James2
-
Posts
4,259 -
Joined
-
Last visited
Content Type
Profiles
Forums
Events
Gallery
Everything posted by James2
-
Nicely done
-
Looks very nice. Do I see some Big Donkey or perhaps FRW pieces there?
-

How do I remove glue smudge from windshield?
James2 replied to Mike C.'s topic in Model Building Questions and Answers
If you take the time and work slowly Novus polish does work pretty well. I have used it with success and have friends that have actually used very fine sandpaper then Novus and polished out some very bad scratches. If this doesn't work, can you tint it? -
How do I remove glue smudge from windshield?
James2 replied to Mike C.'s topic in Model Building Questions and Answers
Get a new windshield! -
It's still tough for many and happens to often. My journey through this tragedy in print is intended to help others. Thanks for sharing Sorry for your loss Carl, the whole girls reason happens a lot more than people can imagine.
-
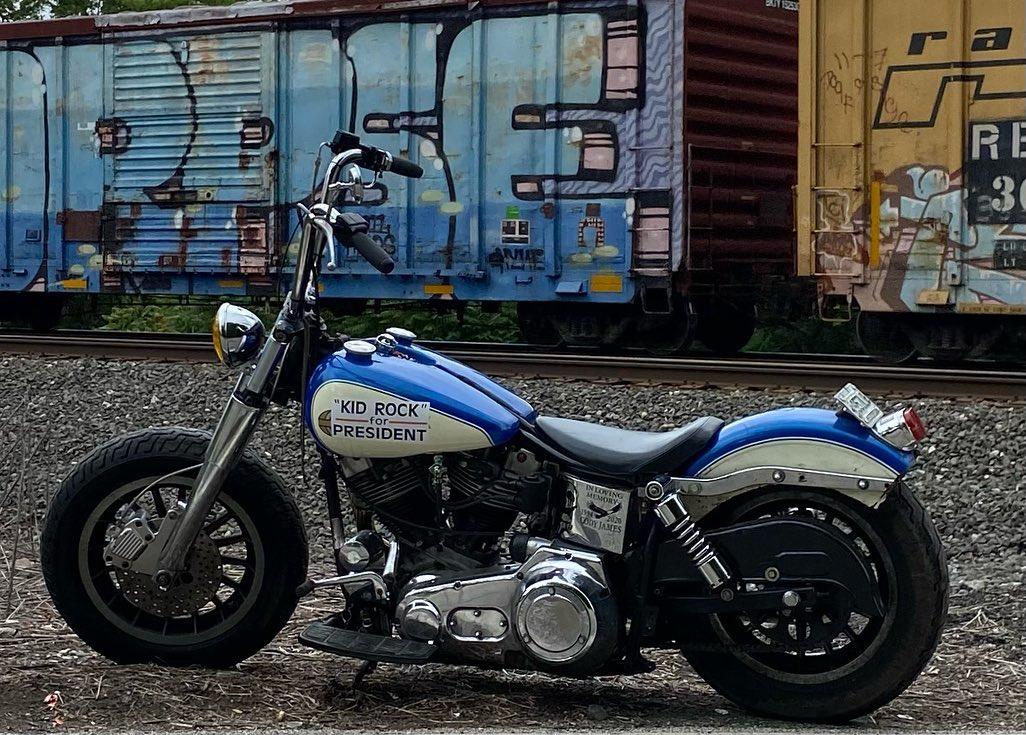
My best pal and son Cody called his Harley Dynagluide “Dirty Girl” the only thing he loved more than riding his motorcycle was riding my Shovelhead. Though it is stripped down like a bobber now I think he’d like it just fine. He passed by suicide two year ago and from now on this bike will be called Dirty Girl in his honor…
-
Some of you guys may remember me sharing about the suicidal loss of my son Cody James. I hope you don't mind the selfish plug but I have put pen to paper and published our story of love, loss and recovery. The book speaks for itself and my hope is to help other in a time of crisis when it seems no one else could possibly understand. Comfortably Disturbing: Ries, James: 9798218026424: Amazon.com: Books Proceeds will be going to suicide prevention. Please take a look and share if you would...
-

-
at what point is too long to wait for something to be shipped
James2 replied to MrMiles's topic in The Off-Topic Lounge
See I told you Your overreacting! -
Absolutely enjoying this build, your is coming along nicely. I had a great time building two of these. Here's a link if you'd like to see it. http://www.modelcarsmag.com/forums/topic/132727-gs-corvette-003/
-
at what point is too long to wait for something to be shipped
James2 replied to MrMiles's topic in The Off-Topic Lounge
Your being unreasonable! -
World class build, very nice job sticking with it for so long. One question. Now that it's complete, what would you have done differently?
-
Amazingly recreated and imagineered. I like everything about it, except the hair hanging off the bumper!
-
The evil twin...mid 1960's type BB/SR drag racing street roadster...
James2 replied to tim boyd's topic in Drag Racing
Inspiring as always Tim, thanks for sharing. The link is the build I did after reading the original story you posted. -
Nice, clean building and my favorite color too!
-
-
So I have inquired and the response is favorable! My buddy is now searching the archives for the Vic and when he finds I will be in business. This should be interesting because i have never gotten back a model that I let go before. If you have let me know what happen?
-
AMT '70s Short Body R.E. Dragster (05/22/2022)
James2 replied to Straightliner59's topic in WIP: Drag Racing Models
Pieces/Parts looking good... -
I should check on it shouldn't I?
-
Mid-engine custom Corvair aka "Unsafe At Any Speed" :)
James2 replied to ea0863's topic in WIP: Model Cars
"Unsafe at any speed" Exactly right and no airbags either, we die like men! Great subject matter and imagineering on this one especially the V-drive. -
AMT '70s Short Body R.E. Dragster (05/22/2022)
James2 replied to Straightliner59's topic in WIP: Drag Racing Models
Great subject for a project, you have my attention... -
Custom fabrication at it's finest!
-
70s cars as they really were!
James2 replied to Oldcarfan27's topic in General Automotive Talk (Trucks and Cars)
Brings back a lot of memories... -
Hemi-Hydro
James2 replied to James2's topic in WIP: All The Rest: Motorcycles, Aviation, Military, Sci-Fi, Figures
I did and posted the finished bote somewhere! -
Are these the best-ever, yet most unsung funny car kits of all time?
James2 replied to tim boyd's topic in Drag Racing
Tim, thanks for sharing these models. I remember the article you wrote up about them and your spray can paint technique which I have occasionally used over the years. Your building style and subject matter has inspired so many and right now I need to go find a Funny Car kit!