Snake45
-
Posts
22,539 -
Joined
-
Last visited
Content Type
Profiles
Forums
Events
Gallery
Everything posted by Snake45
-
 Tim, I found the other one I spotted the other day. Page 94, first paragraph, where you're telling how AMT lost the promo contract for 1968 Chevies. I believe the "1968" and "for 1968" terms are switched vis a vis the "wishy-washy" and "declarative" descriptions. Unless I'm reading it wrong somehow, it says exactly the opposite of what you meant to say.
 -
The Revell grille's not too far out, the headlight doors are too far BACK. The grill portion is only about an inch or so deep. The Revell kit makes it look three inches deep. Not sure how my mod is gonna look until I get it done. If I don't like the way the doors look, I'll just leave 'em off and mount the headlights in there. The real car had a vacuum switch you could flick and the doors would stay open. I used to do that with my real one sometimes just for a different look. When I got it painted, I had the RS stuff taken off and a standard grille put in, which I liked a lot better in those days. That's how I happen to have a real RS grille hanging in my garage.
-
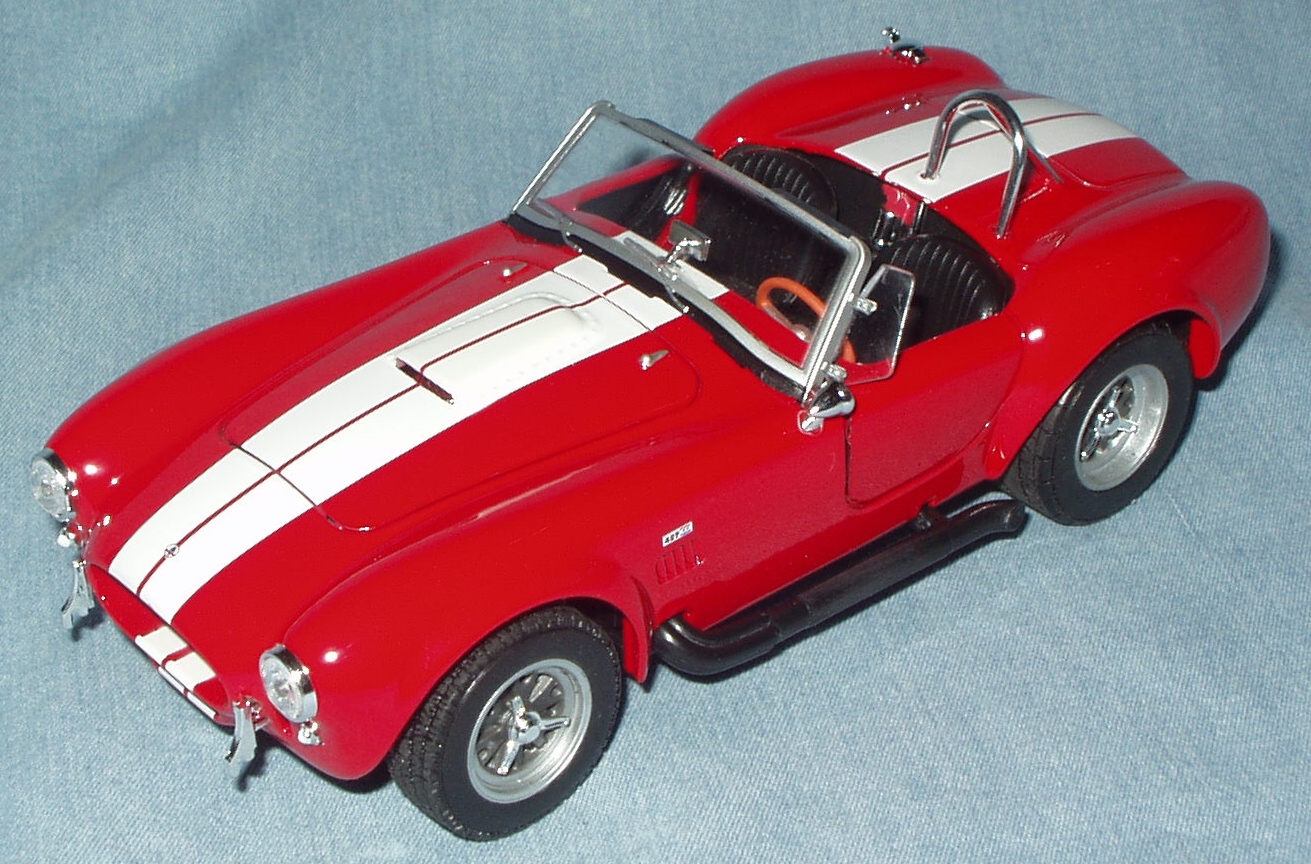
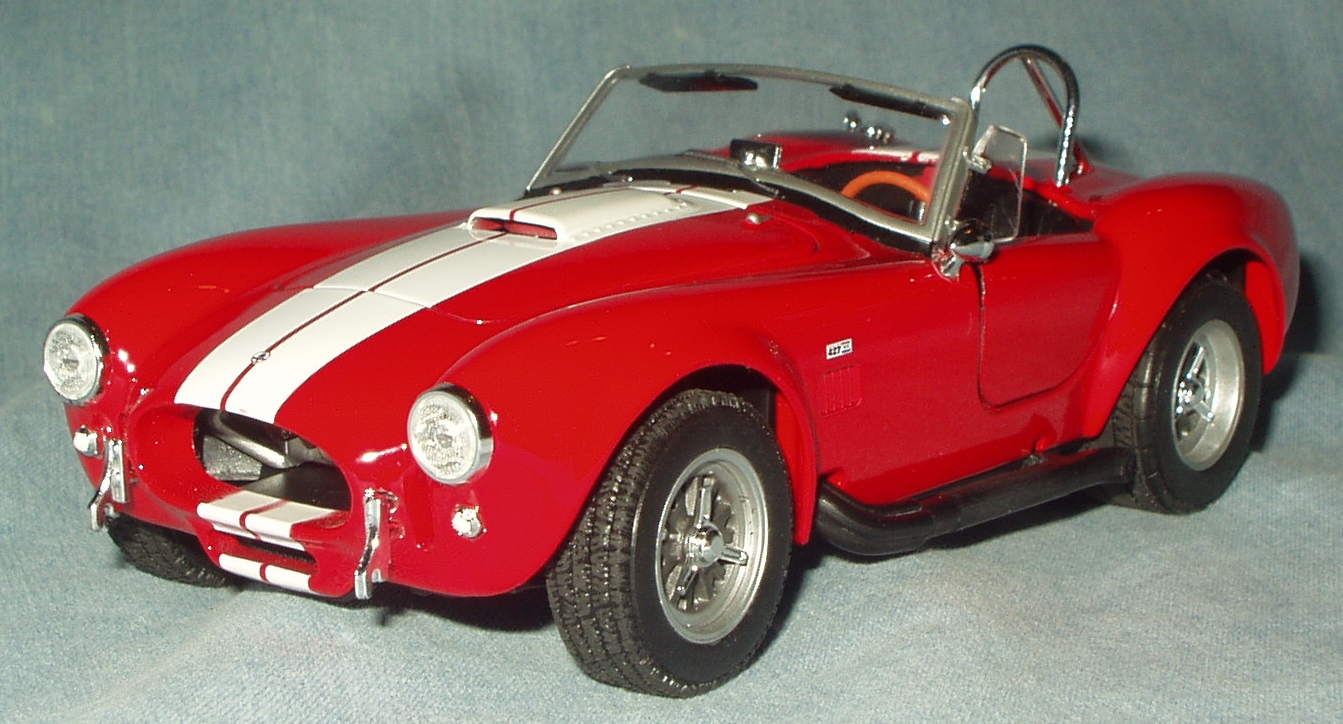
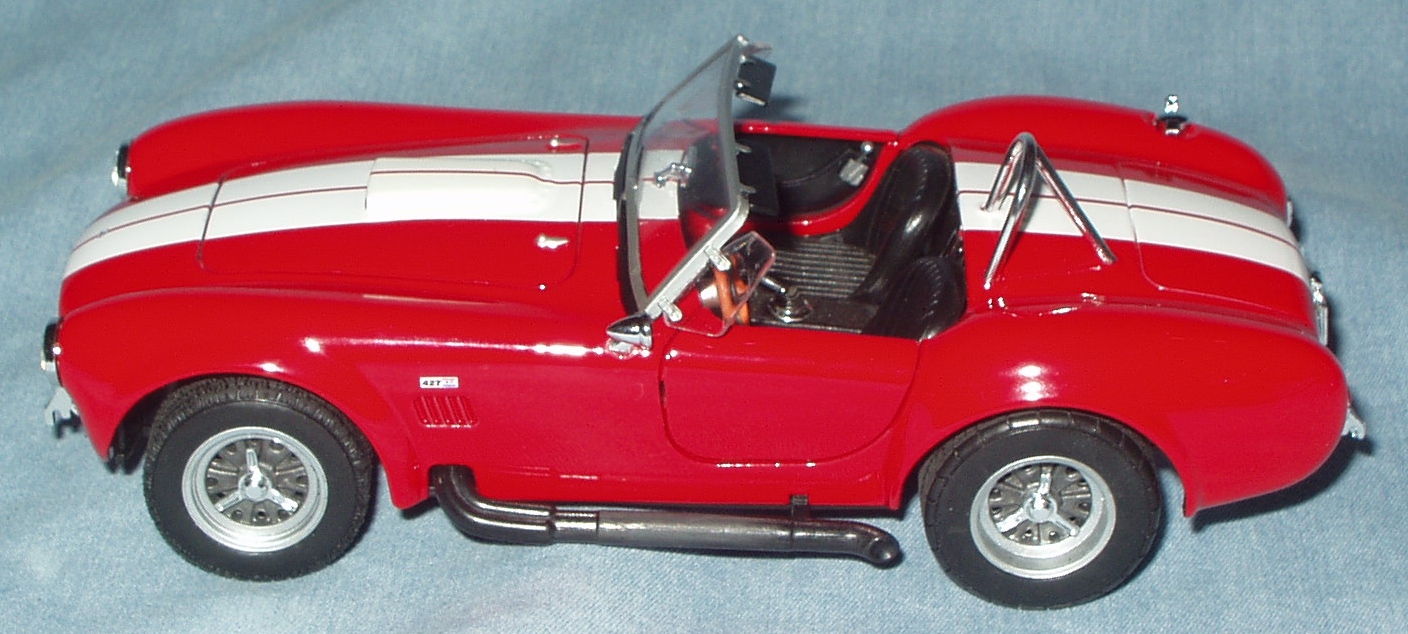
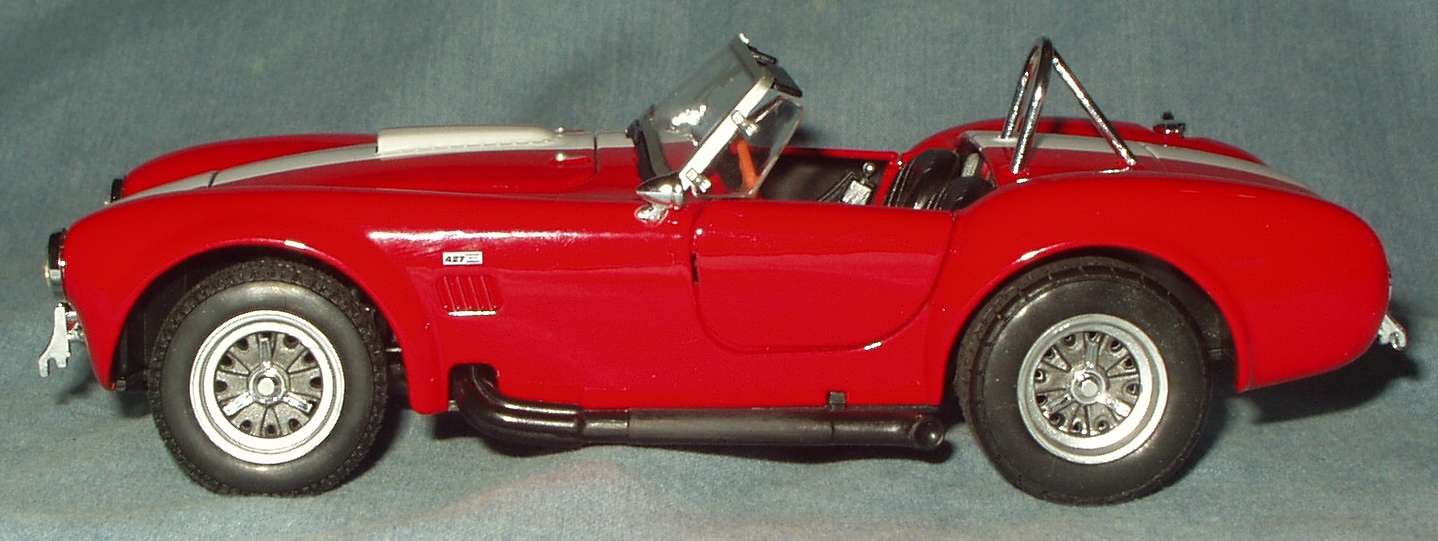
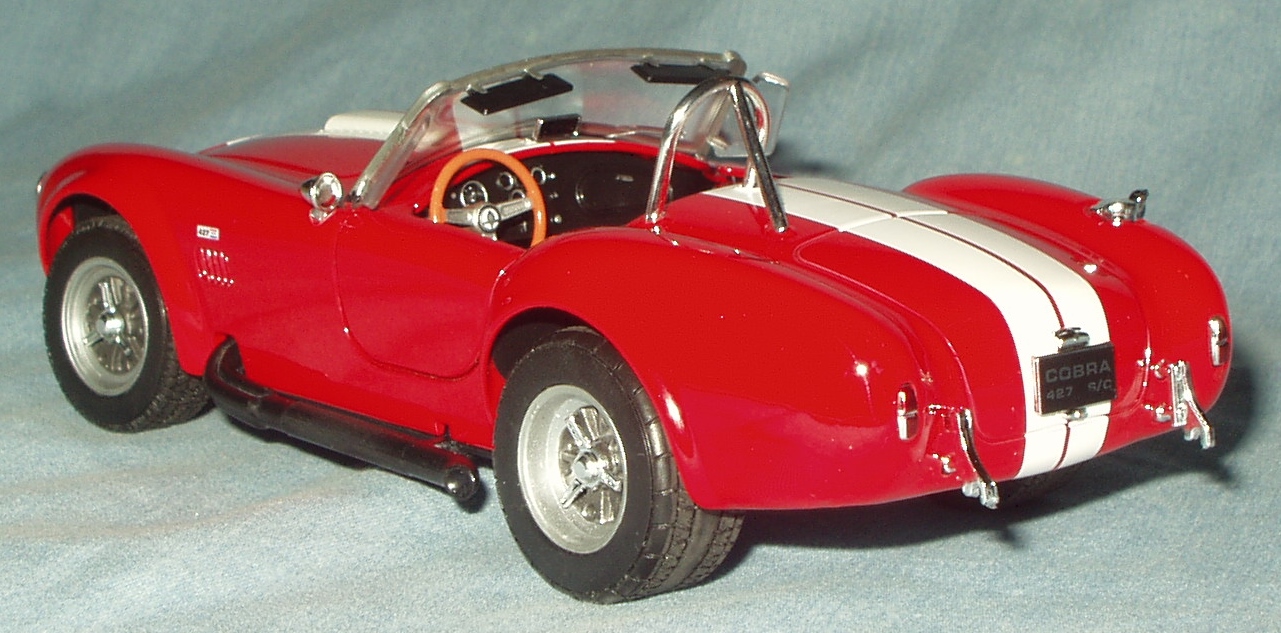
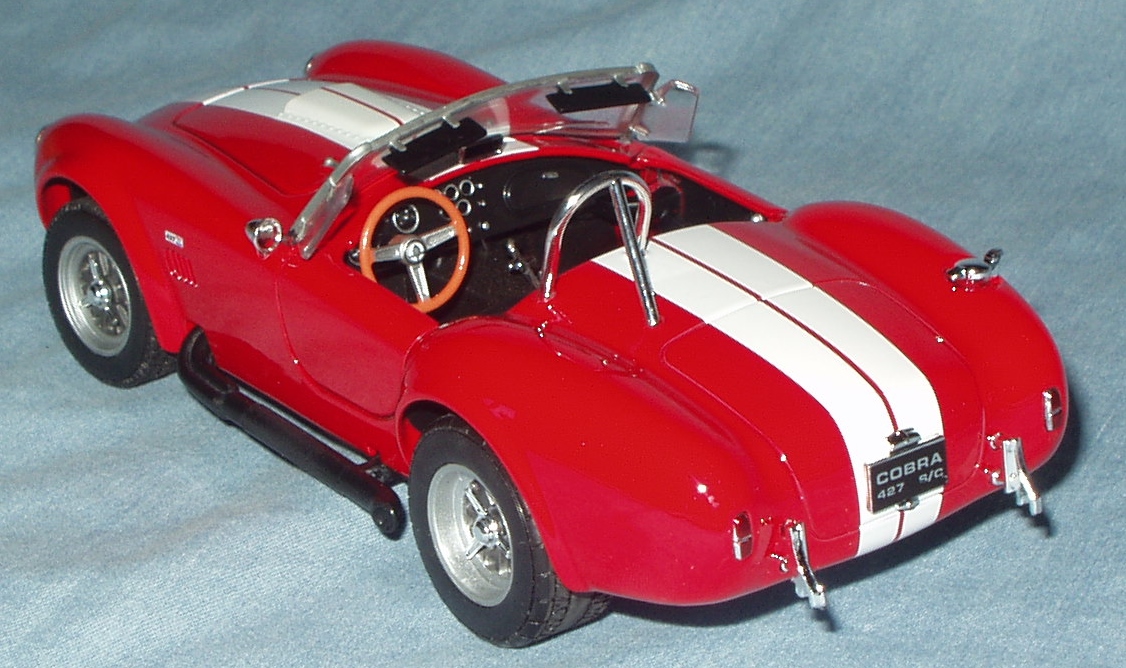
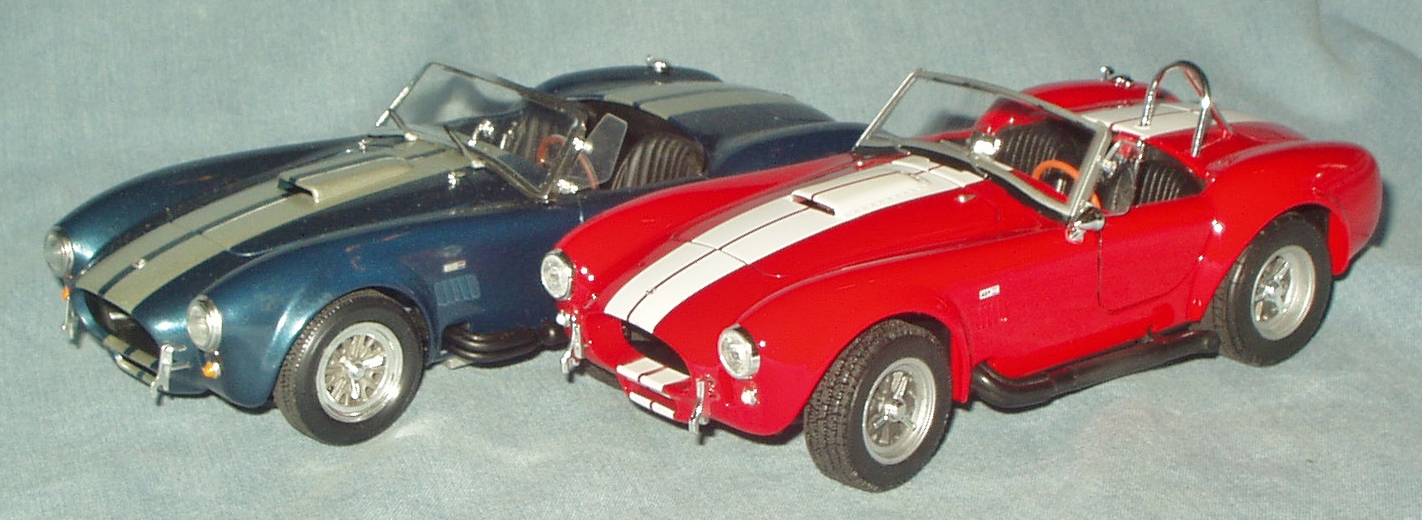
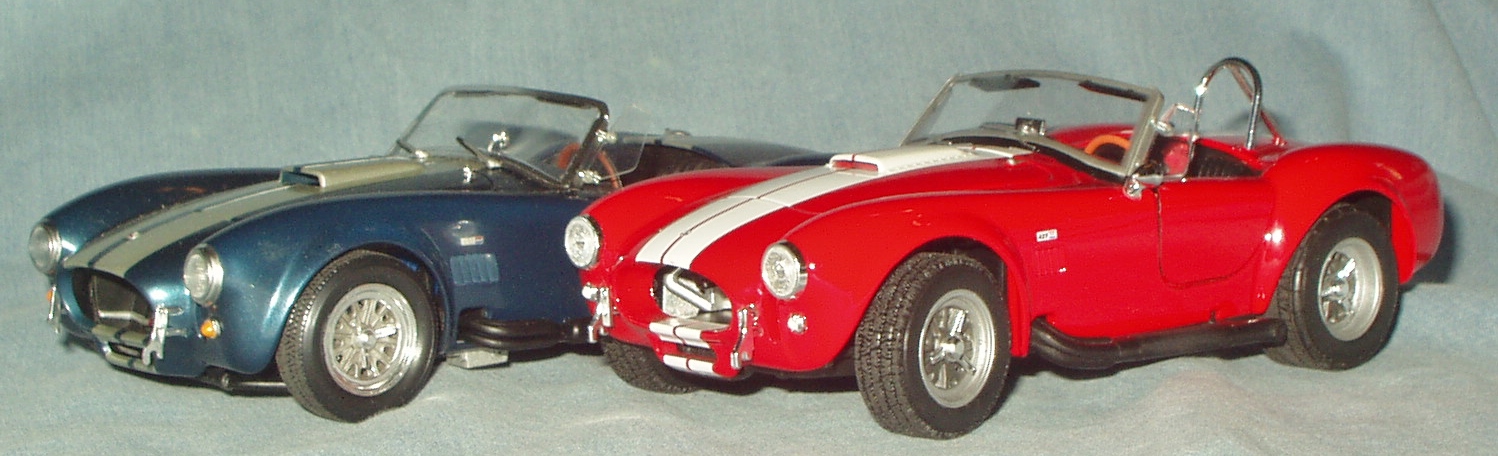
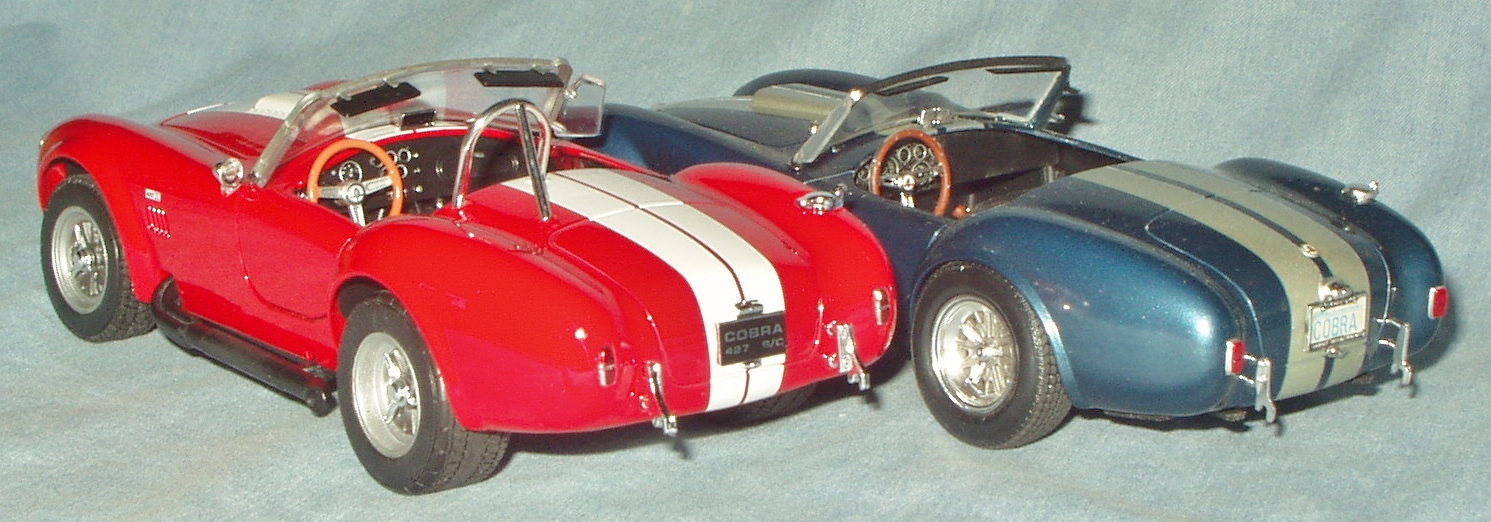
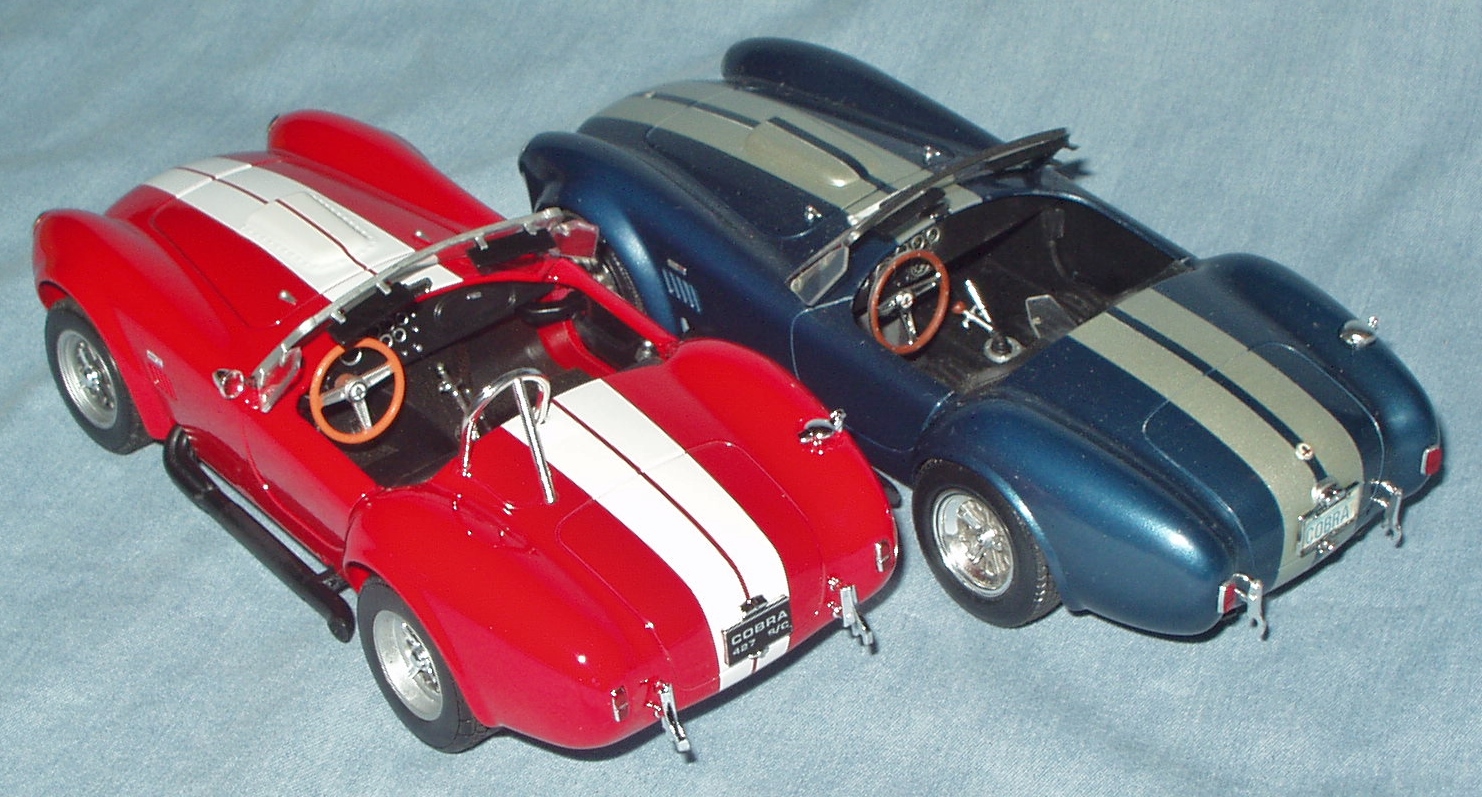
Got this one at Rite Aid last week, $10.00. Looked VERY good, excellent red paint, not much to do to it. Trimmed rear wheel rims; sanded tire treads; cut flash on edge of hood scoop opening; touched up white stripe on edge of hood scoop; painted sun visors (molded as part of clear windshield) black; Silver-Sharpied sun visor and wind wing brackets and the edges of the windshield; painted headlight stems white to lessen the googly-eye look. The side exhausts were chromed, and nicely too, but they had a seam I couldn't live with so I scraped that off, then stripped the chrome. I usually strip off chrome in minutes with household ammonia but this stuff was tough—after three hours soaking in it, only about a quarter of the chrome had come off, so I took the rest off with Easy-Off oven cleaner. Didn't have any good flat aluminum/steel paint so I just left them in bare black plastic. (I see now from the pics that I should have painted the inside of the hood scoop black. I'll take care of that soon. The roll bar looks like it might be too tall. While I had it apart, I removed the heat seals from the bottom of the roll bar tubes and opened up their holes in the interior floor so I can push it down lower. I diddled with the brace bar a little and was able to get the roll bar down very slightly, but to get it lower I'll have to cut the brace bar and remount it to the new geometery. I'll worry about that later if/when I confirm that it needs to go down more. It sits a little high, especially in the front, but for $10 I can live with it. (And that might even be fixable.) BTW, the front and rear wheels and tires are different sizes, a nice touch. No Before pics this time. My changes, which only took a couple hours, are so small and subtle that they might not even show in pics. Here it is with the Monogram kit I built in the late '80s, which I think was the fourth model car I built after returning to cars after doing airplanes for more than 15 years. The Welly displays quite well next to the Monogram kit (which I spent a LOT of time building and painting), and I think they look good together. Thanks for looking and as always, comments welcome!

-
So I take it you didn't think much of my RS grille work, then?
-
Using discarded household items in modeling
Snake45 replied to Greg Myers's topic in Tips, Tricks, and Tutorials
I use those for acrylic crafts paints, which are often quite thick. Squirt a dab or two of paint into that cap, add a drop of water, stir with a toothpick, use, toss the whole mess in the trash when finished. The crafts bottles have enough paint in them to do this dozens if not hundreds of times. -
I've heard good things about that stuff. Have never tried it, but I plan to sometime soon.
-
Great news, and good for you! I thought I spotted one more minor thing a couple weeks ago, but can't recall what it was right now. Must have been really minor. I'll see if I can take another look. On a more positive note, I was impressed how often in reading your book, you'd start talking about a particular kit and I'd think "Yeah, but it has such-and-such a flaw"...and then you'd mention the very same thing! So, good on you for the honesty in this book! Well done, and model--and write!--on!
-
Glue Bomb Rescues and Survivor Restorations of 2018
Snake45 replied to Snake45's topic in Model Cars
Thanks. A little wheel detailing really goes a long way, doesn't it? Thanks! I haven't written up the details of that red Chevelle in Under Glass yet. Will try to get to it sometime soon. As a fellow survivor restorer and glue bomb rebuilder, I know you know that it was! The pressure for perfection is off with these things, and you can really enjoy yourself. Thanks for the kind words! Thanks! It's all about what Mike Wolfe on American Pickers calls "good bones." Is it complete? Can the paint be shined up a little, or touched up? Do I think I can make it look better without a WHOLE lot of time? And, is it cheap? If I can get it on the shelf with one-fourth the time and money that a new kit would cost me to build, it's a winner. I am honored. Of course, I do have Fifth Degree Black Belt in Snake-Fu. Thanks Joe! Model on! Yes, I usually try to honor the OB's original intent, at least as much as I can stand. I'll replace wheels and tires with ones I deem more "appropriate," and adjust the stance sometimes, but generally, I'd like the OB to be pleased with it if he could ever see it again. Also, you'll notice that none of these is particularly rare, valuable, or desirable (or expensive). Anything like that, I have few qualms about stripping back to bare styrene and building back up as good as I can--and MY way. Thanks for the kind words. I really appreciate this coming from you, one of my favorite builders on this board and one whose tastes are so close to my own. Thanks! Yeah, as I replied to Plastic Passion. These things are also a way back to MY past, as I feel like a kid again working on them and having FUN! I've often said that for these "rescues," my goal is to make them look like something I might have built in 1968. If I can make one look like I built it in 1969 (when I was getting pretty good), I'm ecstatic! (Most of these bombs start out looking like something I built in 1966.) Thanks for the kind words! Thanks! I can't wait, either. Got a few projects planned already, a couple even underway....stay tuned and MODEL ON, EVERYONE! -
What he said! I"m not a convertible fan, but I've restored two genuine "survivor" MPC '68 GTO HTs--one built by me, one by someone else--both painted blue. Couple years ago I managed to score a resin repro of the '68 HT promo body and I plan to build it up in Verdoro Green. While I've got the airbrush loaded up with the stuff, the plan is to also do a Monogram 1/24 '68 and a Revell '68 Firebird the same color for a Verdoro Green trifecta. As usual, well done and model on!
-
Very nice! The old Aurora kit, right? I did a "survivor resto" of one of those last year and could tell it was a very "fiddly" build. I'd like to try one from a new kit if I ever run across one. Well done and model on!
-
I've only used Tamiya clear once, and it eventually cracked and went "alligator skin" on me. Obviously, I'll never use it again. The VERY BEST clear I've ever used is Model Master Metalizer Sealer, airbrushed. A bit hard to find, but well worth it.
-
I've sprayed it. Airbrush can be cleaned with rubbing alcohol or ammonia. Some have said that ammonia can damage airbrush parts, so after ammonia, flush with water. Practice spraying it on something else before you try a good job. The stuff's tricky. It will look like you don't have enough on, and then all of a sudden it will start running, so stop just BEFORE you think you have enough and wait for it to flow out. If you get runs, you can wick them off the lower body edge with a paper towel while it's still wet. Don't be afraid to lay on two or three or four thin coats. If you screw up, you can wash it right off with ammonia. Pledge/Future comes with a LOT of baggage/problems, which is why I almost never use it for a final finish. Once in a great while, due to some special circumstance, I'll hand-brush a coat or two of it on, but generally I prefer a clear enamel, lacquer, or even acrylic.
-
I like this a LOT! Definitely one of the nicest Manxs I've seen, and I've seen a few nice ones. Bonus points awarded for painting the lower body black, as most of the real ones were. More bonus points for sanding the tire treads, and for your complete description of the parts and materials you used. You are making me want to build one of these this year--my highest compliment! VERY well done and model on!
-
Glue Bomb Rescues and Survivor Restorations of 2018
Snake45 replied to Snake45's topic in Model Cars
I use foil when it's the easiest or best way to get the result I want. There's foil on three of these. The '70 Monte Carlo has foil lower body trim. The '68 Vette has the emblems done with the foil-under-paint method. I had intended to do all the chrome on the '66 Buick land yacht with foil, but the first thing I did was the hood "streak," and I discovered that the rubbing alcohol I always use to clean up foil glue residue was taking off the red paint, so had to switch gears at the last minute on that idea. So there's foil on the hood of that one, but the rest is all Silver Sharpie (and a little dry-brushed Testor Chrome Silver). Thanks for the kind words! -
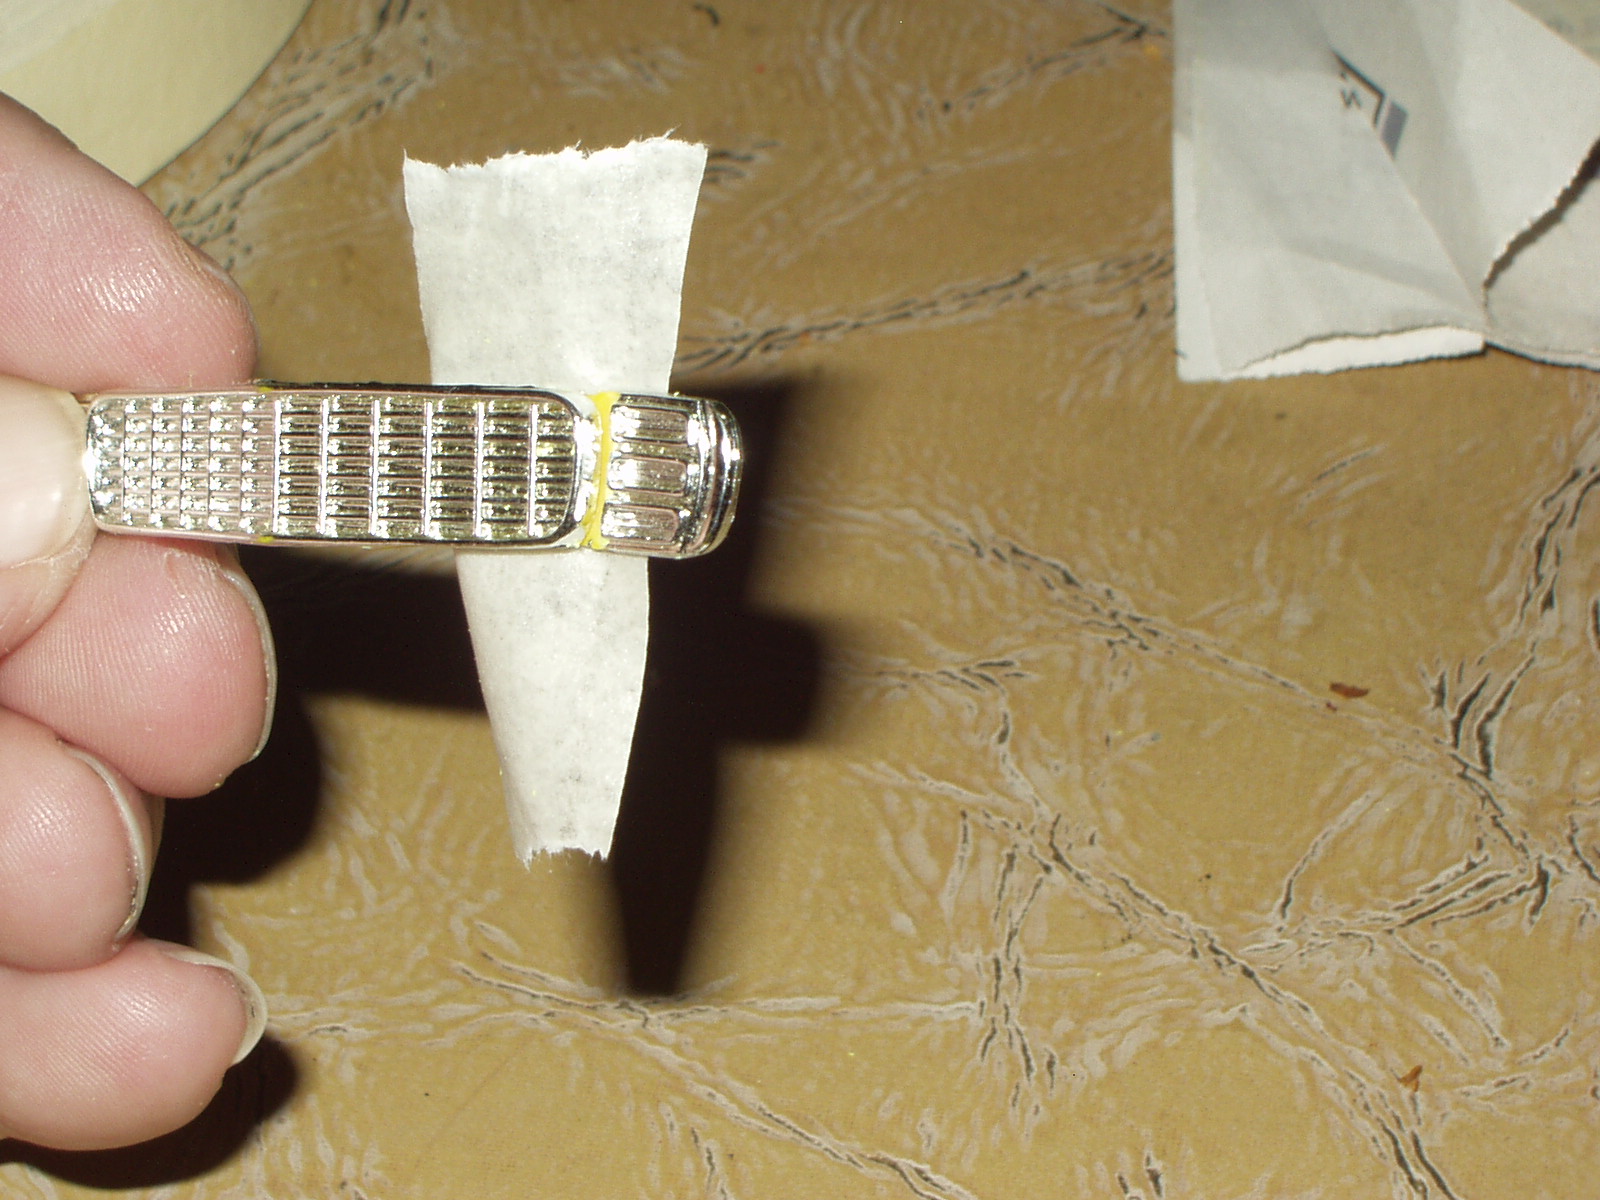
Here's a sneak peak--couple uncropped, unfixed in-progress pics. Basically, you cut the doors away from the grille, then thin the backside of the grille. The real RS grille (chrome part) doesn't protrude NEARLY as much as Revell would have you believe.
-
WIX '67 Chevelle SS396--Now with Snake-Fu! 1/25/18
Snake45 replied to Snake45's topic in Diecast Corner
Can't find ICONS anywhere on it. Does say ERTL Collictibles. Overall quality is not even up to an average Welly, Maisto or Motor Max, but the wheels/tires and overall body shape are quite nice and I think it'll look great after some 2nd or 3rd degree Snake-Fu. -
WIX '67 Chevelle SS396--Now with Snake-Fu! 1/25/18
Snake45 replied to Snake45's topic in Diecast Corner
I'm sure it would but it would probably also remove the paint. I wouldn't even try it. The acetone-free nail polish remover works great. Are you sure your Cuda isn't M2? Yellow with red and black stripes and the Hooker thing? I have one of those and am planning to remove that junk, too. I expect that the yellow paint will also have to be polished out after the tampo removal, but that's not a big deal. -
Very nice model of probably THE most influential car in the history of drag racing. Well done and model on!
-
Your stacks look good, but in the last picture, it looks like the rear ones are taller than the front pair. I'm sure you'll fix that. Interesting side note: In the factory showroom brochure for the Mercury Cougar, either '68 or '69 I forget which, the Cougar was photographed at a drag strip, and in the near background is a junior dragster that is CLEARLY powered by a small block Chevy! I'll bet SOMEBODY took some heat for signing off on that!
-
Looks very, very good! Your finish with that craft acrylic paint is really nice. I hope to experiment with some of this this year. Well done and model on!
-
Very nice! Not your typical "Fad T," but definitely the kind of thing one could have seen in the early to mid-'60s. Well done and model on!
-
The Revell '69 is wider than any other 1/25 1G Camaro. The MPC Camaros are the narrowest. The AMT '67 annual, AMT "new" '67-'68, and Revell '68 Firebird are all pretty much the same width.
-
Revell 1968 Chevy Chevelle SS 396...........My take
Snake45 replied to MrObsessive's topic in Car Kit News & Reviews
My guess is they were owner-added later. I've seen a LOT of pics of '65 and '66 Chevies of all kinds with Rally Wheels (which didn't become available till '67), because Chevy didn't offer a really good-looking wheel until the Rallys. (IMHO, of course.) -
I believe it is. I'm working on making the Revell RS grille more accurate. Hope to finish it soon and have been taking pictures. It really helps that I have a REAL '69 Camaro RS grille hanging on my garage wall.
-
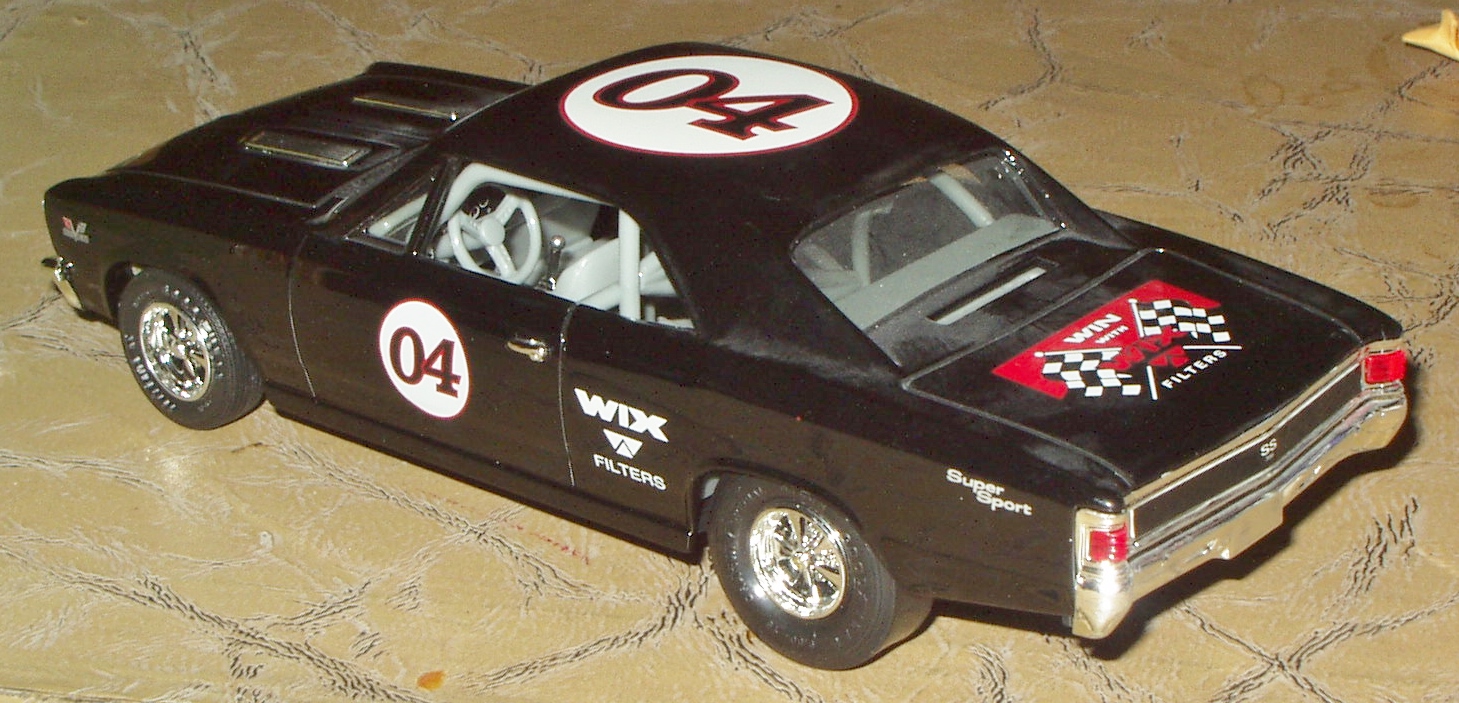
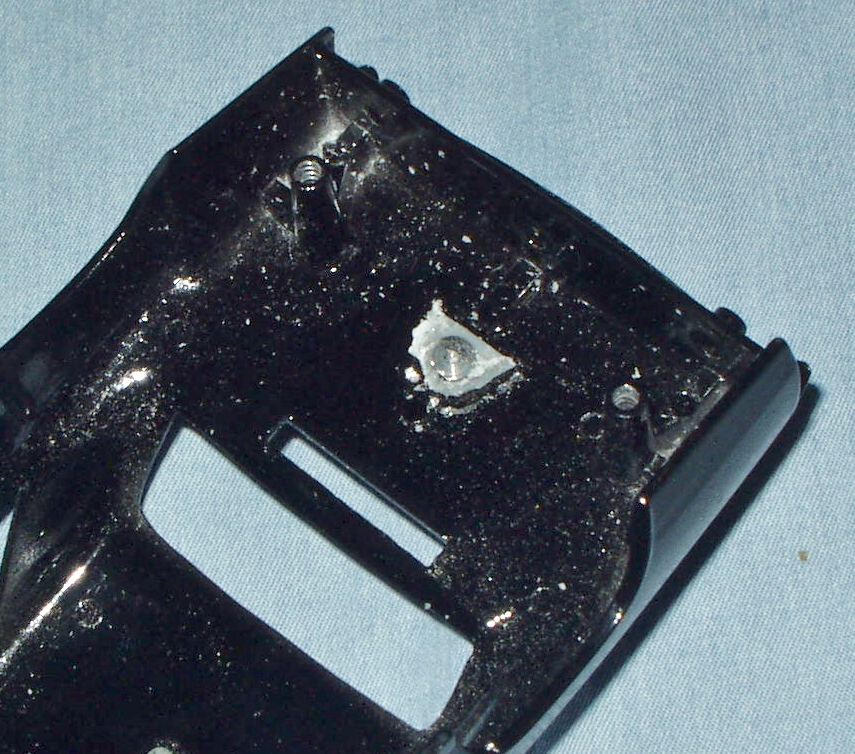
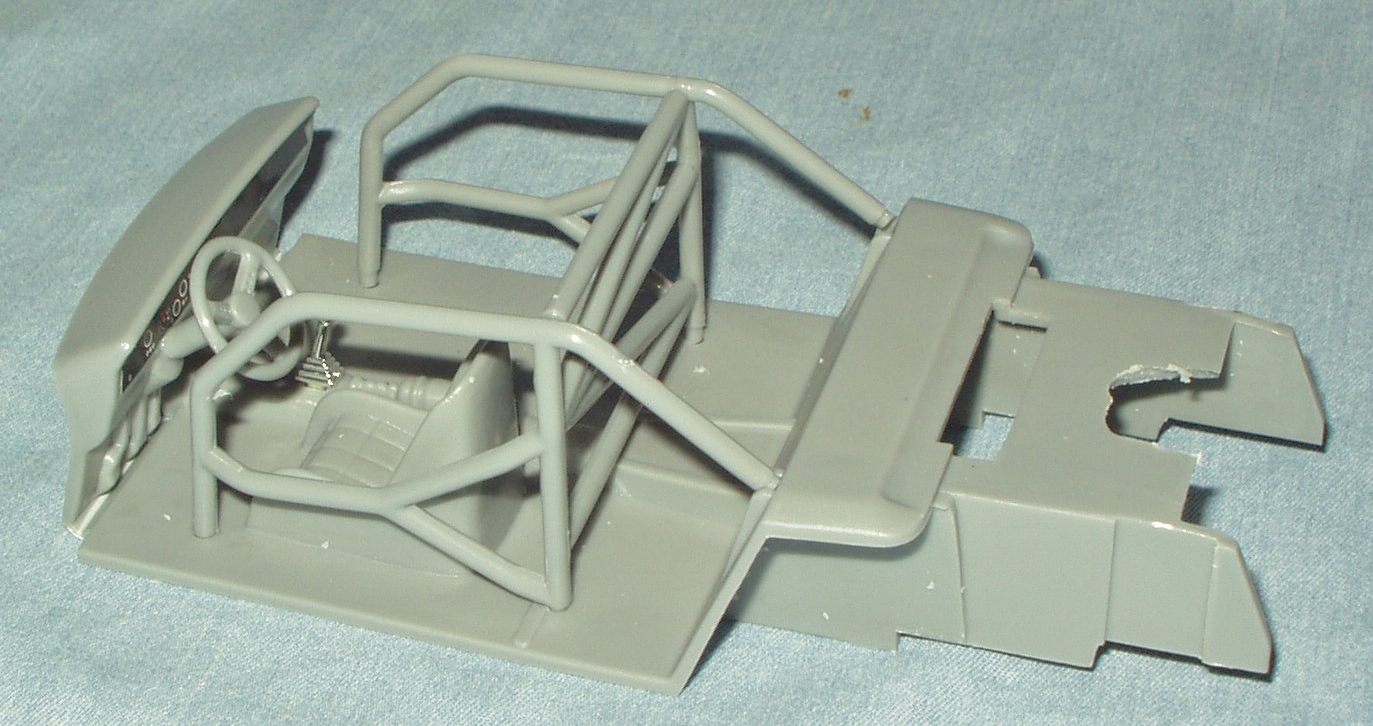
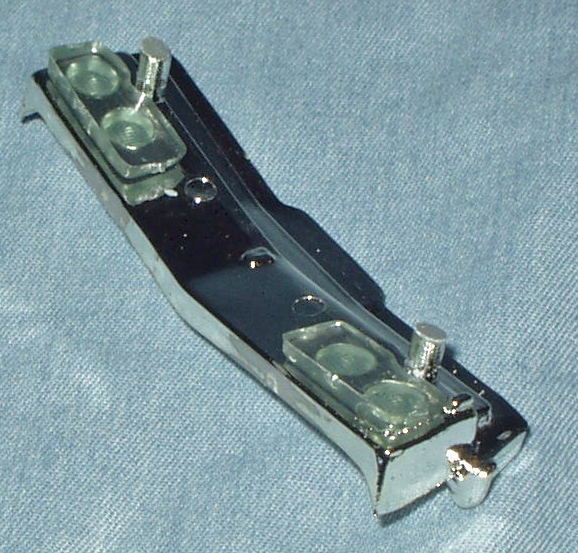
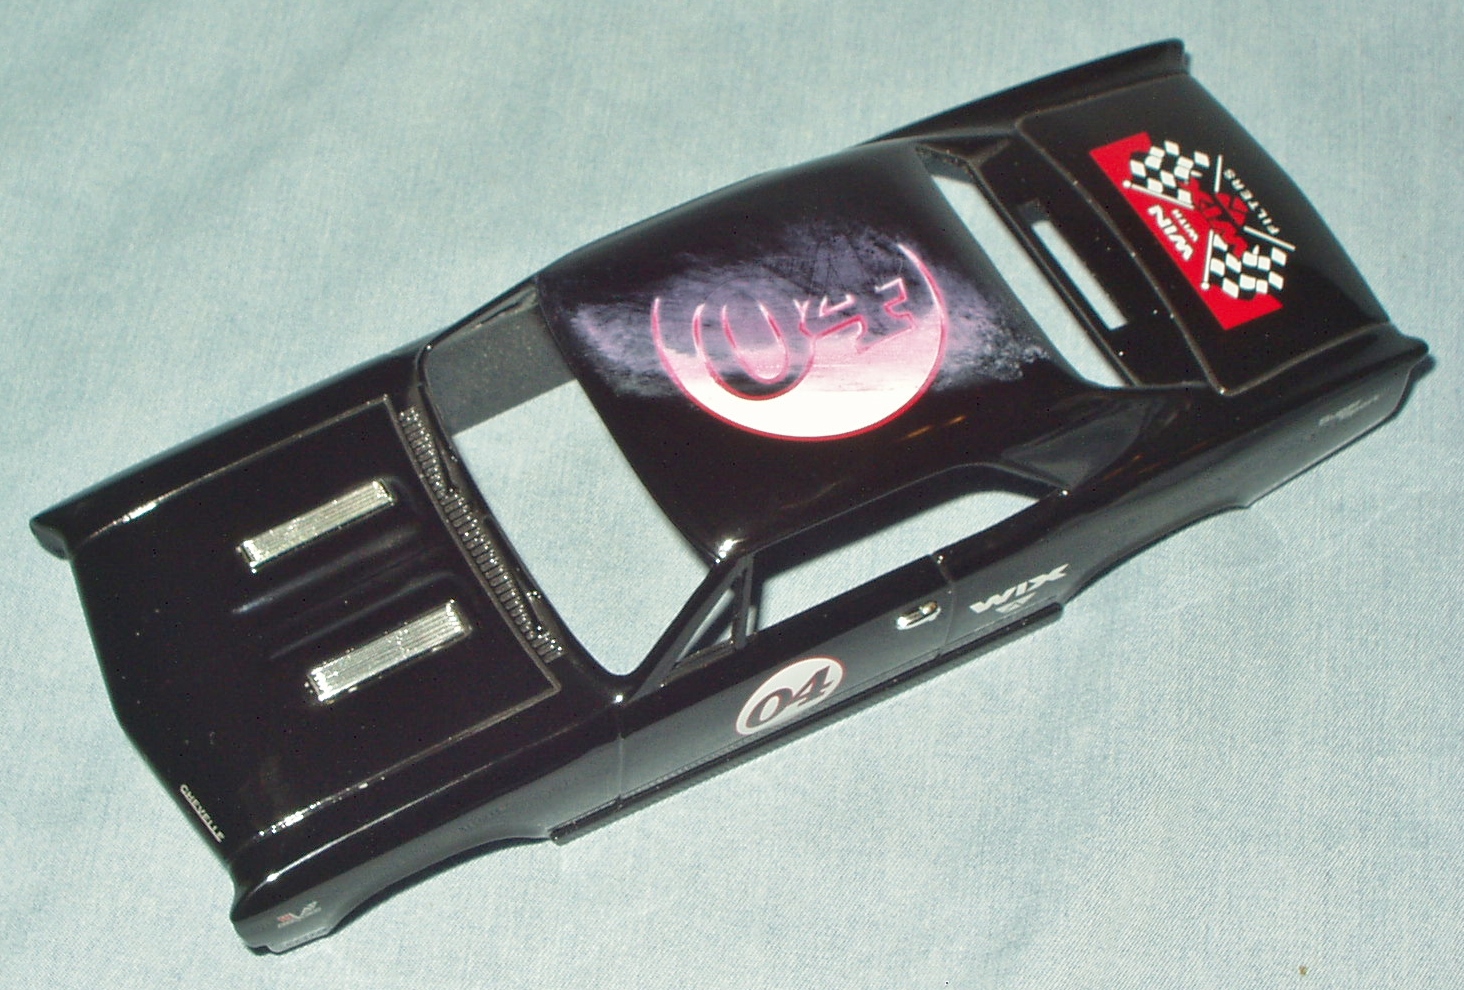
Bought this WIX '67 Chevelle at the local toy show in December. I thought the shape looked pretty good and the price was right. It turns out to be exactly the same size as a Revell 1/25, so it's 1/25. (It might have actually been reverse-engineered from the Revell body.) For $10, I thought it had a lot of potential. The interior was riveted in with a shiny metal rivet that must be made of Kryptonite. A stone grinding wheel in my Dremel did no more than polish it! I ended up having to use a different grinding bit and grind away the plastic around it; the rivet is still in there. The smaller rivets holding the glass to the roof succumbed to a Dremel cutoff wheel. Here's the entire interior, a real oddity. There are no sidewalls here or in the body. Note that the firewall/dashboard were molded in one piece with the floor, and then just folded/bent into position. The single racing-ish seat is molded as part of the floor, too. With the full roll cage, the interior seems to be NASCAR or dirt-tracky, which goes with the big numbers on the body, but the wheels/tires and overall stance sure don't look like that. If this body were painted anything but black, I'd just cut this roll cage back to a 4-point rollbar and paint the whole guts black, but I know from experience that a black-on-black model doesn't look very good. I'm thinking of seeing if the interior tub from a Revell '67 Chevelle will fit in without modification—if so, I'll use that with white seats and door panels. If not, I'll have to make some kind of side panels, then cut this seat off the floor and come up with a pair of suitable bucket seats. We'll see what happens. The headlights are also weird. They're molded in pairs, backed by a big block, all in a light green tint like an old Coke bottle. And the thing was painted a light gray on the back. Last night I filed the two backs flat and then polished them; will try painting them white, or white behind them. Whatever I do has gotta look better than what I started with. The tampo printing is TOUGH. It's coming off with non-acetone nail polish remover (which doesn't hurt the paint), but it's taking some effort. Getting this much off took me about 15 minutes last night. Good job to do while watching TV--I WILL wrestle the beast to the ground! Stay tuned, diecast fans....