peteski
-
Posts
9,227 -
Joined
-
Last visited
Content Type
Profiles
Forums
Events
Gallery
Everything posted by peteski
-
Man, you are really hung up on ED. I haven''t seen this kind of ads for probably couple years. Honest.
-
Interesting . . . sounds like it was good for plastic models. I'm in the Lowell, MA area. I participate in model train show at the Big-E in W. Springfield. But not this year.
-
I never heard of Blue Magic paint remover. The name (like other car care products) sounds like a remover designed to work on metal (real cars). Was it plastic-compatible?
-
I wish it was that easy. If I started another project, I woudl not have any space on my workbench to actually do any work. Too many already (and not just model cars). I noticed that you live in England, in Billericay. I'm in the New England part of the USA, and the town next to mine is named Billerica.
-
You sure did David!
-
I have never built any of those 1:32 scale kits in my youth, but I do have a collection of the Gunze Sangyo 1:32 kits and I won't mind adding the Riviera and Eldorado to that collection. To me there is no such thing as "wrong scale". I'm not a "1:25 snob".

-
I love it, especially how you recreated the photo in 3D!
-
Very interesting. Never heard of it. To me it has the body lines of a Japanese car from the '70s.
-
I don't clear coat BMF. Never had a problem, and some of my models are over 30 years old. Even very narrow stripes stay put. The BMF trim on the top of "rubber" bumper pieces and side body moldings are probably less than 1/32" wide, and they stay put. That model was built over 10 years ago. But I also do not polish or even handle my models much.
-

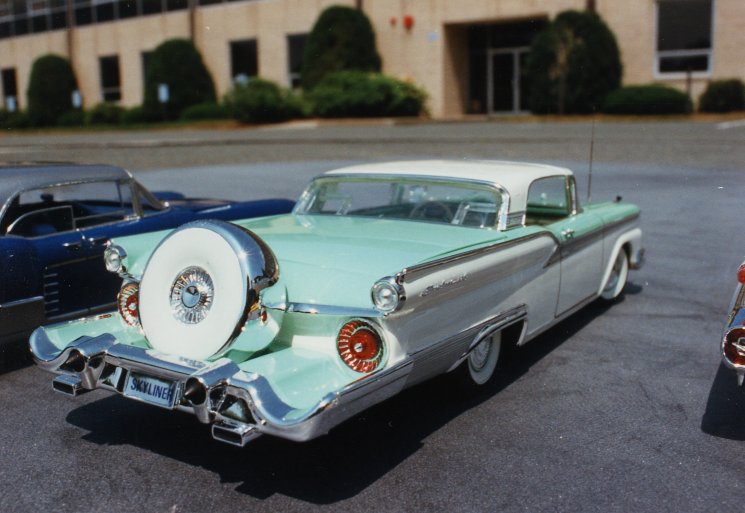
how would you describe this color? flat gold?
peteski replied to youpey's topic in Model Building Questions and Answers
I think the tank looks good now. -
how would you describe this color? flat gold?
peteski replied to youpey's topic in Model Building Questions and Answers
Yeah, the mesh pattern is way to coarse for the scale, and the pattern looks nothing like the real Kvlar mesh. -
How to pronounce Porsche
peteski replied to afx's topic in General Automotive Talk (Trucks and Cars)
Not sure if it is a true story, but I heard that Mitsubishi Starion was supposed to be named Stallion. -
I've seen her on episodes of Perry Mason, and either original Twilight Zone or Alfred Hitchcock Presents (or both).
-
Let's See Some Survivors!
peteski replied to Snake45's topic in General Automotive Talk (Trucks and Cars)
Linking to photos hosted on Google is an exercise in futility. The images still show up as a (gray) European stype "do not enter" traffic sign (typical when Google refuses to show the photo). -
How to pronounce Porsche
peteski replied to afx's topic in General Automotive Talk (Trucks and Cars)
Similar problem as with Qattar exists with the pronunciation of Iran. There is certain group of American who pronounce it as "Ay-raq". The other names are even more butchered in other languages. I speak Polish, and Rome is "Rzym", Italia is "Włochy", Deutchland is "Niemcy" and Paris is "Paryż". -
Decal masters please respond!
peteski replied to Venom's topic in Model Building Questions and Answers
Yes, there are 3D river decals out there: Microscale and Archer both make them (Archer rivets are little more "3D"). Do a Google search for either type. Those are best applied before the final lcolors. That way the clear carrier will get hidden while the protruding rivets will still be visible. -
How to pronounce Porsche
peteski replied to afx's topic in General Automotive Talk (Trucks and Cars)
I vocalize the "tee" sound (although it is very brief). -
Decal masters please respond!
peteski replied to Venom's topic in Model Building Questions and Answers
https://www.themightybrush.com/article/how-to-apply-decals-with-microset-and-microsol/ And rigth from the decal manufacturer: http://www.microscale.com/Merchant2/graphics/Instructions/MSISysteminstr.pdf -
In those photos, the top side of both looks quite similar (or do I dare say "identical") as far as the color goes. The original Chrome BMF is some sort of low-melting-point alloy (not just another aluminum foil), and that is the secret that makes it so pliable. To me it always had a slightly yellowish hue. Interesting about the yellow color adhesive. Also stange is that one of my model club members mentioned that his newly purchased sheet of regular chrome BMF had black color adhesive! This was about a year ago, before the pandemic, and since we don't have physical meetings, I was not able to see it in-person. Maybe BMF is trying different adhesives?
-
Tamiya TS-83 and TS-84
peteski replied to Rodent's topic in General Automotive Talk (Trucks and Cars)
Ok then, I got confused because this thread is specifically about TS-83 and TS-84 and they extra high price (compared to other Tamiya spray paints). They seem to be more expensive, not because Tamiya raised prices, but because those are special types of paint. -
I think that it is finally sinking in that these are just plastic toys, not some super-precise and very expensive equipment. Same applies to decals. You aren't building a precision stopwatch - just a plastic toy for crying out loud. As far Alps printers go, here is an example of decal I designed and printed (in Corel Draw, in vector format of course) for a fellow club-member. For size reference, the model is 1:25 scale. All the graphics (including the license plate, and the bumpersticker on the back window) were printed on Alps. All the graphics (including the tire lettering) are Alps printed decals.
-
Let's See Some Survivors!
peteski replied to Snake45's topic in General Automotive Talk (Trucks and Cars)
Since this thread was brought back from the dead, I read the initial post. "Models from before 1981"?! LOL! Some members here weren't even born at that time! How can they have models build (by them) before 1981? I propose the criteria should be changed to just post photos of models from someone's early days of modeling. Yes, I know this forum is full of old farts, but for a member now in their 30s, their "survivor" would be a model likely built between 1998 and 2008. -
Tamiya TS-83 and TS-84
peteski replied to Rodent's topic in General Automotive Talk (Trucks and Cars)
I believe those higher prices are MSRP prices set by Tamiya. Since these are different than regular Tamiya paints, it is feasible that they will charge more for them. -
Is that Testors color similar to Tamiya Smoke?
-
Alps neither understand or deals with Pantone colors. It is a standard CYMK printer, but there are tricks that can be done to achieve solid (non-dithered) colors by layering multiple layers of 100% saturation inks. This techinique is not something mentioned in the usr's manual - these were developed by hobbyists, after lots of experiments. I woudl not expect anybody but a hobbyist who owns an Alps printer (and understands all the tricks) to use the Alps spot color method to get good quality results. Also there is no choice of Metallic silver hues with Alps - there is a single Metallic Silver cartridge and it only produced one type of metallic silver hue. if you don't like it - tough! I suspect that you really have to notch down your expectation as what you can get from small custom decal manufacturers. If you really want to get top-notch decals, you need to hire a "real" decal company which will mix the inks to your exact specifications, and use either the screen-printing method, or a $100k printer to produce your decals. Company such as Microscale can print custom decals (IIRC in minimum qunatity of 250), or one of the absolute best decal printing companies: Cartograf in Italy. Then your fantasy models will have absolutely best quality decals. Yes, it will be expensive.