SfanGoch
-
Posts
5,248 -
Joined
-
Last visited
Content Type
Profiles
Forums
Events
Gallery
Everything posted by SfanGoch
-
The seller replied and thanked me. He said that he works and doesn't have the time to check the kits.
-
I was checking out a kit on ebay a few minutes ago. The seller wrote the following: "Awesome vintage Jo-Han Kit. Appears to be all there, but Please refer to the photos for what’s included as I am not an expert. Actual item is pictured. Thanks!" Appears to be all there.....Not an expert.....Cut the poop already, man. The price he's asking for this kit, and other items he's selling, indicates otherwise. I contacted him and told him to inventory what's in the box against what is shown in the instruction sheet, which is prominently visible in the photos he posted.
-
Nice find.
-
 Must be nice to have a spare 70 million simoleons laying around. Ferrari 250 GTO sells for world record £52 million - Here’s why it is worth so much
 -
If you intend on replicating viny/leather seat covers, semigloss. Cloth, flat/matte.
-
MCW Oldsmobiles
SfanGoch replied to StevenGuthmiller's topic in General Automotive Talk (Trucks and Cars)
'54 Super 88 HT '55 Super 88 HT '56 88 HT You can also see them, and the sedans, in the Gallery. -
Please accept my condolences for your loss.
-
Most parents felt that way about Mad. I honed my B.S.'ing skills while explaining to my mother that George Woodbridge was teaching kids history with his historically accurate artwork.I strategically neglected to show her his 43-Man Squamish stuff
-
Ethanol blend gas is a way to keep corn growers in the Midwest happy. They get gubment subsidies.
-
I'd like to say that I sympathize with you guys paying three bucks a gallon.....but, I don't. A Citgo station in the Bronx is charging $3.95/gal. for regular. Another one (Shell) in the Bronx is charging $3.35 for regular and $4.19 (cach price. $4.29 on the plastic) for premium. Platinum catalysts are used to increase octane ratings of gasoline in a process called platforming. Combined with the addition of tetraethyl lead, 100 octane gas can be achieved from low grade 48 octane gas. I'm glad Materials Science was taught when I went to high school. Ya never know when somebody might ask how this is done. As an aside, mix phenol formaldehyde with liquid latex rubber and you end up making a thermosetting plastic, aka Bakelite.
-
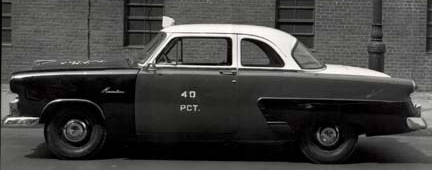
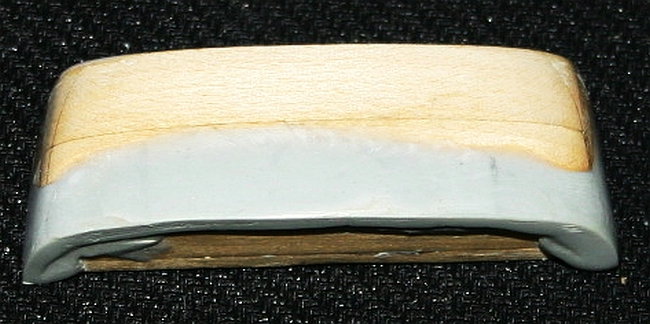
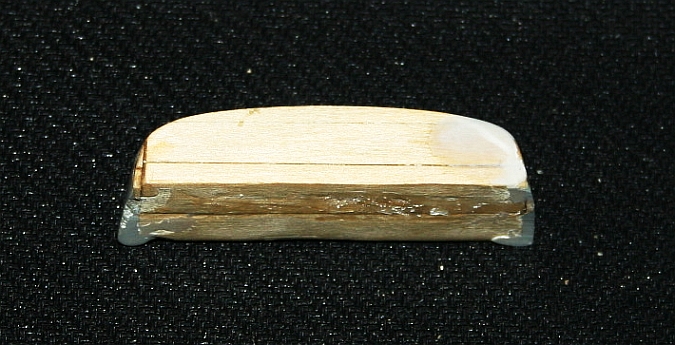
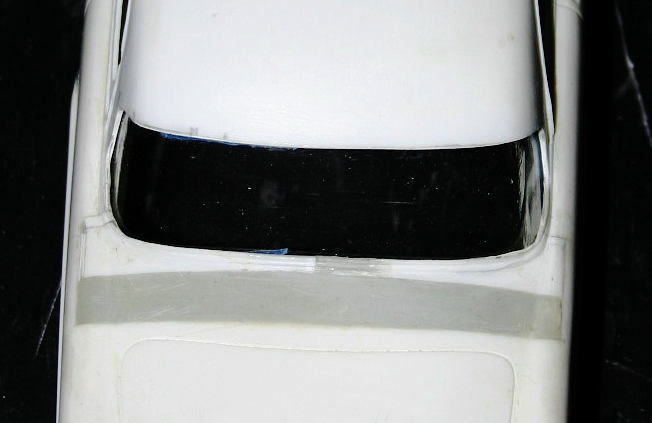
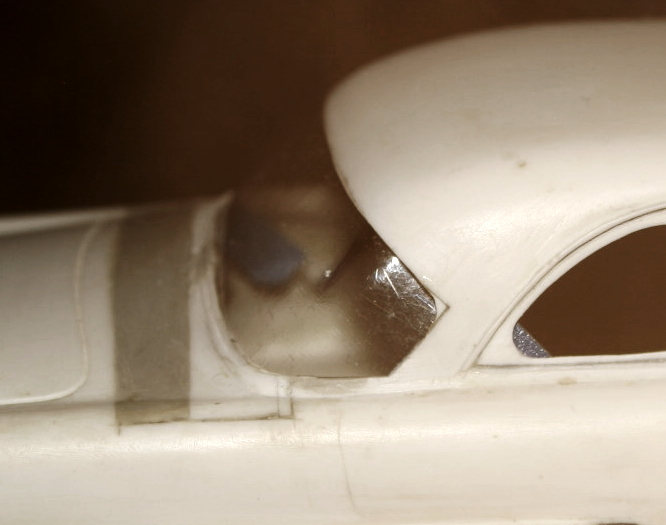
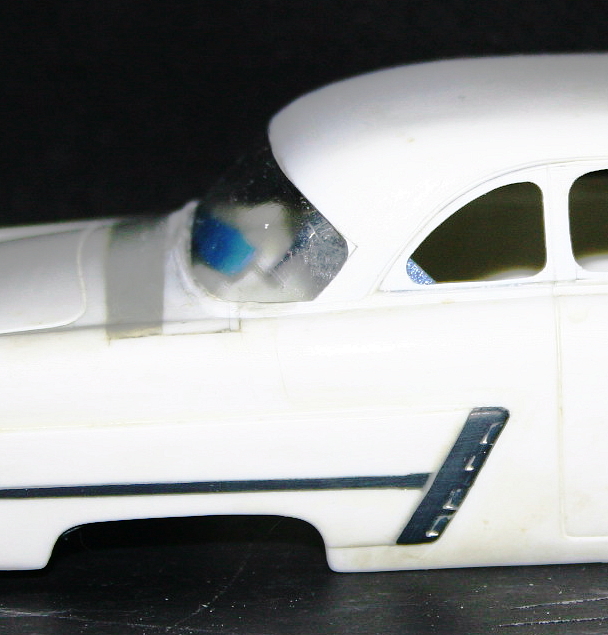
I'm attempting to build a collection of cars used by the NYPD covering the years 1920-1972. Prior to 1958, all NYPD patrol cars were either 2 door coupes or sedans without rear seats. That's why, when you watch an old movie featuring police cars in NYC, you'll always hear a cop saying, "We sent for the paddy wagon" when skells needed to be transported downtown for booking. One of the first I'll be constructing will be a 1952 Ford Mainline Business Coupe. A Lindberg 1953 Ford Victoria will be the chosen victim for conversion. I used the Vic's side trim, and sanded it flush, to fill in the recesses on the body. This method is much simpler than trying to fill in these areas with either styrene or putty. Since the Business Coupe has a B pillar, I needed to scratchbuild the window frames. I managed this from a single piece of .040"/1mm styrene sheet by scribing out the windows and radiusing the corners to match the photo. Next, I had to do something with the backlight. Using the Vic body as-is wasn't going to work since the Business Coupe's rear window is more angled upright and shorter at the base. I cut the tulip panel just behind the lower window trim and the lower window frame 8mm from the rear of the C pillar, moving the cut section forward 7mm to make the new window opening. I needed to re-radius the upper parts of the opening to, once again, replicate the 1:1 shape. Swell, I got a new rear window opening. Now, I need a new rear window. I had some 1/4 x 3/16" basswood left over from an old model railroad bridge project; so, I cut and laminated the basswood into a block and moto-tooled away away to form a buck. The gray stuff on the buck is Magic-Sculpt two-part epoxy. I used it to adjust the curvature of the window. As you'll see, I also used Magic-Sculpt to fill in the cut on the tulip panel. It's easy to work with, carve , sand, machine and polishes glass smooth. When it dries, it's rock hard. I swear by this stuff. I formed the rear glass by cutting a ring section from a 2 liter soda bottle, placing the section around an empty pasta sauce jar, slipping the buck between them and tightening the soda bottle section by clamping the slack with vice grips to hold everything in place. Then, I used a heat gun, set on low, to shrink the bottle plastic around the buck. High tech it ain't; but, it works! The glass was cut and trimmed and this is what it looks like in a test fit: Fits like the proverbial glove. If I decide to do another Mainline, I'll need to redo the rear window. The height of the backlight needs to be increased about 2mm; but, I'm satisfied with the results so far. The window opening still needs some finishing. The next thing to work on will be the '53 grille, which needs heavy mods to look like a '52 type. That's what styrene tubes, rods and Magic-Sculpt were created for. Feel free to critique and/or criticize as you see fit. I'm always open to suggestions.

-
How's that? Check out Hyperscale's Forum Index. Can't get easier. Hyperscale Forums
-
Favorite police procedural/crime dramas
SfanGoch replied to Rob Hall's topic in The Off-Topic Lounge
I ain't saying that you should; but, it's always good to stay on your toes. I keep a copy of this book just to keep tabs on what me kit is planning. They are devious, diabolical and conniving. -
Maybe all of this Star Wars overkill will mean I can snag a Hasbro Millennium Falcon for cheap again.
-
Tapatalk would have been a better platform choice than Invision. Network54 was recently acquired by Tapatalk and all of the NW54 fora were migrated to TT. More dependable and without all of the issues.
-
MCW '66 Biscayne 2Dr Sedan
-
Hmmm...no listing for it on the site.
-
Testor’s clear window glue
SfanGoch replied to ewetwo's topic in Model Building Questions and Answers
Gator Grip Hobby Acrylic Glue is great stuff too. In addition to attaching glass, you can use it to mock up assemblies to check for fit and whatnot. -
Favorite police procedural/crime dramas
SfanGoch replied to Rob Hall's topic in The Off-Topic Lounge
"Elementary" is a testament to that. If the original characters ain't broke, why try to fix them with a quirky new take? -
detail Pet peeve of mine!
SfanGoch replied to Mercuryman54's topic in General Automotive Talk (Trucks and Cars)
I gots high standards. You can tell by who I associate with. -
detail Pet peeve of mine!
SfanGoch replied to Mercuryman54's topic in General Automotive Talk (Trucks and Cars)
Nah, your photos are swell. -
You overpaid. Ted's Stationery Store had'em for a buck seventy nine.
-
detail Pet peeve of mine!
SfanGoch replied to Mercuryman54's topic in General Automotive Talk (Trucks and Cars)
Sure, a model is a 3 dimensional subject. Unfortunately, a lot of people have a one dimensional eye when it comes to composing and taking photographs. How about twenty pics of a car model, eighteen of which are repetitive 3/4 perspective views of the front and rear ends. The remaining two are shots of the same tire/wheel/hubcap as seen from just under the fender when looking down. -
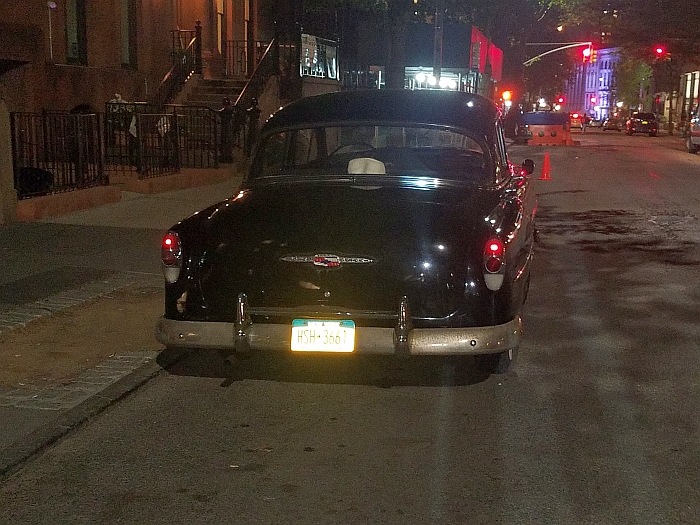
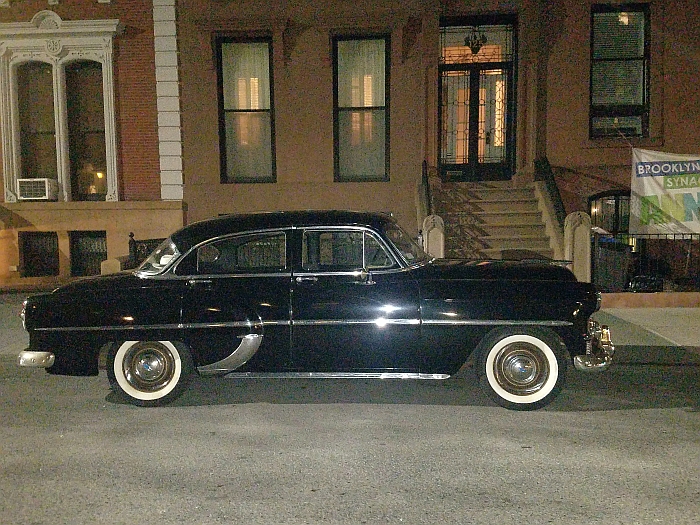
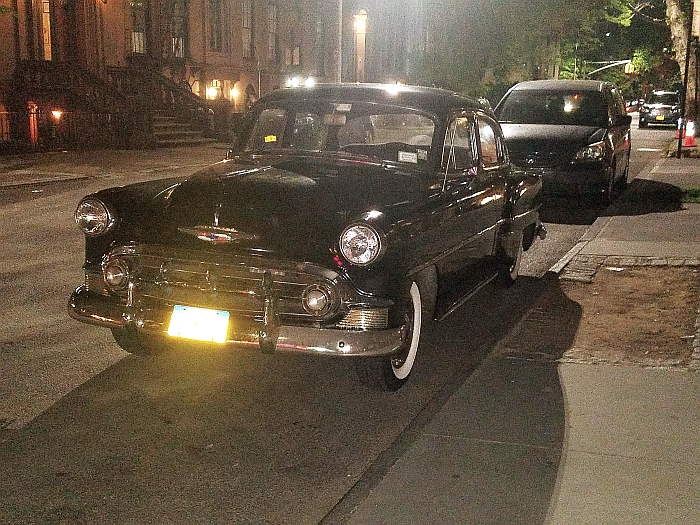
What did you see on the road today?
SfanGoch replied to Harry P.'s topic in General Automotive Talk (Trucks and Cars)
Saw this beauty while taking a walk around the neighborhood earlier this evening:
-
Thanks, Ron. It was a better choice than the Lindberg Mopar chassis.No comparison as far as details were concerned.