stitchdup
-
Posts
6,953 -
Joined
-
Last visited
Content Type
Profiles
Forums
Events
Gallery
Everything posted by stitchdup
-
2020 vision does not mean you saw your way through a year no matter what a facebook post i saw said
-
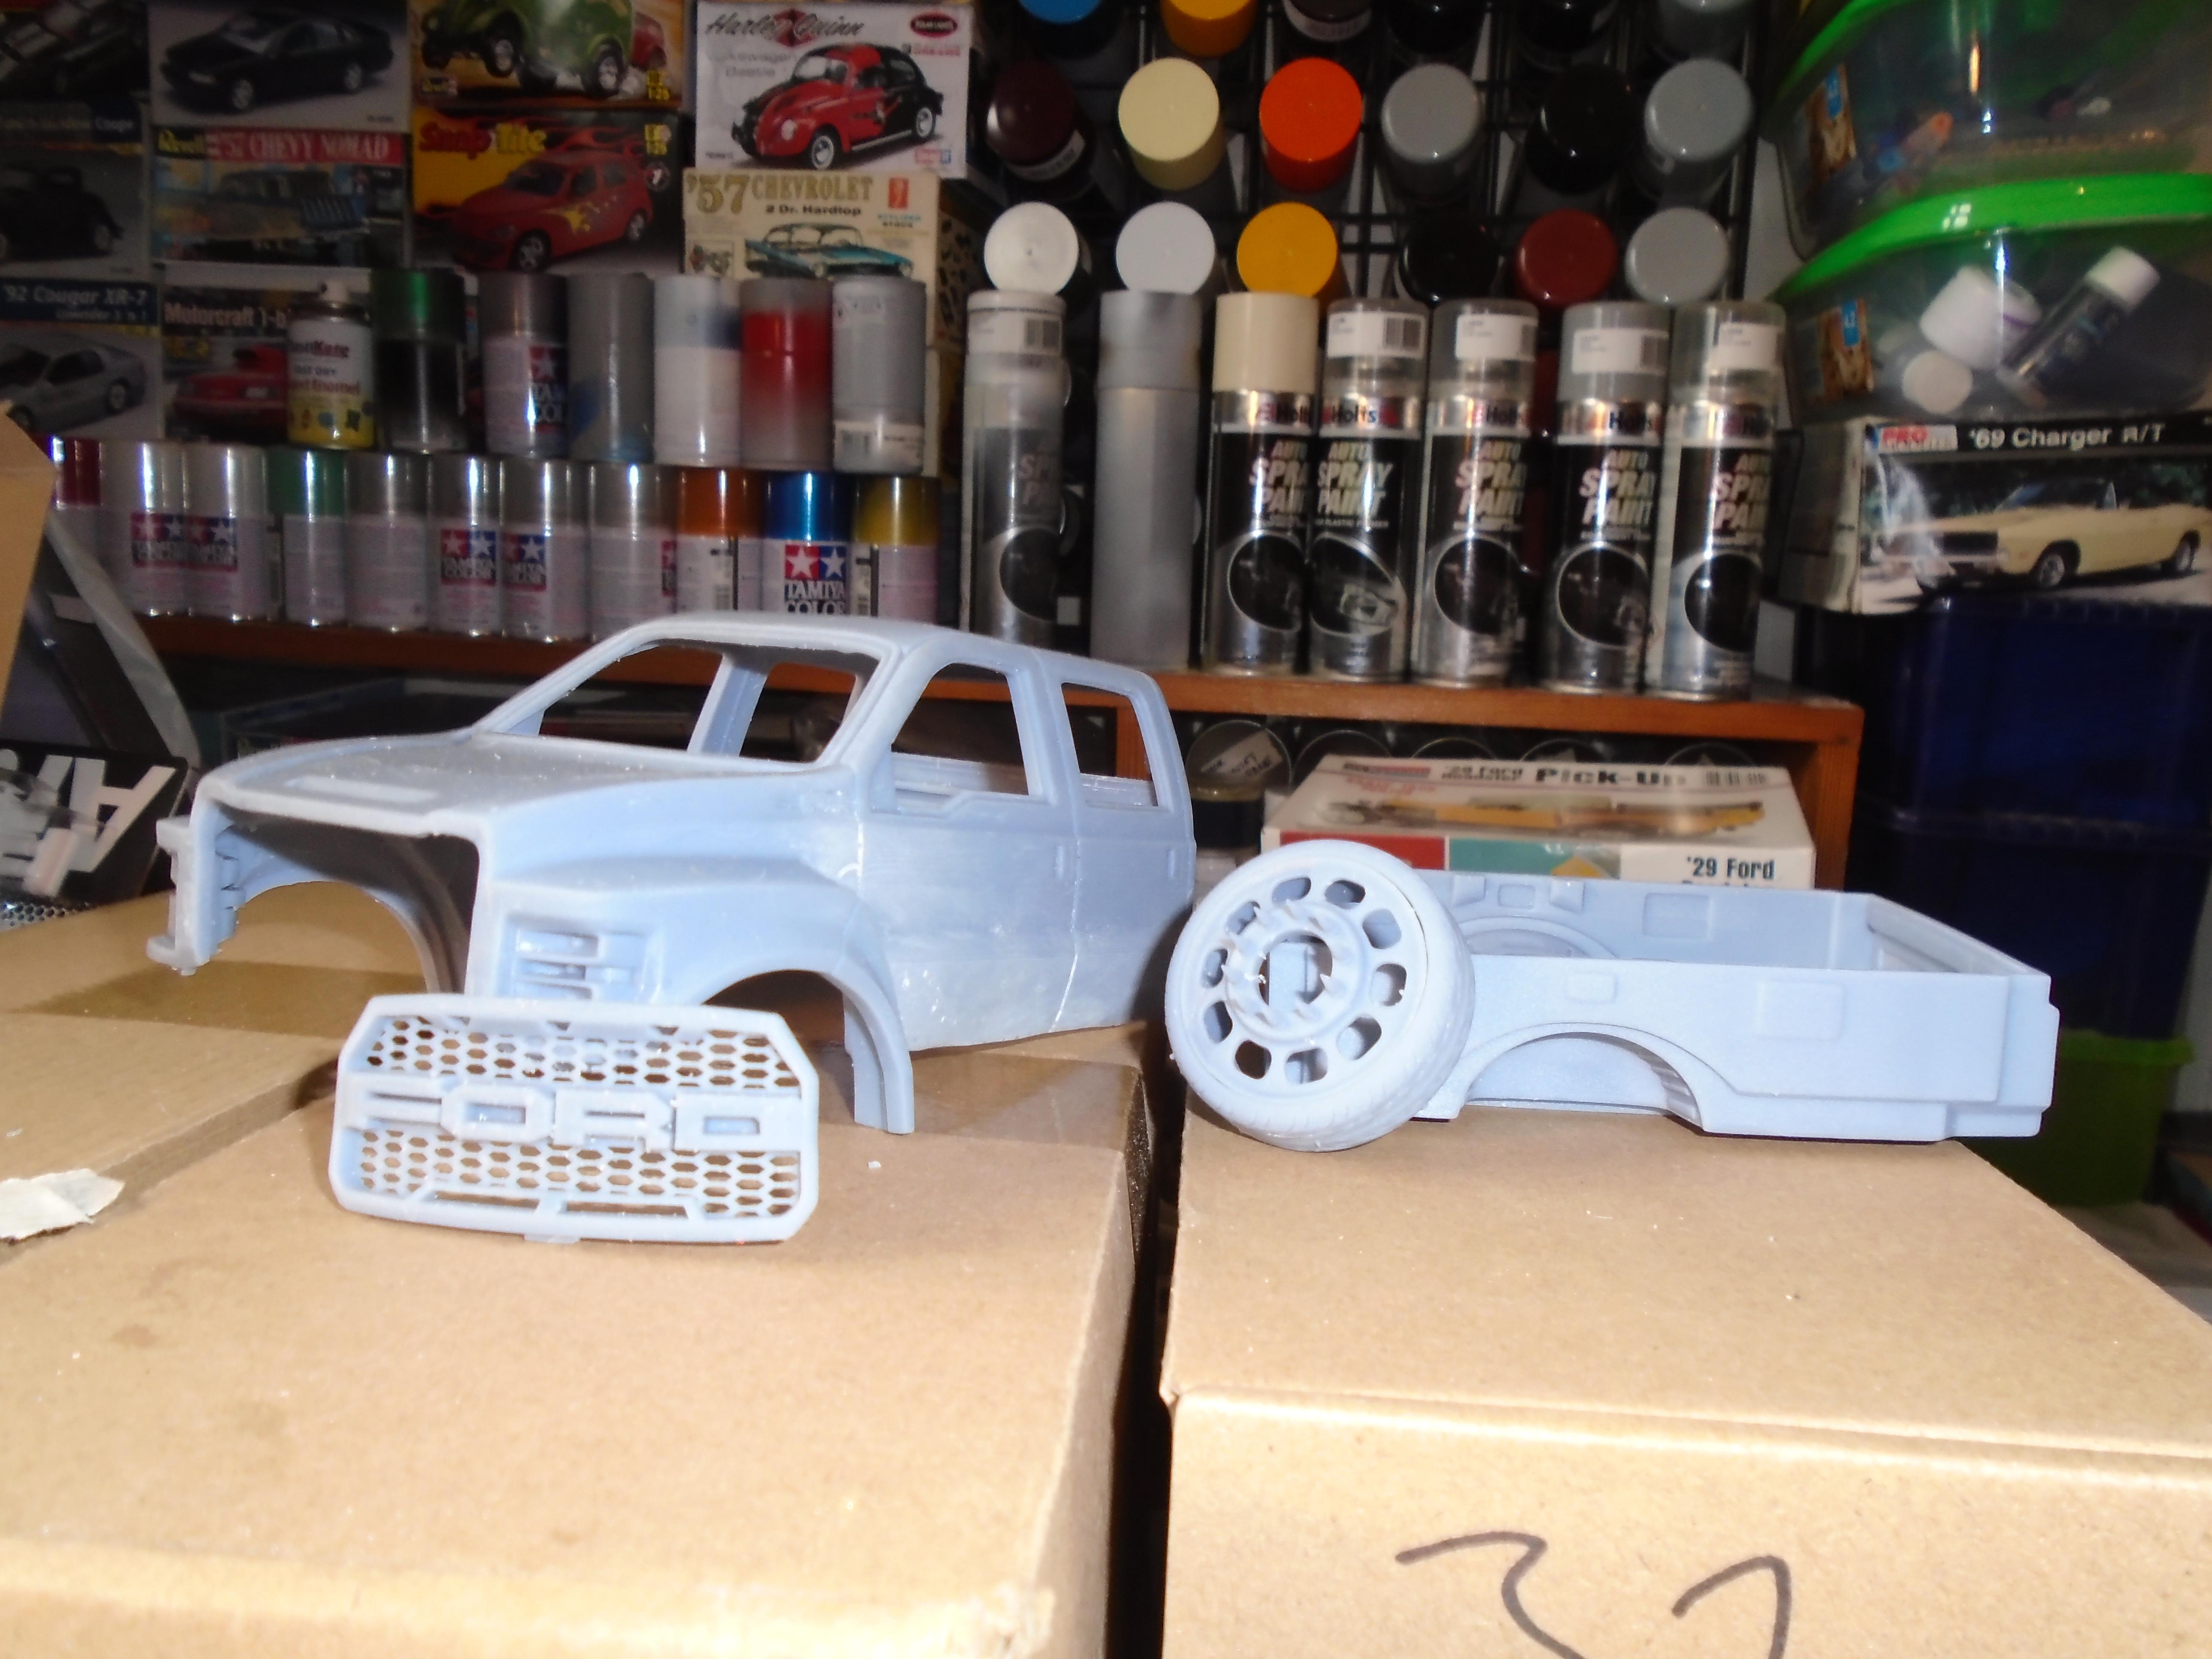
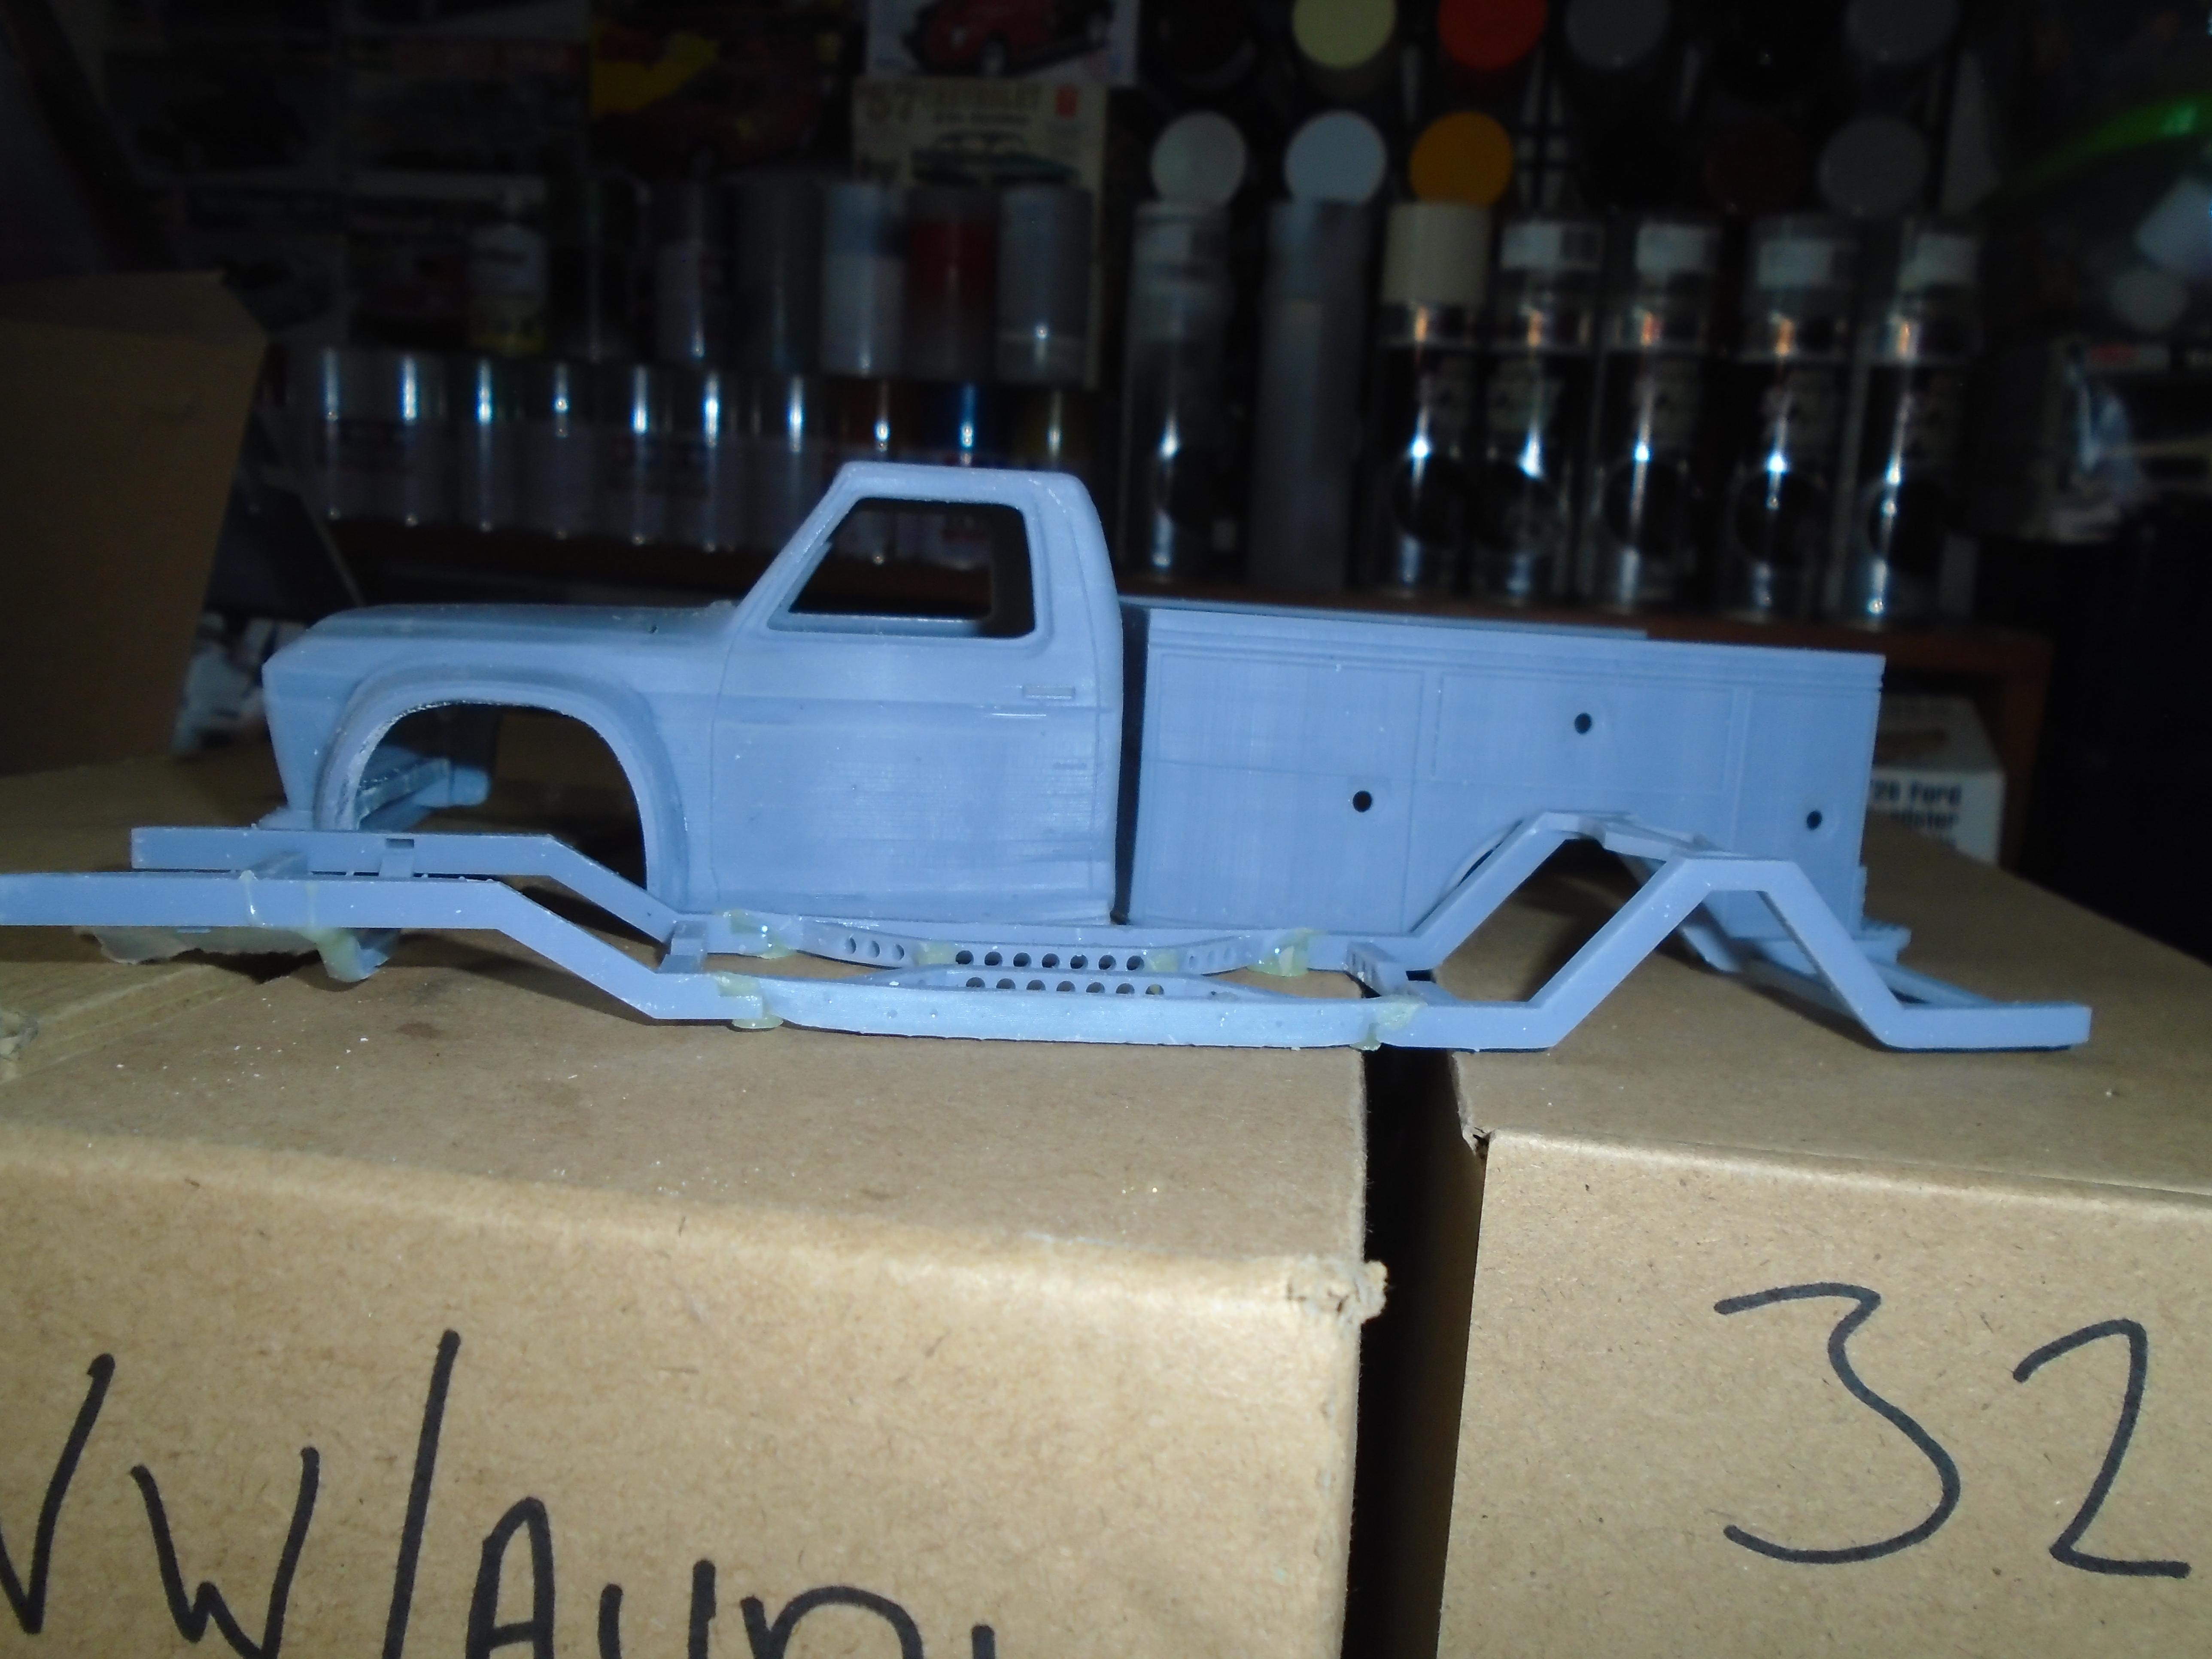
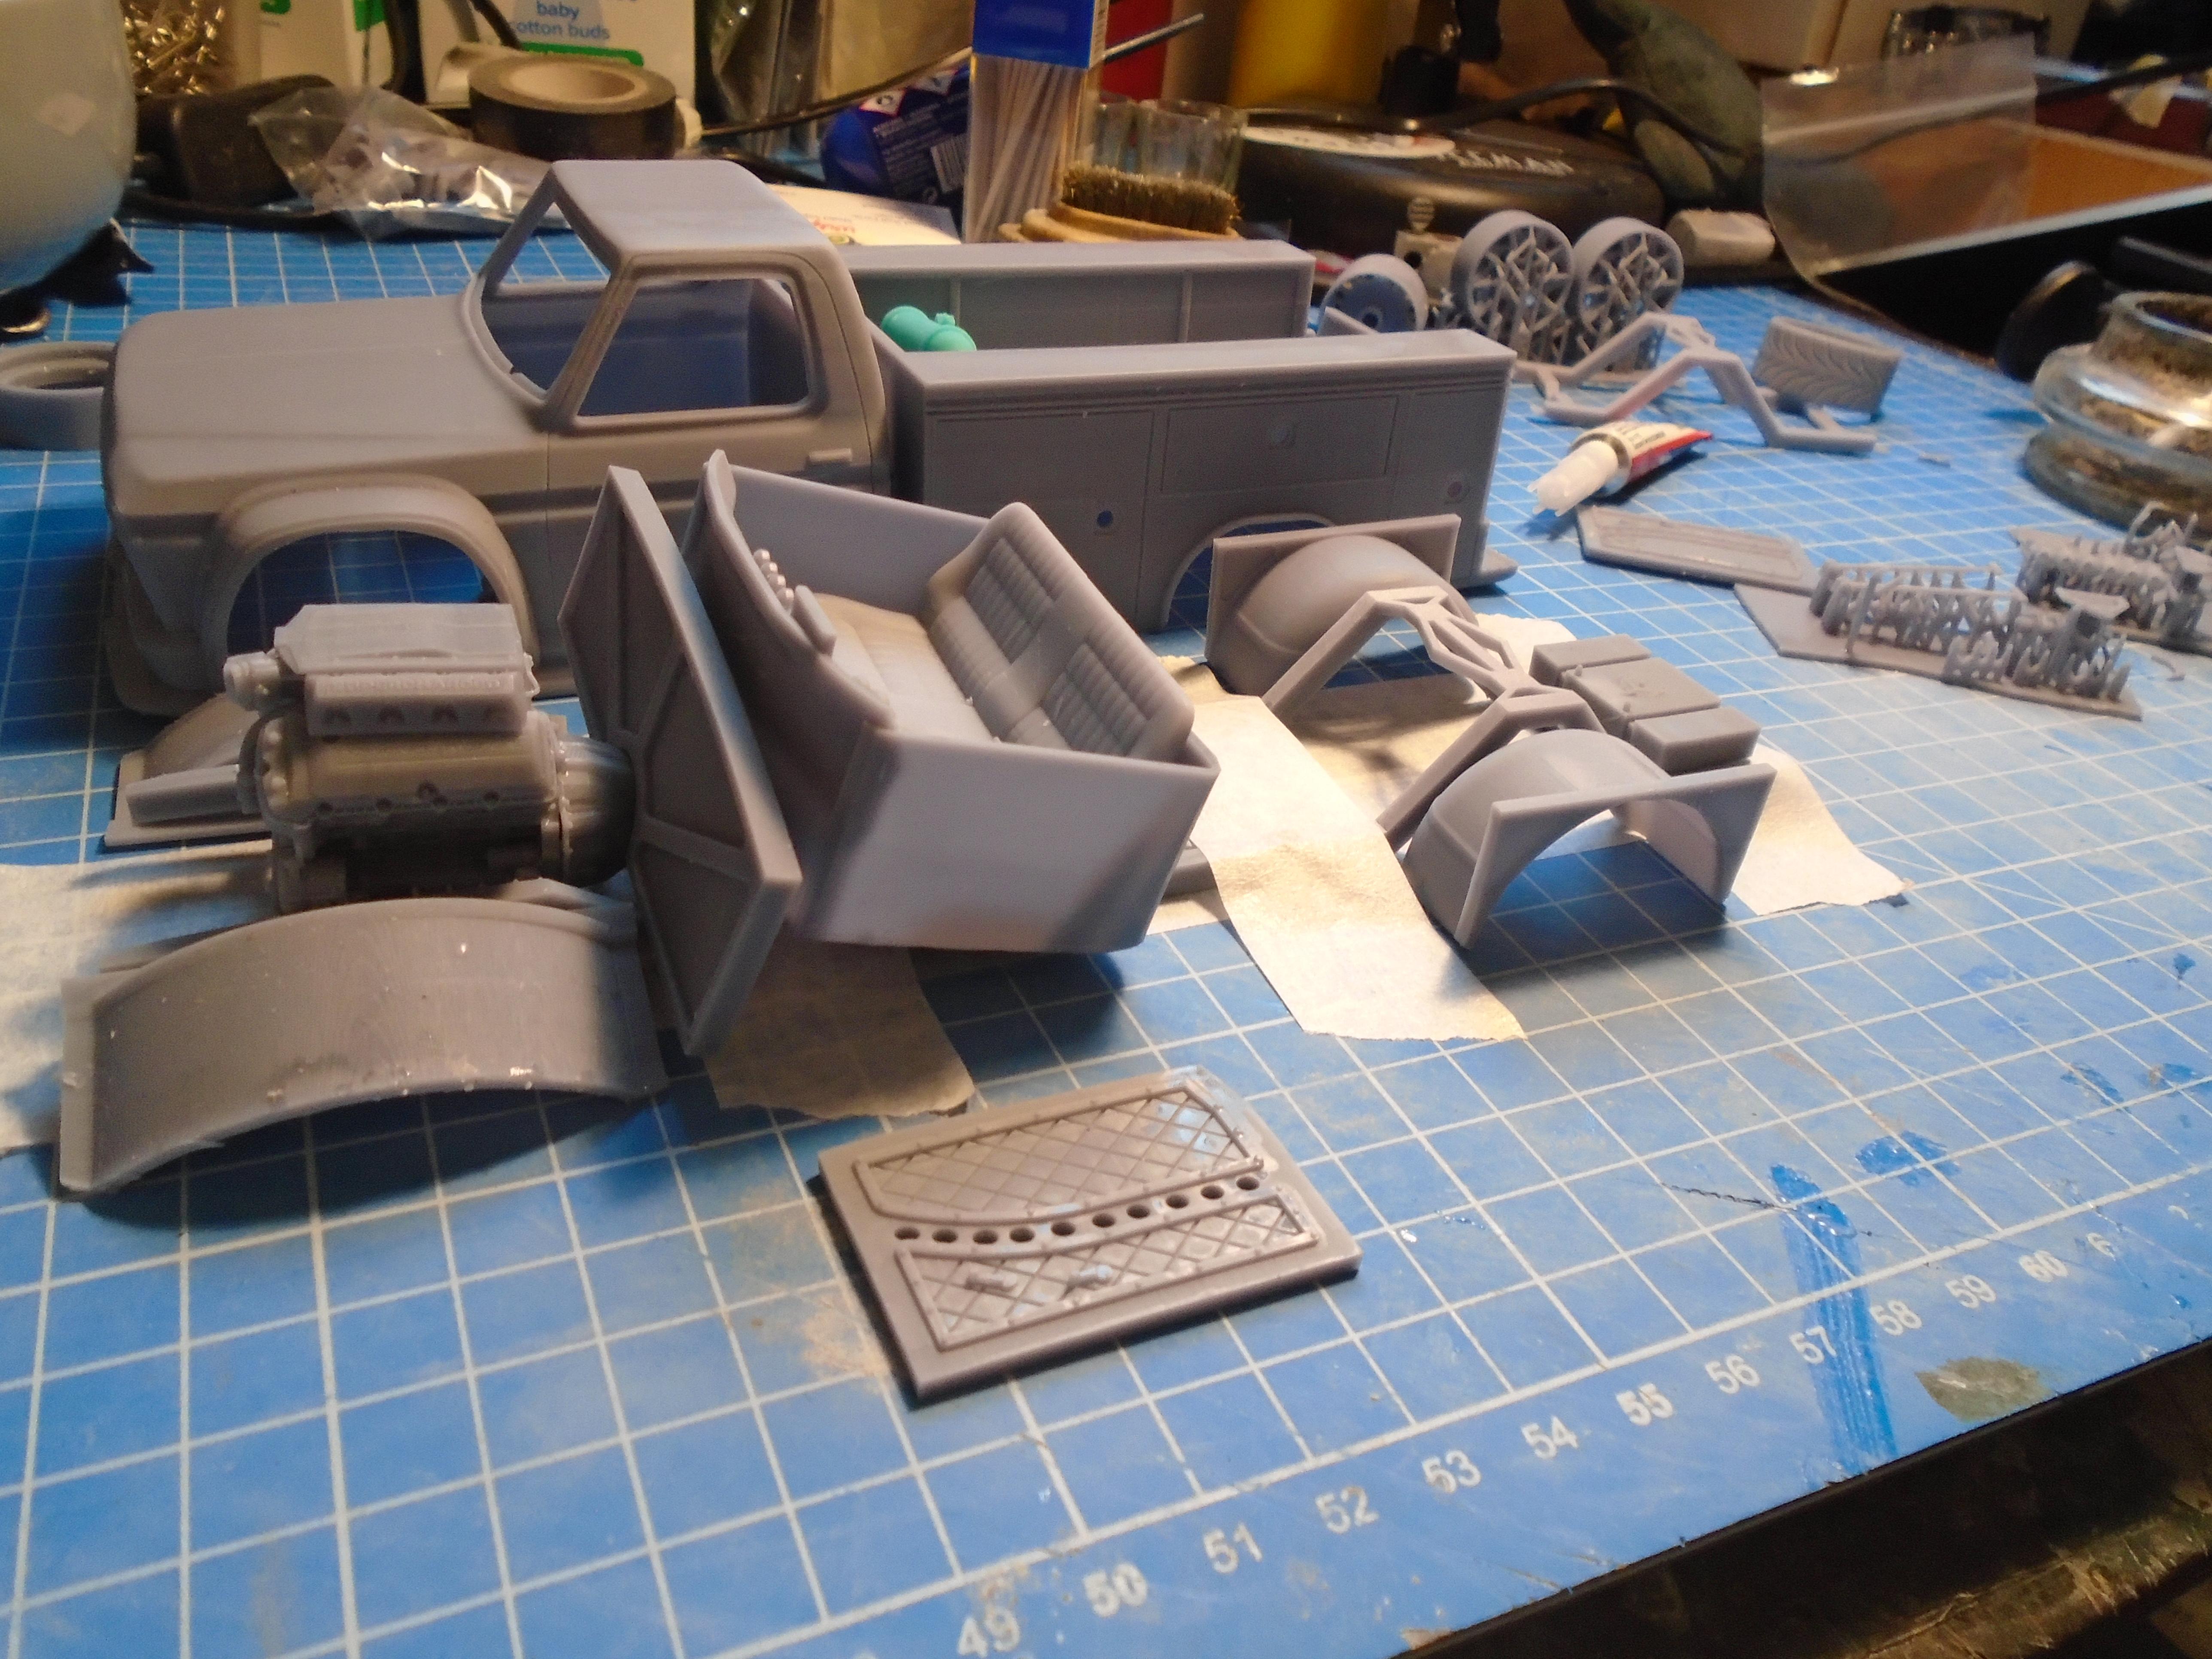
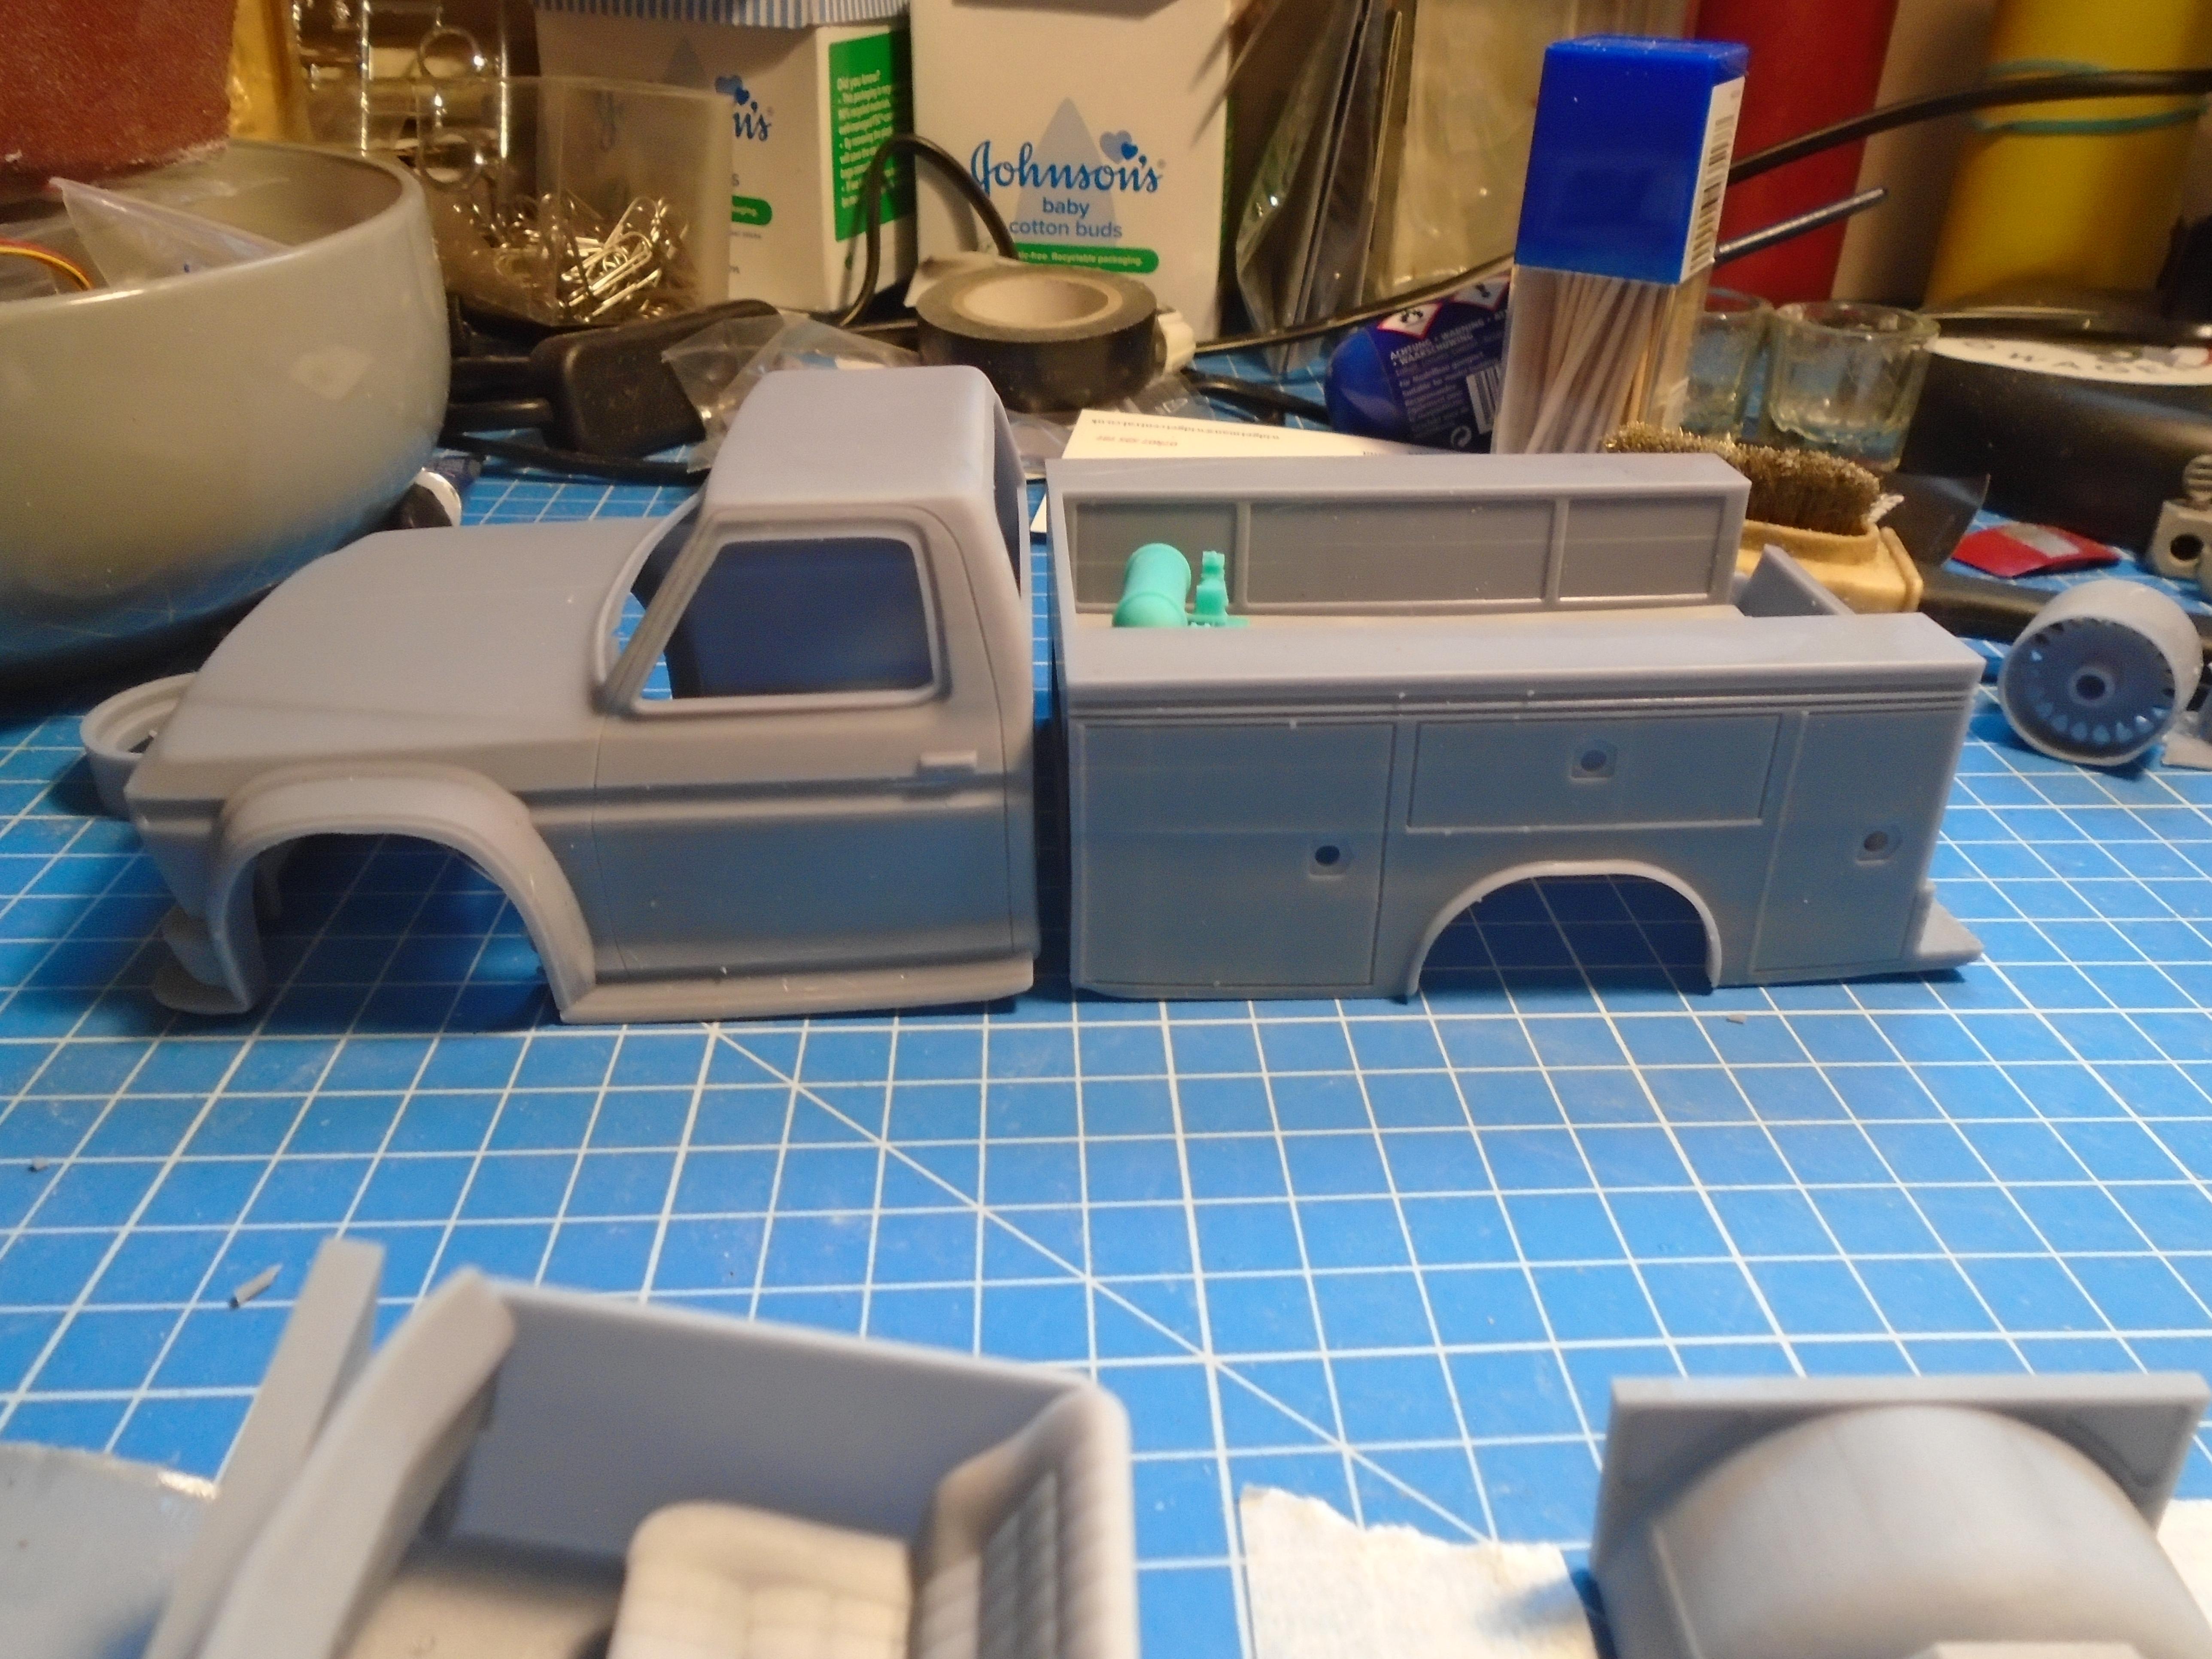
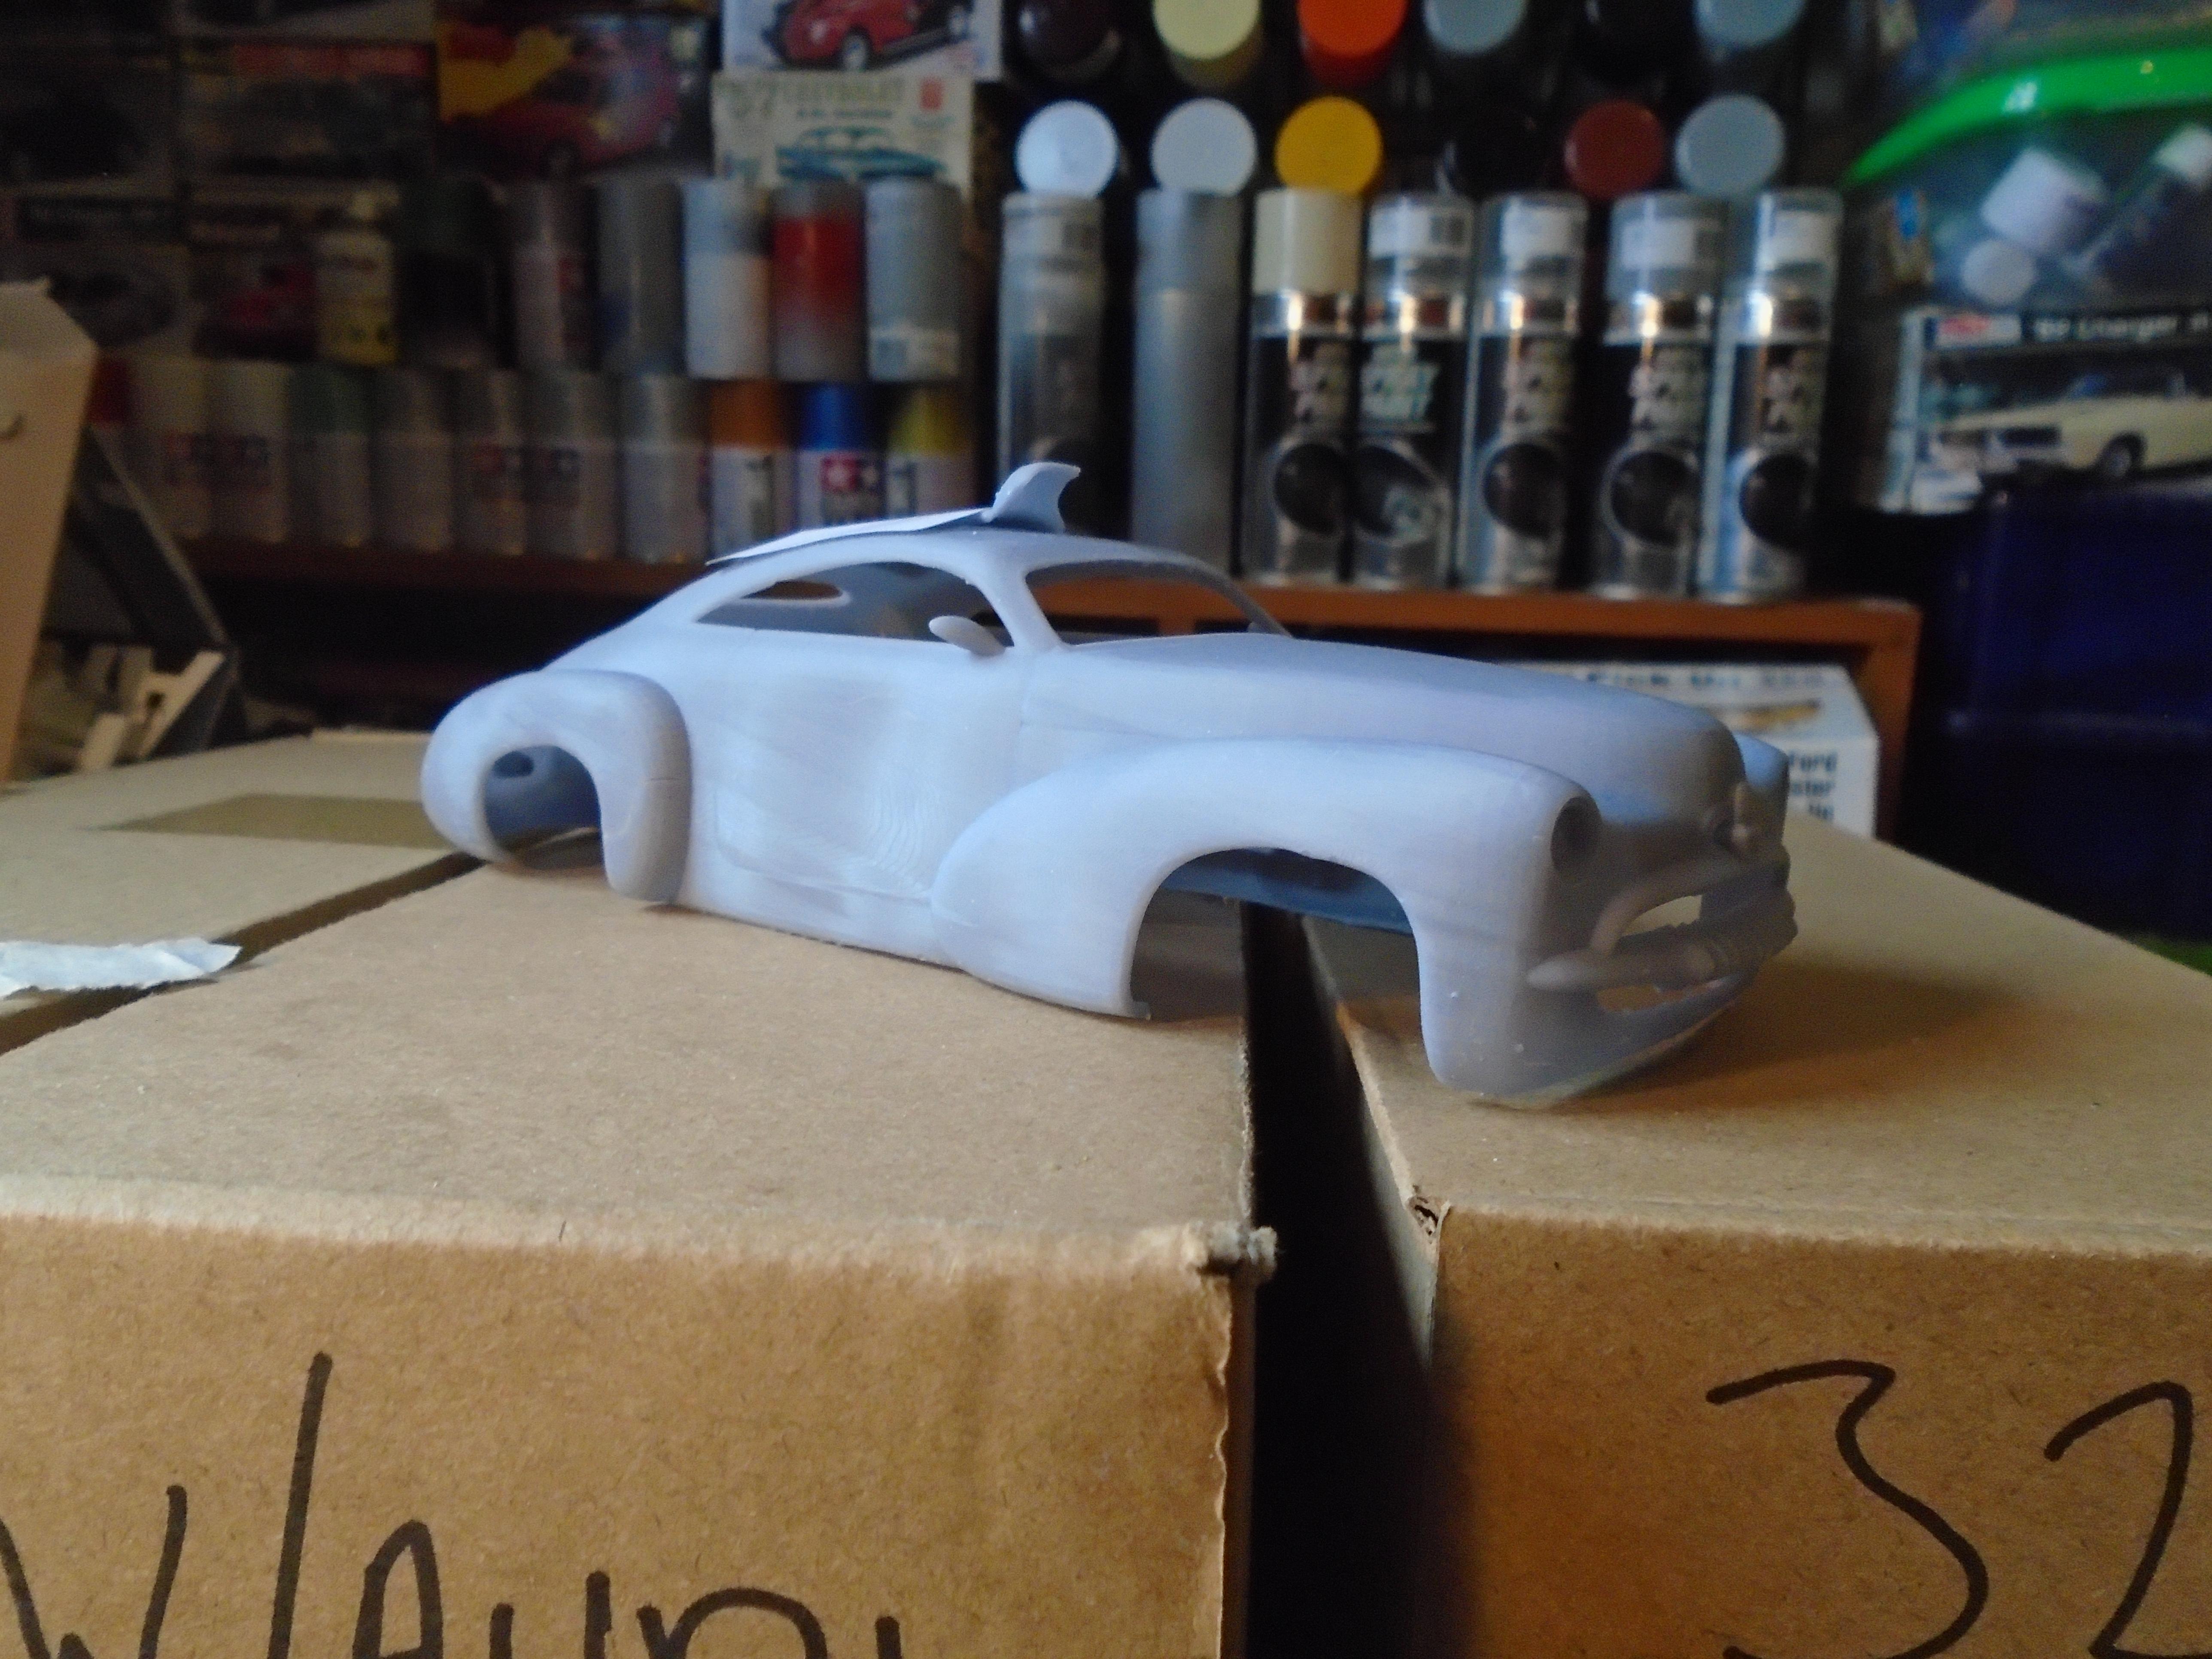
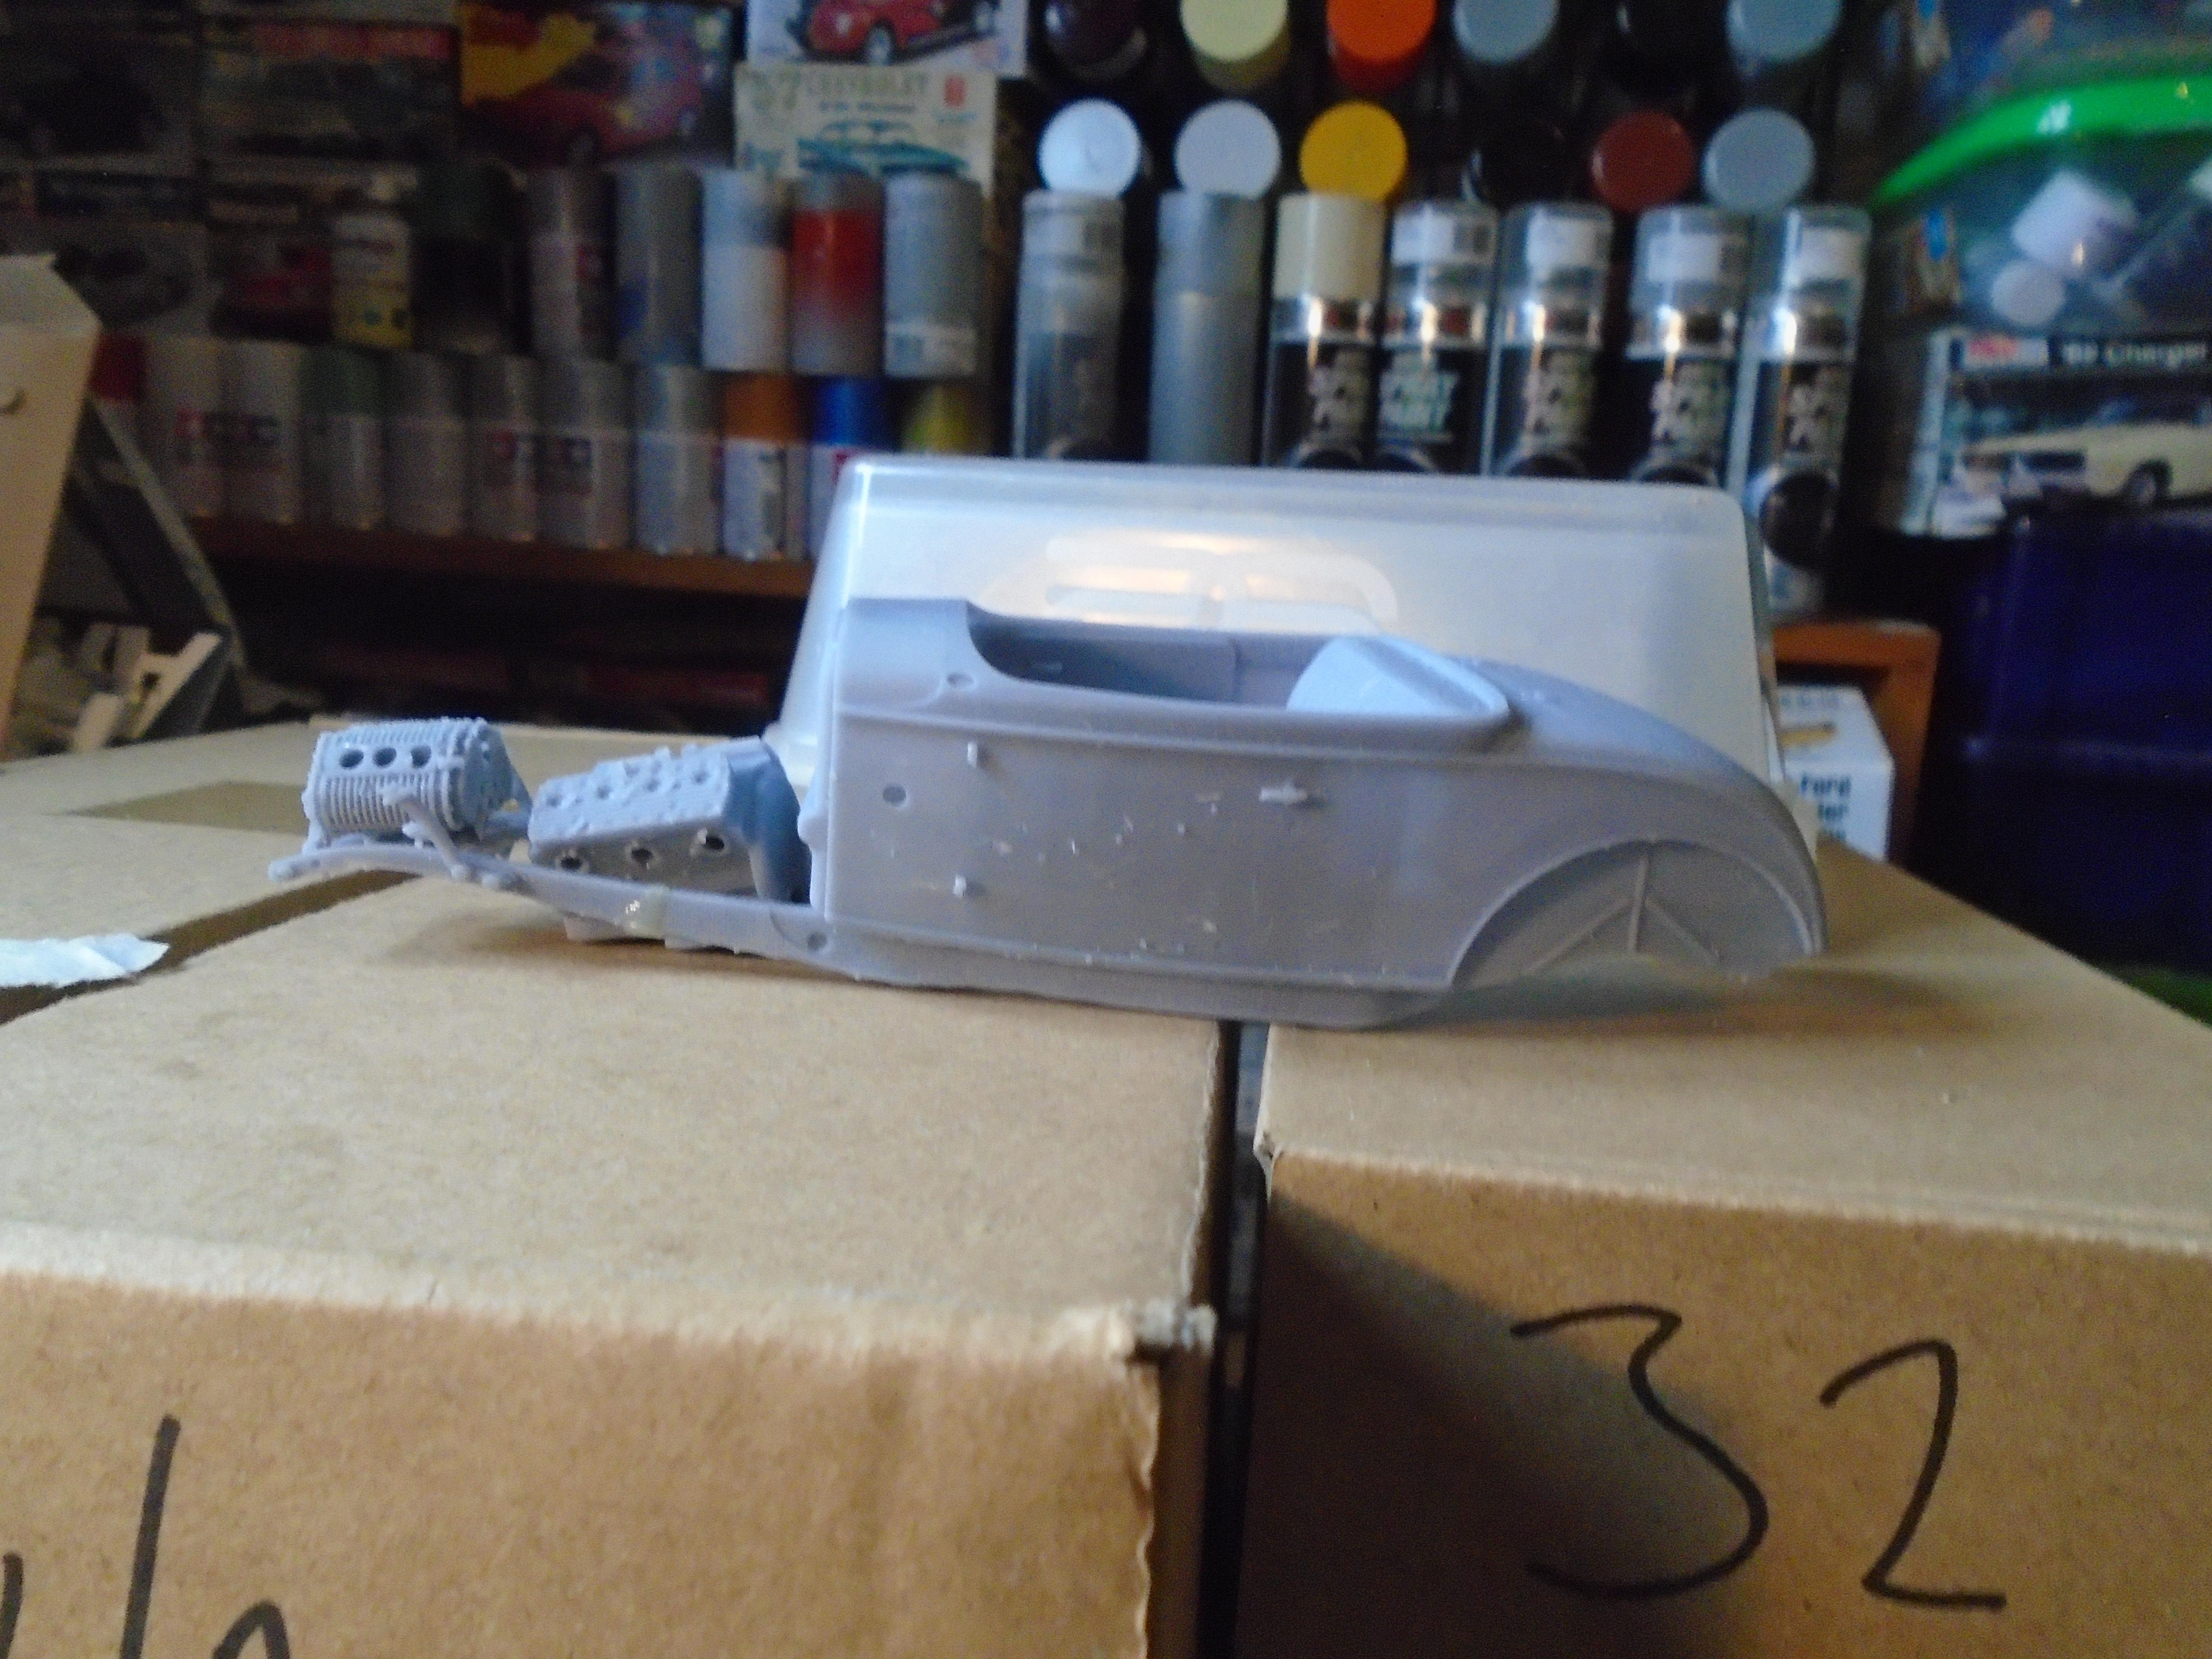
While I'm a vw fan my eye sometimes get caught by other things too. So here are a couple of trucks I've printed and 32 roadster that is intended to be a bentley style build if i can find some decent modern size wires for it. first is a ford f650. As I'm never satisfied I've printed out a raptor grille and a few wheel options. I have some left over parts from a meng f350 and they seem to be a little larger scaled. There is about a 2/3mm height difference between the meng sides and this cab but once i fit the dually fenders from this kit to the meng sides it will be mostly hidden. ford f350. This is an amalgamation of parts from various different designers. The engine is from texas3dcustoms and i've had it in the stash for a while. this is holdens efijy concept car from a few years back. I broke the side but its an easy repair so no need to print another 32 roadster. This is a file by digital surface for a 32 roadster kit. I'm not using his engine and have resized the length by 7mm. the hood has been stretched 5mm and the grille 3mm. This is all because of twin blown flathead with the blowers mounted in front of the engine. This made me think a bentley inspired build ala hooolywood hotrods might be cool so I strtched it in lychee. still need to find suitable wire wheels for this one

-
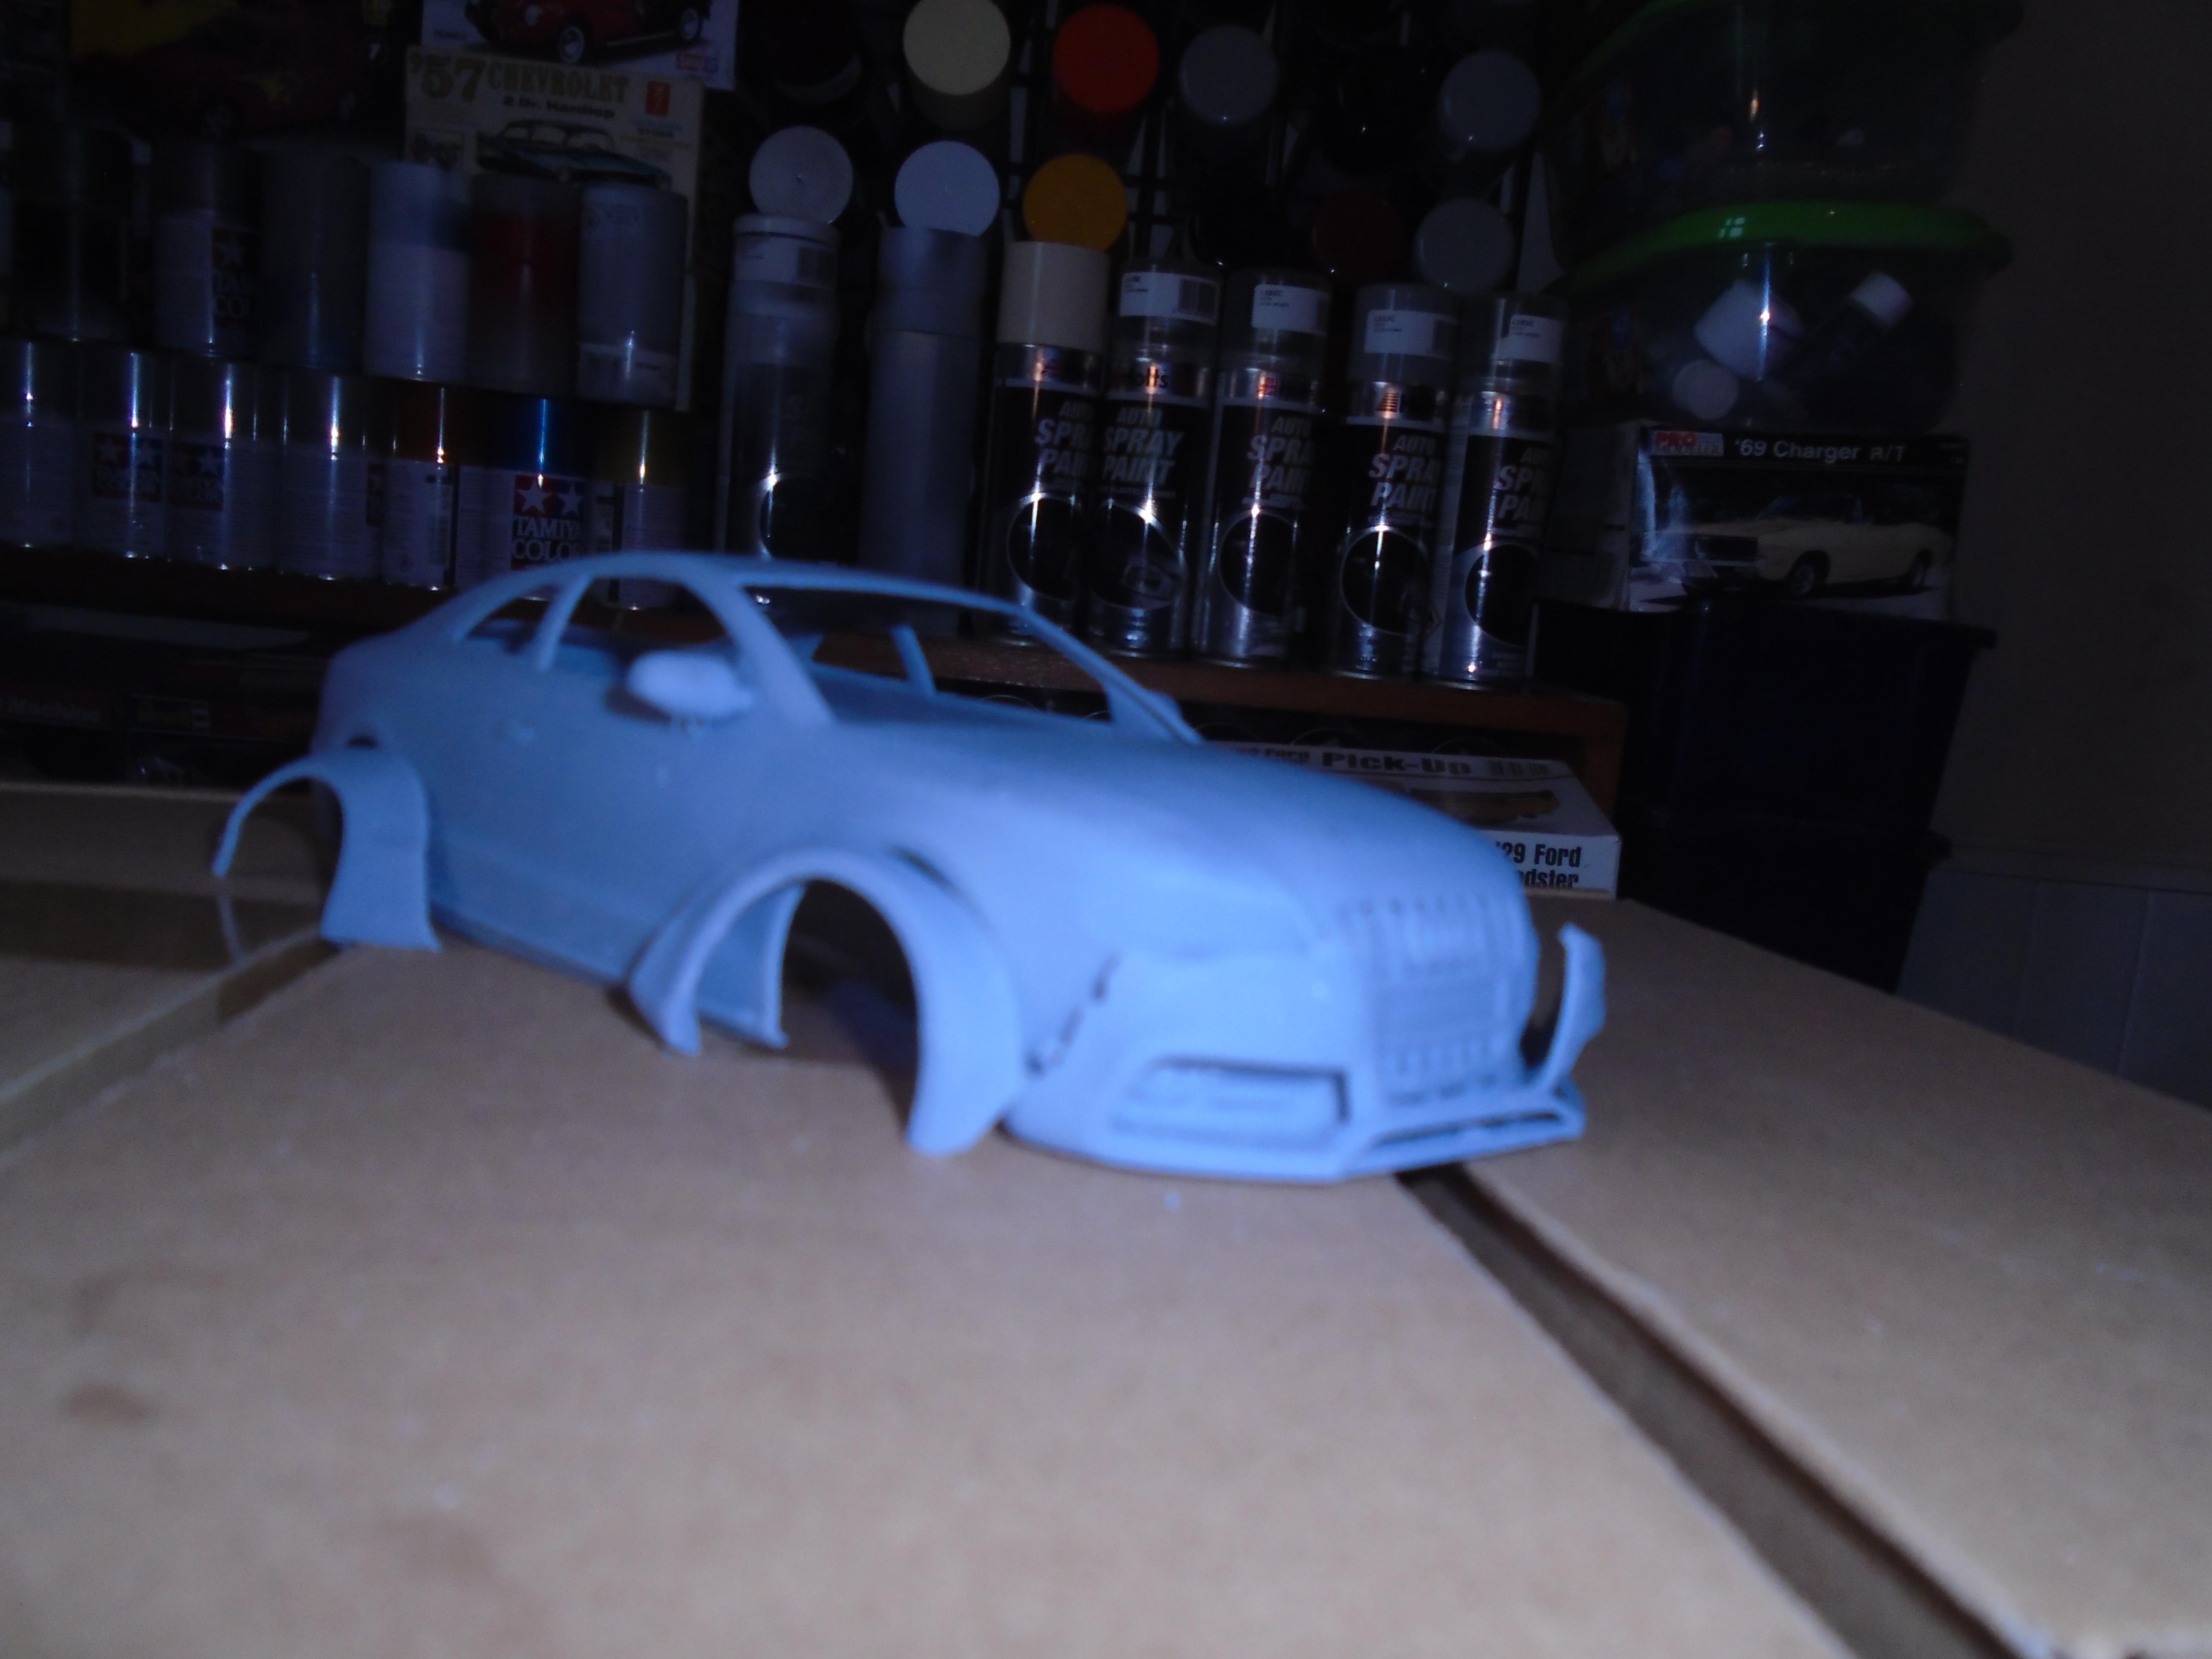
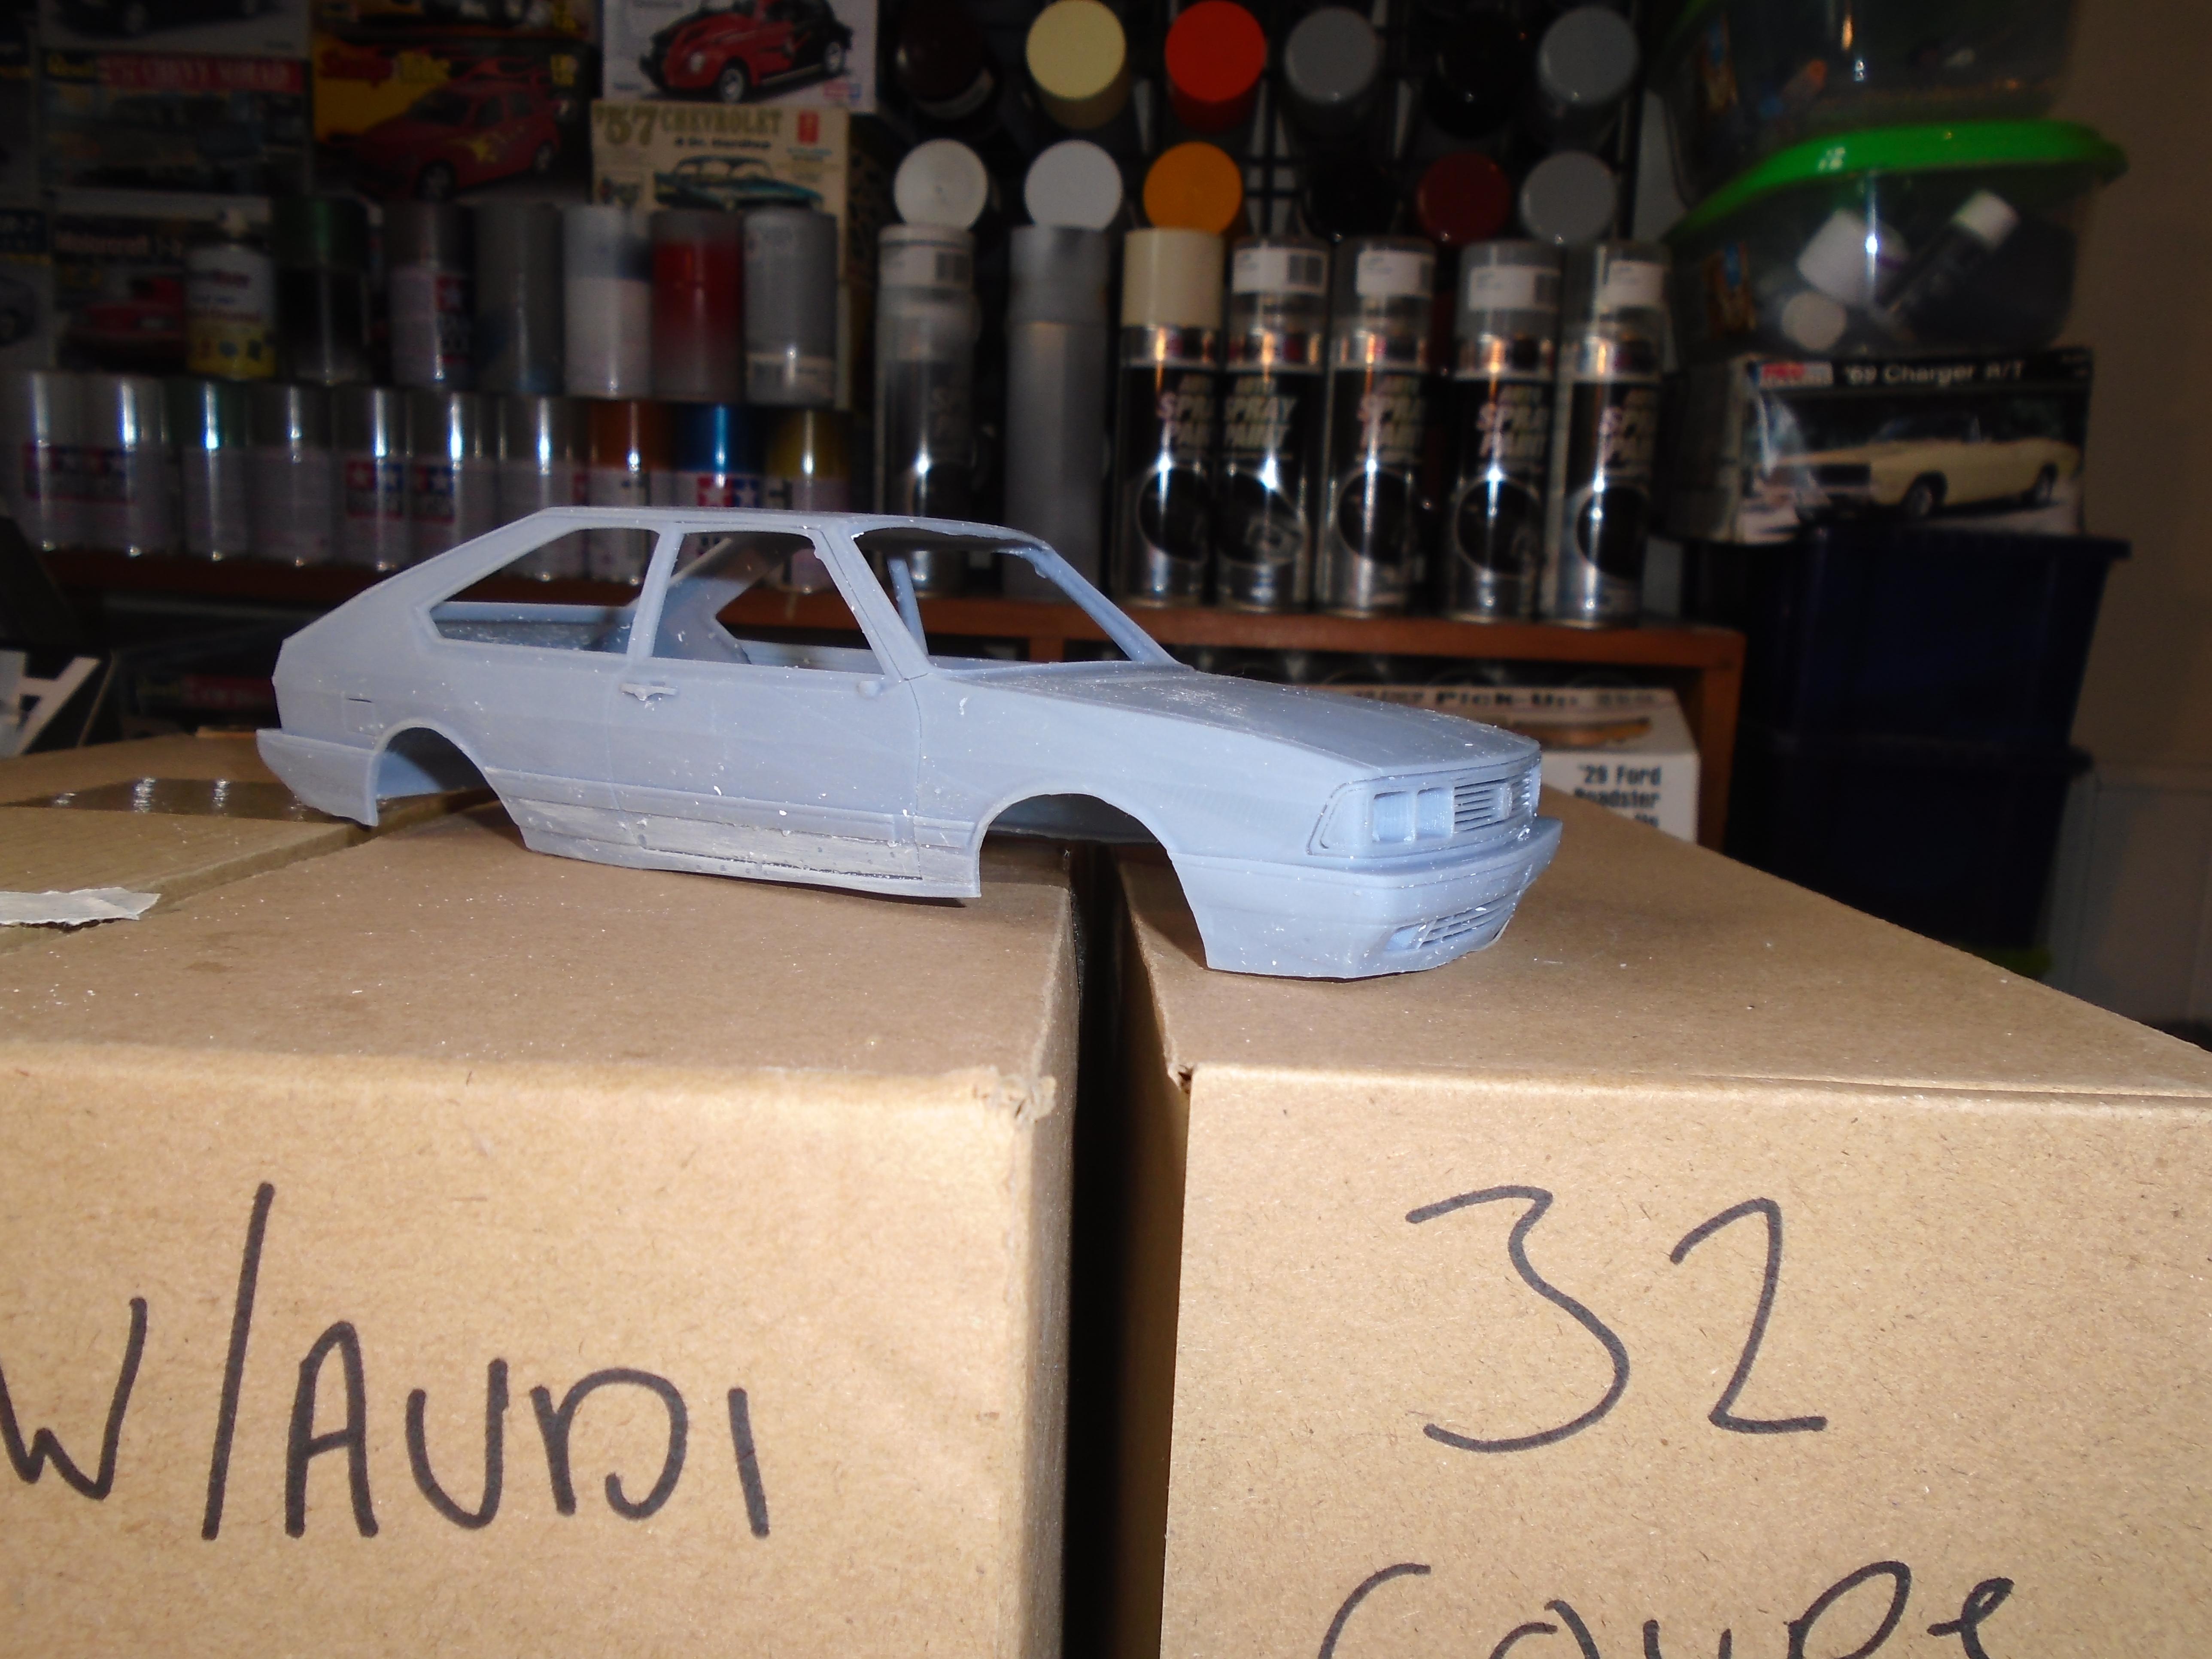
As you all know by now I'm a big vw fanboy, and i also have a fondness for the more unusual cars which has led to me printing out a load of south american vws. I'm still trying to get the passat, parati and saveiro g1 to print at 1/24 but everything elde is 1/24 exceprt the 2020 audi rs5 which is scaled to fit a drag chassis so i can build daddy daves new no prep car. I have everything to build it and printed 2 bodies so i can cut the front off to show the engine. First up is group of files from various places to build a liberty walk audi a5. I have an interior file for this too but it needs a lot of work to print well so this build is a while away. next is a blackboxstl beach buggy. as I'm never satisfied I've also printed out the drag parts to fit the engine and a set of small tyres this one is a south american vw but versions of it were available in europe. Isn't it ugly? should look sweet slammed on some suitable period style rims this is a facelift mk2 vw passat. it needs rescaled as its too big just now. this one has an interior also this will become daddy dave's new no prep car. All the chassis and other parts except the body are files from mcs or mattys custom scale on cults. Nice files but they feel underscaled for 1/24 this is a saveiro g1 summer. its got an interior and underhood detail. also needs rescaled vw sp2. this is a rescaled slotcar body. there are other sp2 files but they all get the rear wheel arches completely wrong vw bora. this broke when i was taking it off the supports. i'll print another though. I tried another bora file but it printed like paper and was a waste of 18 hours printing vw parati. I need to rescale this one too. its another with interior and underhood detail This one i got the scale right on. I've been doing a little work on it. it started a slotcar and was very blocky once printed. I spent a load of time smoothing the body and then fitted a mk1 golf arches but the body keeps breaking on me. Not a very good file but i have another to try now we get to the one I'm working on currently. Its a vw saveiro g6. As you can see the body has some texture issues but the resin is easy to work with so its not really a problem. I've opened the hood and have rescaled a mk2 golf engine bay to suit. I'm using a vw 1.8t engine but since the file is one piece I'll use 2 and cut them apart to make detailing easier. The seats I'm using are from blackboxstl and handily have the audi rs pattern. For glass since this has a convex profile I'm going to attempt to cut it from just below the shoulder on a fizzy juice bottle. I'm hoping it will keep the curve as i flatten it out. For the front suspension I'll be using some printed parts from another blackbox bodykit.
-

How big is your... stash?
stitchdup replied to Pierre Rivard's topic in Model Building Questions and Answers
Now the next question is how many of you's answers are now out of date? I know i've added around 15 kits and 16 printed kits just this month and i'm printing every day so thats 3 or 4 more bodies every day -
How Do You Remove Paint From Chrome
stitchdup replied to midlineqb's topic in Model Building Questions and Answers
You might be stuck with having to reo the chrome. Most of the stuff we use to strip paint will also strip chrome parts. Do you know what type of paint is on it? eg; acrylic or enamel etc.. -
pianee is often one of the side effects of excessive alcohol consumption
-
Ah the smell of spring, much as the smell aint great, its always a sign that summer is on the way. Great job on the dio
-
Isn't vlad looking pale tonight were count dracula's doctors last words
-
If your not going to be using it in vac former too often you could use cheap car body filler and use it to make a buck for forming from. if you cover the back side of your master with cling film (i think you guys call it saran wrap) you can build a small box around your master then pack the box with filler for a buck to form from. It should work for a few tries, possibly more tries if you made it bigger so you can trim back the window and being made from body filler you can remedy any flaws easily. Even the glassfibre filler would work but its more likelly to have bubbles
-
beauty is in the eye of the bee holder just proves how odd english is
-
thats looking good, i still need to mask the window surrounds for the black, and give the rear lights some clear red. I might see if the liberty walk kit fits it too but just to look
-
I wrote my house number on my outdoor bin about 4 months ago. Its exposed to wind, rain, salt, snow and sun in the area the bin sits. Its still there but just a dull silver now. alternatively i did the chassis on an el camno about 4 or 5 years ago just after the pens became available and it looks ok. i have noticed the pen strokes have started to show where the pen was used (like darker shadows in the chrome) but where i used a brush its still good. I'll pull it out of the case in the morning and get some pics in sunlight so they can be compared to the first built pics. I might have done the engine chrome too
-
Running out of Future / Pledge Floor Care?
stitchdup replied to Pierre Rivard's topic in Tips, Tricks, and Tutorials
If any of you know a janitor from any large public building that has linoleum floors you could get the stuff they use in the floor polisher machines. It goes on with a satin finish but the more you rub it, the shinier it gets. I had a near limitless supply when i cleaned airports. It comes in large drums (25 litre drums is what i had) and generally doesn't have a prominent brand name, just a row of letters and numbers. Its self levelling too -
stick a pin from a shirt collar in the needle when your not using it, it will mostly keep the needle clear and if it does block just flip the needle and use the same pin to clear it, or just put a bit of wire in the needle. if the wires longer than the needle it wont block as it will clear when you remove the wire. I prefer the humbrol glue myself, but the revell is a close second but it sometimes struggles to bond some black styrene while the humbrol works but is a little thicker
-
I like the kit. I got the slammed version and was pleasantly surprised to find it already had a twin turbo Ls so now i might actually build something box stock for a change
-
I think their system might be fully automatic. It may be that its out of stock but more is on the way so they kept the order open. I must have got about 20 emails while mine was in transit
-
A new . . . . Hornet?!
stitchdup replied to peteski's topic in General Automotive Talk (Trucks and Cars)
I'm probably thinking of the vauxhall then, its the uk version of the opels and most likelly pretty common -
What are michael jacksons pronouns? he/hee
-
I'm considering offering smoothed engine bay kits for the non revell vw golfs. They would be engine, gearbox and the metal work for the bay and I'm working on radiator and upper front panel detail for mk1 thru 4 golfs. The engines I can do so far are the r32 v6 in multi parts, and in one piece i have the 16v, 2 versions of the vr6 and a 1.8t. I'm also thinking about some kits but done as a what i would call curbside plus by which i mean they incluce engine bays and full interiors but there is no chassis detail. I'm working on a vw saveiro g6 just now that will be built this way and i might do an audi a5 next. Are there any vw group cars you would like to see? For example if i did a type 3 body with a dash and chassis to take tamiya bug parts for the rest, would it be wanted? Is there something you'd rather see? If its already available i wont be doing it. Everything i do would be 1/24 scale to suit the majority of the kits available currently
-
Model building versus other hobbies
stitchdup replied to Sledsel's topic in General Automotive Talk (Trucks and Cars)
Some sports fans, when their team plays it like a case of temporary rabies has infected entire towns, and it happens weekly but is somehow just part of it. Doesn't matter how good a people they are, their team plays and all their wit and reason gets chucked out the window. -
A new . . . . Hornet?!
stitchdup replied to peteski's topic in General Automotive Talk (Trucks and Cars)
even in yellow it looks dull, is it a rebadge from another brand as the back end looks identical to some mercedes sold in europe which is kinda confusing cos fiat own them now -
revolution(s) per minute make some things enjoyable
-
3D Printing Storefront Directory
stitchdup replied to Mr. Metallic's topic in Car Aftermarket / Resin / 3D Printed
i use cults3d.com. searching can be a bit of a chore but theres lots to choose from and the prices seem fair -
Does anyone make Saab car model kits?
stitchdup replied to ctruss53's topic in Model Building Questions and Answers
I could print you a 1979 900 turbo. it is very curbside and basic and has a different grille to yours but i dont know much about saabs so i dont know if it accurate or not. Its really just a shell, basic interior and chassis plate. It can be datailed up if you dont mind some work with files and sandpper. The lights are also printed as part of the body so you'd probably need to scratch some up there but given the shape of the saab you might be able to shape some modern 1 piece kit glass to fit as lenses if you use the top edge of the side glass as i suspect the shape is right or at least very close. this is the file i can get but there are others that dont have anything but the body https://cults3d.com/en/3d-model/game/saab-900-1979-printable-car-in-separate-parts -
Modern pickups. Interest?
stitchdup replied to zaina's topic in Truck Aftermarket / Resin / 3D Printed
I've just finished printing out the crew cab. It scales out pretty well and the body lines match the the meng f350 so I'll be using the fenders from it with the over fenders from this gafted on. The meng parts even fit the 650 box. I have the scenes unlimited dually set for the meng so its good to use some spare parts up. I've also printed out a raptor grille and fit it to this.