Impalow
-
Posts
1,065 -
Joined
-
Last visited
Content Type
Profiles
Forums
Events
Gallery
Everything posted by Impalow
-
This continues to be absolutely awesome Jim! It looks like you were able to get your cutter to score some styrene sheet? I love that scoop.
-
Oh and for sure SuperFly! ??
-
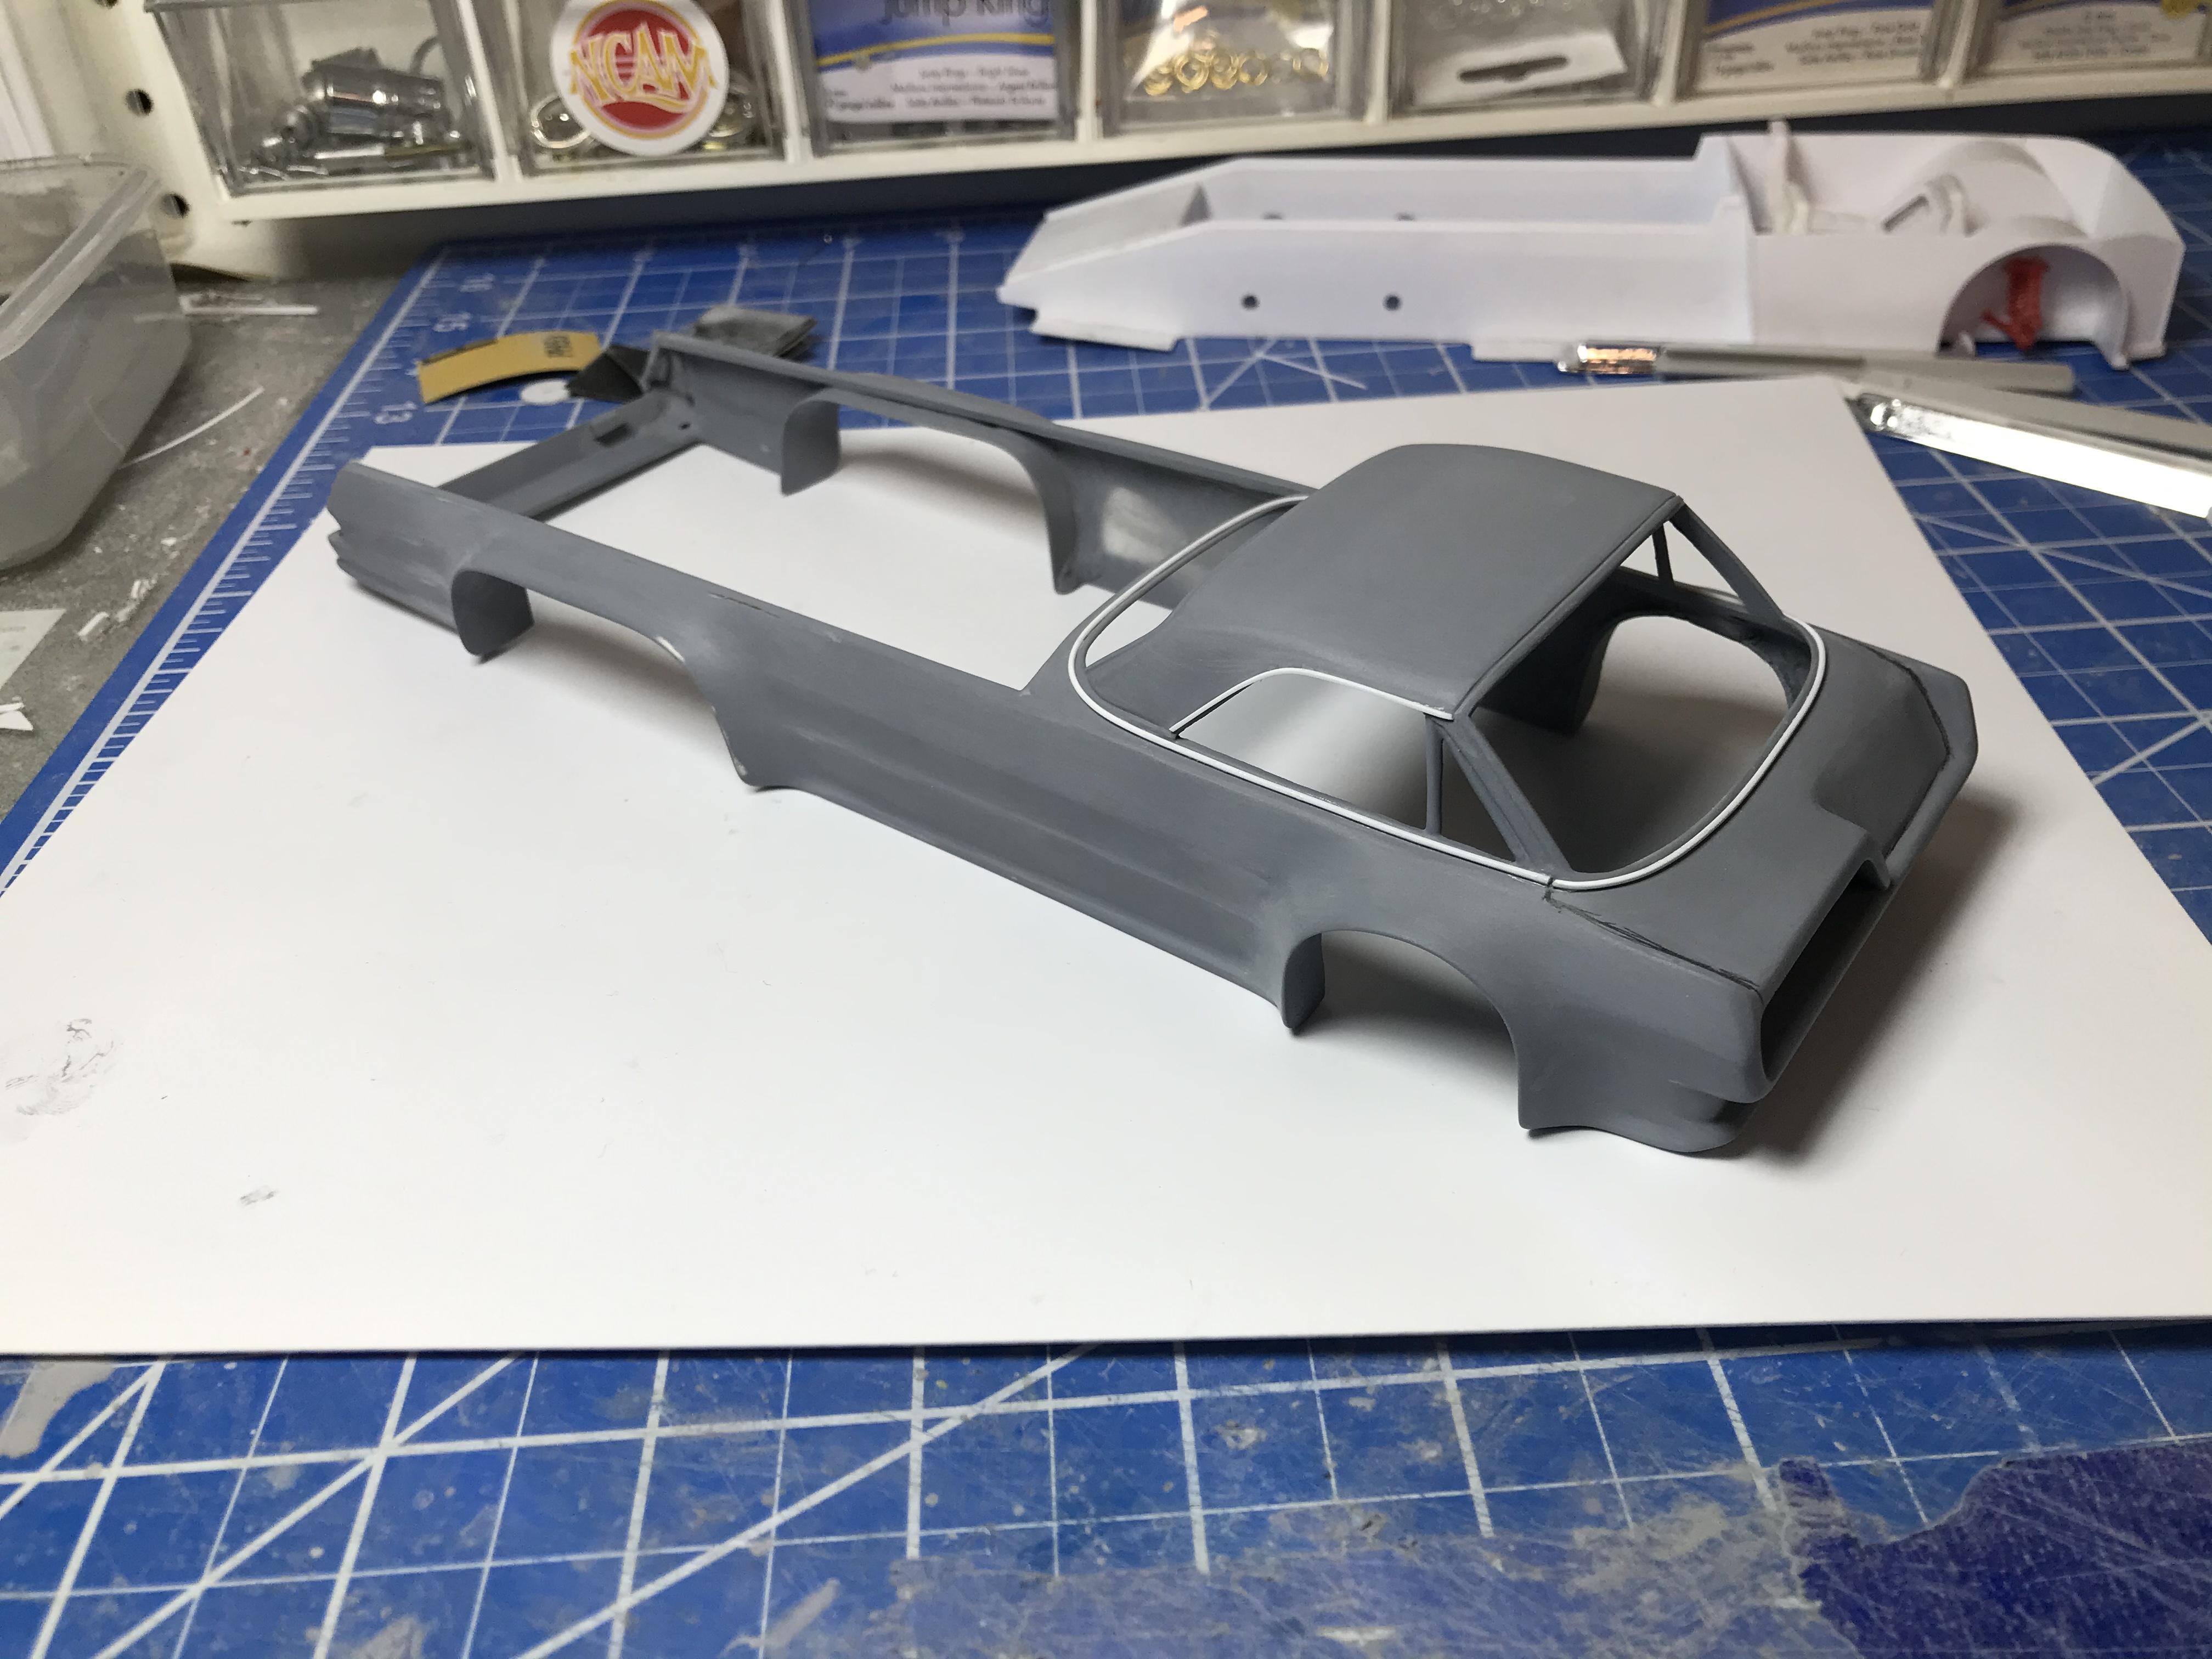
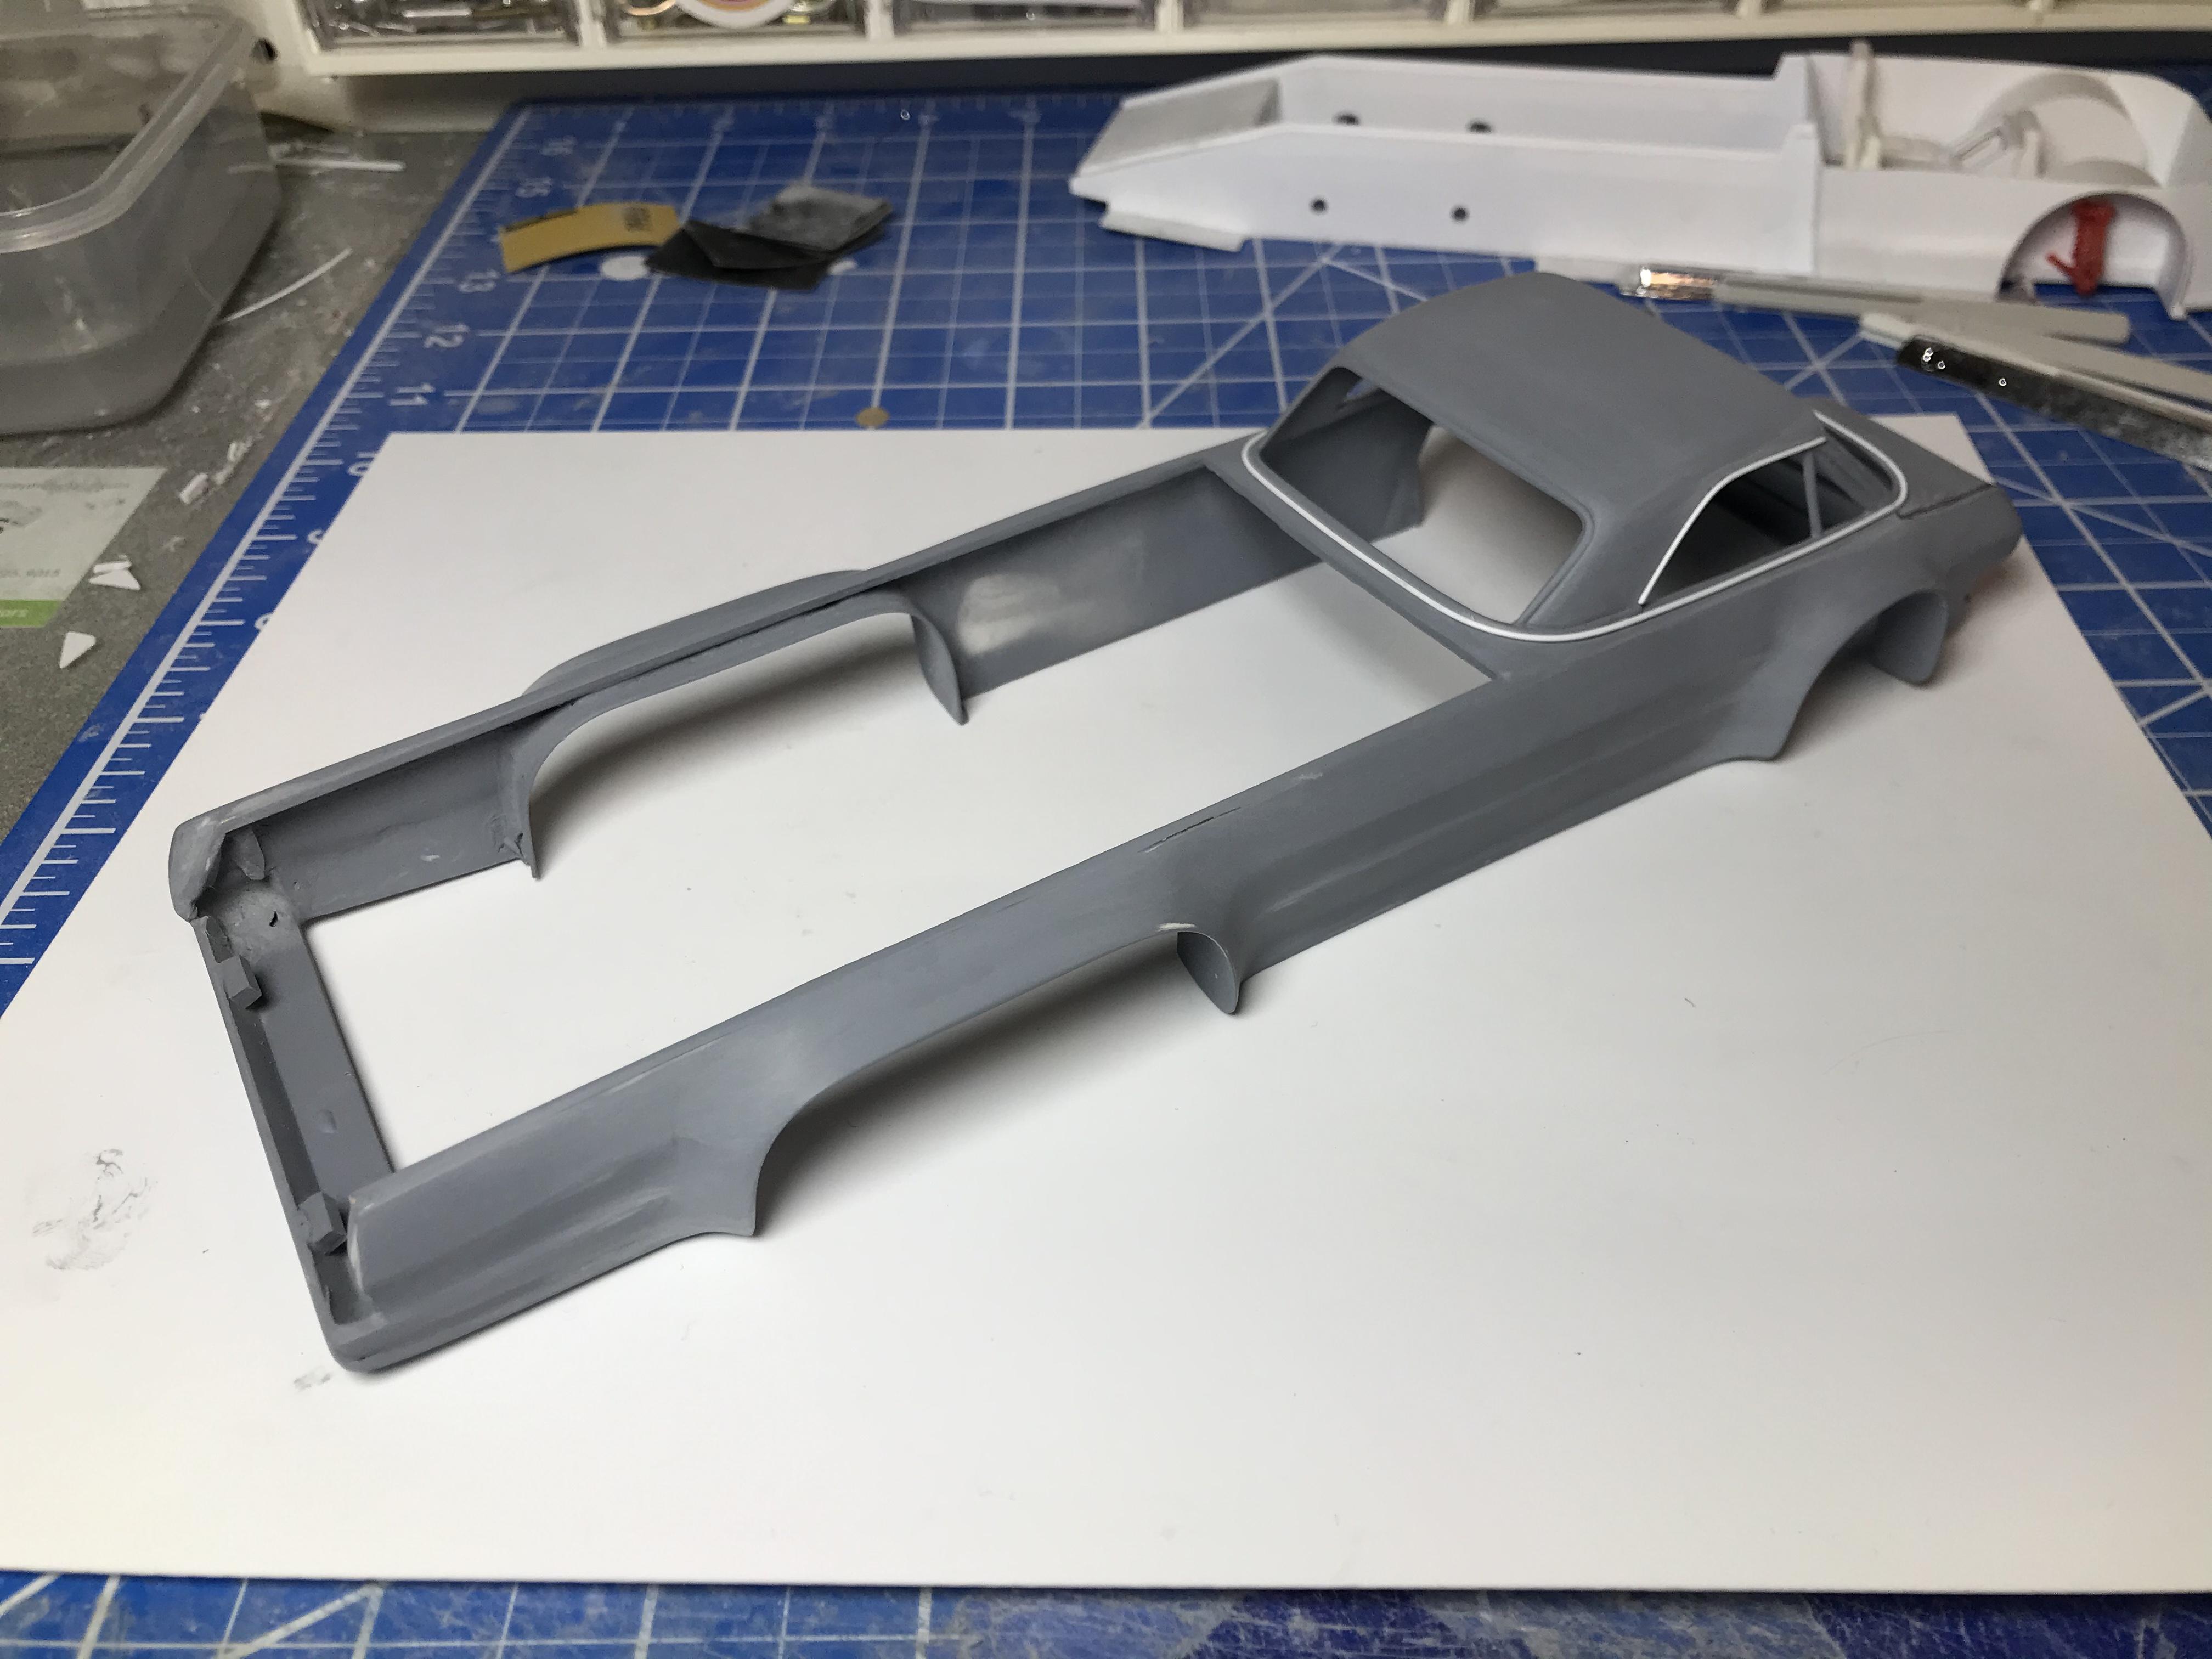
Thanks guys!! I hopefully will have more updates in the next couple days... body work is all done, then added all the trim back on with some styrene strips. I still need to scribe the lines for the hatch/front door then its ready for paint. I was rushing to that point, but now with East being delayed.. im gonna get the rest of this a bit further before paint.

-

Met my first Palmer kit today.....
Impalow replied to JollySipper's topic in General Automotive Talk (Trucks and Cars)
Oh thats fantastic! I don't want to start any rumors but I did run into Mr. Foose crusing the Model Car vendor Area at Detroit Autorama last month.... ?
-
Met my first Palmer kit today.....
Impalow replied to JollySipper's topic in General Automotive Talk (Trucks and Cars)
That's what I'm talking about! I can see some off these being starts for some strange customs... So wait... Thats a 69 fastback rear with a 71 front? It just came like that? and is that from the box pictured above? -
Met my first Palmer kit today.....
Impalow replied to JollySipper's topic in General Automotive Talk (Trucks and Cars)
So has anyone ever made something acceptable from one of these? I'm not going to lie.... every time these threads come up, I see a challenge... ? -
10th Annual Buckeye Classic Show 3-7-2020
Impalow replied to Gerald Haney's topic in Contests and Shows
Thanks for the photos Gerald! I loved your builds! Congrats on your awards! -
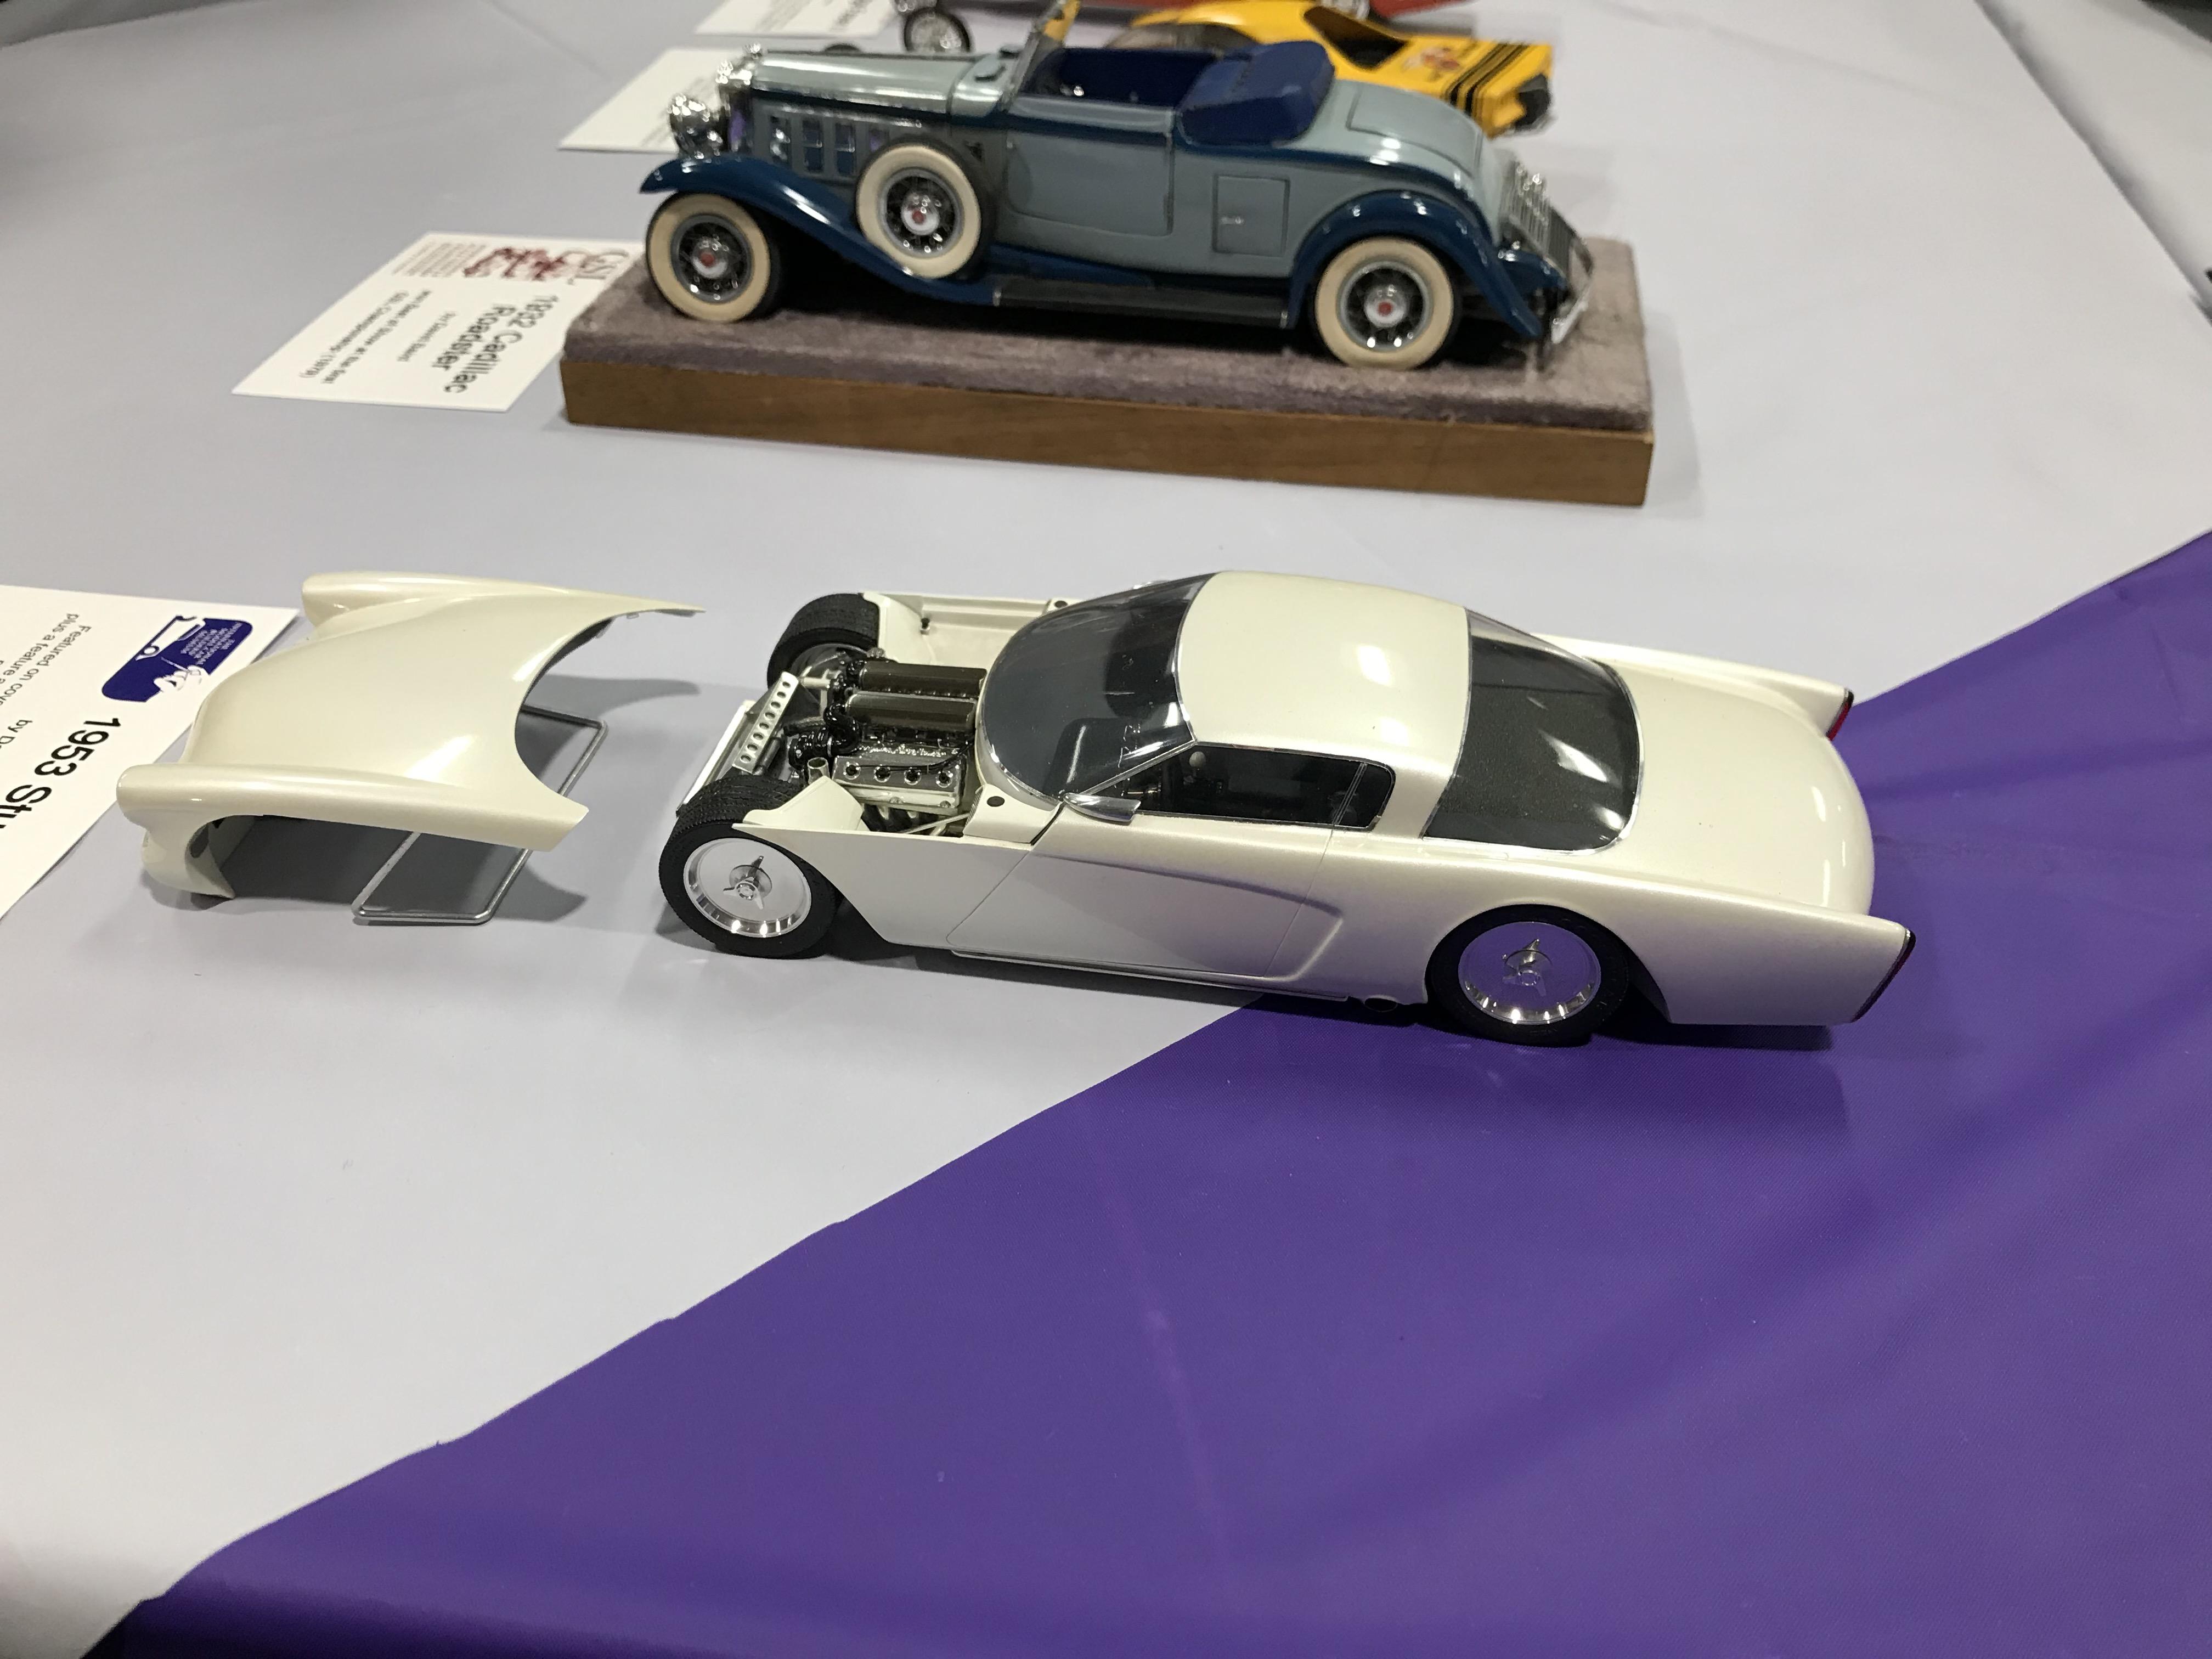
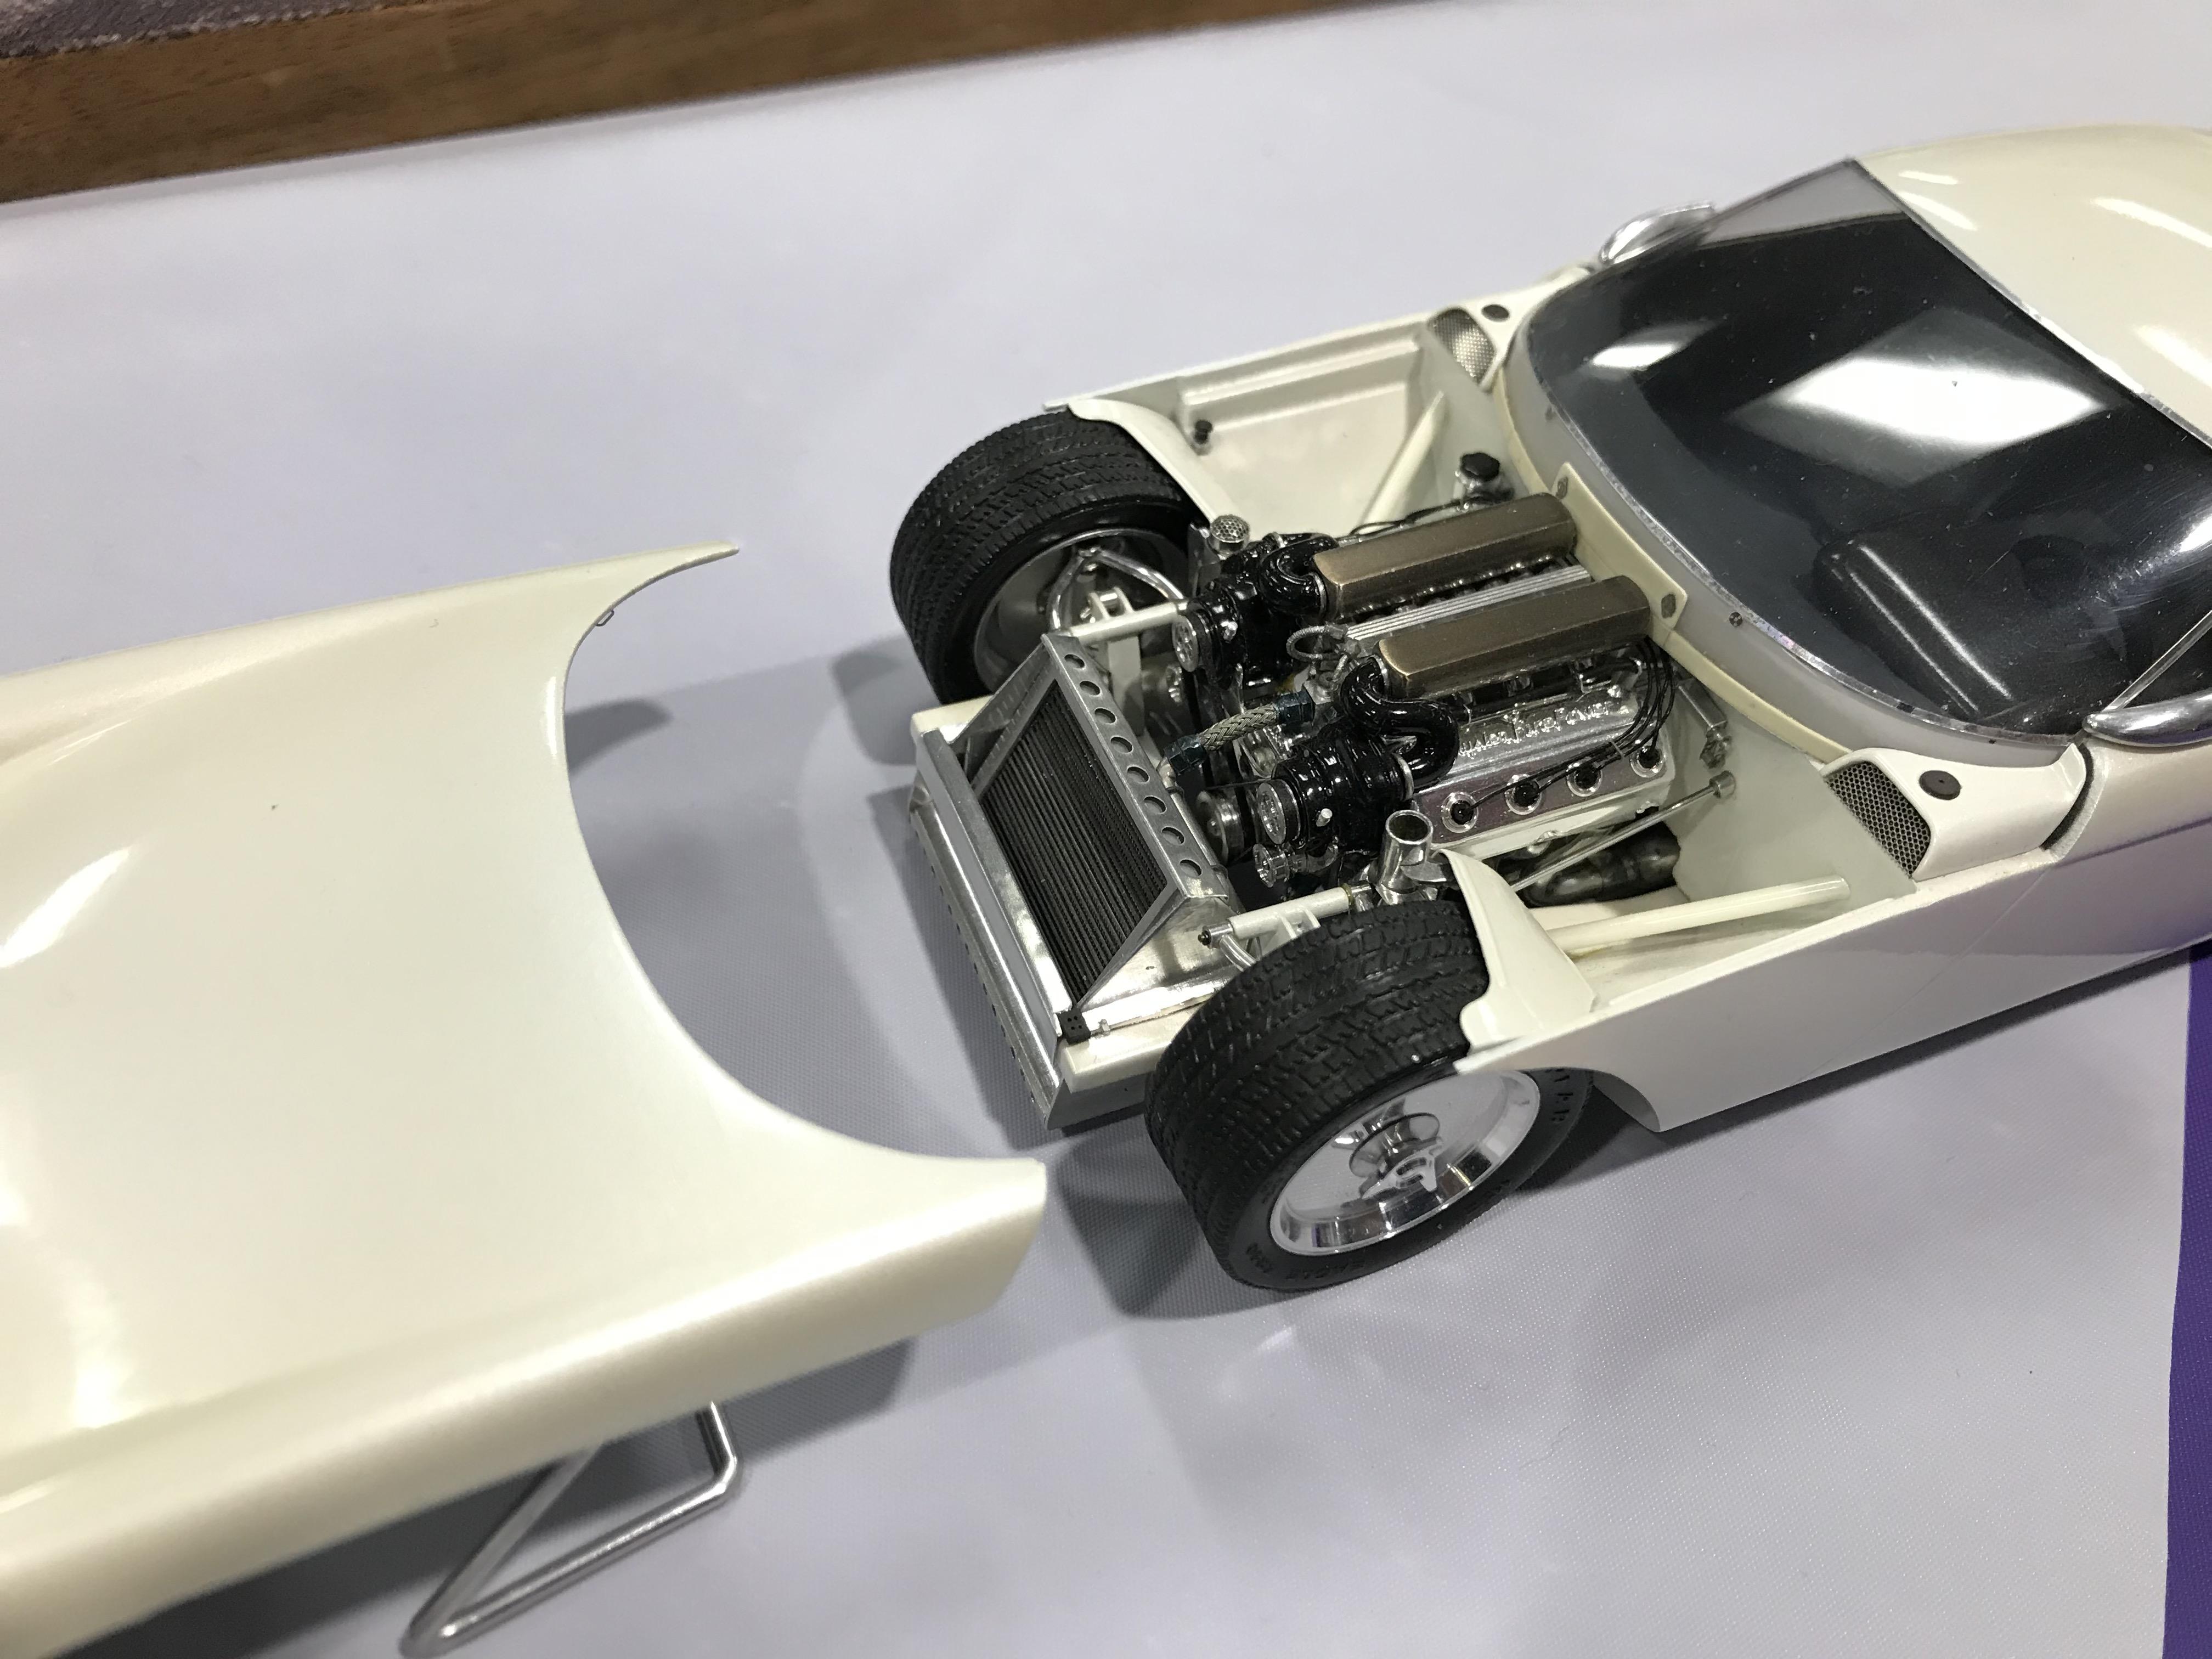
couple that with the fact it was built over 20 years ago and the styling still holds up... very very well.... its amazing.
-
One for me that sticks out is Doug Whytes 1953 Stude... I remember reading, and re-reading the magazine features on this build in my early to mid-teens. (93-95?) It was a major inspiration for me, its the reason I have a lathe, a vacuum-former, and quite possibly a small part in my decision to pursue a career in automotive design. I was luckily enough to see it in person at the 40th Toledo NNL after party, as well as talk over its intricacy's with Doug himself. (you can actually see the previously mentioned Dodge Fever in the background, that sure was an amazing event)
-
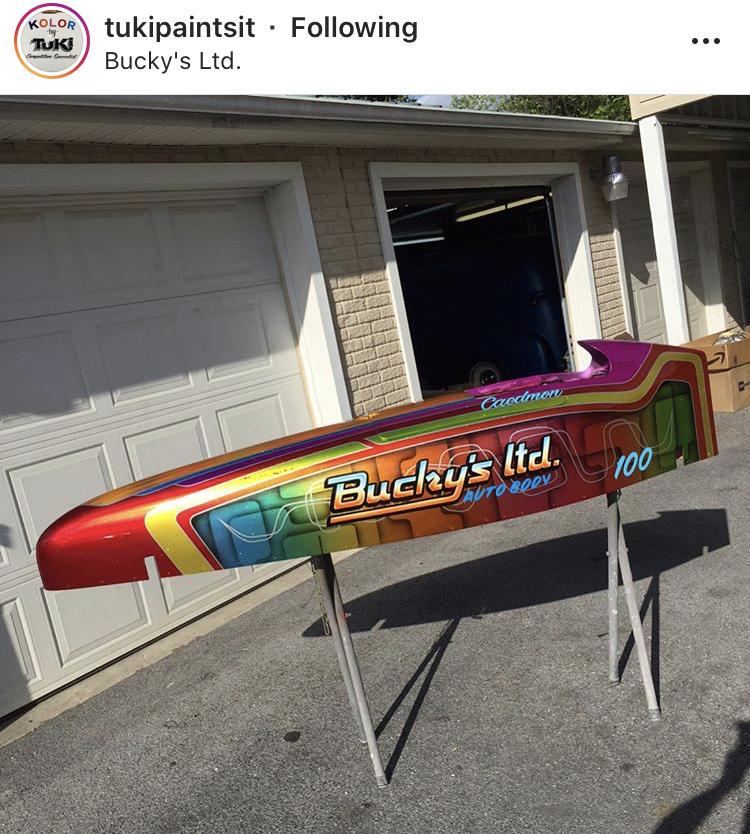
Thanks guys!!! This one is a lot of fun! I have a plan!... but nothing set in stone yet... here is my inspiration. Going to use my larger silver flake as a base...mask the panels, some faded shapes and perimeter shading, then rainbow candies, then back mask the panels and some HOK bright red pearl for the perimeter areas. Although this has been my plan all along, I'm realizing I don't have much surface area on this thing to try and pull this off (really the only spots for the panels are sides and the short roof, maybe the hood) So I may have to drastically simplify... but the basic colorful idea should be achievable. Bright and sparkly!
-
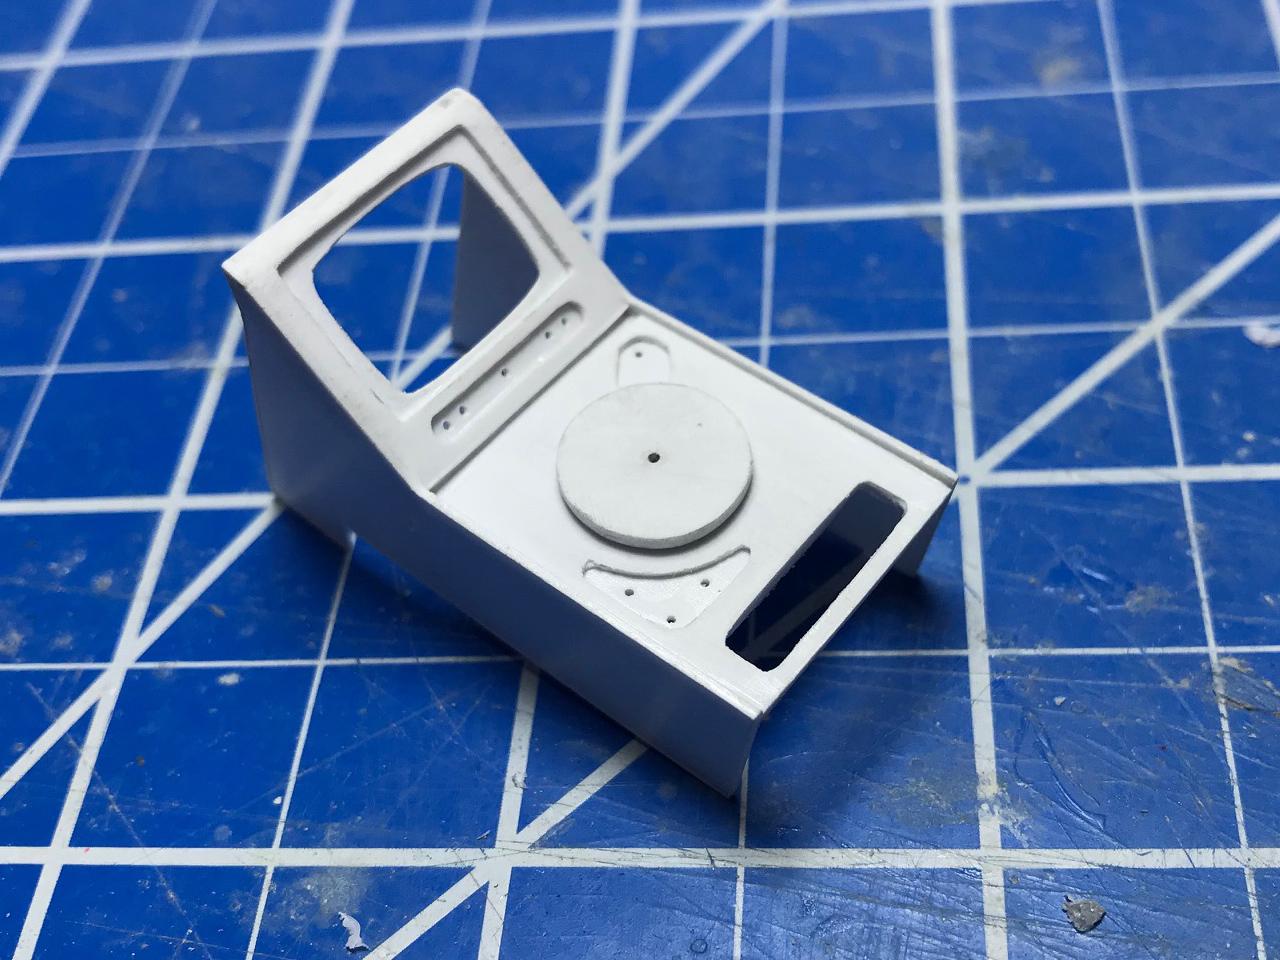
Thats Fantastic John!... Lots of similarity there! ? Here is a little update! working on firming up the bodywork, rounds of primer... removing and adding trim... all the fun stuff... I'm thinking one more round of filler.. hopefully I can get some metalflake on the thing soon! I made a swing up tailgate.... I spent a few hours trying to hinge it, and it just wasn't going to work, at least not with my hinge making ability... I probably should practice more at that. ? So, this ended up as a pull out, and swing over setup... im think I may make controls for the winch on the underside of the tailgate that will be in a good spot once its completely inverted. Then I started on the rear center console with TV, and record player... Ive had a desire to scratchbuild a full detail record player for awhile.... this one is going to have a red transparent record on it, as well as storage for some others in that slot.
-
The High Cost of the Hobby
Impalow replied to Nitrobarry's topic in General Automotive Talk (Trucks and Cars)
I actually had this discussion with someone at a show over the weekend.... I tend to build one complex model a year, even at an 180.00 total investment... that is 15.00 a month... less than most spend on coffee, and other means of entertainment. Ill get what I need to make it as perfect as I can to my vision.. and worry about the price later... Regardless its a whole lot cheaper than 1:1 building. Now if you are building multiple custom/aftermarket and resin builds a month.. yeah it would get quite pricey... but most of us are unable to pull that off, and those that are have been stock piling supplies for years. As for the young guys.. bring them to a show with vendors... I rarely pay more than 20.00 for kits... most 7.00-10.00-15.00 That all said... I do think 28-32.00 for a kit is quite steep...and rarely will stretch that far for one.... but I also tend to not use much of them.. ? -
This is fantastic Guy! That undercarriage shot shows how much work you did to replicate the 1:1.... Outstanding Model!
-
Very Nice work! I love the color!
-
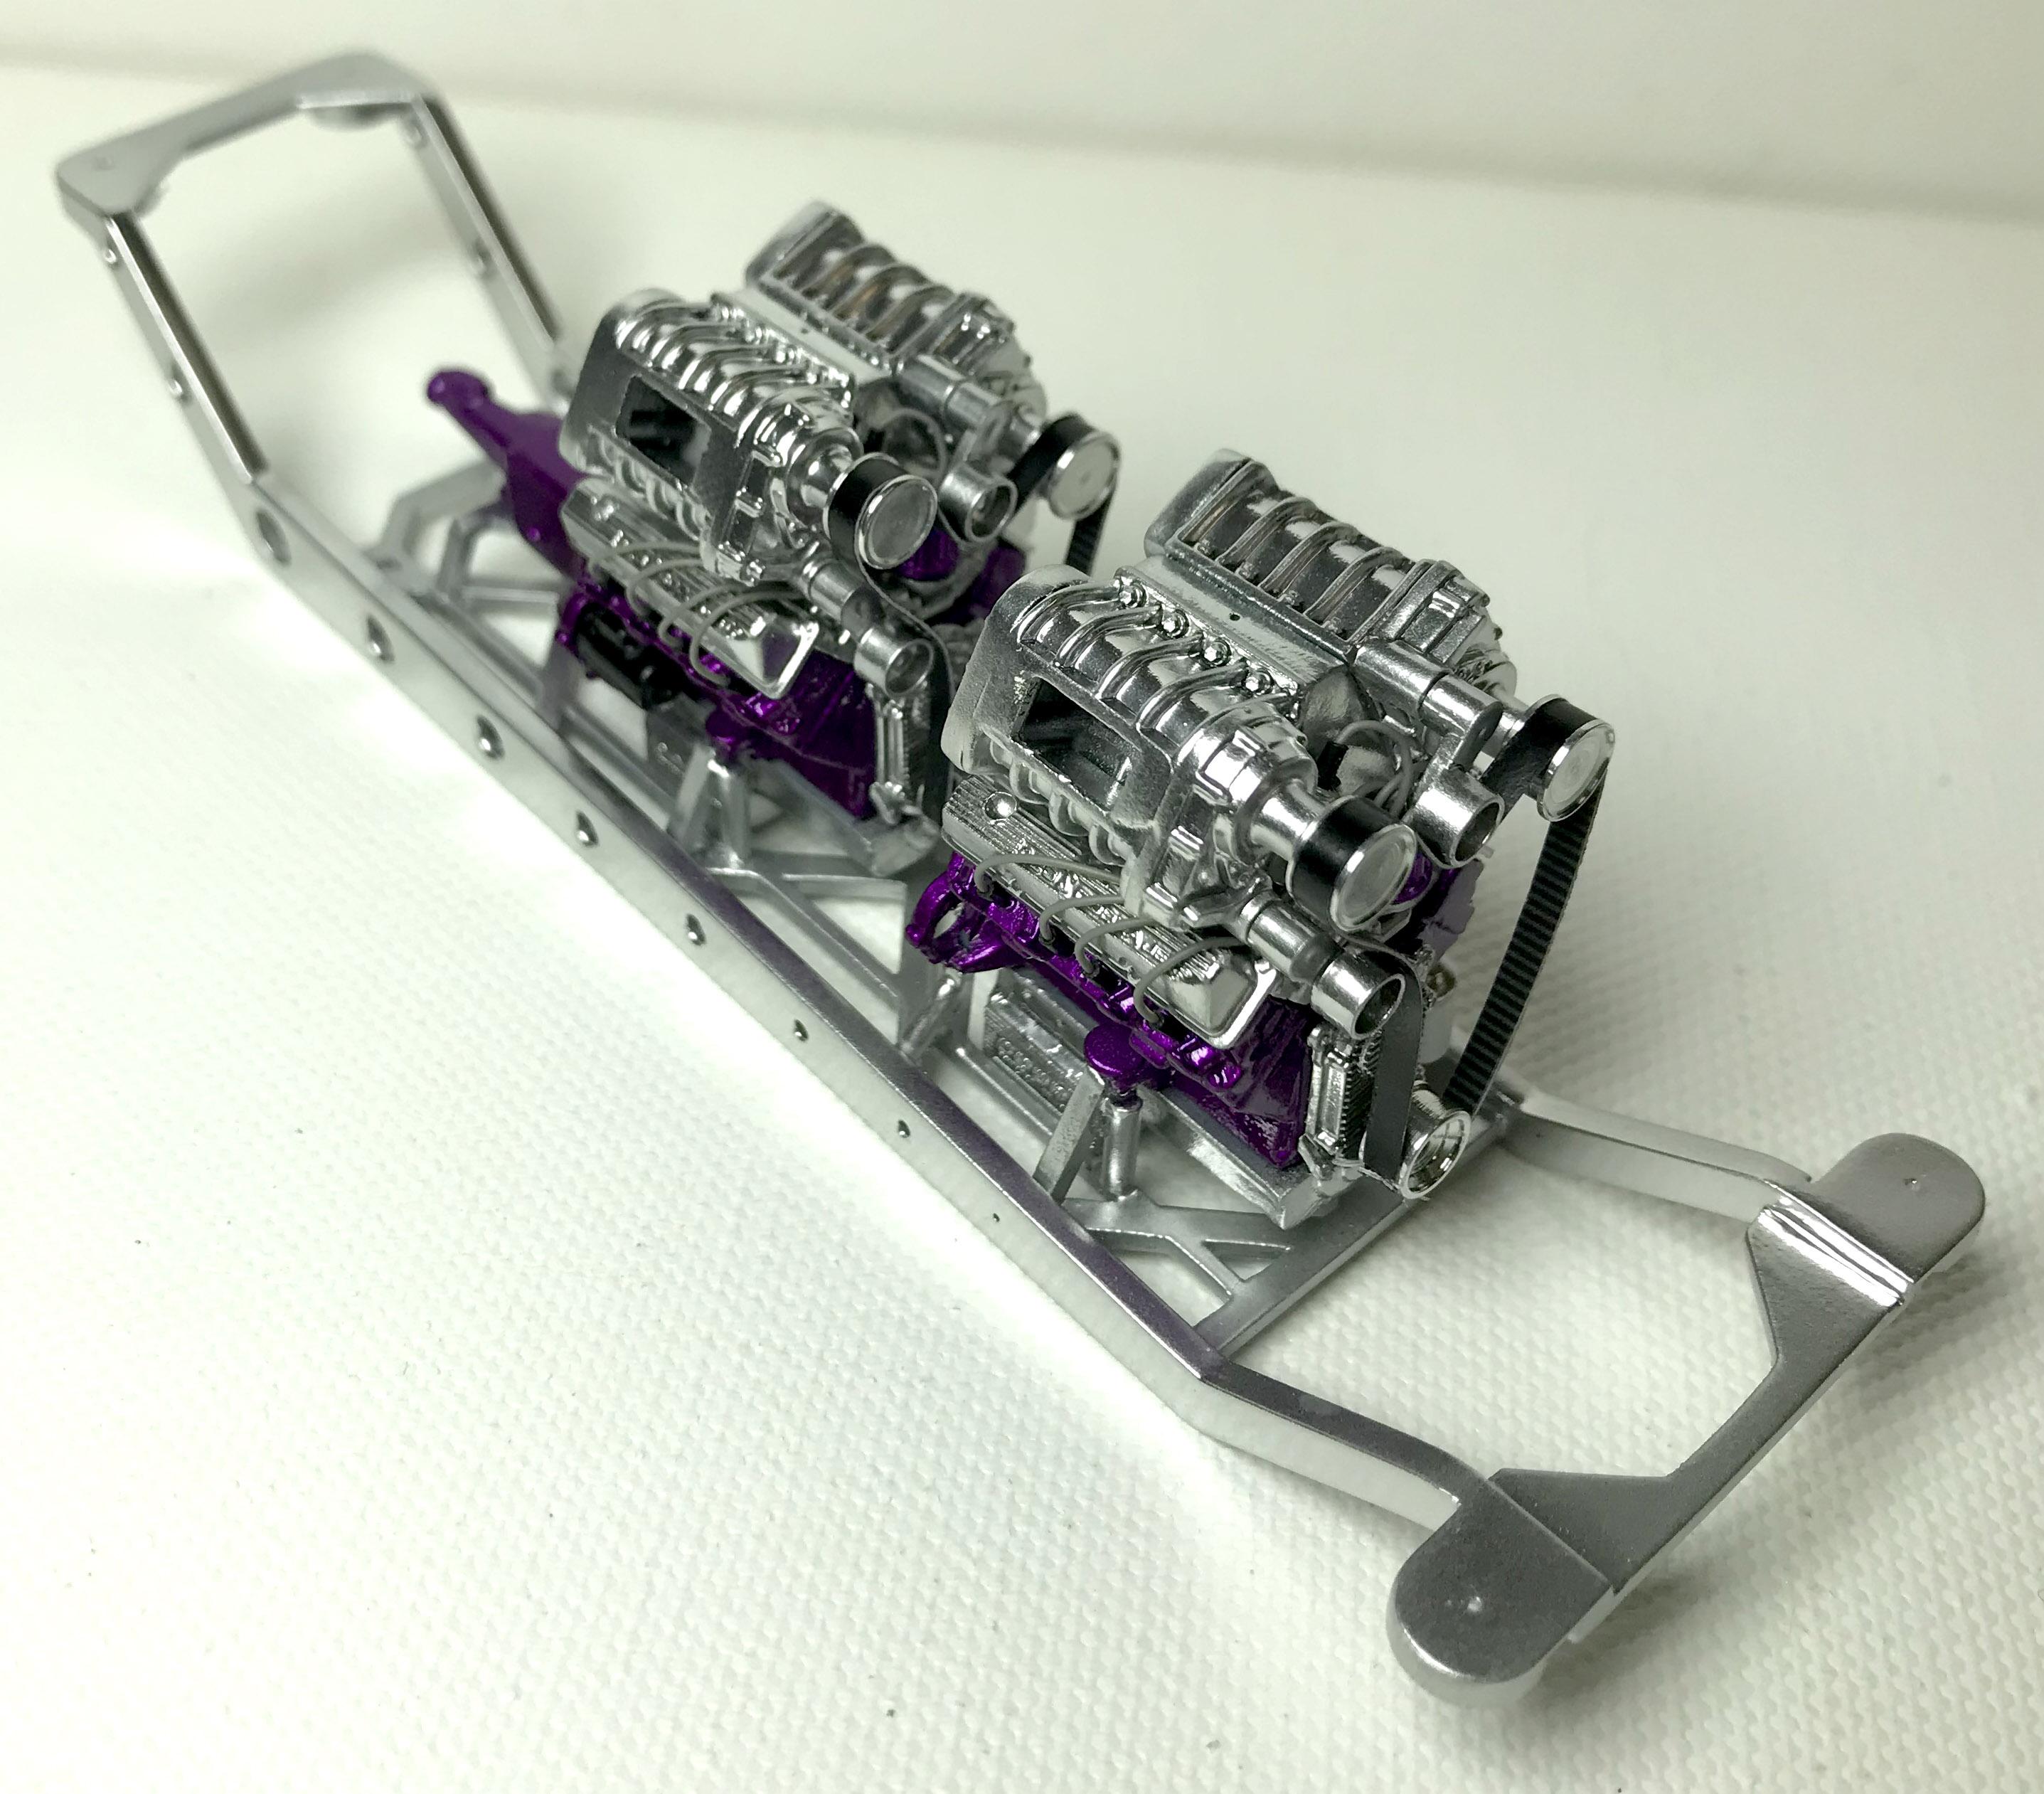
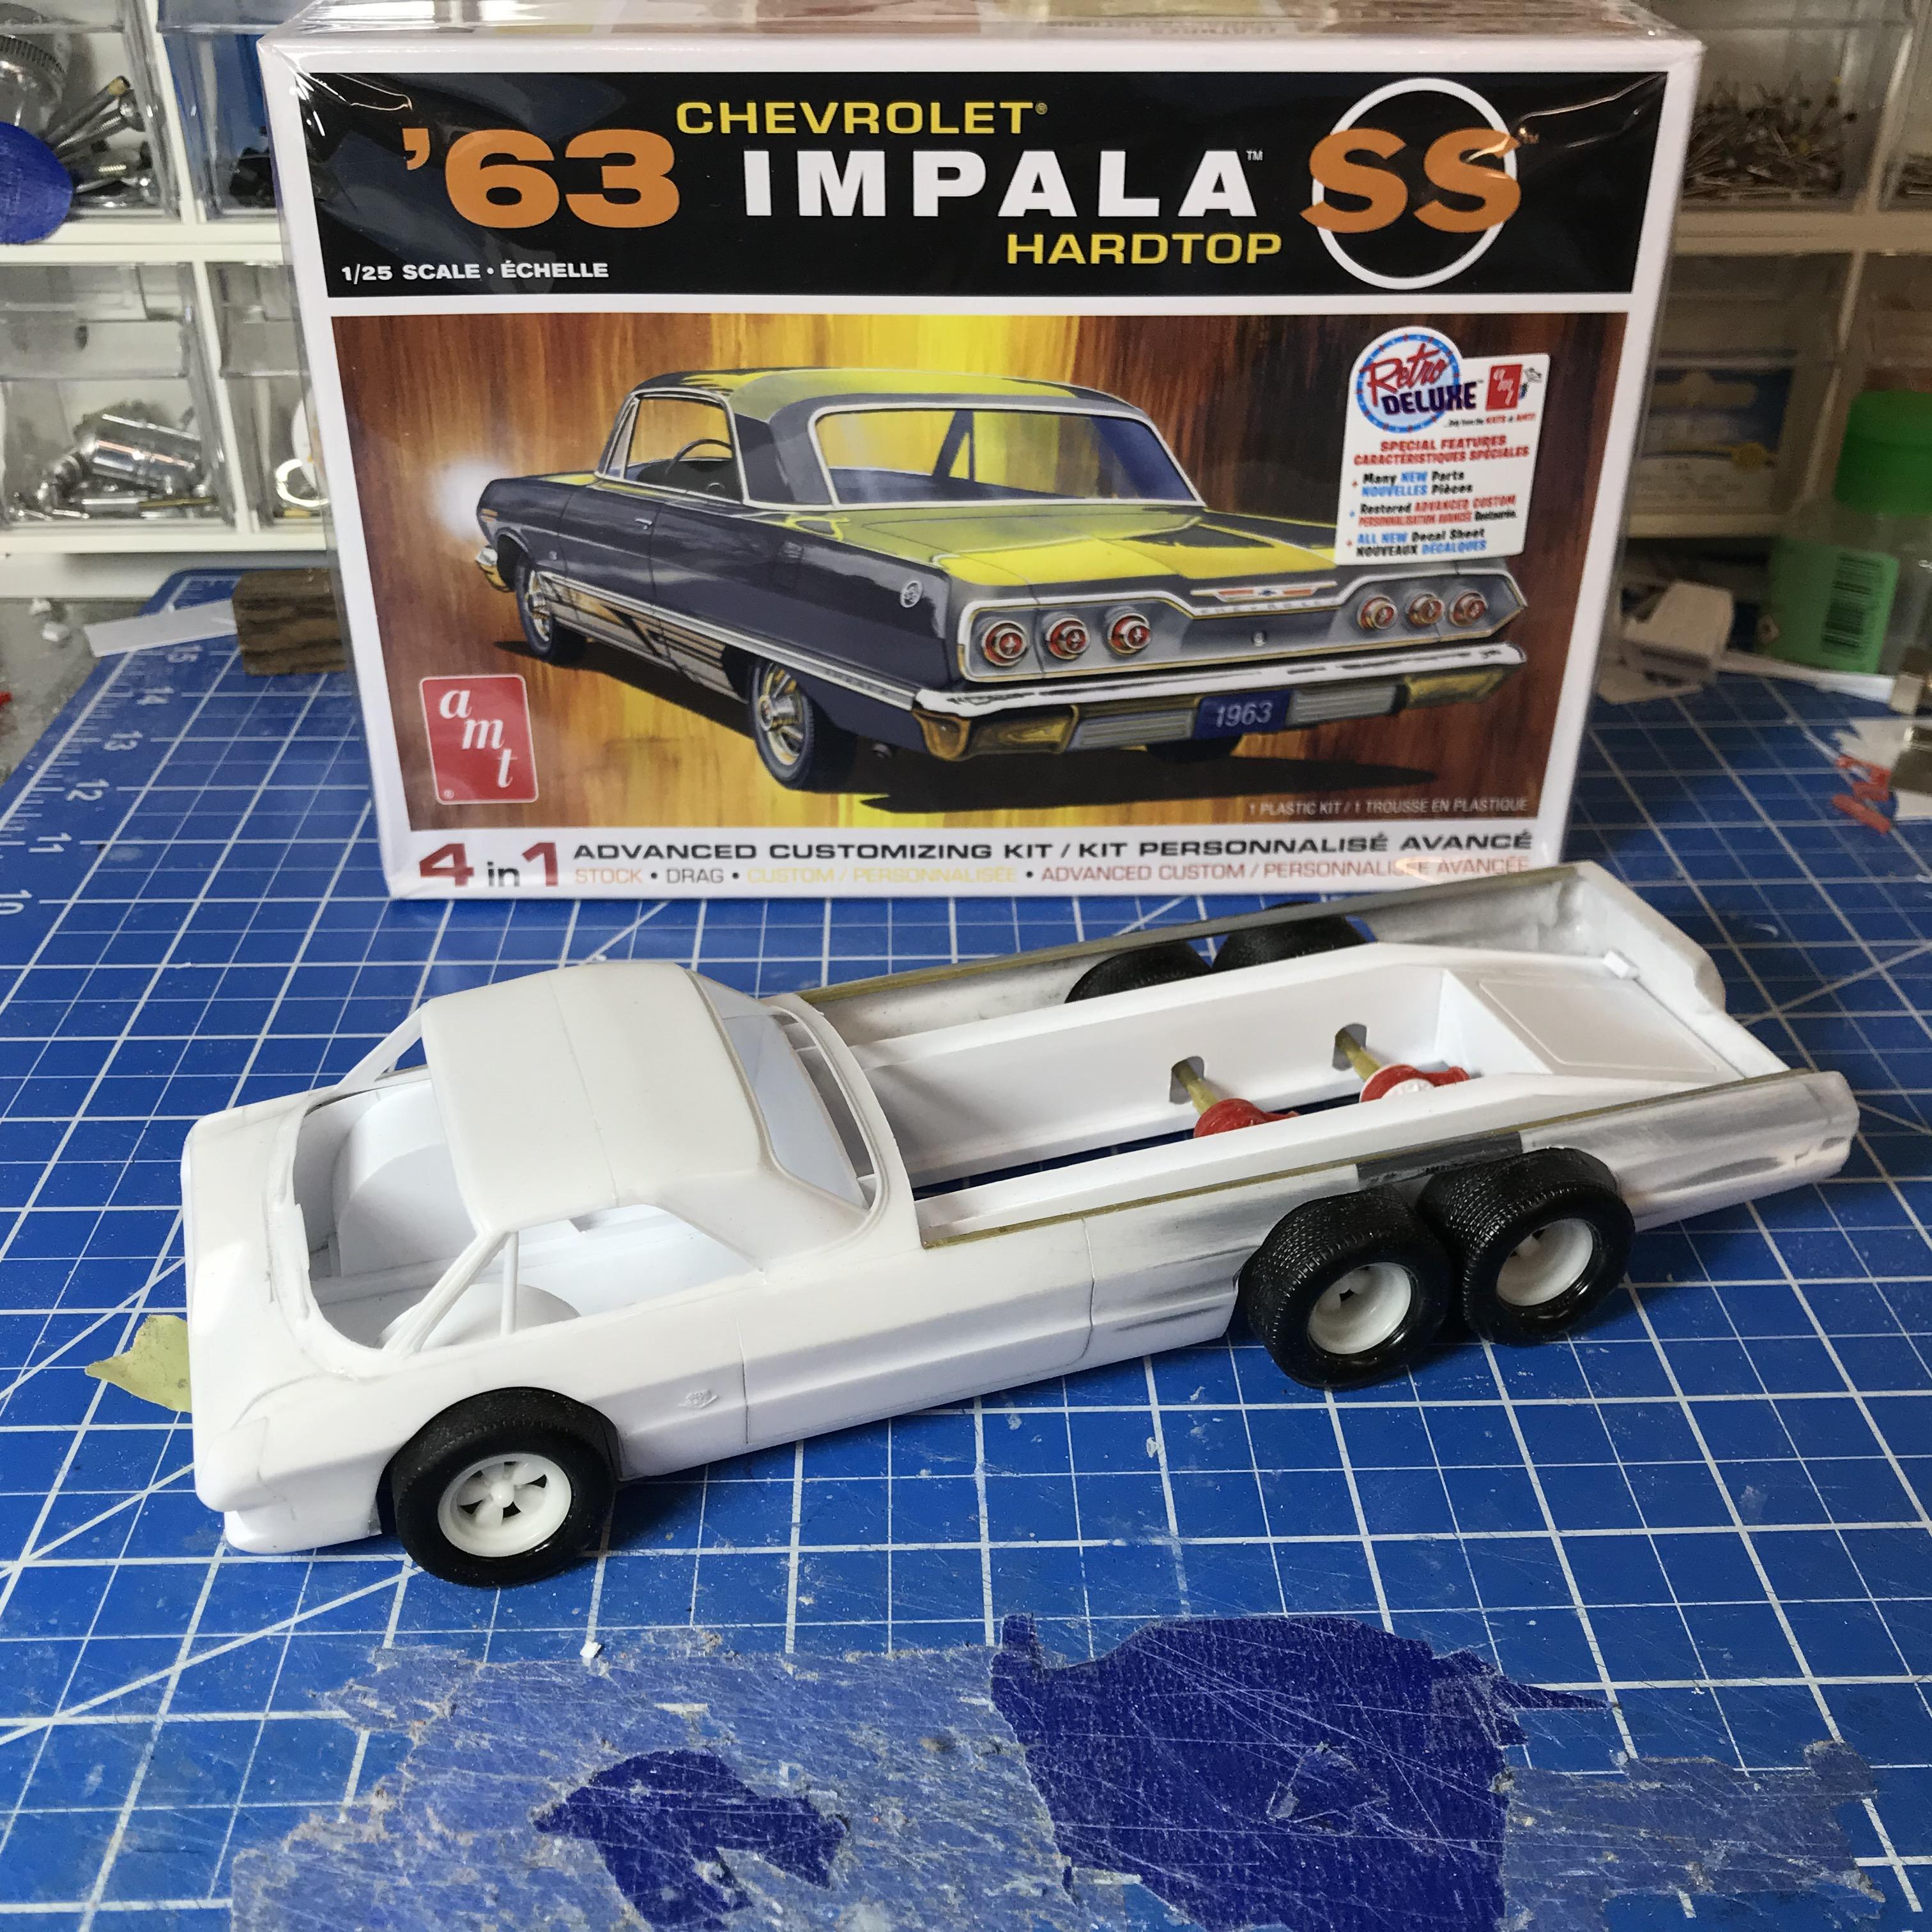
Oh boy!!! 2 months should be good... but we shall see... it will be there regardless. I knocked out the drivetrain over the weekend..still need to add detail, but its all roughed in and positioned. Next up is the interior, then ramps.... ?
-
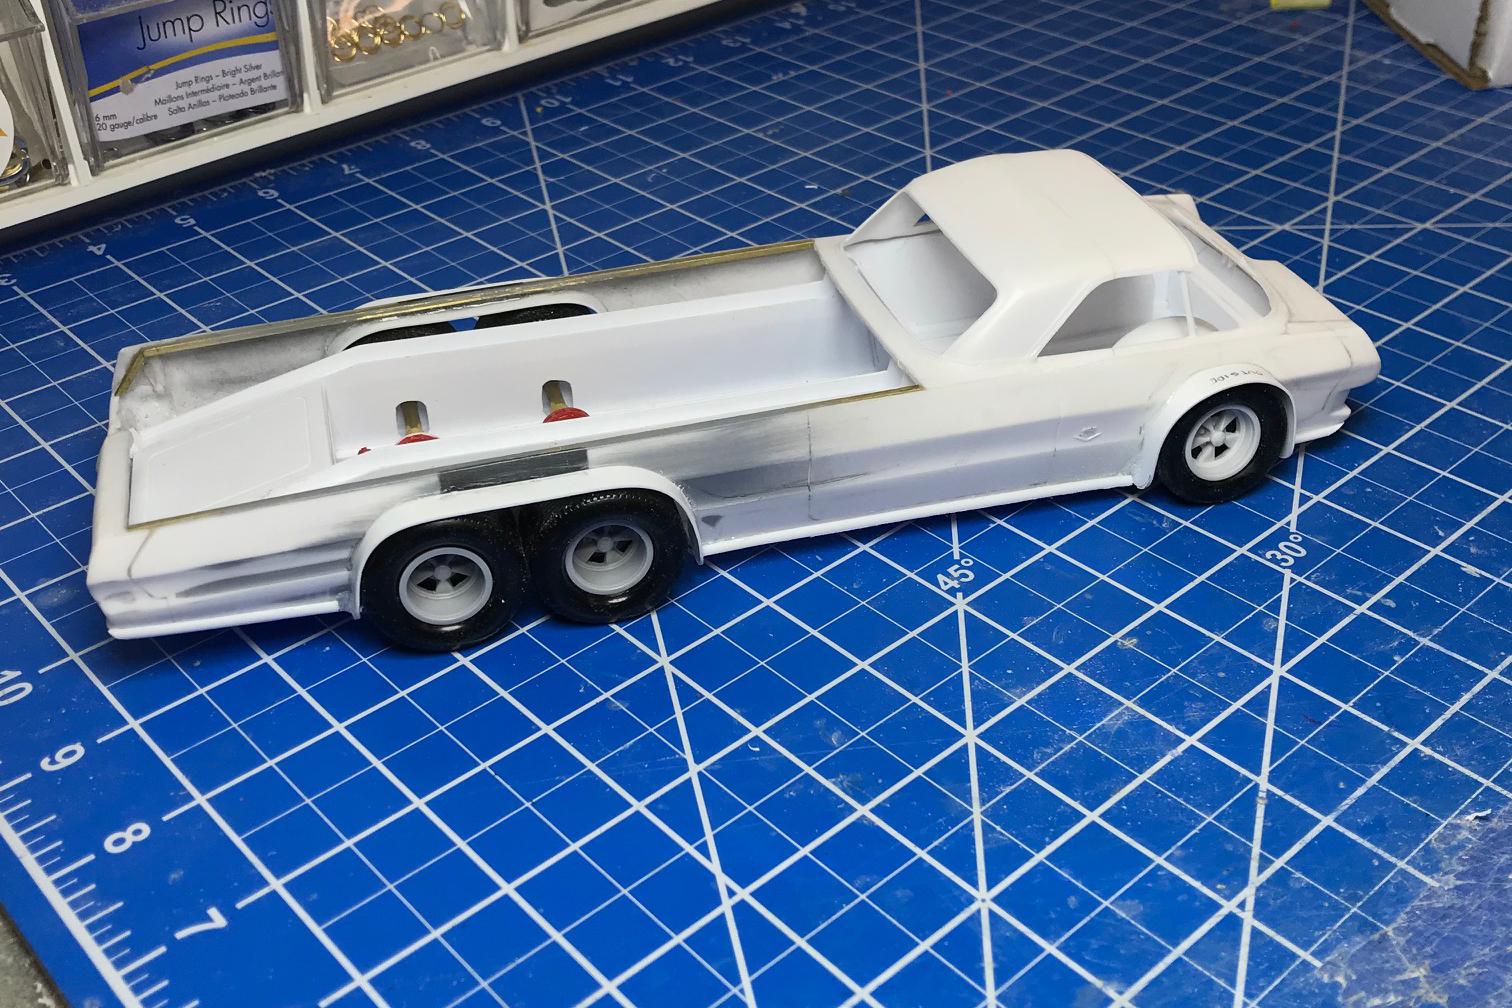
Thanks guys!!! We have flares! Im really starting to love this apoxie sculpt!
-
Outstanding work! I am always envious of the ability to do these multiple builds at once. Keep up the excellent work!
-
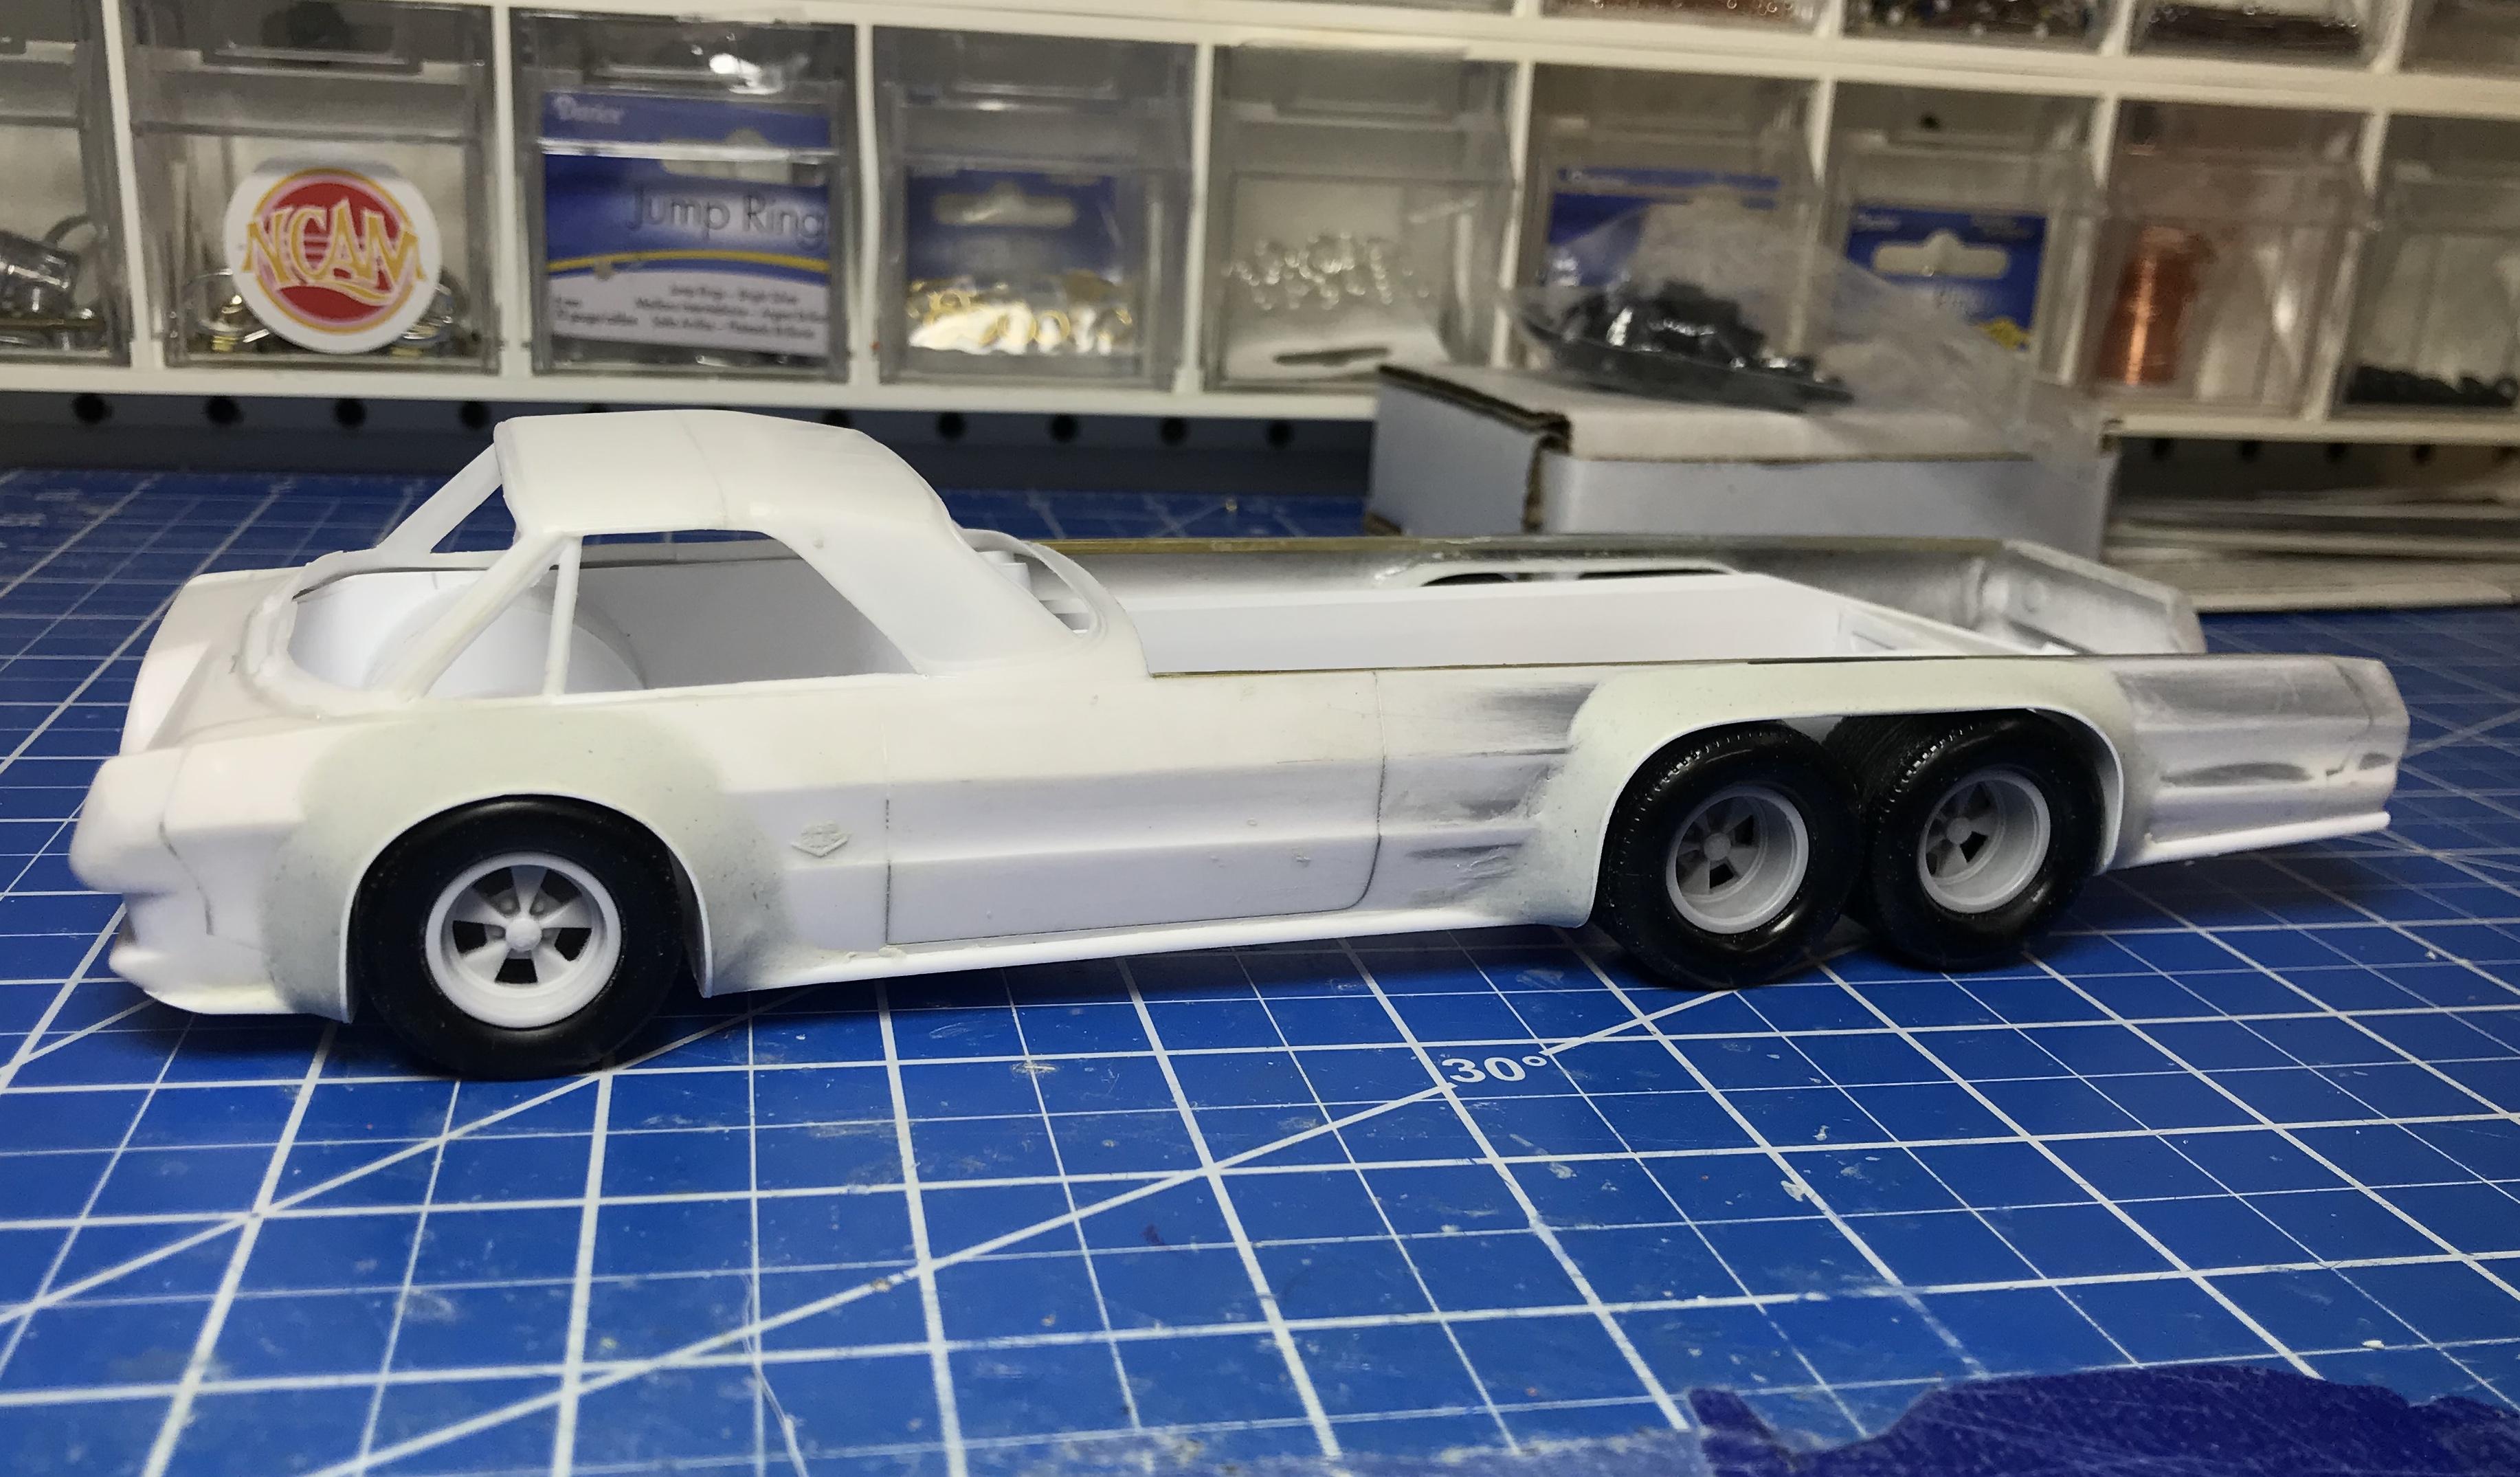
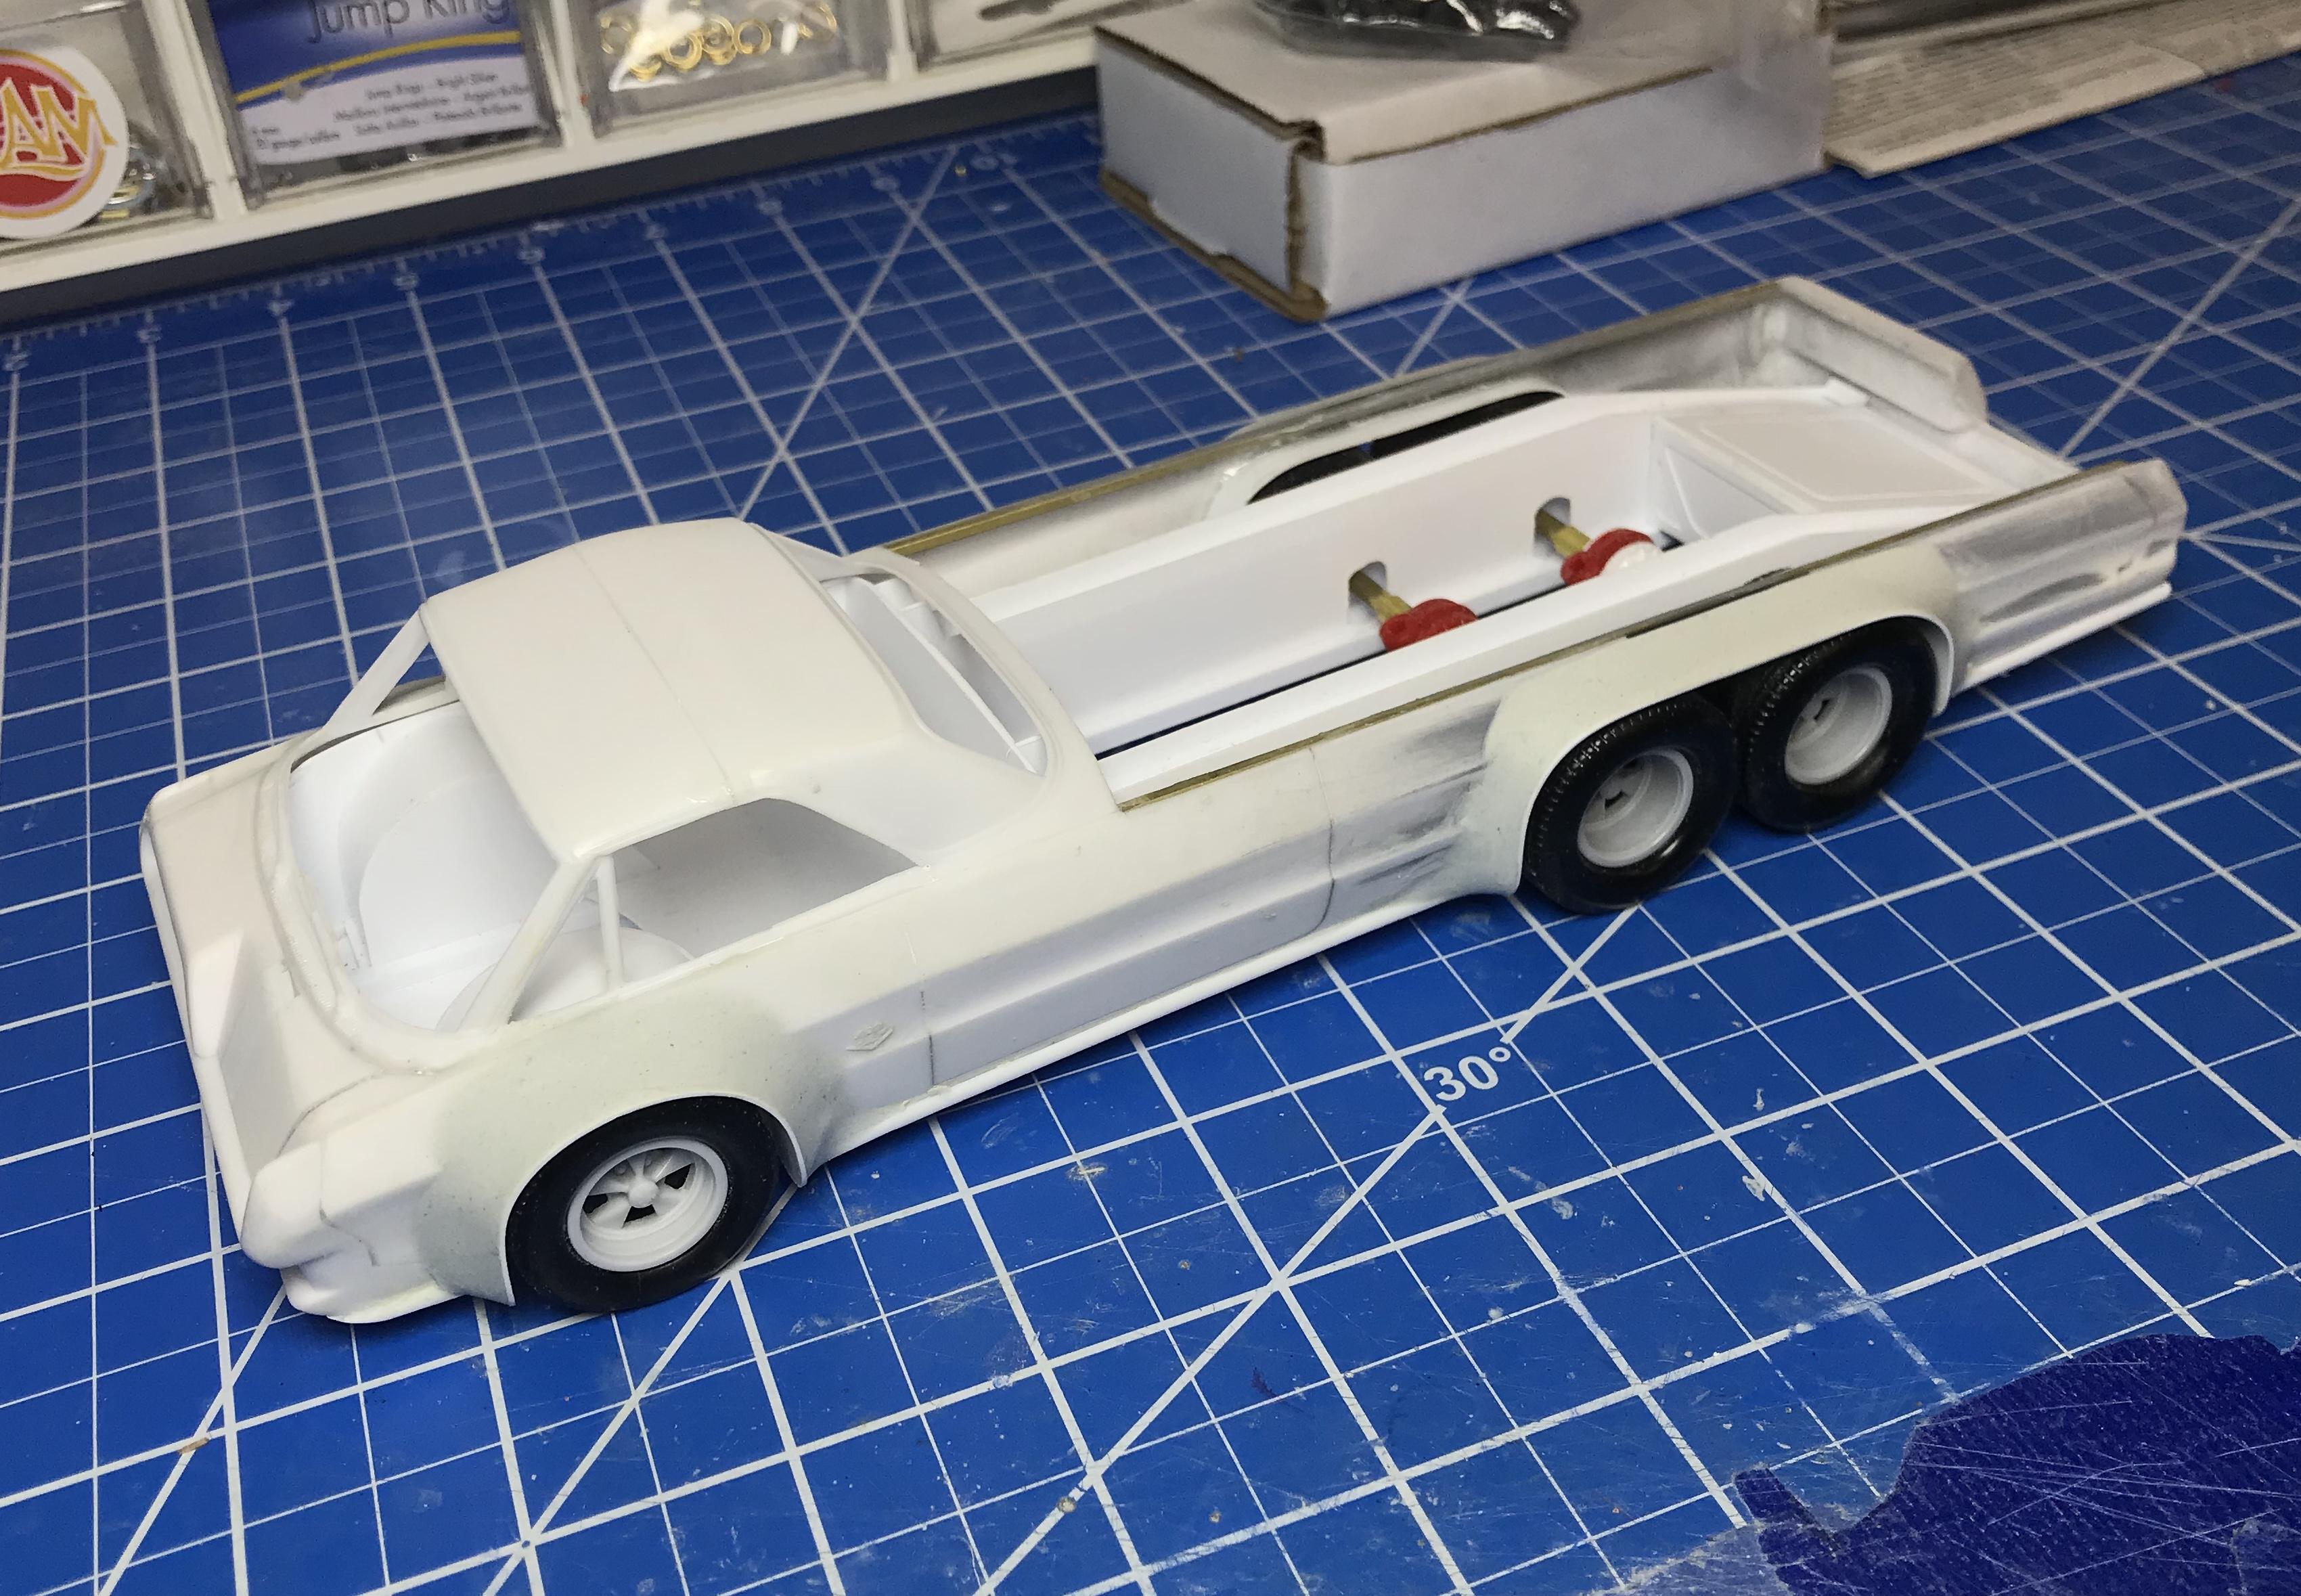
Thanks guys! A little update on this... I ground the wheelwells open a bit more, then added a strip of .020 styrene for the base of the flares. After that I added some quarter round styene strips to the bottom edge of the body to give it that 70's molded feel... Im going to sculpt the flares with apoxy sculpt in the next couple days so this should give me good reference points. The wheels are from Scenes Unlimited and they are perfect! Im going to add some larger lips onto them still... but the depth feels about right. Thanks for following along.. this thing is truly odd.. and works way better than it should.. haha.
-
No worries! In hindsight, should have been much more clear... I just print regular old copy paper on my inkjet printer with the image below, spray it with some krylon matte clear to seal it up and create a bit of sheen. Then I print another block of color the same size (black in this case) I also seal this up with some matte clear. I then use regular old spray mount to stick these 2 pieces of paper together printed side out. Then just cut strips to the width I need, wrap it around the pulleys, overlap and join it at a inconspicuous location with a dab of glue... usually at the bottom of the crank pulley. Thanks Claude! That is the Bubbletop Comet showrod I did a few years back... here is a link to the build log. http://www.modelcarsmag.com/forums/topic/127669-moebius-comet-wild-bubbletop-show-rod-done-3-17/ All of the chrome on this is airbrushed molotow chrome, with spazstik's clear... the clear dulled the chrome effect a bunch in places, but made it able to be handled, the sheen is interesting.
-
Ive been using printed paper.... 2peices glued together... one side a solid color, the other side gray and black lines.. then darken the edge with a sharpie.... it seems to work pretty good! Same trick for a modern timing belt....
-
Very nice! Some clear should make that flake POP!
-
ooooo..... this is really cool! all that lined up much better than I would have thought. Great work! Great Concept!
-
oops.
-
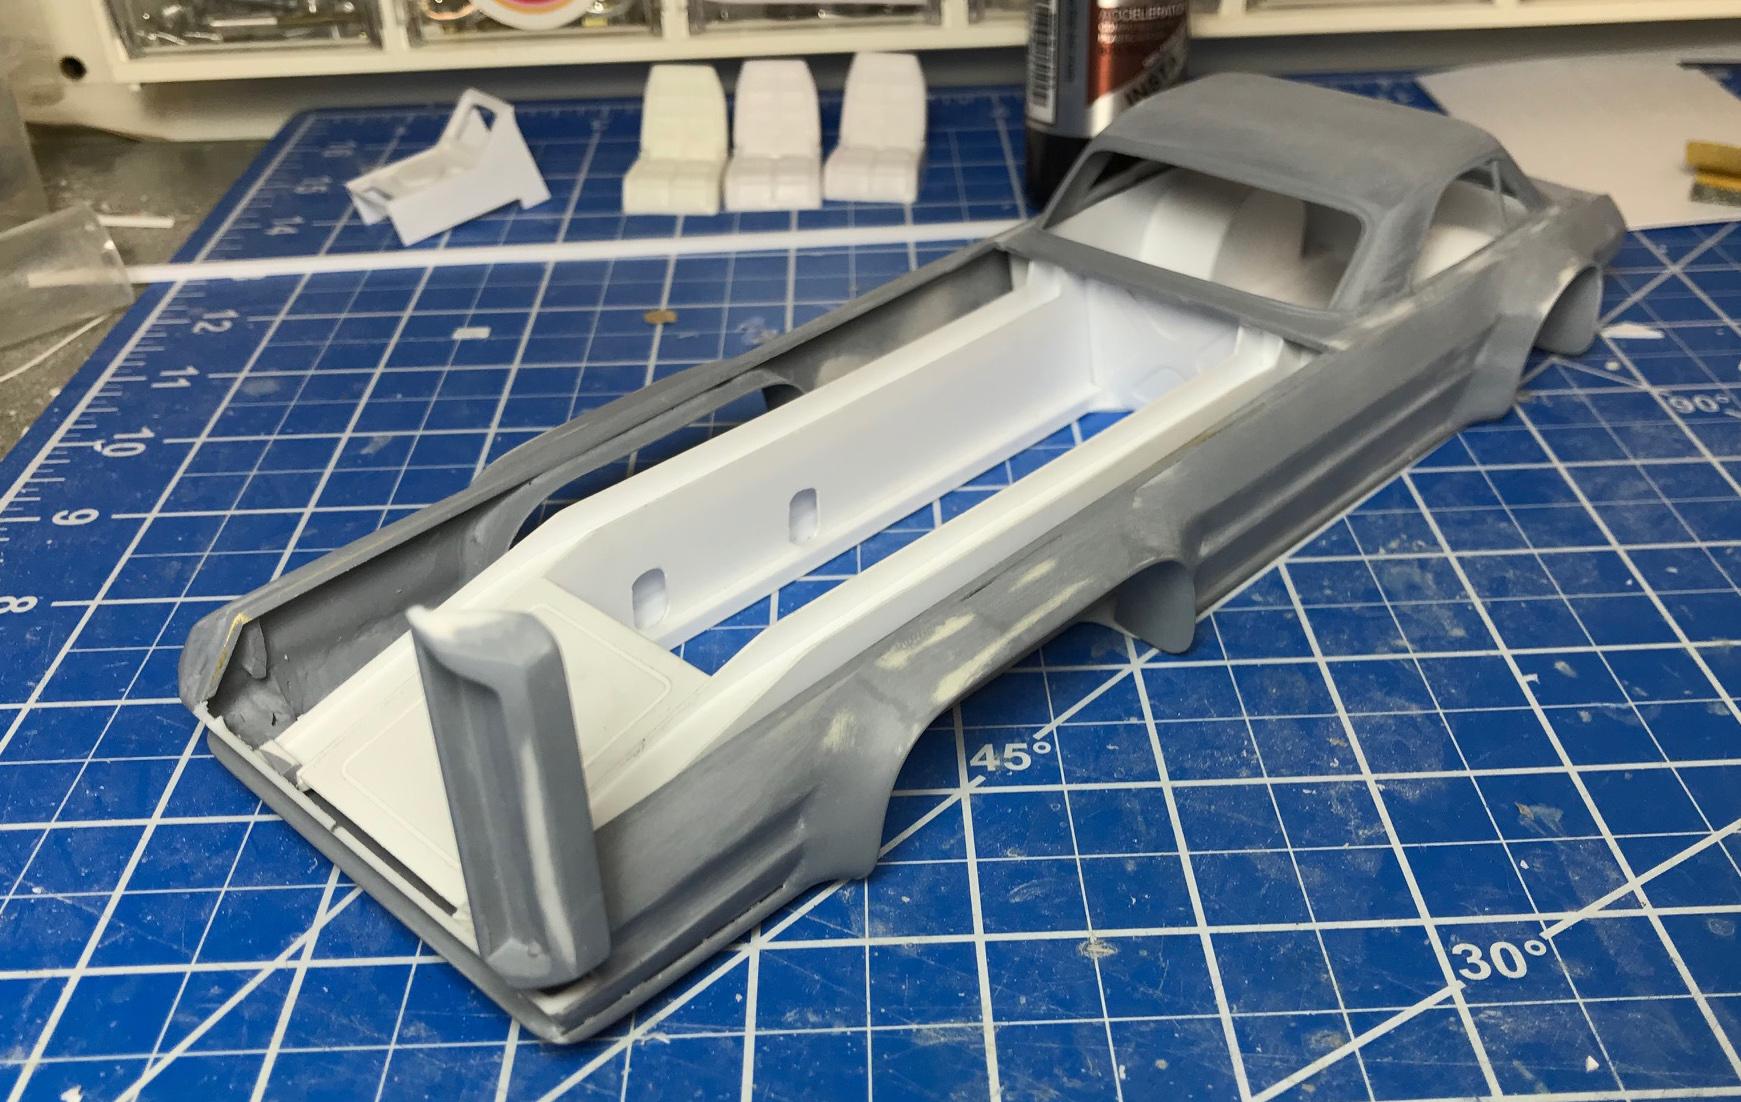
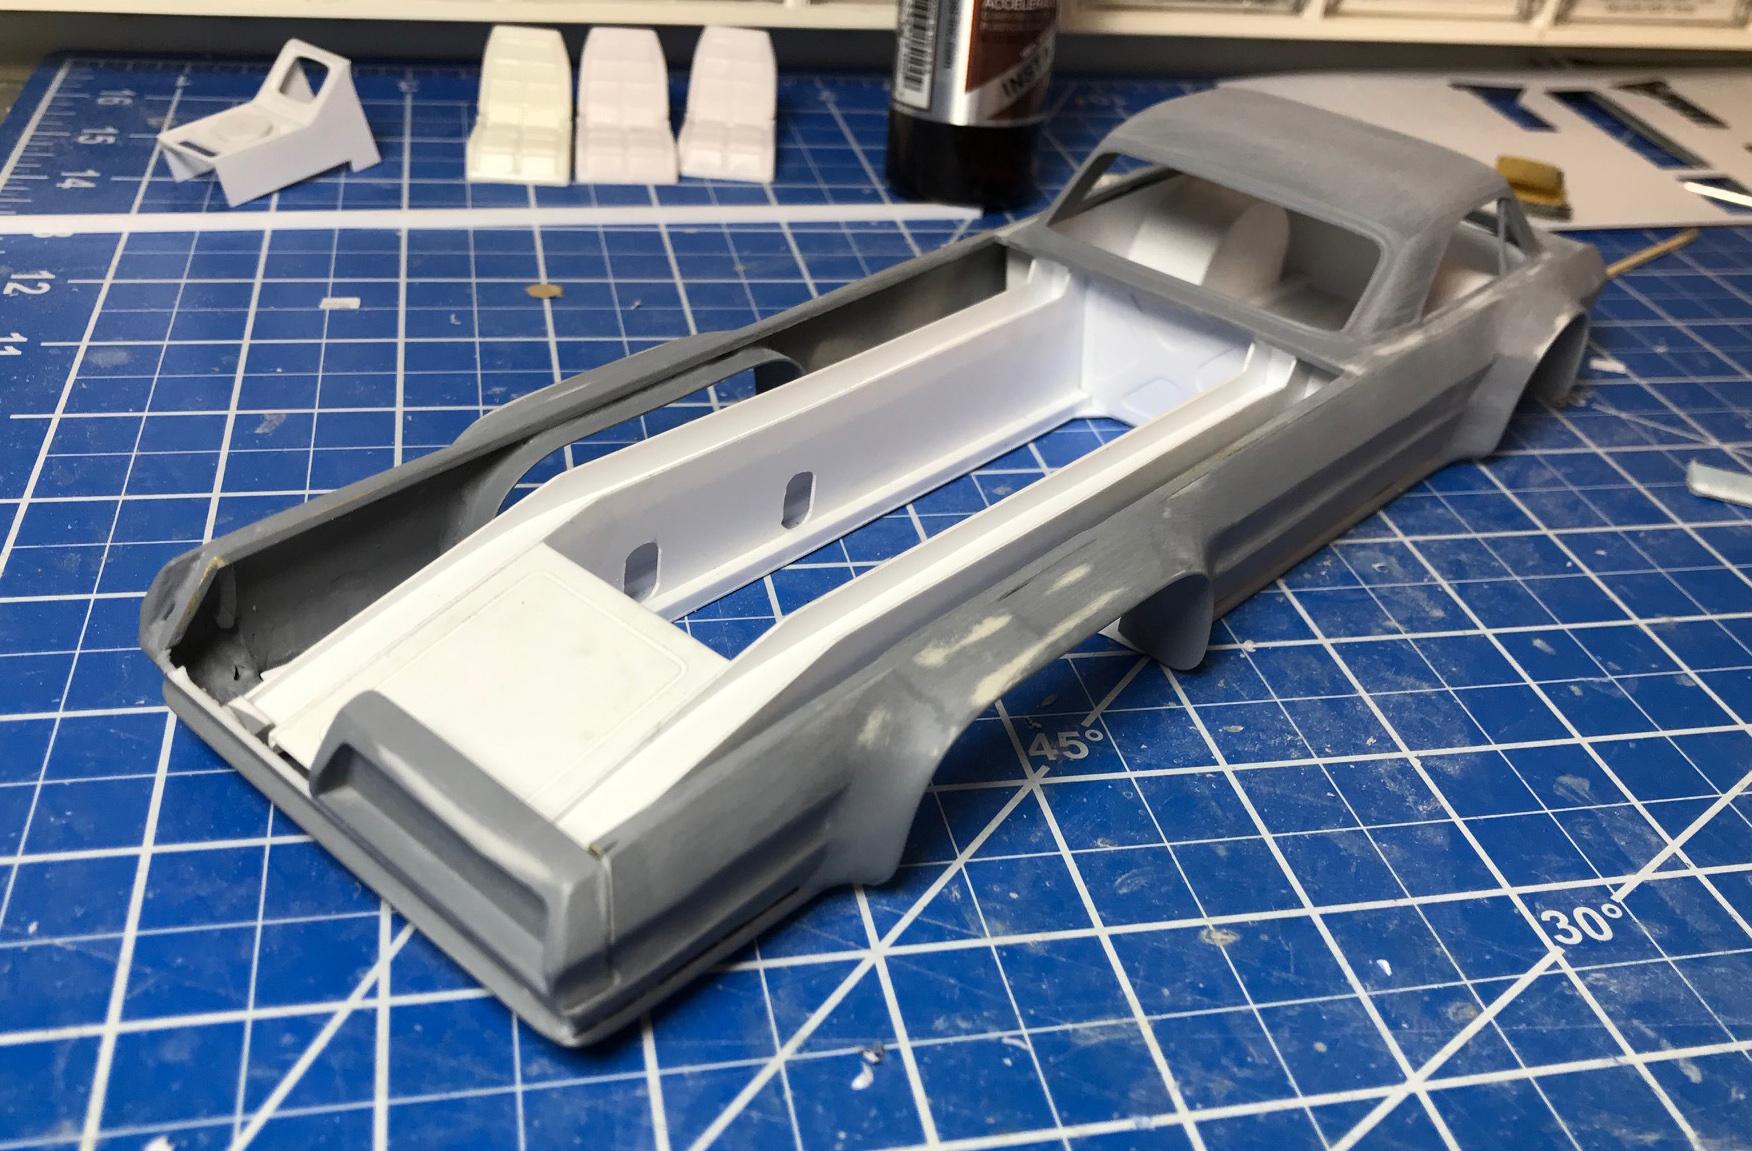
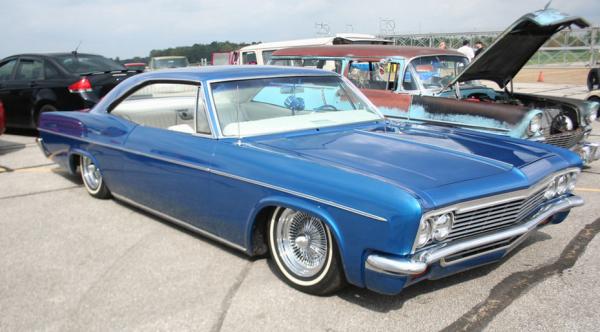
Anytime Jim! I really enjoy seeing what you are doing with the cutter... its fun exploring the possibilities of computer aided modeling. Got this thing freestanding over the weekend... the interior bucket is fully built.. track width is figured out so I should be able to start on the flares. Wheels are just place holders for now... rears need to be larger diameter, and fronts need more deep. this is the look/feel im going for with this thing ?... so these funky 70's flares are on the way! Also someone should build that...... ☝️
-
Detroit Area Auto Modelers show and contest 3-29-2020
Impalow replied to ZTony8's topic in Contests and Shows
I'm not a moderator, but I have created an event before... so I went ahead and created the event for you... its awaiting admin approval. See ya there! My favorite show of the year! -e