Impalow
-
Posts
1,065 -
Joined
-
Last visited
Content Type
Profiles
Forums
Events
Gallery
Everything posted by Impalow
-
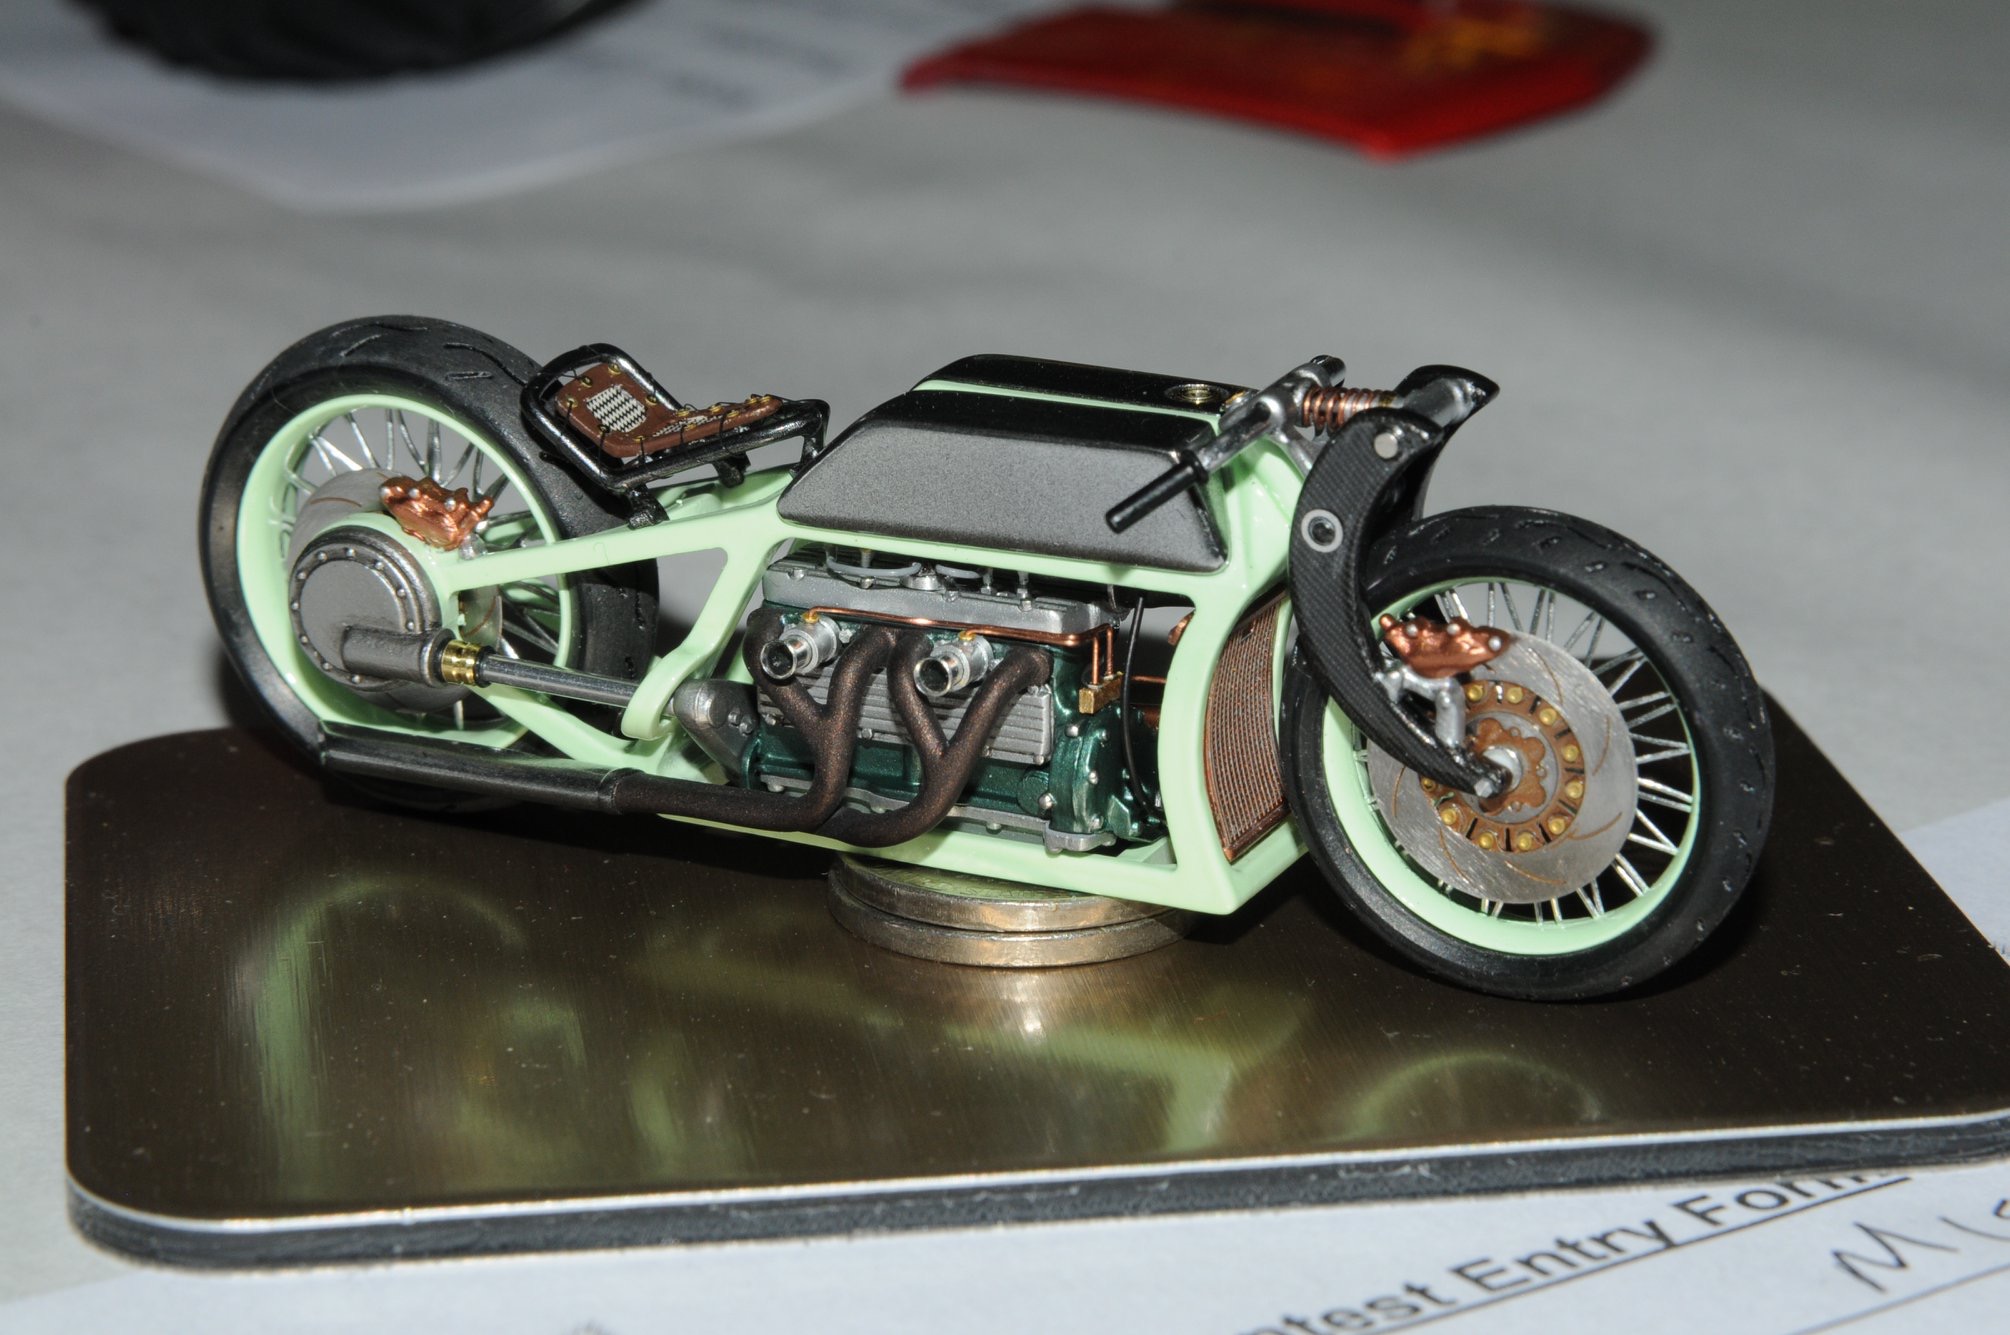
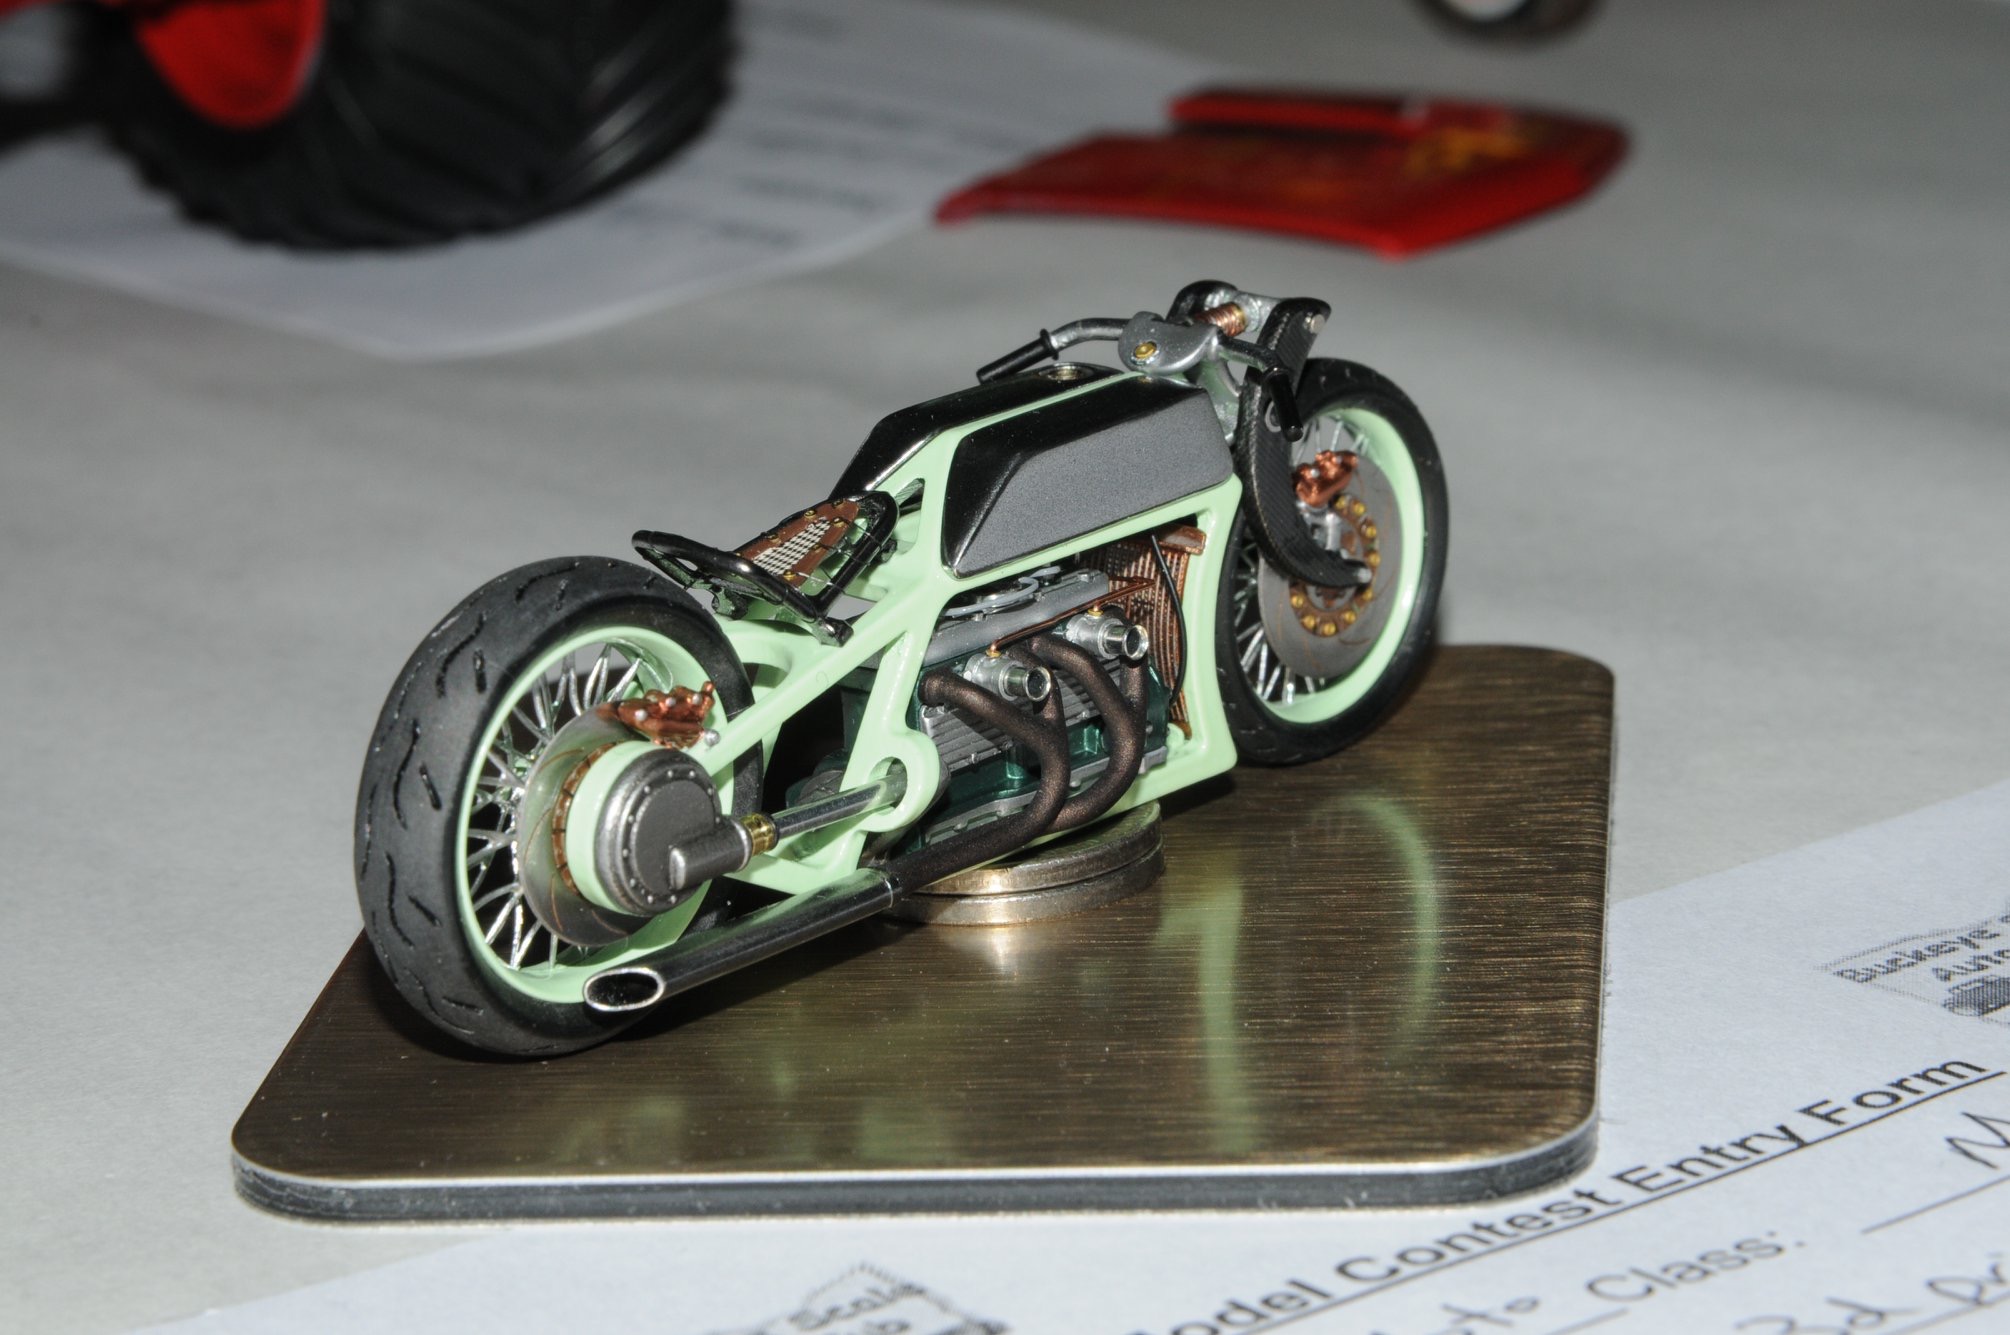
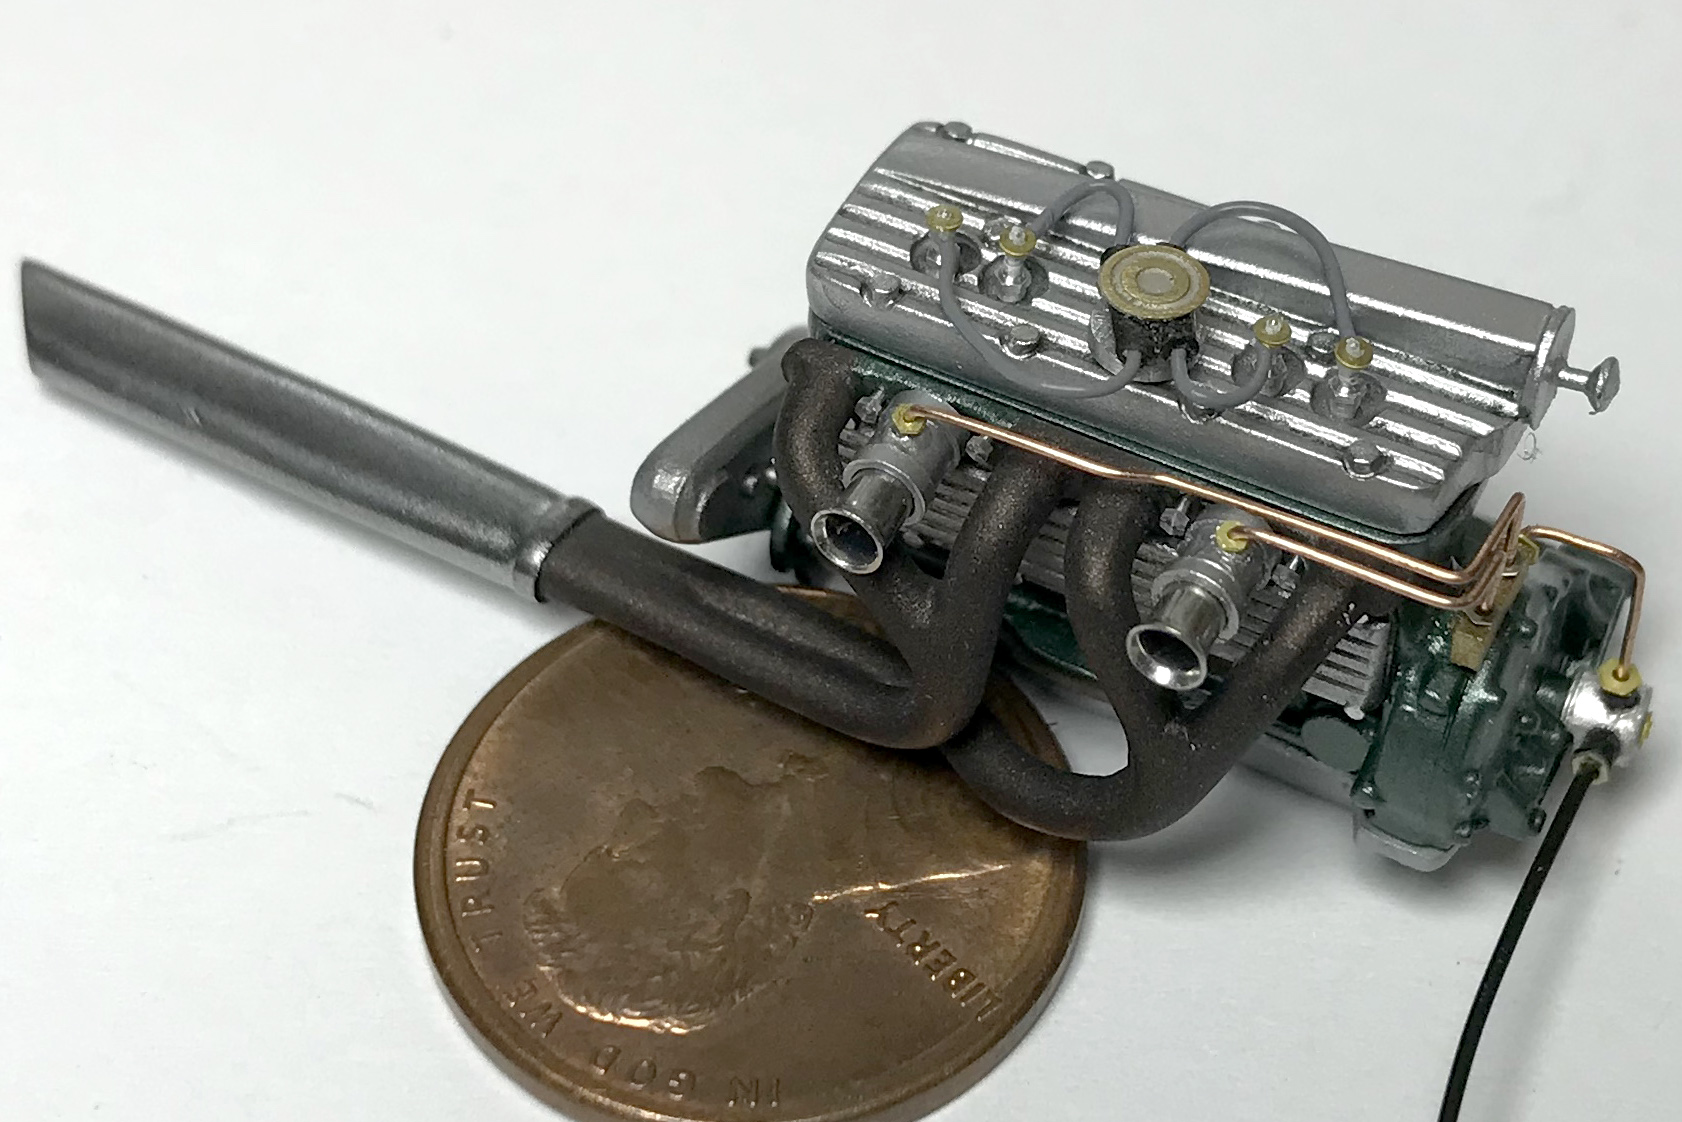
 Thanks tom! Its a tiny little thing! It was great seeing you! are you heading to Detroit here in a couple weeks? I'm trying to get a custom trike done for that.. Here are some photos of the bike sitting on a couple nickels, Glenn Marek took these at the Columbus show last Saturday. Much better than what my phone can pull off.
-
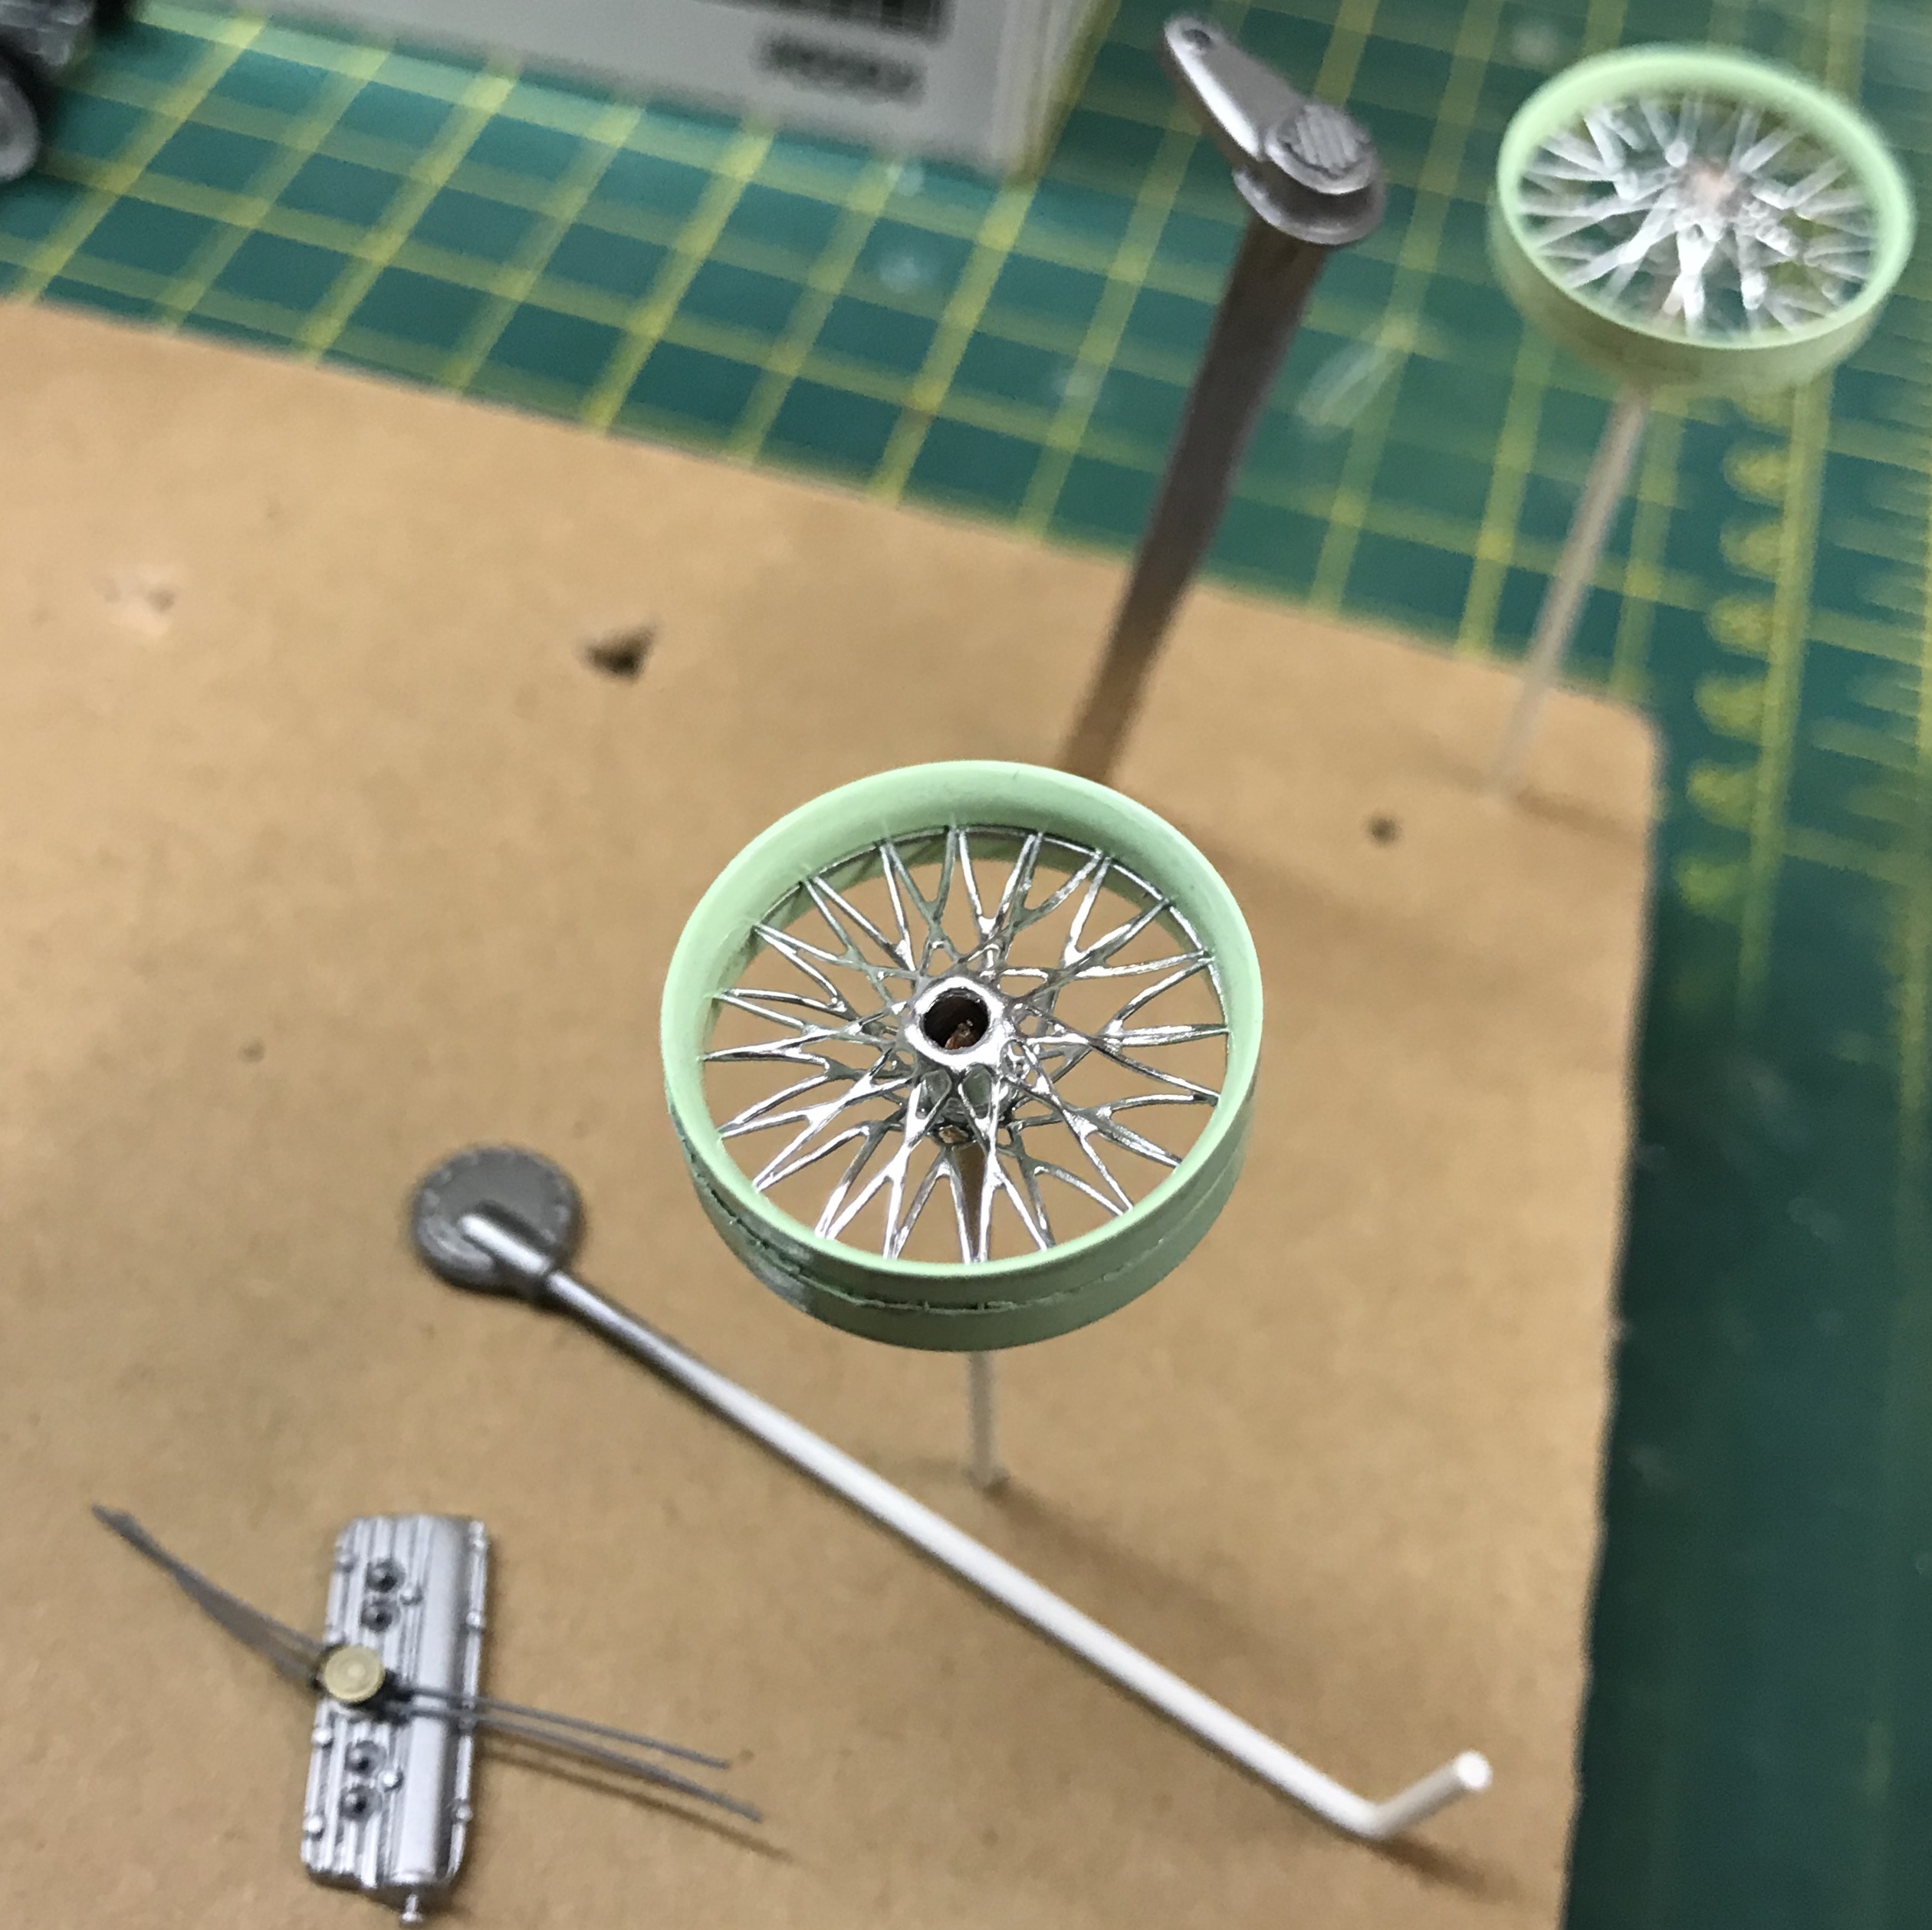
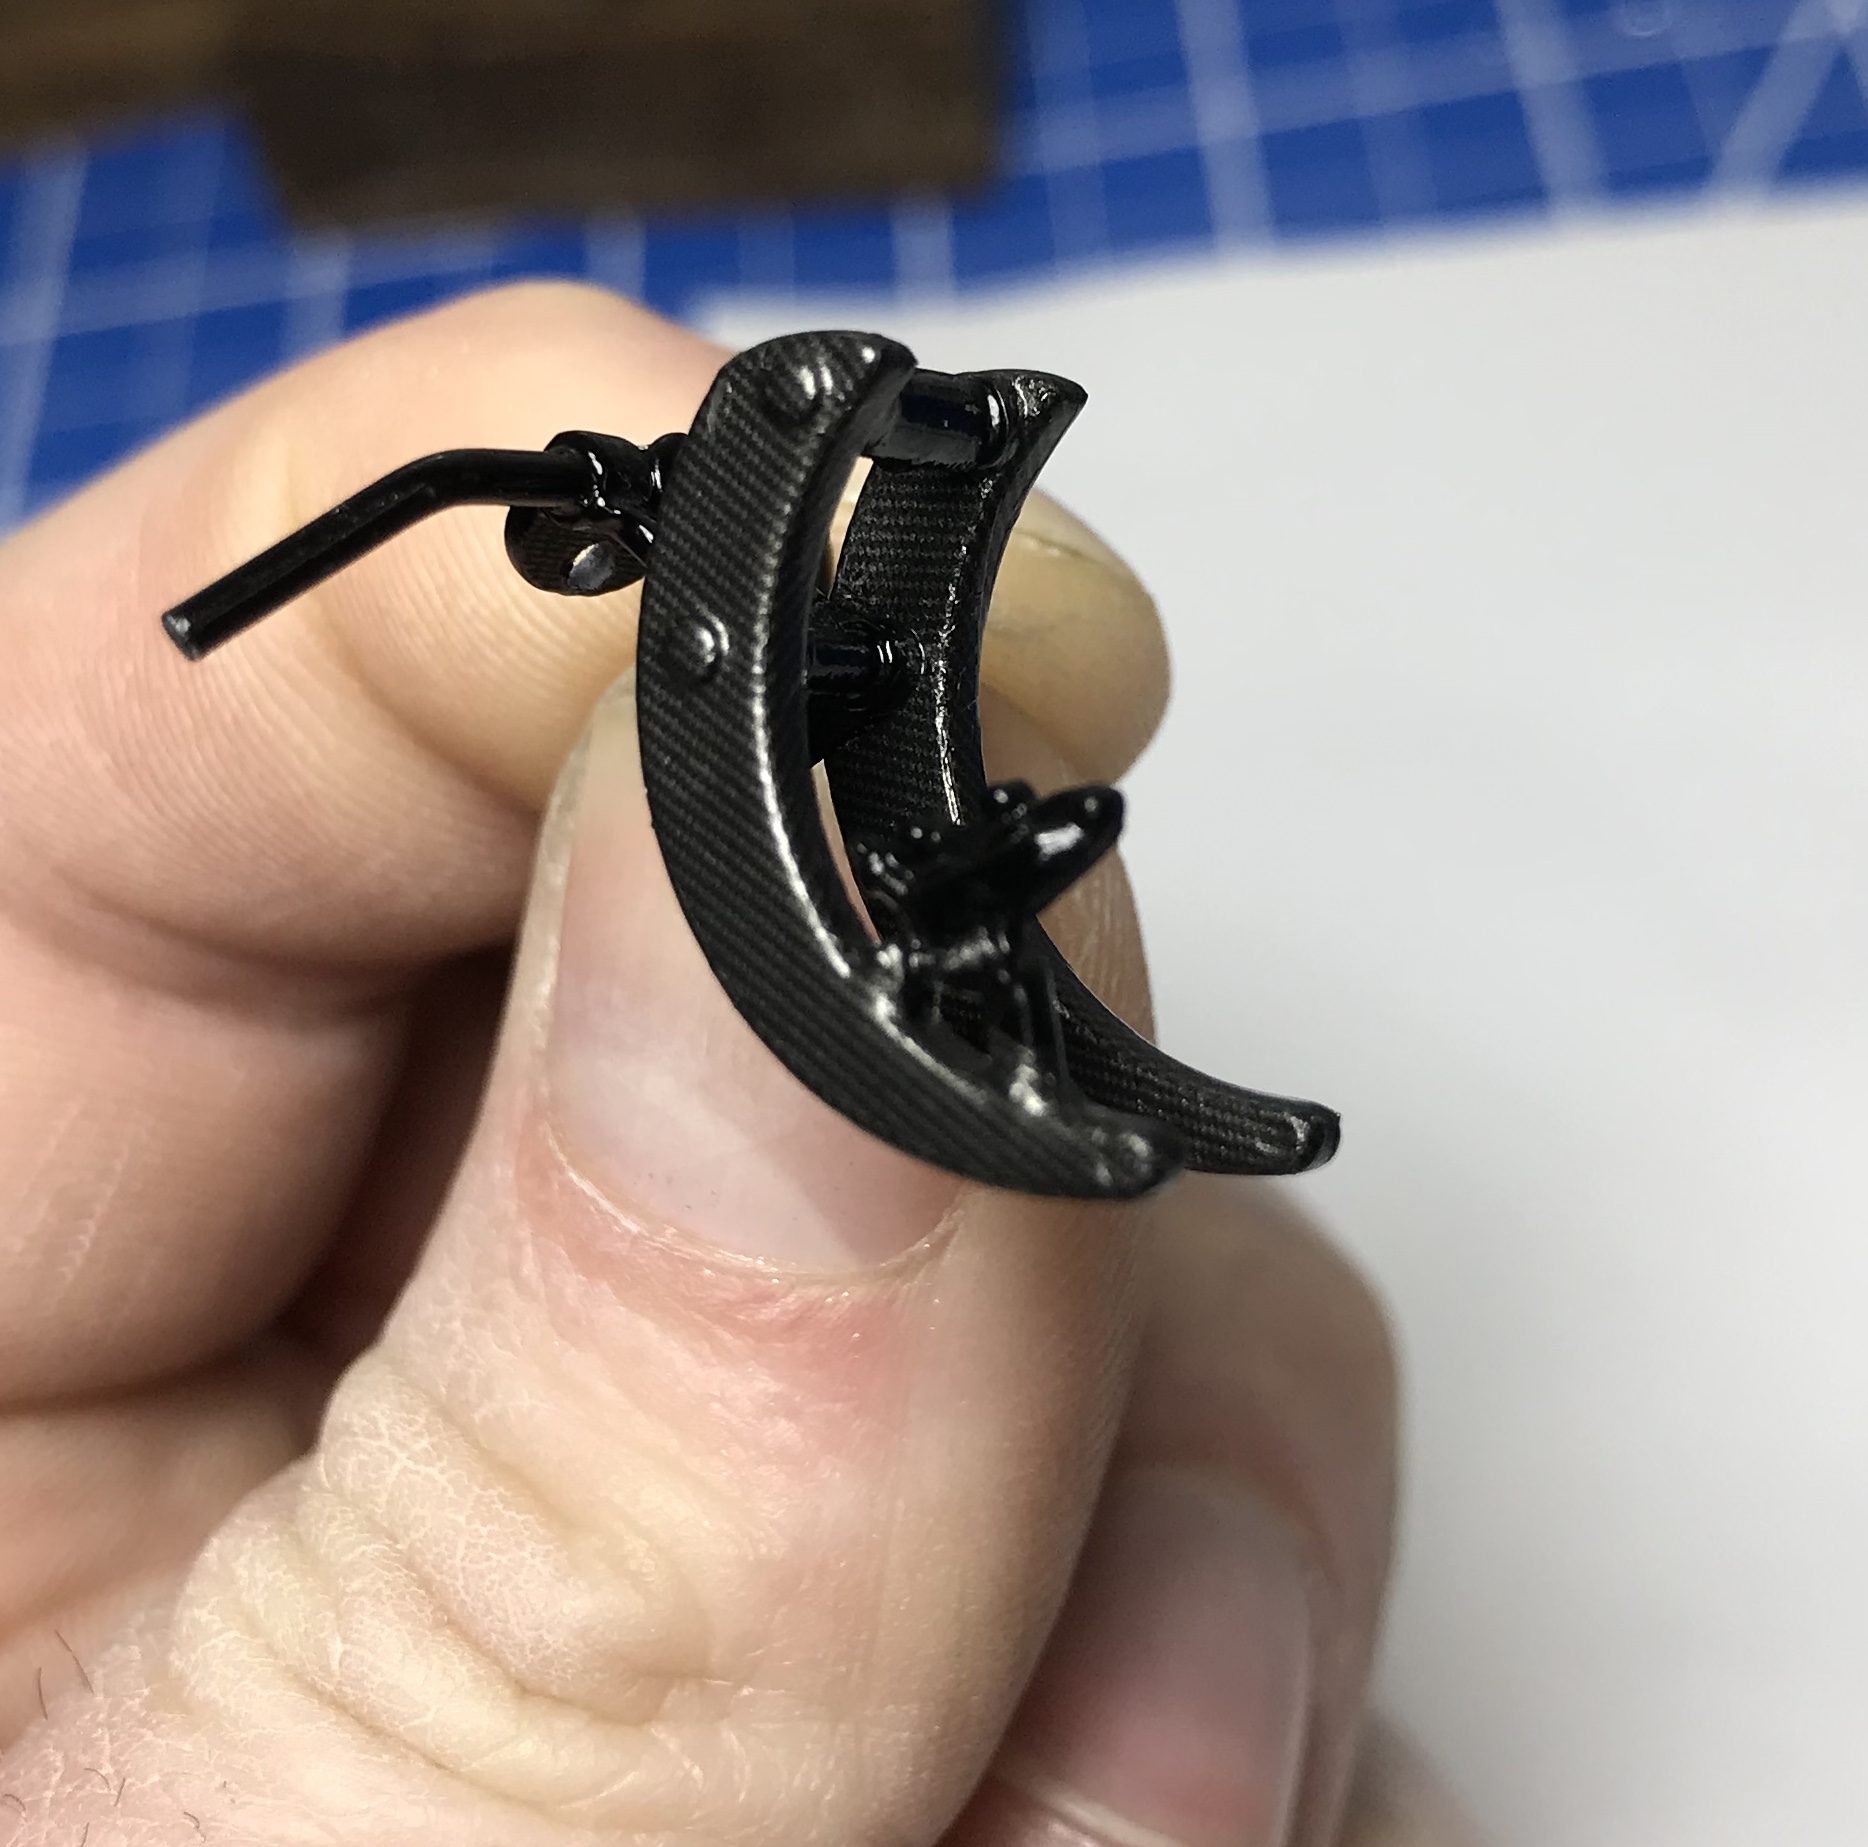
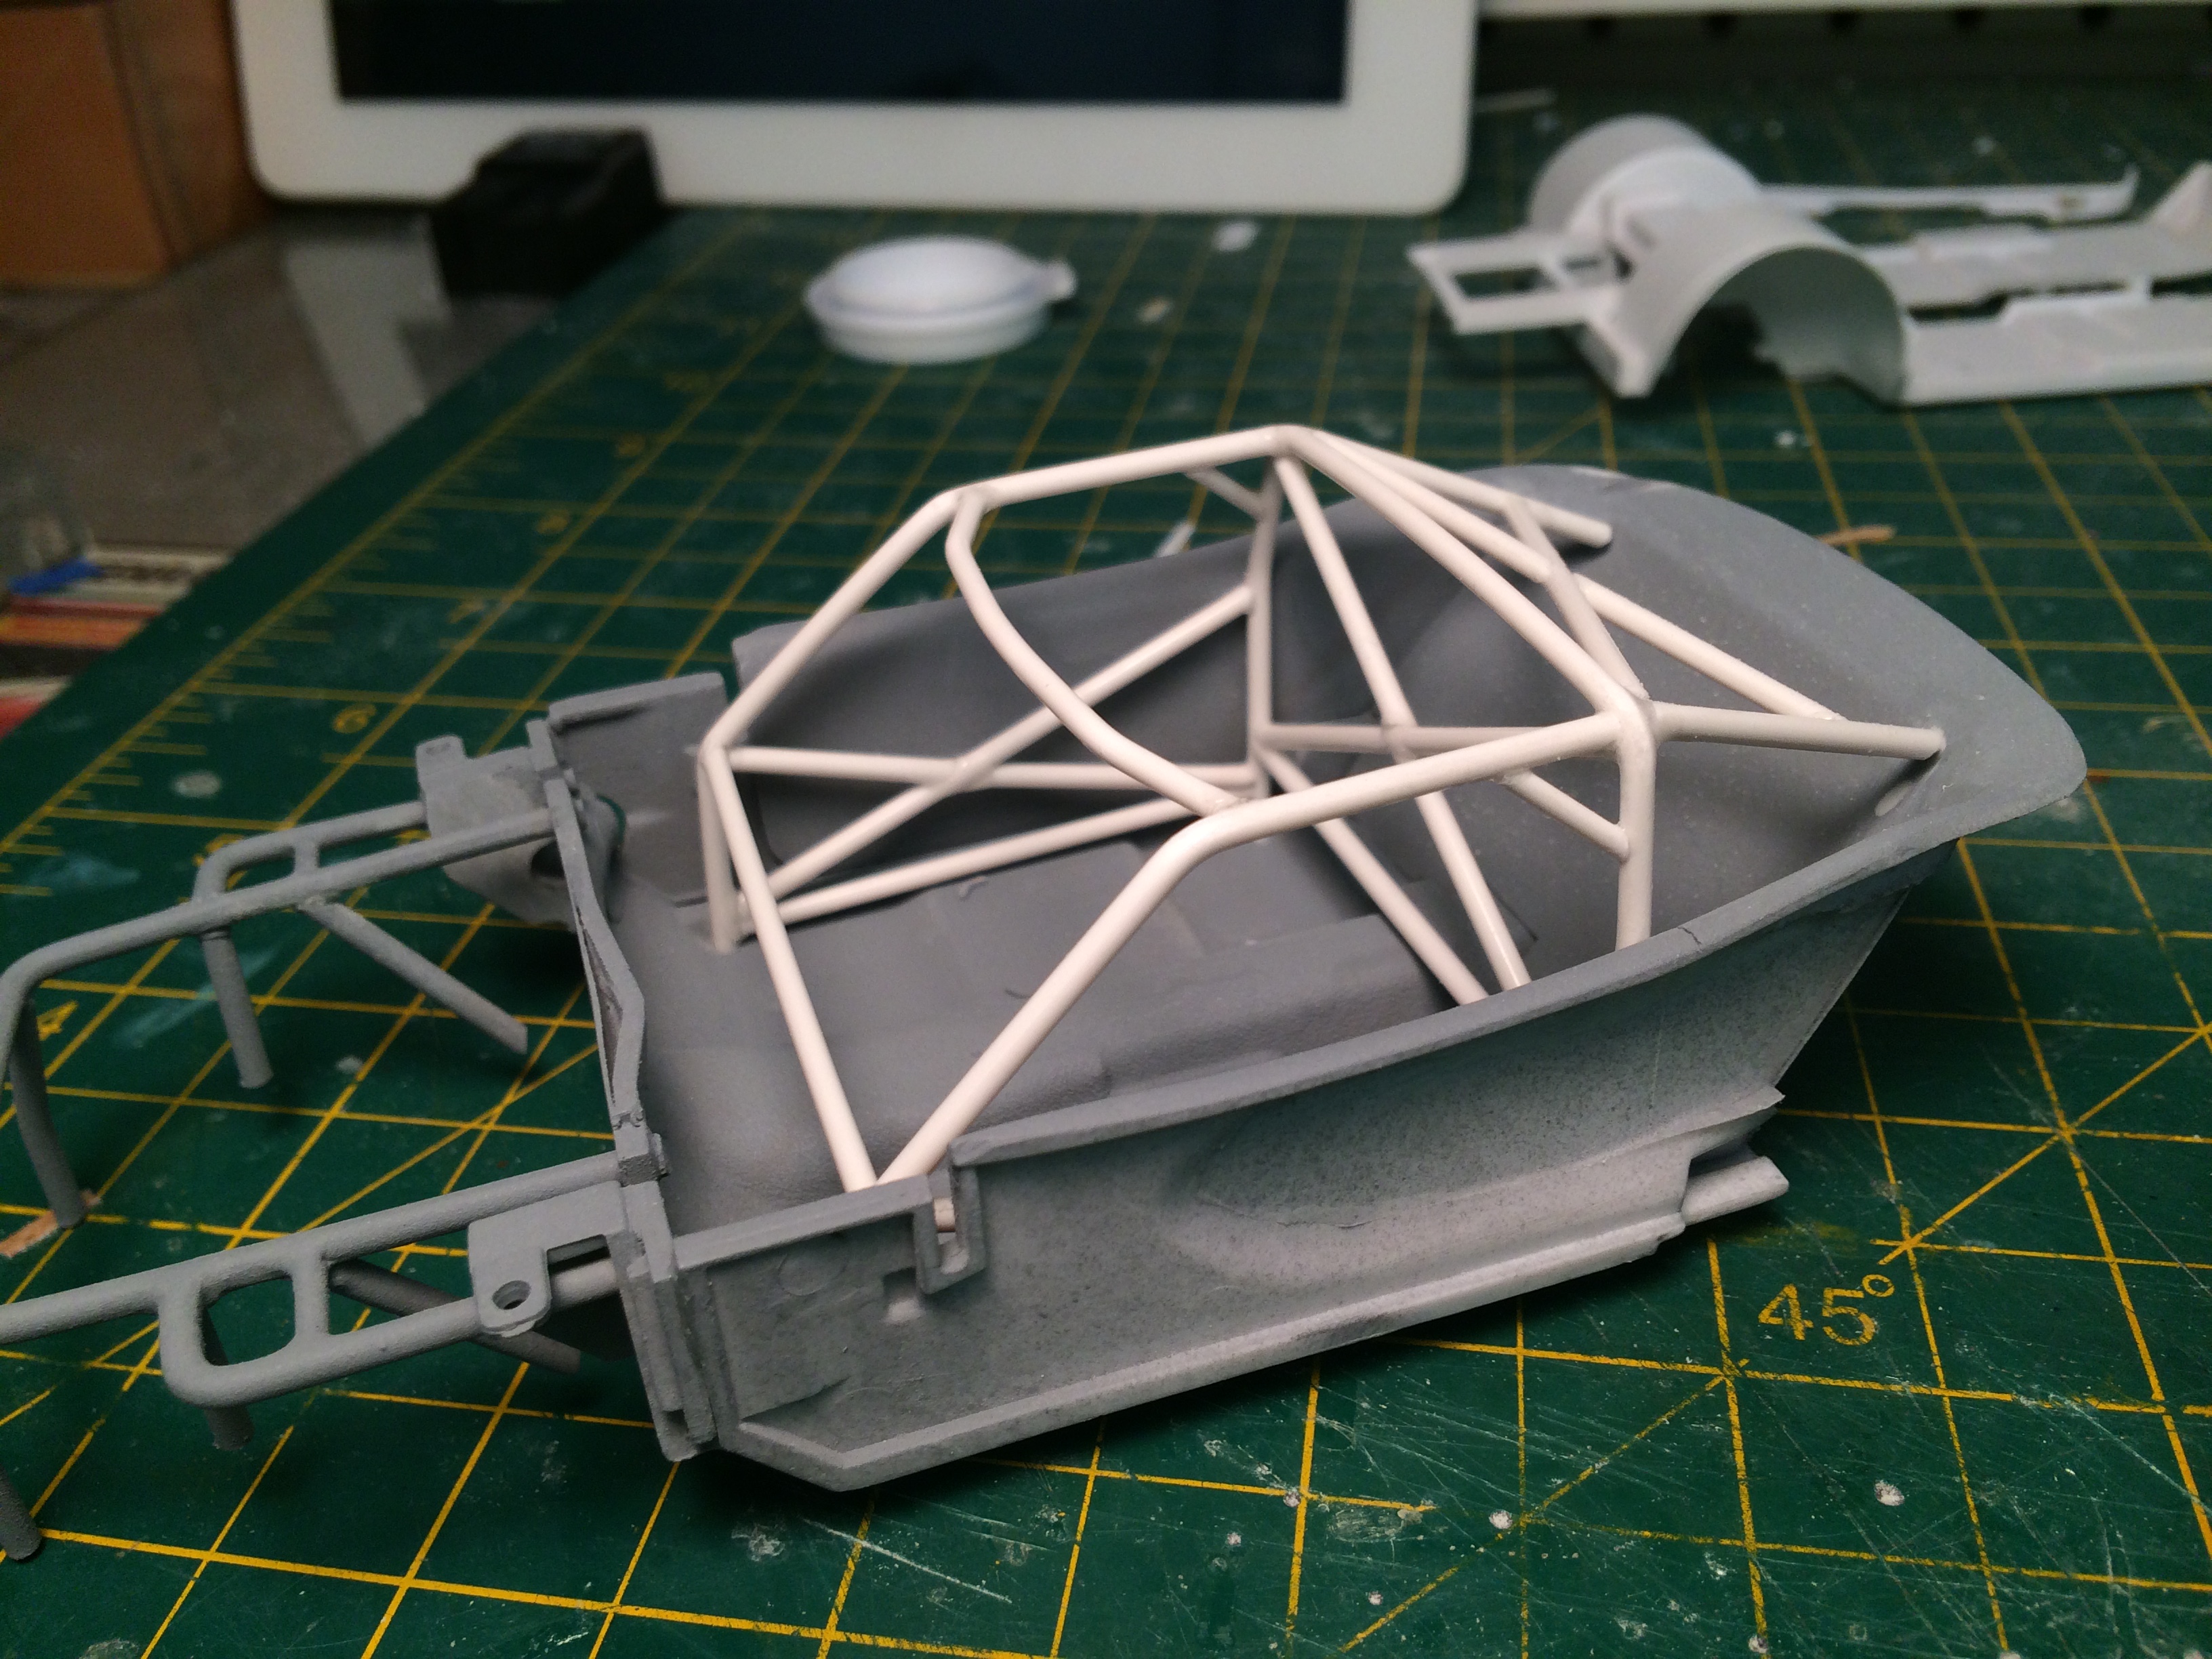
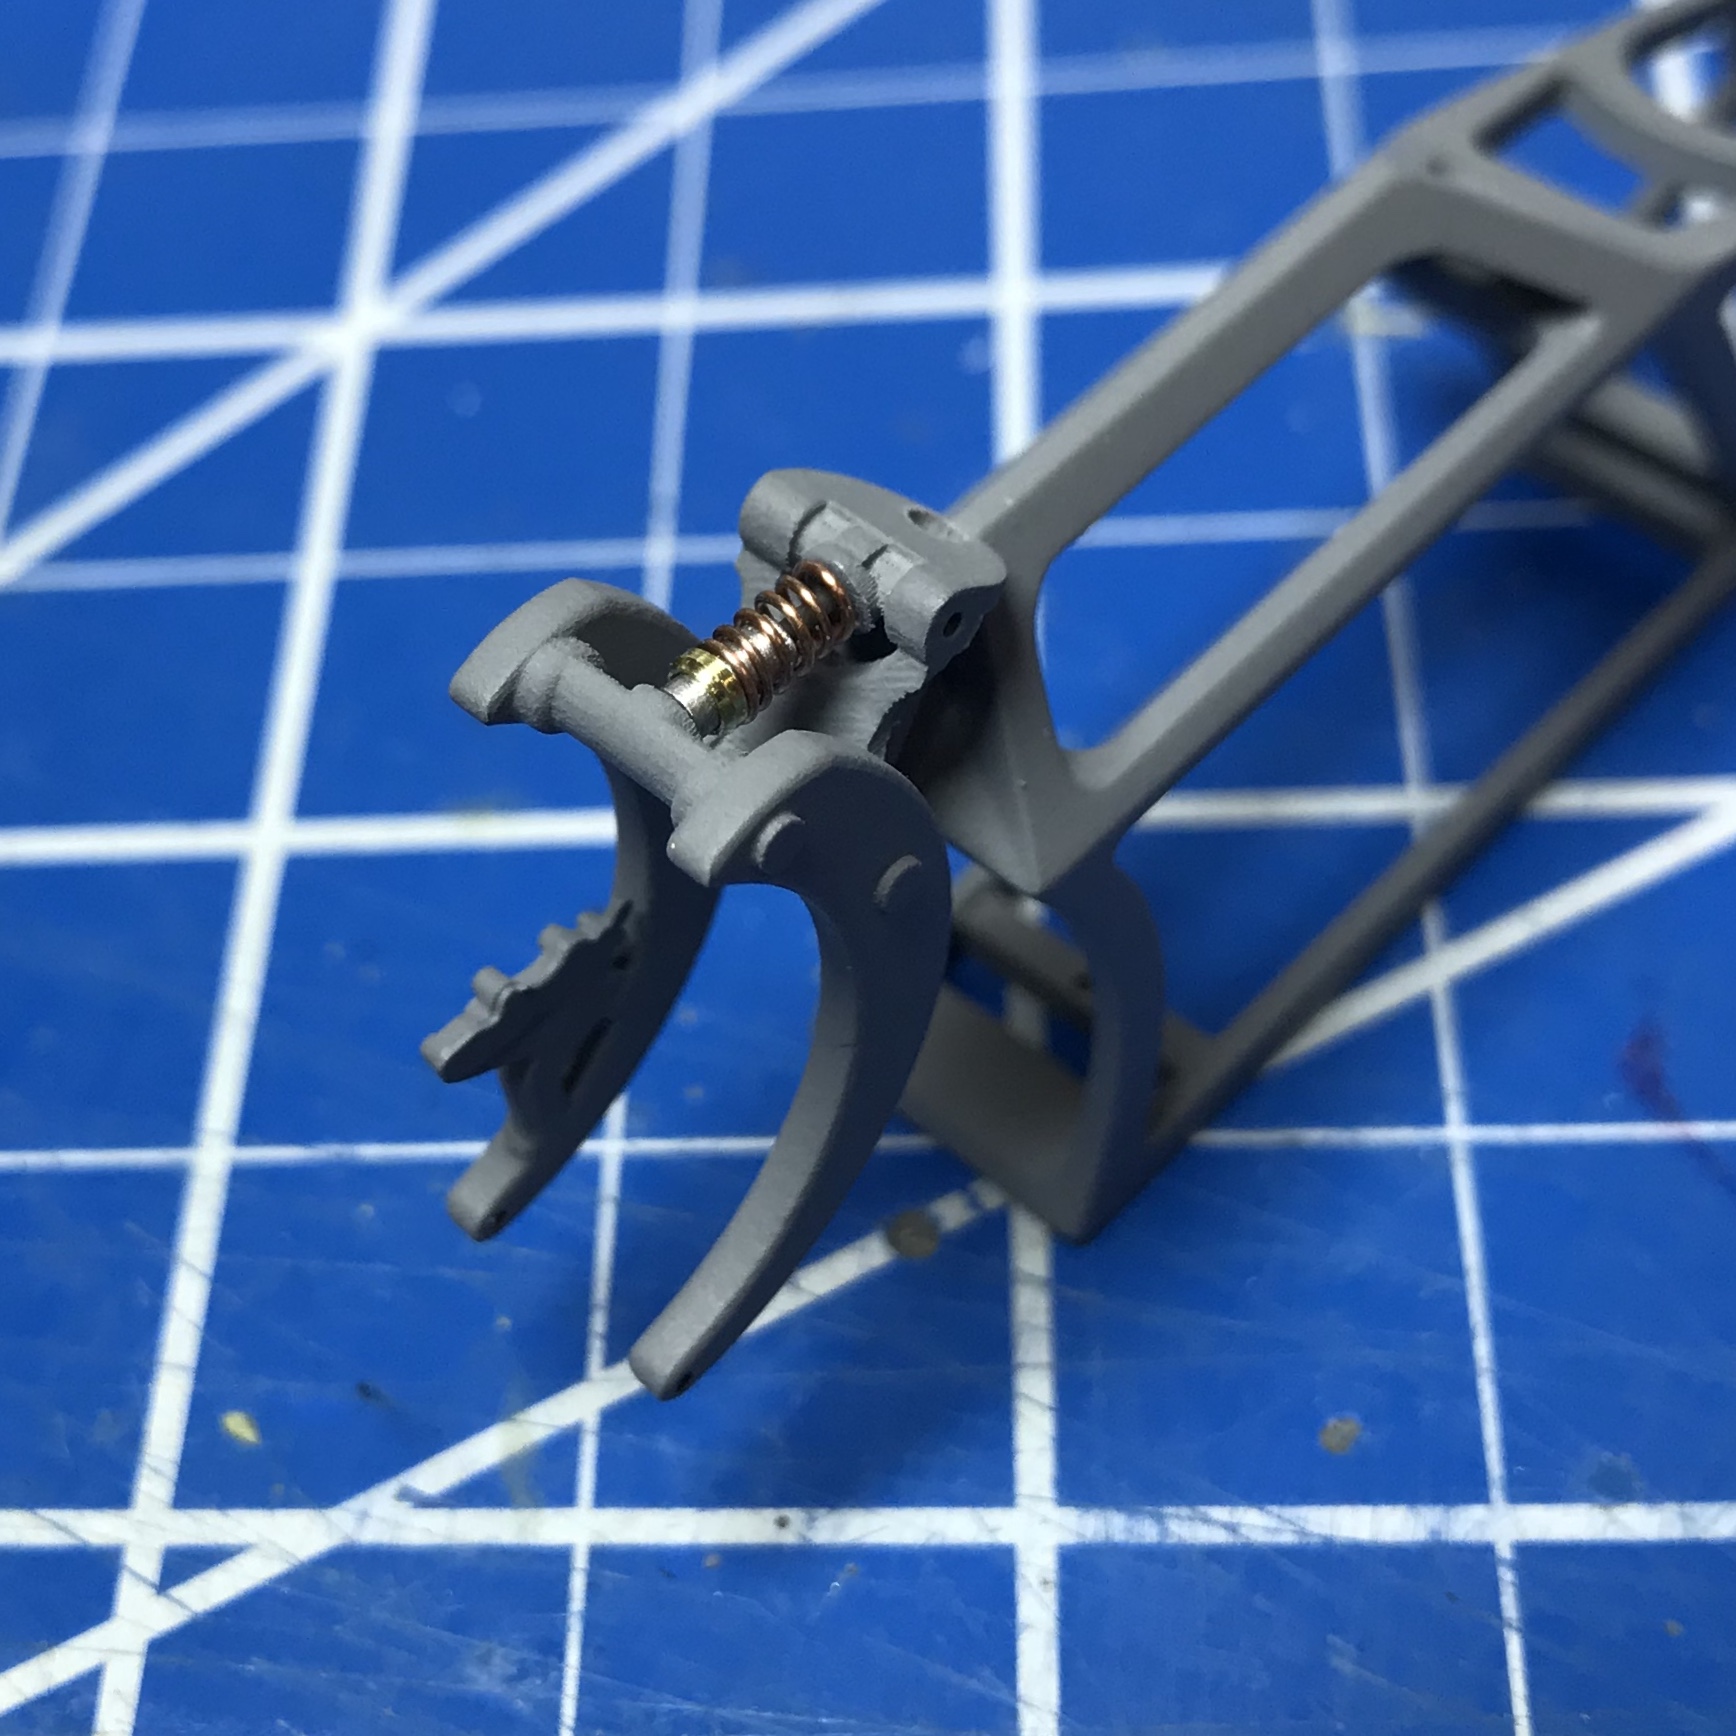
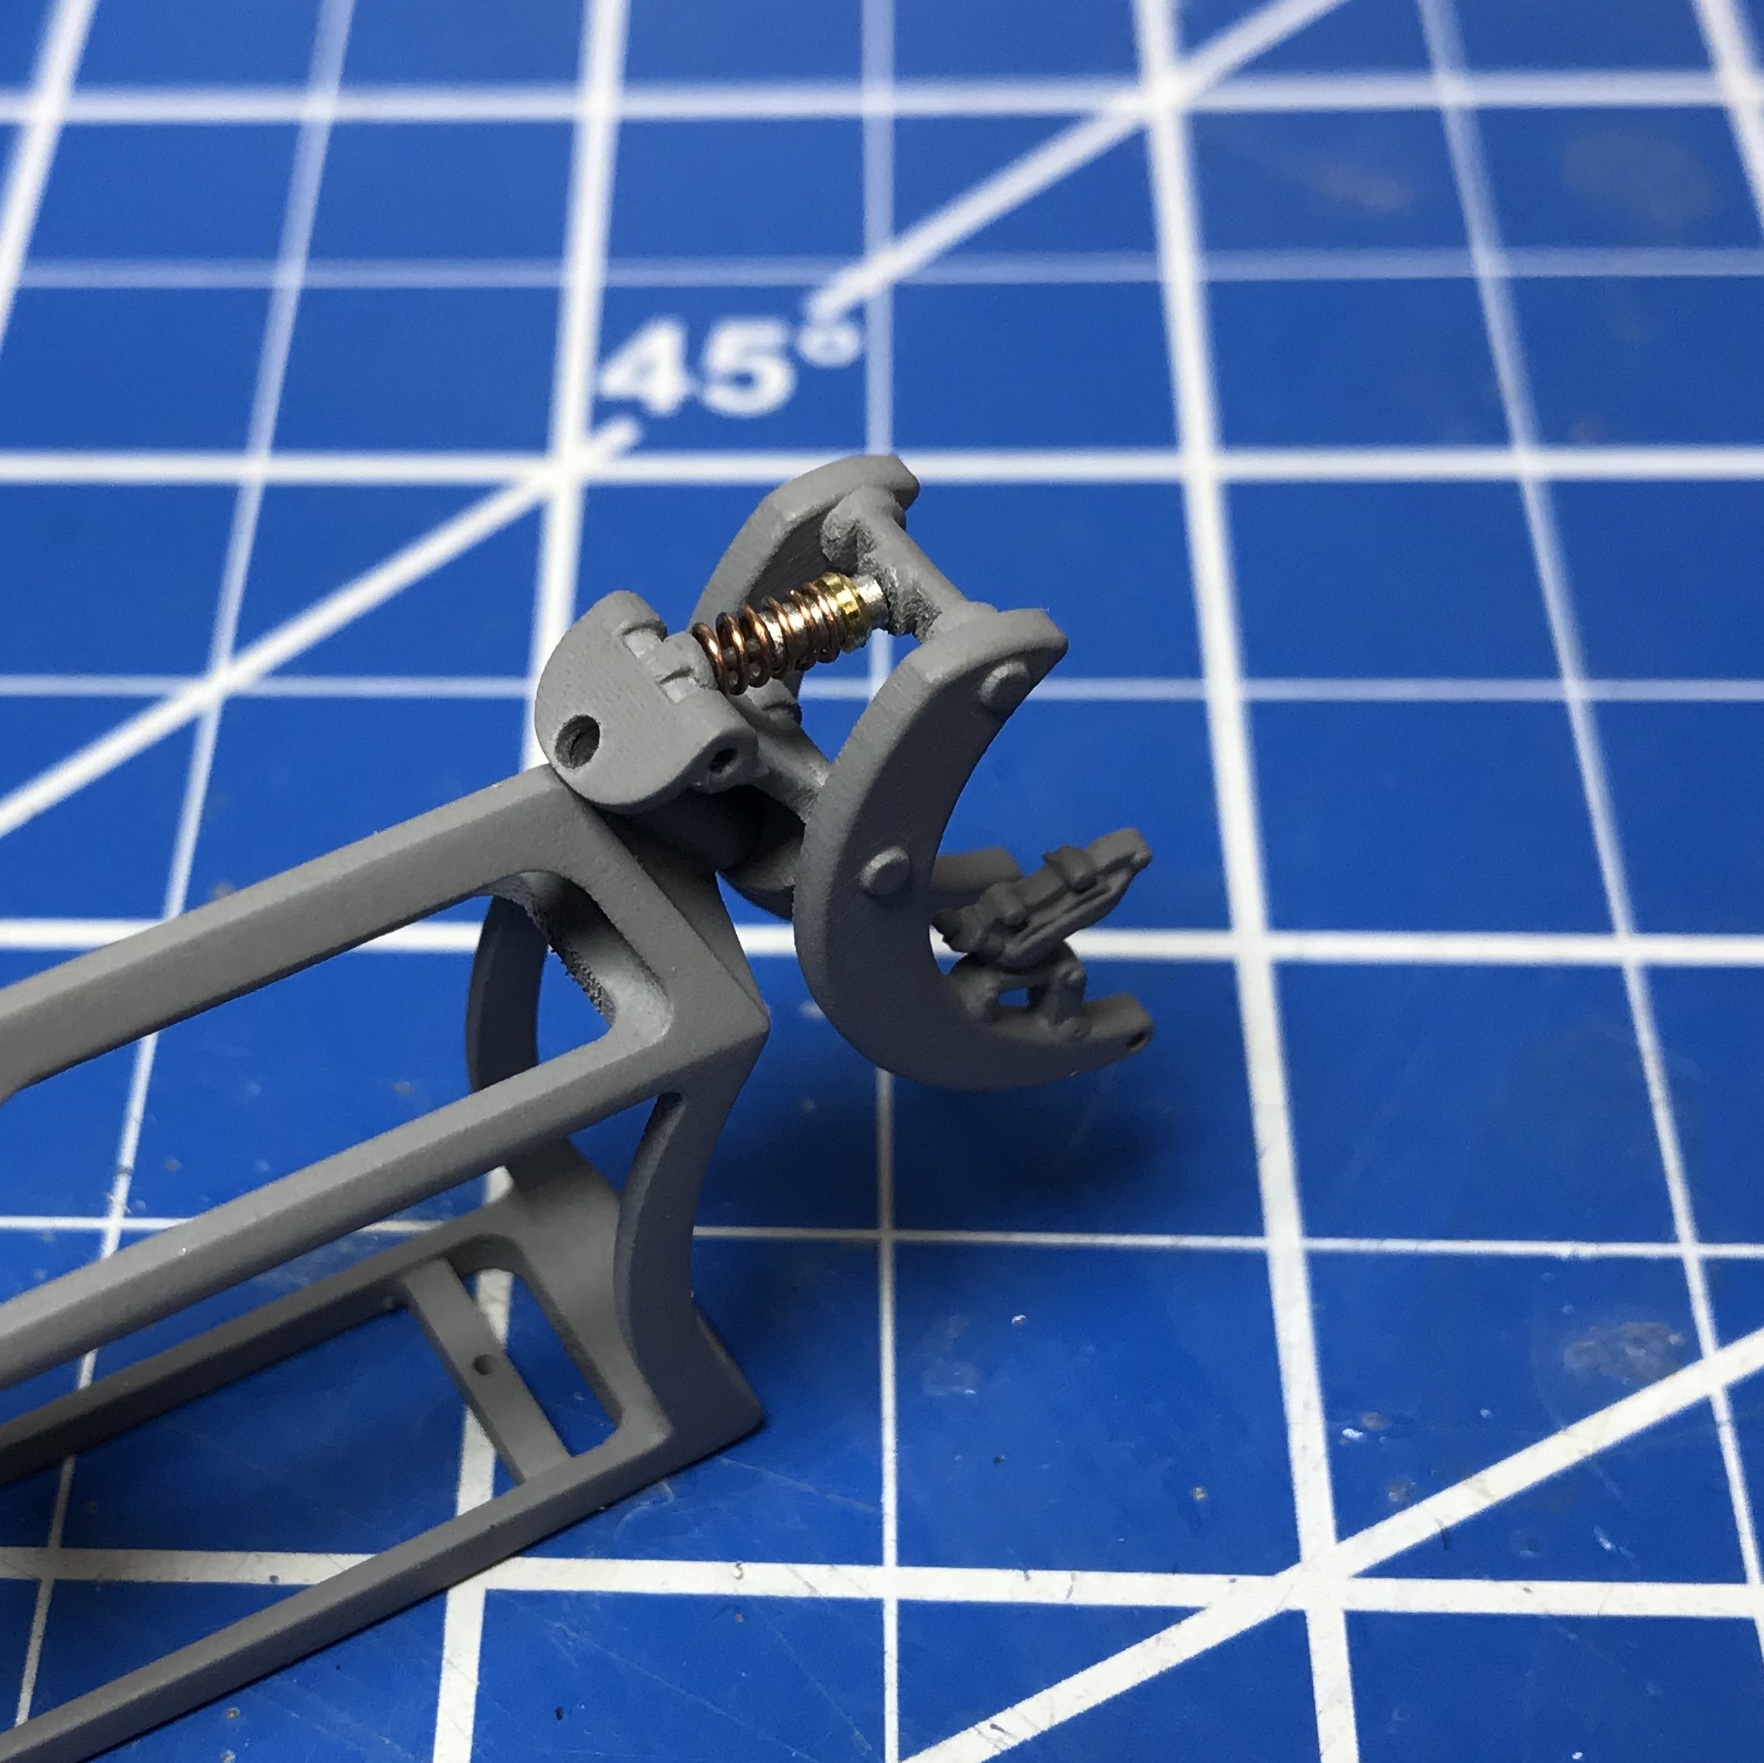
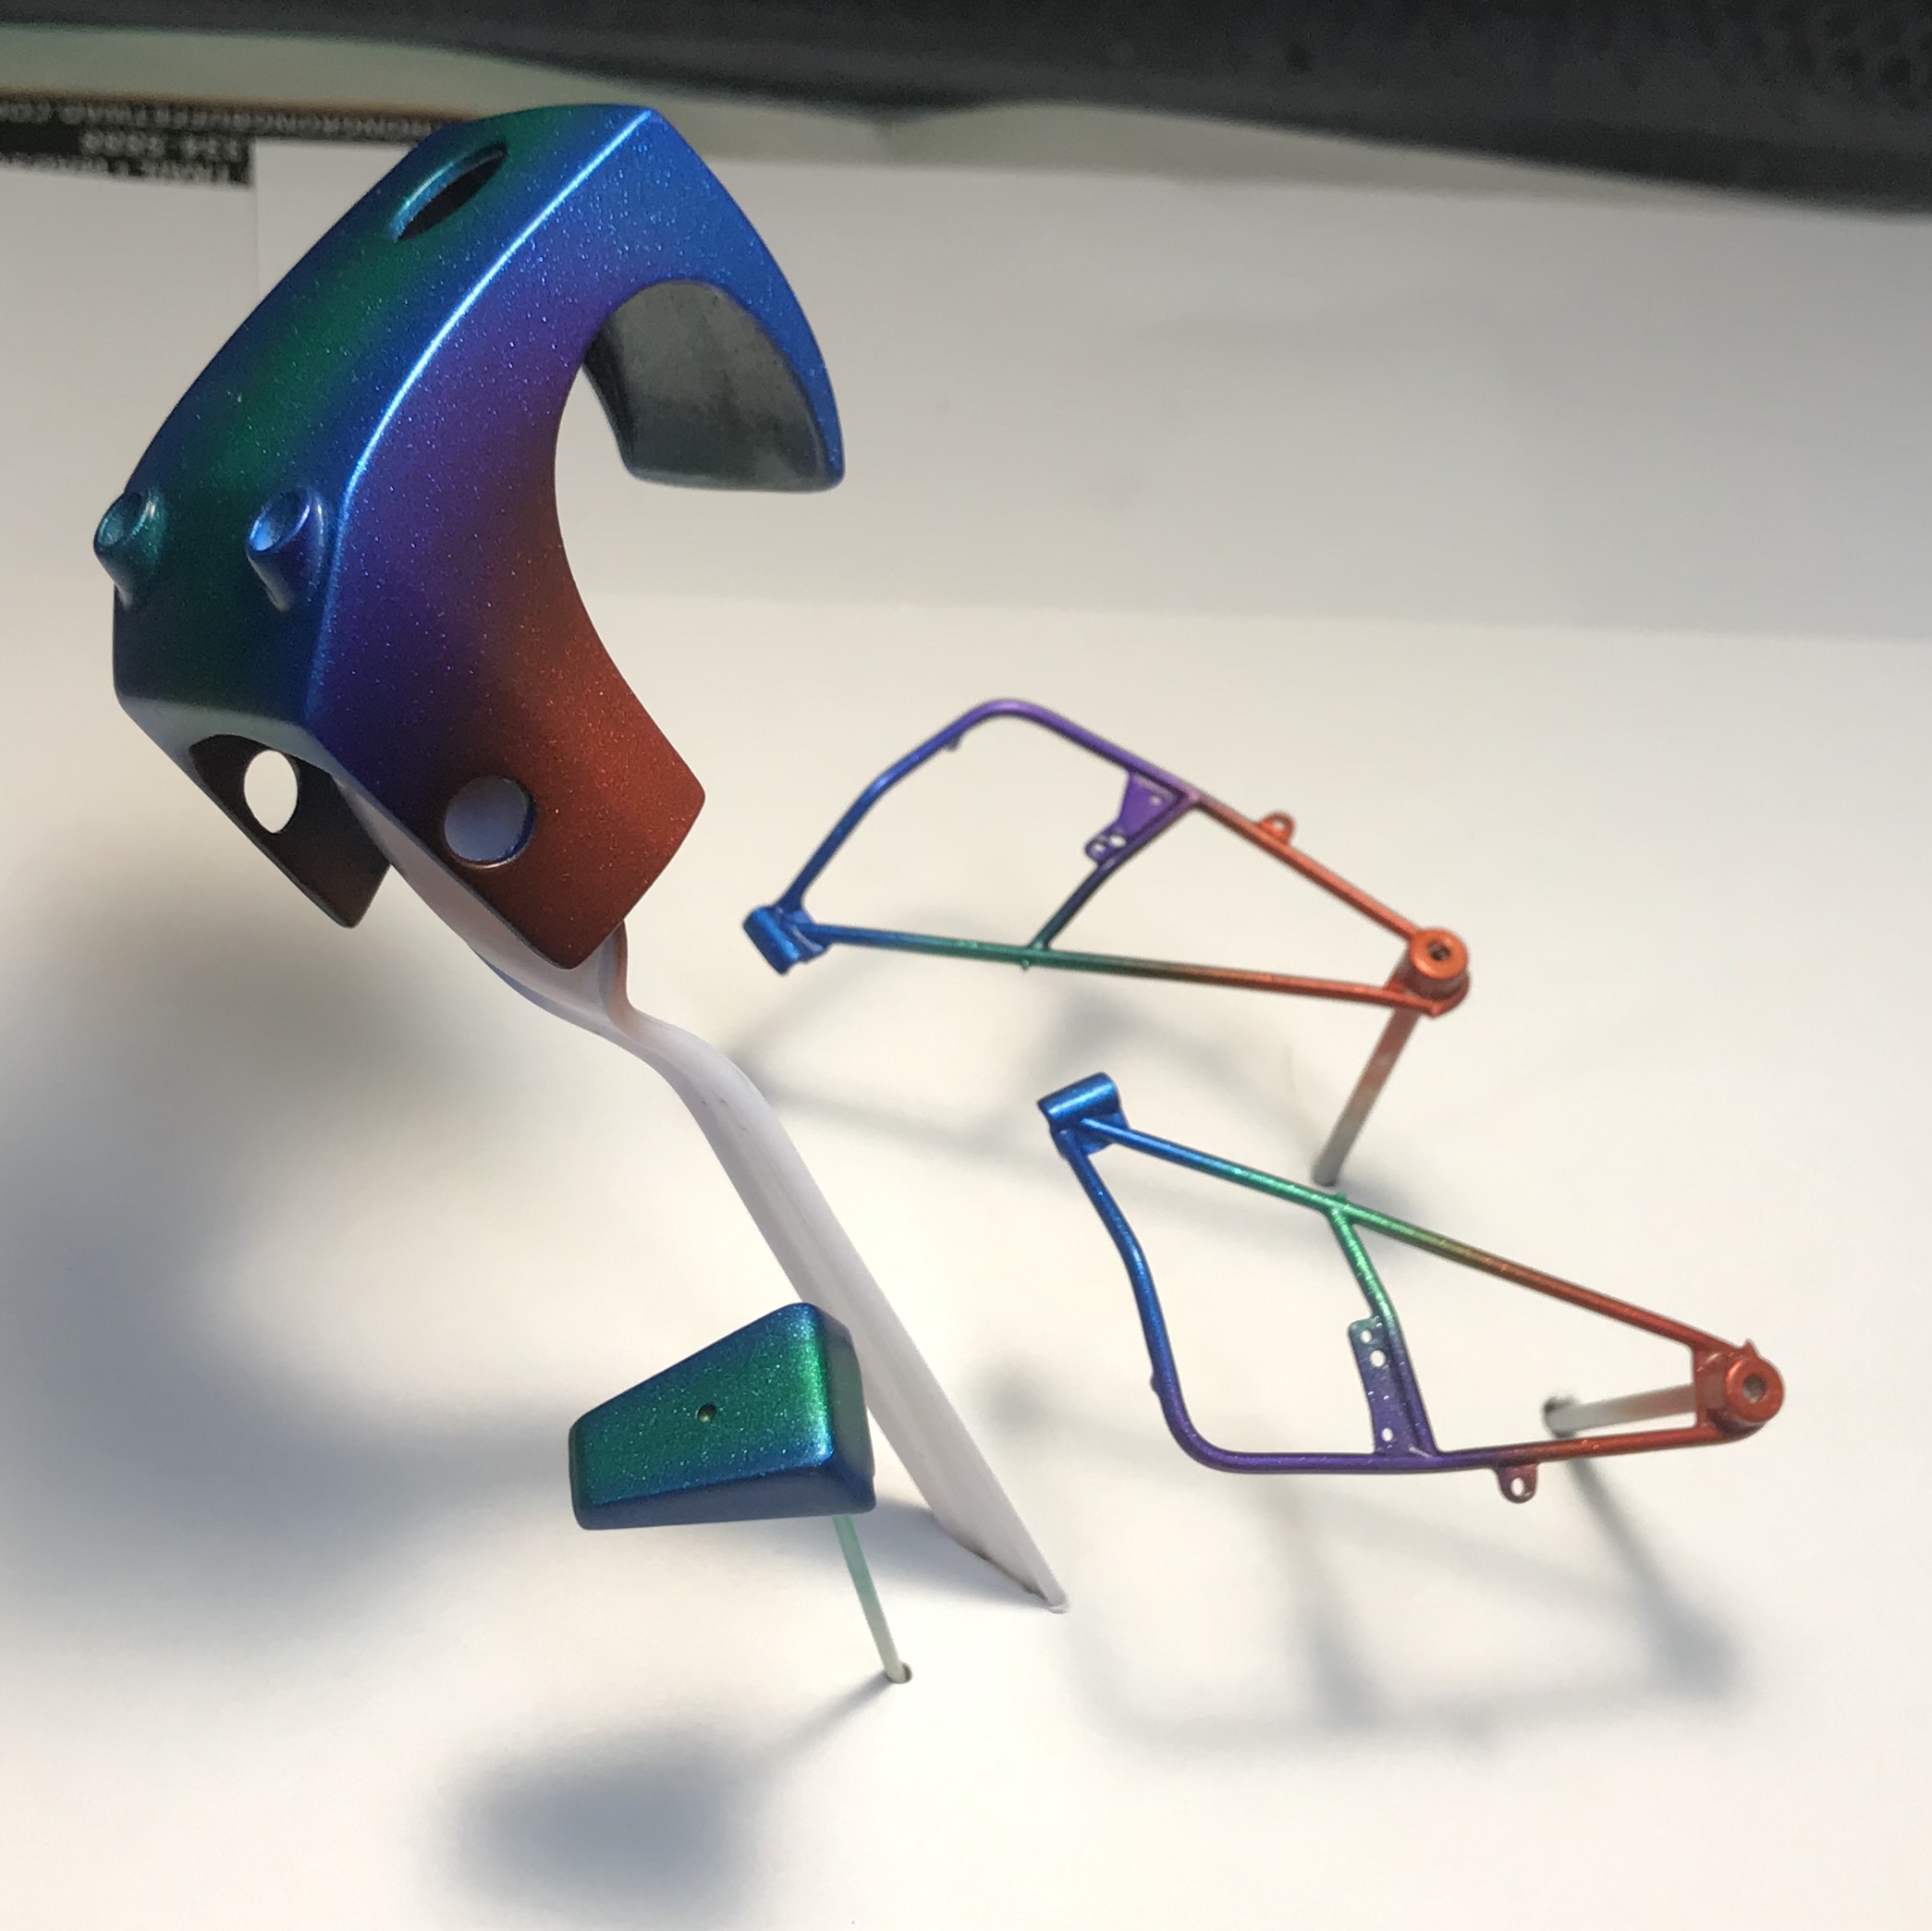
Thank you all for the comments and compliments! hahaha.. you noticed that huh... probably not at this point... the designer buggered that up a bit... and the frosted 3d printed material is super brittle and i was scared to drill for some foot pegs. Thanks Chris! yeah just a ton of Microsol... I did try using the "amber" Scale motorsports carbon decals first, and the SOL just didnt touch them... I went to the standard gray carbon and it sucked down nicely. Thanks Luke! Yeah that was a pain! the worst part was the adhesive (vallejo matte varnish) I used to put the grommets down plugged the holes for the lacing... so i had to develop a technique to use less adhesive, and center them on the hole in the "leather".. the ones on the lean back portion are on both sides... I ended up doing all the grommets at least twice... it was certainly a challenge. It is actually an oval.. I used some thin wall brass round tube and squished it carefully in some soft jaw pliers.. It took a couple pieces to get one that was clean without kinks, but its a very short section, so that technique worked okay.
-
1000hp is the new 400hp.... seriously... every custom build lately seems to be claiming 1000+hp. Regardless, sweet nova!
-
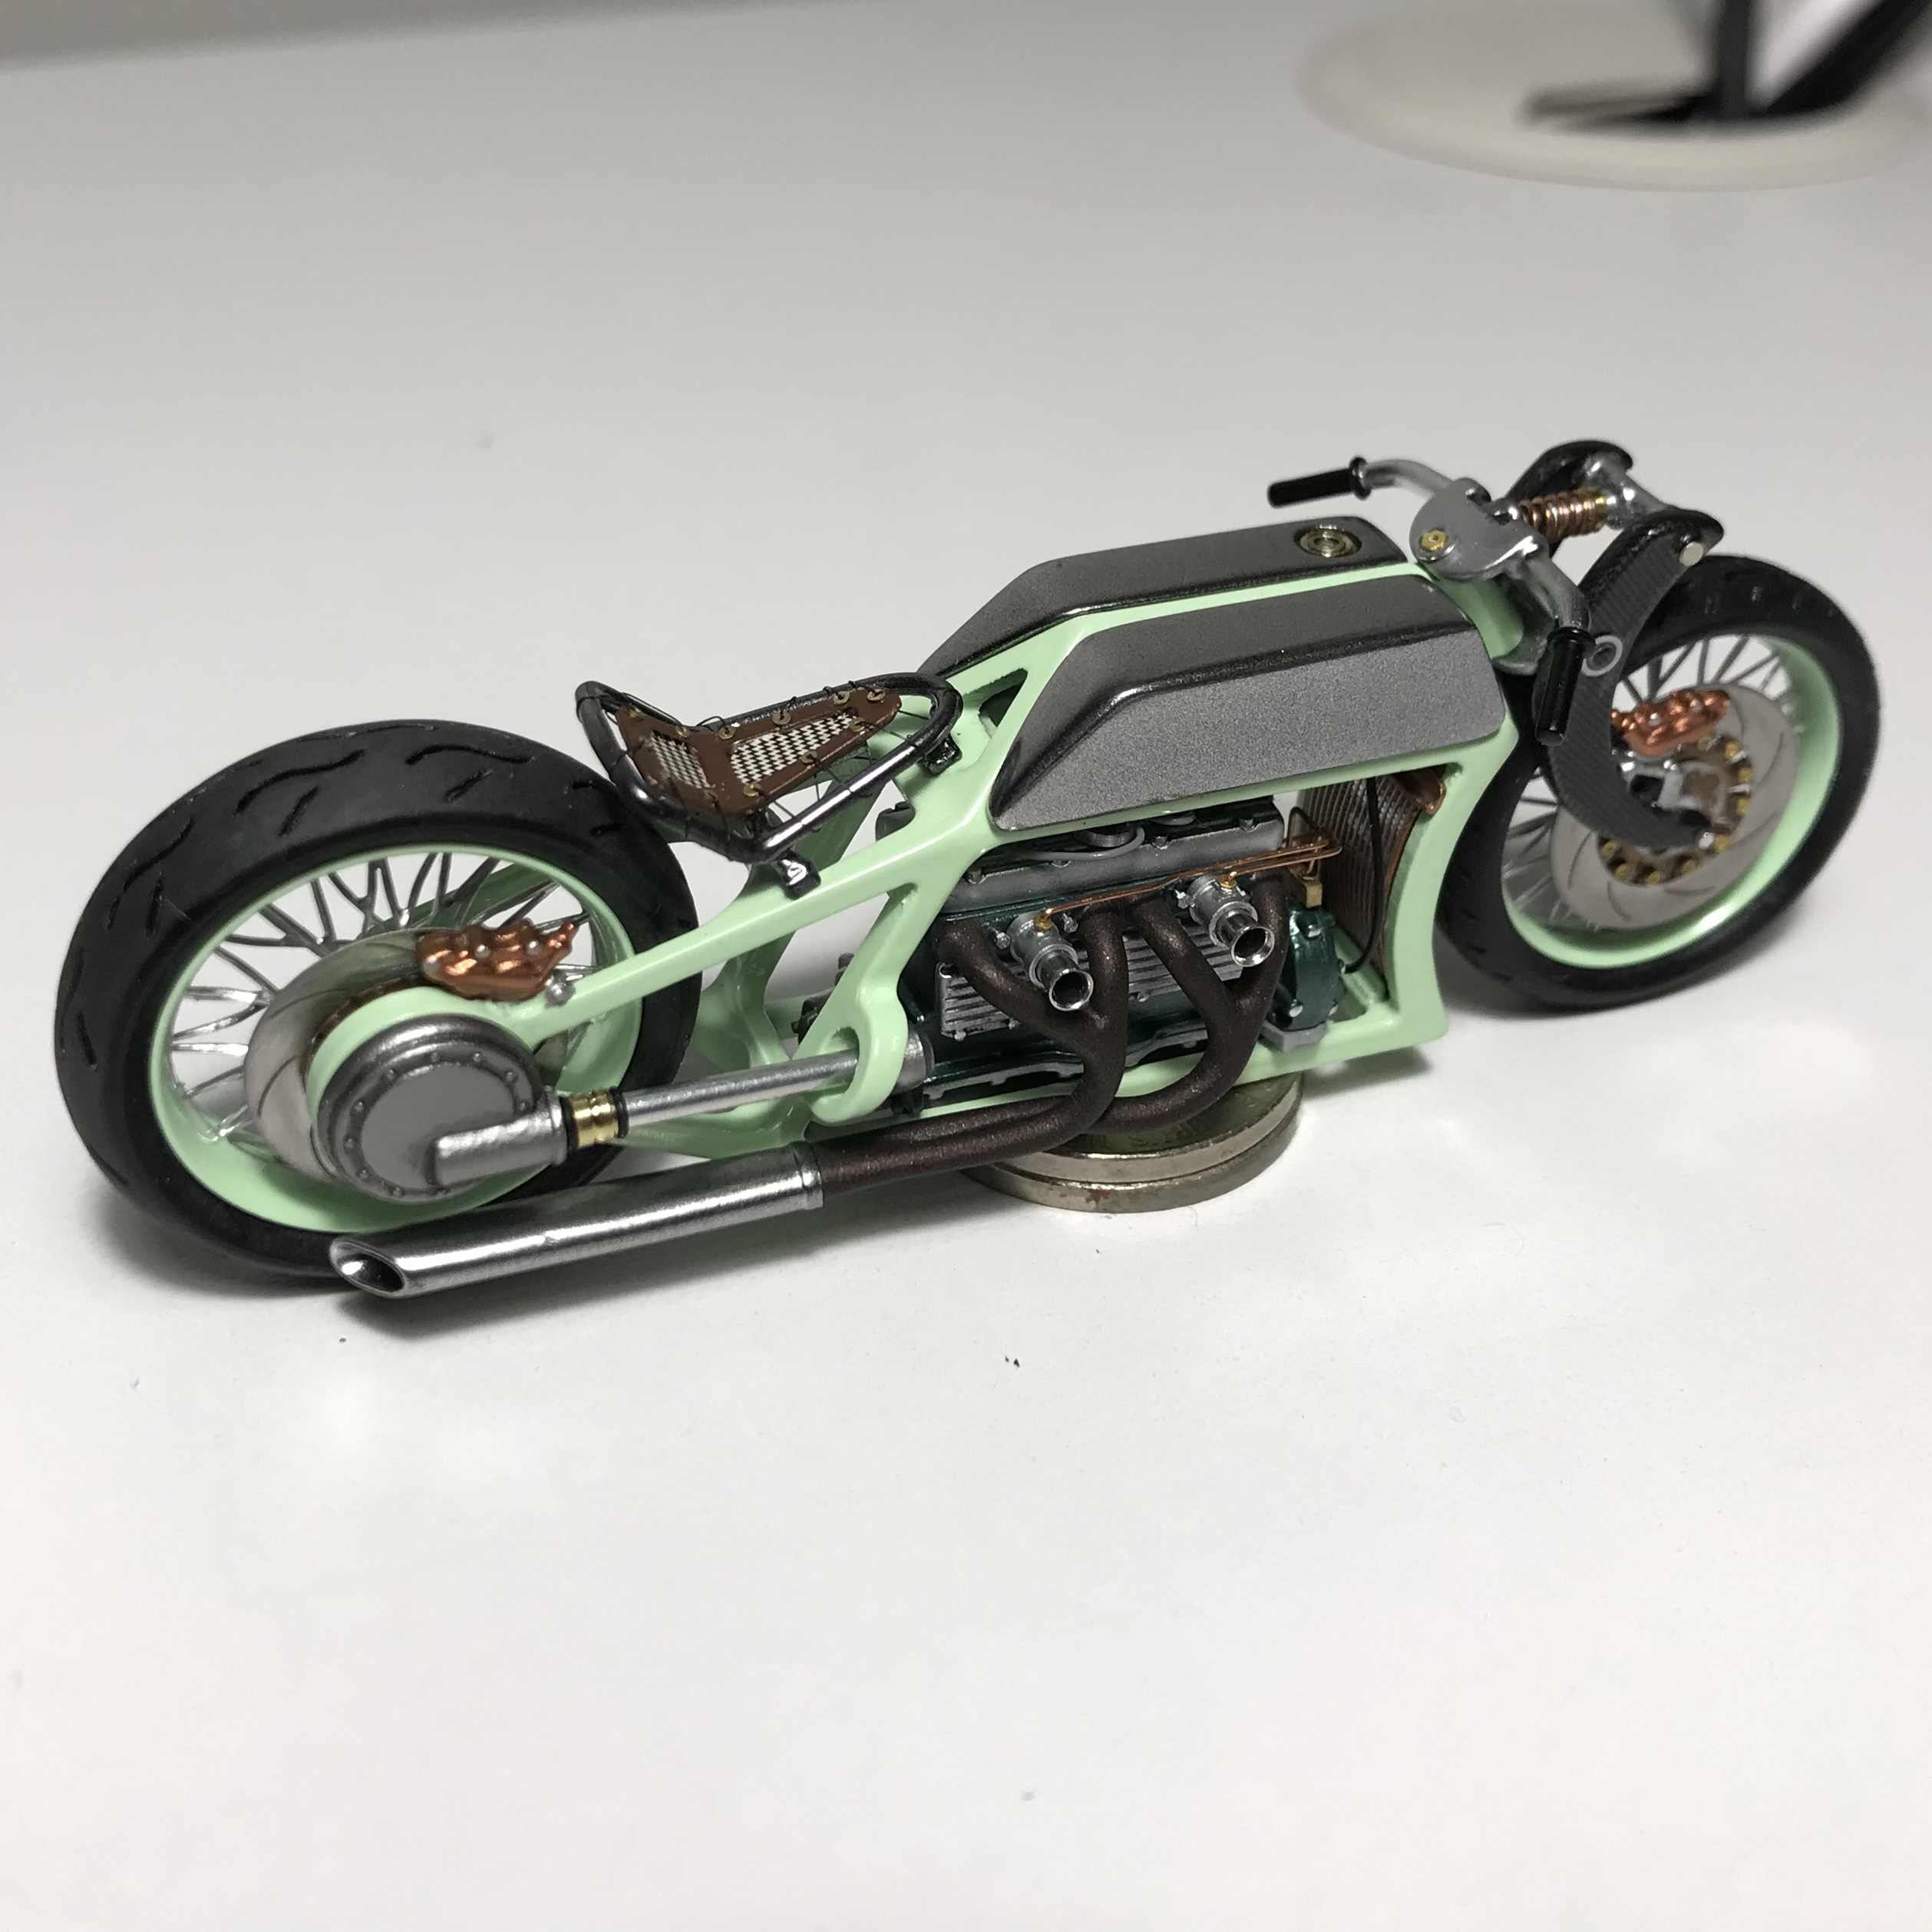
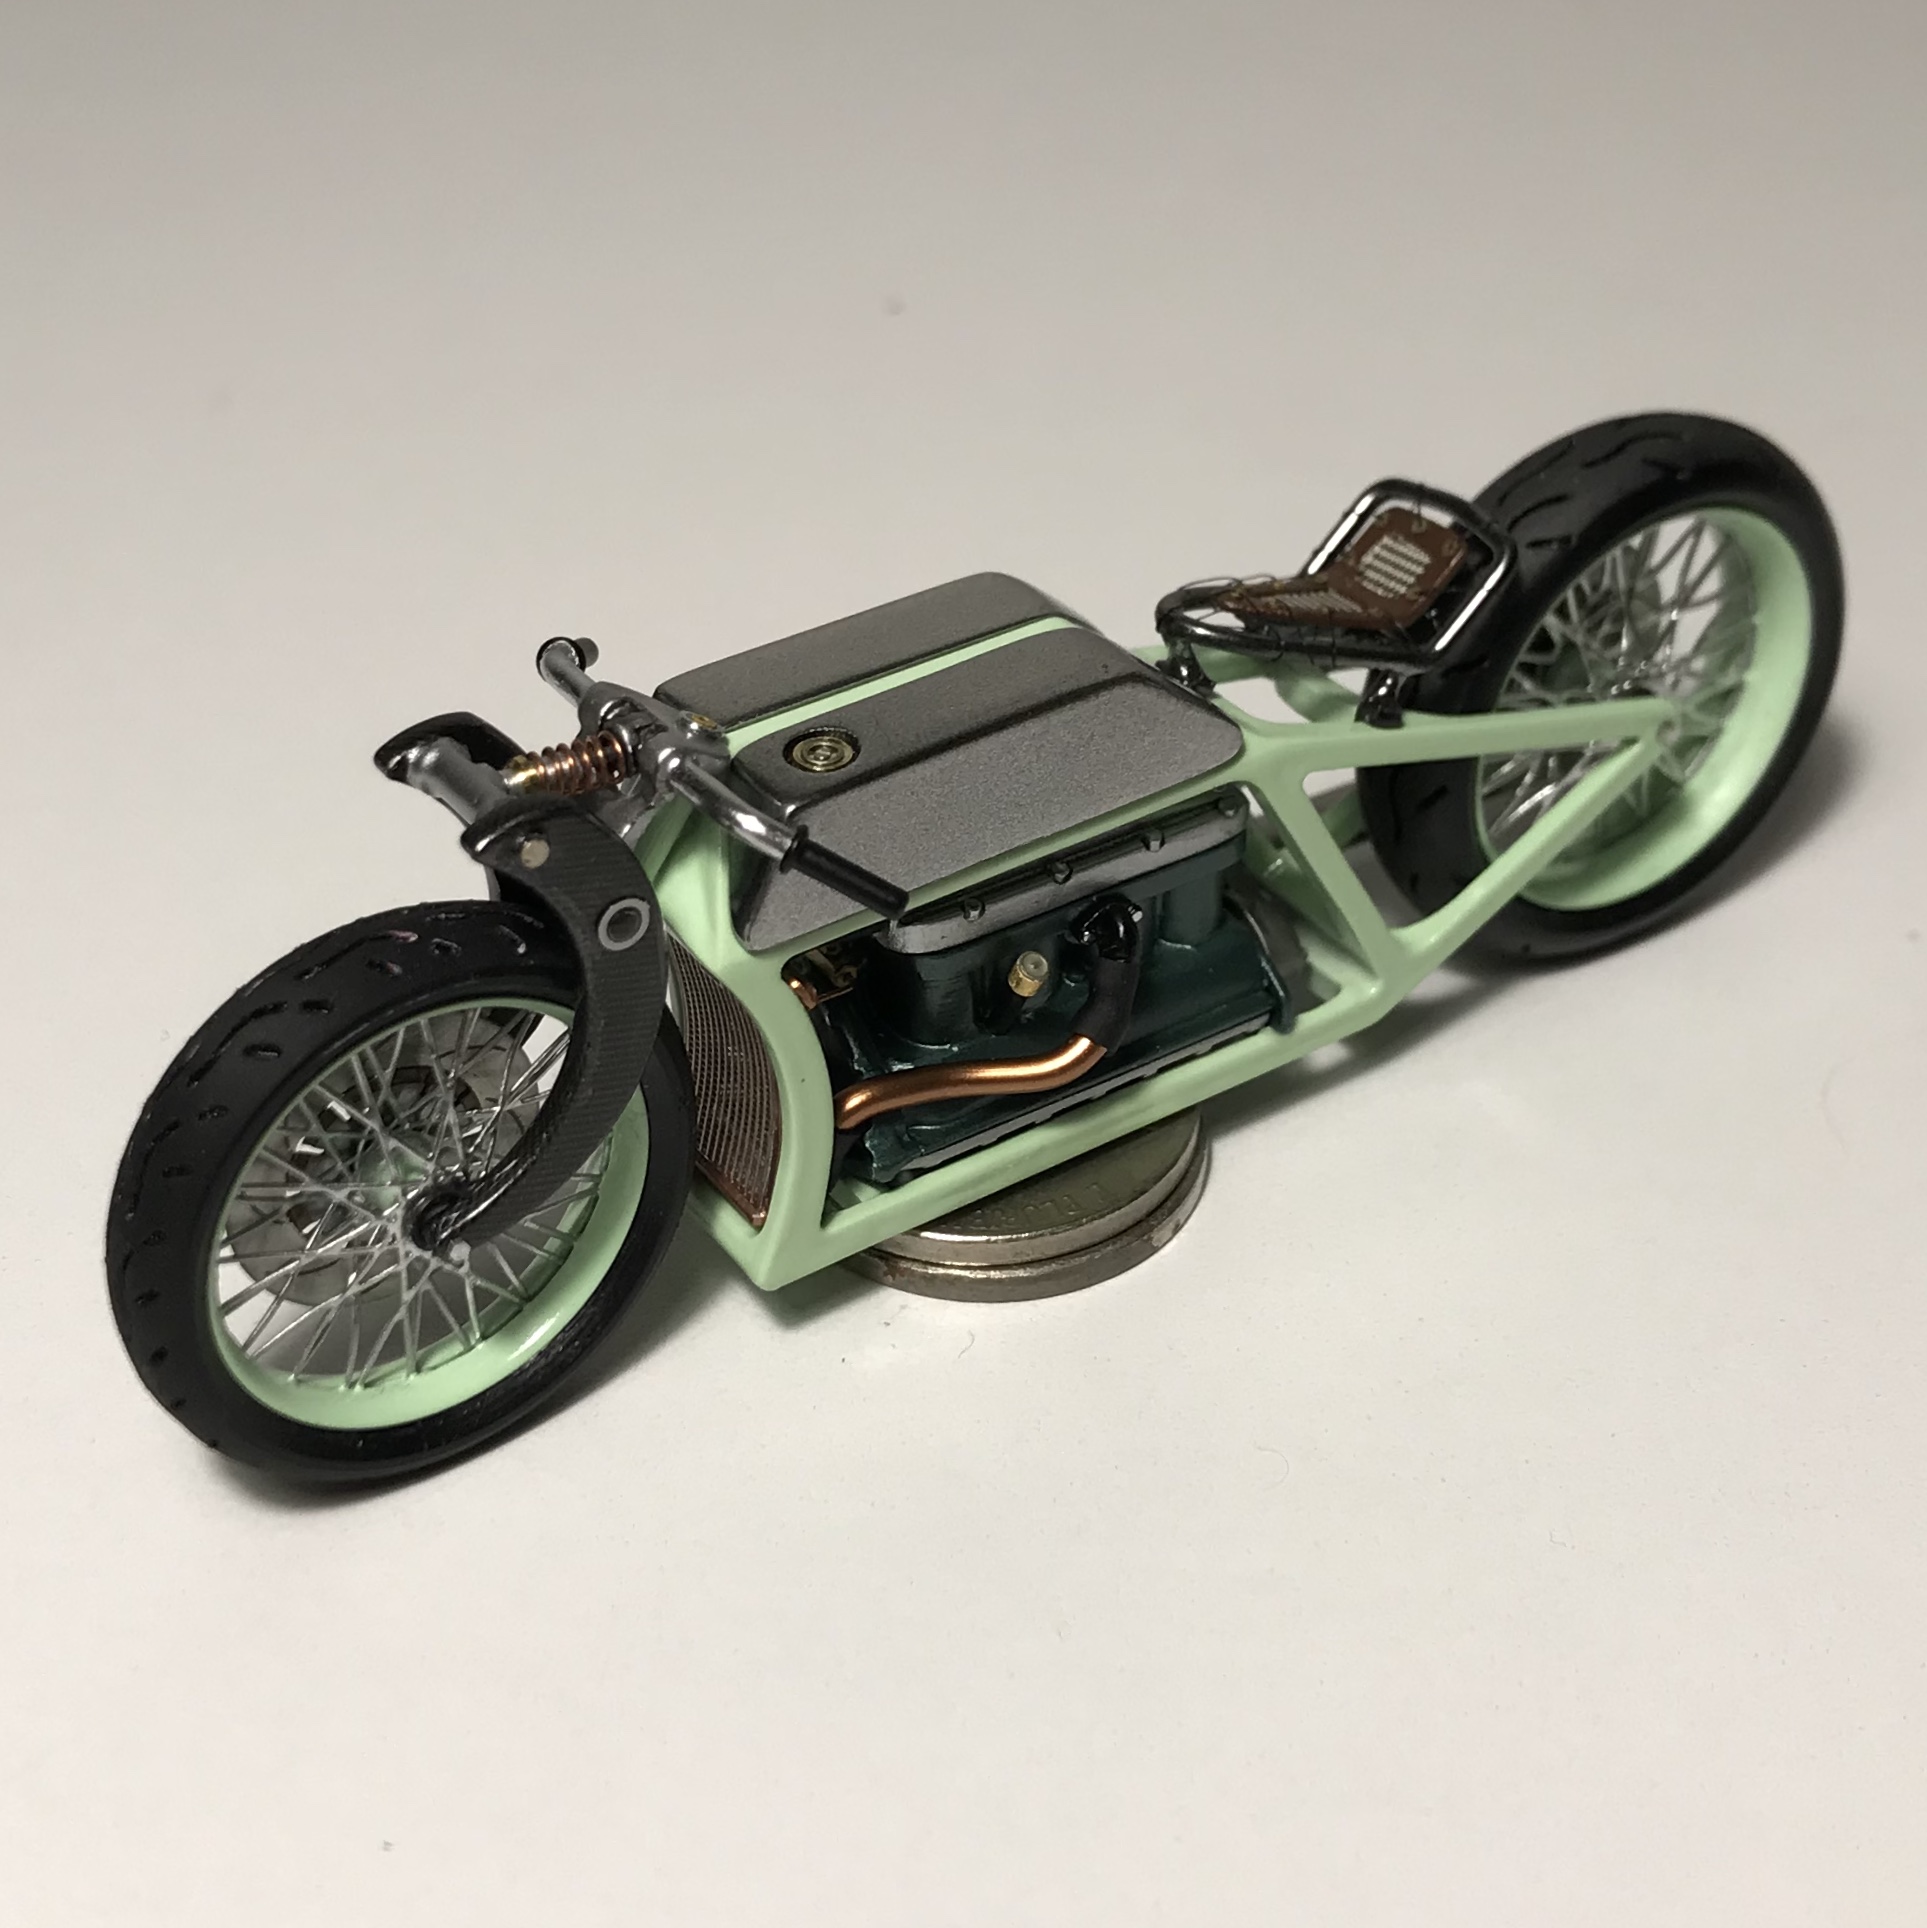
Thank you guys! Your comments and support mean a lot! This has been a really fun challenge.... and this little part is done! now back to making that ramp for the bronco... at least i have a nice little stand alone model for the Columbus show tomorrow.
-
Pennsylvania Hobby Shops
Impalow replied to iBorg's topic in General Automotive Talk (Trucks and Cars)
Agreed! That place is insane.... no clue how they keep that investment in inventory... we are talking floor to ceiling stacks of expensive R/C stuff as well. Its a hobby lovers dream, something for everyone! -
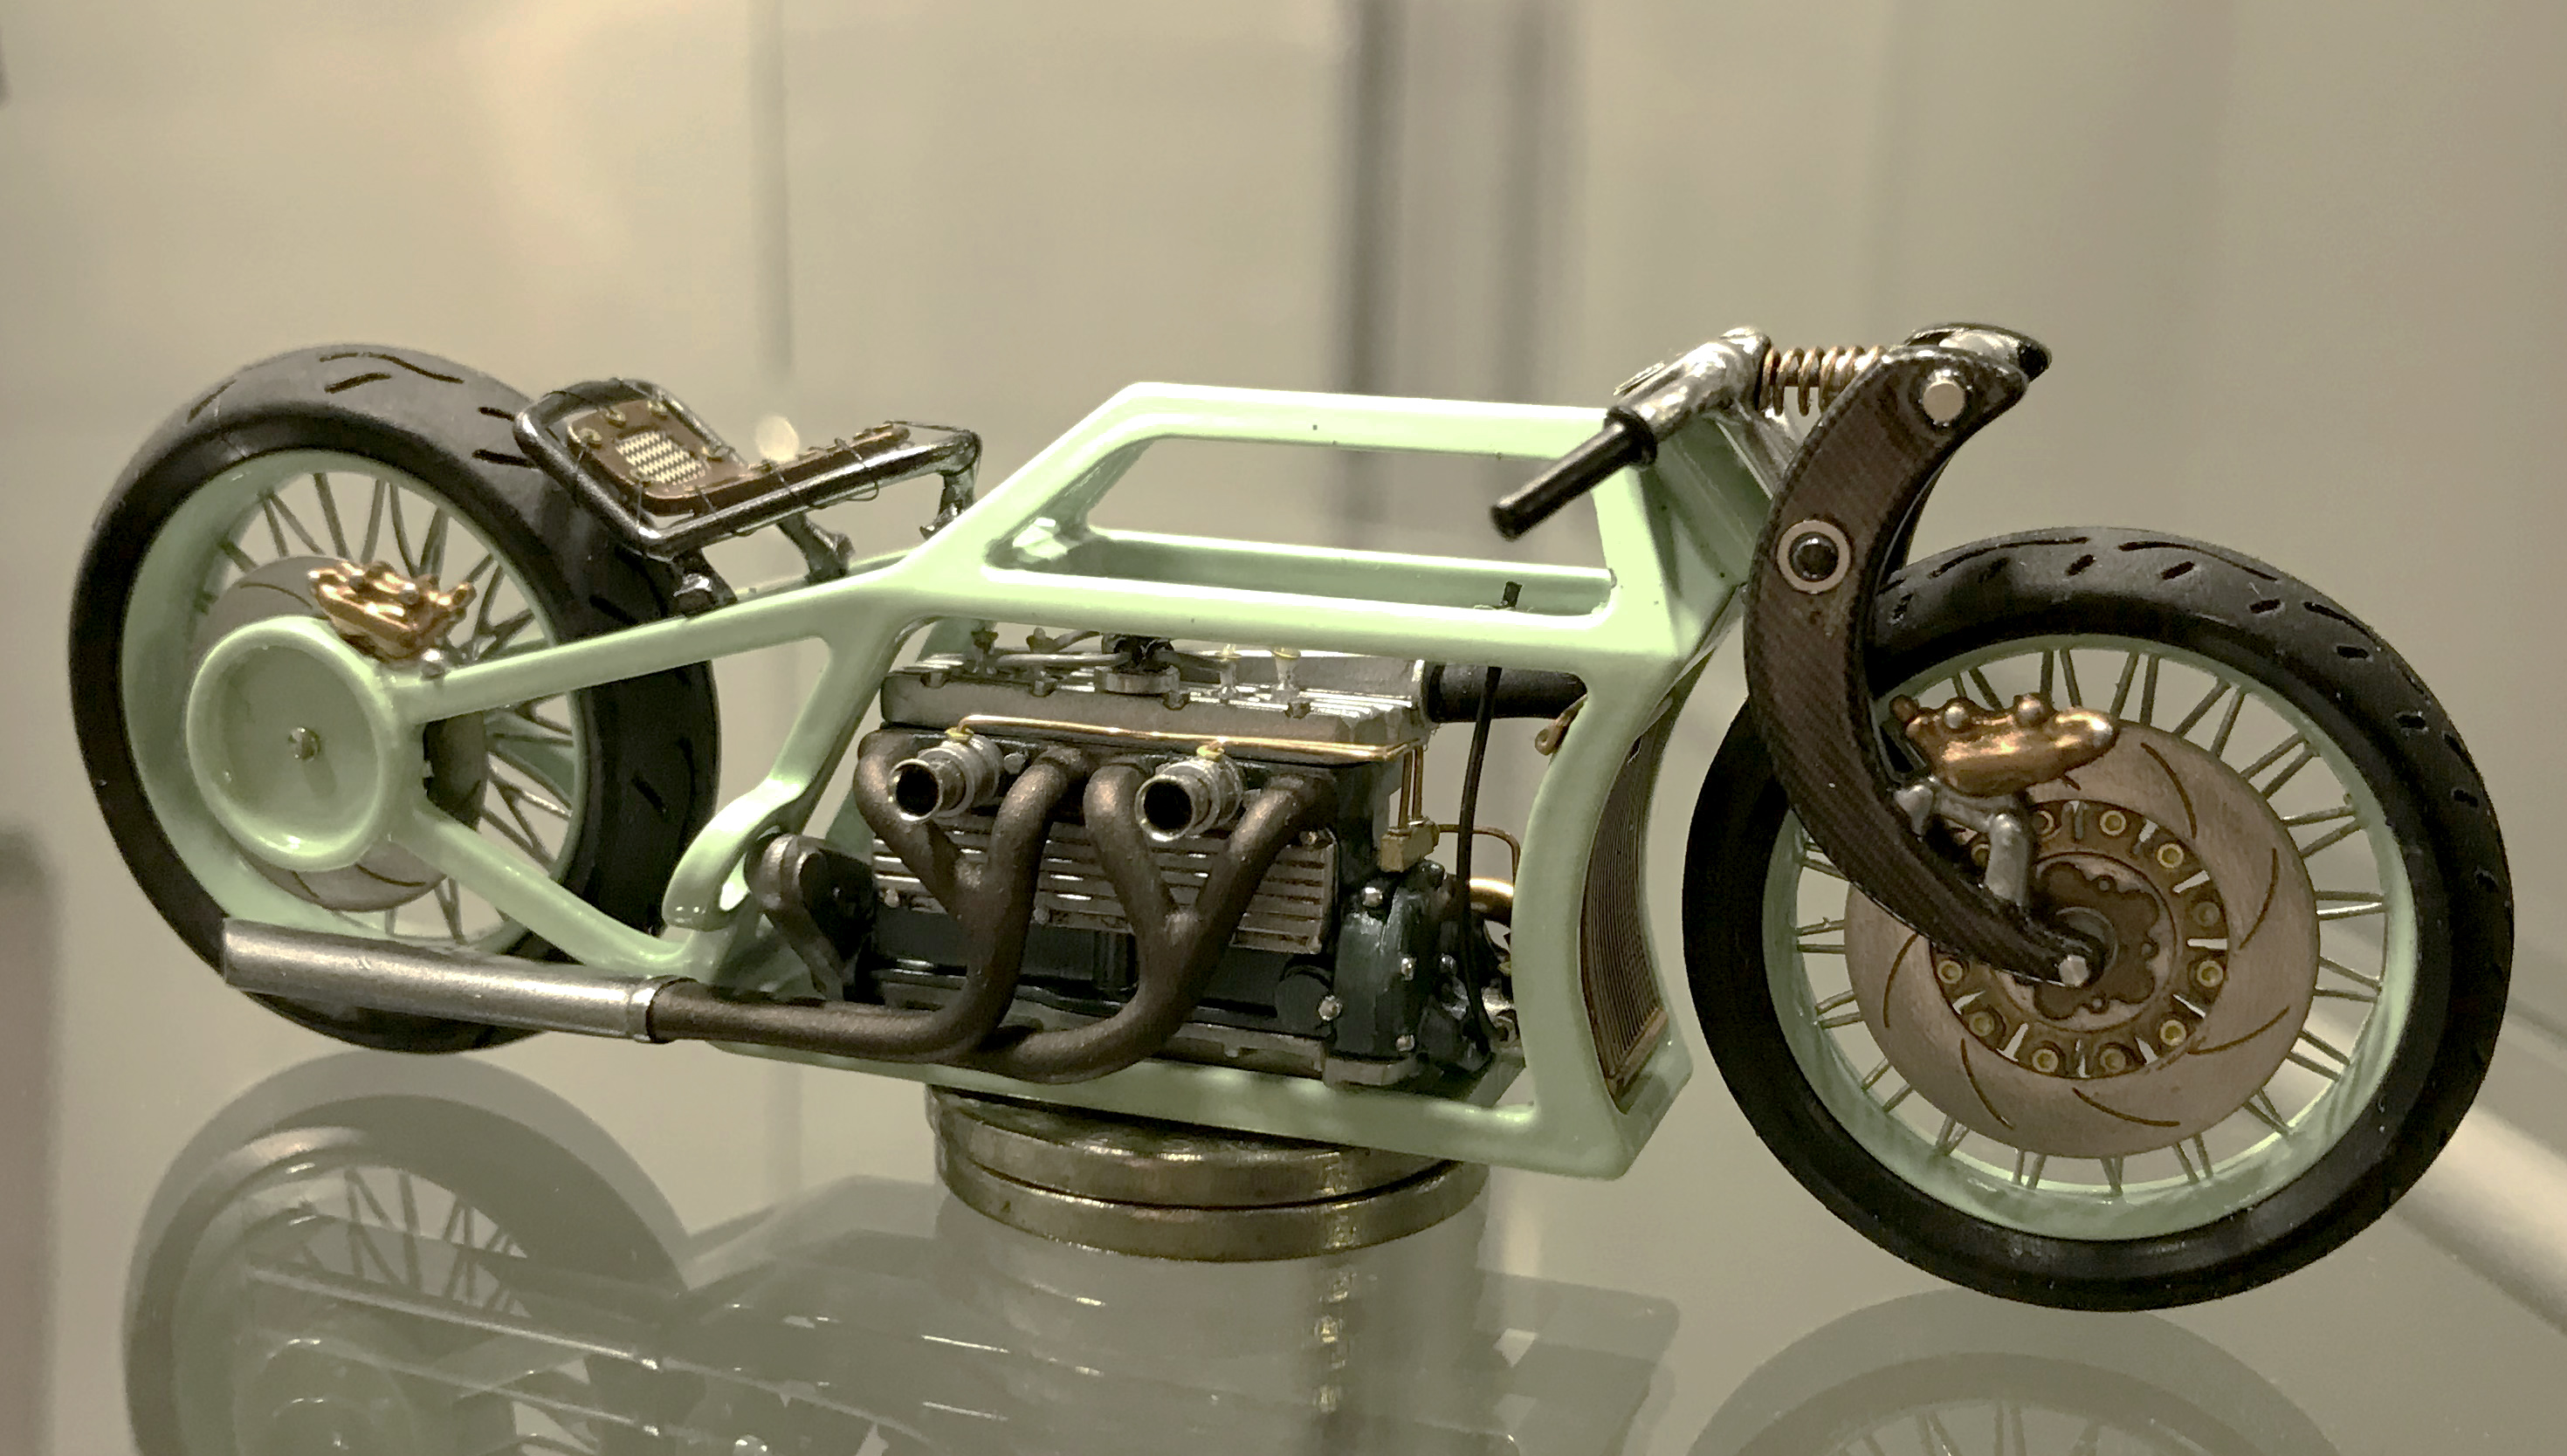
Thank you guys!! im almost done with this bike! Here are a couple photos of in progress... the seat lacing was especially tricky on this one... everything is just so tiny. and all wired and plumbed.. and where it sits now.... just need the tanks and driveshaft and this puppy is done!
-
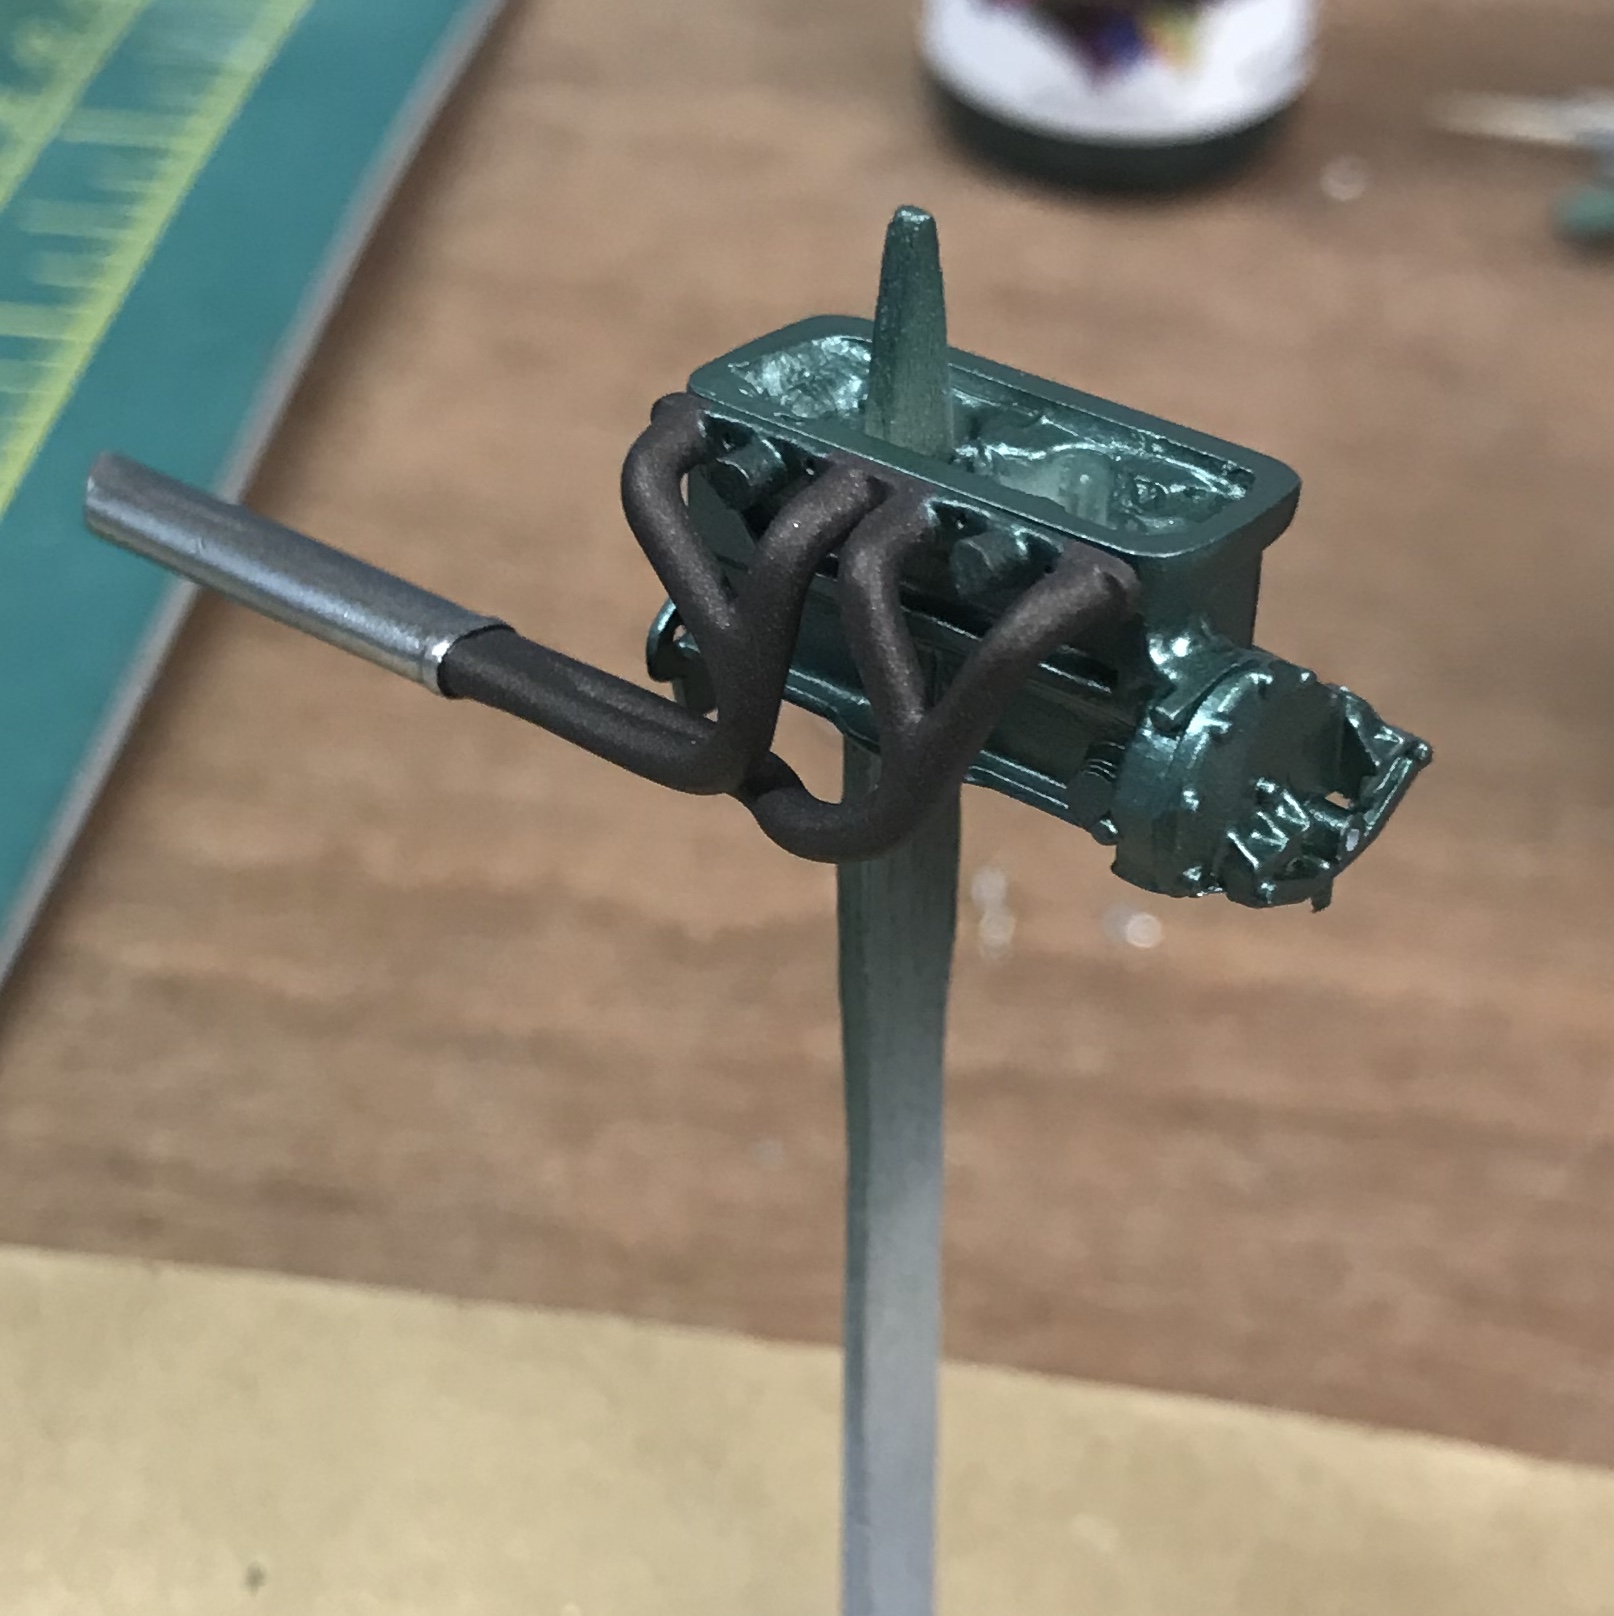
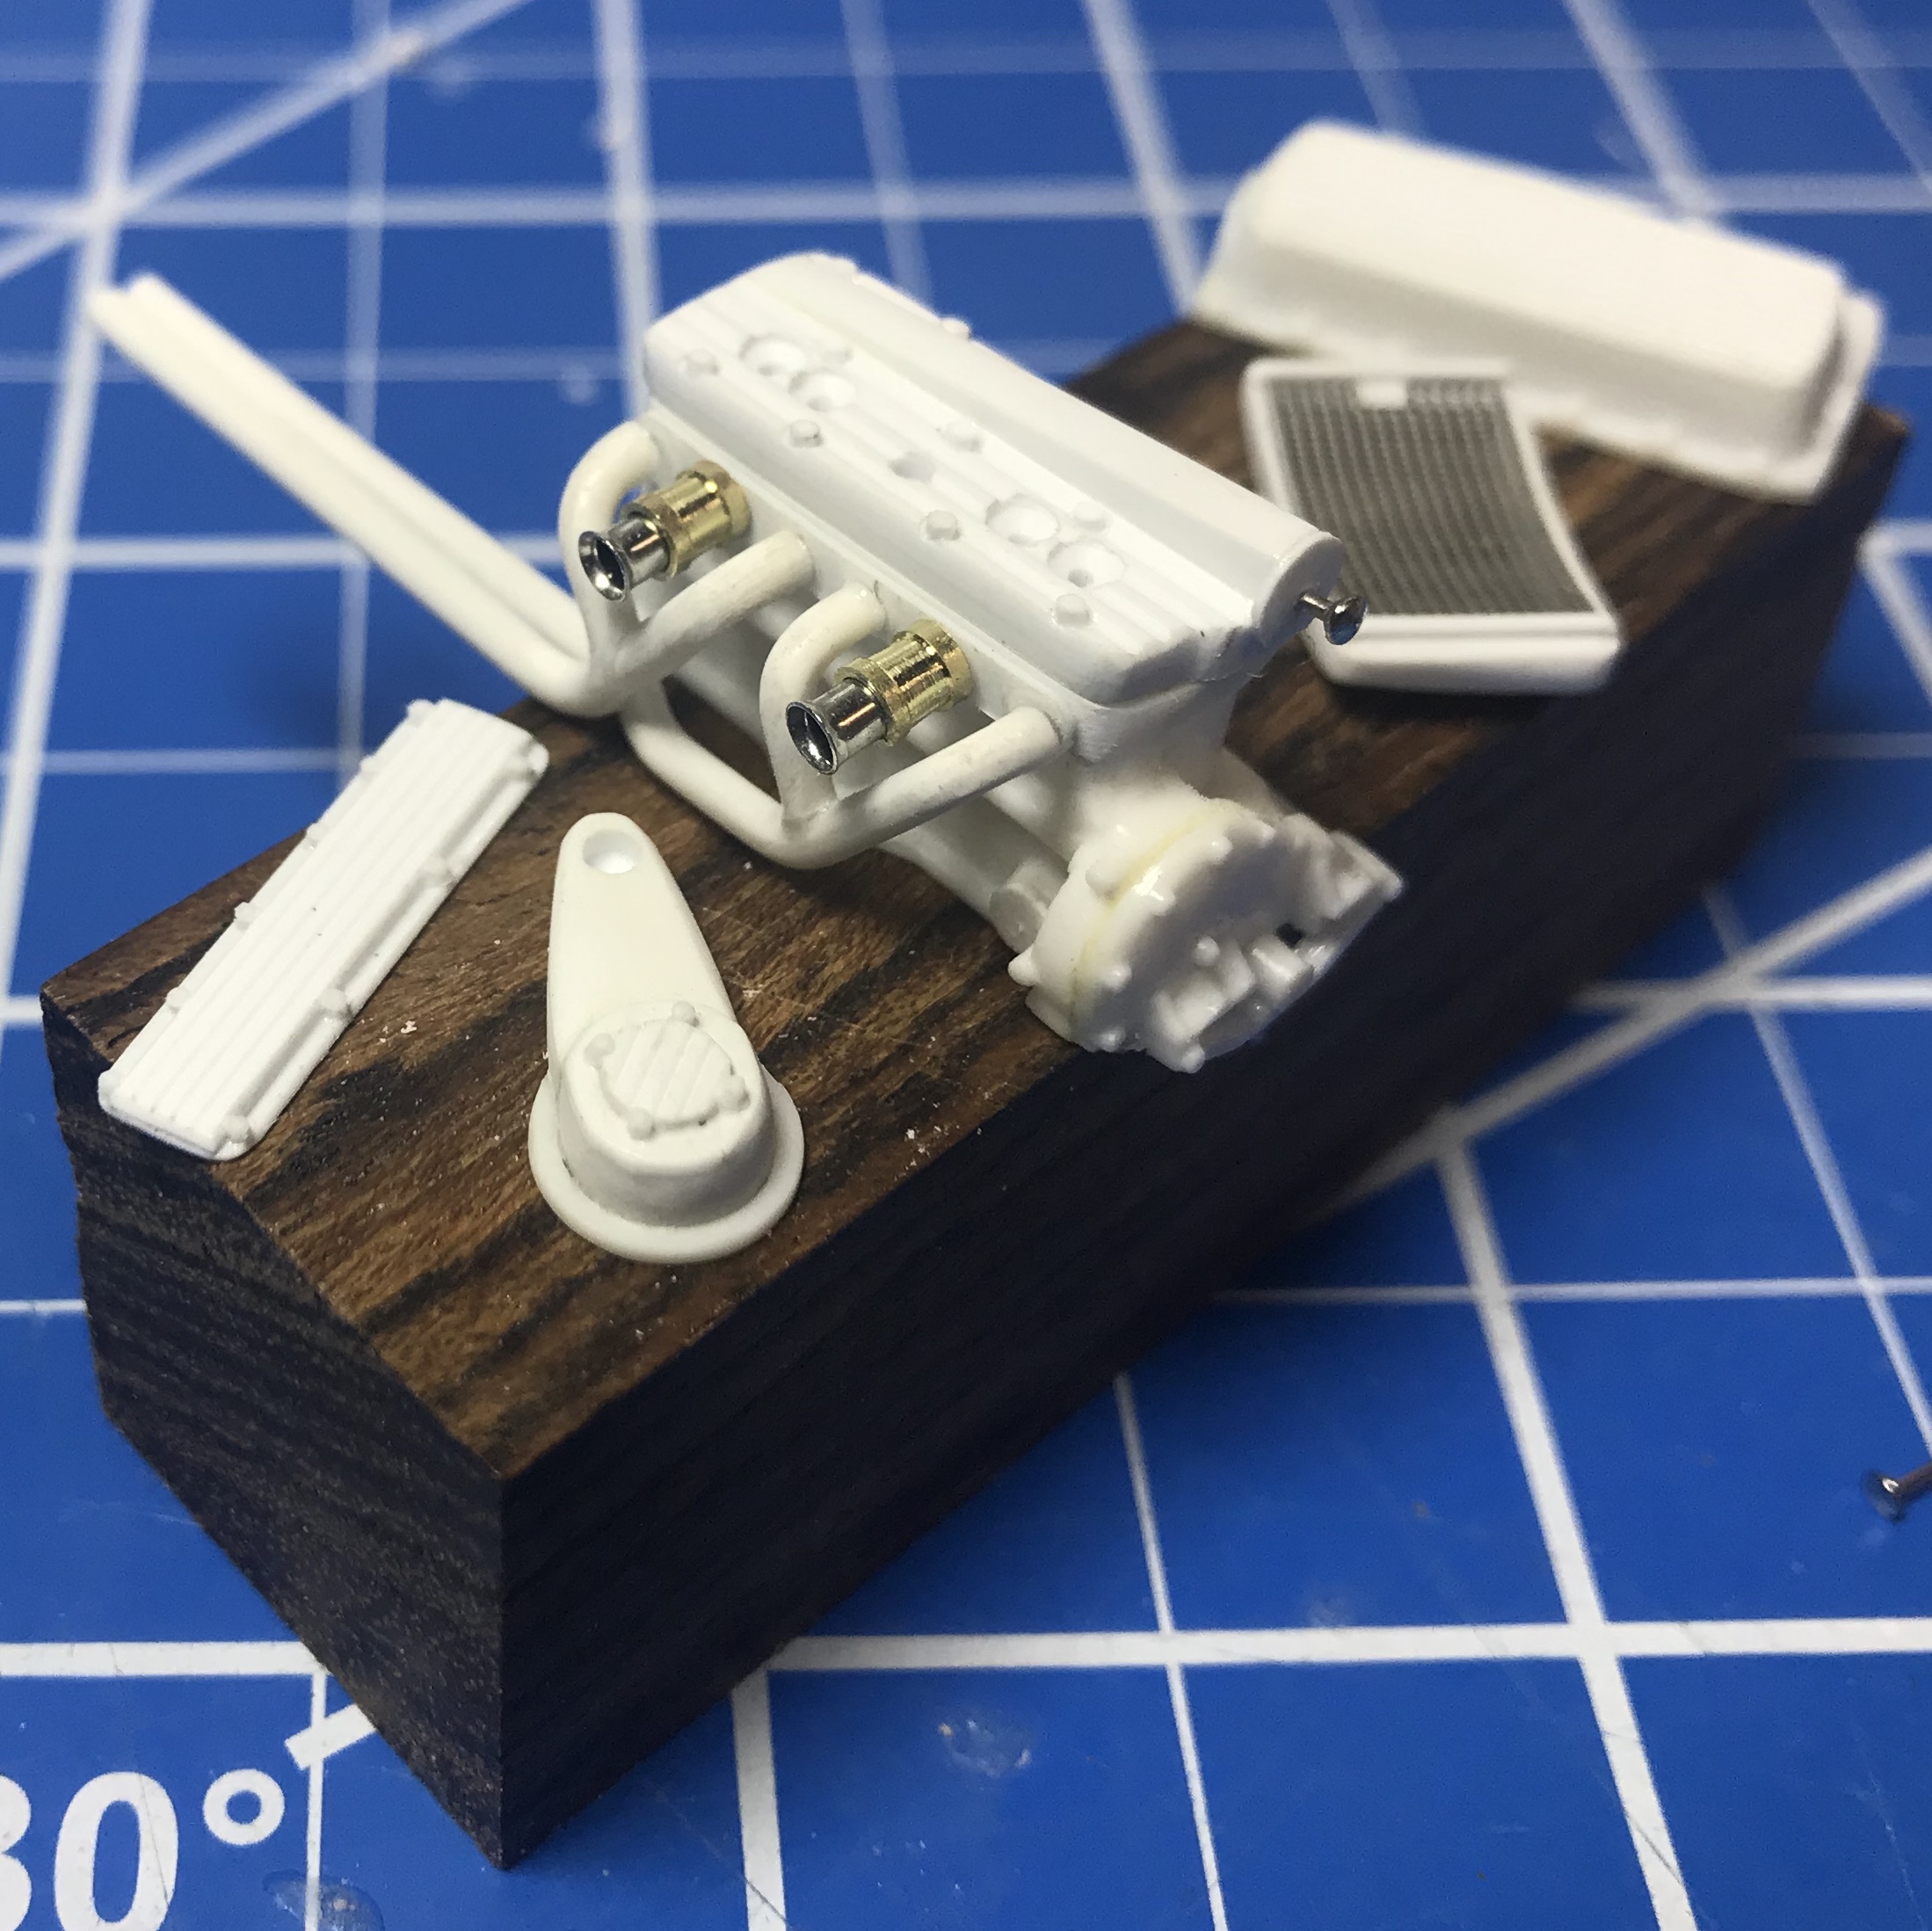
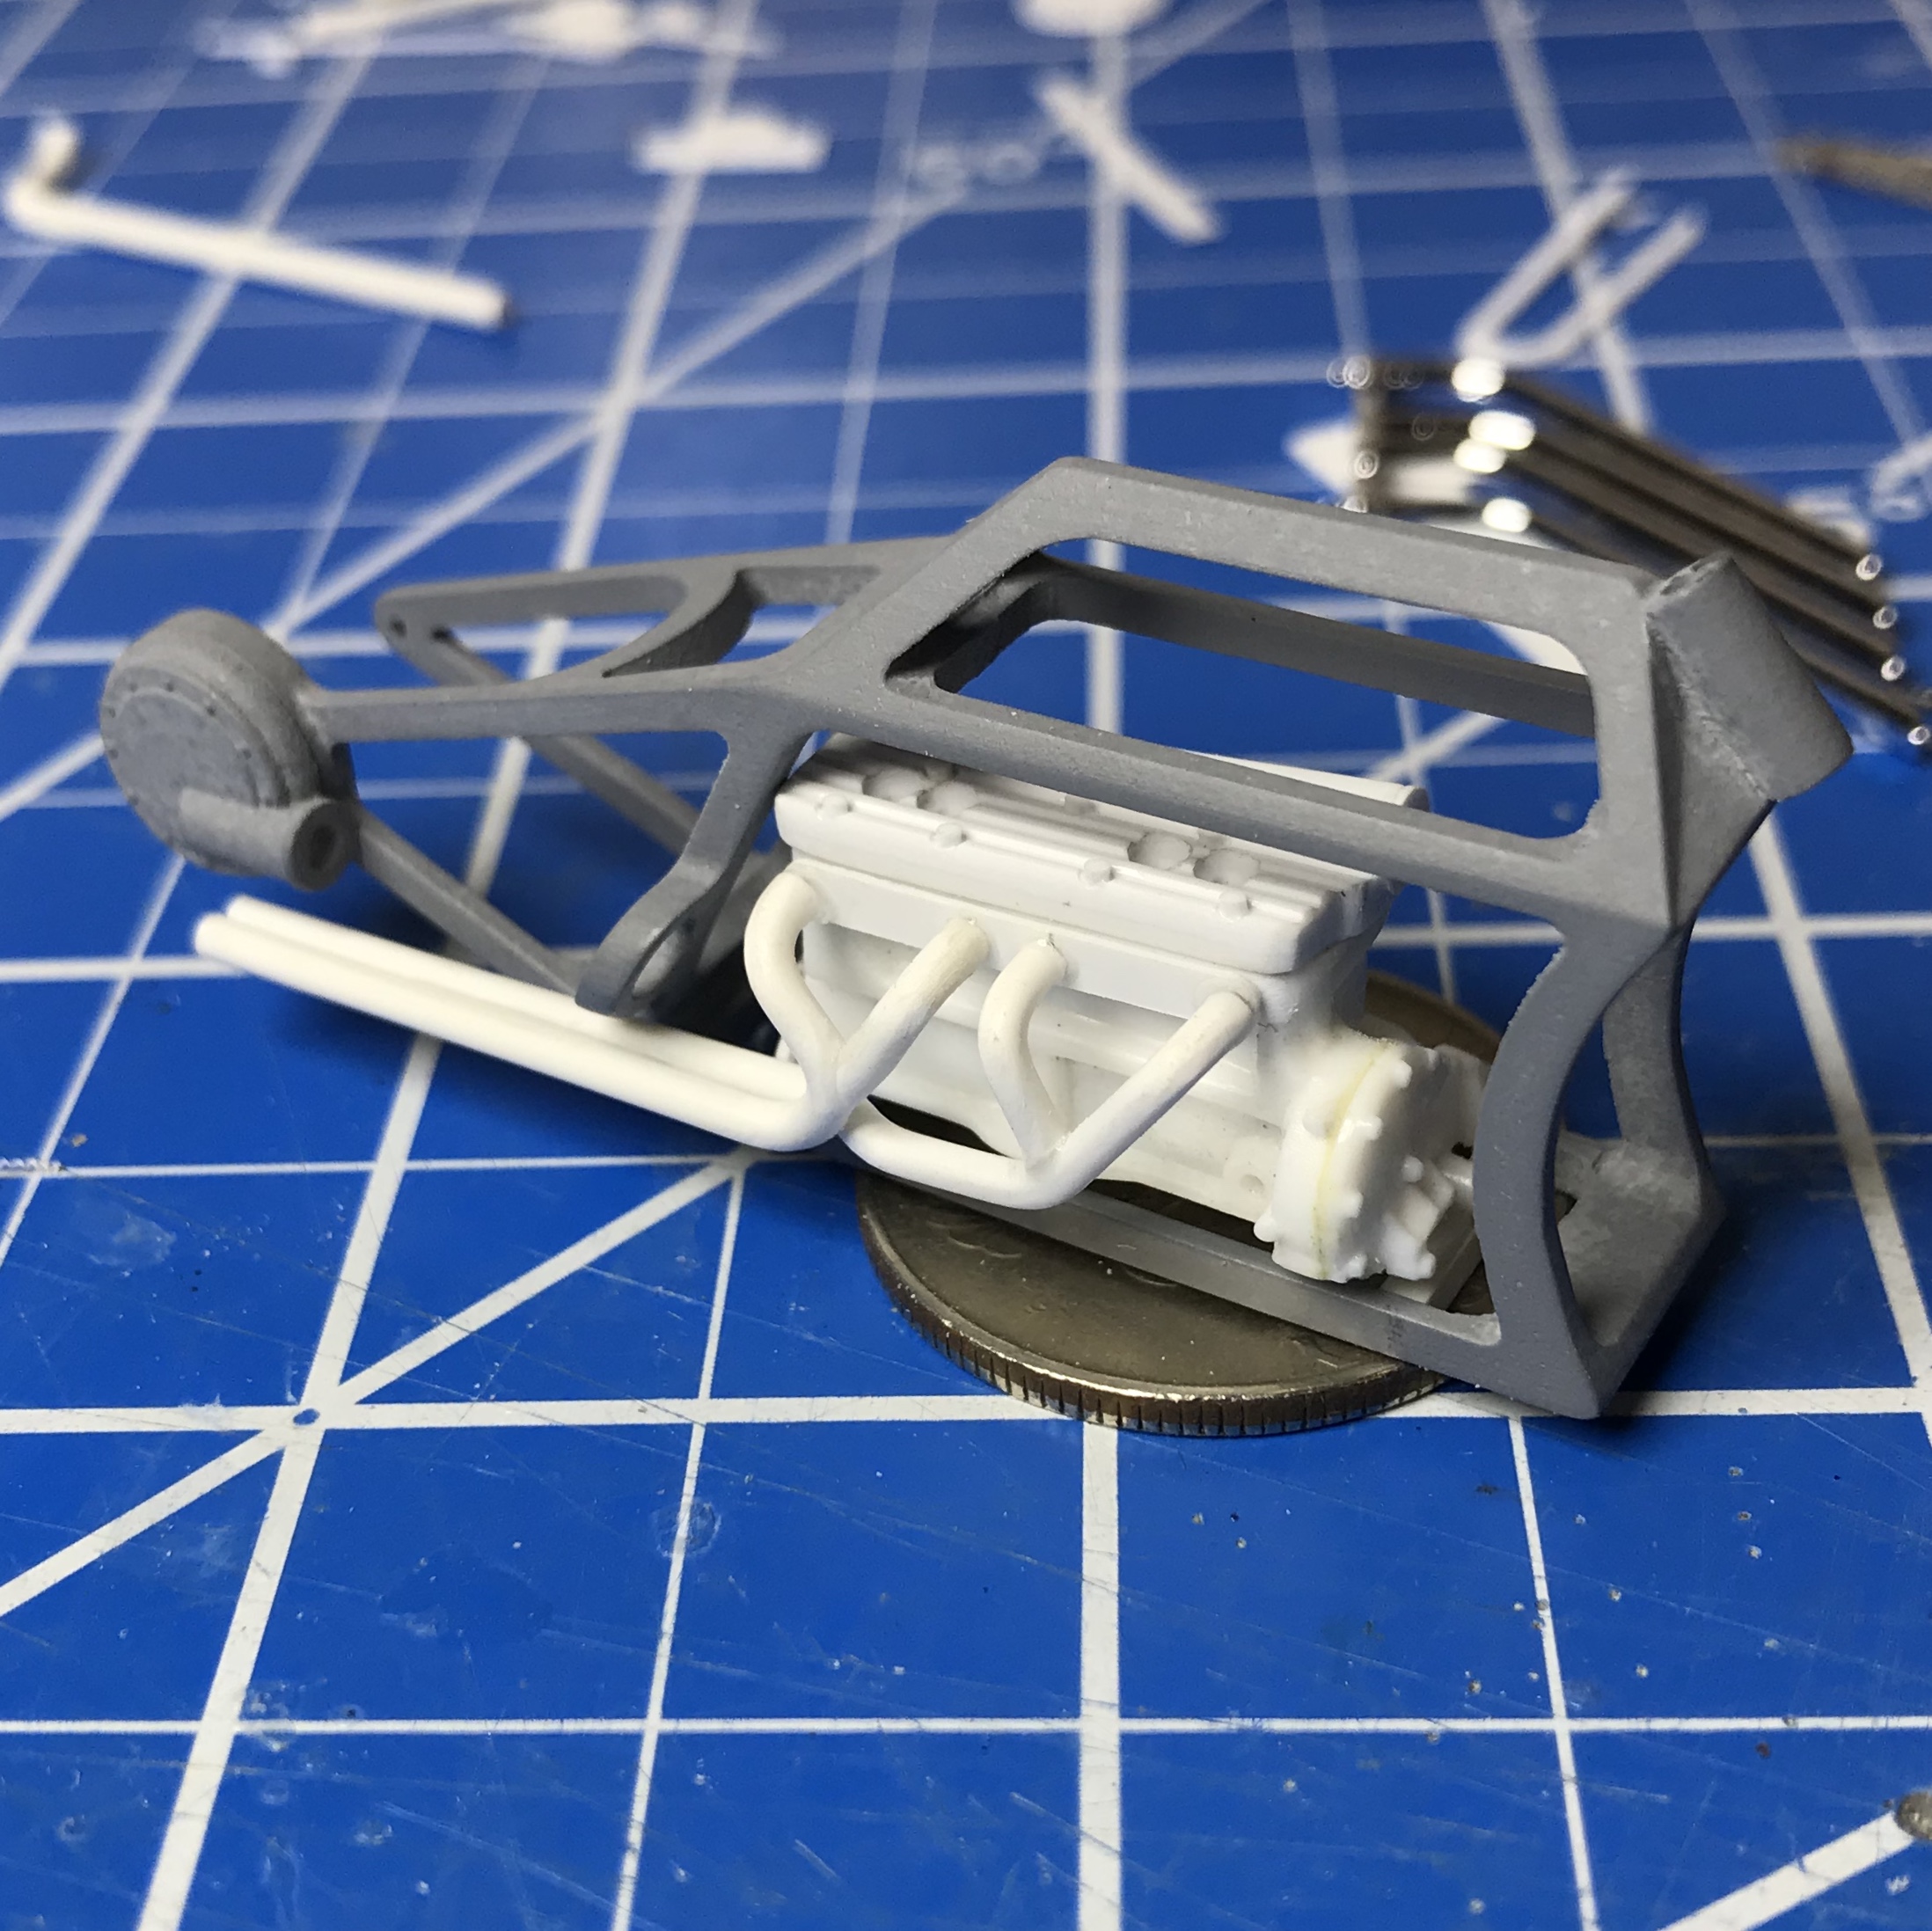
Thanks guys! im still plugging away on this little guy.... Hoping to have it done as a stand alone item for the Columbus show in a couple weeks... then back onto the bronco hauler. Here are some progress shots: And starting the engine assembly... those RBmotion manifold bolts were fun...
-
Datsun 620 Pickup
Impalow replied to afx's topic in WIP: Model Trucks: Pickups, Vans, SUVs, Light Commercial
Fantastic work J.C.! I'm digging that mock-up a lot! -
I have been using this lately and have been really impressed with it.... available in 1/32" and 1/28" https://painthuffer.bigcartel.com/product/fbs-micro-fineline-crepe-tape-pt43 I stopped at the FBS booth at SEMA and talked to them, got some samples to try...and I've been really impressed. Painthuffer is just my favorite distributor of their products.
-
Datsun 620 Pickup
Impalow replied to afx's topic in WIP: Model Trucks: Pickups, Vans, SUVs, Light Commercial
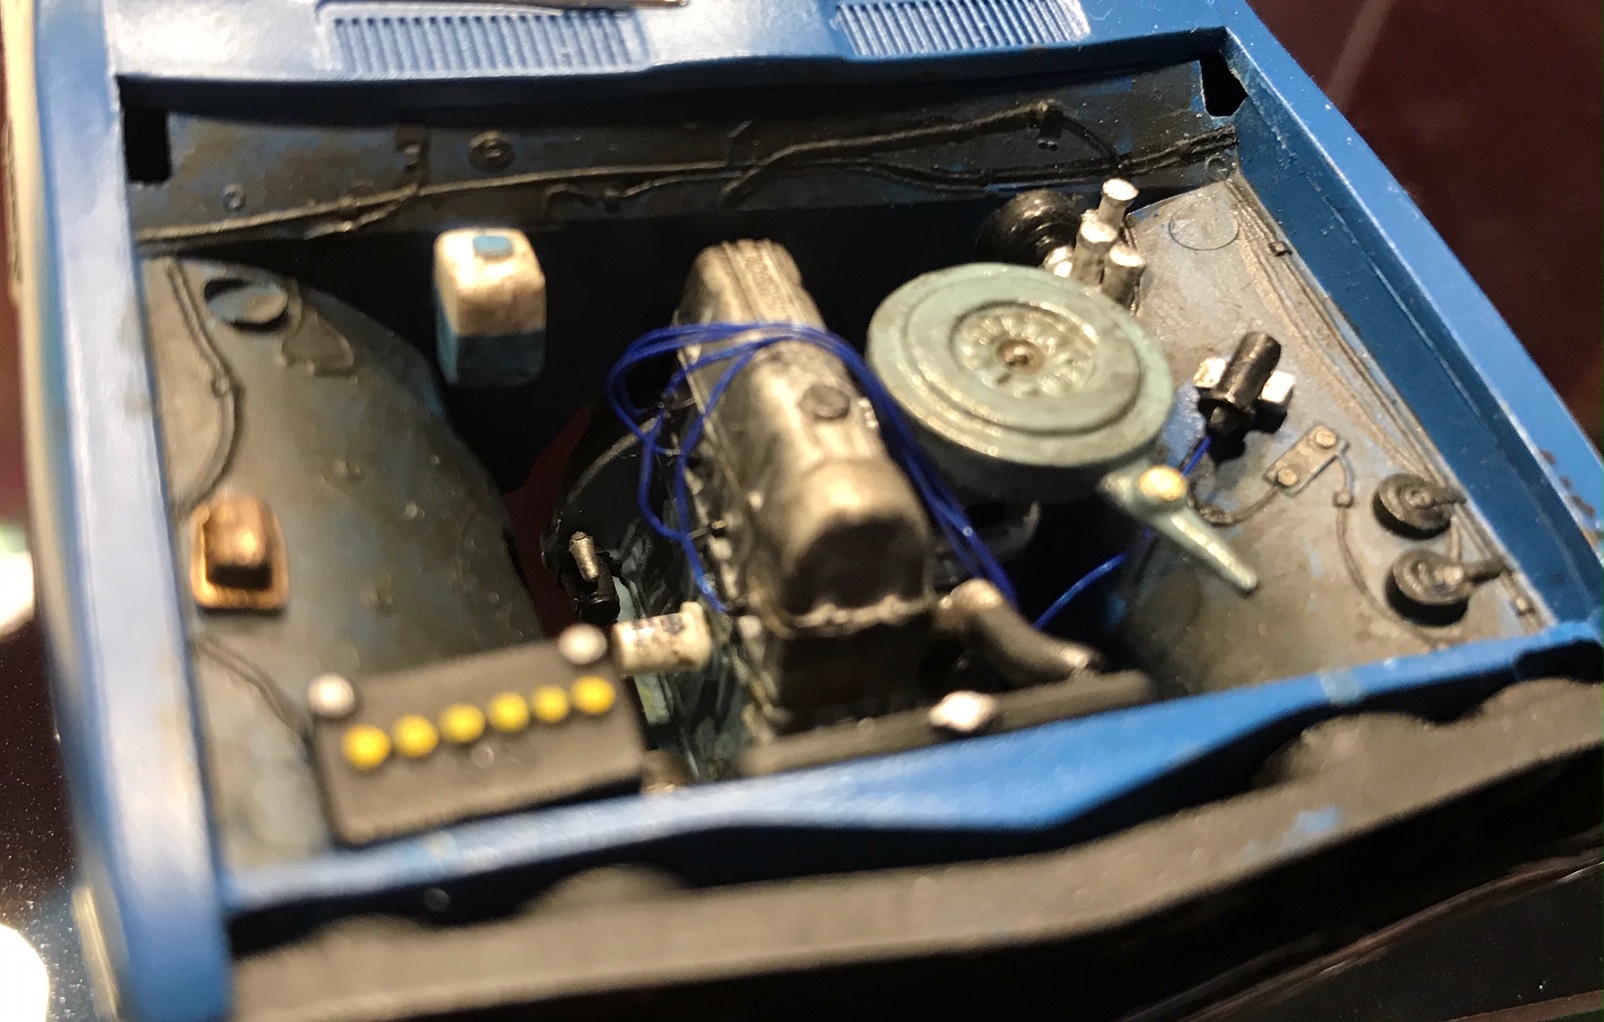
Nothing really notable... just a weber carb, and deletion of some emission stuff. My dad did build a clone of our truck out of the California Sunshine previous release of this kit... and its pretty fantastic/spot on in my opinion. (the truck had some wide whites for a while)
-
Datsun 620 Pickup
Impalow replied to afx's topic in WIP: Model Trucks: Pickups, Vans, SUVs, Light Commercial
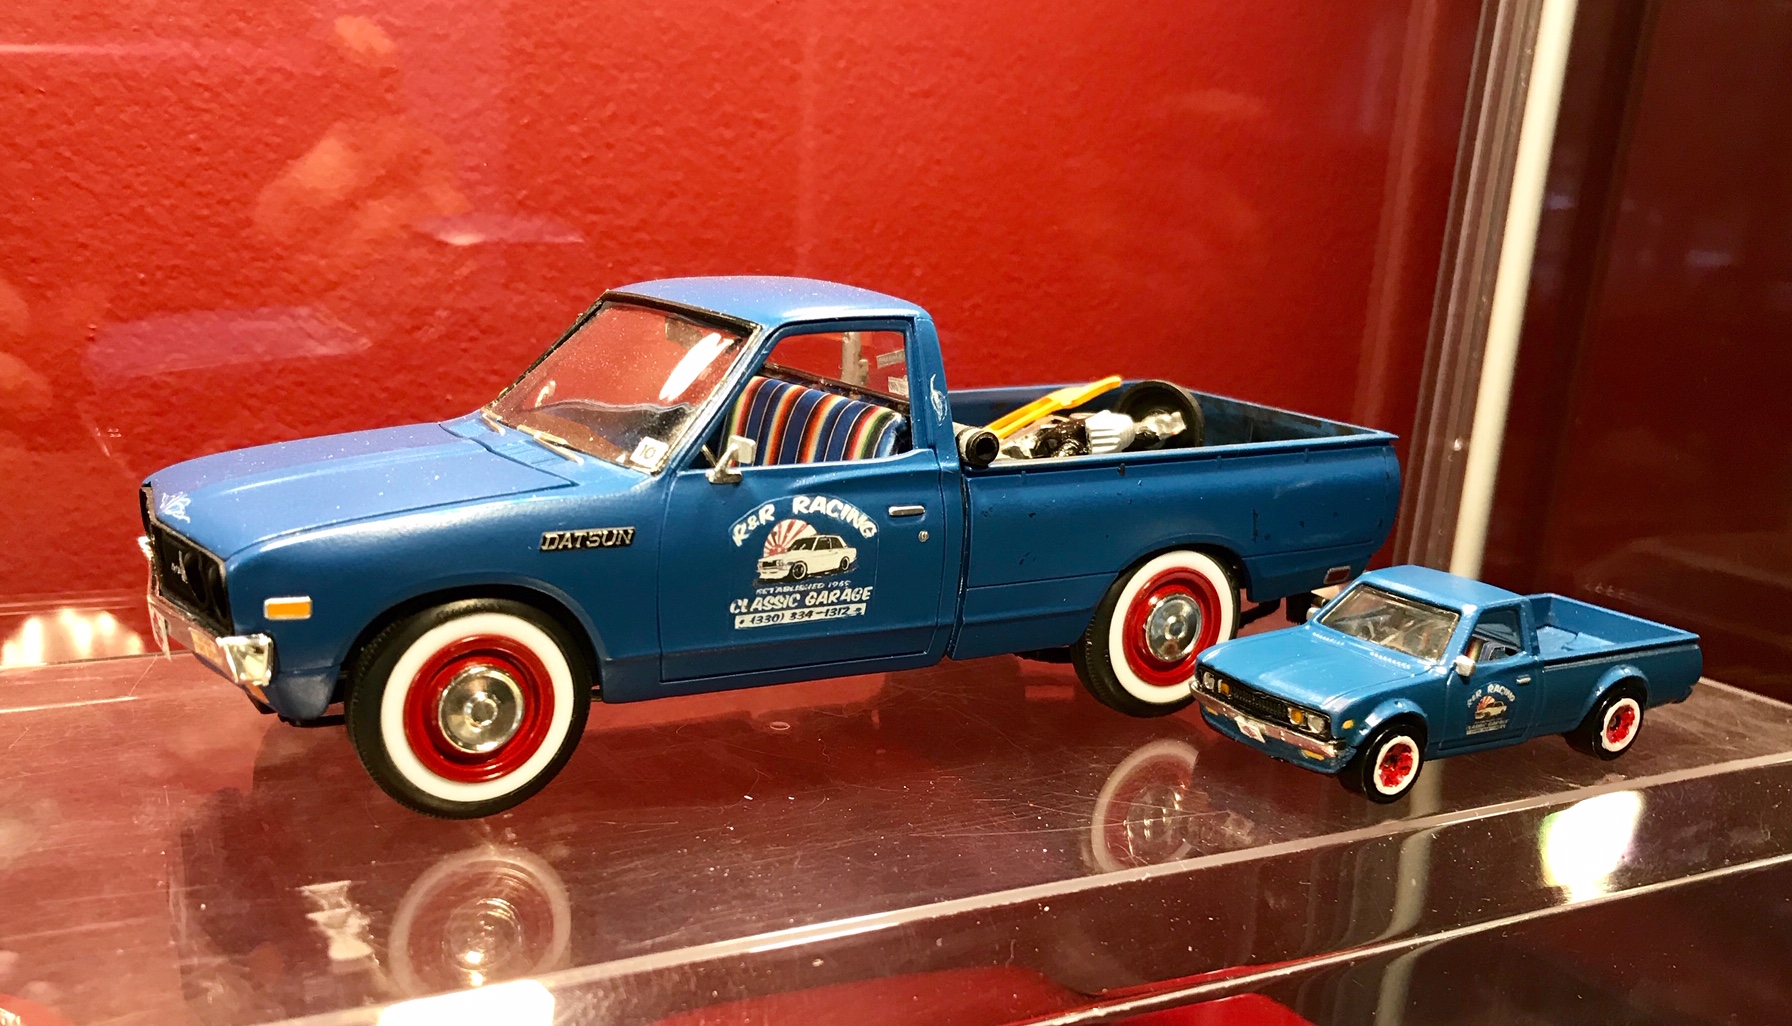
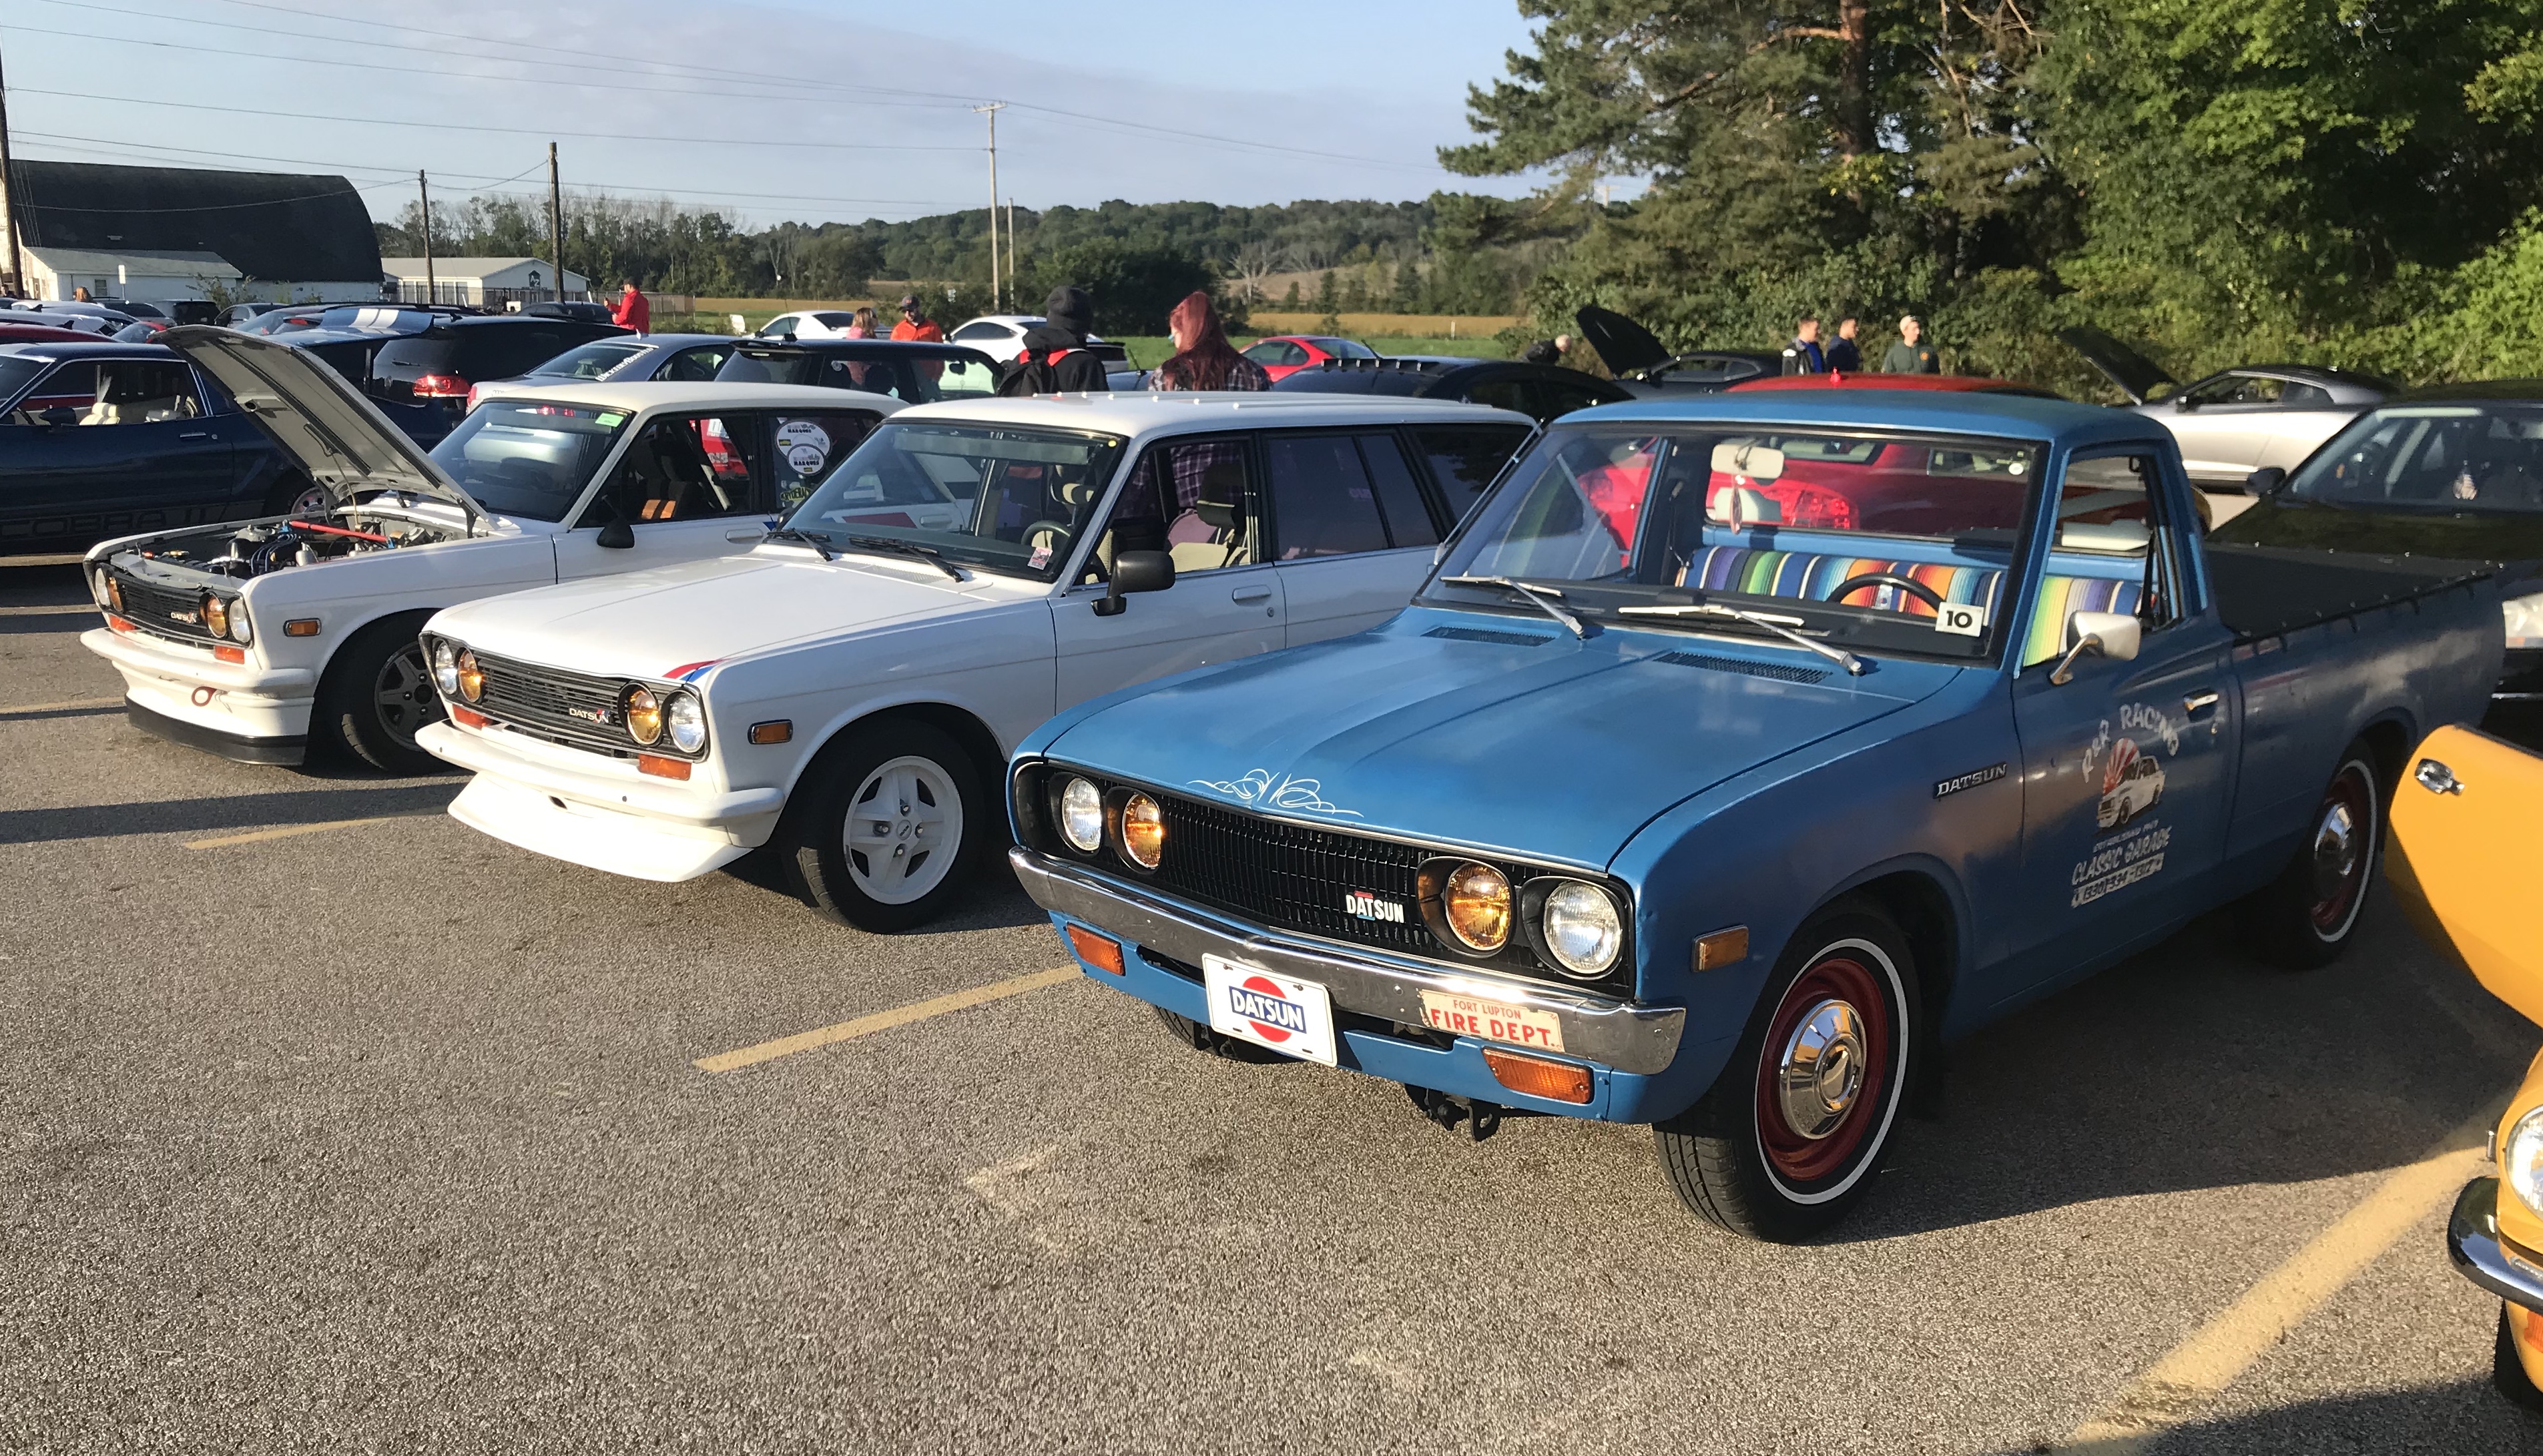
Ray that truck is awesome! I would love to have that now, especially with that cap/stripe/wheel combo! Here is my dad and I's current 620 shop truck (along with 2 of our 510s) I did the patina shop logos and pinstripes a few years back when we snatched it off Craigslist... it was originally a volunteer fireman's vehicle out of fort lupton colorado. We have lowered it a bit, and dropped in a Z 5speed, other than that its pretty much stock-ish.
-
That is gorgeous! Fantastic work!
-
Datsun 620 Pickup
Impalow replied to afx's topic in WIP: Model Trucks: Pickups, Vans, SUVs, Light Commercial
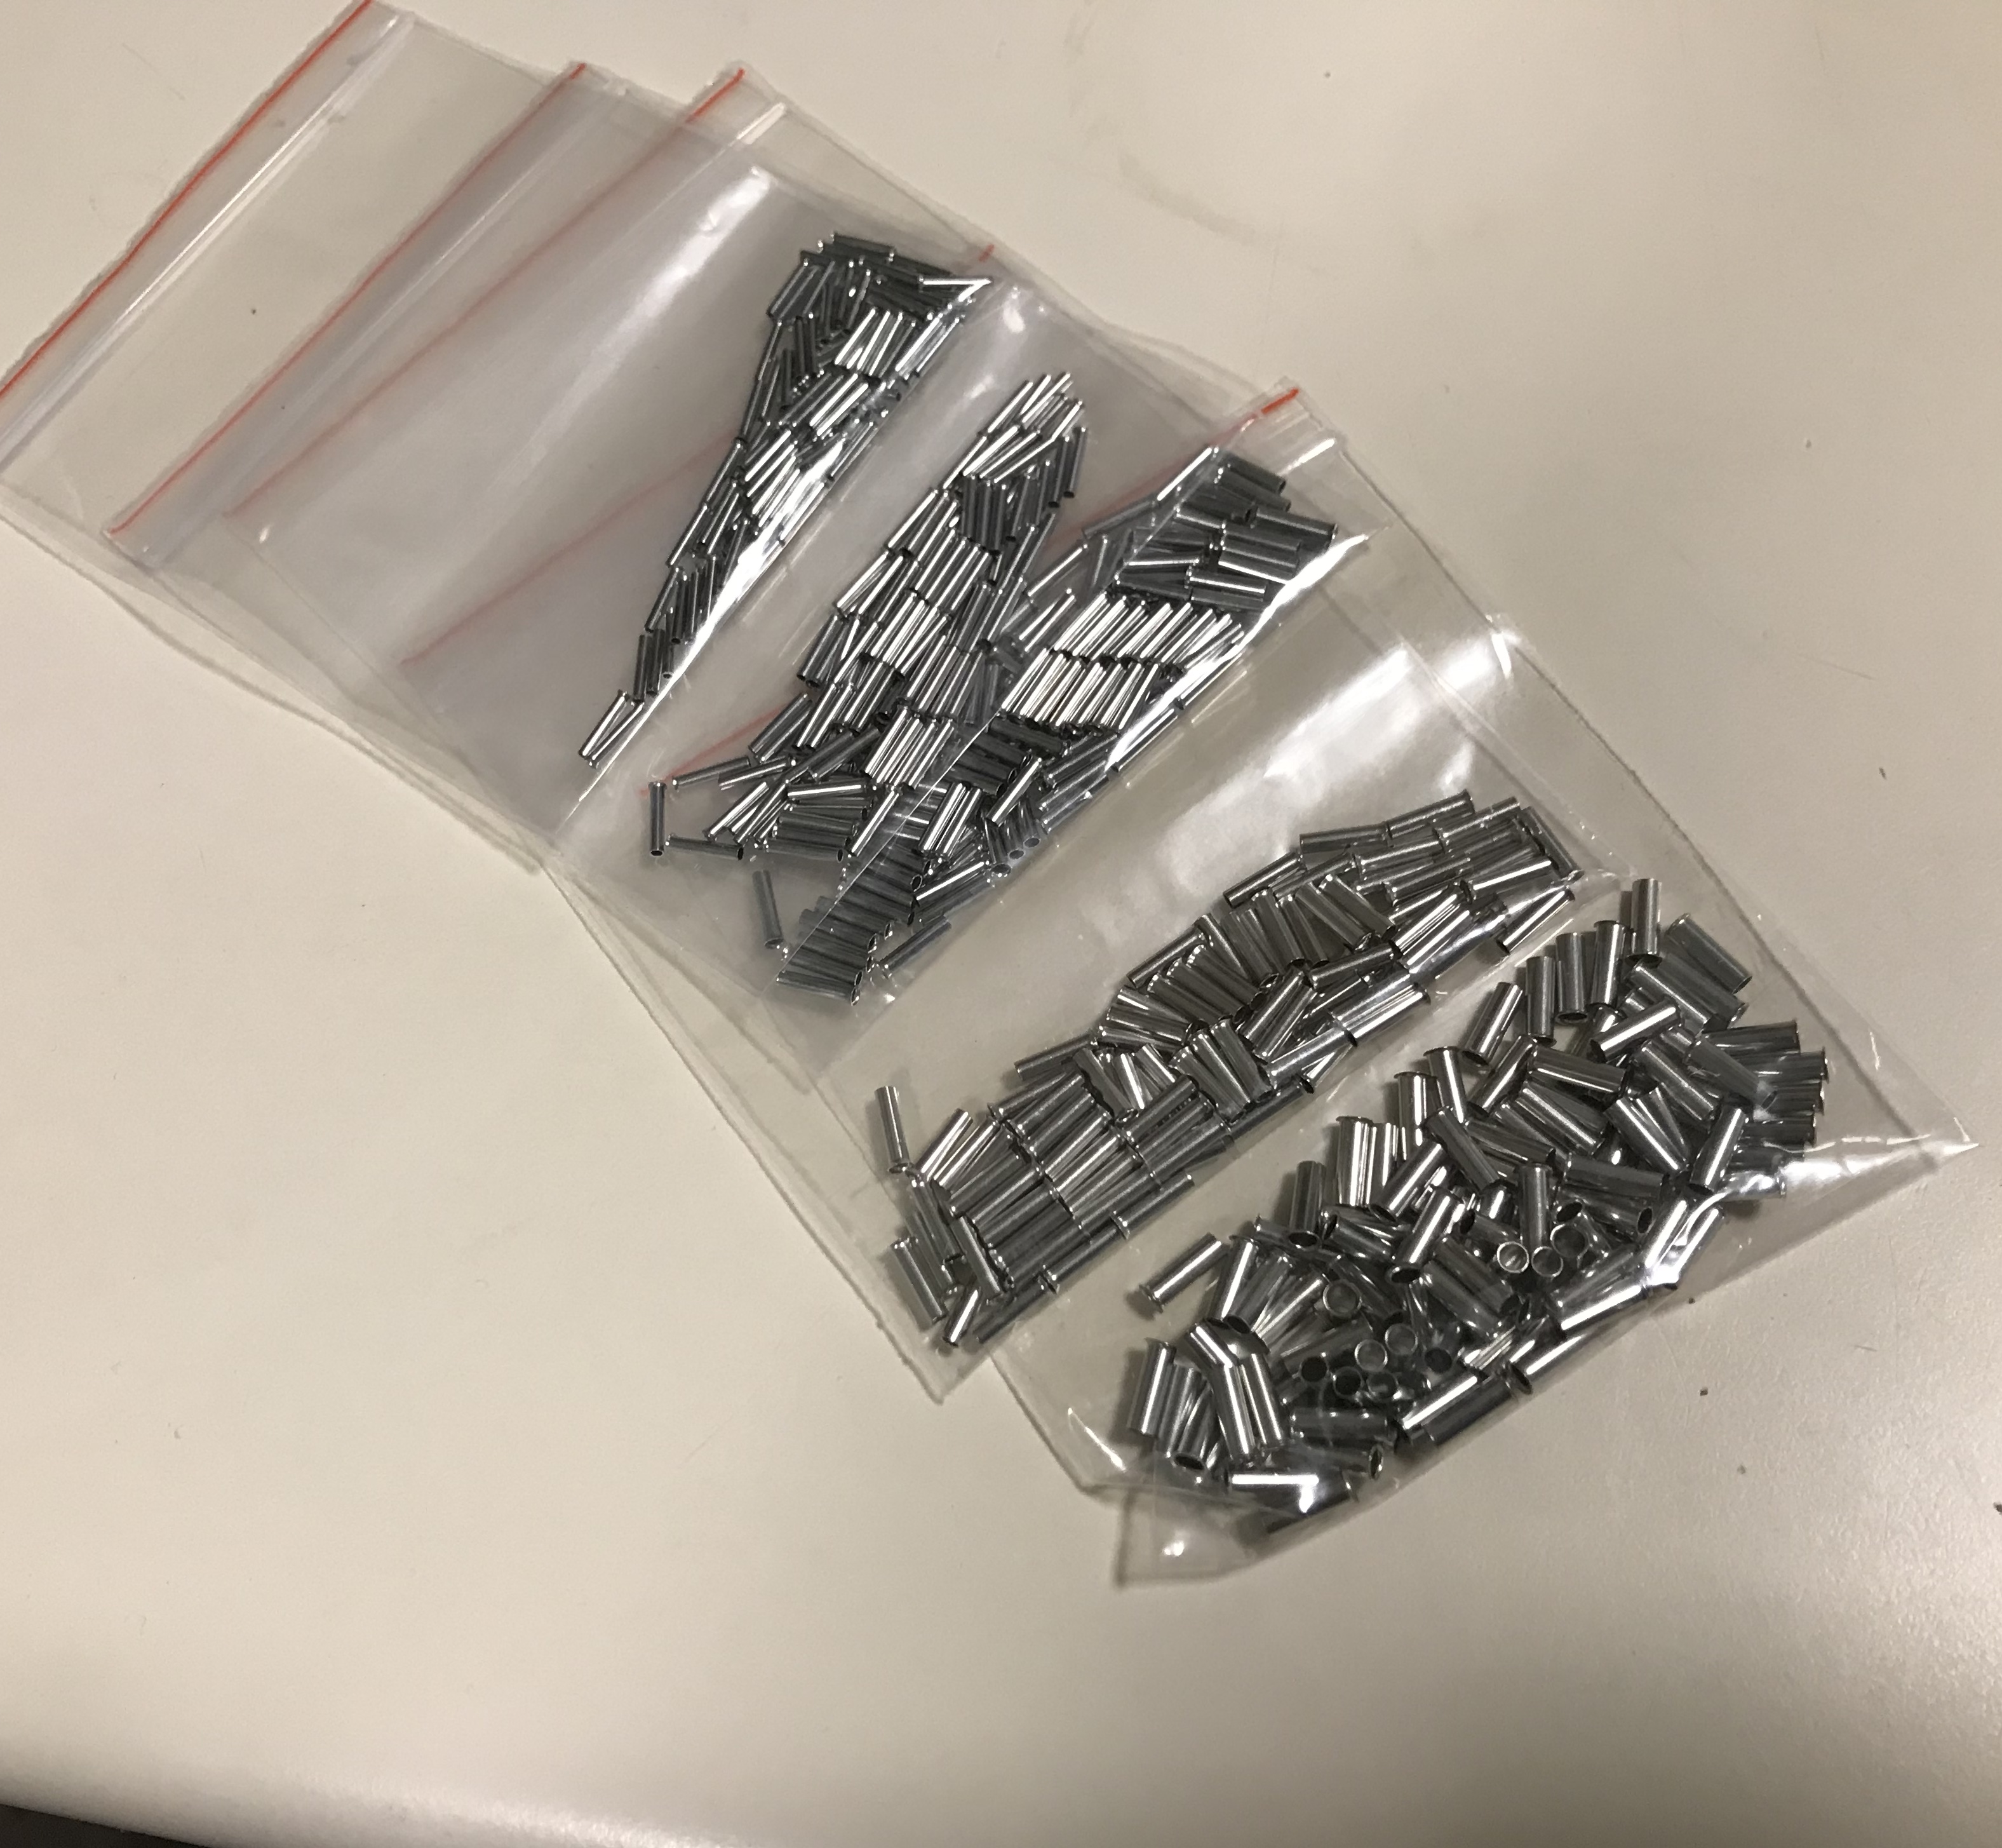
Very nice work! Heading back to a previous post....about air horns/ velocity stacks... I found a nice assortment pack of wire ferules on amazon that work perfect for these, and you get a ton of usable sized ones for $7.29! Just a heads up! https://www.amazon.com/gp/product/B01I93KA90/ref=ppx_yo_dt_b_asin_title_o09__o00_s00?ie=UTF8&psc=1
-
Kurt! Holy Moly! I just went page by page through this entire thread! Fantastic work all around, thank you for taking detailed photos of all your processes and scratchbuilding... just beautiful and inspiring stuff!
-
Hey Tim! It appears a board update has occurred for security reasons, that eliminates the ability to edit any post after 3 days... Which is kinda a bummer for people that update the title of the post as you have been doing, Im pretty sure Mr. Ambrose is working on solutions to still allow that to happen, just nothing as of right now... Will you be attending NNL East this year? I would really like to see this work of art in person, not to mention meet you.
-
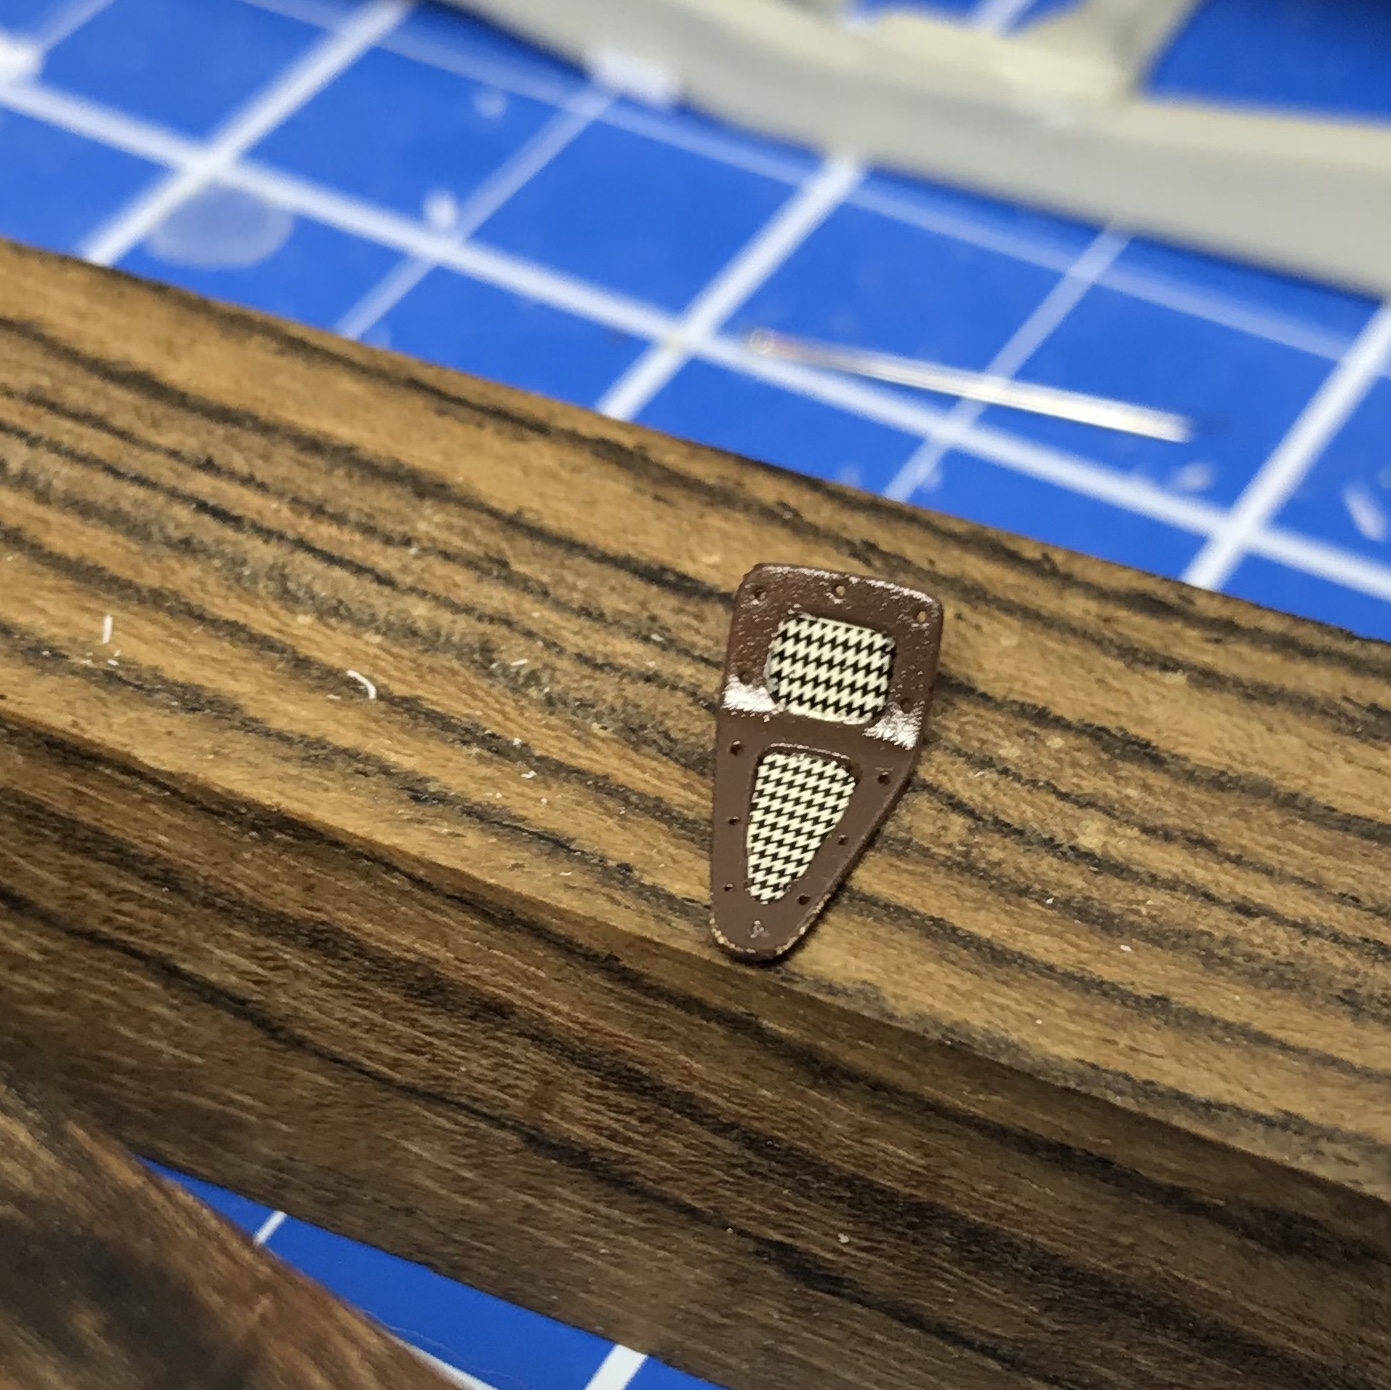
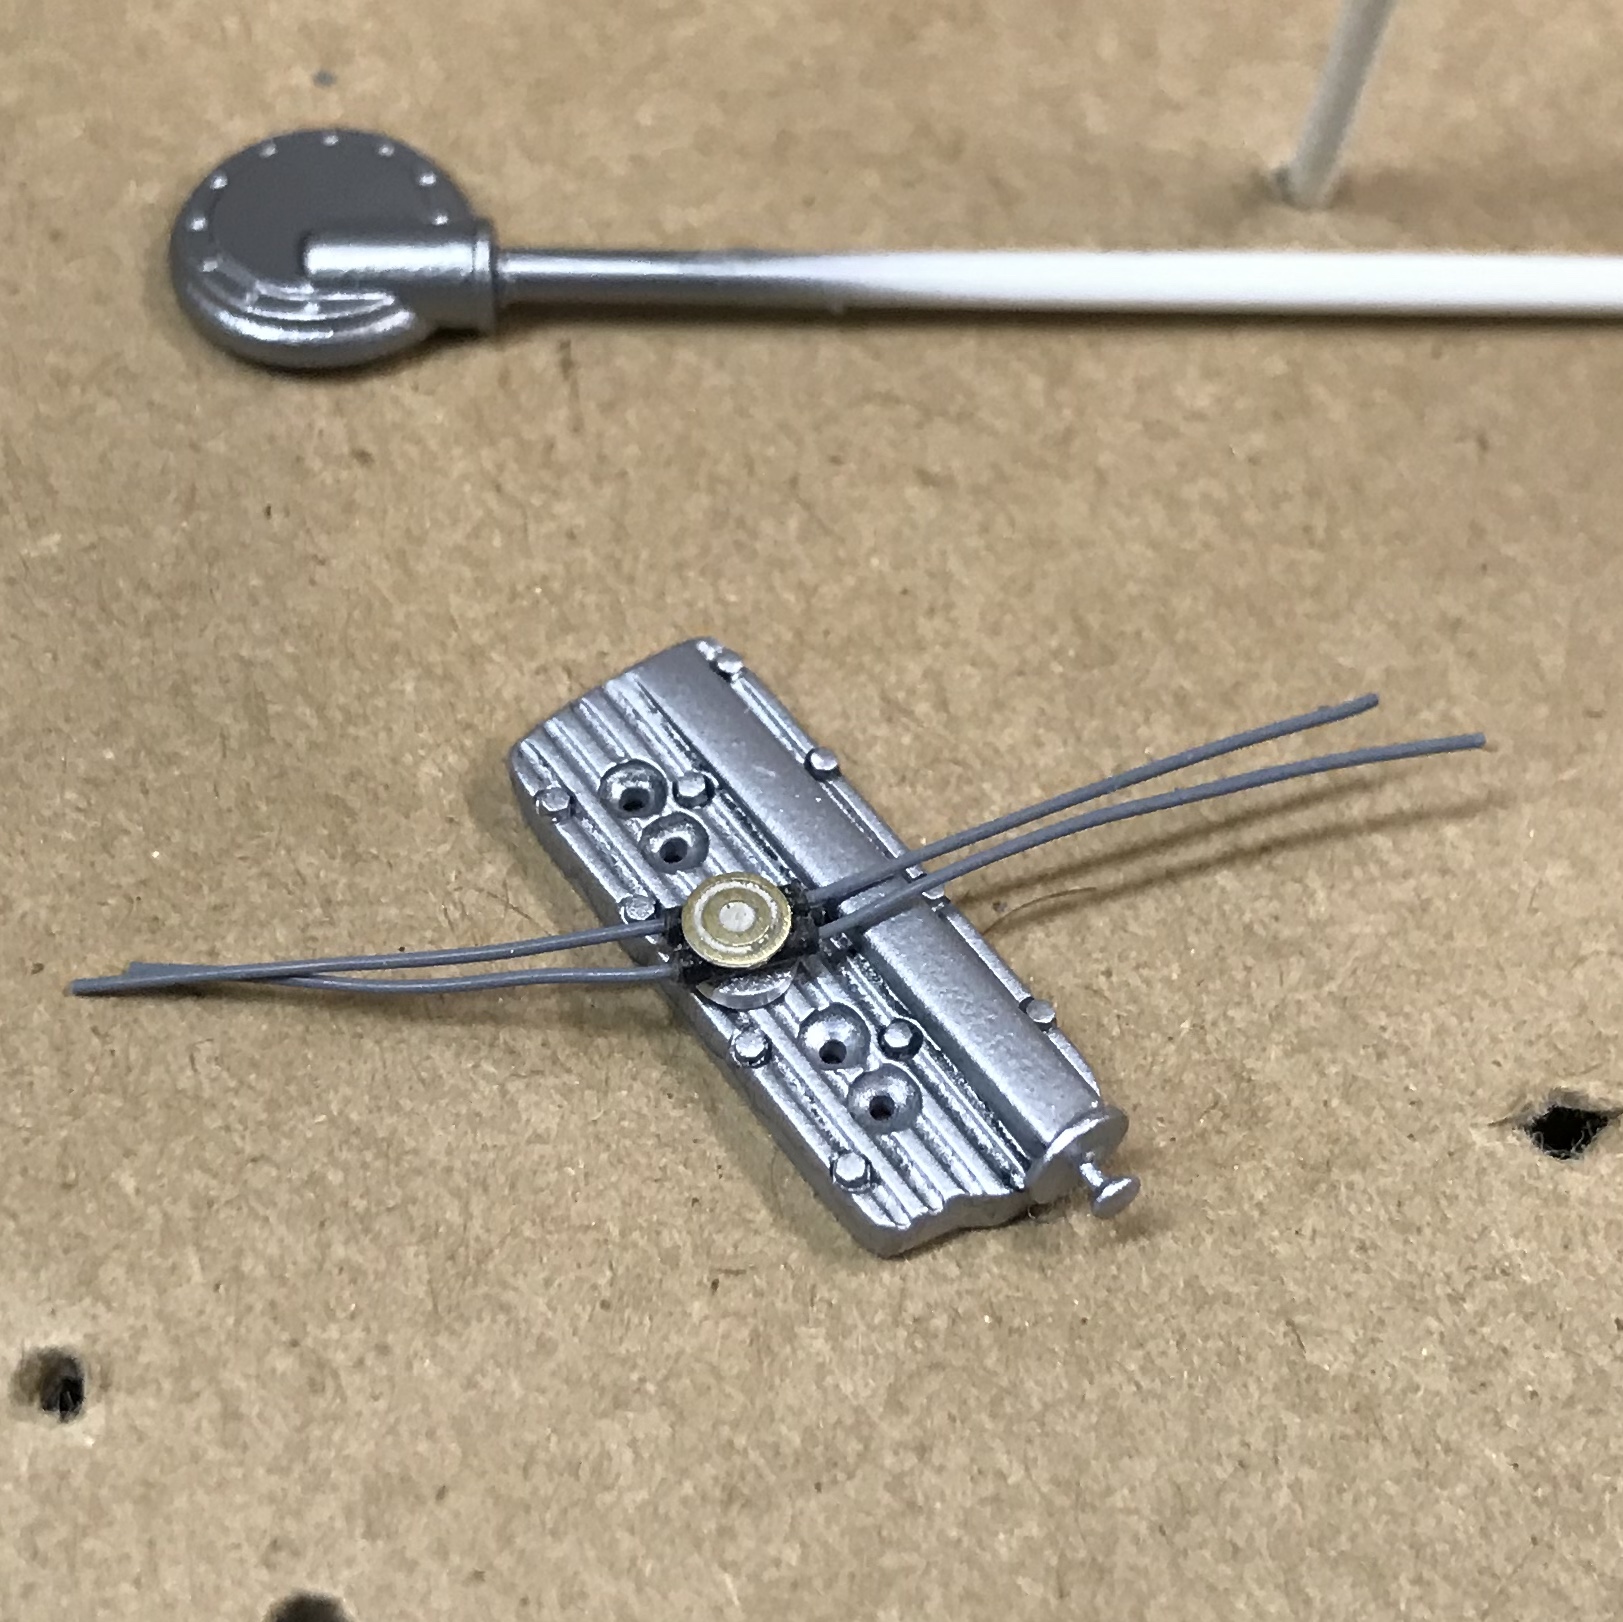
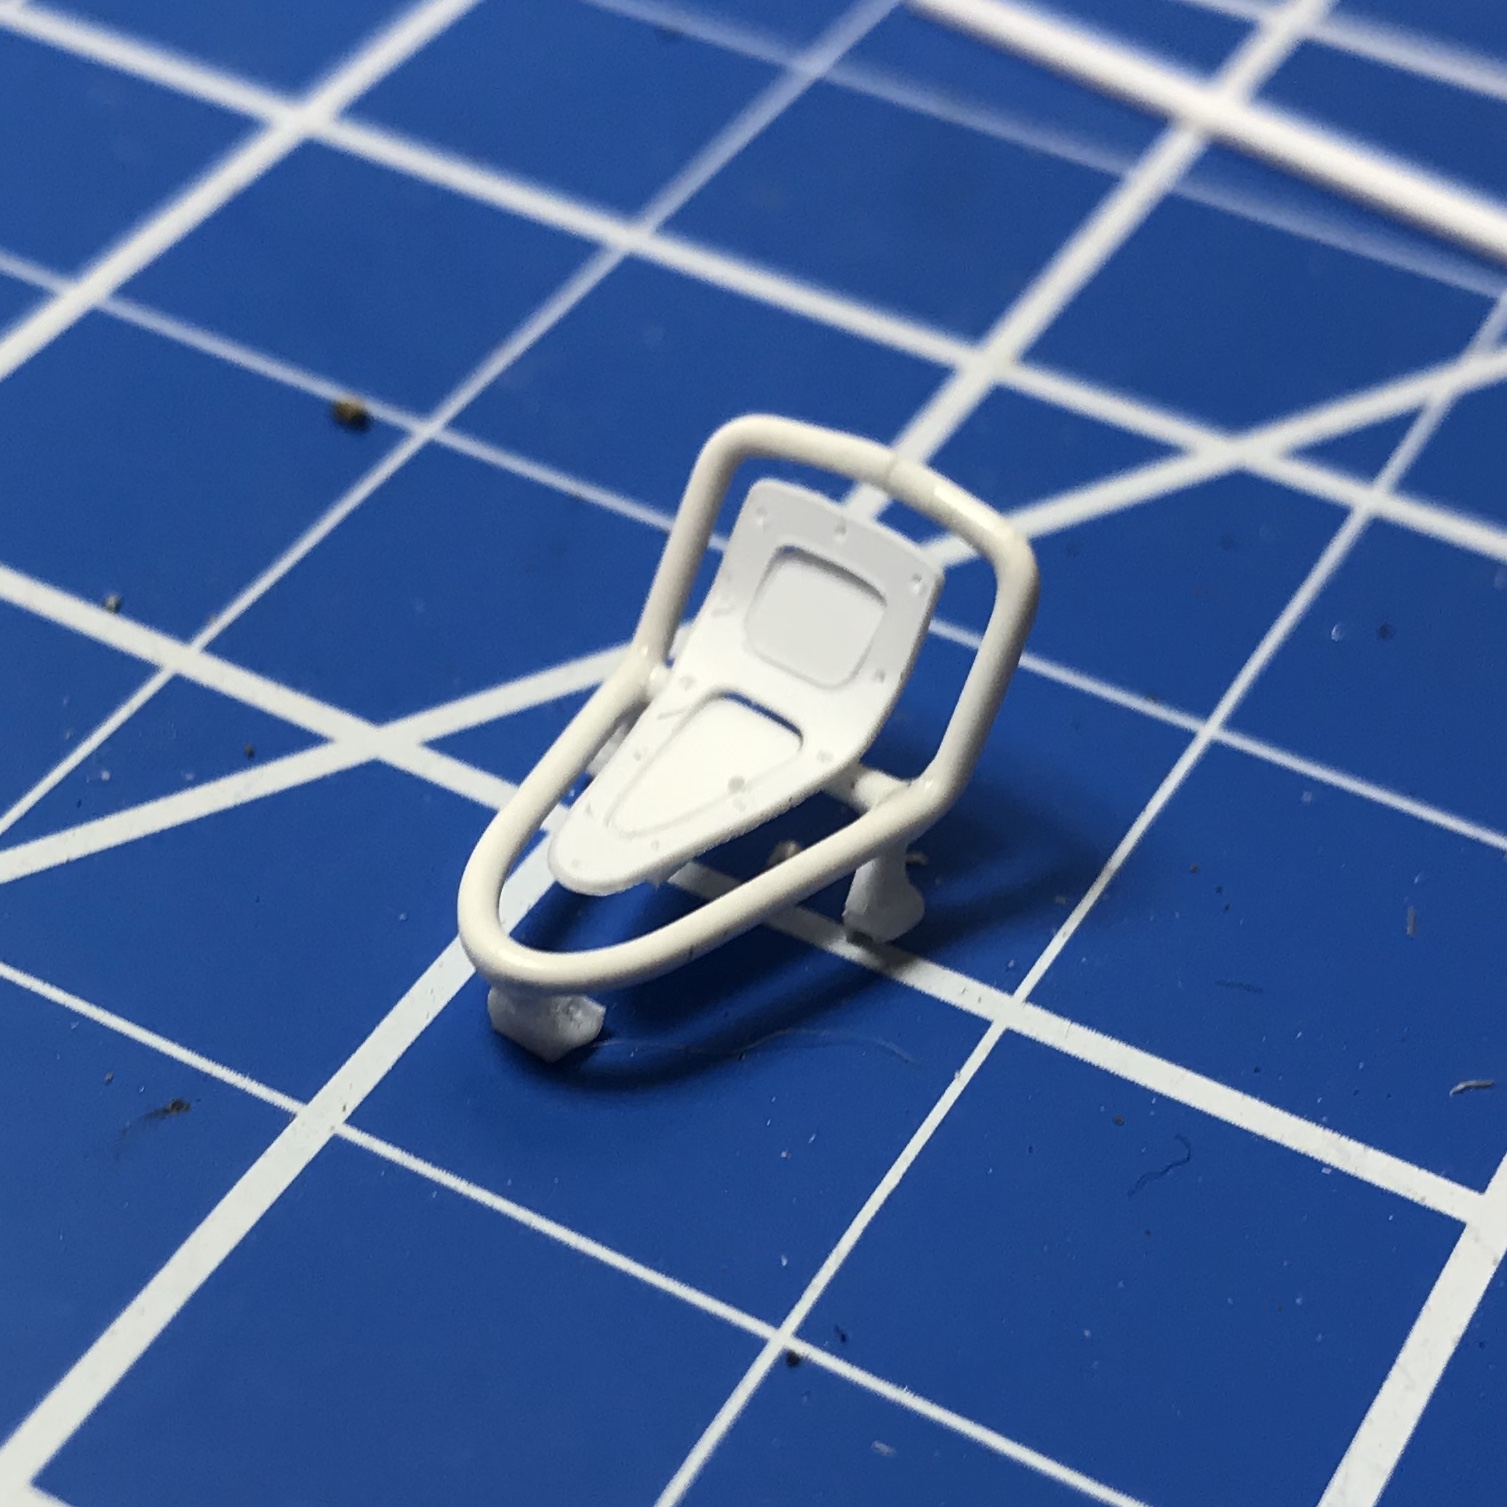
More Progress.... new seat insert is made! I feel like i've done this before.. haha.. at least its only one this time. Incase anyone is wondering the white grid is 1/2", and this thing is so tiny. and a little mockup to see the colors better... hopefully I can wrap this guy up in the next week or so and get back on the bronco.
-
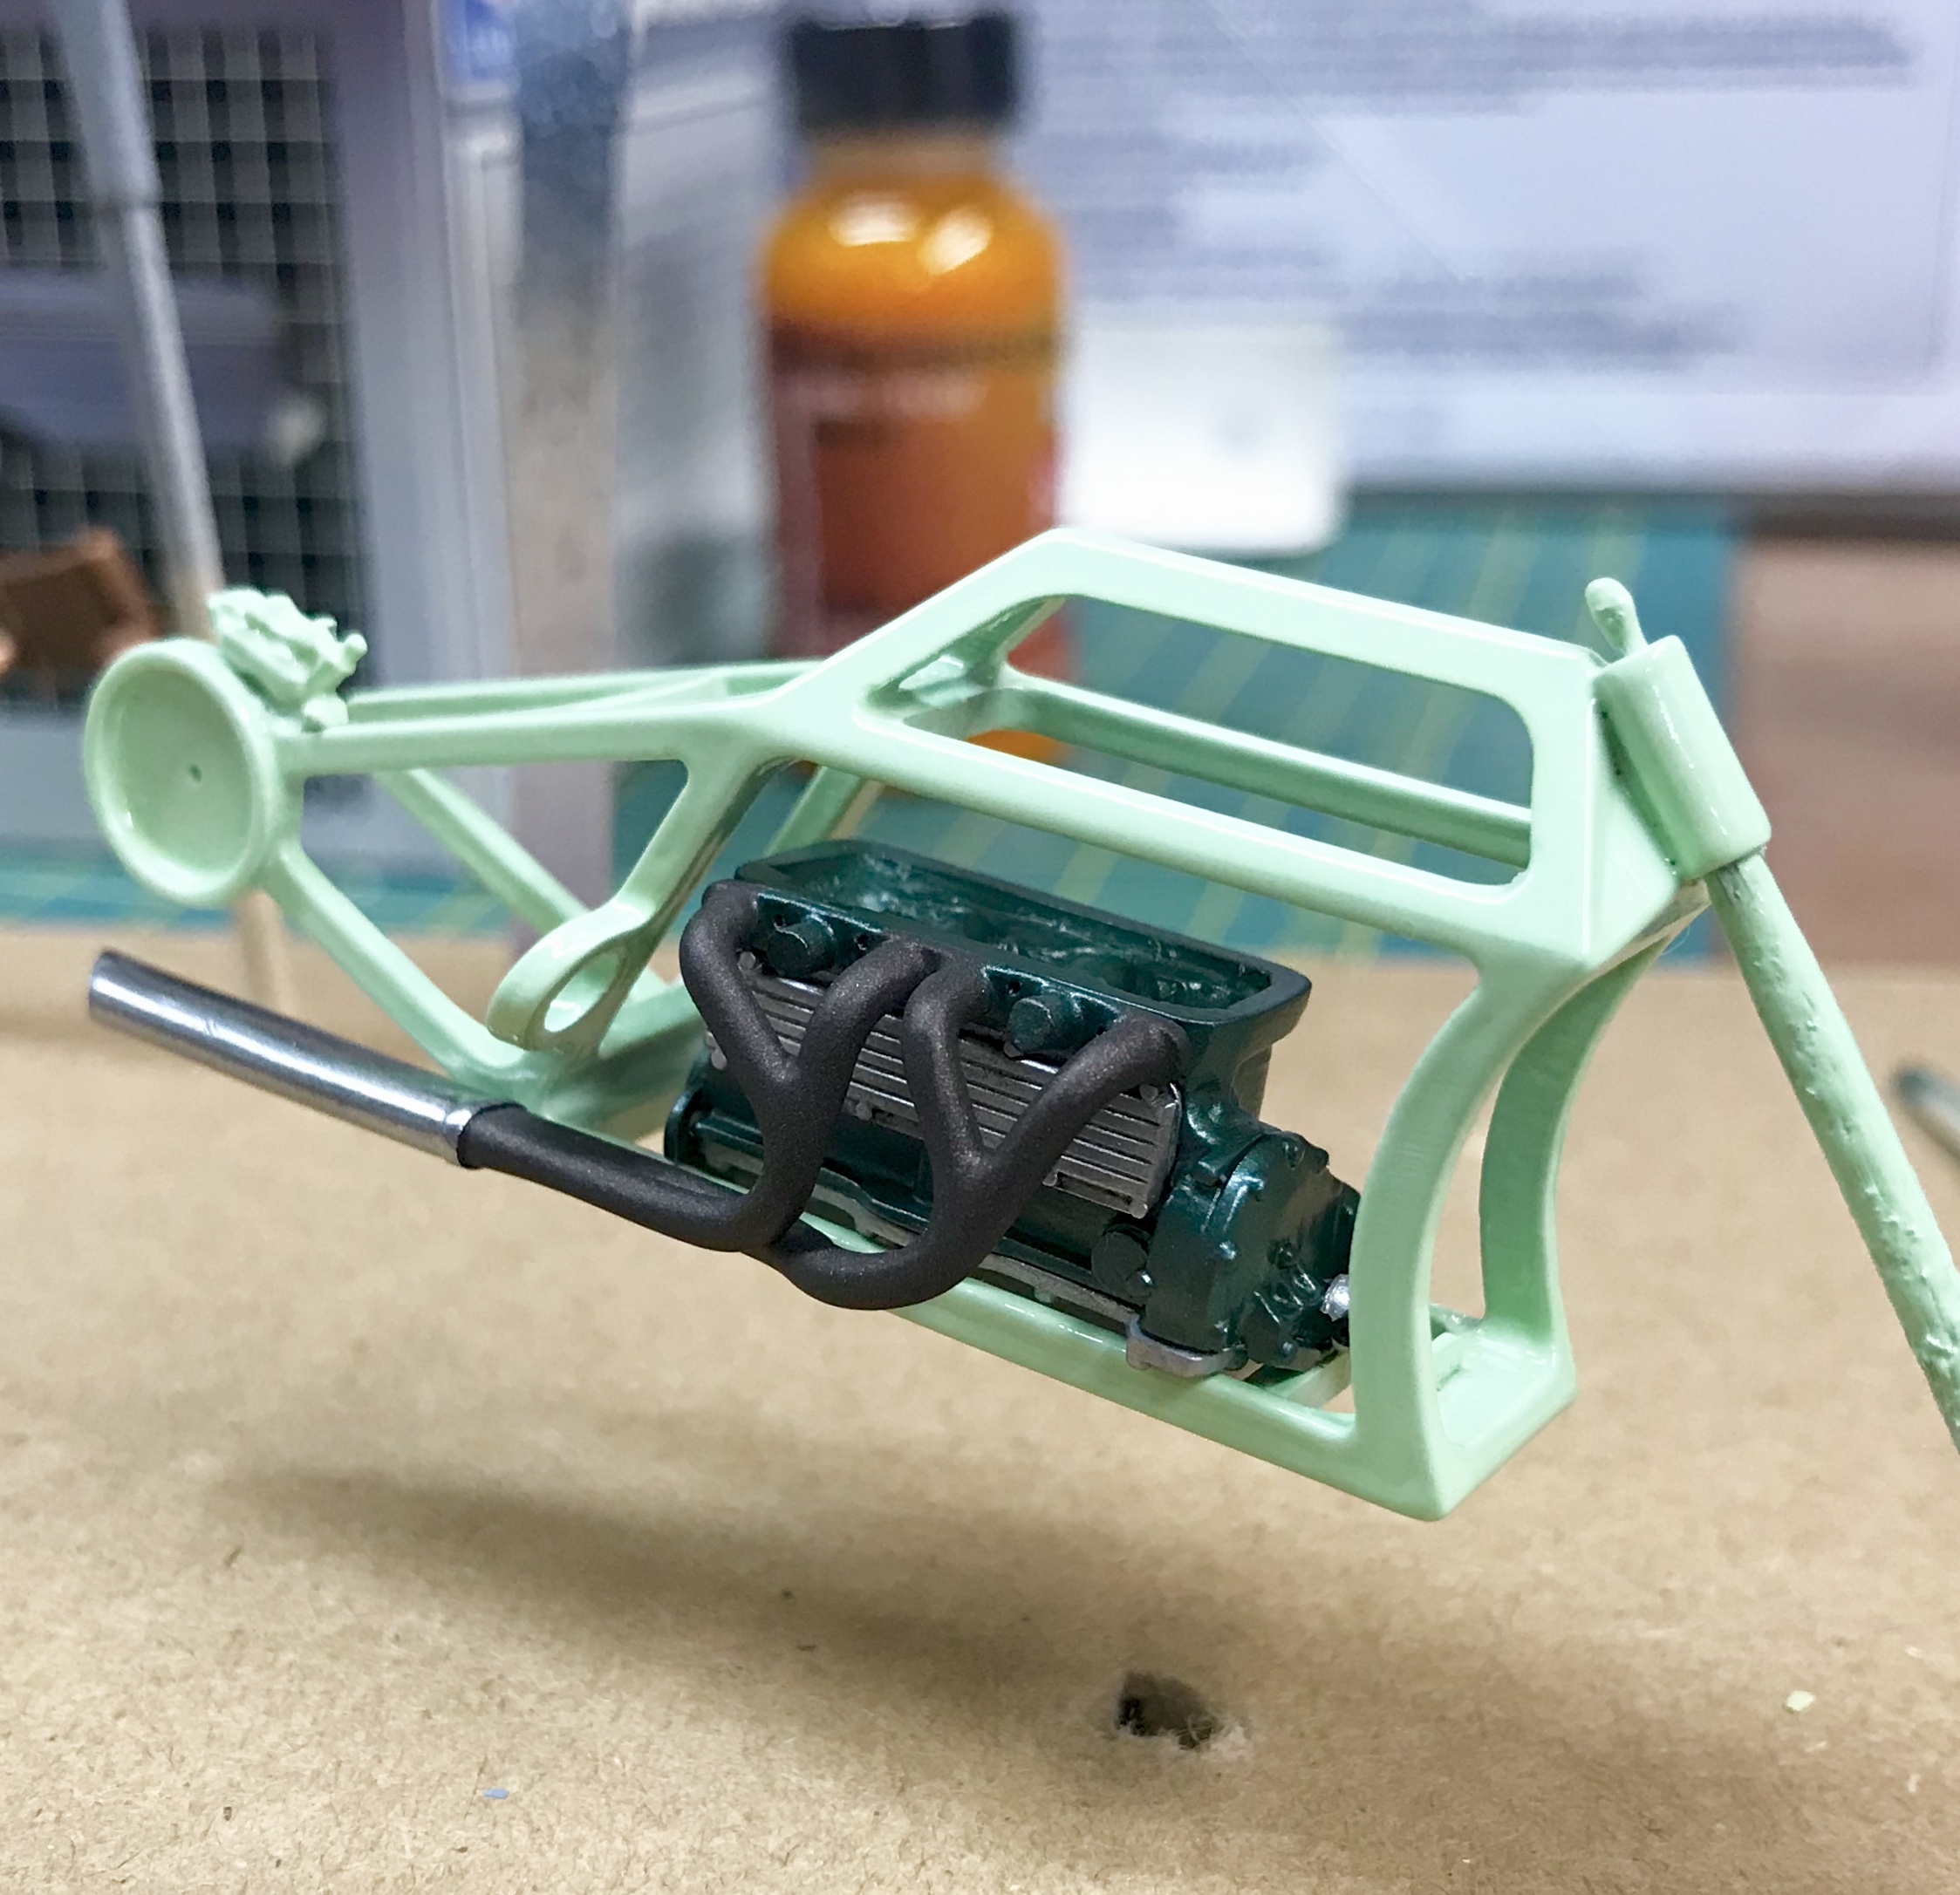
Thanks Bob! A little glimpse at the color.... 1972 Ford factory color Winter Green... this will also be the primary color for the bronco.
-
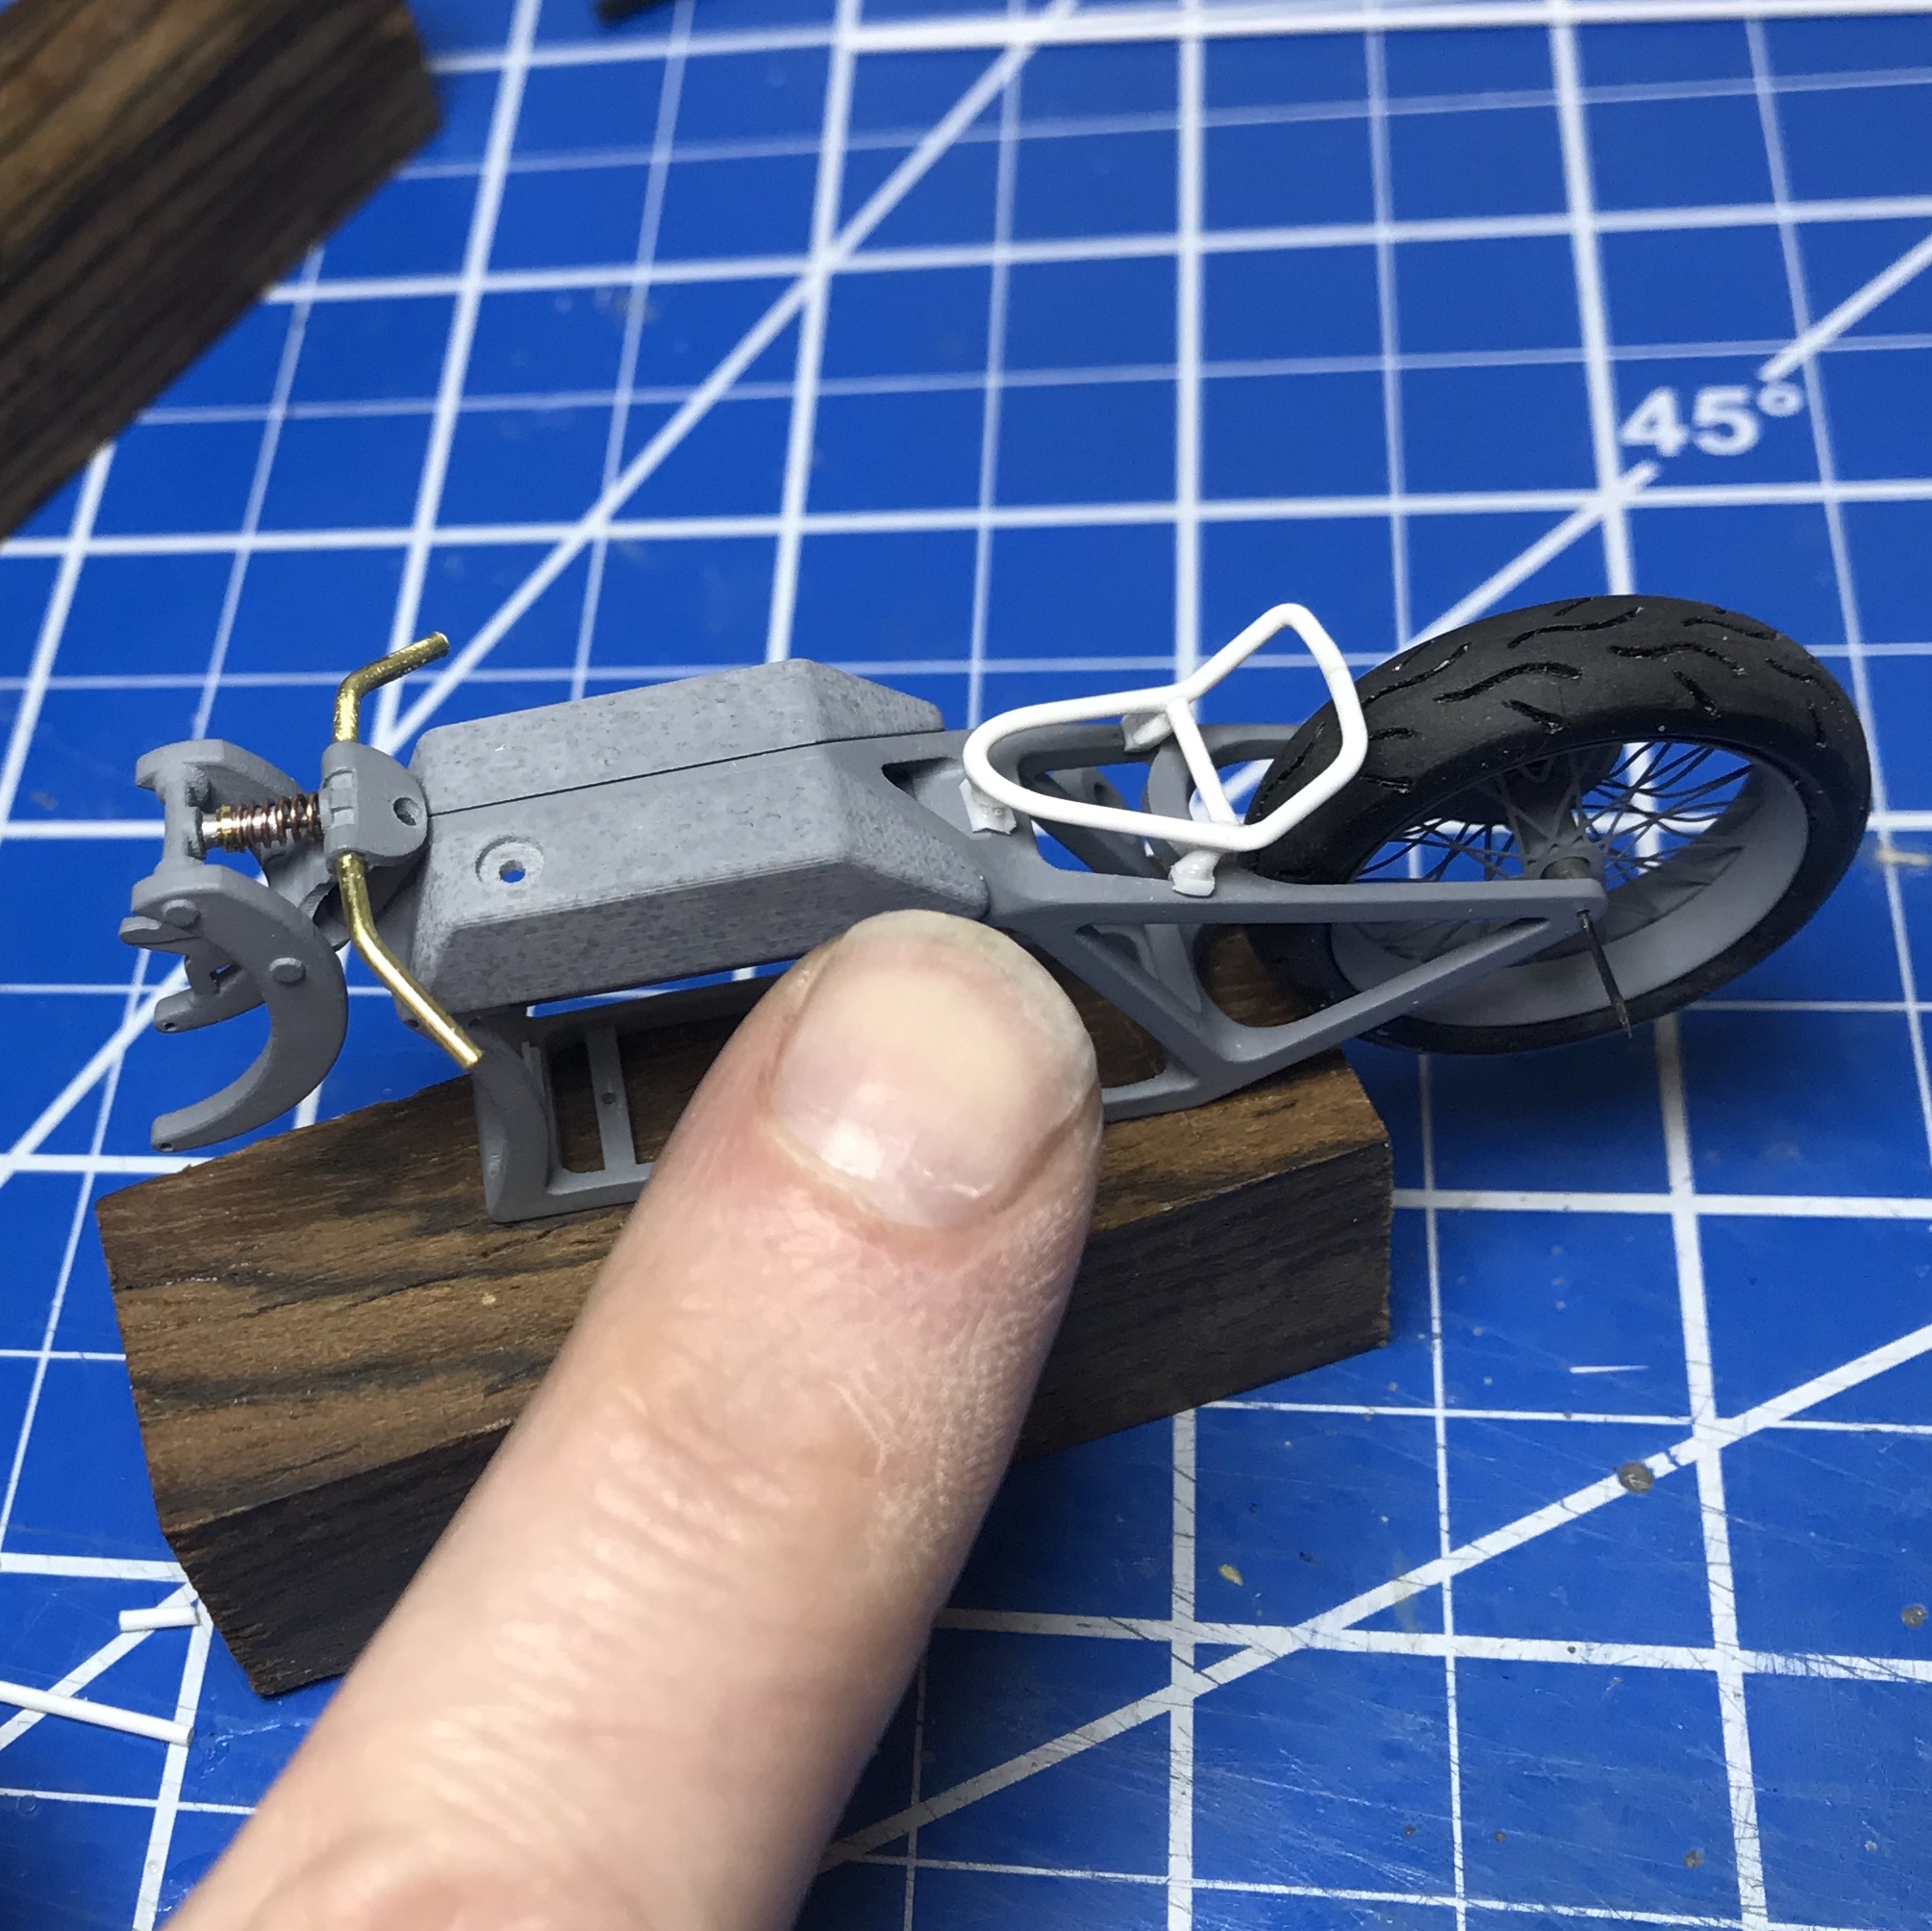
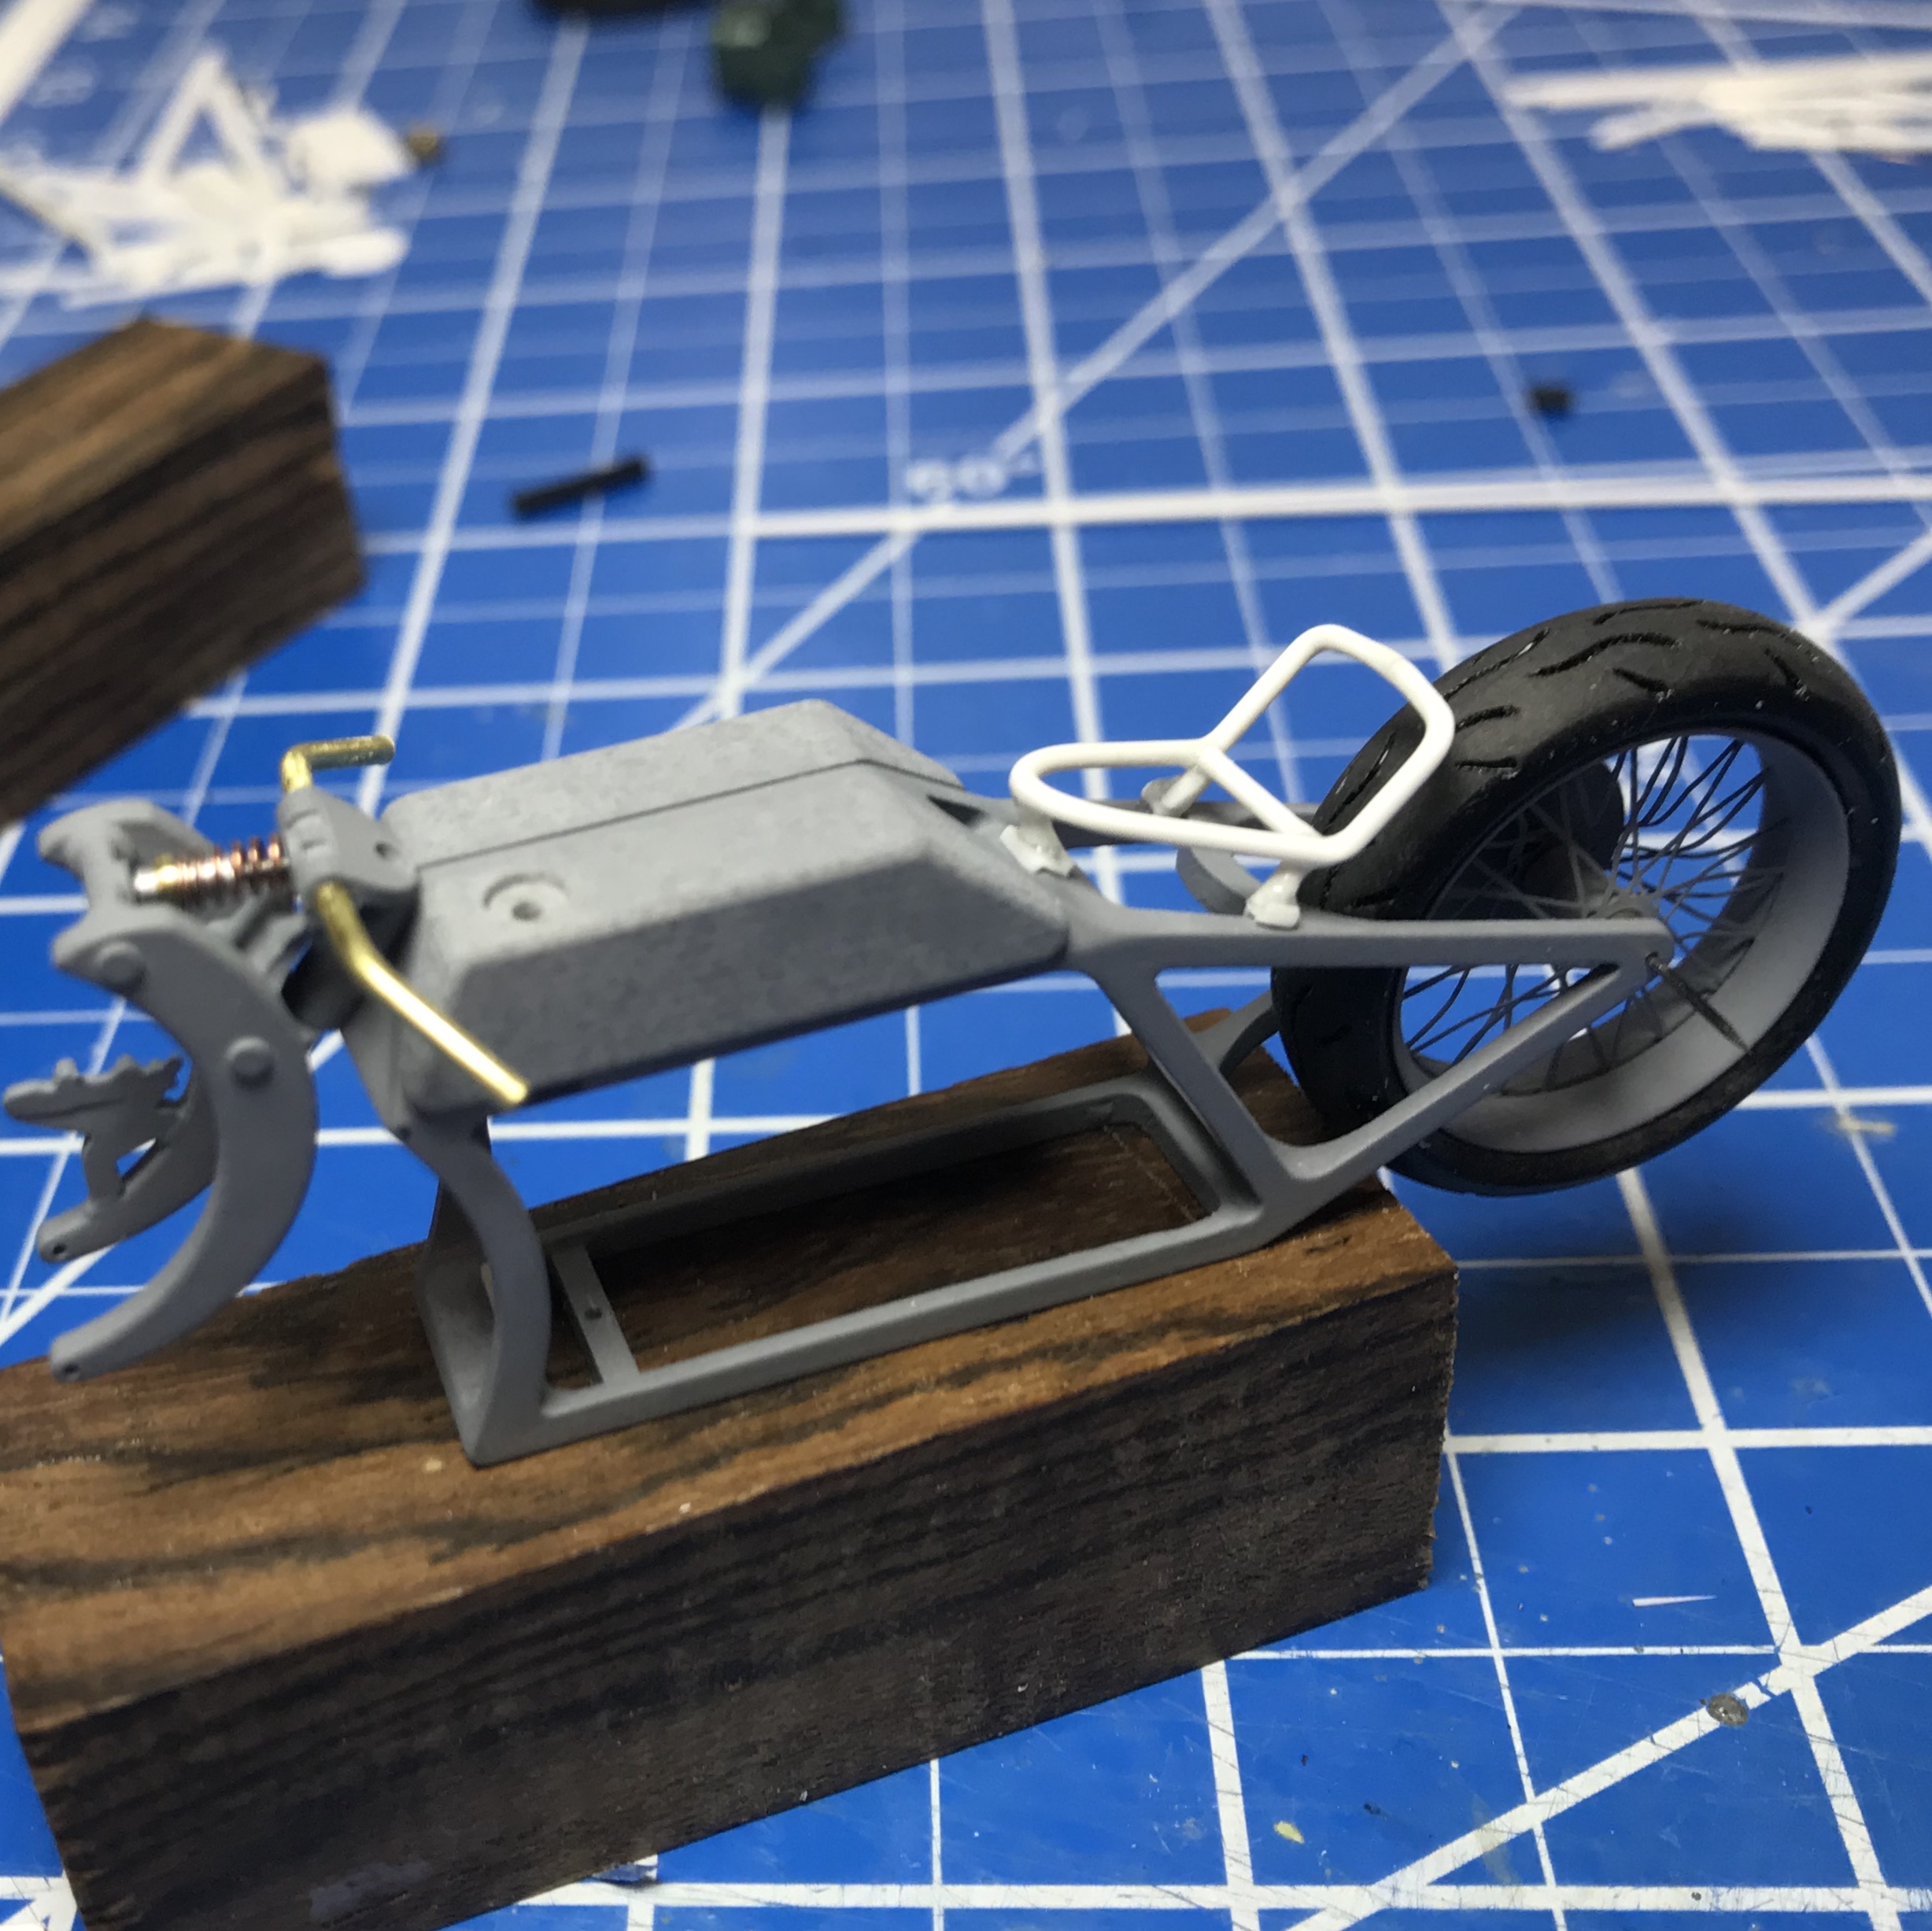
Another option for clean bends without heat is this styrene rod off eBay.. http://www.ebay.com/itm/STYRENE-ROUND-ROD-120-PIECE-ASSORTMENT-LOT-6-SIZES-PIPE/122094423448?_trksid=p2047675.c100011.m1850&_trkparms=aid%3D222007%26algo%3DSIC.MBE%26ao%3D1%26asc%3D37570%26meid%3D2be1c9a6a5a74c38acfdf6022ada2dc9%26pid%3D100011%26rk%3D1%26rkt%3D2%26sd%3D111889933610 I stumbled on this on accident, it bends and holds its shape without heat.. The only downfall is, it doesn't glue well with normal styrene glue (I only use CA on it), and sometimes the pieces are not uniform in diameter from end to end. I have purchased this 120 piece assortment, and recently purchased just 120 pieces of the .080 in a custom auction from him. The diameter thing is a bit of a bummer, but once you are aware of it, you can pick and choose pieces so its not much of an issue. I am a really big fan of this stuff, I have never had much luck using heat.
-
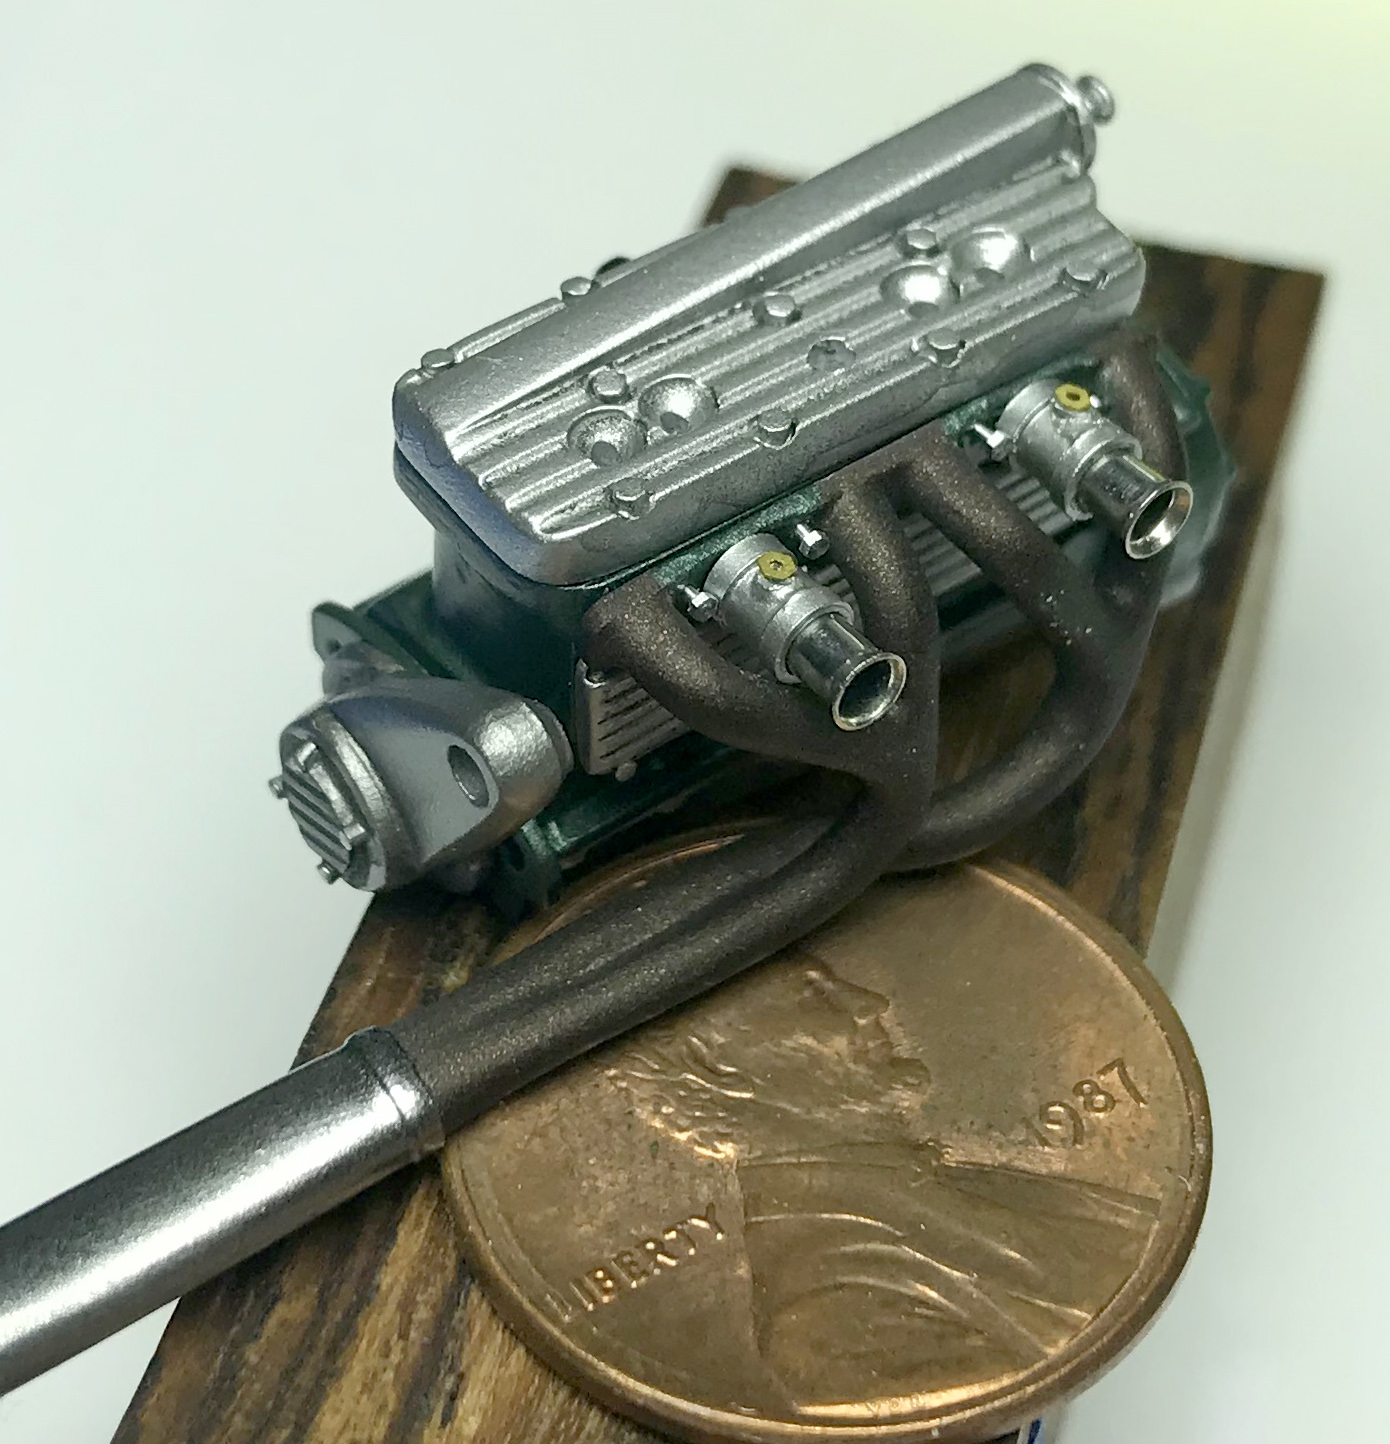
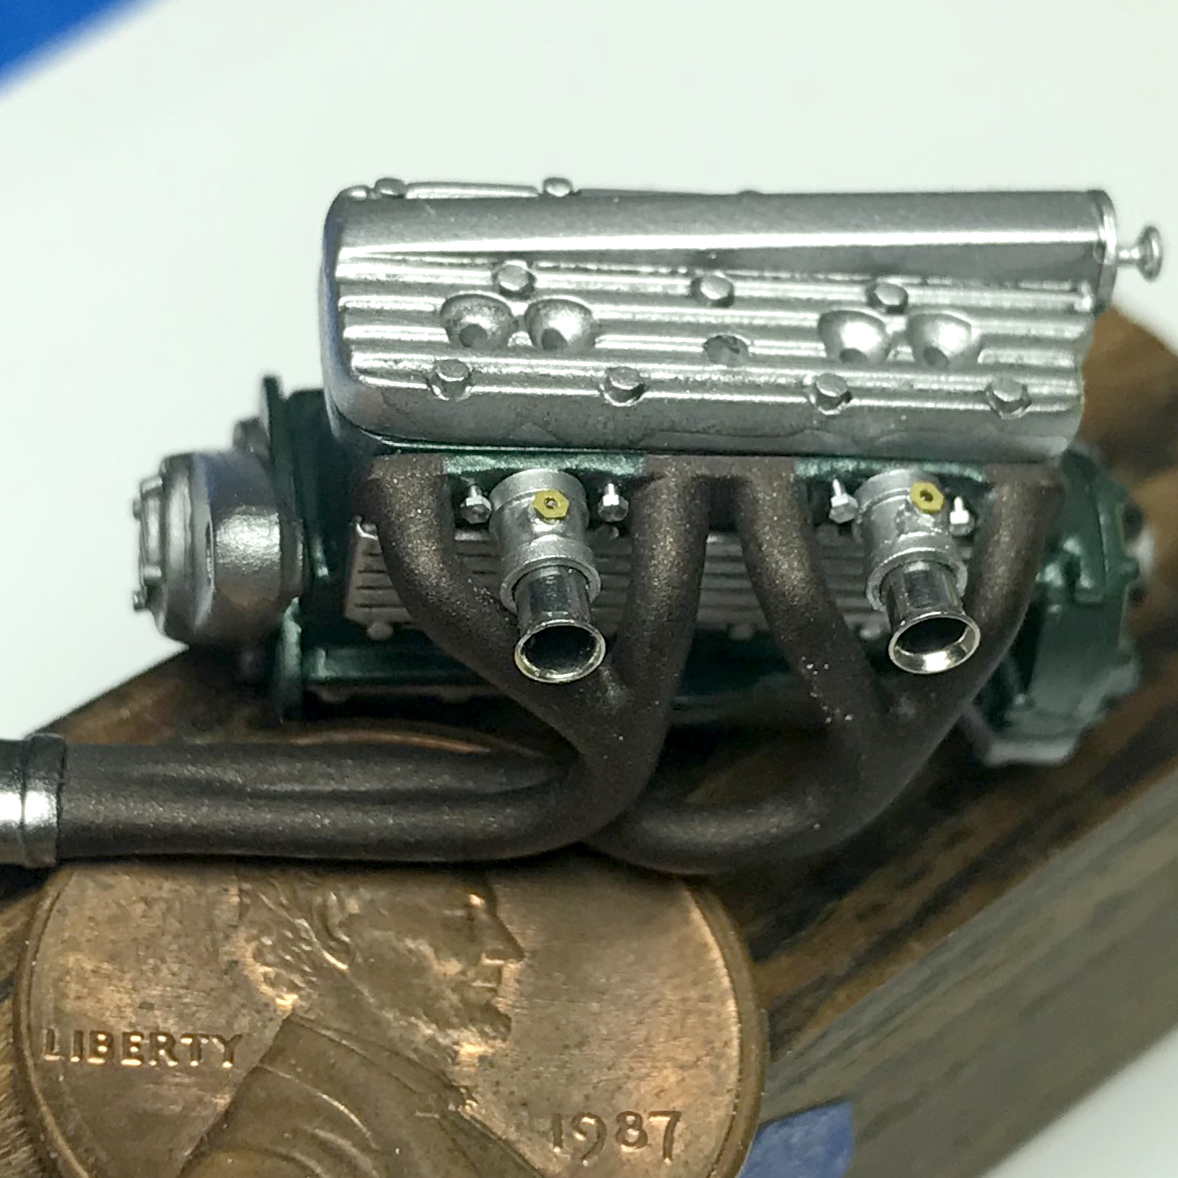
Thanks Tom! Started spraying a little paint last night.... I really like the engine block color , it is Splash Paints Aston Martin Almond Green just feels like a modern take on the original ford green. The header is Alclad exhaust mainifold and Alclad chrome. Im really getting excited to see this little guy come together.
-
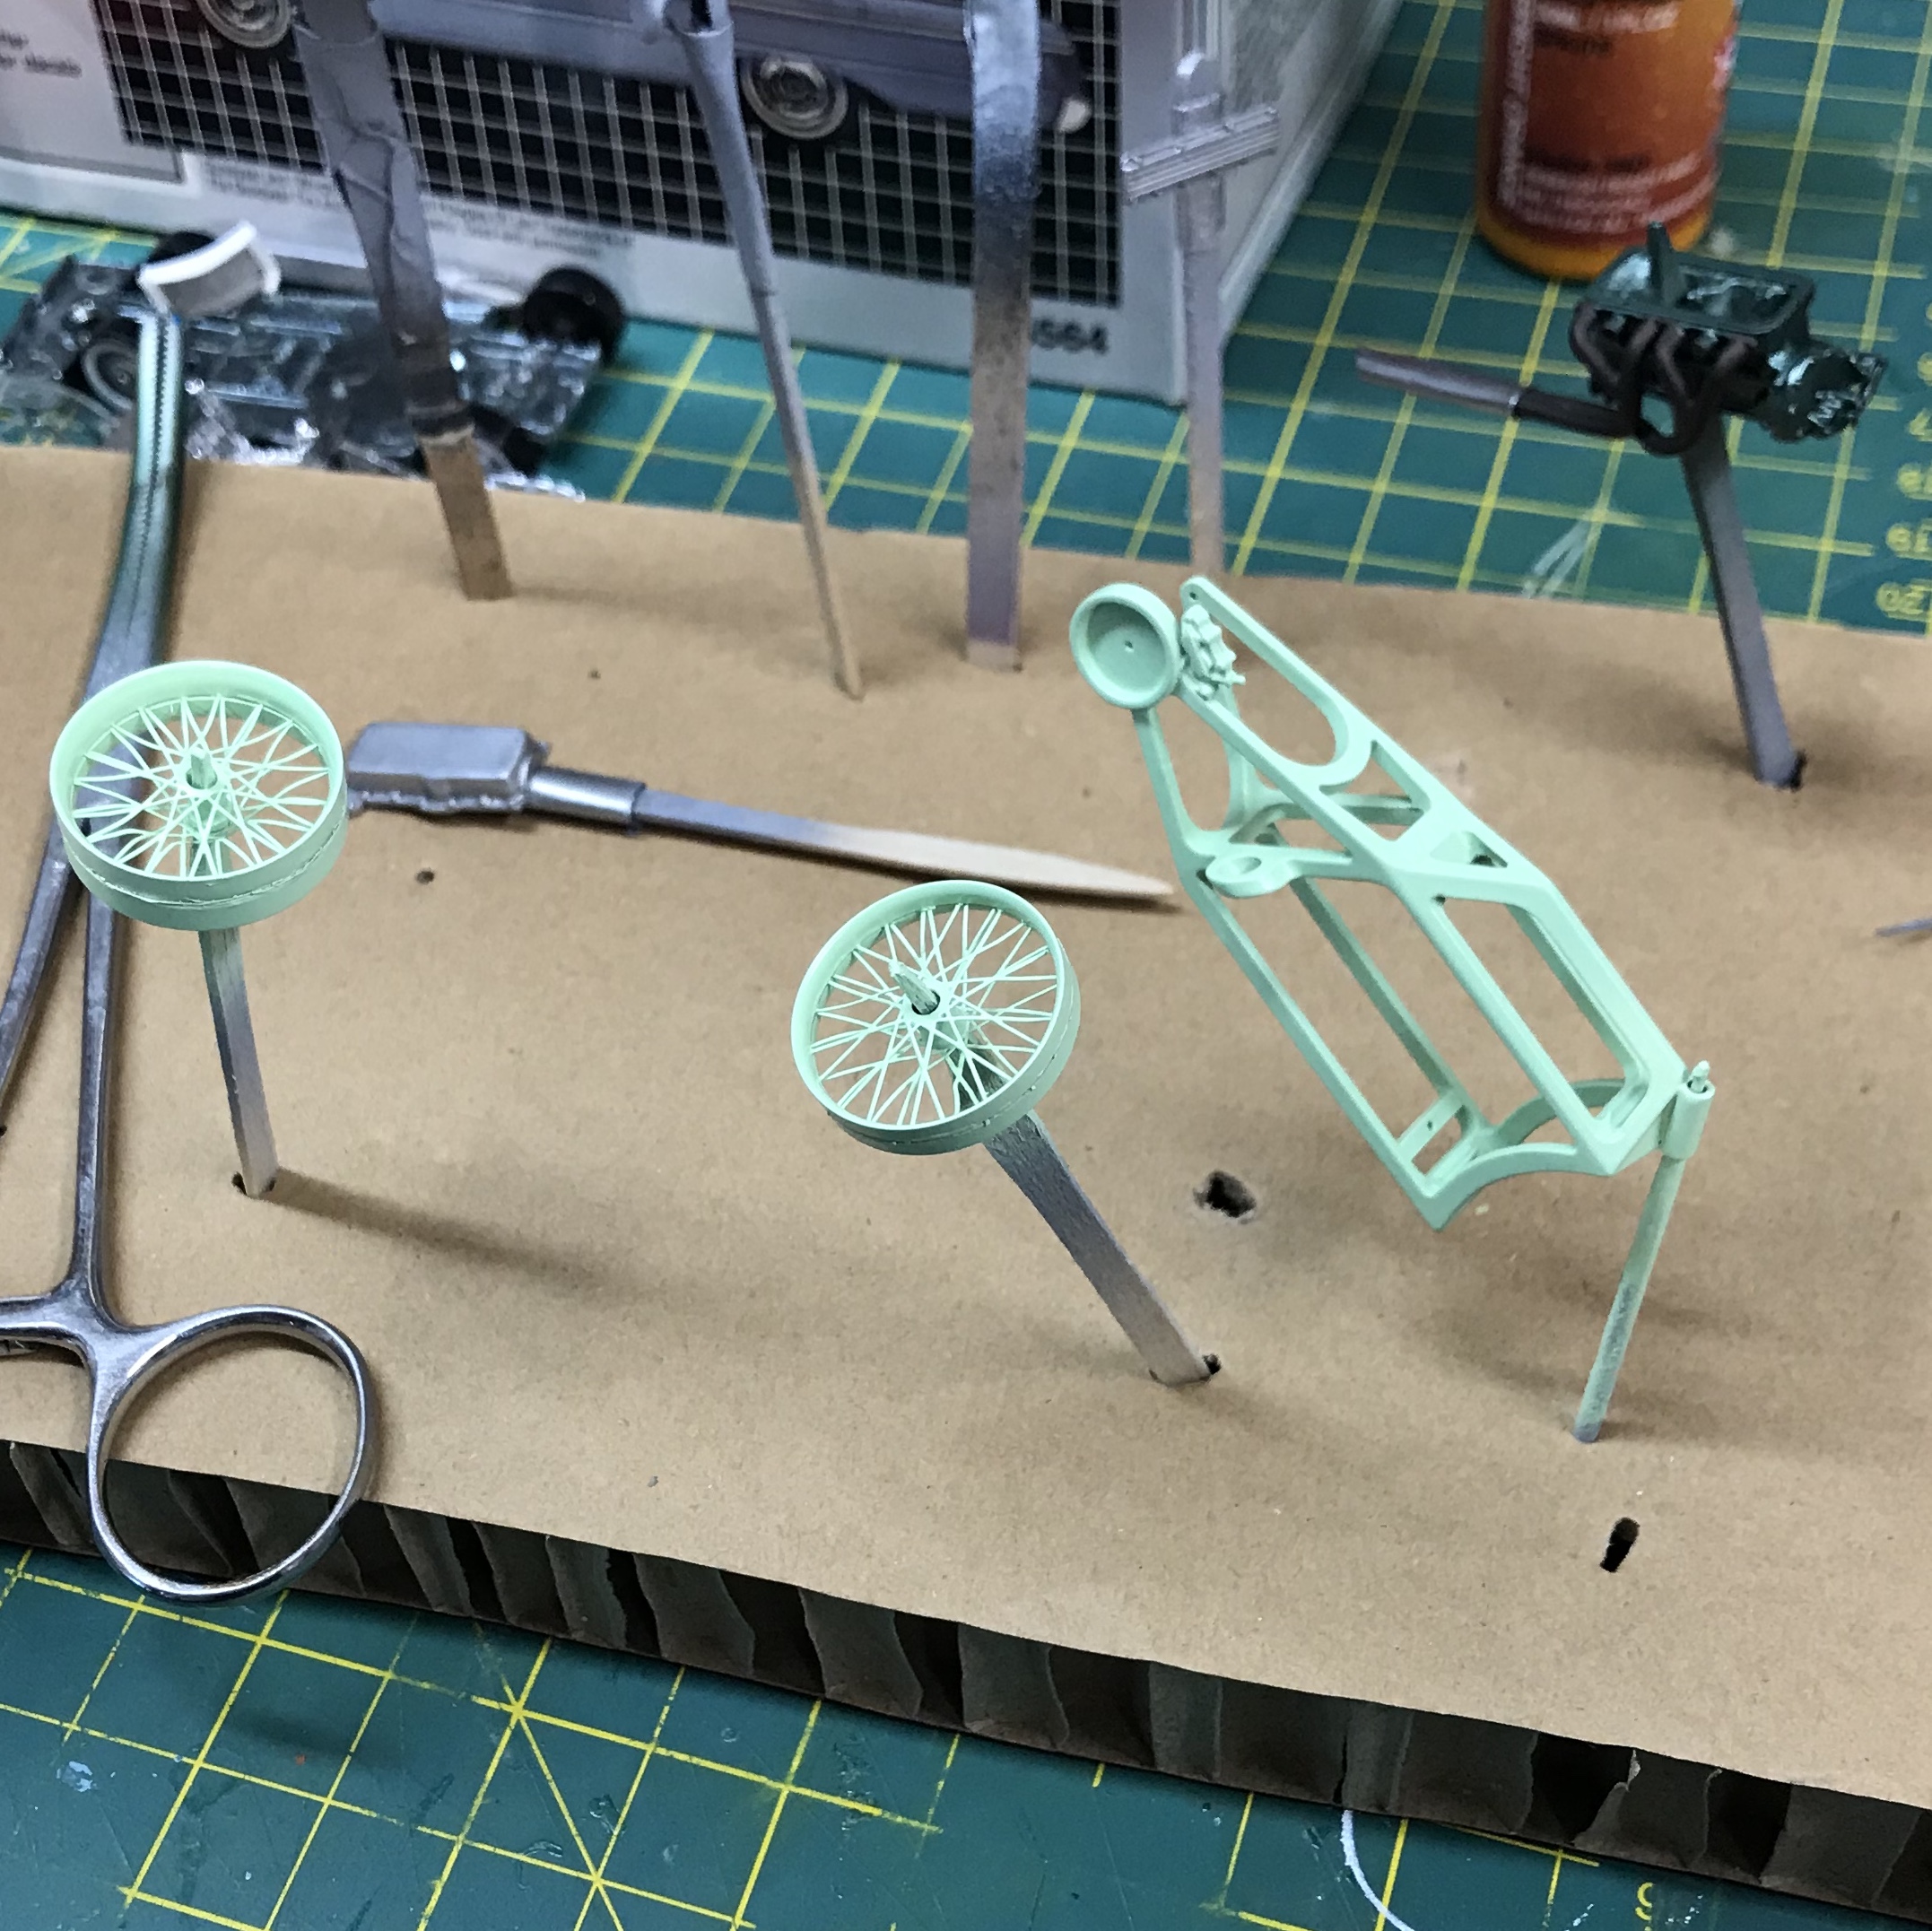
Thanks guys! Still fab'ing away at this bike.... almost time to start painting... Basically just the seat insert to fabricate.
-
Thanks Ray! Got the exhaust all bent up last night! Still need to figure out the tail section, but ill figure something out... maybe some oval tubing... Next up is the injection... have i mentioned this thing is tiny...
-
As requested.....the Pink '29 A Pickup from Street Rodder, May 1990...TIM
Impalow replied to tim boyd's topic in Model Cars
Very cool build Tim! Brings me back to the style of vehicles when I started modeling. And I couldn't agree more with the statement above ^ -
Moebius '61 Pontiac with doors, trunk, fuel door, etc. openable
Impalow replied to traditional's topic in Model Cars
Beautiful work Clifford! Hopefully, I can see it in person in Detroit in a couple months.... always love seeing your work, as well as larry's... Thanks for sharing! -
I picked up one of the Sotar airbrushes last year when the owner of Badger did his $54.00 birthday sale... its been sitting in my workshop for over a year collecting dust.... well I finally had an excuse to break it out, and I'm kicking myself for not doing it sooner... the soft spray pattern and functionality is fantastic!! I can get small super nice fades and gradients, with no sputters or spits..... I'm also bummed I didn't pick up another one this year, when he had the $55.00 sale.. doh. http://www.badgerairbrush.com/Sotar_20-20.asp I used it to spray the new Splash paints Kandy colors over a super coarse silver metallic base. (Painthuffer Metalflake Micro Silver Bullet .004 Flake https://painthuffer.bigcartel.com/product/micro-silver-bullet-004 ) The transparent candy colors were ready to spray, and worked perfectly.... https://www.splash-paints.com/kandy Highly recommend both for people looking to do scale custom paint!
-
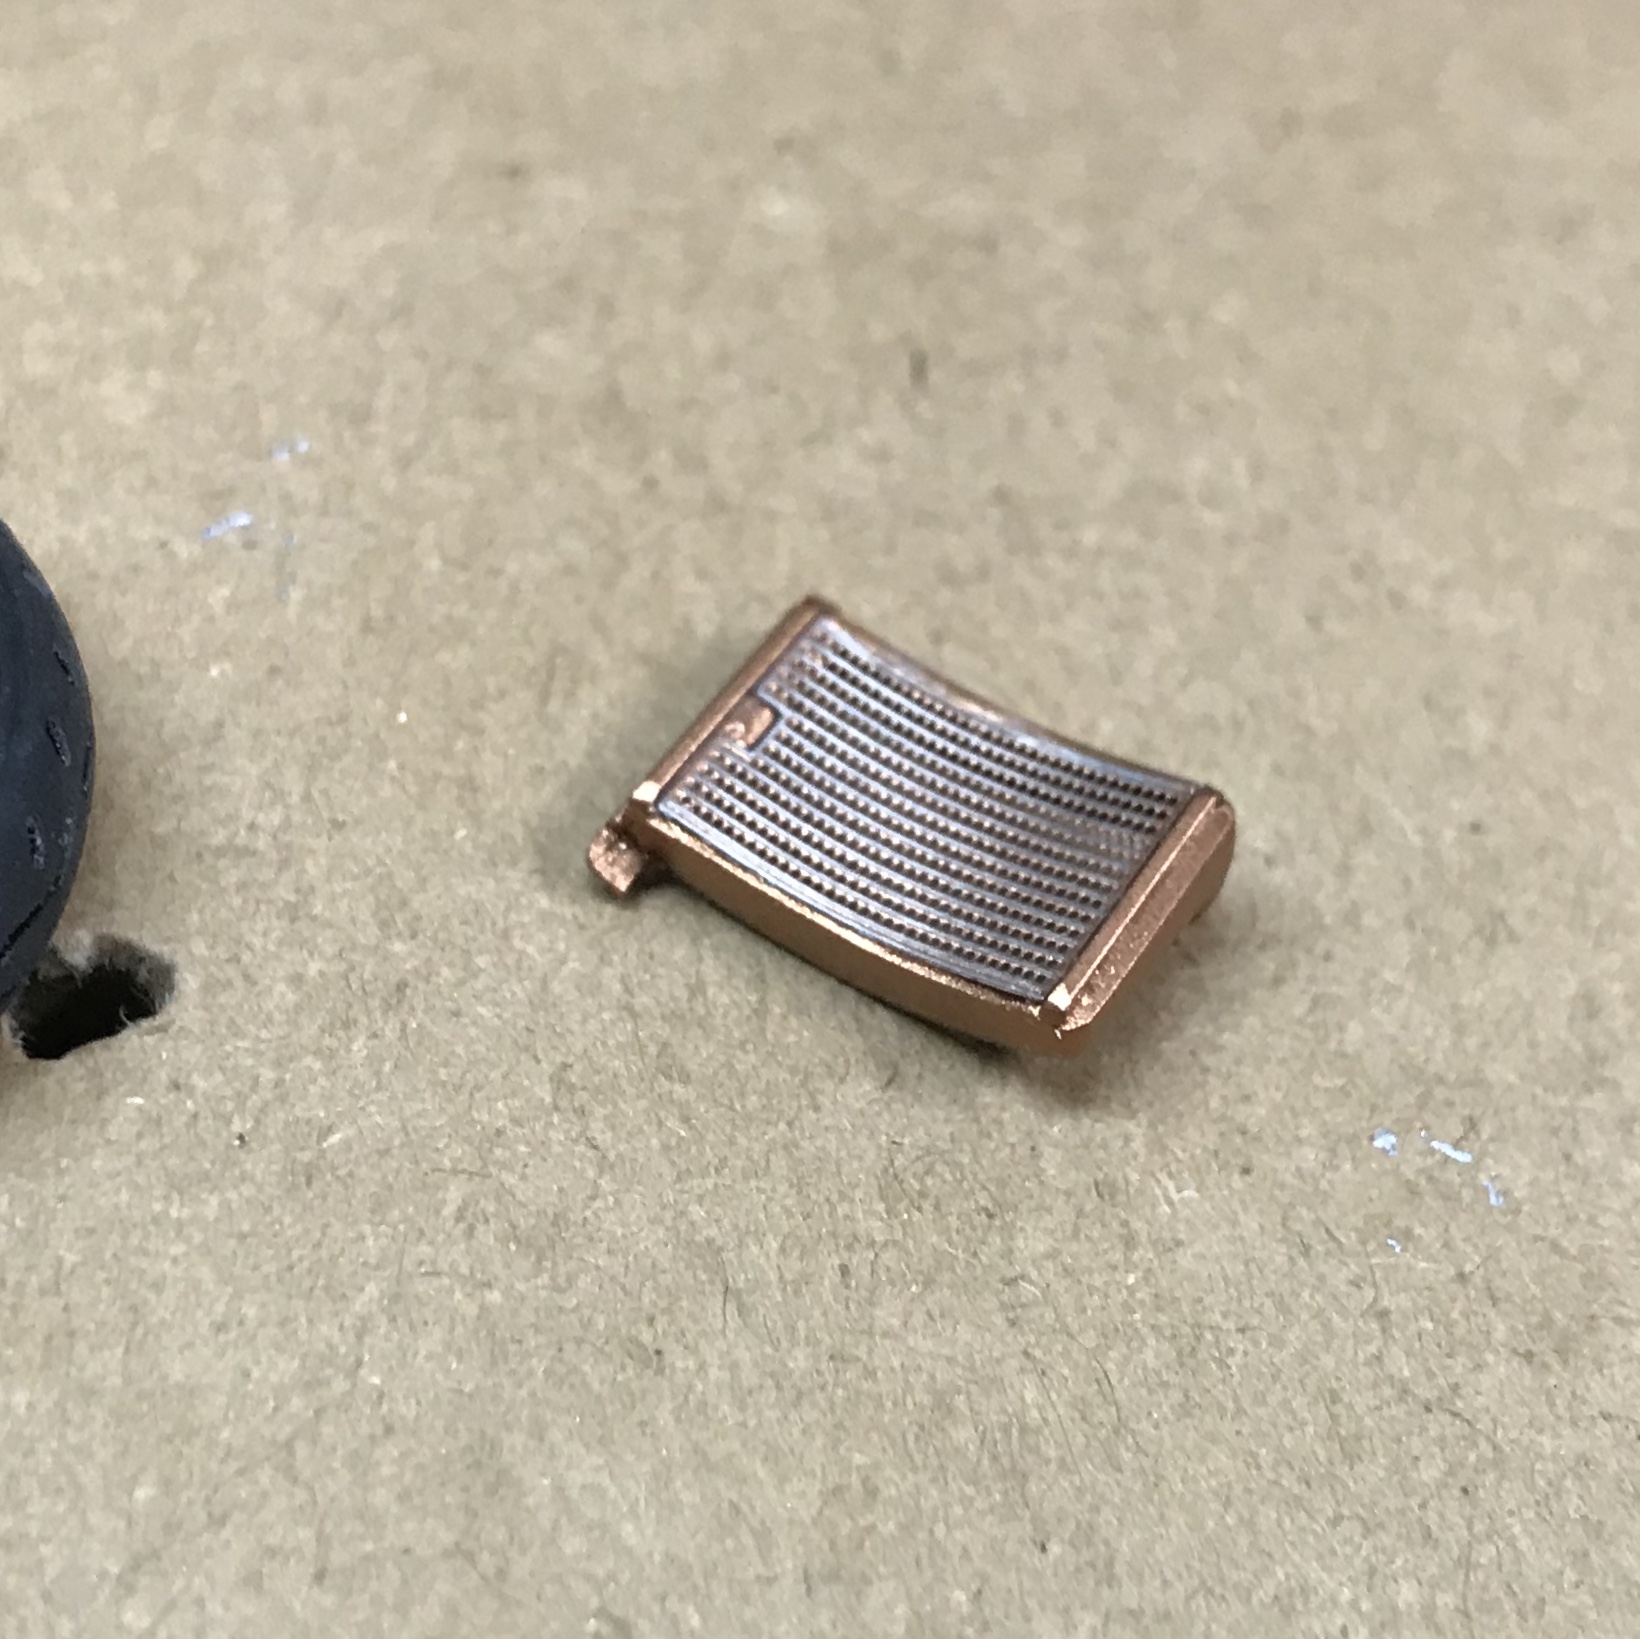
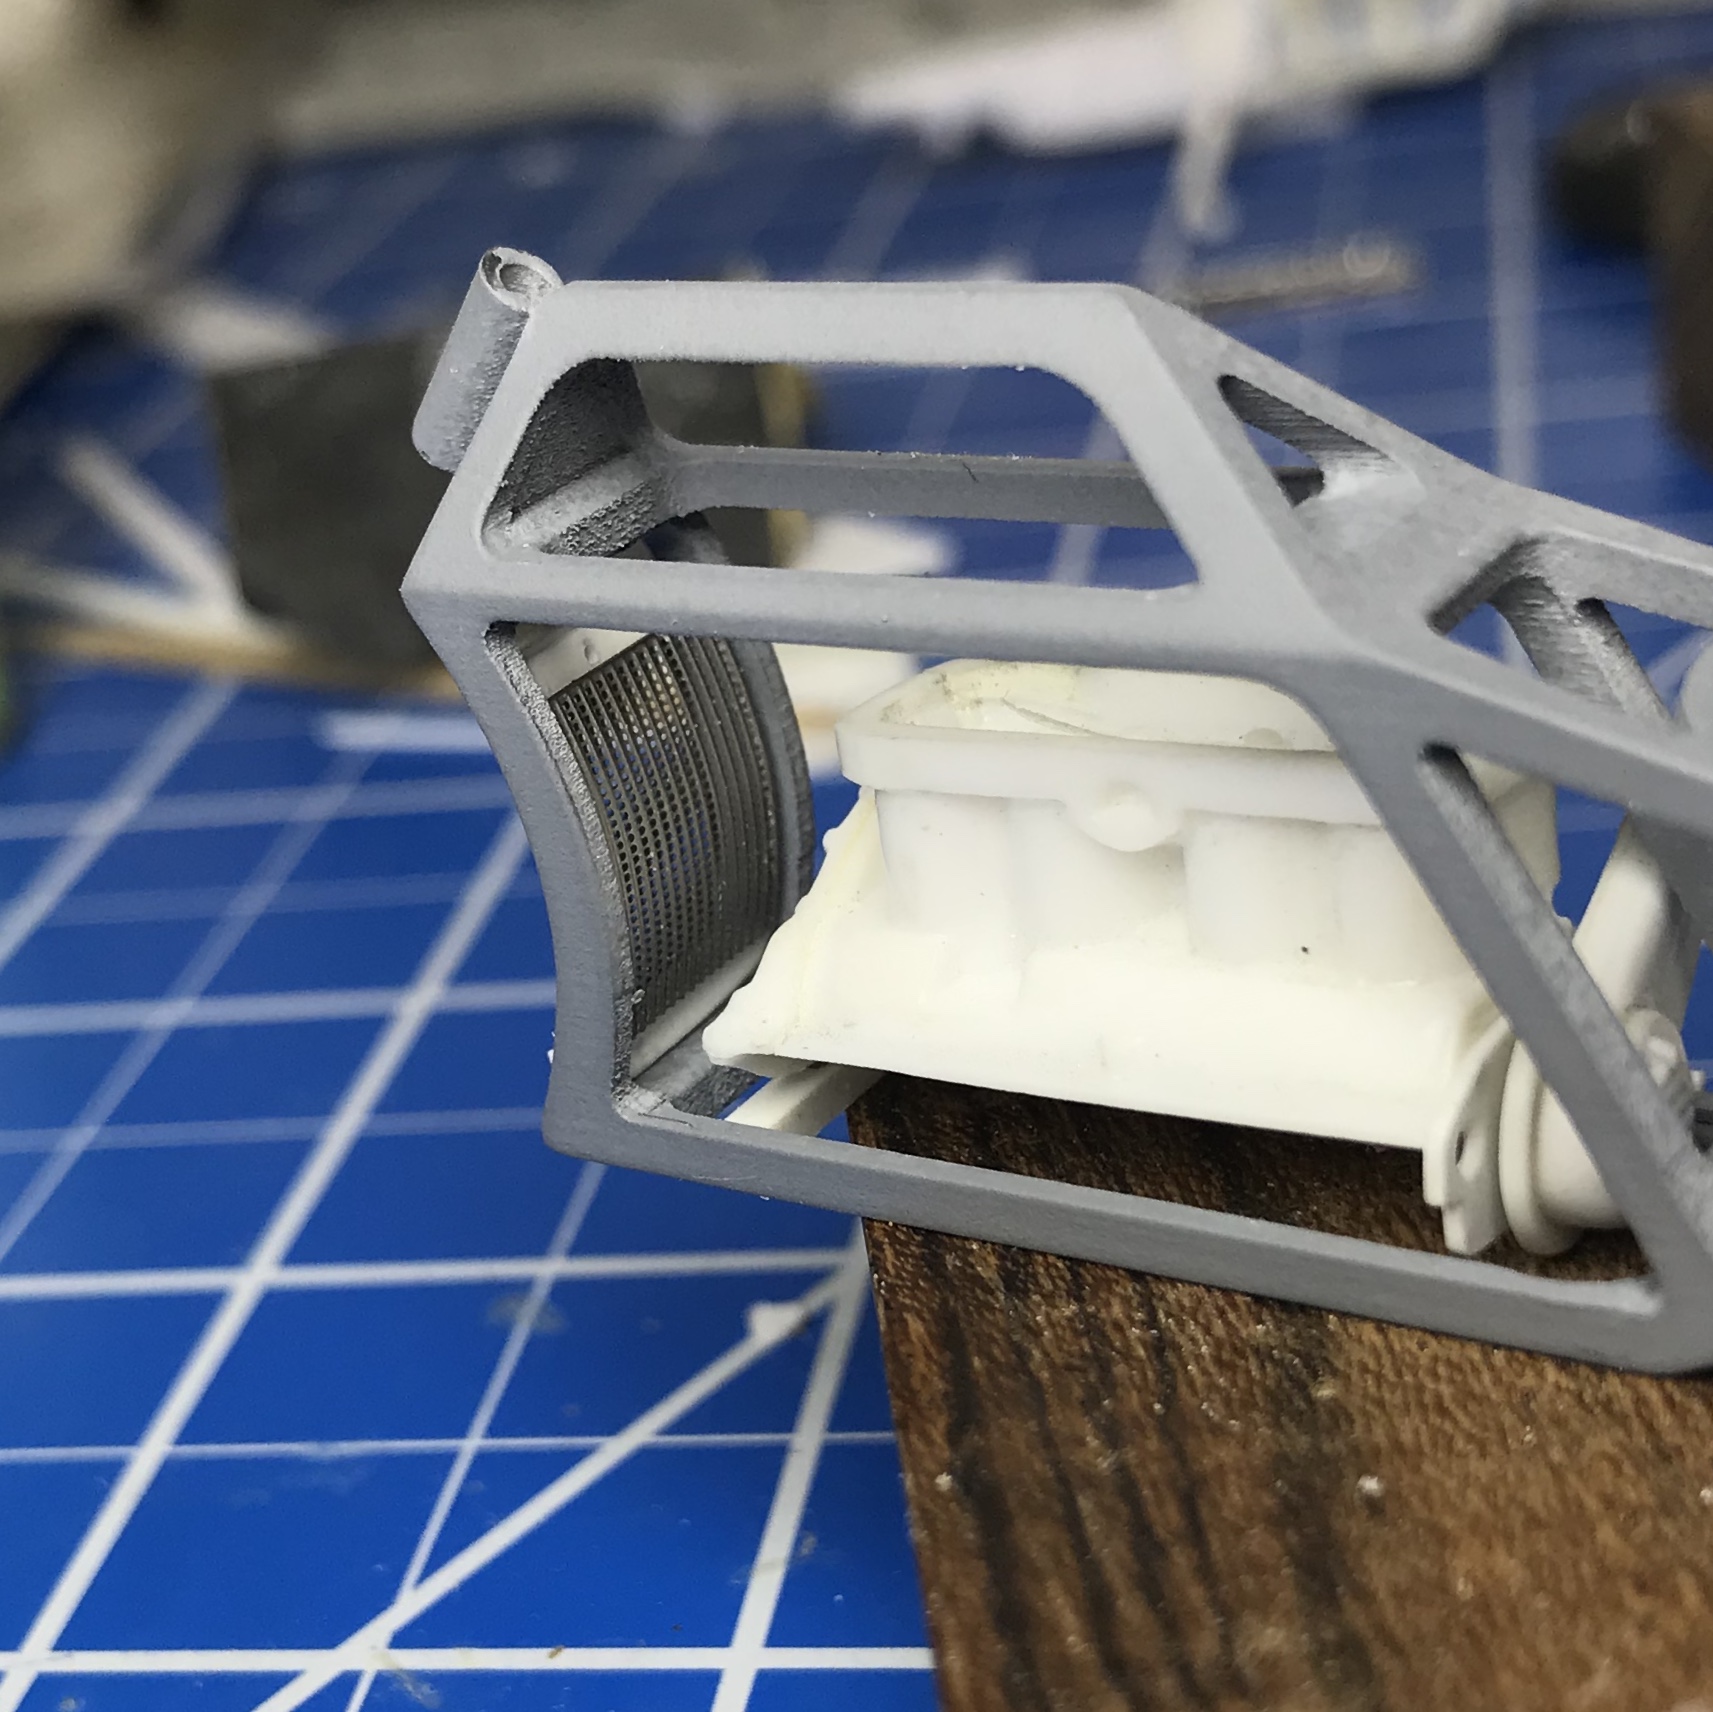
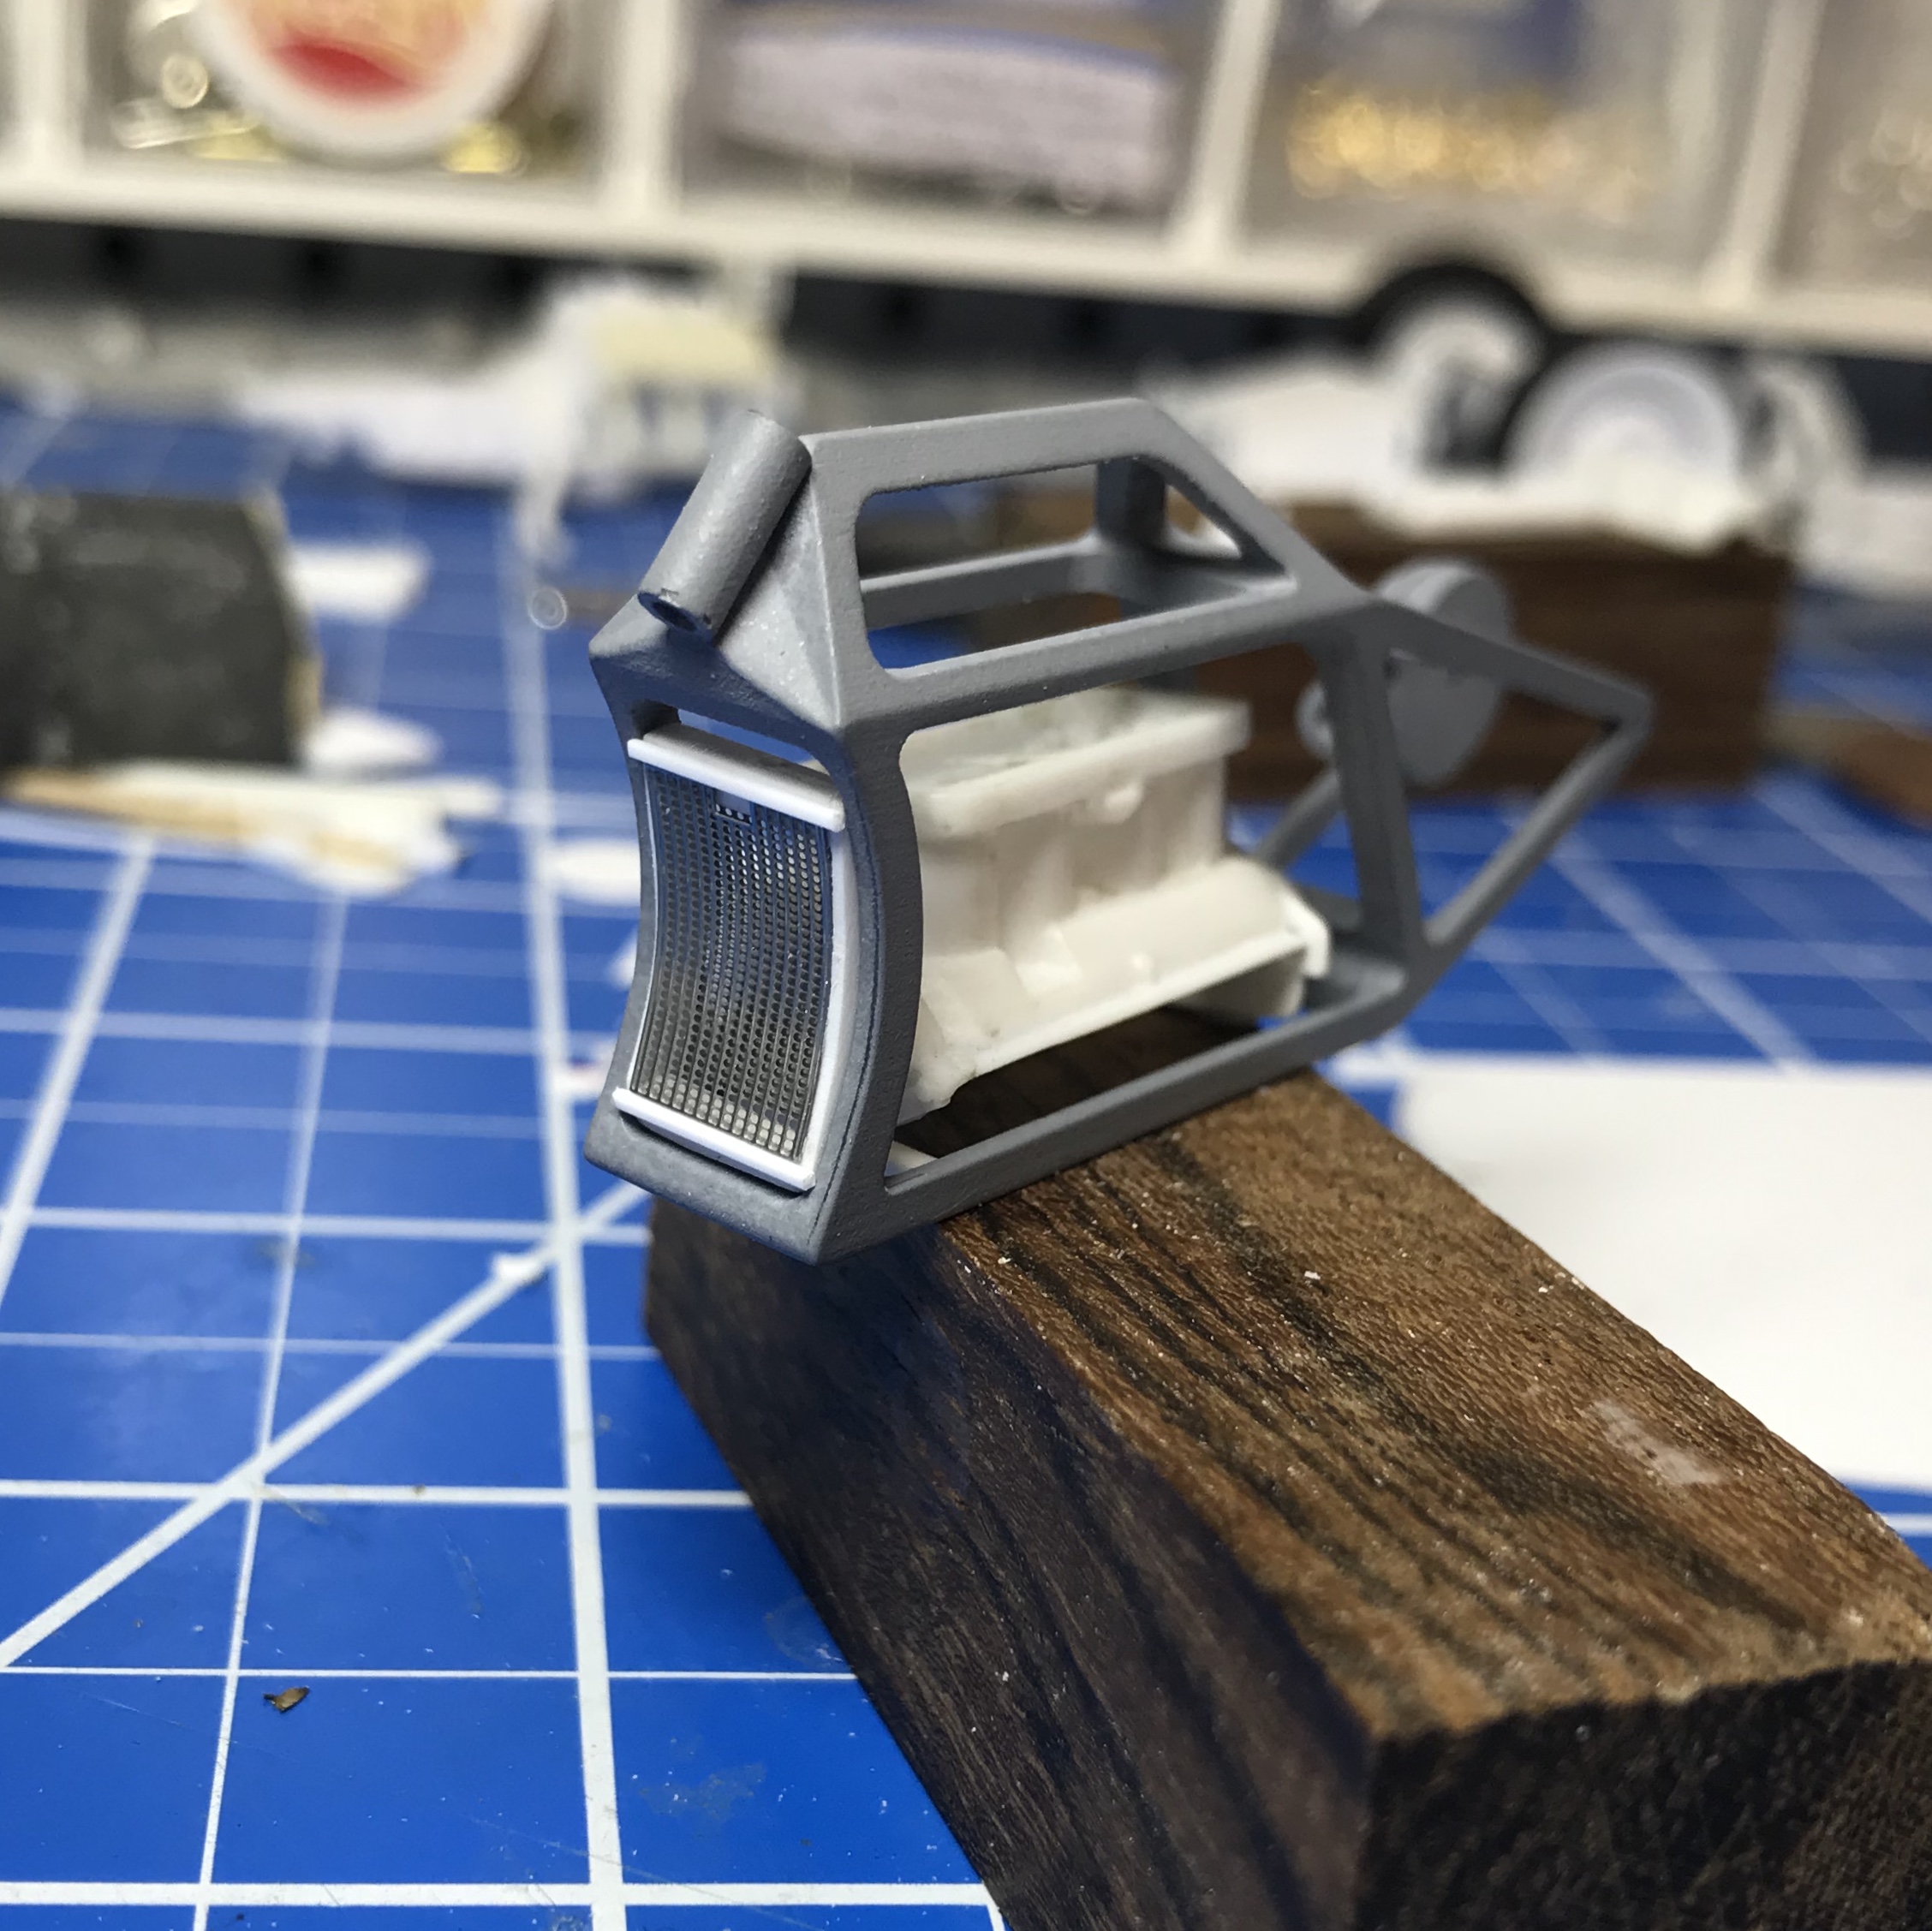
Thanks Luke and Bob! Here is a quick update.... just made a curved radiator, Ive always wanted to make one that you can see-through.... this seemed like a good chance to do that. I scratch built a surround then added photo-etch screens from a crazy modeler Ferrari FXX detail set. It really worked out nice Last night I spent about three hours making different types of carbs/intakes that all ended up in the parts bin... so that is a bummer, just nothing I made looked correct or had the level of detail I wanted. So tonight I will try again, just a shame to spend that much time with zero to show for it, its all part of the process, I guess. Instead of carbs I'm going to go with dual throttle body Hilborn inspired mechanical injection system, something like you would see on an offy... hopefully I can pull that off.