Impalow
-
Posts
1,065 -
Joined
-
Last visited
Content Type
Profiles
Forums
Events
Gallery
Everything posted by Impalow
-
 Looks fantastic joe! Nice recovery!
 -
keep stopping at the end of my builds
Impalow replied to youpey's topic in General Automotive Talk (Trucks and Cars)
I honestly start dragging my feet at the end of all of my builds.... and after some self-reflection... I realized I don't want the process to be done... I have invested so much time, thoughts, and energy over obsessing for 6-ish months on a project... I don't want it to end. Now granted I build models slightly different than others, for me it is a creative outlet.. and i really enjoy exploring new techniques and ideas.. to me the finished model is sometimes secondary to the process of building it. I came to this realization when i noticed, after I complete a model I go into some sort of minor depression.. a feeling of being lost to some extent. Especially when thrashing to get done for a deadline, 2-3 weeks of every night working on something.. and loving every minute of it.... when its over then what? its not like you can drive these things, and you can only stare at it so long without being a total weirdo.... Sometimes I try to start something new right away, but if the spark of the old project isn't there, it just feels like I'm going through the motions. More often than not, I'm just exhausted and not willing to jump back into something so immersive. Its a reoccurring thing, and I'm sure its common among others... and now that i have realized it.... its a bit easier to deal with. I realize why its taking me extra long to assemble something... or glue on that last part.. -
More on Molotow pens
Impalow replied to smhardesty's topic in General Automotive Talk (Trucks and Cars)
With some help from Bob, Ive had excellent luck using the Molotow through a cheapo amazon airbrush(8.00).... Every bit of chrome on this is airbrushed Molotow topped with SpazStix Clear. The spazStix clear did dull it in some spots... but I think it had more to do with my application technique. I was experimenting with heavy vs light coats of the clear, it did make a difference... but there was so much chrome on this, i lost track of what was what. It even stood up to the Vallejo Model Washes without any issues. I did have some issues with fingerprints in the clear on the chassis... i think it was just my sweaty hands holding it tightly during assembly... other than that, no issues at all.
-
The Golden Foose - DONE!
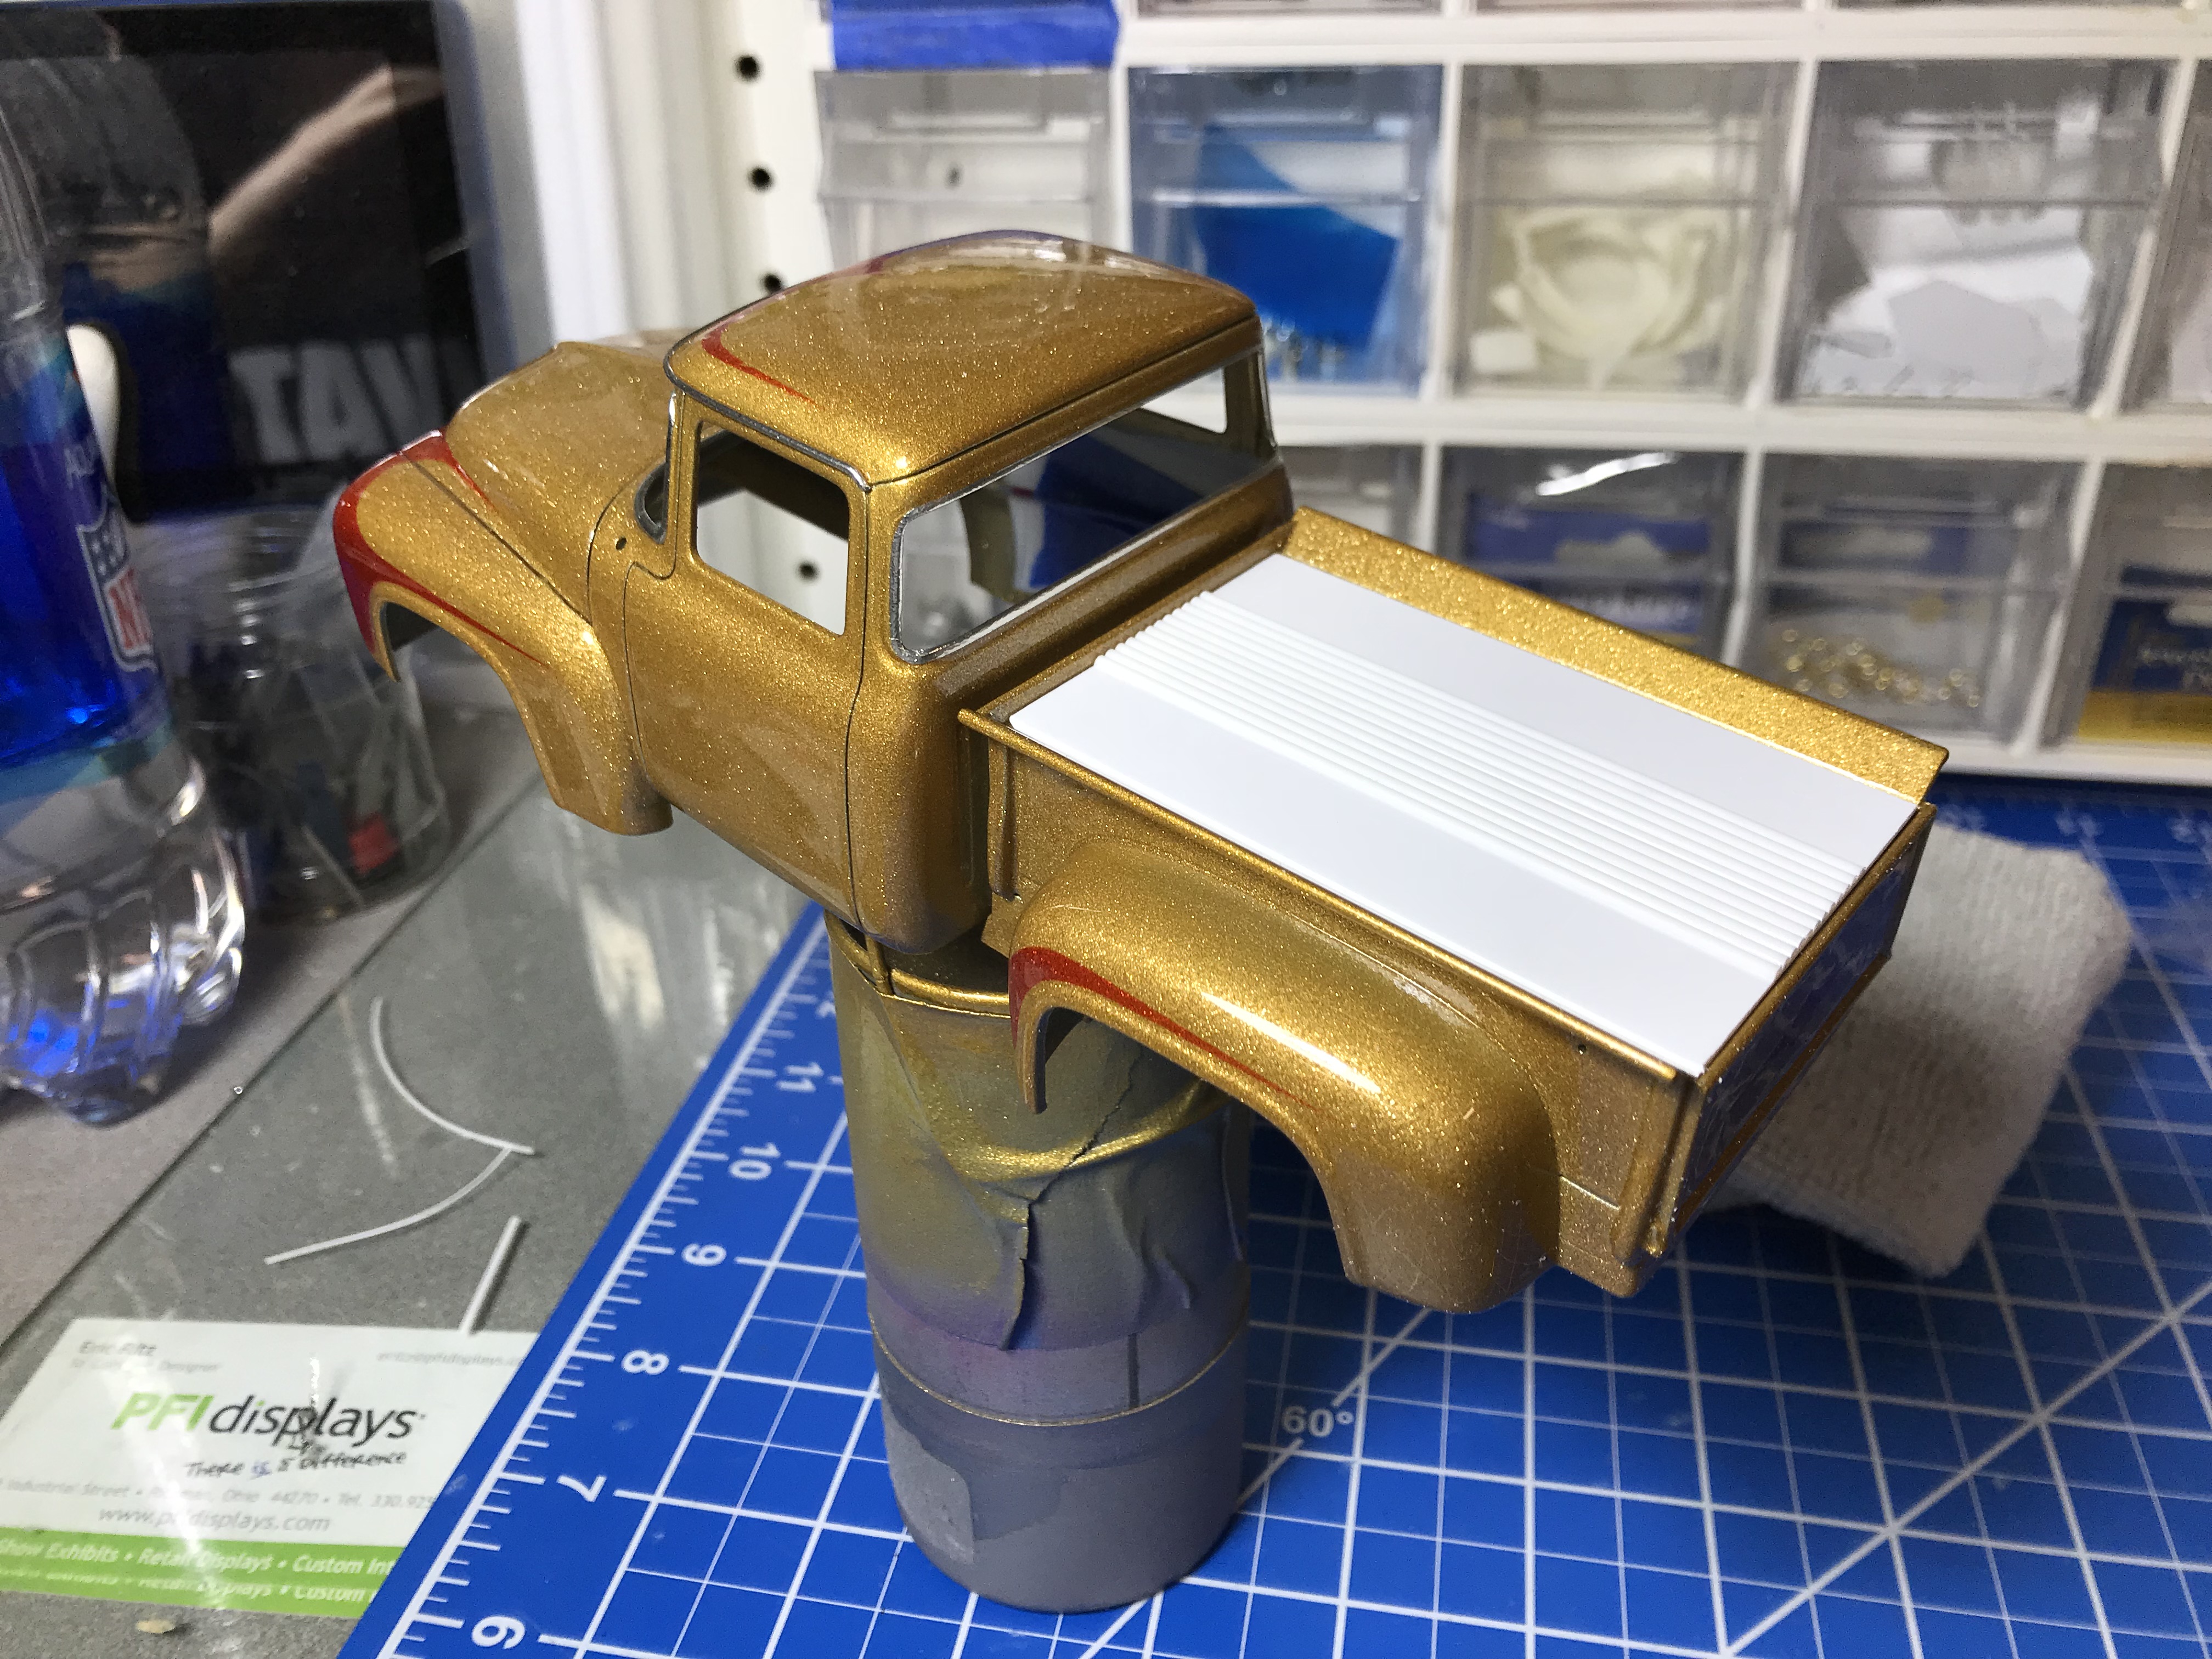
Impalow replied to Impalow's topic in WIP: Model Trucks: Pickups, Vans, SUVs, Light Commercial
Thank you guys!! Im really digging this one.. its going quick and practically falling together out of parts I have laying around. Thanks chris! I love that Watson truck, and yours is quite nice as well! Great job on the chop, its perfect. With all the subtle body mods on the foose truck it was a no brainer for a quick minor body work custom... but all said i like the 53-55 roof line much better. Here is a quick update on the truck... BMF and last coat of clear done... A couple of dirt specs in the roof and hood, but should be an easy wet sand and buff. Then I knocked out a quick pleated tonneau cover... Flat stock and some .060 half round for the pleats. Mocked up the interior.. Pearl white paint really took this back a couple of decades... Thinking the red piping will make it pop quite nicely, the red carpet was done with embossing powder. Im going to use some Replicas and Miniatures door handles and window cranks to further backdate this thing.
-
Awesome Stuff David! Thanks for re-posting them...some absolute greatness here. The infinT and short woody are my personal favorites... but that willys is right up there.. and the other 2 are also winners in my book... sooo i guess im saying i like them all.
-
The Golden Foose - DONE!
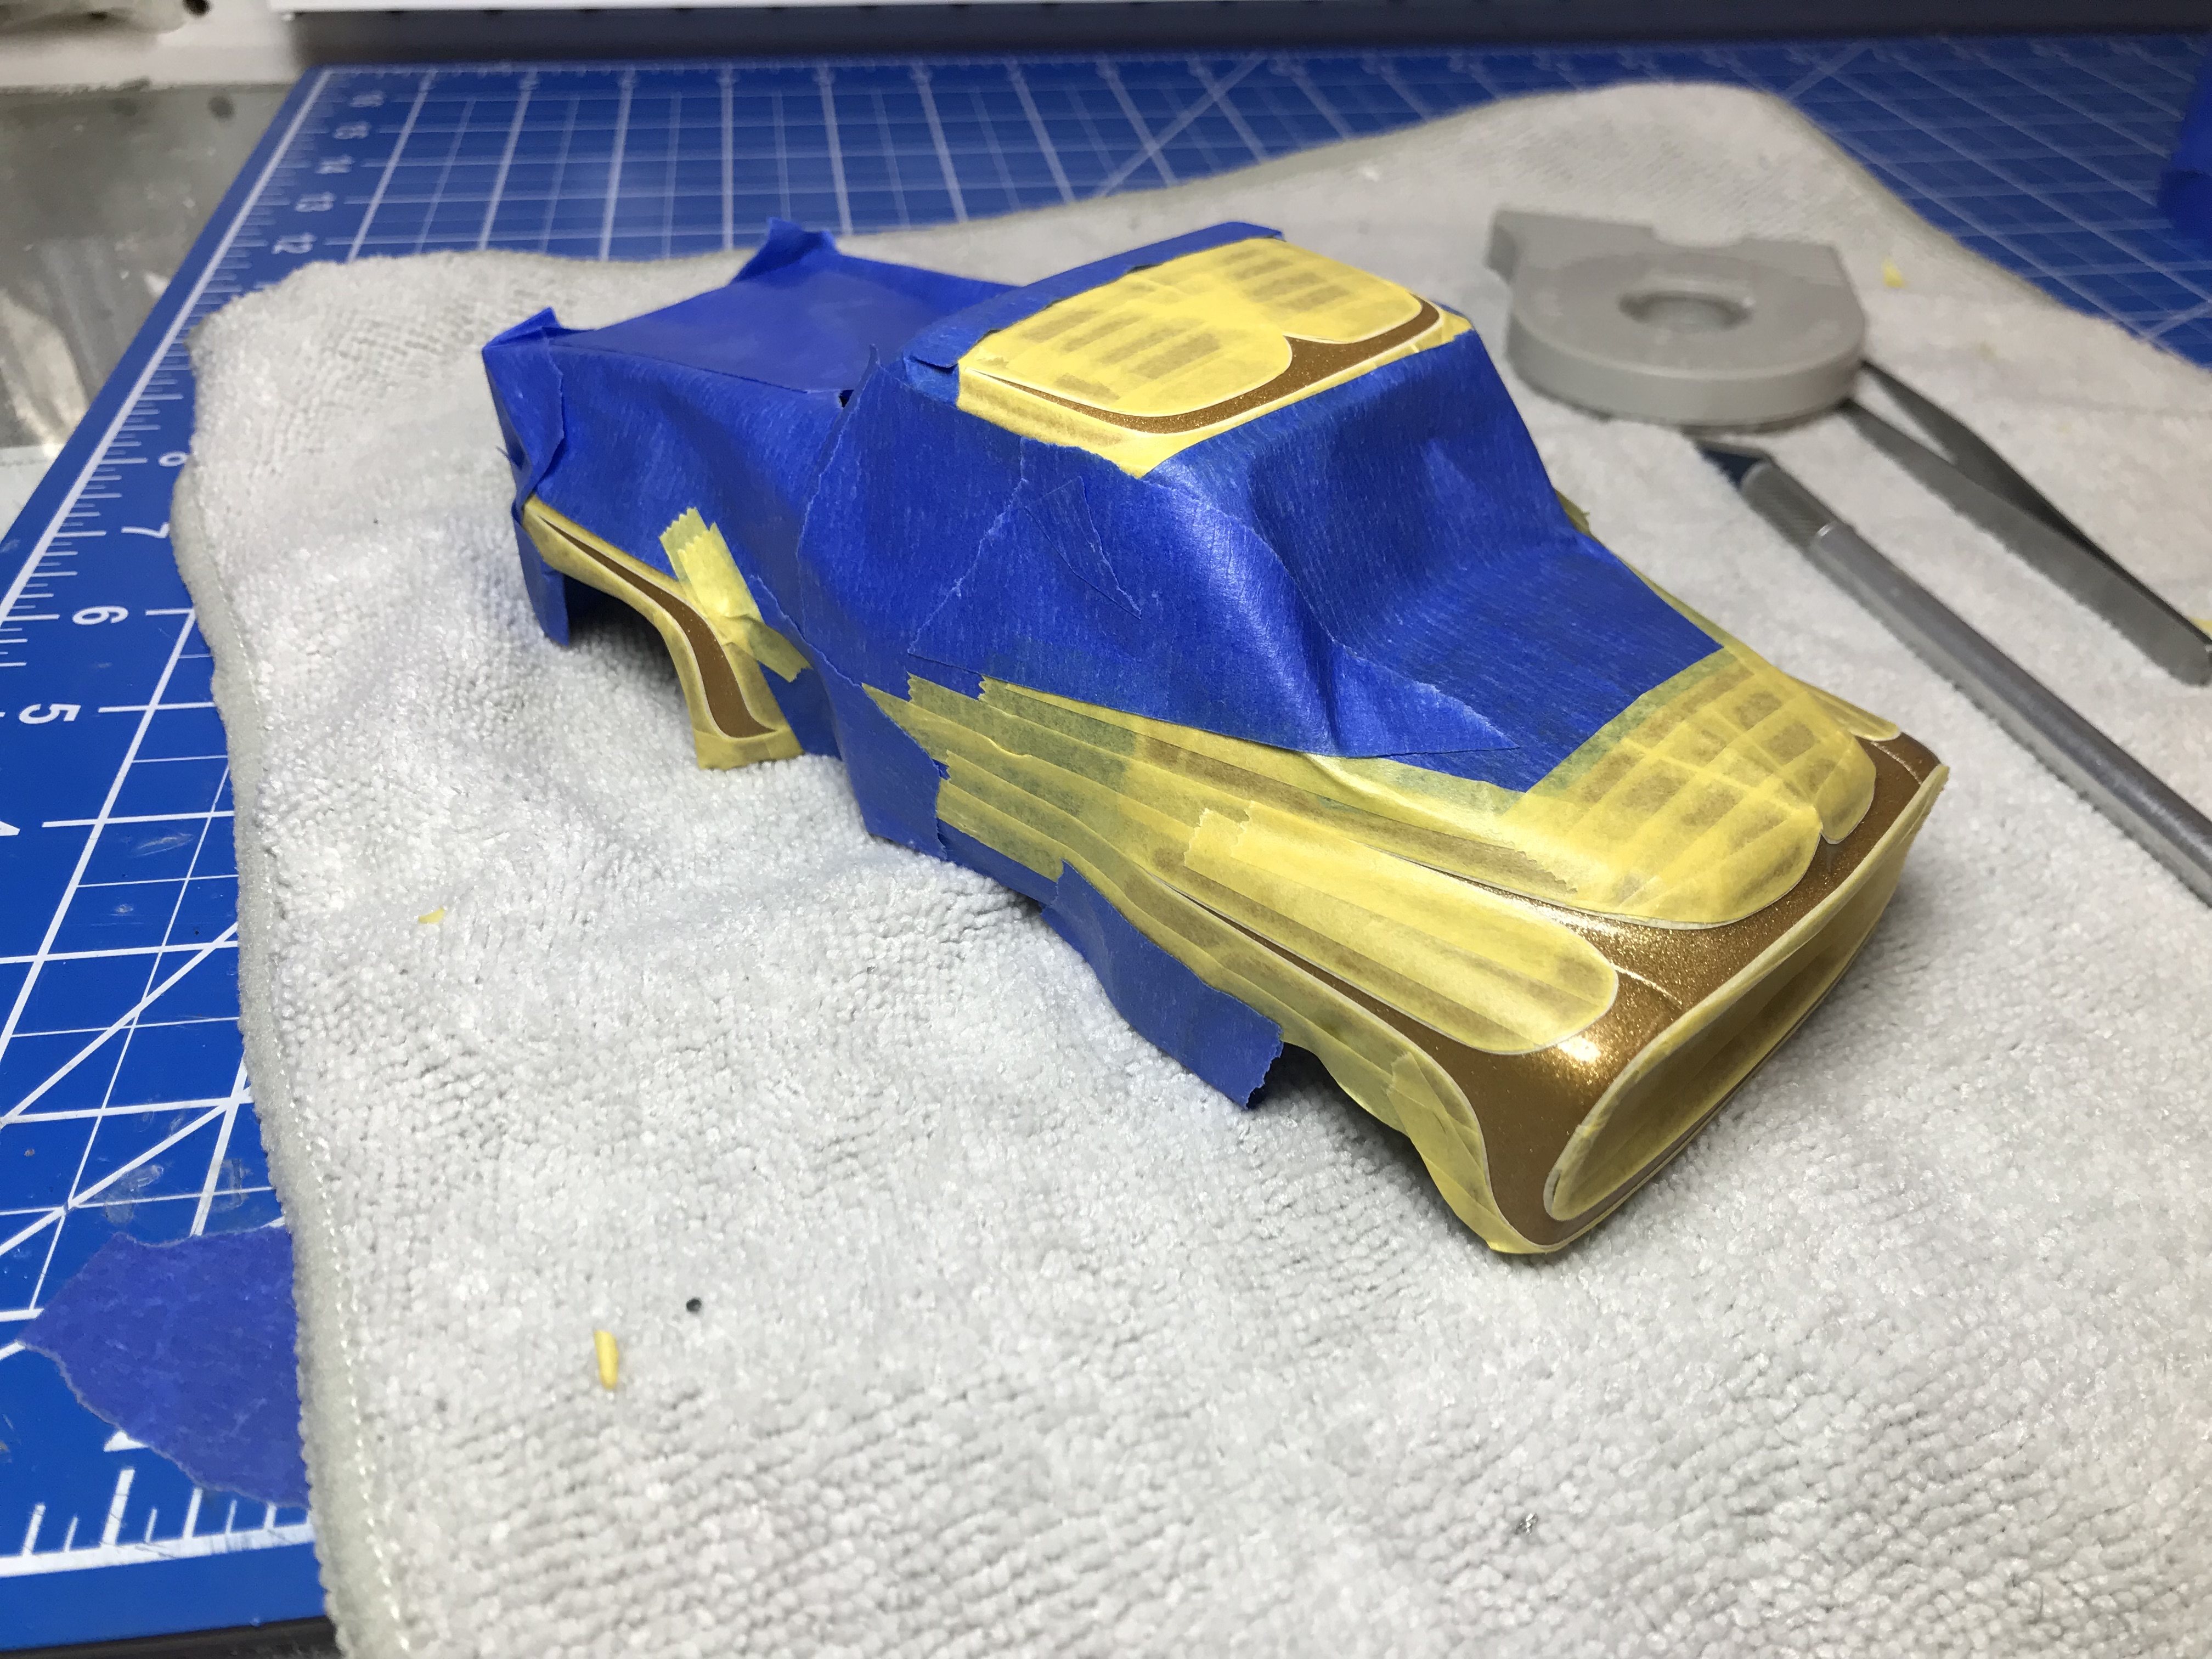
Impalow replied to Impalow's topic in WIP: Model Trucks: Pickups, Vans, SUVs, Light Commercial
Sand all down with 3000grit and then came the scallops... hand masked with some 1/32" FBS Micro Tape... Tamiya clear red thinned with lacquer thinner. All done and ready for some more clear Can't forget about the dash.... more interior photos later, that will be the next day or 2.
-
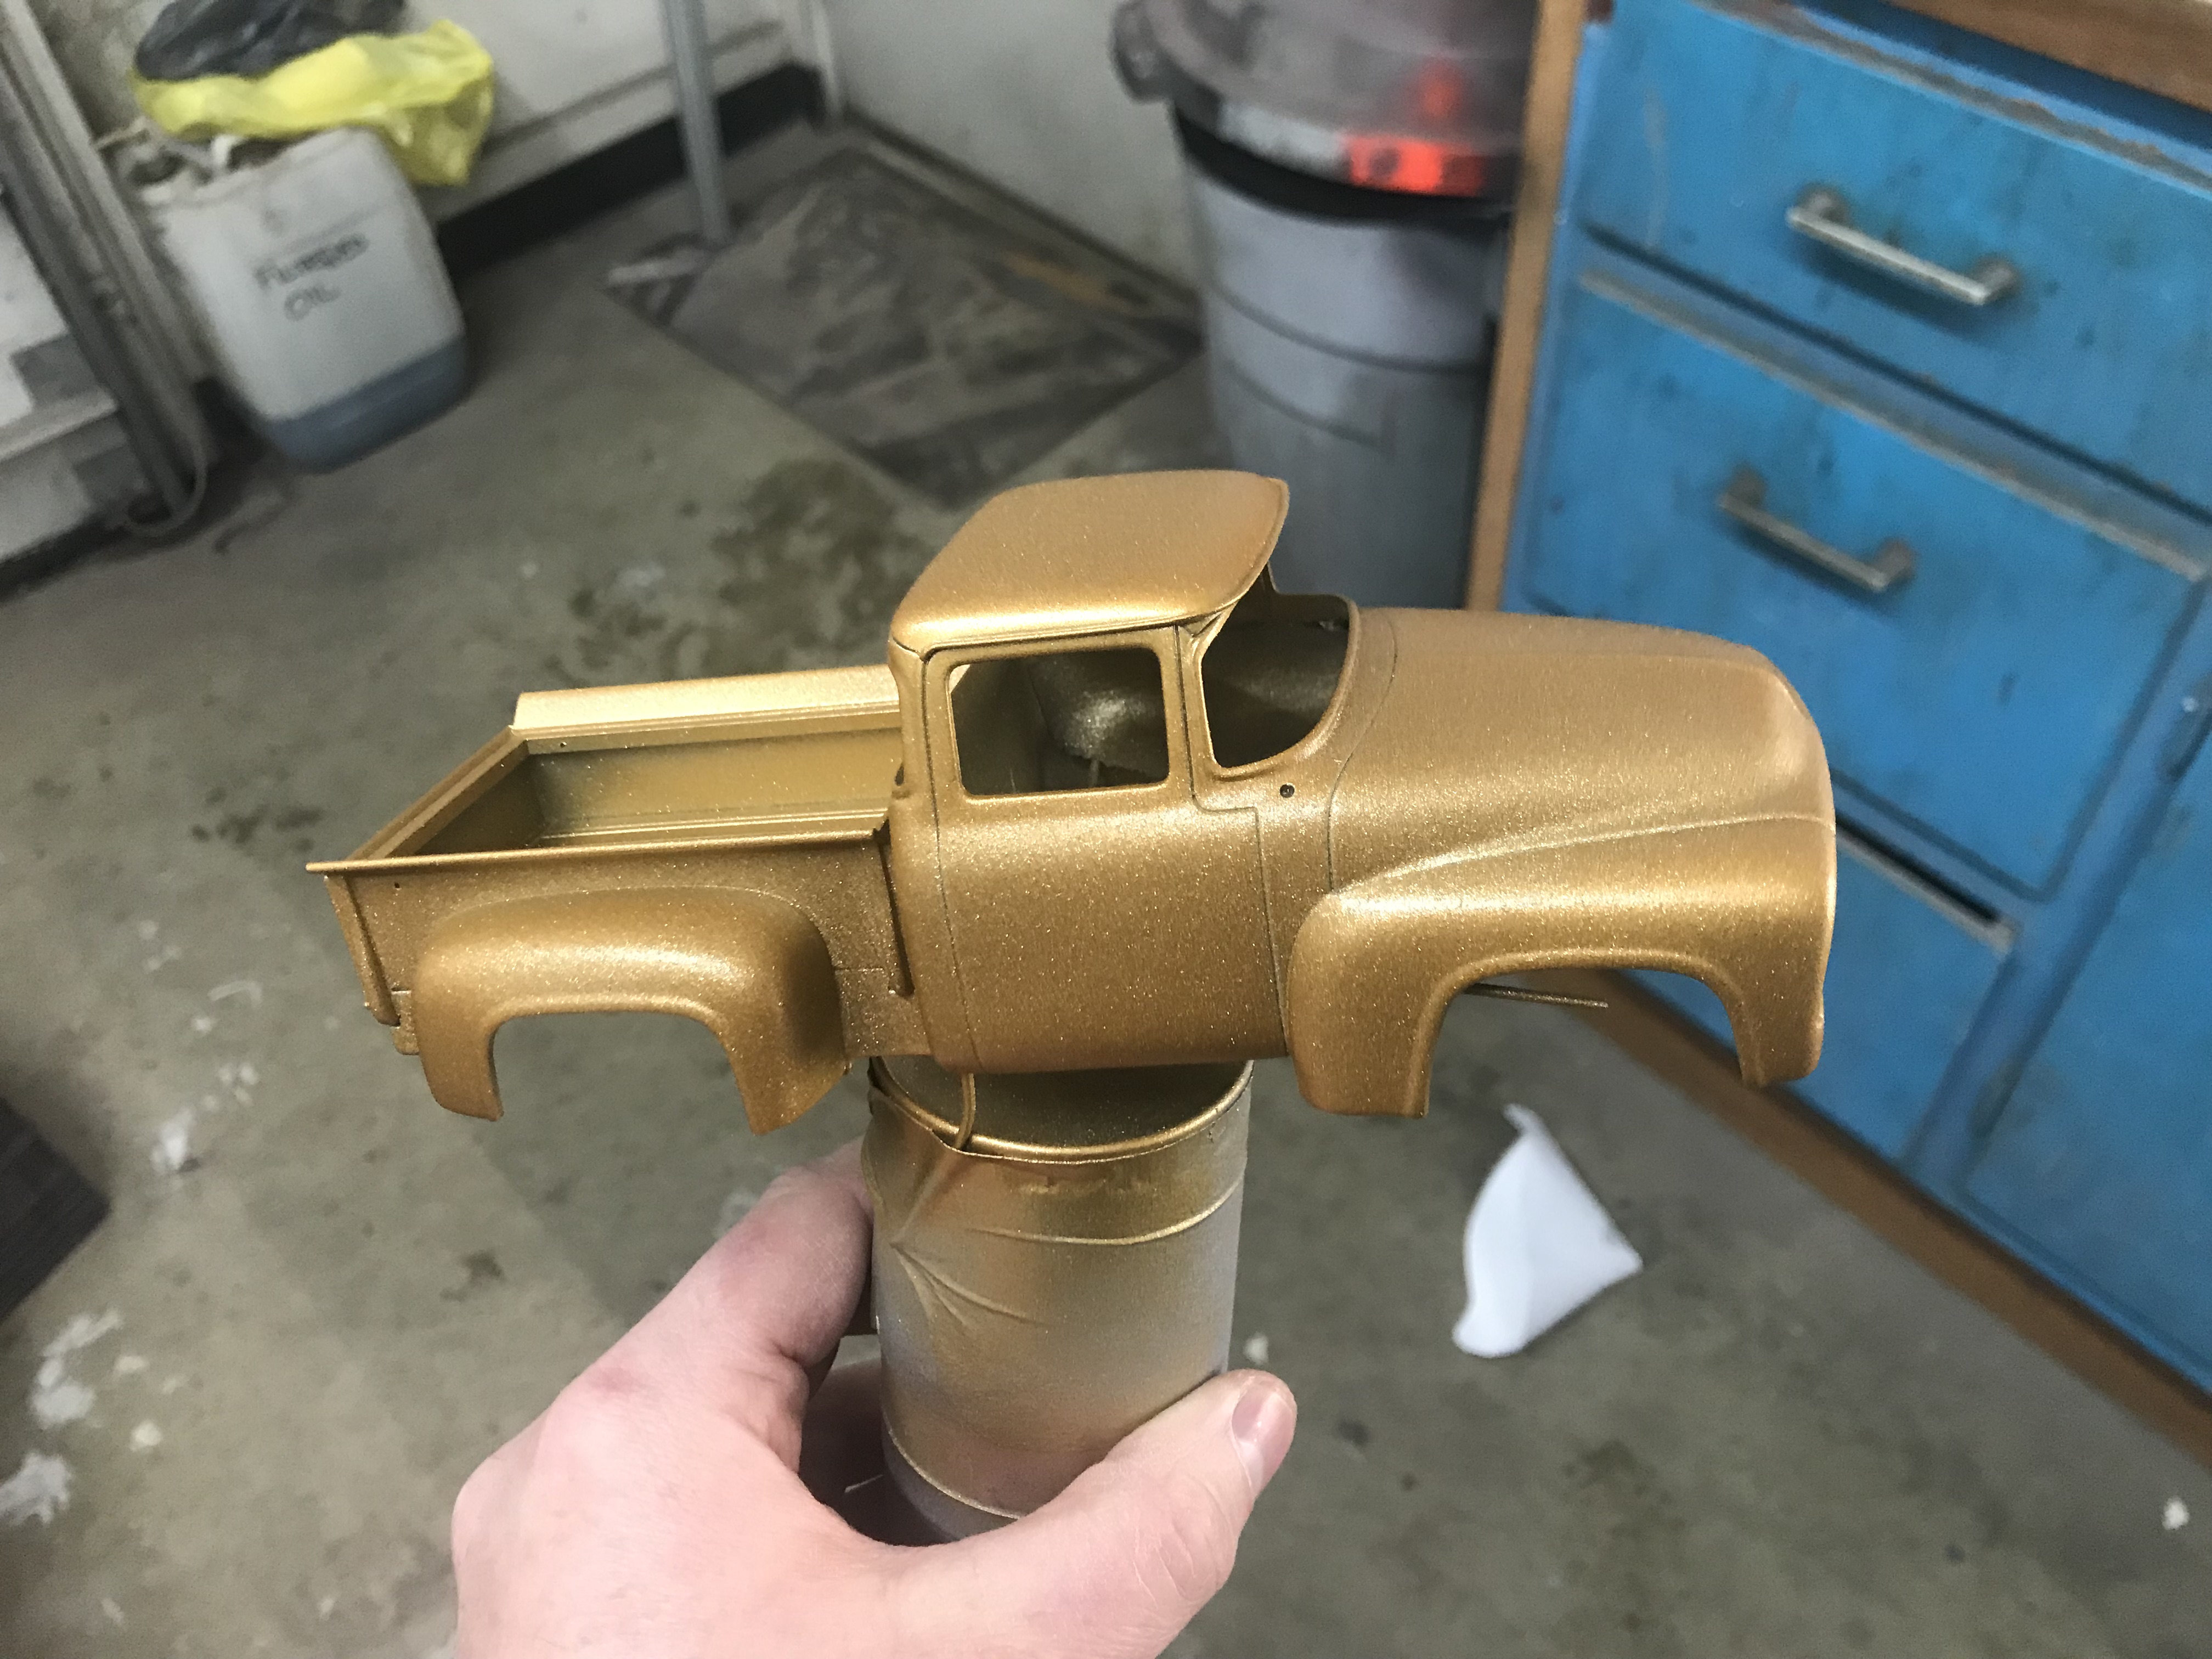
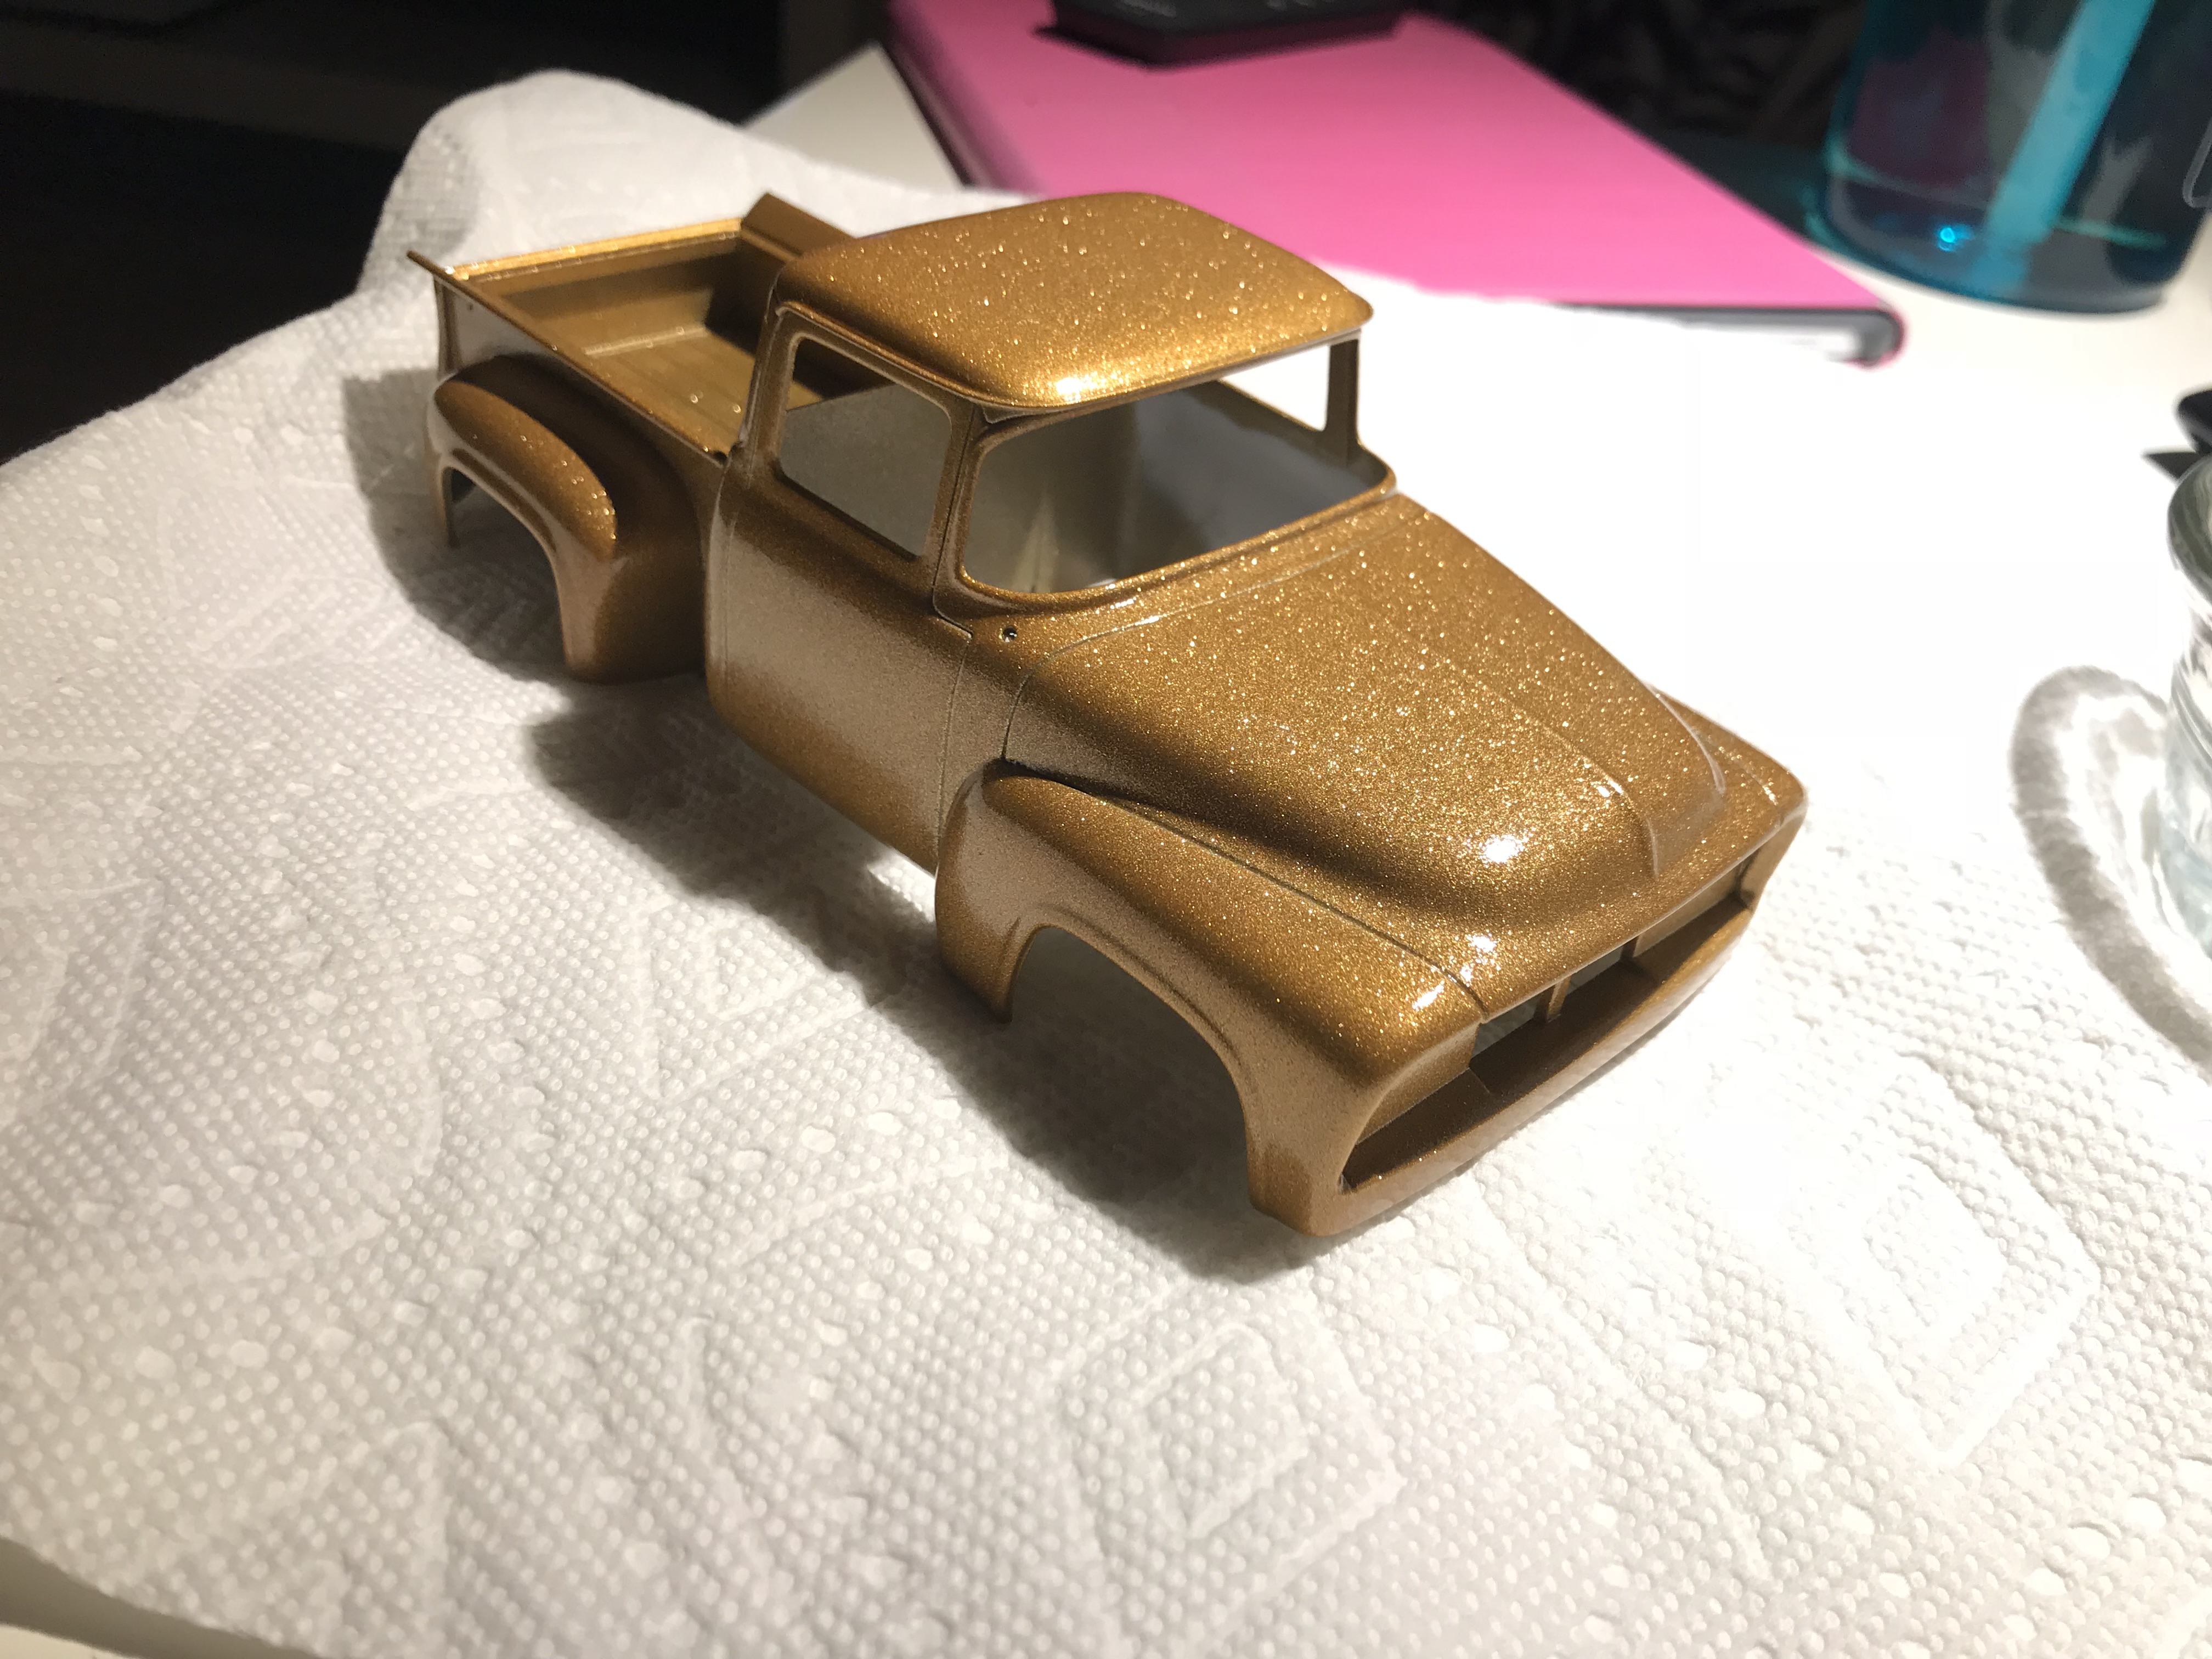
Well this should be a super fast moving thread... I had this Foose truck laying around, I had pirated the grill for my bronco build, the engine & chassis look like good pieces for a future build and I wanted to try out this .002 metal flake from TCP global... thus the Golden Foose Custom truck is born. Hopefully this little guy will be done by NNL East. Worked out some minor body modifications.. (shaved handles, fuel filter and wipers, filled bumper holes front and roll panned the rear) I attached the body to the bed, and then separated the running boards, they will be white tuck-n-roll like the tonneau cover. The hub caps and tires are the 1/24th scale items from the 58 t-bird... the slightly oversized tires seem to fill the oversized wheel wells nicely. Grille is from the AMT/blueprinter packs, the headlights came from a parts box. Next up was some testors pure gold as a base coat.... followed by a few coats of .002 gold flake from TCP Global in a carrier clear.. Finally some urethane clear to make it really sparkle.
-
Oh this is awesome!!! Love it!
-
Oh yeah! This is a fun one!
-
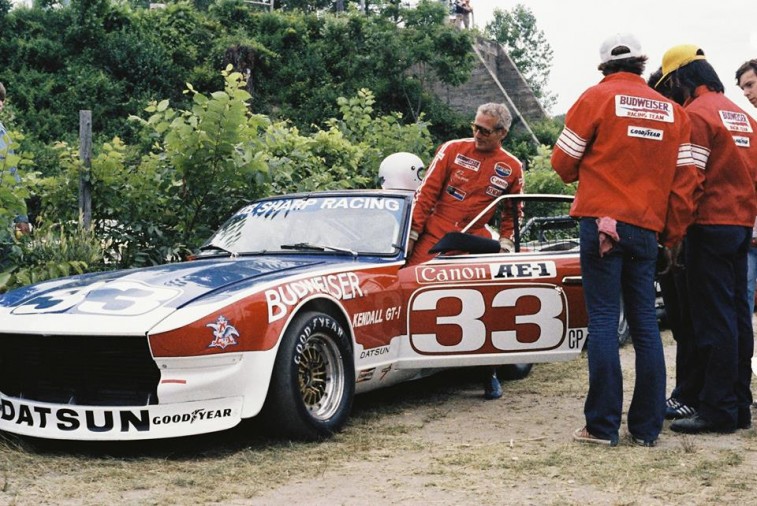
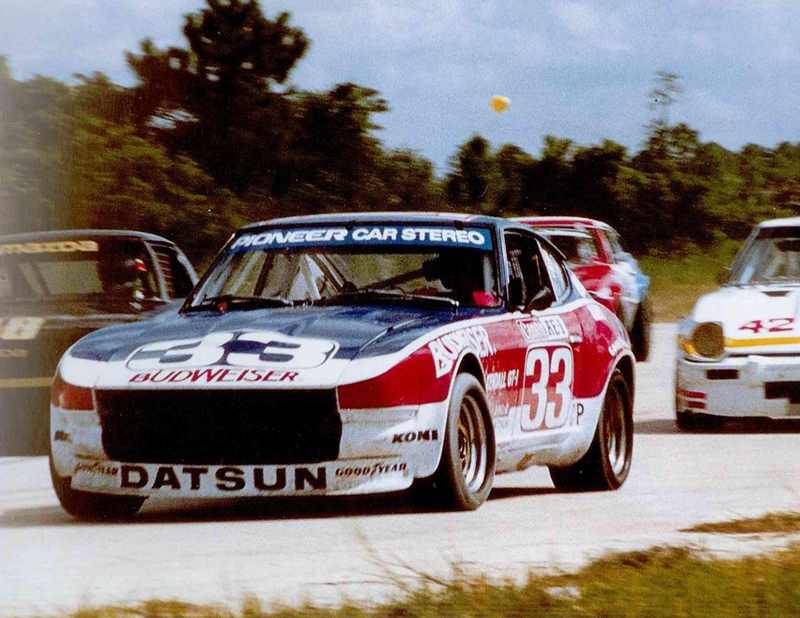
Oh... It does look like Mr. Newman did run an earlier 240Z (like your kit) in CP... not sure if anyone makes the bob sharp/newman livery decals... but that would be a cool build.
-
Oh that's sweet!! looking forward to more on this one.... nice work as usual!
-
thats the plan! Im knocking out a quick foose truck curbside for nnl east... and then I hope to fuddle around with this one all summer and have it done for the Toledo NNL... I really want to fully detail all of the plumbing, air suspension, brakes, etc... it will be a challenge to keep it super clean. I did make progress on the motorcycle... the main profile is all programed and ready to cut out.... still going to have lots of scratchbuilding on this one... but that is how i like it.
-
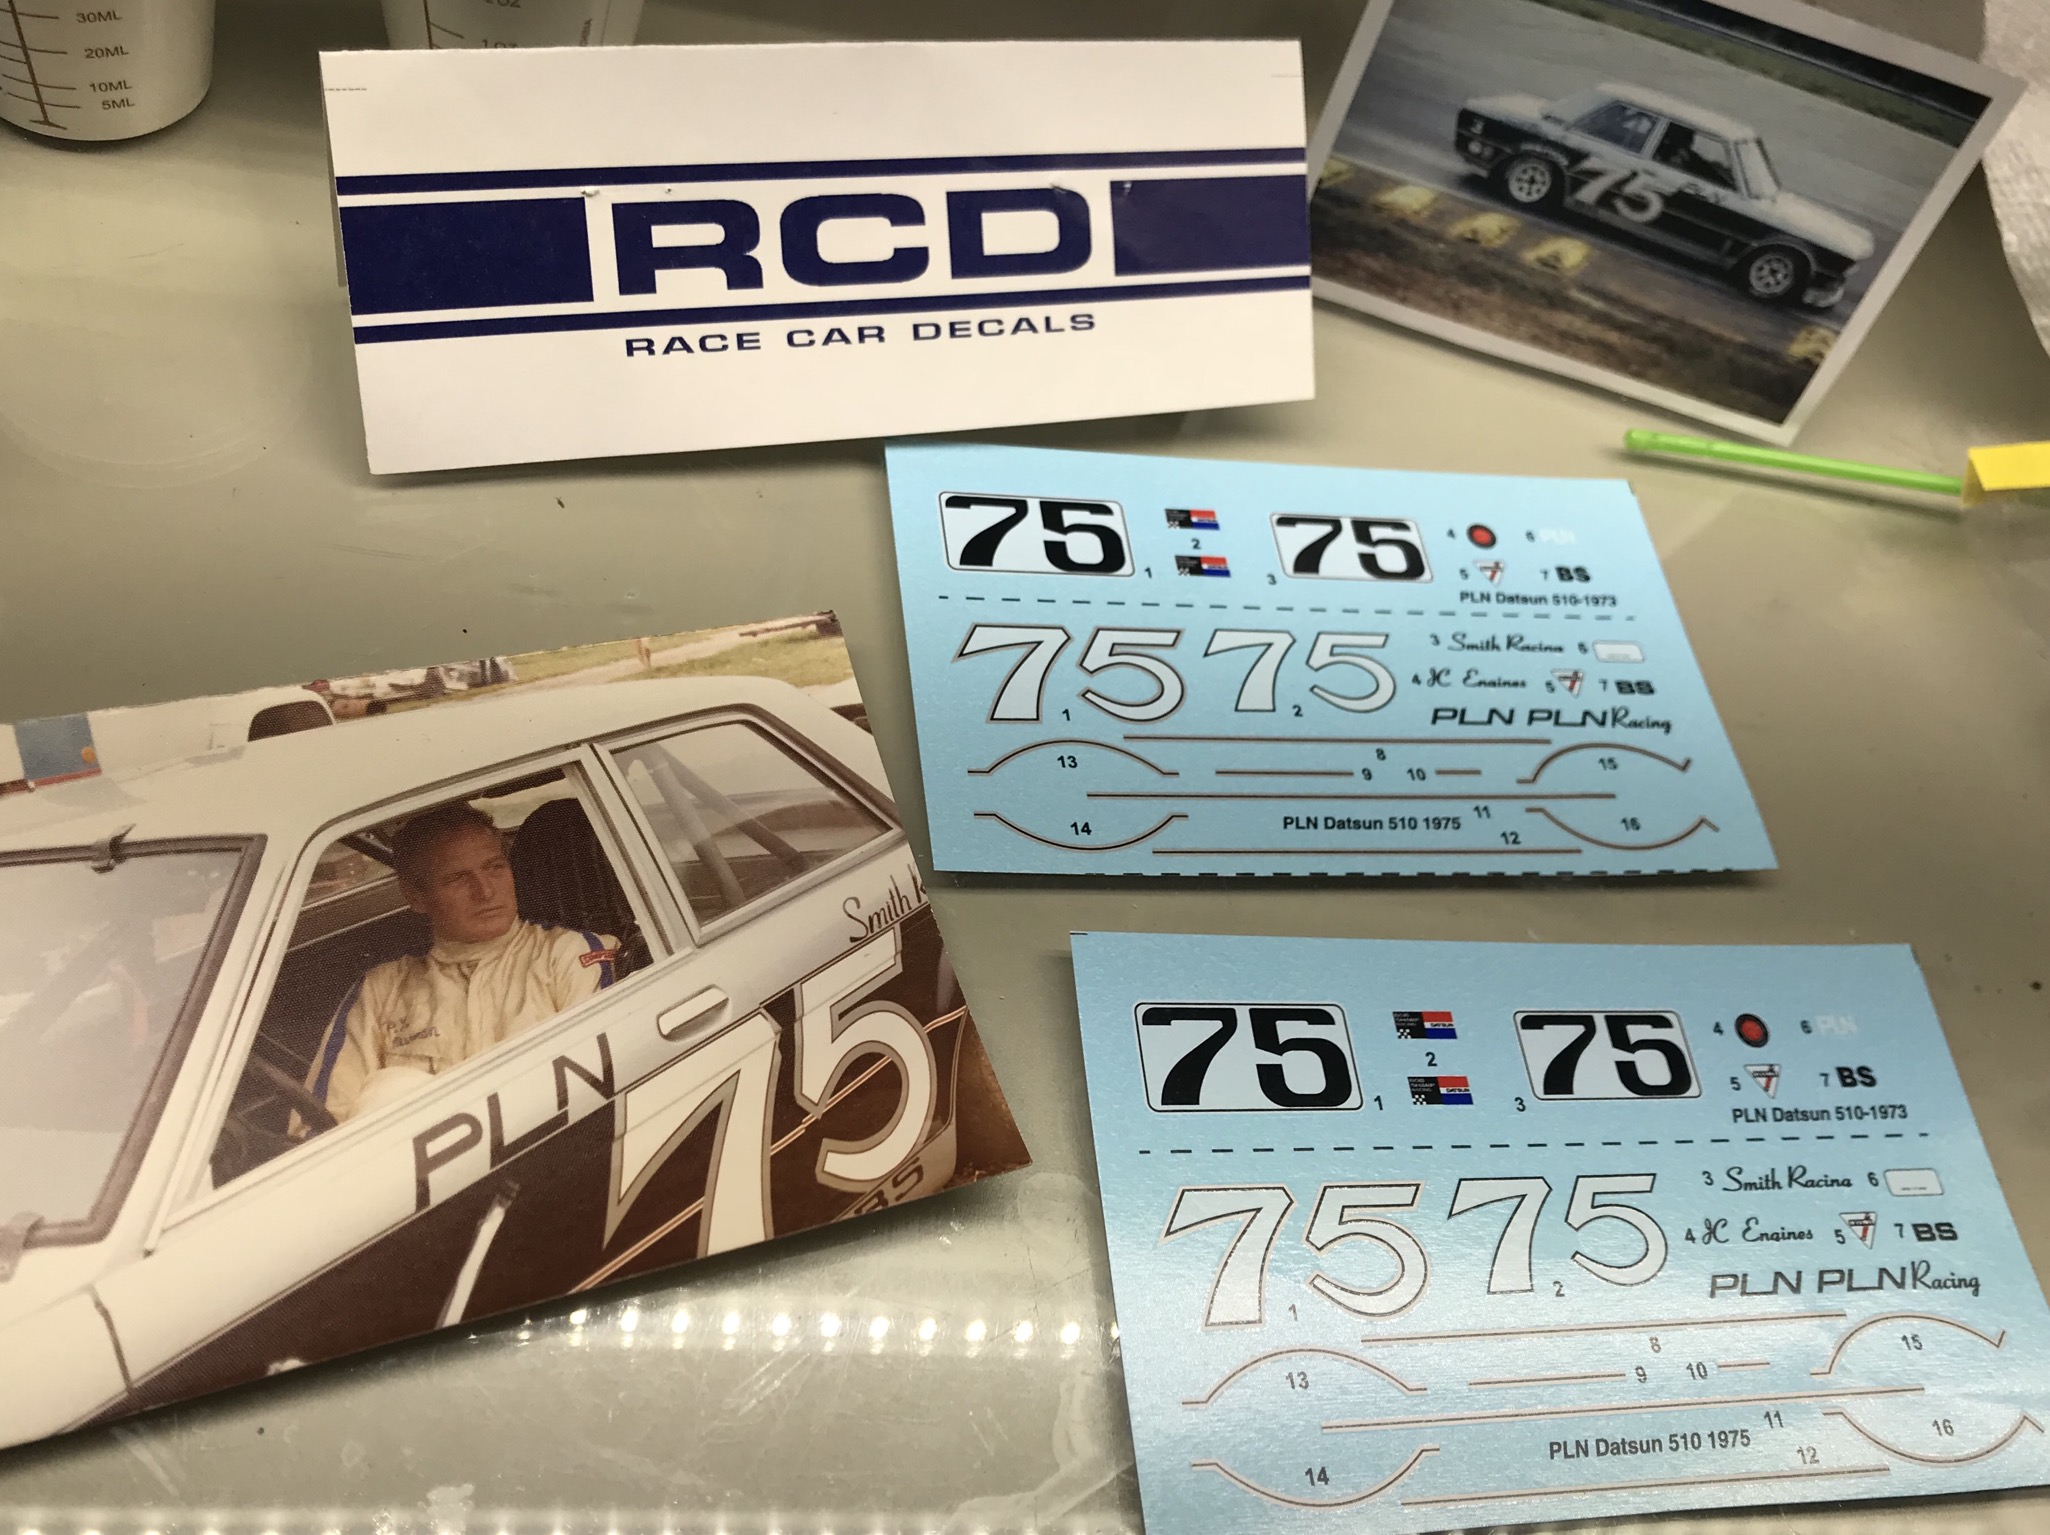
Found it!! http://www.starfighter-decals.com/pln-datsun-510.html
-
some one out there makes them... My dad picked up a set at NNL East last year or the year before.... for the life of me I cant remember the brand... i think its 3 letters.
-
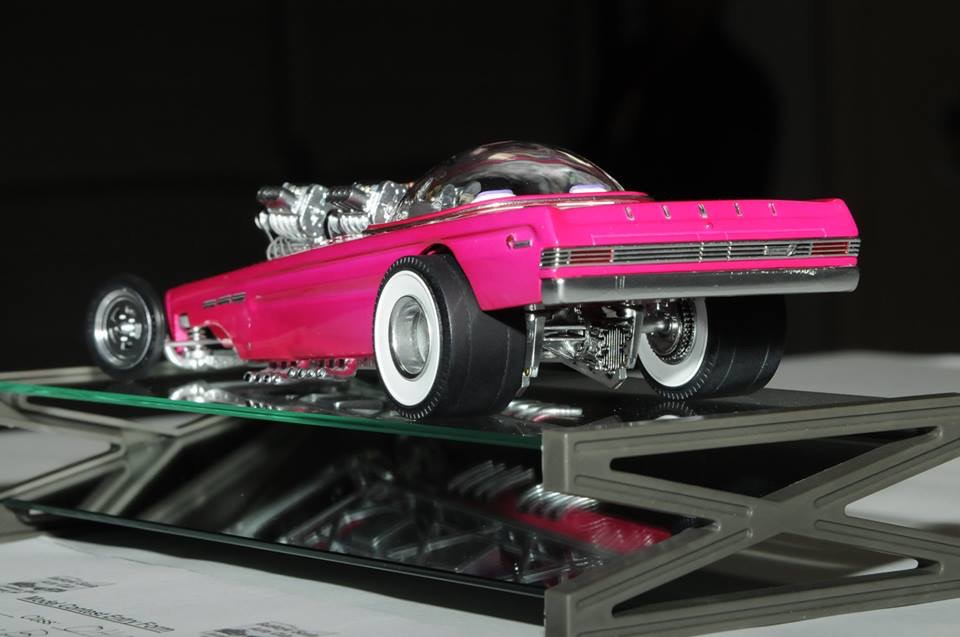
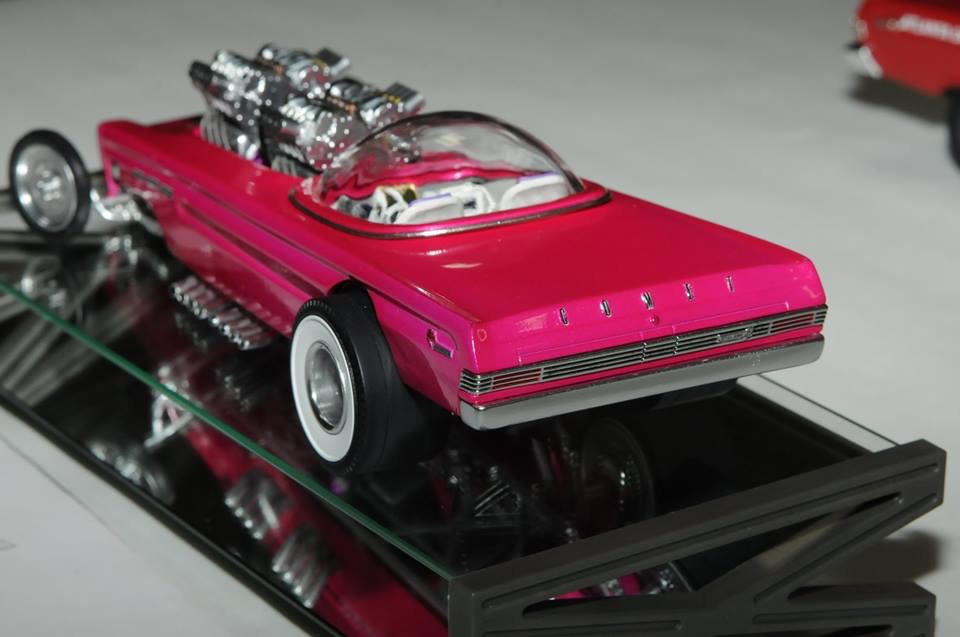
Moebius Comet... Wild Bubbletop Show Rod- Done! 3-17
Impalow replied to Impalow's topic in WIP: Model Cars
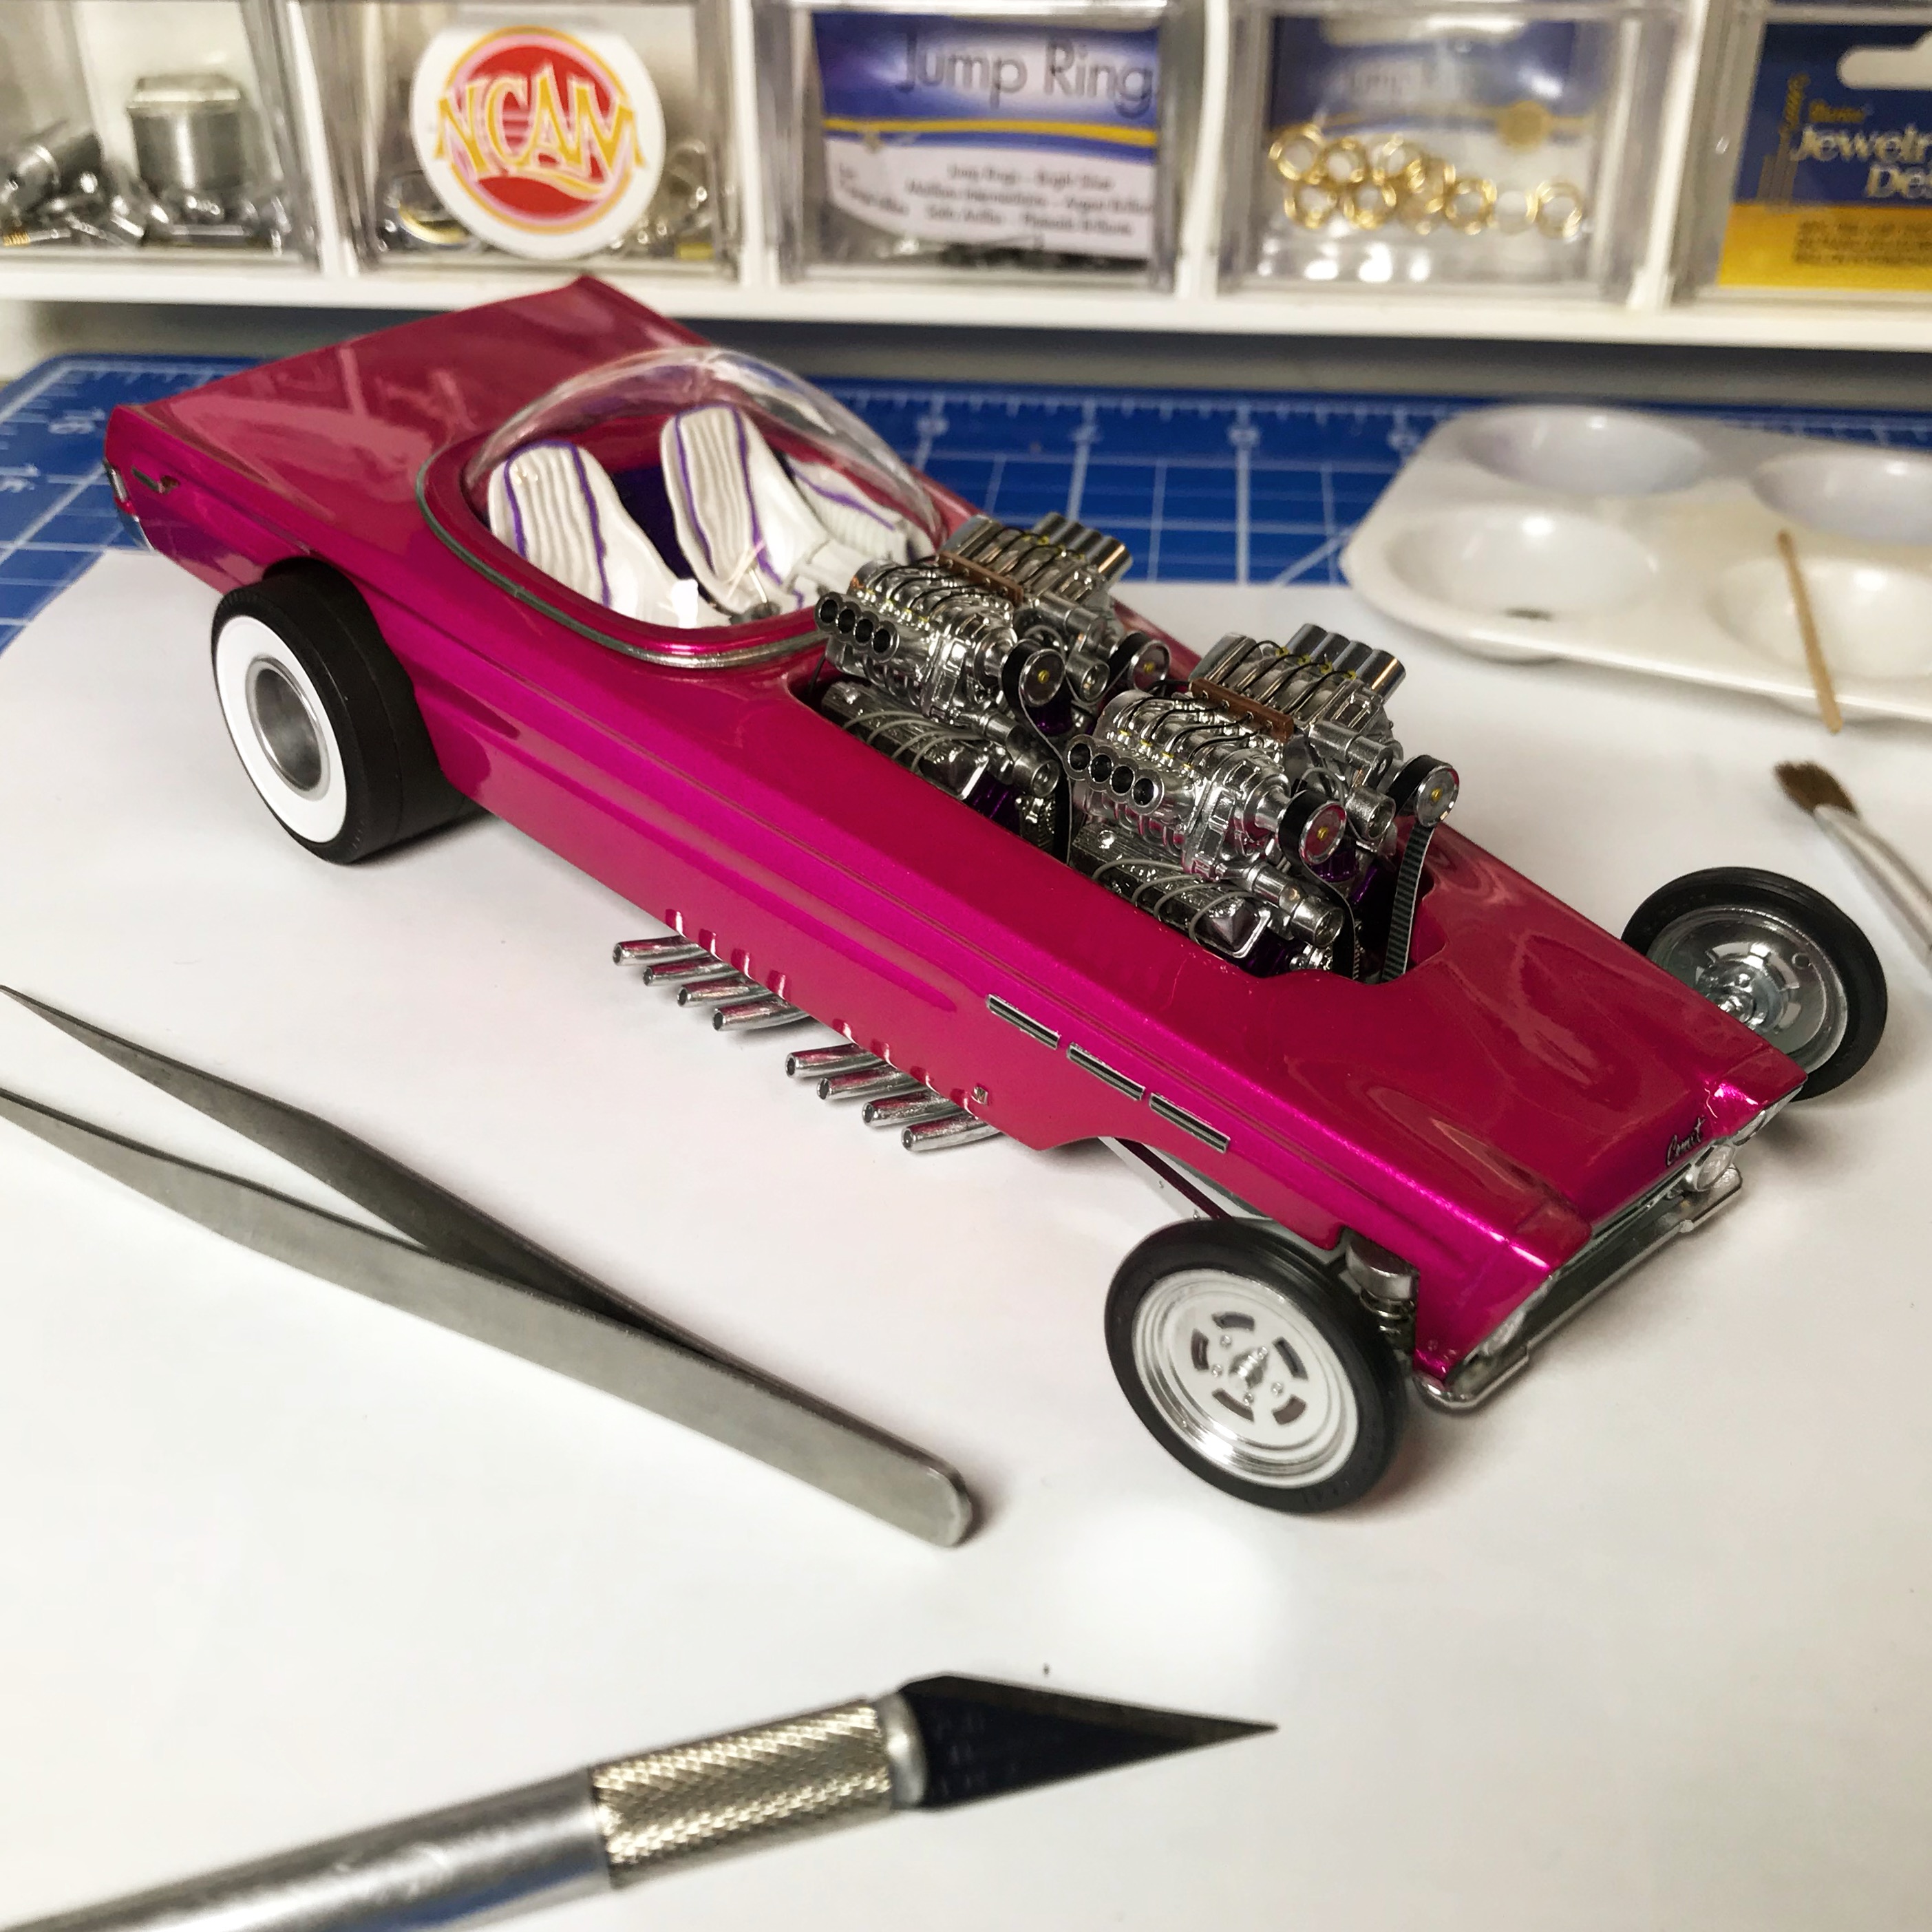
Thank you guys for all the kind words! I really need to do an under-glass photo-shoot and post some finished photos. -
Hobbico - BANKRUPT!
Impalow replied to niteowl7710's topic in General Automotive Talk (Trucks and Cars)
I think iBorg was referring to repercussions to the companies owed, not the repercussions to the hobbico organization... The erased debt is going to leave all of those company's out to dry... some may not be able to handle it... some may choose to not come back to a market that burned them... its a bummer regardless... hopefully it all works out for the best. -
It was great to see you guys! hopefully see you at the next show!
-
Yeah I would have to agree with what everyone else has said.... personally i would go with a .010 skin, then add detail and structure to the inside and outside. My cutter will pierce all the way through the .010, my only concern would be tracking over that length and the roundness of the holes... my cutter seems to make everything oblong, so i have to chase holes with a drillbit. since the are oval holes that will be tricky.. would be a very cool/rewarding project tho..
-
Moebius Comet... Wild Bubbletop Show Rod- Done! 3-17
Impalow replied to Impalow's topic in WIP: Model Cars
And here are some photos from the show: (thanks glenn marek for the photos!) more show photos at this link: https://public.fotki.com/Donald-Splitstone/model-shows/2018/8th-annual-buckeye-/
-
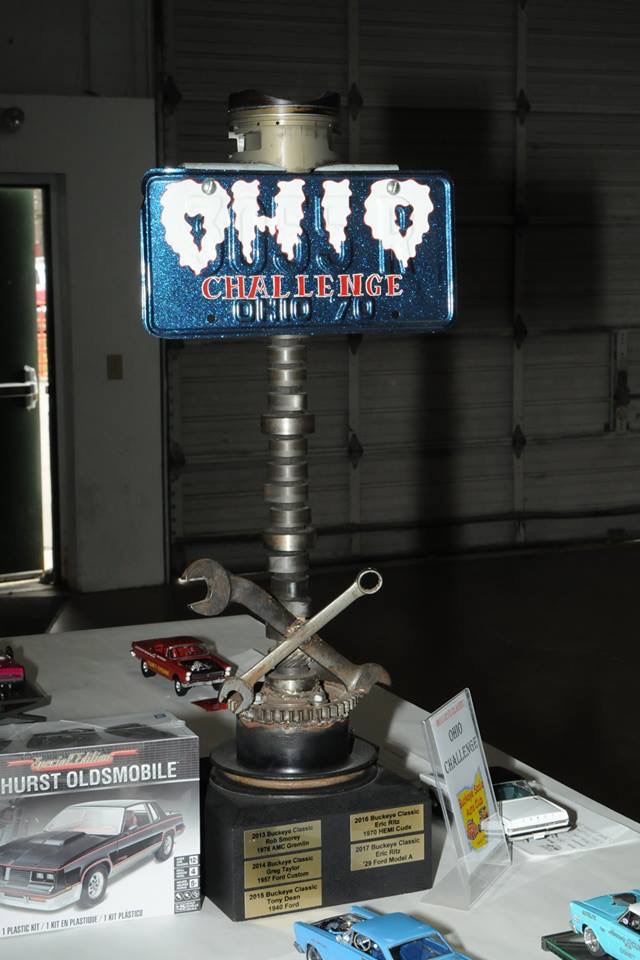
Moebius Comet... Wild Bubbletop Show Rod- Done! 3-17
Impalow replied to Impalow's topic in WIP: Model Cars
Thank you all for the comments and compliments! I really like how this turned out, I finished it up at about 2:30am Friday morning. Luckily I took Friday off from work.... Saturdays show was awesome as usual... I really commend the Buckeye Scale Auto Club for putting on a top notch show every year.. Great/fun group of guys as well. I was honored to bring home the Ohio Challenge for the 3rd year in a row... Next years build off is based on the Revell 85 Olds Cutlass, so everyone get building! Here are a couple photos from the completion of the build:
-
probably adorable.... haha ... Love the cobra crate ray!!
-
Grabowski's "77 Sunset Tee" found
Impalow replied to Greg Myers's topic in General Automotive Talk (Trucks and Cars)
Yikes... no coming back from that..... i still say the kookie car is easily reversed to its previous glory... although i would have a hard time sanding off a true Watson paint job... but that's just me. -
Grabowski's "77 Sunset Tee" found
Impalow replied to Greg Myers's topic in General Automotive Talk (Trucks and Cars)
Eh.. it was a different time... I read somewhere online... that all of the "showcar" parts were add-ons, and Jim saved all of the take off parts... i don't see any permanent/structural damage from the over the top pieces stuck on it... grab some headlights, intake,headers, non-dual rear tires.. and remove those wonk seats and its back here-ish. Its amazing that both of these cars have surfaced after so long... and still looking pretty decent and complete...
-
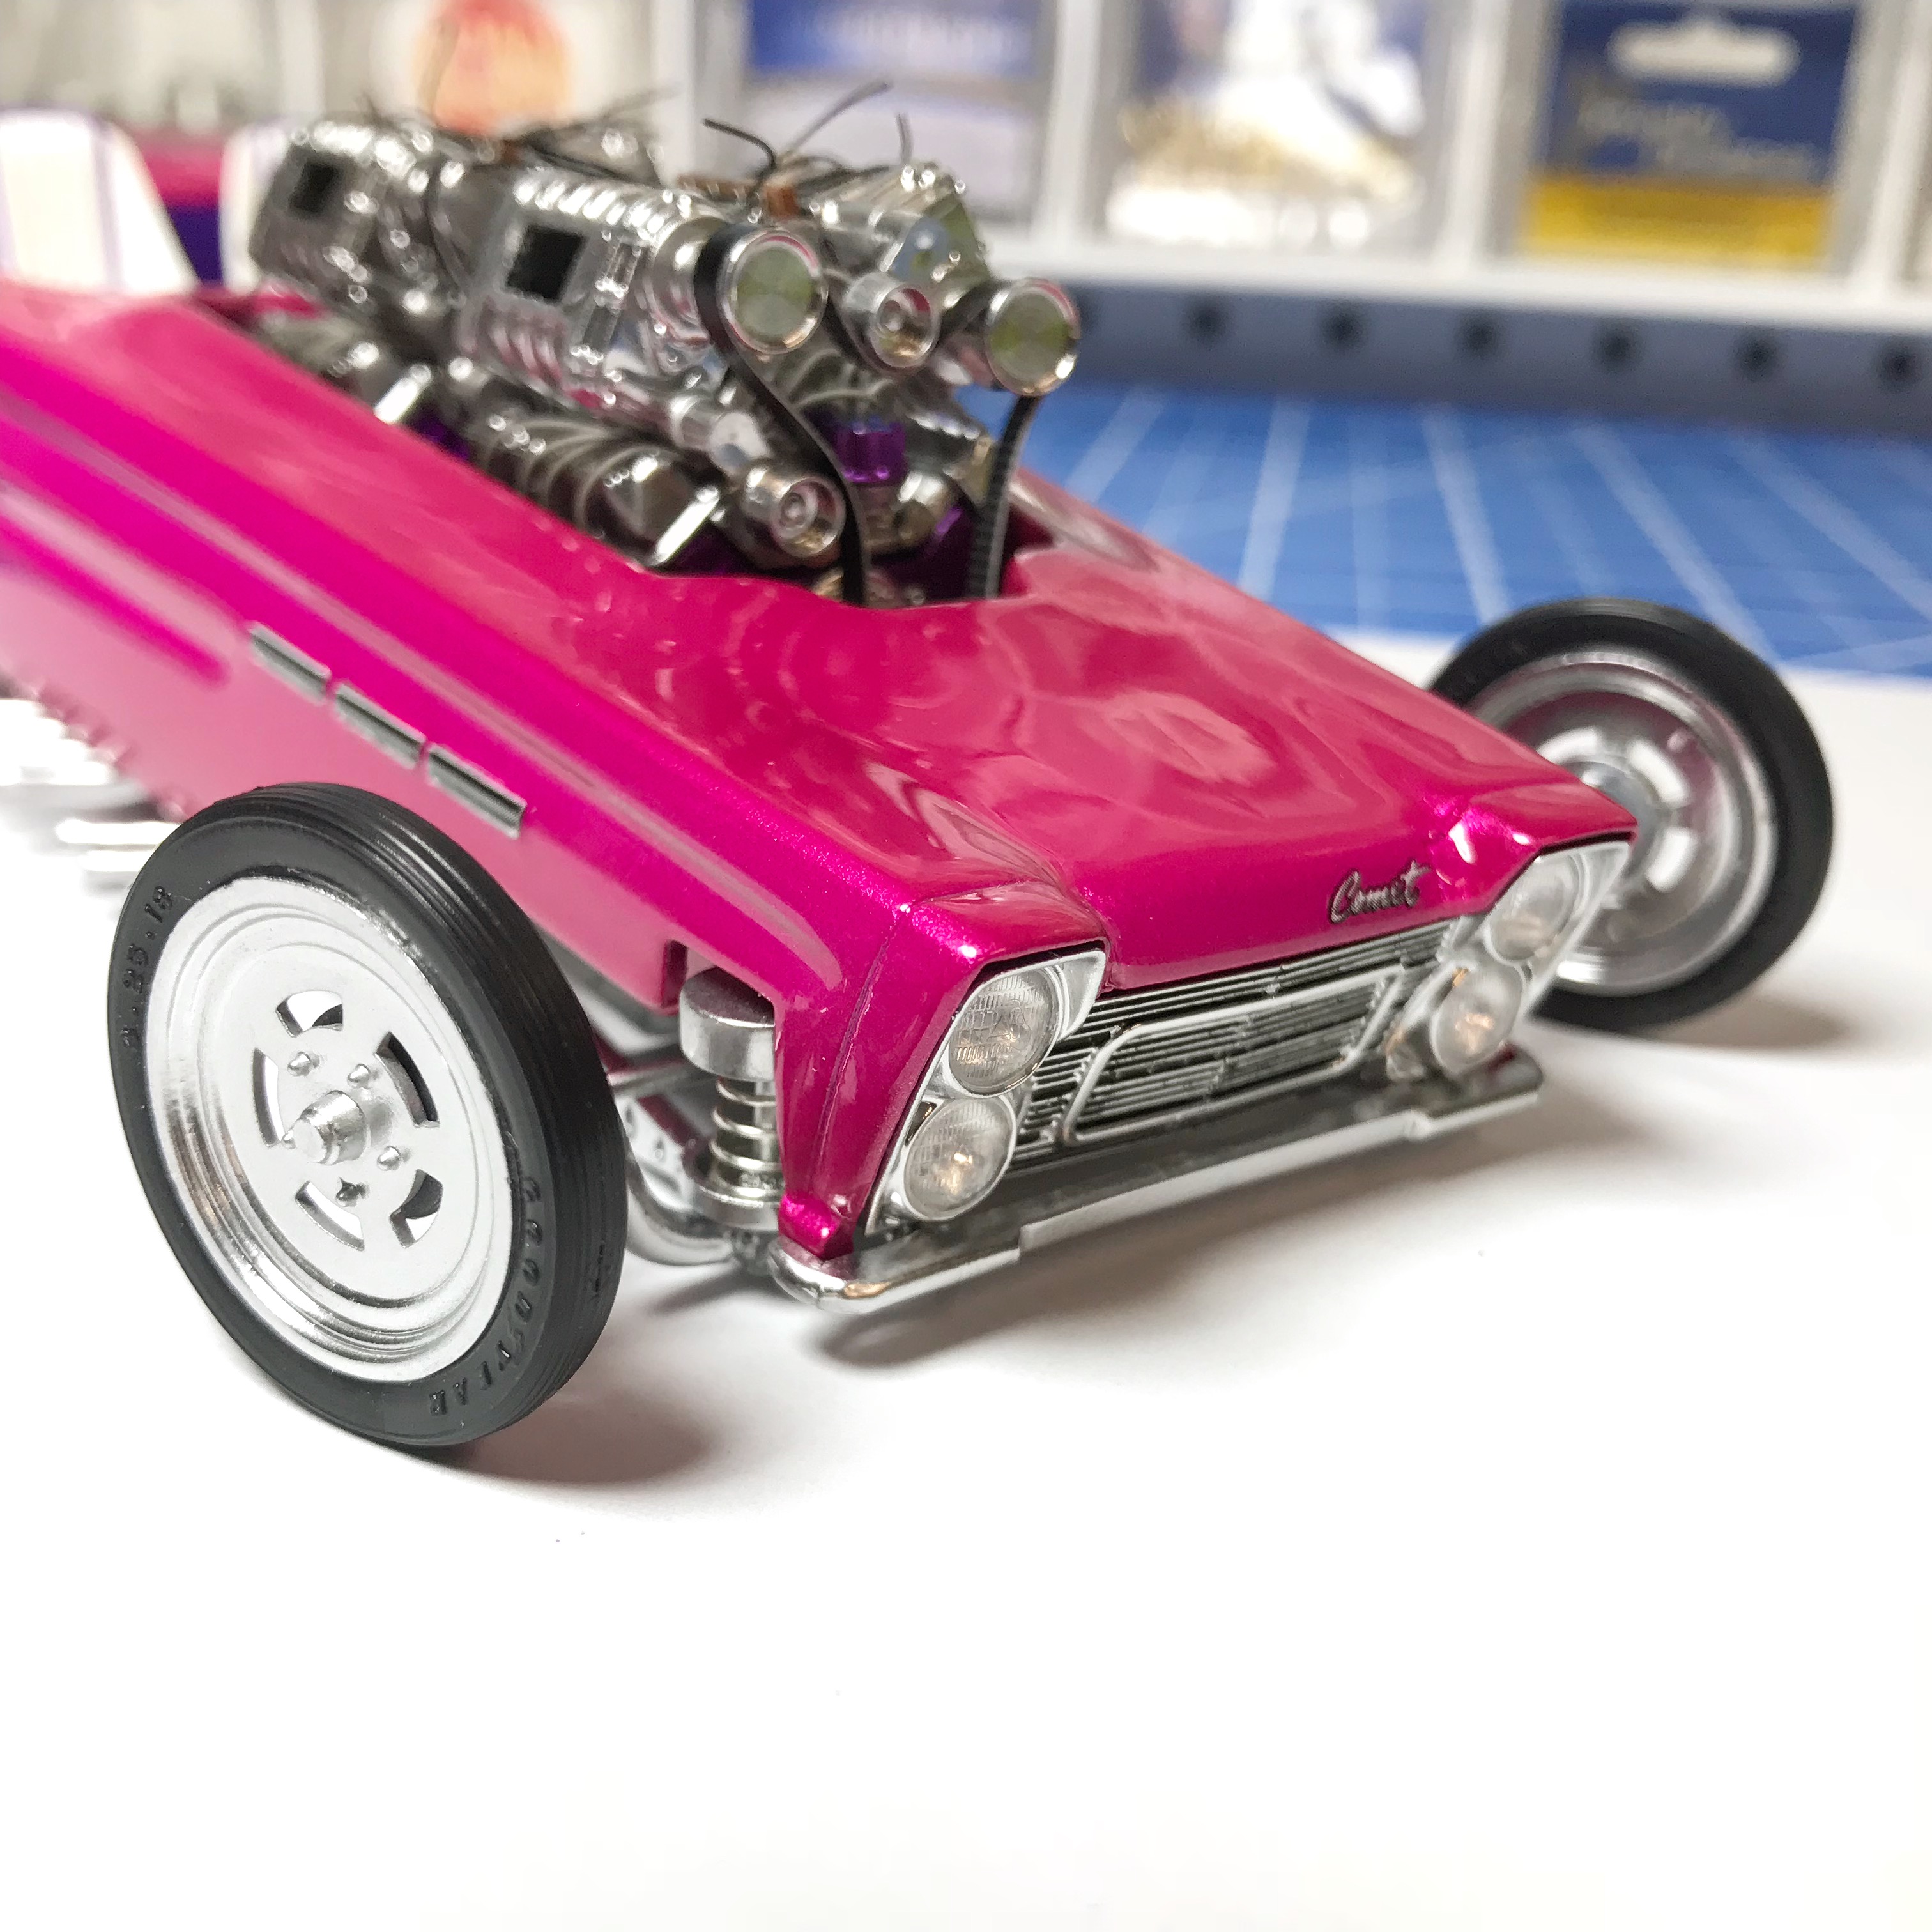
Moebius Comet... Wild Bubbletop Show Rod- Done! 3-17
Impalow replied to Impalow's topic in WIP: Model Cars
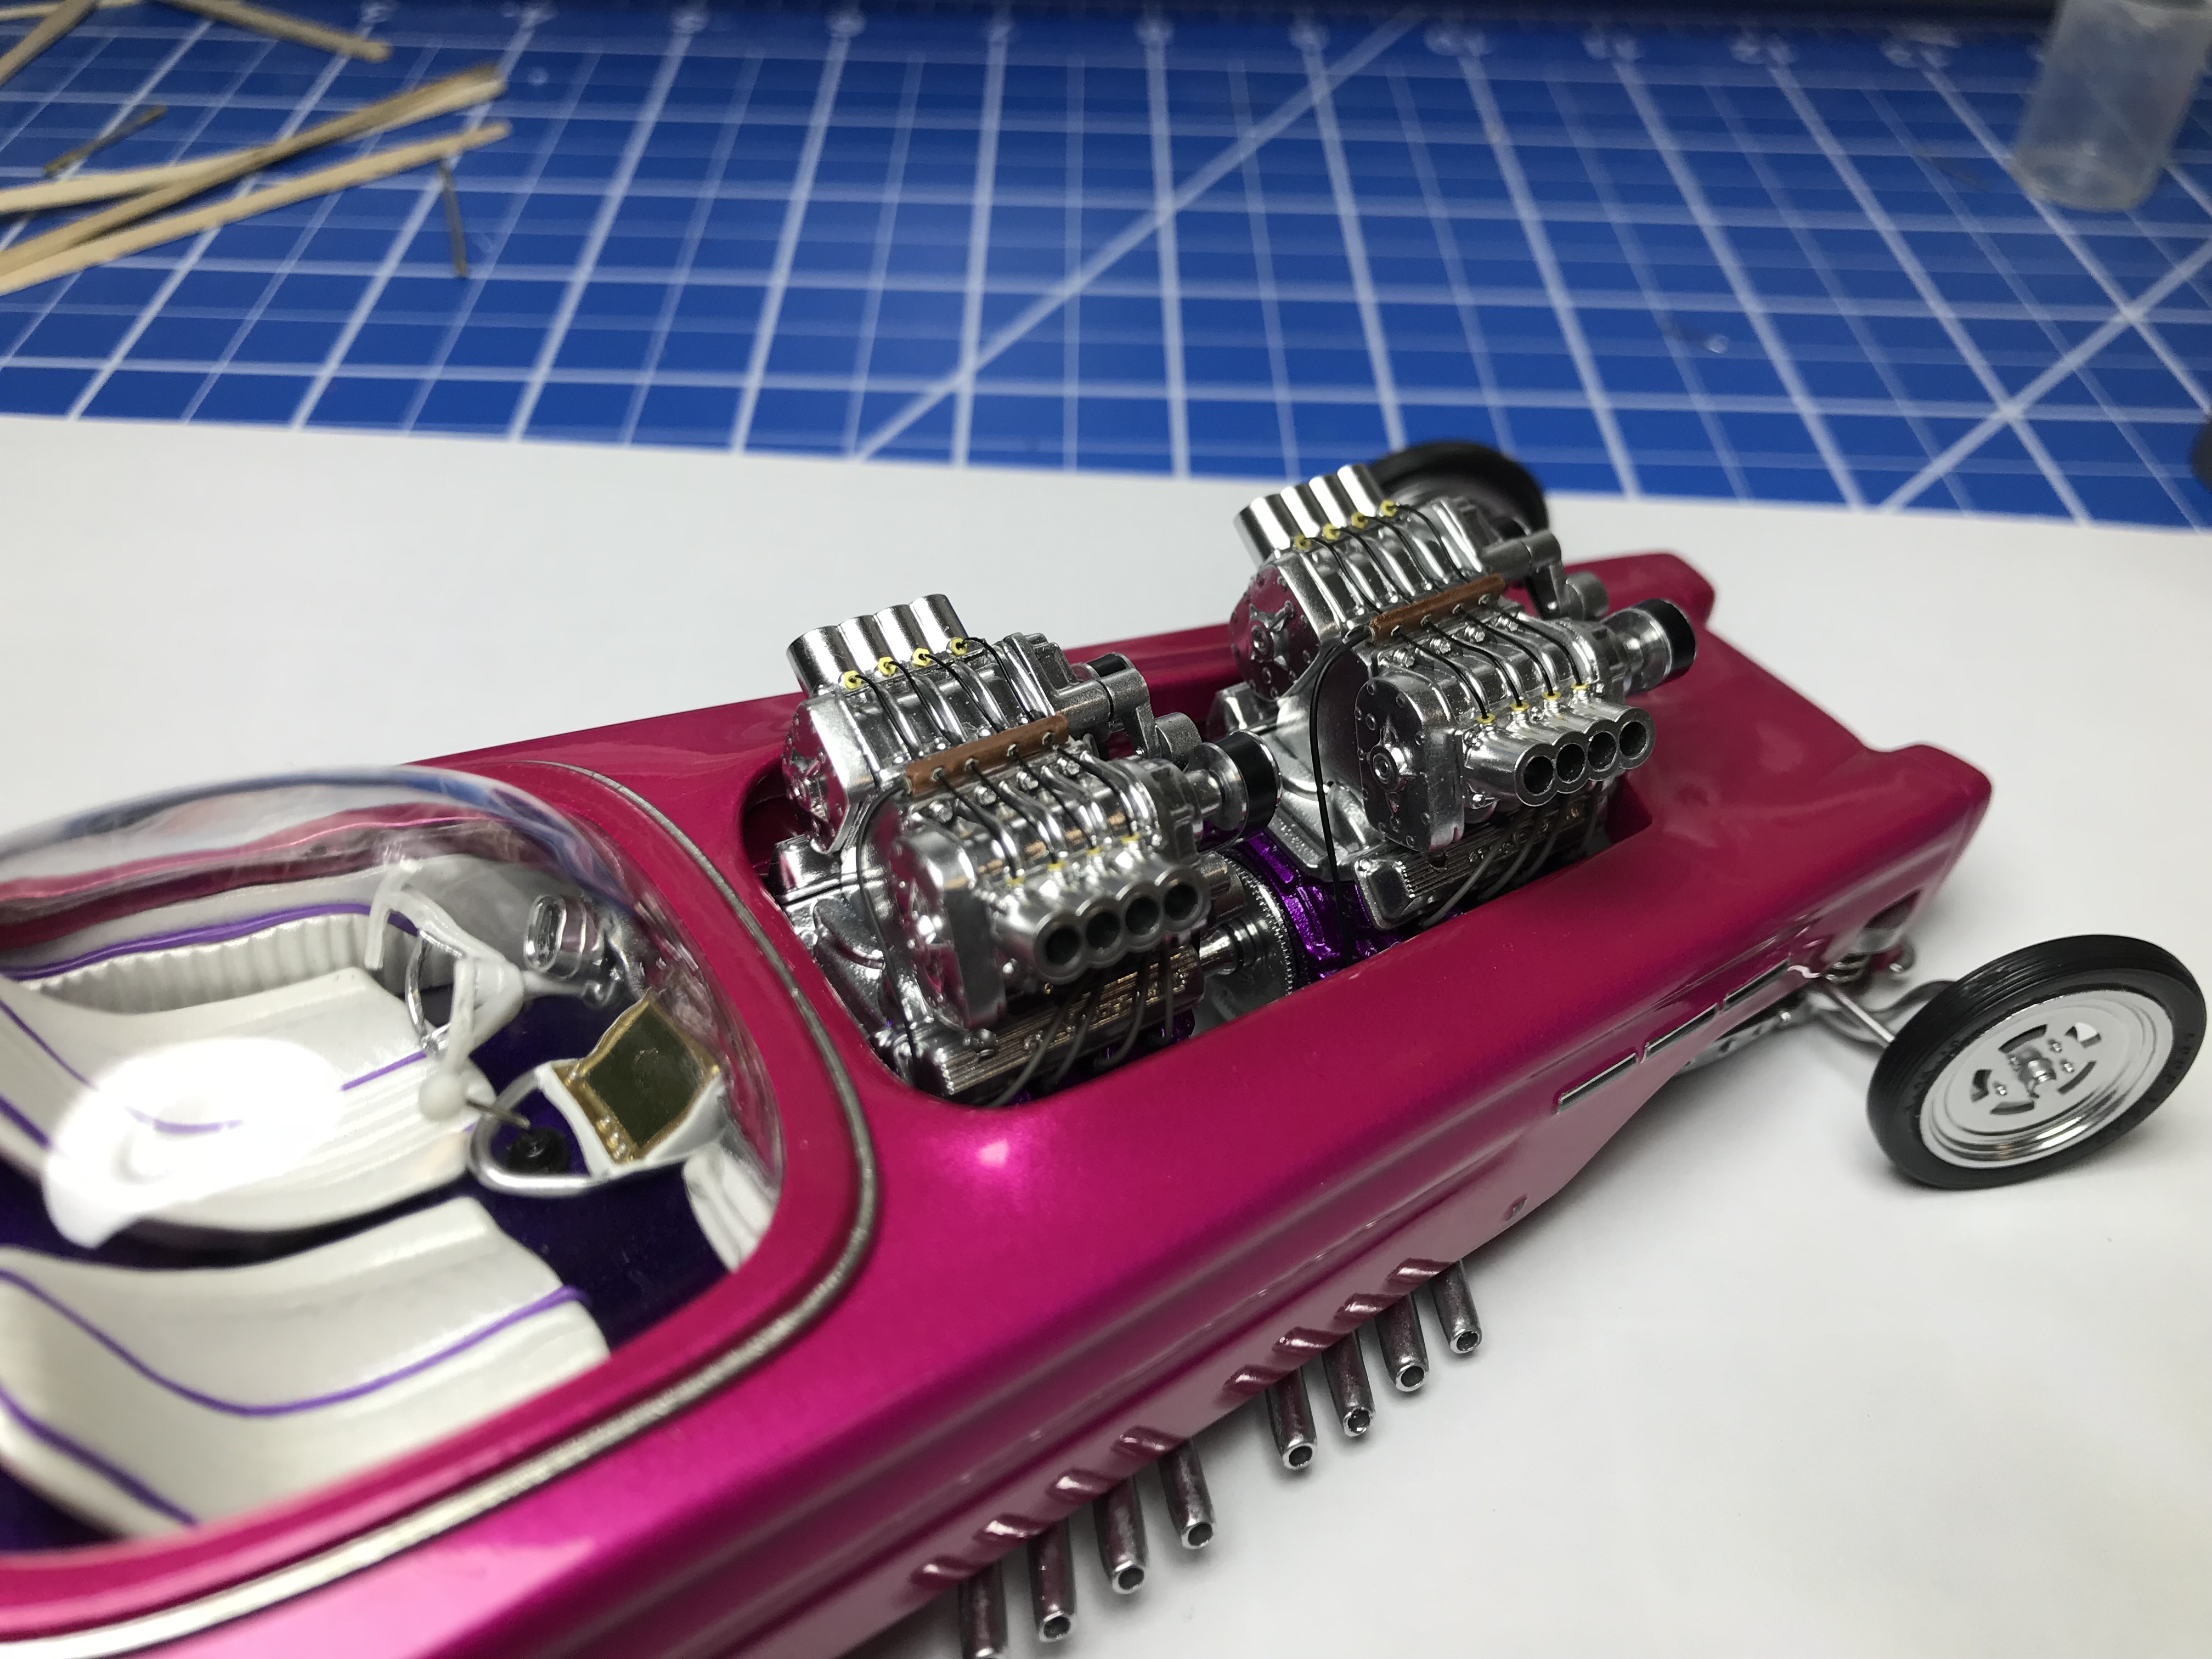
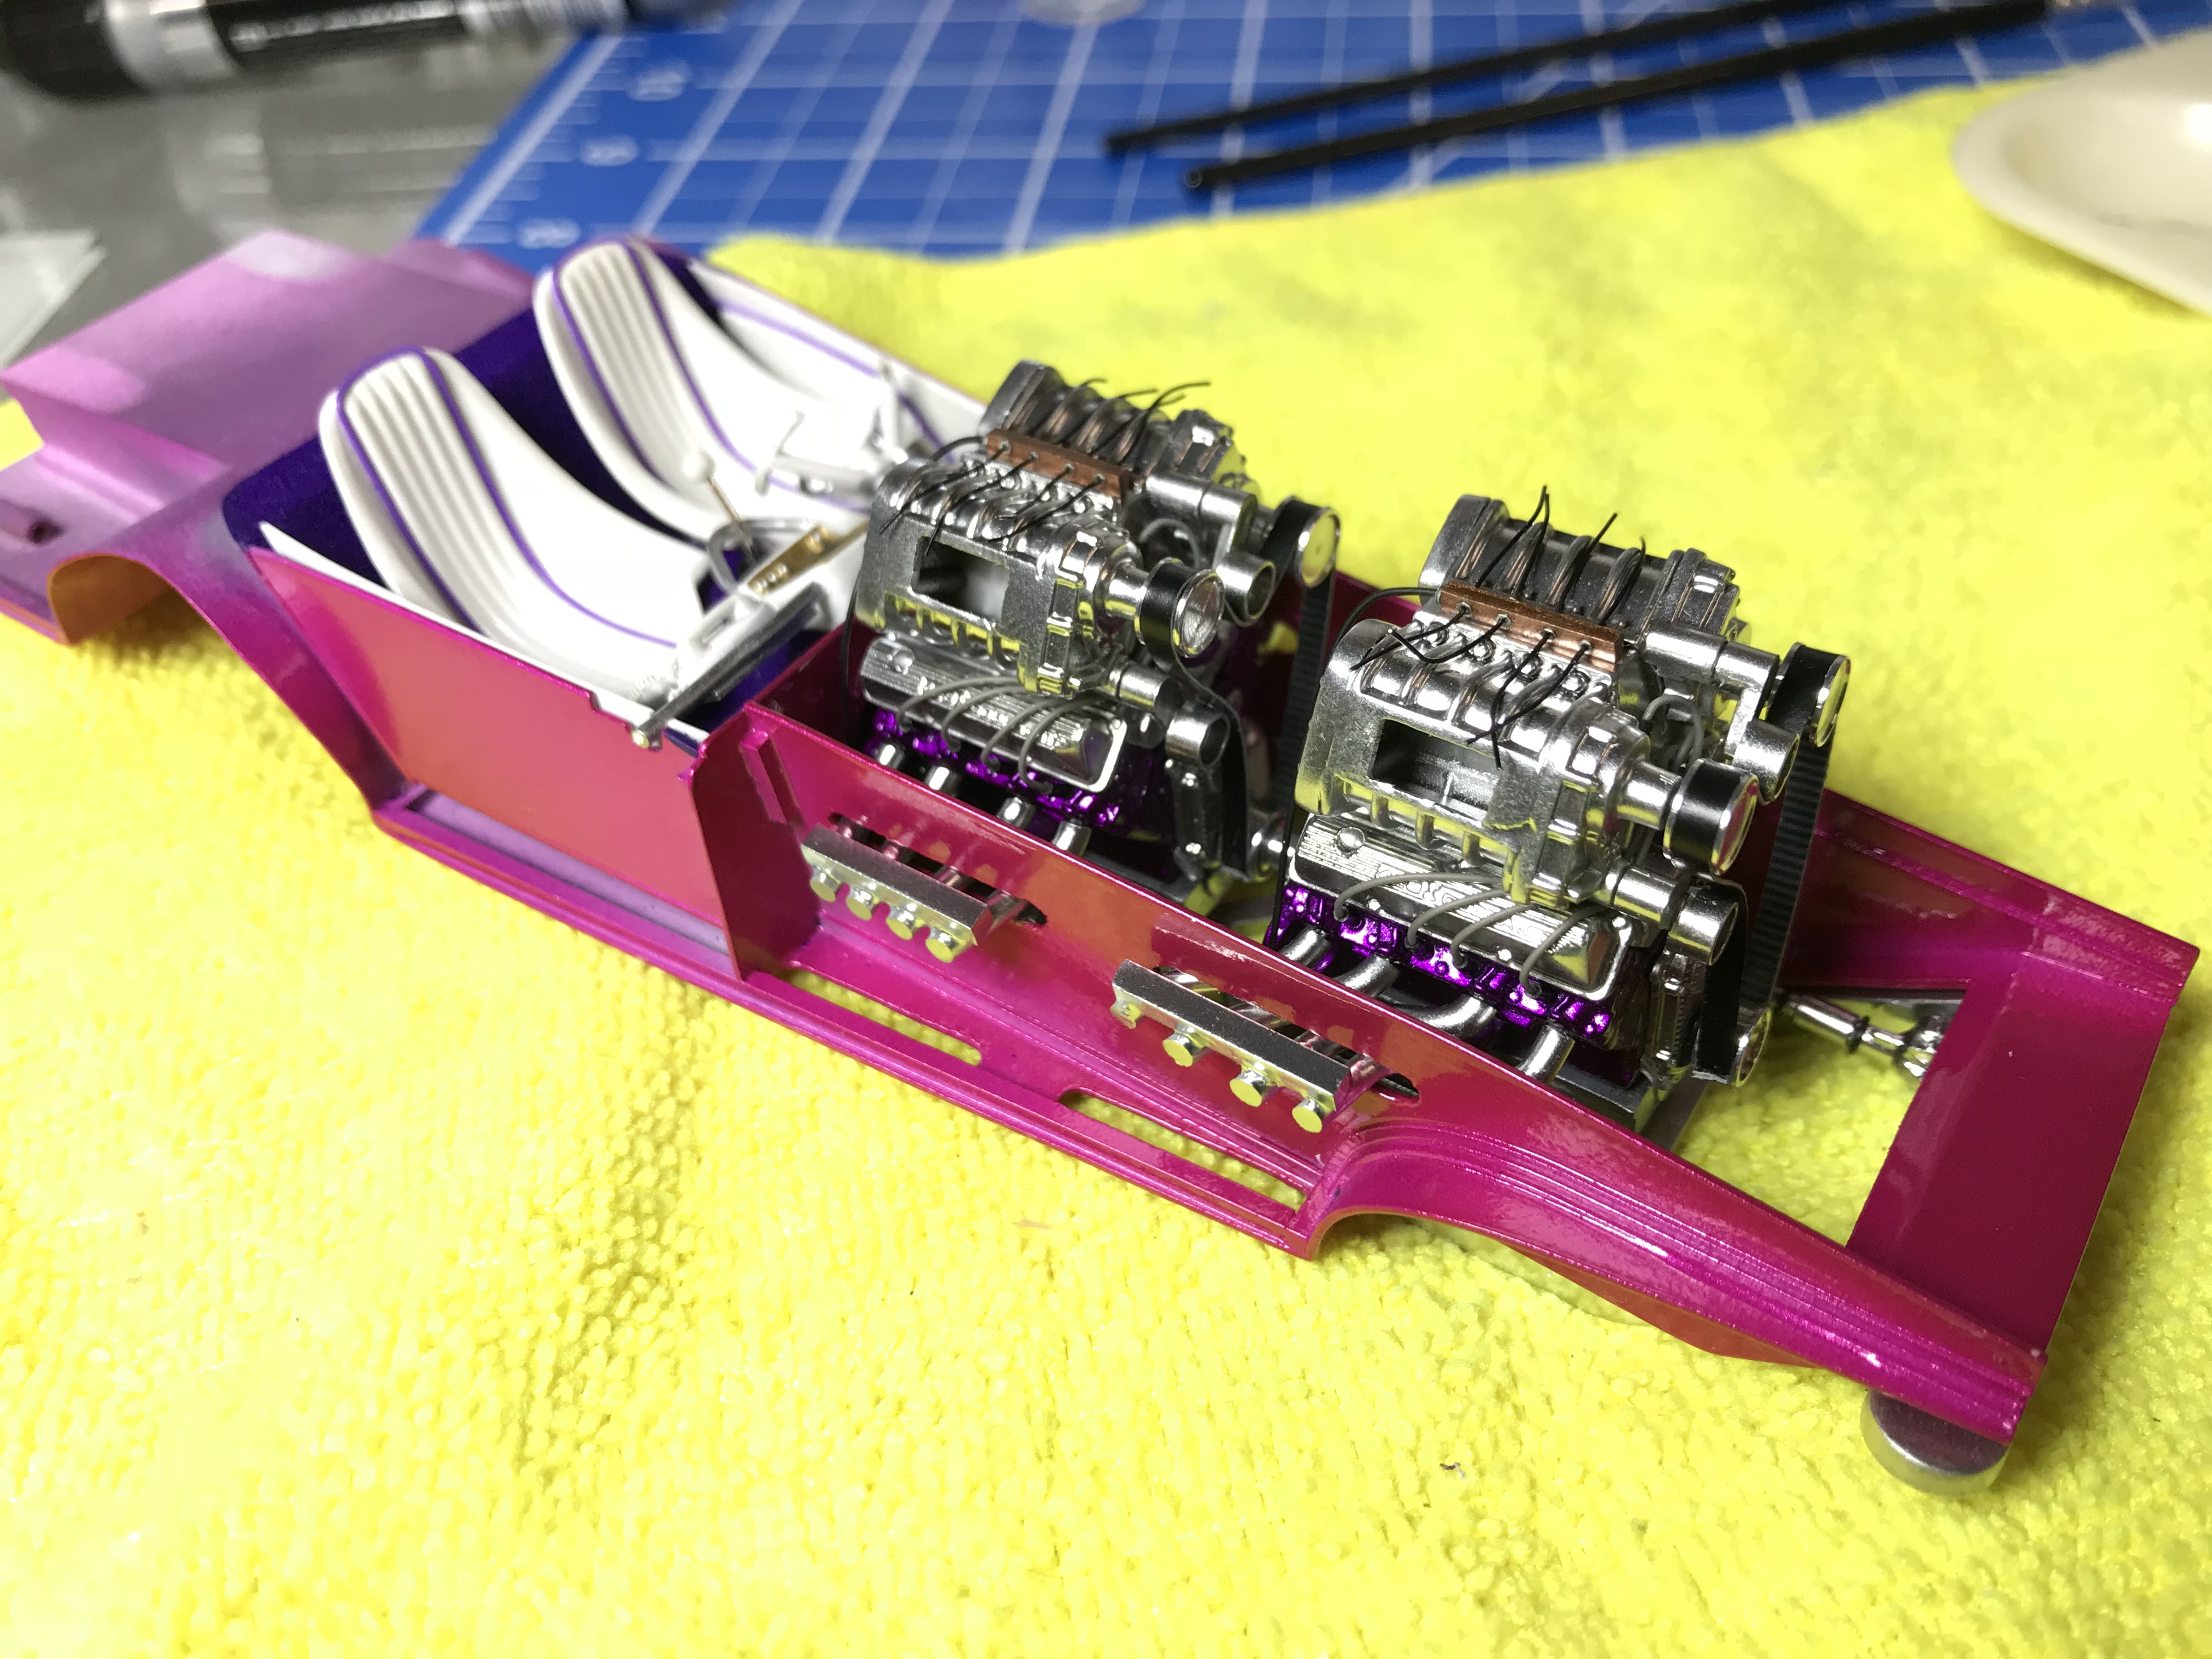
Thanks David and Bob!! A little Wednesday night update... 2 days to go here... Chassis permanently attached. Previously mentioned steering shaft made, chromed and installed.... its not a functionally correct piece... but at least there is something visually connecting the column to the steering box. I used micro O-rings at the bends to simulate u-joints with boots. Then it was on to the header install... which was some major "ship in a bottle" action... i scratched them up pretty bad getting them in there, luckily some creative brush work and molotow chrome saved the day.
-
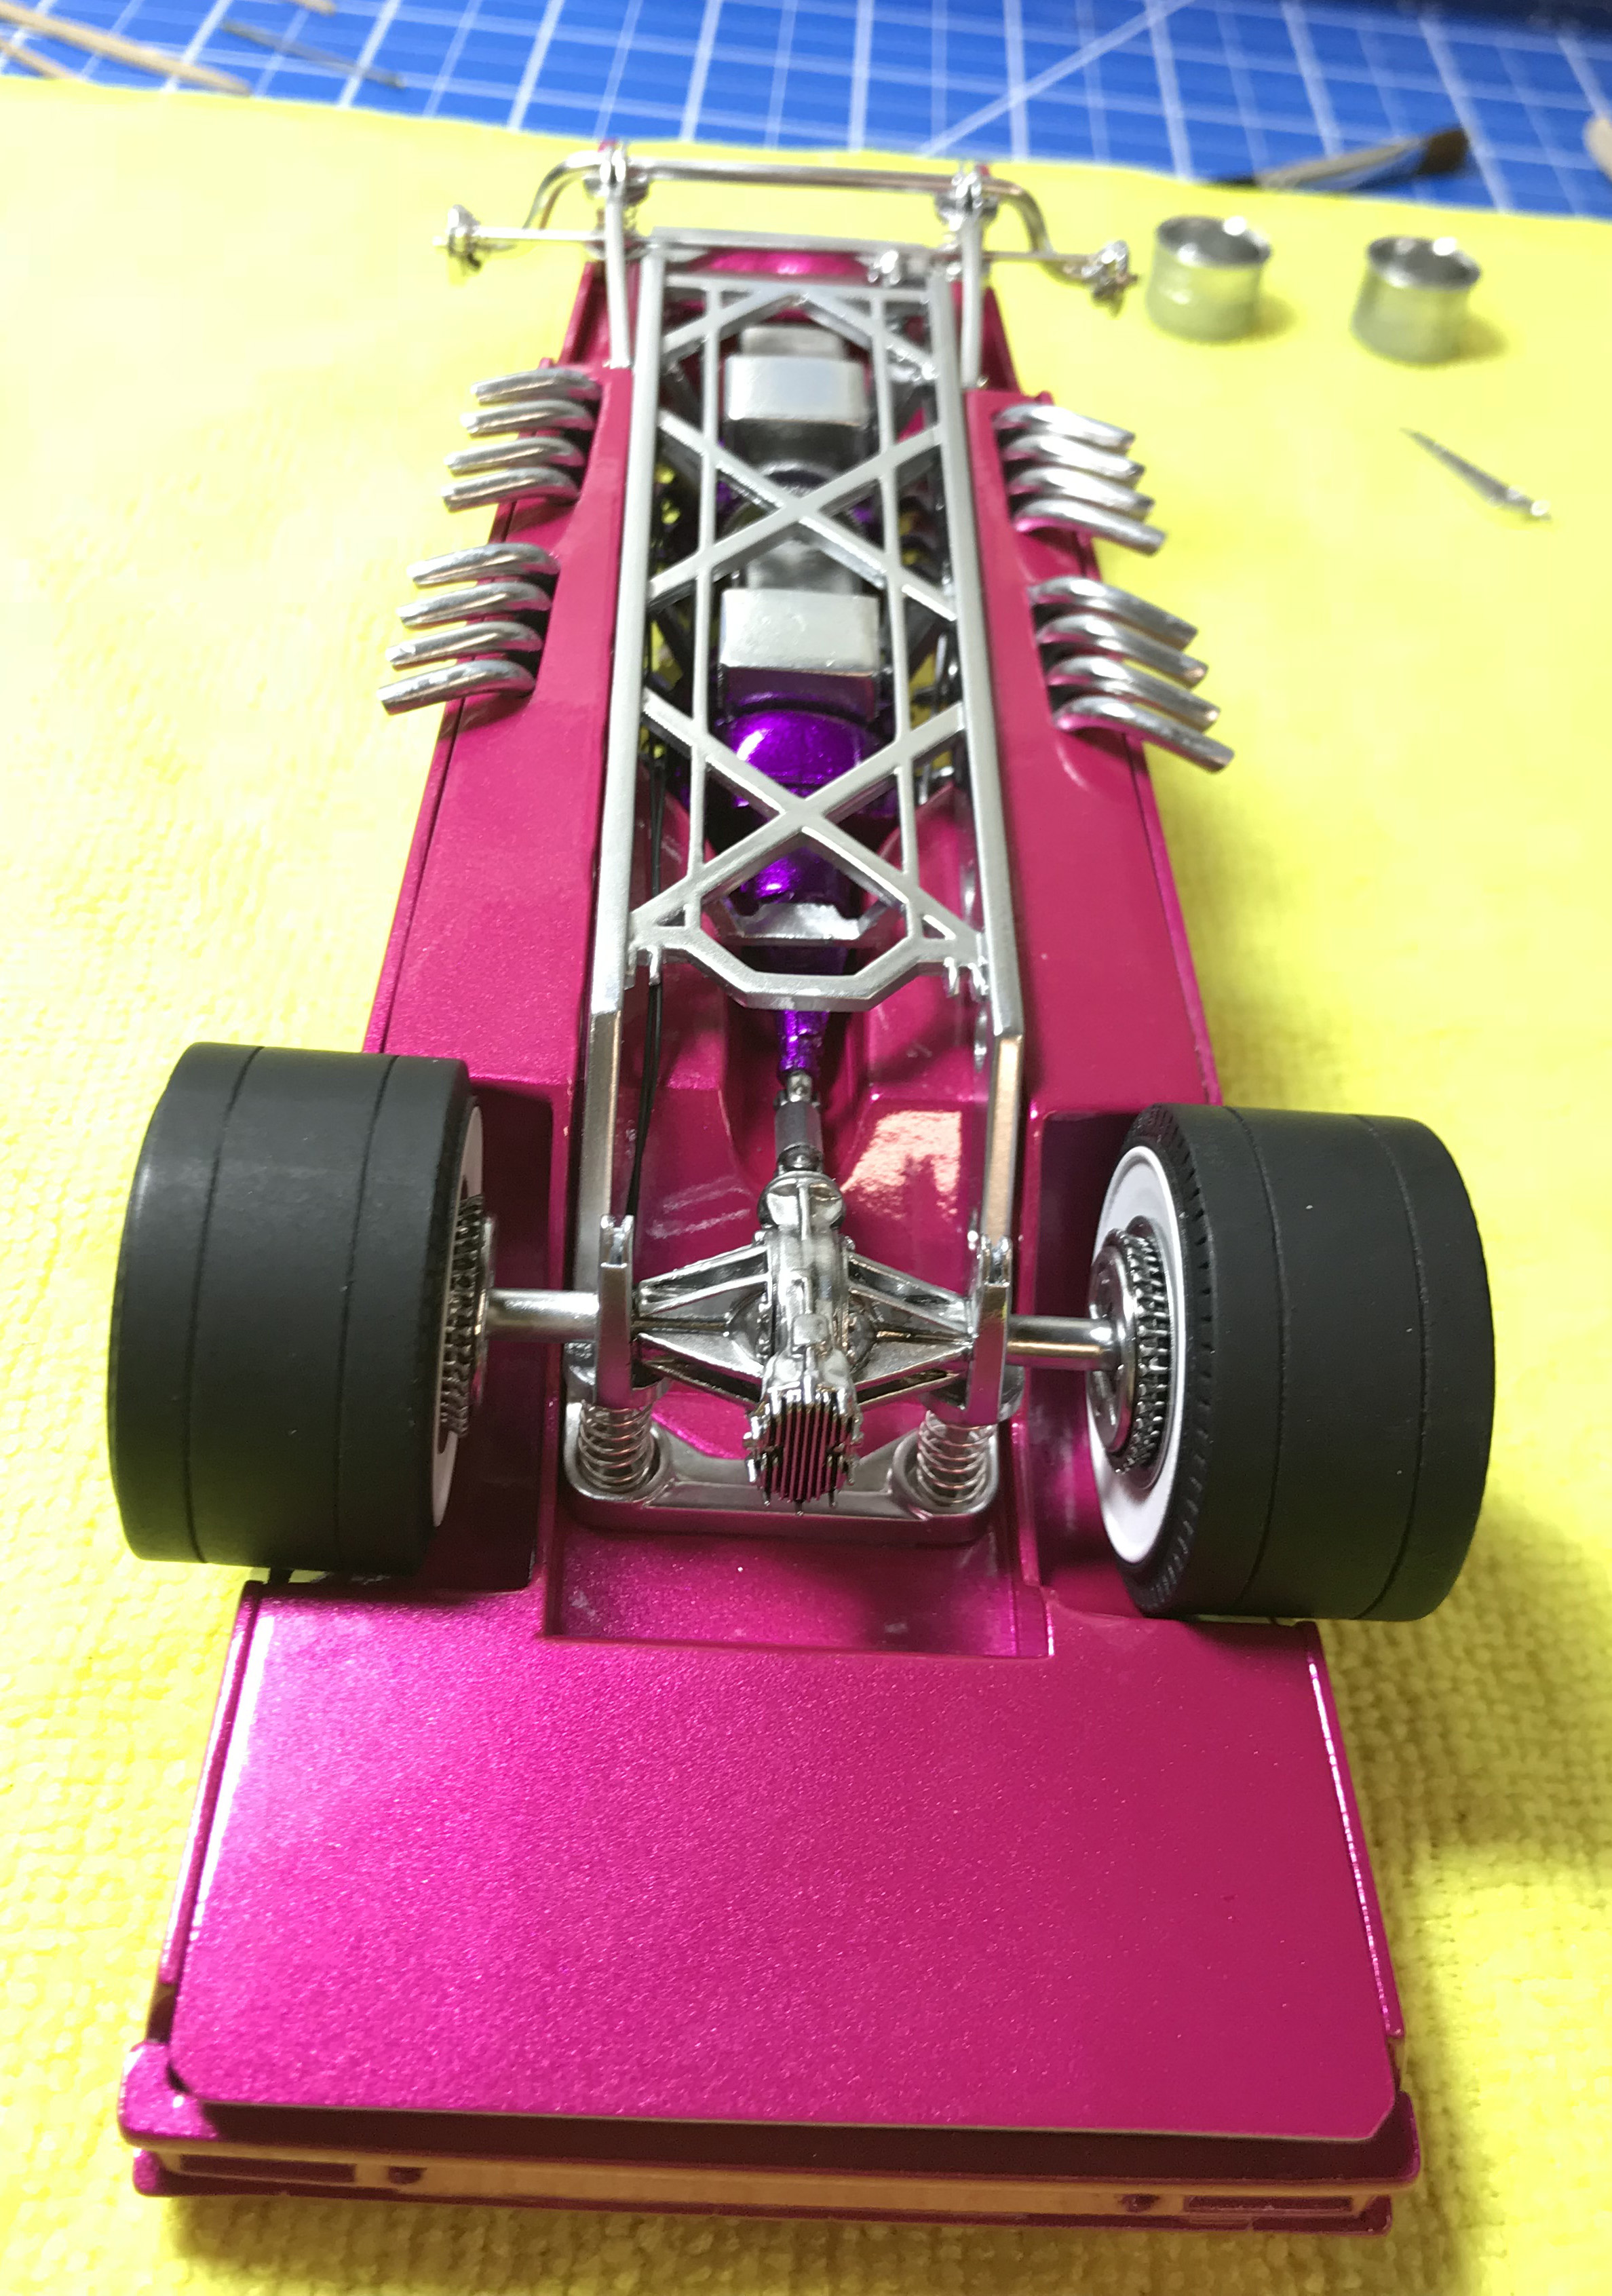
Moebius Comet... Wild Bubbletop Show Rod- Done! 3-17
Impalow replied to Impalow's topic in WIP: Model Cars
thank you guys! i don't know about all that... John's work is phenomenal and he would have had this done months ago... haha Last nights update... interior is done! Then i made and installed the fuel "logs"... that was fun... I got a bit lost building a steering box and shaft.... that probably wont be visible at all... but it will be there. Tonight's plan is joining the frame and chassis, installing steering box and then exhaust....and buffing out the body.