

Nosferatu
-
Posts
490 -
Joined
-
Last visited
Content Type
Profiles
Forums
Events
Gallery
Everything posted by Nosferatu
-
 Beautiful weathering! Some of the best I've seen! Dave
 -
CHEVY 41 COE water rescue
Nosferatu replied to CUSTOMBOY's topic in Model Trucks: Pickups, Vans, SUVs, Light Commercial
Nice work! What did you use for the pipes in the rack on the side? Dave -
Beautifully weathered look! Dave
-
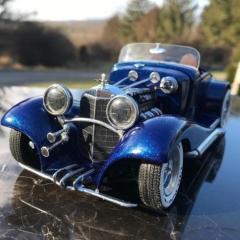
Beautiful! That is the perfect color for this model! Dave
-
Rare/unusual auto options.
Nosferatu replied to Chuckyg1's topic in General Automotive Talk (Trucks and Cars)
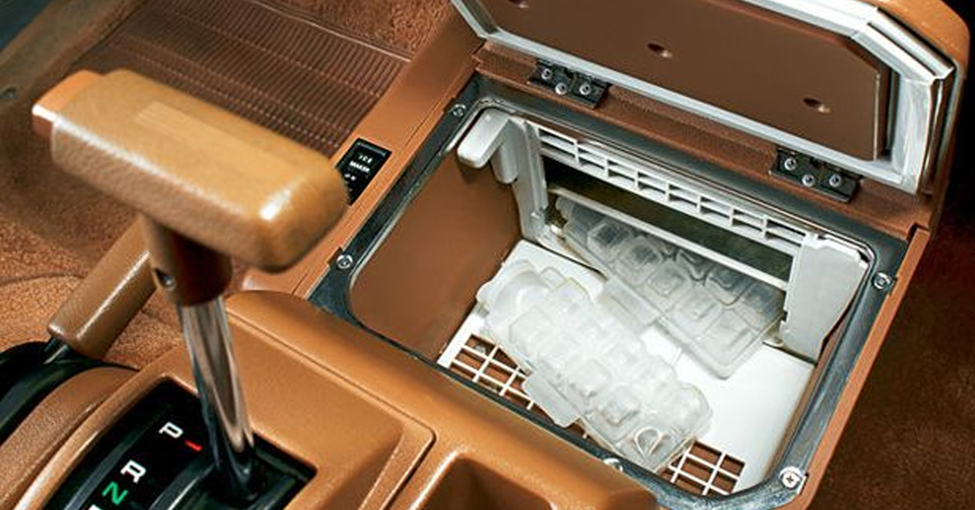
Toyota Van Ice Maker Illuminated Tires Not only did Goodyear’s engineers develop a translucent tire in 1960, but it was also able to be dyed multiple colors as well.
-
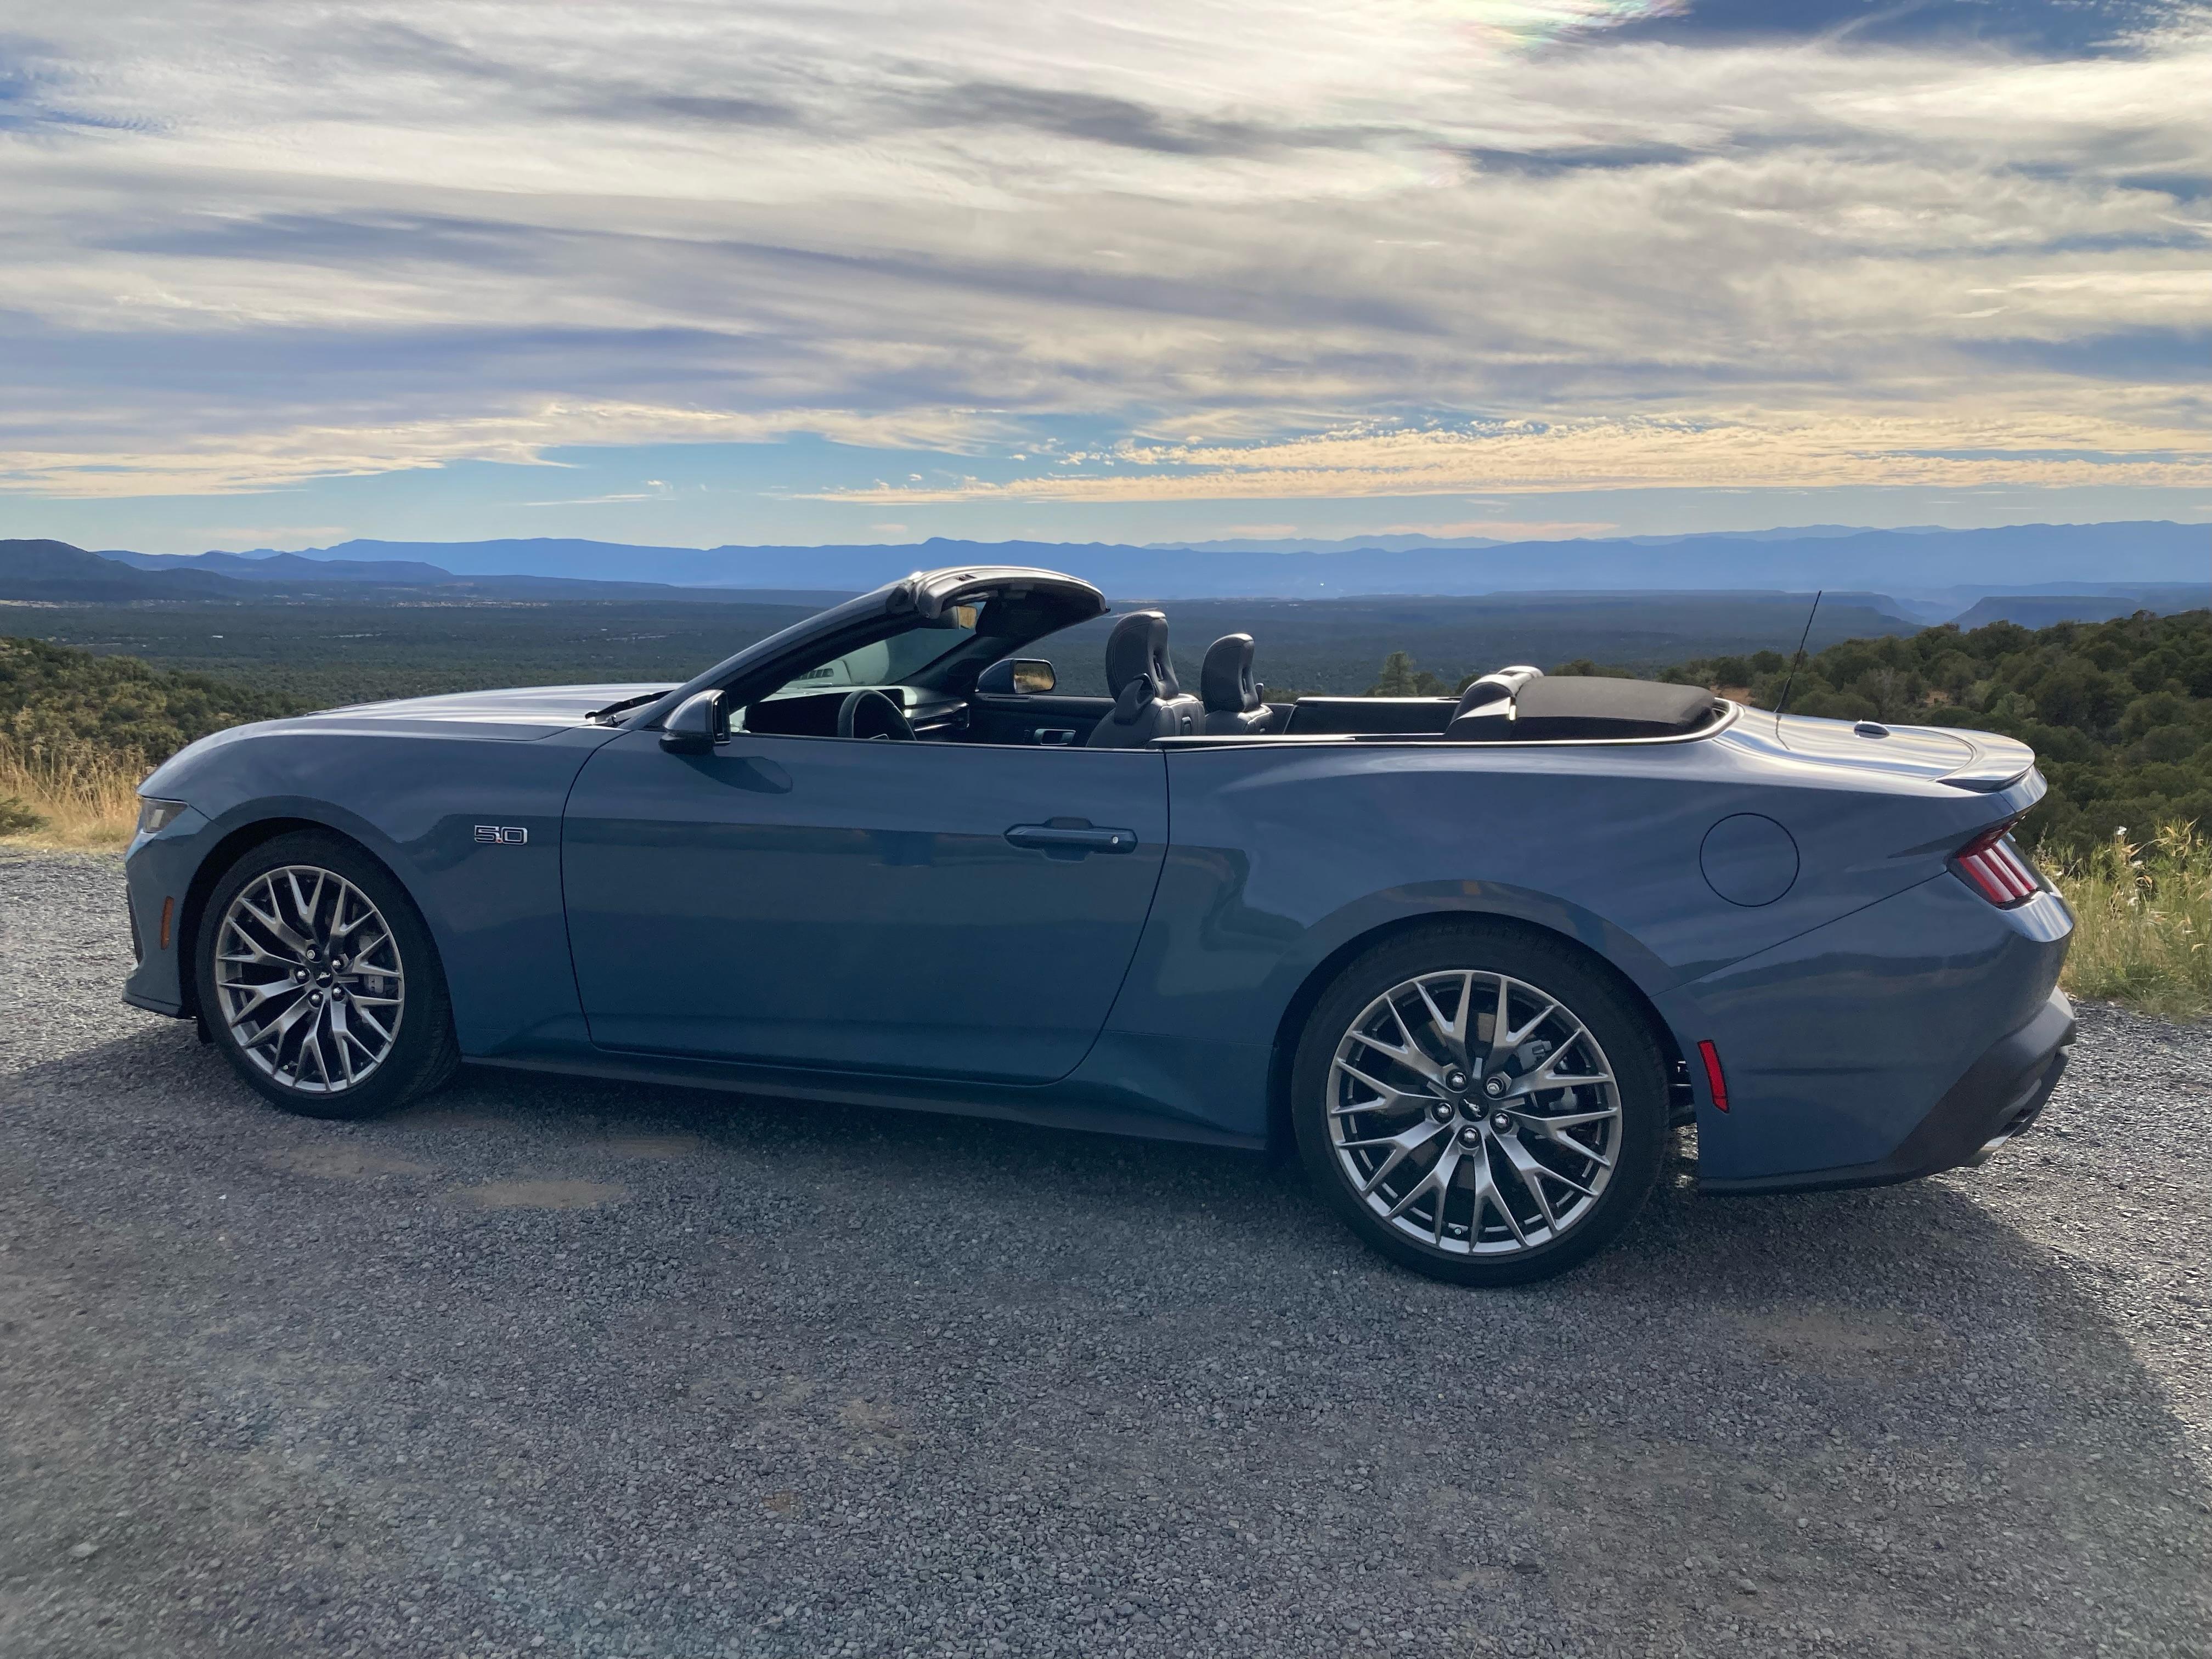
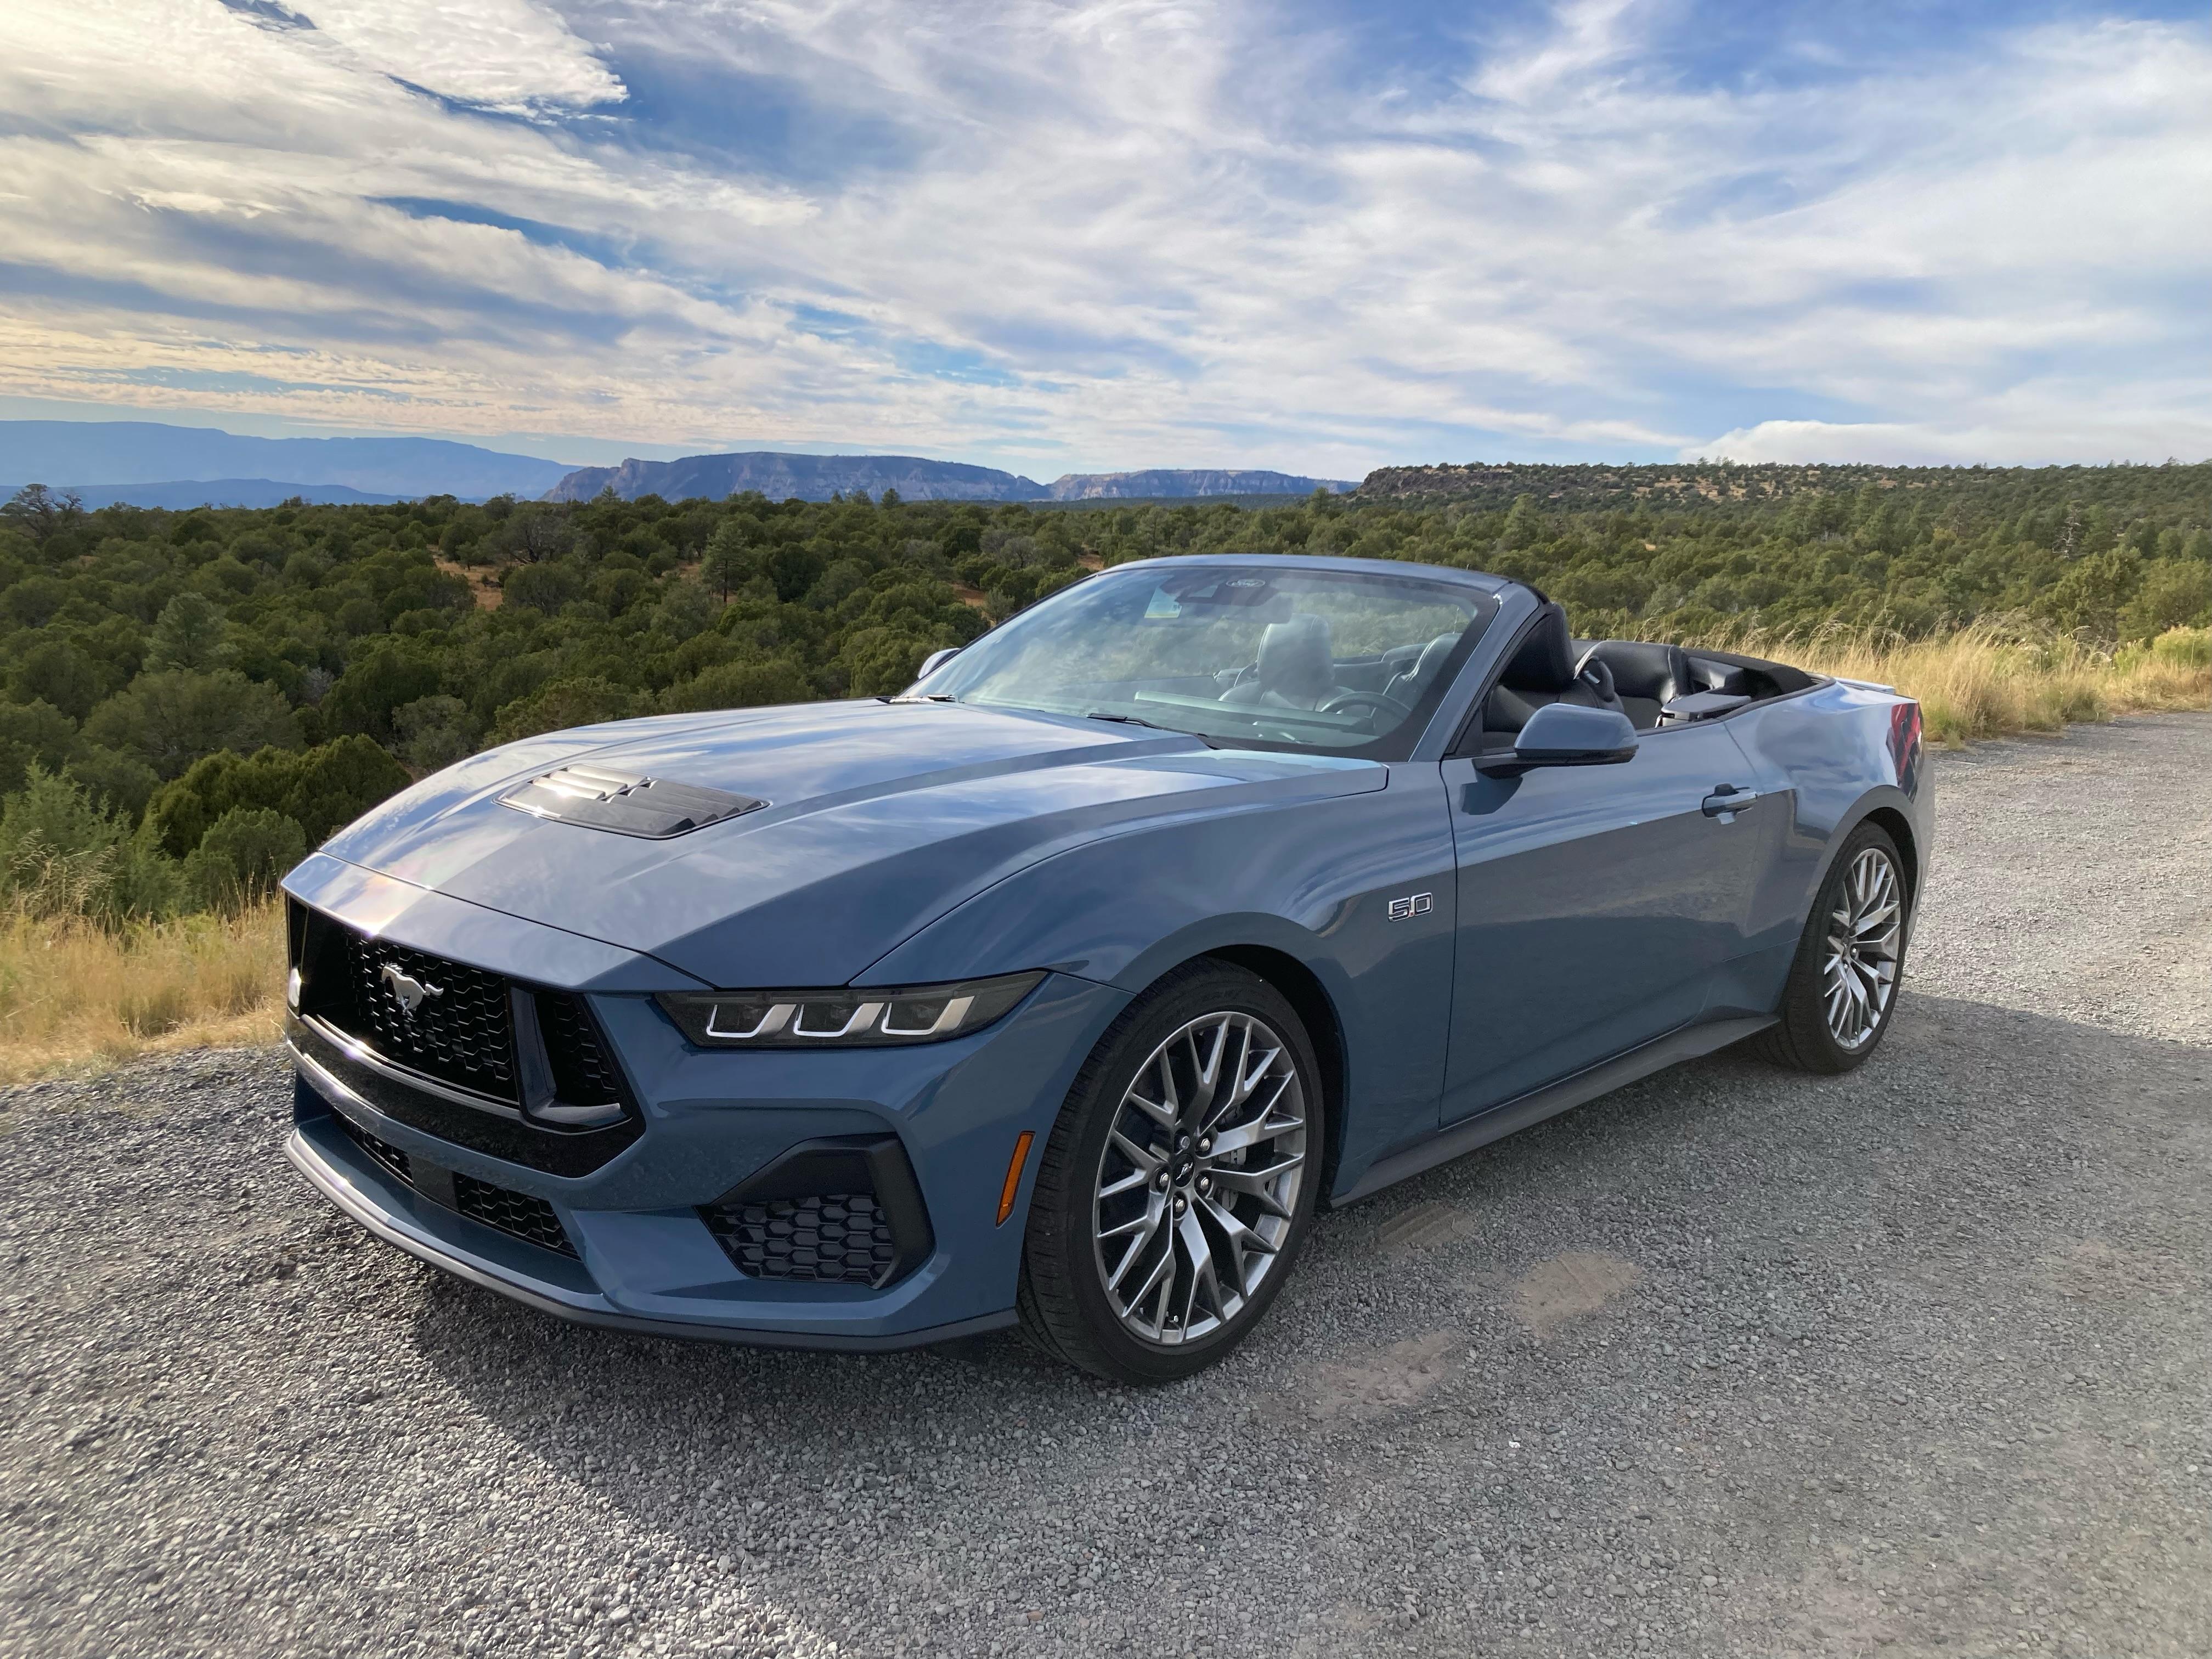
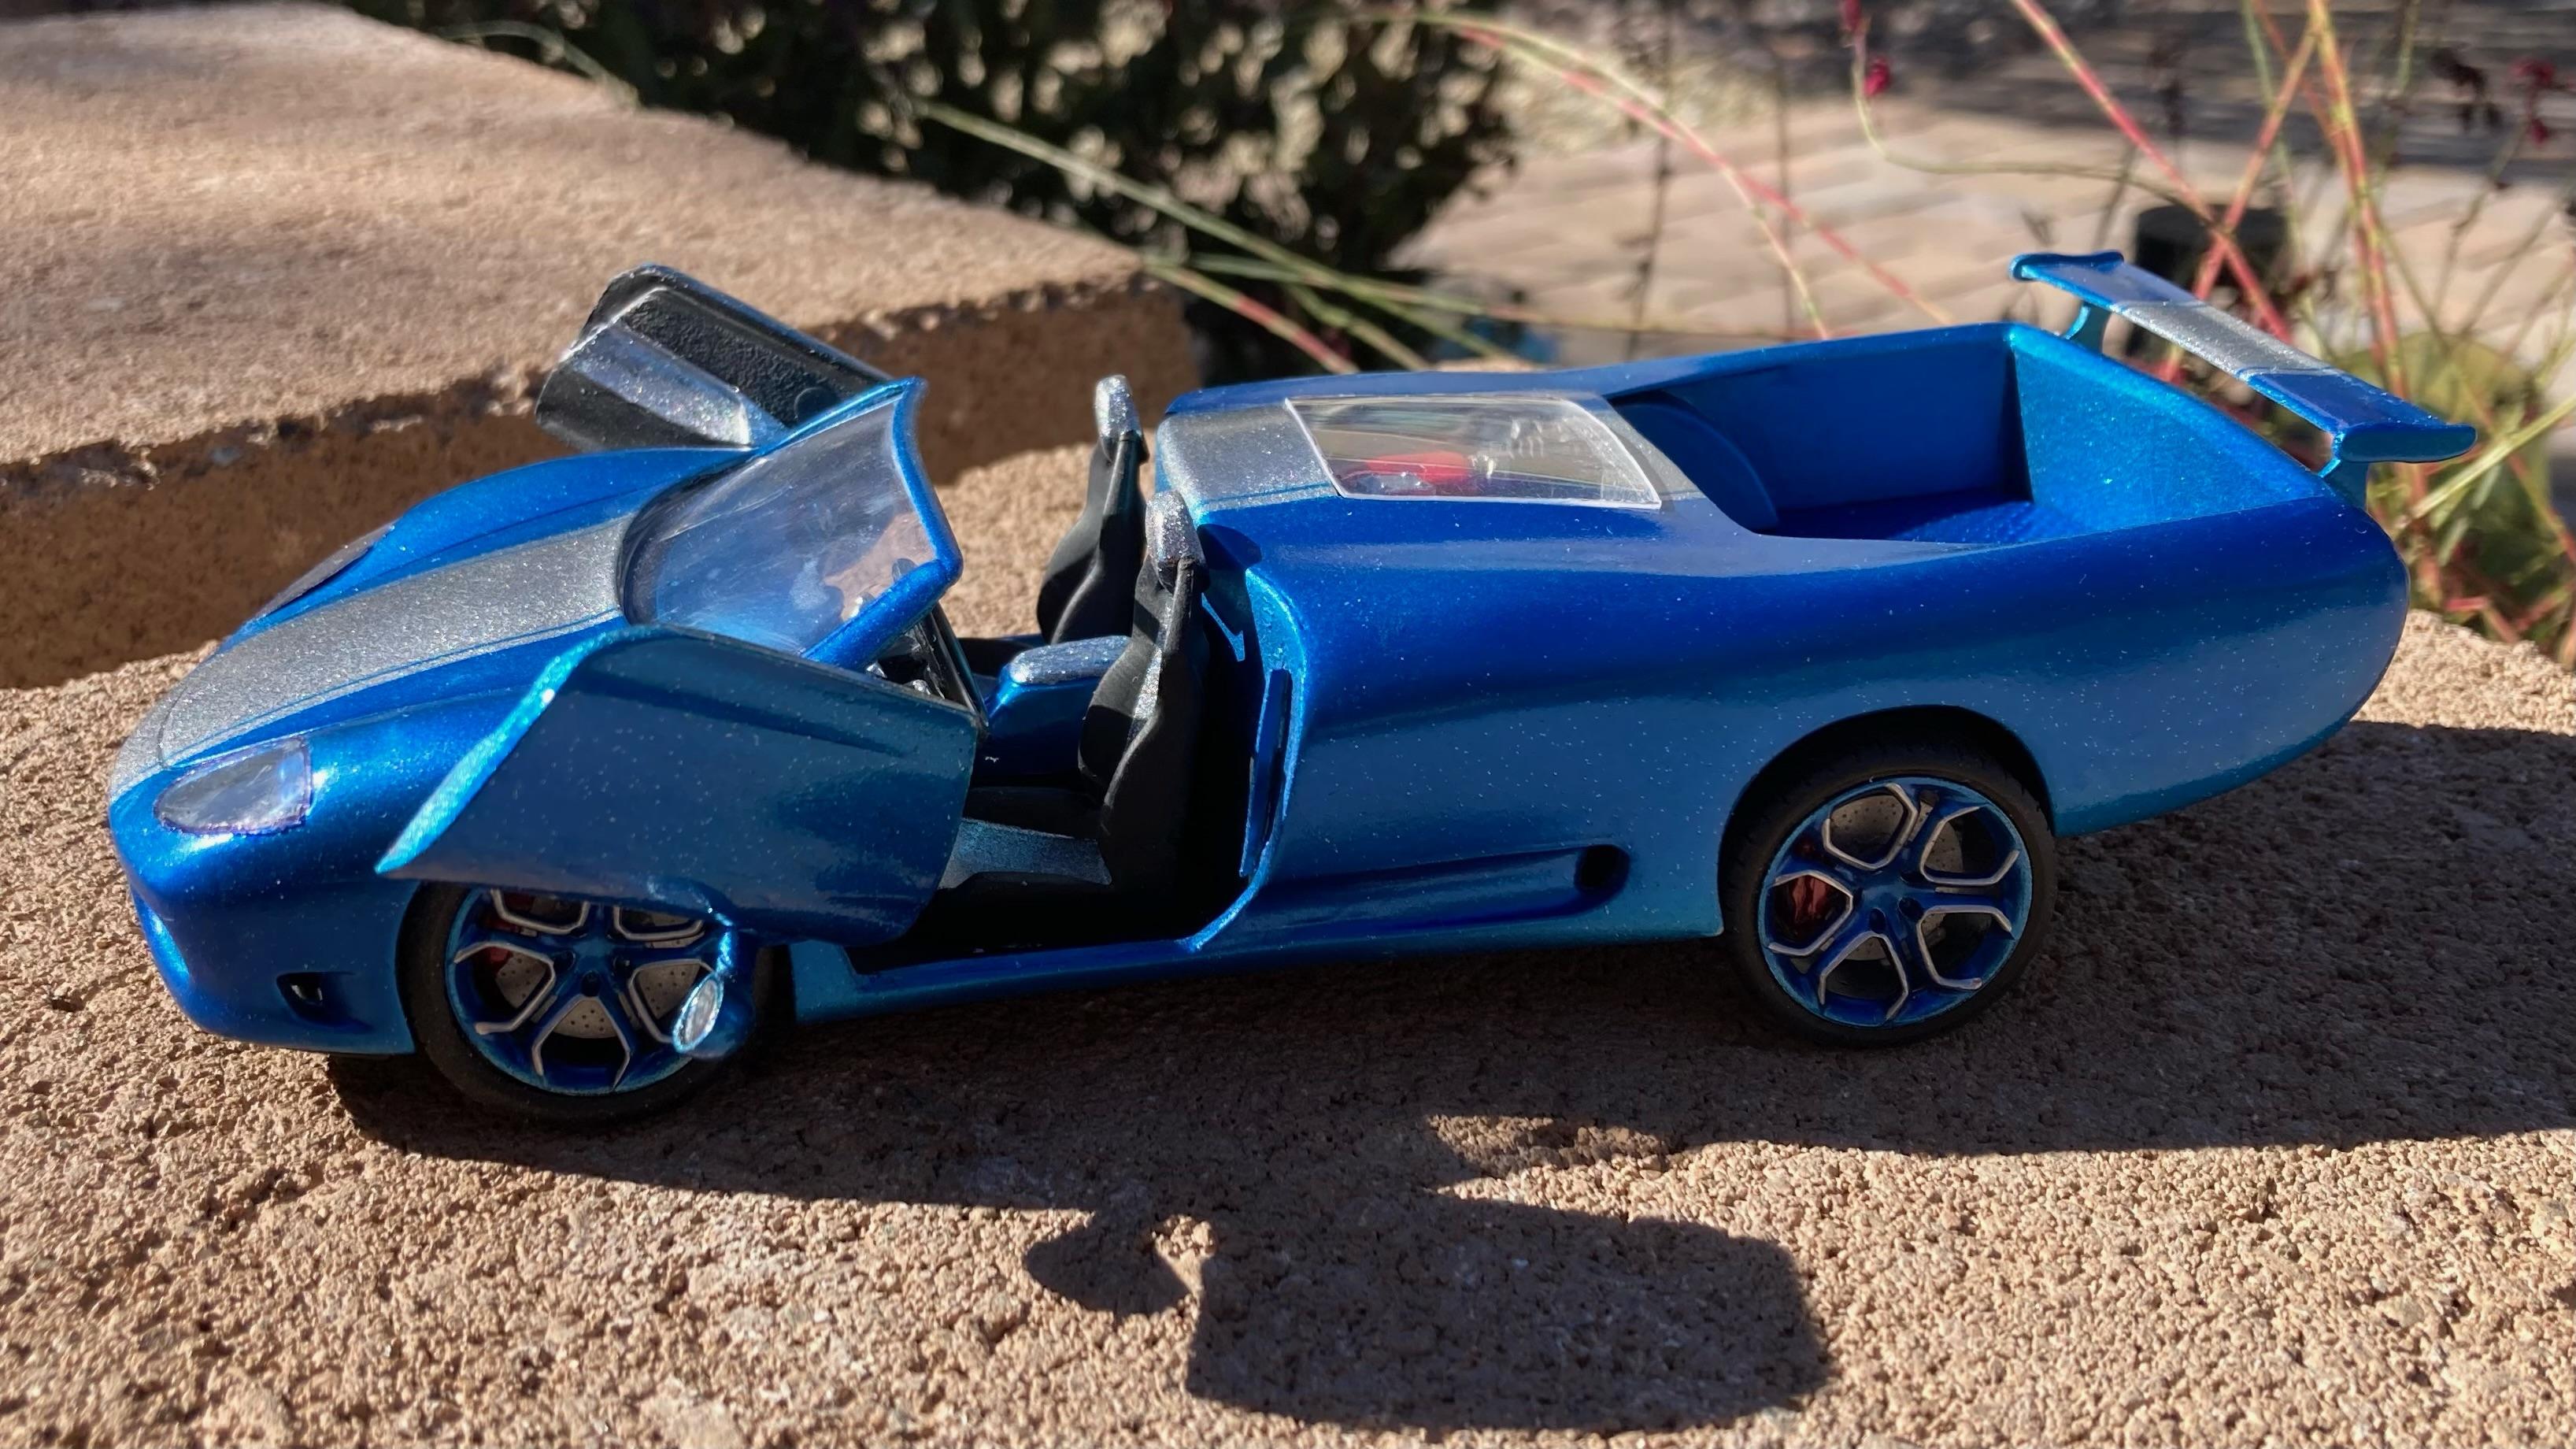
I sold my Honda CRV for this 2024 GT....its a lot more fun!! Dave
-
1941 Willy's Pickup
Nosferatu replied to Zippi's topic in WIP: Model Trucks: Pickups, Vans, SUVs, Light Commercial
Great color! I love that short bed! Dave -
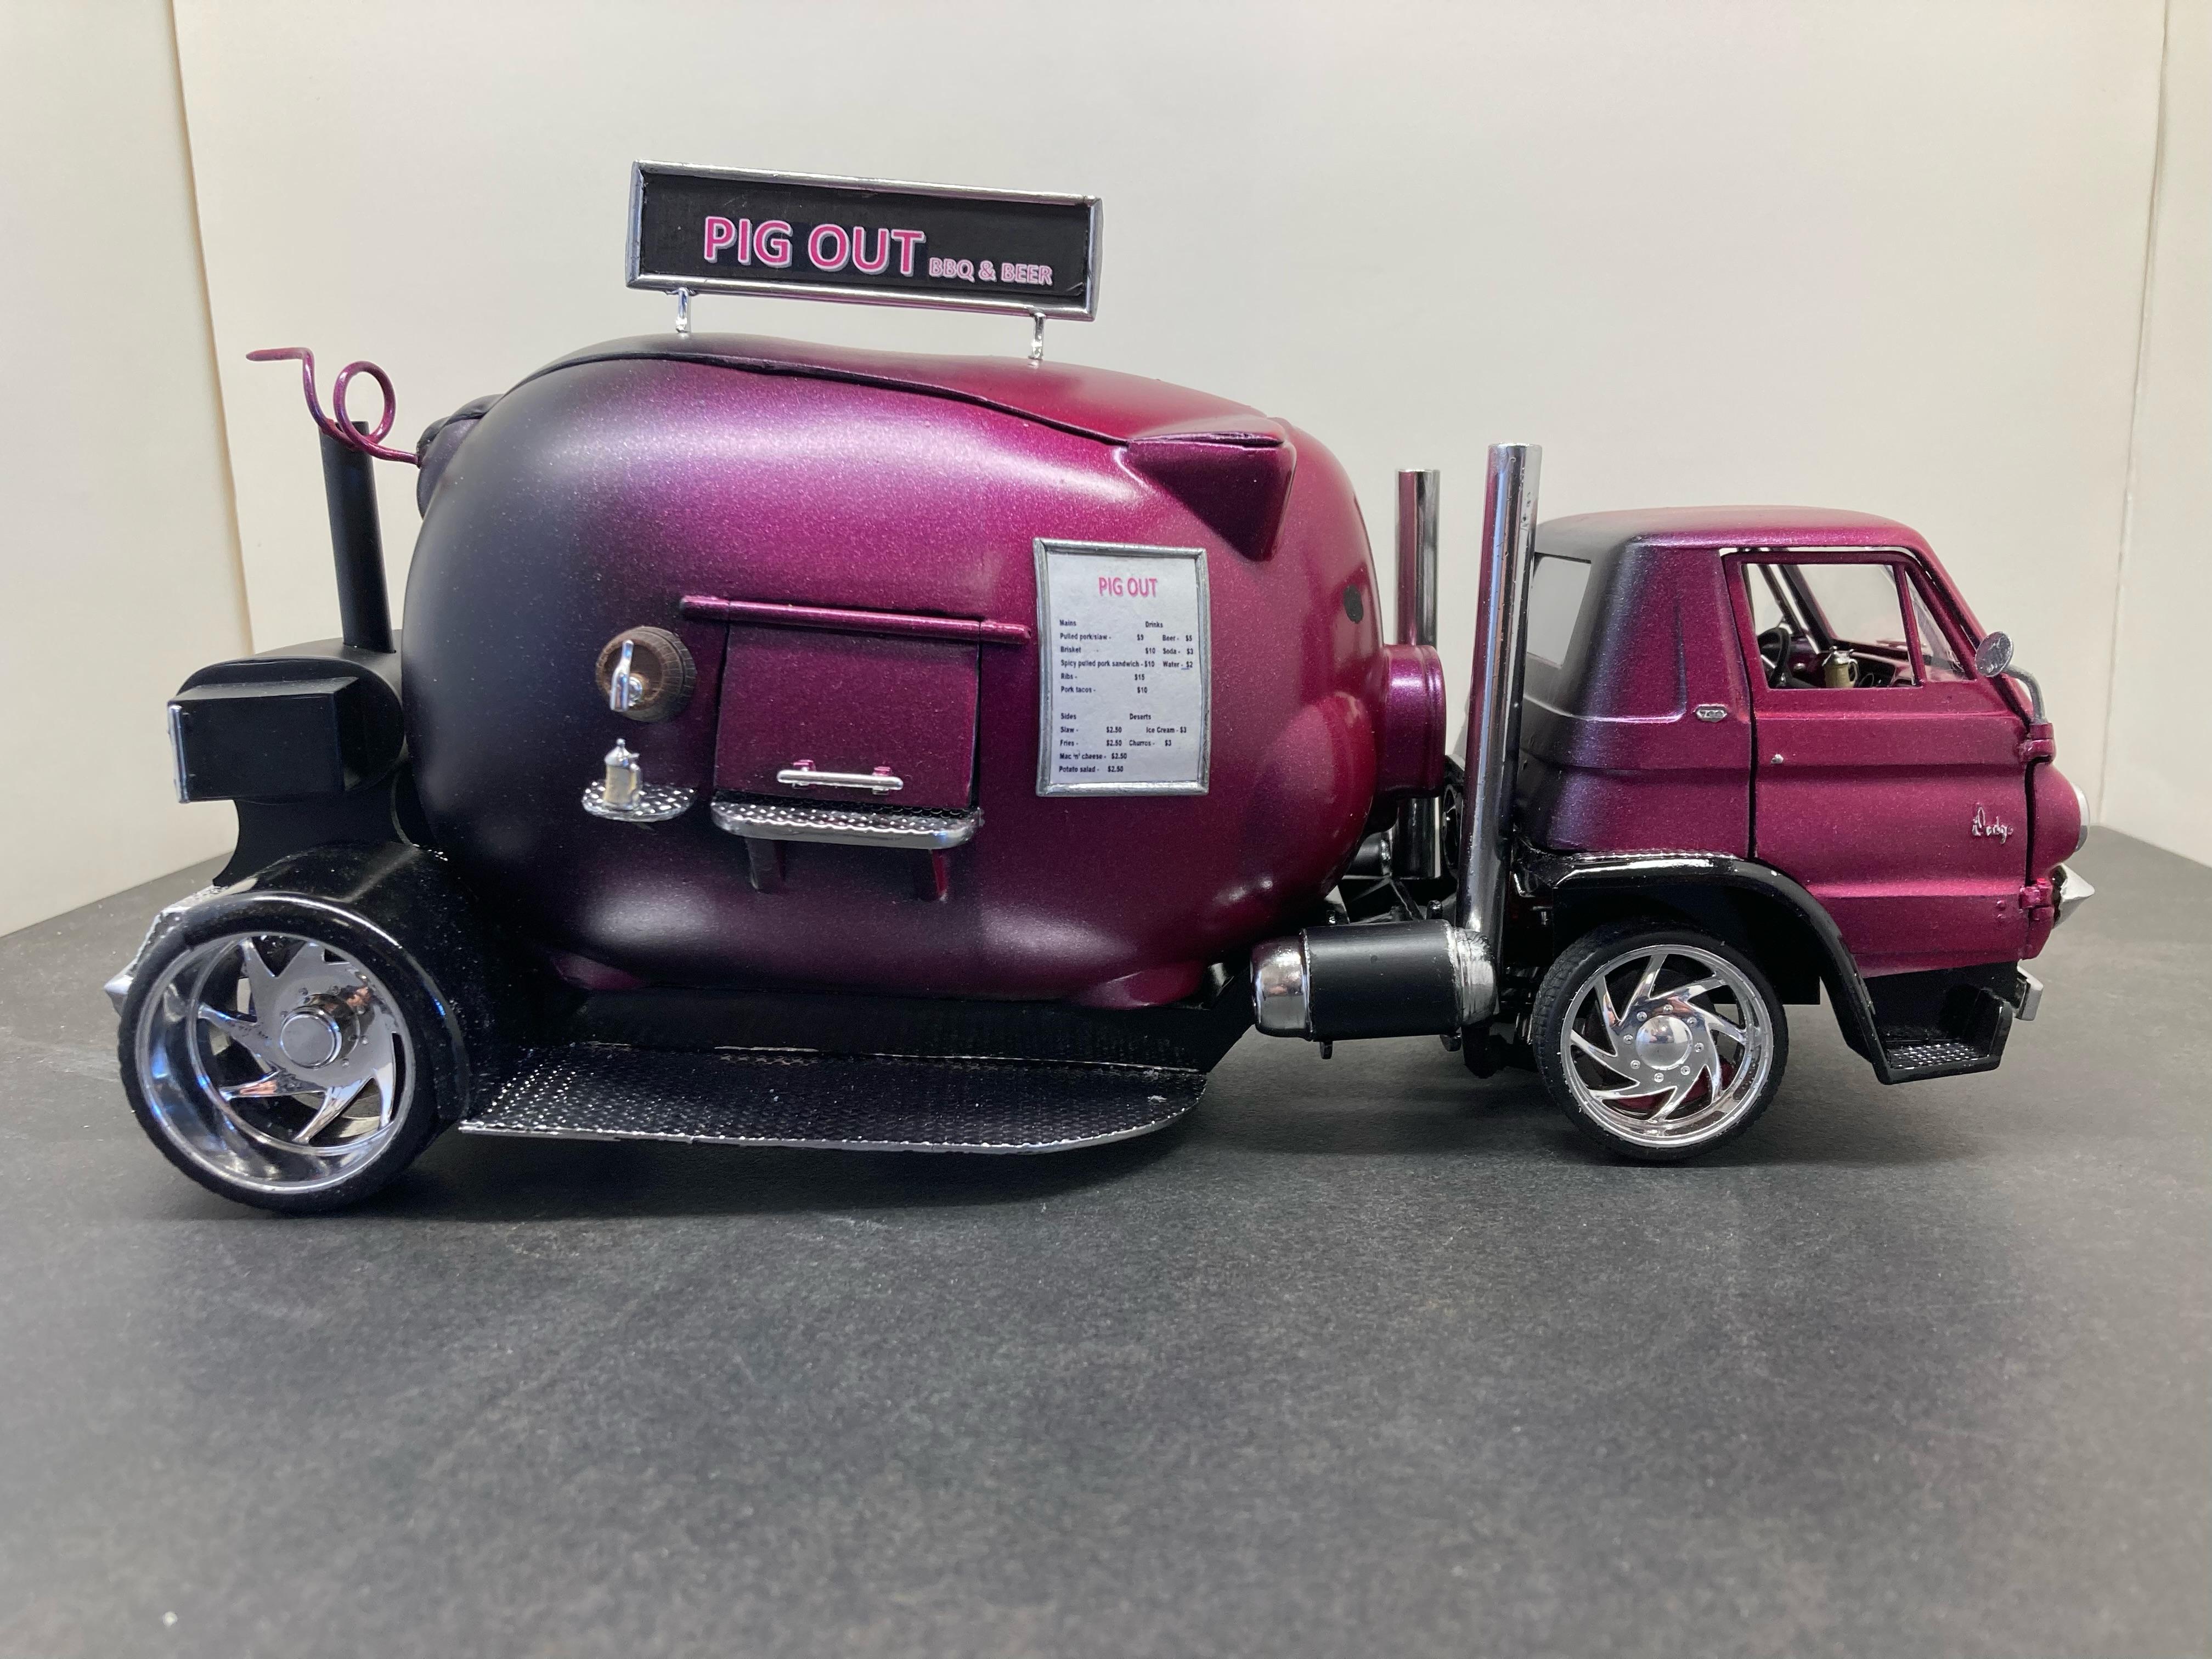
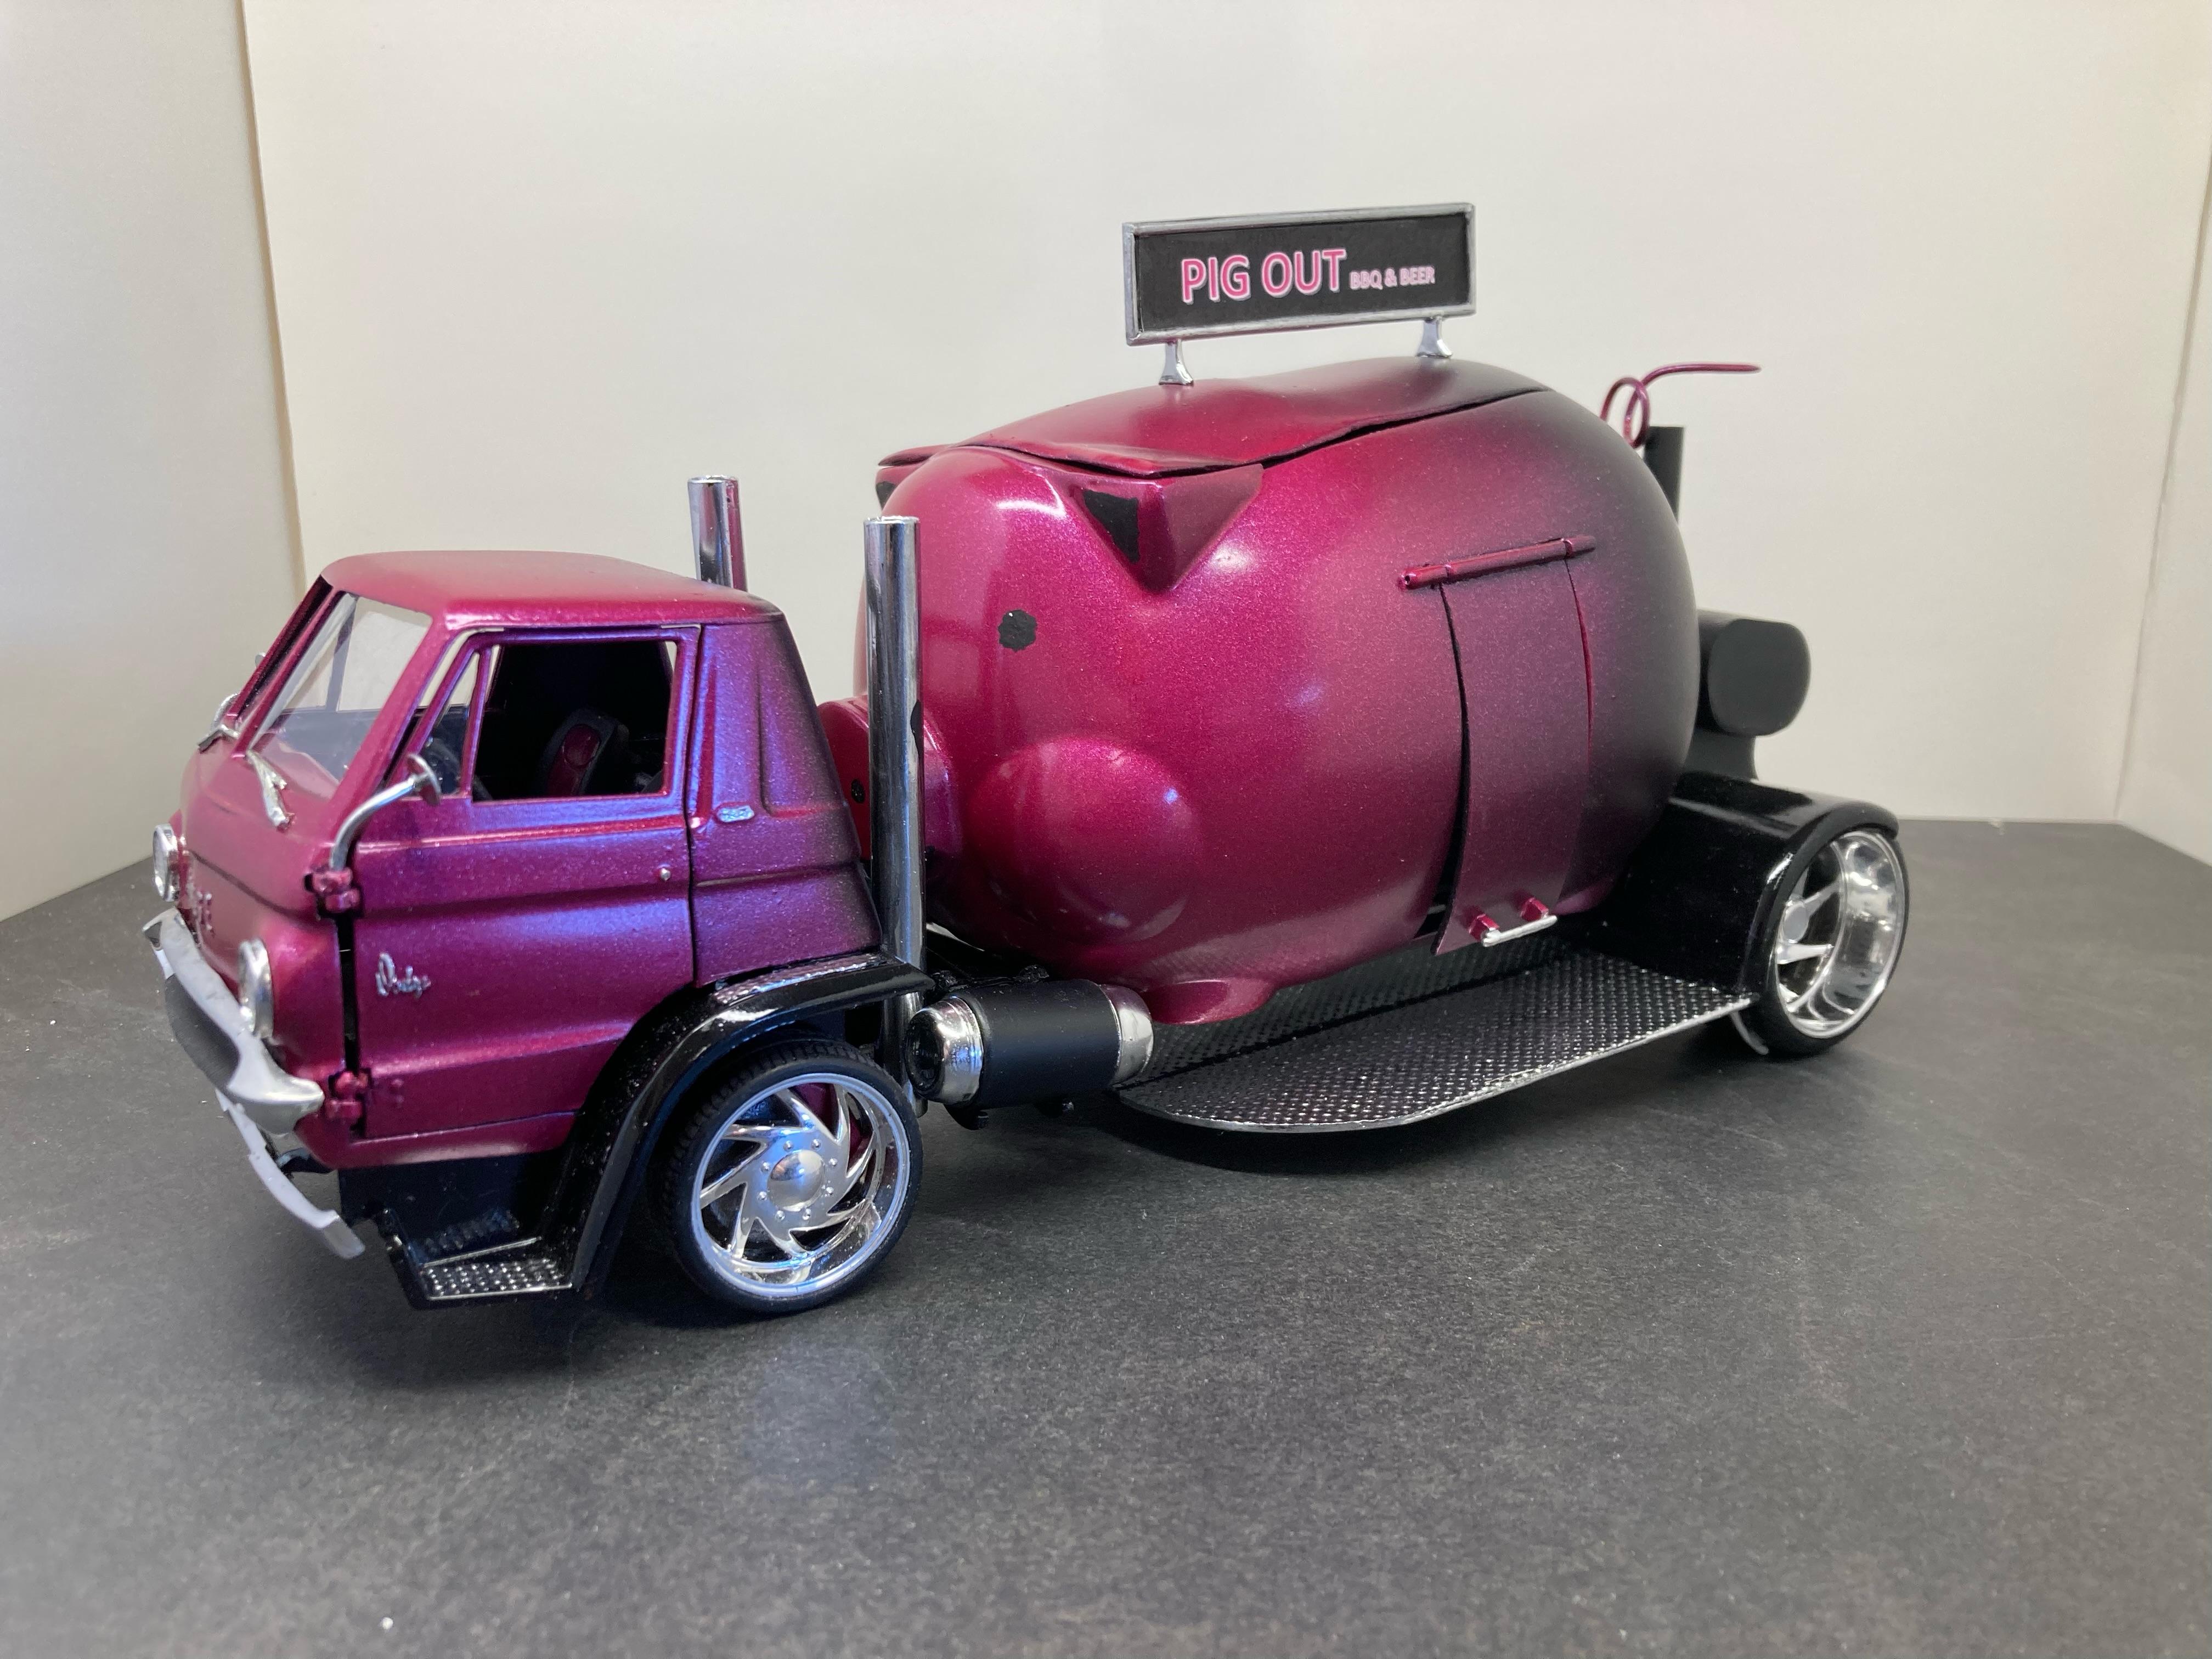
The Pig Rig - Finished!
Nosferatu replied to Nosferatu's topic in Model Trucks: Pickups, Vans, SUVs, Light Commercial
Thanks Mark for your nice comment! Dave -
I didn't build as many as I hoped but here they are. Dave
-
The Pig Rig - Finished!
Nosferatu replied to Nosferatu's topic in Model Trucks: Pickups, Vans, SUVs, Light Commercial
Thanks for all your kind comments! Dave -
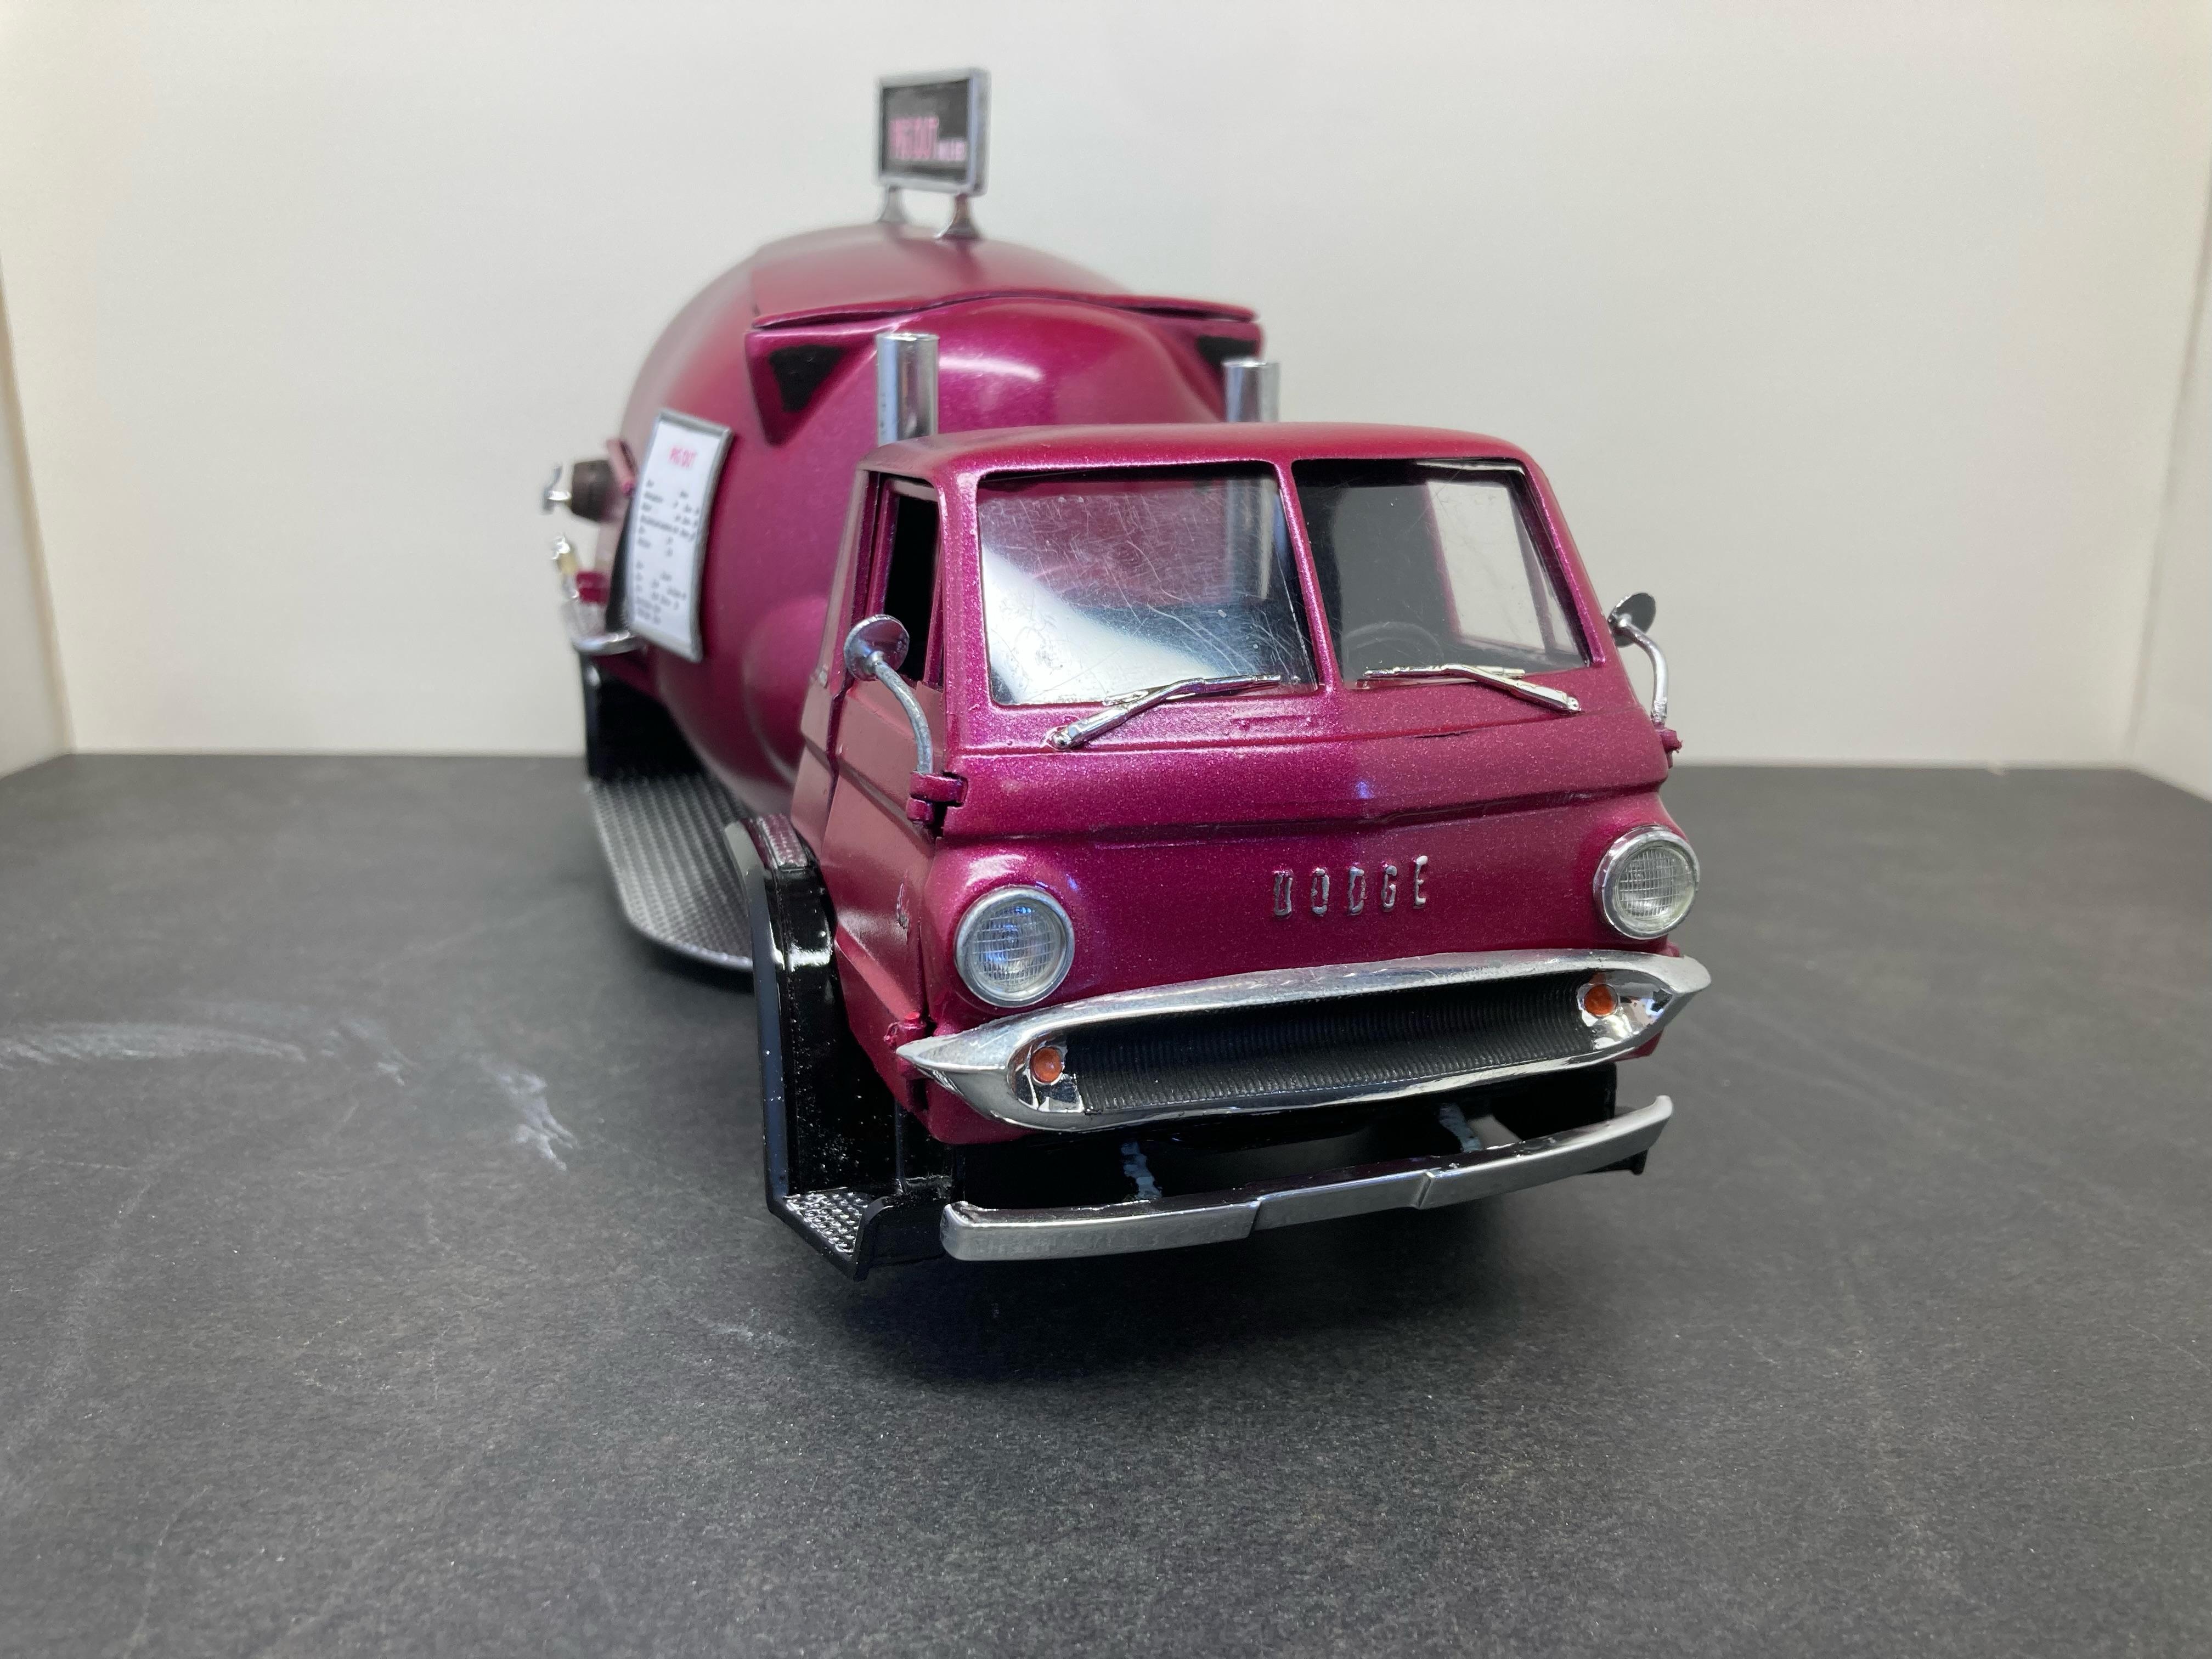
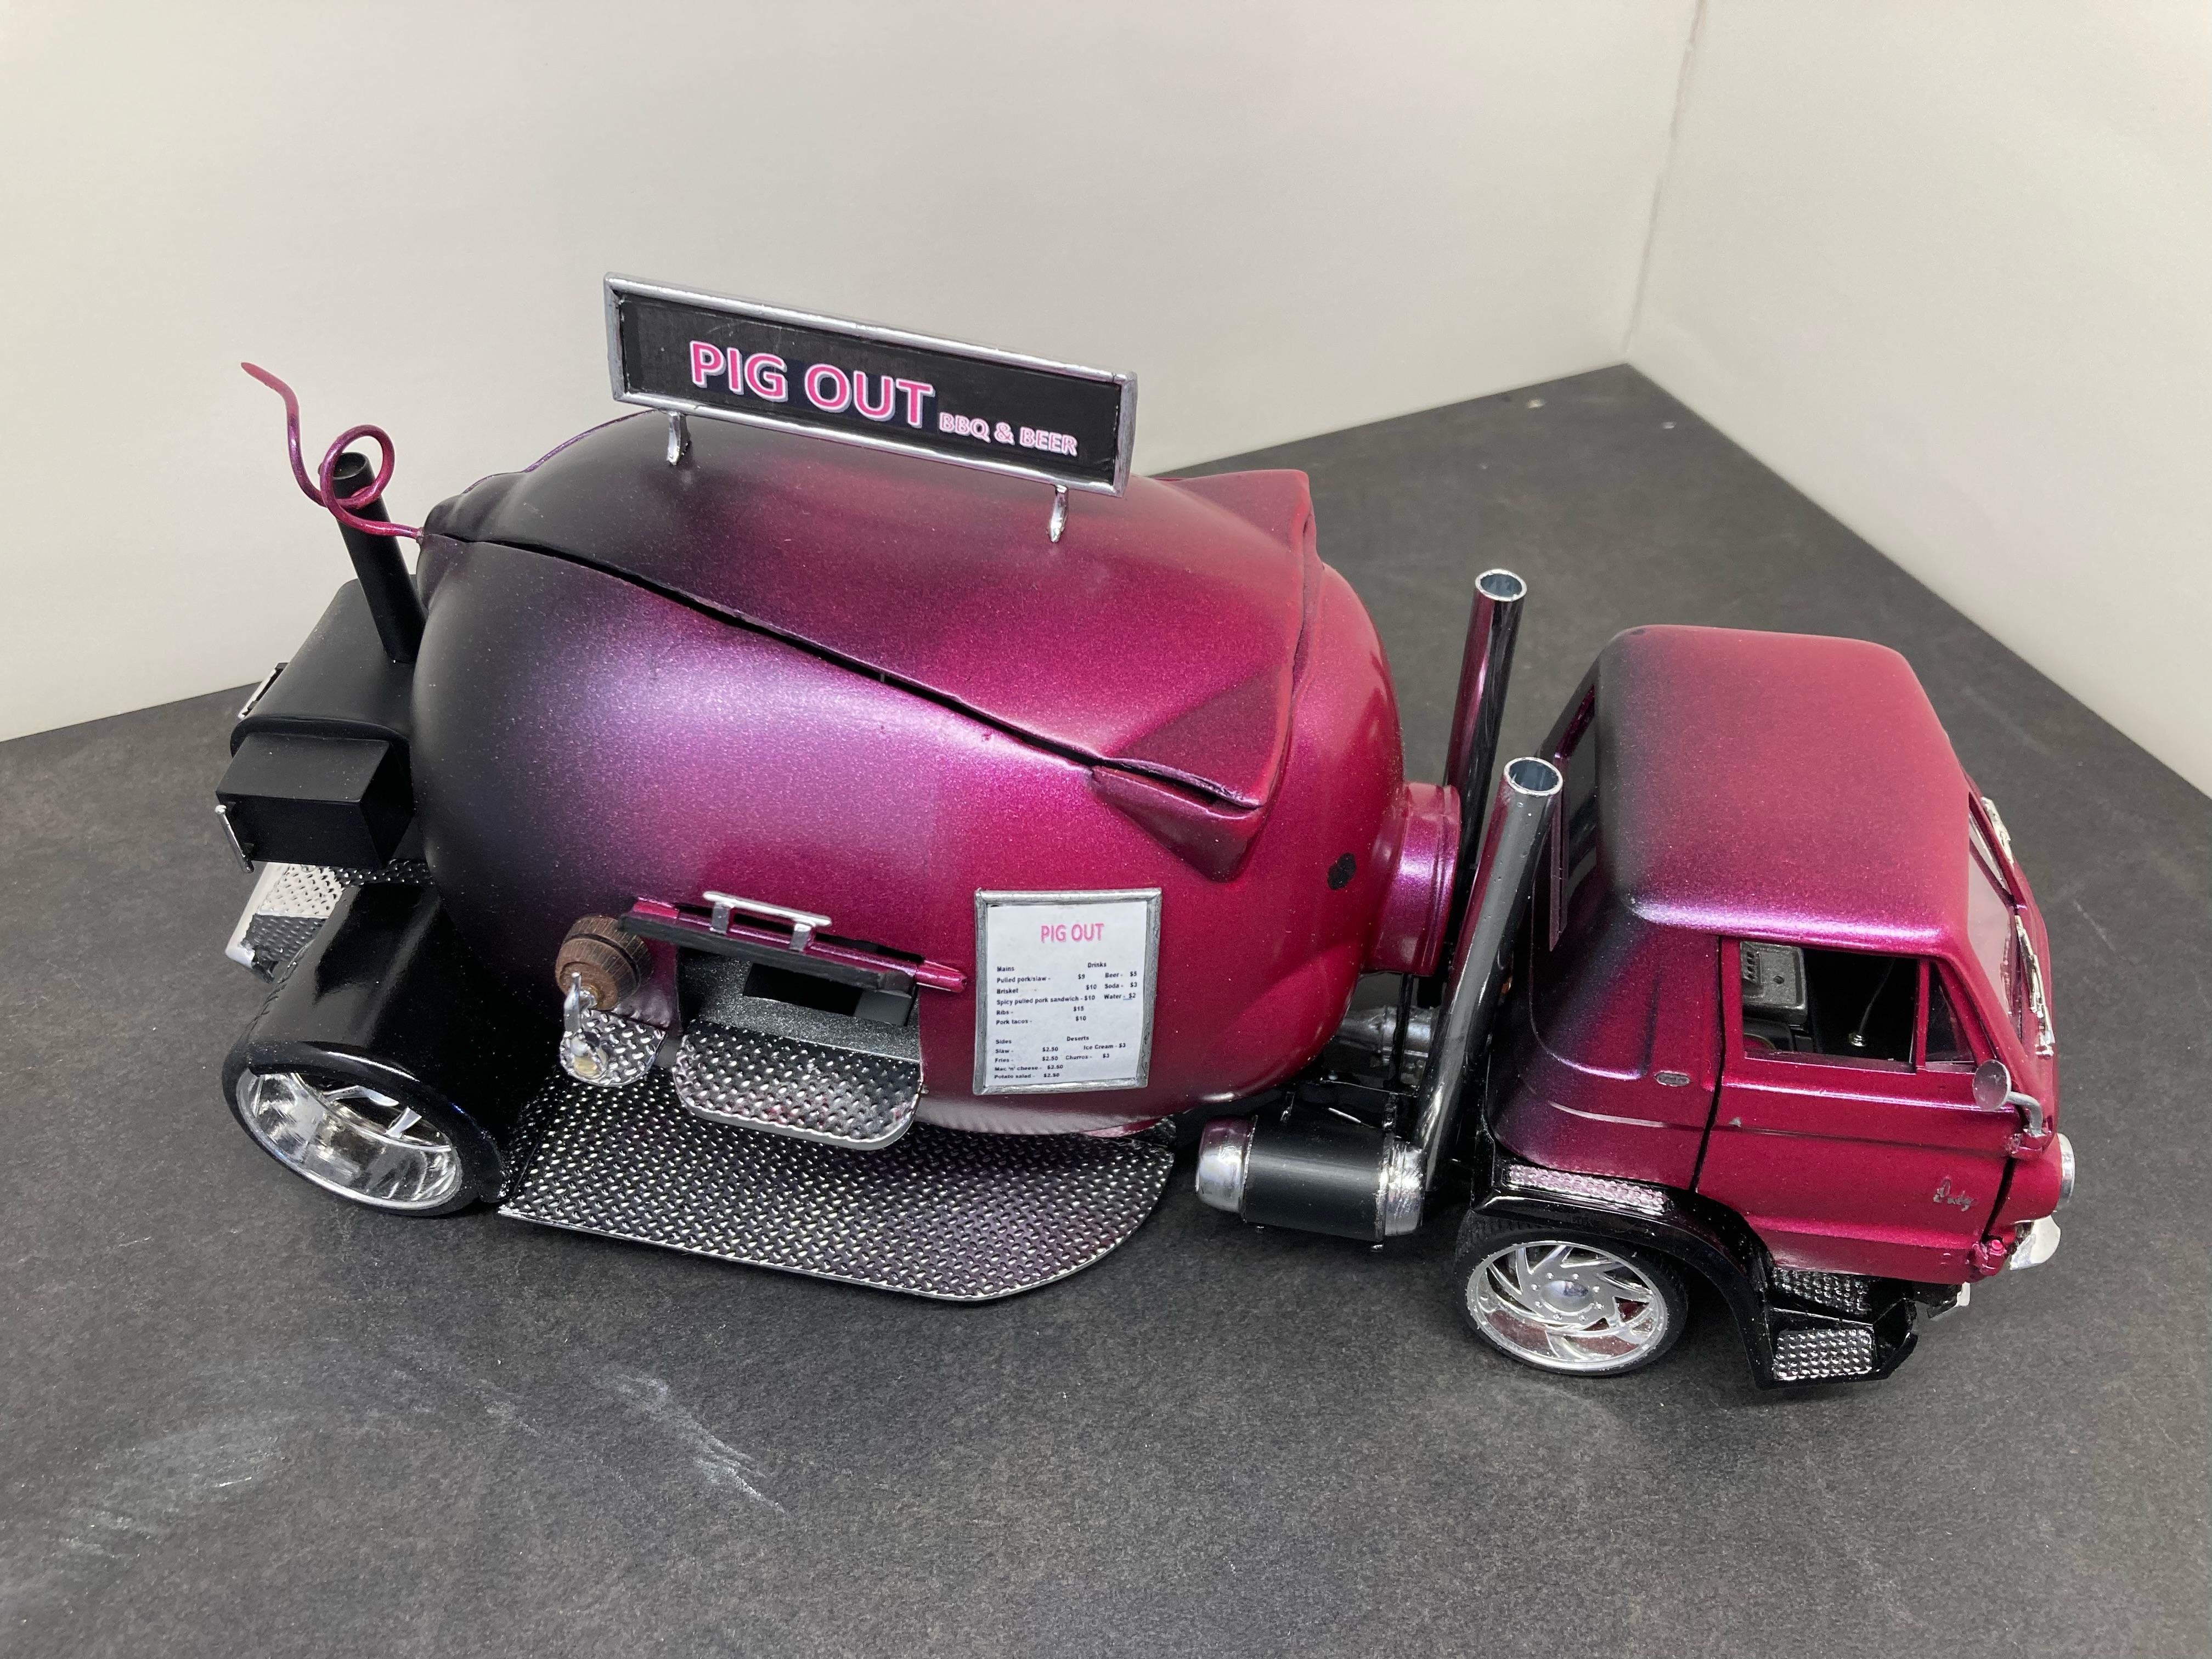
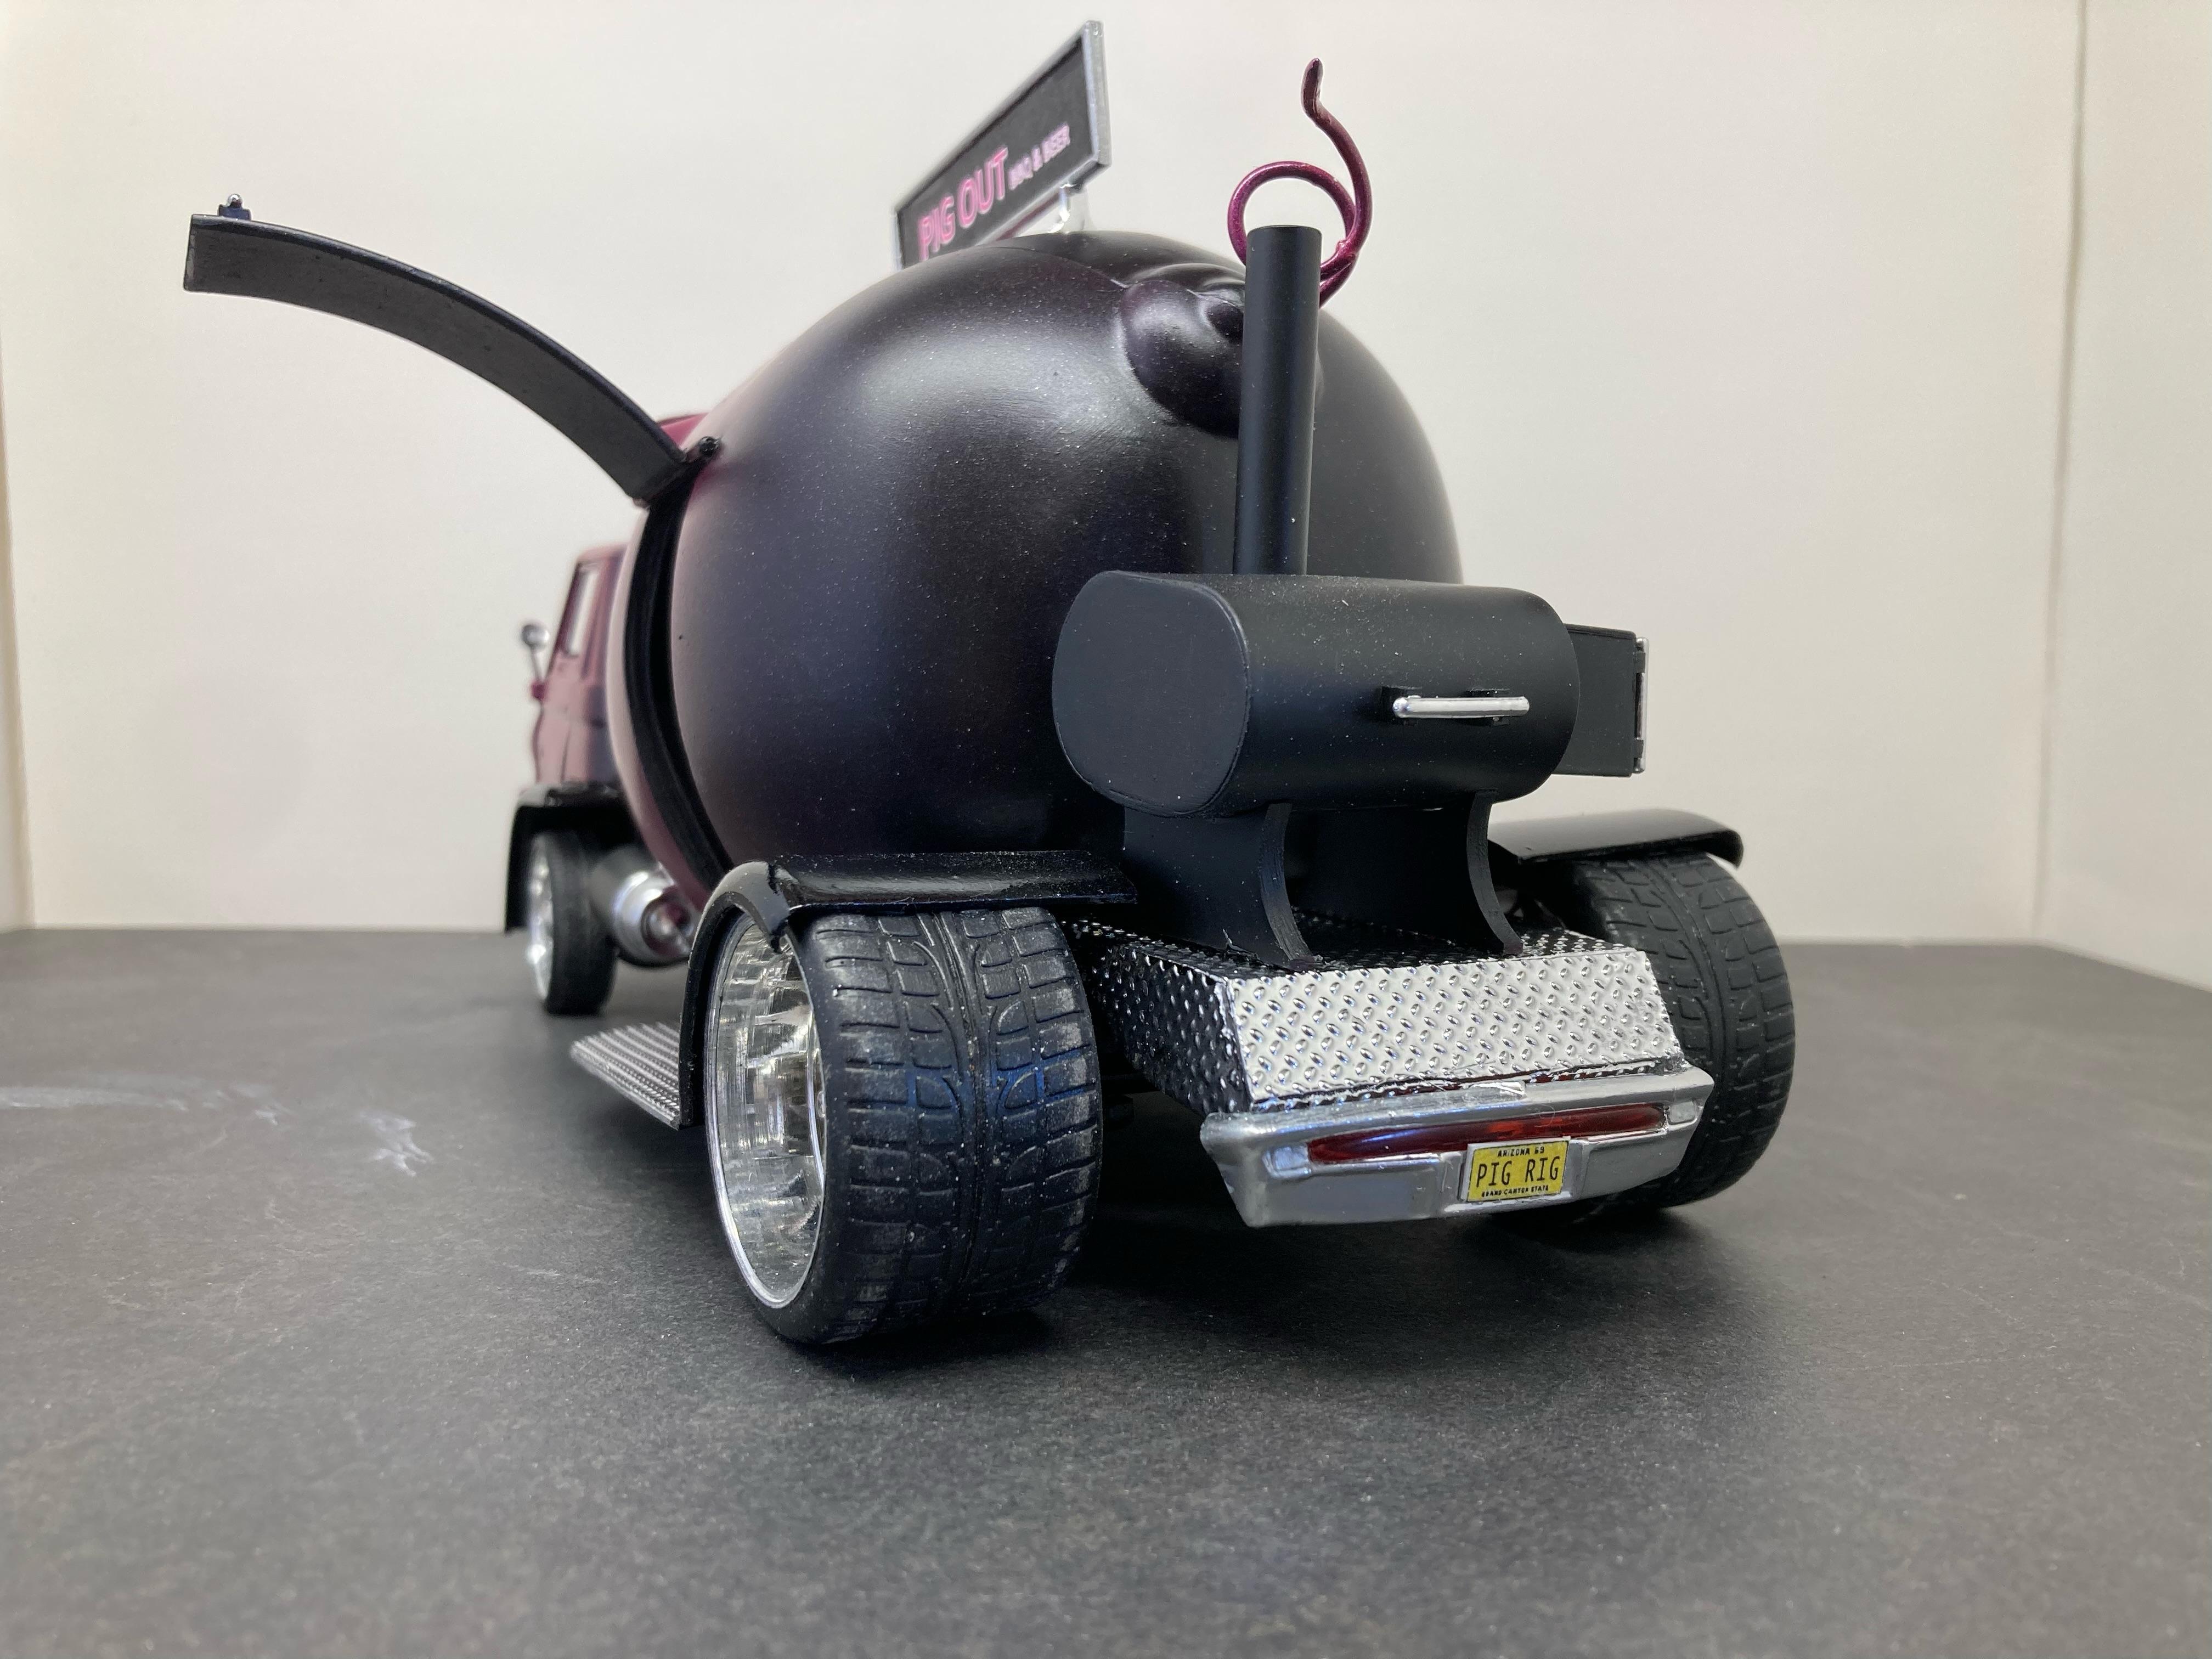
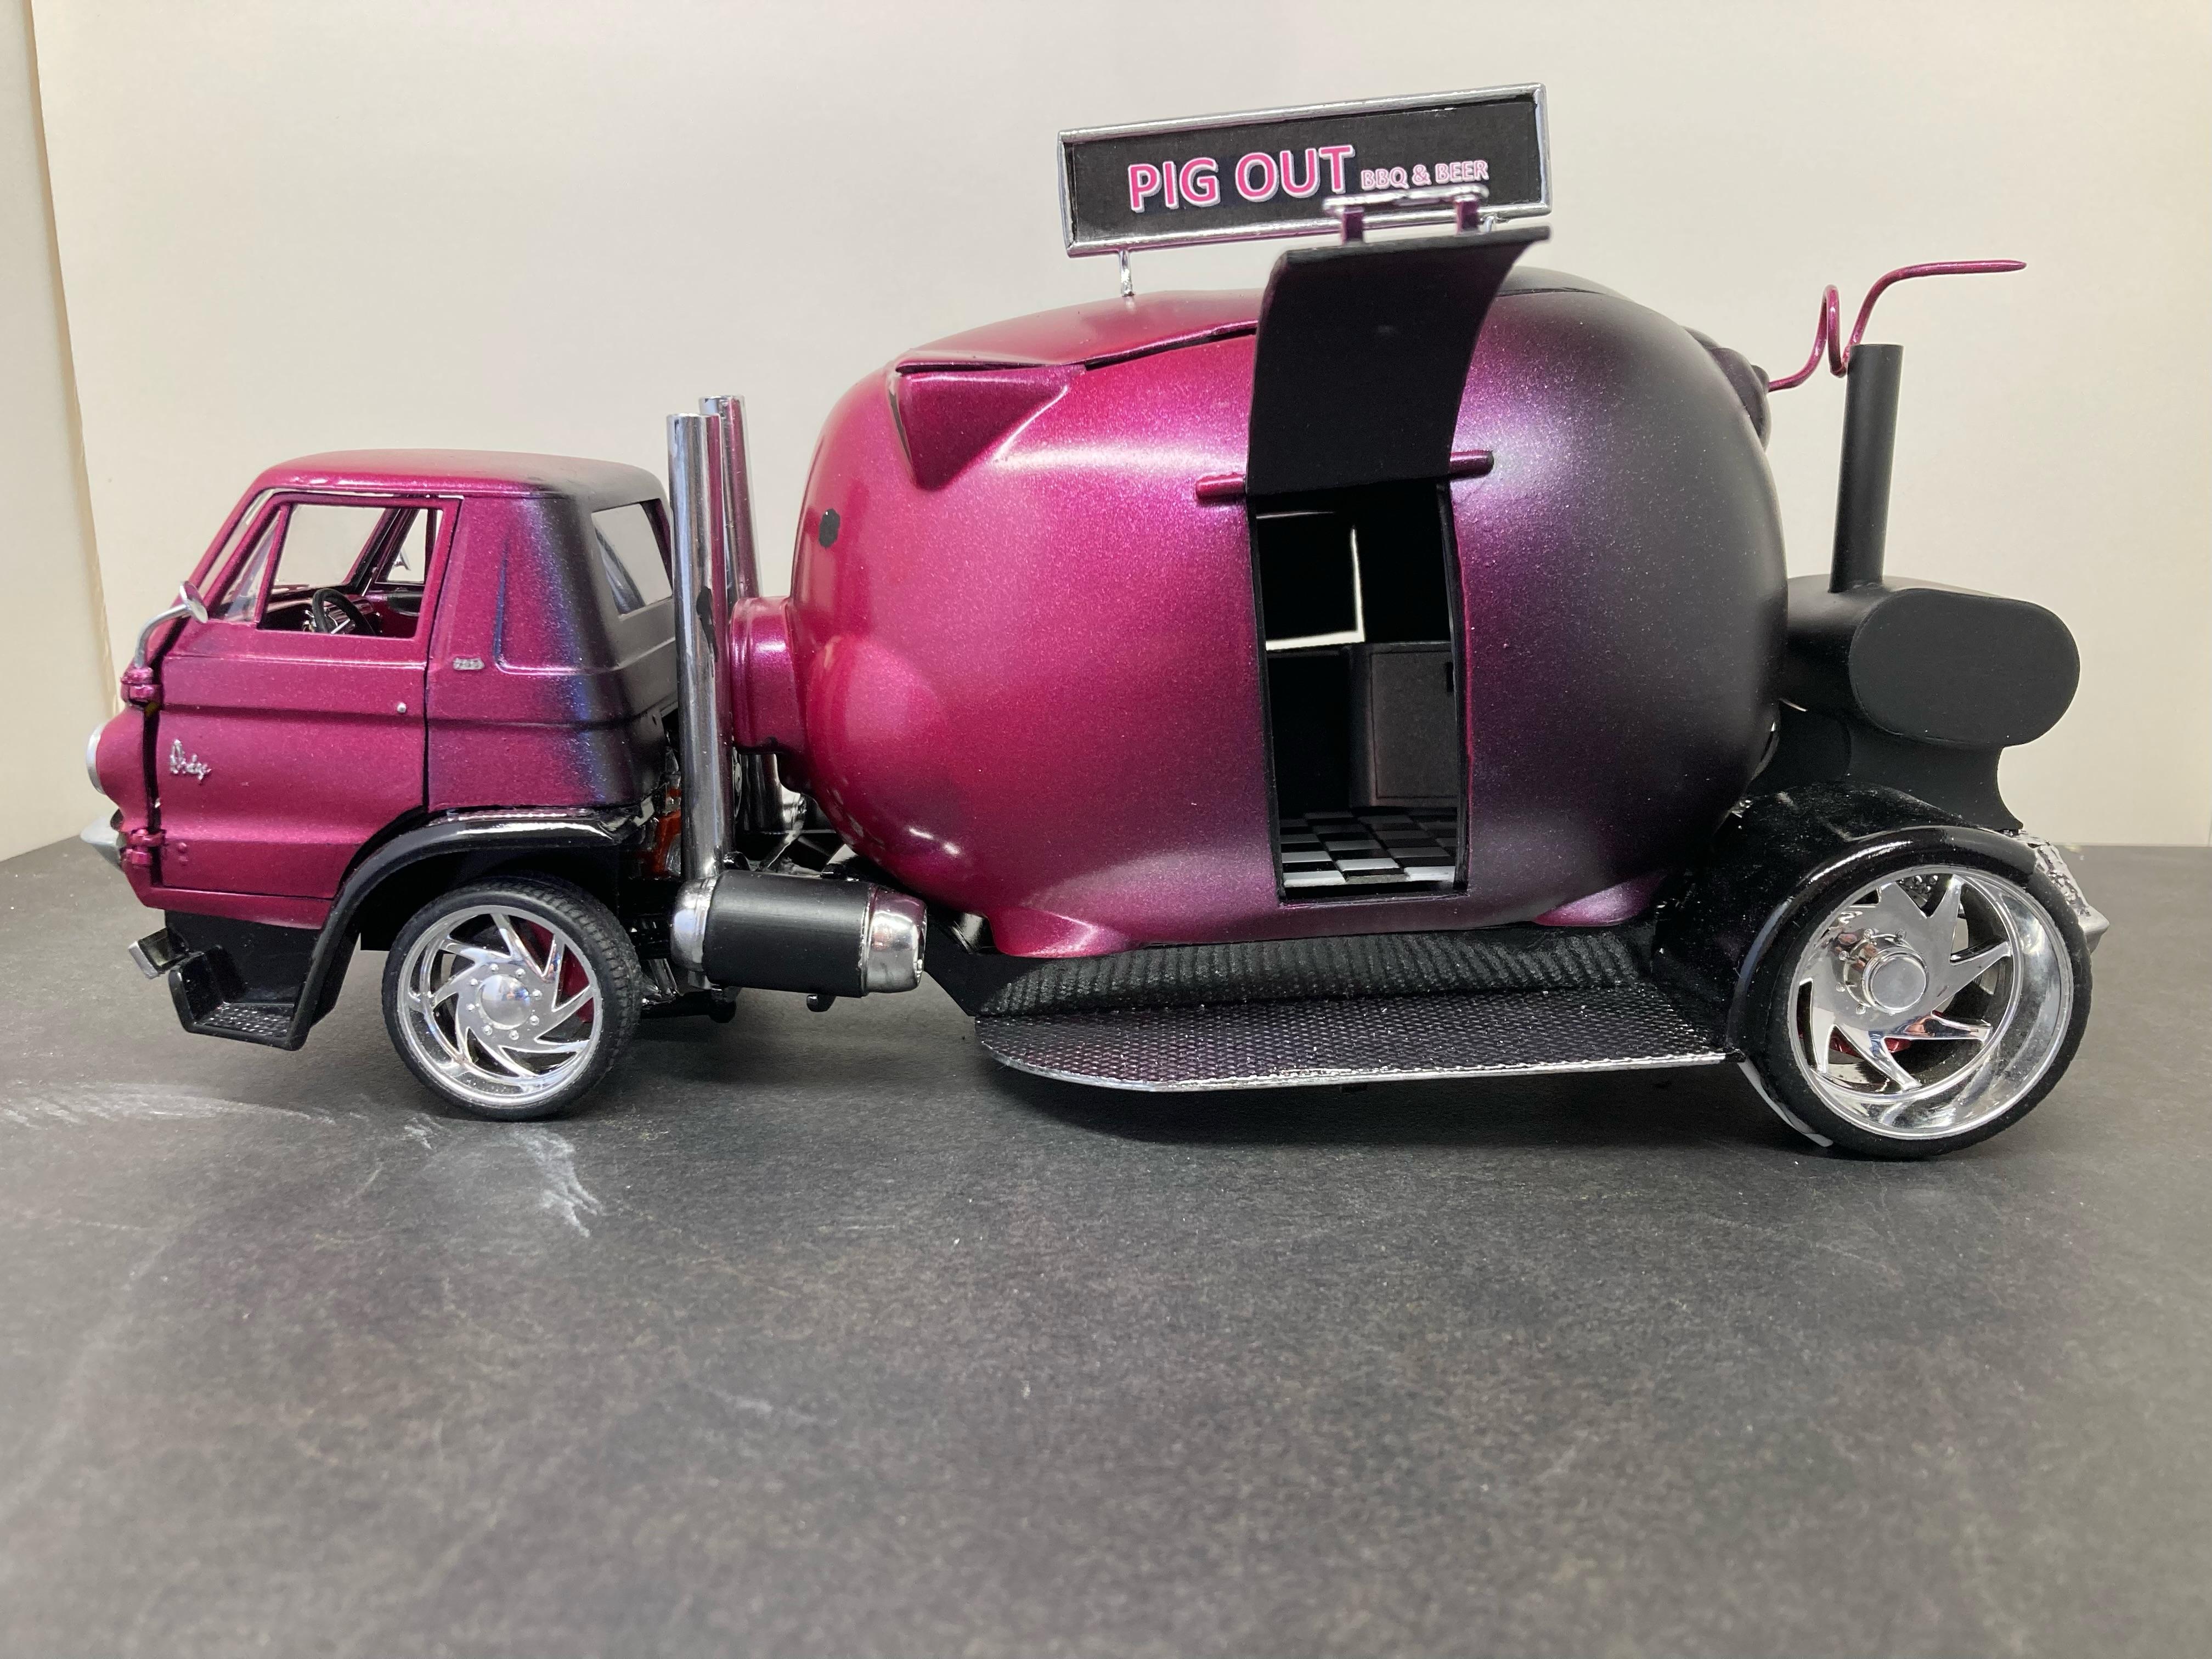
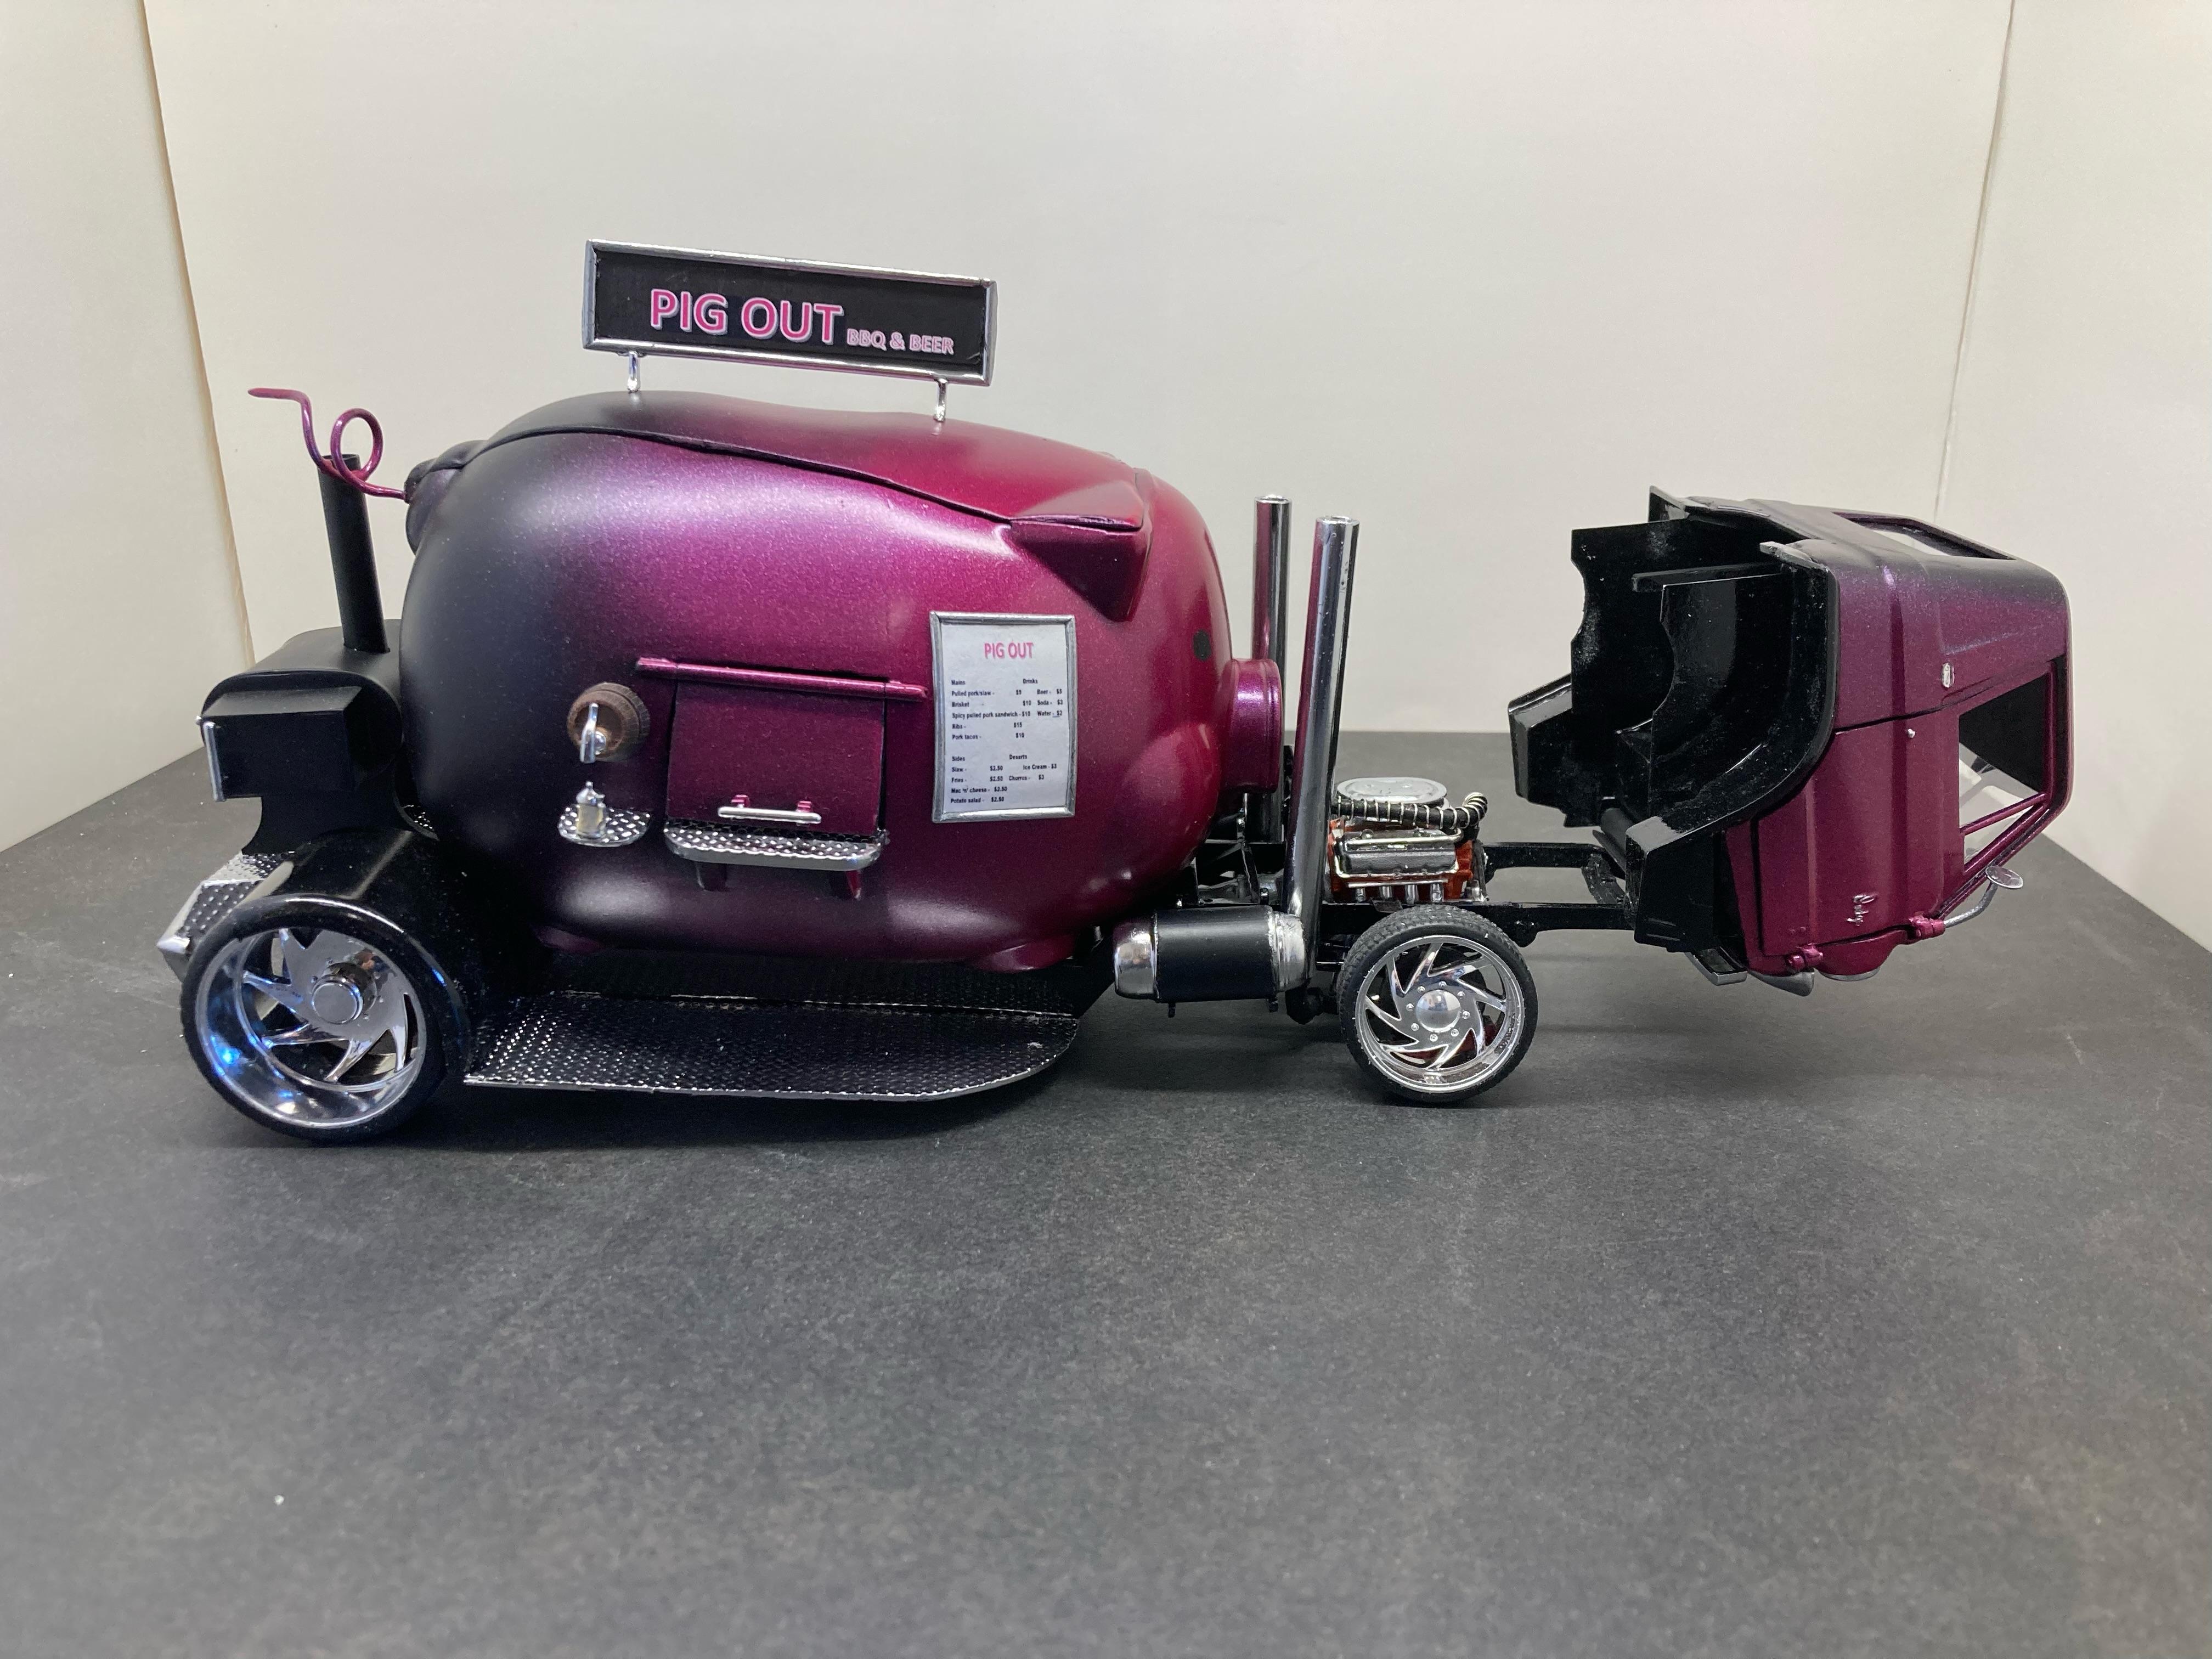
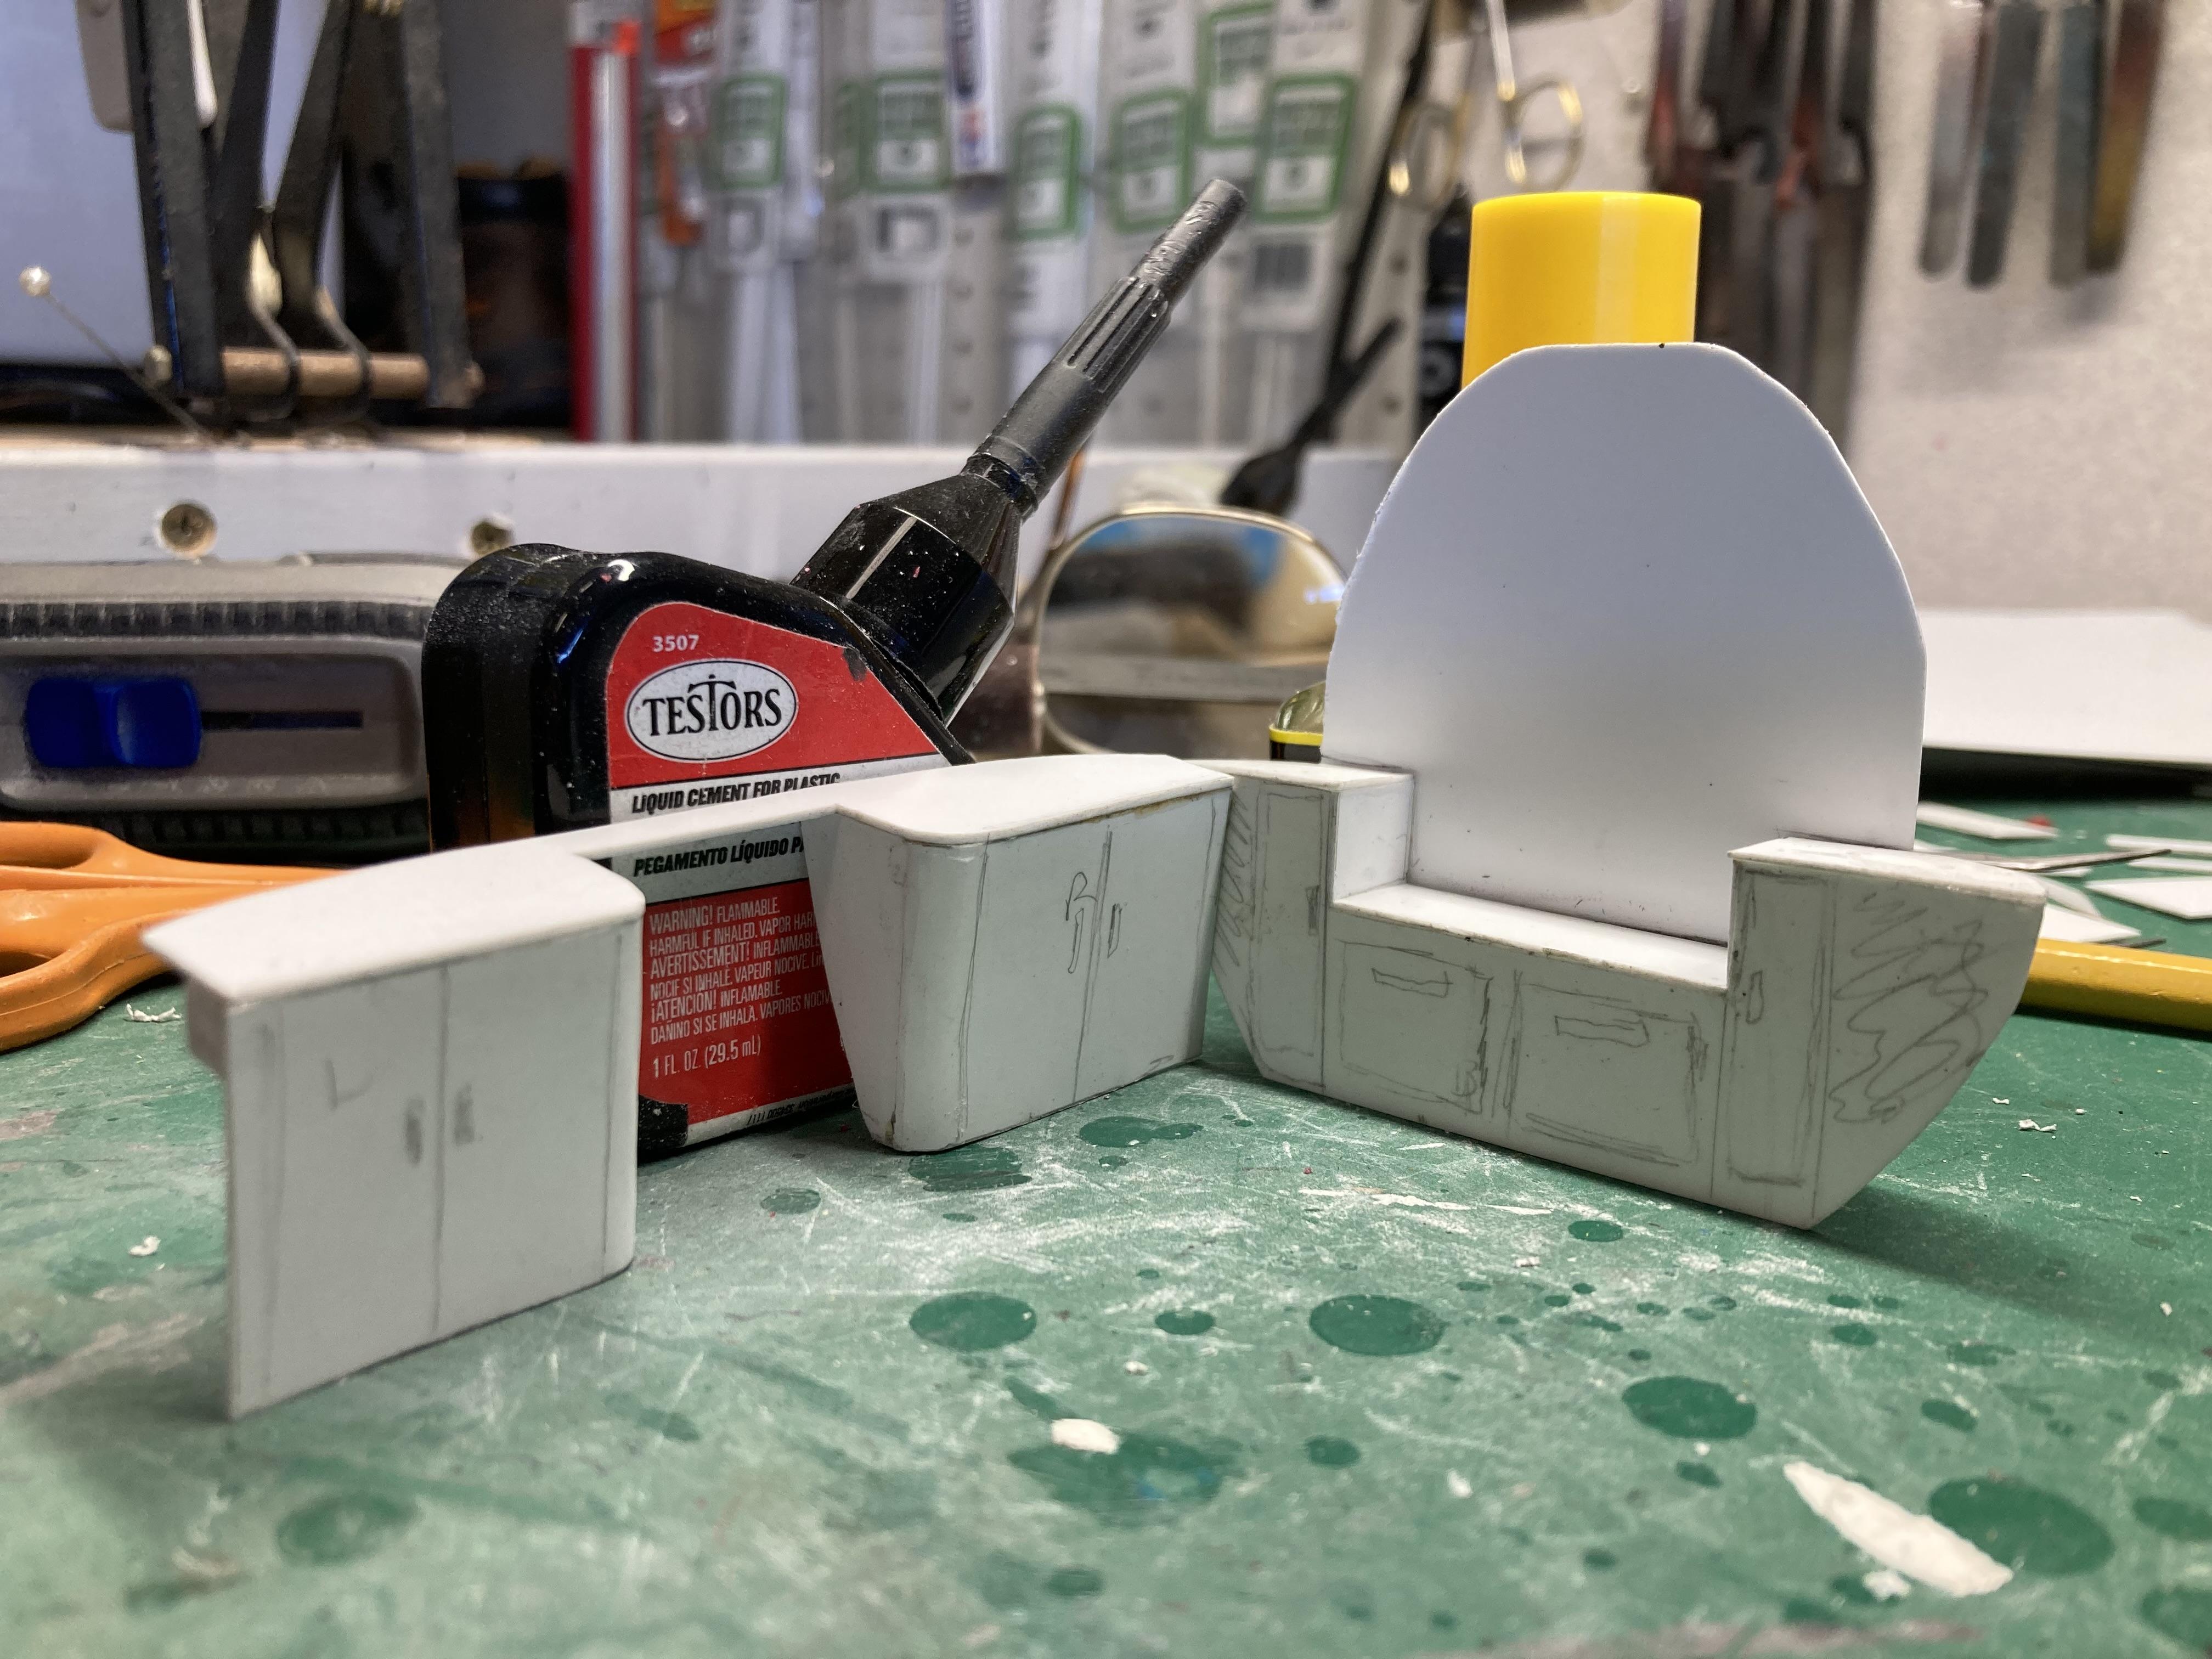
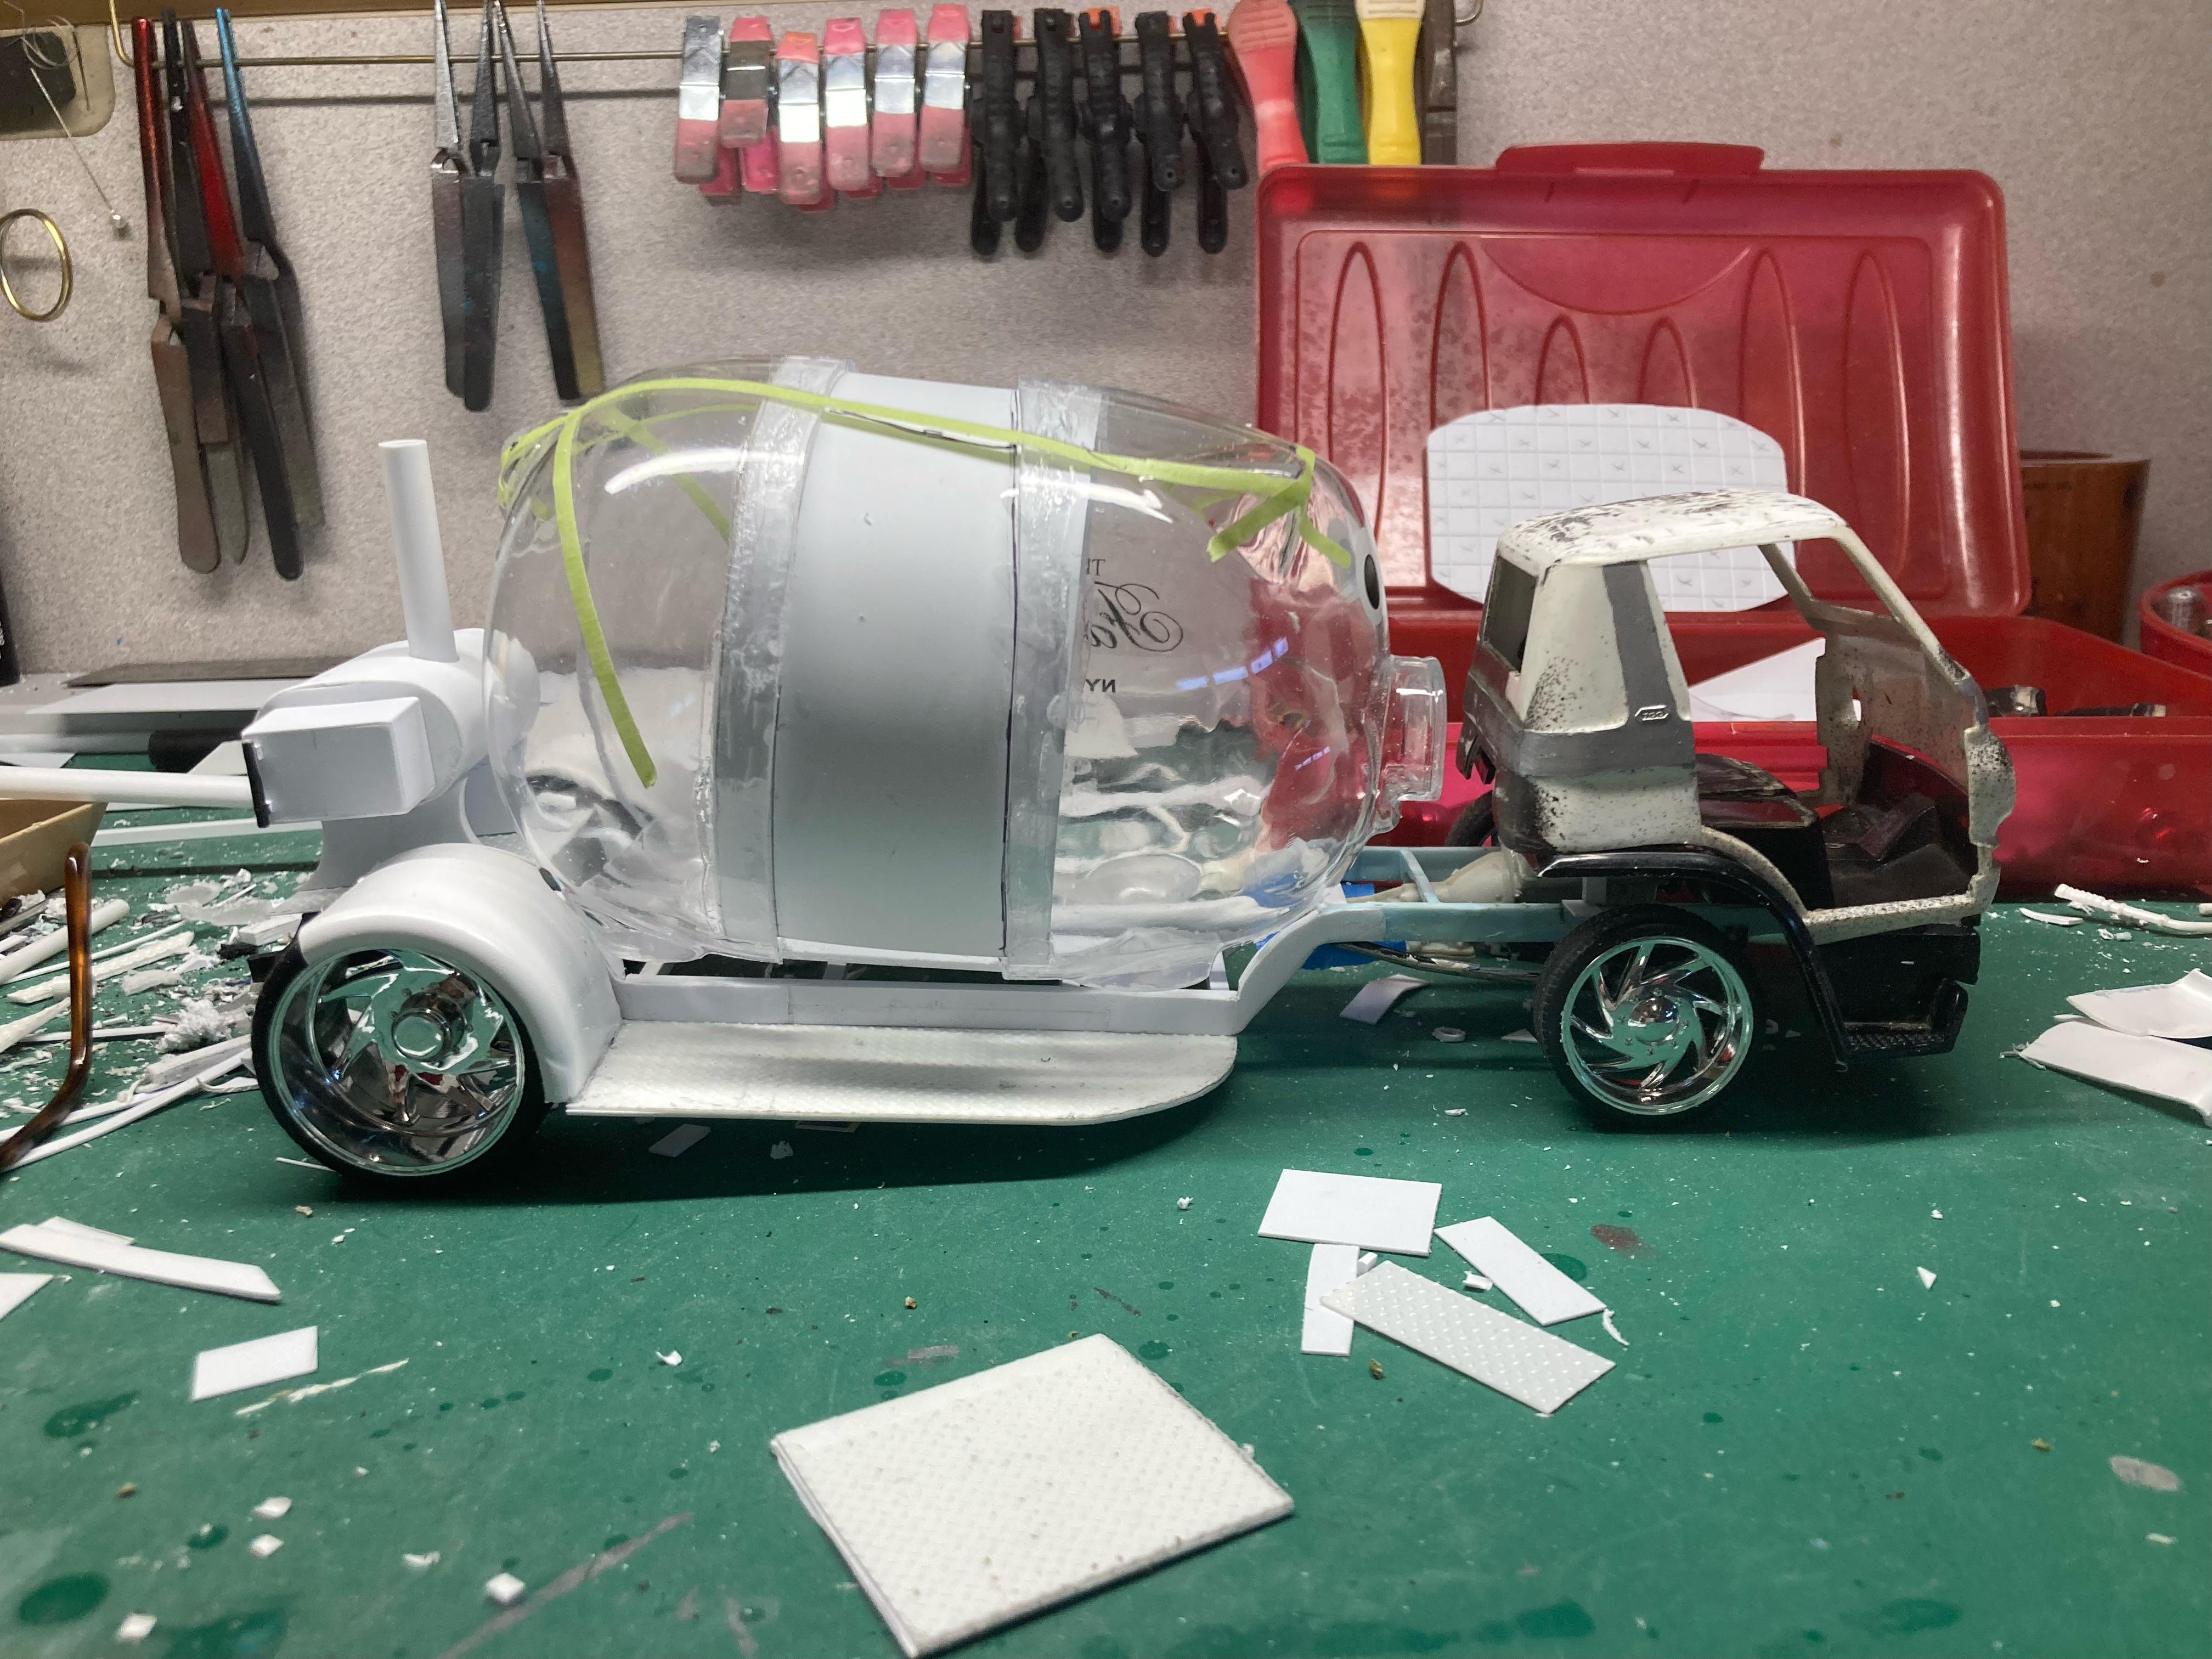
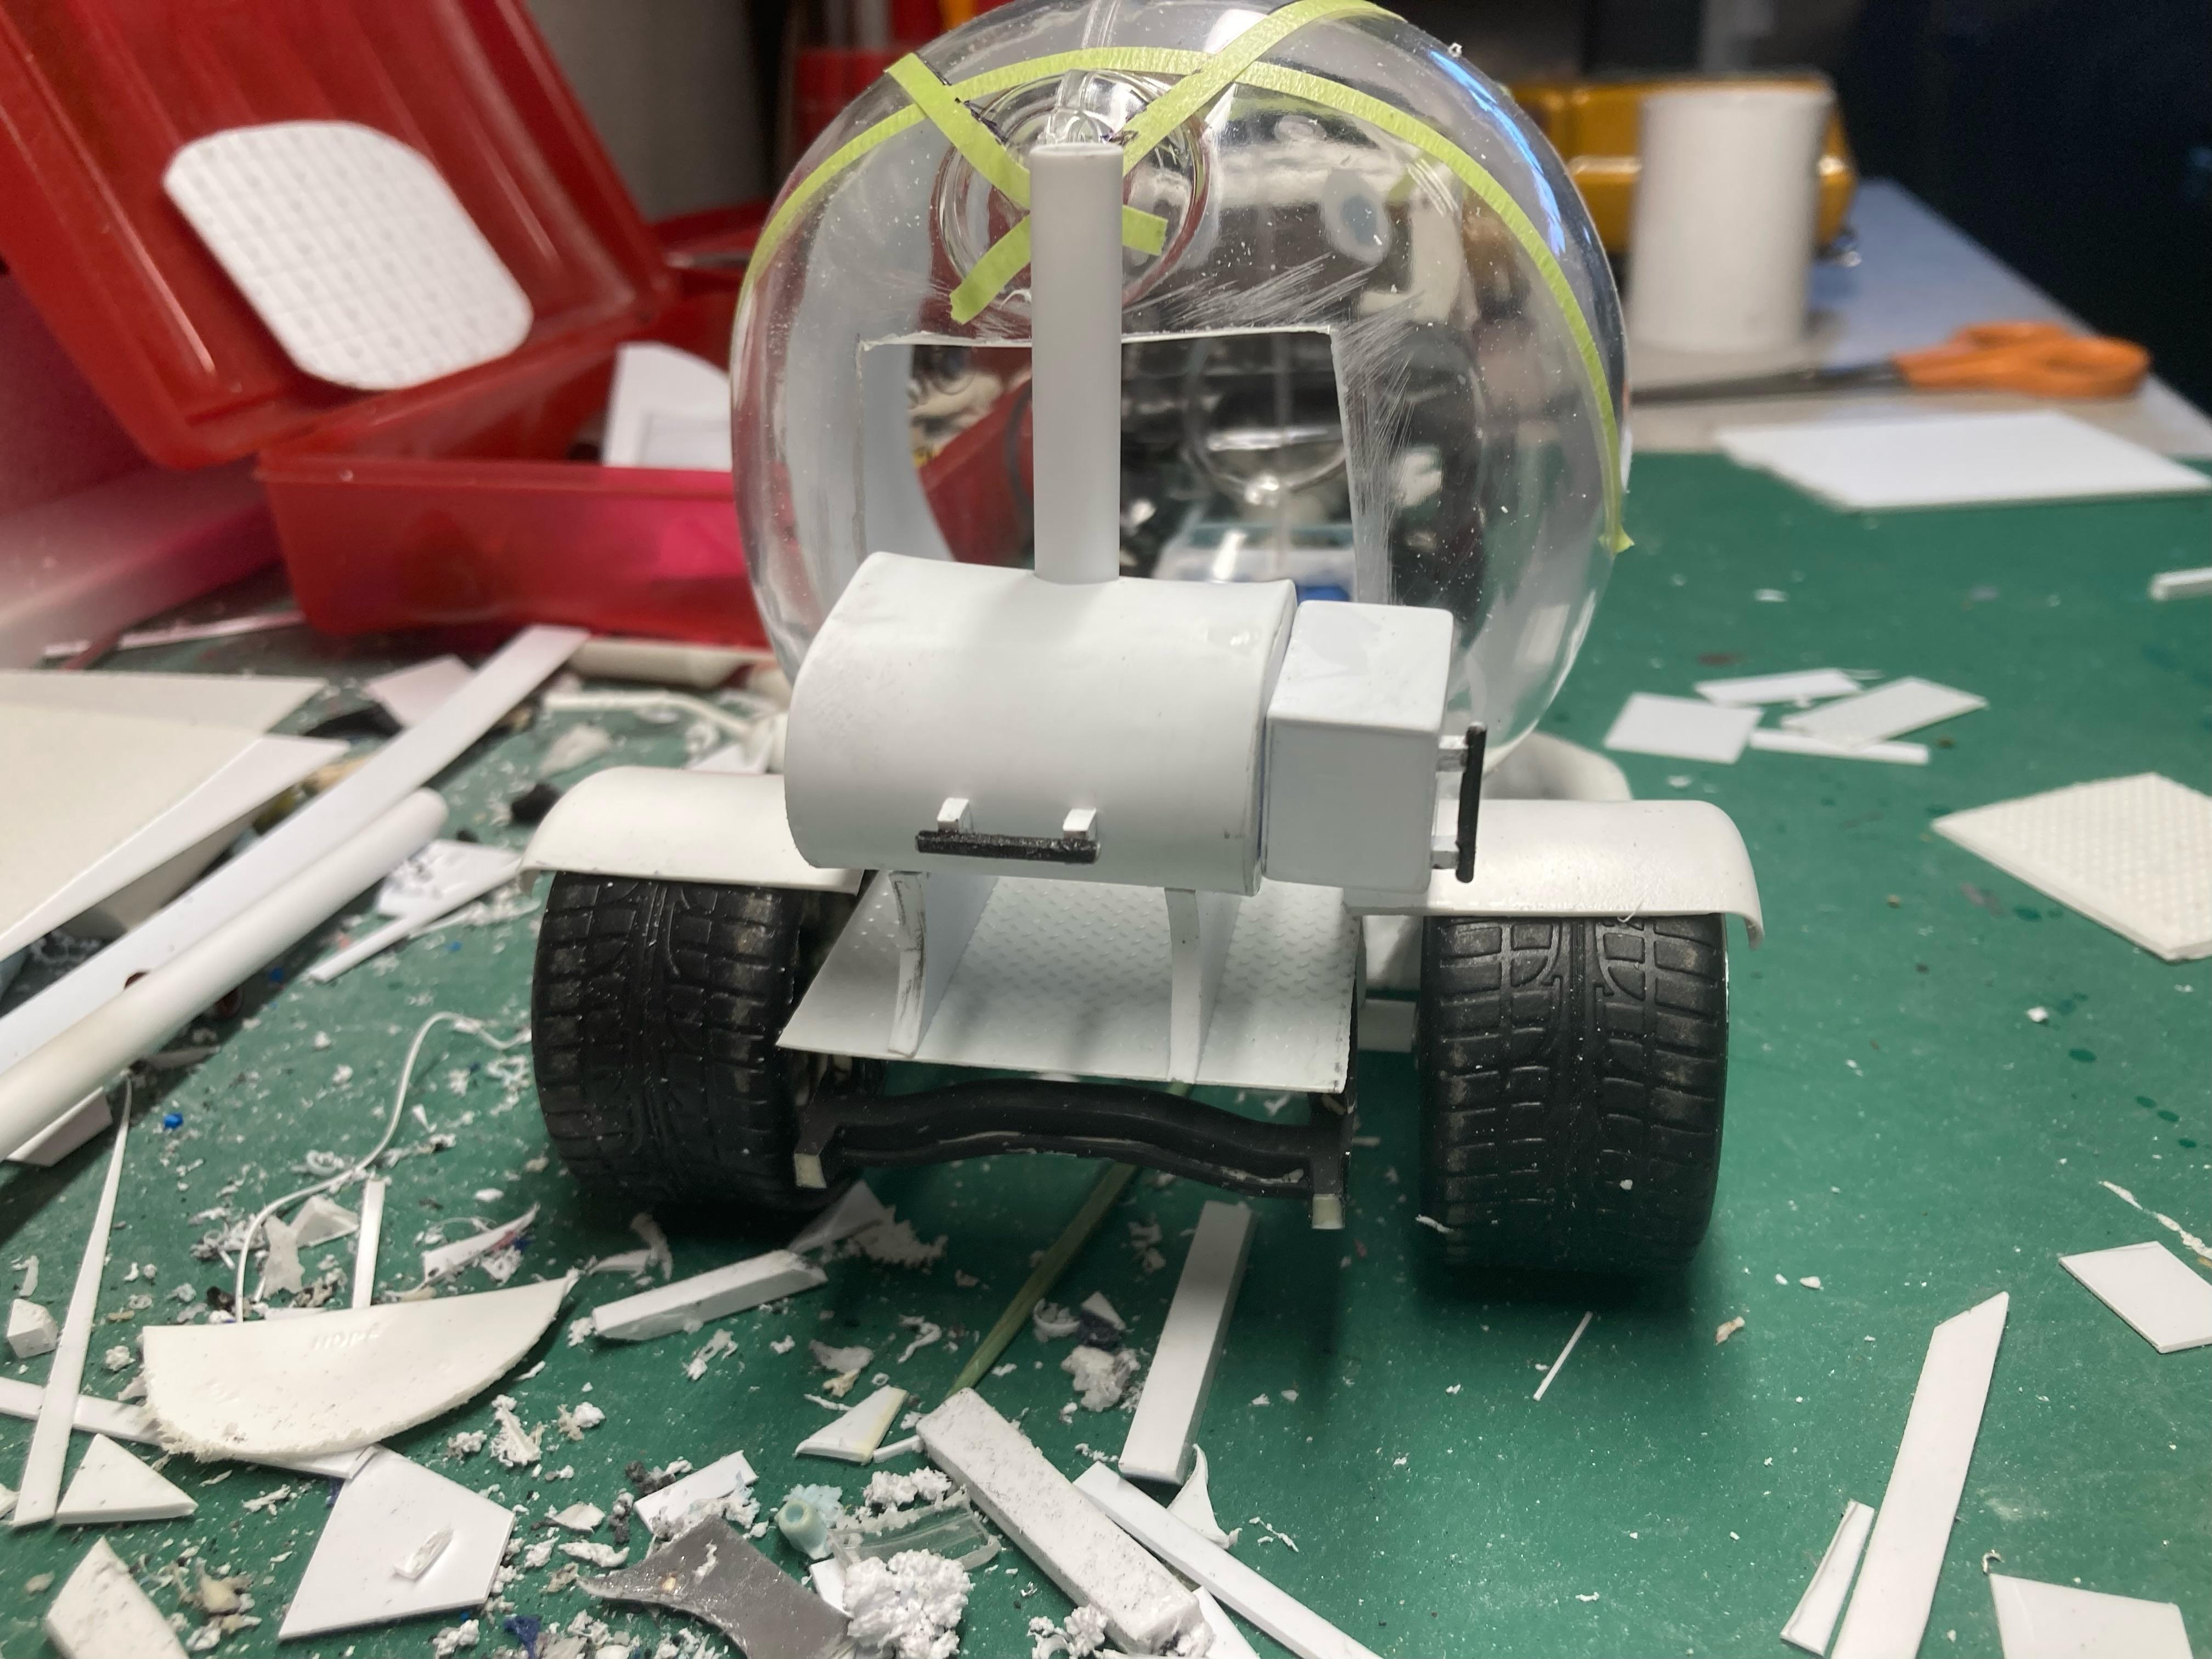
PHEW!!! I finished this build at the 11th hour…finally. I’m not super happy with it but I’m calling it done. Everything that could have gone wrong did go wrong, paint, fitment(ugh)fenders and chassis. This was a very challenging build. Most of the model was built from scratch which really put me thru the test. I have the skills for it but while getting older I find I have less dexterity. My first career was in the trades for about 20 years. From that, besides having arthritis, I have no feeling at the tips of my fingers. This makes holding tiny parts a huge challenge as I have a hard time judging how much pressure to use holding the part so I either drop it many times or break it…frustrating to say the least! Anyway back to the build. I found the piggy bank body in a thrift store and thought that I could somehow create a BBQ truck from it. I cut the pig in half and extended it about an inch. Within that inch width I added the serving window on one side and the door opening on the other side. I dug thru my stash of truck bodies and thought the Dodge 700 cabover would fit the bill. After a few tries at scratch building the chassis incorporating premade chassis parts that just didn’t work I decided to make one completely from scratch. I needed rear fenders but had nothing in my stash that worked with the rear tires and wheels. I found an aspirin 81 plastic bottle that was the correct diameter and cut it up. Gluing it to the chassis was a nightmare as there seemed to be no glue that would stick to it. I don’t know what kind of plastic is used for these but it seems to be resistant to glue. I finally used quite a bit of gorilla glue and clamped it for a week and that seemed to hold. I tried to get the doors on the cab to fit and open but I haven’t had a lot of experience in door hinges so I am not real happy with them as they don’t work too well. Next time I will cut the hinges from a soda can and bend them instead of using plastic. The fuel tanks are made from copper pipes and scale beer keg ends. The engine is an old hemi with the radiator behind it. I used the grill from the Lincoln Futura as it looked like a good fit, and added an old modified front bumper. The rear bumper is something else I modified. Inside the cab I used two seats from some toy I got at a thrift store. I also added the beer stein shifter from the beer wagon. Home made signage and another beer stein for the tap on the side. The tires and wheels were from another toy I got at the thrift store. The kitchen was also an interesting challenge. It is all made from sheet plastic. The hard part was making it to fit inside a multi curved interior surface. Paint colors are always an issue with me as I can’t get the colors correct. I ended up using Testors Lacquer Electric Pink sprayed over flat black and a clear matte over that. I logged almost all of the build time and it came to 35 hours. This does not include all the time I spent thinking about how to design the pieces and looking for parts. Onto the next build! I hope you like it and thanks for looking! Dave
- 23 replies
-
- 14
-

-
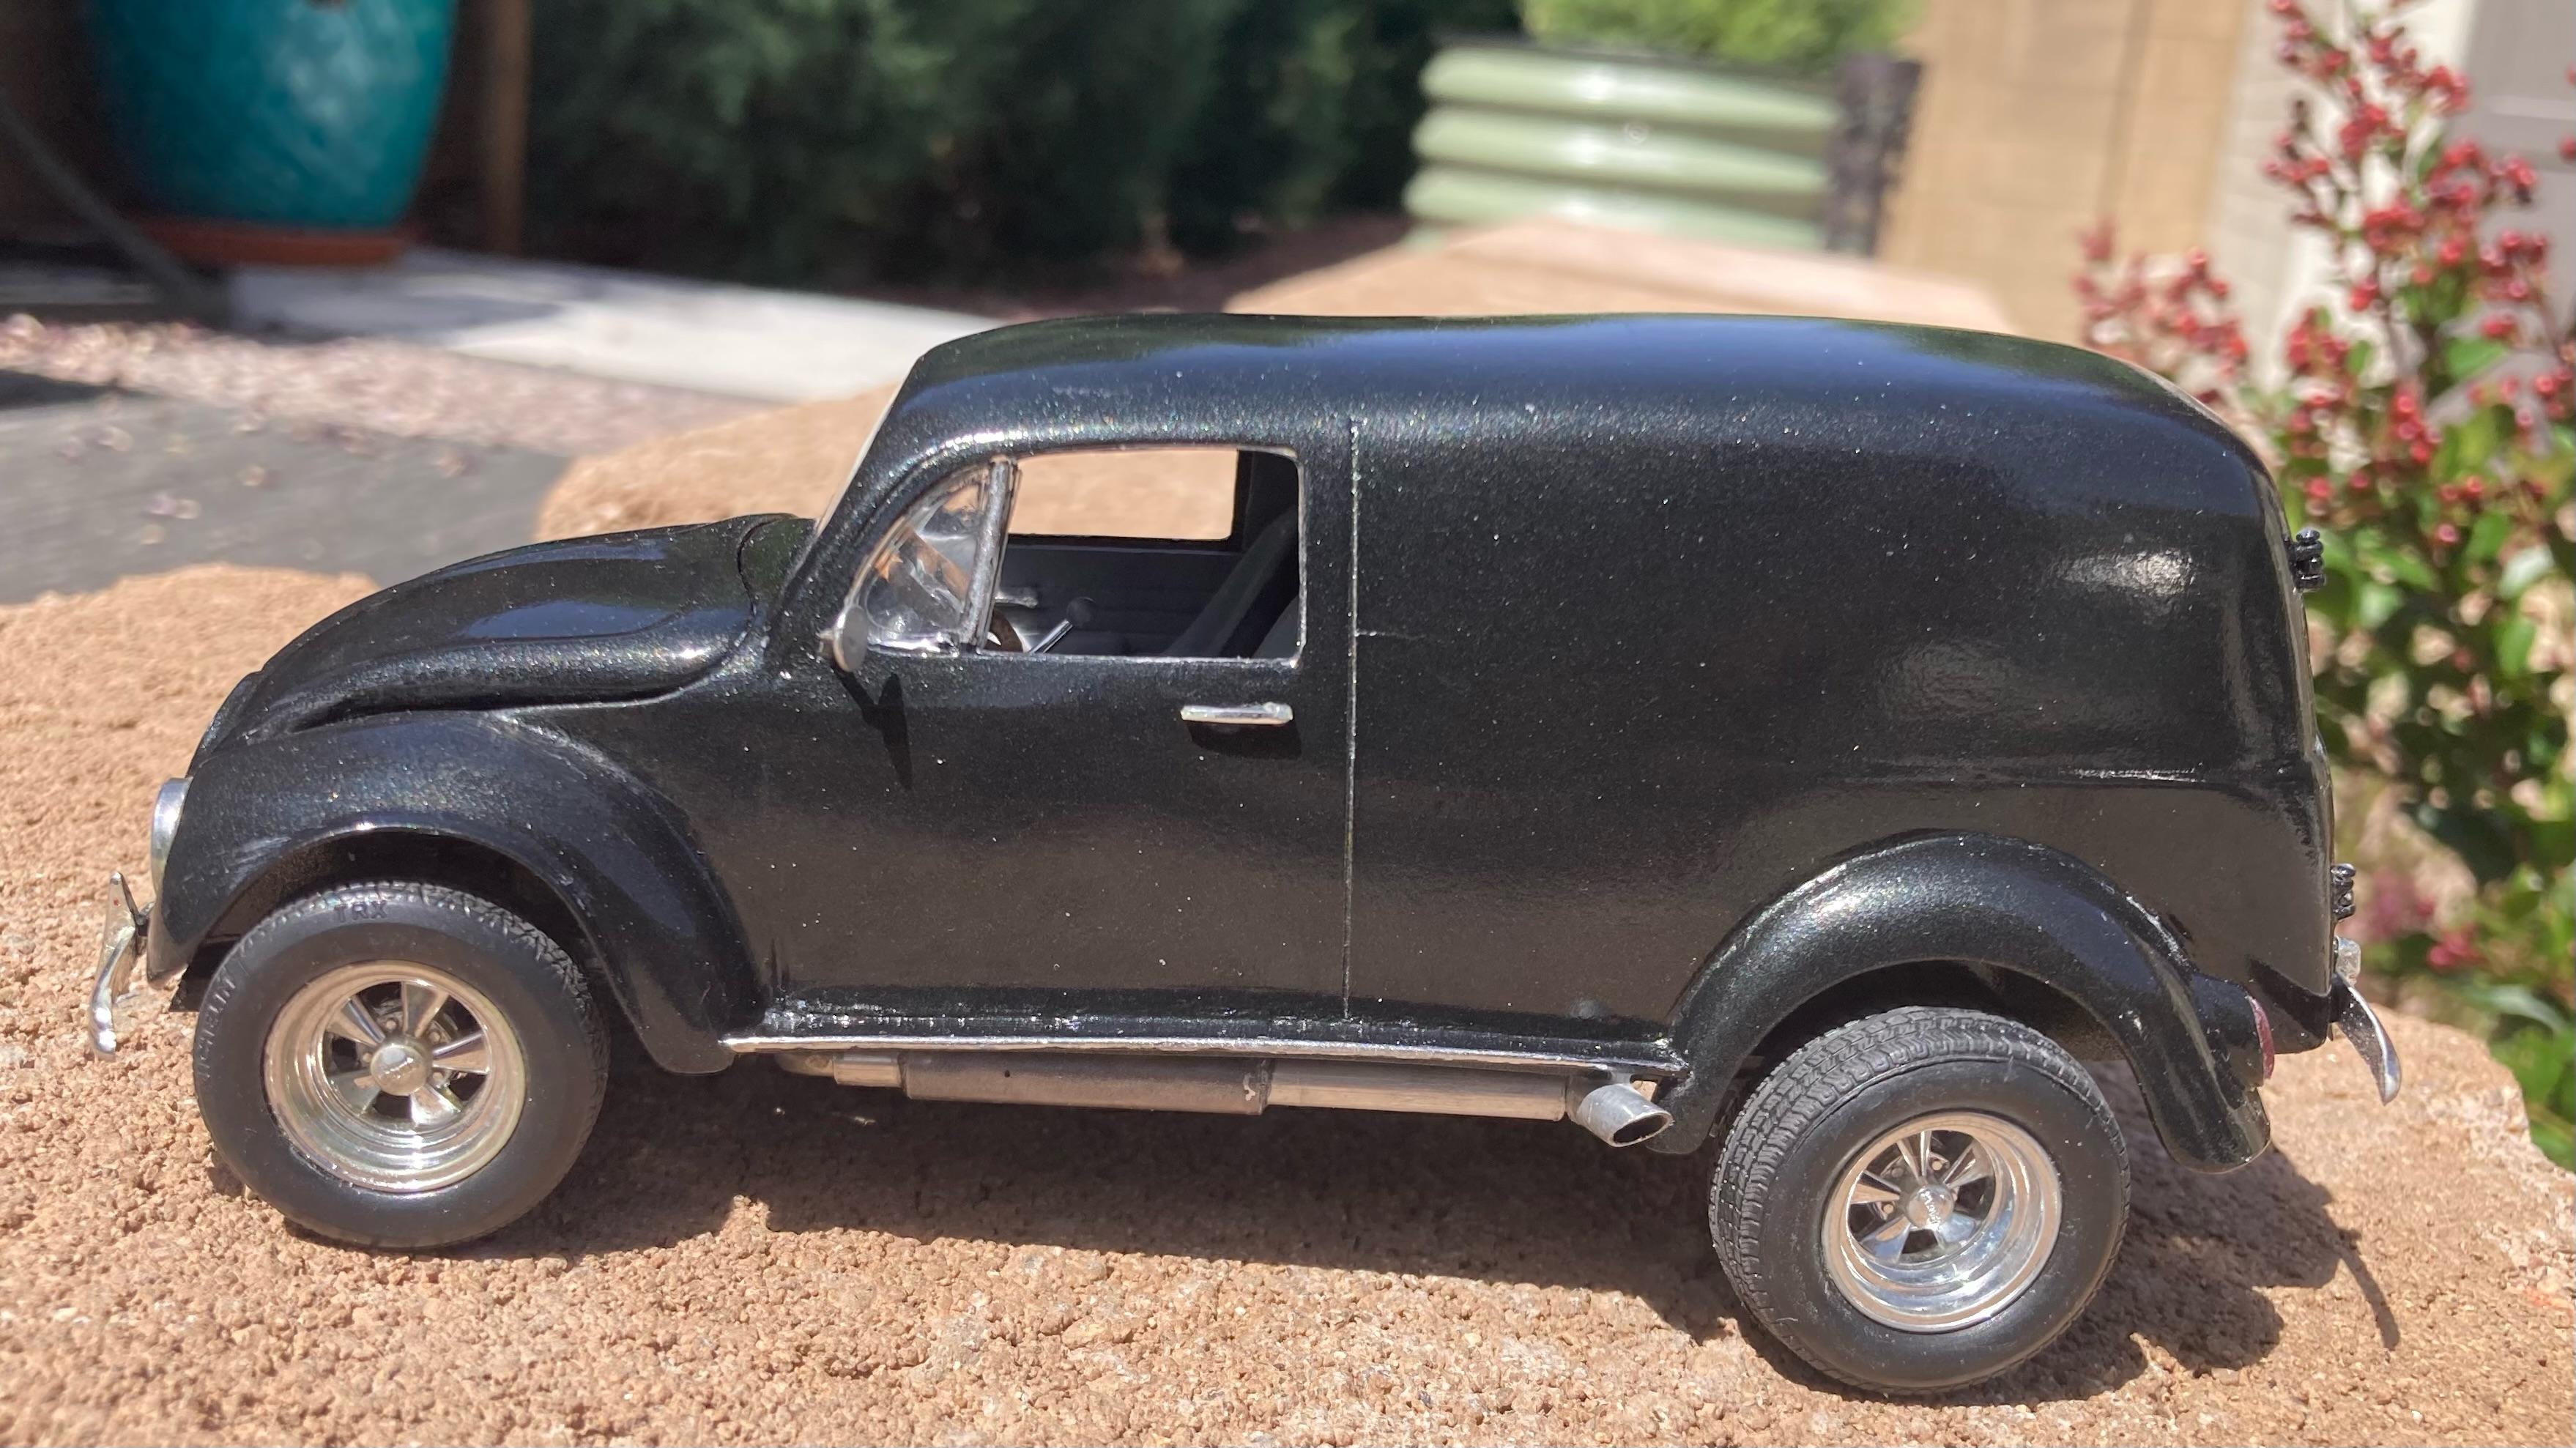
Nice monster truck! When was the last time someone saw a Chevy Luv on the road! Dave
-
Both are very nice! I love all the pick up truck releases! Dave
-
Nice job on the wrecker! Dave
-
Very nice! Love the Dragula! Dave
-
Amt 60 Ford Pickup
Nosferatu replied to tabsscale1's topic in WIP: Model Trucks: Pickups, Vans, SUVs, Light Commercial
Nice color! I recently bought one of these and am looking for an excuse to move it to the top of the list. Dave -
I got this at Hobby Lobby with a 40% discount. You get a lot of bang for your buck as there is a trailer included.
- 39,060 replies
-
- 3
-
-
- johan
- glue bombs
- (and 1 more)
-
The Pig Rig
Nosferatu replied to Nosferatu's topic in WIP: Model Trucks: Pickups, Vans, SUVs, Light Commercial
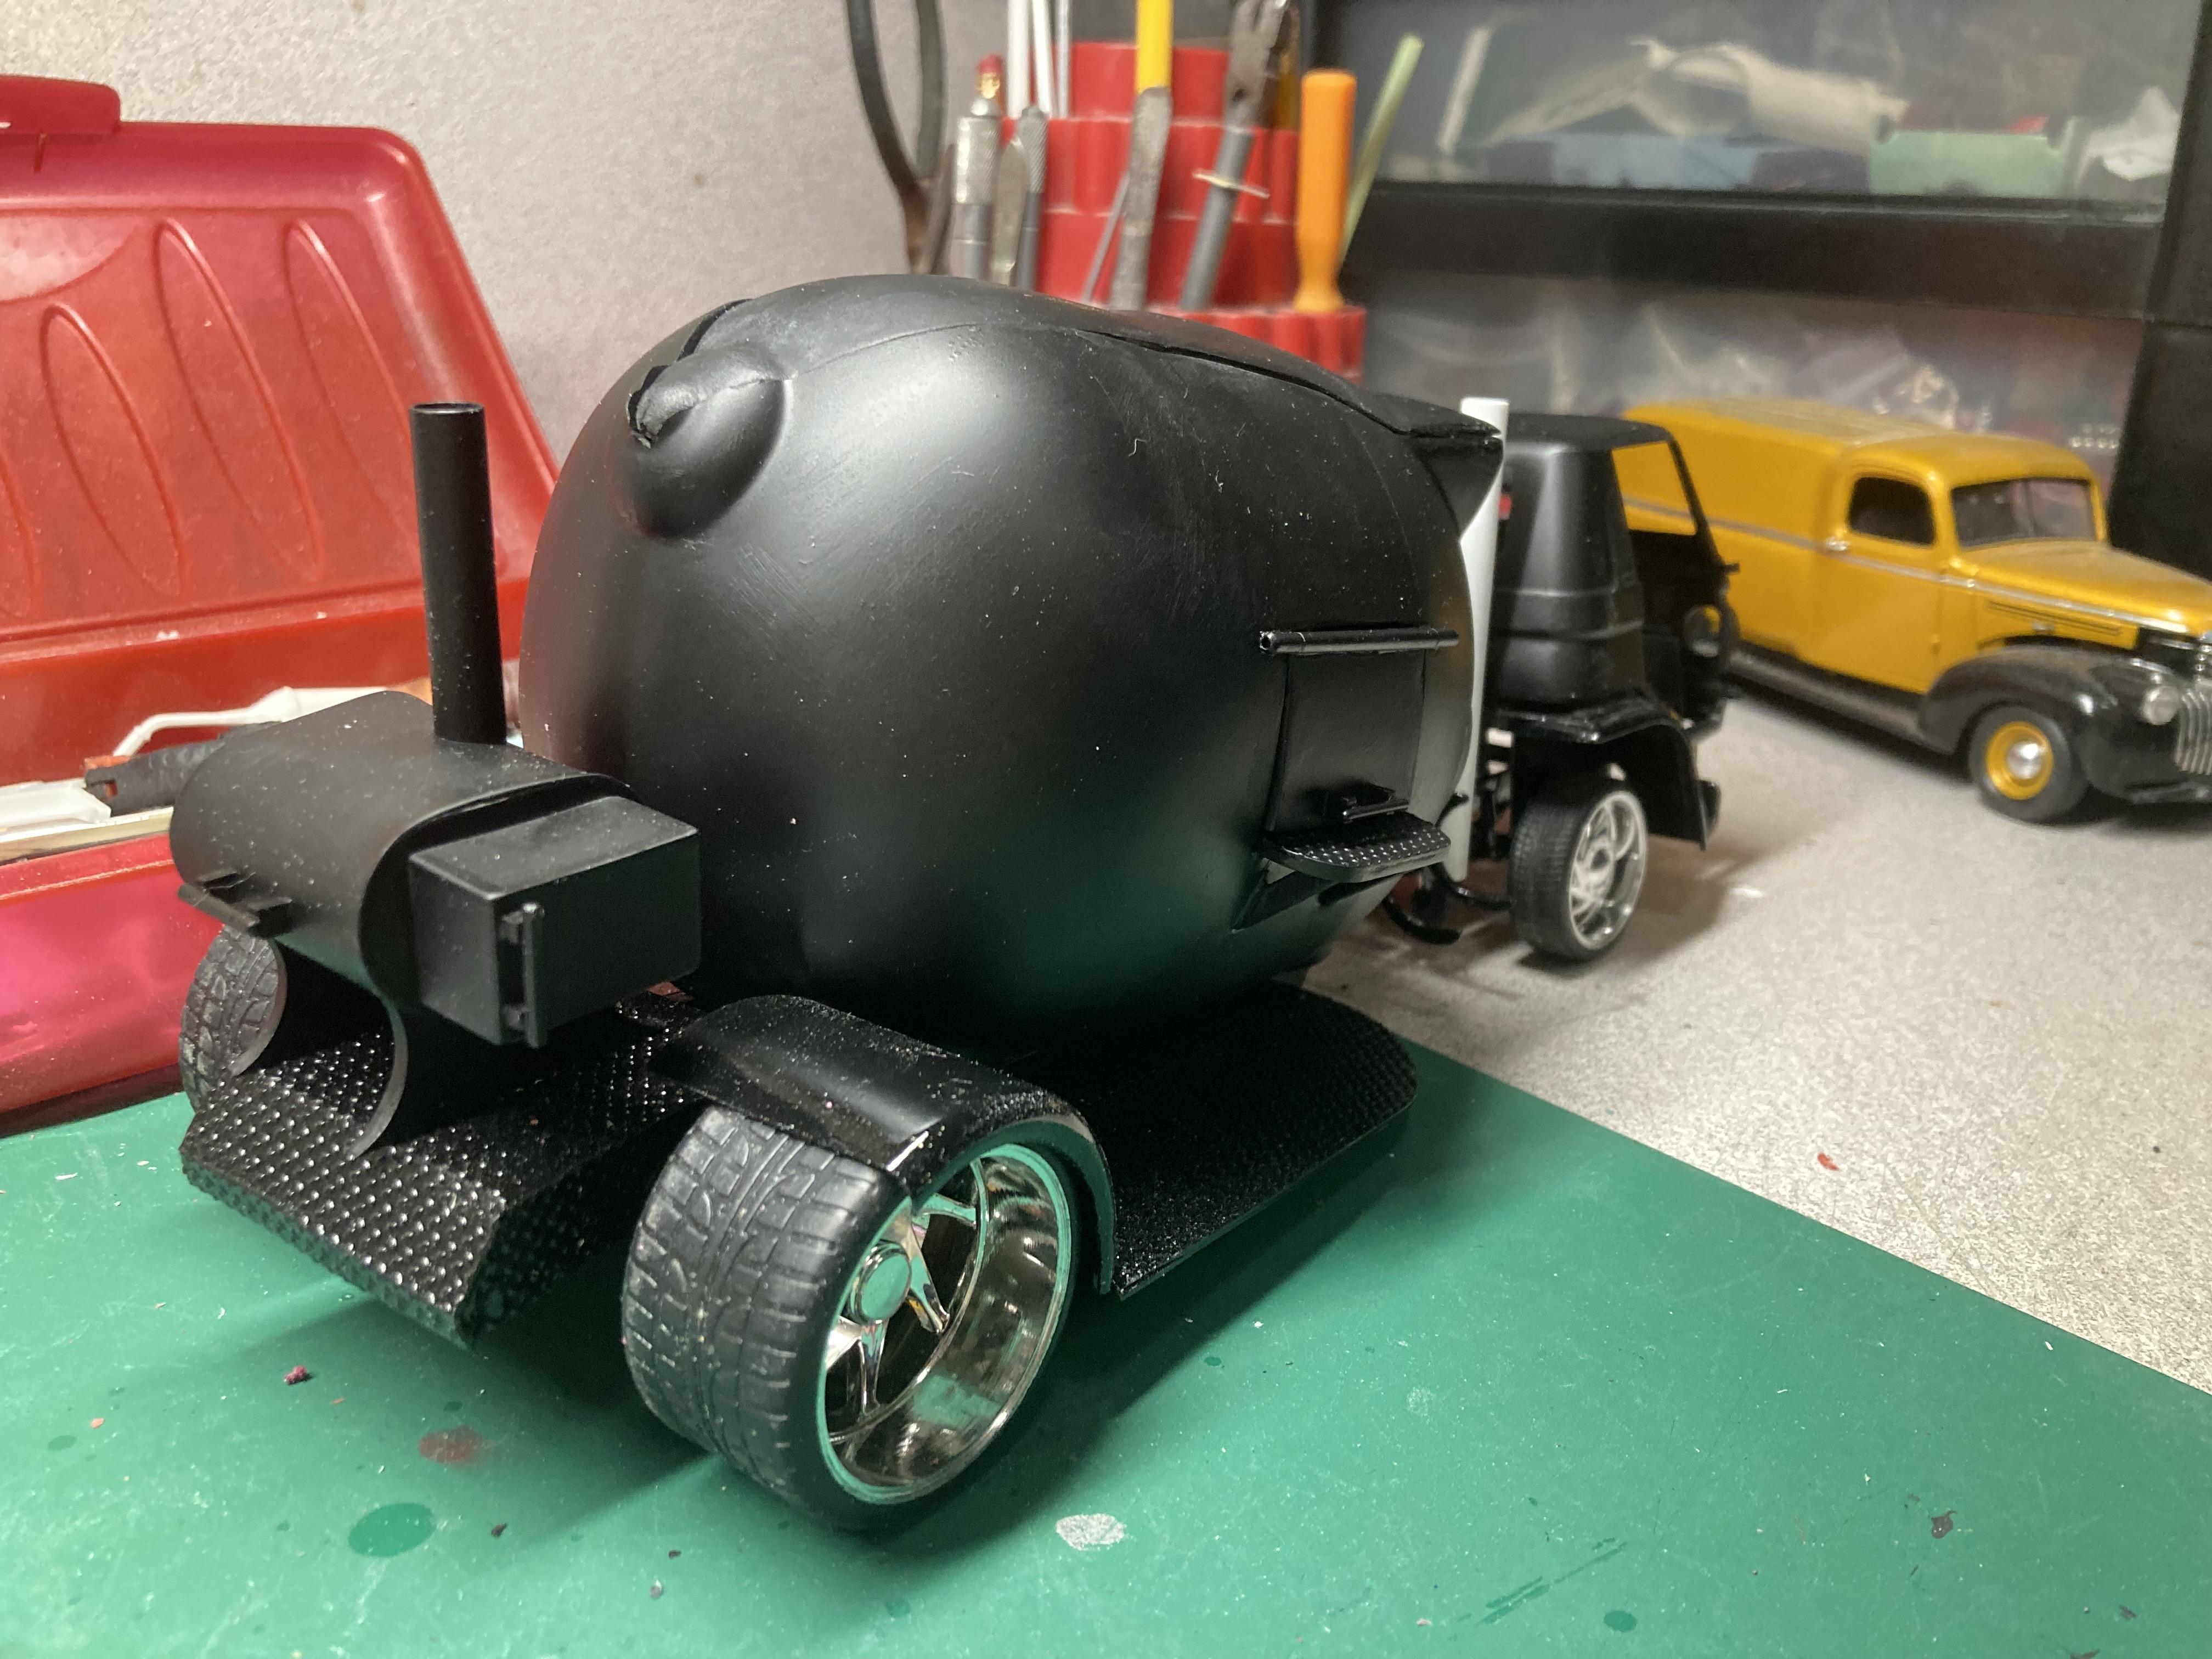
Also this. The pig will need some adjusting on the chassis.
-
The Pig Rig
Nosferatu replied to Nosferatu's topic in WIP: Model Trucks: Pickups, Vans, SUVs, Light Commercial
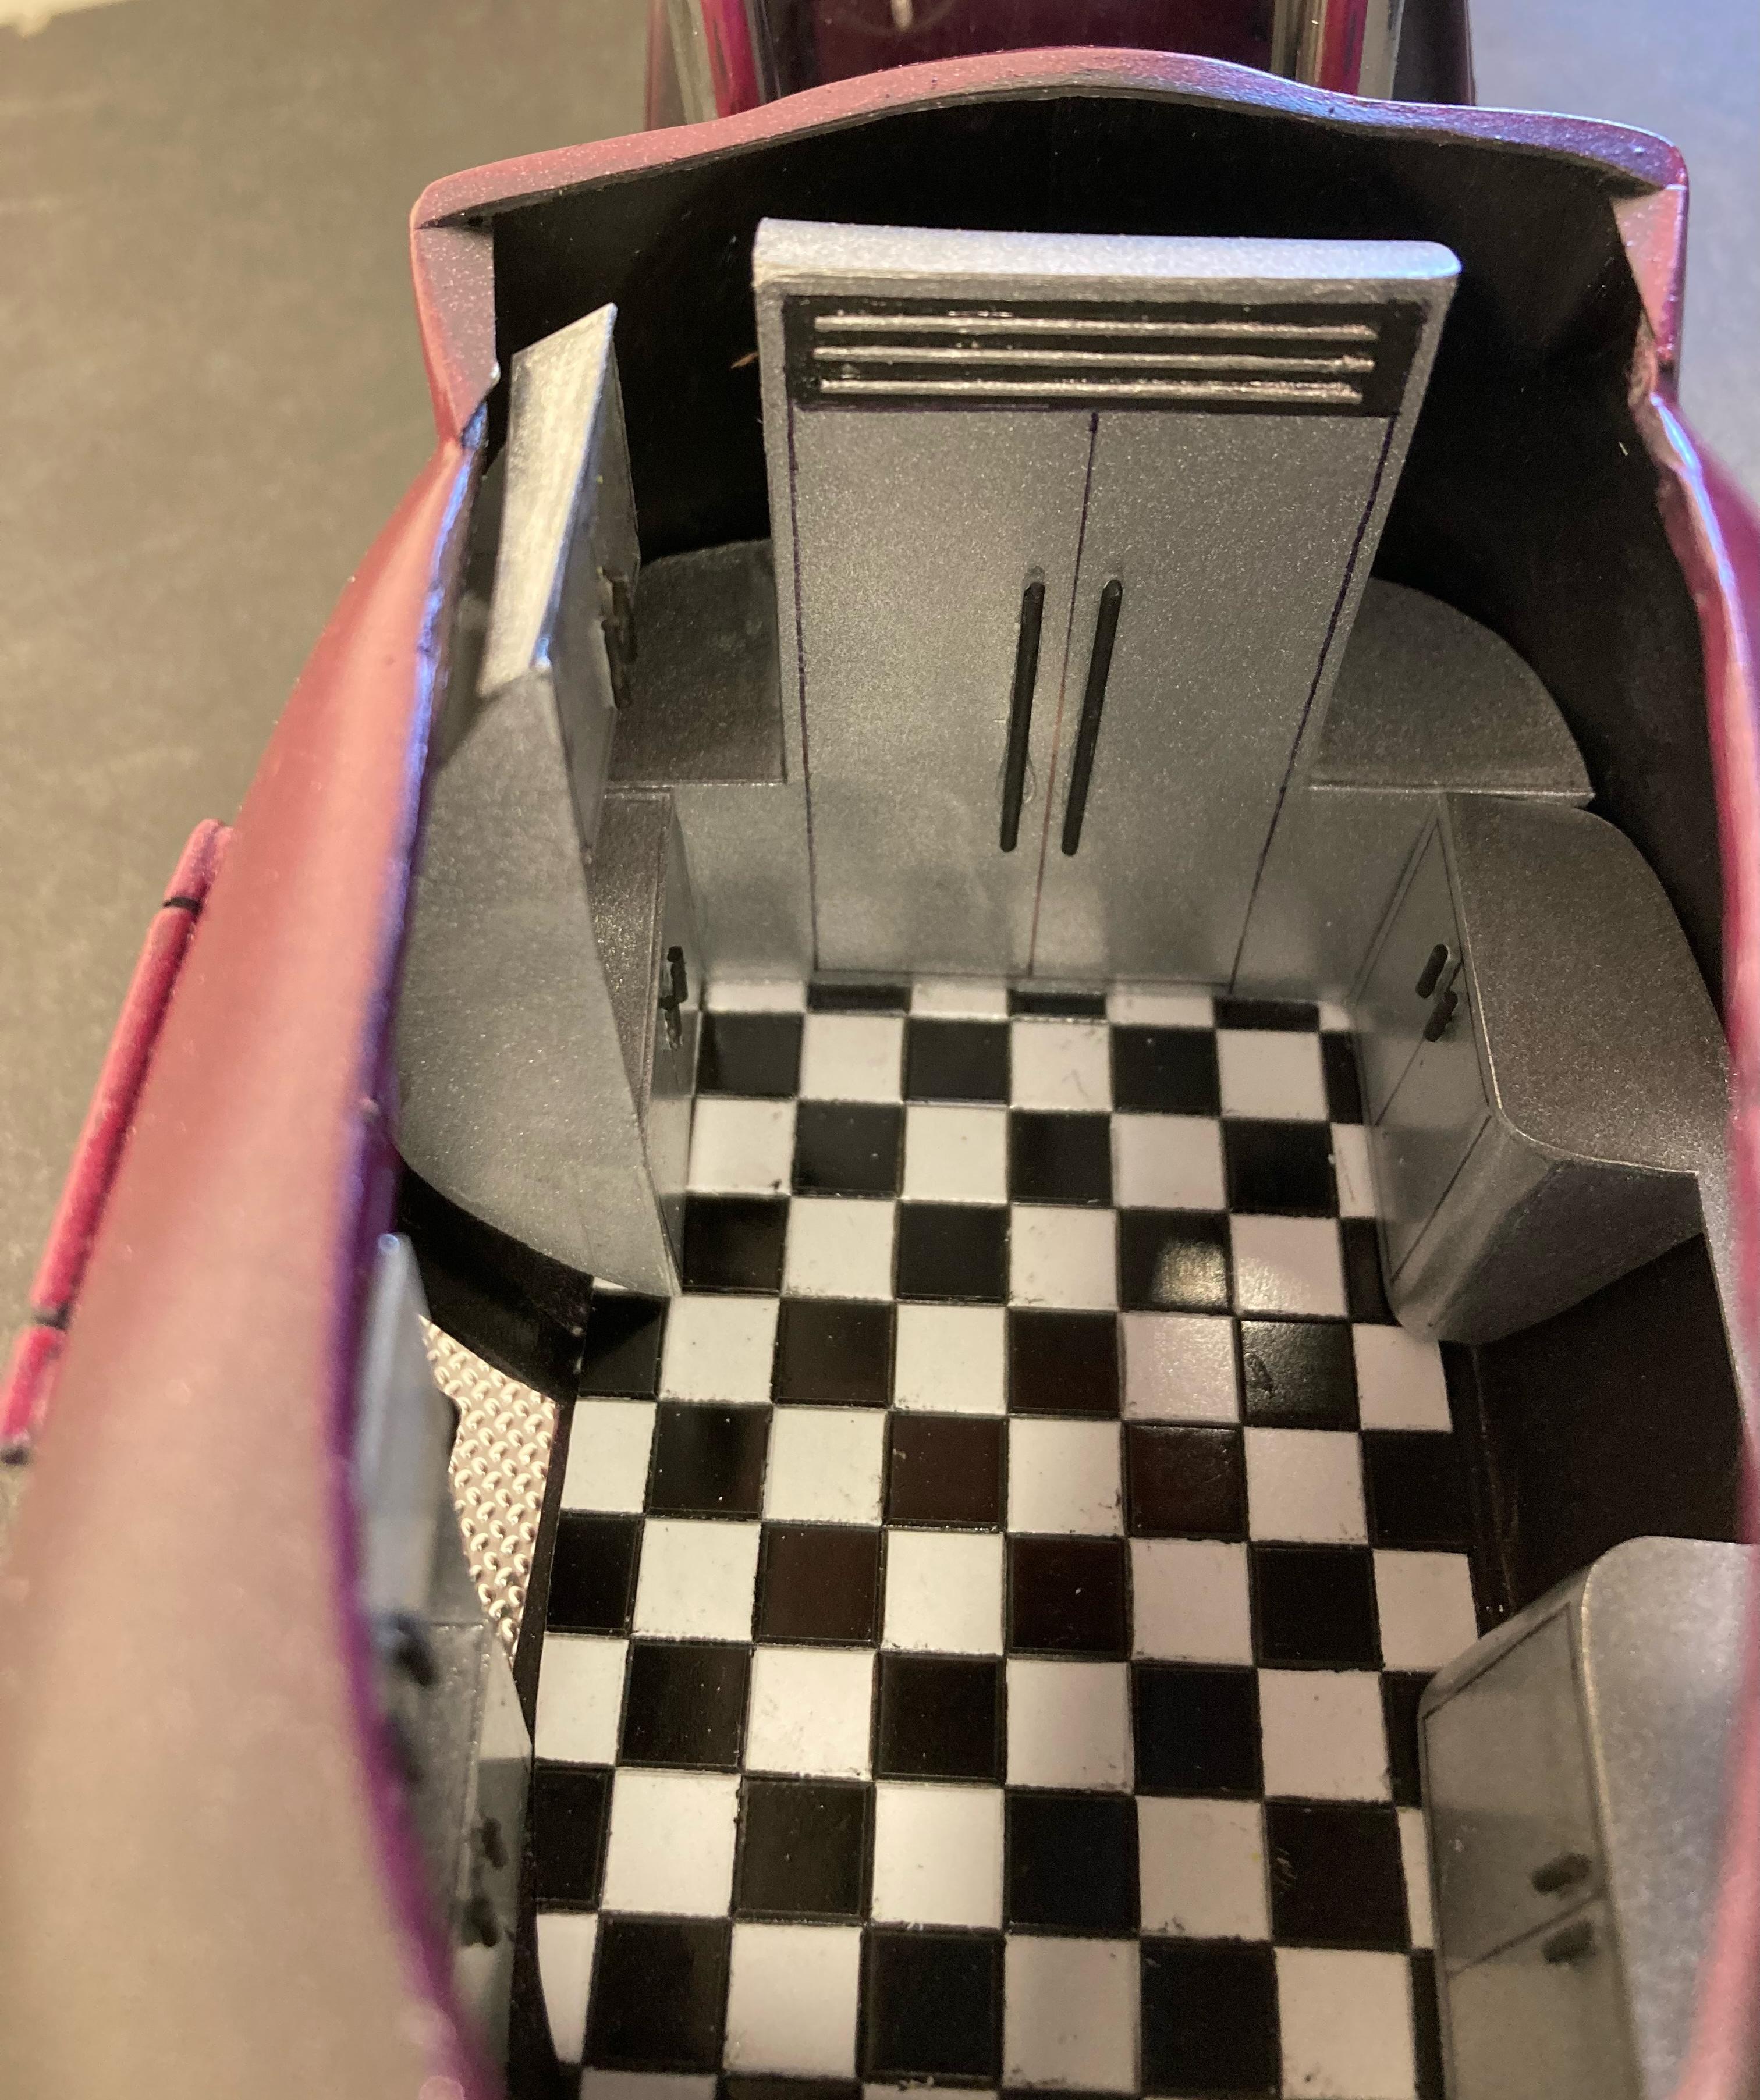
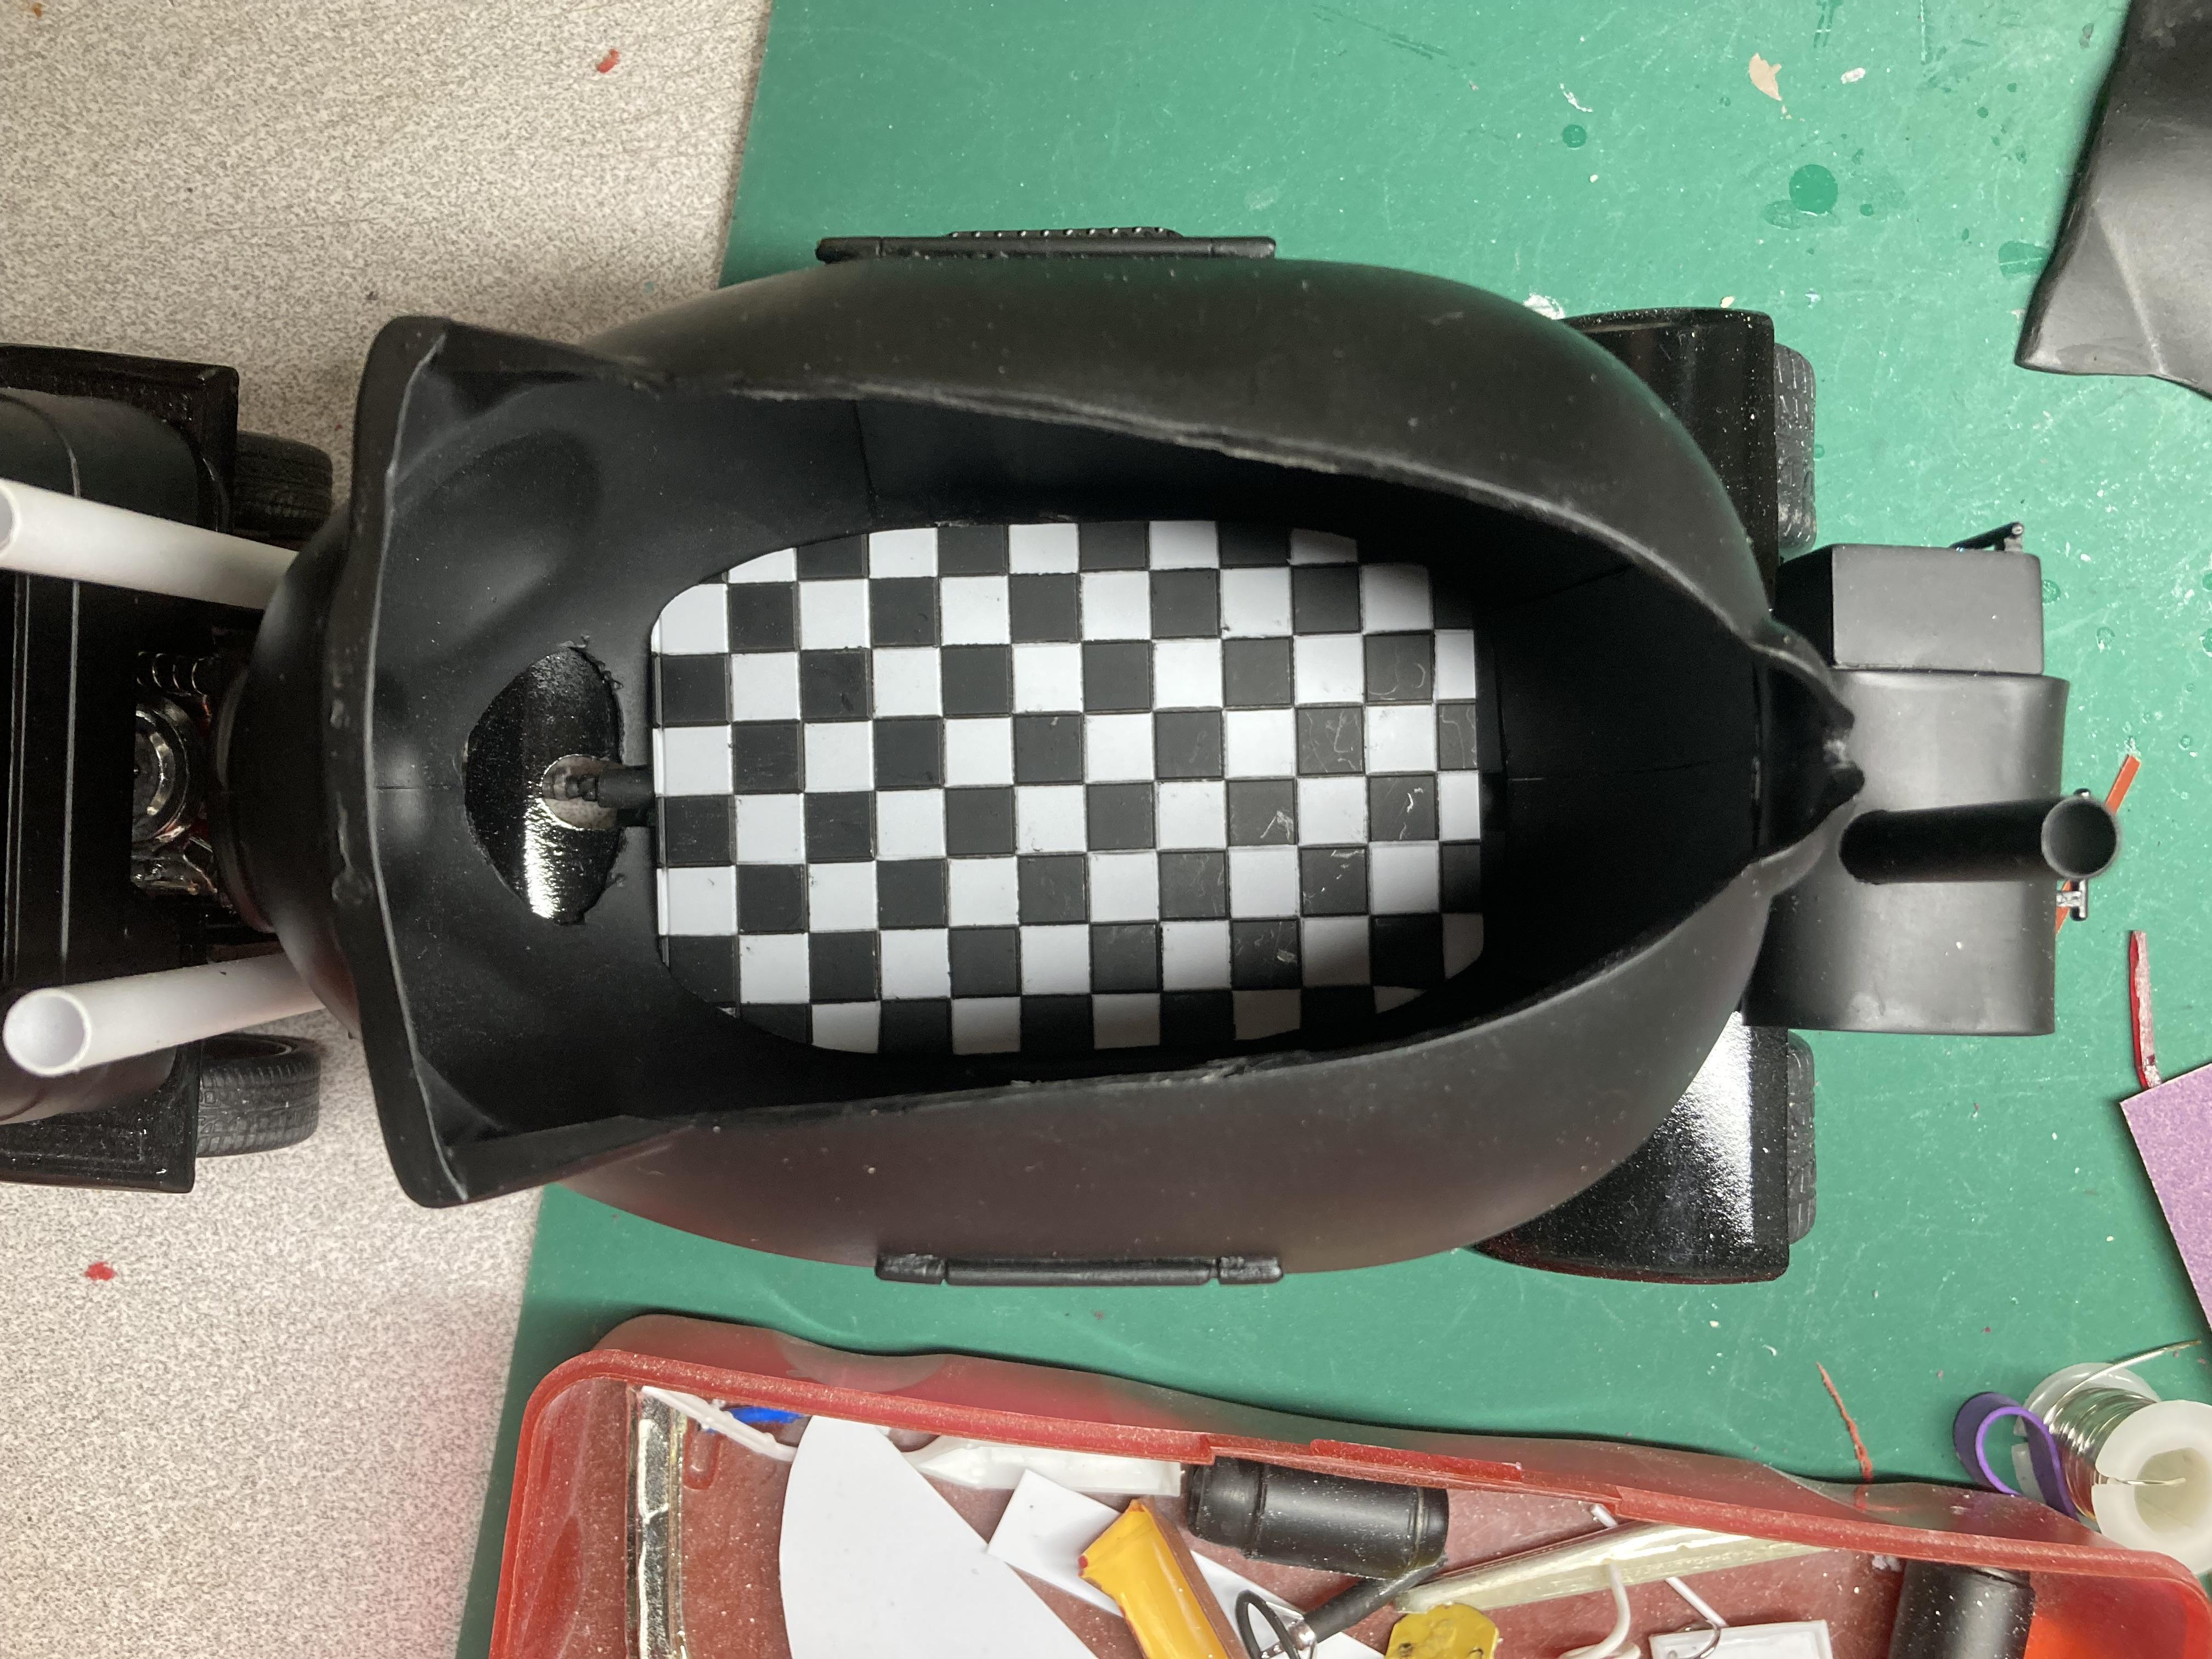
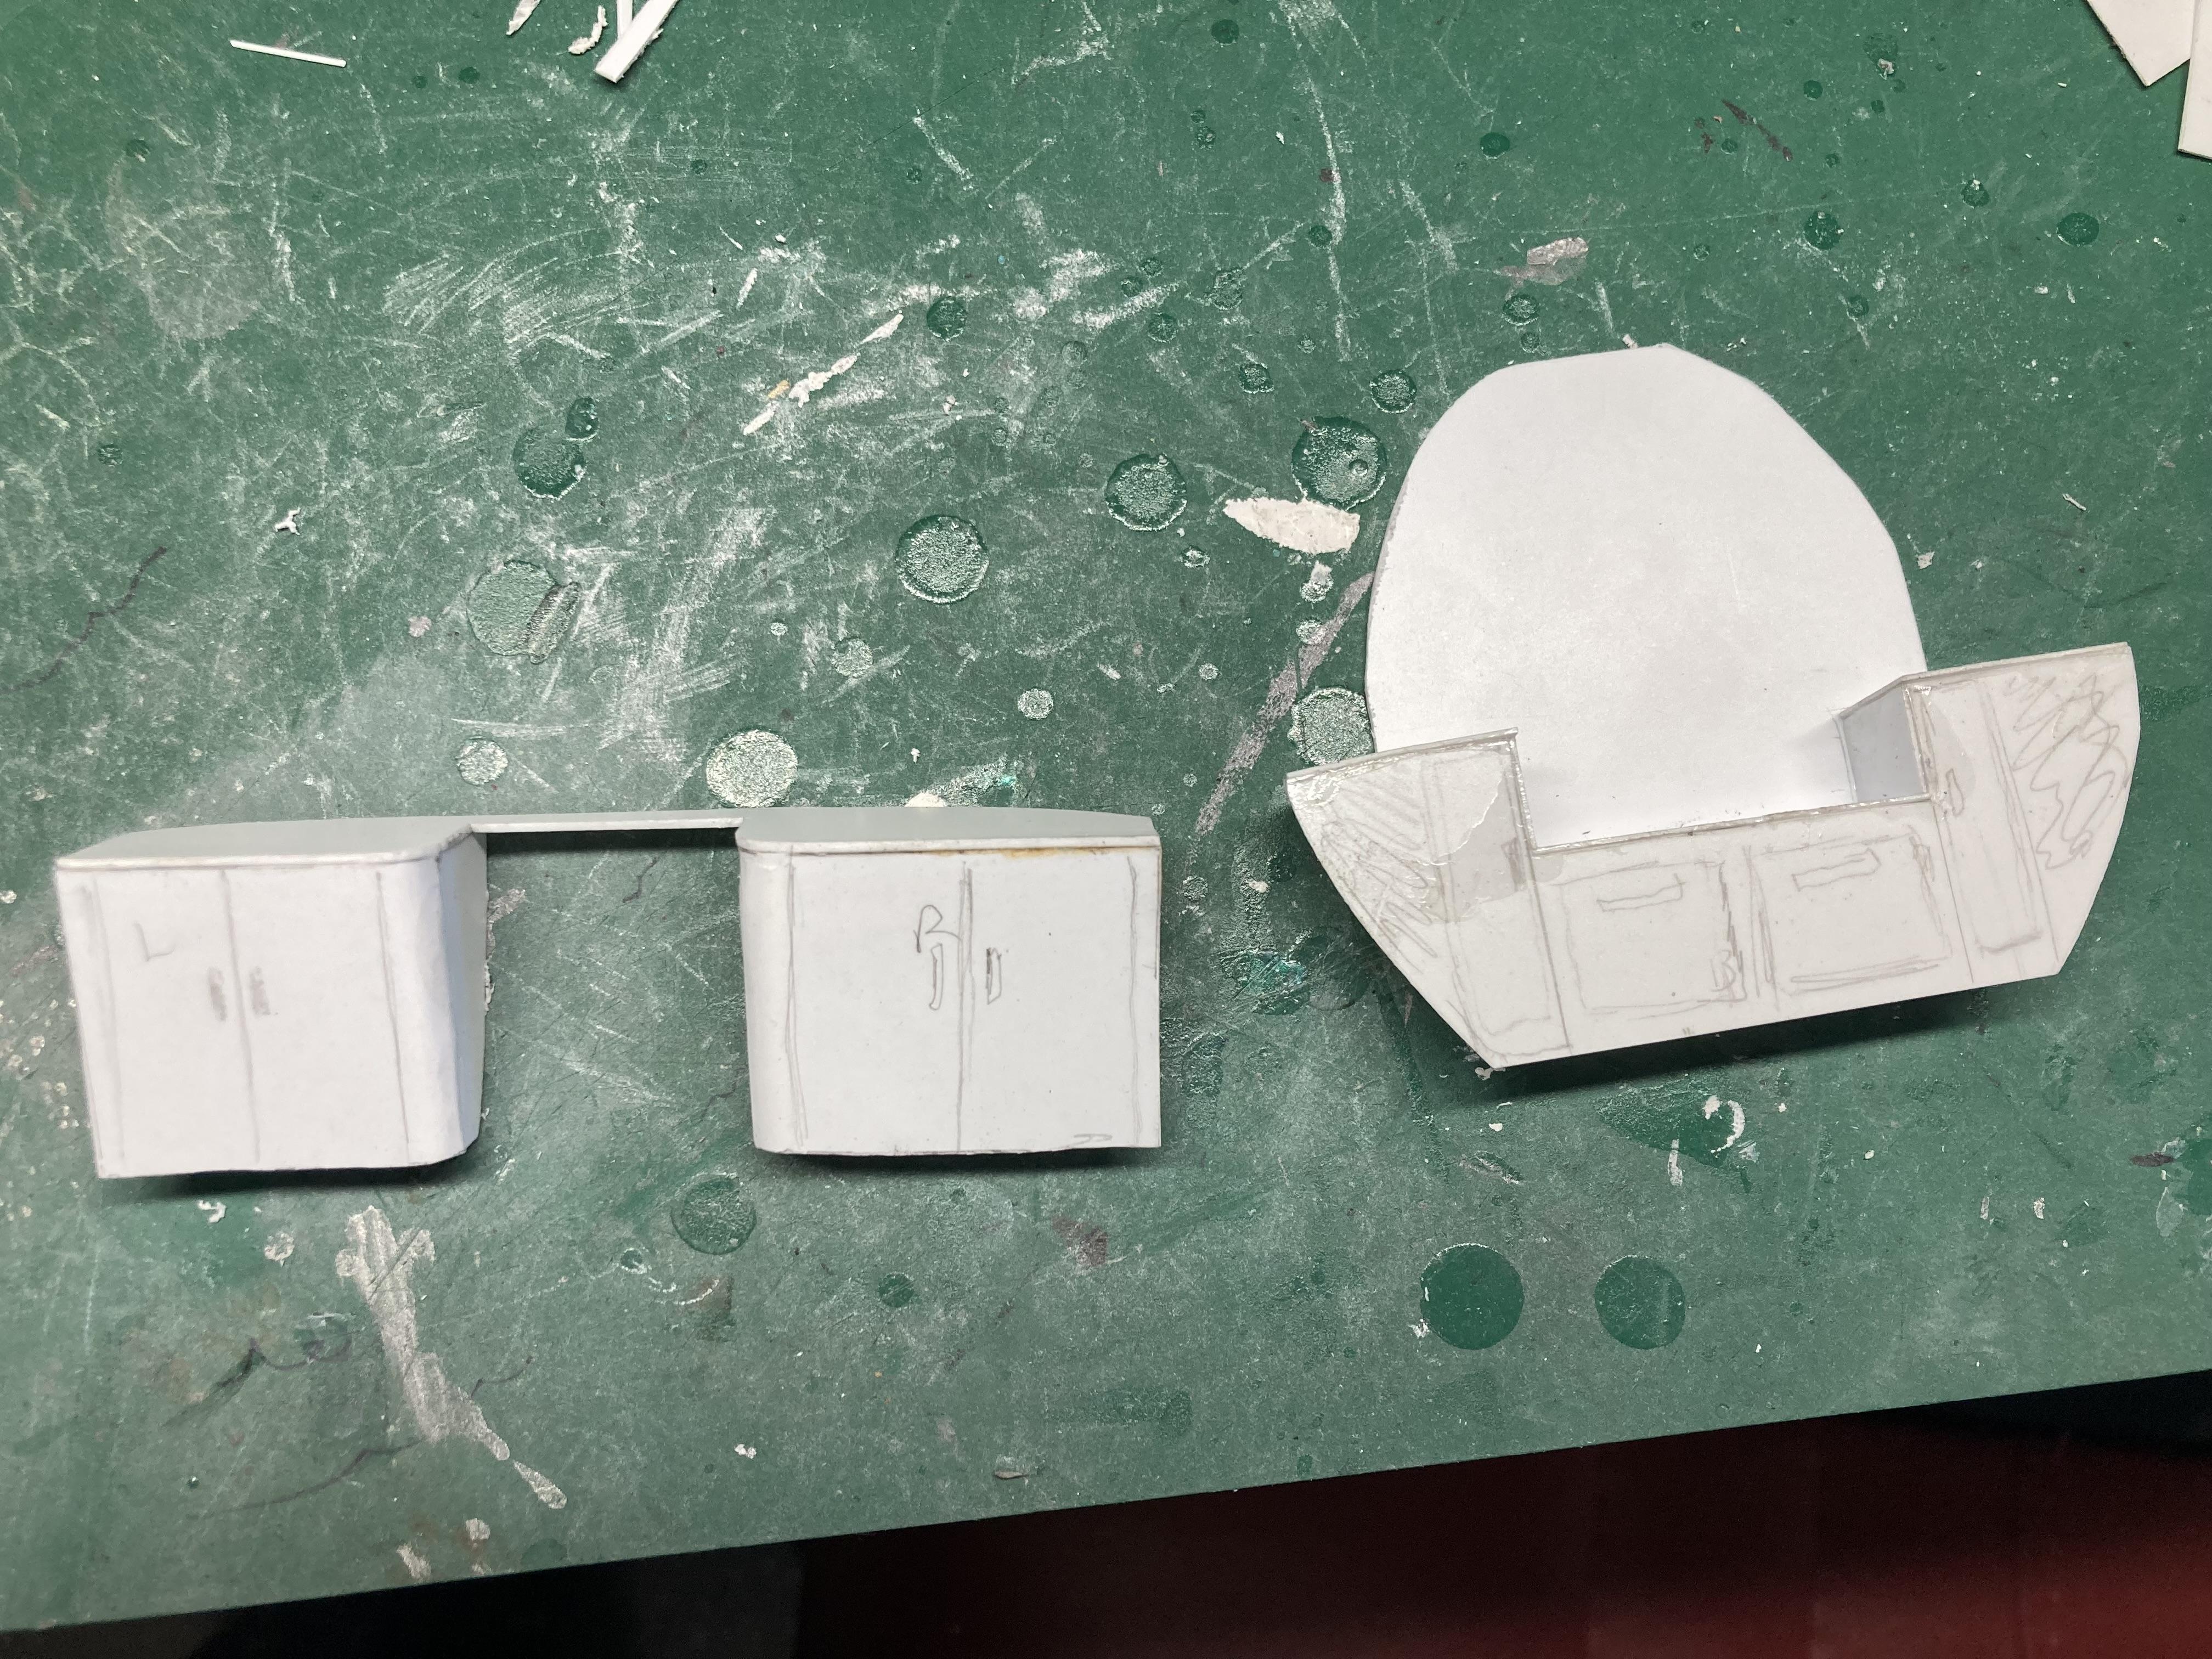
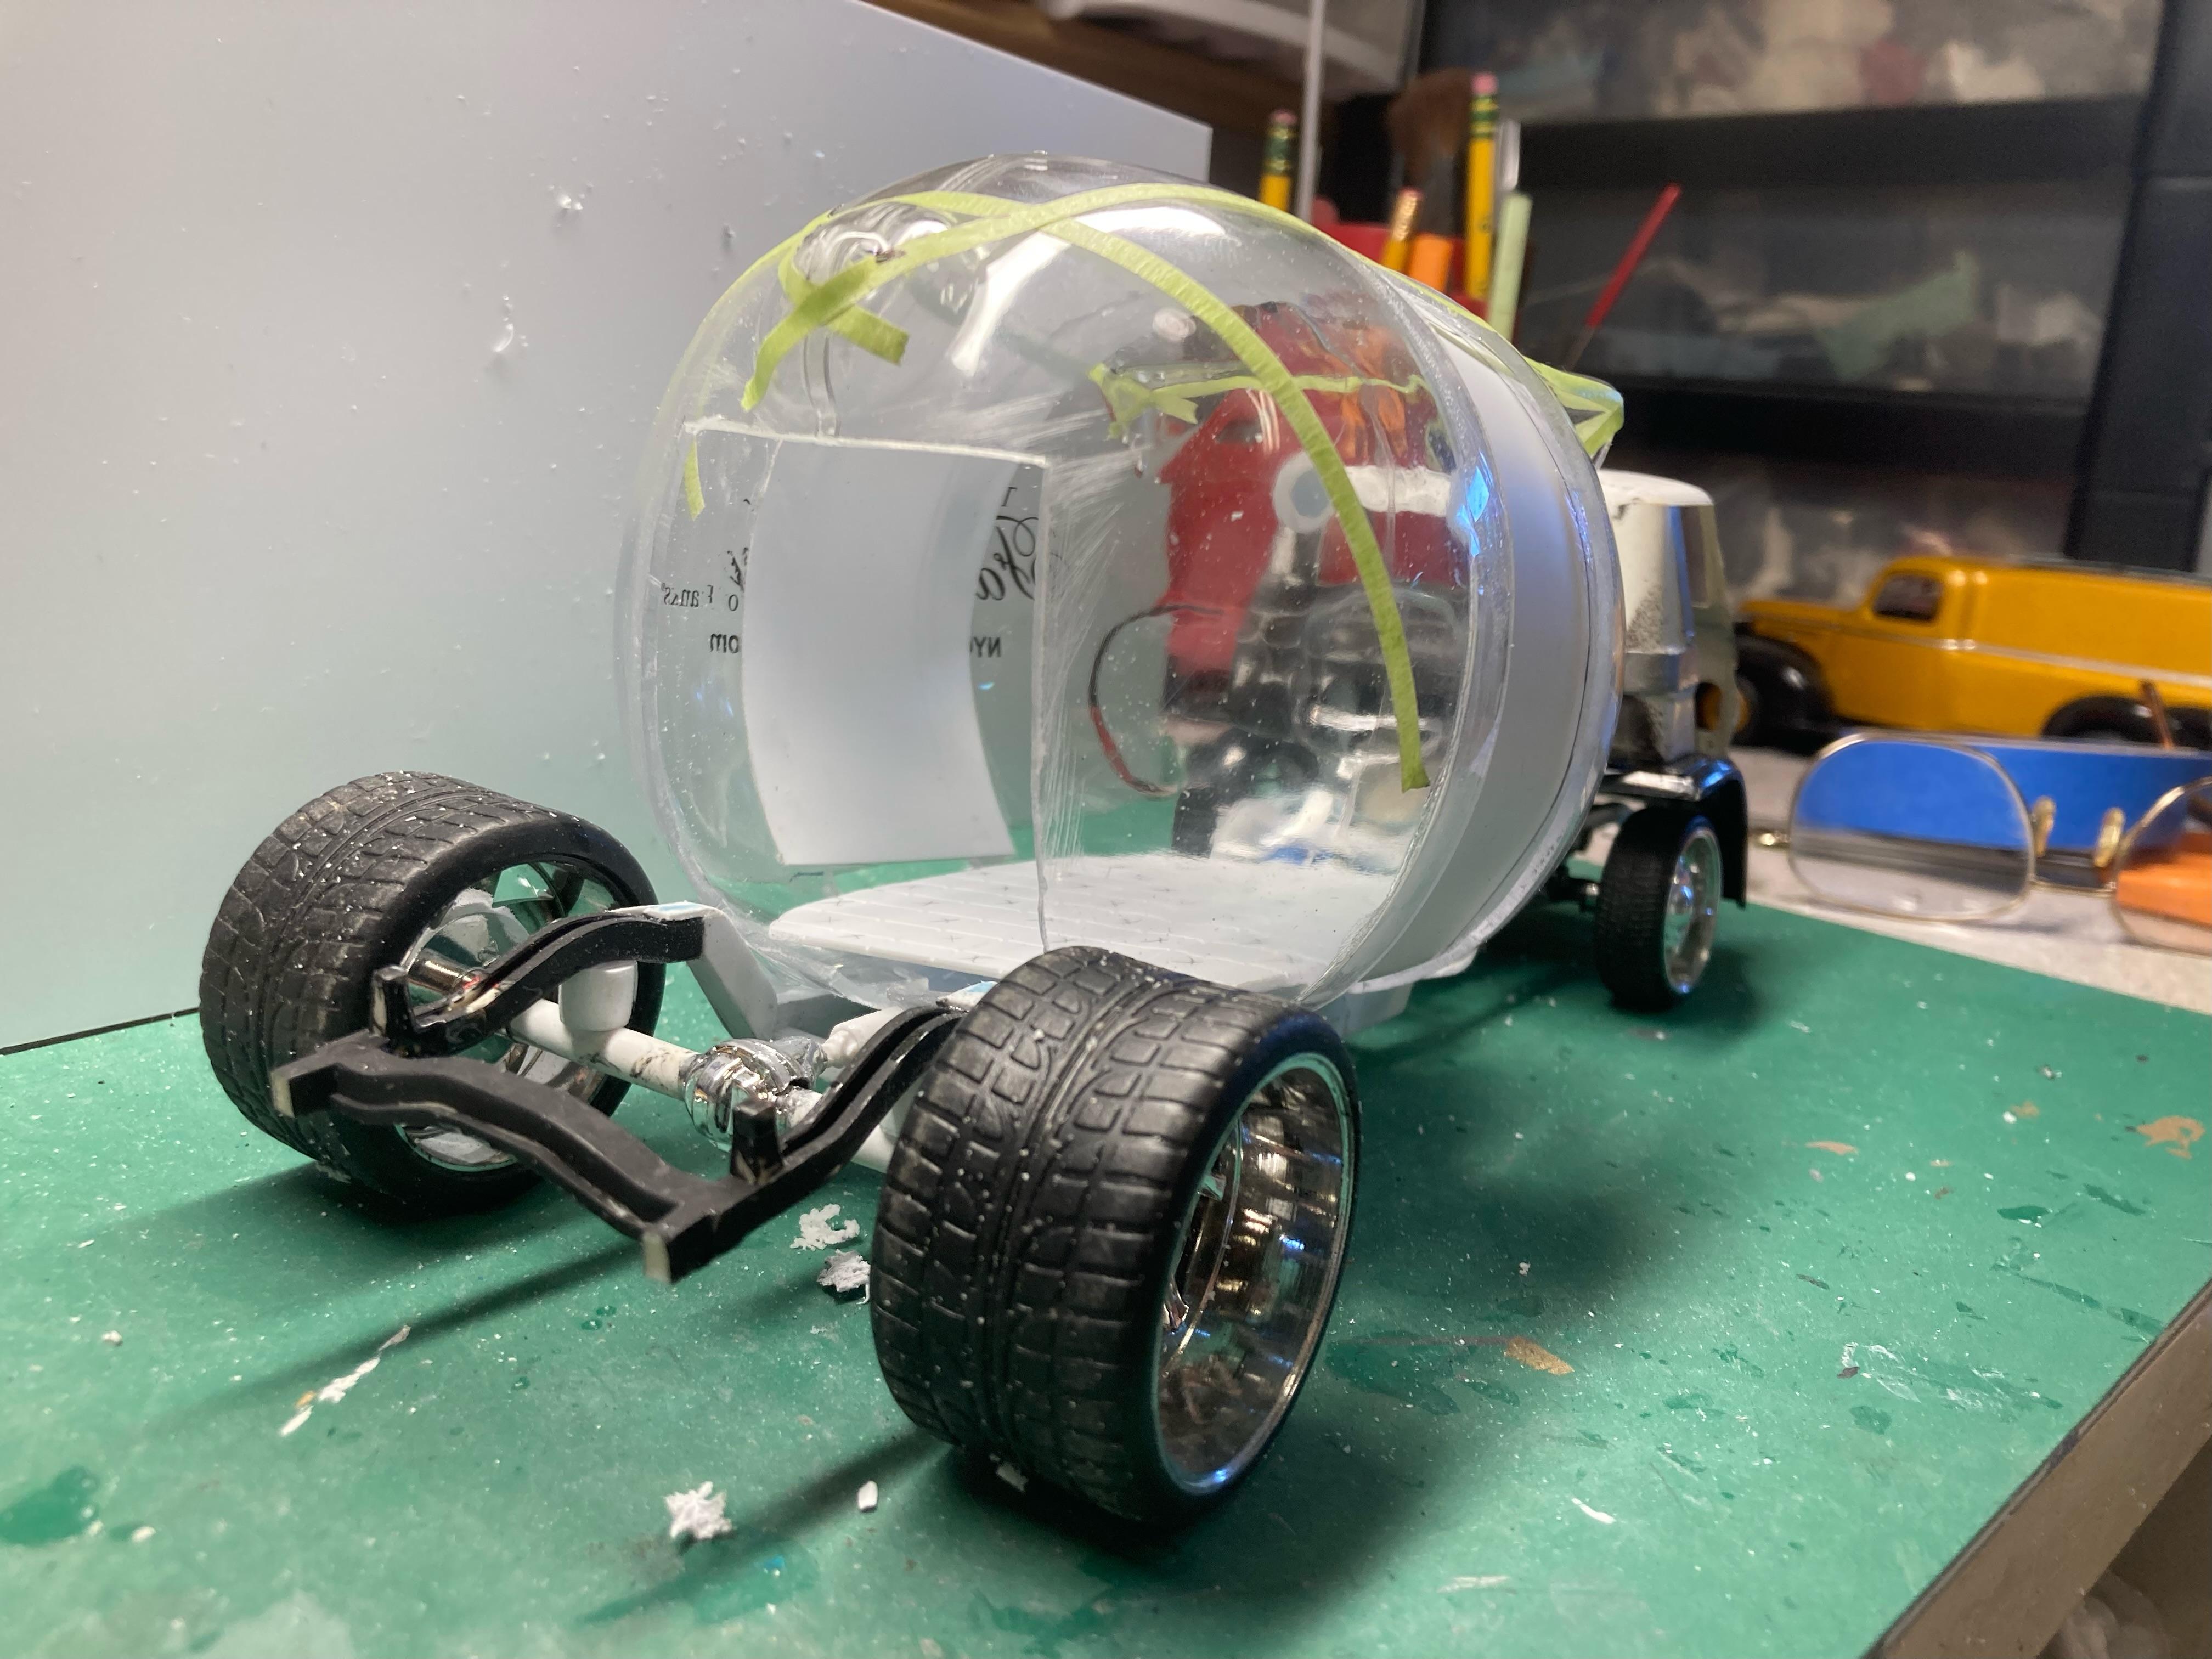
I started working on the inside kitchen of the pig. It’s a bit difficult working in such a small space where I can only use two fingers.
-
Zvezda STZ-5 Tractor
Nosferatu replied to PatW's topic in All The Rest: Motorcycles, Aviation, Military, Sci-Fi, Figures
Nice work Pat! That looks like it will go anywhere! Dave -
Thanks David! Dave
-
The Pig Rig
Nosferatu replied to Nosferatu's topic in WIP: Model Trucks: Pickups, Vans, SUVs, Light Commercial
Thanks! Dave -
I’ve had the plastic piggy bank for a while looking to use it in a build. I wanted to incorporate it with a BBQ smoker build. I cut the pig in half in order to extend it. Then I cut in a rear door but that got in the way of the smoker I planned to put on the back. I then cut the roof off in order to install the kitchen inside and sealed up the rear door. I scratched built the smoker for the rear and made a platform for it. I worked on the scratchbuilt chassis for about 4 ½ hours. I needed some wide rear fenders and the only thing that had the correct circumference was a plastic aspirin bottle. I put the radiator behind the engine as there was no room for it in the front of the cab. The Dodge 700 cabover seemed like a good choice so I rebuild the door hinges. The pig body needed lots of putty (7 layers) as the plastic was all different thicknesses. I cut in the serving window and the drivers side entry door. I still have to design and build the interior. I will be using a chessboard pattern for the kitchen floor. The power train is of course a Dodge hemi. I’m not sure of a final color yet but that will materialize when I get closer. The BBQ truck will be called Pig Out. Thanks for looking and I hope you like it. Dave
-
Thanks again! Dave
-
Thank you! Dave


.jpeg.3156dc6b14d445c80b6211f49e592621.jpeg)

.jpeg.8e0b1c434f8397d4299cc7d8da053f86.jpeg)
.jpeg.e29444471d347efcf8e866fbf35a69aa.jpeg)

.jpeg.0747834a087bd9c2d6ac885060372470.jpeg)

.jpeg.0b35eea3b936905b8b9f1532b792c714.jpeg)
.jpeg.213972519395b5657a308fcb5e94c7ae.jpeg)
.jpeg.38dd802237e30d9cfd506b5363dbeb9b.jpeg)
.jpeg.ae07b3ea512586e28740b09dc7602469.jpeg)
.jpeg.601ec26c71579692cdf28a38049de3ef.jpeg)