

Nosferatu
-
Posts
490 -
Joined
-
Last visited
Content Type
Profiles
Forums
Events
Gallery
Everything posted by Nosferatu
-
Nice work and cool color! Dave
-
Very nice build and a beautiful car! I love the street light shot! Dave
-
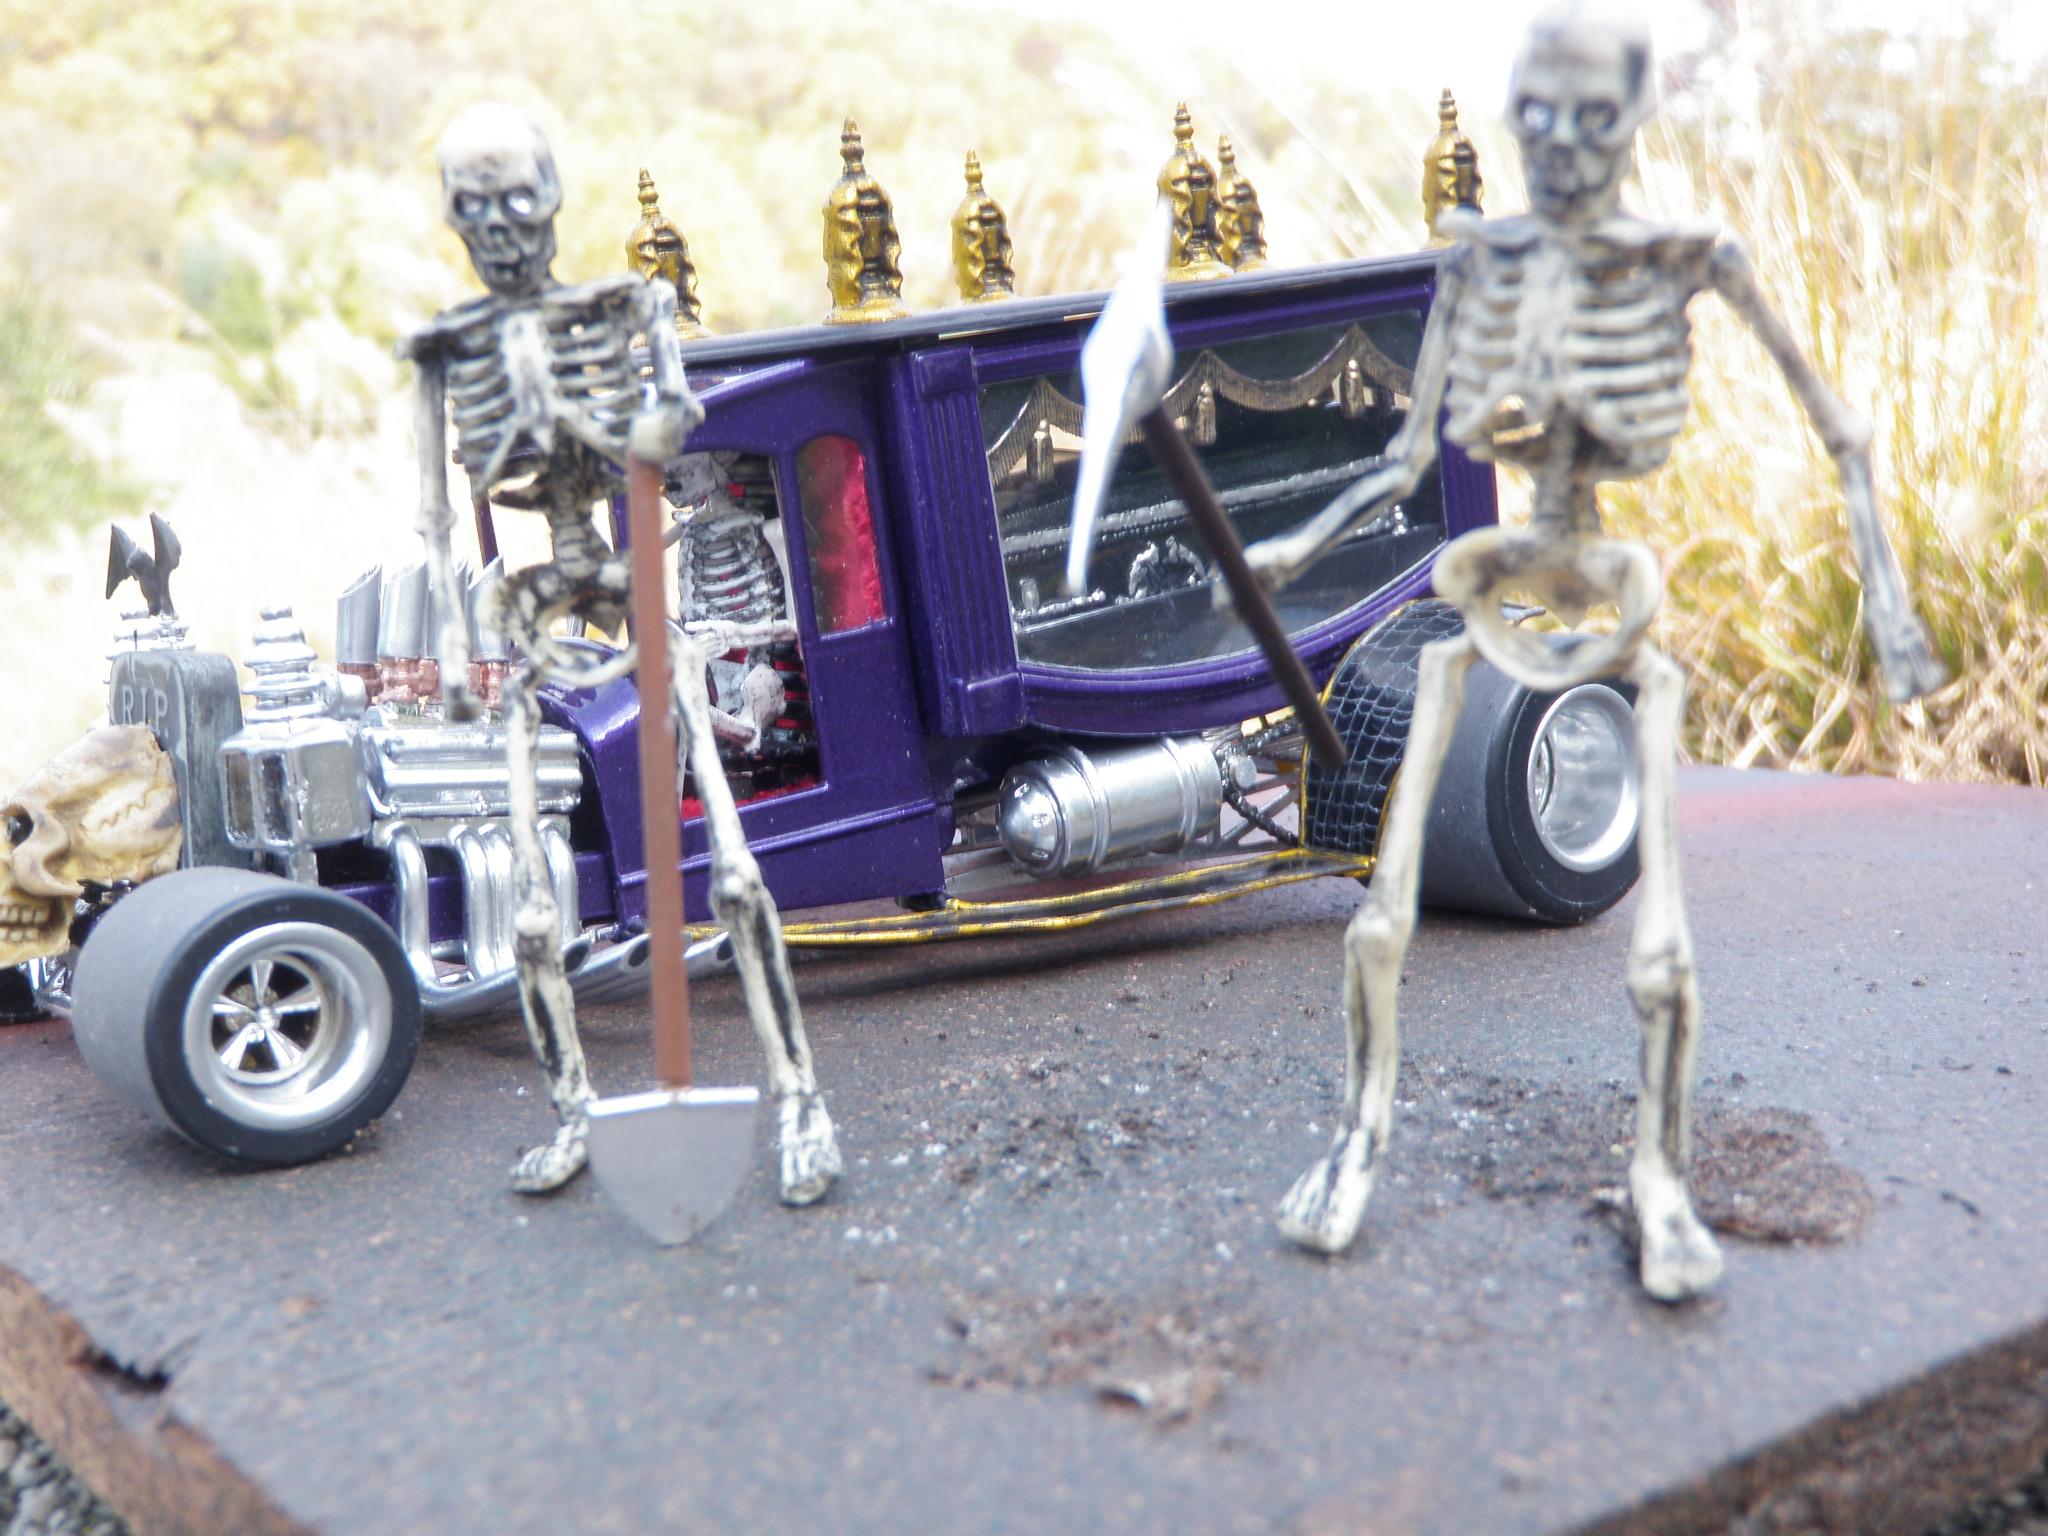
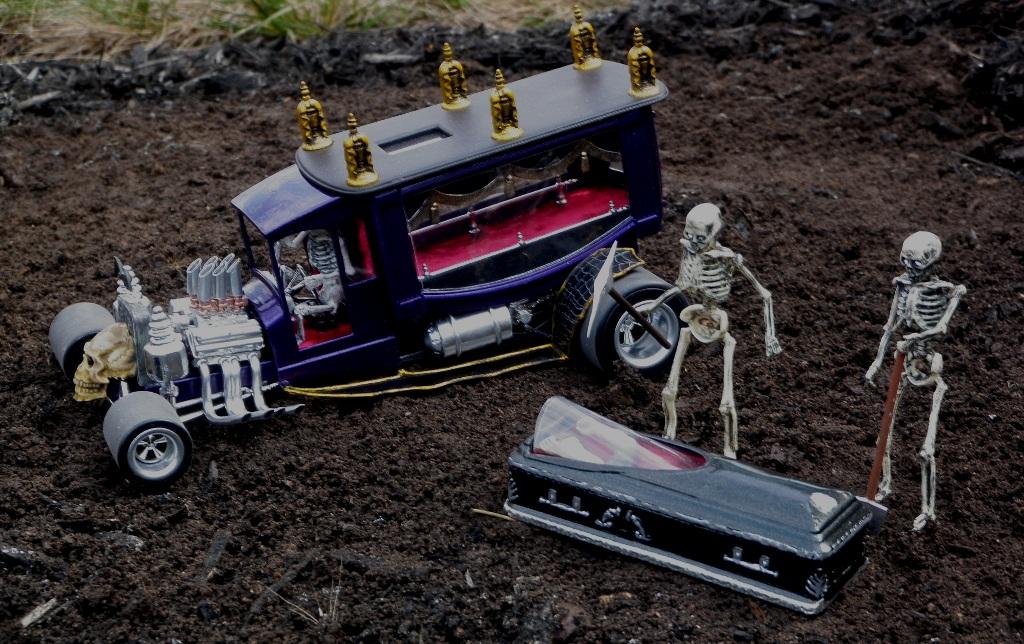
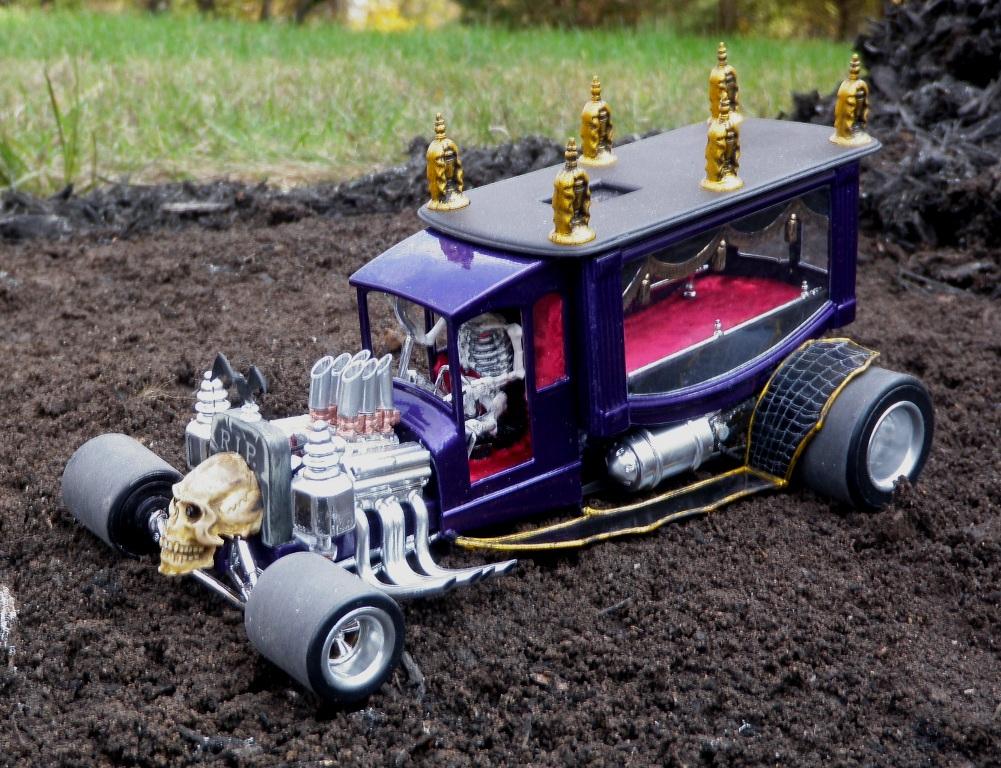
Excellent rendition of this car! Lots of nice details. Dave
-
1960 Patina Chevy Pickup
Nosferatu replied to Nosferatu's topic in Model Trucks: Pickups, Vans, SUVs, Light Commercial
Thank you. Dave -
1960 Patina Chevy Pickup
Nosferatu replied to Nosferatu's topic in Model Trucks: Pickups, Vans, SUVs, Light Commercial
Thank you! Dave -
1960 Patina Chevy Pickup
Nosferatu replied to Nosferatu's topic in Model Trucks: Pickups, Vans, SUVs, Light Commercial
Thank you! Dave -
1960 Patina Chevy Pickup
Nosferatu replied to Nosferatu's topic in Model Trucks: Pickups, Vans, SUVs, Light Commercial
Thanks Chuck! Dave -
1950 Chevy Pickup
Nosferatu replied to Zippi's topic in Model Trucks: Pickups, Vans, SUVs, Light Commercial
Beautiful job! What a great color combination. You've nailed that picture perfectly! Dave -
57 Chevy Bubbletop pickup
Nosferatu replied to Modlbldr's topic in WIP: Model Trucks: Pickups, Vans, SUVs, Light Commercial
Very interesting! You certainly have my attention! I like the Vette side panels. Dave -
Lets see what you have.

-
1960 Ford F-100
Nosferatu replied to Mercuryman54's topic in WIP: Model Trucks: Pickups, Vans, SUVs, Light Commercial
You've taken a dark cloud and exposed the silver lining! What a great challenge. Great work on this one! I love rebuilding these old glue bombs, its so much fun! Dave -
Fantastic body work on this custom! The lines and color are perfect. Dave
-
1950 Chevrolet 3100 Pickup
Nosferatu replied to Zippi's topic in WIP: Model Trucks: Pickups, Vans, SUVs, Light Commercial
This is coming along nicely! I love the trim on the fenders. Dave -
Thank you for the kind words! I really appreciate them. I just got back from Durango, Co and I am ready to wrap this one up. Dave
-
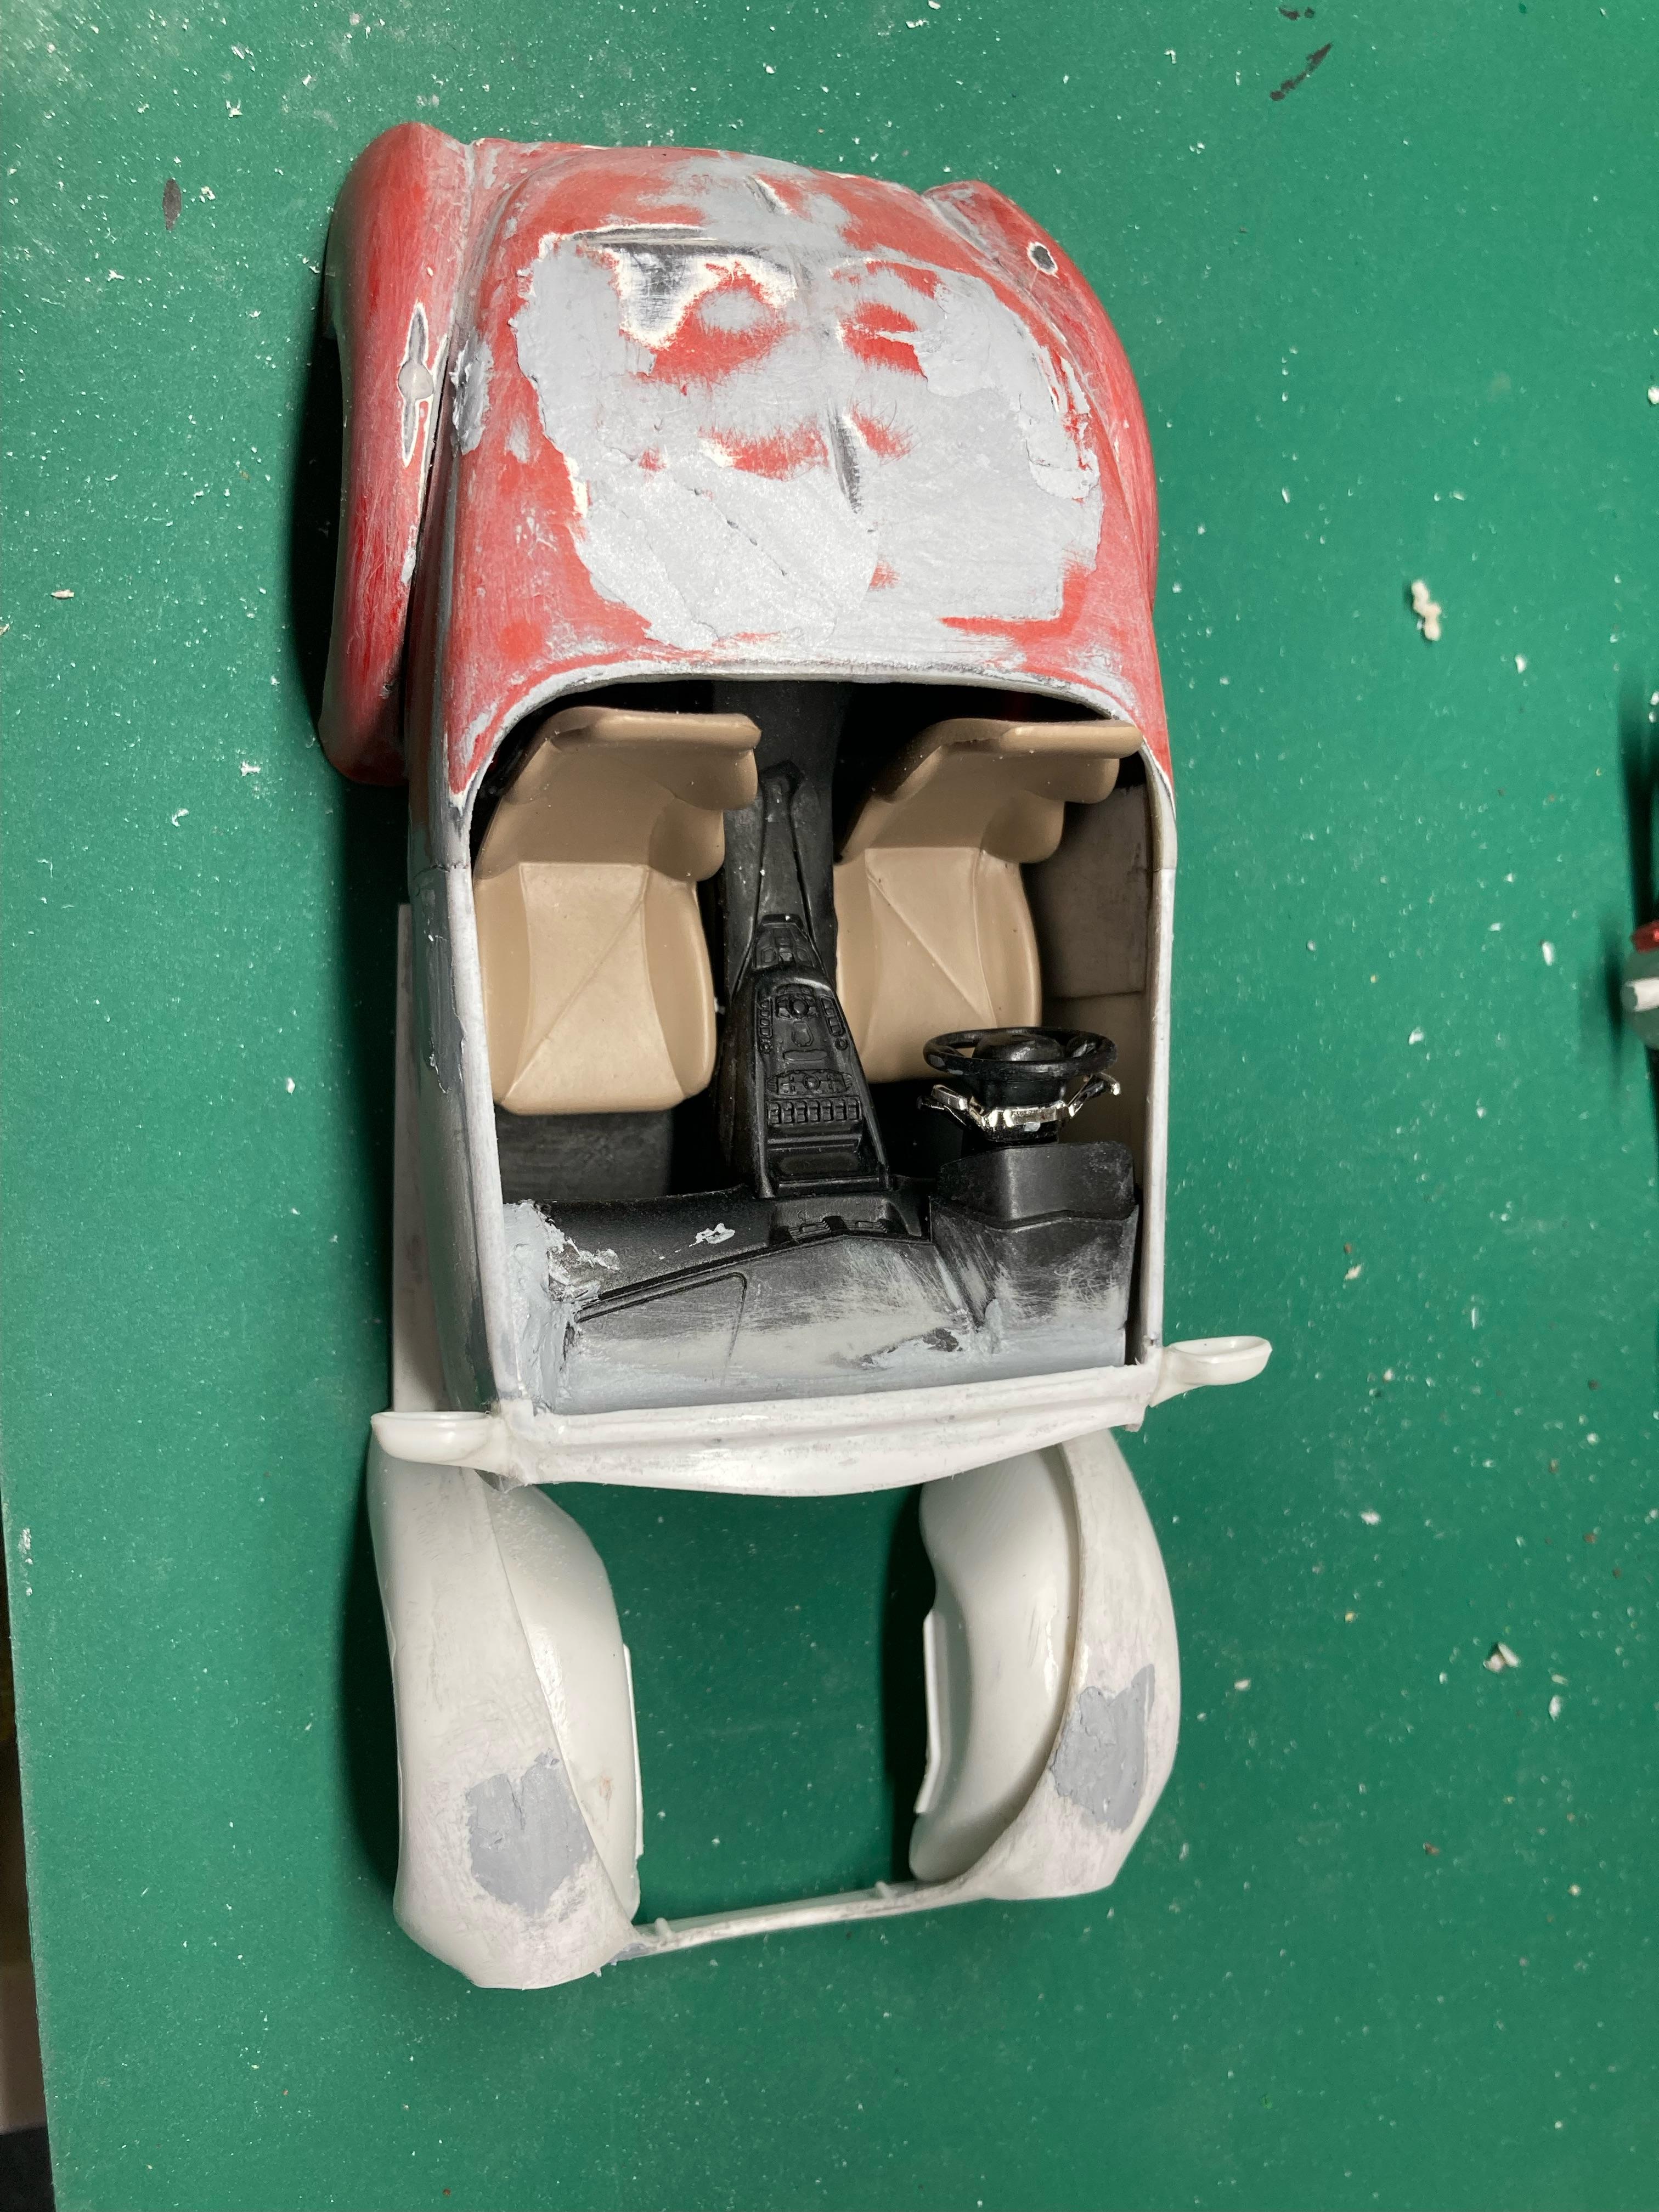
I got the last coat of primer in this one. I chose a white primer as I needed a light base color under the finish color.
-
Oh man I'm so sorry you are having trouble with the paint. I can feel your pain. I have been there many times and likely be there again. Good luck on the next round. I have learned one thing that the paint and the model need to be the same temperature. I also found that the primer may be an issue sometimes. Dave
-
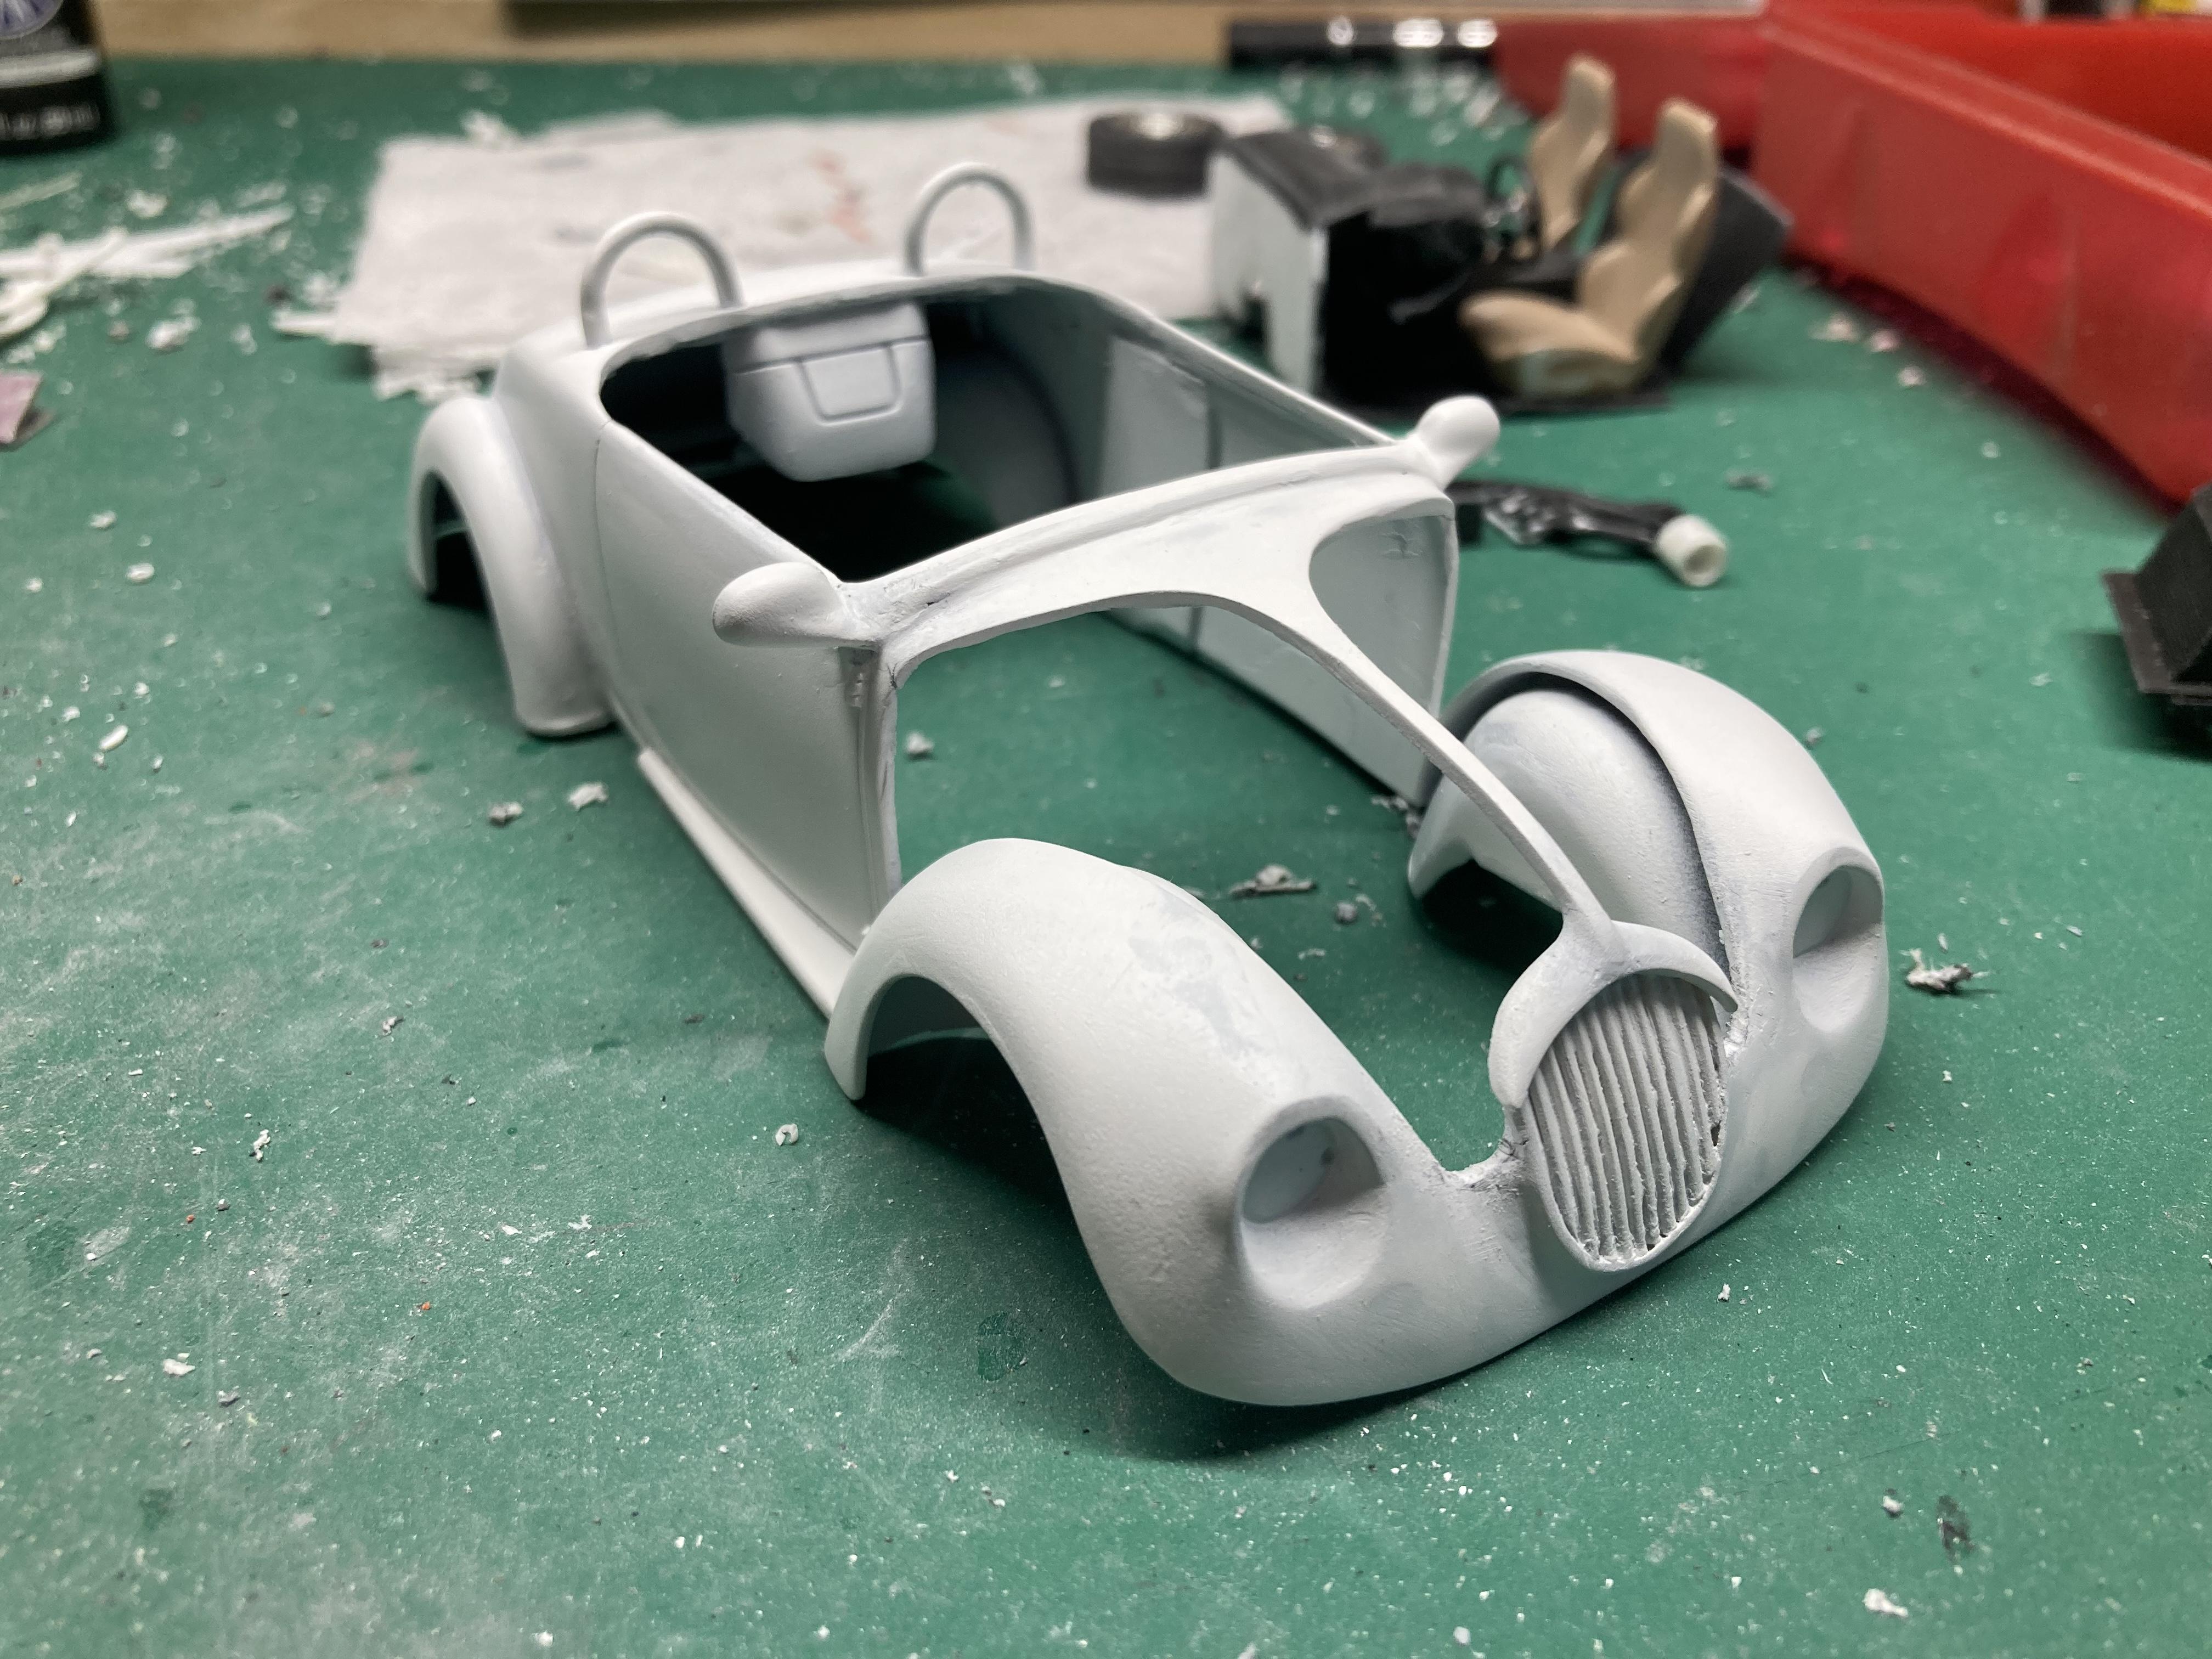
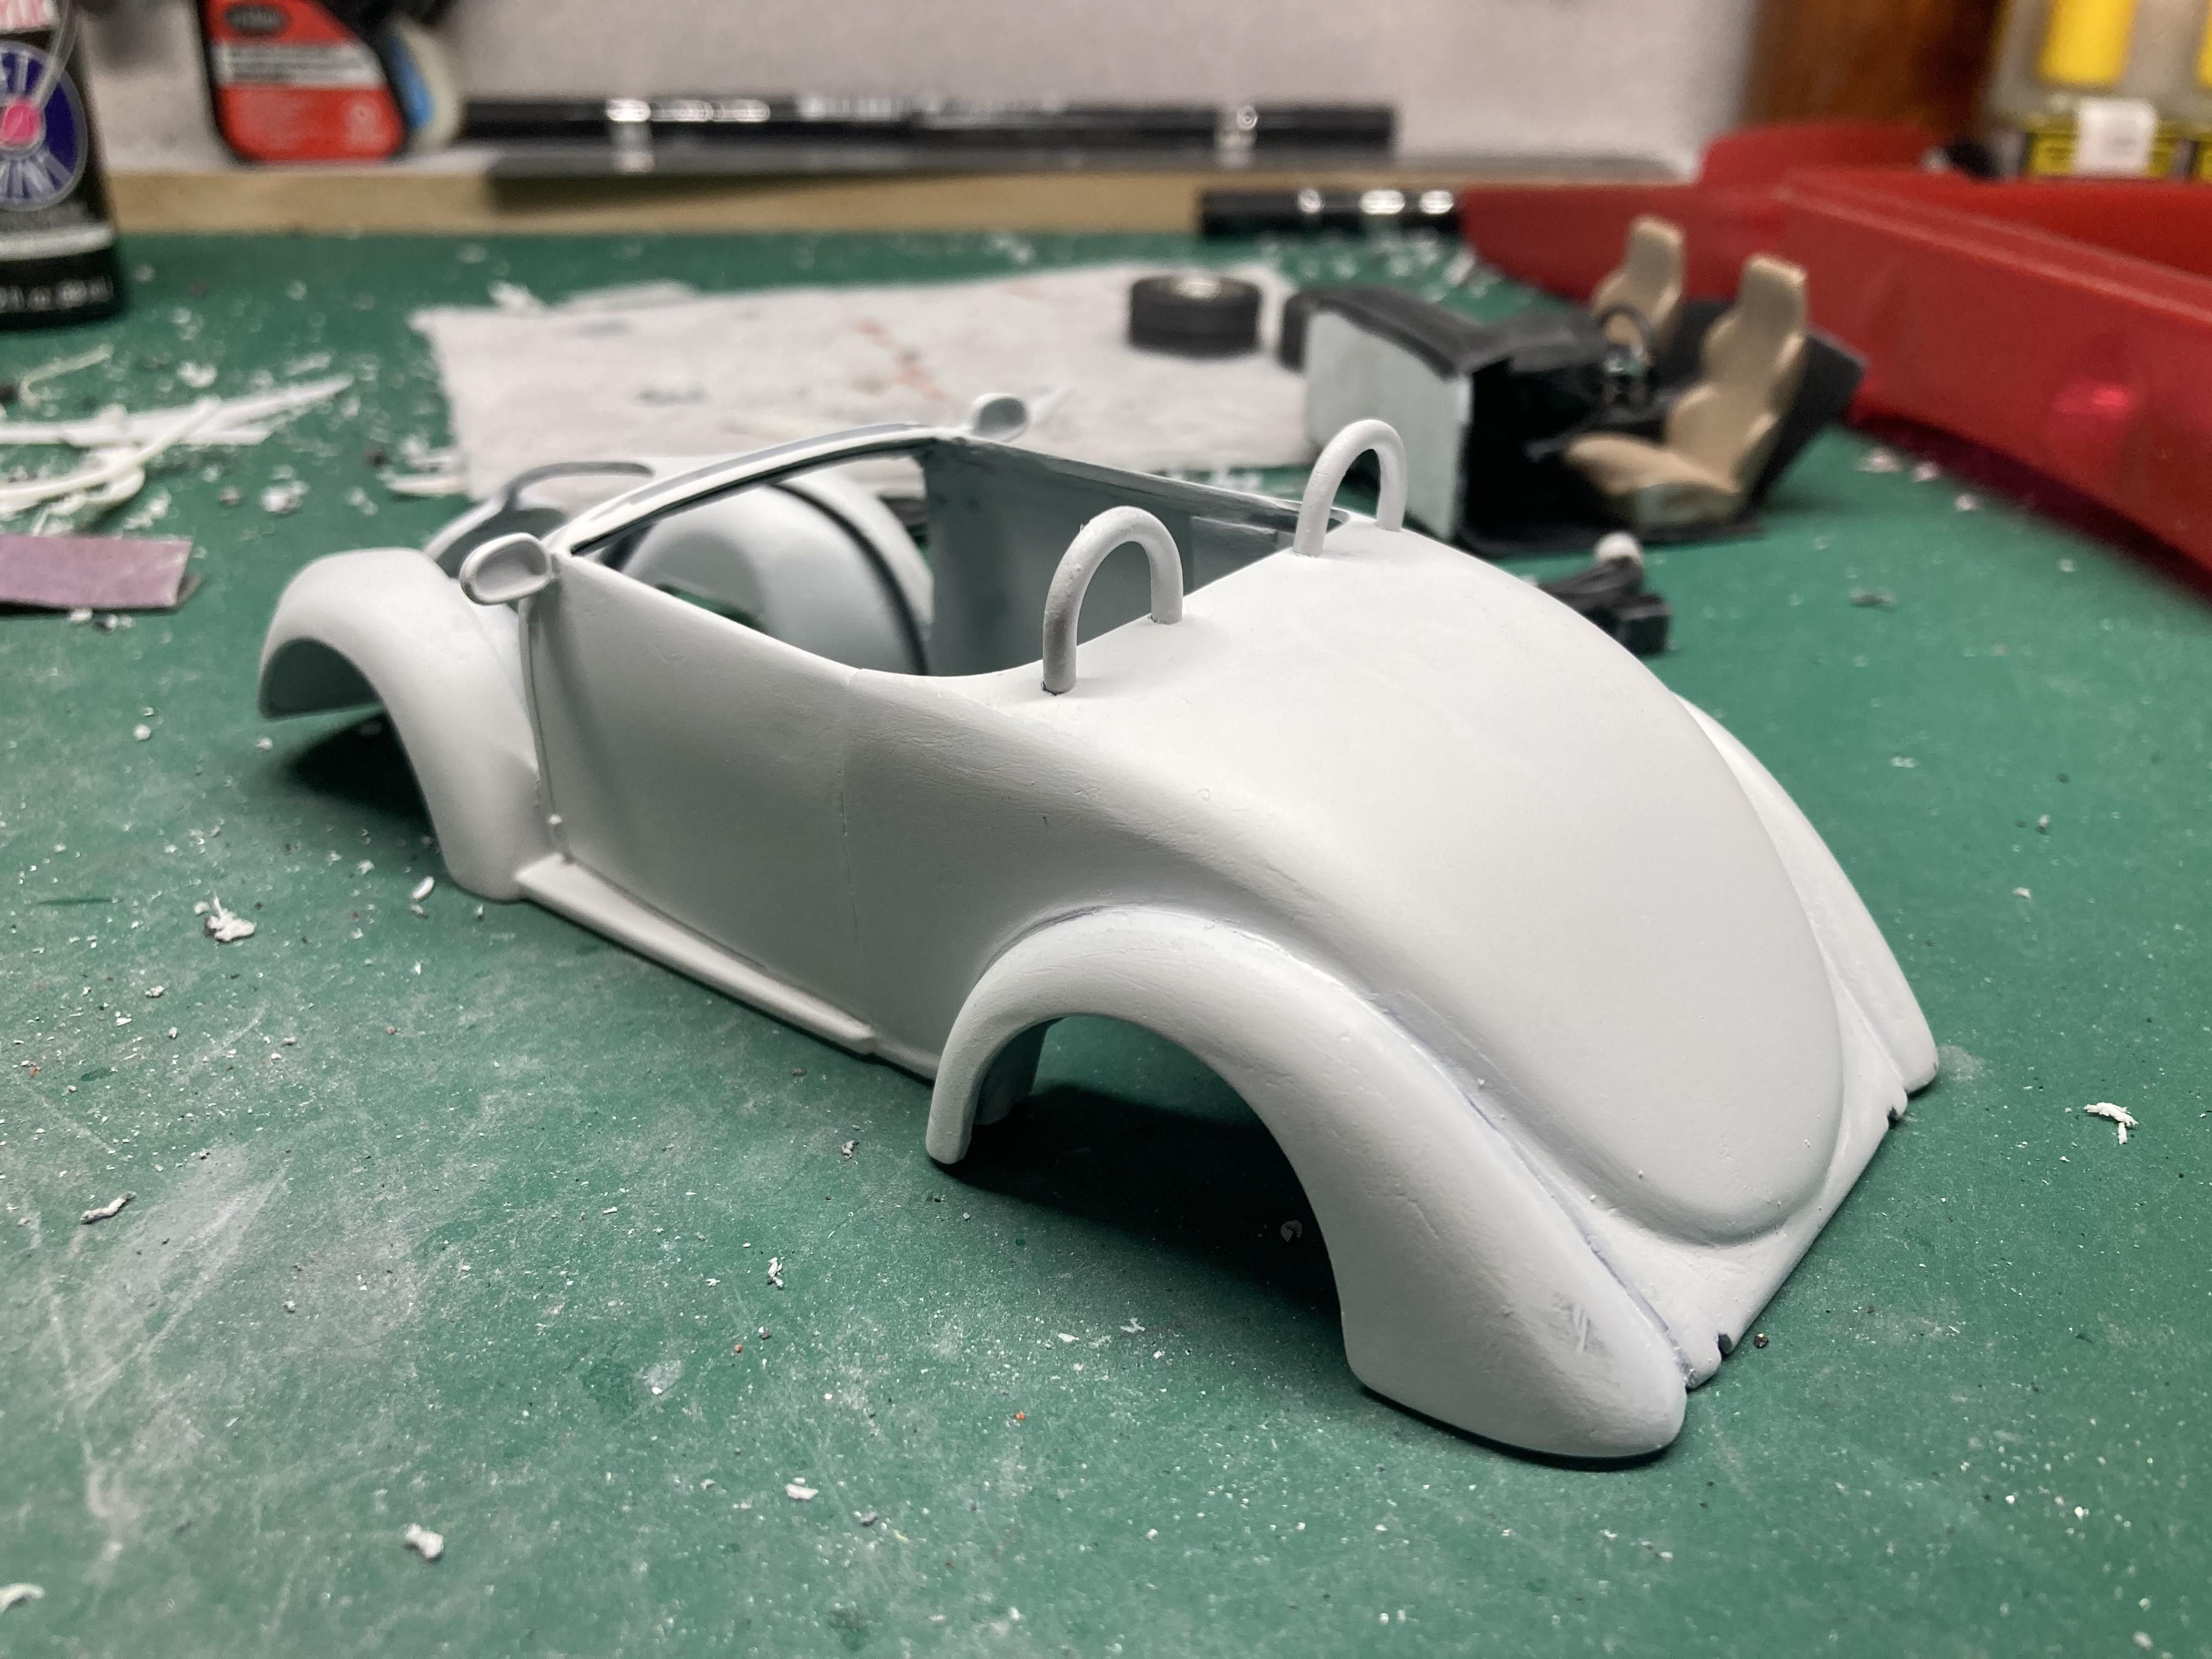
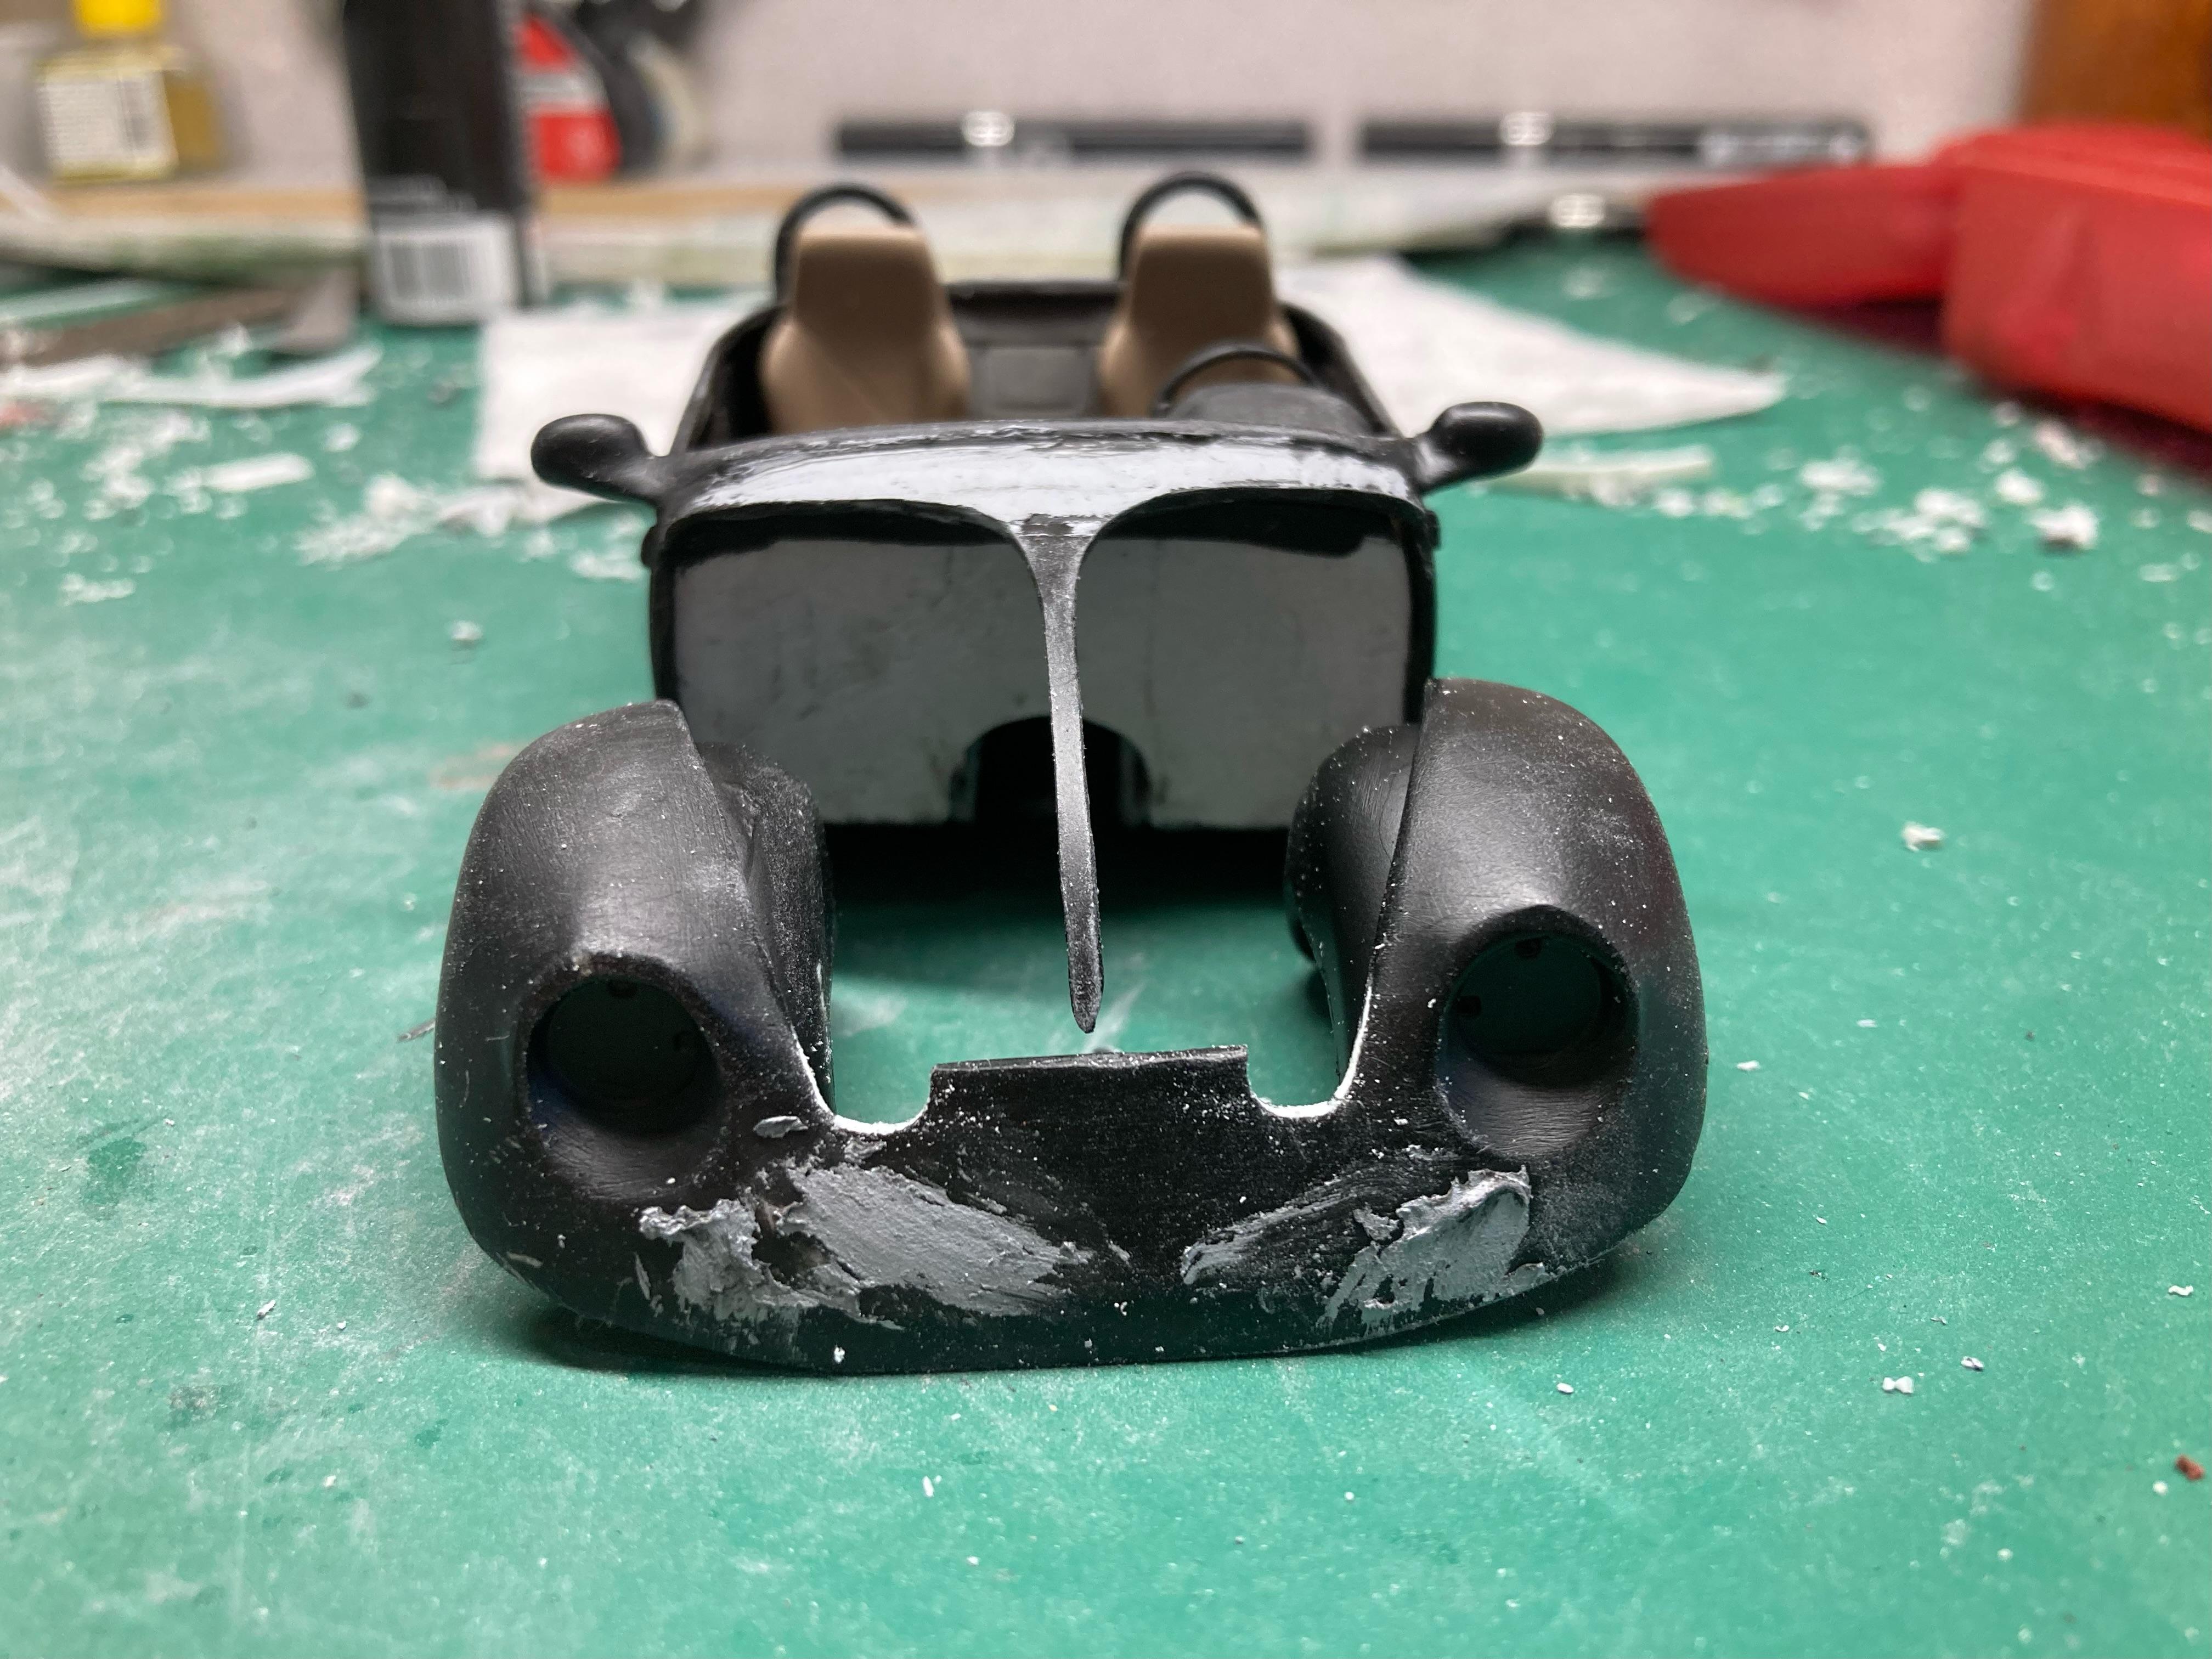
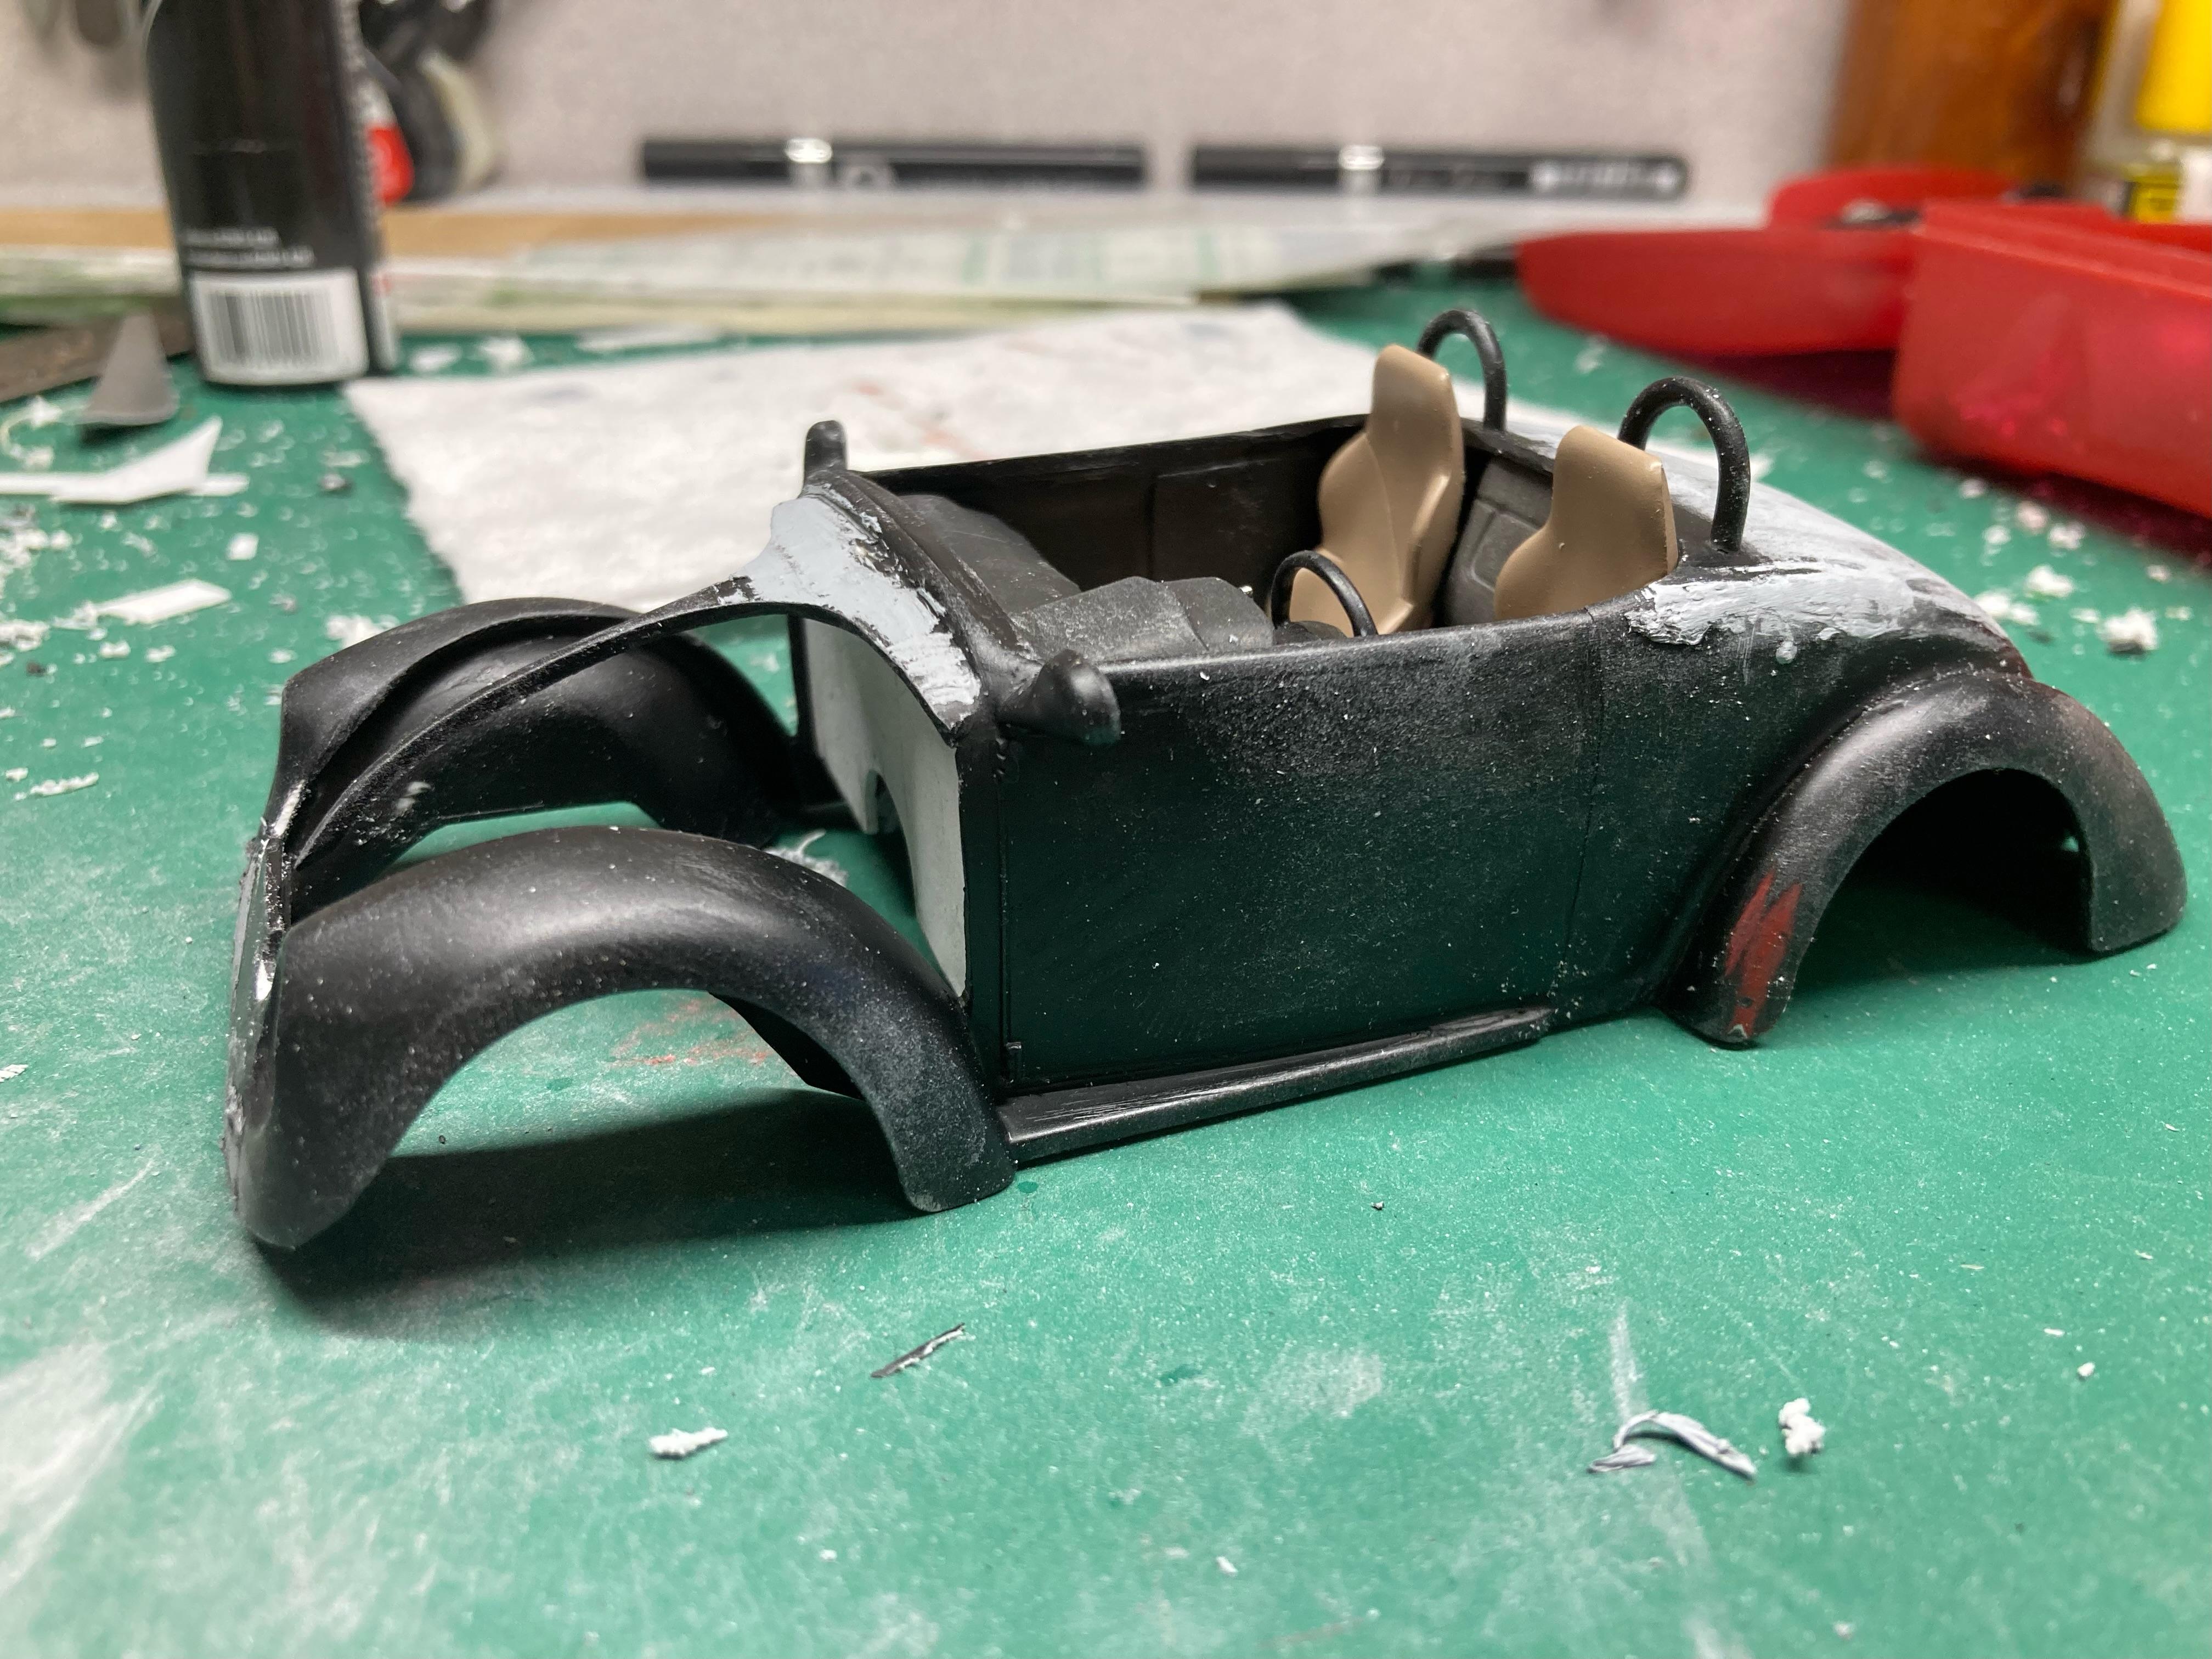
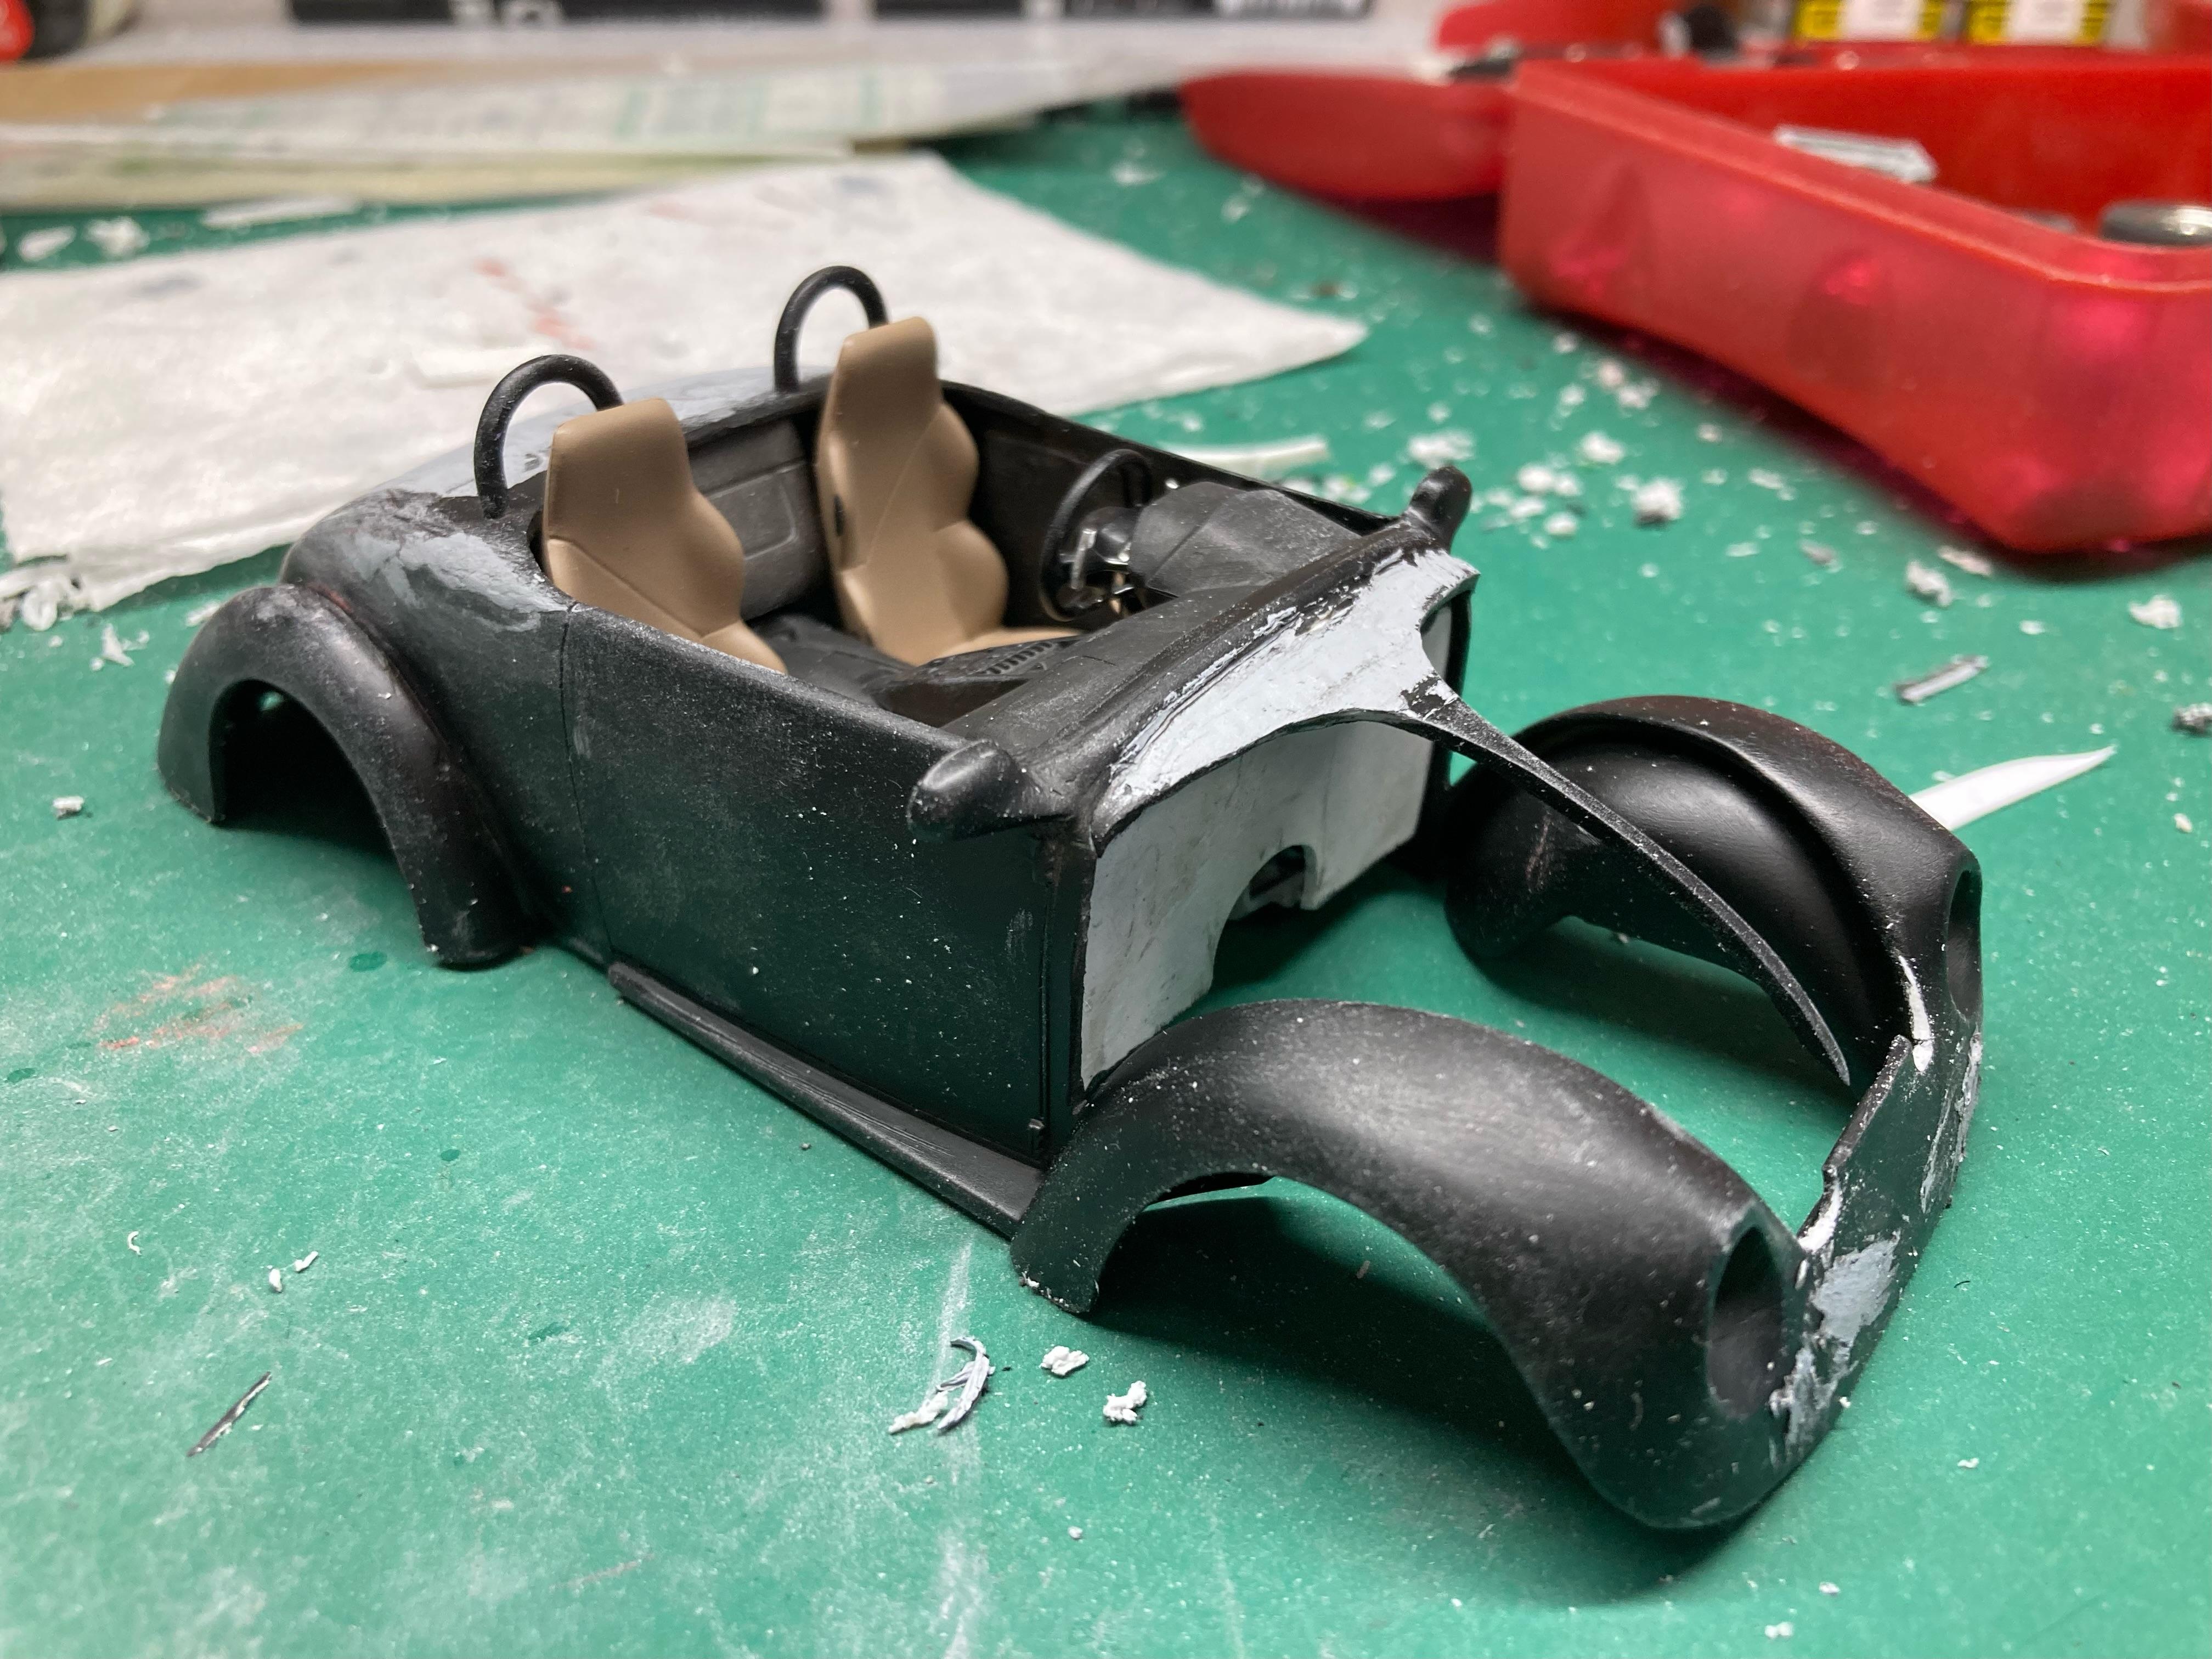
I did a bit more work to this. I decided to use the VW front hood but cut it out to see the Corvette LT5 engine and added a couple roll bars. Its in primer but I saw some spots that needed more putty. I will be adding a scratch built grill. Dave
-
Thanks Starwulf. I am using the chassis for this build. I tried to use the grill but there are too many curves that don't flow with the VW front. I am designing my own front grill. Dave
-
Thanks, but what does that swoopy Lindberg grille look like? Which kit is it from? Dave
-
Thanks Shark, I'm glad you like it so far. Dave
-
I was looking for another project to build and came up with this. I like the swooping rear of the Ford so I decided to add it to a VW bug front. Its still similar but with a longer rear. I added a Ferrari interior and a Corvette engine. Then I chopped off the windshield and will be adding a frameless window and a couple rollbars. I’m not sure of the color yet. I narrowed the Ford rear body to coincide with the VW width. I’m still trying to come up with a grill. Here is what I have so far. Thanks for looking and I hope you like it. All constructive ideas and criticism are welcome. Dave
-
1960 Patina Chevy Pickup
Nosferatu replied to Nosferatu's topic in Model Trucks: Pickups, Vans, SUVs, Light Commercial
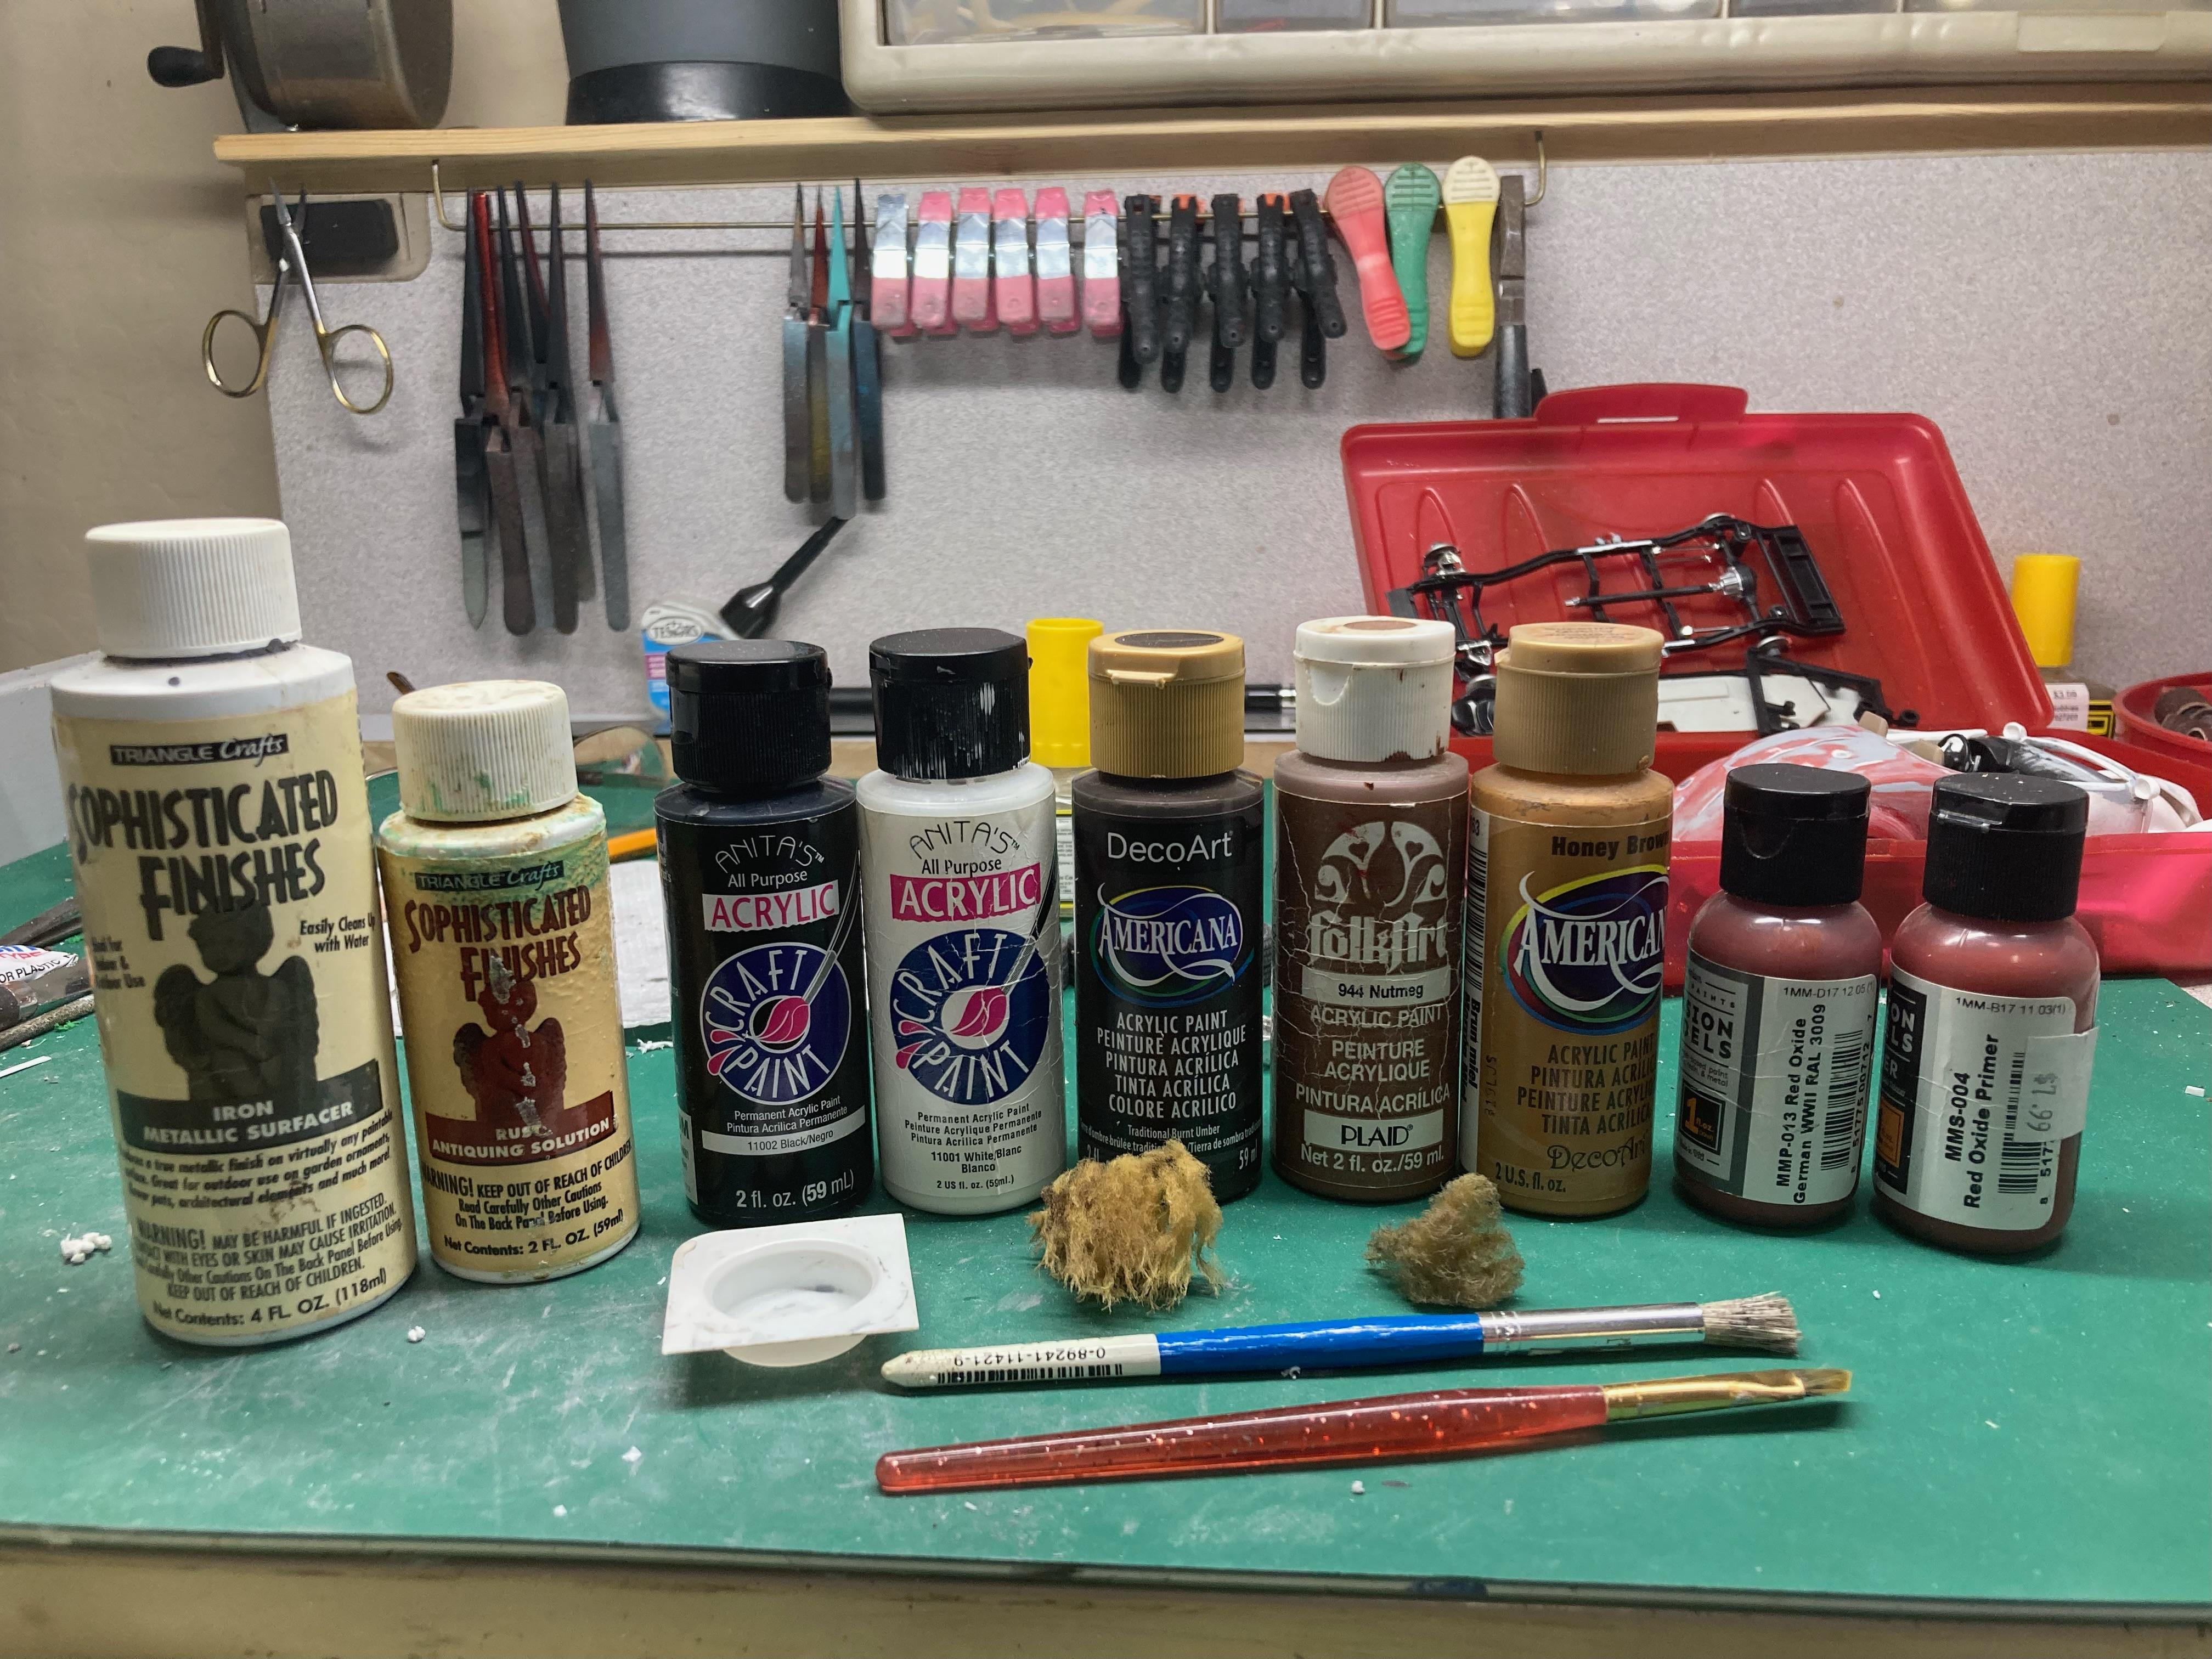
Thanks! I'll try to explain it. I have done rusting a few times and I still have lots of improvements to learn. There are many Youtube videos on rusting. I studied the videos that only used paint, not the salt method. The other area I studied were pictures of desert rusted vehicles in order to understand where the rust forms. In the west the rust forms on the tops and in the east the rust forms on the bottoms and usually eats away the body and door bottoms. First I painted the truck the stock color. I then started with the darker color first. Black, then the oxides, browns. I also mixed some of the colors together. You need to get a few colors that look like different shades of rust and layer it on (its all about layering colors). I applied the colors with a damp sponge and the dry brush method. To dull the factory color paint I used a very thin black wash. For the final rust I used Sophisticated Finishes - Iron Metallic Surfacer and the Rust Antiquing Solution. This iron metallic surfacer uses fine metallic particles and the antiquing solution oxidized the iron particles and is actually rust. I applied this several times is the areas I wanted thicker rust showing. Colors - Black, white, burnt umber, nutmeg, honey brown, red oxide. For the seat I dremeled away the drivers side seat base where your butt would be to look worn and a bit flattened, I also did it to the back of the seat where your back would be. I did the same to the passengers seat but not to the same extreme. Then I covered the seat with blue painters tape. I like that tape because it has texture. Then I slit the tape after it was applied to the seat and picked it open as if to expose the stuffing. I painted some honey brown between the slits to show that the stuffing was a different color. For the seat corner I opened the tape as if the corner was worn and damaged. I used the same method for the floor mats except I didn’t paint the inside of the slits. Then I used a thicker wash and applied it to the seat with a damp sponge to make it look old and dirty. The nice thing about this is that if you mess up its just water based paint so it is easy to restart if it doesn’t wash off. Here are the paints I used. I hope this helps. These videos may help: https://www.youtube.com/watch?v=DUd_vC-7XEA https://www.youtube.com/watch?v=6PVes5Eiz44 Here is another seat I made for a different build. Here is the link to the model: I used this aluminum wire for the springs and used the rust solutions for the rust.
-
1960 Patina Chevy Pickup
Nosferatu replied to Nosferatu's topic in Model Trucks: Pickups, Vans, SUVs, Light Commercial
Thanks for all you kind comments. Dave -
1960 Patina Chevy Pickup
Nosferatu replied to Nosferatu's topic in Model Trucks: Pickups, Vans, SUVs, Light Commercial
Thanks for your kind comments. Dave -
1960 Patina Chevy Pickup
Nosferatu replied to Nosferatu's topic in Model Trucks: Pickups, Vans, SUVs, Light Commercial
Thanks! It was a fun build. Dave


.jpeg.3343505538e15b6ac8c8de9def4fa37b.jpeg)
.jpeg.ac16913865467d54e91131bdd4c0d271.jpeg)
.jpeg.6c1f2f2a3644a7b38c6a5f55e56b1016.jpeg)