CabDriver
-
Posts
5,130 -
Joined
-
Last visited
Content Type
Profiles
Forums
Events
Gallery
Everything posted by CabDriver
-

34 Church Truck
CabDriver replied to CabDriver's topic in WIP: Model Trucks: Pickups, Vans, SUVs, Light Commercial
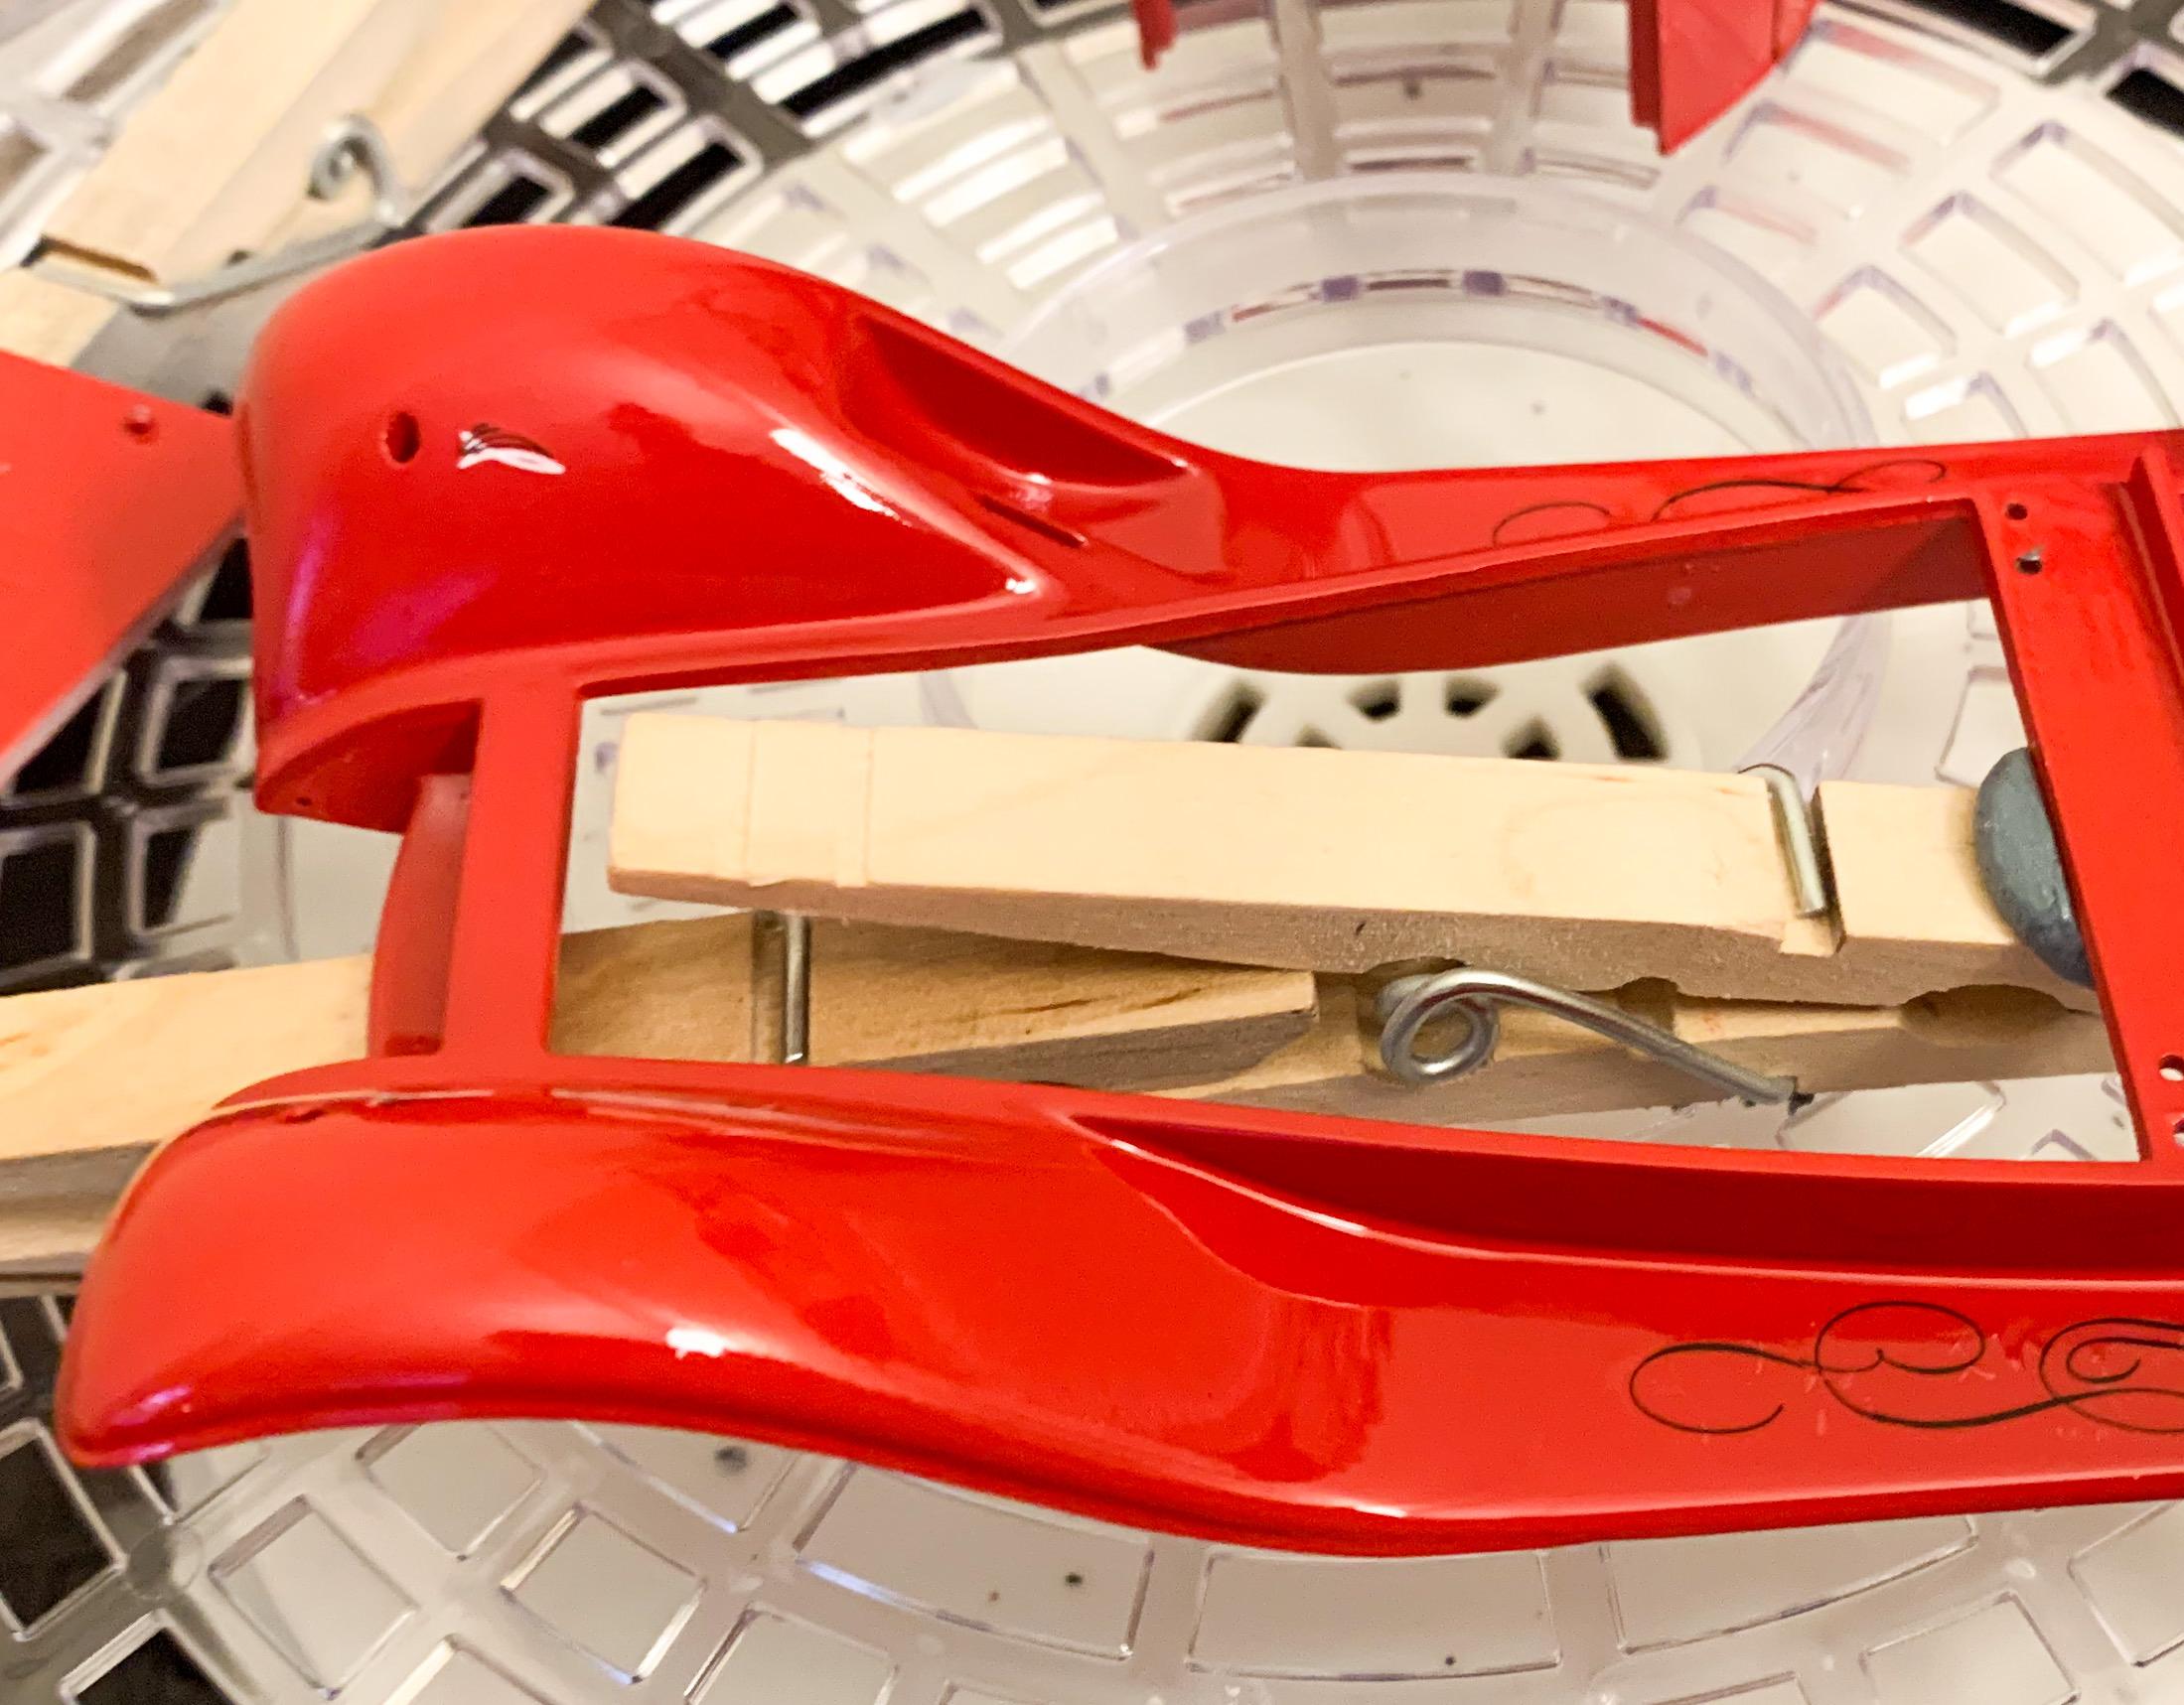
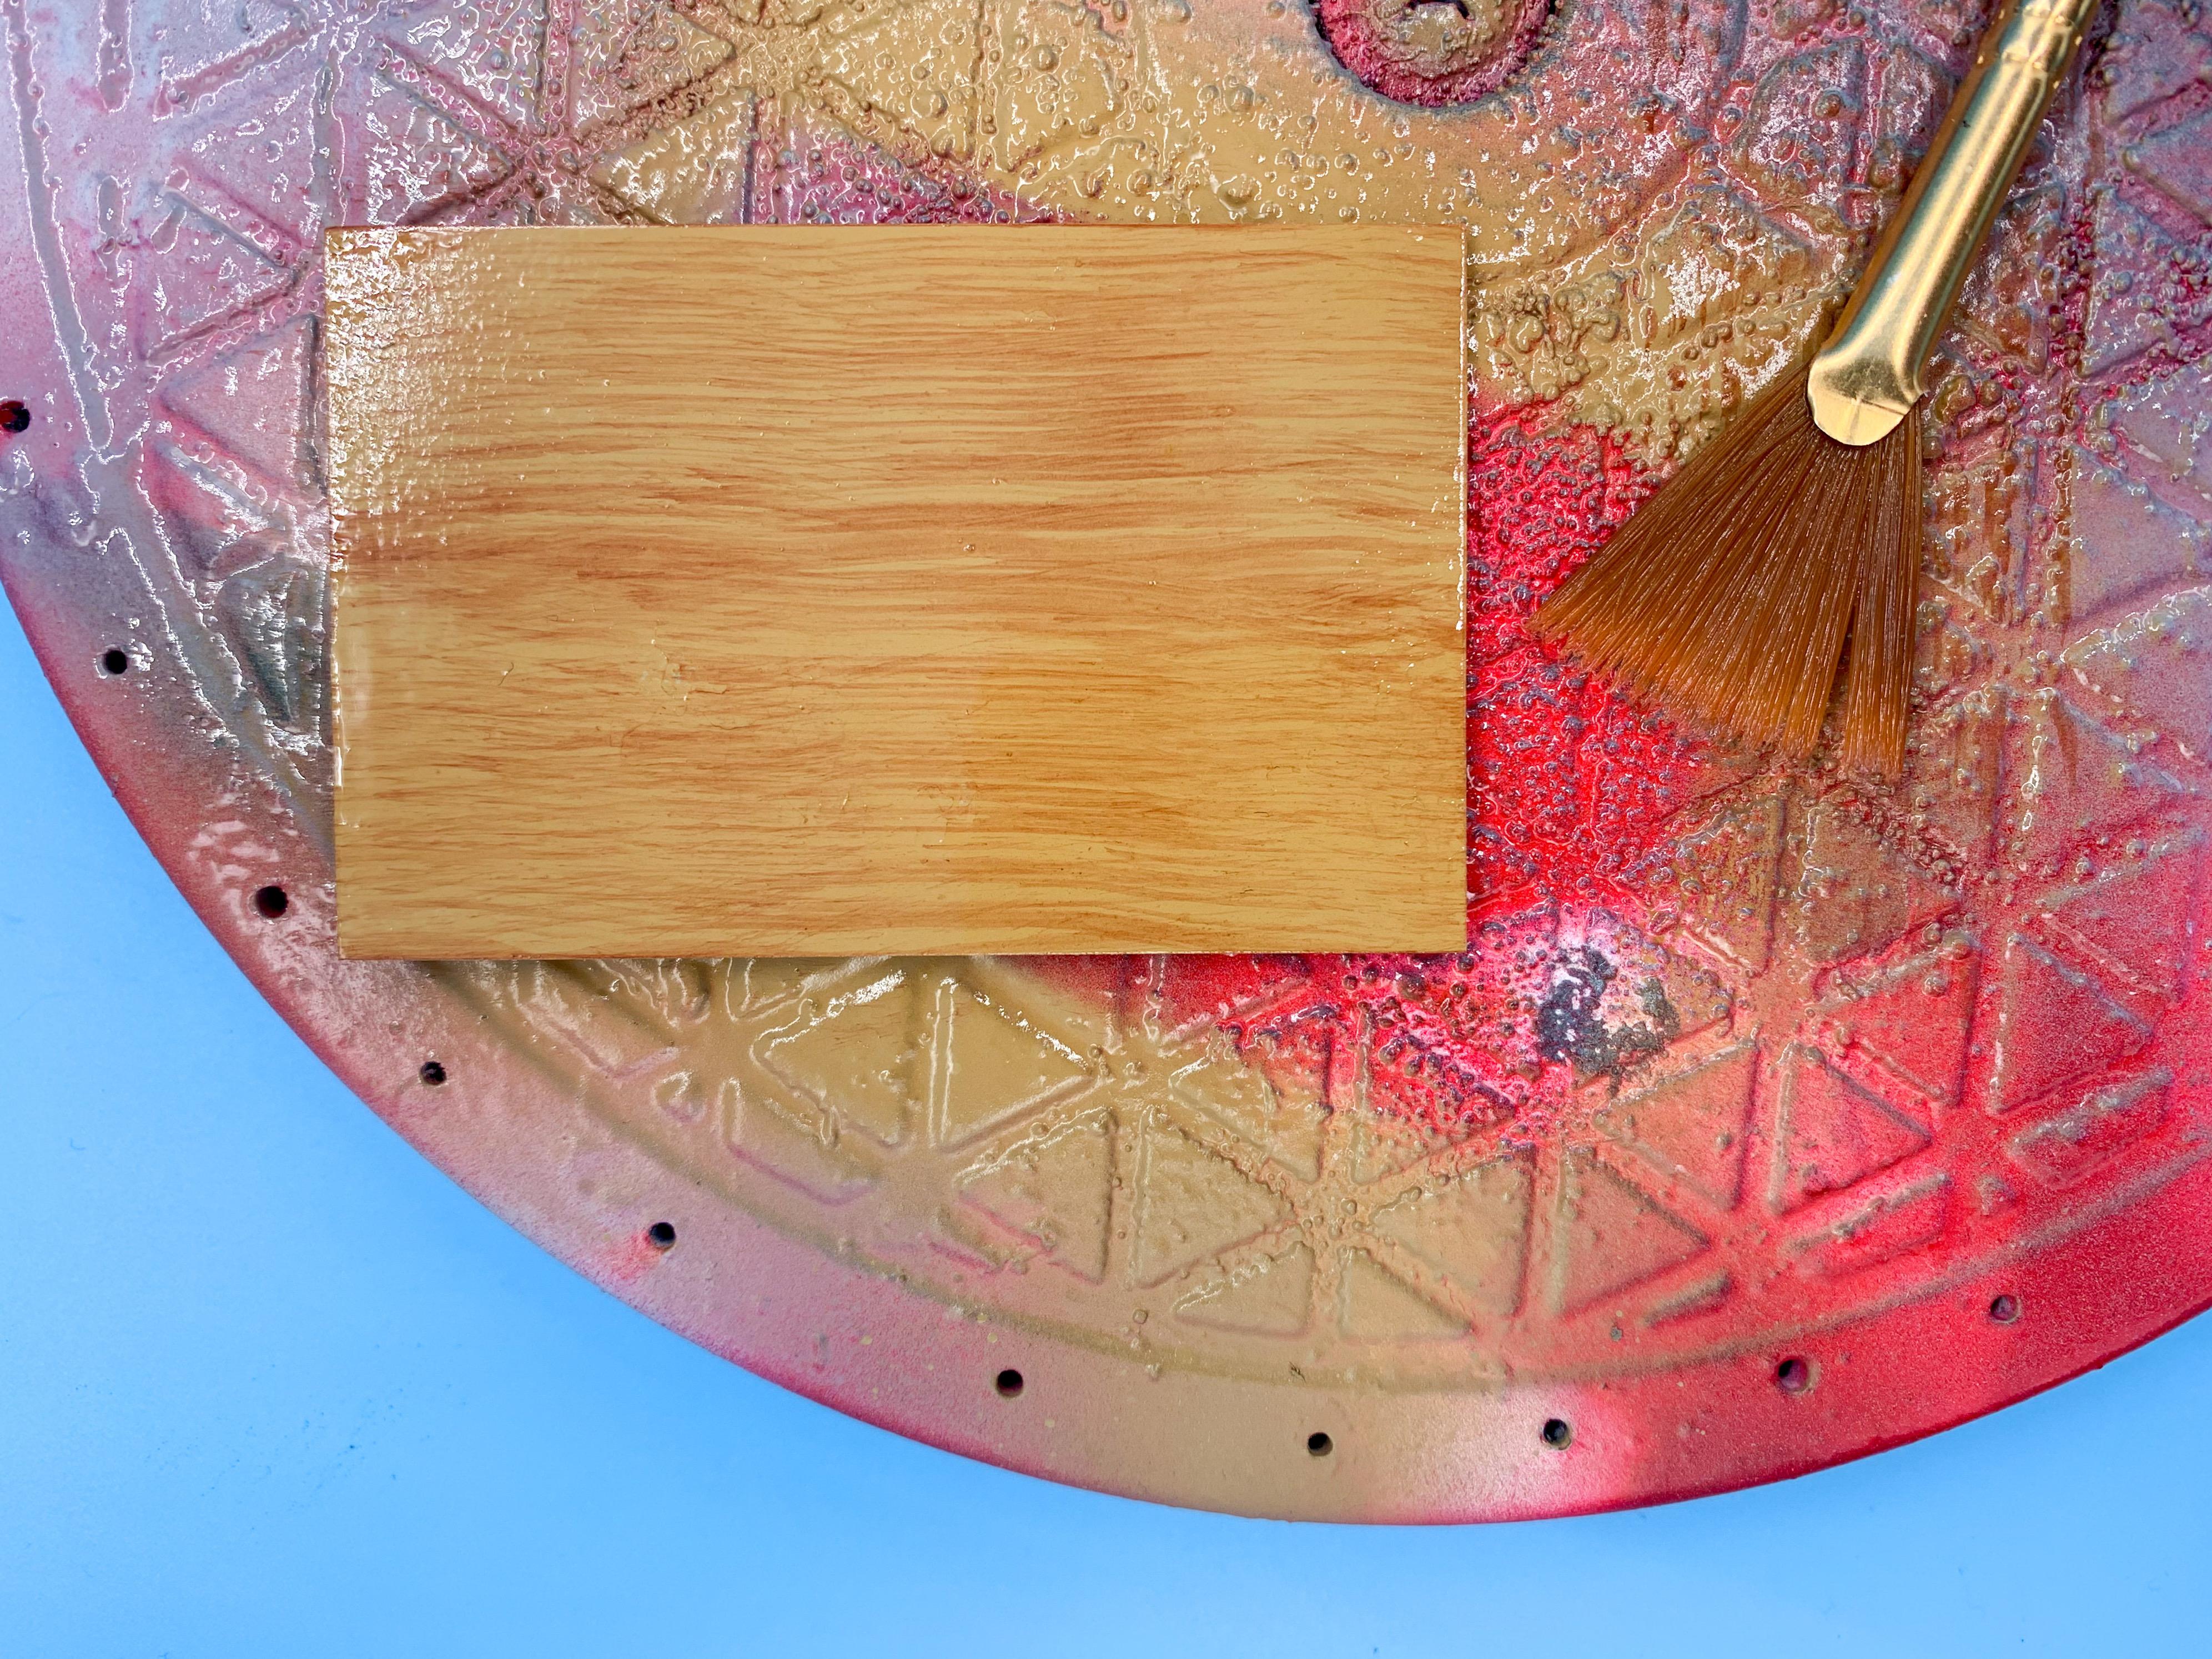
Thank you Steve! The woodgrain thing kinda IS easy, I can’t claim much credit for that...just need one of those fan brushes and give the suface a few light passes with just enough paint on there to make the grain pattern. Appreciate the kind words! Ohh - interesting! I like the idea of a matching boat! ?♀️ Thanks buddy! A little more progress today - first up masked that ‘wood’ from yesterday... ...and shot some black - came out ok I think! Not totally sold on the interior floor yet, need to mess with that some more... Meanwhile, the dehydrator finished it’s dehydrating so I could finish off the clear coating (it was easier just to do some parts in two stages). Got some pretty glossy clear laid down! The dehydrator definitely helps smooth this clear out and removes any orange peel before it gets to drying: And finally, shot some Spazstix on some of the mechanical bits...I’m still getting the hang of this stuff and I need to redo one of the headlights but I like it so far. No better or worse than Alclad I don’t think, just different! More soon!
-
34 Church Truck
CabDriver replied to CabDriver's topic in WIP: Model Trucks: Pickups, Vans, SUVs, Light Commercial
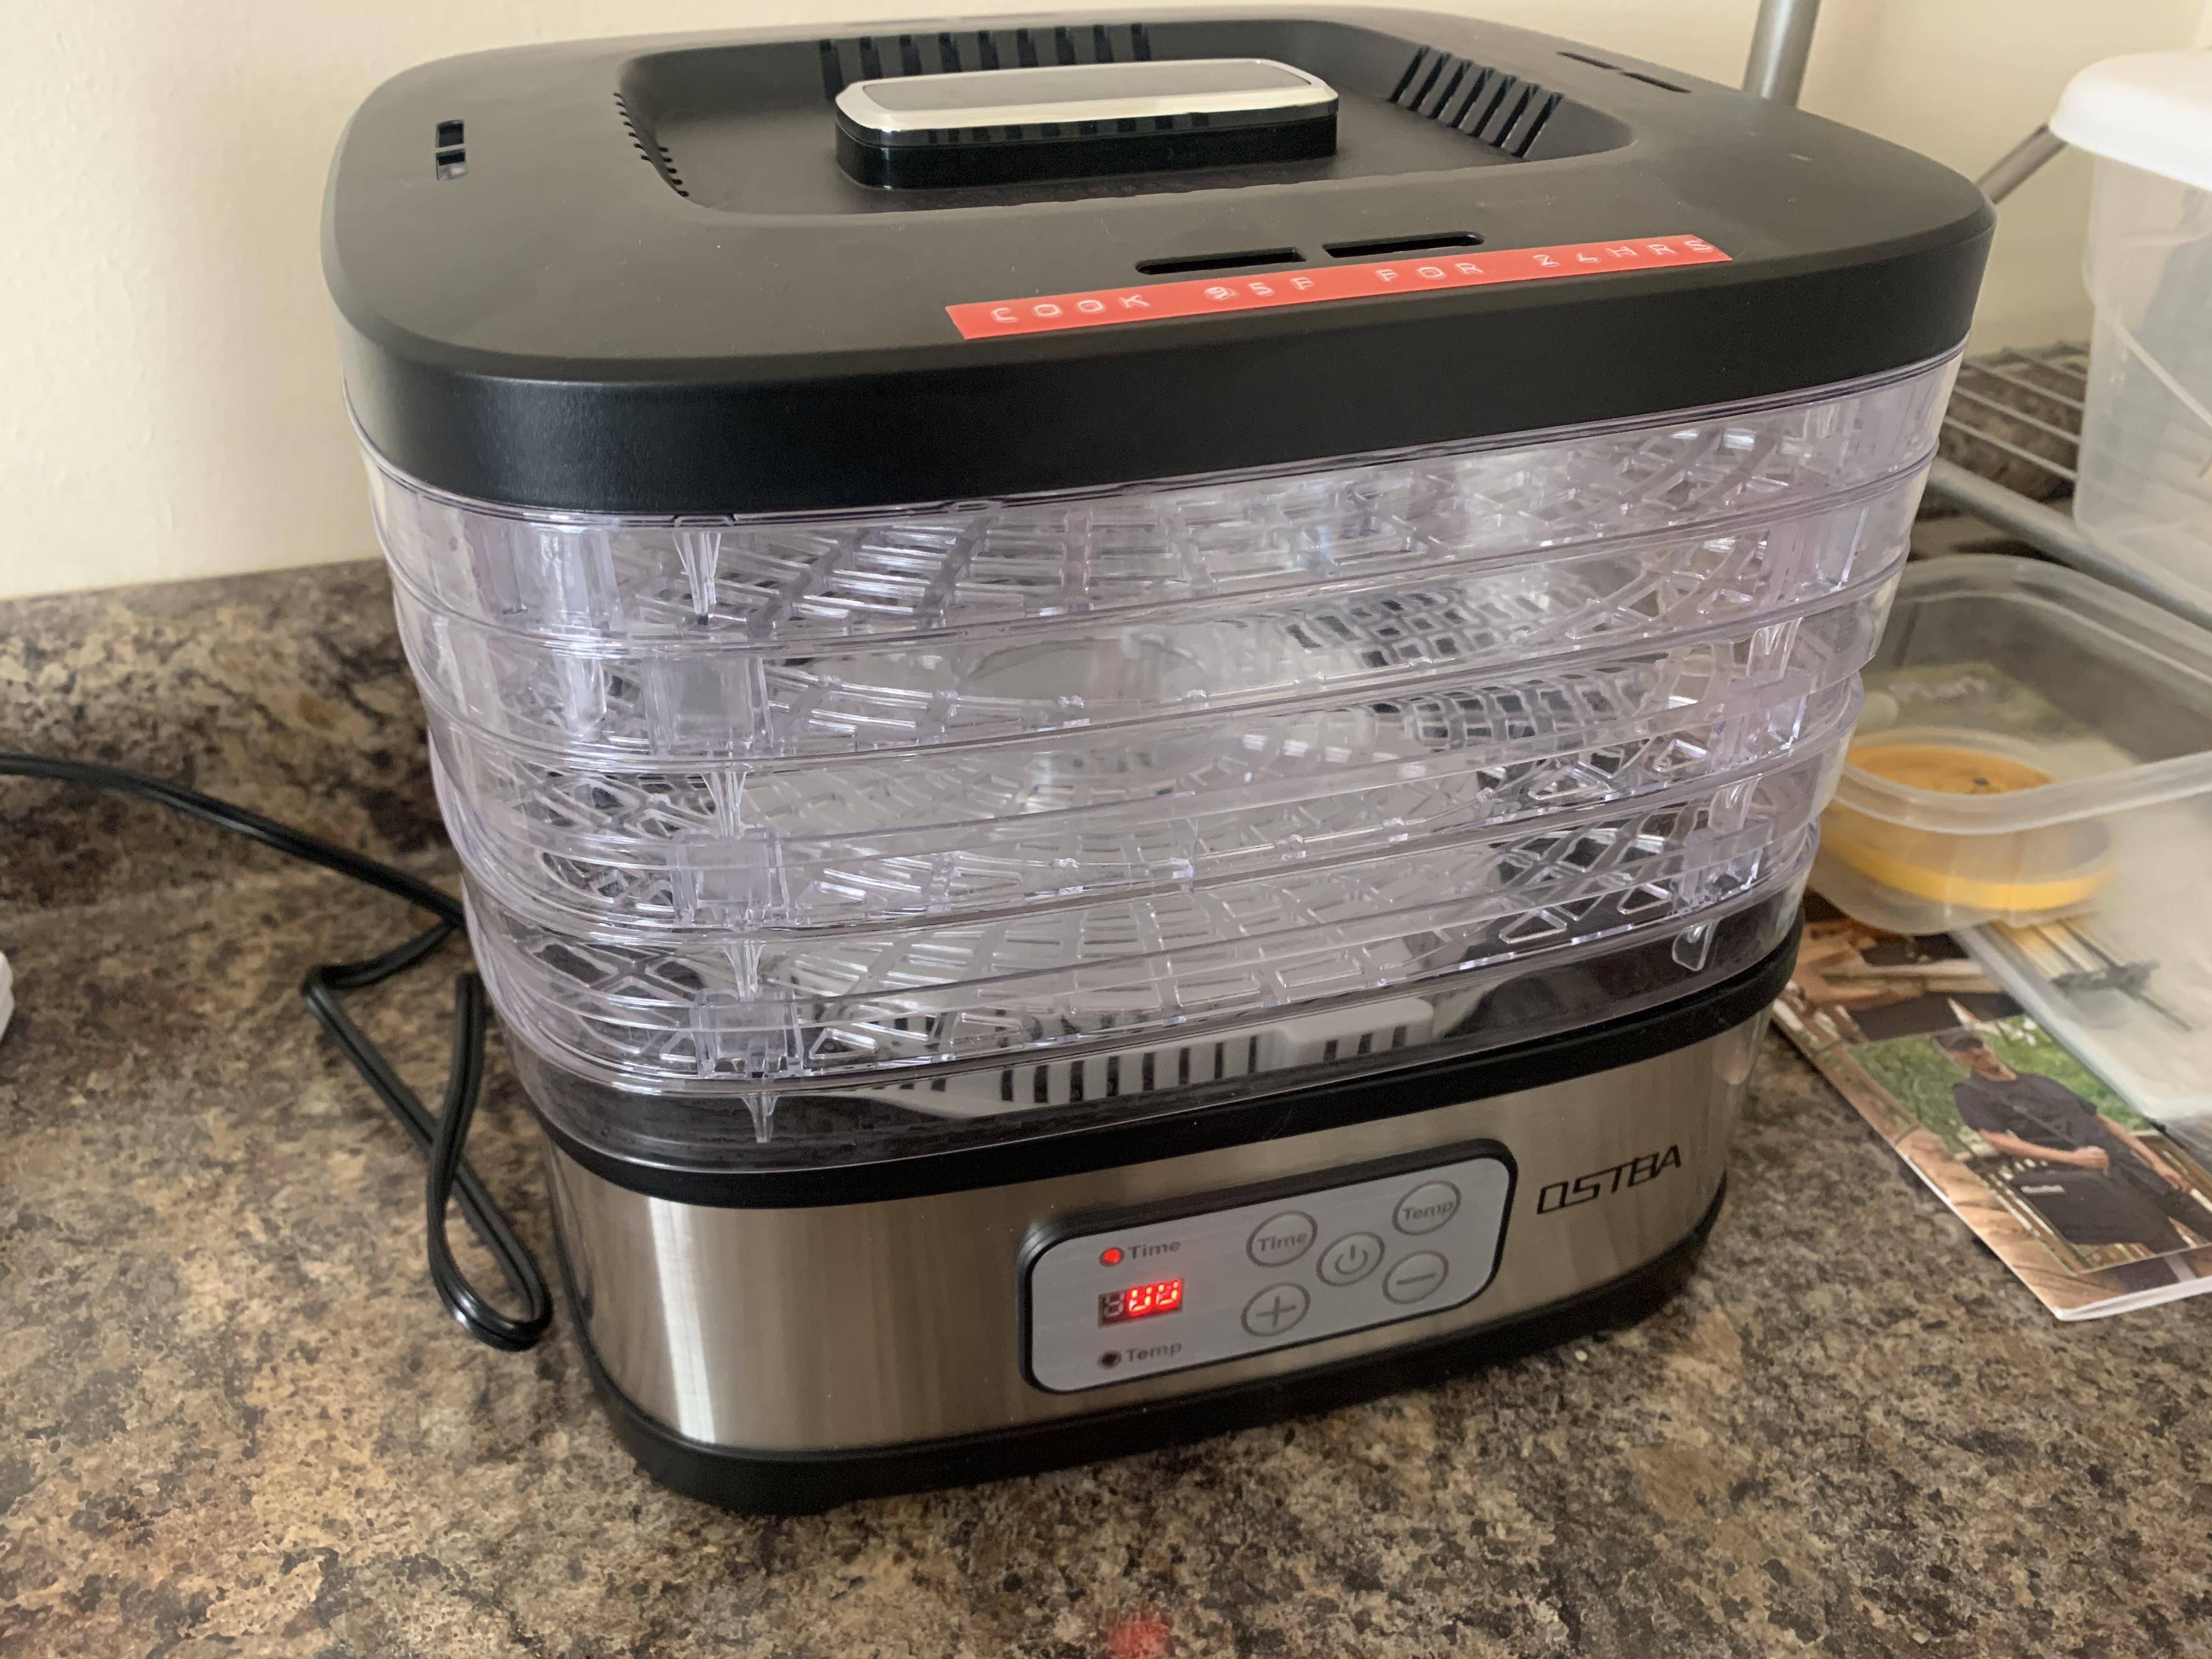
Happy New Year to you too Francis! I keep the dehydrator set on it’s lowest setting, which is 95 degrees - although my little hydrometer says it’s actually running at 101. Warm, but not much warmer than my workshop gets on a warm day ?. I think the air circulation in the dehydrator does as much to dry the paint as the temperature does, most likely. First full project using it though, so we’ll see in 21 hours (and counting)... Speaking of which, did some touch-ups on those decals, got them snuggled down tight as best I can and shot some clear today! The humidity here is a little higher than I’d normally like for shooting clear, but I got a bunch of parts in the dehydrator and the clear seems to be levelling out beautifully: Most of these parts (and some more not pictured) will need a second round of painting tomorrow to get the top sides - the fenders primarily, but also the frame, the bed and the tailgate, so more clear-coating adventures tomorrow! Meanwhile, shot the interior floor and the truck bed in Tamiya Tan... And then painted some woodgrain on there, ready for further paint detailing tomorrow: And finally, prepped a bunch of parts ready for Testor’s enamel black and then Alclad once they’ve set up a while...first time using this dehydrator and I already filled it up and need a second one ? More soon!
-
Got a colorscheme in mind Eric? I’m excited to see it with some paint on too!
-
New magazine from Kalmbach
CabDriver replied to Mike 1017's topic in General Automotive Talk (Trucks and Cars)
Surprising that the digital version is exactly the same cost as the print copy. I wonder how many people choose that option? -
Those colors are gorgeous! Nice job Bella!
-
34 Church Truck
CabDriver replied to CabDriver's topic in WIP: Model Trucks: Pickups, Vans, SUVs, Light Commercial
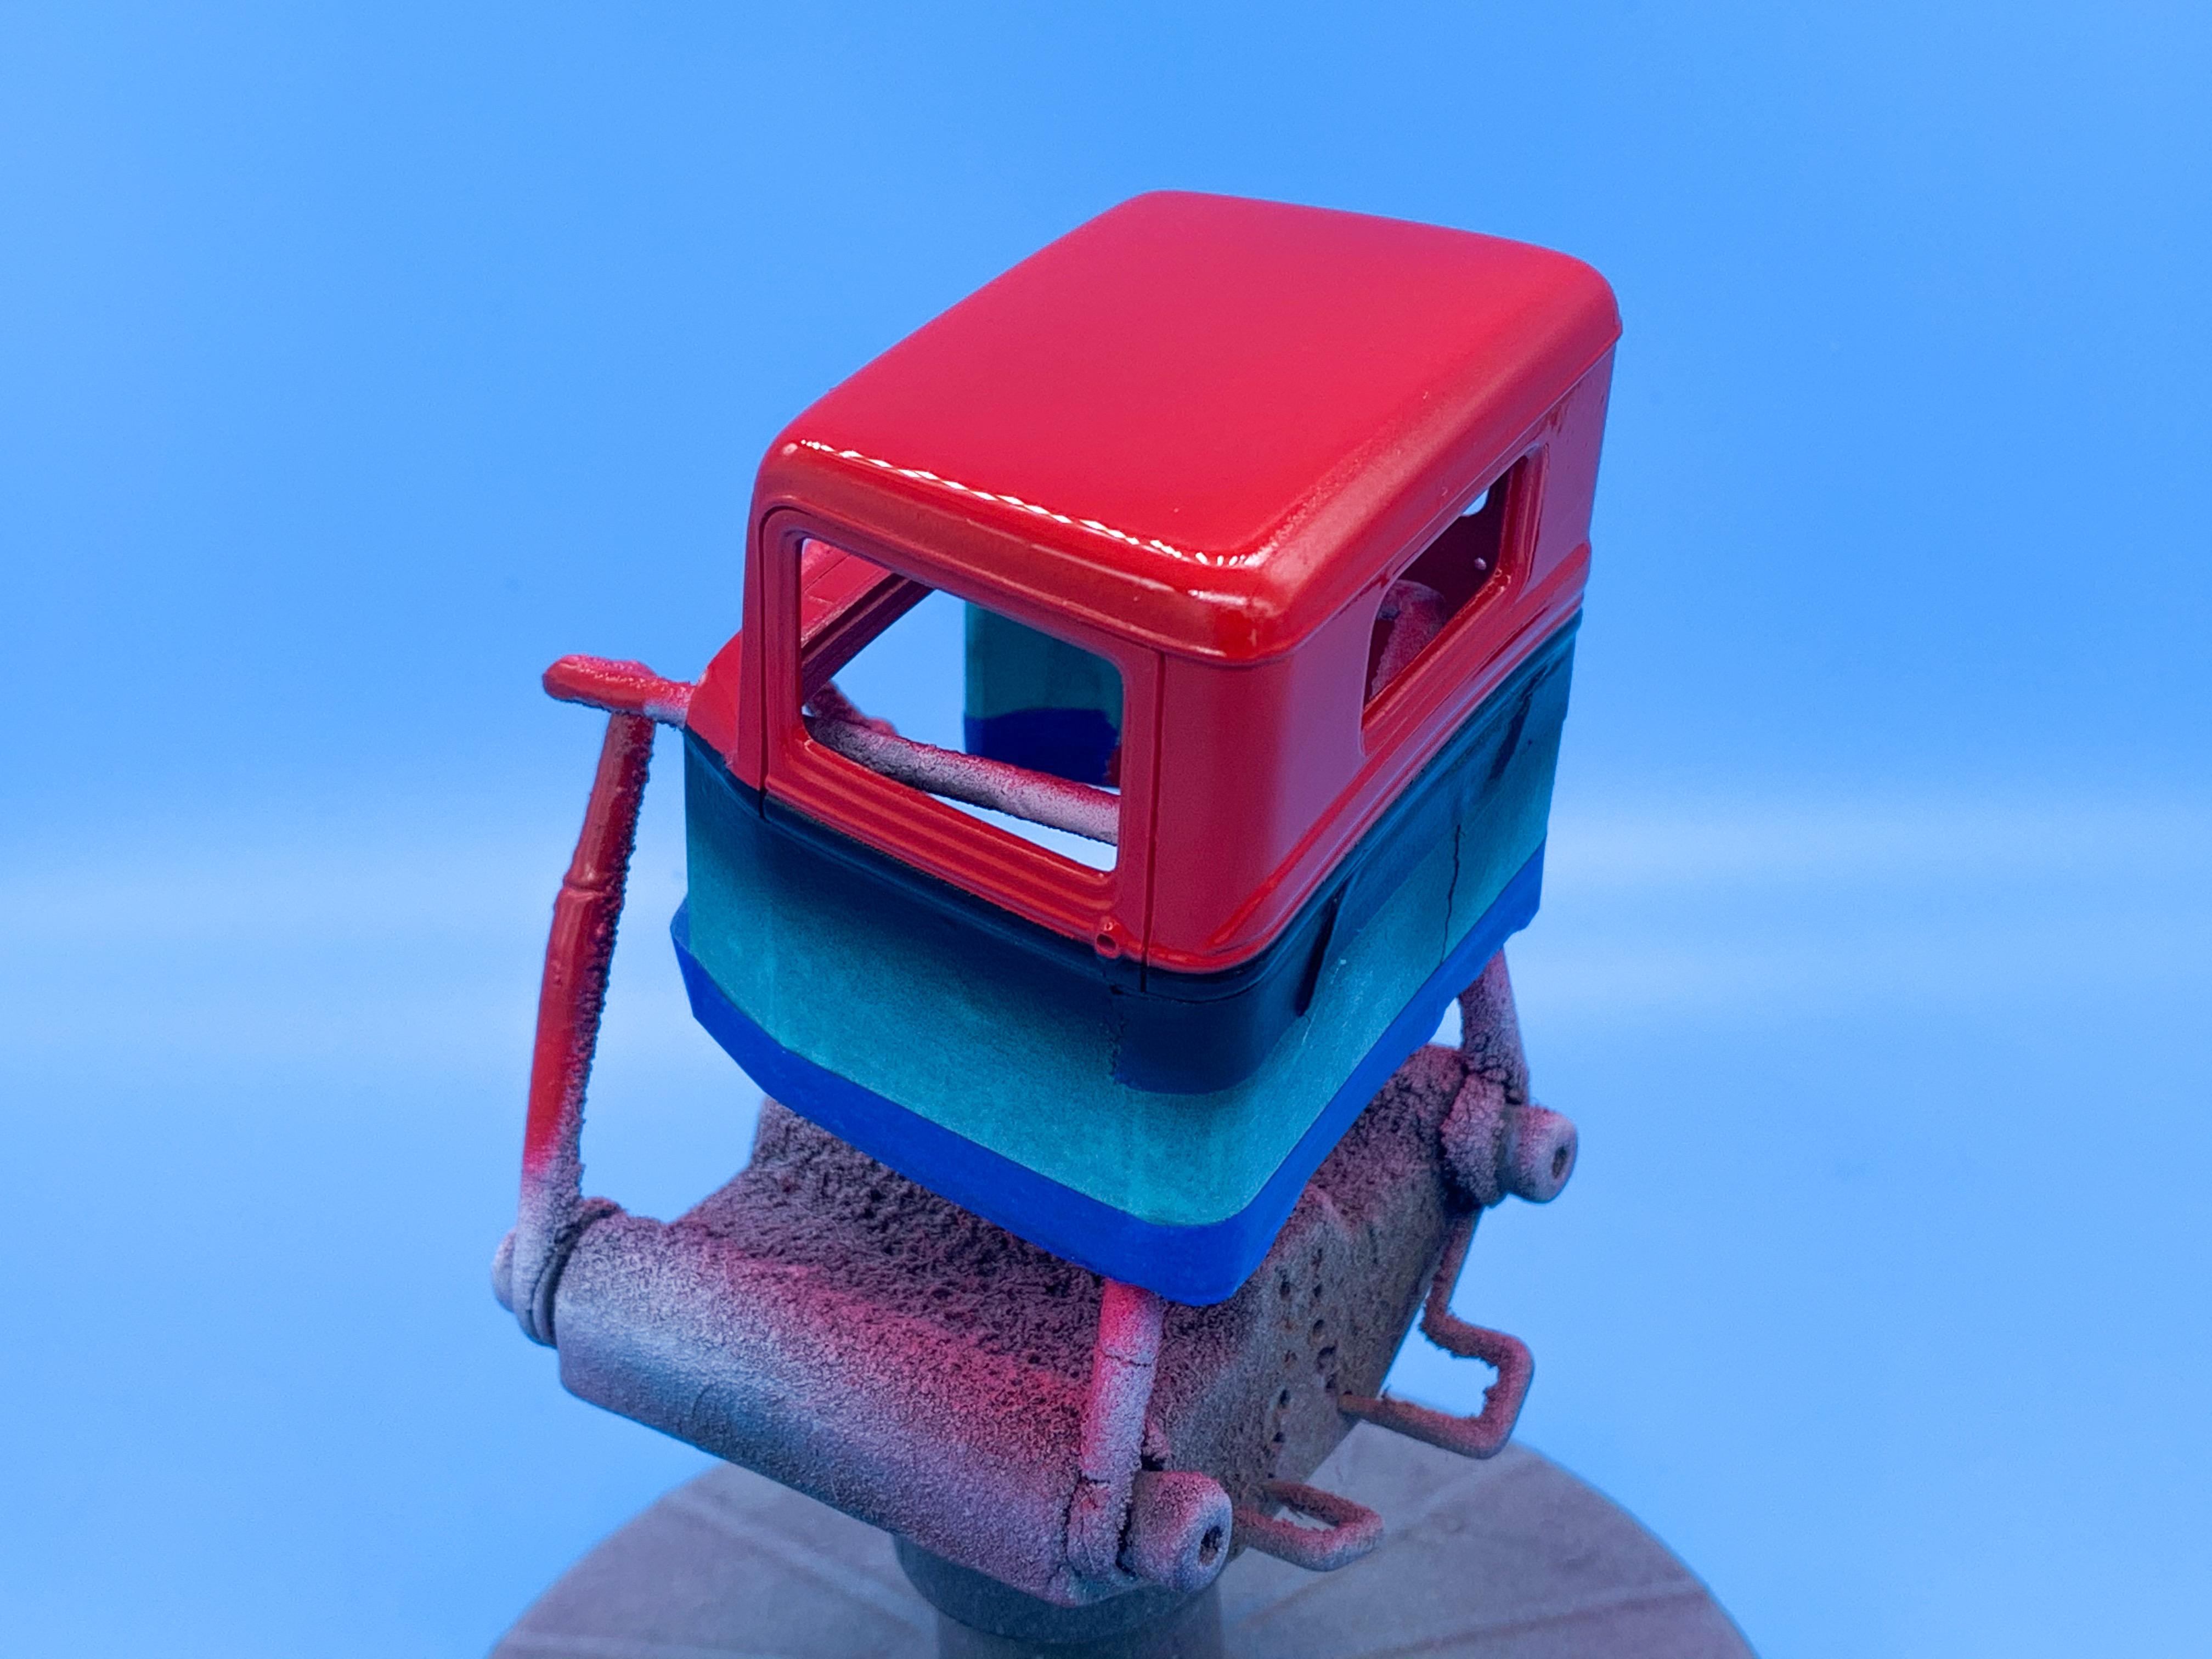
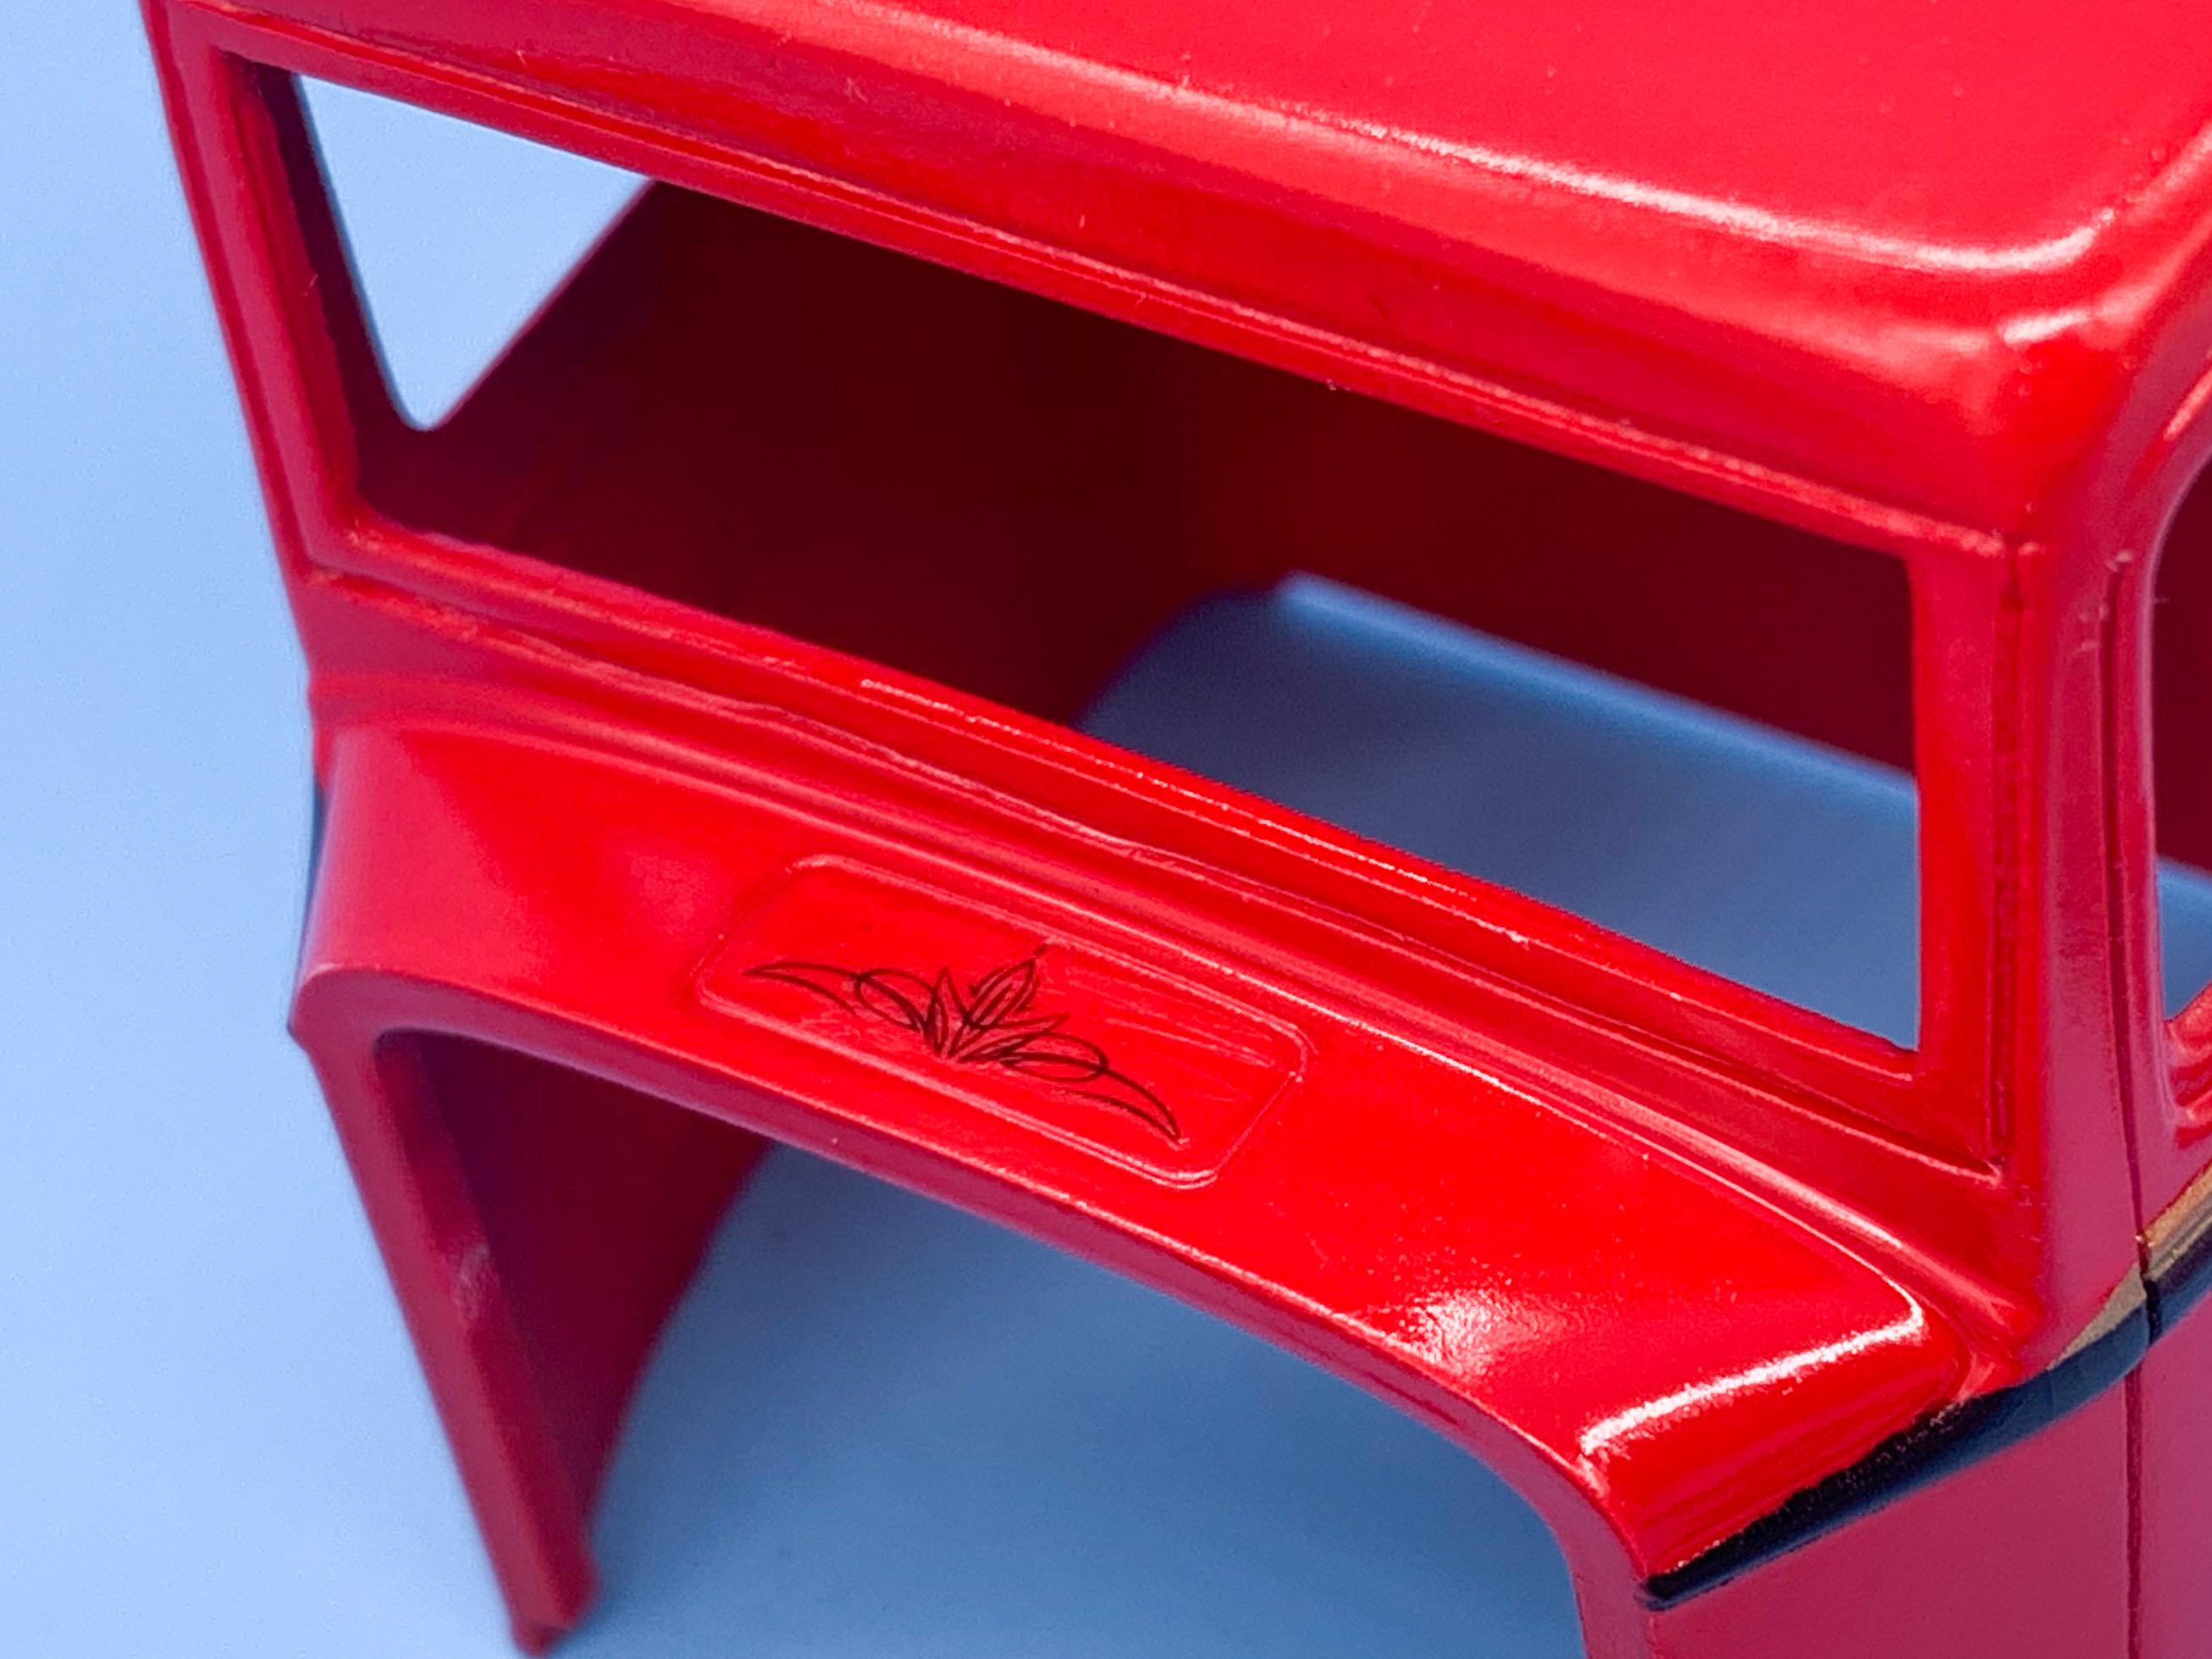
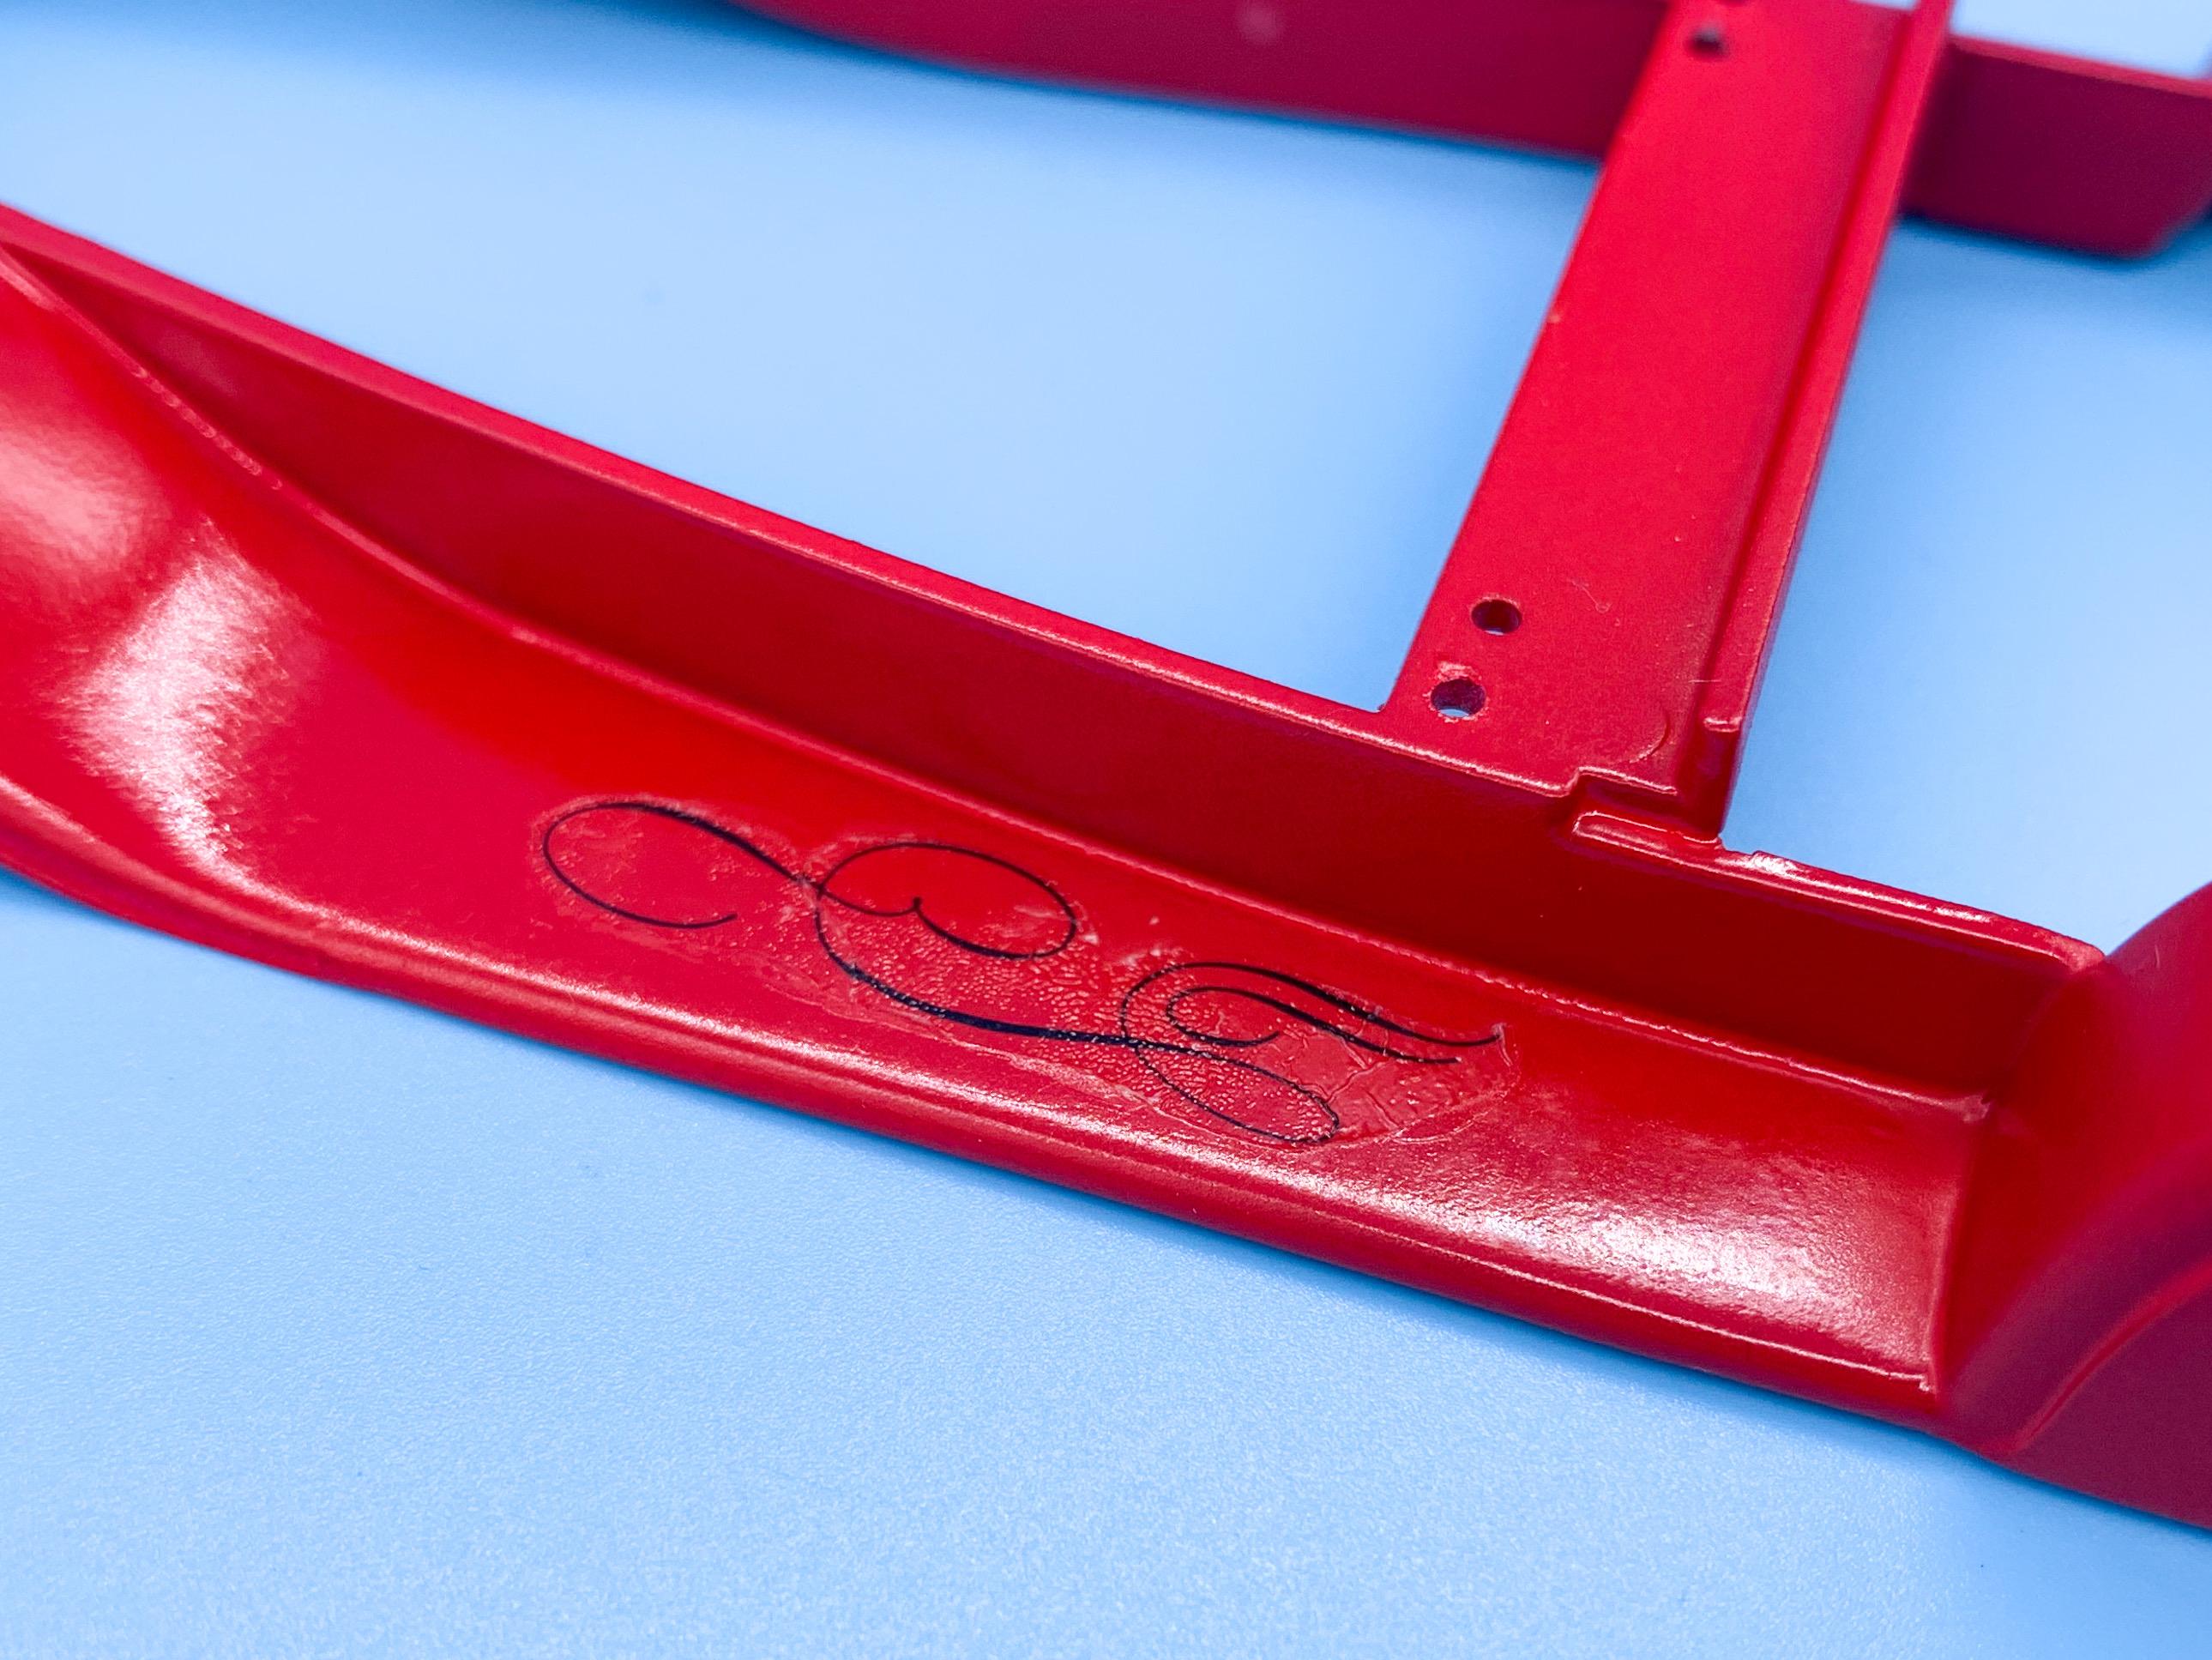
Thanks fellas! A little more progress this evening whilst we wait for the ball to drop... I wanted to add some subtle paint detail and some pinstriping to the body; first up some black and gold detail to the cab: And some little pinstripe touches - there’s not a good way that I’ve found to paint this stuff in scale, so decals it is... Man that acrylic paint surface looks rough up close ?. Some clear will fix those sins tho. Also, the ejector pin mark in the bed there, but I’m adding a new floor so that’ll be hidden further down the line... Once the setting solution has dried overnight I can clear some of this stuff and get it in the dehydrator that Santa thoughtfully brought me - exciting! Couldn’t resist a quick mock-up in the meantime whilst I wait: I really want to see how the color-scheme looks with the wooden bed in the back there - some nice light wood to compliment the gold touches on the body and the engine, so I’ll likely work on that tomorrow. More soon, happy new year everyone!
-
34 Church Truck
CabDriver replied to CabDriver's topic in WIP: Model Trucks: Pickups, Vans, SUVs, Light Commercial
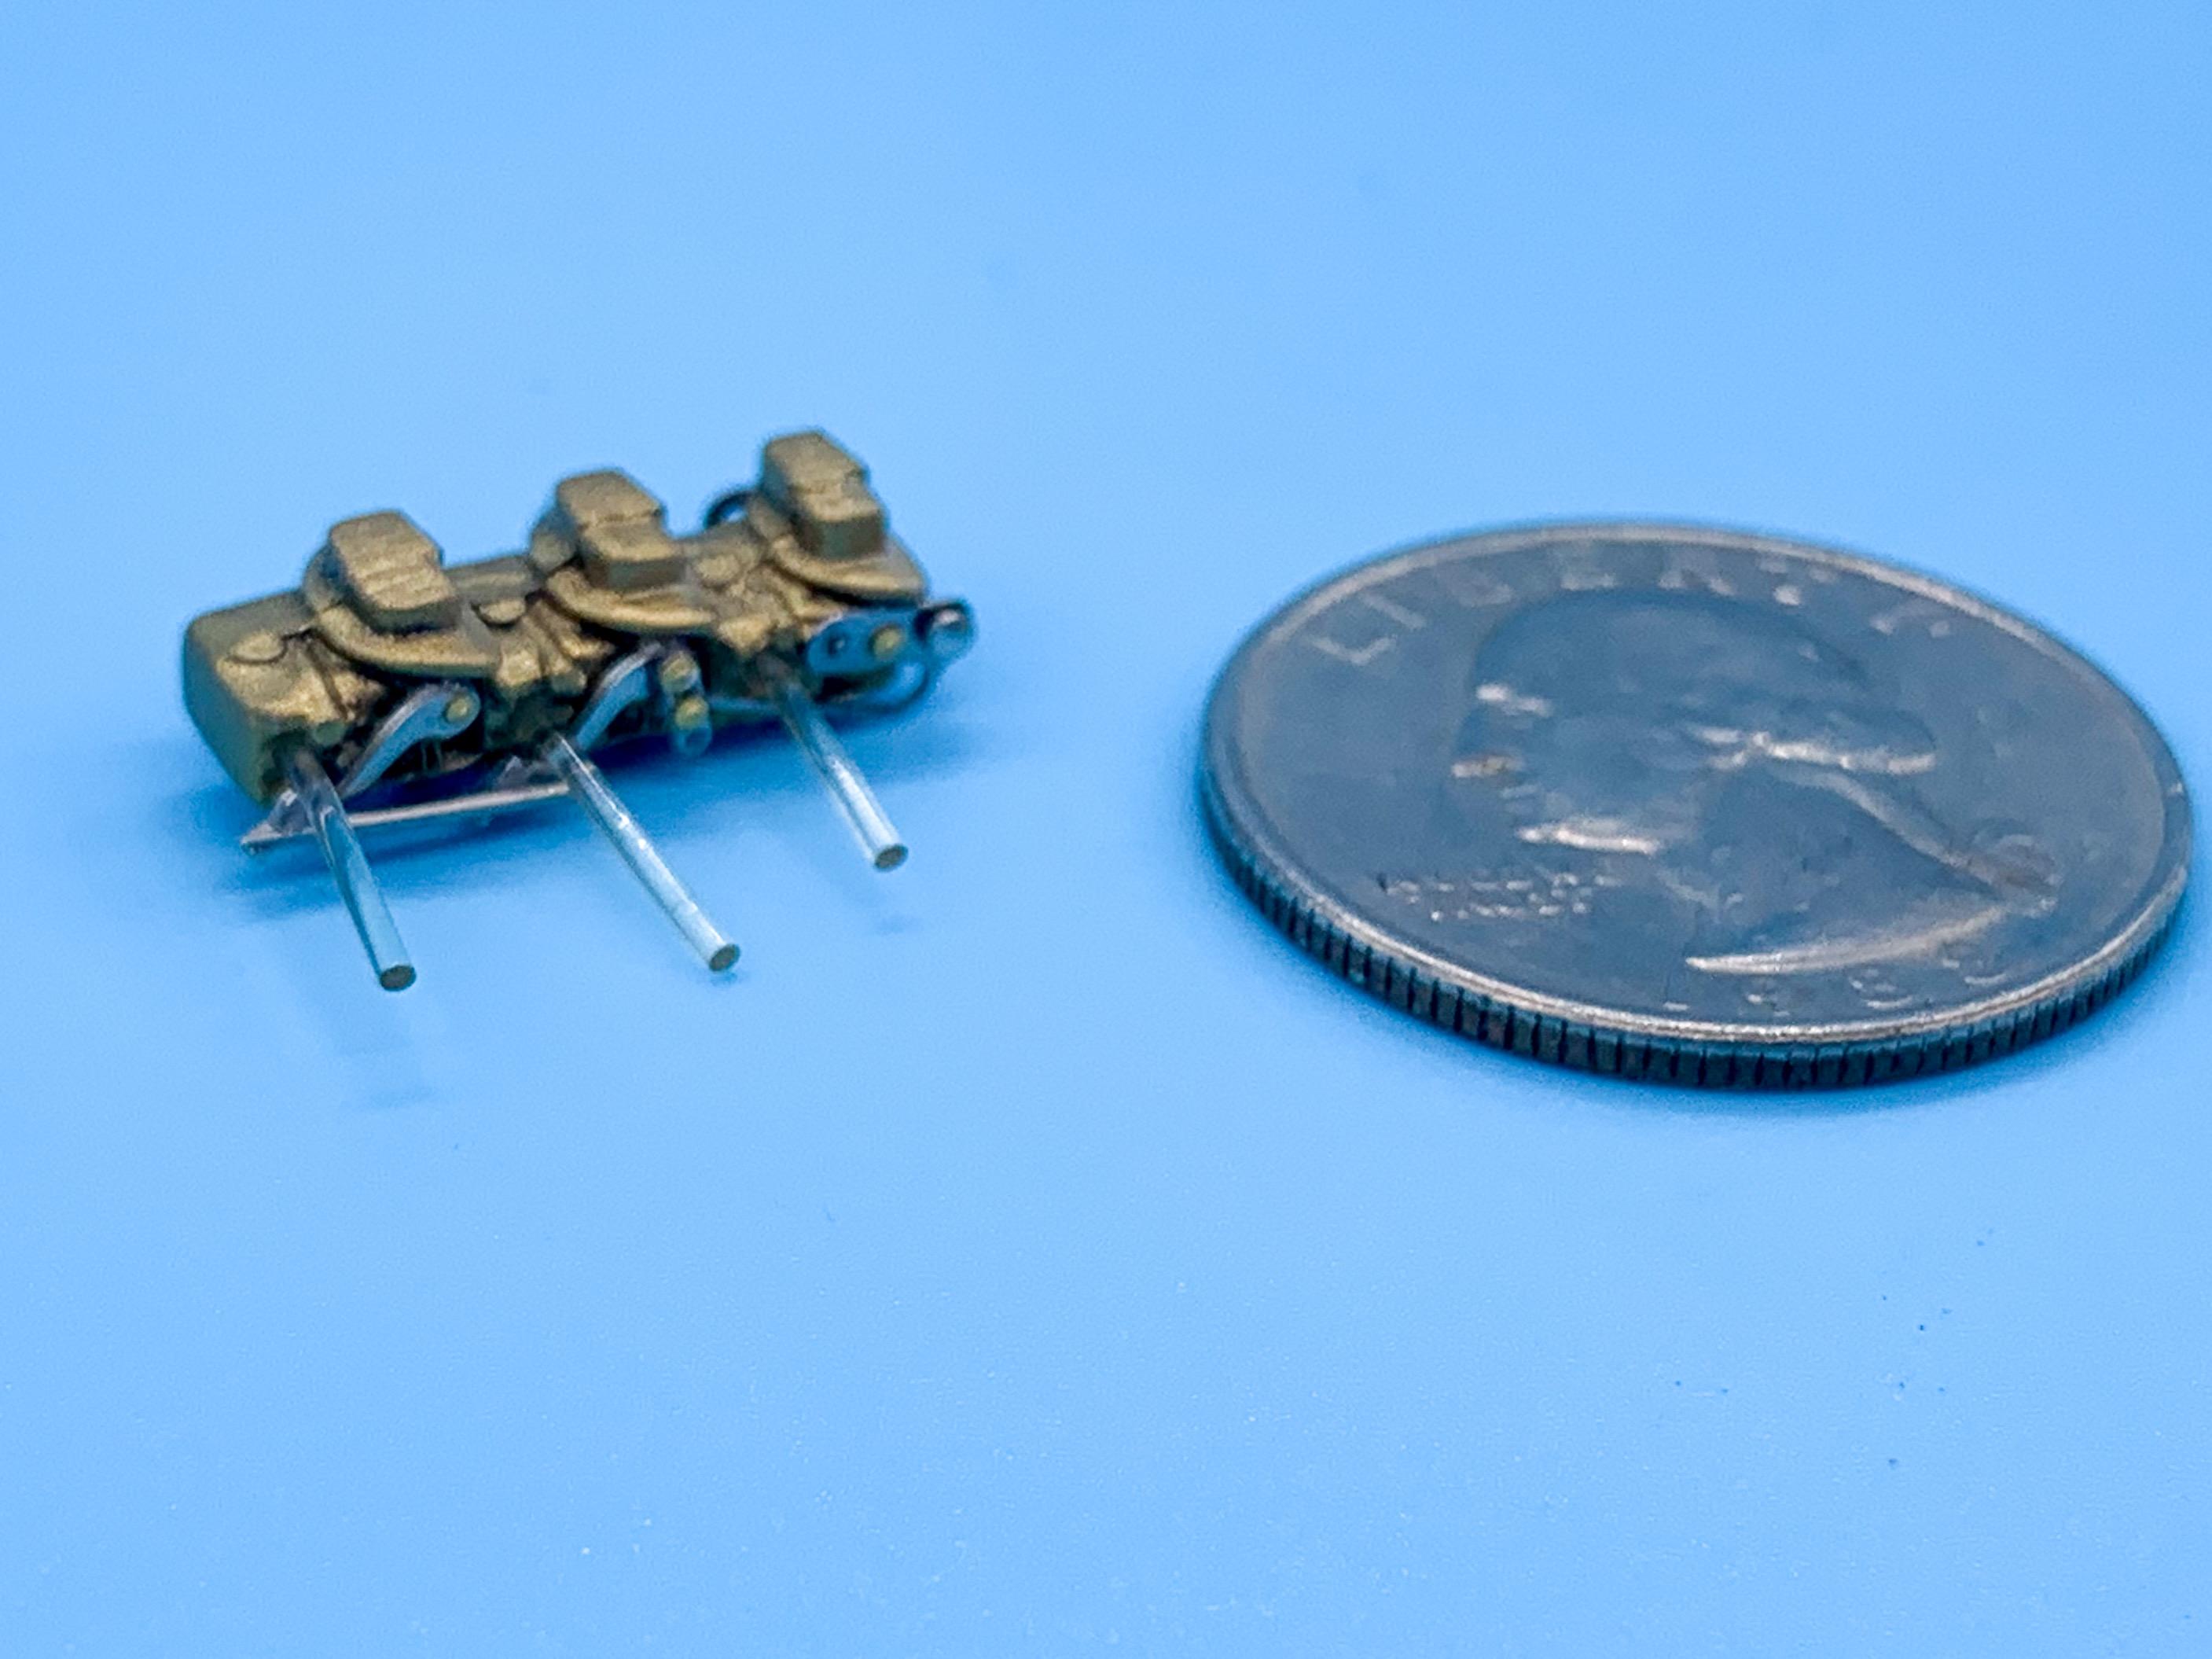
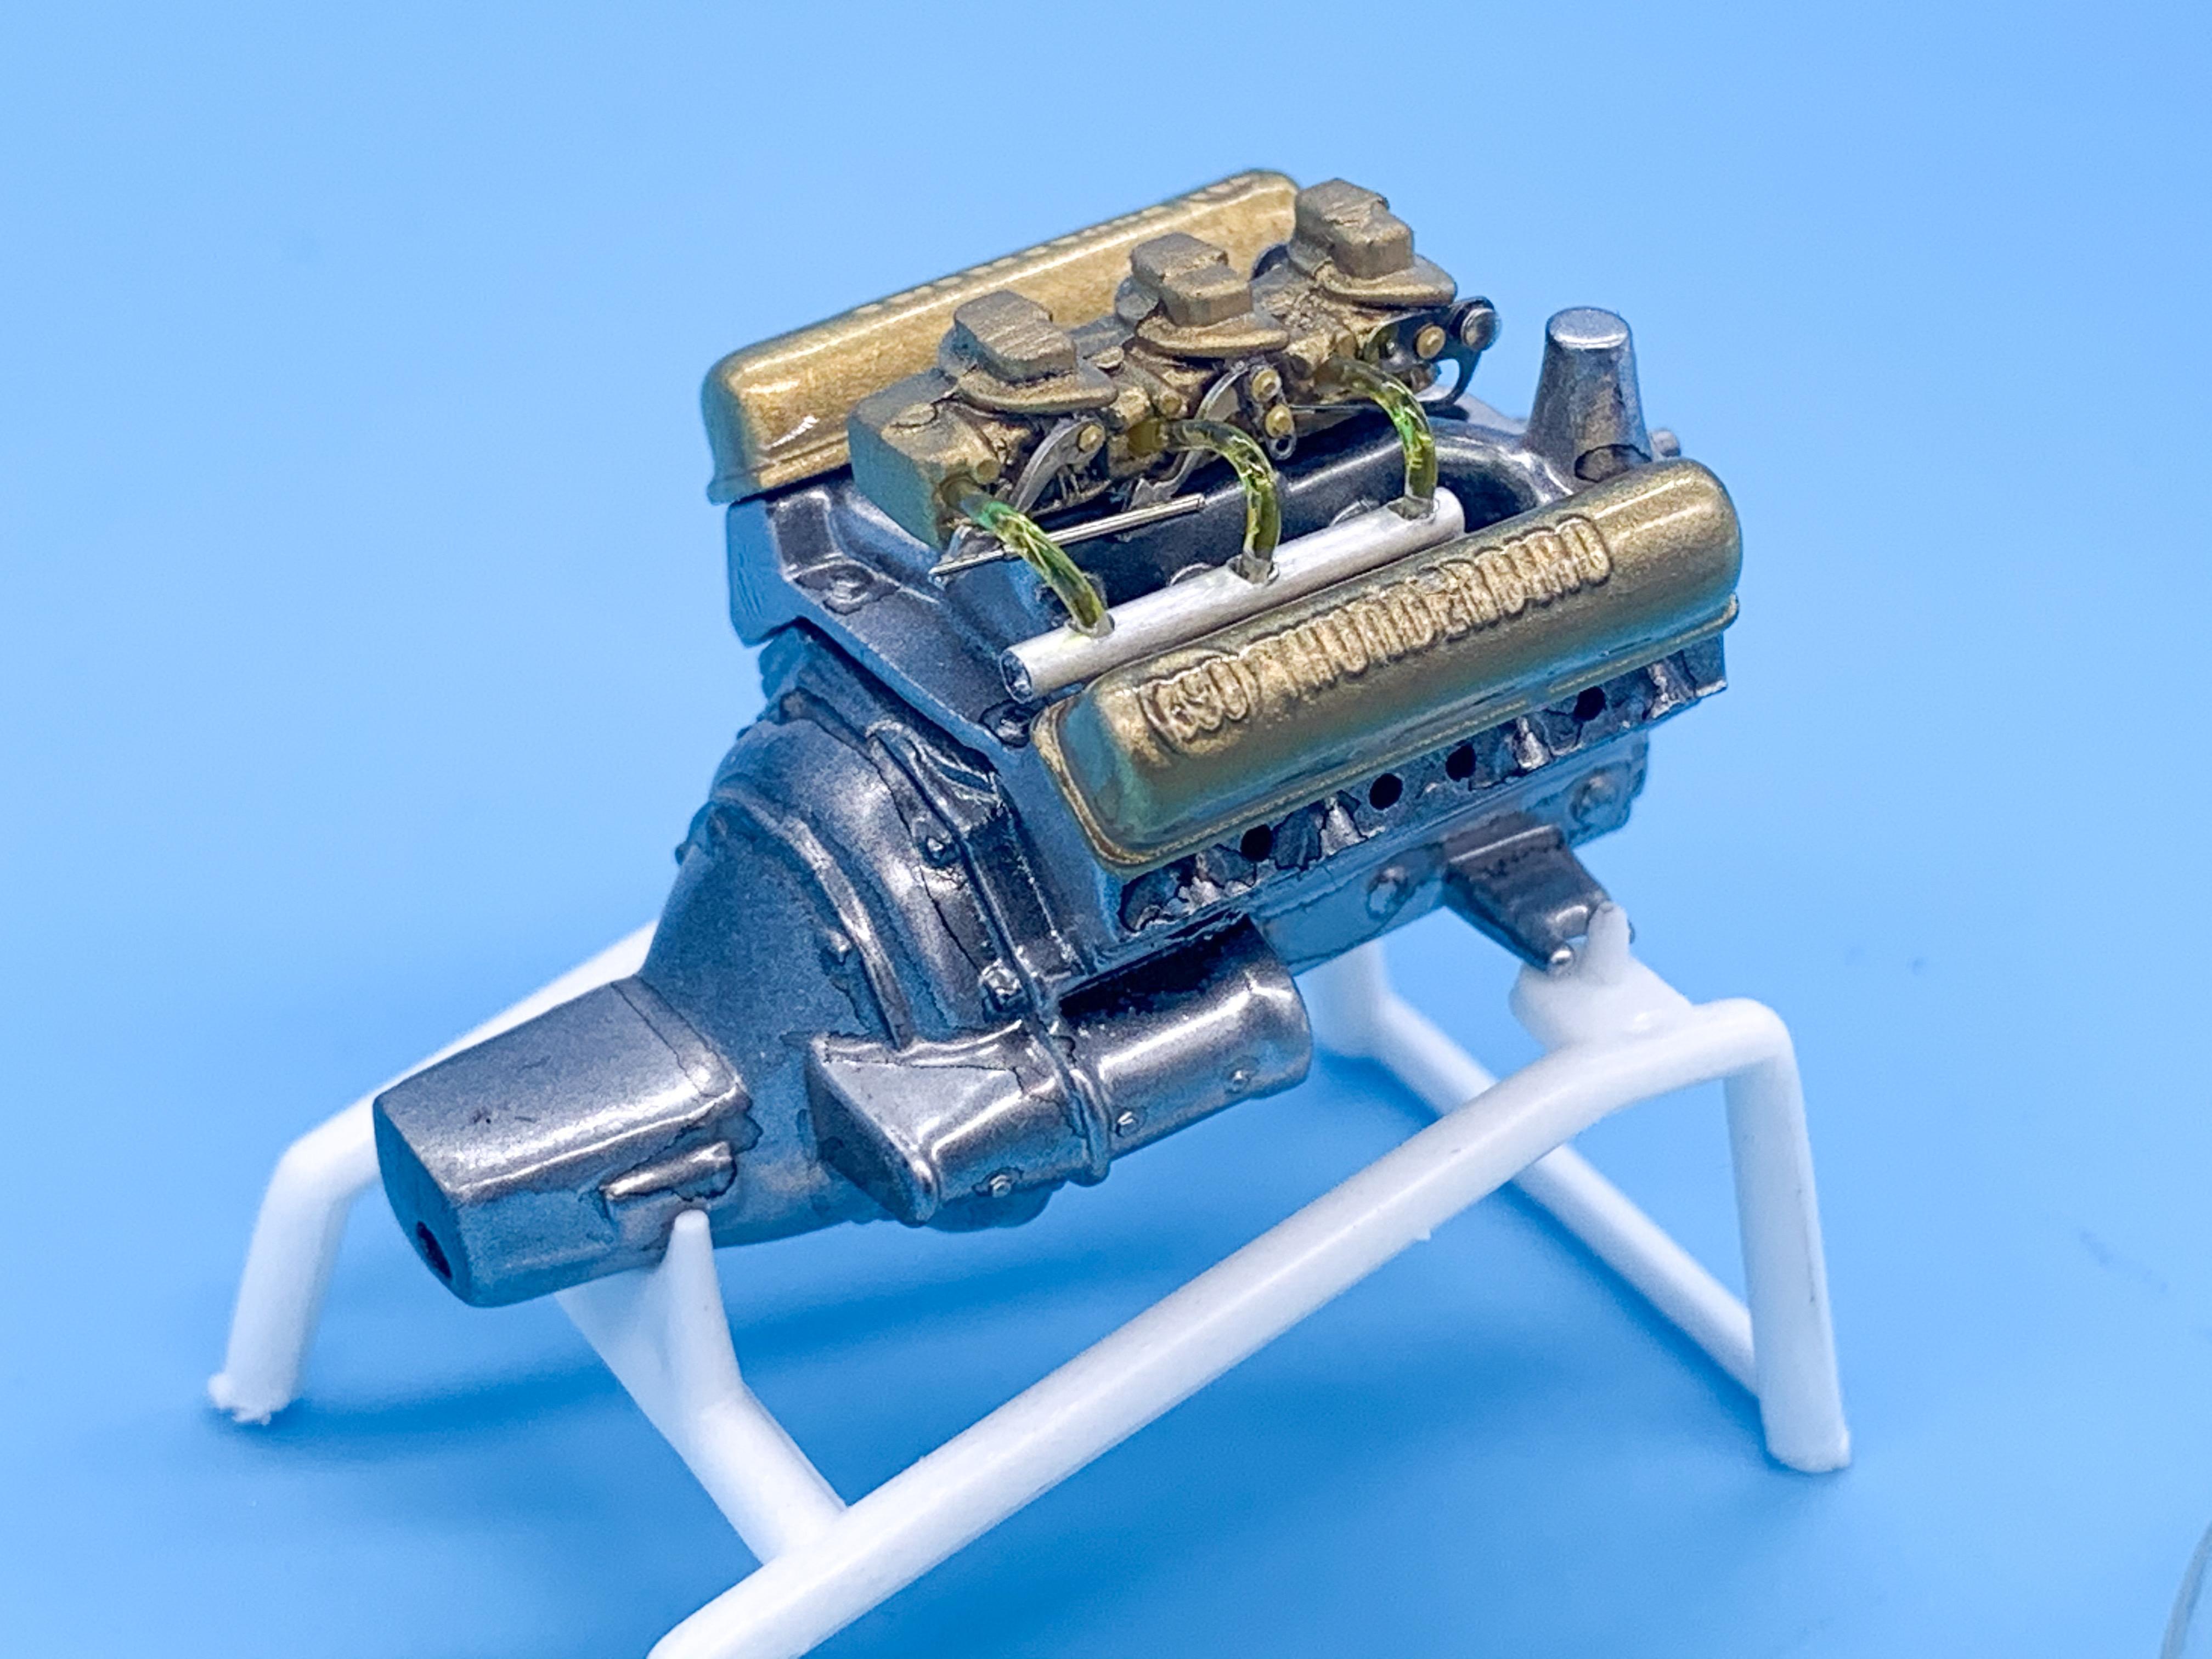
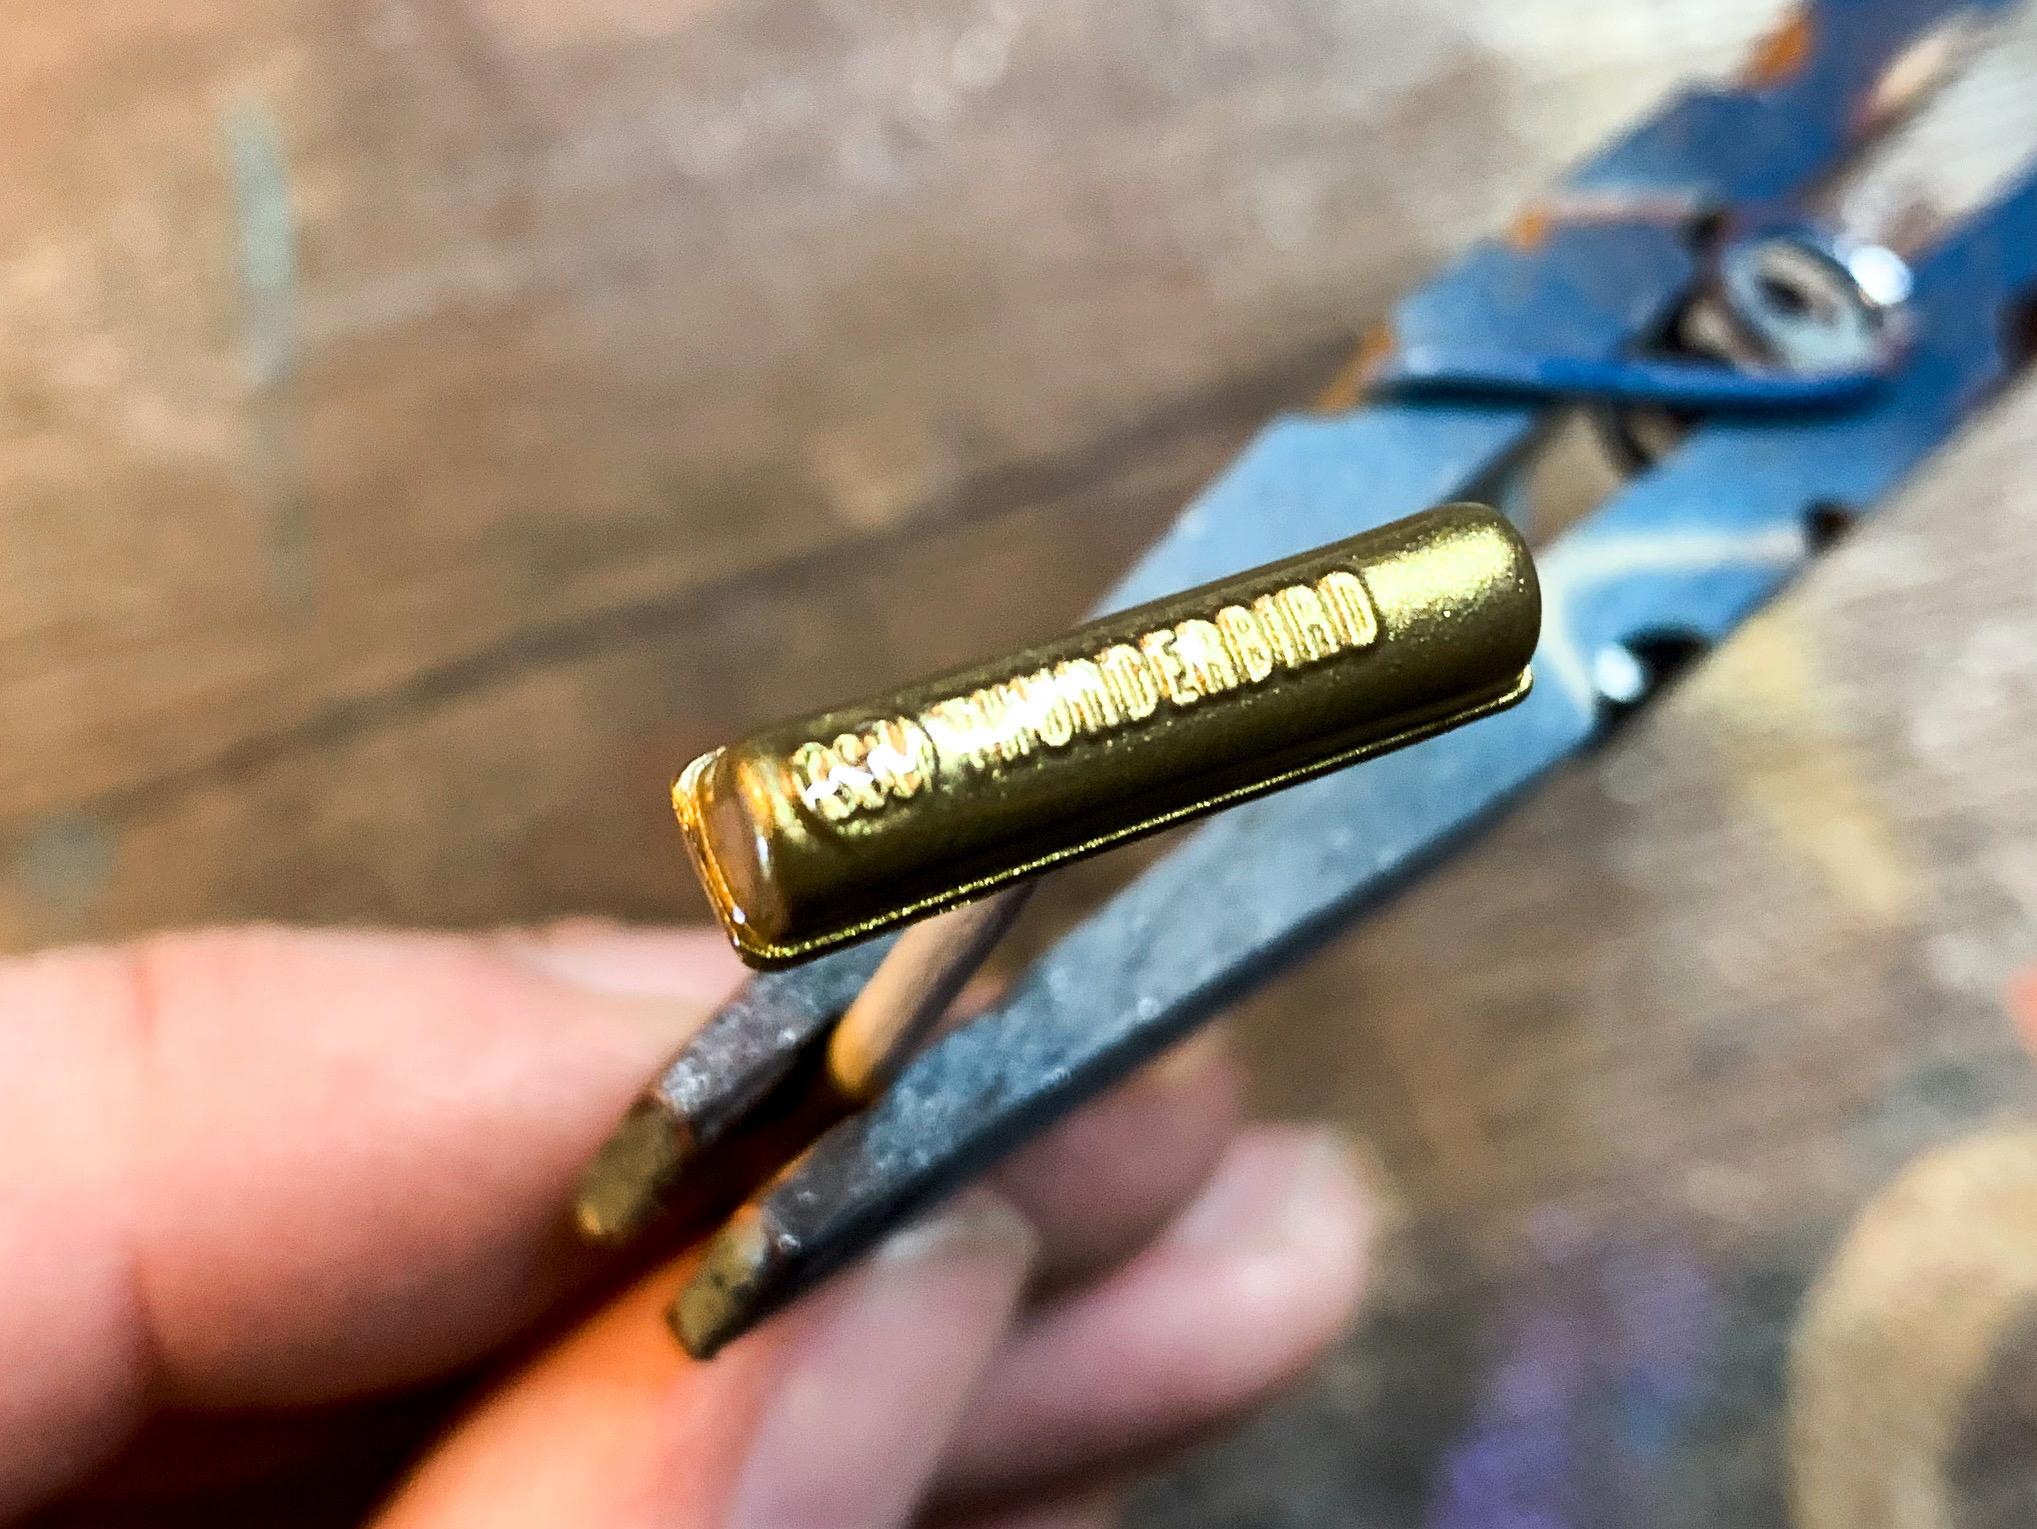
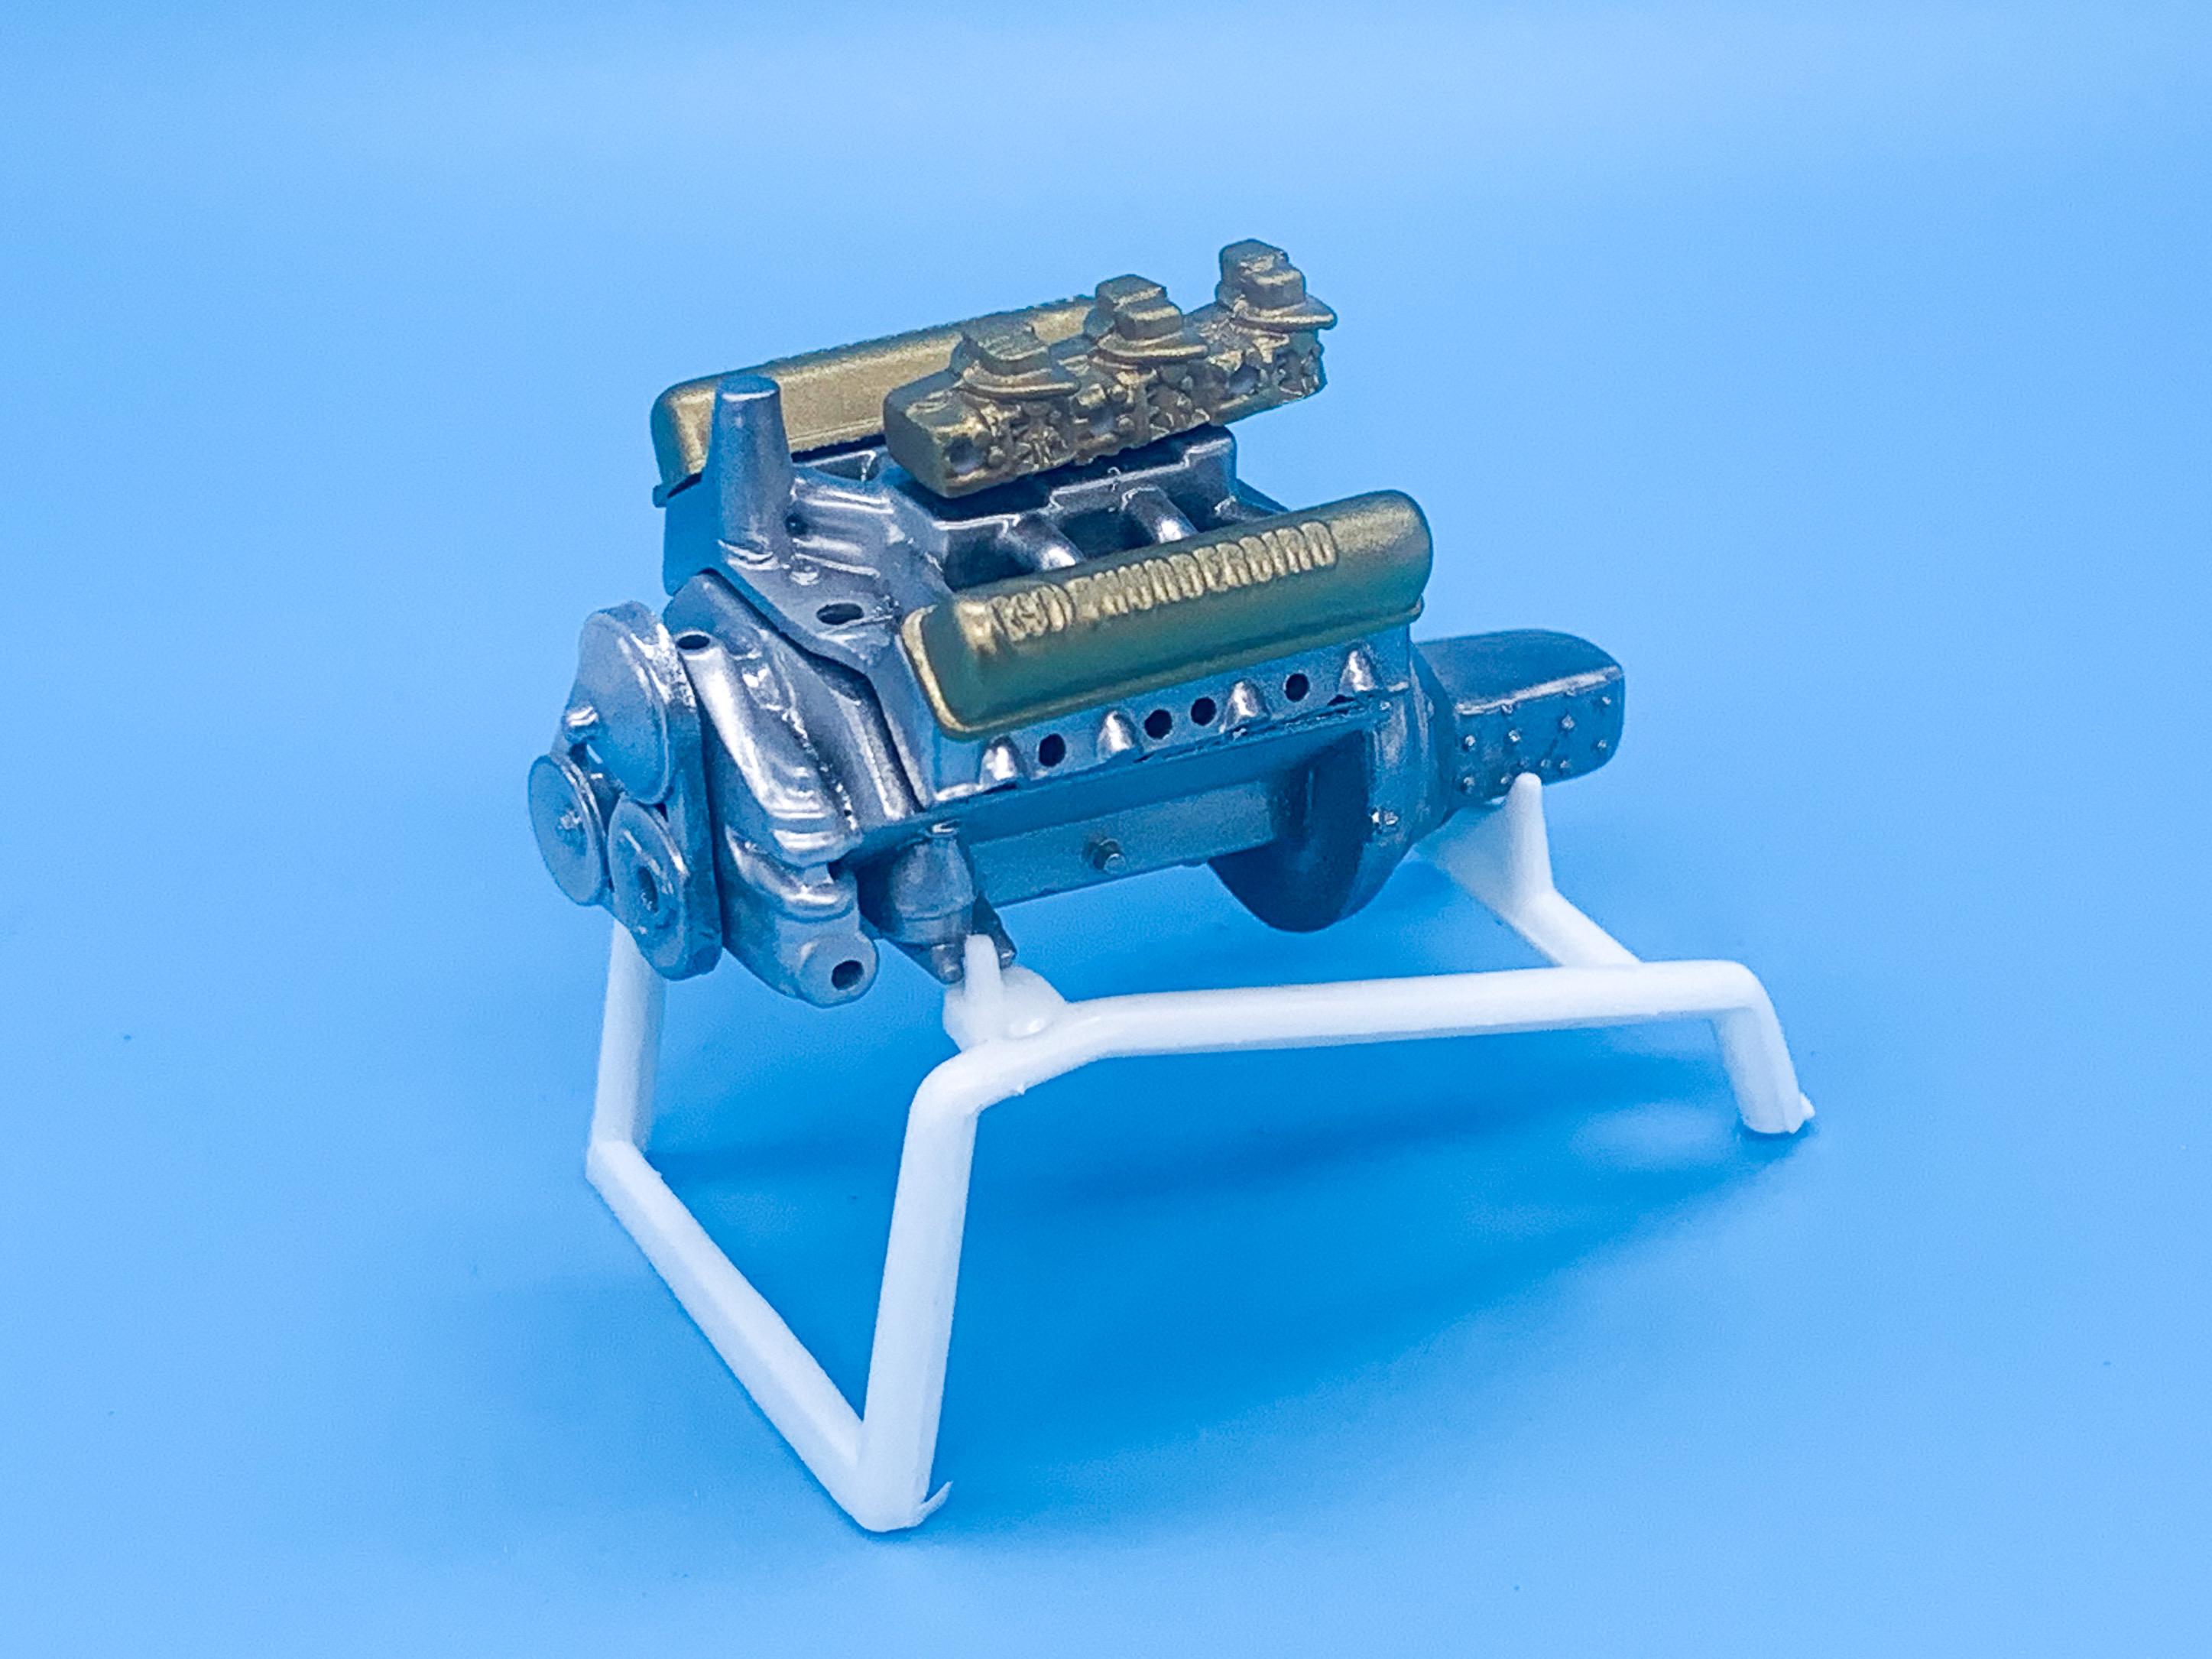
Great ideas all, thanks buddy! Could put a 1/25 version of the cookie tin in there too! ? Well, I wasn’t allowed to open them for twenty of those days, but I sure did eat a lot of them on the twenty first! ? Best wishes to you too, Steve, and thanks for the nice words! Hey Claude! The only paint where I’ve ever had that cracking issue is when I’ve shot Future in heavy coats over Tamiya gloss acrylics - the little jars. It’ll lay down just fine and look like you did a good job, then spider web and crack further down the line. Sometimes not very far down the line either... that aside I’ve never had an issue with it - my oldest model with Future on it somewhere is probably 5 or 6 years old now, and no cracks yet! That said, I don’t lay down heavy wet coats of the stuff anymore - I never mastered getting those amazing finishes with it like some people do but it’s become a useful tool in my arsenal as an intercoat - it lays down thin, is tough enough to protect delicate paint underneath it and can withstand plenty of handling and taping. Thank you sir! That 390 probably wouldn’t haul this thing along TOO quickly, but with the right intentions I’m sure one could collect some tickets regardless ?. My thoughts on Future above, for what they’re worth... Speaking of that 390 Thunderbird engine, got a couple of parts I was waiting for today from Morgan Automotive... ...and felt inspired to do some work on the engine. Next job on that was detailing the triple carbs a little - they’re not SUPER visible under the air cleaner anyway but I’ll never pass up a chance to do some detailing... Added some photoetch, watch parts and assorted other doodads to detail up a little: Once I’d checked everything still fit ok, added some fuel lines: I like this Stretch Magic elastic for clear lines right now - it’s a little too large to be perfectly in scale, but these will be hard to see under the air cleaner anyway so I wasn’t anti using something a little bigger so you have a chance of seeing them... Made a fuel rail from some aluminum tube and some candy yellow paint on the lines to simulate there being some gas in them and got it all glued in place: Excuse the flaws that these big close-up photos highlight - looks better in real life than in these big photos - but it’s a start! More detailing fun to come!
-
Excellent weathering! Looks great!
-
I’d be proud to have build any of these - let alone all of them! Nice work Dennis! Got a mental list of builds to build for ‘21 yet?
-
64 Dodge D100 Pickup Pro Street
CabDriver replied to AmericanMuscleFan's topic in WIP: Drag Racing Models
Beautiful! -
I like Jimmy Flintstone resin bodies, and the price is usually right, but you have to put in a little effort to get them paint-ready I've found. Good start, I like it!
-
Agreed - GREAT looking parts! Print quality looks really good too!
-
34 Church Truck
CabDriver replied to CabDriver's topic in WIP: Model Trucks: Pickups, Vans, SUVs, Light Commercial
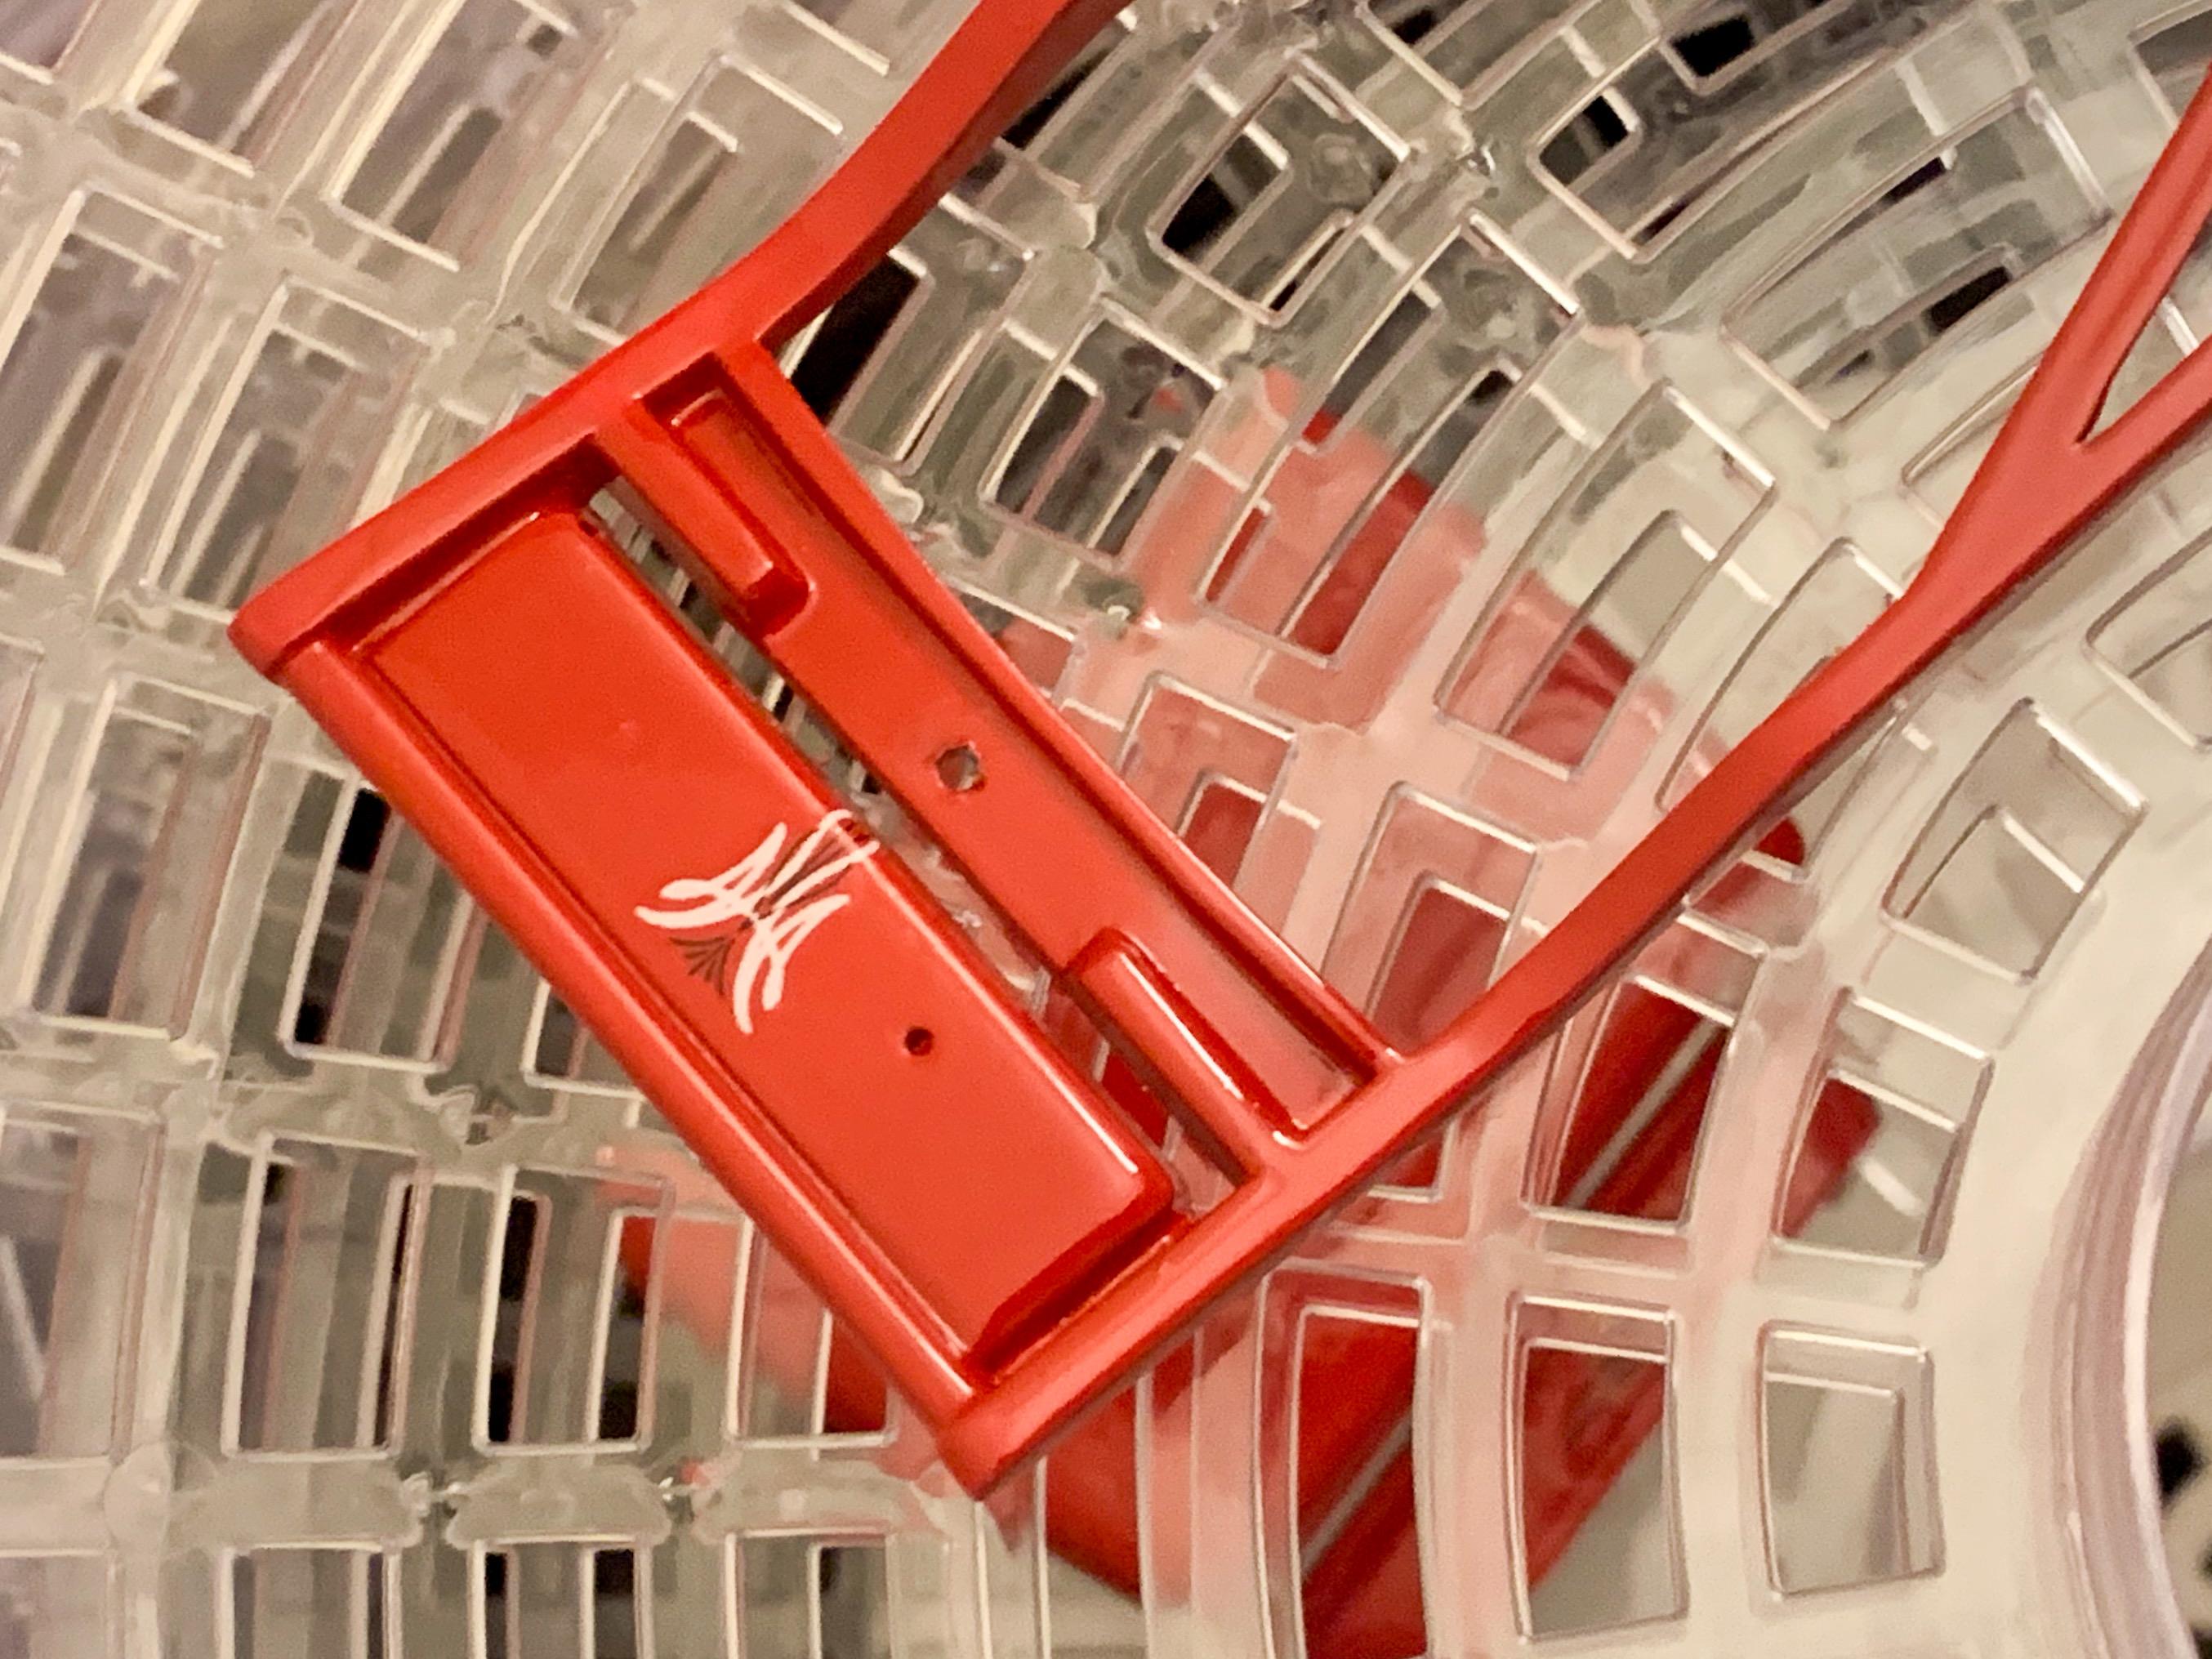
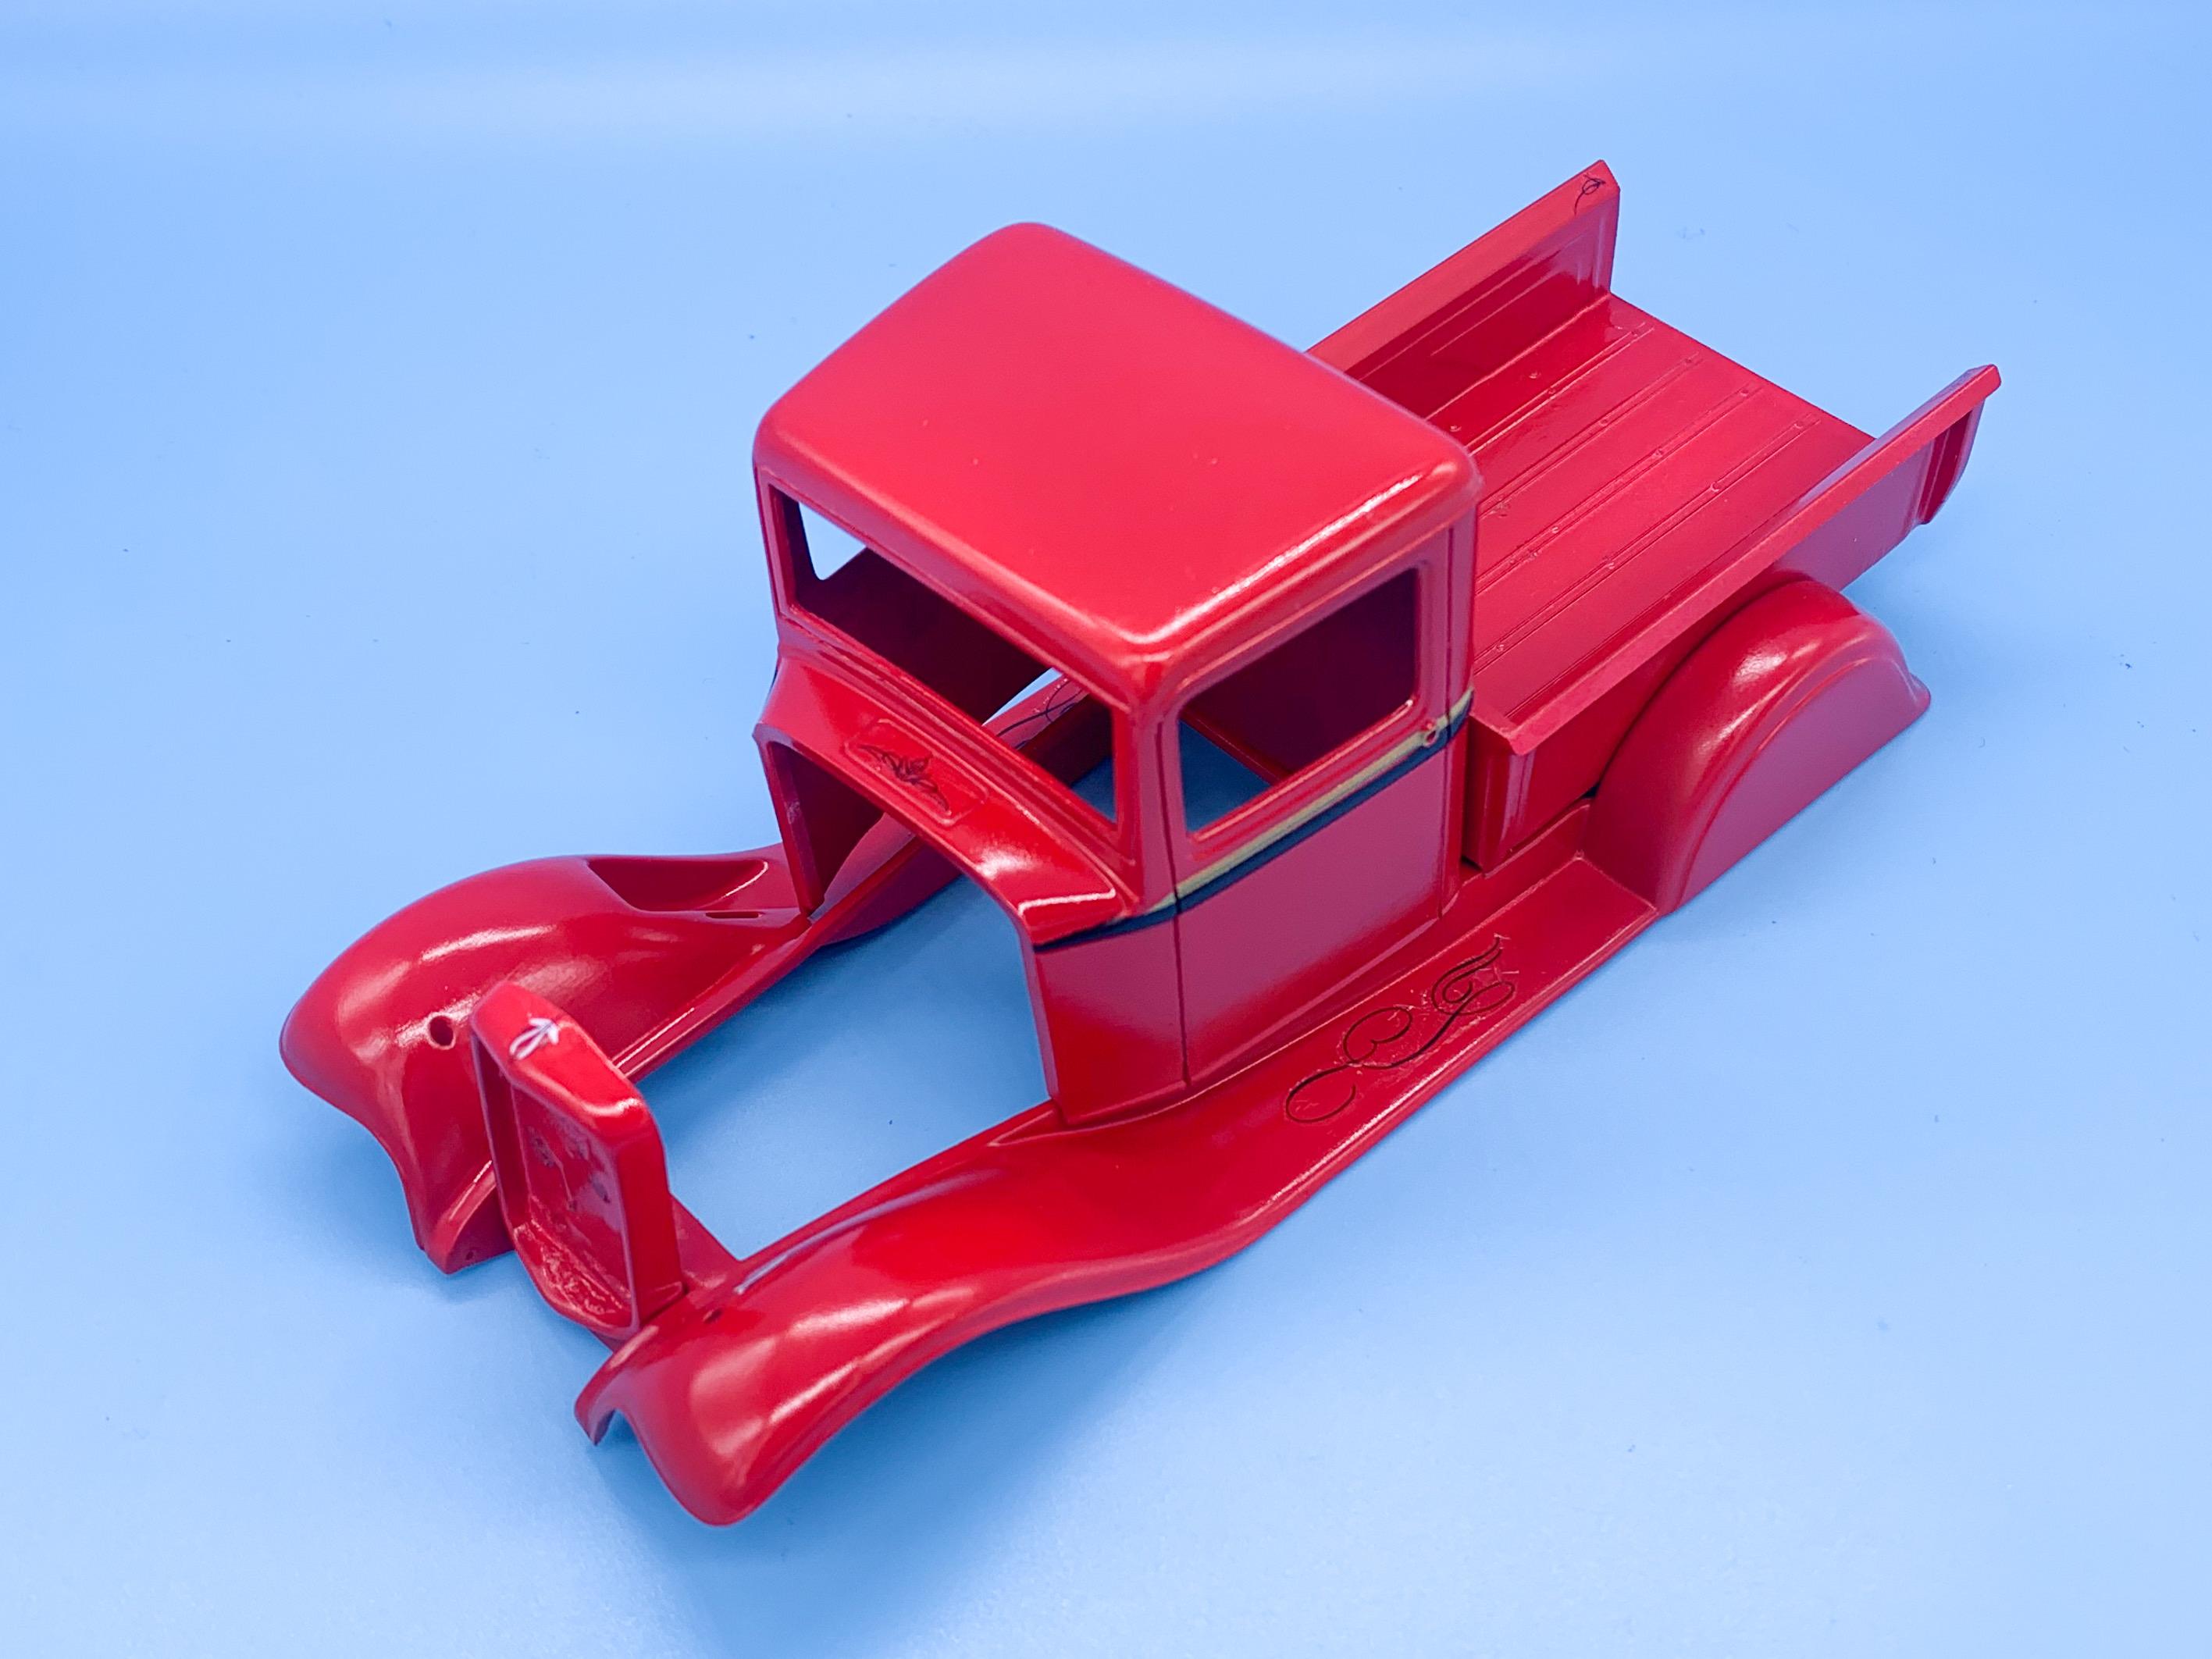
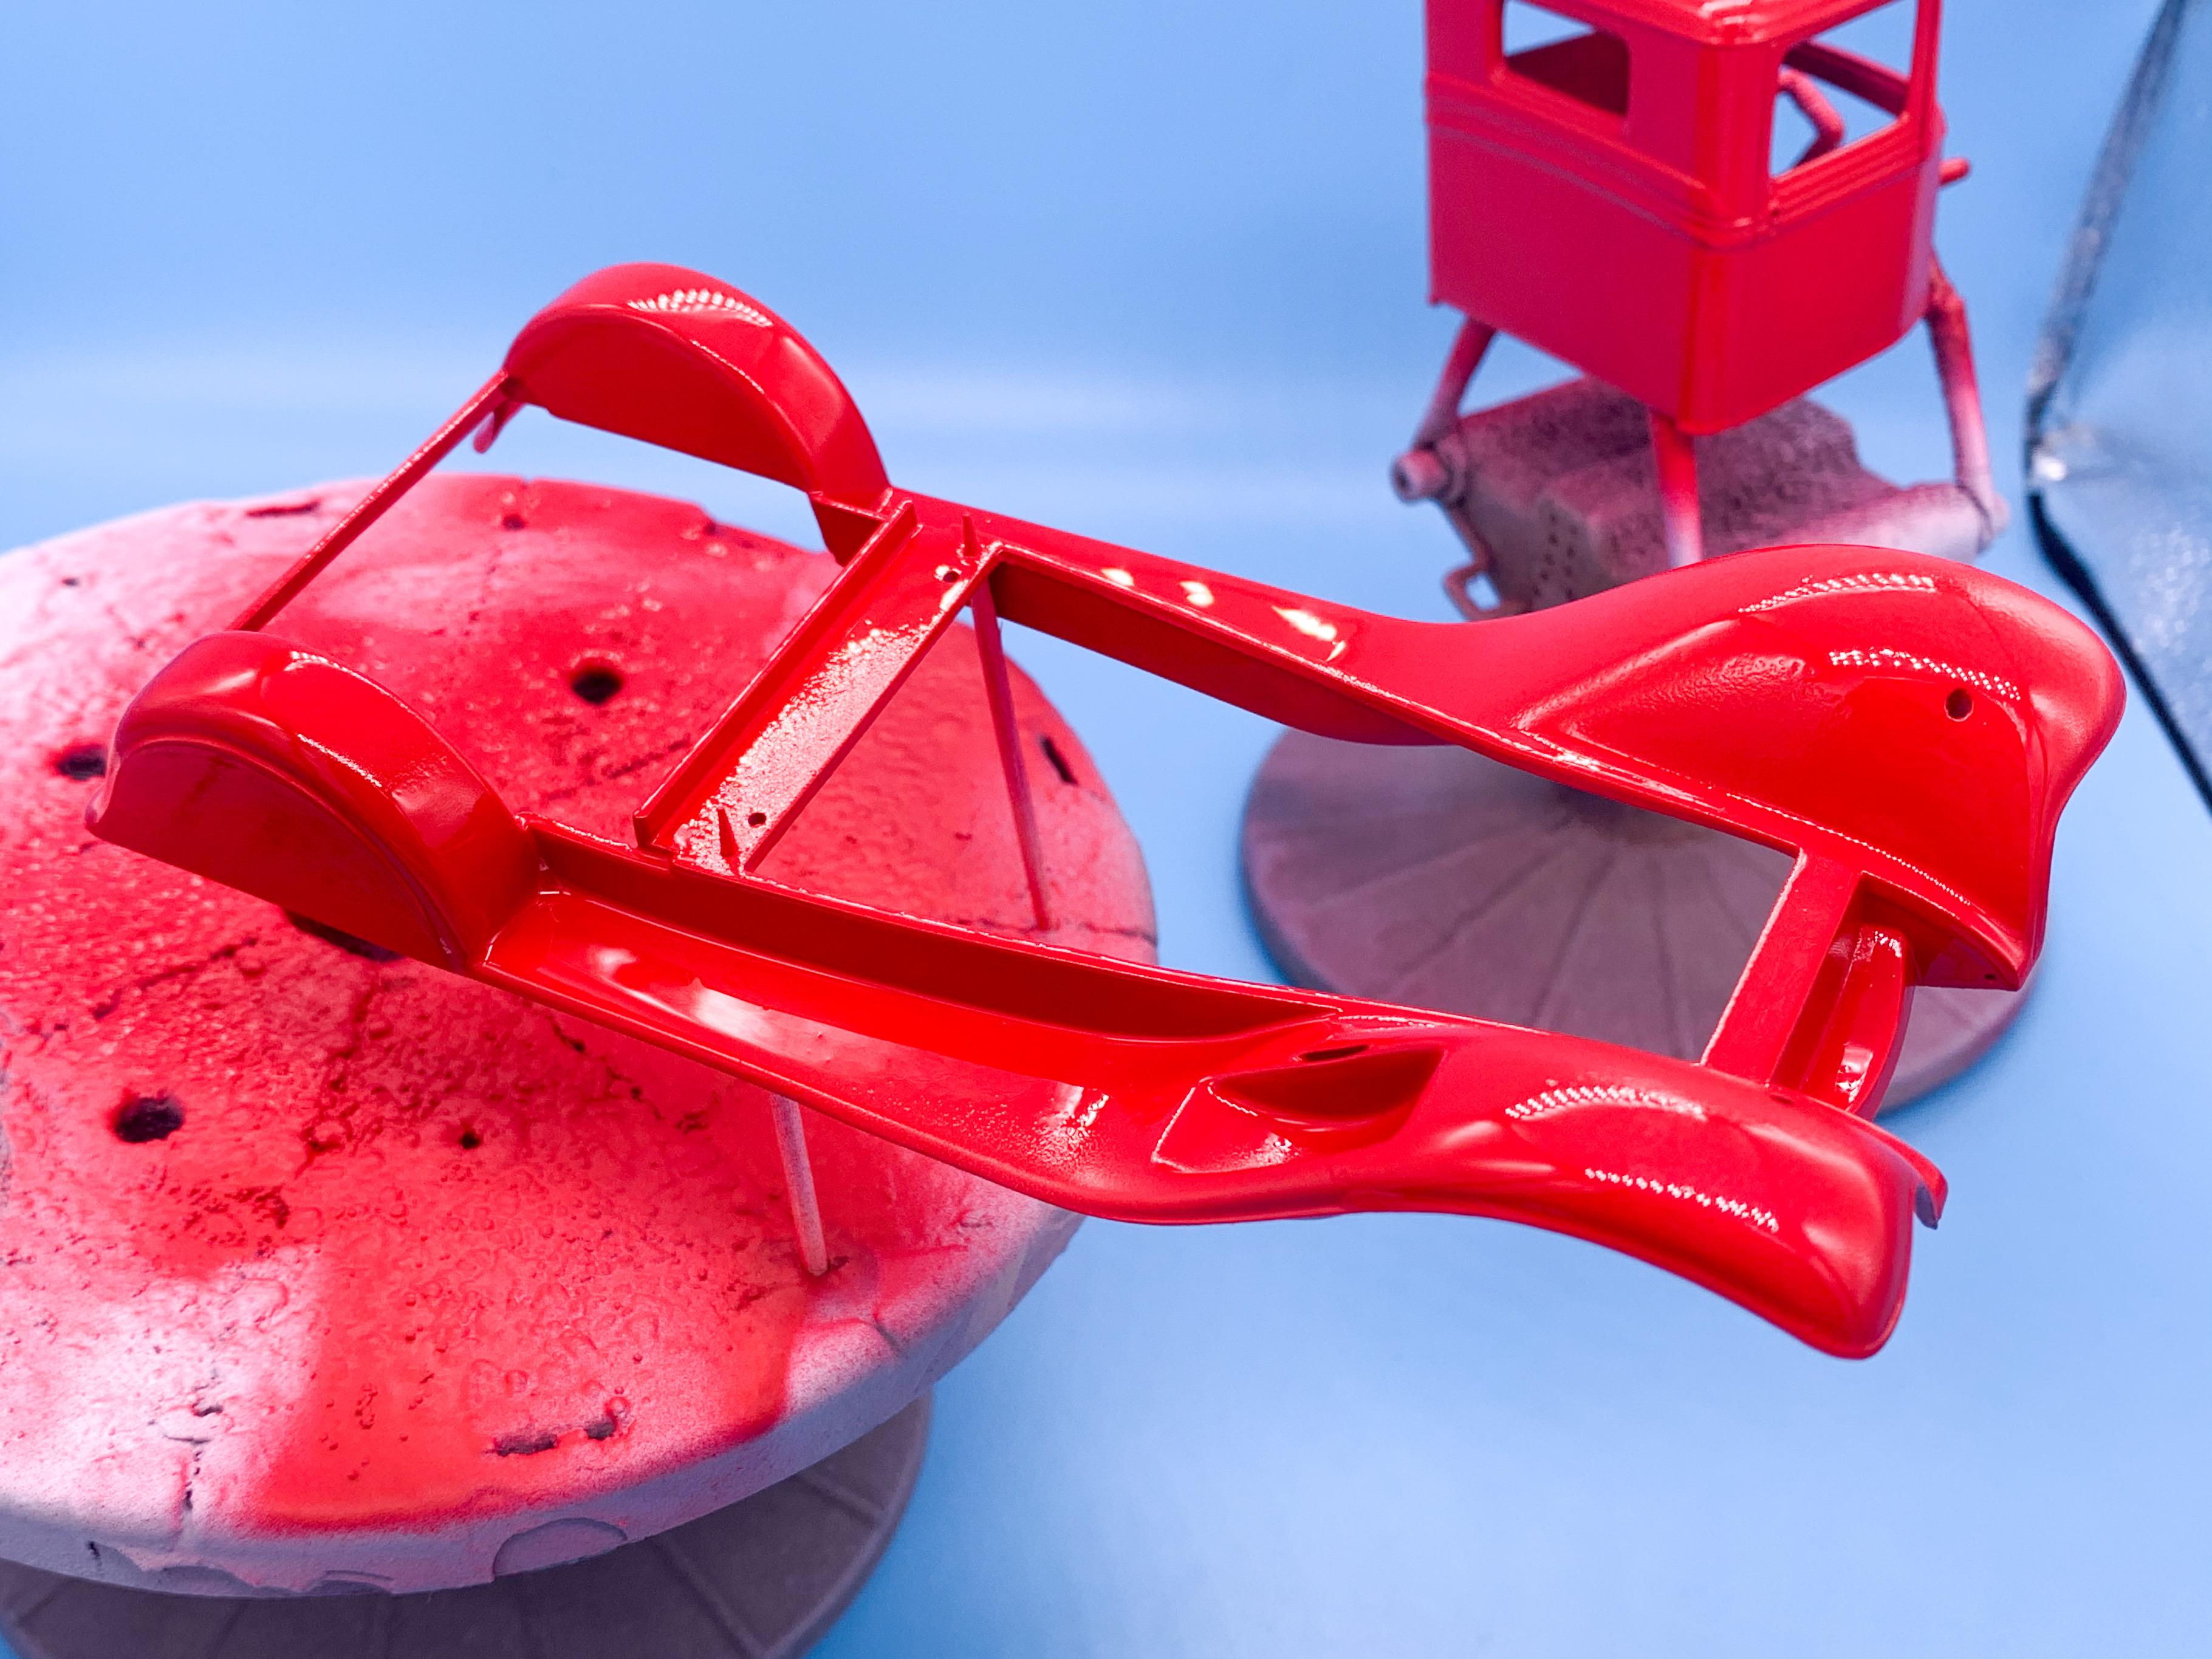
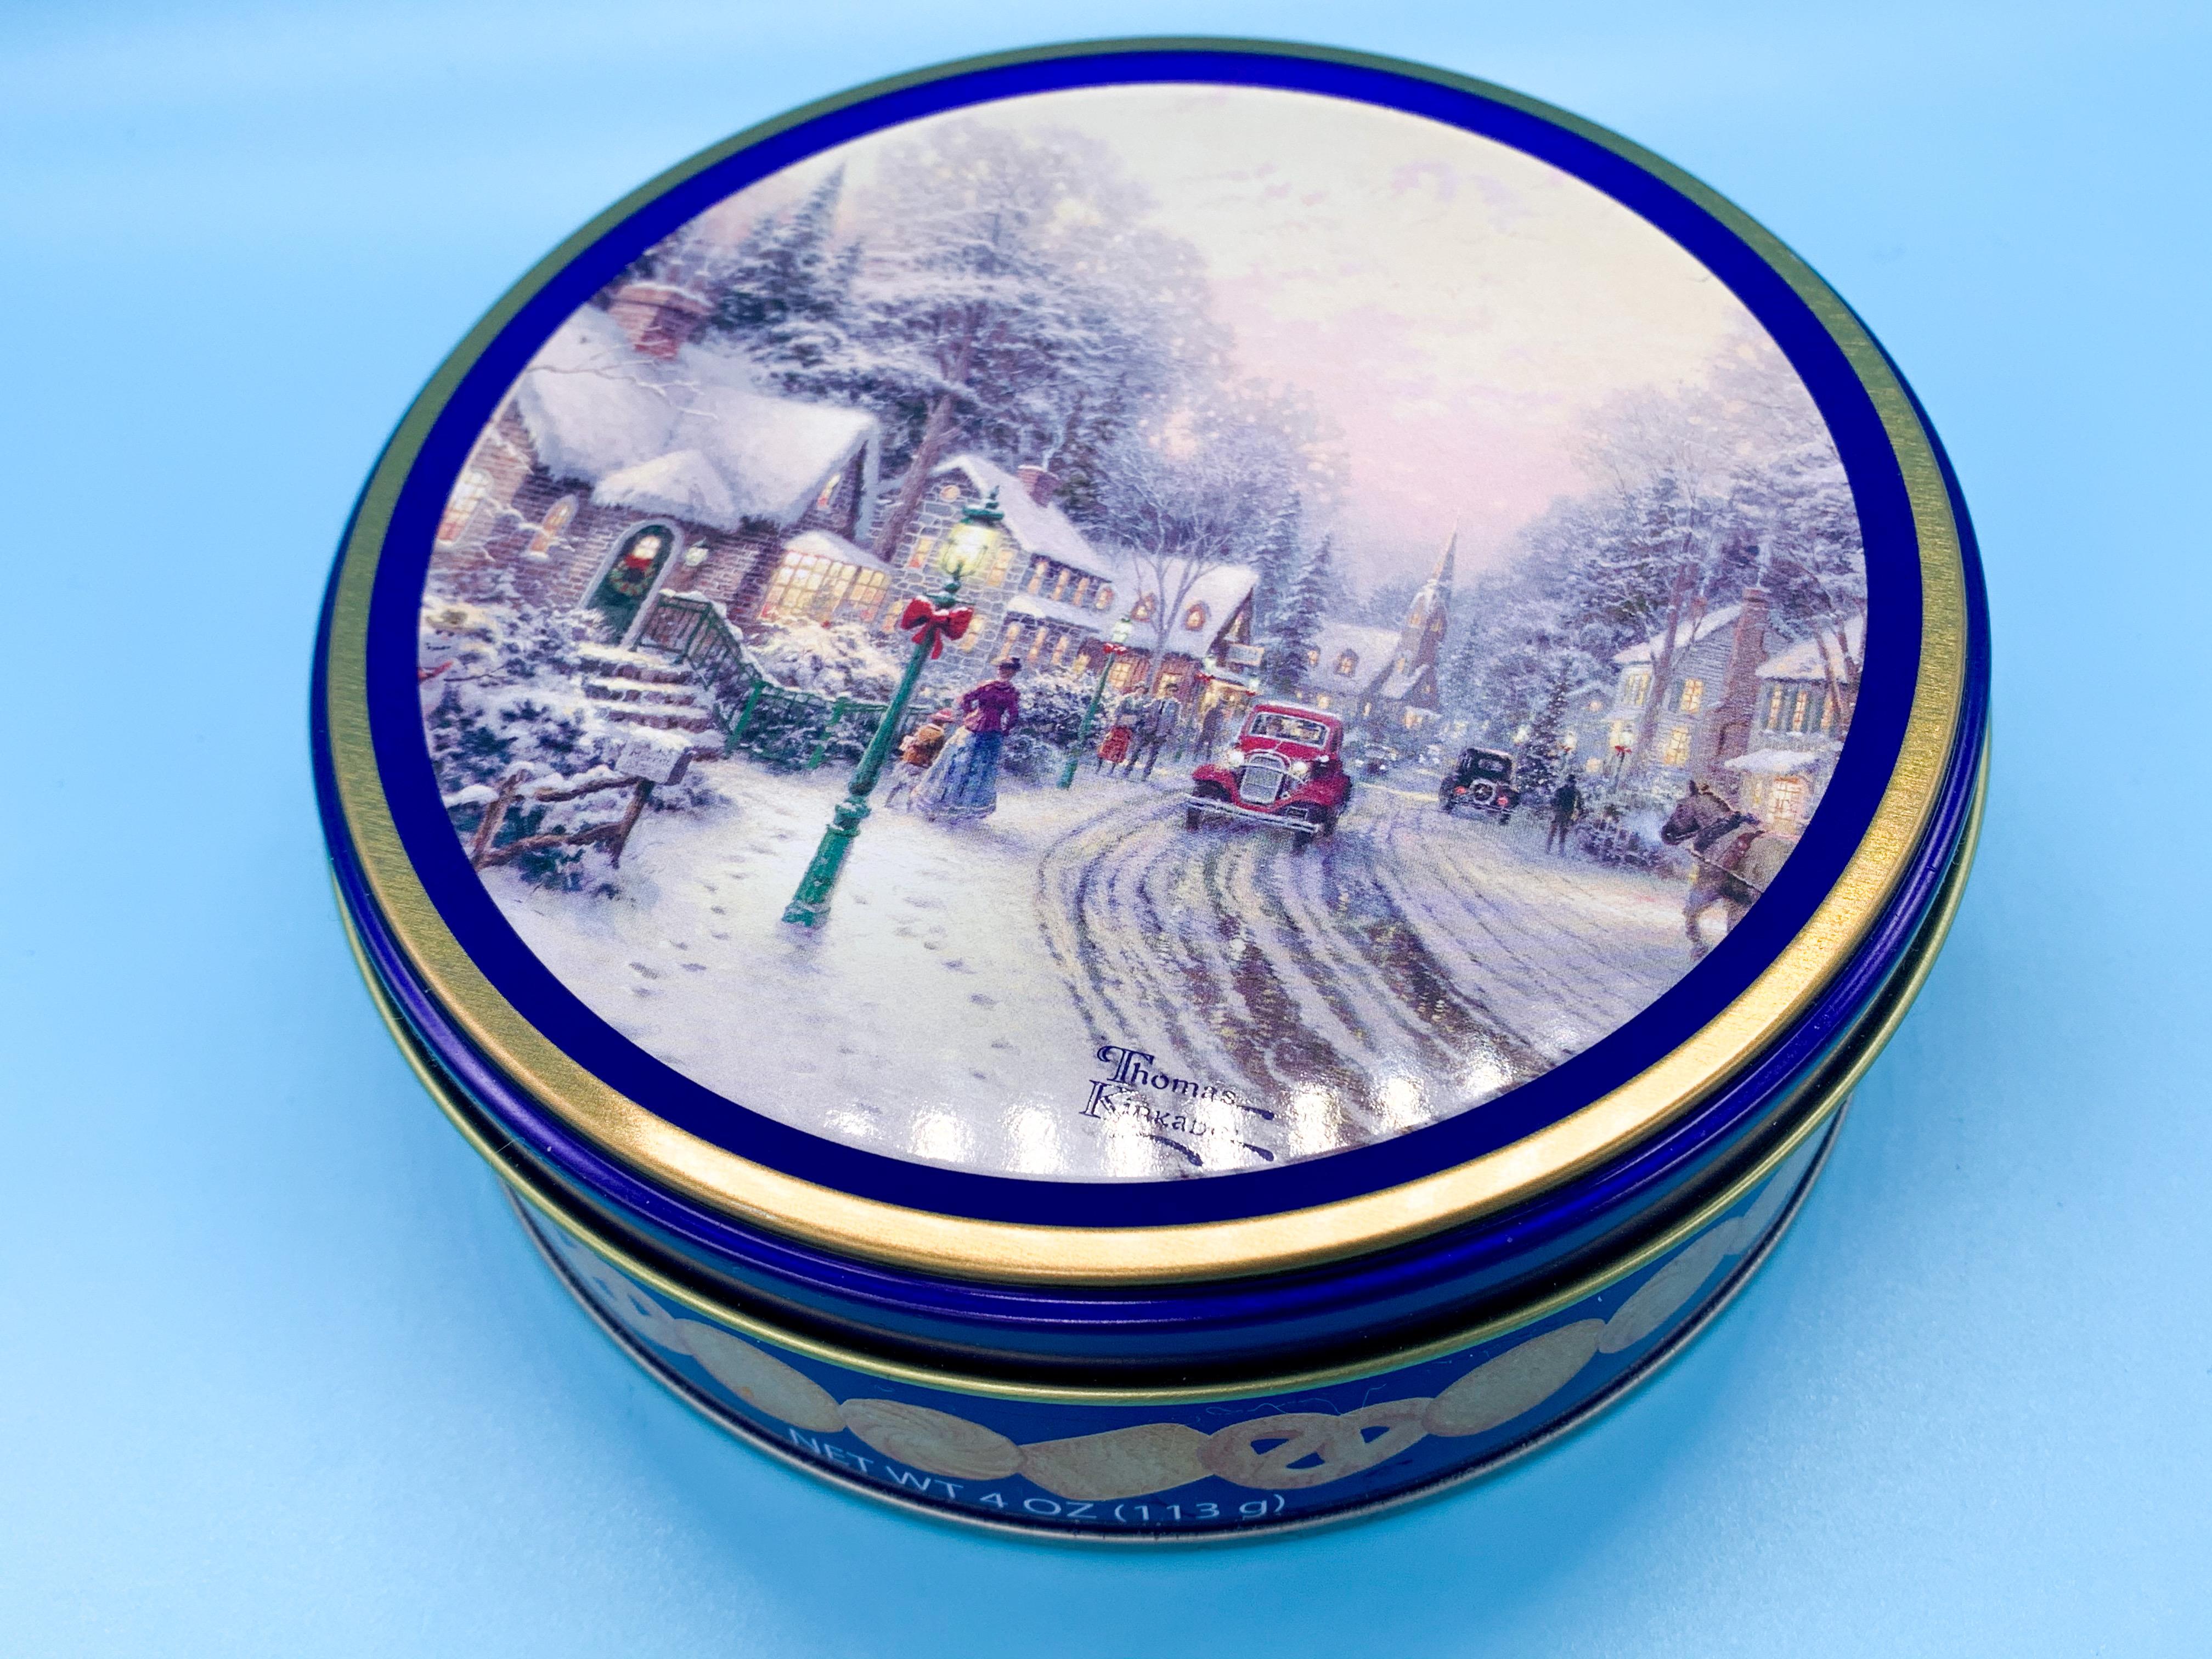
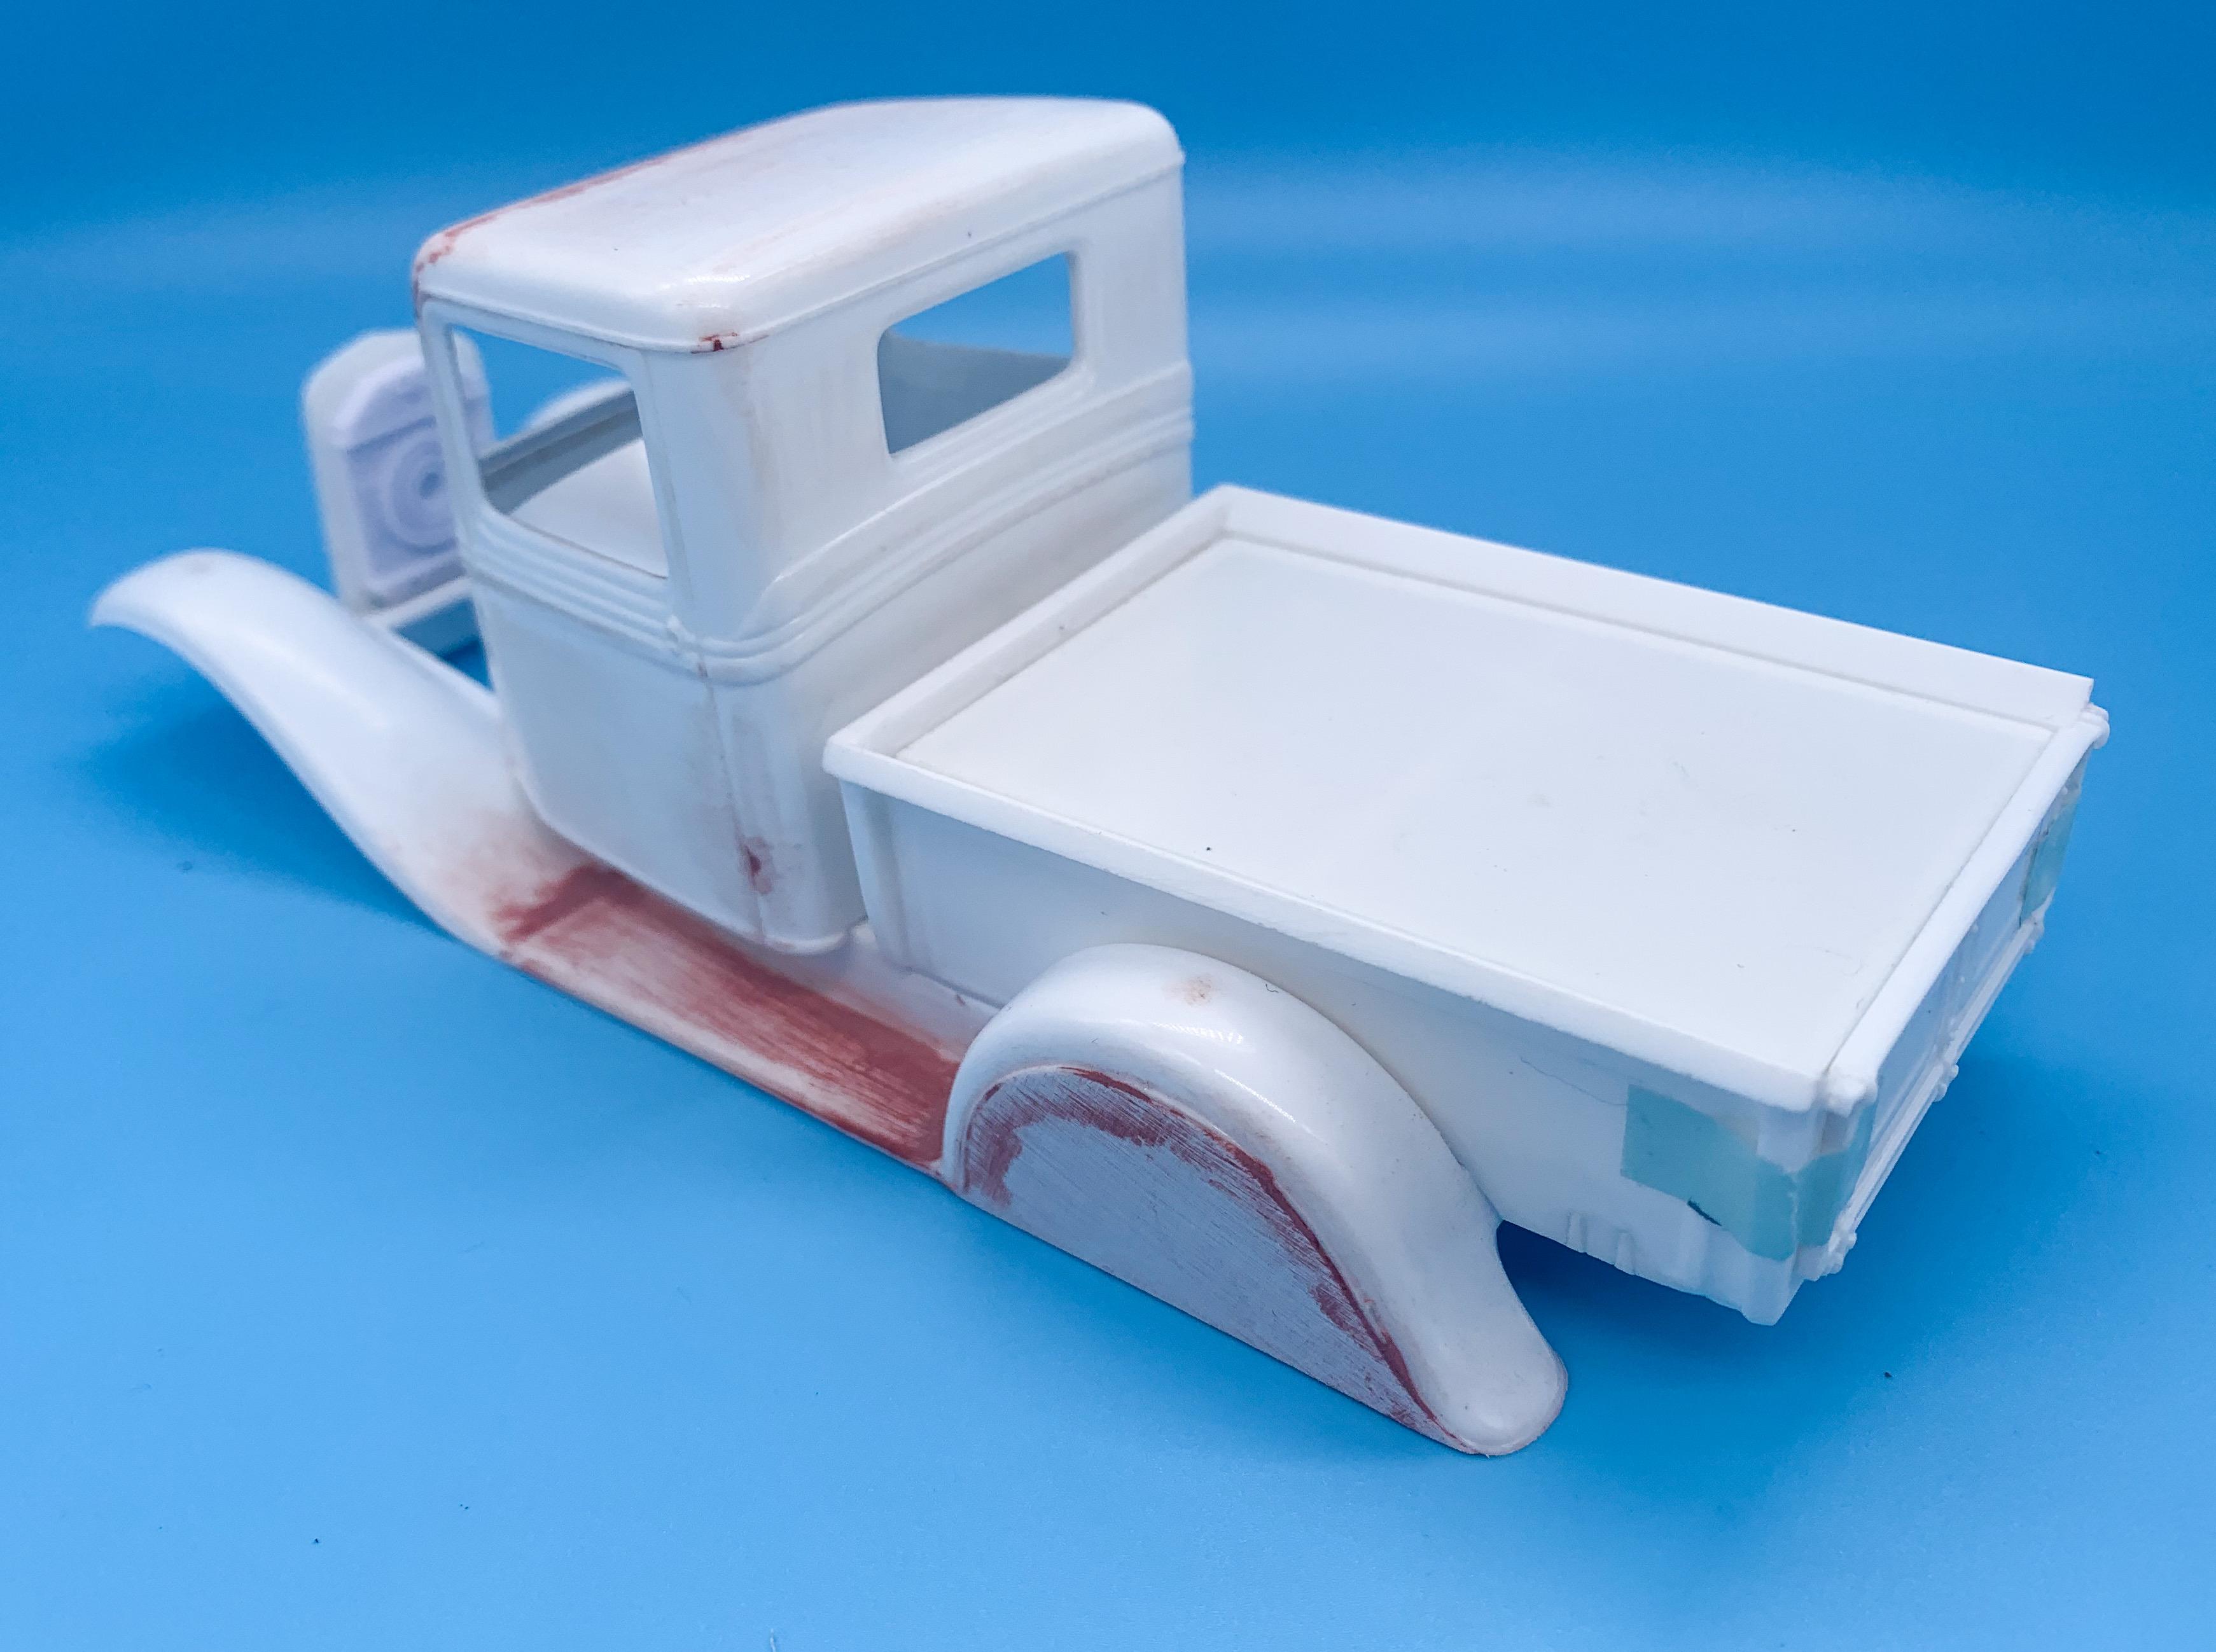
Thanks fellas! I wanna figure out some nice knobs and stuff for that dash, but didn’t get that far yet... Got some progress made over Christmas though on the bigger parts...got primer on everything that was due to be red: Painted it red ?: And then hit it all with Future as a barrier coat - looks nice with a little gloss on it! I’d like to do some subtle pinstriping and add some paint detail...the idea I’m going with for this build is something relatively simple looking at first glance but then as you take a second and third look more little details emerge. So, no wild flames and airbrushing (this time) but some nice little touches for me to test my paint skills and give the viewer something extra to notice. Also, it occurred to me after I decided to paint this thing red that I’ve been looking at something not too different on our tin of Christmas cookies here for the last three weeks: More soon!
-
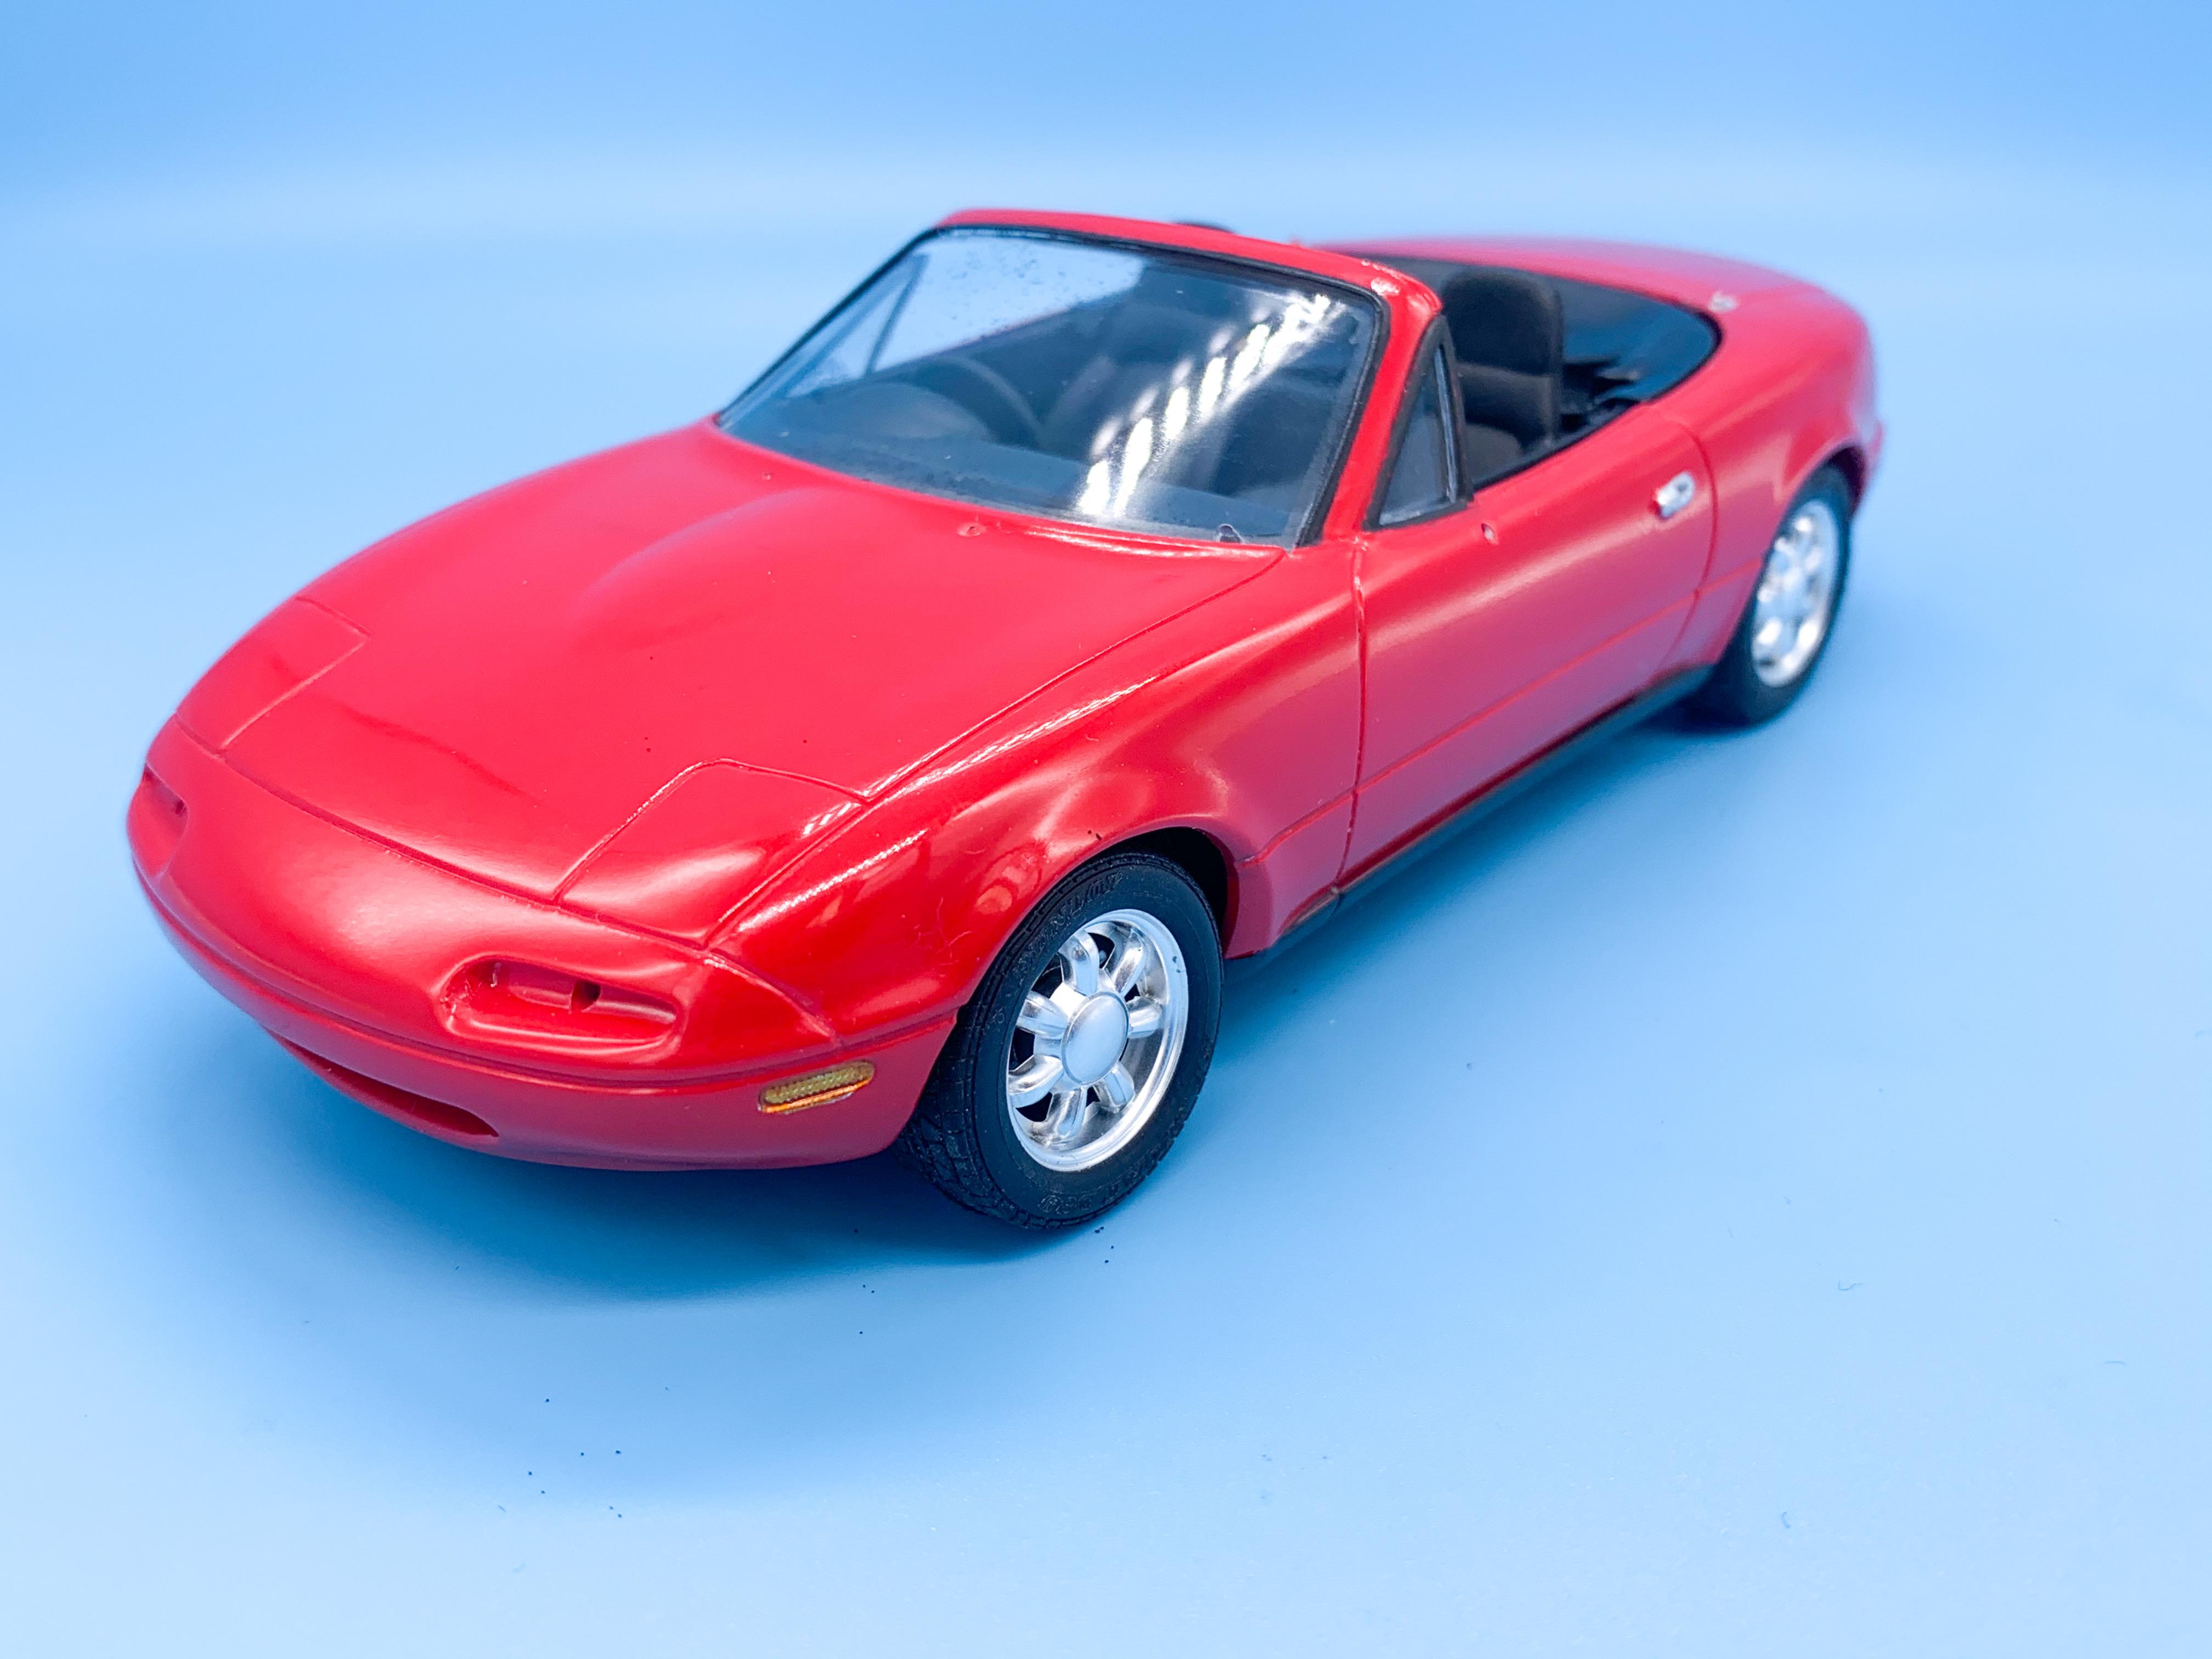
I loved your version Kurt! That was a cool build! A little more on this one... Got the interior together - it’s not super inspiring in factory stock trim but I added a metal shift knob for my own amusement... Painted the marker lights with SpazStix and then Createx candy orange and red (for front and rear, respectively) Got the glass in place and the body, interior and frame mated: And got the remaining few little bits in place and it’s about a wrap! A couple of little touch-ups to do before this one’s under glass, but it was a fun little box stock build...and I got better since last year’s effort (the car at the back here:) Hope I can make similar progress in the next 12 months!
-
Have you considered (or tried) attaching the interior panels to the inside of the body rather than to the floor, and then slip the body (with attached door panels) onto the floor/frame? I’ve done that with the other Revell Deuce kits before and it worked great - although not with this body style specifically...
-
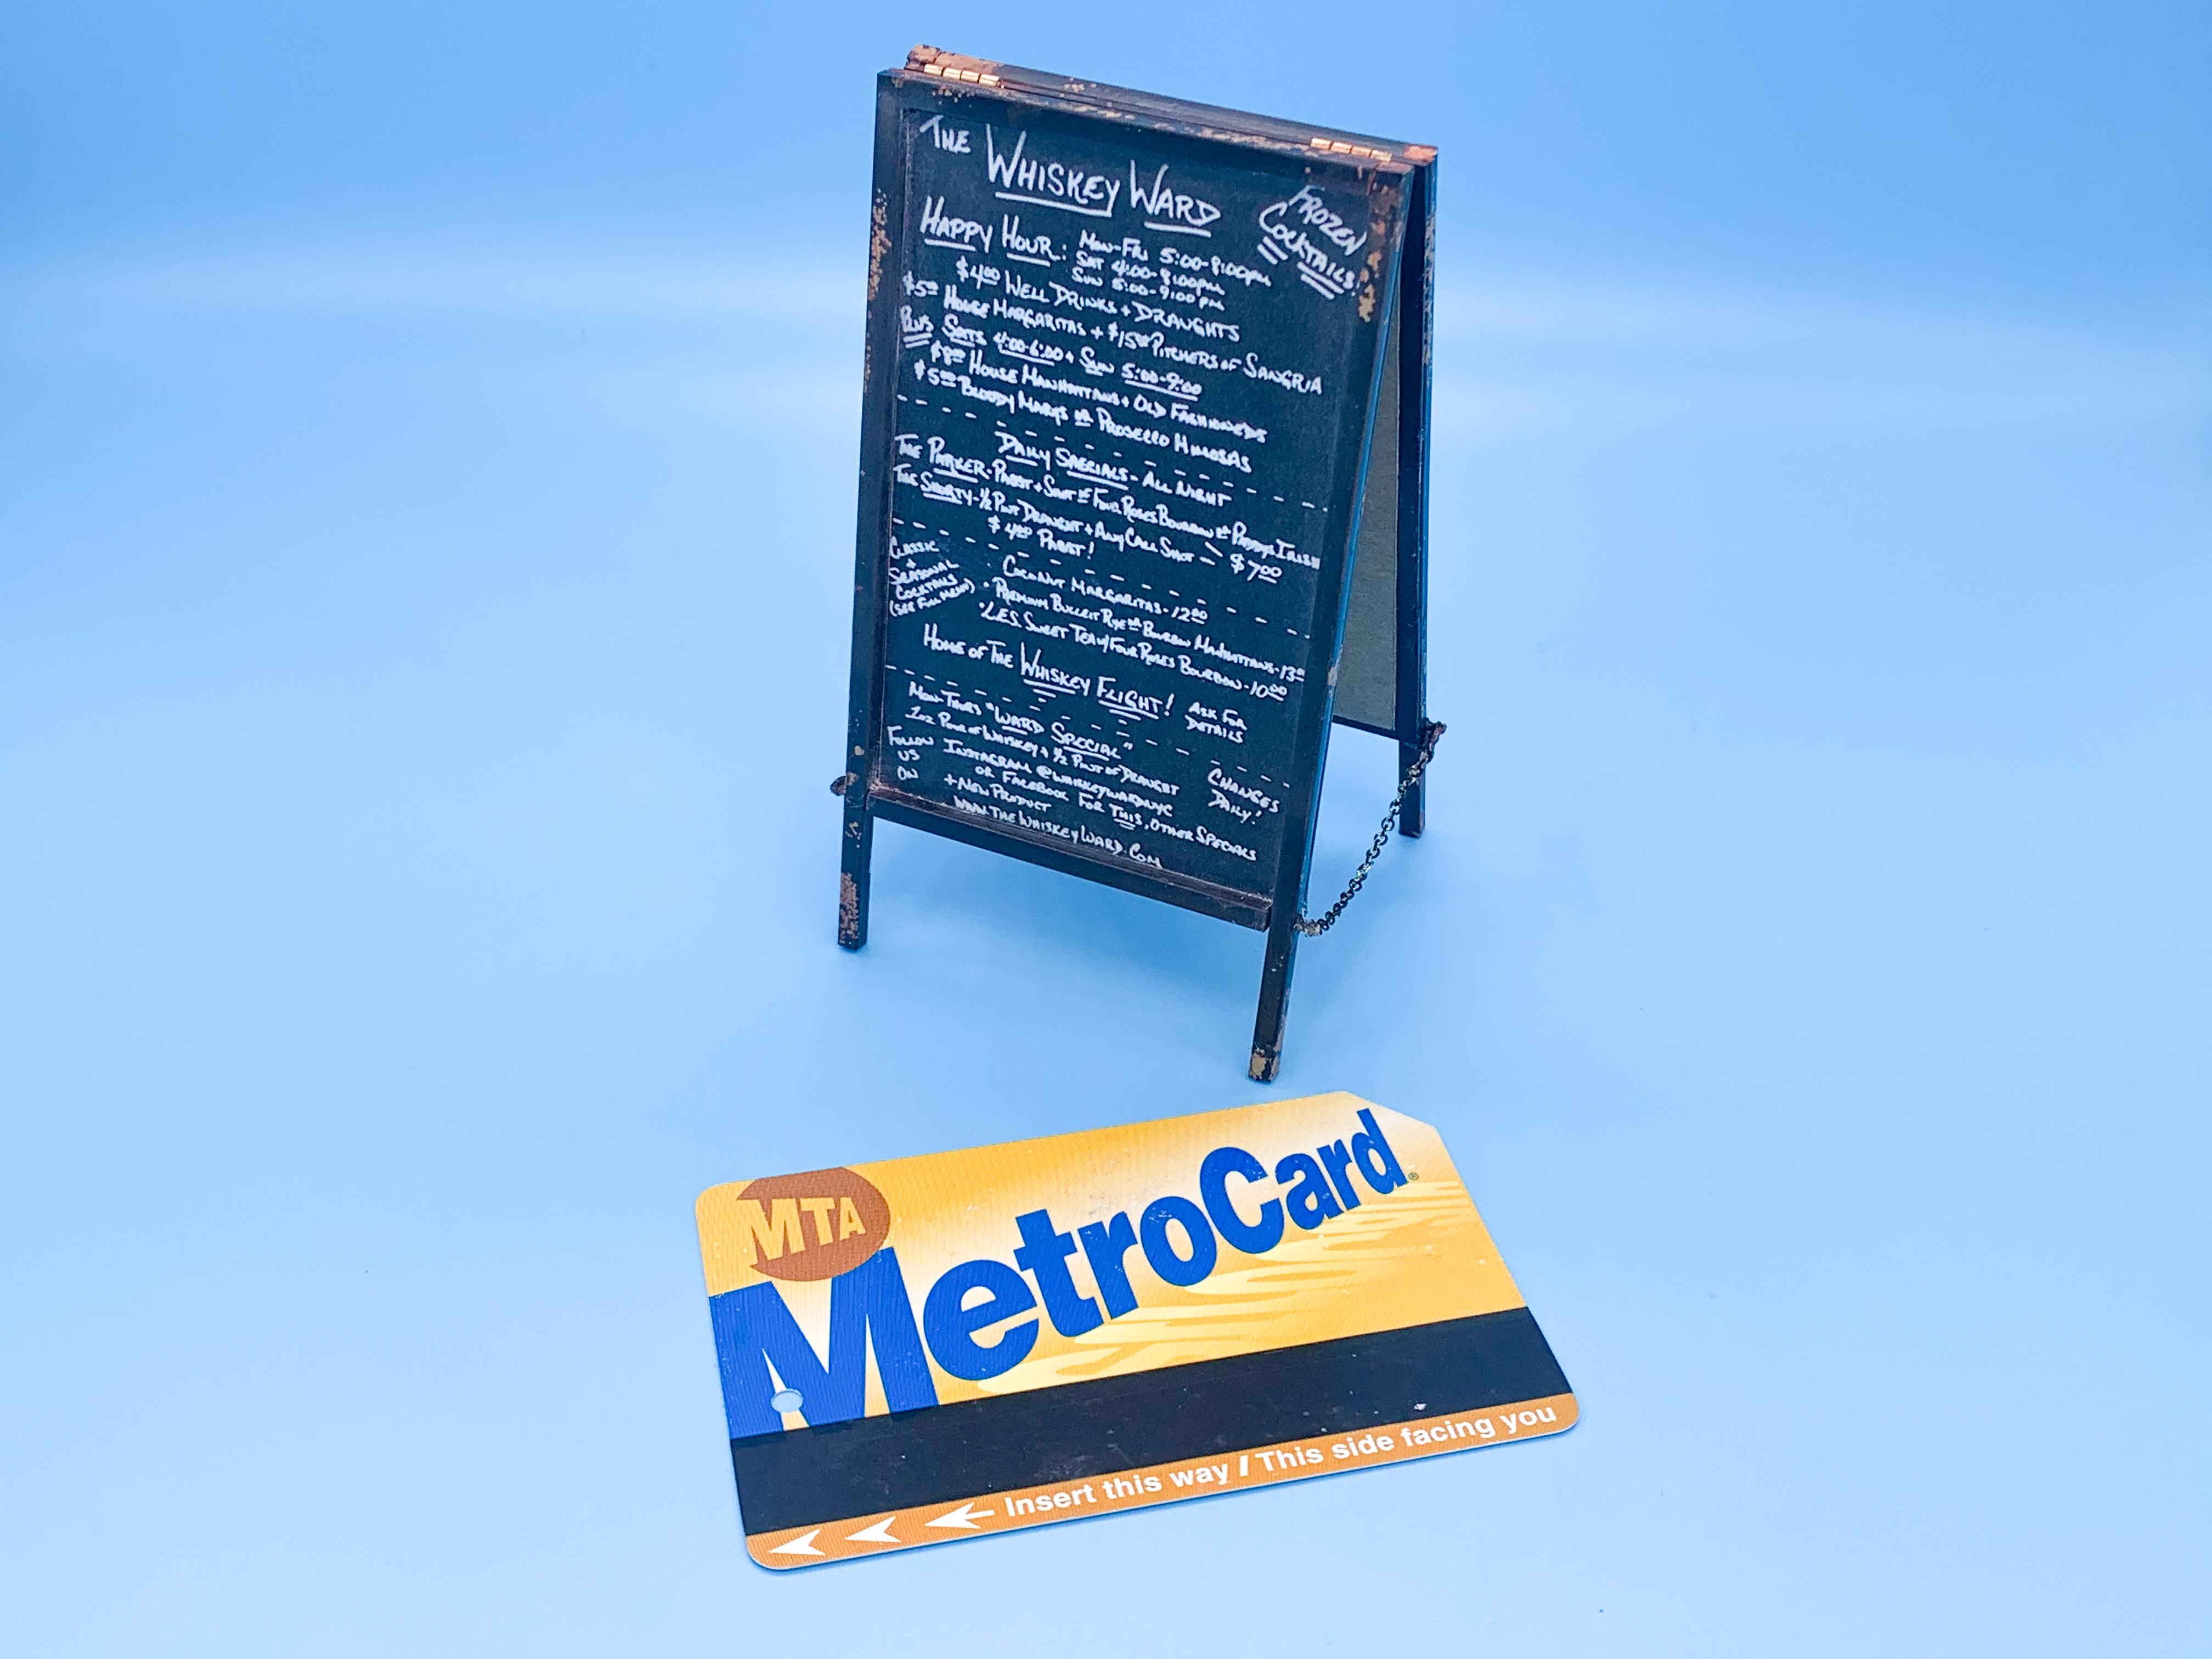
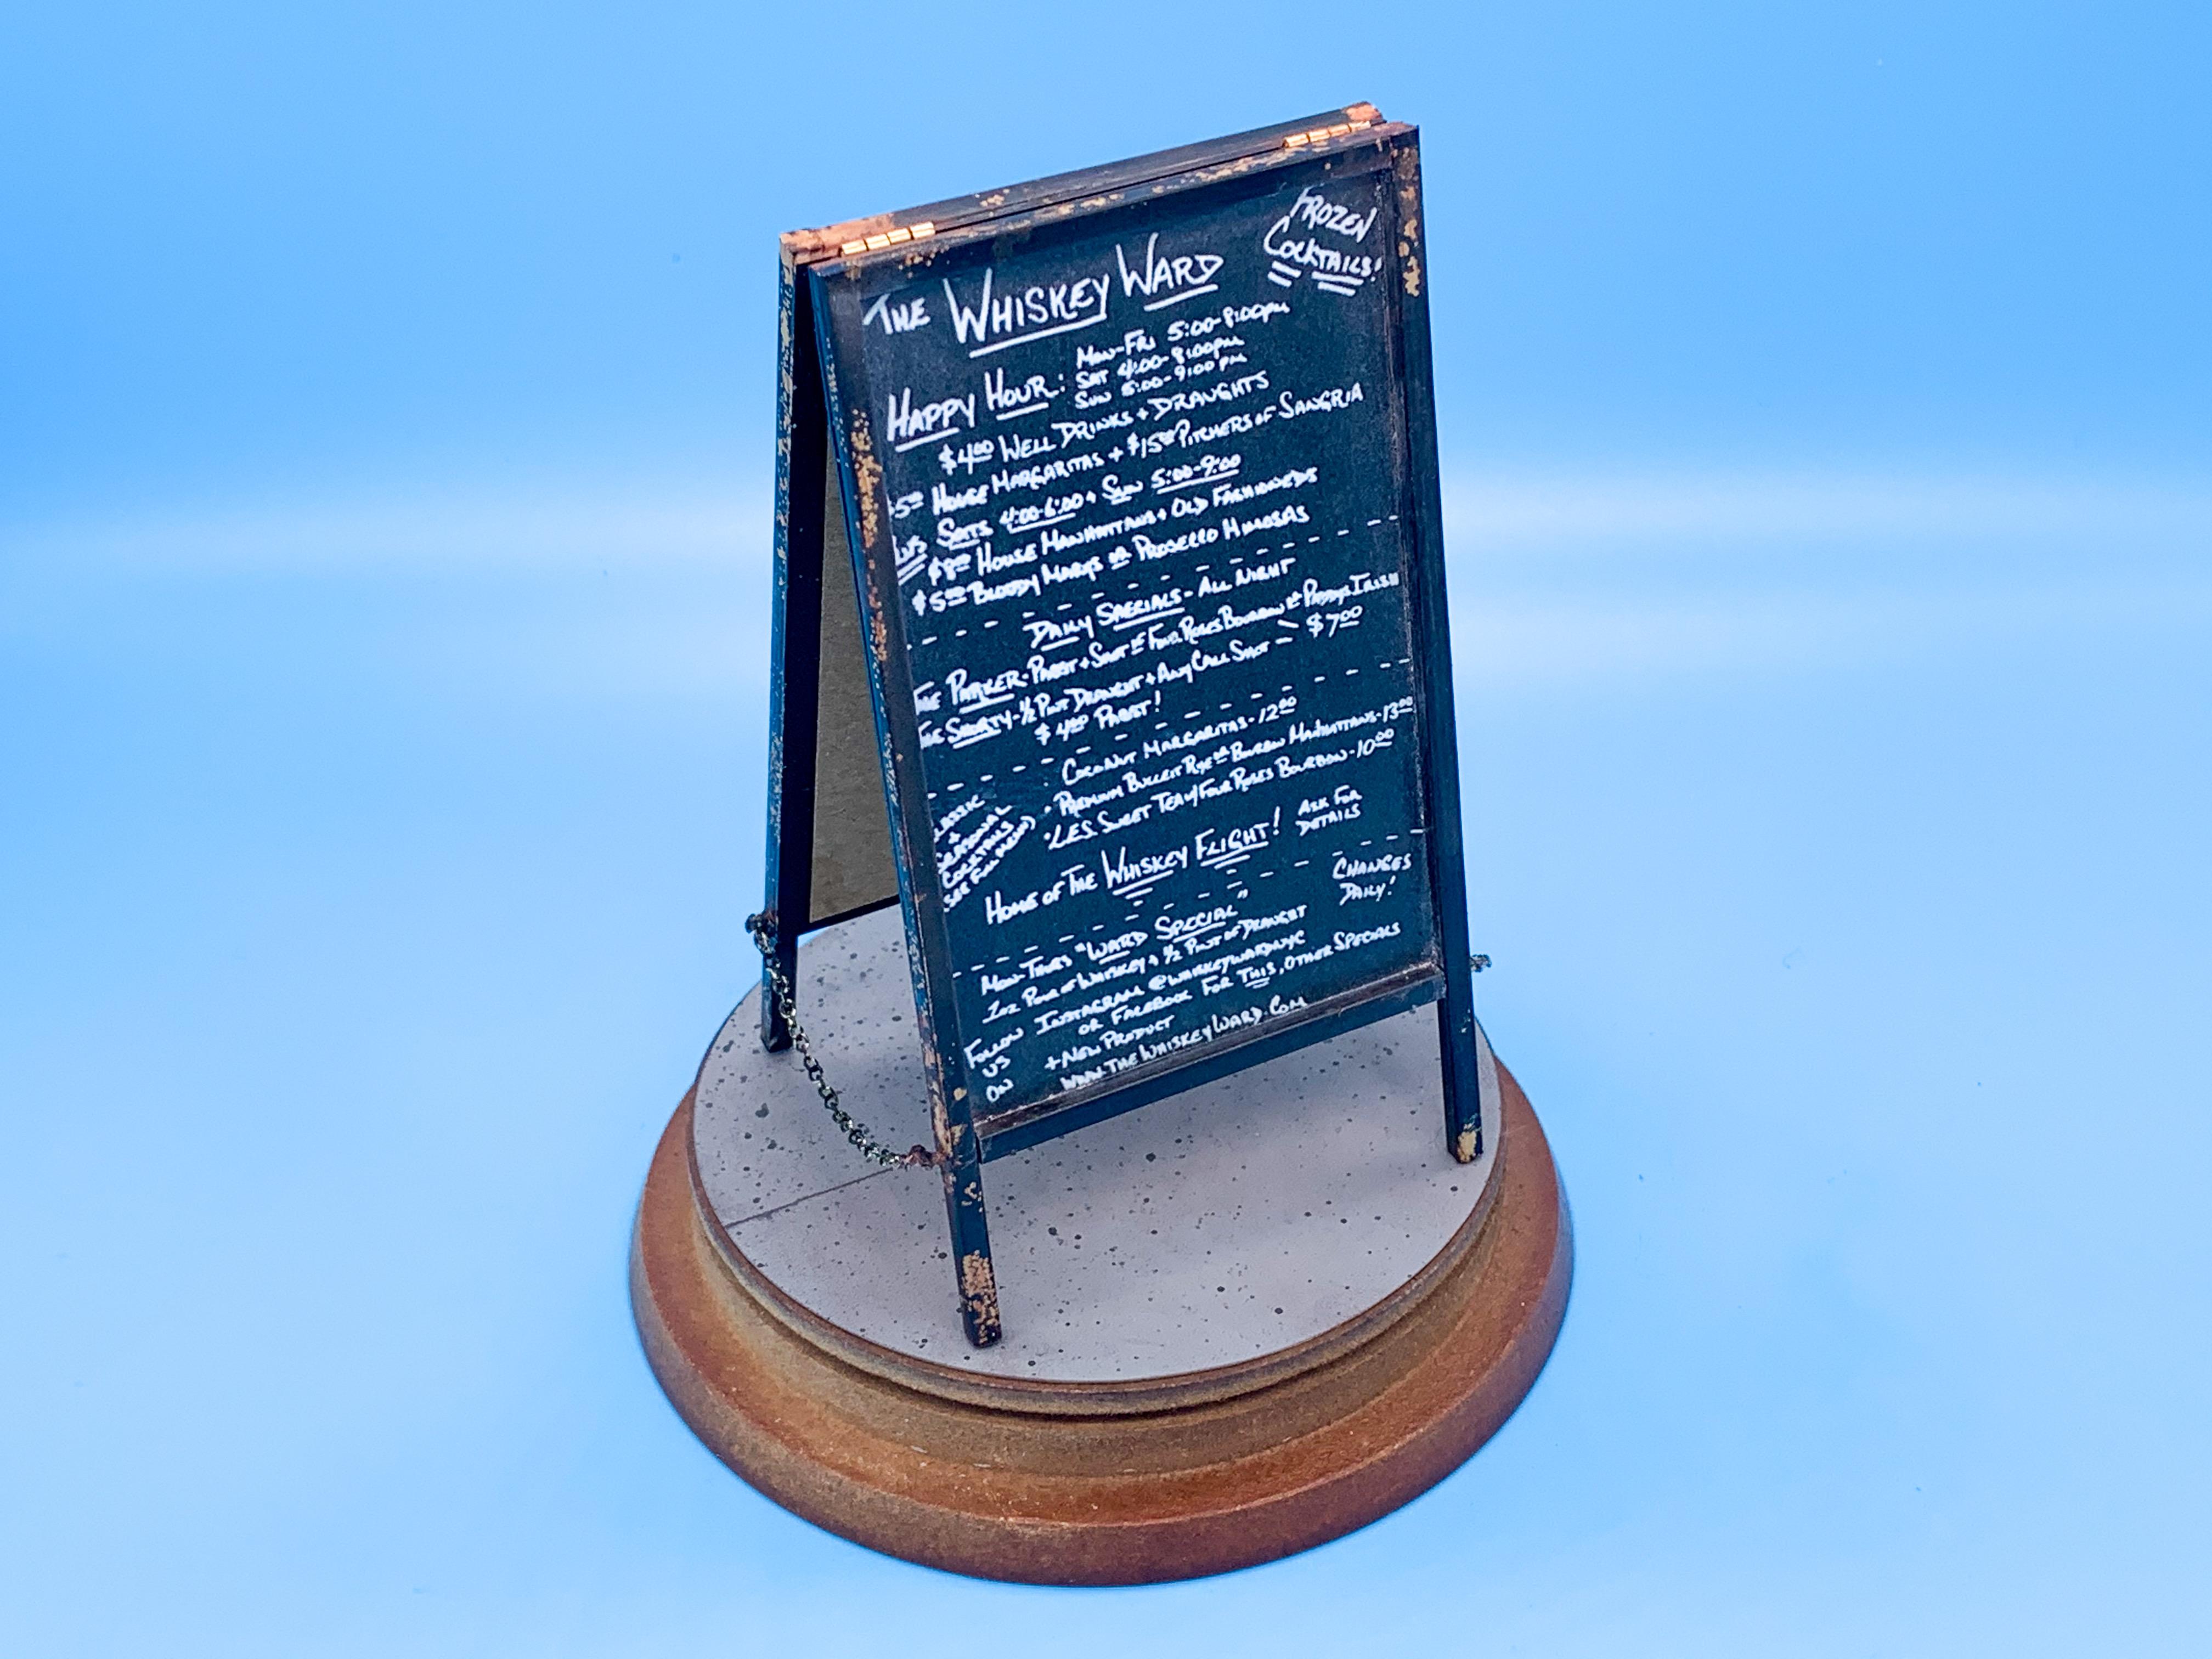
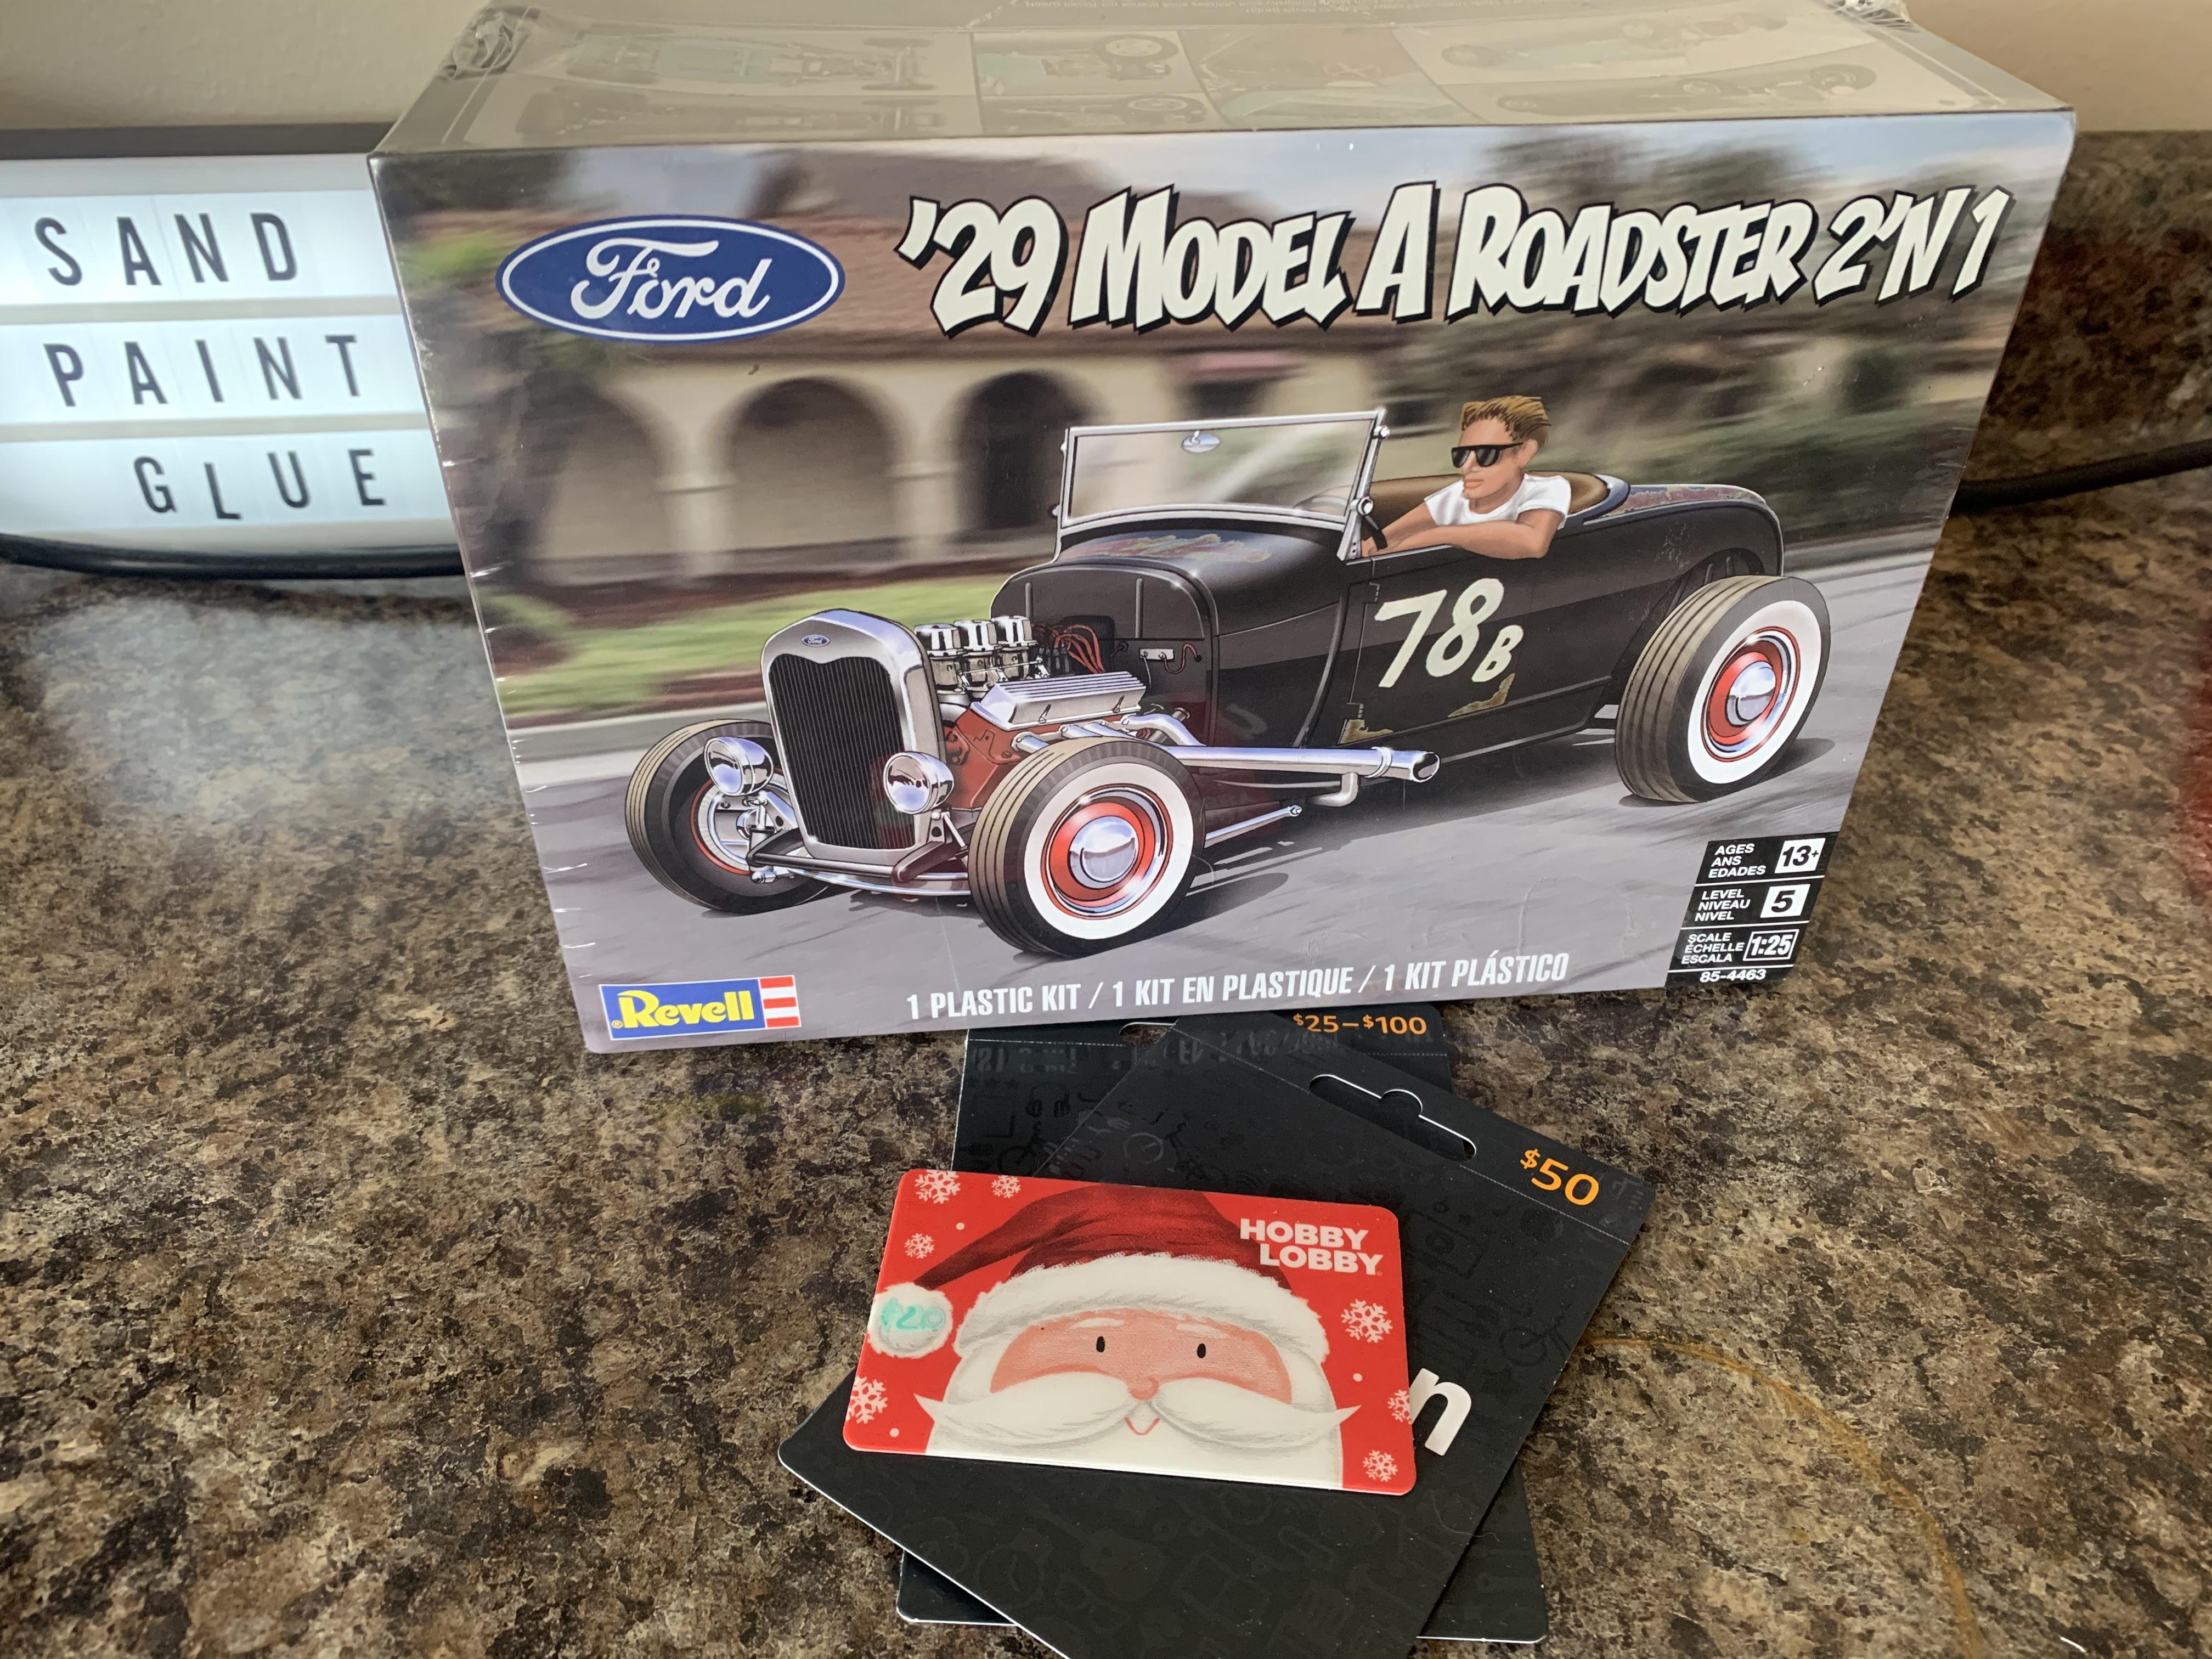
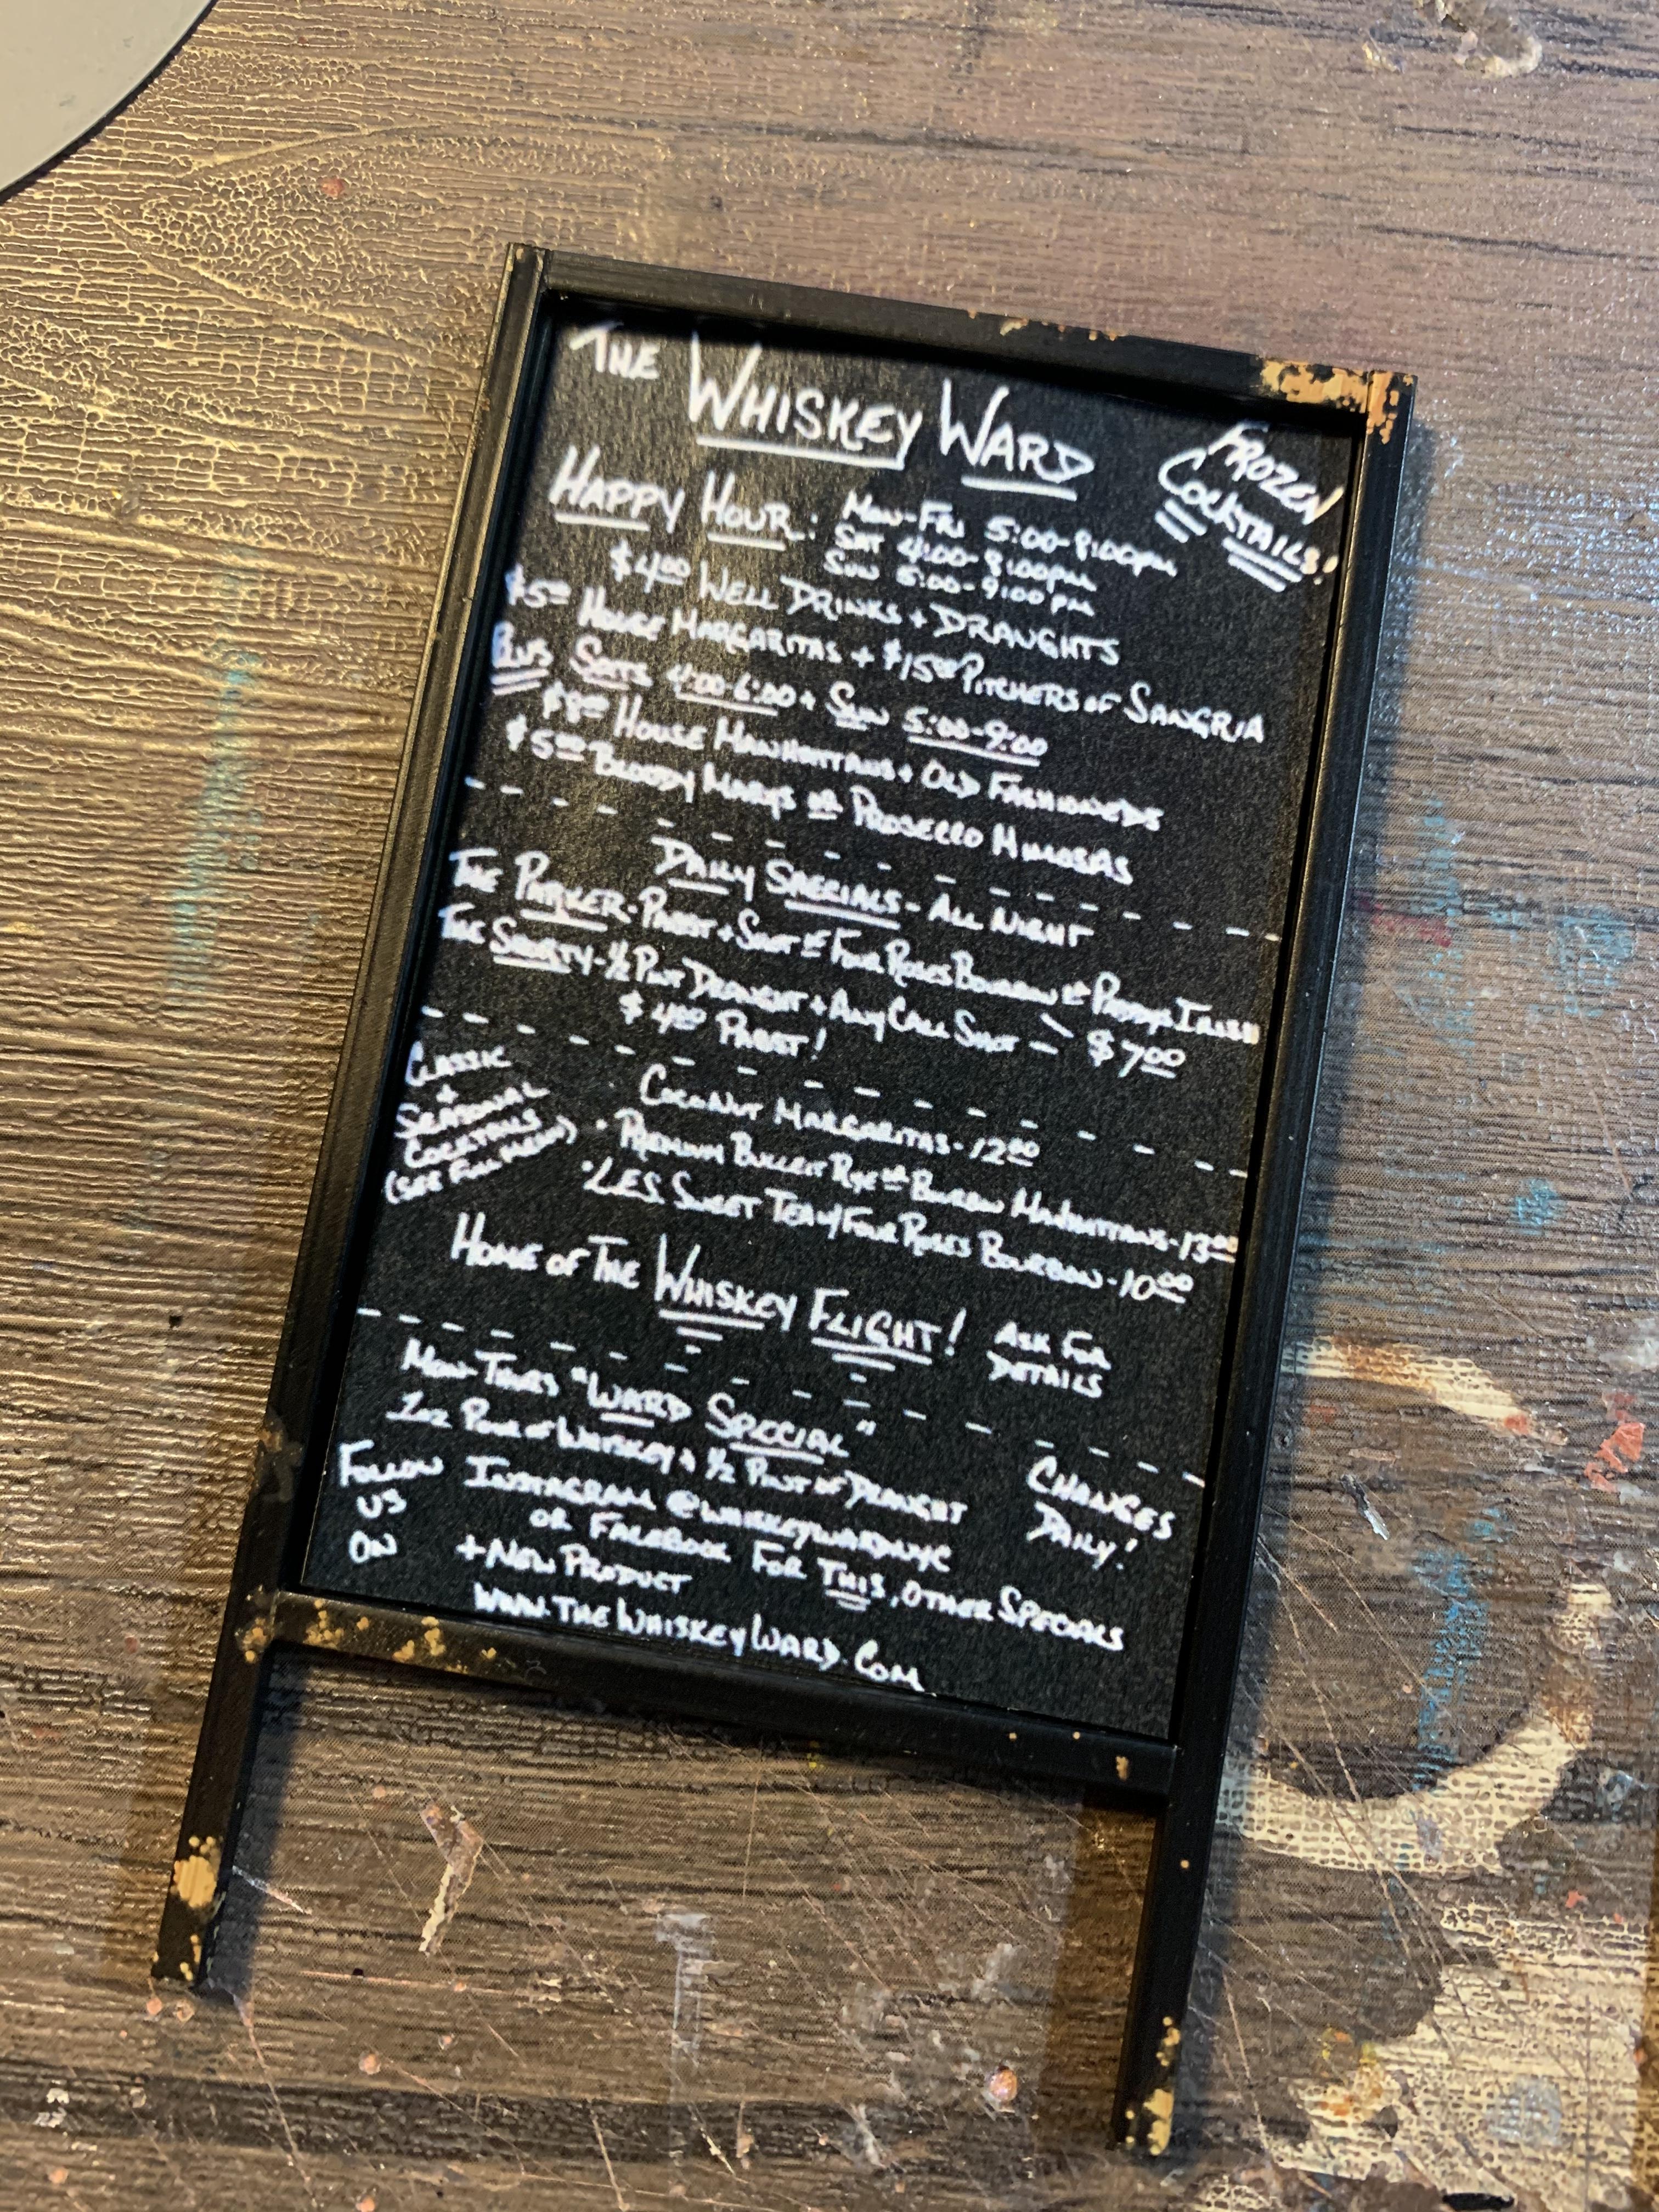
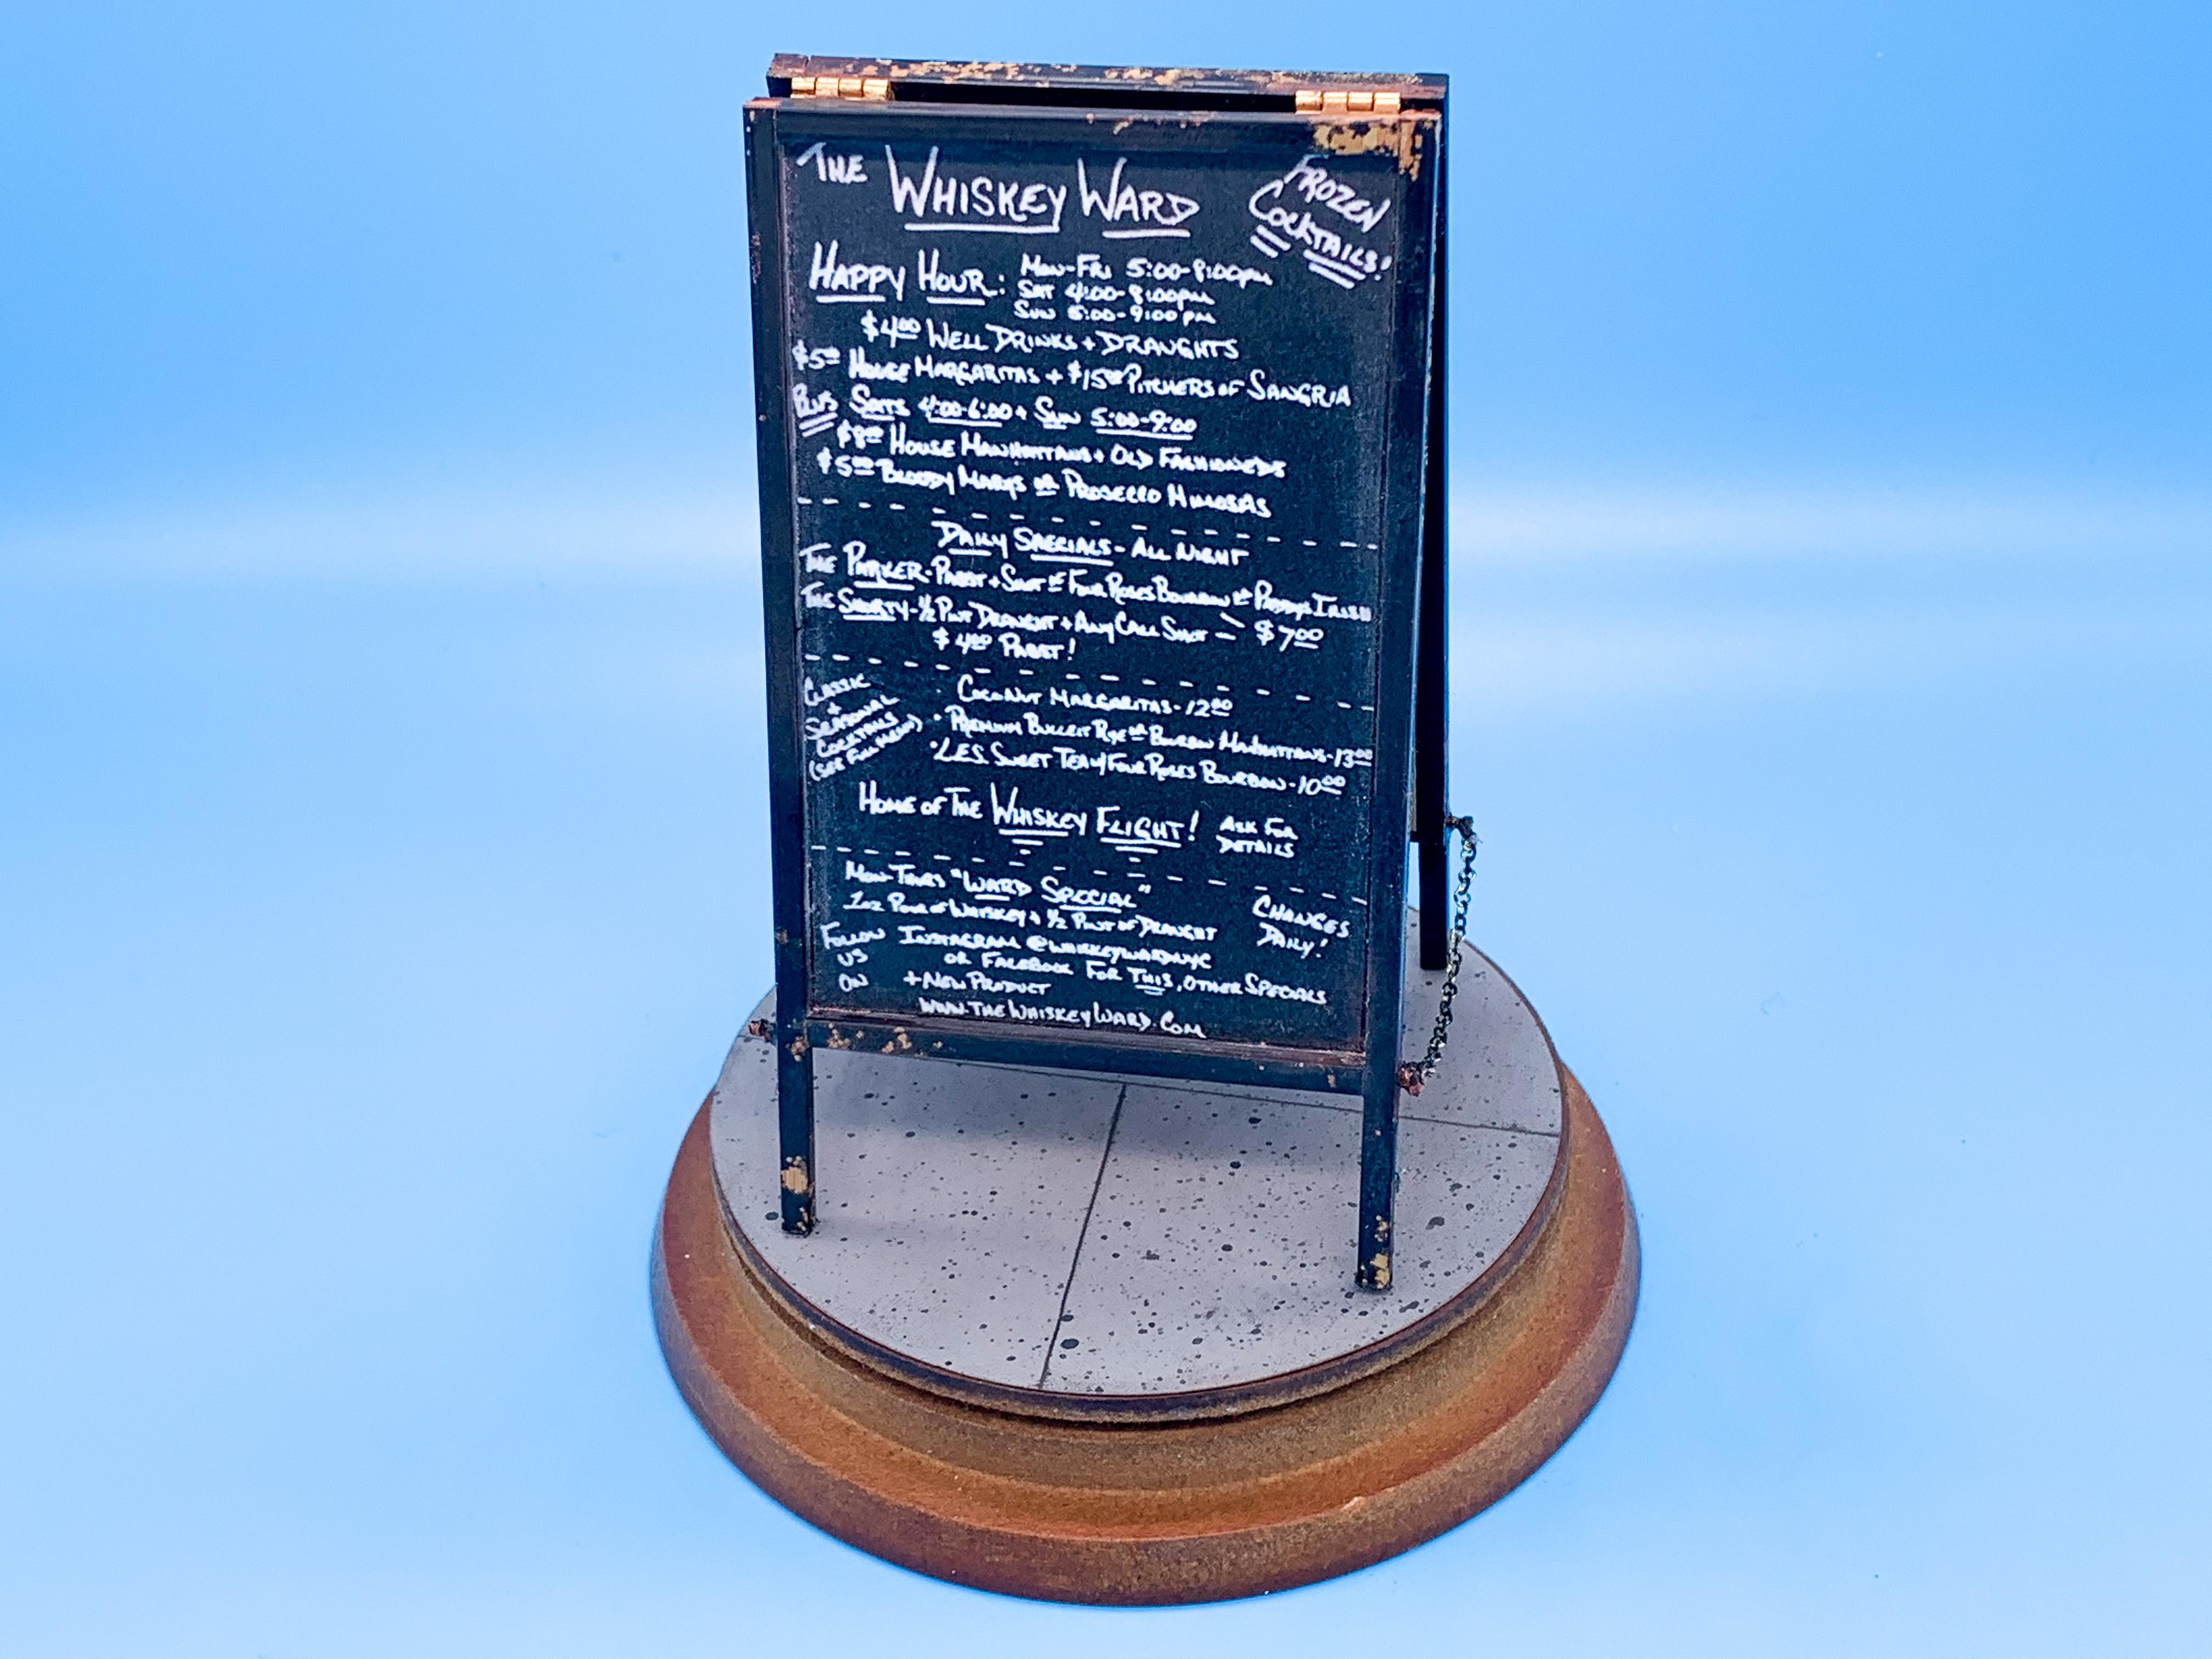
What a good attitude Tom! Merry Christmas everyone! Santa was good to me this year - got a dehydrator (which I’ve already converted/ruined so I can use it for drying bodies): And another Revell 29 - plus Hobby Lobby and Amazon gift cards: Mostly though I’m thankful for my family all being healthy and everyone making it through a rough 2020! Oh, and some of you may have seen the miniature sandwich board I made for my one friend who owns a bar - it’s a semi-replica of the actual one she’s been hauling out onto the sidewalk every day for the last 20 years (COVID closures aside in 2020)...it was a HUGE hit! Was nice to gift someone something I made and have them REALLY love it and be blown away by it: Giving is as good as getting! Happy Christmas y’all!
-
Huh! Didn’t know that! Every day’s a school day!
-
Really really enjoying seeing this come together - amazing work!
-
Great start! I too love the antennas coming through the fin! Way cool!
-
34 Church Truck
CabDriver replied to CabDriver's topic in WIP: Model Trucks: Pickups, Vans, SUVs, Light Commercial
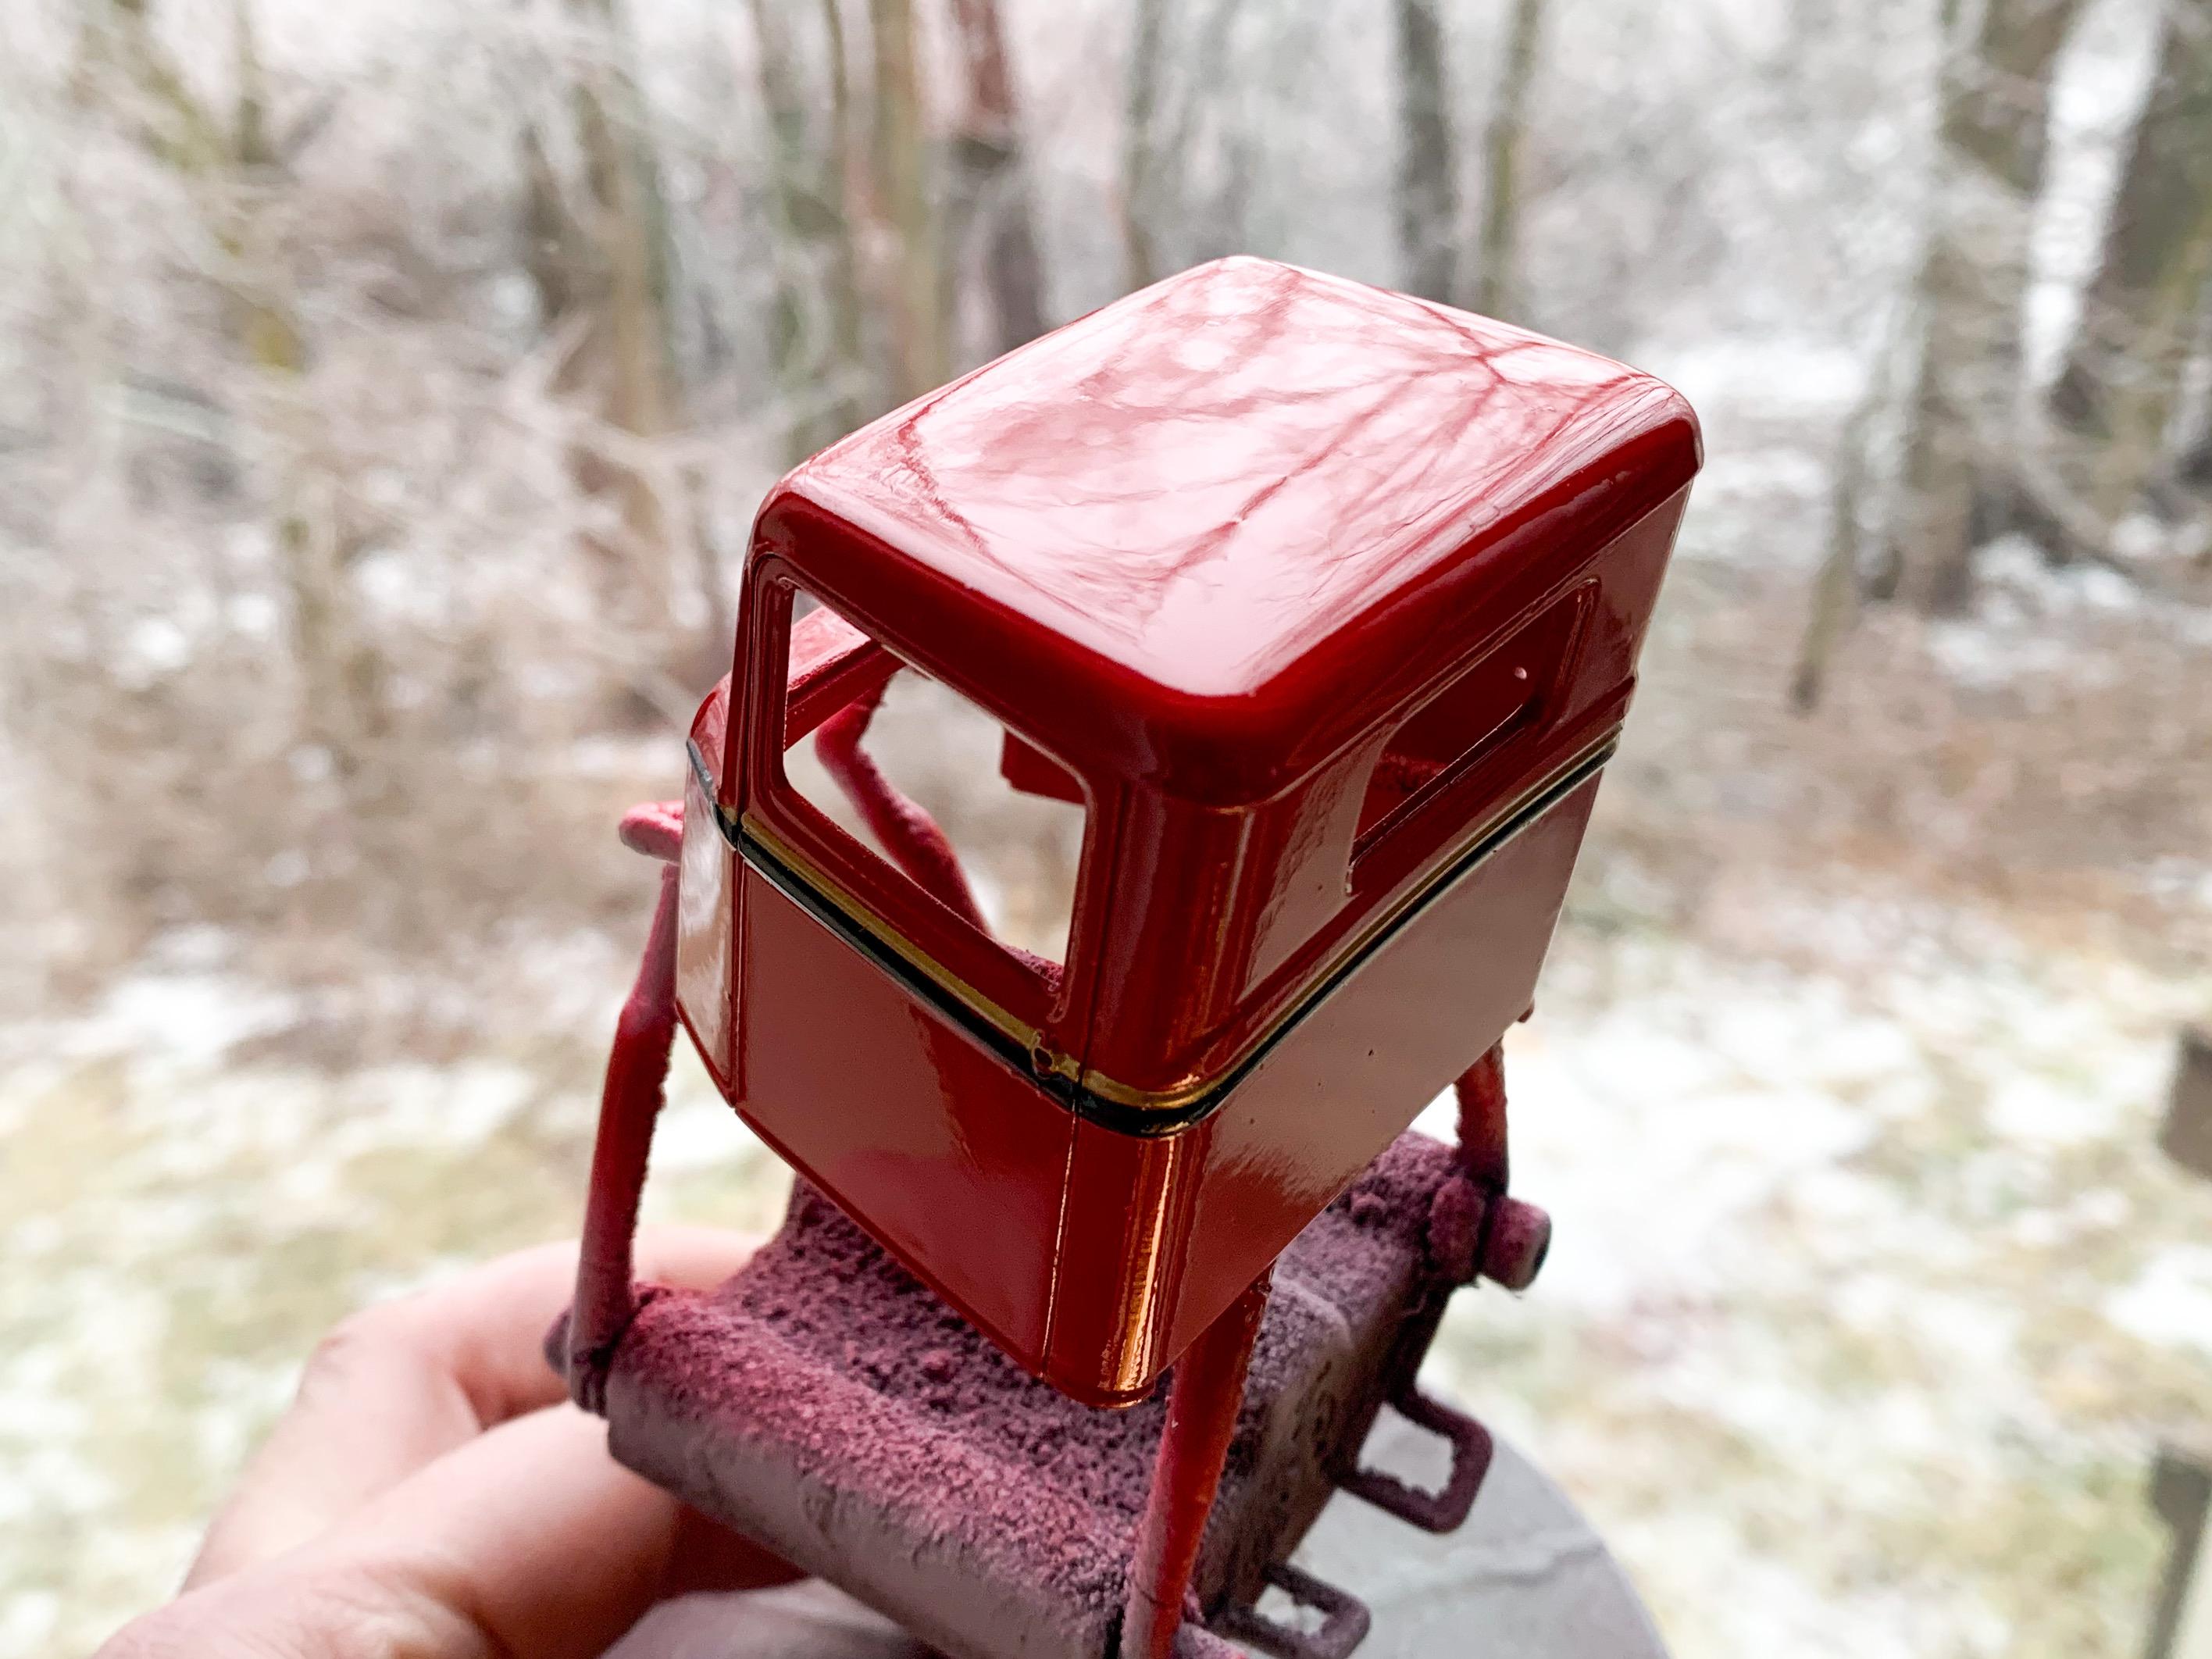
Thank you sir! Just drilled out the kit ones to make ‘em hollow! Exactly right on both counts sir! I like it because the cleanup is easy and there’s about zero chance of damaging anything...and if you don’t like the results just rinse it off before it dries! I still use regular lacquer primer and clears too, but the more I use acrylics the more I like them. I wouldn’t necessarily say they’re any harder or easier than regular lacquers to apply - just a little different! Having a busy week before Christmas, but got some pinstripe decals and the gauges on the dash and into clear: And added a little BMF to that grill to bling it up a little - need to burnish it down some more but it looks cool on there! Got the steering wheel and shift knob in clear too, whilst I was at it... Got a little imperfection in the clear on that wheel but I fixed it and re-cleared and it shrunk down nice as it dried, and tightened up some to look less dipped-in-syrup. Oh, and shot the valve covers in some clear too so I can start working on the engine: I’ve been waiting for some parts to come to Morgan Automotive for the engine but they don’t seem to be dispatching orders or answering emails right now so that might slow me up - but plenty of other stuff to work on. More soon!
-
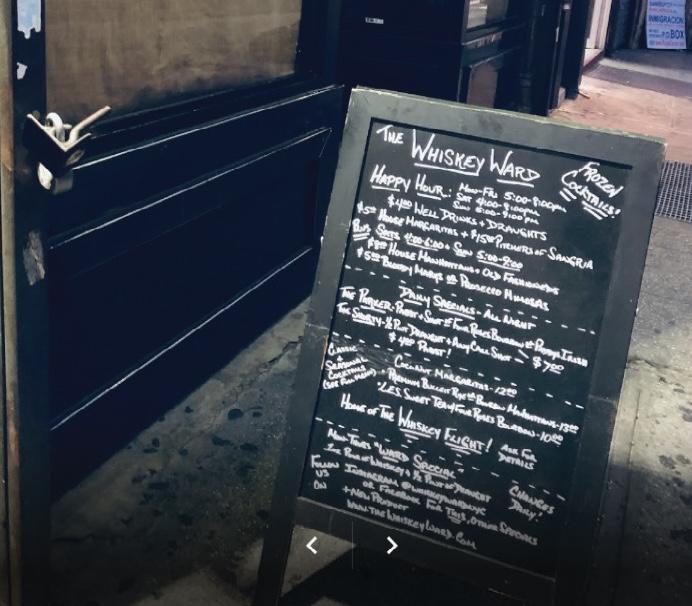
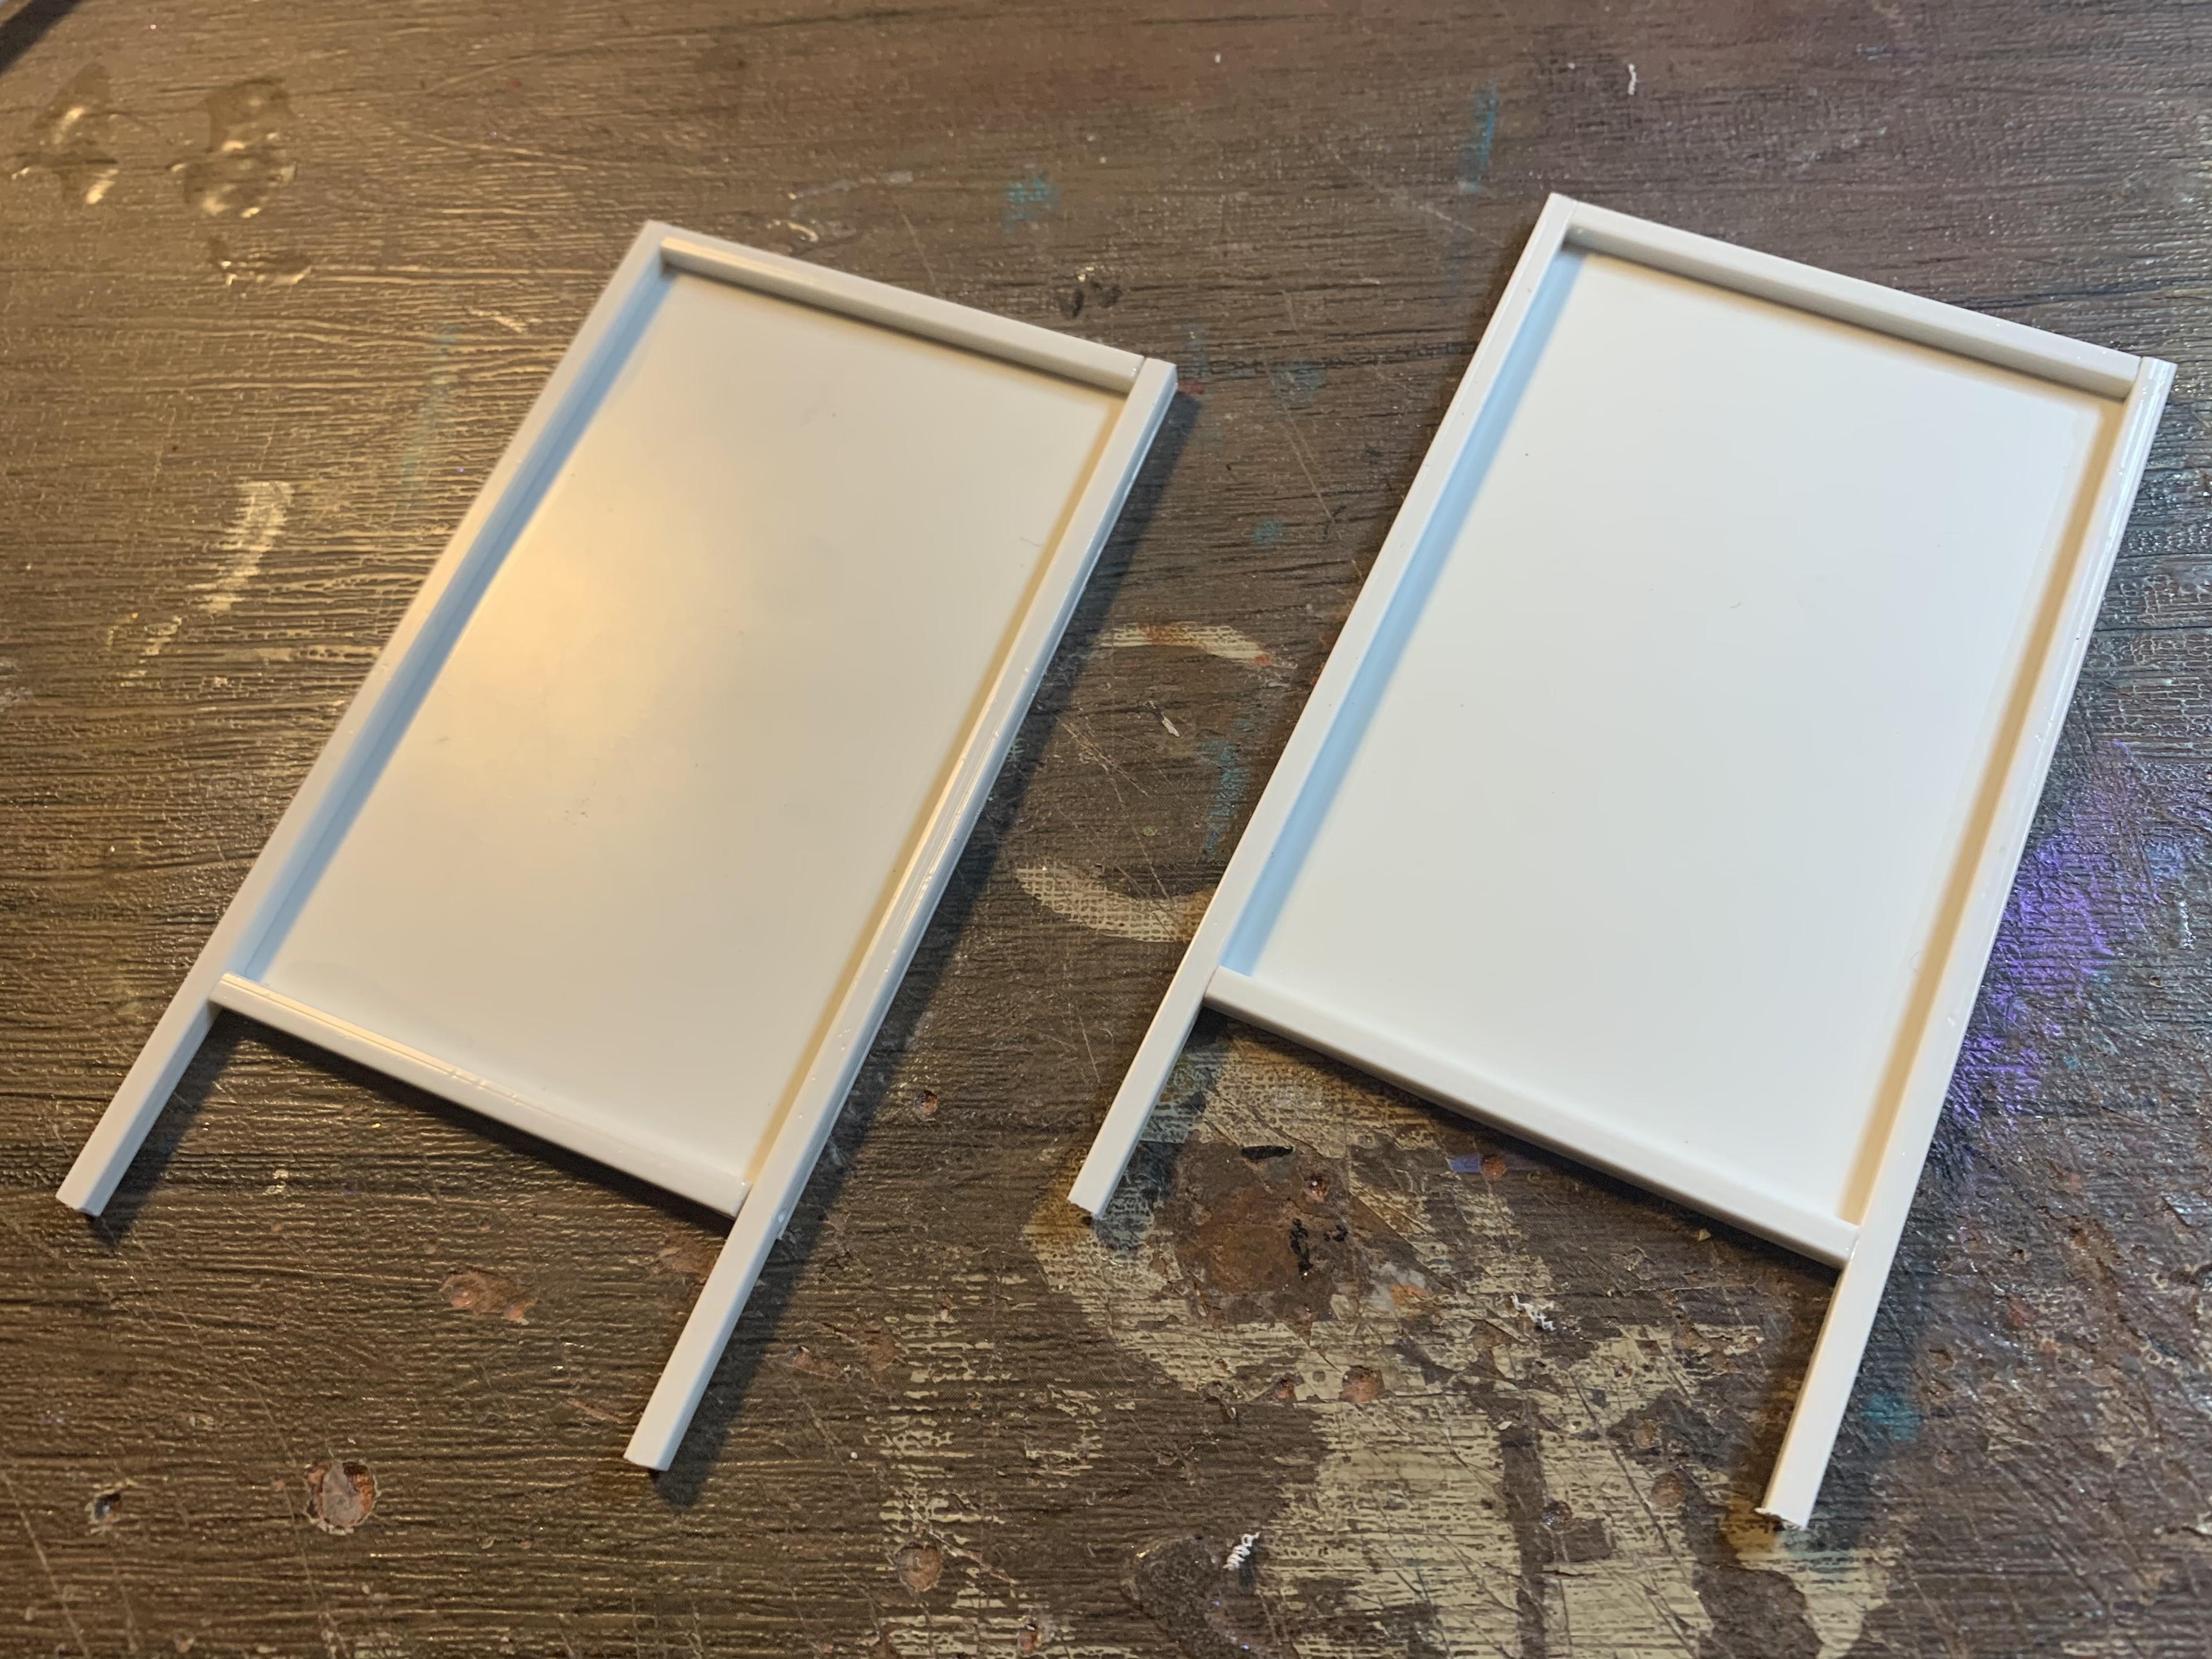
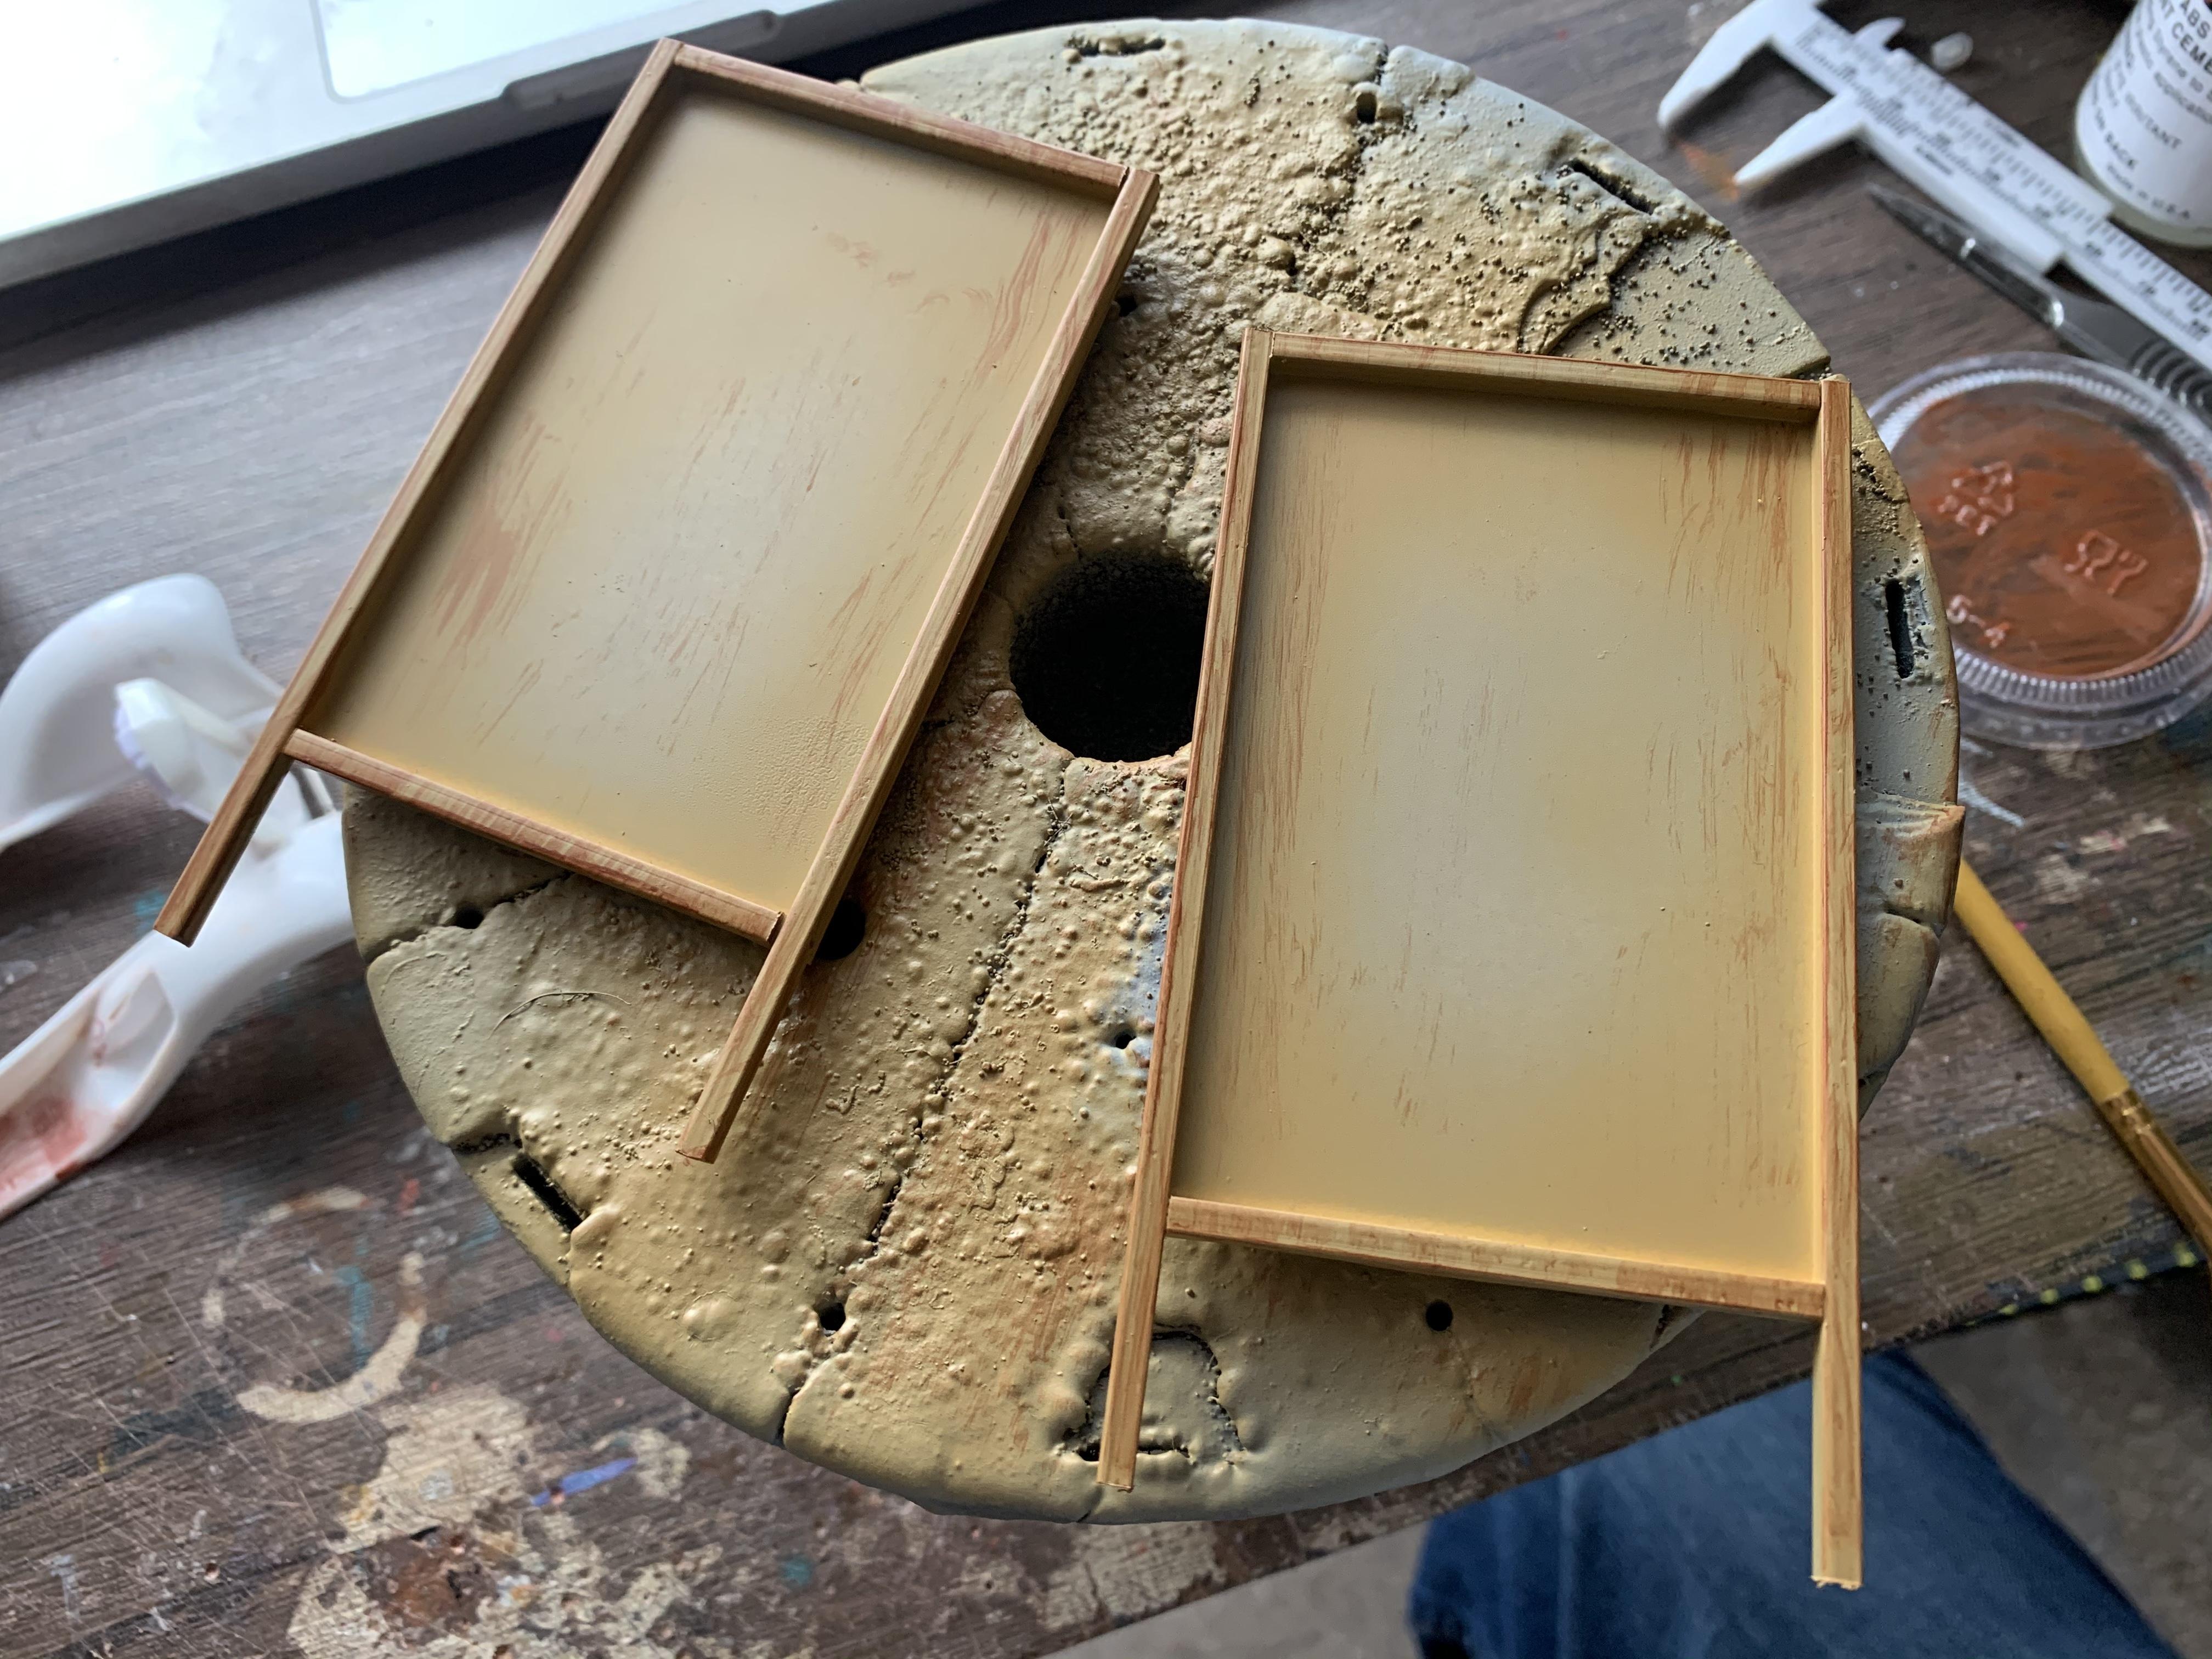
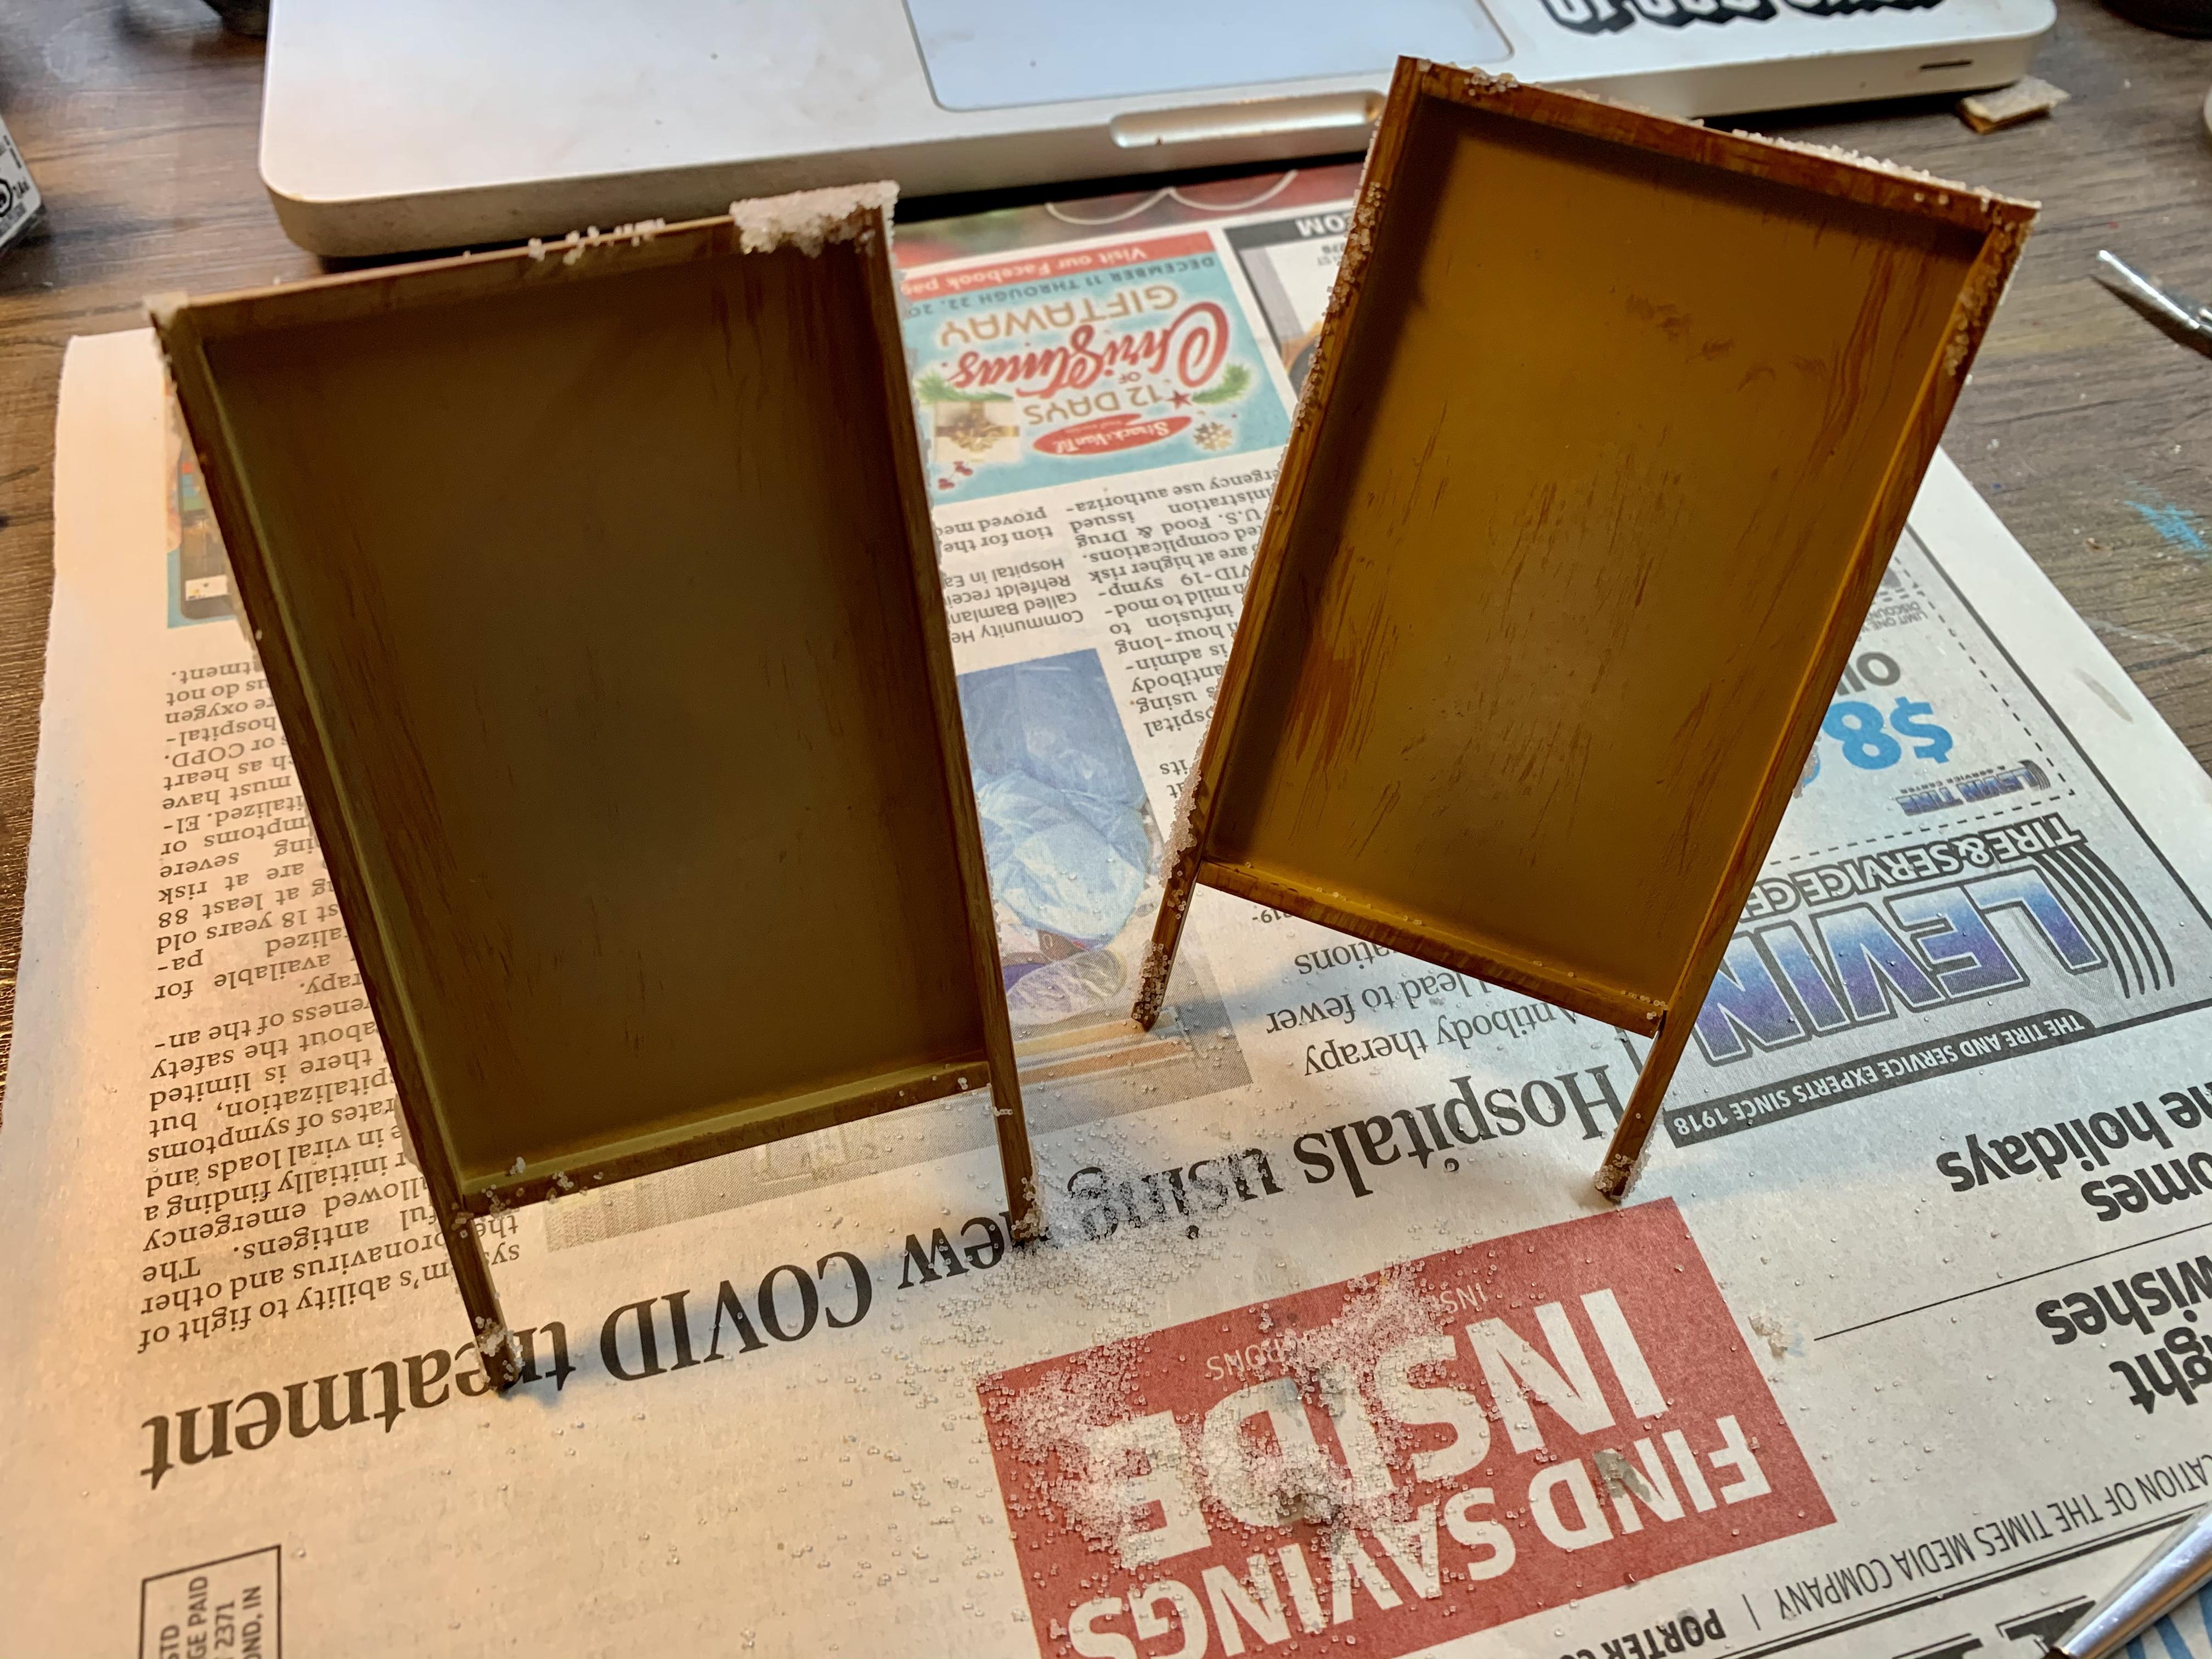
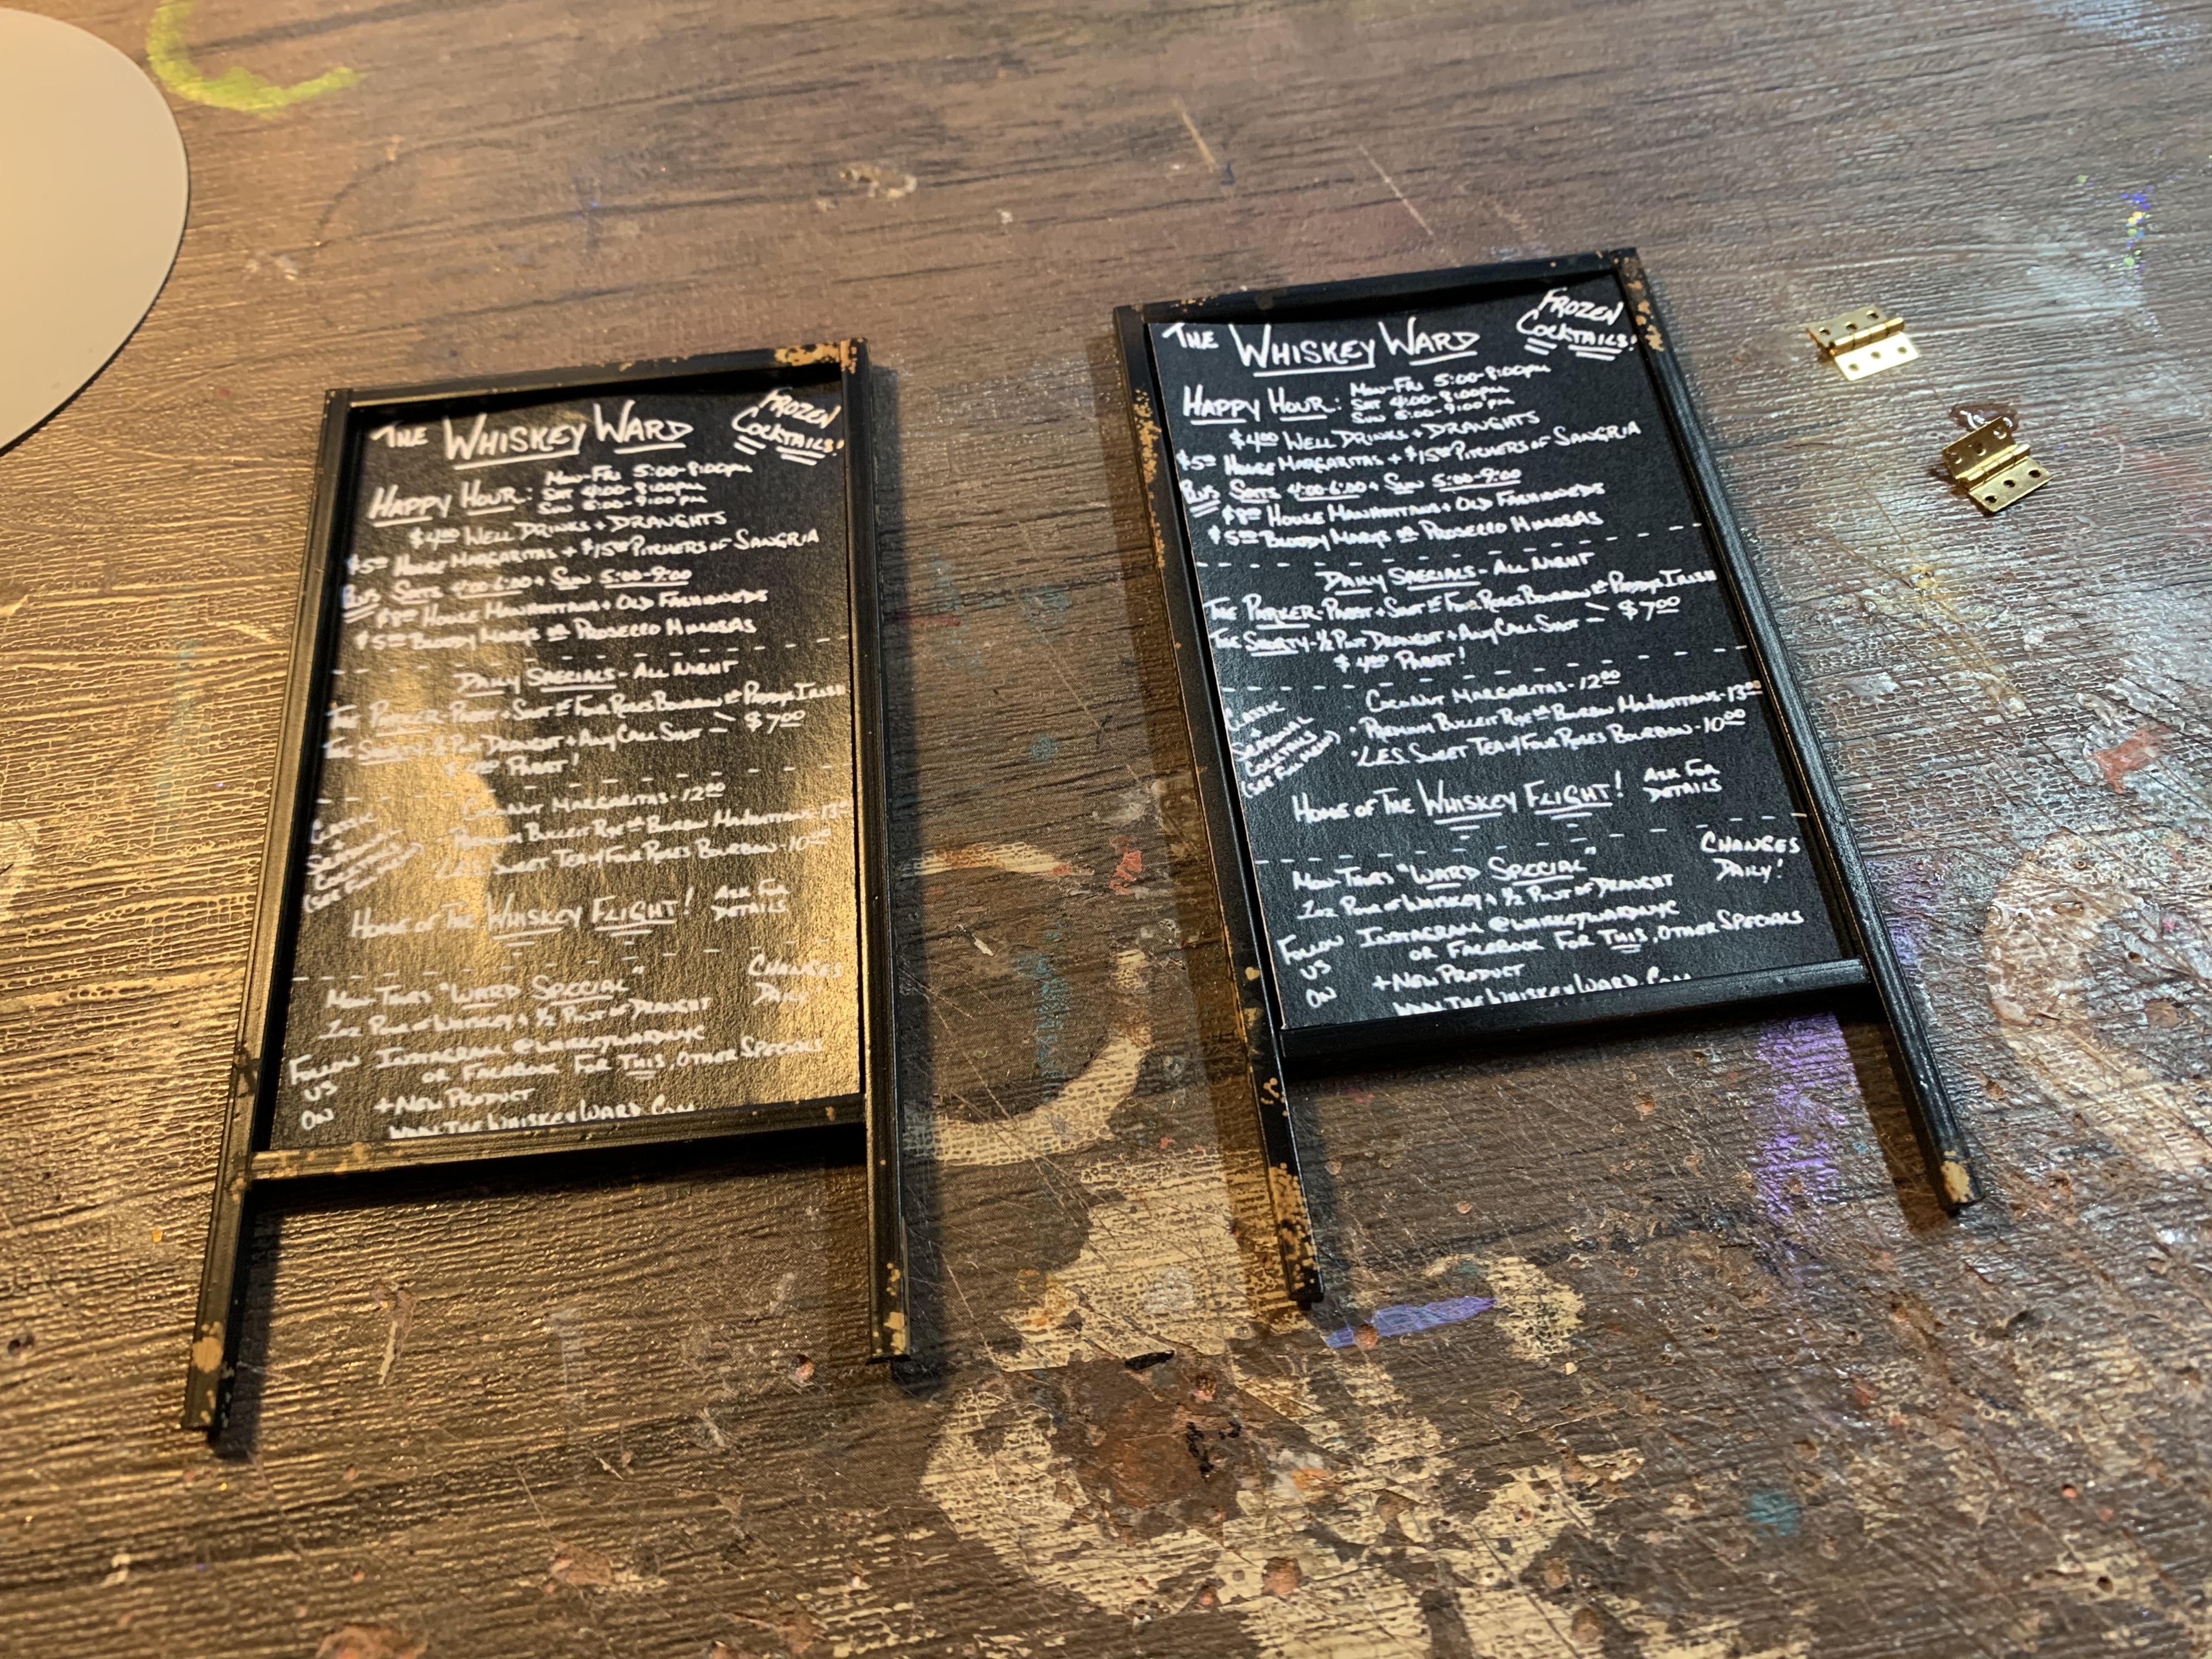
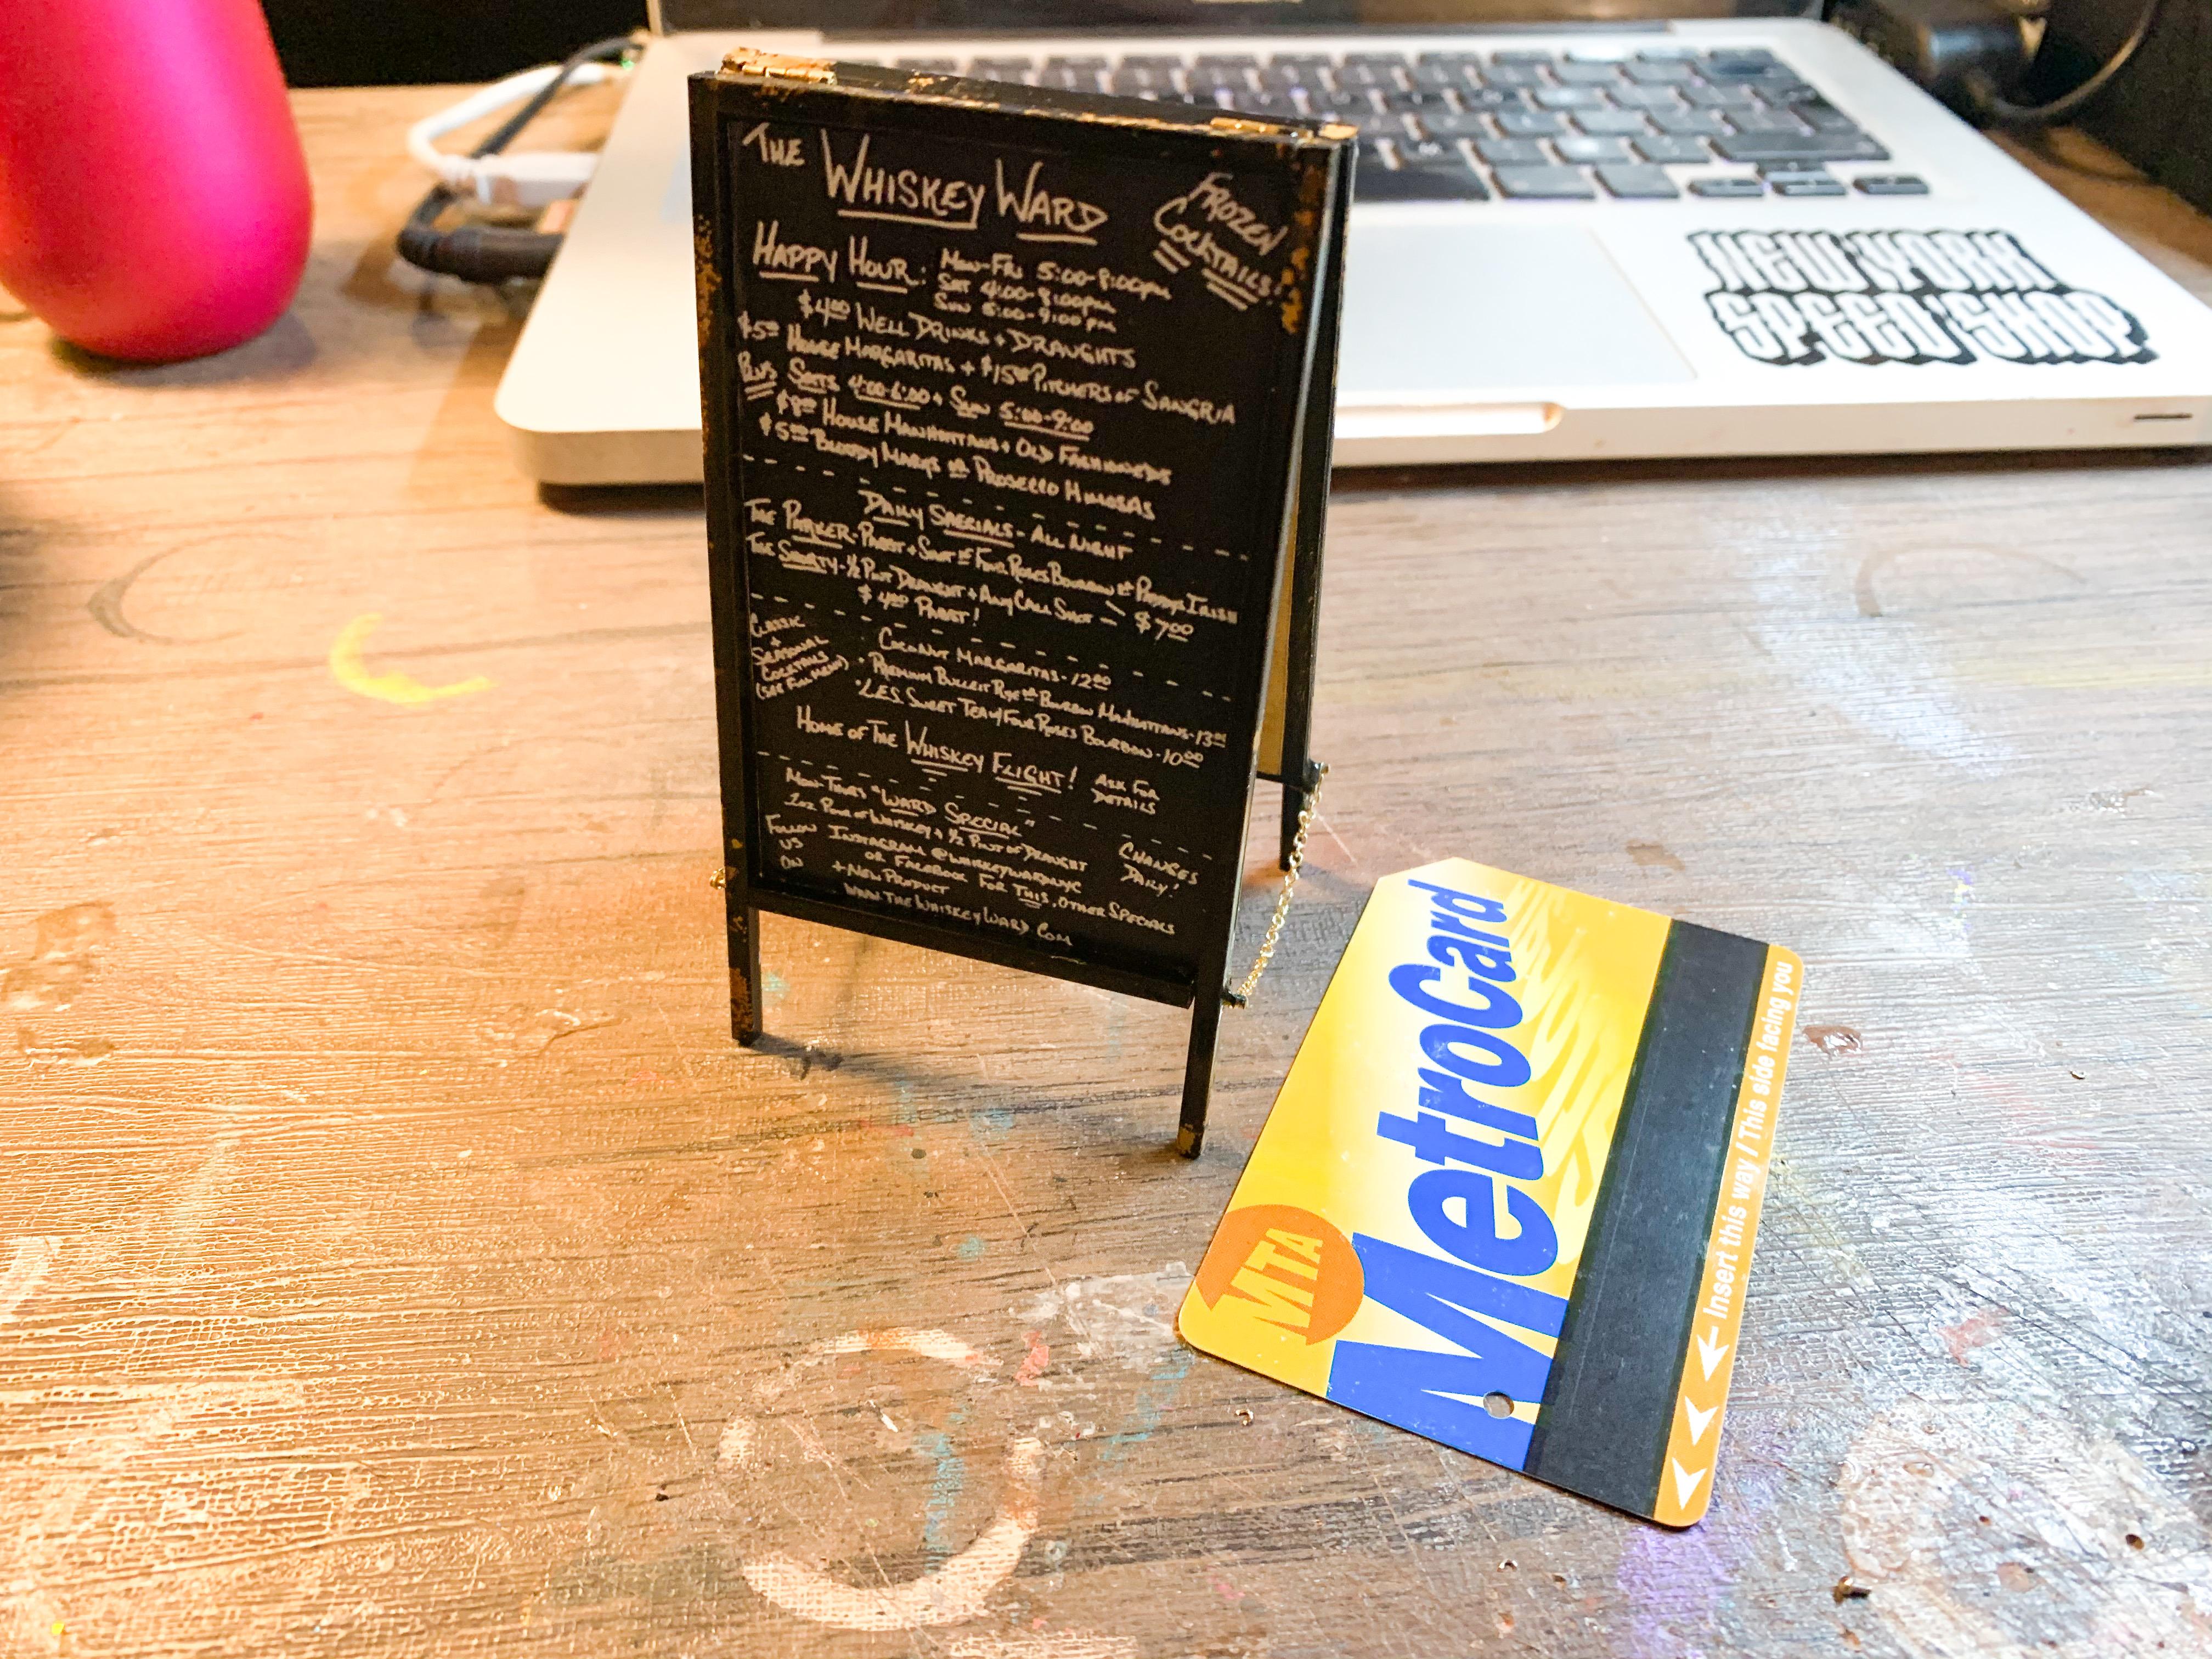
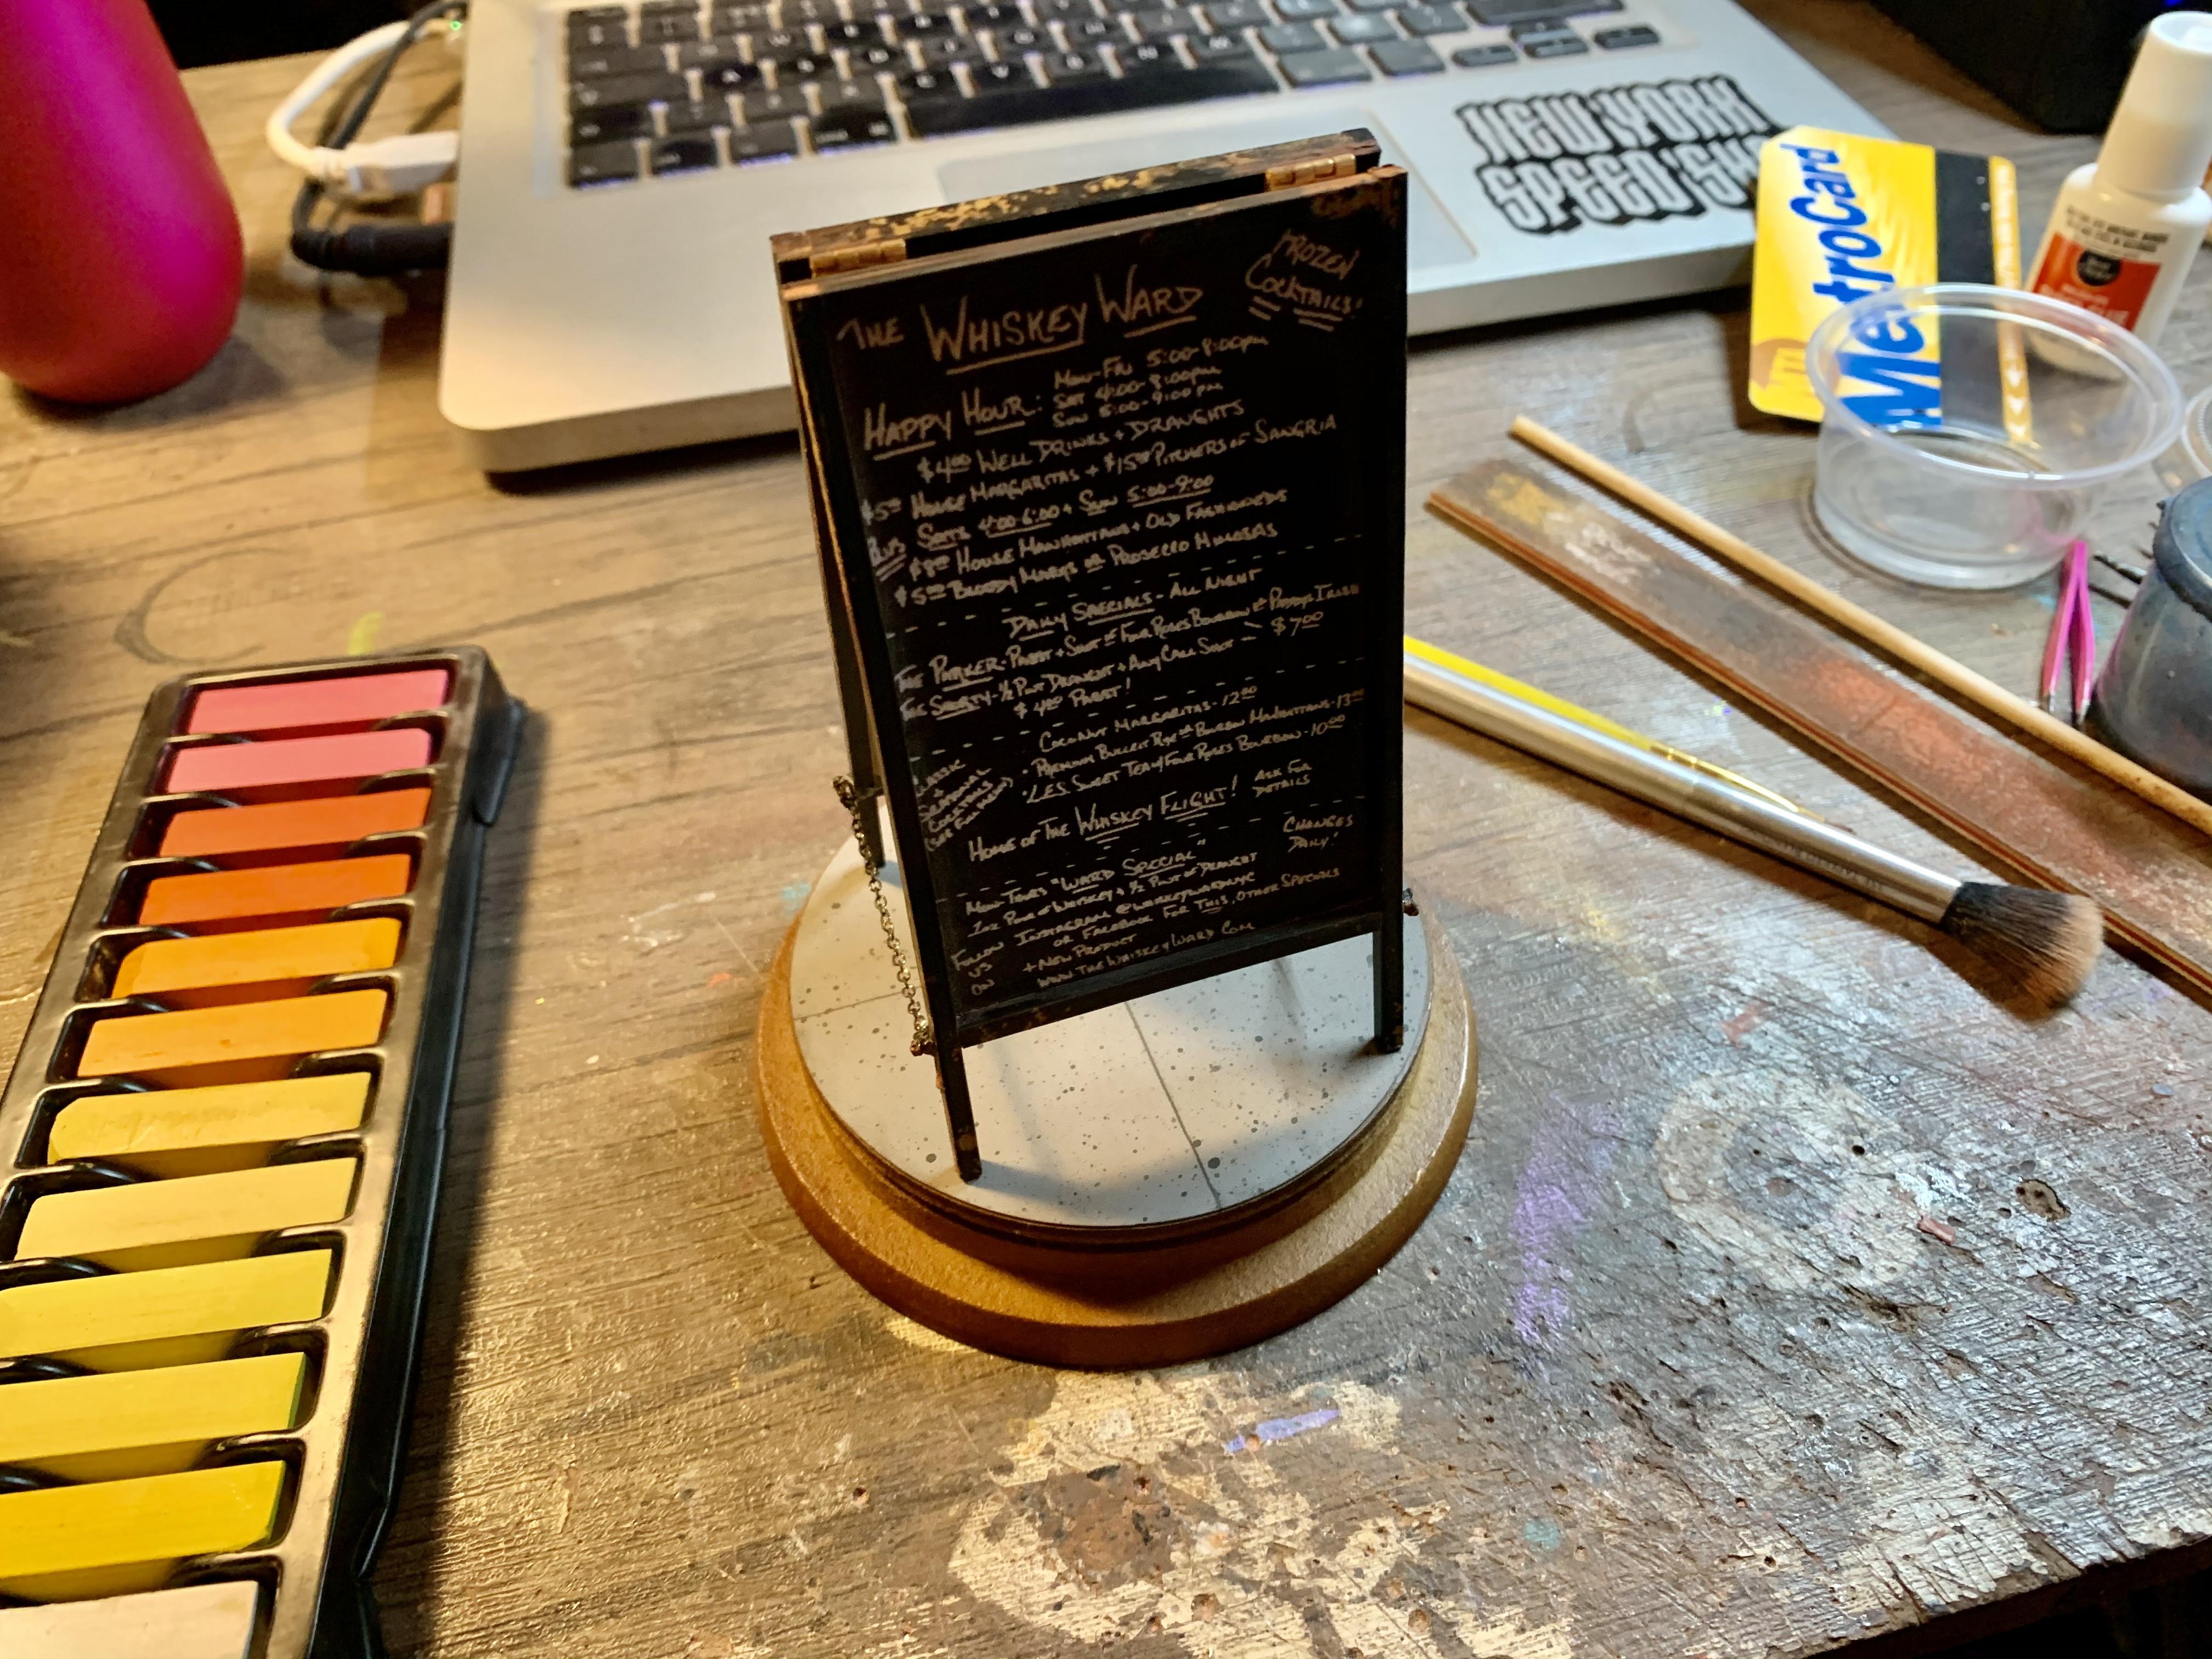
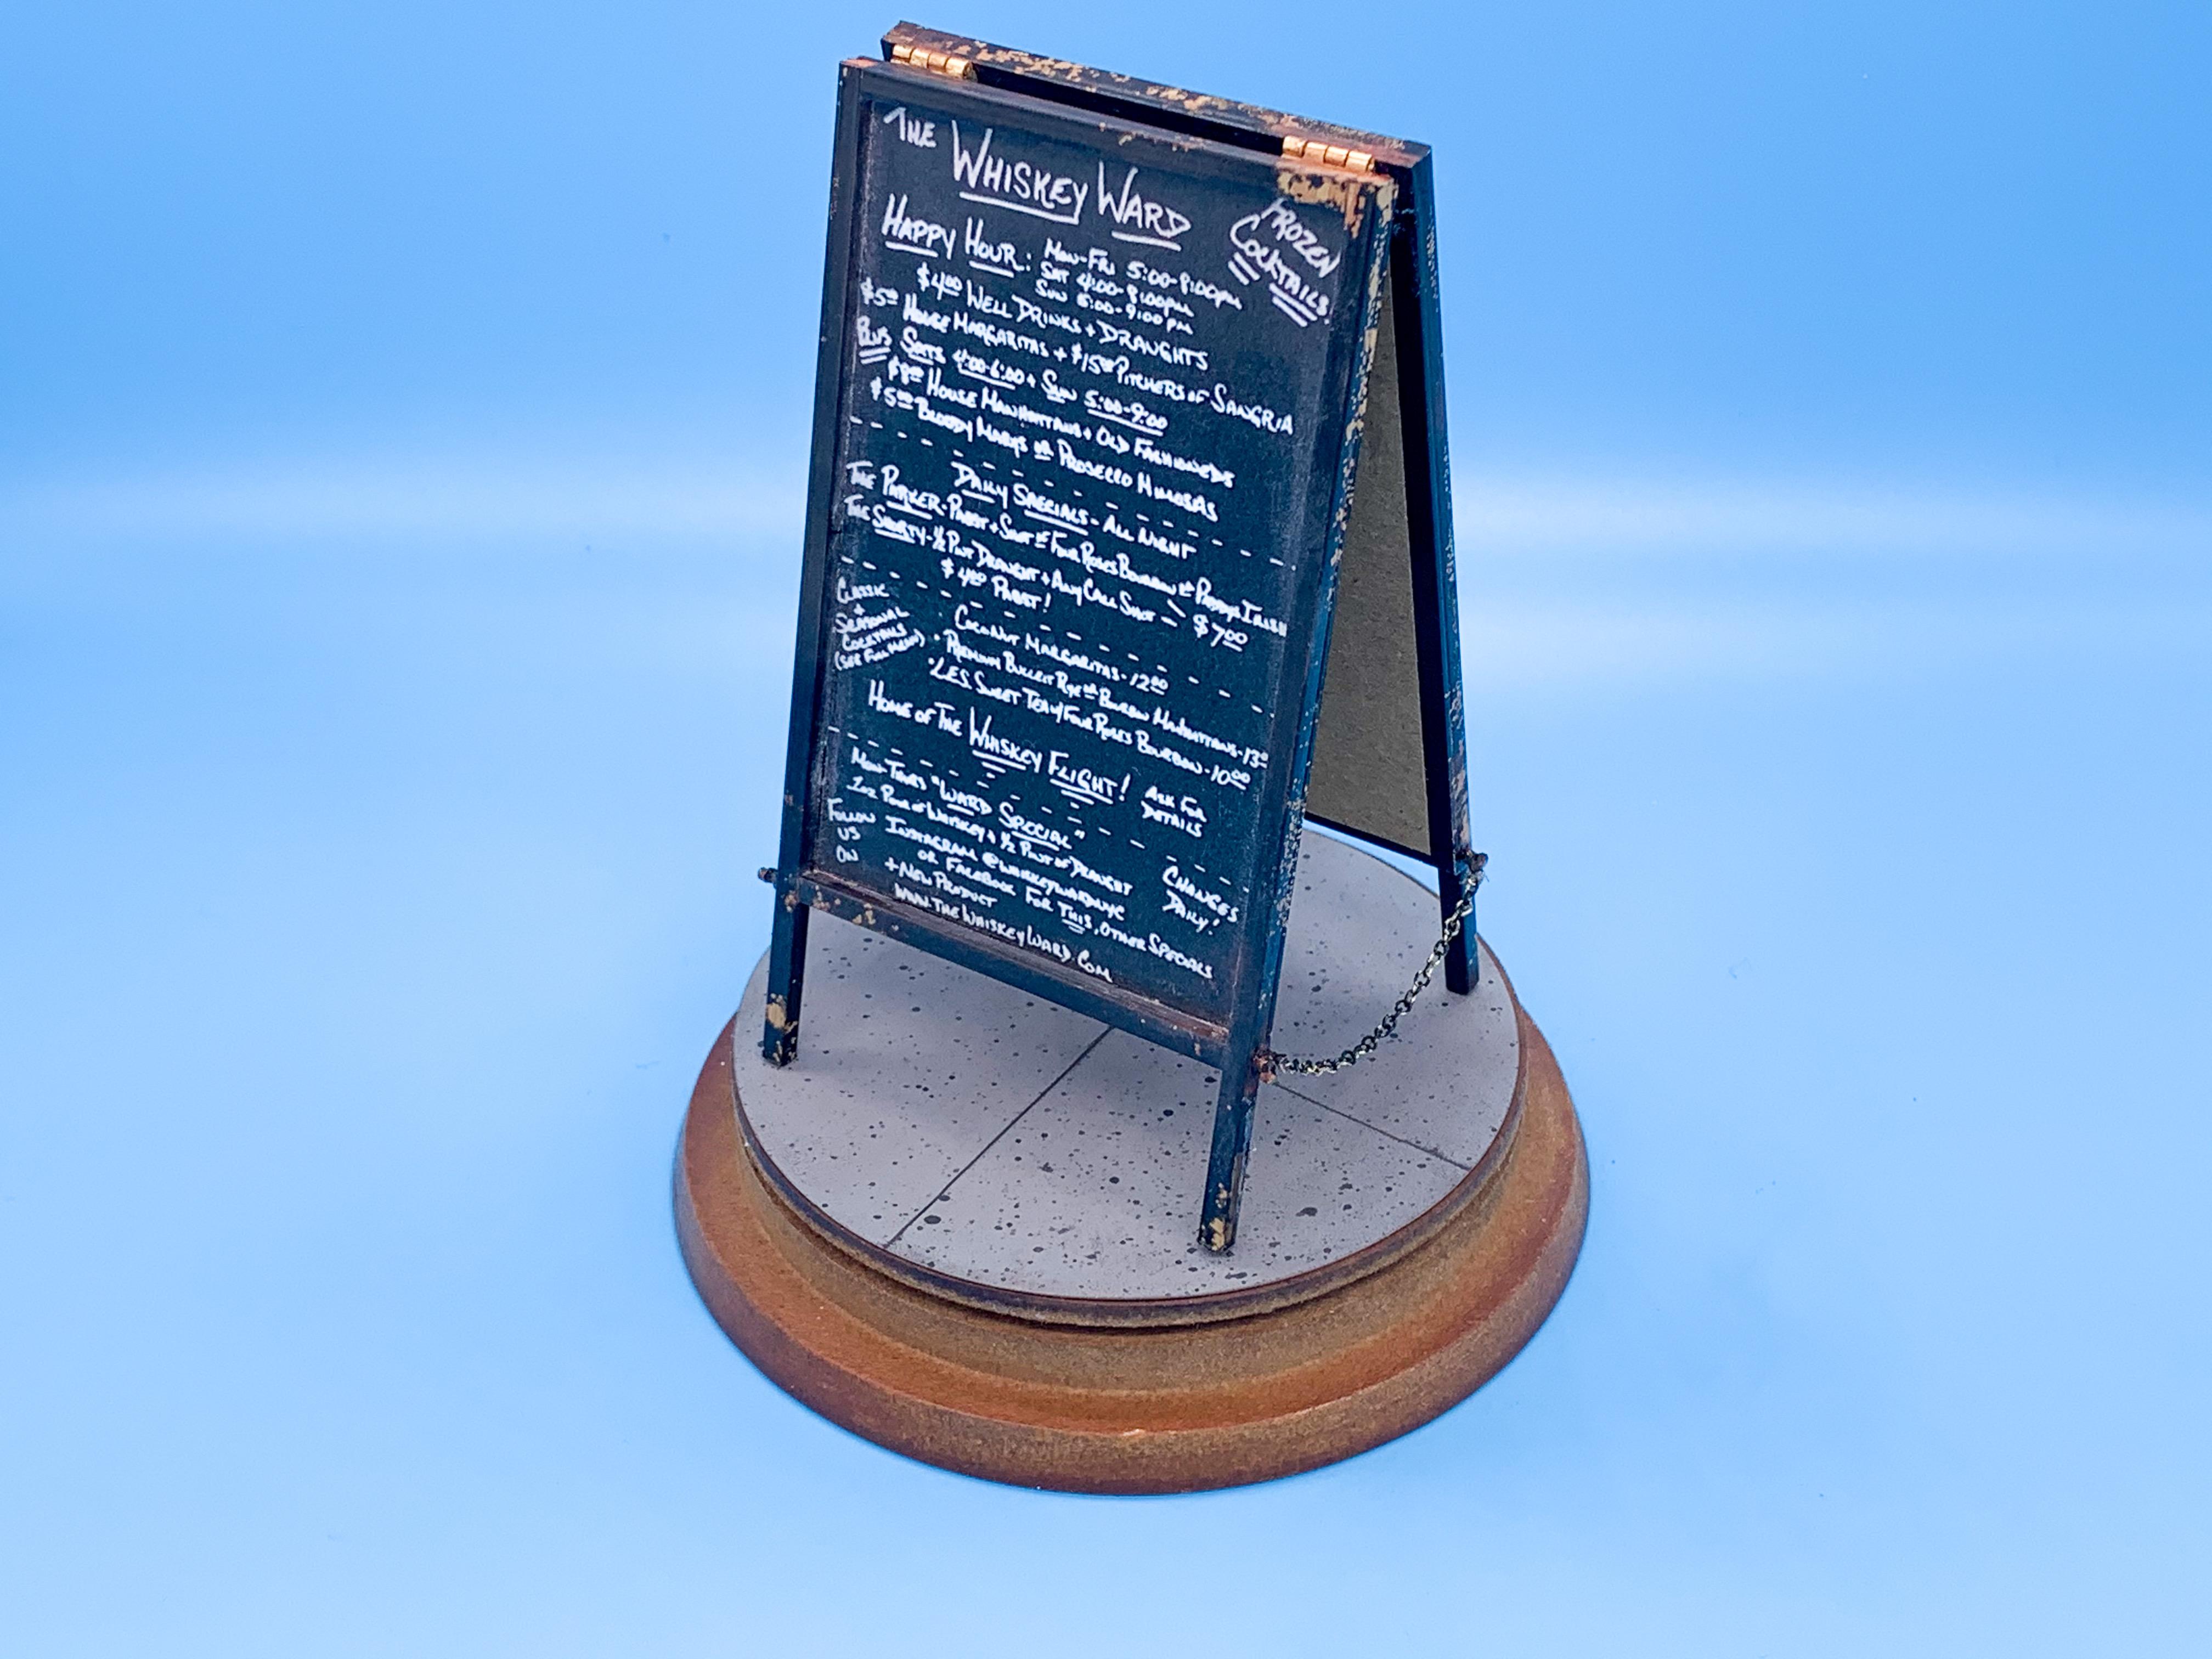
With Christmas coming I wanted to make a little gift for my friend who owns a bar in the city - so I figured a miniature of the sandwich board she pulls out the front every night and lists the specials on in chalk would be a fun little project (and gift). A photo I found online of the real thing, for rough reference: I want to make this thing sturdy enough that she can show it to people and have them handle it so I’m taking some liberties with the exact proportions and dimensions but it’ll look something like that anyway... Made the two boards: Primed, then painted tan, then brushed a little woodgrain detail on: A little salt: And black: Next up, squared up that hand lettered chalkboard in Photoshop and printed it: Glued in place with some Elmer’s: Next, added some chipboard-looking card to represent the unpainted rear side of the chalkboard, and added some brass hinges: I was going to add photoetched screw heads, but you can’t see back in there anyhow... Added the chains that stop it doing the splits: Made a little sidewalk-looking texture from some styrene sheet and attached to a wooden base (actually a lid from one of my wife’s fancy candles), and did some weathering with pastels and a black wash: And all done - fun afternoon project!
-
Cool to see this one pop up in the current Model Cars Mag! Was cool to see it again!
-
P.E. Callout!!! Bring out your Photoetched!!!
CabDriver replied to Plastic_Passion's topic in Model Cars
It looks like a great build - thanks for the reply Pete! Would love to see more photos as and when you find them! -
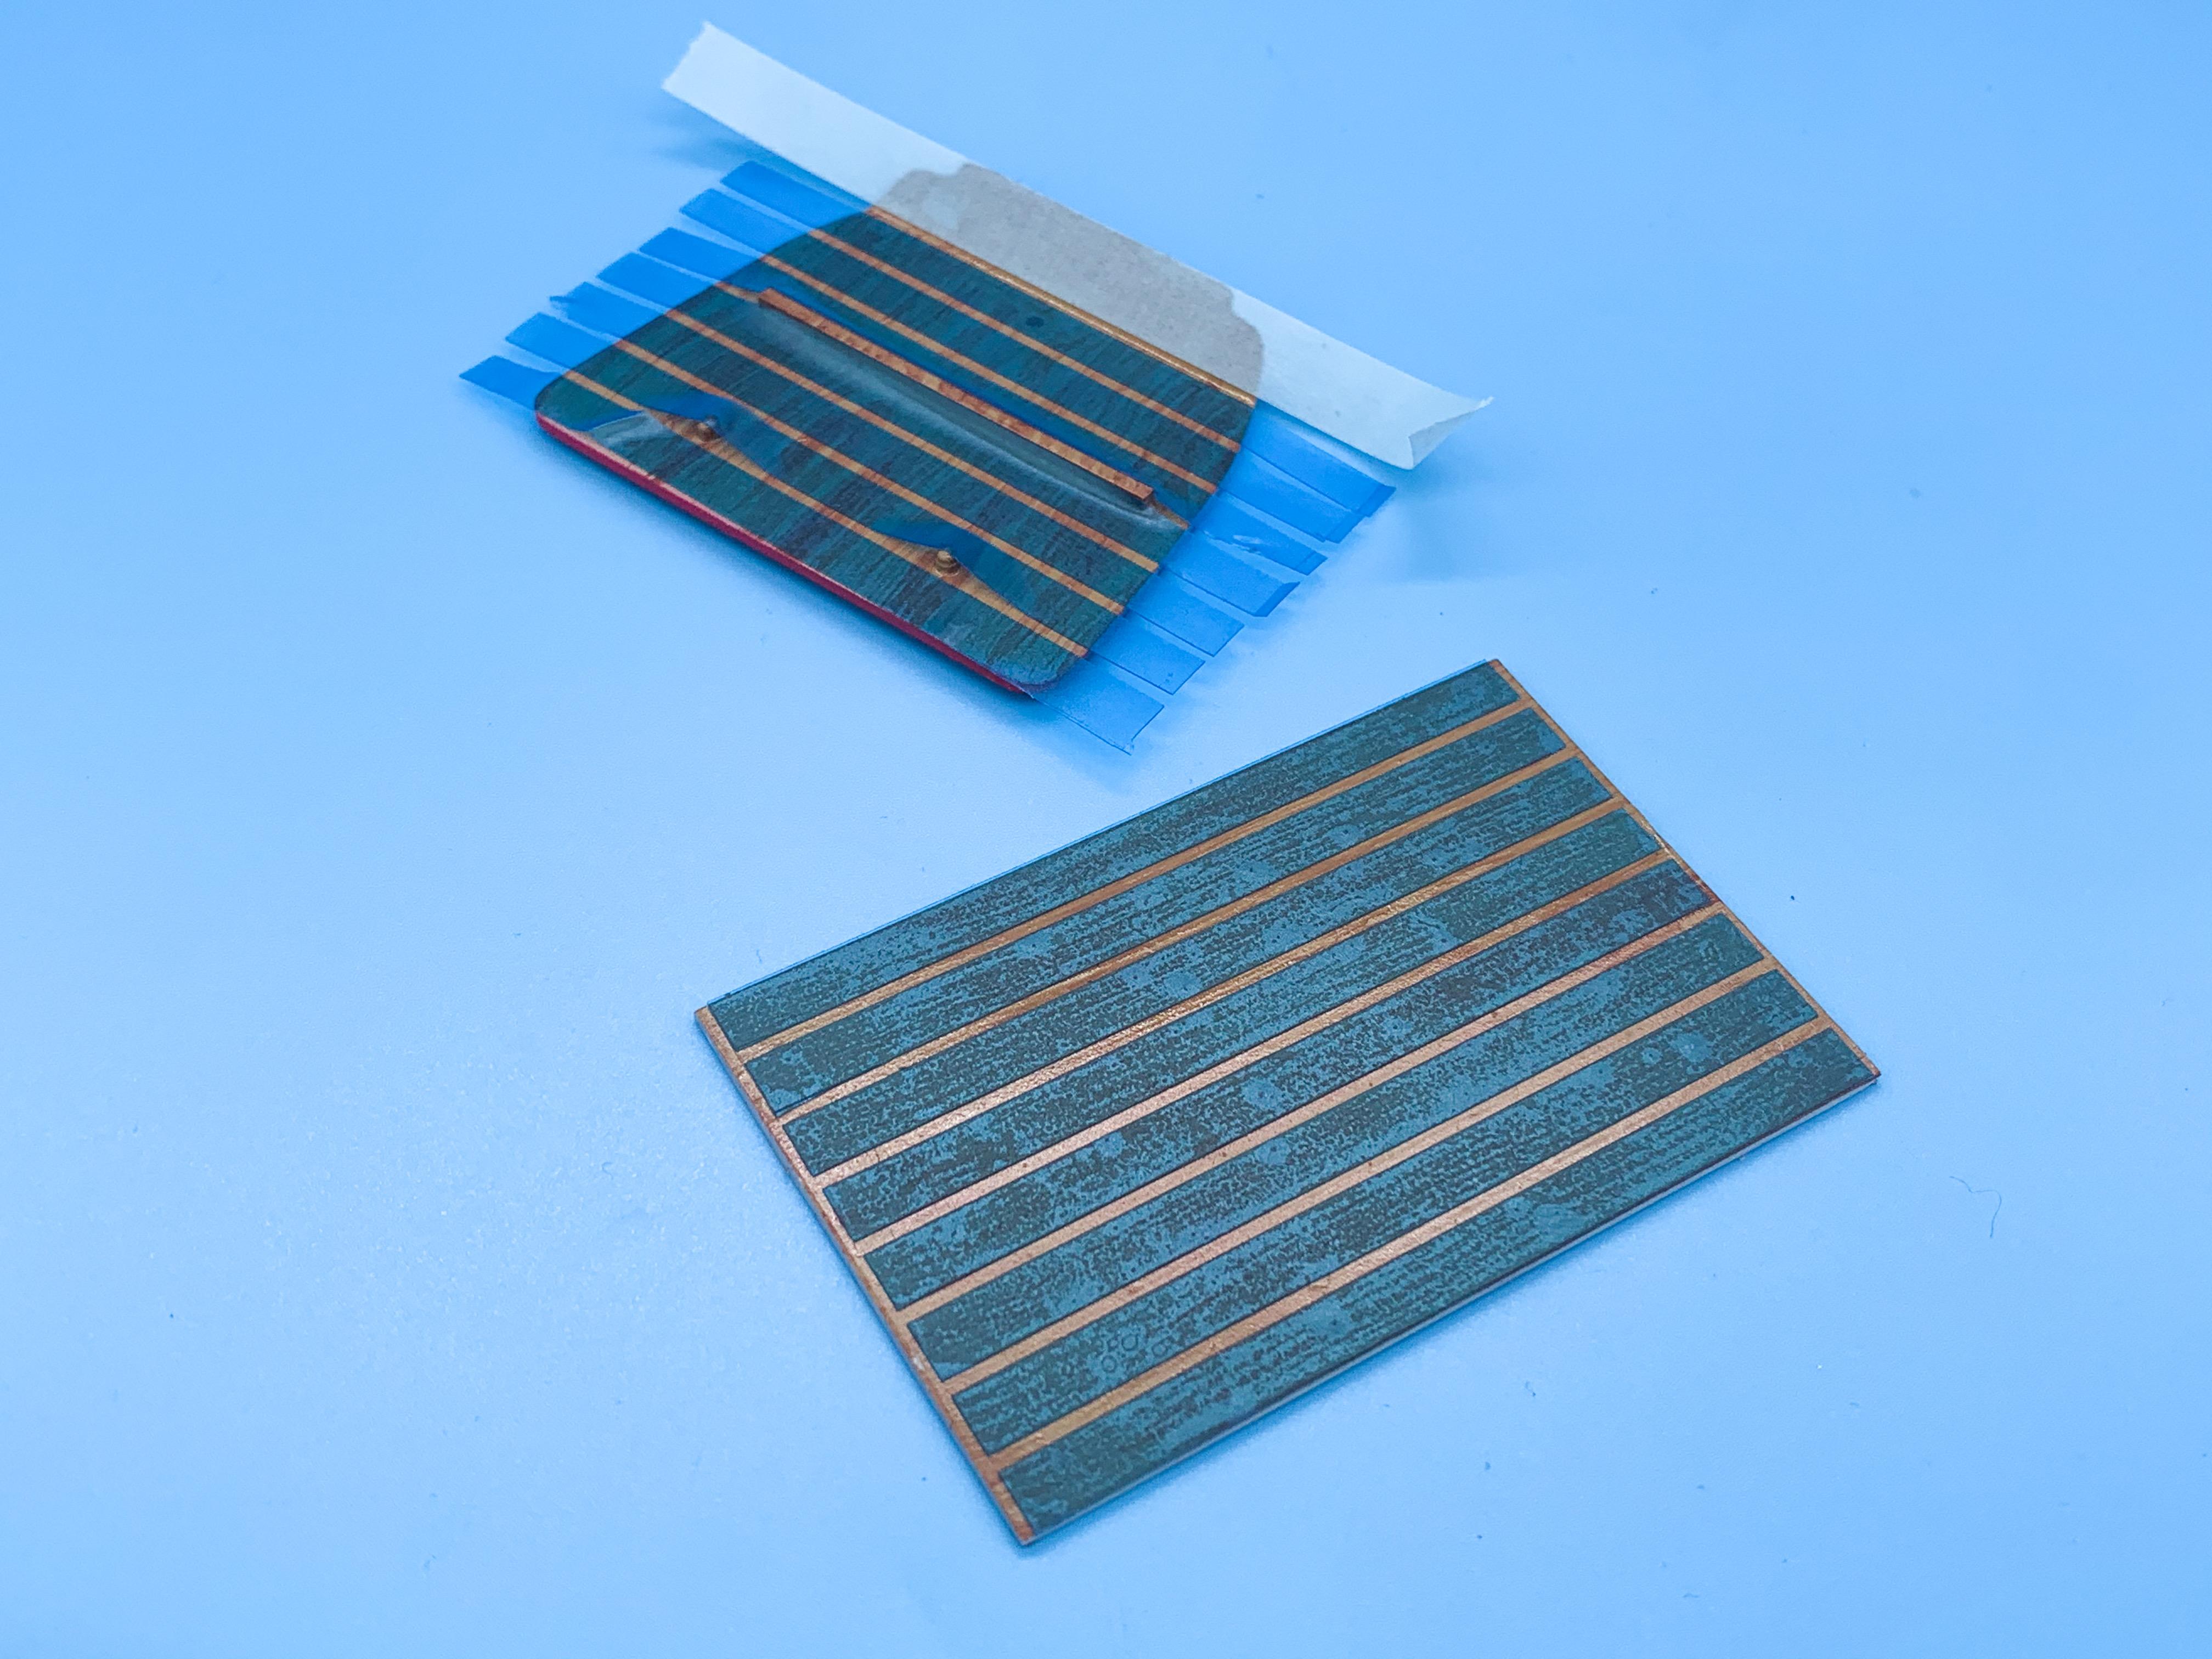
Tuck 'n Roll from Acrylic Paint Queston
CabDriver replied to JollySipper's topic in Model Building Questions and Answers
Which got me thinking - this trick would actually work well to pull ANY texture off about any part so you can replicate it to use on a different part. I definitely need to hit Hobby Lobby tomorrow and get some supplies to mess with - they have some GREAT textures papers and cards that might work well too for finer patterns -
34 Church Truck
CabDriver replied to CabDriver's topic in WIP: Model Trucks: Pickups, Vans, SUVs, Light Commercial
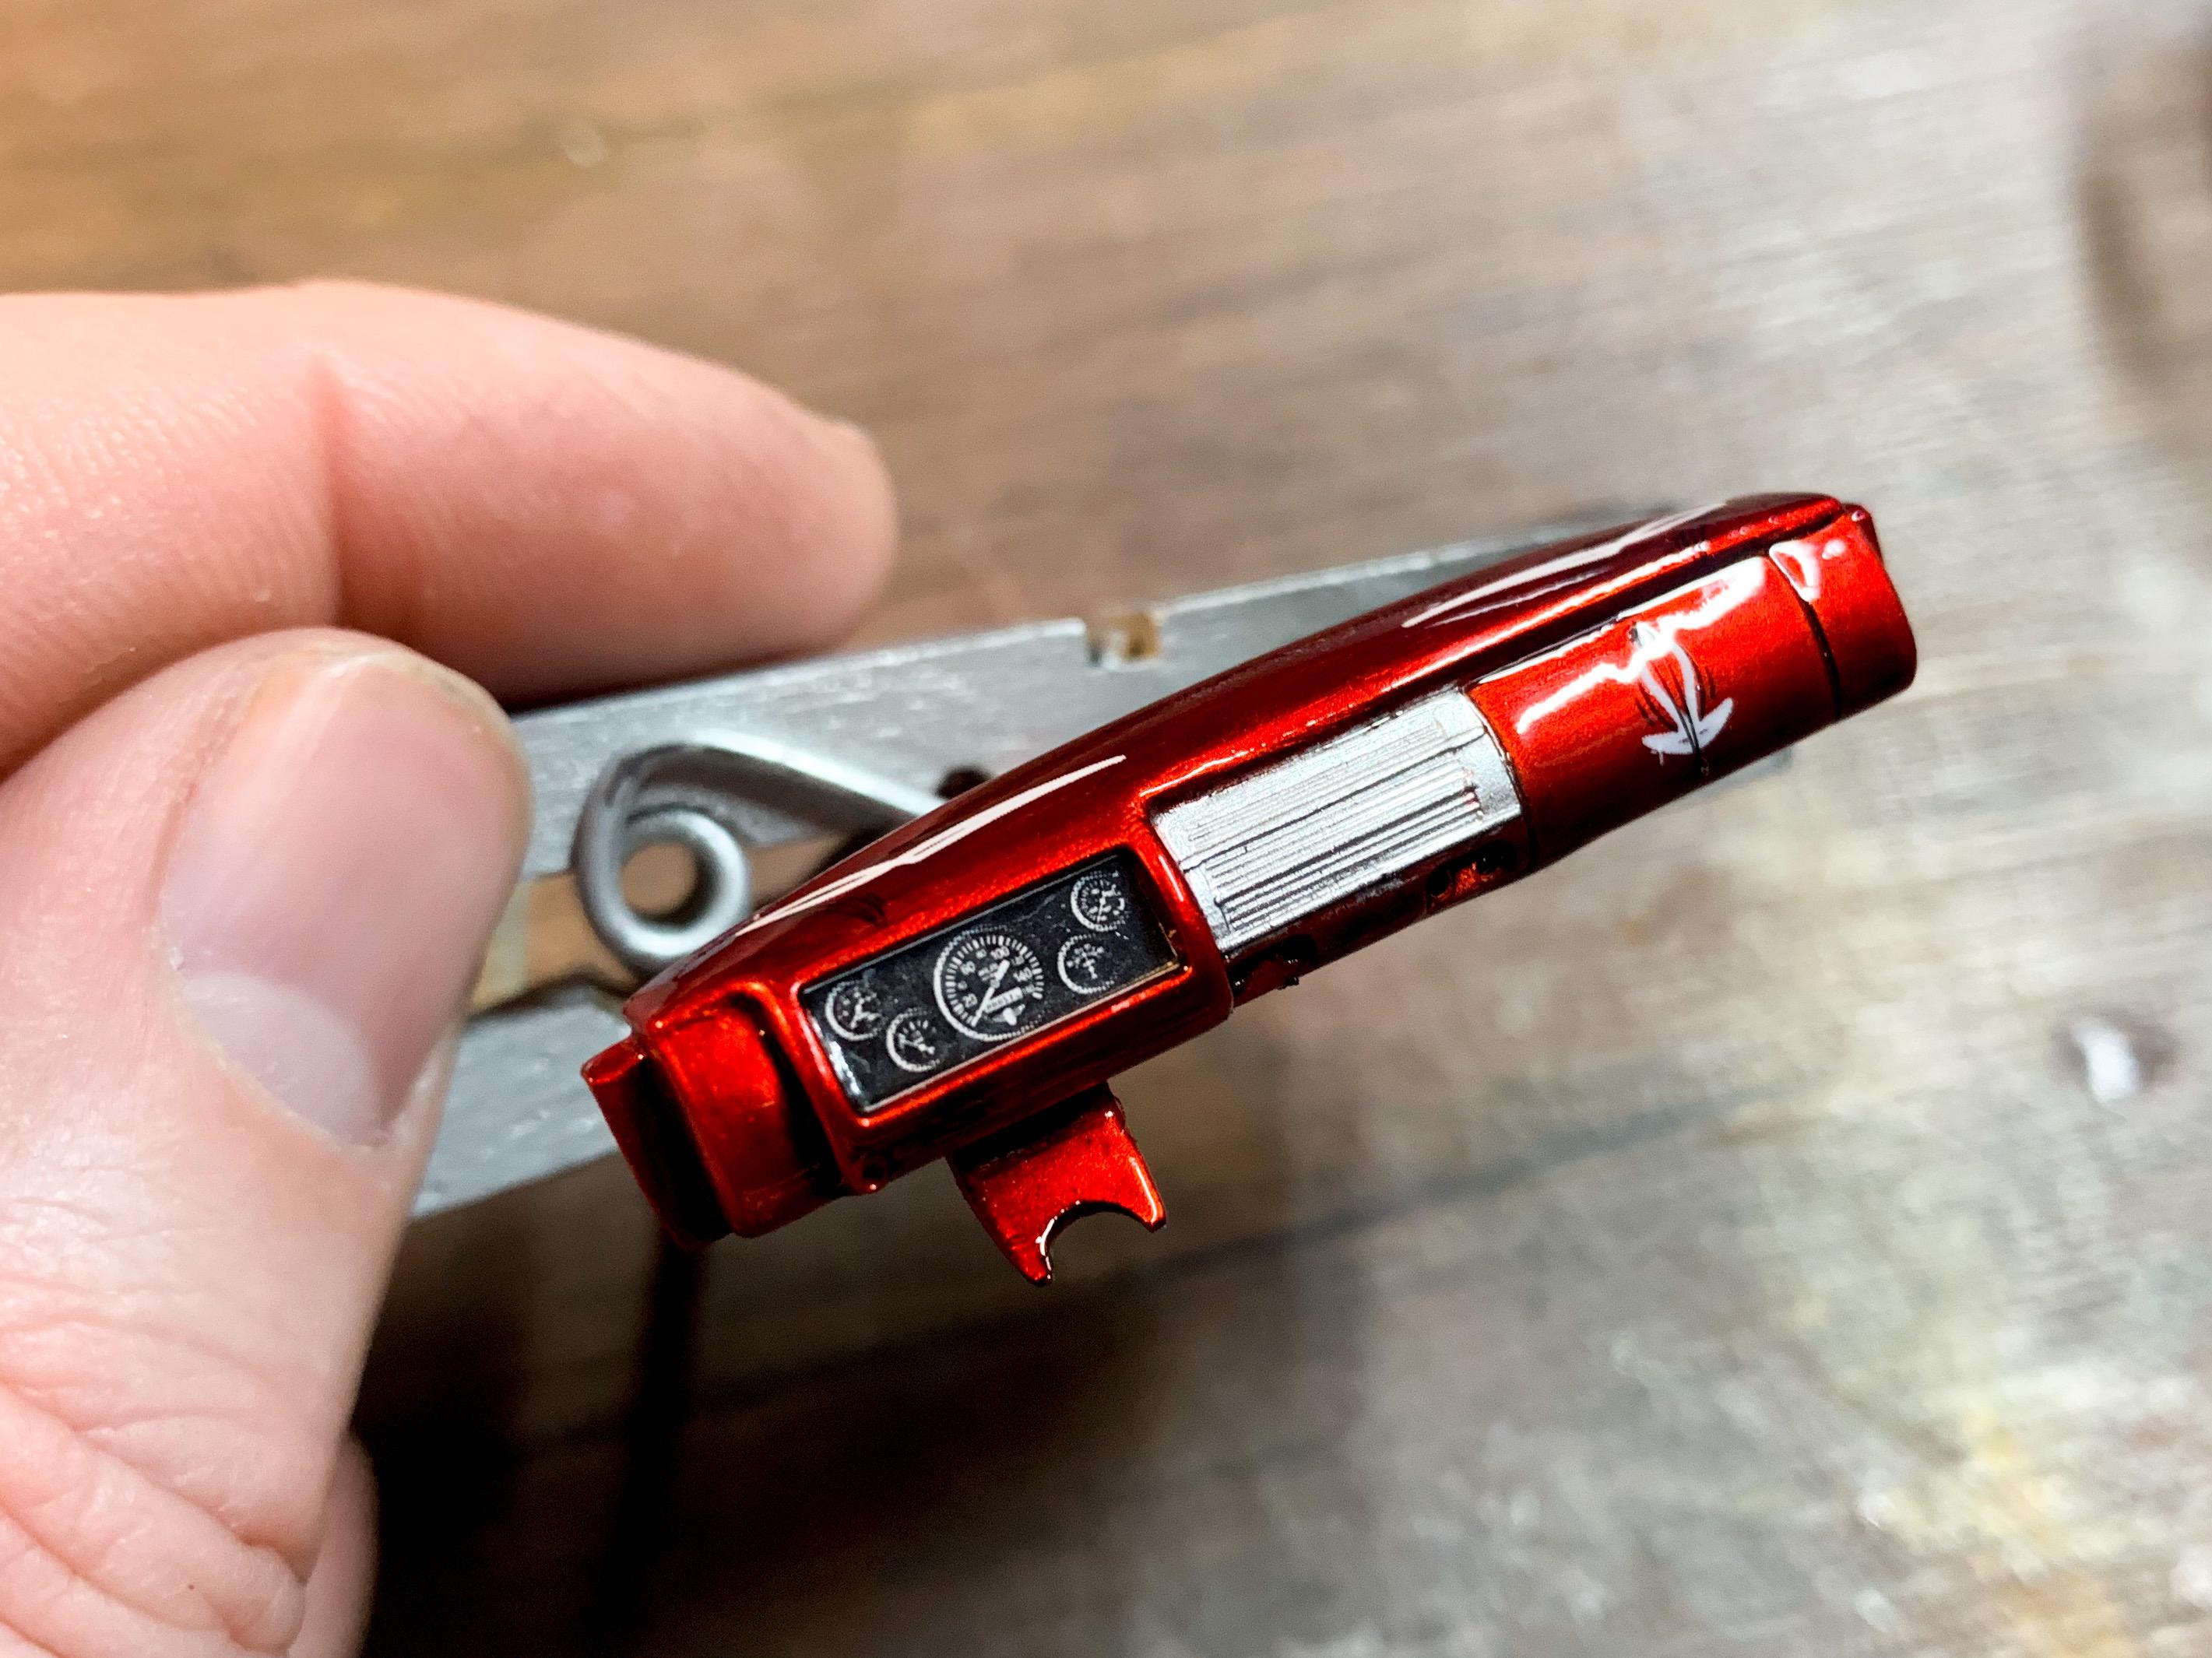
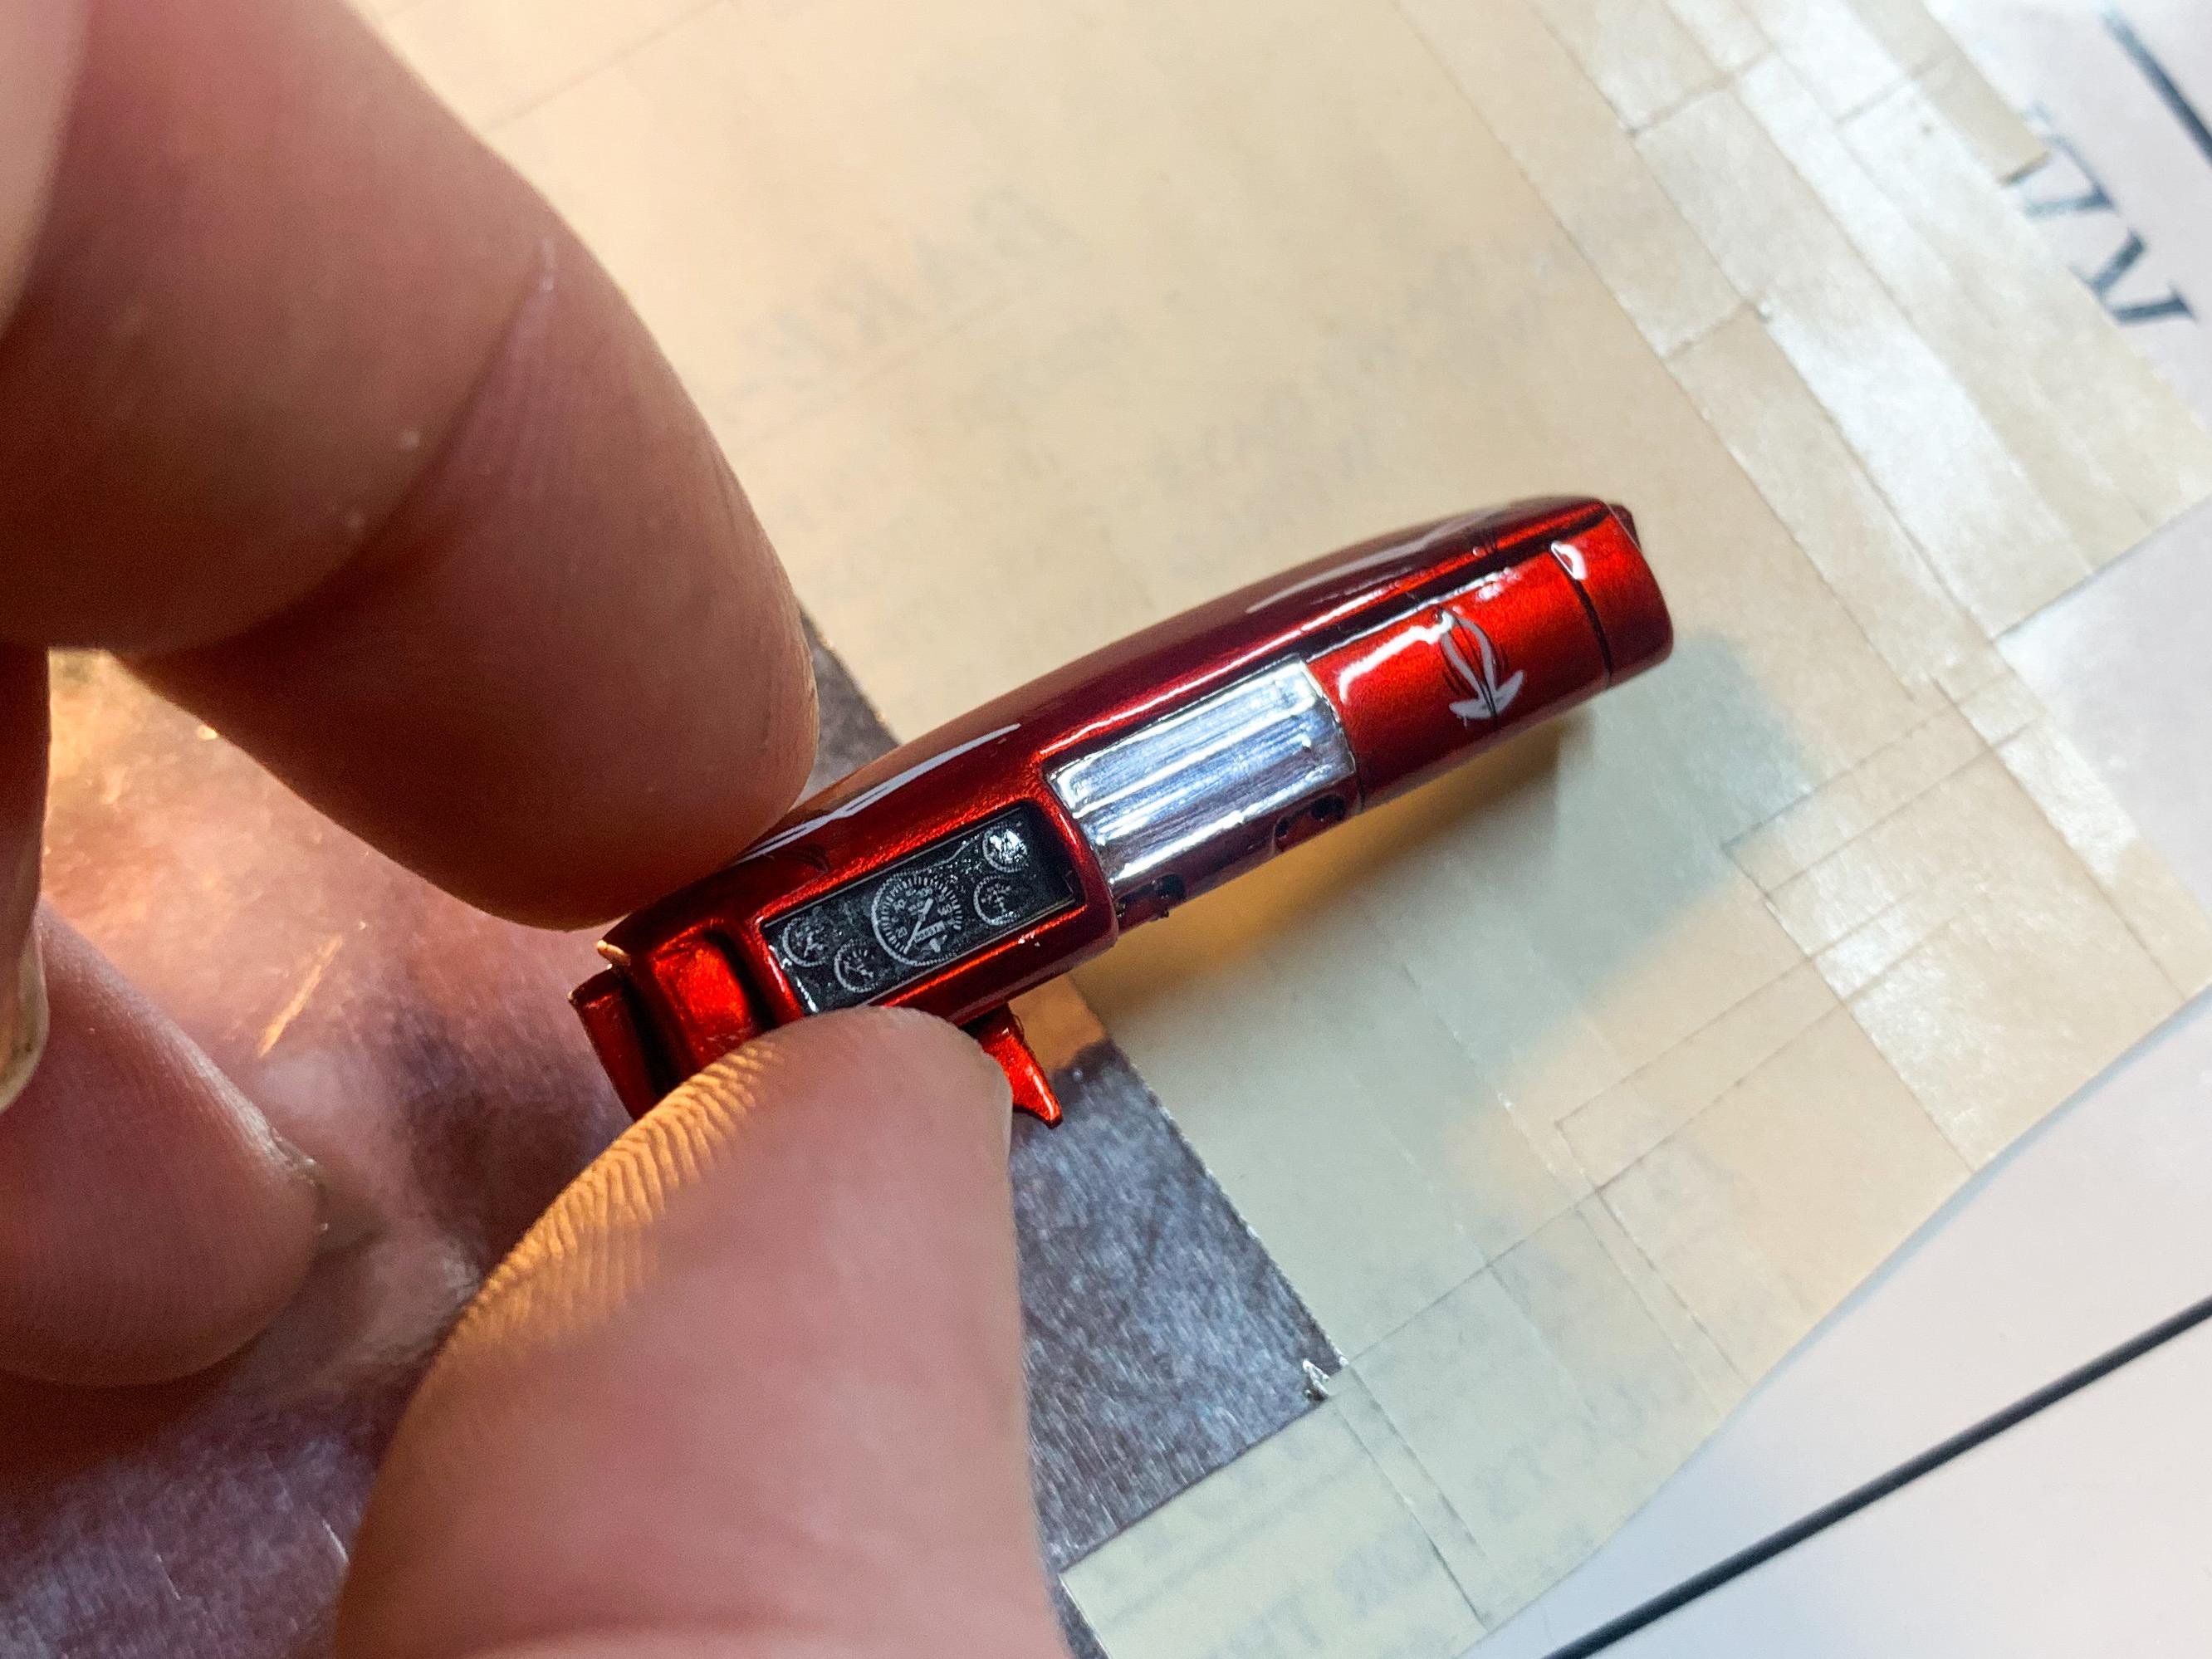
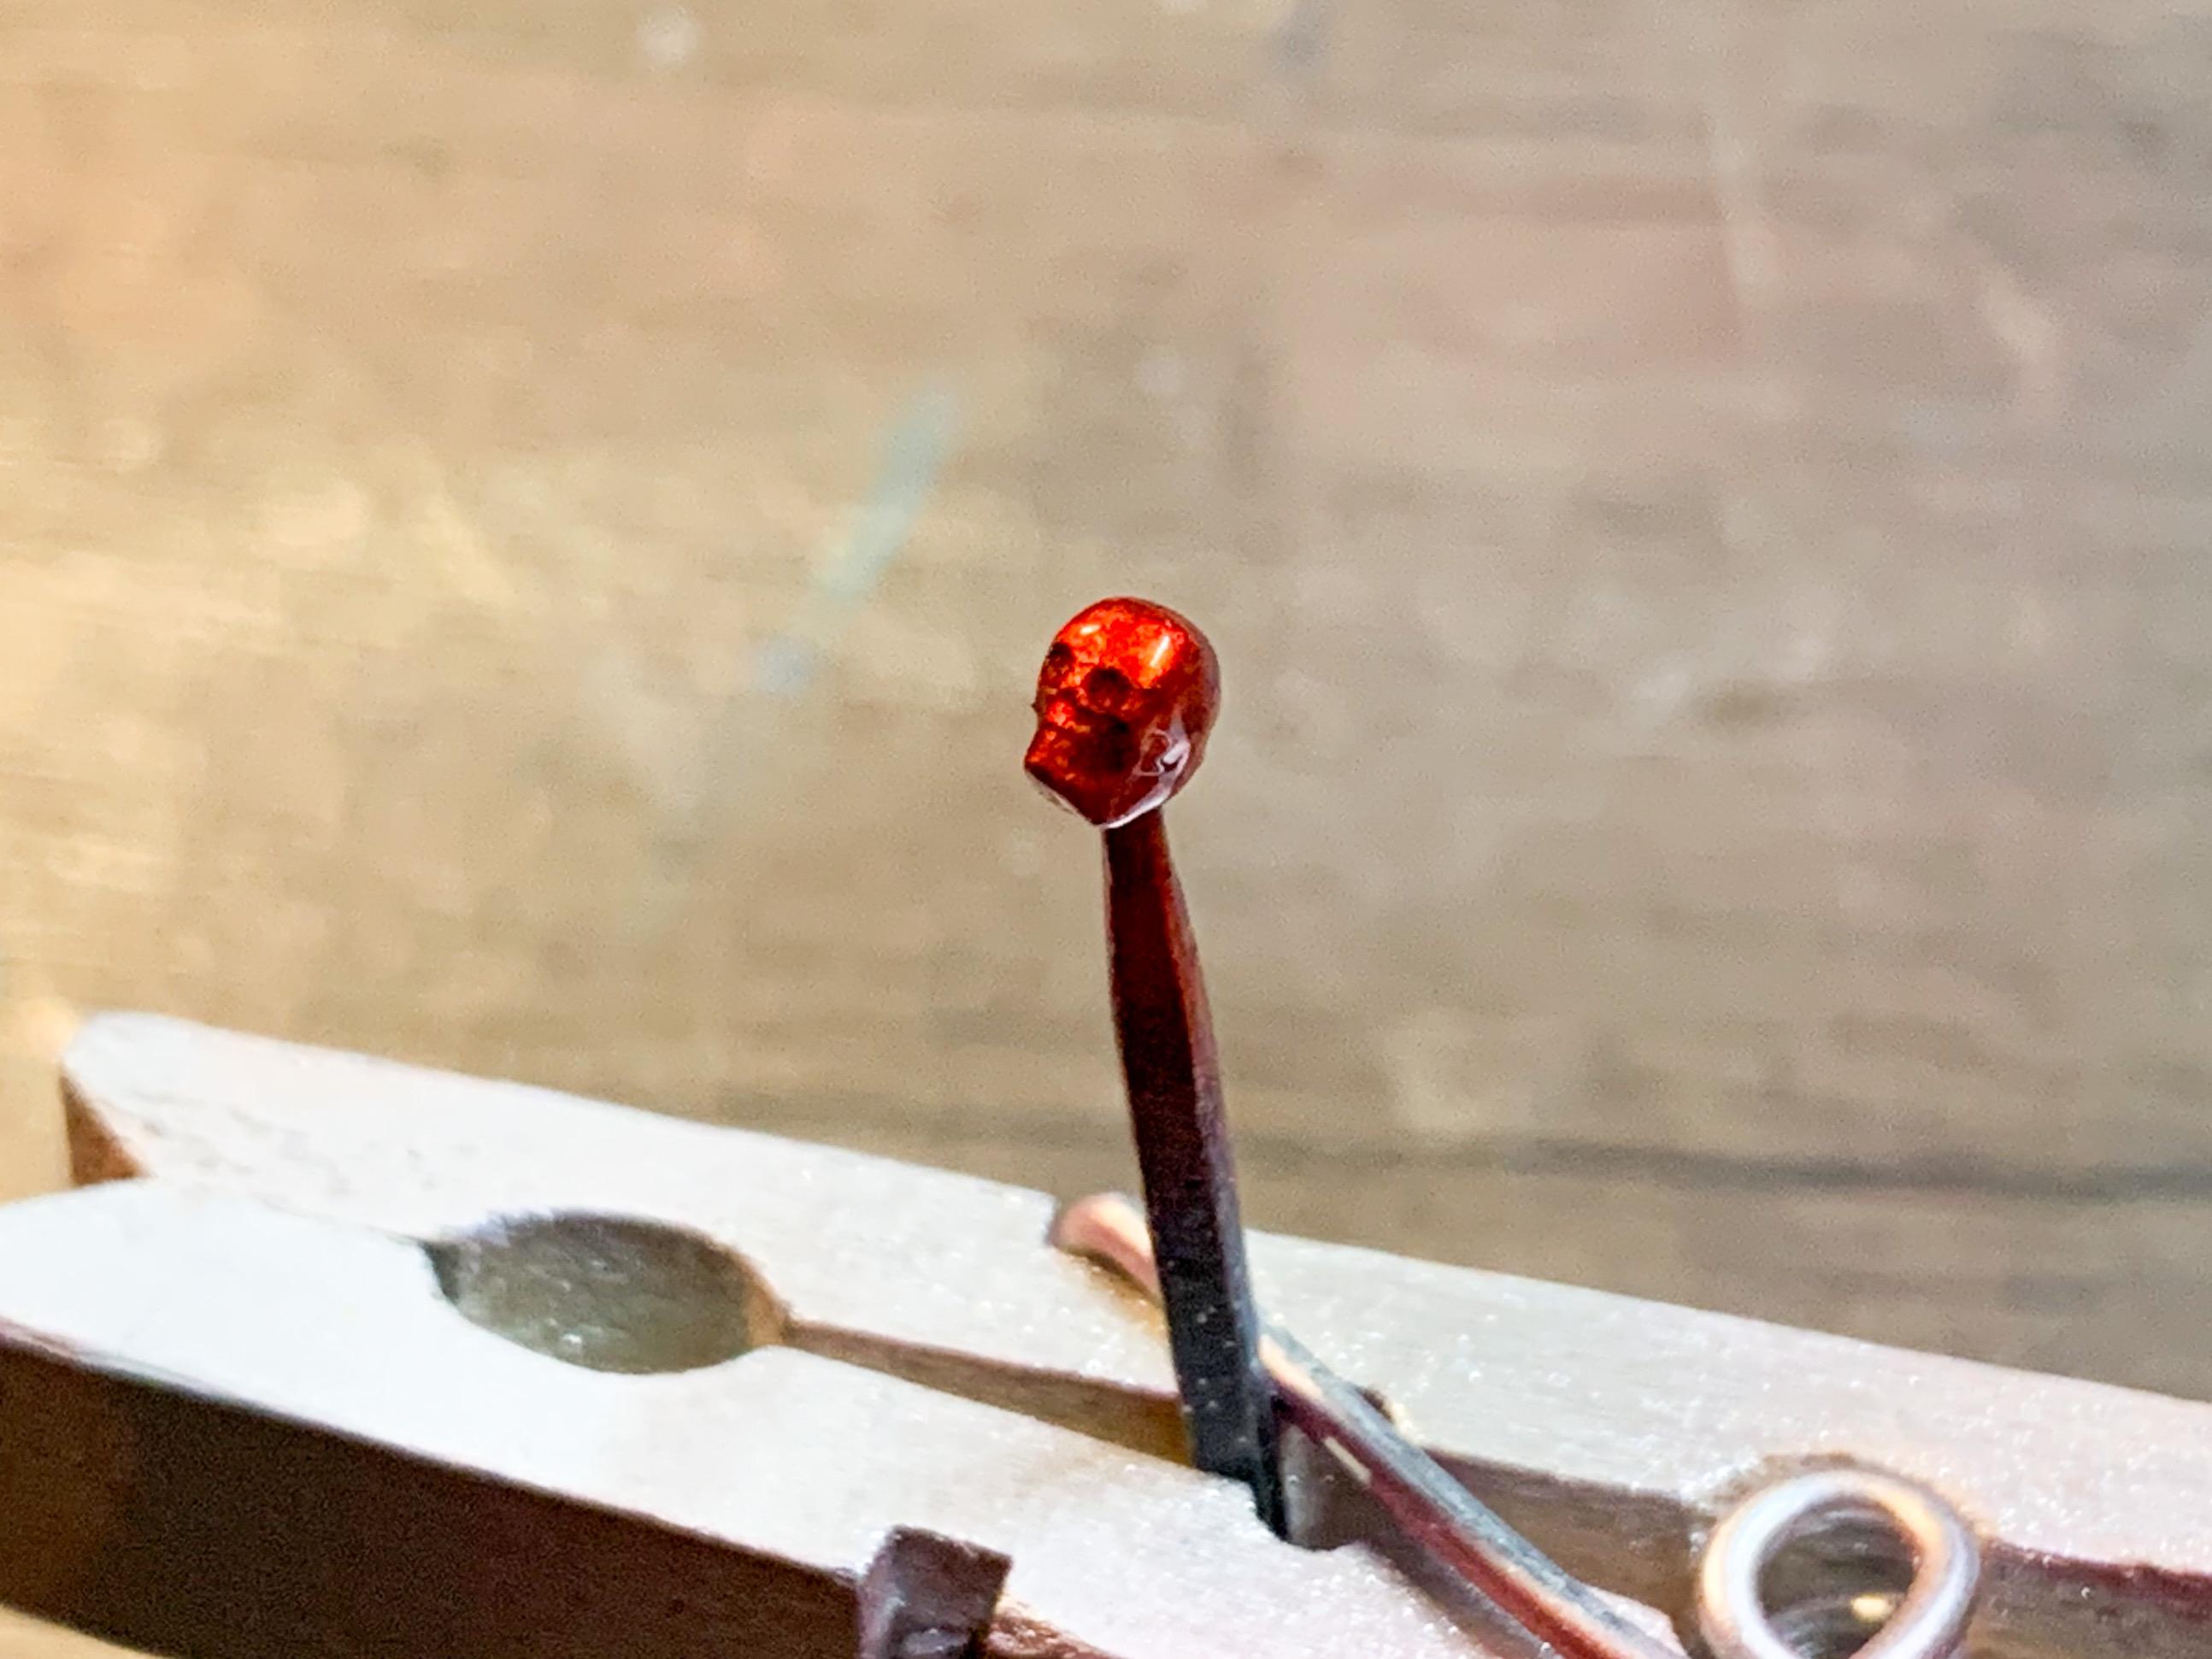
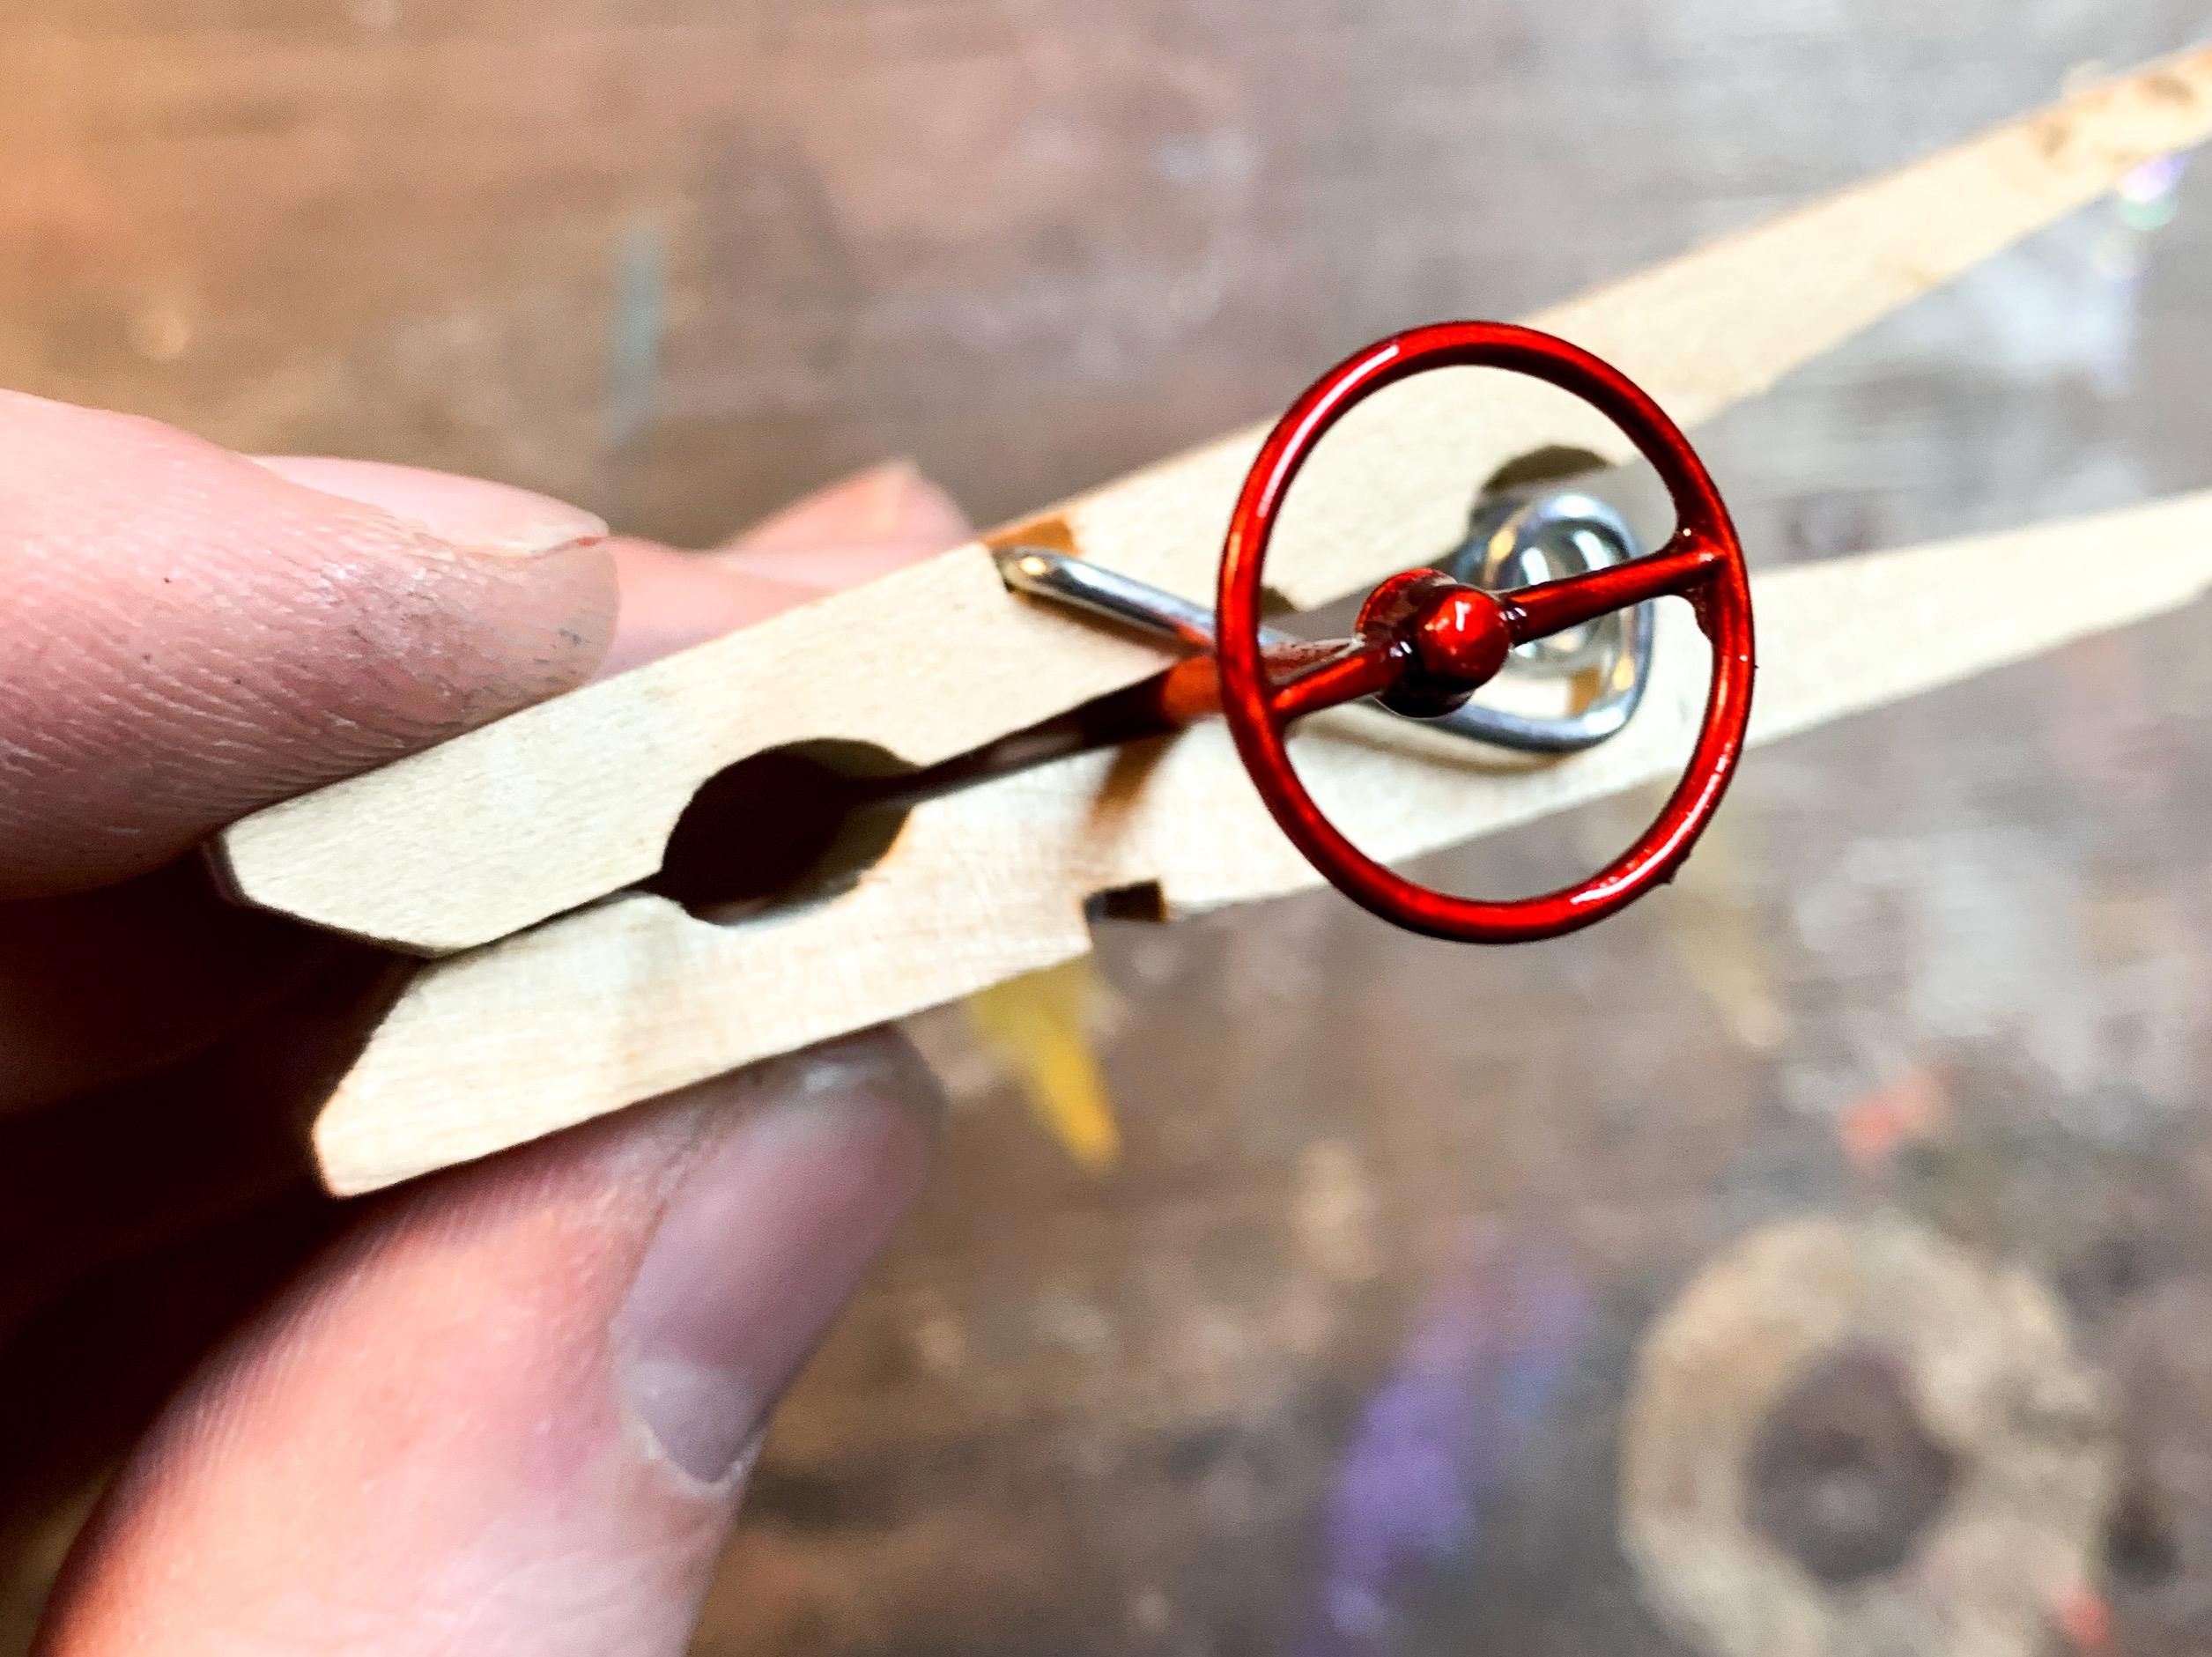
A little progress, despite a busy week... Started working on a bed cover - haven’t quite decided how it will affix and/or hinge but made a frame out of styrene square rod and a top panel. More to go on this still before primer... Got some paint on a couple more engine parts, and gave the block a black wash - I didn’t want it looking too ‘showy’...not dirty, but not showy either: Should make for a nice looking mill with some detailing: Finished smoothing out the 40 Ford dash, picked out a steering wheel and resin cast one of my little skull shifters that I like, then shot them with Rustoleum silver ready for a nice Candy Red. I’m using Createx Candy for these, which requires that balancer in the second bottle (actually to thicken it up a little rather than reduce it like you might think) Some airbrushing later... This Createx paint often lays down a little lumpy but usually flattens right out as it dries so hopefully this candy will be the same - although I haven’t used this particular one before. Guess we’ll see! It’ll all be getting a good healthy clear coat anyway before further detail painting... And finally, shot the headers, air cleaner and oil pan with Alclad and Spax Stix metal tones: And that’s all for this installment - oh, and I painted a bunch of spoons to try and get the red I had in my mind. Still experimenting on that... More soon!