DRIPTROIT 71
-
Posts
7,190 -
Joined
-
Last visited
Content Type
Profiles
Forums
Events
Gallery
Everything posted by DRIPTROIT 71
-
359 / tanker combo
DRIPTROIT 71 replied to purepmd's topic in Model Trucks: Big Rigs and Heavy Equipment
That is a sharp looking rig! Great work!! -
Very Cool Project!!
-
Well guys here it is July and June has passed by us. We are down to seven remaining contestant that are still building and seven finished builds. Thanks to all who are hanging in there. August 1st is drawing near. This is the home stretched guys. Finished: 1. Spruslayer DM600 2. landman Paystar 5000 3. gotnitro? Mack R 4. Sam I Am Titan 90 5. tbill Western Star (waiting to put under glass) 6.signguy 2108 Mack Cruiseliner 7. Oldmopars IH Dozer Lowboy Combo Remaining Contestants: 1. iamsuperdan 2. jacobus 3. amtrak115 4. BuilderX 5. dodgefever 6. Bennyg 7 .lwwoods
-
Looking good!!
-
Mack R on a DM600 chassis
DRIPTROIT 71 replied to Tesla's topic in WIP: Model Trucks: Big Rigs and Heavy Equipment
x3 -
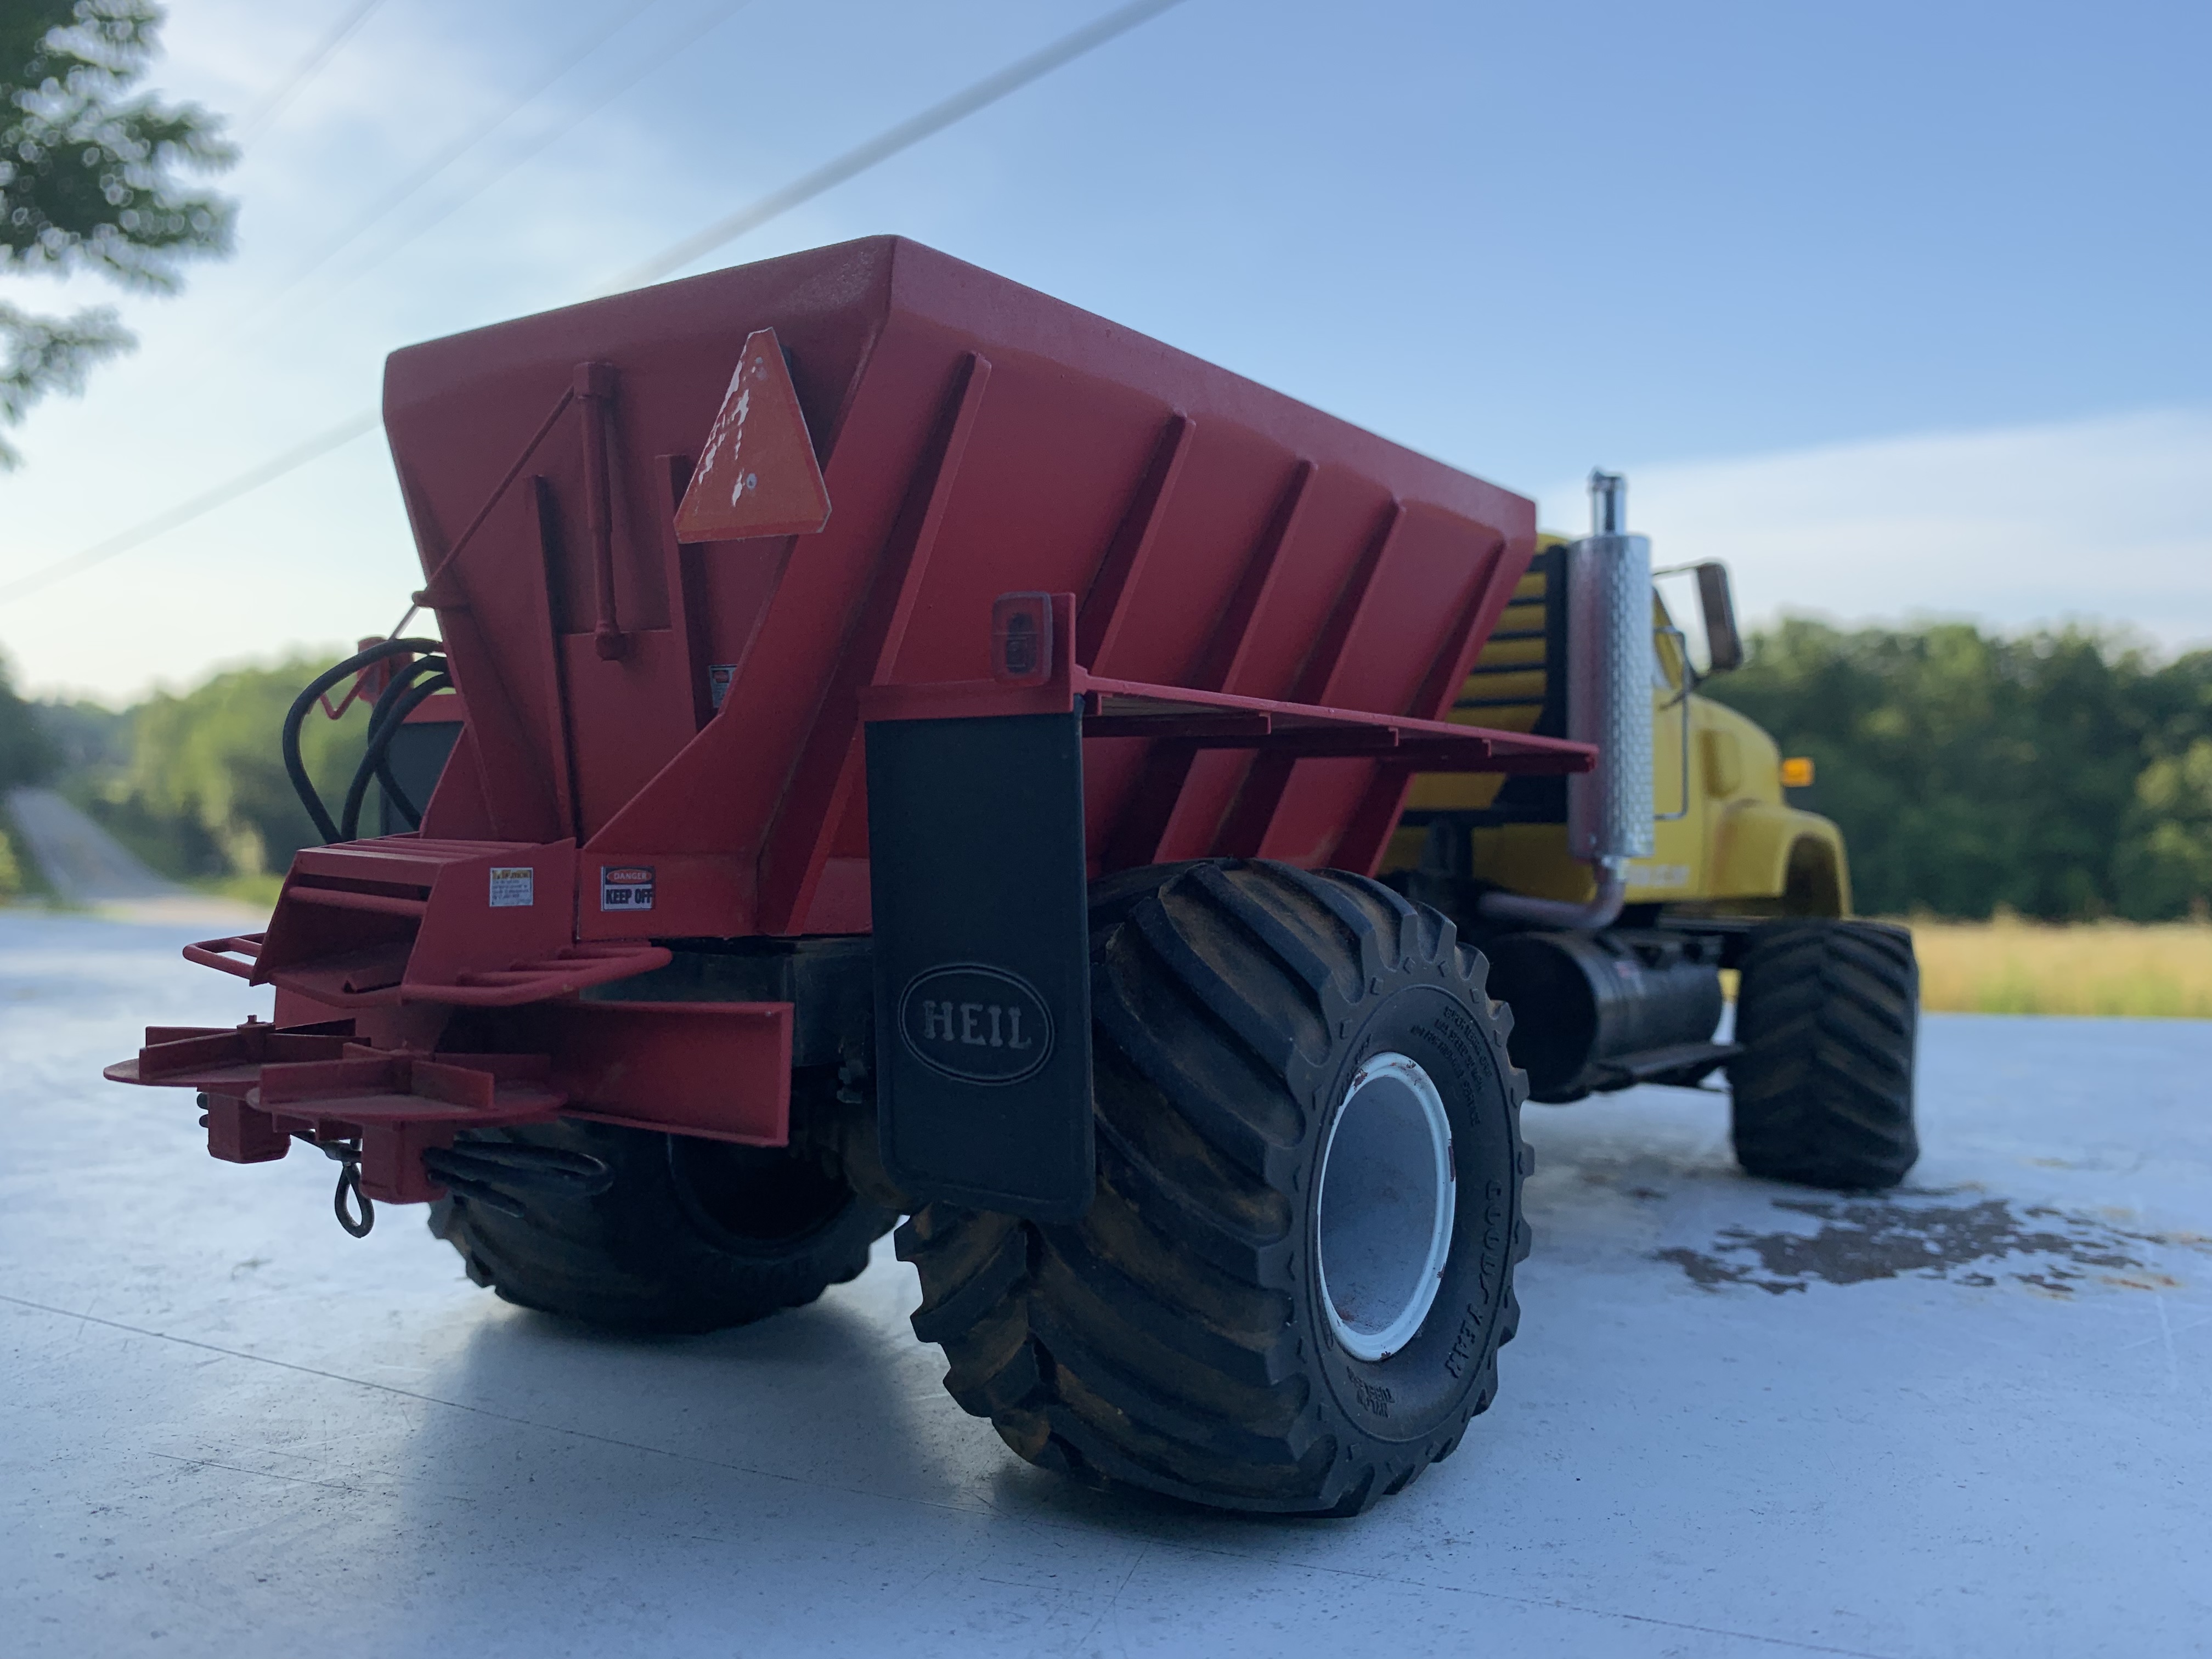
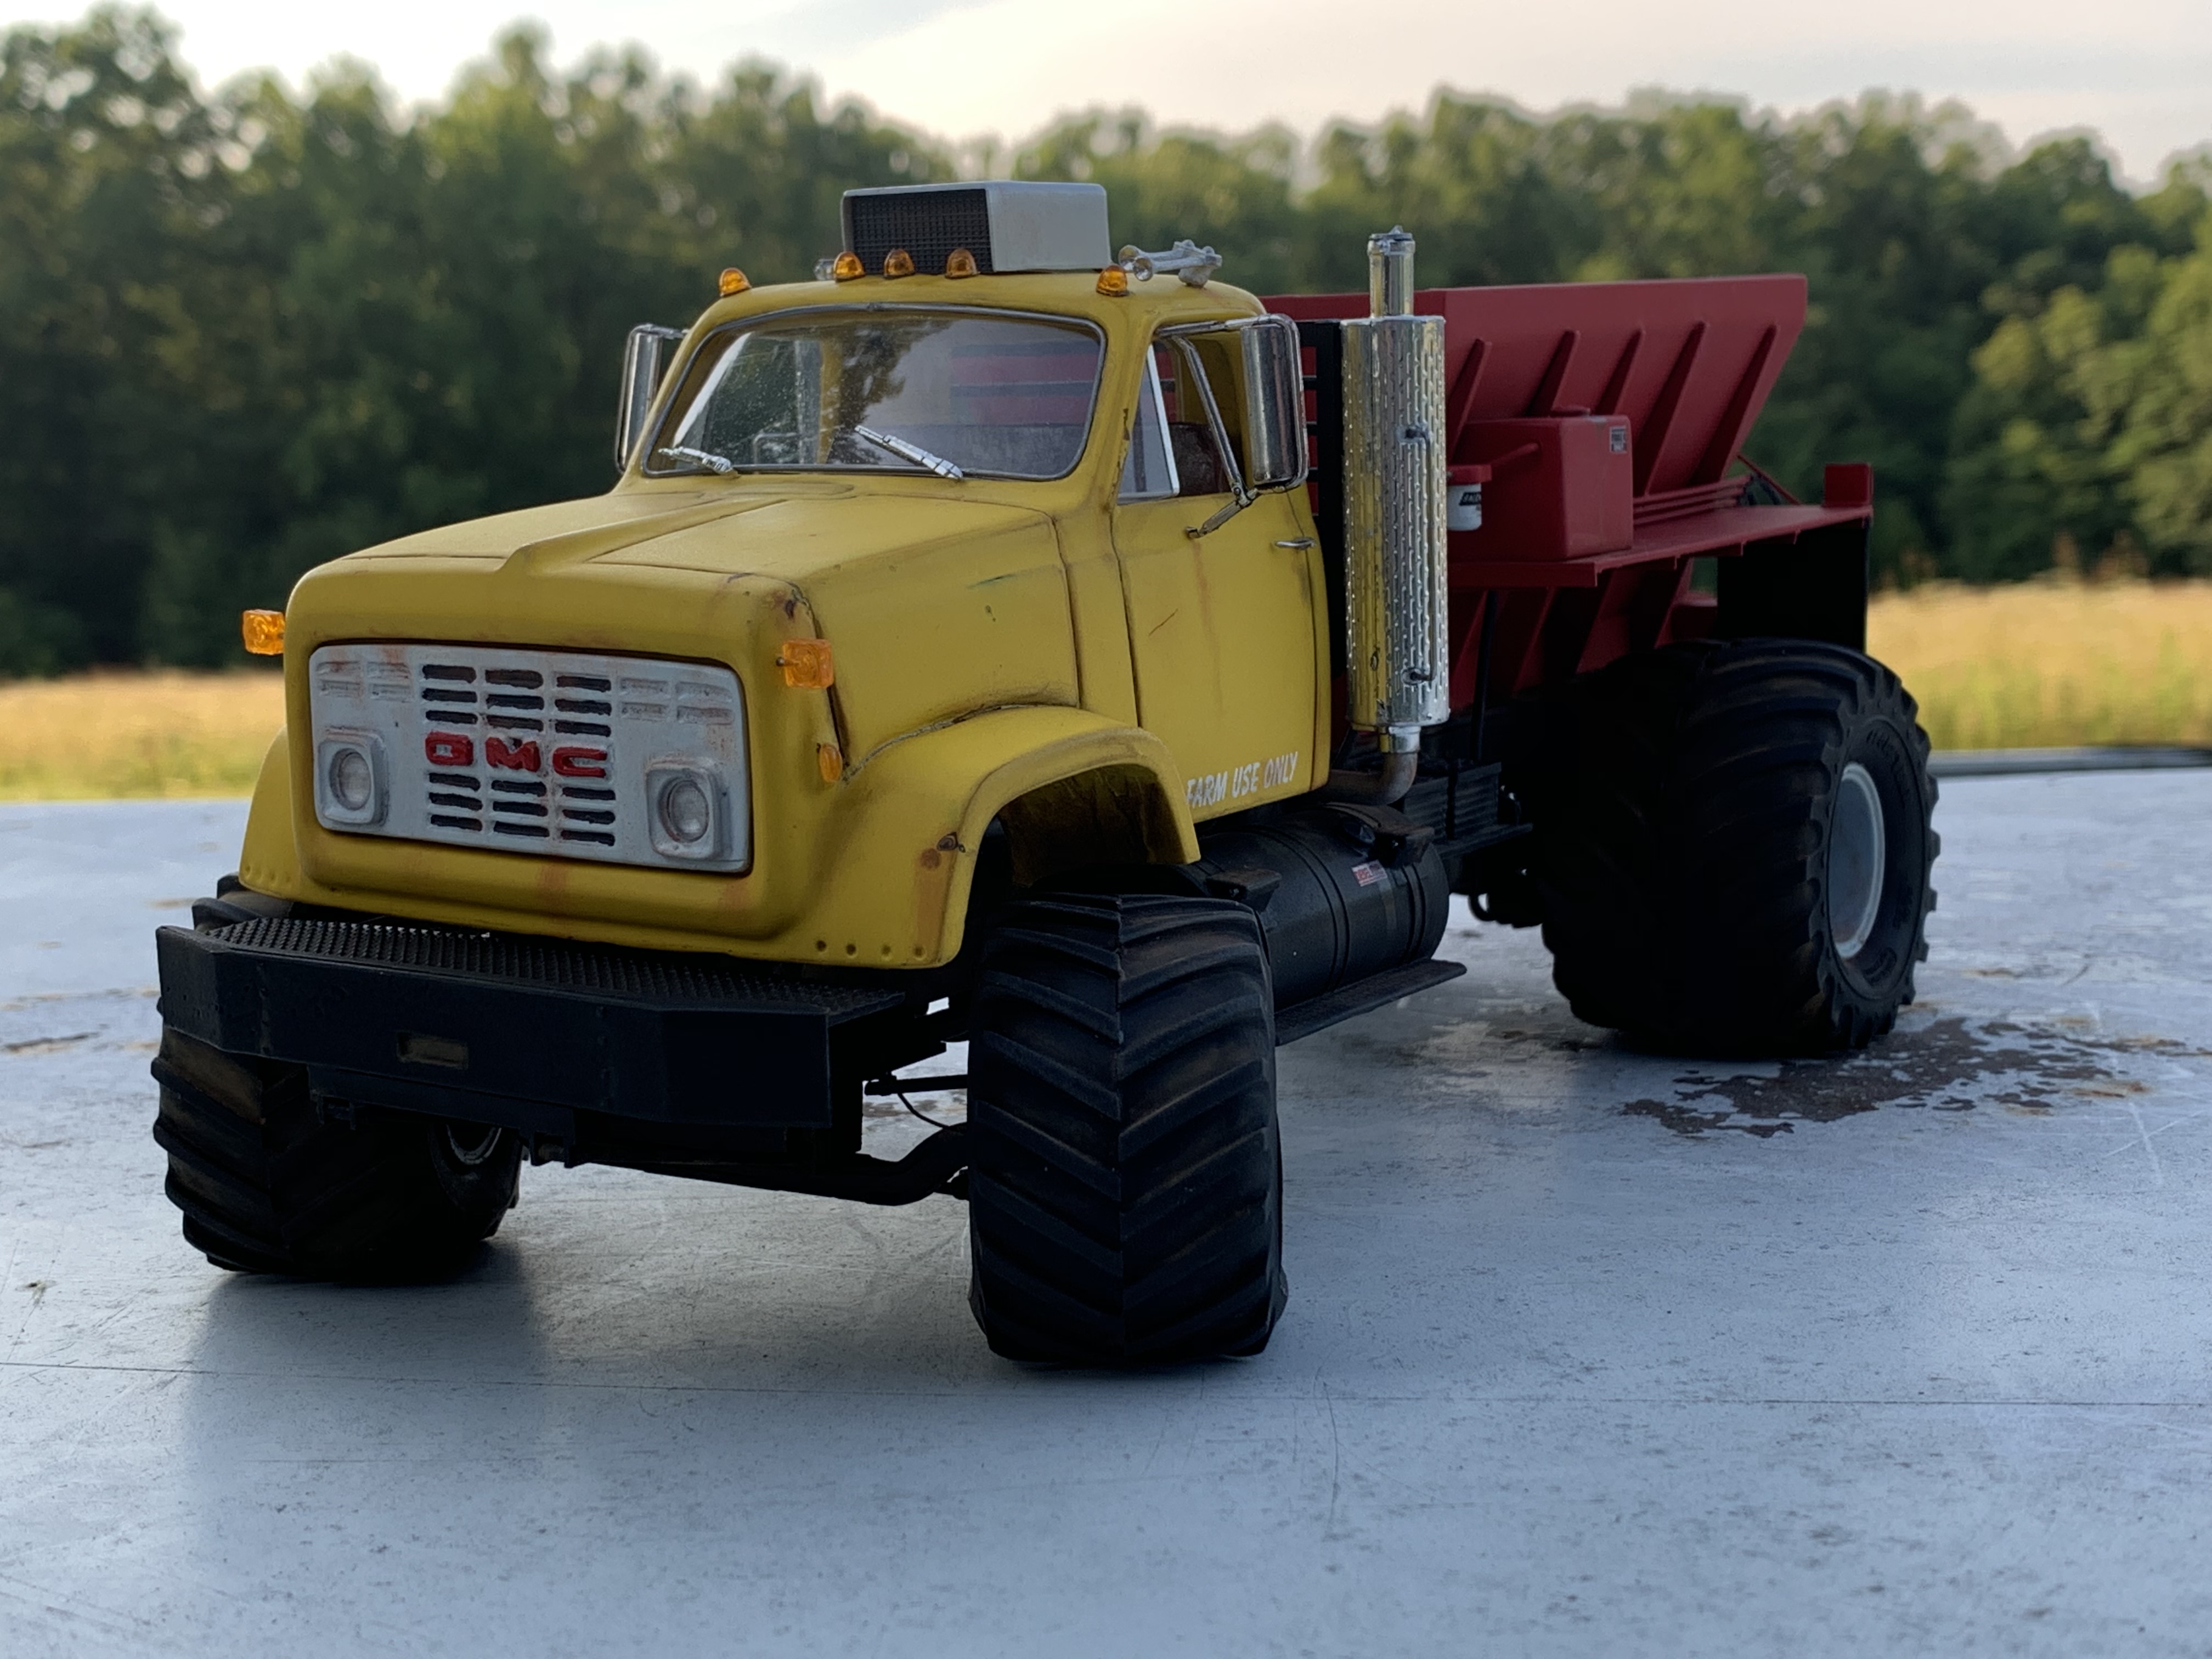
GMC 7500 Spreader Truck
DRIPTROIT 71 replied to DRIPTROIT 71's topic in Model Trucks: Big Rigs and Heavy Equipment
Thanks! Most of the ones that I found on line were Internationals too. Thanks!! The front tires are solid cast resin from Kit Form Services and they are cast that way with the weighted look. For the rear tires which are 66" kit tires from a monster truck, I first glue a styrene block to the air side of the wheel where the tire rides centered between the rim edges. This will be at the bottom once on the truck. I drill a pin sized hole in the center of the block. I cut about a quarter inch hole in the center of the tread of the tire. I take a piece of styrene sheet about 1/2 inch square and drill a pin size hole in it as well. I place the tire on the rim aligning the hole in the tire with the pin hole in the block and then place a pin through the 1/2 inch square and glue it into the the the styrene block on the rim which collapses the tire. The length of the pin determines how collapsed the tire will be. This at least for me caused a concaved area in the tread of the tire. I then cut a small area out of another scrap tire's tread and glued it in place to fill in the concaved area. Once on the ground it looks pretty good and much better I think than the ballooned weightless look especially on a truck. -
Moebius Ford pickup without warped hood
DRIPTROIT 71 replied to youpey's topic in Truck Kit News & Reviews
My cab and hood were really bad on my 71. The roof of the cab looked like a bird bath. I tried hot water, hair dryer, and nothing worked. It was to the point that I had nothing to lose. I used the stove top and turned one burner up on high. I started with the cab and held it at a slight distance above the heat. When the plastic got just soft enough to work with I reshaped it. Don't get the plastic too hot though and be careful not to get burnt. Both the cab and hood turned out fine this way. -
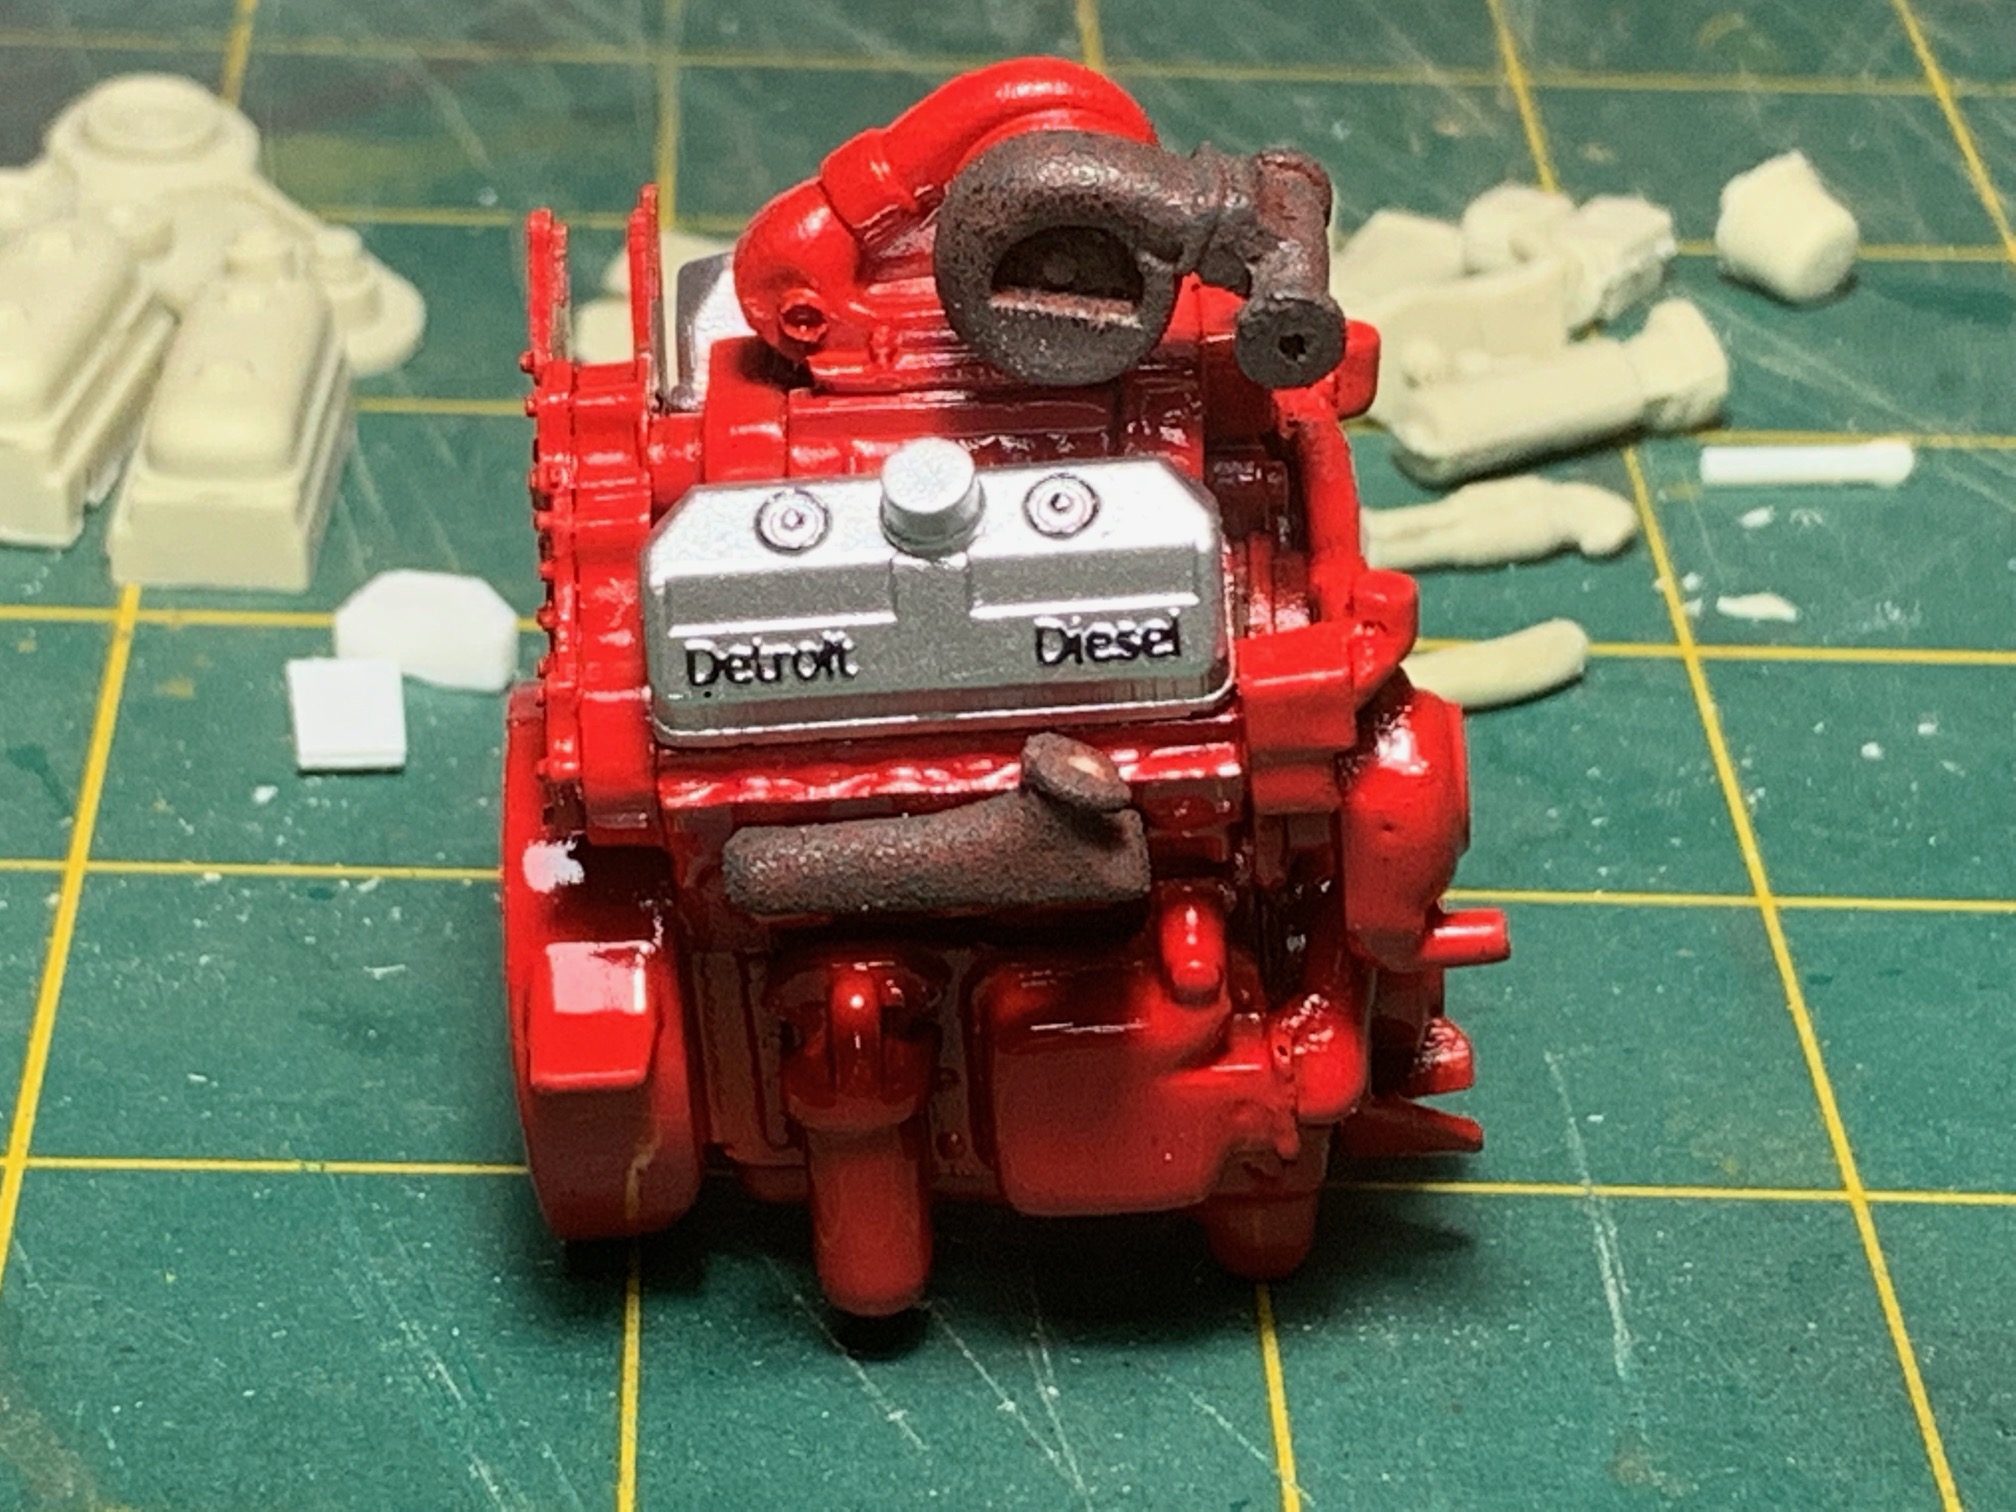
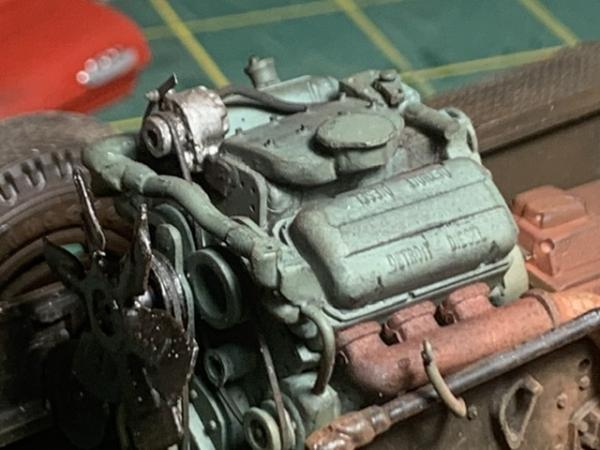
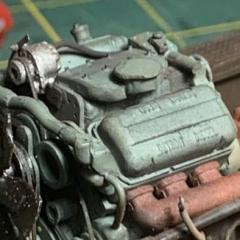
I picked up the old Ertl dump truck kit recently. I've always liked these kits since I was a kid. I just started on the engine which is a 6v-92 Detroit from Auslowe with a few modifications Including some modified valve covers from KJ at Double Take. This one will have a lift axle from Gary Wallace and wheels and tires from Jamie at moluminum. Here is the engine so far:

-
Joe's Power Plus Service Station modification
DRIPTROIT 71 replied to DaveP's topic in WIP: Dioramas
Looks great! I'm assuming with the more modern lift that you are going to build a surviving service station of more recent years. I worked at one of those for over 24 years. It too had 3 bays. We did the same thing in one of the bays as you have here. The center post lift developed a leak, so we dug it out and replaced it with an electric/ hydraulic side post similar to what you've got. The service station that I worked at has stopped selling gas and dug up it's tanks, but it still operates as a garage today. Looking forward to seeing more of this one! Praying your hip does well. -
Looks great! The grime on the door, the frame and the light switch is perfect!
-
GMC 7500 Spreader Truck
DRIPTROIT 71 replied to DRIPTROIT 71's topic in Model Trucks: Big Rigs and Heavy Equipment
Thanks man!! Thanks!! Thanks! Most of the ones around here have the 48" tires on the rear, but after finding pictures of these on line, I had to try to build one. Thanks so much!! -
"Food Lion" Brockway 457 Daycab
DRIPTROIT 71 replied to DRIPTROIT 71's topic in Model Trucks: Big Rigs and Heavy Equipment
Thanks!! -
I'm in and building the Gravel Trailer!!
-
B.R.B.O Mack DM600 Dump
DRIPTROIT 71 replied to dodgefever's topic in WIP: Model Trucks: Big Rigs and Heavy Equipment
Looks Great! I'm taking notes. I'm fixing to start a dump project myself. -
77 GMC Pickup
DRIPTROIT 71 replied to Tyler62990's topic in Model Trucks: Pickups, Vans, SUVs, Light Commercial
The shop scenes are fantastic!! -
Excellent project! There used to be quite a few mobile home plants around here and there are still a few. I see a lot of mobile home toters. I'm glad you posted this one. I like the high lift hitch on it as well. Some guys actually mount fork lift booms to the back of their truck to achieve this. It looks great!! I built one over twenty years ago, but would like to build another one some day.
-
1964 GMC
DRIPTROIT 71 replied to bill lanfear's topic in Model Trucks: Pickups, Vans, SUVs, Light Commercial
Very nice build! The weathering is perfect! I like that engine! I really need one myself!! Excellent Work!! -
GMC 7500 Spreader Truck
DRIPTROIT 71 replied to DRIPTROIT 71's topic in Model Trucks: Big Rigs and Heavy Equipment
Thanks Jim!! Thanks Mark! Thanks Tom! Thanks again for the tires too! They were a big help! I didn't want it to look destroyed, just well used, but mostly taken care of. Thanks Dennis! I did consider scrapping this cab many times though. Thanks!!! Thanks for the kind words! There are a few around here, but most have 48" tires on the rear and regular highway flotation tires on the front. Thanks!! Thanks Ken! Thanks! It actually began with the front tires. I started researching ideas on how to use them, I halfway settled on this project and after I started the bed I decided that I was going to finish it even if I had to change to a different cab. Thanks Warren! Thanks! -
Looks awesome Pat!
-
Thanks Guys! This one is done and under glass now! Thanks to all who posted!
-
Cool project!!
-
1976 International Scout II
DRIPTROIT 71 replied to Chuck Most's topic in Model Trucks: Pickups, Vans, SUVs, Light Commercial
Cool idea!! Great Work!! -
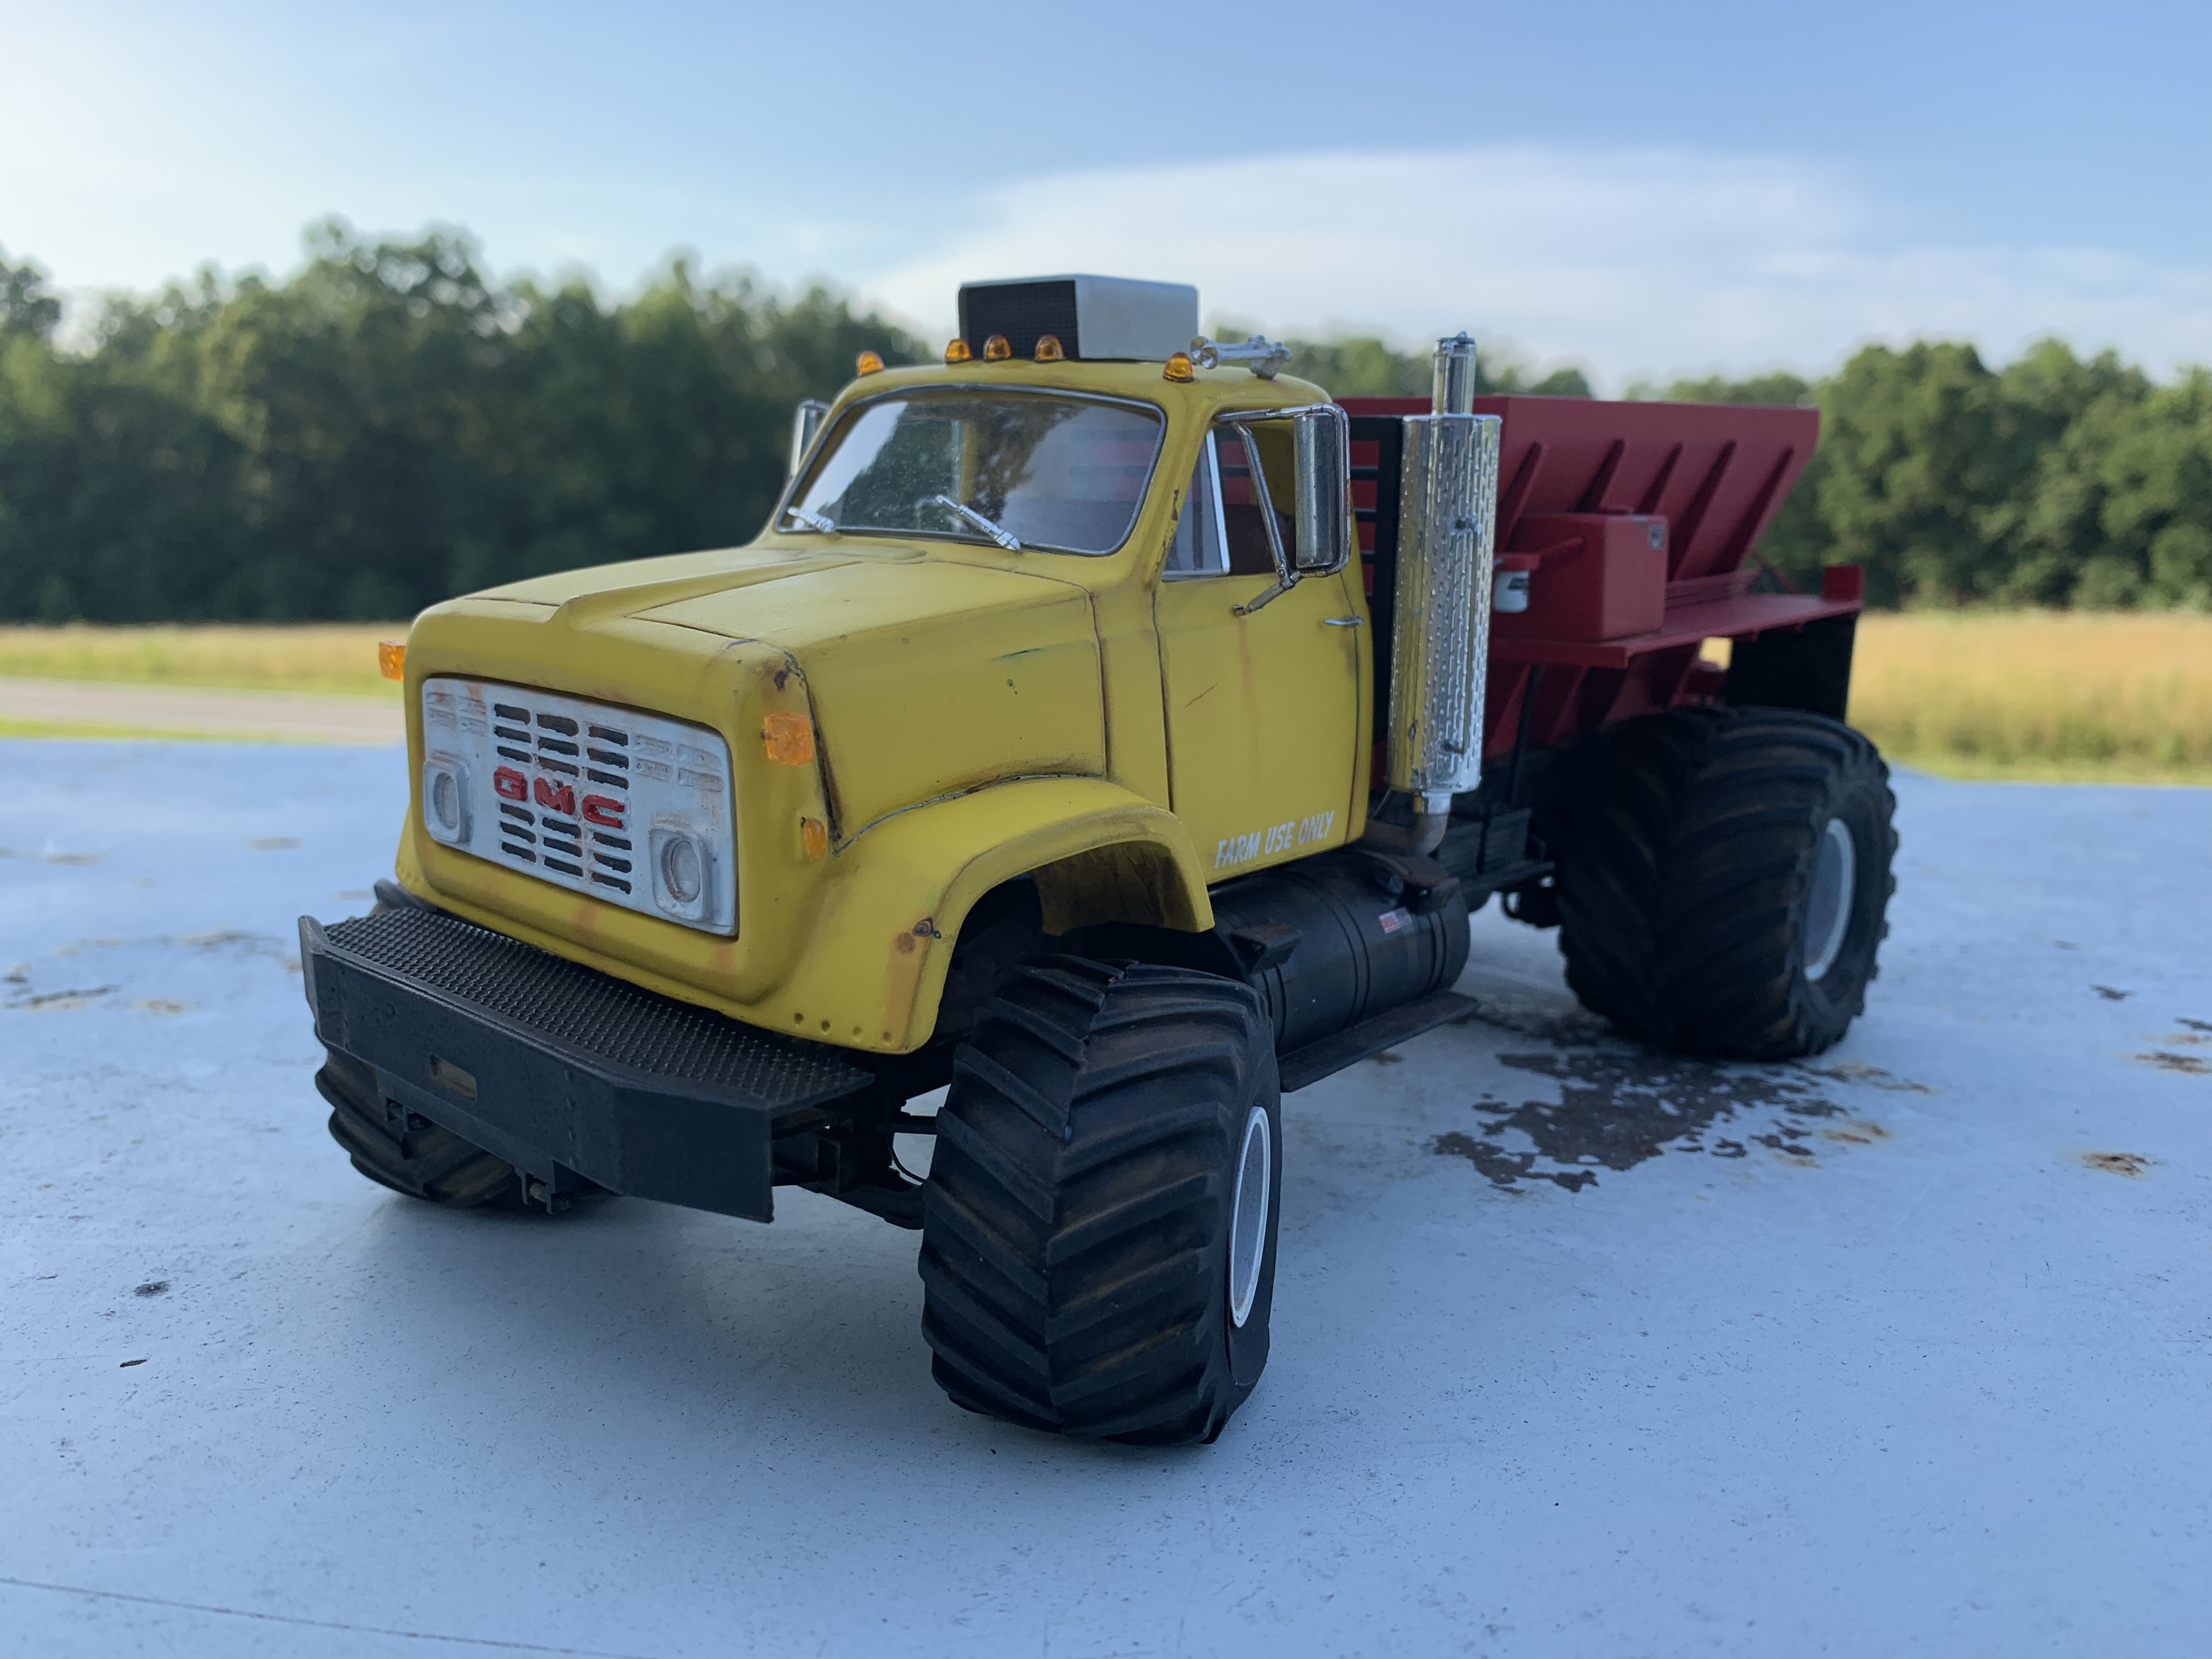
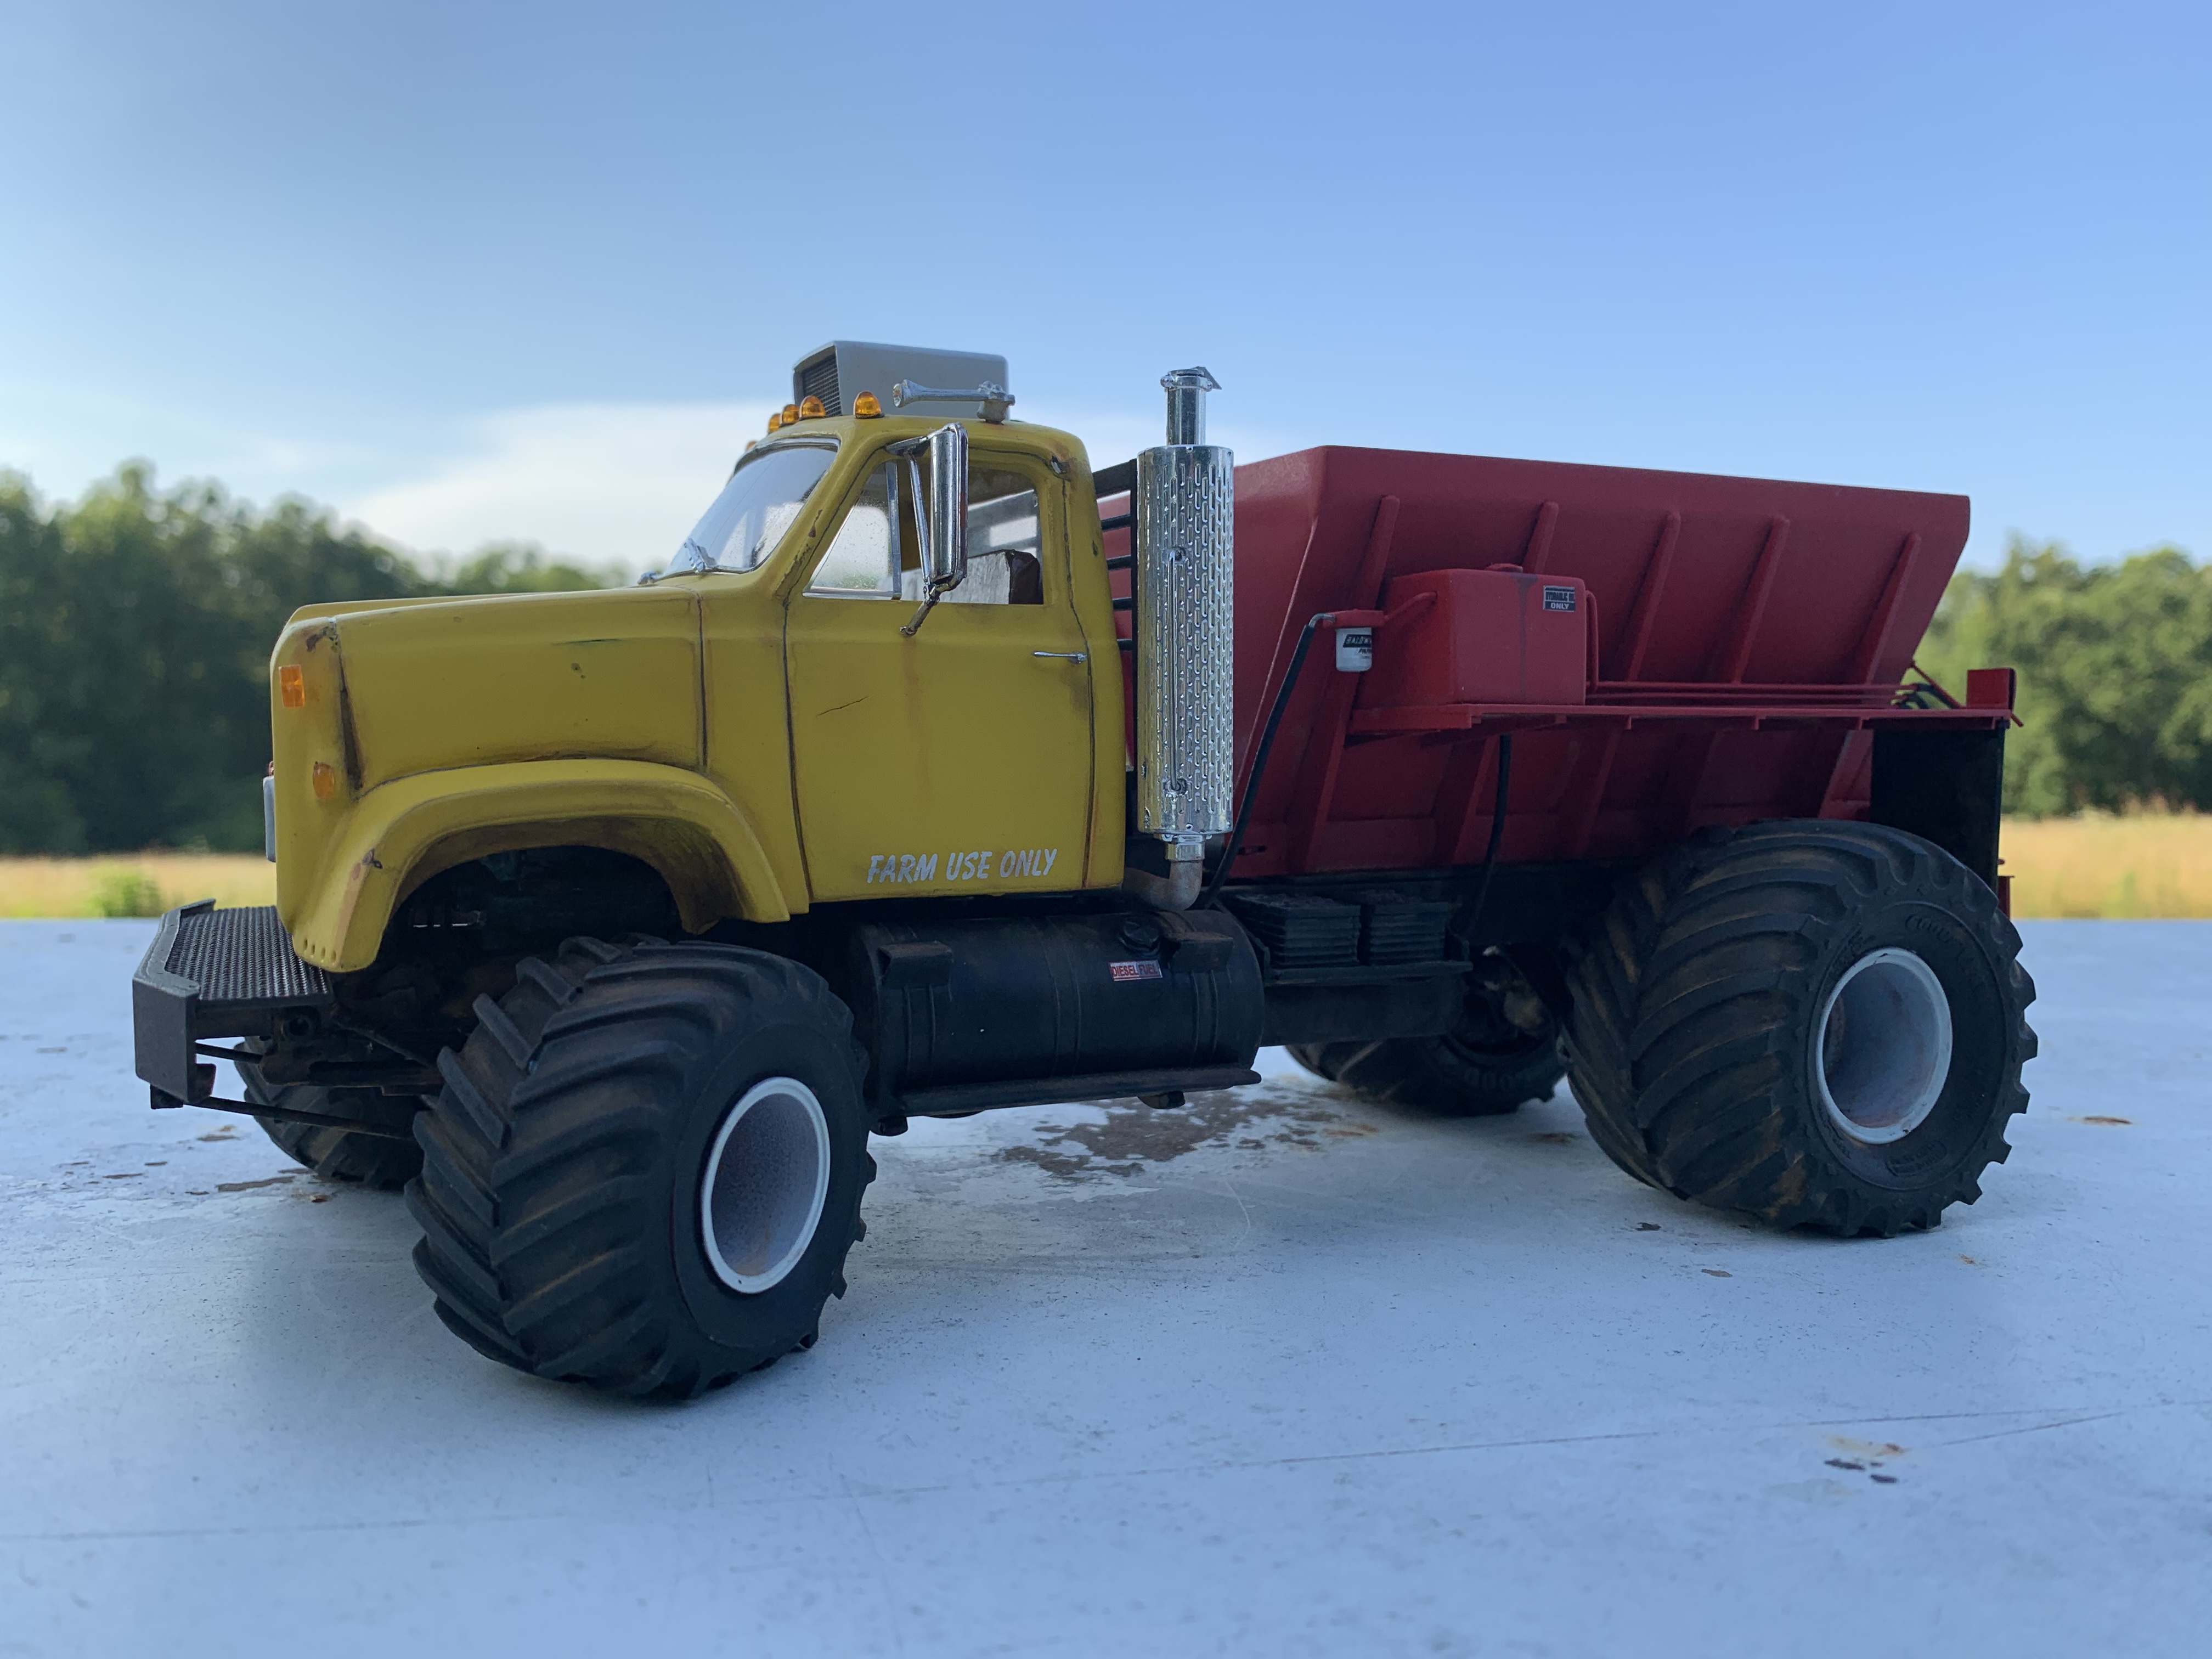
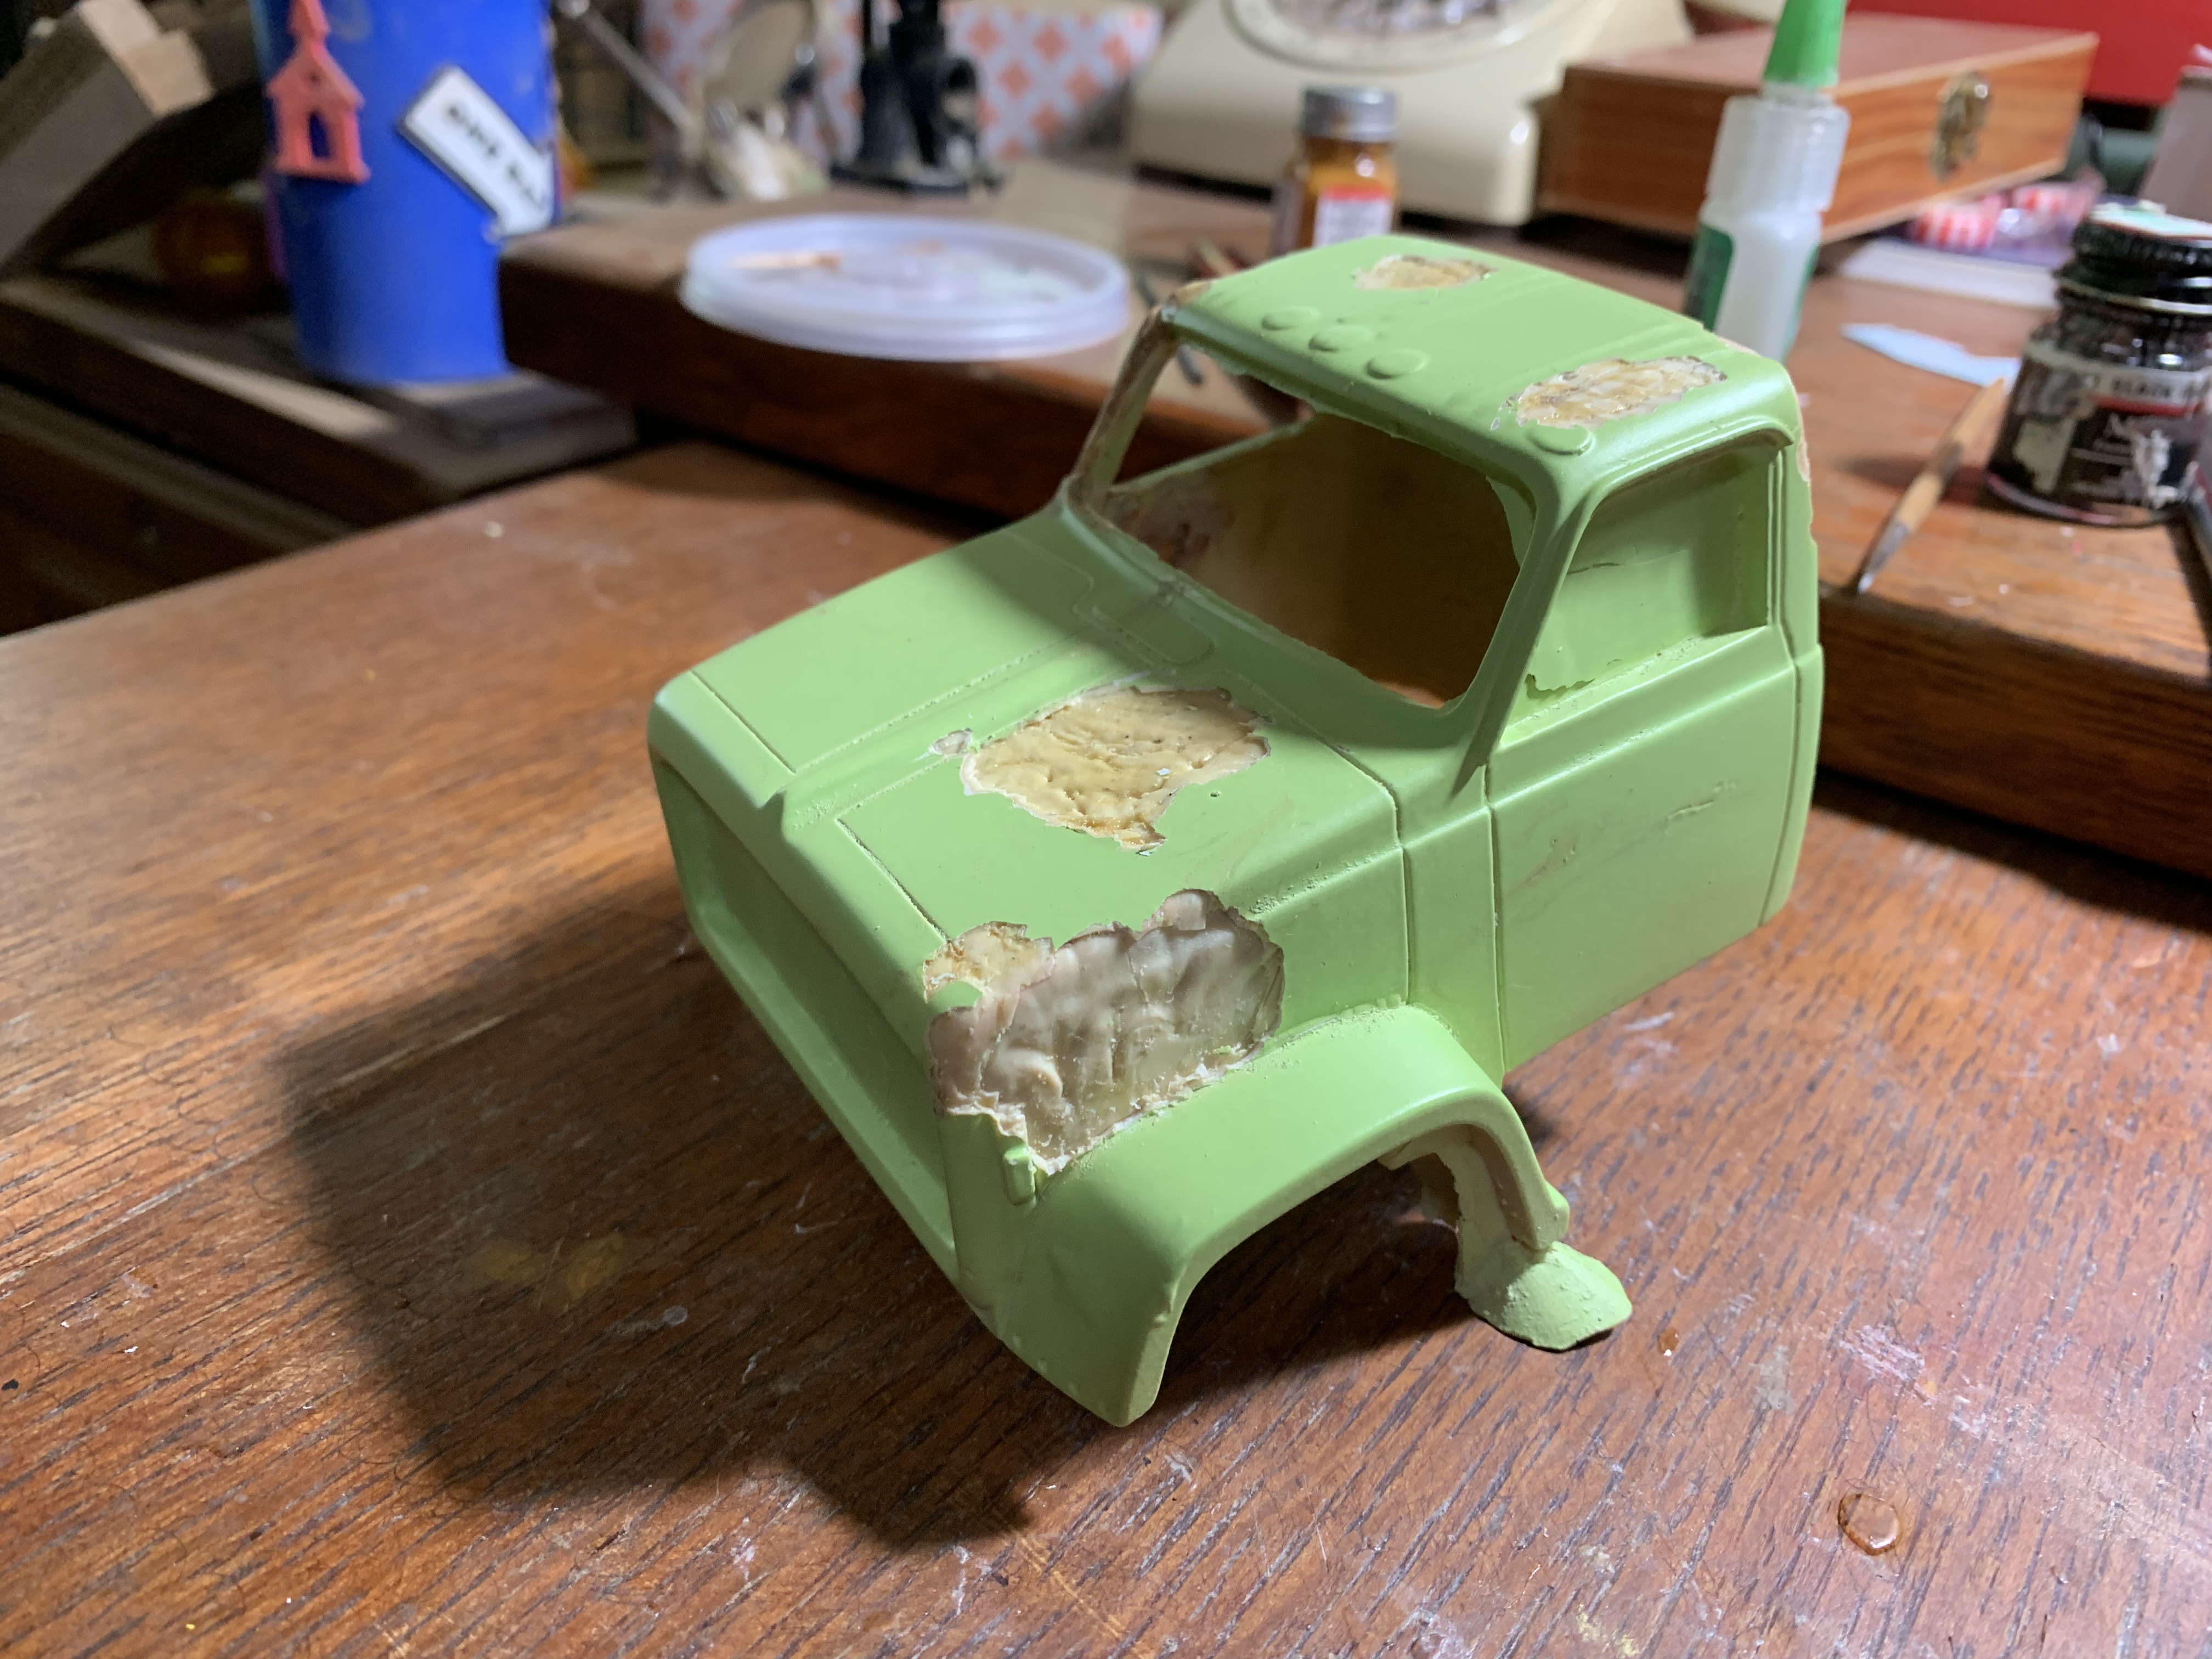
This one was completely built out of junk, Evergreen Stryrene, and Plastruct. The only new parts were the resin front tires that came from a great trade with Jeff Buimer "gotnitro". No model kits were harmed in the building of this truck! The frame is from a junk IH 4270. A big thanks to Tom Decker "redneckrigger" for the rear tires. The engine is a 6v-53 Detroit. The bed and spreader is scratch built. The interior was scratch built. The windshield was made from a "DR. Perky" (generic Dr Pepper) bottle. It had the right curve in it. The parts box took care of the rest. The cab was a mess, but turned out okay. This is what the cab looked like when I started:
-
Mayflower Moving Van Trailer
DRIPTROIT 71 replied to DRIPTROIT 71's topic in Model Trucks: Big Rigs and Heavy Equipment
Thanks Hermann! Thanks!! Thanks JT!