.jpg.54ecf0d4a006234146ea24c7f6762038.jpg)
redneckrigger
-
Posts
1,578 -
Joined
-
Last visited
Content Type
Profiles
Forums
Events
Gallery
Everything posted by redneckrigger
-
.thumb.jpg.4bca3333e1da4027c381d8d56a564ec1.jpg) Nice build Mike! Yup, detailitis is definitely a disease!
Nice build Mike! Yup, detailitis is definitely a disease! -
Nicely done Mike! Got any more photos of that build? Looks great!
-
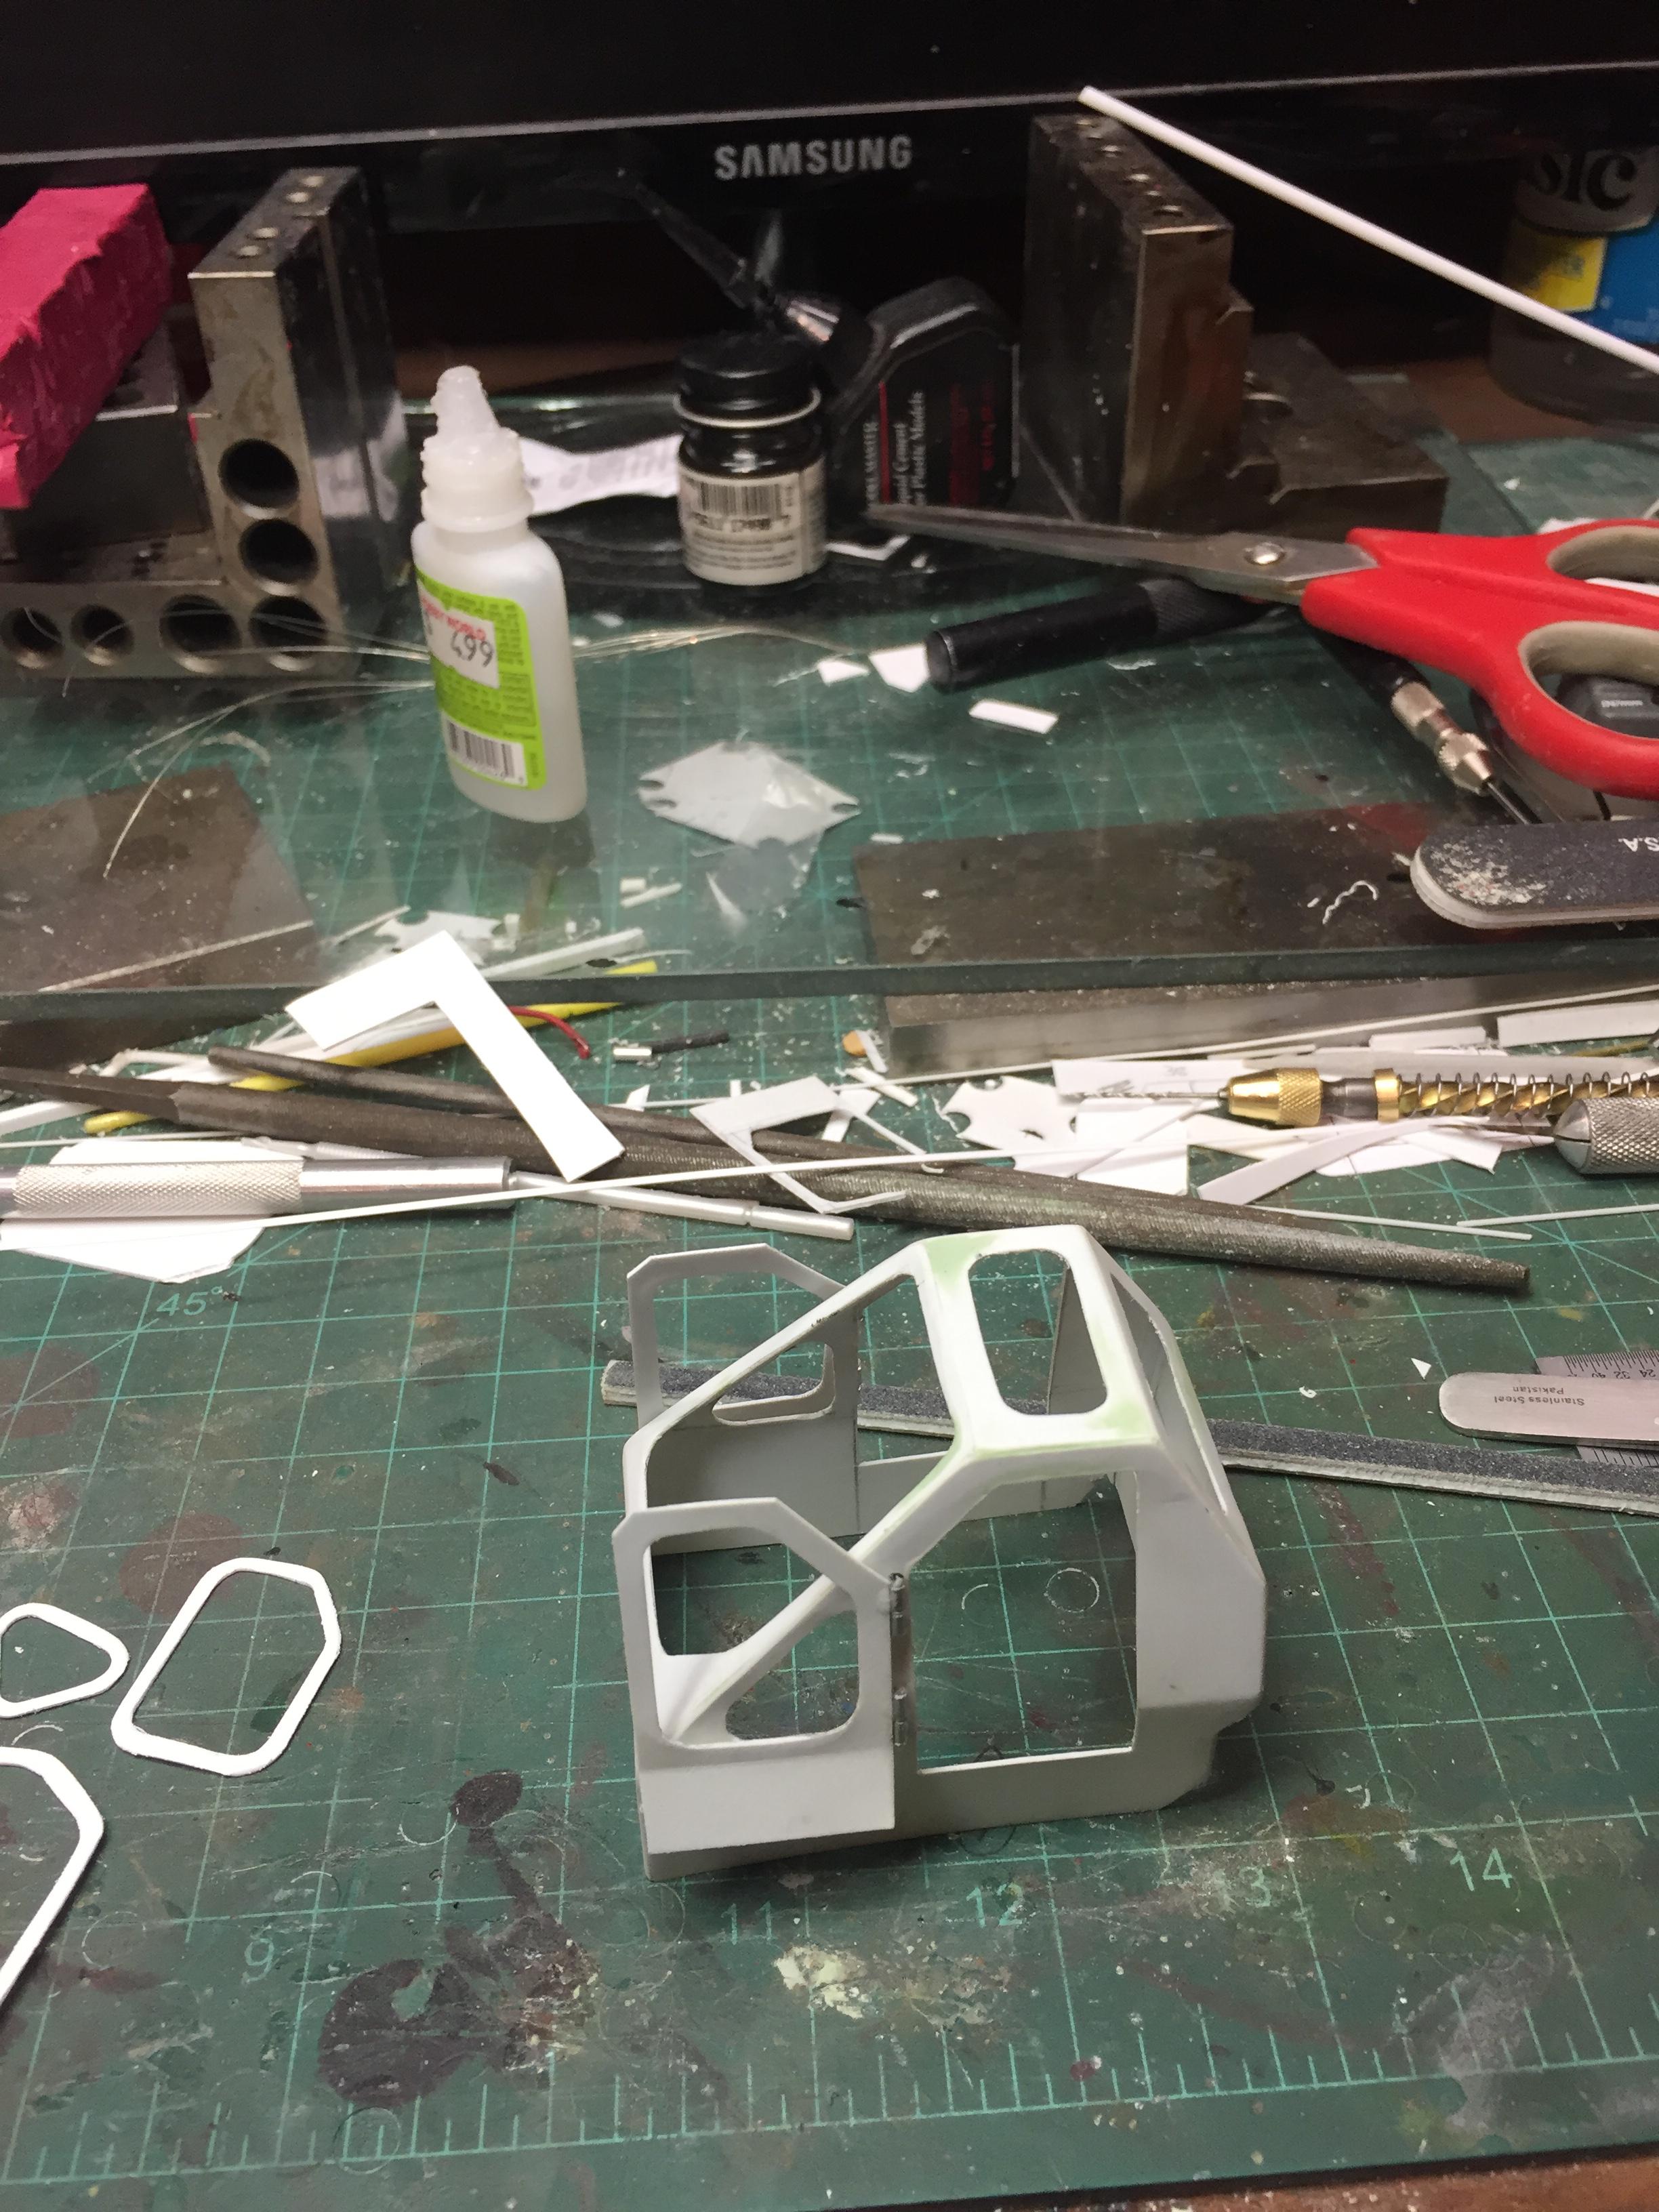
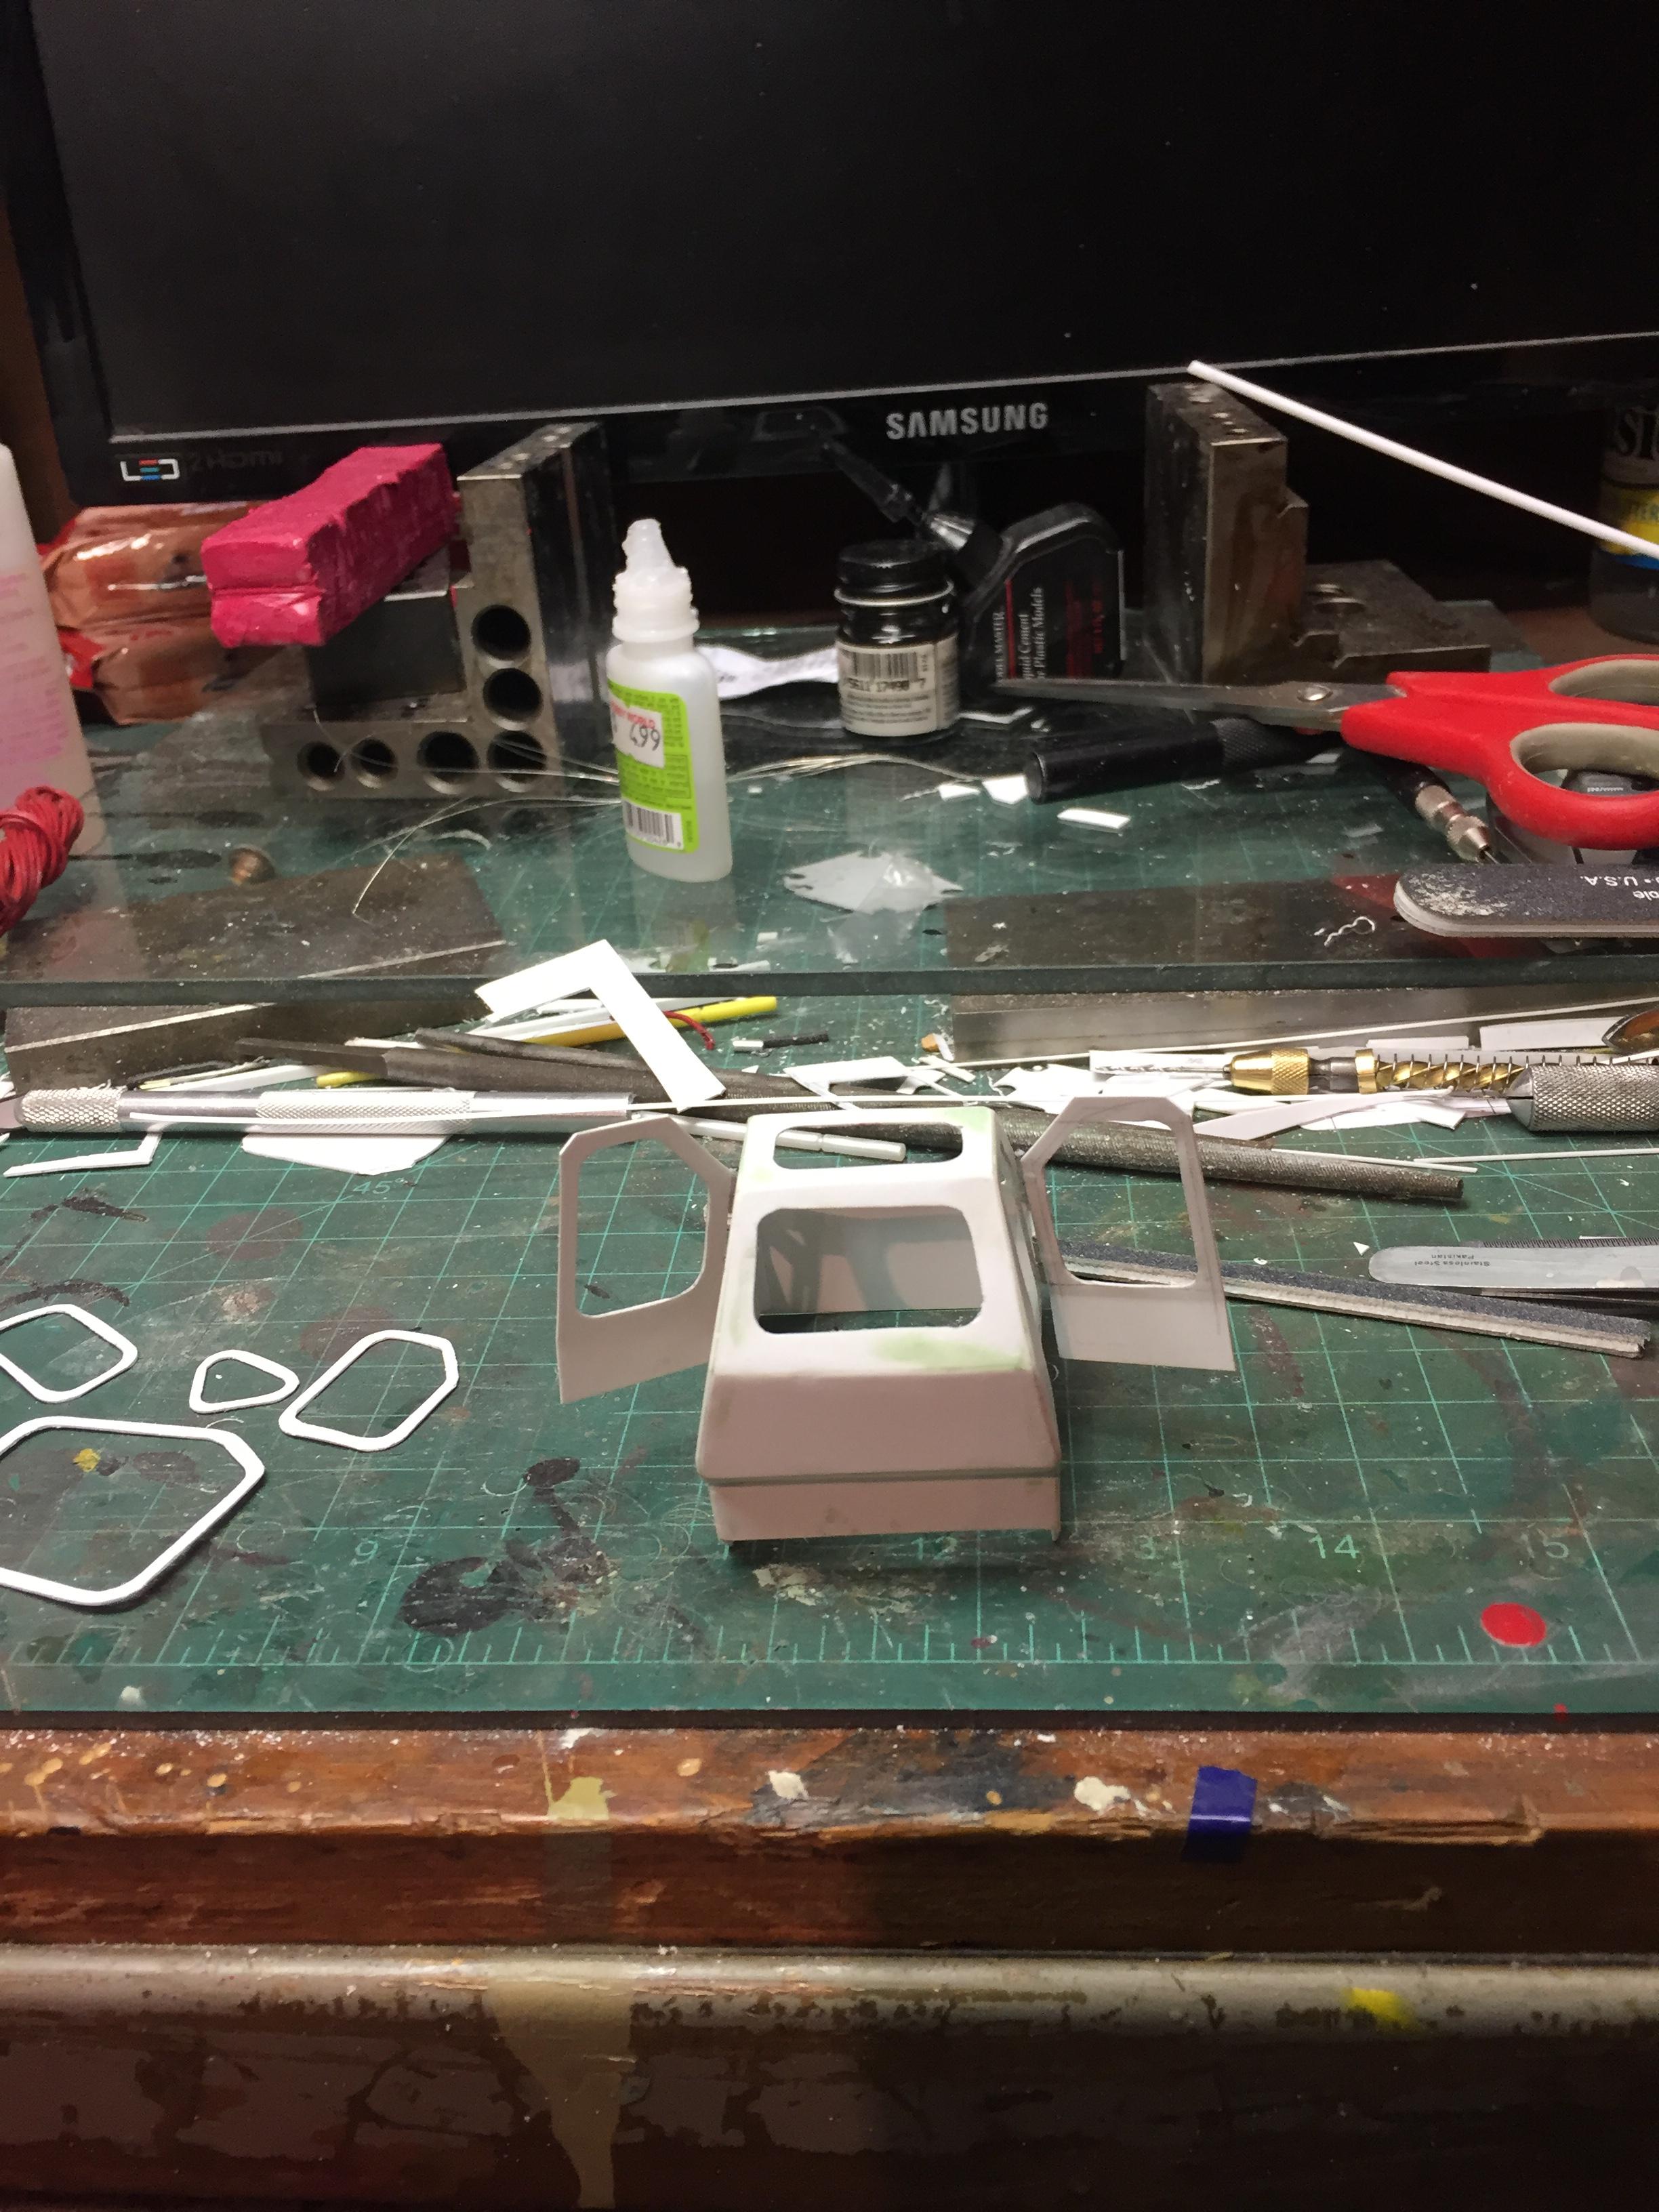
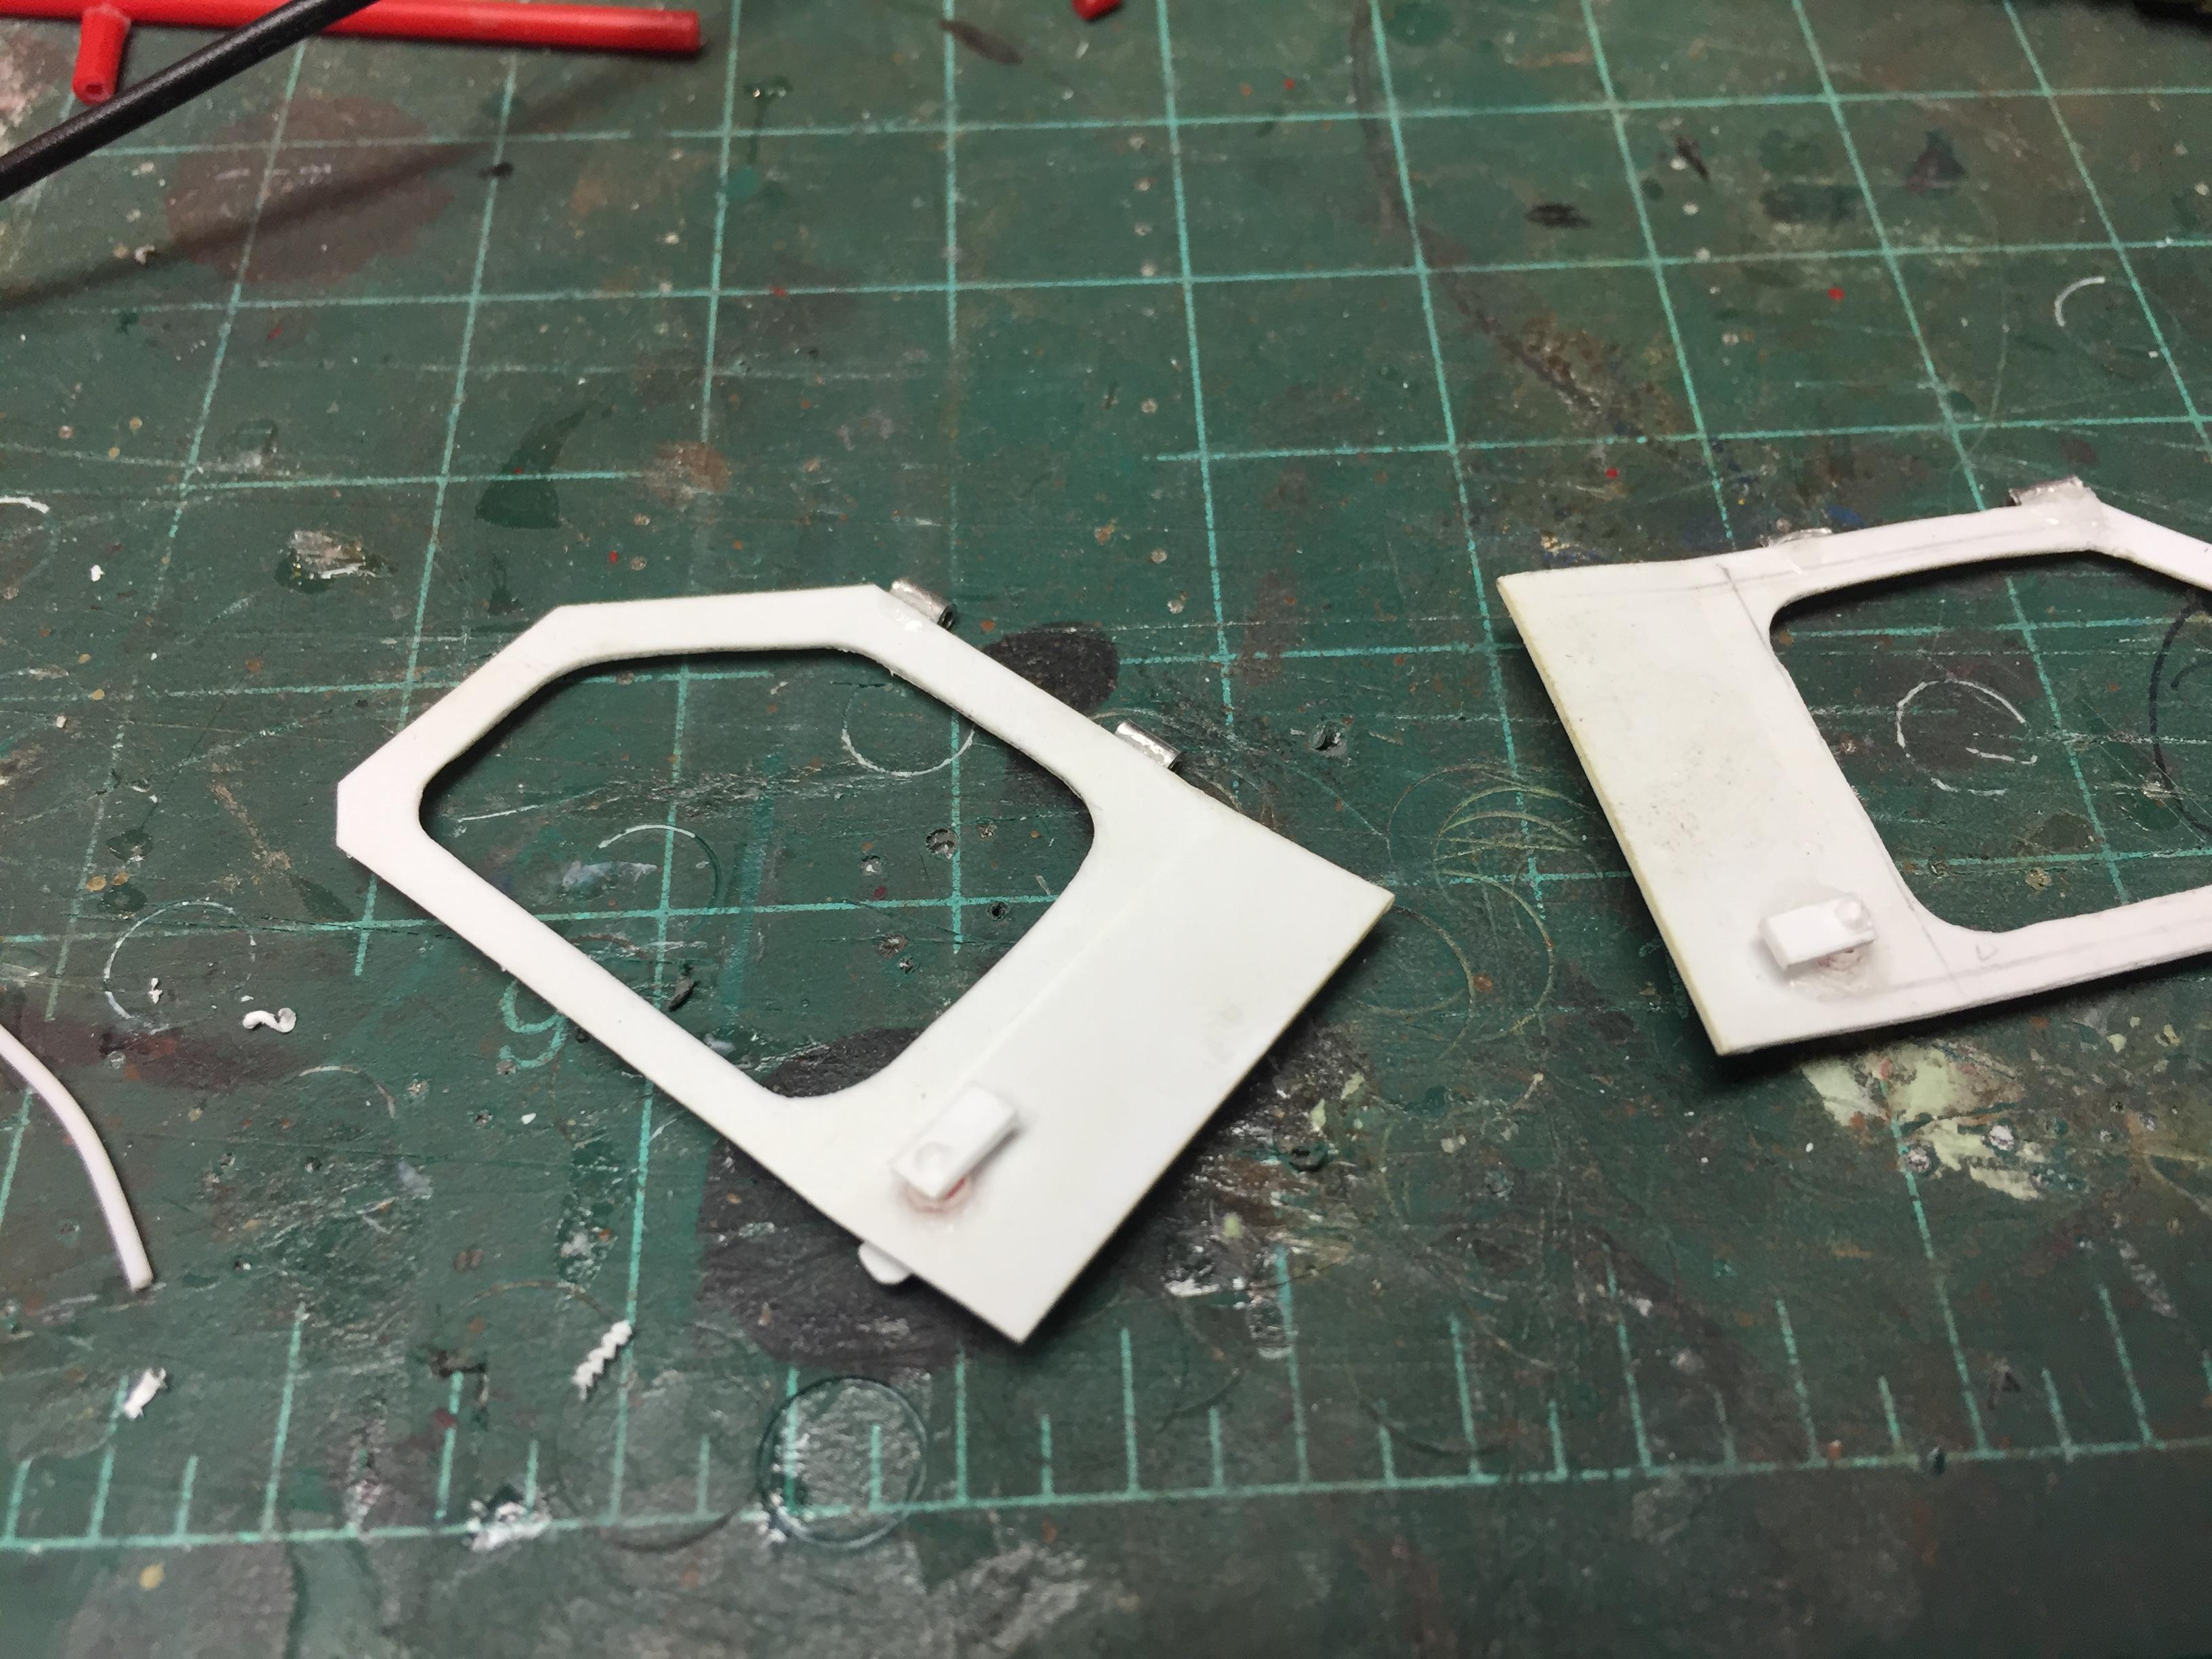
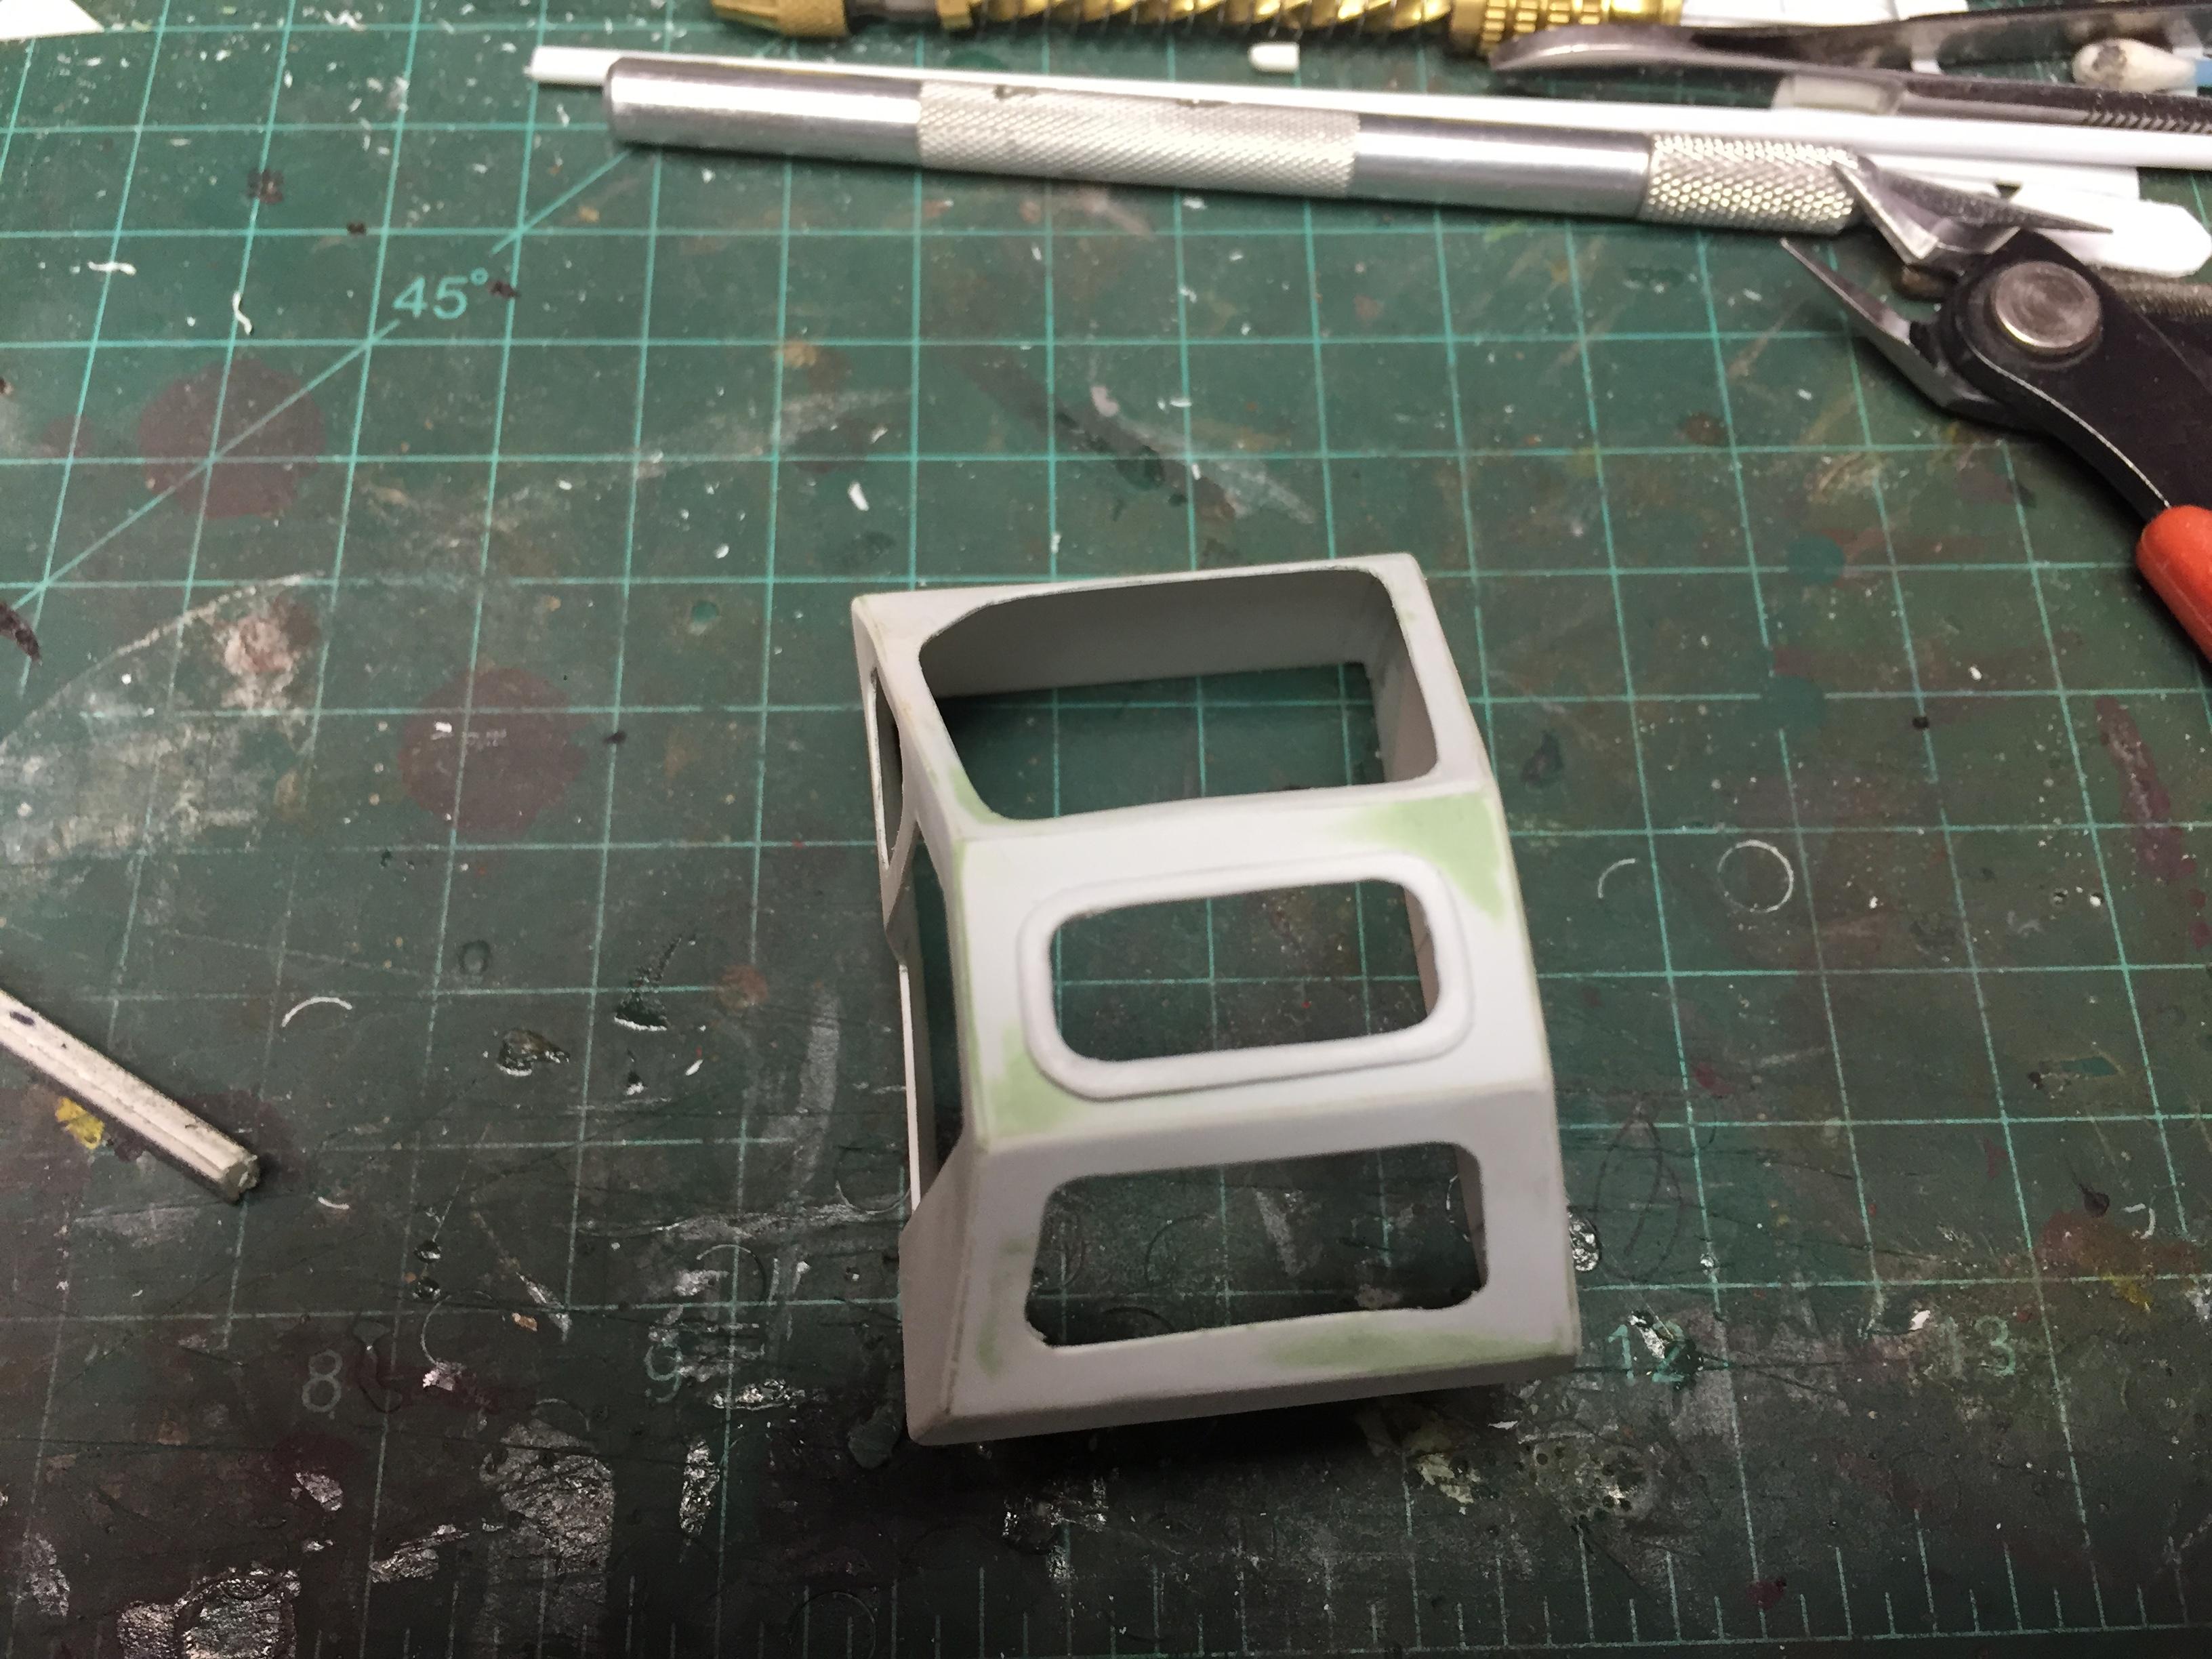
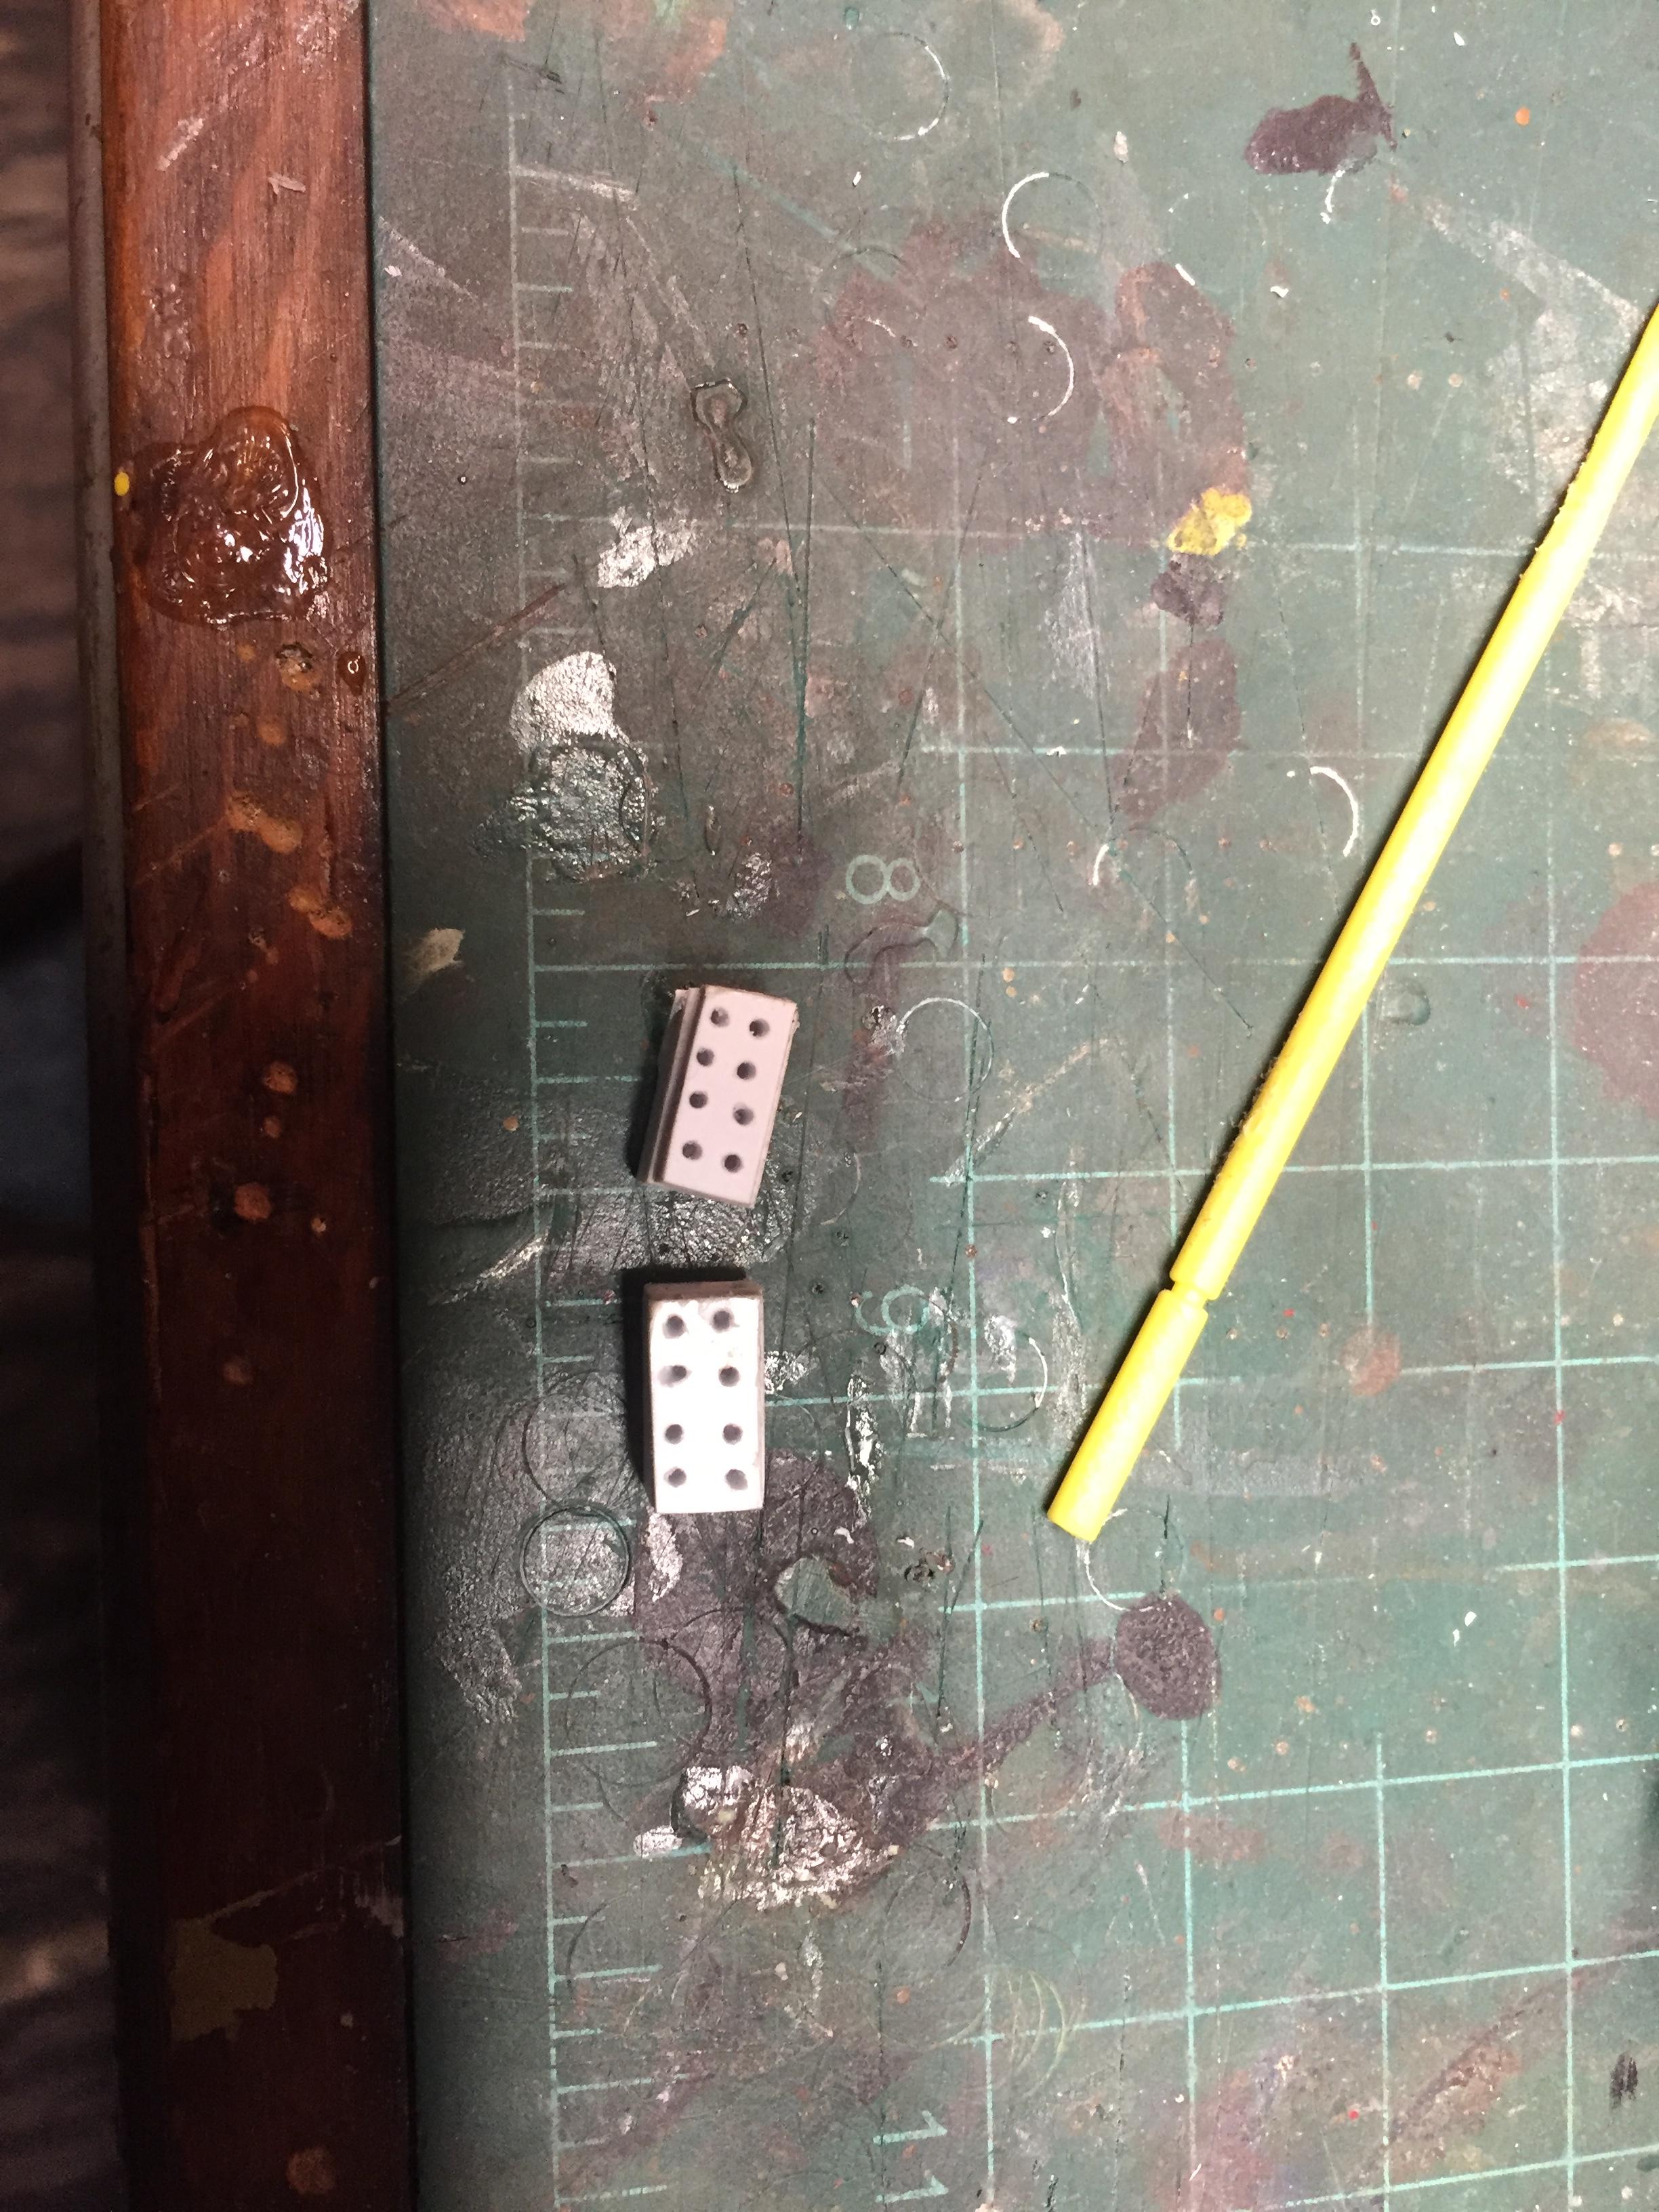
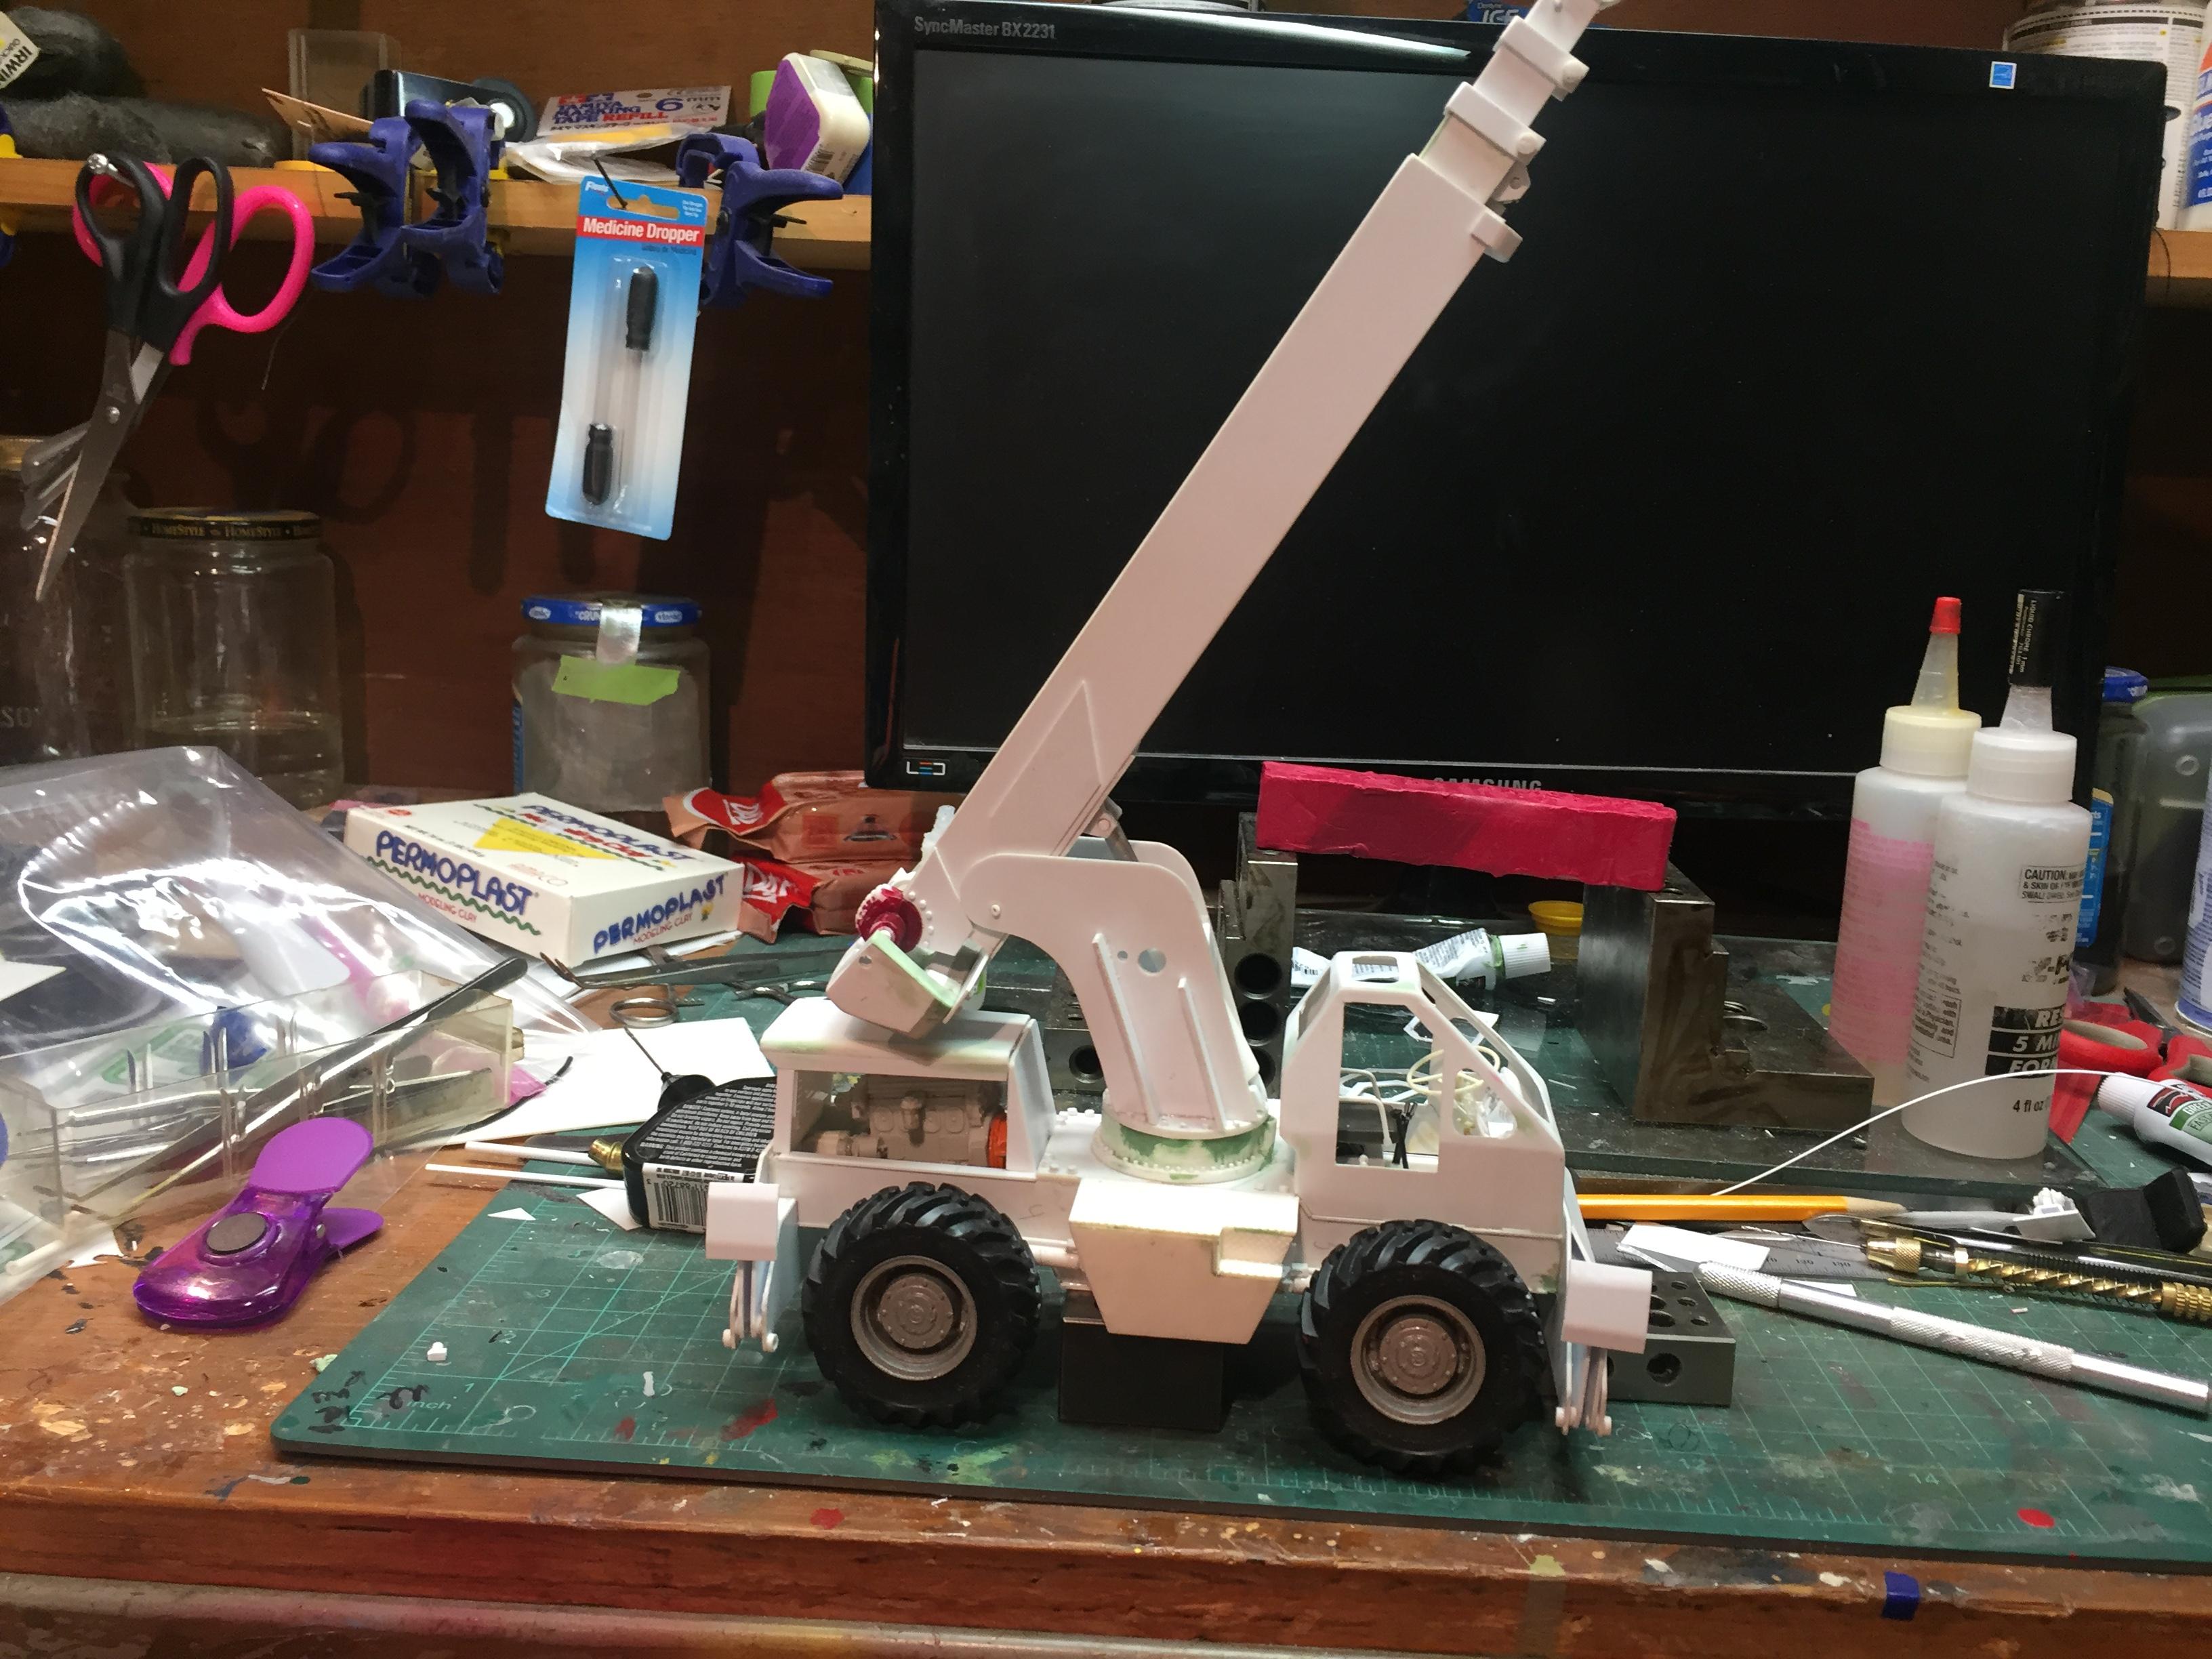
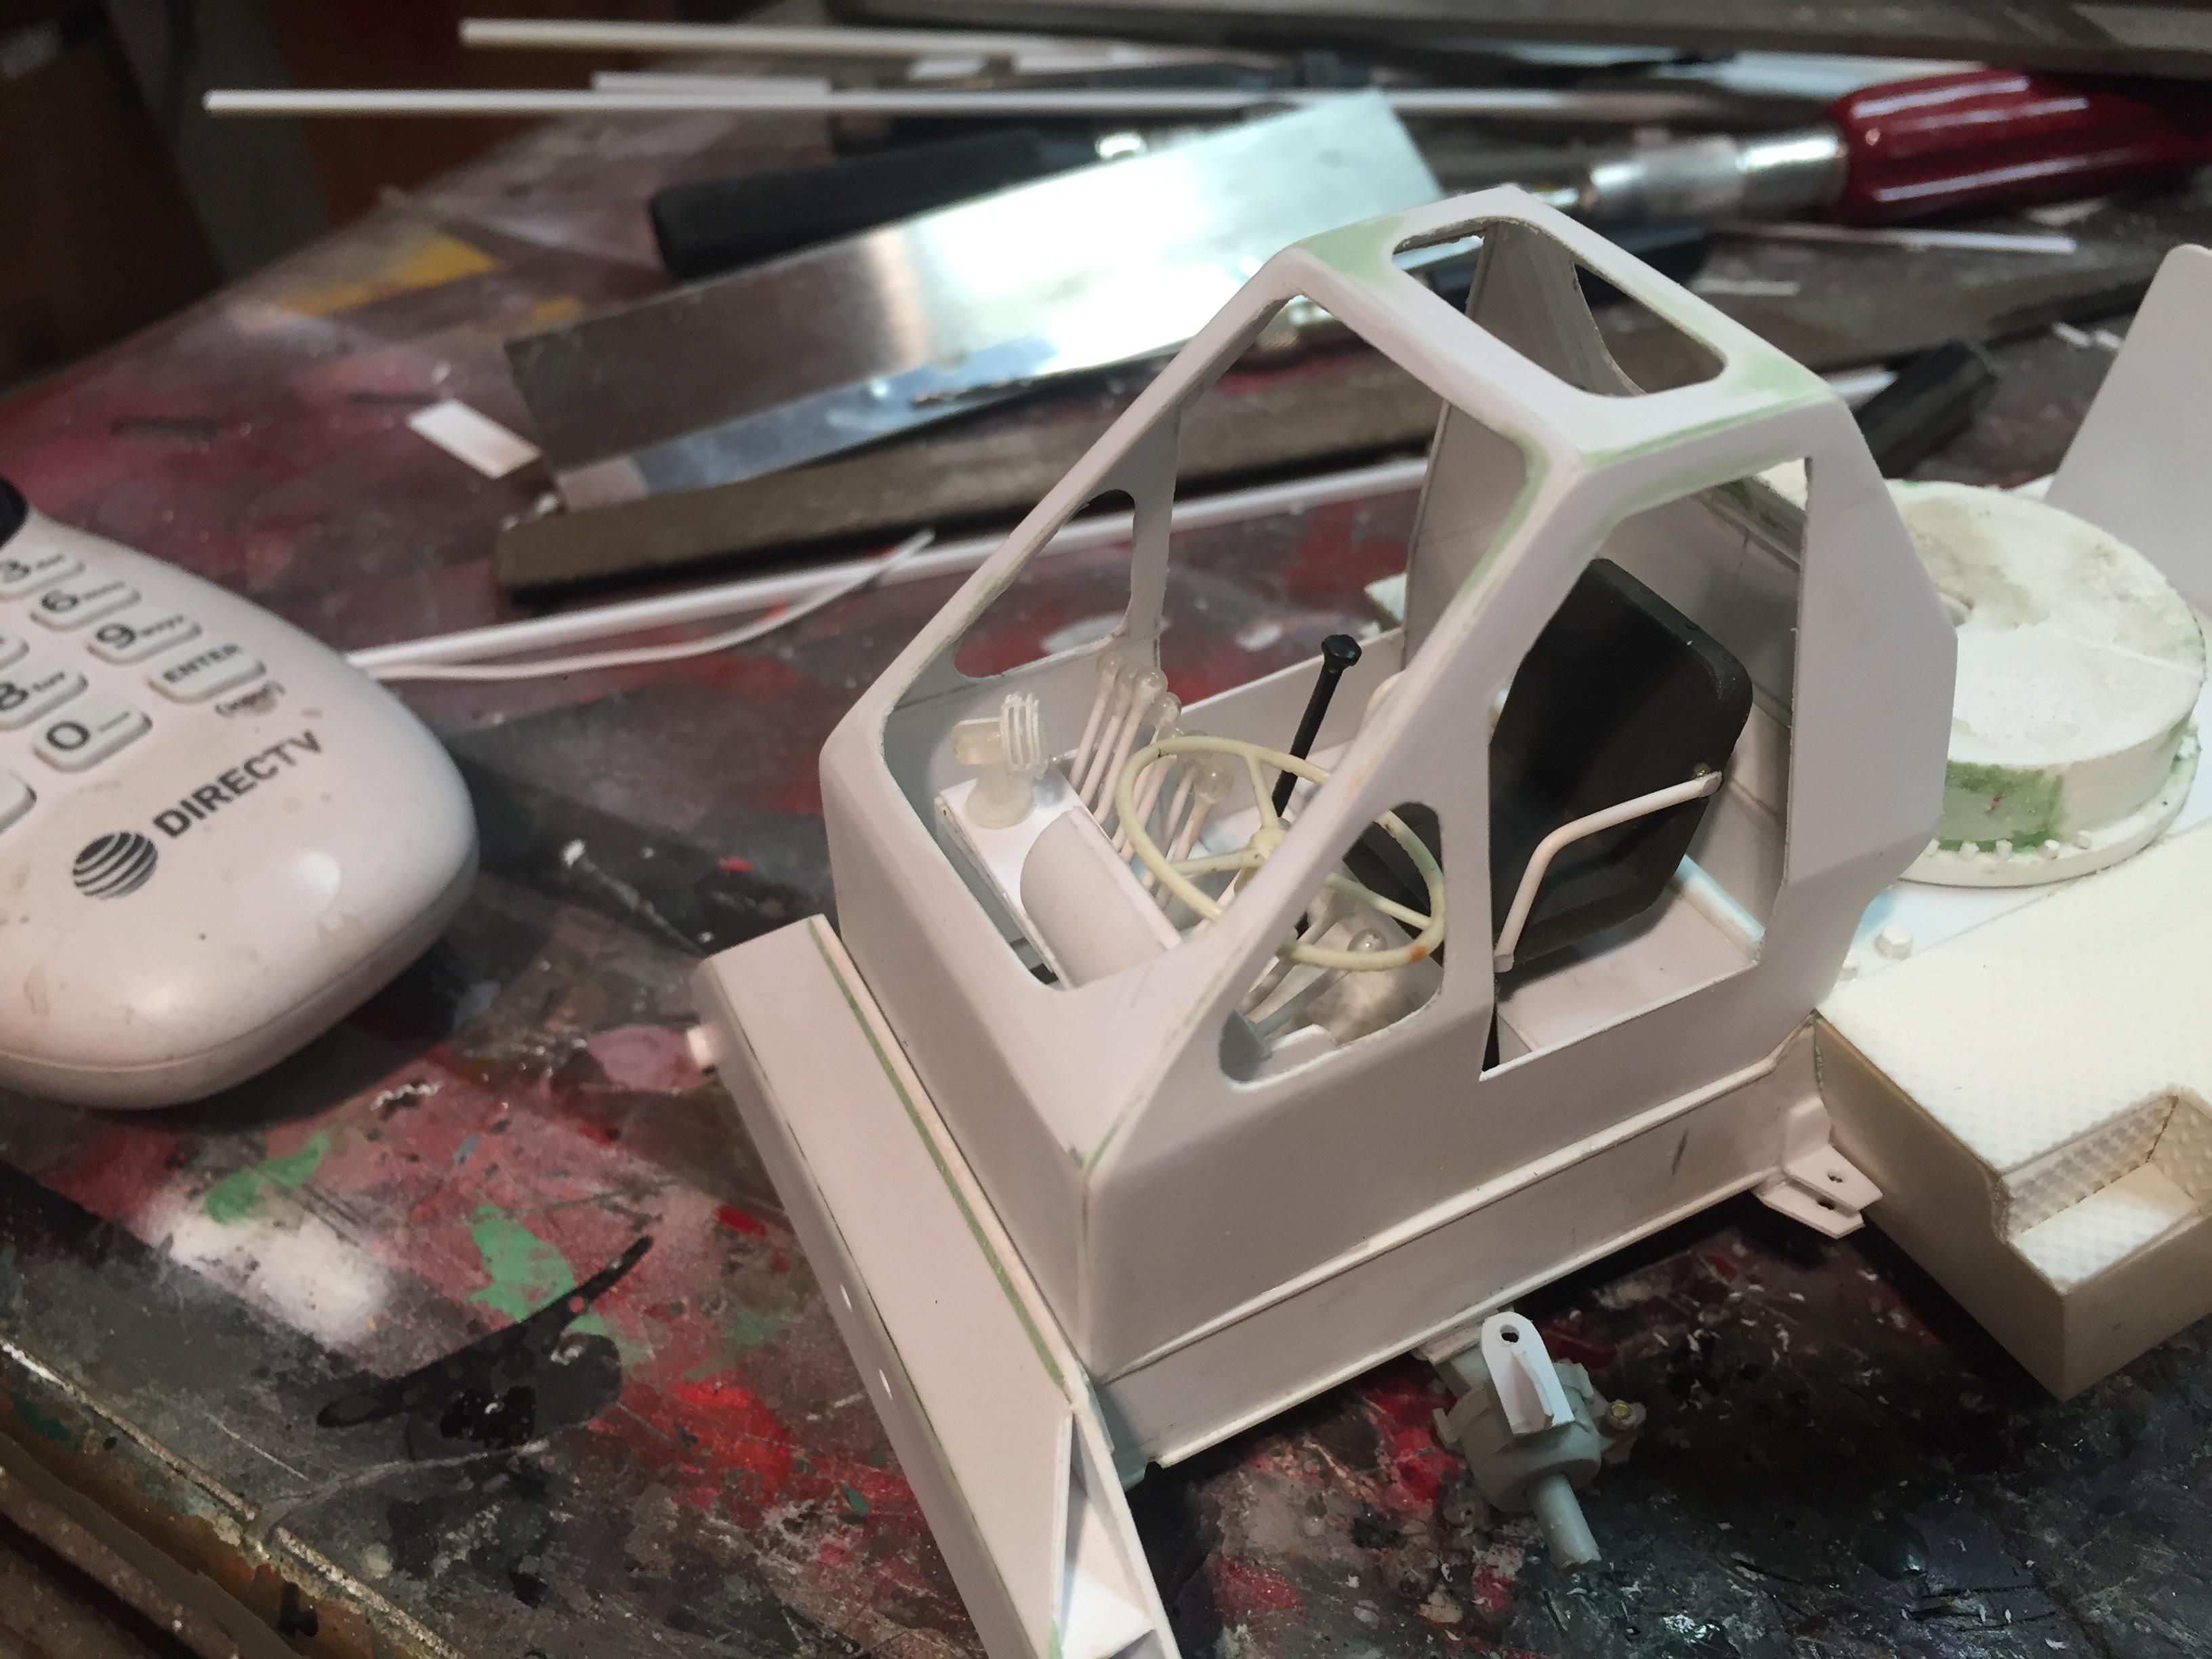
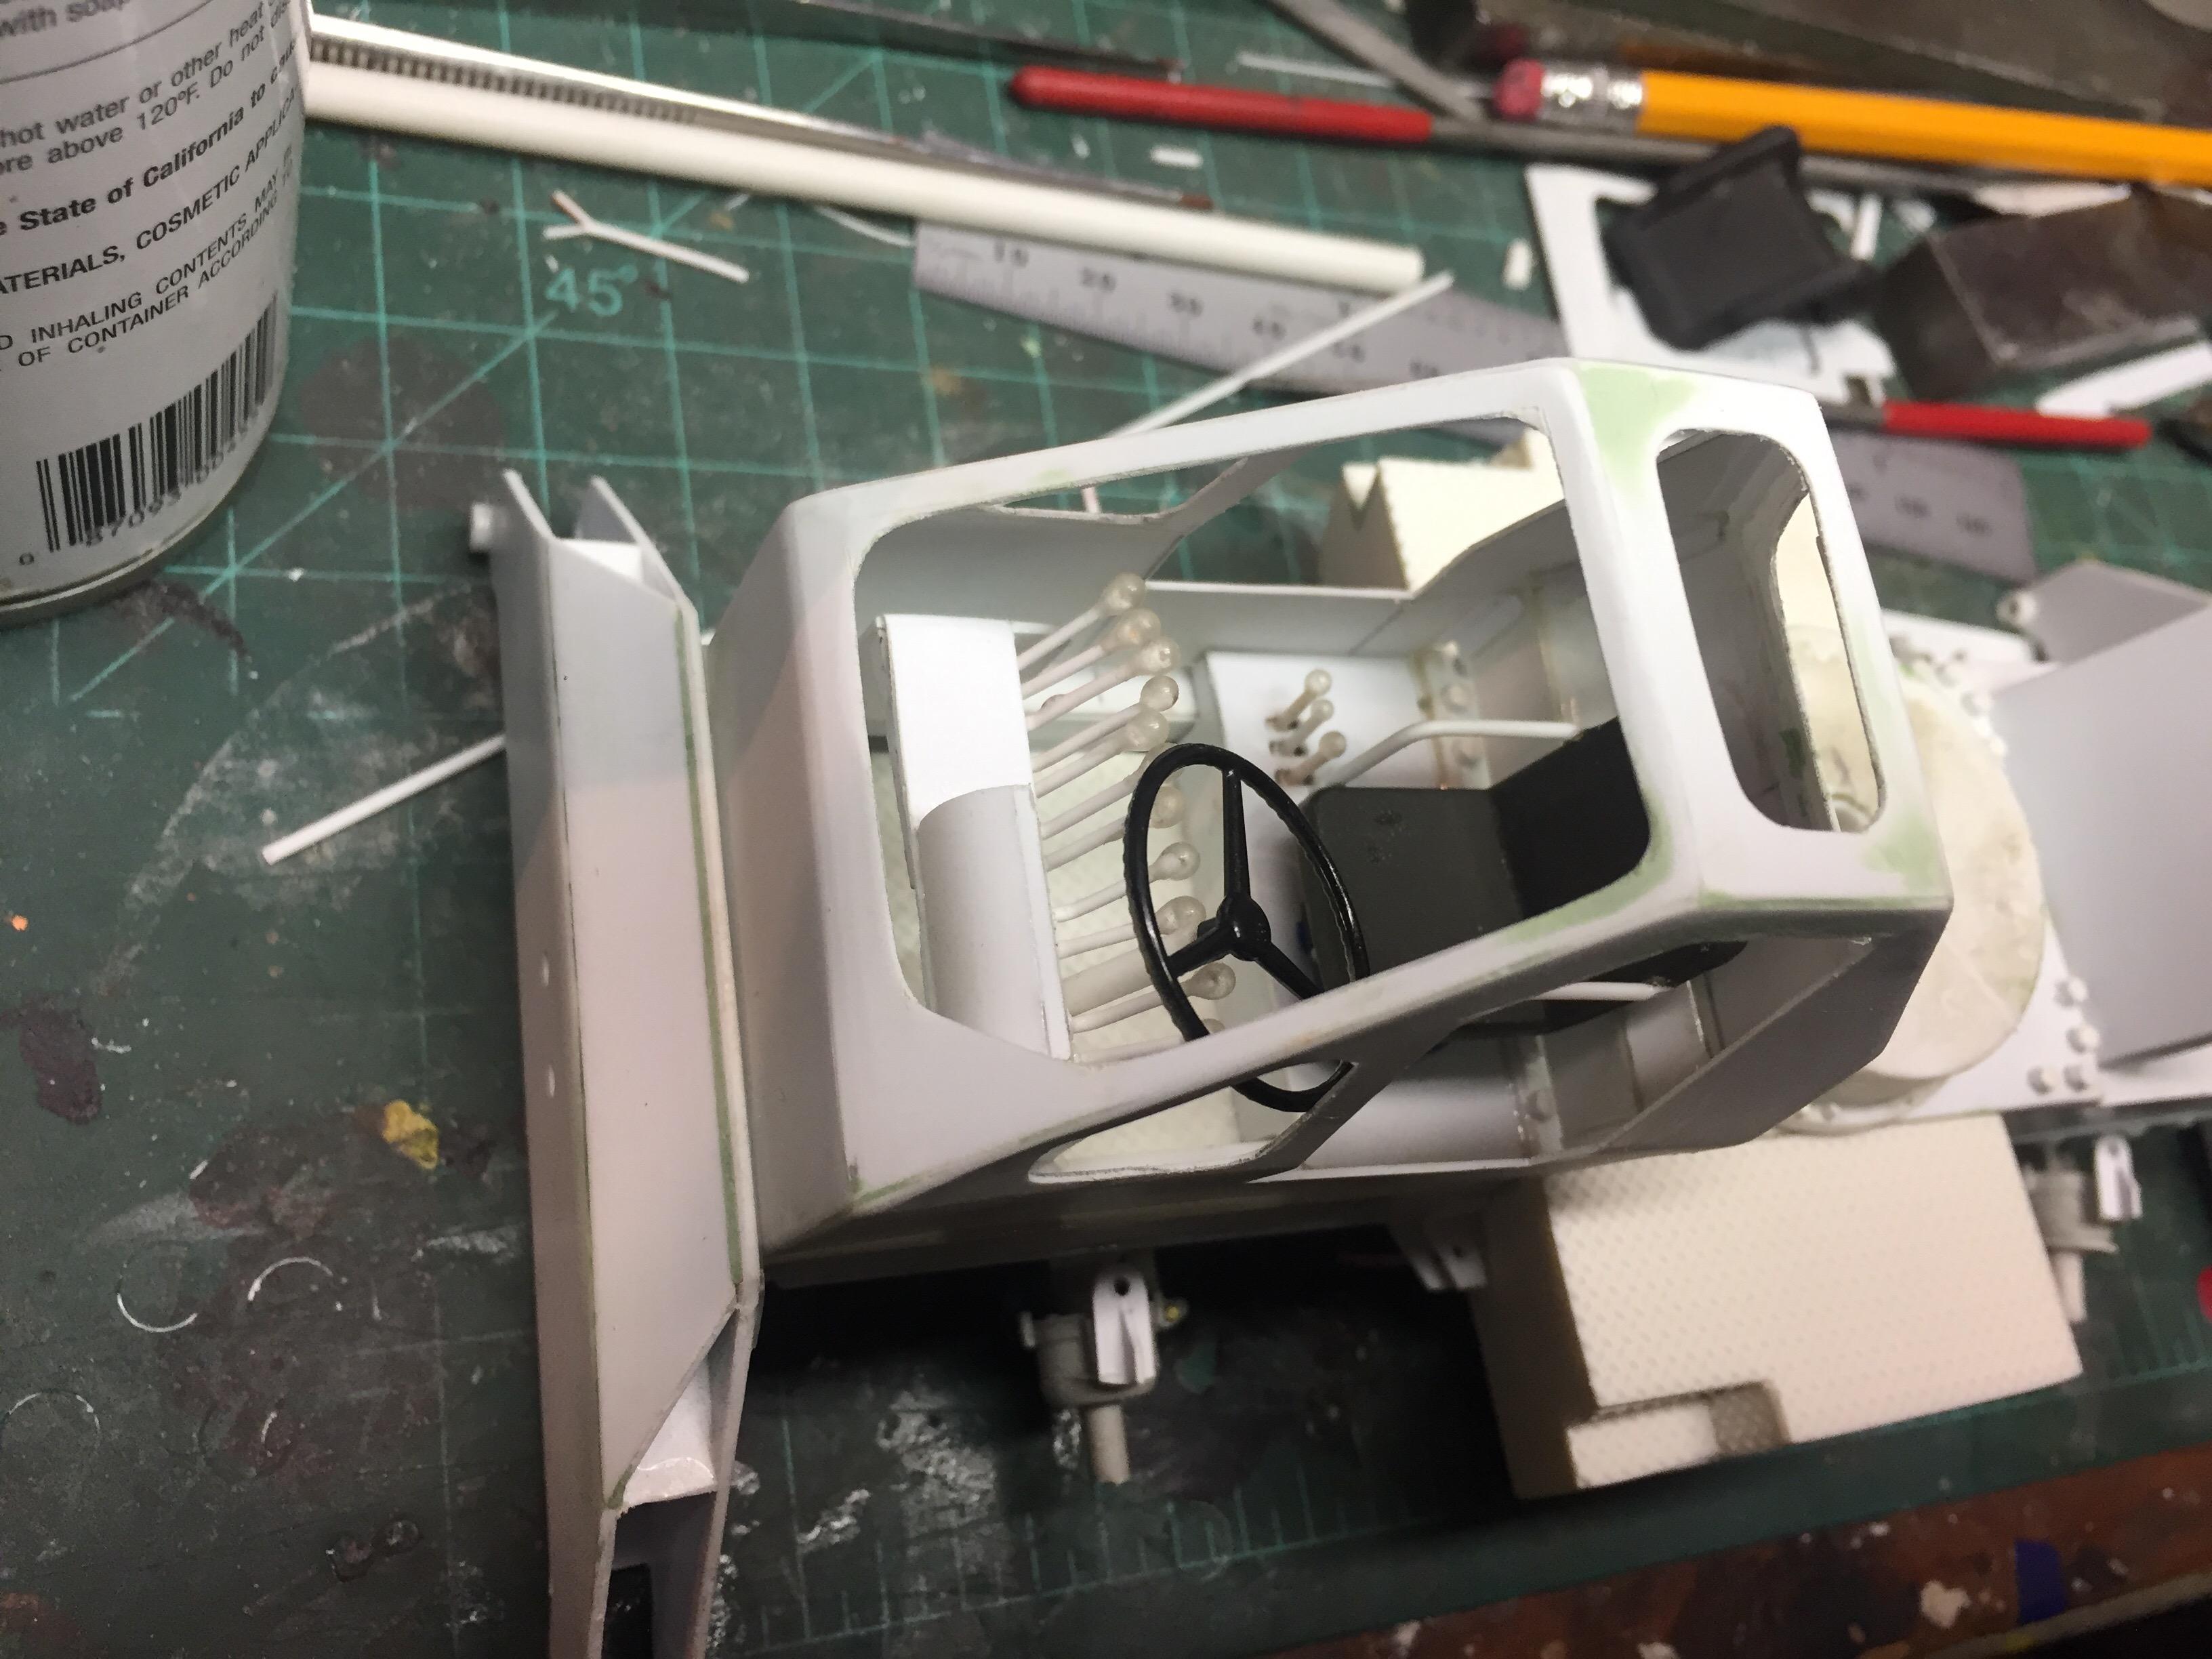
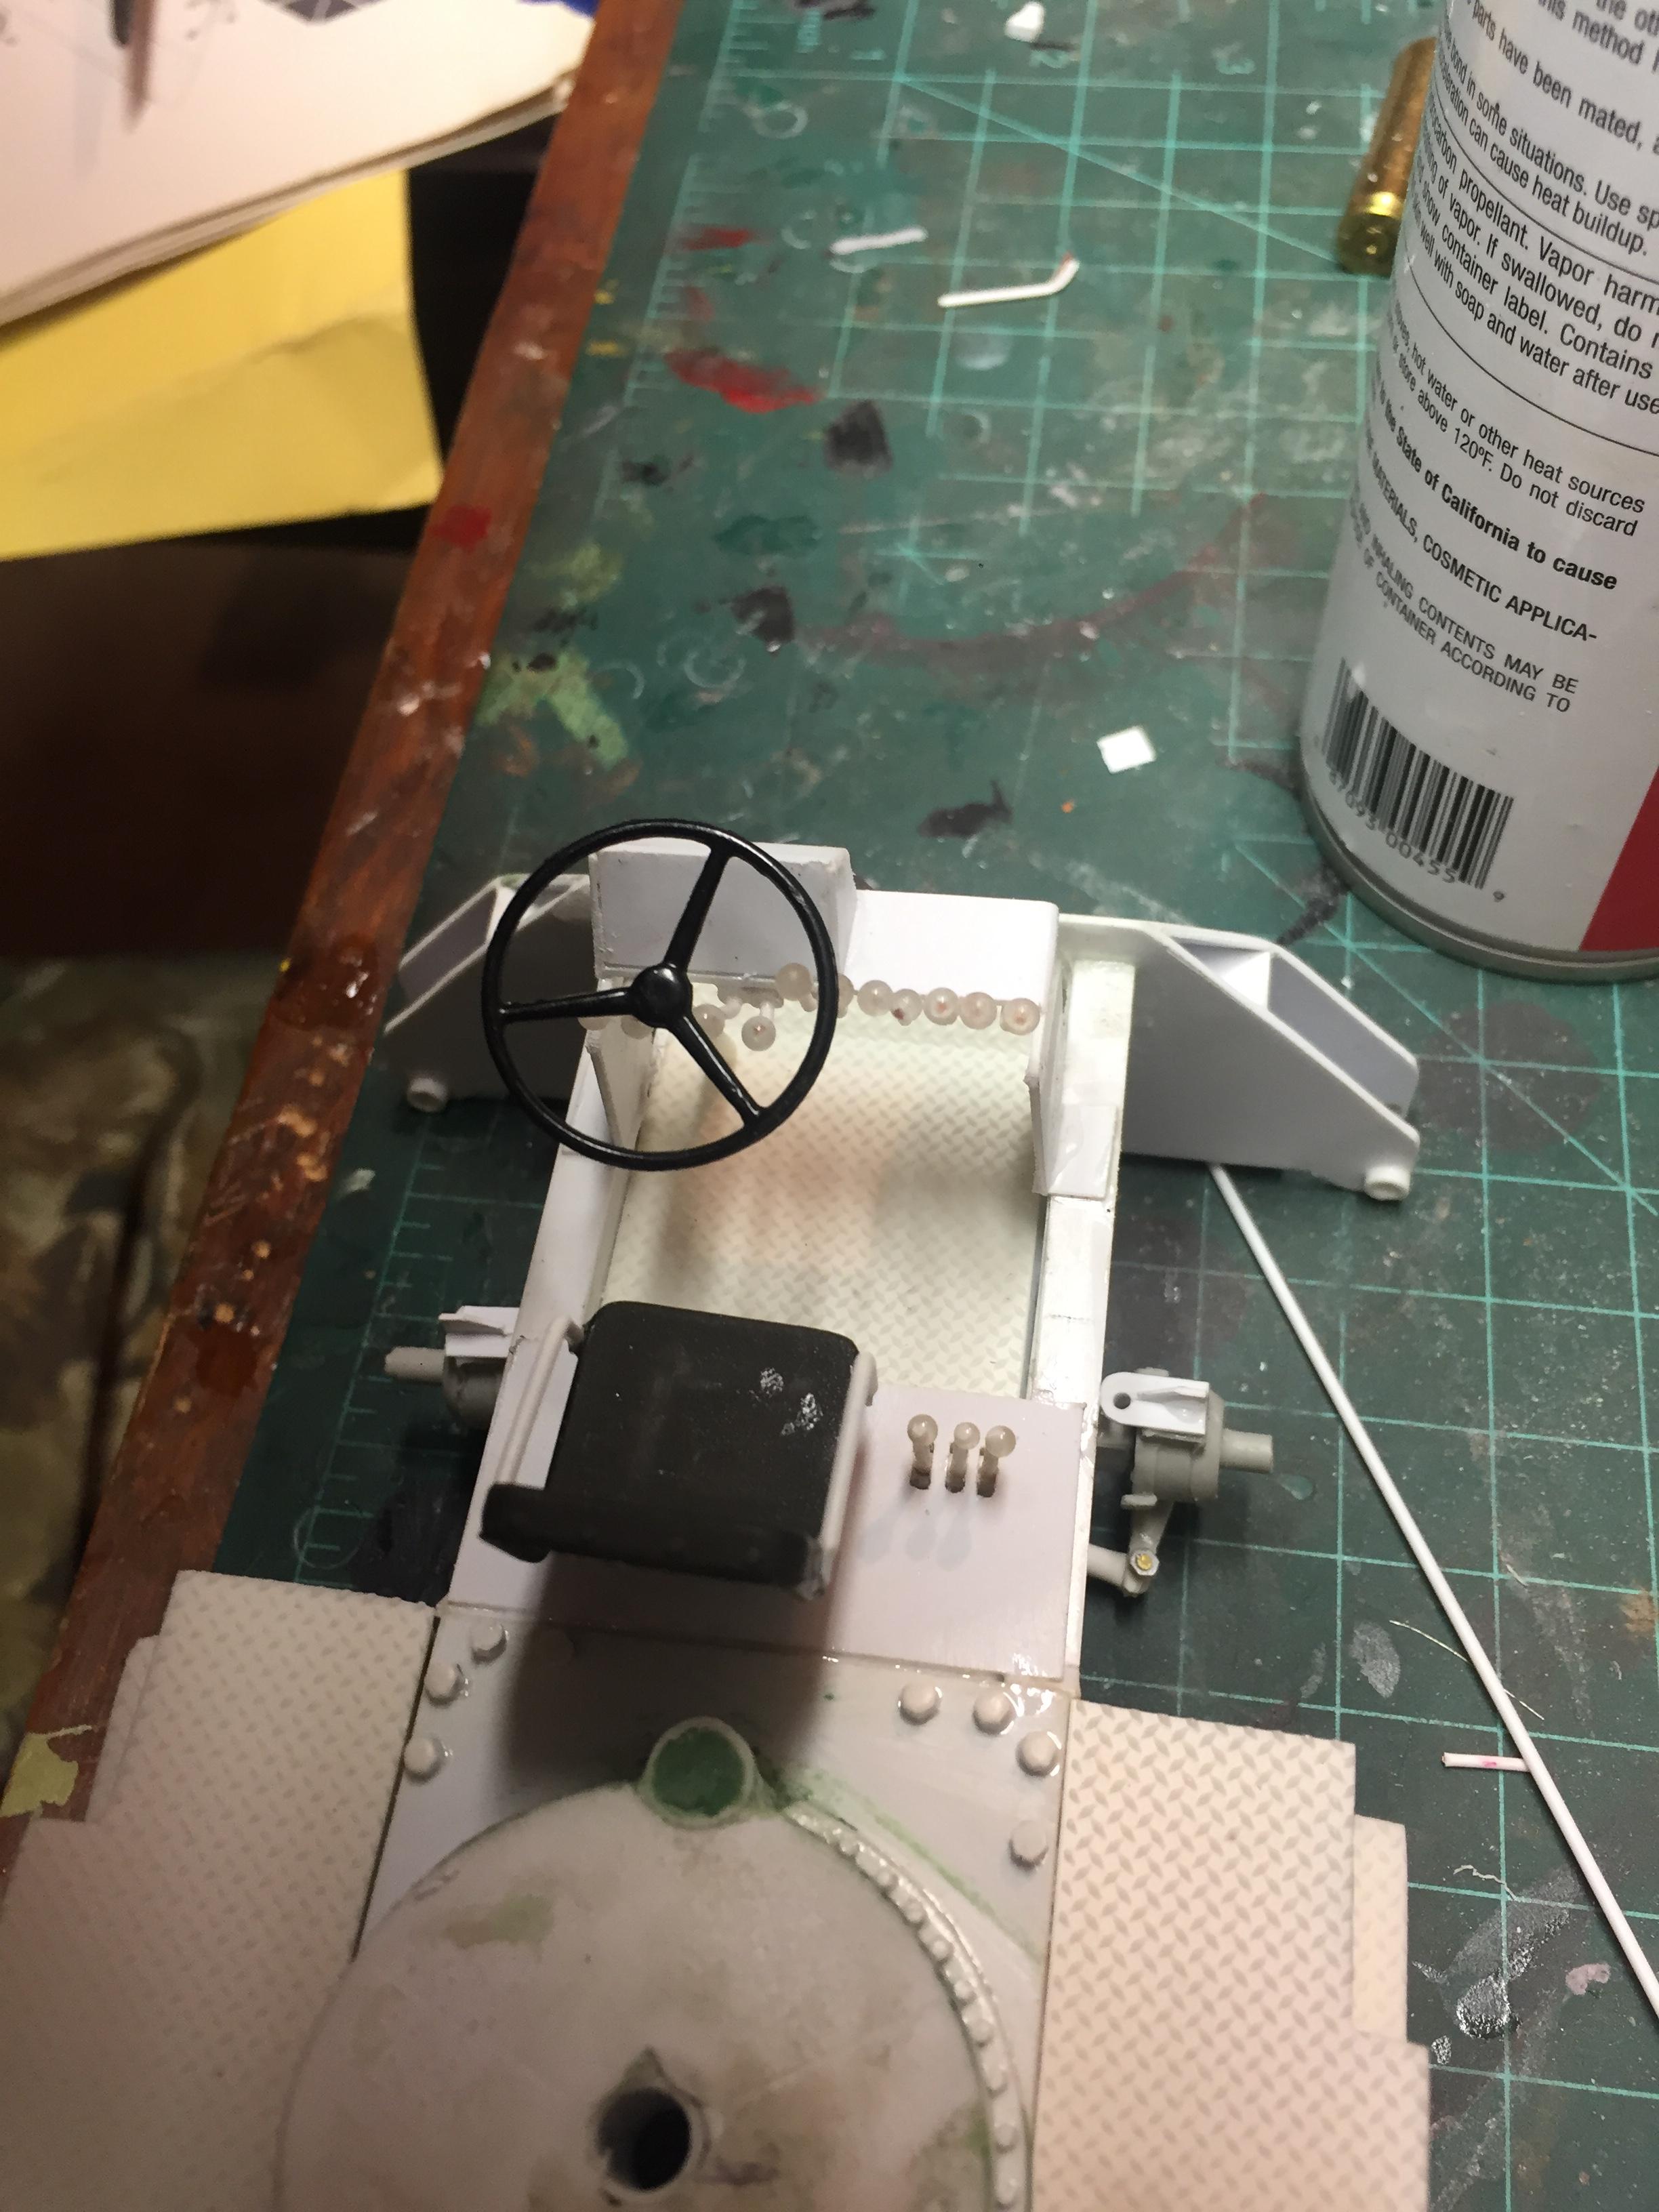
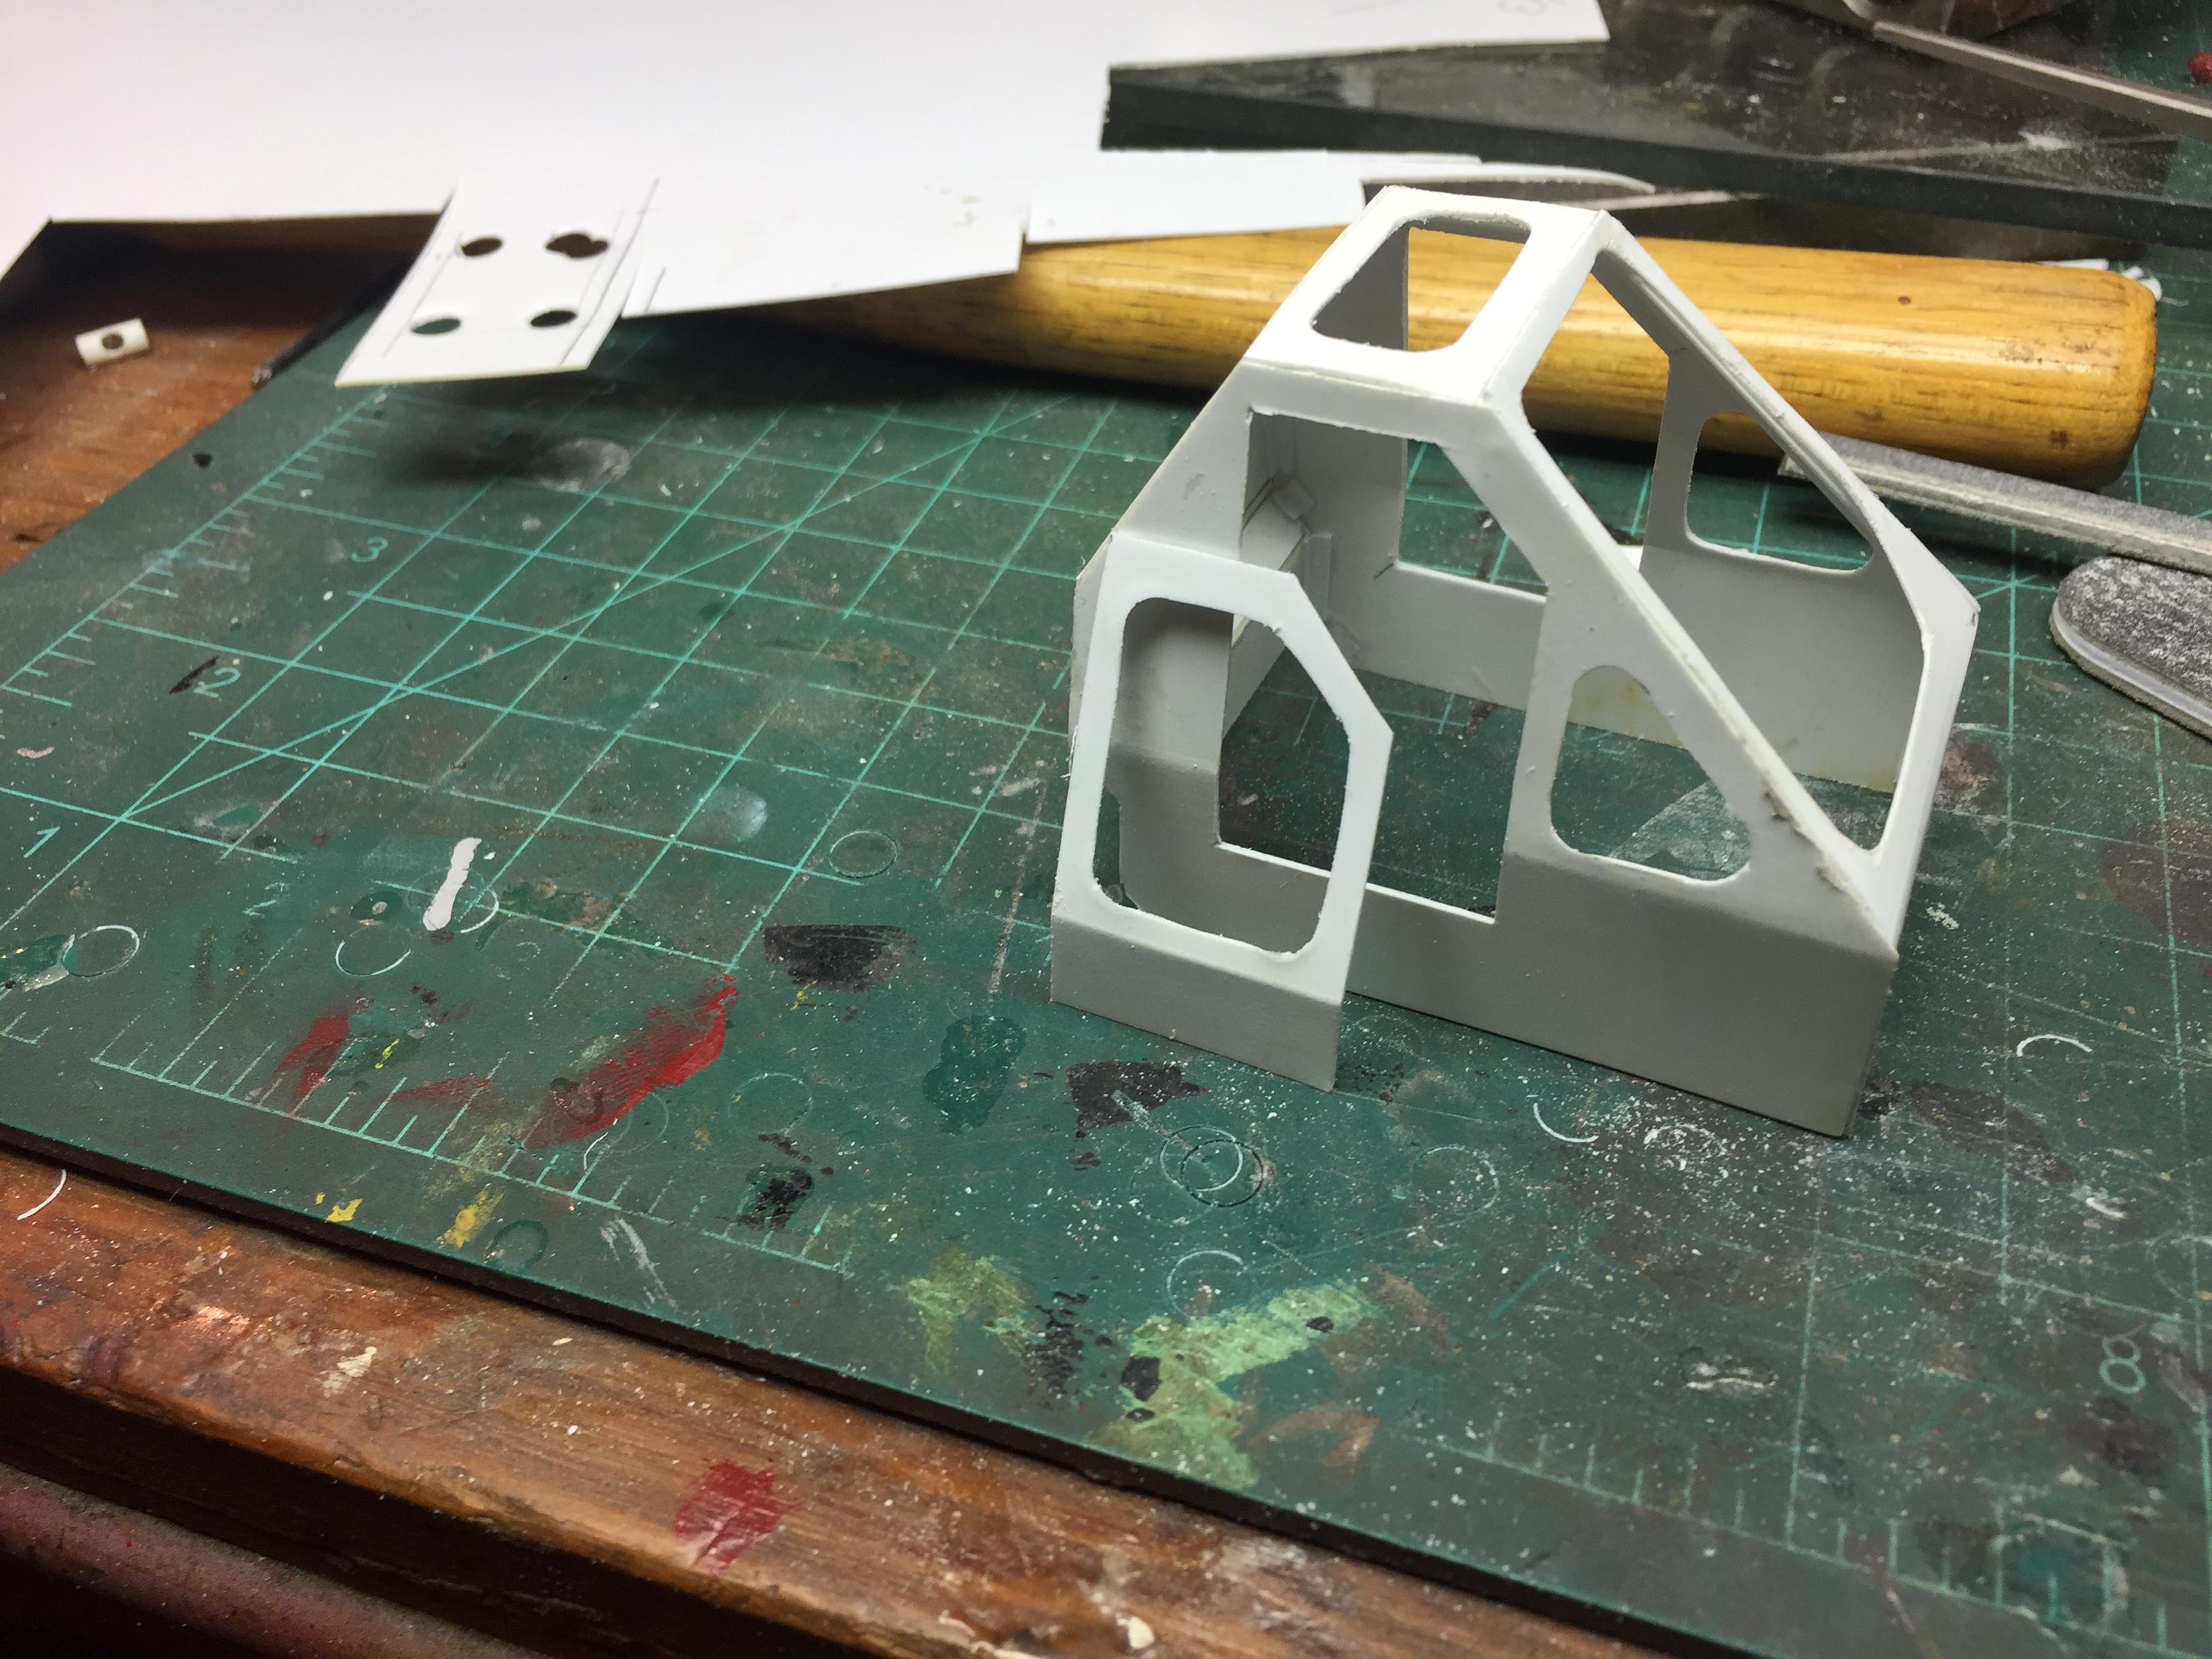
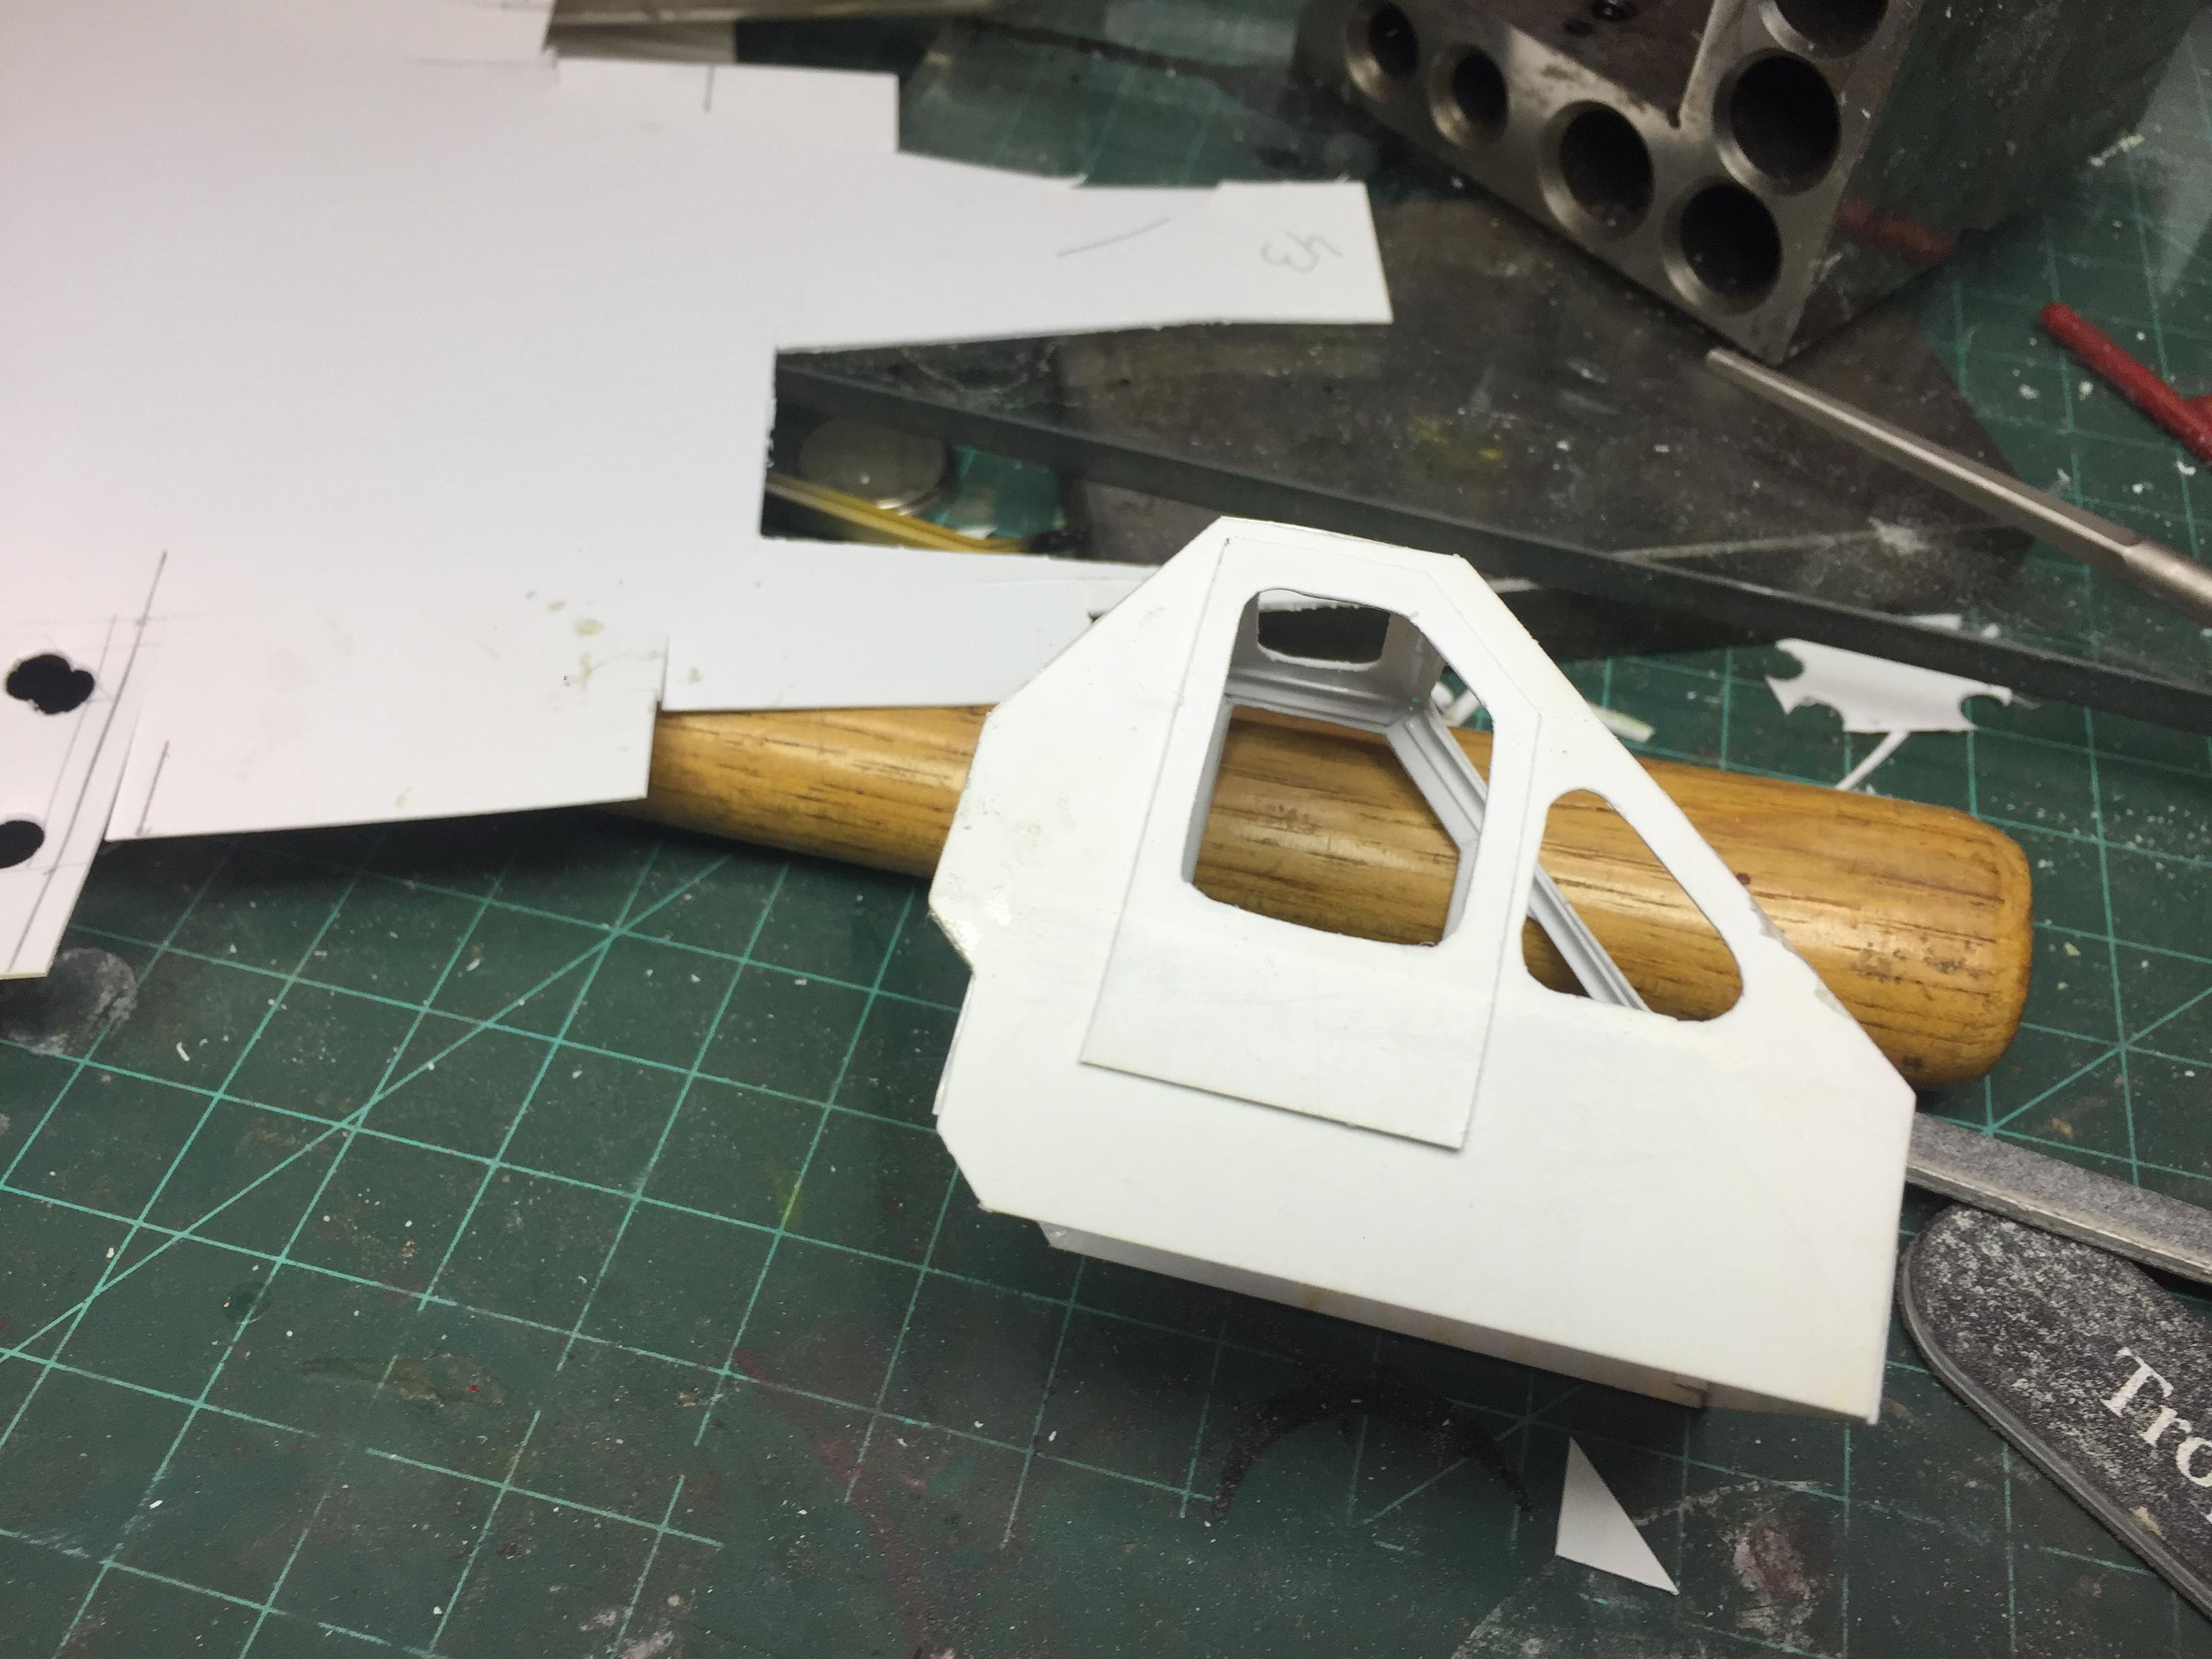
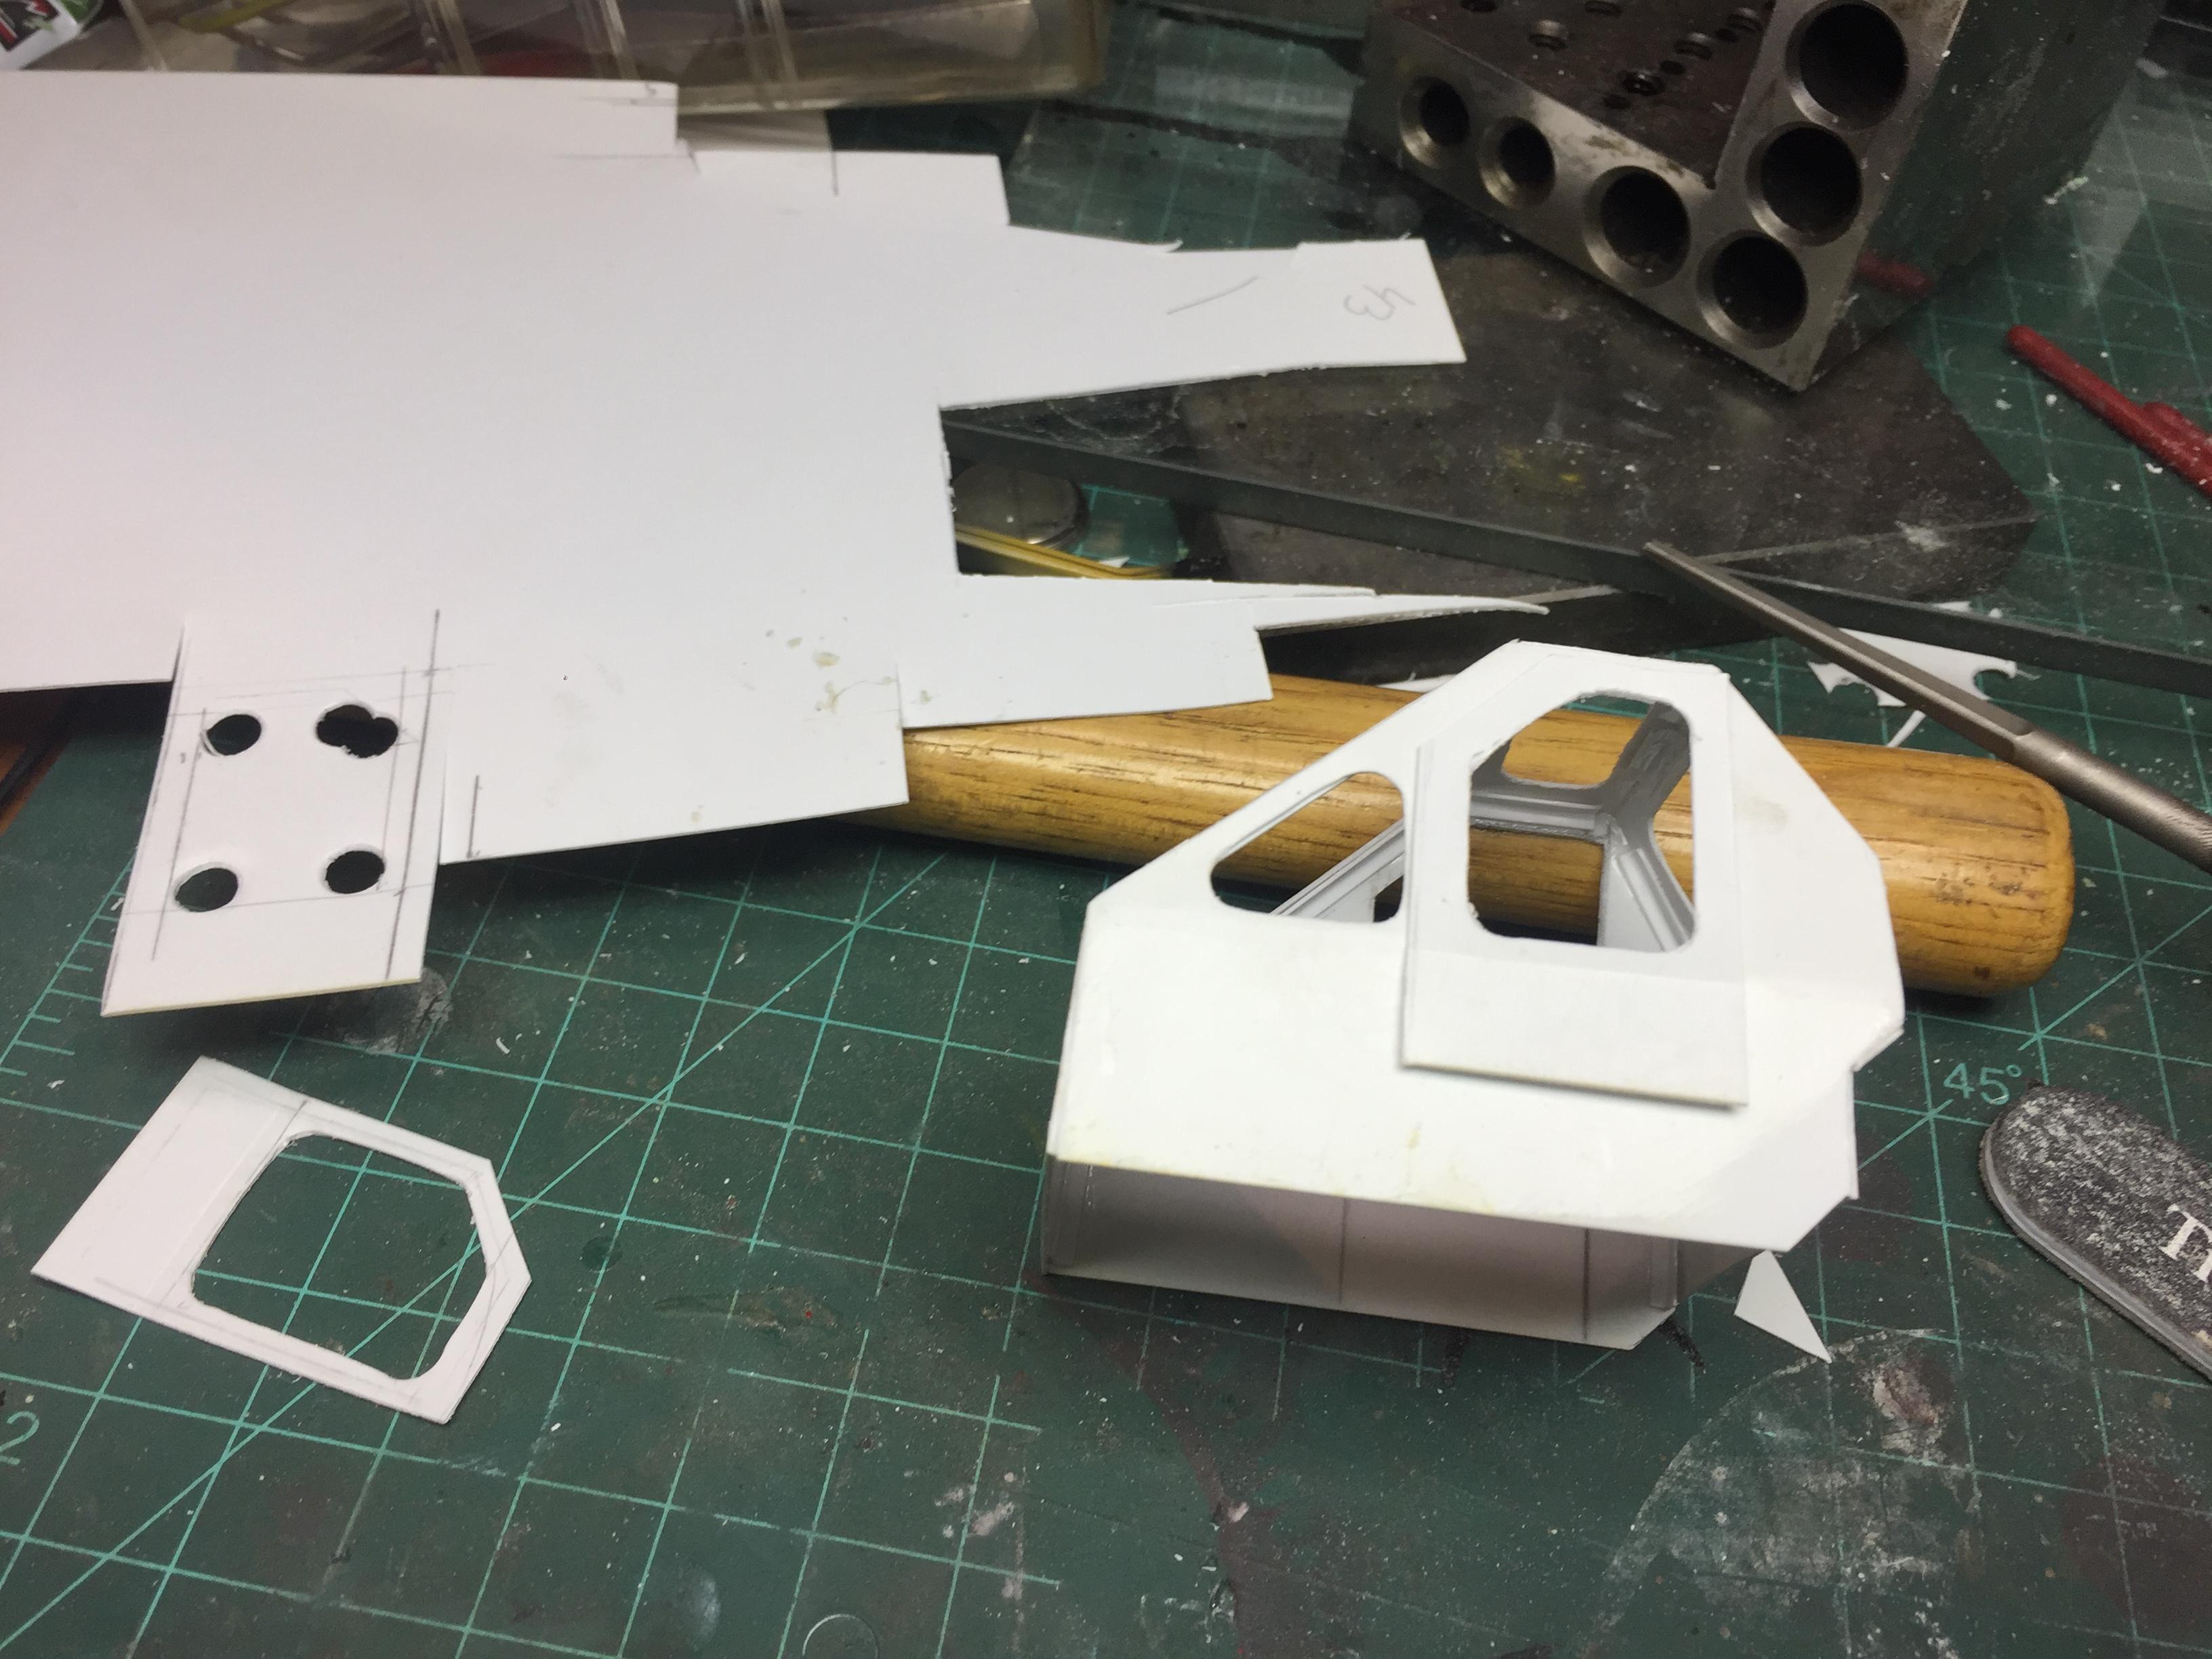
Finished making the window gaskets. Now I have to see if I trust my painting abilities with a tiny brush so I can attach them before I paint the cab and then paint them black later. I feel a lot better about attaching them that way, but my hands shake so bad.....!!?? Also hinged the cab doors and started the latches. The farther I get with this the tinier the parts get!

-
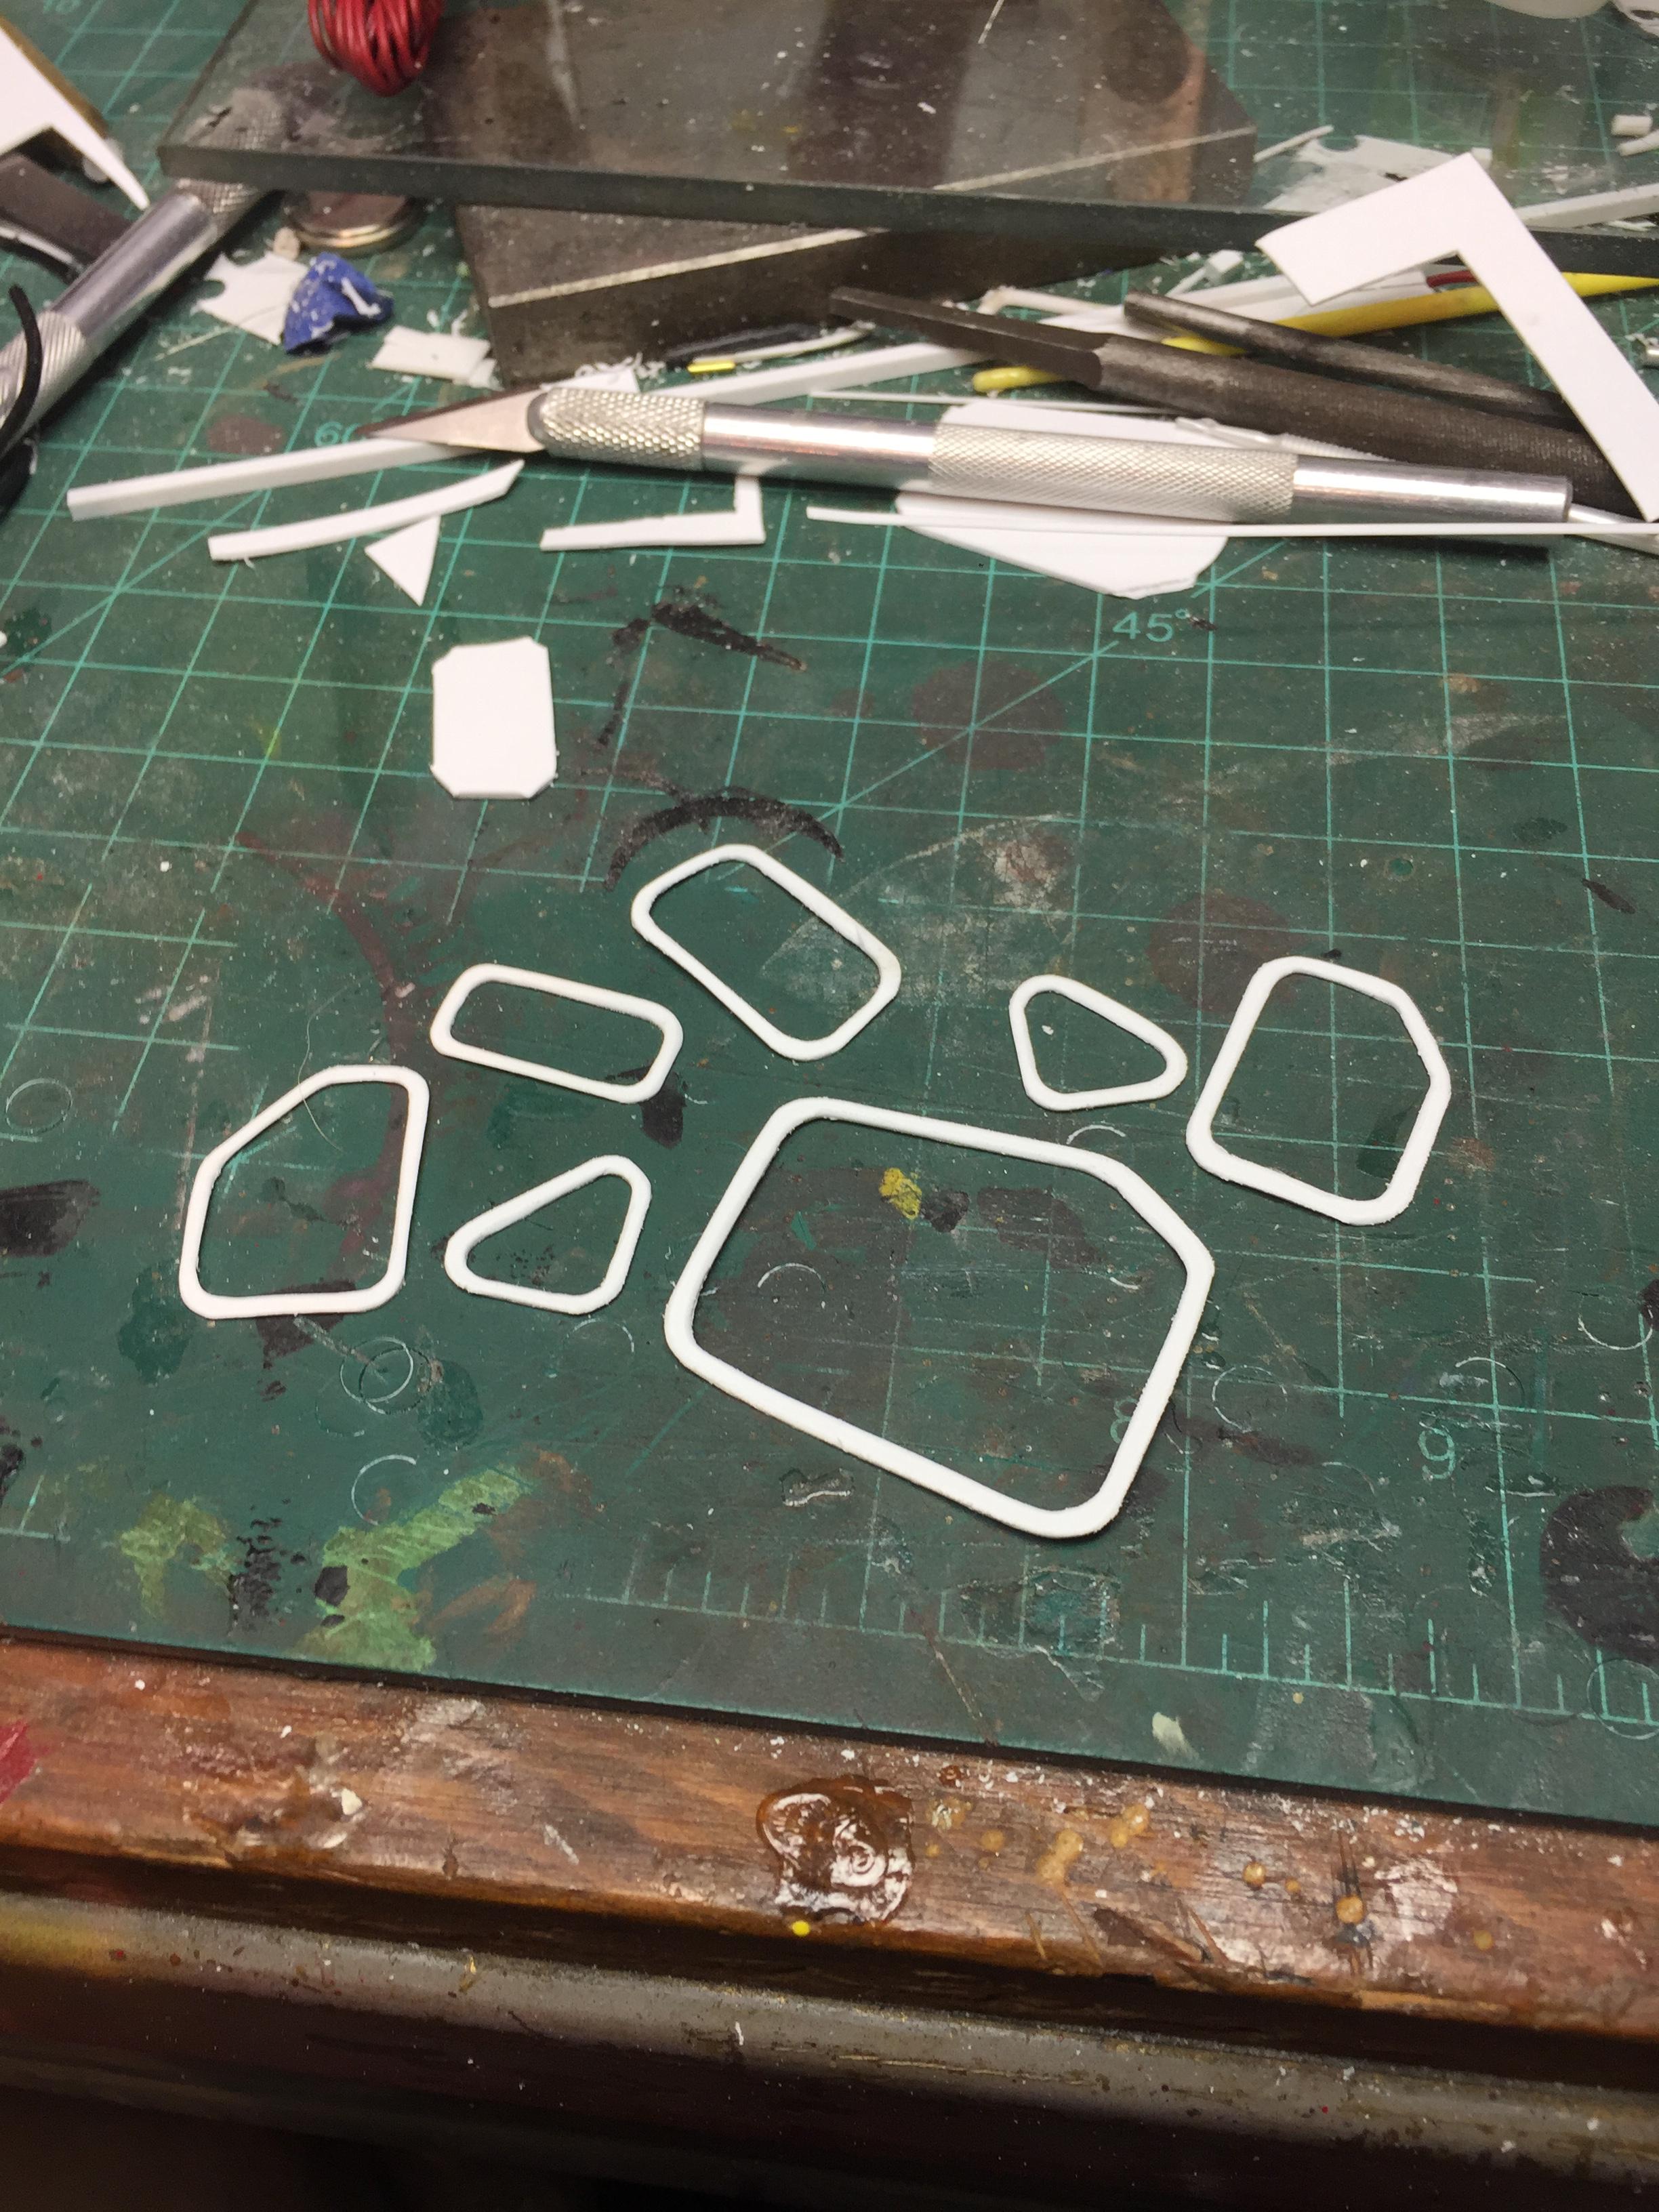
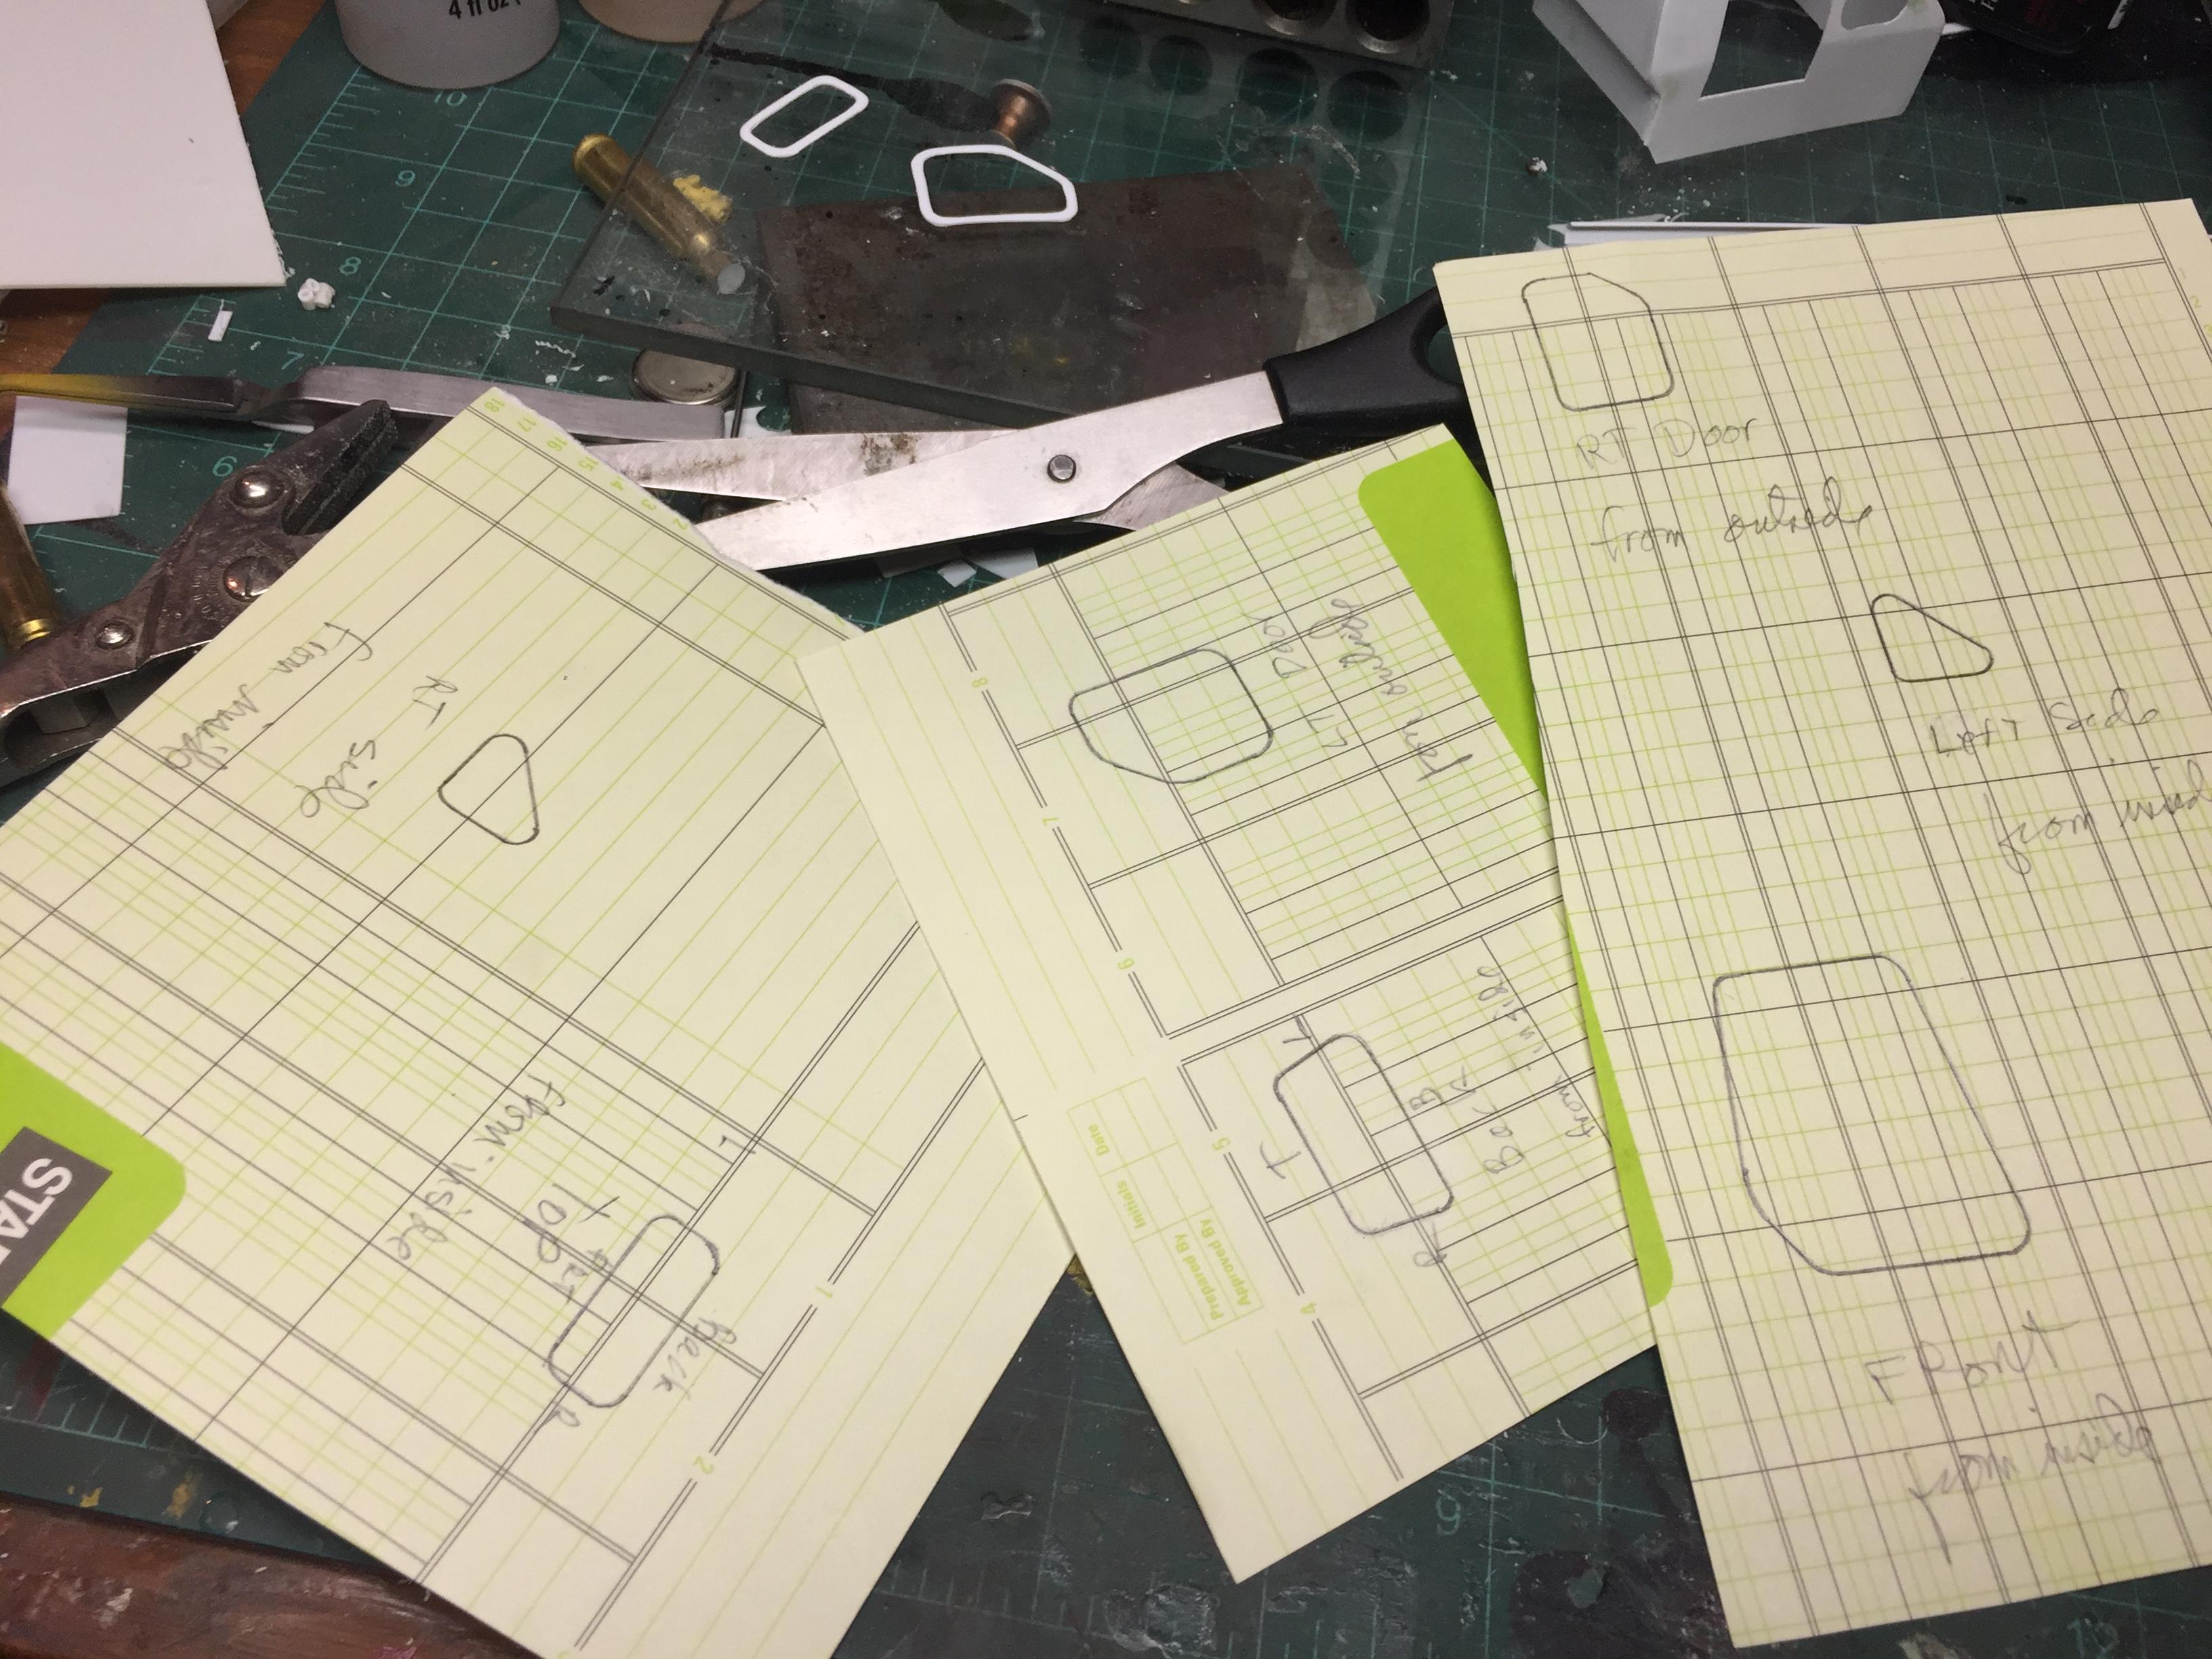
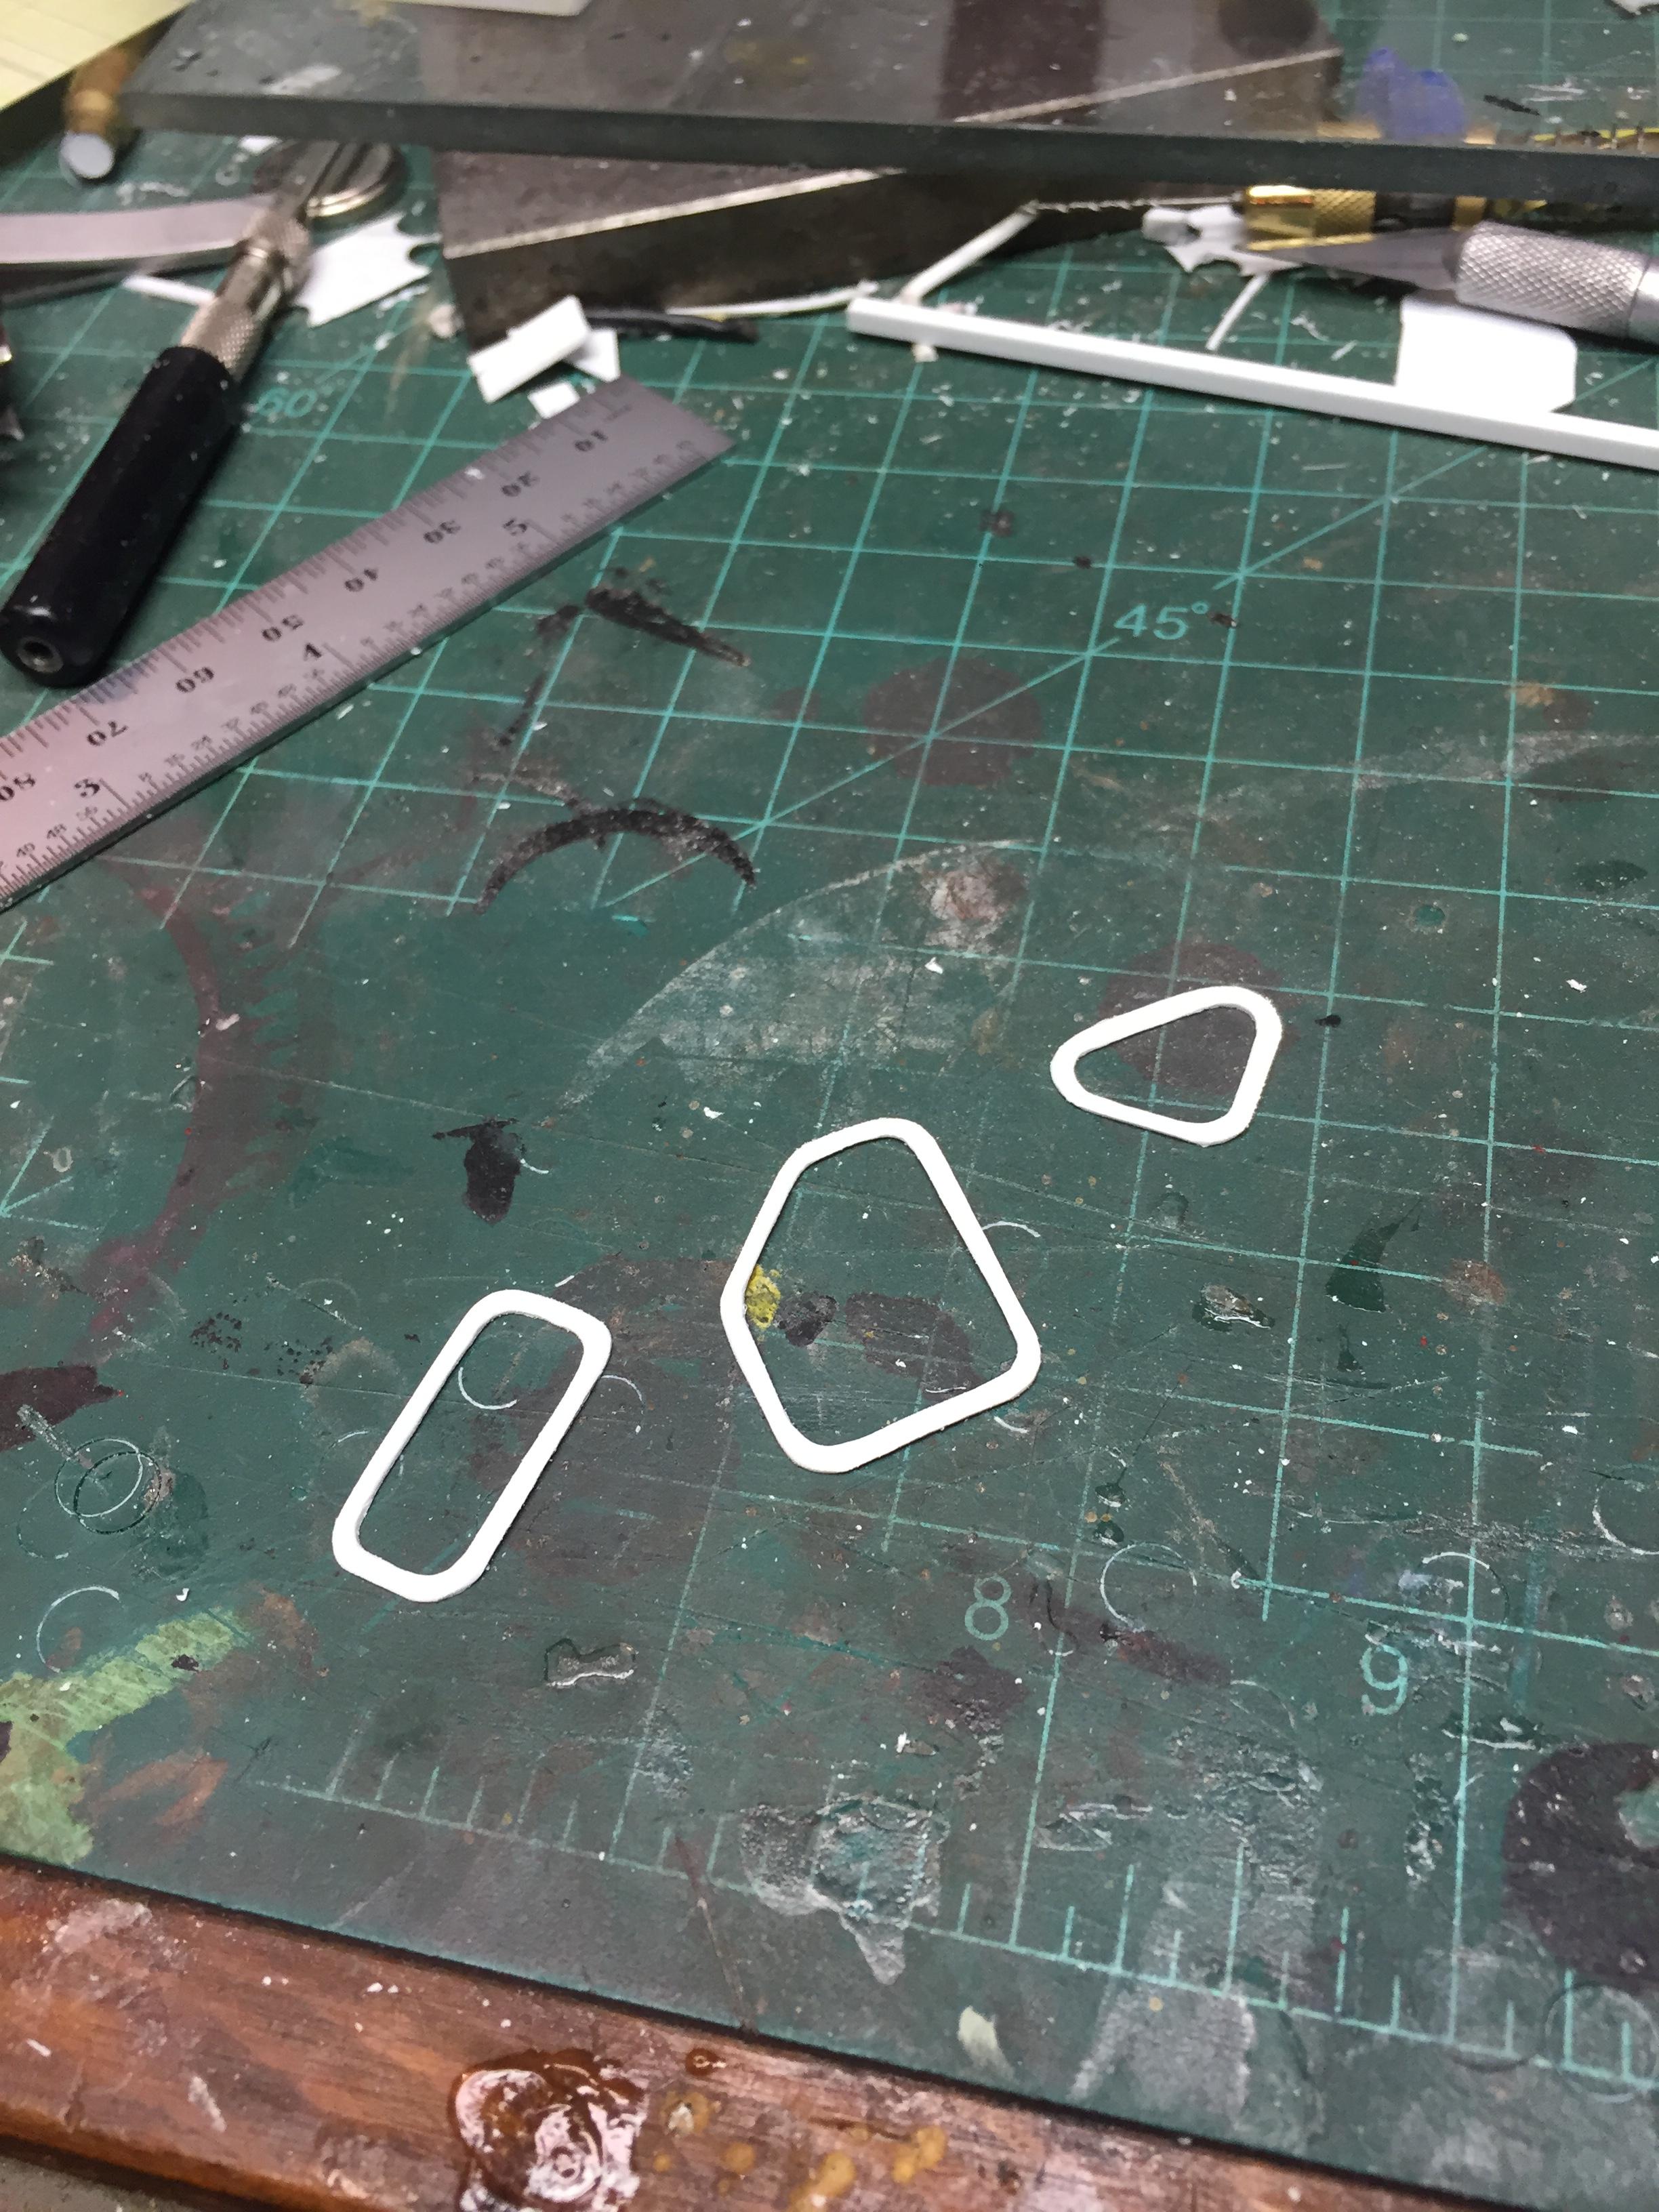
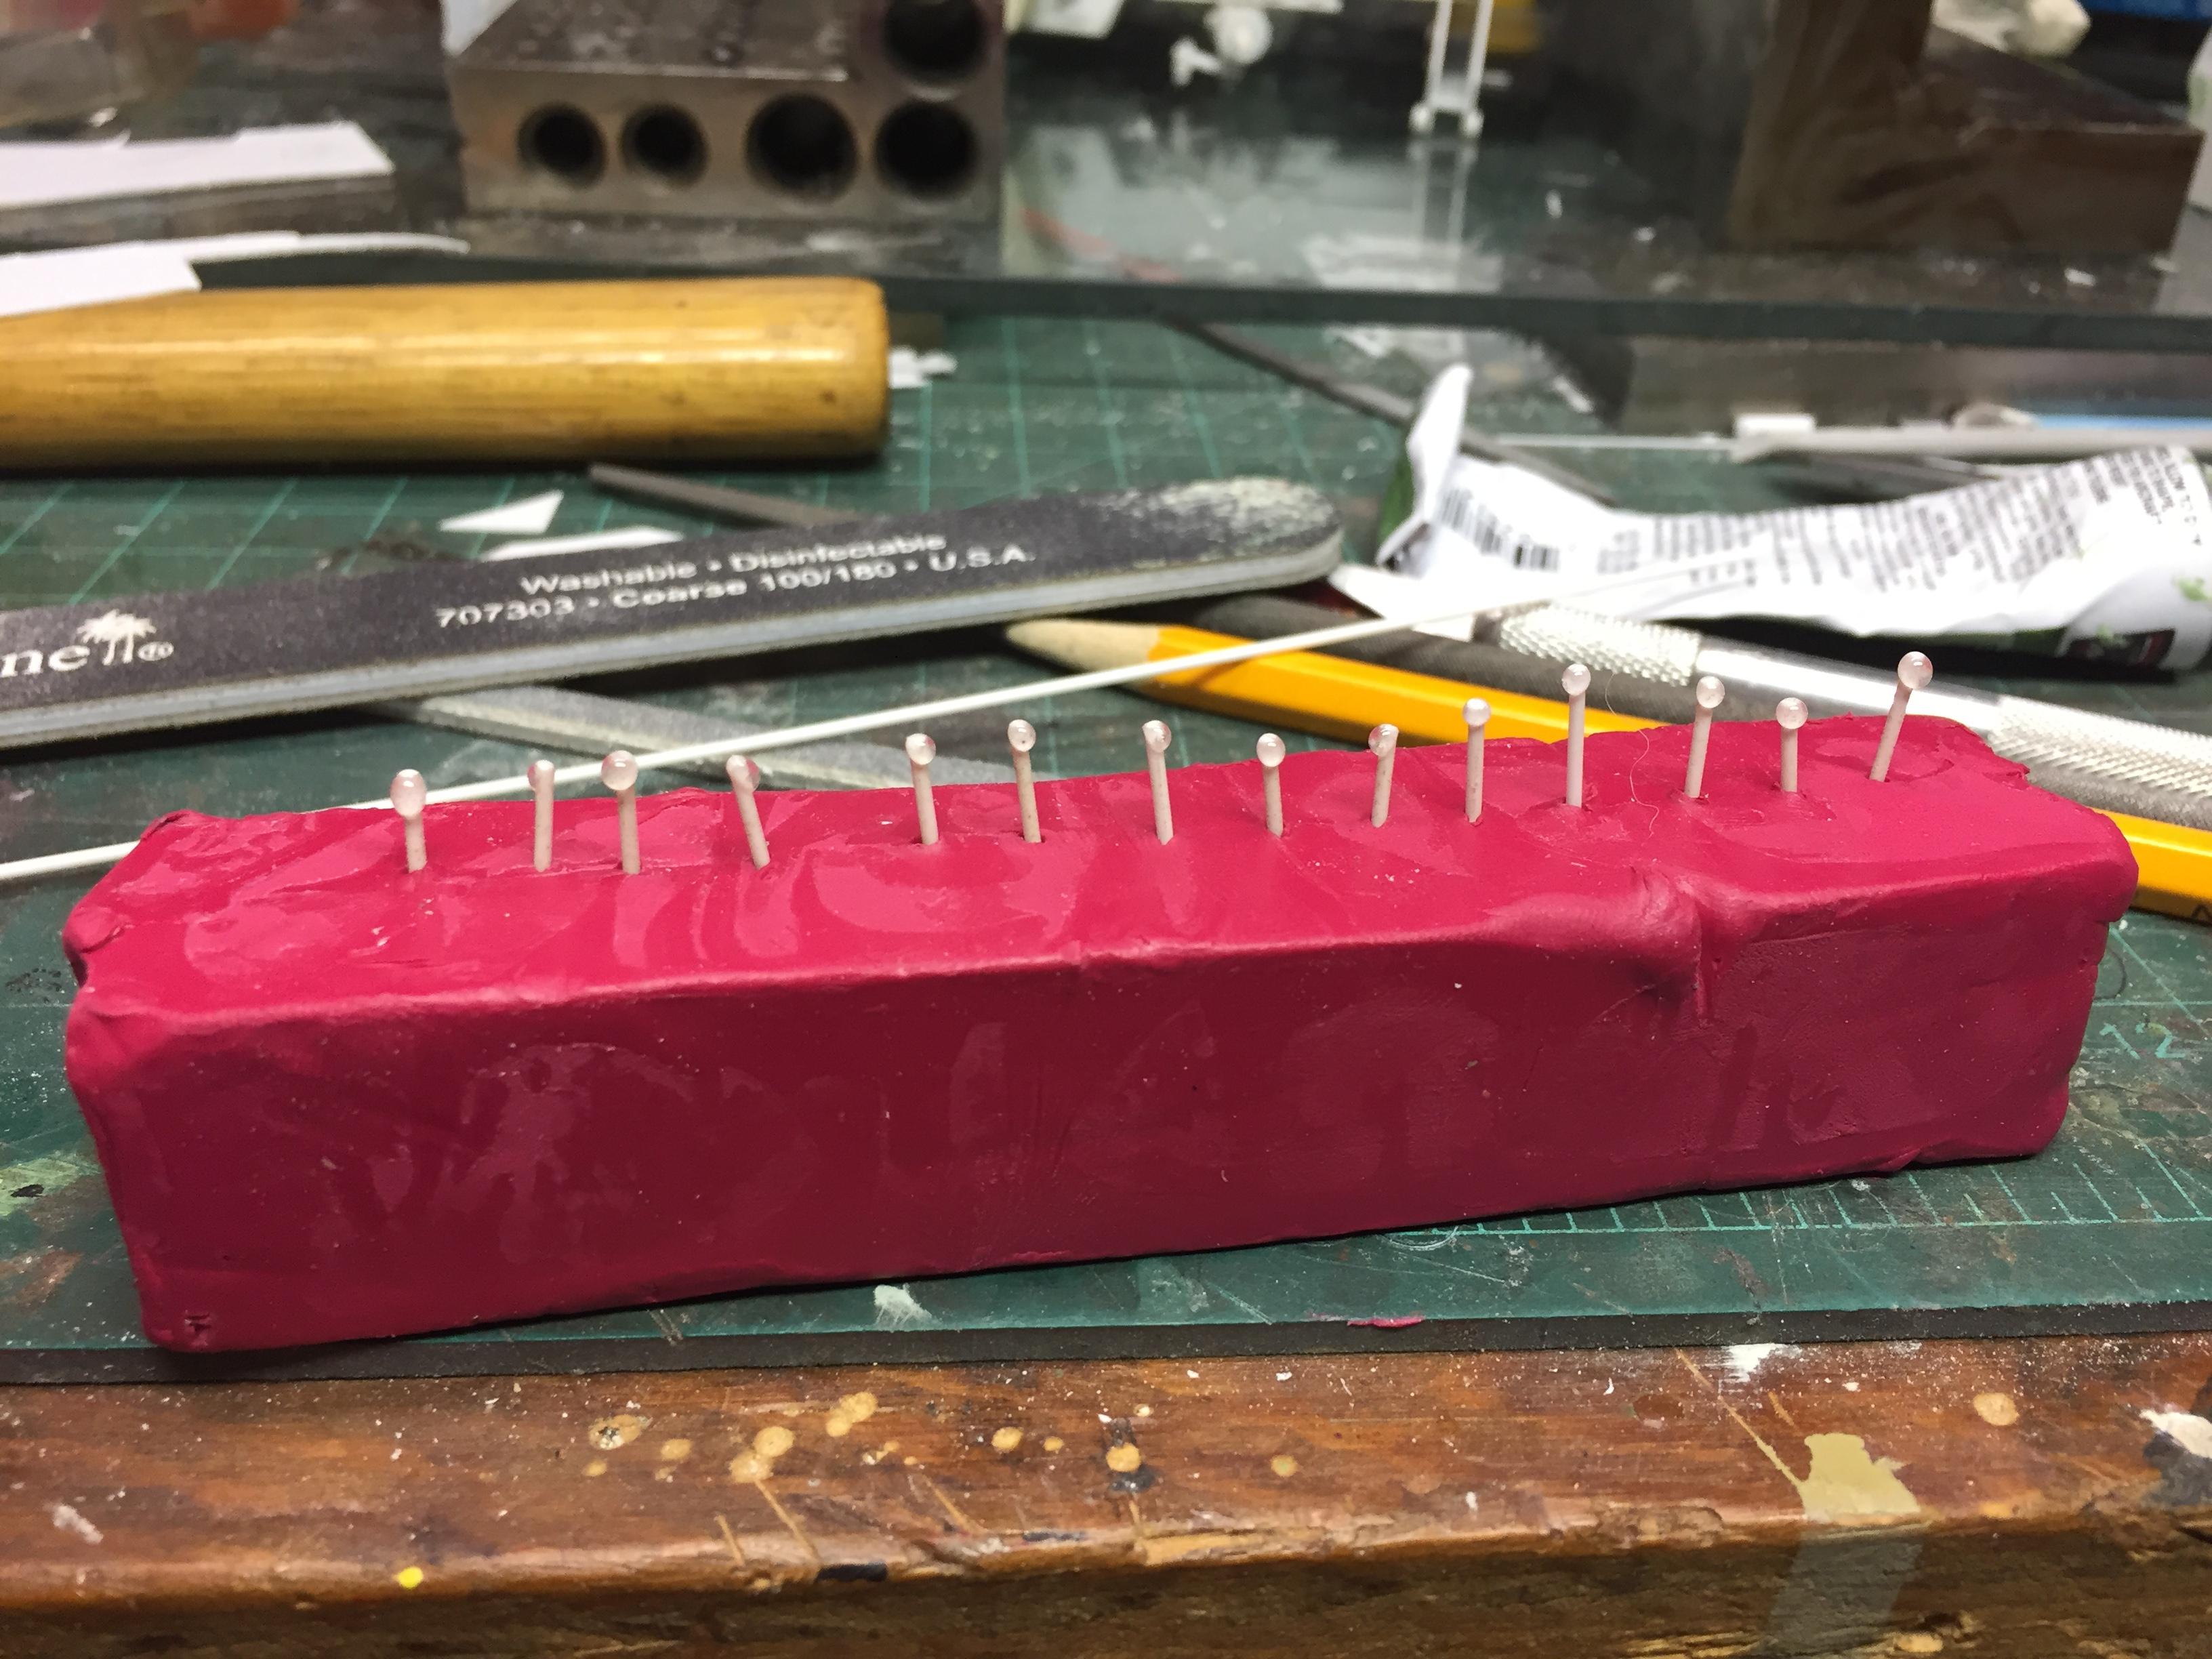
Started making the window gaskets tonight. Got three of the seven done which is about all my hands can take in one session, but they are exactly what I hoped for. Charlie, (Chariots Of Fire), gave a great tutorial on how to make them, and I kind of modified the method a bit. I made a template from the window opening on card stock. The I cut it out smaller than the opening, transferred it to .030 styrene, cut the opening, and then cut the whole thing out as a gasket, larger than the template, resulting in a great gasket. I then rounded the edges. I plan on painting the cab, painting the gaskets black and then attaching them with CA cement to the opening, and then attaching the glass from behind. So far so good! This was the part of this build that had me most concerned, but I think it's going to be great. And a TREMENDOUS shoutout of thanks to Charlie!
-
1950 Chevrolet 3100
redneckrigger replied to landman's topic in WIP: Model Trucks: Pickups, Vans, SUVs, Light Commercial
Man, you keep those guys in your shop BUSY! They do nice work! -
Looking great!
-
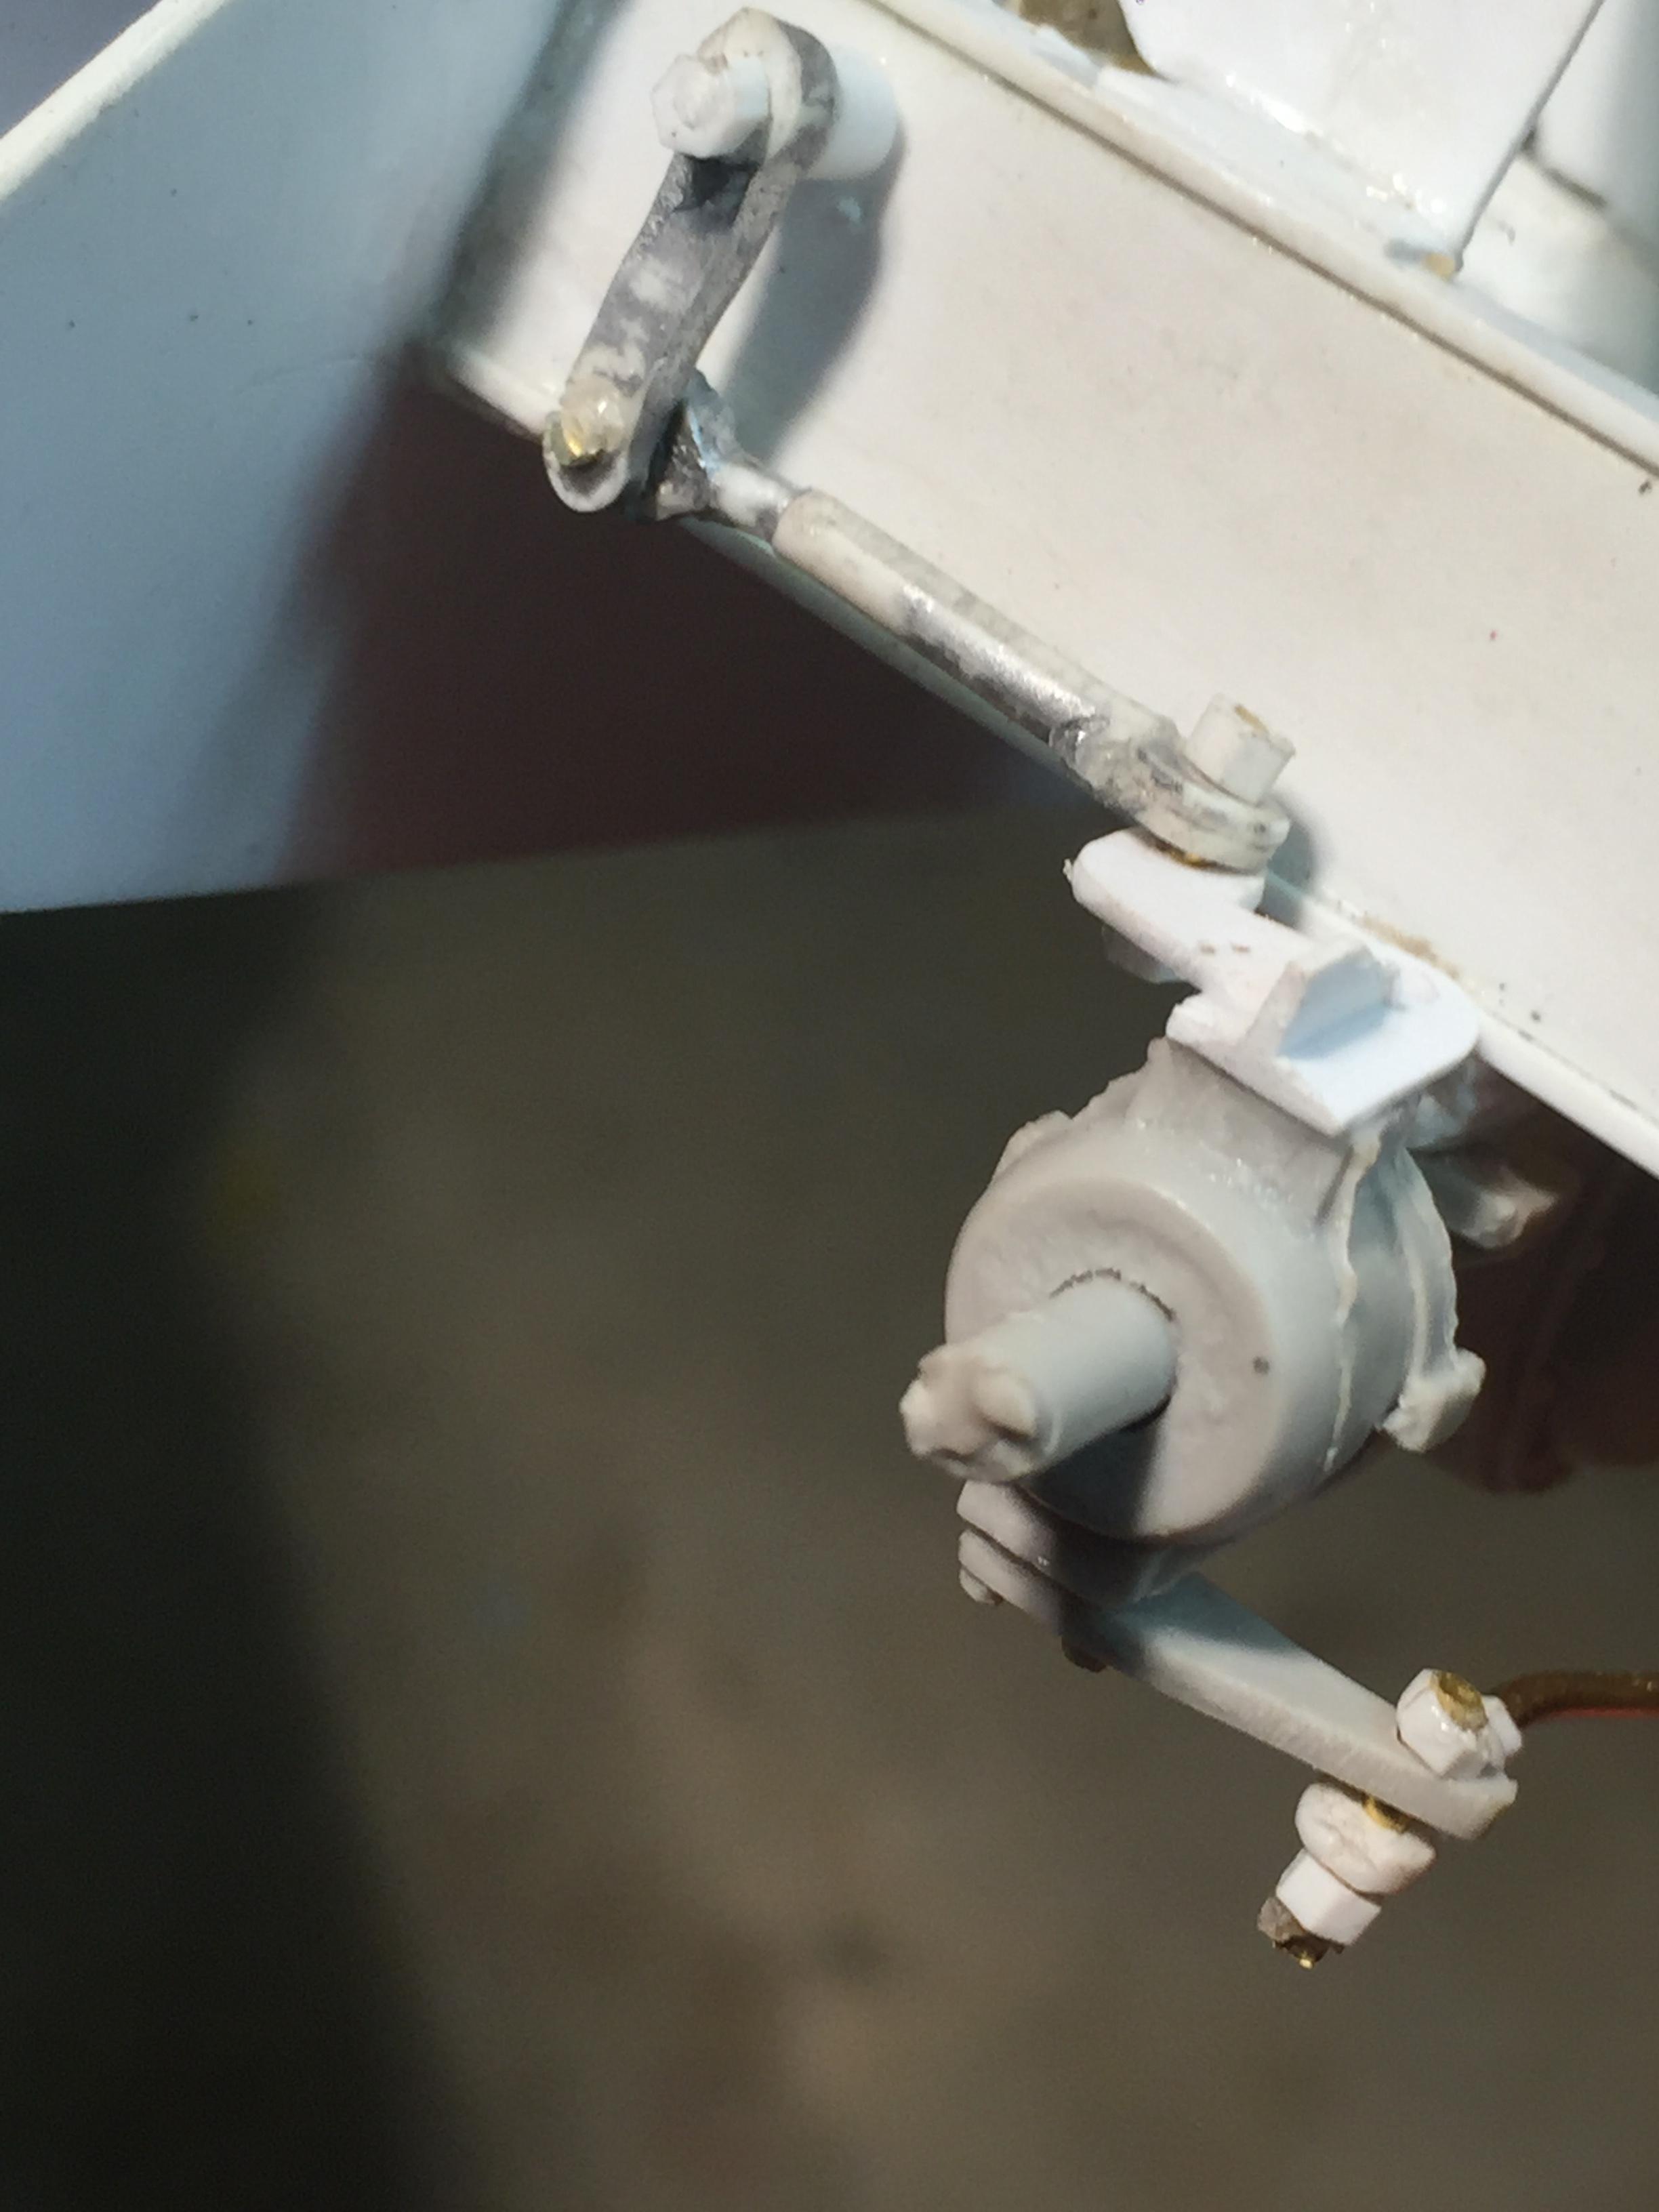
There is a drag link to the front axle, shown in one of the previous posts, as it has a mechanical link to the steering wheels. It also has hydraulic steering. The rear axle is either locked or allowed to steer hydraulically. None of the steering cylinders have been installed yet. It can do conventional four wheel steer or crab style steering.
-
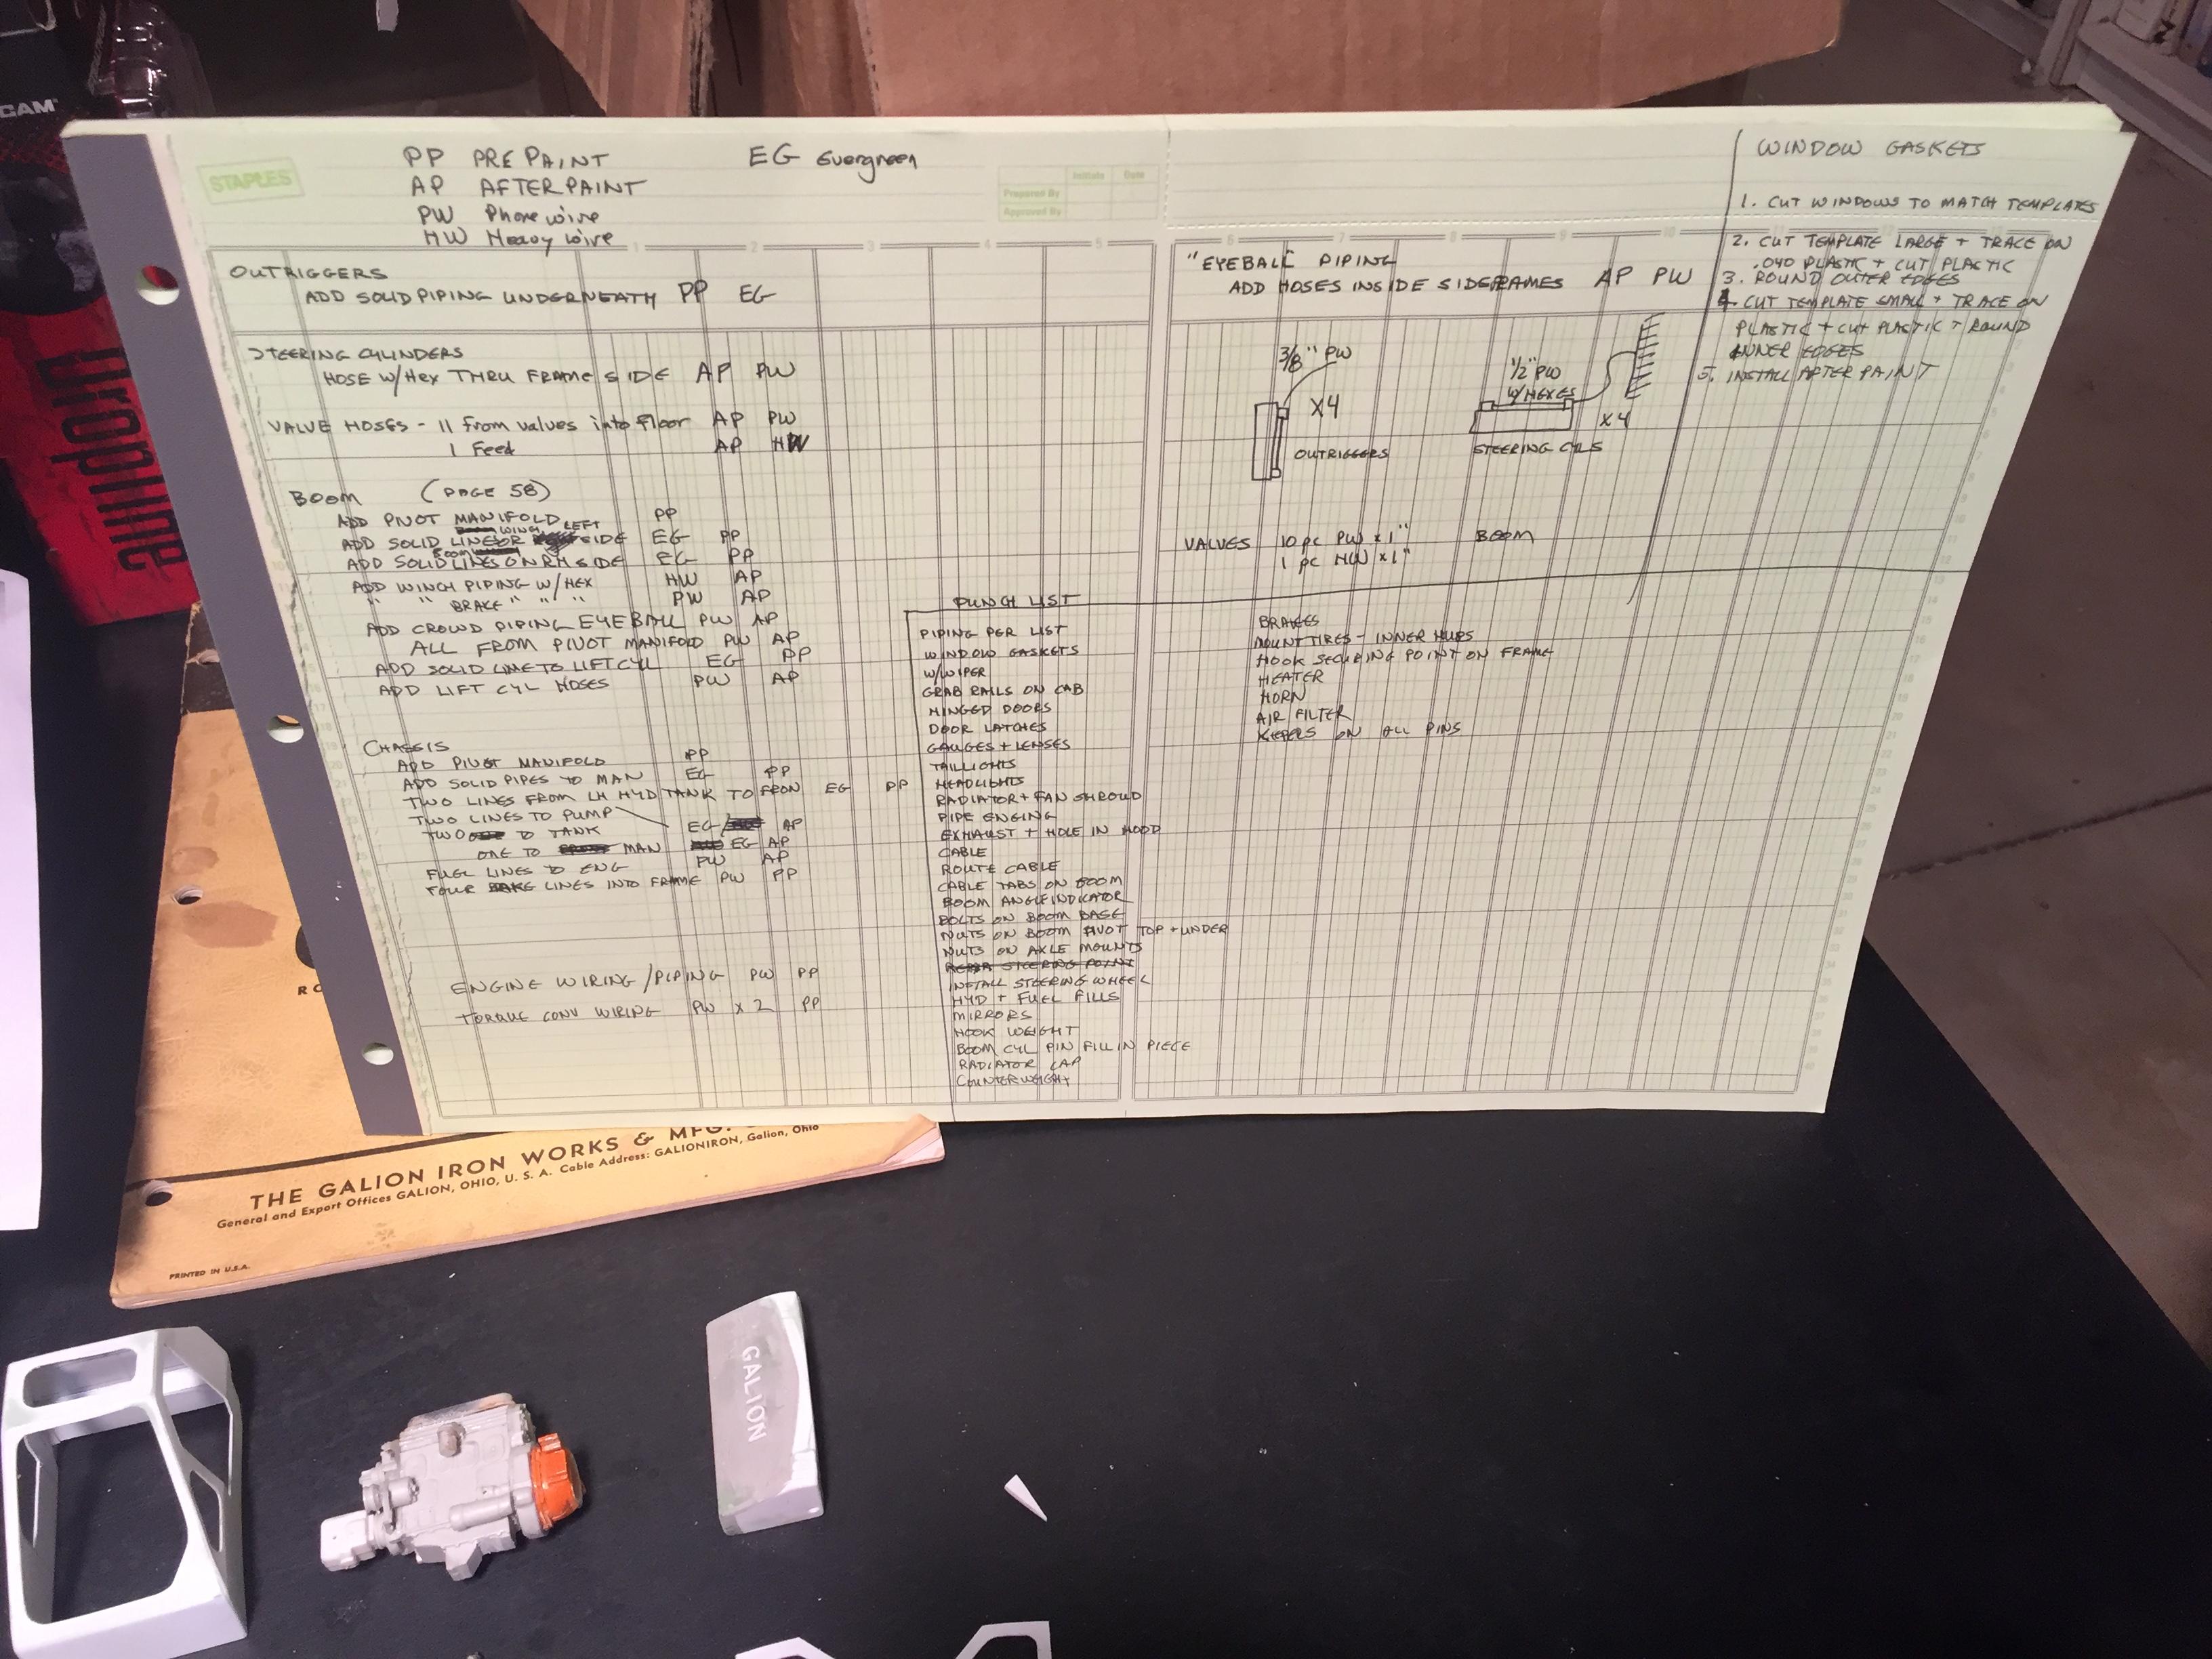
Thanks Dennis......................I used work for a very large construction company and used to run the shop where we rebuilt heavy equipment in the winter time. From rust repairs to dump body rebuilds and complete teardowns and new cabs on Mack trucks to repairing rolled over cranes and everything else in between. The best way I found to make sure everything got done in a timely manner and in order was a punch list. When I ran my own body shop we used the same method. I guess some things just can't be forgotten! And, even better, it works!
-
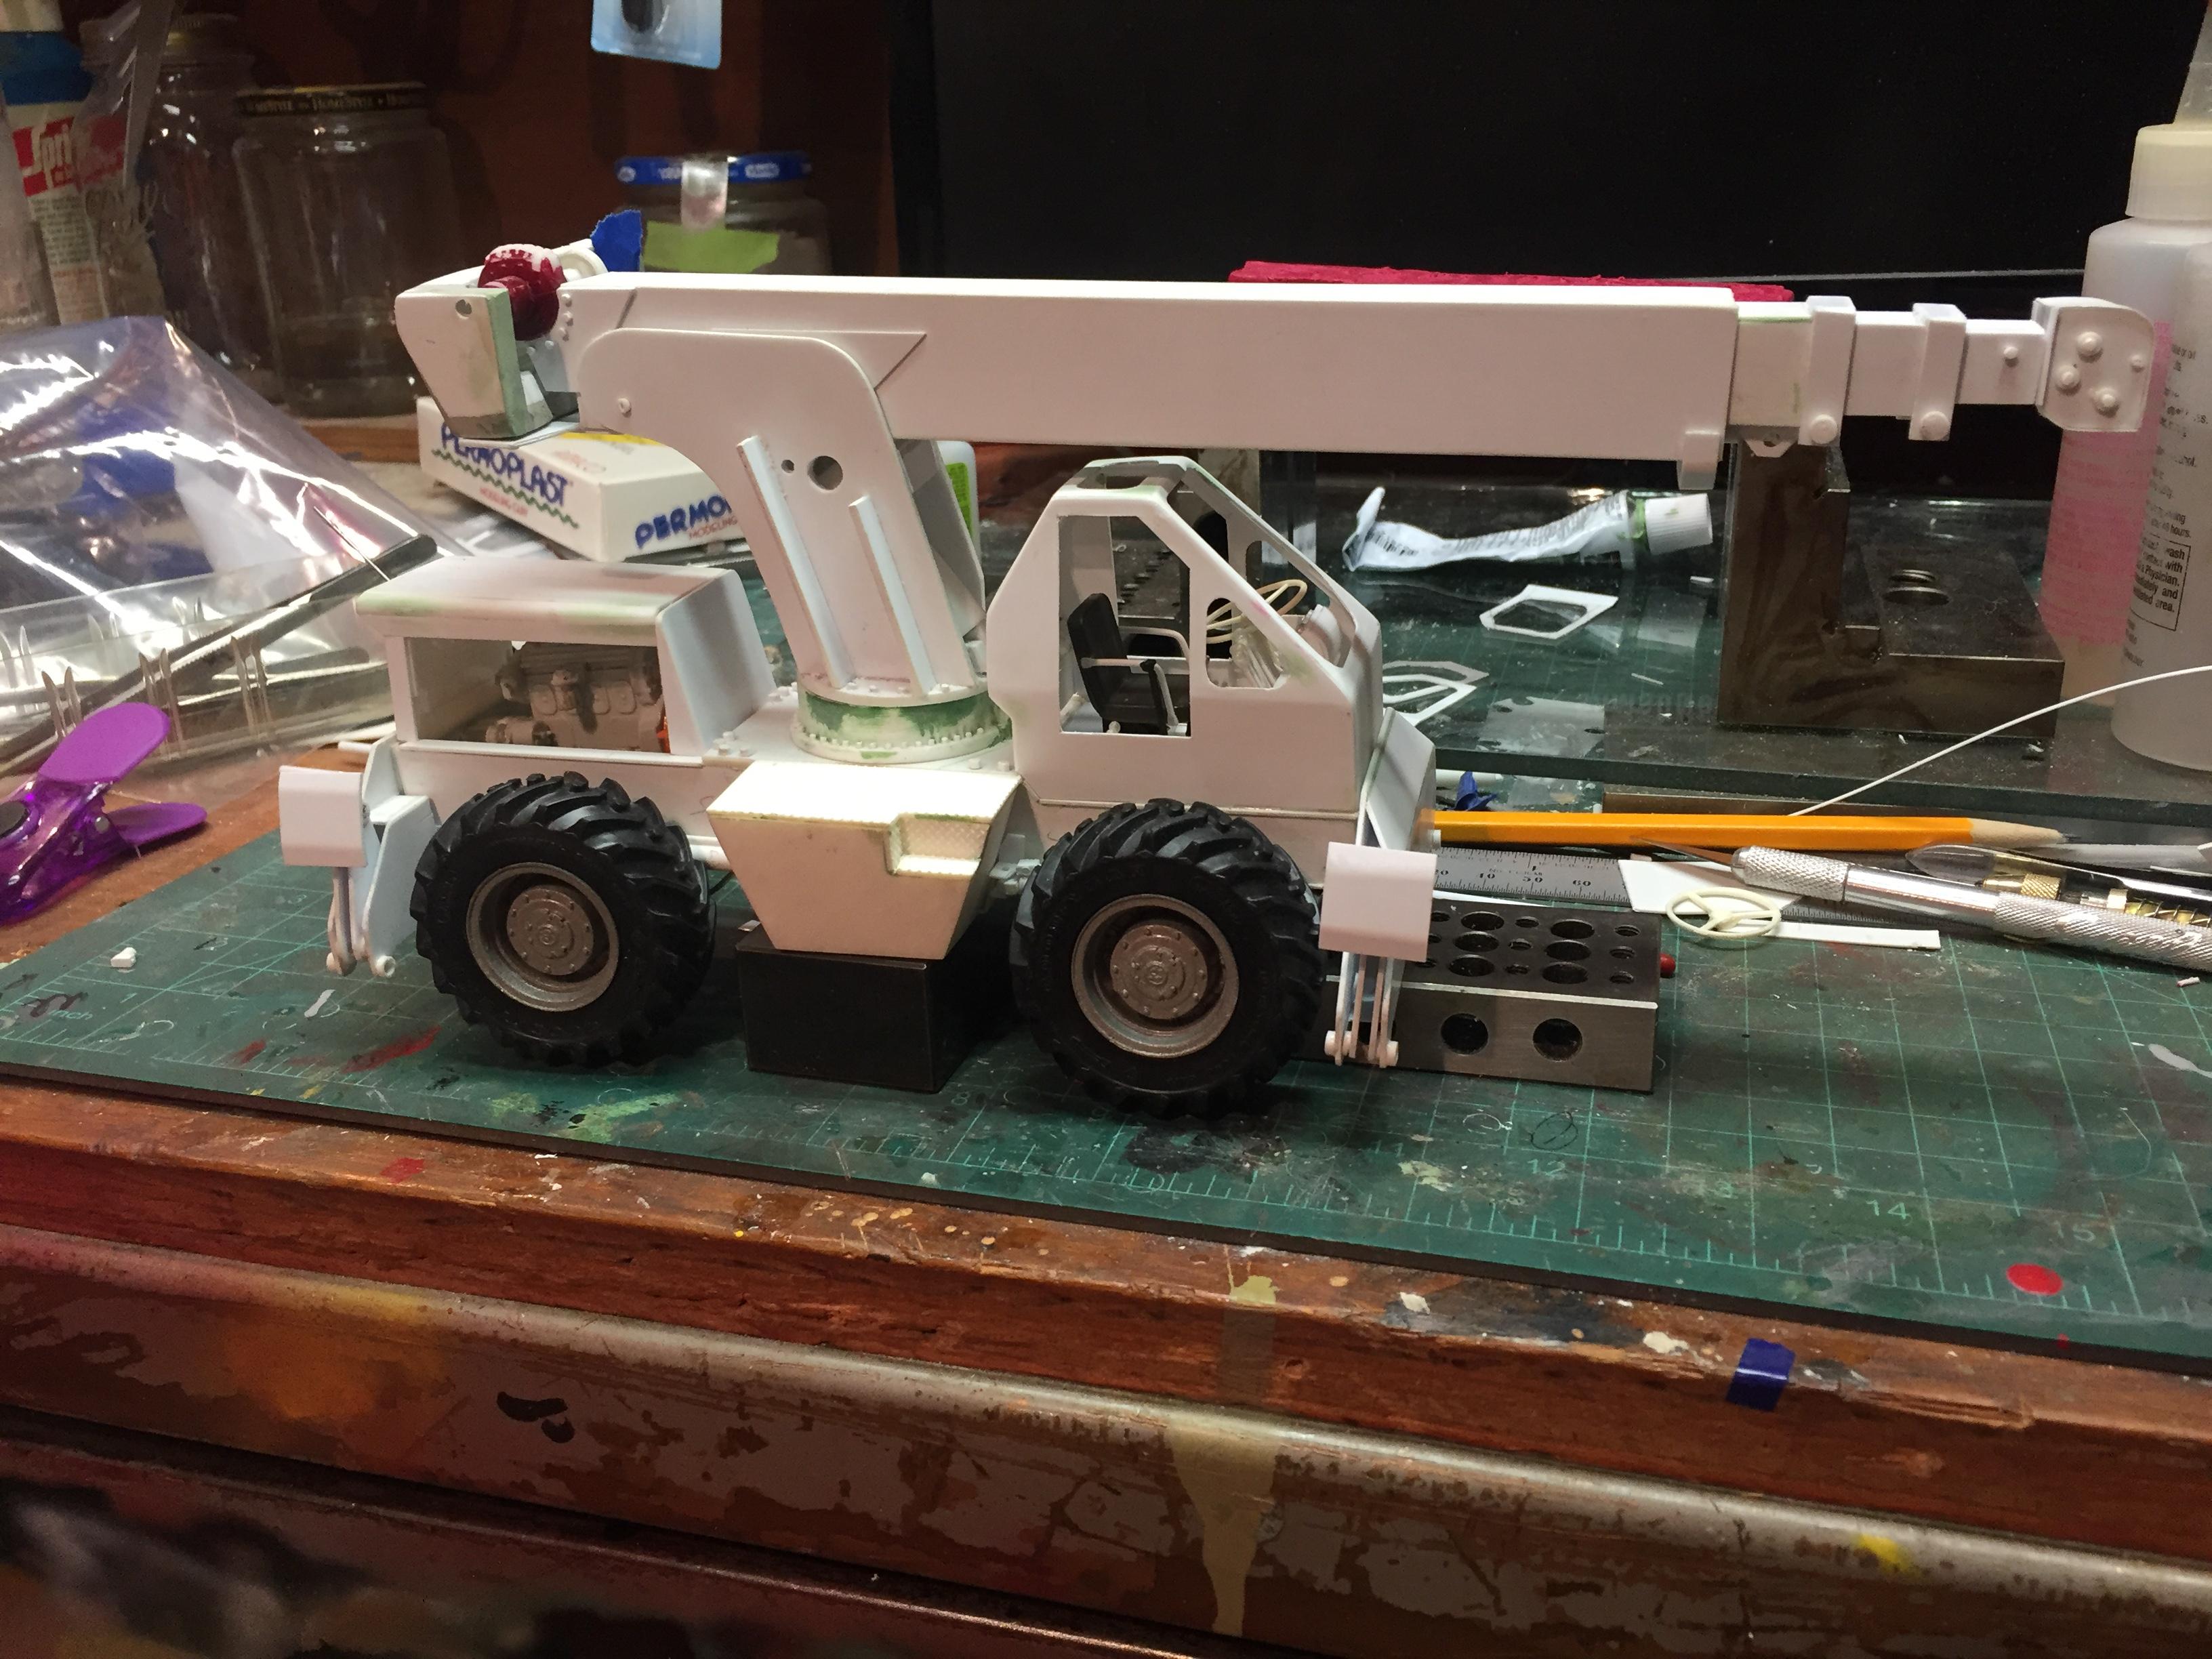
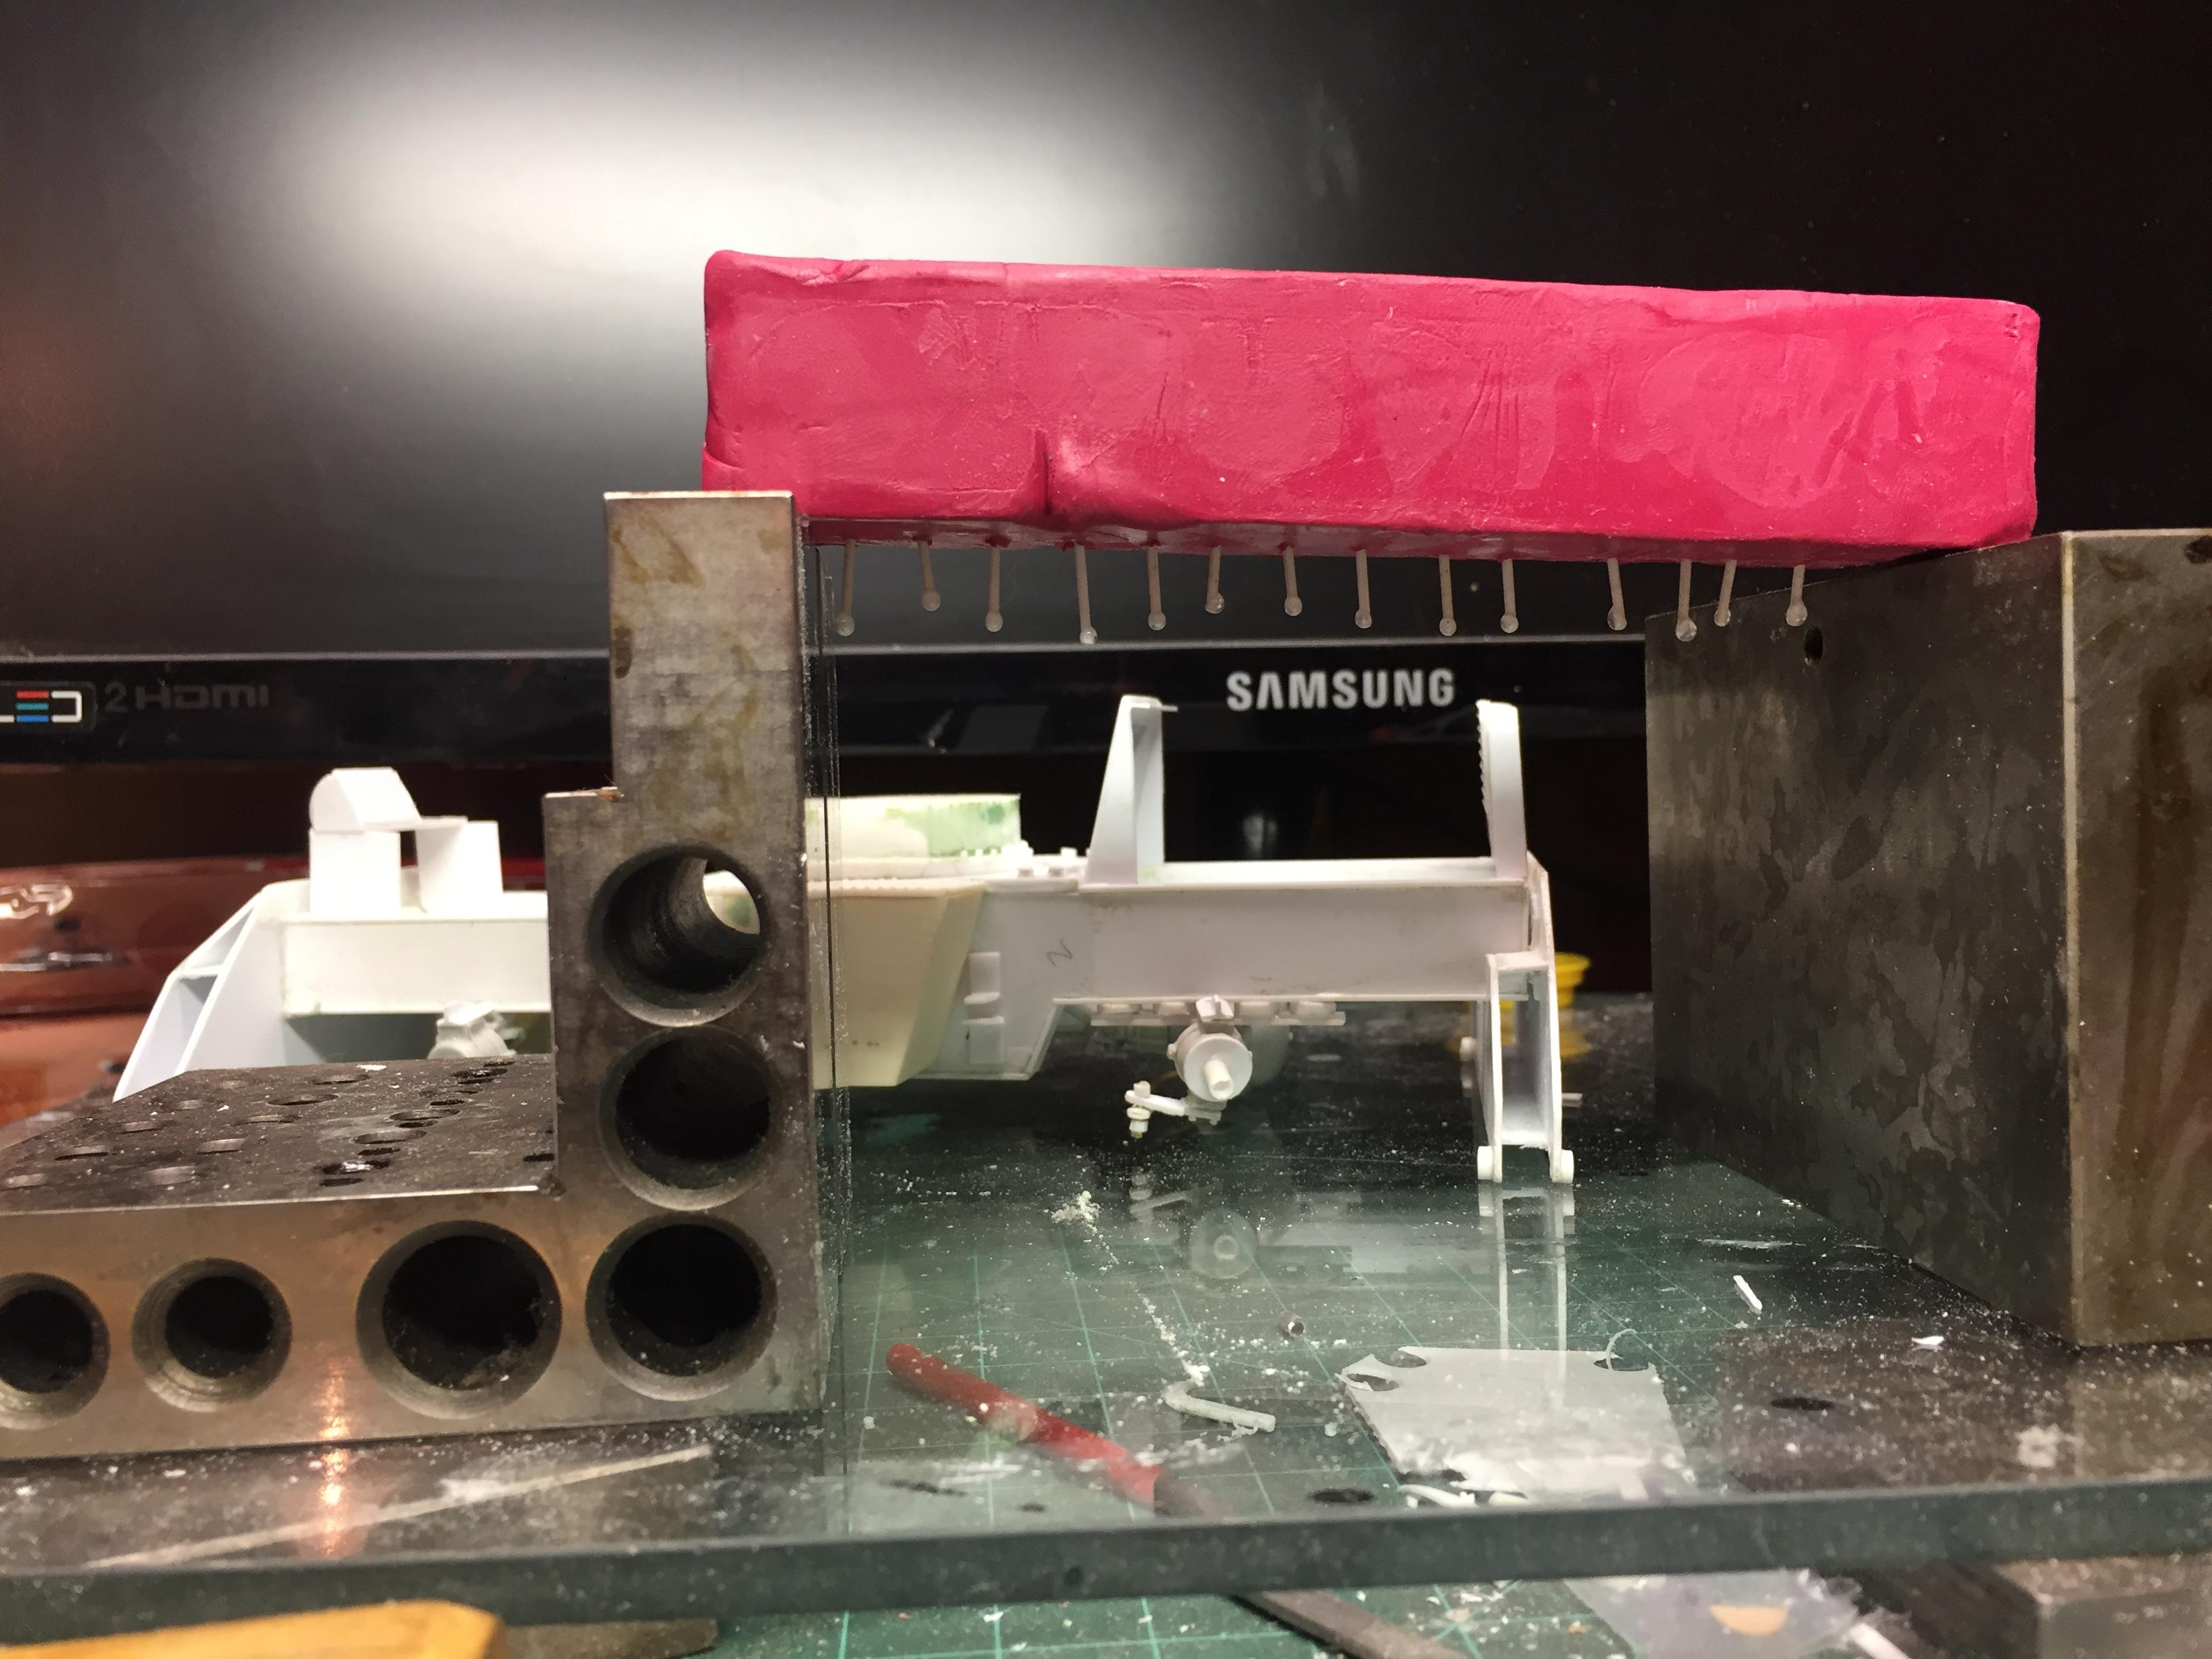
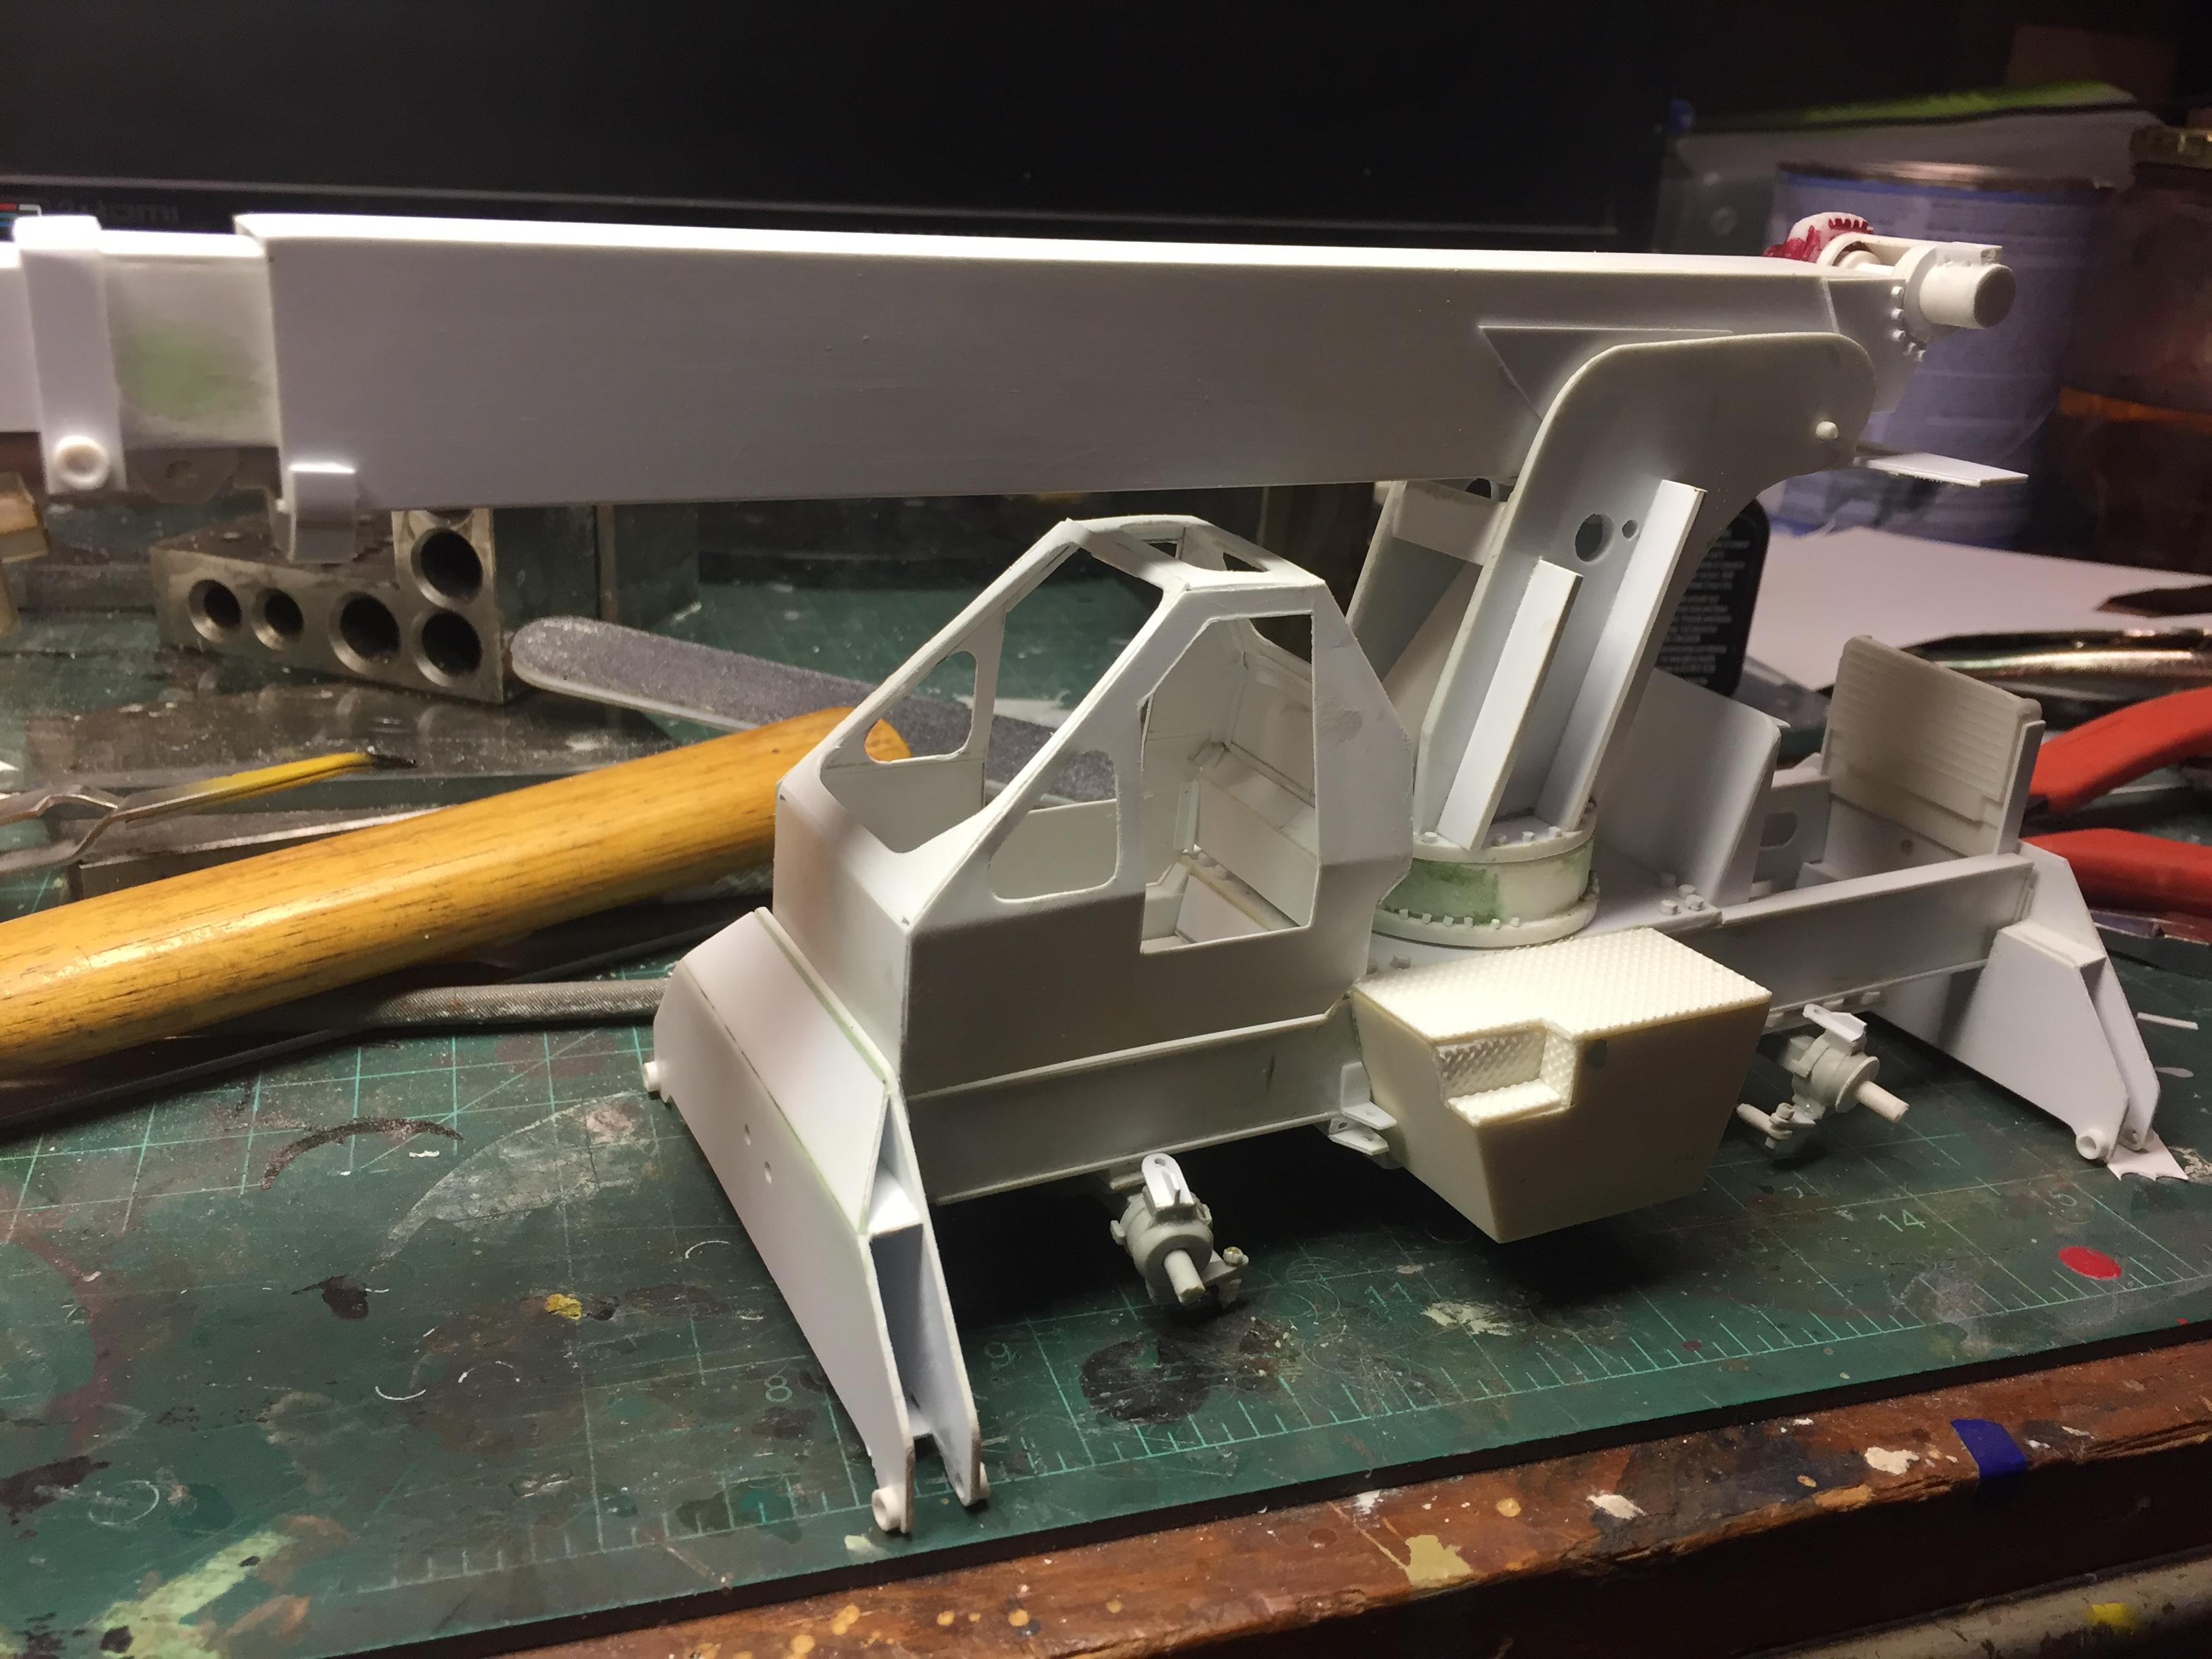
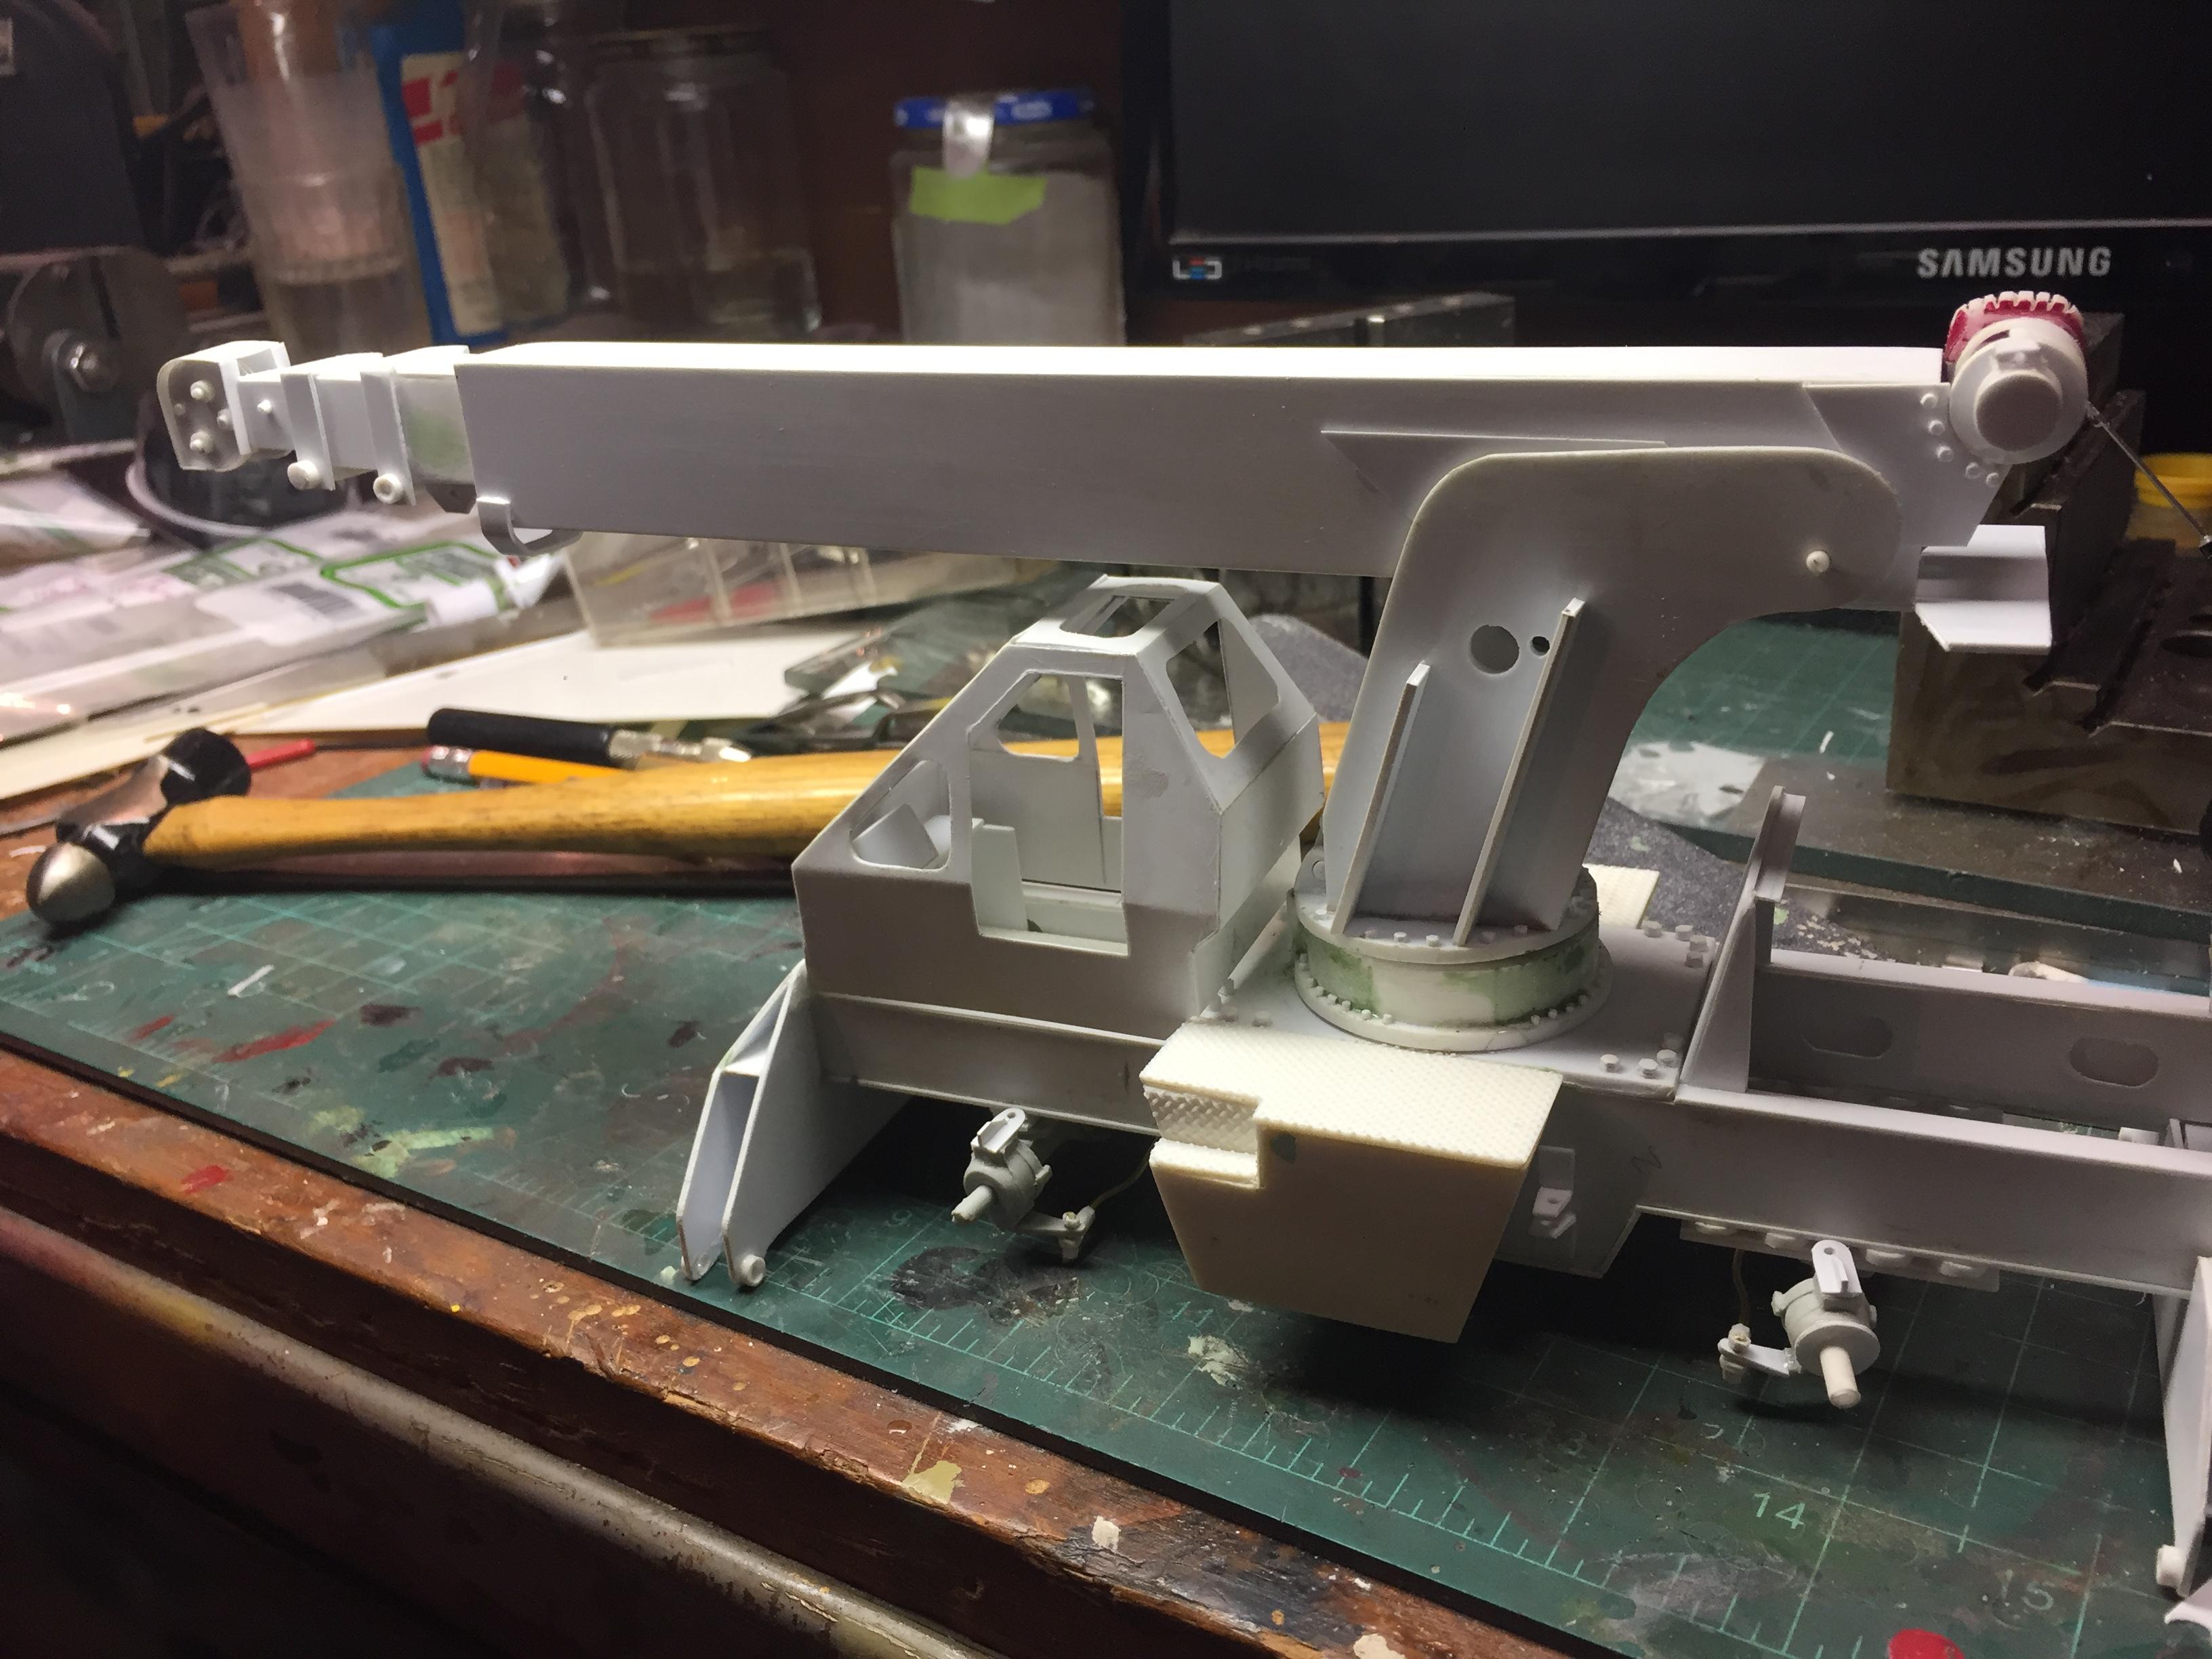
Installed the boom swing swivel joint and the hard piped portion of the hydraulics for the winch, winch brake and the crowd cylinders. All the rest of the piping will be flexible hose after paint. On to the cab window gaskets and door hinges and tons of small details seemingly everywhere, and then the power plant details, and wheels and then paint! On a roll now!
-
Paint codes galore
redneckrigger replied to Yahshu's topic in General Automotive Talk (Trucks and Cars)
Great reference! Thank you. -
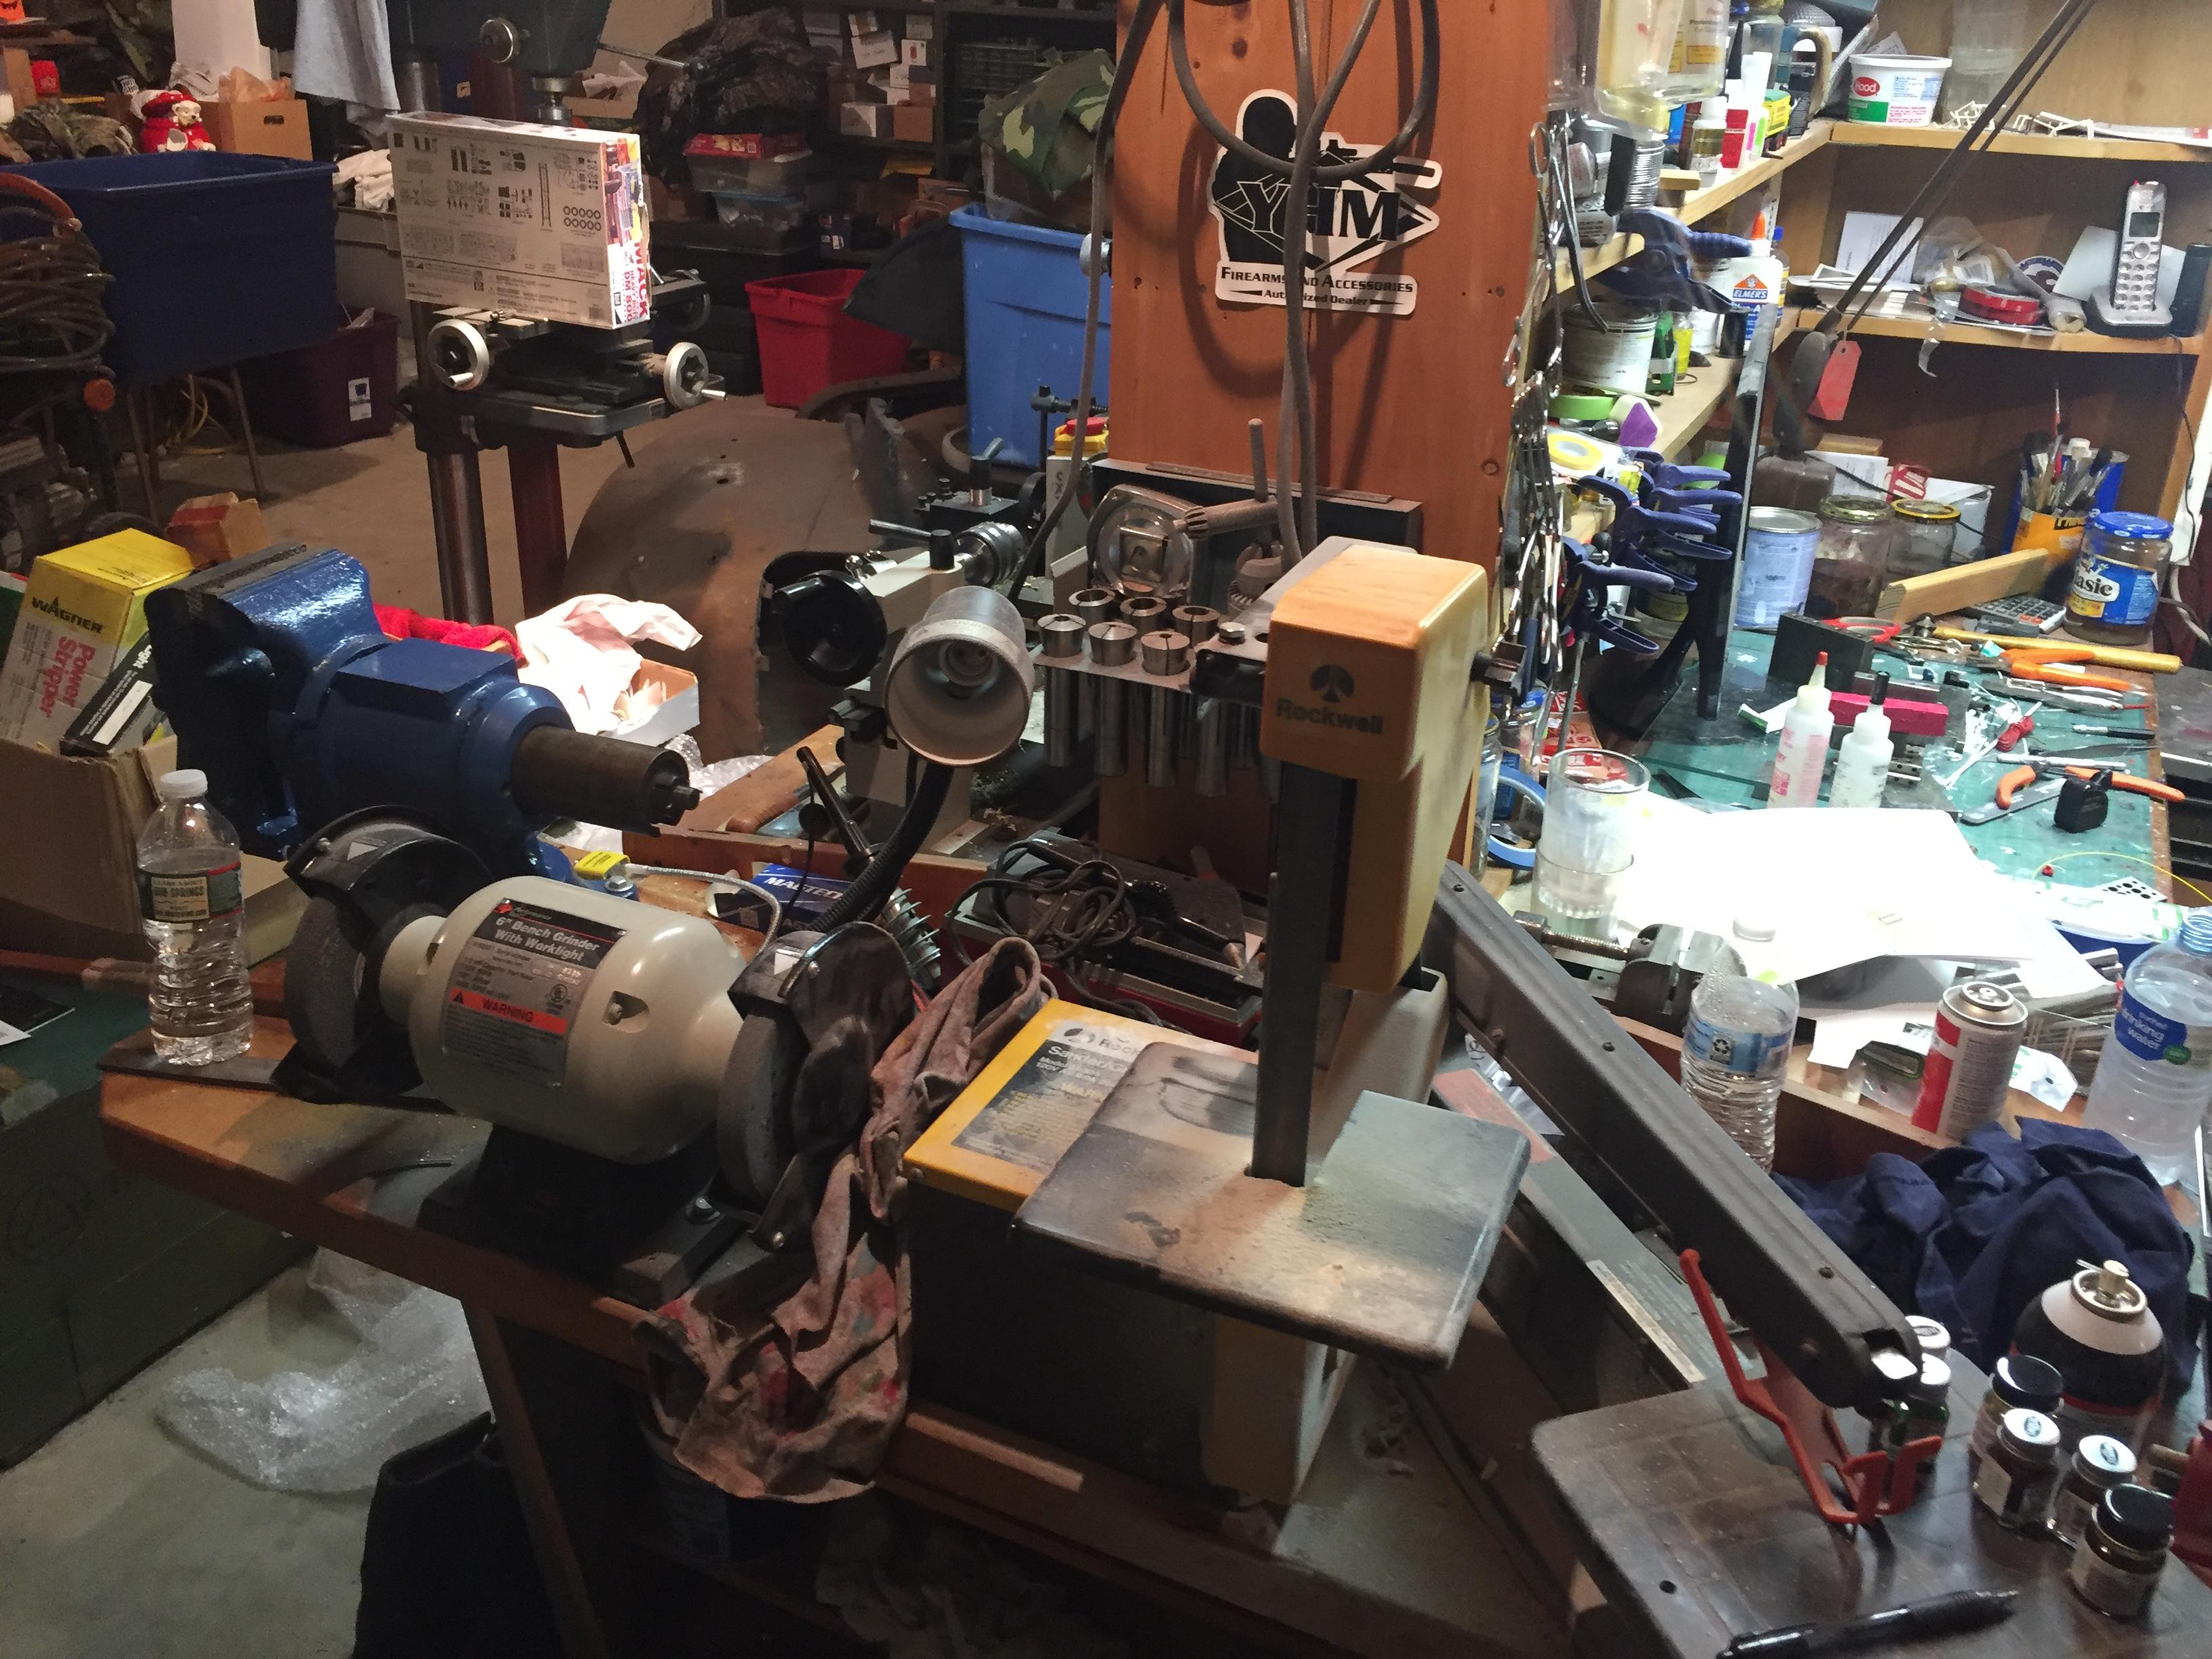
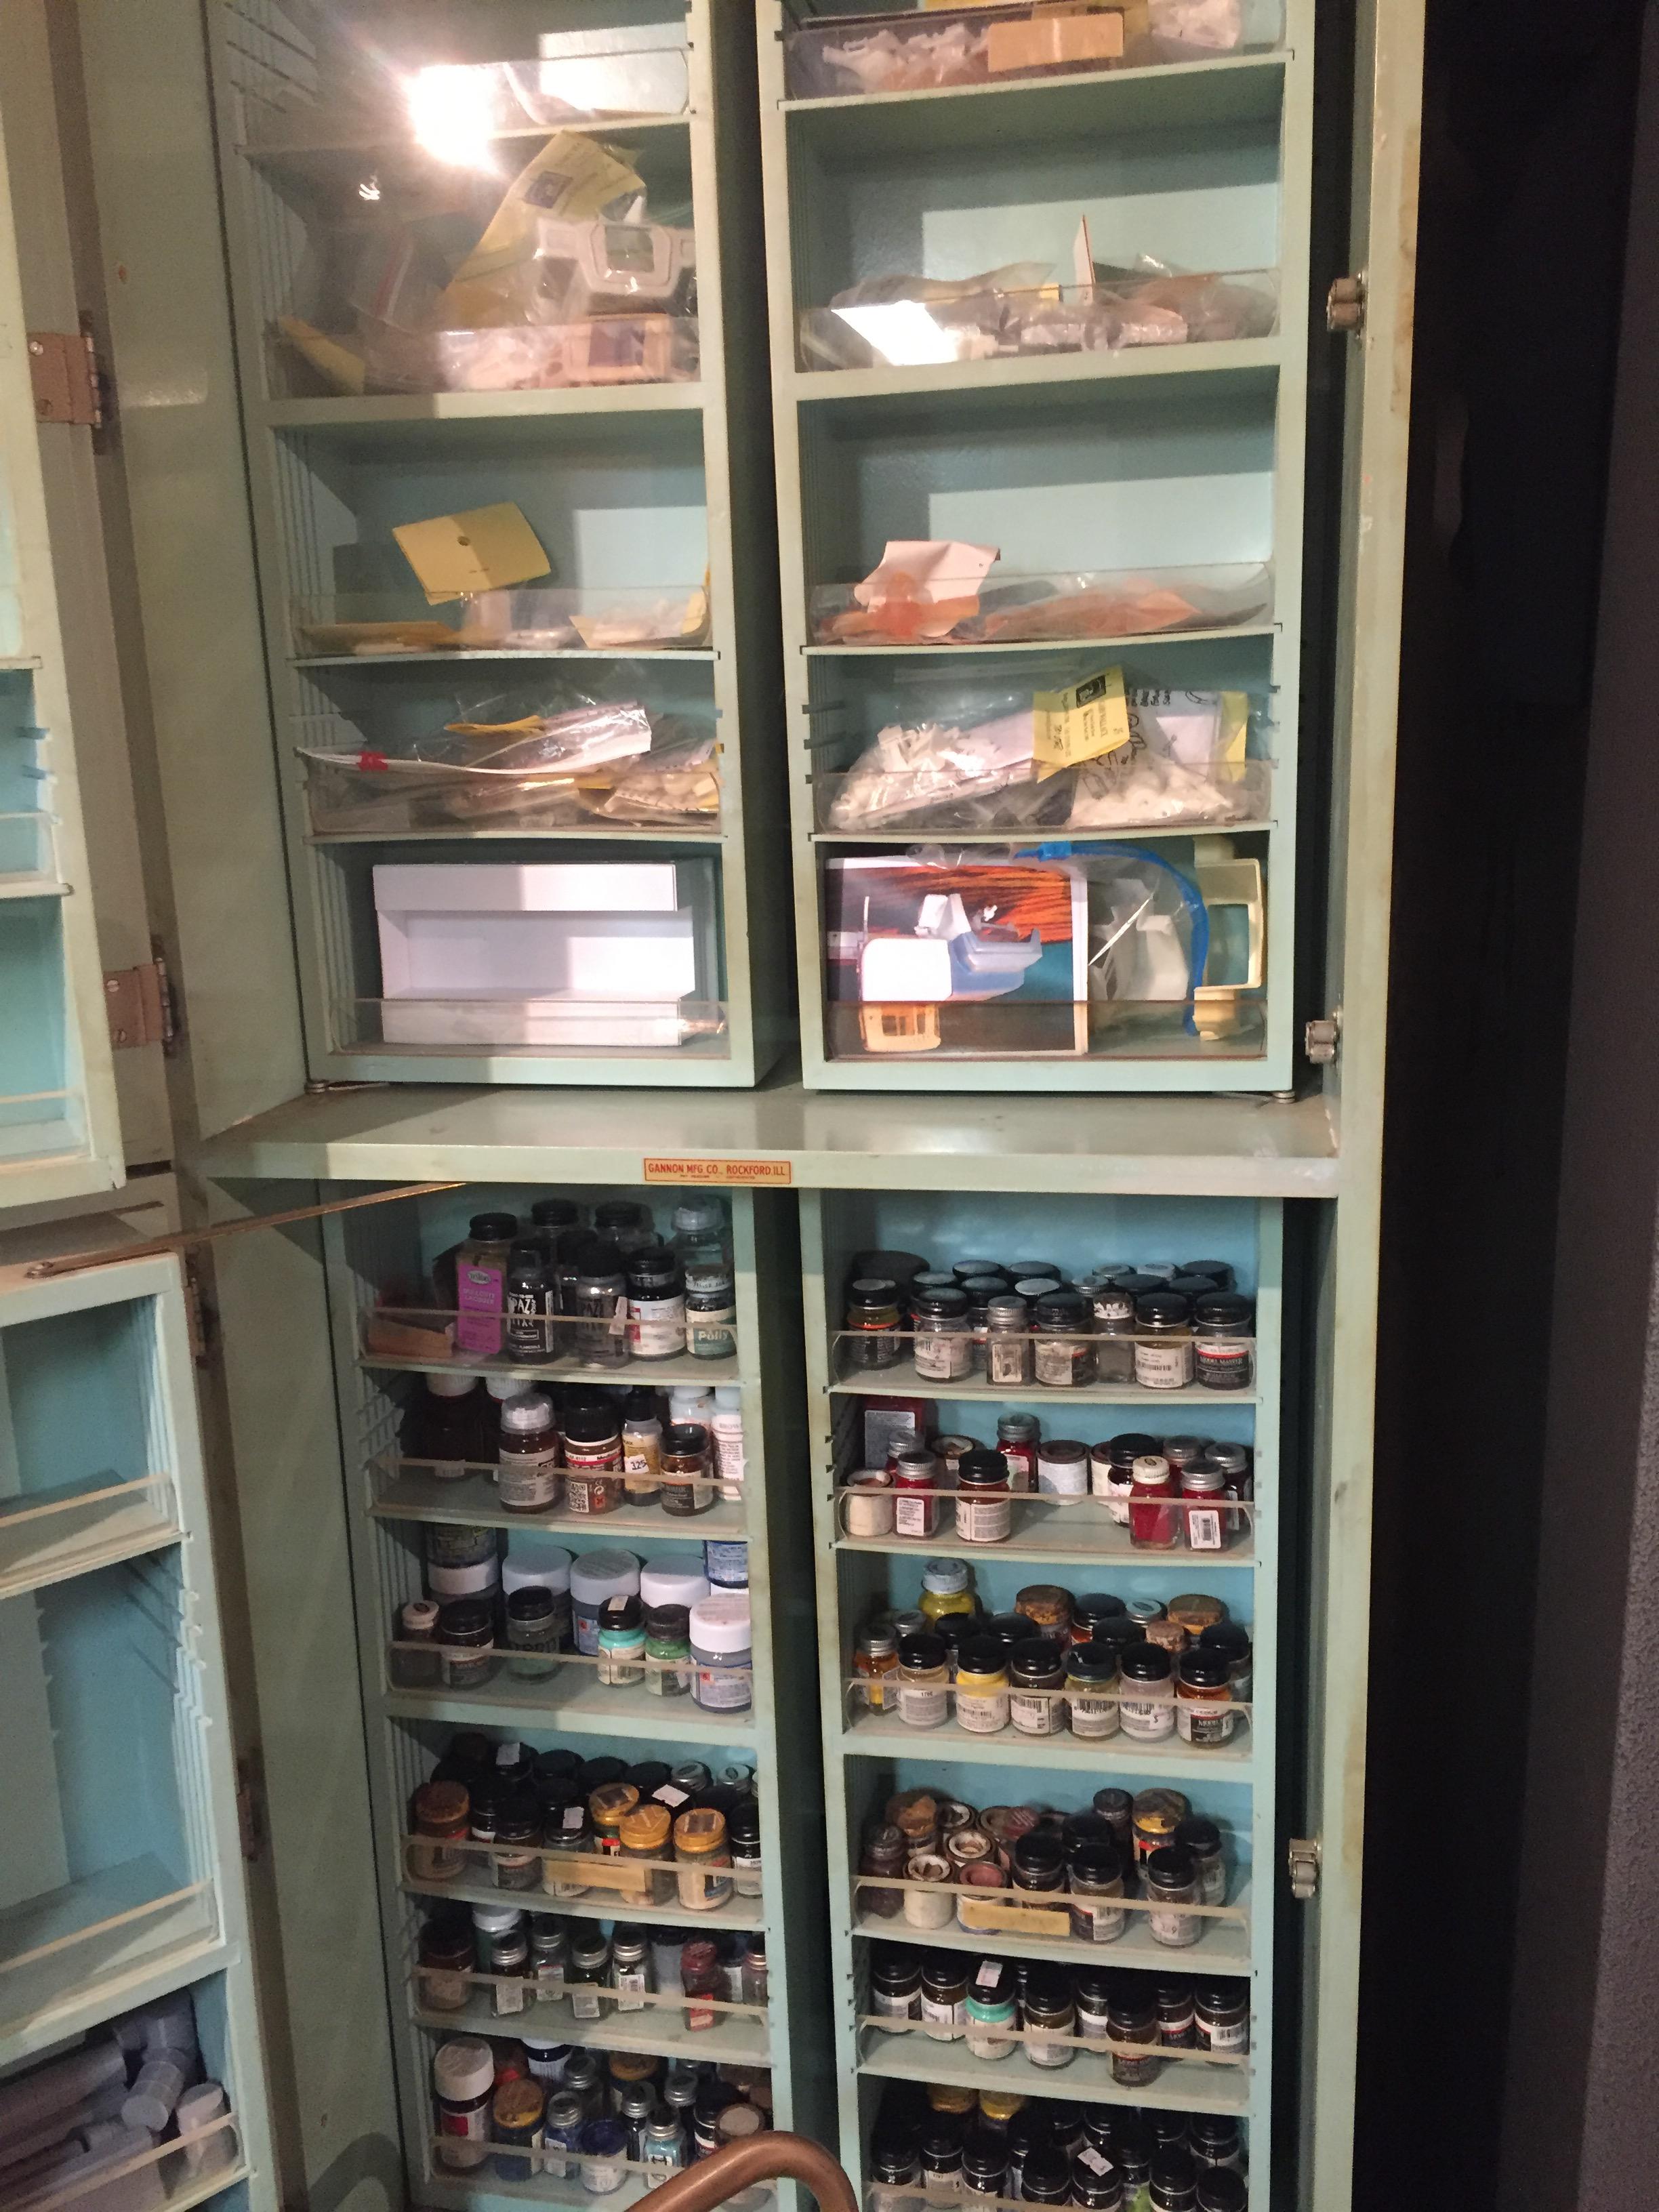
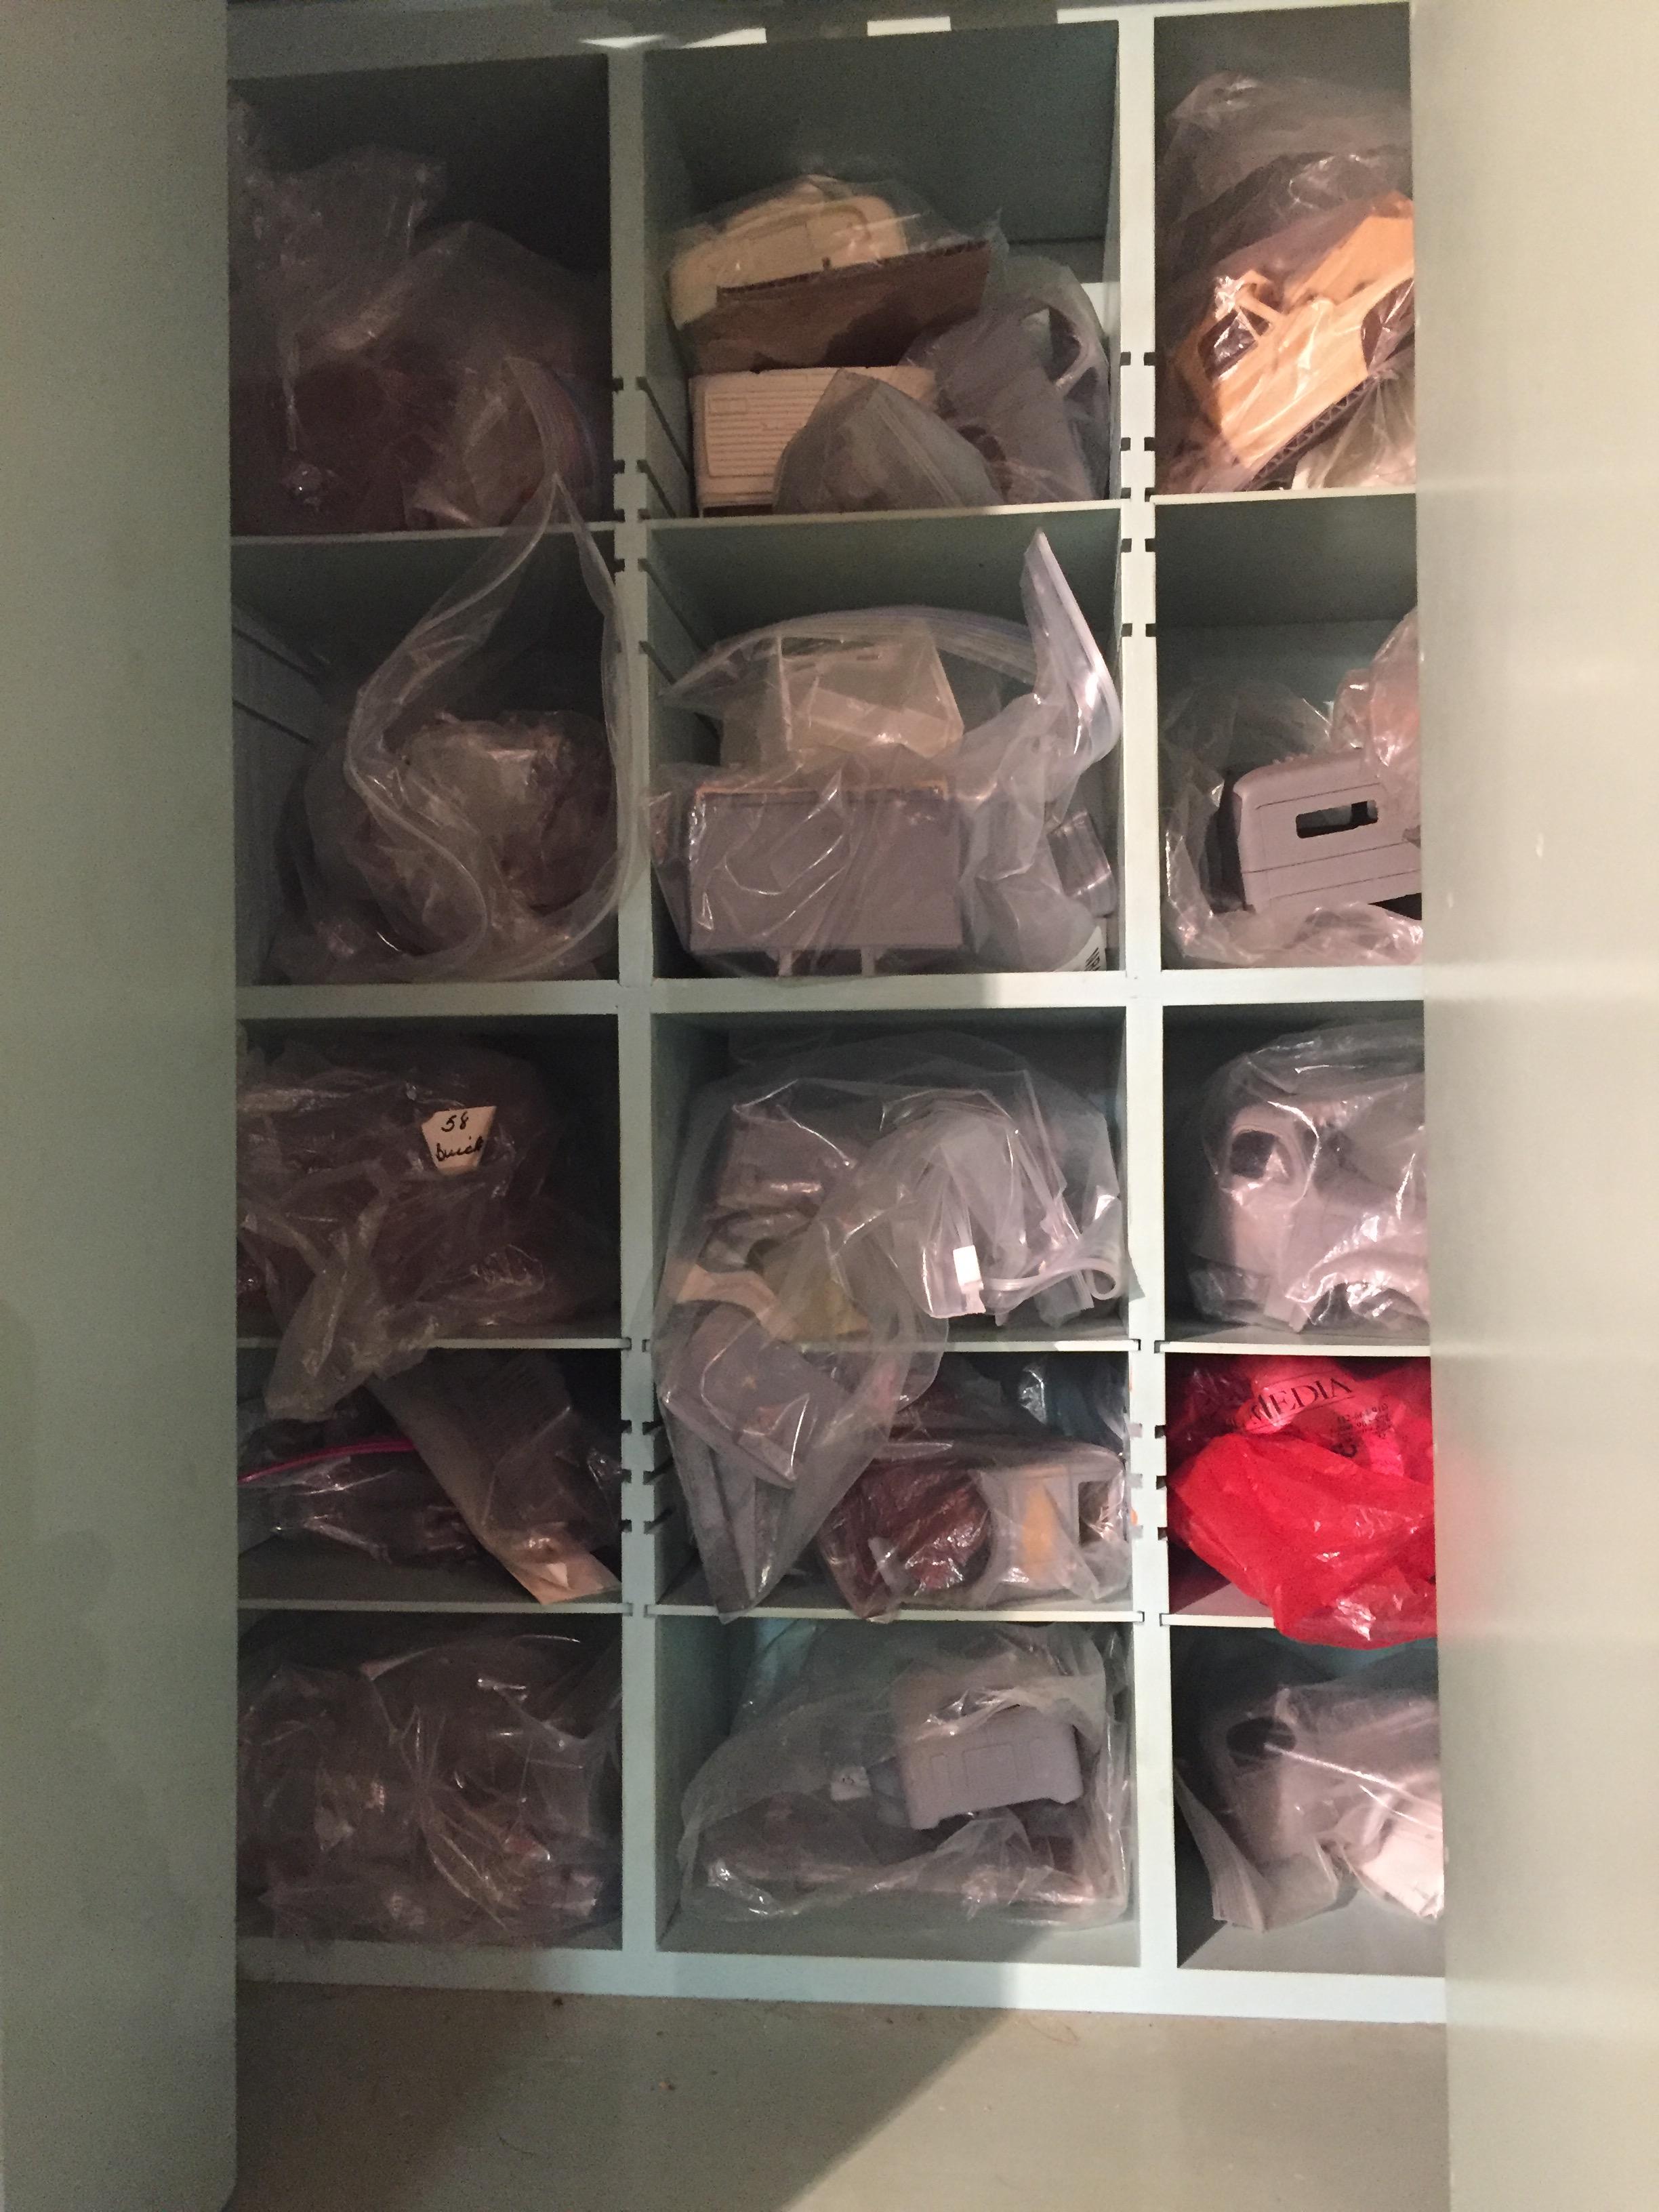
These pics show only one build in progress, have about another ten going! And this is only a day after I neatened up a bit!
-
MYTHICAL MACK
redneckrigger replied to purepmd's topic in Model Trucks: Big Rigs and Heavy Equipment
Beautiful work! Love the power choice and execution.................and the colors are perfect! -
Added the lower half of the hydraulic swivel joint and all of the fixed piping to the chassis today, this will get painted. Added the hydraulic motor for the boom swivel and all of the control hoses. Still have to add the flexible hoses for the steering after paint. Now it's on to the boom and the fixed piping there. One step at a time!
-
Autocar A64B
redneckrigger replied to Bronzekeg's topic in Model Trucks: Big Rigs and Heavy Equipment
Extremely nice work and absolutely perfect color combo! -
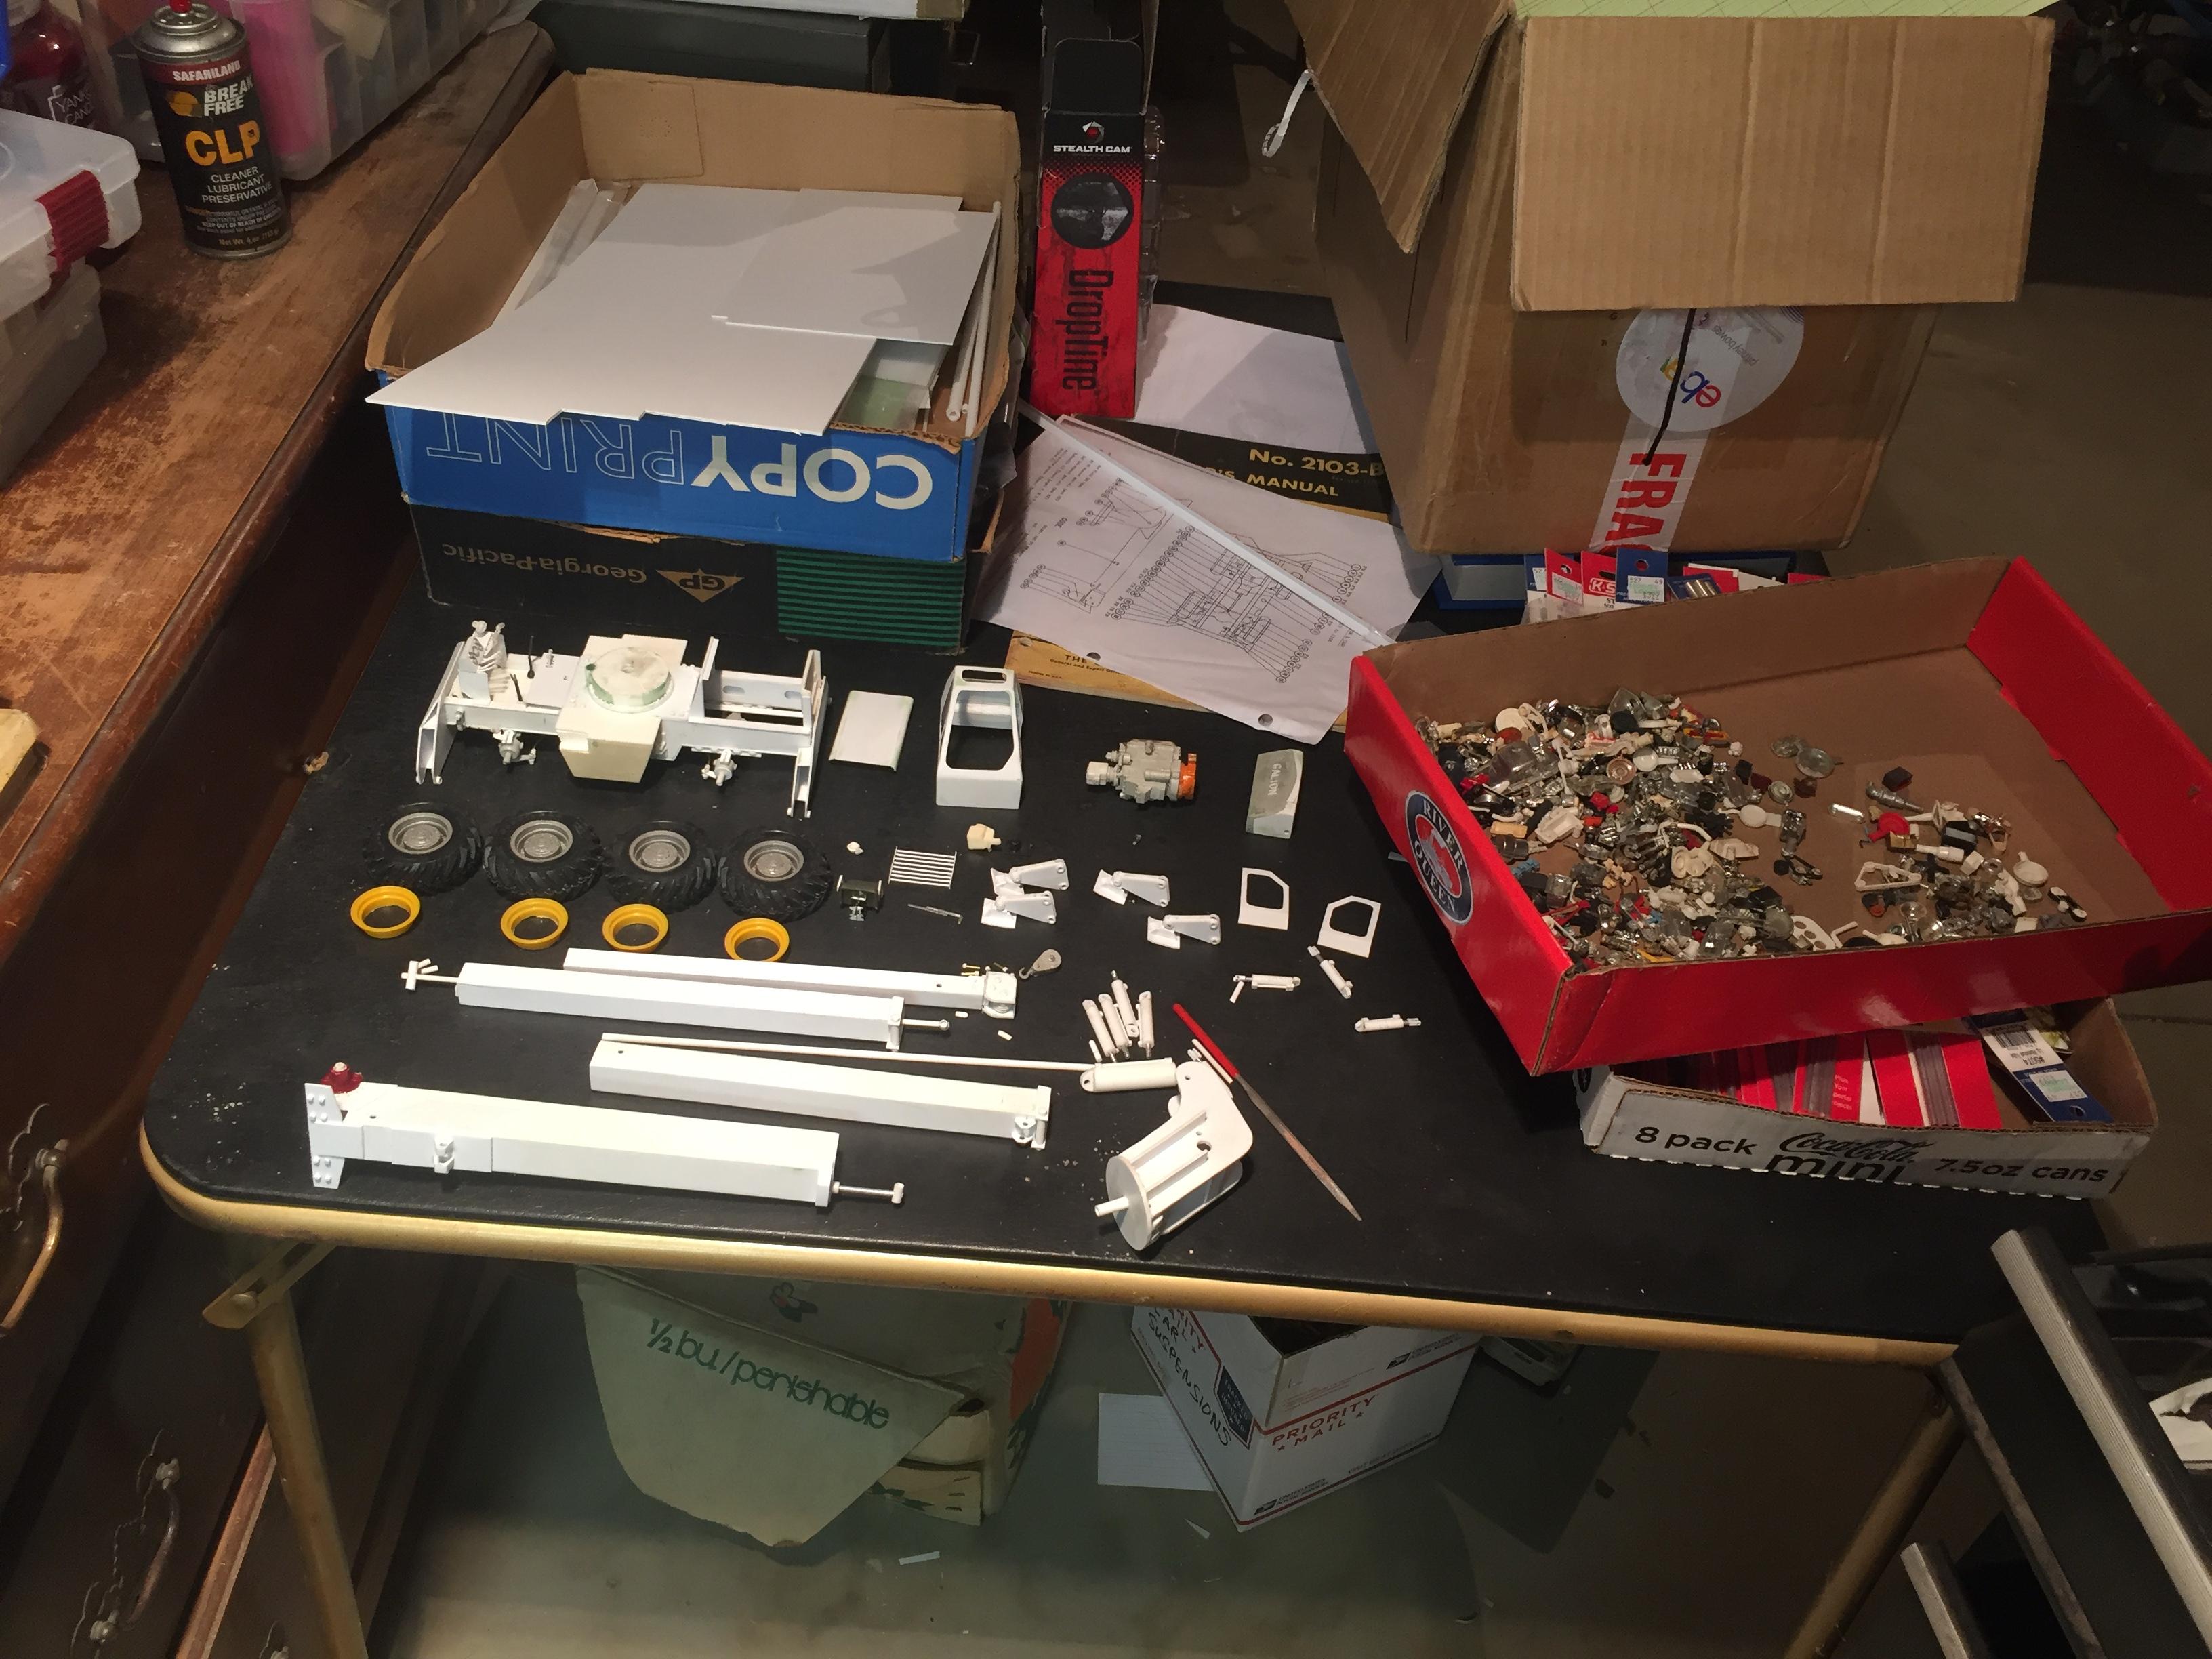
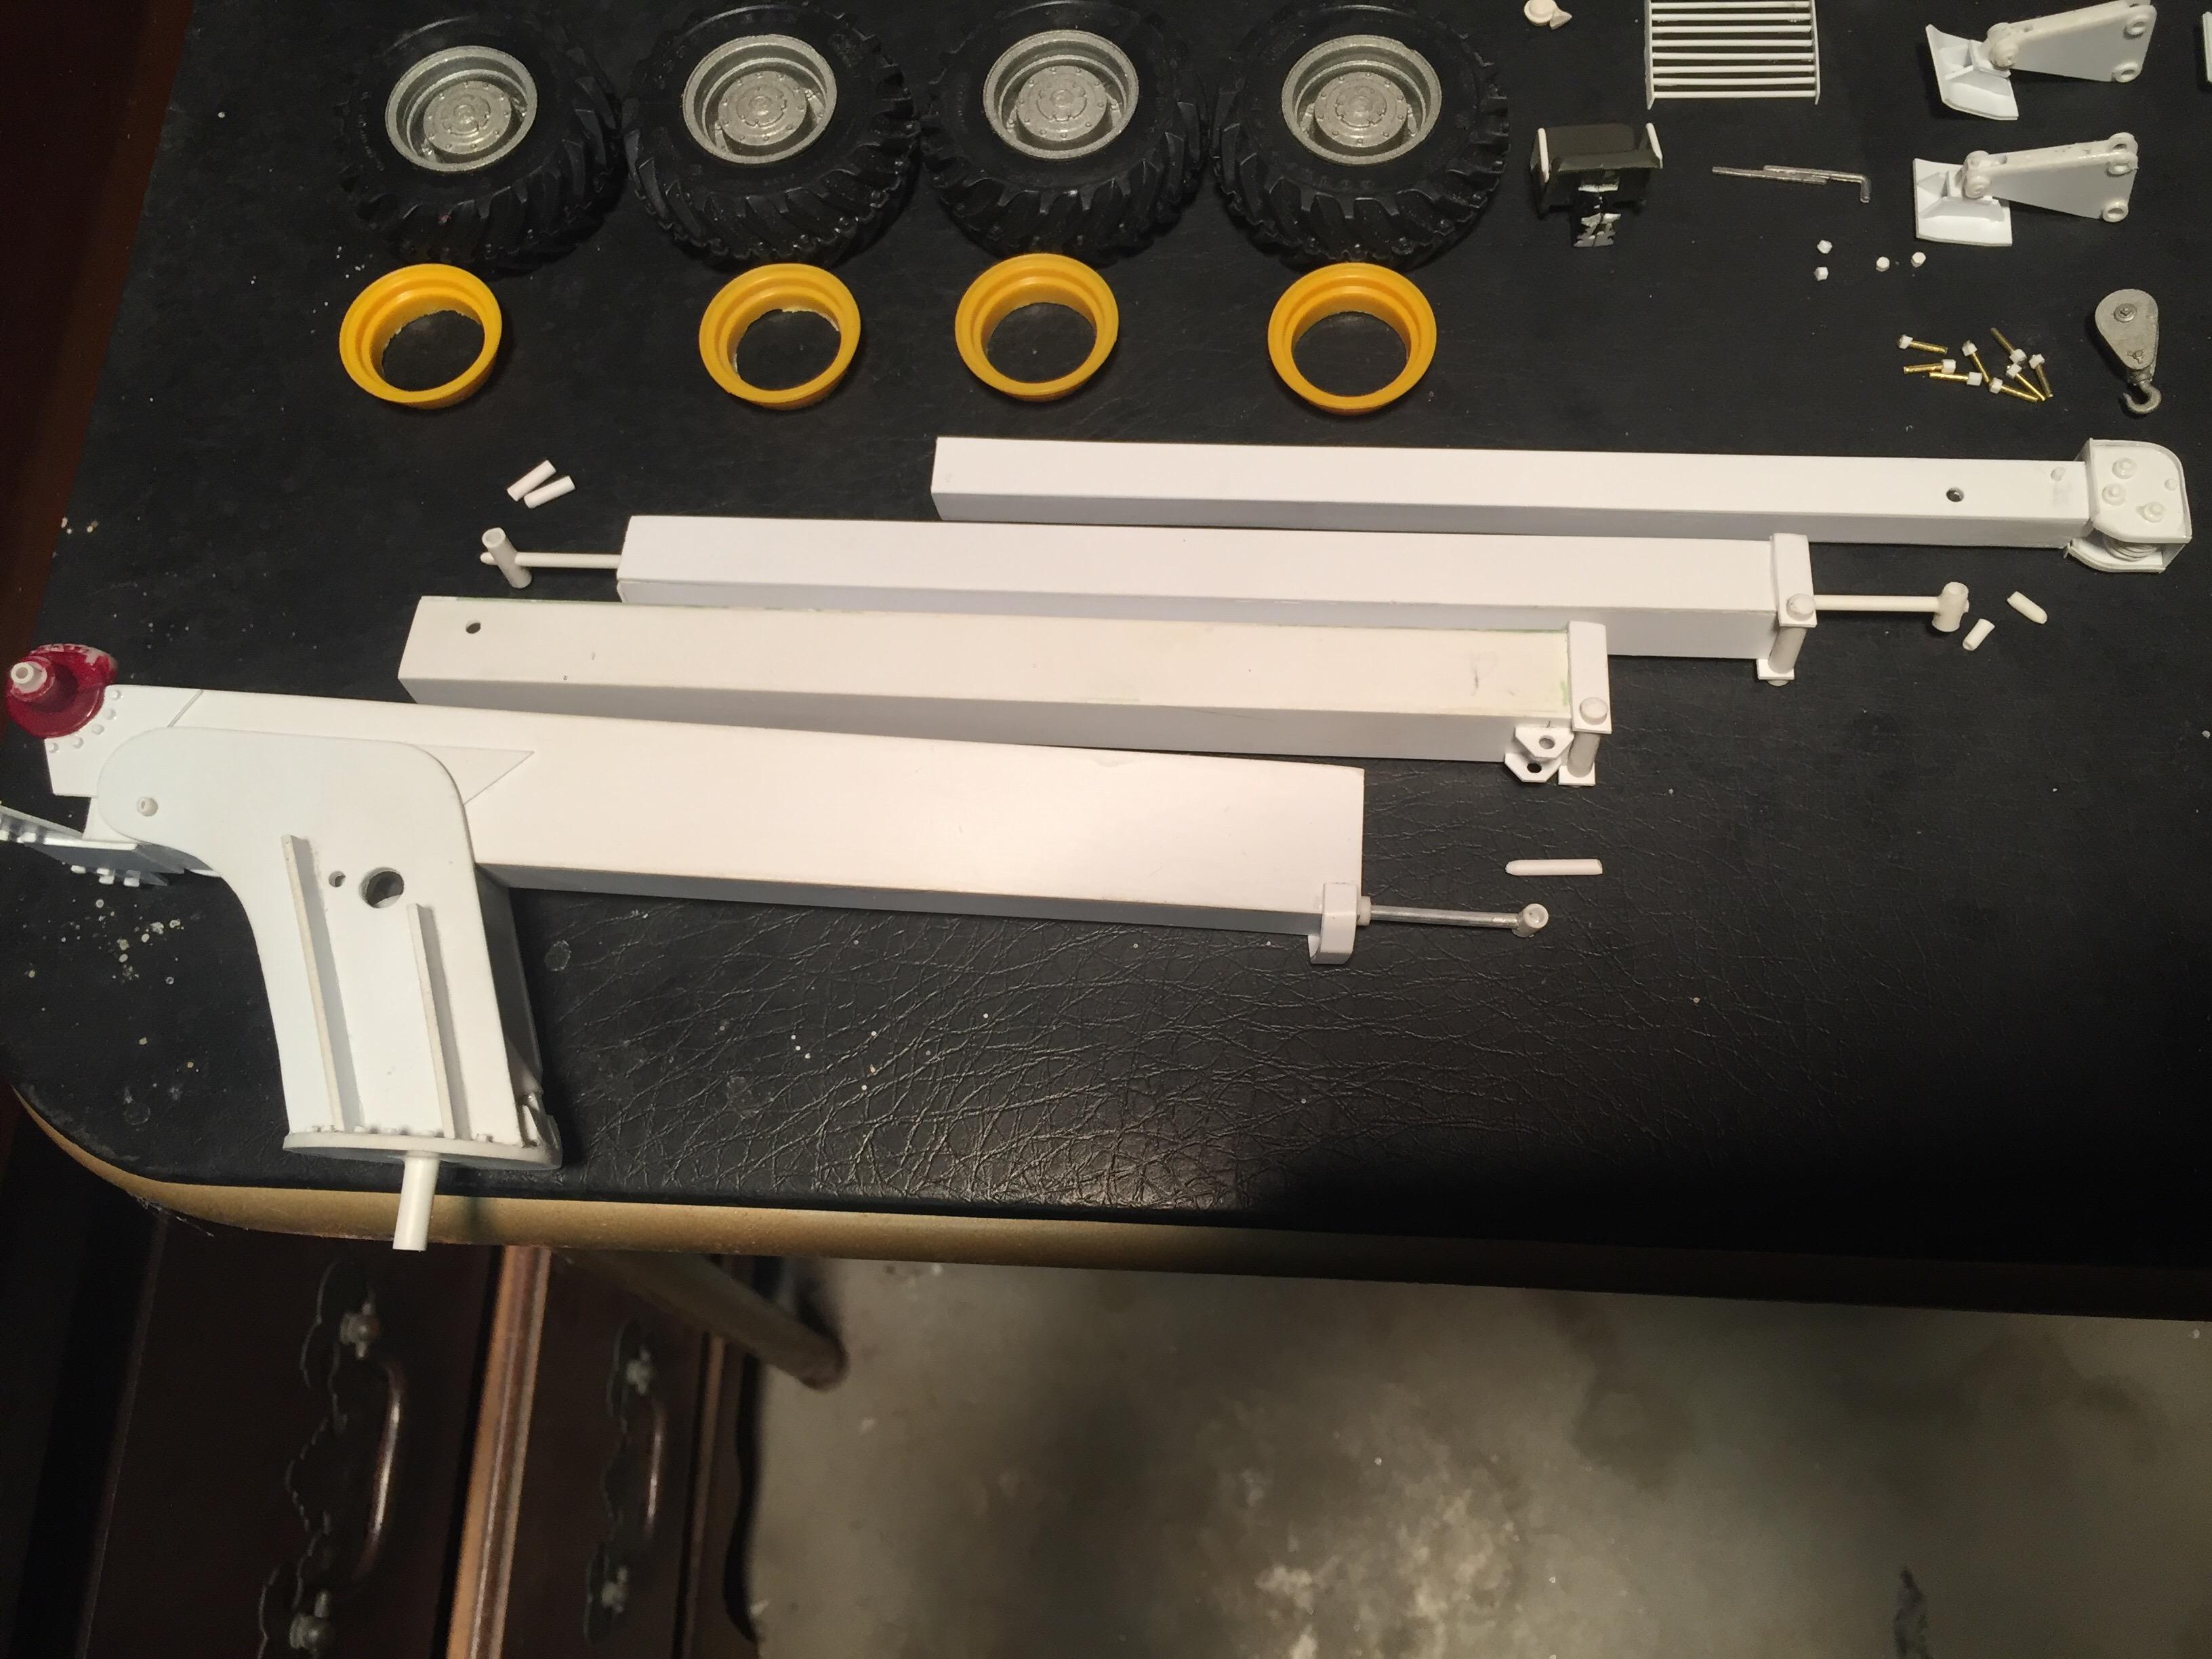
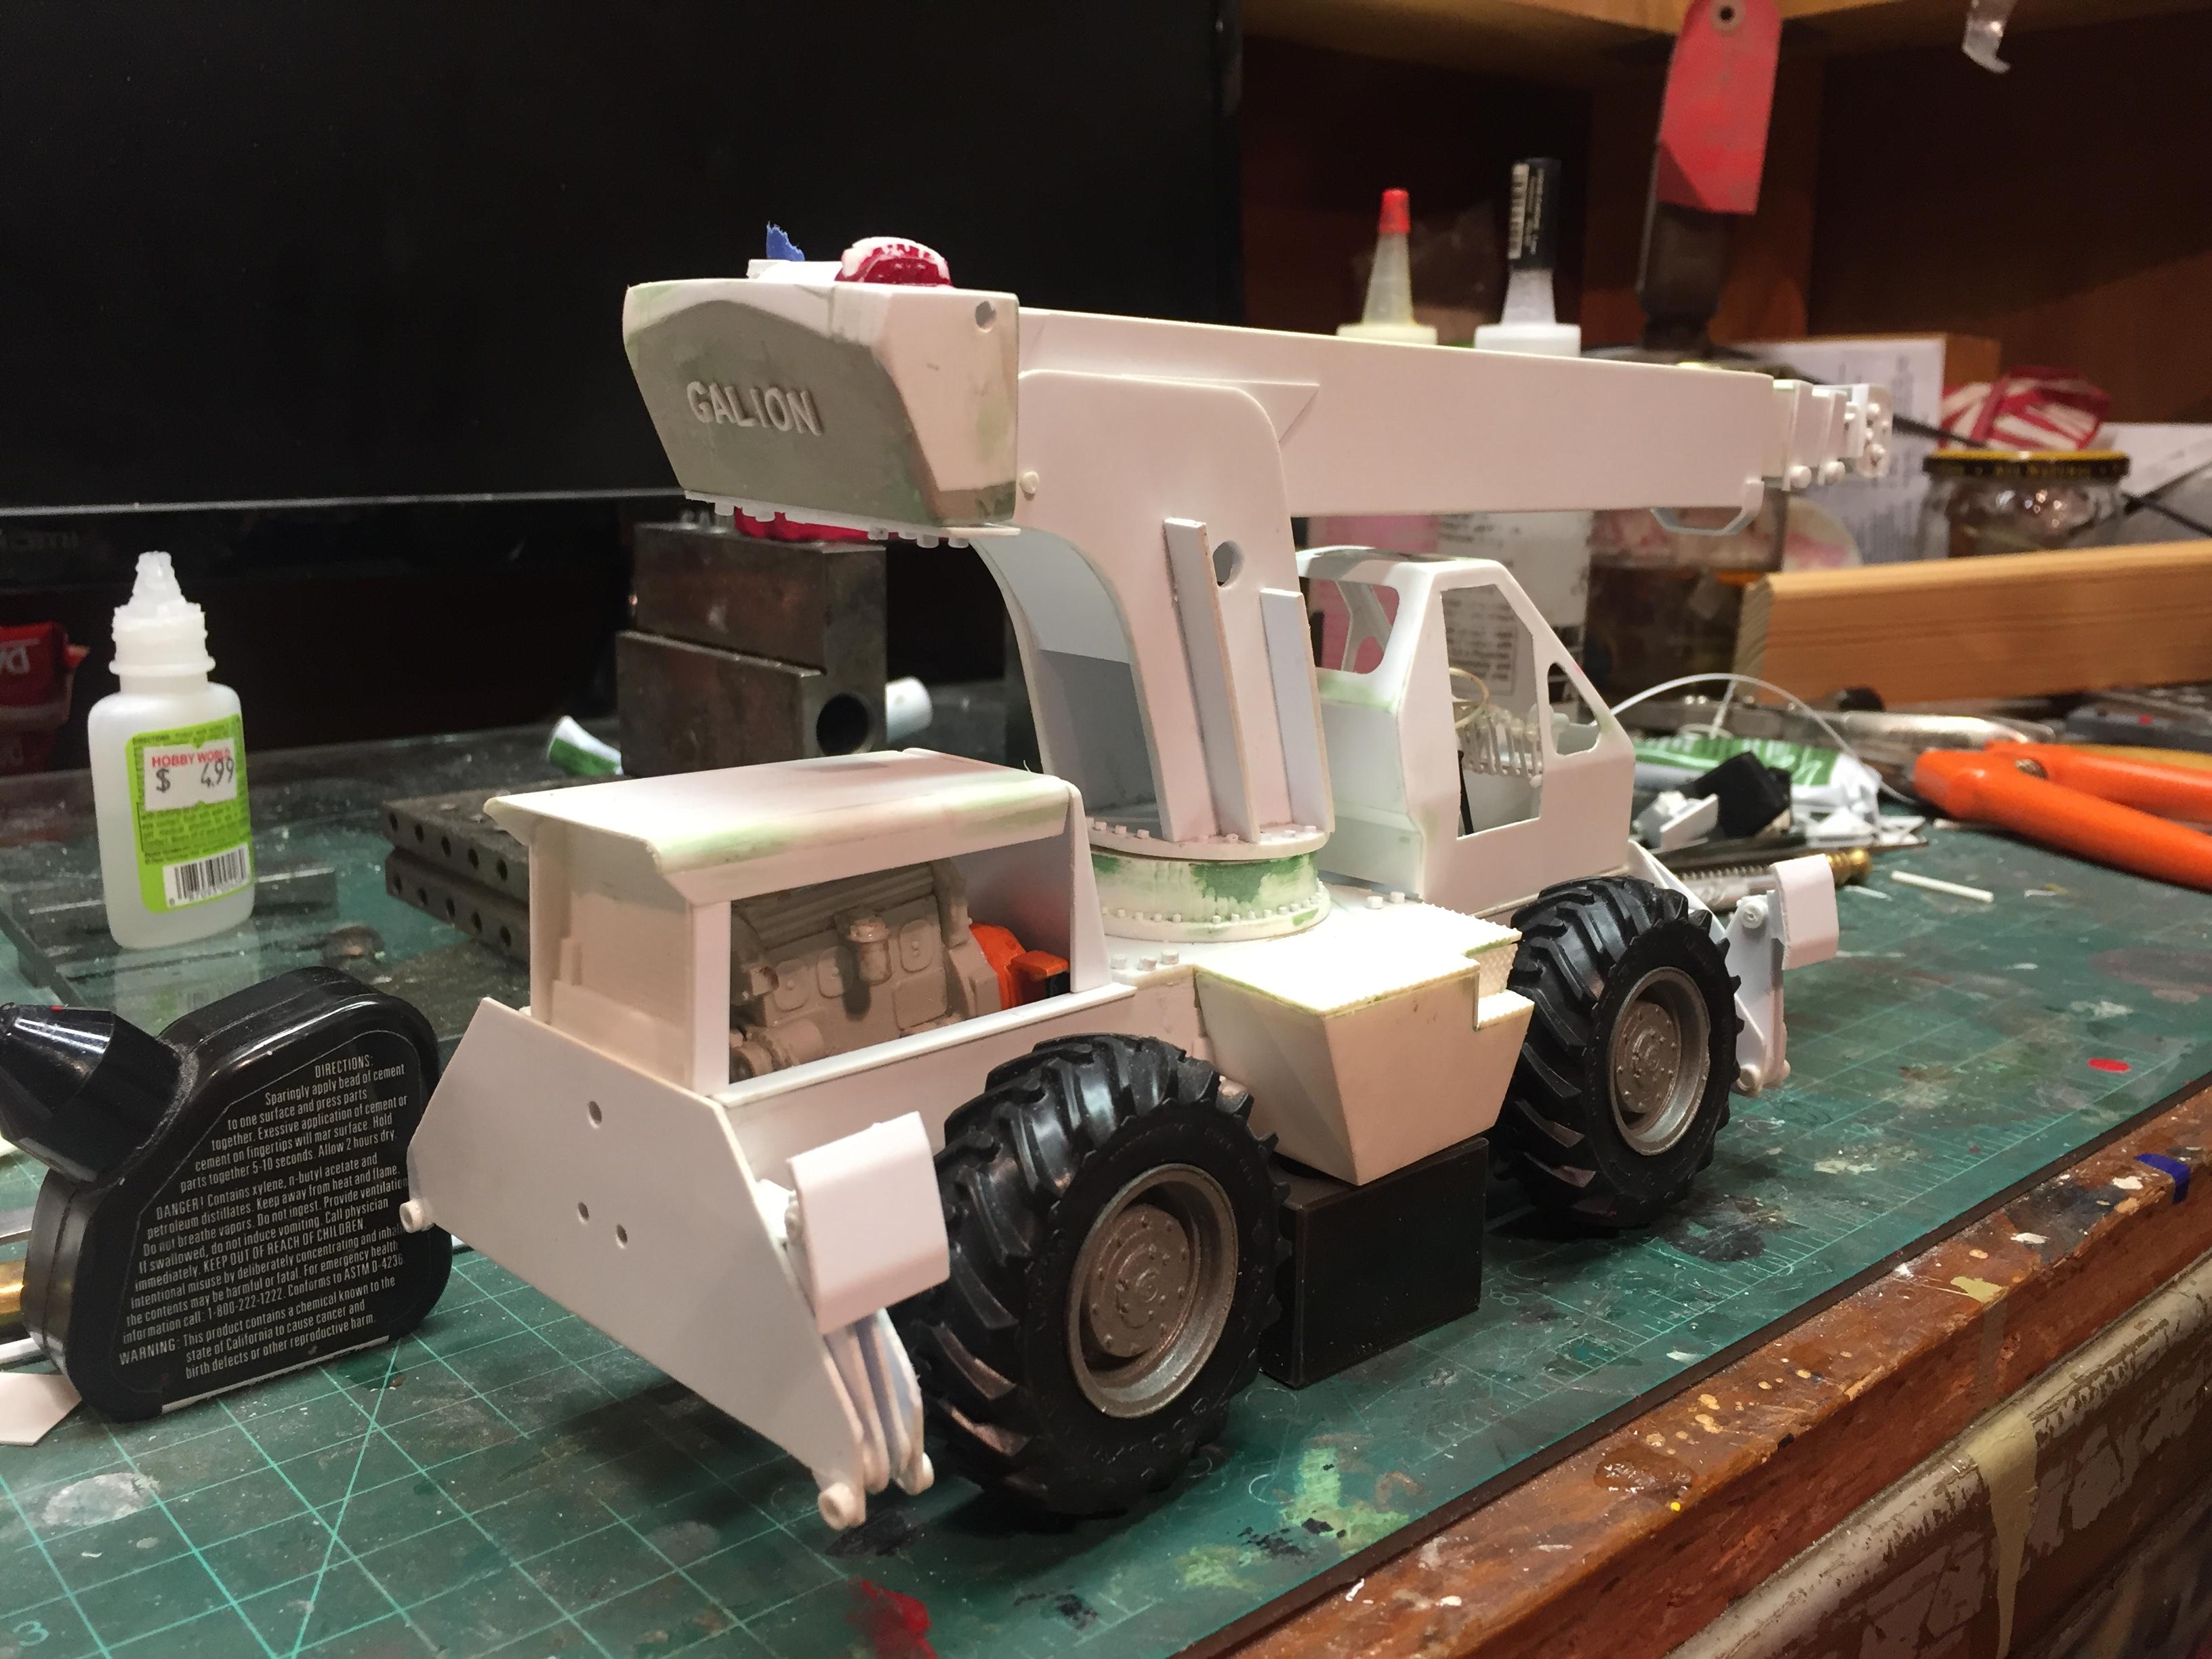
Well, it's about to the time where I have to do the piping and figure out the proper order of paint vs. assembly. So, here's a photo of what I have so far, and my punch list which will undoubtedly have a few detours along the way. I had to make a choice of making it look like it had been repainted along the way, and all of the hoses got painted too, or install the hoses after it's painted. I am going to shoot for paint, then do the hoses. I hope to do very minor weathering but not a lot. Also shown here since I didn't really do a good job on photos when I built it, is the boom and all of it's sections. This shows the extension cylinders, their attachment points, and gives a better idea of how it works, exactly like the original. The main boom has the cylinder inside, underneath section 2. Section two extends from the main. Section 3 has tandem cylinders, one atop the other, one extending out each end of the section. It pushes itself out of section 2 and pushes section 4 out of itself. The cylinders inside sections 2, 3, and 4 are hidden when assembled. A lot of the hoses are hidden within the frame and boom, but I'm going to make it look as true to the original as I can.
-
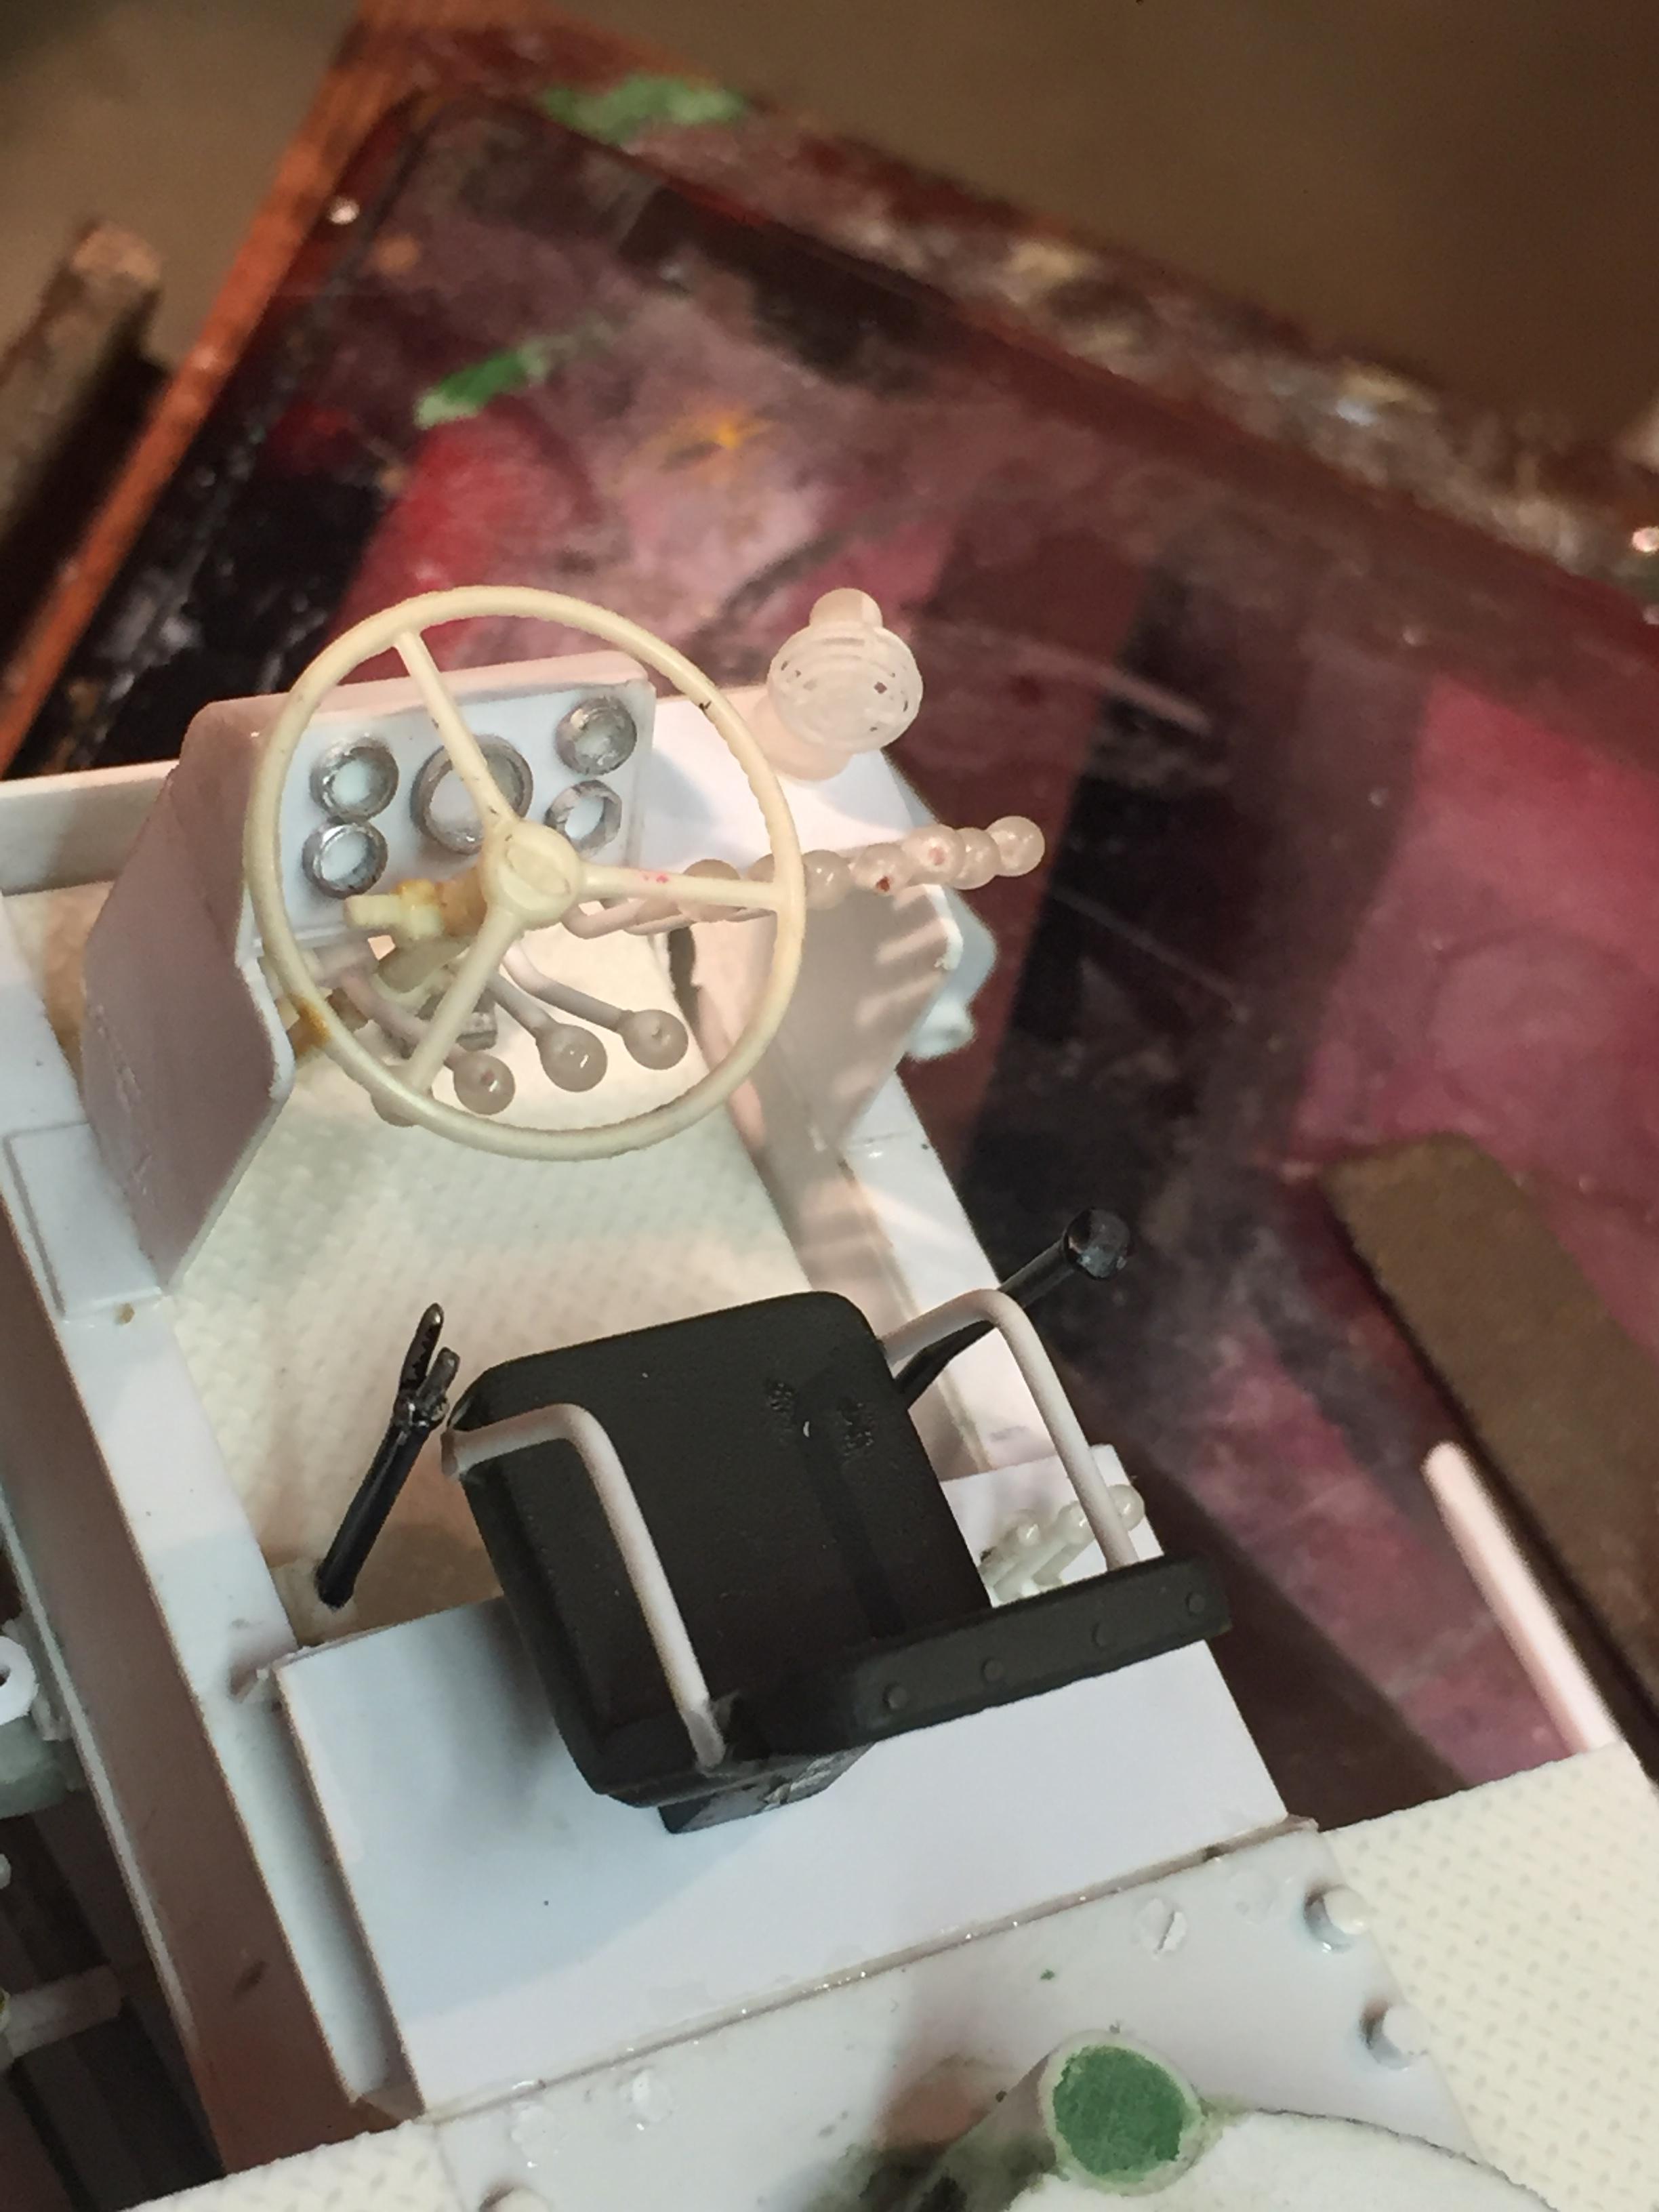
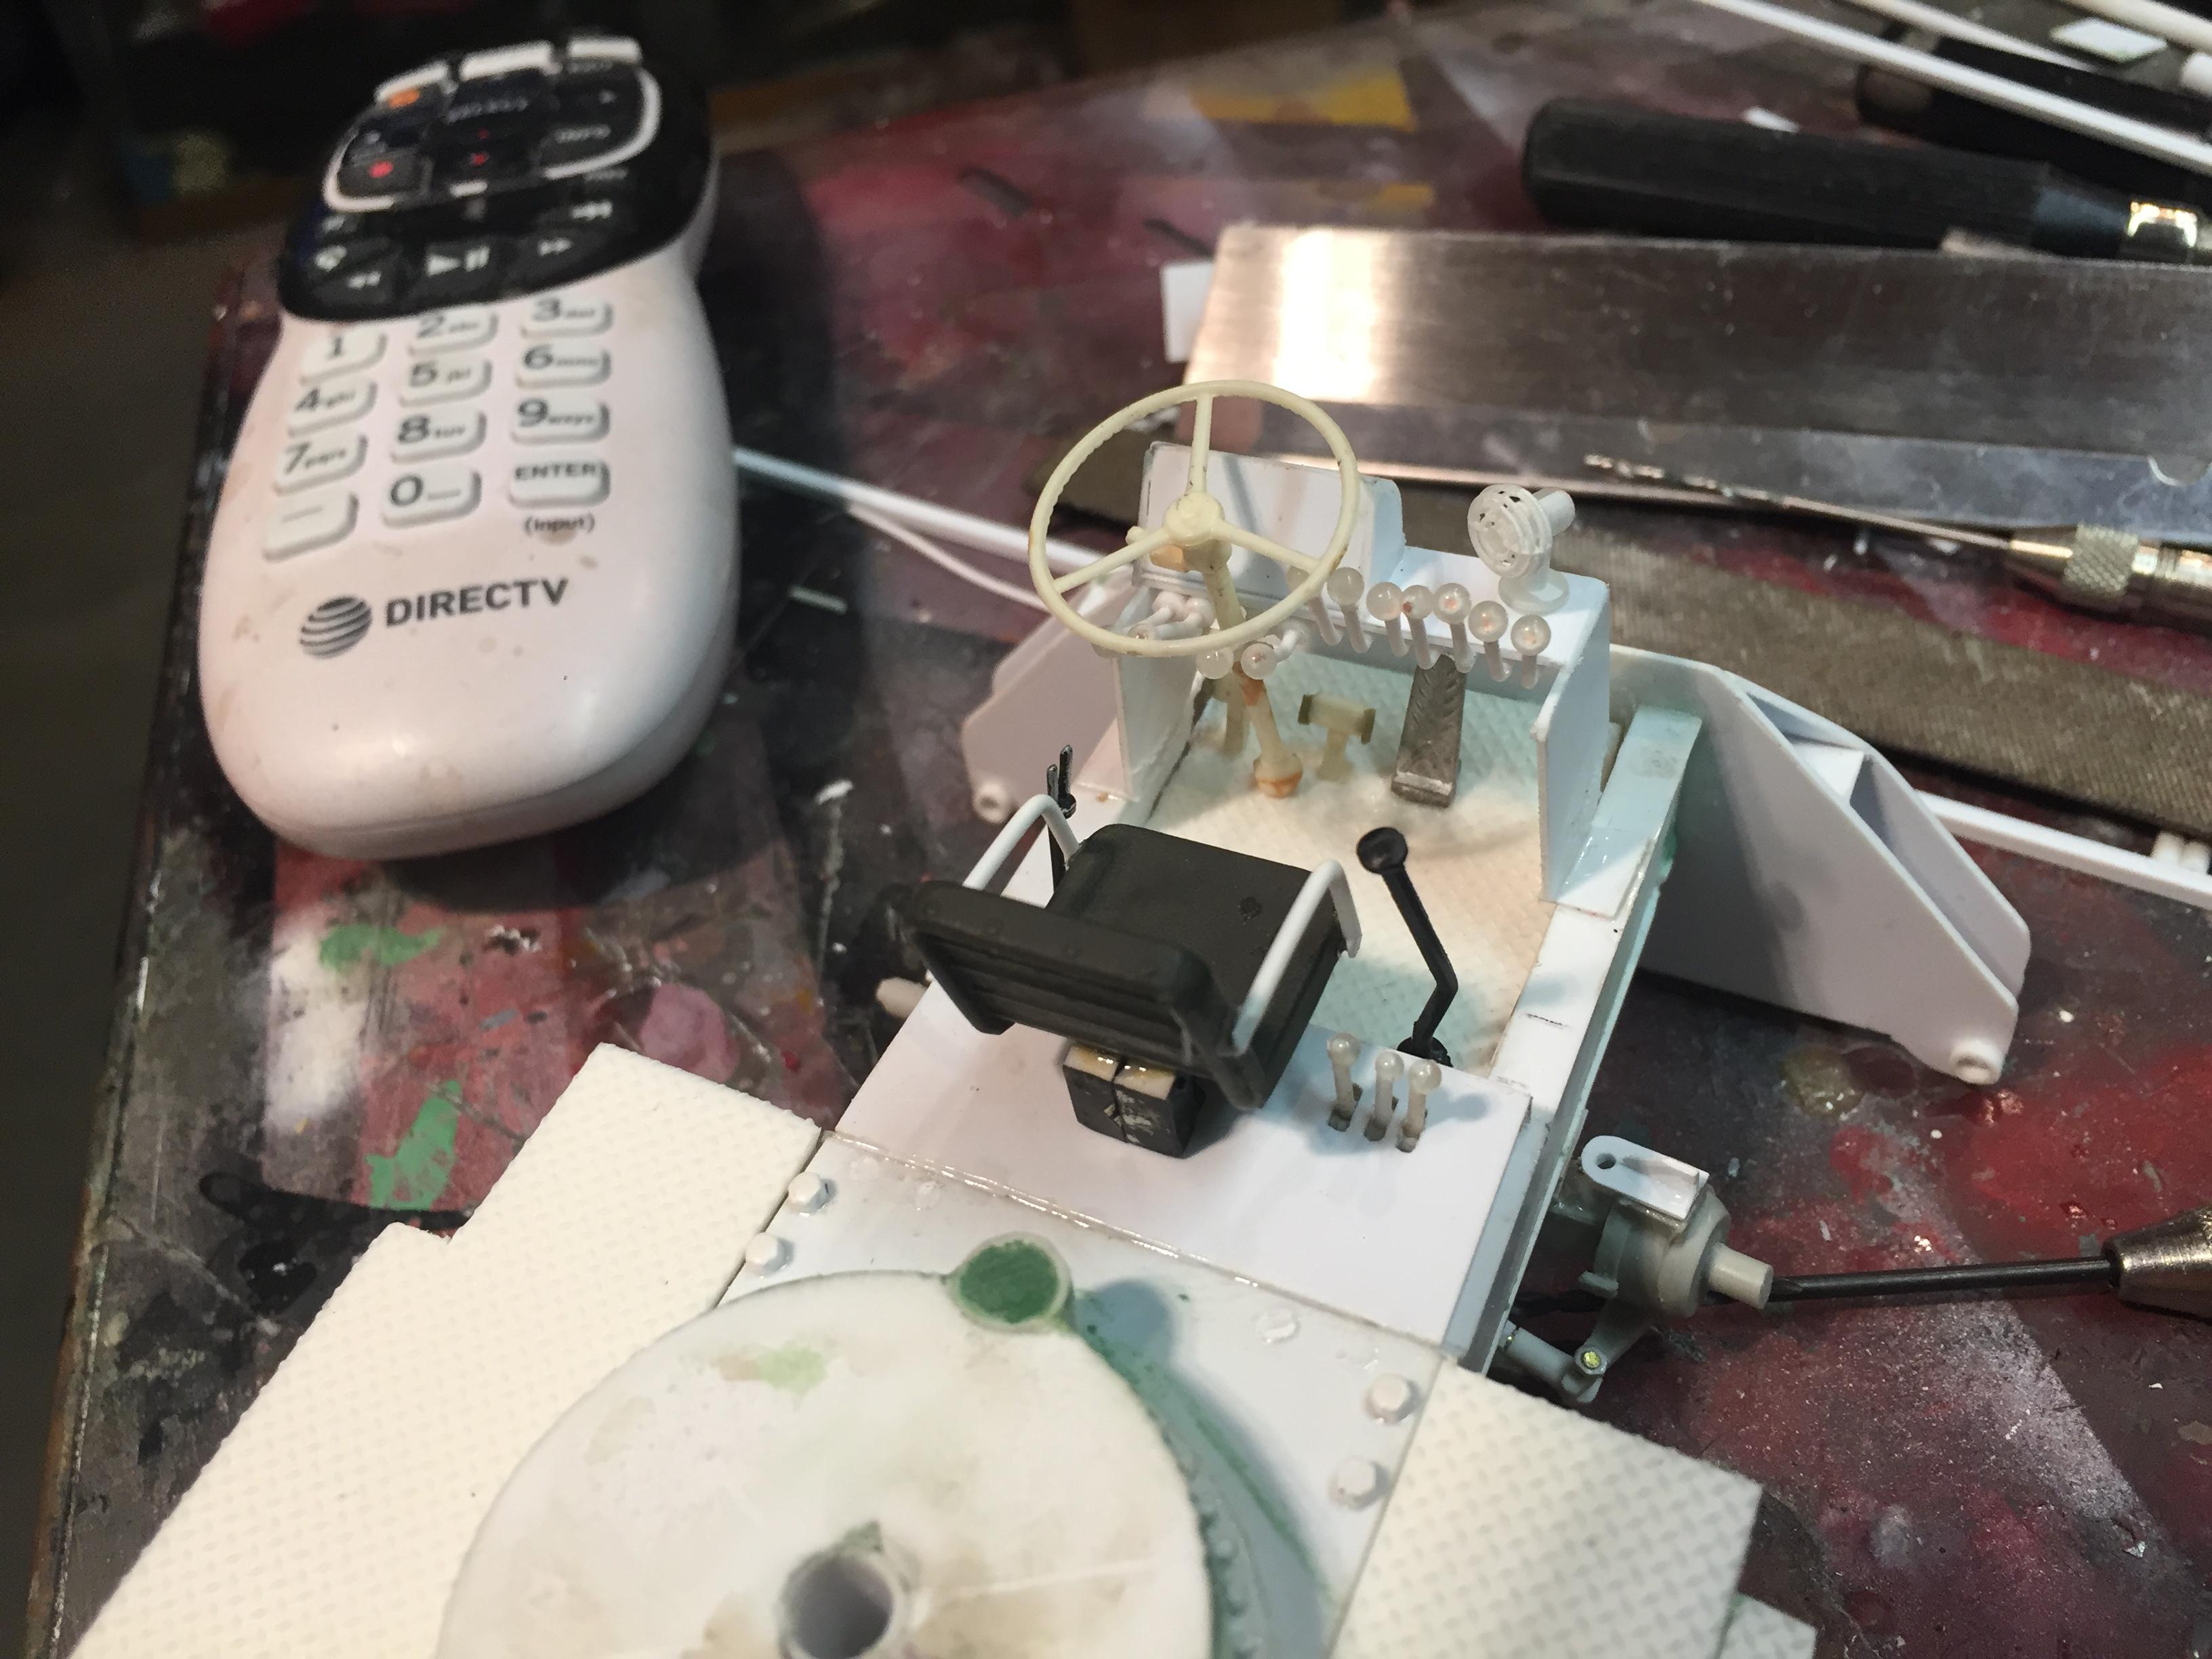
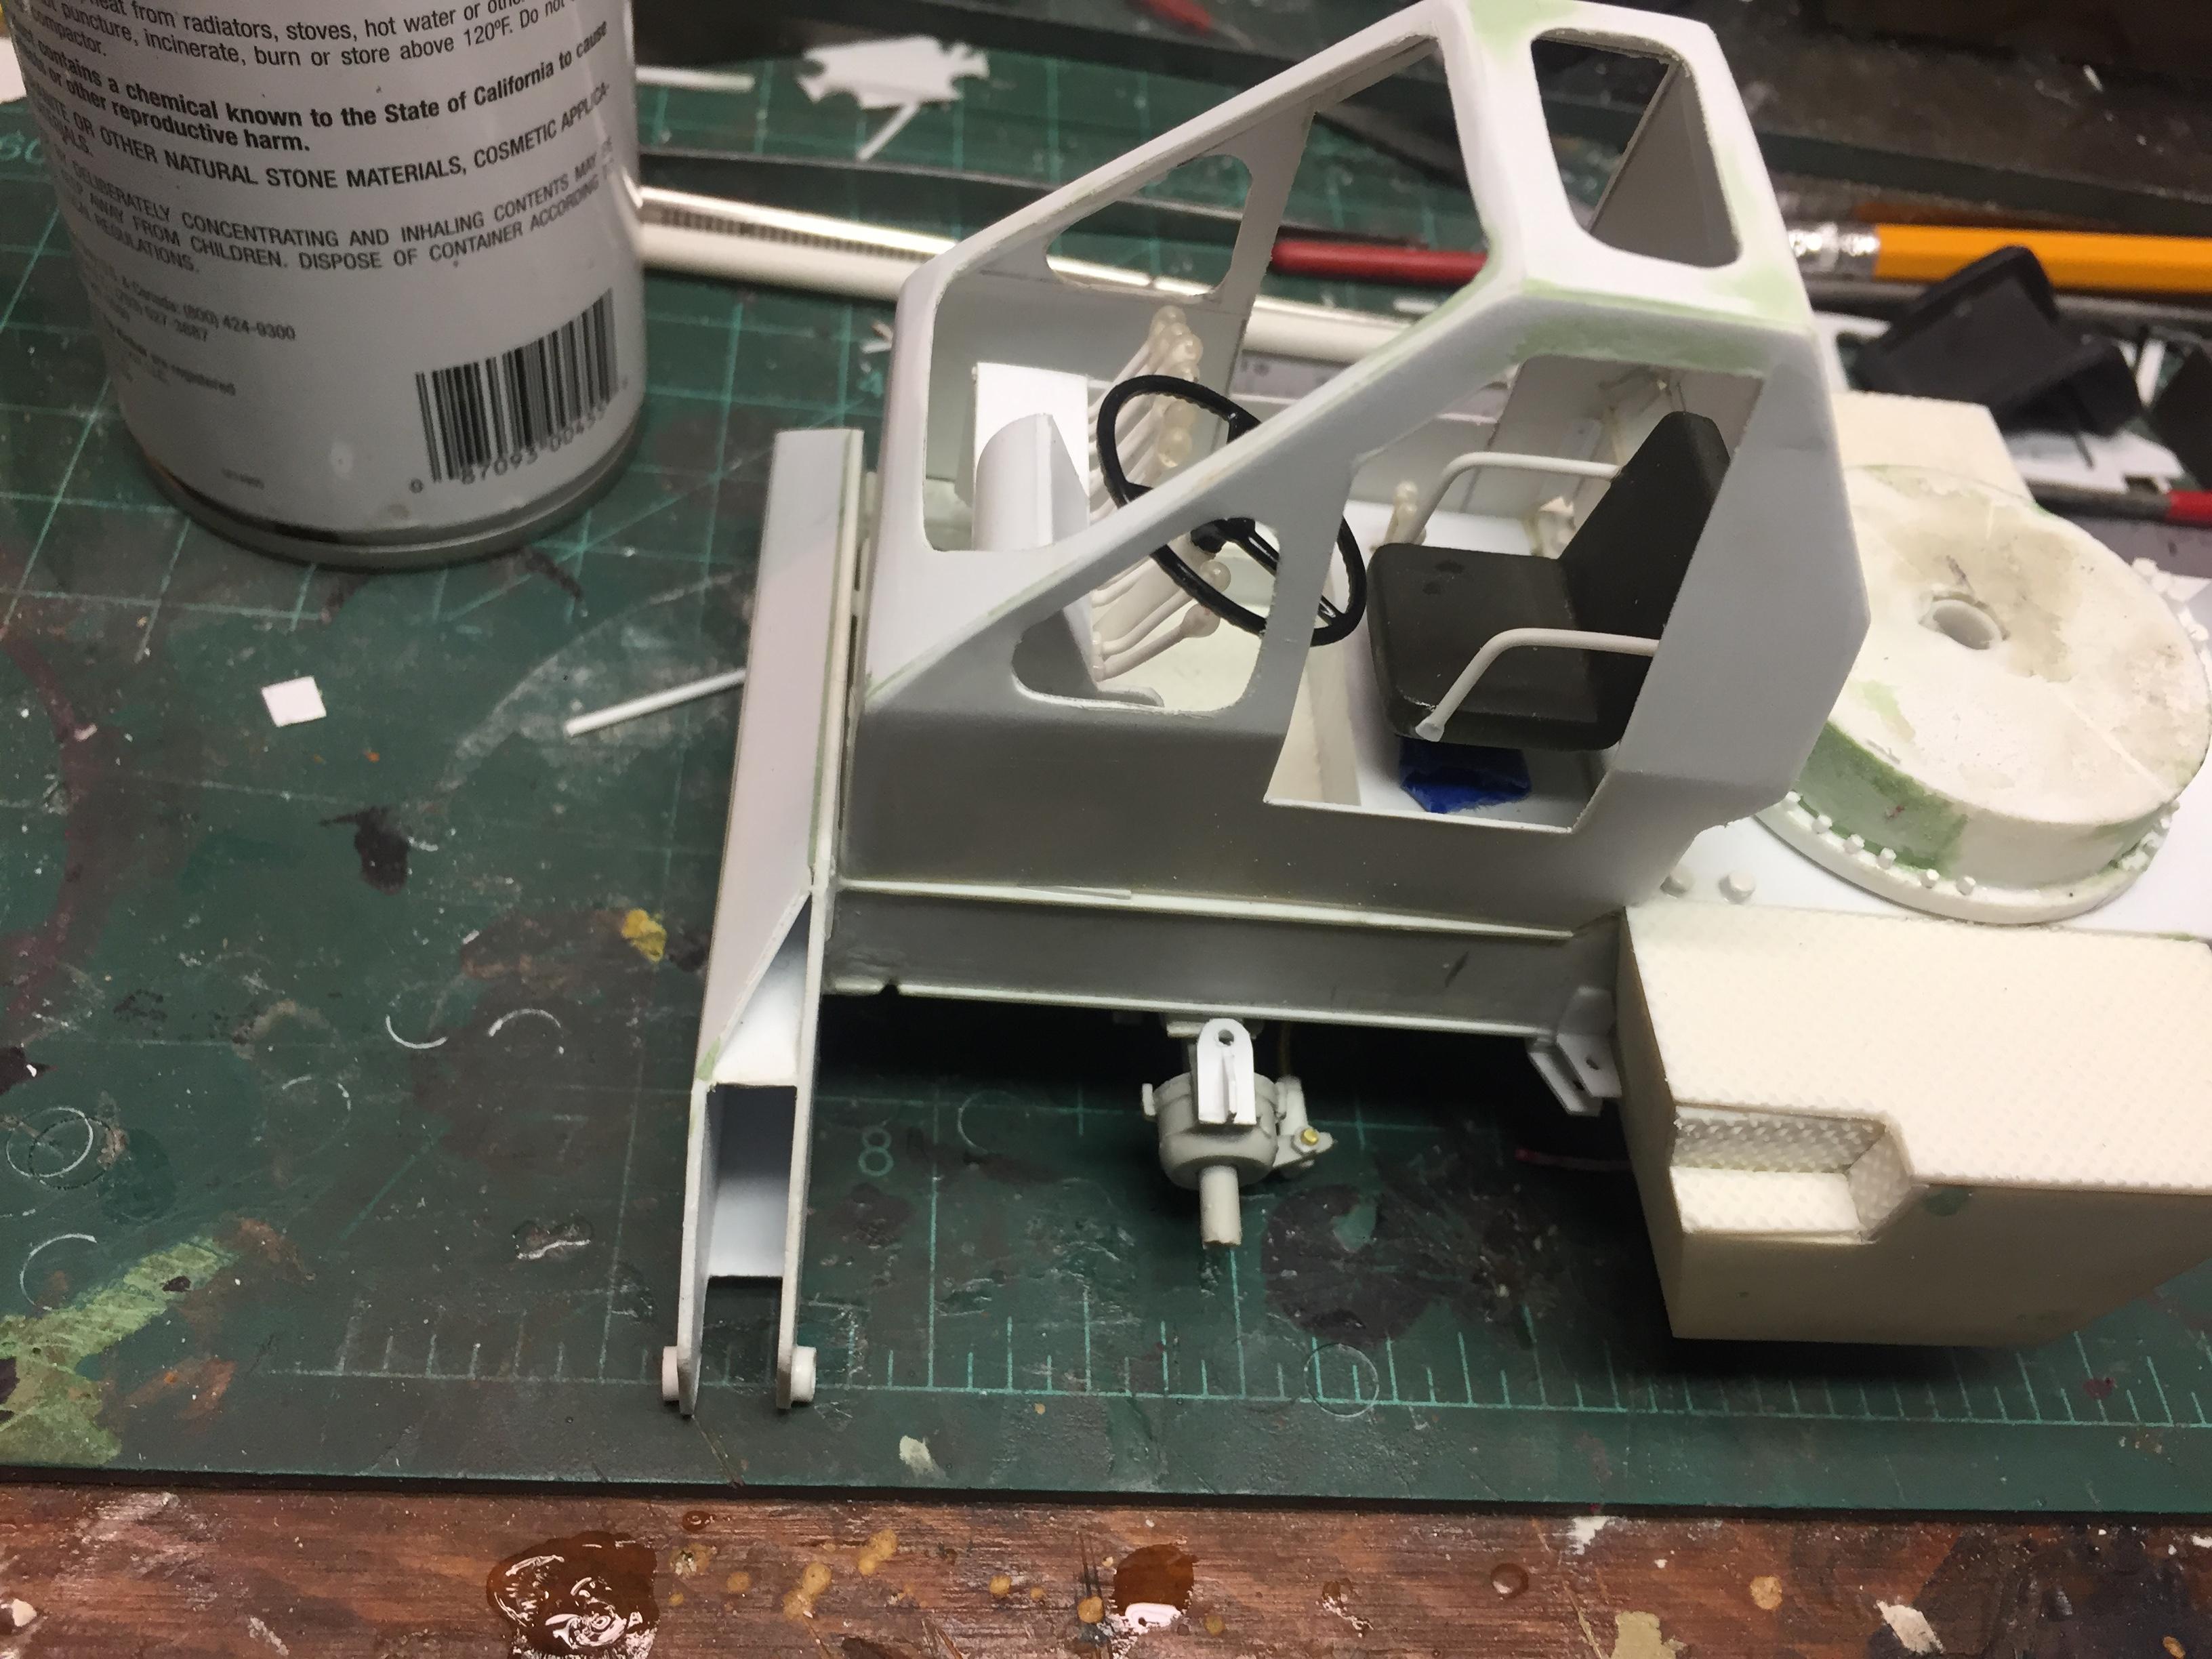
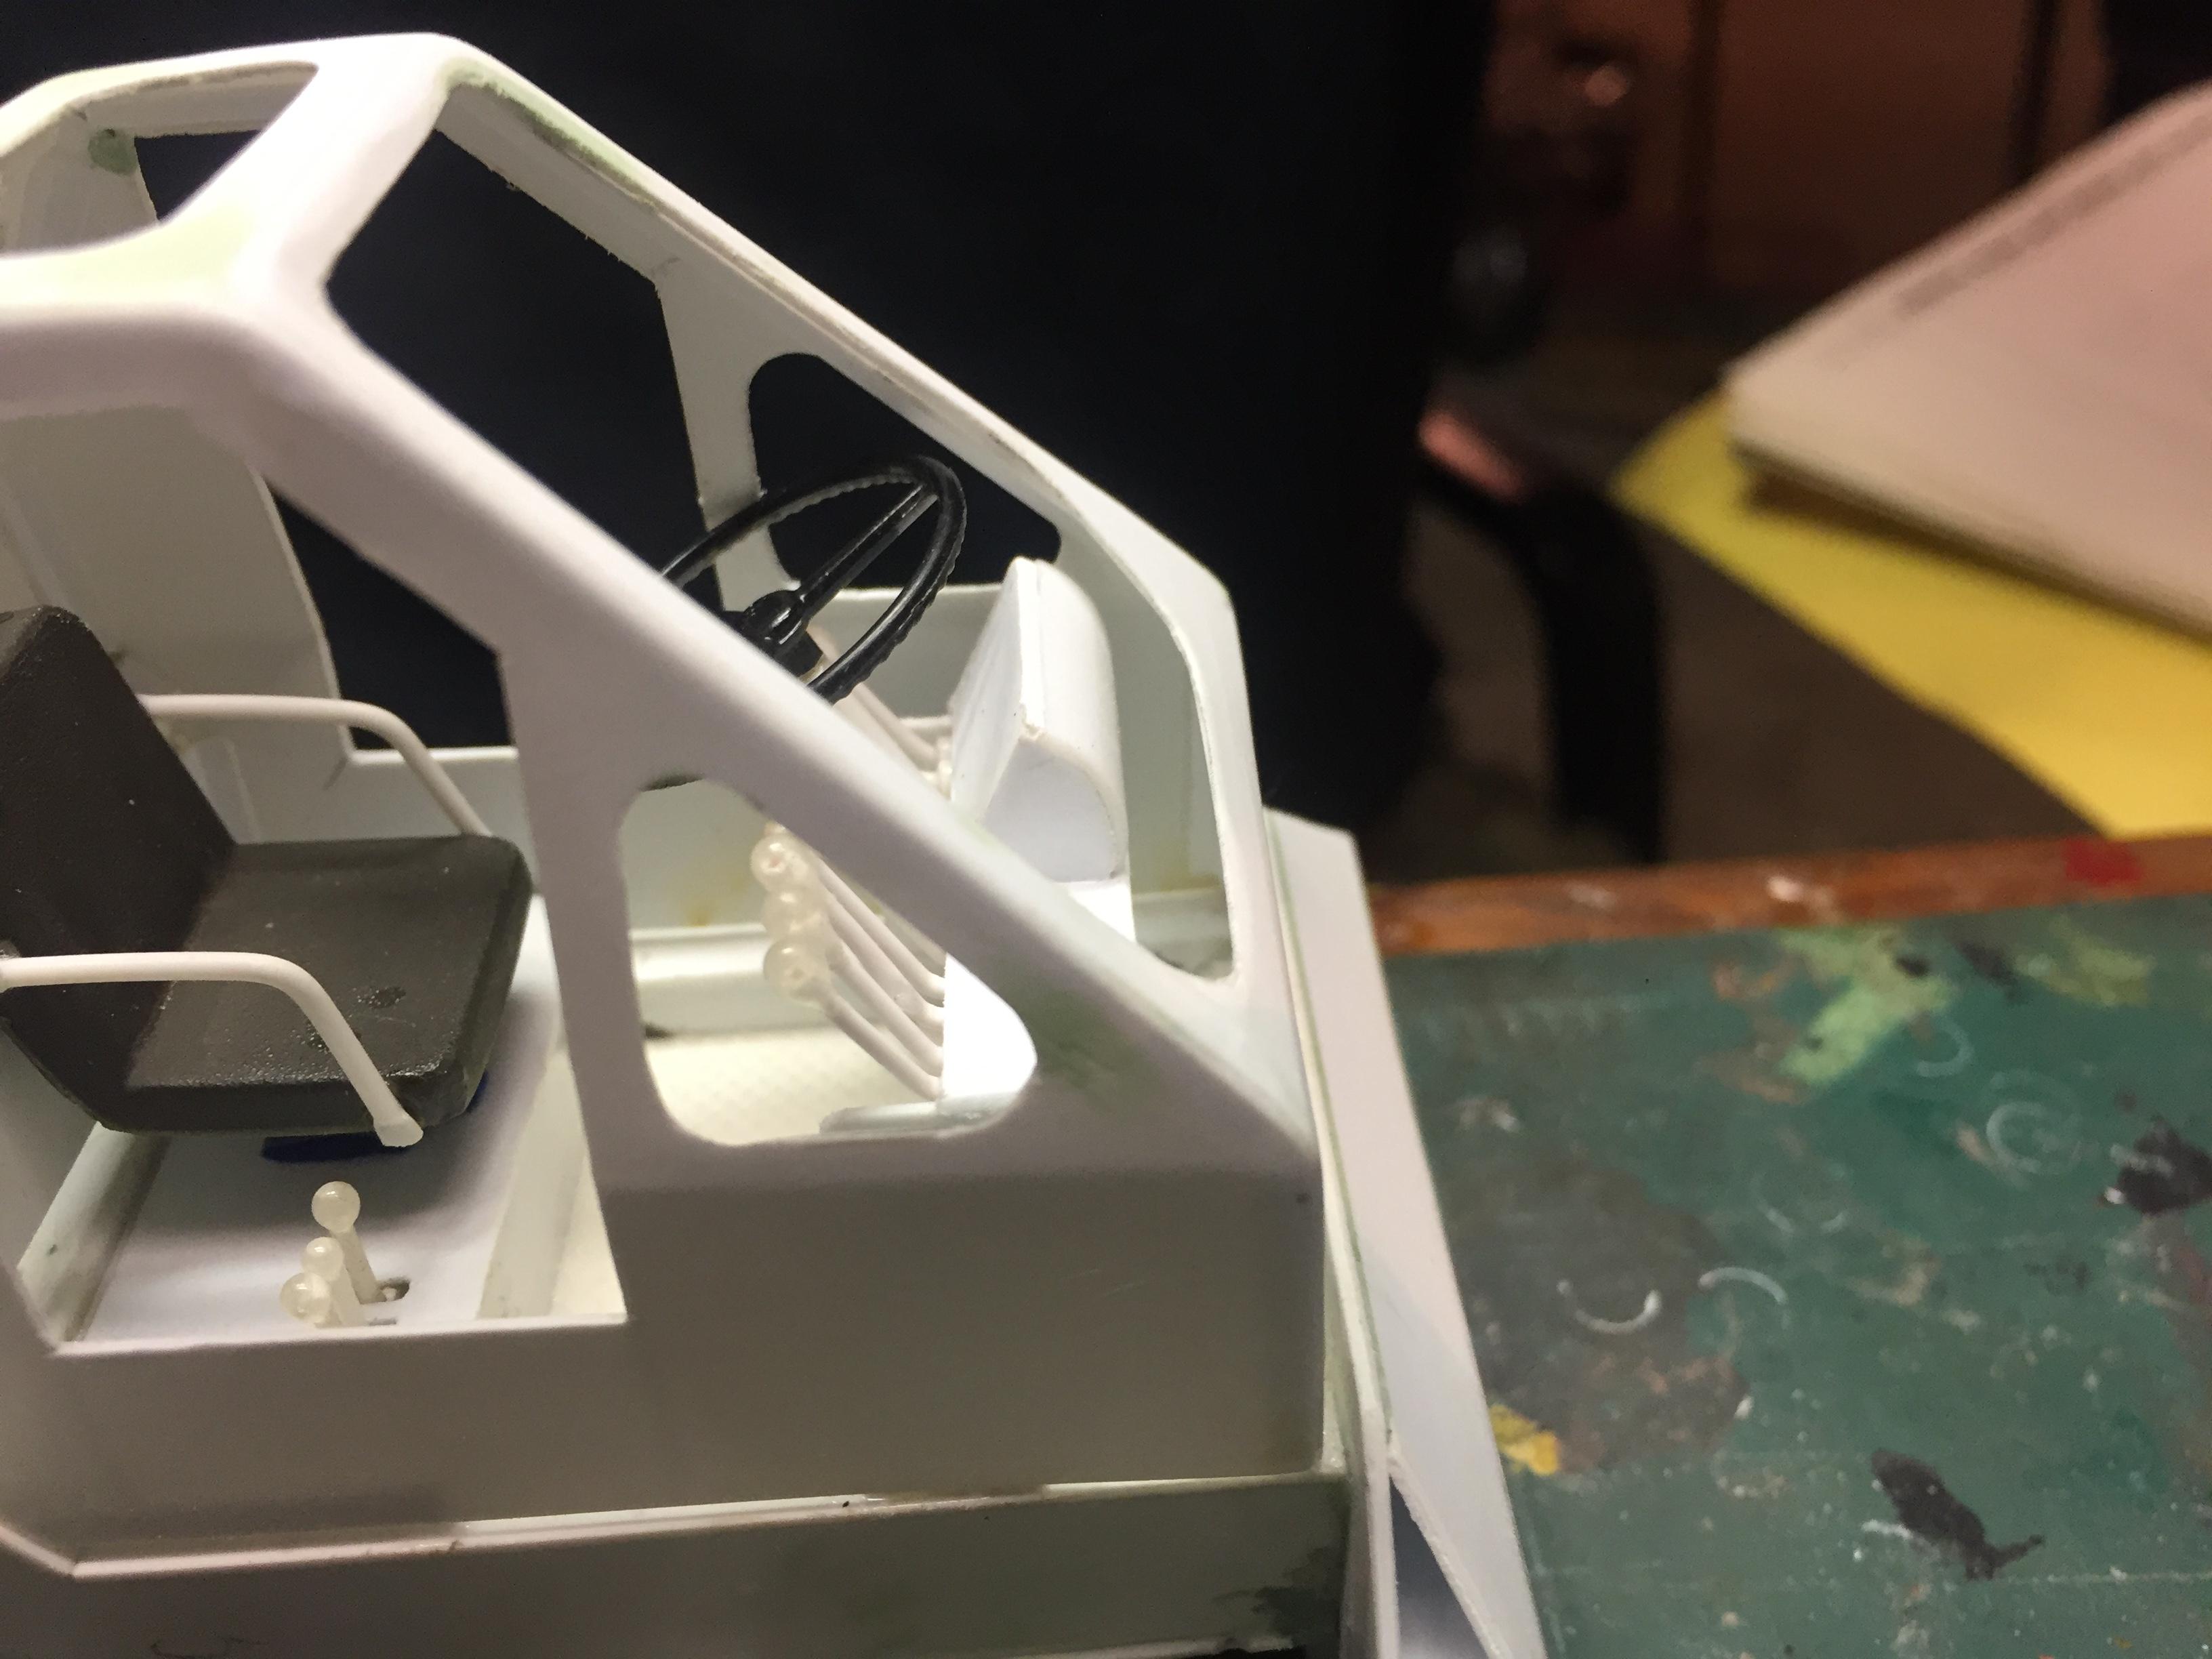
Since this not only has full four wheel hydraulic steering, it also has conventional mechanical steering on the front axle, so just added that too. Added the gauge bezels to the dashboard, will apply decals and epoxy lenses after paint. Guess it's just about time to start installing all of the hydraulic lines.......probably going to be a mile of 'em! Here's a mockup of progress so far.
-
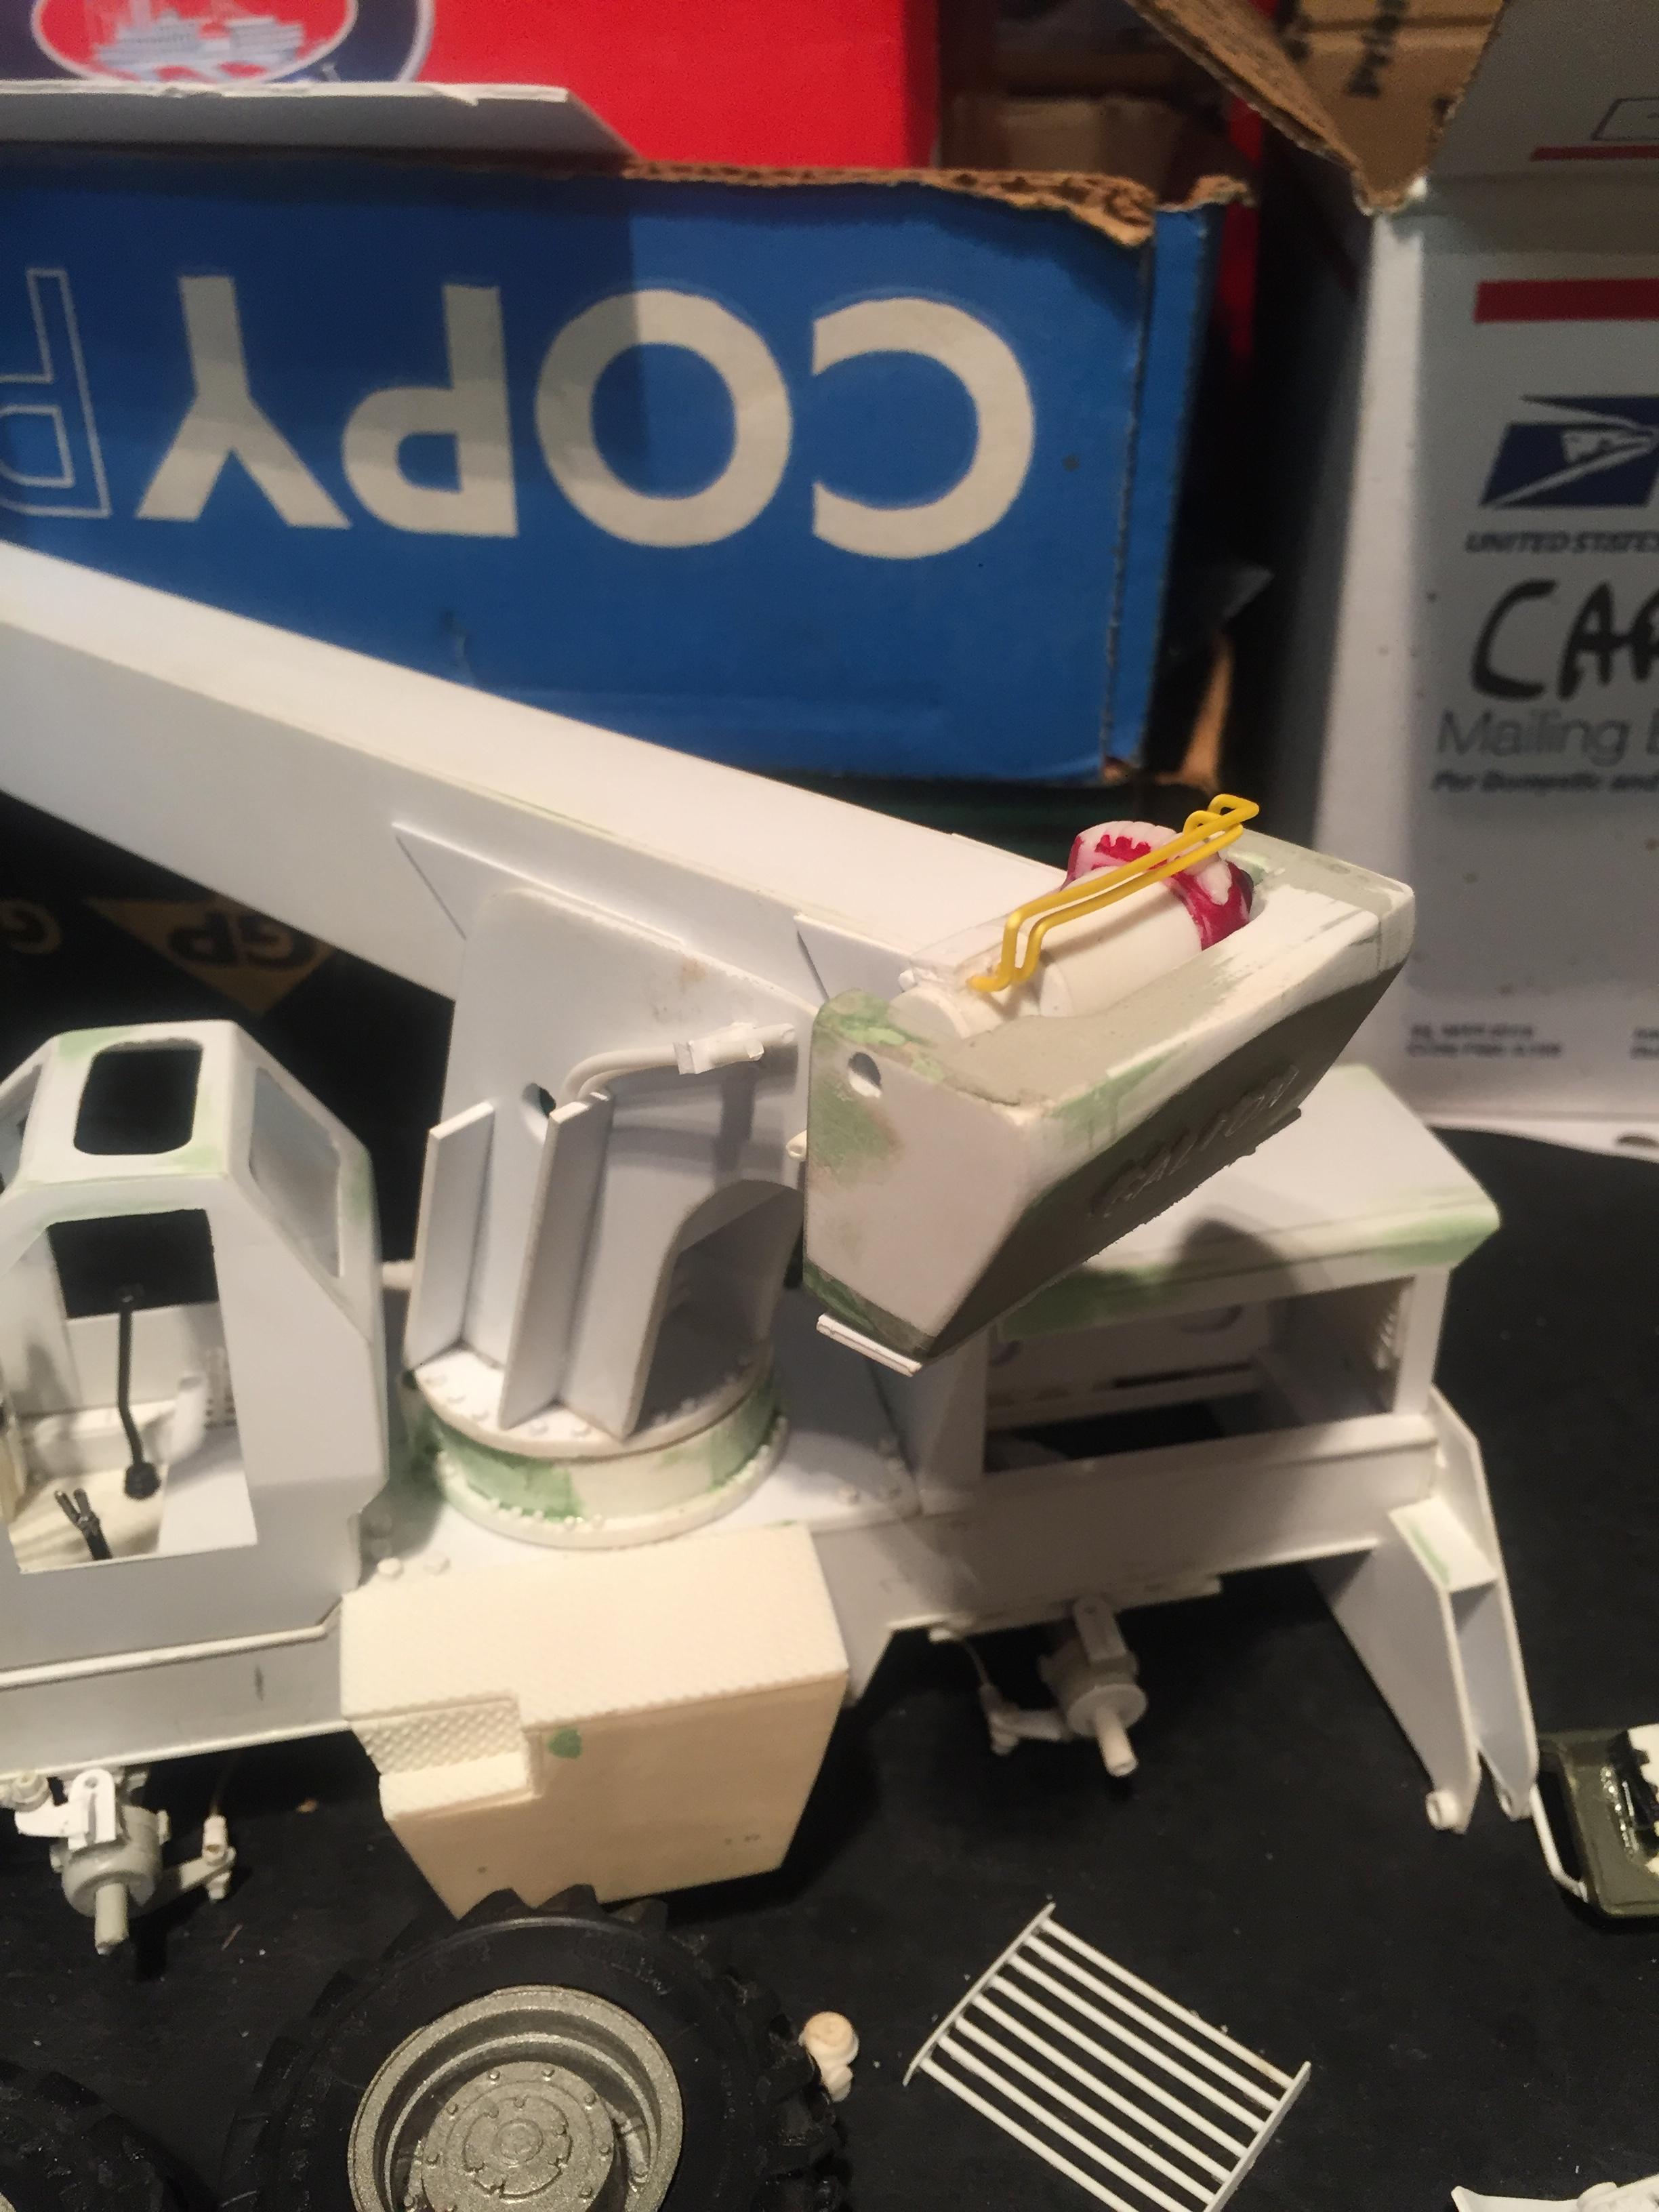
The levers are telephone wire with epoxy knobs. Lots of them for sure. Four outriggers, rear steer, swing, low line speed, intermediate line speed, main boom extend, aux boom extend, boom raise/lower, on the floor is rear drive selector, forward/reverse, throttle and gear selector, e-brake, foot controls are brake, inching control and accelerator. It can get REAL busy in there!
-
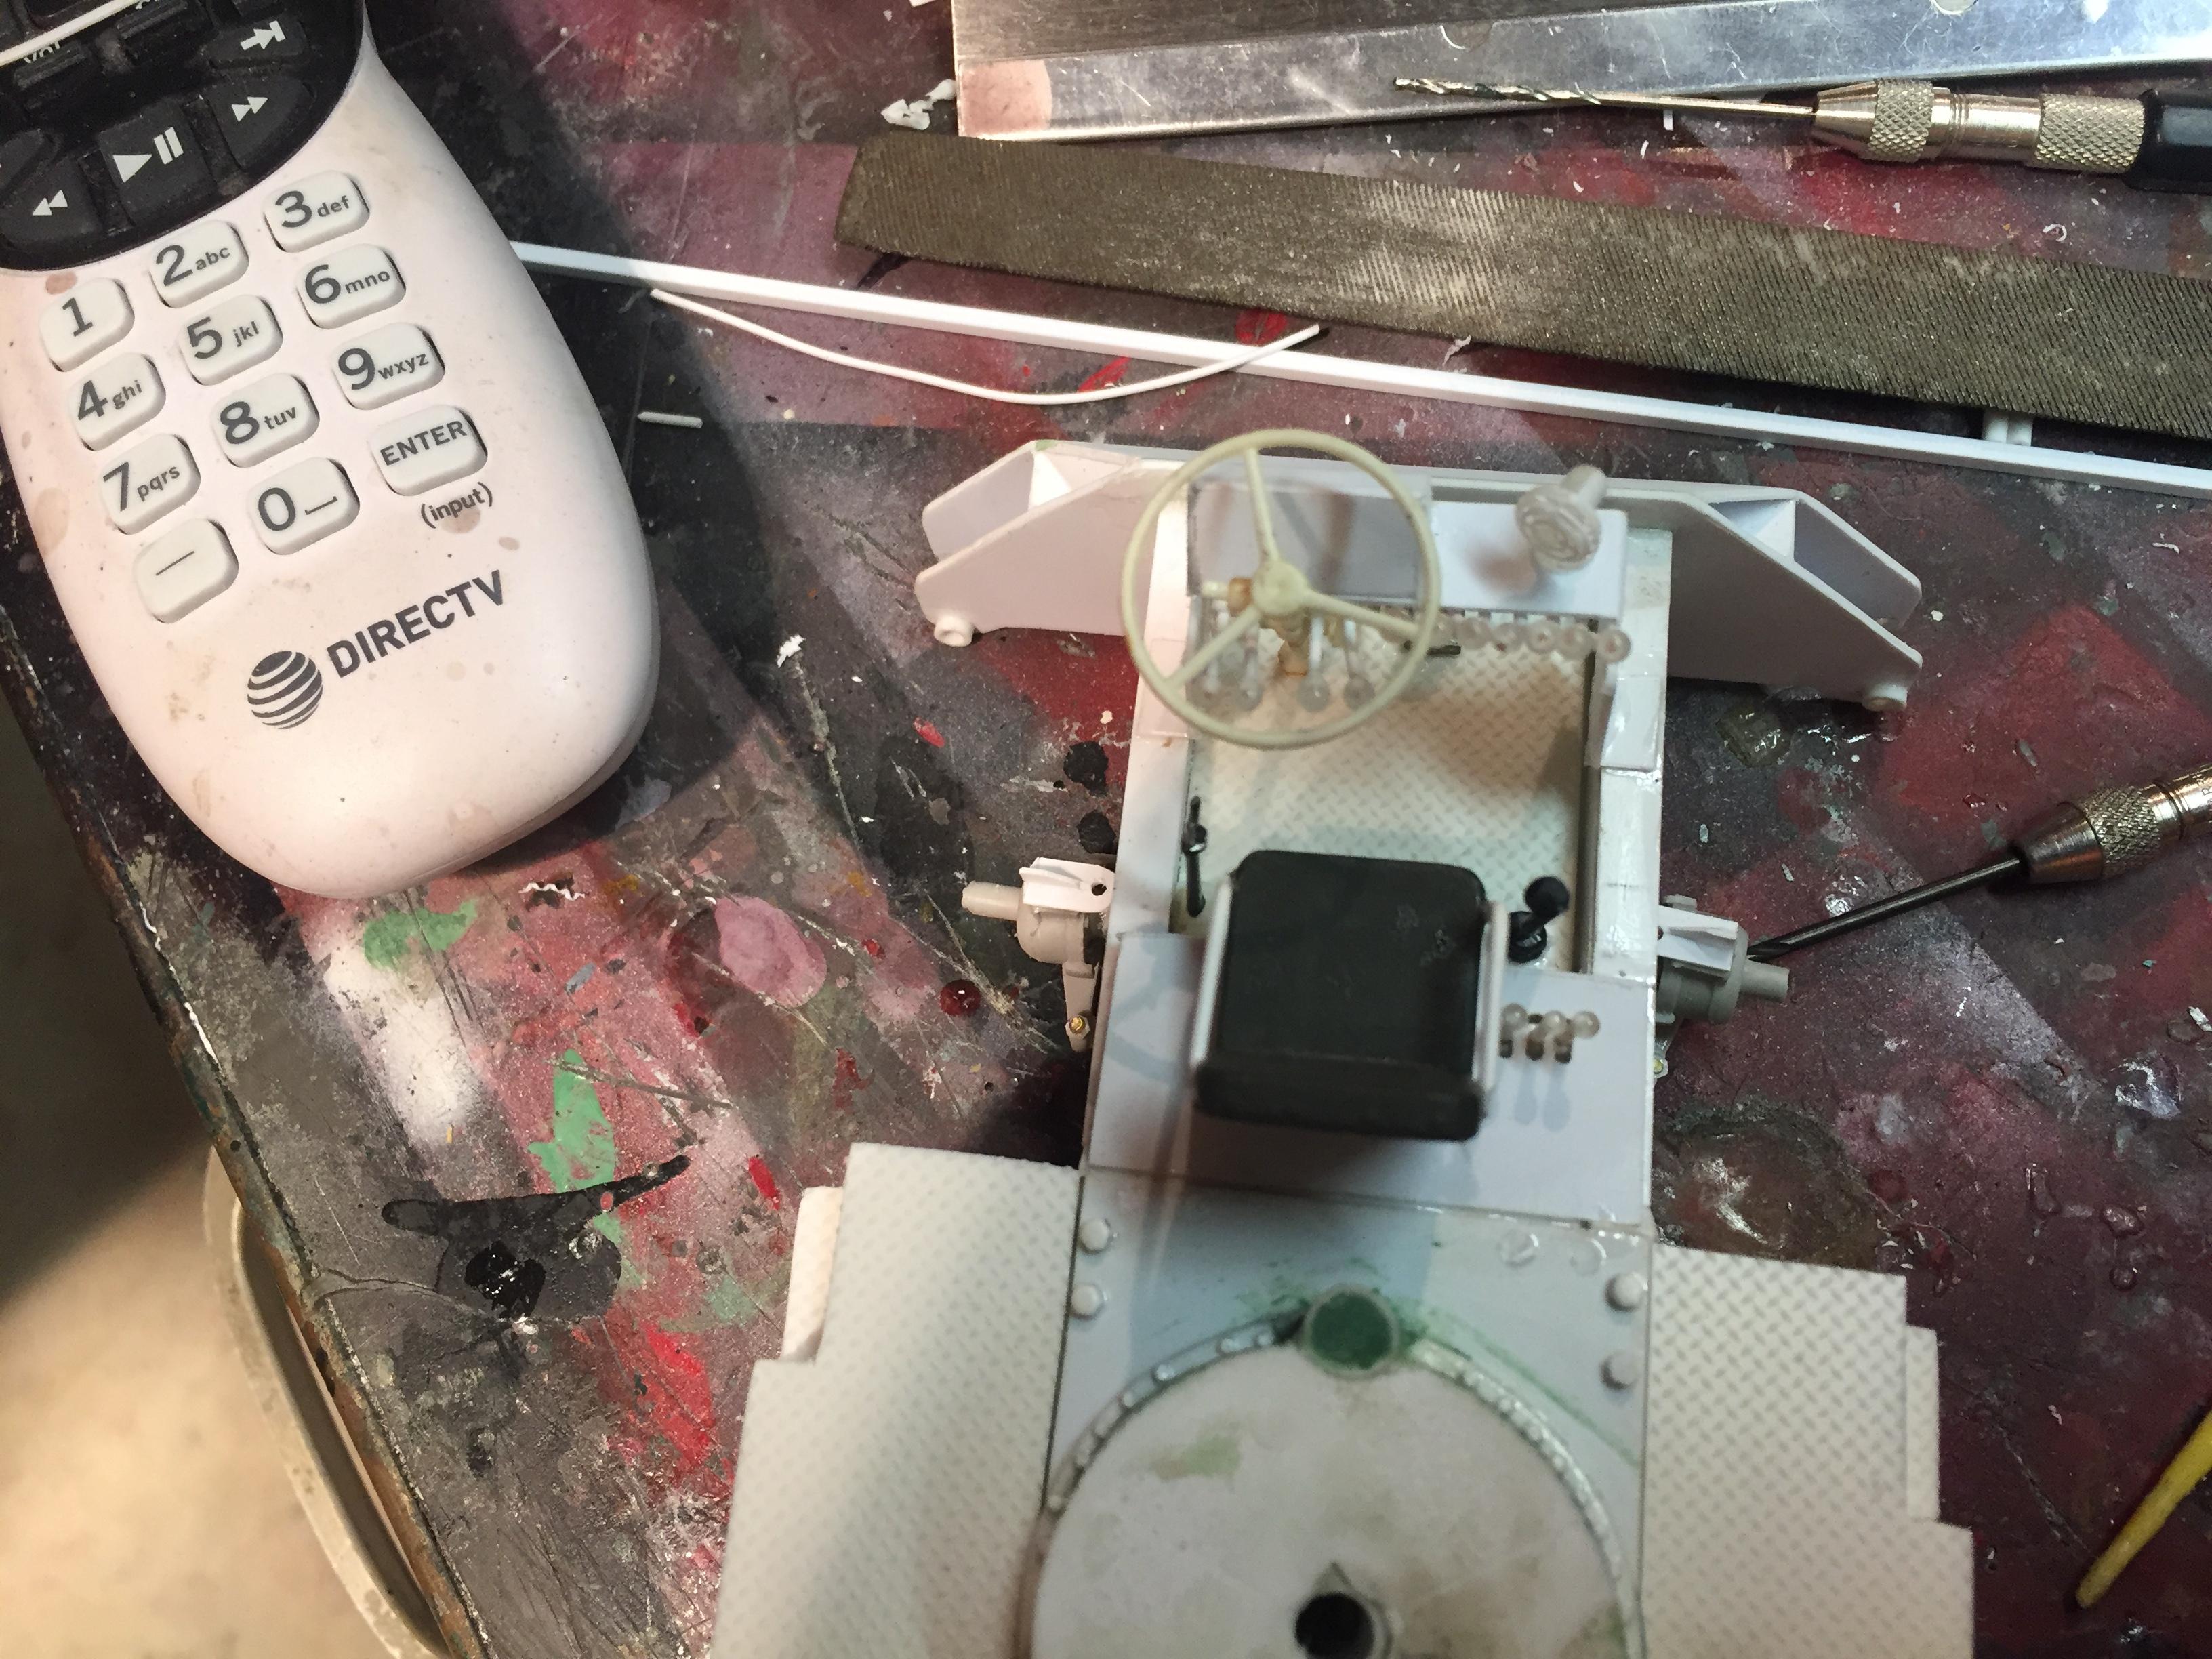
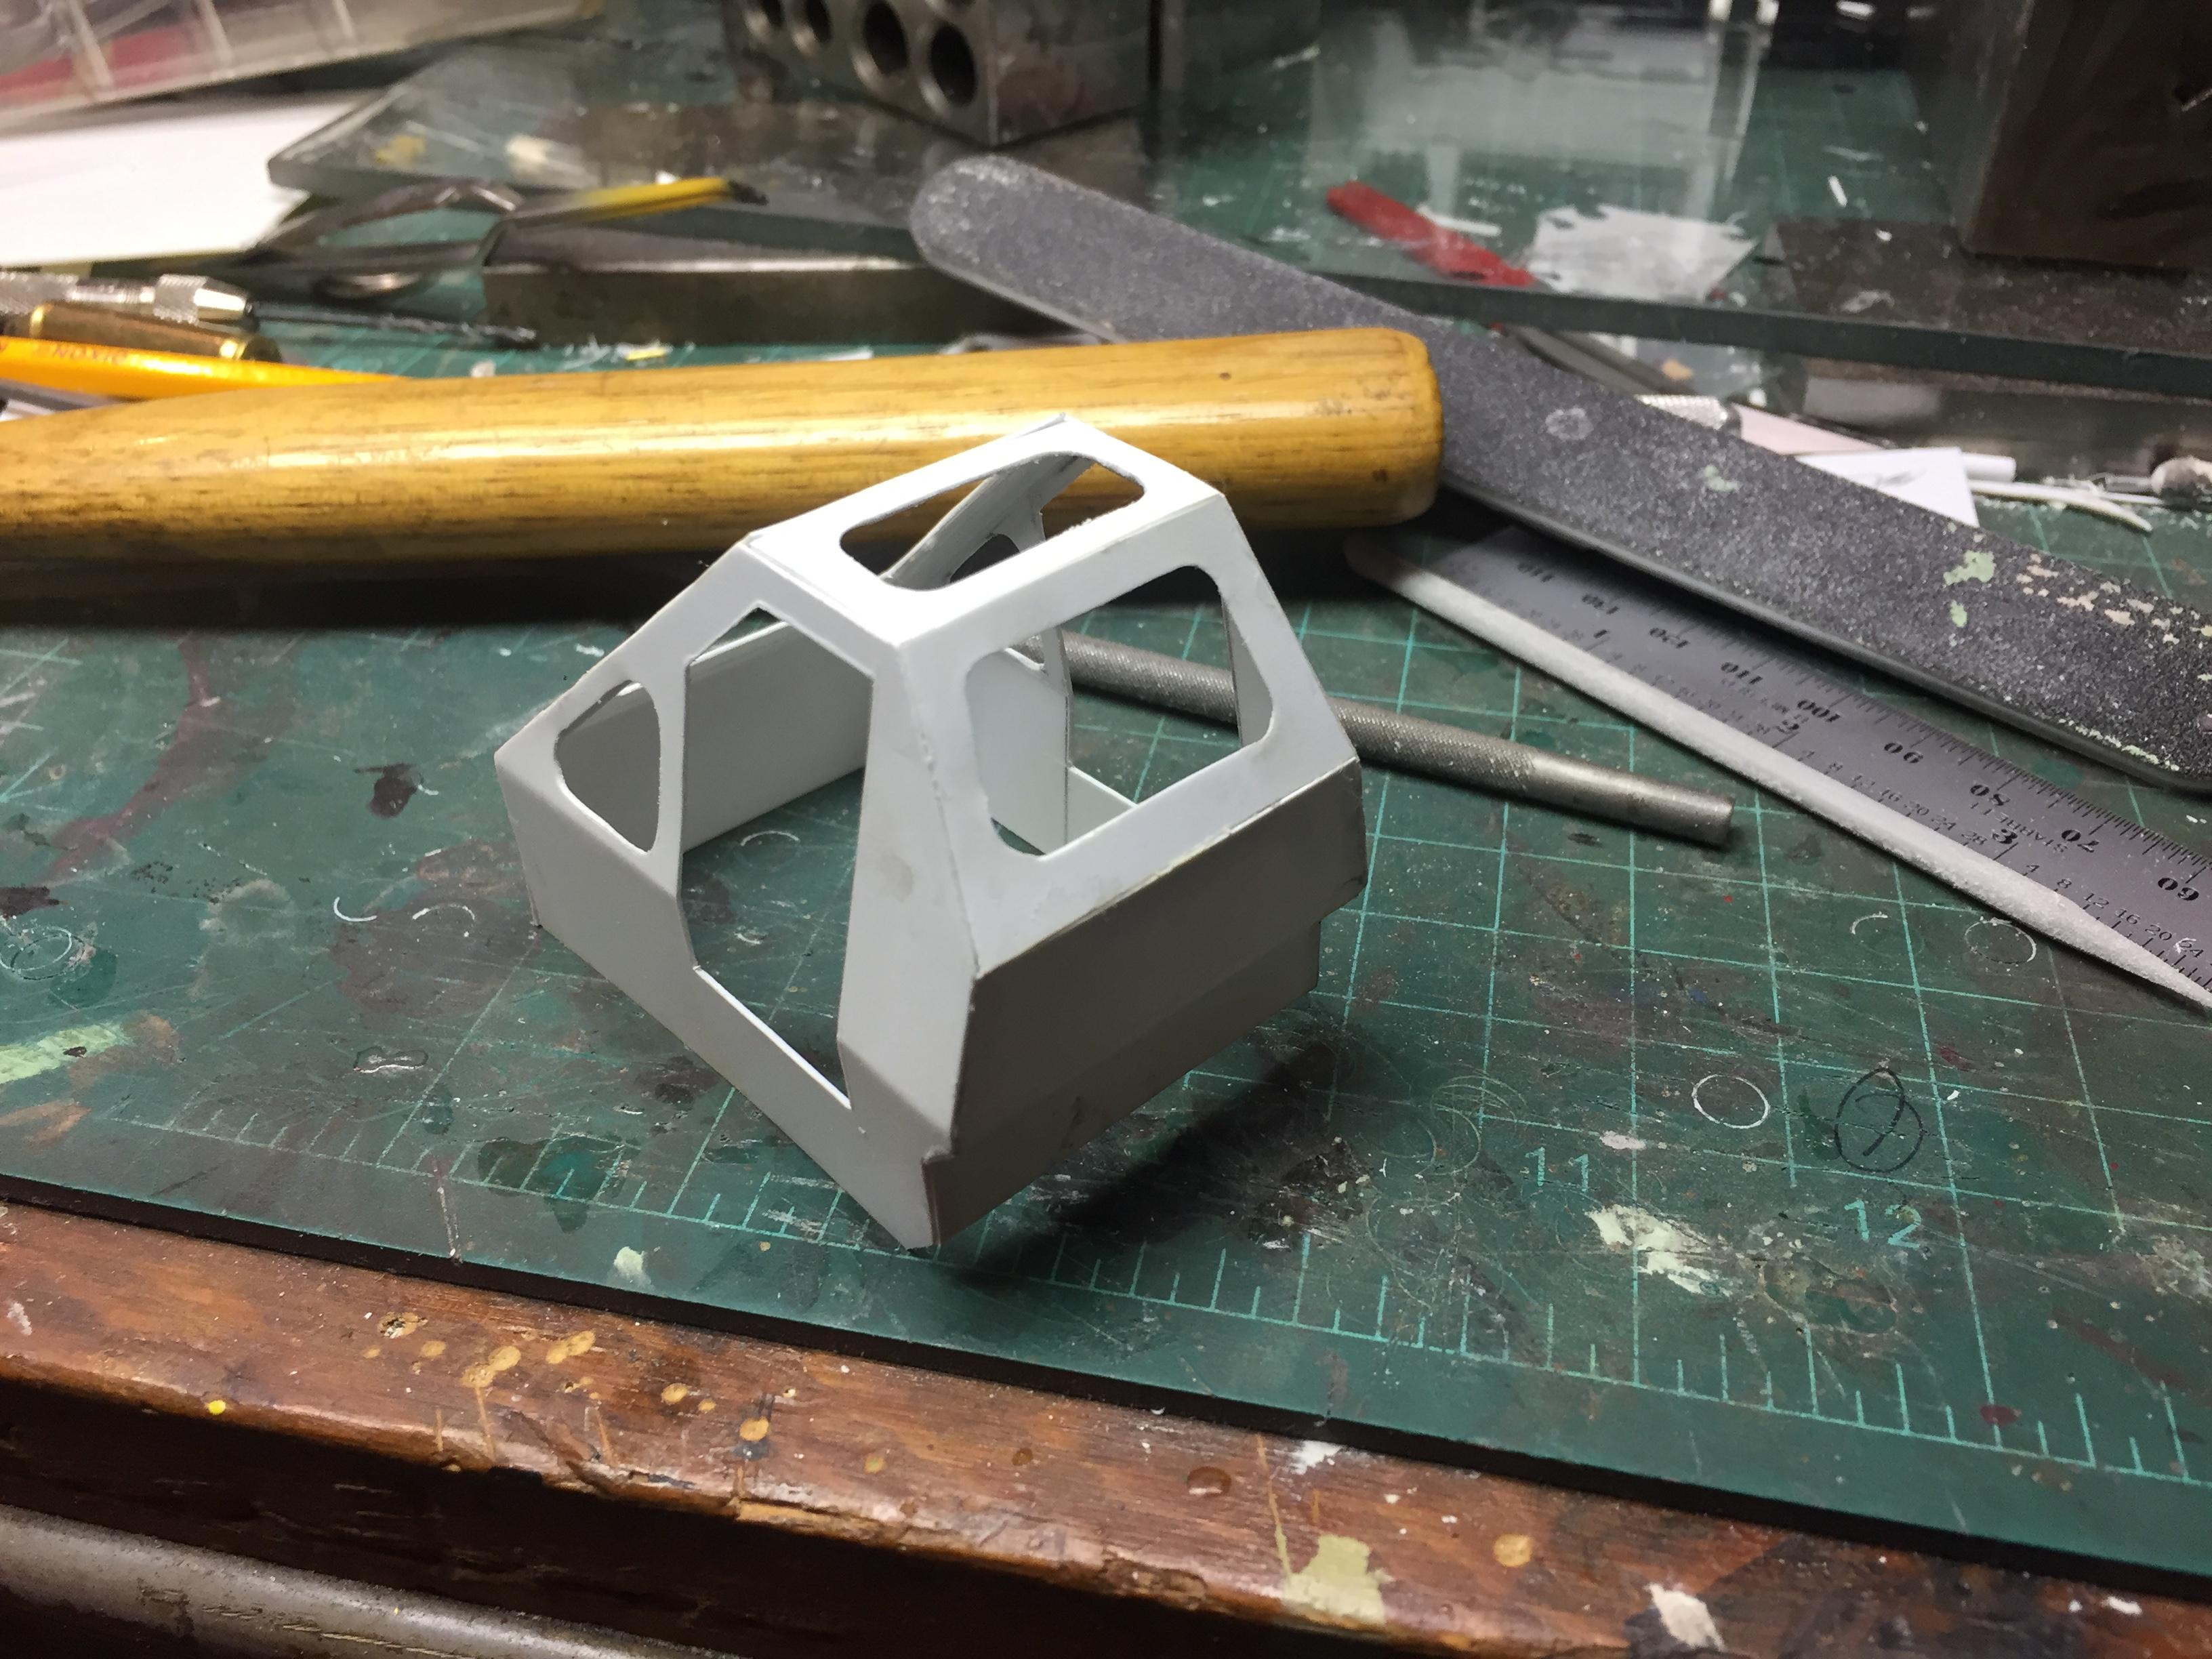
Well, I seem to have gotten by the last month of builders block due to life events, and am now finally getting somewhere with the operator's station. Got the hydraulic controls, levers, dash and seat all finalized. Lots of tiny details to add but it's finally getting there. The new cab was definitely worth doing and looks like it is supposed to. Made the control levers from telephone wire with epoxy dipped knobs.
-
Brockway 361 Wrecker
redneckrigger replied to Warren D's topic in WIP: Model Trucks: Big Rigs and Heavy Equipment
Looking great so far. Glad to see that the Napa body is finding a home on a Brockway..............perfect! -
Nice conversion job! I miss the diecasts from Danbury and Franklin Mint.
-
Why do you build models?
redneckrigger replied to Oldmopars's topic in General Automotive Talk (Trucks and Cars)
I started building models with my Dad, back when I was 7 or 8 in the very early 60's. Still have a couple pieces of one of my first cars, a 1961 SMP Pontiac. Dad was the CO of the local National Guard unit, and built models of the armor and light skinned vehicles they had in his unit. I probably destroyed all of them as he built them, but we had fun, and he just built more. That just started a life long addiction to plastic that has lasted almost 60 years. I slowed down in high school, but started up again in college, and went kind of crazy in my early to mid 20's, becoming a collector, one who had to have at least one of everything made. I've always been a gearhead, owning perhaps 150 cars and various trucks during my life, being a mechanic and repairman and painter for a construction company, and then owning my own garage and bodyshop business. I wanted one of everything in REAL cars as well, but, alas, I ran out of space and $$$, not in that order. So, I continued collecting and building to scratch the itch of wanting one of everything. In the early 90's, I purged my collection, selling off about 4000 unbuilt kits to finance the building of a 55 x 100 full service garage and bodyshop. But, I kept building and kept a few kits along the way. I also have, for some reason, an obsession for the world of miniatures, be it 1/25th scale, 1/87th scale Roco armor, (sold my collection of about 5000 pieces a couple years ago), HO scale trains, or anything in smaller than life scale. I love the old muscle cars, Mustangs, Camaros, GTO's, and ALL trucks, from pickups to heavy tractors, and the heavy trucks etc. has become my area of interest now. I love the challenge of building something that I can only see in my mind, and making it work. I have started getting into scratchbuilding, and have not looked back. The small stash I had has again ballooned to over 500 kits with a hundred or so resin kits, and LOTS of resin bits and pieces. I love the challenge, and never build anything out of the box. I used to love painting 1:1 vehicles, and still love the paint portion of a build. I enjoy sharing experiences with the friends I have met on this forum, and enjoy the NNL East gathering each spring. I don't build for others, as I build for a much more demanding critic..................myself. But, mainly, I simply enjoy the time spent at the bench, the creativity, the therapy of the body and mind and soul, and the memories it evokes, that of time spent with my Dad, and now time that I spend now and again, building something with my grandson, (my passion seems to have skipped a generation, but that's OK too), who kinda thinks his Papa has a neat hobby! And all of this is shared with my other hobbies, gun collecting, (I own a gun shop now), hunting, motorcycles, dogs, traveling with my best friend my wife, and family! Not enough hours in the day! -
Grab yer camera and snap a hundred or so photos! I try to do that every time I see an interesting piece. Doesn't mean I'm gonna get to build it, but, hey, you never know~!
-
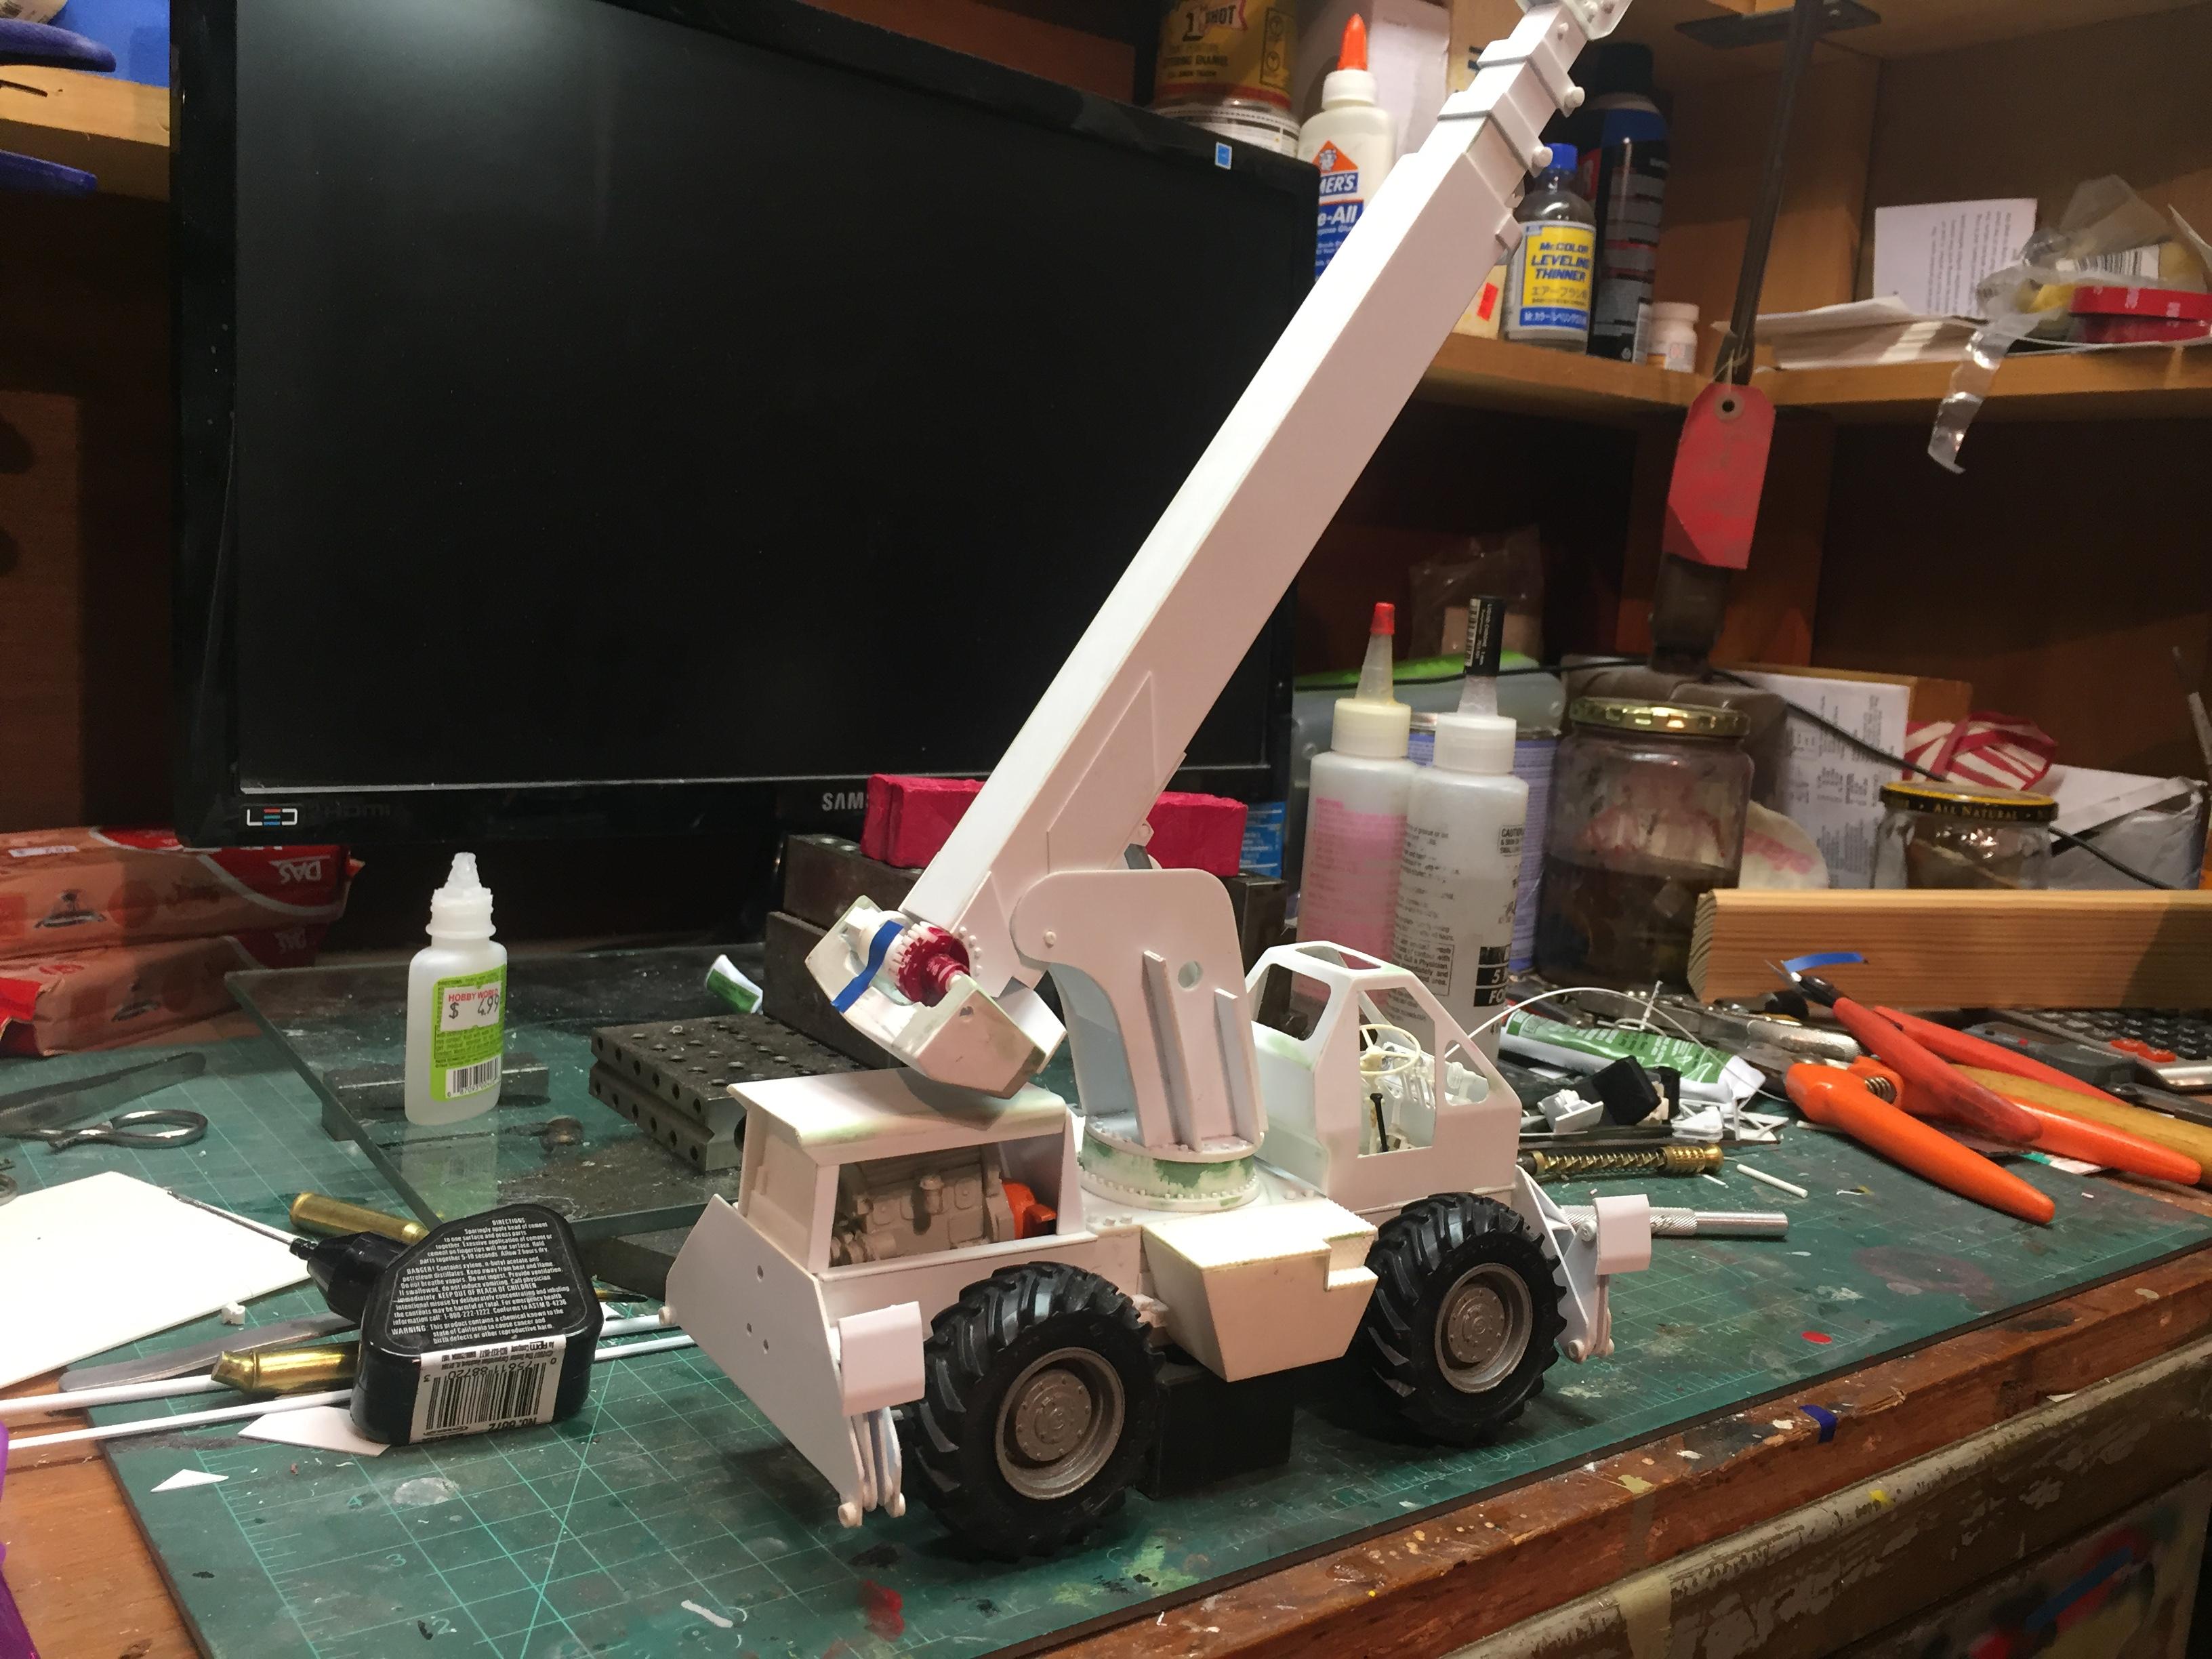
Got the cab done, and to my satisfaction. Need to hinge the doors and make the window gaskets. Looks far better now.
-
Chevy truck cab lights
redneckrigger replied to Greg Wann's topic in Truck Aftermarket / Resin / 3D Printed
Yeah, had a 1973 RD350 for a bit. Wish I still did! But, we still do have the 1978 XS750E I bought new in 1978. Cool old timer for sure! -
Ha!!!!!!!!!!!!! Just noticed that.........it sure does look like a Lunar Module!