.jpg.54ecf0d4a006234146ea24c7f6762038.jpg)
redneckrigger
-
Posts
1,578 -
Joined
-
Last visited
Content Type
Profiles
Forums
Events
Gallery
Everything posted by redneckrigger
-
.thumb.jpg.4bca3333e1da4027c381d8d56a564ec1.jpg)
Did you experience the Blizzard of '78?
redneckrigger replied to Jon Cole's topic in The Off-Topic Lounge
Yeah, the '78 blizzard dumped a ton on us in western MA. I can remember using the old Moto-Skis to get around town. Any other time, we would have gotten arrested, but things became far more lenient when a snowmobile was the only way to get around! -
What would make a rear axle cause vibration at highway speed?
redneckrigger replied to LDO's topic in The Off-Topic Lounge
I drive a 2012 Chevy 2500 Silverado. It has about 80K on her and has been fantastic since I got it. I have tires that have a very aggressive tread and full studs just for plowing snow in the winter. Last spring, when I took them off, my summer tires were worn beyond safe, so the tire shop had a set of used summer treads of the same size that he gave me a great deal on. I had them installed, and once I got to 63 MPH, a couple days later, the truck started shaking. So, back to the tire shop I went. He rebalanced them, and I tried it again. Yup, still a shake. So, back again, and he did it again, with the same results. He told me that it must be a problem with the CV joints, or the driveshaft that was masked by the aggressive tires. OK, could be, so I put her up on my lift and went through the whole drivetrain inspecting everything, and nothing was wrong. Mind you, by this time, I am at about wit's end. This whole thing has taken about 2 months by now, and it kept shaking the dickens out of me at about 59-63 MPH. So, I went back to the tire shop to have him take the summers off and put my winters back on.............the heck with the studs, even if it was June, as I live in Vermont, and studs can be on anytime. He took the tires off the wheels, and found about 1/2 to 1 full cup of water in three of the four tires, which is impossible to balance out, and would raise havoc at highway speeds. I had those tires put on in early April, and apparently, there was a bit of ice inside each one, as they had been outside. When it melted, it caused all KINDS of balance and vibration problems. The winter tires were not put back on, the summers were redone, DRY this time on the inside, and it ran fine! Little things......................! -
Loadstar Brush Truck
redneckrigger replied to Chariots of Fire's topic in WIP: Model Trucks: Big Rigs and Heavy Equipment
Absolutely incredible!!! The power train looks exactly like two all wheel drive LoadStars we had as plow trucks back in the late '80s in the Town of Savoy, MA. Tough trucks! -
Yeah Dan, I absolutely love the square bodies..........................! I've had many trucks in my life, but the one I still kick myself for getting rid of is the '85 K3500. There's just something about those looks! And, I, like you, have several squares in the works...............a 1984 K3500 with a Holmes 475T body, (again a replica of one I had), a short bed, and a CUCV, eventually!
-
Yup, I used the predecessor to the Deserter, the Fall Guy kit, to make a commercial version of the CUCV, a 1985 K3500 with a proper 8 foot box, correct Dana 60 front axle, 14 bolt GM rear, correct interior, and dual tanks, and tons of other details. LOVE the square bodied GM's!!!

-
Early Bronco
redneckrigger replied to carsntrucks4you's topic in WIP: Model Trucks: Pickups, Vans, SUVs, Light Commercial
Superb work.........................looks great! I also use Fireball's parts.............they are the best! -
I believe that the door is an engine access and the grille is to let fresh air in for the intake. It could also serve to let hot air out as suggested above. On all of the references that I researched for the 3000 that I built, and can be seen in my avatar, the carburetor air intake is immediately behind that grille. The sleeper version actually has a small sleeper box incorporated into the cab as can be seen in the attached photo.
-
I have a real 1946 Chevy 1 1/2 ton stake body truck. It has the same cab as a 1/2 ton or even the 2 1/2 ton truck. The front fenders are larger with a larger radius cut out for the tires, and the 2 1/2 ton truck has an even larger radius cutout than the 1 1/2 ton version. The wheelbase of my truck is the 134 1/2 version and does not have the added on vertical reinforcement plate as shown in the photos above in the quoted post. If there any photos, or measurements that you need, just let me know.
-
Looking forward to a new venue for this great show!
-
Two Western Star photo replicas
redneckrigger replied to Hammerdown's topic in Model Trucks: Big Rigs and Heavy Equipment
Incredible technique! -
Peterbilt heavy haul 367
redneckrigger replied to Dirtracer22's topic in Model Trucks: Big Rigs and Heavy Equipment
Extremely nice build! What did you start with for the base kit? VERY NICE! -
The new Ram at least bears a strong resemblance to the Ram we have become used to. That said, I owned a 2006 Ram 2500HD. It was a very nice looking truck, bore strong resemblance to the bloodline, and was unfortunately the biggest POS I ever owned. I had previously been a GM guy, through and through, with a very few exceptions, (two previous Dodges, a '74 and an '80, and a '93 full size Bronco, and ALL were great vehicles), and I LOVED my 1980's square body GM trucks. So I went back to Chevy for a 2012 Silverado, and flat out love that truck. Chevy/GMC has always had a strong year to year resemblance and one could tell that a truck was a Chevy or GMC by it's look alone. They carried looks and features over well from year to year. It is sad to see that they have ventured far away from that trend with the 2019 truck. In my humble opinion, it's look is very polarizing, I hate it, others may love it. But, as always, it isn't the cover of the book that tells the true story. Hopefully, all of the makers don't abandon their loyal fans and come out with something so new, one cannot tell the make of it when using it. Still love GM!
-
Yes, there are delays in getting the magazine............and availability at the LHS, for those lucky enough to HAVE an LHS, is also an issue. However, Gregg is a one man show, and as a small business owner, I can understand some of the issues. I also am a builder of models other than automotive subjects. I USED to get a publication called Military Miniatures In Review, in my humble opinion simply the best magazine on military modelling that there was. It just recently went down the drain because it was also run by a small staff, and also had many of the same issues that MCM has. But the company that owned them got sold, and the new owner didn't see fit to continue publication. It is a serious loss to the modelling community. And MCM would be a far larger loss, again in my humble opinion. Gregg has many issues from health to running MCM. And we should support him, NO MATTER WHAT, IMHO. If it takes extreme patience on our part, so be it. If it takes a membership fee to use the forum, fine. Whatever it takes is WELL worth it. For us to get upset does not get us anywhere, especially when we consider the alternate universe we would be in WITHOUT Gregg, and MCM and this wonderful forum! Gregg gives this magazine and forum everything he has. A lesser man would have cut and run LONG ago! Thank you, Gregg, for your commitment!
-
Long bed for the MPC GMC (Fall Guy) kit?
redneckrigger replied to Ben's topic in Truck Aftermarket / Resin / 3D Printed
The casting is very nice. It does not have a chassis plate, as you will have to stretch your short bed chassis to fit. I added underbed ribs and cross members to mine, and stake pockets. It is dimensionally excellent. -
wip- VK4502P
redneckrigger replied to JTRACING's topic in WIP: All The Rest: Motorcycles, Aviation, Military, Sci-Fi, Figures
Beautiful work!!! -
'69 GMC 1 ton
redneckrigger replied to dieseldawg142's topic in Model Trucks: Pickups, Vans, SUVs, Light Commercial
VERY well done! -
Photo service sites help
redneckrigger replied to clayton's topic in General Automotive Talk (Trucks and Cars)
I have been using Fotki with super results. -
I seem to remember seeing that AITM took over all of Bob's products. Check with Dave at AITM.
-
A trailer for the GMC - DONE
redneckrigger replied to landman's topic in WIP: Model Trucks: Big Rigs and Heavy Equipment
Looks tremendous! -
Ryder 1980 Mack Cruiseliner
redneckrigger replied to DRIPTROIT 71's topic in WIP: Model Trucks: Big Rigs and Heavy Equipment
Looking very nice! Best of both worlds......................a COE and a Mack............only thing better would be a Detroit as well! -
Old field Kenworth
redneckrigger replied to KJ790's topic in WIP: Model Trucks: Big Rigs and Heavy Equipment
That is stunning work, KJ, great subject matter, of course, and tremendous weathering work. Can''t wait to see more! -
1955 IH RDTC 405
redneckrigger replied to DRIPTROIT 71's topic in WIP: Model Trucks: Big Rigs and Heavy Equipment
That is a superb build, Brian, and not one seen very often, which makes it all that much more interesting! Is the engine a DAN Models resin? -
Site Update Complete
redneckrigger replied to Dave Ambrose's topic in General Automotive Talk (Trucks and Cars)
Thank you for the hard work...................!!! It looks great to me, and works fine so far! -
Loadstar Brush Truck
redneckrigger replied to Chariots of Fire's topic in WIP: Model Trucks: Big Rigs and Heavy Equipment
Stunning as usual!!!! Keep the pics coming................it is tremendous inspiration! -
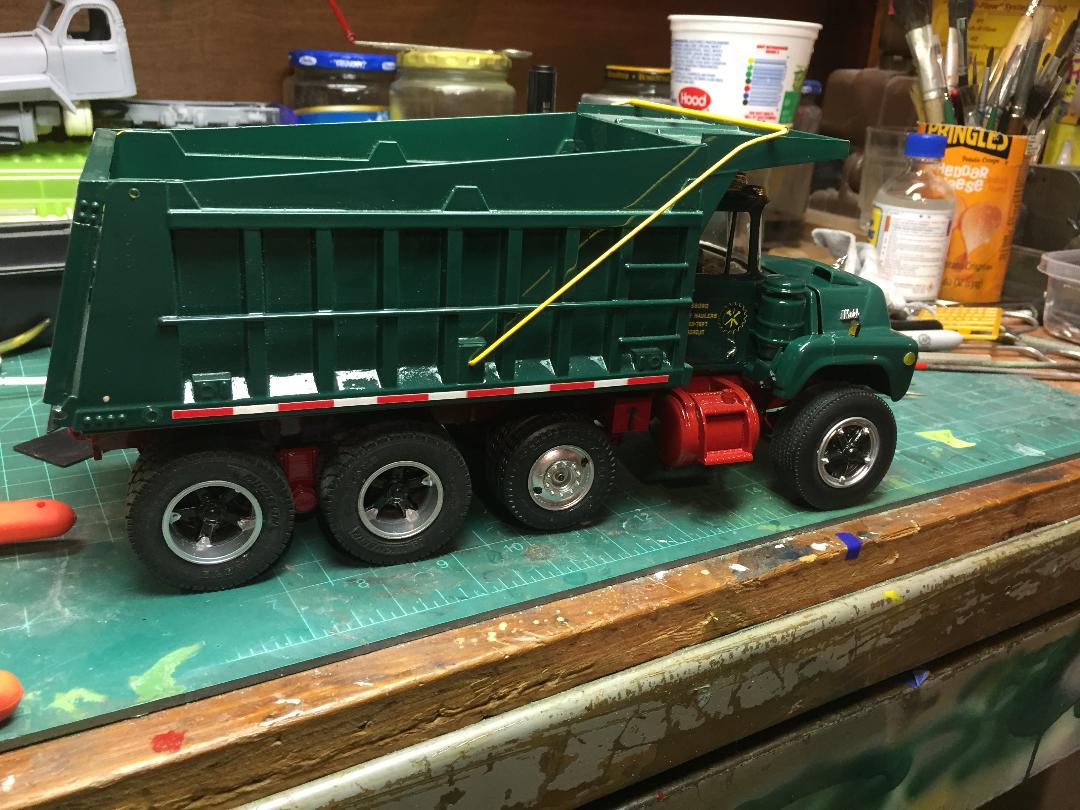
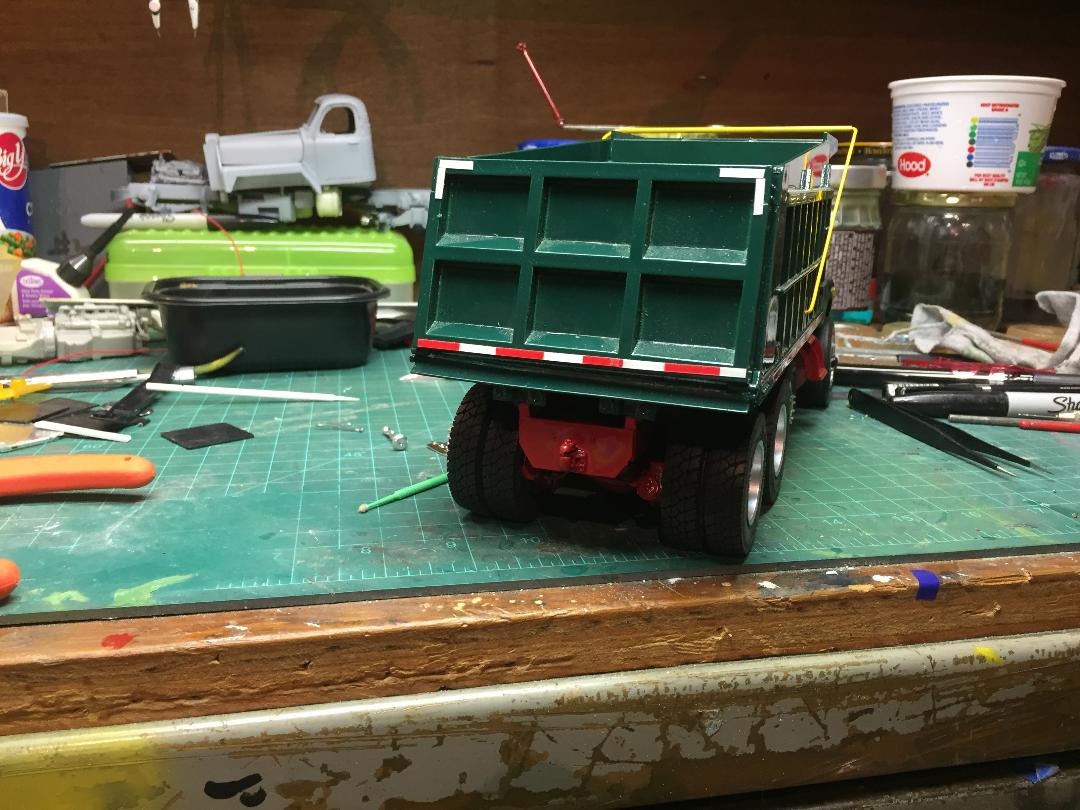
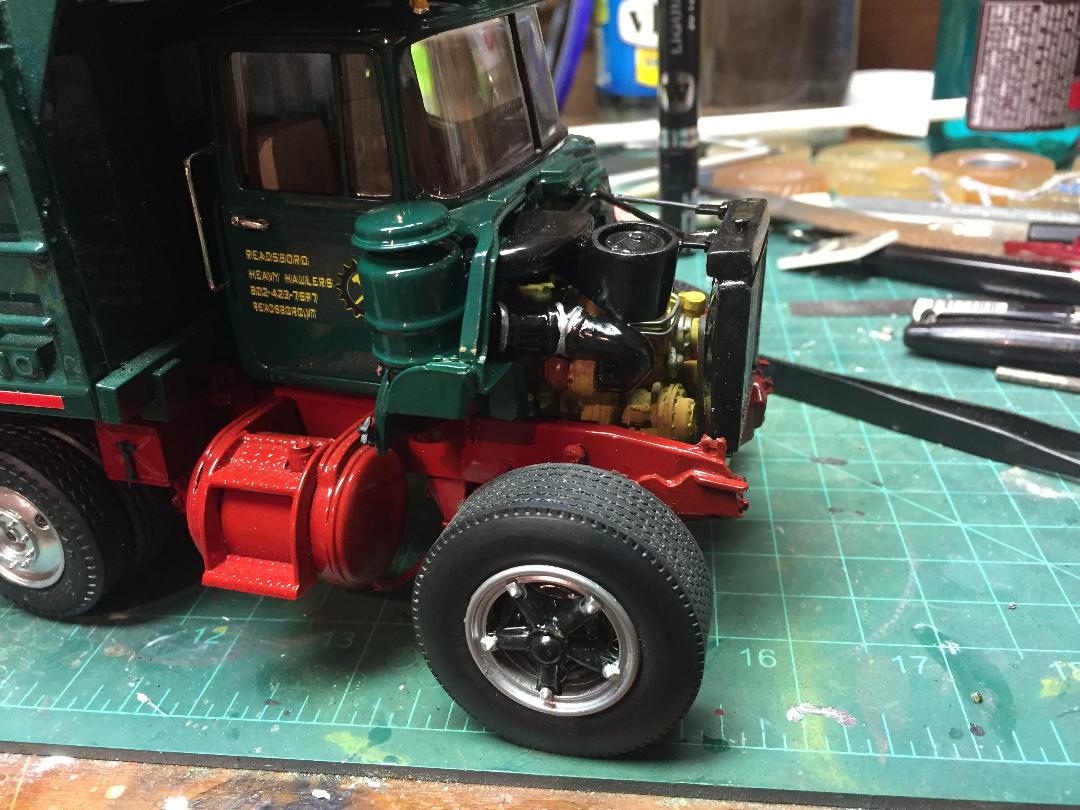
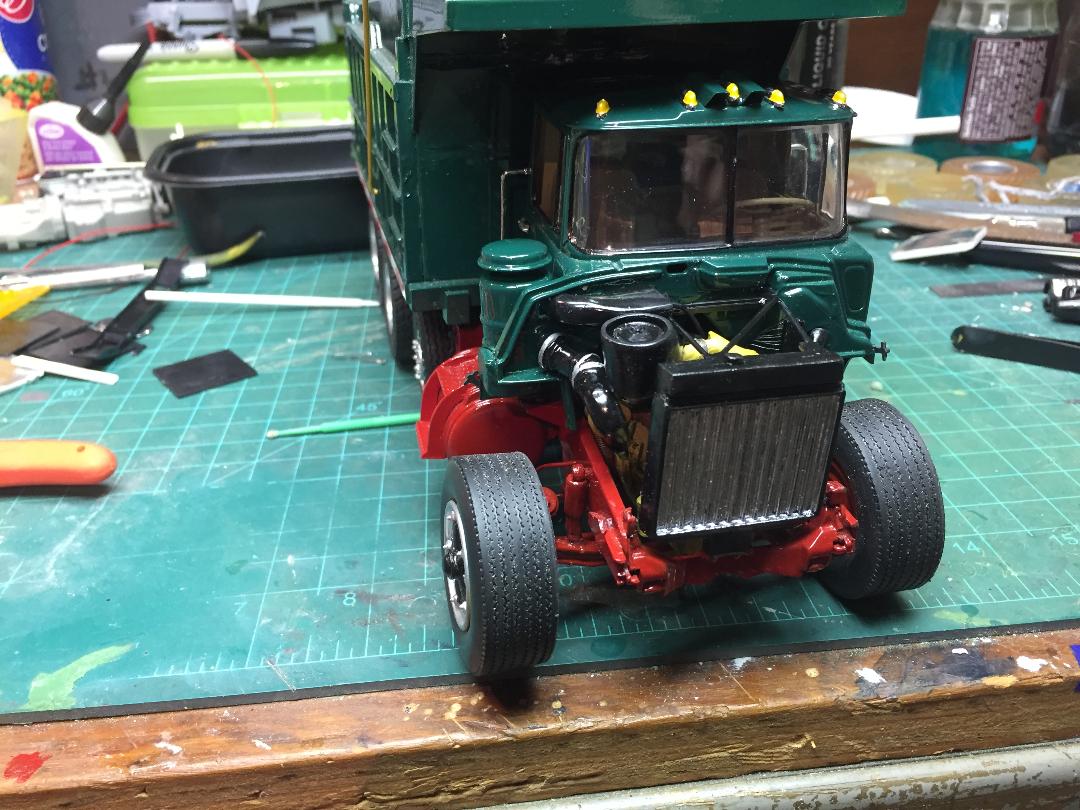
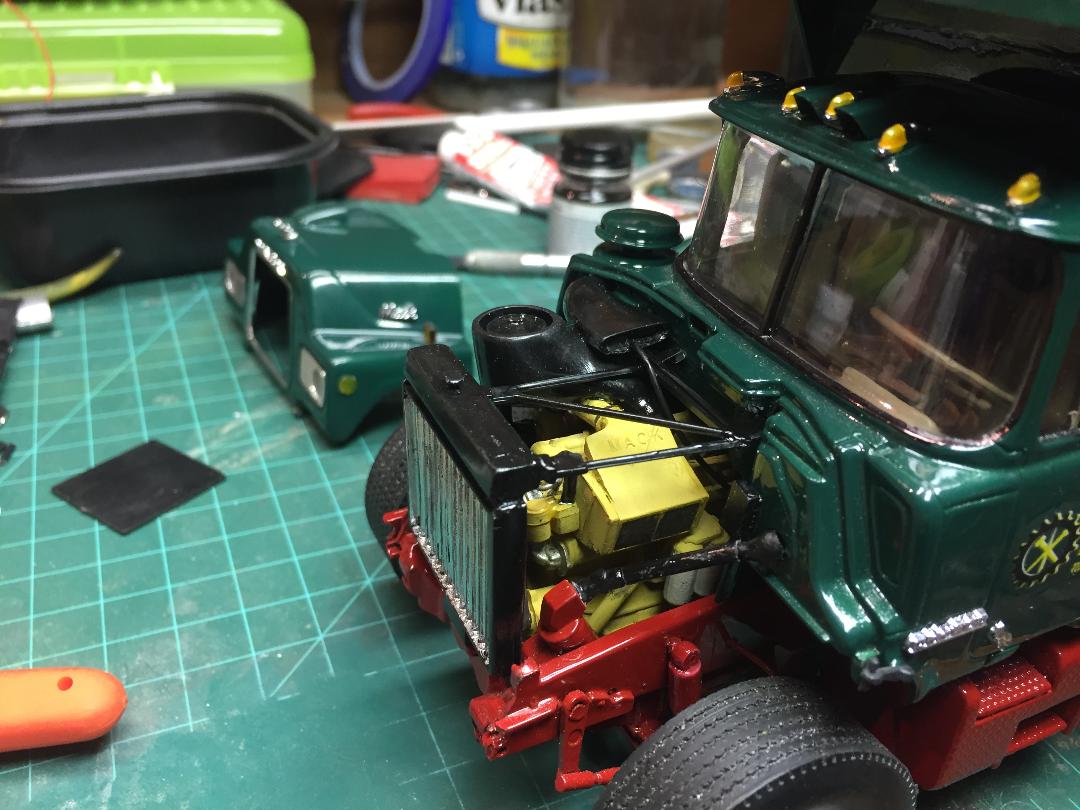
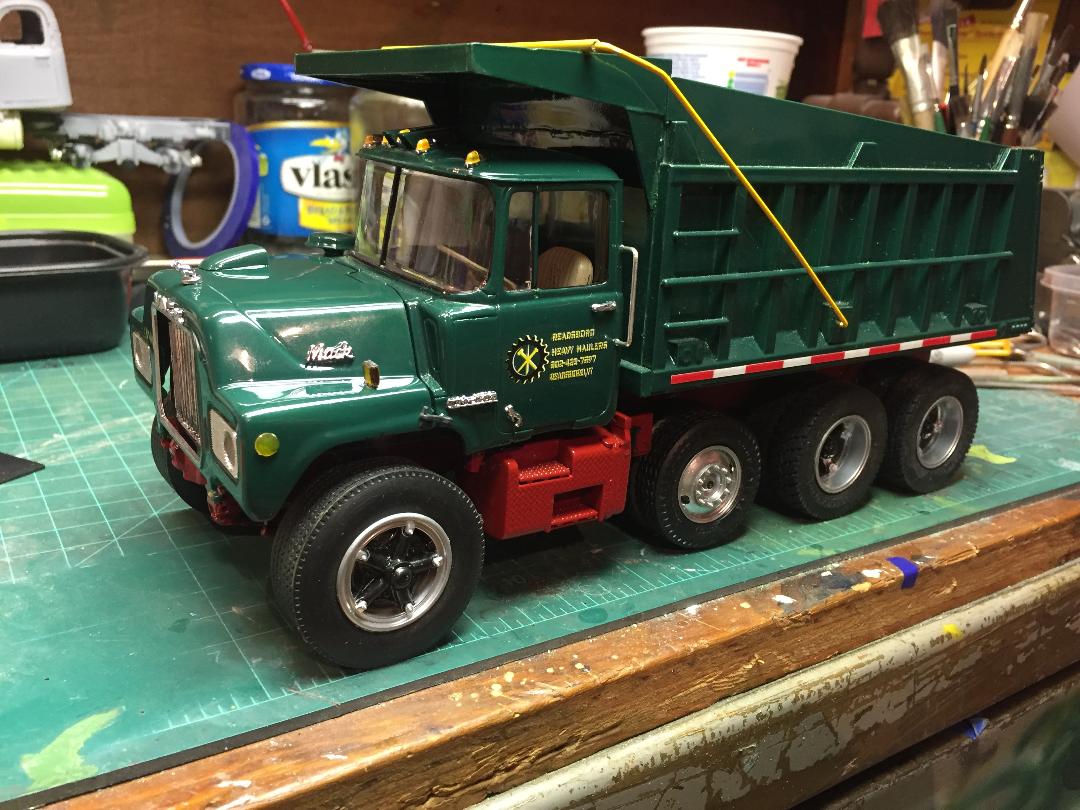
Well, after a while sitting there looking forlorn, I got some more work done on the old girl. I finished installing the Tip Turbine engine with the scratch built air intake ductwork. Got the rest of the piping done for the hydraulics and fuel lines. Added the radiator and brace, hinged the hood, added hood holdowns, and added the roof marker lights, all nameplates and marker lights on the cab, and the Tip Turbine hood scoop. Added appropriate reflective markings to the dump body. Still have to add the horns and mirrors, wipers, frame extensions to the front bumper and the bumper and nameplate stand, exhaust, and detail the dump body with a tarp retraction system, lights, etc. But it sure is looking better!