Dann Tier
-
Posts
8,151 -
Joined
-
Last visited
Content Type
Profiles
Forums
Events
Gallery
Everything posted by Dann Tier
-

Re-engineering Monograms Lotus Esprit...new update!
Dann Tier replied to Dann Tier's topic in WIP: Model Cars
You bet, Bud!!...it works a treat!!, AND theres still plenty of room for brakes, and rotors!! -
I've built that one too, and it is VERY nice!!
-
Thanks, Dominik!!
-
Thanks, bud!!....yes it does!
-
Thanks alot!!
-
LOVE IT!!!!
-
I'm sure you could attach the rockers to the chassis first, but it freaks me out.....something keeps telling me not to, so i wont. I totally used the pivot for the rear suspension drop....its such a small adjustment, that it didnt really affect the tyre spacing/centering.
-
Re-engineering Monograms Lotus Esprit...new update!
Dann Tier replied to Dann Tier's topic in WIP: Model Cars
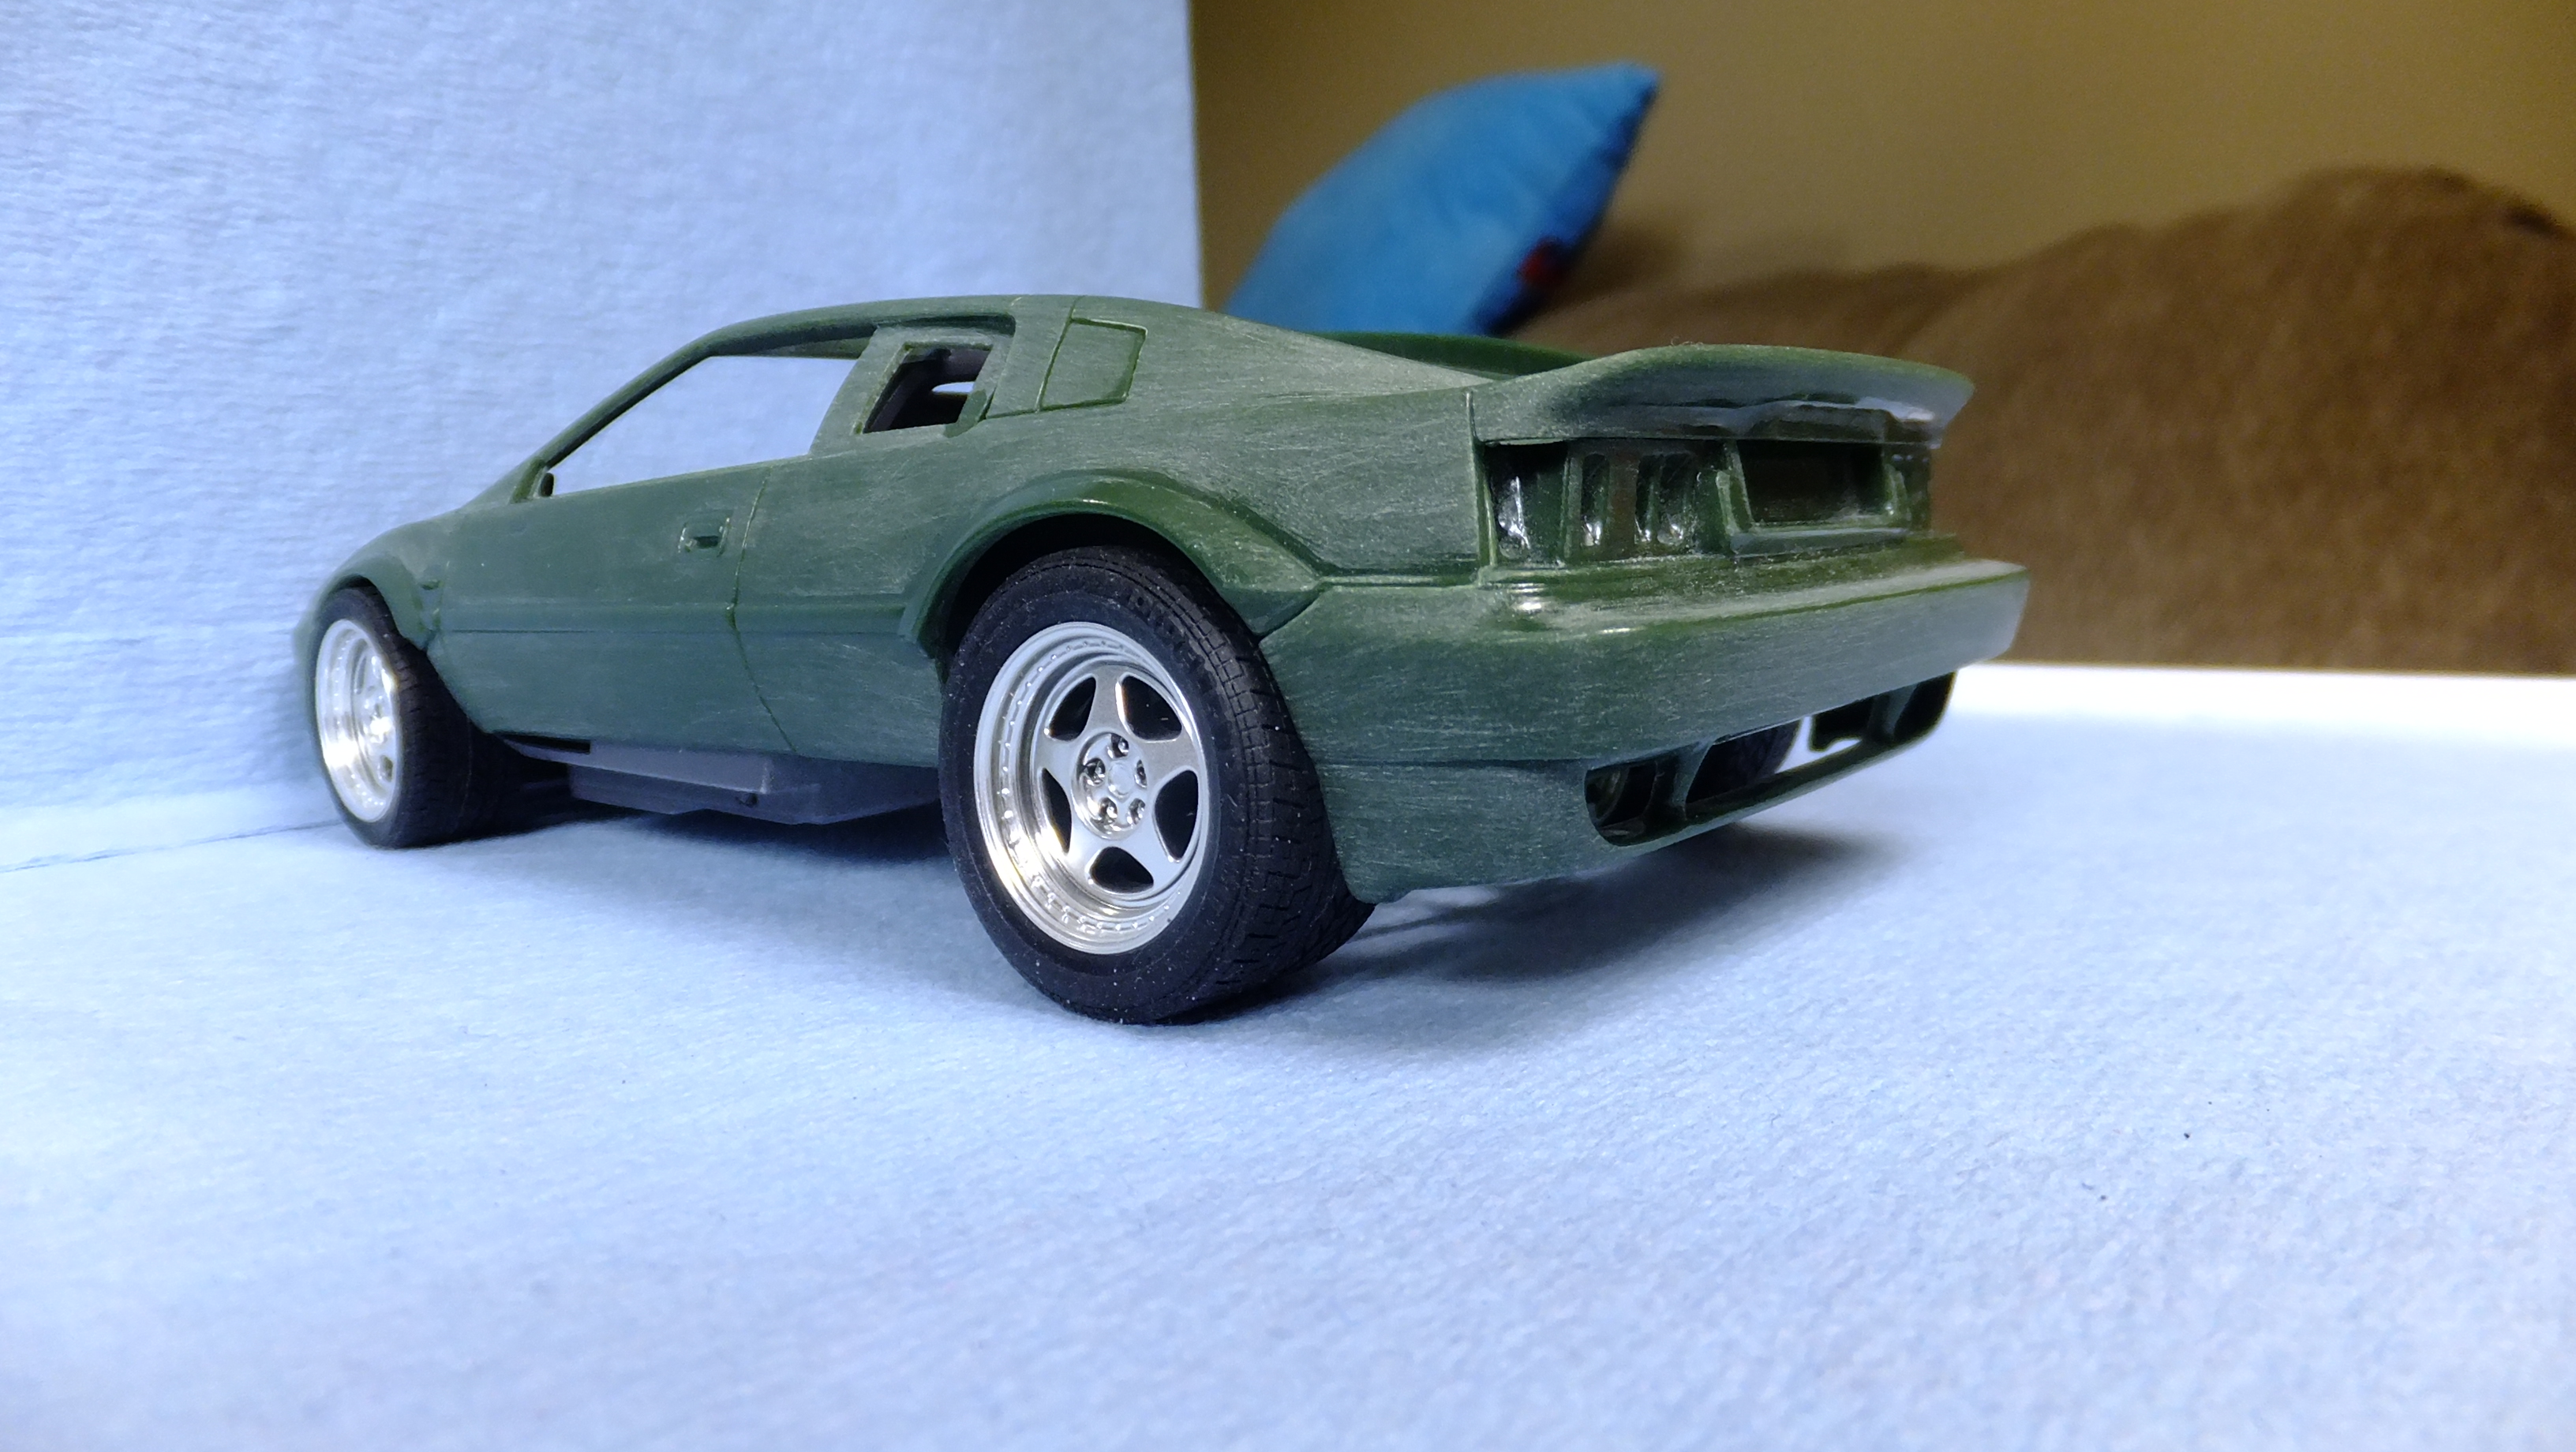
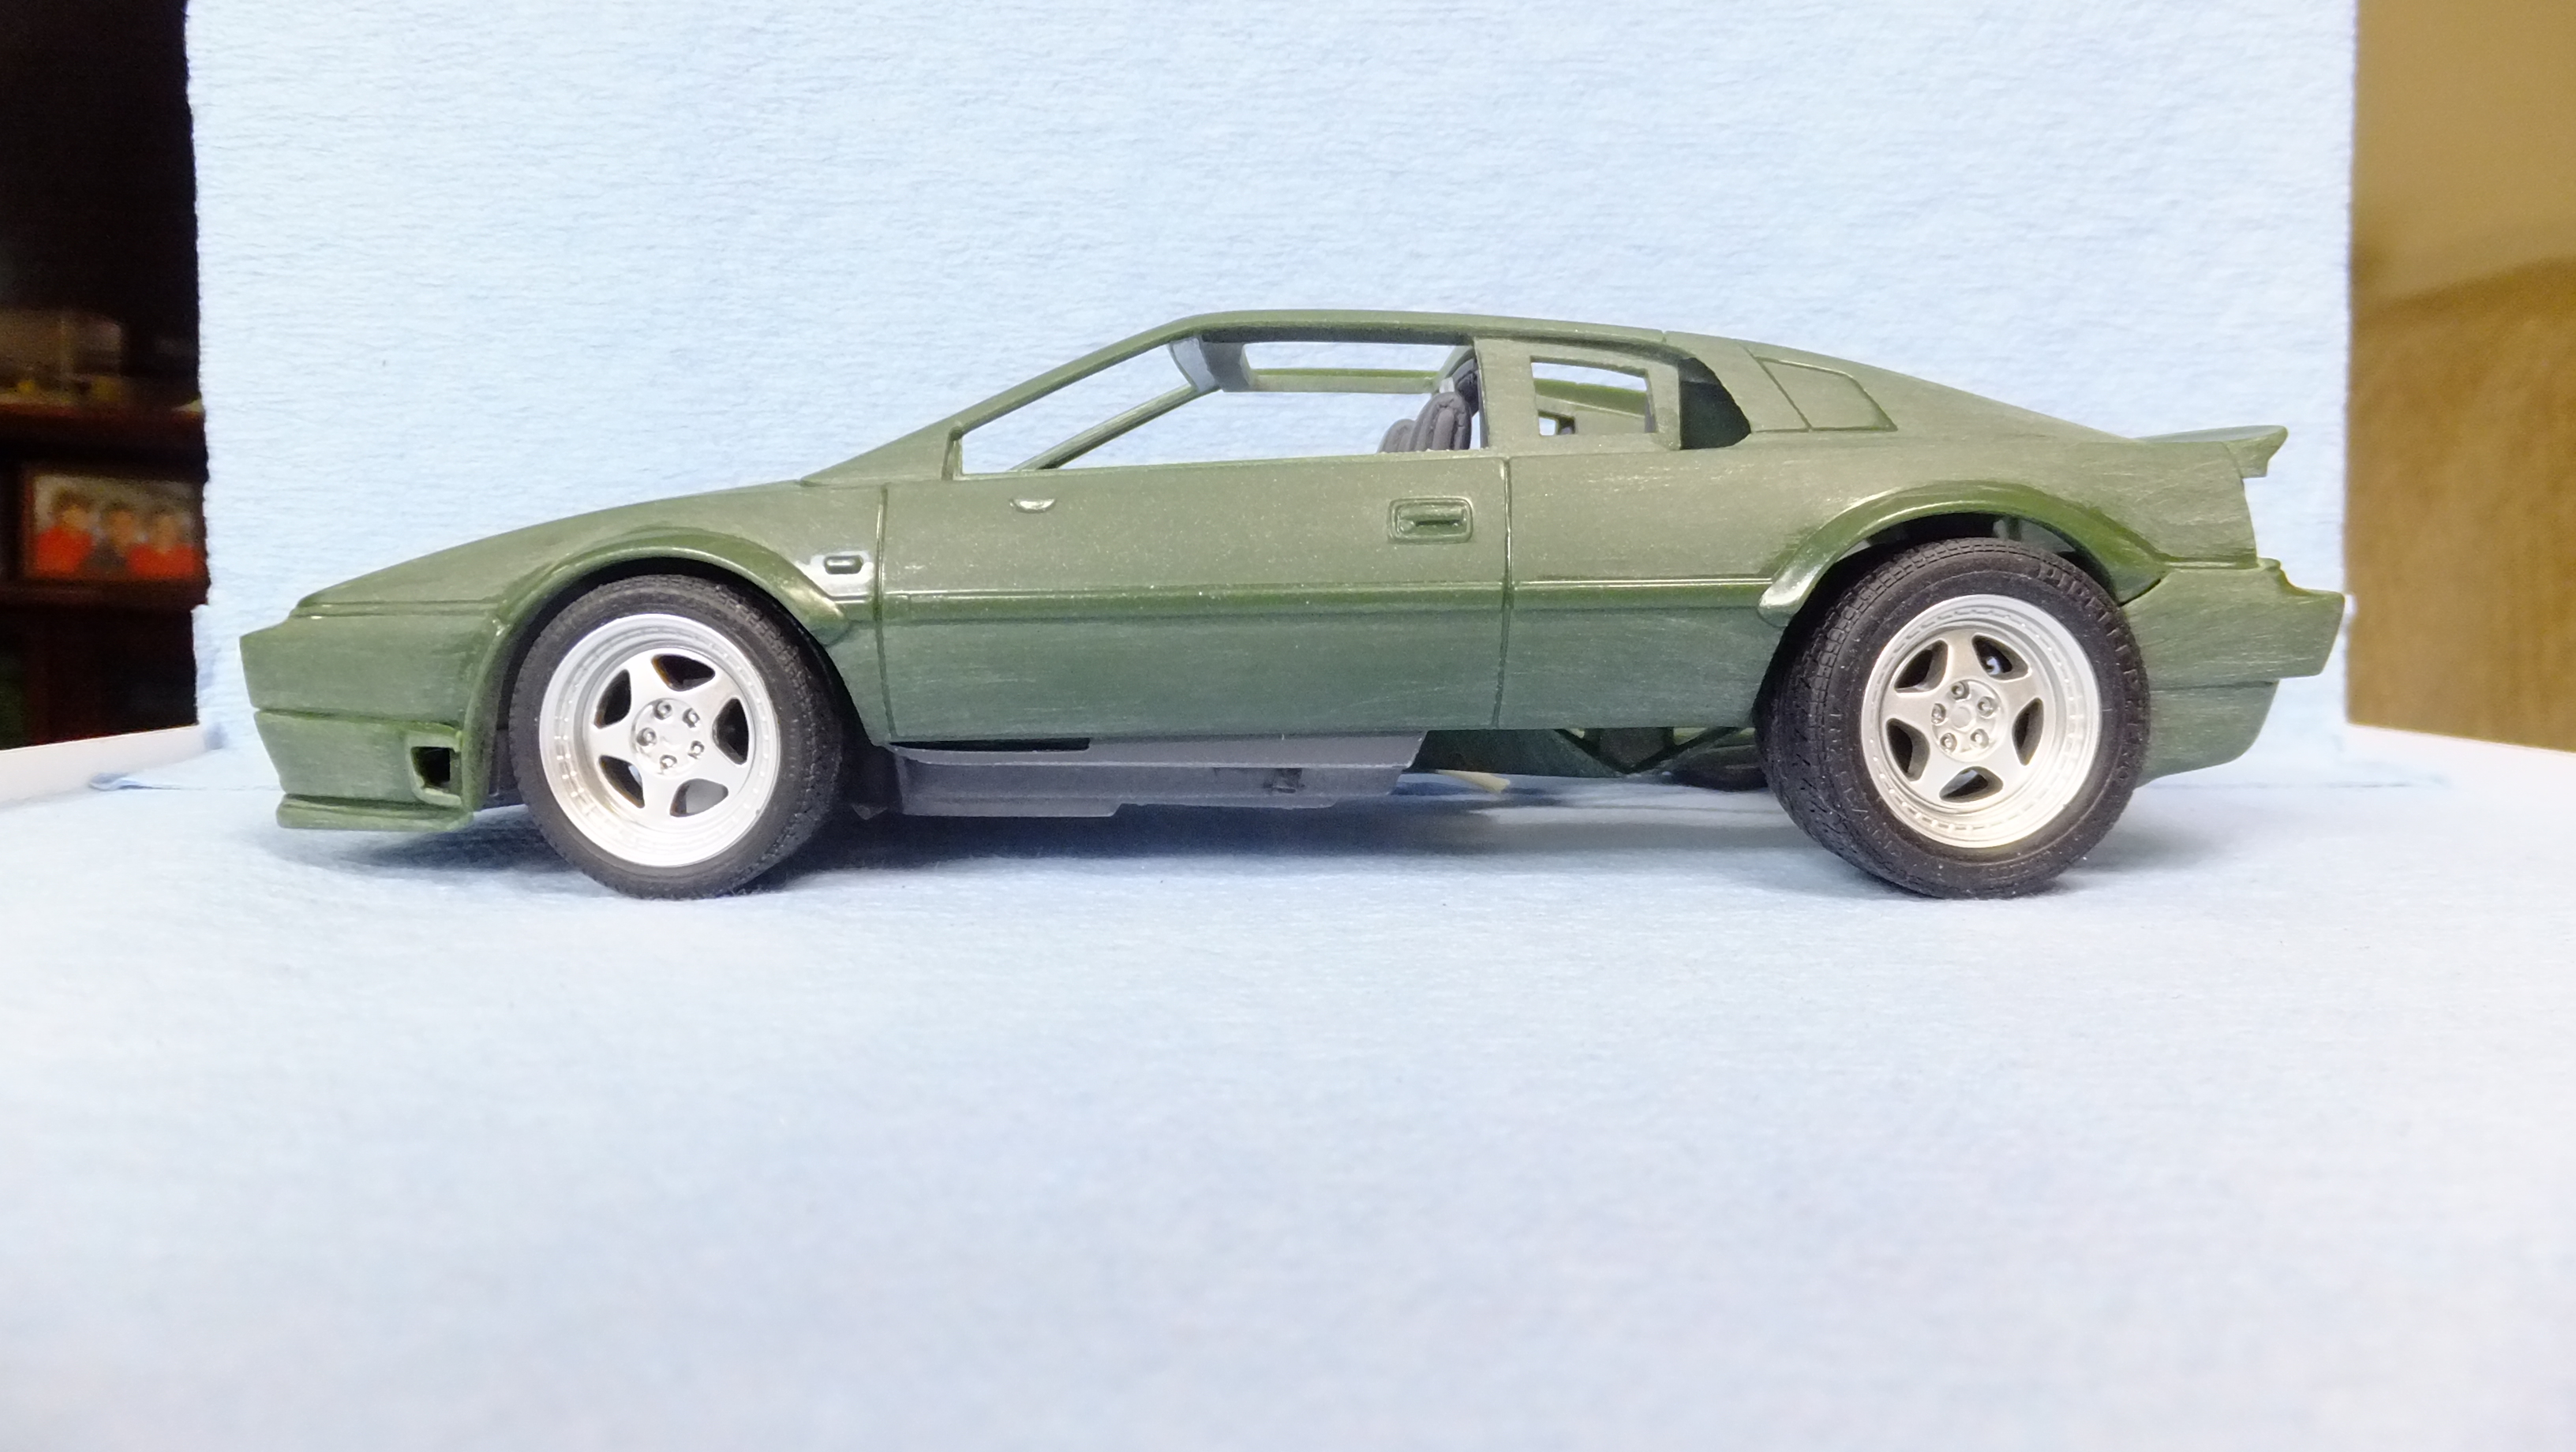
Hey, everyone!, Here is how i dealt with the front end suspension lowering. Wish i woulda got to it sooner for you, Randy, but here it is..... -Photo 1; Here are the bits for the job....to make the slide that the spindles are attached to, i just carefully cut the lips off the C-channel. -Photo 2; Cant remember the size of rod i used for the spindles, but it was barely loose in there, which helps with Canter, and Camber.....i always use a thicker glue for mounting my wheels, and tyres. E6000 craft glue is my favorite, it gives you time to tweak things....fills in the loose space, and cures great!! -Photo 3; Starting position, which happens to be where i'm gonna set it at. -Photo 4; Look how high the spindle on the left can slide up.....drastically lowering the car!!....notice the one on the right is still at the start position. FINAL THOUGHTS; This technique can be used to fix so many issues....including kits that were built right, but doesnt fit flat on all fours. Hope this helps with other kits as well!!
-
Hey, Bud!, i'm about to post the photos!!
-
Now i feel bad that i havent gotten back to this one.....i will fix the ride height issue today, then post it. Sorry, bud!
-
Revell Williams Renault FW19 F1 1997 Champion
Dann Tier replied to Twokidsnosleep's topic in WIP: Model Cars
I think you have the exhaust pretty spot-on, bud!!...NICE!!! -
Otaki 1/12 Lamborghini Countach Twin Turbo...Mission Statement
Dann Tier replied to Dann Tier's topic in WIP: Model Cars
Thanks, bud!! -
Otaki 1/12 Lamborghini Countach Twin Turbo...Mission Statement
Dann Tier replied to Dann Tier's topic in WIP: Model Cars
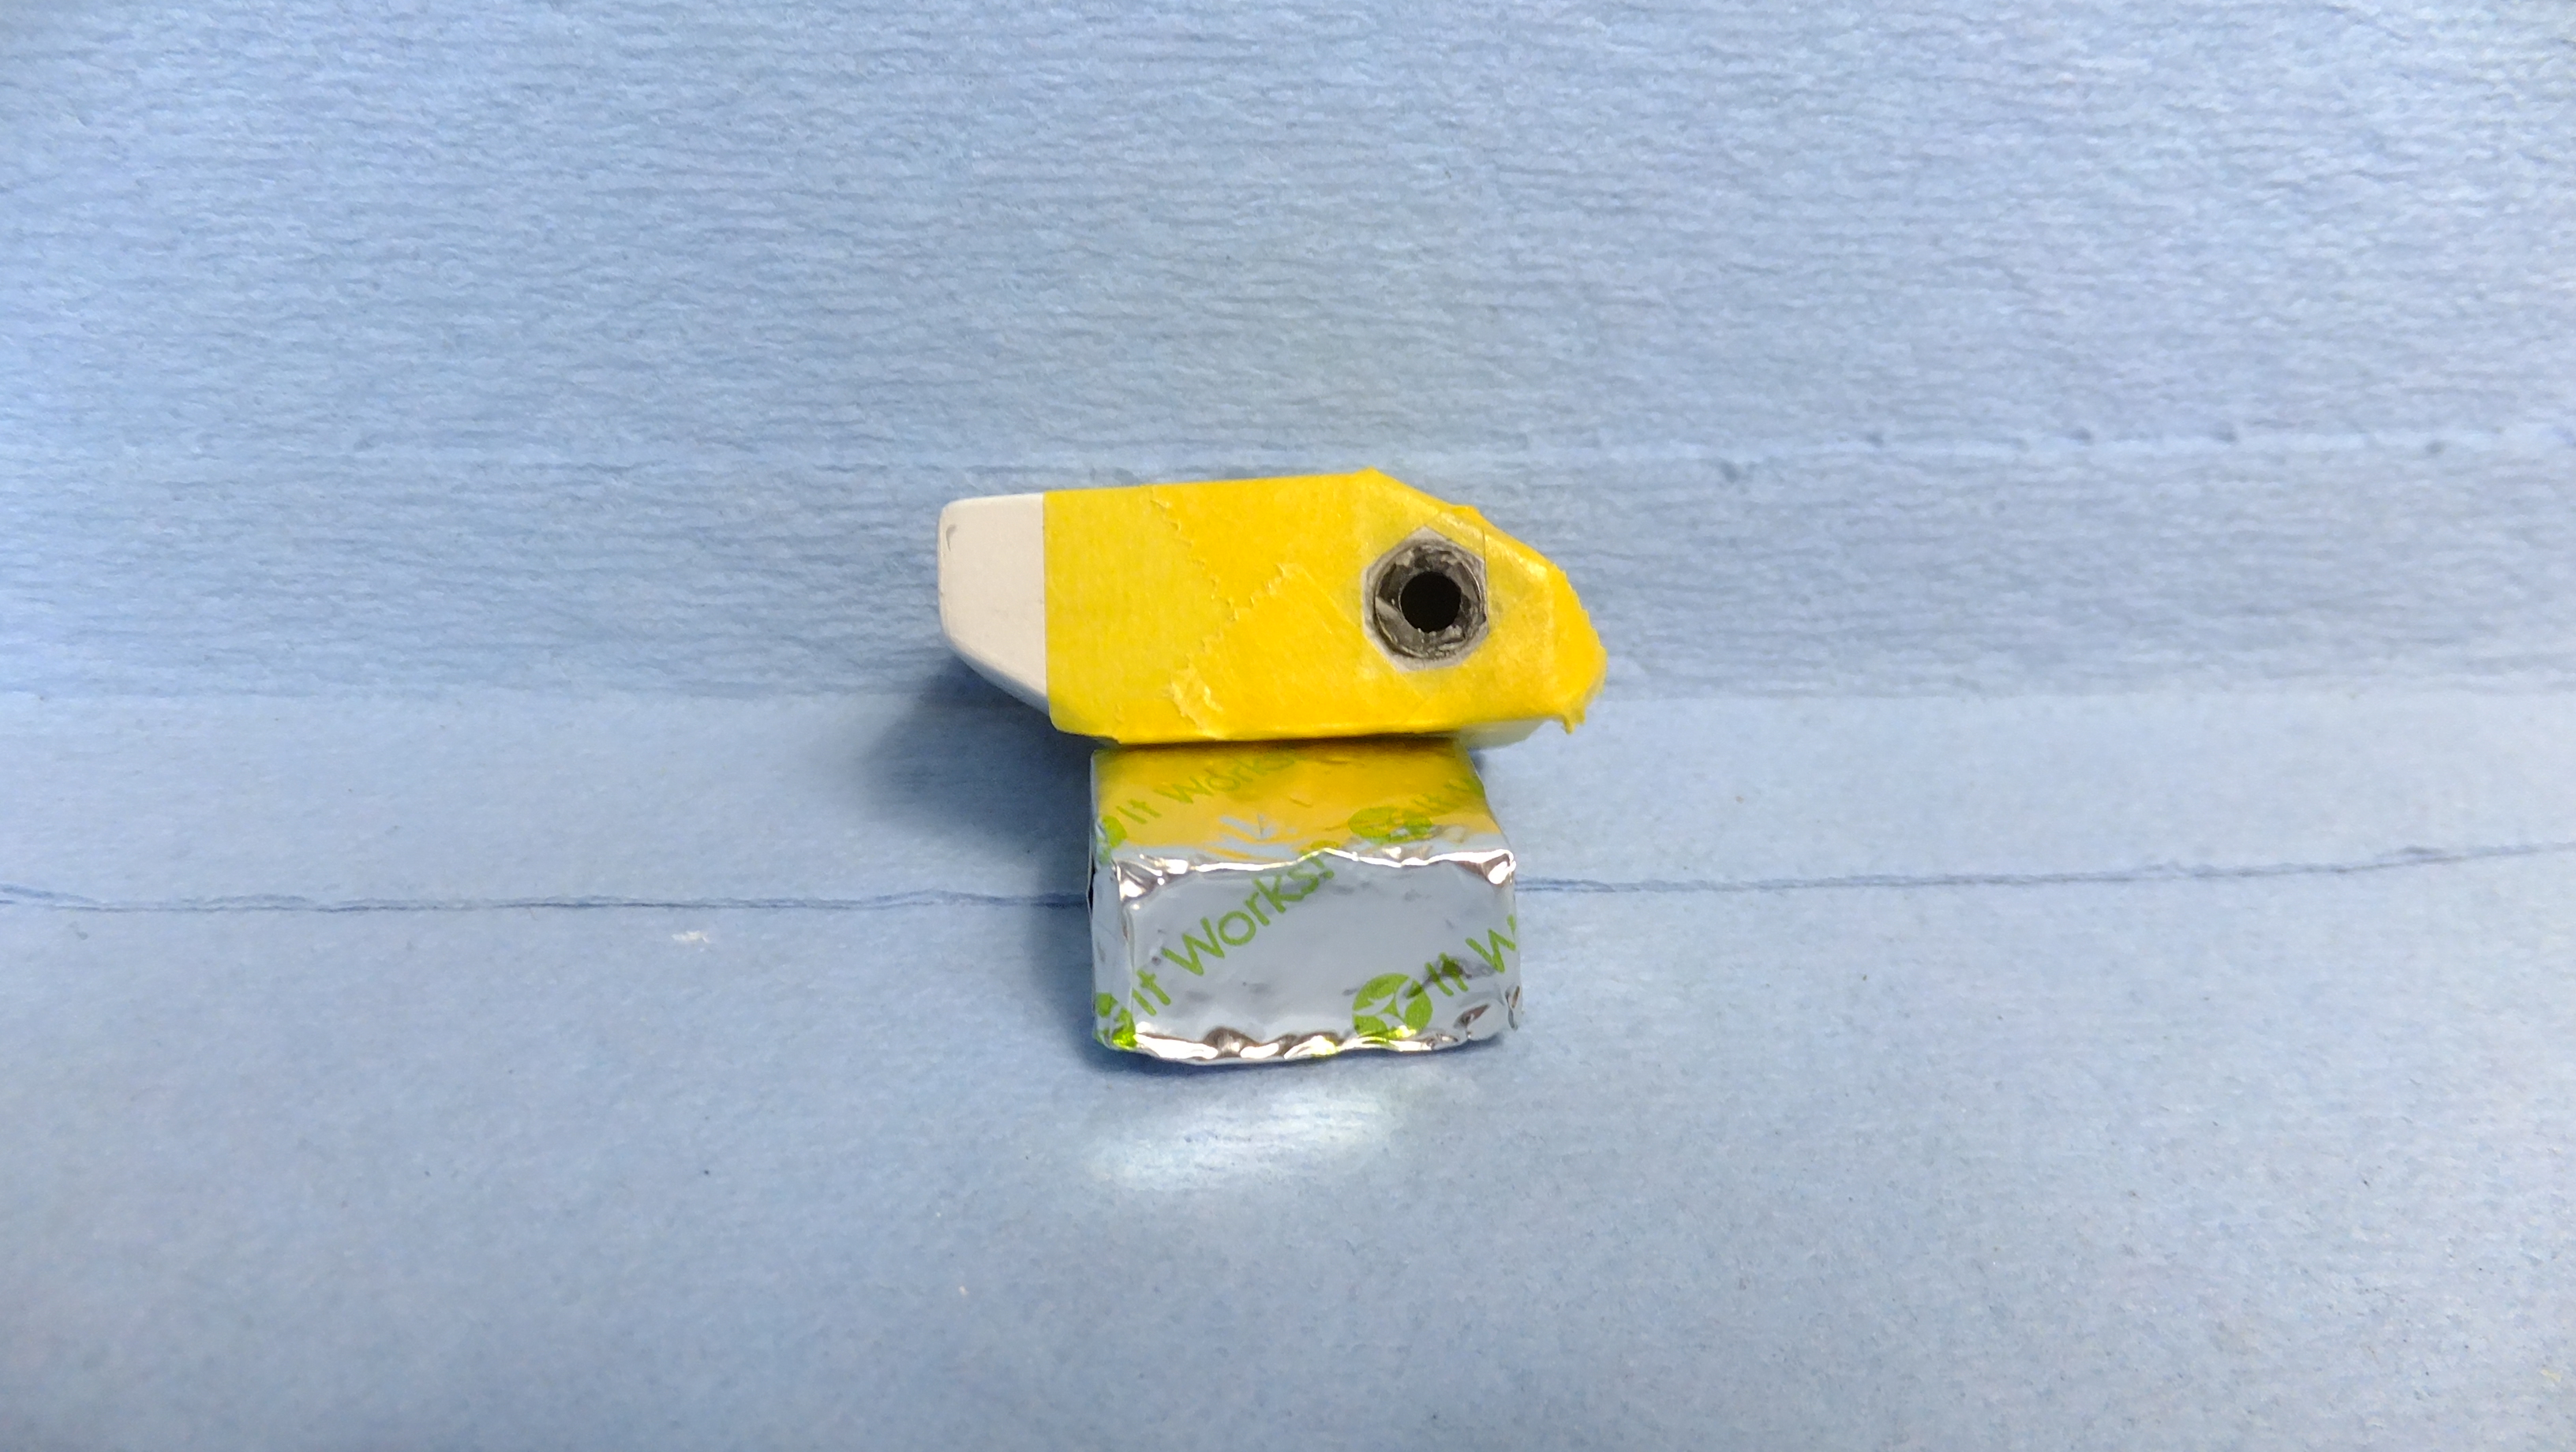
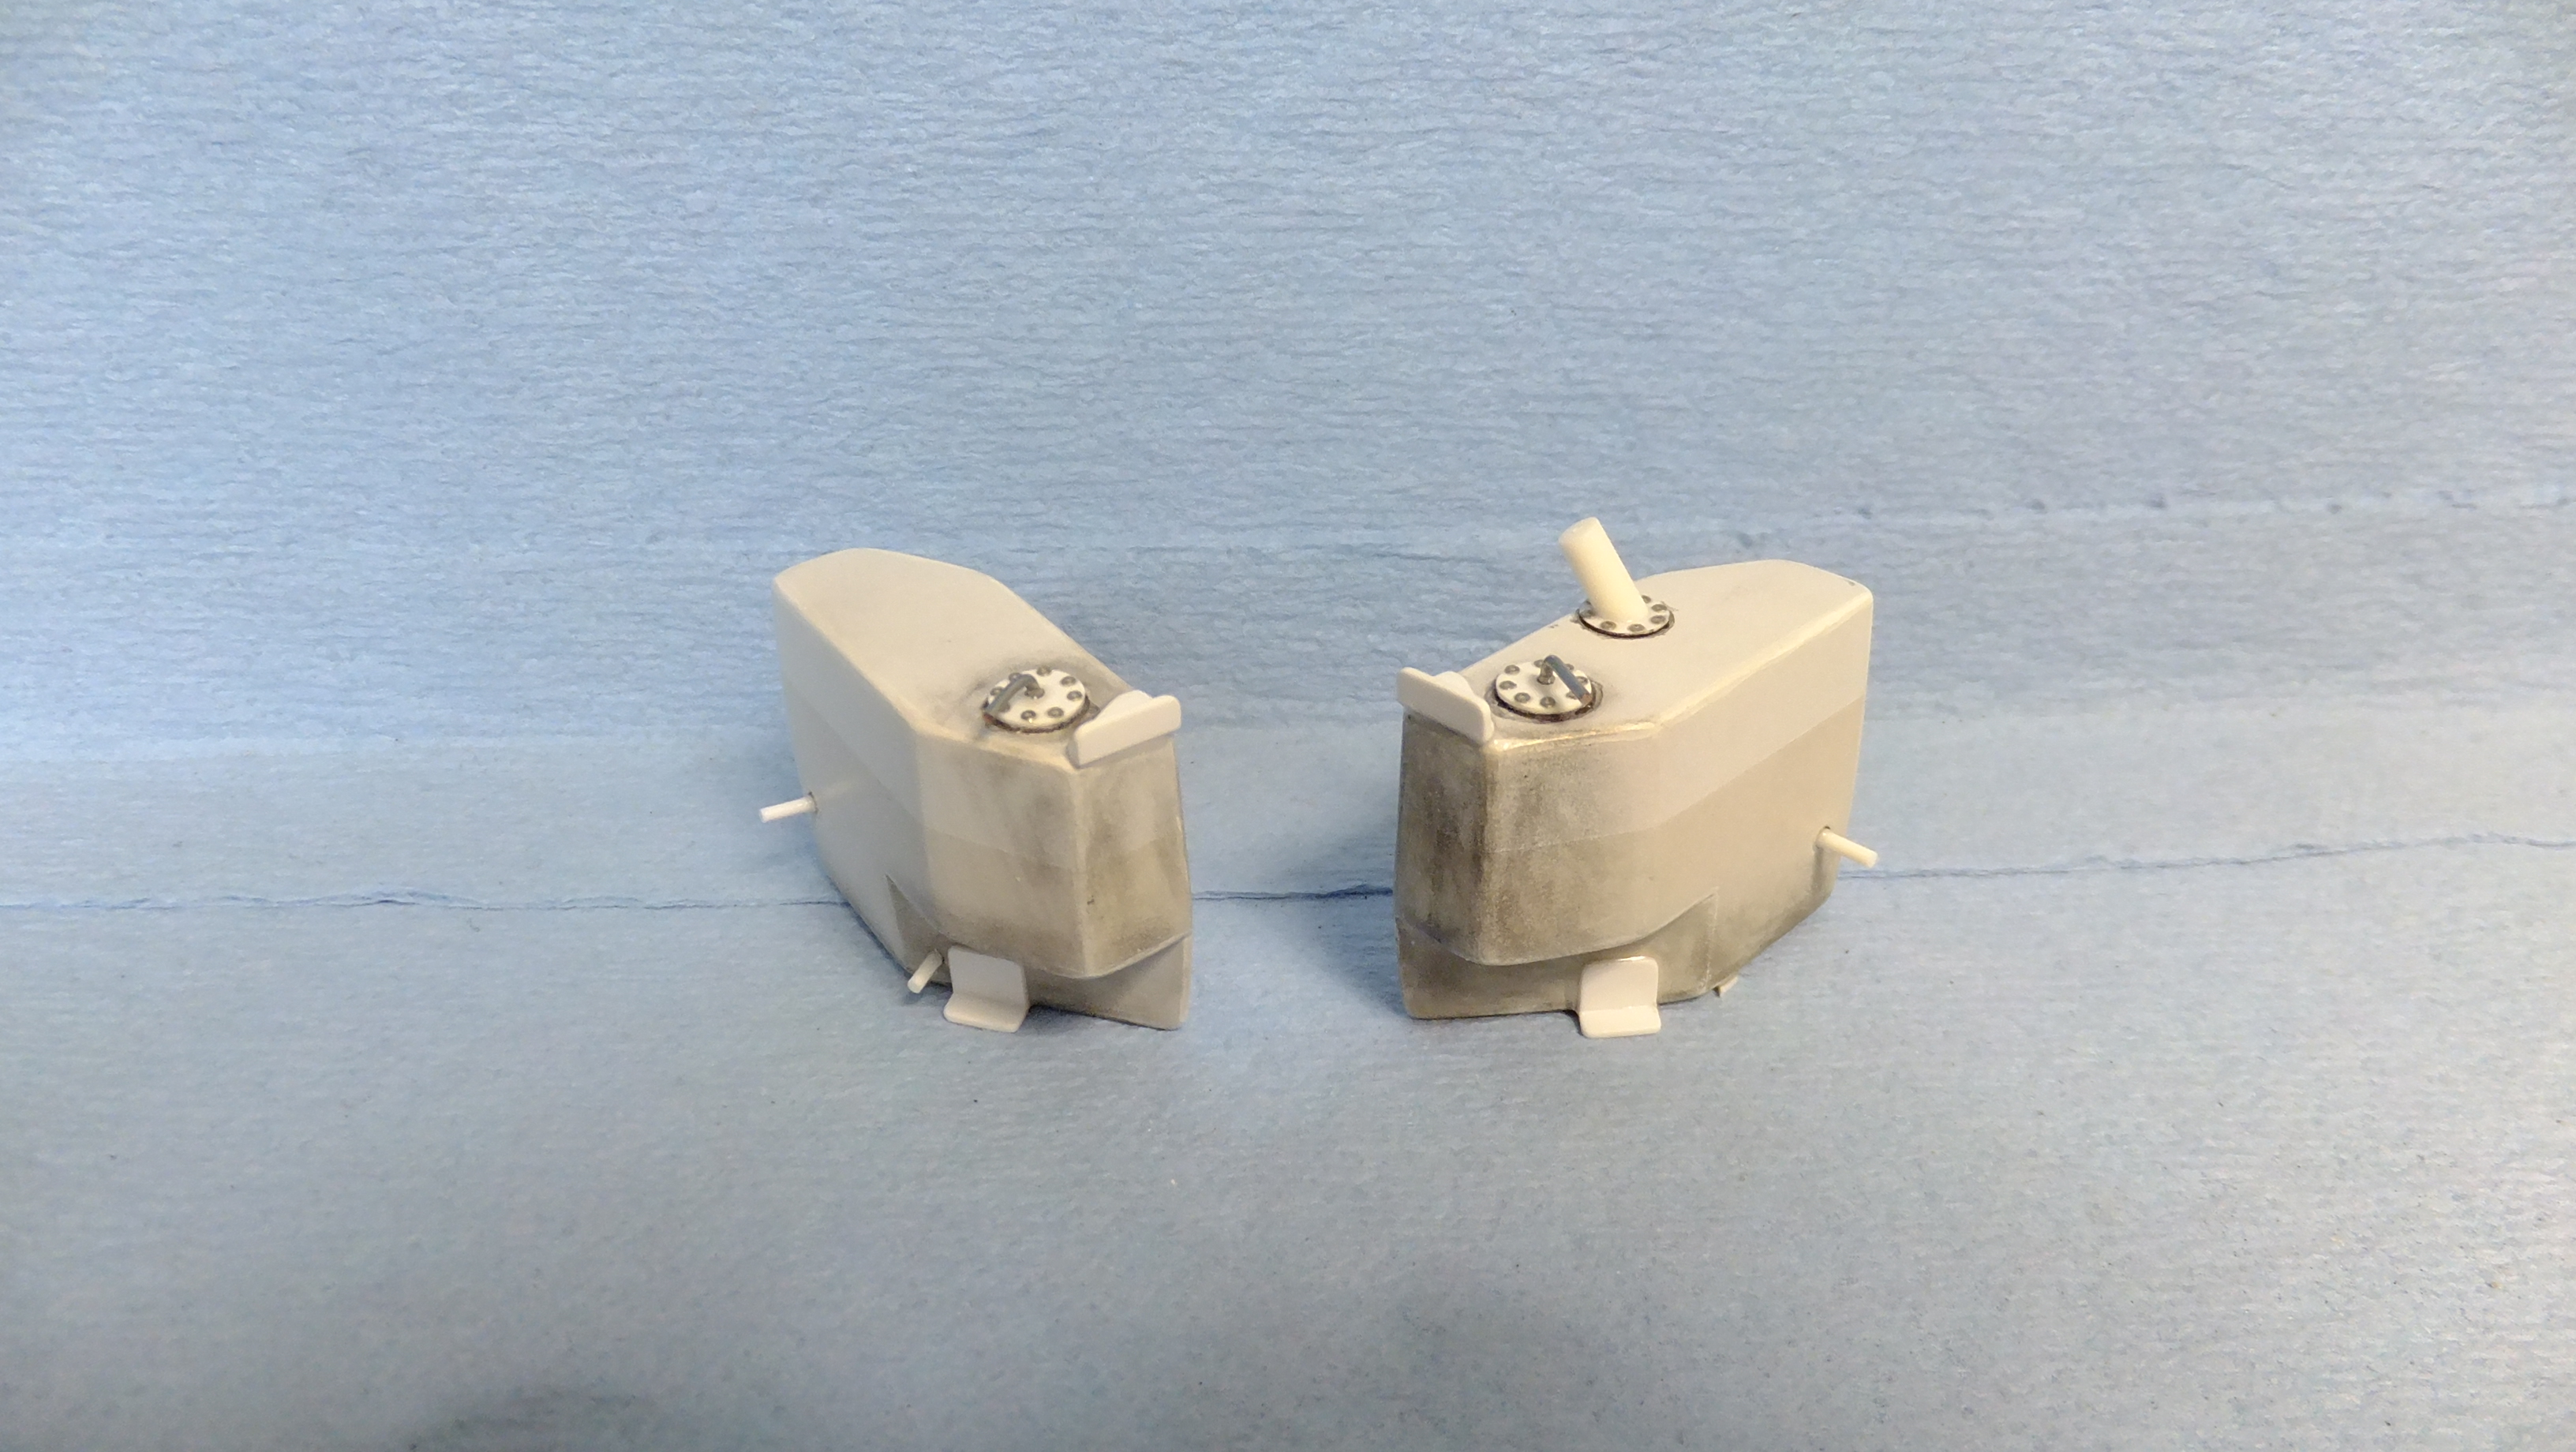
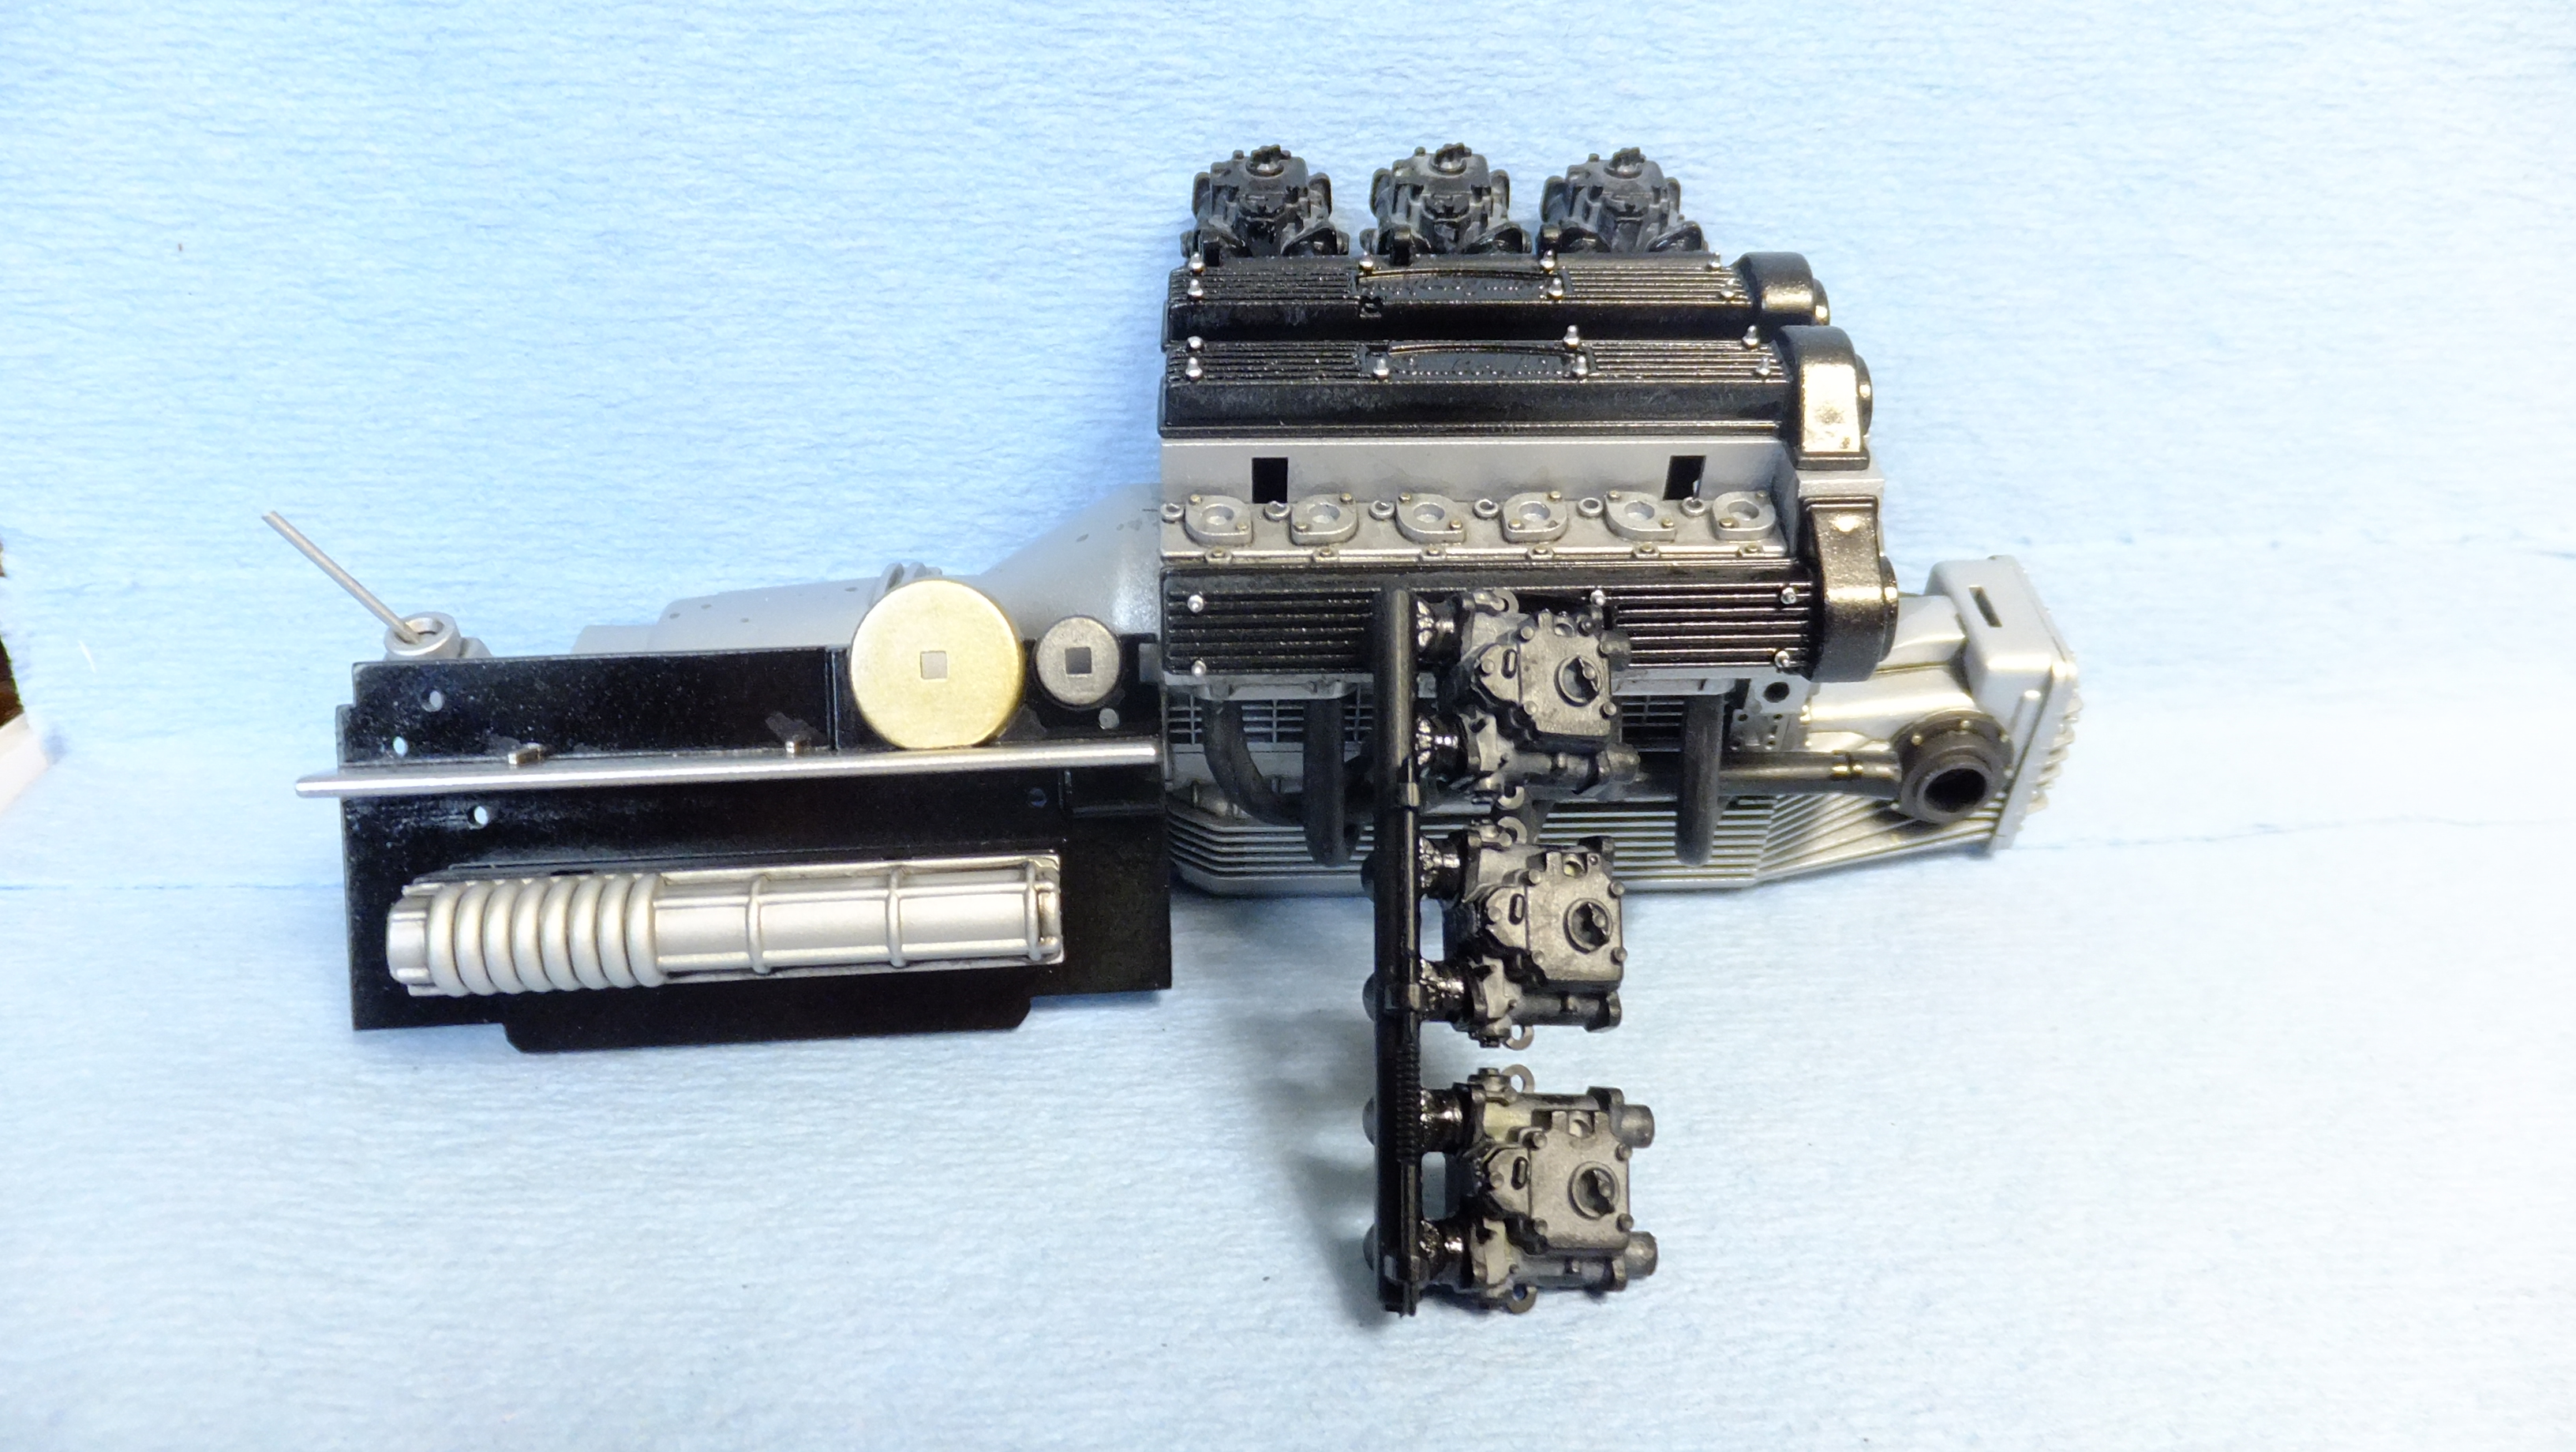
Today i jumped right in on the fuel system!, after i SB the fuel pump, i can install it all. -Photo 1; Here are the kit supplied fuel tanks... -Photo 2; I needed to remove the two unrealistic "caps", so i used tape to protect the surrounding areas while i worked on them. -Photo 3-5; Since i was going for an updated, lightweight plastic look, i decided to ditch the tank straps, and SB a molded-in bracket look. After the glue dries, i will paint all the stuff i added here, as well as make bolts for everything. Its now time to SB a fuel pump!
-
Thanks, bud!, much appreciated!!
-
Nice, Tough looking BEAST!!!
-
I like that "Torque Thrust" look too!!!
-
Revell Williams Renault FW19 F1 1997 Champion
Dann Tier replied to Twokidsnosleep's topic in WIP: Model Cars
SWEEEET!!! -
Home stretch!!!!, and its looking KILLER!!!!
-
I cant wait!!!!, i love Tamiyas modelling wax, i only use it on clear parts that i have to repair.
-
Absolutely STUNNING, bud!!!!
-
Otaki 1/12 Lamborghini Countach Twin Turbo...Mission Statement
Dann Tier replied to Dann Tier's topic in WIP: Model Cars
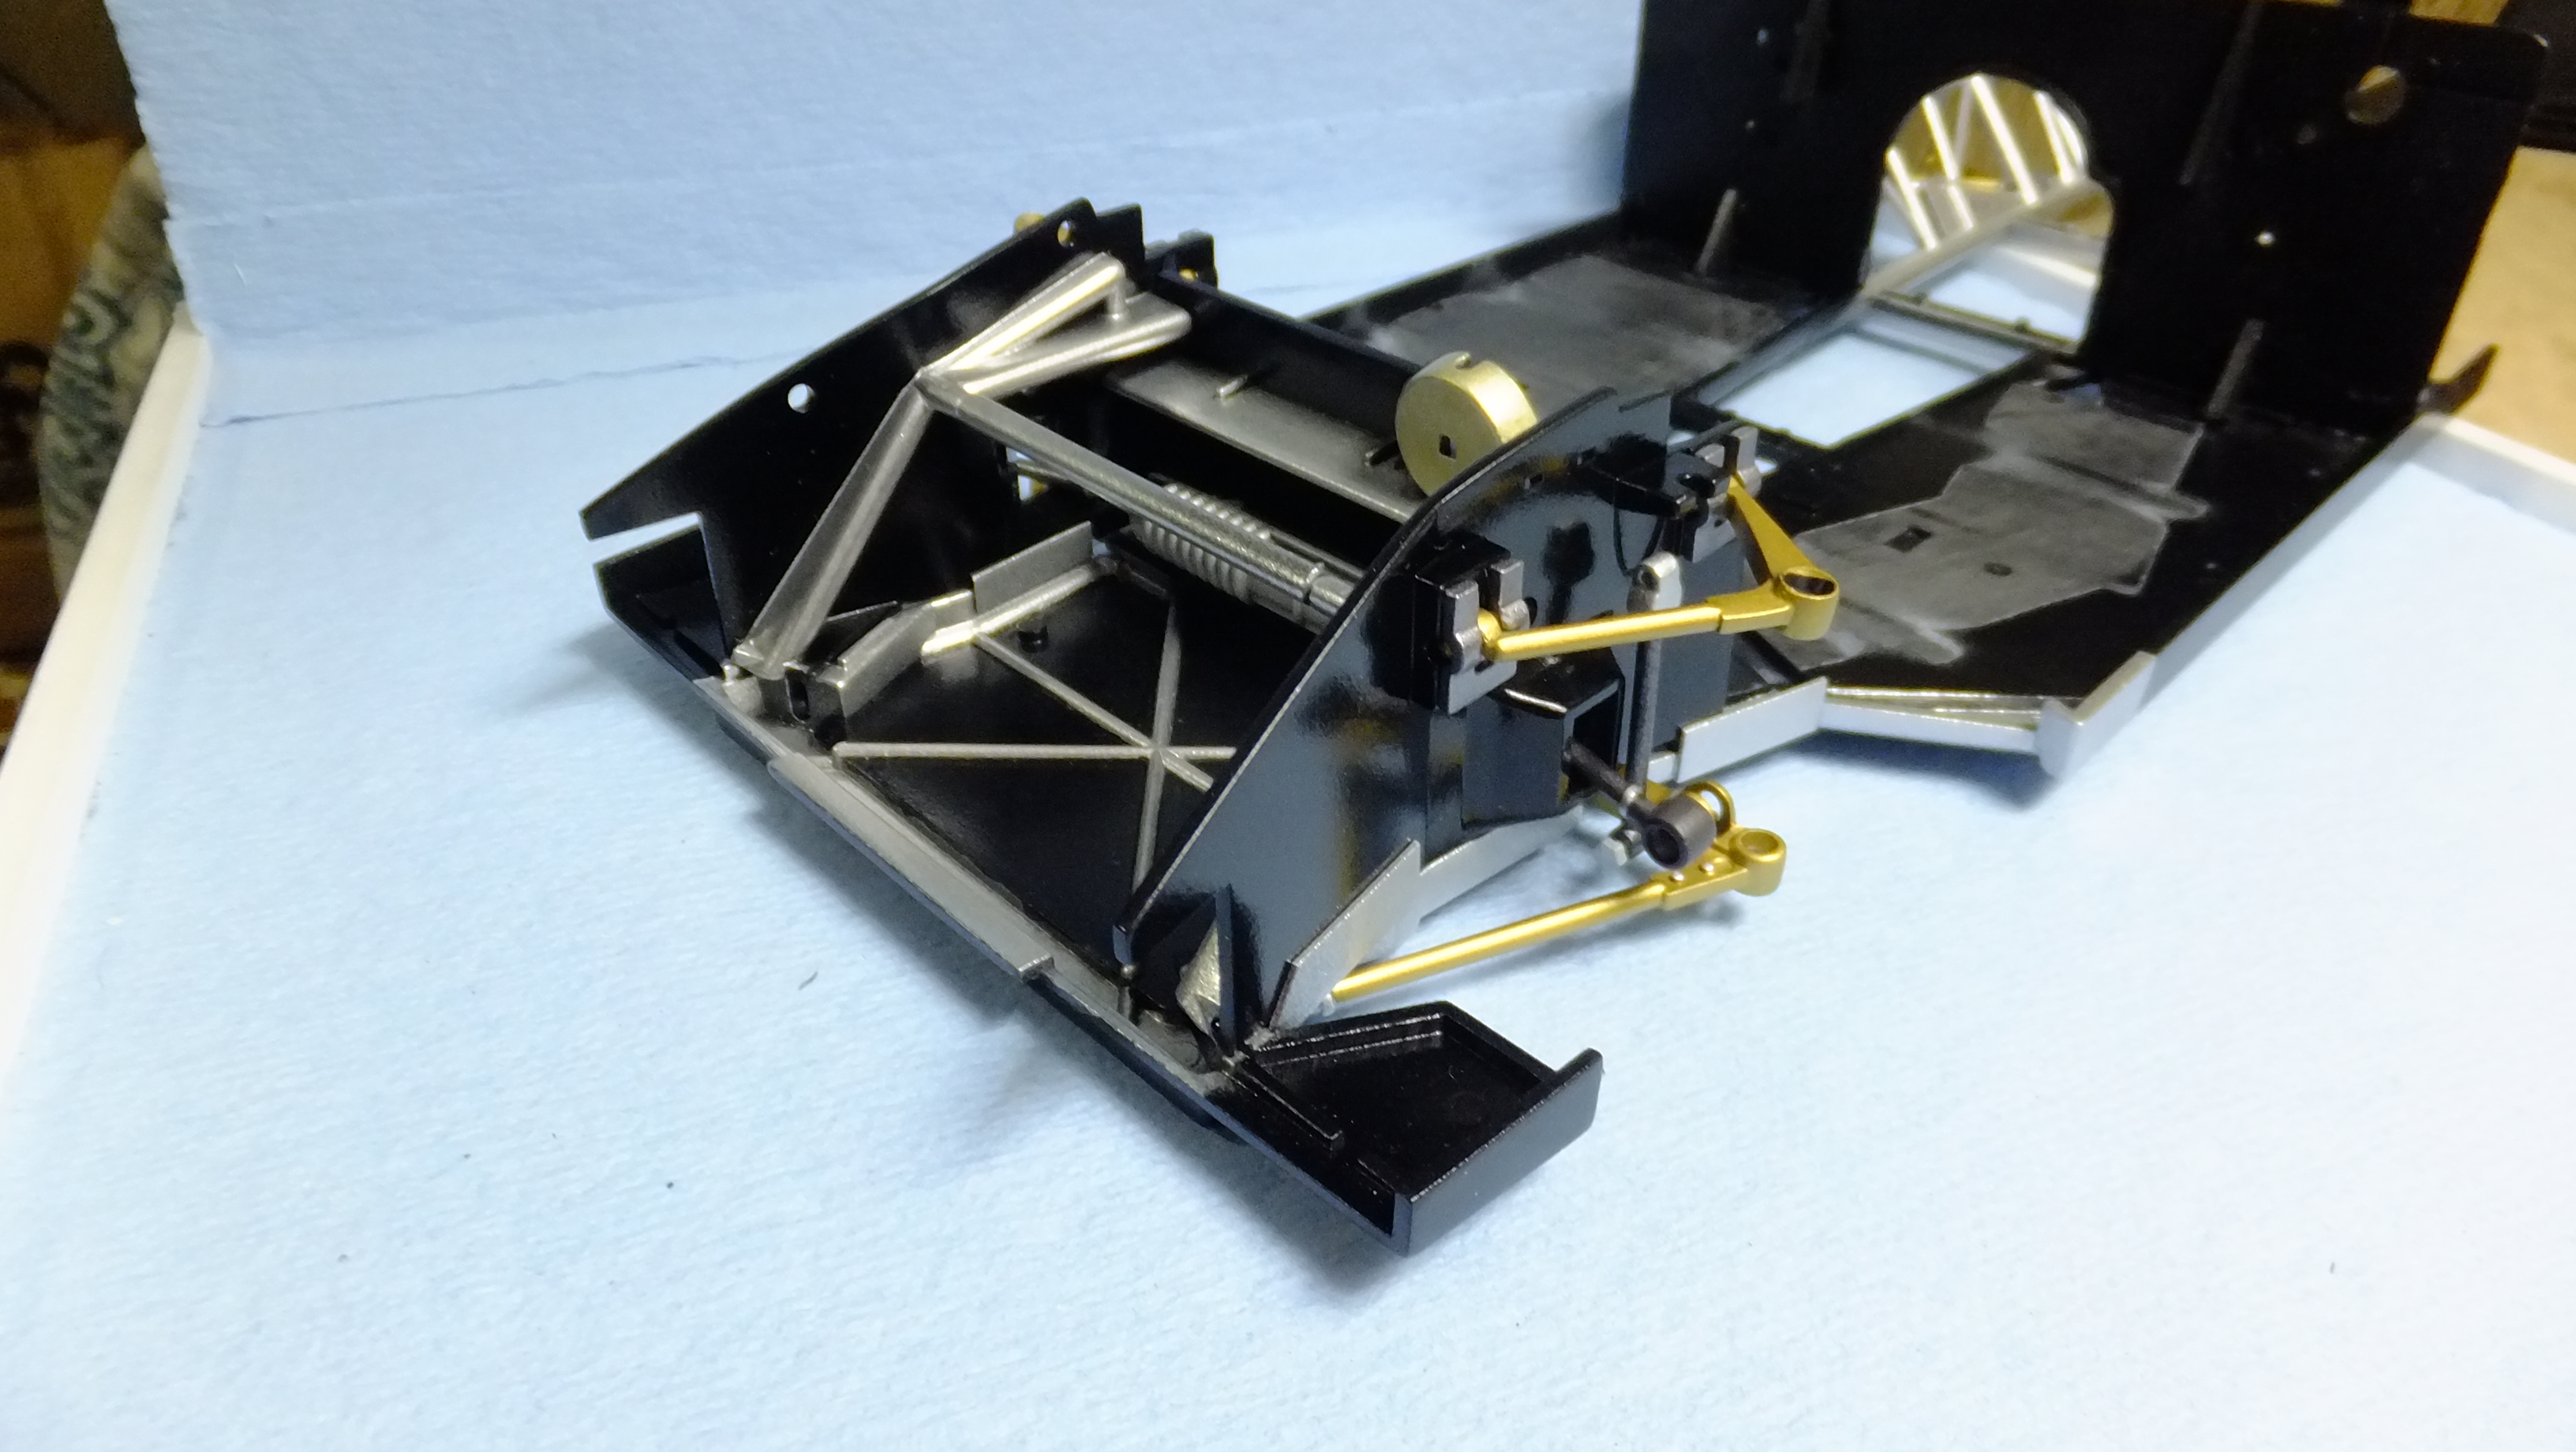
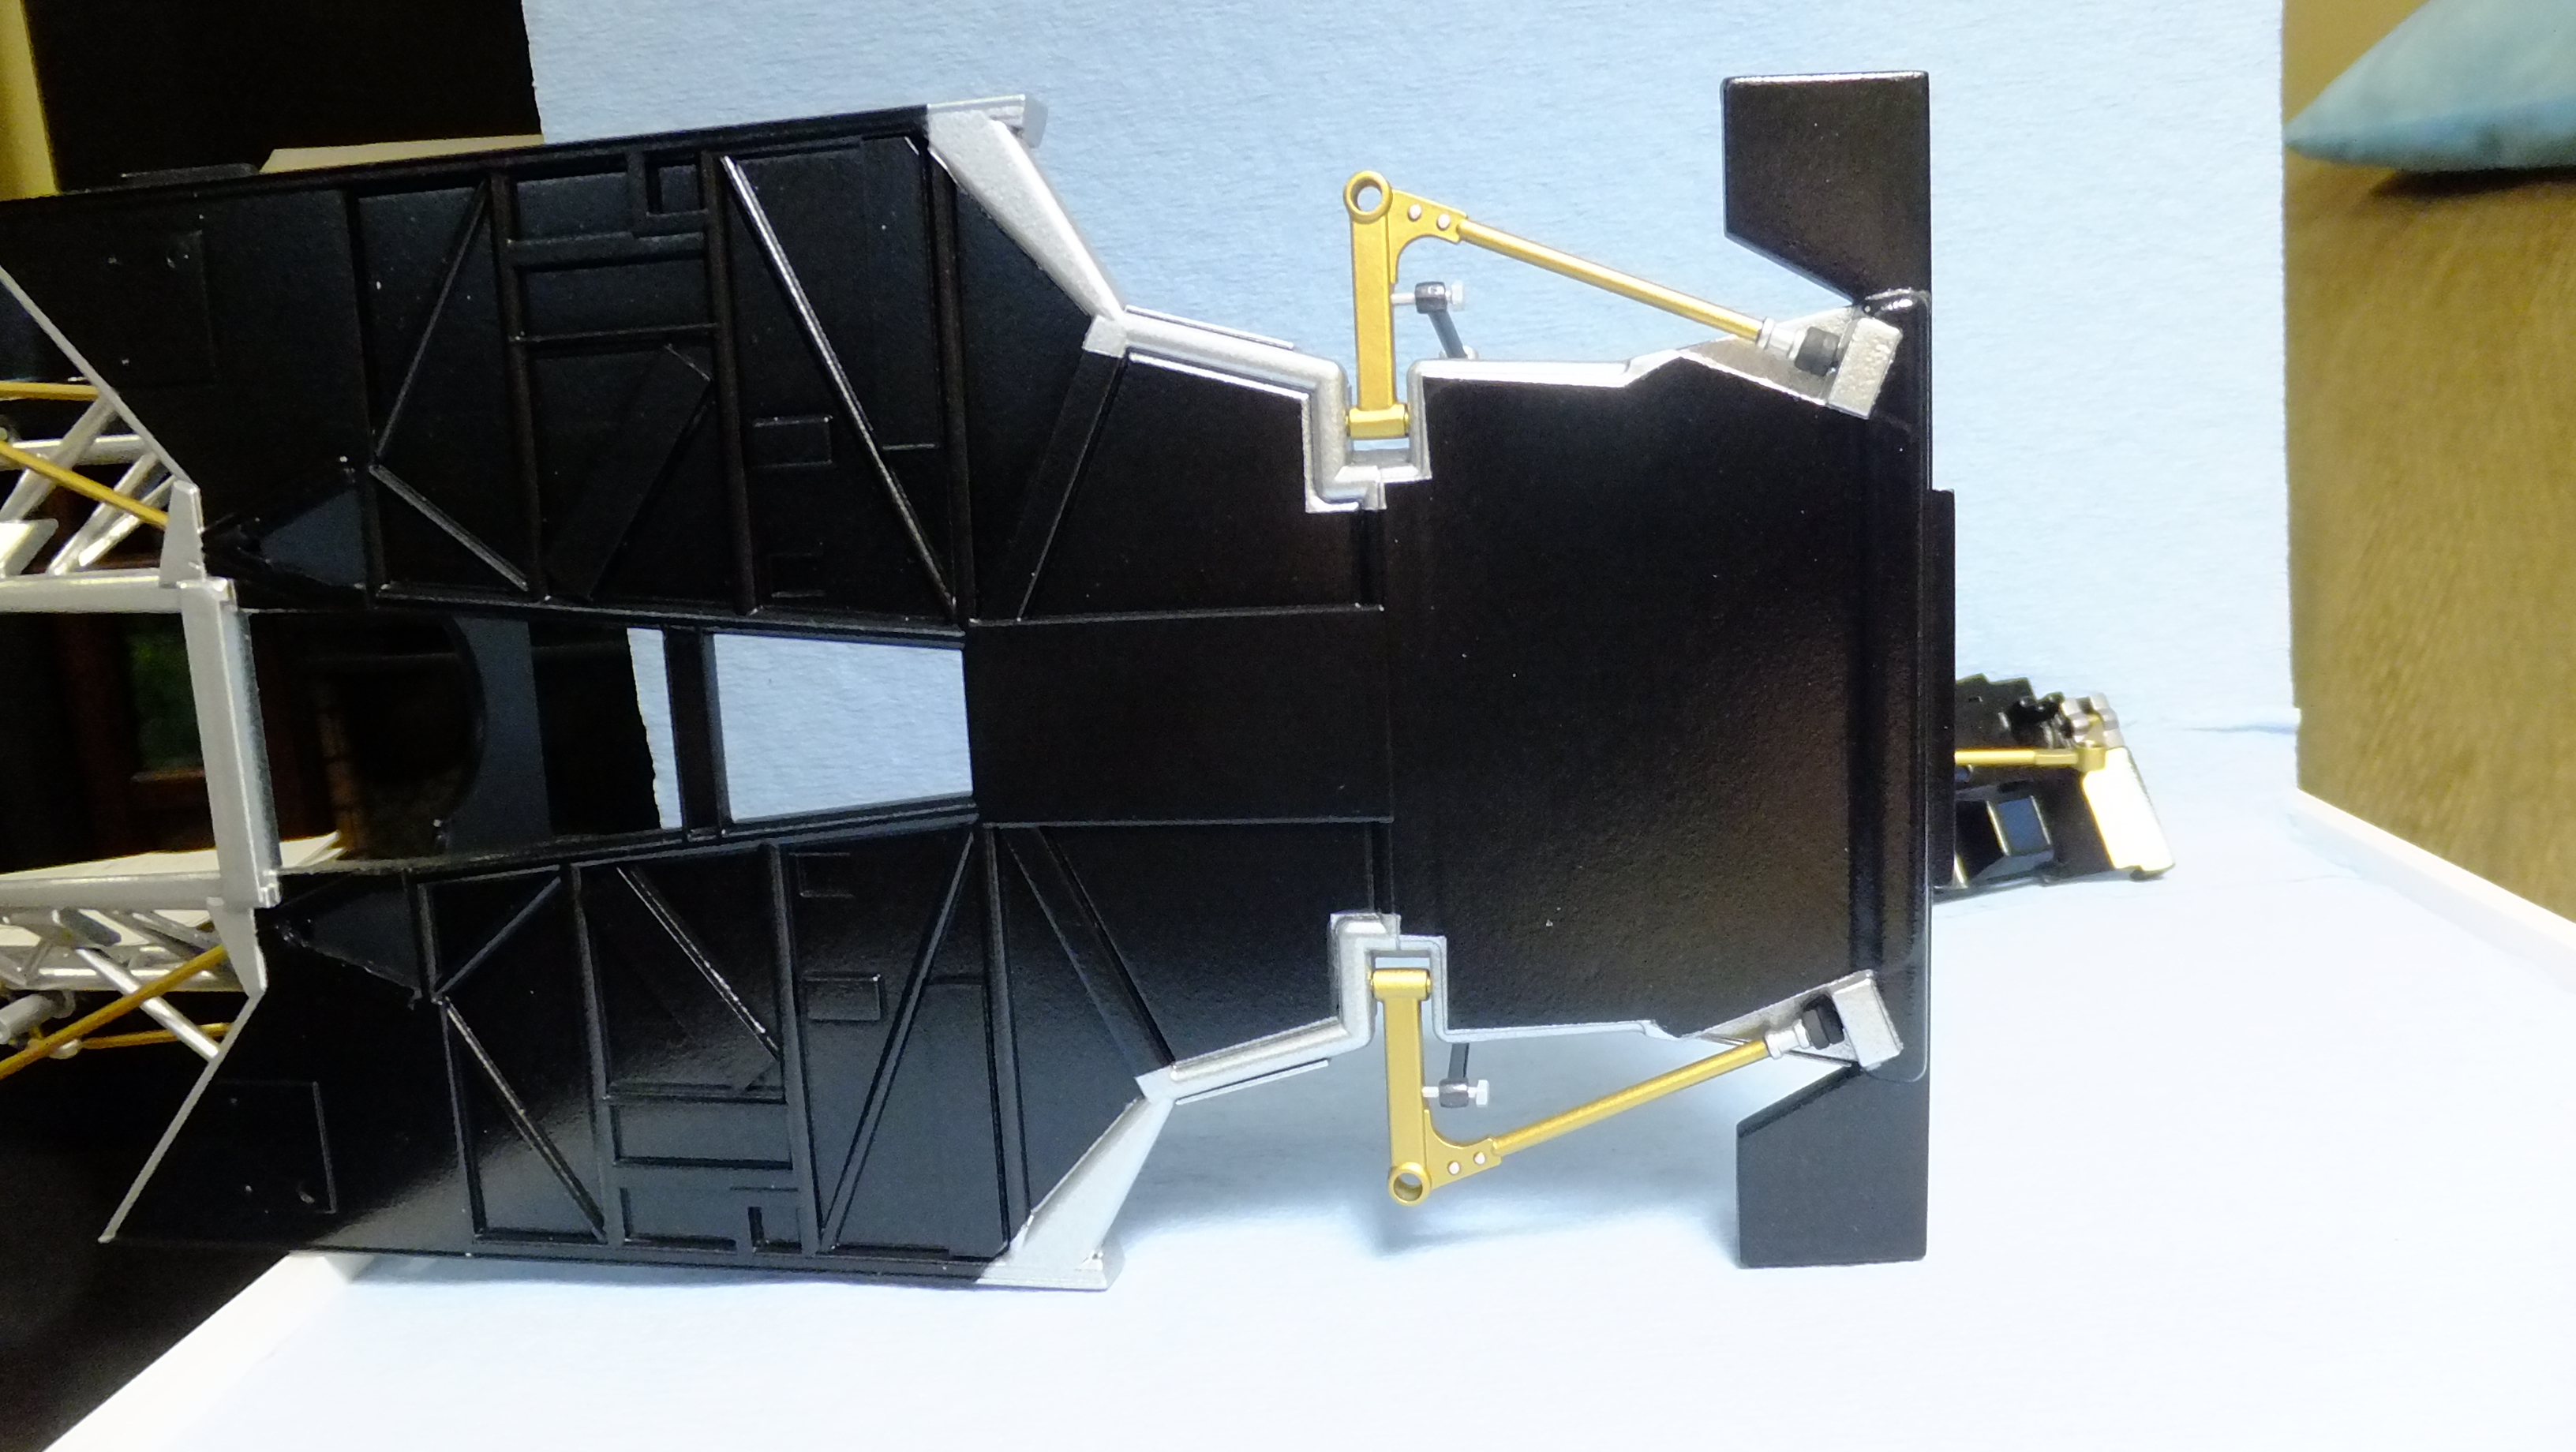
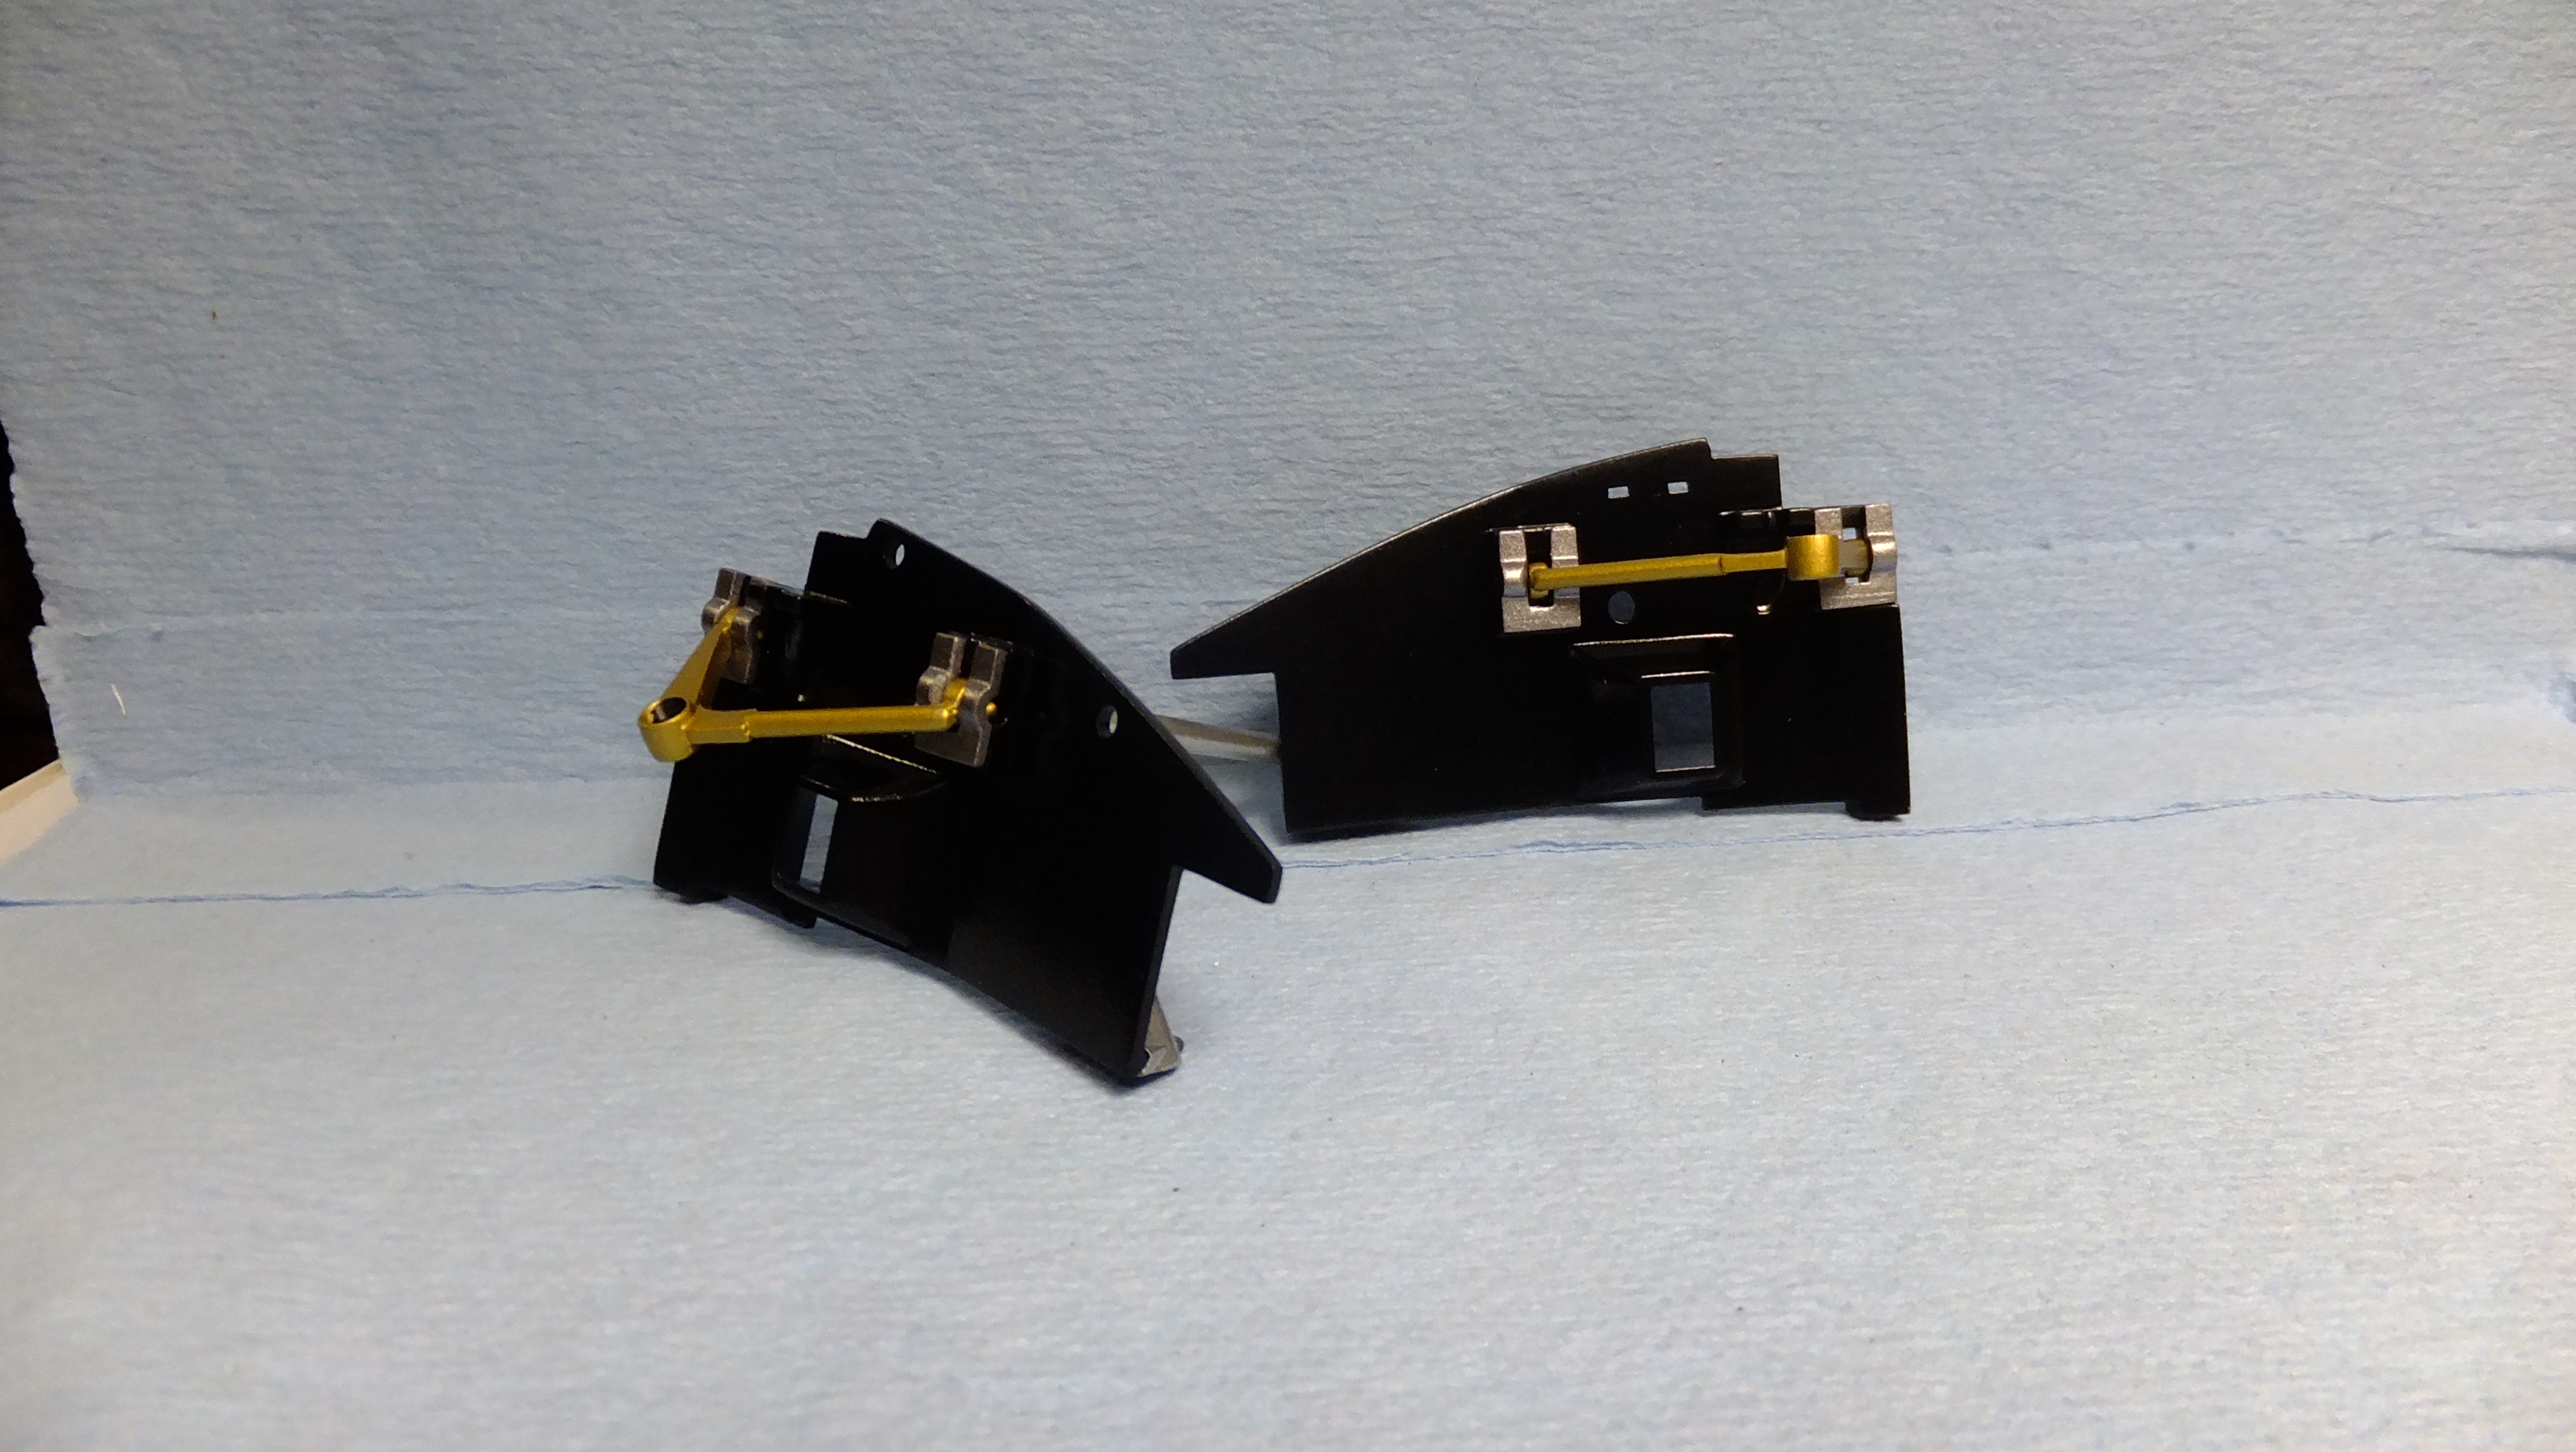
Hey, everyone!, i got quite a bit done today!....now i can start detailing the chassis, and suspension!
-
Thanks again!!, it was soooo plain, missing ALL door card detail too!!
-
Thanks alot, bud!!
-
"Pretty good"??......more like; BRILLIANT!!!!
-
Thanks, Larry!!