Dann Tier
-
Posts
8,151 -
Joined
-
Last visited
Content Type
Profiles
Forums
Events
Gallery
Everything posted by Dann Tier
-
Thanks, bud!!....it was pretty fun, even though i had to fix everything, lol
-
Thanks again, bud!!...i'm glad this one is finally done!
-
Thanks, bud!!, i thought so too!
-
Getting excited to see this one all buttoned-up!!!, EXCELLENT attention to details!!!!
-
That stance is looking Fantastic!!!!....
-
I love this car/kit!!, and i love the kolor choices you made!....looking forward to more!!!
-
A Masterpiece in the making!!!
-
KILLER kolor!!!!!....i always use canned air to blast possible debris off my parts....between EVERY coat.
-
BRILLIANT!!!.....man am i getting excited to see this in paint!!!!
-
Cant wait to see your "weathering" on this one!!!!
-
Love EVERYTHING about this build!!!!!
-
OUTSTANDING!!!
-
A VERY klean...Beautiful job!!!
-
Wow!!, very cool!!, this is actually the first one i've ever seen built!.....thanks for sharing!!!
-

Re-engineering Monograms Lotus Esprit...new update!
Dann Tier replied to Dann Tier's topic in WIP: Model Cars
Thanks, bud!!, i'm very glad to help! -
Re-engineering Monograms Lotus Esprit...new update!
Dann Tier replied to Dann Tier's topic in WIP: Model Cars
Thanks, bud!!....lol -
Re-engineering Monograms Lotus Esprit...new update!
Dann Tier replied to Dann Tier's topic in WIP: Model Cars
Thats right, bud...rockers separate. -
BEAUTIFUL!!!!!, i too would rather mask and paint stripes..
-
Thanks, bud!!
-
Re-engineering Monograms Lotus Esprit...new update!
Dann Tier replied to Dann Tier's topic in WIP: Model Cars
Thanks!, i've learned ALOT from the first one! -
I love Fujimi kits, dont get me wrong, but i wont pretend that their the best either....lol
-
Re-engineering Monograms Lotus Esprit...new update!
Dann Tier replied to Dann Tier's topic in WIP: Model Cars
Thanks alot, bud!....no problem.....i like helping with difficult tricks, and i've built this bugger before. -
Re-engineering Monograms Lotus Esprit...new update!
Dann Tier replied to Dann Tier's topic in WIP: Model Cars
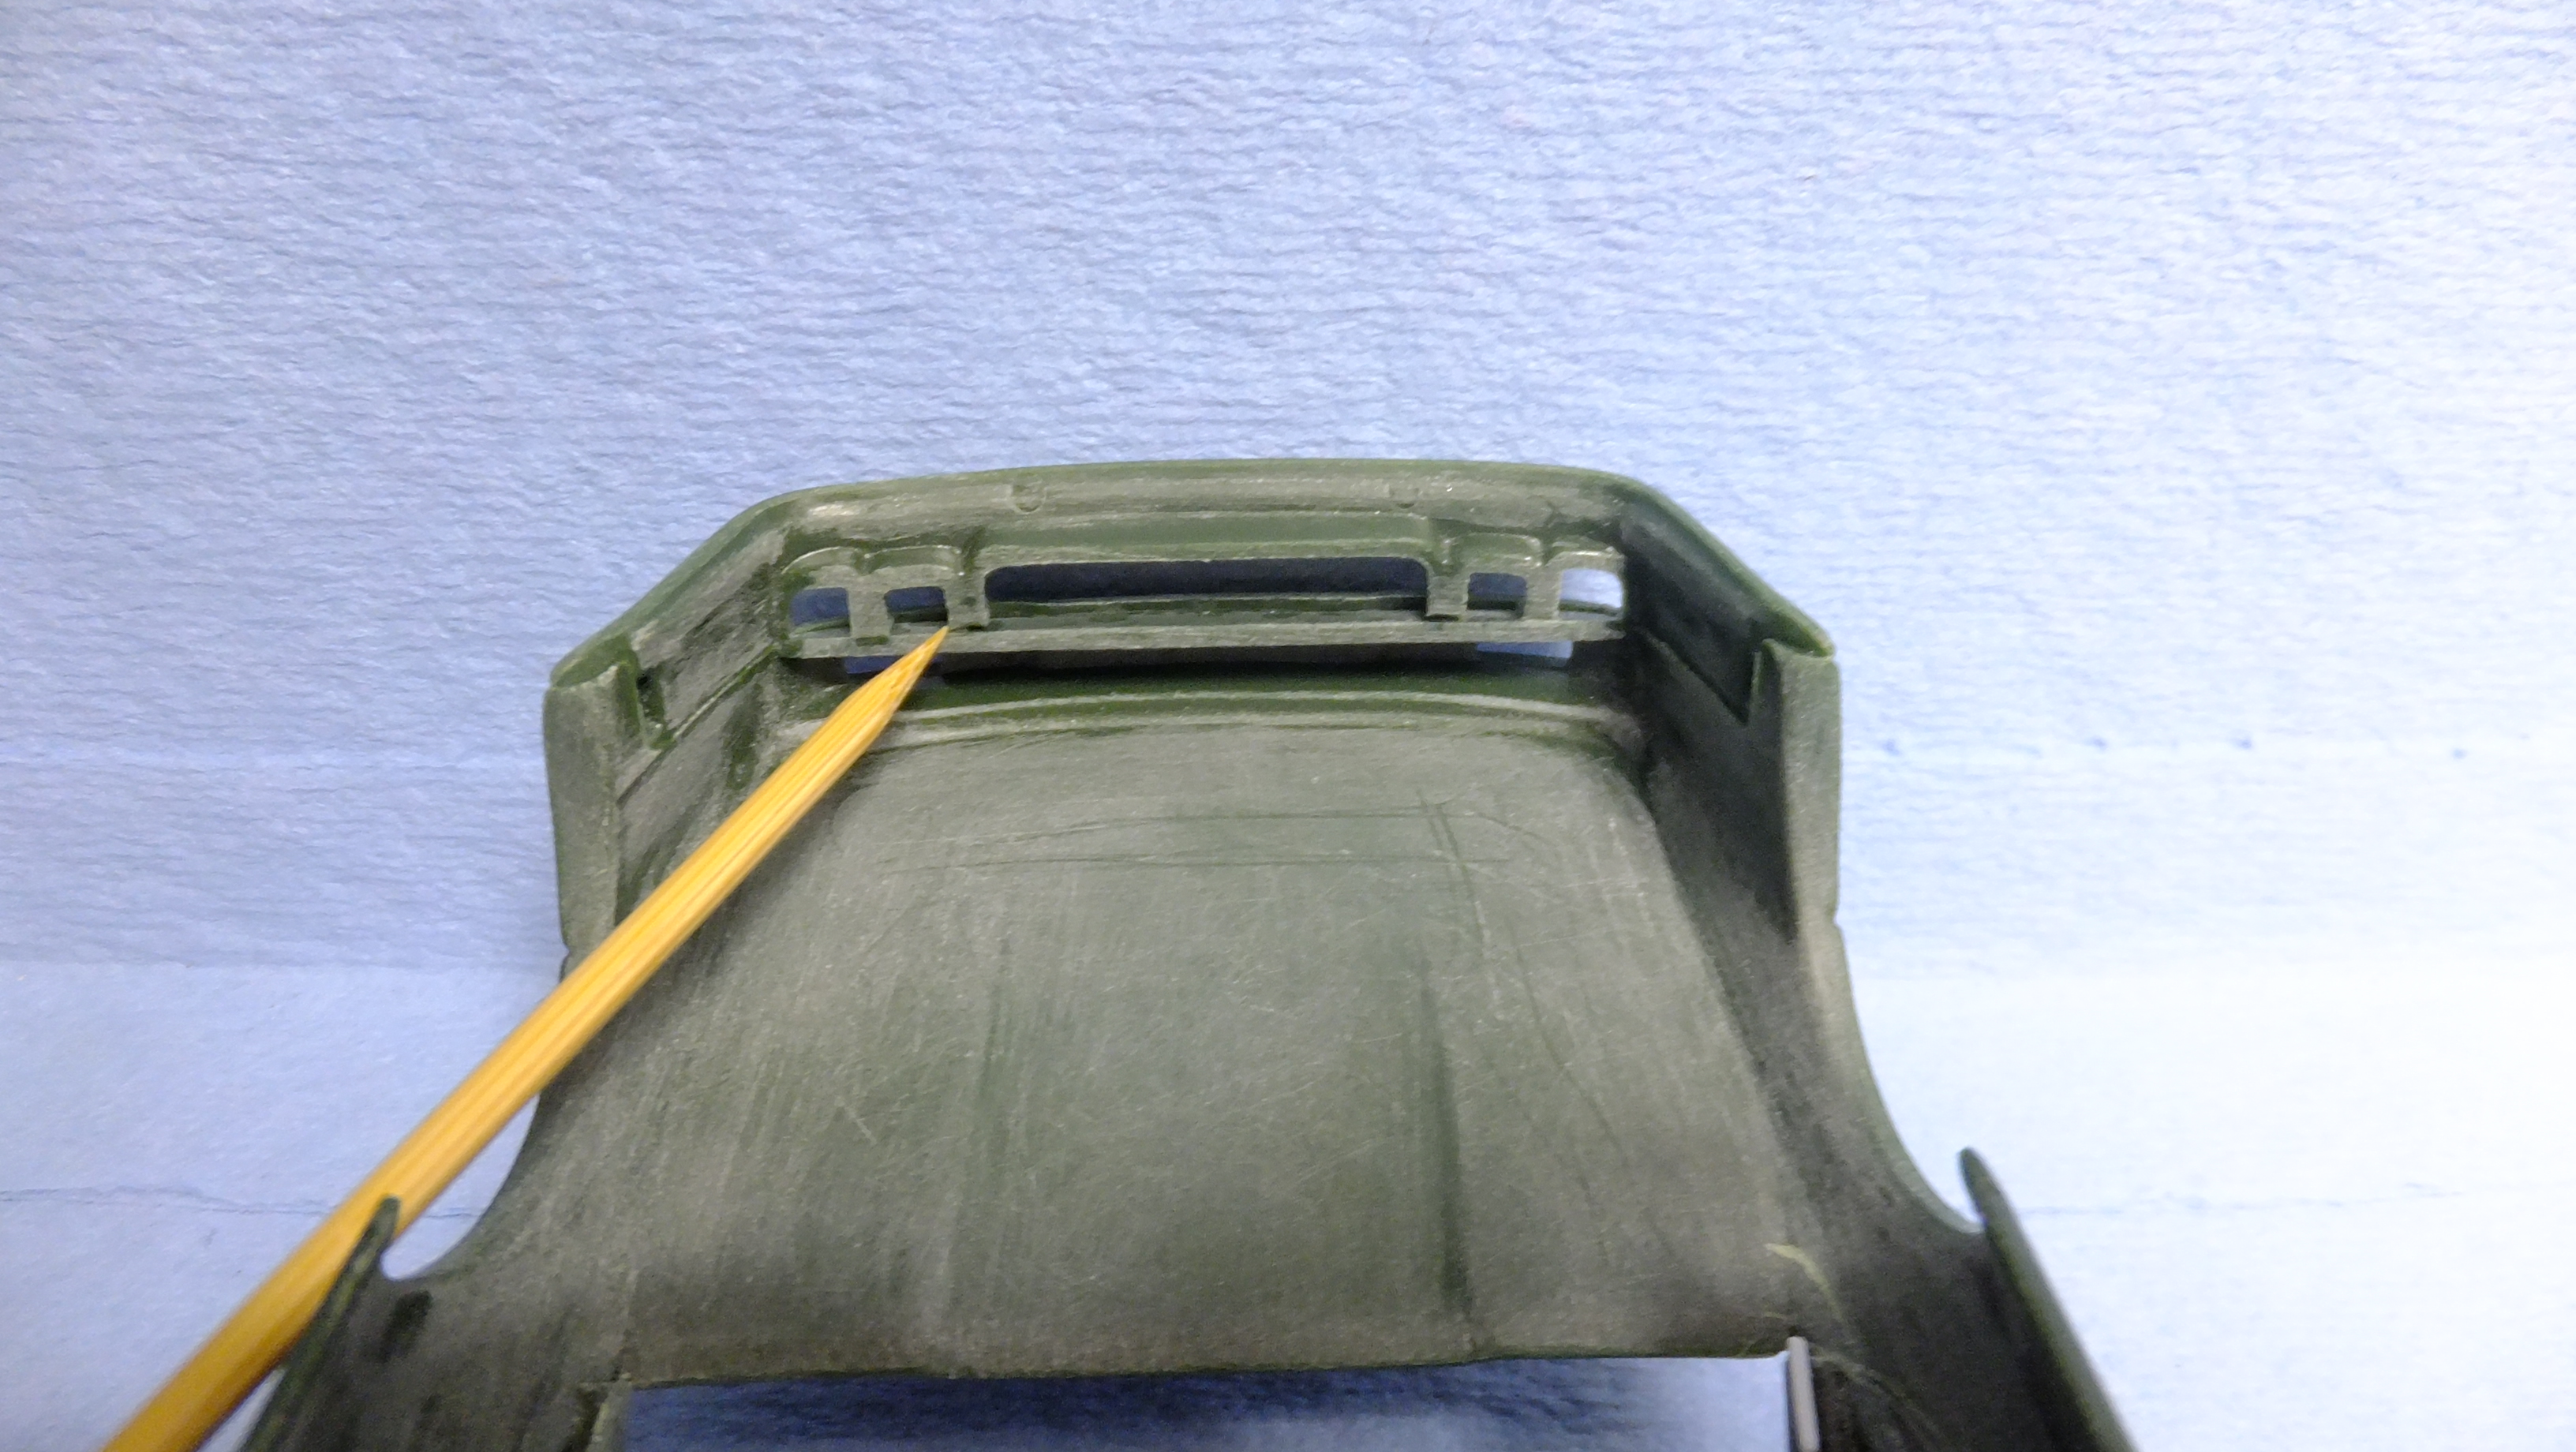
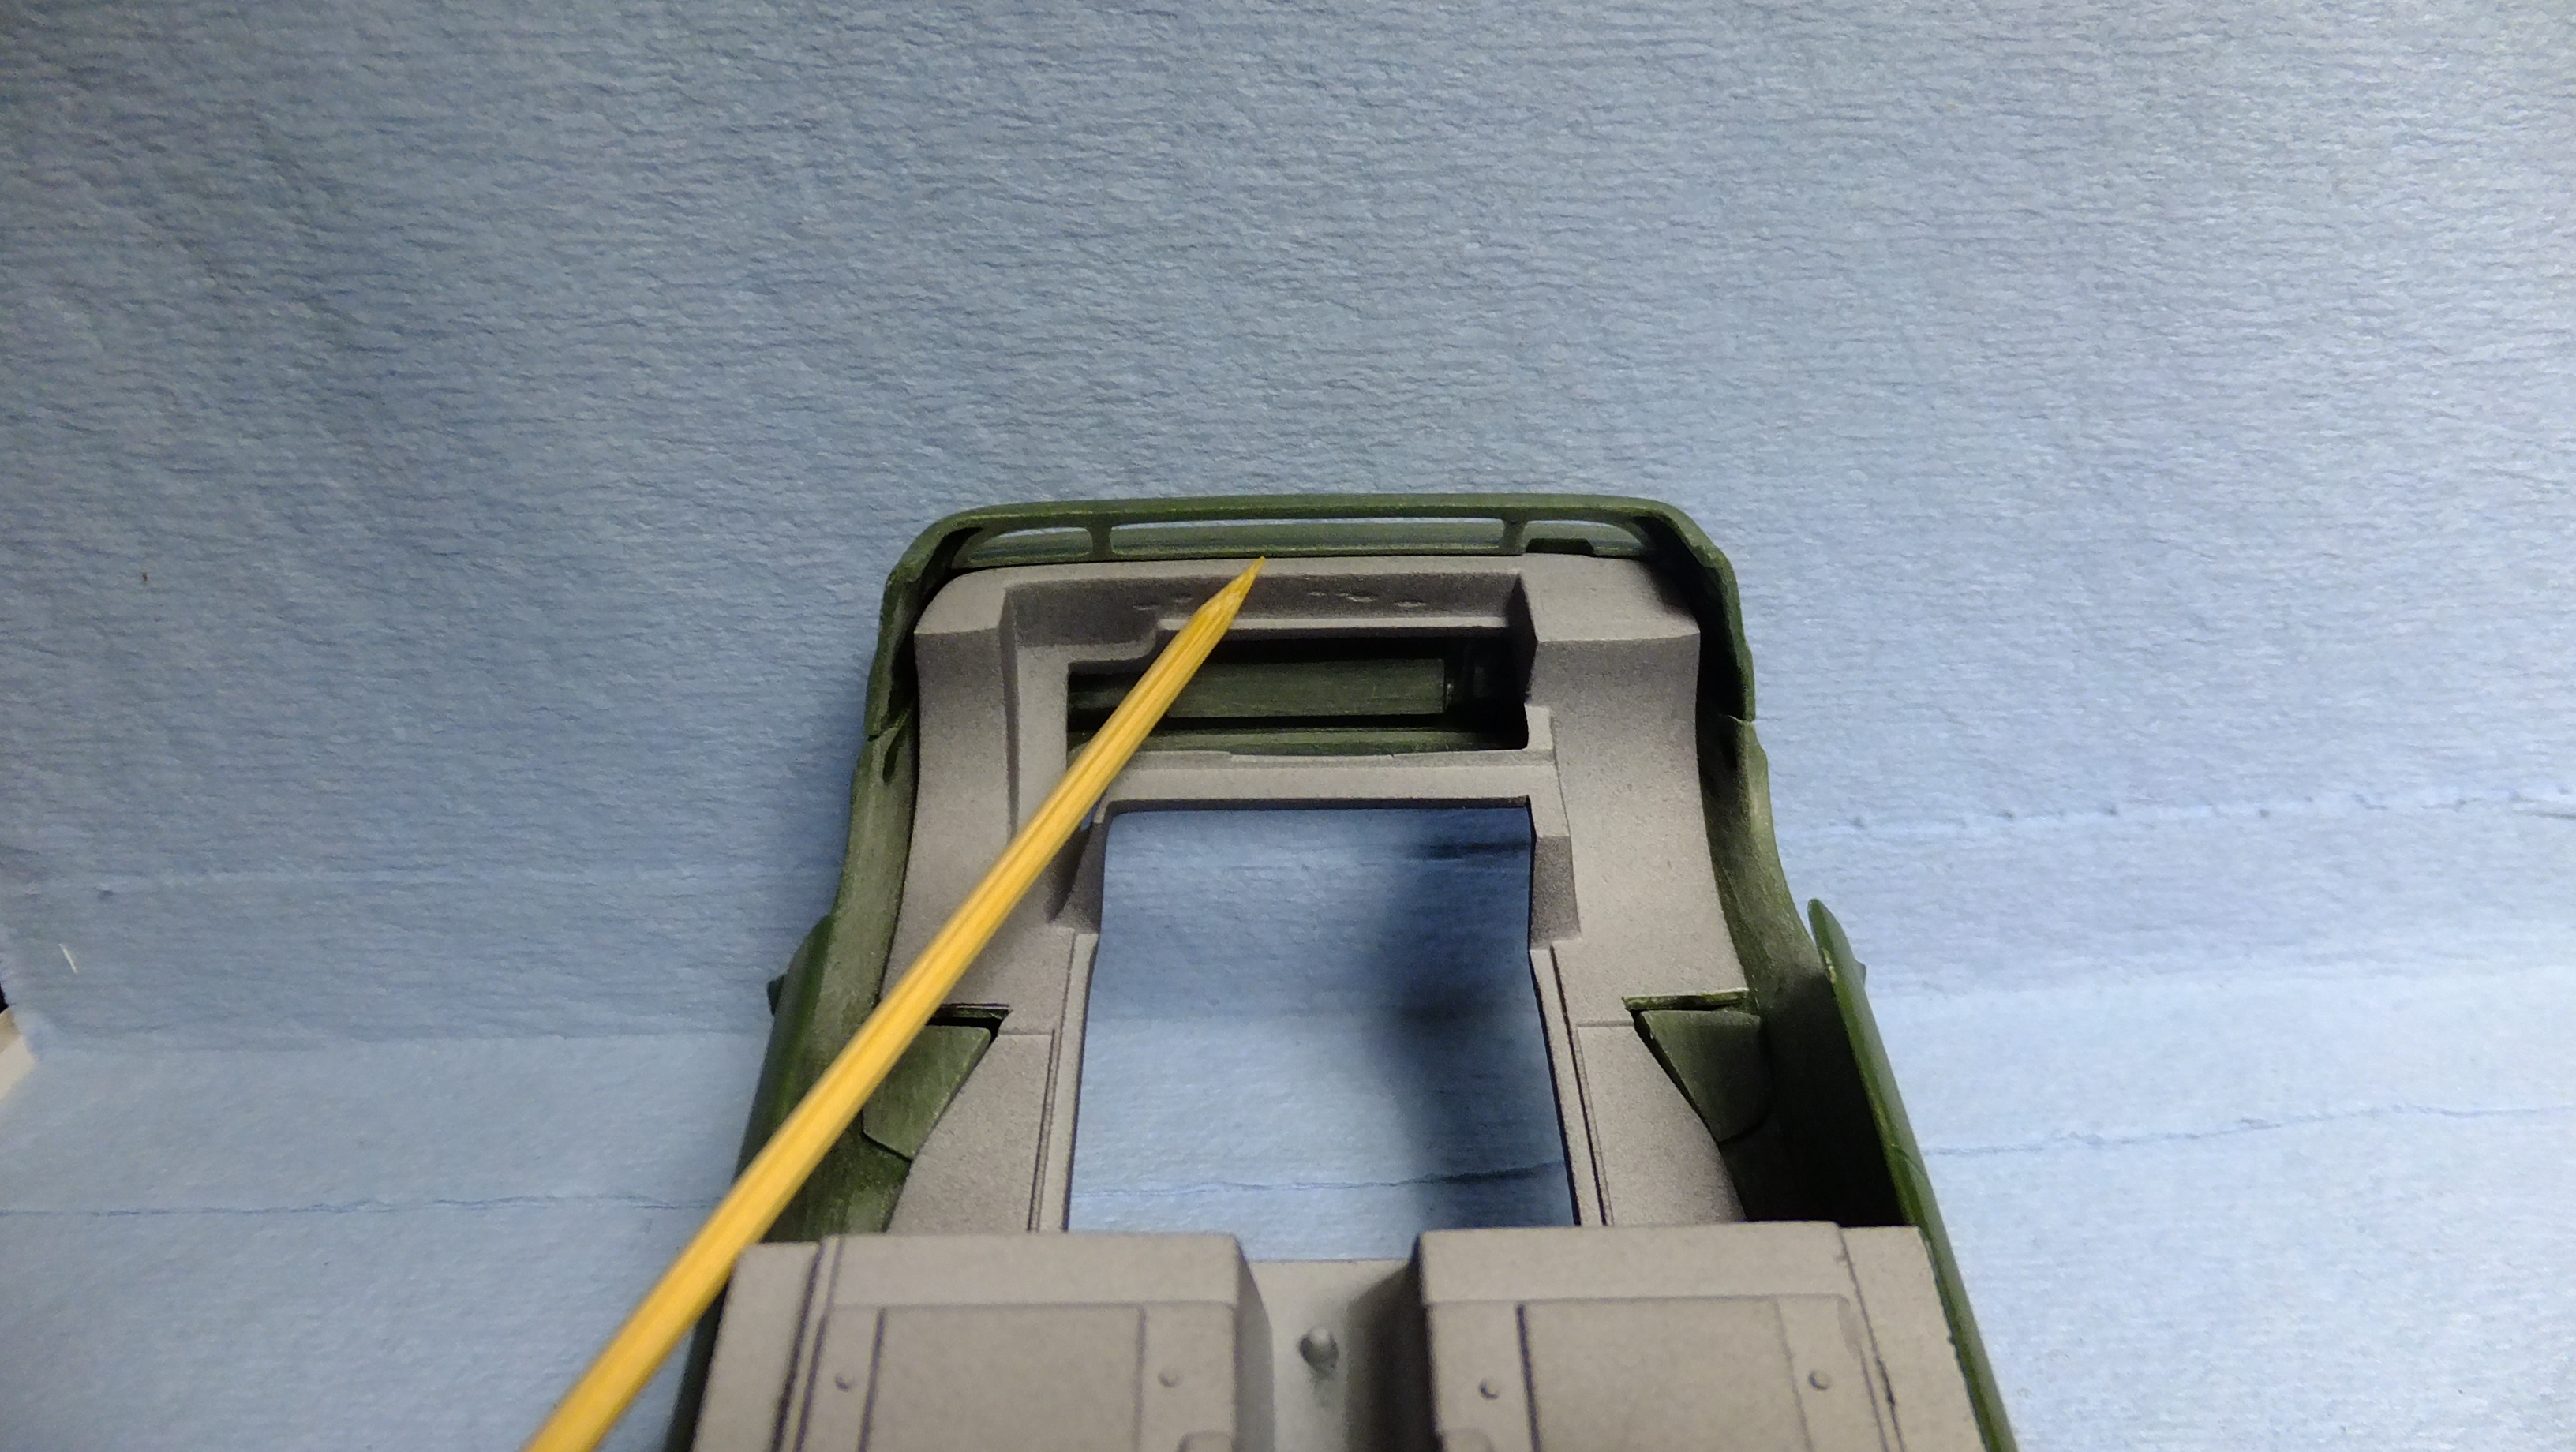
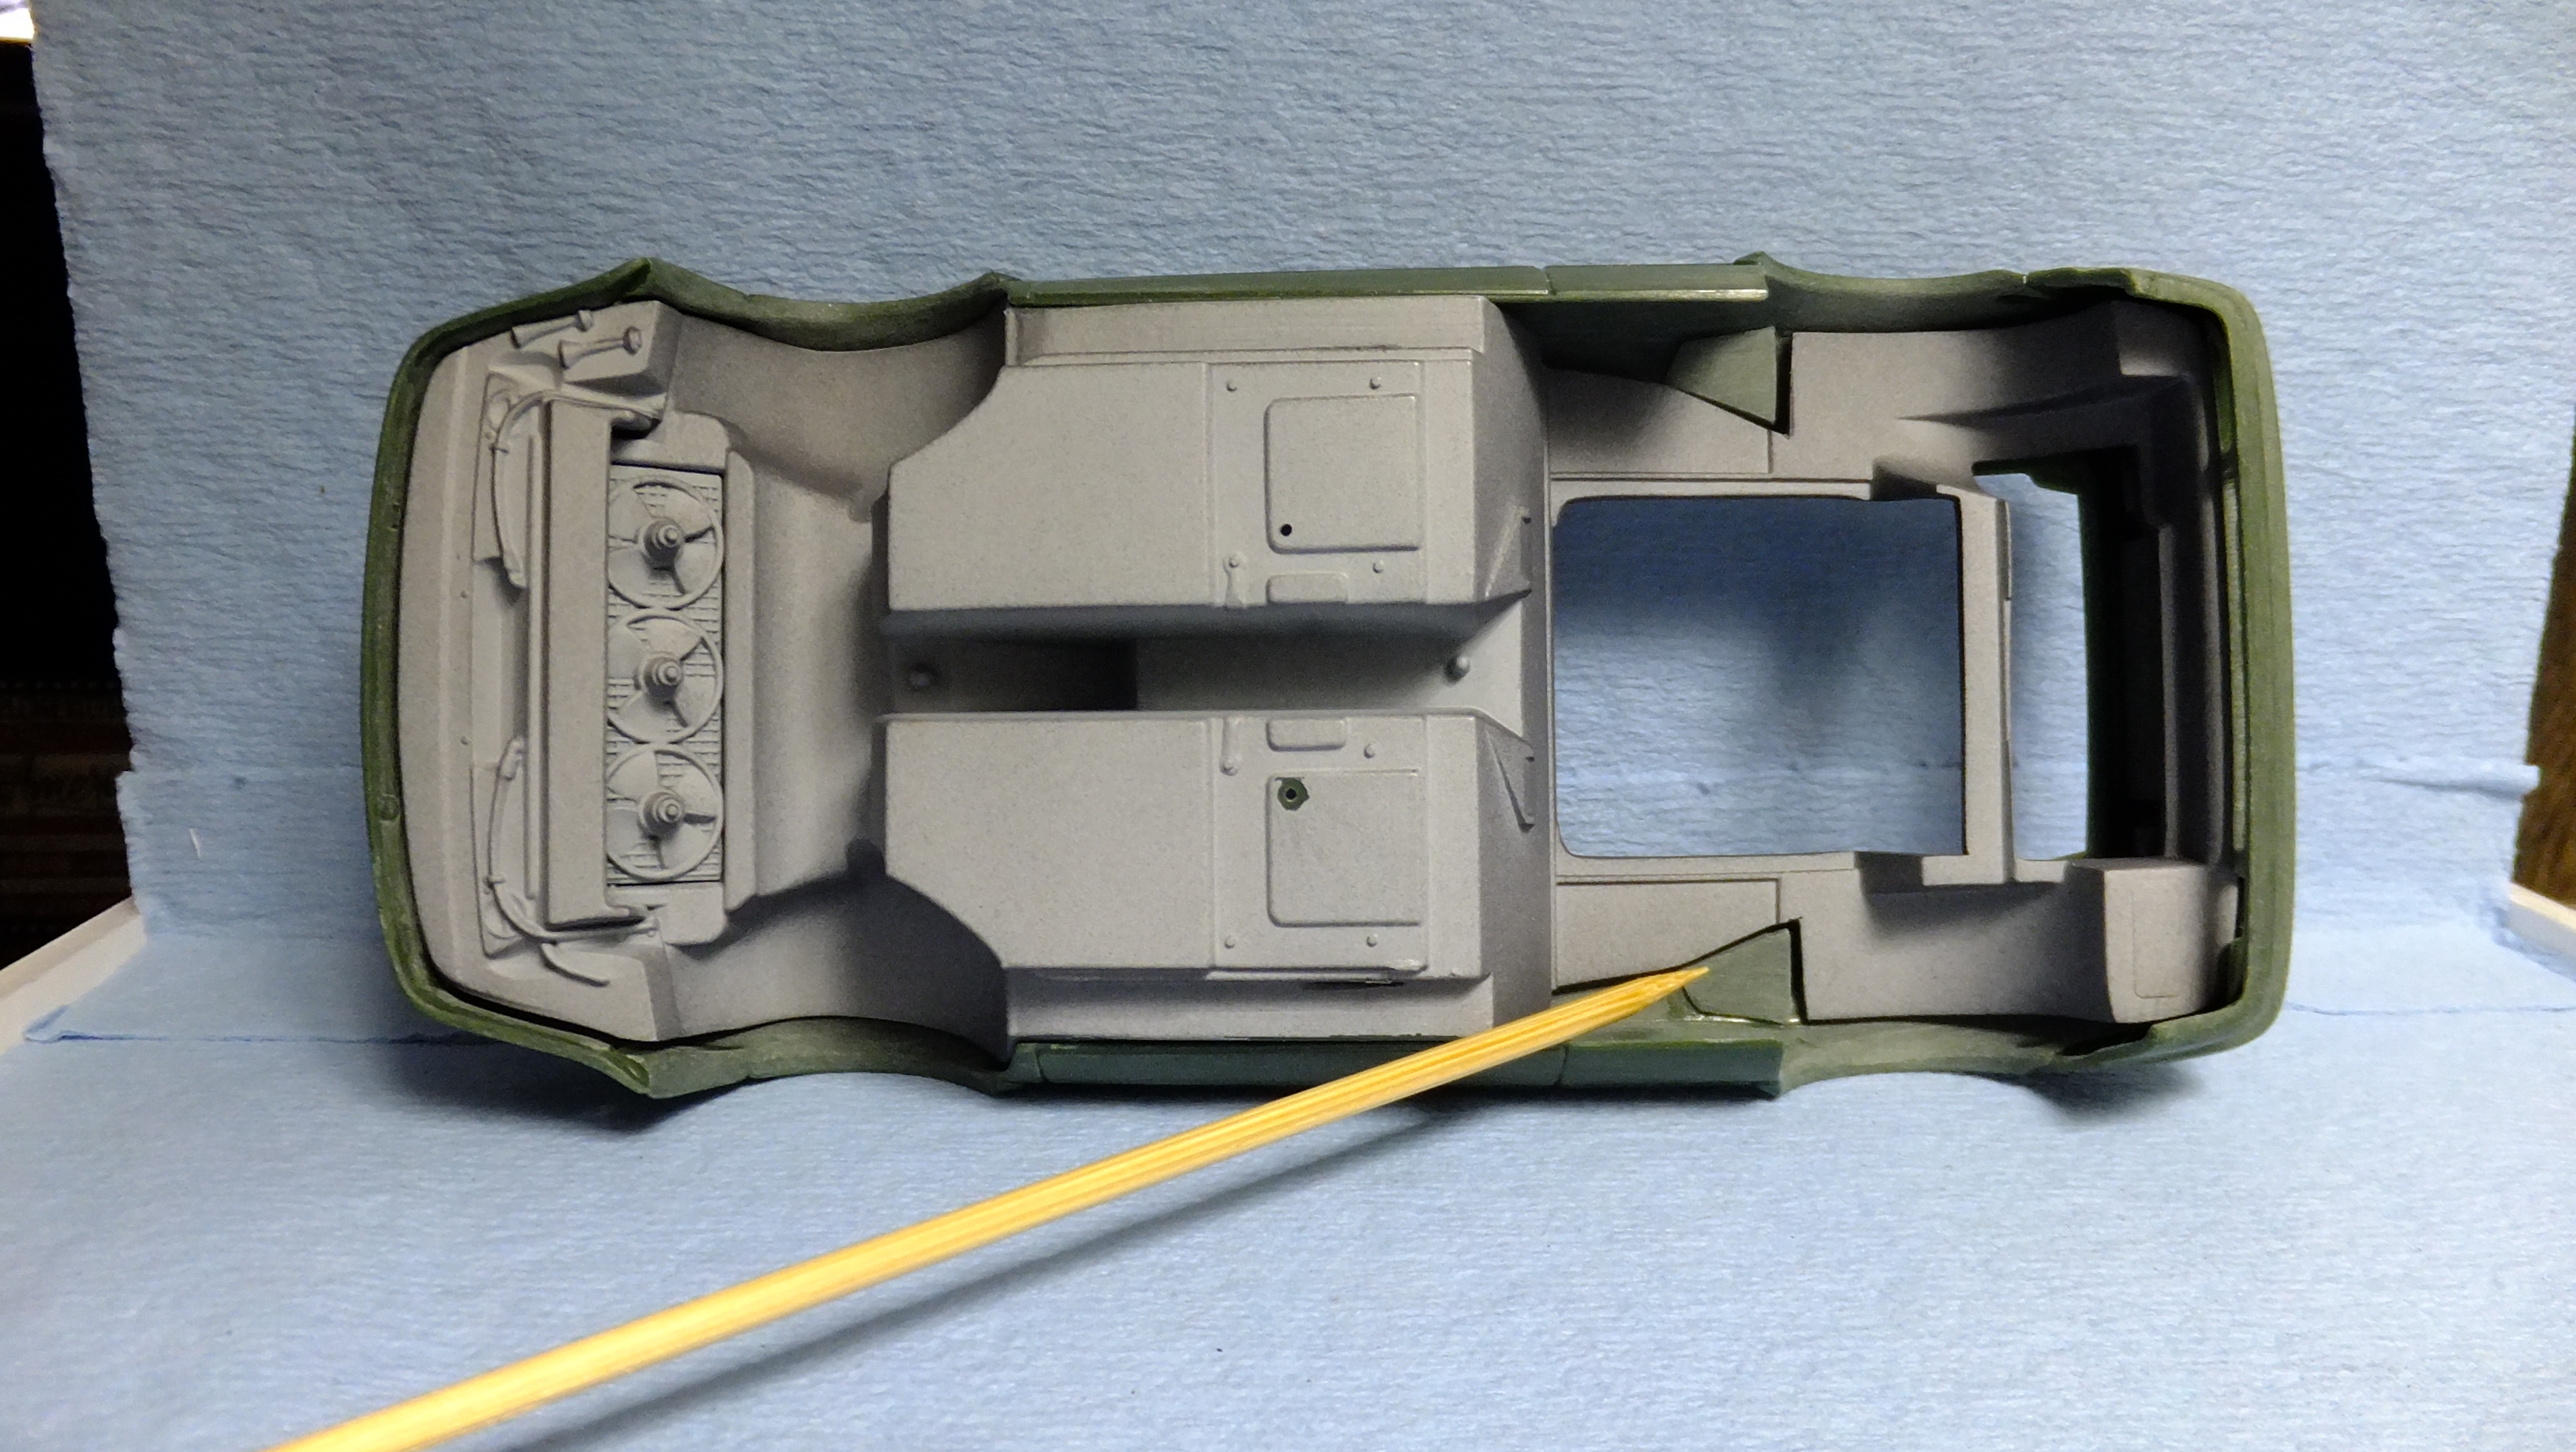
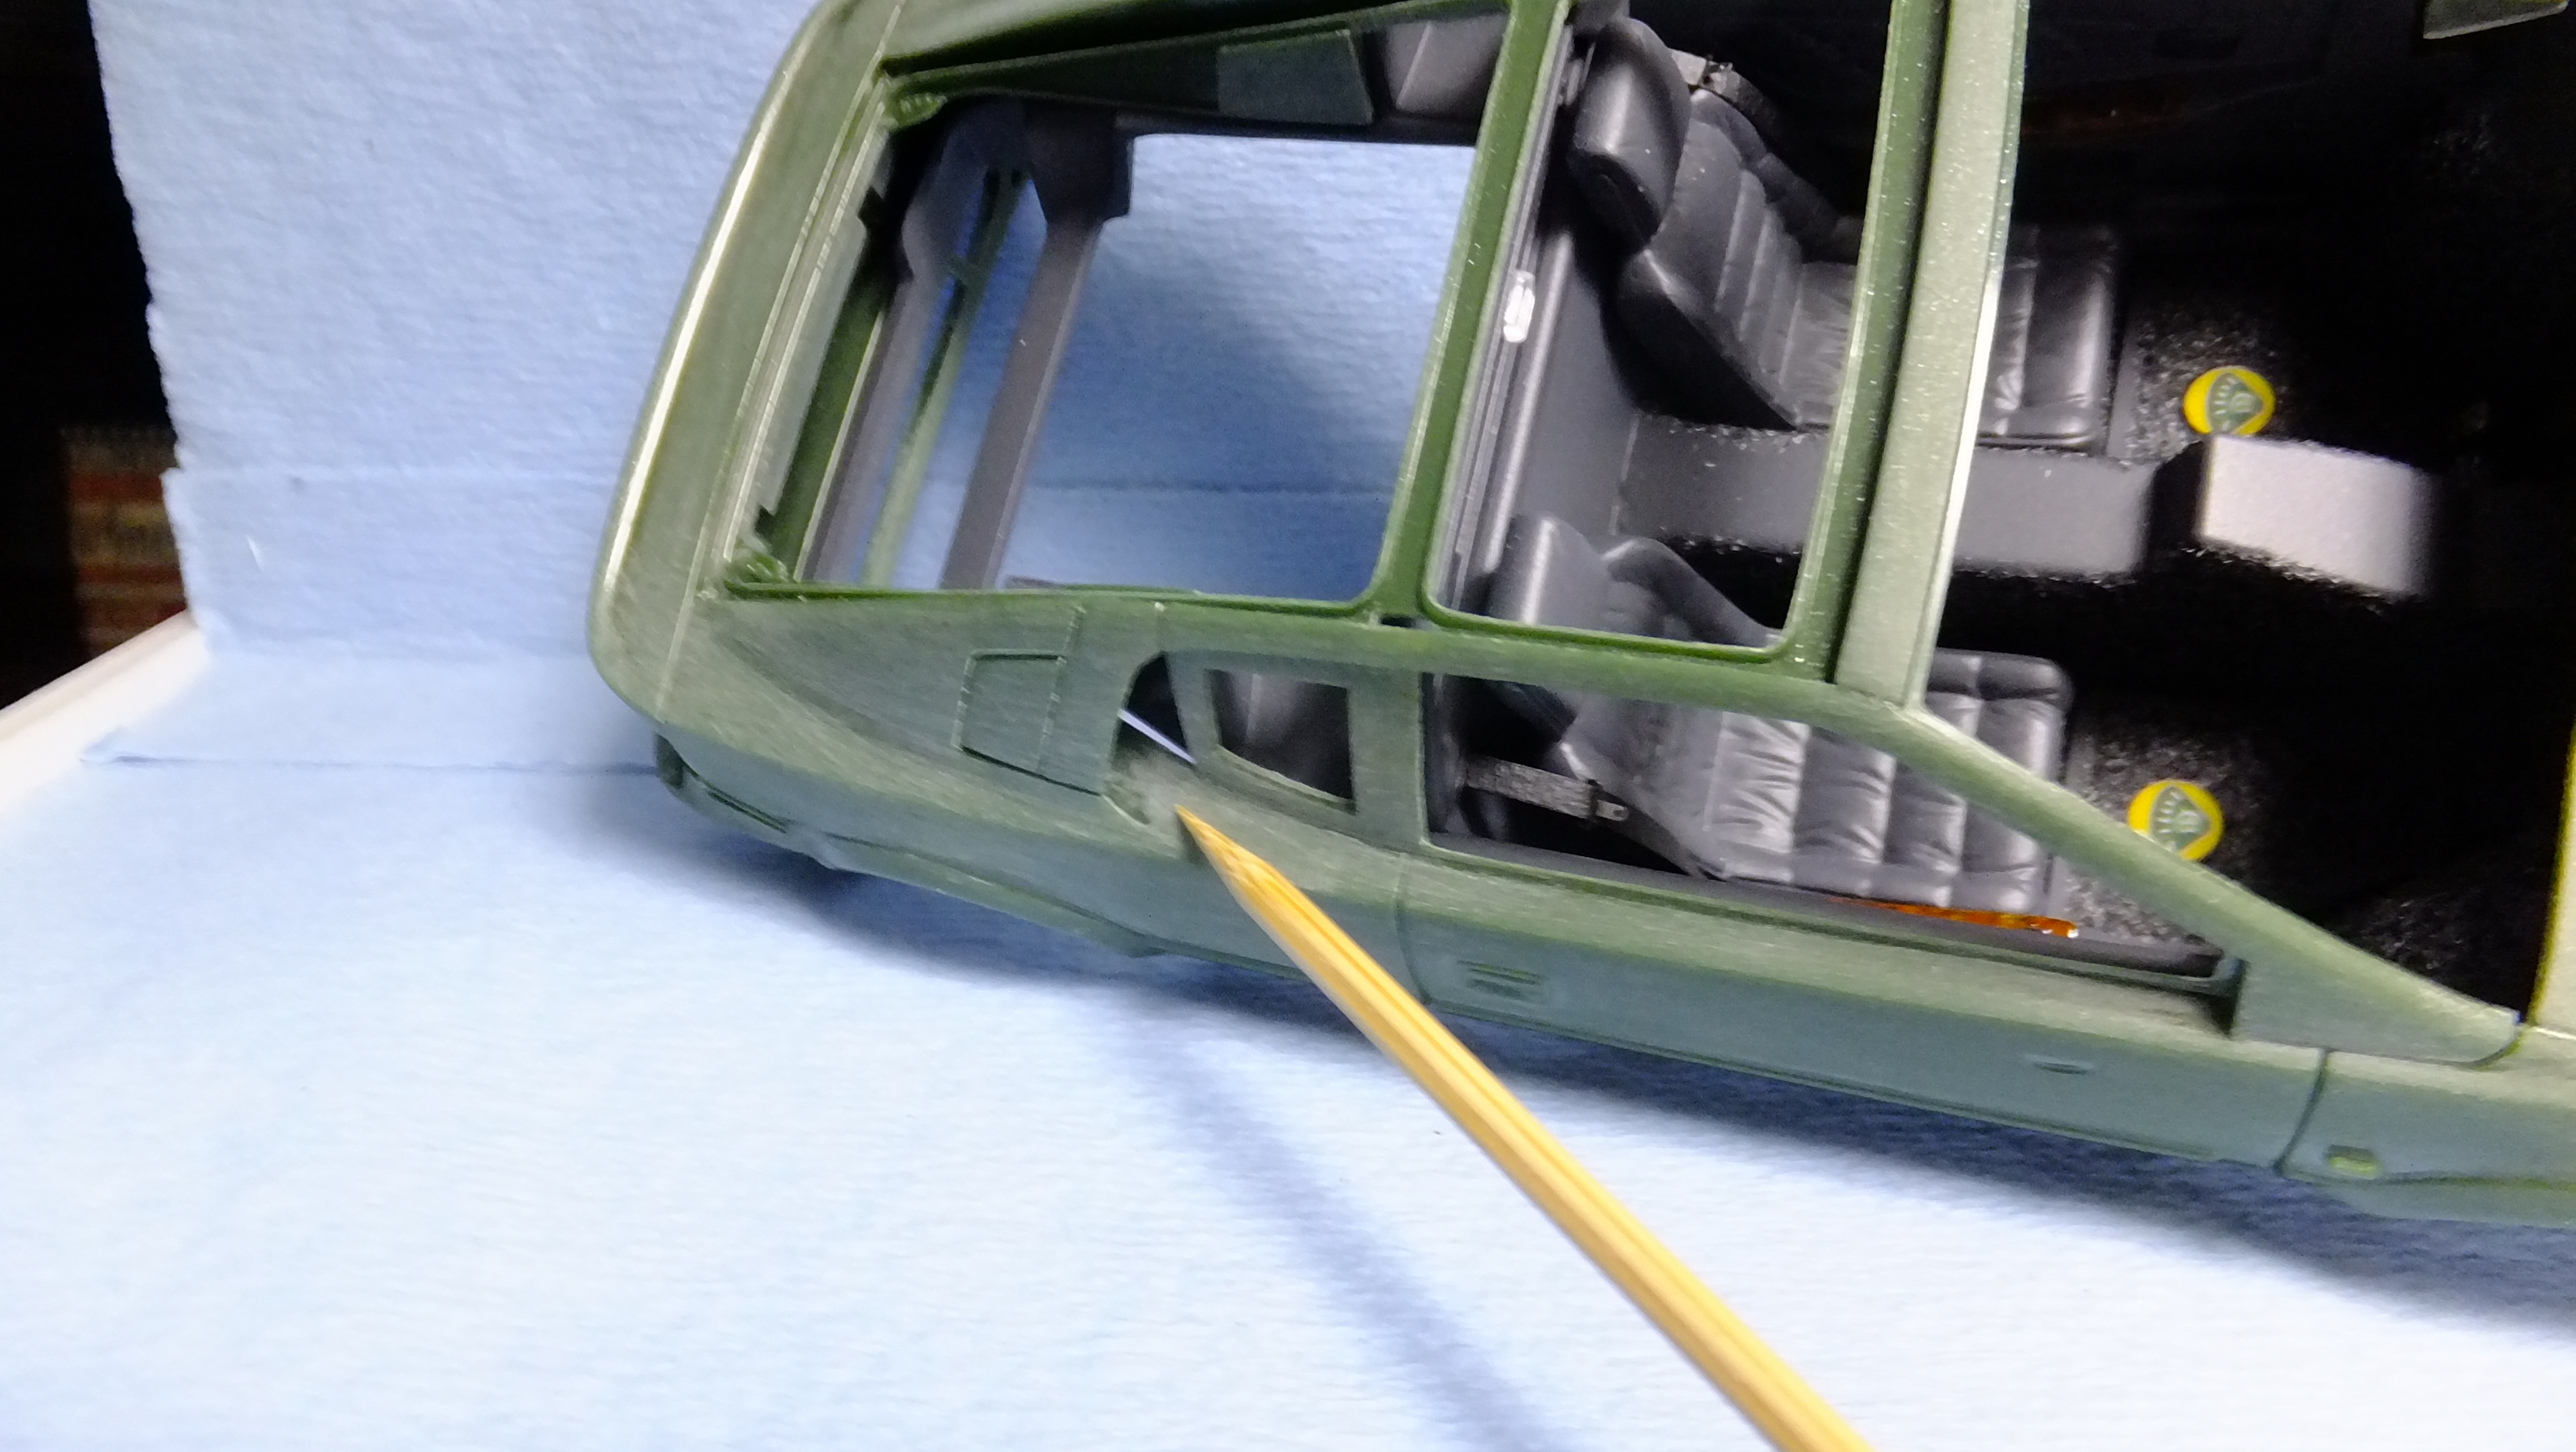
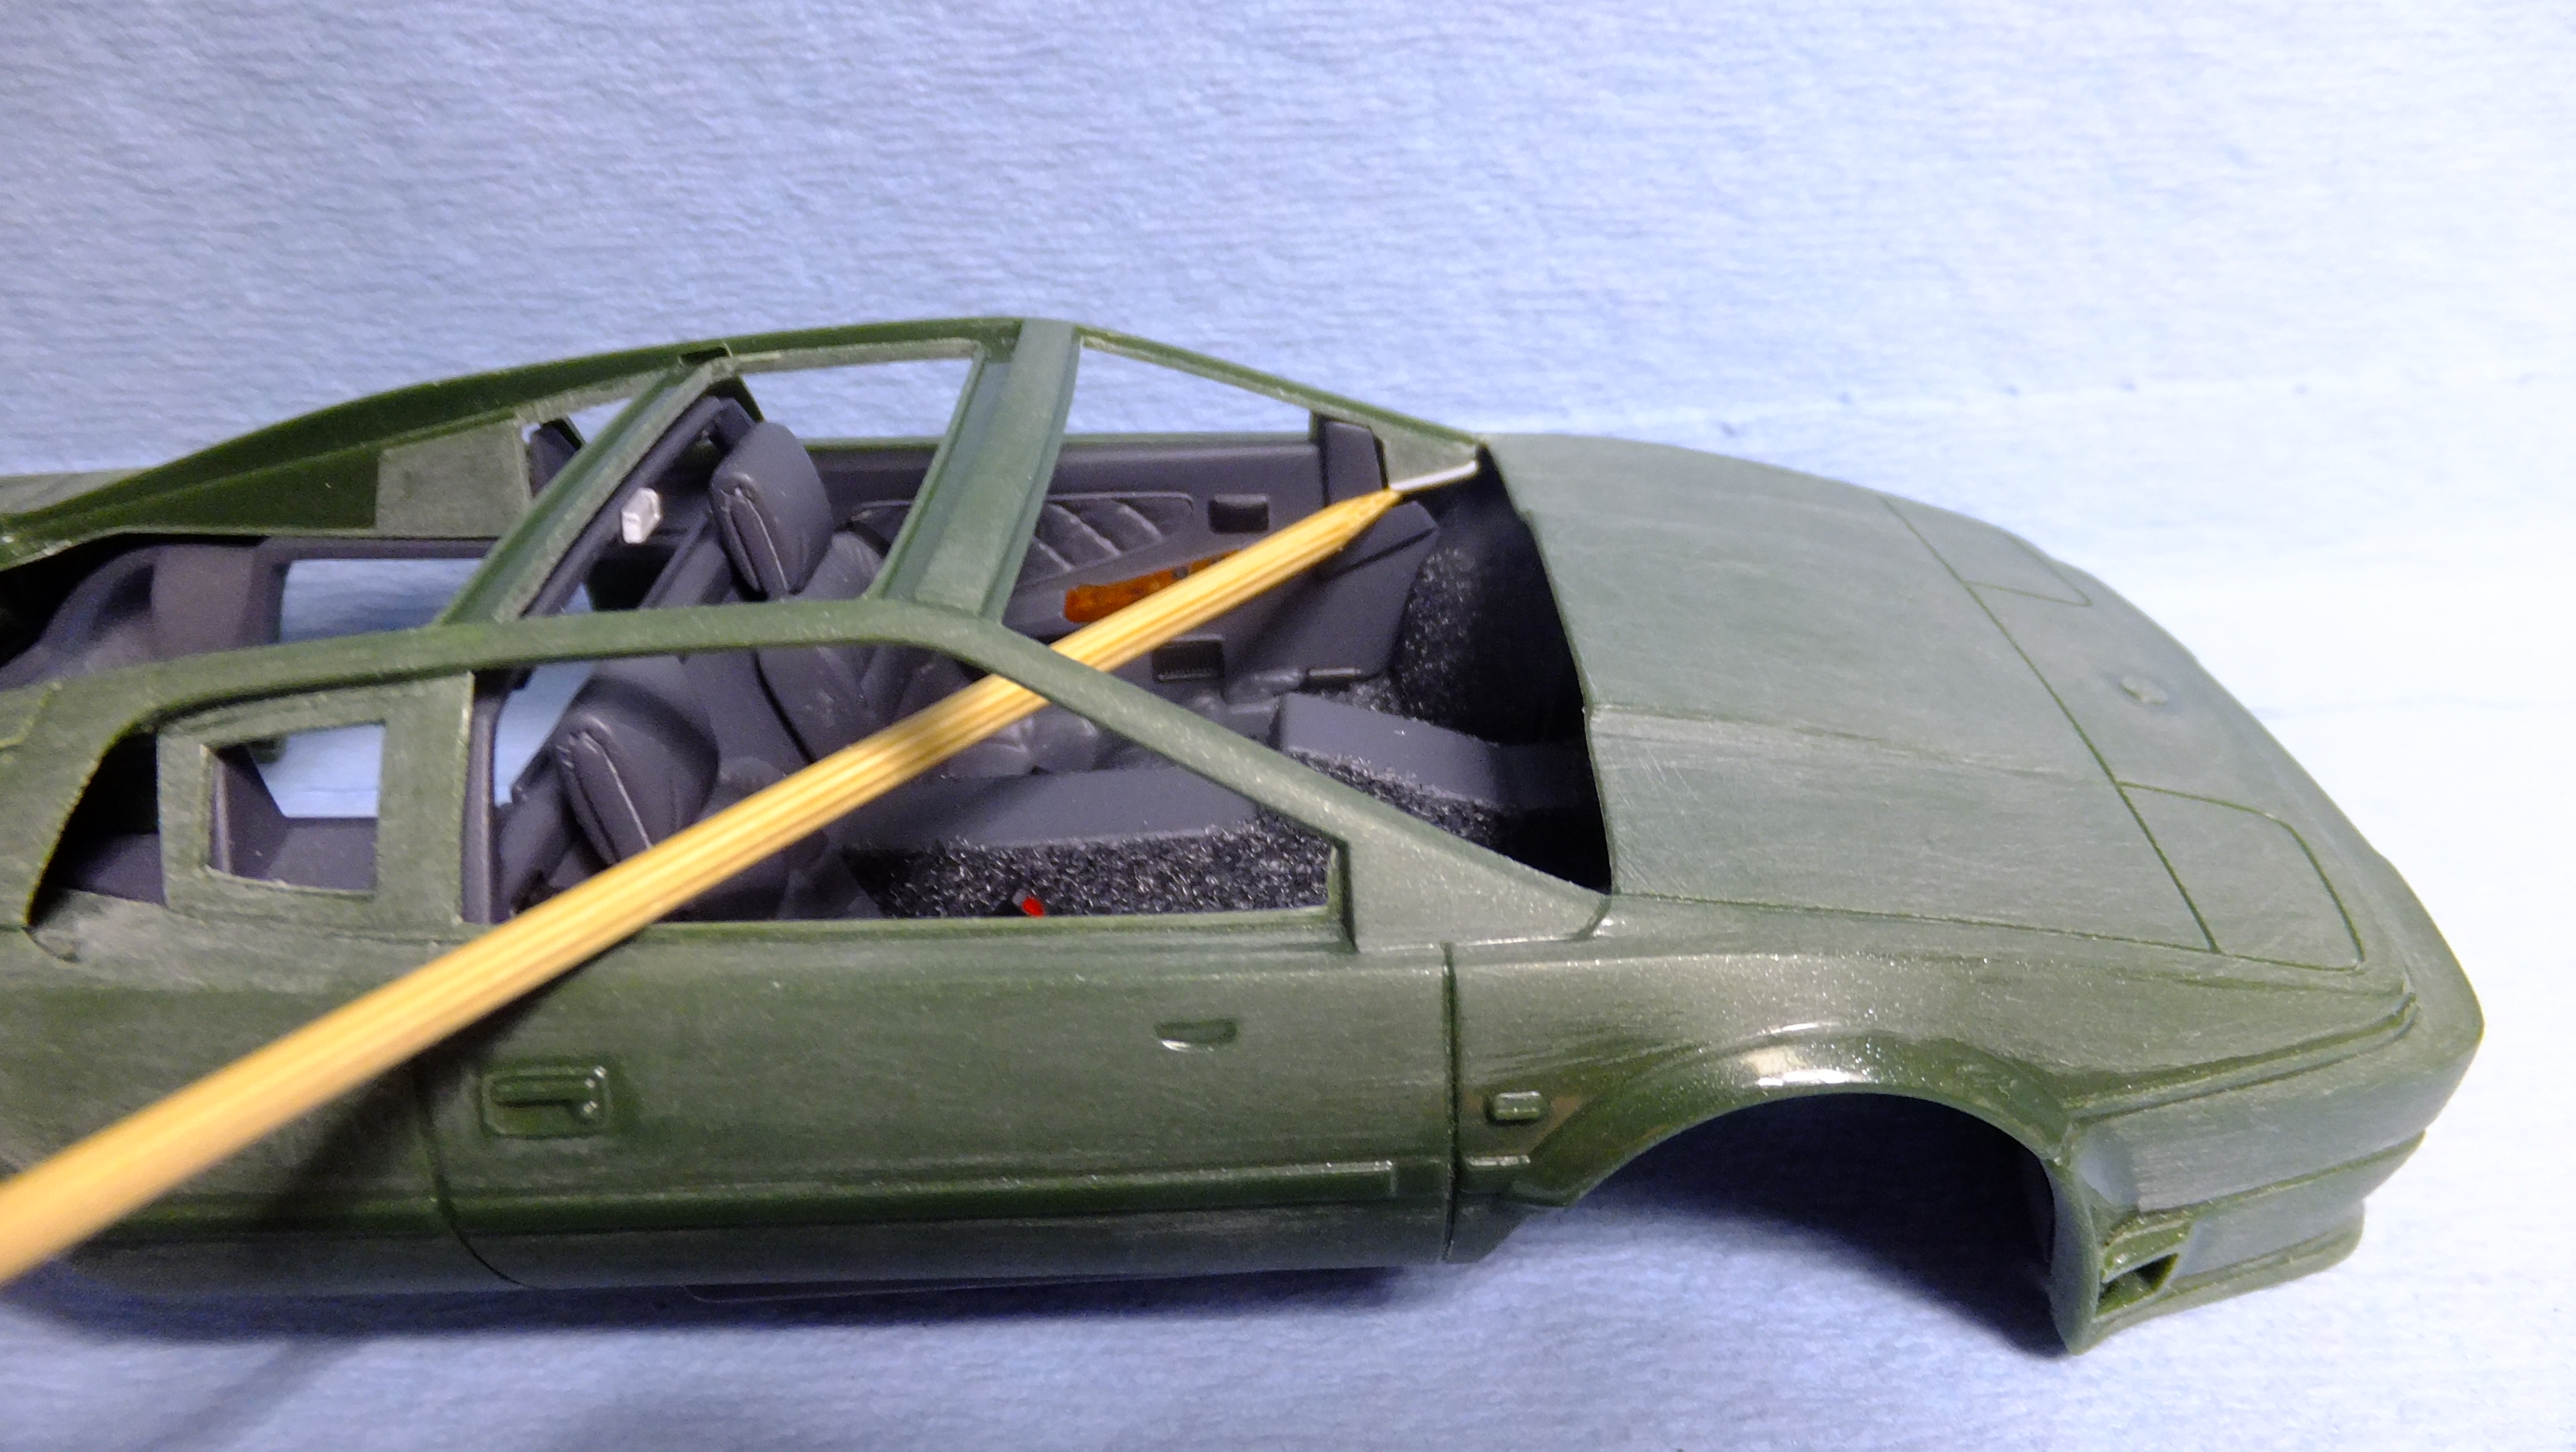
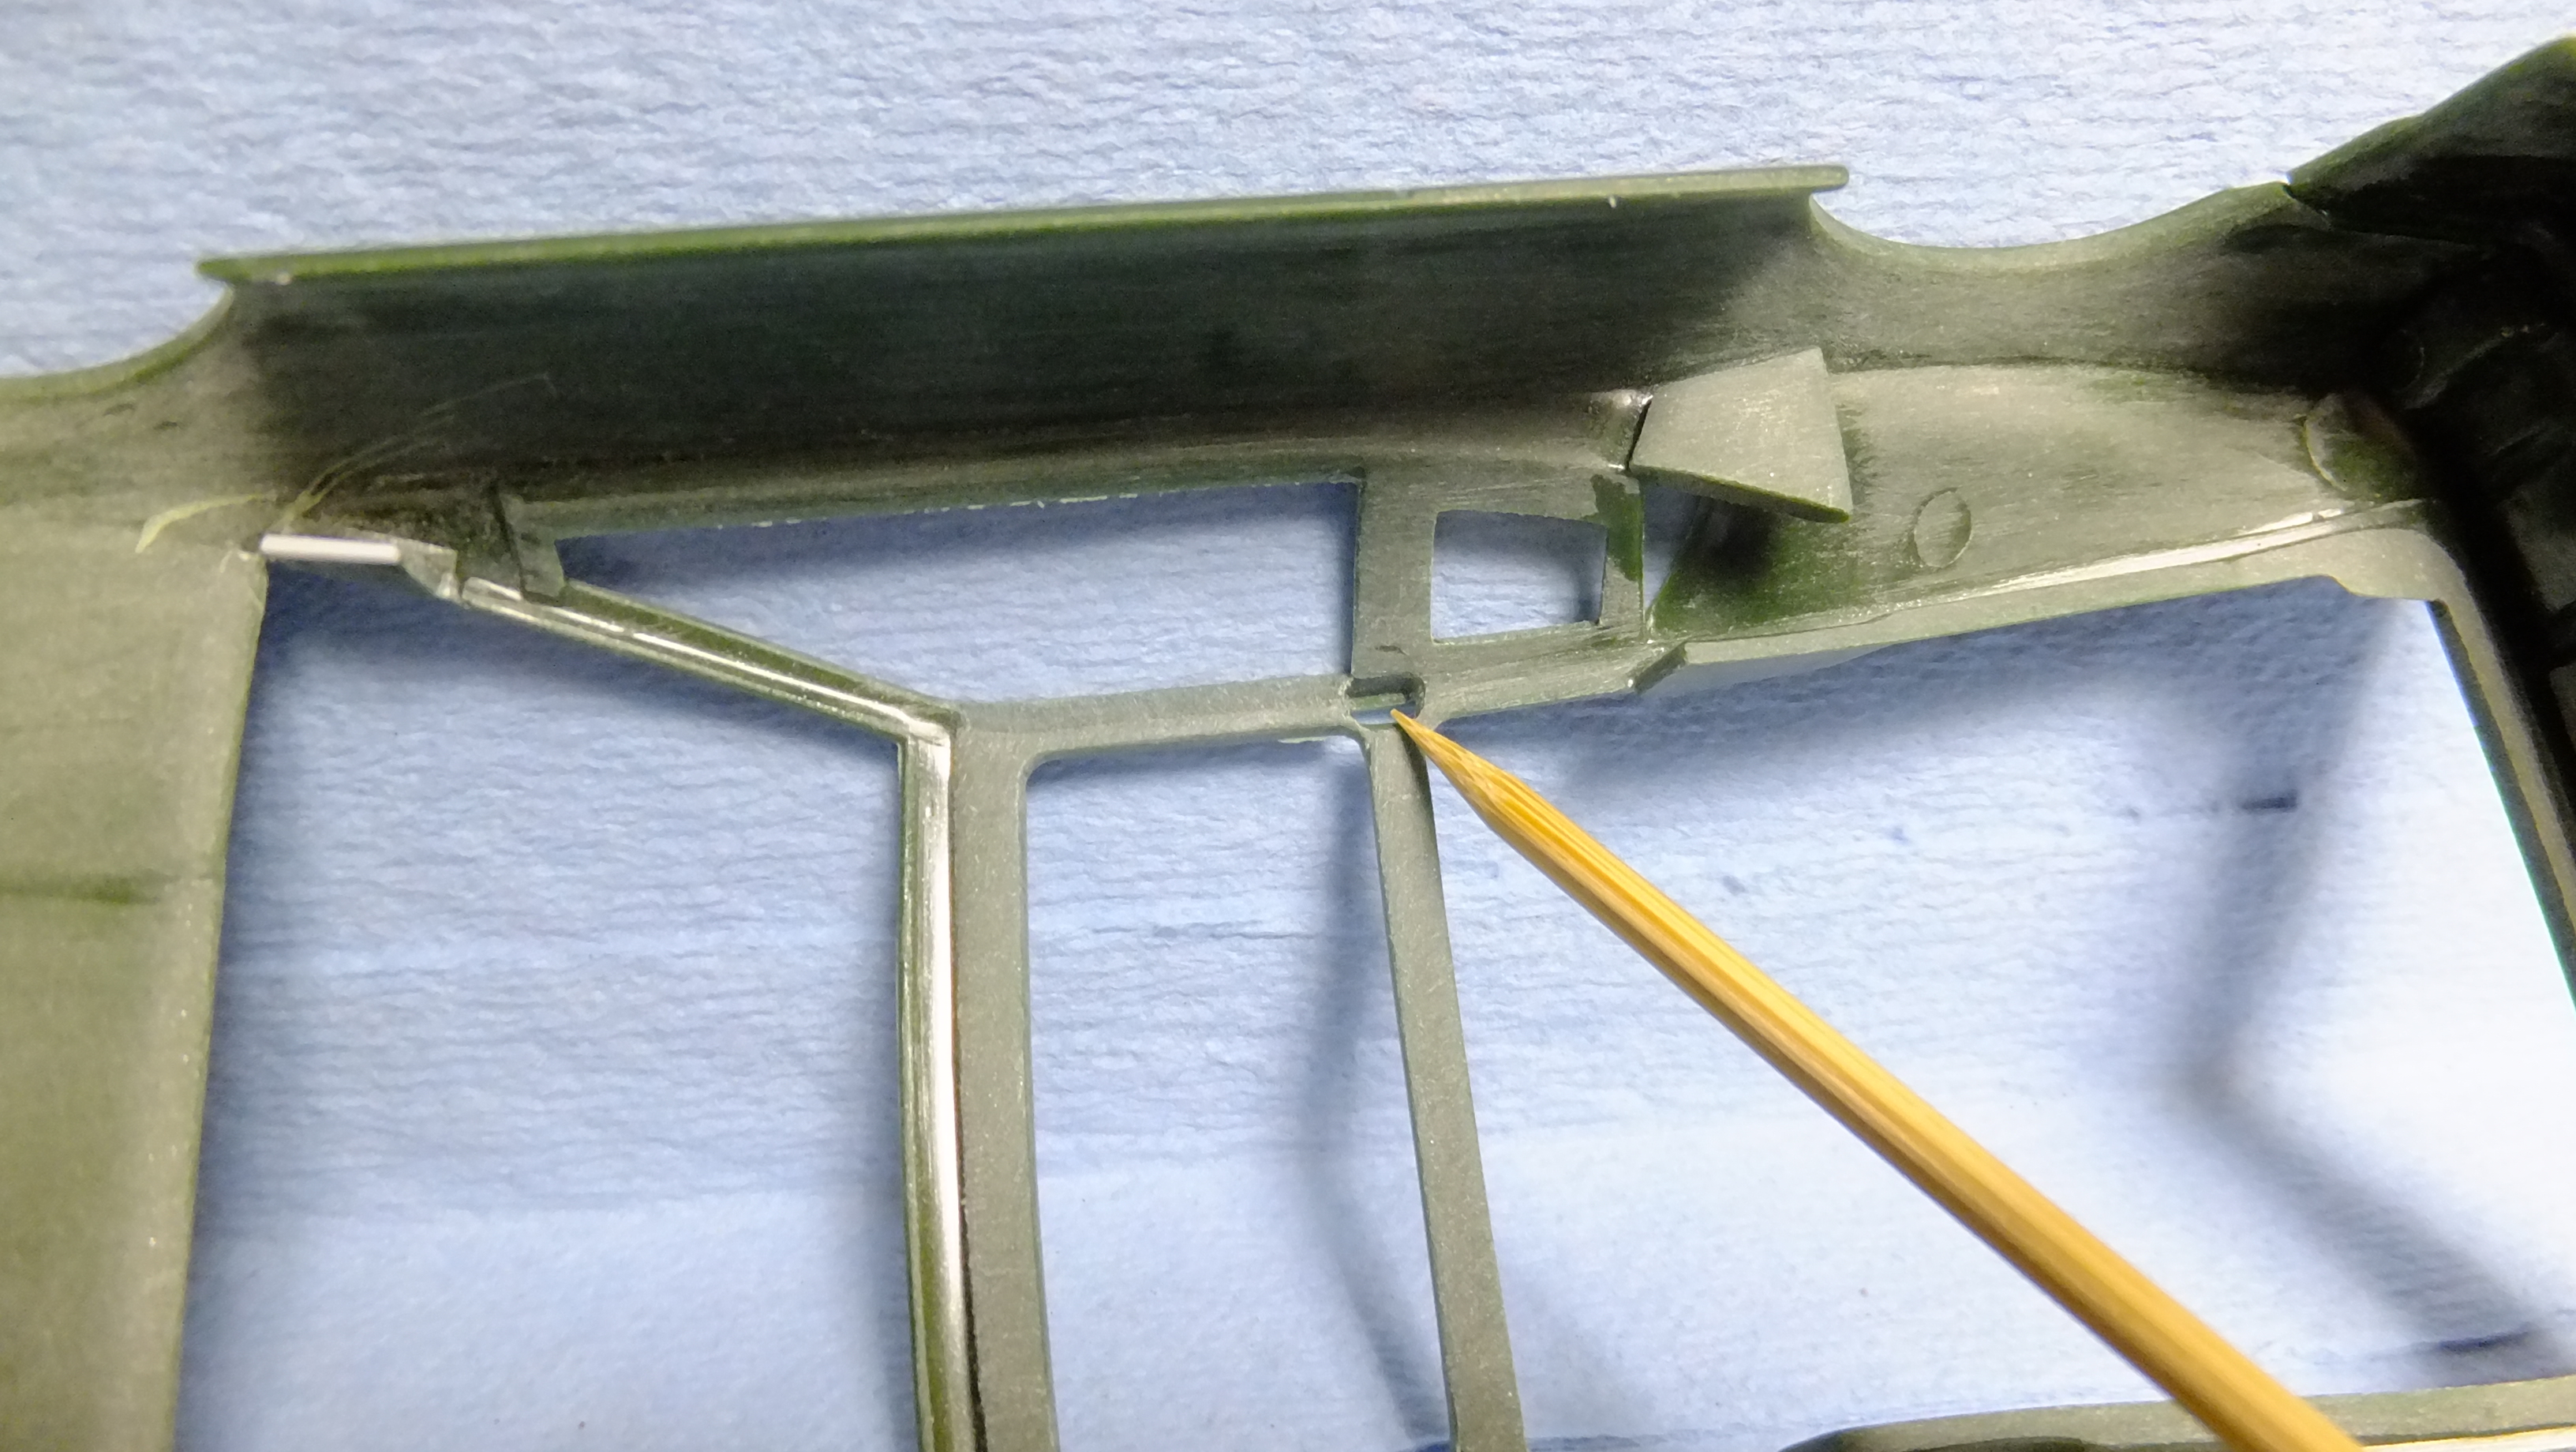
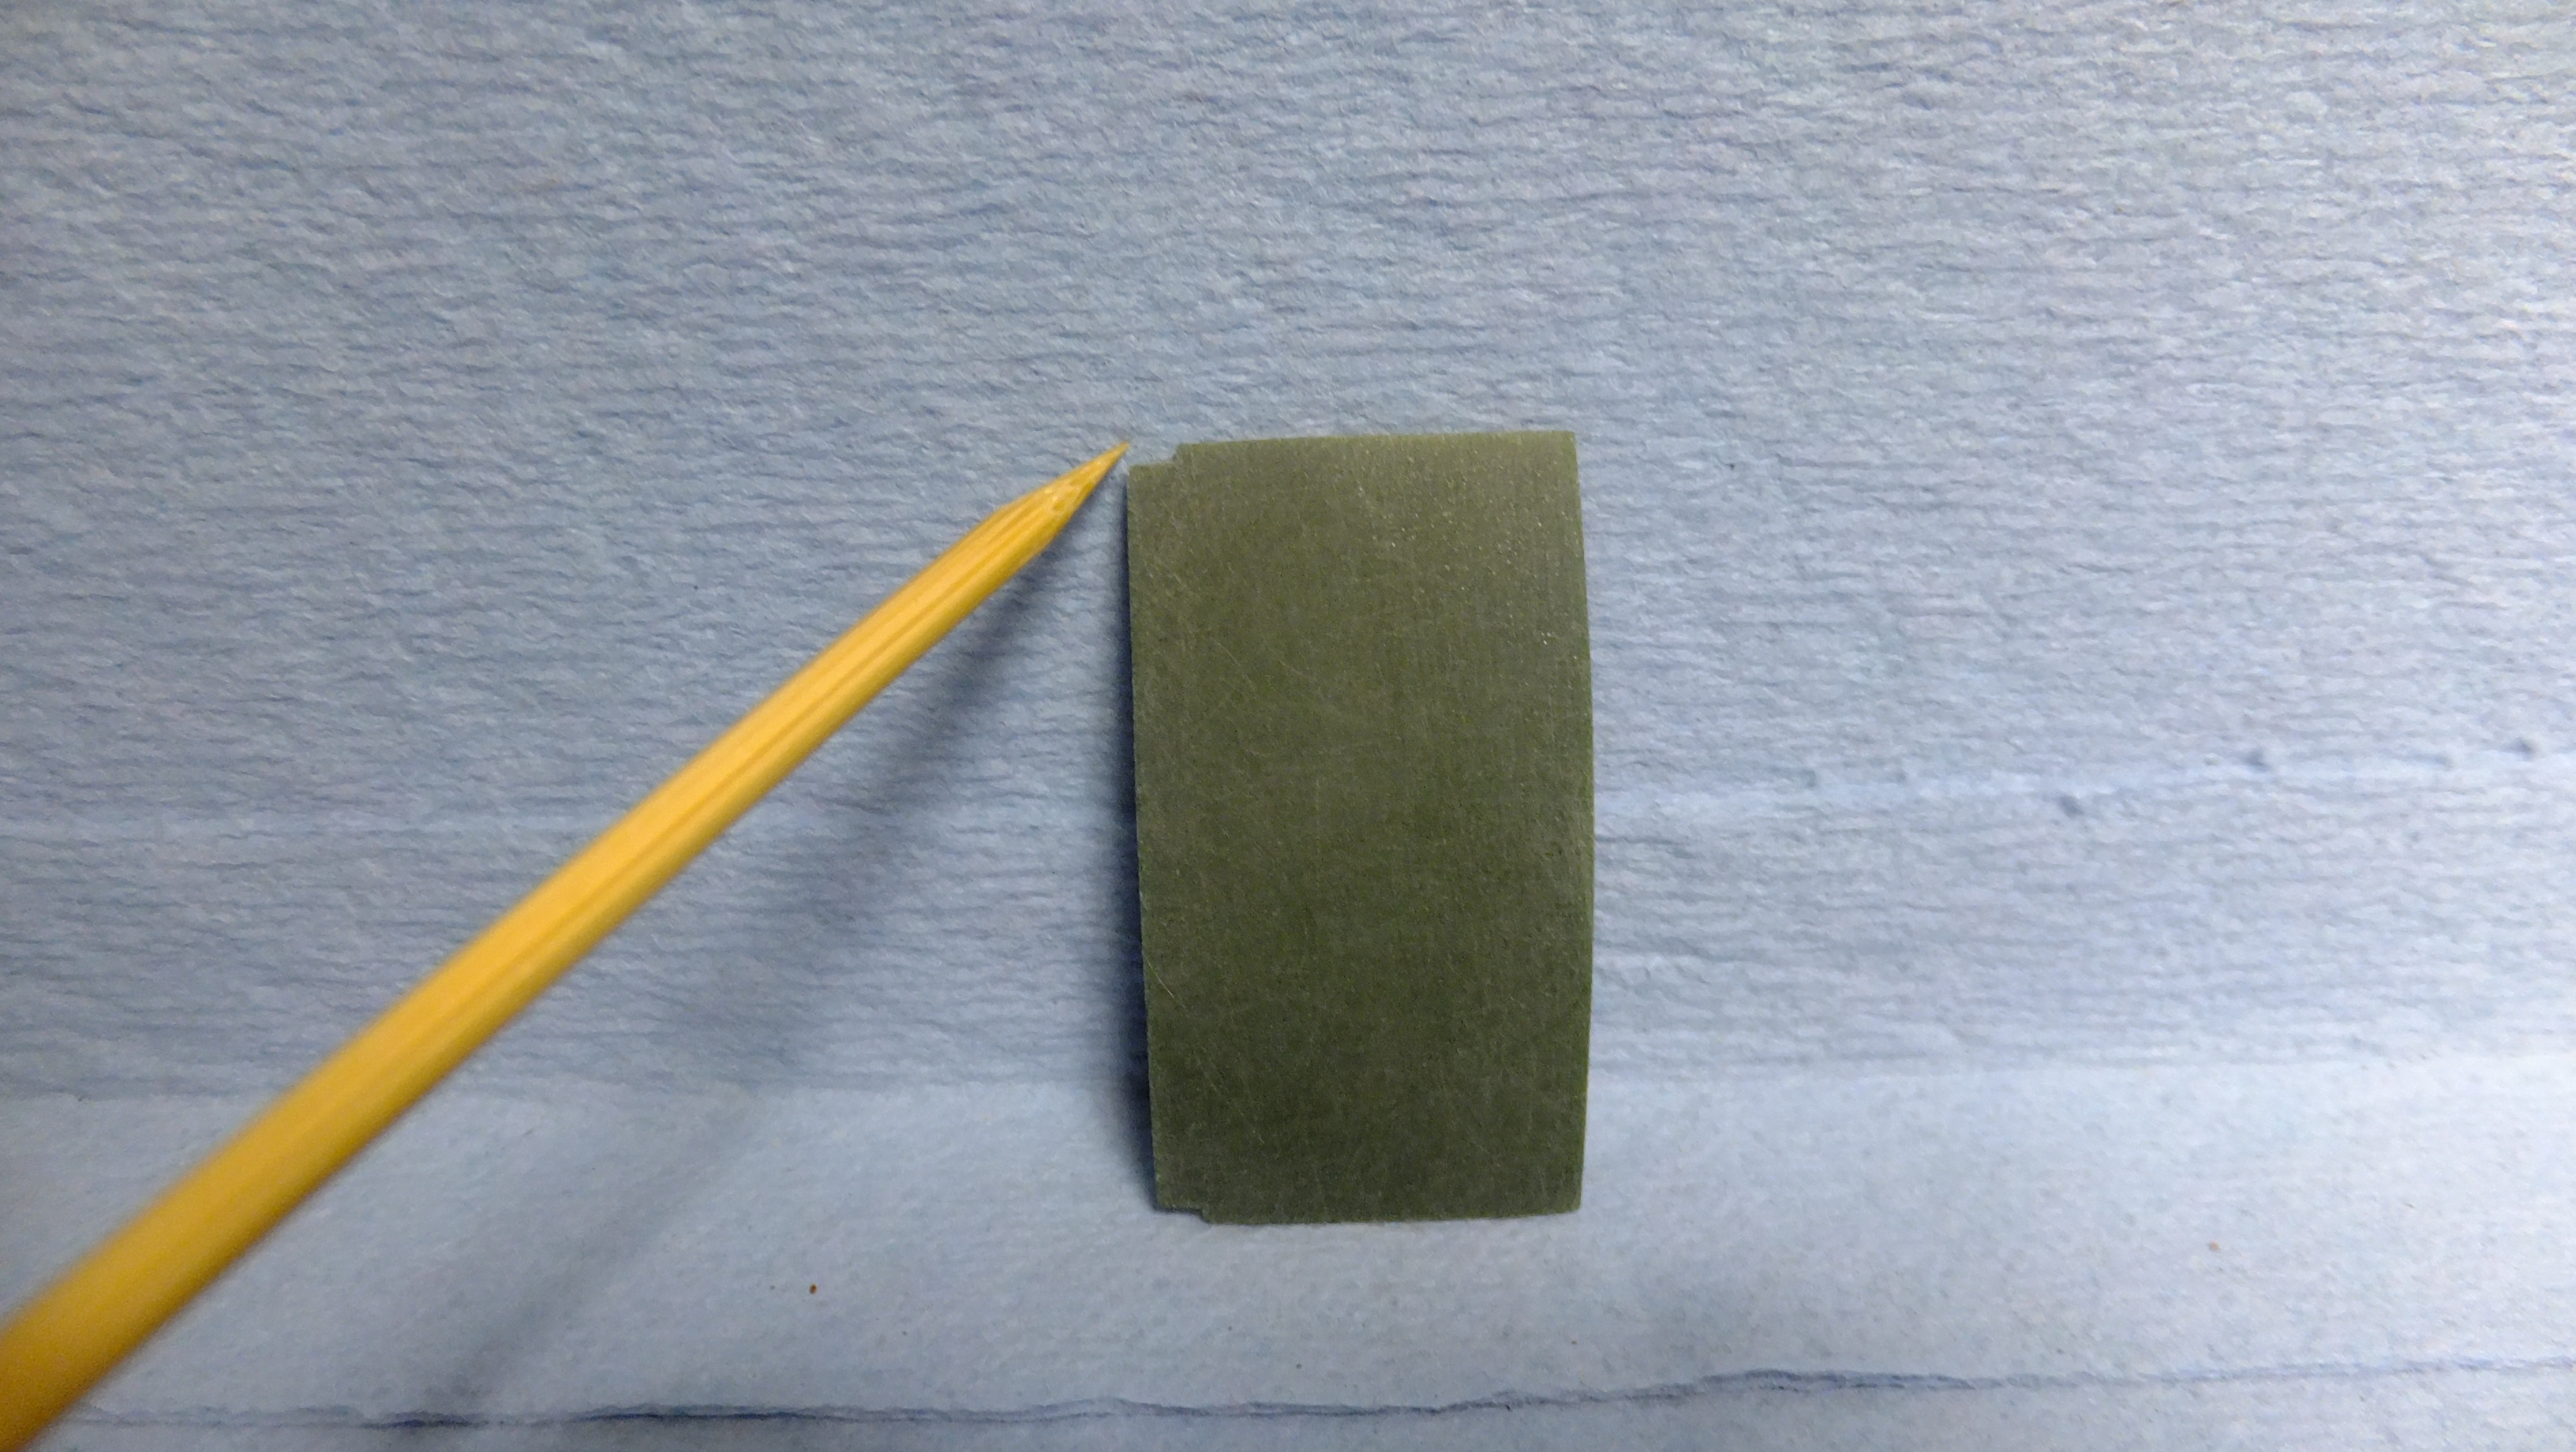
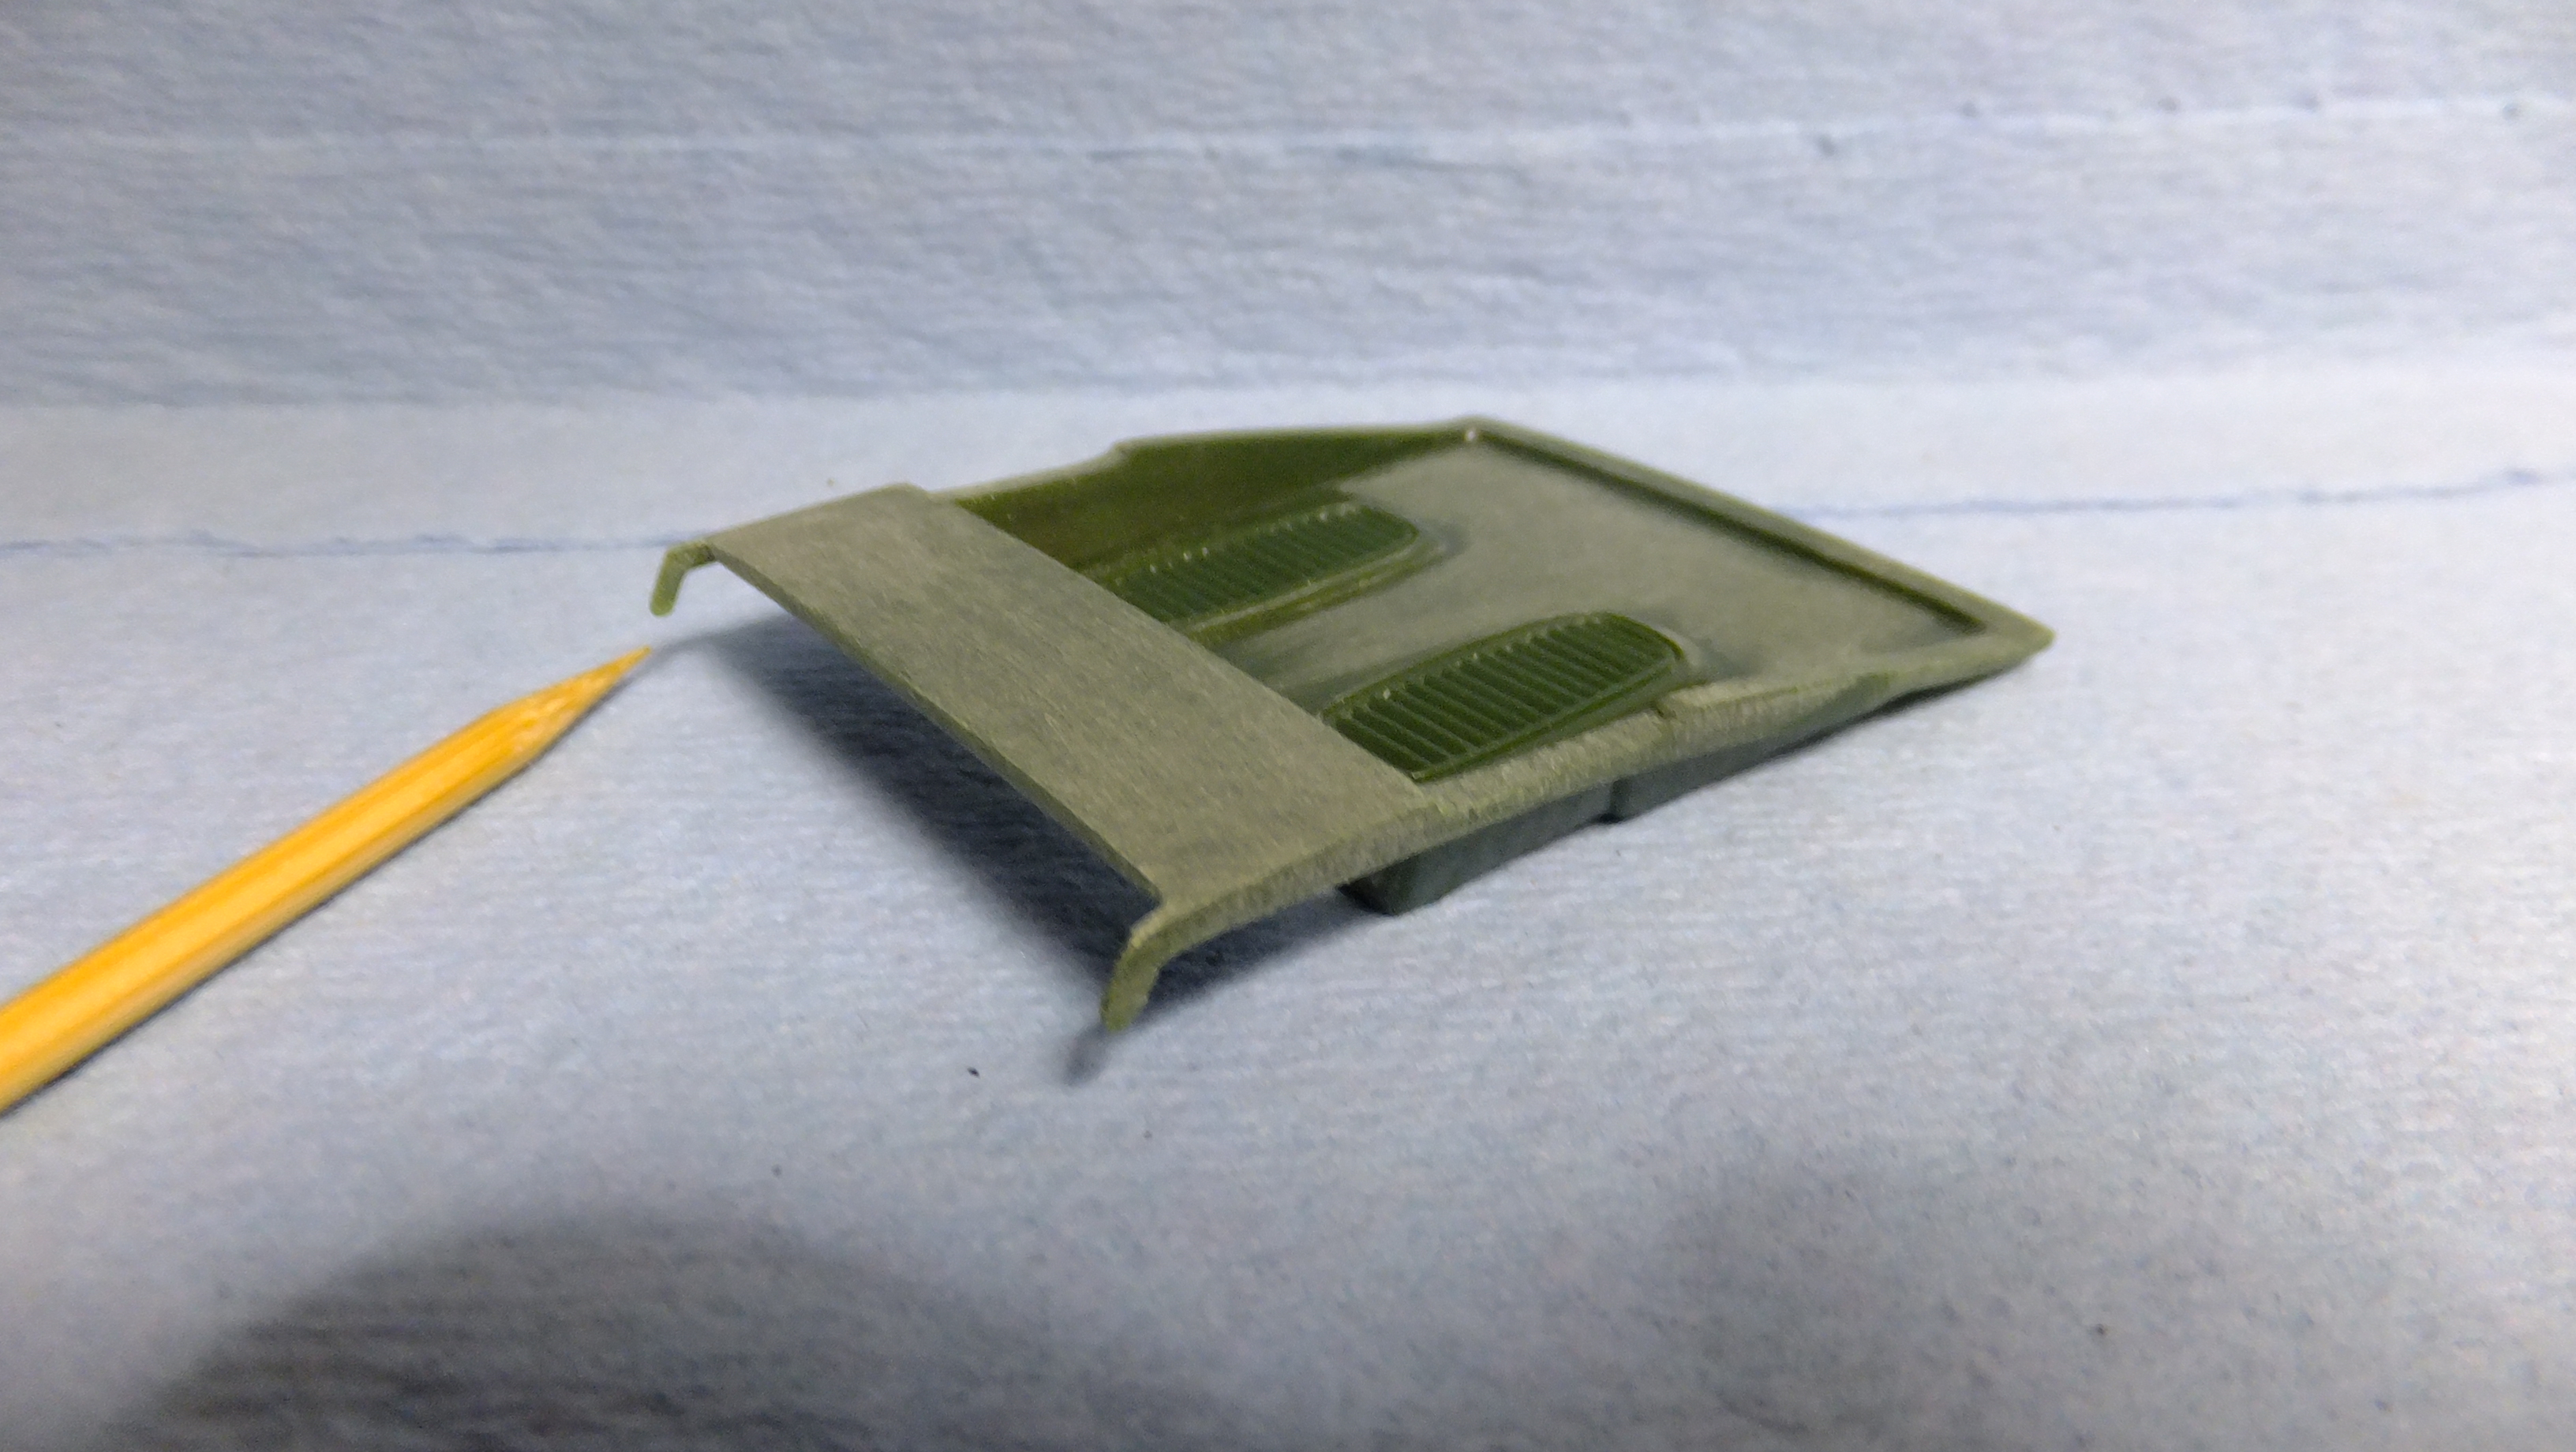
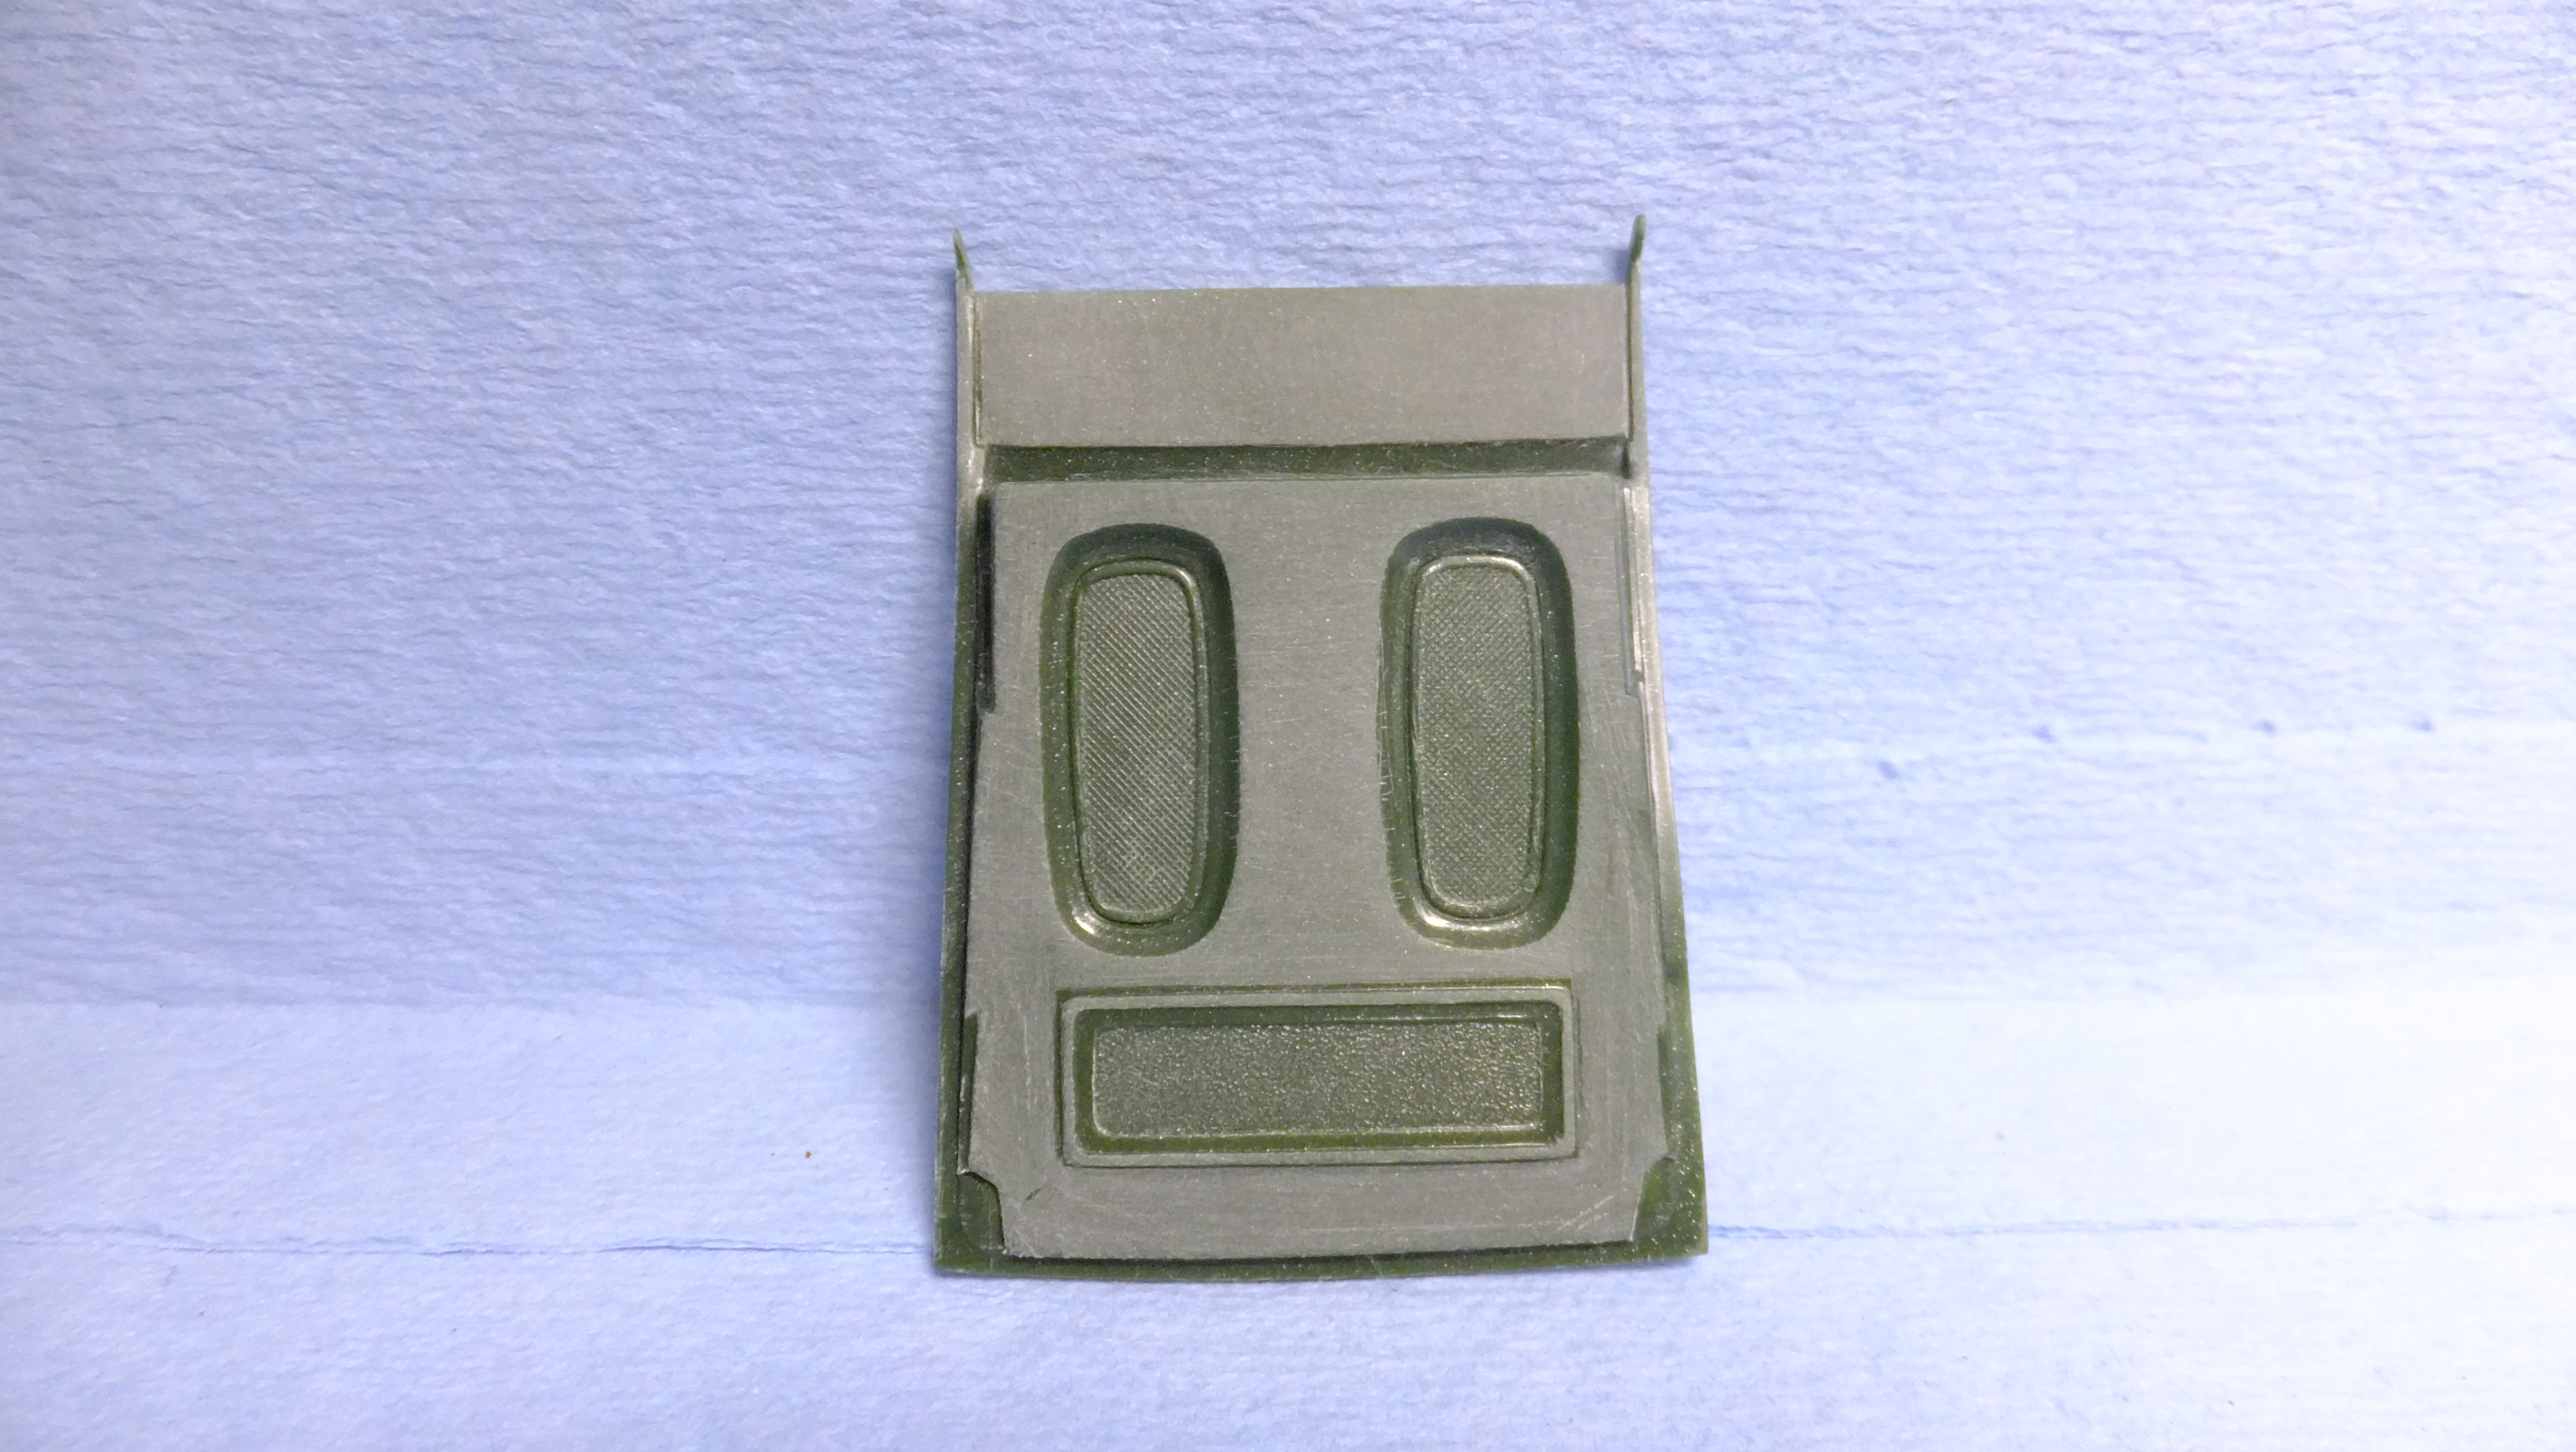
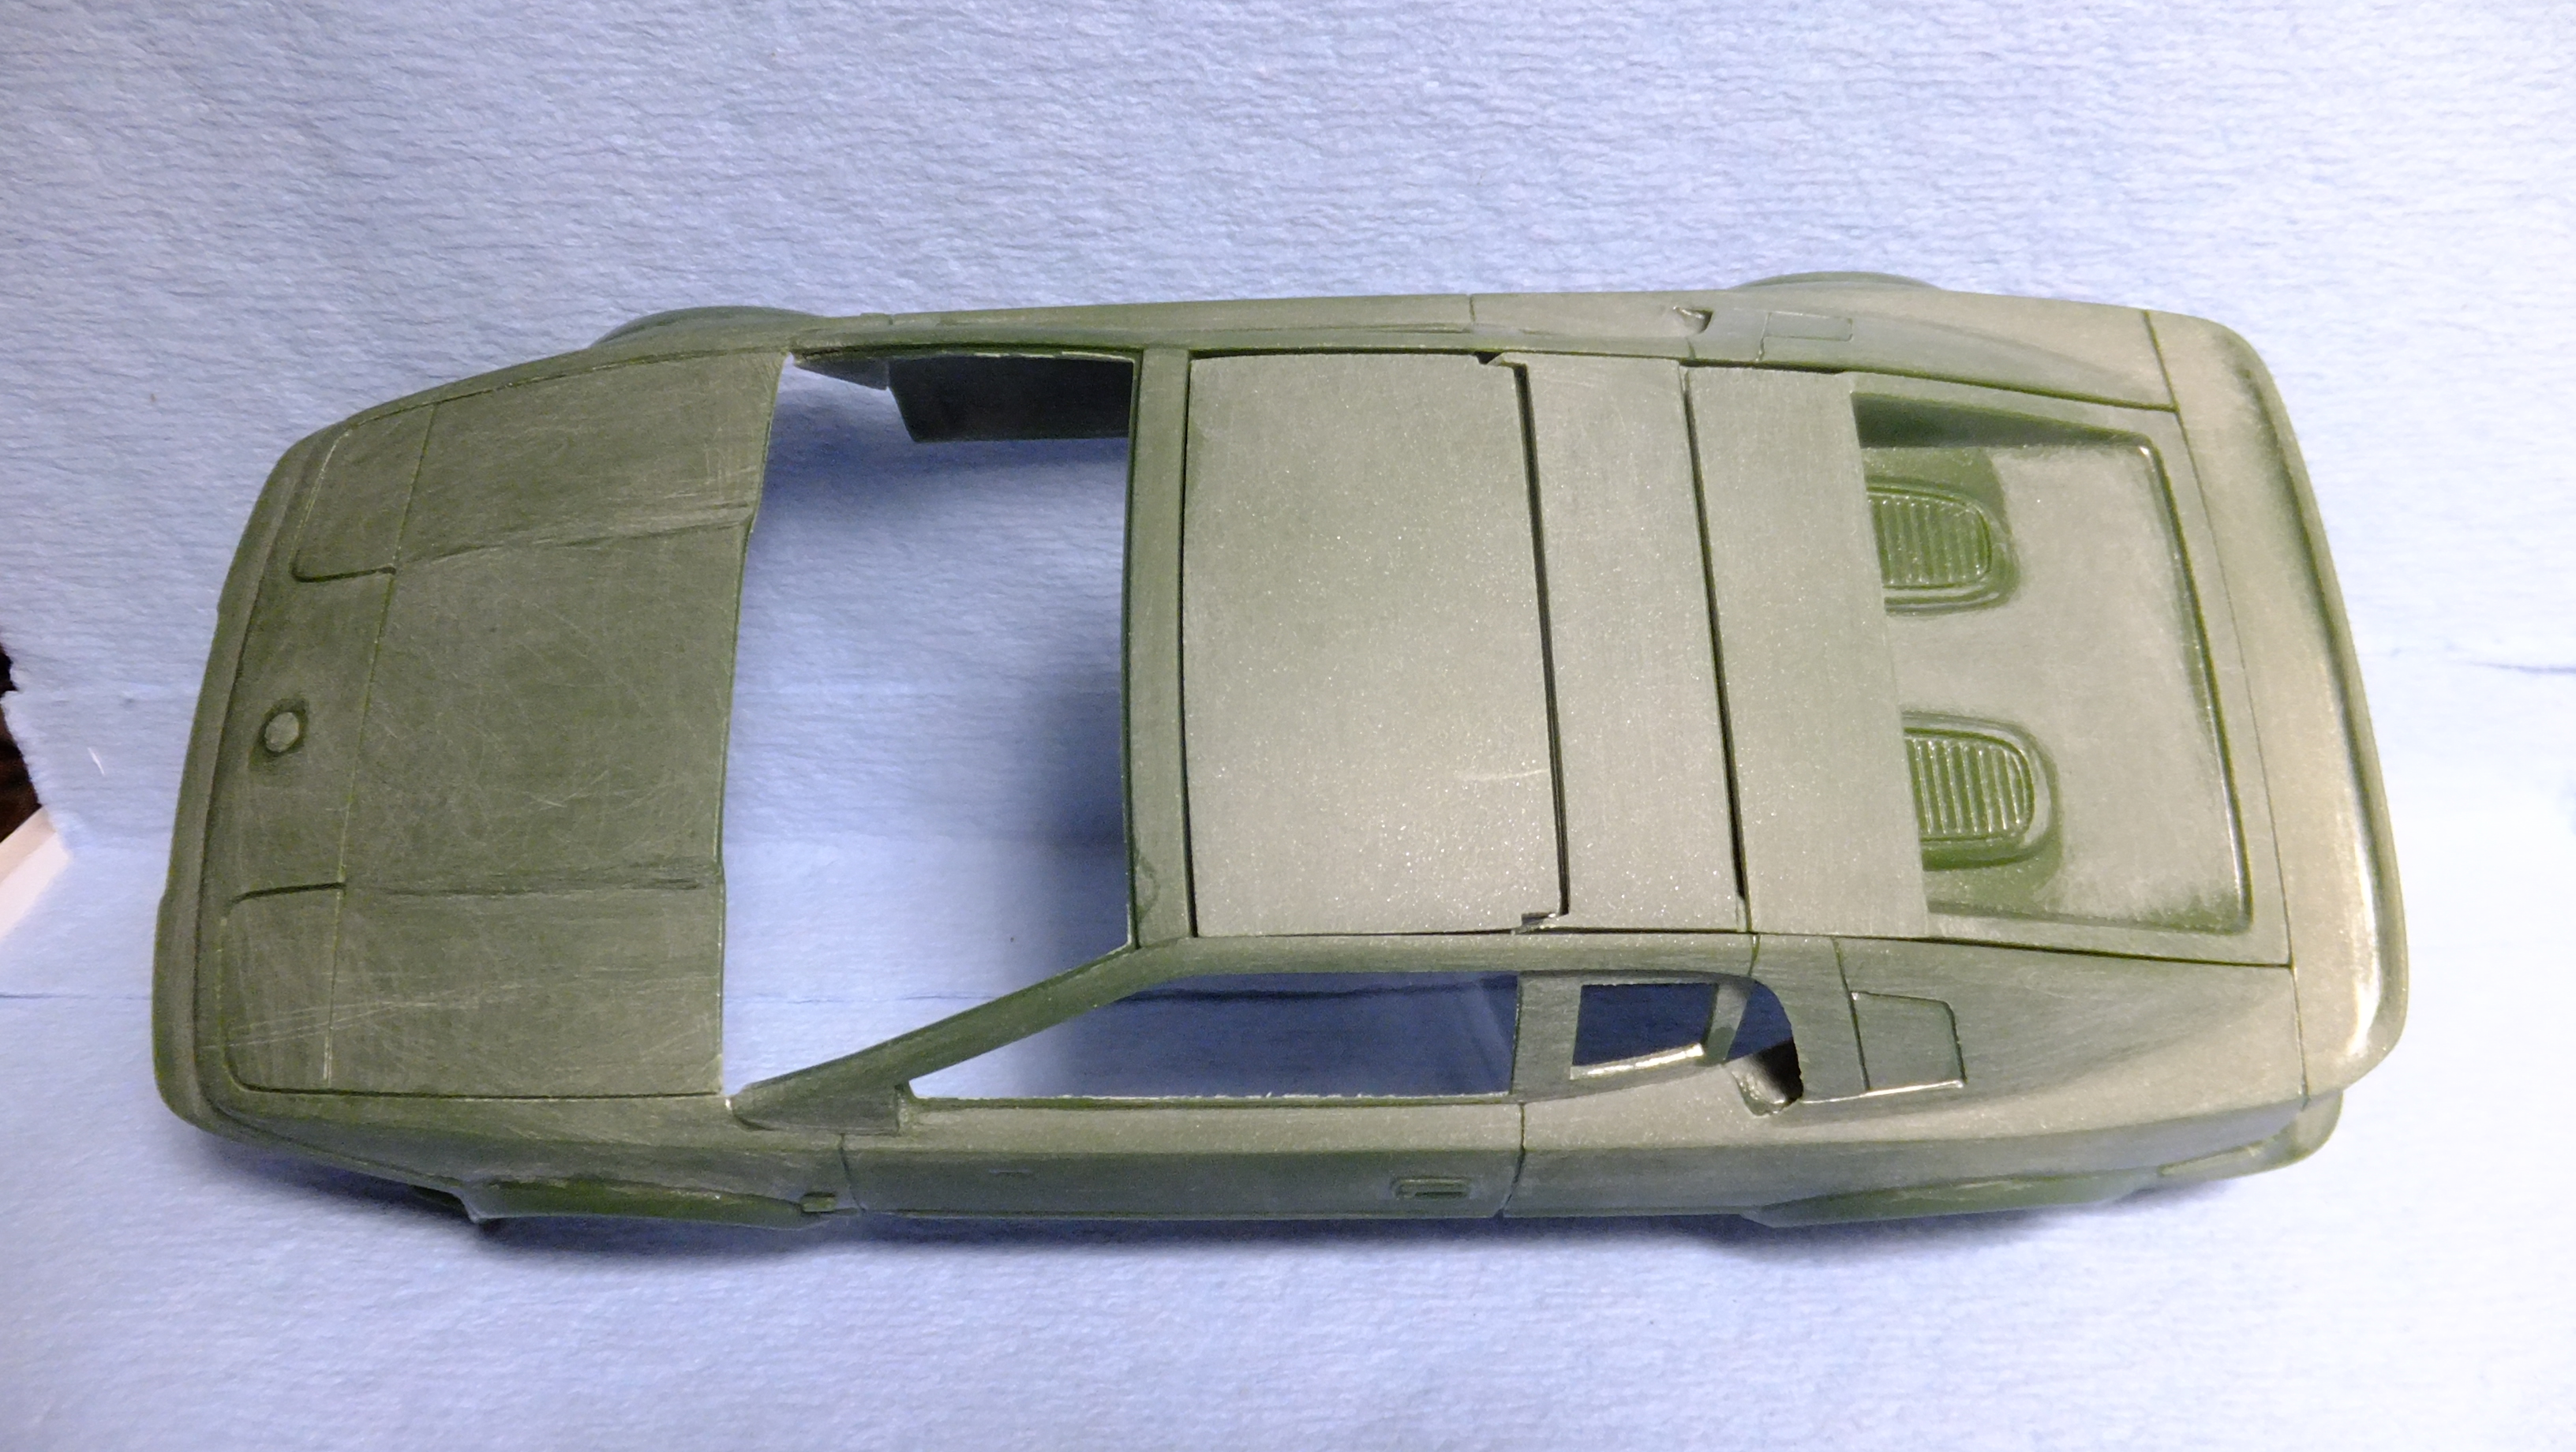
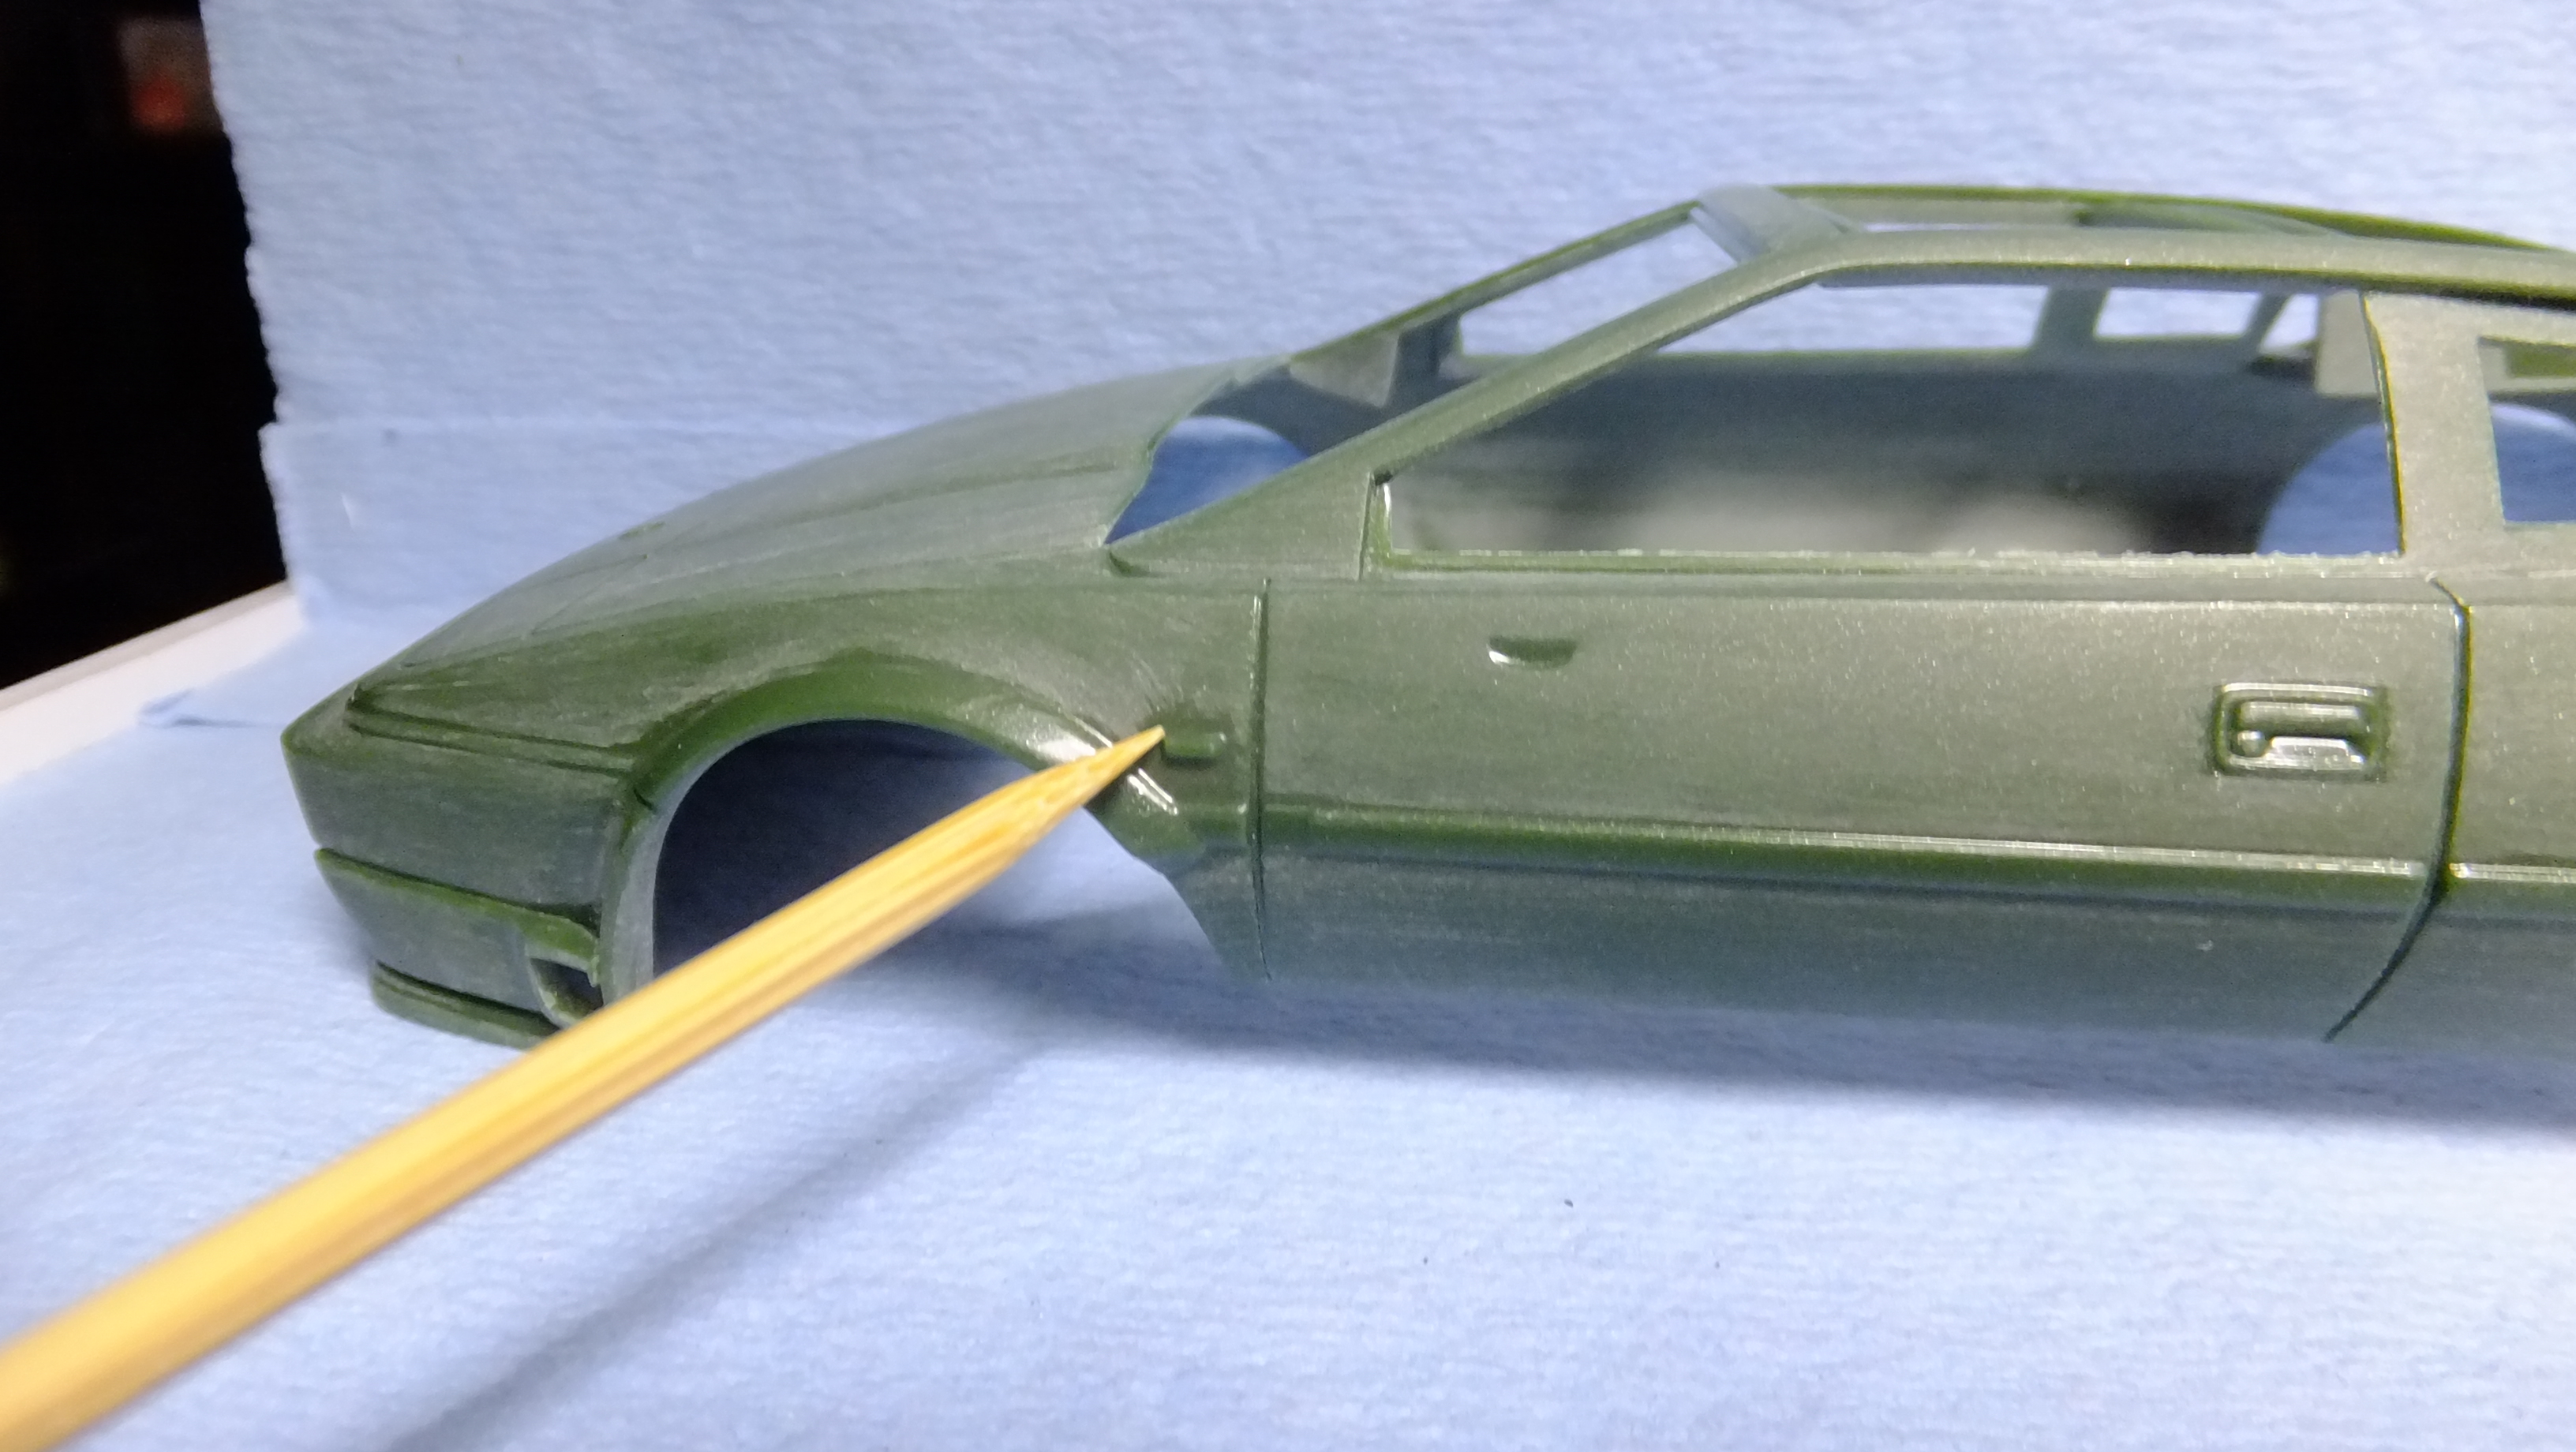
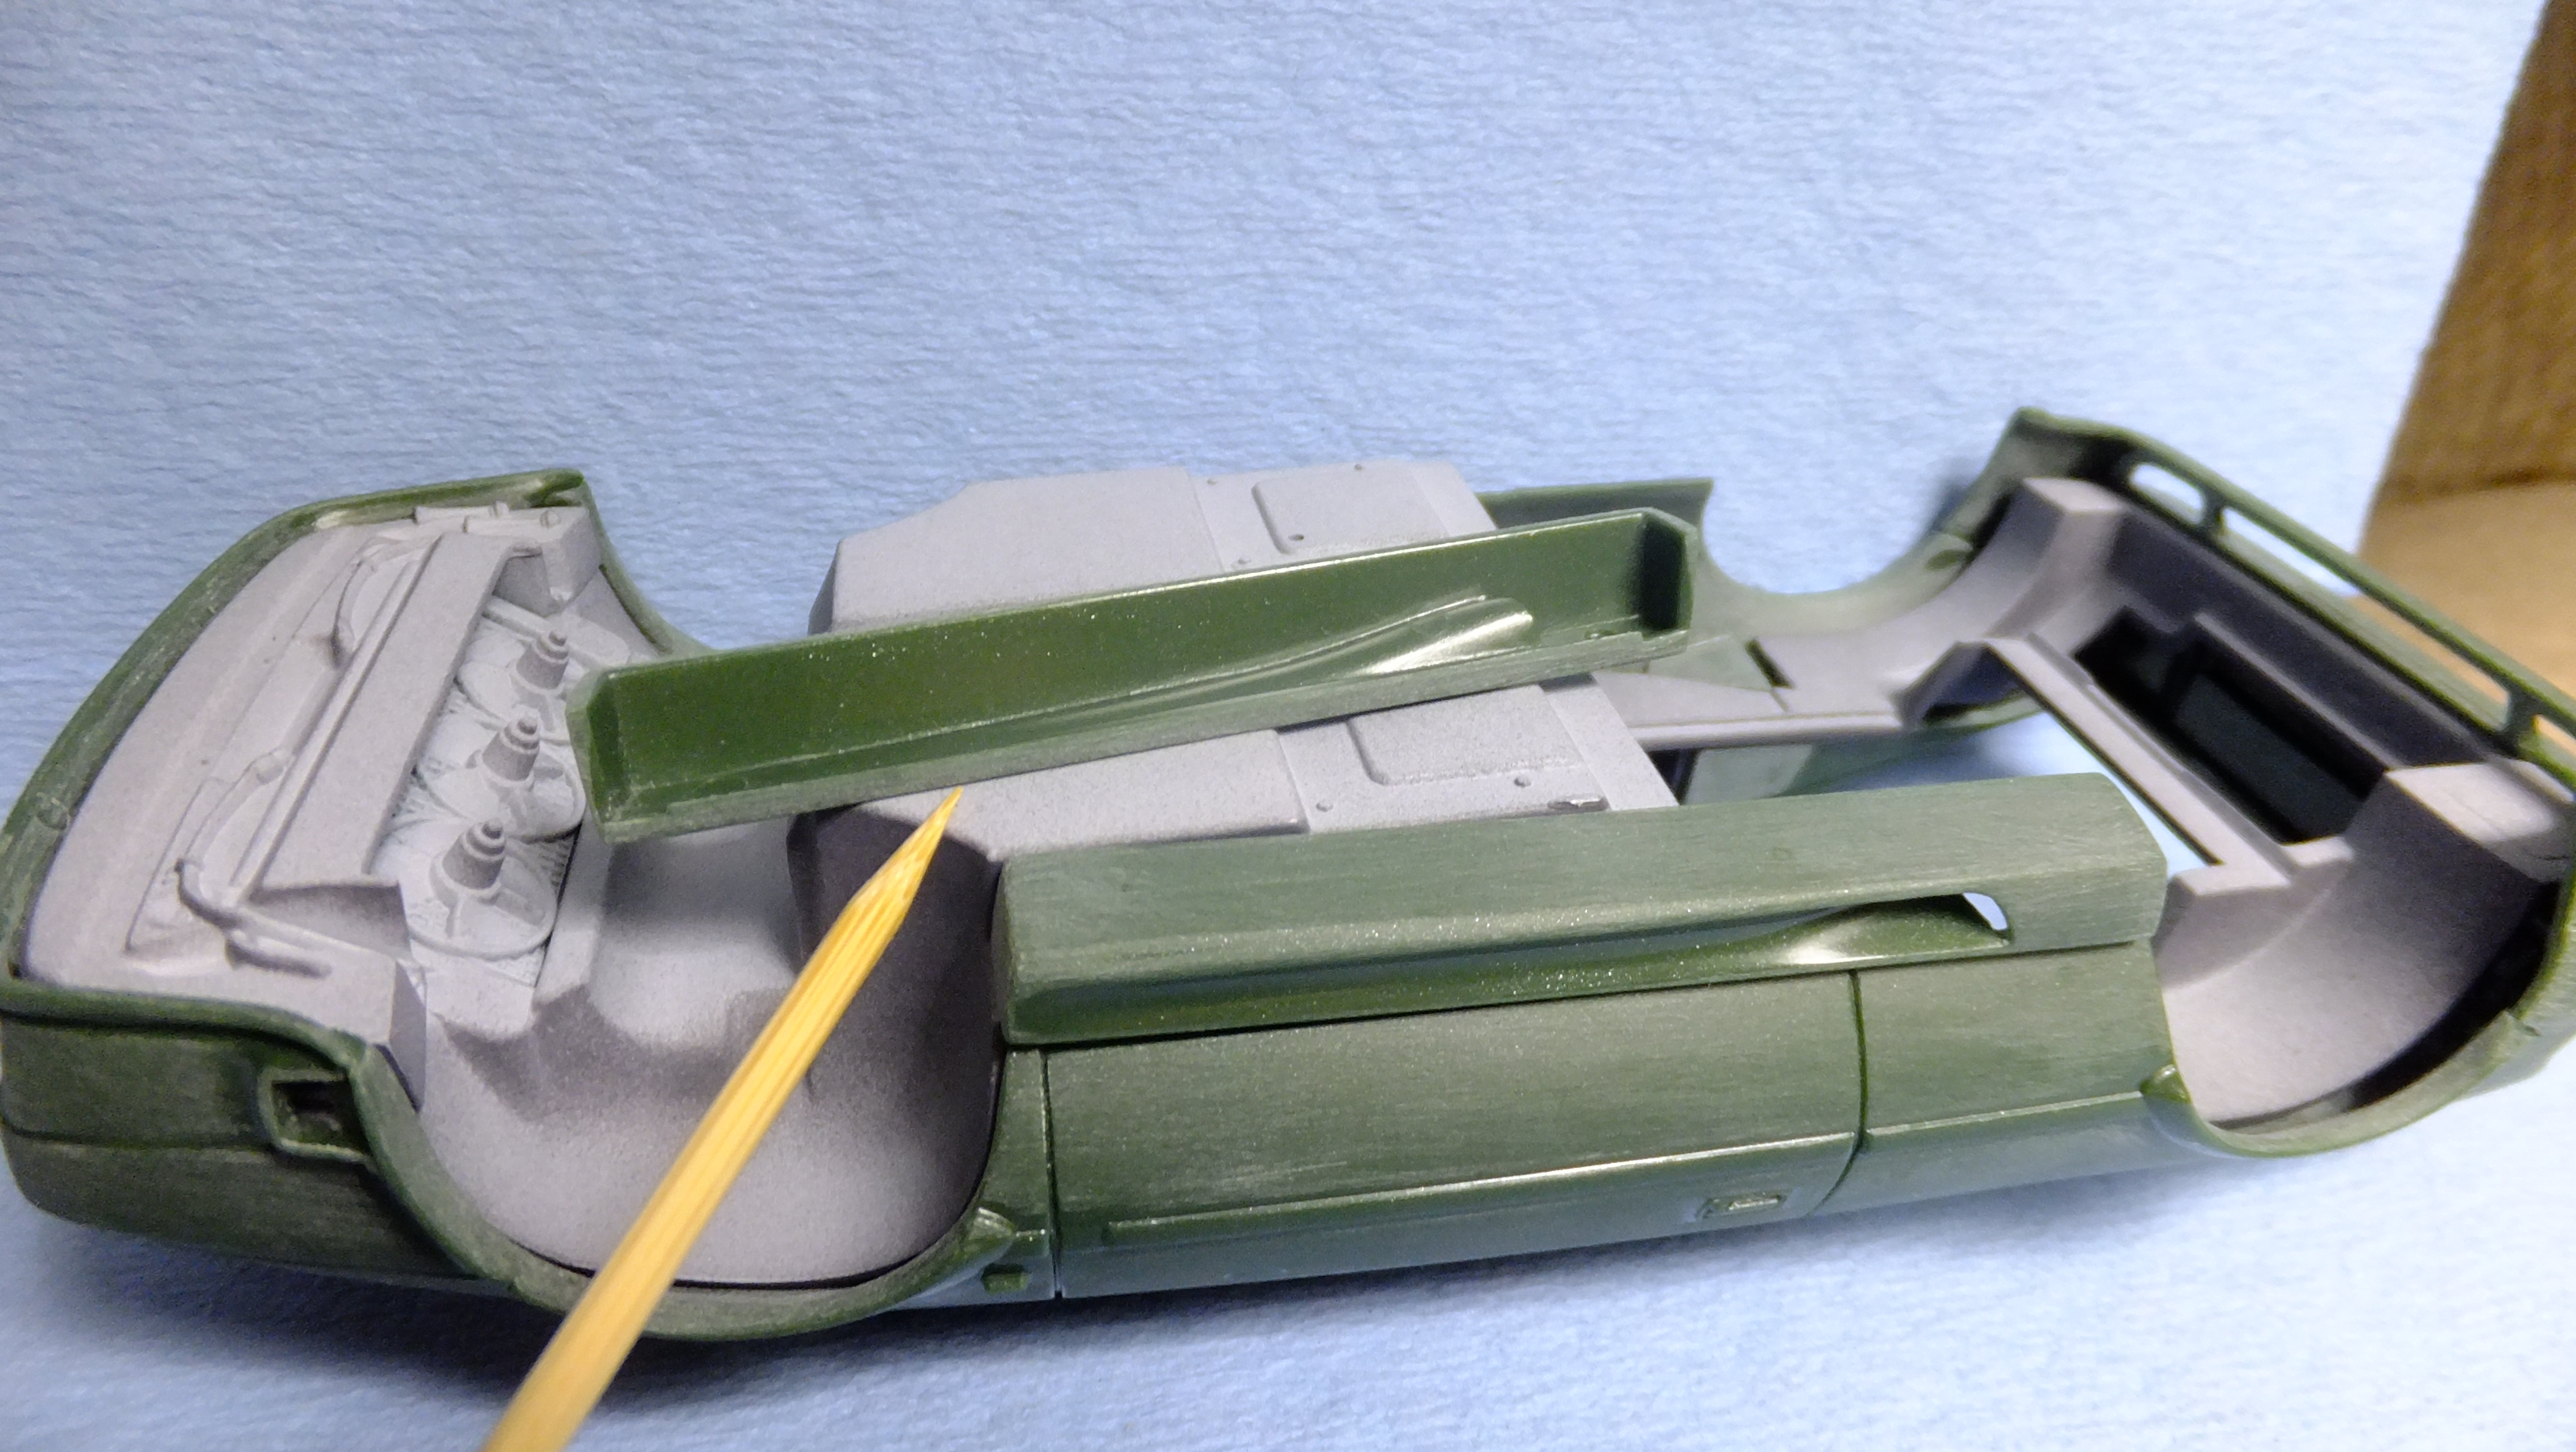
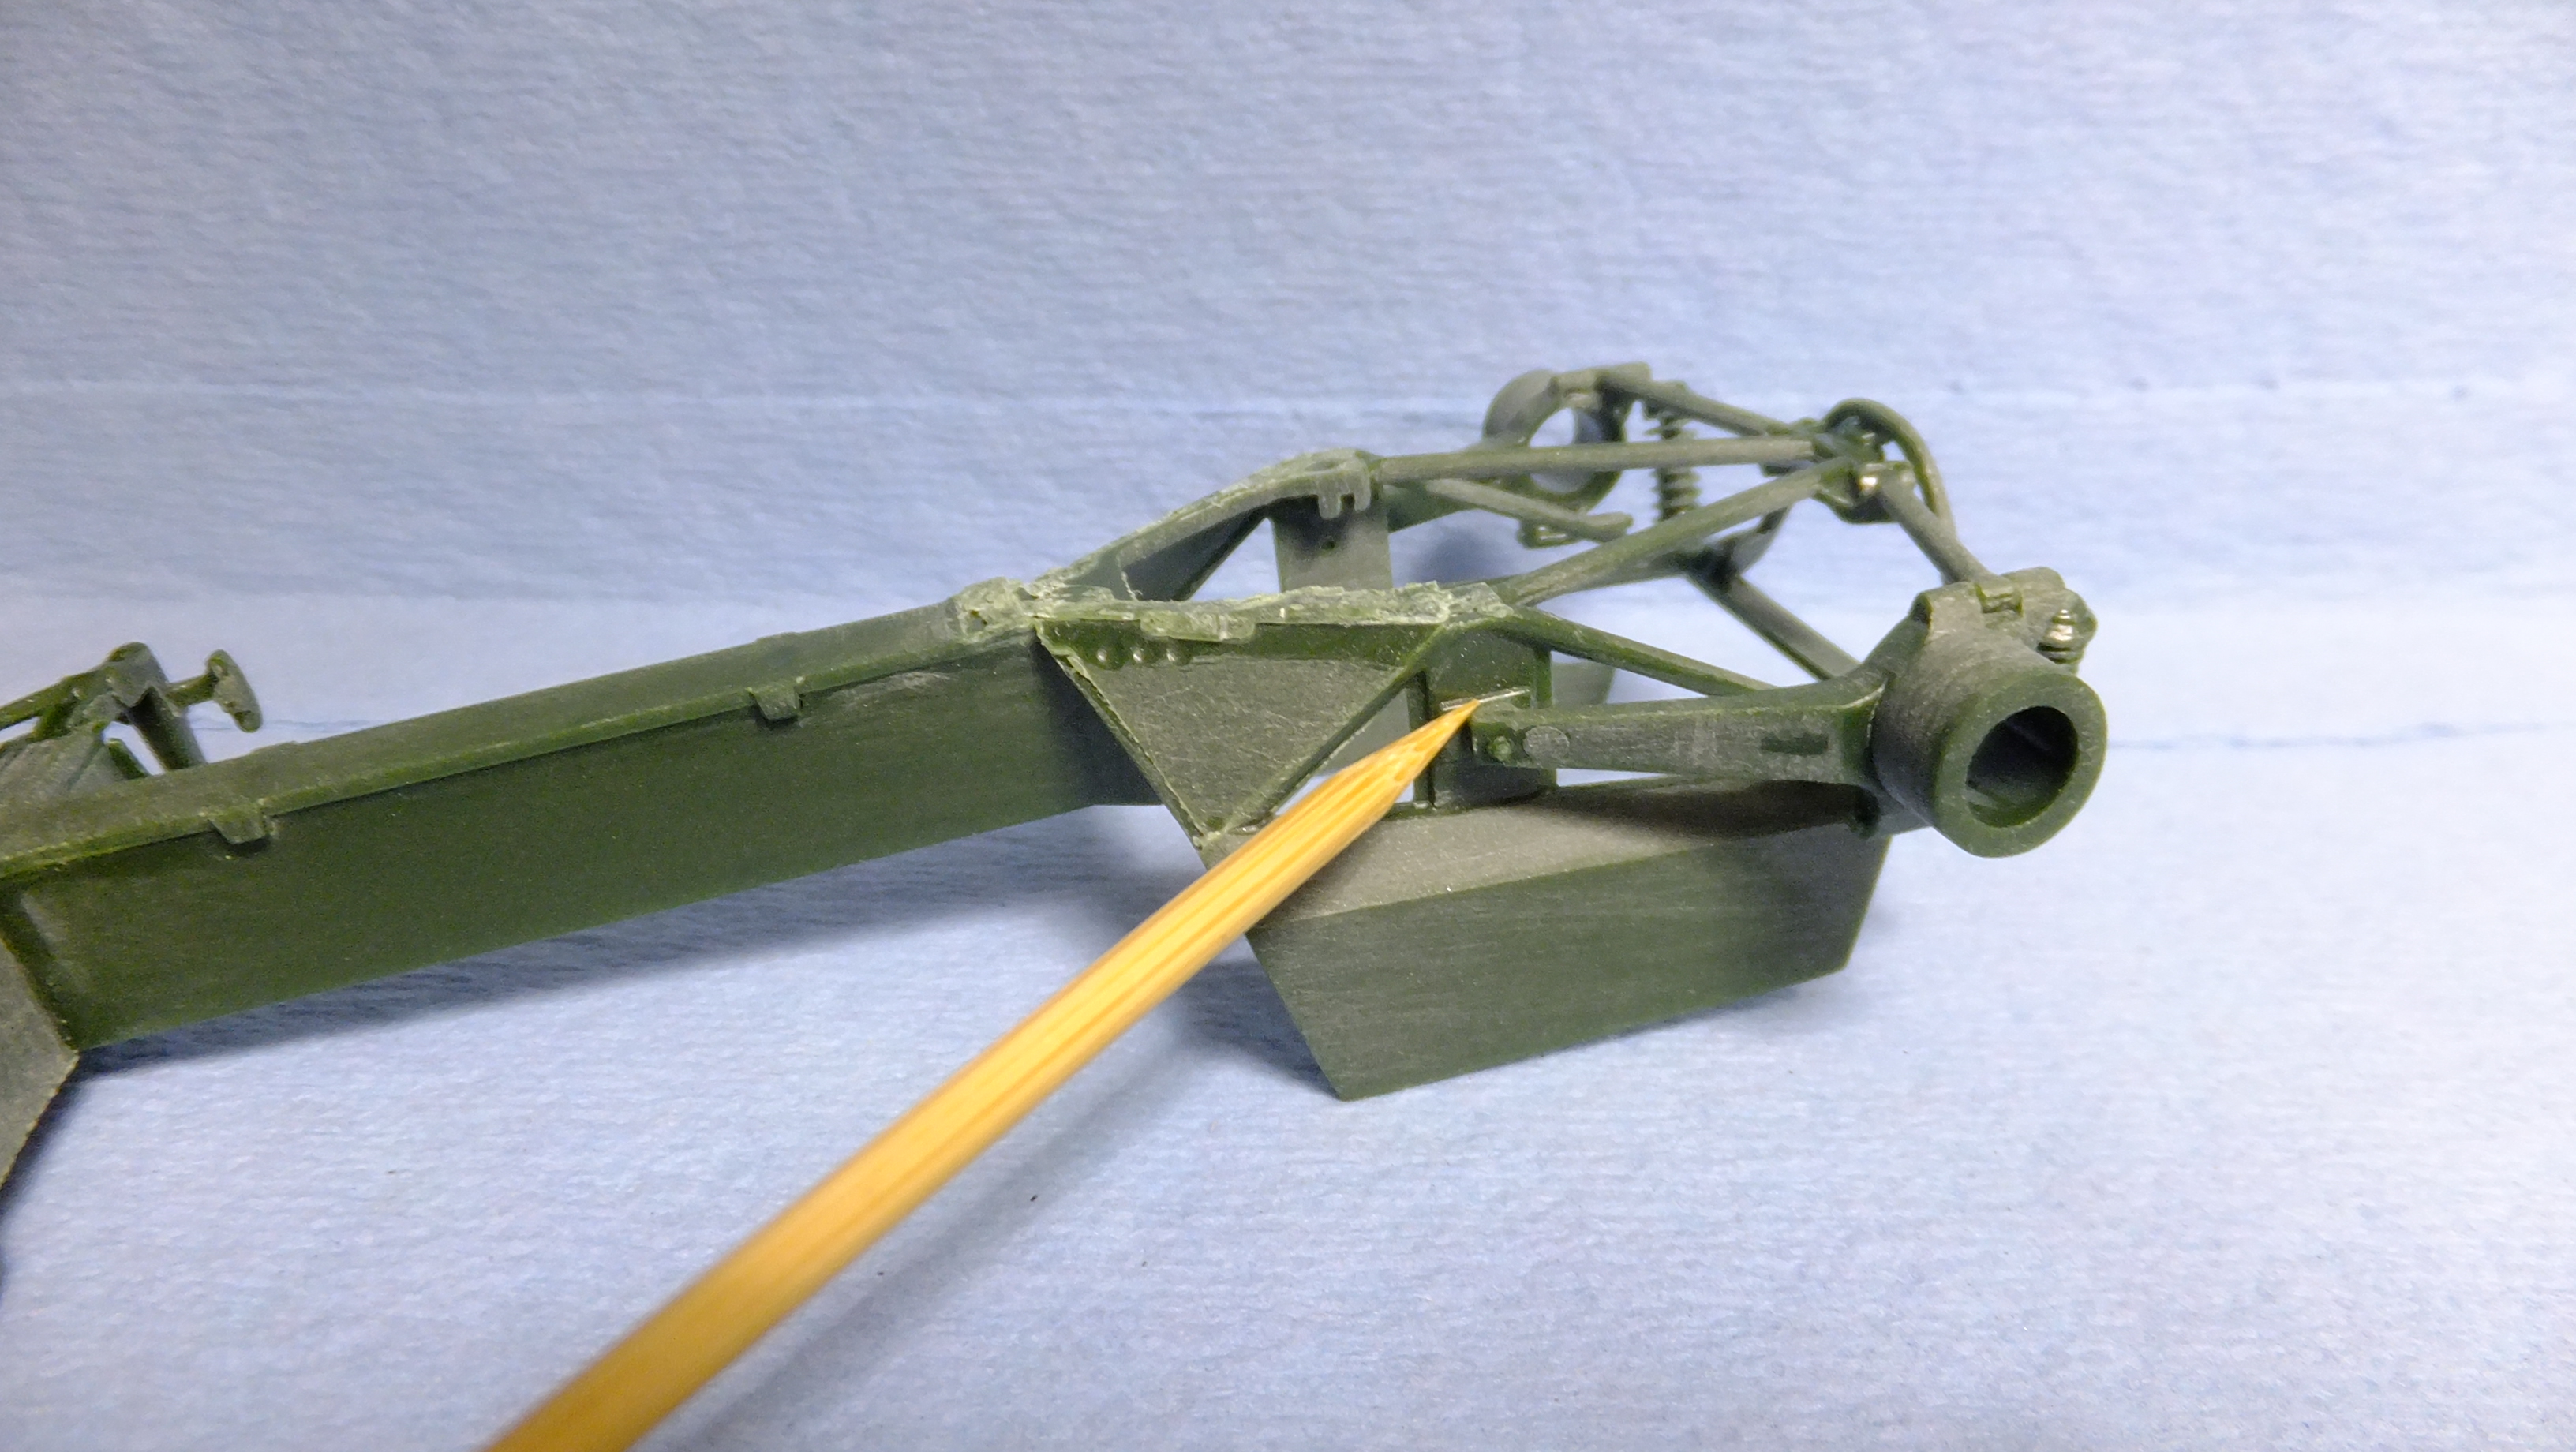
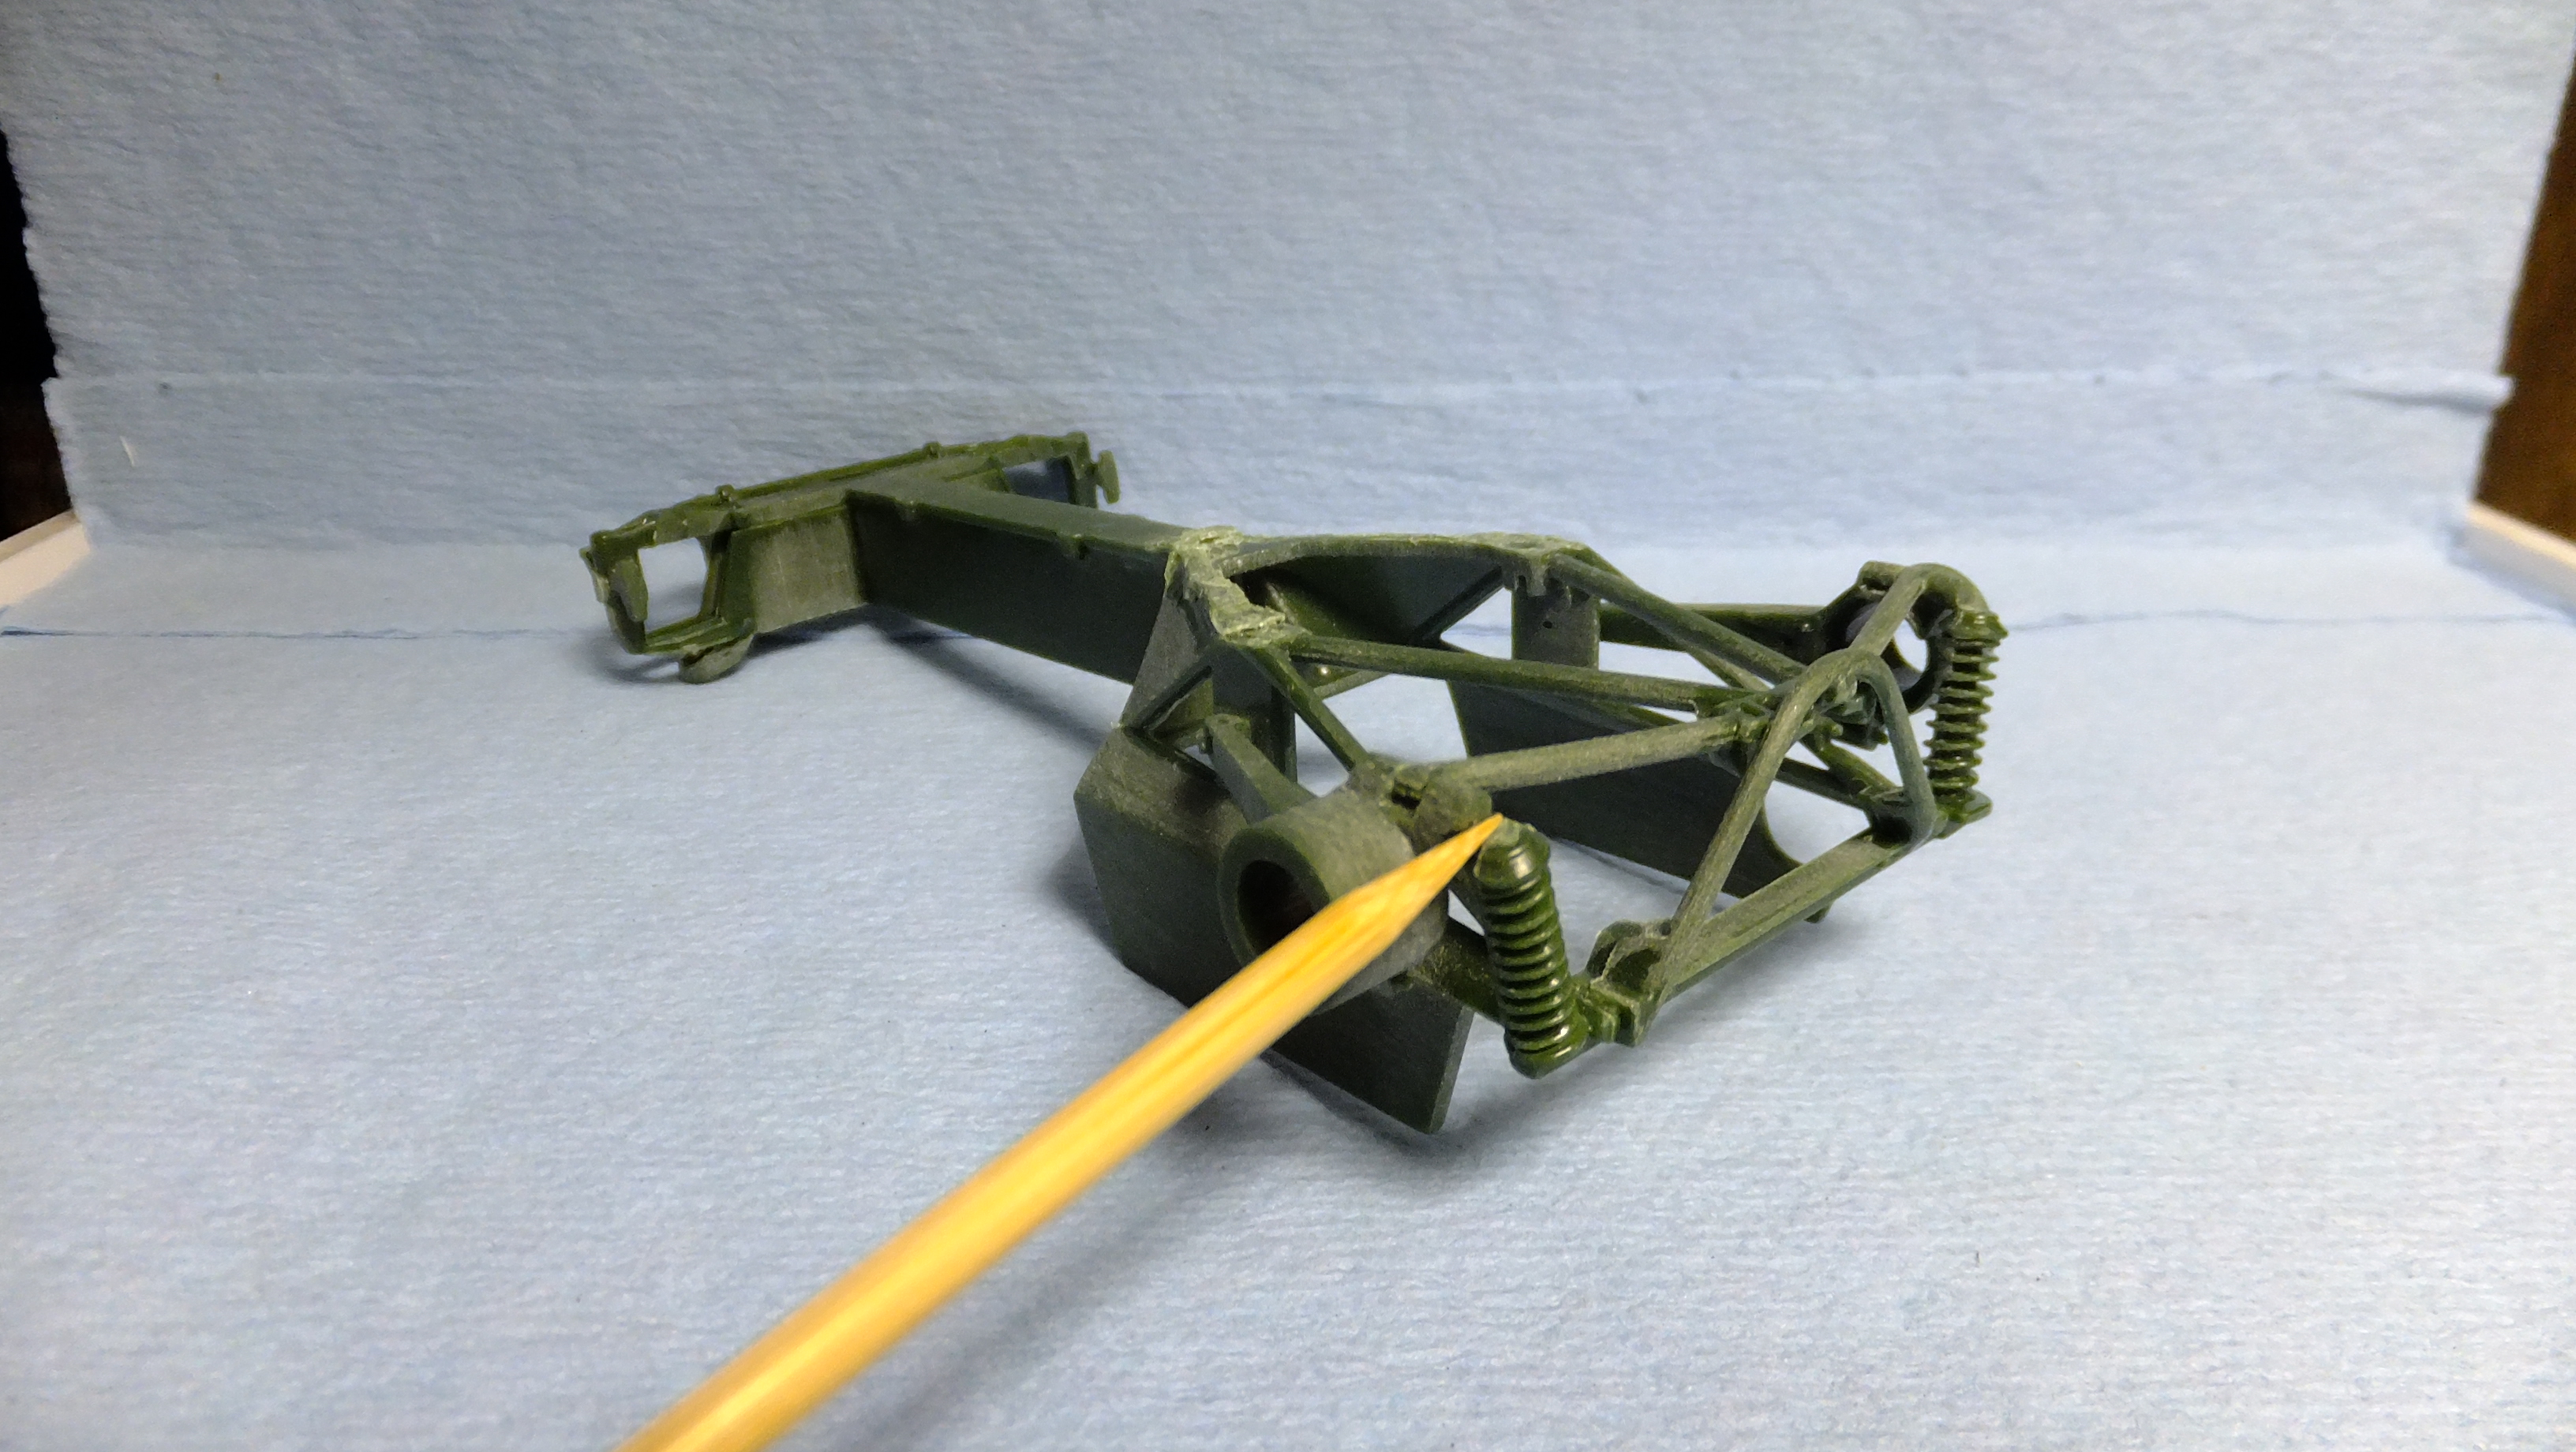
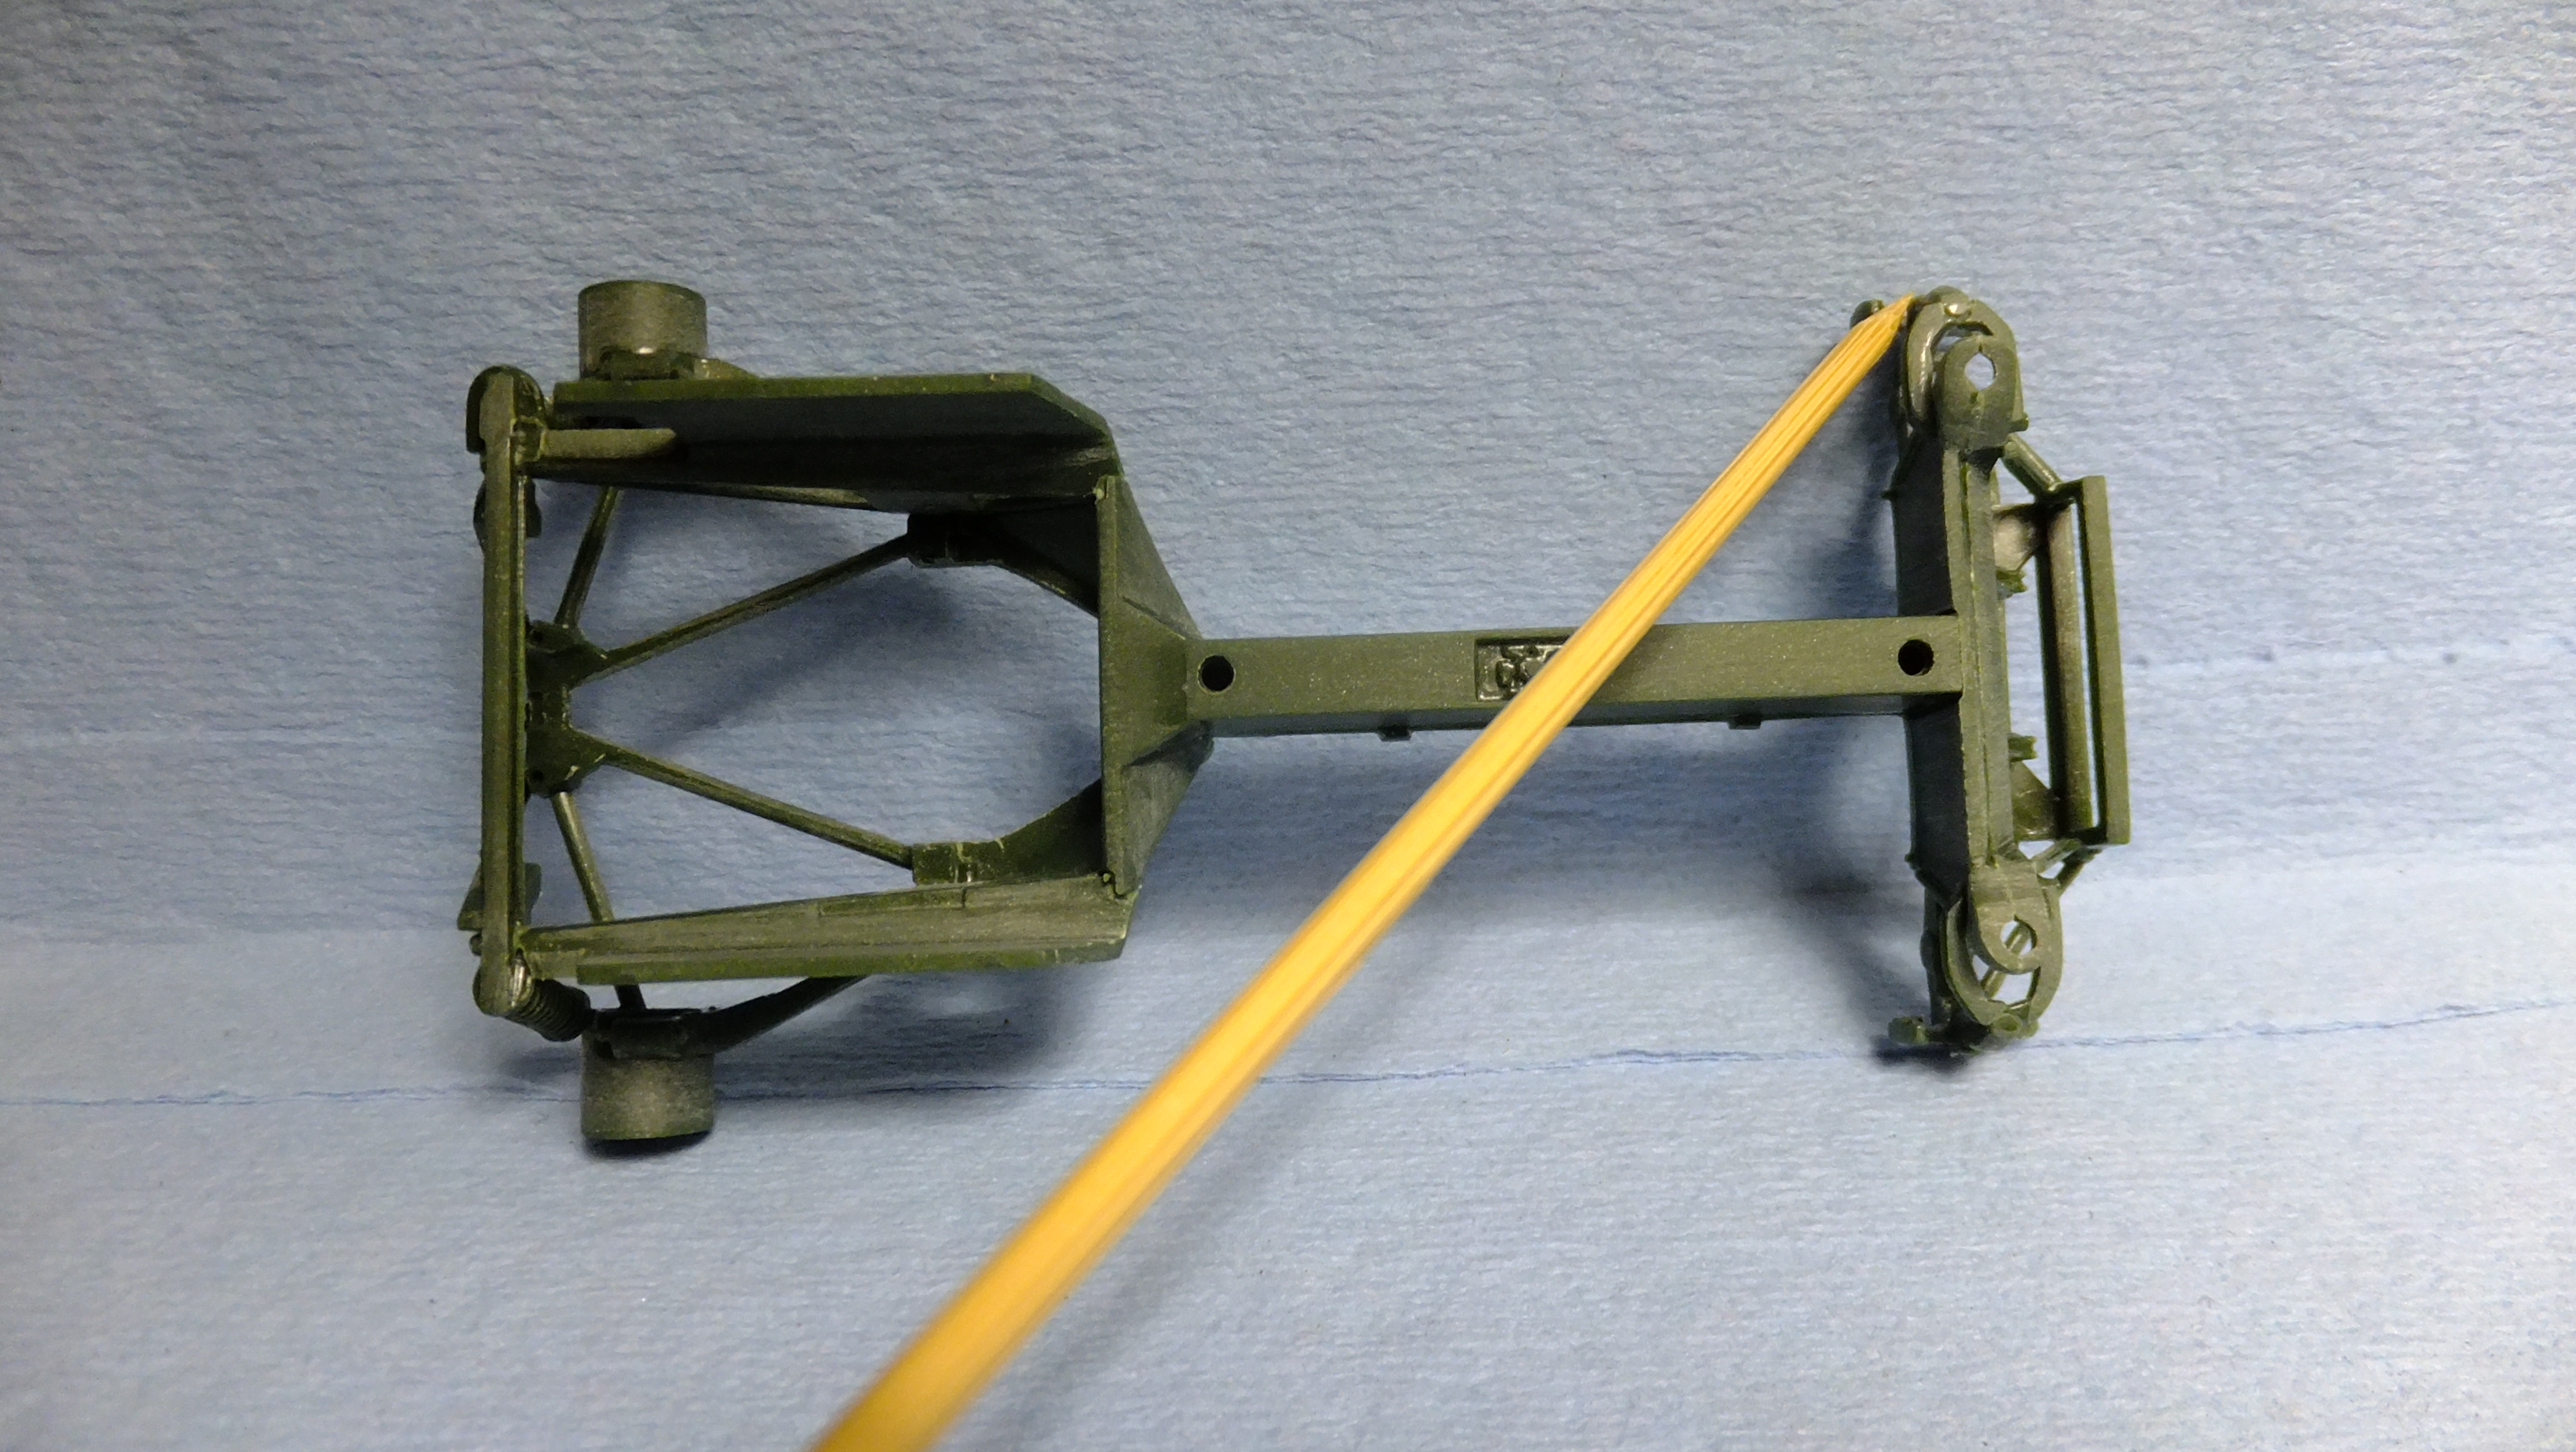
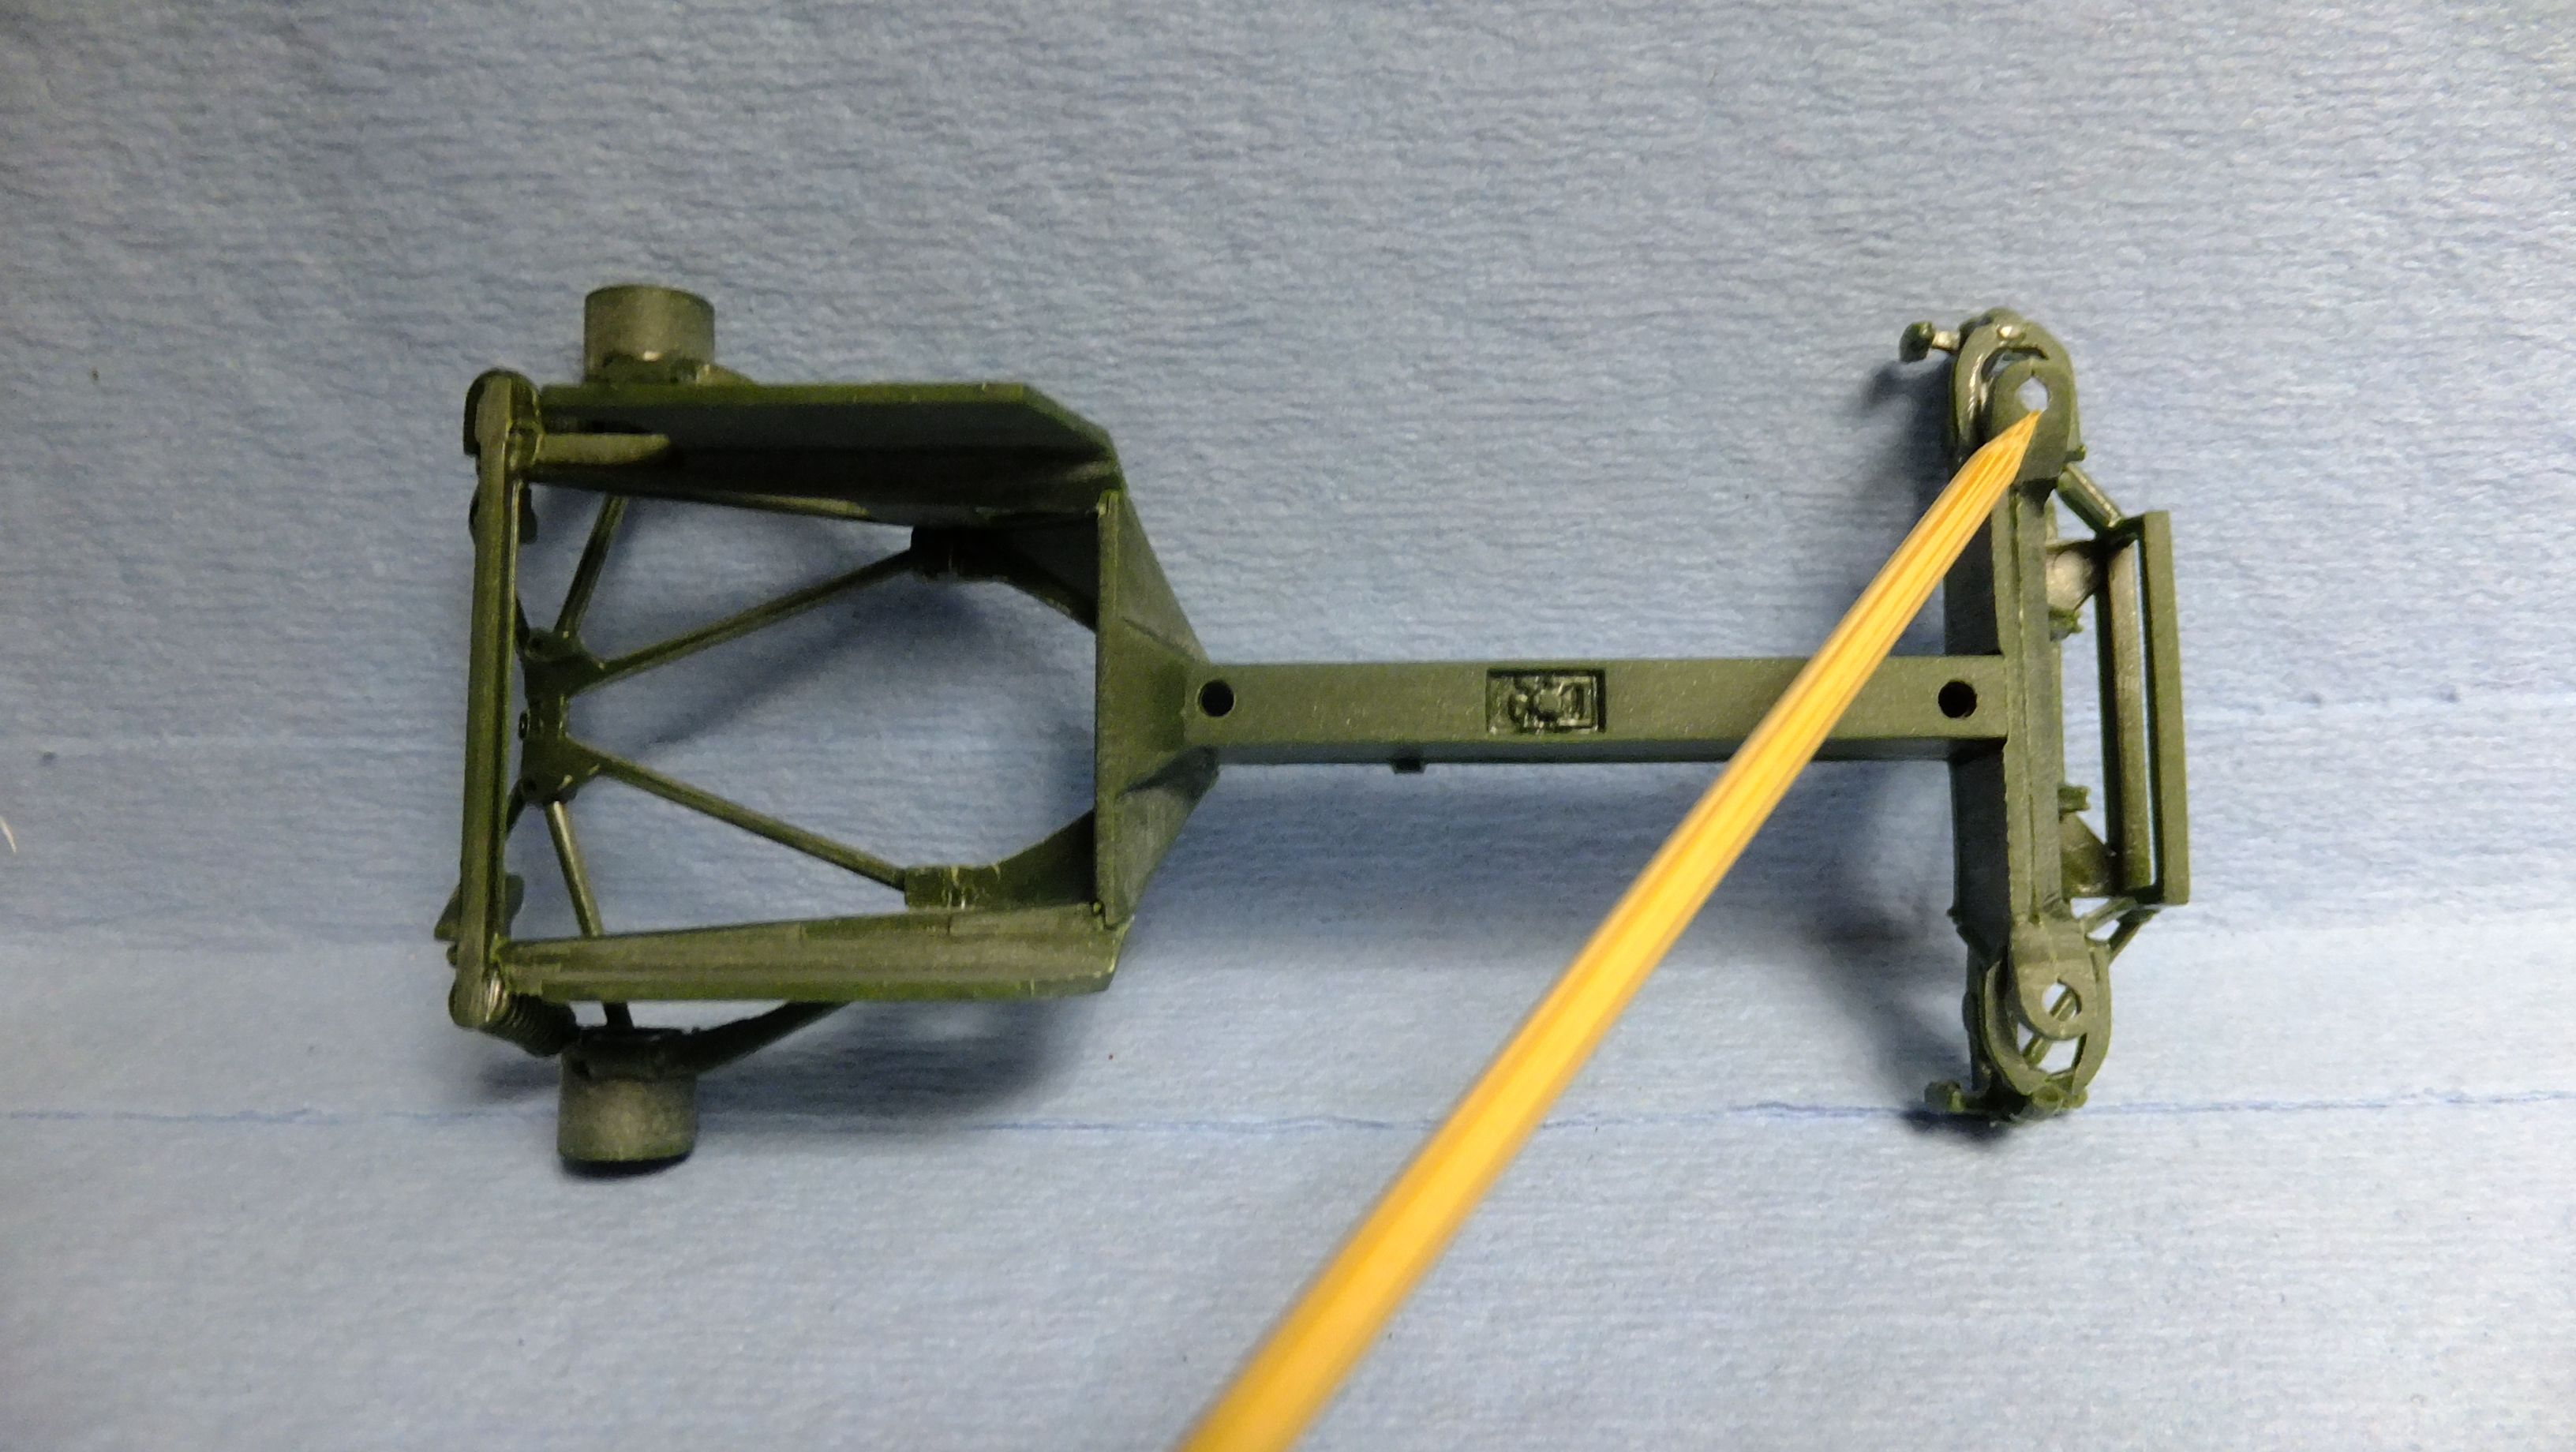
Hey, everyone!....update time!! -Photo 1; Here i had to cut the front tip off the interior tub part, and attach it to the front fascia as you see, in order to make a one-piece body. -Photo 2; I'm not sure how many people know this about this kit, but the back edge of the interior tub part is meant to tuck-in under the rear fascia's lip like shown. Its better to attach the rear fascia now, to make a stronger bond, and to avoid a messed up paint finish when trying to attach it later as a separate piece. -Photo 3; This shows the triangular bits that needed to be removed from the interior tub part, and attached where it belonged -to the bodies side vents. -Photo 4; I just need to blend the vents in with super glue now... -Photo 5; Make sure to leave a bit of clearance at the base of the A-pillars, so that they wont keep the body from seating properly. -Photo 6; The first step to making sure that the hood fits easily after painting, is to open these holes a bit... -Photo 7; ...next, get rid of the horrible ejection pin marks in this area... -Photo 8; ...widen these notches a bit... -Photo 9; ...sand all the edges of the hood in order to make the hinges very thin....if you are careful, they will be stronger than you expect. -Photo 11; Here you can see how loose i sanded the parts to compensate for paint thickness....all these parts will be EASILY removable. -Photo 12; Time to remove the molded-in side markers. -Photo 13; I removed the lip on the top of the rockers...they make final assembly a nightmare, and often ends up with exposed glue, and chipped paint...they were a stupid idea. The best contact for these parts, is actually the ridge on the belly of the interior tub. -Photo 14 & 15; Its now time to start lowering the ride height. I chopped the shocks shorter at the bottom contacts, then using the holes for the control arms, i rotated them up to the ride height i wanted, then glued them into place. Next step will be SB new lower contacts for the shocks. -Photo 16; Onto lowering the front suspension...i start by cutting off the molded-in spindles, and now, i will SB new ones at the ride height i want. -Photo 17; To deal with the LOUSY fit of the front suspension bits, i pre-assembled most of it....and now in order to get the struts in there, i have to make the holes bigger...then cap them off after instillation. -Photo 18; Since i decided to SB a smooth belly pan, i needed to remove the kits version that i had already attached....no worries, just a bit of klean up.
-
Looking GREAT, bud!!!
-
Revell Williams Renault FW19 F1 1997 Champion
Dann Tier replied to Twokidsnosleep's topic in WIP: Model Cars
LOOKING AWESOME, BUD!!!!!!