Dann Tier
-
Posts
8,151 -
Joined
-
Last visited
Content Type
Profiles
Forums
Events
Gallery
Everything posted by Dann Tier
-
Its gonna be freaking KILLER in that kolor, Bud!!!!
-
LOL!!!!
-

Fully detailed Airfix James Bond Aston Martin DB-5
Dann Tier replied to Dann Tier's topic in WIP: Model Cars
LOL, its all good, Bud!...i'm glad you like to follow!...i think i have 13...14 on the go, lol. -
Fully detailed Airfix James Bond Aston Martin DB-5
Dann Tier replied to Dann Tier's topic in WIP: Model Cars
Thanks, Bud!!, i will have to check that out!...i have a book on all the James Bond cars...gadgets, and other things, but i've never seen this one... -
Fully detailed Airfix James Bond Aston Martin DB-5
Dann Tier replied to Dann Tier's topic in WIP: Model Cars
NICE!!!, how is that version?...can you share any photos here?!....there will be an update soon, its one of my next few to get updated. -
Fully detailed Airfix James Bond Aston Martin DB-5
Dann Tier replied to Dann Tier's topic in WIP: Model Cars
LOL!...yes i do. I normally only have 1-3, but i want all my stalled projects done, lol -
DANG!!!...i'm away for a second, and you've got your Masterpiece done already!!!...its AMAZING!!!!
-
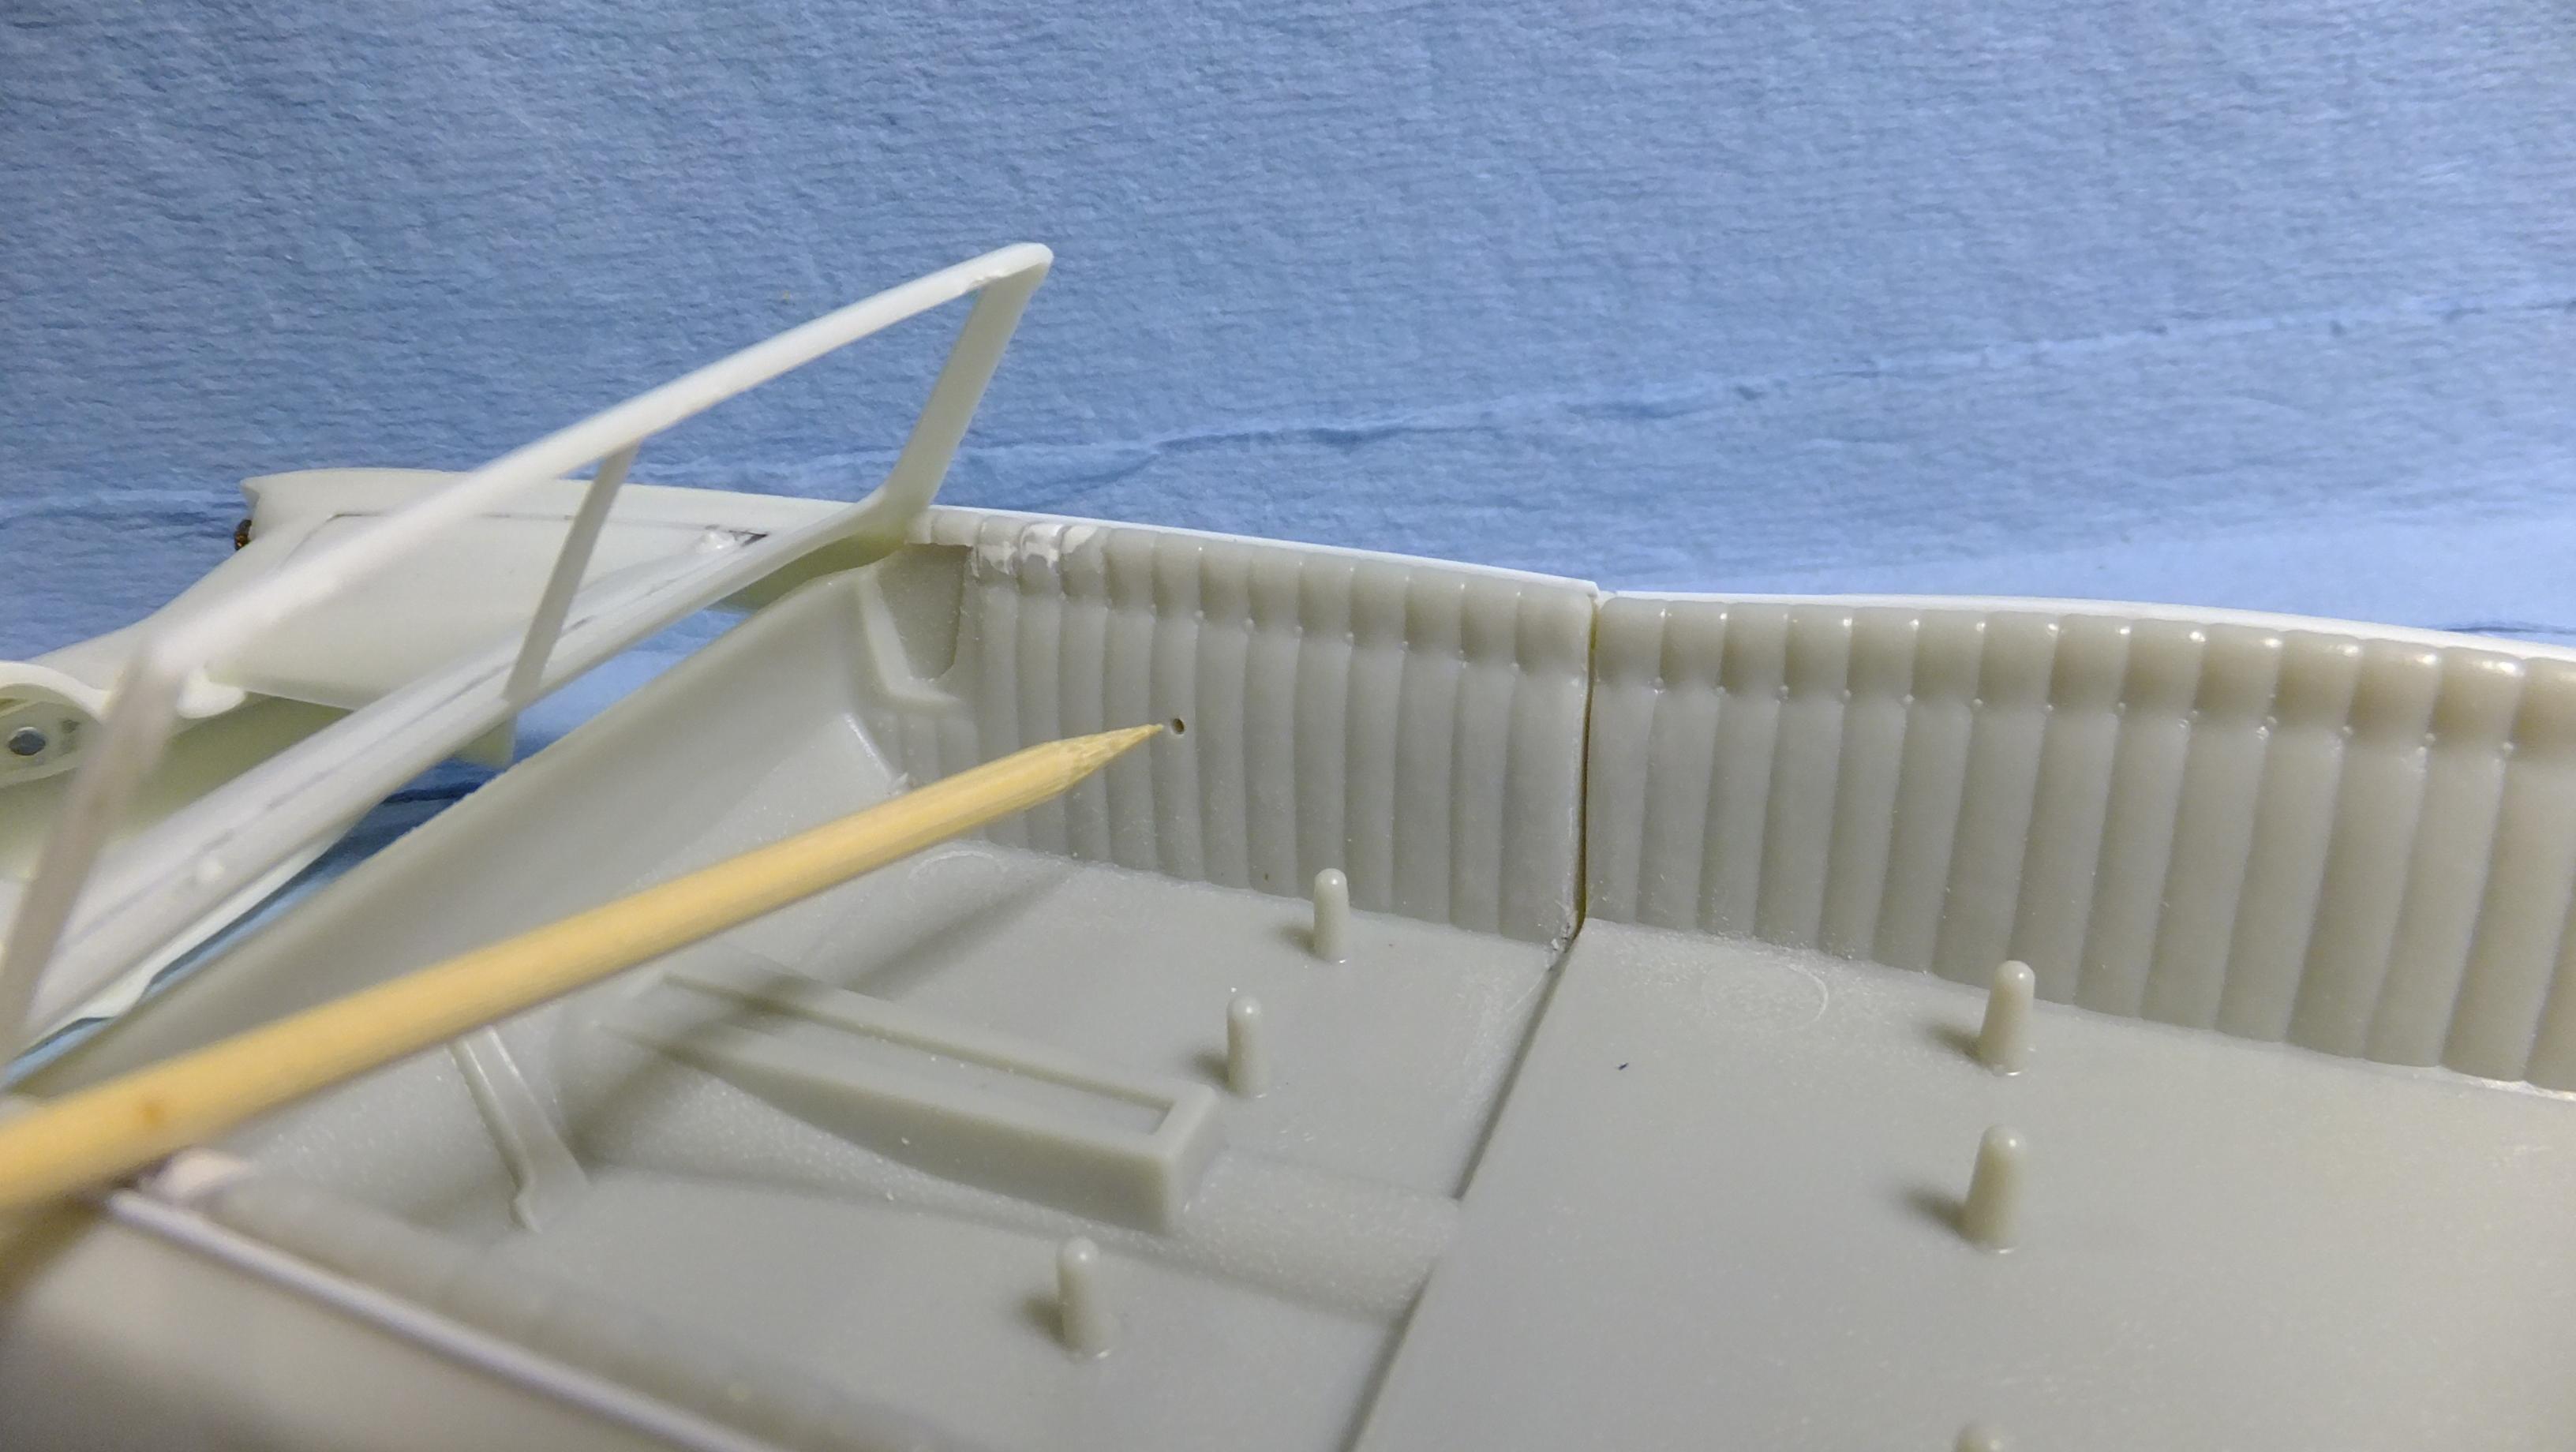
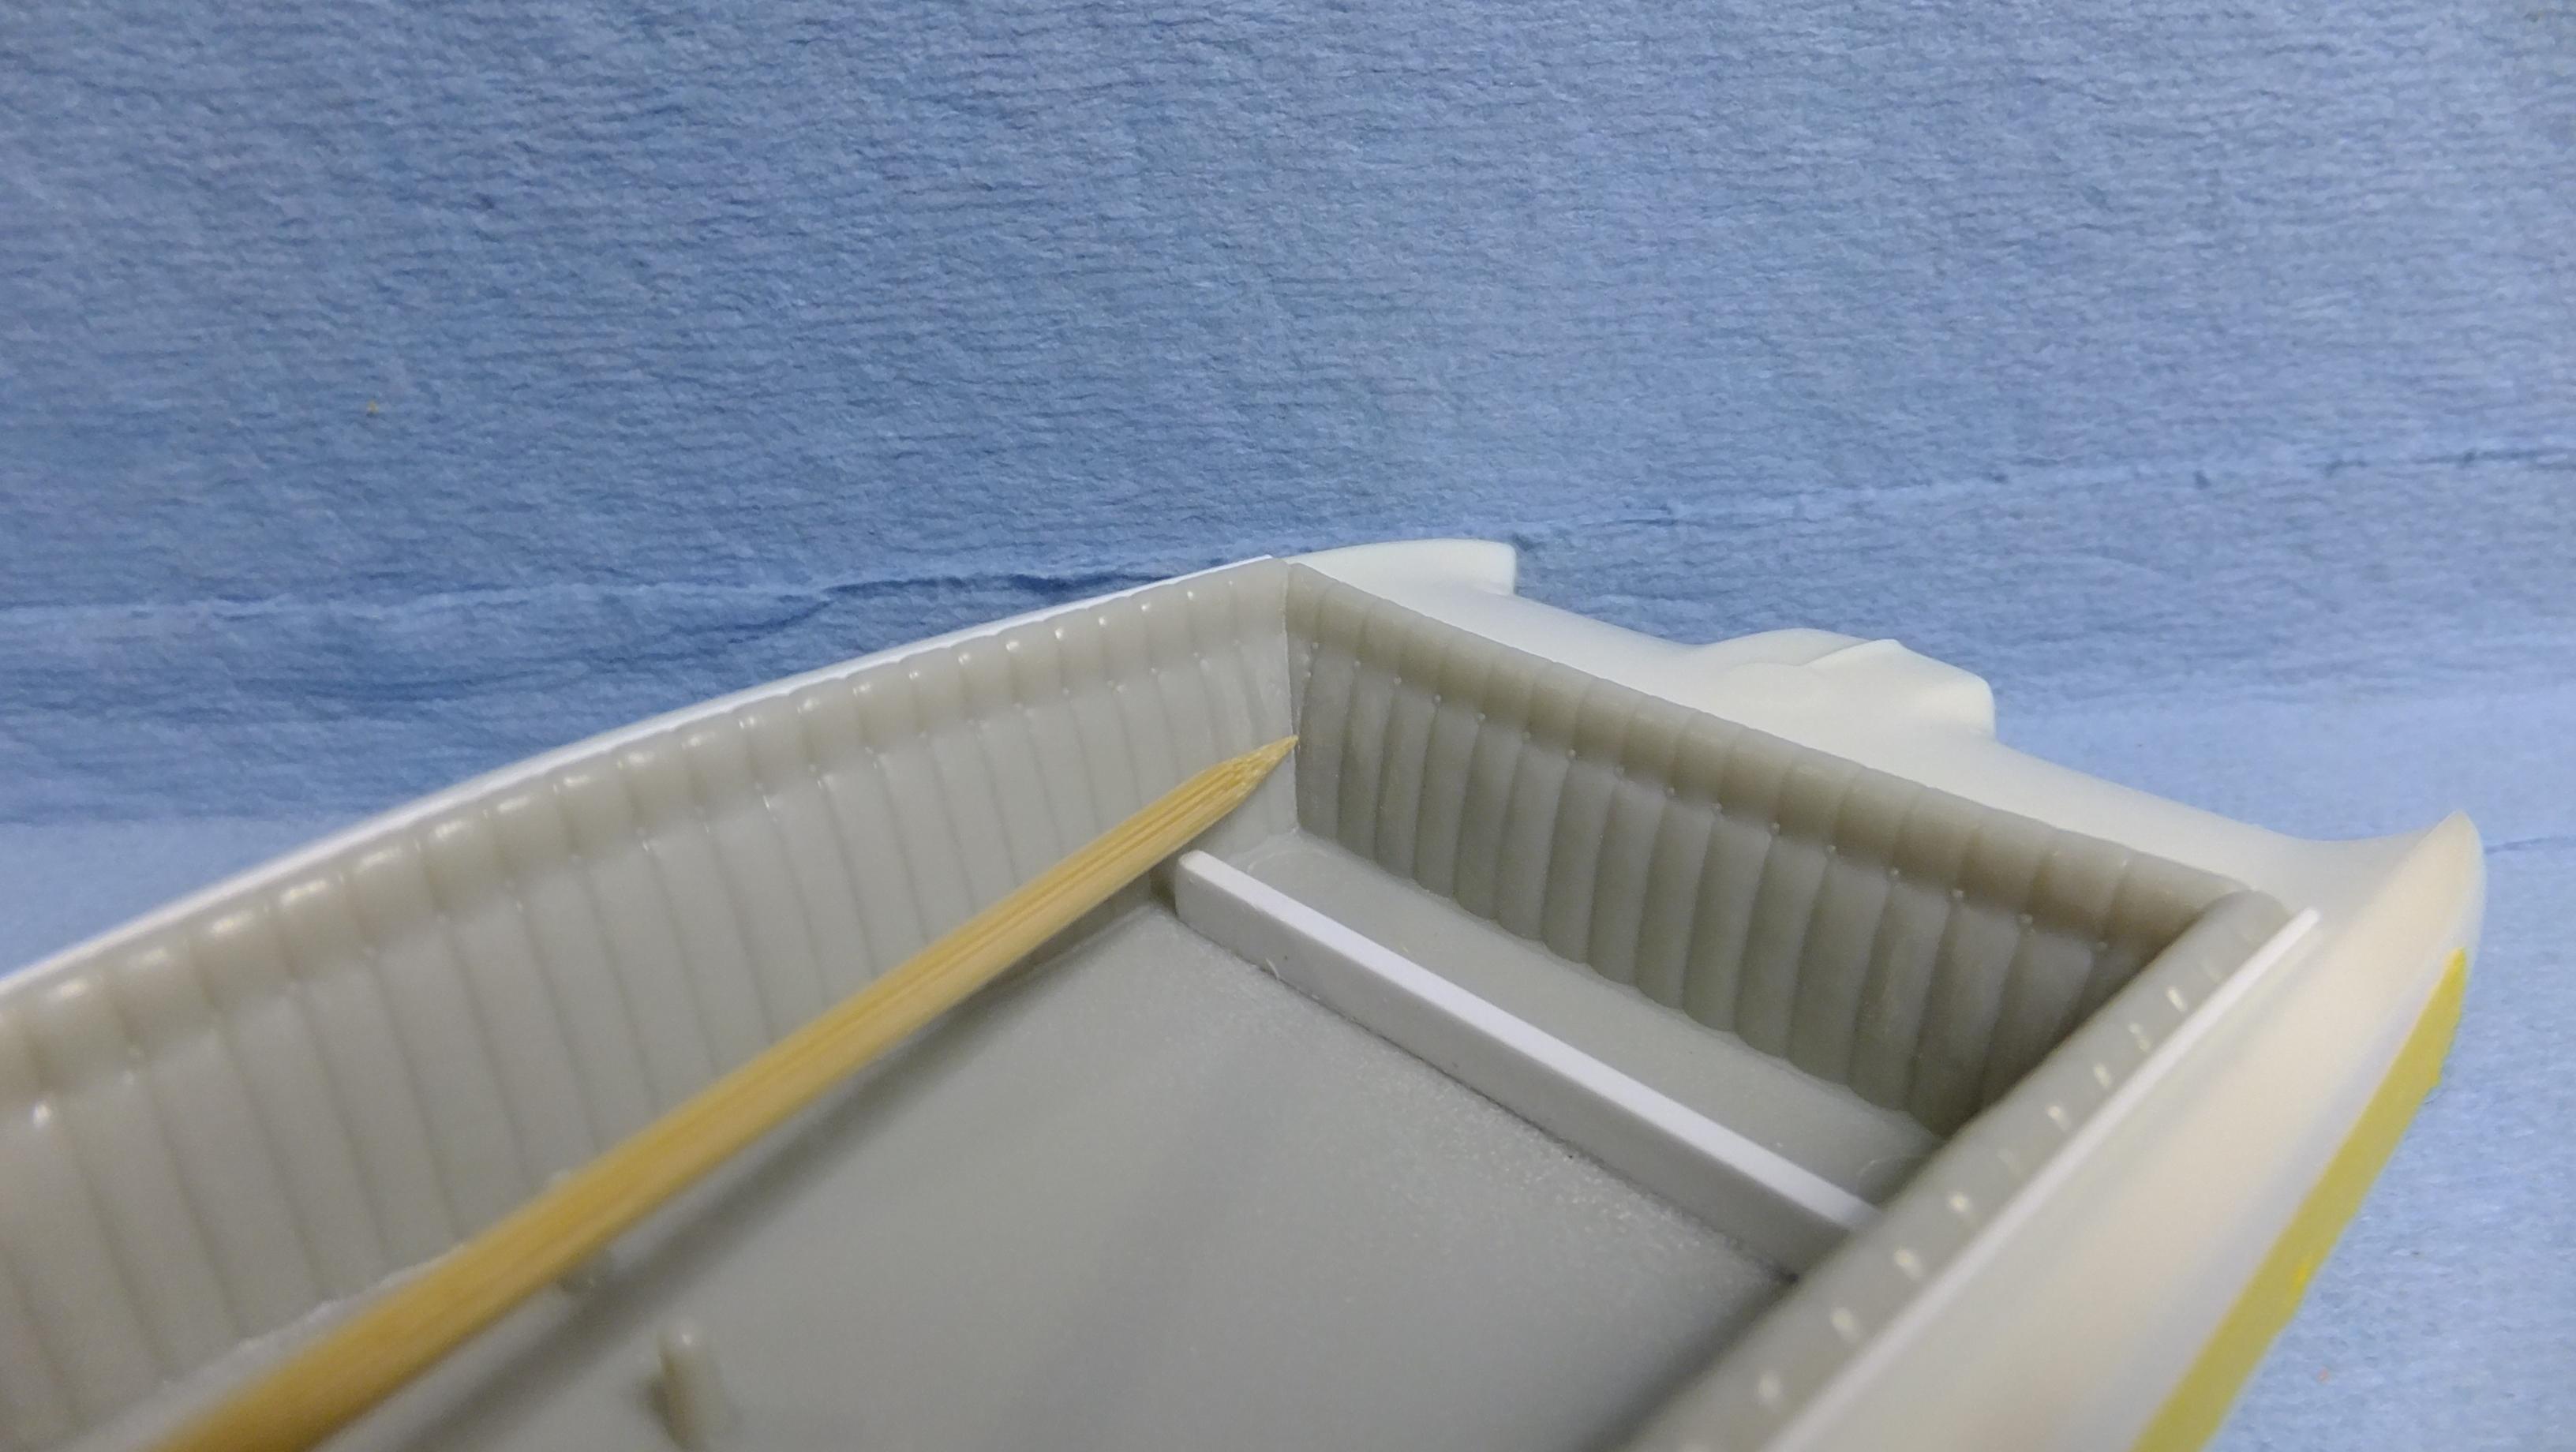
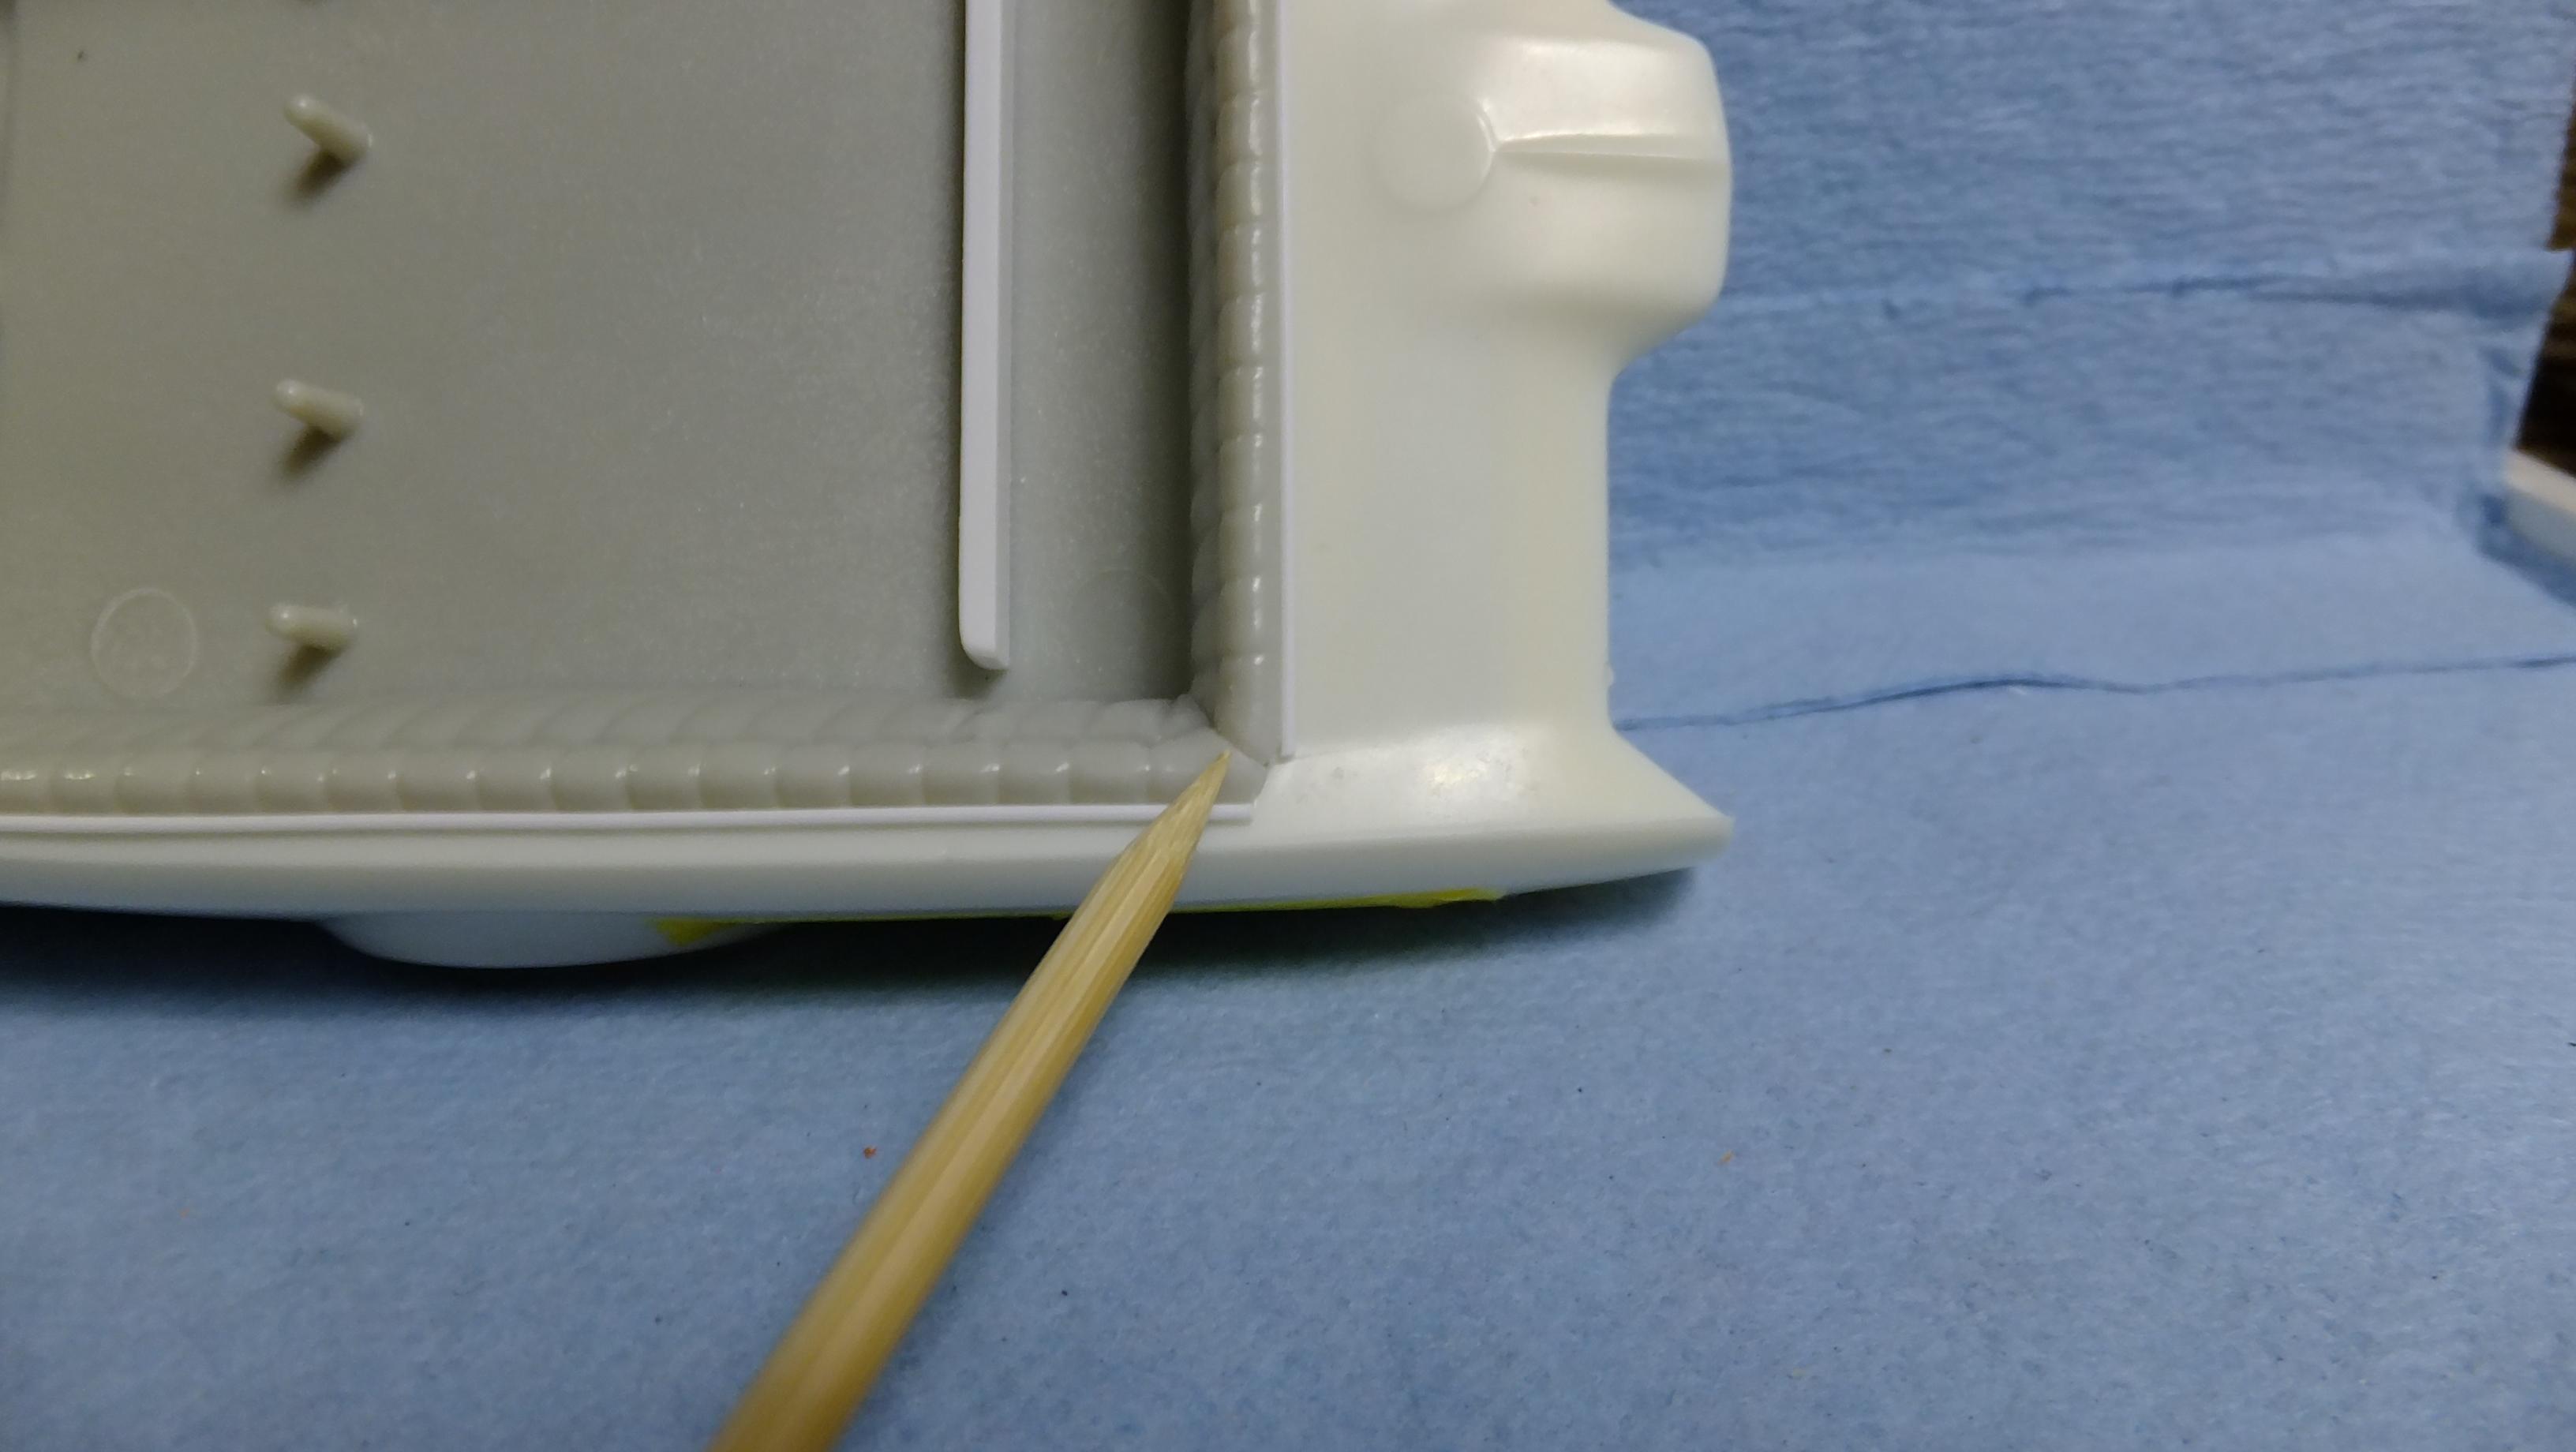
Finally back to this one as well!...test fit the interior bits inside the body, and the way i shaped the tranny access panel pushed the seats WAAAAY to far forward, so i needed to reshape. -Photo 1&2; As you can see....its HORRIBLE!...i may even need a new seat....i will chop the arch off them, and see what i think first. -Photo 3&4; You can see that i chopped it back at 45* angles, but STILL a wee bit too close...Next step will be for me to notch them out as the pencil lines denote....fingers crossed! -threes the charm, right?...i hope, lol -Photo 5; Still plenty of space for the rather narrow Lamborghini tranny.

-
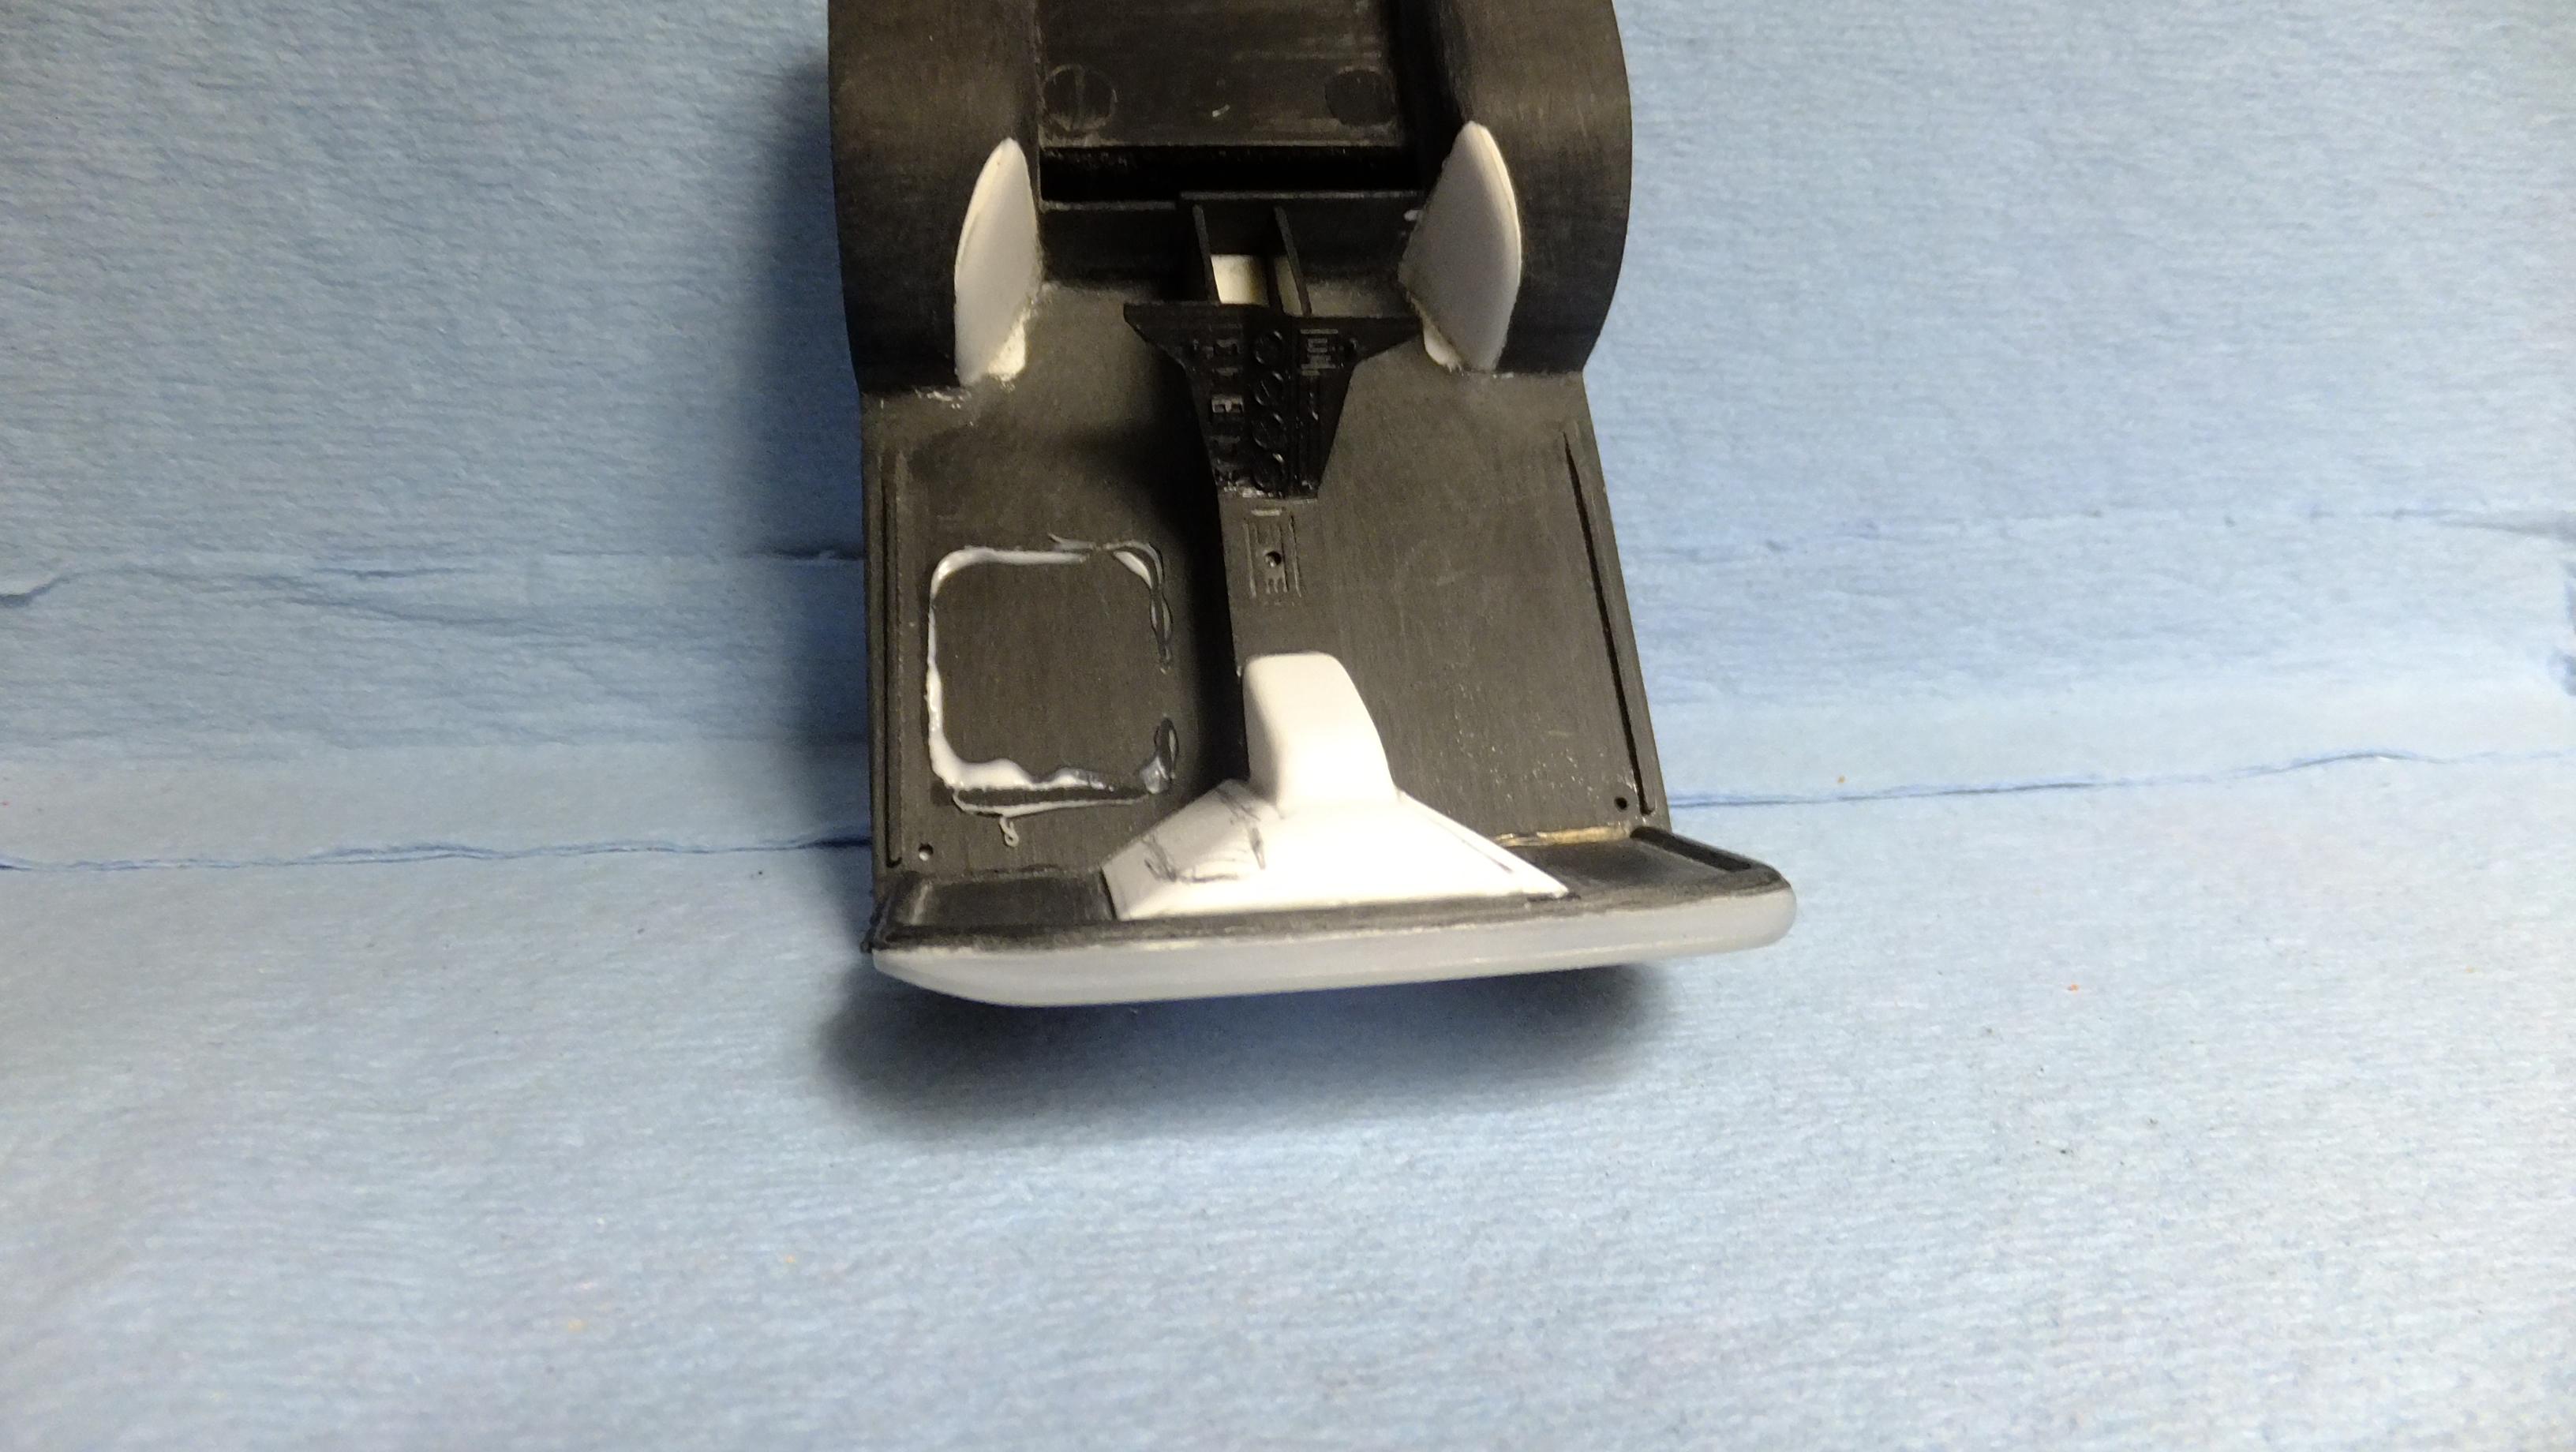
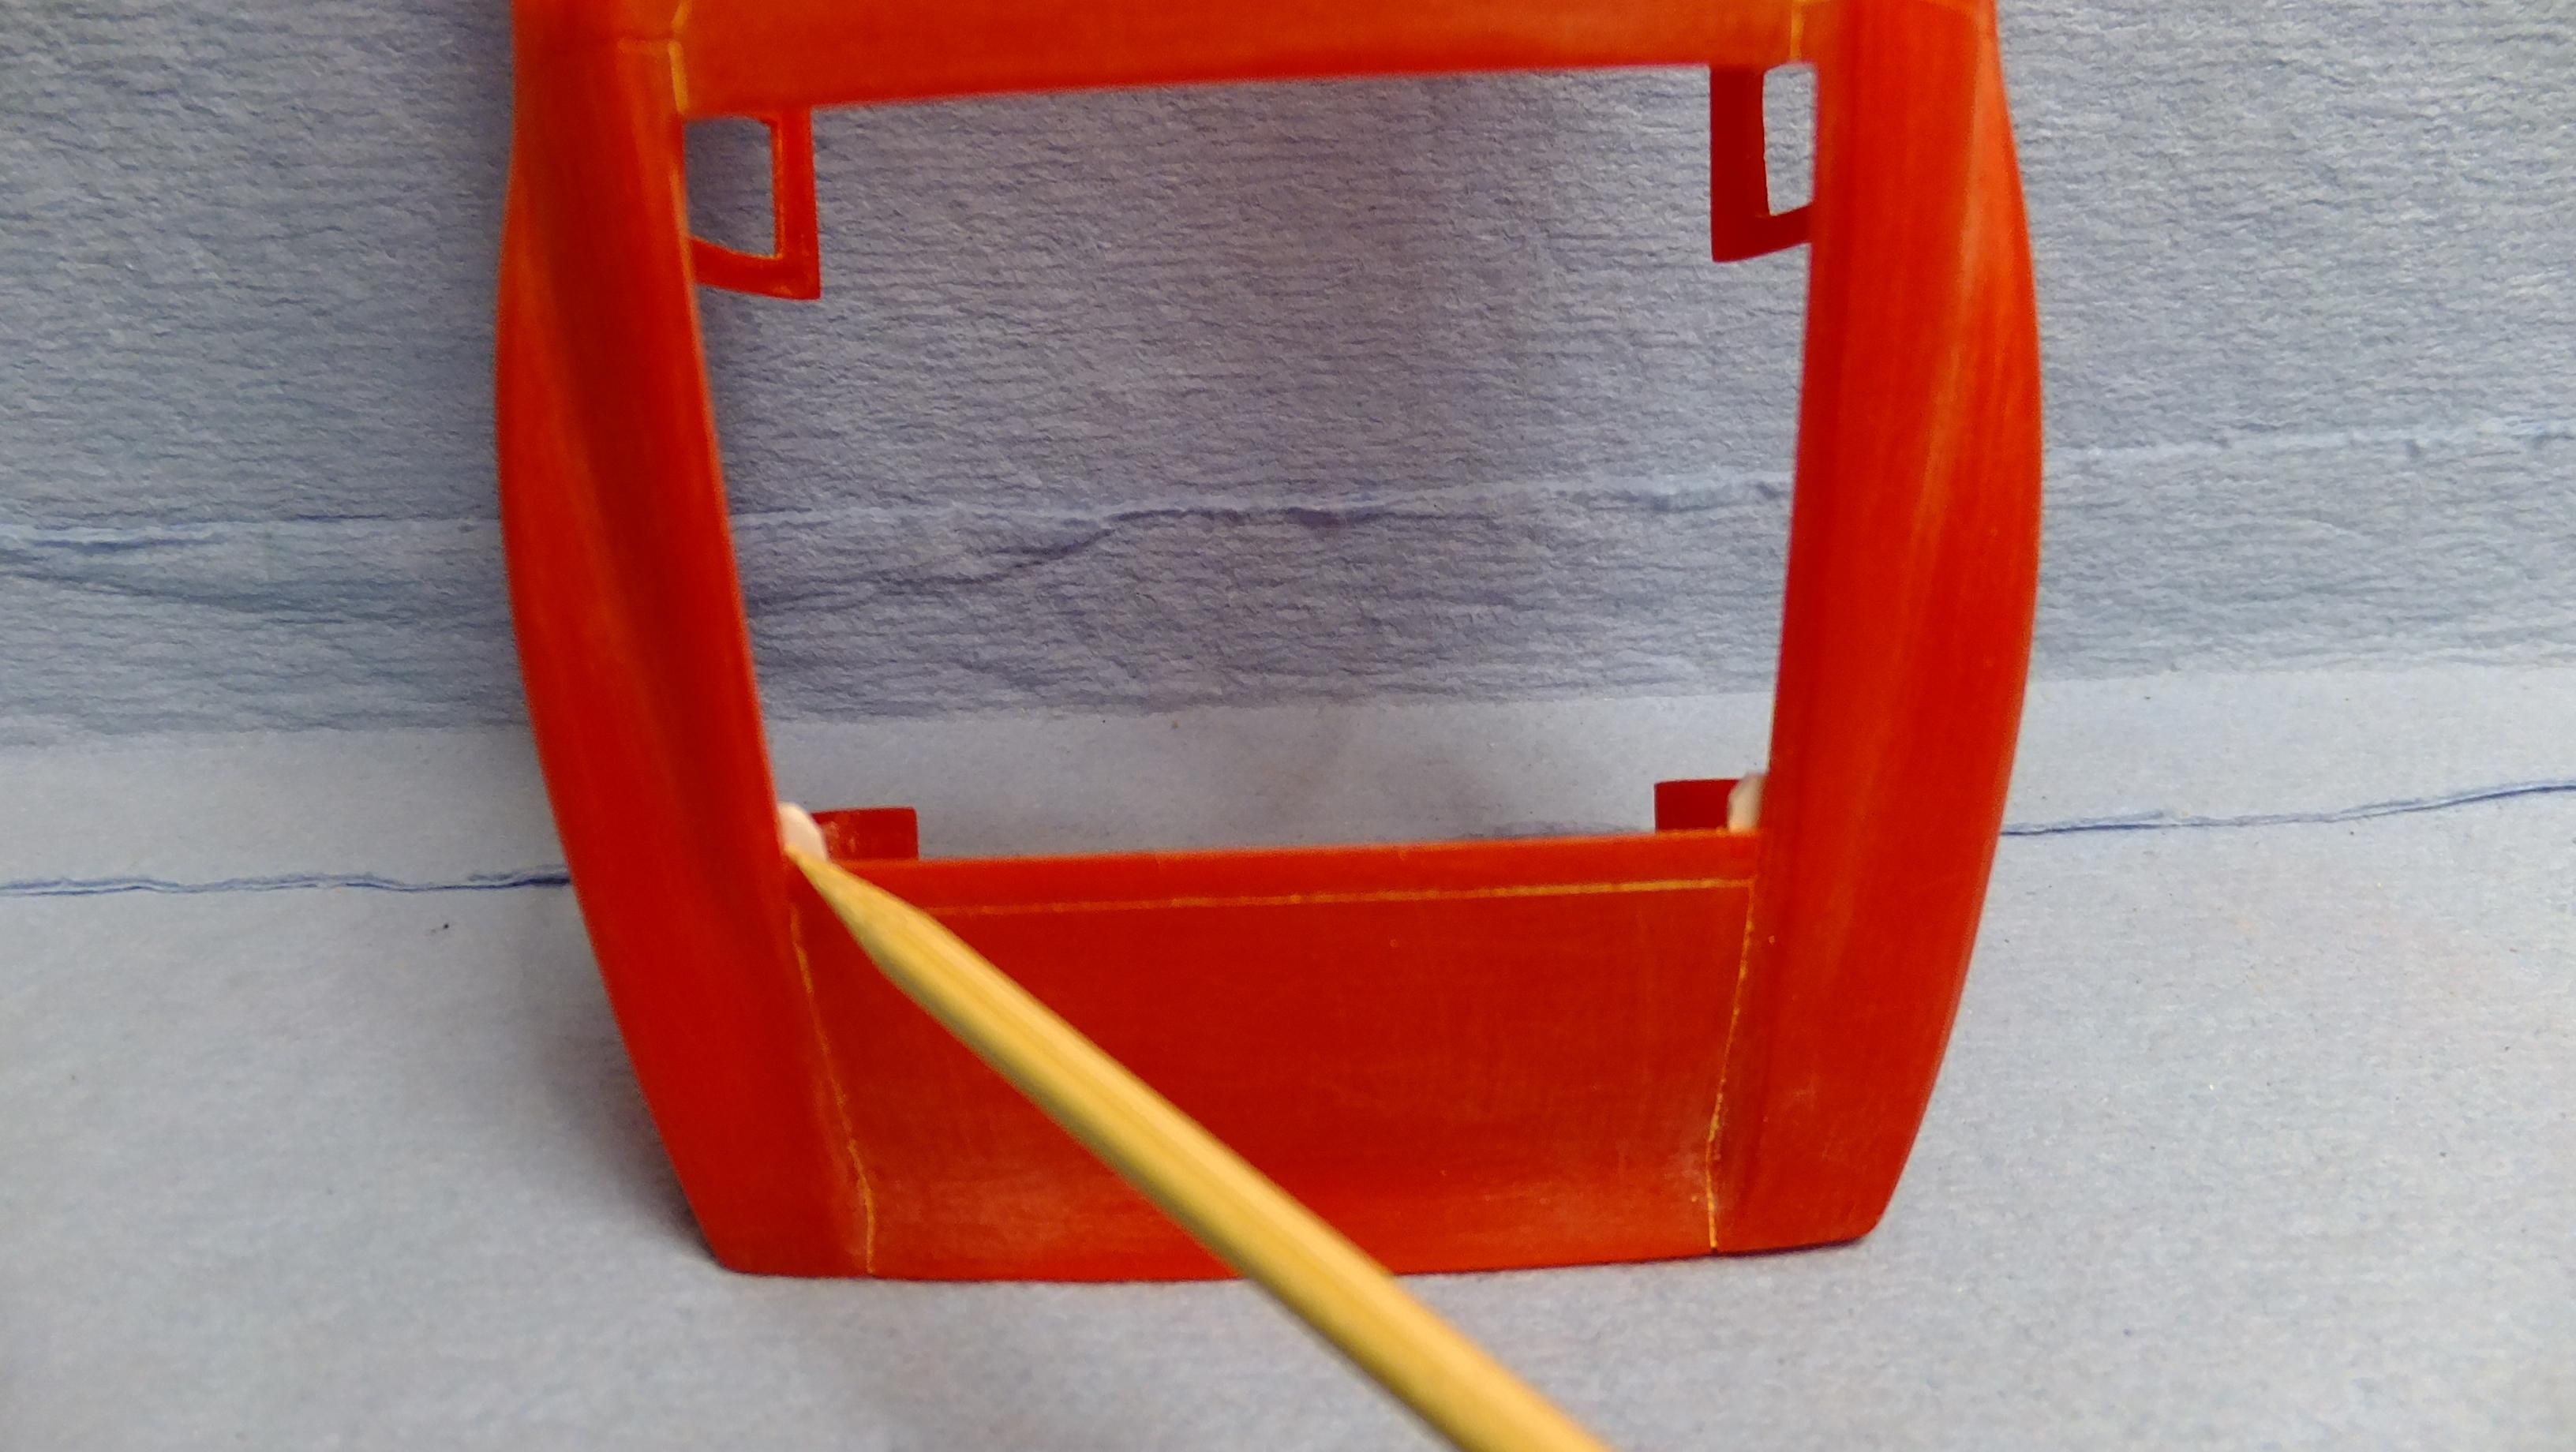
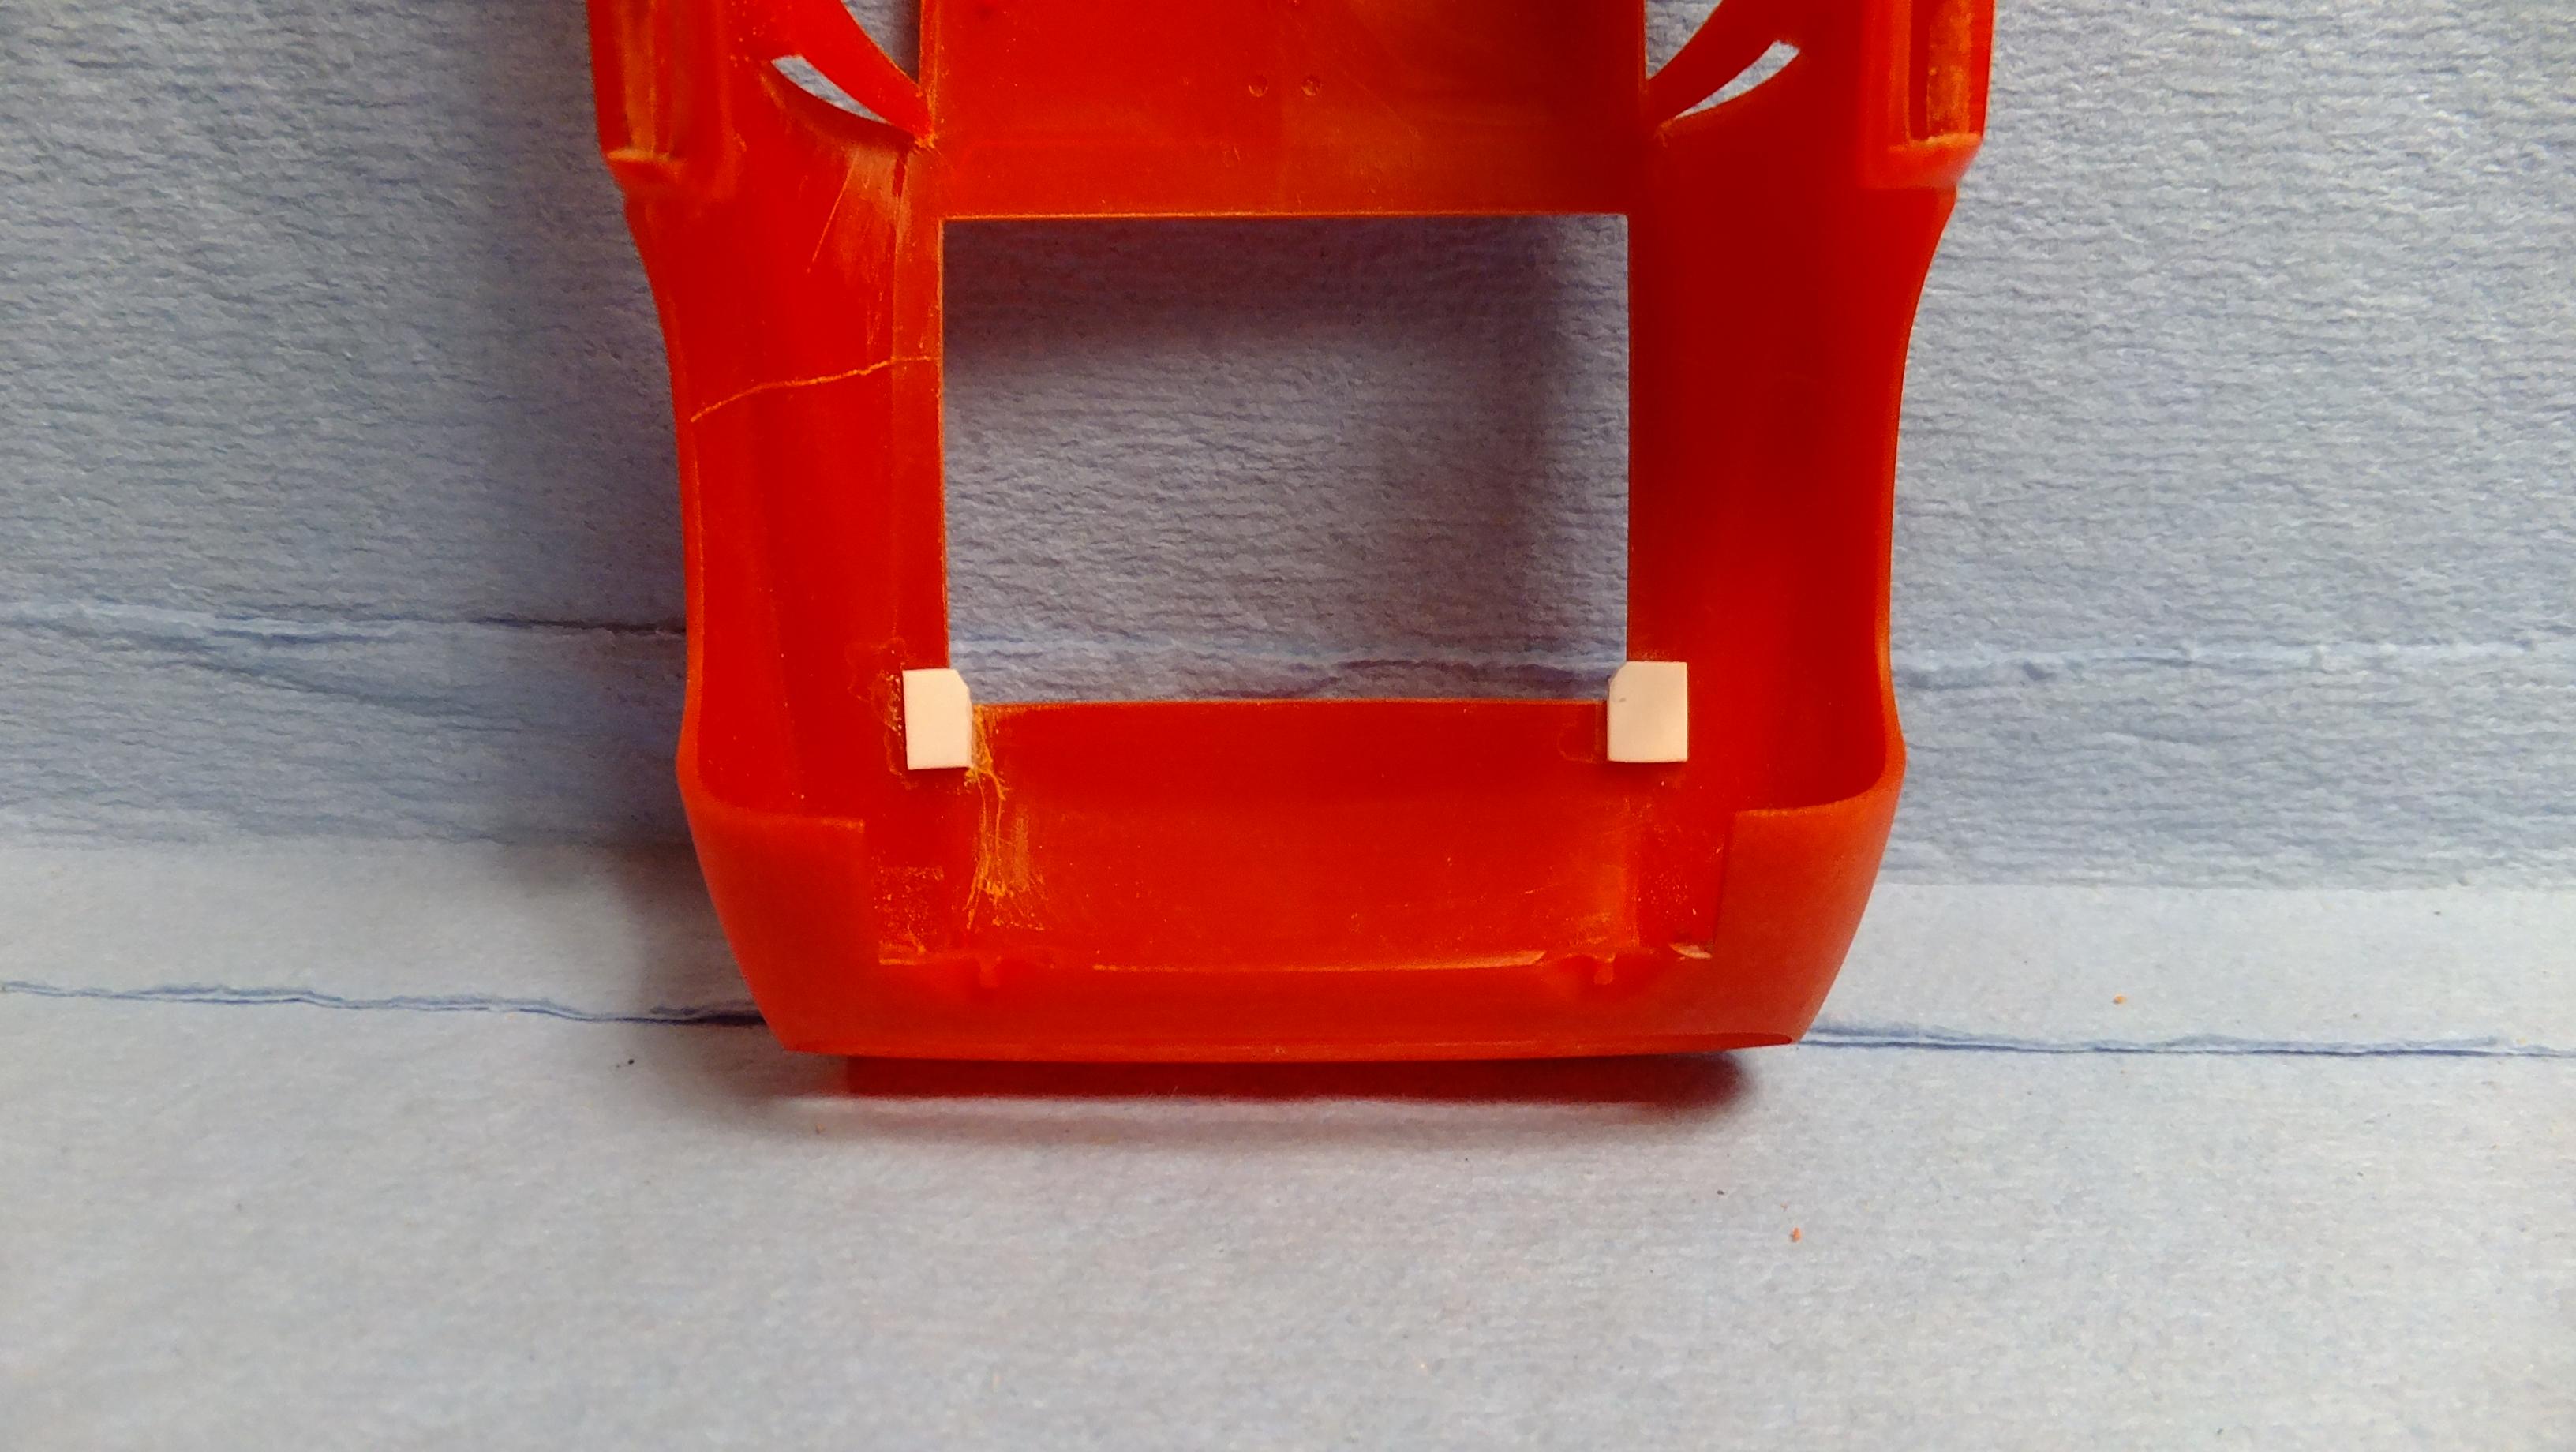
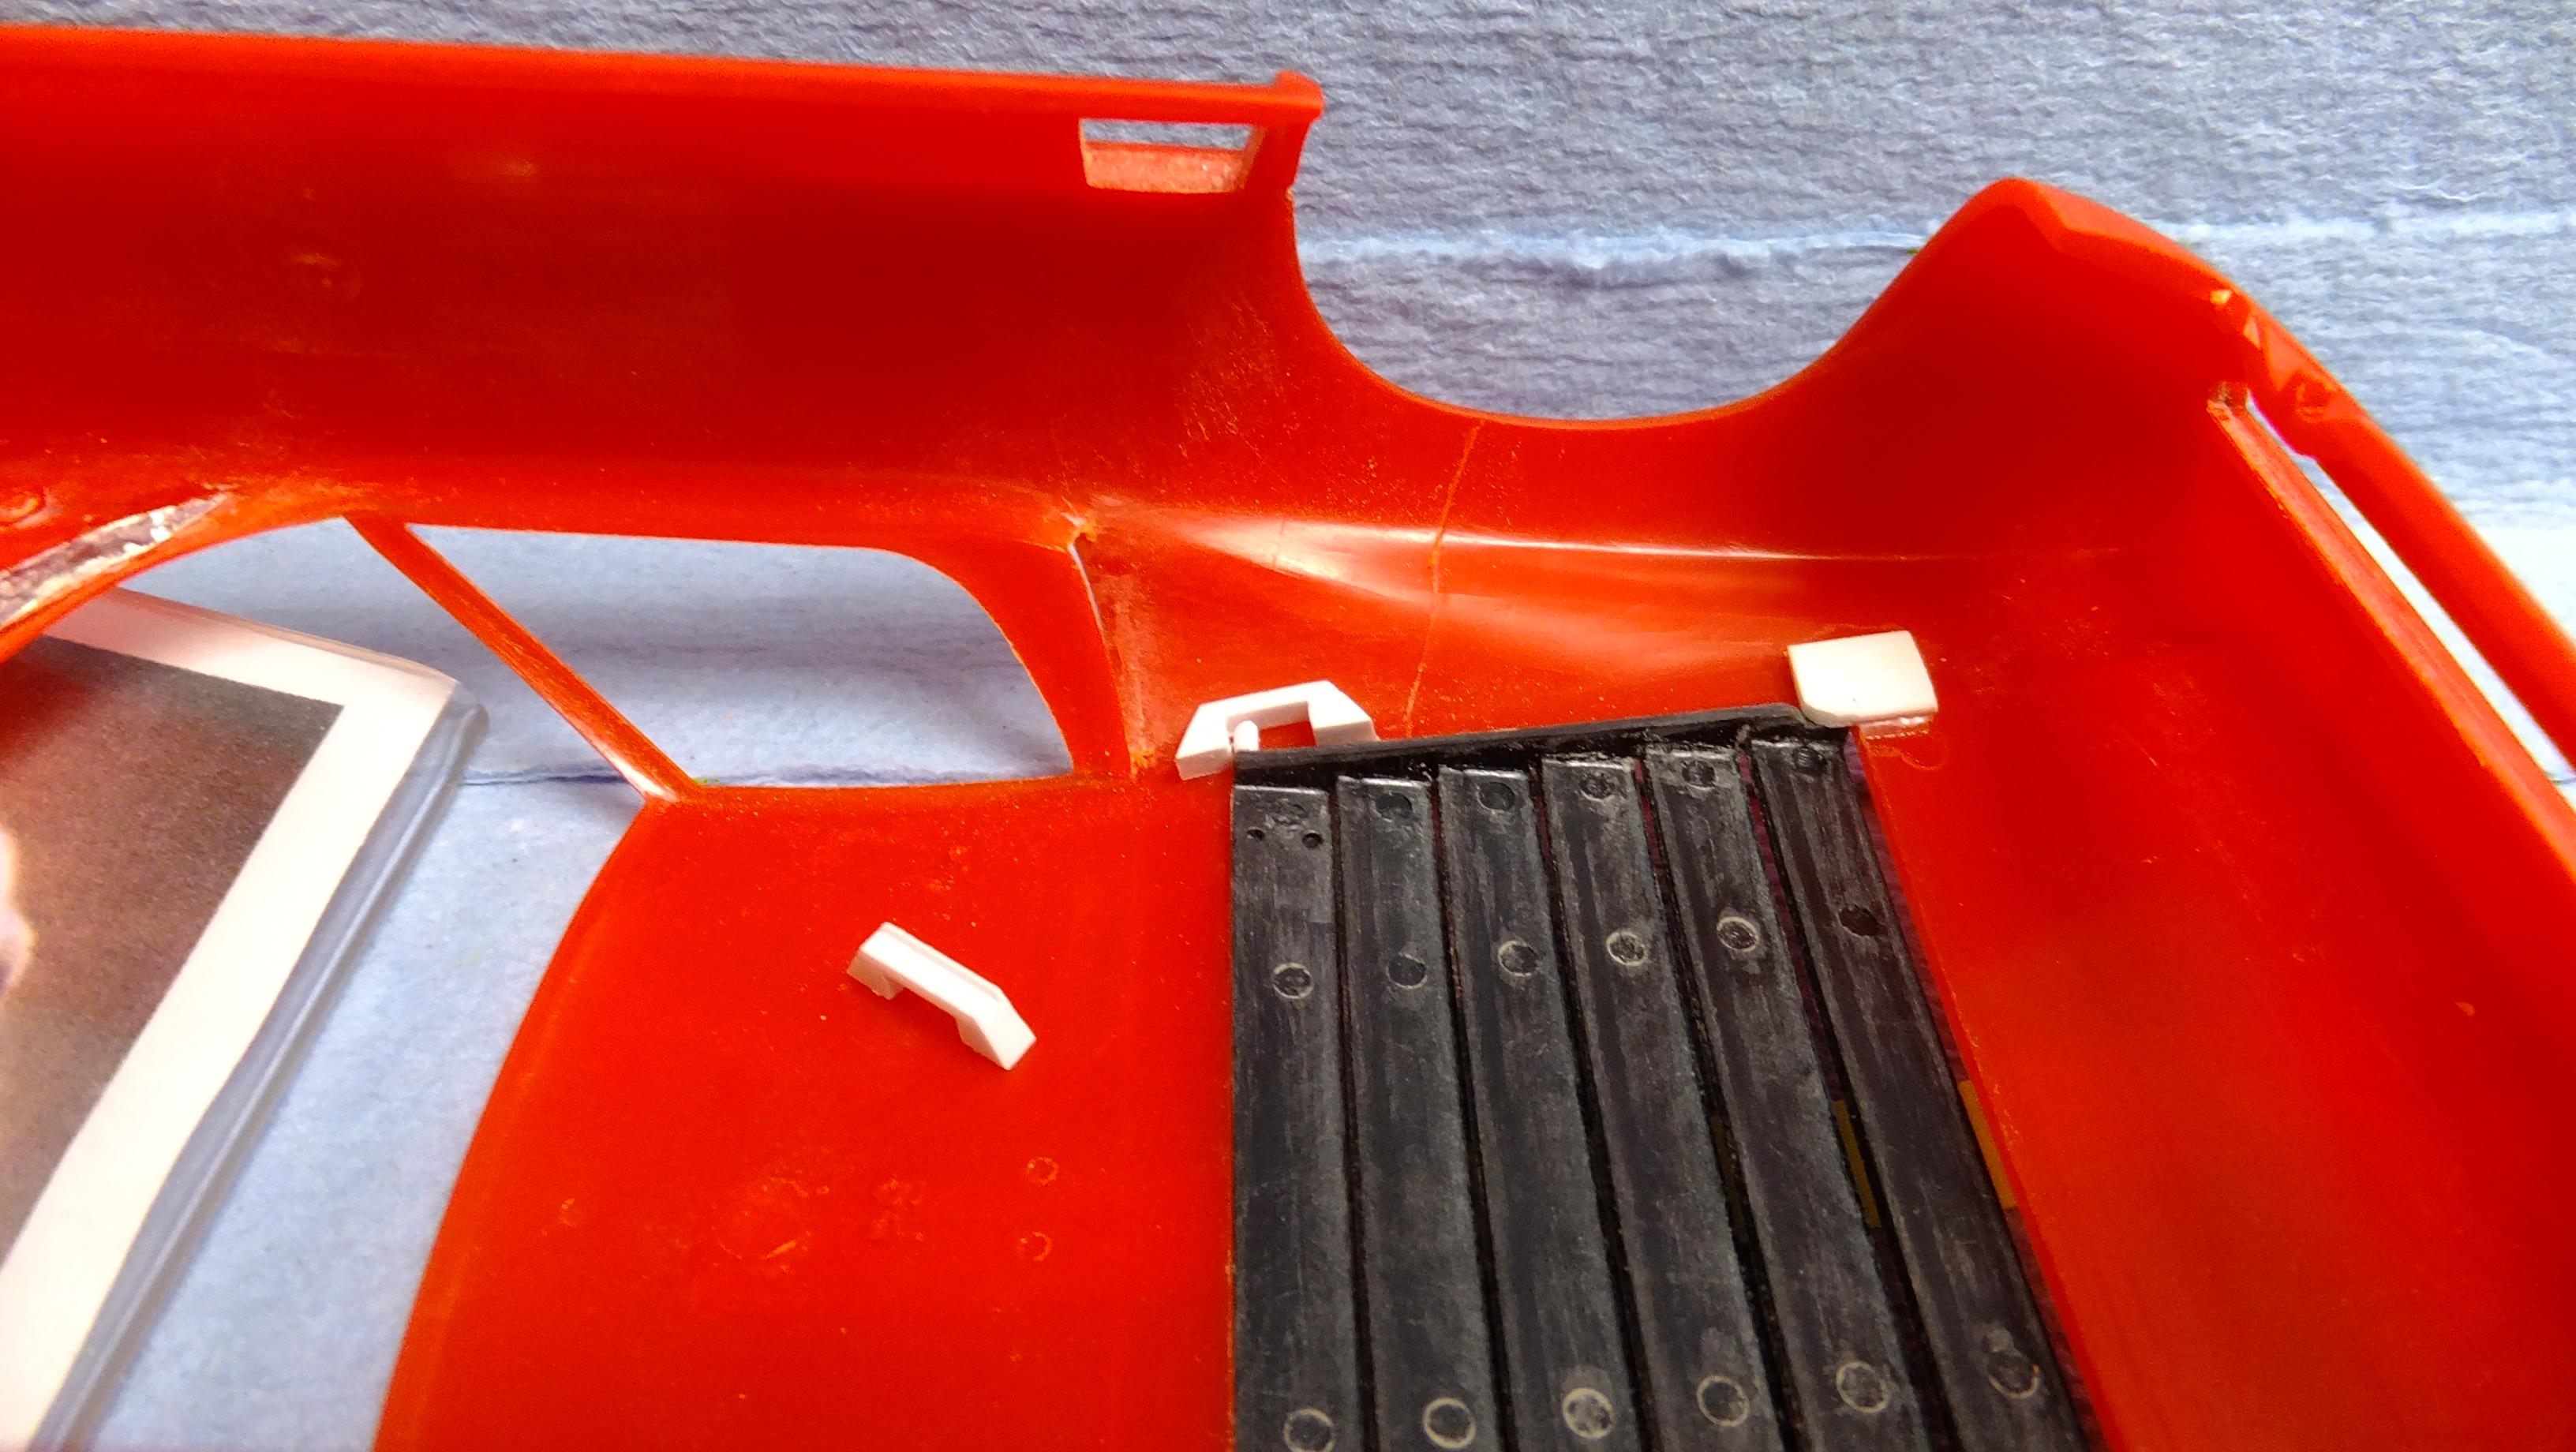
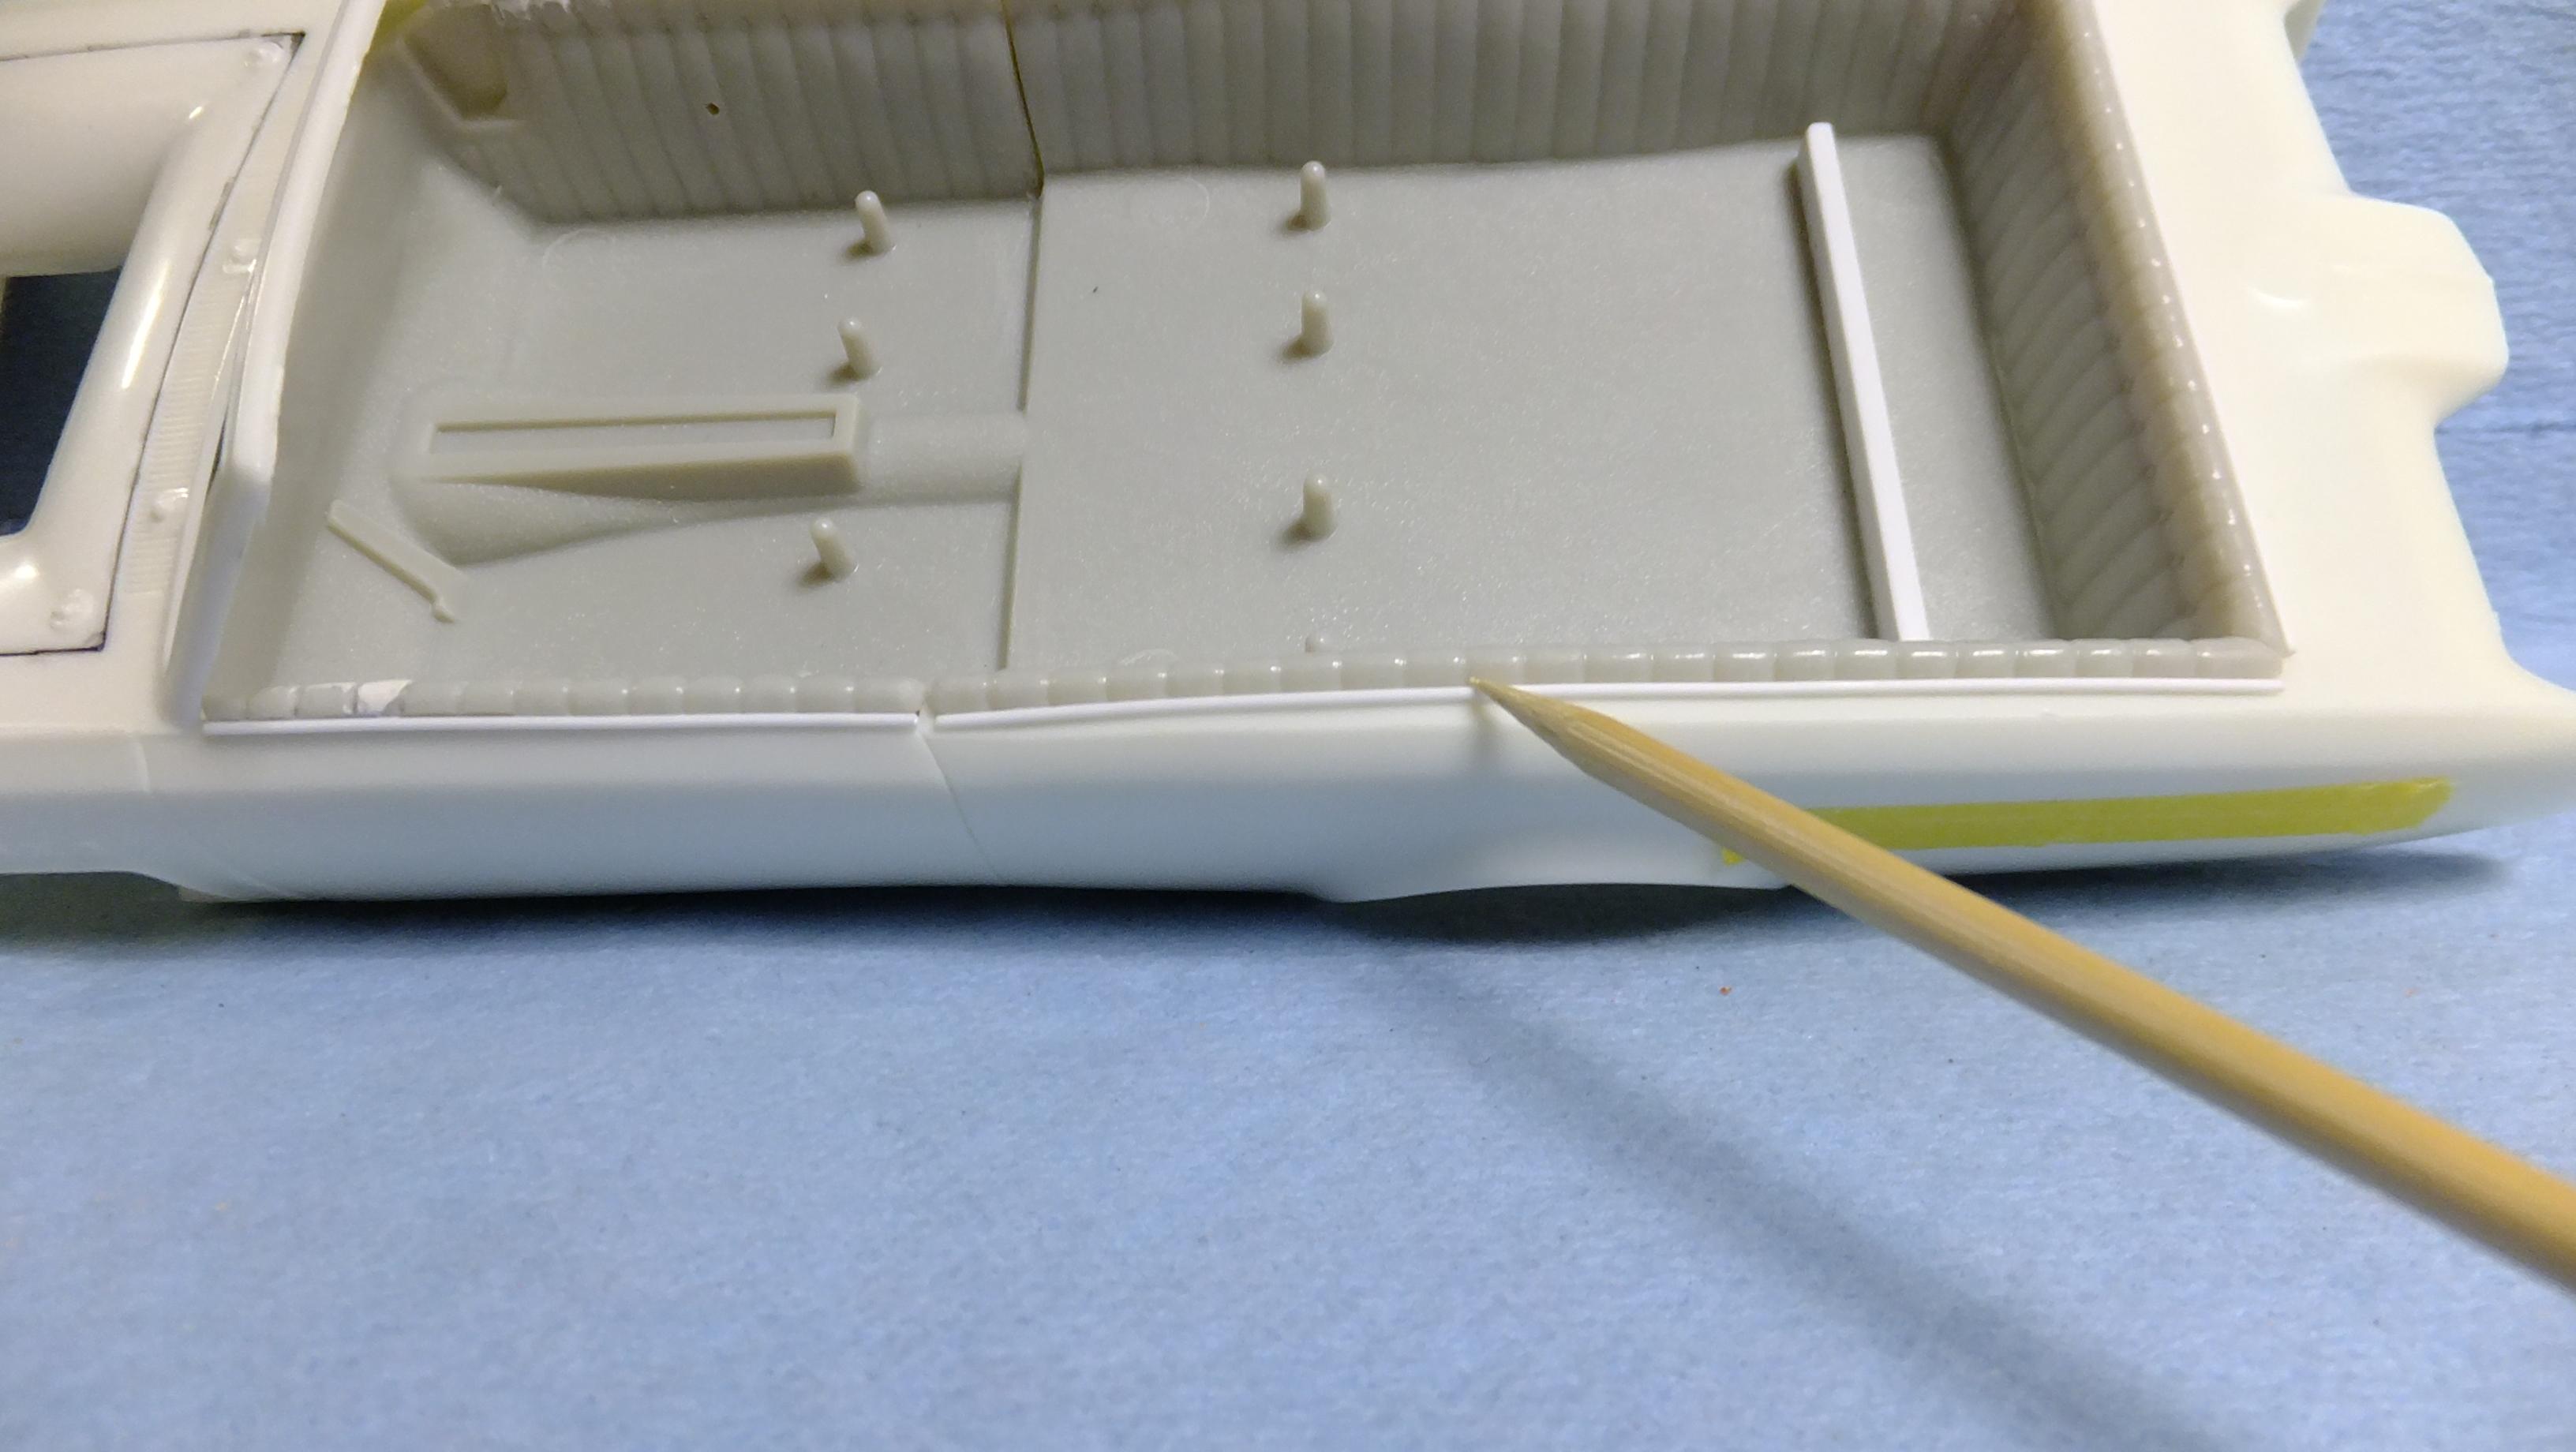
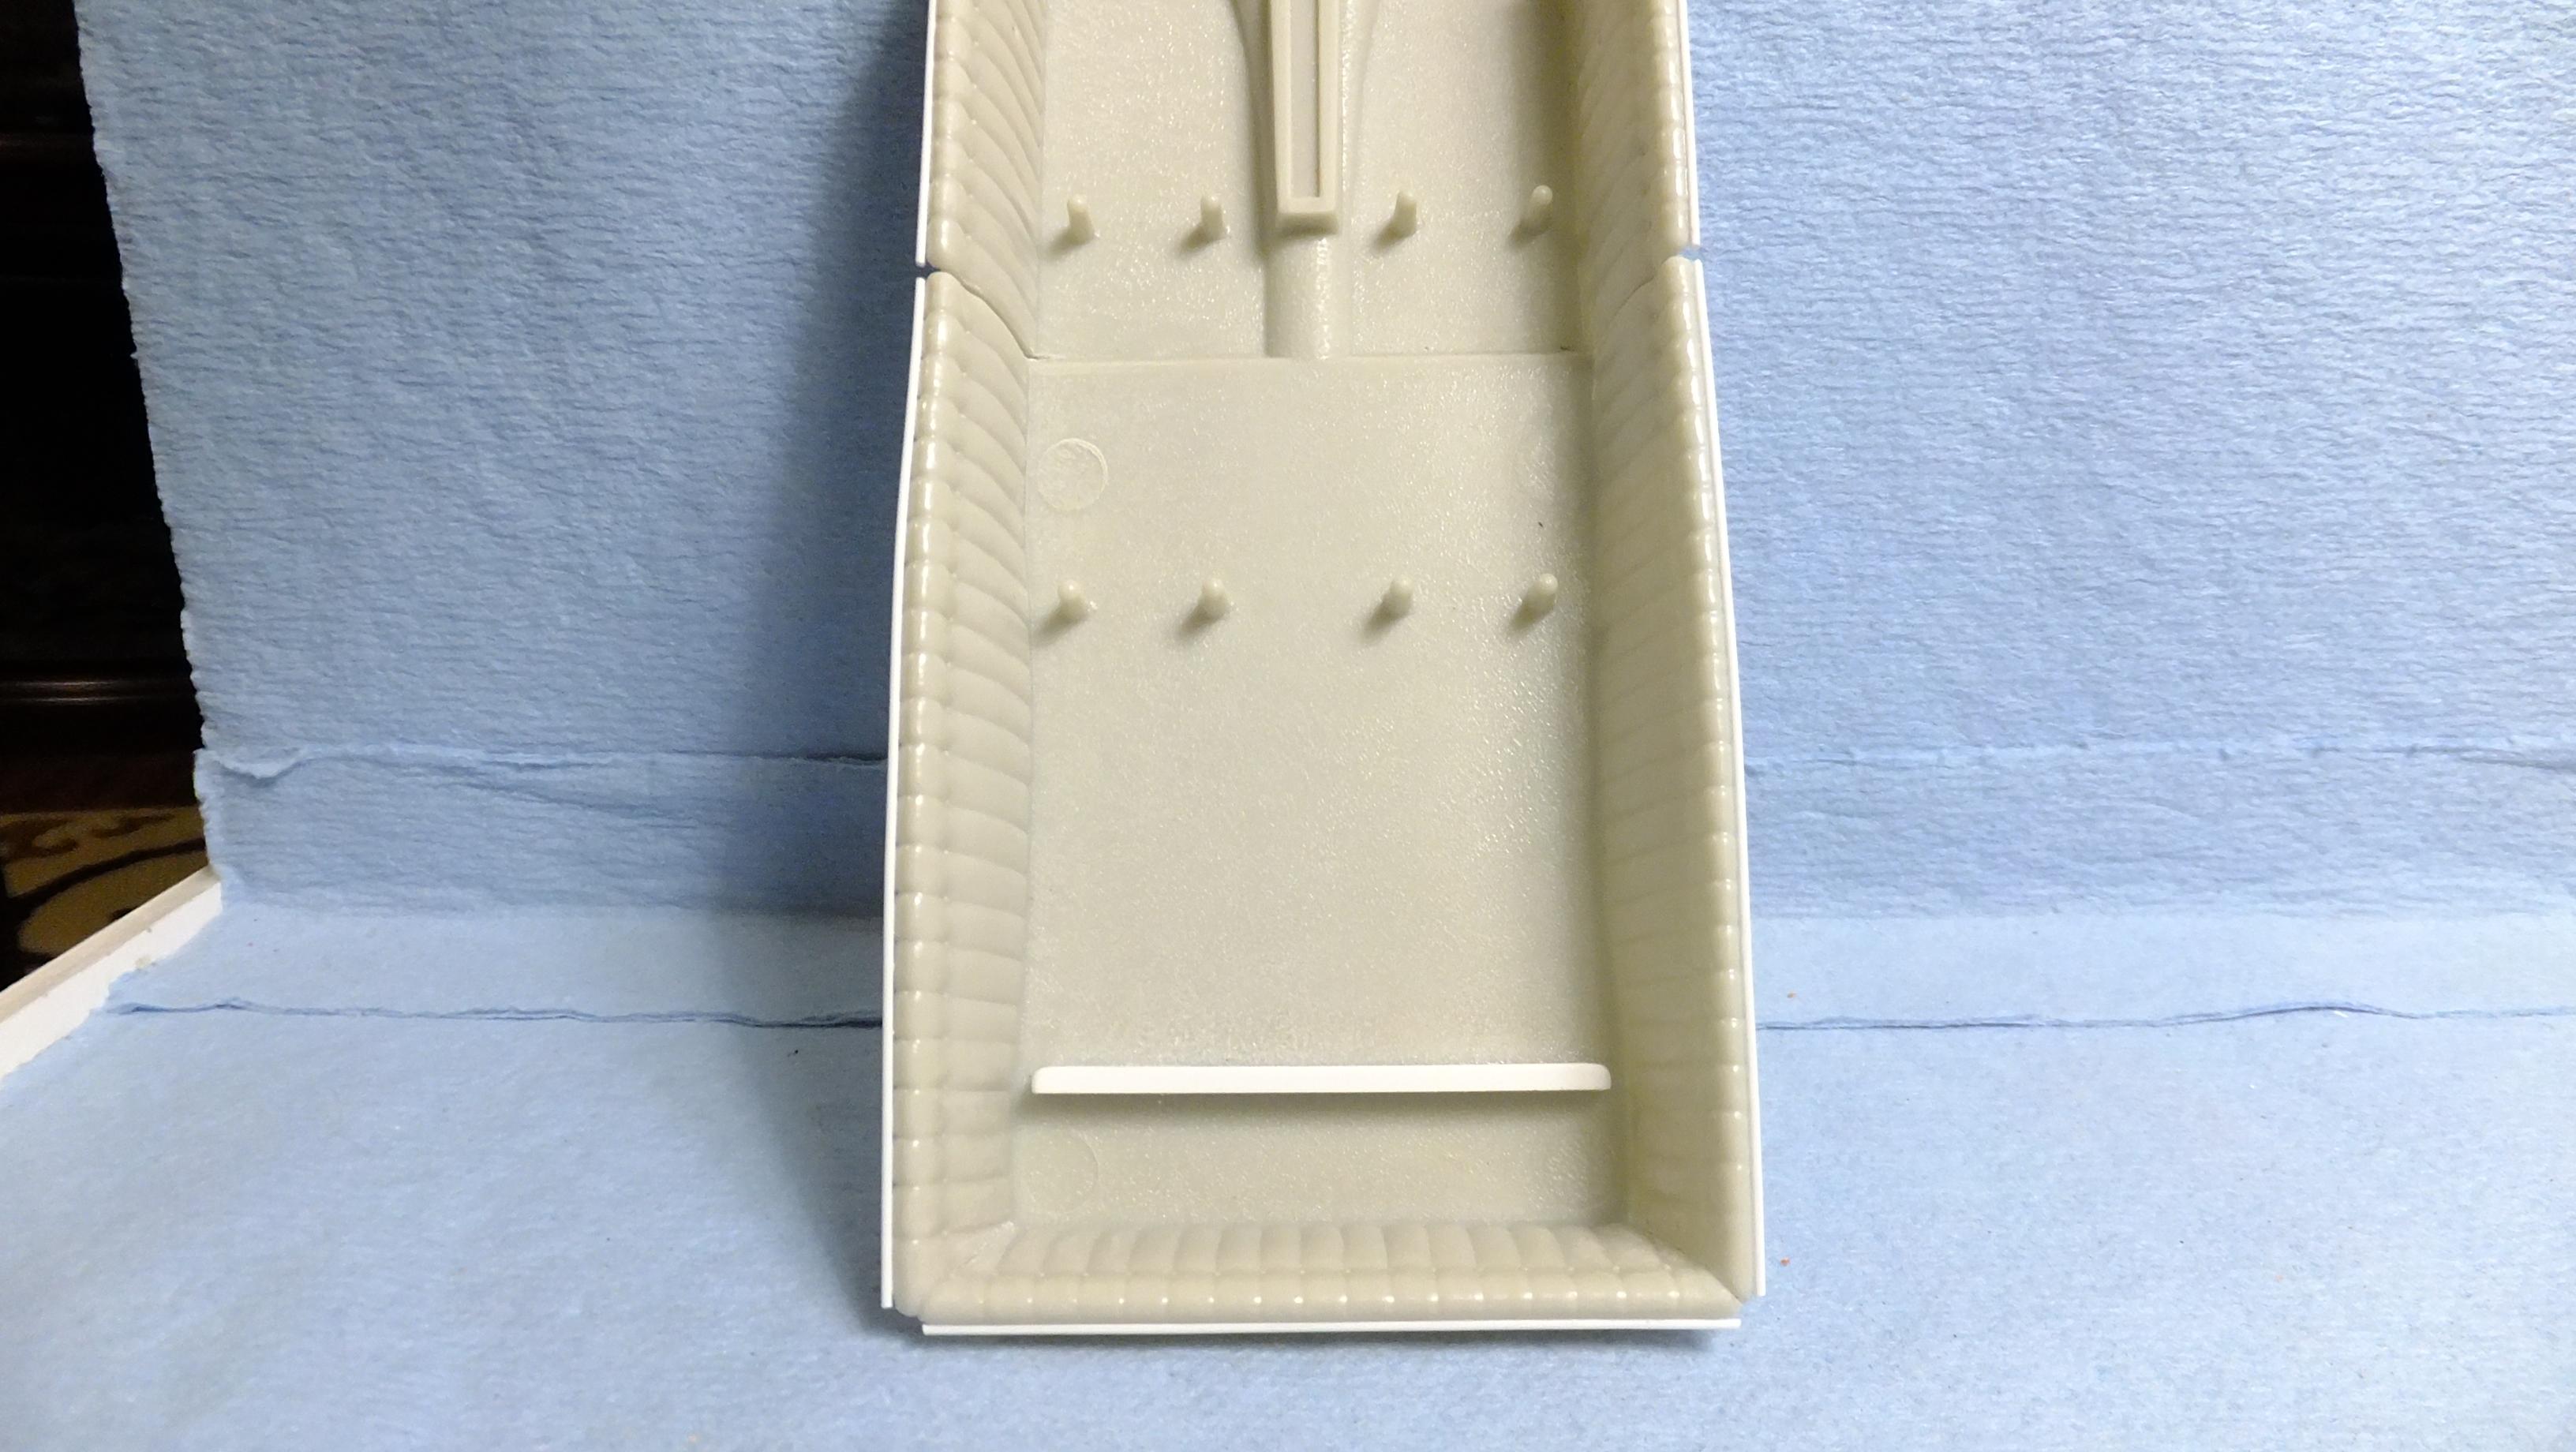
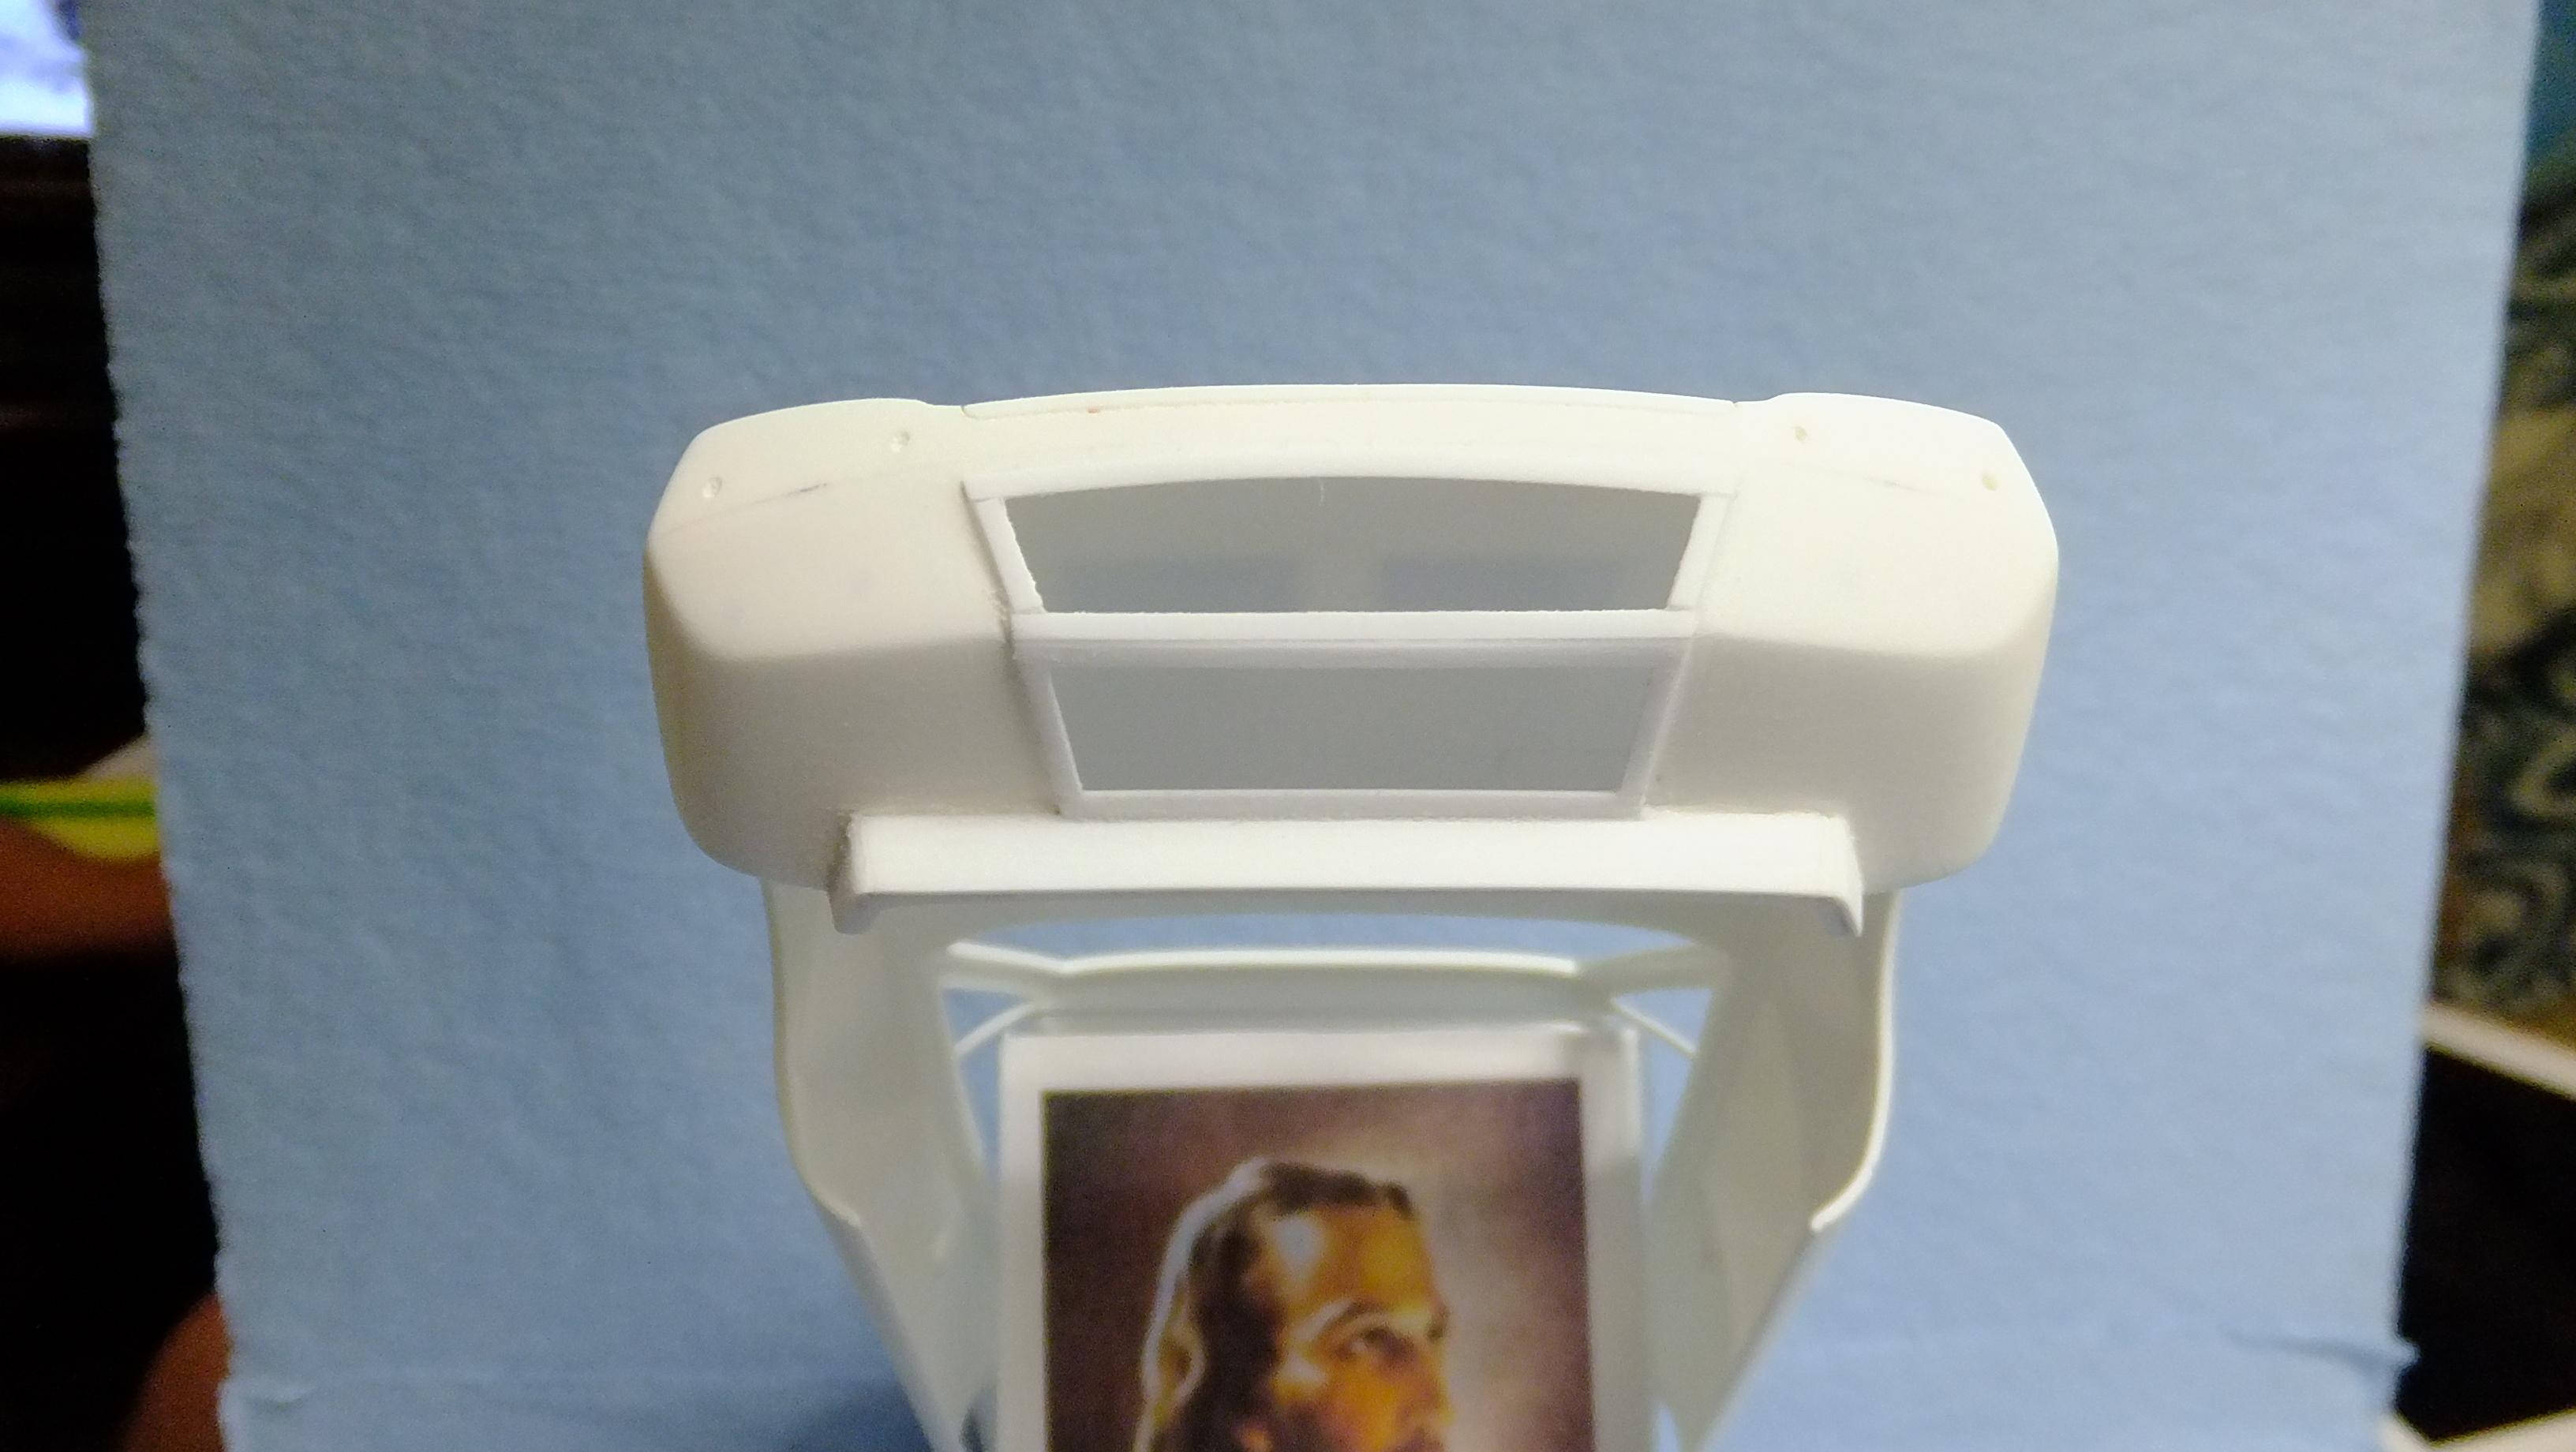
Heres a new update on this build....getting VERY close to painting a bunch of bits! -Photo 1; Here i made separate door cards. They will still get more detailing. I also needed to enlarge the door pockets in the tub so that they wouldnt be seen...later i will add the covers to them. -Photo 2; Cant have door cards without having the seams etched to show that the doors open. Yhe top edges of these doors will now become the window weather stripping, and be painted rubber. -Photo 3&4; Since the foot walls werent there, i had to make them. The styrene block you see, is a locator for the peddles which also werent part of the kit, but i found some in my parts bin. I have also made the carpet, and mat pipping, using solder. Its larger than scale, because once you flock around it, it visually shrinks to the right size. Remember not to make them perfectly straight...they arent on the real cars...this will add some crazy visual interest, and realism without trying too hard. -Photo 5; I cut the slots for the seat belts to retract into. -Photo 6; ...i also cut a slot for the hand brake. -Photo 7; The area i'm pointing at is the split between two padded sections, so i needed to scribe them. -Photo 8; At the last second, i noticed that i forgot to etch all the way round the glove box door. Without doing so, it would have blended into the dash after the painting process, and wouldnt have looked real...as if i could open. -Photo 9; Here i show how i cut a section out of a spare part, and attached it to the uneven side of the chassis(the white slash lines indicate the part i removed from the spare where the arrows point. To take this area a little bit further, i will be adding shocks which didnt come with this kit.
-
Hasegawas Lamborghini Miura SV....new update!
Dann Tier replied to Dann Tier's topic in WIP: Model Cars
Hey, everyone!, heres a bit of an update...moving steadily forward to paint the body. Before anybody gets their knickers in a twist, i am FULLY aware that the real miura doesnt have opening louvers....in this case, i dont care, as long as it looks real in its proper position, thats all i care about....and it does. Since i really wanna wire-up this motor, but dont wanna do all the extra work involved with opening the rear cowl, and making everything inside look realistic, i decided that this would be the perfect compromise. -Photo 1&2; First i made the rear louver rests....it doesnt really matter what they look like underneath, as long as the visible bits look even, and proper. -Photo 3&4; After eliminating the two contact lips on either side of the louvers, i added styrene pins to the very top two corners.Then i made two brackets that wouldnt allow the louvers to sink down, but i made them twice the width of the pins diameter, so that one could slide the louvers down, and away from possibly binding/chipping paint off the roof. -Photo 5; In the closed position, you cant tell that anything is different.
-
Shoulda known....i have that kit too, lol
-
AMT 250 SWB Ferrari (comp. spyder conversion)
Dann Tier replied to Dave B's topic in WIP: Model Cars
I think its a sweet idea!!!....i actually like the Italeri version the best....i will build mine some day. -
Thanks, Trevor!, there is another way to make your own windscreen, but it involves cutting off the molded in trim, and adding your own -scaled down trim. I dont think it would be too bad. I know that i really eliminated most of the problem, as seen by the photos, but will it be good enough for me, as picky as i am?....not sure. I would really hate to have the body painted, then find out that once the interior is in, there is still something i cant live with, then i'd be forced to take a chance at cutting out the already painted trim......maybe i should just make my own to avoid a possible mess....
-
Thanks, bud!, its gonna be a minute...the interior is gonna take some work....
-
You are EXACTLY right, Bud!!!
-
Better, and BETTER every time i see it!!!...VERY clever way to do the headlamps!!, and those thinned intake vents really did the trick!!!!
-
LOVE IT!!!.....Tamiya wheels??
-
Here it is, Bud;
-
Thanks, Bud!, i love helping others!
-
Thanks, Bud!...forgot to say...its silver solder...works like magic!!
-
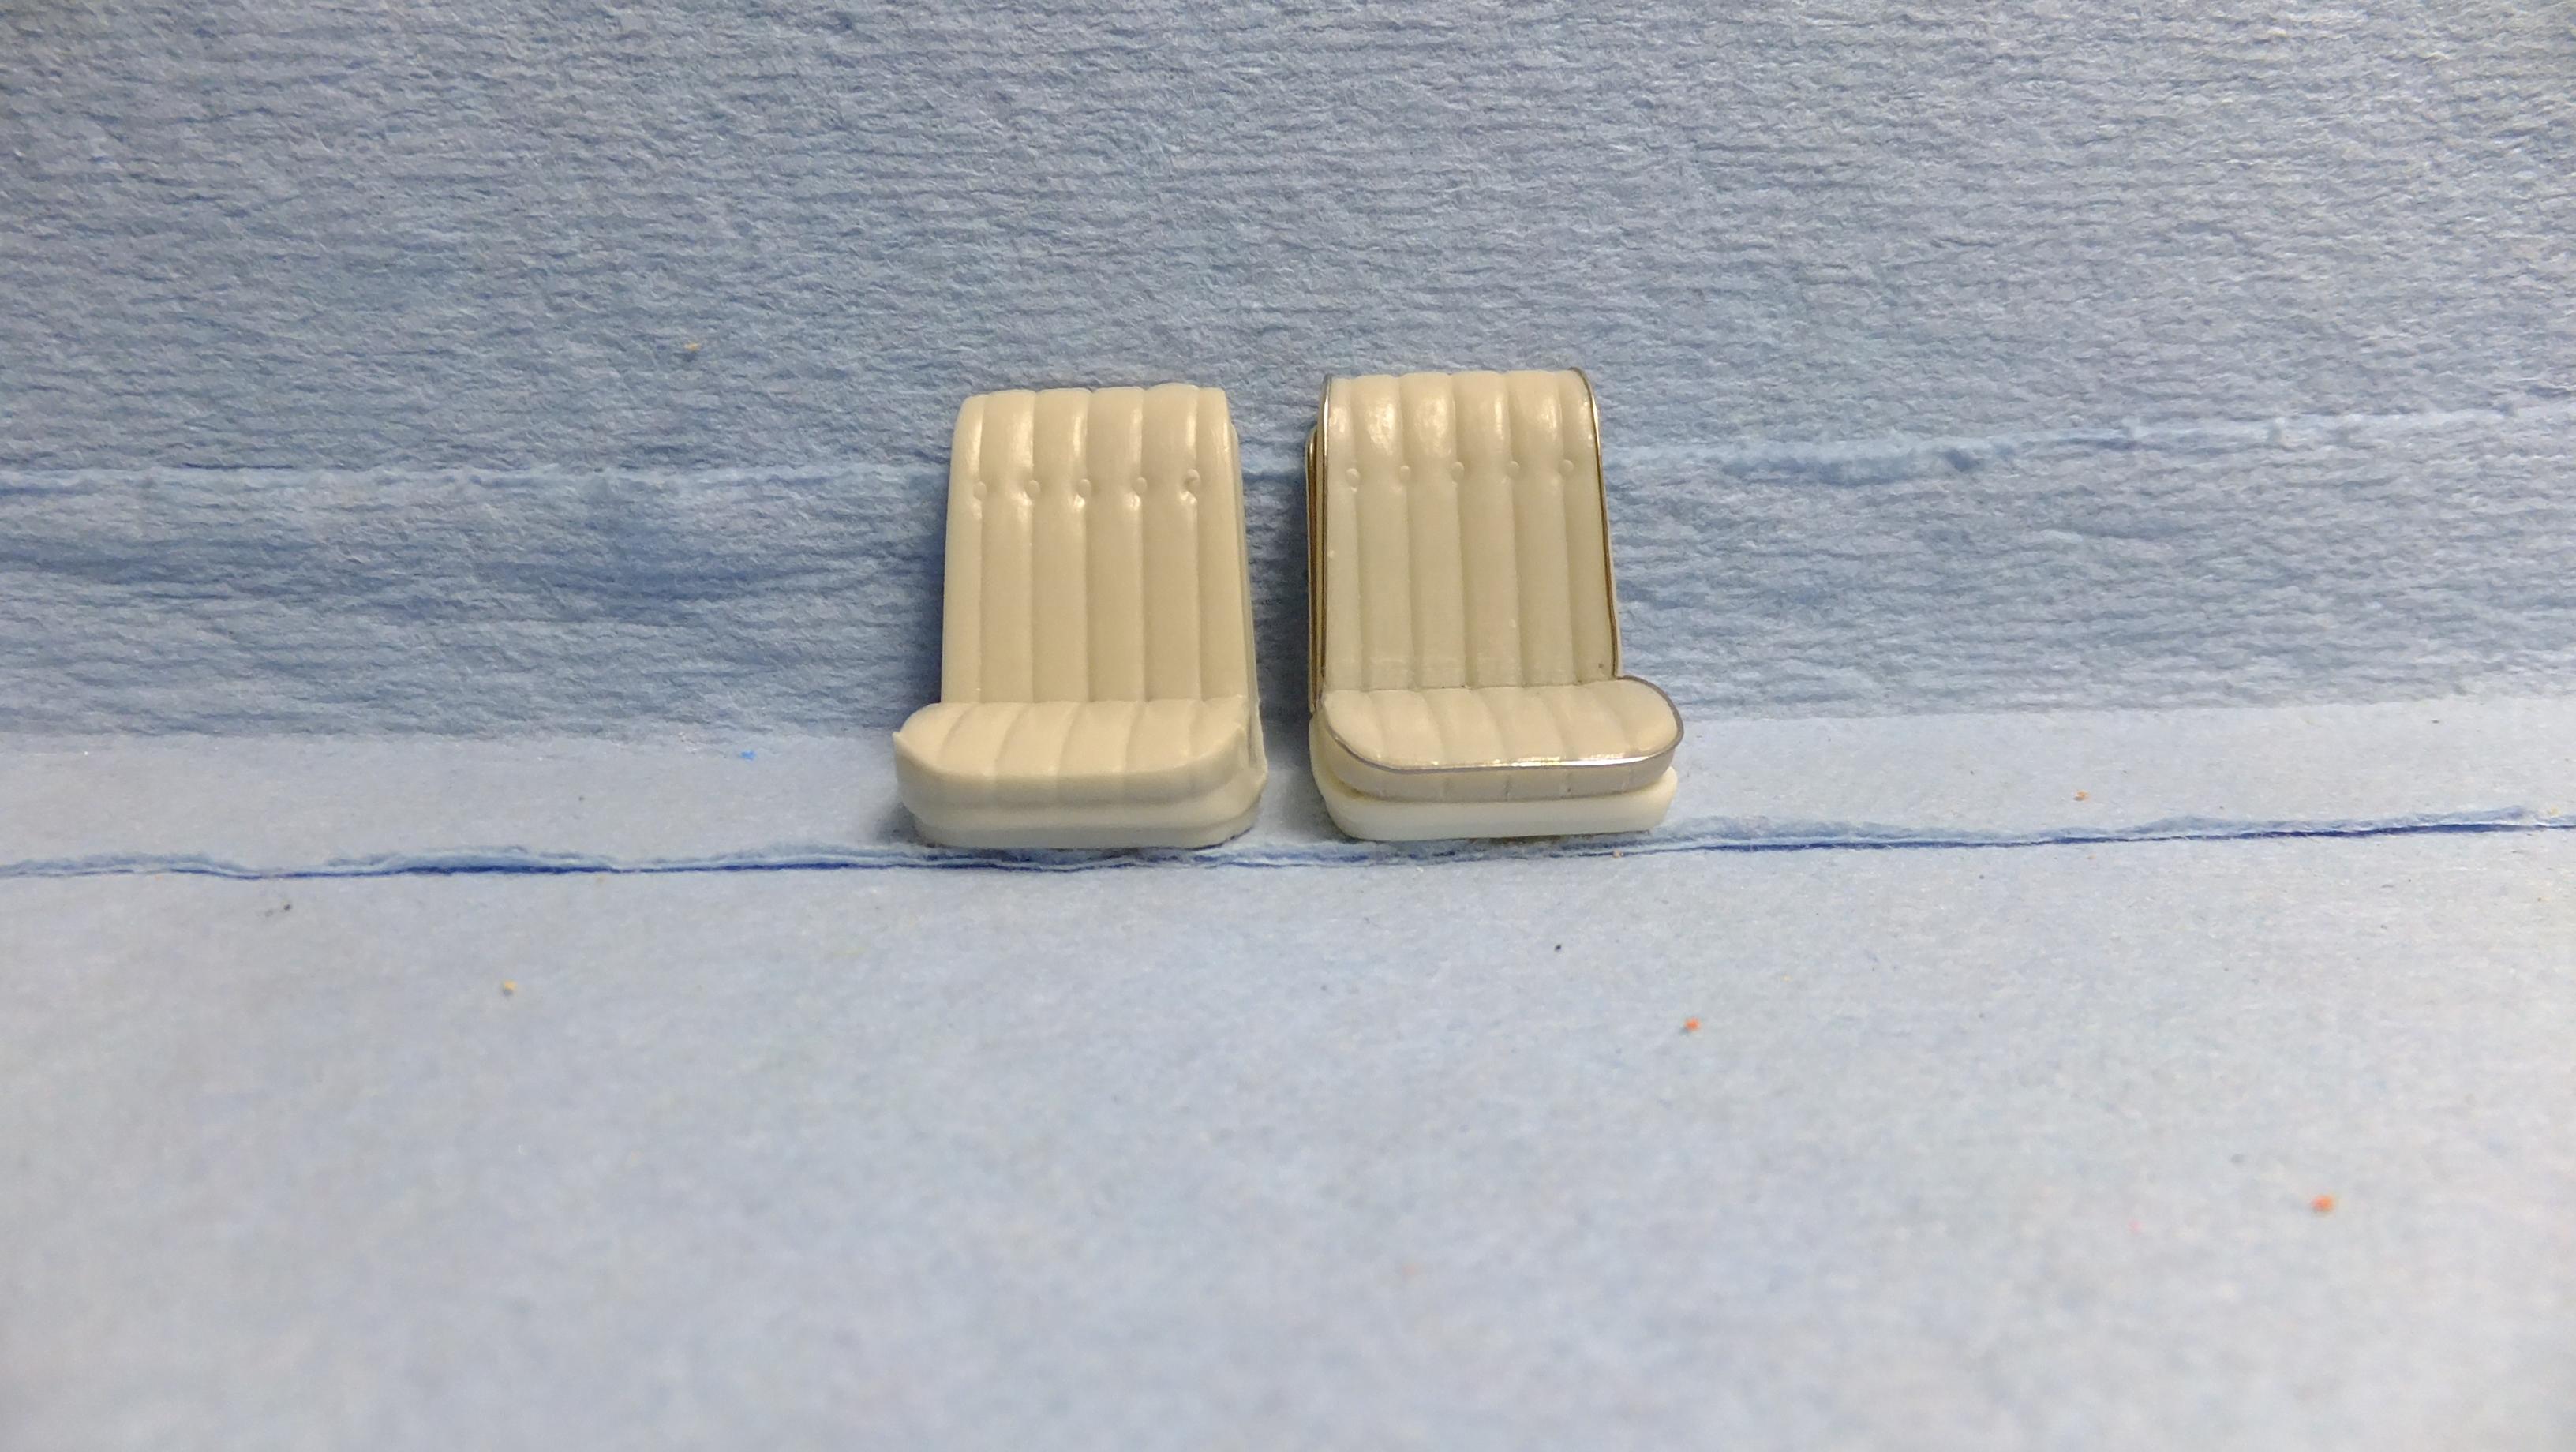
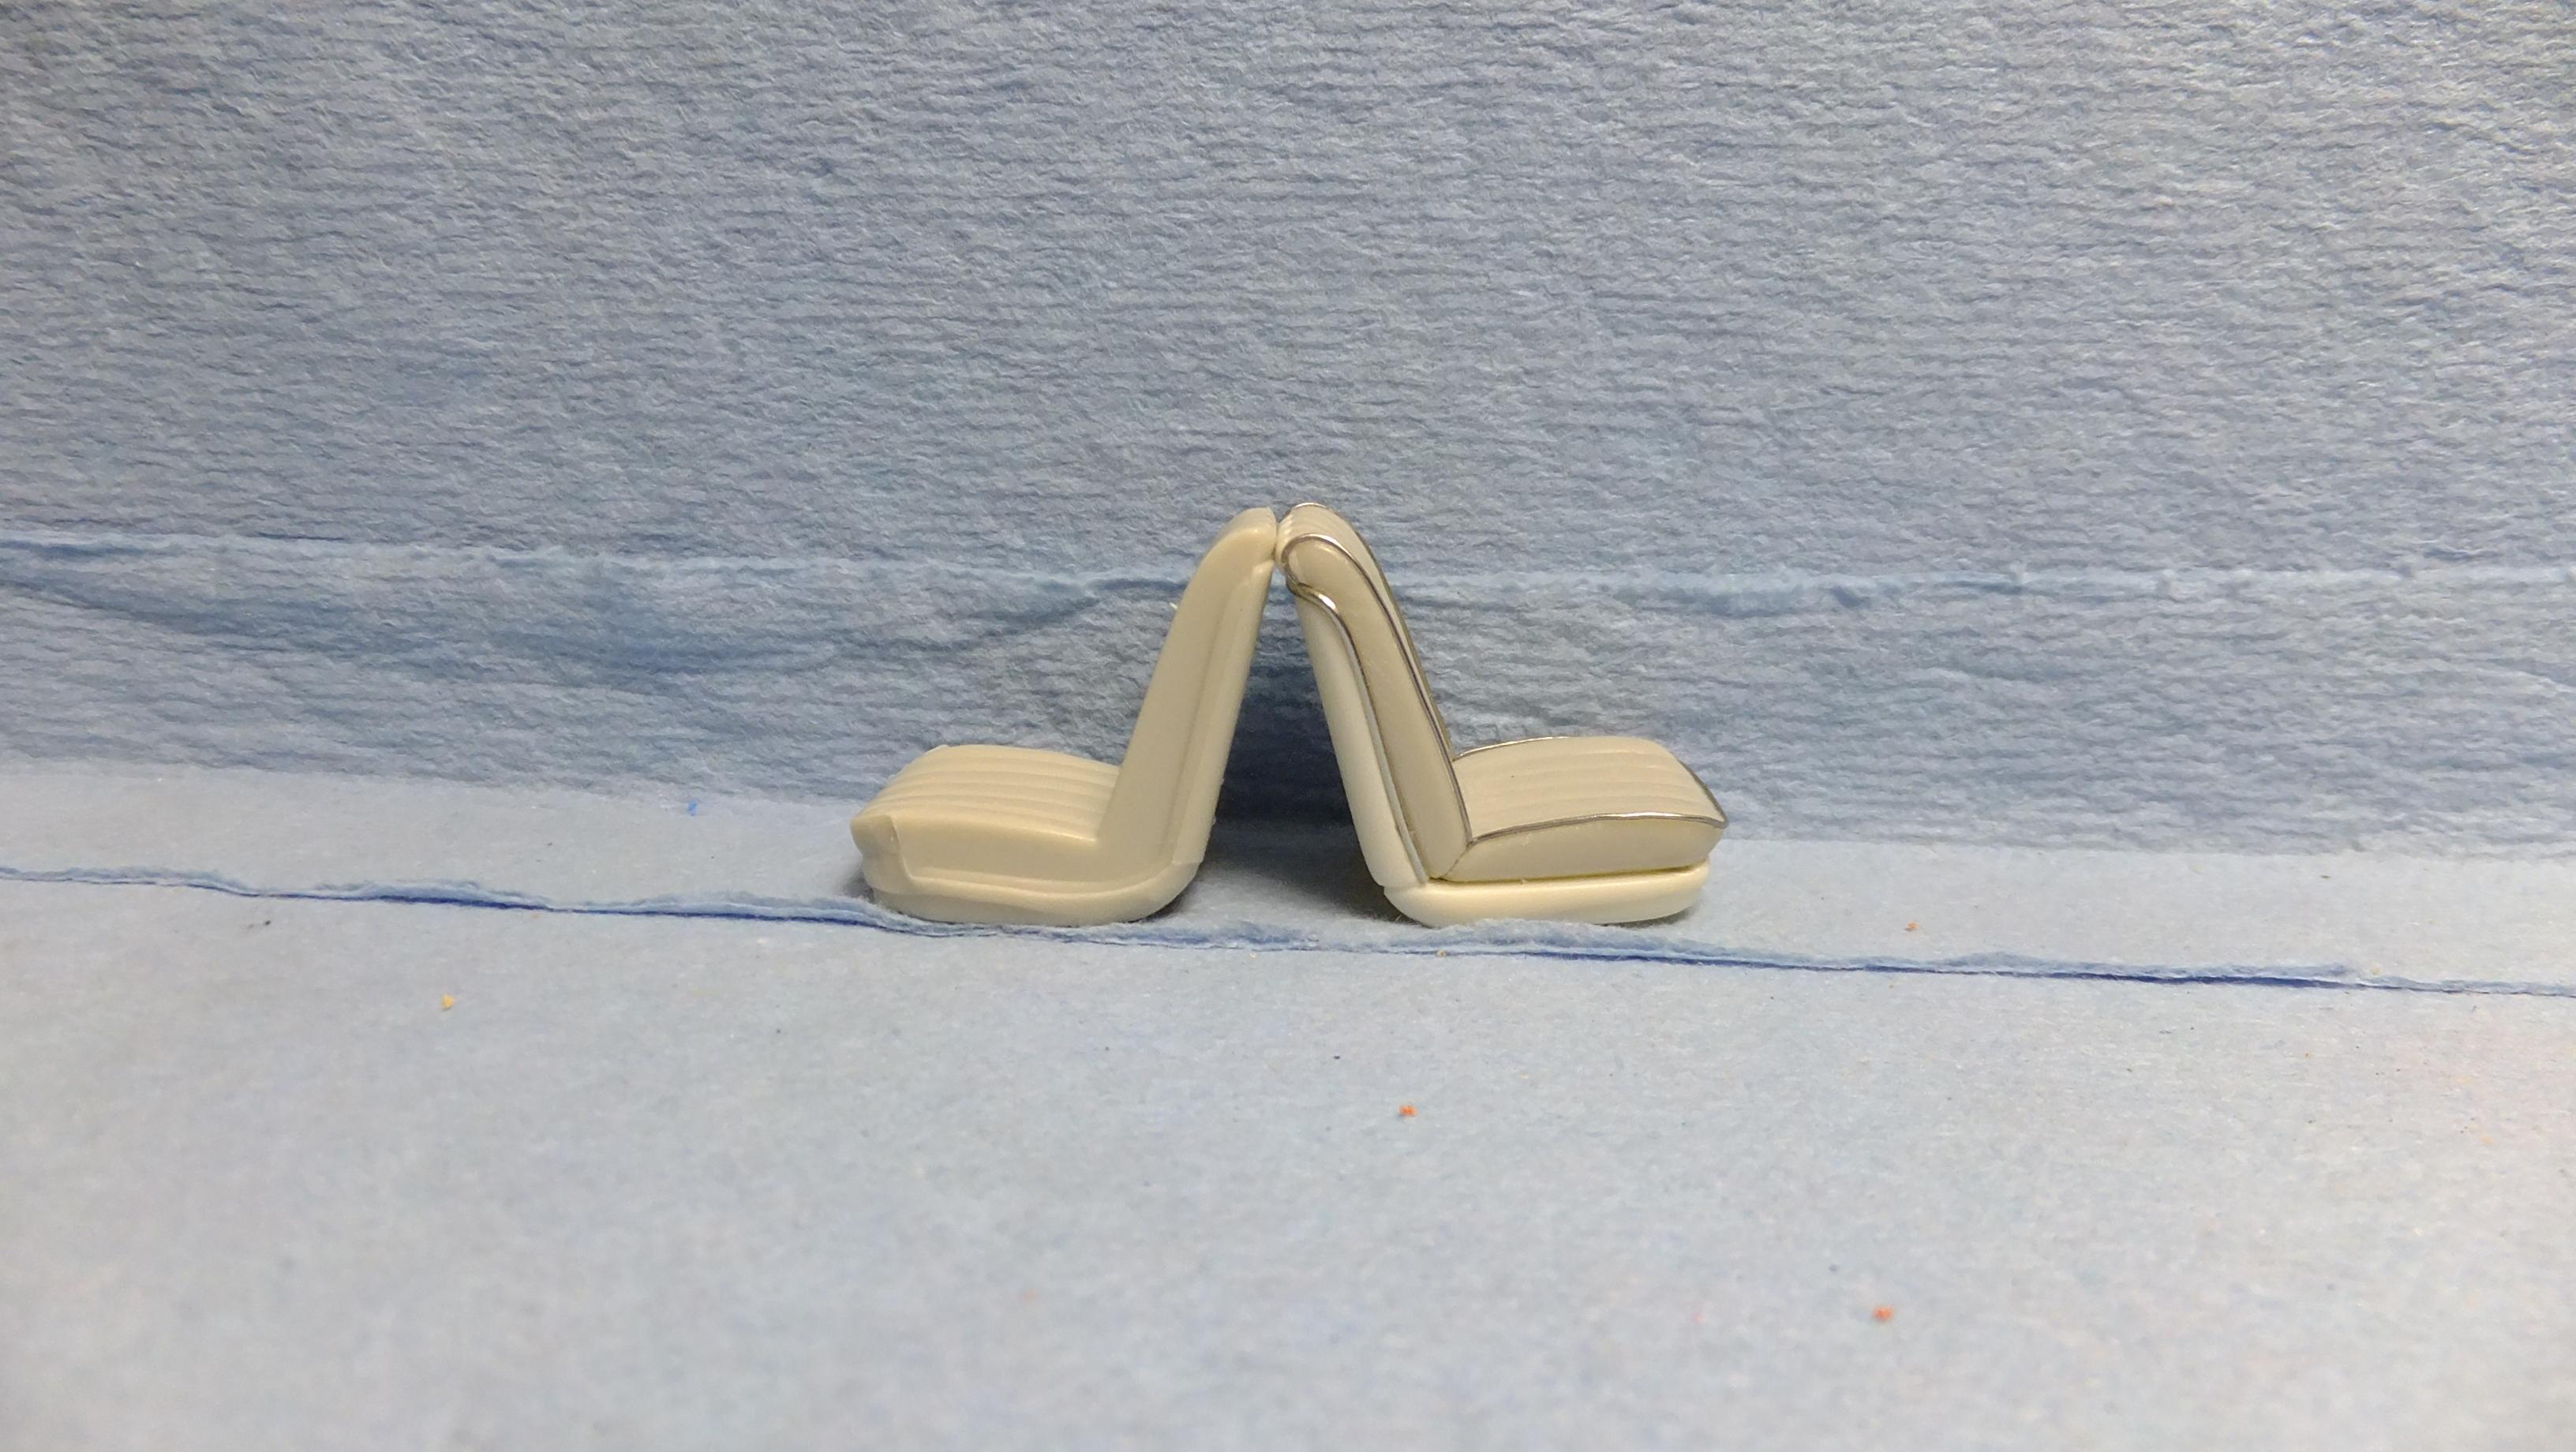
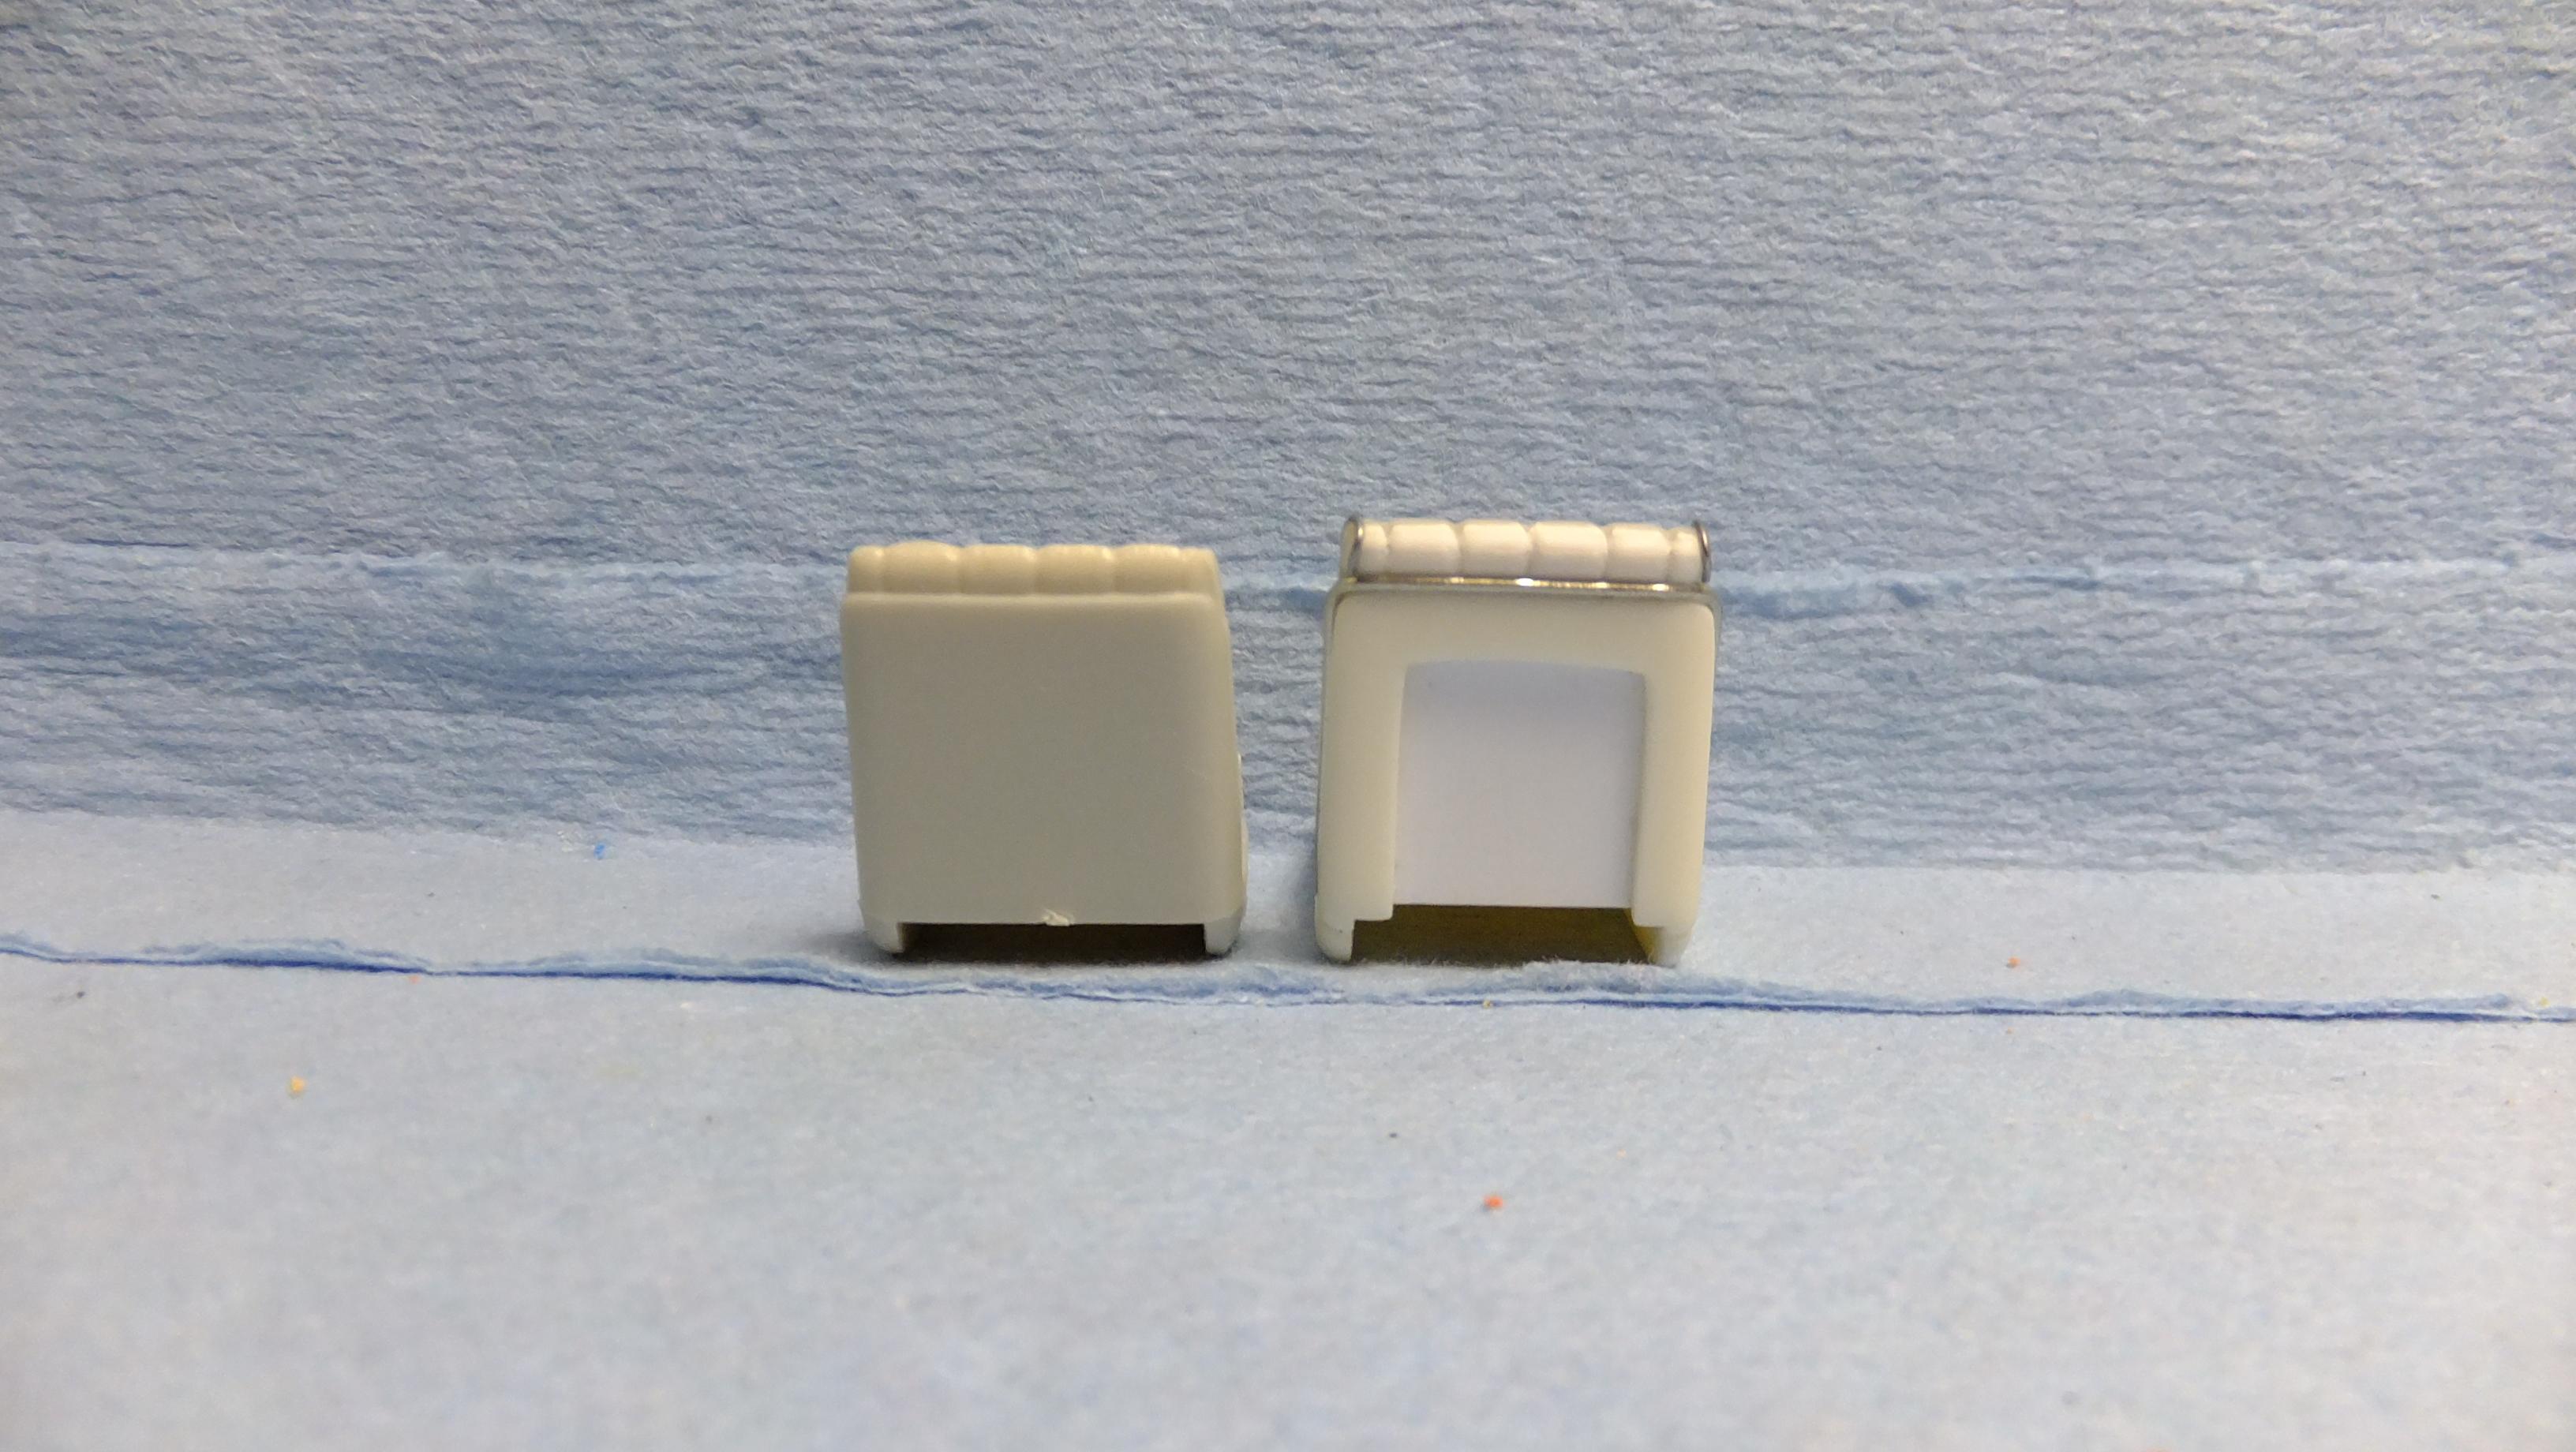
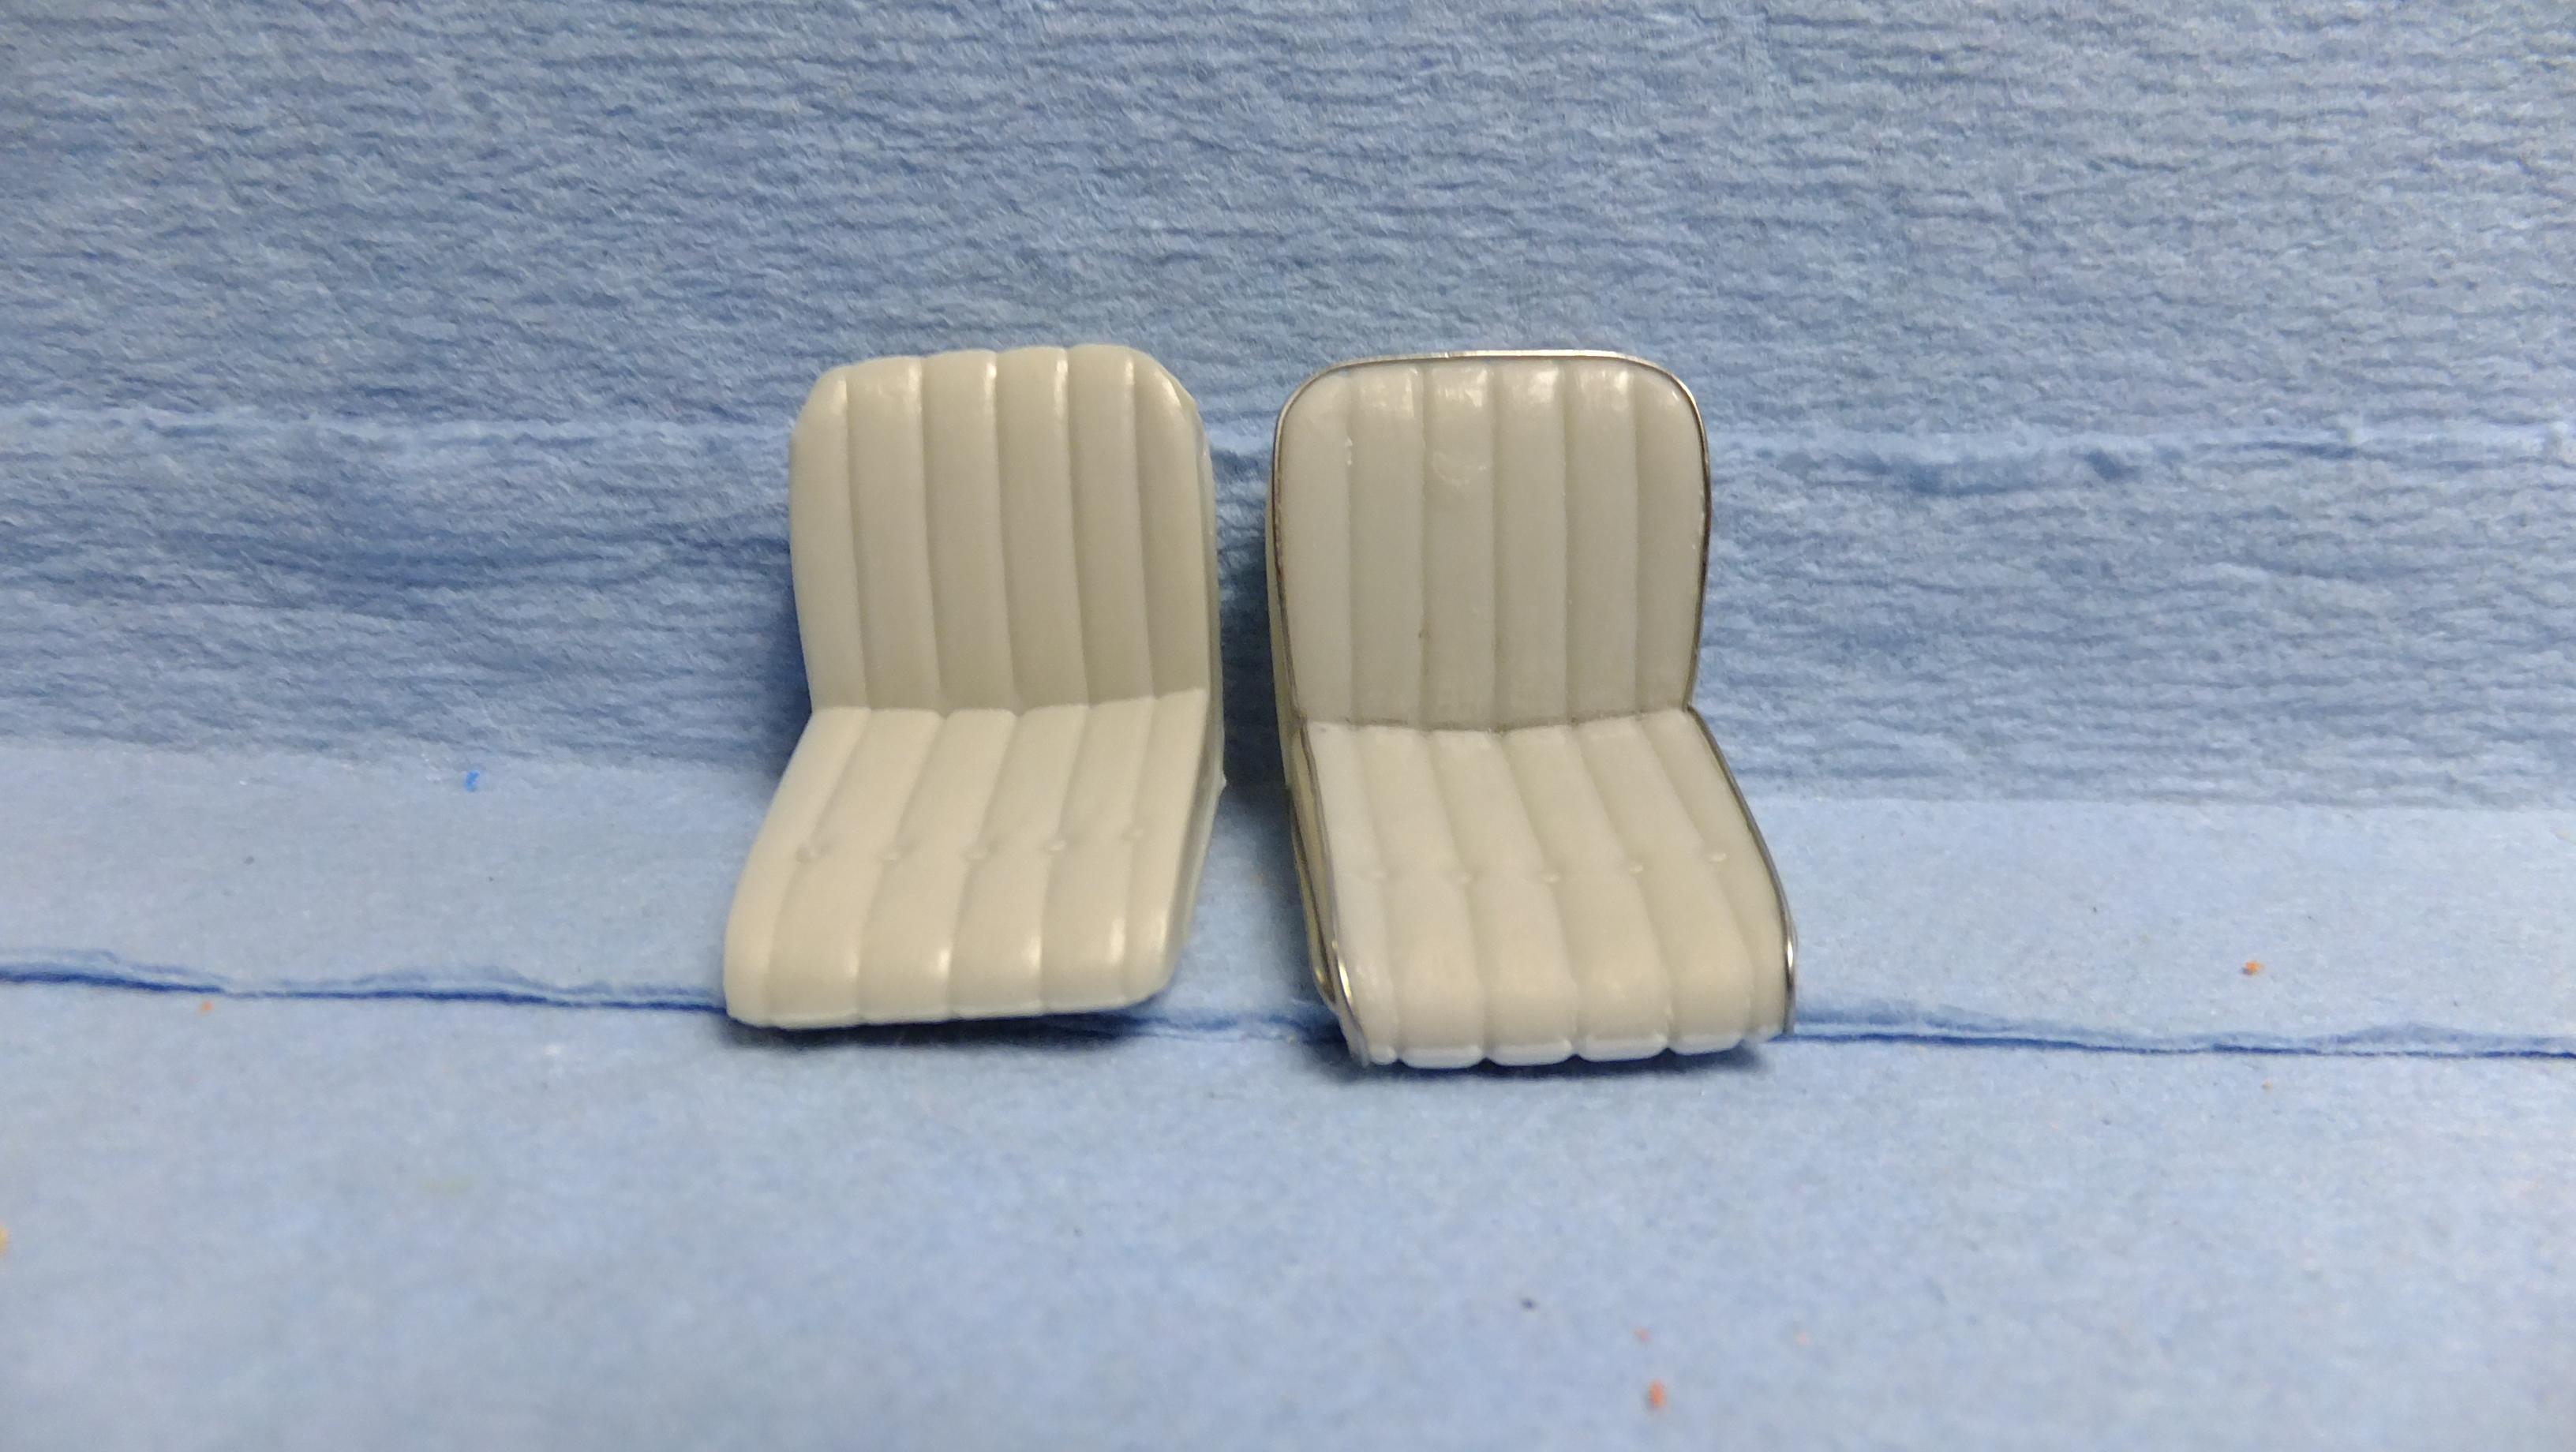
Another update here, everyone; -Photo 1&2;There are some Versions of the car that dont have piping around the interior, but i decided to add it to mine to add visual interest, as well as fill the uneven gaps. -Photo 3&5; In order to define the interior panels, i scribed the corners to do this. -Photo 4; I drilled holes for the door handles. -Photo 6-9; On the left...the kits seats, on the right...my seat.
-
Thanks, Bud!, Milliput needs to be sealed VERY tightly, or it goes bad sooner than it should. I love my Tamiya polish, and wax!!
-
Thanks, Bud!, if i remember right, i got it from Hiroboy.
-
Thanks, Rex!, this kit has alot of good points, but the windows, and interior arent one of them. I've never seen center column controls like these on ANY Pantera. I love the Testors ones too....i'm building one of those too, but i have a motor going in it.
-
Hey, everyone!, i finally have The body of this one ready for paint as well! Using styrene strip, i was able to Remake the mesh framework, and i was able to leave a lip for the mesh to attach too. -Photos 1-3; I would rather make the strips longer that to measure. Its easy-peasy to trim it off. -Photo 4&5; All cleaned up ready for primer! -Photo 6; I also decided that the front wheels were too deep for me, so i changed the offset, and i'm happy now.