talon63
-
Posts
269 -
Joined
-
Last visited
Content Type
Profiles
Forums
Events
Gallery
Everything posted by talon63
-
Glueing Tires to Rims
talon63 replied to Olderisbetter's topic in Model Building Questions and Answers
Glad I'm not only one. As far attaching tires to rims, seldom do I do. Sometimes it's nice to refresh something in the display with a new set of rims or tires, if they are an improvement over what it got built with originally. Some of my Under Glass stuff will be perpetually WIP. -
Why Glue Bombs ?
talon63 replied to D. Battista's topic in General Automotive Talk (Trucks and Cars)
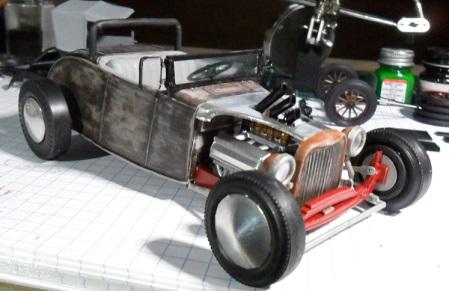
I look at something like this with the same eye as I would look at a 1:1 car. As others have said, sometimes it's the challenge. Pristine plastic is not as challenging as taking a "beater" like this and restoring or modding it into something for the shelf. Sometimes, it may be the only way to get a particular subject that is on the wish list. Sometimes it's am economical way to get spare parts for other projects. Sometimes it's a great way to practice skills and techniques you may not otherwise be tempted to try on the pristine stuff. But I can see turning the above into something like this Yes, it may take more work than working with off-the-sprue parts, but even in the 1:1 world, sometimes you have to work with what you have, especially if the original isn't being made anymore. And, like Ron, I contributed my fair share of glue bombs to the world in my youth. Some of the kits/bombs I look for now are the same ones I built back then, if only to make amends for past sins. Happy Building!
-
Sad Sad Sad News: Our Harry Passed Away
talon63 replied to Gregg's topic in General Automotive Talk (Trucks and Cars)
As has been oft said here, I didn't know Harry personally, but almost from my first post here I discovered his incredible knowledge, skill, and kindness. I was even the recipient of a "magic floating generator" comment. Since coming back to this hobby, Harry's feedback, on my own and others' builds, has been invaluable in making my projects better. His own projects were absolutely stunning to look at, to the point that I bought his books. He was certainly a mentor to many people, and his impact on the community, the magazine and the hobby in general will resonate as much as the loss. I offer my sincerest condolences to his family, friends, the magazine, this community and the countless others his life touched. Requiescat in pace, Harry -
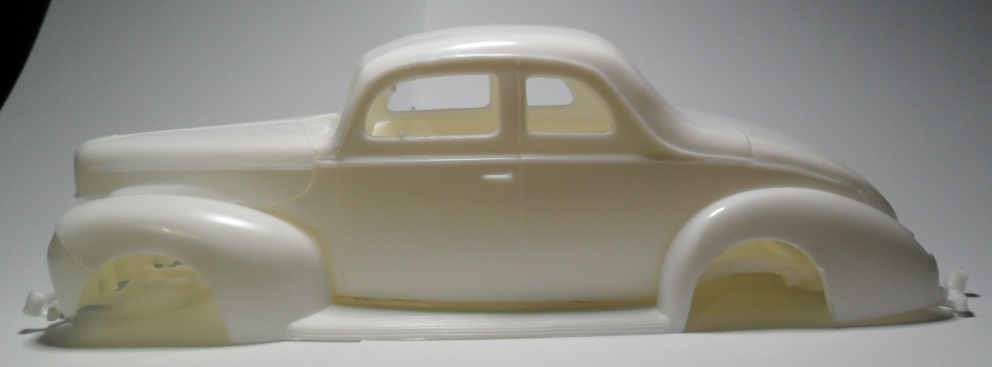
Thanks, Dave. Body work is progressing slowly, but it is progressing. Profile is shaping up. The more I look at the profile, the more I feel like it wants to sit really low in the rear, and get full skirts. Tonneau still needs a slight shave to bring it down flush with the body. Don't need to to do much else to the rear wells, the slight lengthening gave it the space needed. Front wells still needs a reshaping. Work has also begun on the restyling of the interior. Using the tub and dash, but everything else is coming from the parts stash. Guess I need to start giving thought to the color going on this one as well. Thanks for following along, and for the comments, critiques, and suggestions. Happy Building!
-
Elmer's Clear. Also a water-based glue. I just put a drop in and let it self level. I've even put a drop in, let it dry, then add the needle, and put another drop in, just to give it some depth.
-
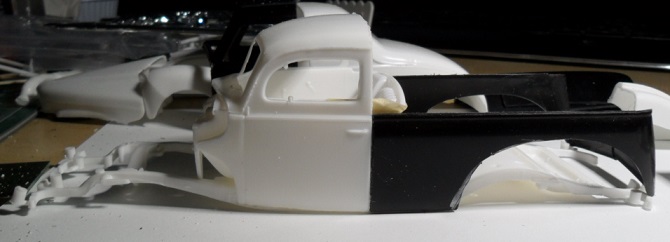
Minor update. Tonneau fabrication under way. Rear fender spacing and rear quarter tweaking under way. Tailgate under construction. Package deck created for the interior. Still need to do some judicious filing to bring the tonneau down about 1/32" to meet up with the body. Once that's good, will get the final placement of the rear fenders and the gaps filled in, and the wheel wells reshaped. Then any other filler work before the first primer coat. Back to the bench for me, and thanks for having a look, leaving comments, critiques, or suggestions. Happy Building!
-
Are you trying to replicate something like these? http://www.modelcarsmag.com/forums/uploads/monthly_2017_03/SAM_0863.thumb.JPG.8b2cab5fe3a0df0760d3225421cdc47d.JPG I think these are from a Lindberg `34 Ford Roadster Pickup (most likely candidate for where these came from since I used the Bic cap trick to make custom, elongated headlamp buckets for my build of that one). Buckets from the Revell `29 Ford should work as well if you are wanting something to make molds from.
-
Coachwork is starting to come together. Still need to make the tailgate and a center strip for the tonneau, pillars for the cut down sidelights, and tidy up the back valance. Once the front fenders are opened up a little, and the rear fenders are finished, it will be time to start the process of filling and sanding to get that first coat of primer on. Back to the bench for me, and thanks for having a look, leaving comments, critiques, or suggestions. Happy Building!
-
Thanks, David. While I might have tried full on replica of the flower car, I had already chppoed out a section of the cab. I'm now planning on doing a version based on that design. More of shorter, street rod look and it will end up with a working, split, center-hinged hard tonneau over the bed section. (at least that's the plan ) Body fabrication still consists of: 1. Getting the roof line mated up and modifying the drip channel line at the transition. 2. Getting the rear quarters shaped to work with the rear fenders 3. Add some stretch in the rear fenders to accommodate the larger rear tires. May have to open them up for tire width as well. 4. Fabricate the tonneau and a tailgate 5. Fabricate a bed and transition from the bed to the "cab". 6.Still need to decide on the drive train and suspension 7. The interior is fairly well sorted. Shortened the bucket, changed out the seats. 8. Decide on the color scheme.
-
So, while looking at some reference photos, I ran across the 1940 Ford Flower Car! So I guess I'm building a modded version of this.
-
Very sharp. A nice, clean build. I have a bunch of 57 Fords I need to tackle at some point, but yours looks great!
-
Oddly enough, the Dodge L-700 in the same kit looks pretty good. I know Lindberg models are sloppy at best, but I can usually turn them into something worth putting on the shelf.
-
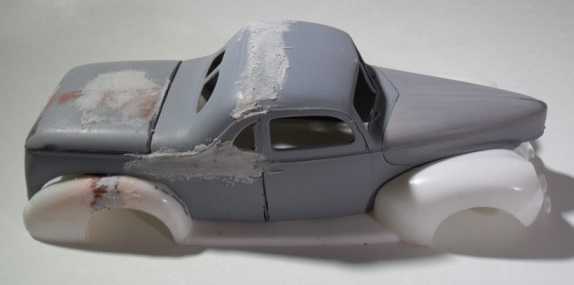
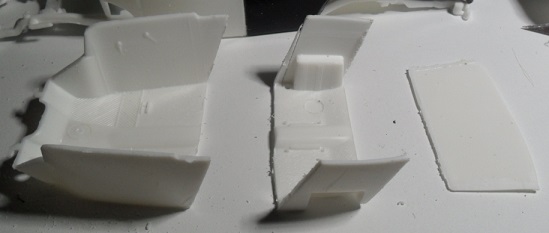
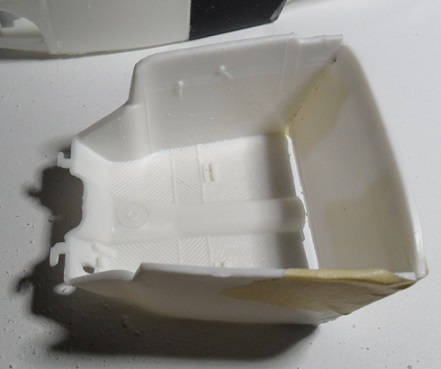
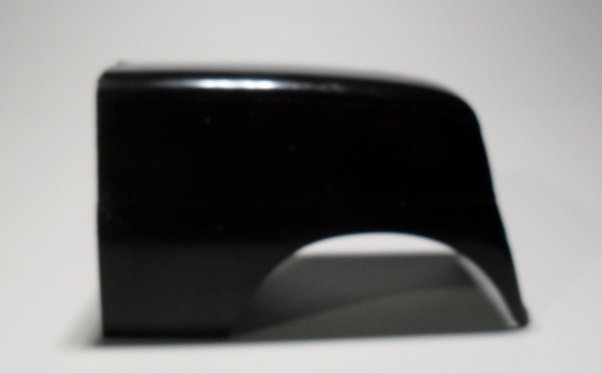
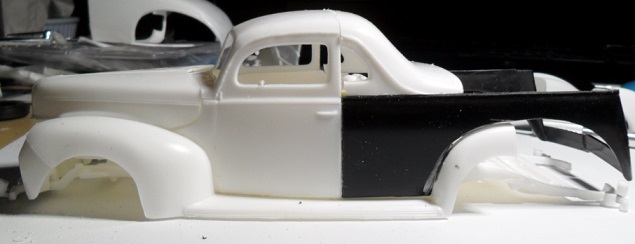
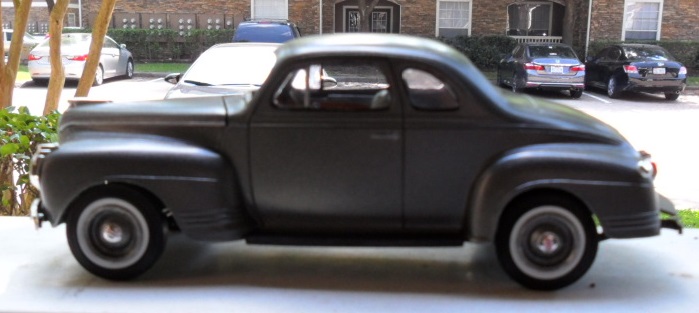
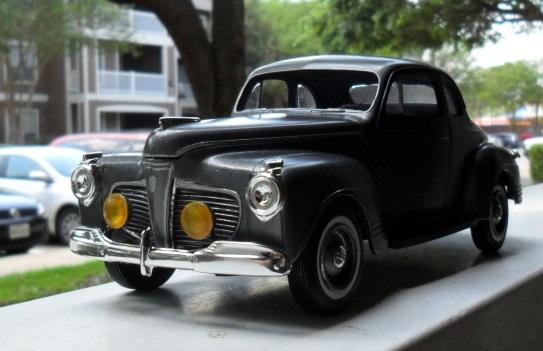
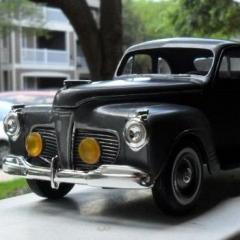
So, after the 41 Plymouth turned out so well, I thought a 40 Ford would look good sitting next to it. Grabbed one off the shelf, opened it up and found this. Heavy flash, short shot, and other issues. So while it was sitting there, on the verge of going back on the shelf, I decided that rather than ever tackle the the problems to make it look as good as the Plymouth, I'd let it tell me what it wants to be. And suddenly, the back half of the body was gone! What will take its place? Ah, the back half of a Gravedigger body presented itself. But not all of it. The rear quarters join the front of the body. Then the back of the roof comes back, but that isn't right. So another cut is made. Looks like it might be getting closer to becoming something. The back half of the rear fenders have come off, since the cutouts on the quarters are somewhat larger than the original body. No worries, by extending the fenders, I can get some bigger tires back there. A quick sectioning of the interior bucket will provide a guide for the final cuts to the top of the body. And so the first cuts are made. I have no idea where this is going, but I see a few more cuts, a lot of modification, and scratch building some custom parts. First profile mock-up As always, feel free to add comments, ideas, criticisms, and Happy Building!
-
Only 18 Percent Of Americans Can Drive Manual. :(
talon63 replied to MrObsessive's topic in The Off-Topic Lounge
I also learned to drive "stick" on-the-fly at one of my first jobs. A car wash when I was still in high school. Boss would toss me keys and say deliver it. Since then I've driven everything from a 50cc scooter to a 1200cc motorcycle, Geo Metro to a 60 foot MAB, 2 wheels up to 18, and a few tracked vehicles. I do like the technology in today's automatics, and my daily driver now is one, but there's a first gen Miata sitting in storage just waiting for a new life as soon as I have a place with a garage again. Speaking of Anti-theft device, I had a 78 Pinto Wagon, with a German Ford 4-speed drivetrain in it, that I picked up cheap on an Army base. One day after driving a pretty long distance, as I went to park the car, the gear shift came out of the transmission. I eased it back in, restarted the car, drove around for a few minutes. No issues!. I never fixed it. When I parked the car somewhere, I'd take the gear shift with me, or tuck it under the seat. -
https://www.amazon.com/gp/help/customer/display.html?nodeId=468512 They've been collecting in some states, like Mass. since 2013 according to some sources. They start collecting on all 45 states that charge sales tax on April 1. Note: This is for items sold directly by Amazon, not through Amazon by third party vendors.
-
Changing name of a topic
talon63 replied to iBorg's topic in Forum News and Questions (formerly: How To Use This Board)
Yes. Go to the bottom of your first (original) post and select Edit. From there you can modify the Topic at the top of the form that comes up. -
https://s-media-cache-ak0.pinimg.com/originals/60/9c/8b/609c8b3d905afa8d793bdc4f913f1174.jpg Flaw in the kit. It does sit a little too high. Fortunately, I can still fix that since the body isn't attached. Although, it may lead to a larger gap in the back end between the body and that part.
-
Fauxberglass for Thin, Strong Repairs
talon63 replied to Snake45's topic in Tips, Tricks, and Tutorials
The only issue I've run into using the dryer sheet method relates to the thickness of the "resin". If it's too thin, and you need to do some sanding, you will end up with fibers protruding from the repair. In one of my early builds here I created a rag top for a Cobra using damp construction paper. After it was shaped, and while it was drying I applied very thin layers of "Future" and let the drying action wick it into the fibers. Once I got the stiffness I wanted, a light coat of matte finish was all that was required. Didn't add anything noticeable to the finished thickness. I've since used the same trick to create construction paper "wrecked" fenders for a garage dio. They crumple nicely. -
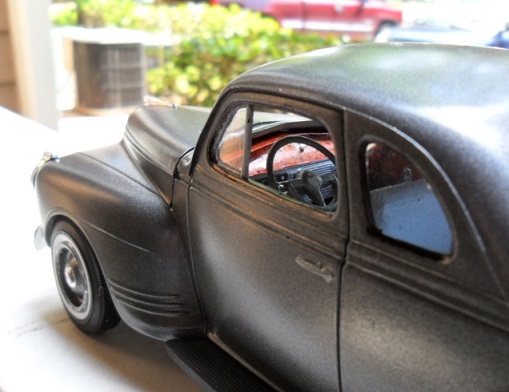
Thanks, David. For that very reason, I decided not to glue the body in place. I can slip it off the chassis to better view the interior detail. A lot of the same work that went into this one will be going into the next couple of builds as well. The Plymouth was kind of a practice run.
-
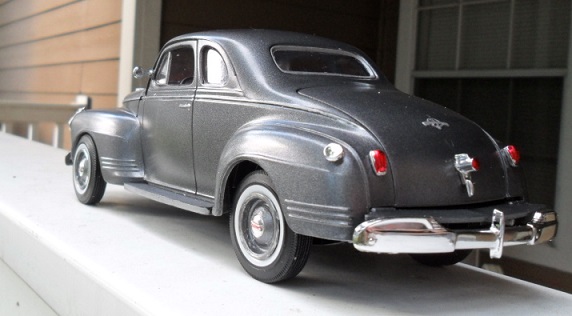
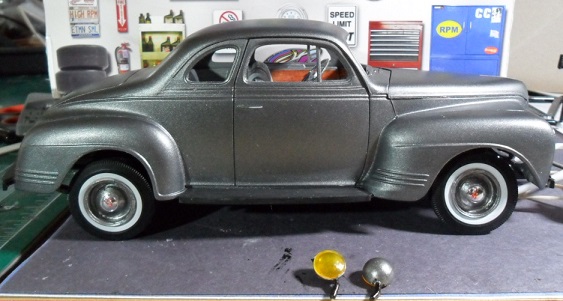
Thanks, it's a Duplicolor Gunmetal Metallic. The codes are in the build thread.
-
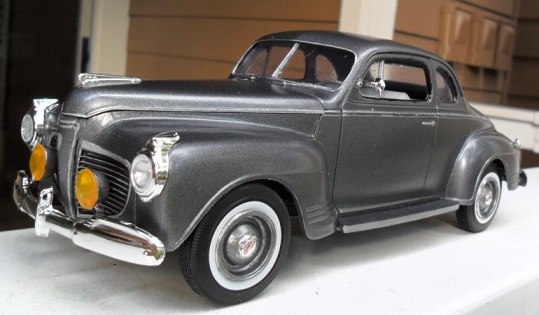
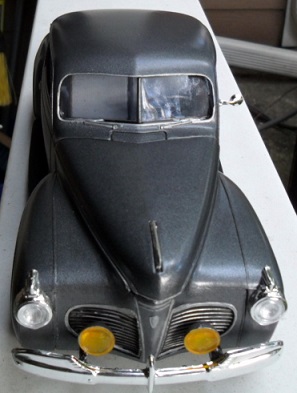
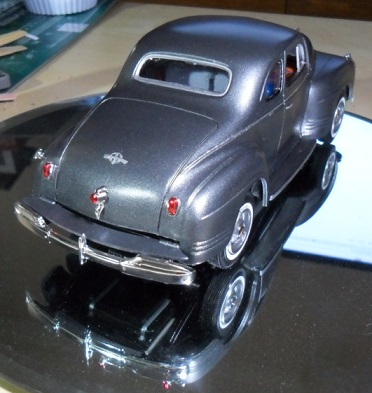
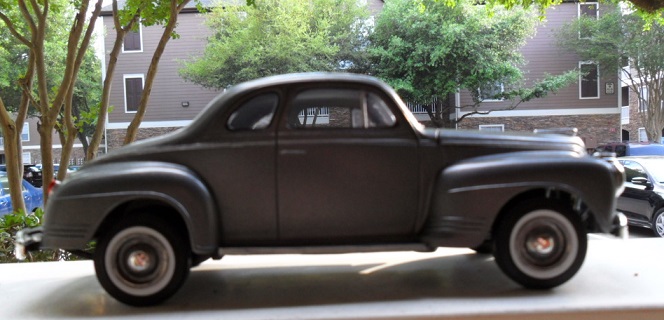
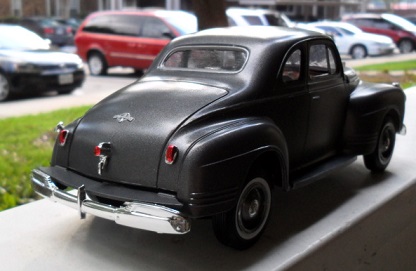
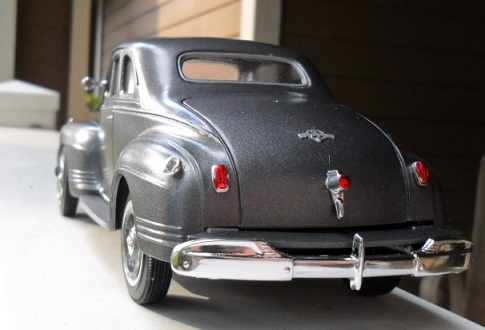
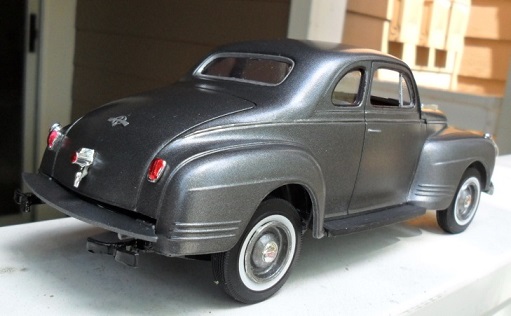
Thanks to those who followed the build under Here are some shots of the finished project. And on to the next project....
-
Final Update before finishing. Just a few details left to take care of before it goes under glass. Windscreen, headlamp lenses, rear bumper, rear view windows, get the body attached to the chassis, and a little chrome touch up. So, here it is, in its near finished glory. This has been a fun build, and thanks again for the looks, feedback and resource assistance. Happy Building!
-
You might have better luck looking in the General section, or in How-to's, Tips and Tricks or that part of the forum. Meanwhile, http://www.modelcarsmag.com/forums/search/?q=chrome+plating might help. While I've never used any of the services, many have, and one of the names that gets brought up a lot is Chrome Tech.
-
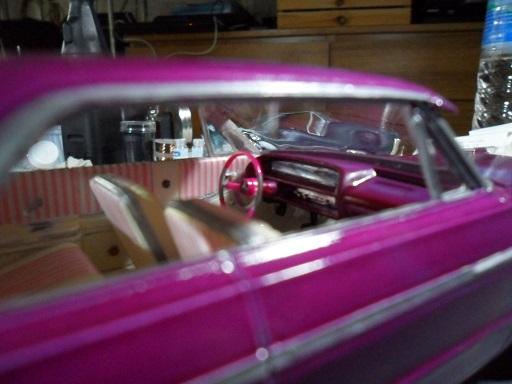
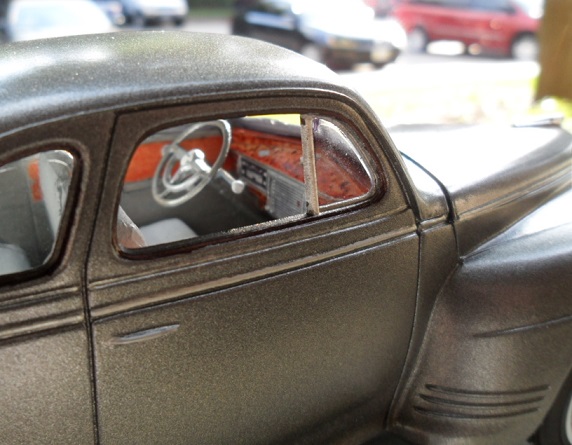
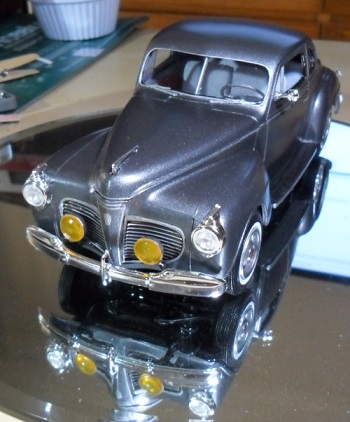
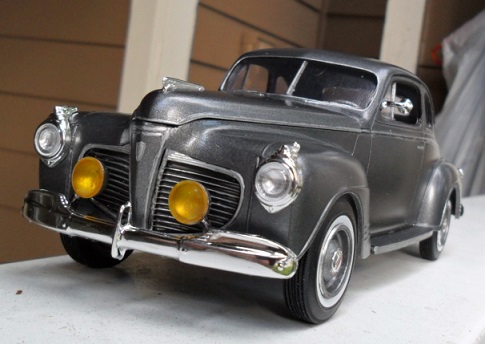
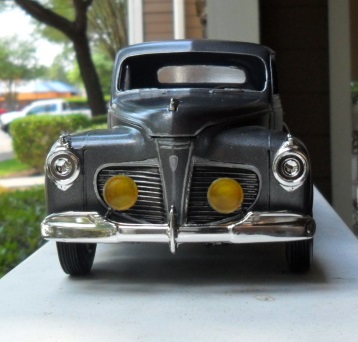
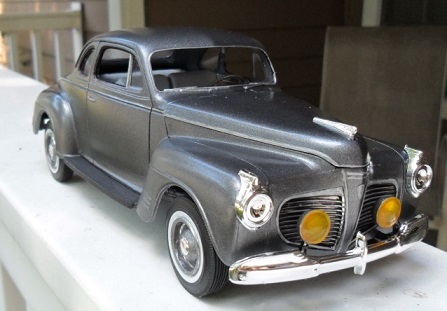
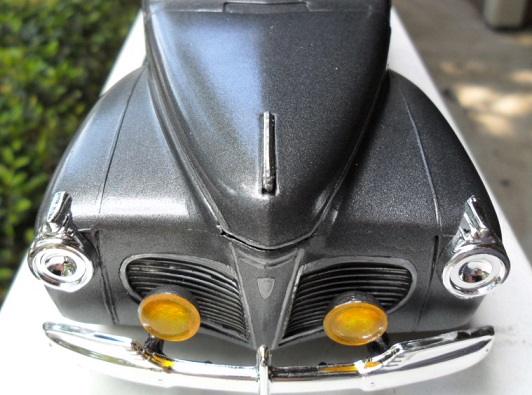
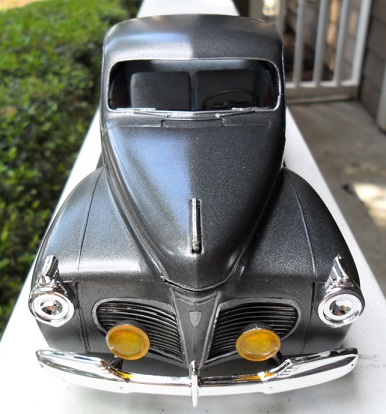
Thanks guys! just about standing on its own rubber now. Odd how the color between the pics changed. Nothing changed except the angle of the camera and the hood was dropped on. I think I see a future 49/50 Merc done in this color as well. Body is just sitting on the chassis at the moment. Got the driving/fog lights done. Used a couple bowls from the parts box, silvered on the inside and matched to the body color, and the lenses are clear rubber cabinet door bumpers tinted with a yellow Sharpie. Rims are also matched to the gunmetal of the body, with Chrome centerpieces and the red logo. Time to get started on the brightwork, and create some new glass. The stock kit glass in this kit is 1.5mm / 1/8" thick, so need to make something a bit thinner. Fortunately, no complex curves, so flat stock should do the trick. Also need to get the clearcoat/polishing done. Might get one more update in, then this one will be "Under Glass". Thanks again for the comments and resource info. It certainly made this build a more enjoyable project for me!
-
That's a Duplicolor BGM0344/DSGM344 Gunmetal Metallic (84 WA7782) rattle can color from the local auto parts store.