Superbird McMonte
-
Posts
508 -
Joined
-
Last visited
Content Type
Profiles
Forums
Events
Gallery
Everything posted by Superbird McMonte
-

1969 A12 Roadrunner (I will need some advice)
Superbird McMonte replied to Brutalform's topic in WIP: Model Cars
I have a bunch of 1969 grills cast from the Johan originals. If you would like a couple, message me your address. -
1969 Hurst Olds convertible conversion
Superbird McMonte replied to Superbird McMonte's topic in Model Cars
Looks good! Not an easy conversion! I must be a glutton for punishment. I’m doing it again. This time I’ll give the trunk correction a shot! -
1969 Hurst Olds convertible conversion
Superbird McMonte replied to Superbird McMonte's topic in Model Cars
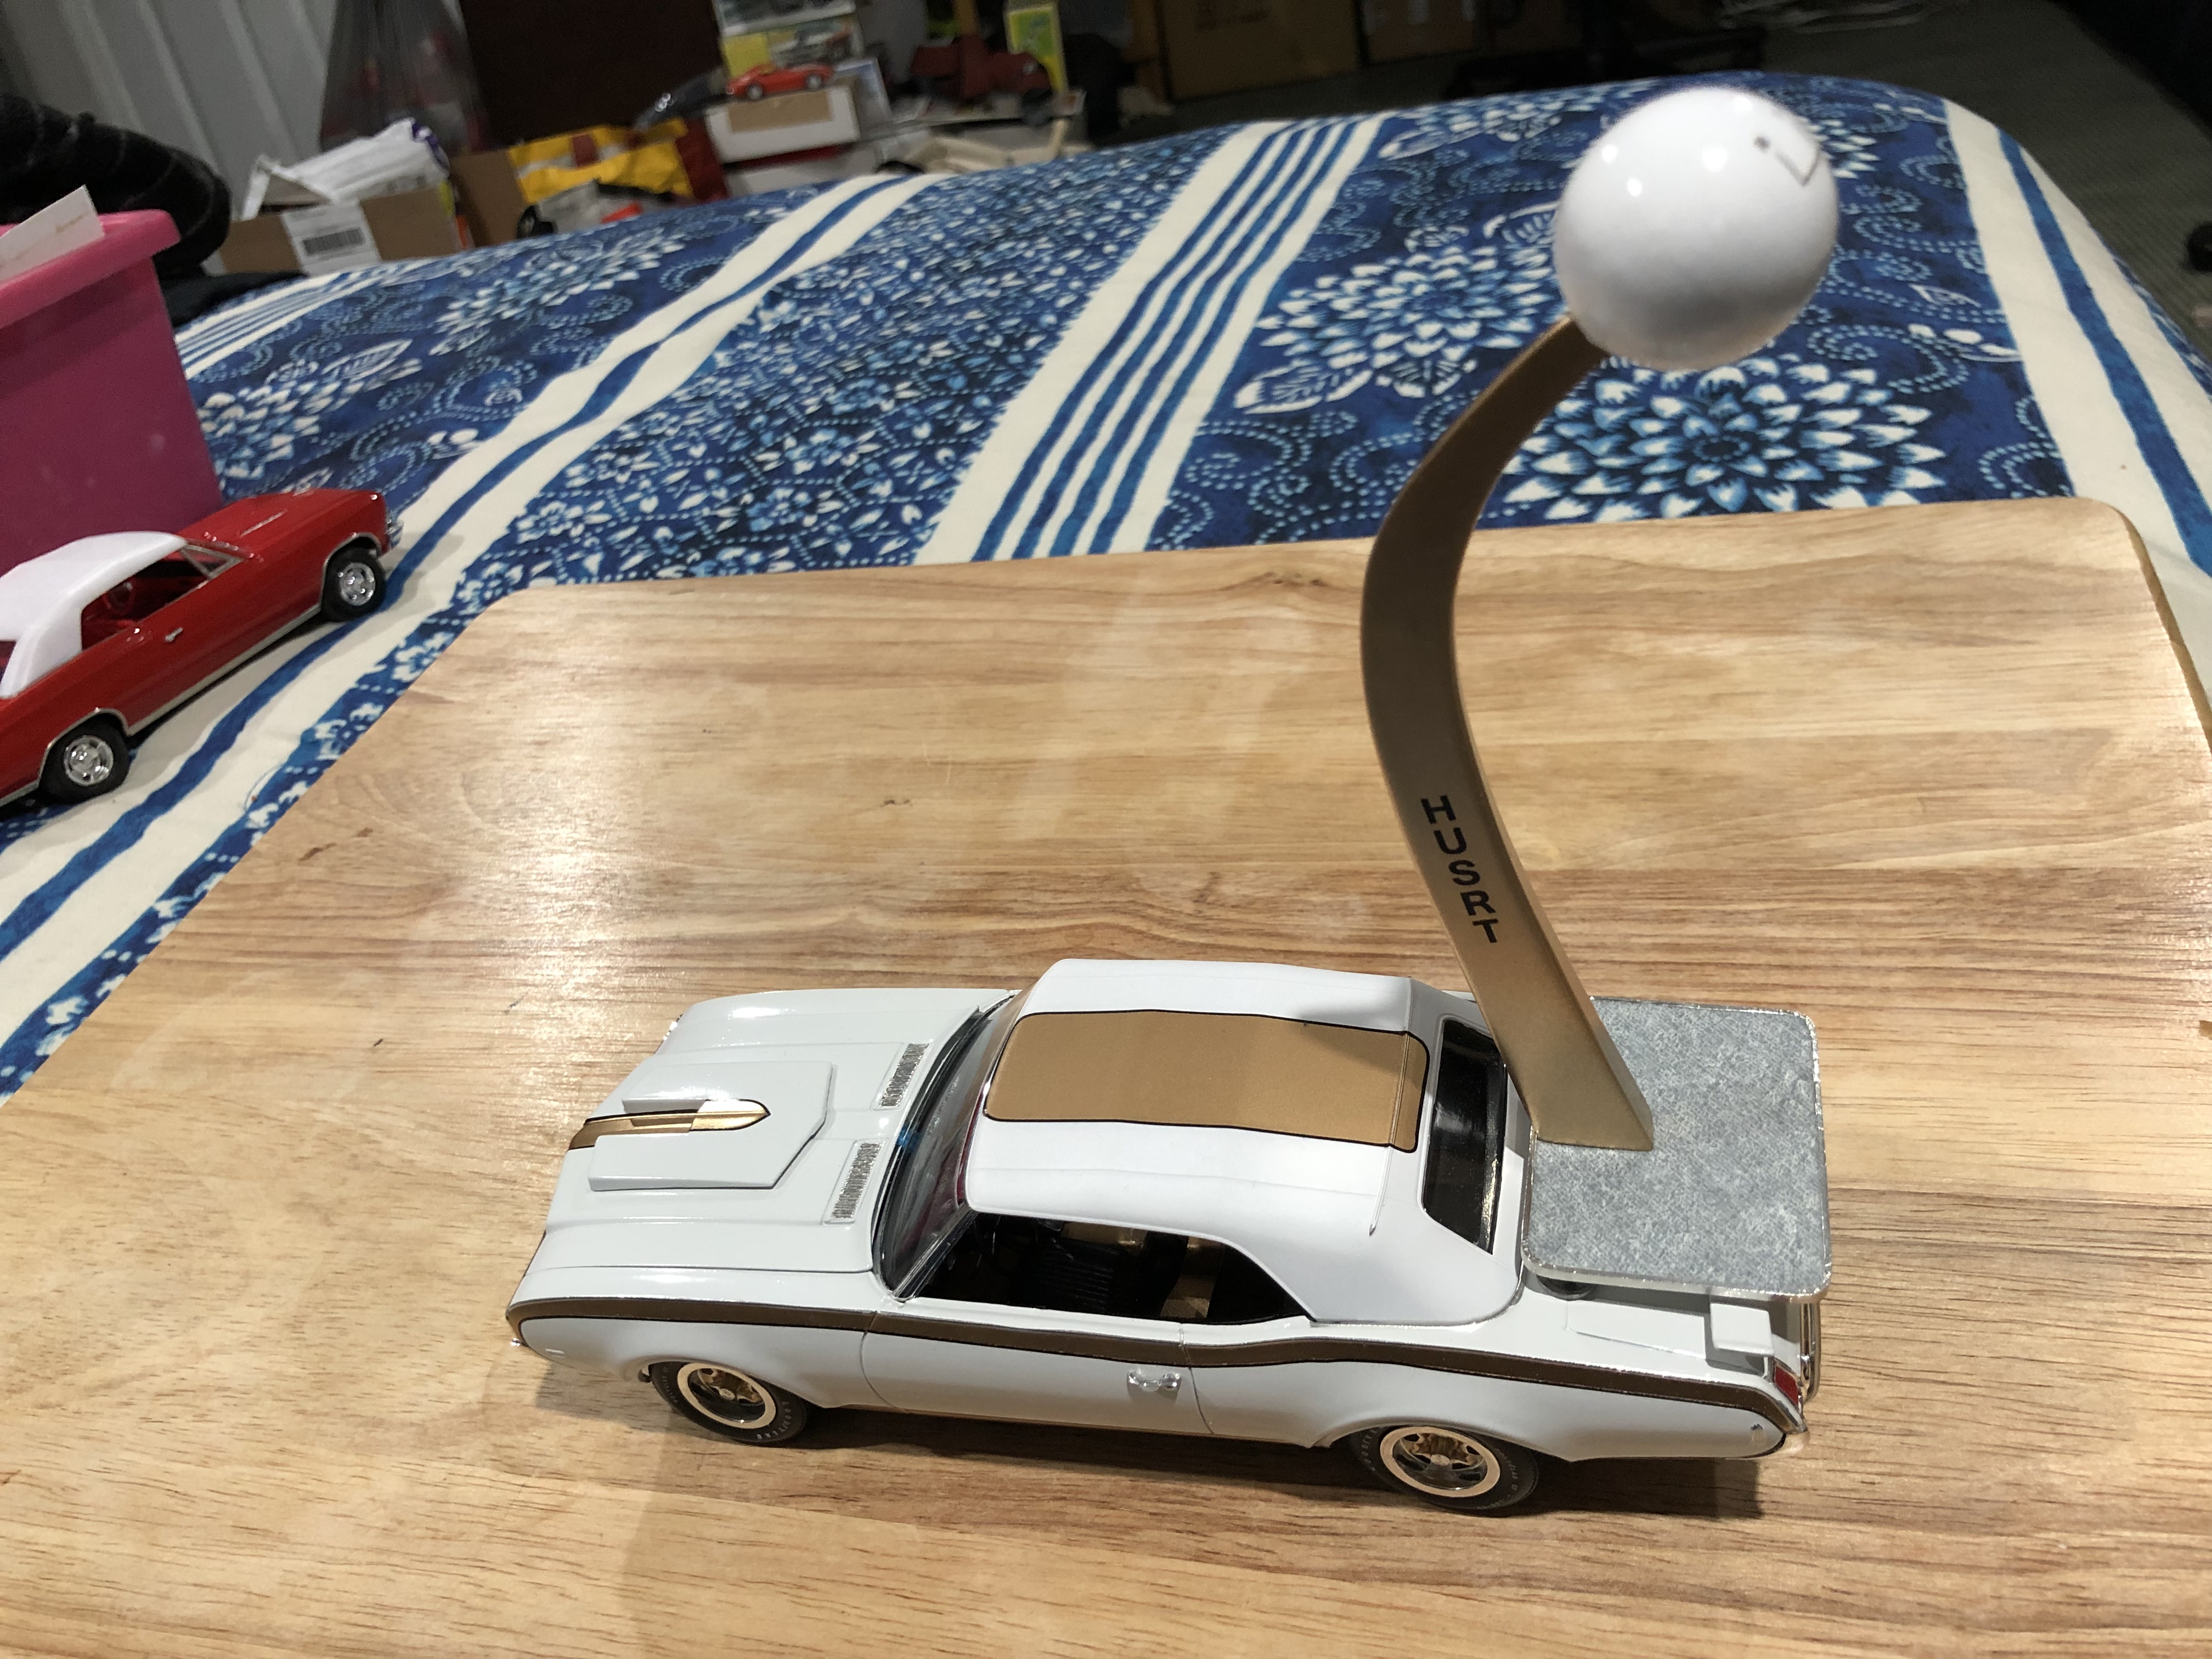
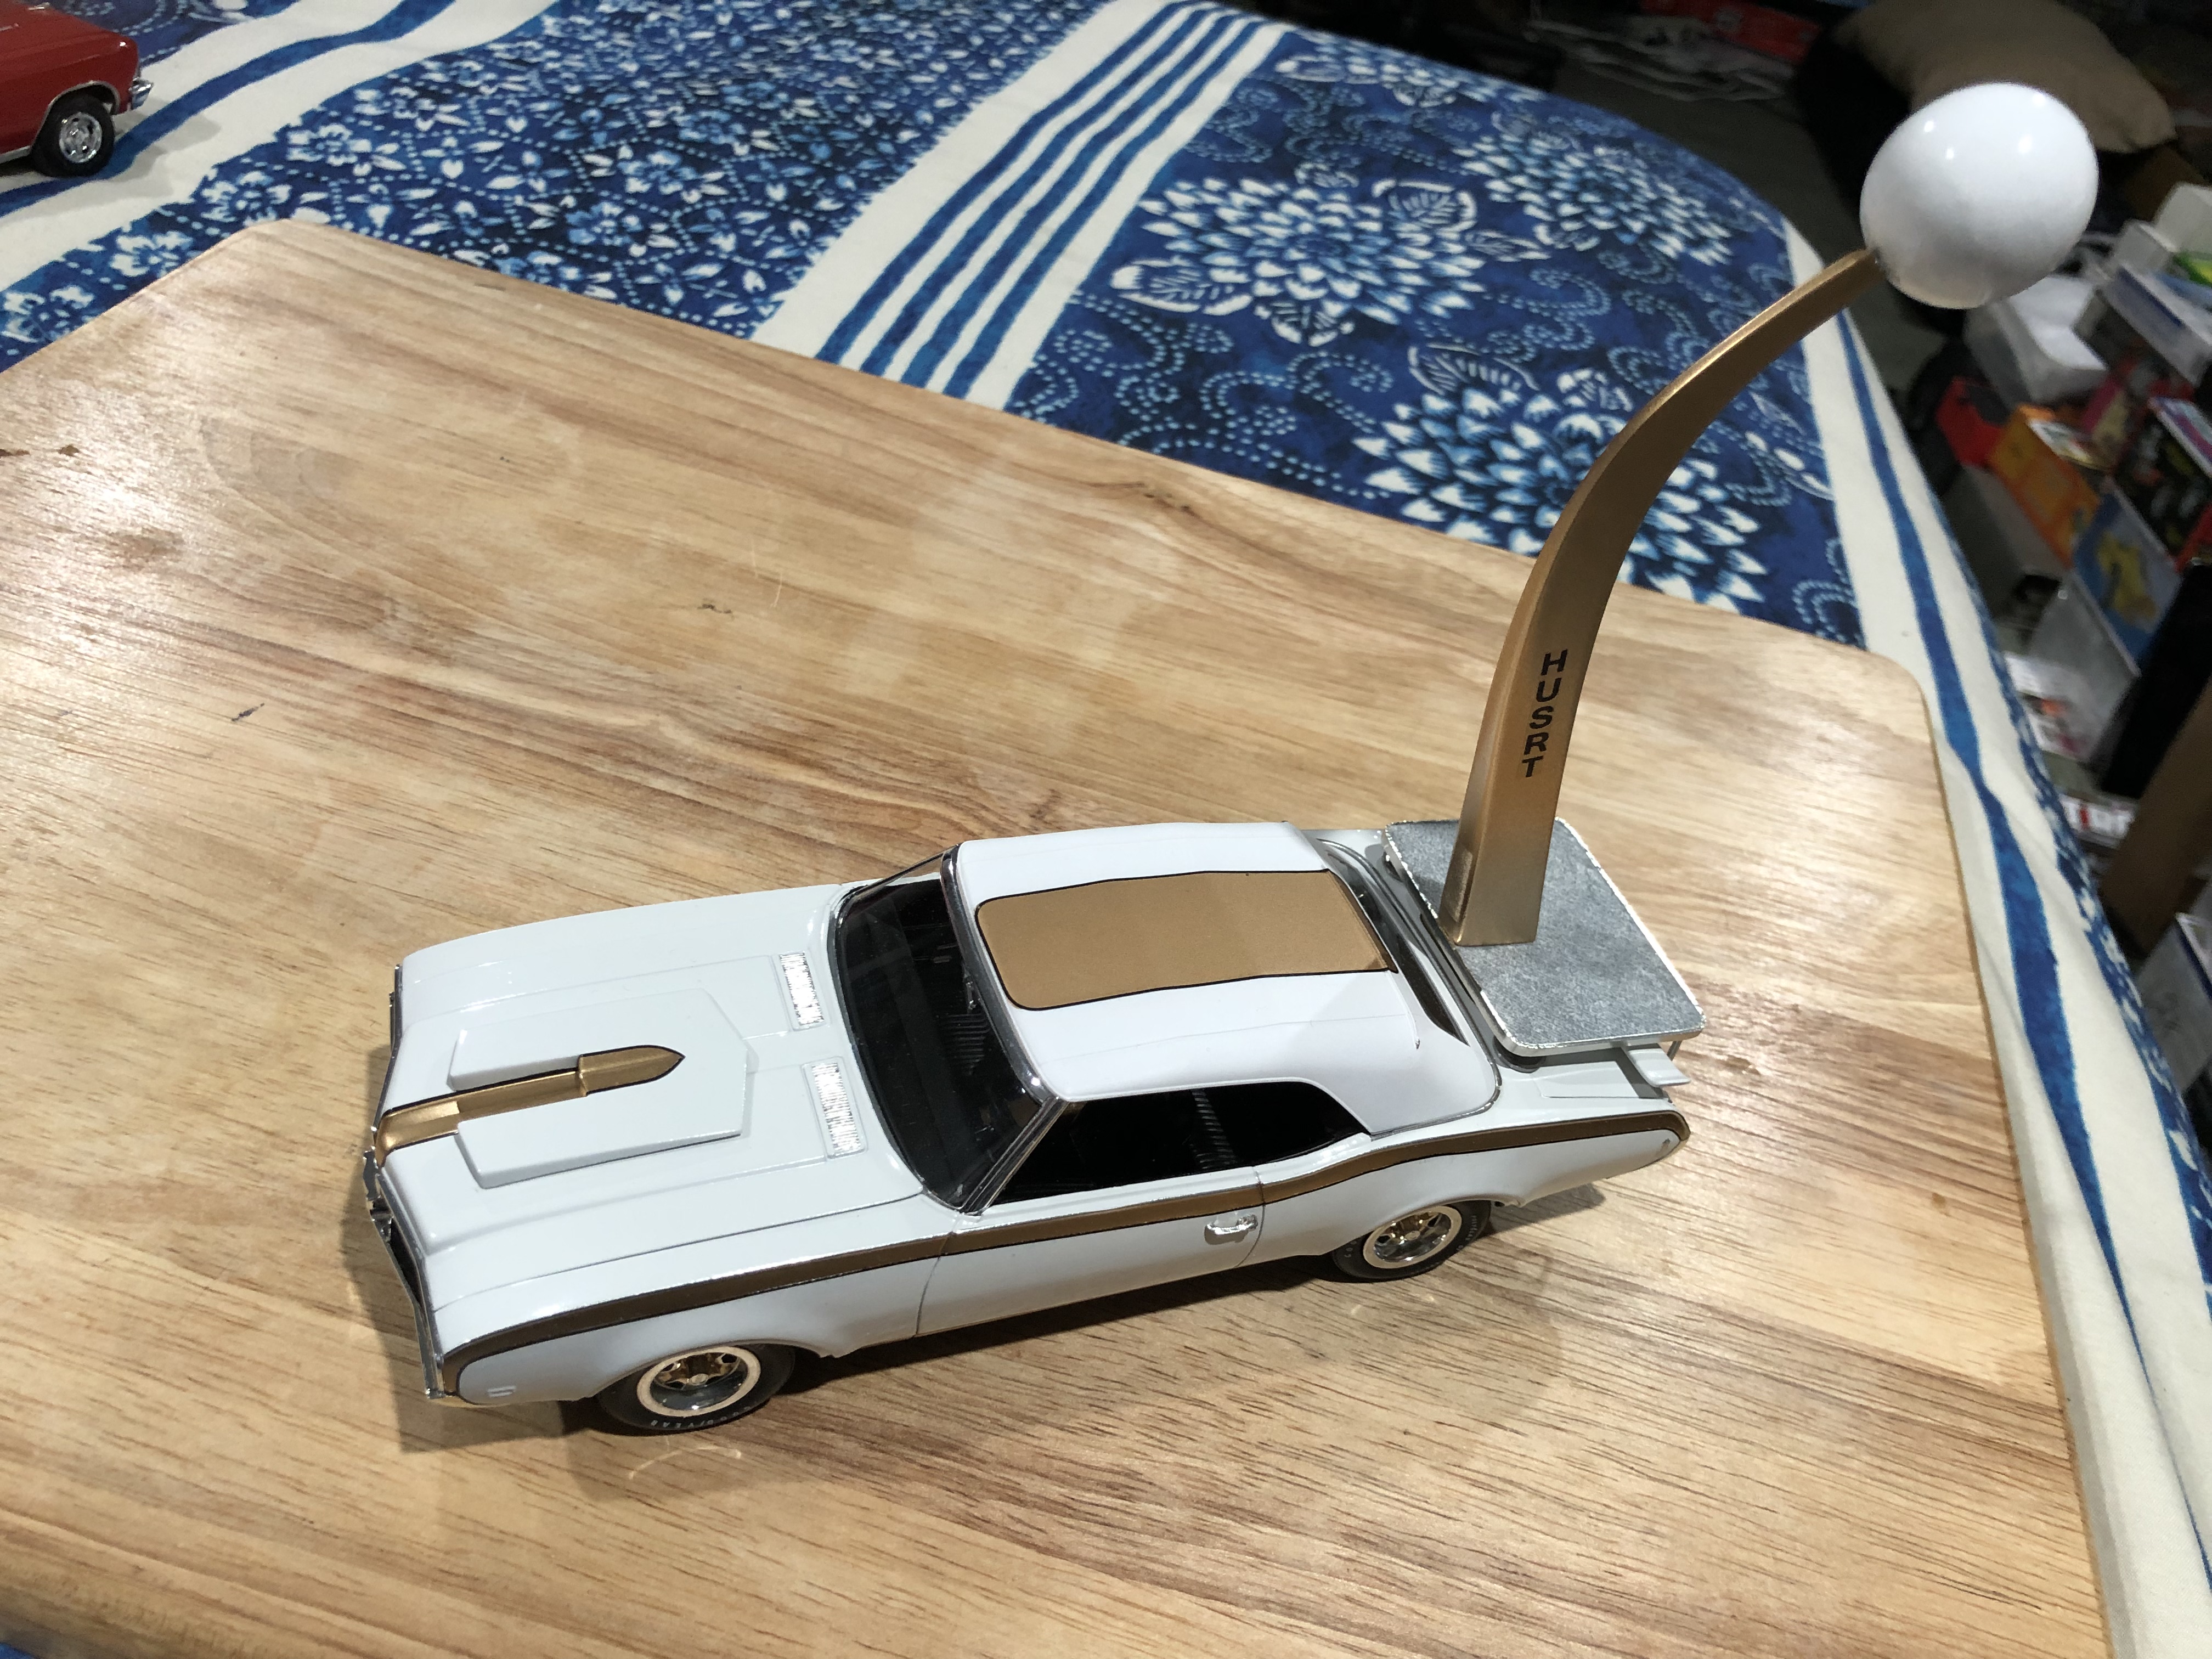
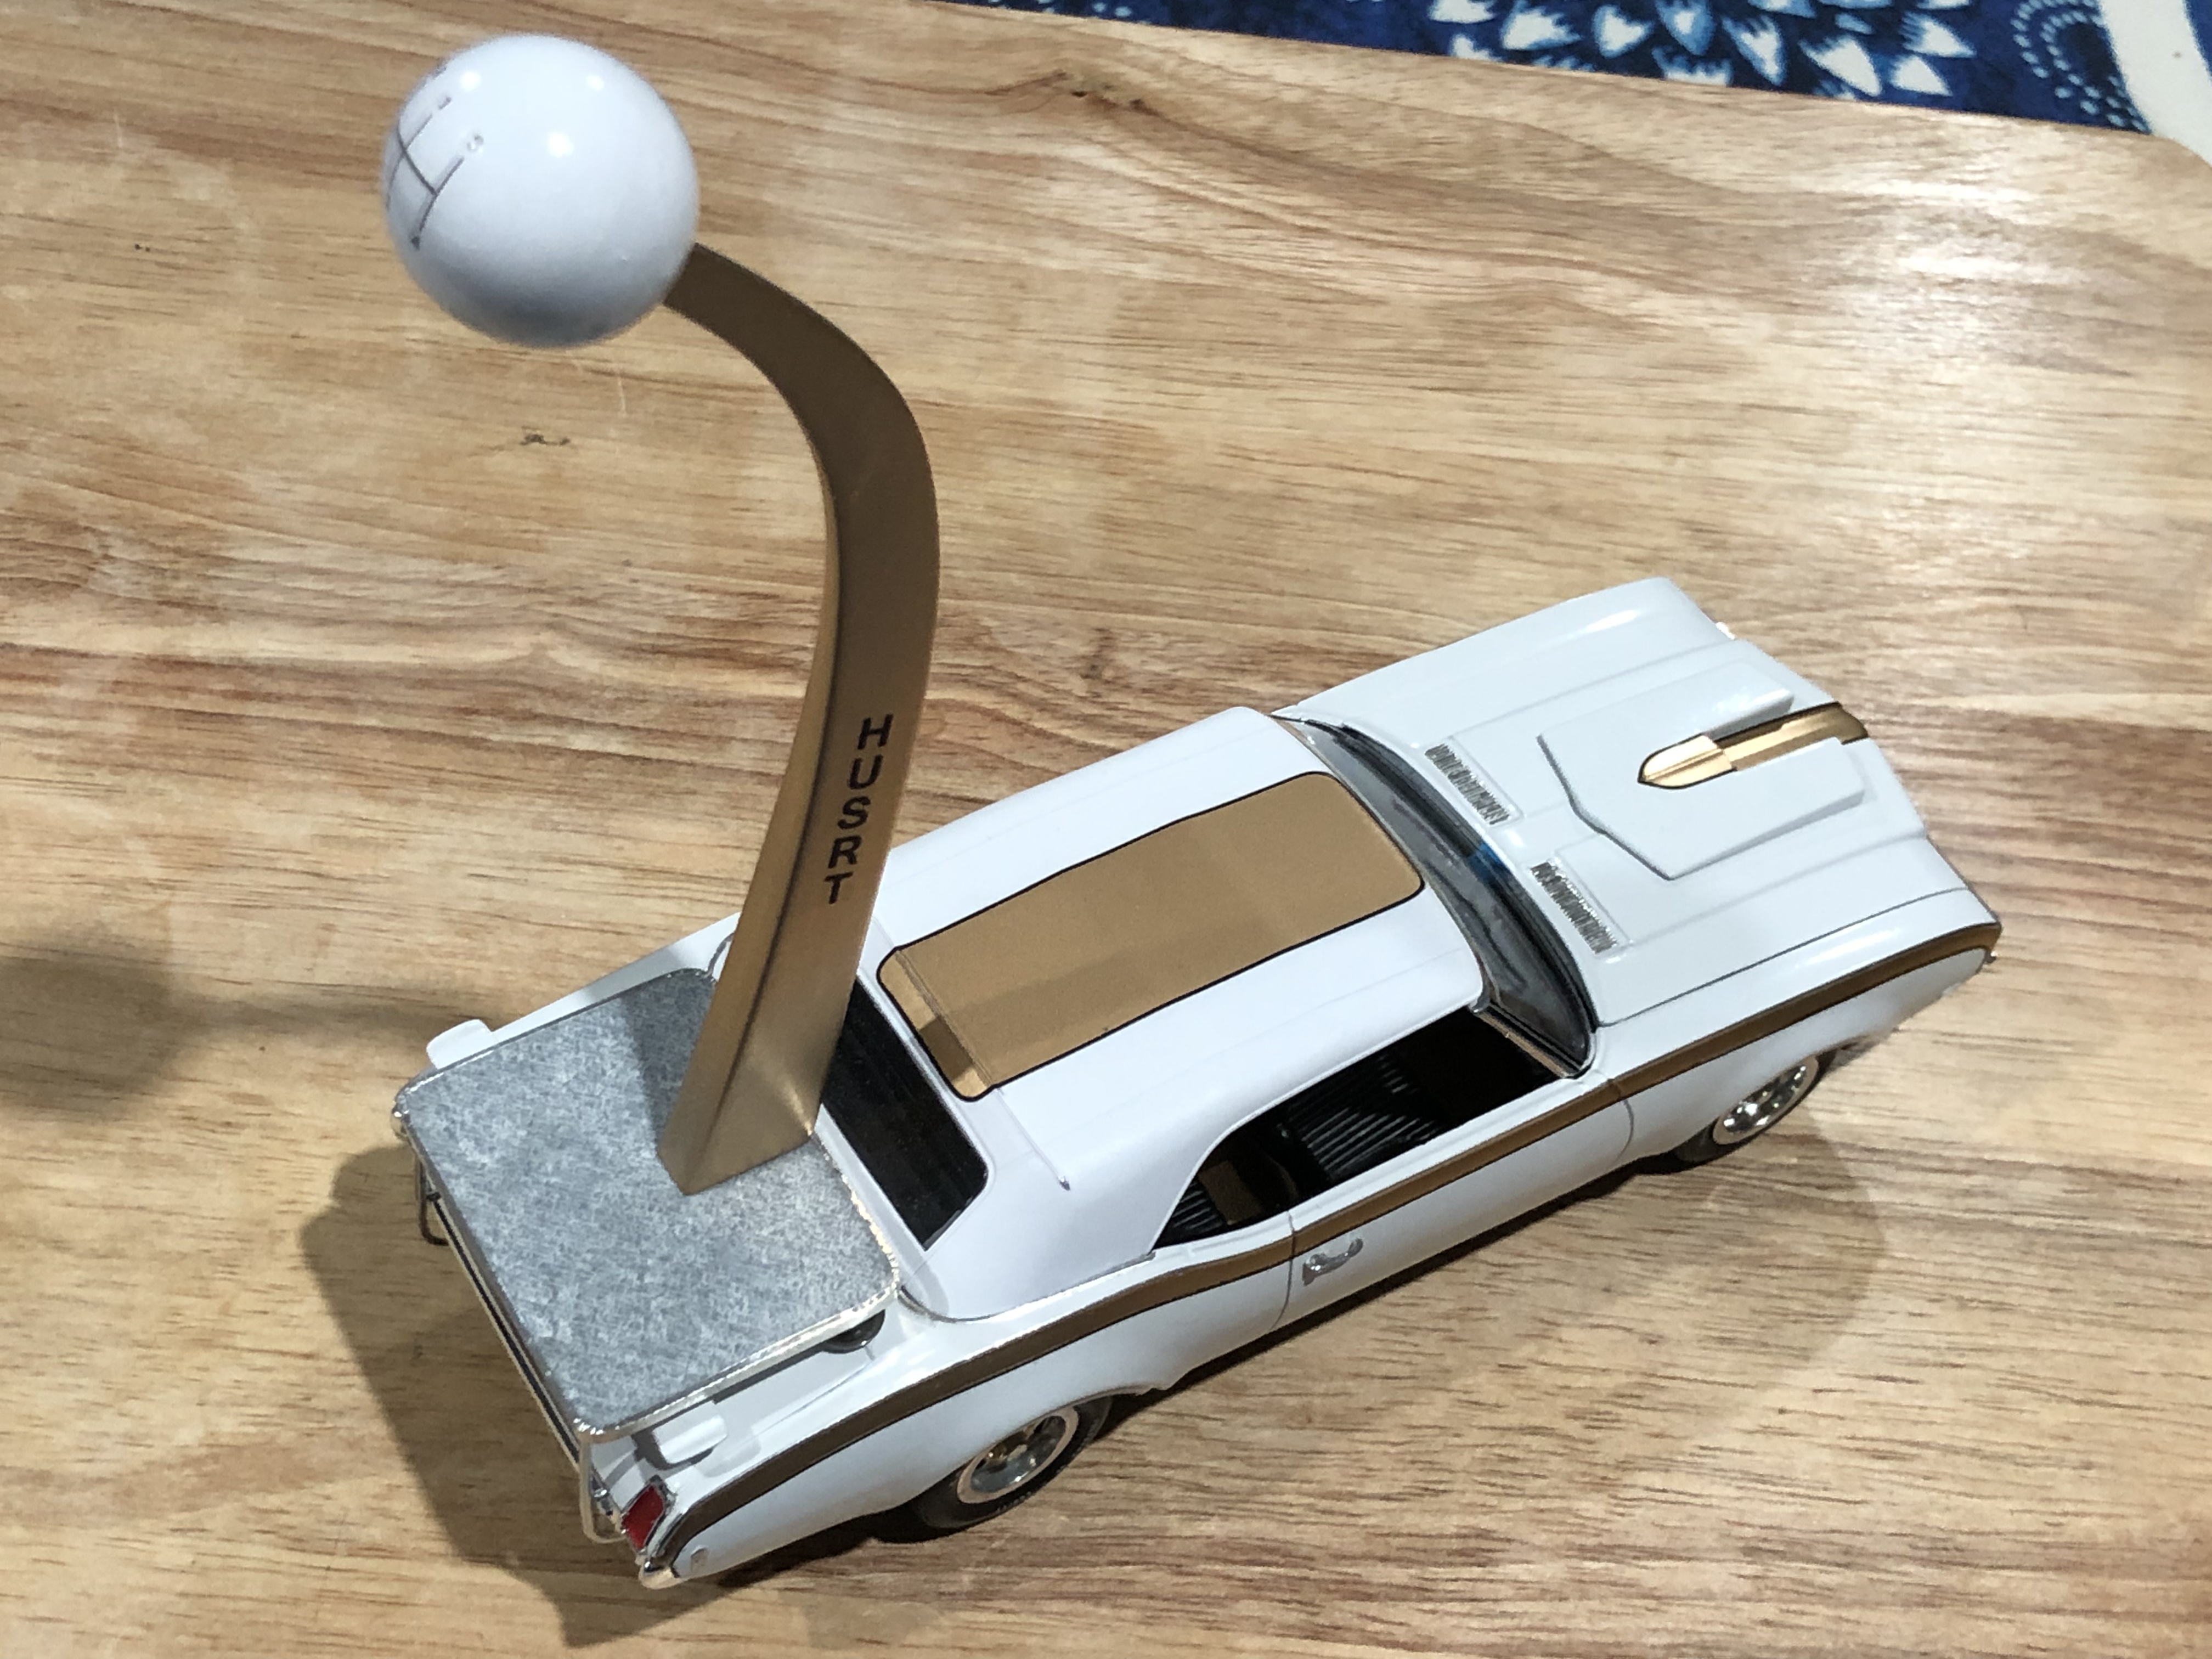
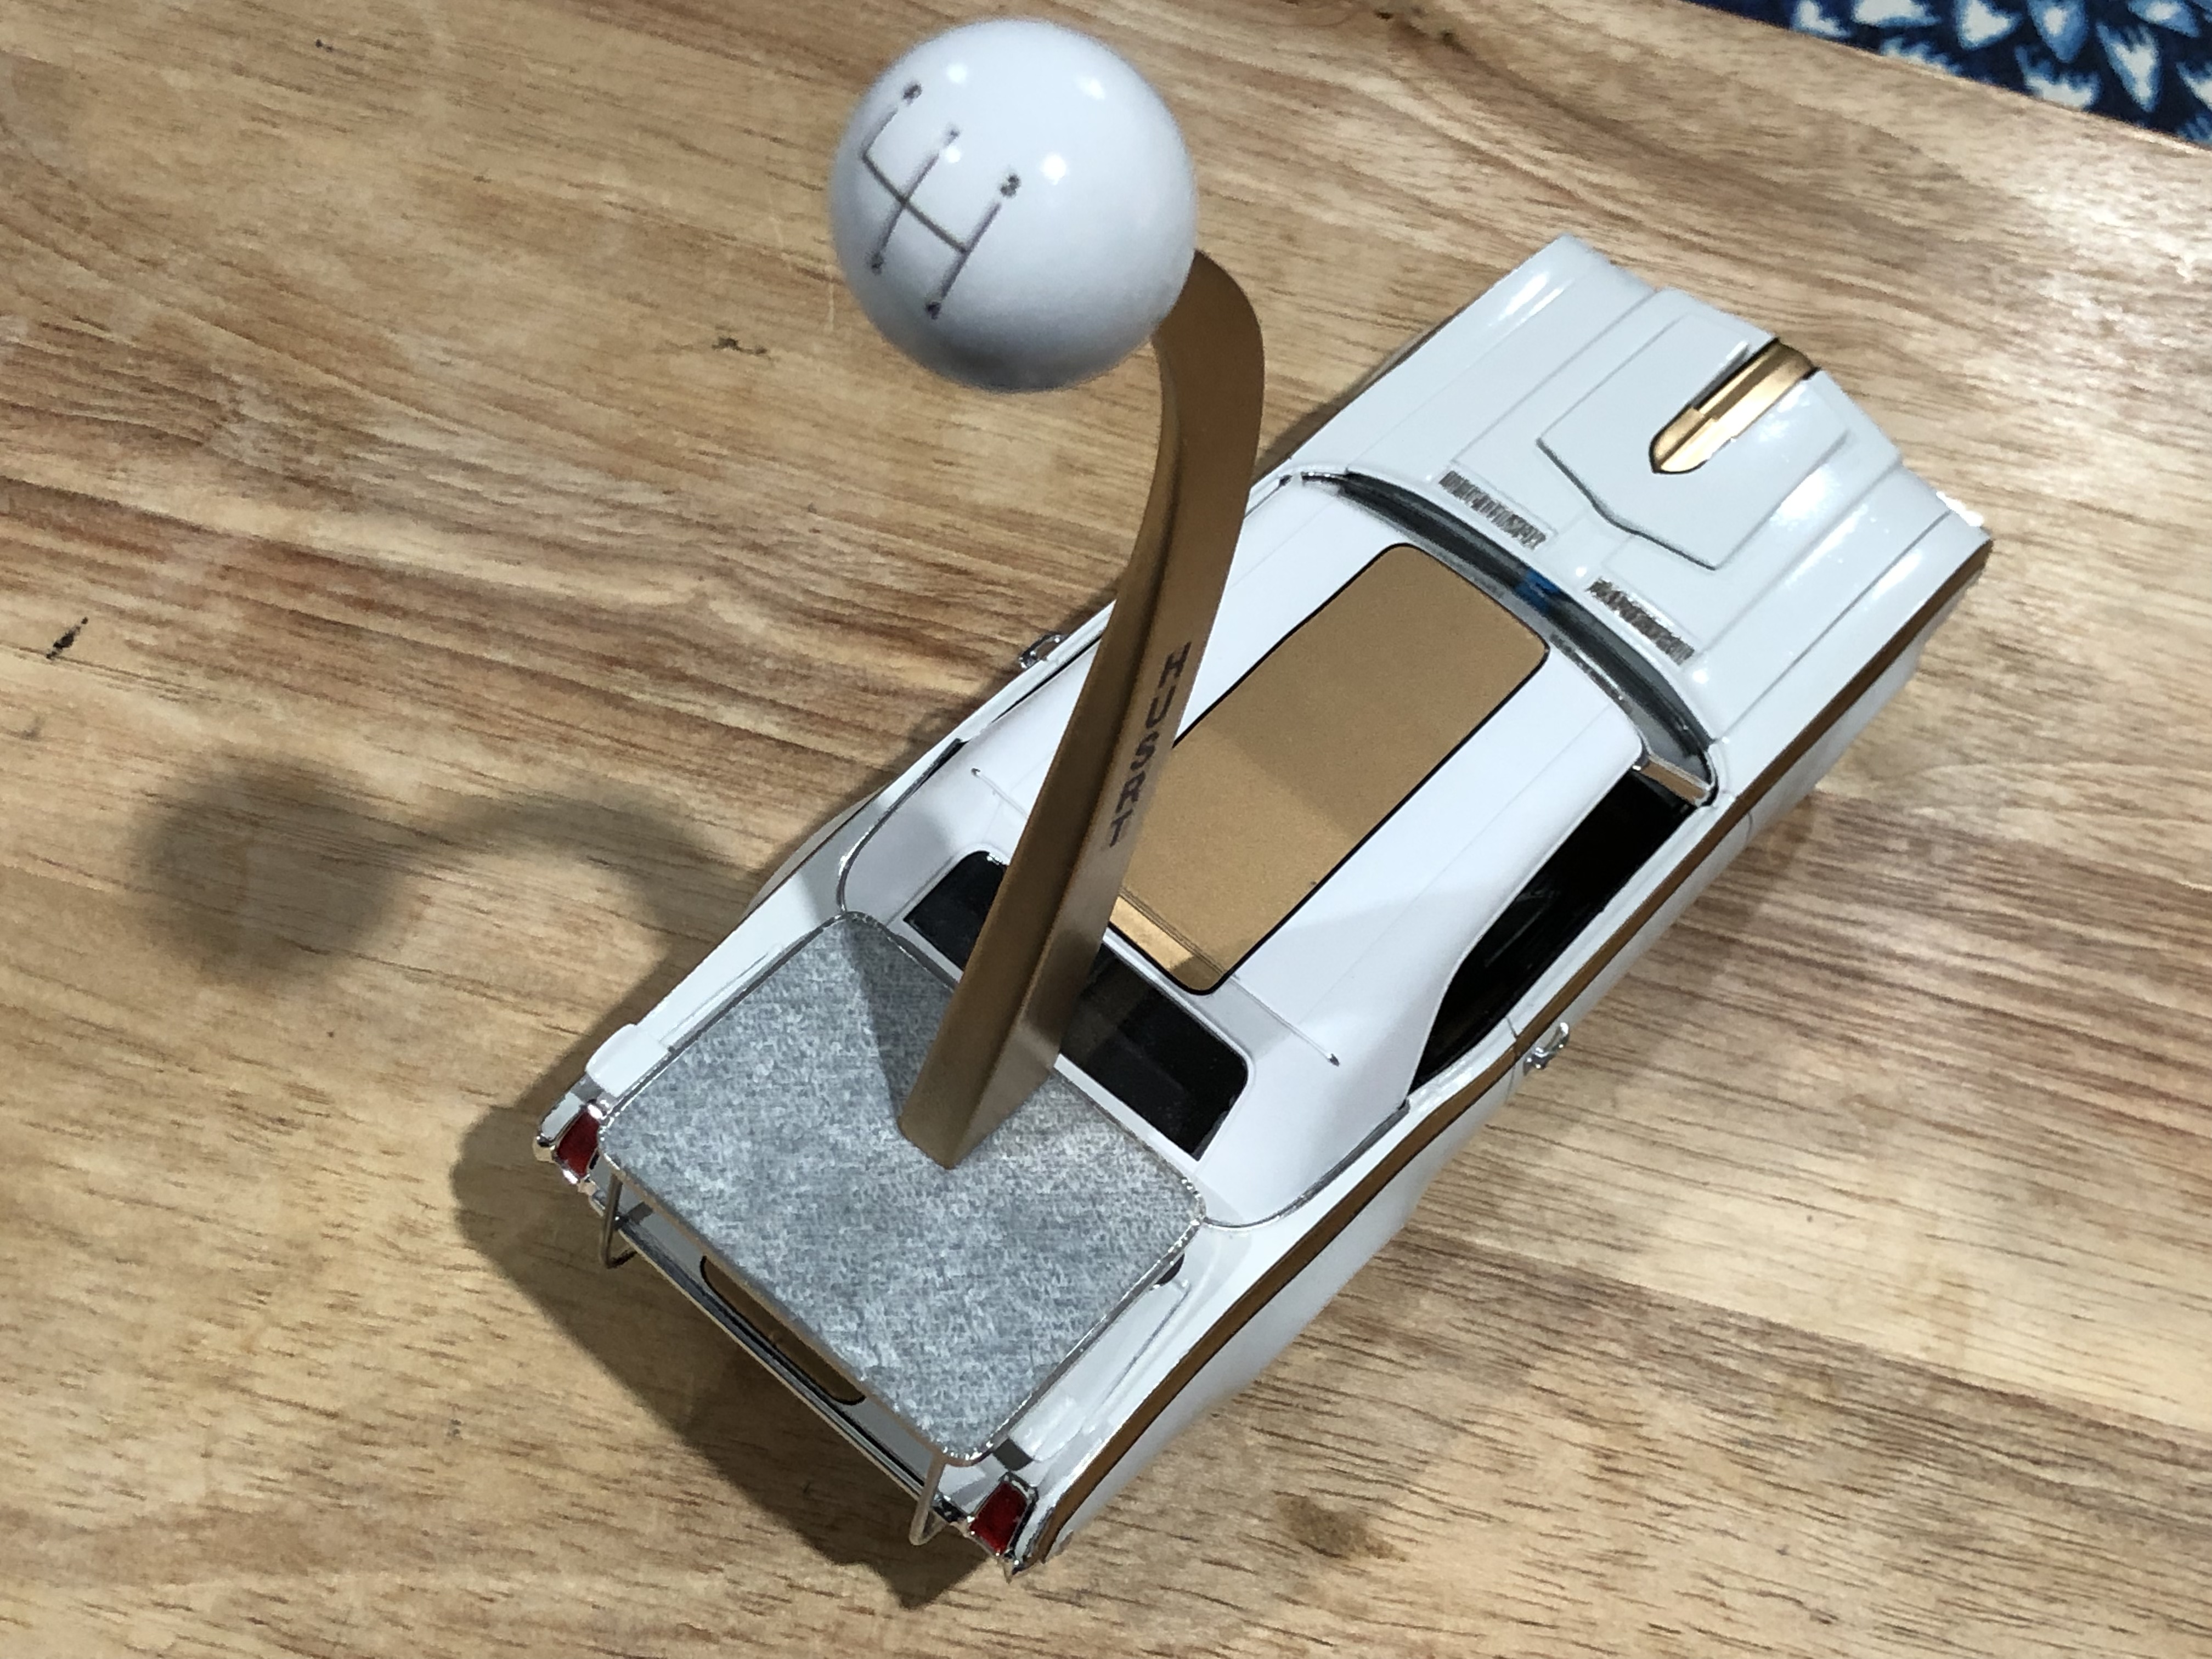
Correction of spelling on shifter?♂️?♂️
-
"Bring Out Your Dead" Completion Build--ROUND 2 Is On!
Superbird McMonte replied to Snake45's topic in WIP: Model Cars
The marker lights have been done, and still have the side mirrors been installed. A couple of the things of that picture was taken. I also corrected the spelling on the shifter! ?? -
Luckily, that kit contains the parts for both the ‘53 and ‘54 Corvette!?? I’m a huge fan of the first 3 Corvettes. I’ll be looking forward to this build!
-
1969 Hurst Olds convertible conversion
Superbird McMonte replied to Superbird McMonte's topic in Model Cars
Thanks Bill! -
1969 Hurst Olds convertible conversion
Superbird McMonte replied to Superbird McMonte's topic in Model Cars
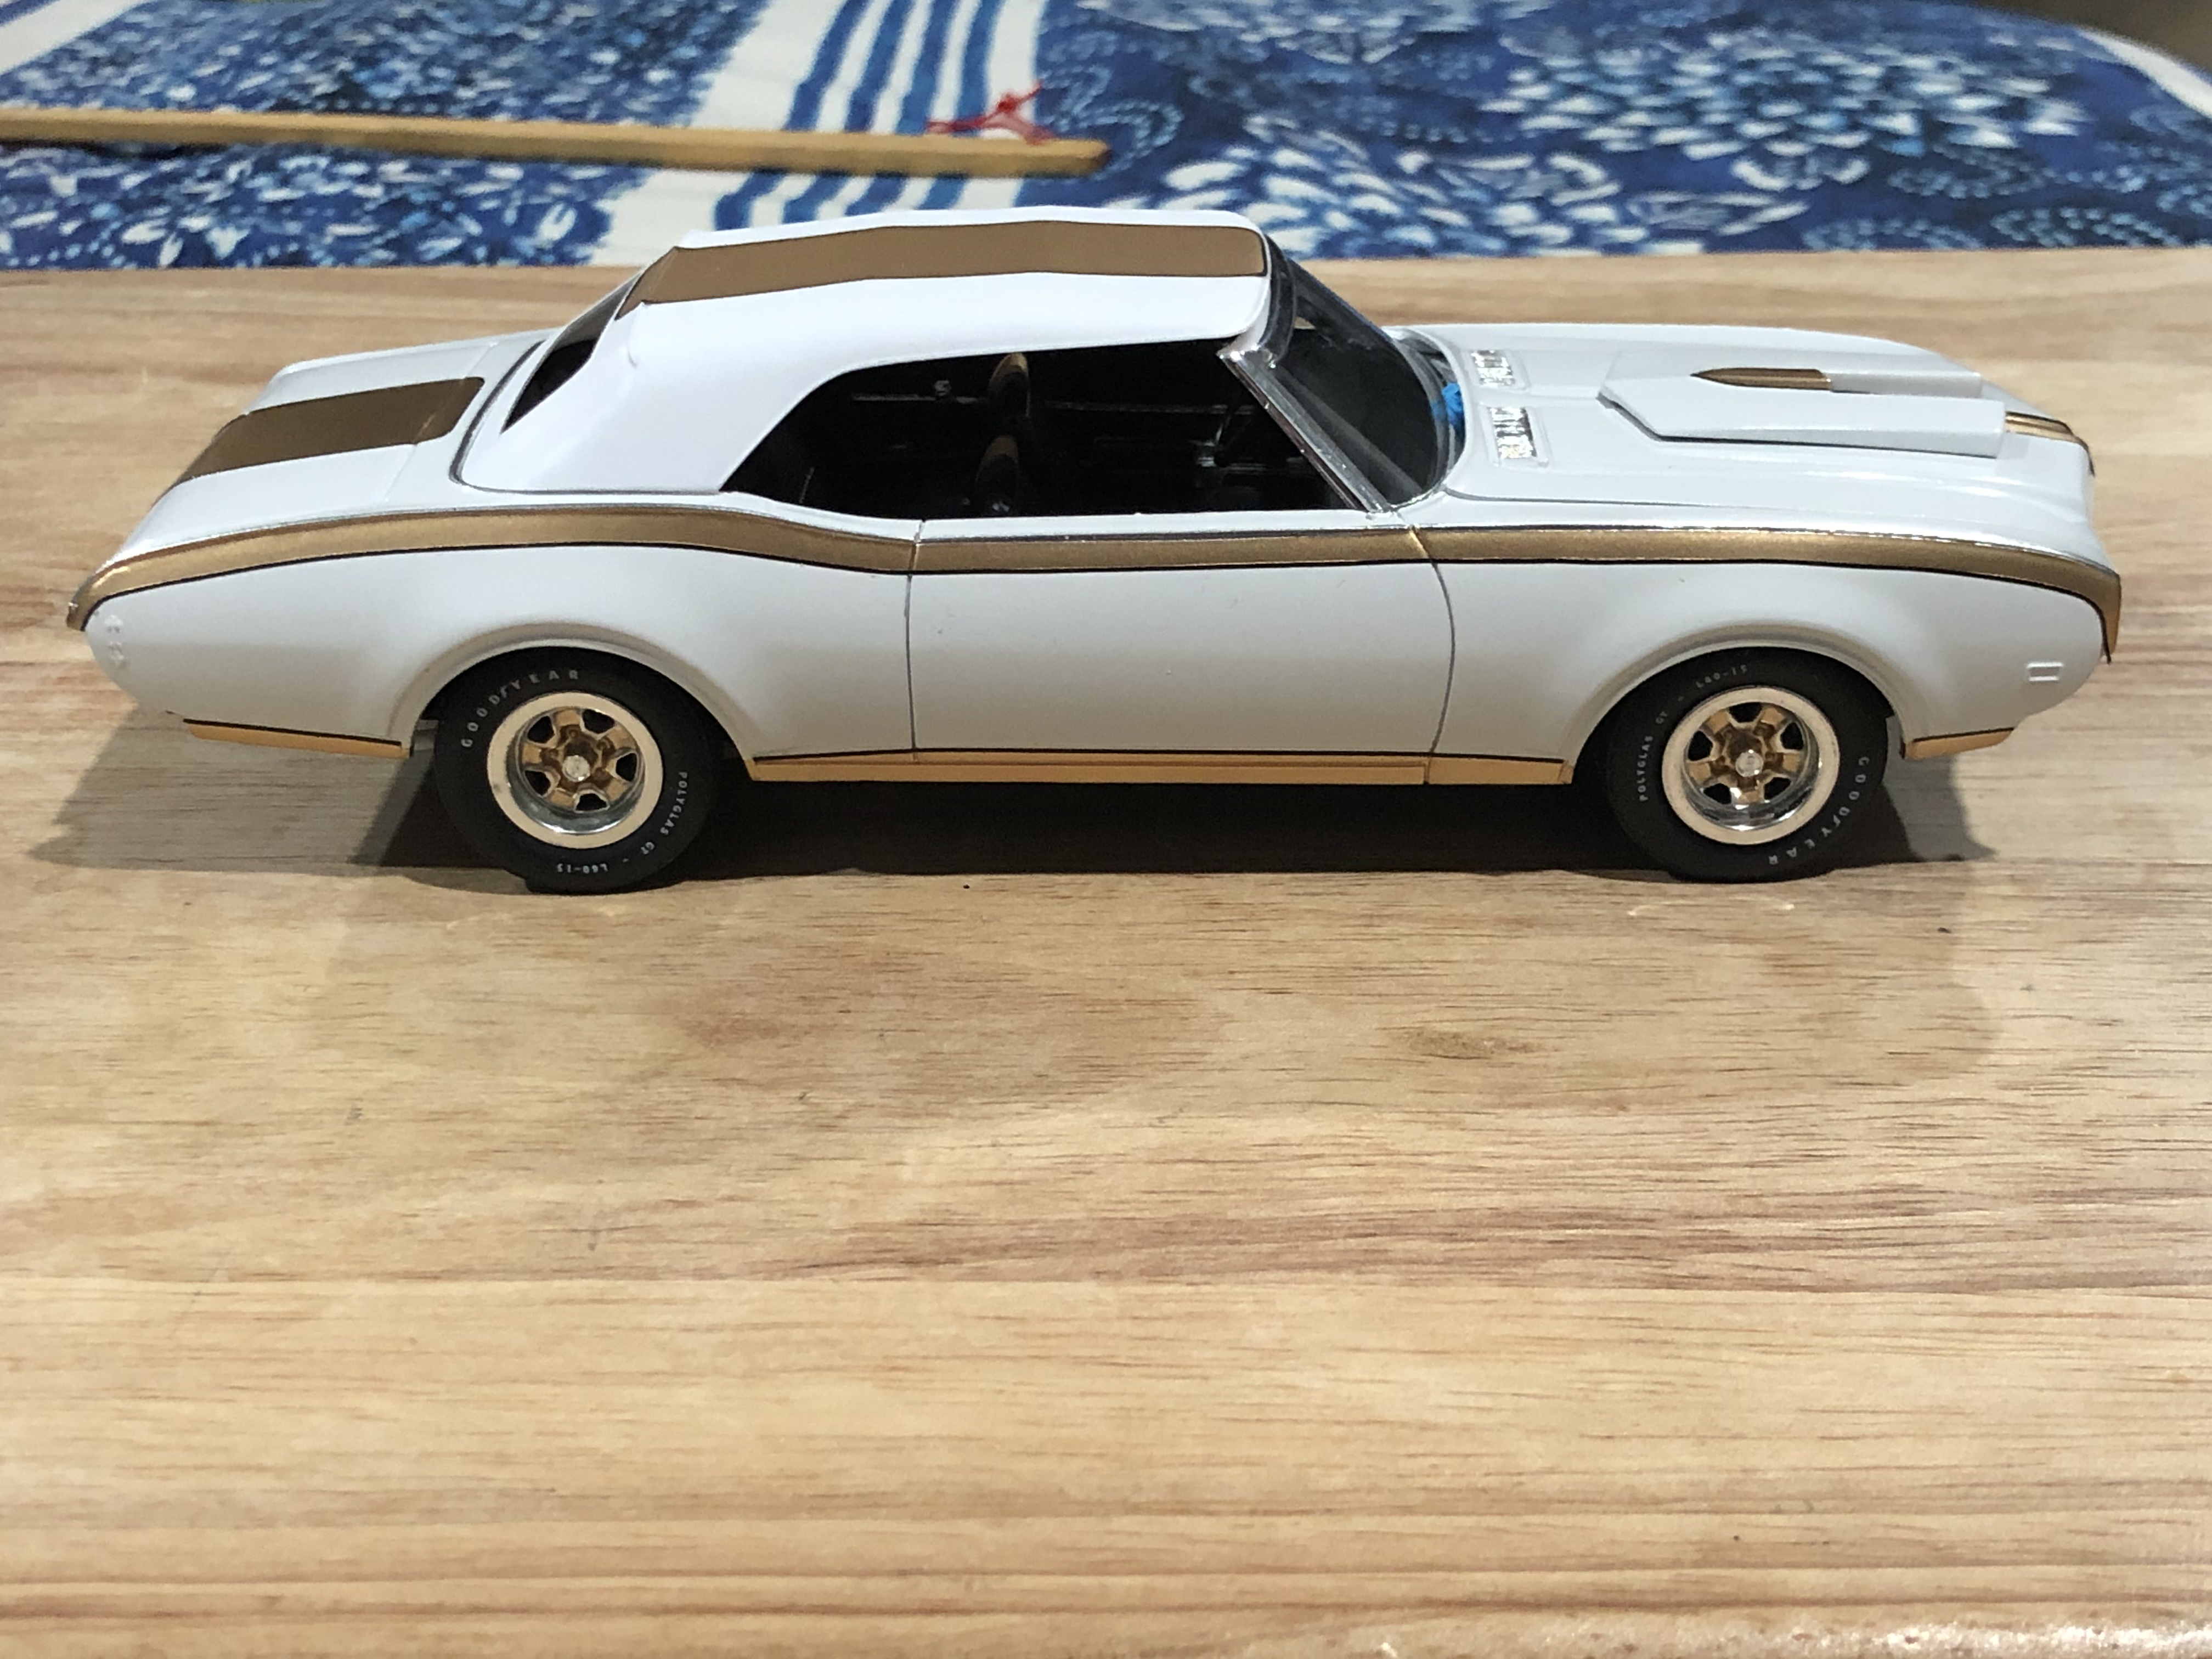
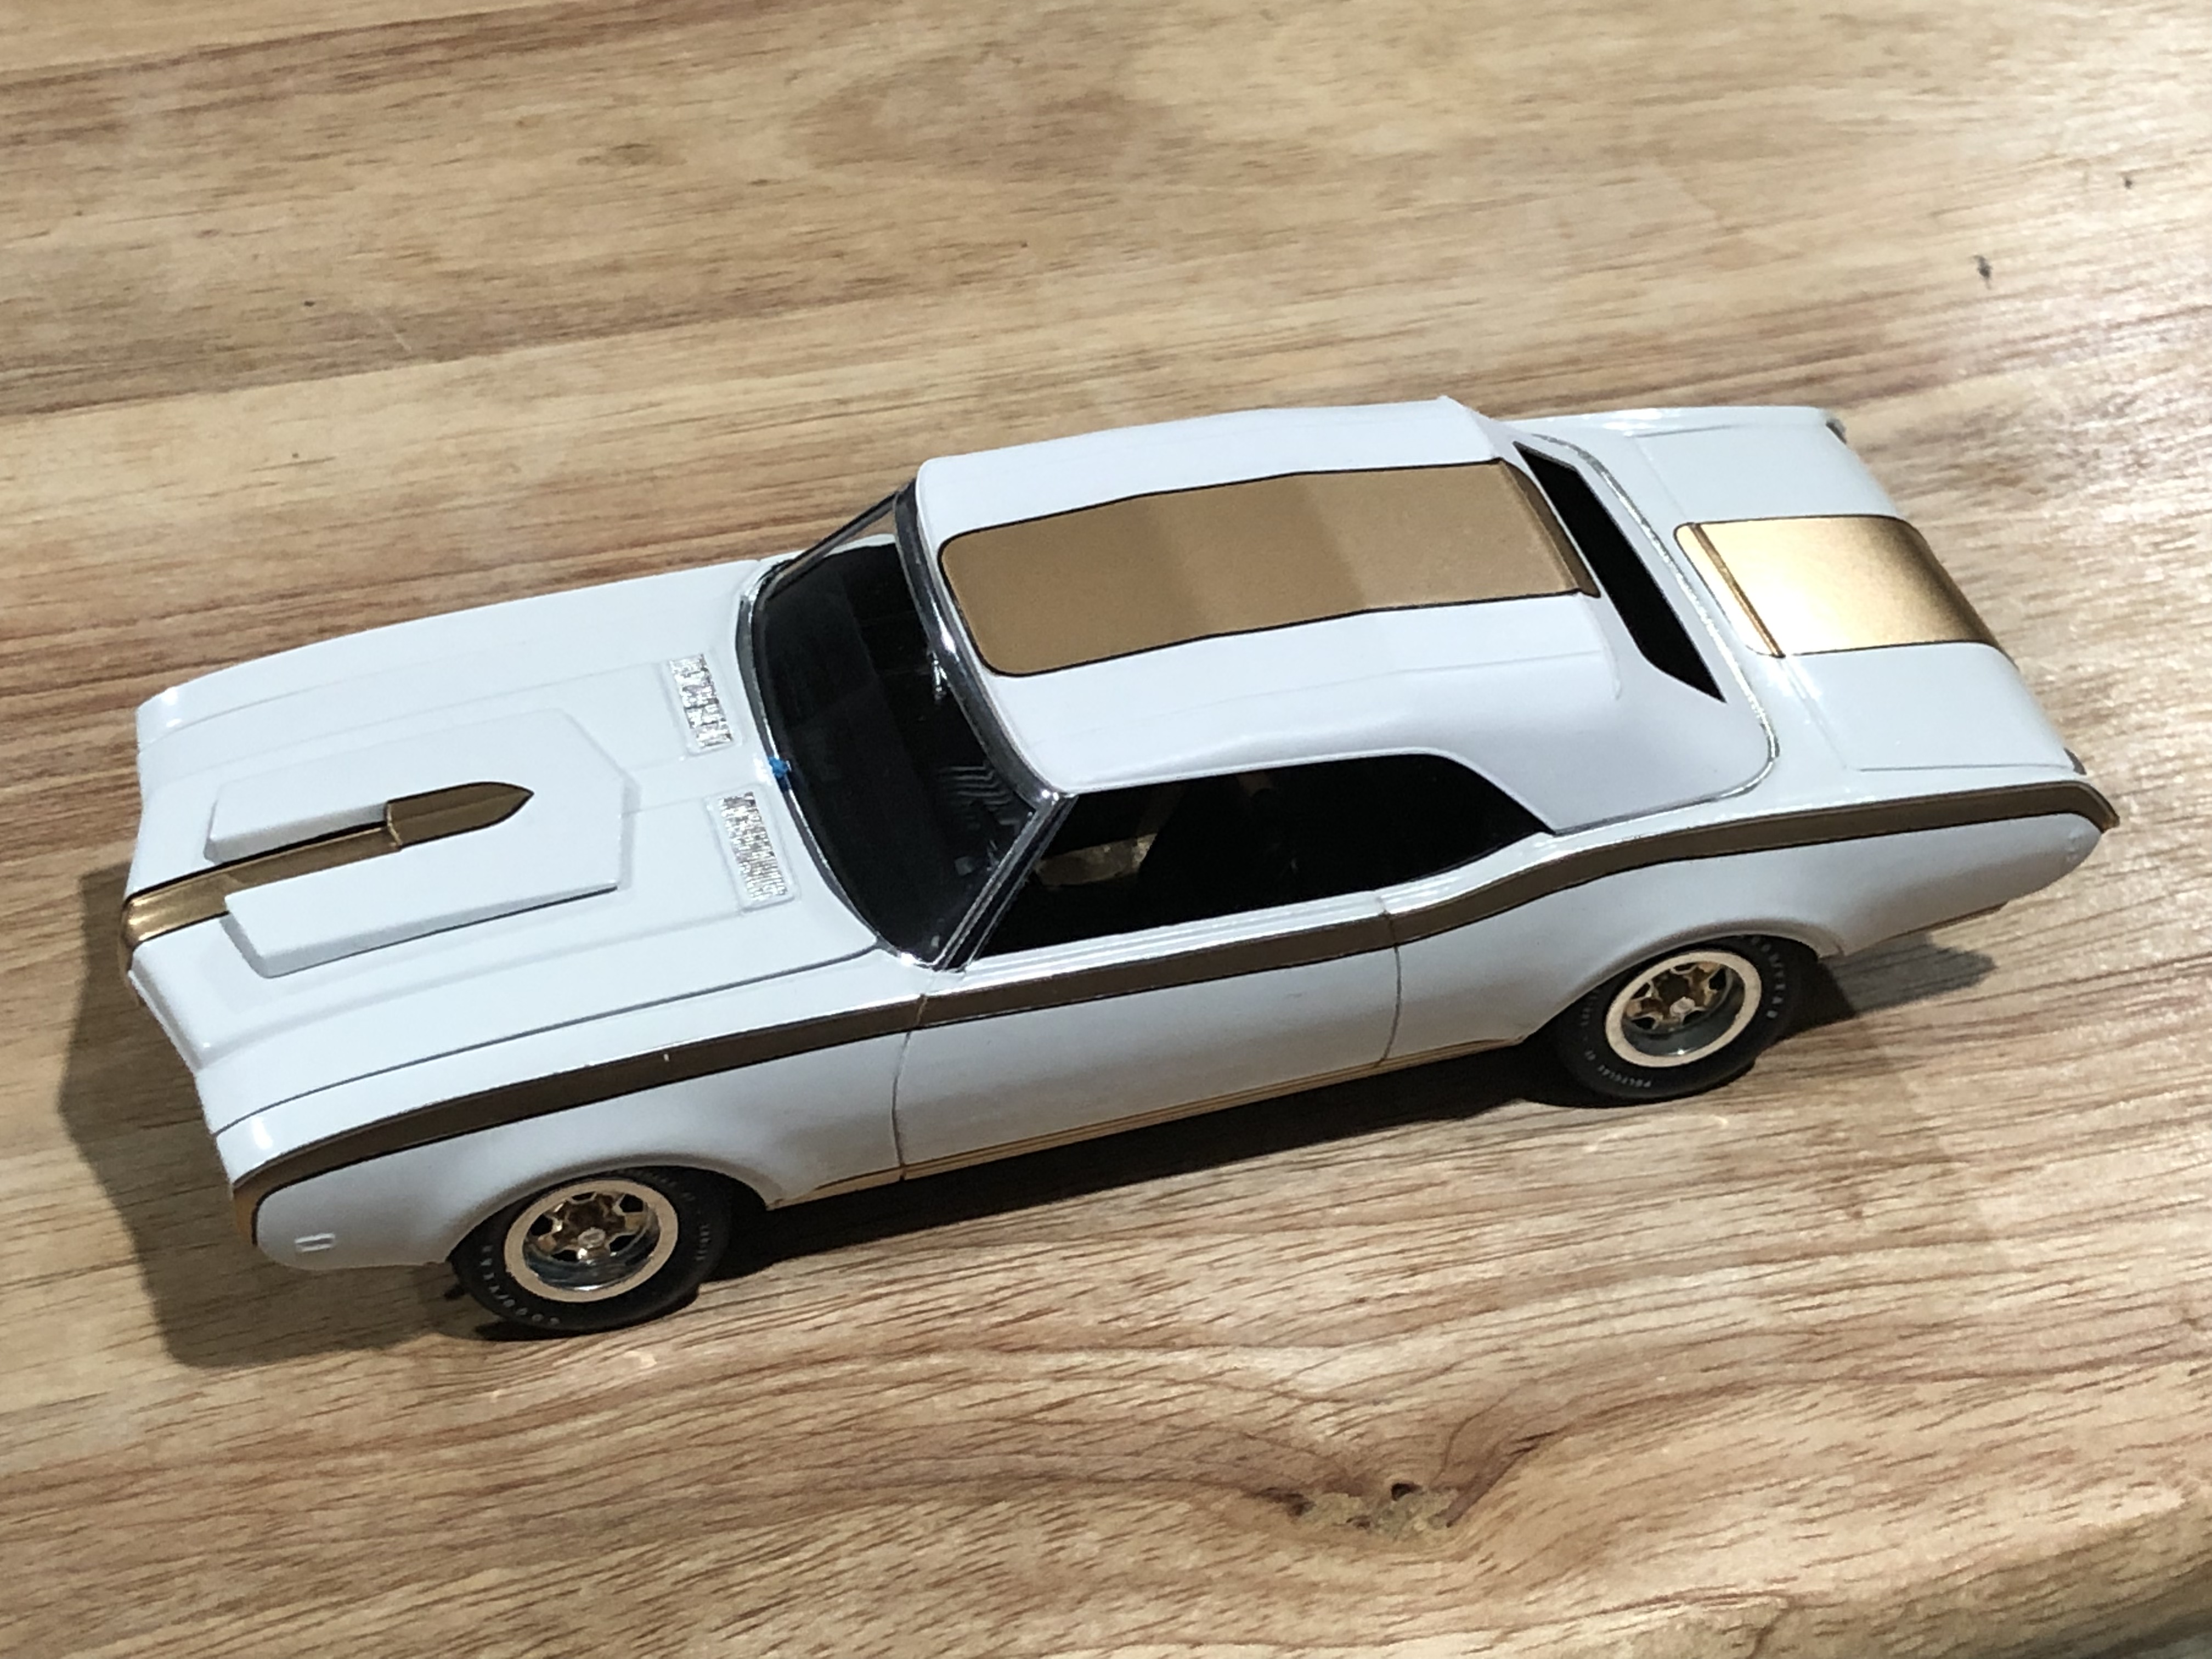
Yes the top is removable. It was a fun conversion. I may do it one more time on a 1968 Hurst Olds convertible. Apparently there was a 68 Hurst Olds that was silver and black. It could go along with my 1968 Hurst Olds hardtop. -
1969 Hurst Olds convertible conversion
Superbird McMonte replied to Superbird McMonte's topic in WIP: Model Cars
Yes. It slides into tubes under the bumper. -
"Bring Out Your Dead" Completion Build--ROUND 2 Is On!
Superbird McMonte replied to Snake45's topic in WIP: Model Cars
It was pretty talll! Cool! -
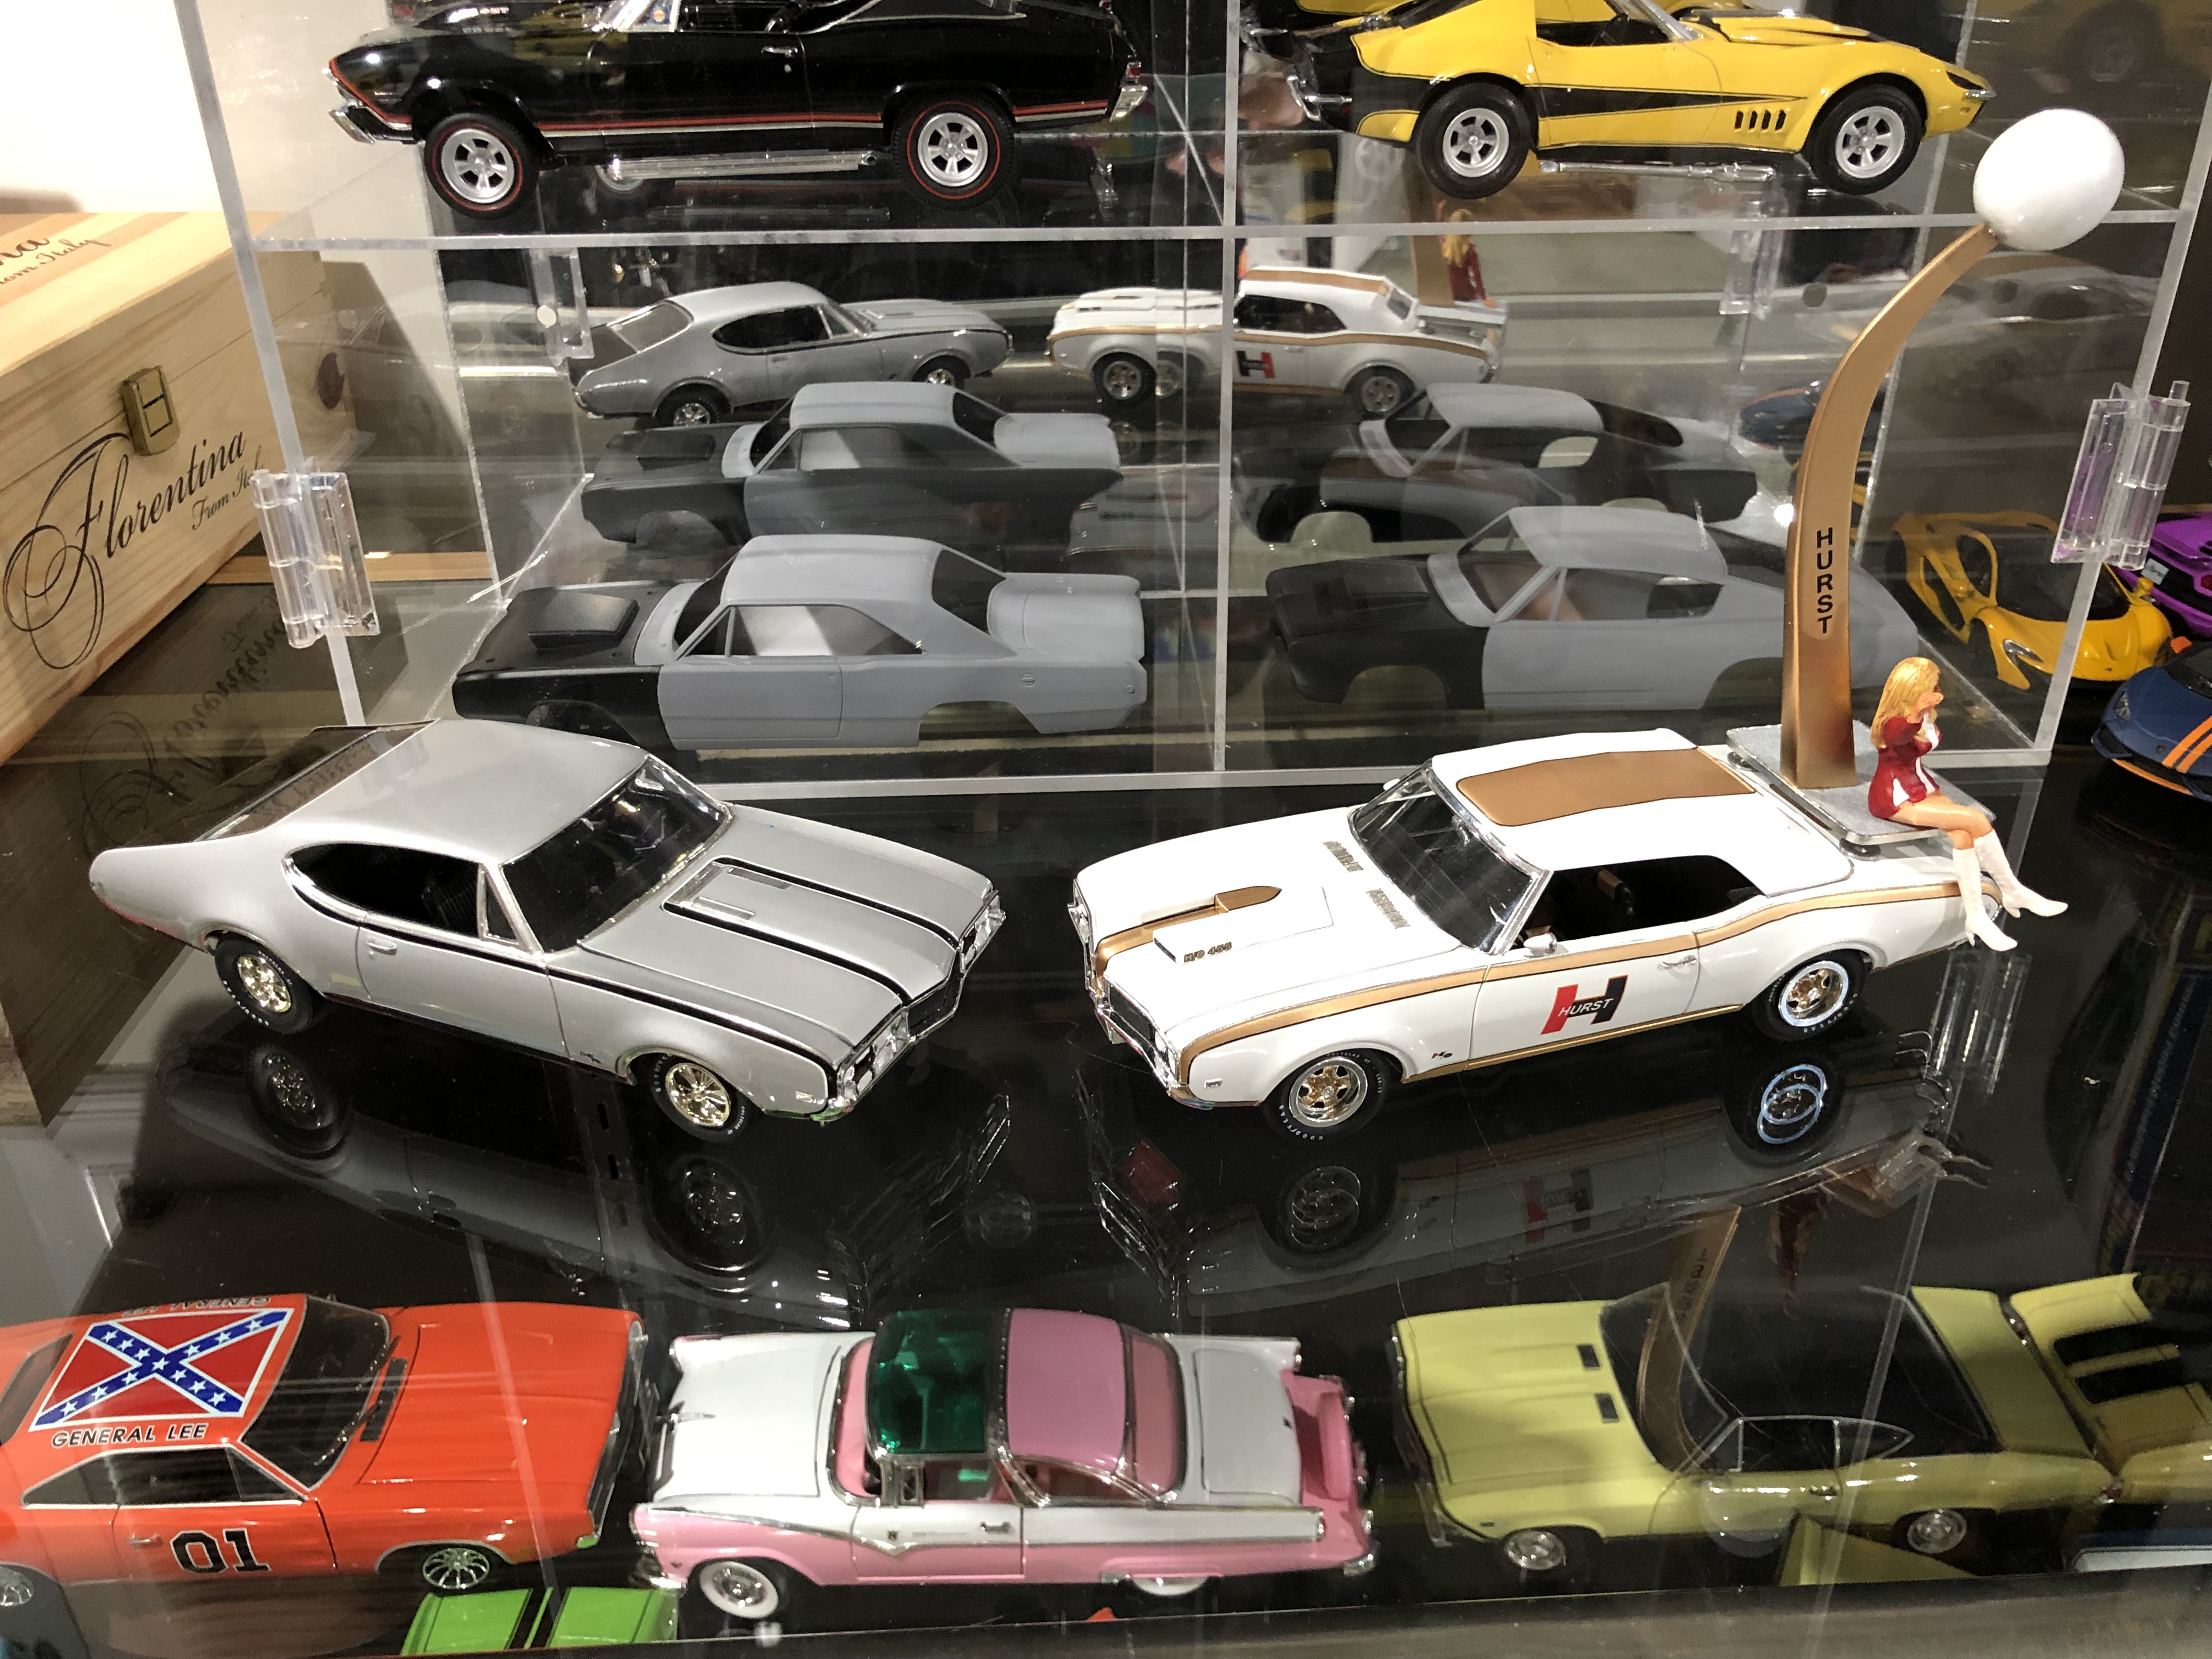
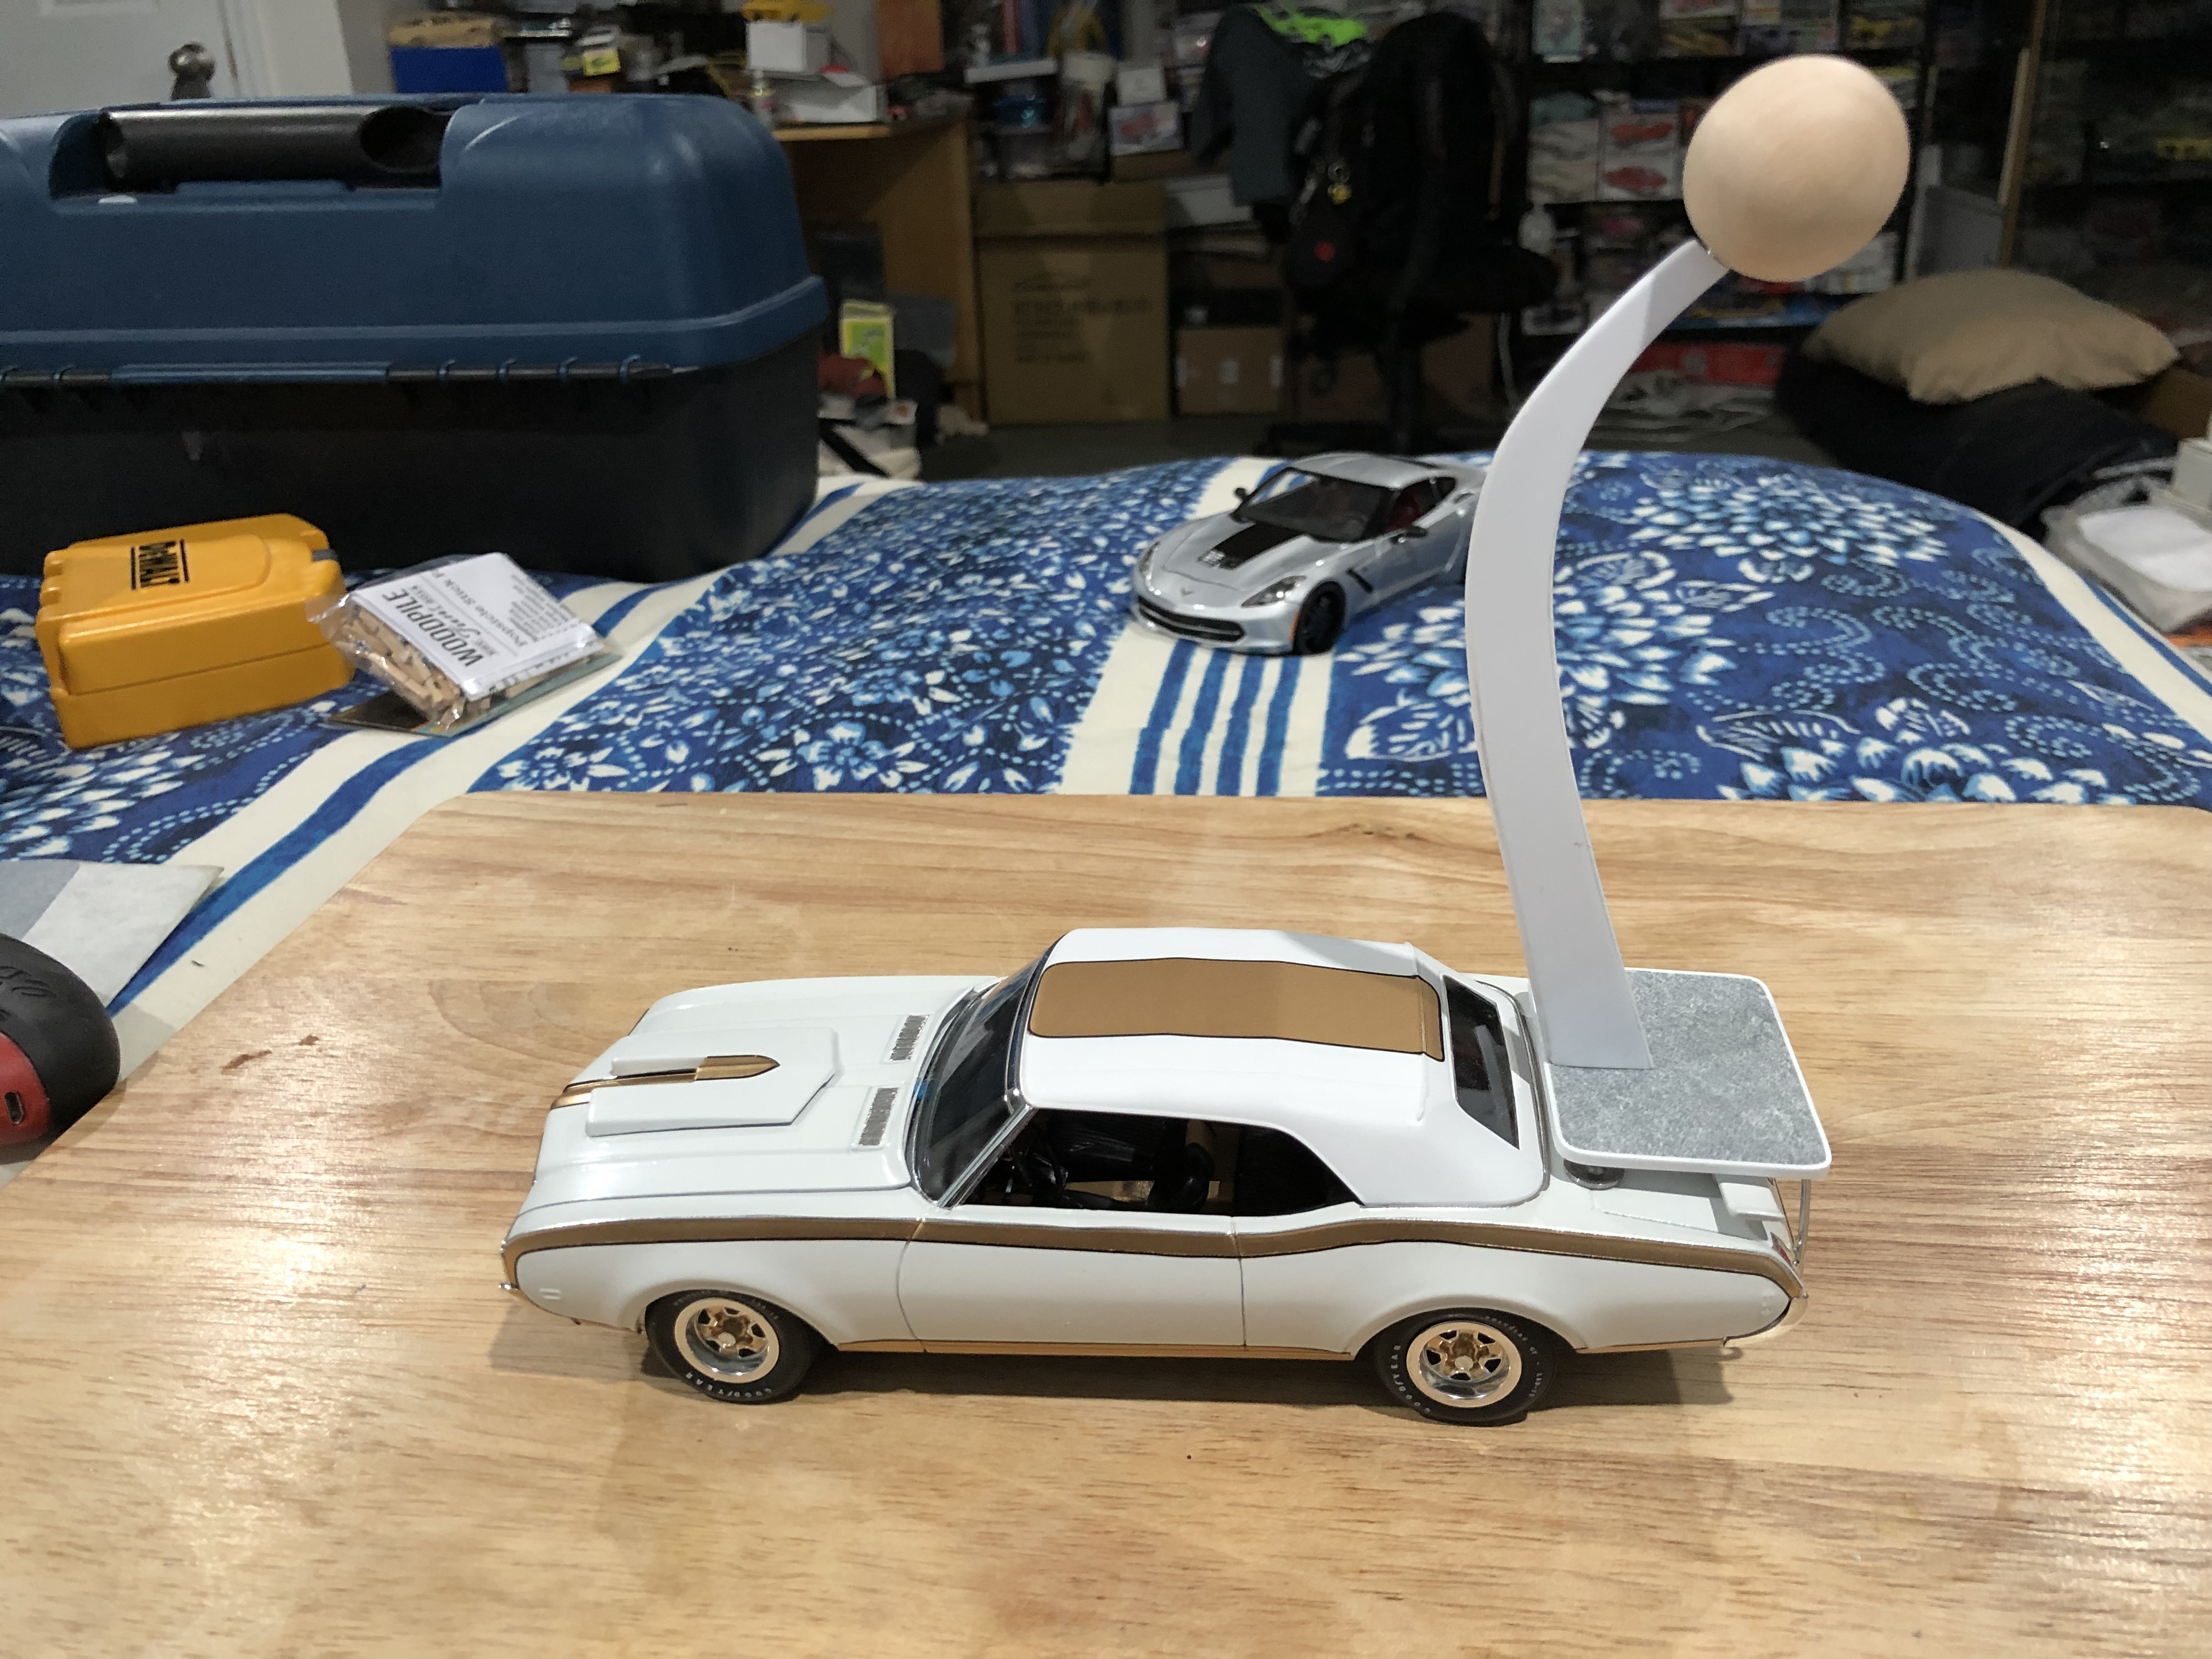
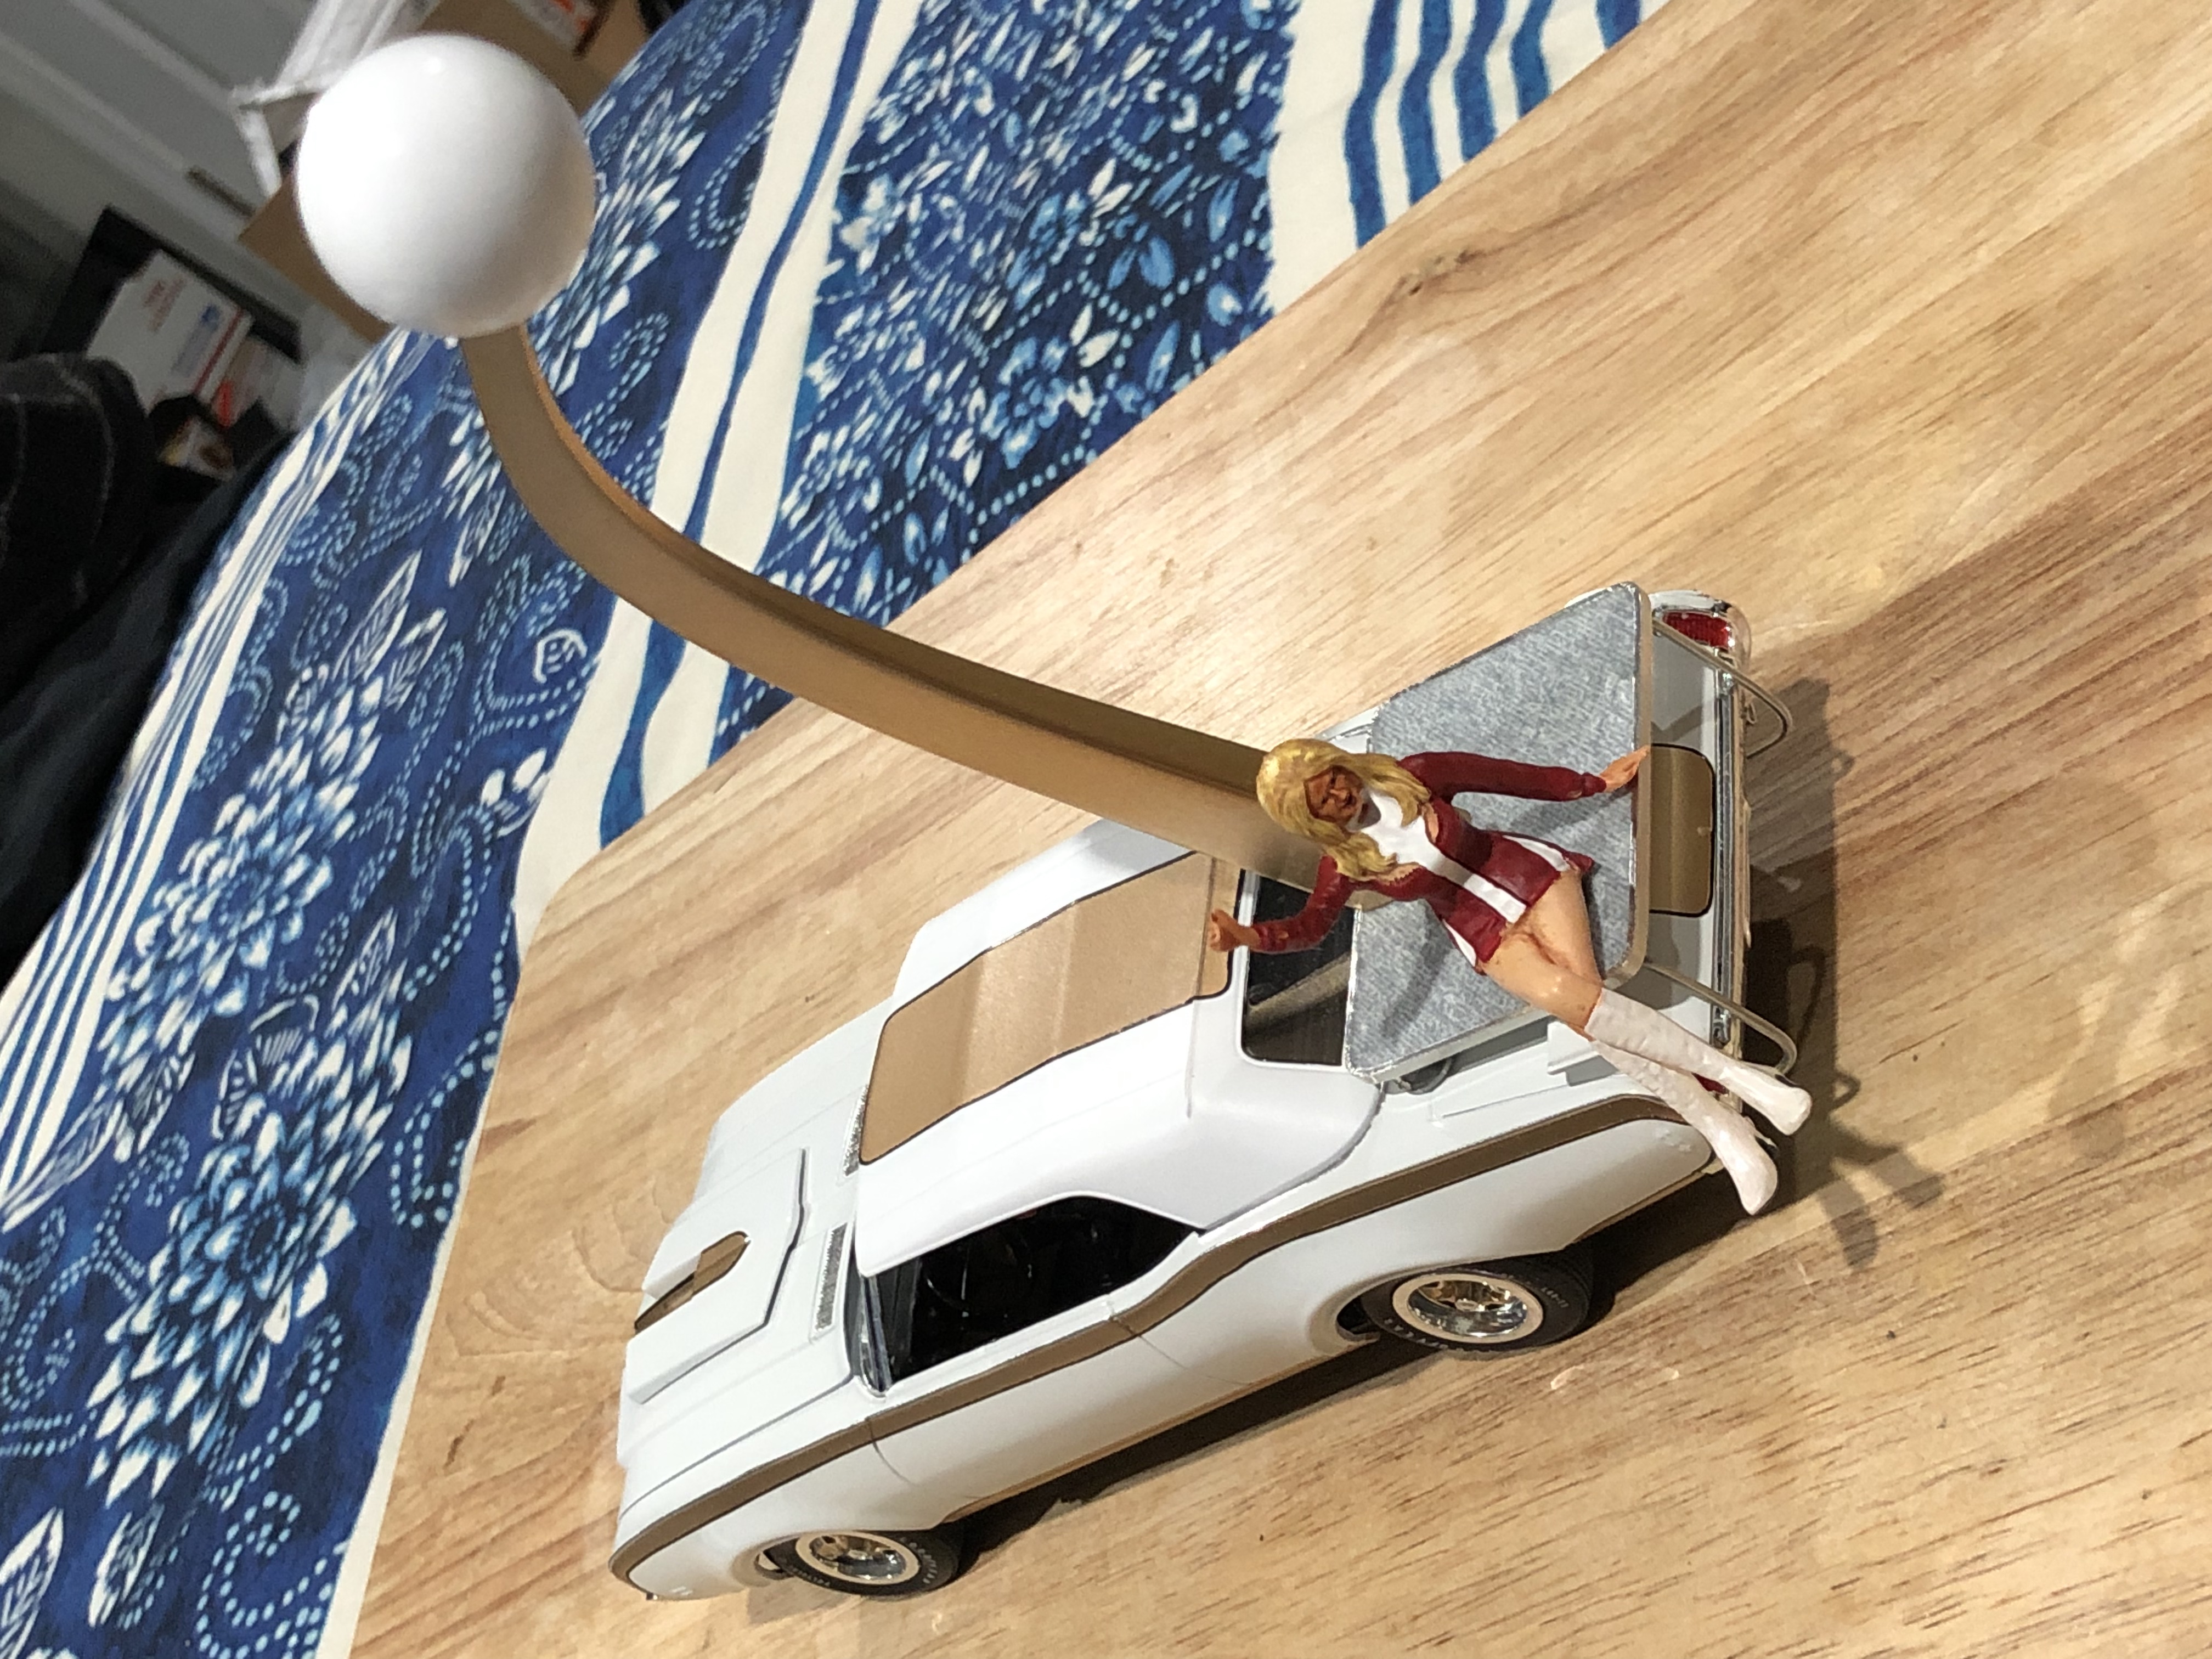
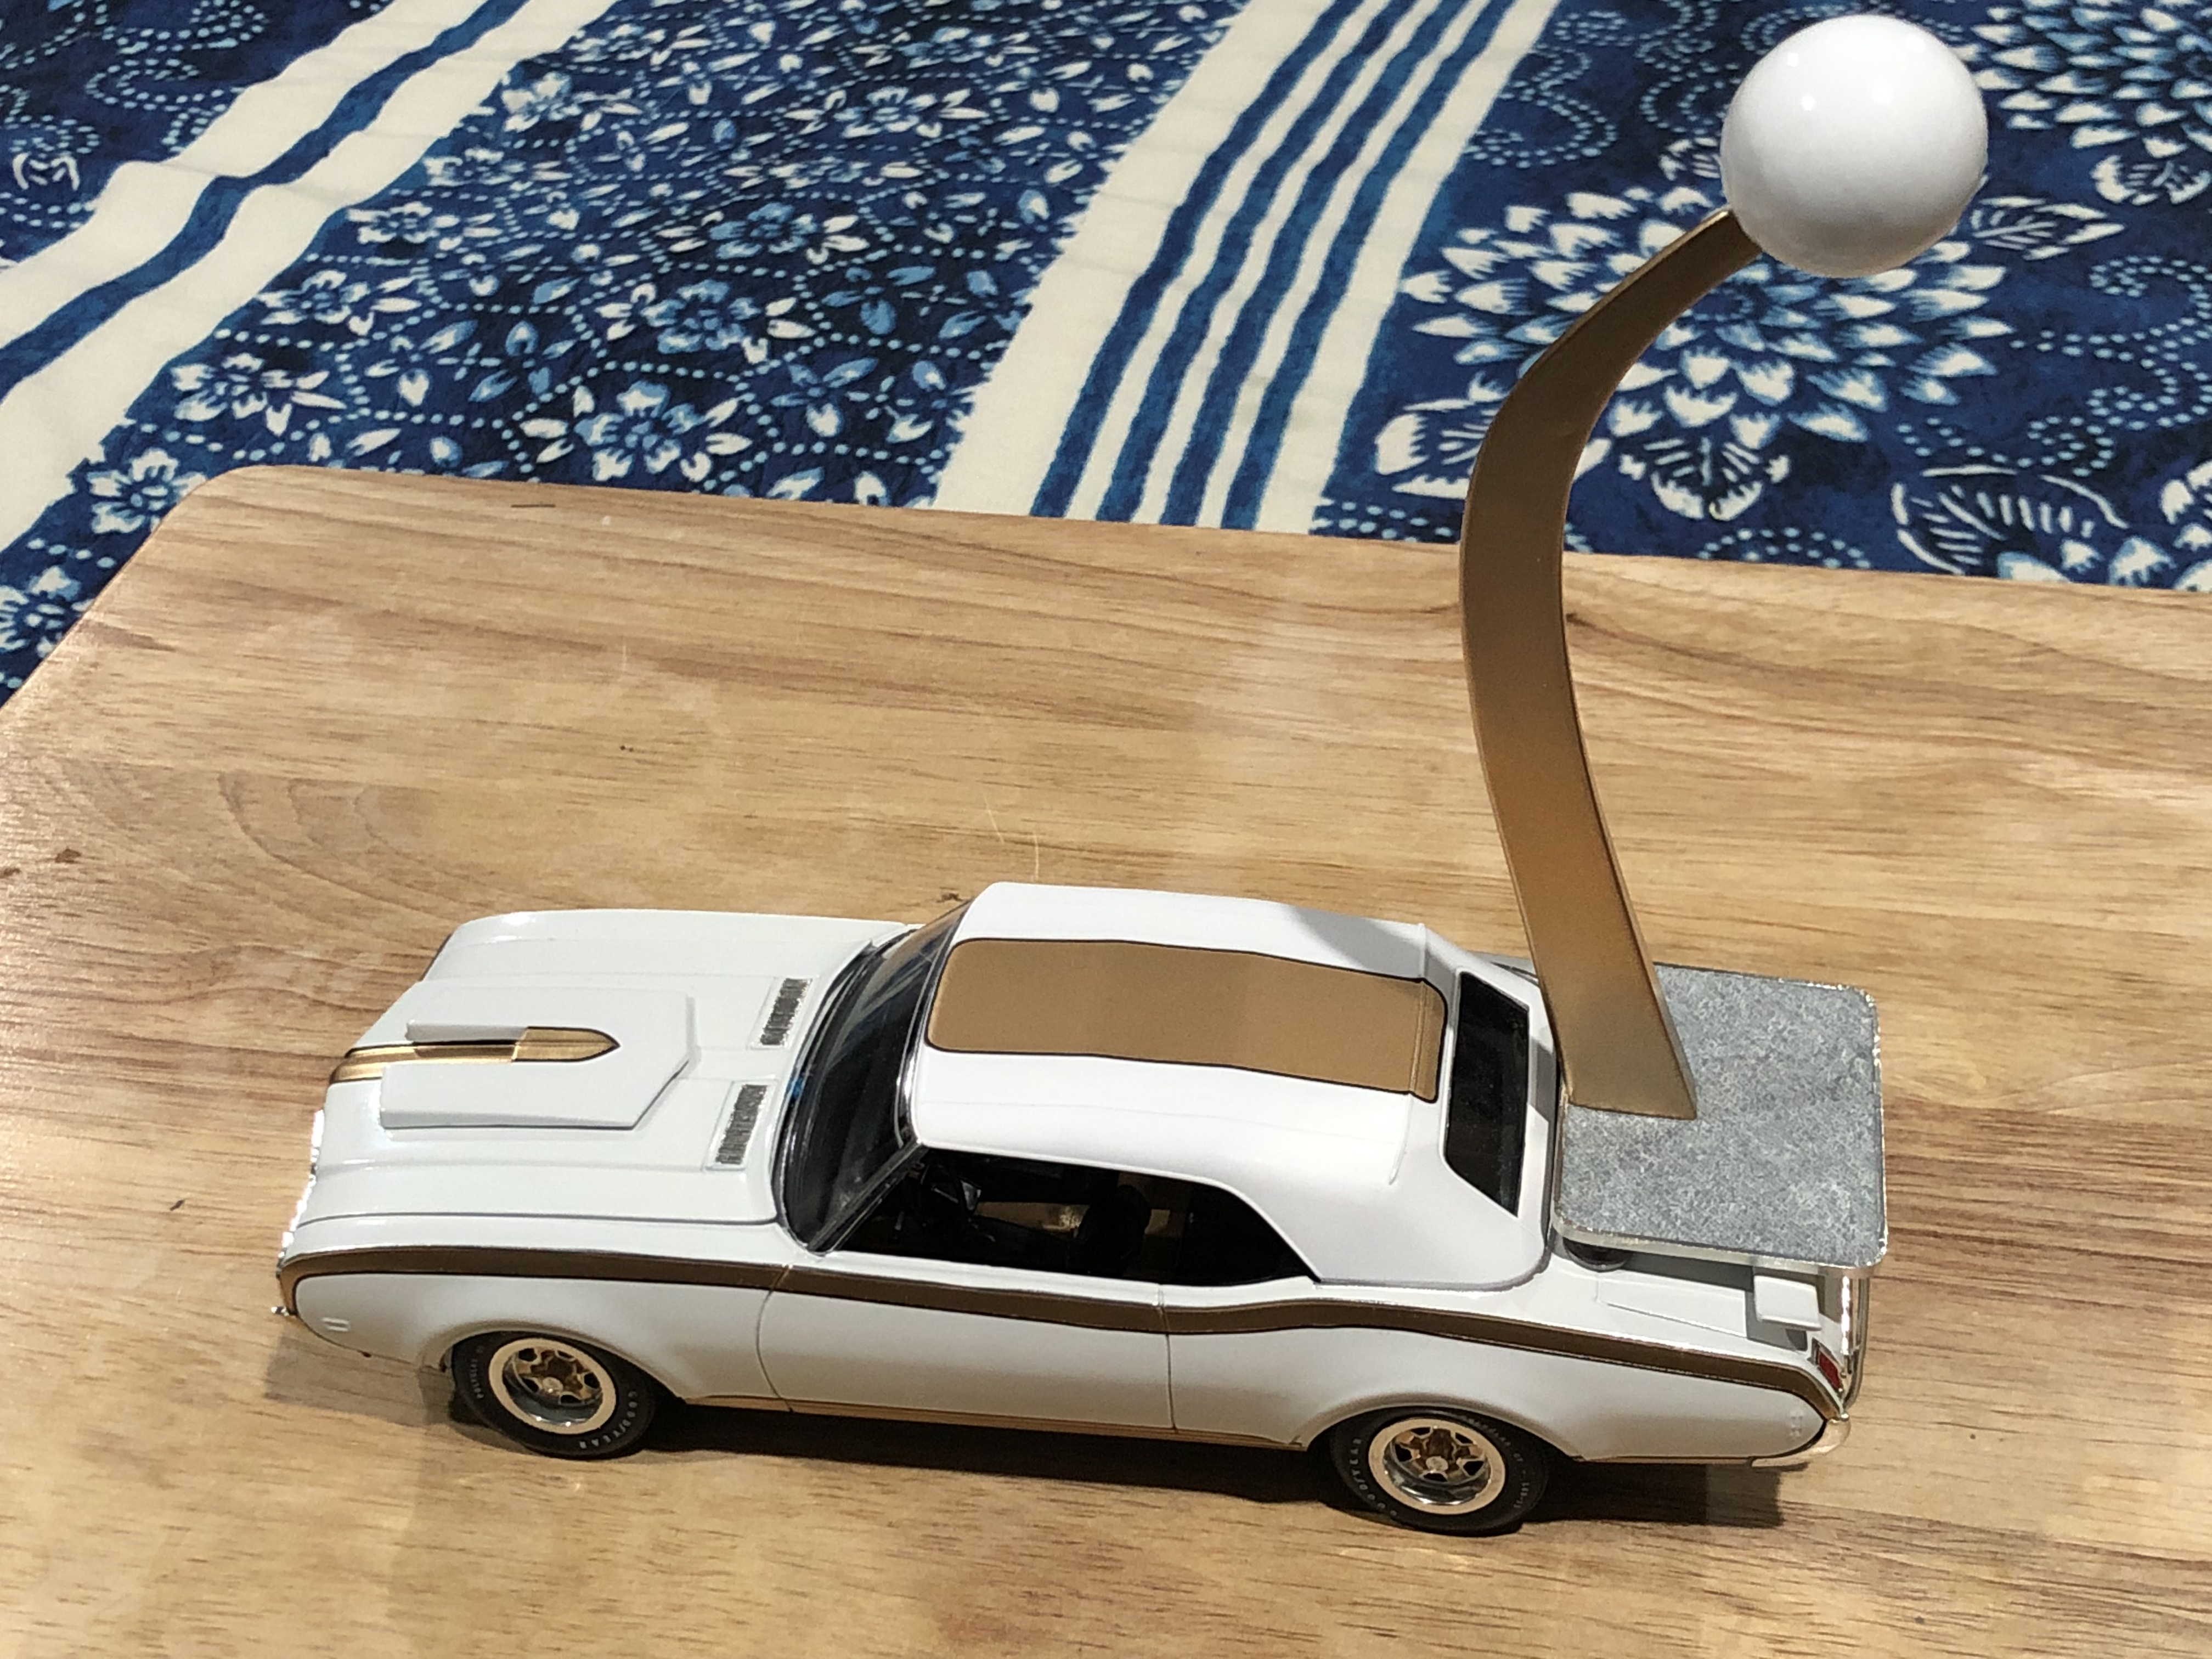
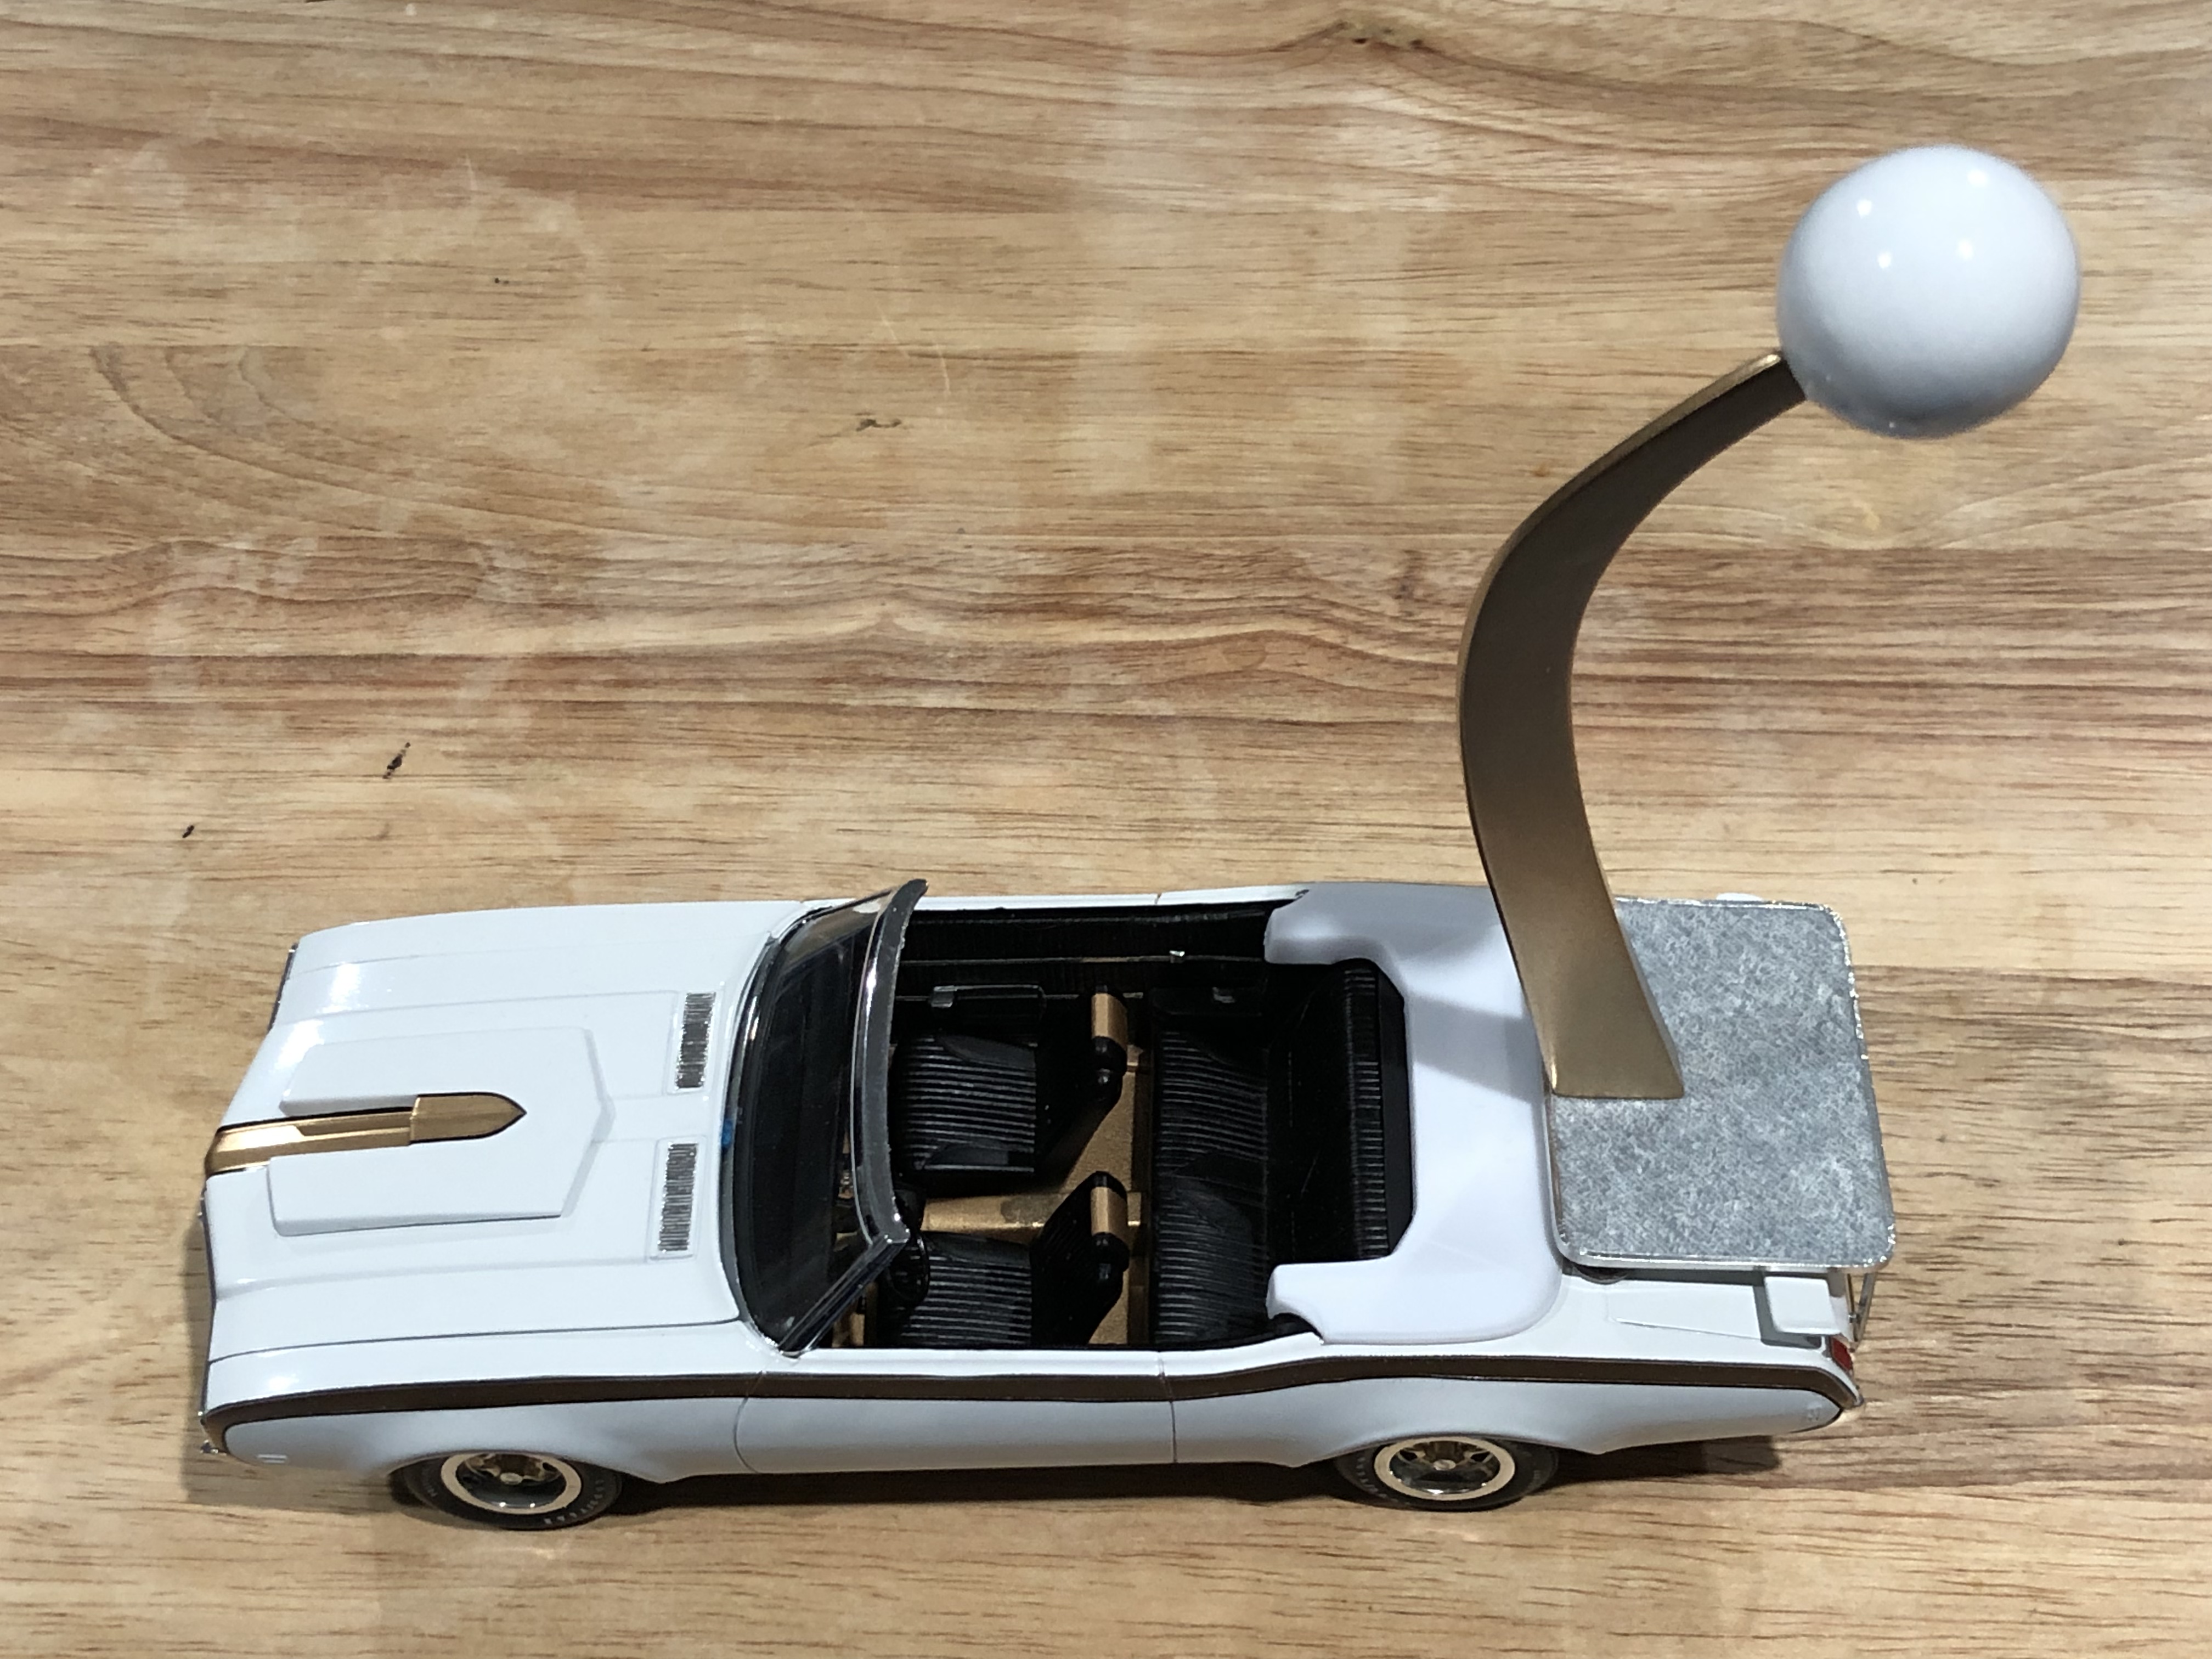
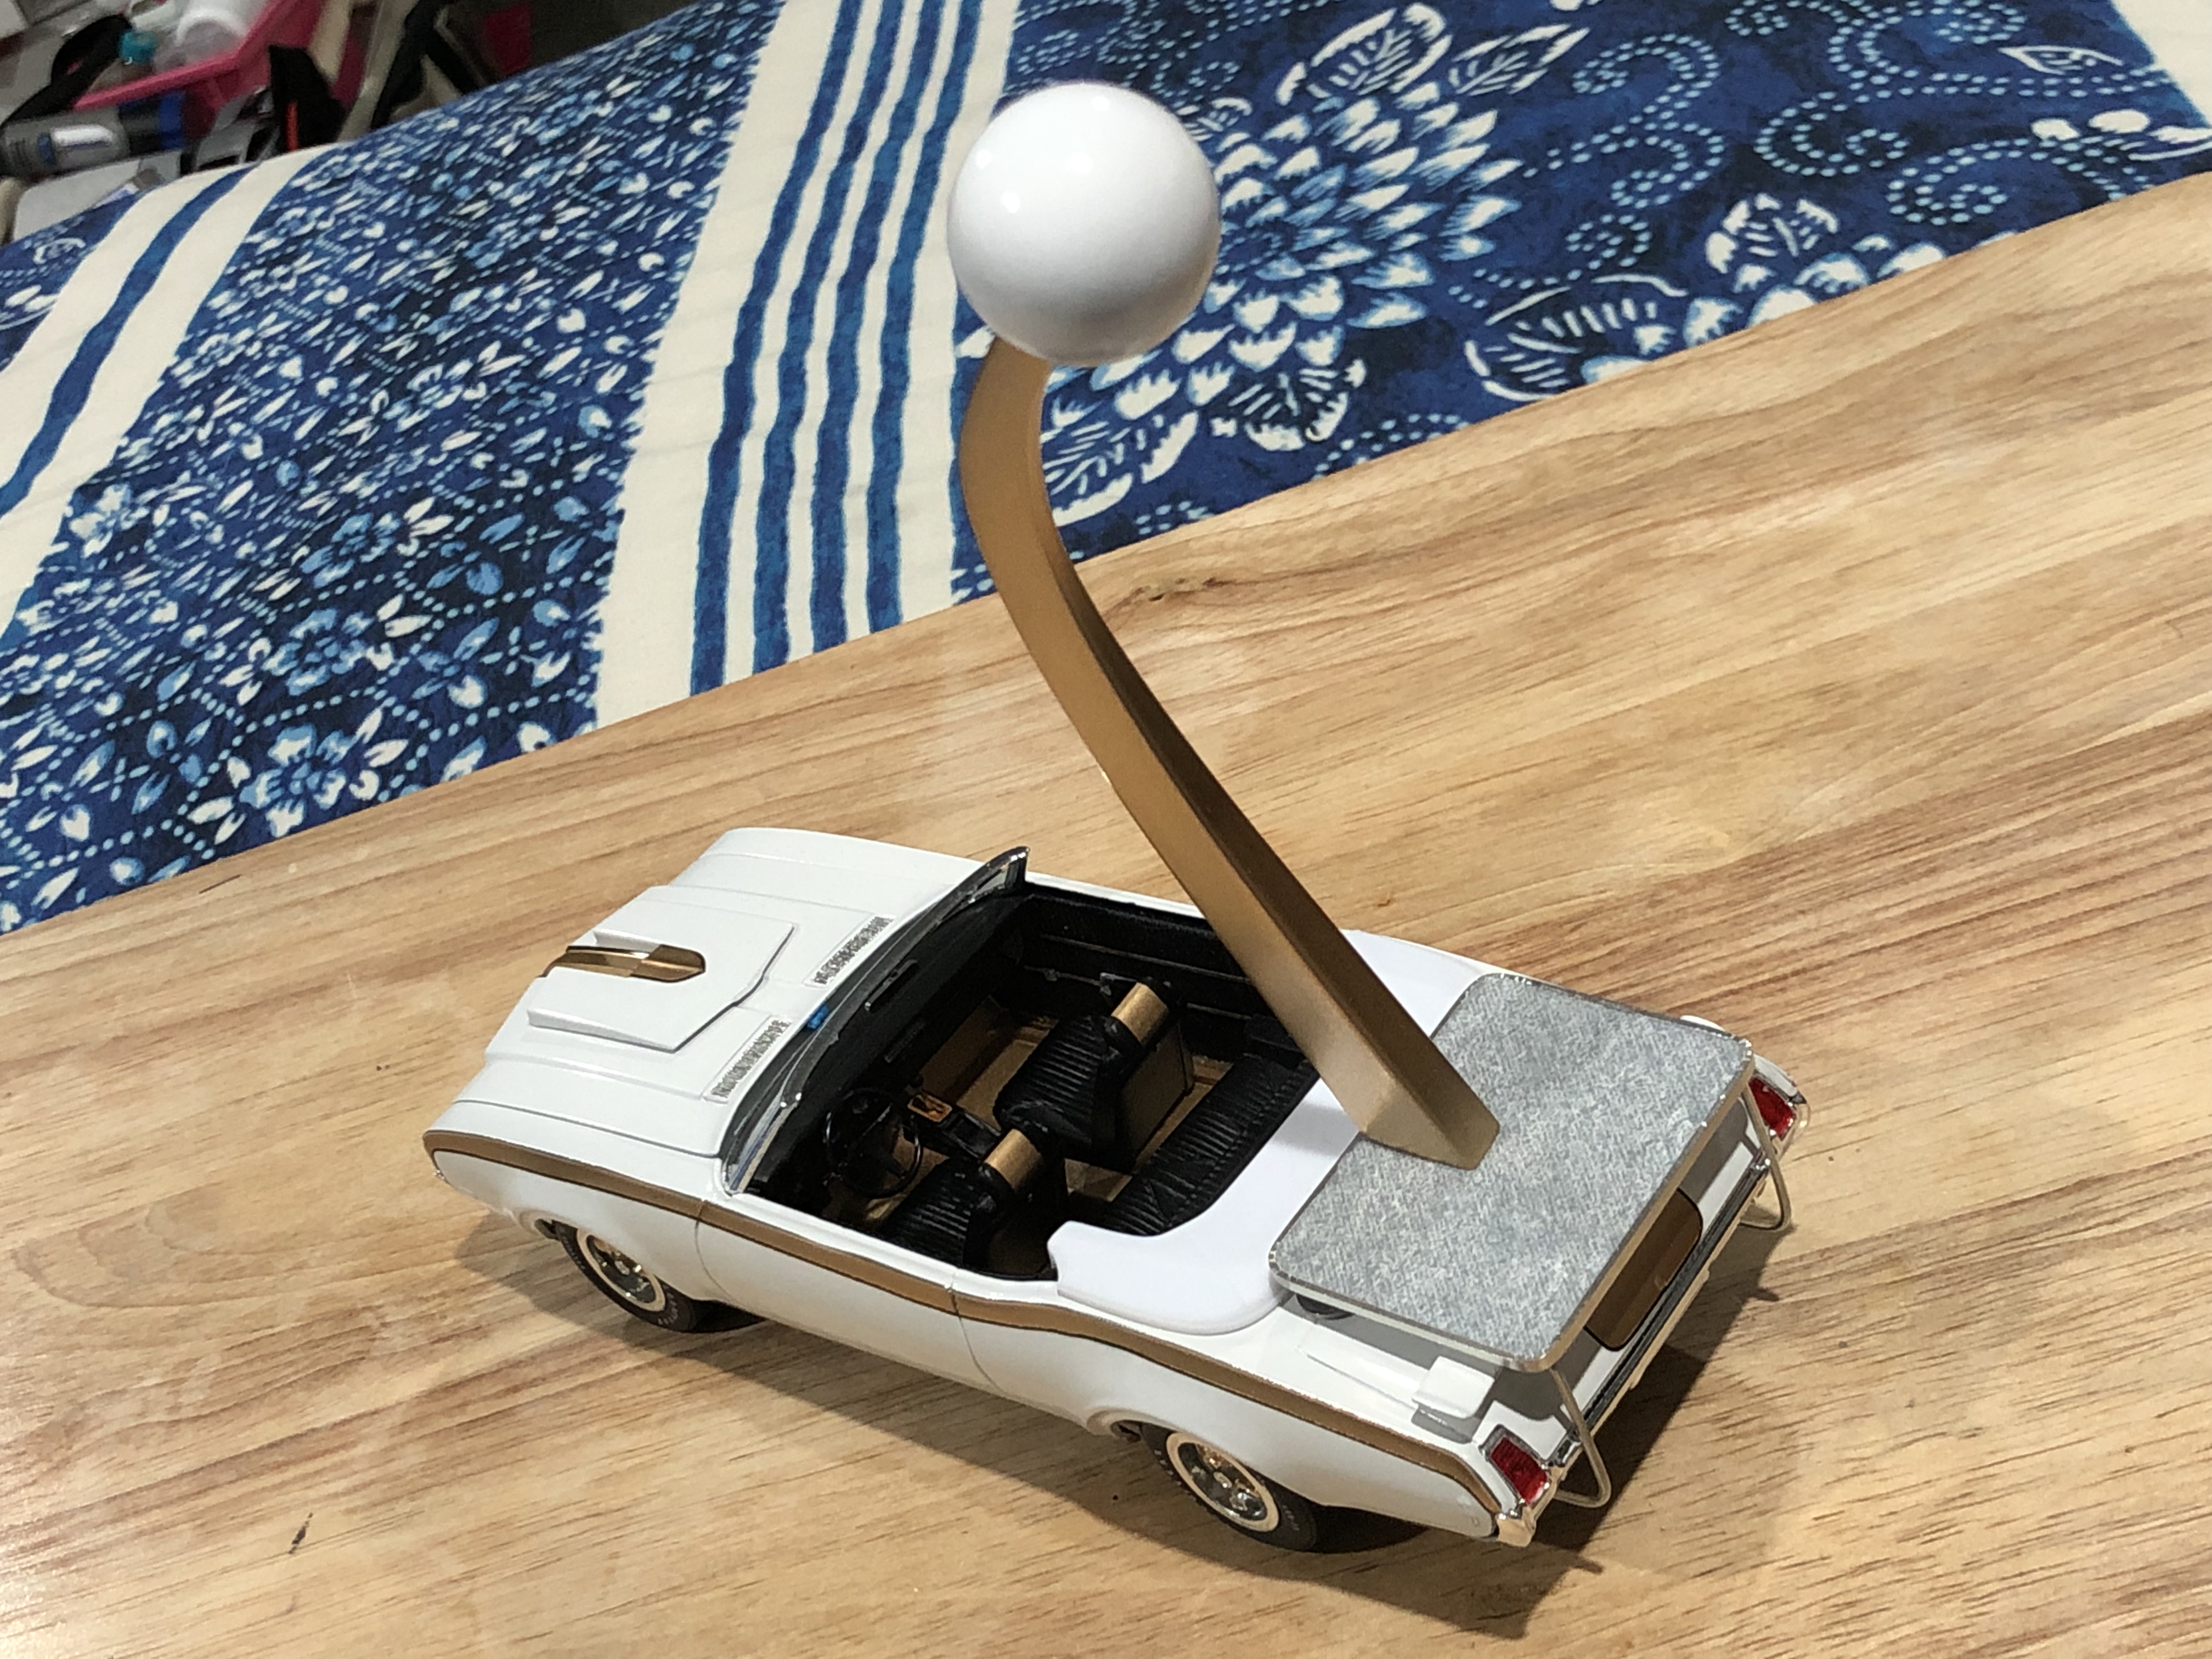
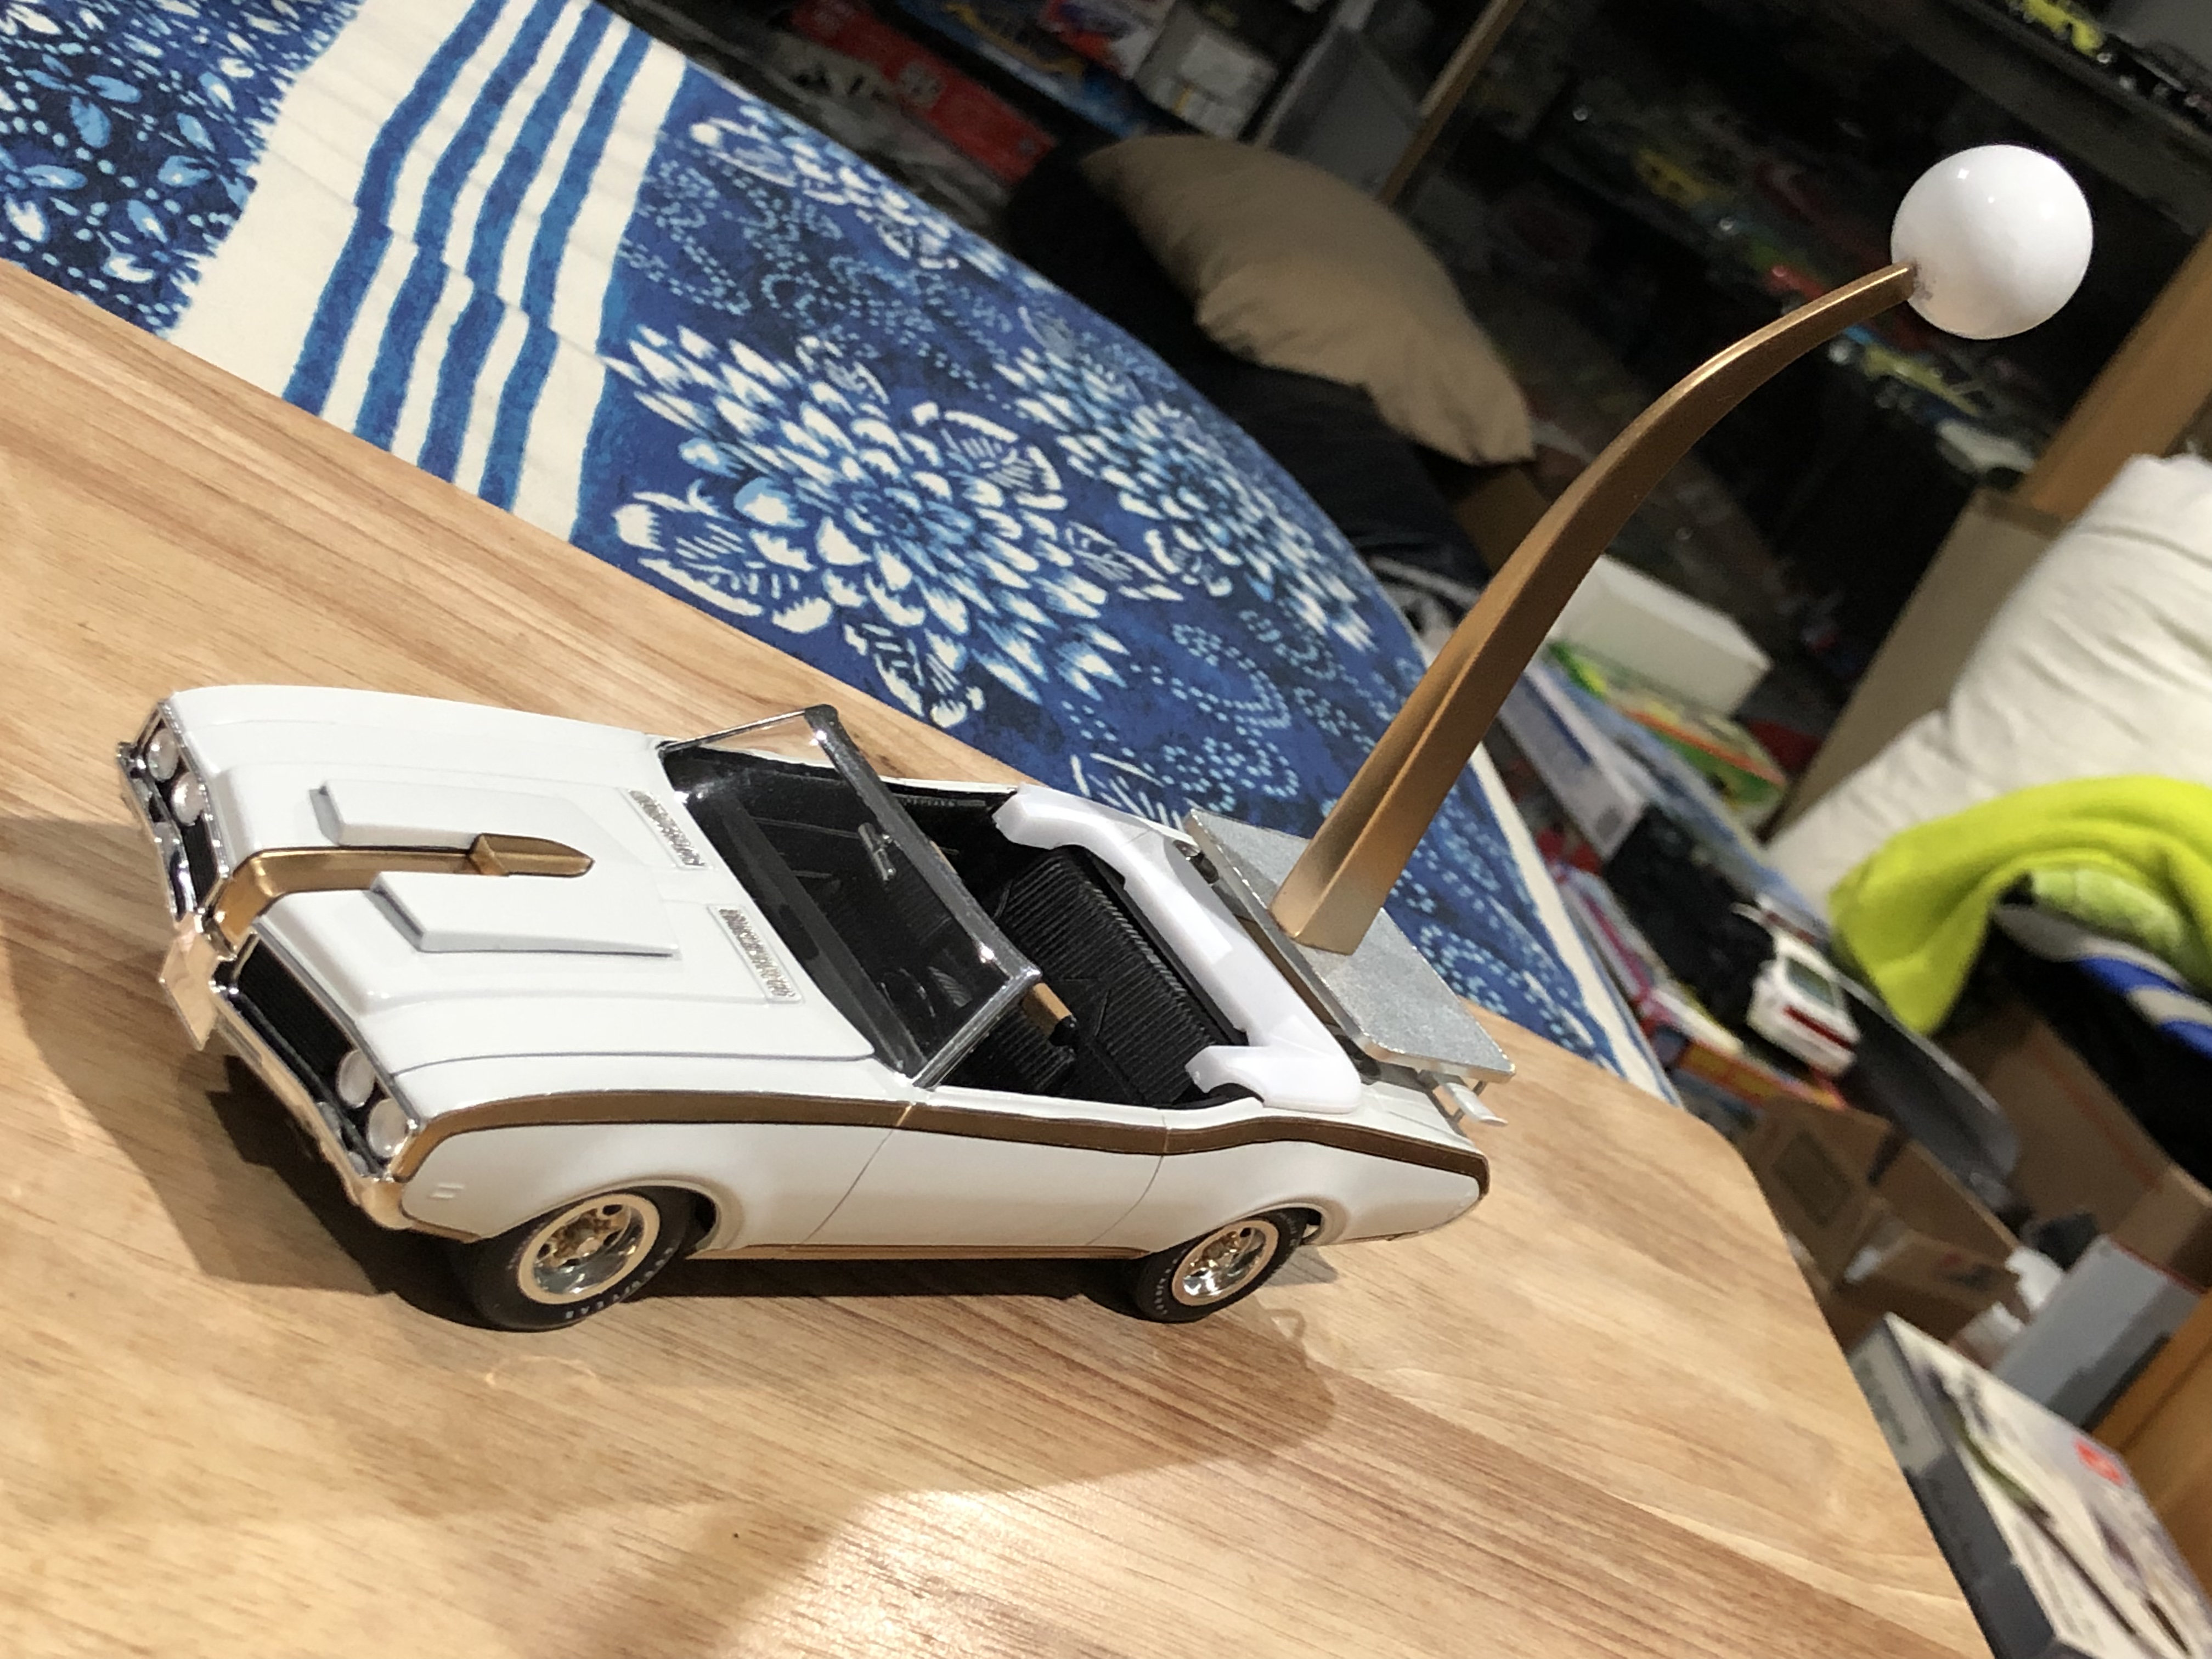
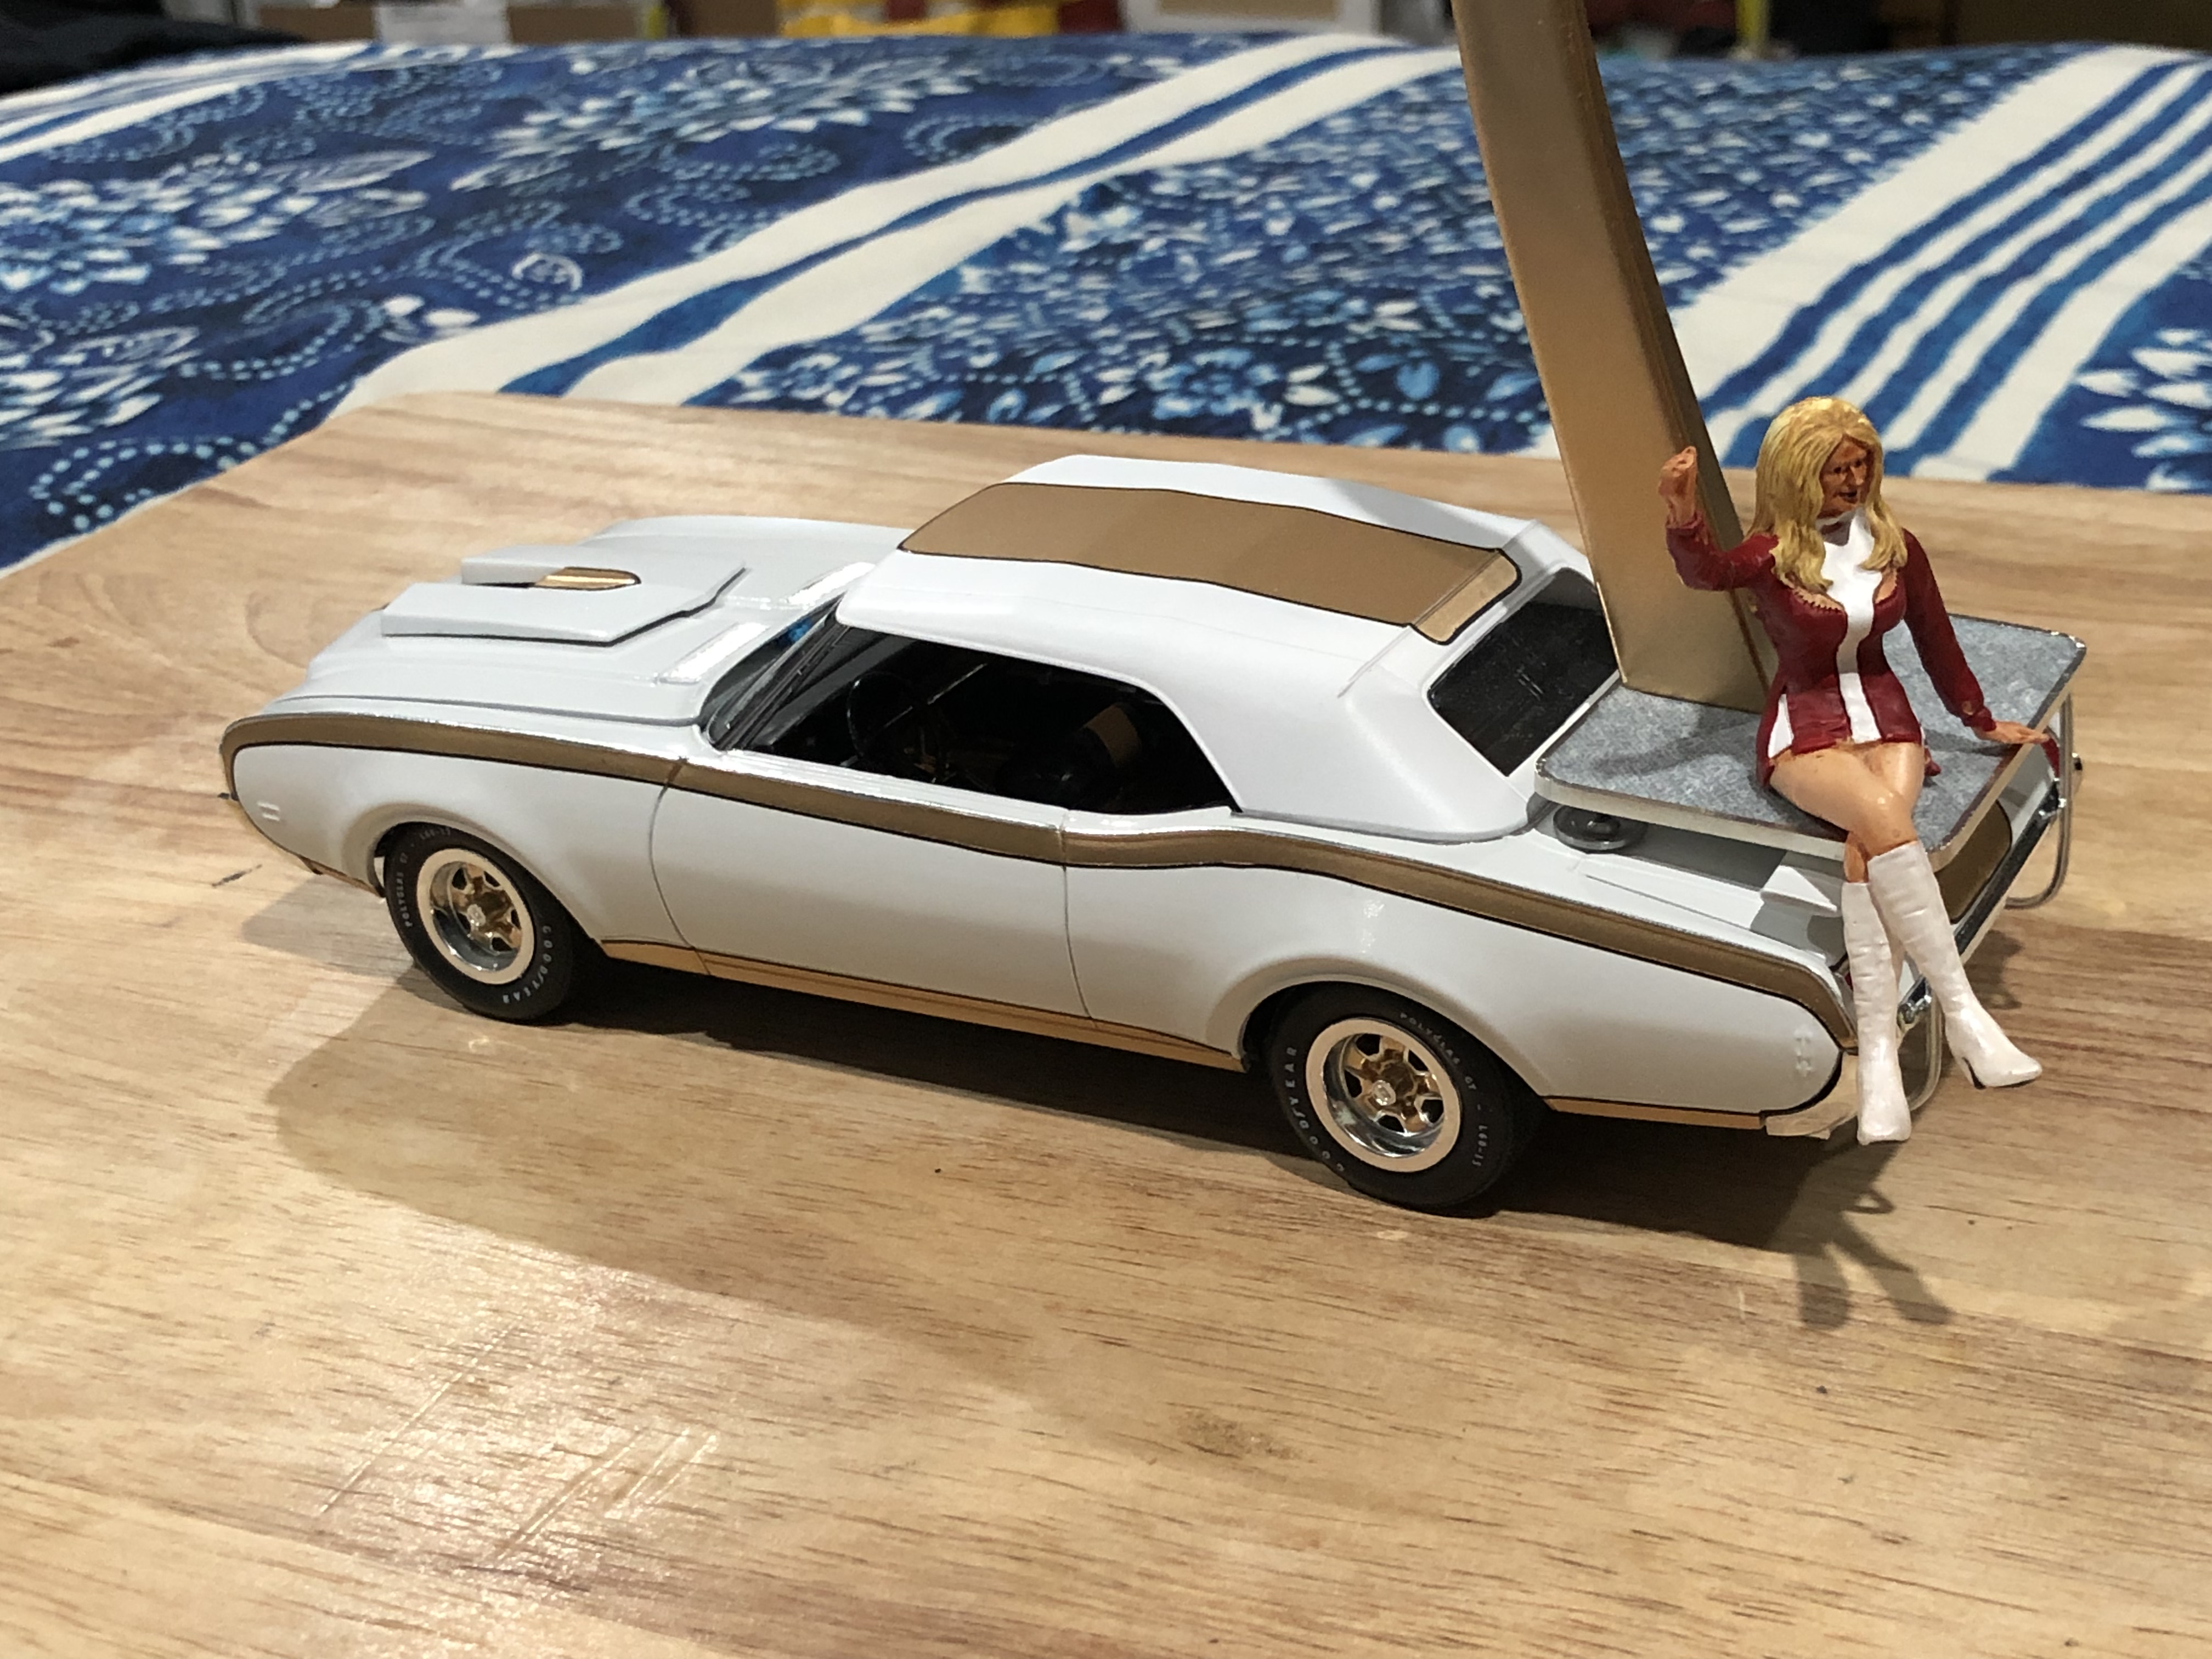
This was a really cool project. It had been on my mind for a couple years. I saw the car in an episode of Muscle Car Of The Week. It’s an online YouTube show bringing mostly cars from the Brothers collection. LOTS of inspiration! Special guest appearance from Linda Vaughn! The shifter and platform are removable. I figured four ease of transportation to and from shows and club nights, this would be a good idea. The platform doesn’t mount to the bumper the same way it does on the real car. So what do you guys think? I’d love to hear any questions or comments. Thanks for following along, I really enjoyed this build!
-
1969 Hurst Olds convertible conversion
Superbird McMonte replied to Superbird McMonte's topic in WIP: Model Cars
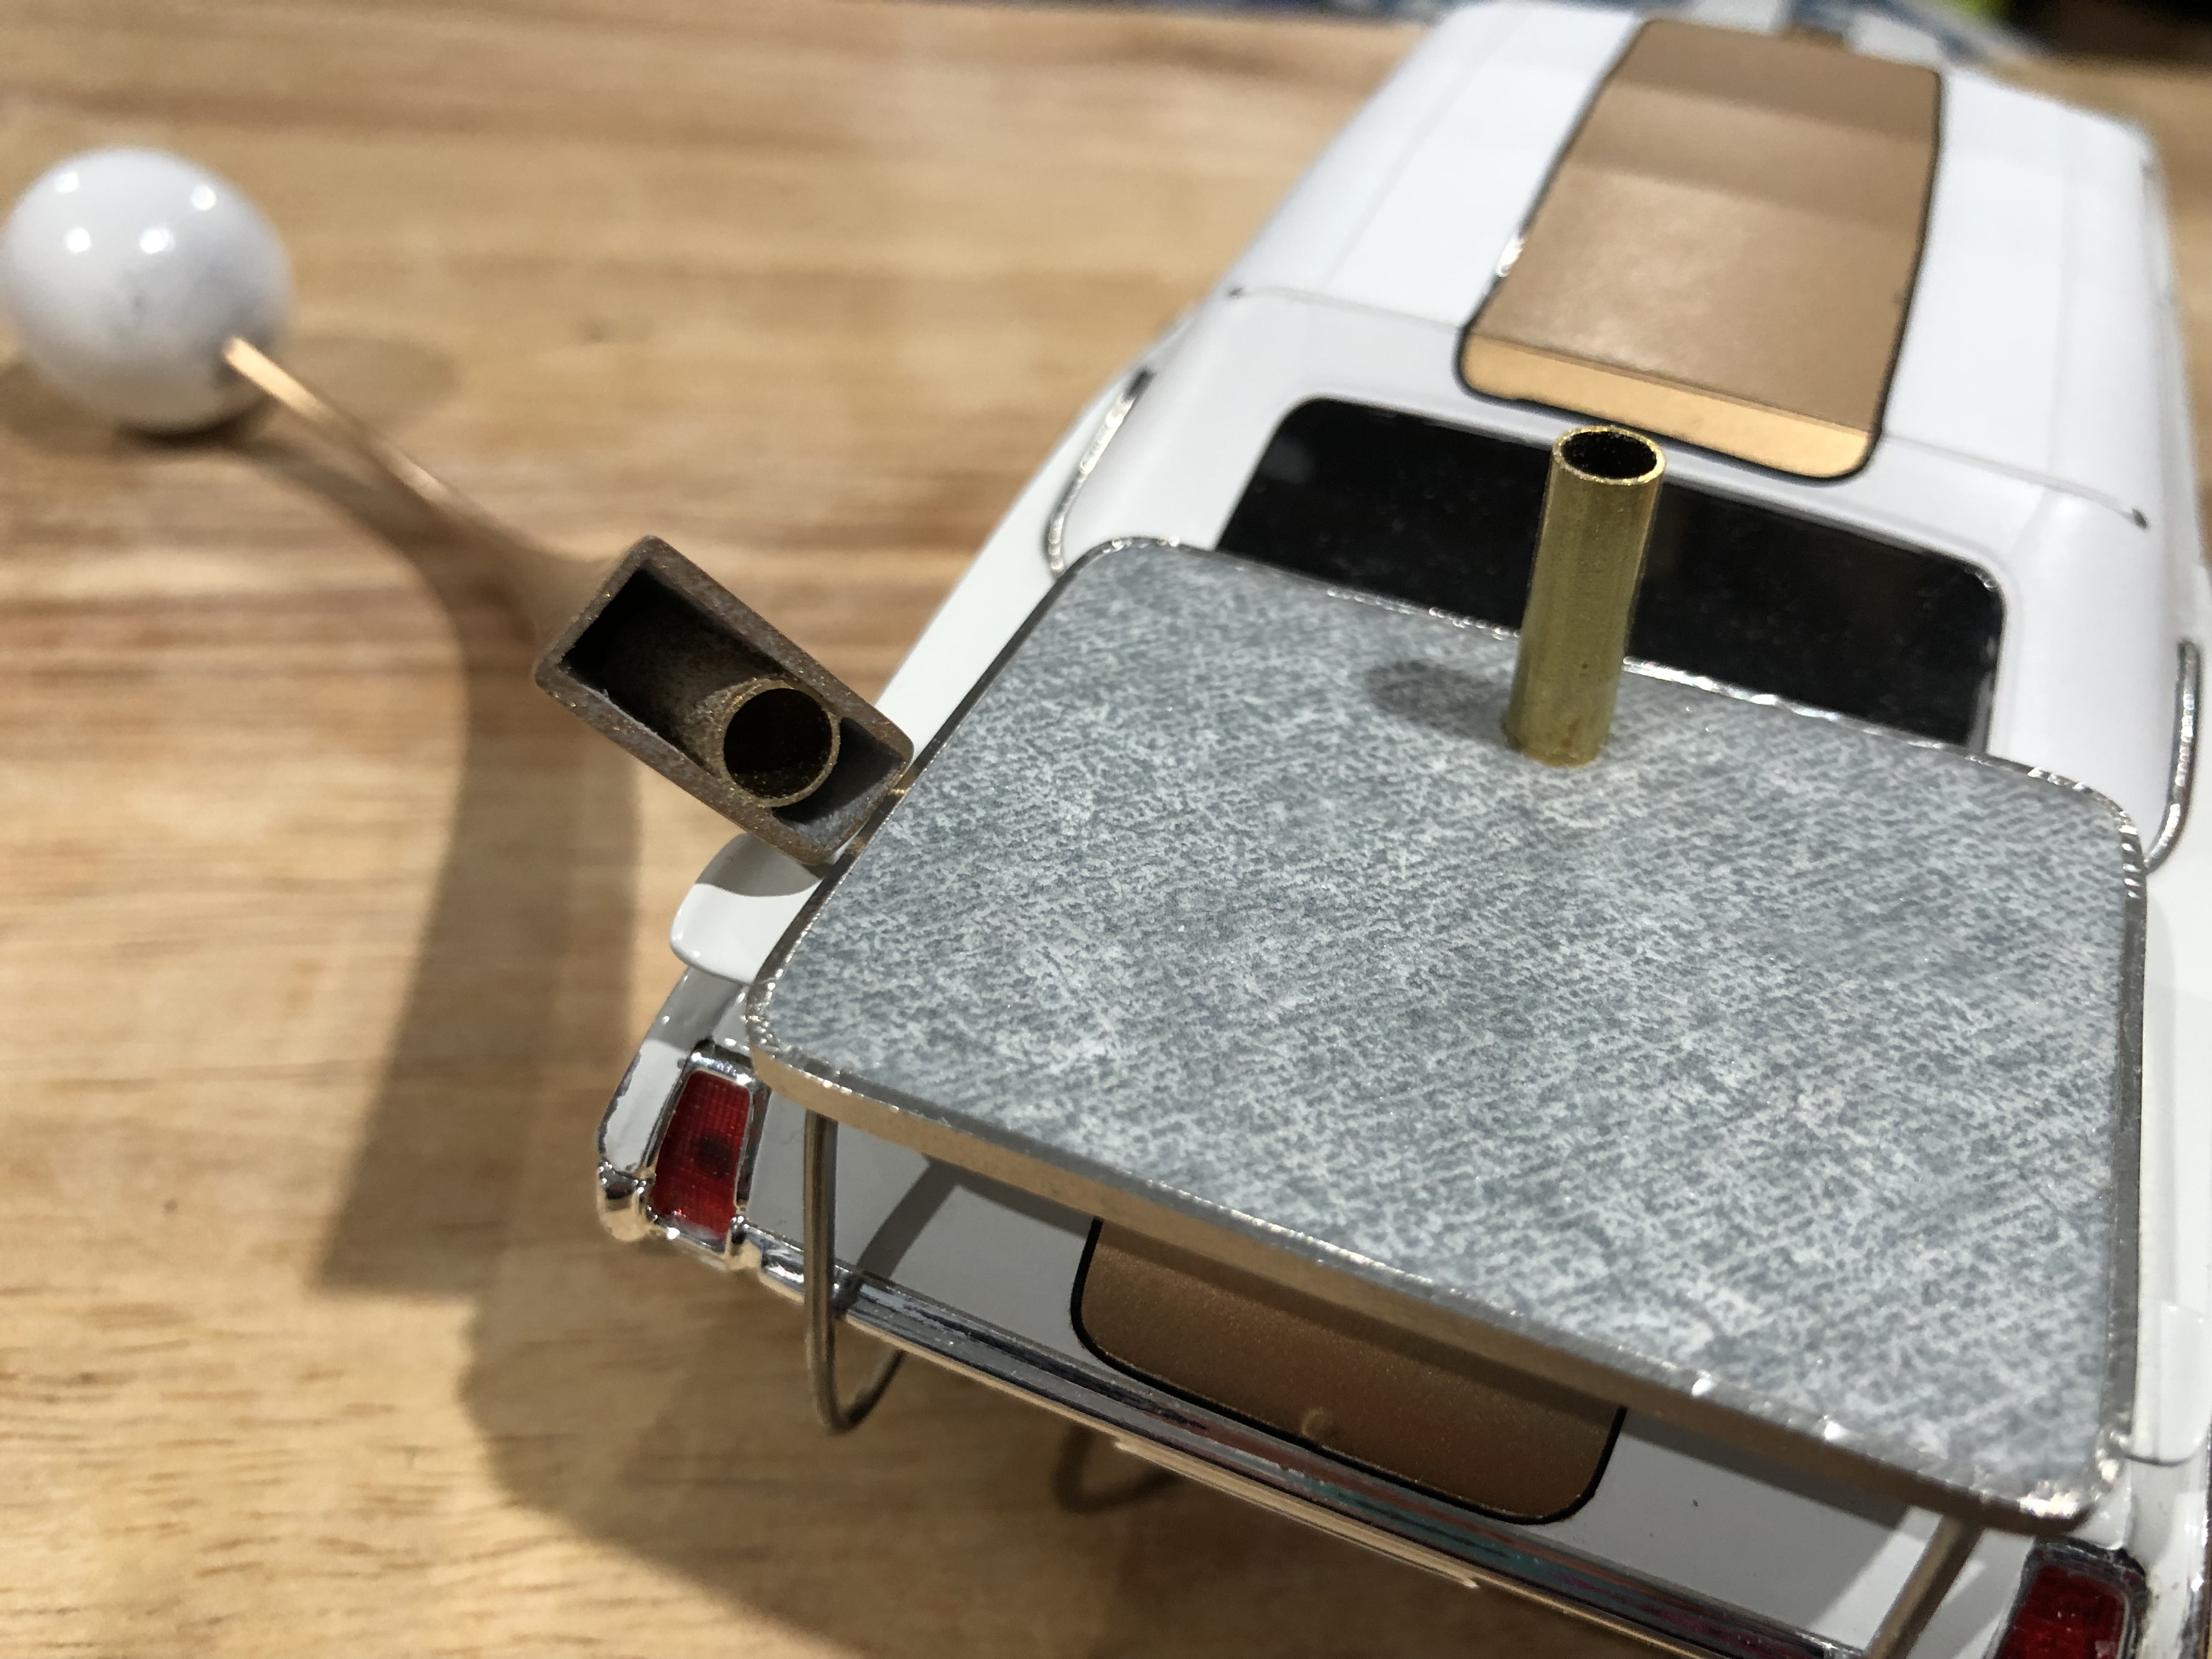
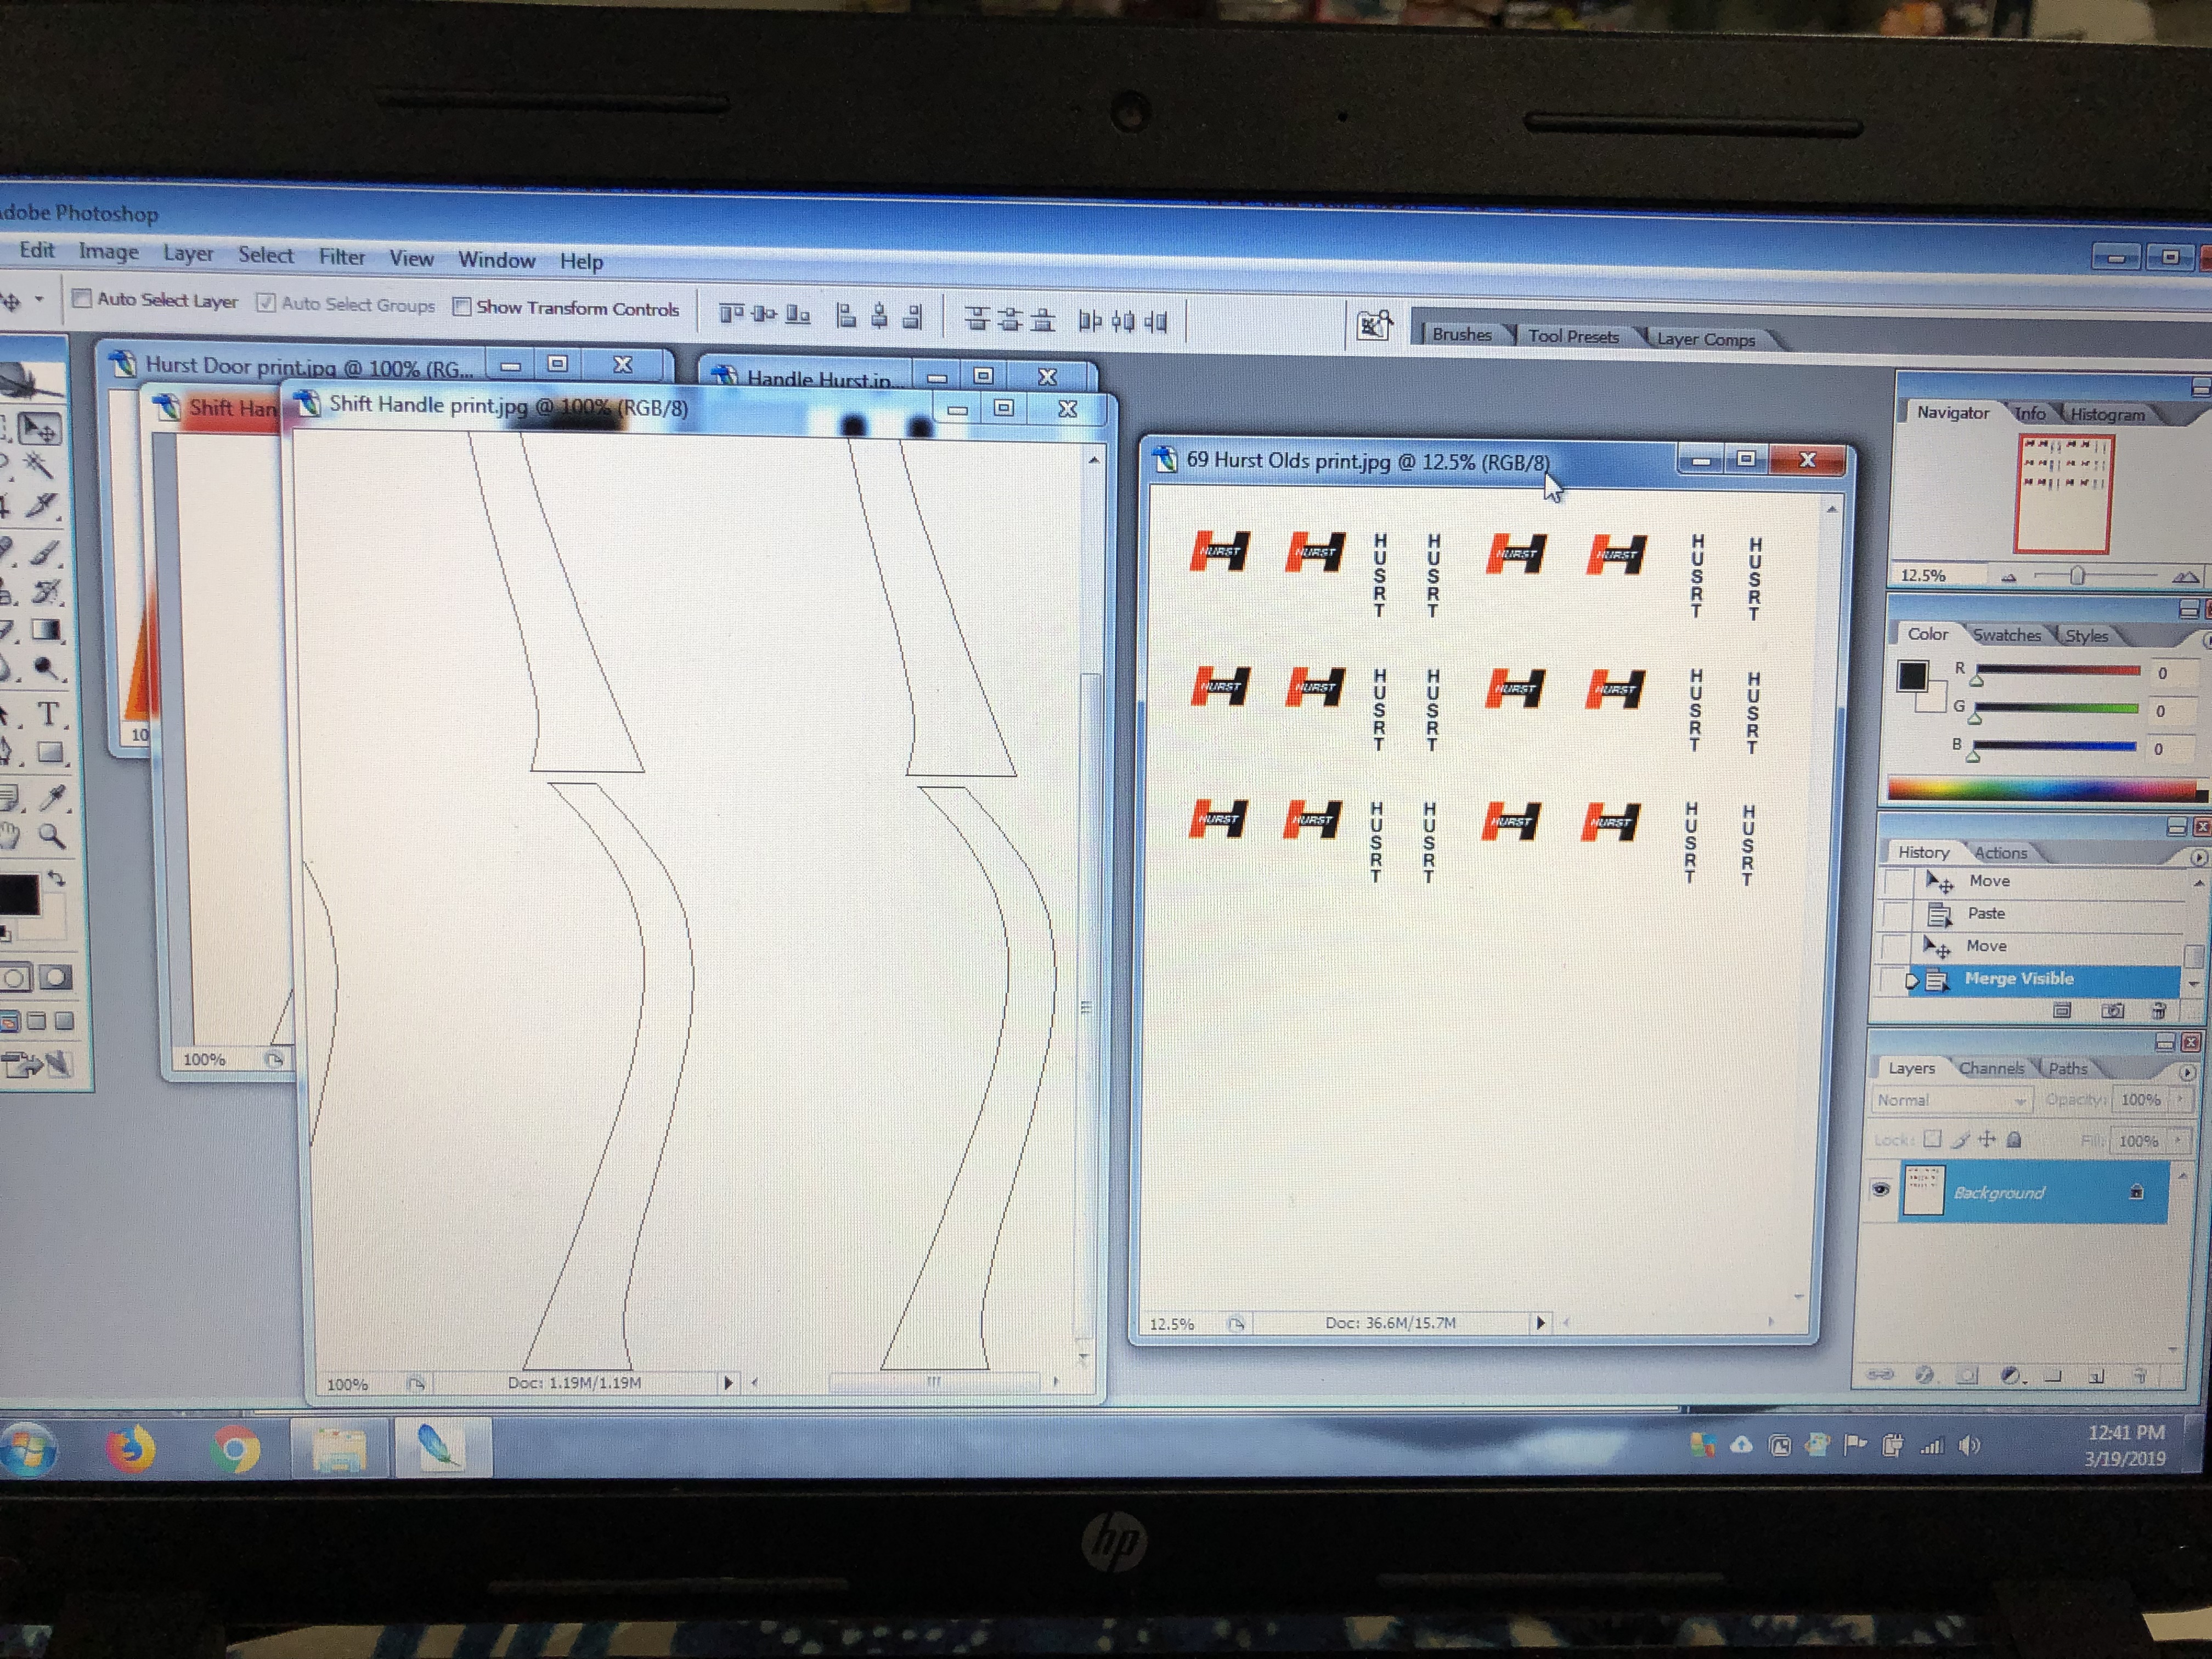
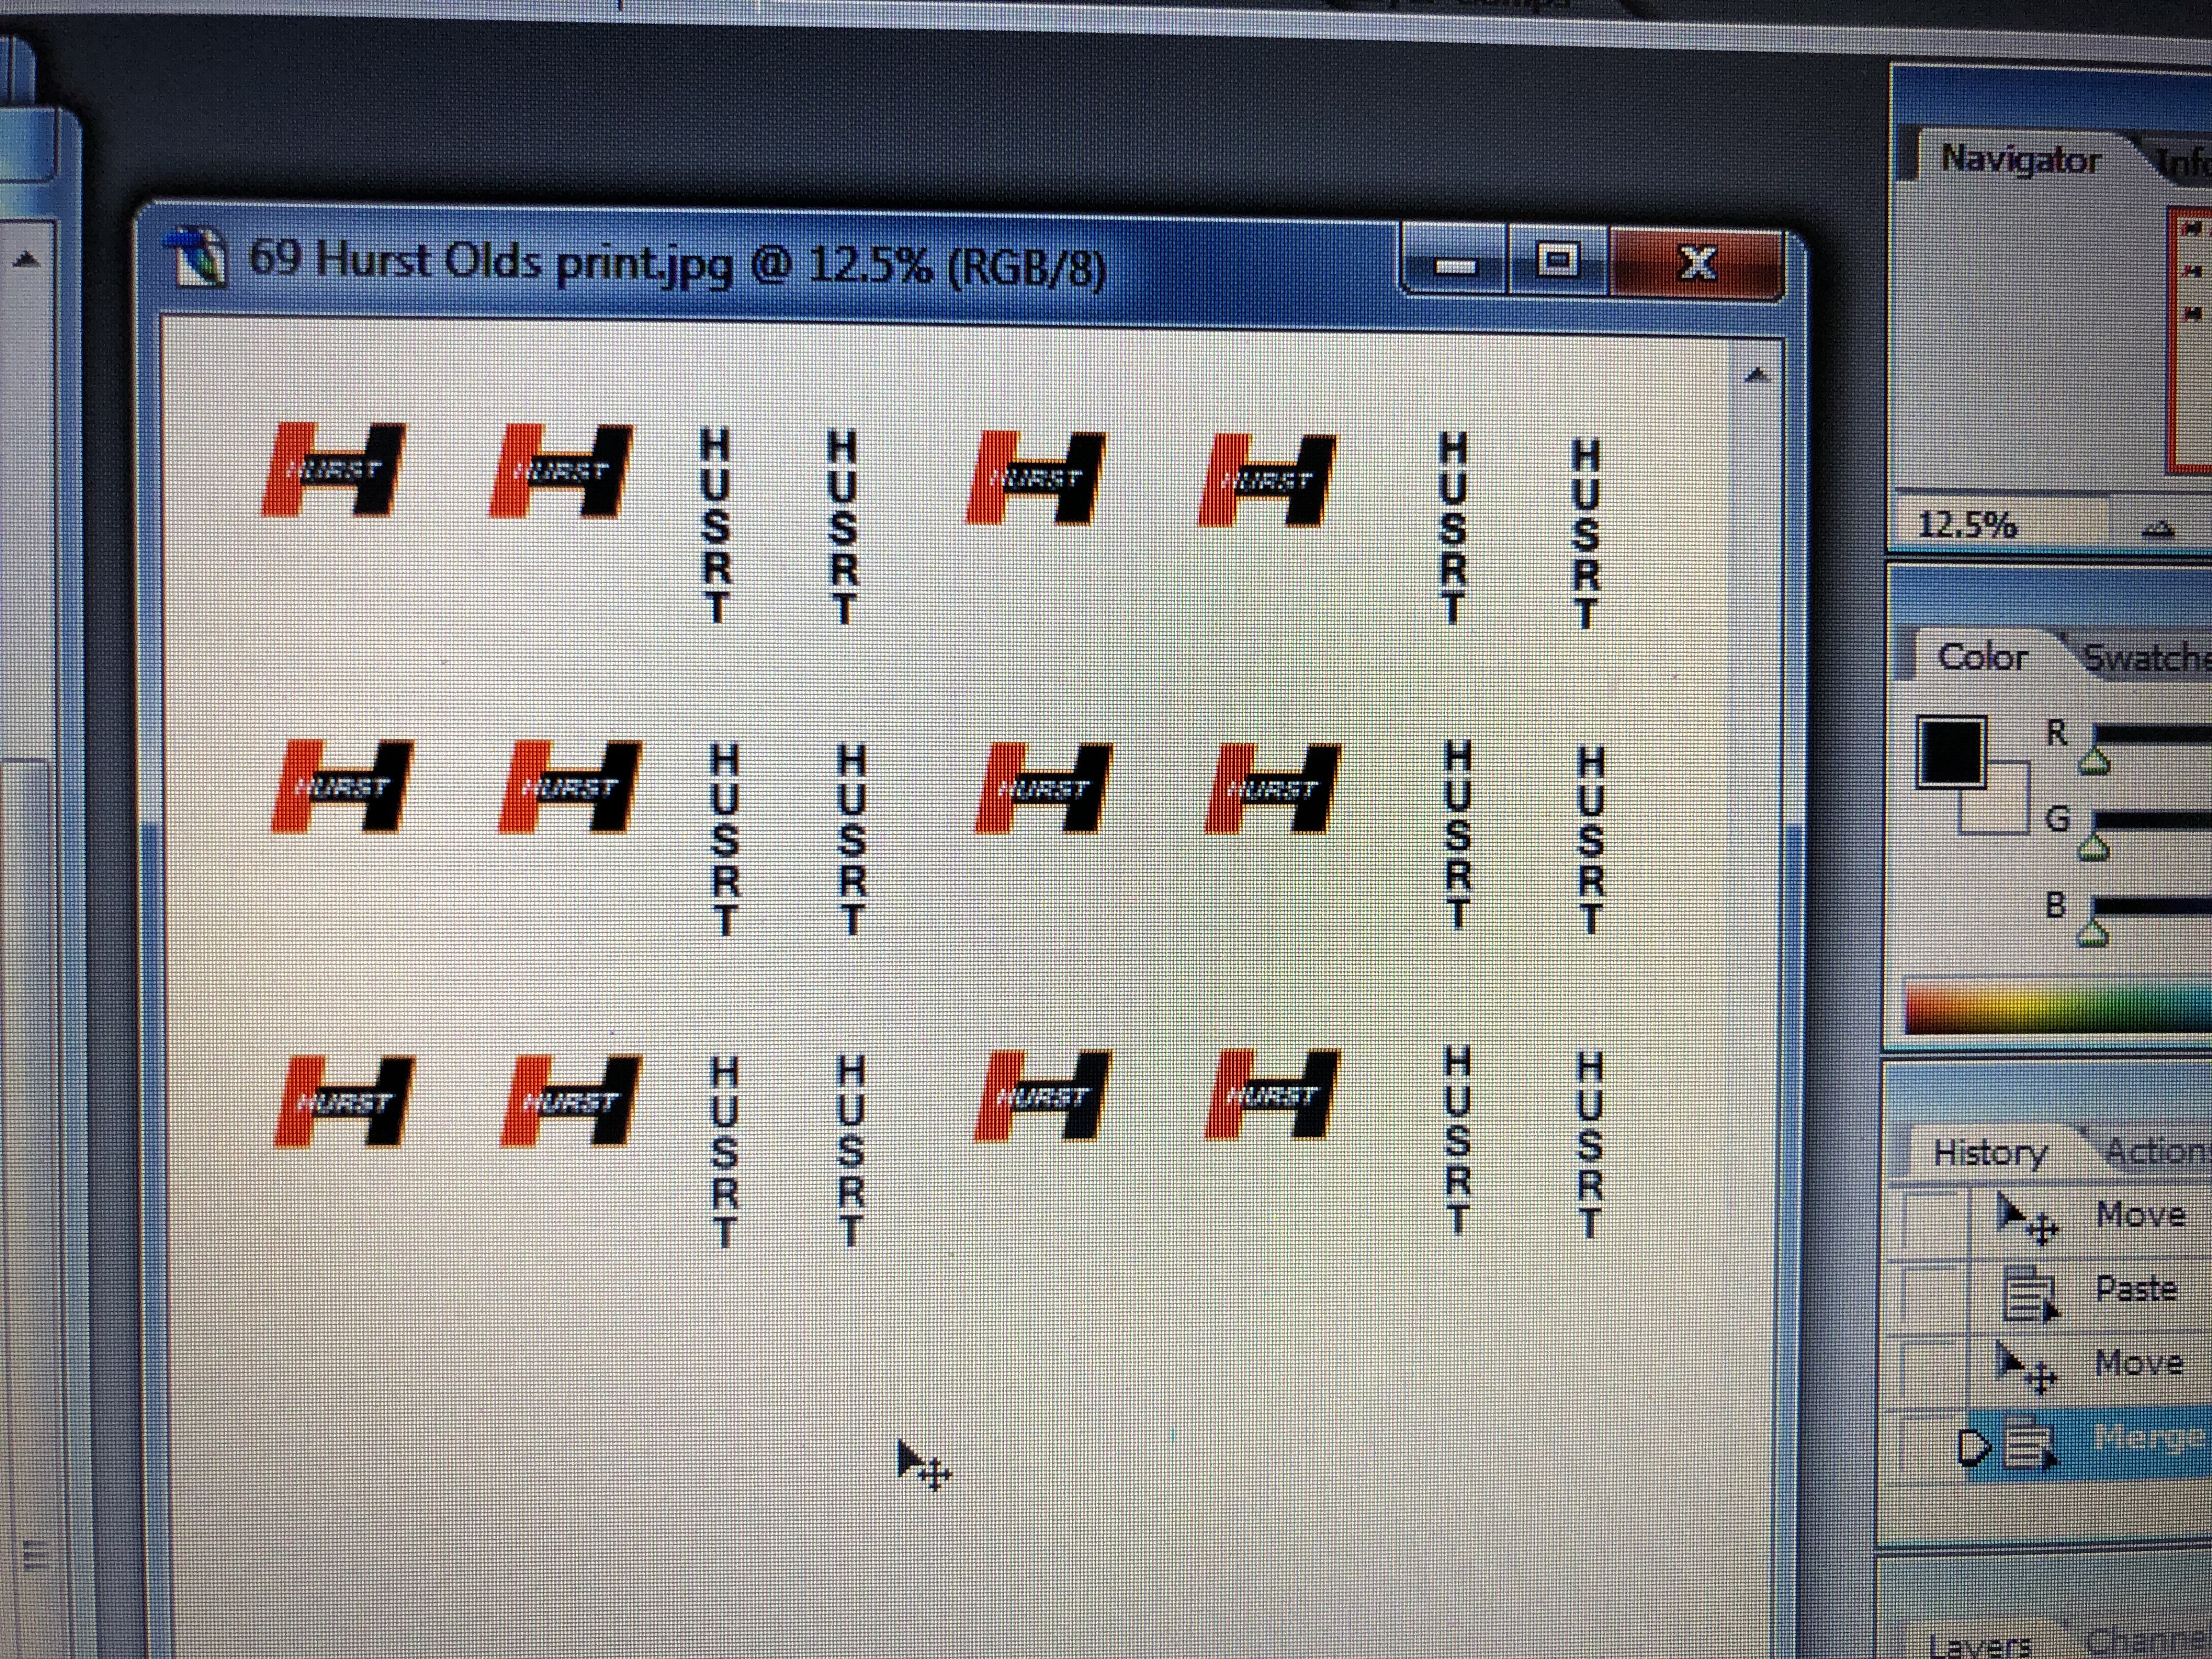
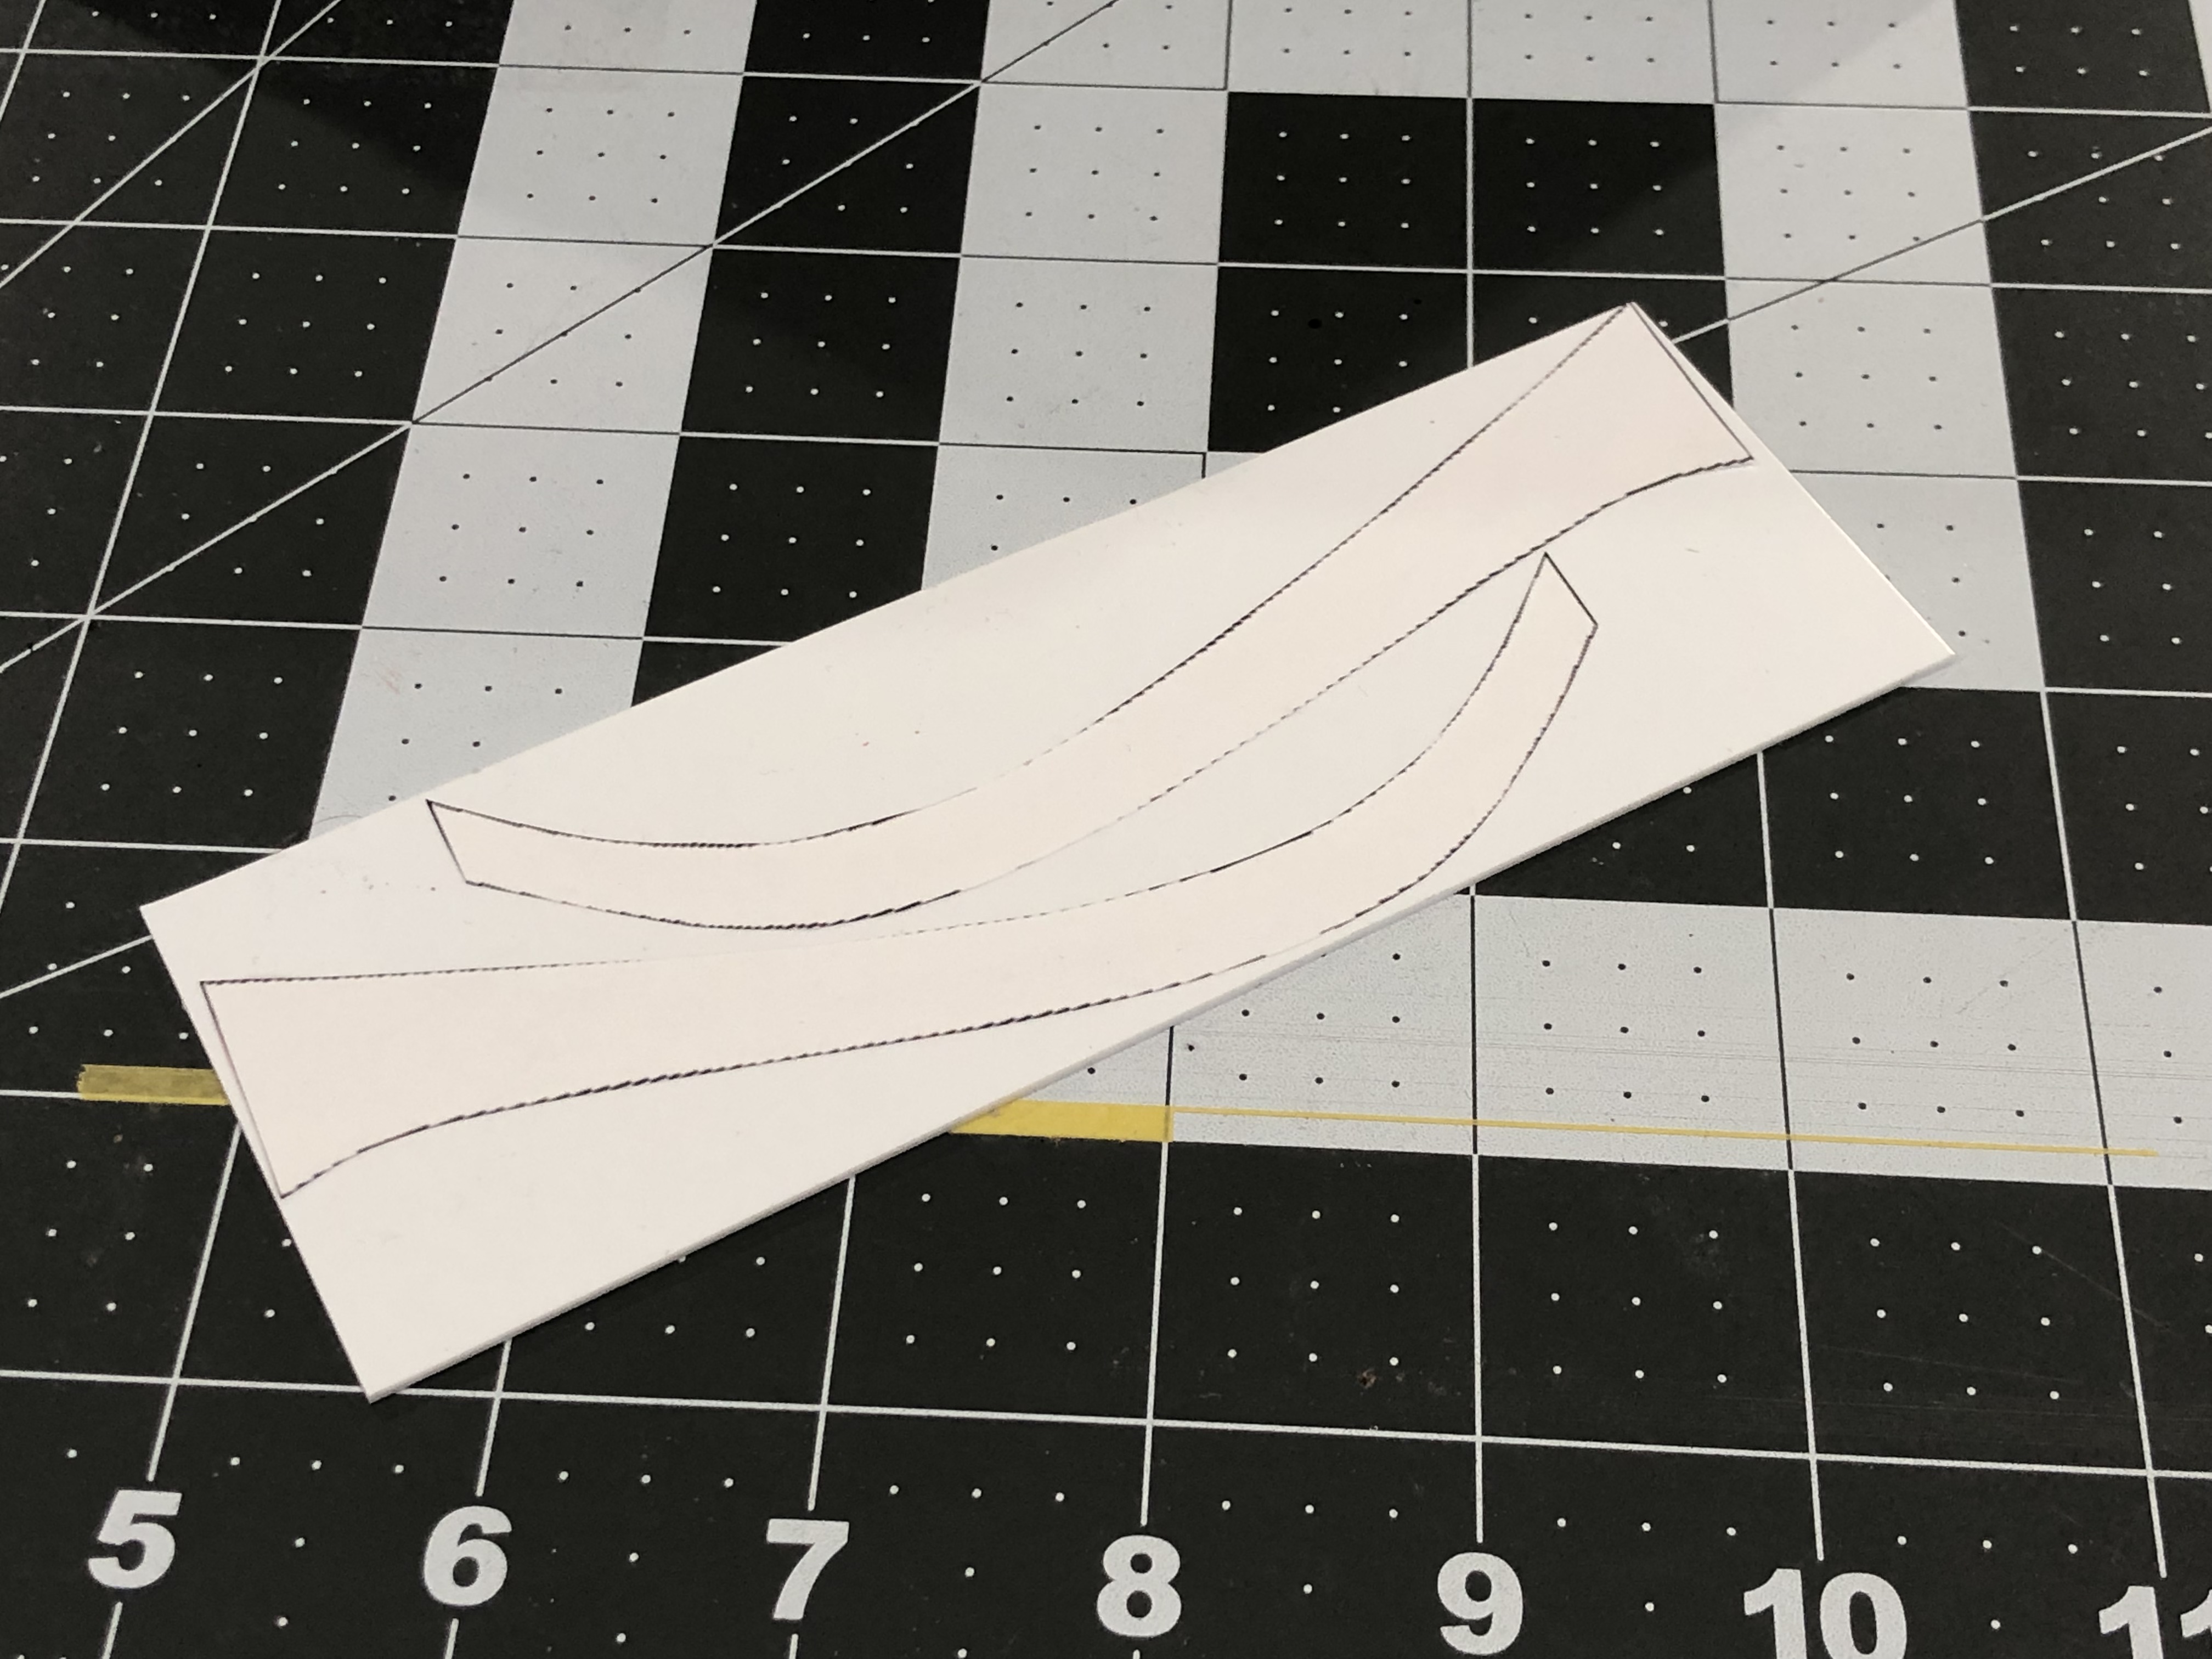
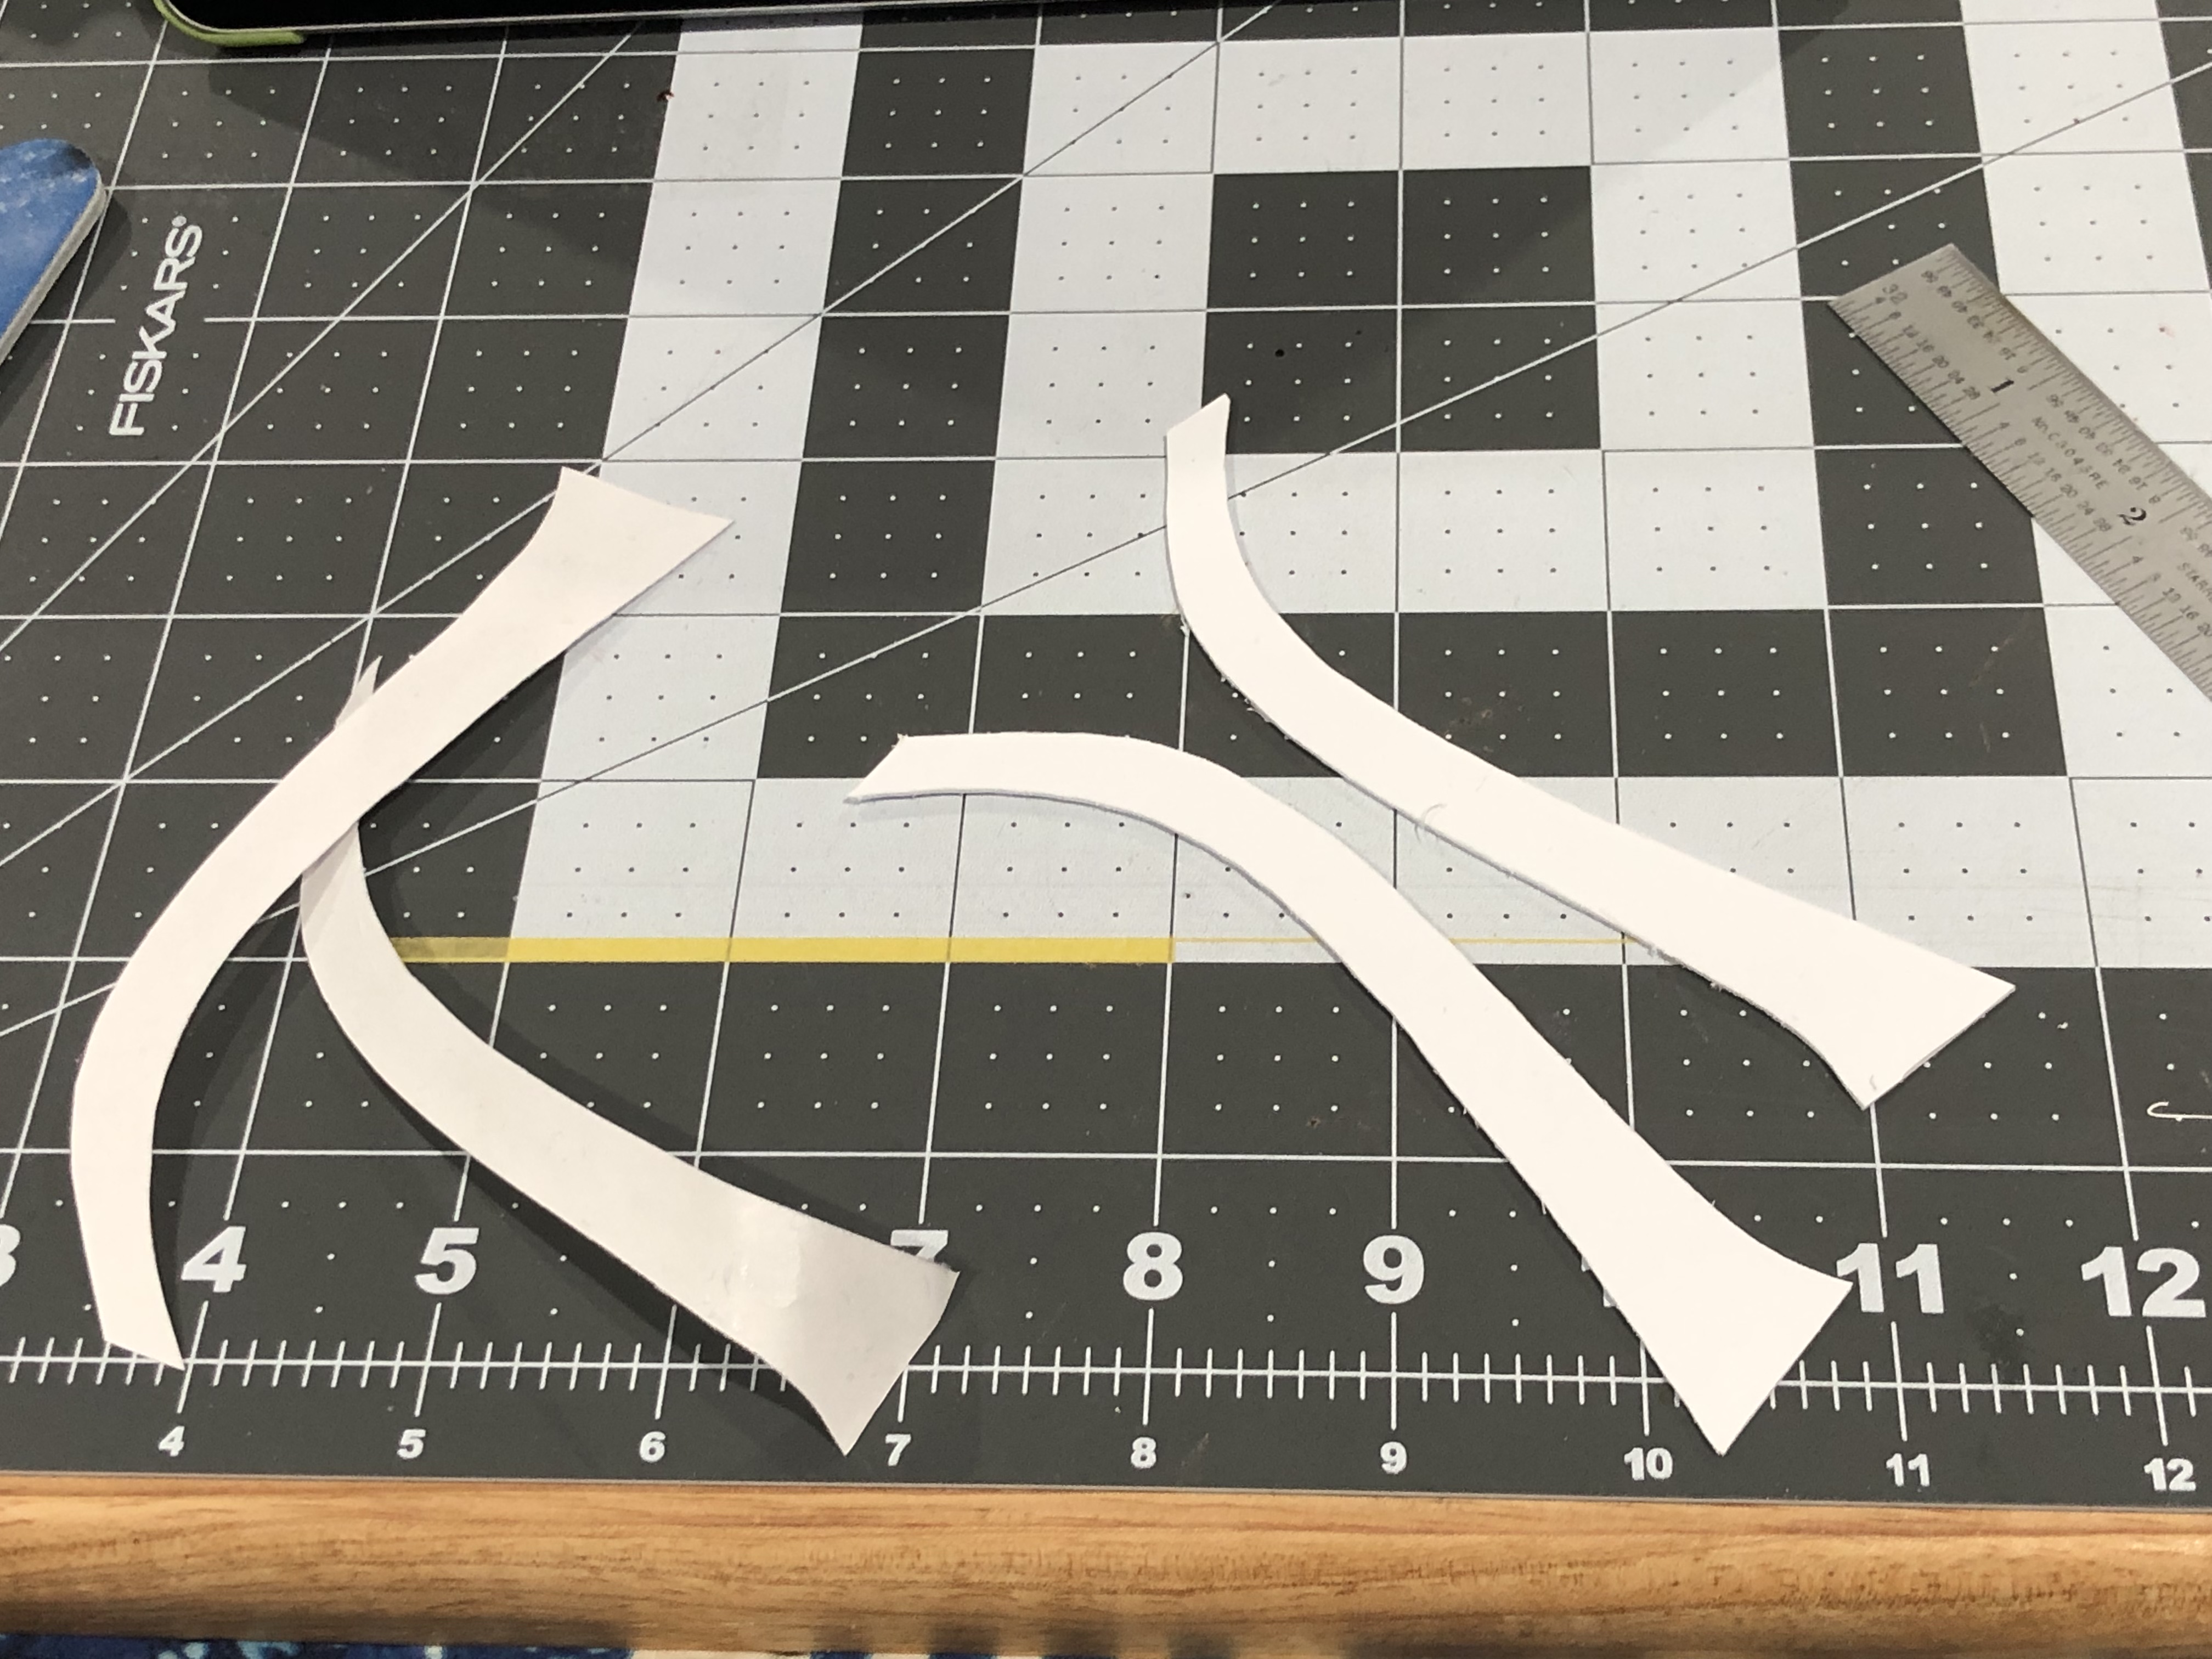
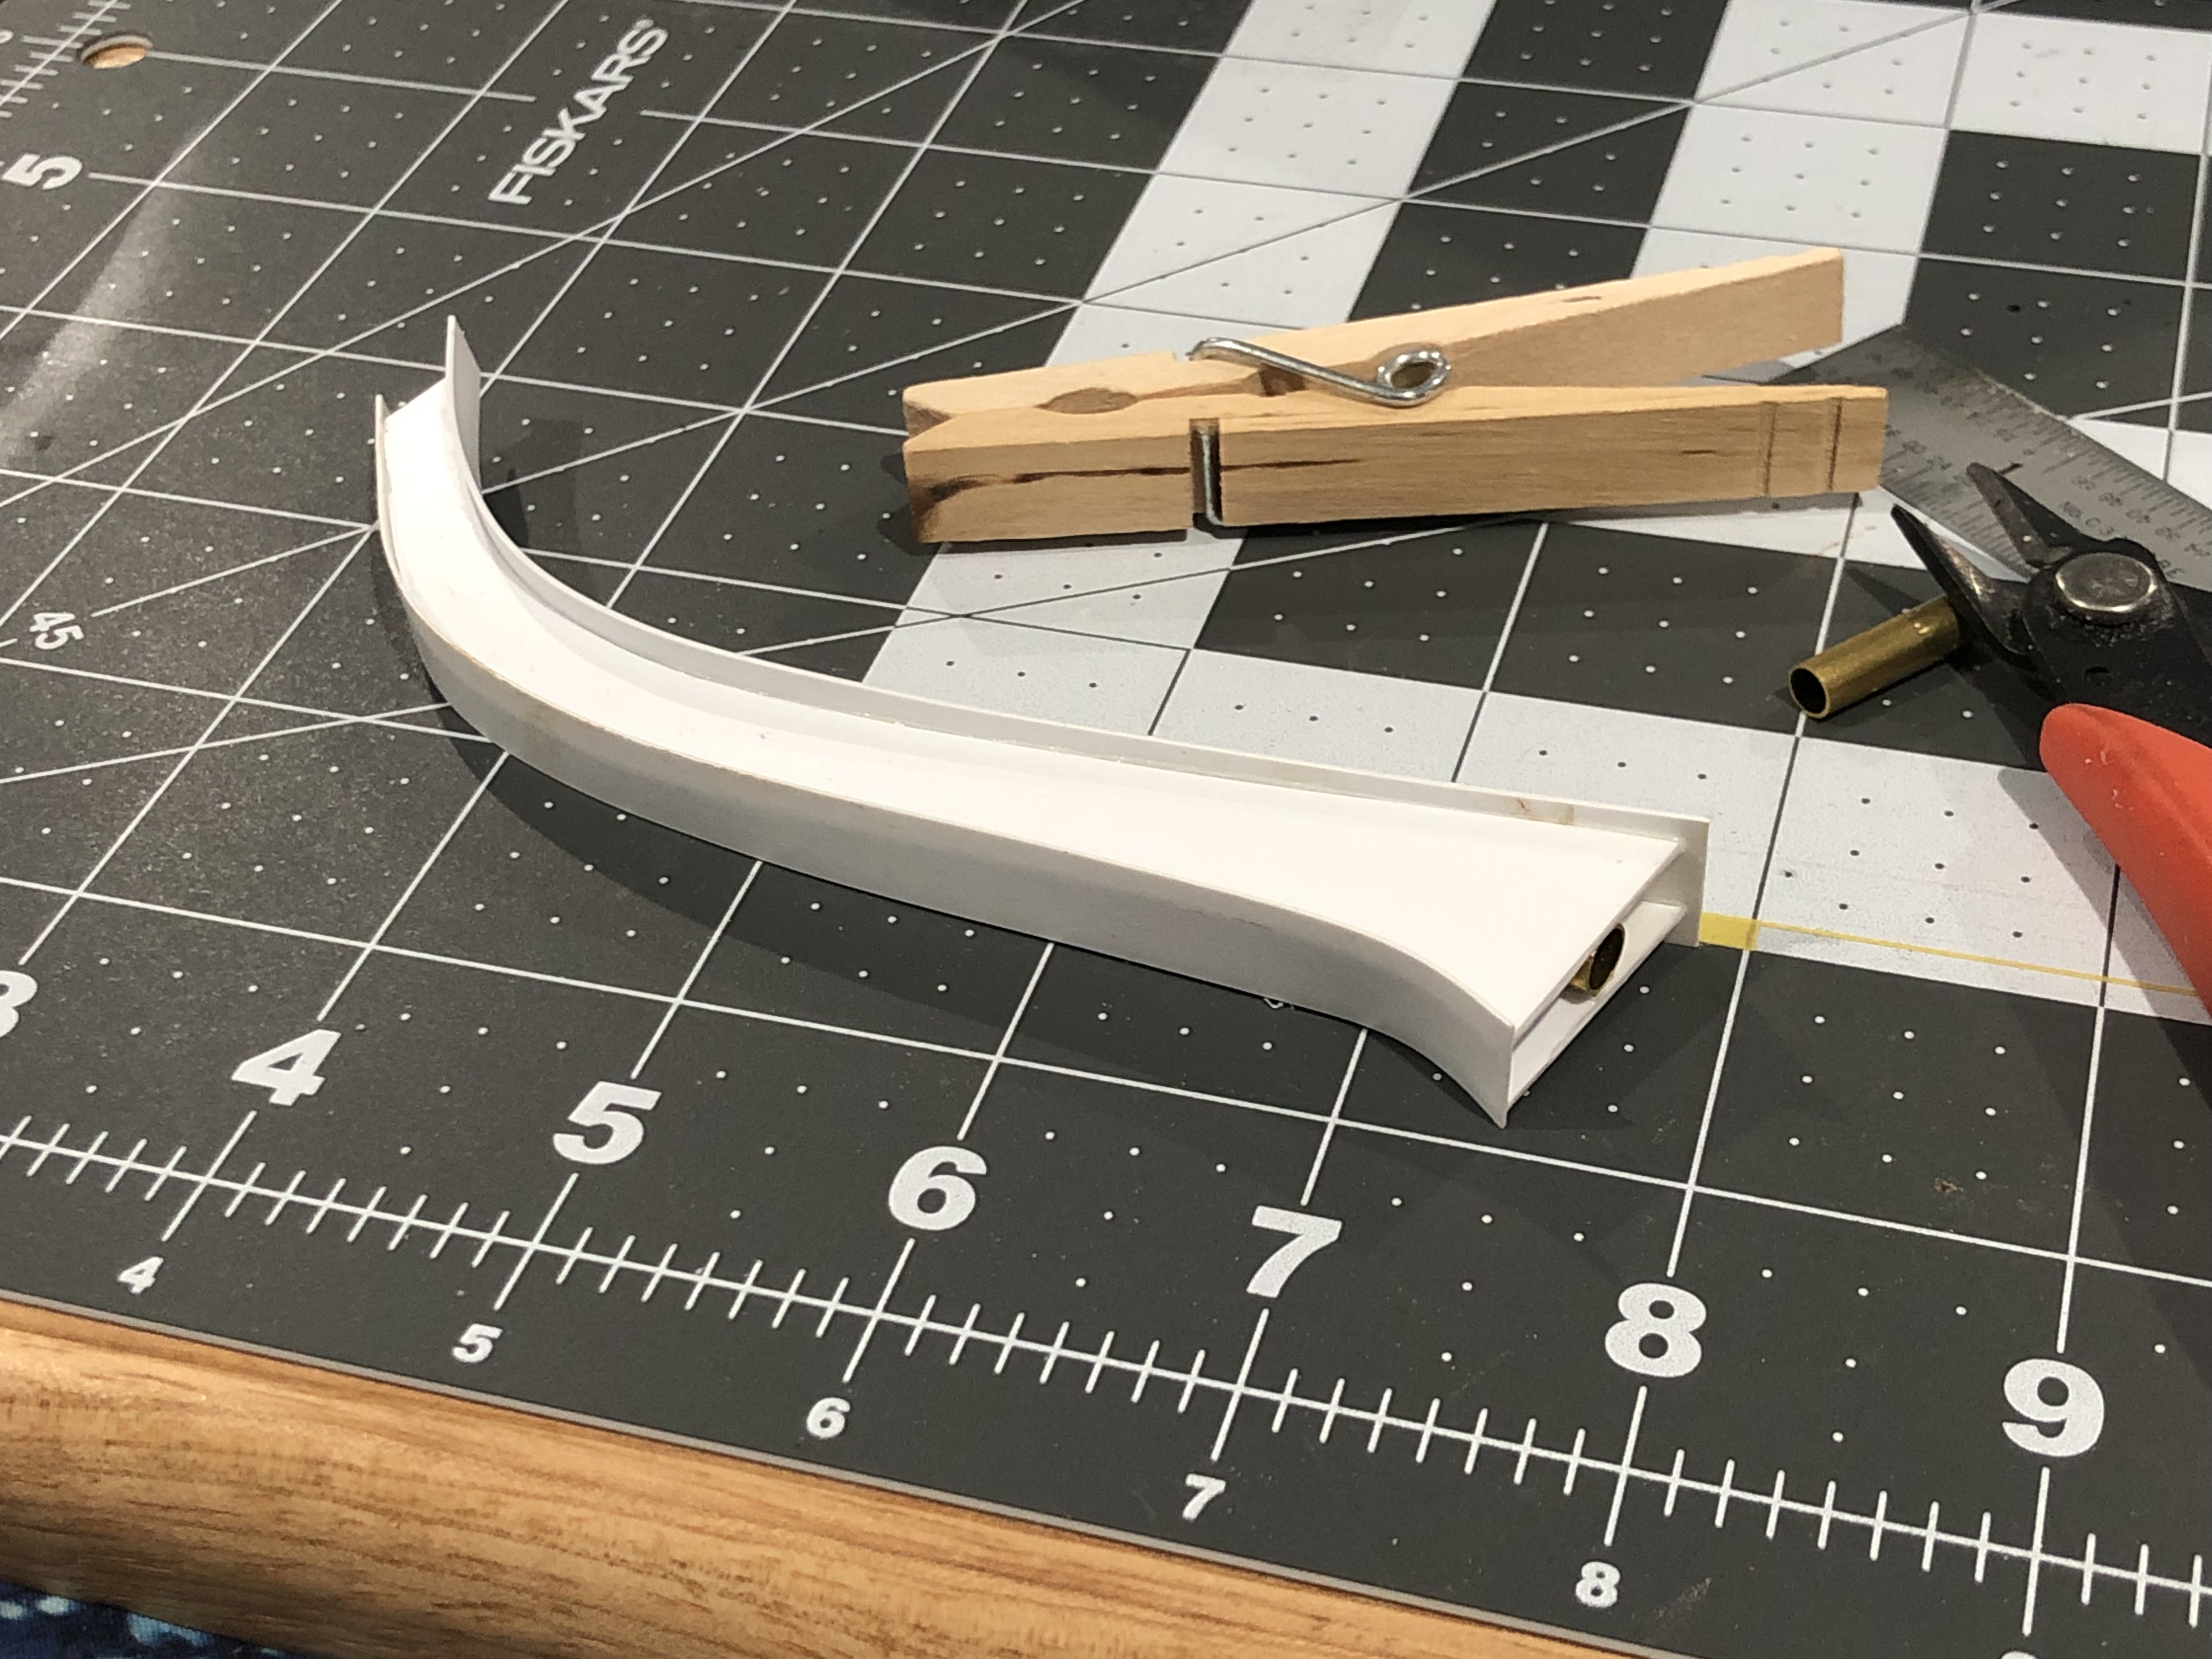
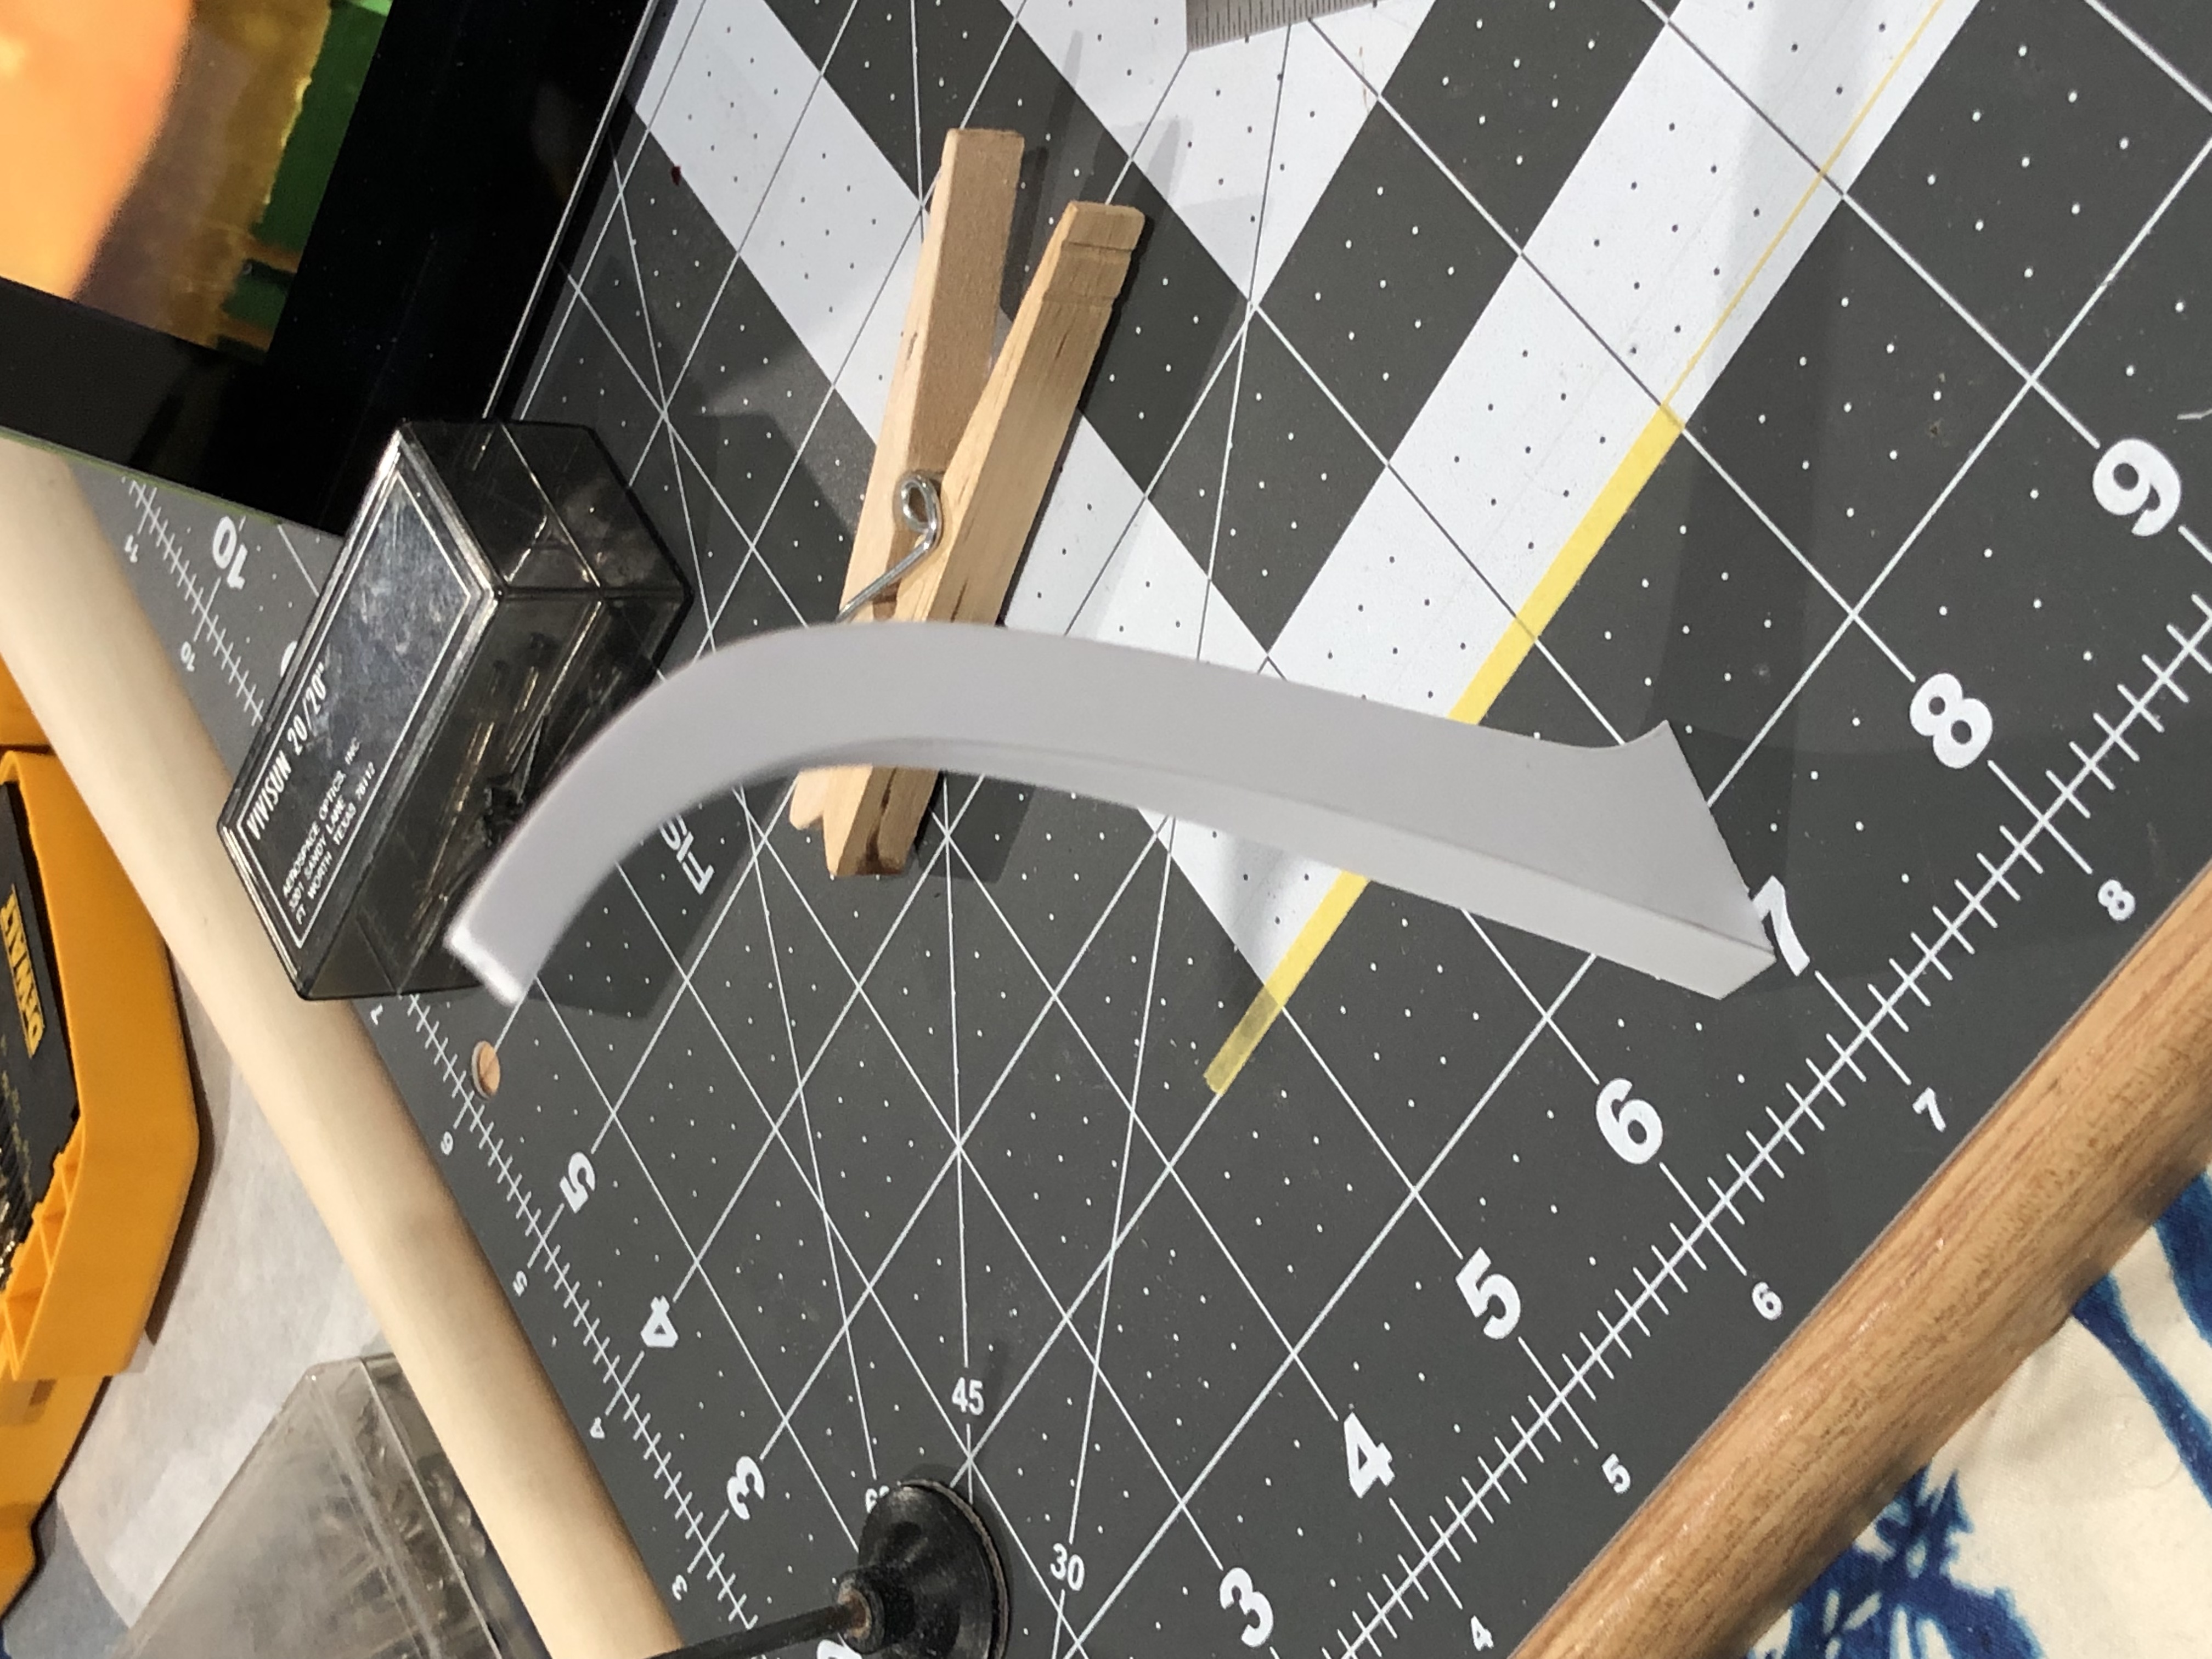
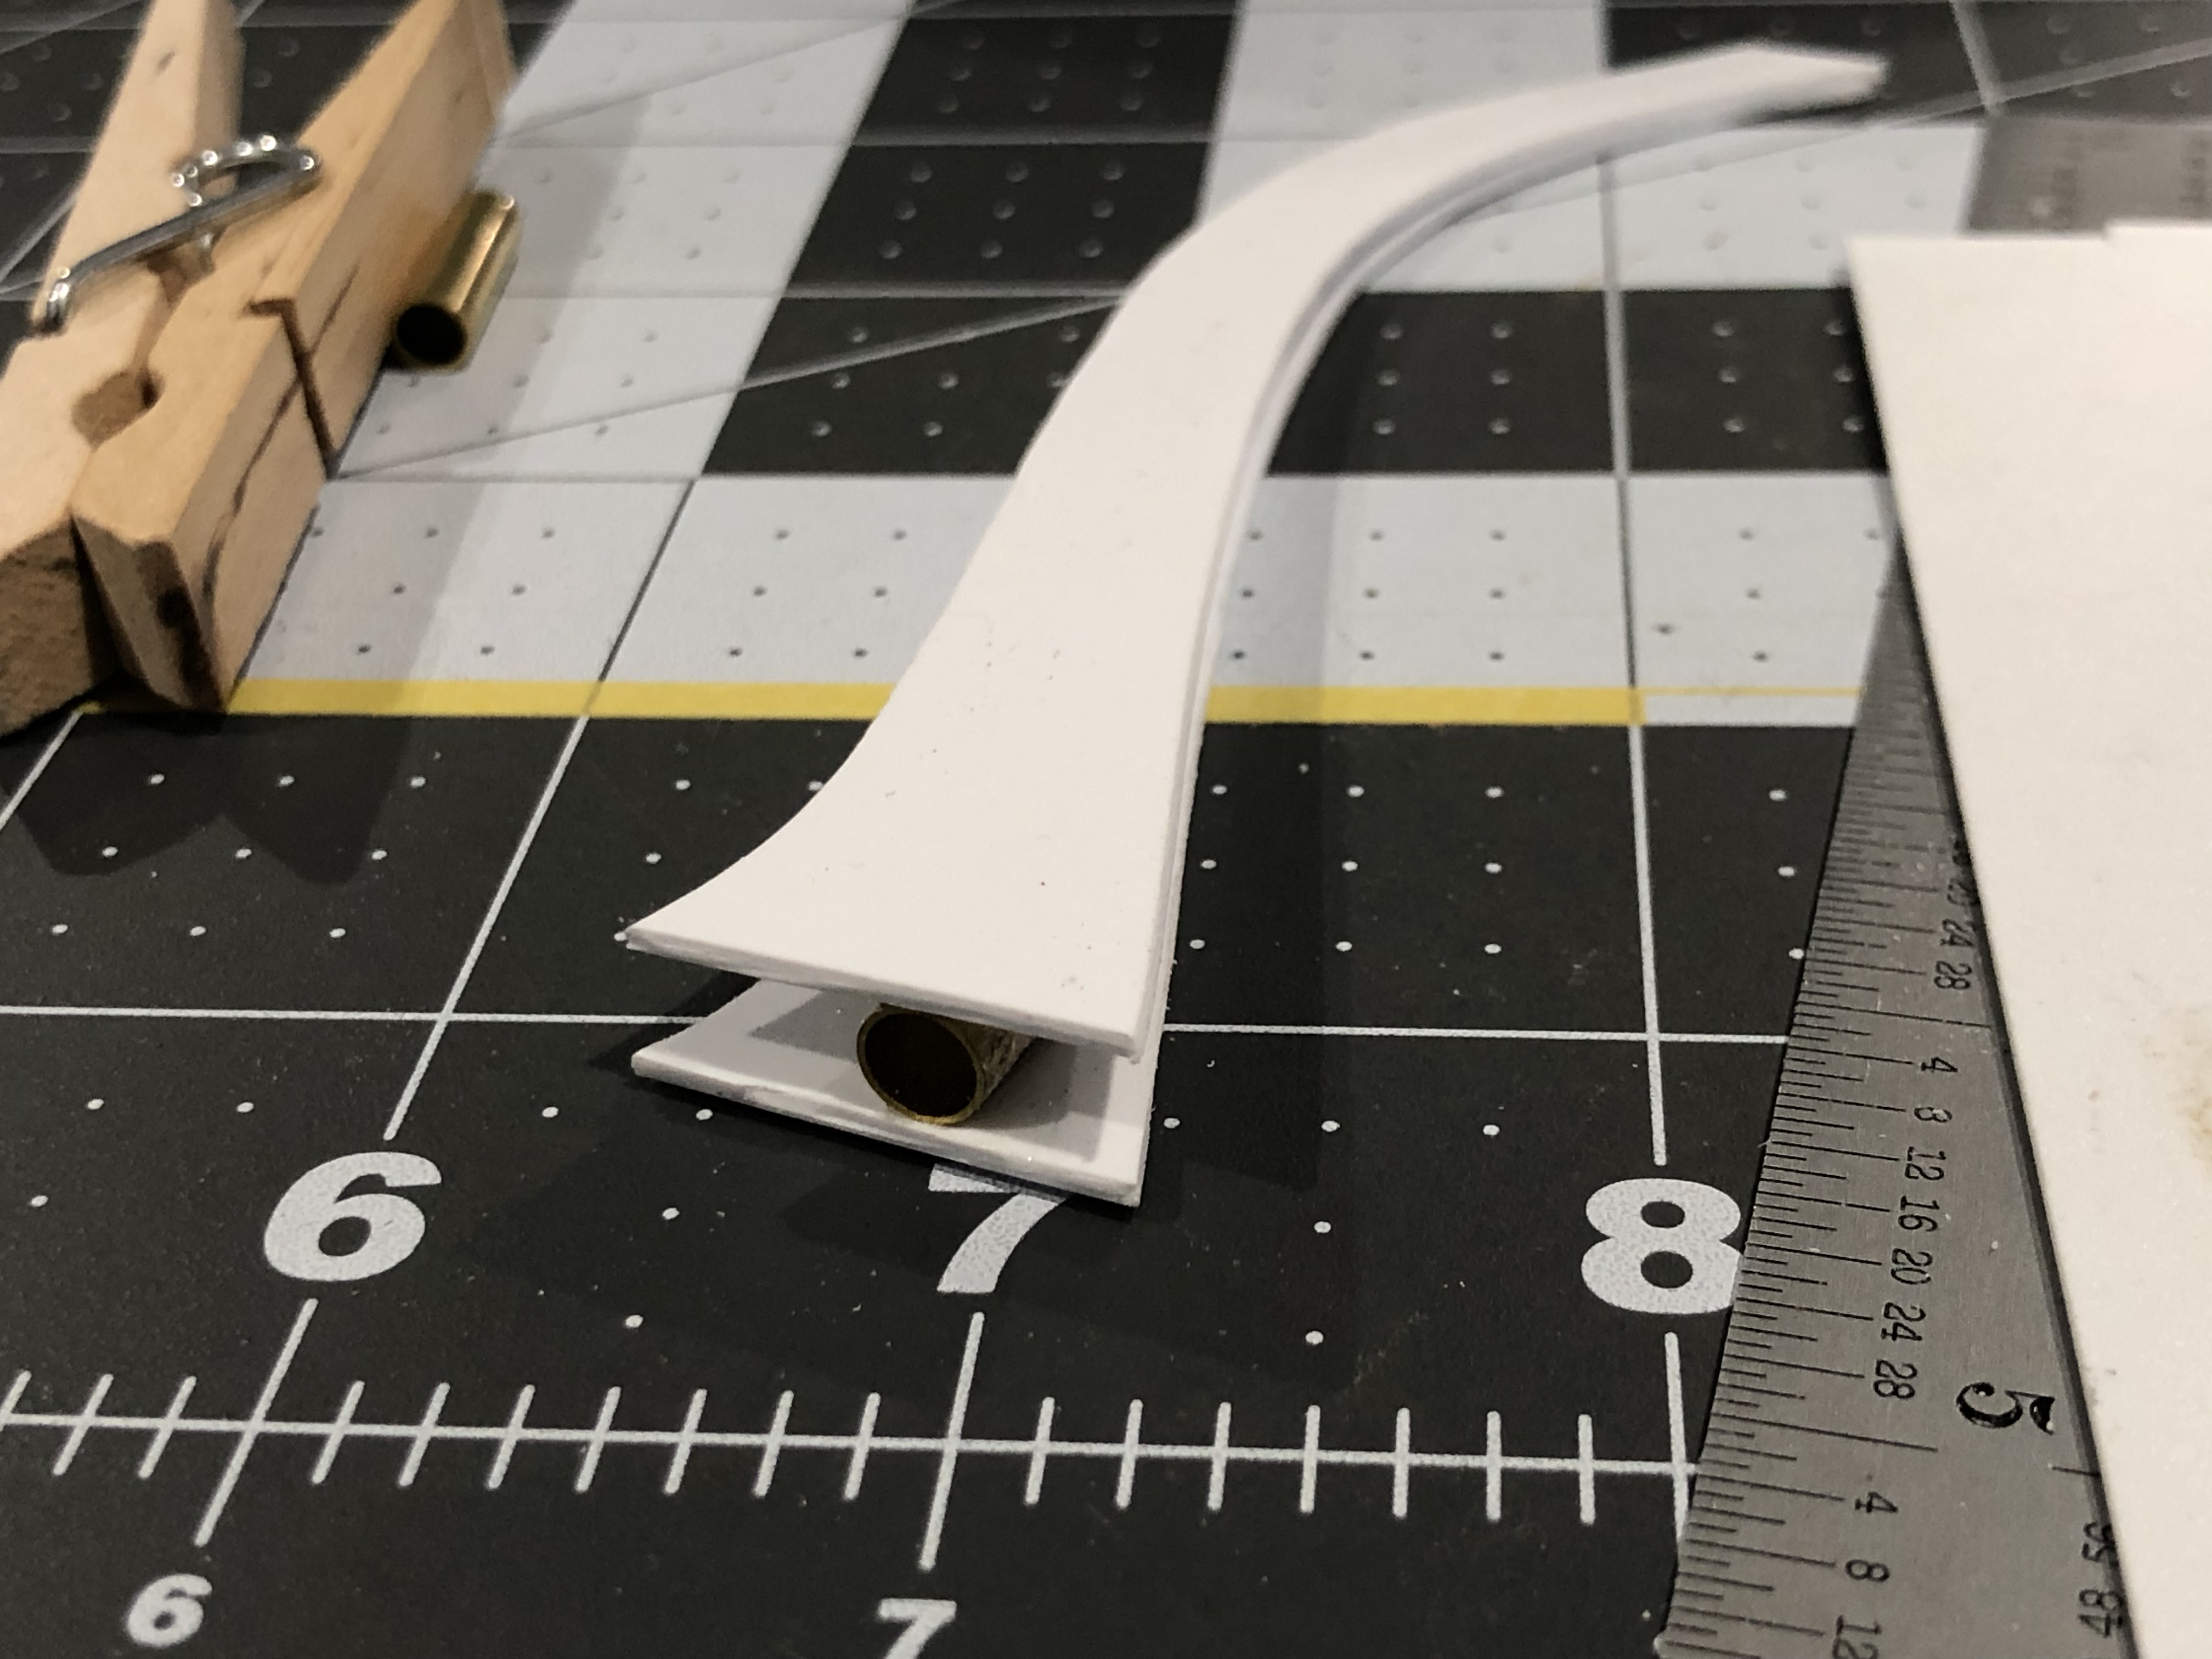
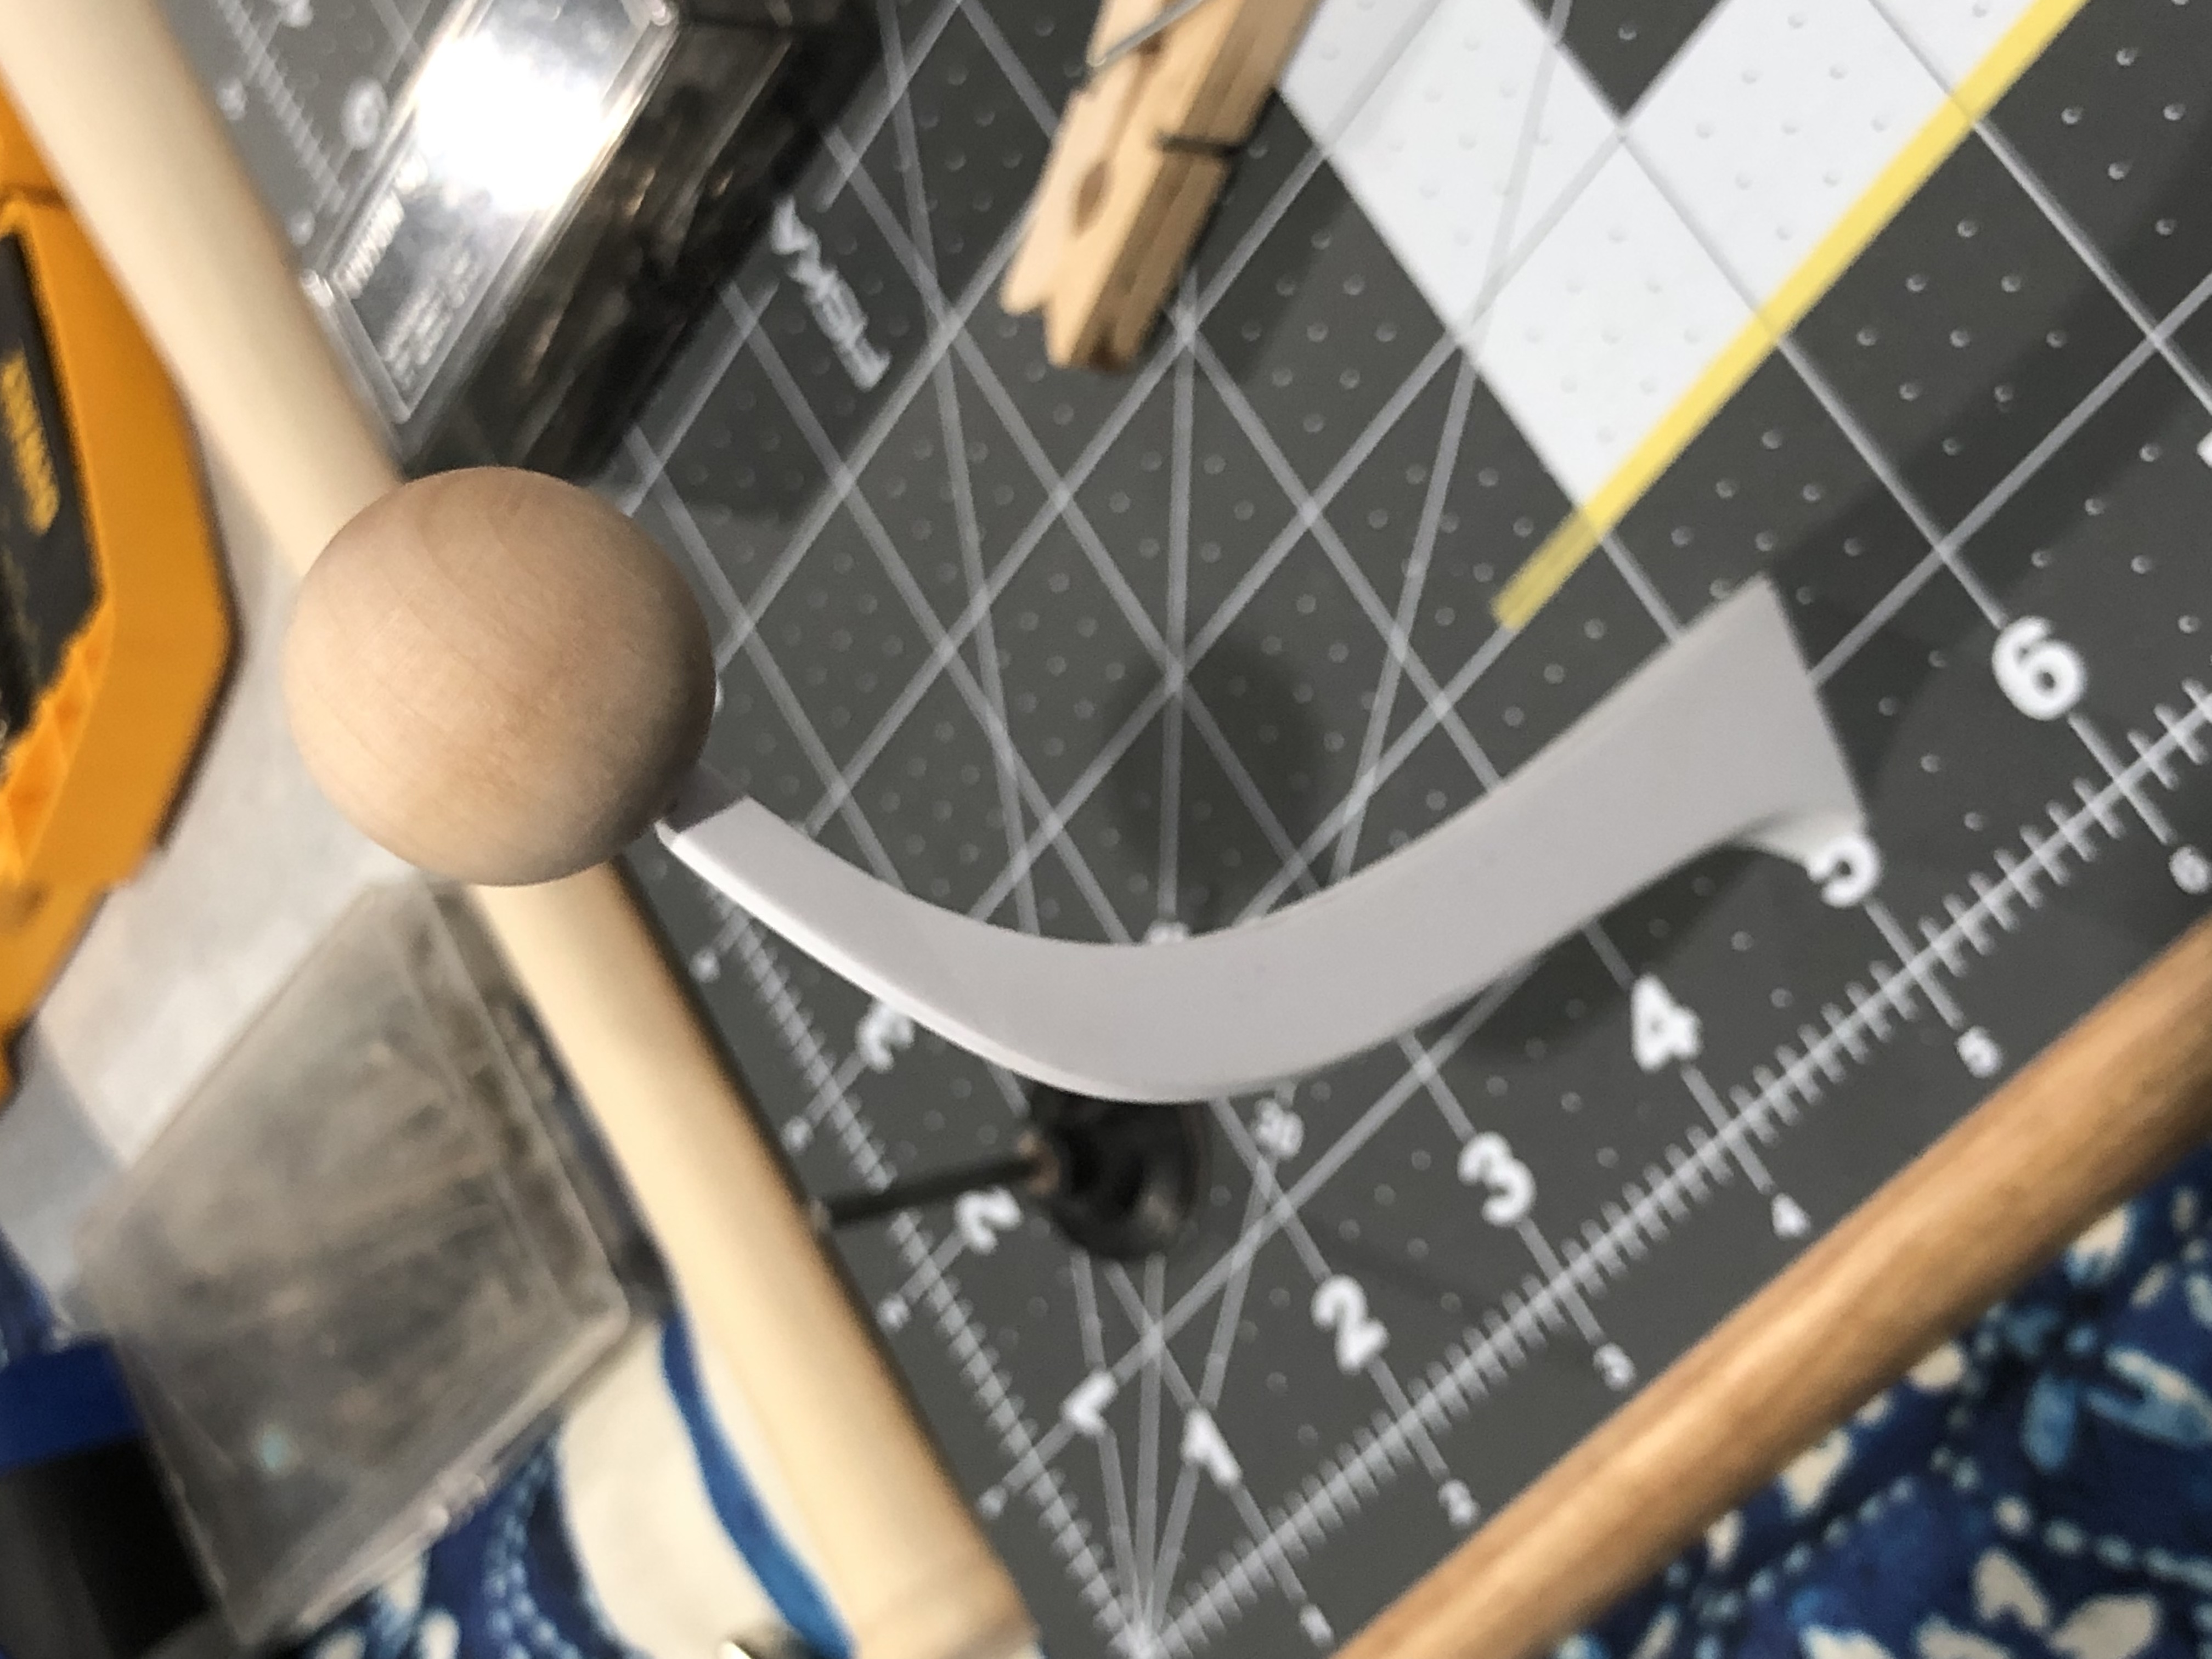
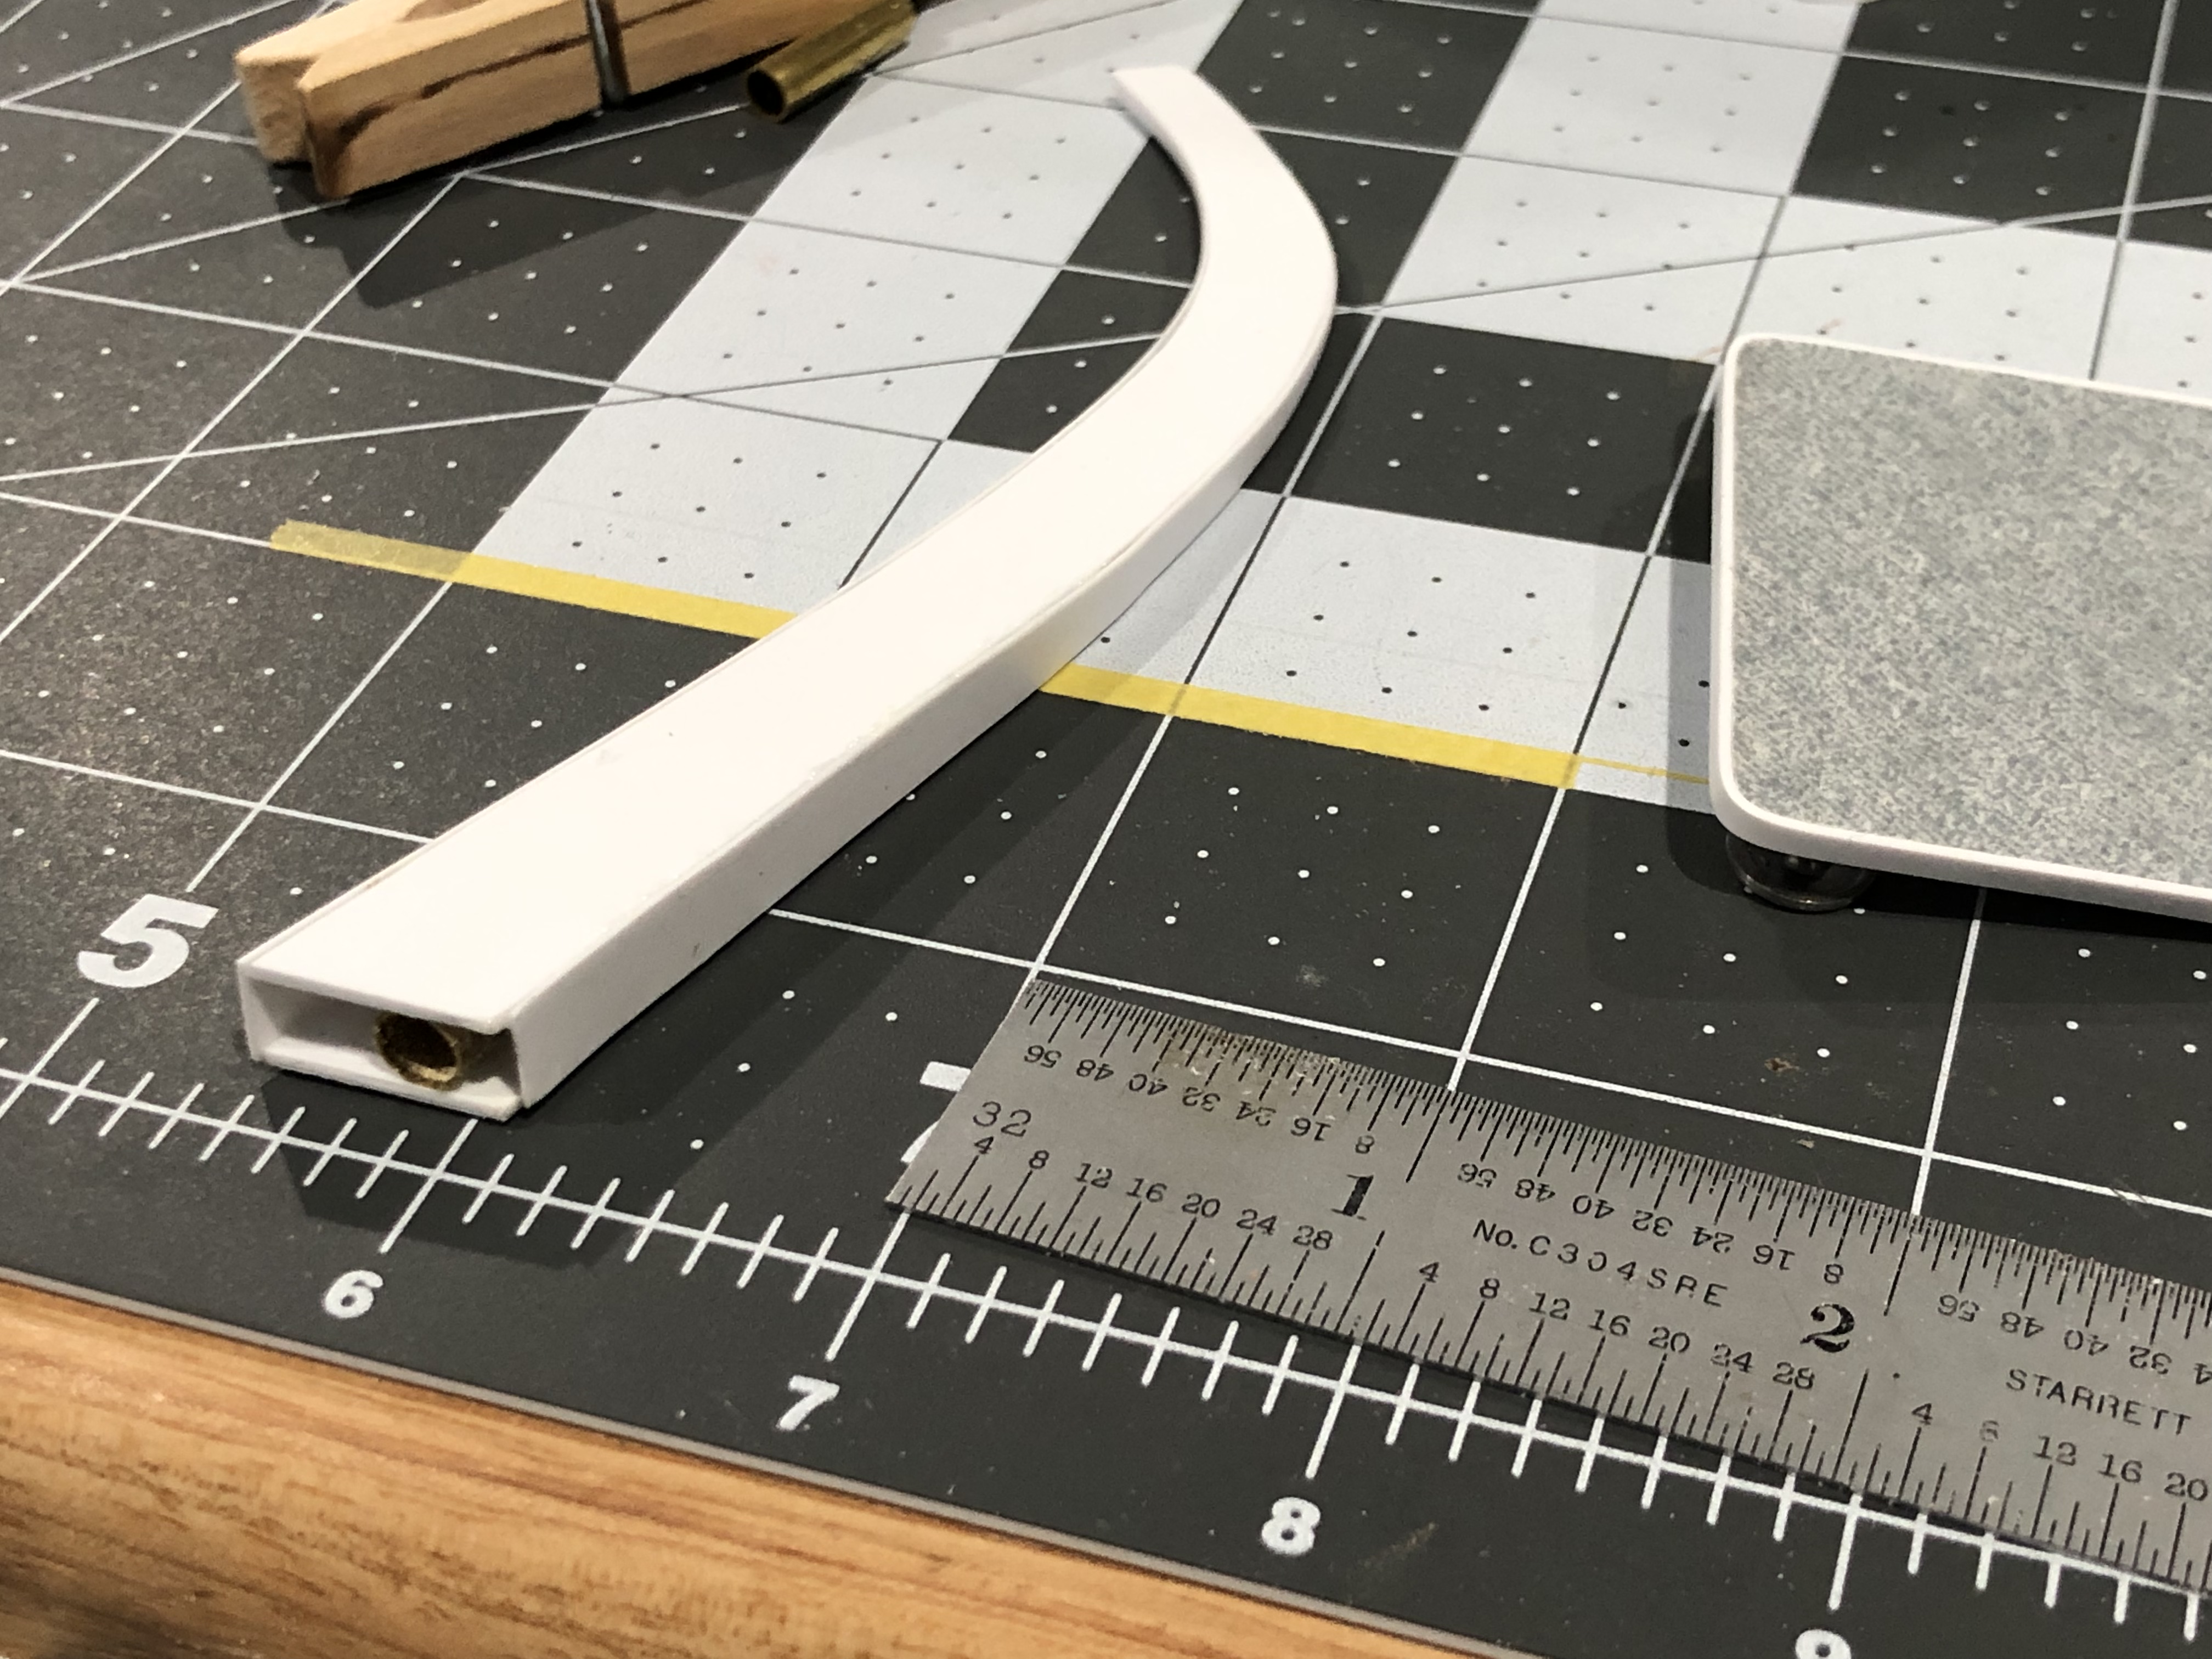
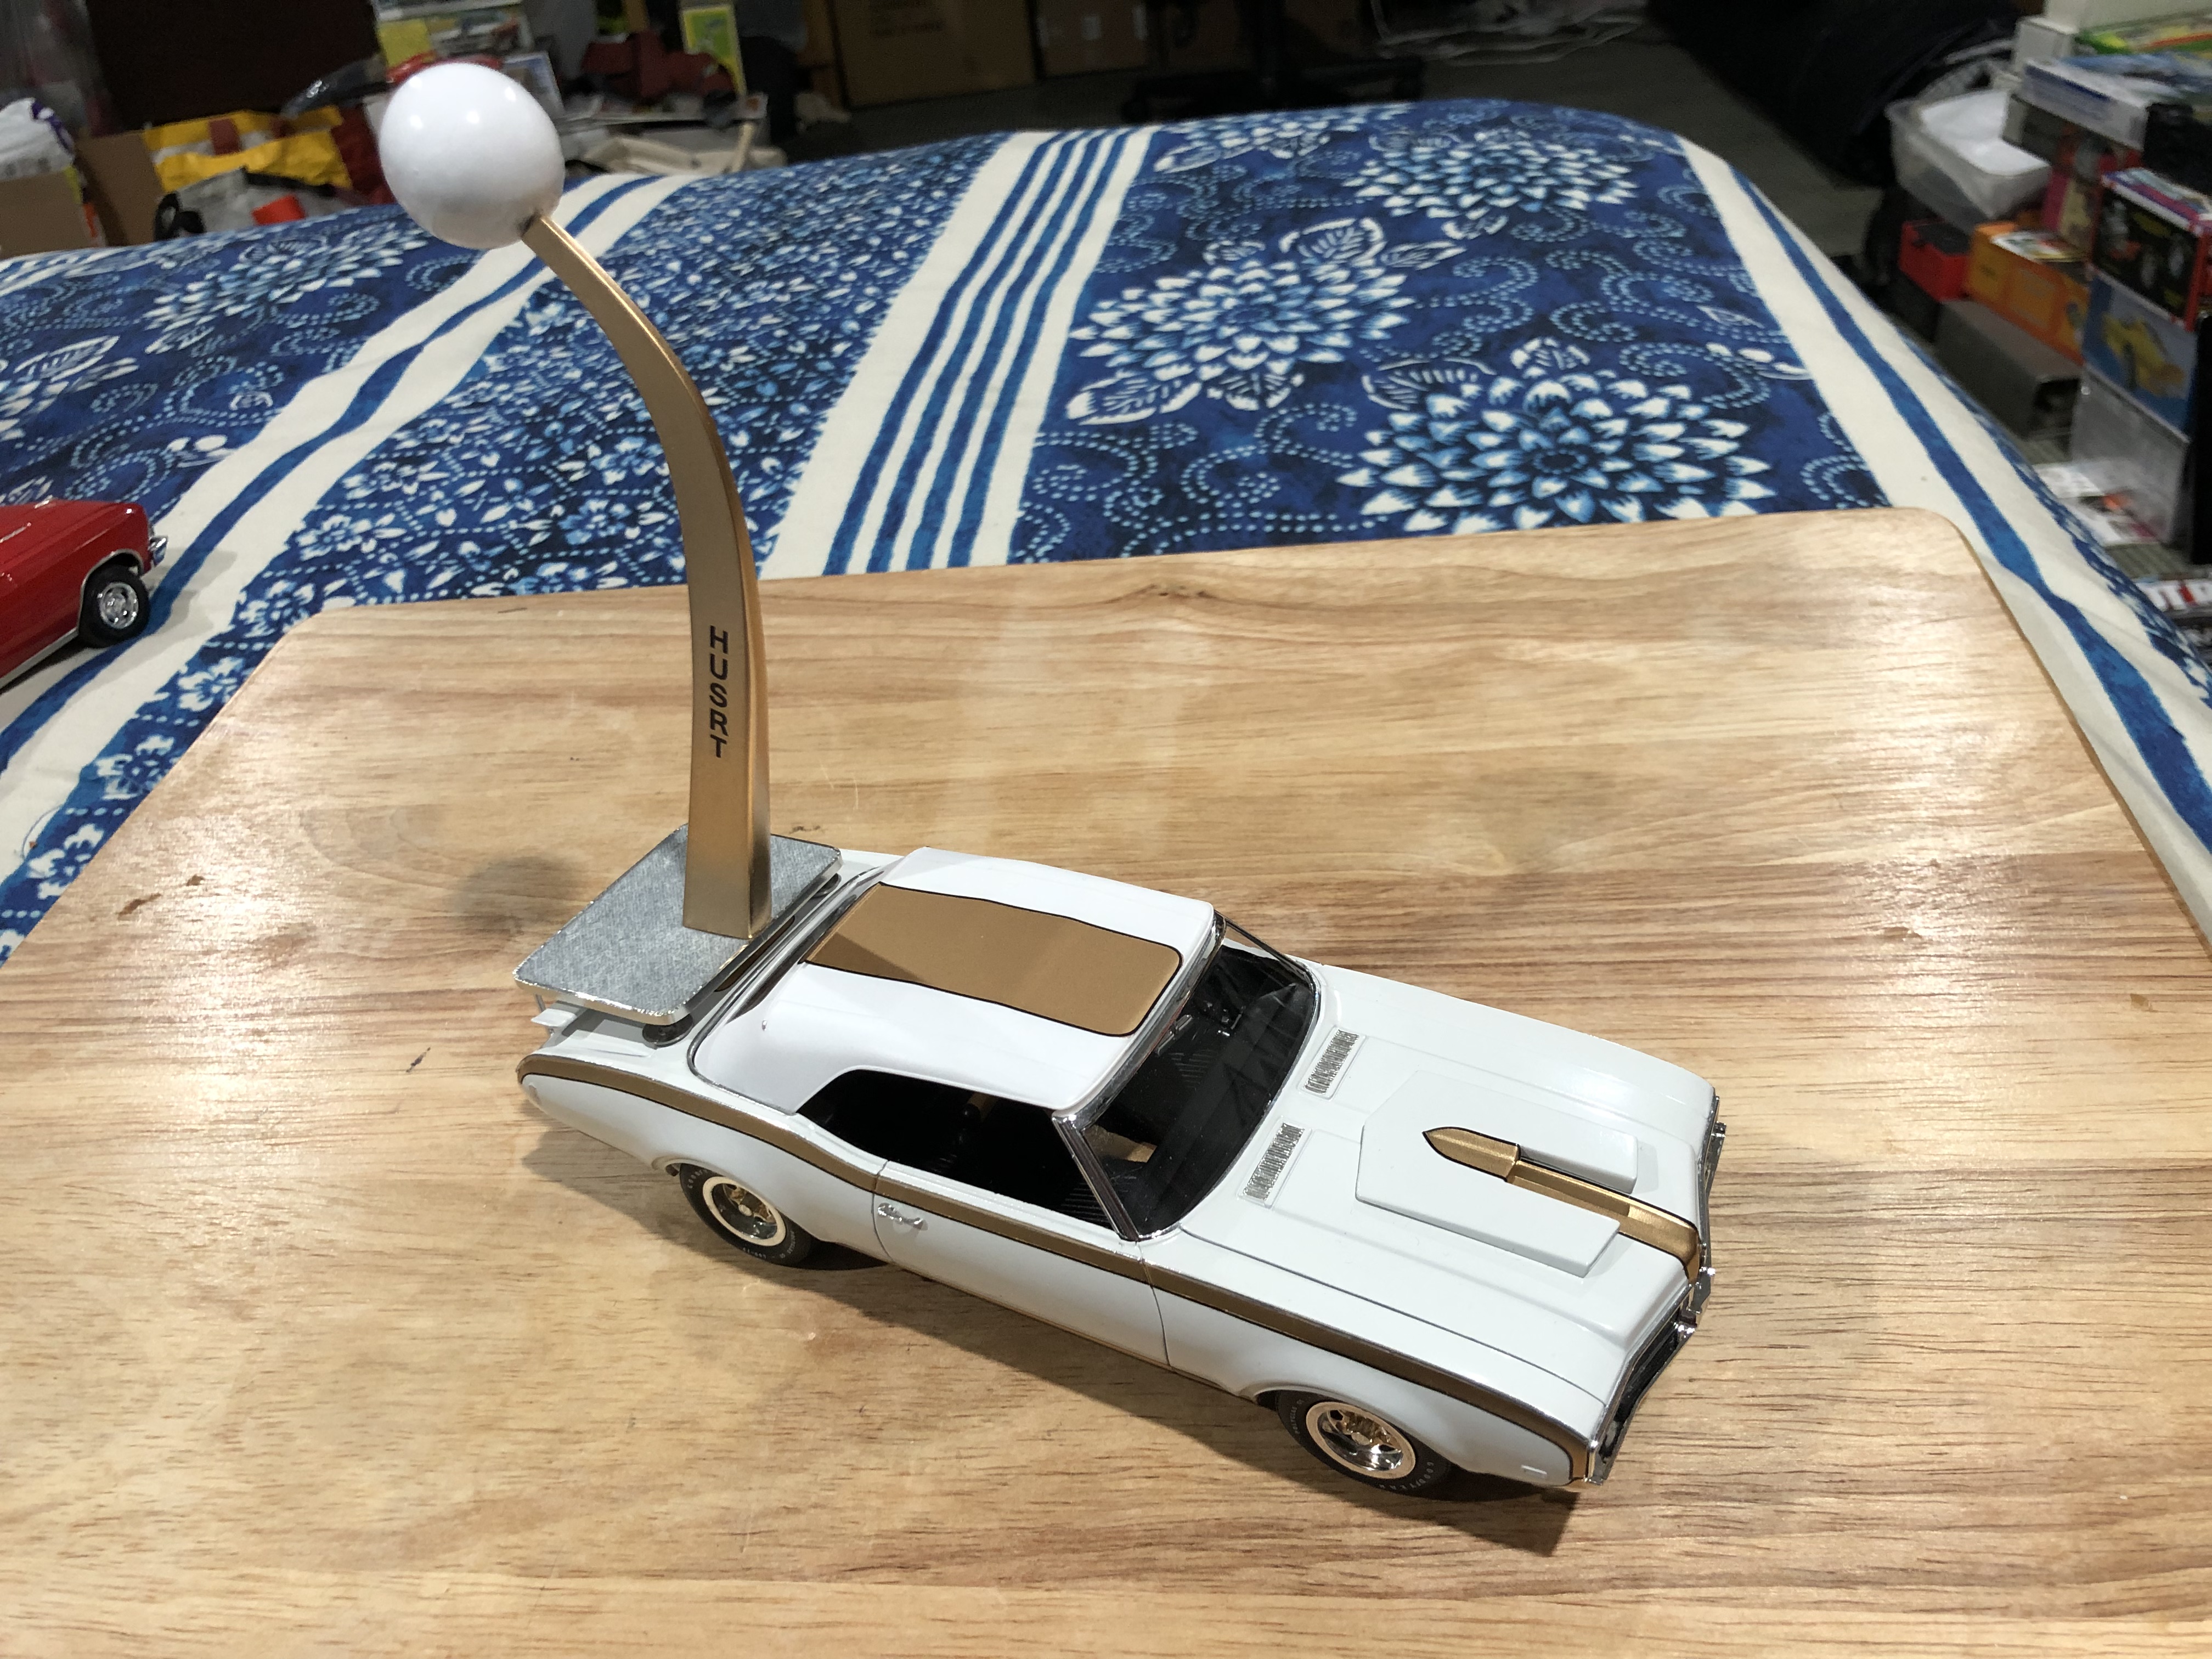
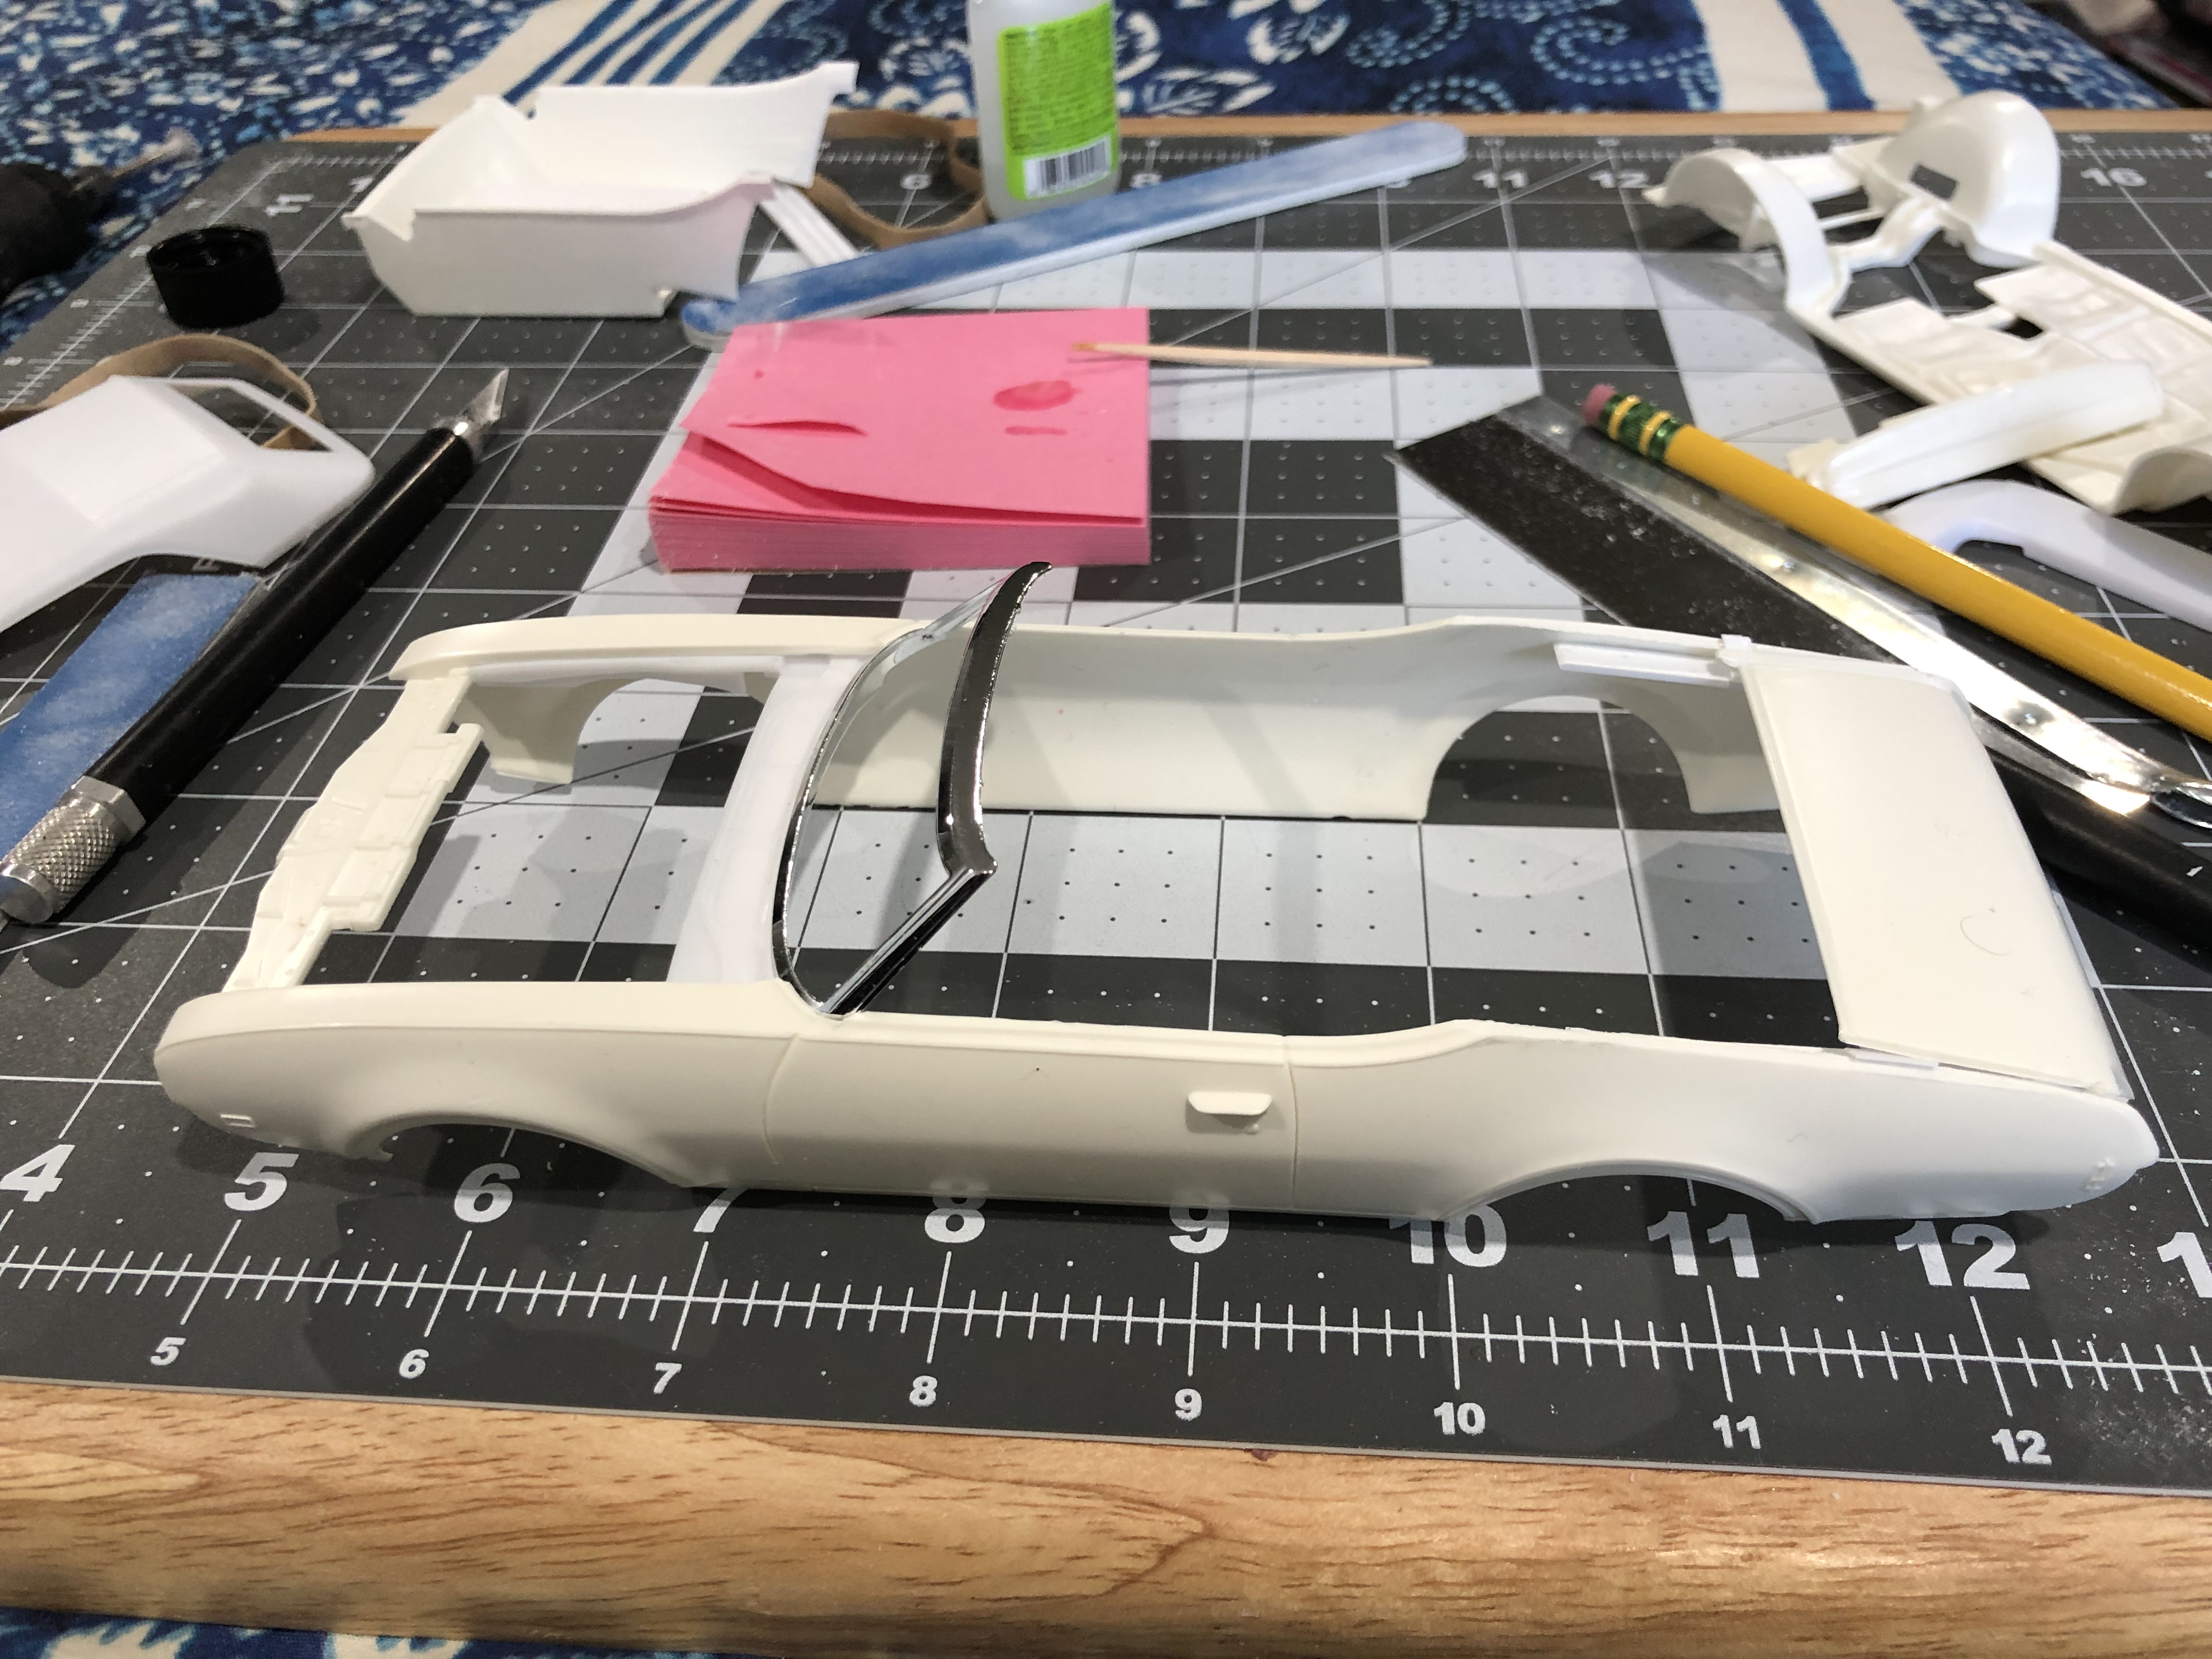
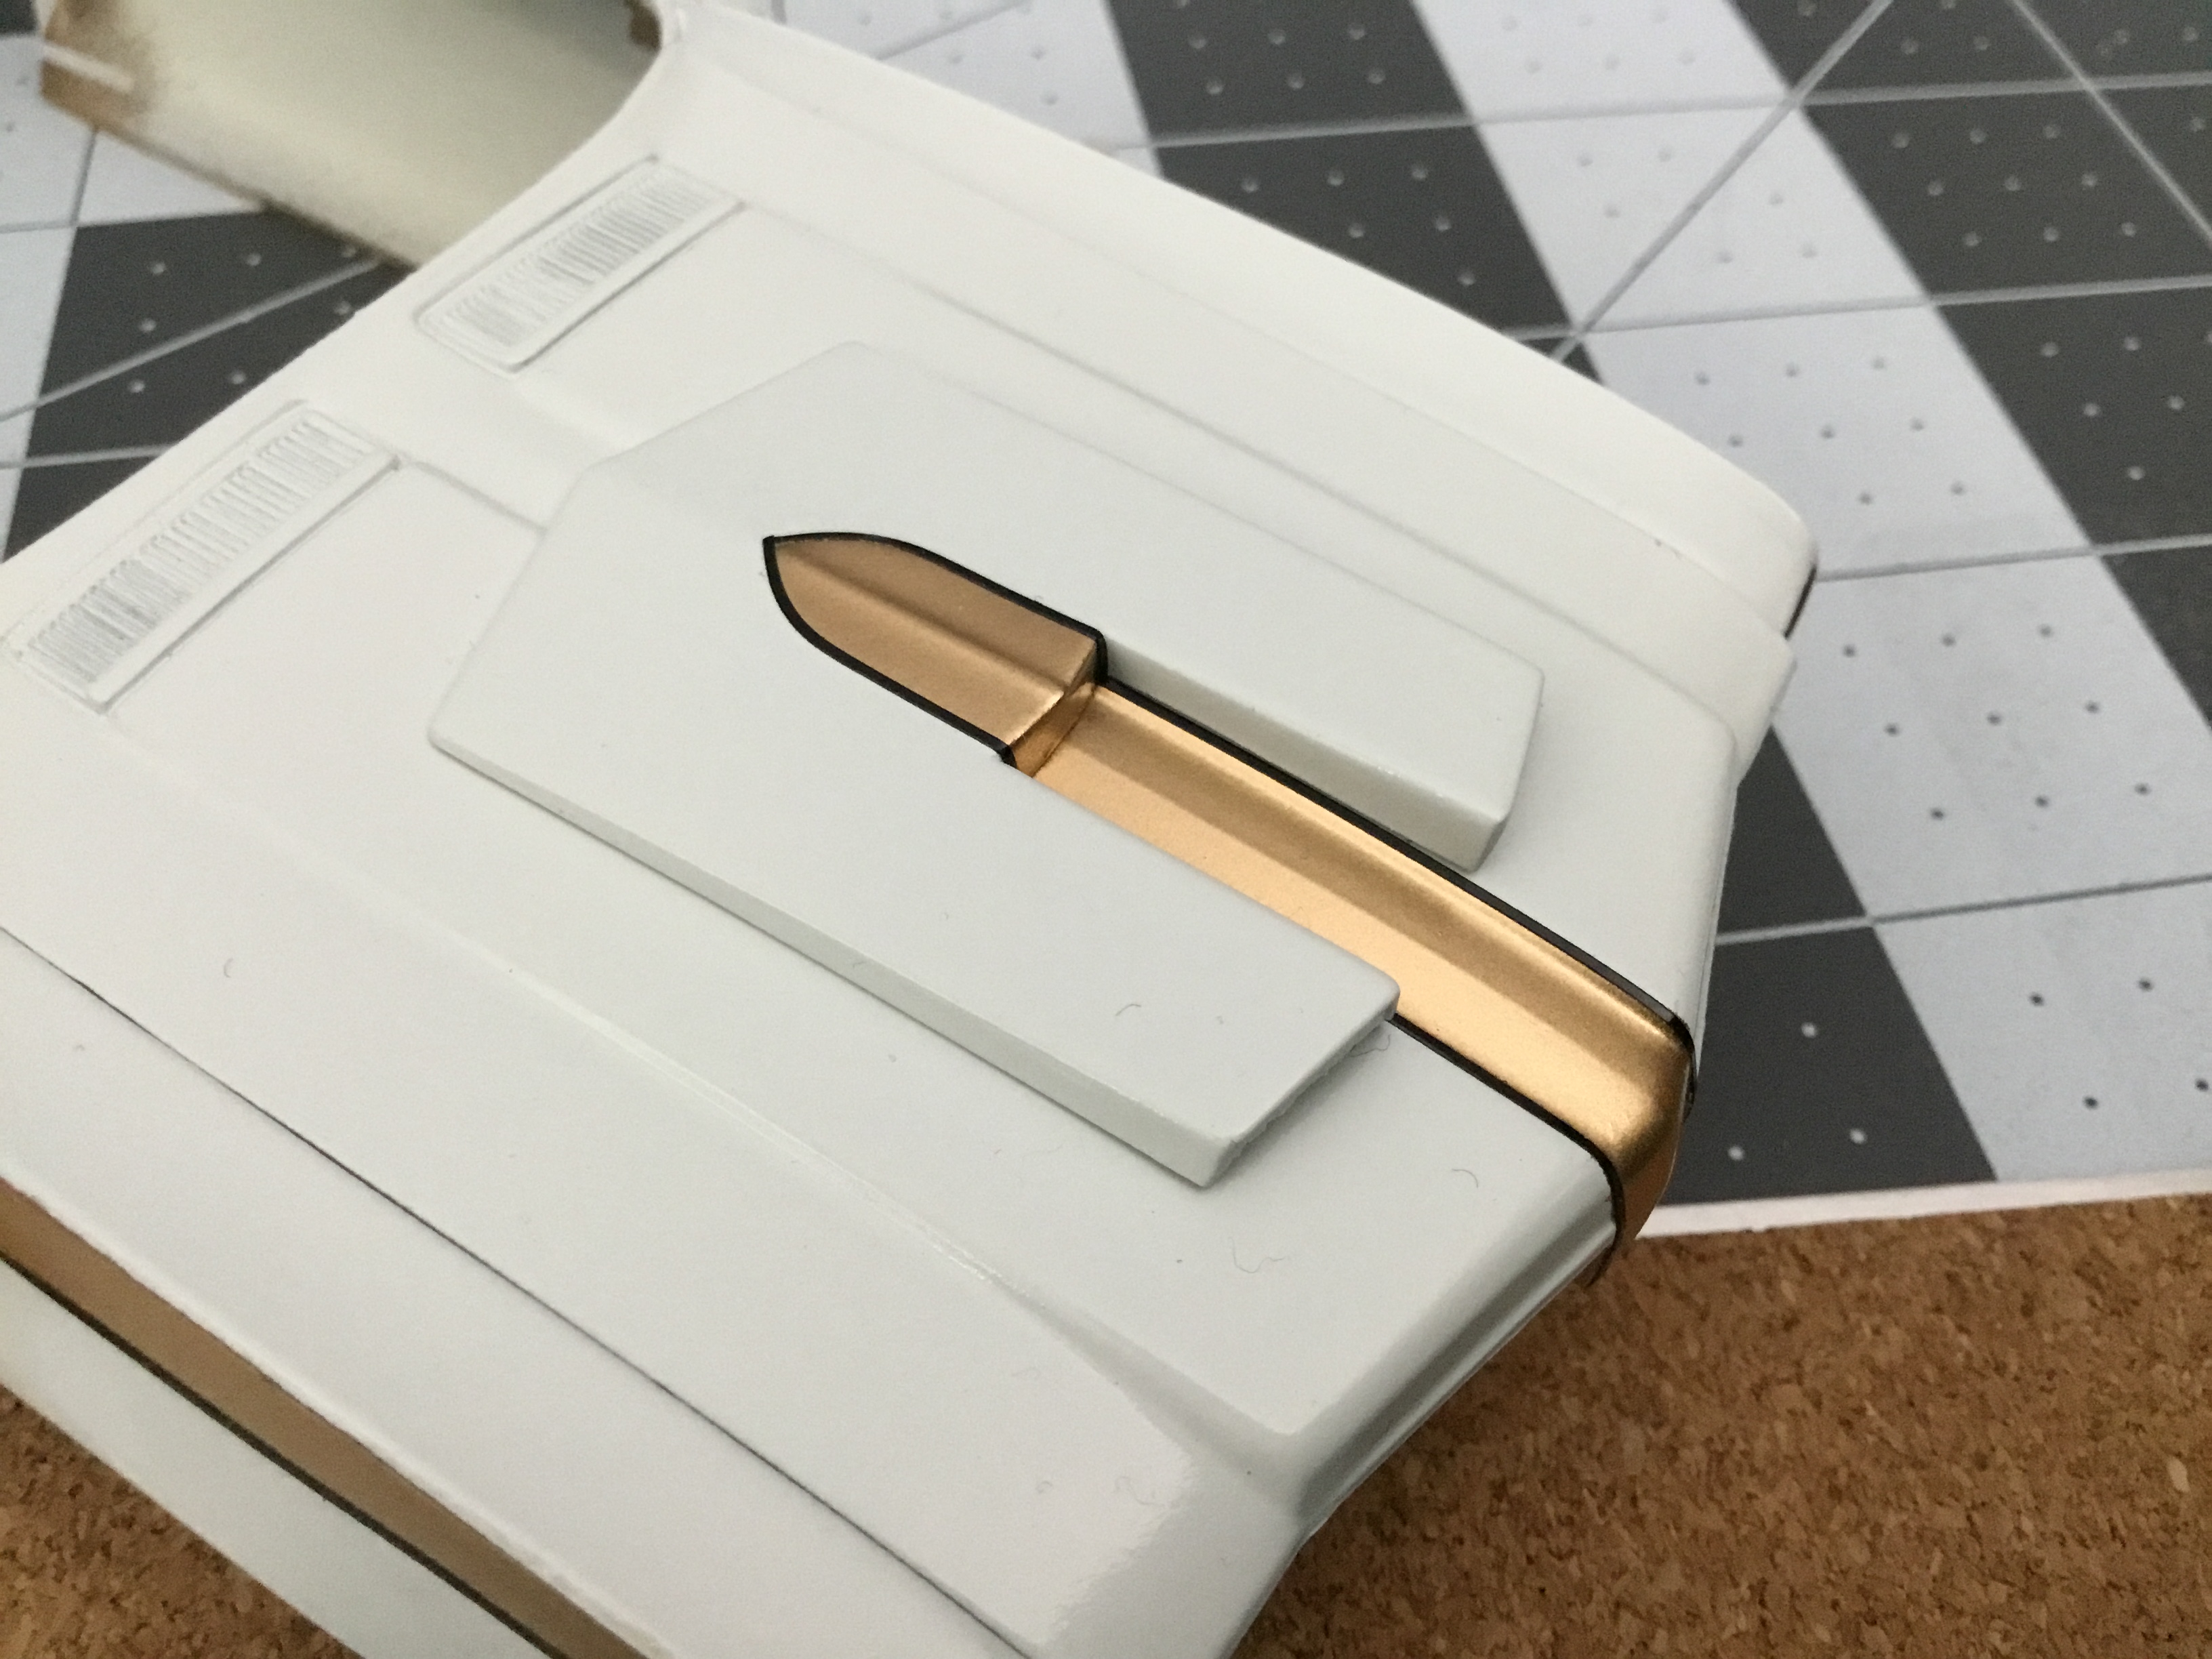
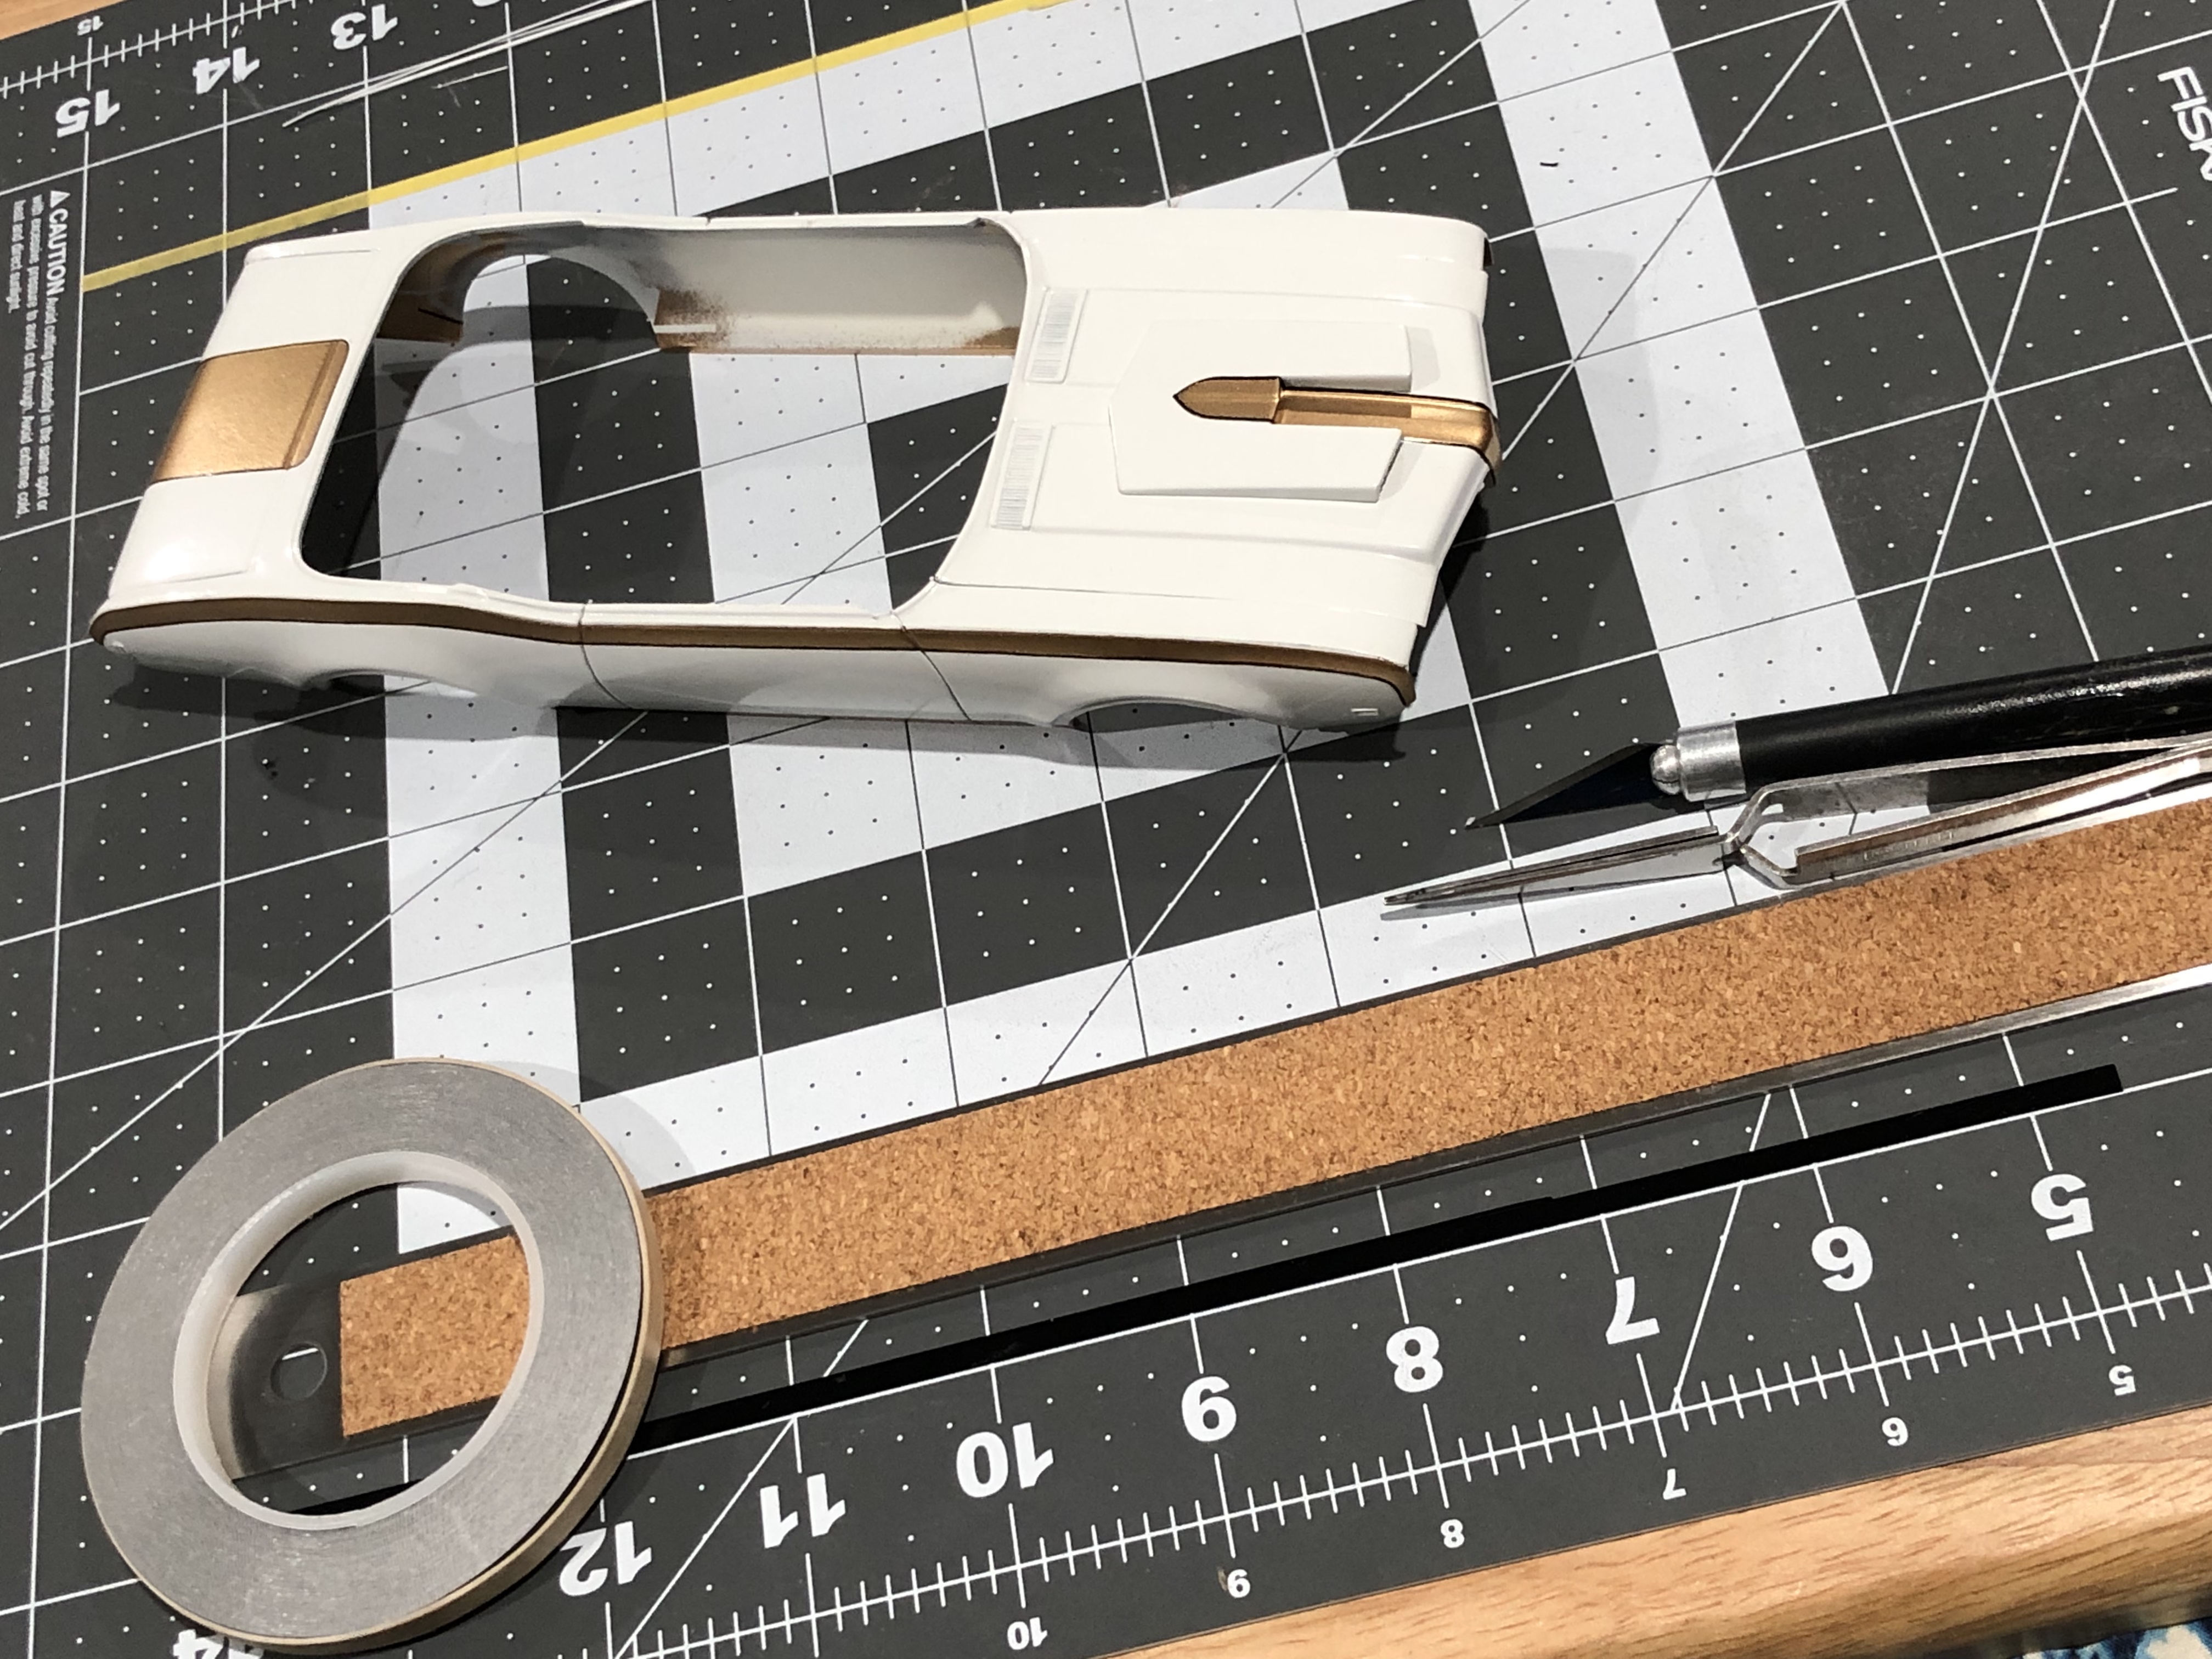
Here is a mock up of the platform for the giant Hurst shifter. It does not attach to the bumper the same way the original did. But I made it so it’s removable. Below is a picture of my artwork in Photoshop. I did the original drawings were done in a different program and then imported. I printed out the templates for the shifter, cut them out and glue them to a sheet of plastic. Below, the paper patterns are on the left and the plastic on the right. The shifter stands up on its own! But in the picture after this you can see the brass tube for mounting it on the platform. I got a bag of wooden balls approximately the right size from Hobby Lobby. The base of the shifter turned out to be too big. So I peeled off the back side and trimmed the sides down. Then I glued the peeled up piece back. It might be a little taller than the prototype, but it doesn’t look too bad in person. The last group of pictures below or of the model just about done. I will post the completed pictures in the under glass section. Questions and comments welcome.
-
1969 Hurst Olds convertible conversion
Superbird McMonte replied to Superbird McMonte's topic in WIP: Model Cars
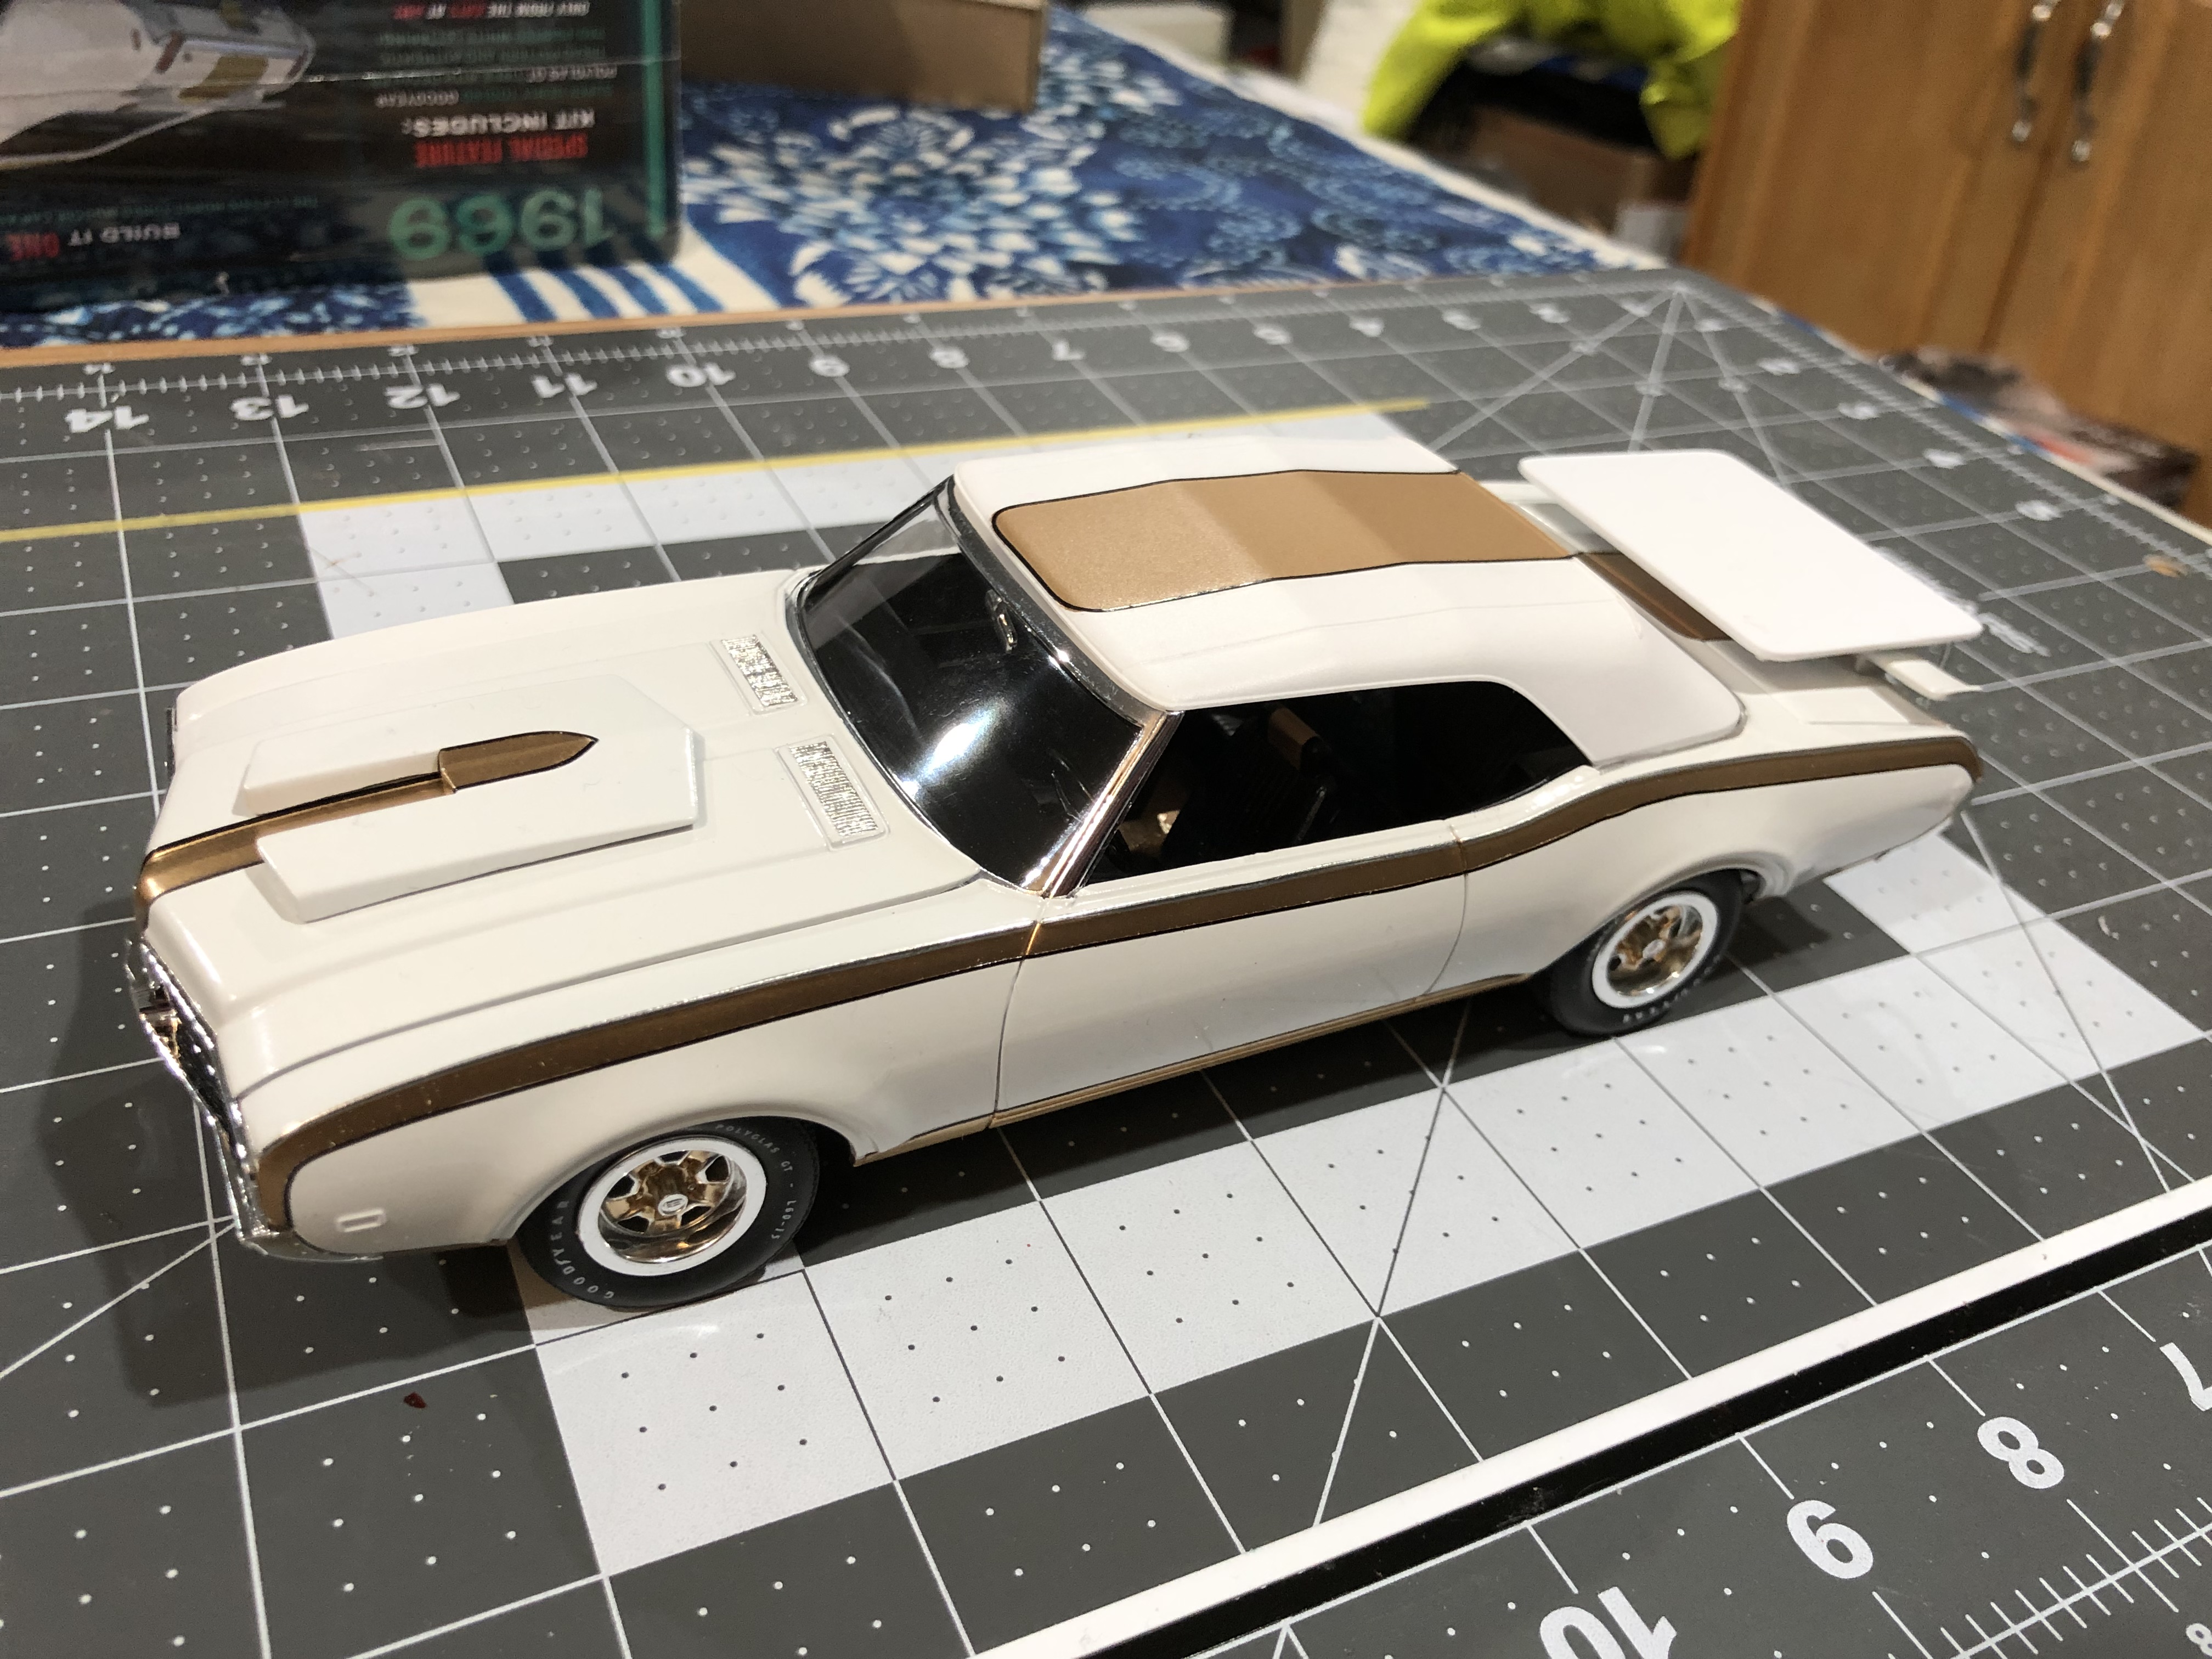
Wheels on! Well actually the chassis and interior have met the body. The engine is in place also. I’ll post some pictures of that too. But it’s official, I’m entering the final stretch. With about two weeks left, the end of my trifecta is in sight!
-
"Bring Out Your Dead" Completion Build--ROUND 2 Is On!
Superbird McMonte replied to Snake45's topic in WIP: Model Cars
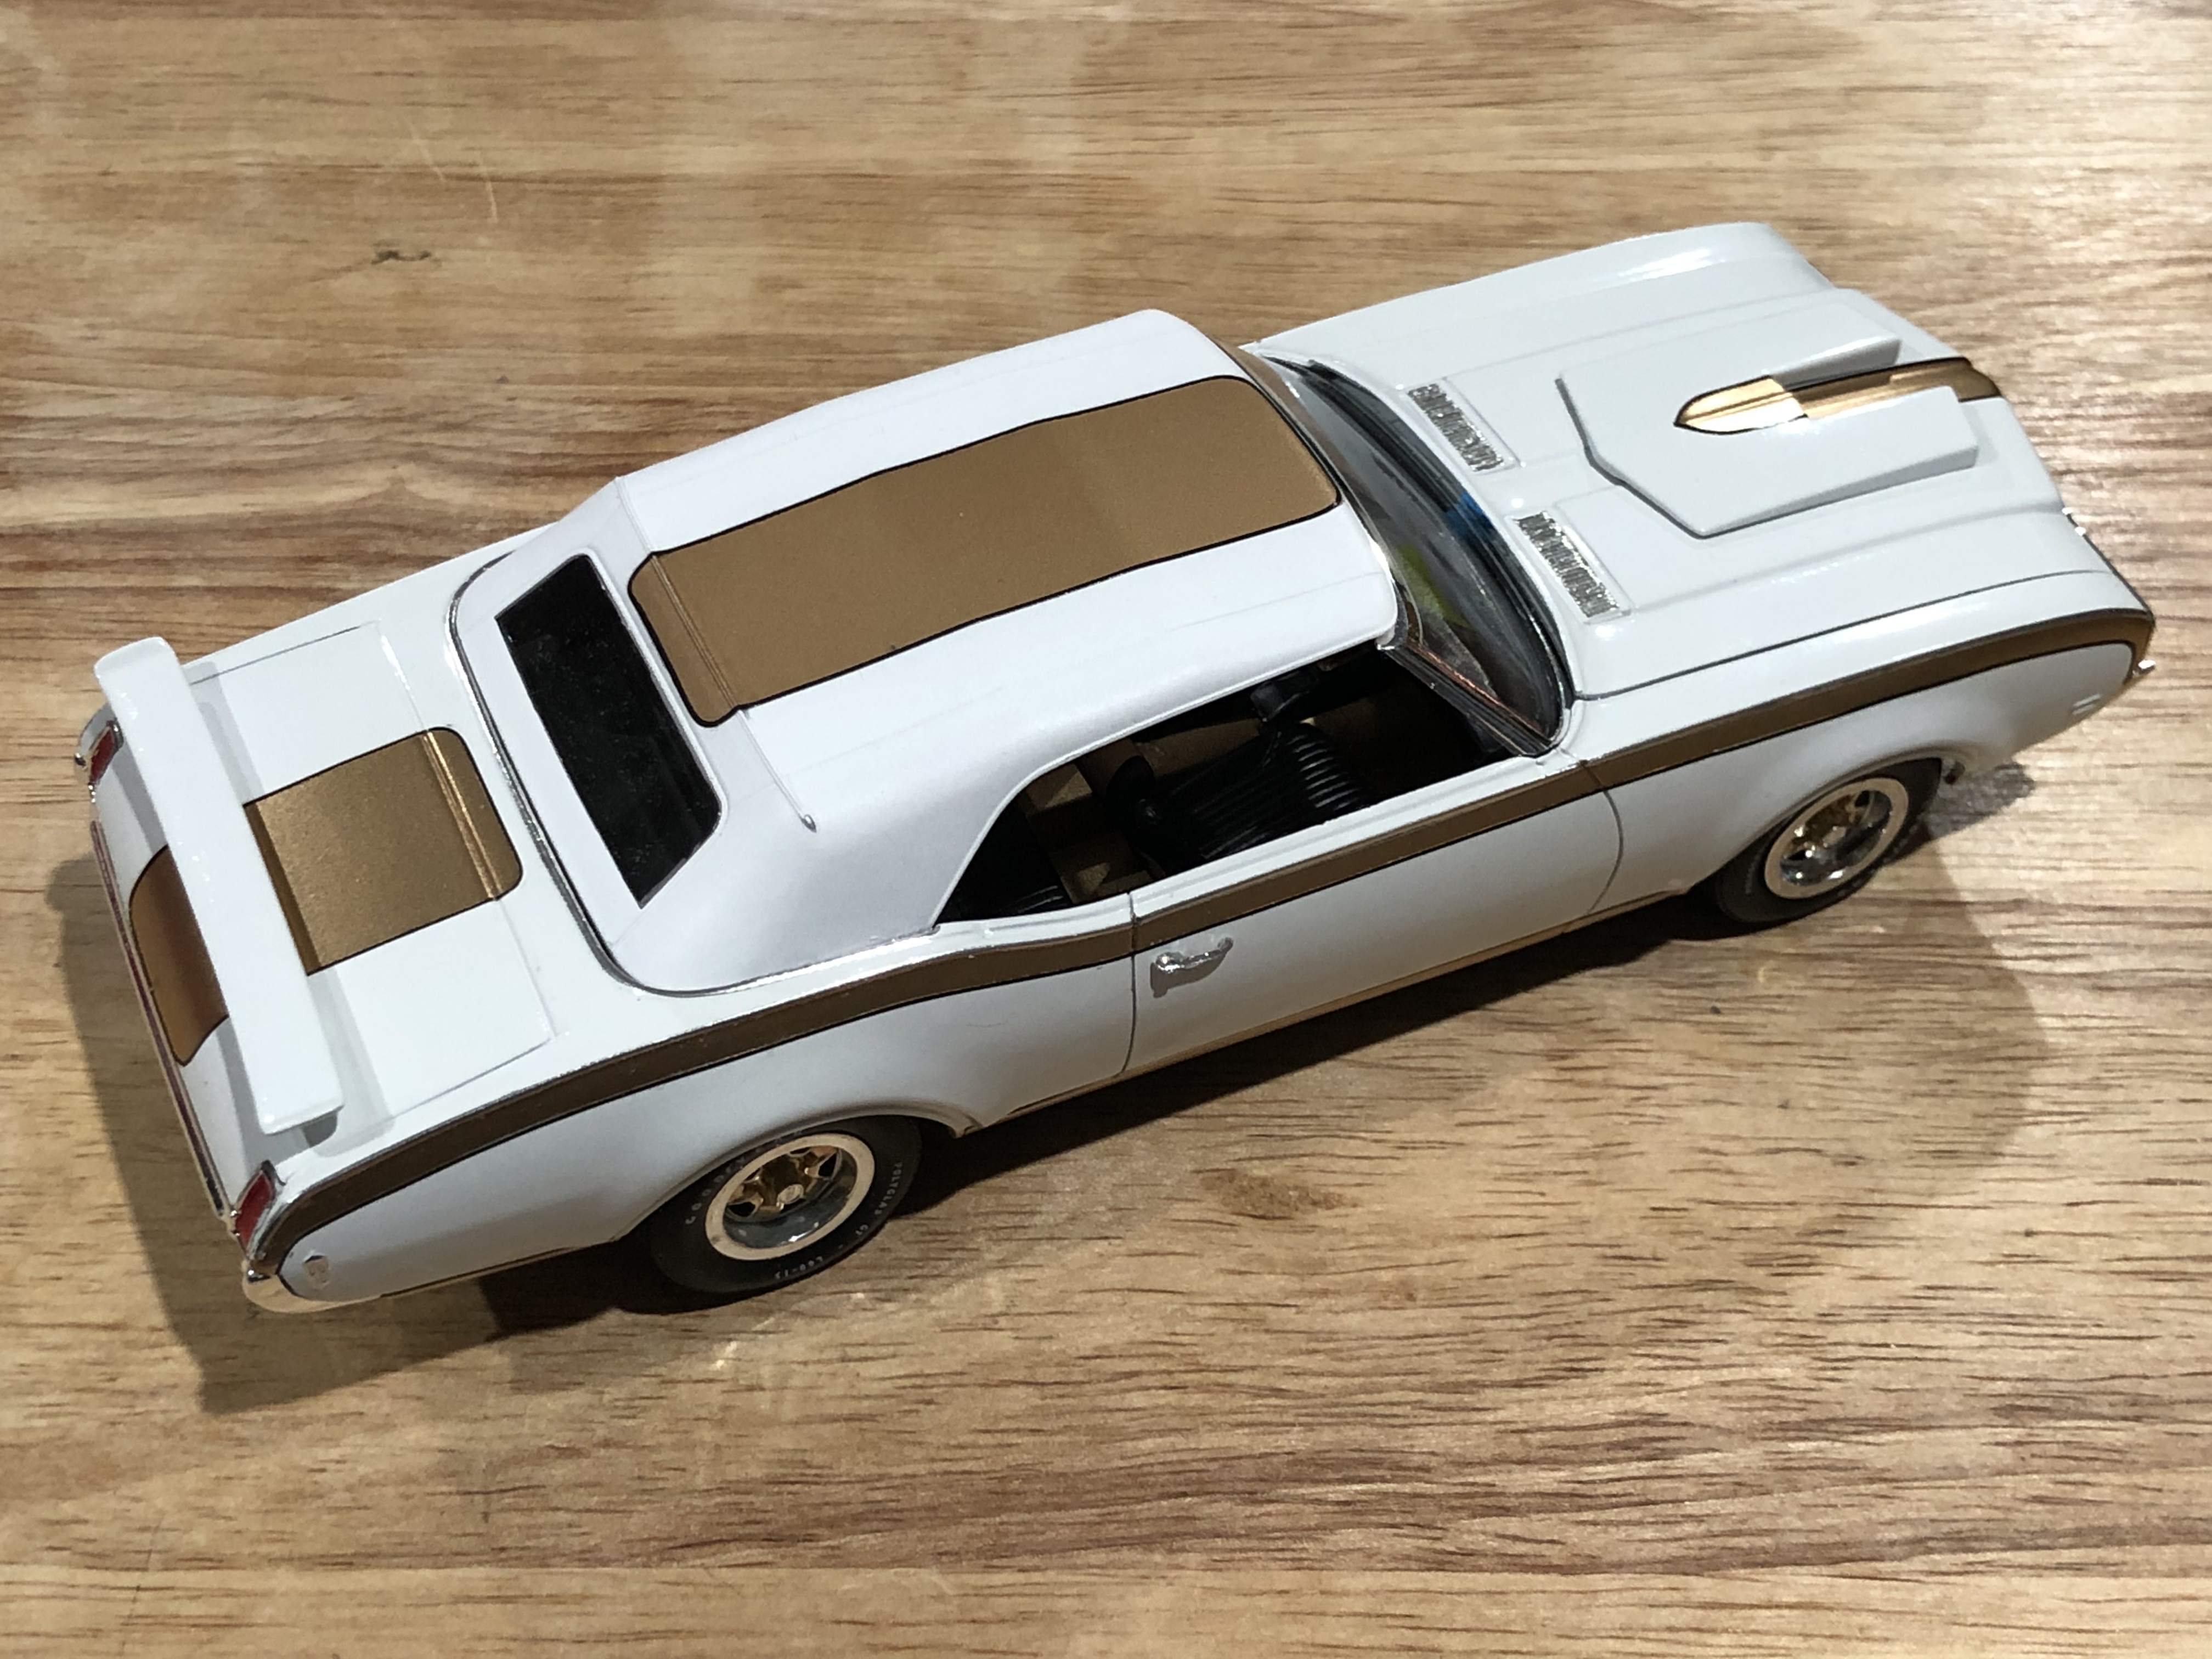
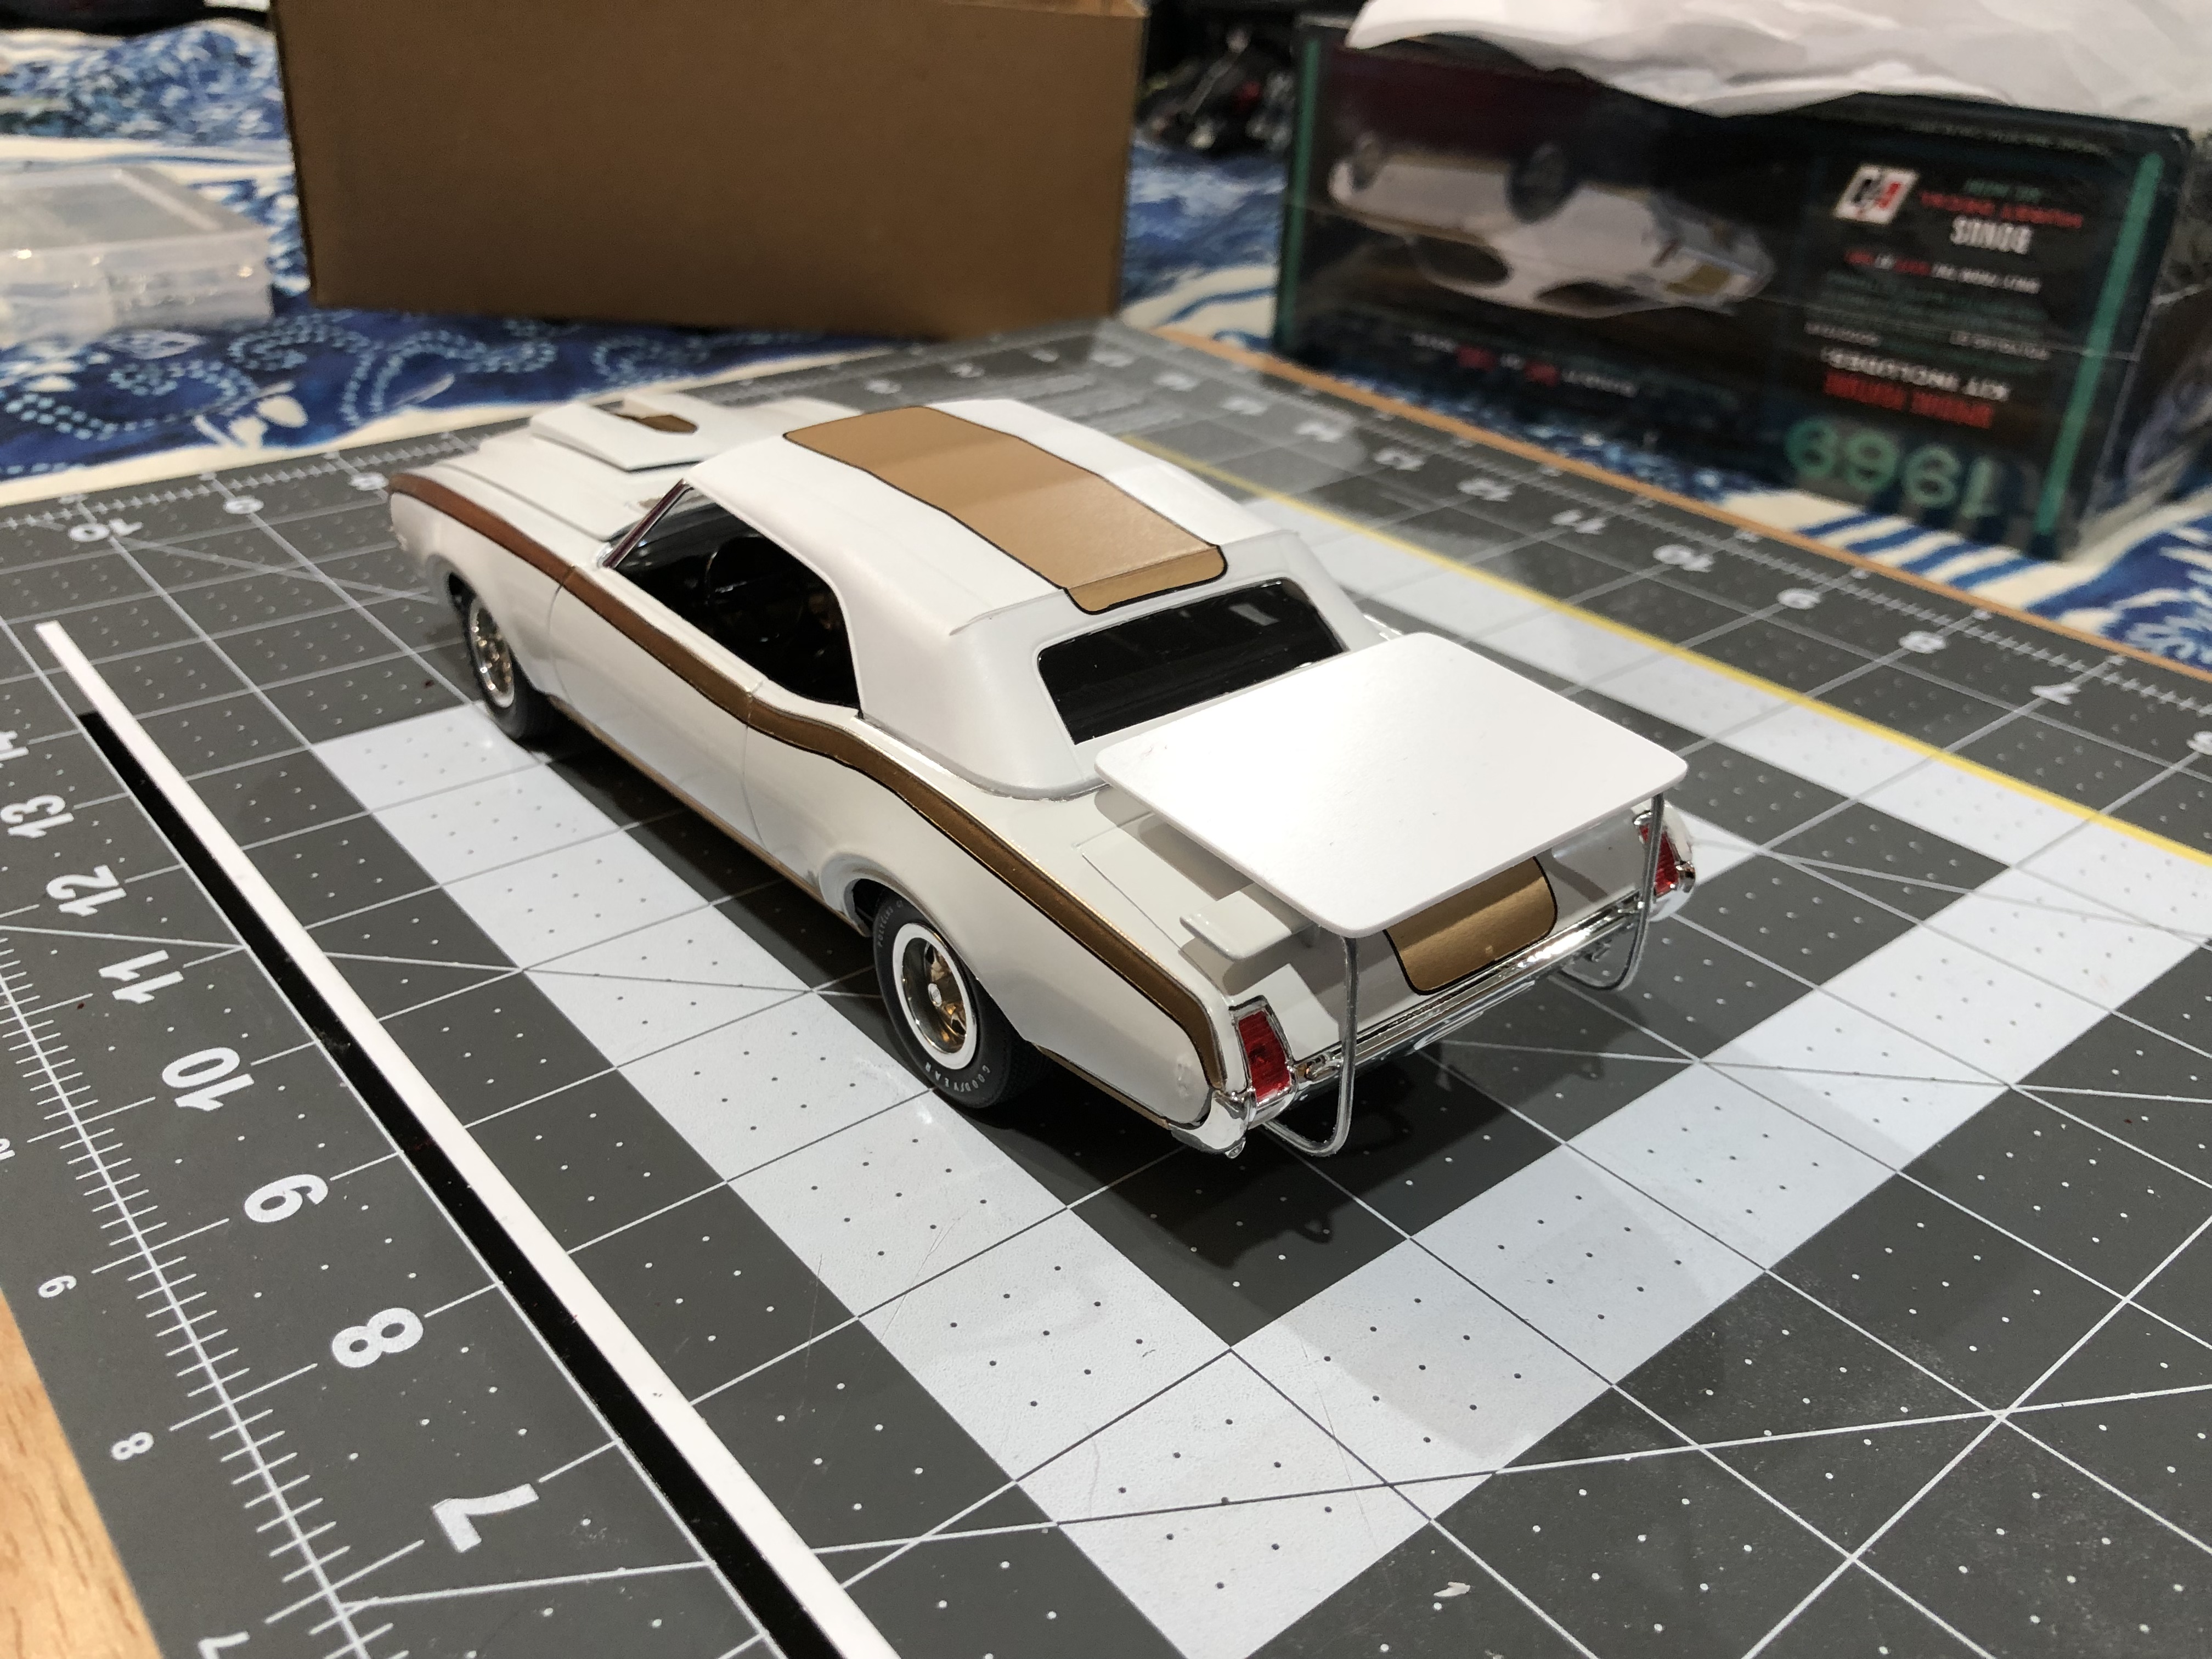
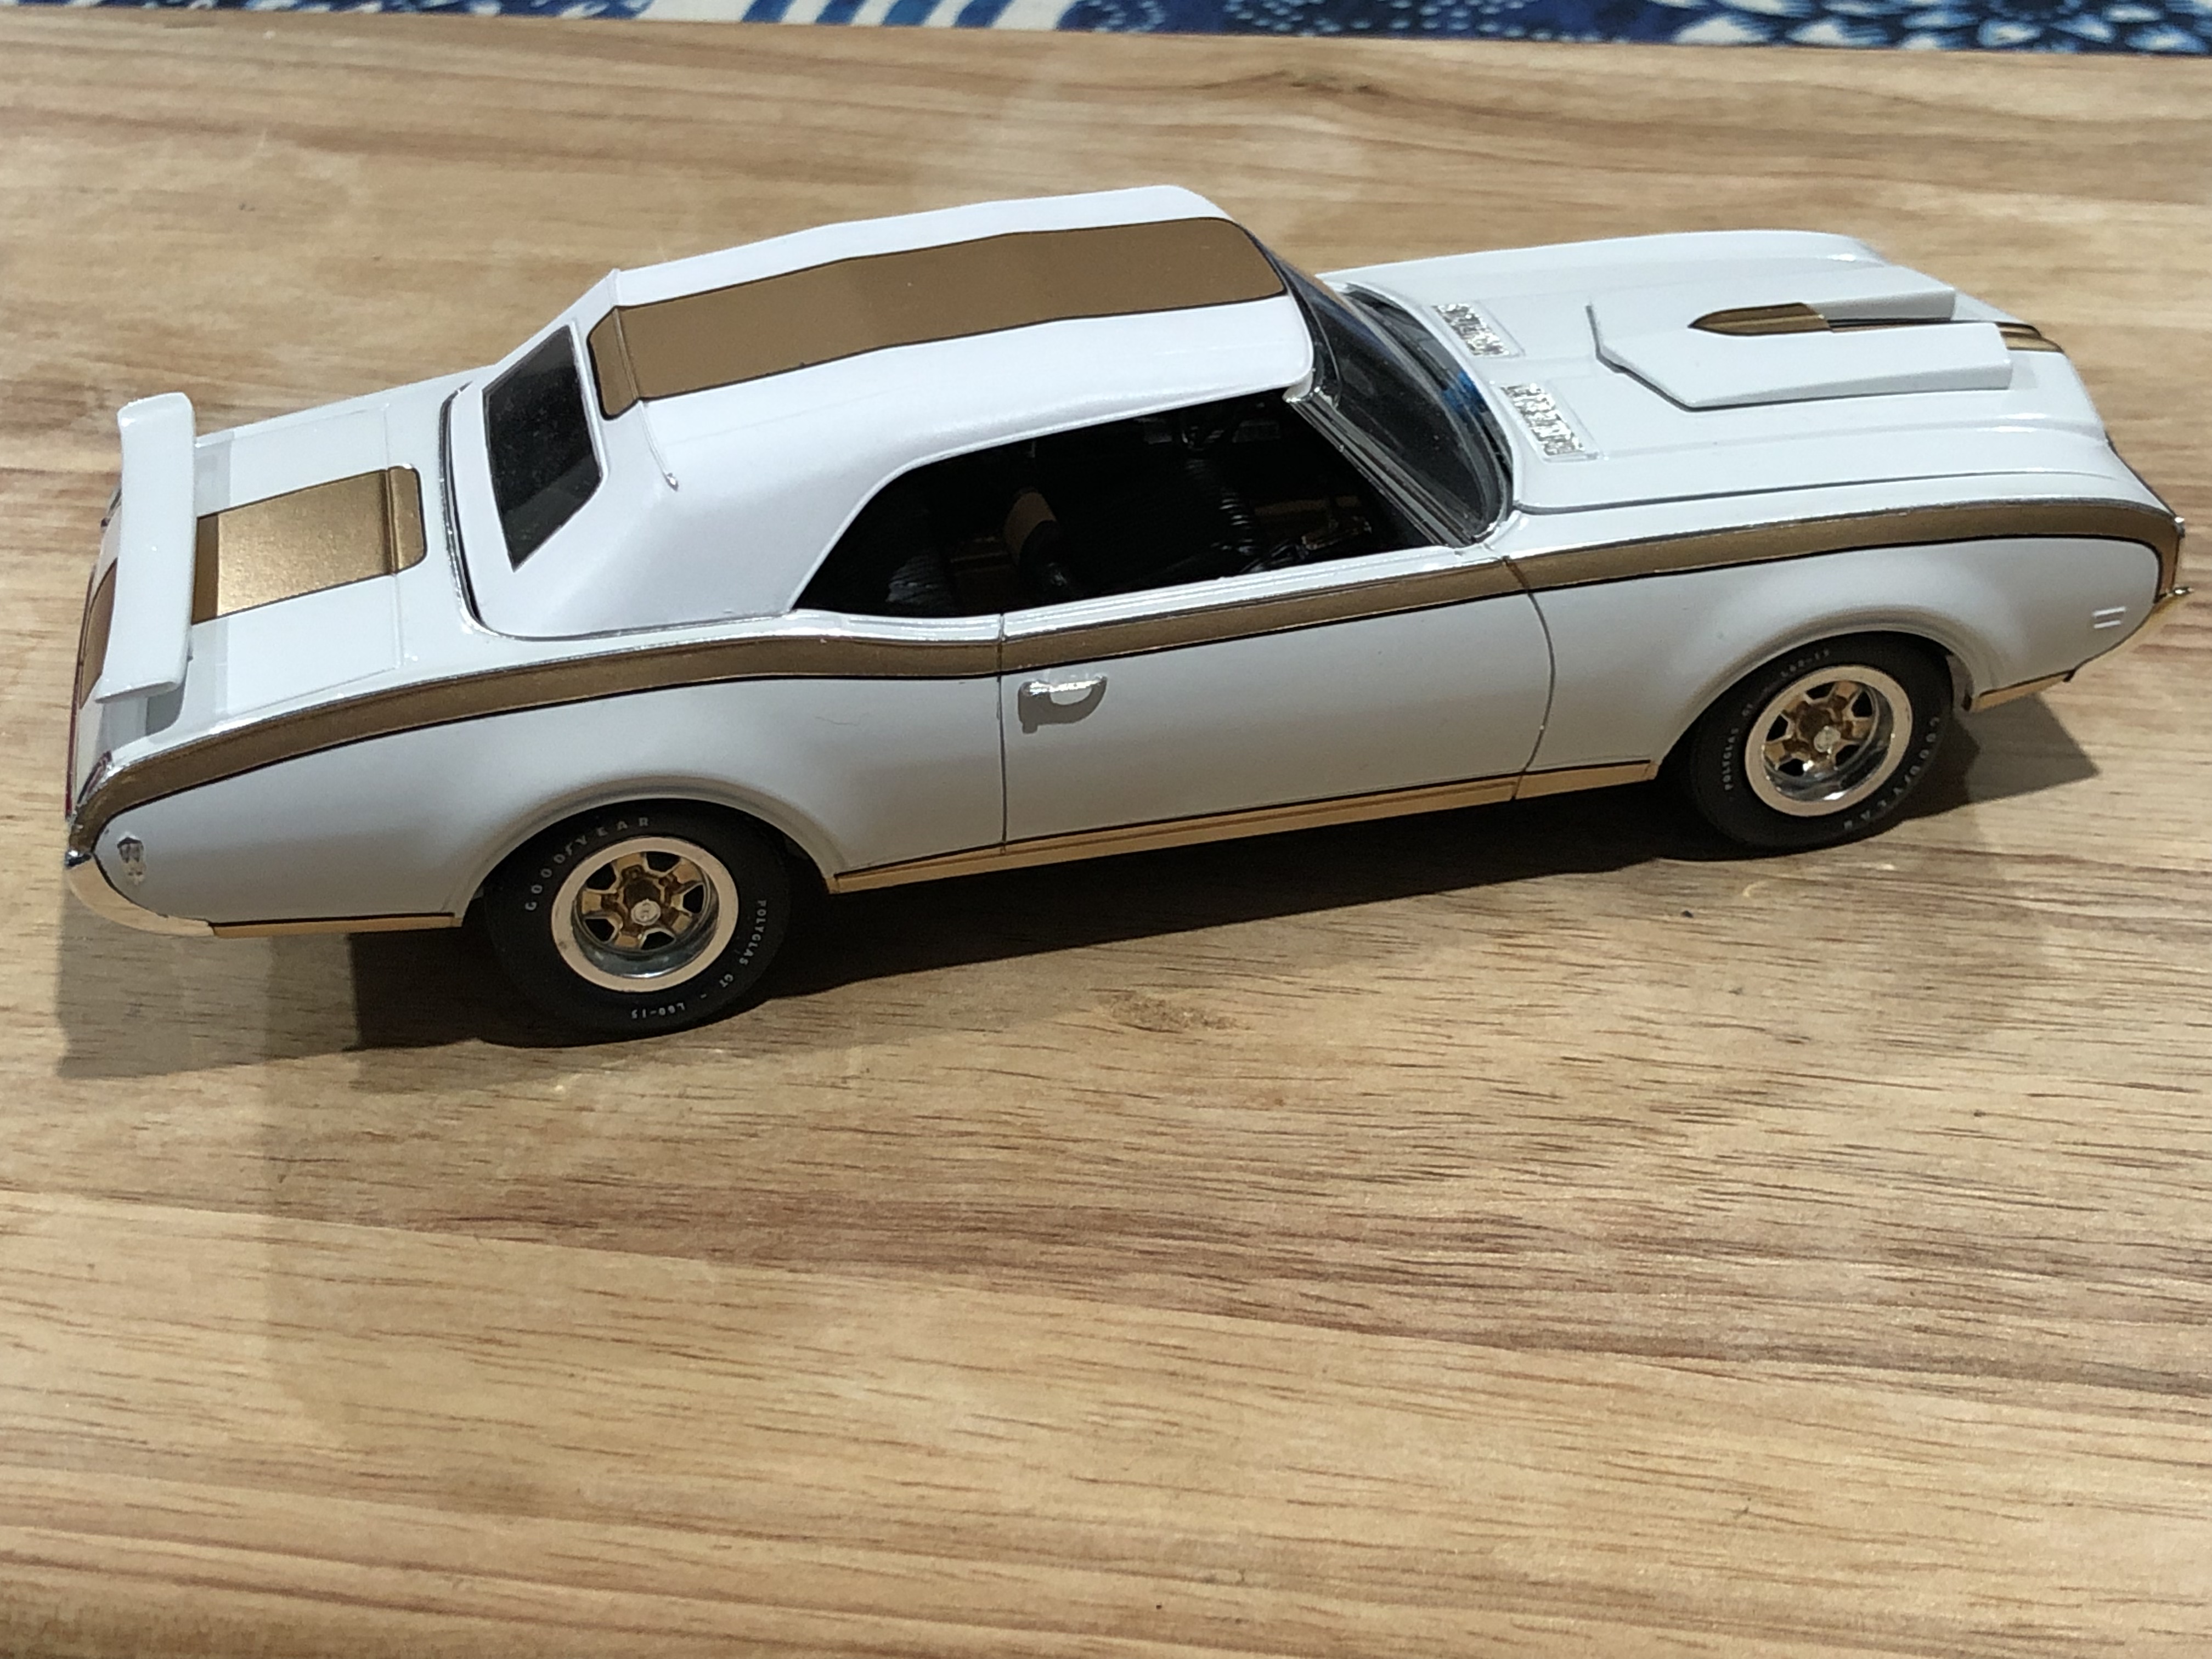
Tonight I completed the trifecta! The 69 Hurst Olds convertible is done! The platform and joint shifter are removable. I did this mainly for transporting back-and-forth to shows what club nights. I’ll post pictures of the construction soon. But everything about the shifter a scratch built. Questions and comments welcome!
-
I love a good roof whack! I may need to do the same to one of my Firebird kits. I’m finishing up a ‘69 Hurst Olds that I whacked the roof off of!
-
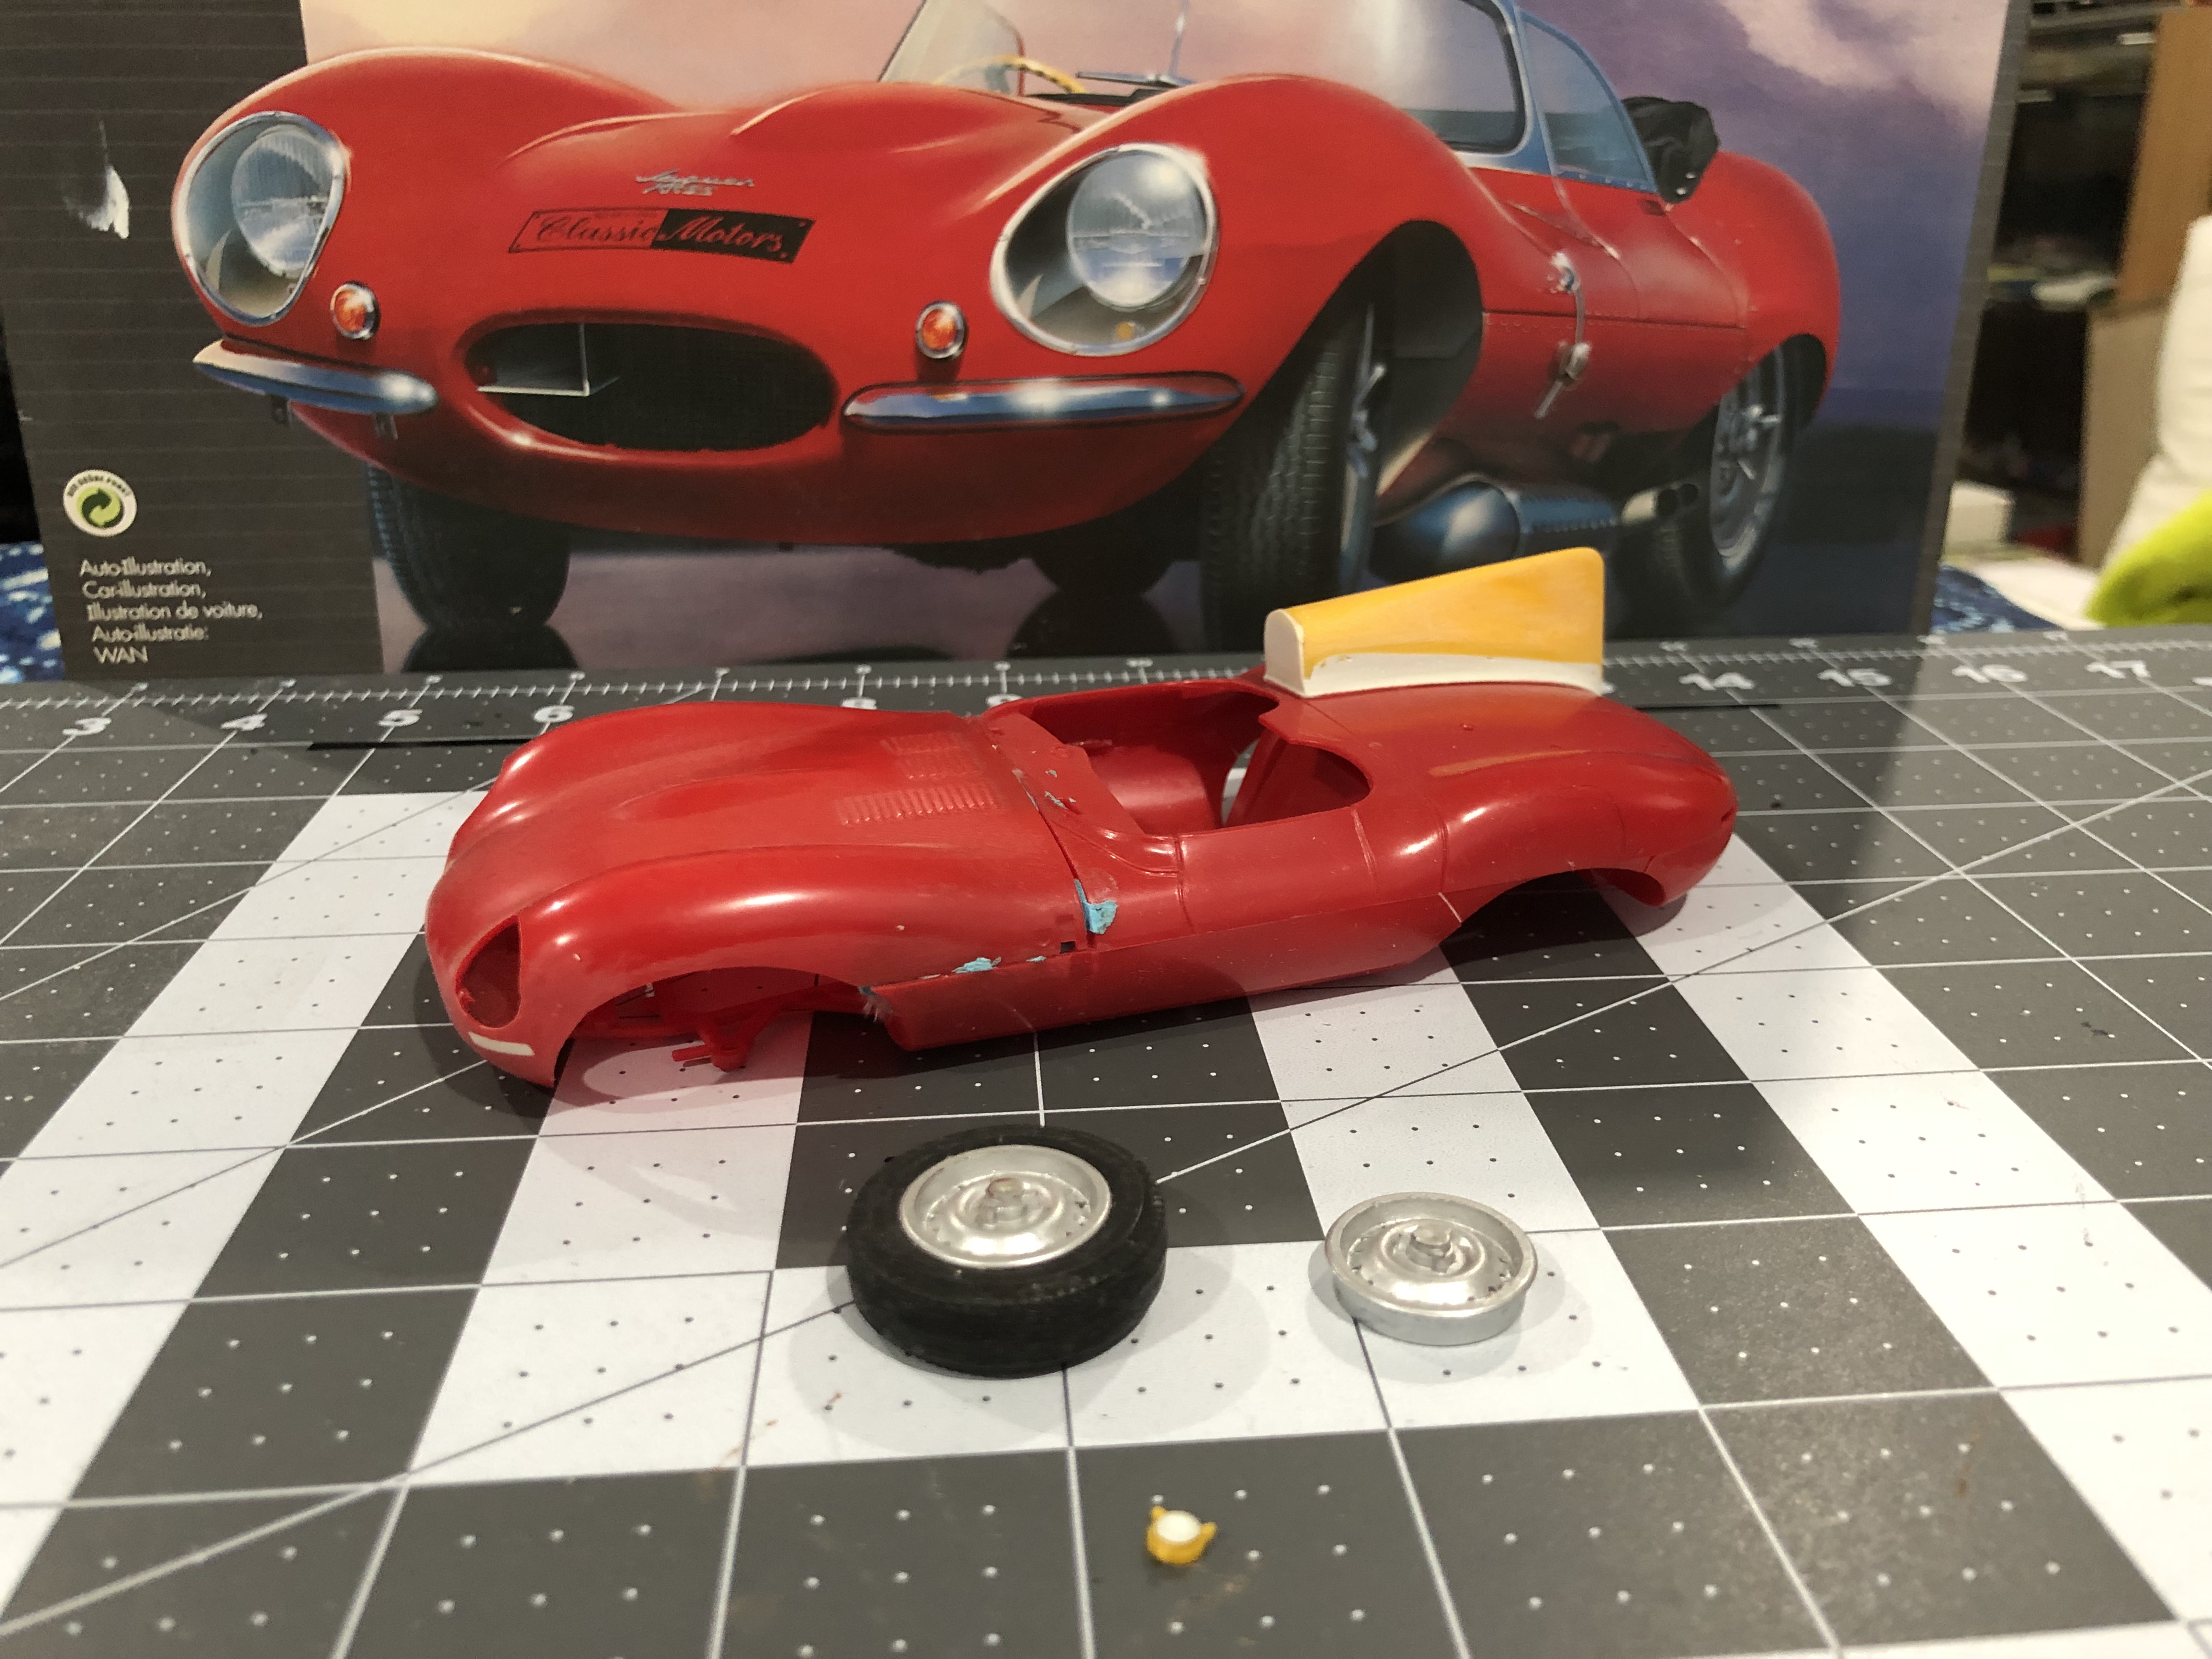
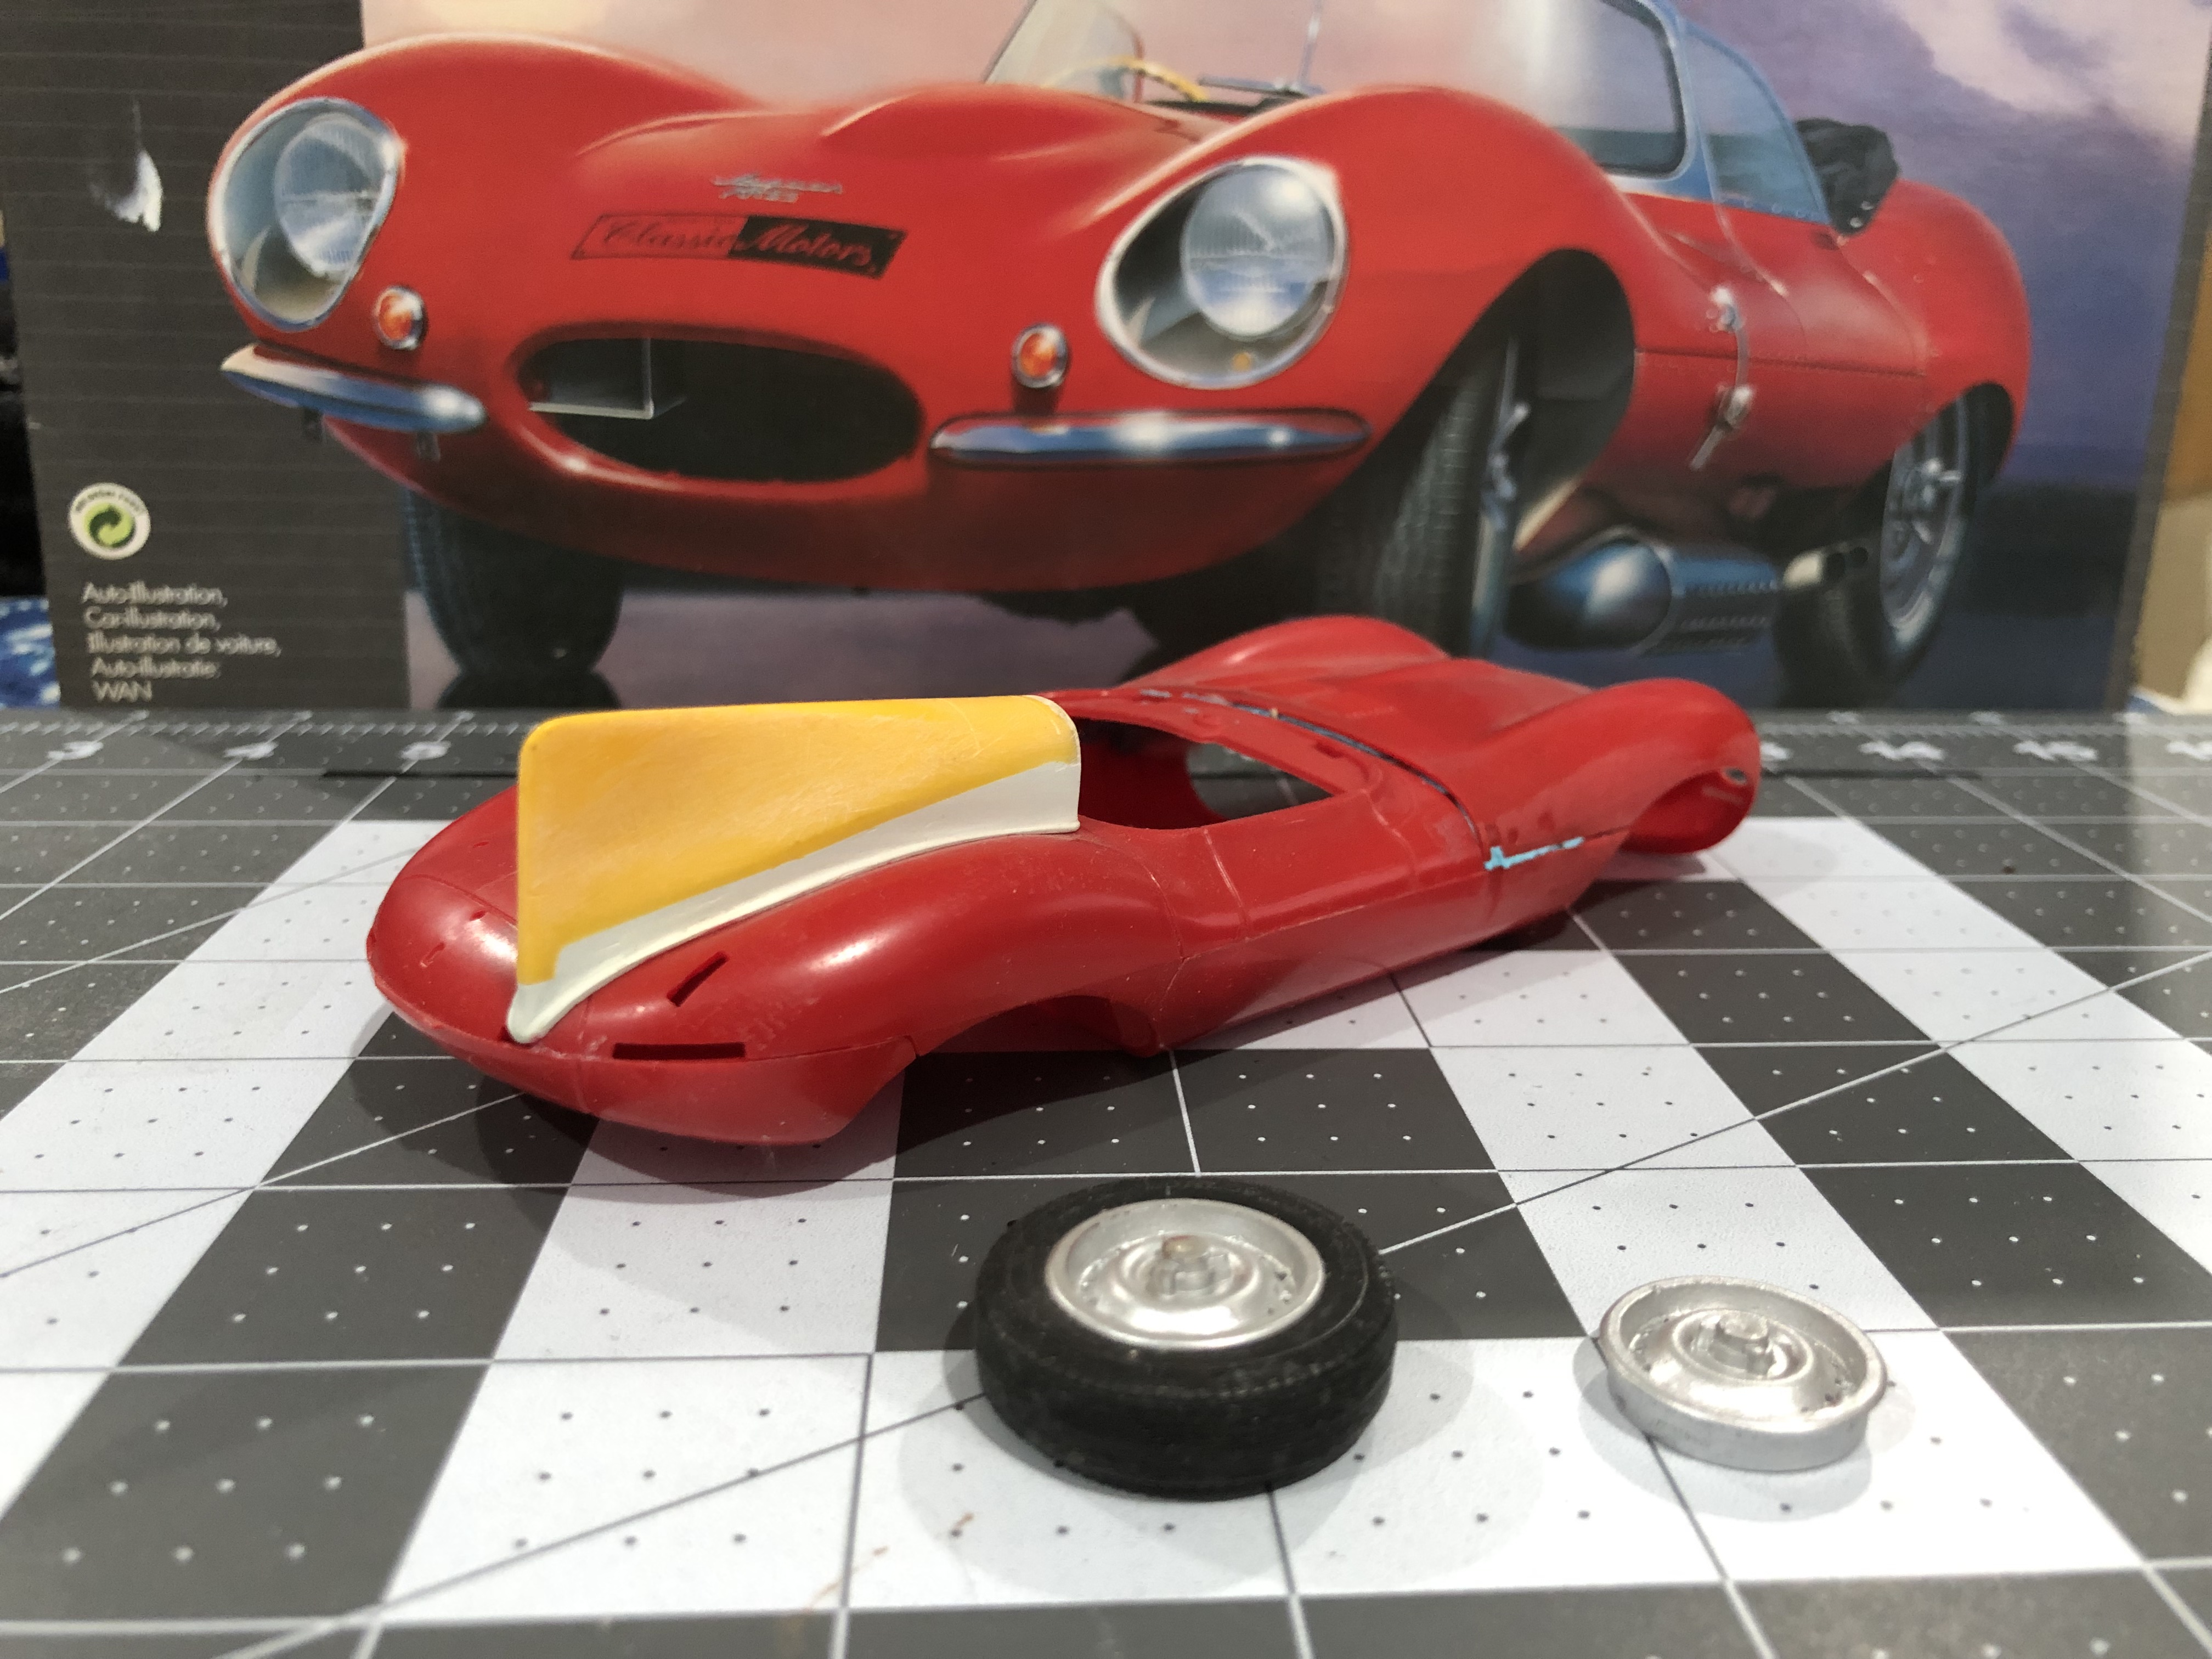
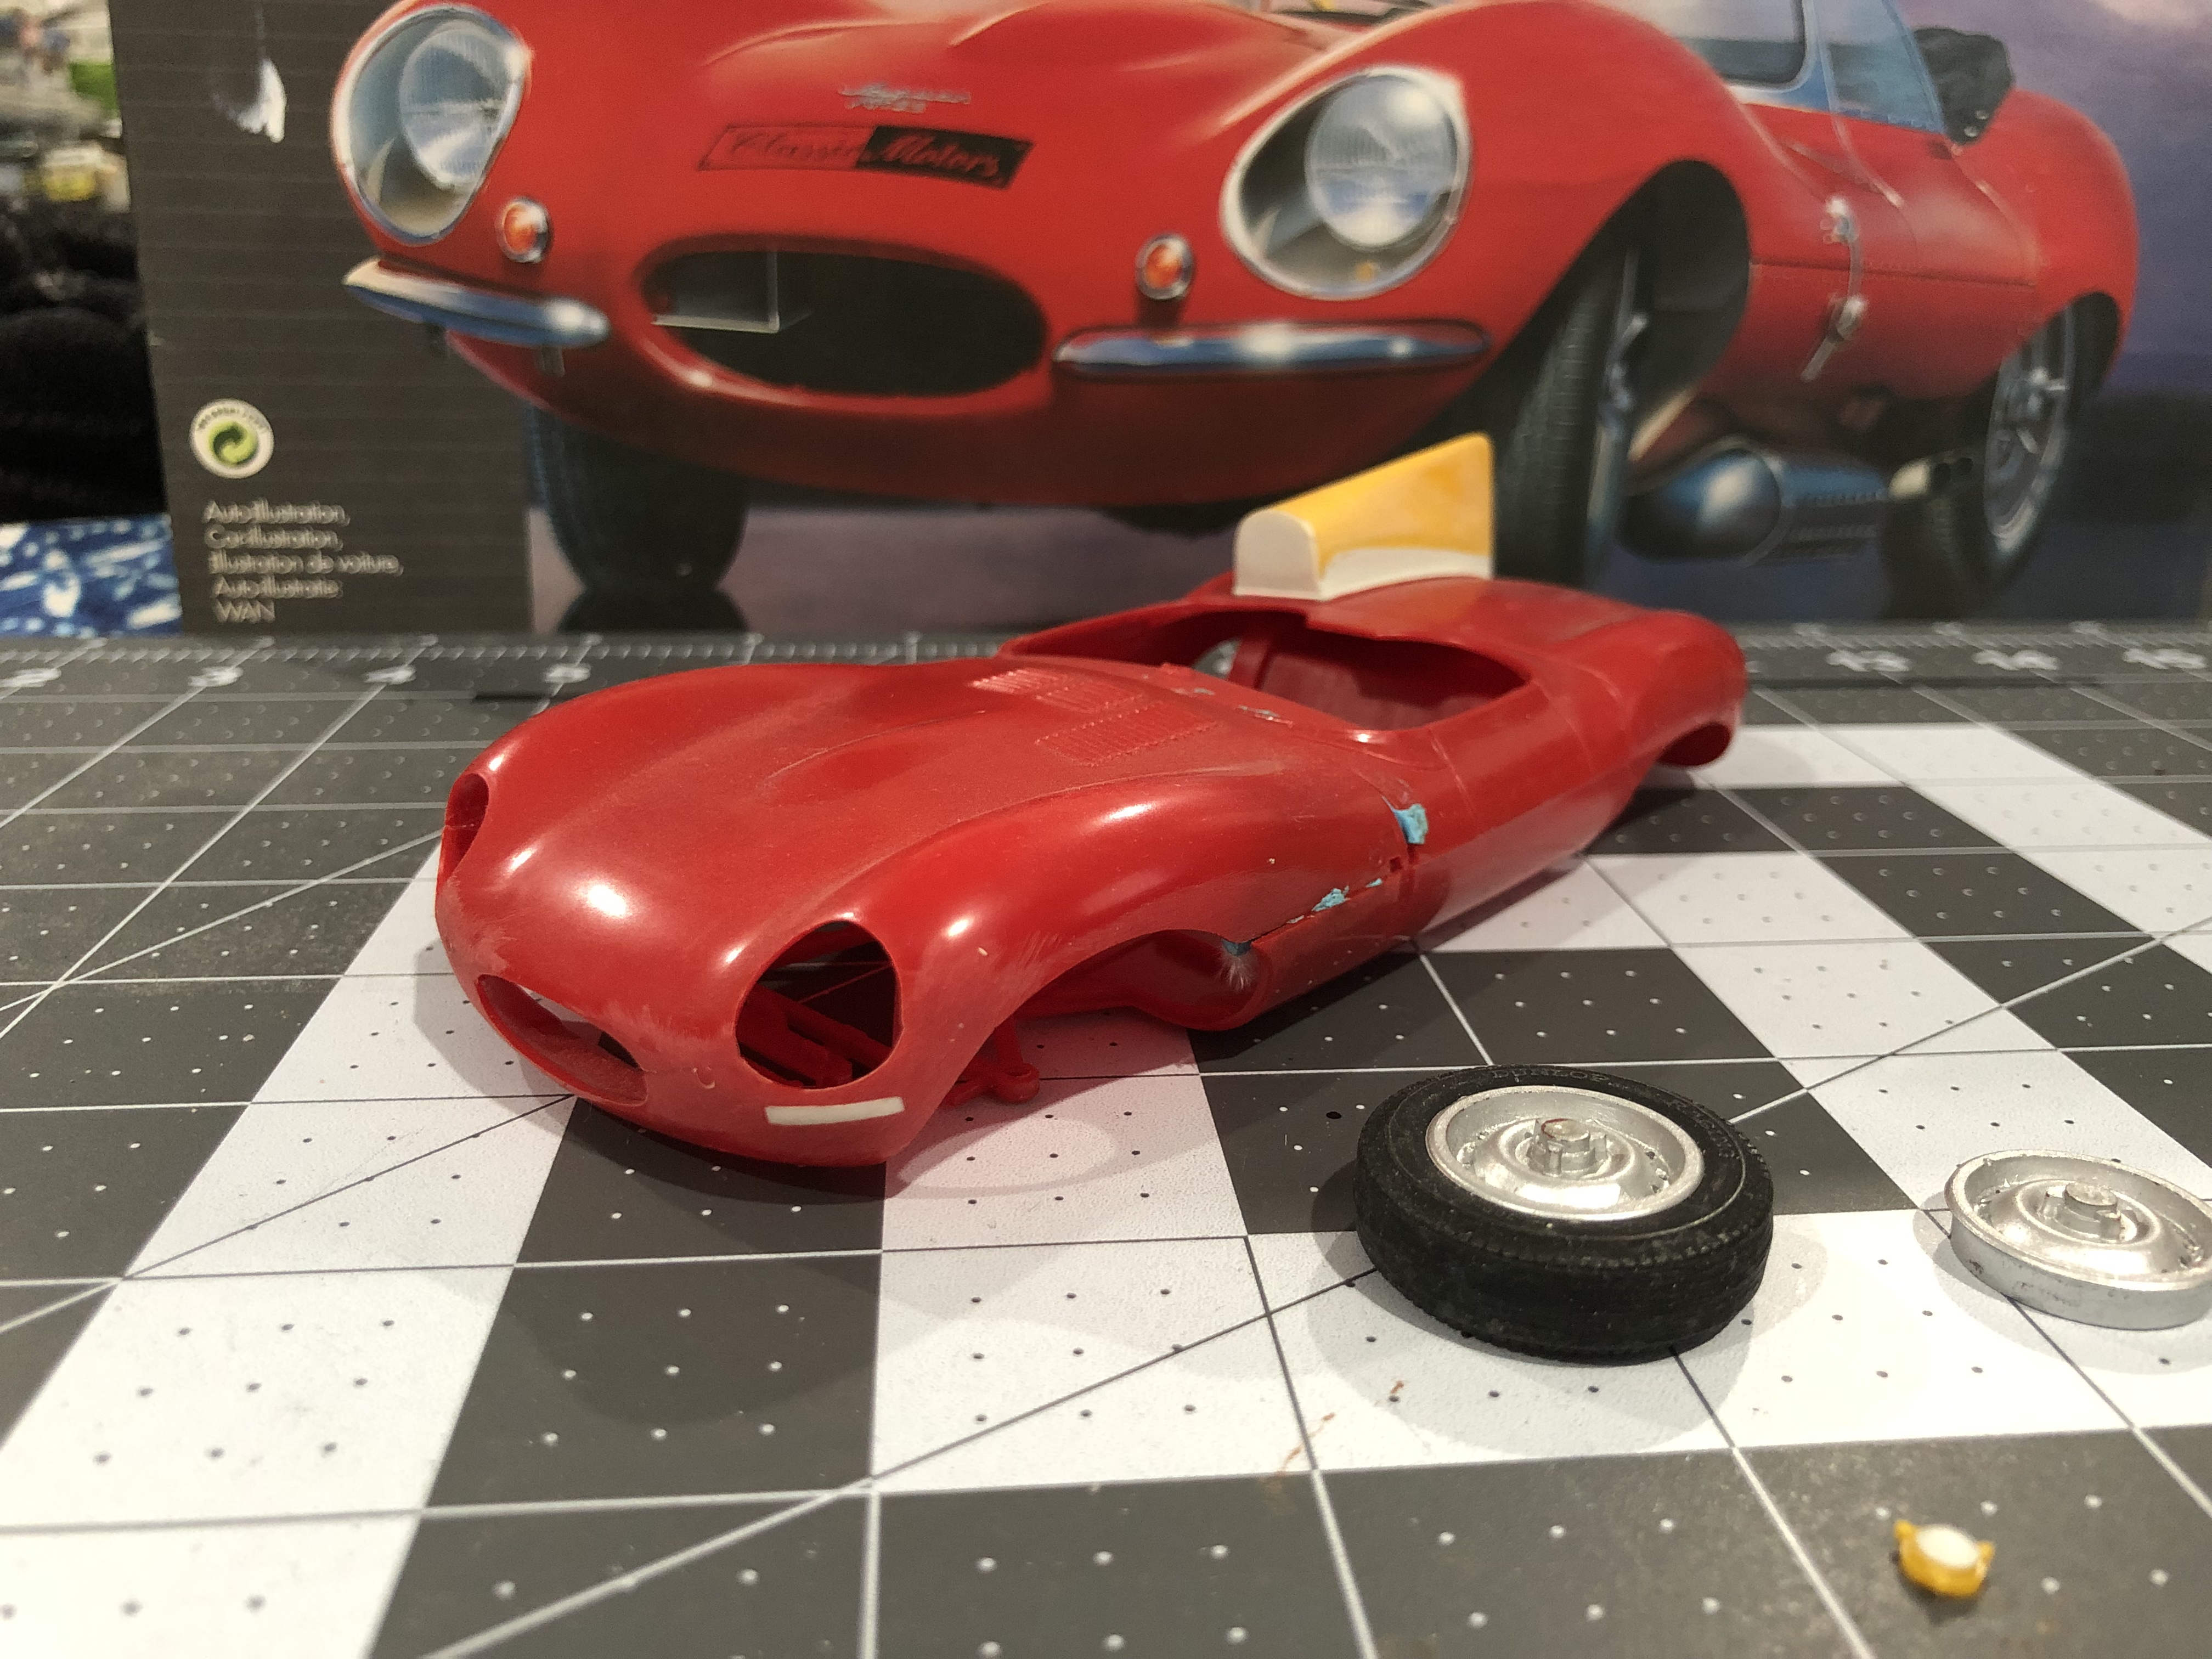
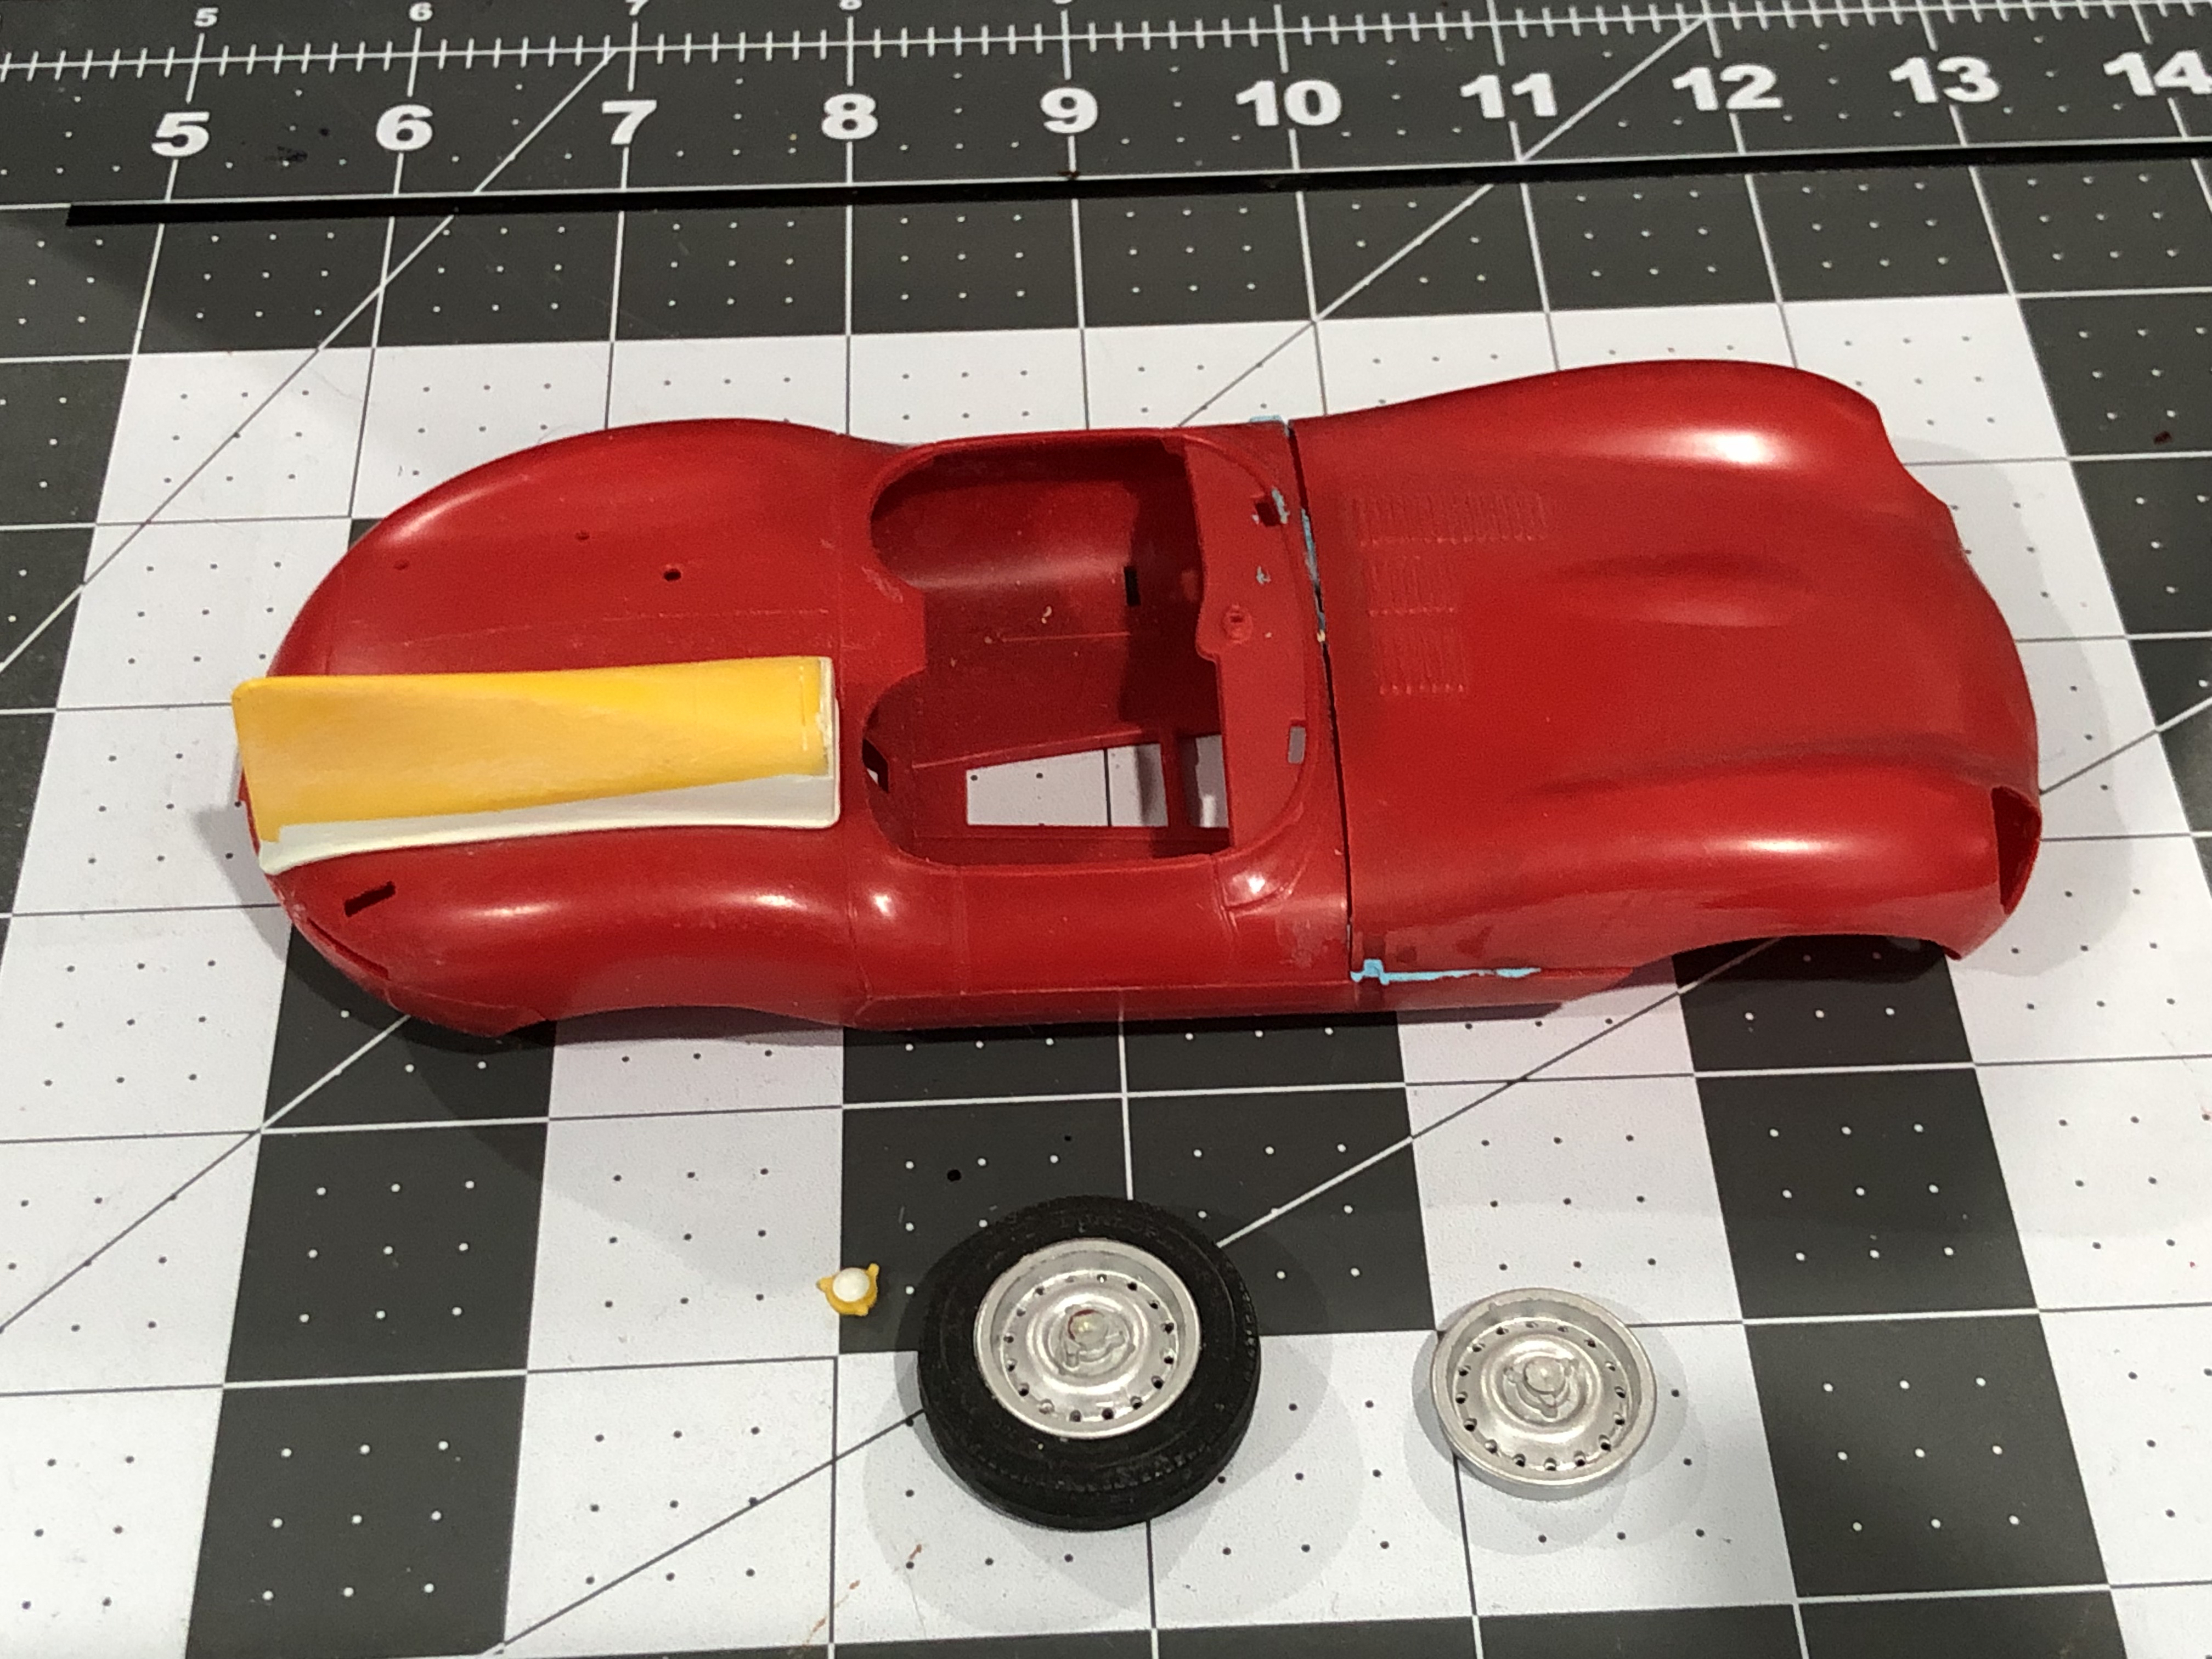
Revell Jaguar XK SS 1:24 Wheel Repair
Superbird McMonte replied to Funkychiken's topic in WIP: Model Cars
Your project has inspired me to dig this one out. I started converting this one to race form a number of years ago. A friend of mine pointed out that the slotcar model of this car is terribly incorrect. I found this for sale at either the NNL East or the LIARS Challenge. Even the slotcar model’s wheels are incorrect.
-
"Bring Out Your Dead" Completion Build--ROUND 2 Is On!
Superbird McMonte replied to Snake45's topic in WIP: Model Cars
It is a great motivator! -
"Bring Out Your Dead" Completion Build--ROUND 2 Is On!
Superbird McMonte replied to Snake45's topic in WIP: Model Cars
Wheels on! Well actually the chassis and interior have met the body. The engine is in place also. I’ll post some pictures of that too. But it’s official, I’m entering the final stretch. With about two weeks left, the end of my trifecta is in sight! -
1969 Hurst Olds convertible conversion
Superbird McMonte replied to Superbird McMonte's topic in WIP: Model Cars
Wheels on! Well actually the chassis and interior have met the body. The engine is in place also. I’ll post some pictures of that too. But it’s official, I’m entering the final stretch. With about two weeks left, the end of my trifecta is in sight! -
"Bring Out Your Dead" Completion Build--ROUND 2 Is On!
Superbird McMonte replied to Snake45's topic in WIP: Model Cars
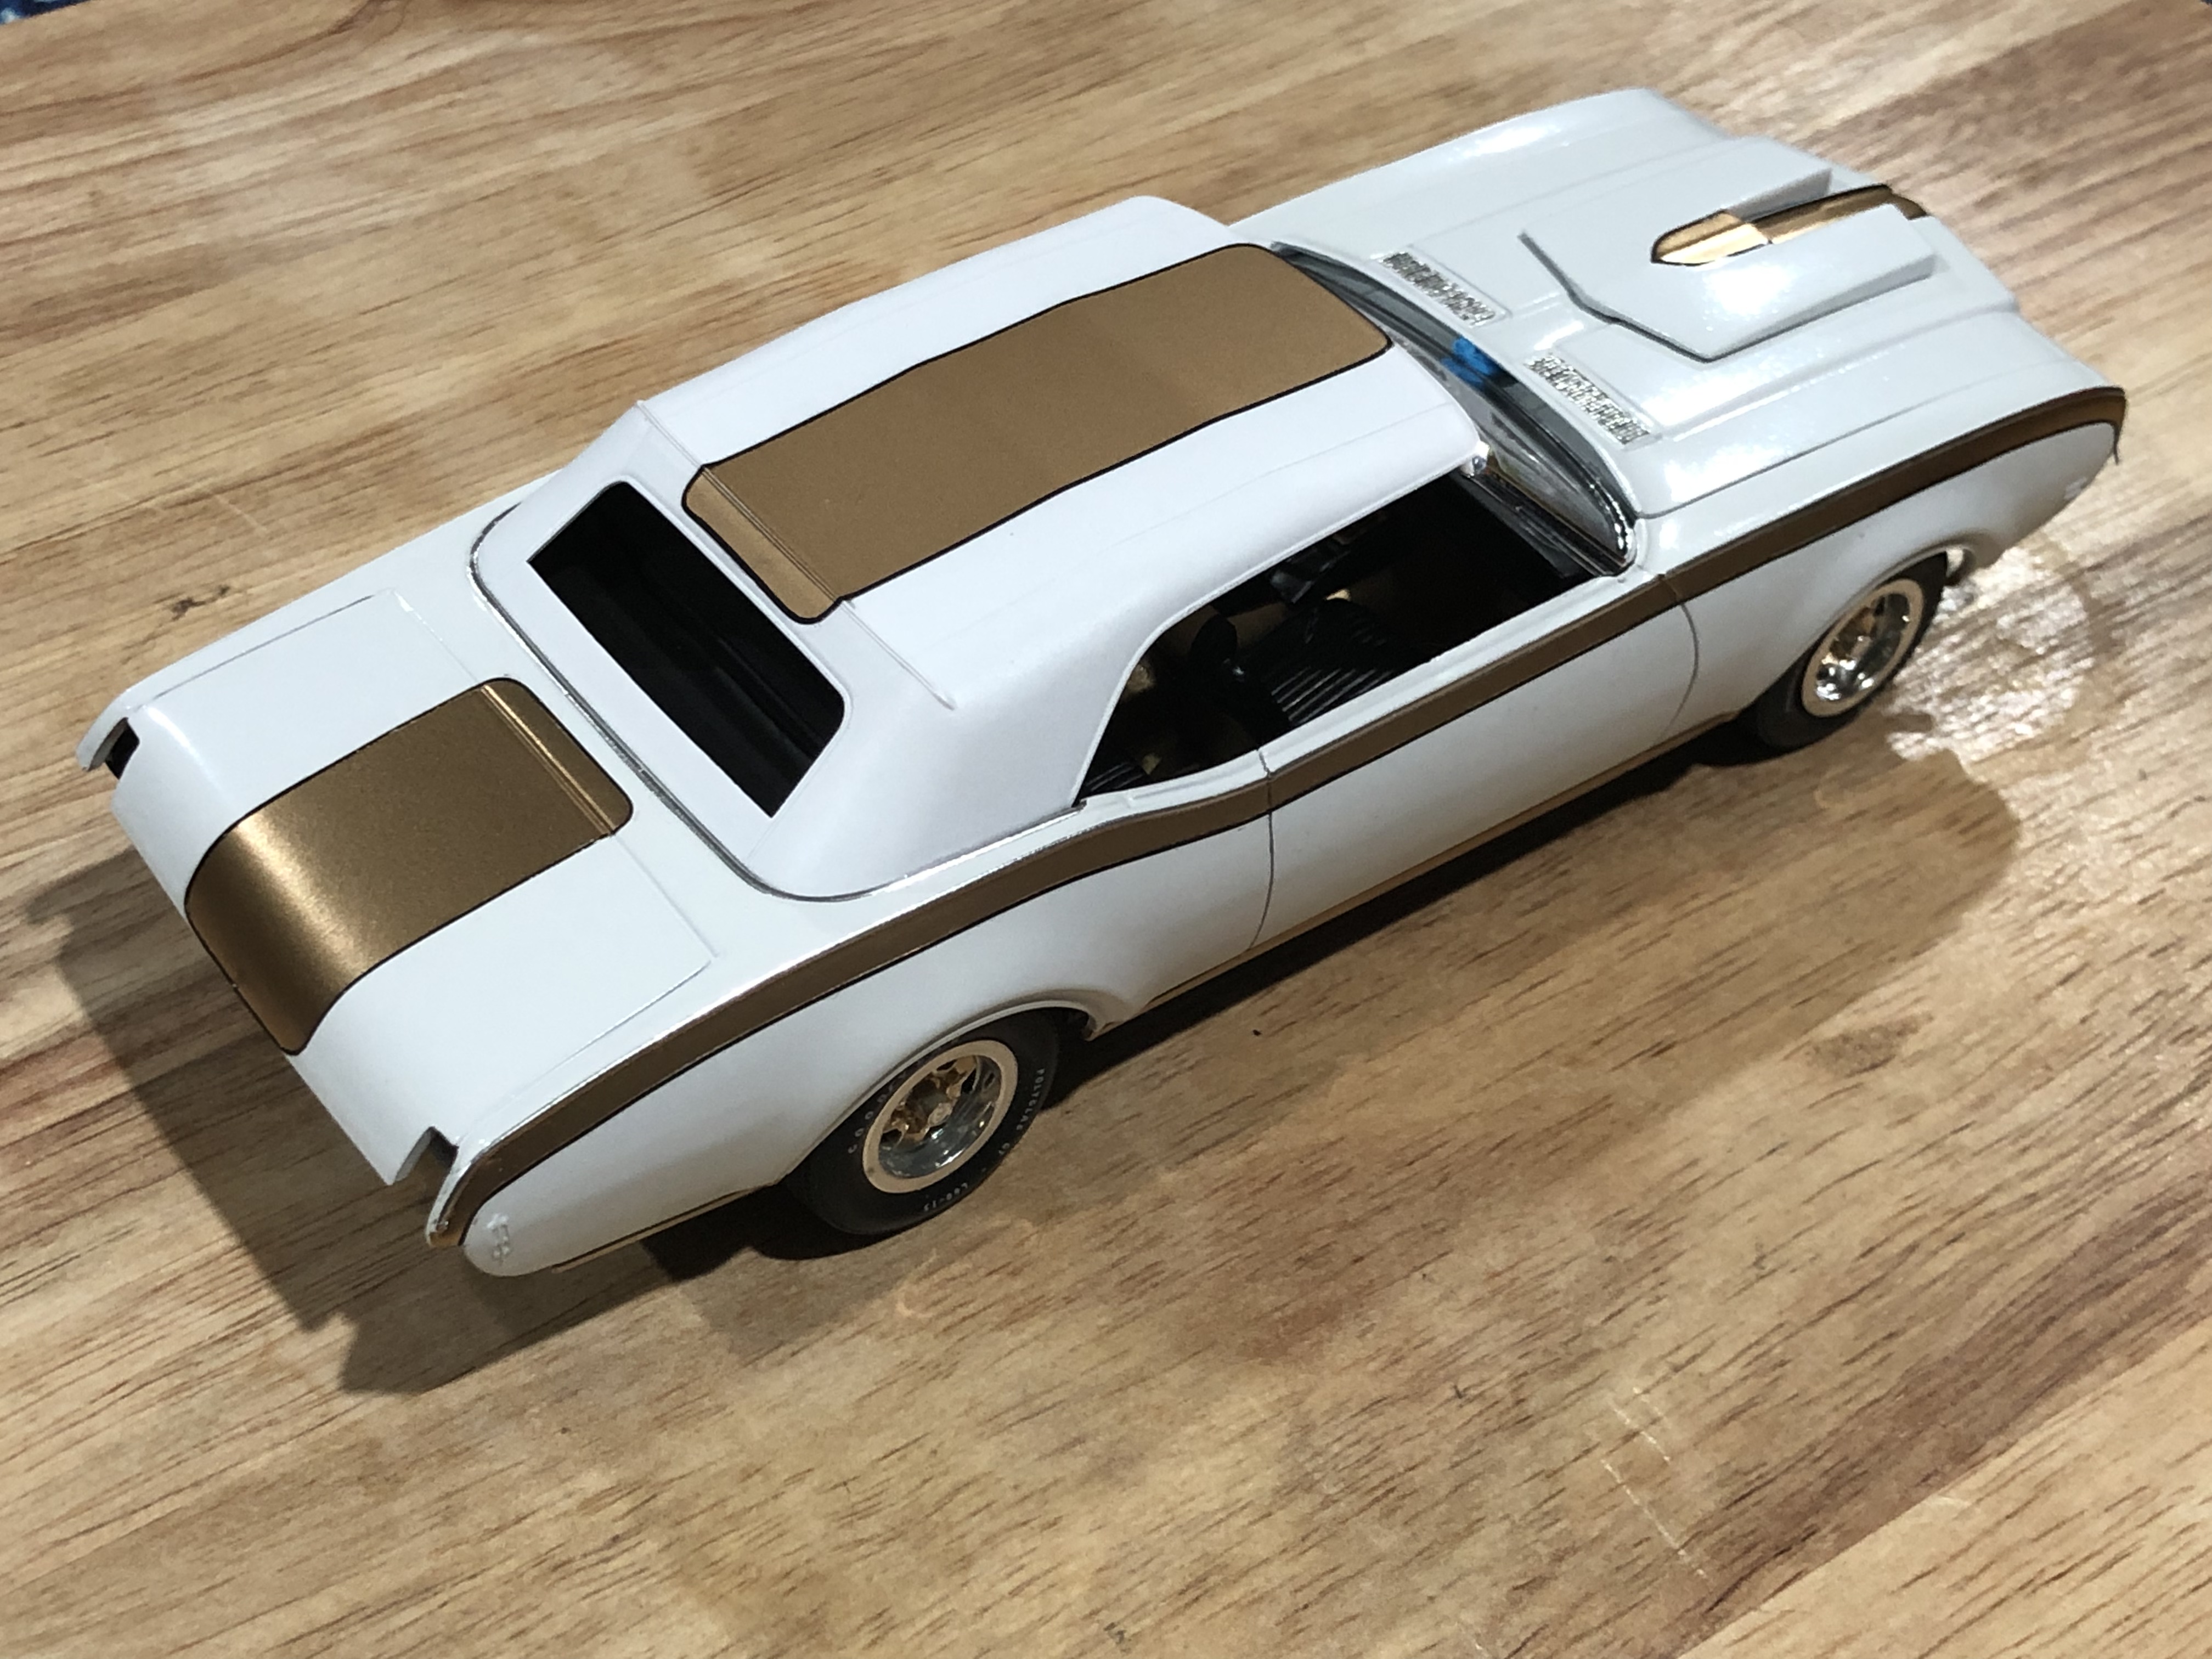
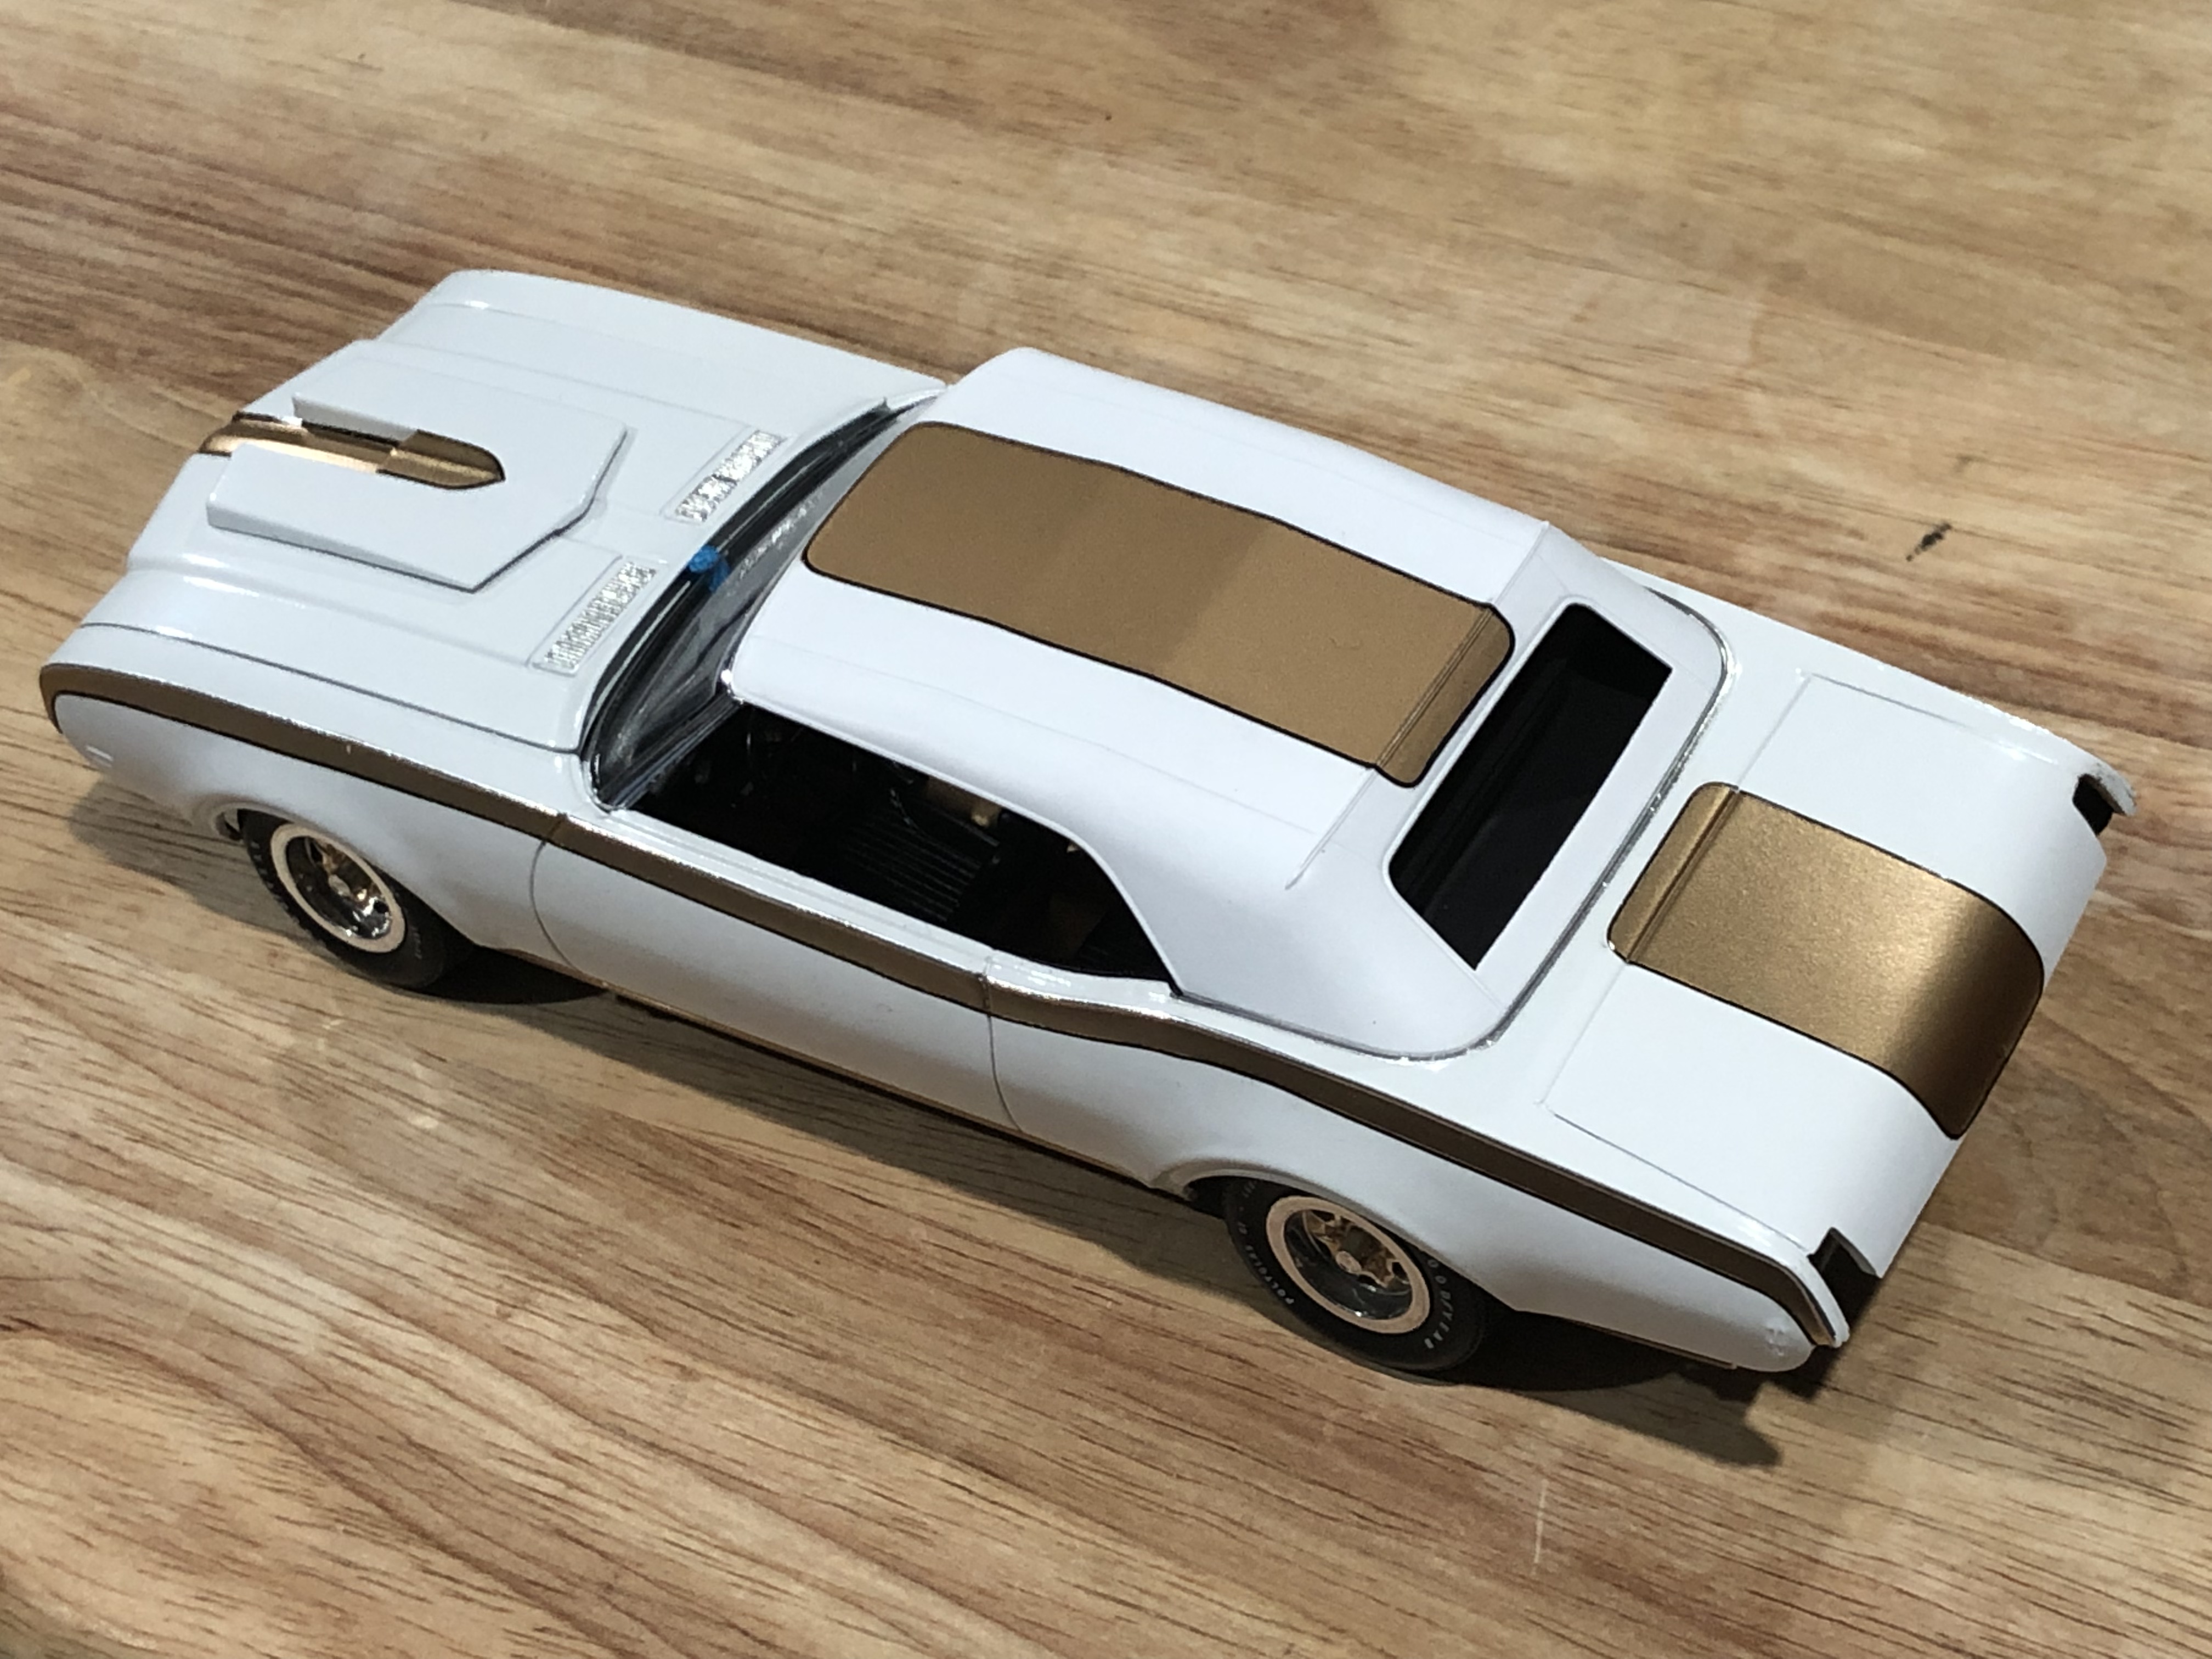
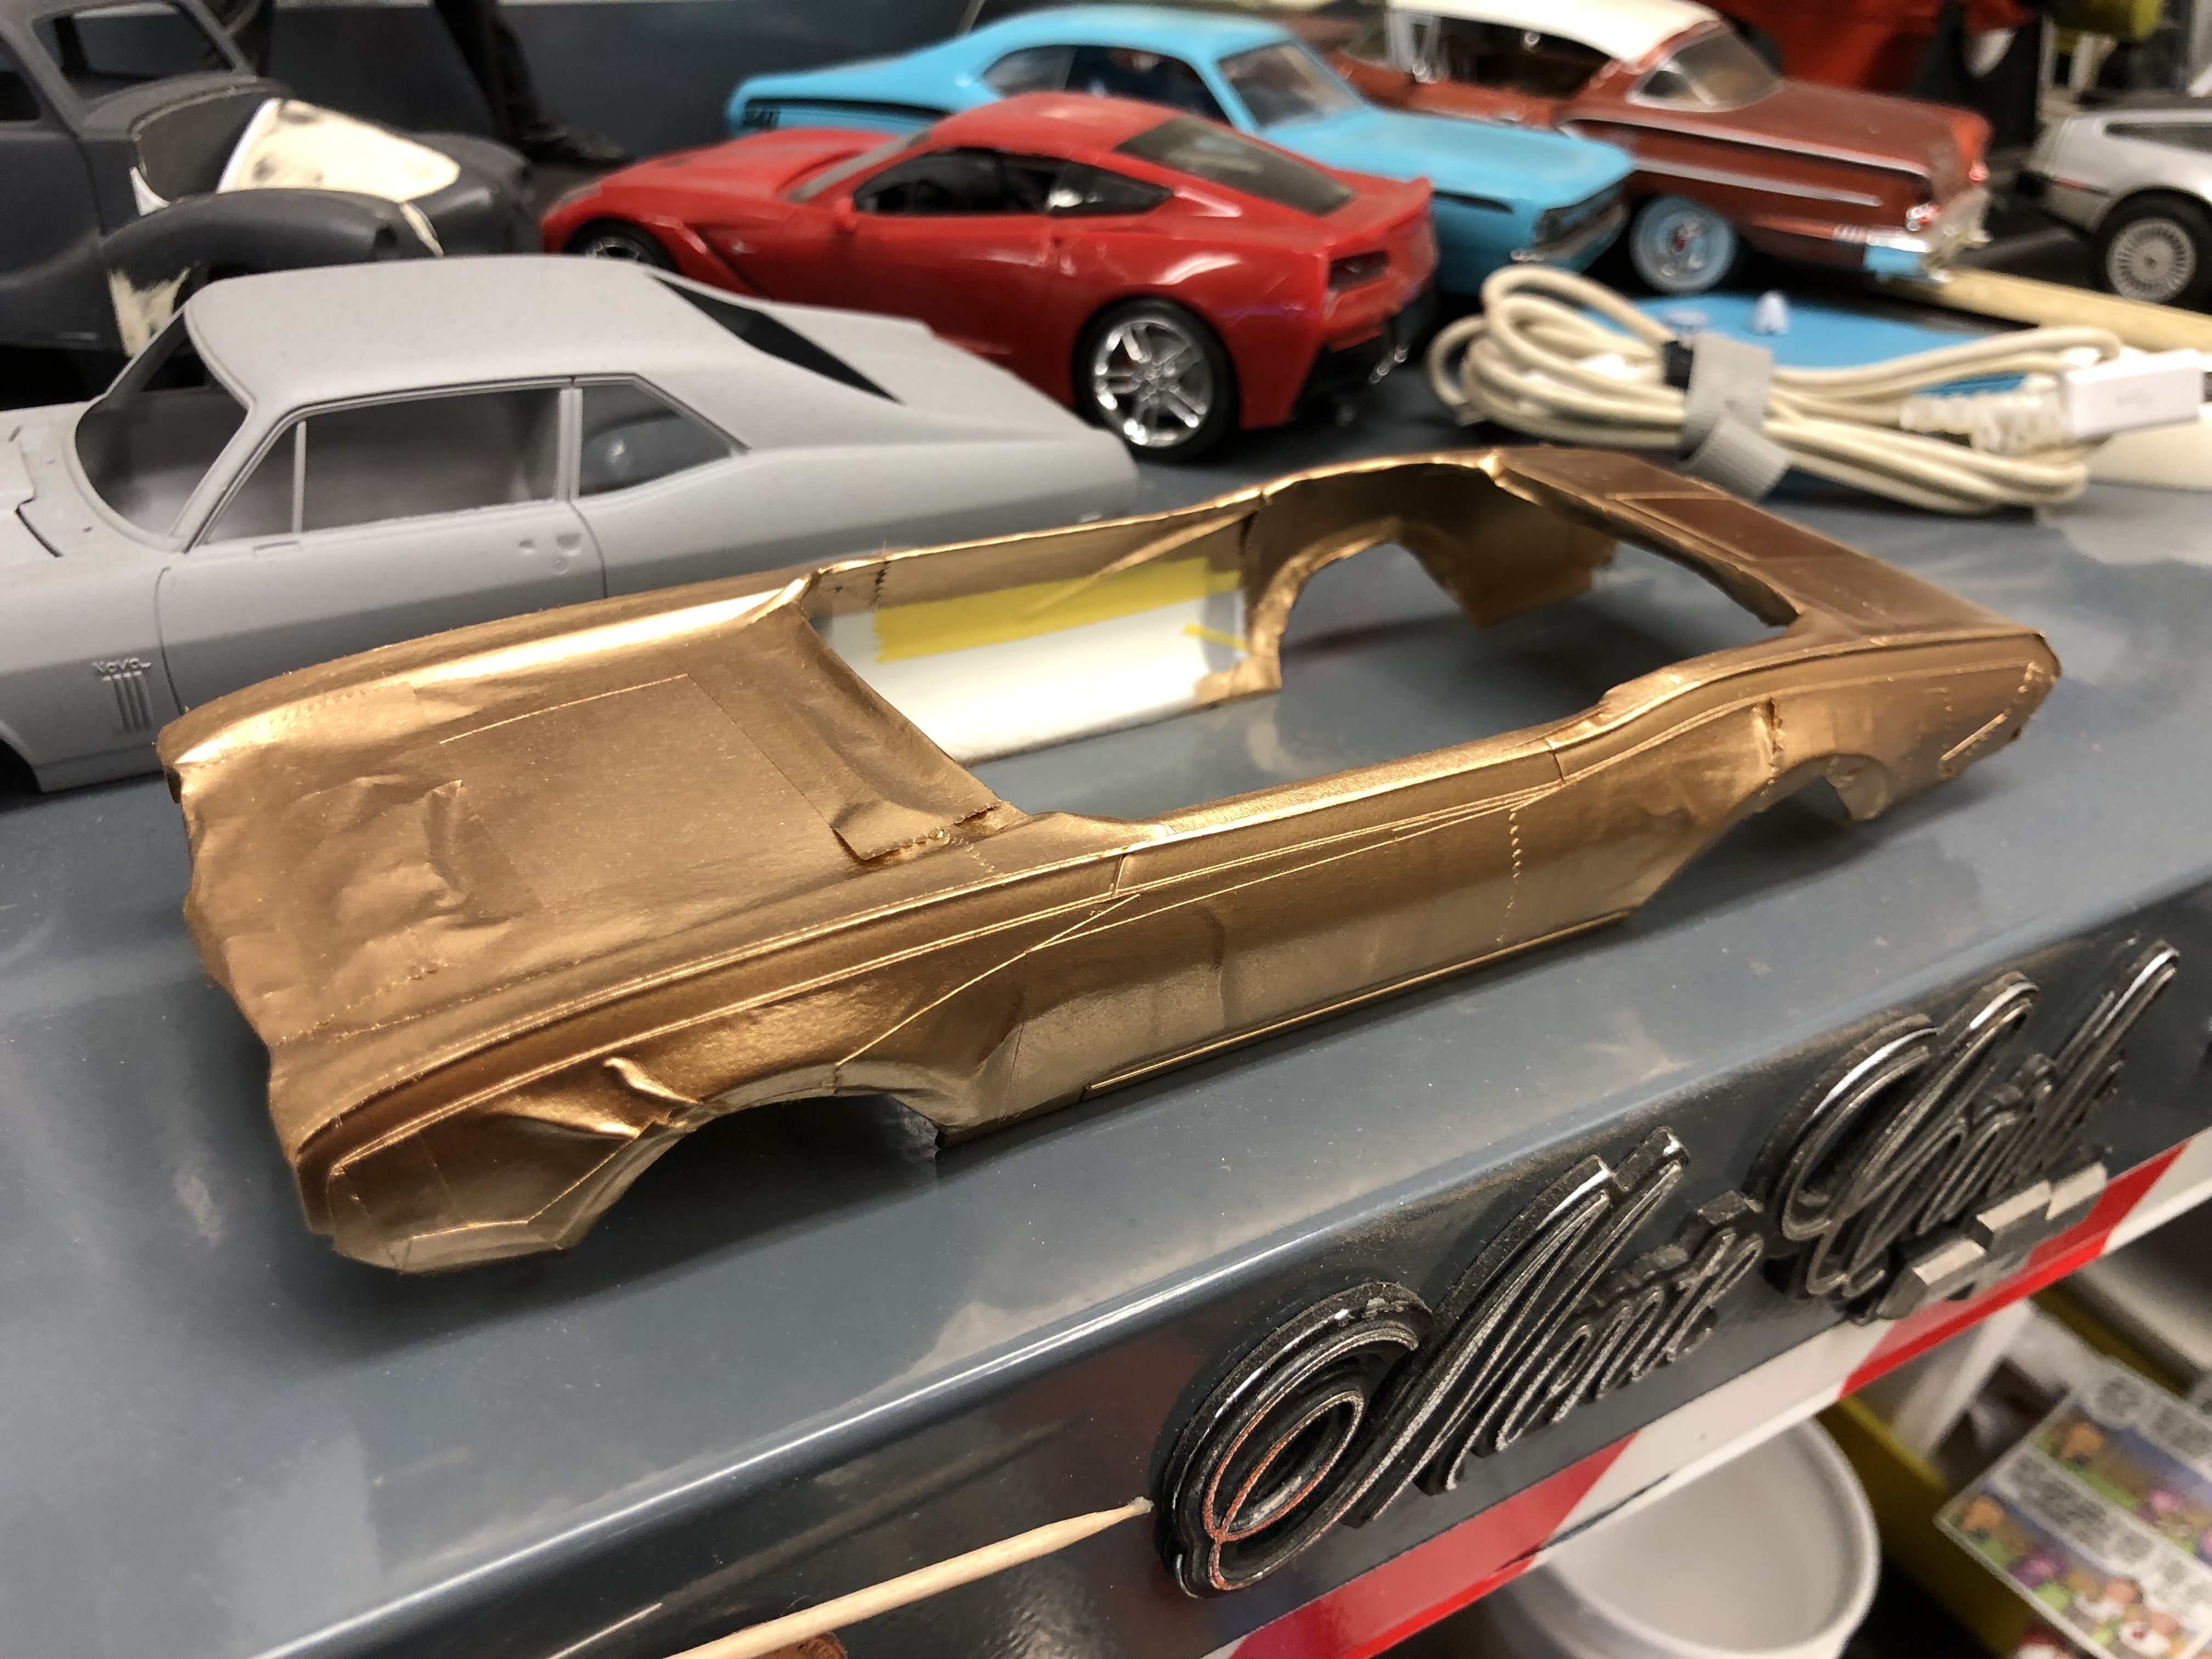
The first two pictures of the convertible top were taken before dull coat was applied. The dull coat helped knock down the shine tremendously. The white is white primer.
-
"Bring Out Your Dead" Completion Build--ROUND 2 Is On!
Superbird McMonte replied to Snake45's topic in WIP: Model Cars
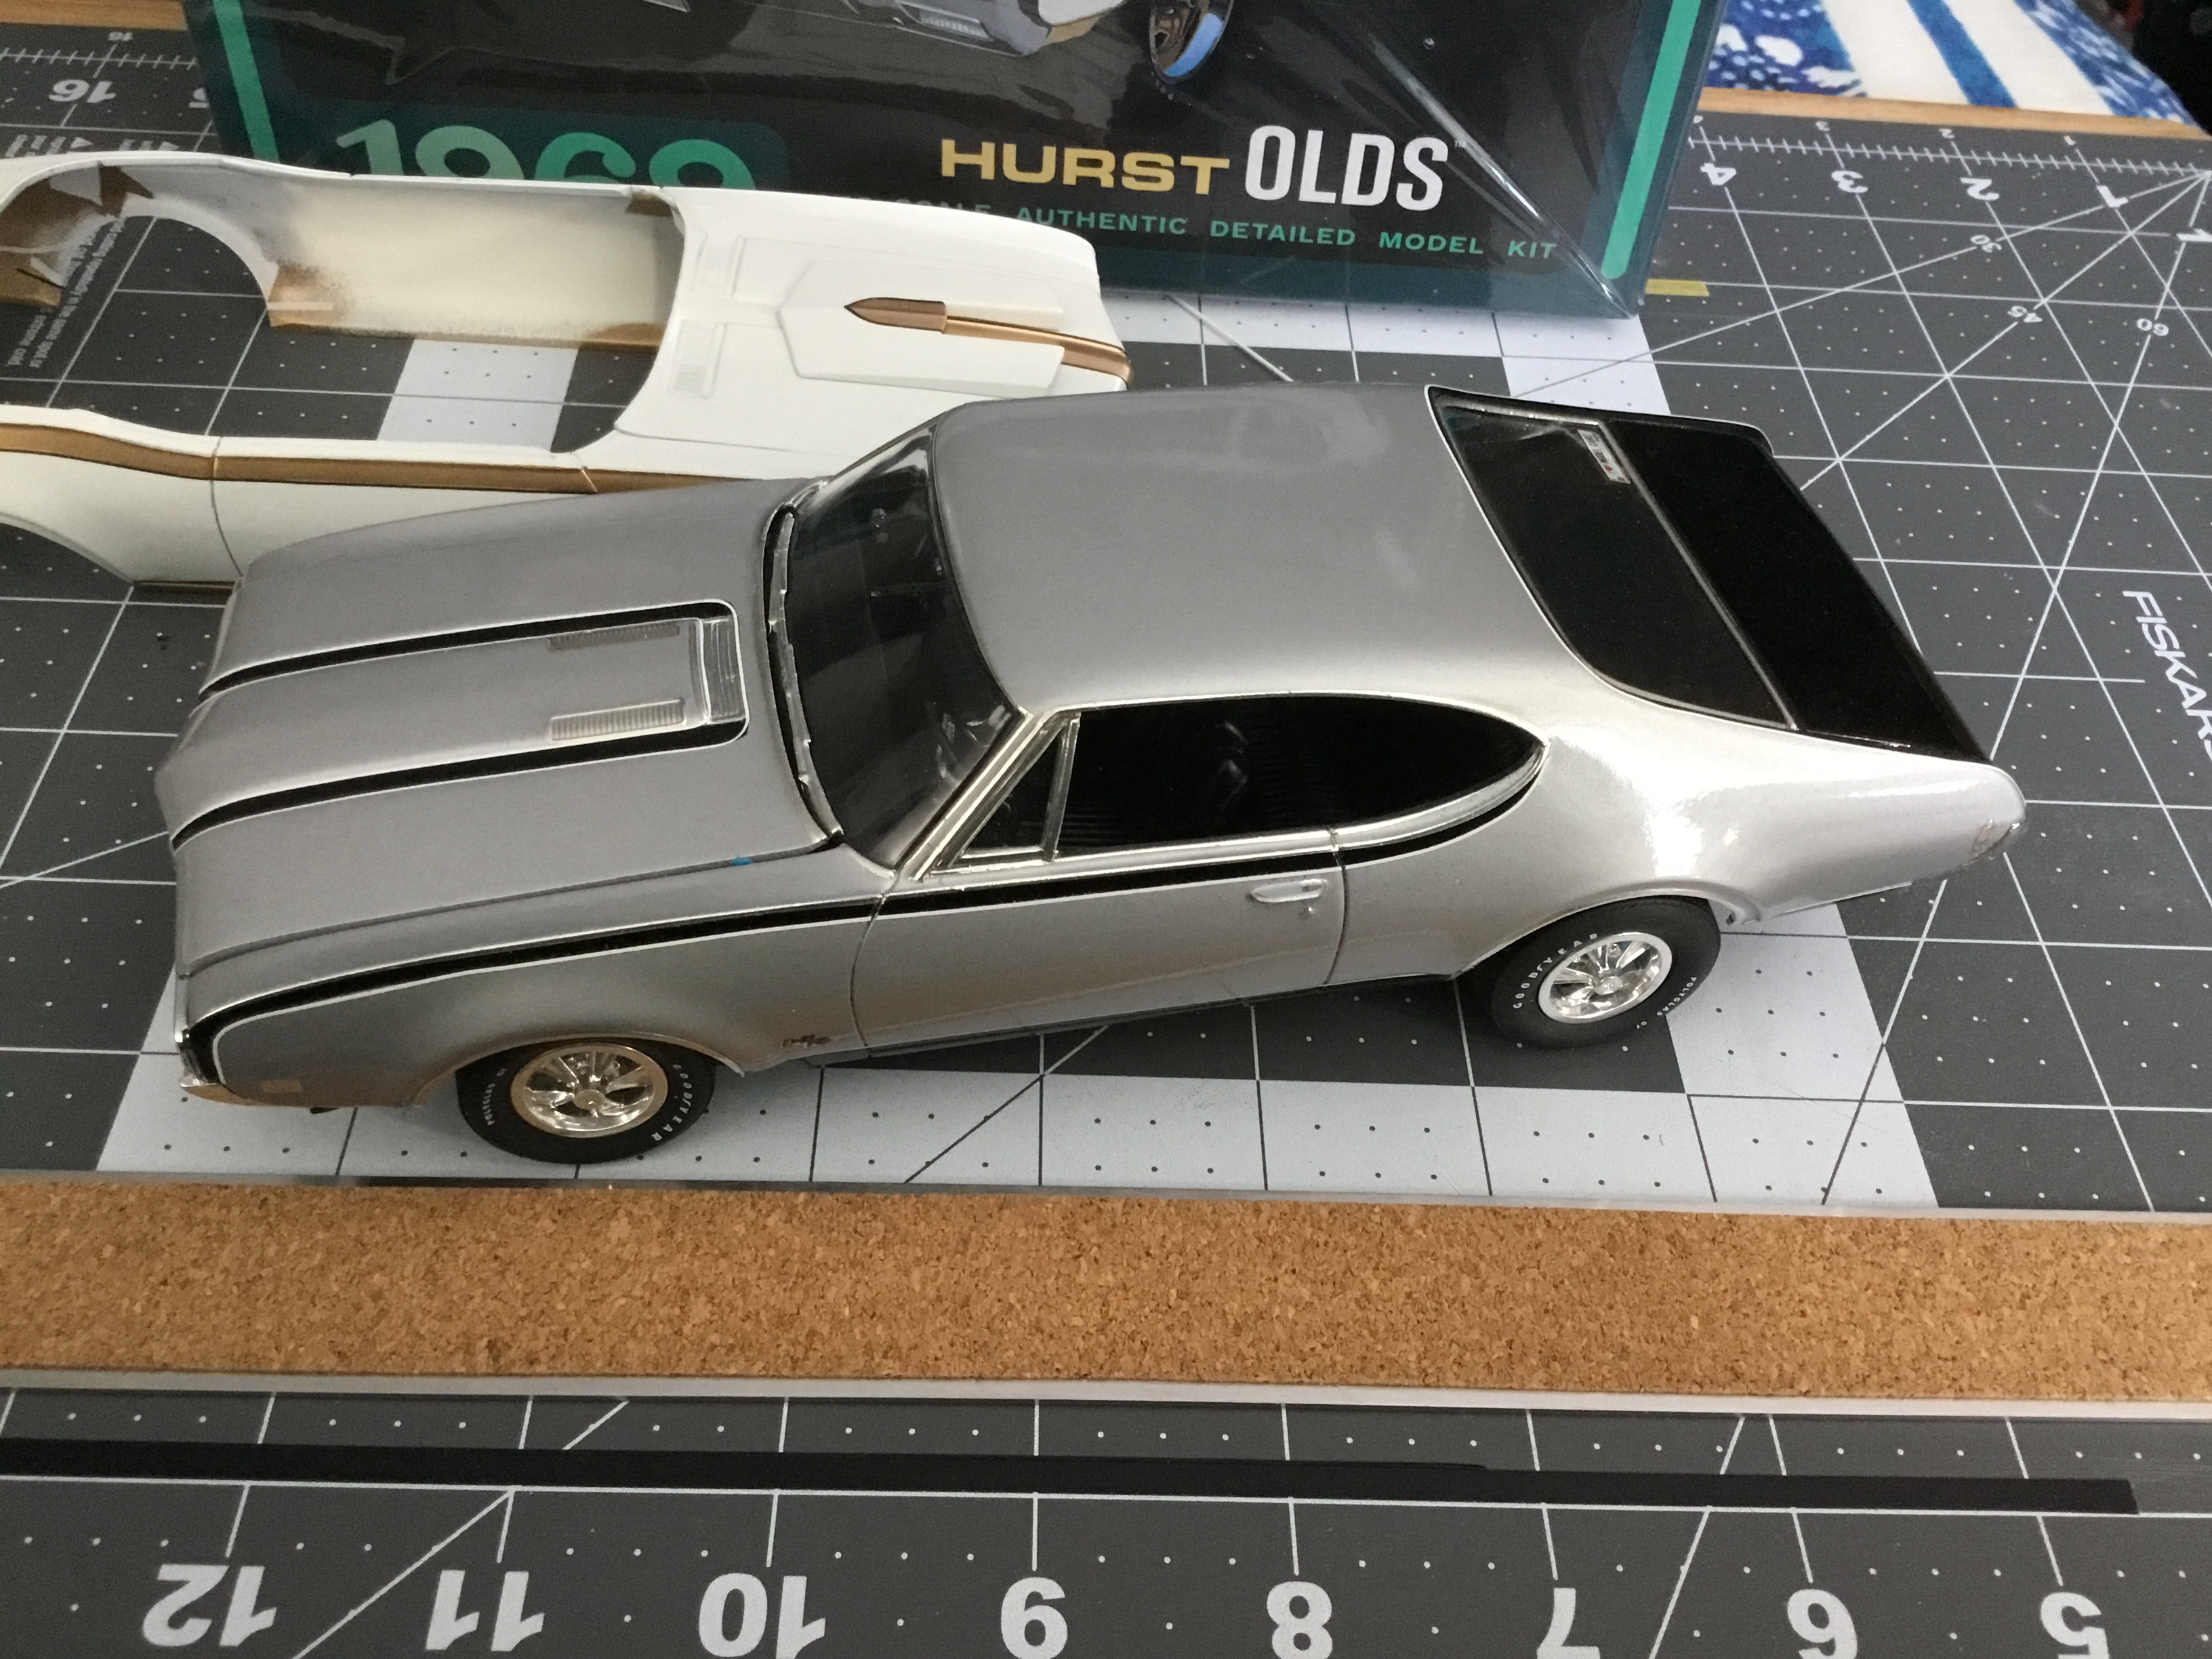
I painted the silver Oldsmobile over 10 years ago. But I believe I used Krylon silver with urethane clearcoat. -
"Bring Out Your Dead" Completion Build--ROUND 2 Is On!
Superbird McMonte replied to Snake45's topic in WIP: Model Cars
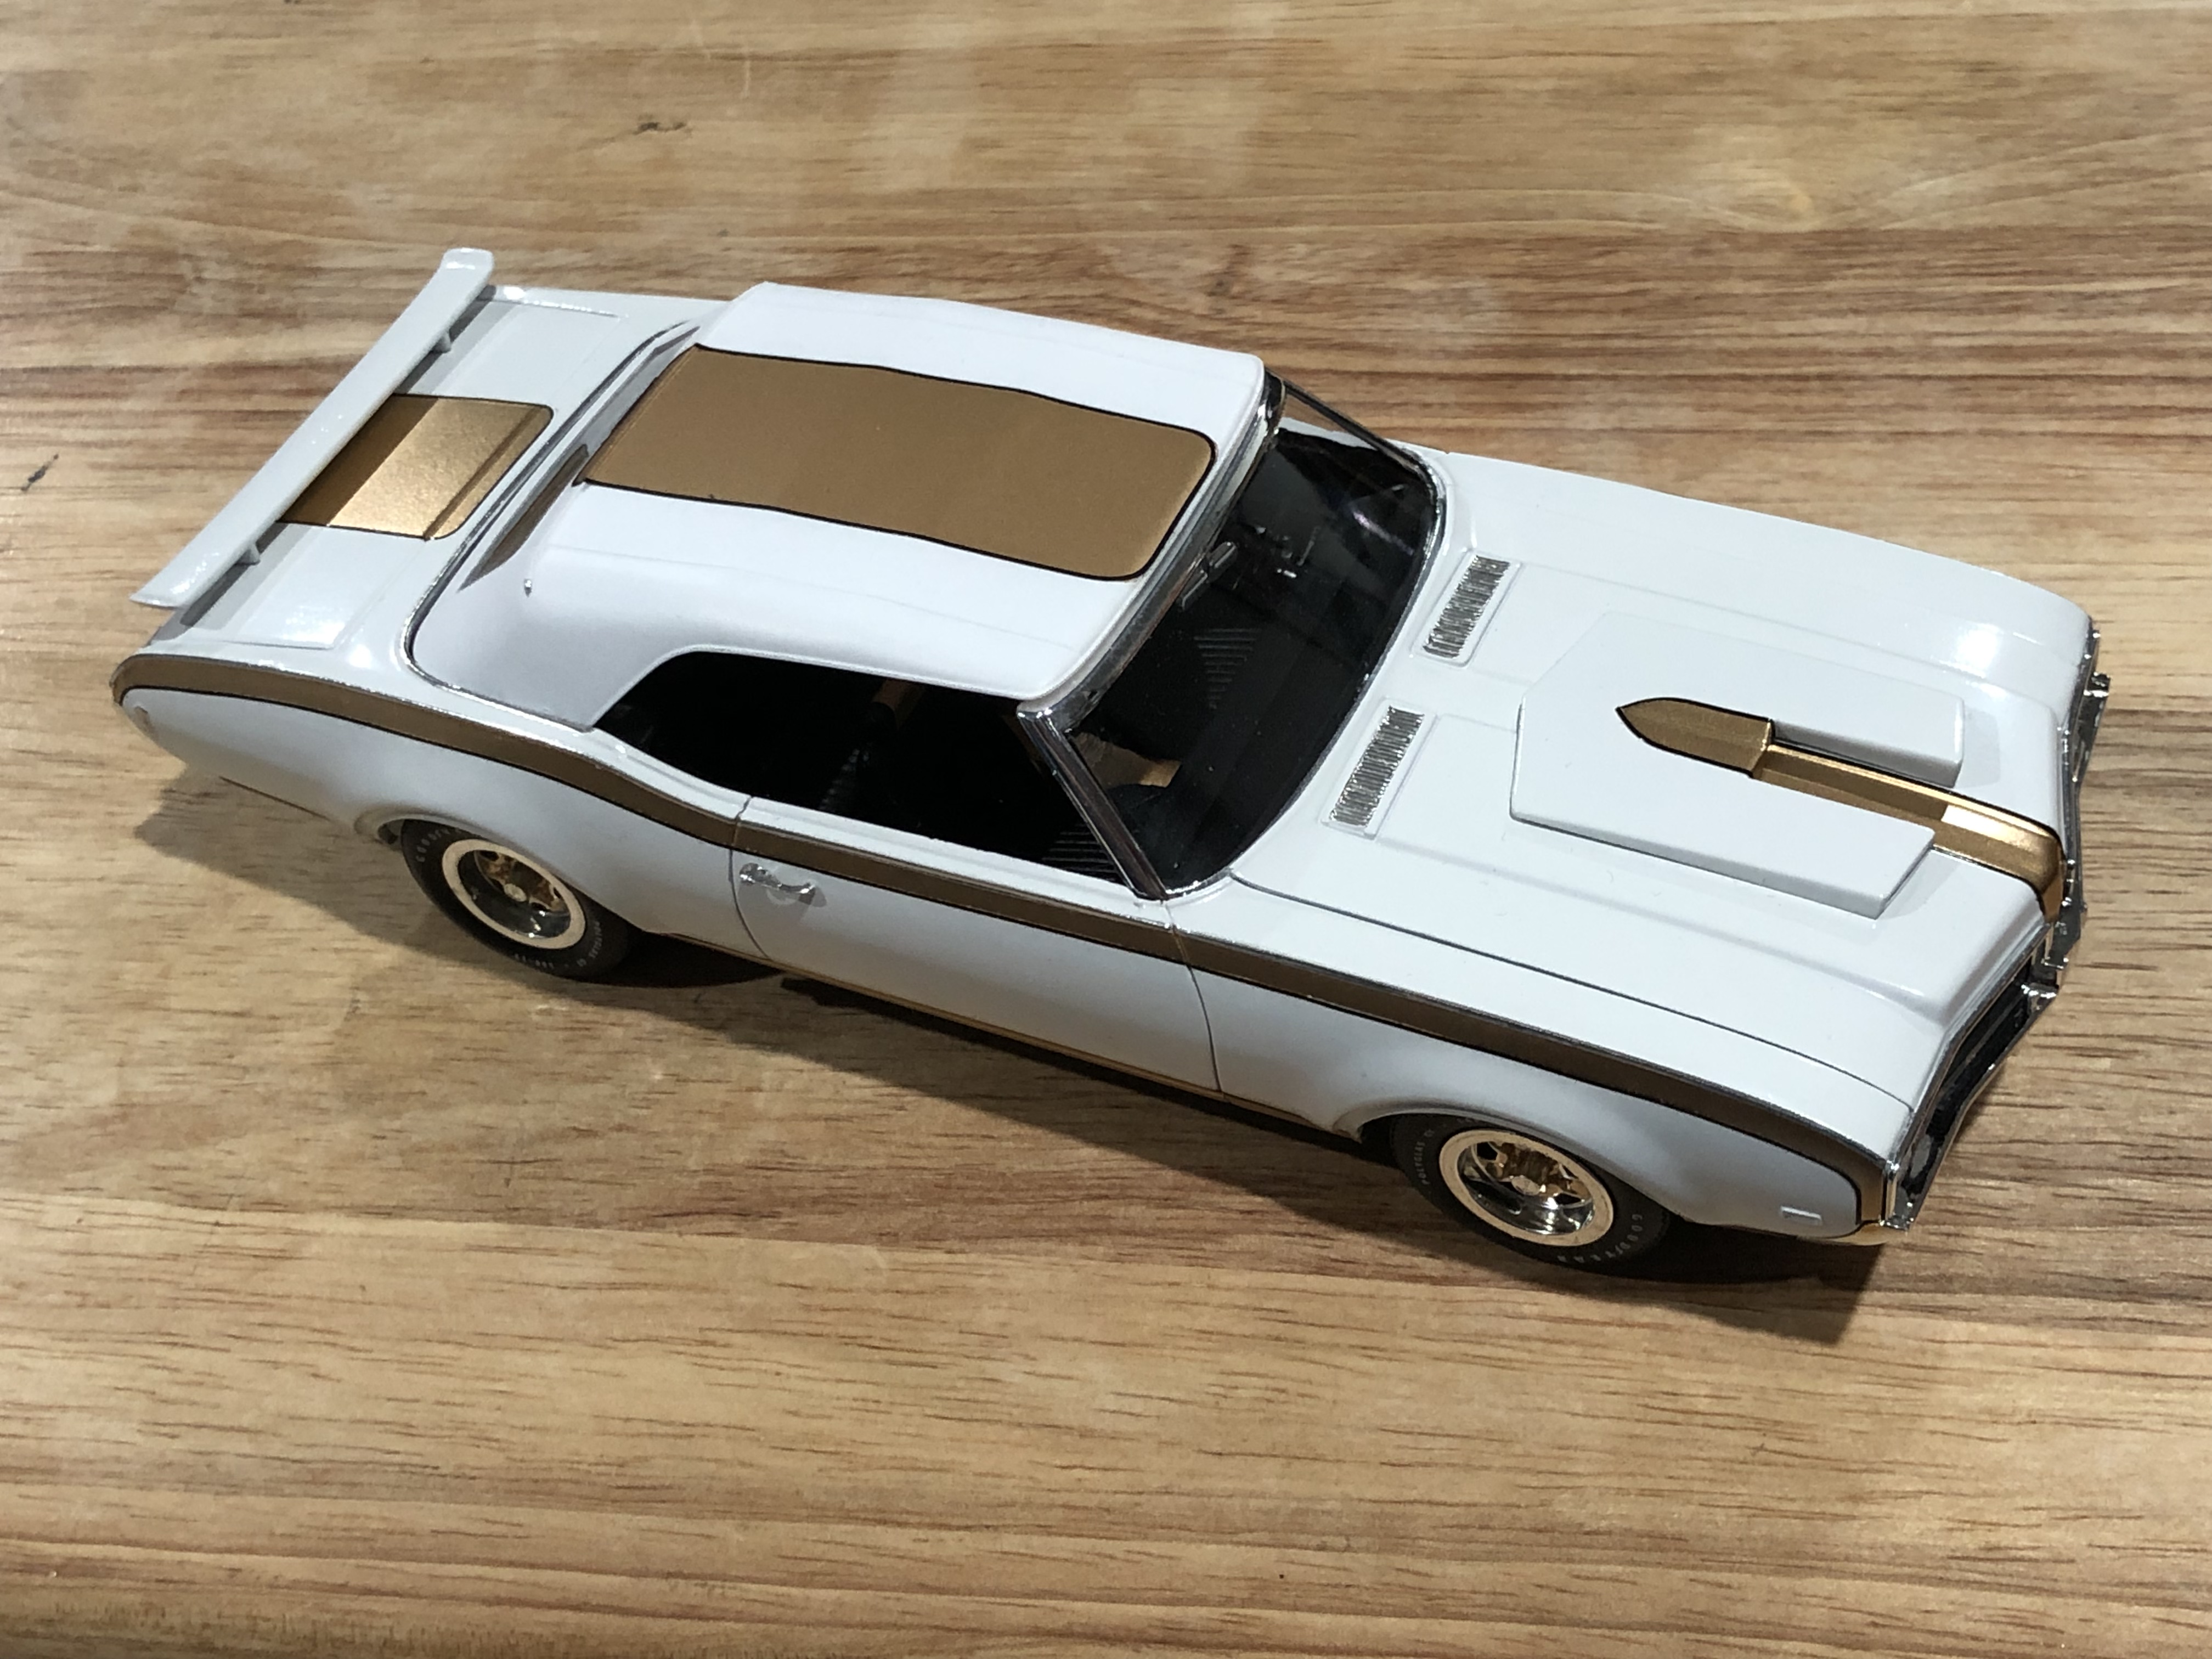
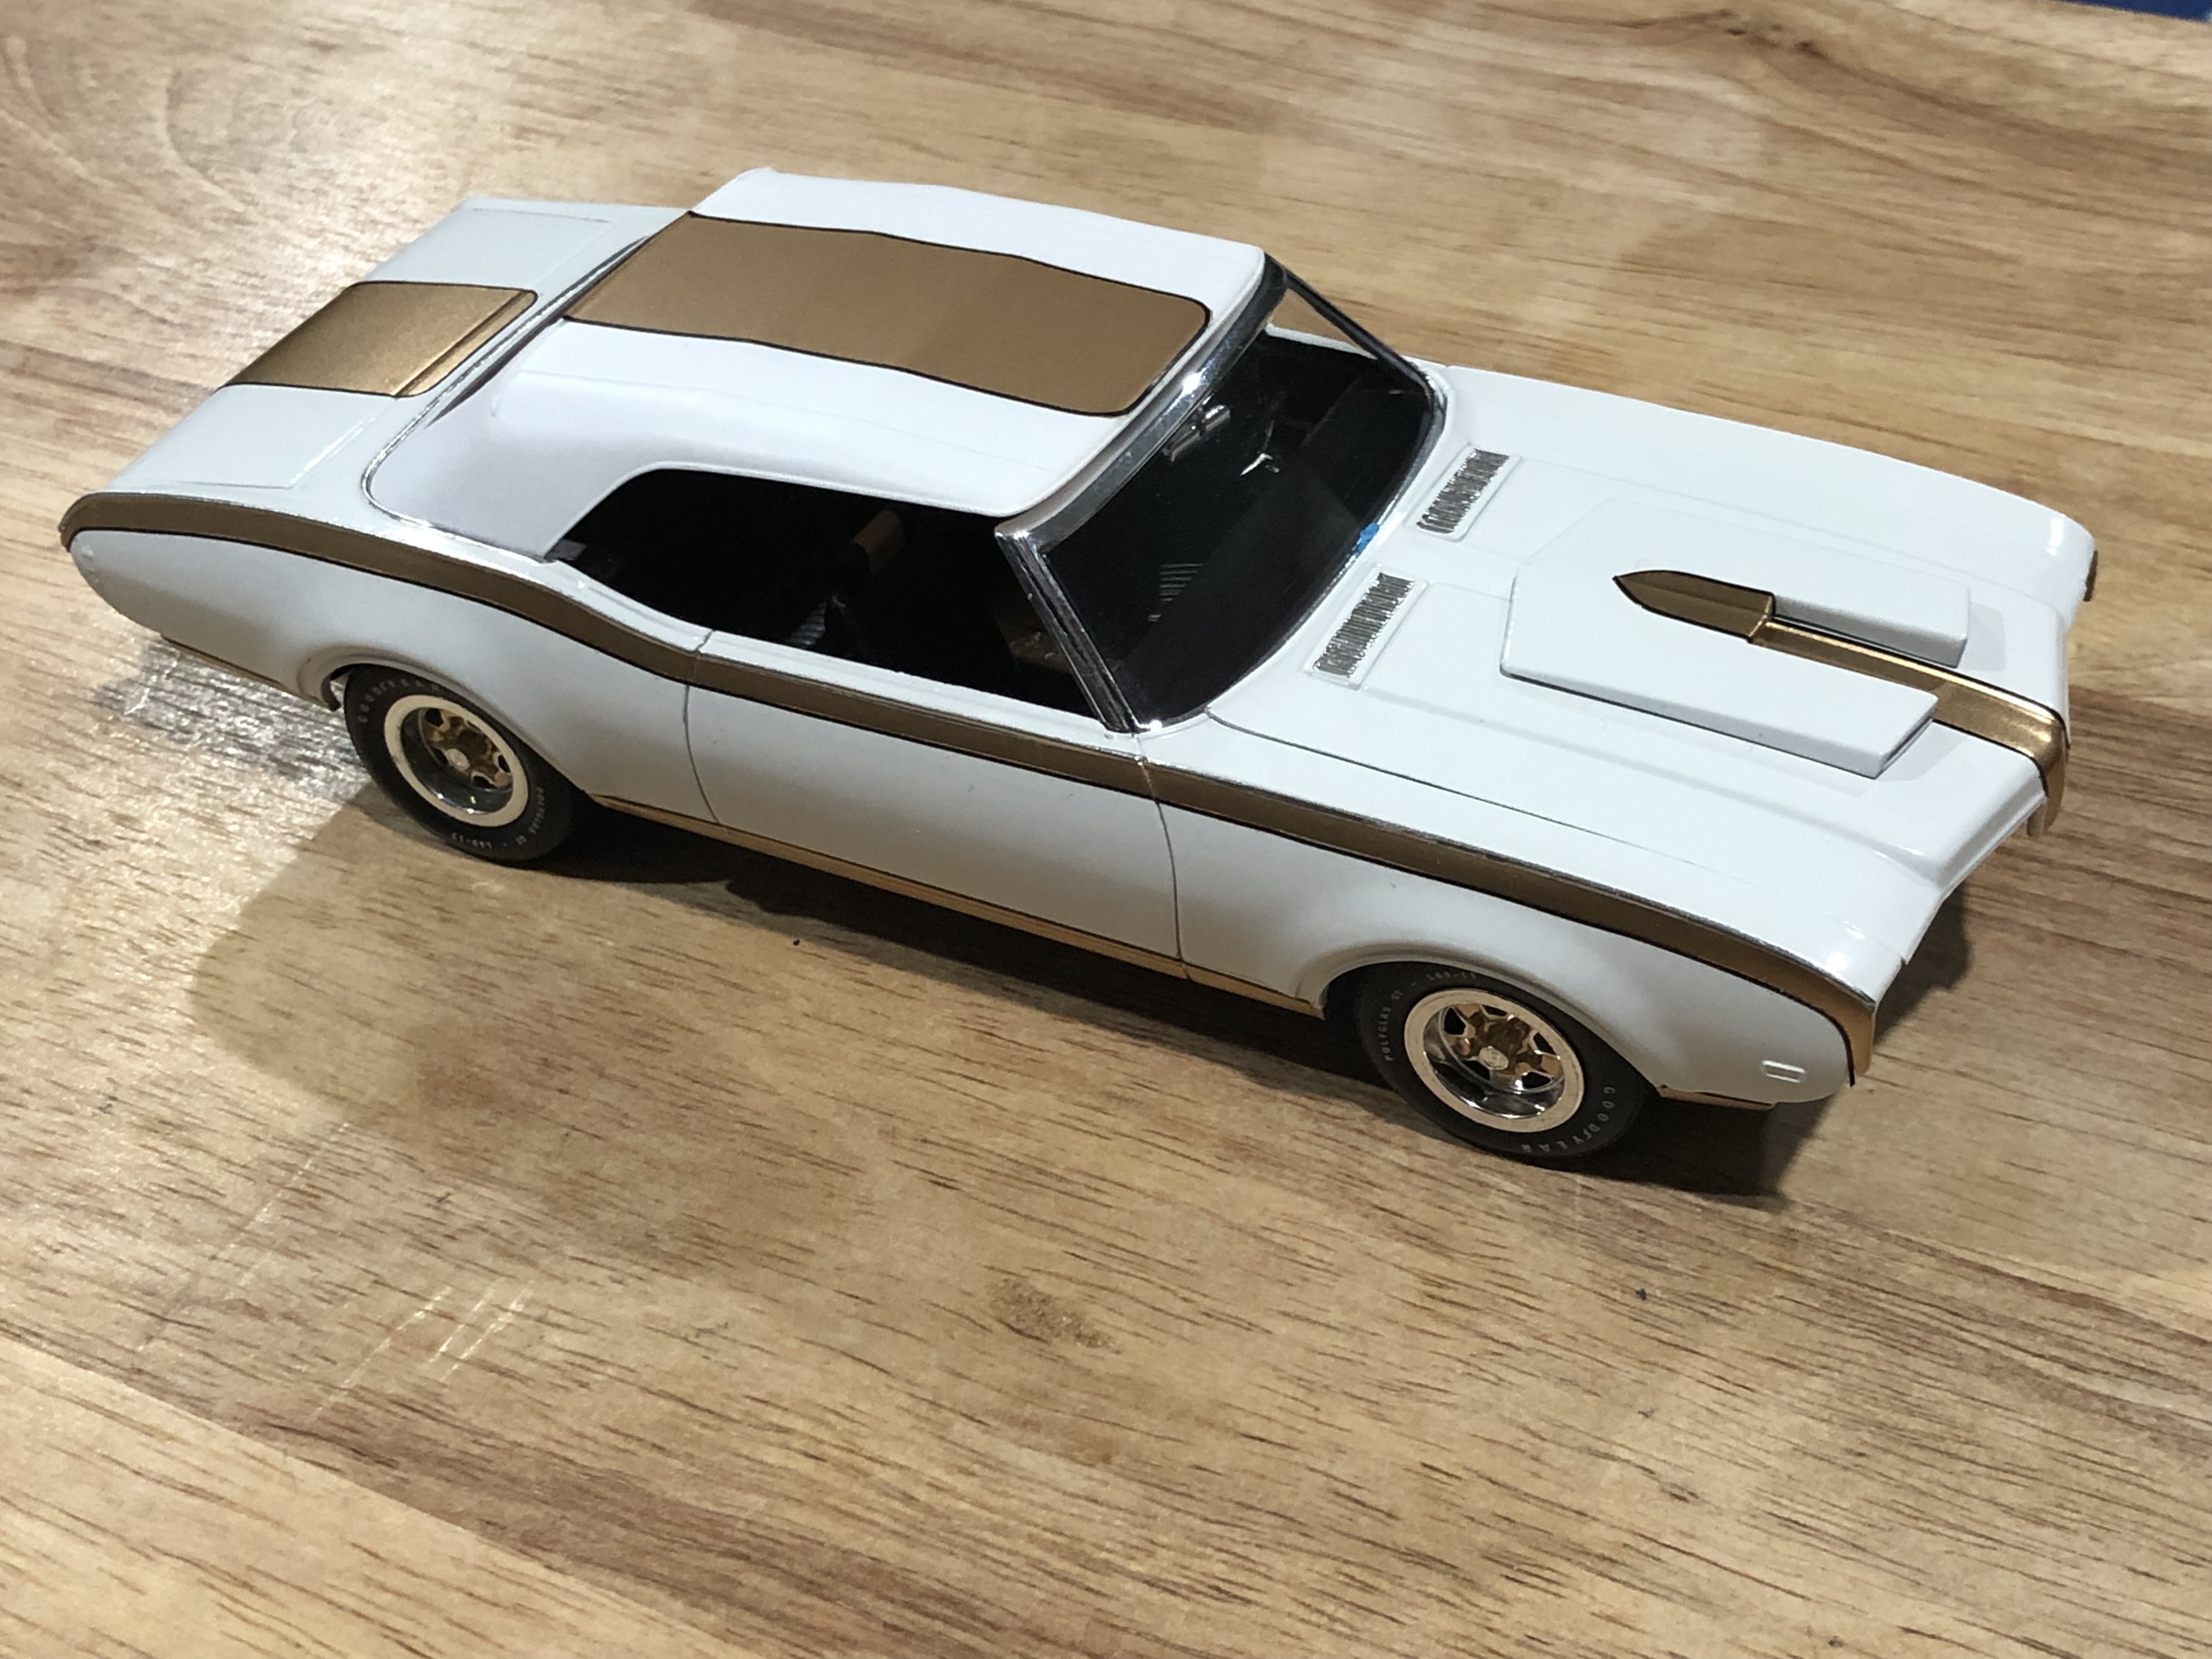
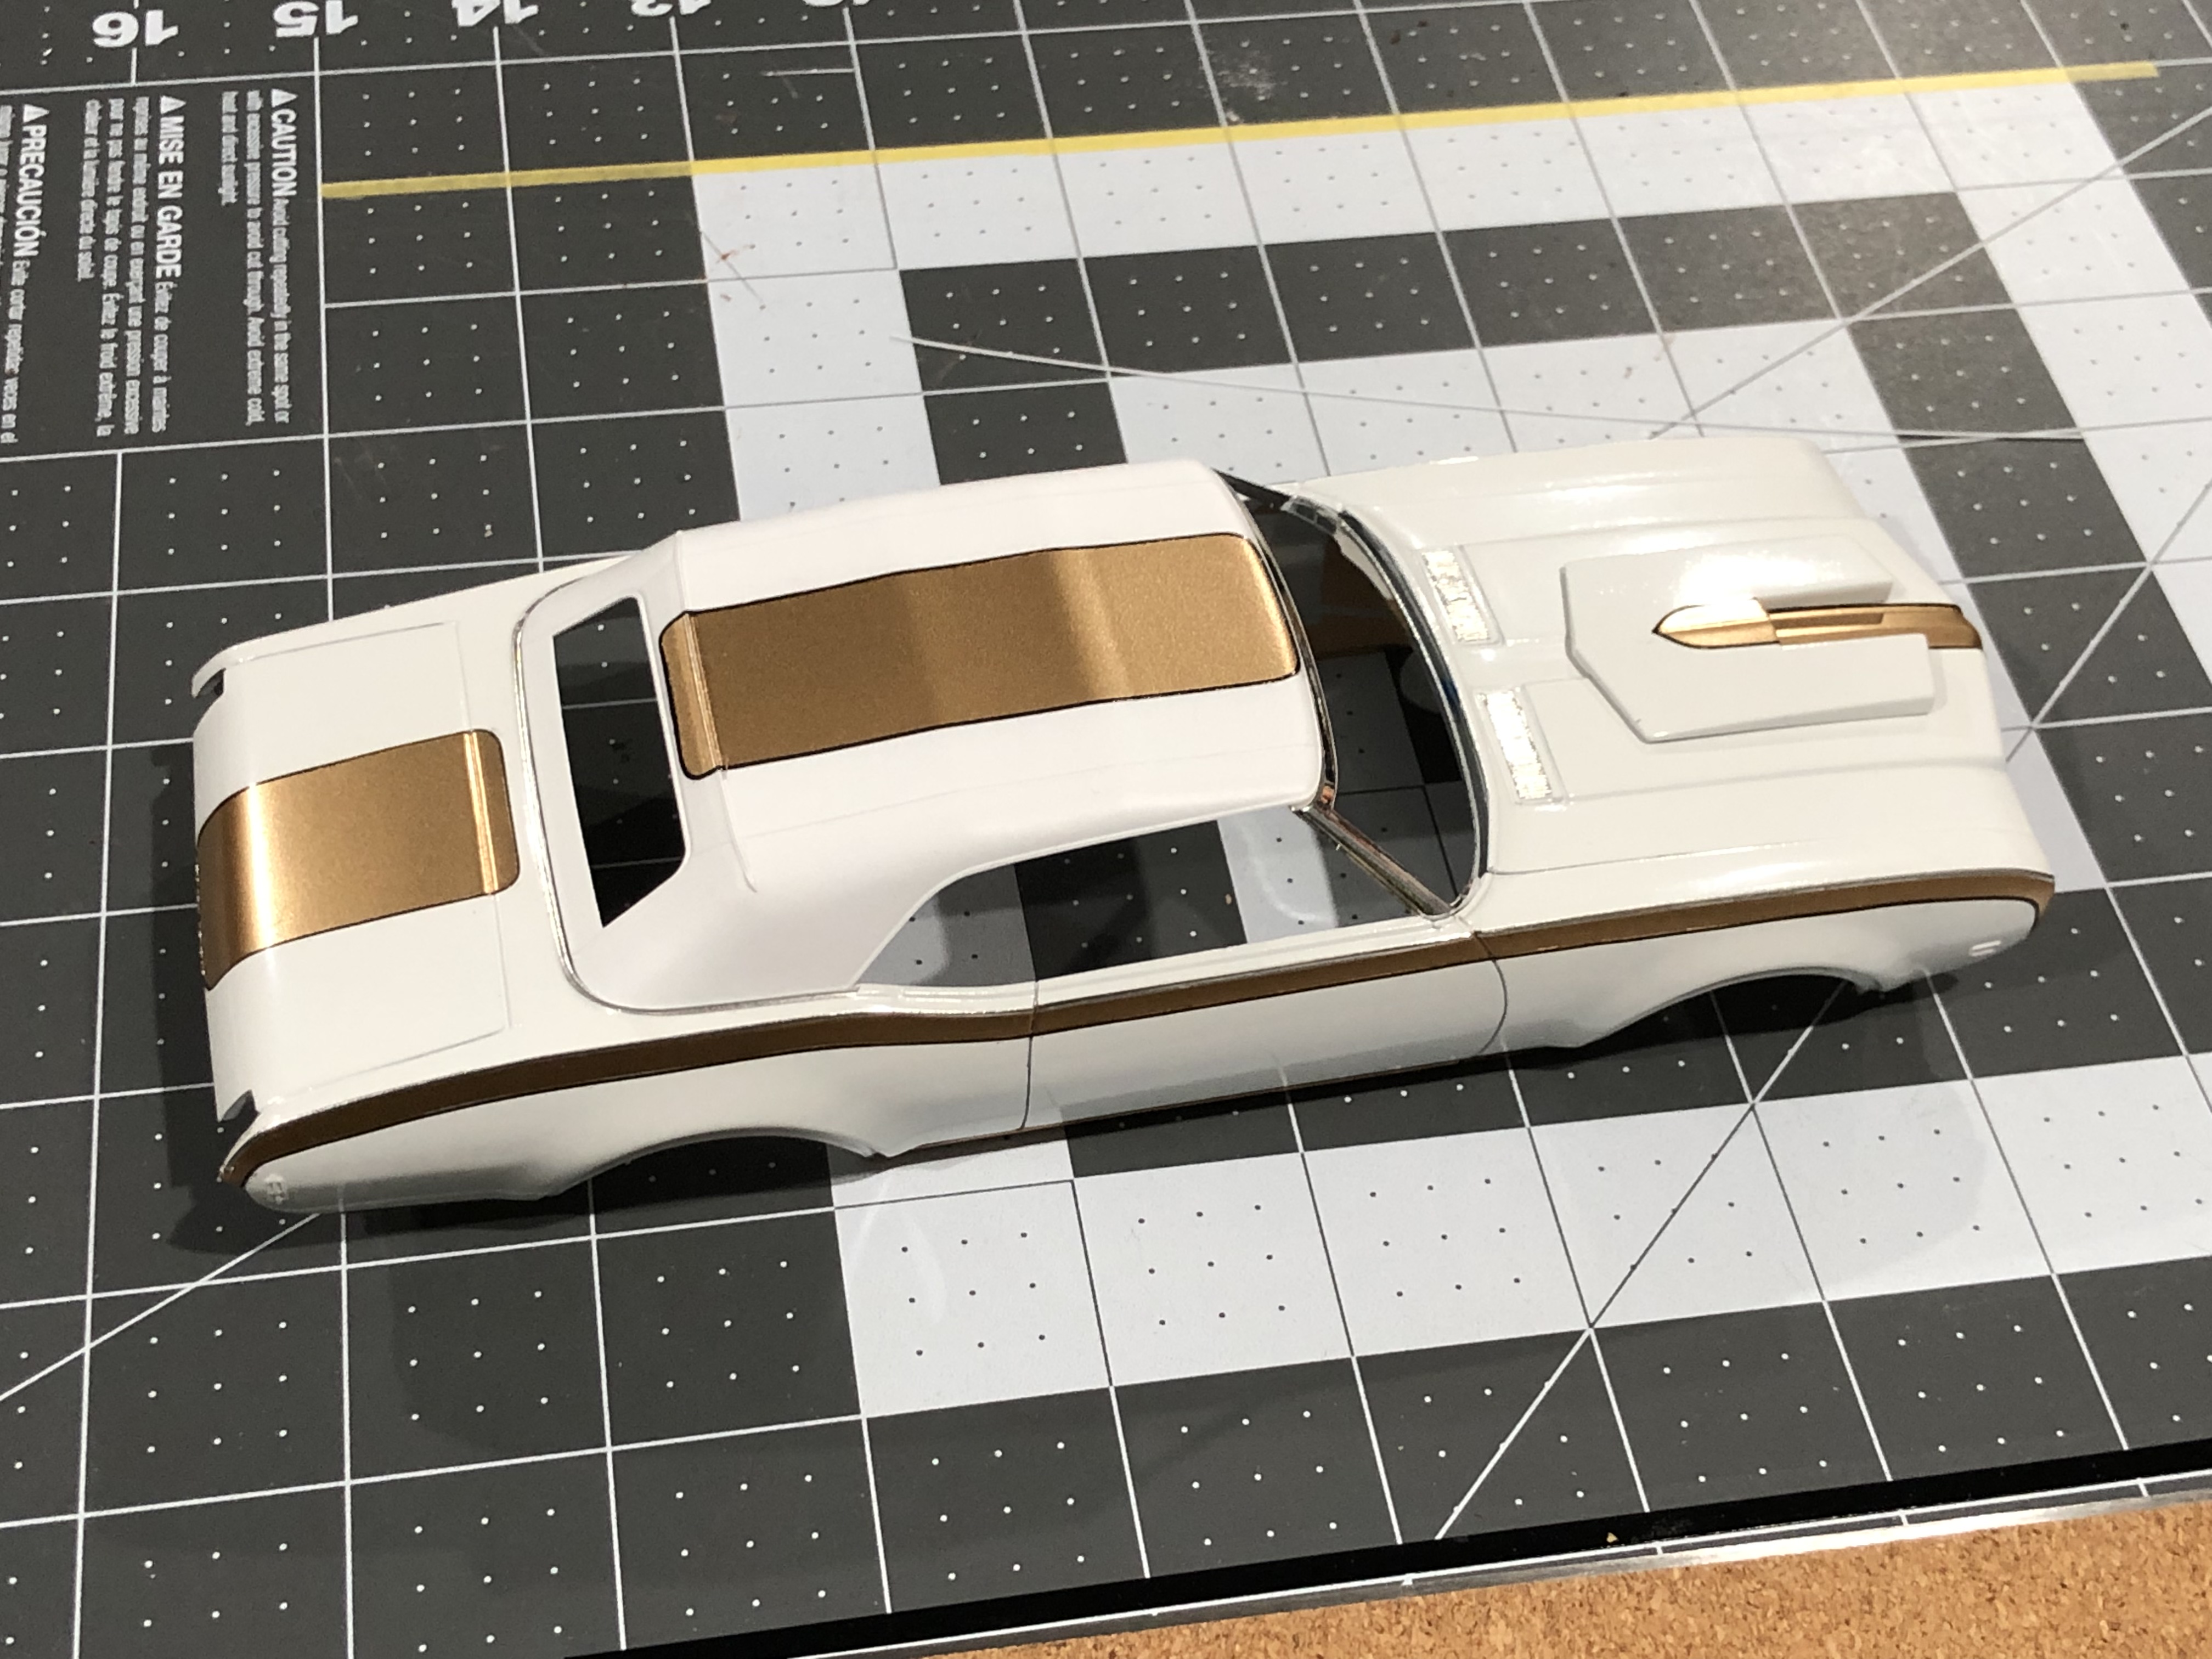
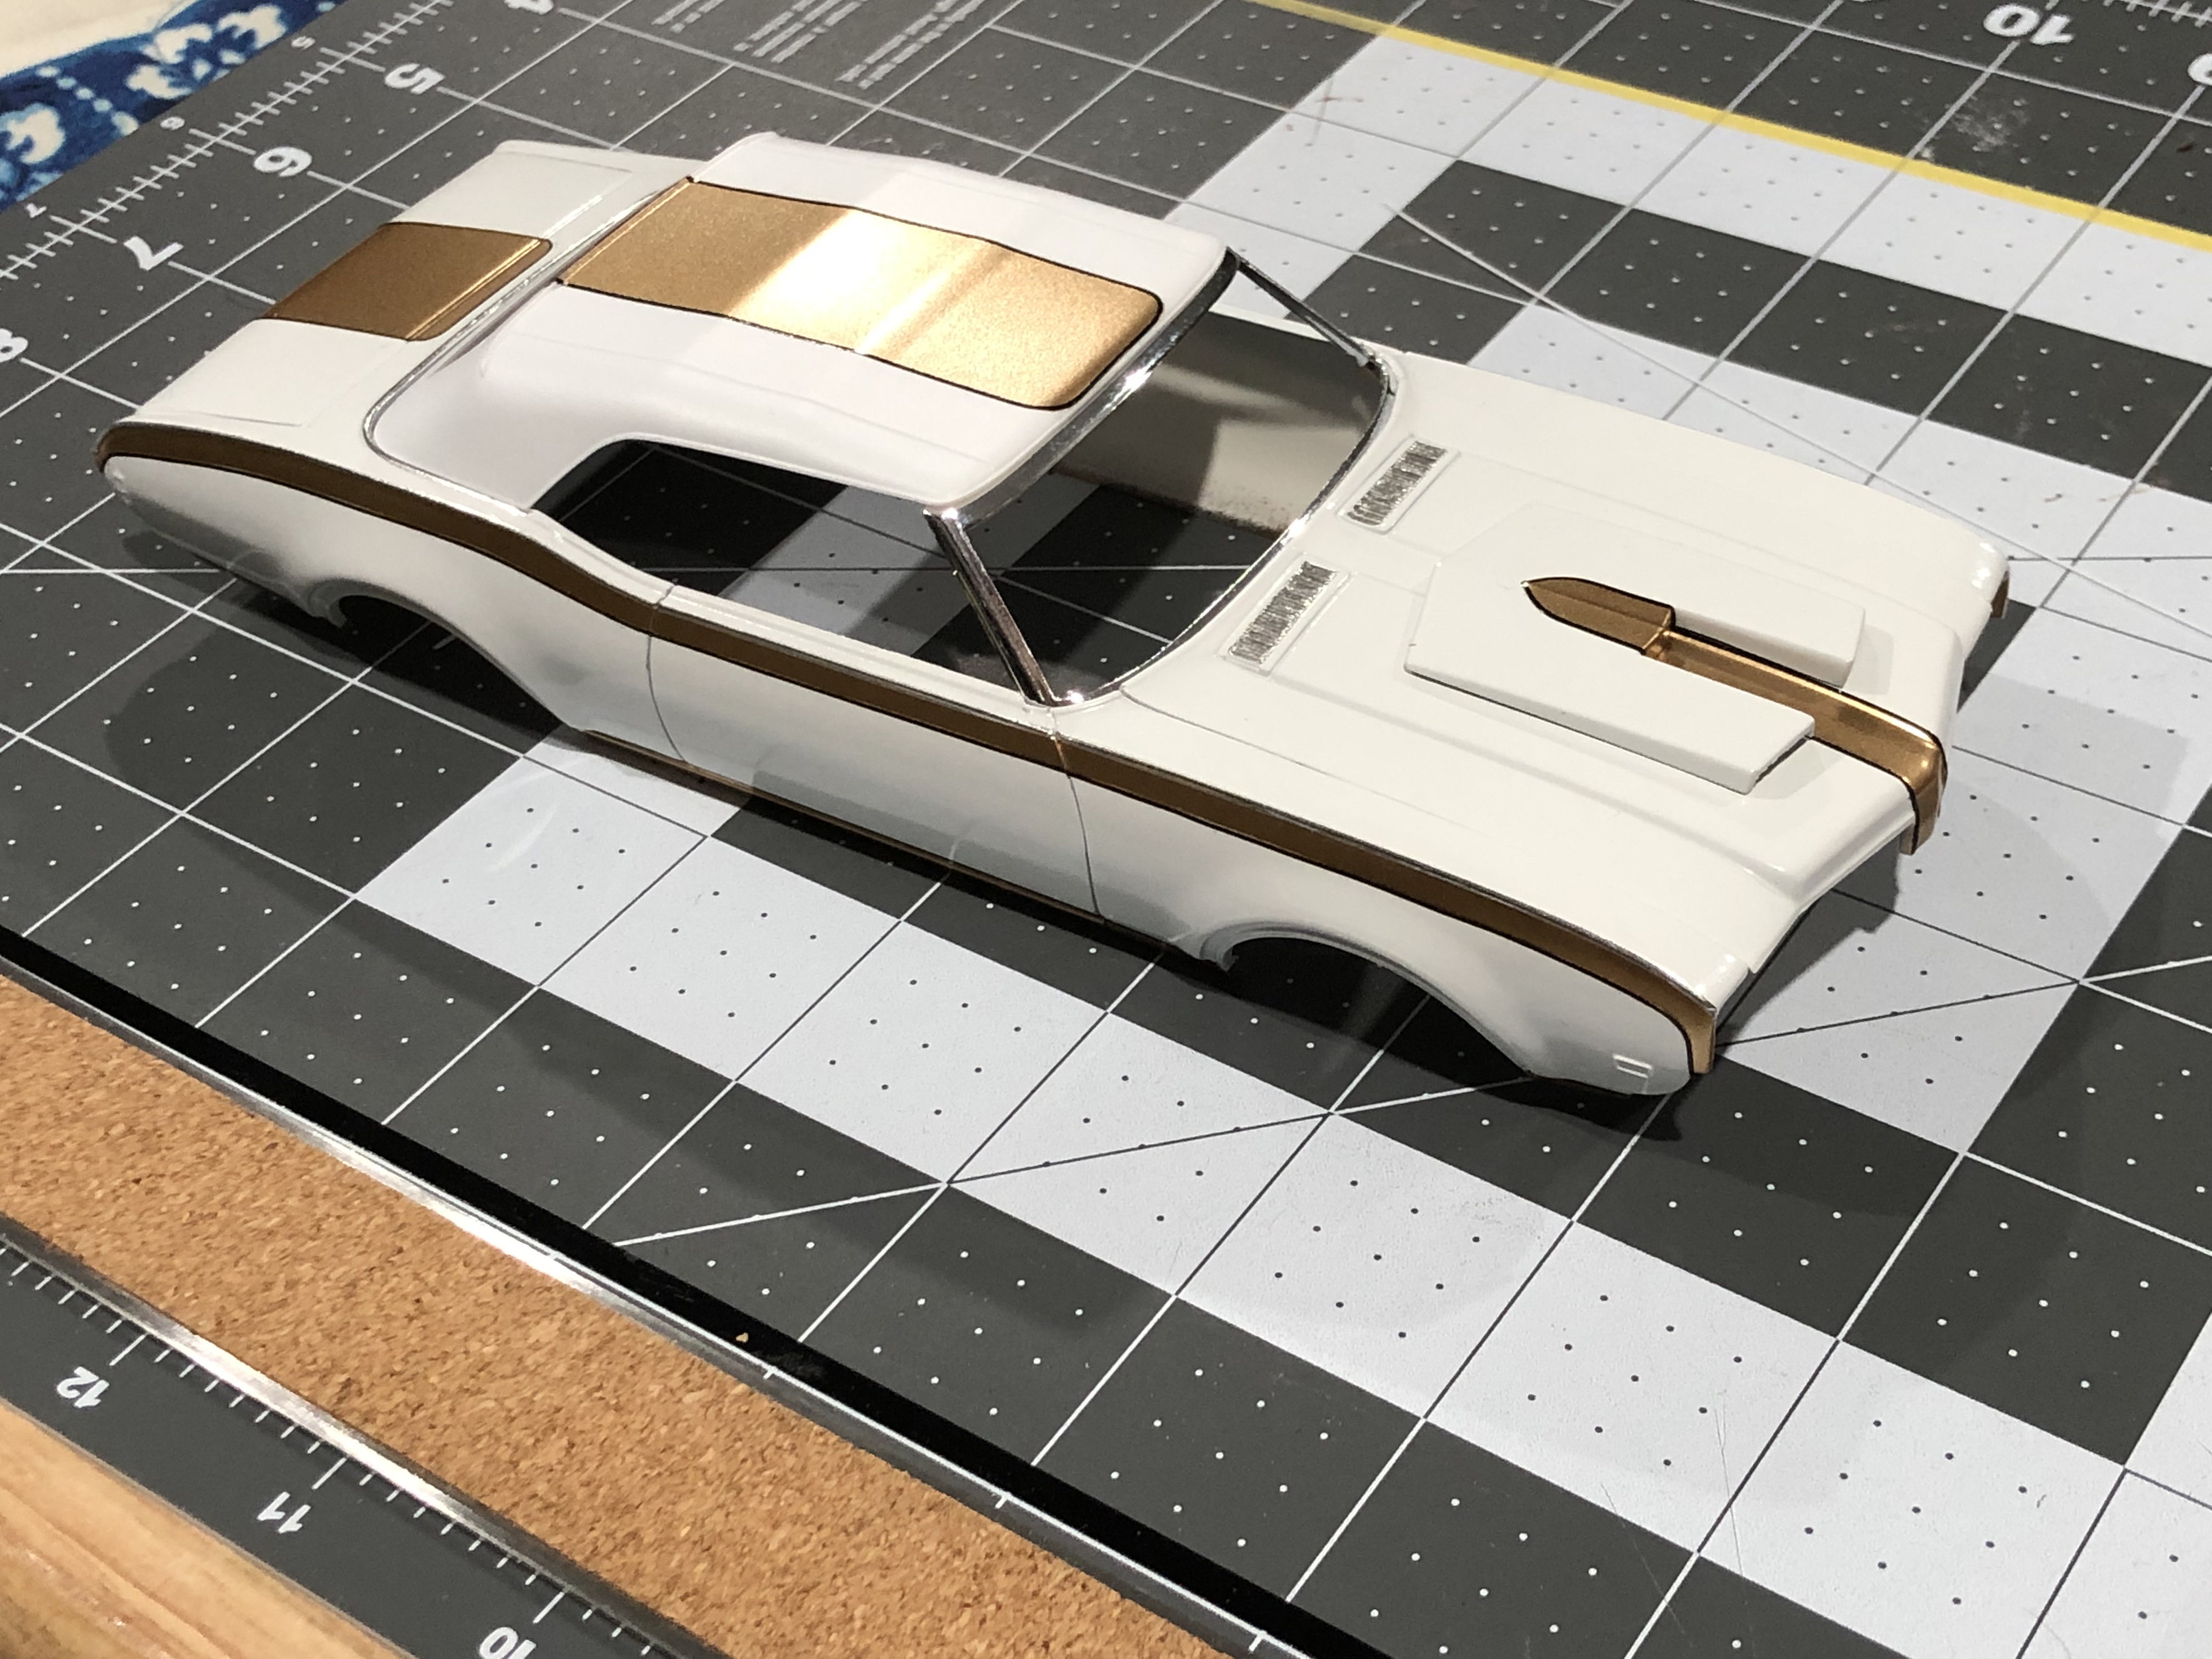
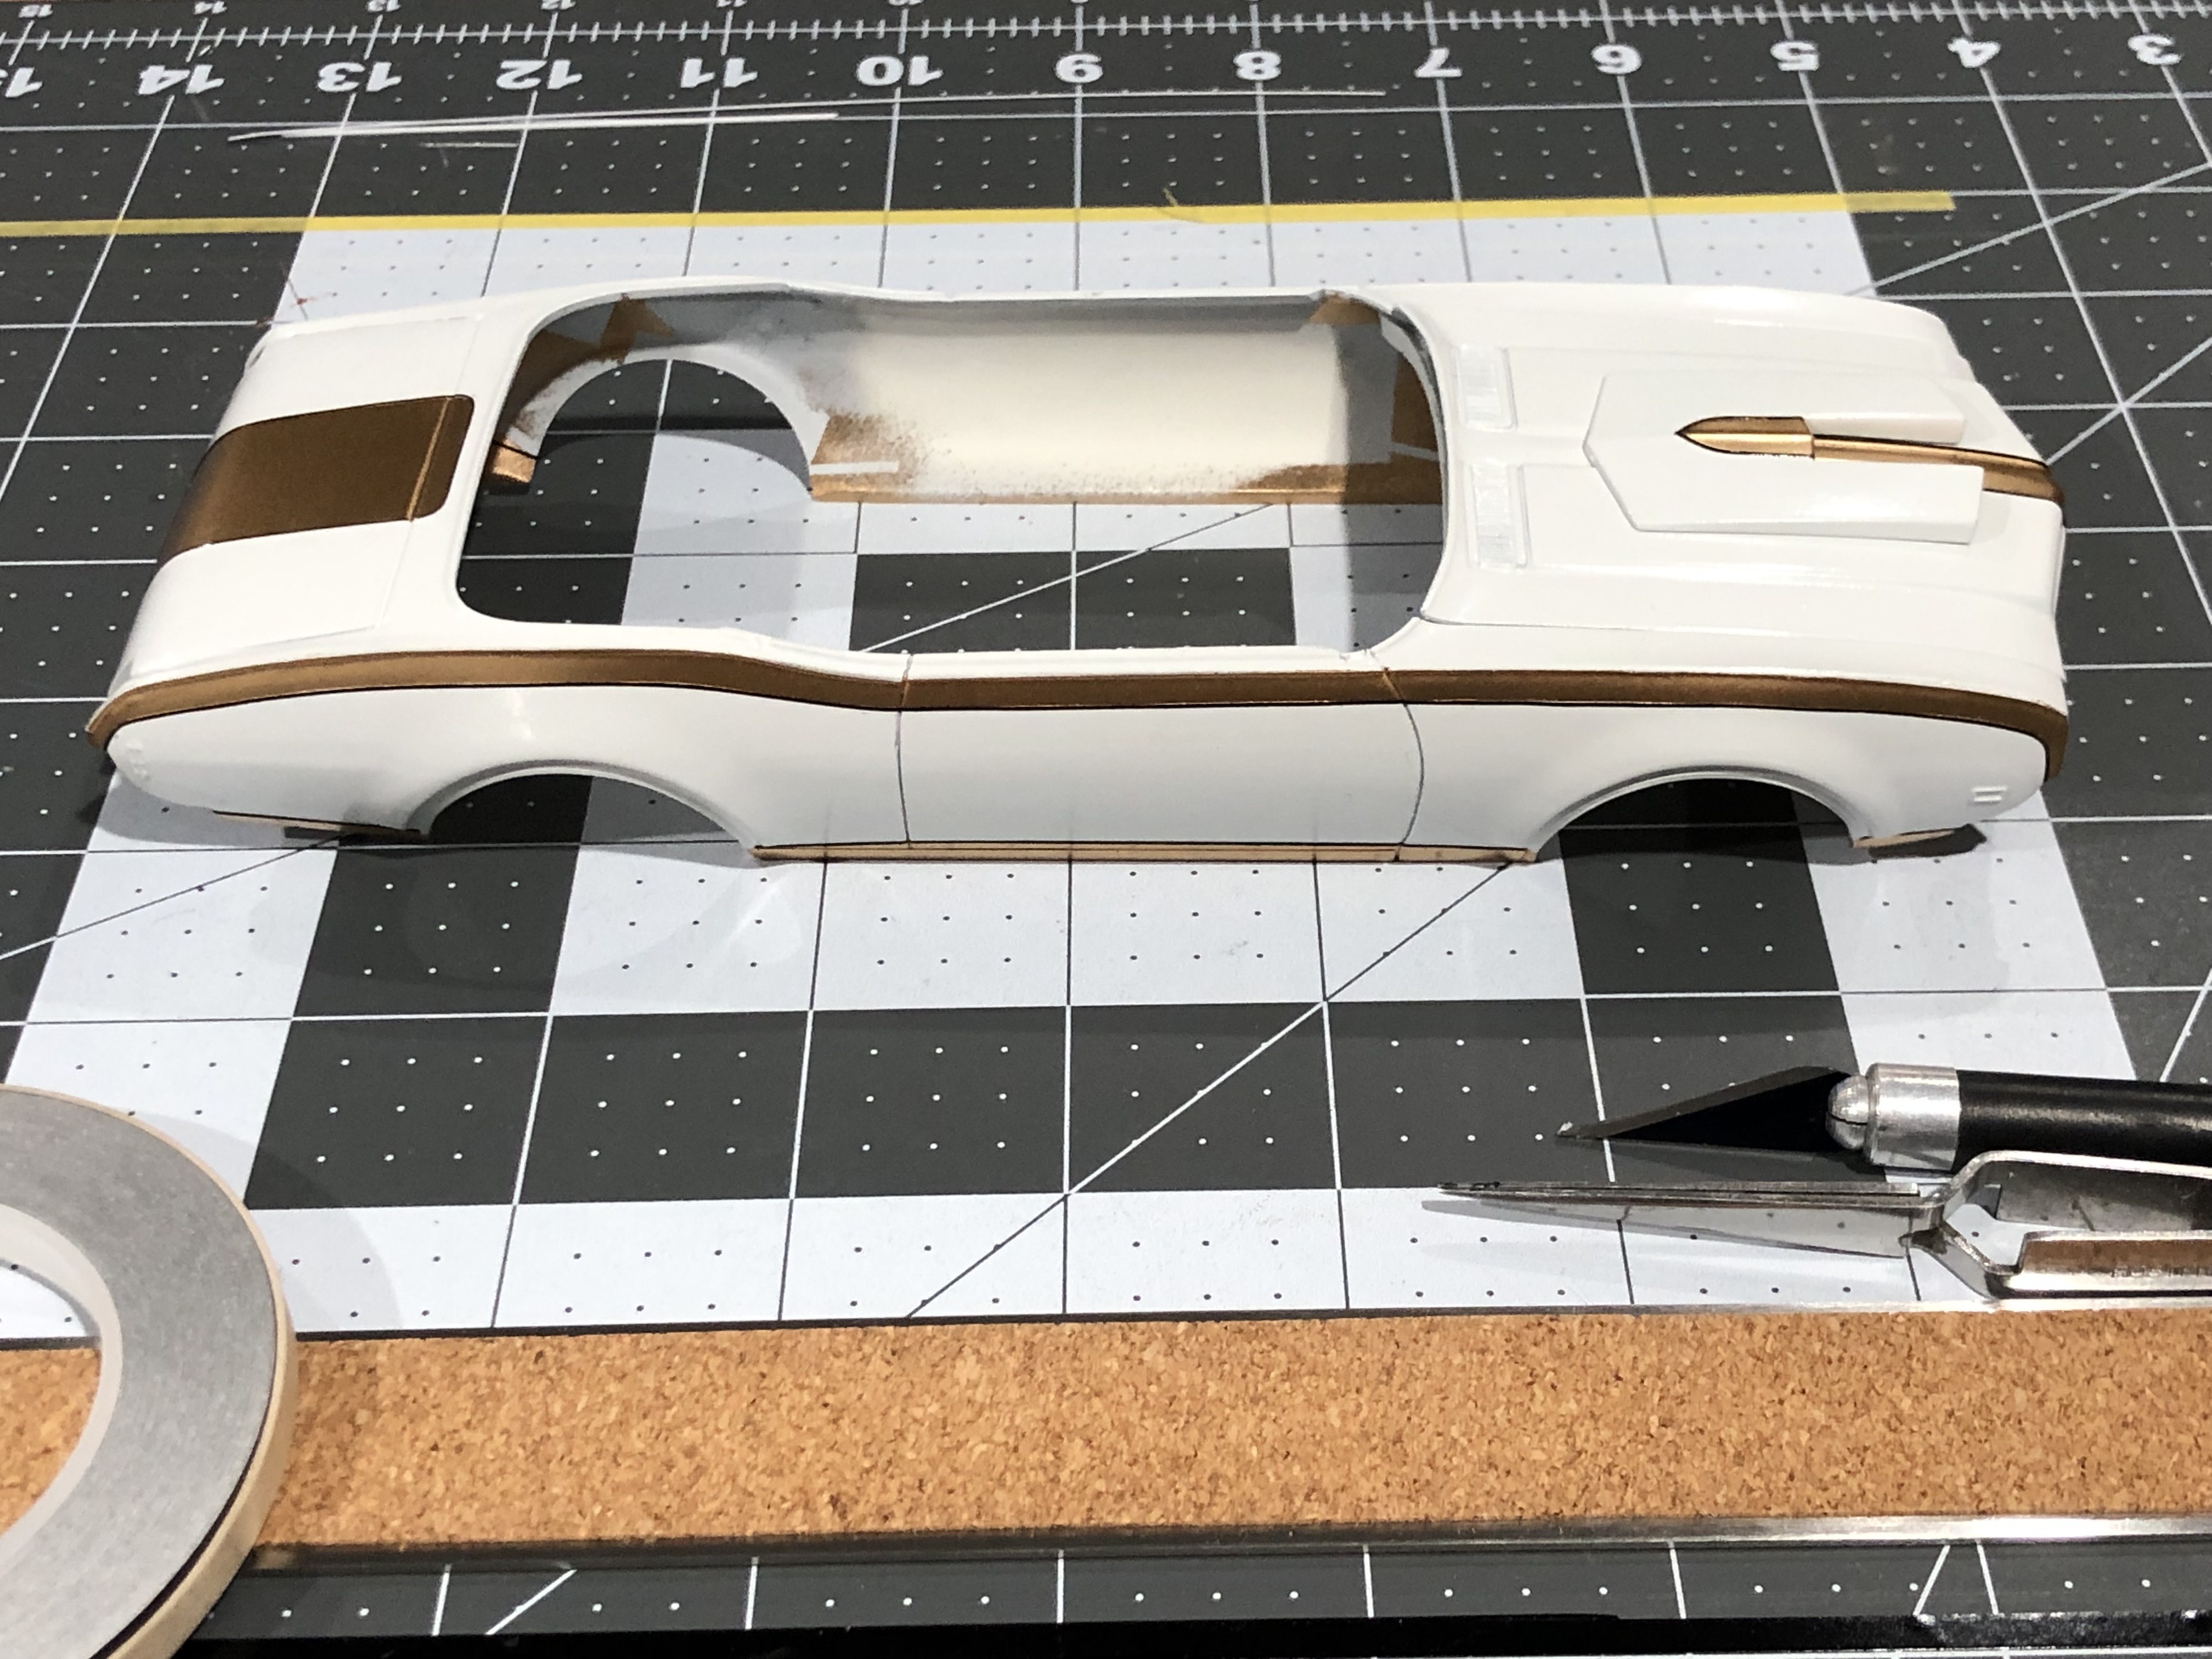
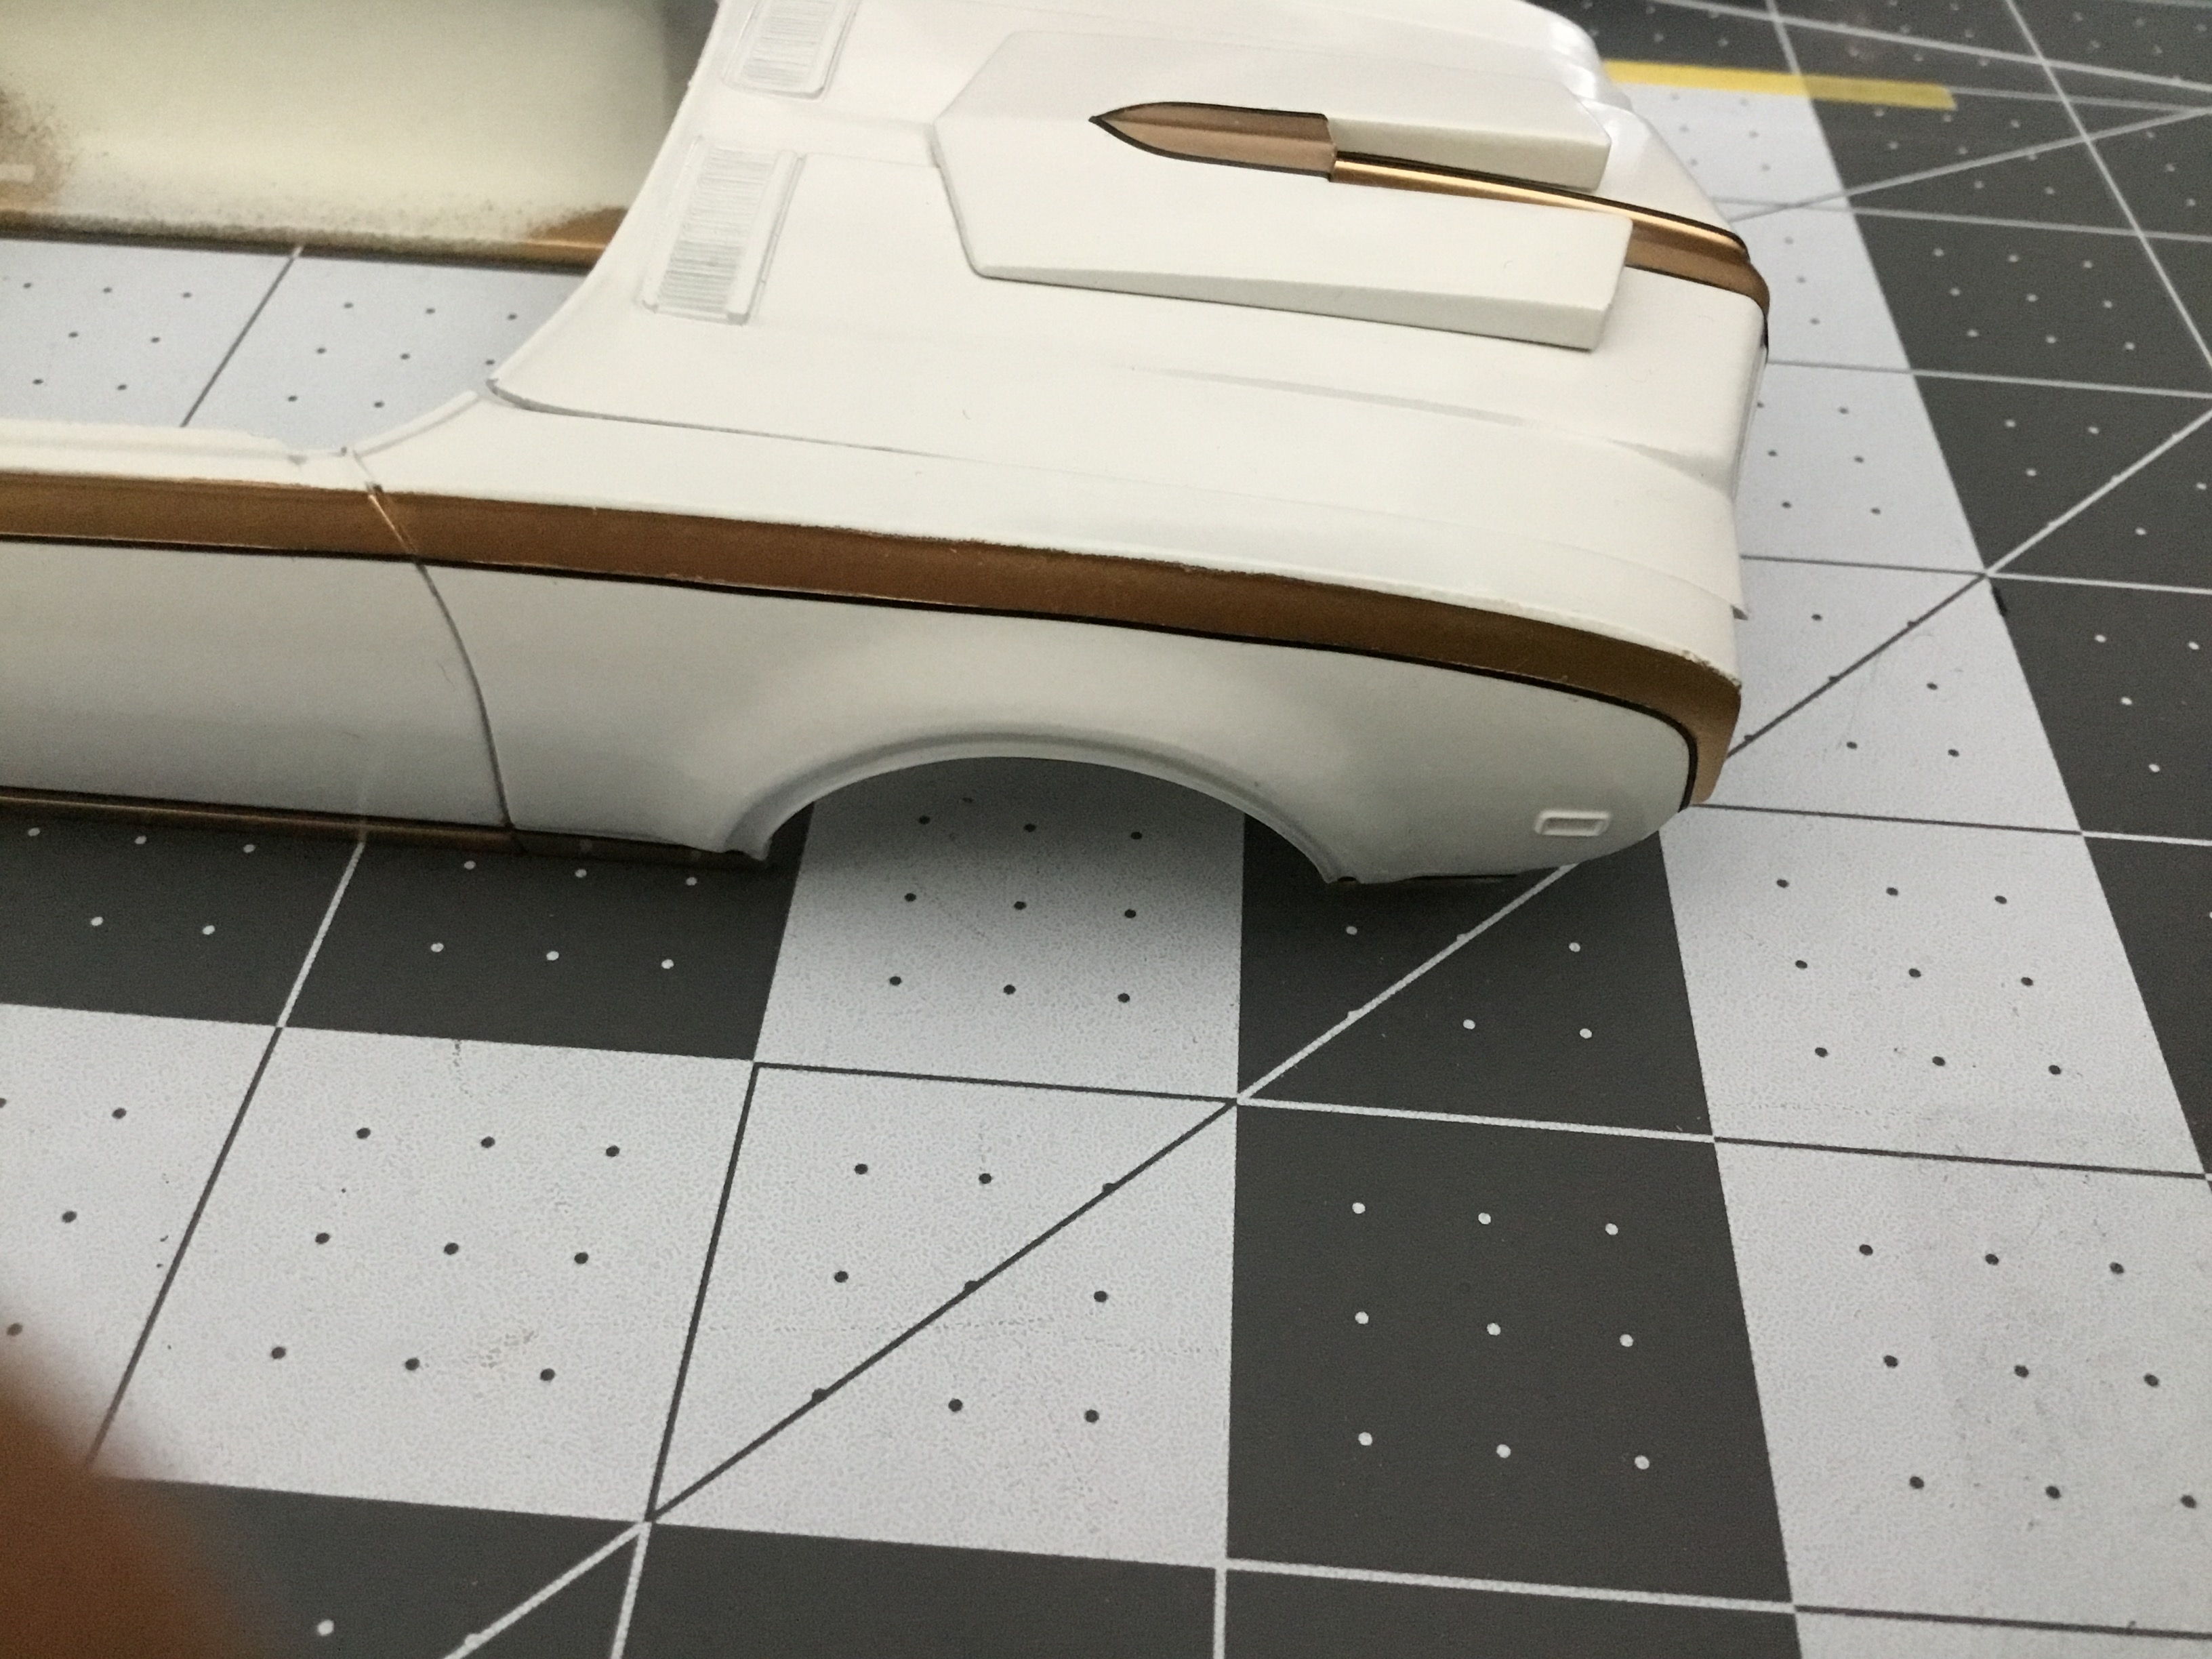
I added the black pin stripe along the edge of the gold. I laid out a piece of tape on my model mat along one of the guide lines. Cut one edge off to make it perfectly straight. I just eyeball the width. If it doesn’t look right on the car, I cut another. I did did this on both Hurst Olds and only used one 10 inch piece for each. $4.99 for 40 feet should last a while! -
1969 Hurst Olds convertible conversion
Superbird McMonte replied to Superbird McMonte's topic in WIP: Model Cars
I added the black pin stripe along the edge of the gold. I laid out a piece of tape on my model mat along one of the guide lines. Cut one edge off to make it perfectly straight. I just eyeball the width. If it doesn’t look right on the car, I cut another. I did did this on both Hurst Olds and only used one 10 inch piece for each. $4.99 for 40 feet should last a while!
-
Love the 64 Impala!
-
1969 Hurst Olds convertible conversion
Superbird McMonte replied to Superbird McMonte's topic in WIP: Model Cars
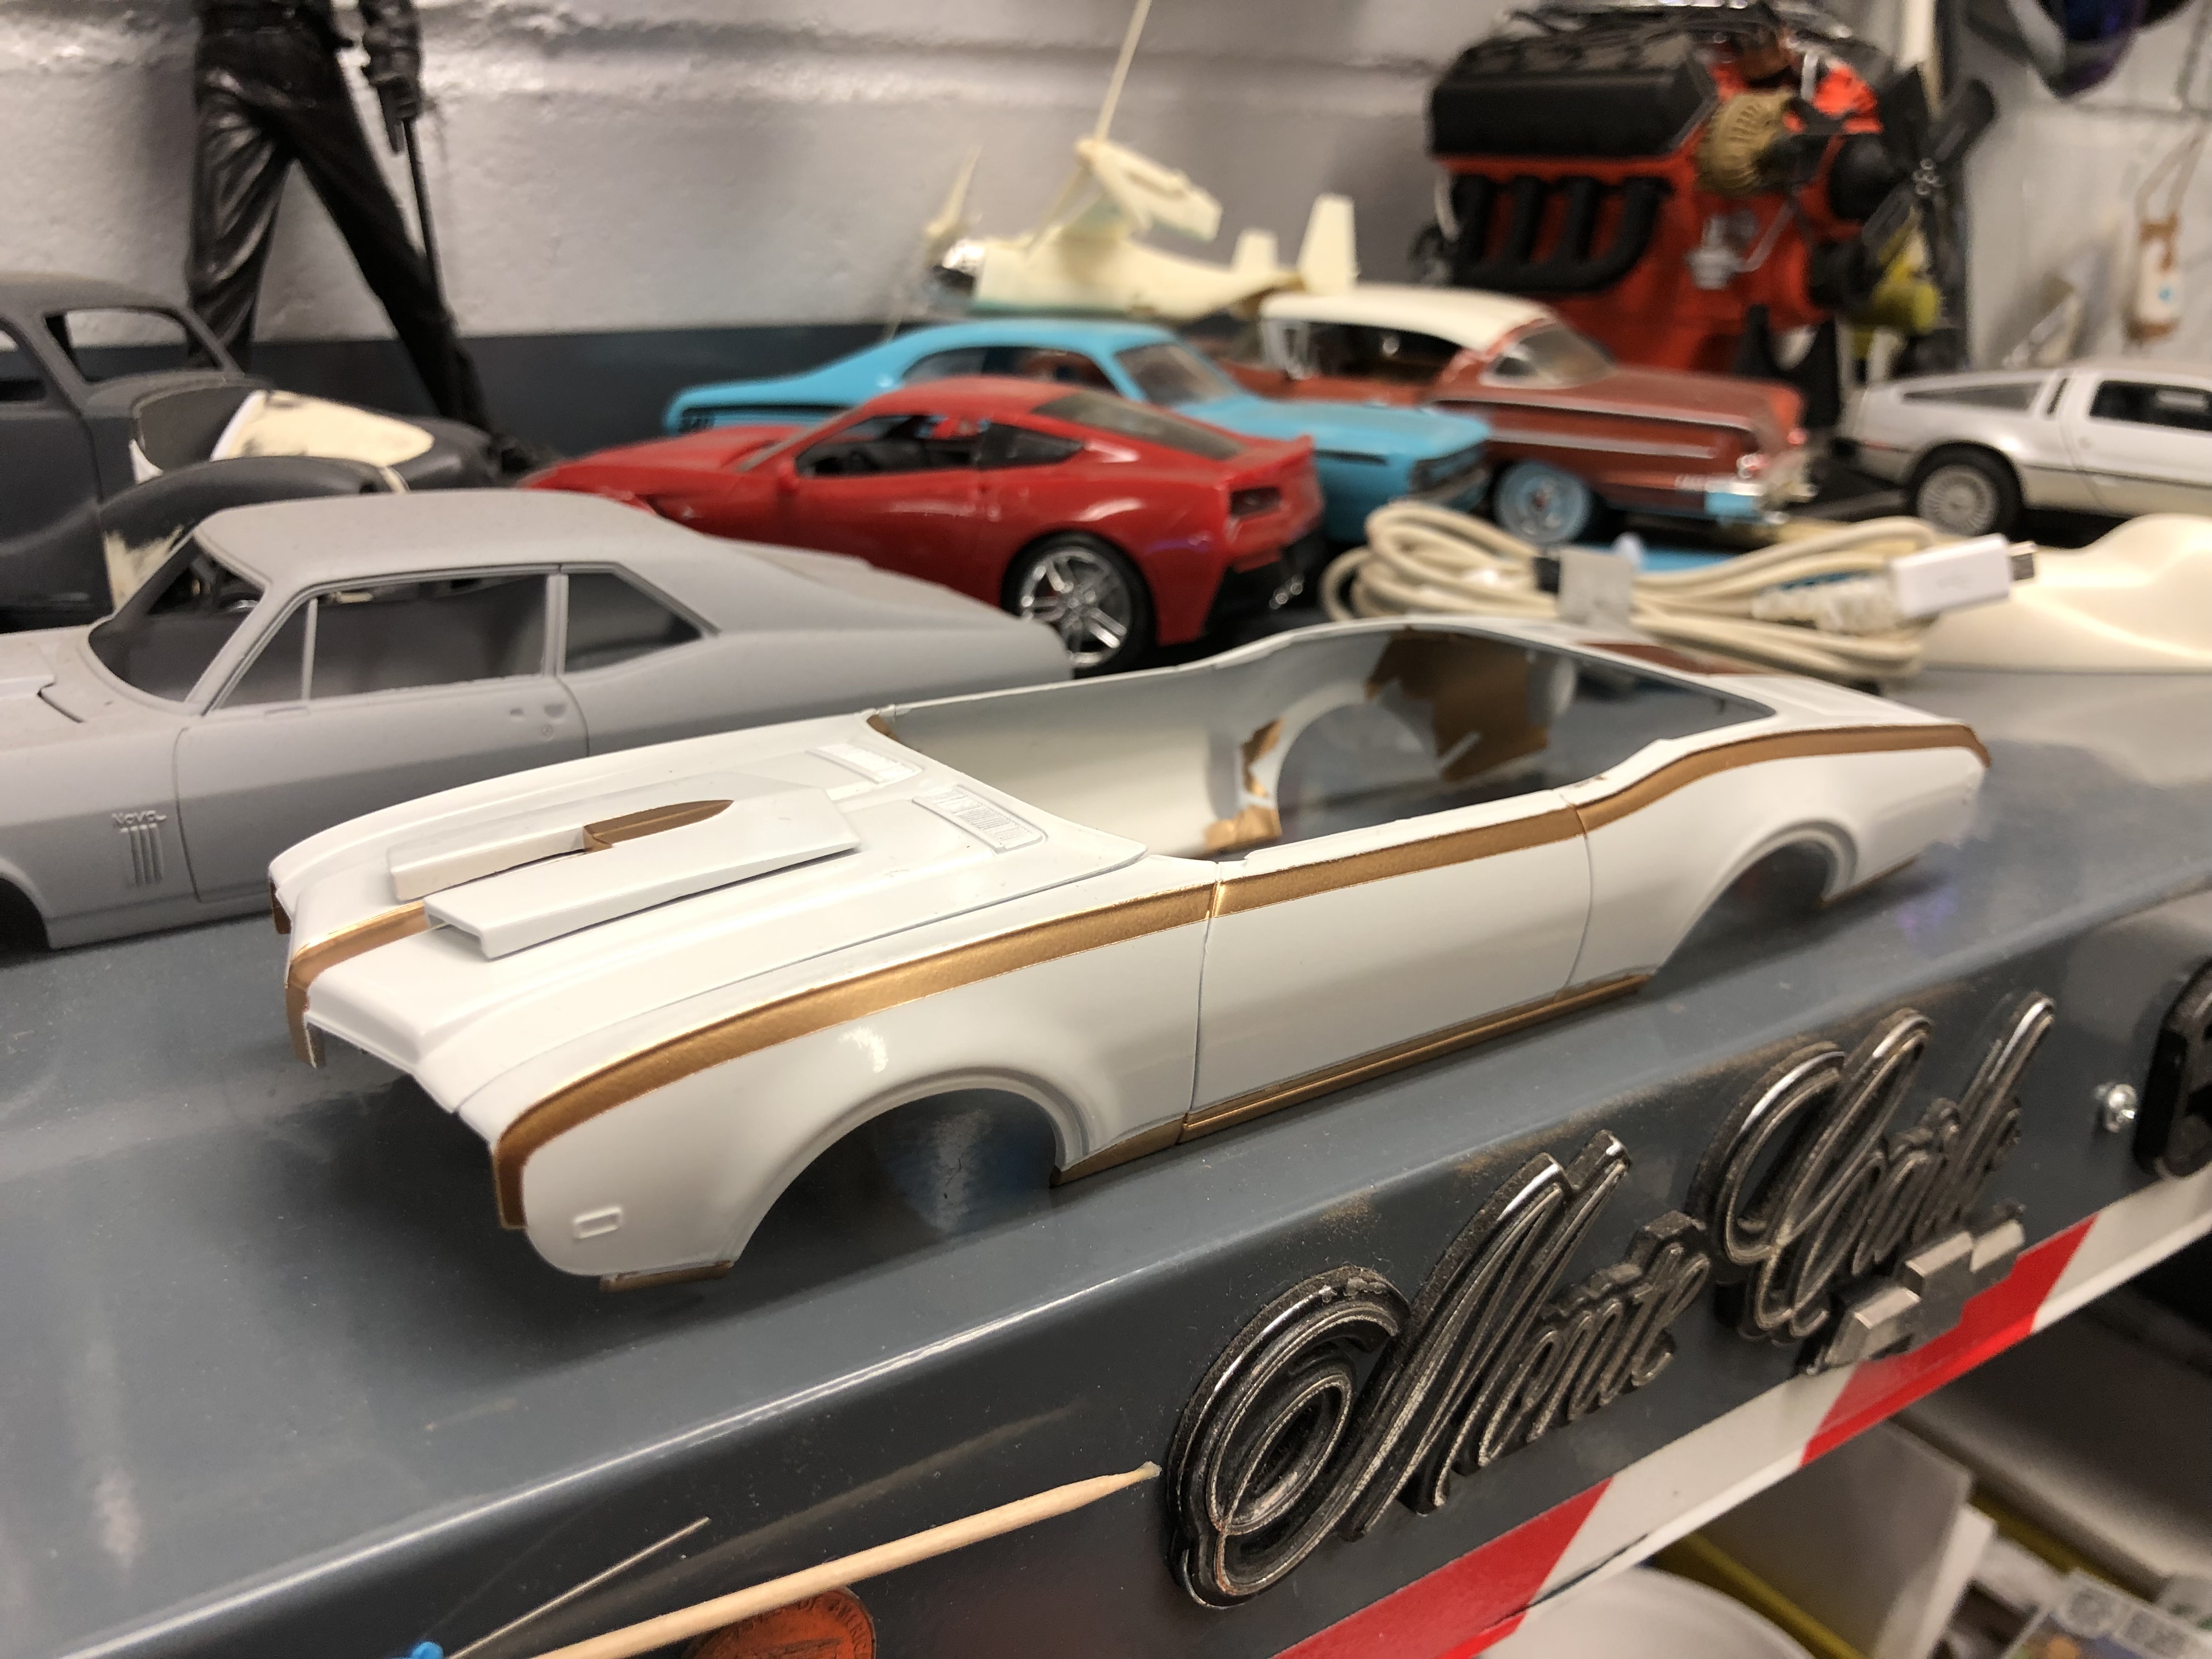
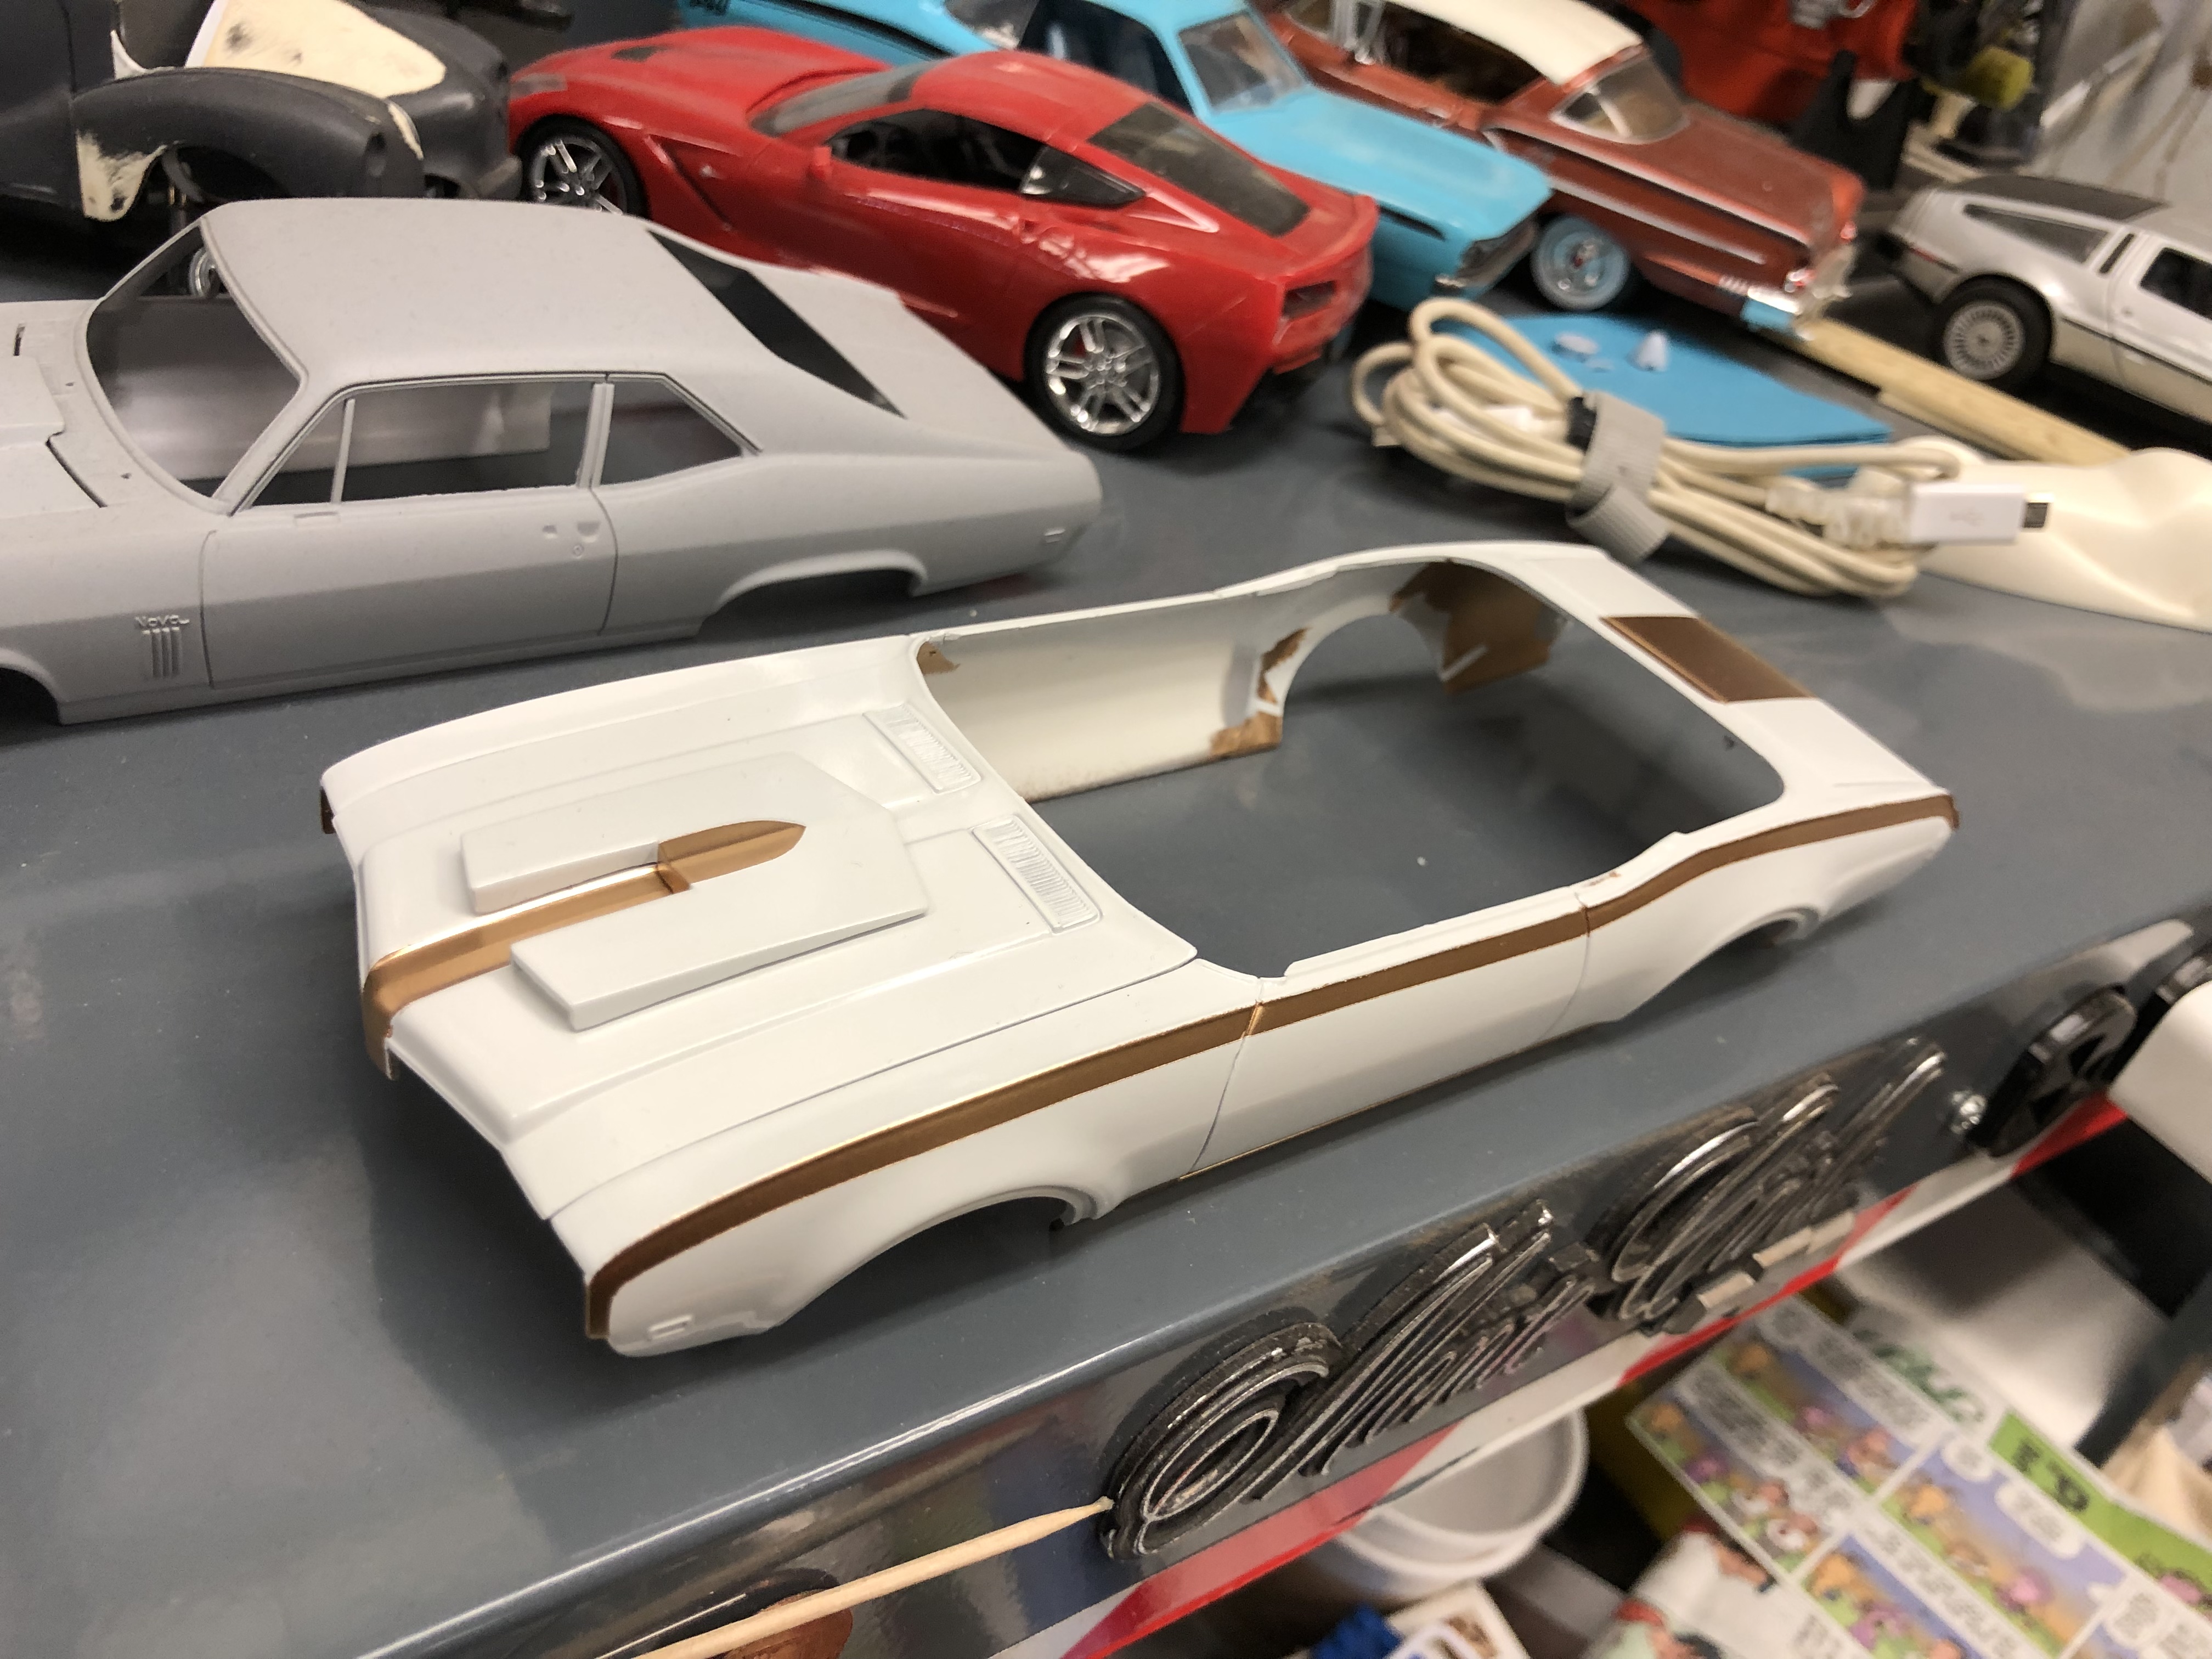
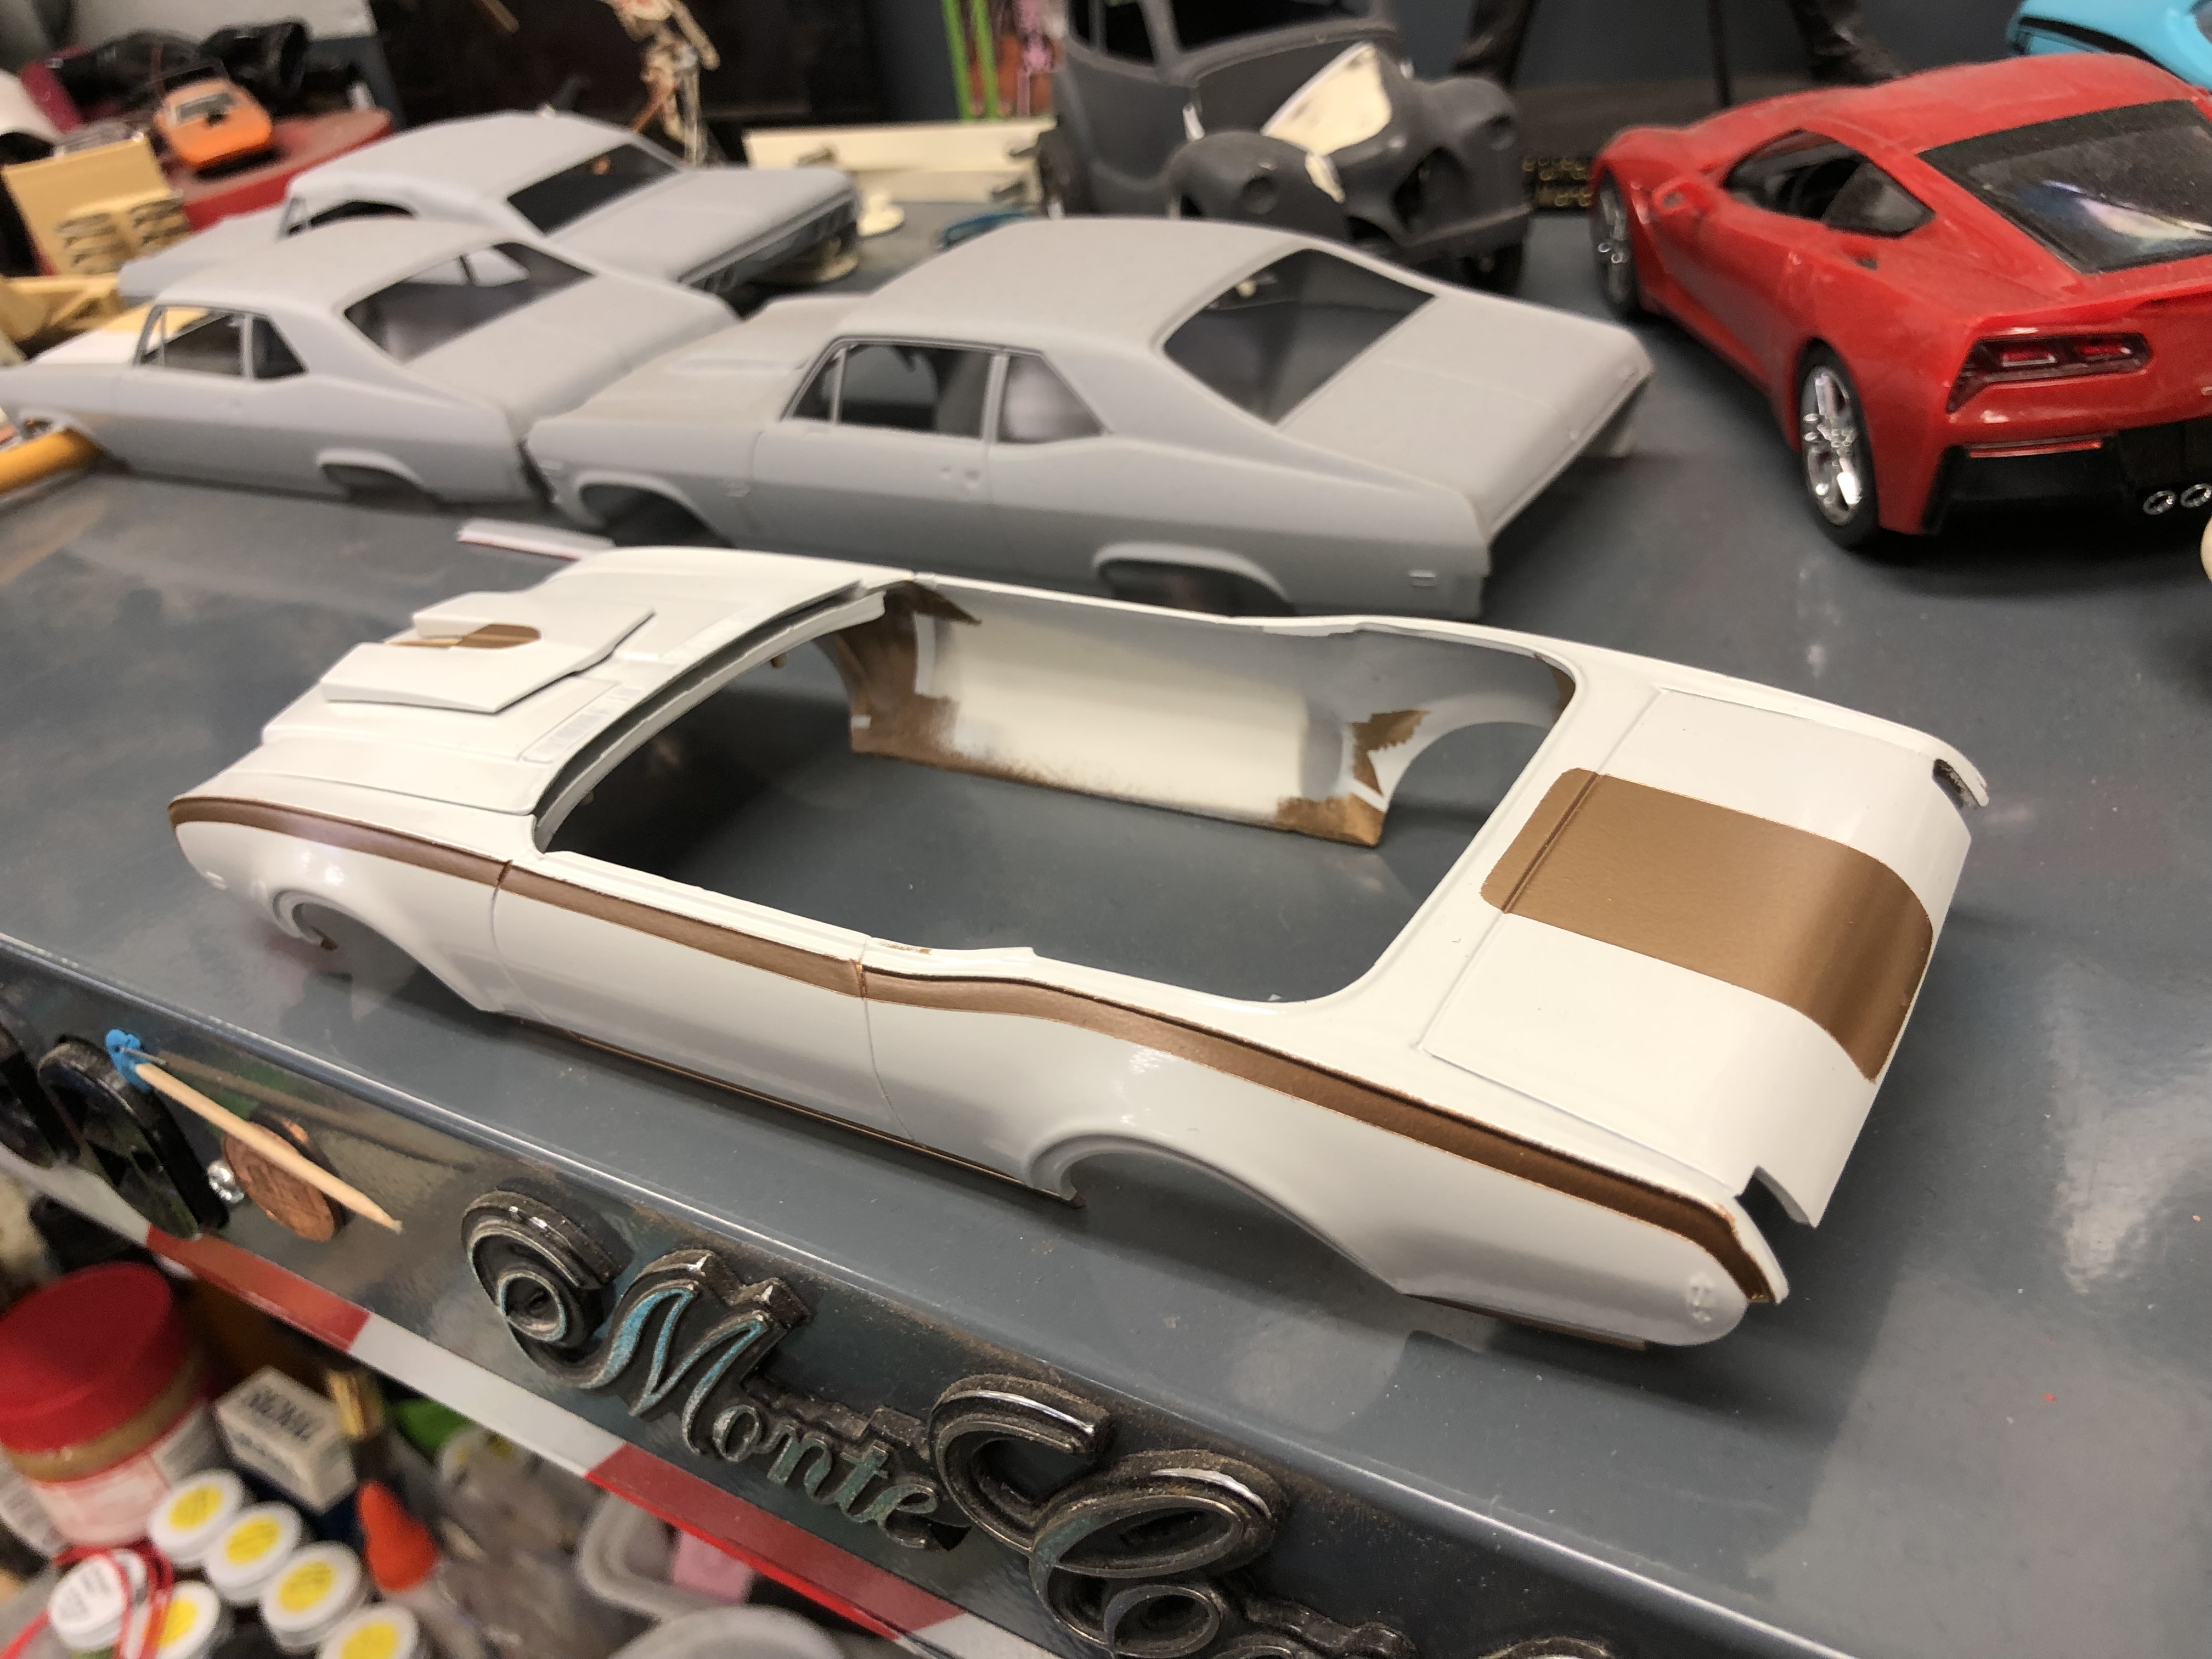
Gold went on nicely this morning! I removed all the masking during my coffee break. I really like the Tamiya tape! Nice clean lines, very little bleeding under! What little bleeding there was I cleaned off with Novus 2. I protected the gold stripes with tape very lightly applied.
-
"Bring Out Your Dead" Completion Build--ROUND 2 Is On!
Superbird McMonte replied to Snake45's topic in WIP: Model Cars
Gold went on nicely this morning! I removed all the masking during my coffee break. I really like the Tamiya tape! Nice clean lines, very little bleeding under! What little bleeding there was I cleaned off with Novus 2. I protected the gold stripes with tape very lightly applied.