Chariots of Fire
-
Posts
2,782 -
Joined
-
Last visited
Content Type
Profiles
Forums
Events
Gallery
Everything posted by Chariots of Fire
-

Rookie mistakes
Chariots of Fire replied to Peterbilt359's topic in Model Building Questions and Answers
Don't use Rustoleum at all for painting models. It goes on too thick and takes forever to dry. Duplicolor used to have good primers but they are now hard to come by. I found Krylon gray primer/filler to be a good substitute. It goes on smooth and is not heavy. It takes a bit to build it up to good coverage but it dries quickly and is very sandable. Michael: Let us have a look at the rest of the model. It might help in seeing it at a whole as to what is best in terms of rectifying the flaws. -
Good tutorial! Many thanks!
-
Len: Here is the way I added some trim to a windshield, or in my case trim around a back window. On my example the trim is a bit strong so I would recommend reducing it some but the idea remains. If your windshield is curved this might not work but if it is flat here we go. First find the centerline both vertically and horizontally on the window opening. Mark it as I did above on the body. Next take a piece of sheet stock of 0.020" thickness and place it inside the cab so that you can trace around the opening on the sheet. Get the sheet as close to the inside surface as you can. Then using the lines on the cab find the center vertically and horizontally on the sheet. Now trace around the outline of the window opening the width of what you want the trim to be. Here is where I would have made mine a bit thinner. Carefully trim the sheet to the outside lines being sure that the alignment marks vertically and horizontally are in place. Once it is cut out, bevel the outside edges of the trim blank to give it some roundness and then glue it in position using the marks on the cab and the sheet stock for alignment. Be sure you are spot on with this because it will become critical in the next step which is to cut out the inside of the trim blank to the inner lines you drew earlier. Don't go beyond the lines!! When the cutting is done you should end up with a thin edge that you can see from the inside of the cab. It is against this edge that you can lay the clear stock for the glass. Here' s the glass in position with the trim around it. As I said it could be thinner all around. I made up for that though, when I painted the cab. Instead of painting the entire trim piece black to simulate the rubber gasket I just did the inner part and a thin portion at the edge using a felt marker. That helped keep the black trim to a minimum. Hope this helps. Even if the windshield is curved you might be able to apply some of this to your project.

-
Nothing sacred in this hobby. I say, if you enjoy building, do it! Vintage or current day, what's the difference? I suppose if you are a kit collector you might cringe at my opinion but that's ok too!?
-
The issues with scratch building
Chariots of Fire replied to IbuildScaleModels's topic in Tips, Tricks, and Tutorials
I'm sort of like you, Tom. I have never built anything that I was doing for the purpose of competing. If it happens to do well in a competition, ok but that's not why I build. It's always because of the subject matter that has an appeal at the time. And I agree, it is a lot of fun just to try new stuff. It's amazing what you can come up with when you try. Ever go back to your early days of model building and check out what you thought was pretty good? I have and it makes me chuckle!? -
1948 Sterling HC 175
Chariots of Fire replied to Chariots of Fire's topic in WIP: Model Trucks: Big Rigs and Heavy Equipment
Louvers and the backup piece are all 0.010" stock. Louvers were 0.010"x0.156" Evergreen. The small knobs are 0.035" round stock. -
Some of the KW kits had in-line 6's. You might try one of them. As far as stacks go, aluminum tubing is a good bet. Making them curved at the top is not something that can be done easily but if all you want is straight up and out the tubing is great.
-
1948 Sterling HC 175
Chariots of Fire replied to Chariots of Fire's topic in WIP: Model Trucks: Big Rigs and Heavy Equipment
Thanks, Mike and Francis! We'll see how things develop! -
The issues with scratch building
Chariots of Fire replied to IbuildScaleModels's topic in Tips, Tricks, and Tutorials
It's the acronym for Acetocyanoacrylate or superglue. I use Loctite but there are many others including Bordens, Gorilla glue, etc. -
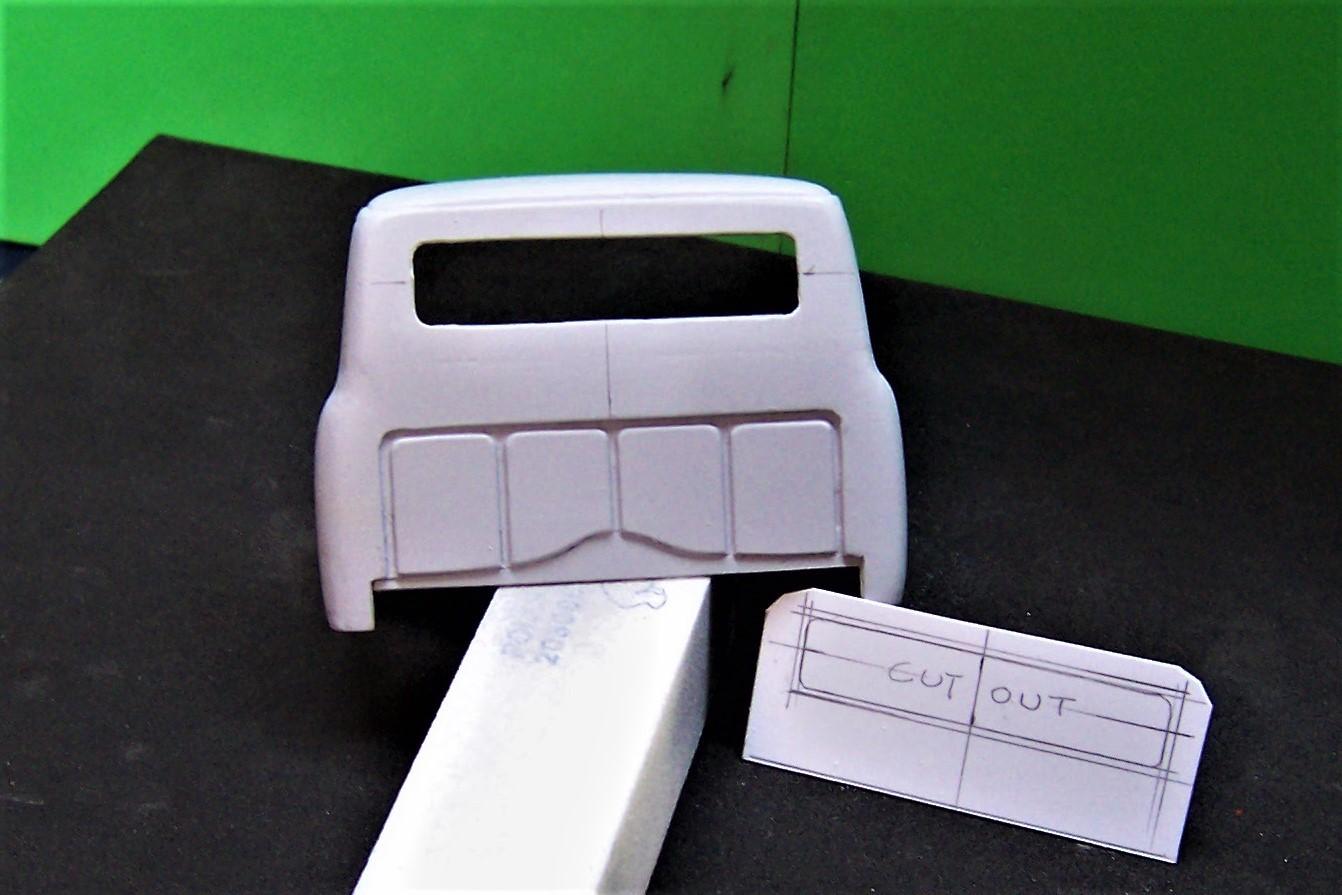
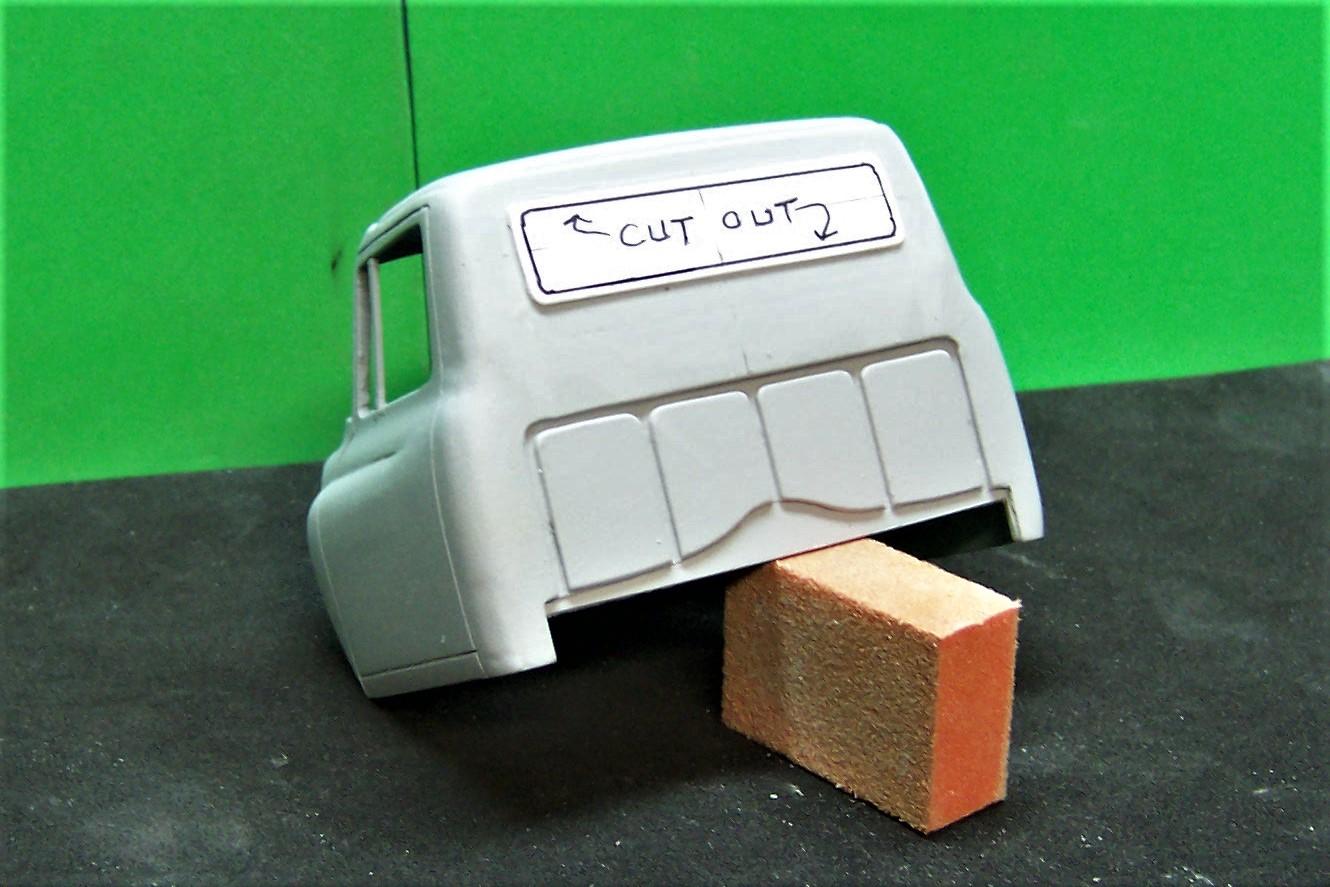
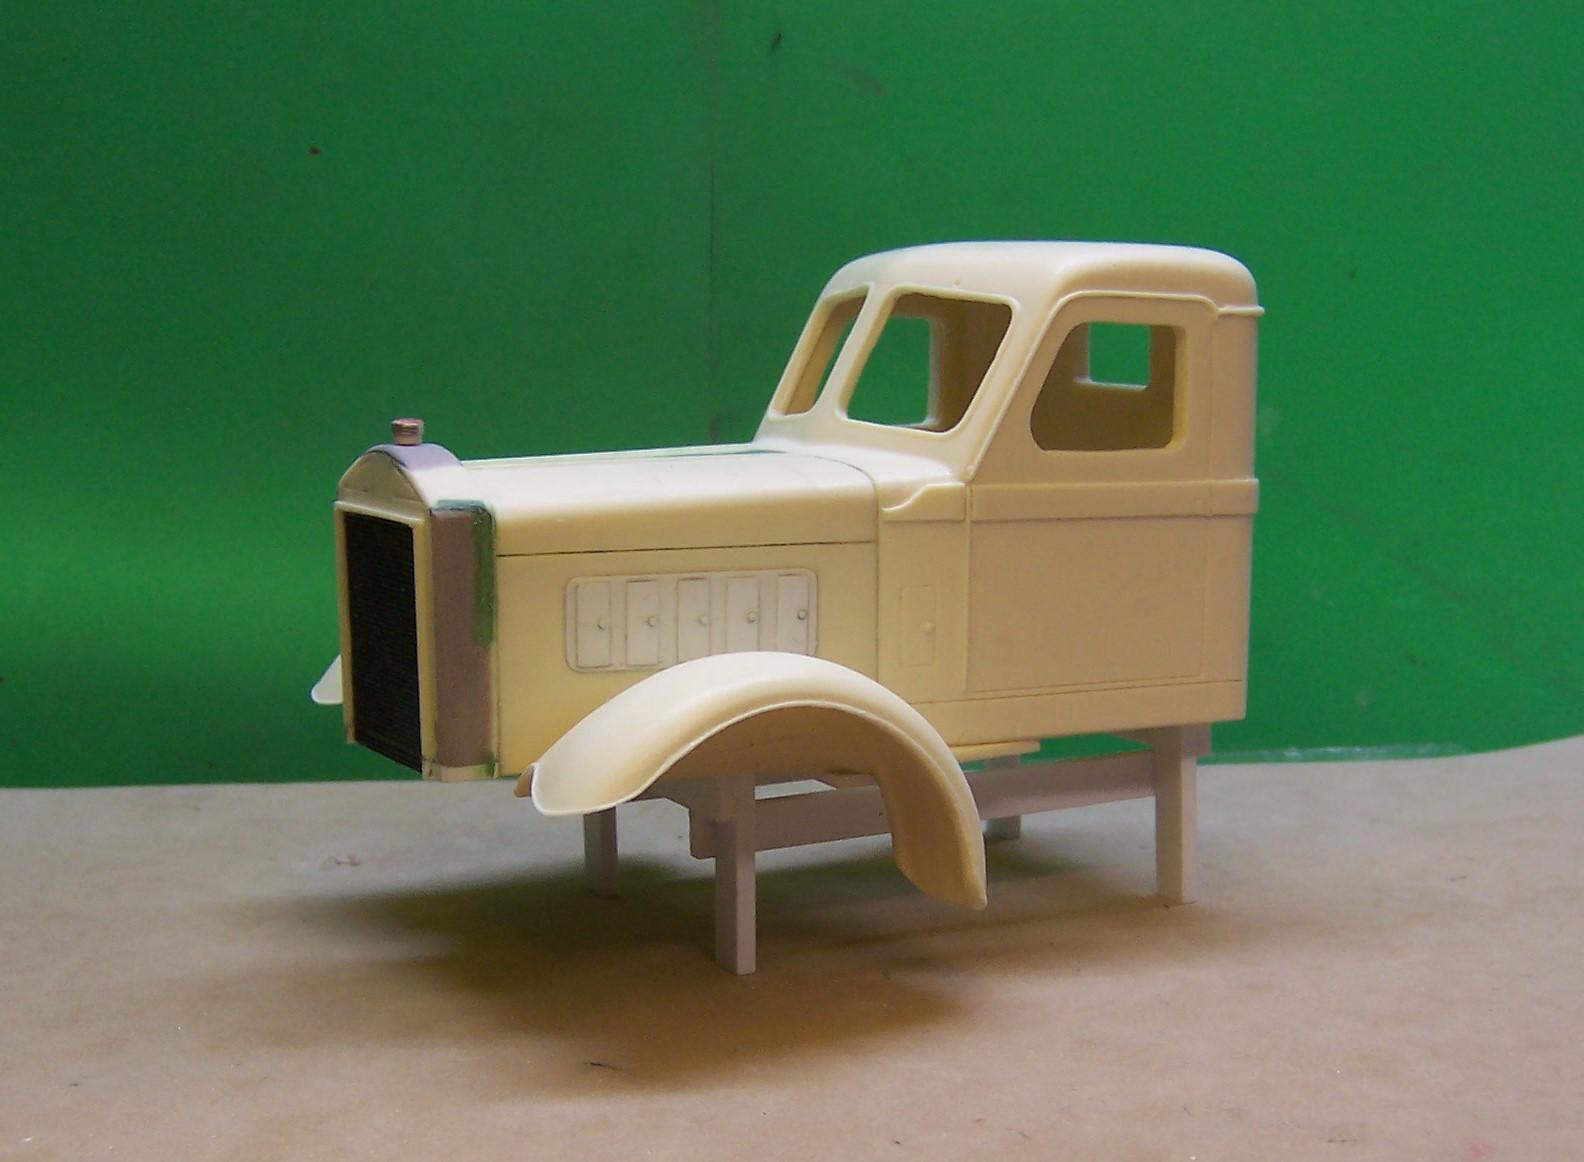
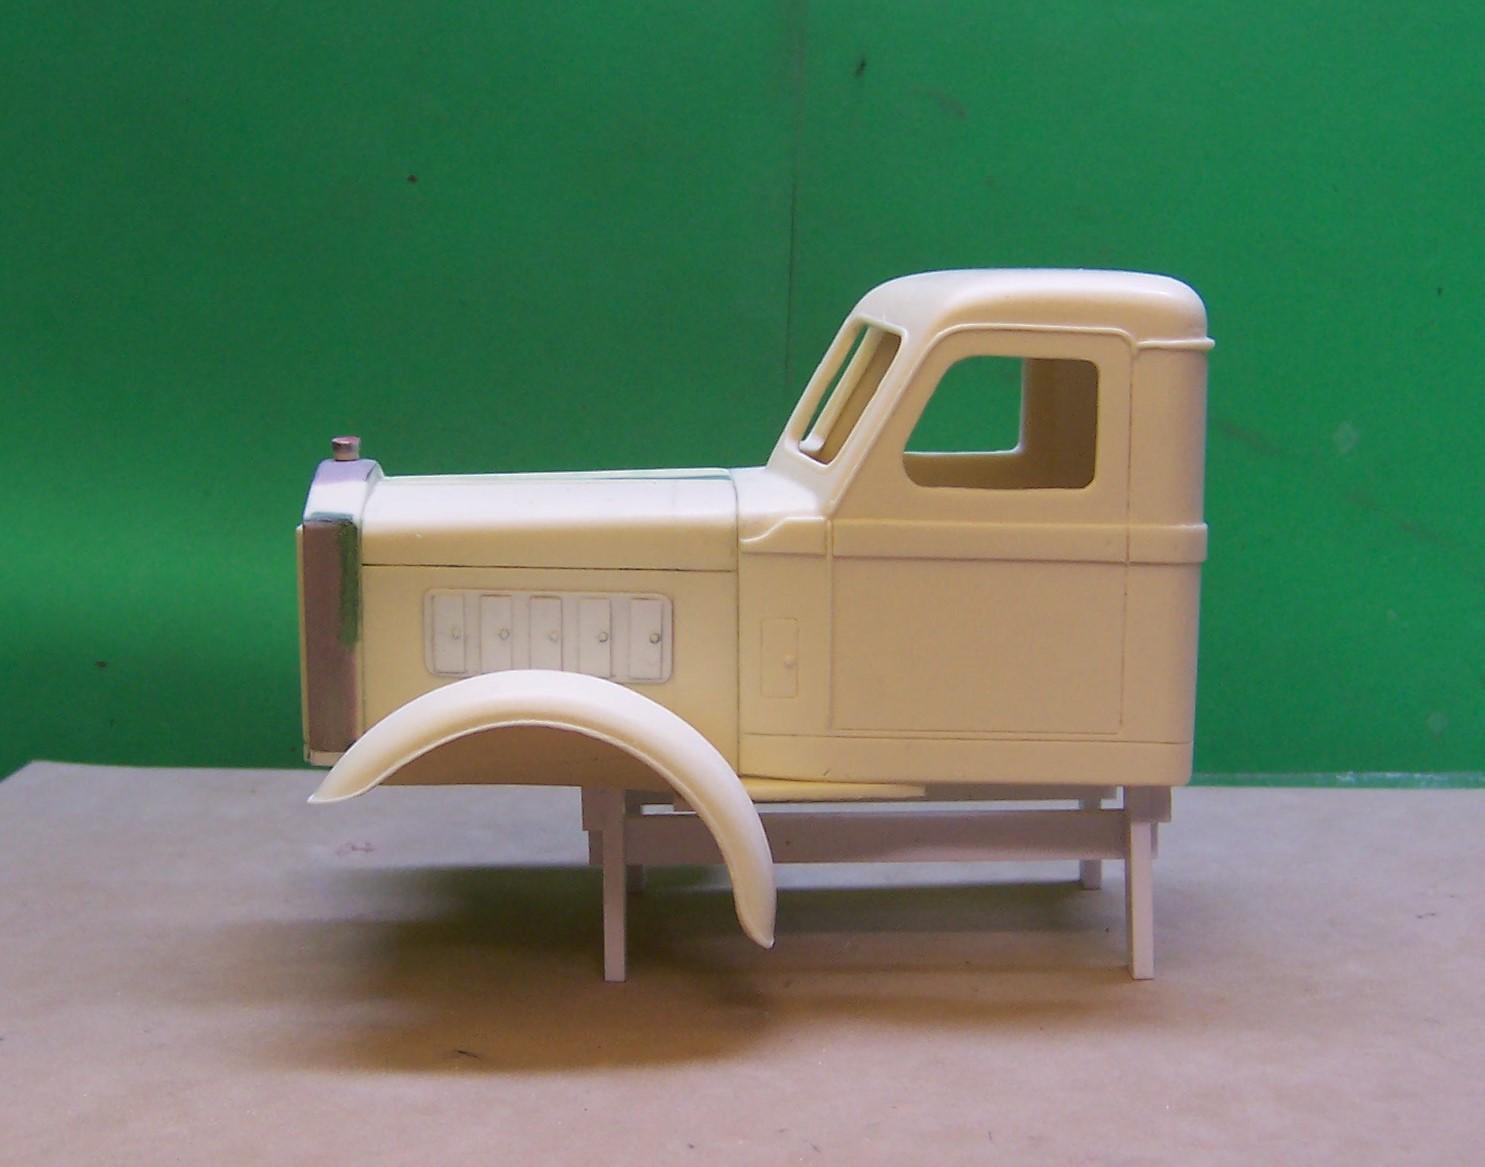
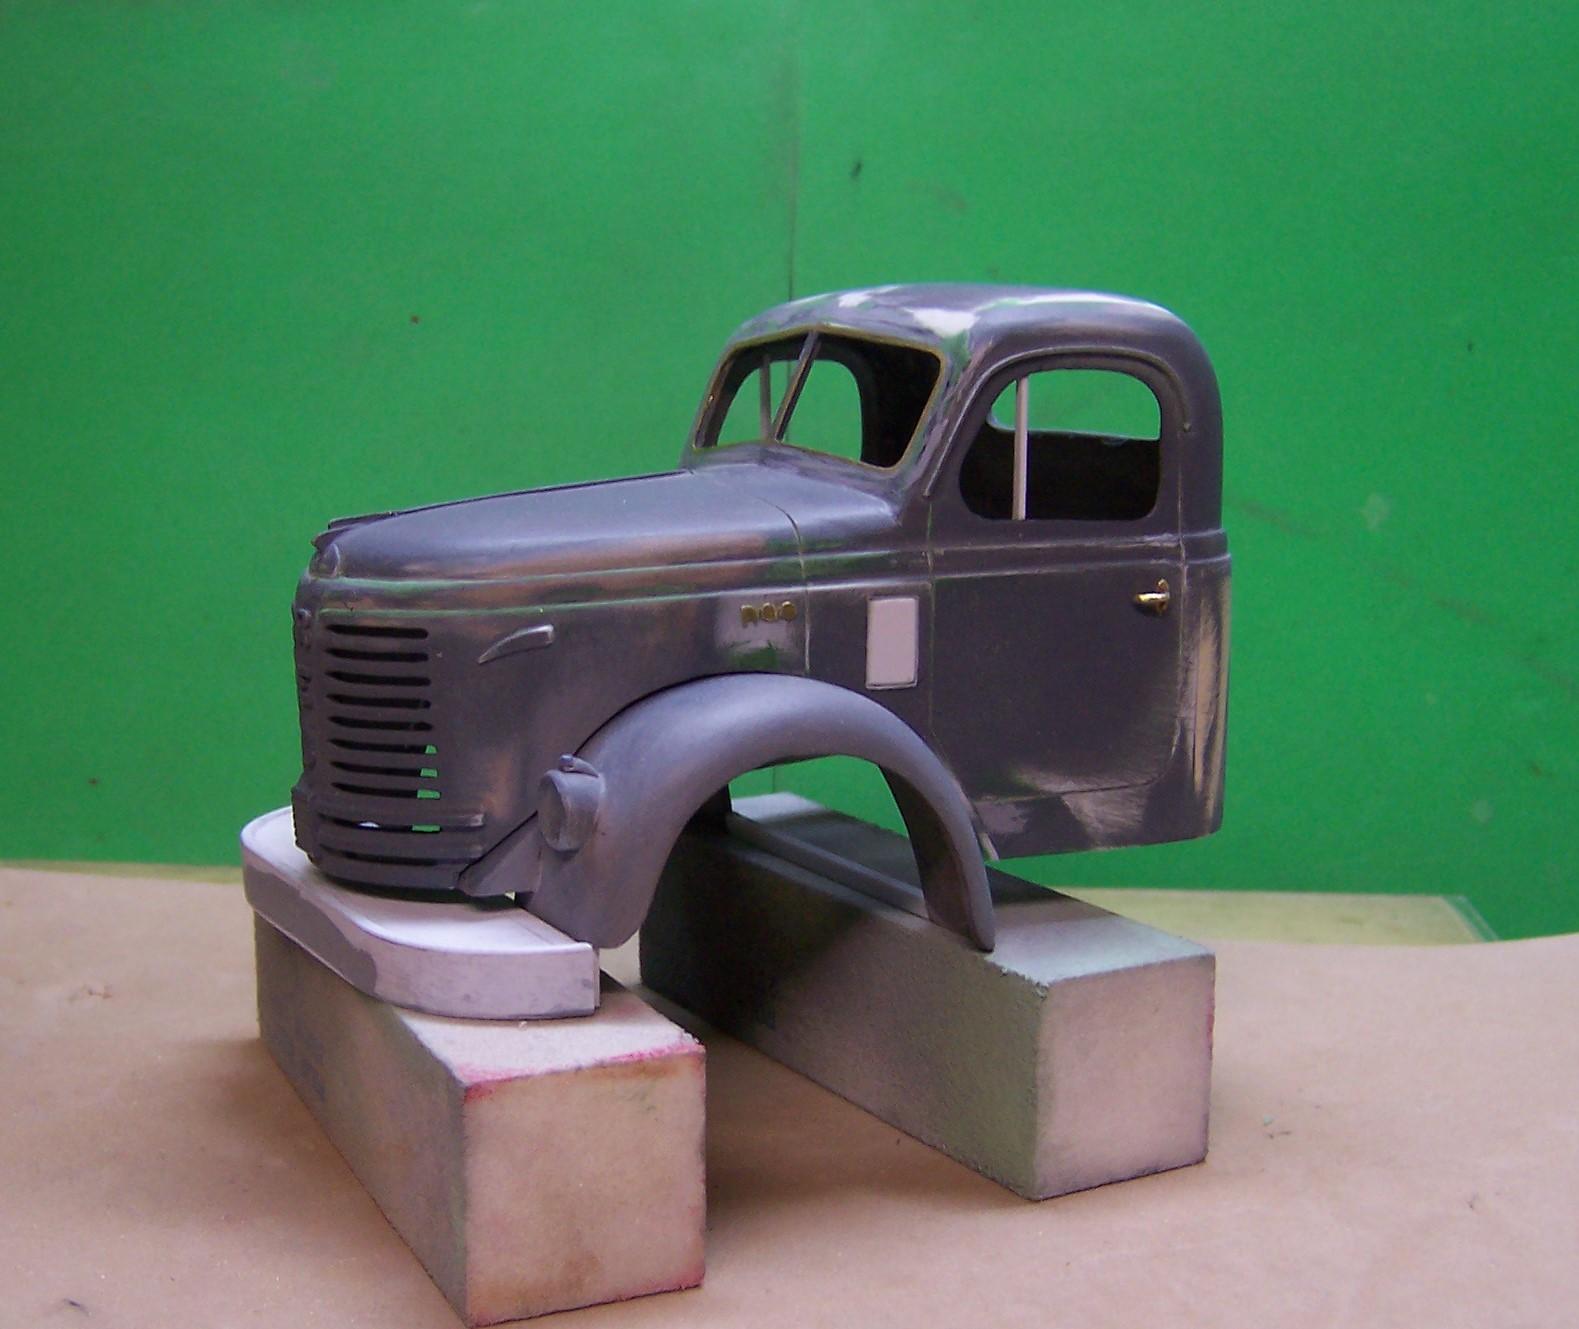
Now that the Reo has gone to the caster, modifications have begun on a Sterling by changing the length of the hood from the West Coast version to one that is shorter and with louvers rather than with the chrome trim. The radiator was also modified. Looking to turn this one into a nice compact heavy duty dump.
-
1957 Reo Gold Comet
Chariots of Fire replied to Chariots of Fire's topic in WIP: Model Trucks: Big Rigs and Heavy Equipment
The Reo is now in the hands of AITM. Molds will be started on Monday. -
1957 Reo Gold Comet
Chariots of Fire replied to Chariots of Fire's topic in WIP: Model Trucks: Big Rigs and Heavy Equipment
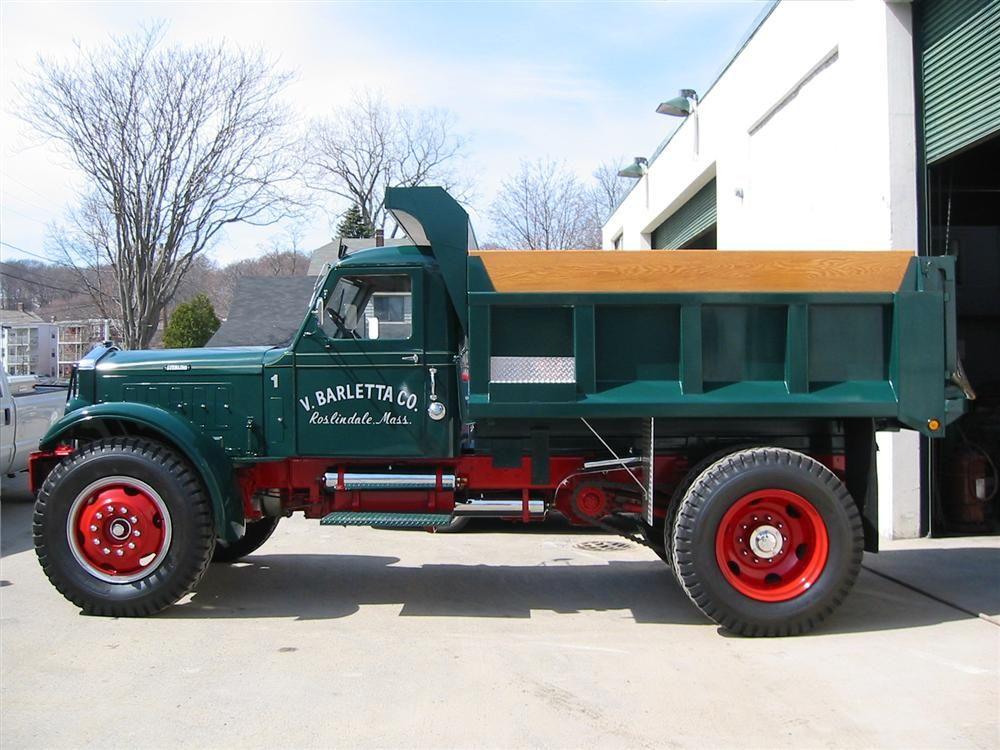
Thank you, Hermann. It will be a while before I get the results back. I have another project to start and that is to convert a West Coast long hood Sterling into the short hood version with louvers in the hood sides rather than the chromed trim. Sort of like this one.
-
1957 Reo Gold Comet
Chariots of Fire replied to Chariots of Fire's topic in WIP: Model Trucks: Big Rigs and Heavy Equipment
Good question, Bill. I don't have one but it's certainly a possibility. -
1957 Reo Gold Comet
Chariots of Fire replied to Chariots of Fire's topic in WIP: Model Trucks: Big Rigs and Heavy Equipment
I think the chassis from the AMT Ford Snowplow kit would work. You would have to change the rear axles from tandem to single, though. The chassis I show above is one from the AMT American La France kits. I think that would work also but it might need some adjustment up front because that particular frame was for a cab forward apparatus but the rear axle is a single. Knowing all of that maybe the right thing would be to combine the relevent components from each kit. Your choice, really. -
1957 Reo Gold Comet
Chariots of Fire replied to Chariots of Fire's topic in WIP: Model Trucks: Big Rigs and Heavy Equipment
I sent it out to AITM this morning. Looking forward to the first pop! -
1957 Reo Gold Comet
Chariots of Fire replied to Chariots of Fire's topic in WIP: Model Trucks: Big Rigs and Heavy Equipment
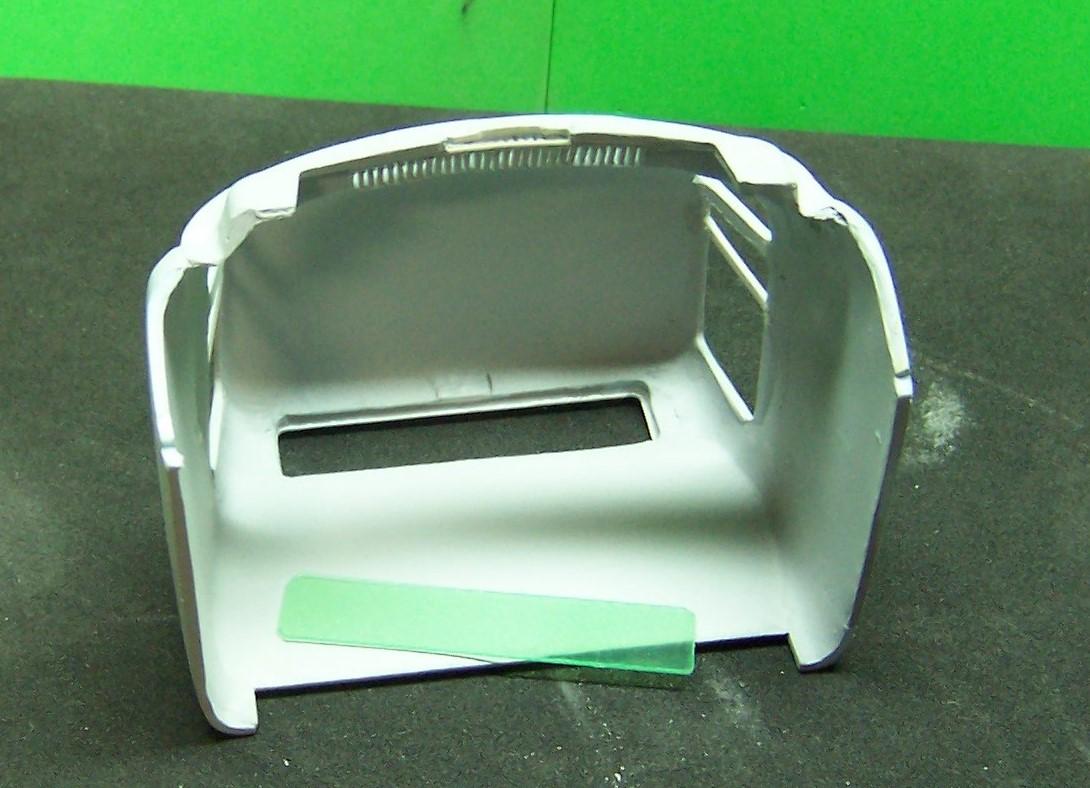
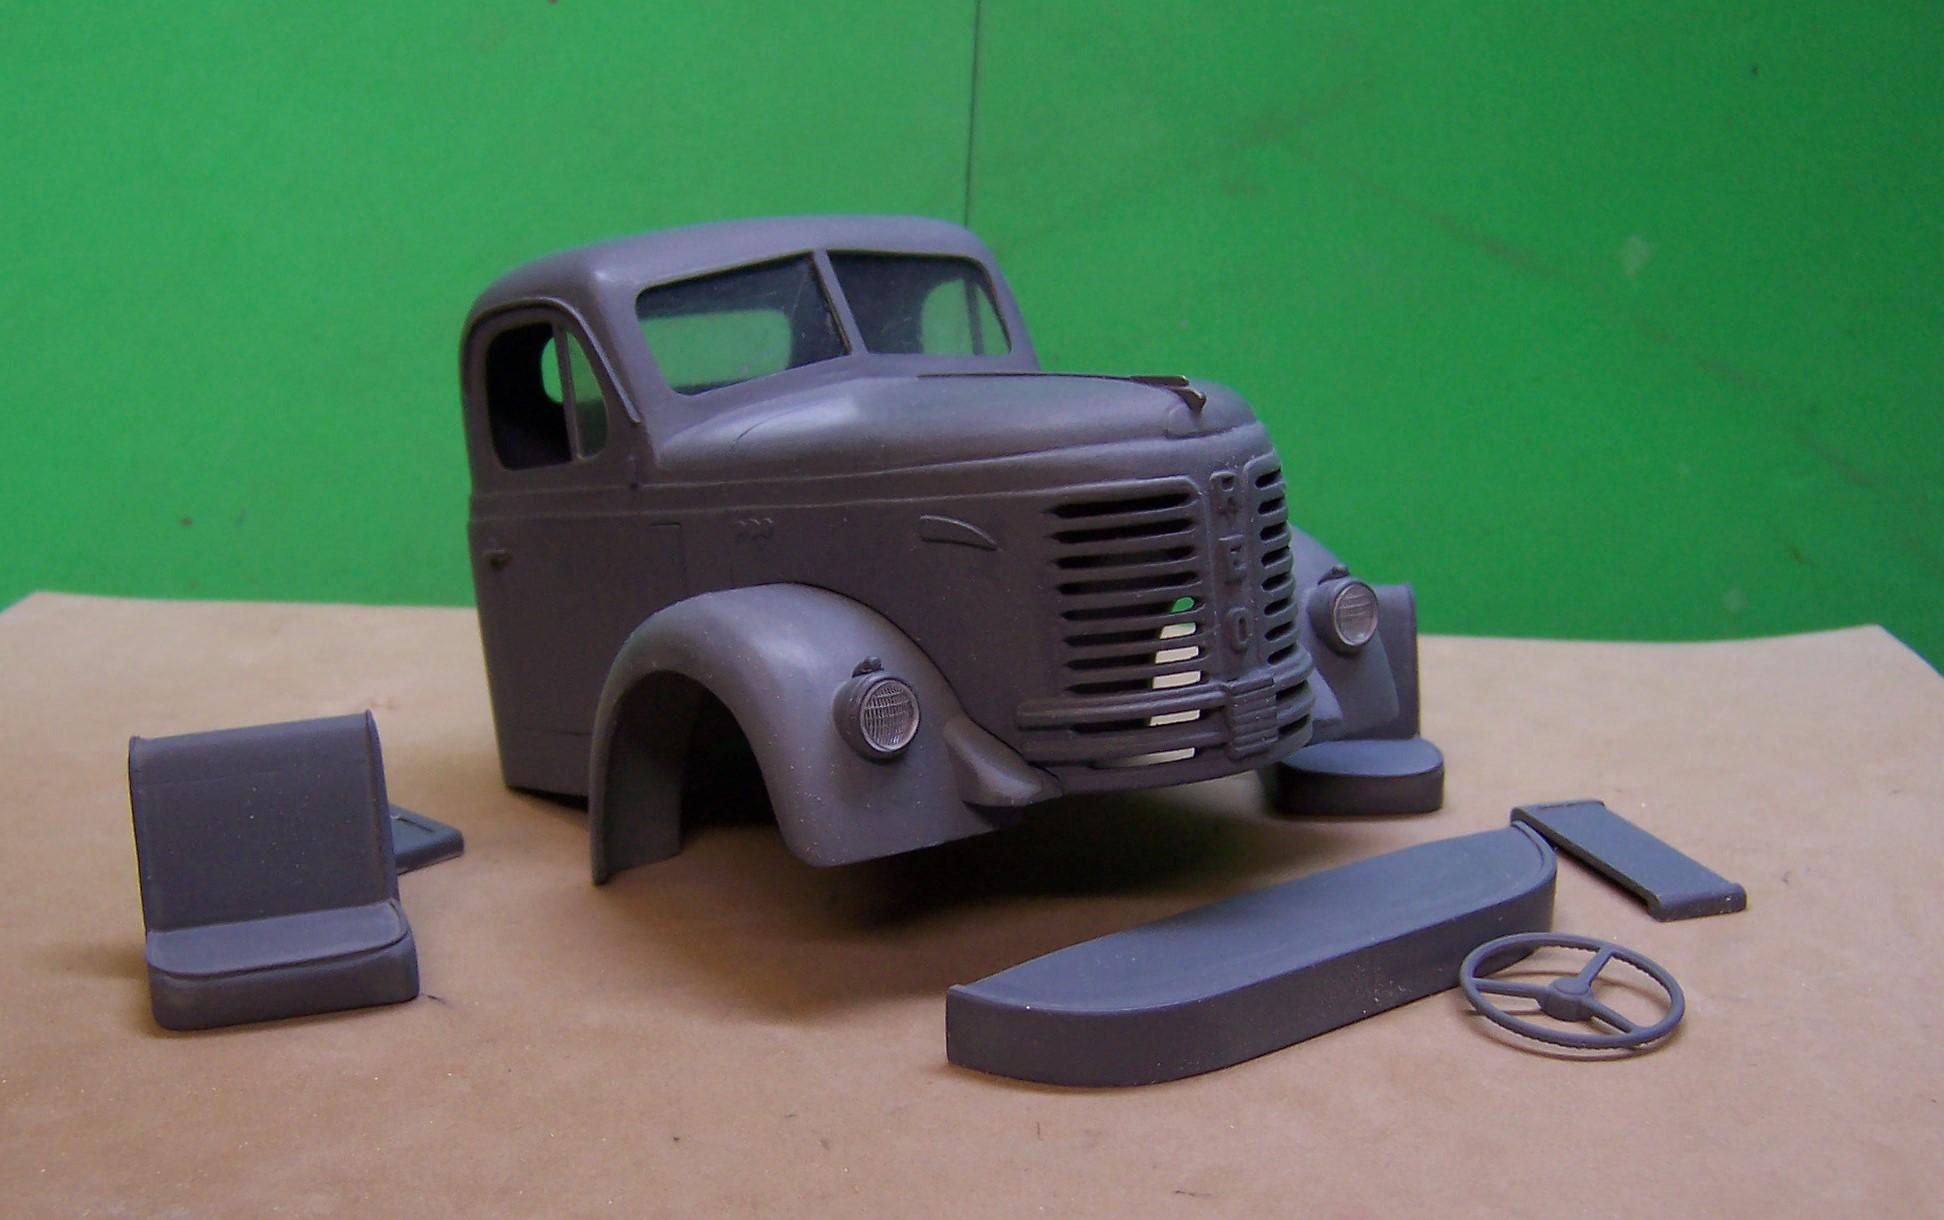
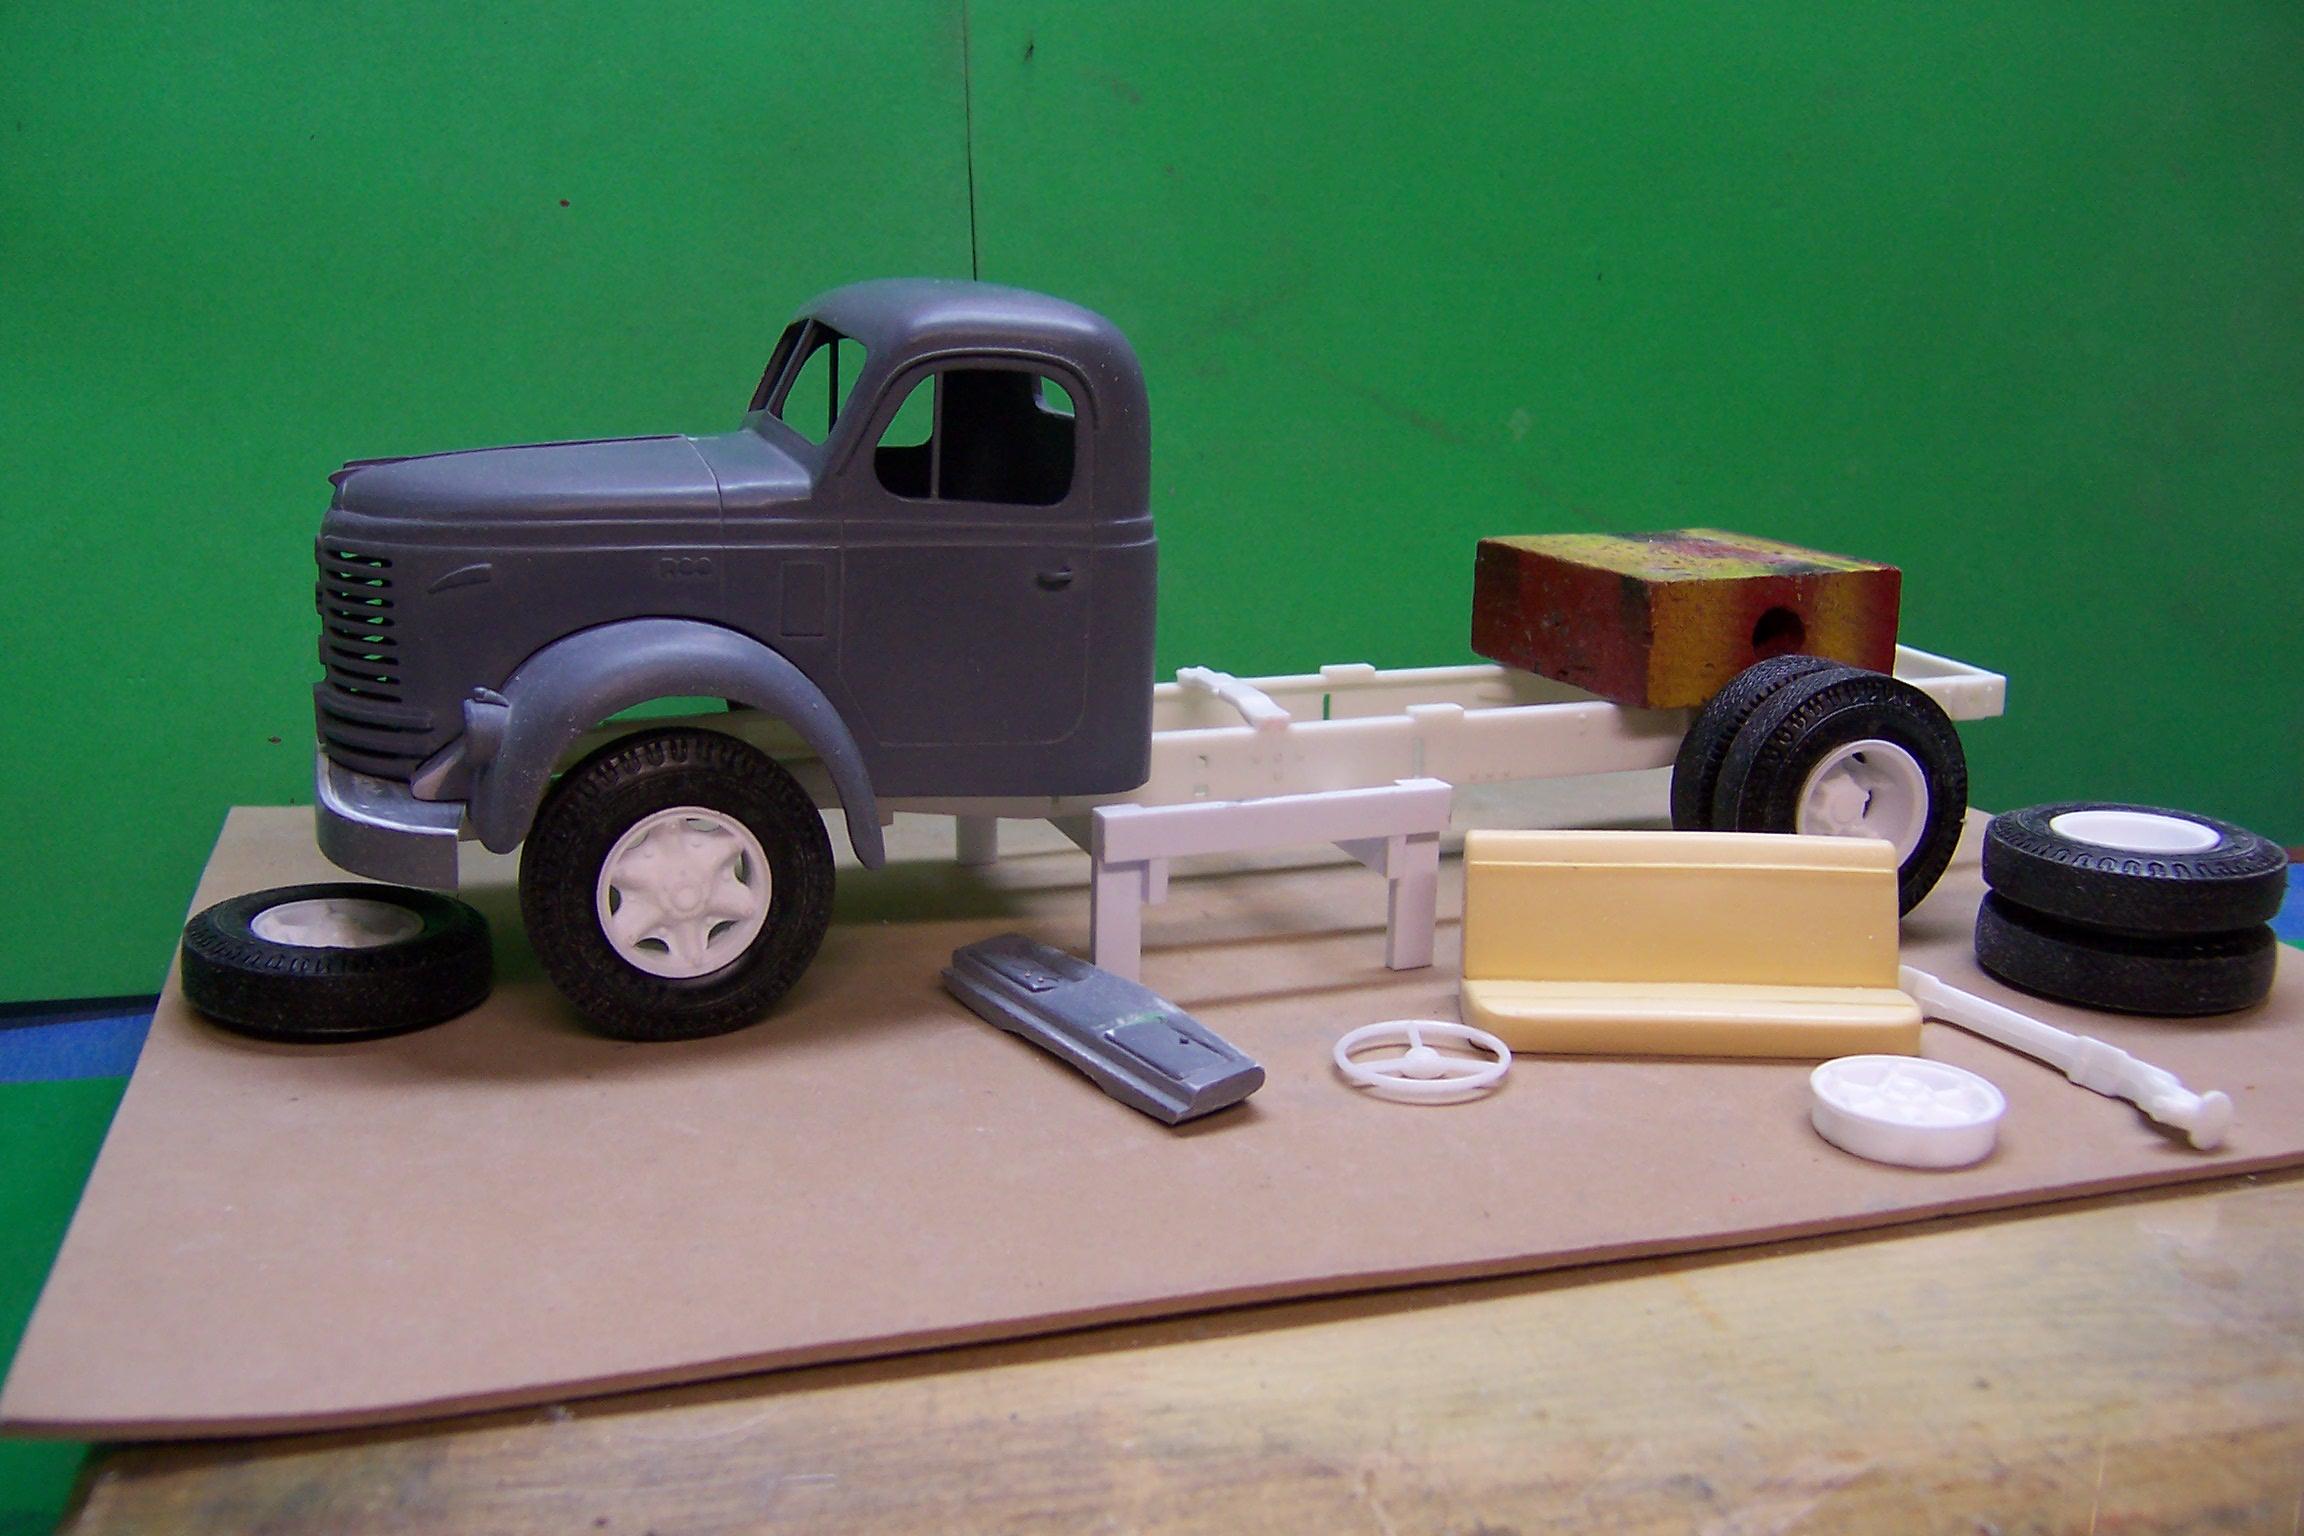
The initial work on a Reo is finished and is all boxed up ready to go to AITM for casting. As soon as a resin pop is available I will post the results. Headlight inserts will not be part of the package but everything else will including the floorboards and dash which are inside the cab in this photo along with templates for the glass. Also decals for Gold Comet and Reo will be included.
-
The issues with scratch building
Chariots of Fire replied to IbuildScaleModels's topic in Tips, Tricks, and Tutorials
That's the stuff! Great to work with. I see an IH R-190 is part of this rig also! I did one just a short time ago. Here is my latest project using Renshape. The fenders, hood and grill are all made with Renshape.
-
1957 Reo Gold Comet
Chariots of Fire replied to Chariots of Fire's topic in WIP: Model Trucks: Big Rigs and Heavy Equipment
Here's an update on where the work has gone so far. I mocked up a frame and set some tires in place just to get the feel for what it might look like. The cab and fenders are done. I finished the basics of the floorboard today and the dashboard a couple of days ago. Still to go are some running boards. Clear stock has been cut and fitted for the glass. The seat is a resin casting from another project but I think it fits the bill. These are the parts that I am looking to get cast. The bumper is included. I just forgot to put it in the photo. Runing boards will be included as well. Tires and wheels will not. I tried to make the parts to go together as easy as possible. The dash fits snugly just below the windshield line. The floorboards have a positive location point with the vertical firewall and the back of the cab. The bottom of the floorboards fit flush with the bottom of the cab. The fenders have a flange around them that fits against the inside of the hood. The projections on the front of the fenders fit into the notch of the grill. The fender flanges also fit between the sides of the body and the sides of the floorboard so everything can be glued together pretty solid. Very little adjustment will be needed to make sure the fenders are square and level.
-
The issues with scratch building
Chariots of Fire replied to IbuildScaleModels's topic in Tips, Tricks, and Tutorials
I bought the lathe because I knew there were certain things I wanted to do with it. To me a mill is secondary although I use my small drill press and a cross slide for that purpose on a limited basis. Just a question of what sort of things need to be made for what we do as modelers. -
The issues with scratch building
Chariots of Fire replied to IbuildScaleModels's topic in Tips, Tricks, and Tutorials
I'm glad to see so many doing things with a lathe. What a great tool it is. That and learning a bit about soldering small parts has made a big difference in how I approach my scratch building. Another material I found was Renshape. It is good not only for making patterns to cast from but it is great stuff to carve. With no grain it is strong in every direction. And when it is milled there is no fuzz around the edges of the cut. I was very fortunate a couple of years ago to be able to purchase a 2" x 4' x 24" block of the 450 grade for very little $$. Oh. And it takes primer and paint with no problems. -
1957 Reo Gold Comet
Chariots of Fire replied to Chariots of Fire's topic in WIP: Model Trucks: Big Rigs and Heavy Equipment
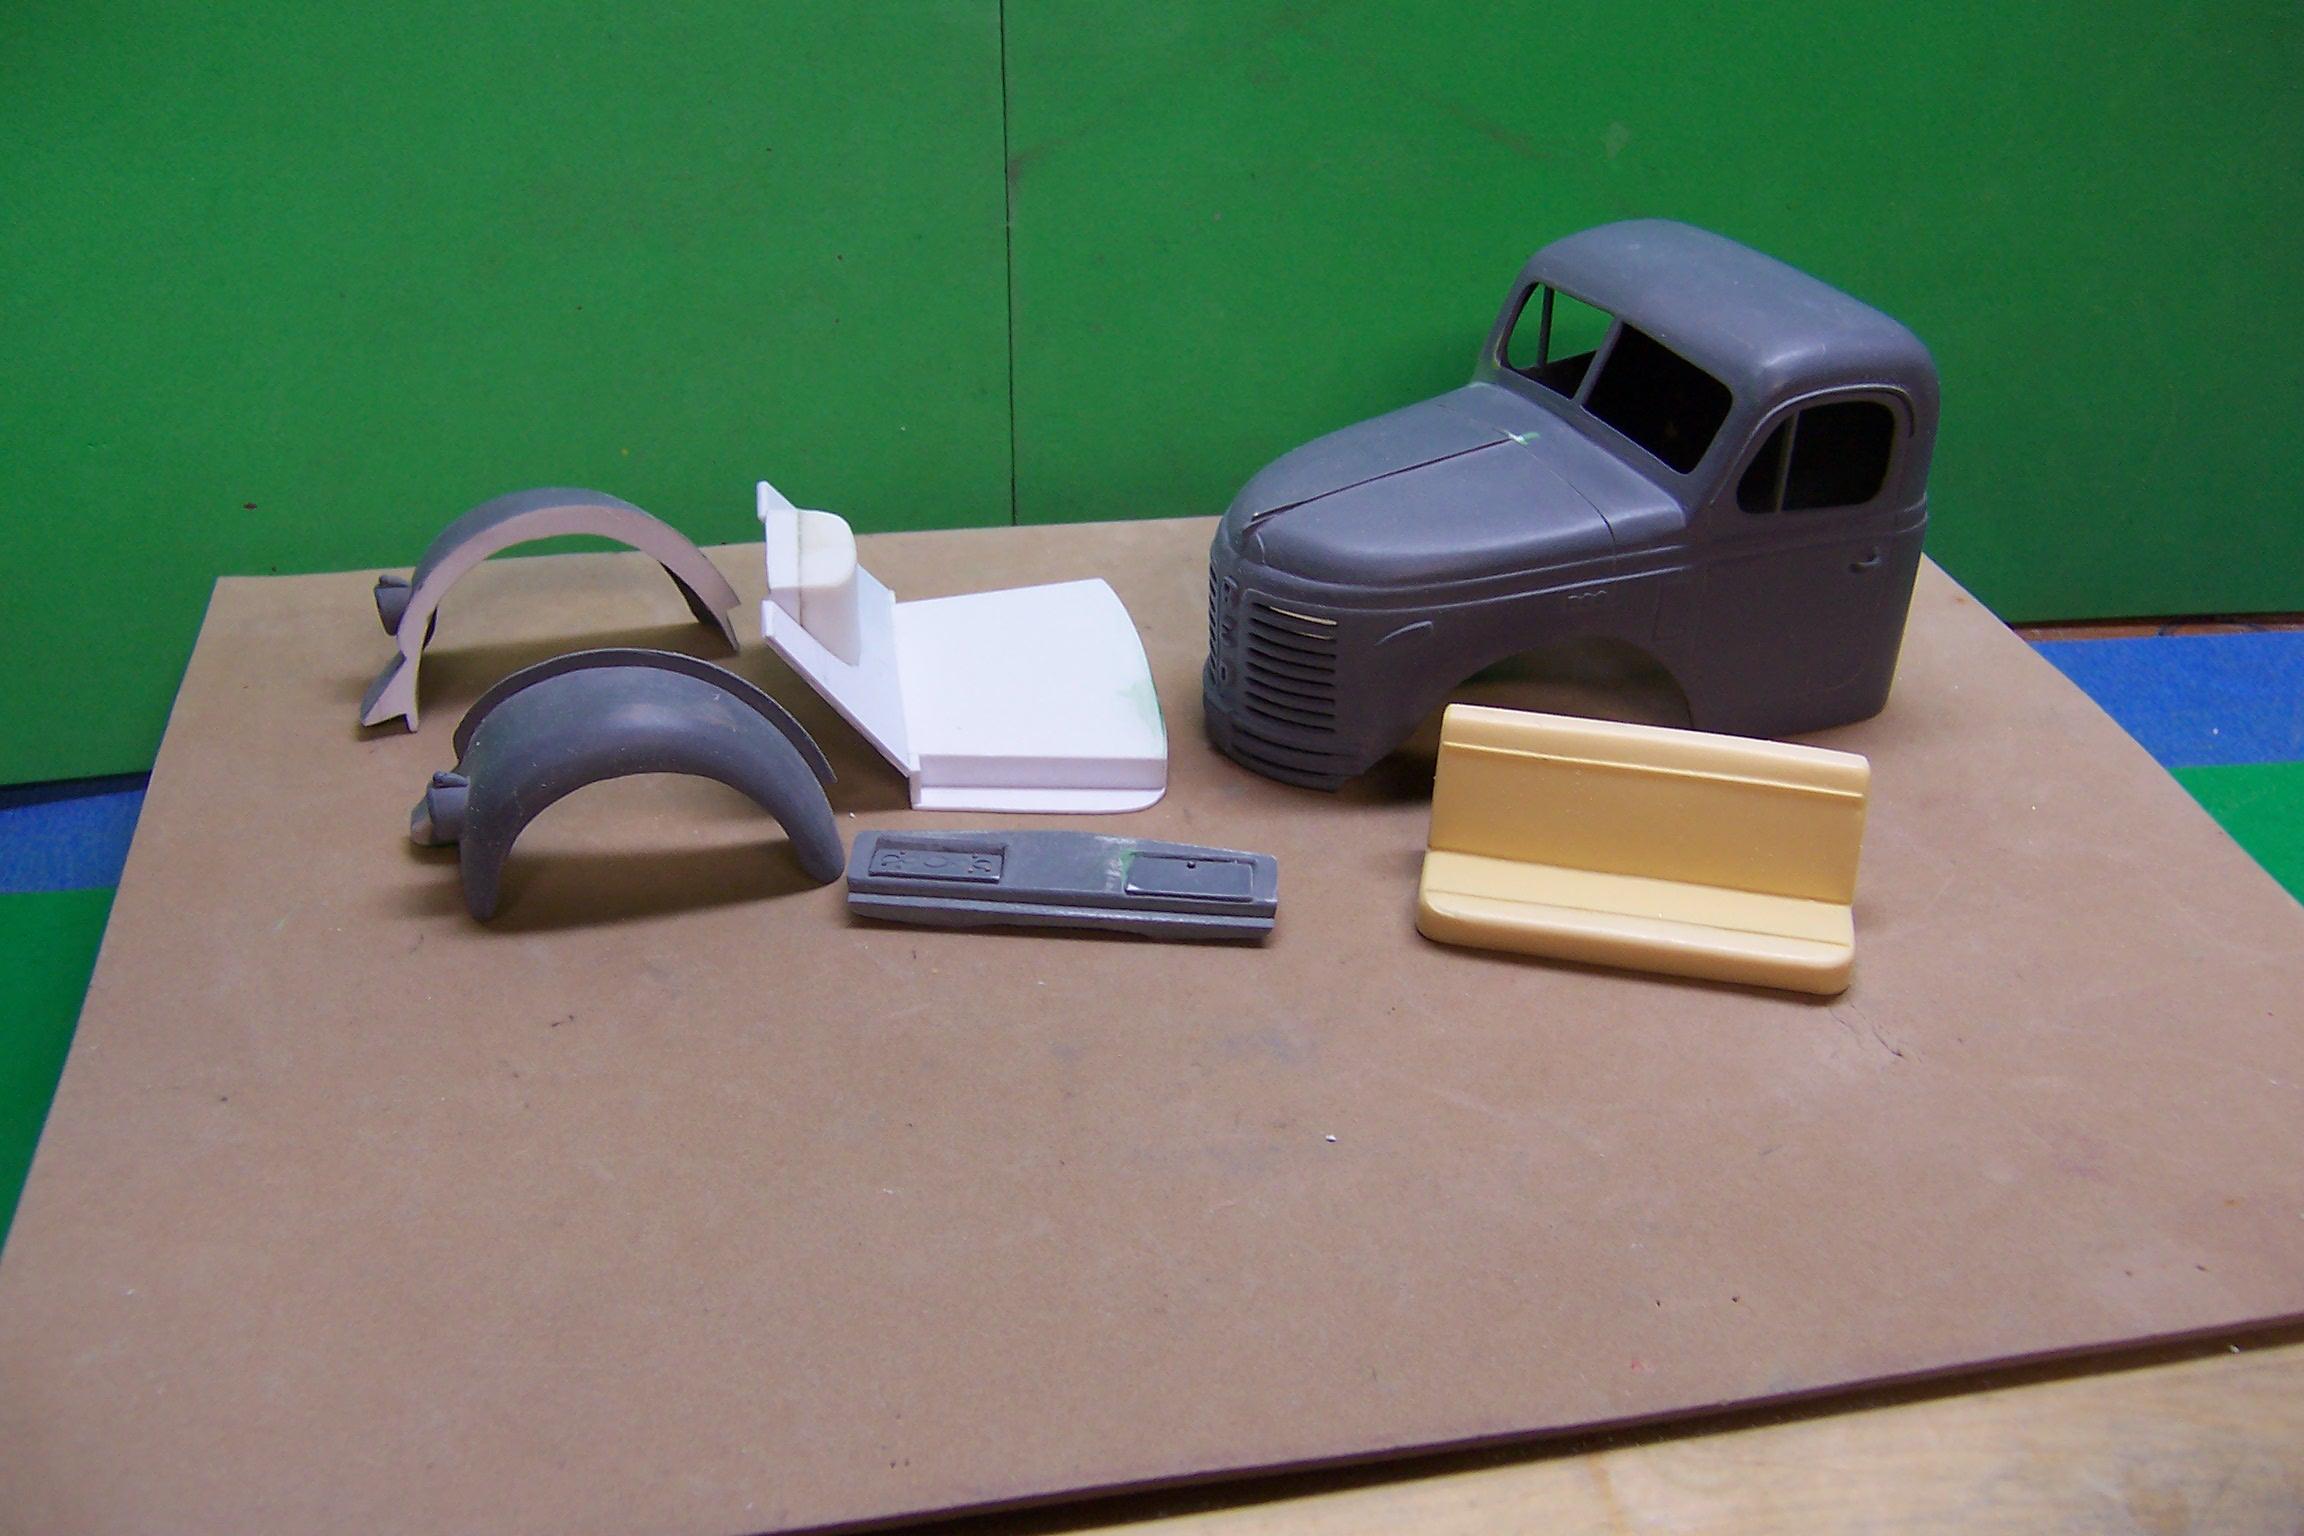
Worked up a dashboard, found a seat and steering wheel that will be the right kind. Last is to do the floor pan, running boards and some inner door panels. Templates made for windshield, vent windows in doors and rear window. As soon as the floor pan, running boards and door panels are done I'm shipping it all out for casting. We'll see what happens. -
1957 Reo Gold Comet
Chariots of Fire replied to Chariots of Fire's topic in WIP: Model Trucks: Big Rigs and Heavy Equipment
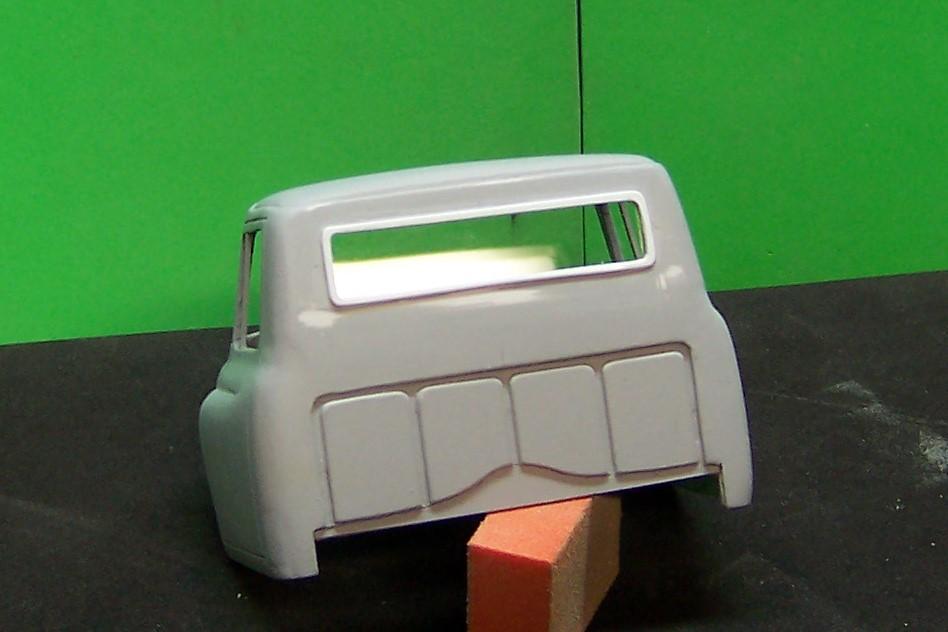
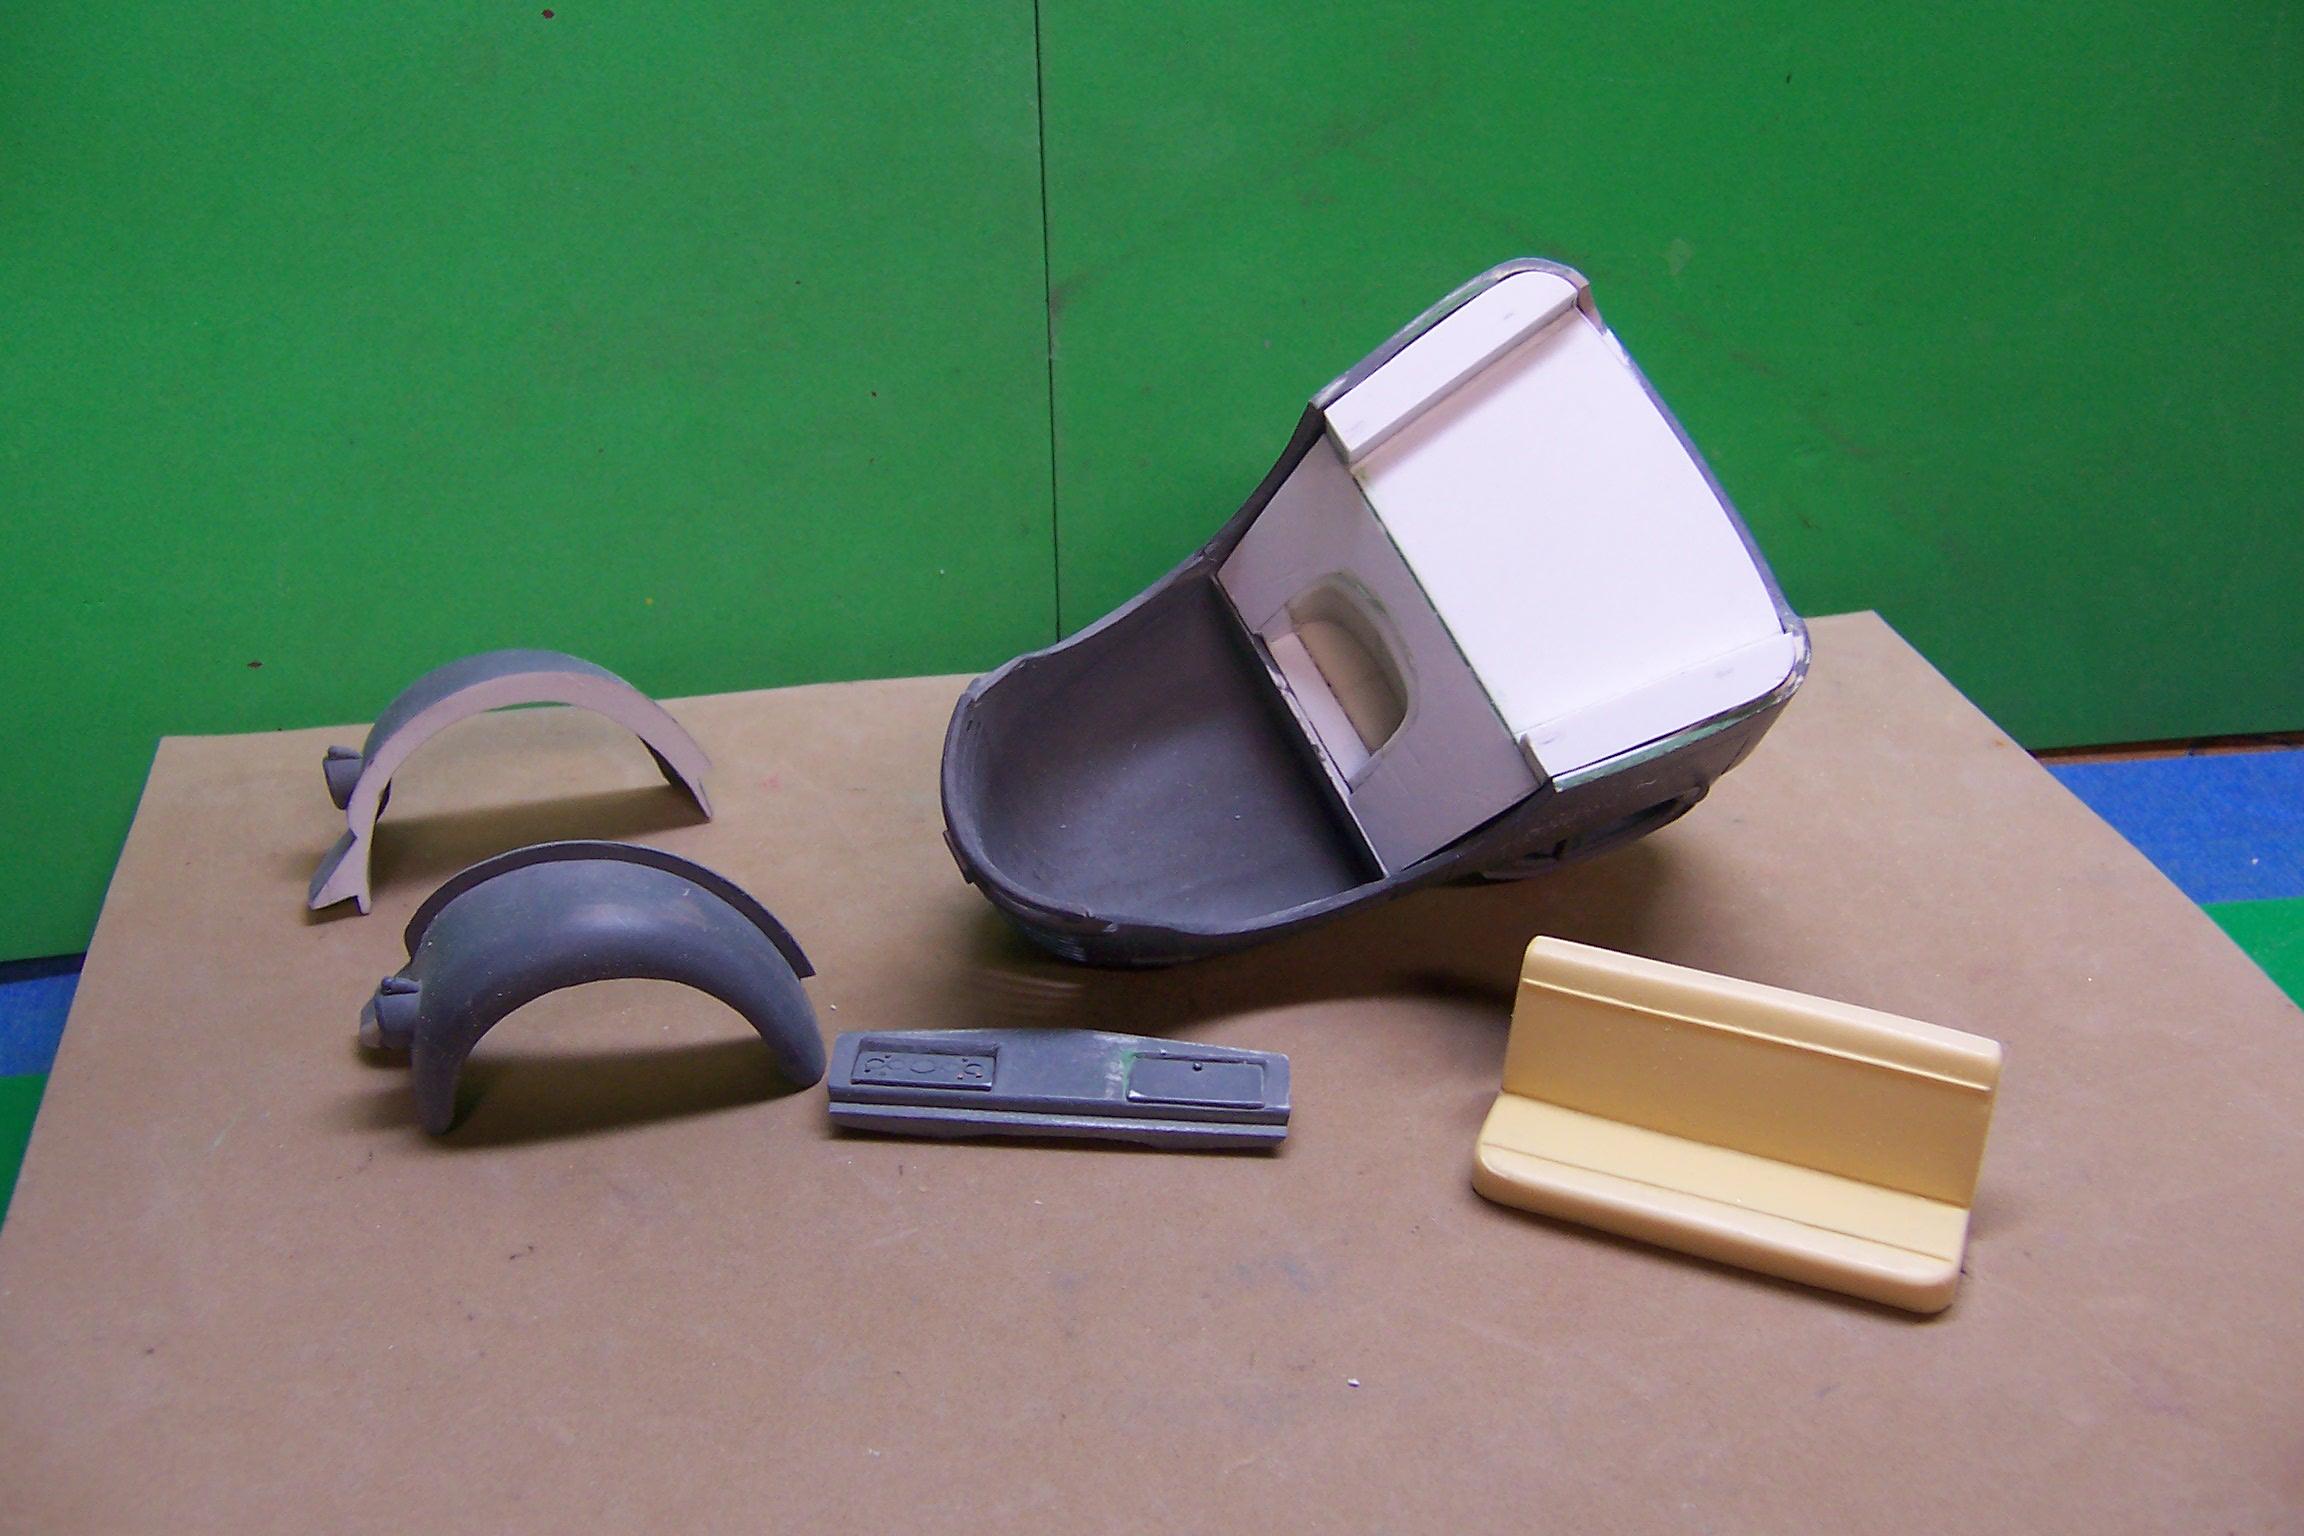
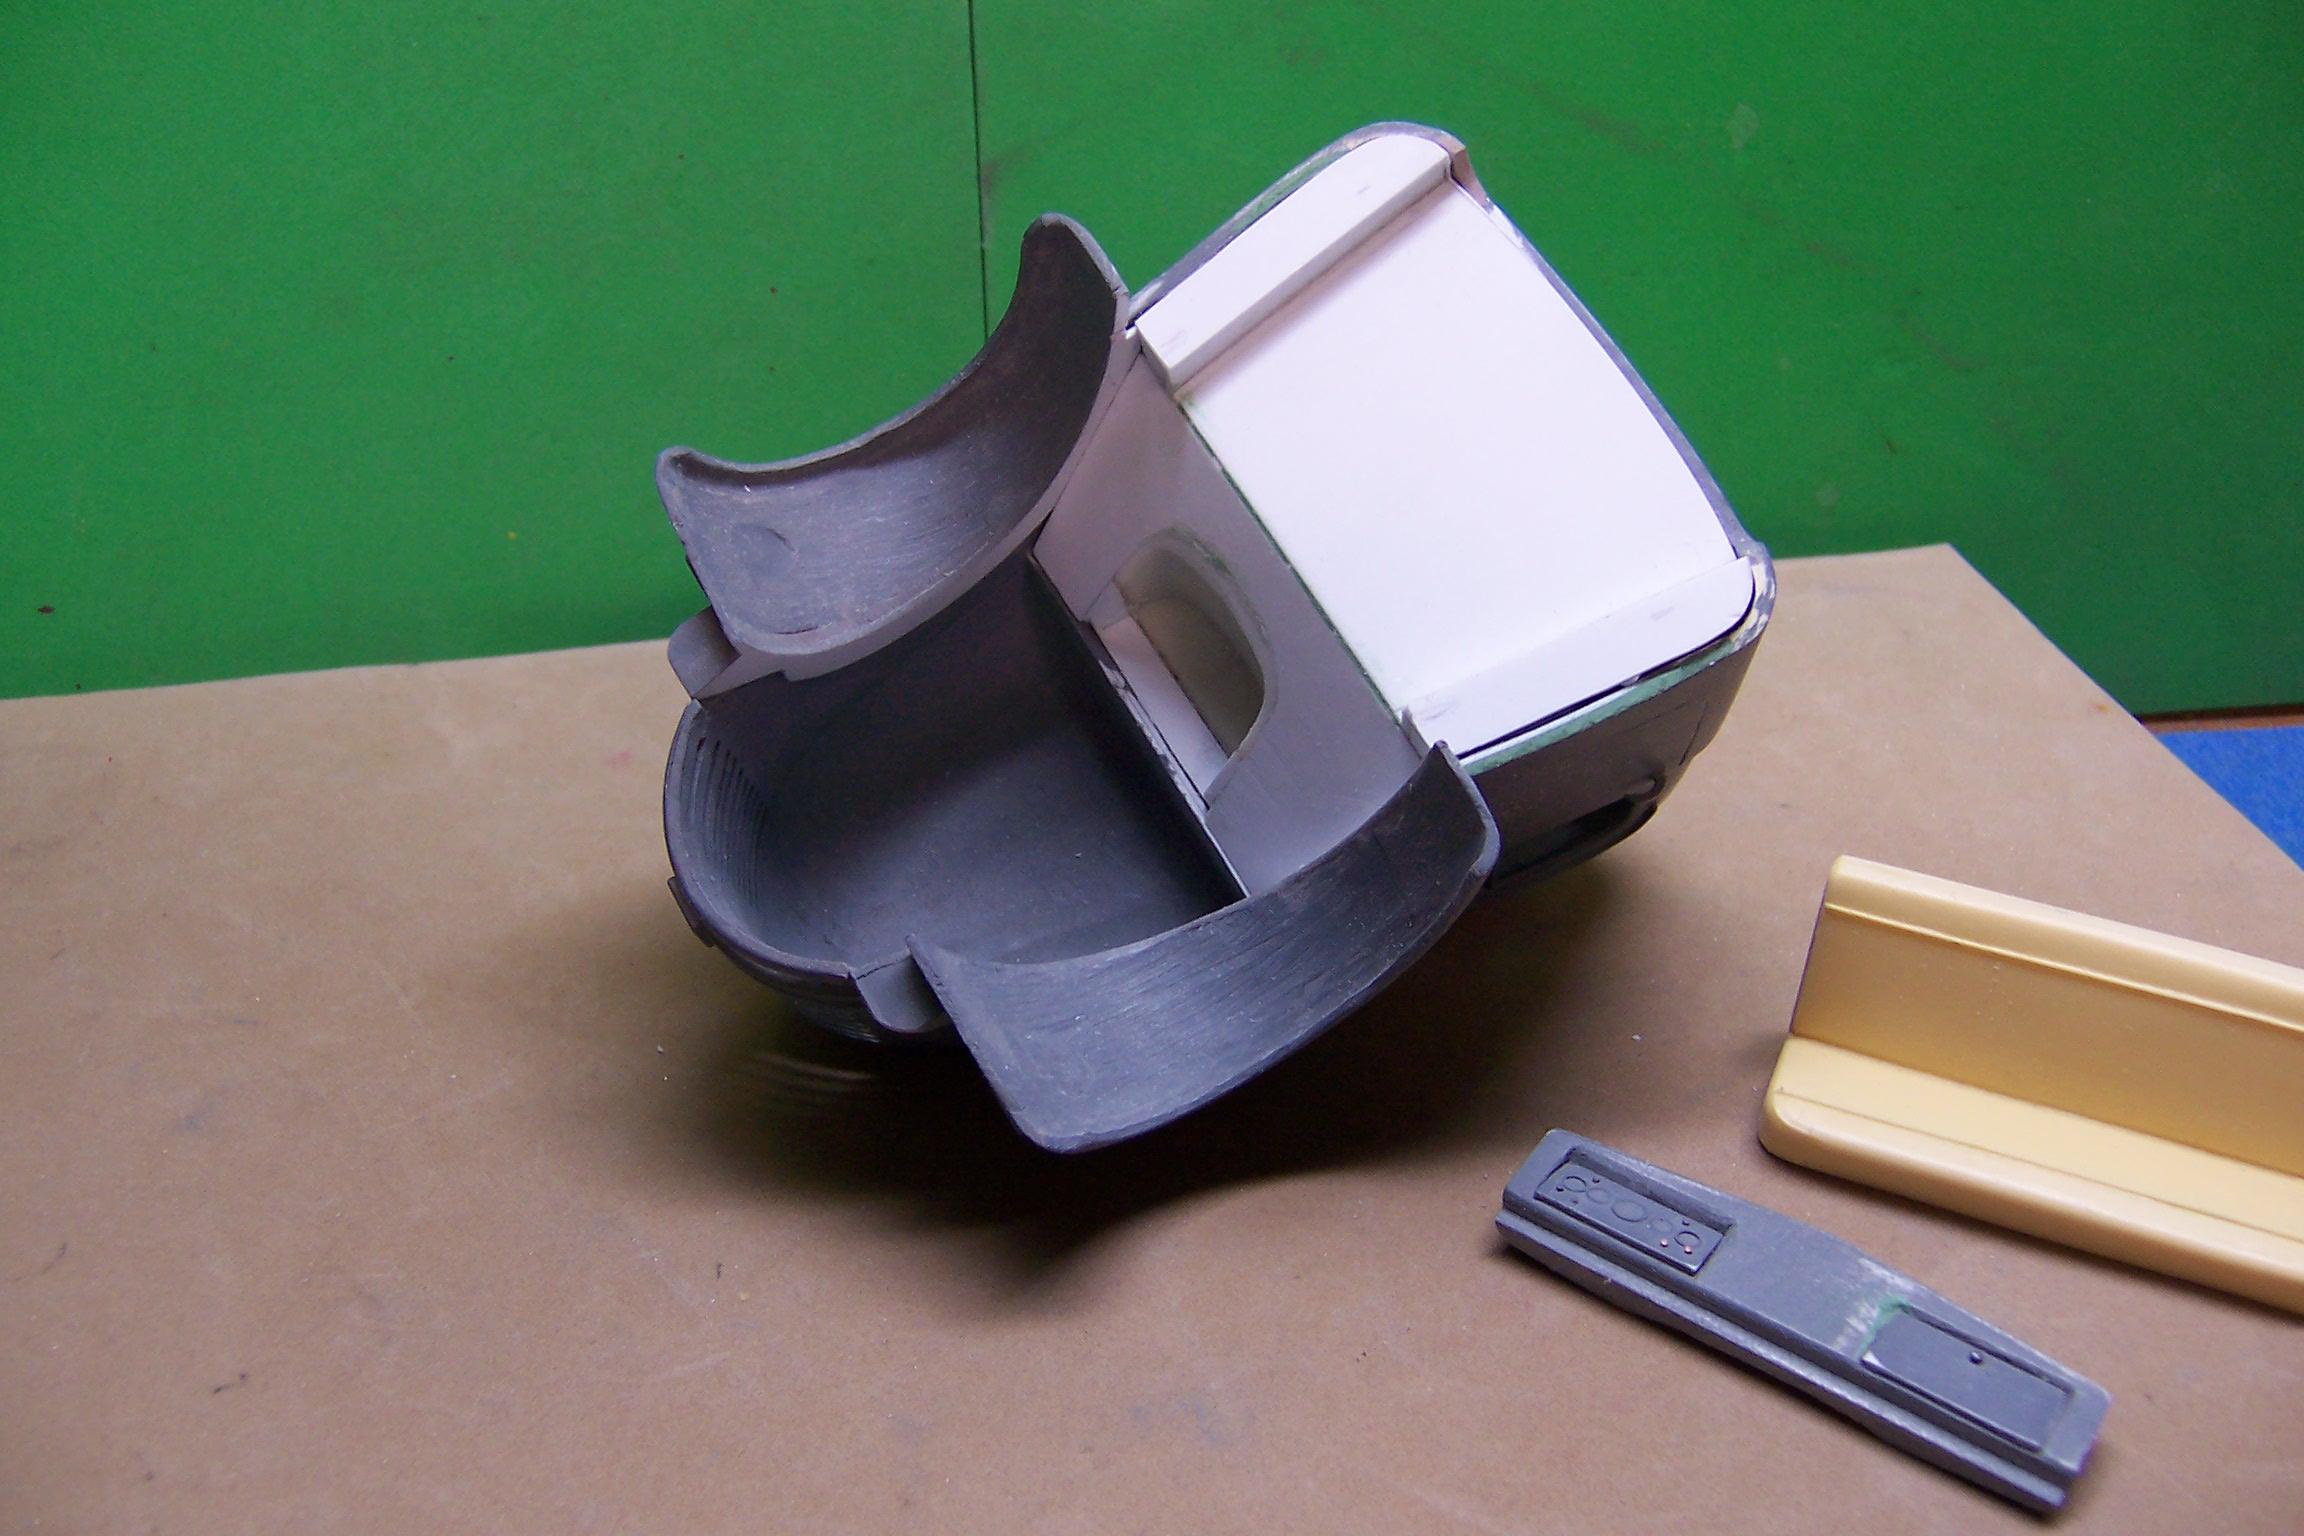
It's been a chore to get all of the little things taken care of that would really show up in a finished model. The belt line under the door windows and along the hood has been especially troublesome because I had built the hood and cab separately and then mated them together. Re-sculpturing has been the only way to take care of it. Anyway I think we are getting there. The hood lines are now reasonably uniform and straight. Today I got the door handles made up and installed. Ordinarily I would not put them on a cab before it is finished but in this case I'm pretty sure they can be cast as is. It was done for the IH Loadstar. The fenders most likely will be cast separate from the hood and cab but will be cast with temporary spacers so that they can be evenly mated to the hood and cab as a unit. Then the spacers can be cut away. There is no reason once the casting is done that the hood and doors could not be cut open and made separate either. That will allow for a lot of engine display as the whole hood and grill raise up as one piece. Kind of neat thinking about the possibilities. I still have to add the door hinges, give it another coat of primer and see where the remaining flaws might be.
-
TAT 2018 IH F-4270
Chariots of Fire replied to Goodwrench3's topic in WIP: Model Trucks: Big Rigs and Heavy Equipment
Man! Why do they do that?? Is it because they want to save on re-tooling or is it that they just are not that observant as to how things should look? Just sayin'! -
What primer under Rustoleum paint???
Chariots of Fire replied to 2zwudz's topic in Model Building Questions and Answers
I tend to stay away from Rustoleum primers and paints because they take so long to set up and are very soft. Krylon makes a good gray primer filler and it works well under Duplicolor with no crazing. Found the primer at Walmart. -
From the vendor I mentioned you can order individual bits or make up a pack of 10 with your favorites. I usually get 5 of each. They come in a nice plastic box with the bit sizes on the label.