Chariots of Fire
-
Posts
2,782 -
Joined
-
Last visited
Content Type
Profiles
Forums
Events
Gallery
Everything posted by Chariots of Fire
-
 Yes I did! I get to "track" them all over when I do inspections for road construction.?
 -
Oshkosh snow plow
Chariots of Fire replied to gotnitro?'s topic in WIP: Model Trucks: Big Rigs and Heavy Equipment
Can I make a suggestion? See if you can find a rear view of the sander body. To me the sides look just a bit too vertical. From the one photo you had at the beginning of the thread it appears that the top of the body sides probably extend outward to be directly over the outside tires back tires but at that angle I could be wrong...just sayin'.? -
Oshkosh snow plow
Chariots of Fire replied to gotnitro?'s topic in WIP: Model Trucks: Big Rigs and Heavy Equipment
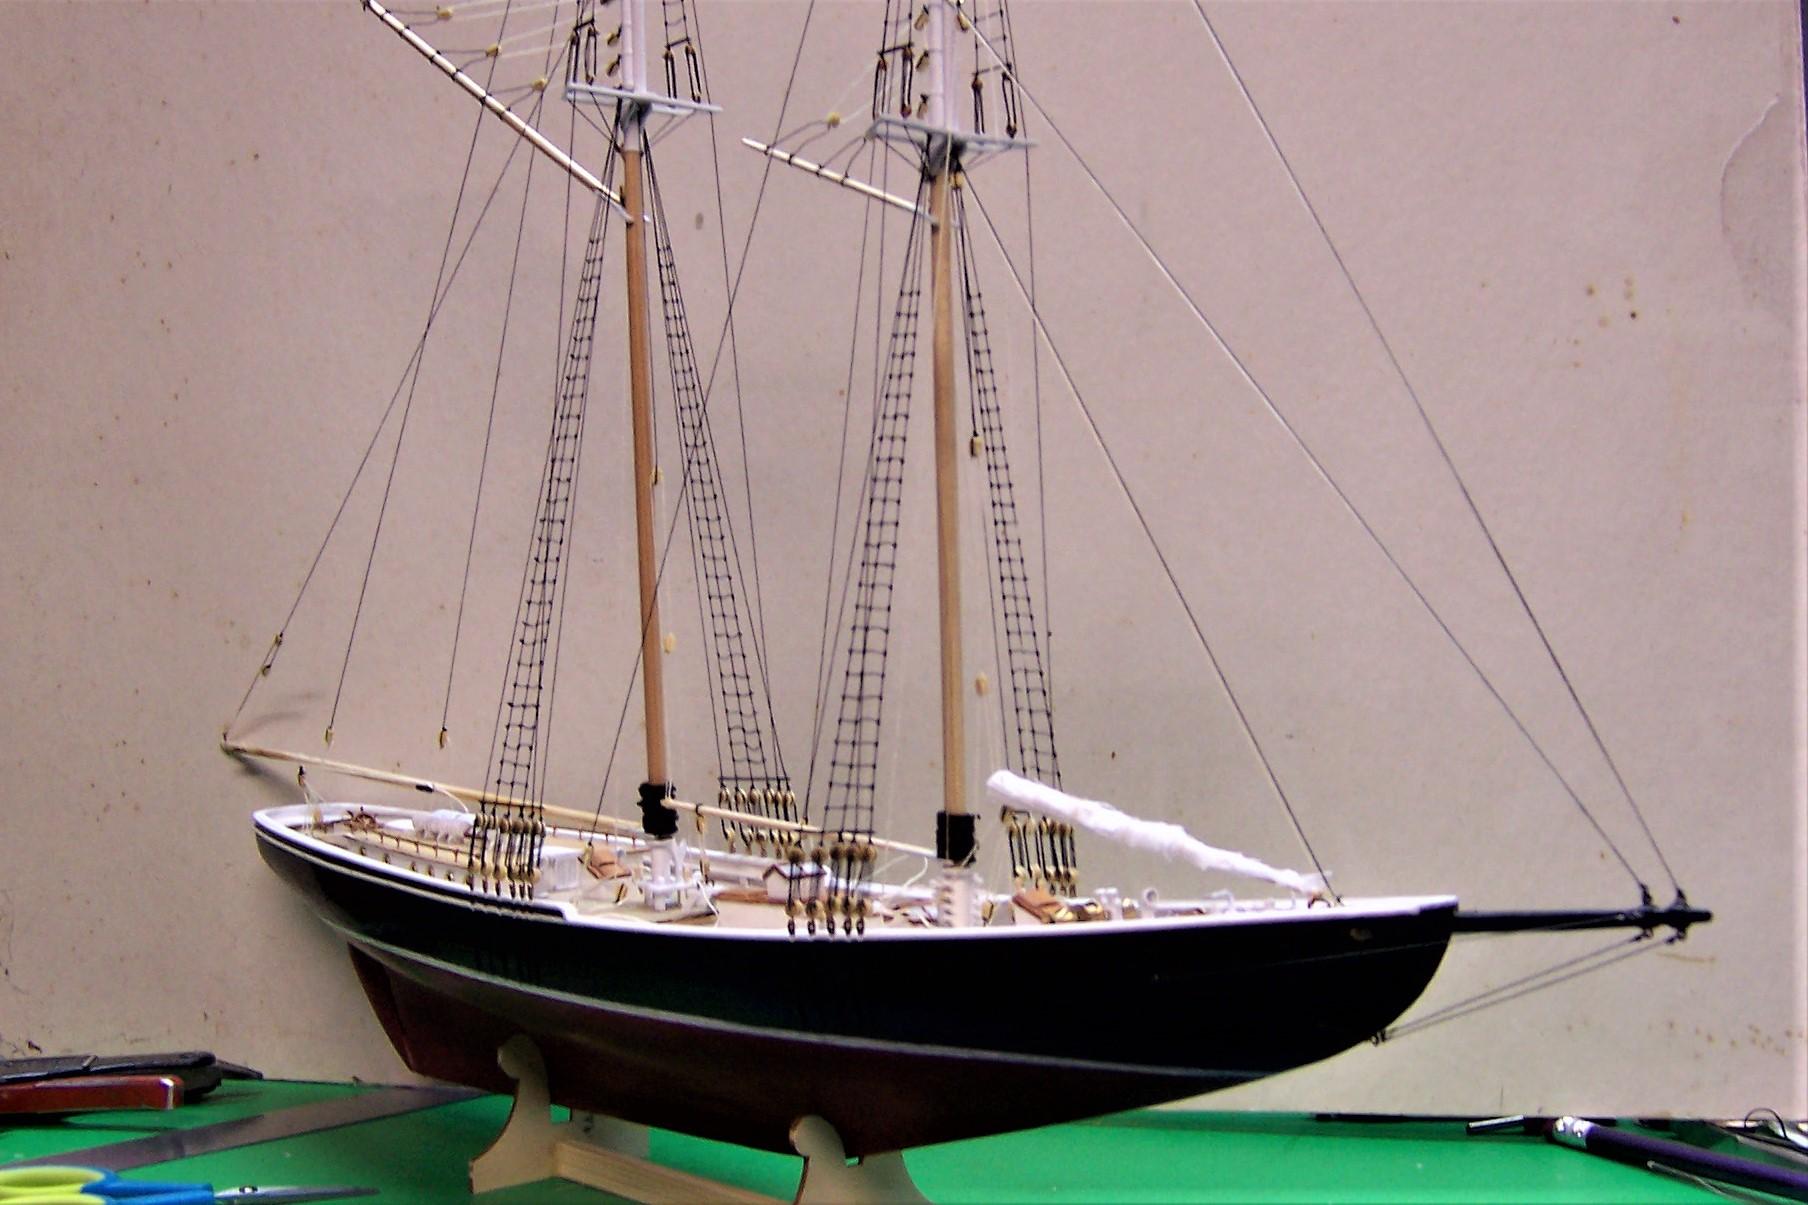
AAhhhhh! Scratch building! What a treat to watch. Tell me again where the front steering knuckles came from. Will be following along for sure. I've been out of site for a while with truck builds. This is what has been on my plate. The Missus thought it would be nice to have a model of Bluenose!?
-
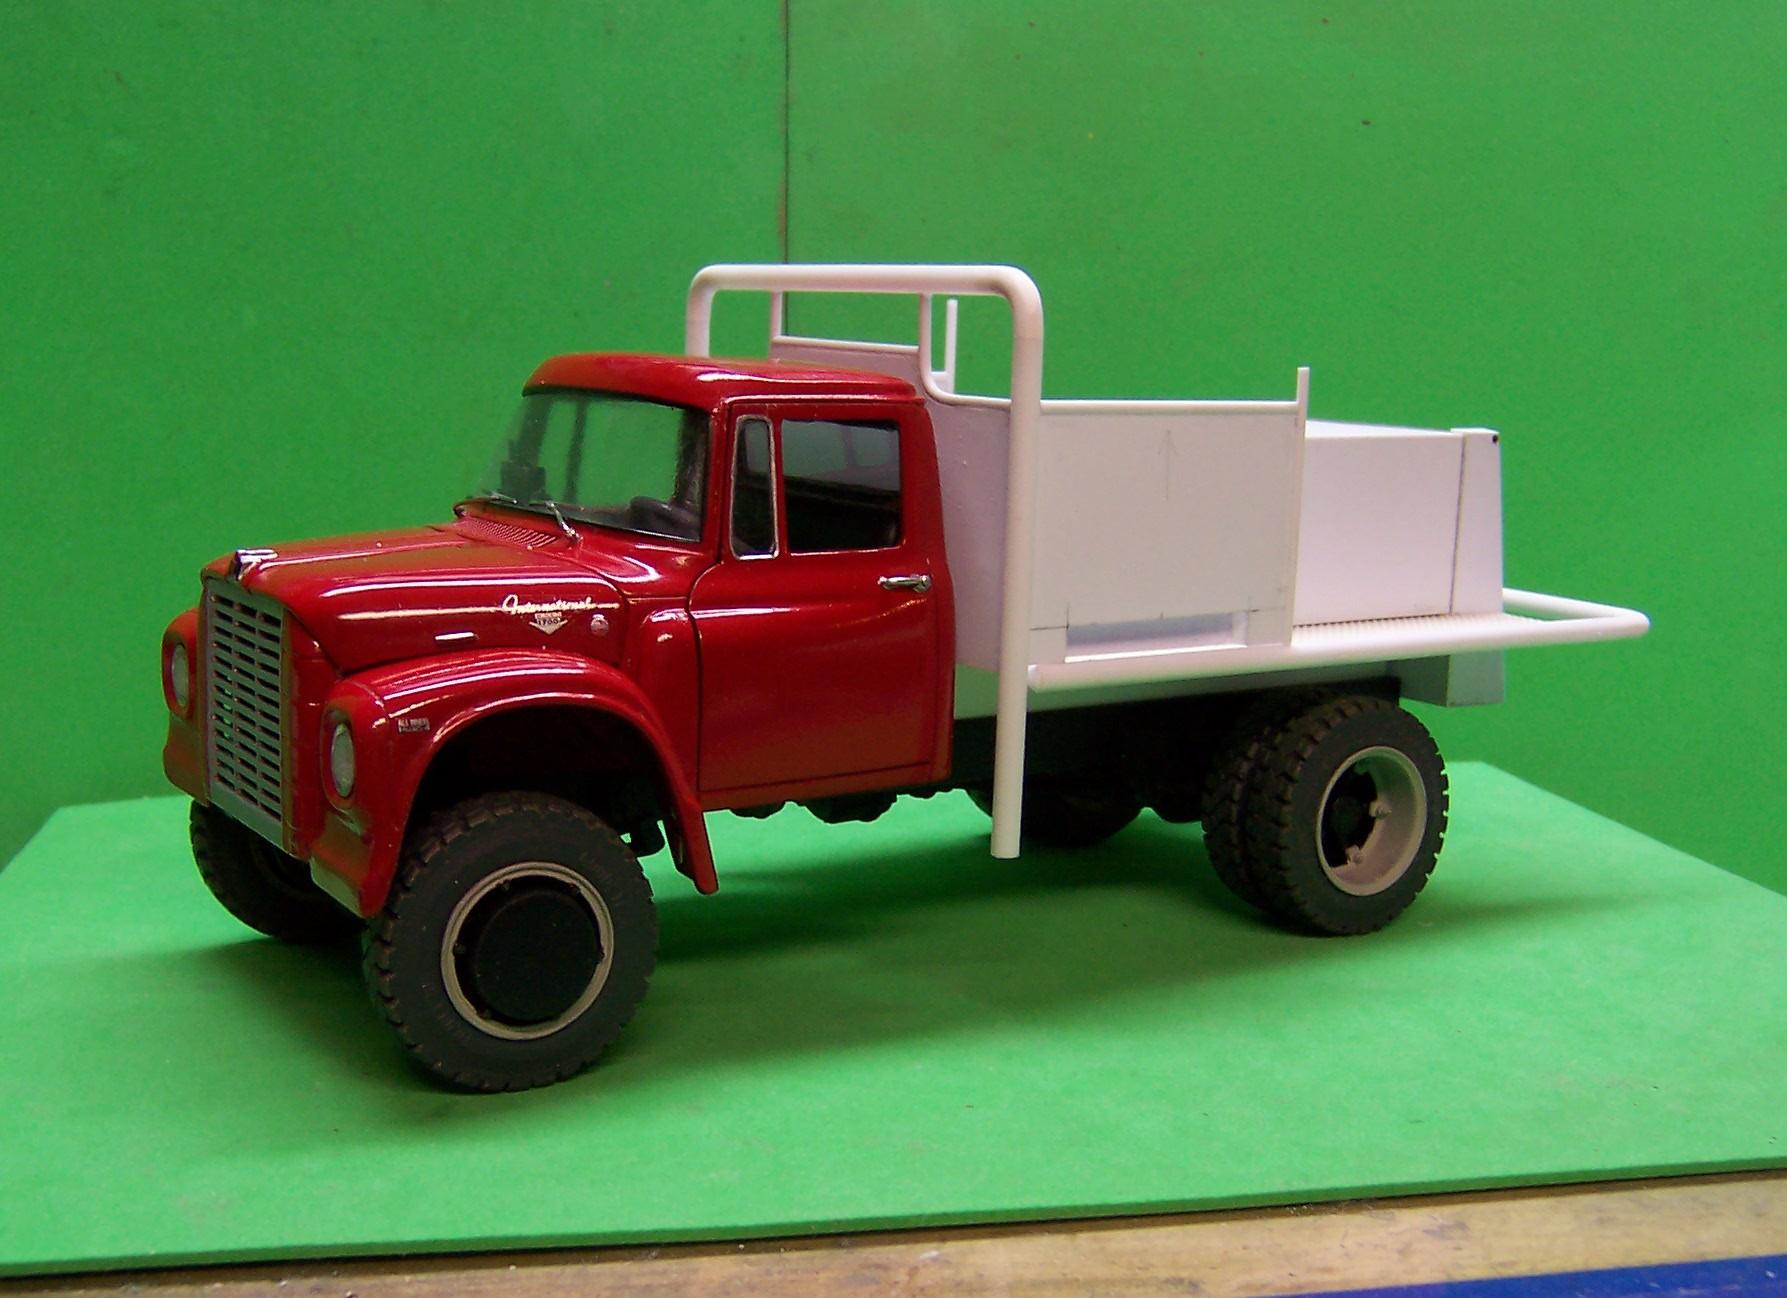
A man after my own heart, Tom! I also appreciate redoing old builds. There is something about resurrecting one that is a lot of fun. This L-700 was a gluebomb at one time. The glue was so dried out it literally came apart by itself. I added the body and crane after the cab and frame were put back together.
-
New from AITM 1950 Sterling
Chariots of Fire replied to Tesla's topic in Truck Aftermarket / Resin / 3D Printed
That does look nice! There was a local construction company that used a lot of them with the chain drive. When I was a wee lad I used to call them "ching ching" trucks because of the noise the made when you let off the gas. Think I might have to get one! -
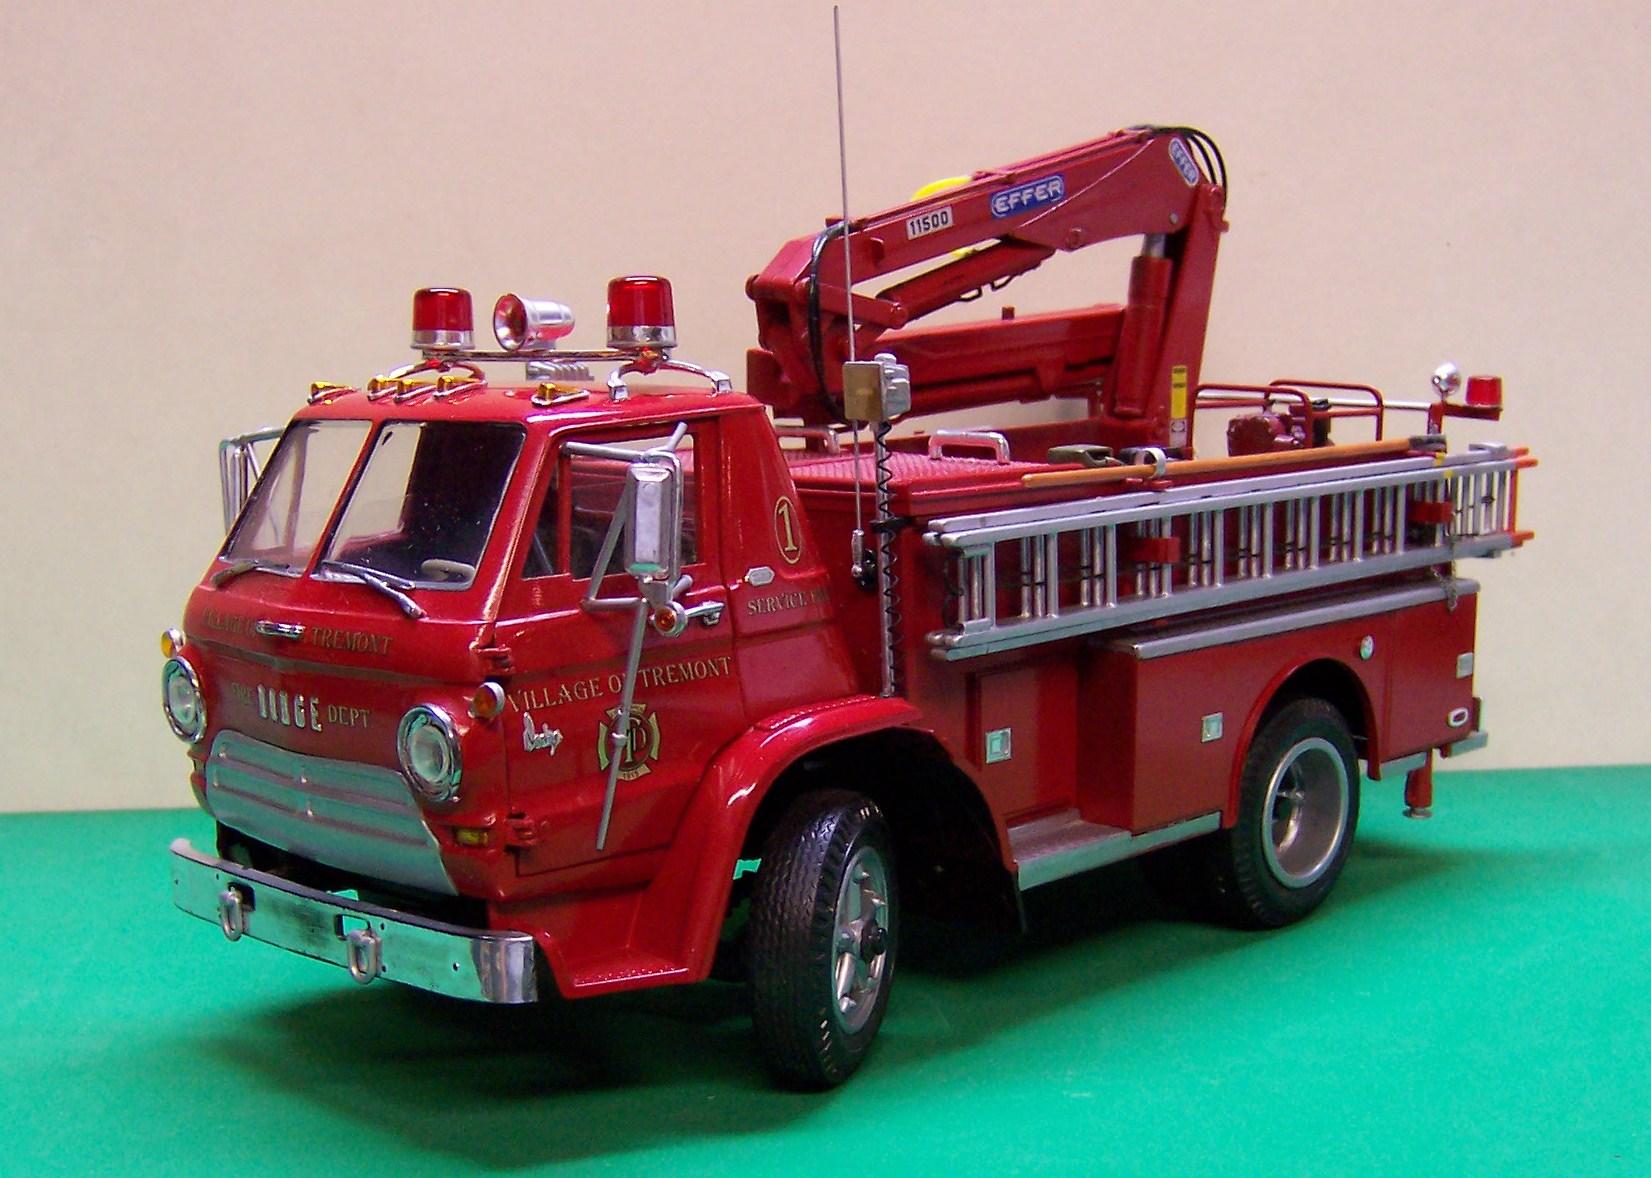
That is pretty! An exceptionally neat piece of work and a great color. What Greg said! It's a fire truck!?
-
Oshkosh M1070
Chariots of Fire replied to Grzegorz's topic in Model Trucks: Big Rigs and Heavy Equipment
Fantastic work! Thanks for showing! -
A fine piece of work, Tom. Congrats! Seeing it through is sometimes a difficult thing. A bit like climbing a mountain. Hardest getting to the top and then it's more like a coast on the way back down. When you do the Gradall don't forget that the bucket on the end swivels as well as curls!?
-
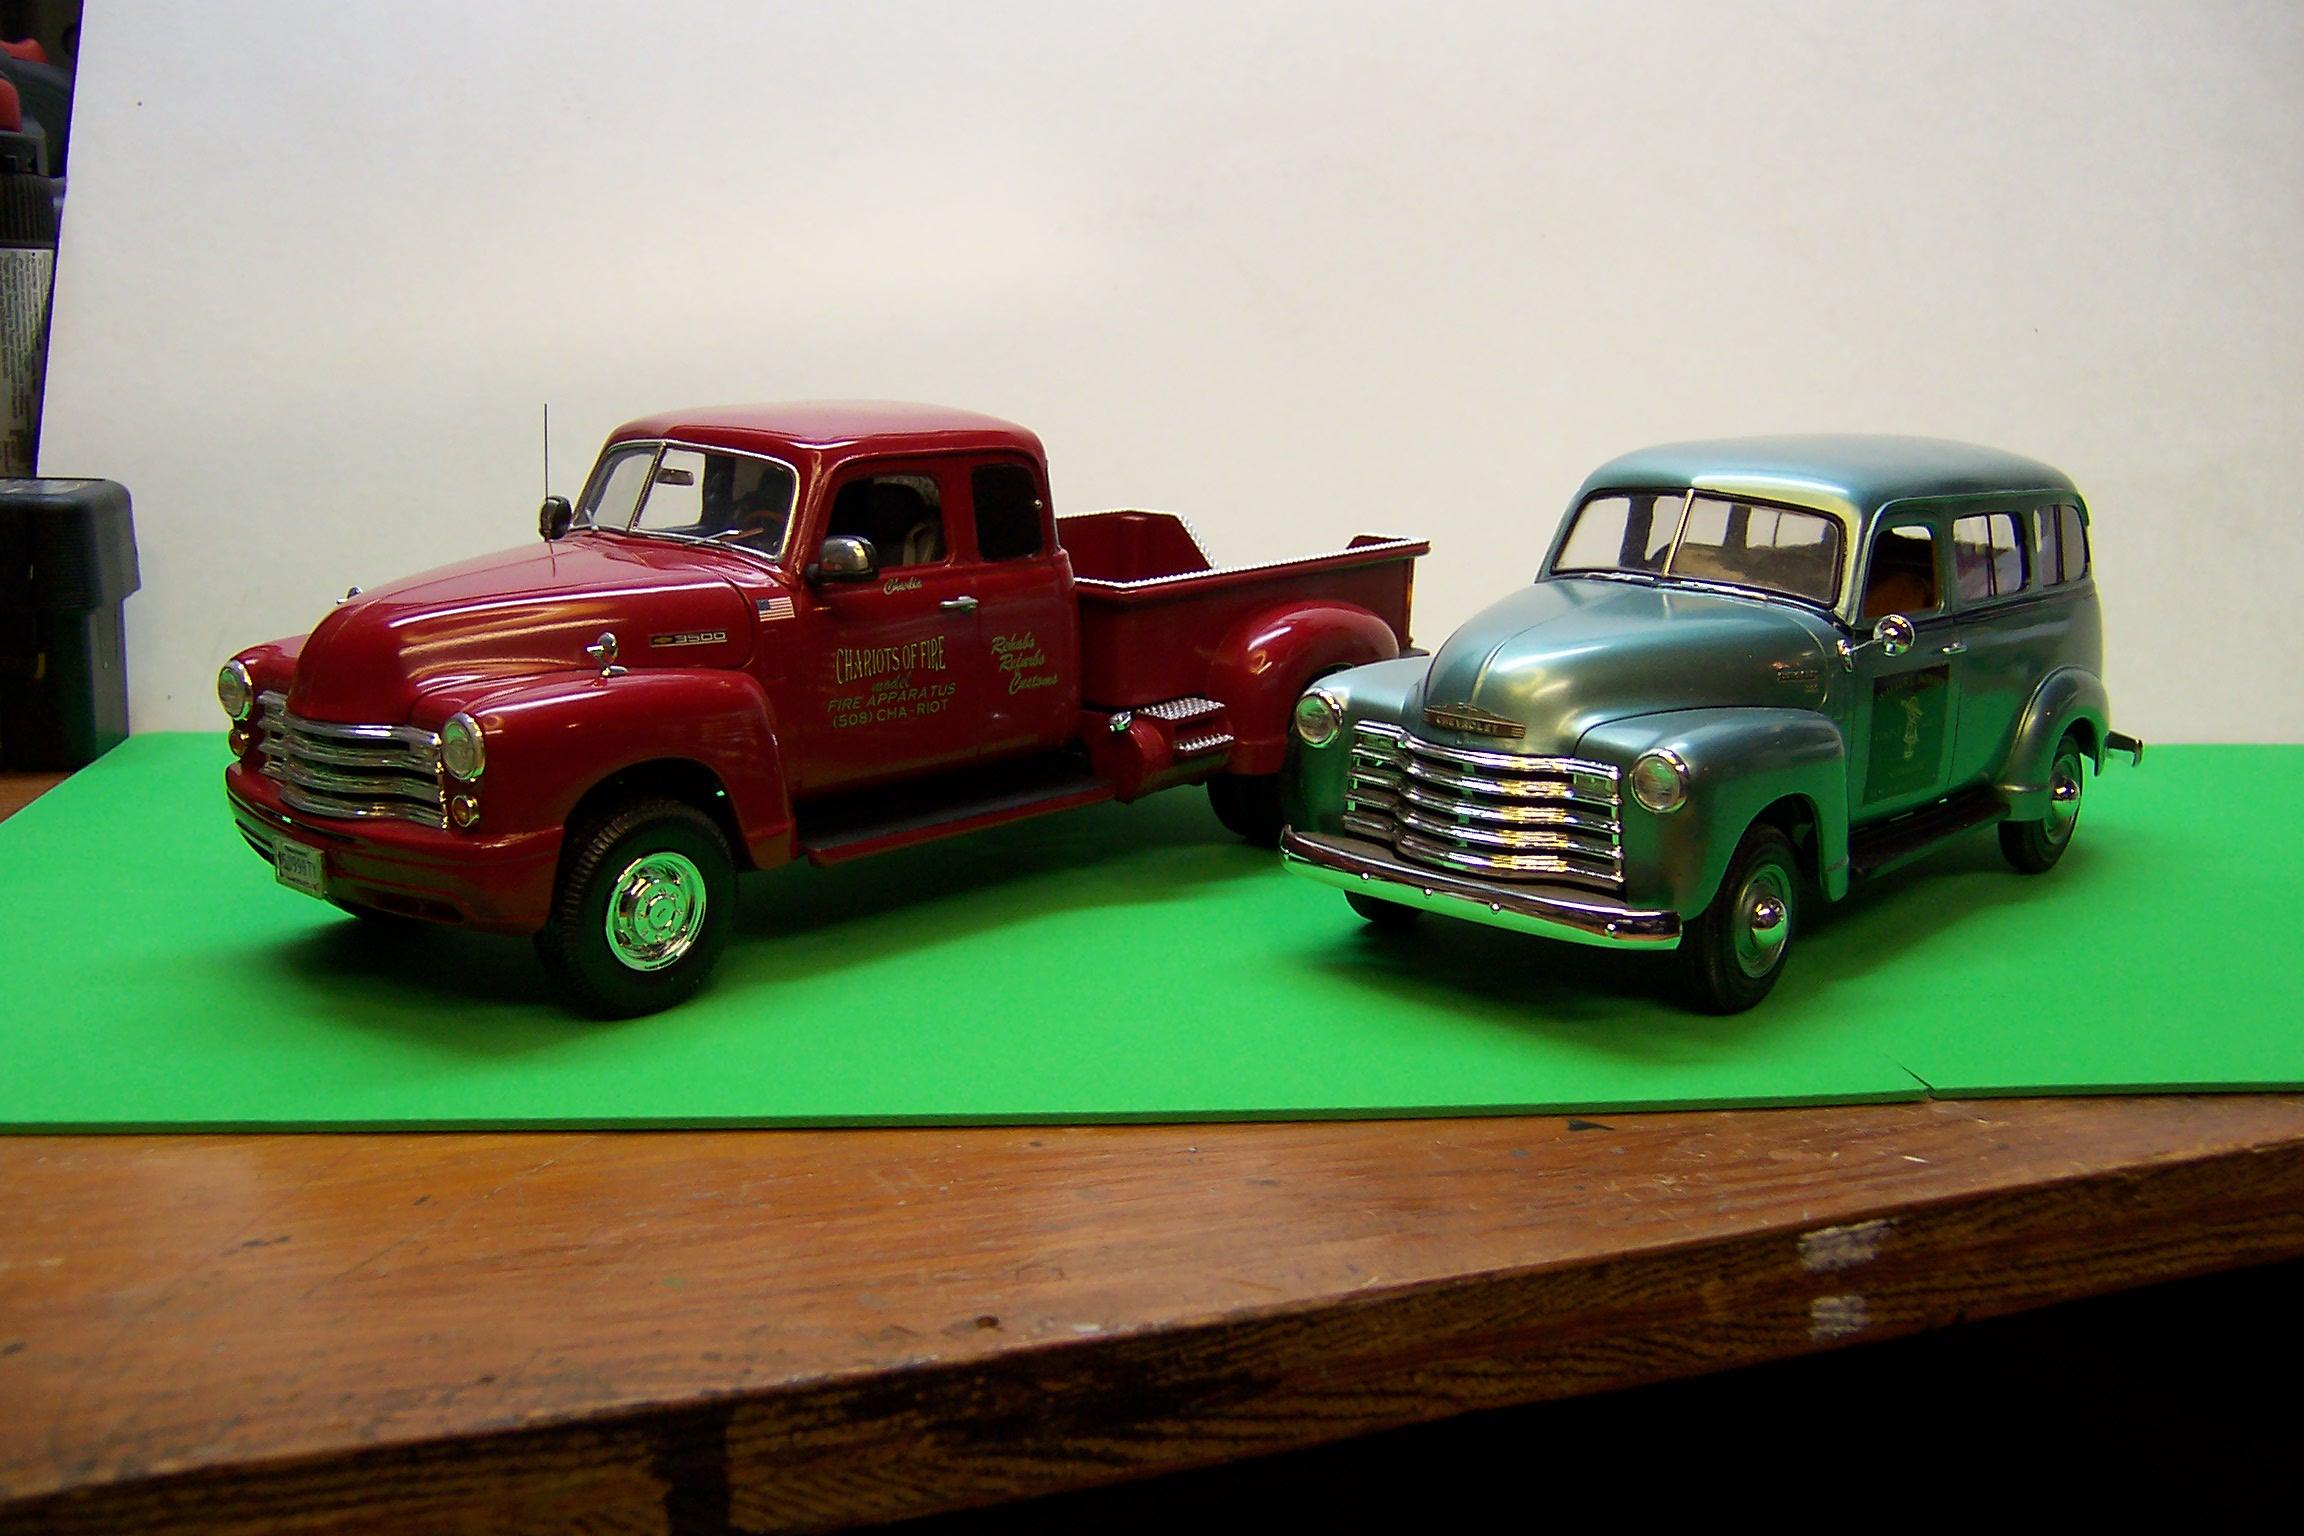
Suburban part was a resin casting. I used the p/u front end and blended it together. Tailgate opens top and bottom.
-
I wanted a modernized version of the '50 Chevy to haul a trailer with a 5th wheel so I created the red one on the left. The suburban on the right is like a 1949 Chevy my dad used for his survey work.
-
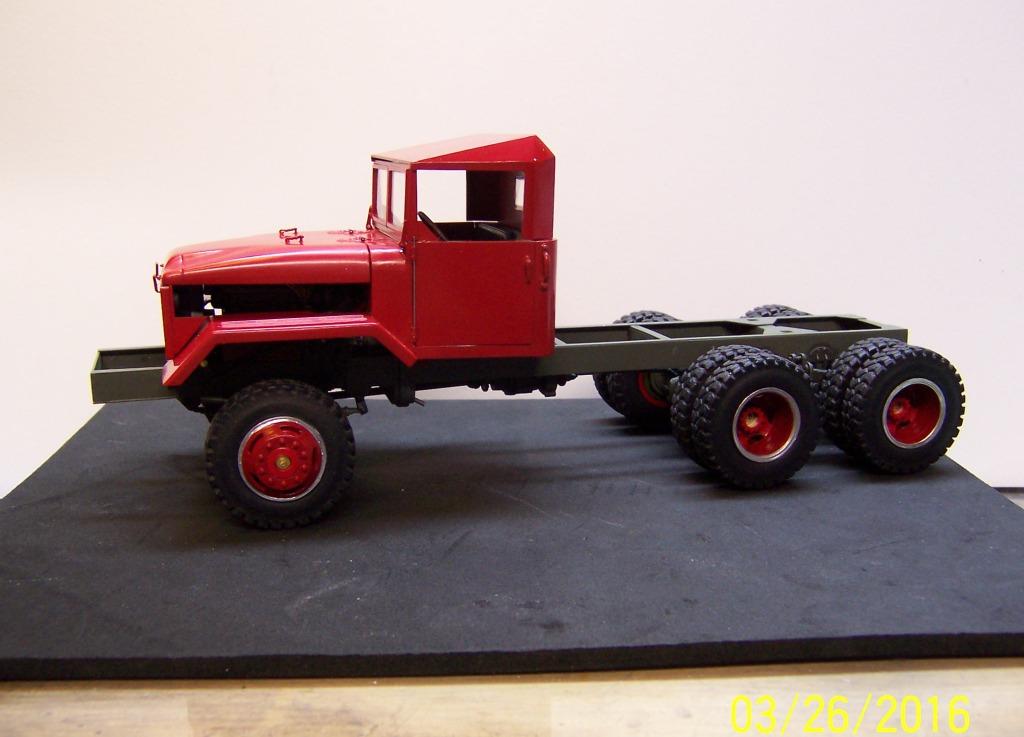
In case you are wondering what an M52 looks like here is a photo of the model prior to adding all of the fire fighting details. The fenders have been "bobbed' because of the way the sides were ultimately built. Originally the fenders had a vertical section at the rear that dropped to the level of the running boards. This happens to be a 1957 Diamond T that was originally a tractor with a 5th wheel.
-
That has been one fantastic build from the first pic to the last. Congratulations, Tom! One question. Did you ever take a count of the total number of pieces of plastic that it took to do all that work? ? PS If you ever decide to the M54 don't use the Renwall 1/32 one to scale up. It's not even close. Let me know if you need dimensions, however. I kept a complete set of notes and sketches of the one I built and I have some reference materials from the technical manuals for the truck. I'd be glad to share them with you.
-
3d printer questions
Chariots of Fire replied to foxbat426's topic in Model Building Questions and Answers
To each his own. I was expressing my opinion based on things I have seen. Personally I still like the hands on approach to scratch building and will continue to do so. Those who are into 3D printing and like the results, have at it. No problem as far as I am concerned.? -
3d printer questions
Chariots of Fire replied to foxbat426's topic in Model Building Questions and Answers
Until the layering of material can be done in such a way that fine detail can be represented without the layering being noticed, I don't see it being of great value to model car builders right now. That is not to say it won't be since all of these kinds of things tend to get refined over time. I have had truck tires 3D printed with excellent results but you sort of want a rough surface on such as that anyway. The plastic is very hard and difficult to sand. Smoothing it out so that it could be painted like a plastic mold injected car body would take a lot of time and effort. Just my 2 ? worth.? -
Hey, Tom; Just a hint on those gaskets. Use a Magic Marker to do the black after you paint. You don't have to do the whole thing, just the inside edge and a bit of the flat area. The marker helps you hold a nice straight line around the perimeter. You might have to go over it more than once but the effect is worth it. I used one on the trim around the windshield on the IH Loadstar.
-
Stretched Frame
Chariots of Fire replied to thecrossguy's topic in Truck Aftermarket / Resin / 3D Printed
Stretched frames are not hard to do and can be done with plastic strip stock. But it is something you will probably have to do yourself. There are plenty of examples in the section of work in progress that you could use for reference. -
Being in on the real stuff definitely helps. It's those little details that make the difference and sometimes being on the inside is the only way to know about them. I found that works on building fire apparatus. Where stuff goes and how it is supposed to function goes a long way. Fine piece of work, Tom!?
-
Destroyed models
Chariots of Fire replied to truckabilly's topic in General Automotive Talk (Trucks and Cars)
Just adding my thoughts also. That is really nasty. ?No thought or concern for anyone else or his work. I hope you are successful in finding all of the parts. Know that we all feel for your loss in time and effort that went into all of that great building. ?️ -
Looking real nice, Tom! Good to see your progress.
-
Dodge D/W 100 dimensions
Chariots of Fire replied to Sergey's topic in General Automotive Talk (Trucks and Cars)
Take a look at the photos again. The flairs on the tractor are probably around 4" in width. So if you start with the Danbury Mint diecast and add the fender flairs, that will add an additional 8" to the overall width. Then use this as a basis for the front tire track width. Make sure the tires and up inside the fender well like is shown in the photo. You would probably have to modify the width of the front axle to gain the added spacing. Add the width to the center of the axle and back it up with a brass or steel pin drilled in to secure it well. -
Destroyed models
Chariots of Fire replied to truckabilly's topic in General Automotive Talk (Trucks and Cars)
Now there is no need for that. What a total disregard for other people and their hard work. You have your work cut out for you but they do look repairable. Be patient and go easy. Keep us informed of your progress. -
1983 IH F-2674 Tri-axle Dump
Chariots of Fire replied to DRIPTROIT 71's topic in Model Trucks: Big Rigs and Heavy Equipment
That is nice work. Realistic weathering and wear on the body! -
MYTHICAL MACK
Chariots of Fire replied to purepmd's topic in Model Trucks: Big Rigs and Heavy Equipment
You want fries with that??? -
I don't mean to rain on anyone's parade but I hope not to see any of the single cab D or W 300's or 500's out there. I sent my masters for someone else to cast from over 2 years ago and when I did I asked them to be returned to me once the molds were done. I have not heard from anyone since concerning their whereabouts.
-
53 Ford
Chariots of Fire replied to BIGTRUCK's topic in WIP: Model Trucks: Pickups, Vans, SUVs, Light Commercial
Just a suggestion. Try a bit of Novus polish without the clear and see if that doesn't protect the paint. It really looks good this time around.