Chariots of Fire
-
Posts
2,782 -
Joined
-
Last visited
Content Type
Profiles
Forums
Events
Gallery
Everything posted by Chariots of Fire
-
 I'll be there. Looking forward to seeing you.
 -
Sizing Images for Decals
Chariots of Fire replied to StevenGuthmiller's topic in Model Building Questions and Answers
No, I have an old program that is vector based unlike Paint that uses pixels. That way the line work gets smoothed out and very small details are retained. I do have Corel Draw on this computer but the old one seems to work just fine. -
Diamond plate look
Chariots of Fire replied to KBryan67's topic in Model Building Questions and Answers
Just go to donmillsmodels@aol.com. He can quote you a price and will mail out an order to you. -
Sizing Images for Decals
Chariots of Fire replied to StevenGuthmiller's topic in Model Building Questions and Answers
I have an old graphics program from Micrographx. I had someone e-mail a photo of a city seal they wanted made into a decal. I downloaded the image into the computer I have the graphics in and then into the graphic program. Many times I can just grab the image and reduce it in size without doing anything to it. On the city seal it came out perfect. Probably could do the same with what you show. I can create a box the size of the image that is desired and then just grab the image and keep downsizing until it fits in the box. Detail generally is retained quite well. Printing is done on my ALPS printer on clear decal film. -
Good sources for coil springs
Chariots of Fire replied to OldNYJim's topic in Model Building Questions and Answers
Easiest way I know is to use soft wire and wrap it around a piece of solid tubing to get the diameter you want. Wrap it tight and with no spacing. Like has been said above, slide it off the tubing and pull it to stretch the wire to the size coil you want. -
Molotow Chrome cure time?
Chariots of Fire replied to crowe-t's topic in Model Building Questions and Answers
Long time to set up but even at that handling it will eventually dull it down to a gray tone. Best to do it last and then not touch it at all. Other than that, great stuff! -
A little mud spattering is good! Logging roads are not expressways by a long shot! Not too late to try the suggestions but it does look good just the way it is!
-
Great Job, Tom. I left some weathering suggestions for you in the WIP section.
-
Hey, Tom. Nice project. Can I suggest some simple weathering techniques for you? Overdone is usually what is seen but with just a bit of easy stuff the results can be very significant. Get one of Tamiya's small weathering kits that has three colors in it. Actually there are two. They are called Tamiya Weathering Masters. One has orange rust, gun metal and silver. The other has a dull yellow, gray and green. They come with a small applicator with a sponge on one end and a brush on the other. Try the gun metal or silver on the running boards, door handles and the doors where you might close the door with an open window; any place where there would be obvious wear. The sponge works best for this. The orange rust might be used on the edges of the fender openings and the edges of the bumper. Maybe the yellow and silver on the rocker panels under the door where it opens showing wear. Try the gray on the wheels, especially at the edges and around the lug nuts. Apply some weathered black to the face of the tires (Master Modeler acrylic) If you want a bit of rust at the edges of the hood where it meets the cowl and radiator shell, try some acrylic rust color and some water diluted with detergent. The detergent reduces the surface tension. Wet the brush with water and a very small amount of the rust color, touch it to the edge of the closed hood and allow it flow down the edges toward the bottom of the hood. Use a paper towel to sop up the excess. Let it dry on its own. Run some along the center hinge of the hood. Best to experiment with this as too much color and the effect is lost. Just some suggestions to try out!
-
Beautiful clean workmanship! Nicely done! 1100 hours is a lot of work time!!
-
1/87 Ulrich Mack H60 Reefer Trucks
Chariots of Fire replied to Pete68's topic in Model Trucks: Big Rigs and Heavy Equipment
I did one of those as well. Did yours come with the rear view mirrors? They were stamped steel with prongs that went into the holes in the cab. -
That's what you call a shorty!
-
Dodge D/W 100 dimensions
Chariots of Fire replied to Sergey's topic in General Automotive Talk (Trucks and Cars)
If you add the fender flairs, open the wheel wells and then extend the rear of the flairs down at the rear you will have the changes that are necessary. Most trucks of that era used the same cabs and simply modified the fenders accordingly. Compare the Danbury model to the heavy truck photo and you will see the similarities are quite remarkable. -
1937 chev pick up
Chariots of Fire replied to Lorne's topic in General Automotive Talk (Trucks and Cars)
The OB Special is the only one I know of. It was orange soft plastic; not the nice stuff that most kits are made of today. -
BRBO 2019 Dodge W500
Chariots of Fire replied to Aaronw's topic in WIP: Model Trucks: Big Rigs and Heavy Equipment
Aaron: I have a Dodge Body Builders Book for 1970 that has a lot of info on frames etc. If that would help I can copy off the W500 frame and send it to you. Will save a lot of work because it has all of the dimensions, location of cross members and the like. Probably not a lot of difference from 1959 to '70. The W500 frame I did for mine I made from plastic strip stock. Came out fine. -
1926 Mack AC Dump Truck
Chariots of Fire replied to Jim B's topic in Model Trucks: Big Rigs and Heavy Equipment
Nice work, Jim. Color is just right for this old rig! -
Wood Trailer Decking Question
Chariots of Fire replied to Oldmopars's topic in General Automotive Talk (Trucks and Cars)
My personal preference is bass wood. A much finer grain that still is easy to cut with a sharp Xacto. A regular dark stain would work well but with one caution. Do not get glue on the upper surface or the stain will not take. Perhaps best to stain the individual strips first and then install. A darker stain in places where oil and grease might fall will add to its overall appearance. Some "distressing" would be in order also but don't forget to keep in scale. Track marks might actually go sideways to indicate adjustments in the location of the equipment as it is being loaded. (JMHO) -
1926 Mack AC Dump Truck
Chariots of Fire replied to Jim B's topic in WIP: Model Trucks: Big Rigs and Heavy Equipment
Do you have any weathering powders? That would be the best way. If not, MicroMark sells them as well as through Walthers. -
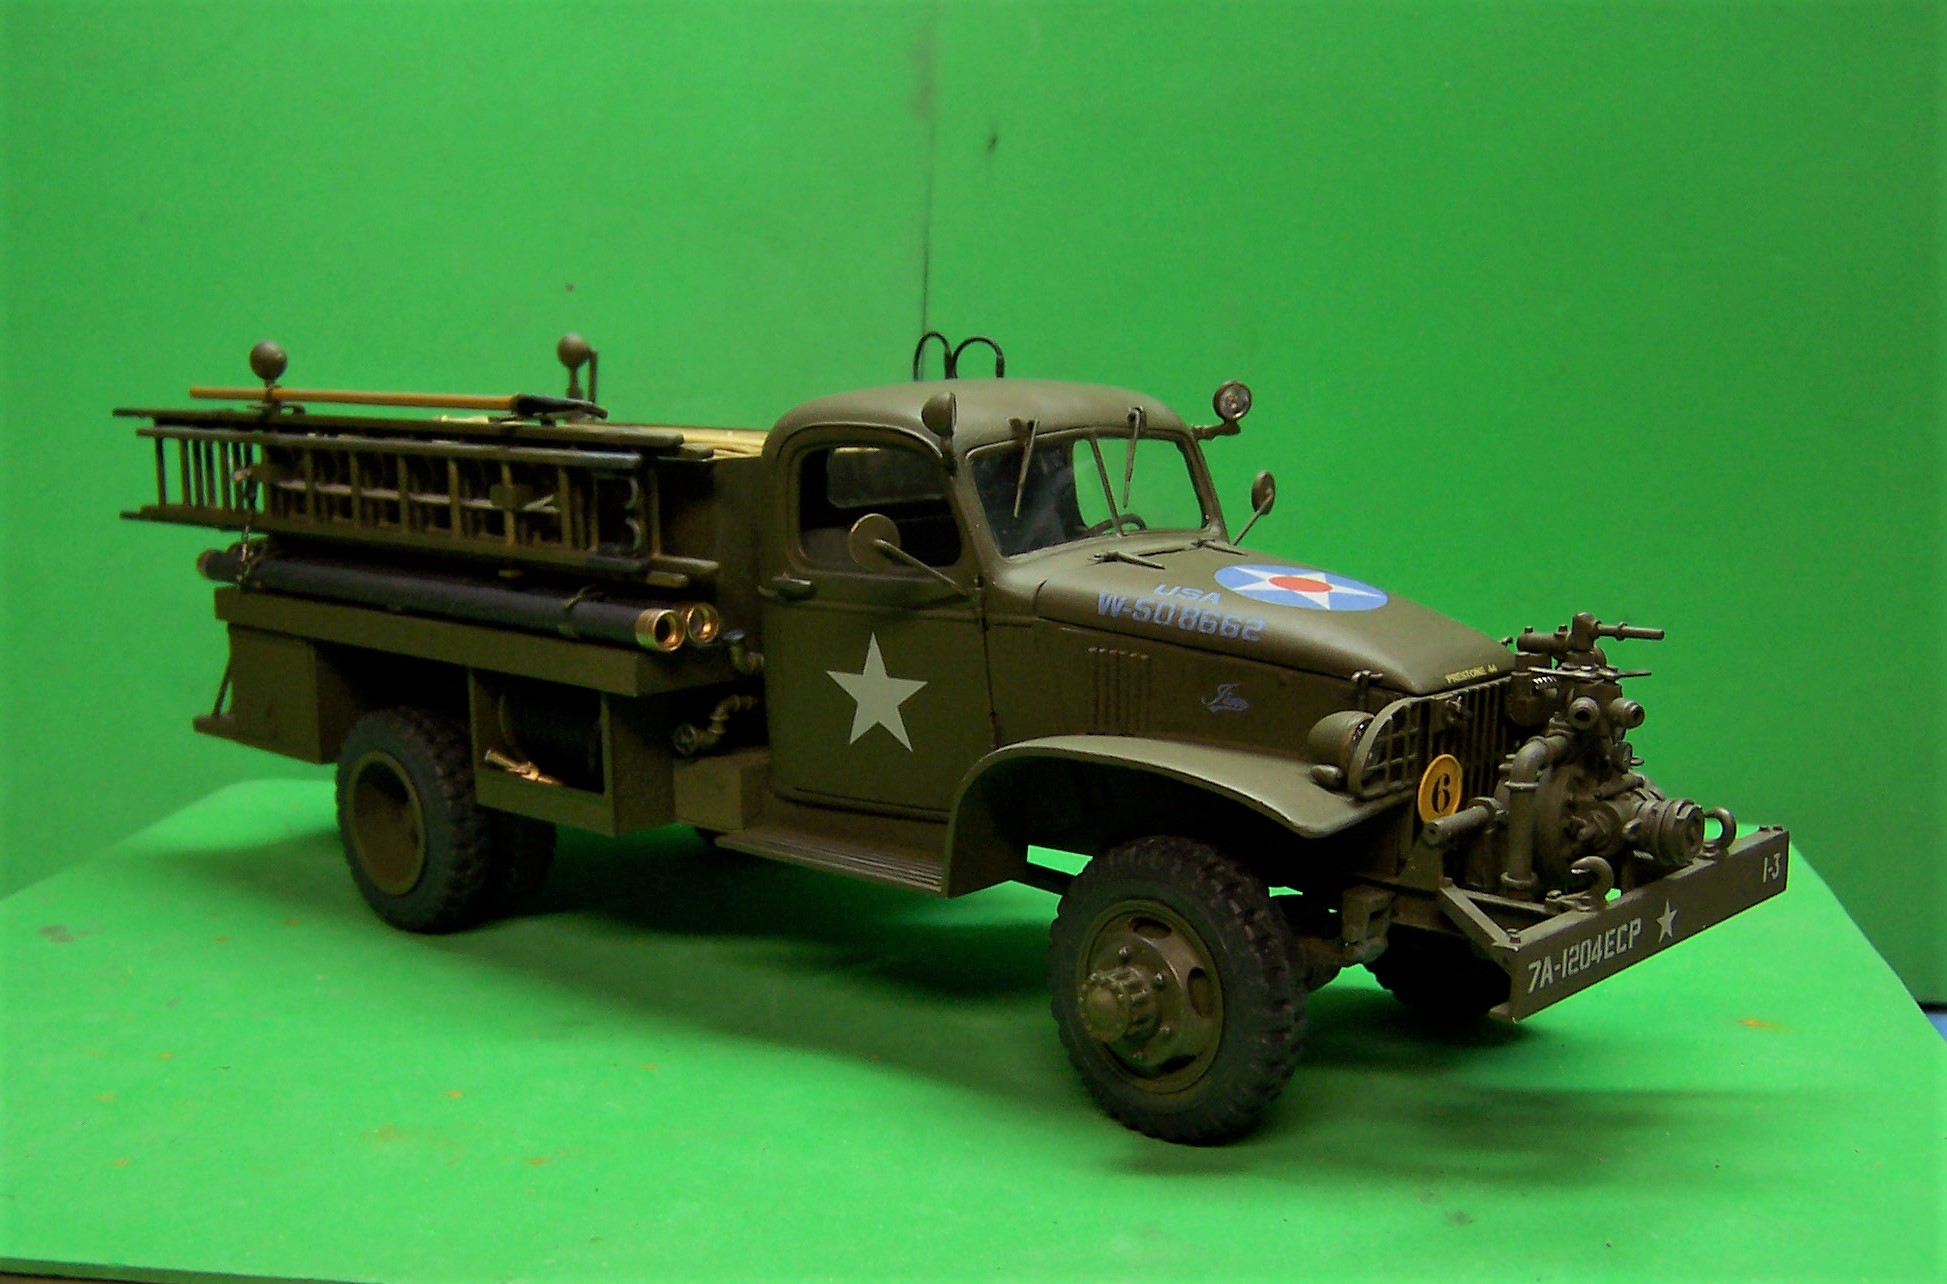
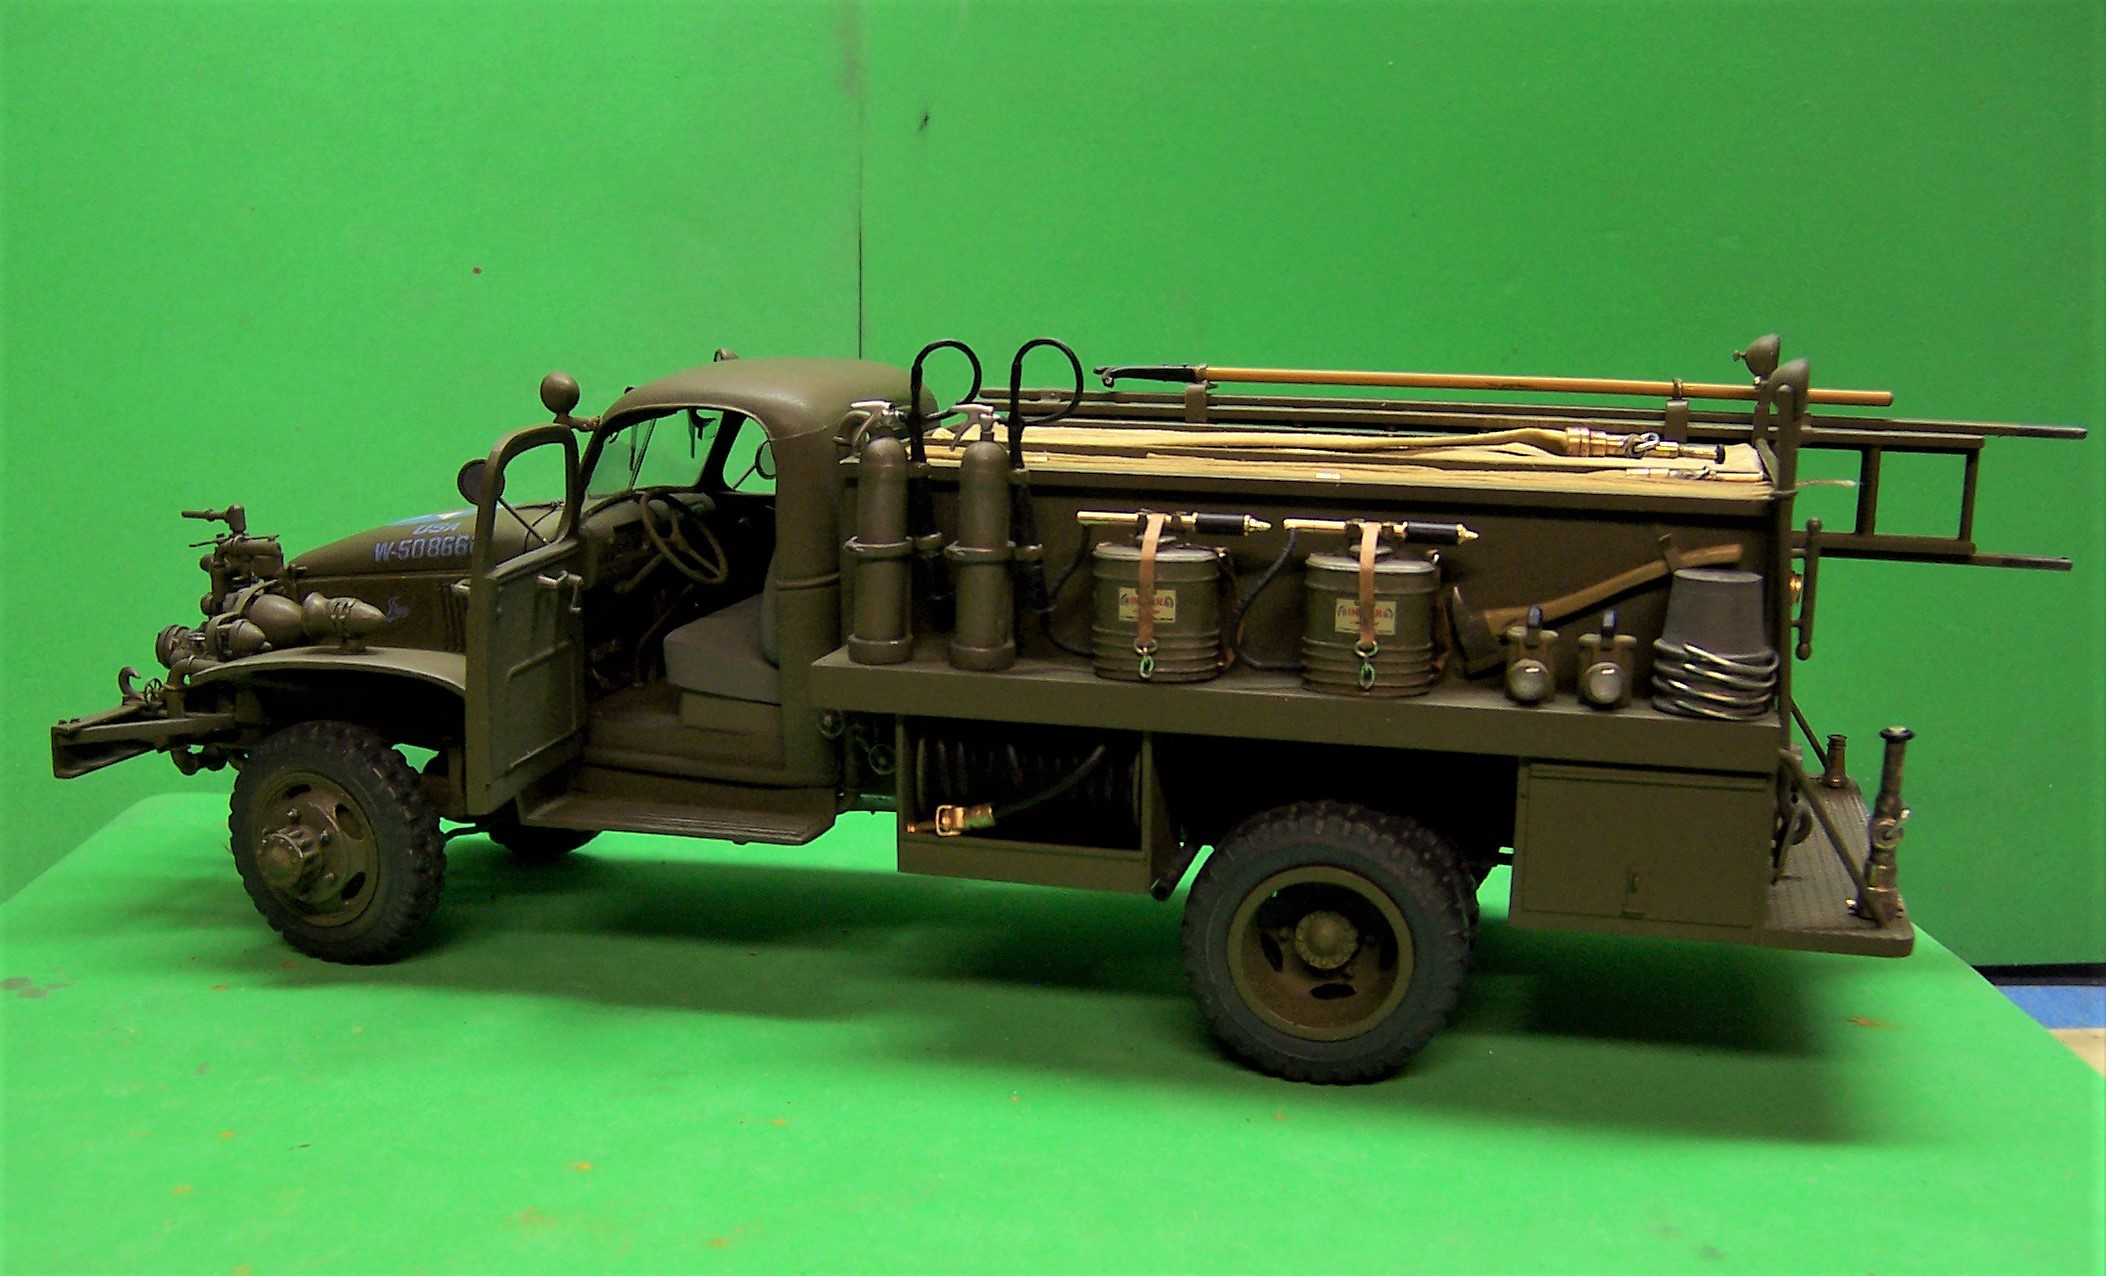
I like to do some computer magic once in a while. Here's what the build would look like in black and white and as it might appear in one of the tech manuals.

-
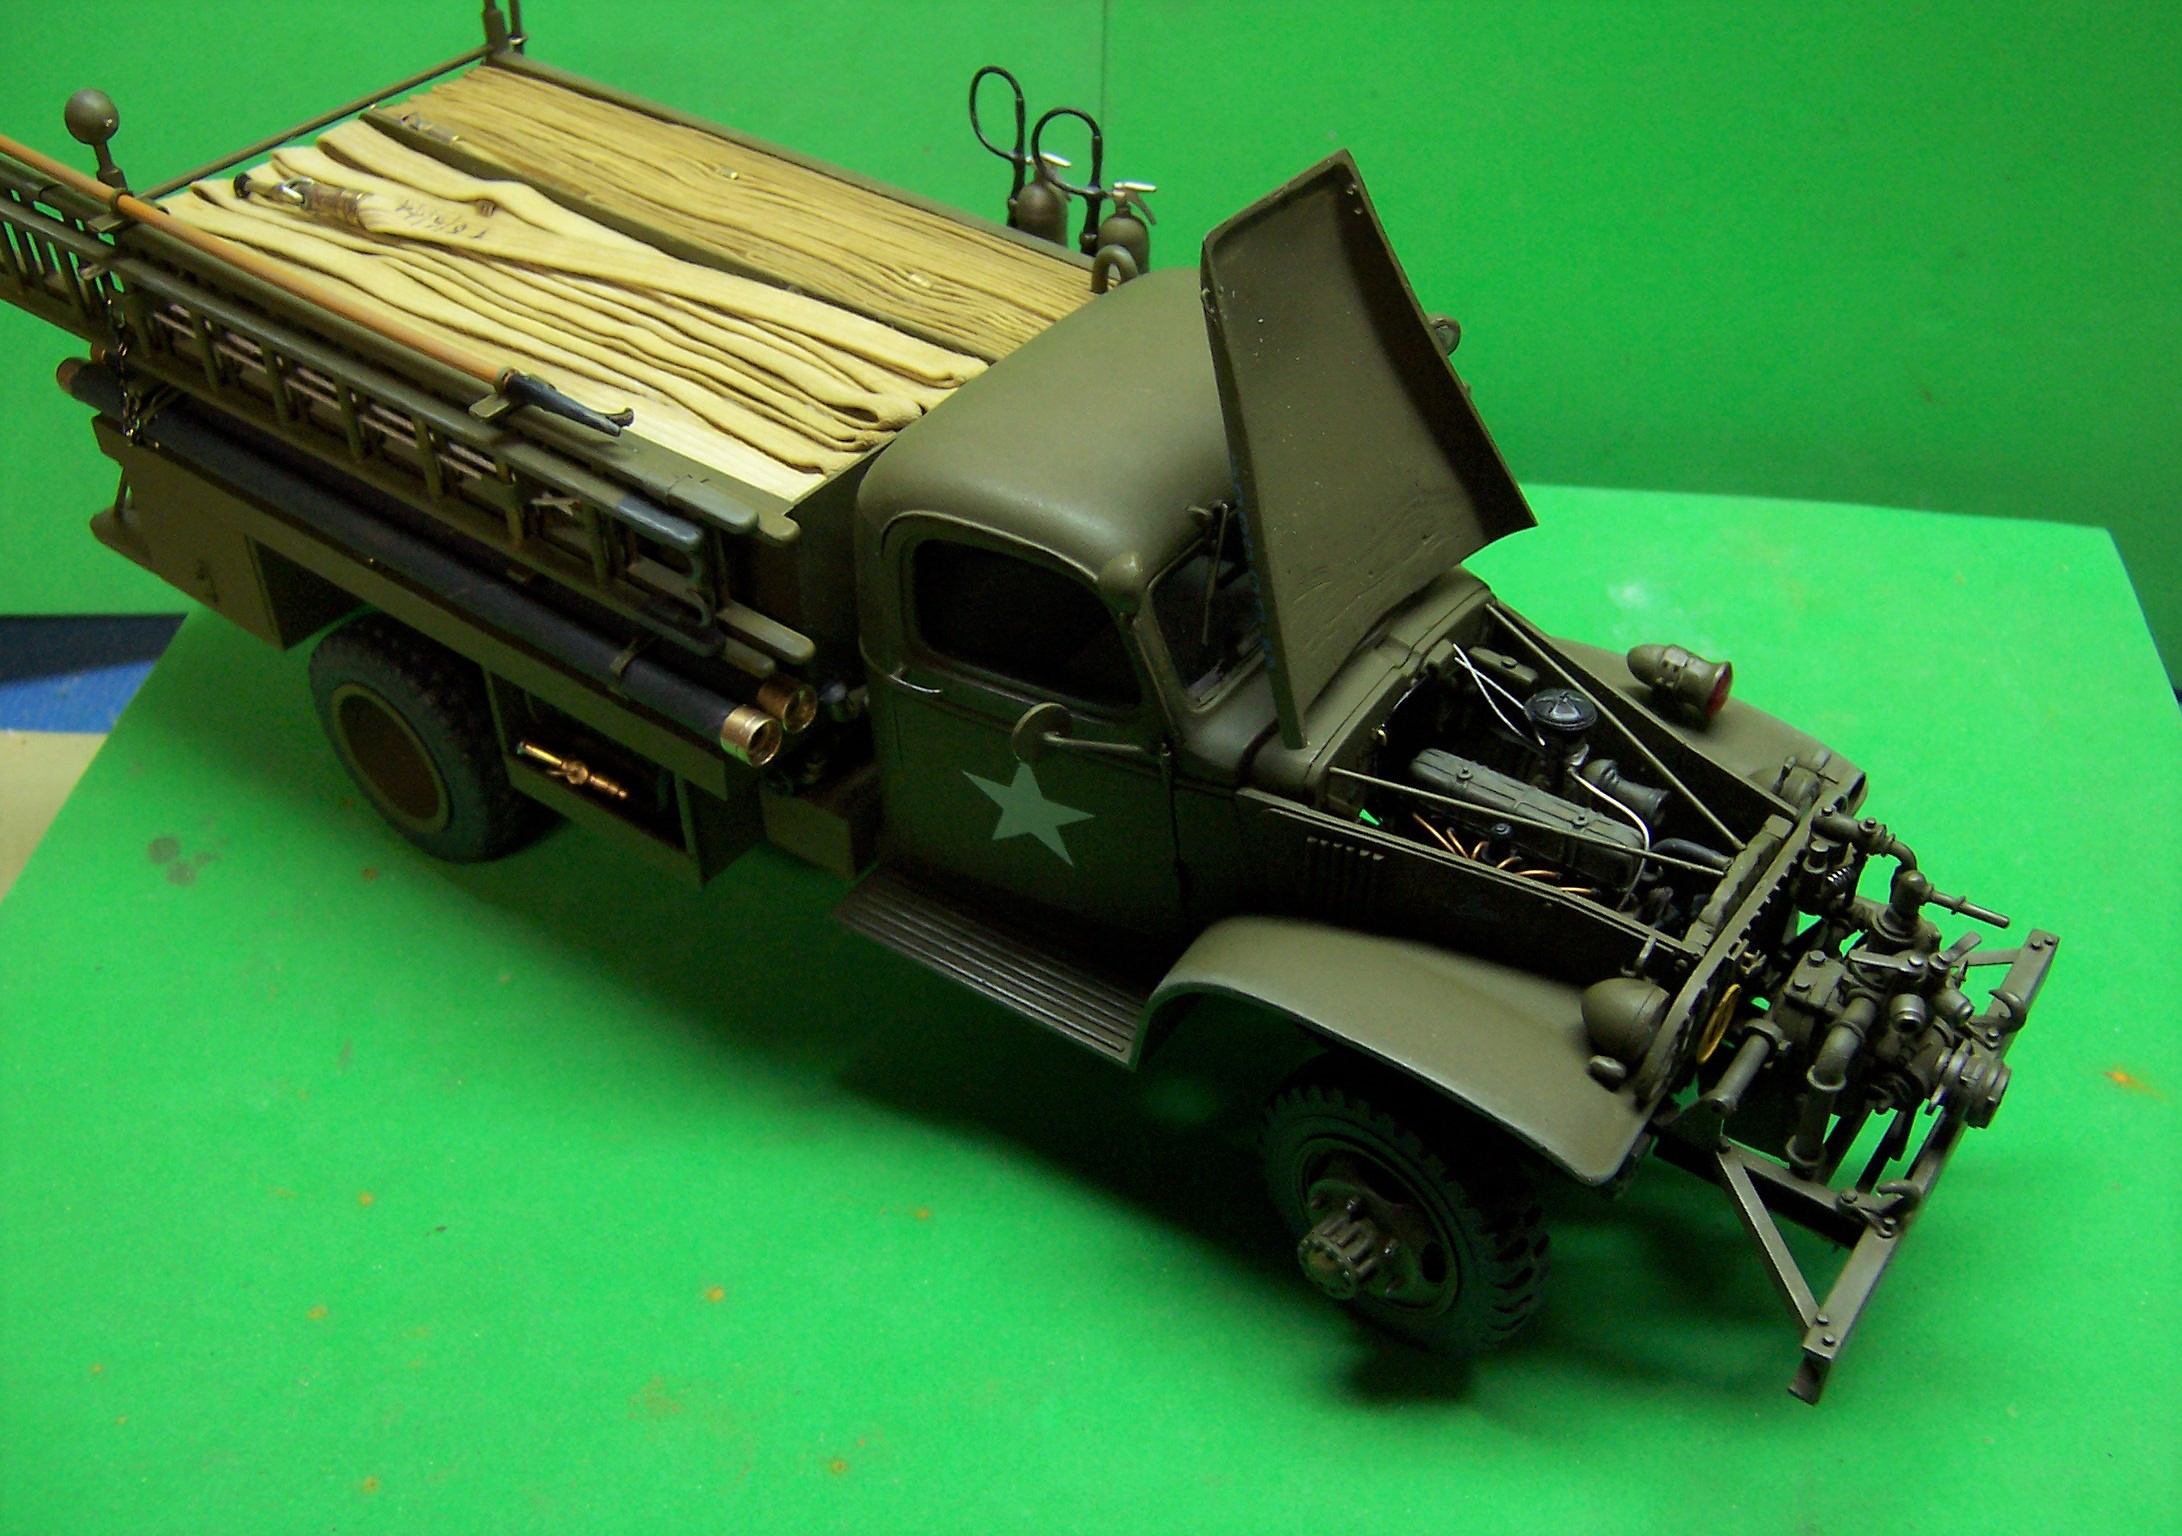
This build is 1/25 scale.
-
1926 Mack AC Dump Truck
Chariots of Fire replied to Jim B's topic in WIP: Model Trucks: Big Rigs and Heavy Equipment
Jim if I can be so bold: Scuff up the tread of the tires with some light sanding. It will cut down on the gloss look and give it an over the road look. Black tool box maybe with just a hint of weathering?? -
1950 Ford F6 Tow Truck
Chariots of Fire replied to Michael Kröger's topic in Model Trucks: Big Rigs and Heavy Equipment
Very nicely done! Love the weathering and the Holmes 600! Great job! -
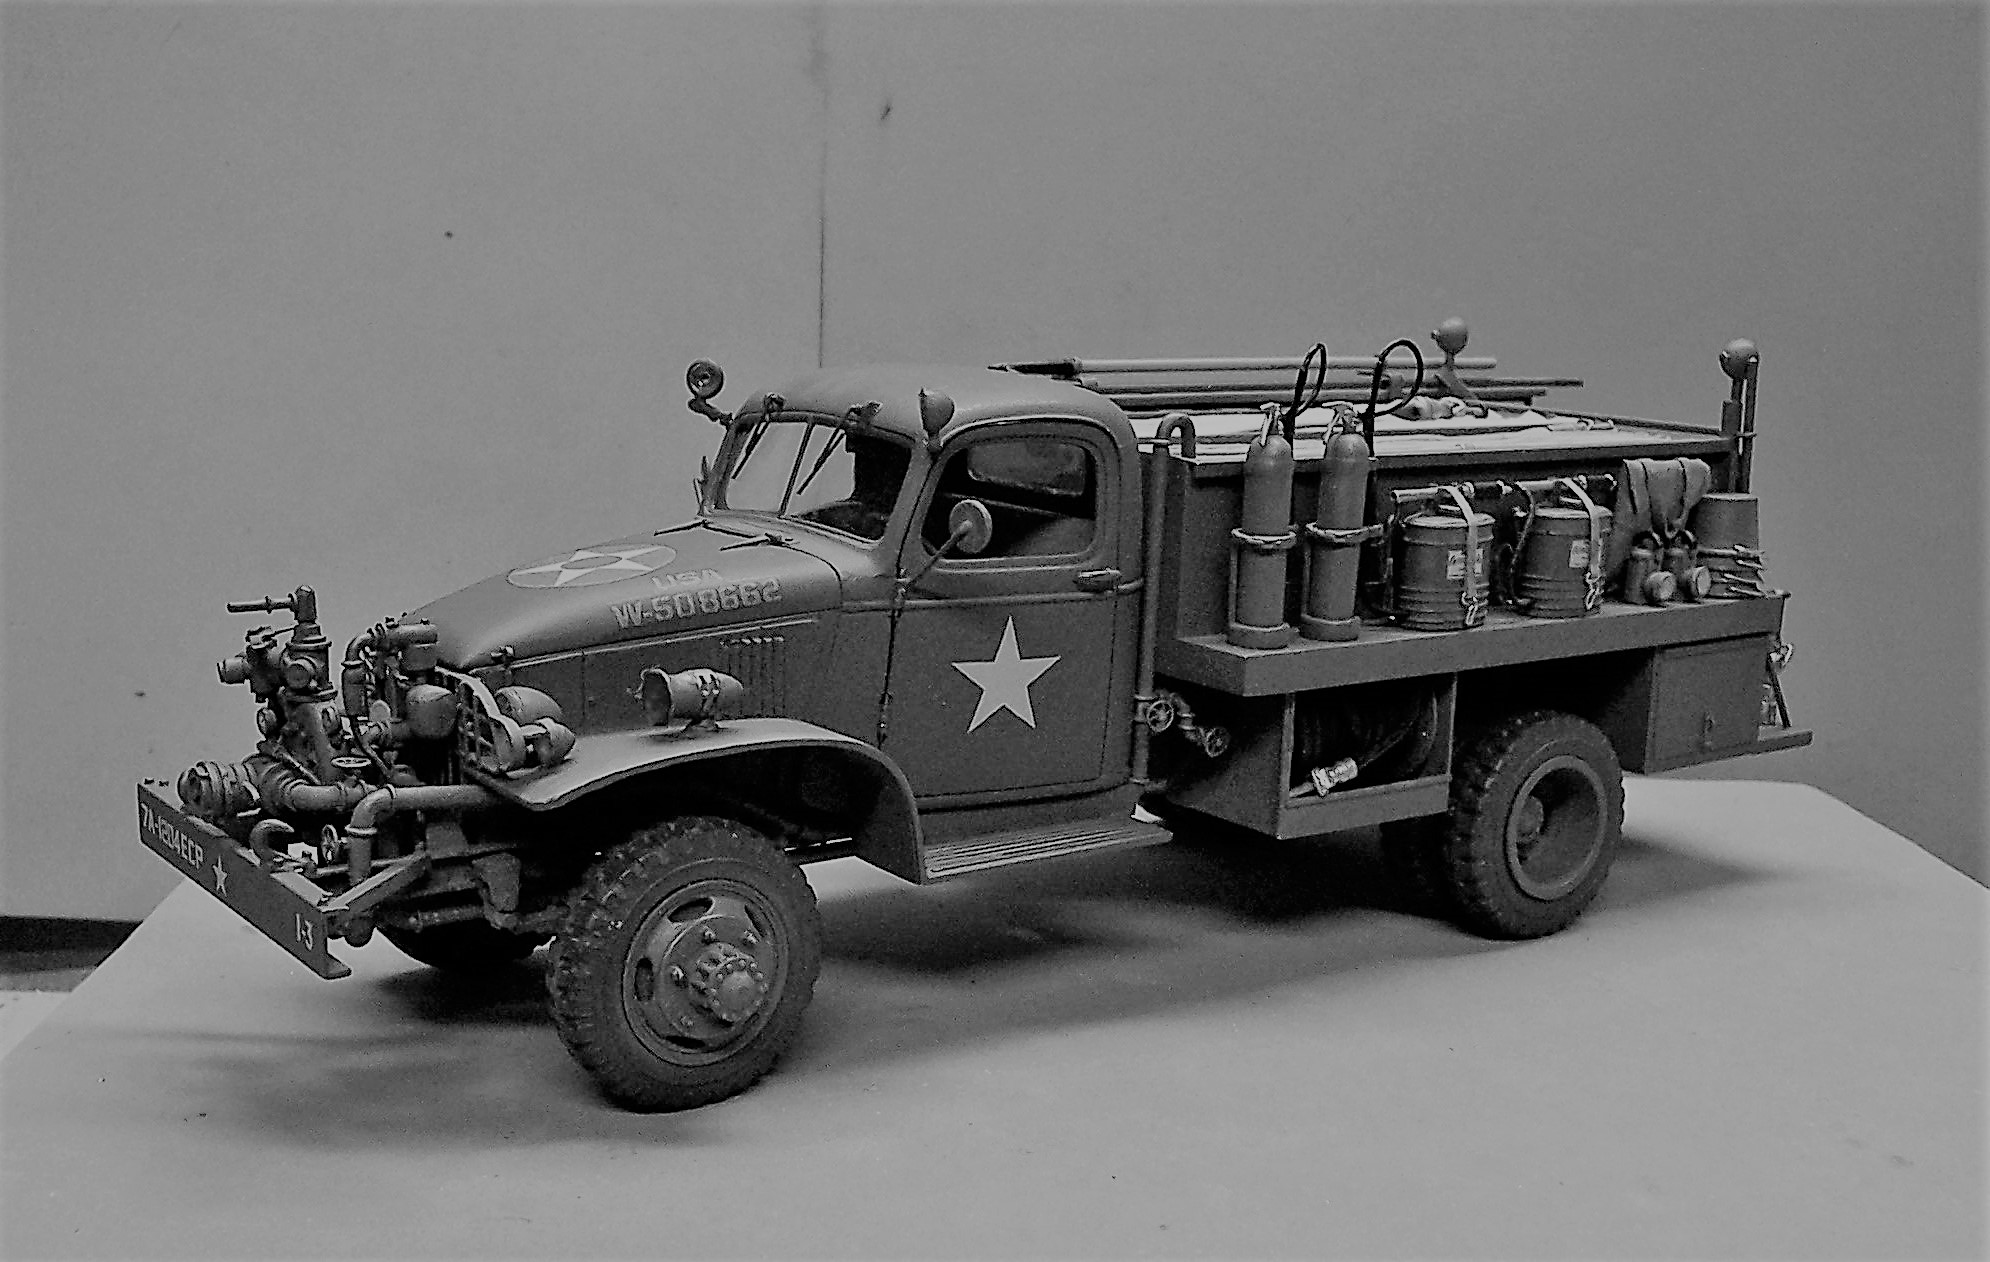
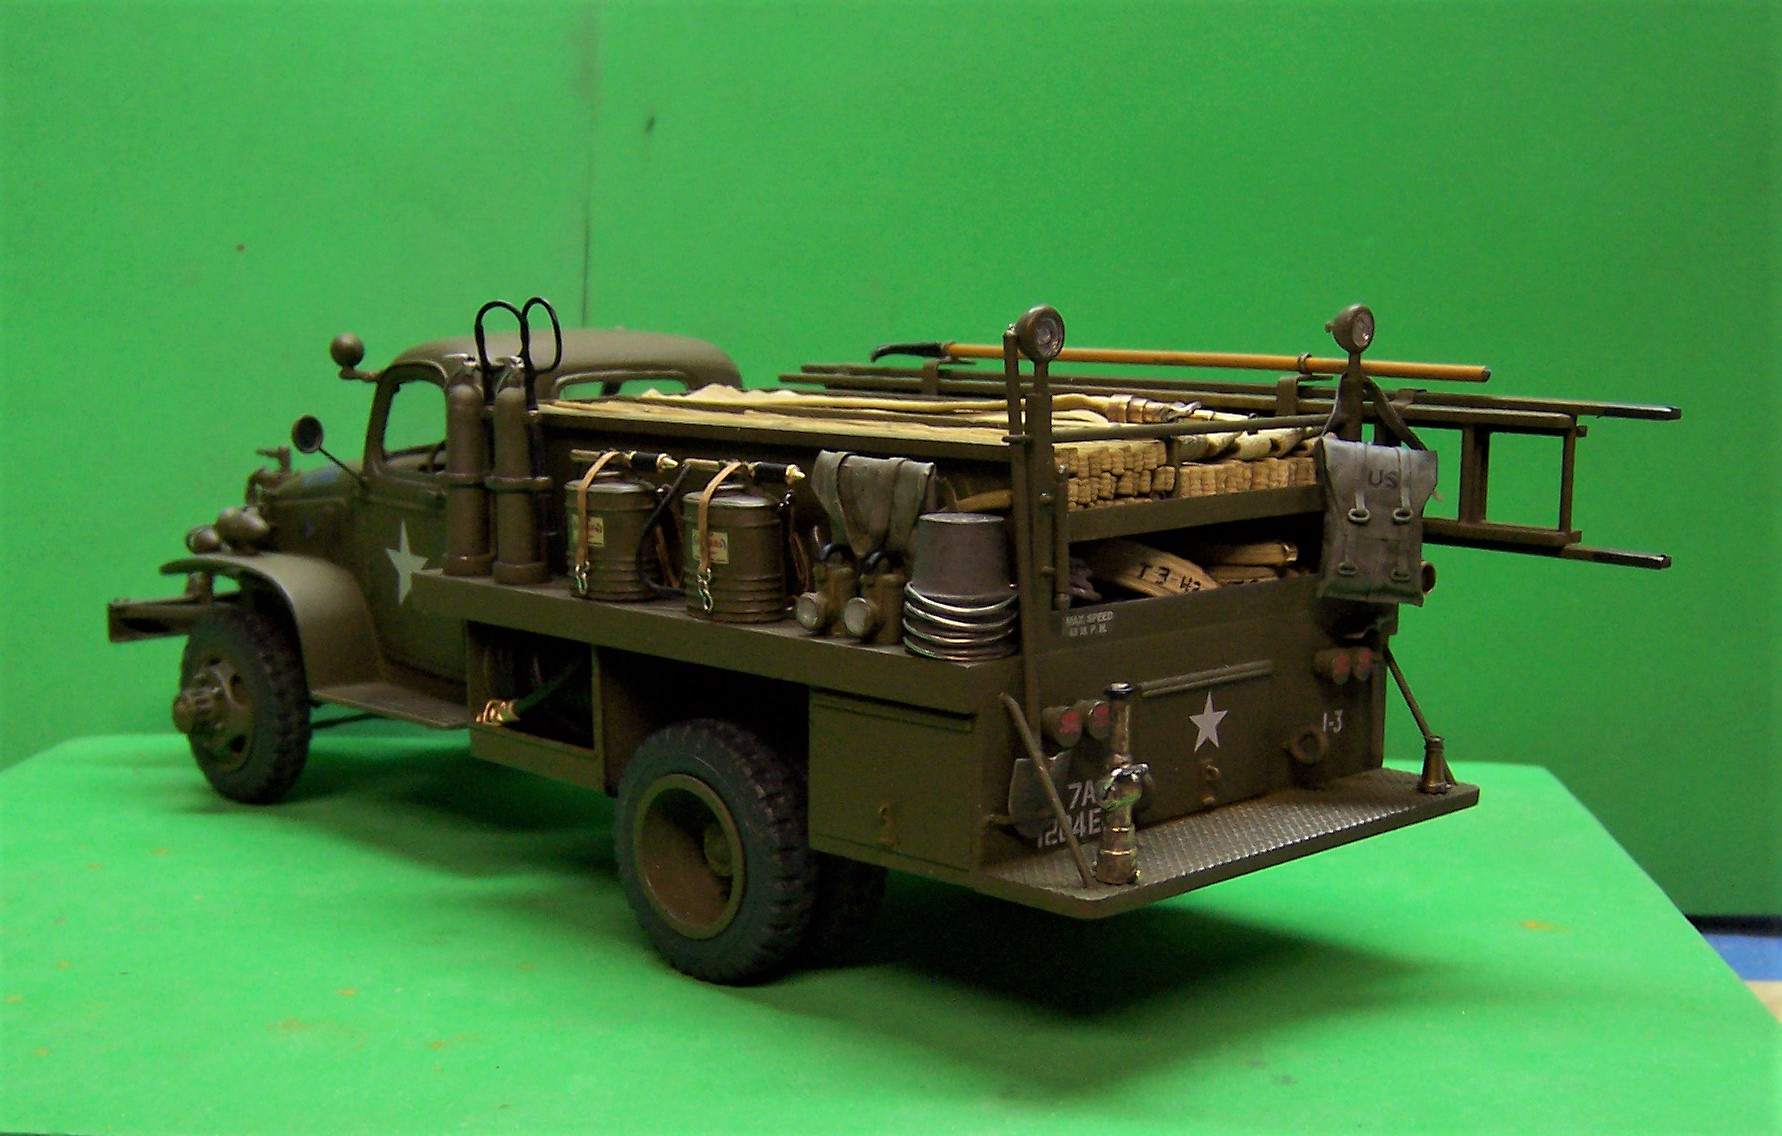
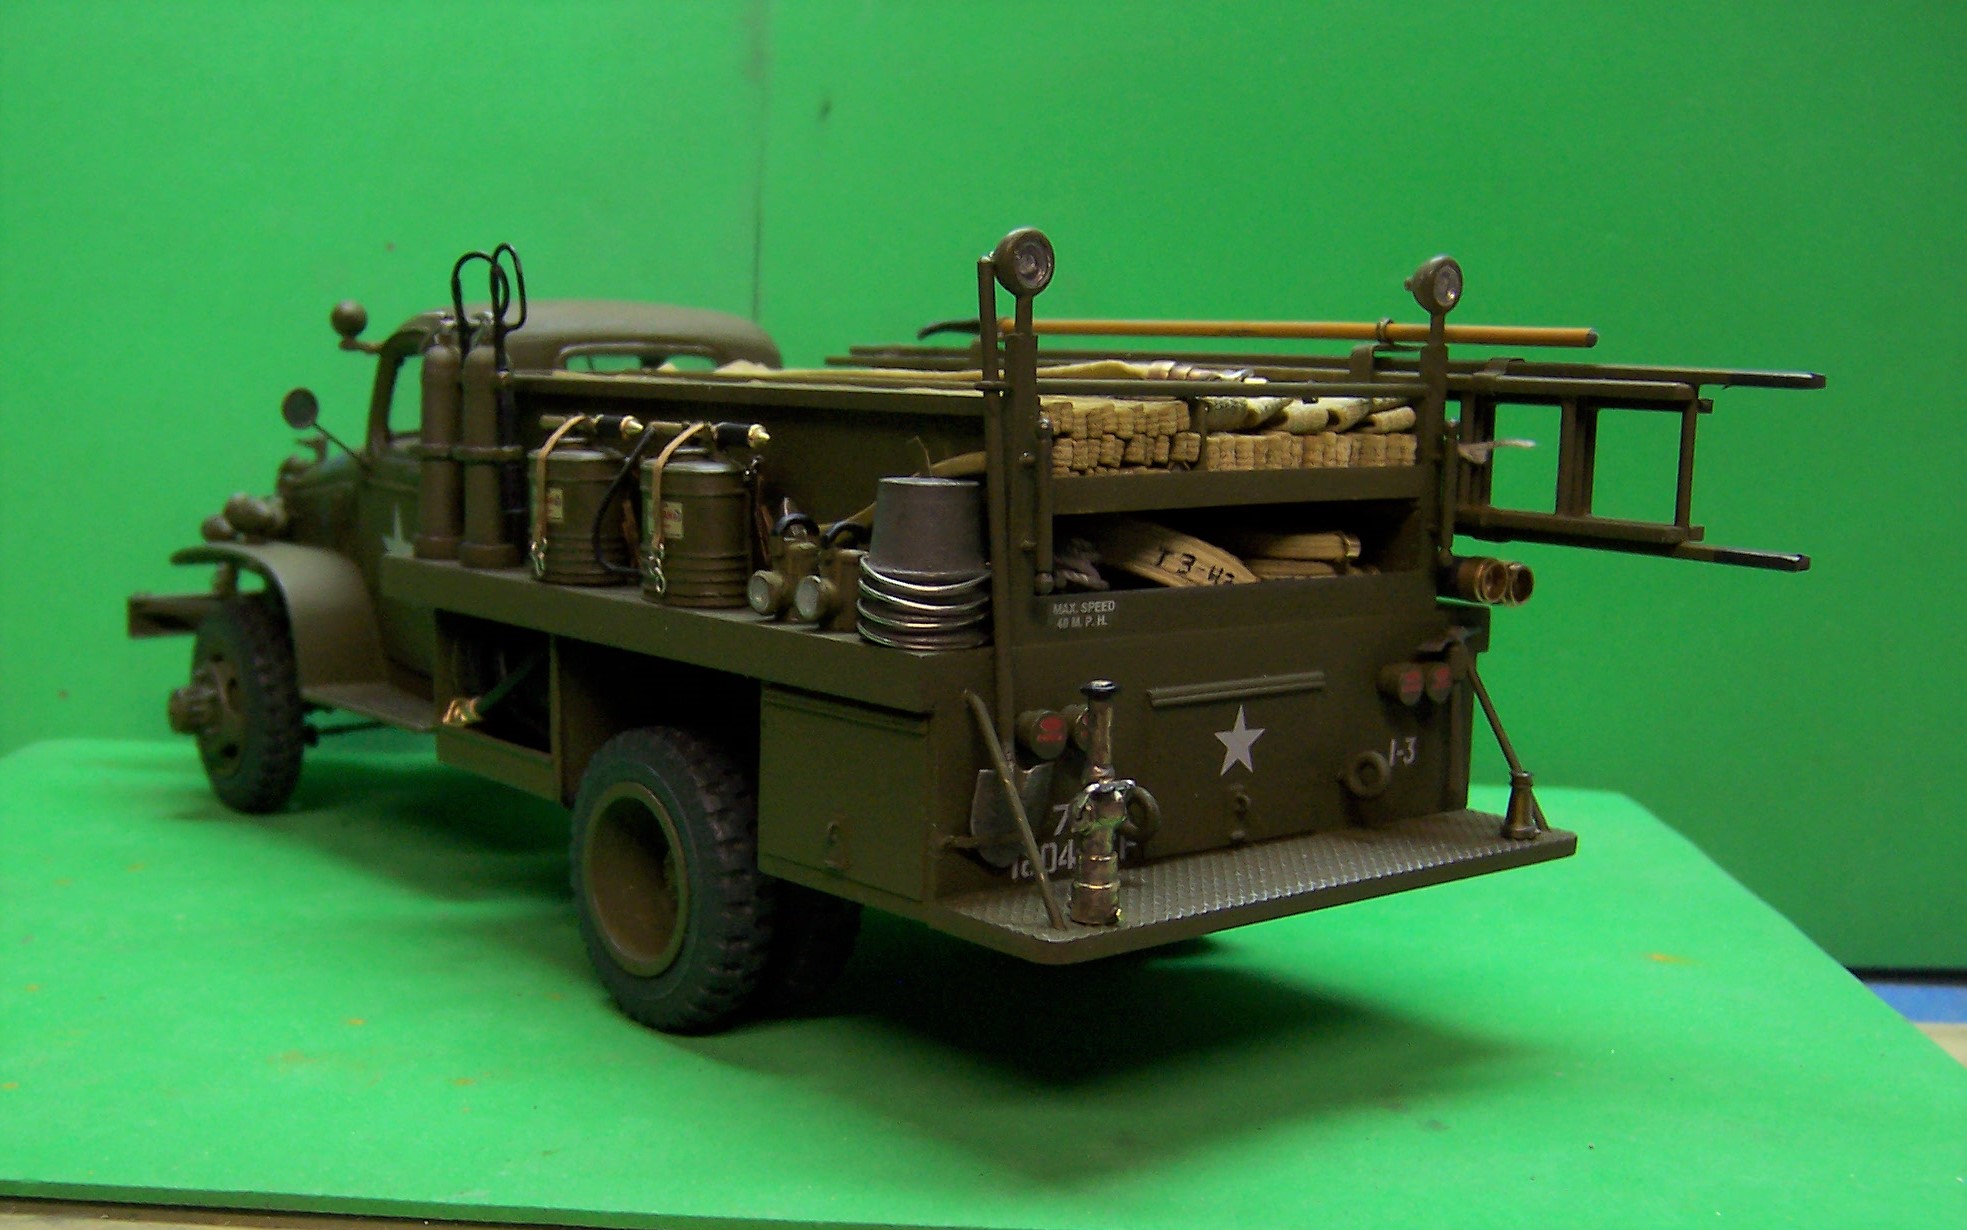
Just had to add one more detail. The real rig has a couple of soft bags hanging about so I added a couple. I am told by one who was there that the fire fighting platoons never did this but kept things stored inside compartments. I think the bags are on the real rig as restoration accessories but are not prototypical. I made the bags using folded paper towel wrapped with duct tape. Then I added the D rings and straps, painted everything with flat OD and then weathered them when the paint was dry. Slightly different shade for contrast.
-
I hear ya, Warrren. But that's what they did back in the day. Nothing bright and shiny to stand out!
-
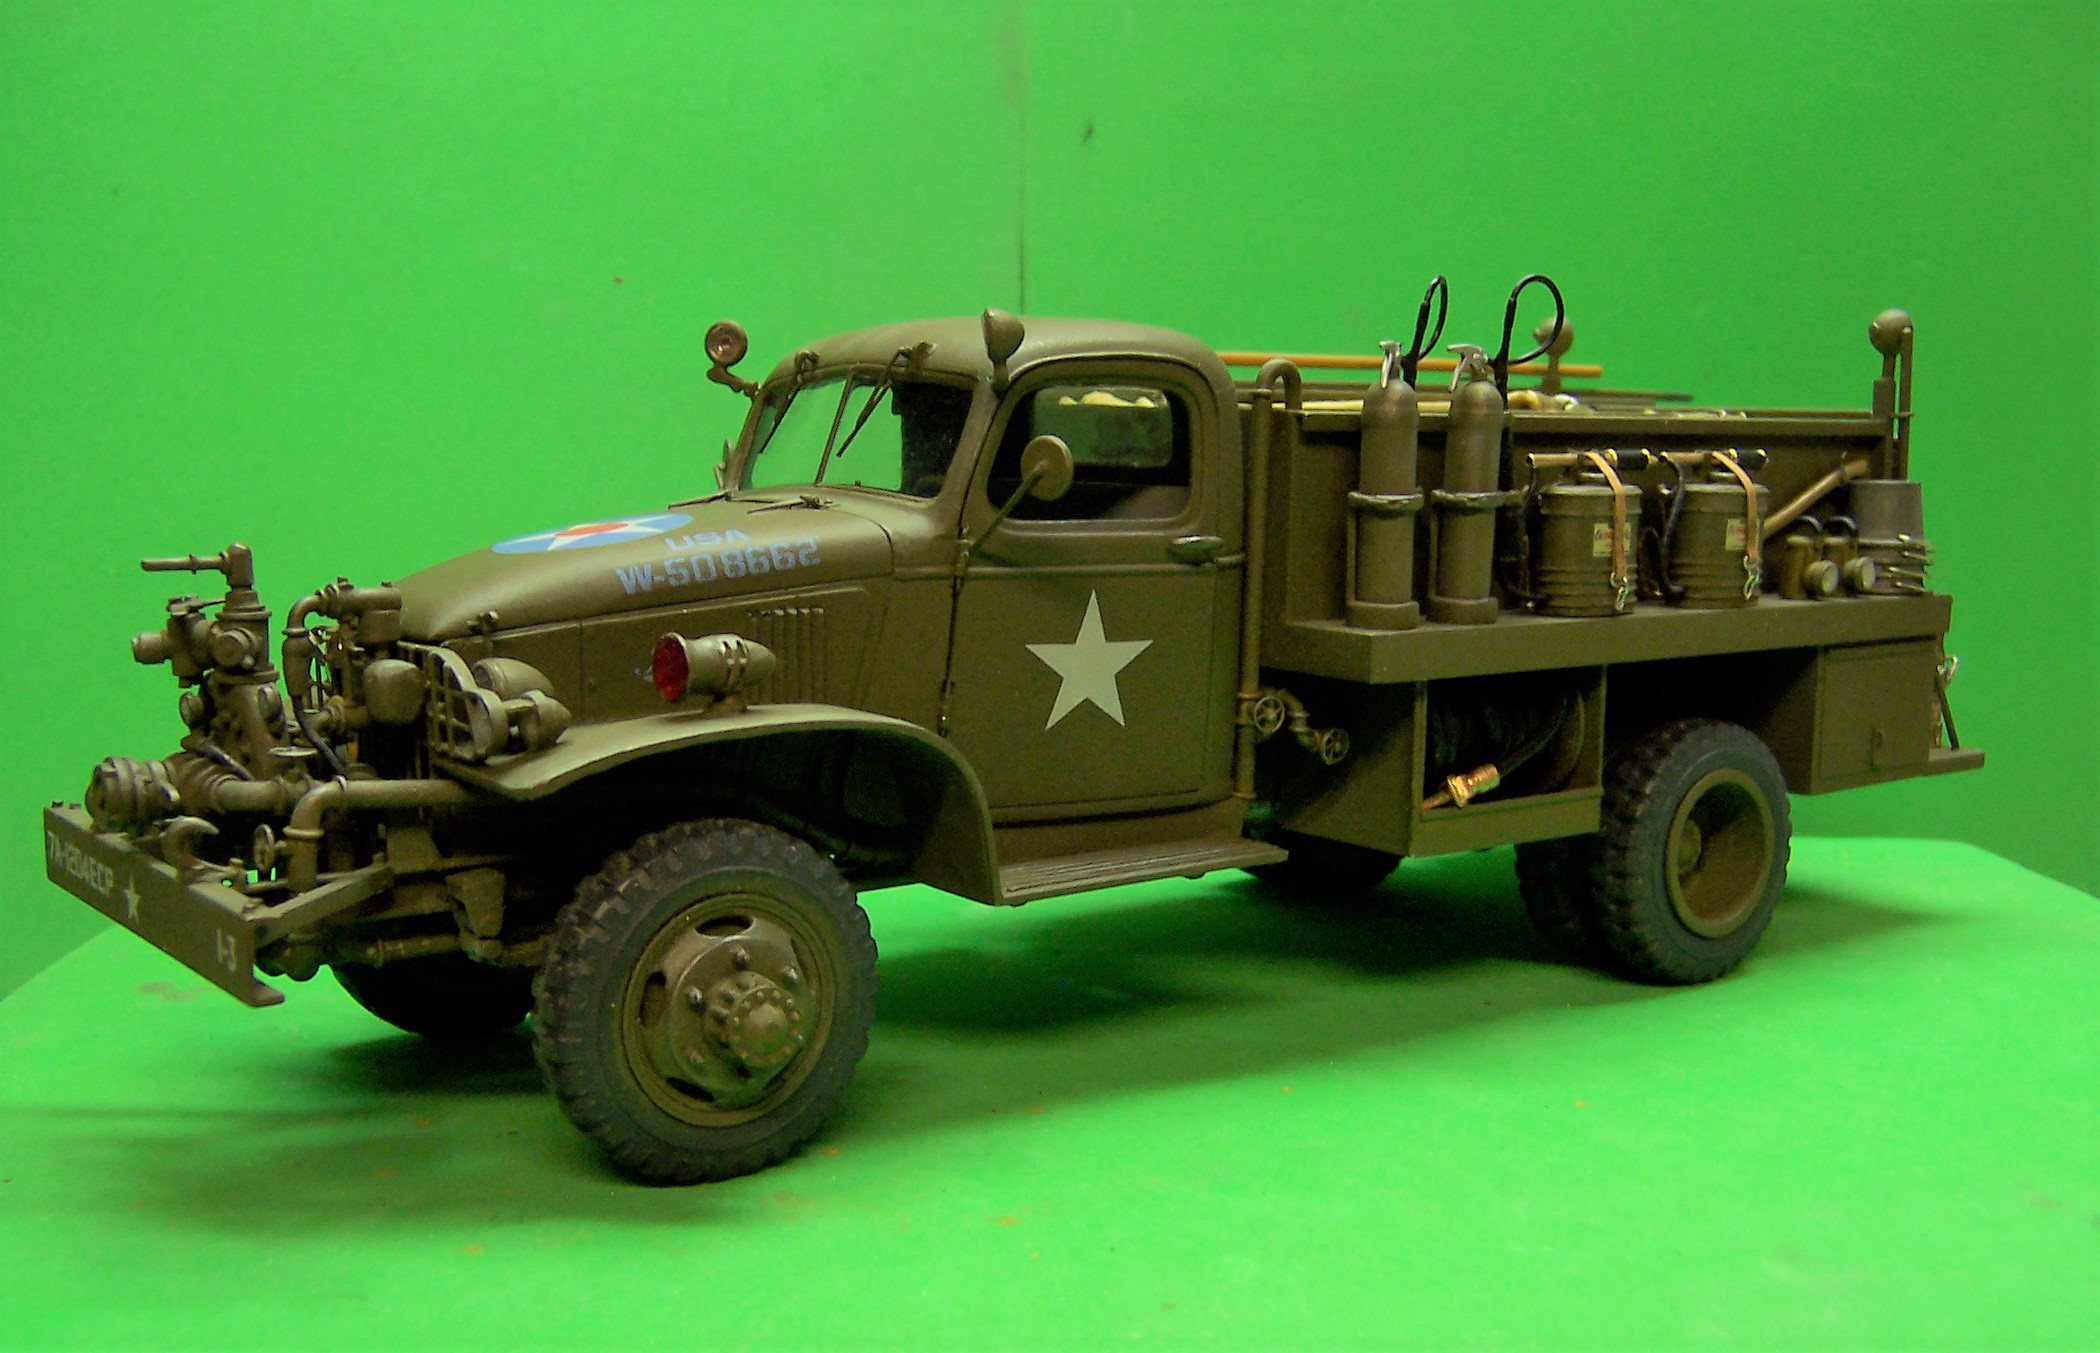
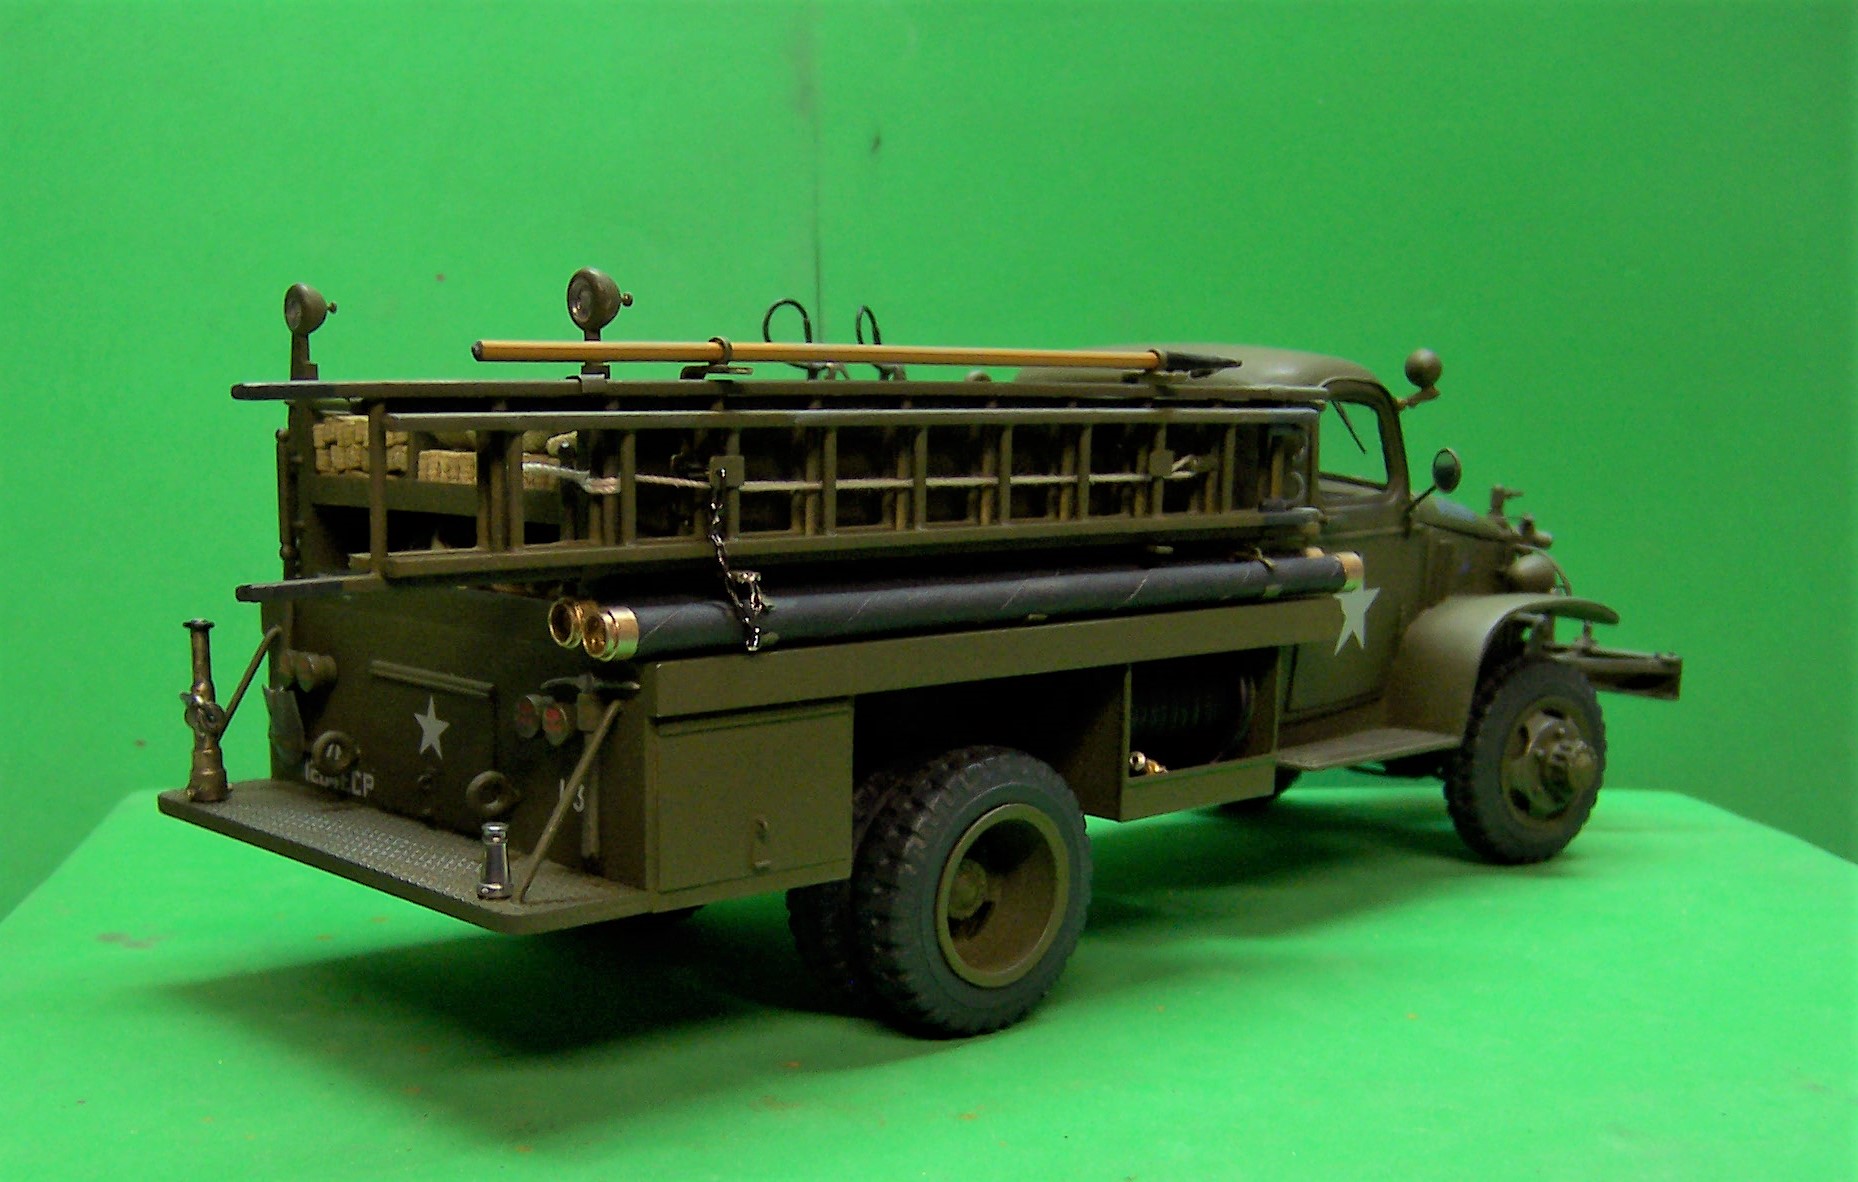
Sometimes things get done before you know it. The last few days were spent doing the small stuff that completes the work. Ladders and brackets, pike pole, extra hose in the open compartment, CO2 extinguishers, pump cans, hand lights, hard suction hose all done. Some highlighting here and there to bring out some of the details was also done. So here is the finished result.