Chariots of Fire
-
Posts
2,782 -
Joined
-
Last visited
Content Type
Profiles
Forums
Events
Gallery
Everything posted by Chariots of Fire
-
 ? Surely you guys jest!! Trying to share it as I go!? Truly there are many good ideas out there that lots of people have posted. And it does not depend on the nature of the build. I have been "encouraged" by my wife to build her a model of the Canadian schooner "Bluenose". Some of the things that are basics to truck and equipment building actually work there as well. Your own experiences are the best teachers because you know from first hand knowledge what works and what does not. Maybe we should all collaborate on that book! ?
 -
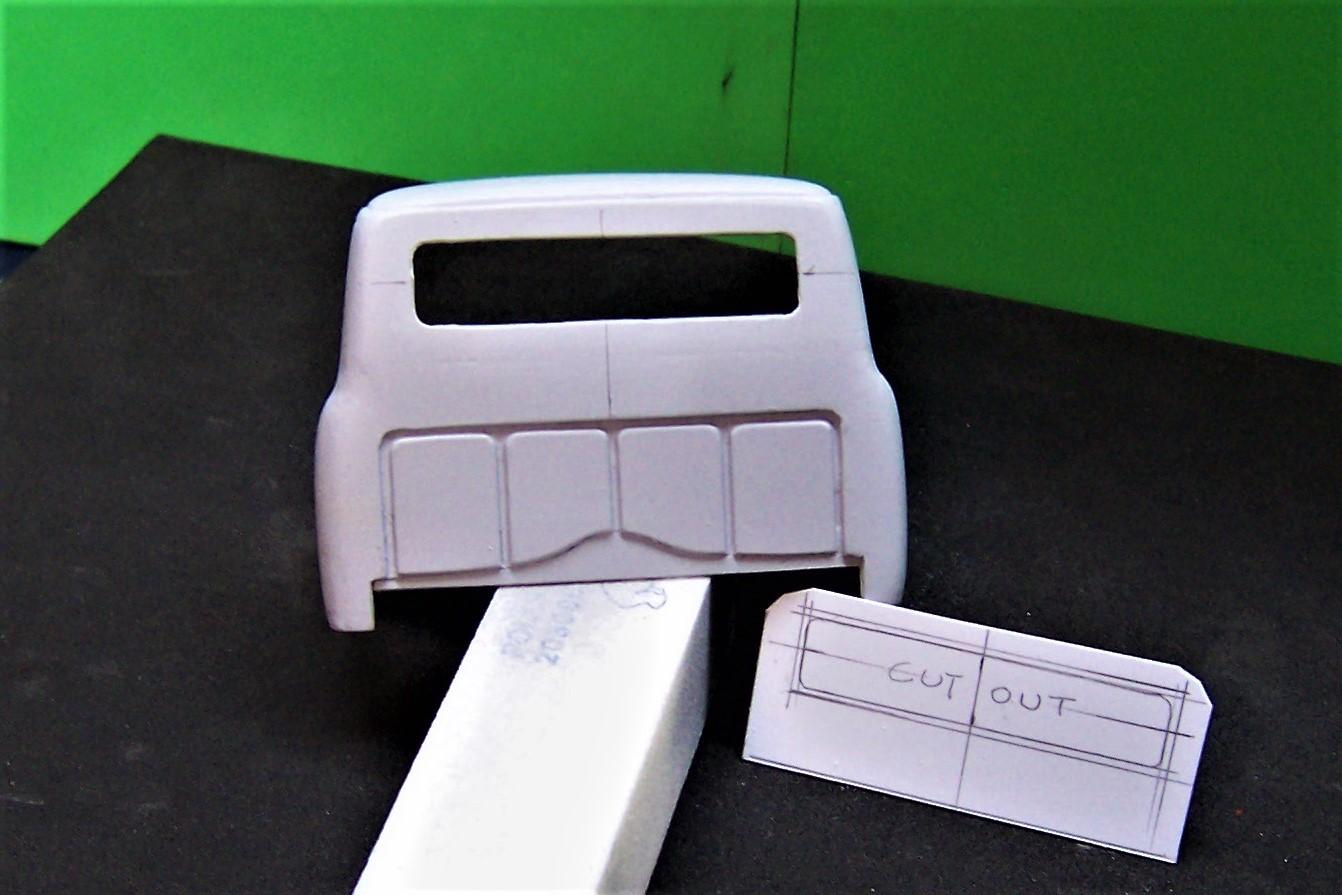
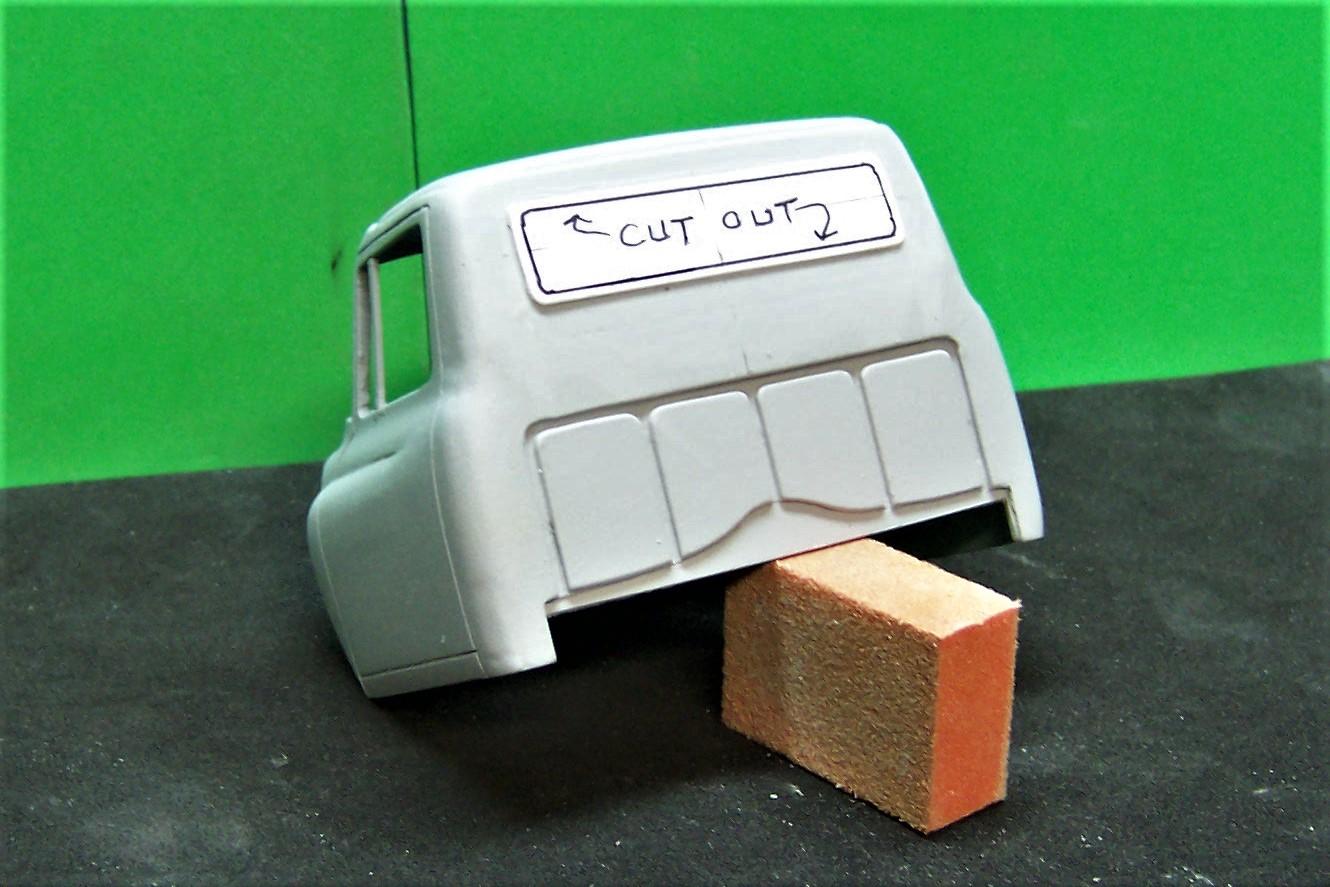
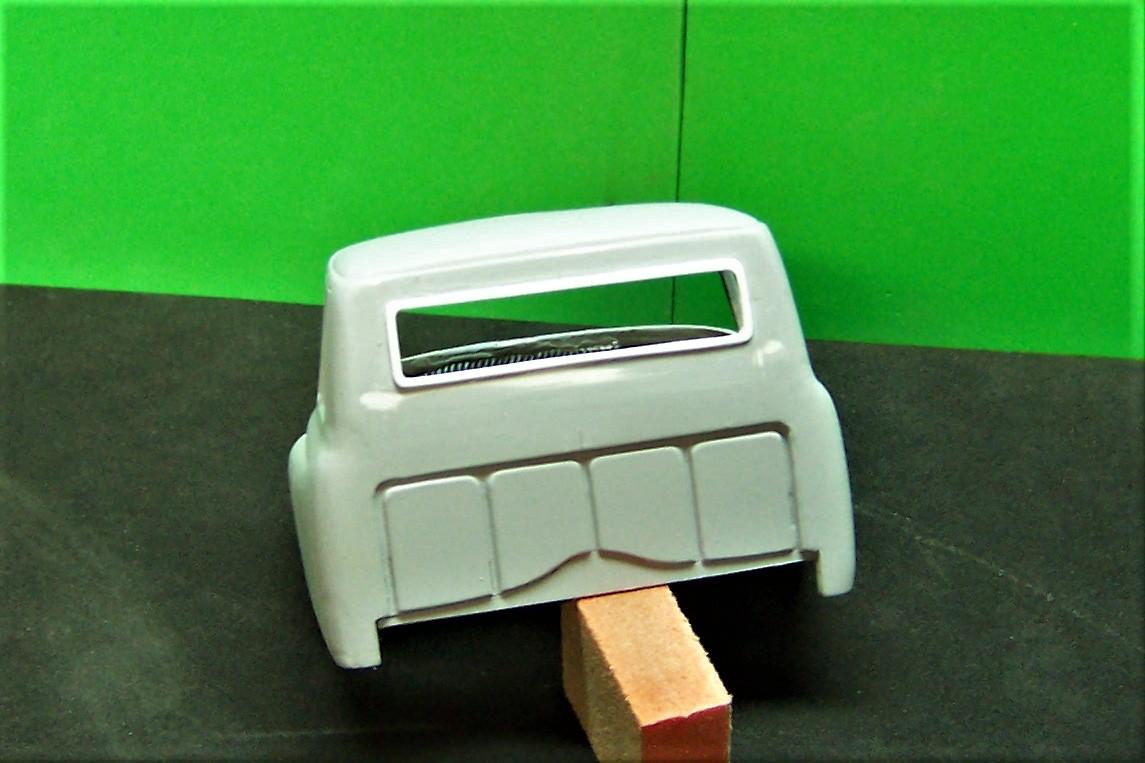
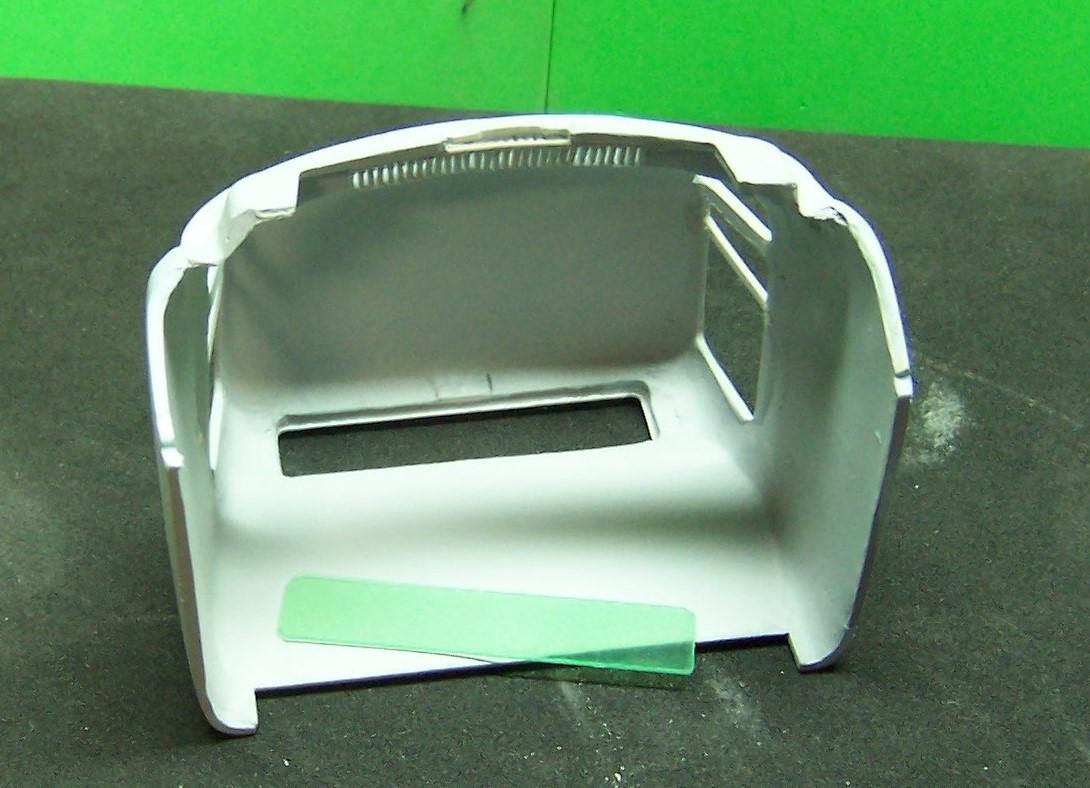
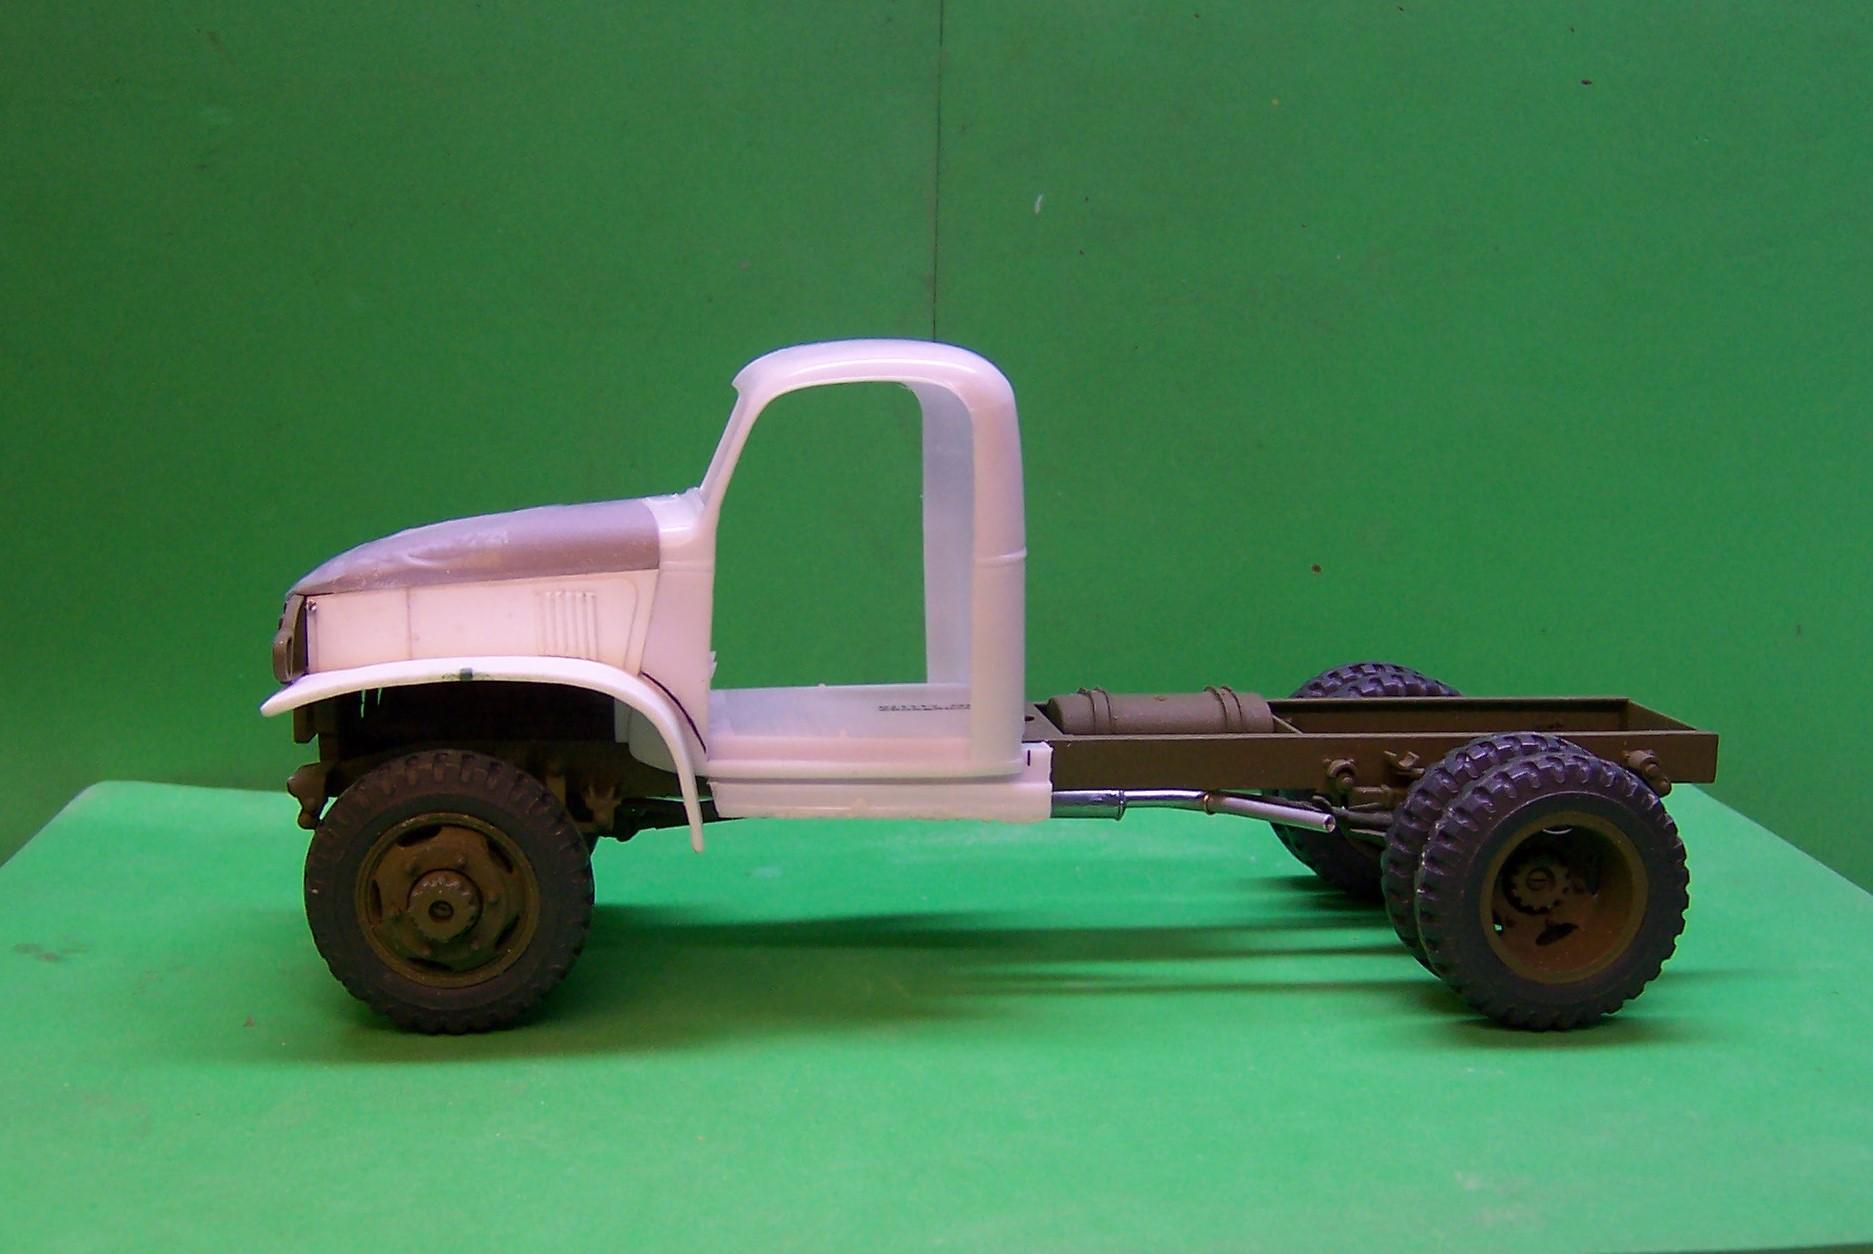
Here's a suggestion for the rubber window gasket. First remove the one you have (or start with your new cab). Next take a piece of 0.020 plastic sheet stock larger than the windshield opening and place it against the opening to where you can draw a pencil line around it onto the sheet stock. Best if you can slip it inside the cab for that purpose but make sure it is larger than the opening as much as you can get. Now take the sheet stock with the pencil line on it and draw parallel lines around it far enough away to represent the gasket width and just far enough so that it fits on the outside of the window opening with no gaps. A little trial and error here may be necessary. Once you are sure you have the right size run a sanding stick around the outside so as to round of the outer edge. Once that is done glue the whole thing to the cab on the outside. Make some pencil lines on the sheet stock line up with pencil lines on the cab to make sure it fits right. (Do this before you trim anything). Now cut out the inner portion of the sheet stock leaving the inside pencil line outline so that you can see it at all times. If you did this right you should end up with a small shelf on the inside of the cab that you lay the glass against. Round off the inner edge of the sheet that is left and you should have a nice small gasket around the windshield. Here are some pix of the one I did for my International before it was cast. The inner line is the one you want to save. The outer lines are what you will trim the sheet to. Note also the lines on the back of the cab that will line up with the same lines on the sheet stock. In this photo the gasket is glued in place. If you look closely you will see the lines drawn on the sheet and similar lines on the cab. That is to make sure that when you cut out the inside you will have the remainder centered on the opening in the cab. Here is the gasket cut out. I could have made this one smaller and more rounded both inside and outside. On the inside is the self I was talking about. The glass fits up against it and leaves the surface nice and clean from the outside. The last thing you can do to minimize the thickness of the gasket is to use a black Magic Marker to color it. Just do the main surface and inner portion before you put the glass in. Let the body color be a bit of a filler around the outside edge. Hope this helps.?

-
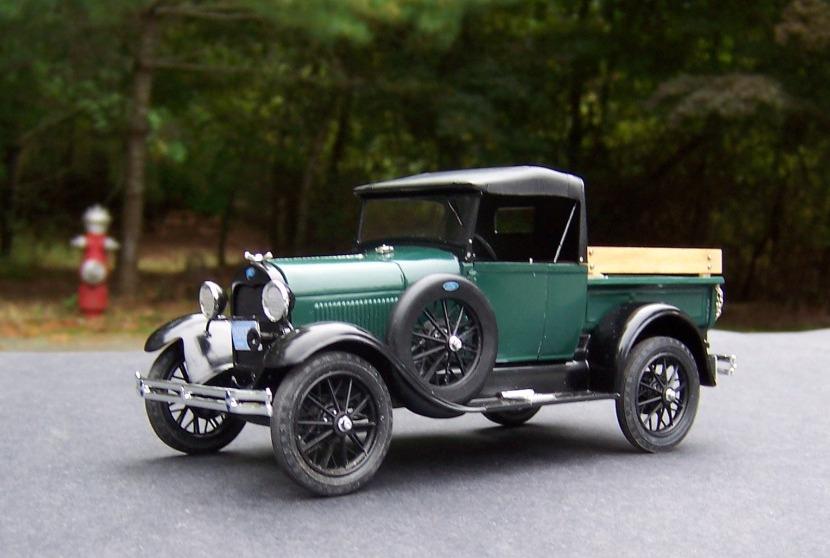
Hey, Tom! Here's my pickup model and the real one under it. It's a lot of fun but a certain amount of headaches as well. After all the truck is 90 years old!
-
'50 Ford F-1
Chariots of Fire replied to Plowboy's topic in Model Trucks: Pickups, Vans, SUVs, Light Commercial
I'm not usually impressed by chopped and modified rods but this is cool to my way of thinking. You did a great job. Love the paint! -
best knife for cutting holes in panels
Chariots of Fire replied to fiatboy's topic in Model Building Questions and Answers
Yes, slowly is the secret. A new sharp blade is best and many, many passes over the same area until you are through is best. I had good results cutting open the doors on a '41 Chevy pickup but it was tedious work, that is for sure.
-
best knife for cutting holes in panels
Chariots of Fire replied to fiatboy's topic in Model Building Questions and Answers
Use your Xacto knife upside down and scribe the panel lines until you work your way through. Time consuming but the best way to achieve good results. Then make new panels to fit the openings. Same as scribing through door lines to remove them so that they can be hinged. -
resin tires...
Chariots of Fire replied to meoirosiosi's topic in Model Building Questions and Answers
That's a nice build Richard! Great tip on the white tires in RTV! I use the RTV from Micro-Mark for molds. It ;holds up well and I think it would make great tires. Only problem with it is that it is blue when it sets. Don't know if you can put any black pigment in it or not. -
Resistance Soldering On A Budget!
Chariots of Fire replied to Straightliner59's topic in Tips, Tricks, and Tutorials
Know what?? That's why I like 1/25 scale to work in. There are 25.4 millimeters in one inch. For practical purposes you can forget the 0.4 and just say there are 25 millimeters in an inch. So If I have a 118 inch wheelbase on a real vehicle it is simply 118 millimeters on my metric ruler! Things couldn't be simpler!? -
Stick with the 1/25!!! So much detail, it makes this really fun to watch.
-
Hmmm? What to do???
Chariots of Fire replied to DrKerry's topic in WIP: Model Trucks: Big Rigs and Heavy Equipment
Trying to straighten out all those wrinkles??? -
Seeing all of the parts you have made give us an idea of all of the work that goes into it. Great job! How did you do the raised "GALION" on the counter weight?
-
Keep it going! Love the scratch building!
-
You are doing some great Imagineering! Scratch building can be so rewarding just making things out of basic materials. Love it!
-
I did this one by making a pattern on a graphics program and then printing out decals. Seats were painted dark blue first.
-
Paint the whole seat white to begin with. Then add a decal for the pattern. Make a pattern first out of masking tape and cut out the decal to match. Easiest way I know.
-
Give us an idea of how you did the inside of the steering knuckles. They look great!
-
American LaFrance 700
Chariots of Fire replied to cargostar's topic in WIP: Model Trucks: Big Rigs and Heavy Equipment
You guys are making me drool!! -
What went wrong?
Chariots of Fire replied to Super28's topic in Model Building Questions and Answers
The one on the left looks like it went on too dry on the trunk. The rest of it looks like a first coat which can be rough. I'd sand the whole thing lightly and spray again. Building up the paint and then a final wet coat will bring the best results. The lacquer could be a humidity thing which can be polished out. However, again I would give it a light sanding and apply more light coats to let the paint build up slowly with a final wet coat. Wait for a relatively low humidity day. Polish only after the last coat is really dry. -
Autocar dump coming this summer
Chariots of Fire replied to brian falcone's topic in Truck Kit News & Reviews
That will be quite some rig, Dave! Don';t forget a folding tank! -
1965 Mack B61ST 1/25 scale
Chariots of Fire replied to Pete68's topic in WIP: Model Trucks: Big Rigs and Heavy Equipment
I was wondering about the rear axles. I've always had a thing against the spread axle look. Glad to see you made the change! -
You don't say how big these parts are or what you are using them on but what is said above would probably work.
-
Resin casting question for the pros
Chariots of Fire replied to gtx6970's topic in Model Building Questions and Answers
Two part rubber mold and from a master of the one you want to copy and then two part casting resin. I'd stiffen up the axle with a piece of wire inserted in the mold while pouring the resin to make sure there is no droop over the long term. The resin can creep in time if not reinforced. -
If the seams are small you can use CA glue by putting it in the seam and then add some plastic sanding dust. Turns hard as a rock and you don't see any ghosting afterward. The only drawback is that the seam is harder than the surrounding plastic so you have to be stingy on the amount of glue in order to reduce the amount of sanding necessary. If seams are large try using another strip of plastic to fill in most of it. Carve the plastic to a rough shape to fill the void and then do the CA and sanding dust truck. Tamiya putty is a good material also but it takes a while to really set up to where you can sand it smooth. Again, for small seams and joints only!
-
Looks like that workbench has seen a lot of building over the years! A real testimony to long time love of the hobby!
-
Love the engineering that goes into making this model! That is a lot of the process of scratch building; working through the "how to's" before setting glue to plastic. It is also a lot of the fun, figuring out just how it will be done so it looks right in the end. Great work, Tom!