Chariots of Fire
-
Posts
2,782 -
Joined
-
Last visited
Content Type
Profiles
Forums
Events
Gallery
Everything posted by Chariots of Fire
-

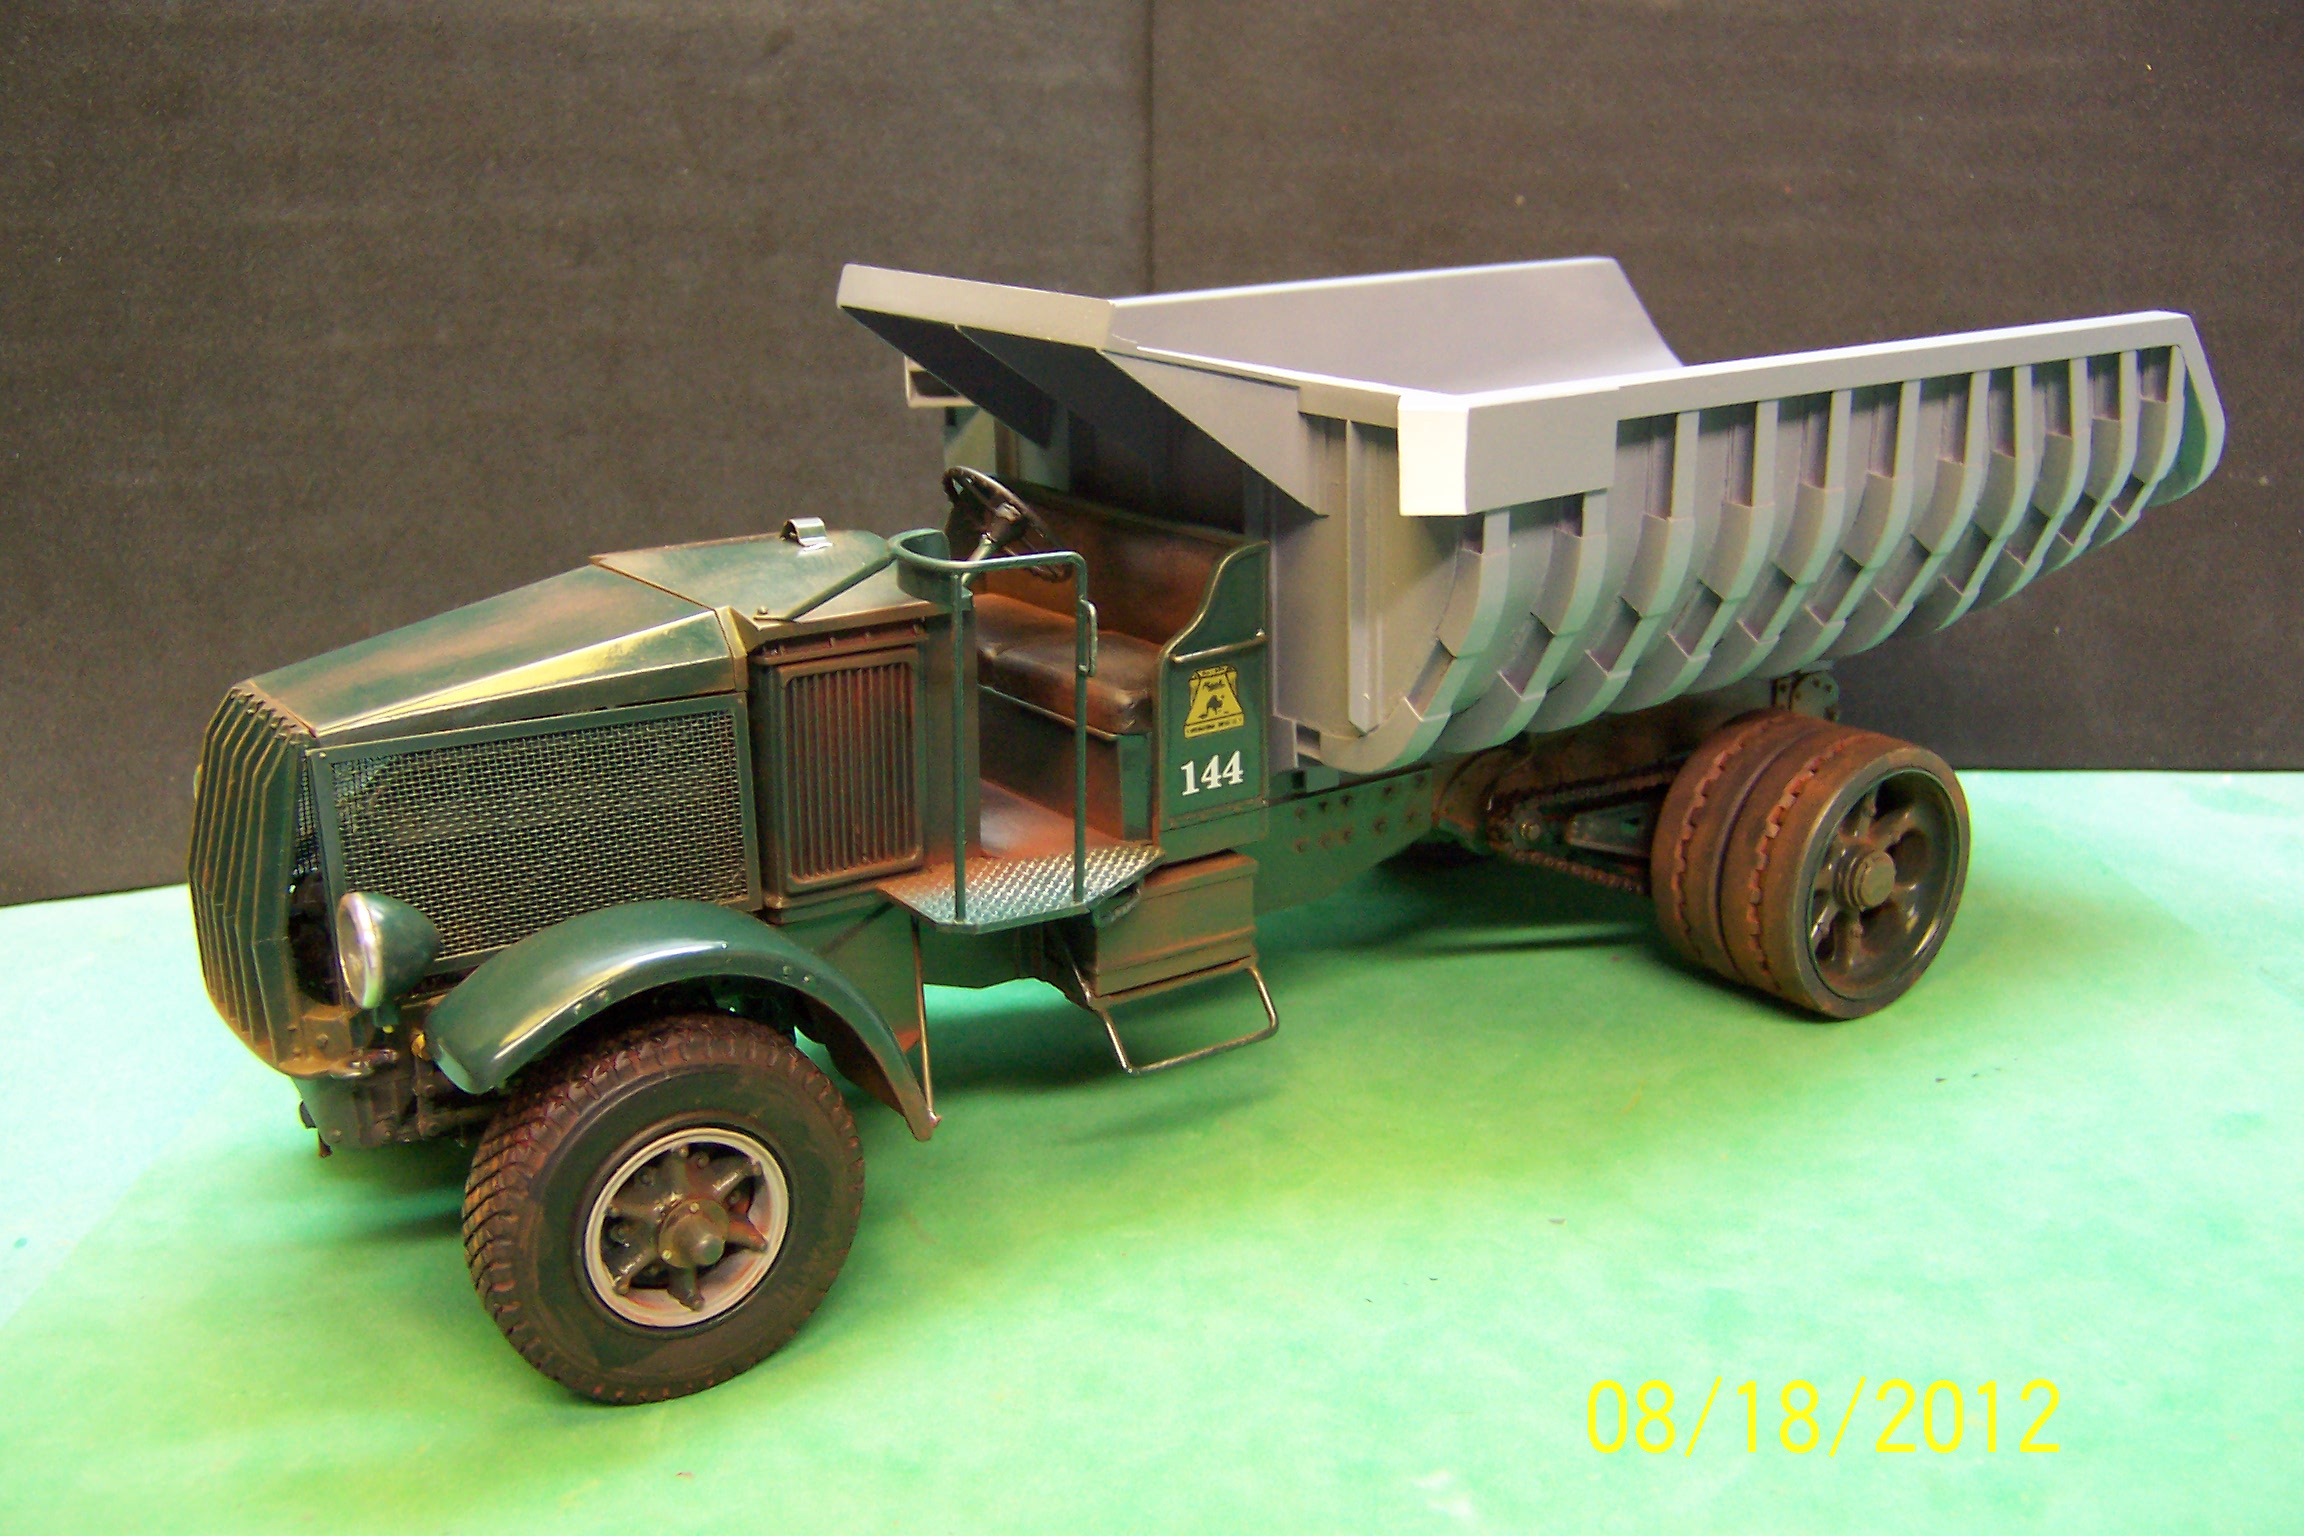
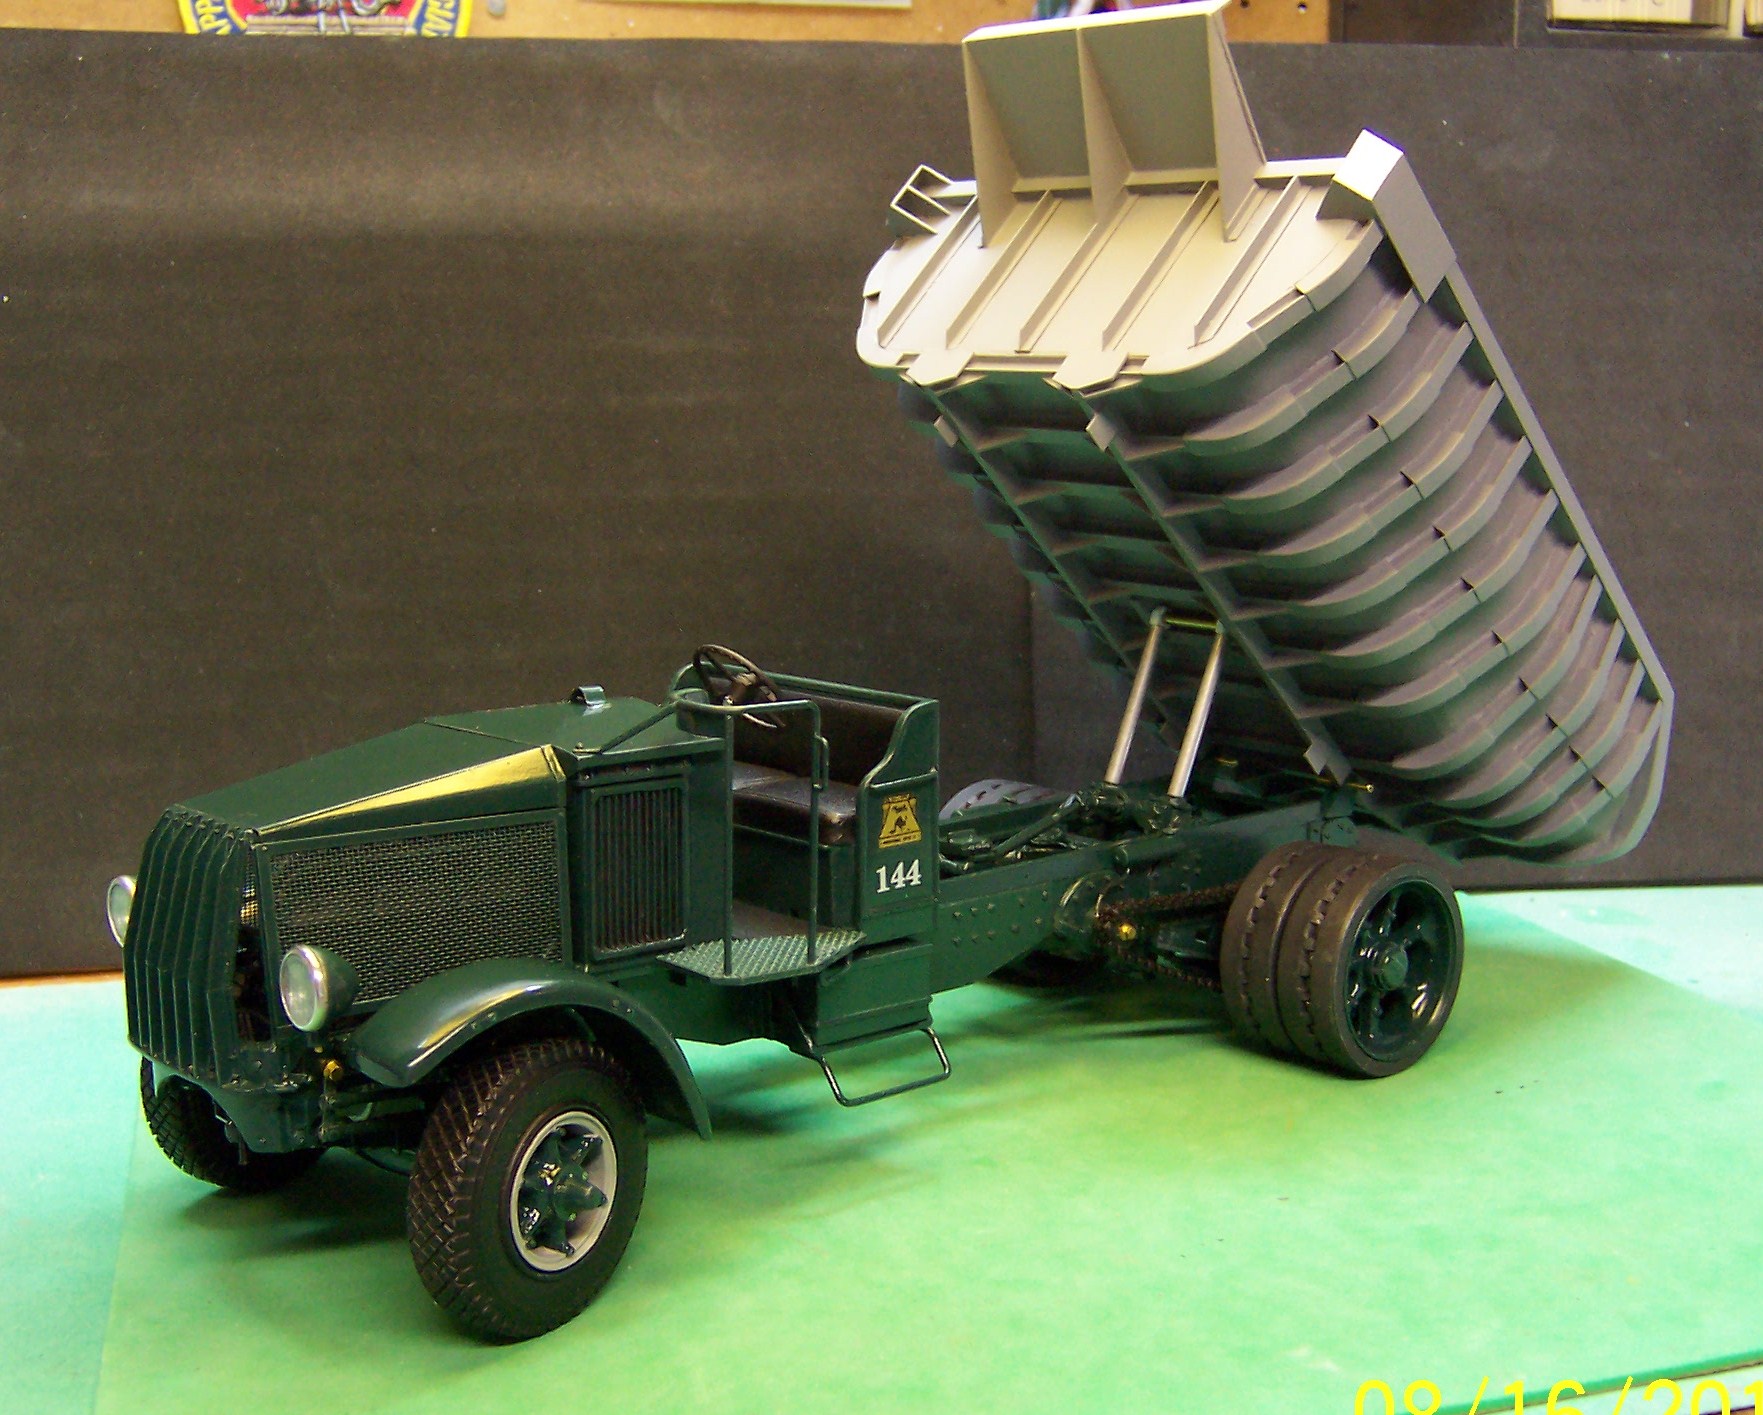
1926 Mack AC Dump Truck
Chariots of Fire replied to Jim B's topic in WIP: Model Trucks: Big Rigs and Heavy Equipment
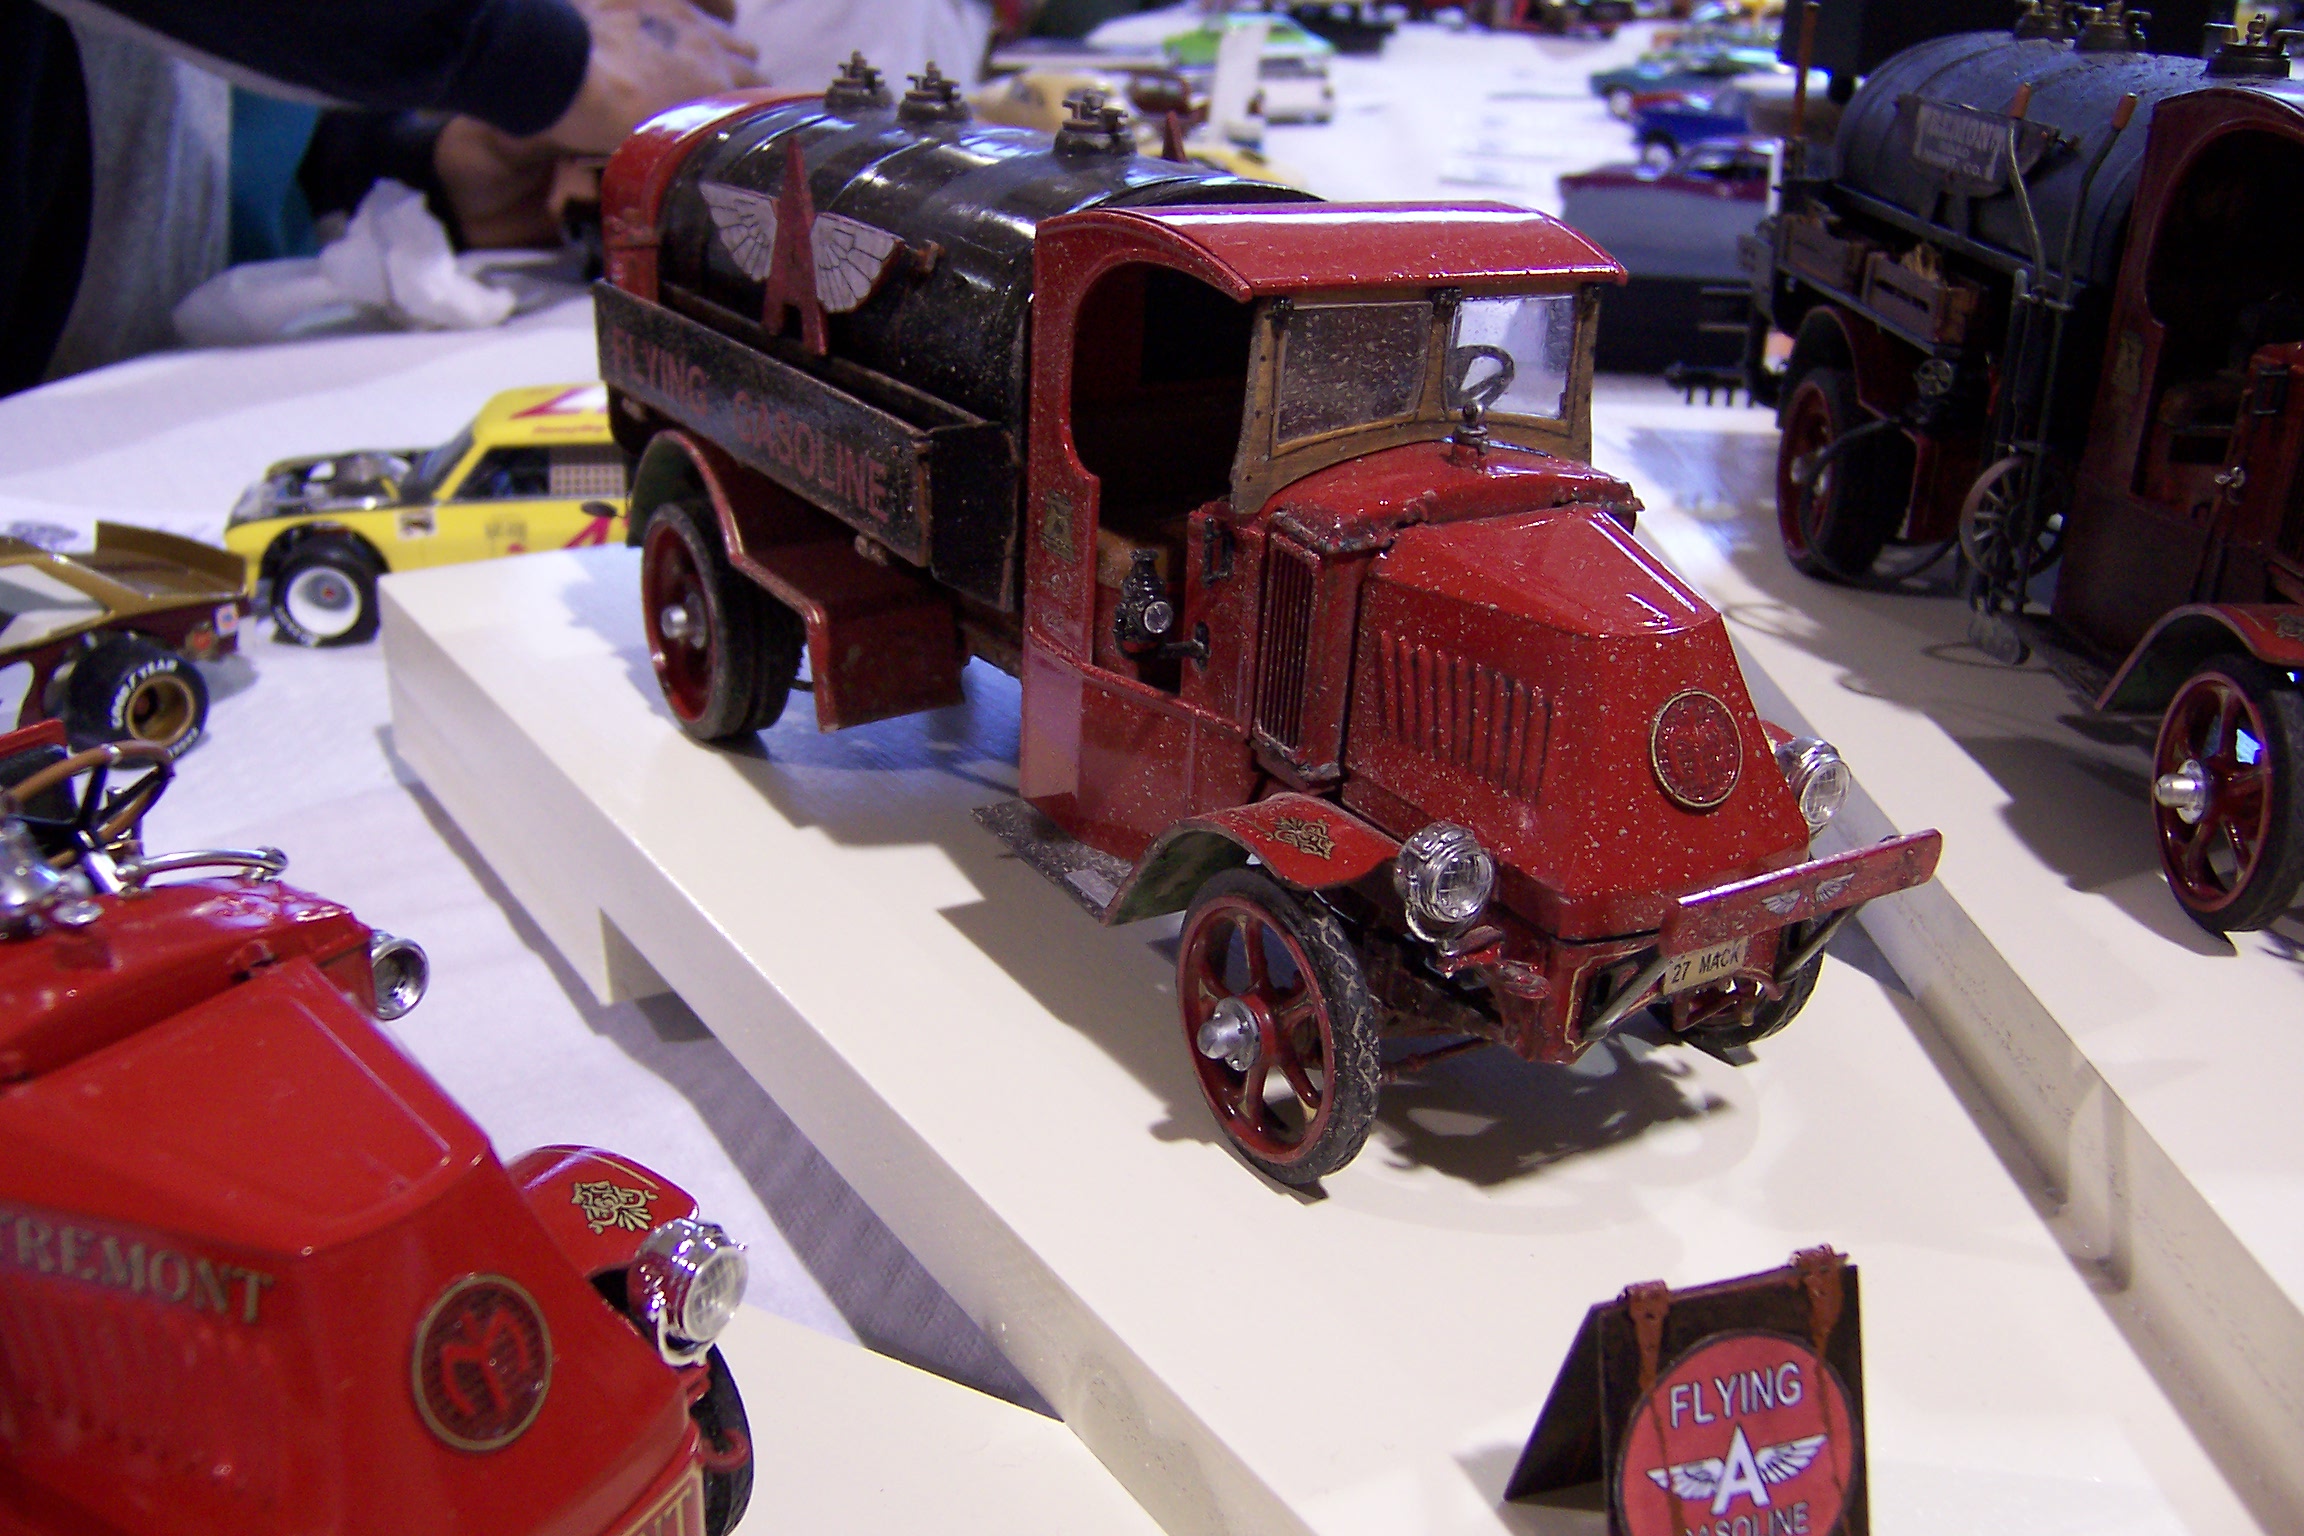
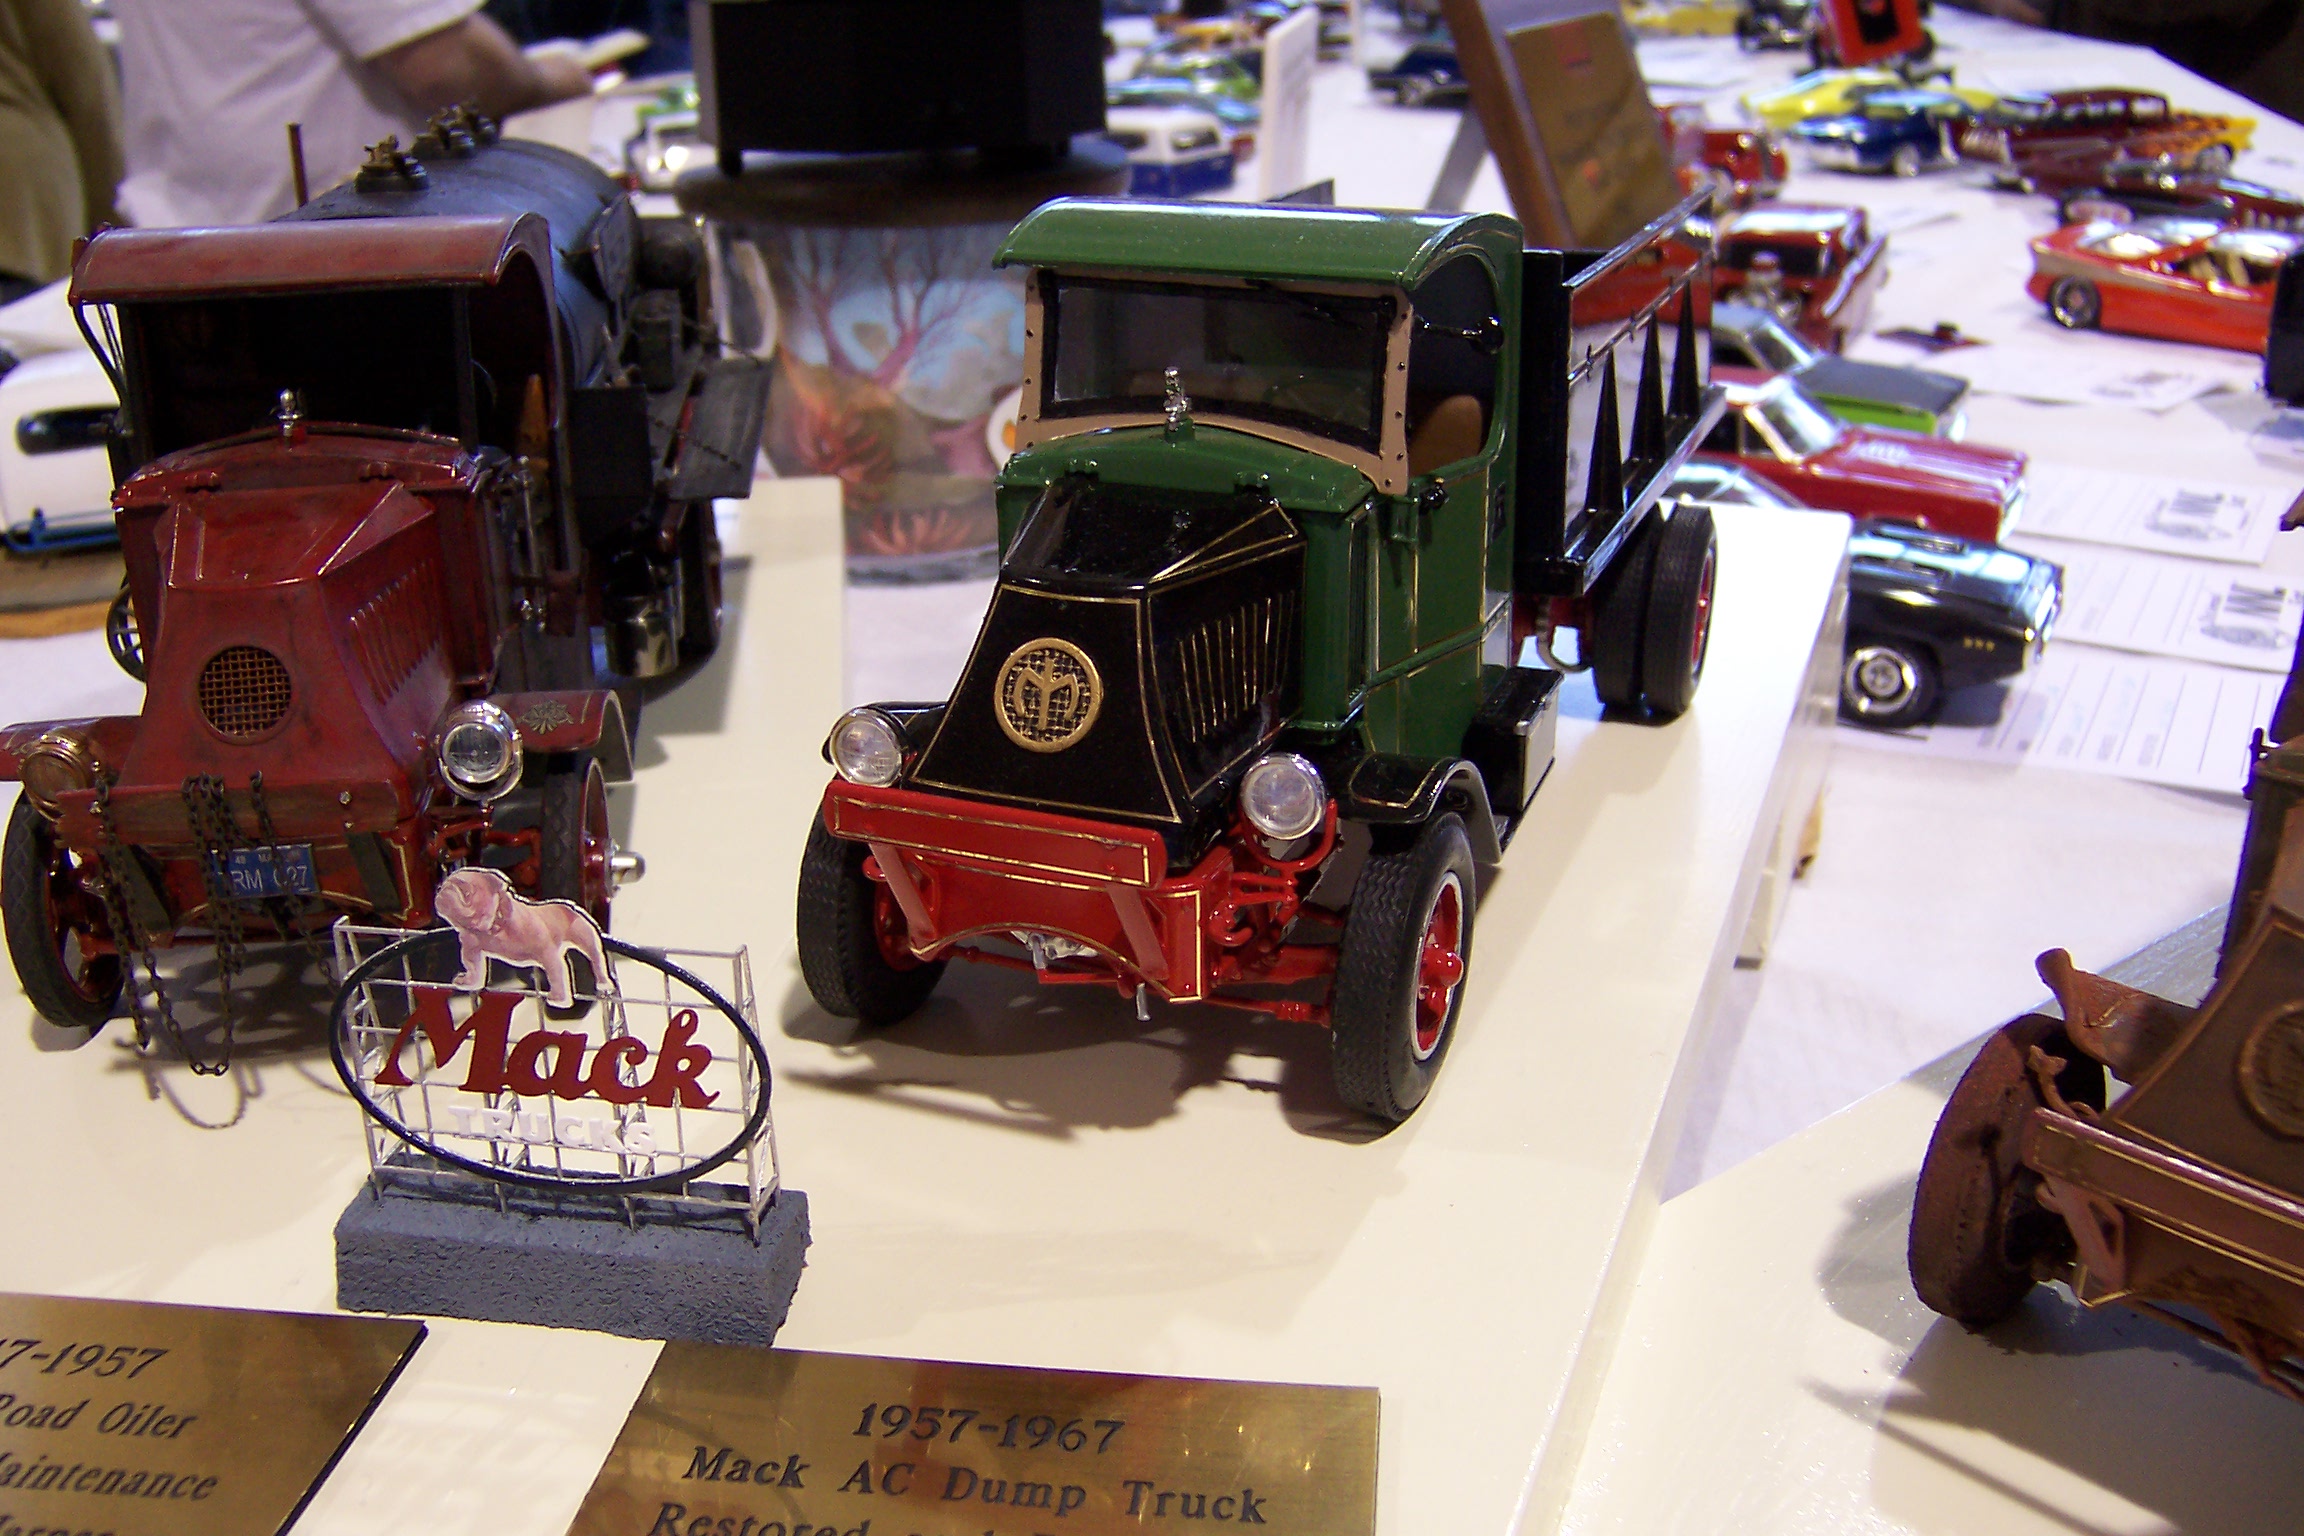
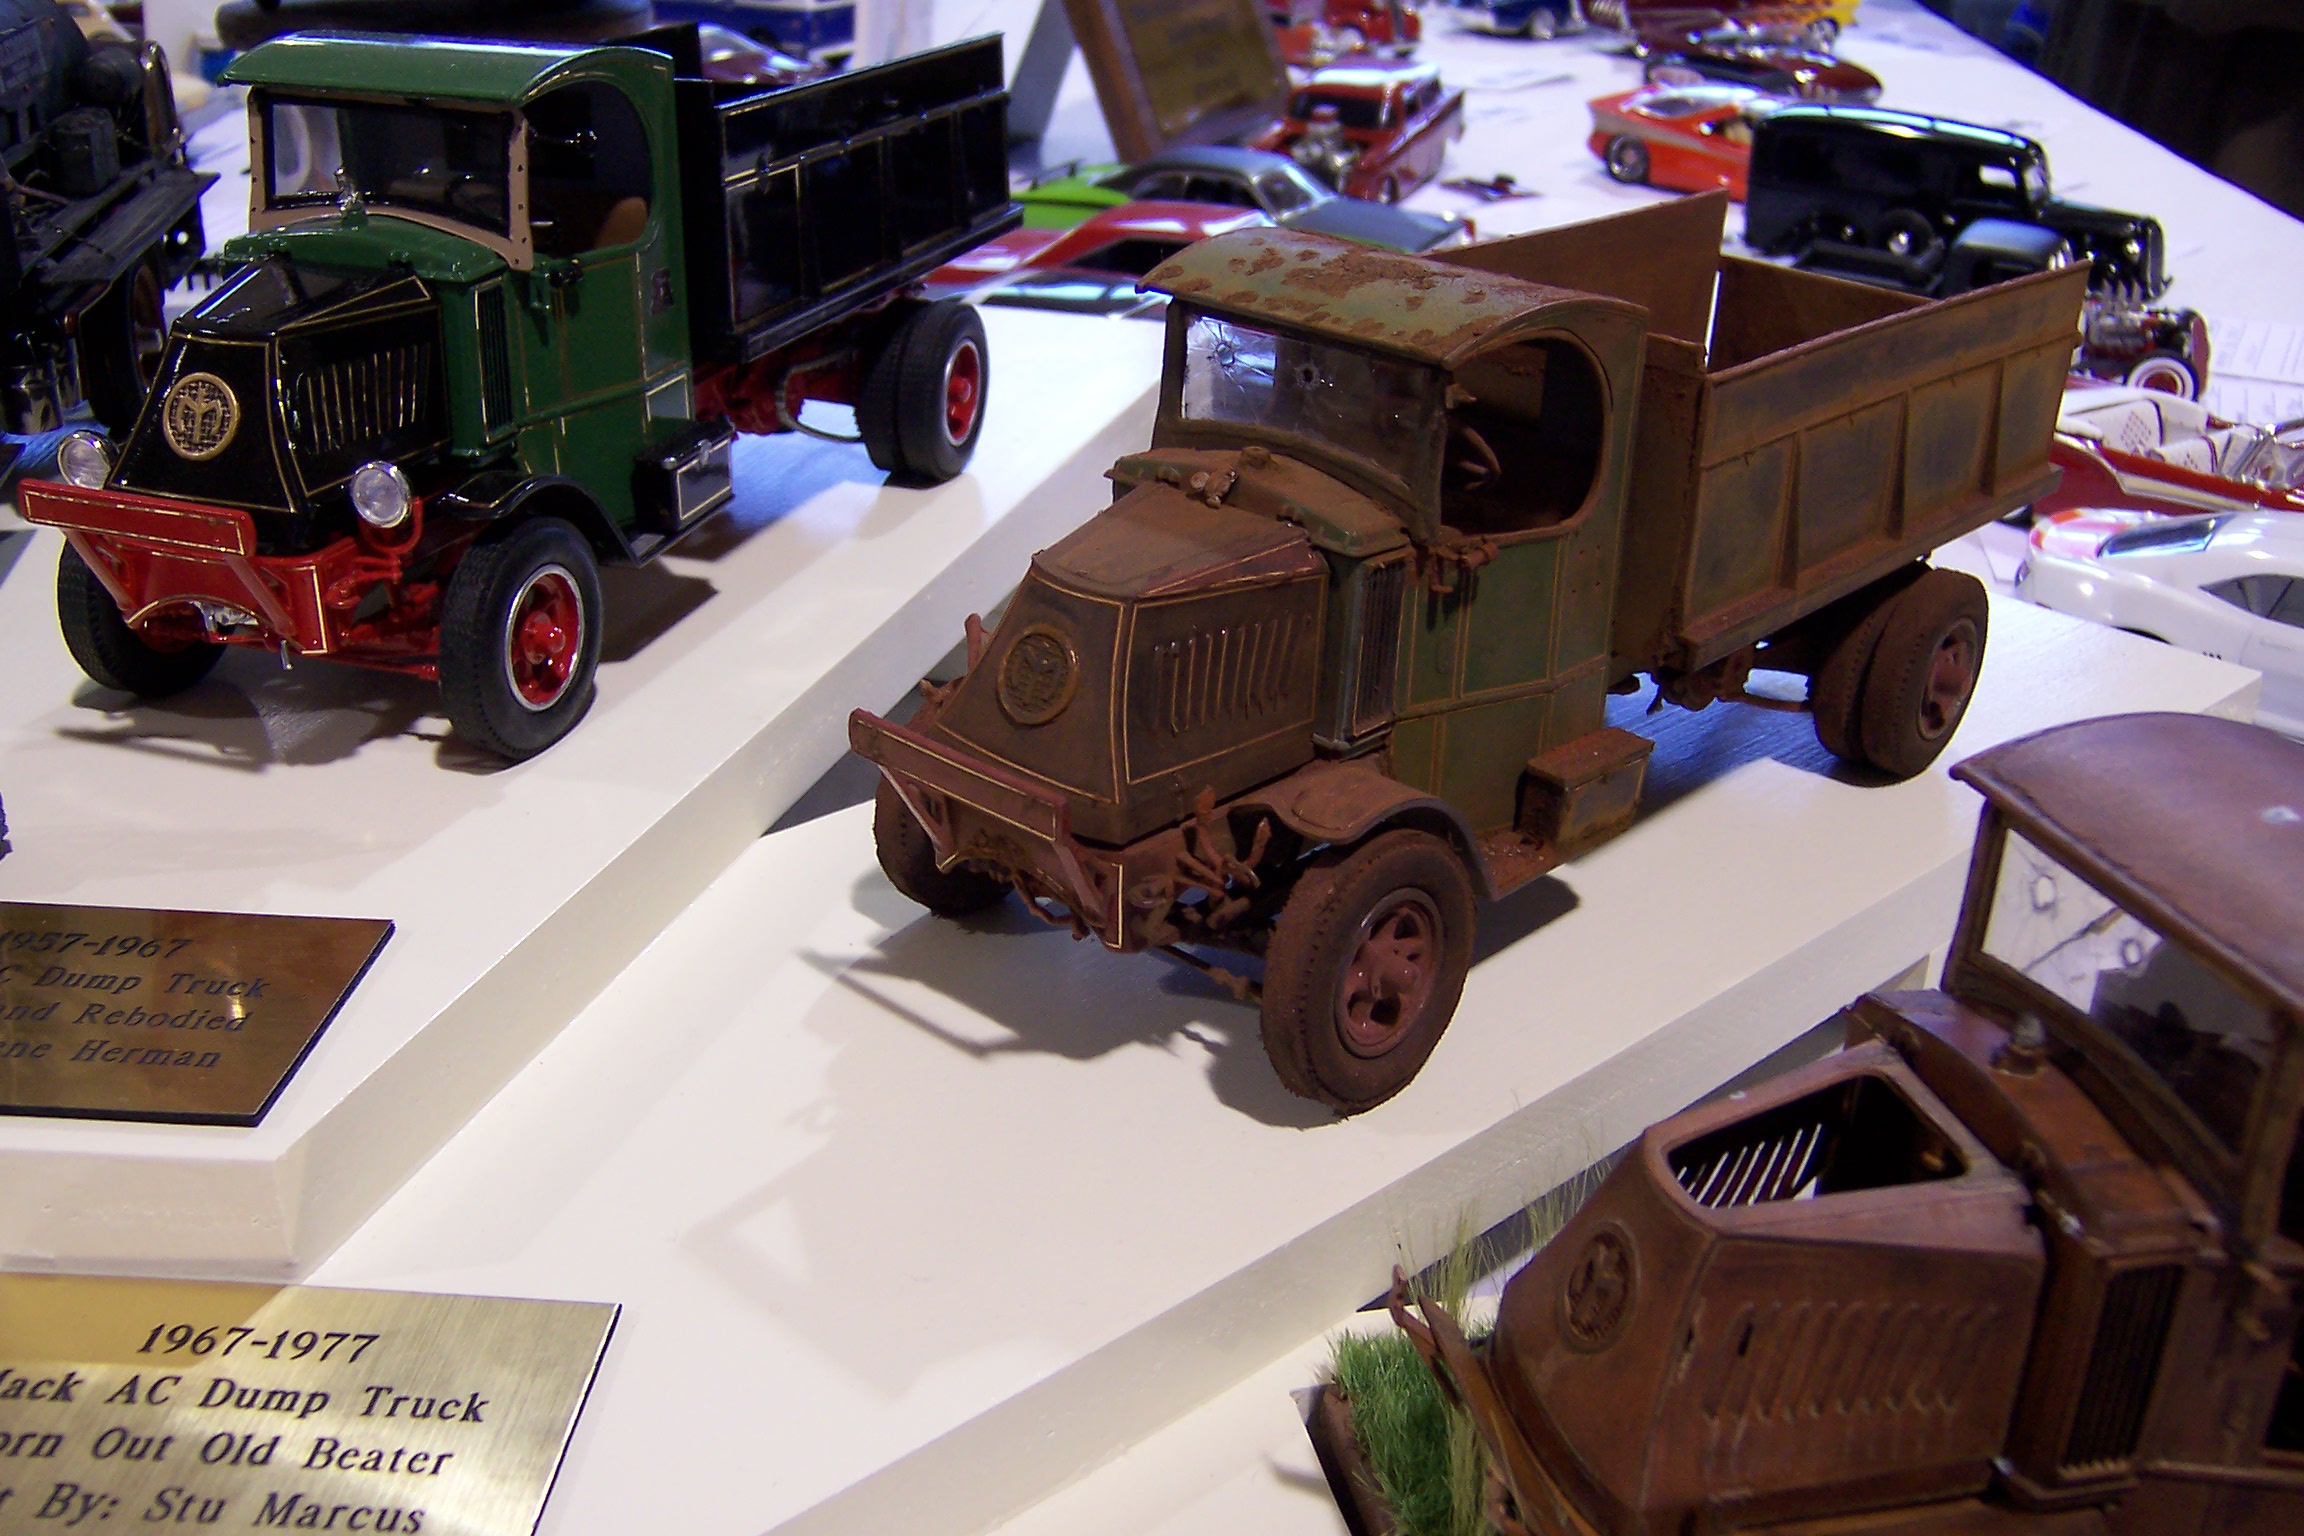
The Monogram Mack engine is very nicely done with that Mack emblem and all. The only complaint I ever had was the fit of the hood. Never that great. It takes a bit of tweaking to have it sit down flush with the frame. If any of you went to NNL back in 2007 you might have seen this display. We did six AC Macks all in a theme.
-
1926 Mack AC Dump Truck
Chariots of Fire replied to Jim B's topic in WIP: Model Trucks: Big Rigs and Heavy Equipment
These were post WW1. They came out in 1932 as the result of a conglomerate called Six Companies that asked Mack to come up with a heavy duty rig they could use in building Boulder (Hoover) Dam. It was the first true off-road truck of its time. -
1926 Mack AC Dump Truck
Chariots of Fire replied to Jim B's topic in WIP: Model Trucks: Big Rigs and Heavy Equipment
When Jeff Harper and I built out Mack AP's a few years back we substituted Delrin chains and sprockets for the plastic drive chains found in the kit. But we took a lot of parts from the kit to do our builds. That is a nice kit to work with and there are lots of possibilities to build things other than the dump truck, logger or tank truck. They were used for just about everything. Here's a photo of the AP so that you can see the resemblance to the AC.
-
This is the only school where tuition is free! There's no diploma or graduation exercises however. The learning never stops!
-
Got a bit more done the last few days. With the pump basically done I turned attention to hinging the doors using some small "H" hinges from MicroMark. They are temporarily held together using stainless steel wire. The wire is stiff enough to keep the hinges in alignment while they are being installed. After first securing them in place with superglue I then drilled out the holes in each half down into the plastic and inserted small brass pins. The pins are also superglued in place and then the heads are ground down nearly flat so that the hinge will close without binding. I used the back of an Xacto knife to scribe out the doors. This takes out the least amount of plastic and leaves a relatively clean edge between the door opening and the door itself. Very little shimming has to be done to keep the opening even all around.
-
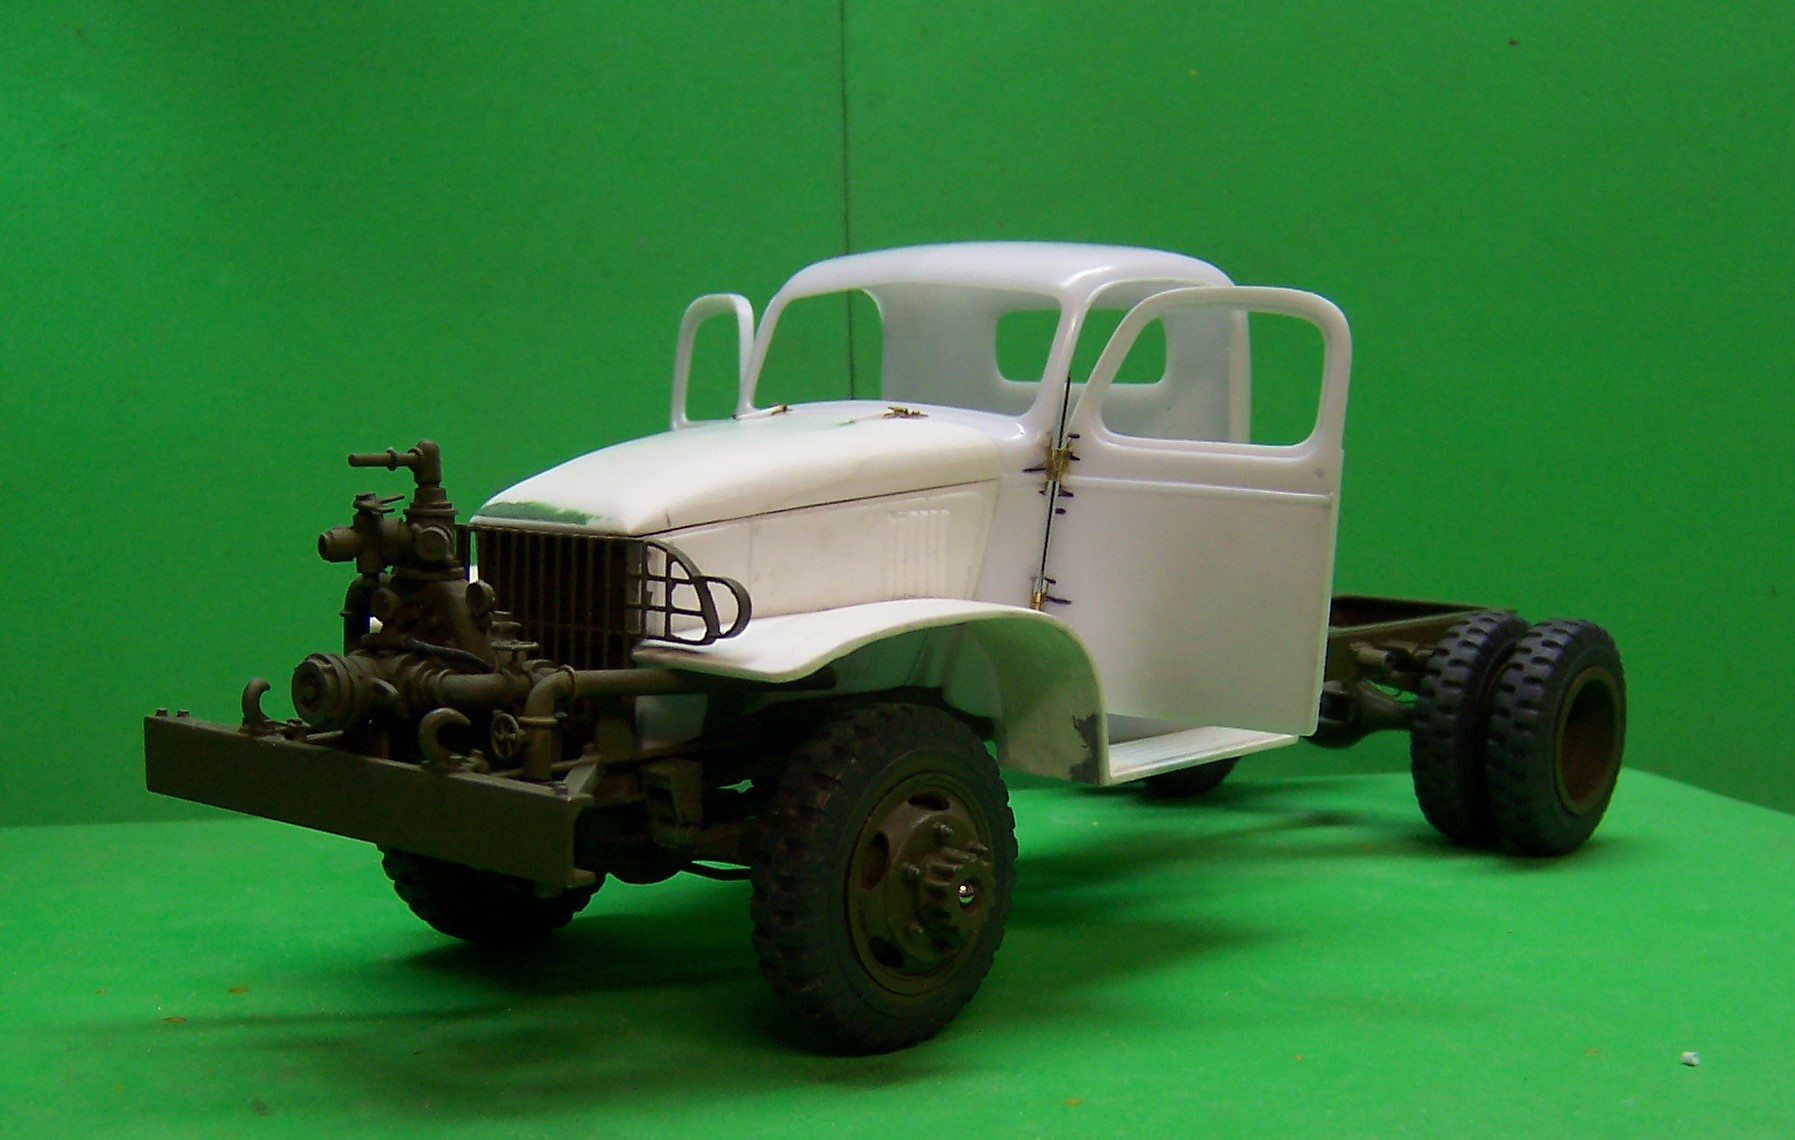
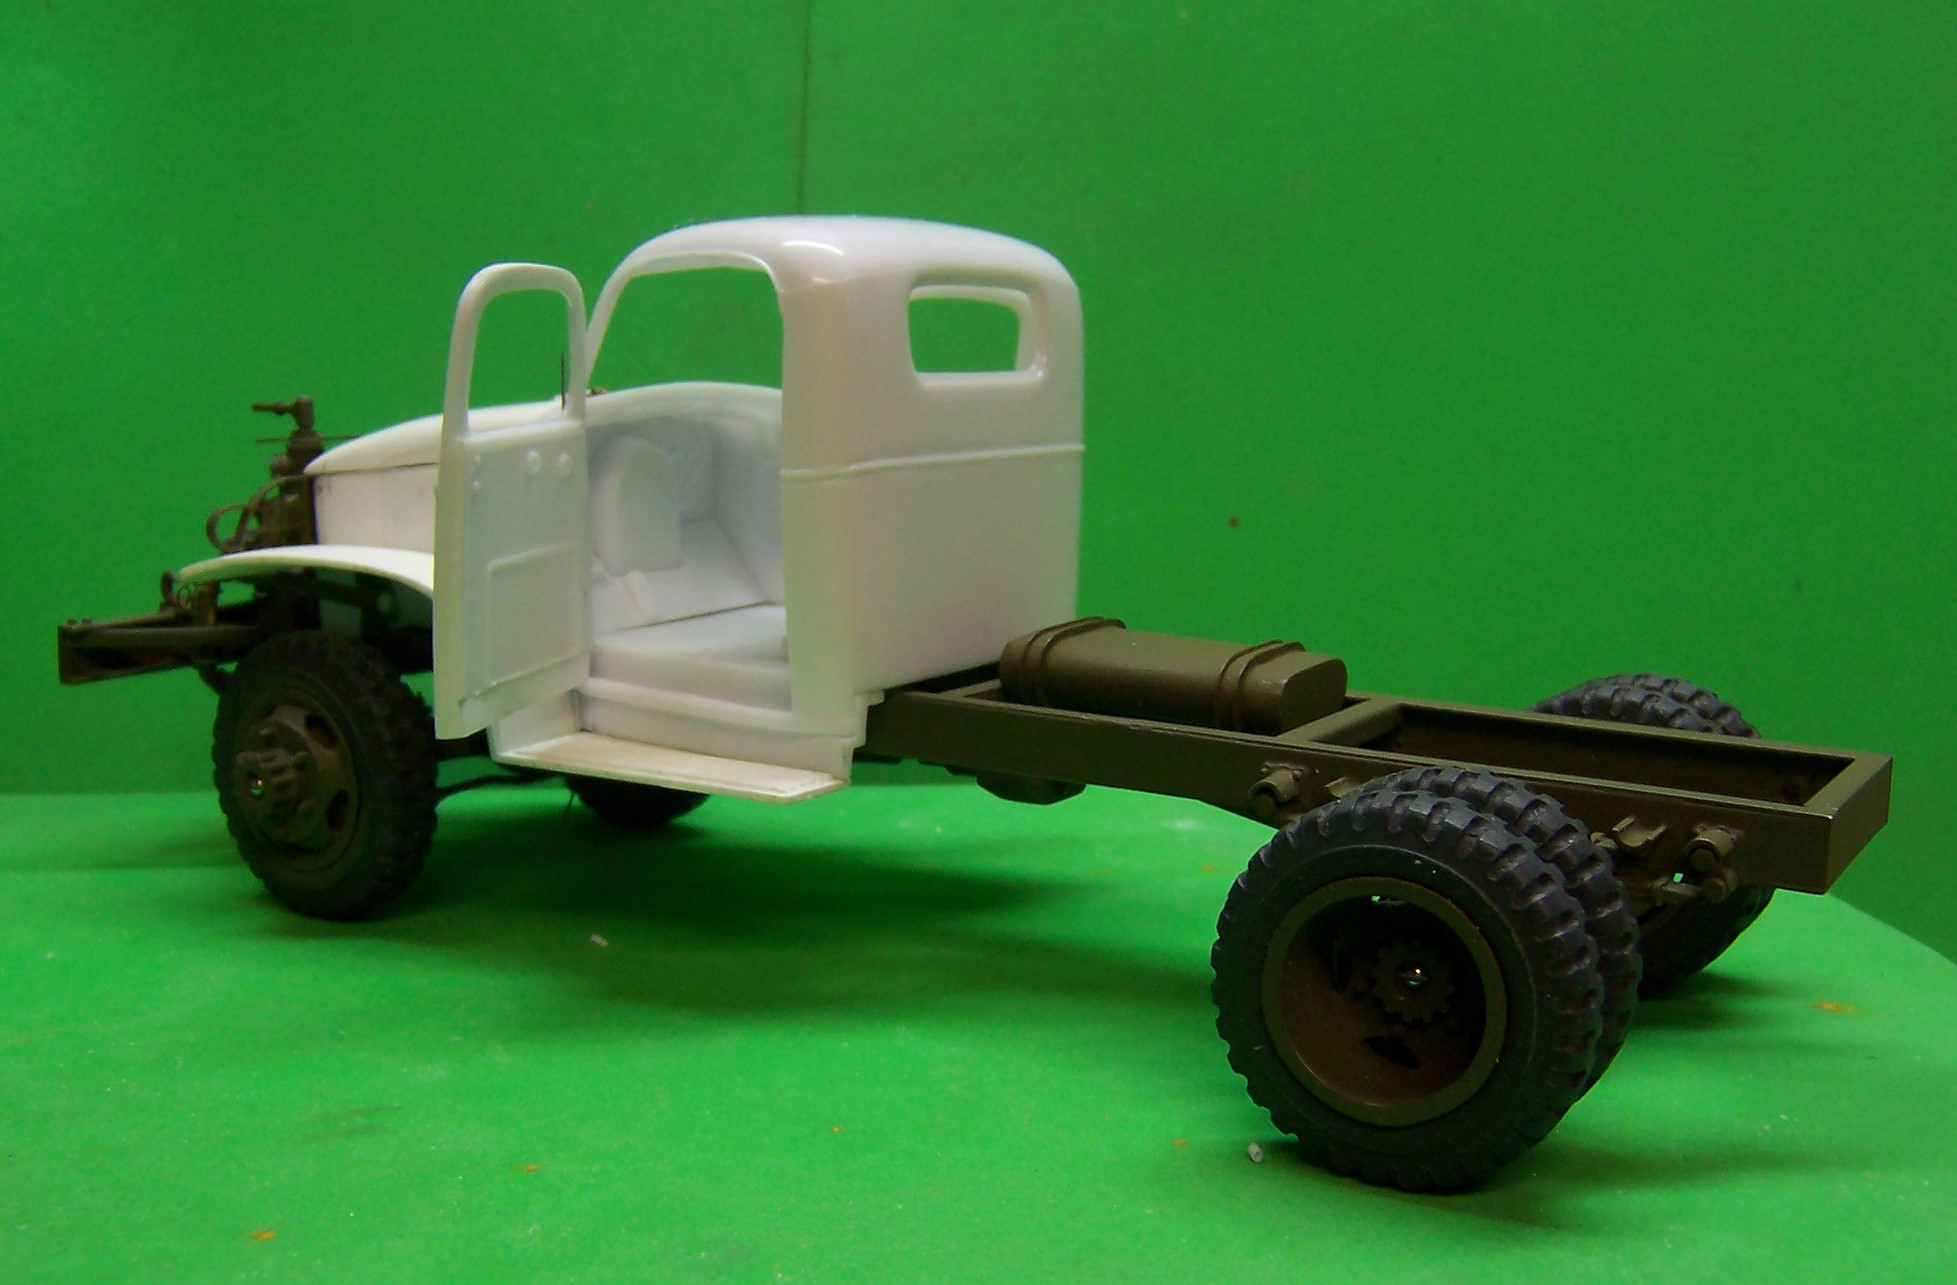
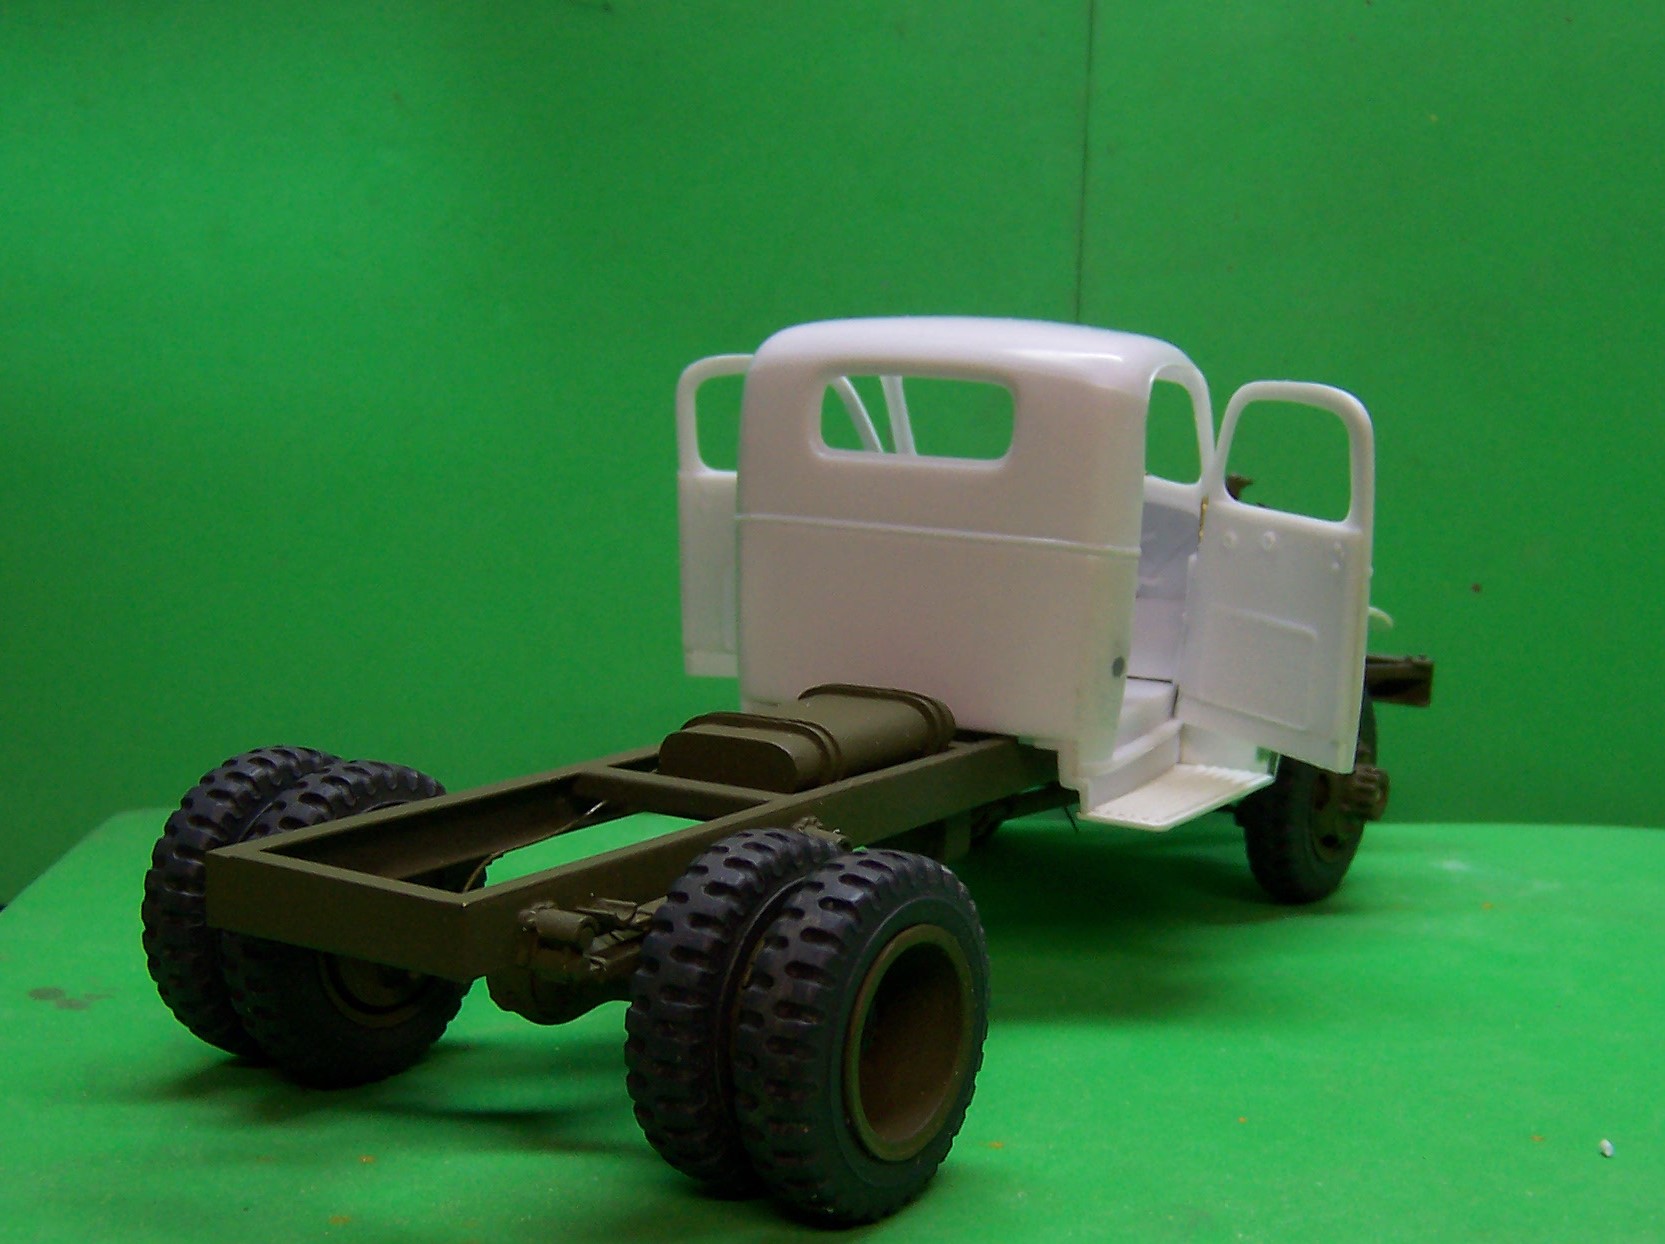
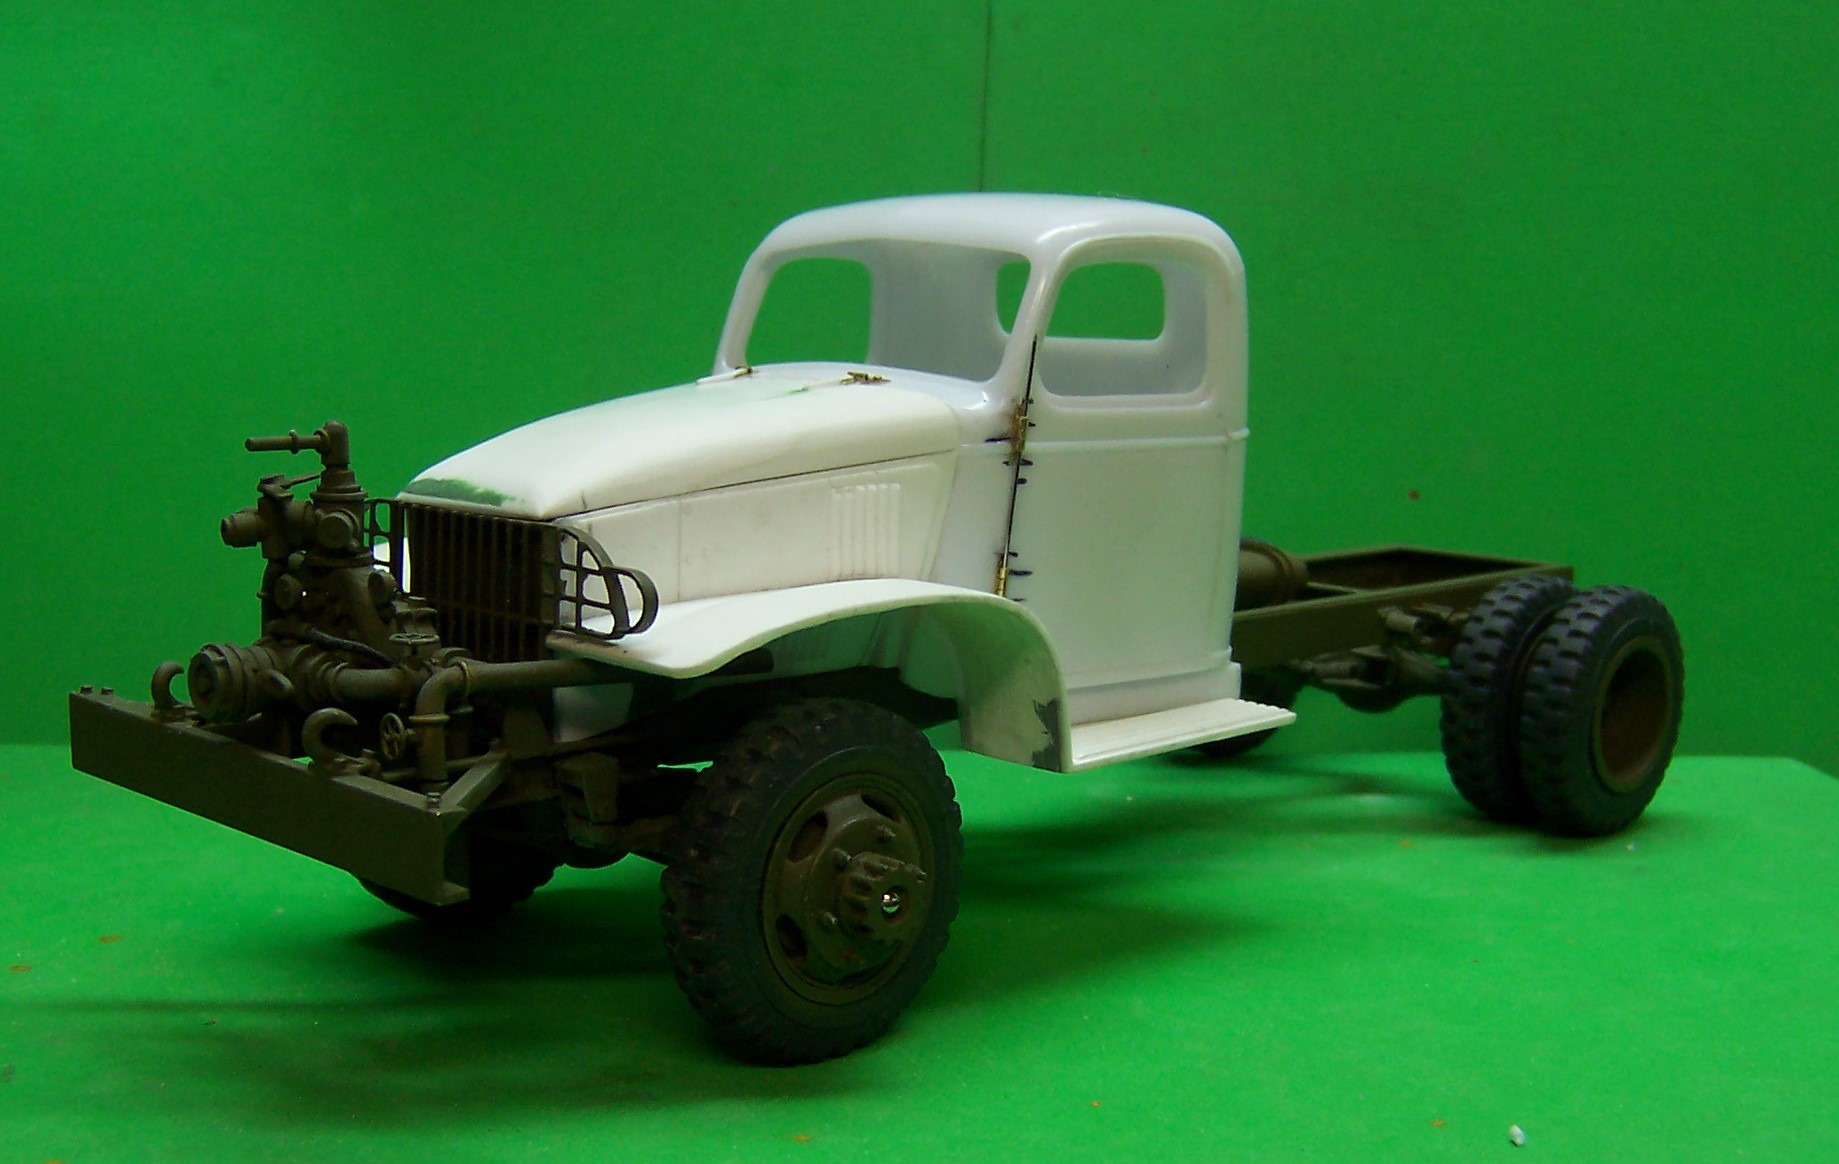
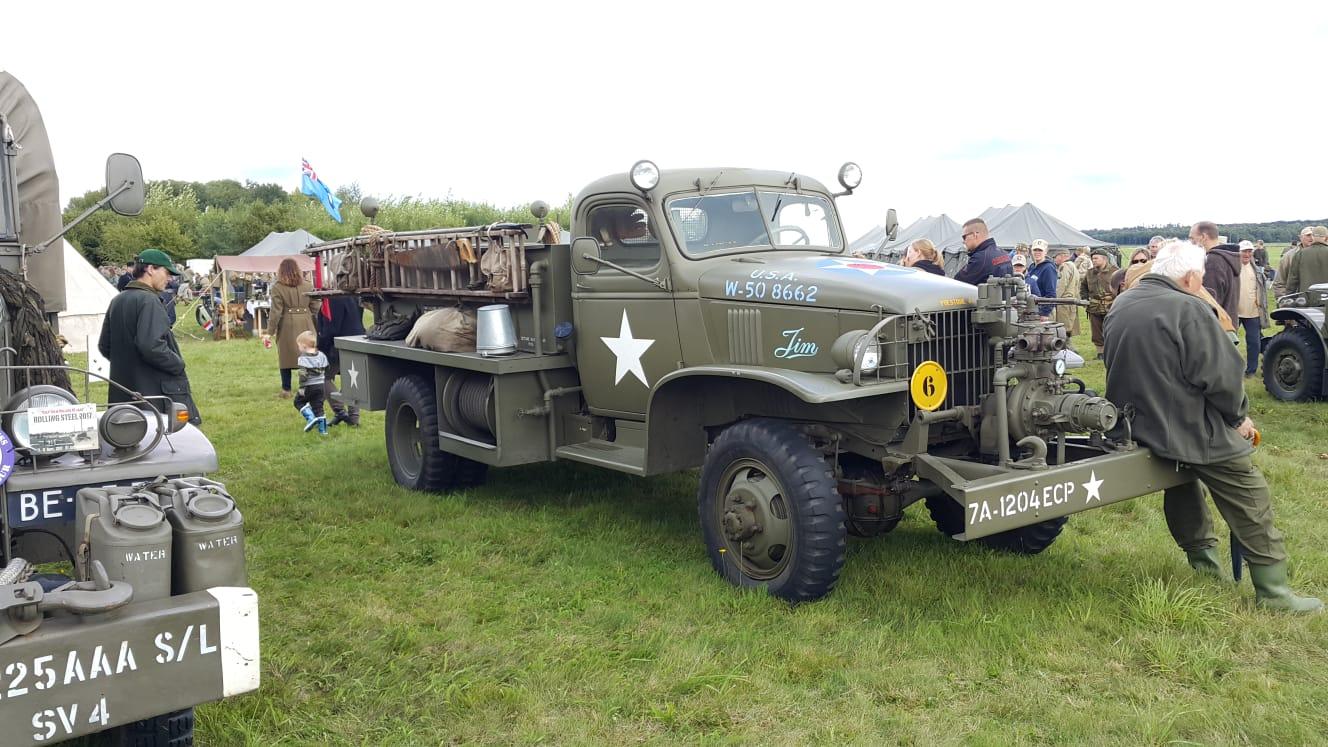
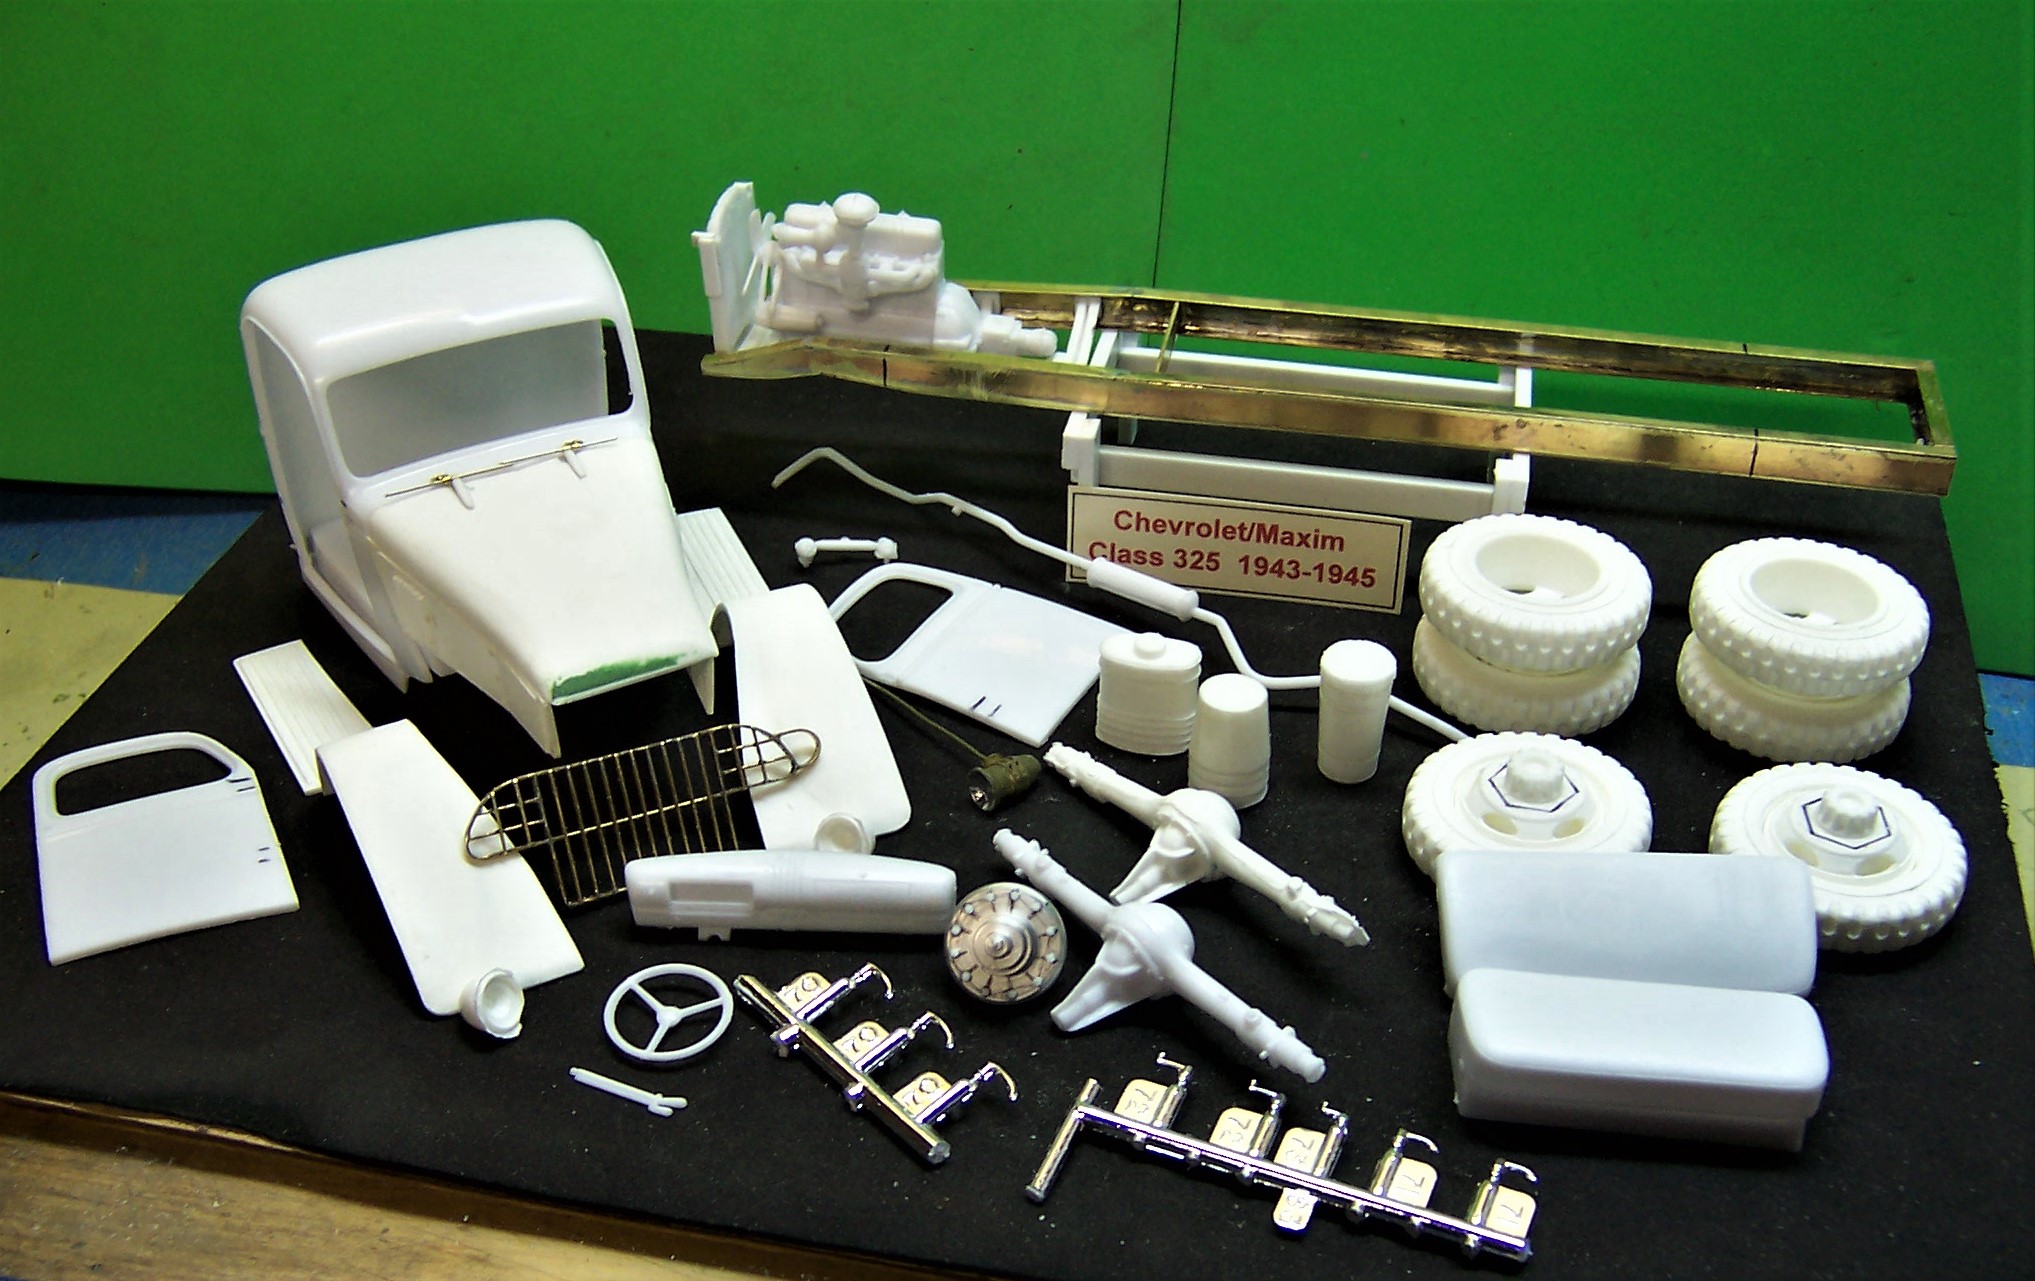
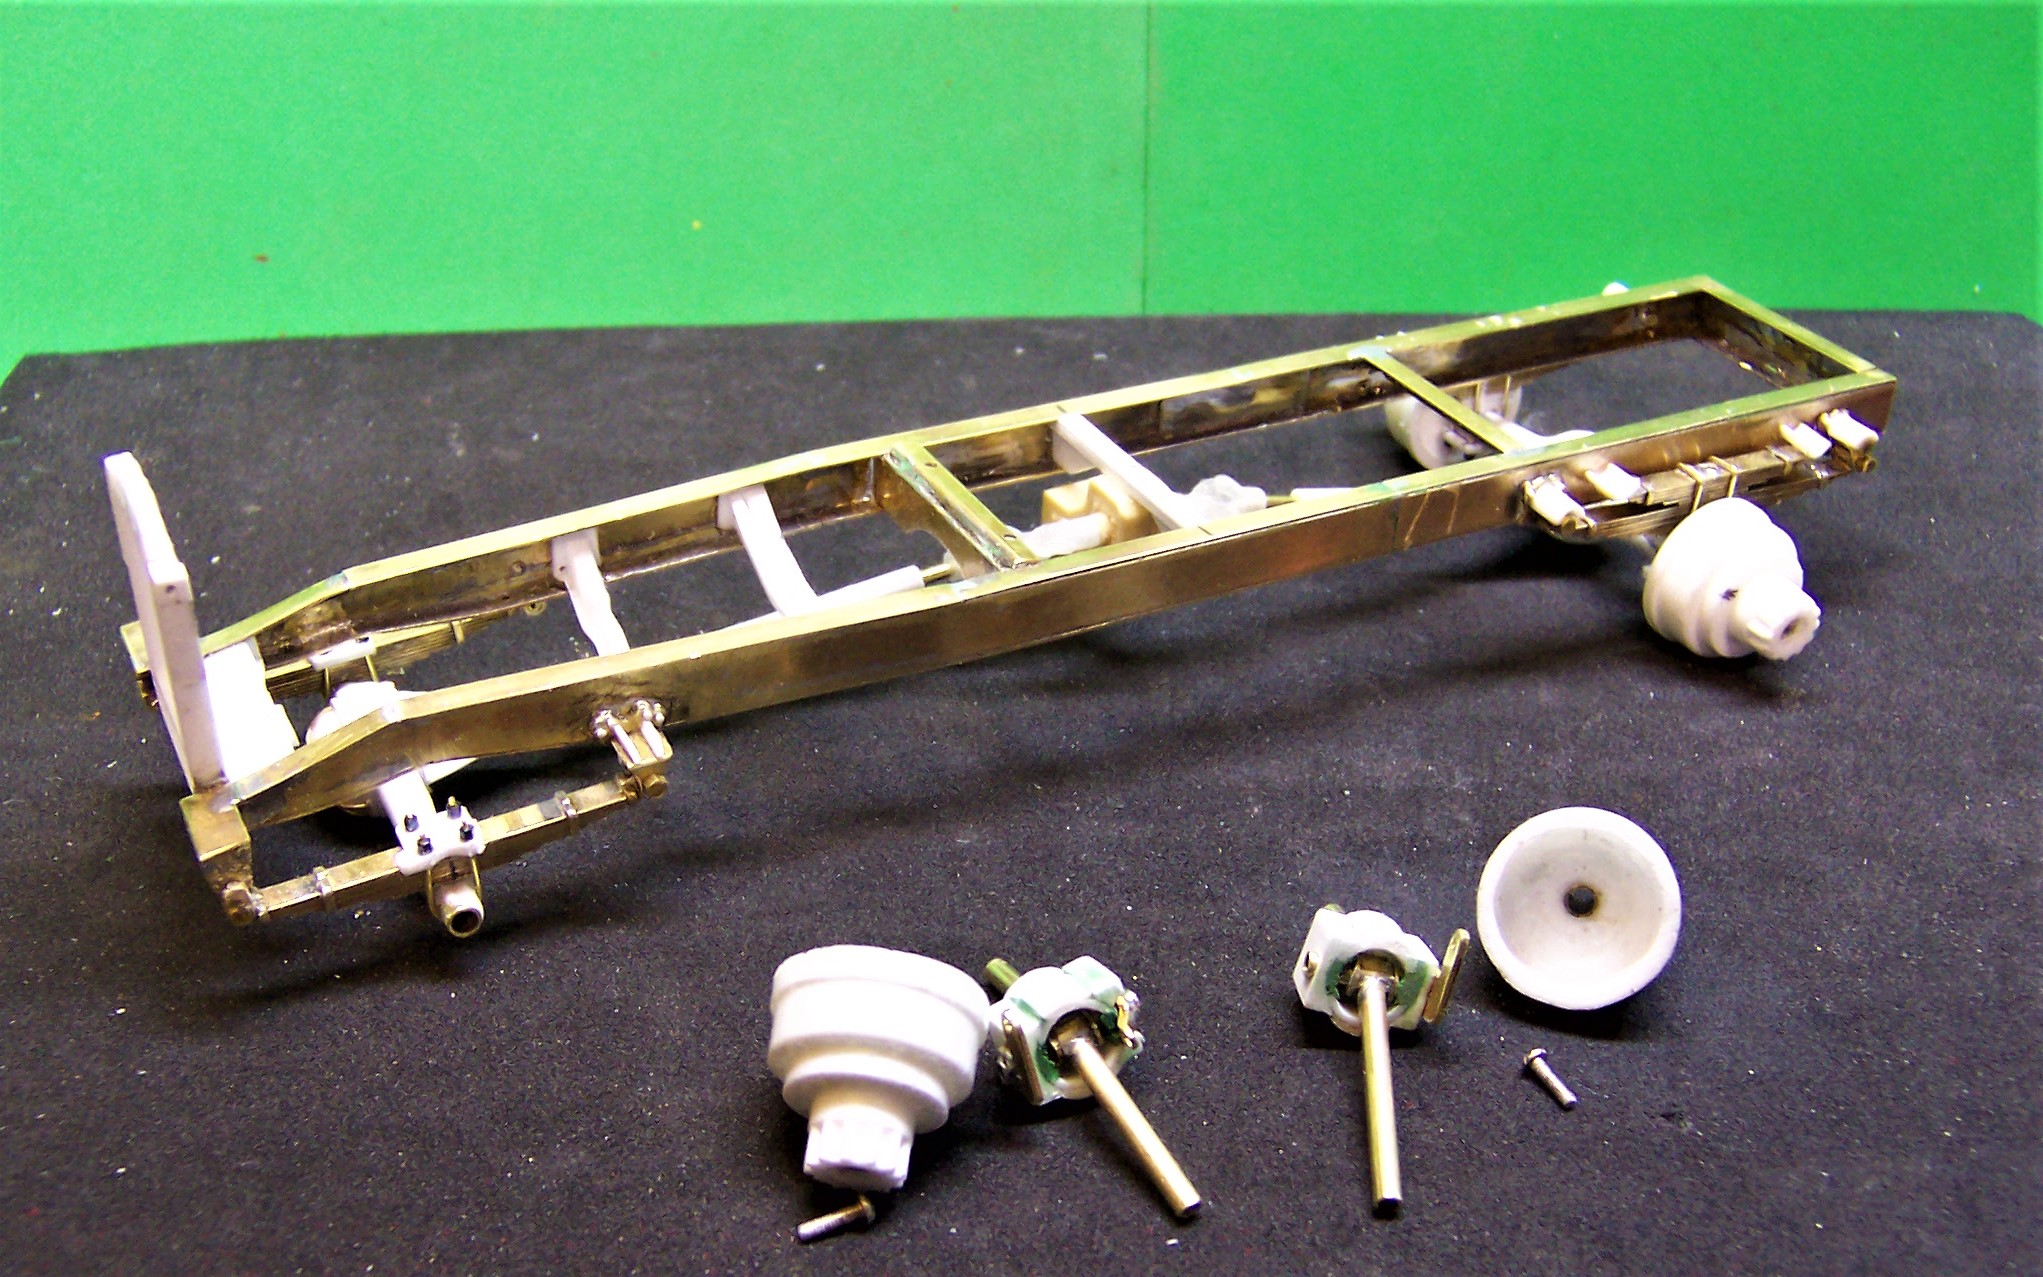
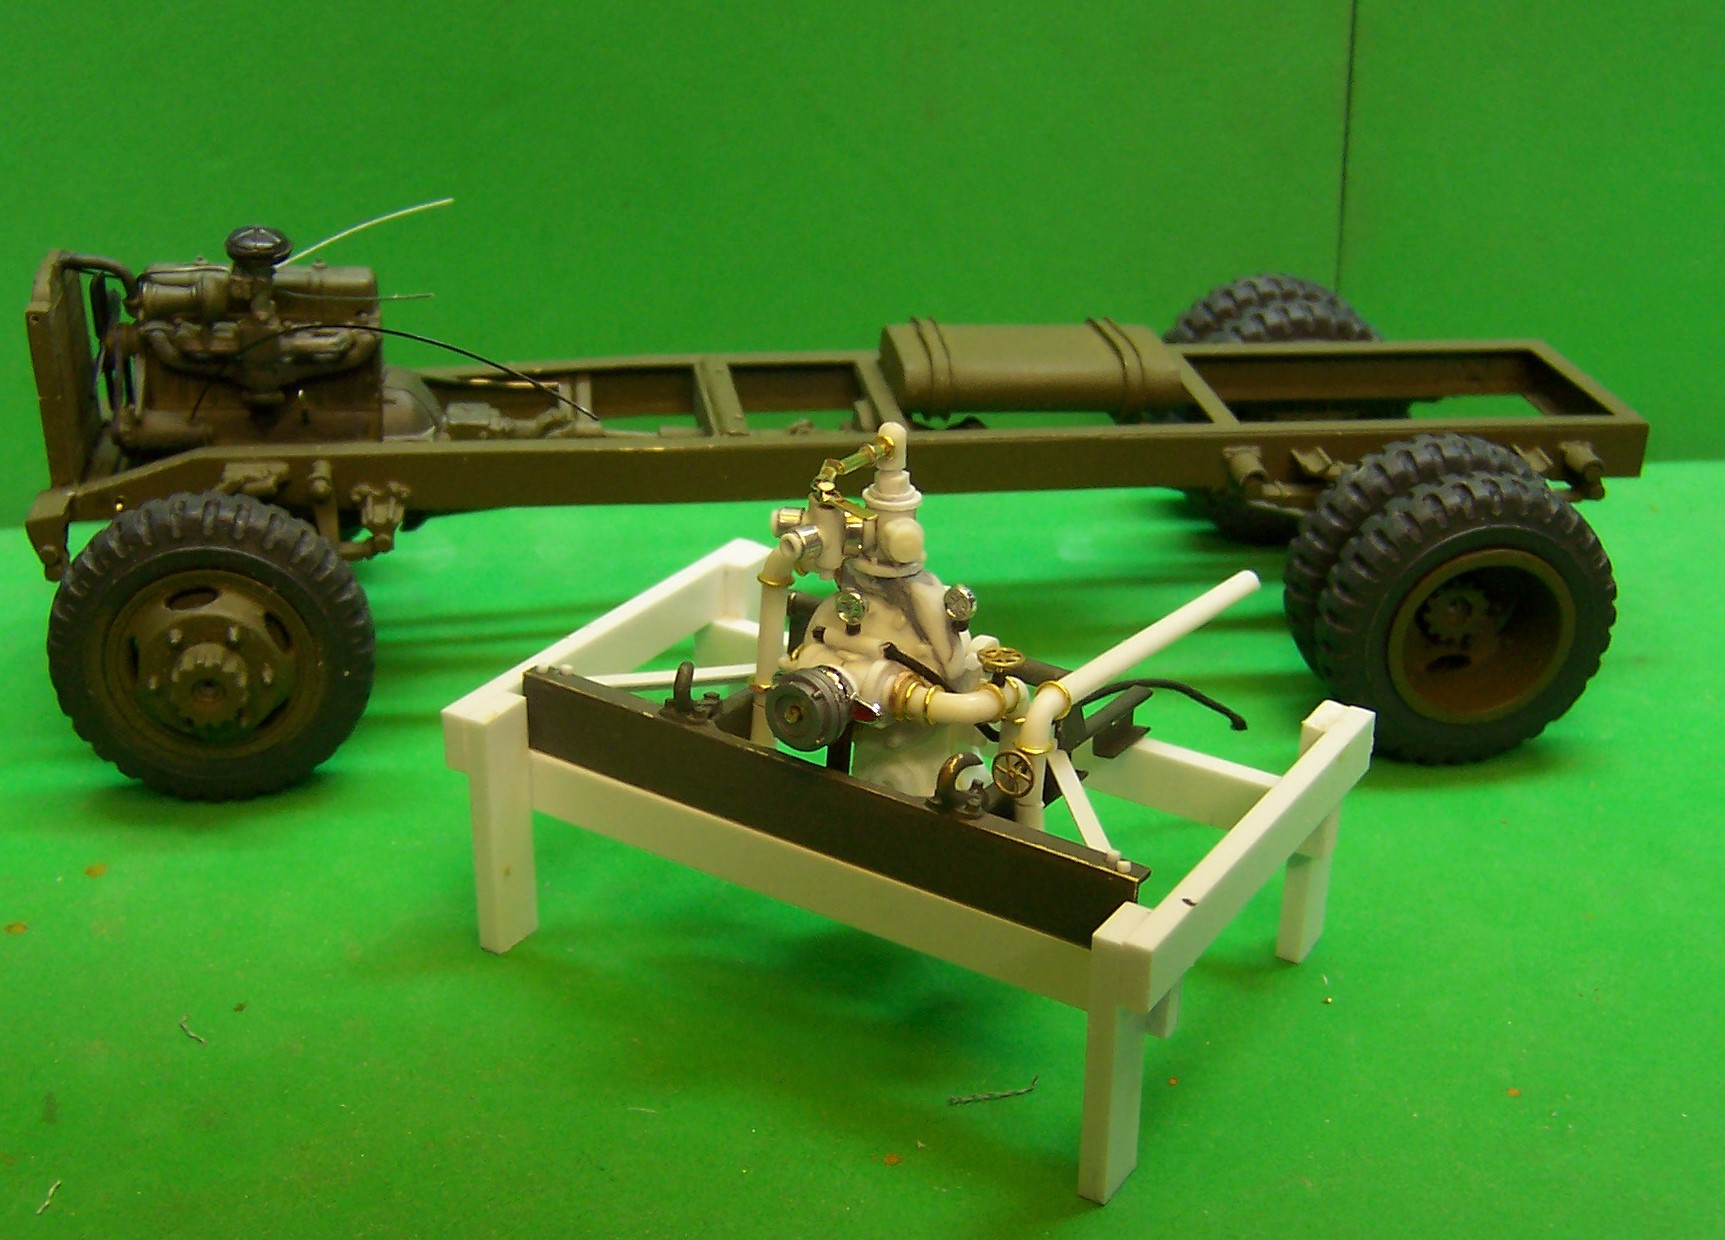
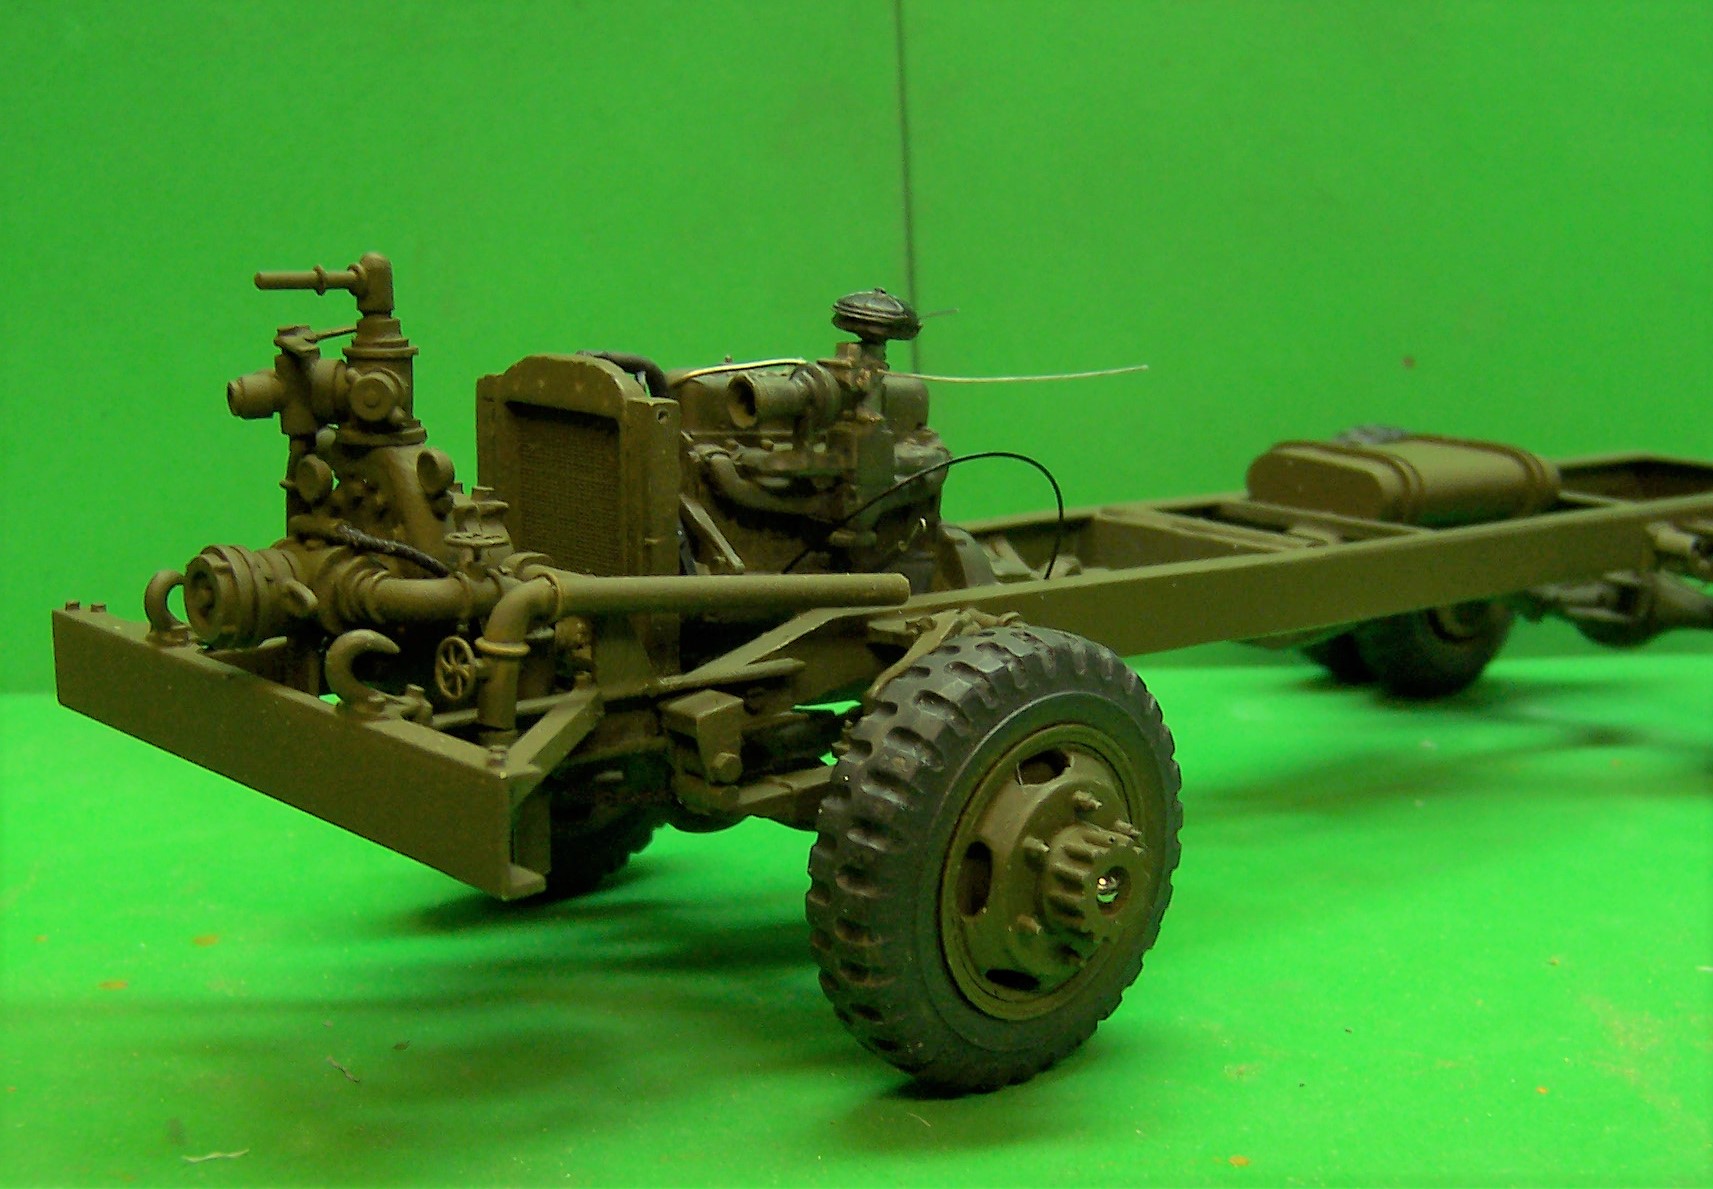
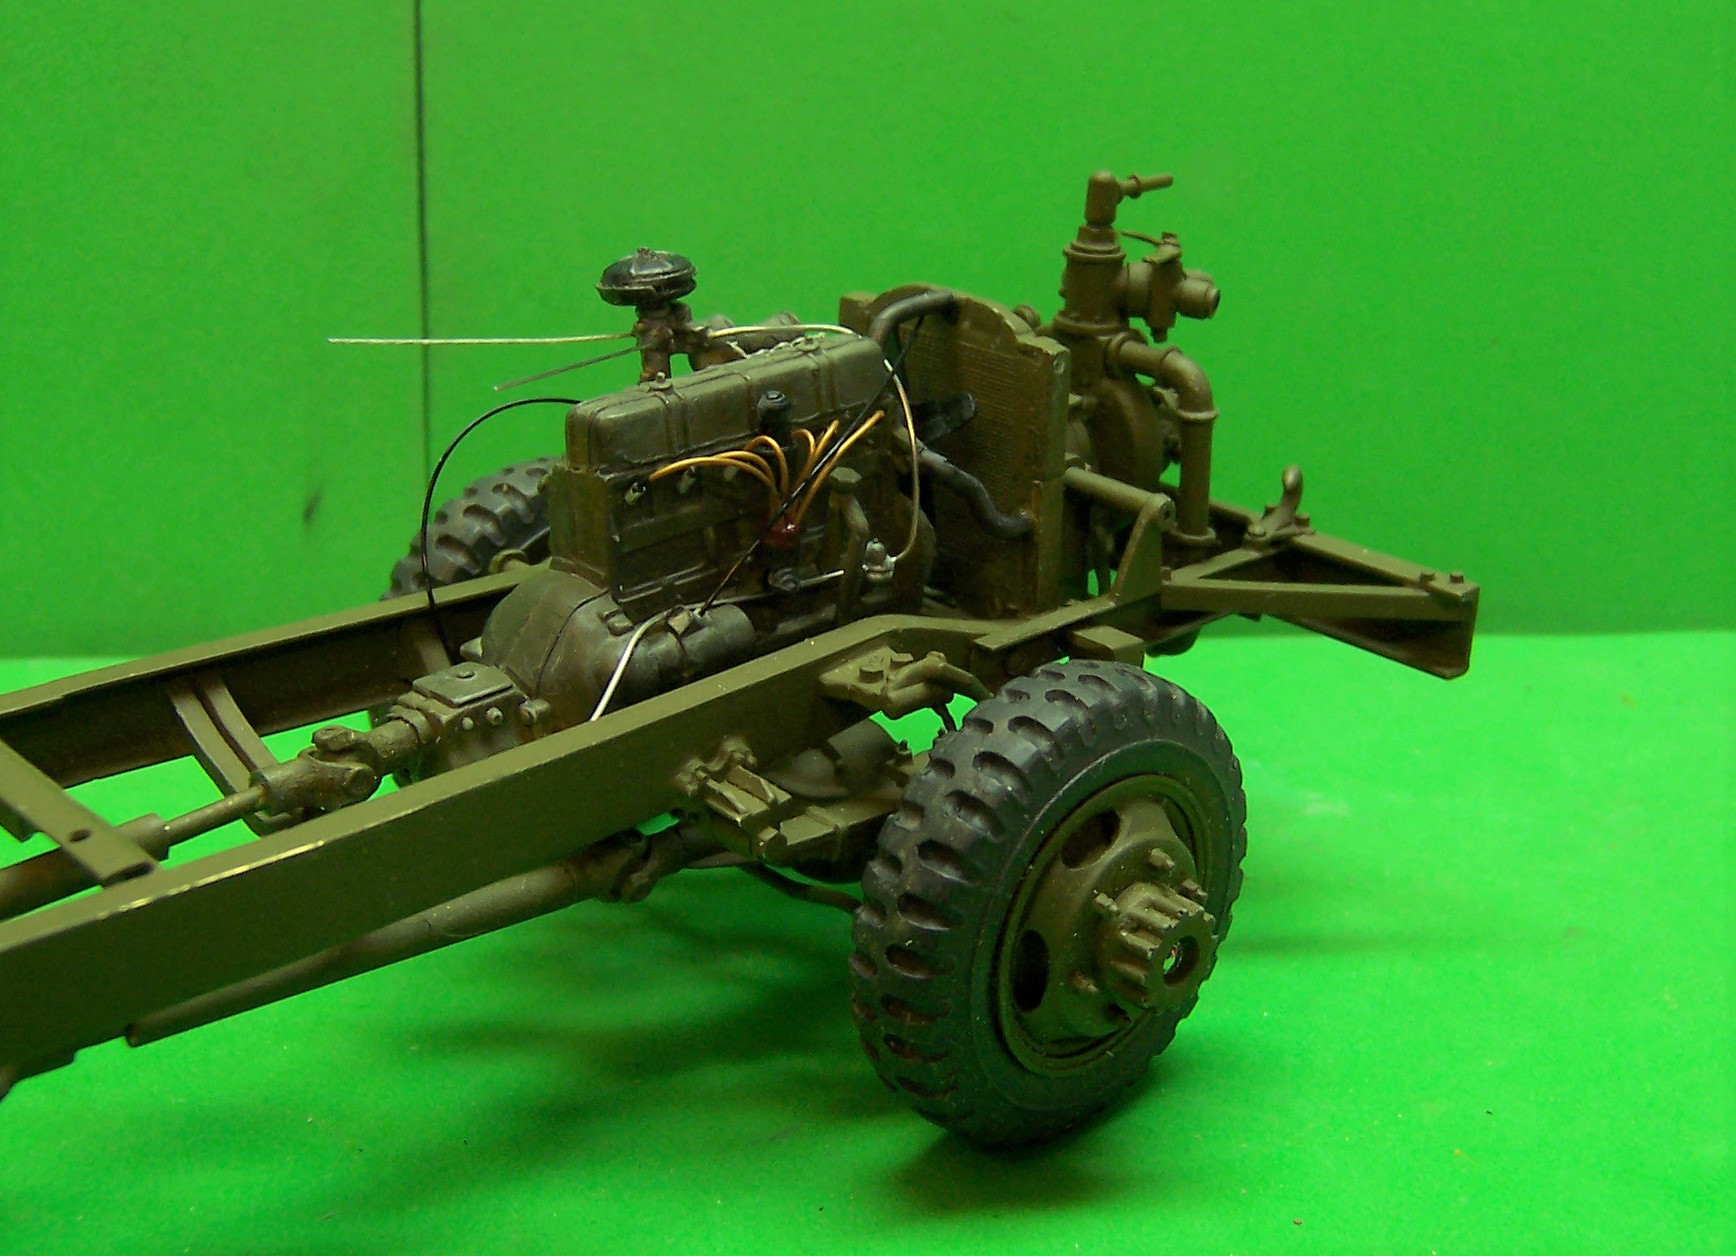
Now that the initial Class 325 US Army pumper is done and delivered I've been working on a second one; this time it will be sent to Belgium to a WWII army vehicle collector. He has the real one in restored condition so this one will be a replica of that particular piece of apparatus. There will be slight differences between the original one and this one; mostly in the markings and some of the equipment that is carried. In fact some of the equipment may not have been original GI issue. But this is the way it is now so that is how the model will be built. Notice the blue ID numbers on the hood. Also the blue around the star on top of the hood. This is not unusual as the army did use blue paint on some of them. Supposedly the blue was harder to see in black and white photographs. The number on the hood and bumper are the ones to be used on the model. An early parts gathering. Lots of resin castings including the hood, fenders, axles, tires and wheels, Indian pump cans, stacked buckets and the main pump housing. The housing in the photo is the aluminum master. The completed truck frame and front wheel assemblies. The small screws go into the ends of each axle and hold the wheels in place. The screws will be covered at the end of the build. Cab and front mounted pump in position. The cab is held in place by two screws that attach to the floorboards and a frame crossmember and small screws that go through the top front corner of the hood sides into the sides of the radiator. The grill guard is all soldered brass strip and wire pieces. The pump with all of the various pieces that are attached to the main pump housing that was cast from the aluminum master. Elbows are made from solid plastic rods that were heated so that they would bend. Craft wire represents the flanges. HO scale brass freight car brake wheels are used for the discharge and intake line gate valves. Fusion beads are used in several places along with pieces of hex rod to represent bolt heads. The gage bezels will be given decal faces after painting is complete. The completed pump is mounted to the truck frame. Frame extensions were used on the real truck as well. Small screws hold the extensions in place and small pieces of brass angle were soldered between the main frame and pump frame to hold it rigid. The back side of the pump and the Chevy engine. I have to relocate the bottom radiator hose! A piece of heavy solder will do just fine.
-
Two things to consider. 1. If you are using C channel stock consider adding a piece of flat strip stock to the inside of the web. That will add thickness but you won't see it from the outside and it will help stiffen the long section to reduce bending. 2. You can also fishplate the beam to make it deeper in the middle. that is where most of the deflection will be and you can eliminate a lot of it by adding a deeper piece of sheet stock in the center. When you glue the two pieces together you will notice an immediate increase in stiffness with either method.
-
Willy's pick-up
Chariots of Fire replied to Pat Minarick's topic in WIP: Model Trucks: Pickups, Vans, SUVs, Light Commercial
Yeah! That's a nice piece of work on the conversion. It all fits together so well! Bravo! -
Looks like it would not be worth it to try. Rubber mold material and casting resin will give the best results, even for small parts. If MEK is nasty stuff to begin with I'd stay clear of it.
-
Beverage trailer
Chariots of Fire replied to Spruslayer's topic in General Automotive Talk (Trucks and Cars)
I did non-functional roll up doors on this rig years ago. I made an inner box of the scribed sheet stock and then made an outer box for the remainder. It made painting it easy and kept things nice and neat. it also made the body very strong.
-
WIP - Gmc crackerbox mixer
Chariots of Fire replied to gotnitro?'s topic in WIP: Model Trucks: Big Rigs and Heavy Equipment
I got a set of those AITM wheels and tires. My only complaint is that the wheels are a bit sloppy and are not well rounded for the opening in the tire. -
That looks like the beginning of a neat spacecraft model!
-
Kalmar Ottawa Yard Tractor
Chariots of Fire replied to hct728(Bob)'s topic in WIP: Model Trucks: Big Rigs and Heavy Equipment
Hey, Bob! In the Tutorial portion of the forum I just posted a "how to" on making a piston/cylinder that will stay together. Hope it helps. -
In the "In Progress" section of trucks there is a posting of a great scratch built project for a yard truck. Bob indicated he might have to redo his hydraulics to make a piston that would not come out of the cylinder when he raised the 5th wheel up. Below is a tutorial of how you can make such using ordinary materials. I have made these successfully using aluminum for the piston because it can be polished and brass tubing for the cylinder parts. But as you can see in the tutorial it can be made with plastic tubing as well so long as it will telescope with the aluminum tubing. Here is the first photo with the materials needed and a description of how to do the assembly. In the photo above are the three materials for the construction and a small section of plastic rod to be used to make sure the piston and plastic sleeve do not come apart inside when all is said and done. I've labelled the stock to be used but the sizes are not important so long as they telescope freely and are not sloppy. To the right side is a cylinder with a section of plastic tubing inserted inside to act as a sleeve for the piston to slide inside of. Use only a small sliver. On the outside is a piece of plastic stock that on the real cylinder would be the raised portion of the housing. Also shown is a disc of plastic stock. This will be used to seal the far end of the cylinder. Adjacent to the cylinder is the piston that will be inserted into the cylinder from the right end. It has a sleeve on the outside the same diameter as the sleeve that is inside the left end of the cylinder. In photo 2 I have inserted the piston into the cylinder with the free end of the piston protruding at the right and the sleeved end of the piston showing at left. You can see the piece of plastic rod inside the piston. I drilled a hole straight through the sleeve and aluminum piston and glued in the pin. After glue sets the pin can be cut smooth with the surface of the sleeve. The pin keeps the sleeve from sliding on the piston in case the glue separates. The sleeve is a thin slice as you can see from the first photo. Photo 3 With the pinned sleeve in place insert the piston into the cylinder from the end opposite the one that has the sleeve inside. Since the sleeve in the cylinder and the one on the piston are the same diameter and just fits into the cylinder it allows the piston to move without a lot of wobble. Be sure that the glue on the sleeve on both cylinder and piston is completely set before inserting the piston or it may become permanently glued so it cannot move. The piston is extended its full length inside the cylinder and the sleeve on the piston is touching the sleeve on the cylinder. This is how the piston is kept from coming out and is shown when the piston is in the fully extended position. With the piston on the inside of the cylinder, the cylinder can be sealed with the plastic disk. In the fourth photo the piston is drawn into the cylinder with the piston sleeve backed up against the closed end of the cylinder. Again, be sure that the glue surrounding the end plate is dry or you may get glue on the sleeve which will prevent it from sliding. With this part of the project complete appropriate pieces can be added to the cylinder where it would be attached to say the truck frame and on the piston a piece of plastic tubing could be inserted inside with another piece glued at right angles to form the end that attaches to the equipment to be raised. What I have shown is generic in that I have not made an attempt to size the cylinder or piston. That has to be done according to each application. But the trick is to have an inner sleeve for the cylinder and an outer sleeve for the piston that are the same diameter and that telescope well. If you use brass tubing for the cylinder you may have to double up some additional pieces to get the proper thickness for the piston to slide through. And the same thing would be true for the sleeve on the piston that slides inside the cylinder. but the process is the same. I added a photo of my Coleman truck with the body raised so that you can see a finished piston and cylinder that was constructed of aluminum and brass tubing. I hope this has been of interest to those who may have wanted to add this kind of detail to your model. SBIF! (Scratch building is fun) Charlie (Chariots of Fire)
-
Kalmar Ottawa Yard Tractor
Chariots of Fire replied to hct728(Bob)'s topic in WIP: Model Trucks: Big Rigs and Heavy Equipment
Bob: Here is what my cylinder looks like. It is a section of aluminum tube inside a section of brass tubing with telescoping sections of brass tubing inside. The section of aluminum tubing fits inside a piece of brass tubing that is 2 sizes larger (in a telescoping sense). I will do a sketch that shows it rather than try and describe the process but the piston slides smoothly in and out and does not wobble. It also cannot come out of the cylinder due to the stop that is at the end of both the cylinder and piston.
-
Kalmar Ottawa Yard Tractor
Chariots of Fire replied to hct728(Bob)'s topic in WIP: Model Trucks: Big Rigs and Heavy Equipment
Is the piston on the lift mechanism the same diameter as the inside of the cylinder? There is a way of making an internal stop to the mechanism if you have room inside the cylinder to add an additional piece to the end of the piston. BTW if you make the piston out of aluminum tubing you can polish it bright and you won't have to paint it. I can post a how-to if you like. -
That's pretty awesome work. Not easy painting it with Alclad. That stuff shows up every little flaw unless you do neat work like you have done. Great job!
-
Kalmar Ottawa Yard Tractor
Chariots of Fire replied to hct728(Bob)'s topic in WIP: Model Trucks: Big Rigs and Heavy Equipment
Looks like you've got the beginning of a great looking engine. Lots of things can be added using tubing and strip stock. I like using small bits of round stock for bolt heads for the smallest areas. some of the others can be replicated with plastic hex shaped strip stock as well. If you've got one of those Northwest Short Line choppers you can make a lot of them from the hex stock. Brass wire and even small solder wire make good fuel lines etc. I like that engine! Nice detail! -
That was my thought as well.
-
That's been a lot of work but your efforts have been worth it! You probably are aware of this by now but patience is a virtue, eh?
-
I also like the color combination. The work you are doing on the model is first class!
-
Dodge Power Wagon
Chariots of Fire replied to Mopar - D's topic in WIP: Model Trucks: Pickups, Vans, SUVs, Light Commercial
Are you sure that is a Dodge and not a Chevy? The cab is a dead ringer for the '41 Revell Chevy p/u. -
I know you spent a lot of time making rivets. Did you know that Archer makes rivet decals? They are raised dots on clear decal paper. They come in a variety of patterns and can be trimmed to any length. I used some on a previous project. They need to be placed on primer so that you don't lose the detail. They come in two sizes, HO and O. I used the O guage size (1/48) for my 1/25 scale model. They are actually made for model railroads but they work well with trucks too.
-
Weathering can be tricky, Tom. But with those Tamiya powders that go on so easily it has hard to make mistakes. So many models are overdone with weathering. It should be subtle and in the right places. That's why if I want a slightly worn look I use the metallic and the small sponge from the Tamiya kit and wipe it on the surface of running boards, the corners of floorboards and even the inside of doors at the bottom of the windows to indicate worn off paint. It doesn't have to be much. The grays and greens are great for bringing out highlights. Again, less is more in this regard. Here's an example of using the metal colored powder to indicate worn spots. floorboards, doors, ladder rungs and walking areas were all done with just swiping the sponge over the surfaces. Here's another one showing some wear inside the cab on the floors. And a light wash on the universal joints inside the cabinet that is open.