

Chariots of Fire
-
Posts
2,782 -
Joined
-
Last visited
Content Type
Profiles
Forums
Events
Gallery
Everything posted by Chariots of Fire
-

'90s GMC TopKick C7500
Chariots of Fire replied to Sergey's topic in WIP: Model Trucks: Big Rigs and Heavy Equipment
Beautiful job on that frame. Great scratch building!! -
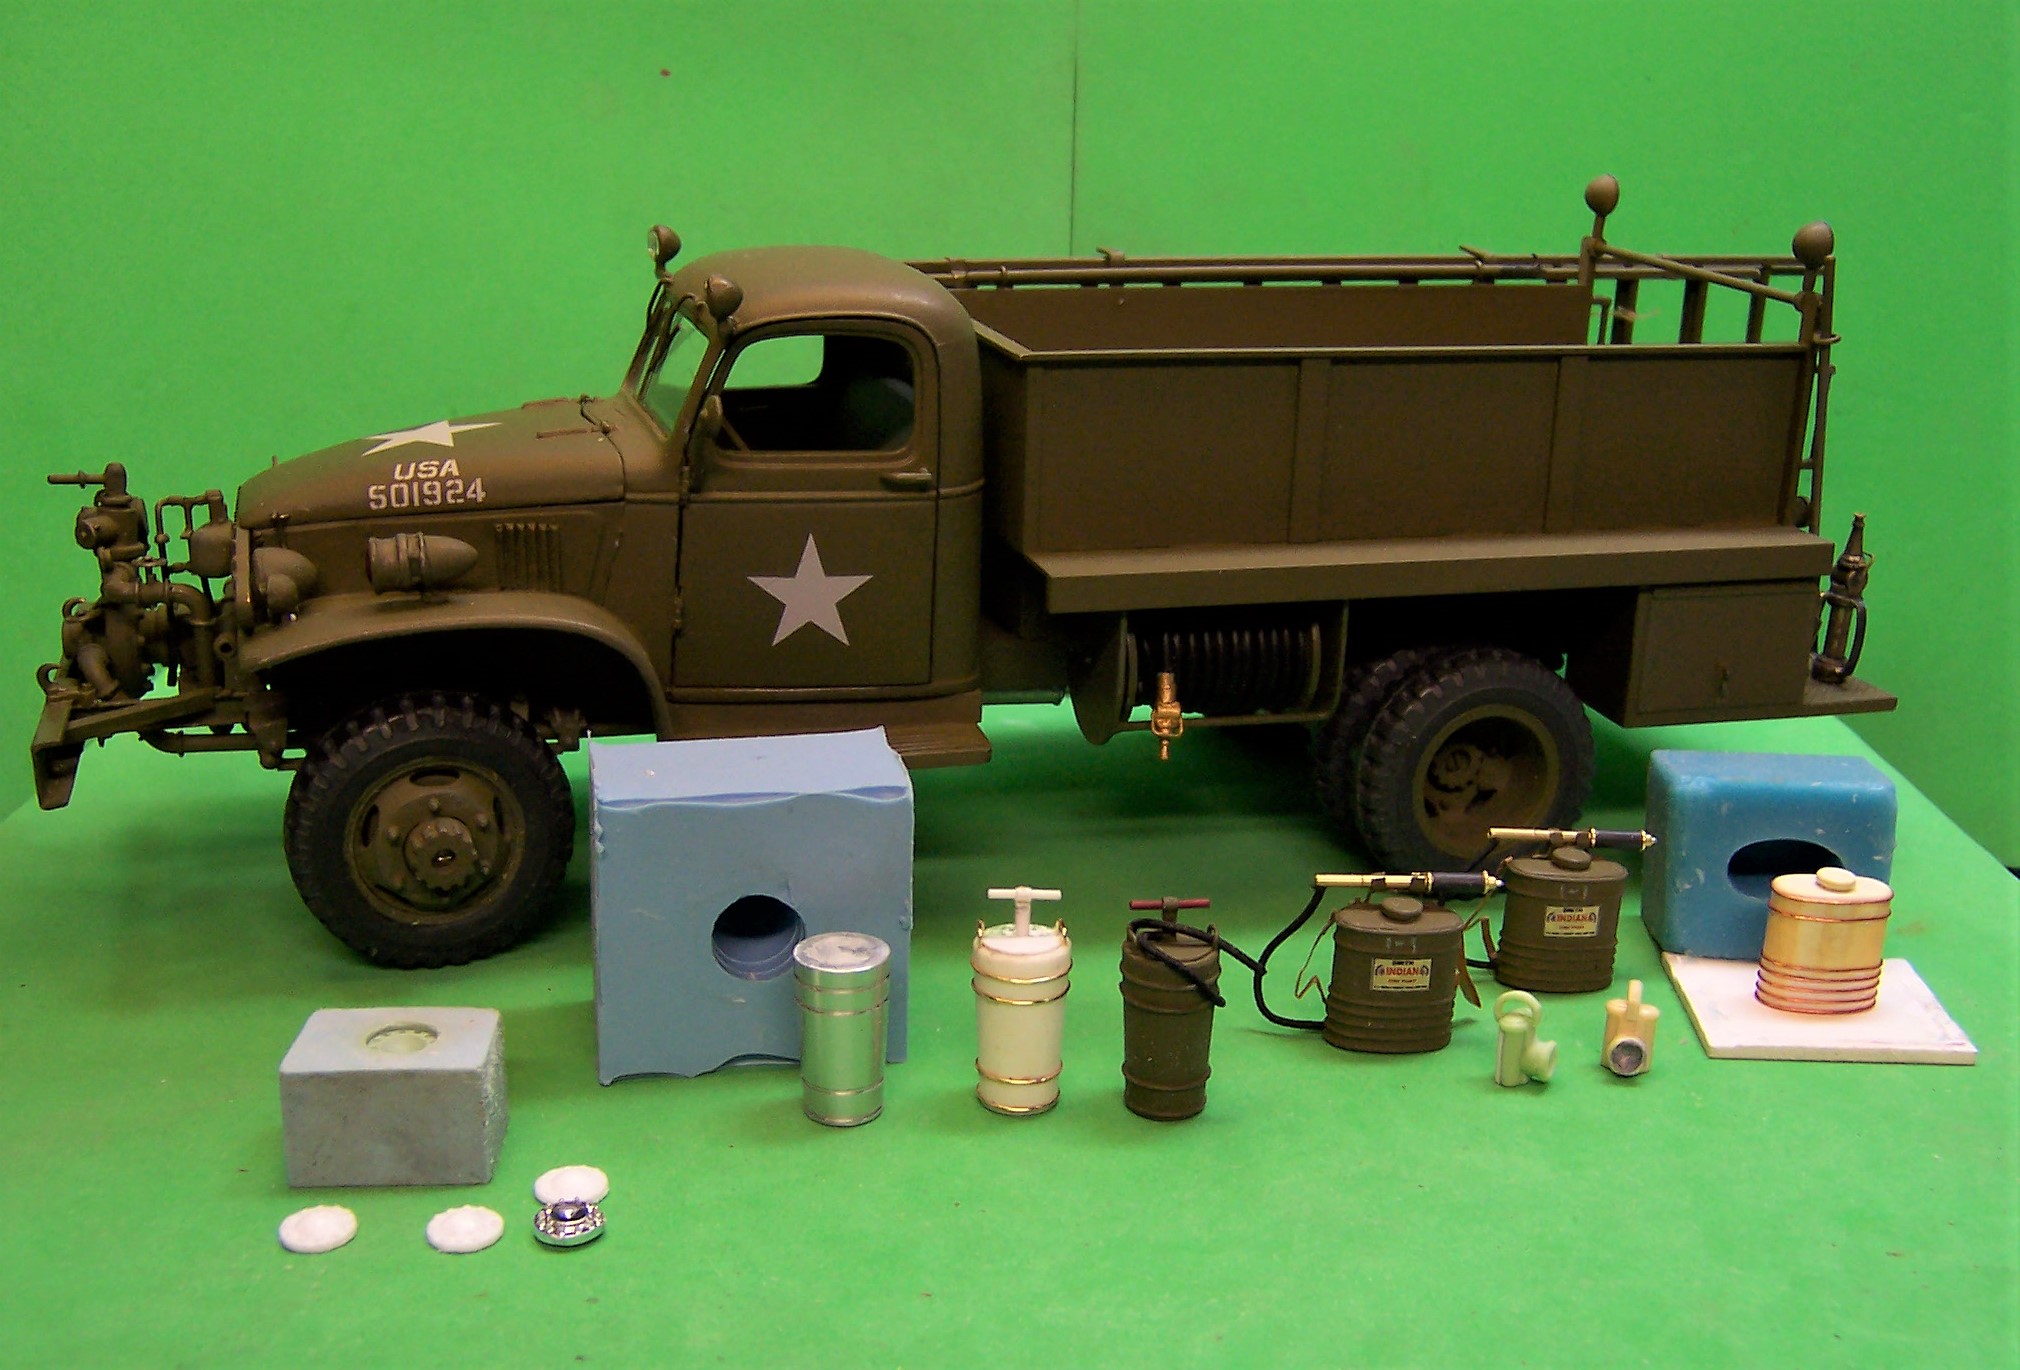
Zeroing in on details now. The left side of the rig carried hand tools and appliances. So far the 4 gallon pump can and the 5 gallon back packs have been finished. Yet to be done are 4 buckets stacked at the rear above the compartment. An ax is mounted on the vertical panel behind the buckets. The photo shows the masters, the molds and in the case of the 4 gallon pump can the intermediate unpainted version beside the finished can. To the very left are 3 of the 4 hub caps that will cover the screws holding the wheels on the axles. In front of the back packs are two battle lanterns that will also be mounted topside.

-
1950 Ford F-8 Big Job
Chariots of Fire replied to DRIPTROIT 71's topic in WIP: Model Trucks: Big Rigs and Heavy Equipment
Keep the chrome pieces bright! It will make a great contrast! -
1950 Ford F-8 Big Job
Chariots of Fire replied to DRIPTROIT 71's topic in WIP: Model Trucks: Big Rigs and Heavy Equipment
That will be nice. I built a 1952 F-7 a while ago but I had to start with the '50 p/u kit cab and widen the fenders and front cowl a bit. Somewhat of a chore but it ended up ok. Keep 'er goin'! -
made my own, Warren. Go on line and look for #15 Fusion Beads. They are little ceramic hex nut shapes with a hole in the middle. Drill a hole where you want the lug nut to go and insert a piece of 0.020" plastic rod. Slip over the rod a fusion bead and secure it with a tiny drop of glue. Then trim off the plastic rod leaving just enough to represent the stud. They look pretty convincing. You can get a package of 200 beads for less than $5. Below is an example I used for my Class 325 rig.
-
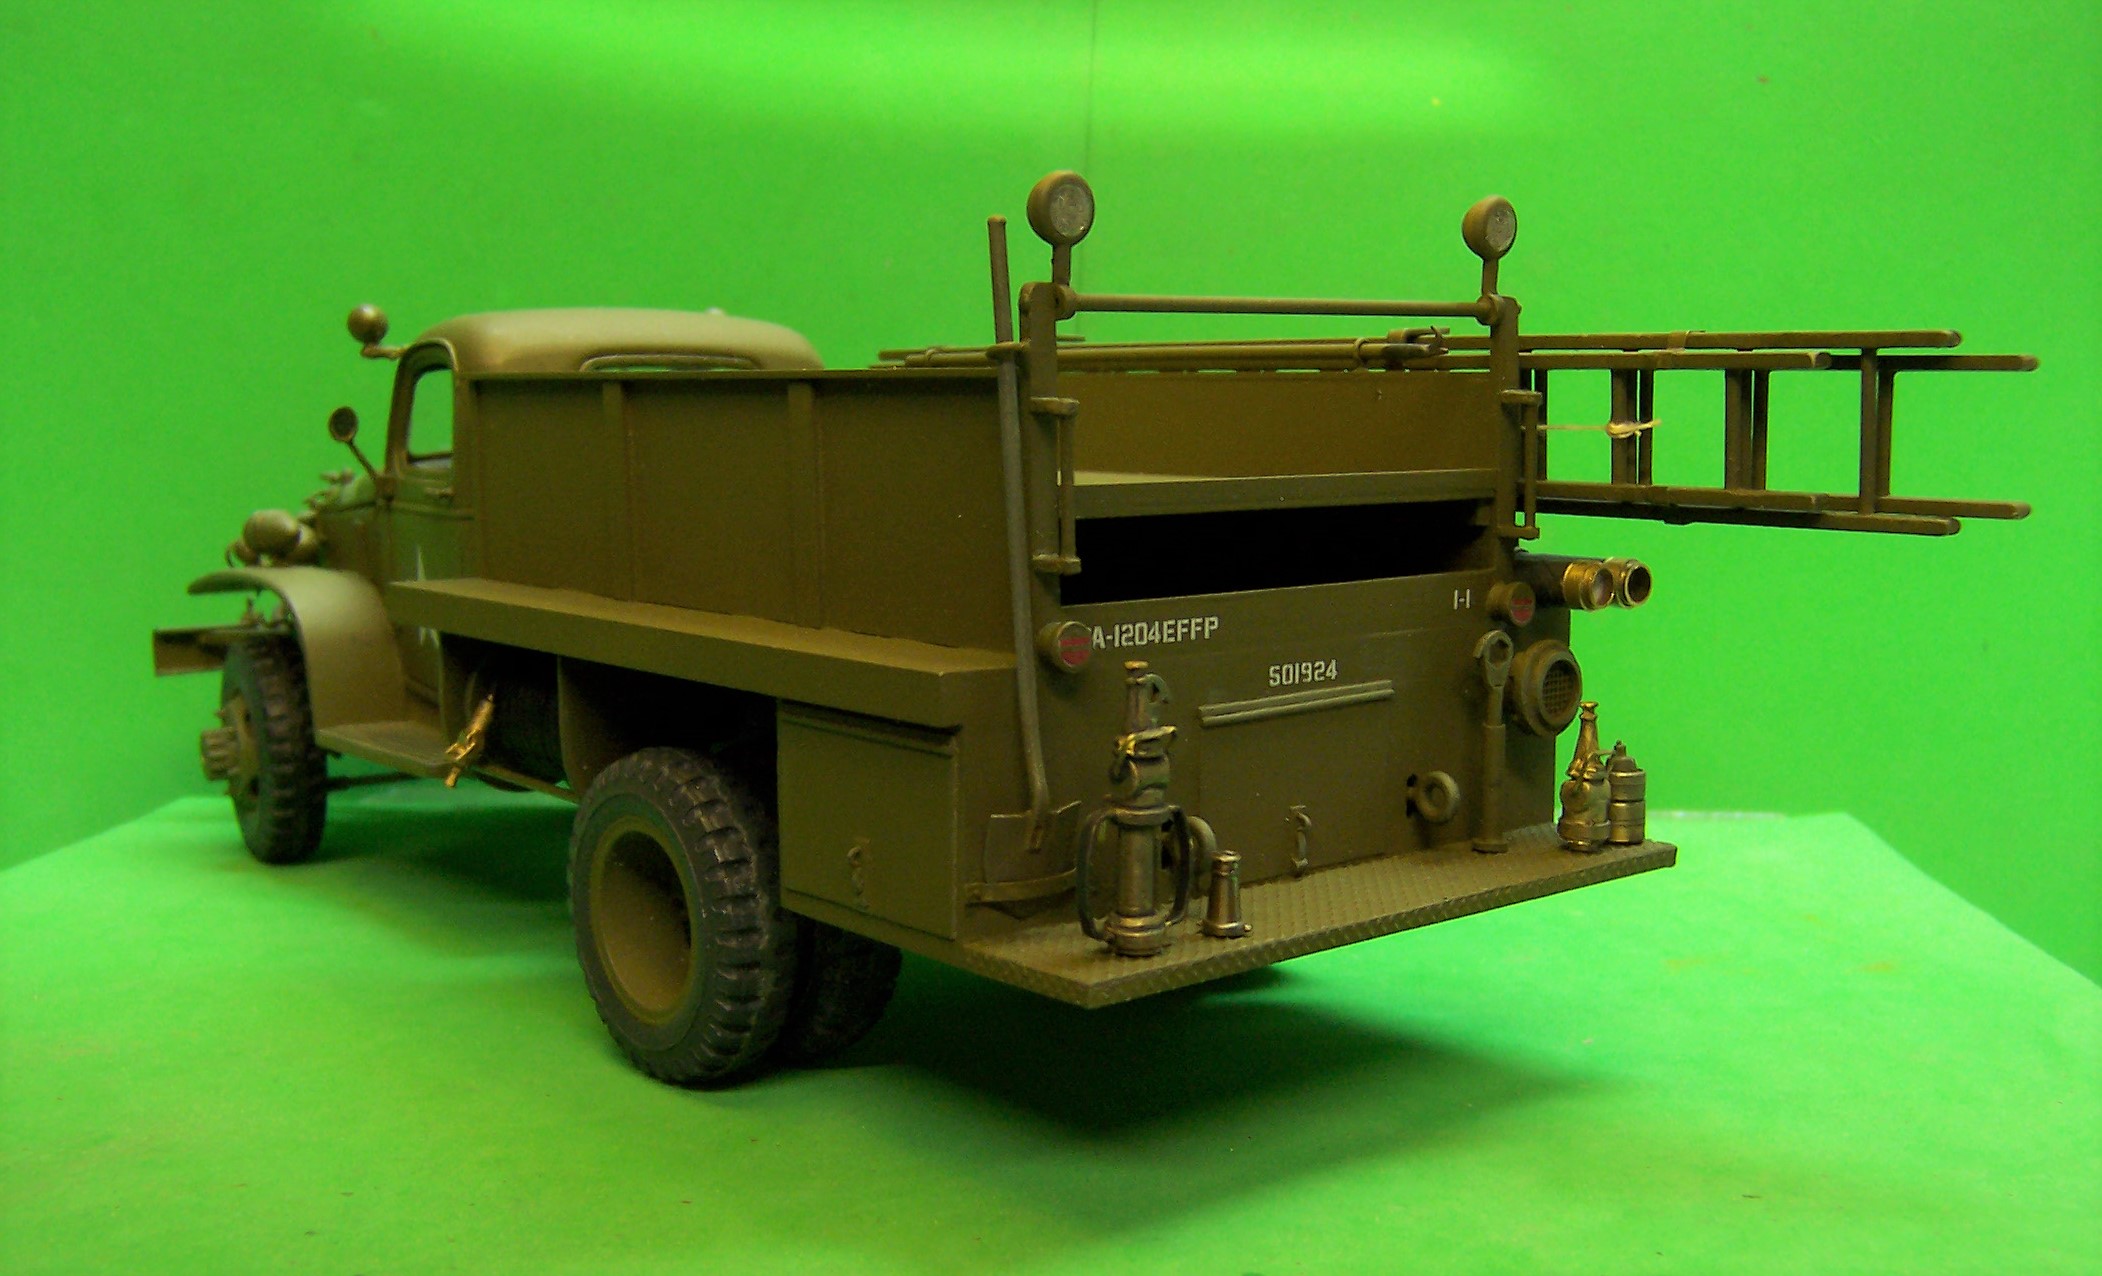
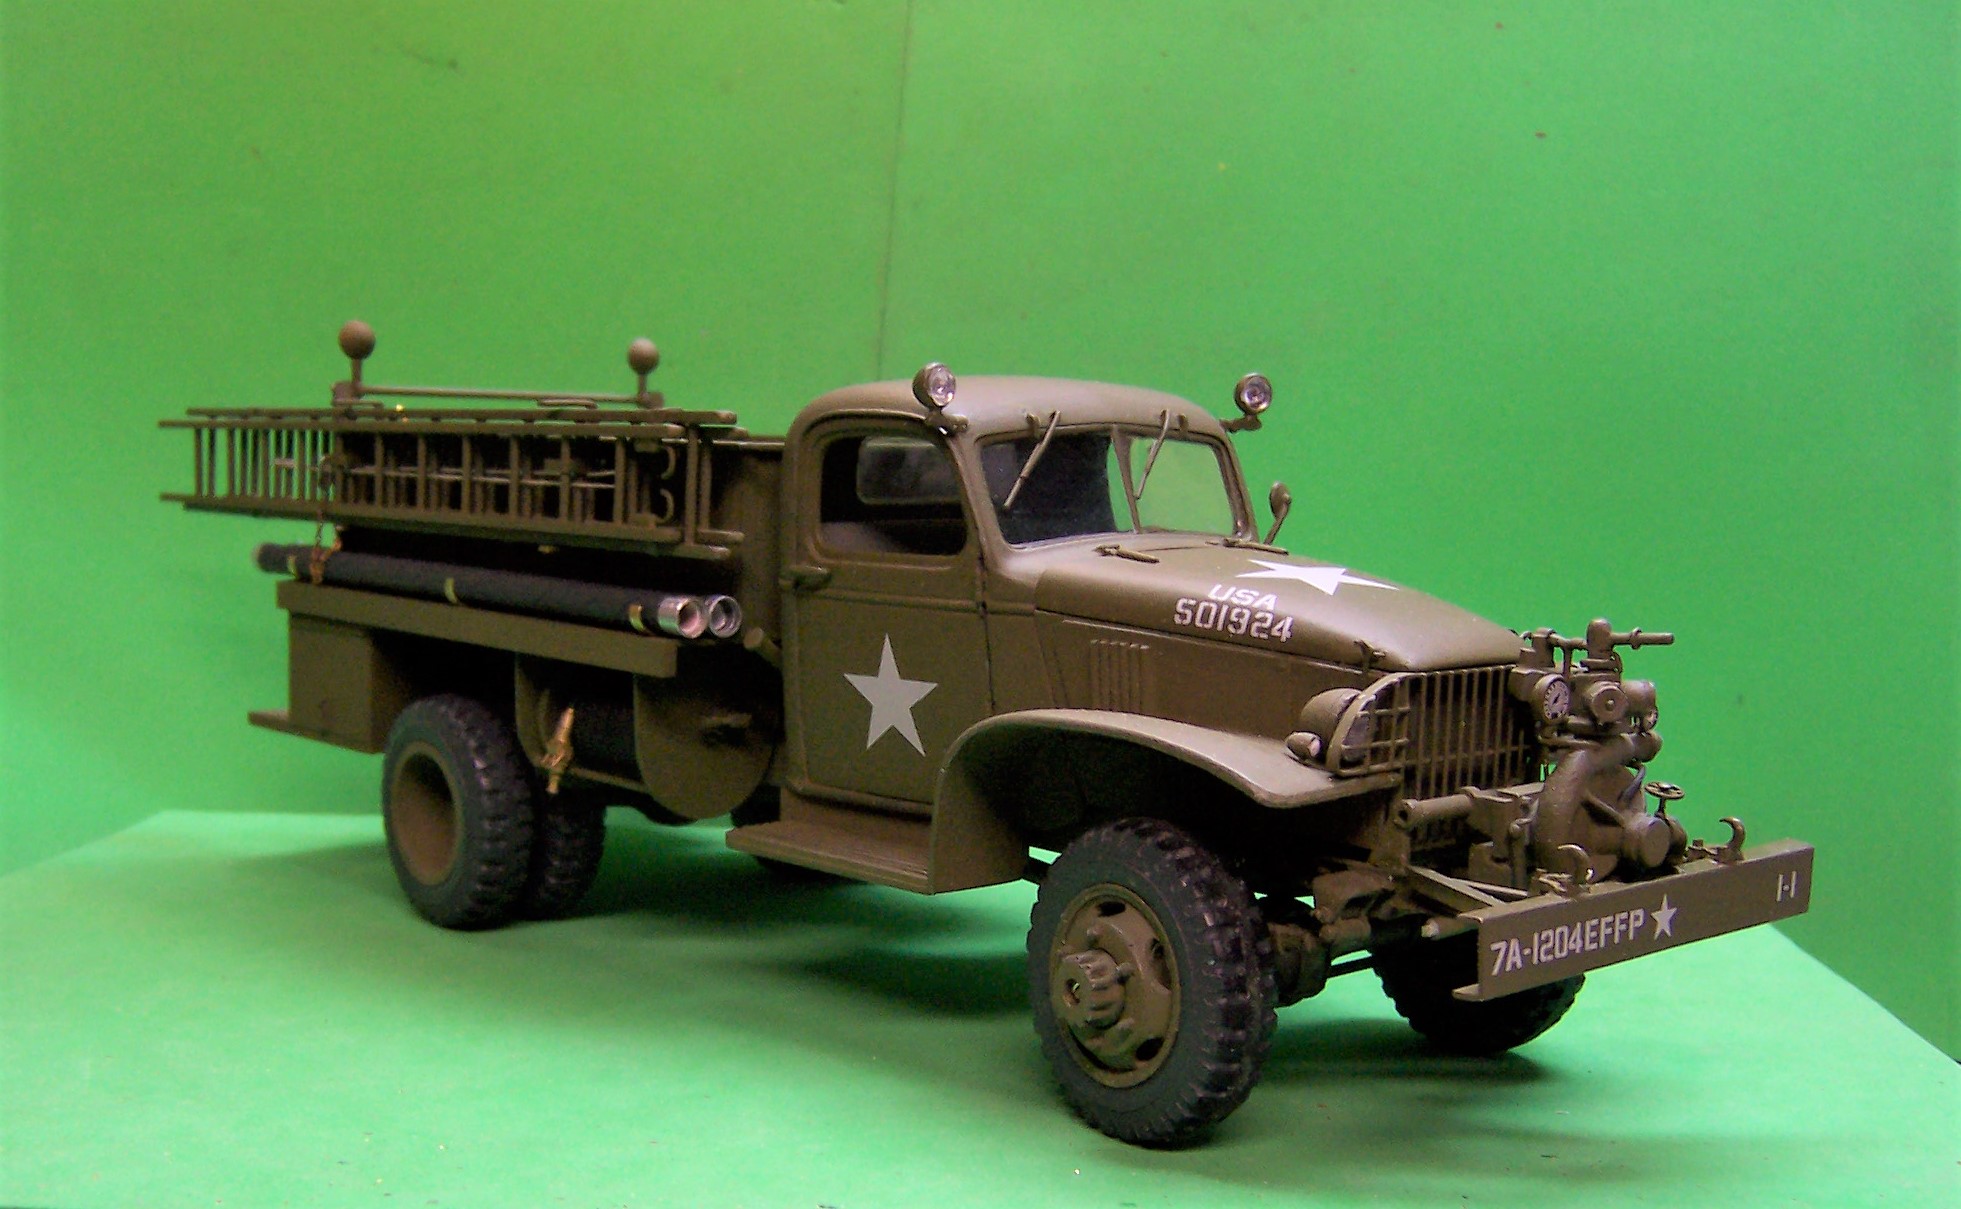
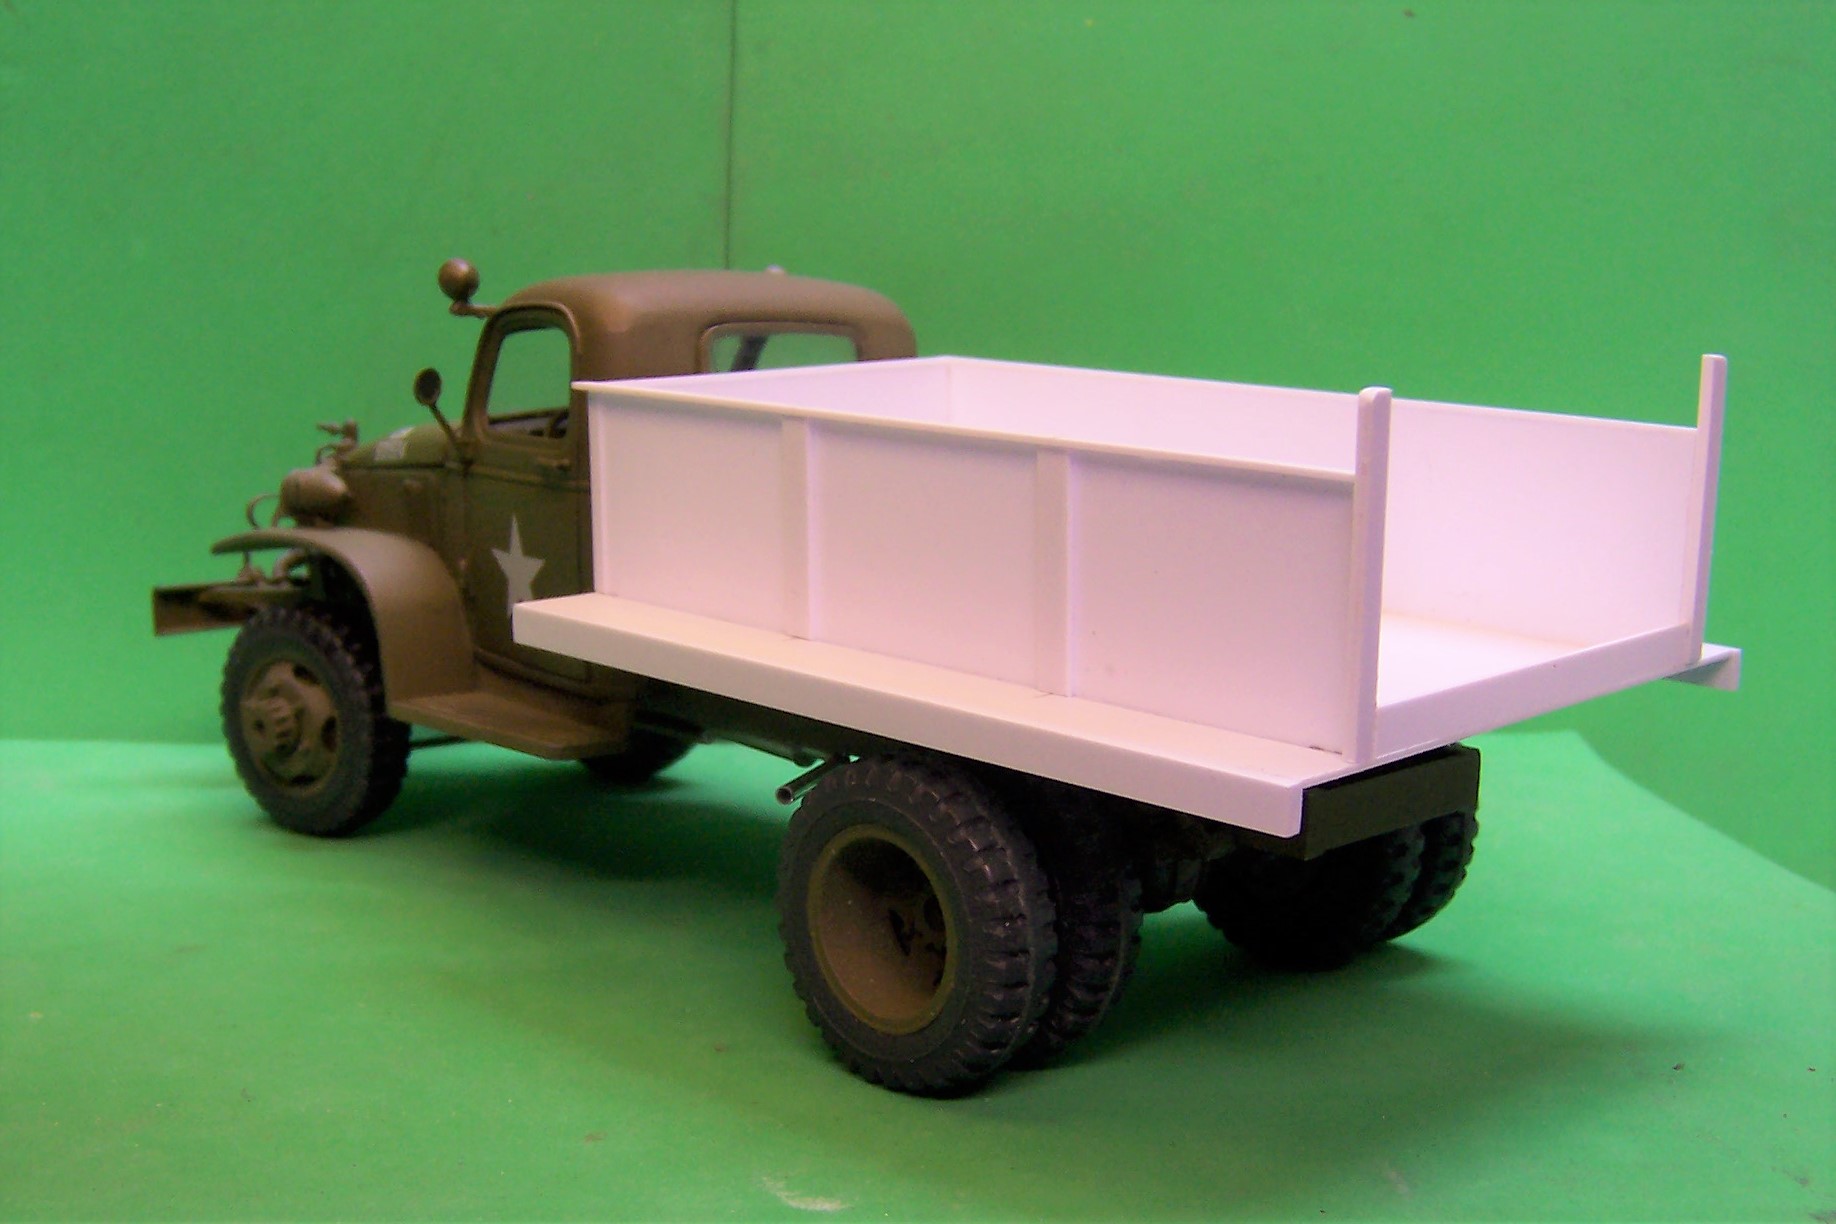
A couple more add-ons to the back of the body. One more nozzle tip, some adapters and a shovel now make up the back step area. One correction was also made. I noticed that the decals for the tail lights were not straight so new ones were made and darkened up some. I simply painted over the old ones and when the paint was dry added the new ones taking care to set them even and straight.
-
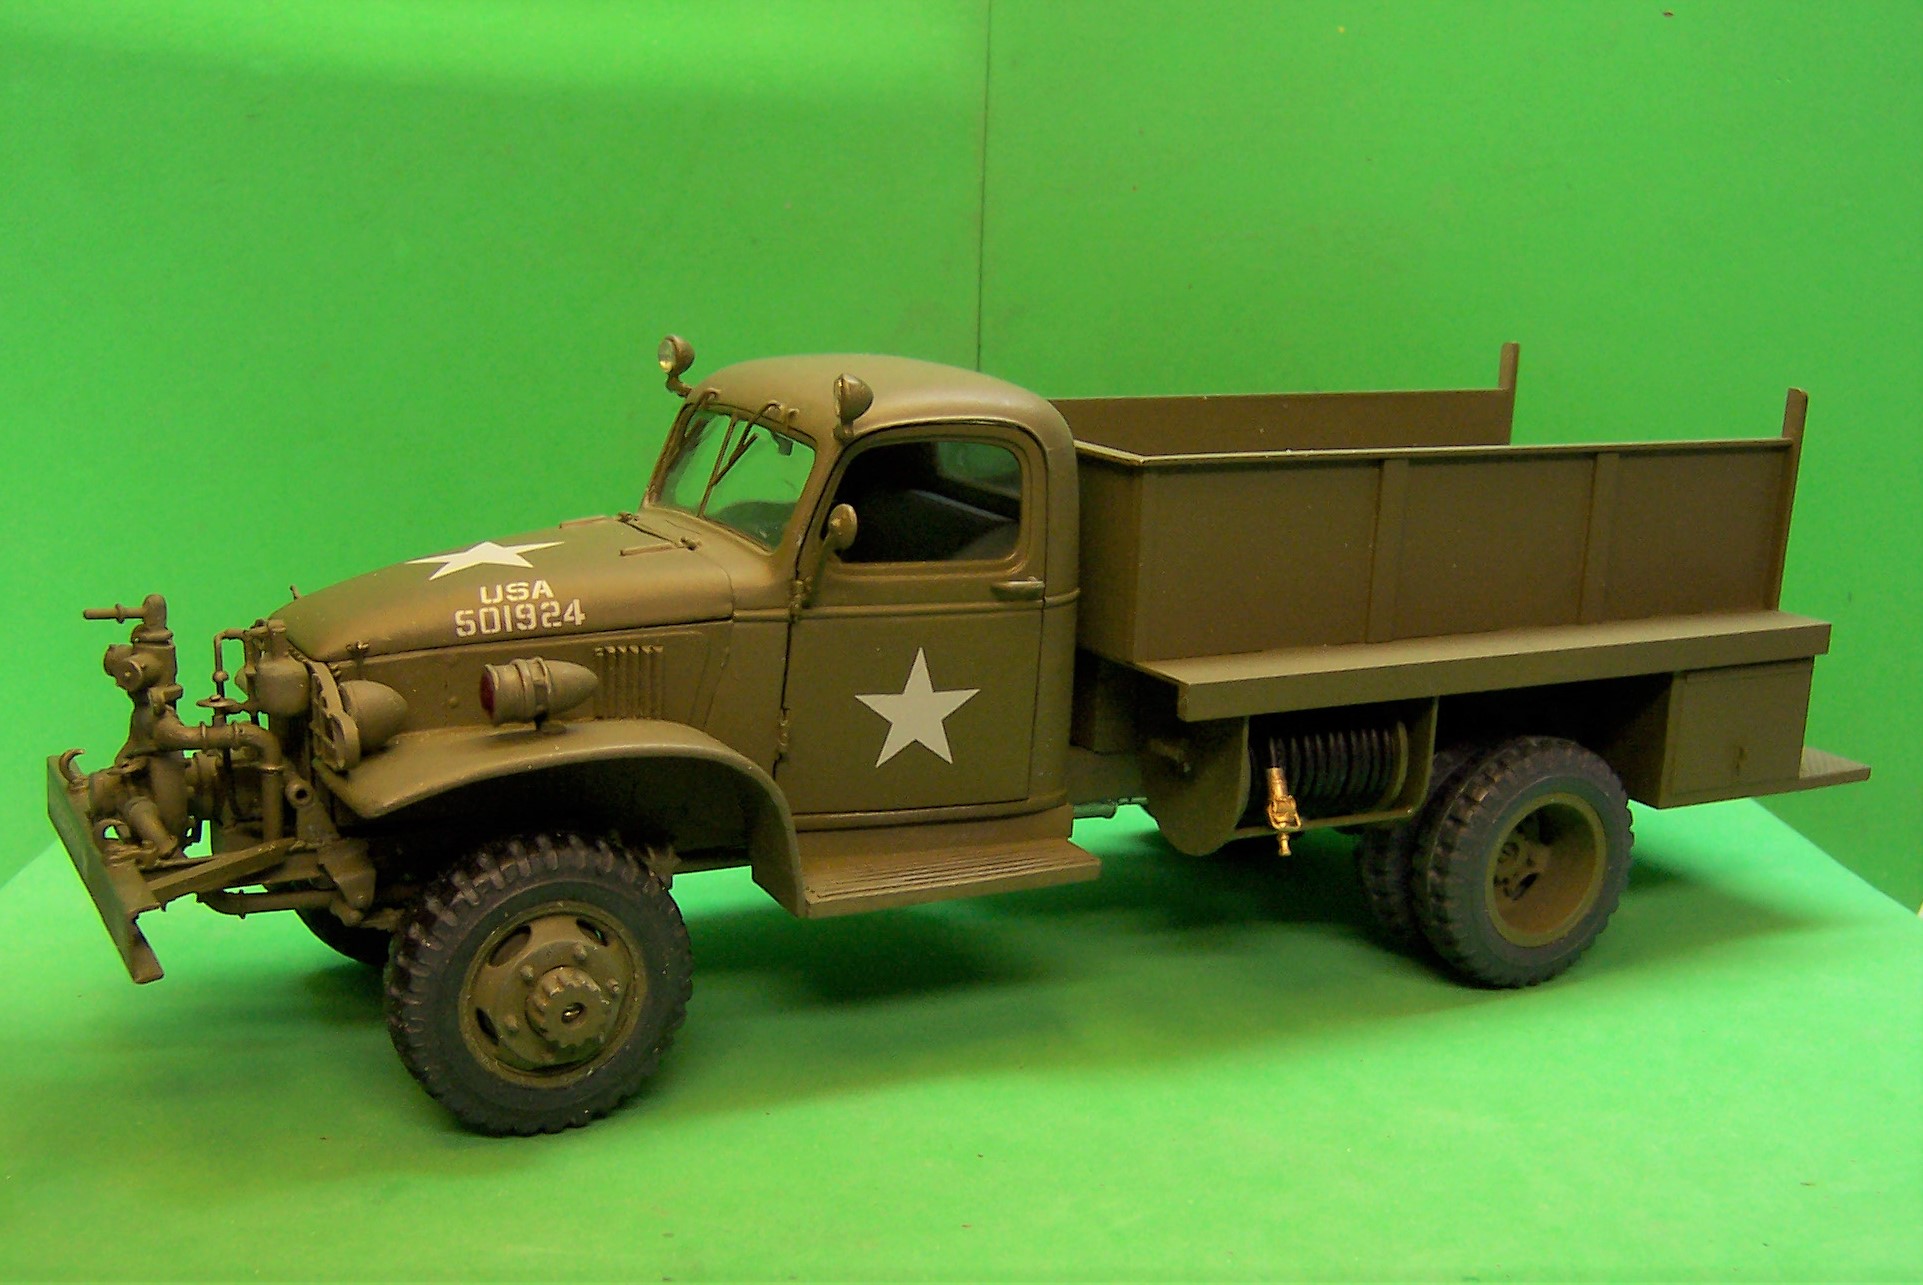
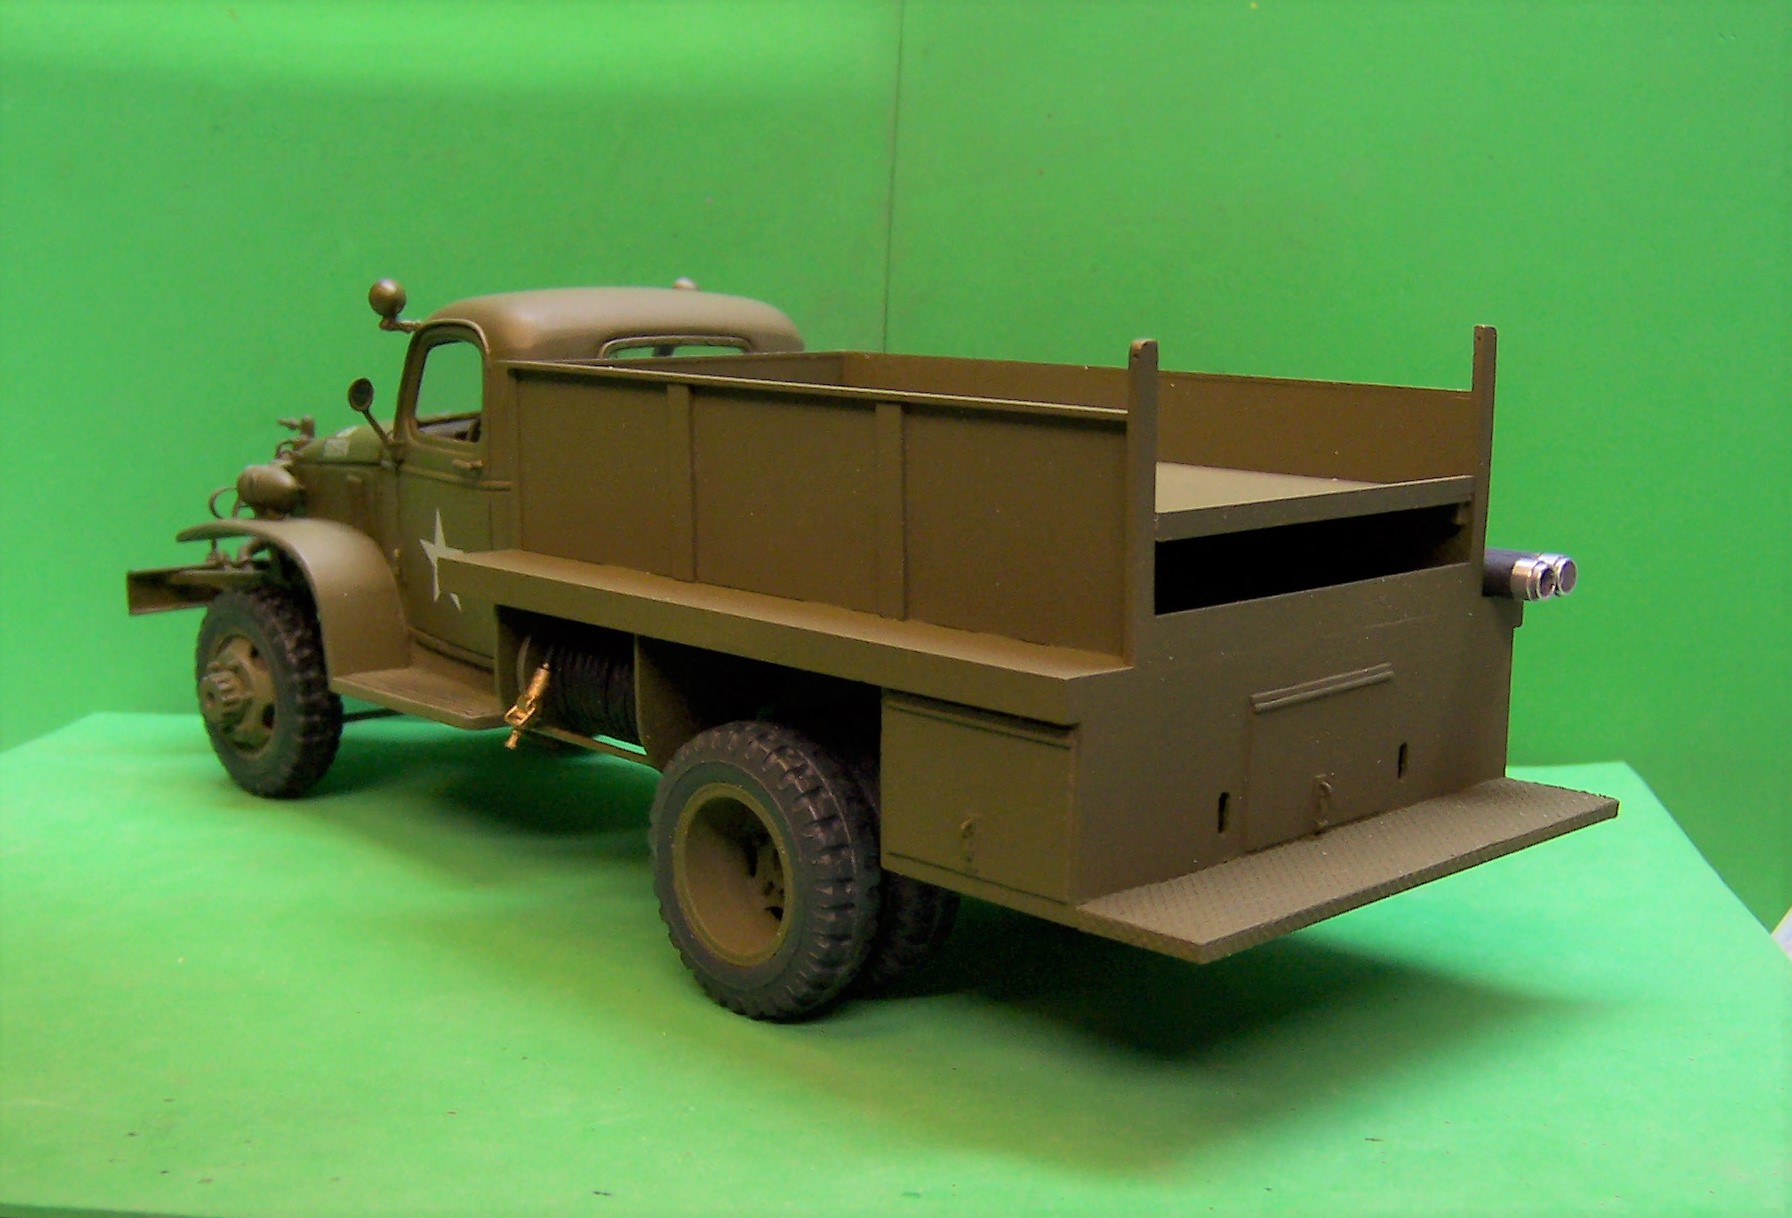
Still more work done. There is more to do as well but the back of the truck is nearly finished. There are two styles of pump cans that go on the left side along with buckets and a long handle shovel. Somewhere I will have to add a fire axe. Just for kicks I took two pump cans off of the Dodge W300 I did years ago and set them on the truck. The ones I do now won't be as fancy as everything on it is OD color. The pump action will be brass. And the hose will be sewing elastic like the samples in the bed. Second photo is what the rear of the truck looks like as of today. Here's the Dodge I took the pump cans from.
-
A very impressive build of a real brute! Well done! One of these days I'm going to have to start the M20 Diamond T tank hauler. That's an impressive kit as well.
-
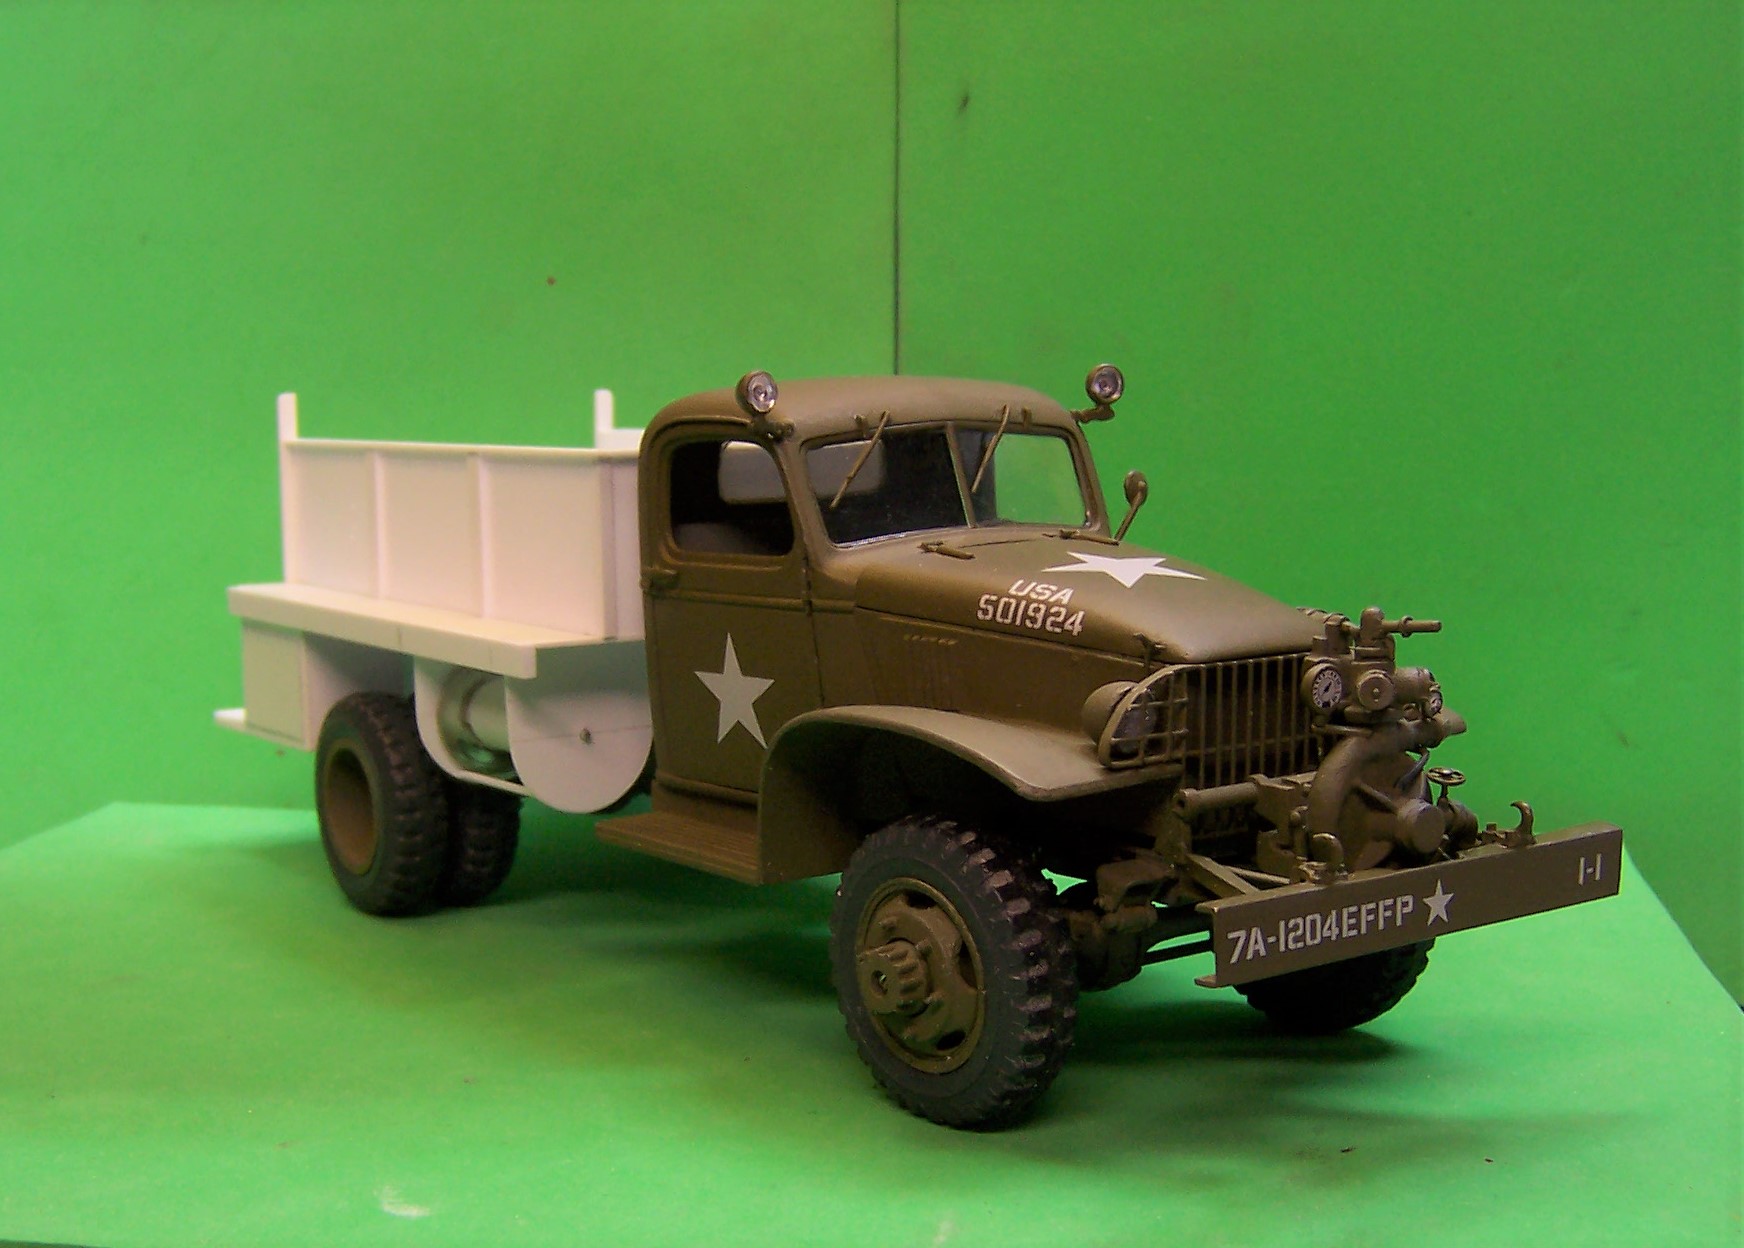
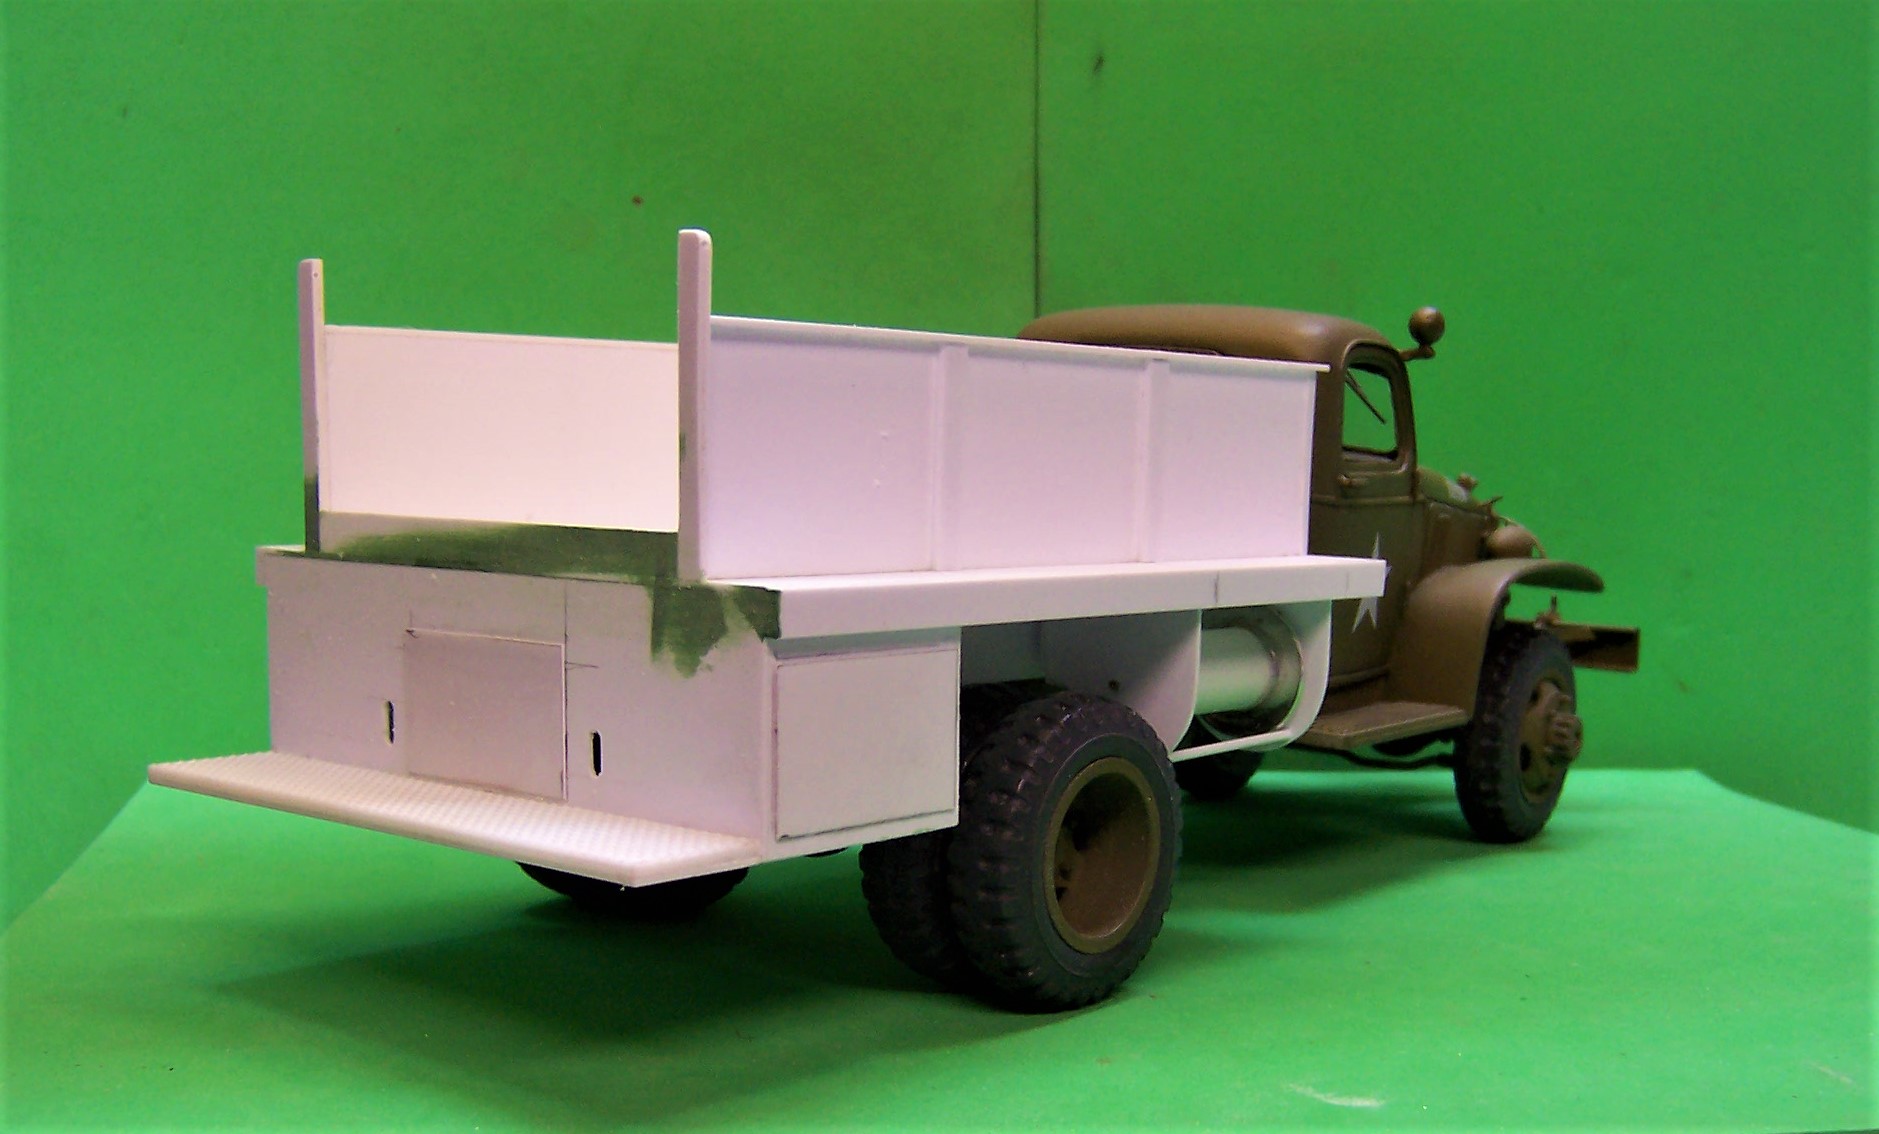
Brian, that body went together about as fast as its ever been done. Just a bunch of square and strip pieces. The two hose reel "brackets" took a little longer with a ruler and compass to get the right curve on the bottom. All the little details become mini-projects. That way you can concentrate on them without worrying about how much more there is to do! One other thing. You couldn't get a much easier paint scheme! Fun part of the OD is that if you mess it up you get out the brush and touch it up. Blends right in. Flats are so forgiving. I'll be working on some pump cans, water pails and other details for the rear step in a bit. Last will be to fill the hose bed.
-
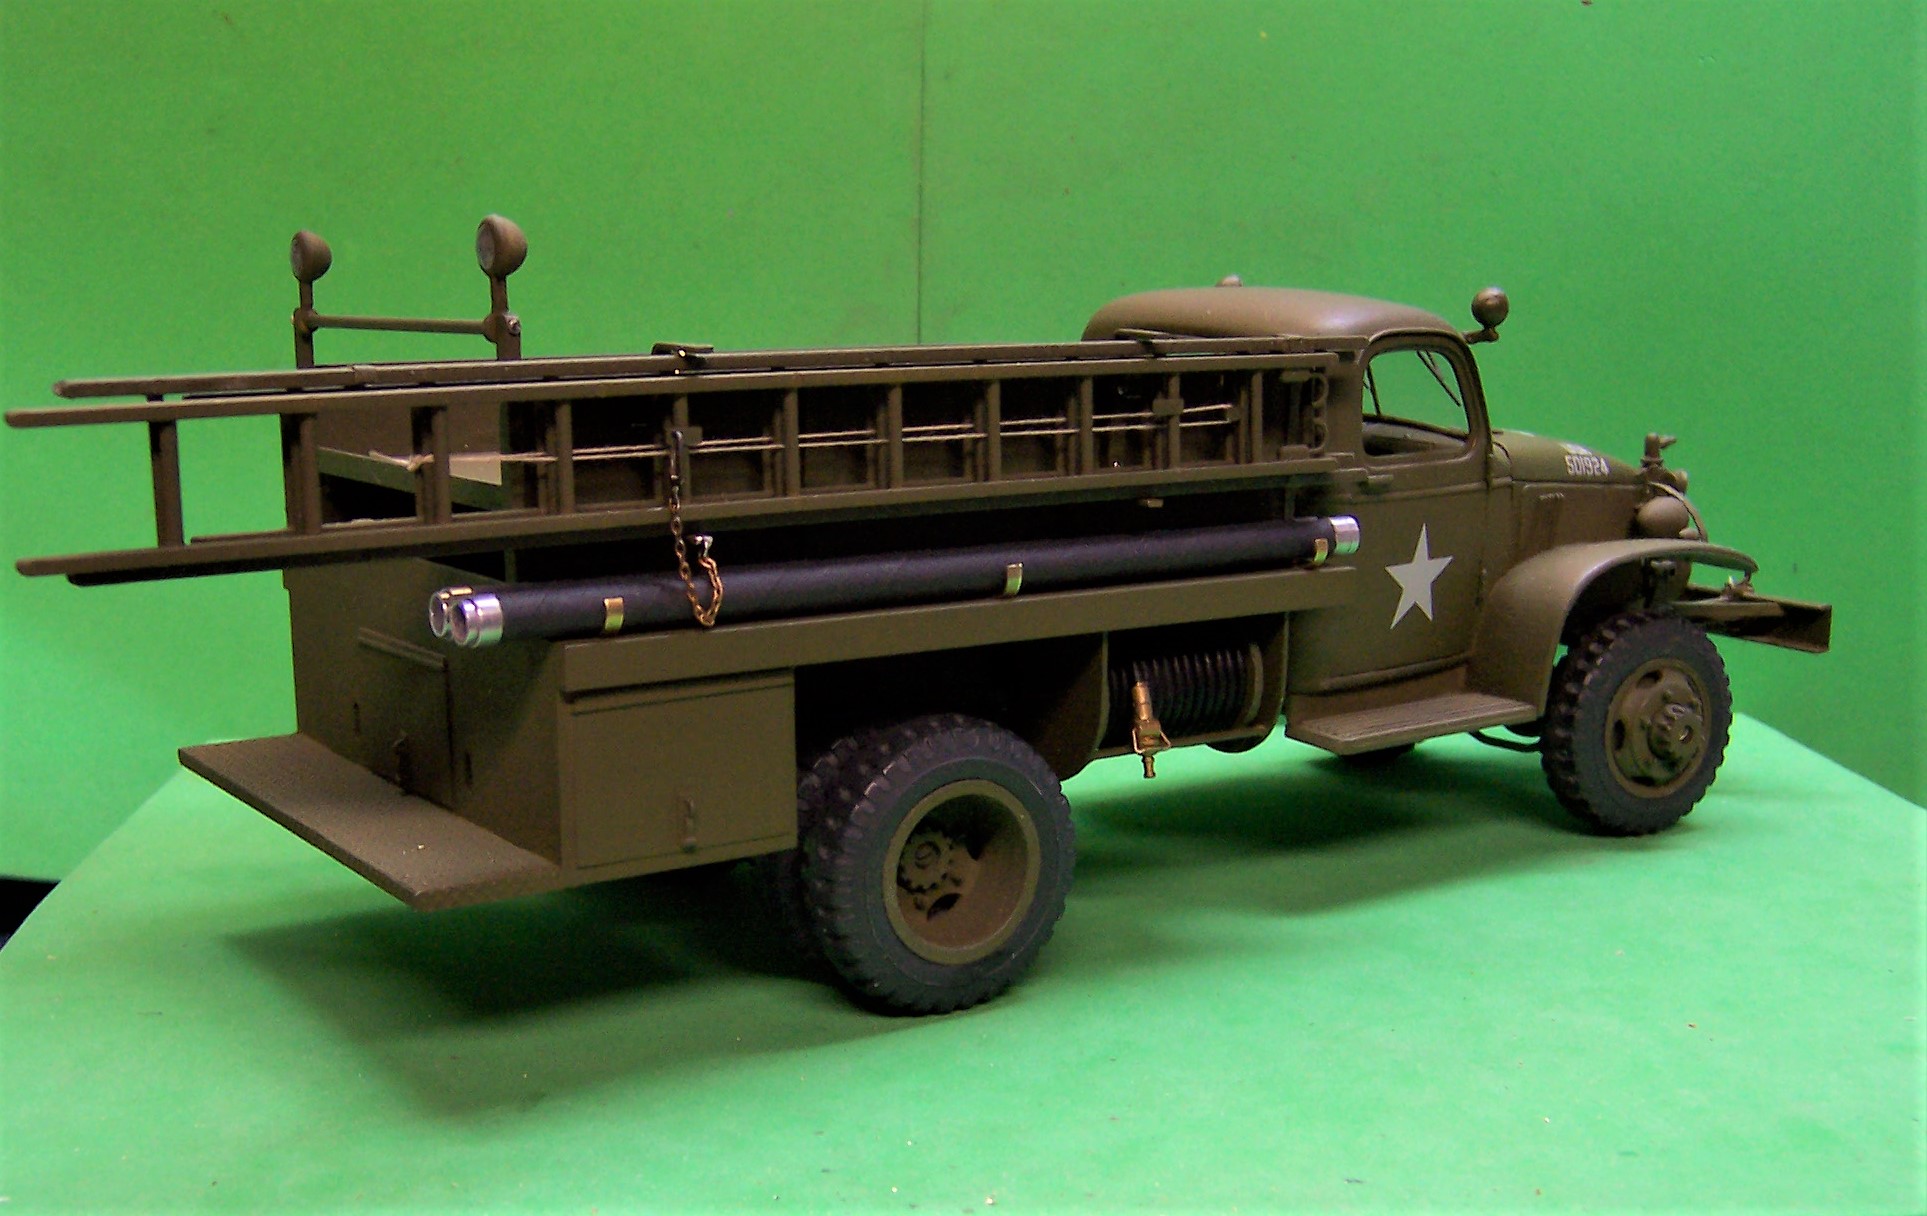
And the work continues. Body is painted, hose reels mounted. Worked on the ladder brackets, suction hose brackets and made up the 20' extension ladder and roof ladder. We are getting closer to the end of the build.
-
That's cool! Never saw something like that before. A first for a model for sure!
-
37 Chevrolet Road Tractor
Chariots of Fire replied to DRIPTROIT 71's topic in WIP: Model Trucks: Big Rigs and Heavy Equipment
I'm glad to see you kept the chrome free of rust. Just the way it ought to be! Nice job. -
Got more done in the last 24 hours. Added two gages for the pump; one for the discharge and one for the intake. Booster reels have been added to the body and detailing of the latches for the three compartment doors is done (though not in these photos). Next up is to prime the body as it is now. There is a hose bed to add and some brackets to make for the ladders and hard suction but that comes later. The hose reels are removable for now so that will make painted behind them much easier. It's beginning to come together now.
-
-
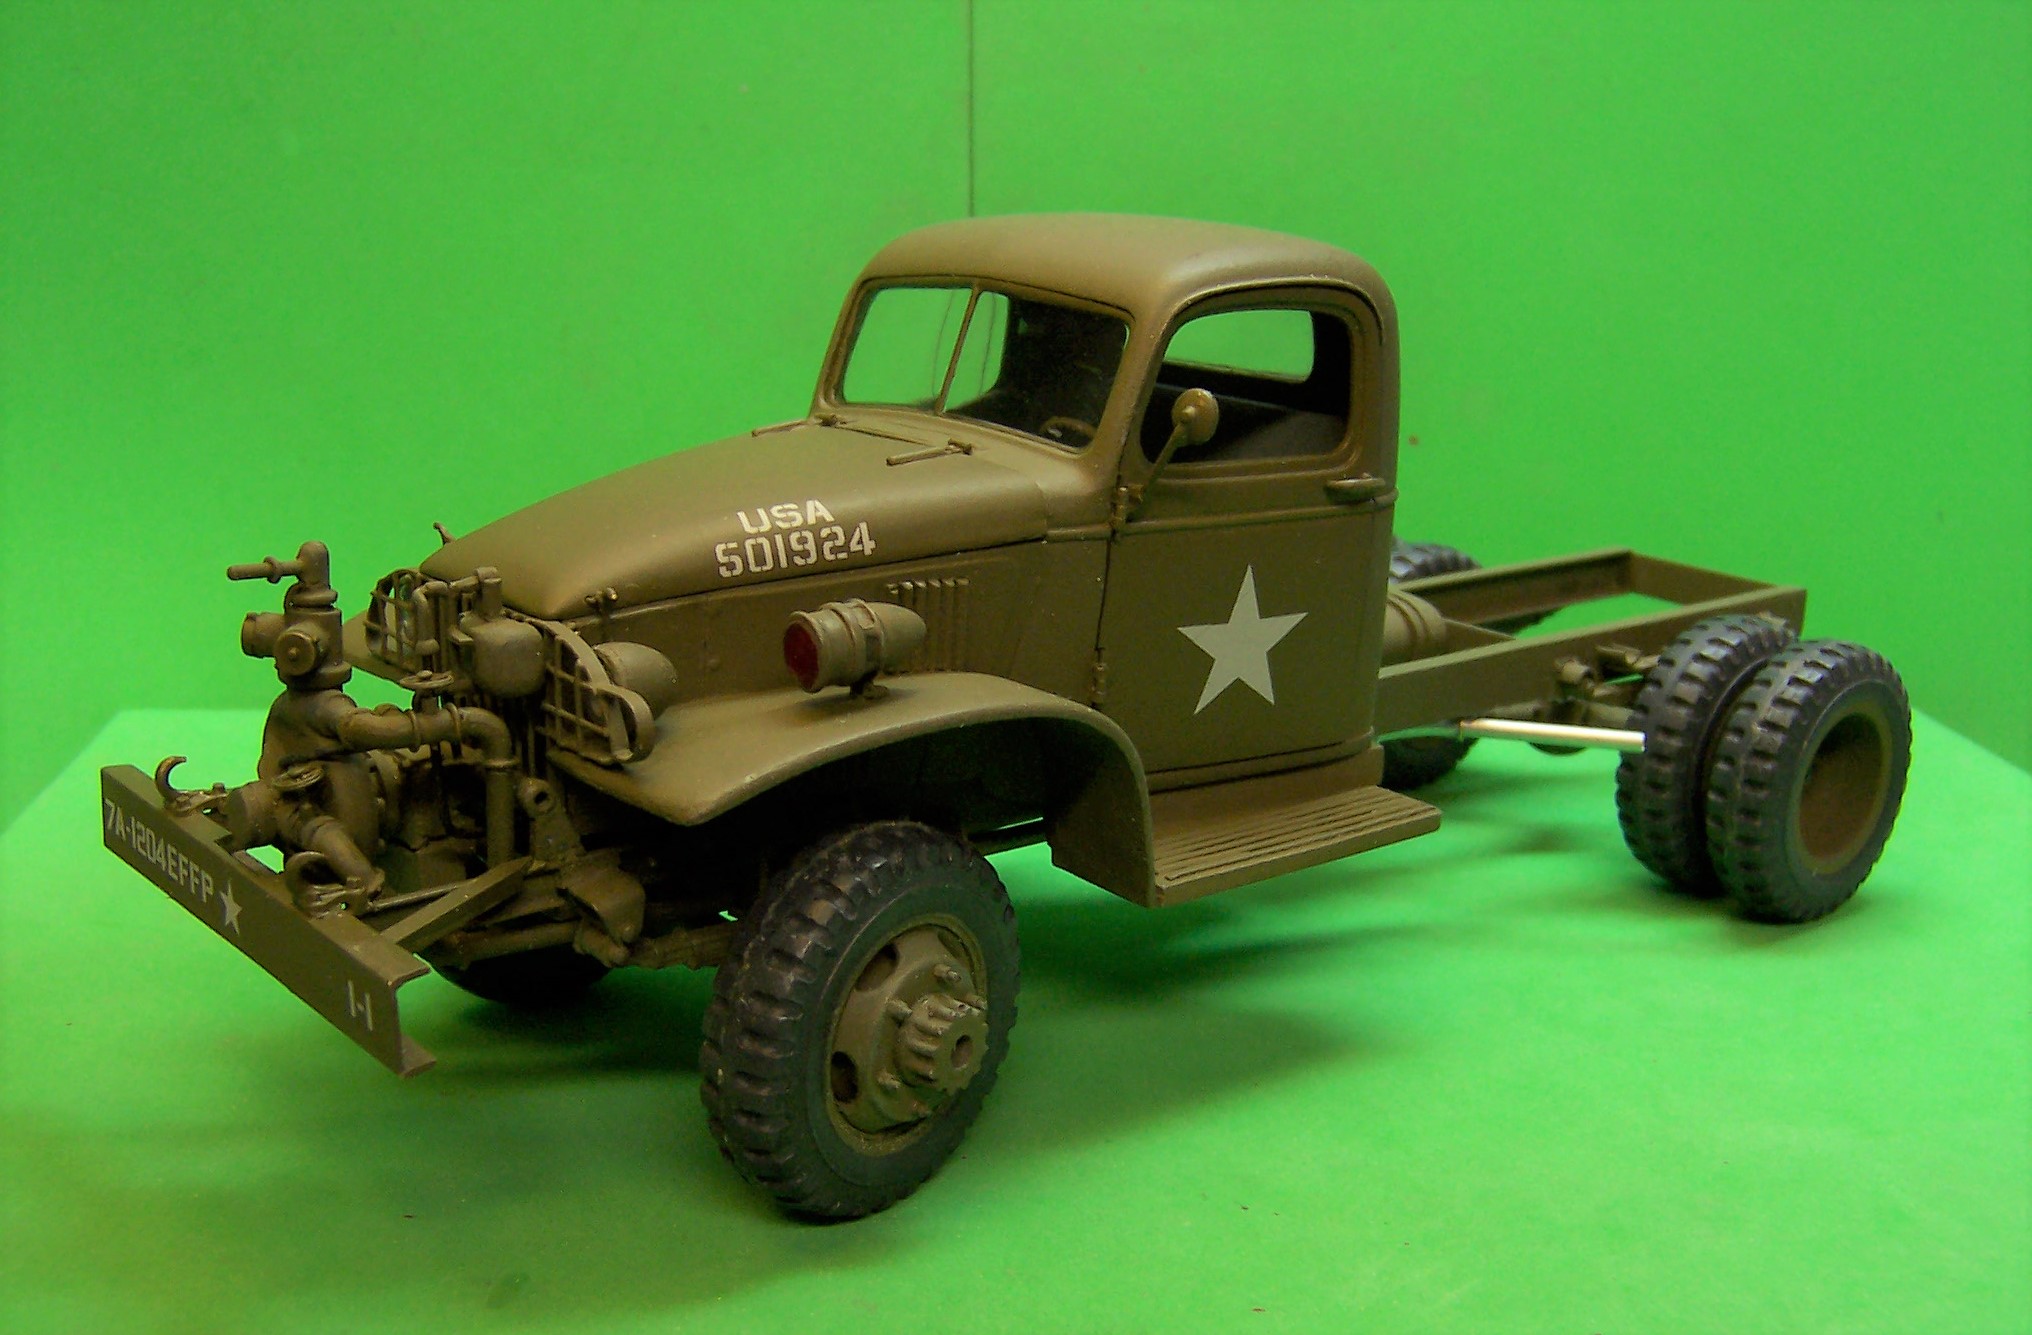
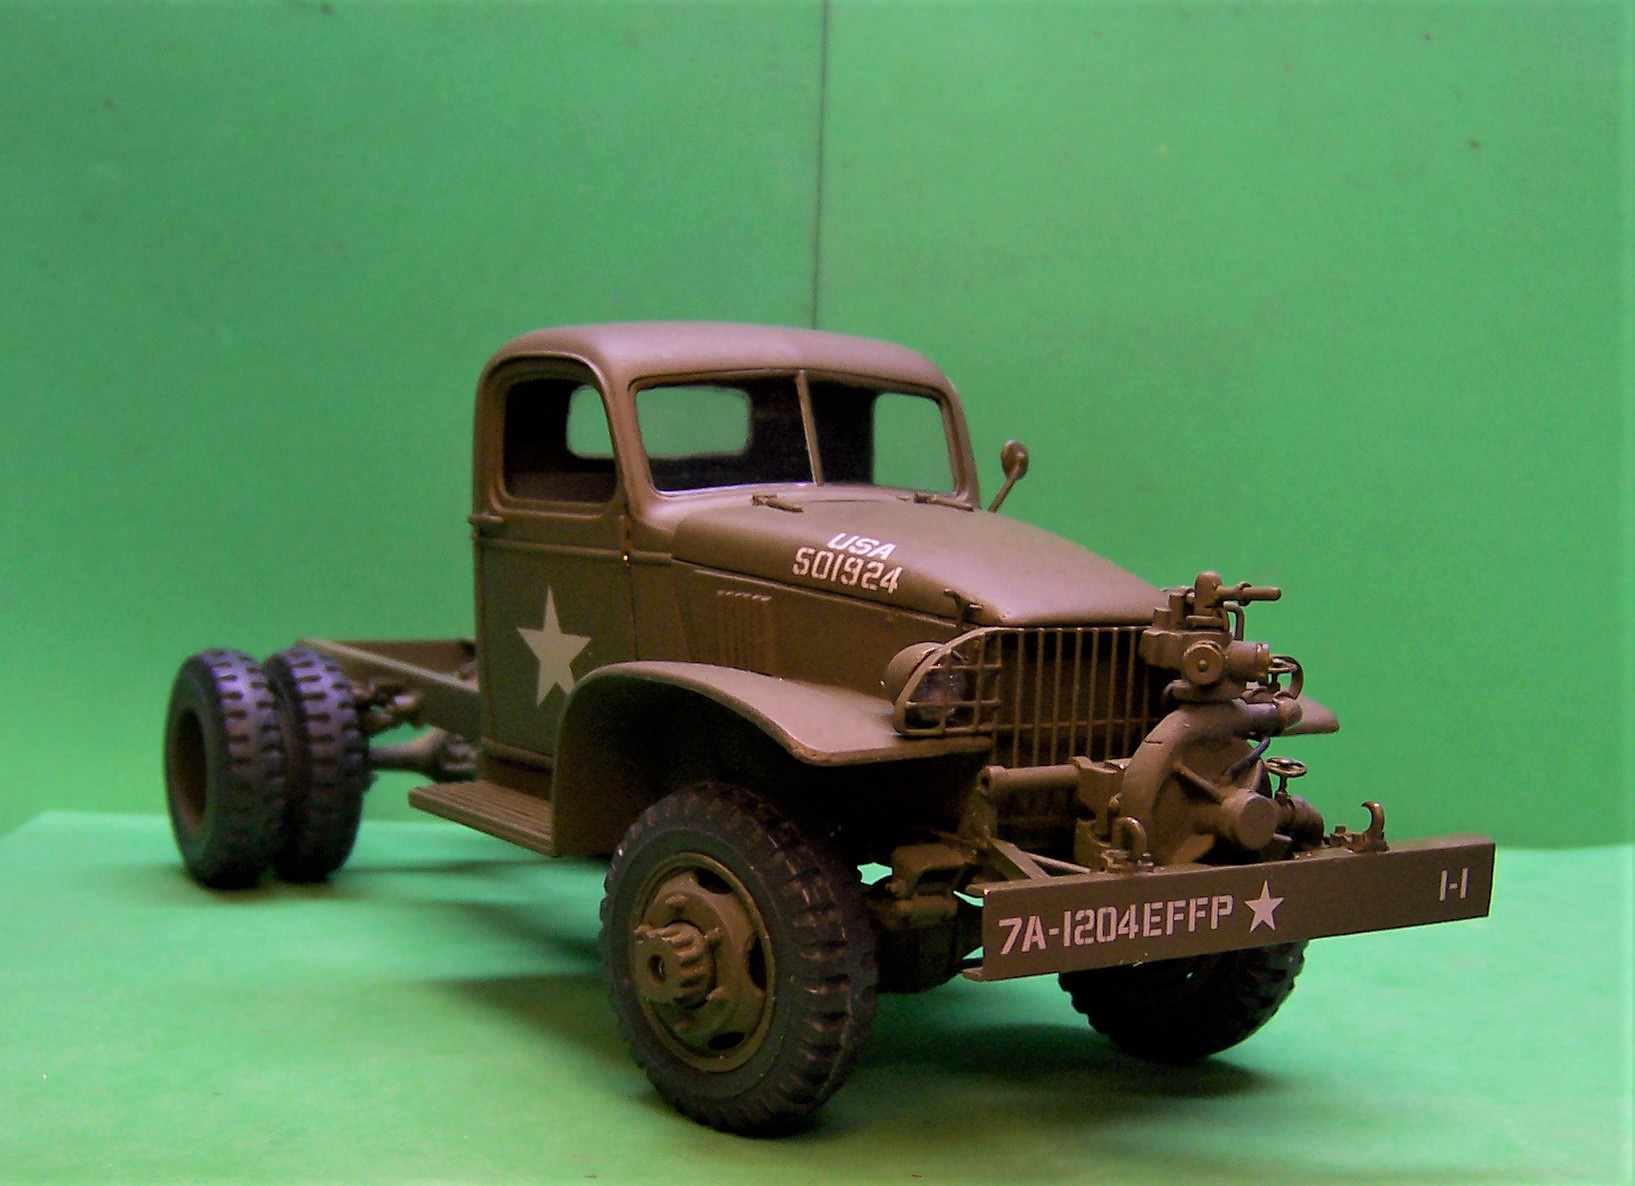
More progress on the Class 325. Cab and chassis are nearly complete. Blackout lights still needed. Got started on the body tonite. Still have the bottom half to do. Compartments in the rear and two hose reels under the upper body just behind the cab. Engine bay is complete as well.
-
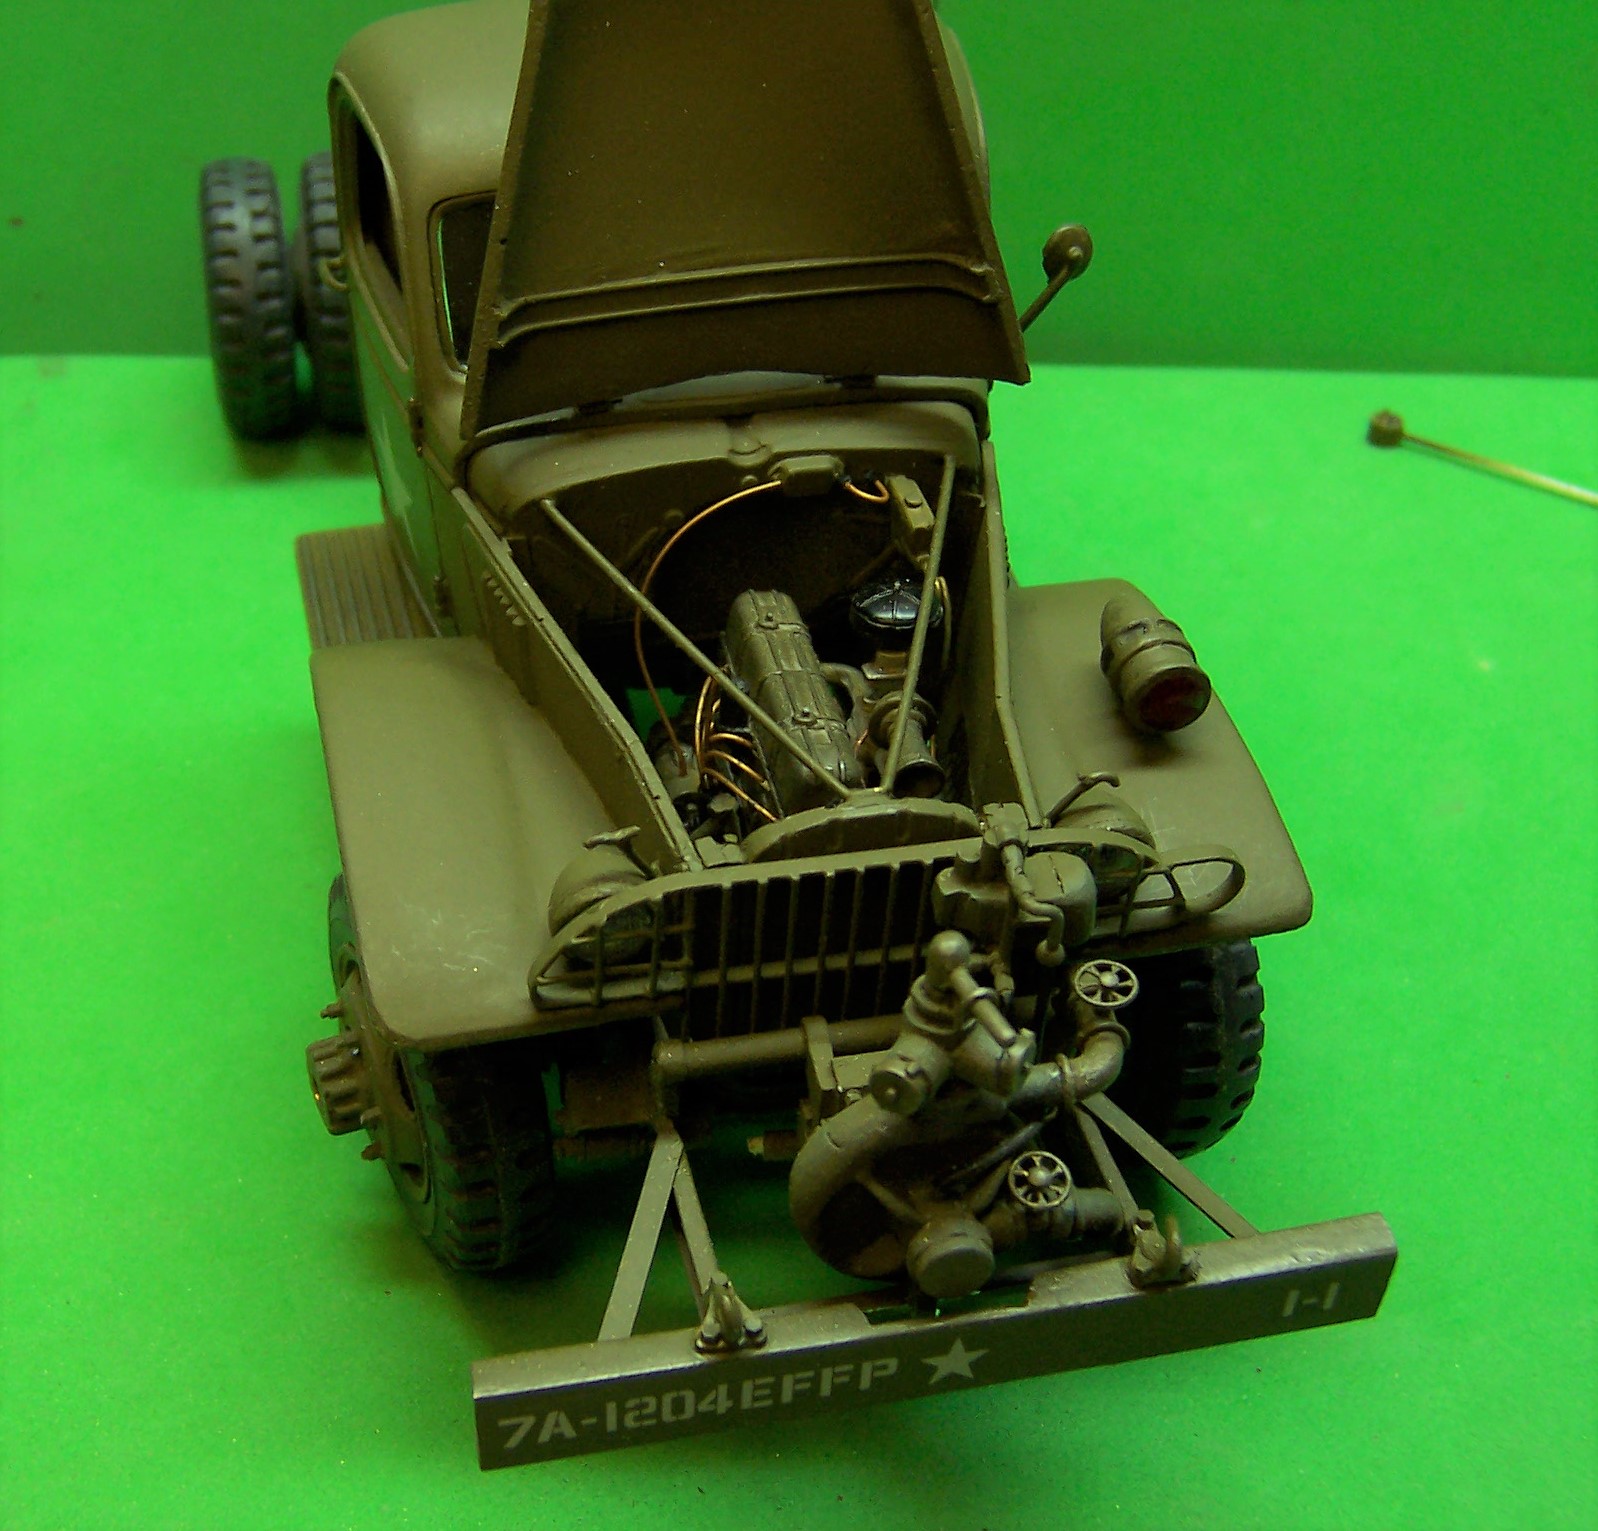
Got some paint on! Decals are special to the unit that Jim Davis was in when he served in WW II. Just a few more details like windshield wipers, blackout lights and spotlights and the cab and chassis are done. Next up will be the fire body.
-
1/32 Scale Snaptite Ford Aeromax
Chariots of Fire replied to Hotrod 97's topic in Model Trucks: Big Rigs and Heavy Equipment
I know what you mean about the tires. The fronts have no backing. I used to take extras and cut off a sidewall and glue it onto the back of the tires to fill them in. Took just a bit of sanding at the corner of the sidewall and tread to make it look right. Other than that the rig looks pretty nice. -
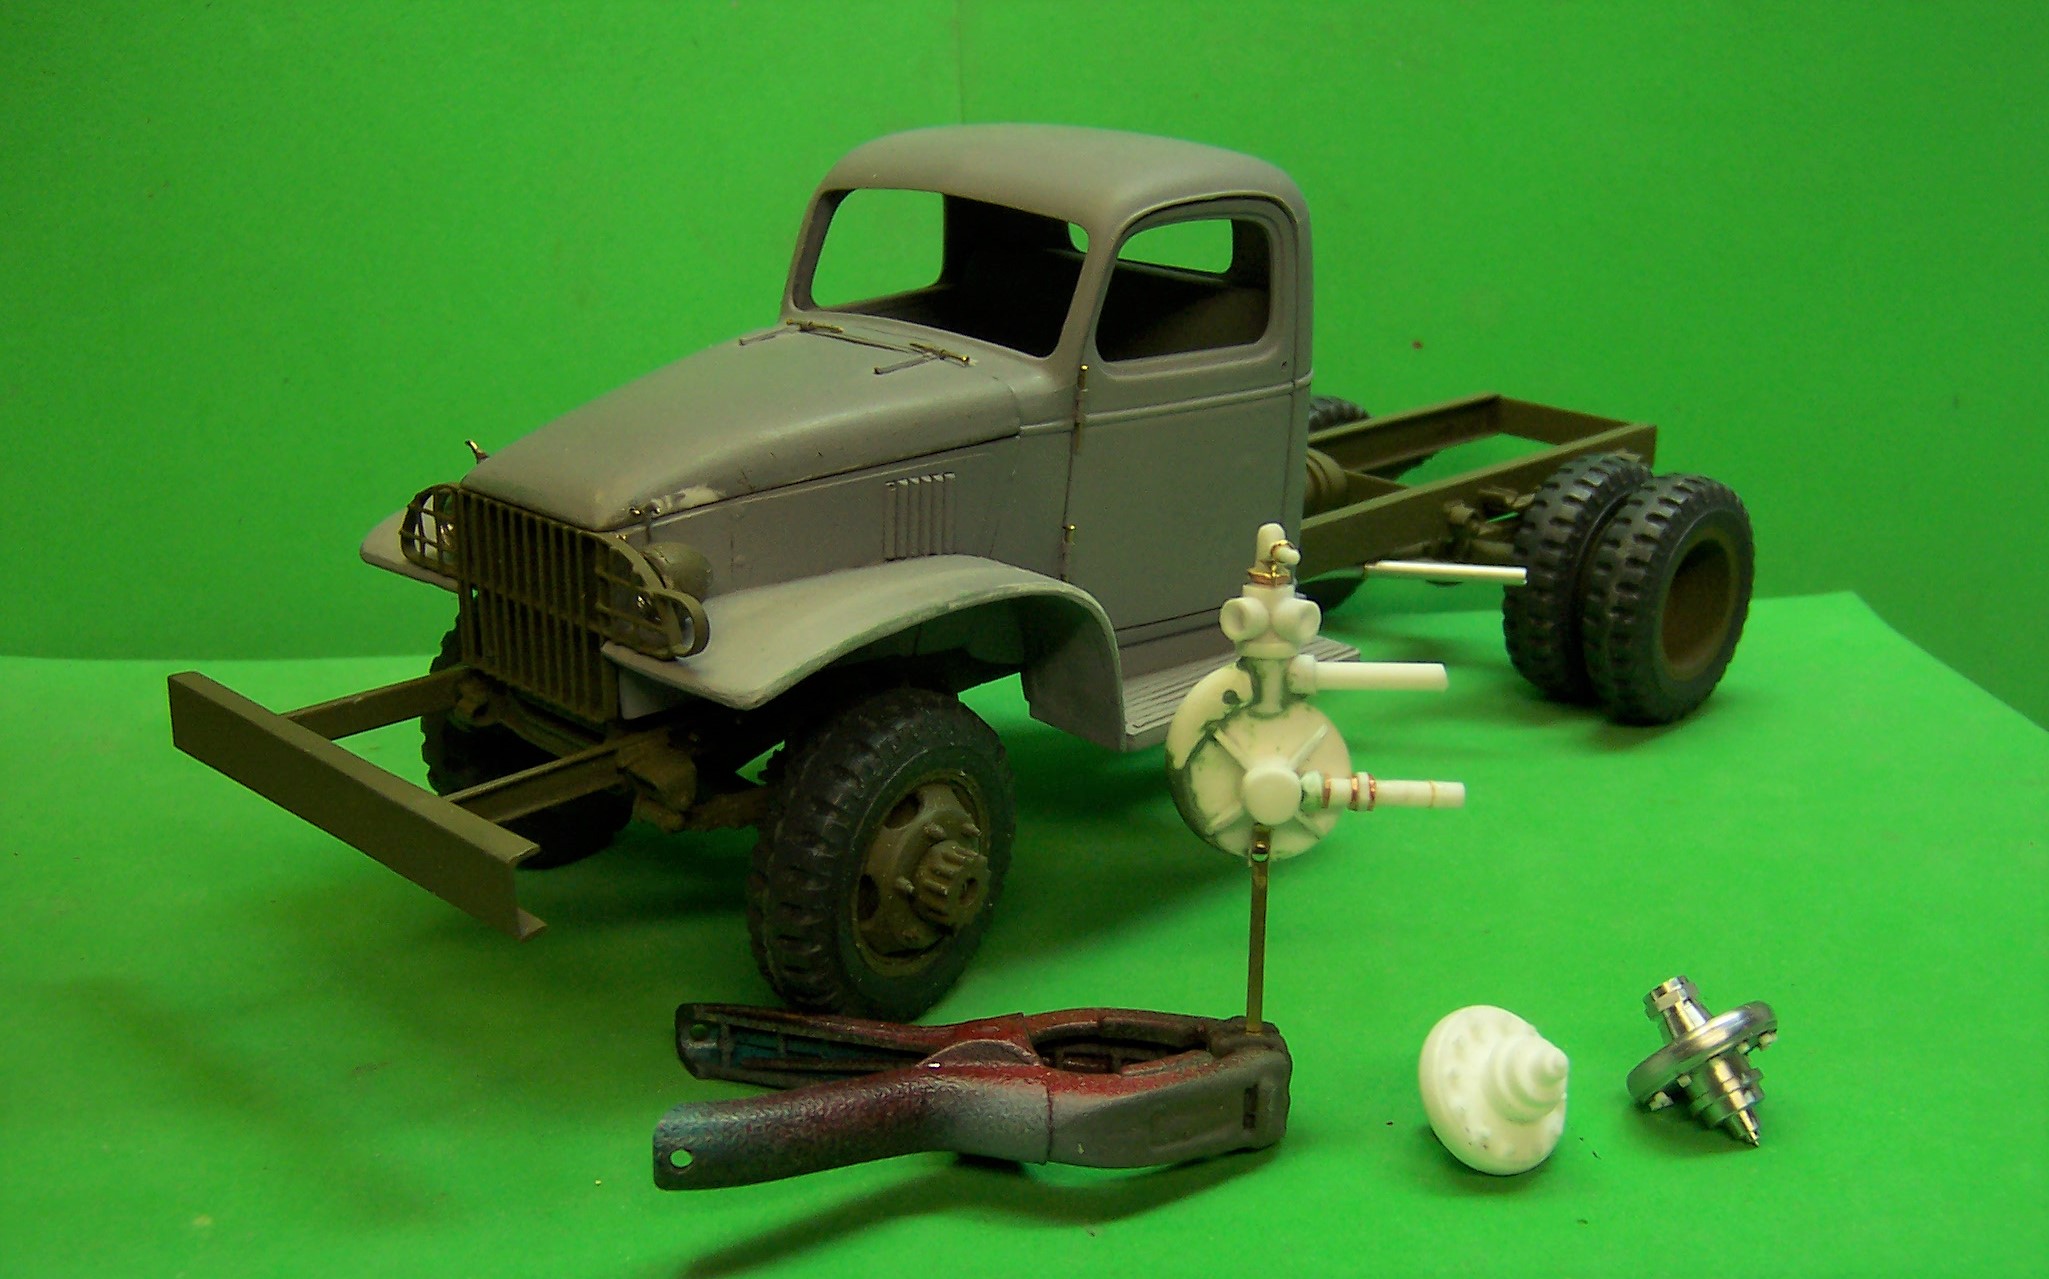
Well here is the pump nearly complete. I'm waiting on an order of HO scale freight car brake wheels that I can use in making a few valves to add. Other than that the pump portion is about done. Just a bit of touchup also with the OD paint.
-
And here it is in primer. Got a few more widgets on it. But I may do some adjusting. The top of the pump sits just a little high so it may come off so I can file down the discharge volute that sends water to it. That should help.
-
Working on the pump for the front end. I turned the blank out of aluminum and then made a mold for casting.
-
Scout Parts
Chariots of Fire replied to cargostar's topic in WIP: Model Trucks: Pickups, Vans, SUVs, Light Commercial
I'm with you guys on the Travelall! Dave: Put me down for one! I can see that added to the Department fleet! -
Modelhaus made a C60 Chevy truck kit in resin a few years ago. You would have to check on e-bay or post a request here to get one as Modelhaus is no longer in business. Here is a tanker I made from the casting. Scale is 1/25
-
No doubt about it. A fine piece of work! The "on the beach" scene is great!
-
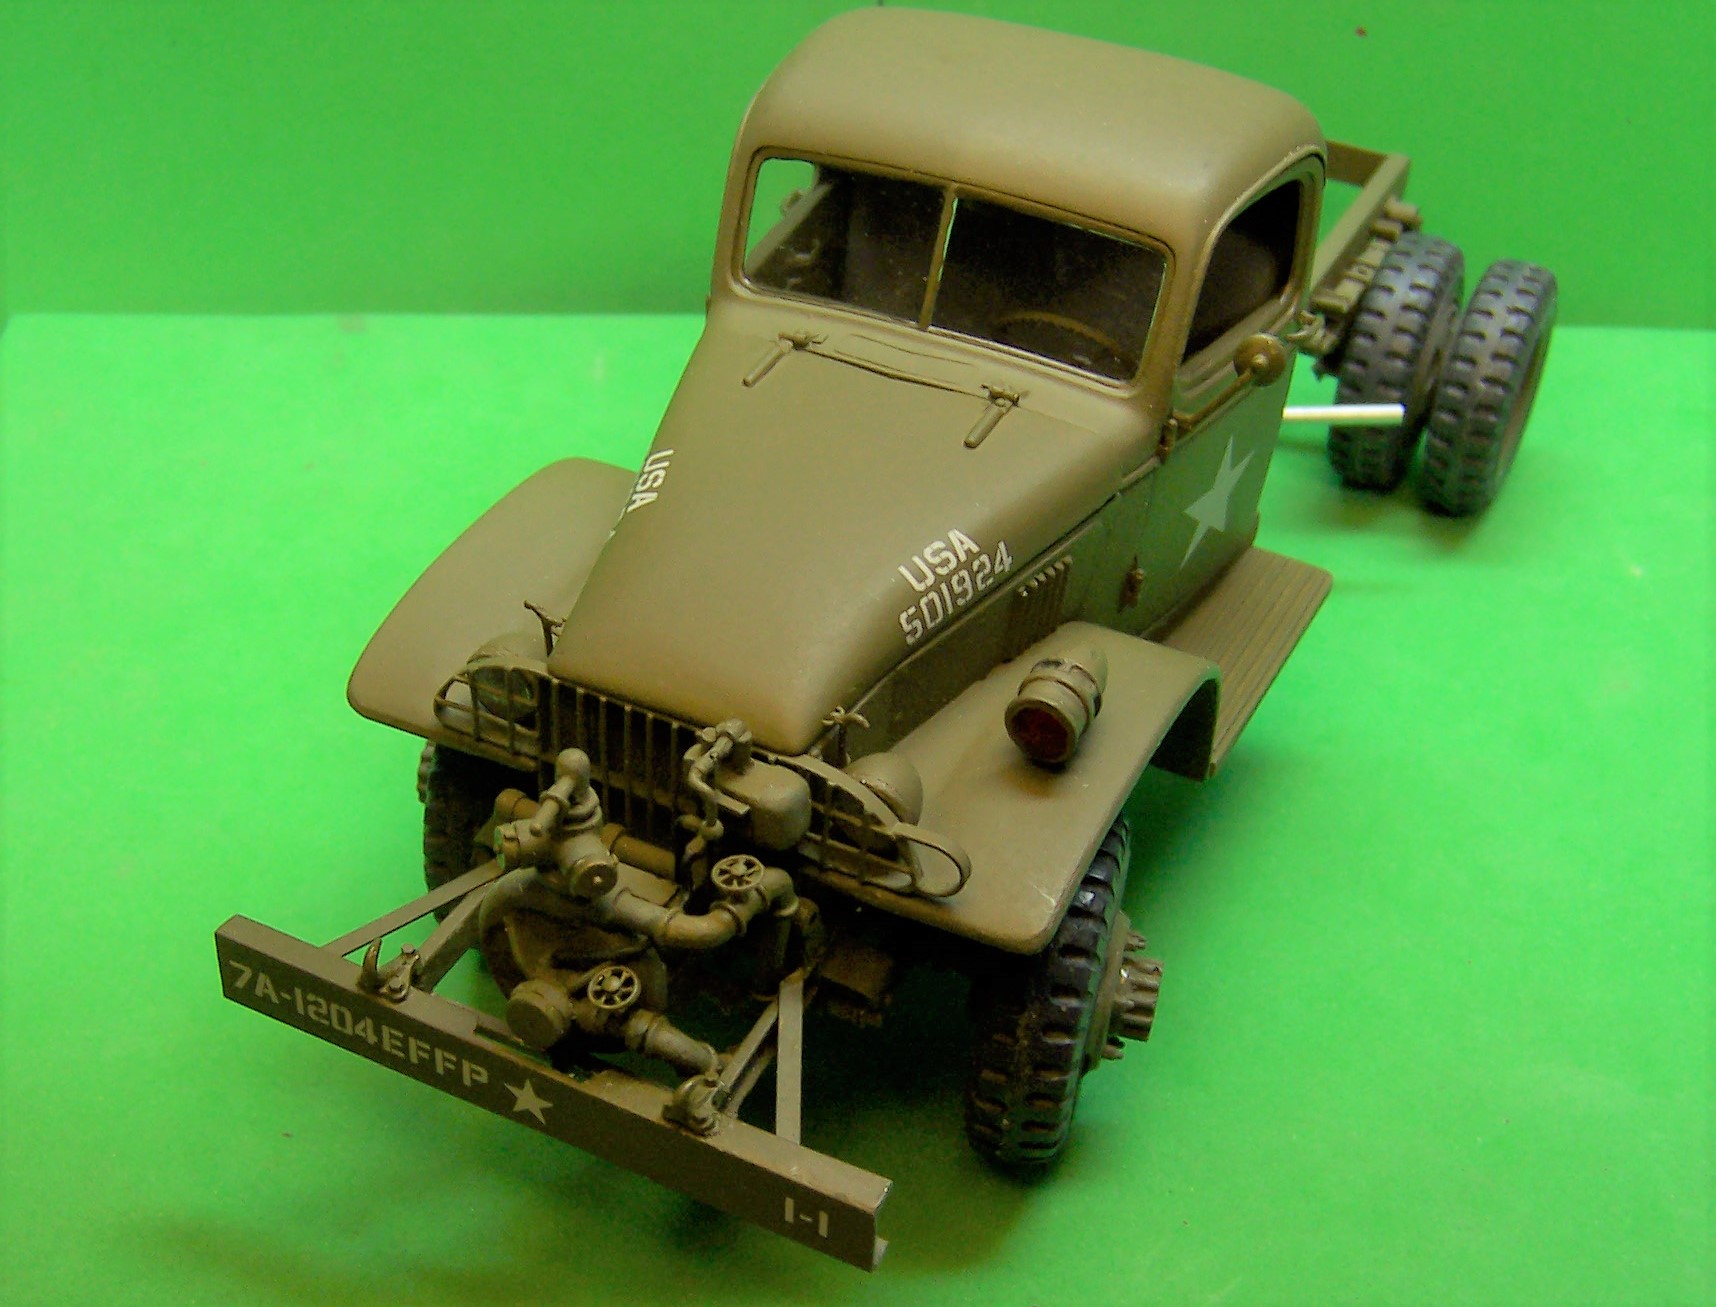
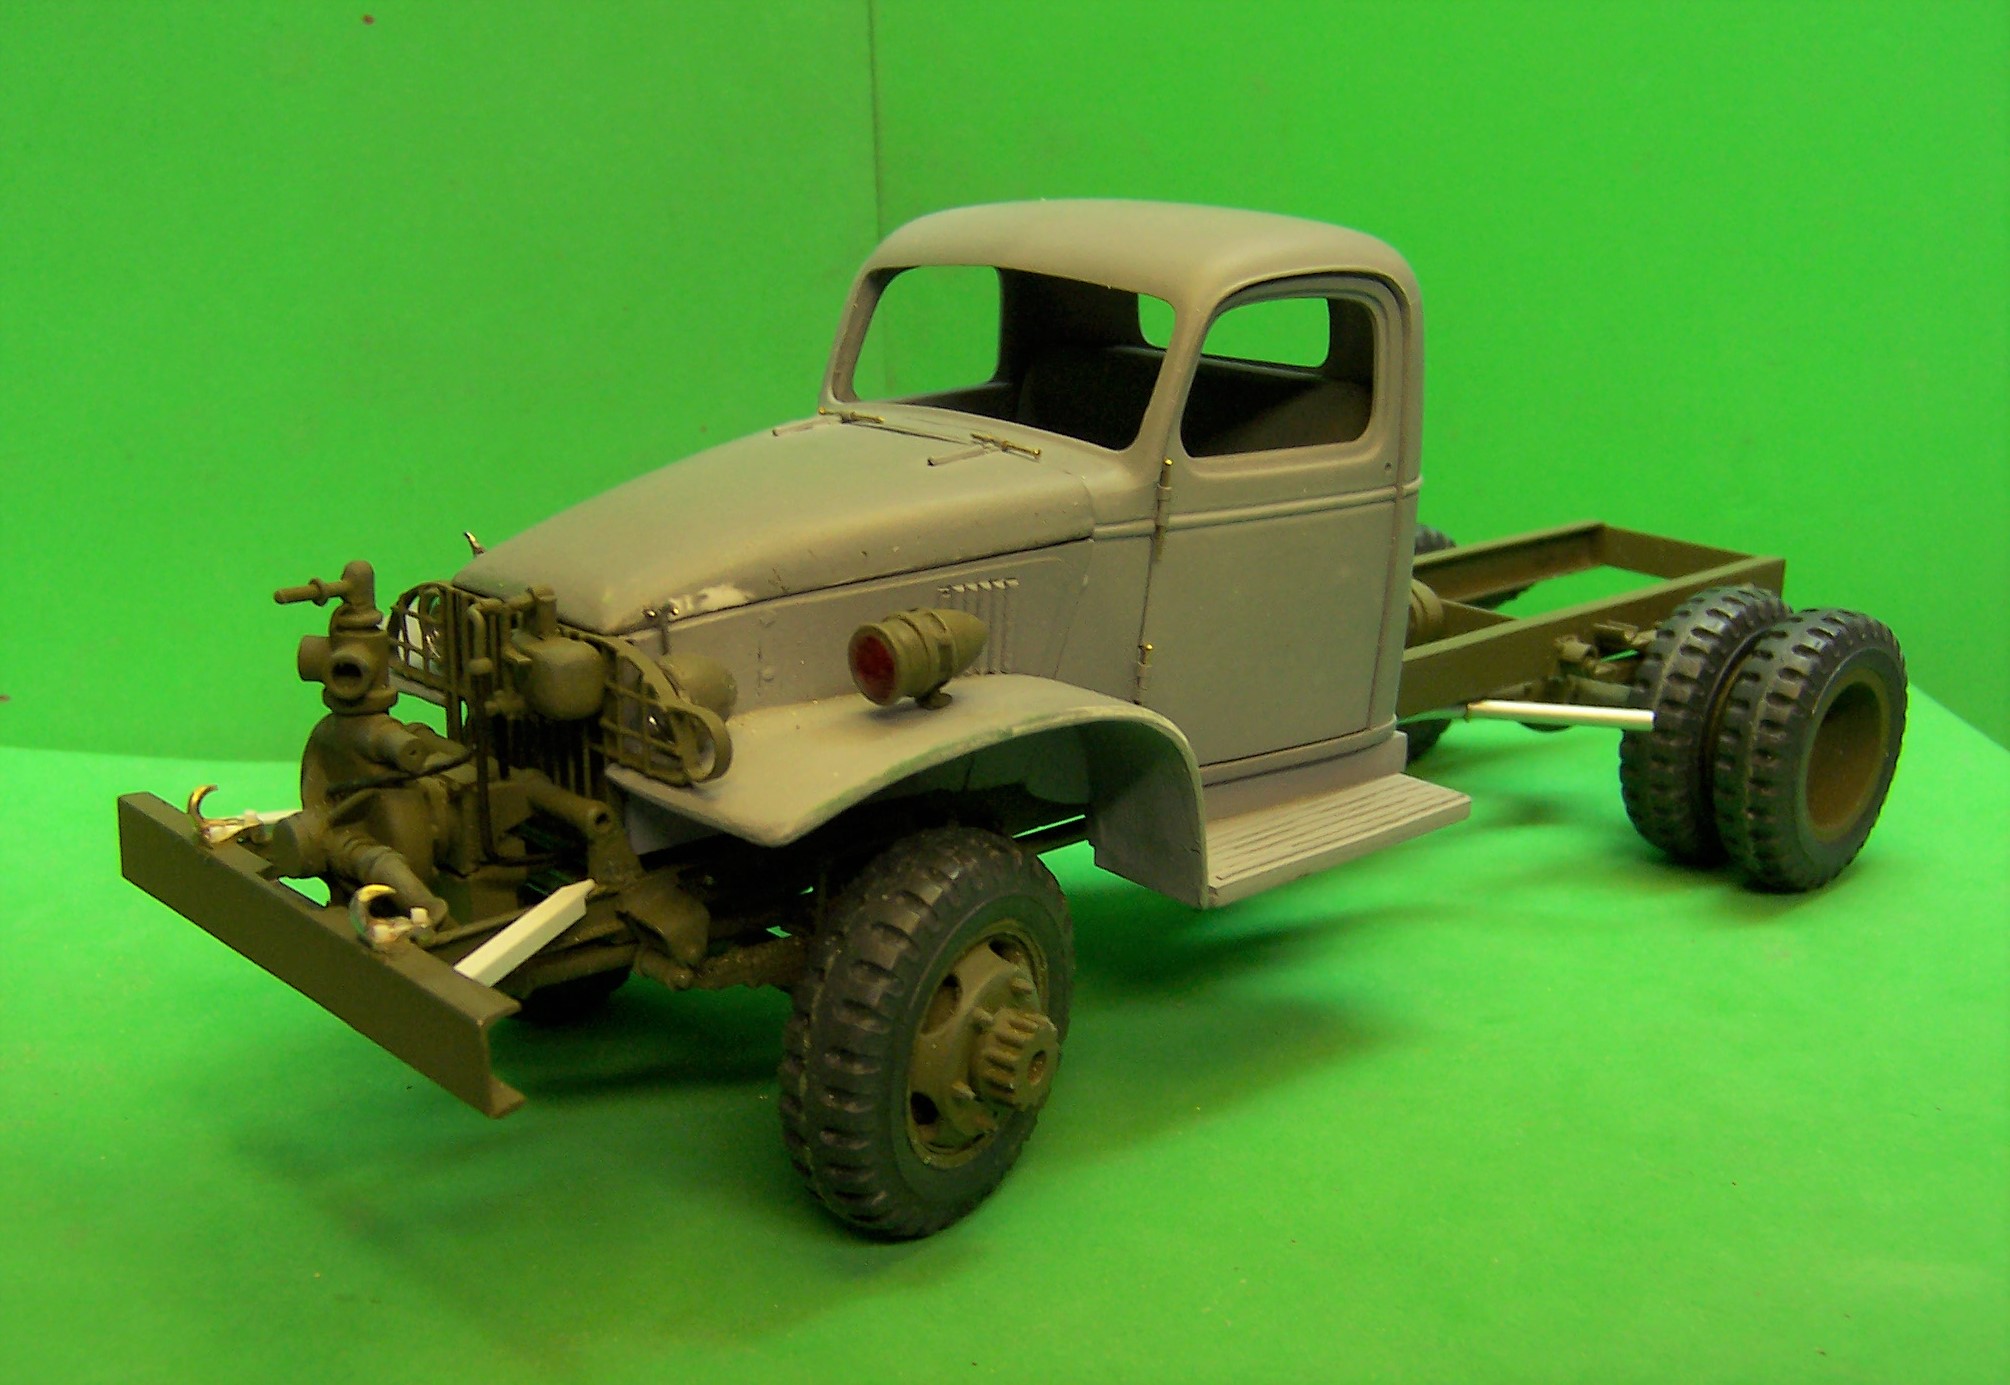
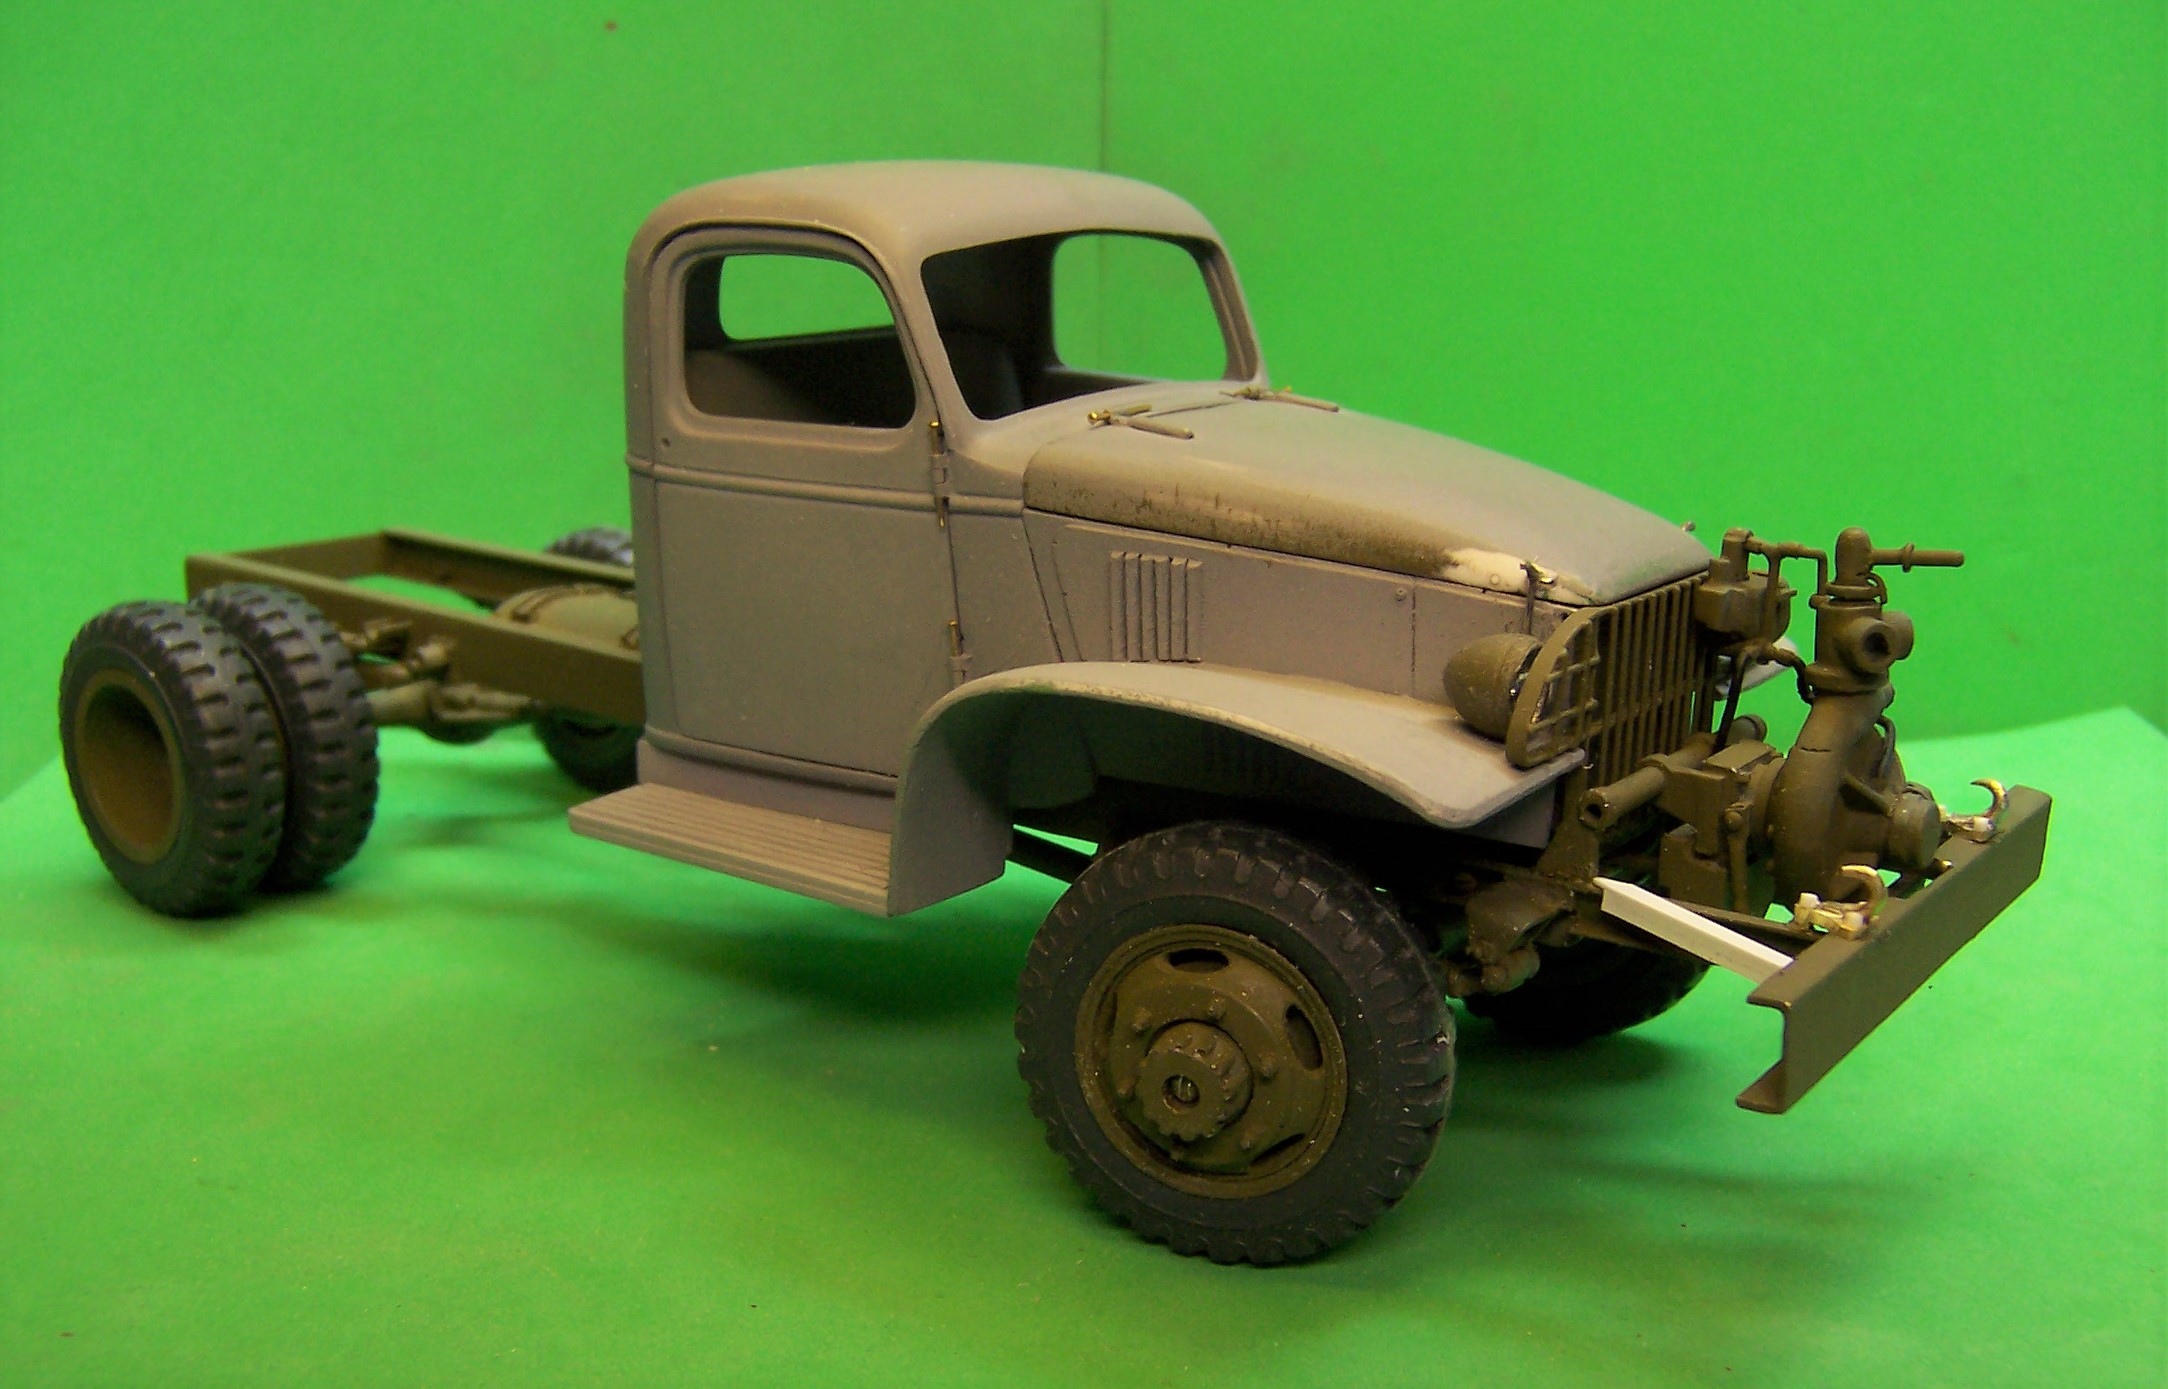
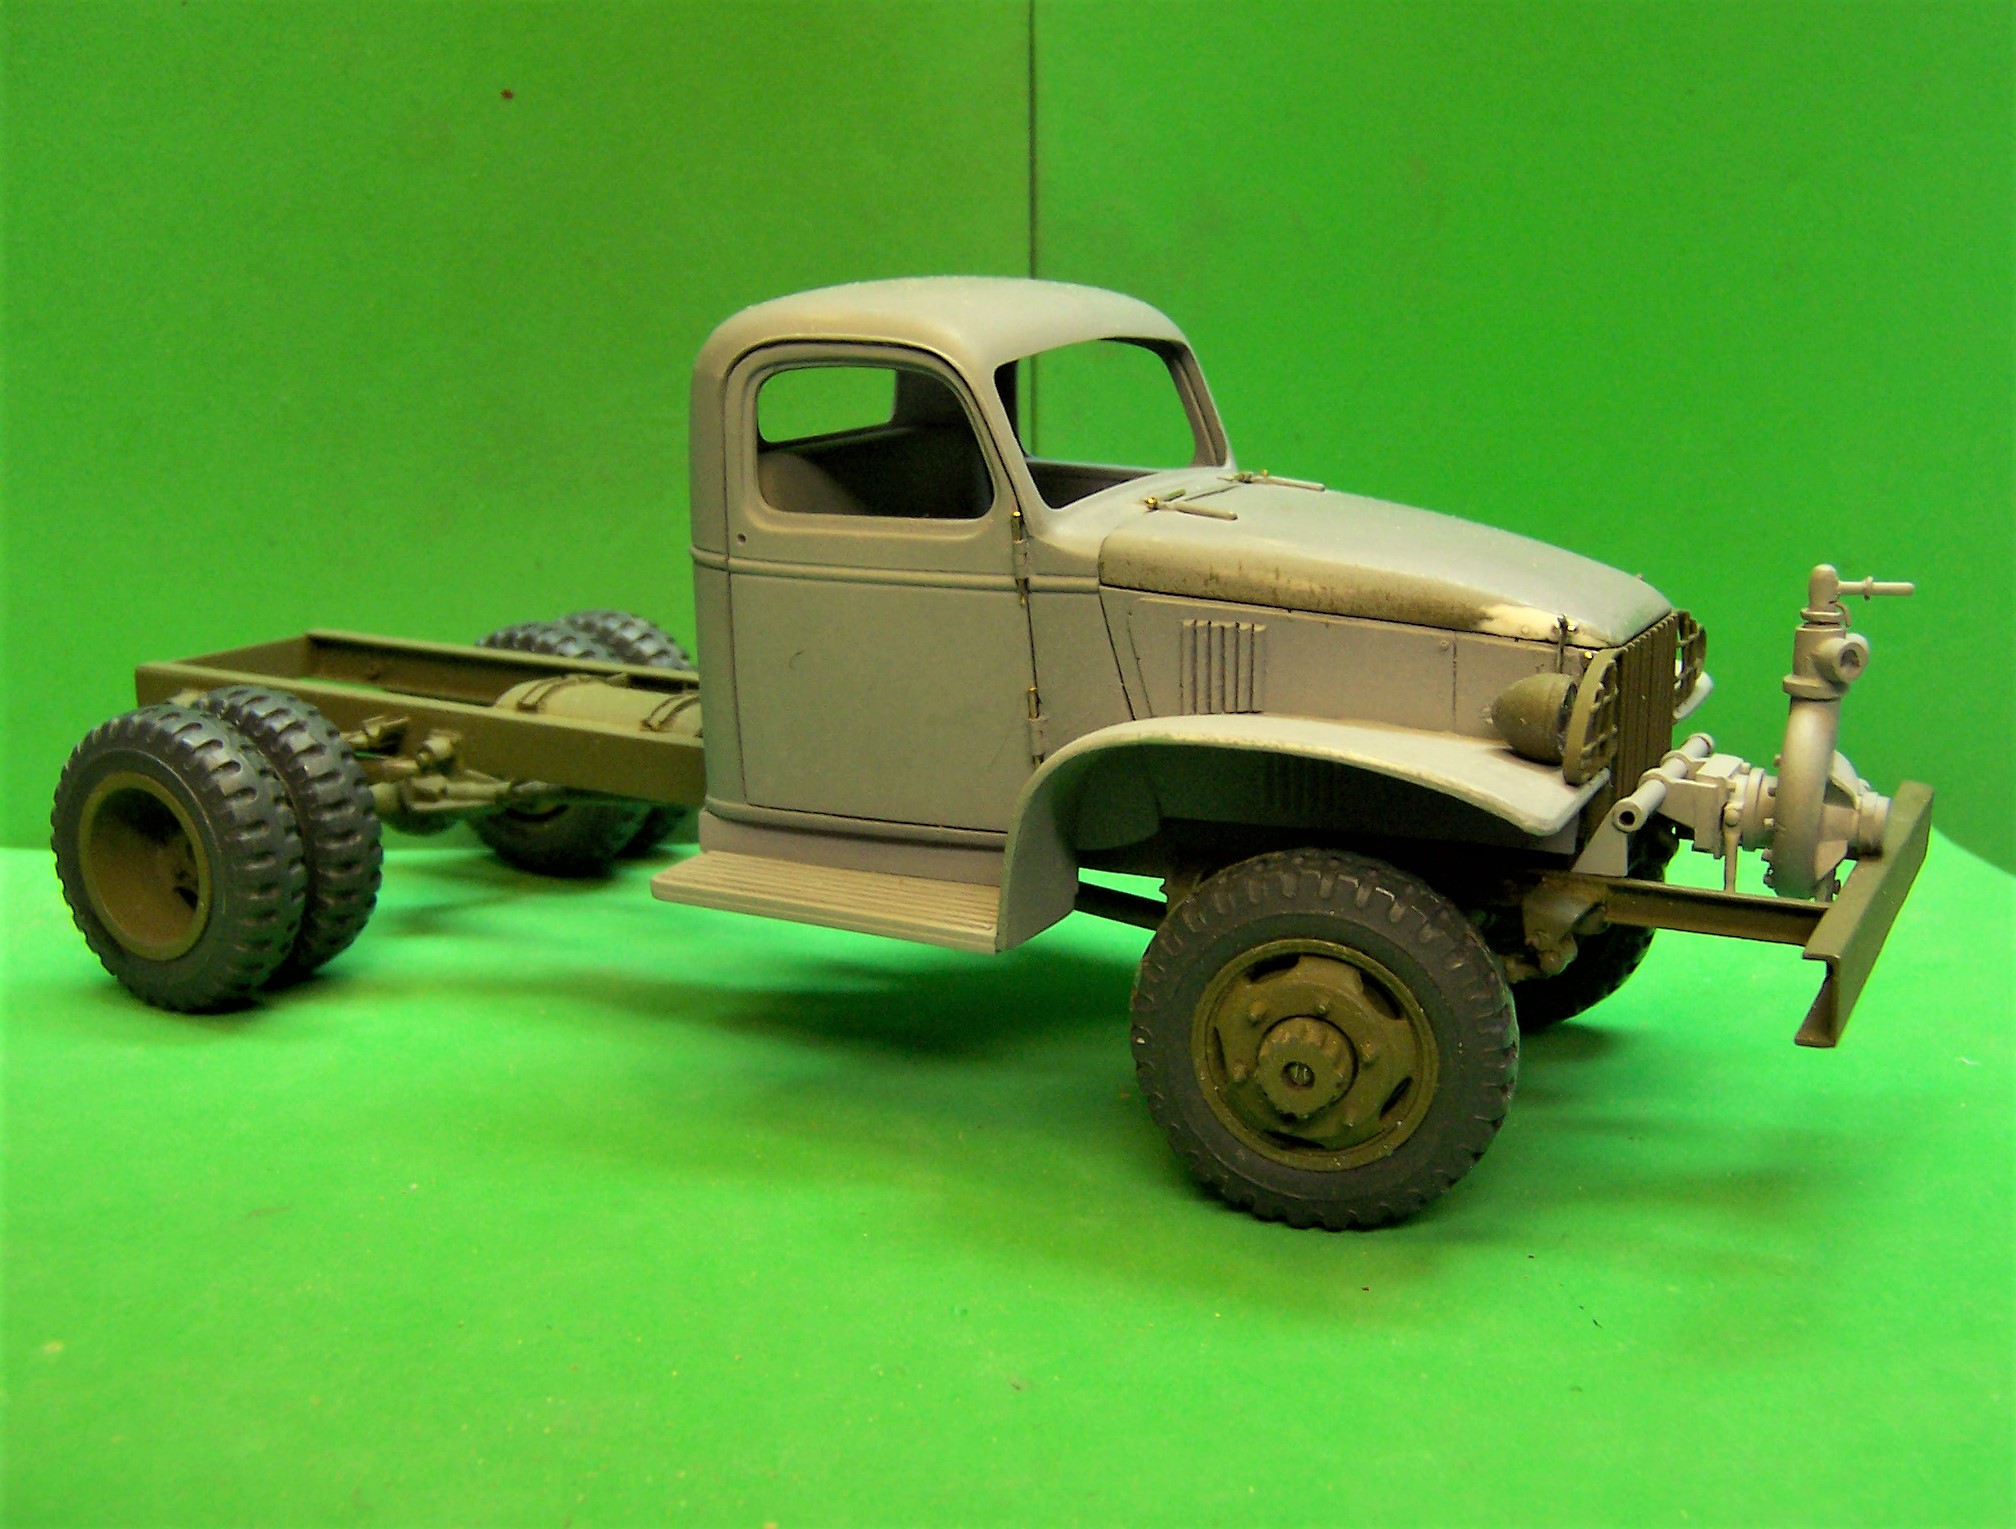
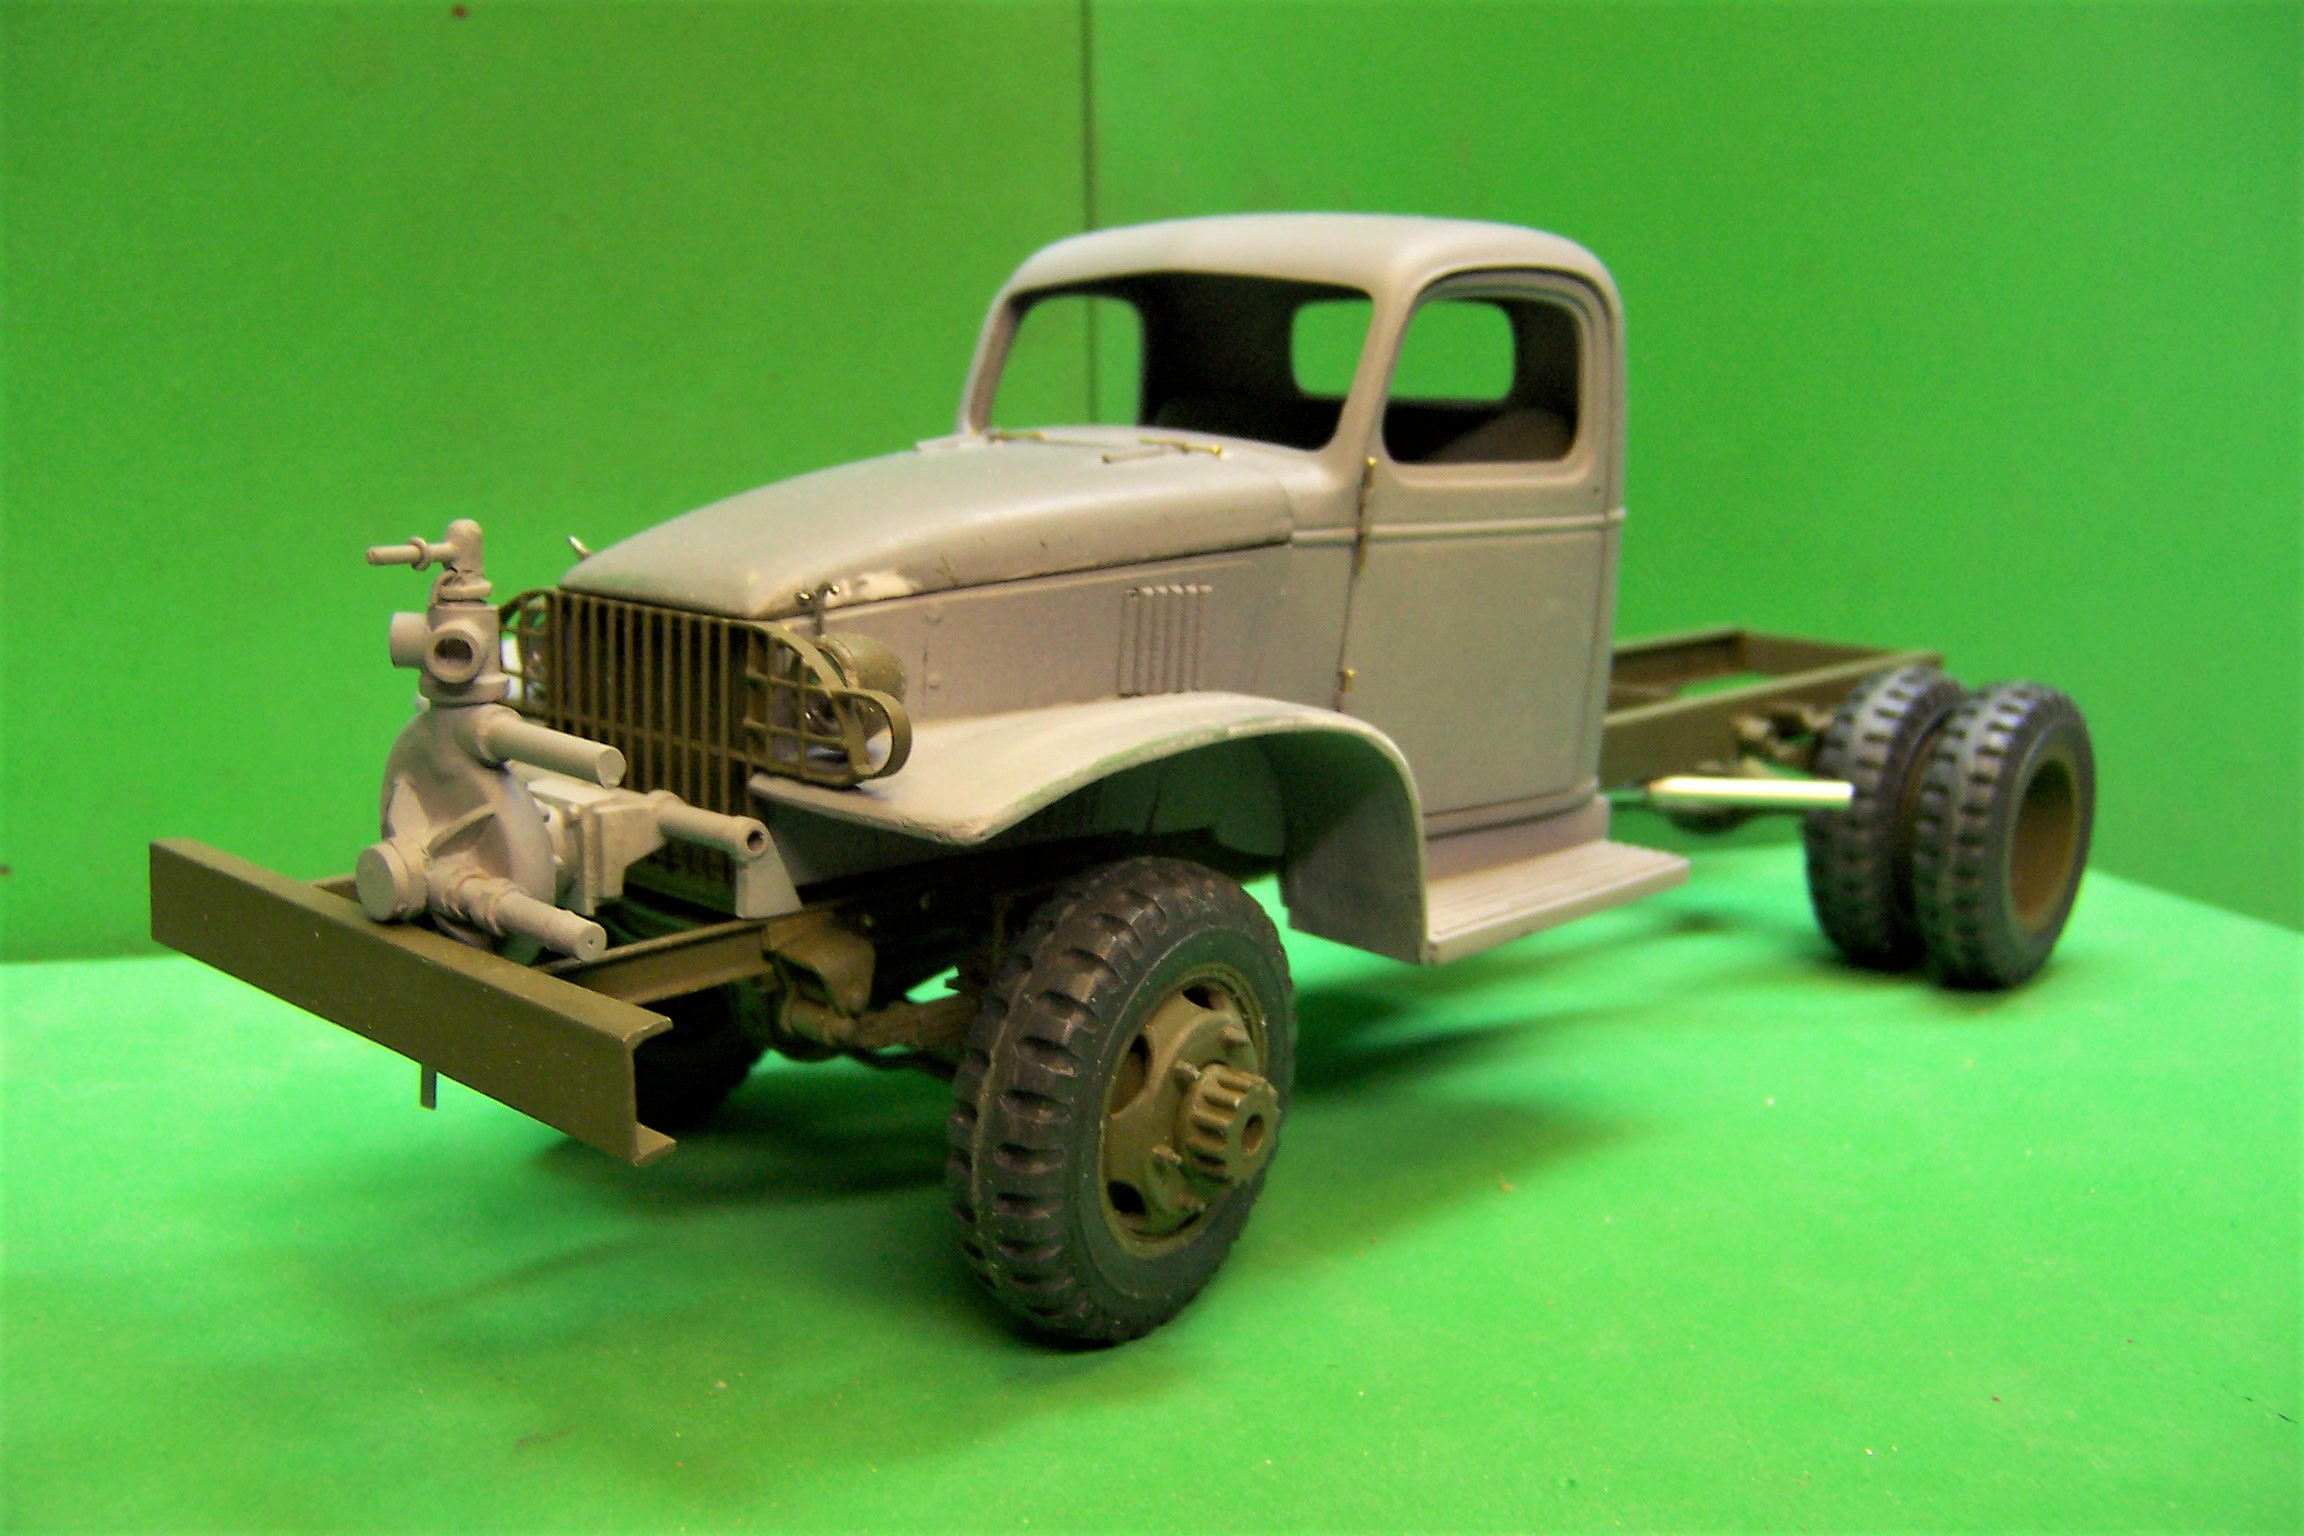
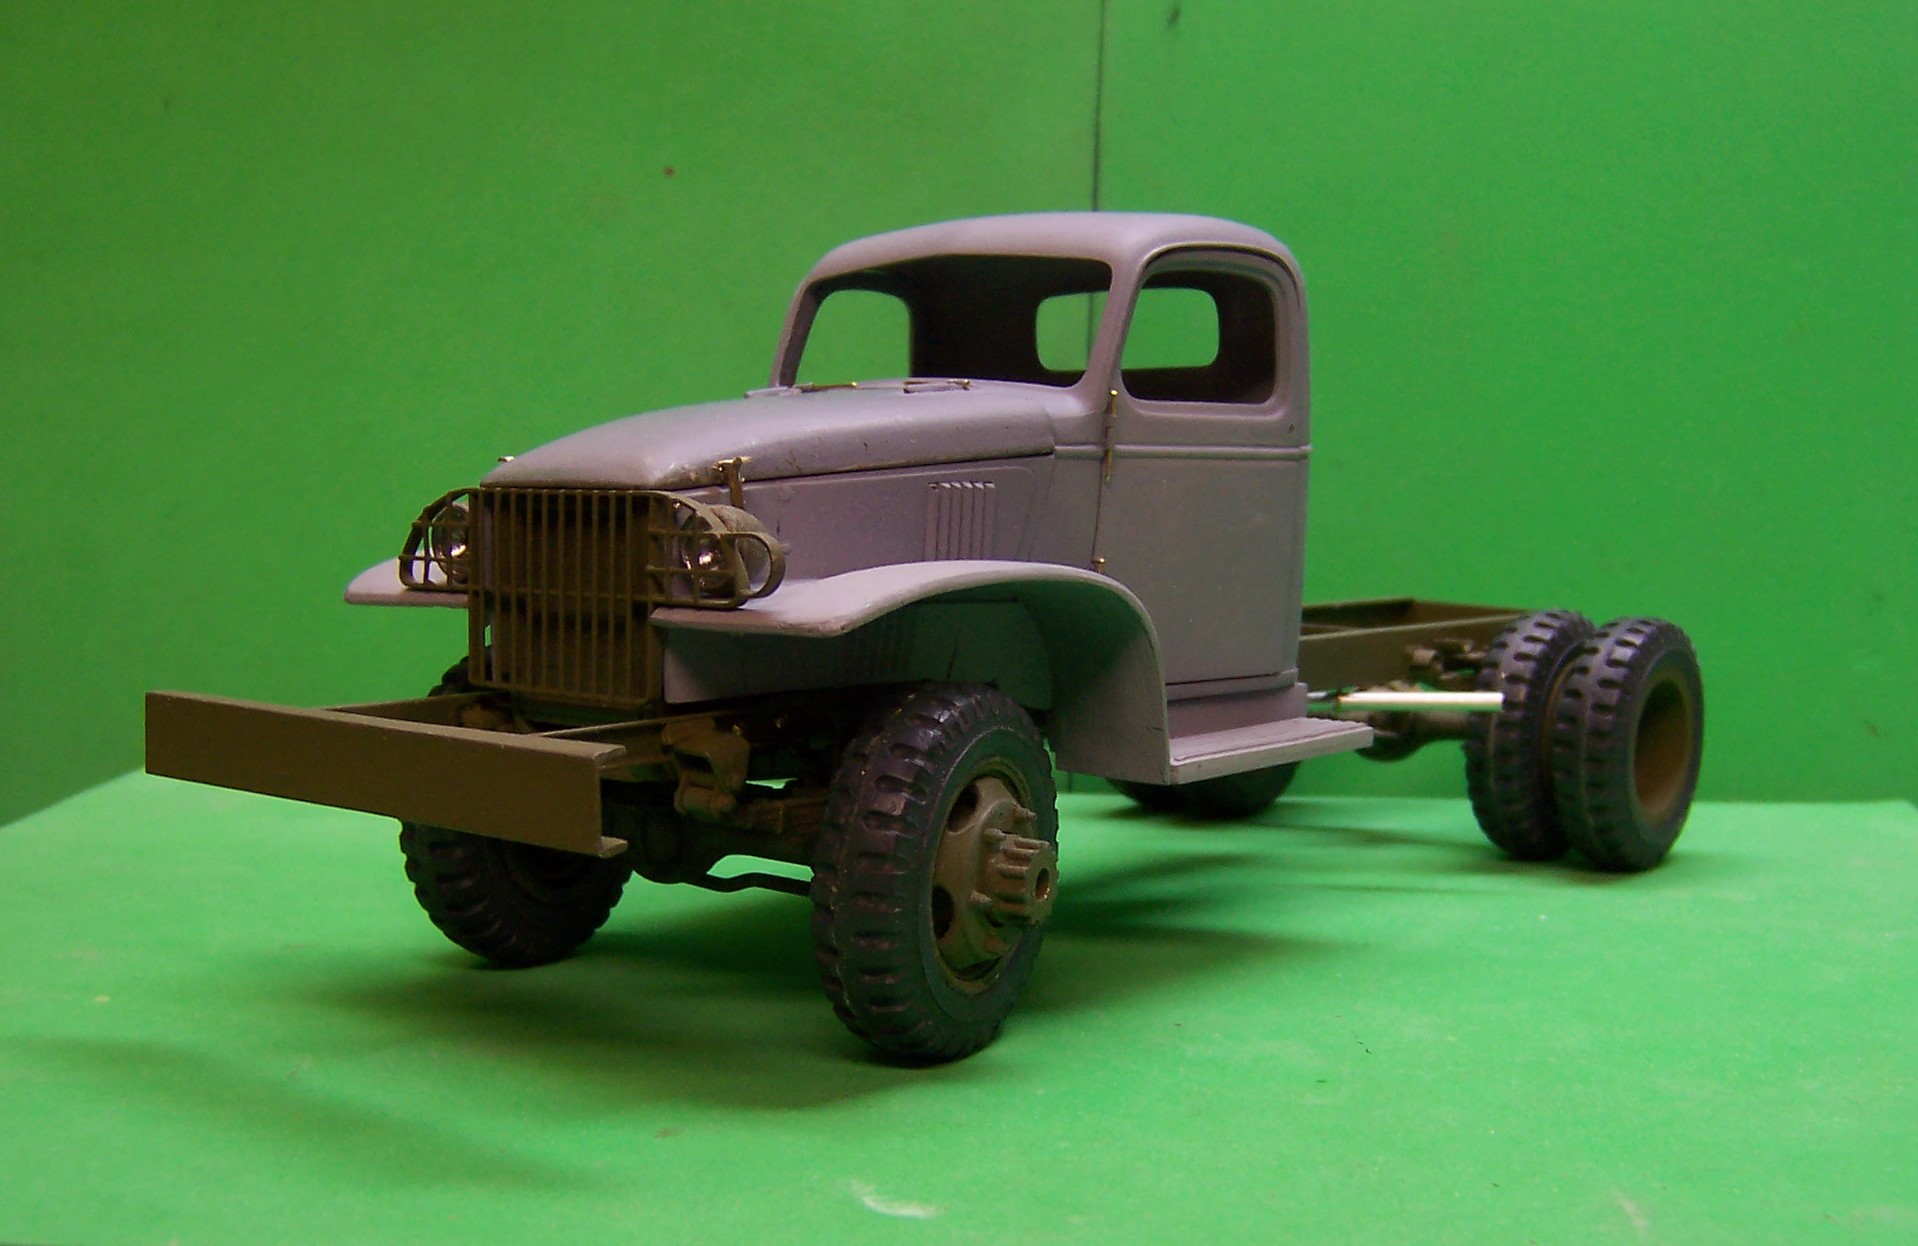
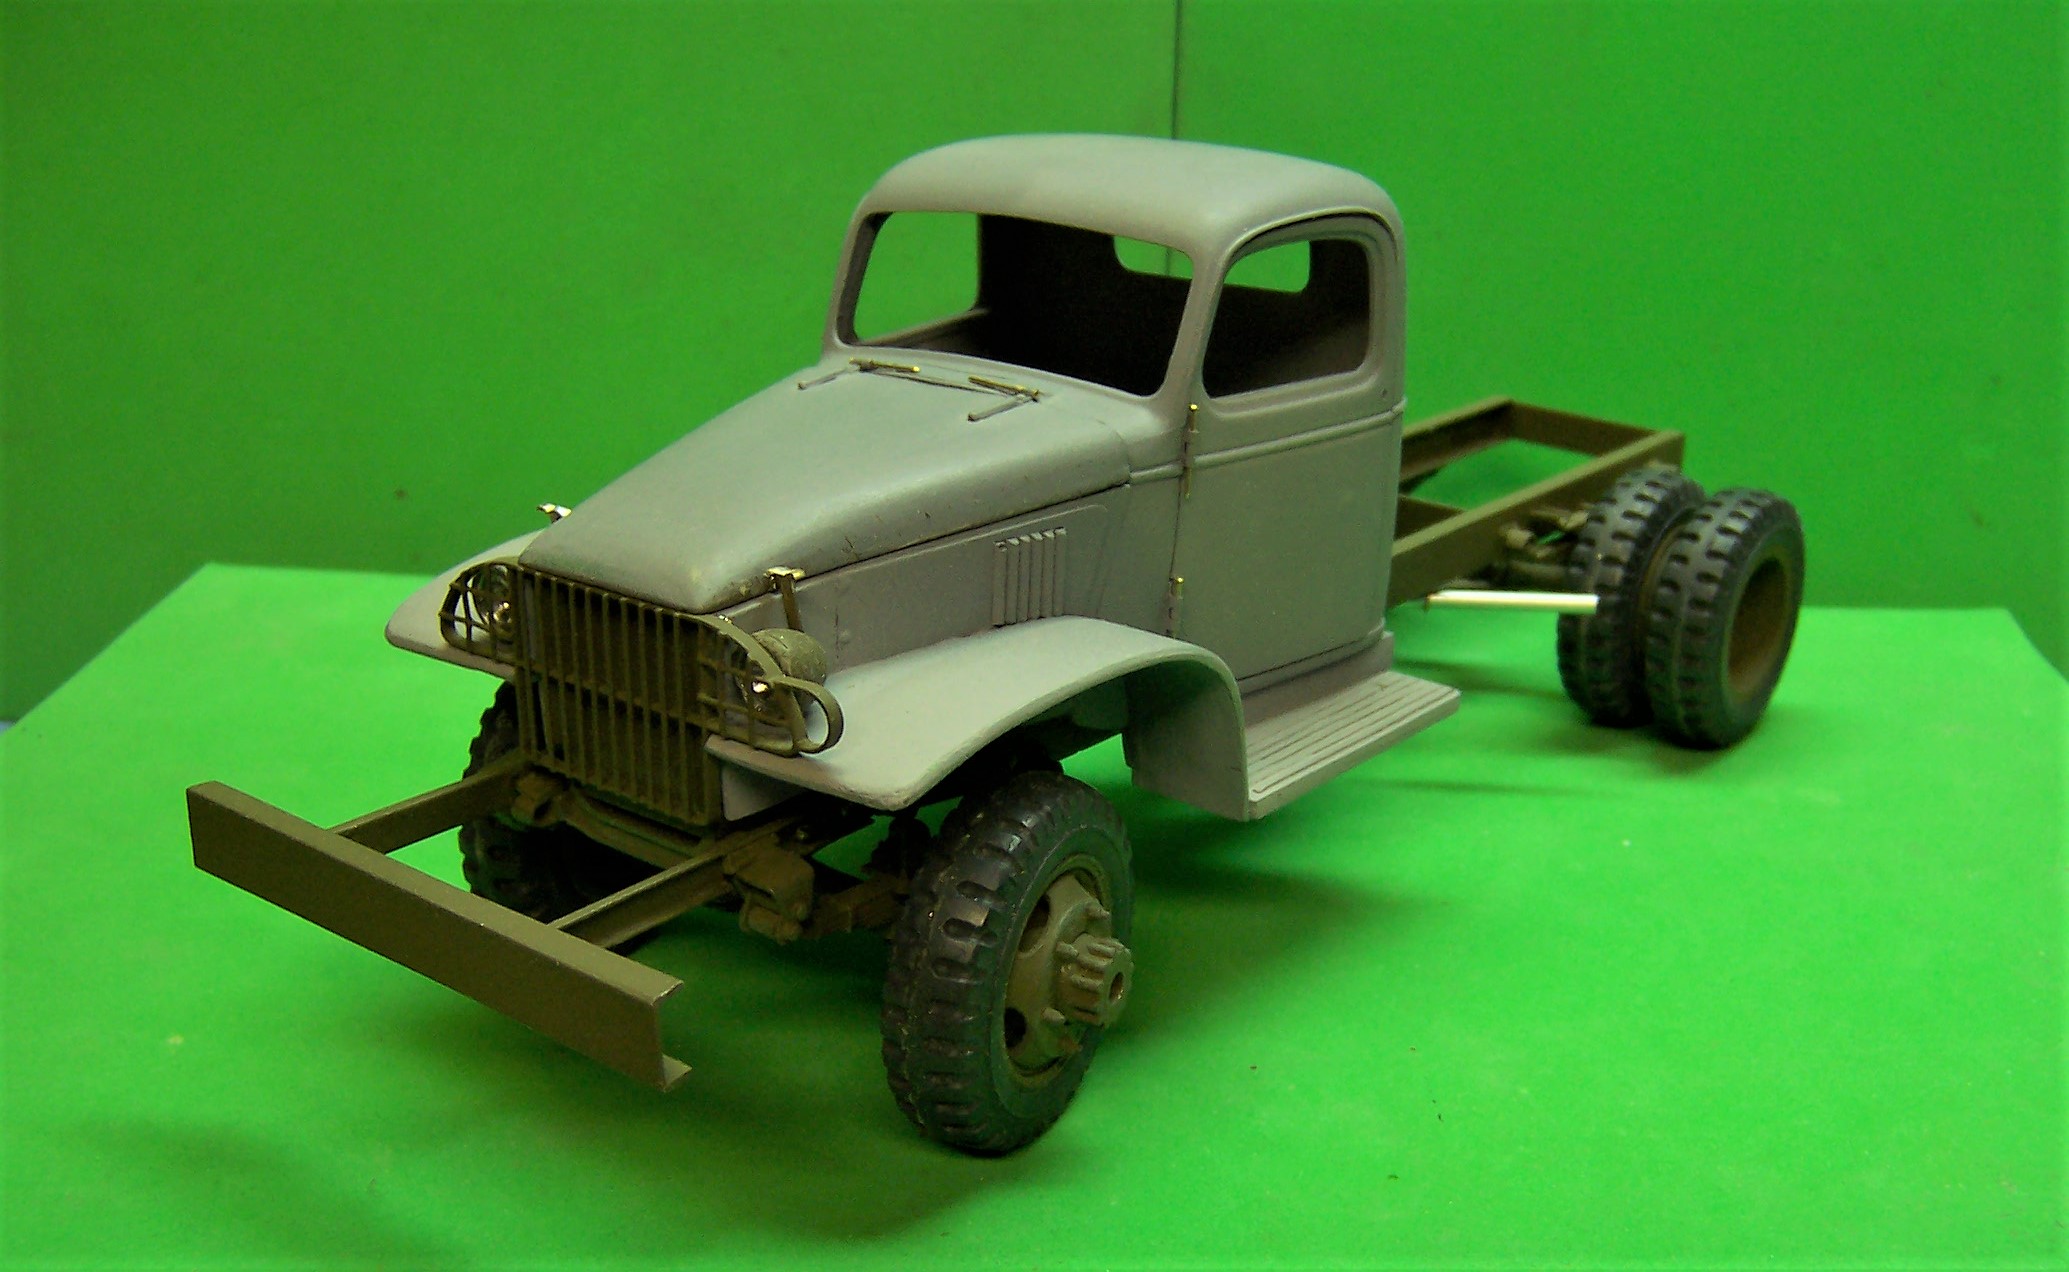
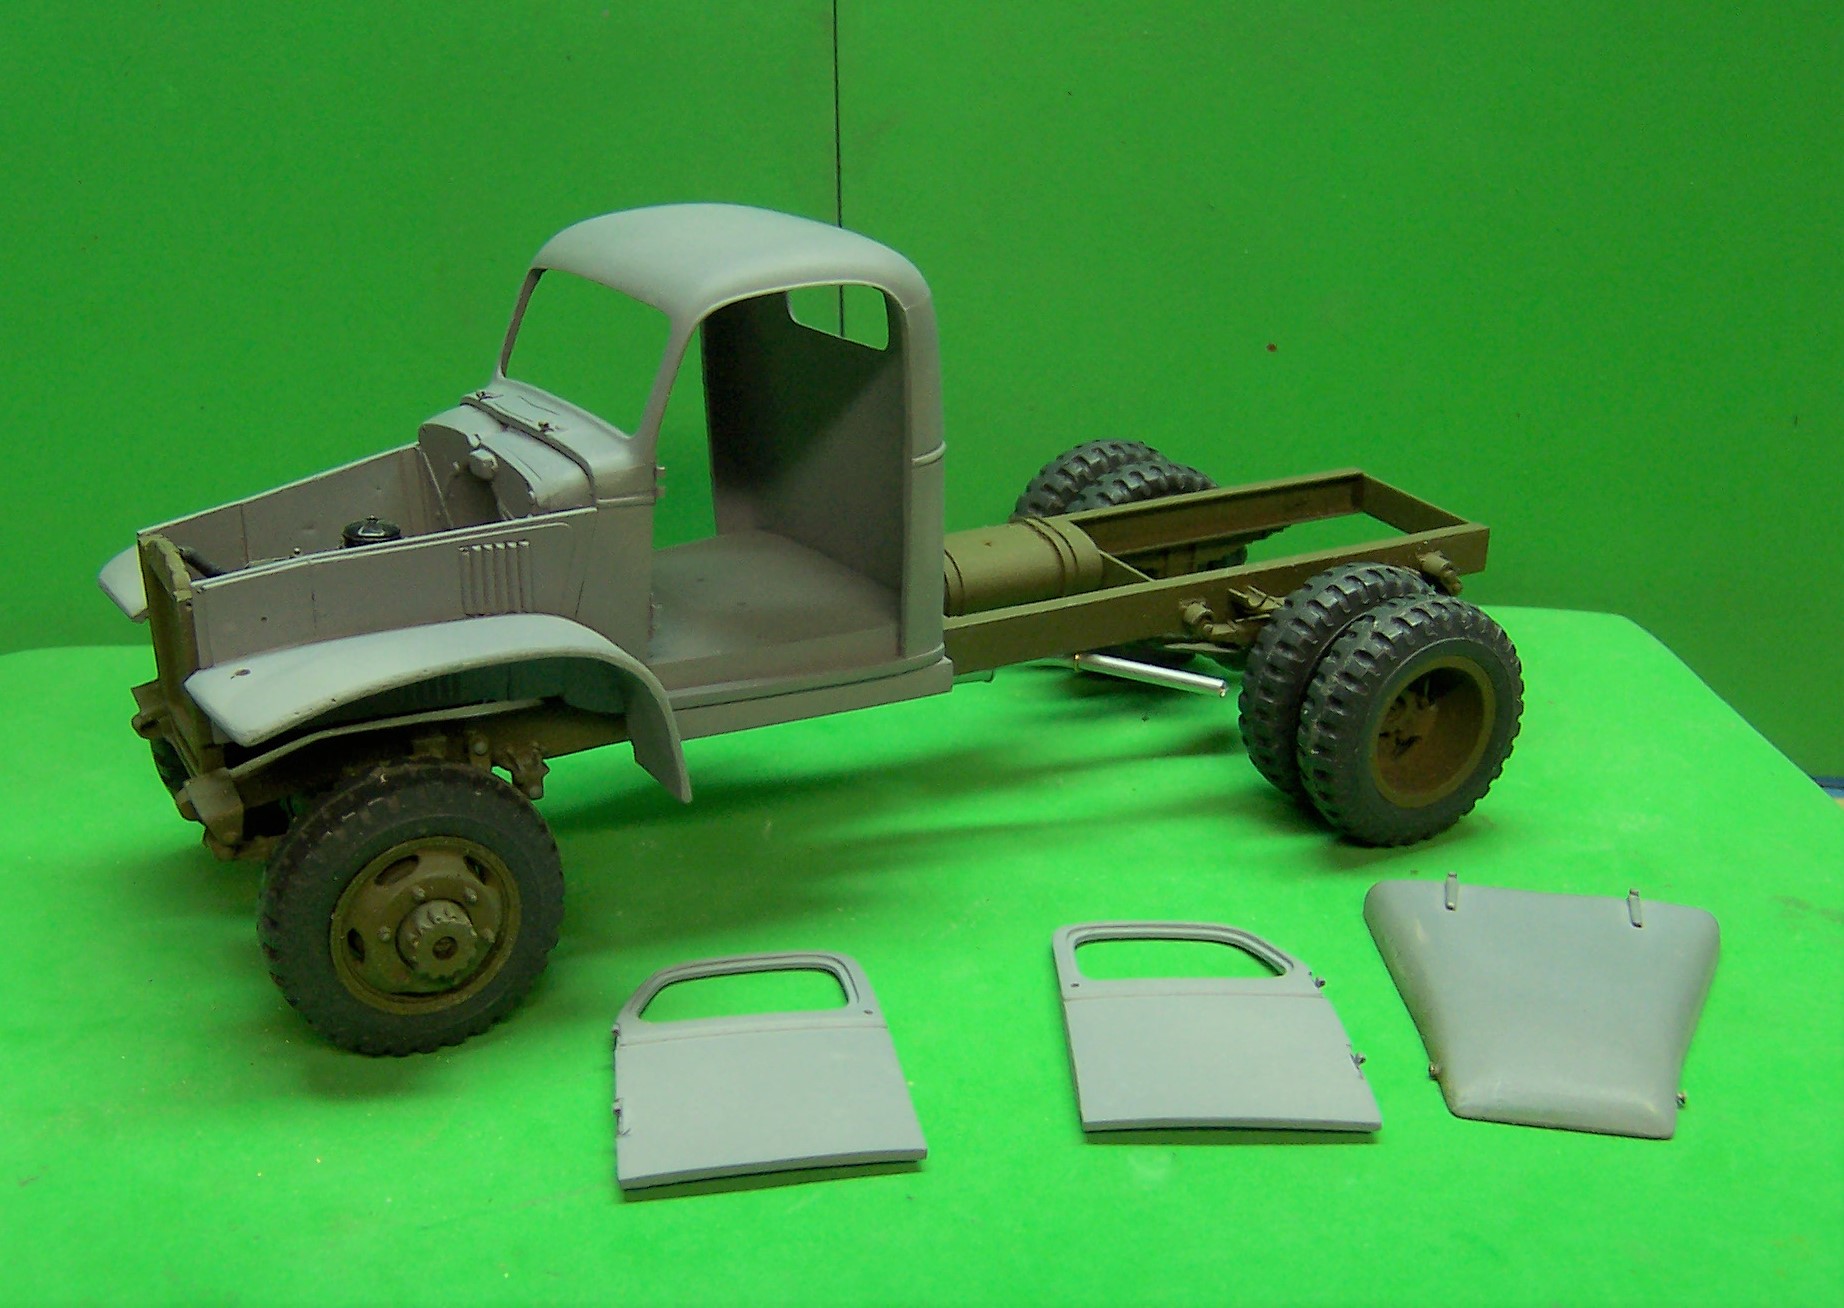
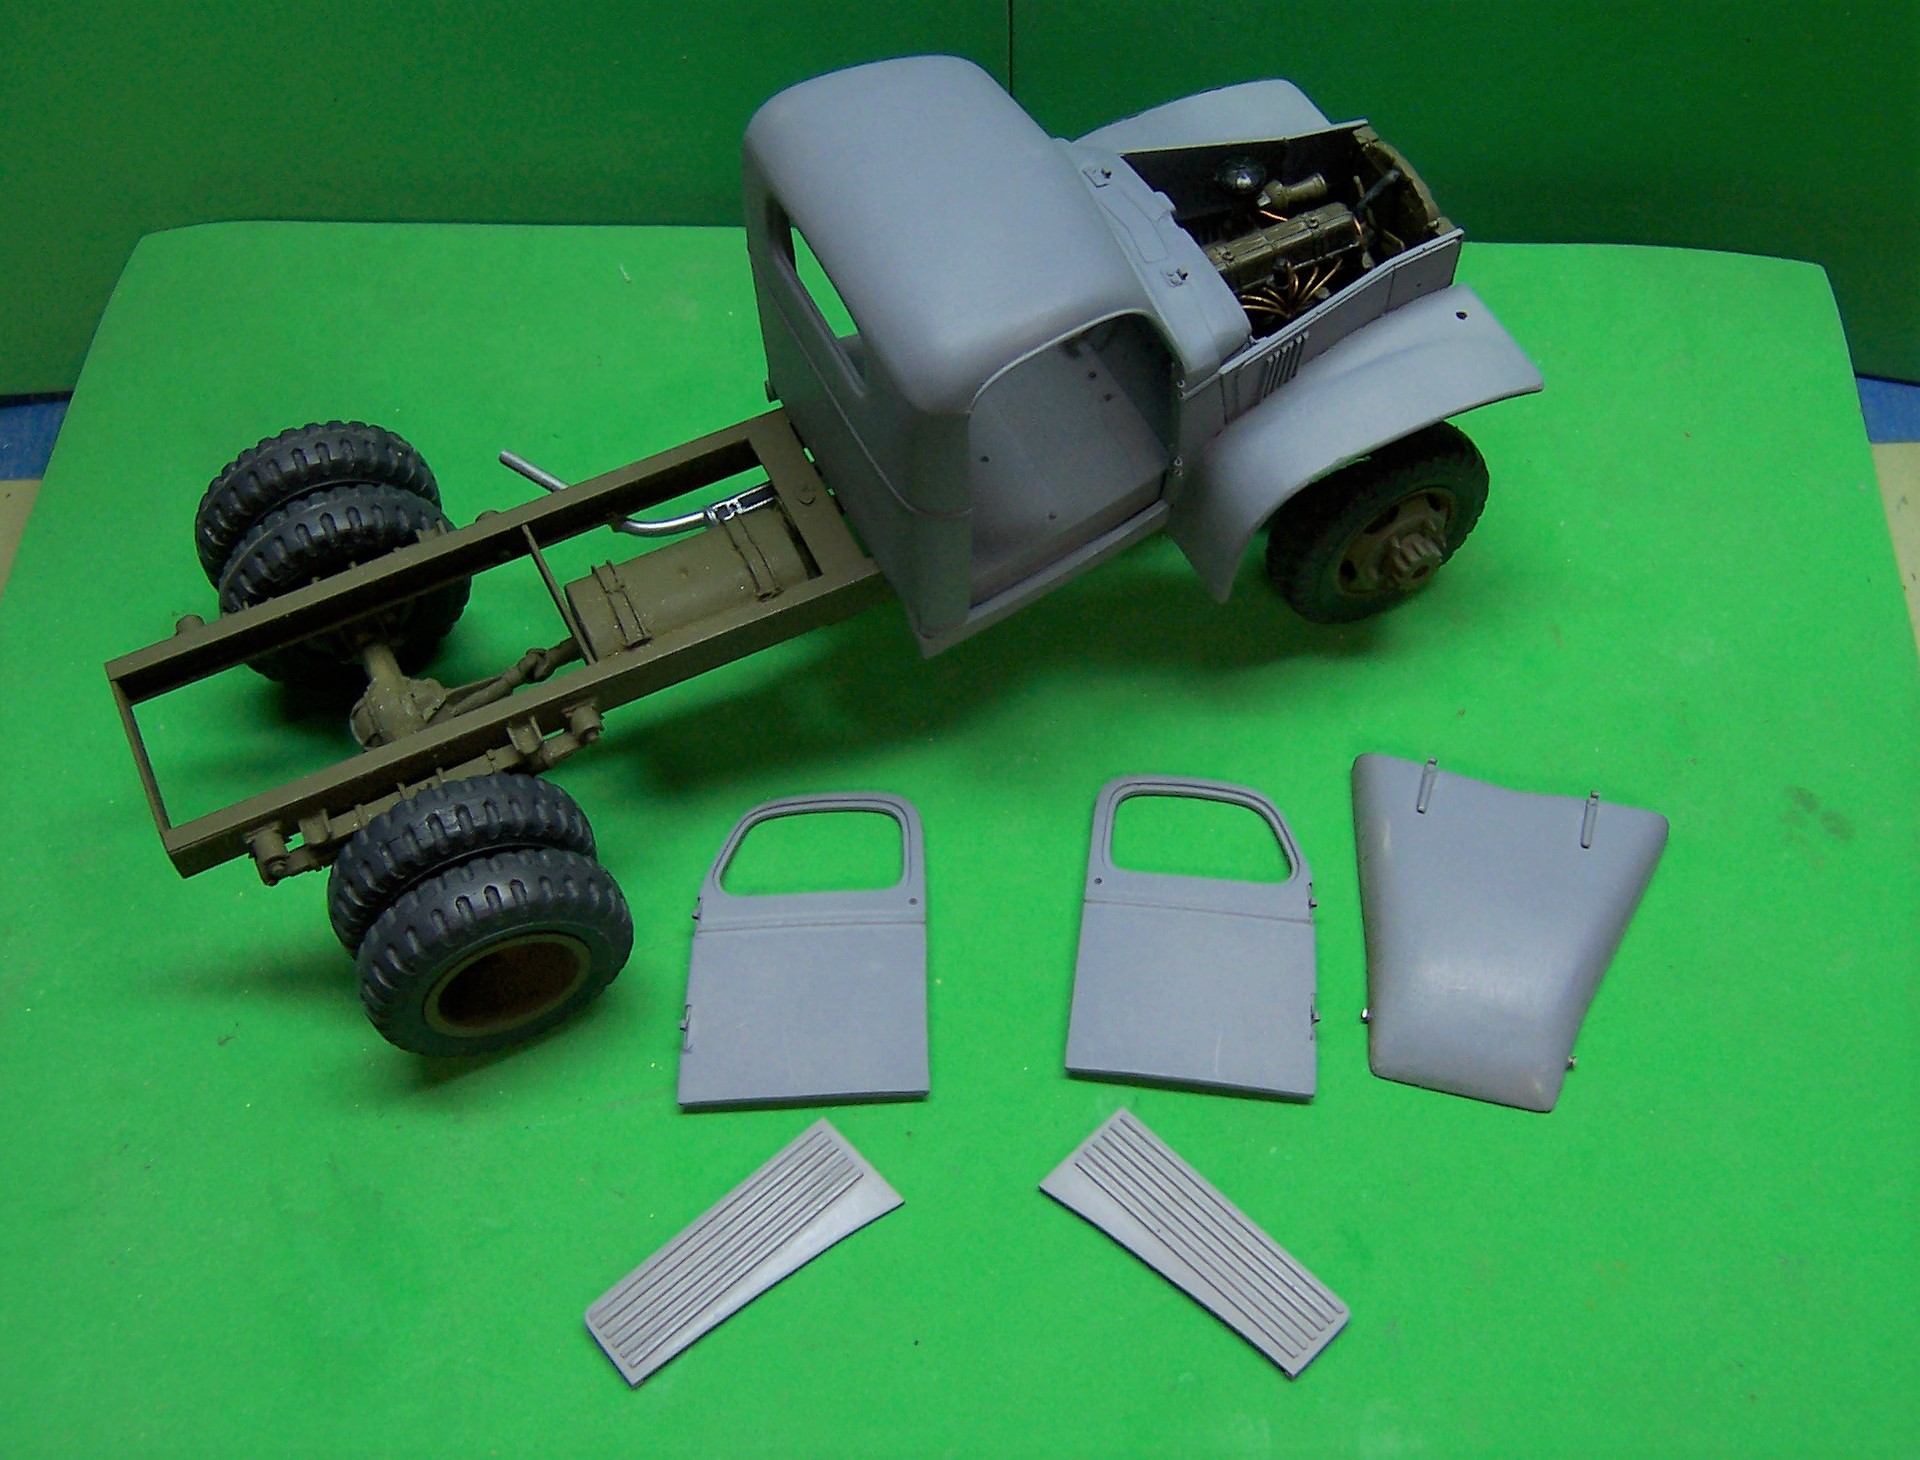
Just some more work done. The bumper and frame extensions are brass strip stock soldered together. I drilled out the ends of the extensions and the main frame. The holes in the main frame were tapped for 00-90 screws to secure the extensions. Biggest problem was getting the bumper to sit at the right height and to be straight and square. It took a little adjustment but it's there. Hood hinges were made from strip brass, brass tubing and common pins. Headlight buckets are resin castings from a turned aluminum master. Molotow chrome paint was used for the interior. Lenses still need to be installed. Running Boards are made from 0040 sheet stock. Ribs are 0.020 x 0.030 strip stock. After gluing them in place they were sanded and rounded off. A master was made and resin castings were used on the model. 0.040 x 0.060 strip stock was used for the edges.
-
Truck is now in primer. Much of the cab work is now done. The primer does bring out some flaws that have to be cleaned up. Just a few pin holes in some of the resin casting but they are minimal. Much of the work today was in making up some details. Running boards were made and cast. Hood latches were made from brass strip and small brass tubing. Headlight buckets are done and ready for installation. Cab interior will be next.


until