Chariots of Fire
-
Posts
2,781 -
Joined
-
Last visited
Content Type
Profiles
Forums
Events
Gallery
Everything posted by Chariots of Fire
-
 If you are still concerned about tires check out Shapeways. There are several tire options there. I have actually had some designed for specific projects and got them printed. I buy a couple, one for use as a master and the other as a backup. Then I make a mold and cast up as many as I need. Less expensive that way.
 -
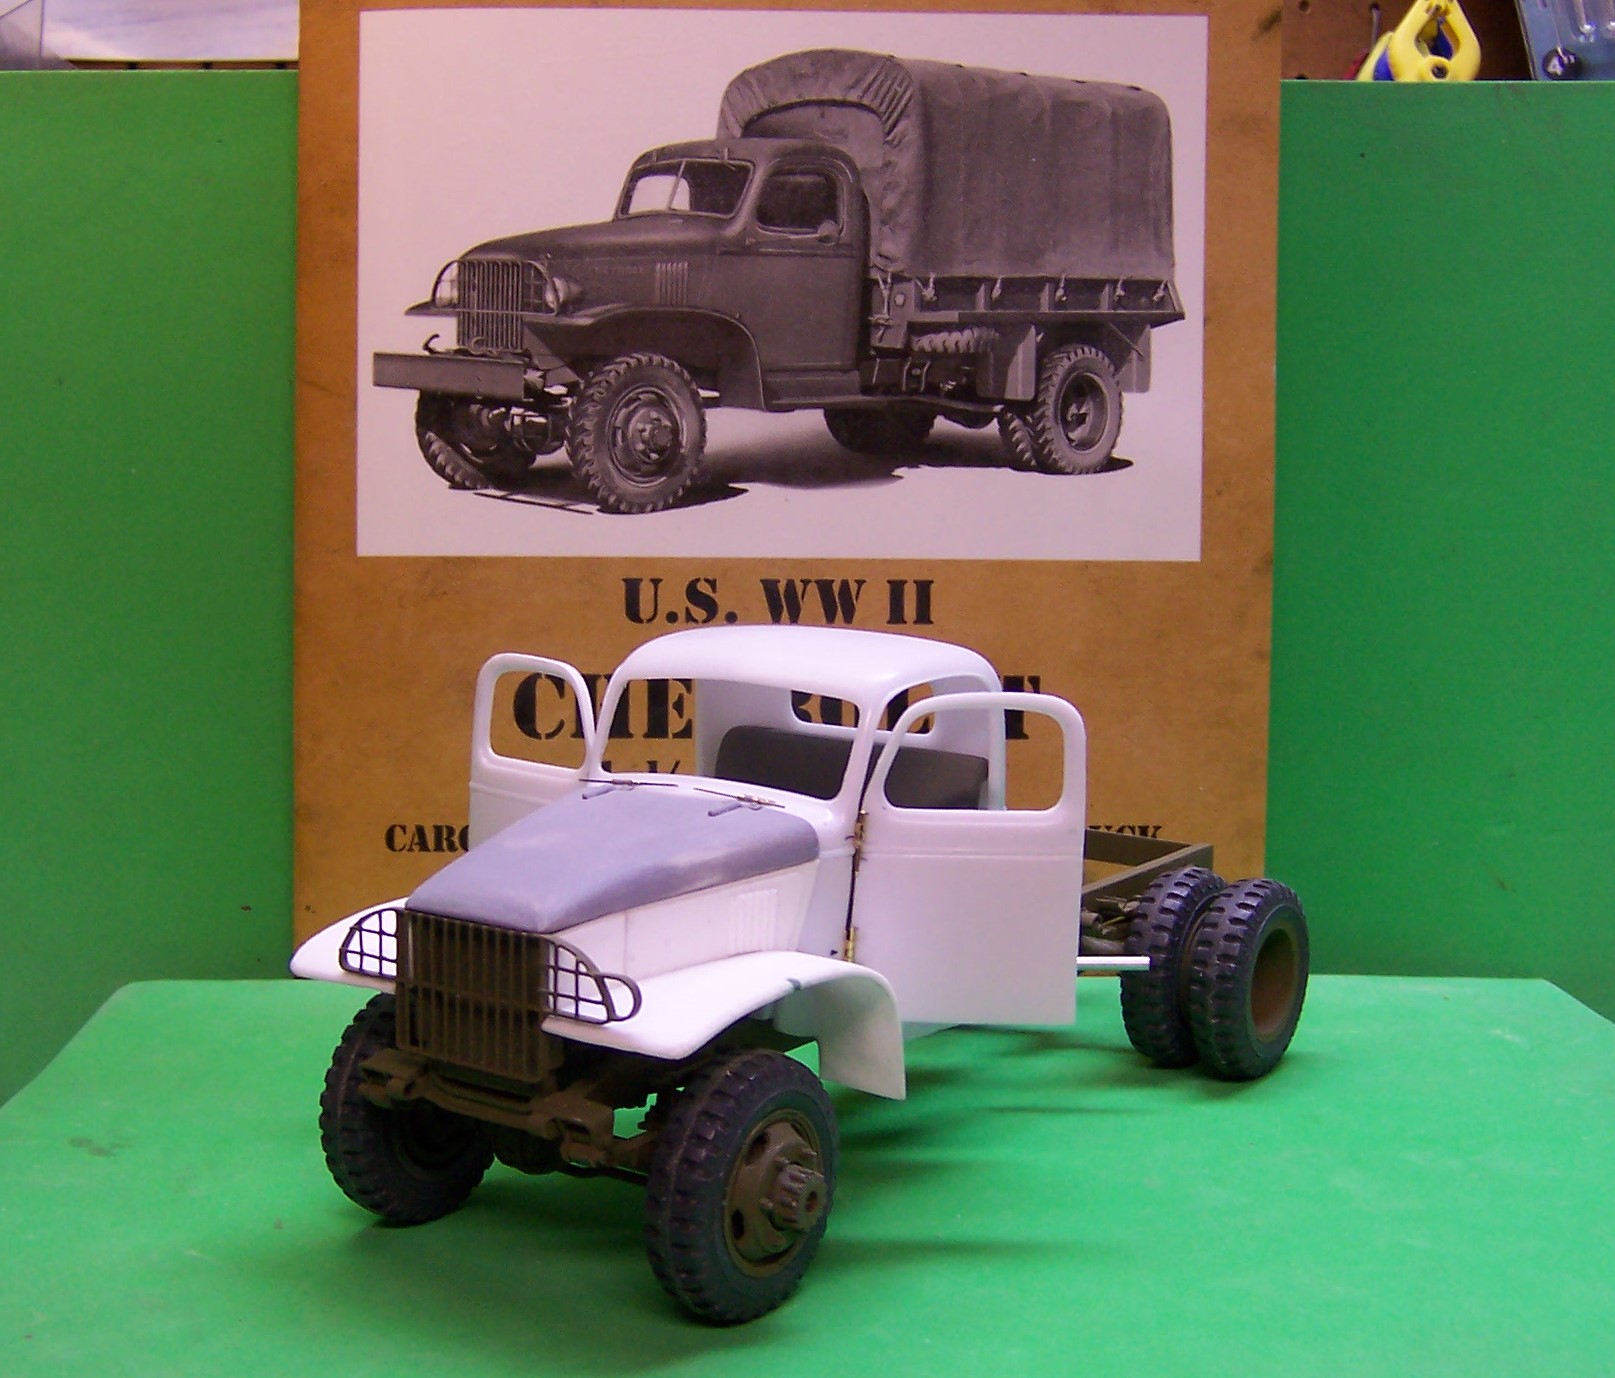
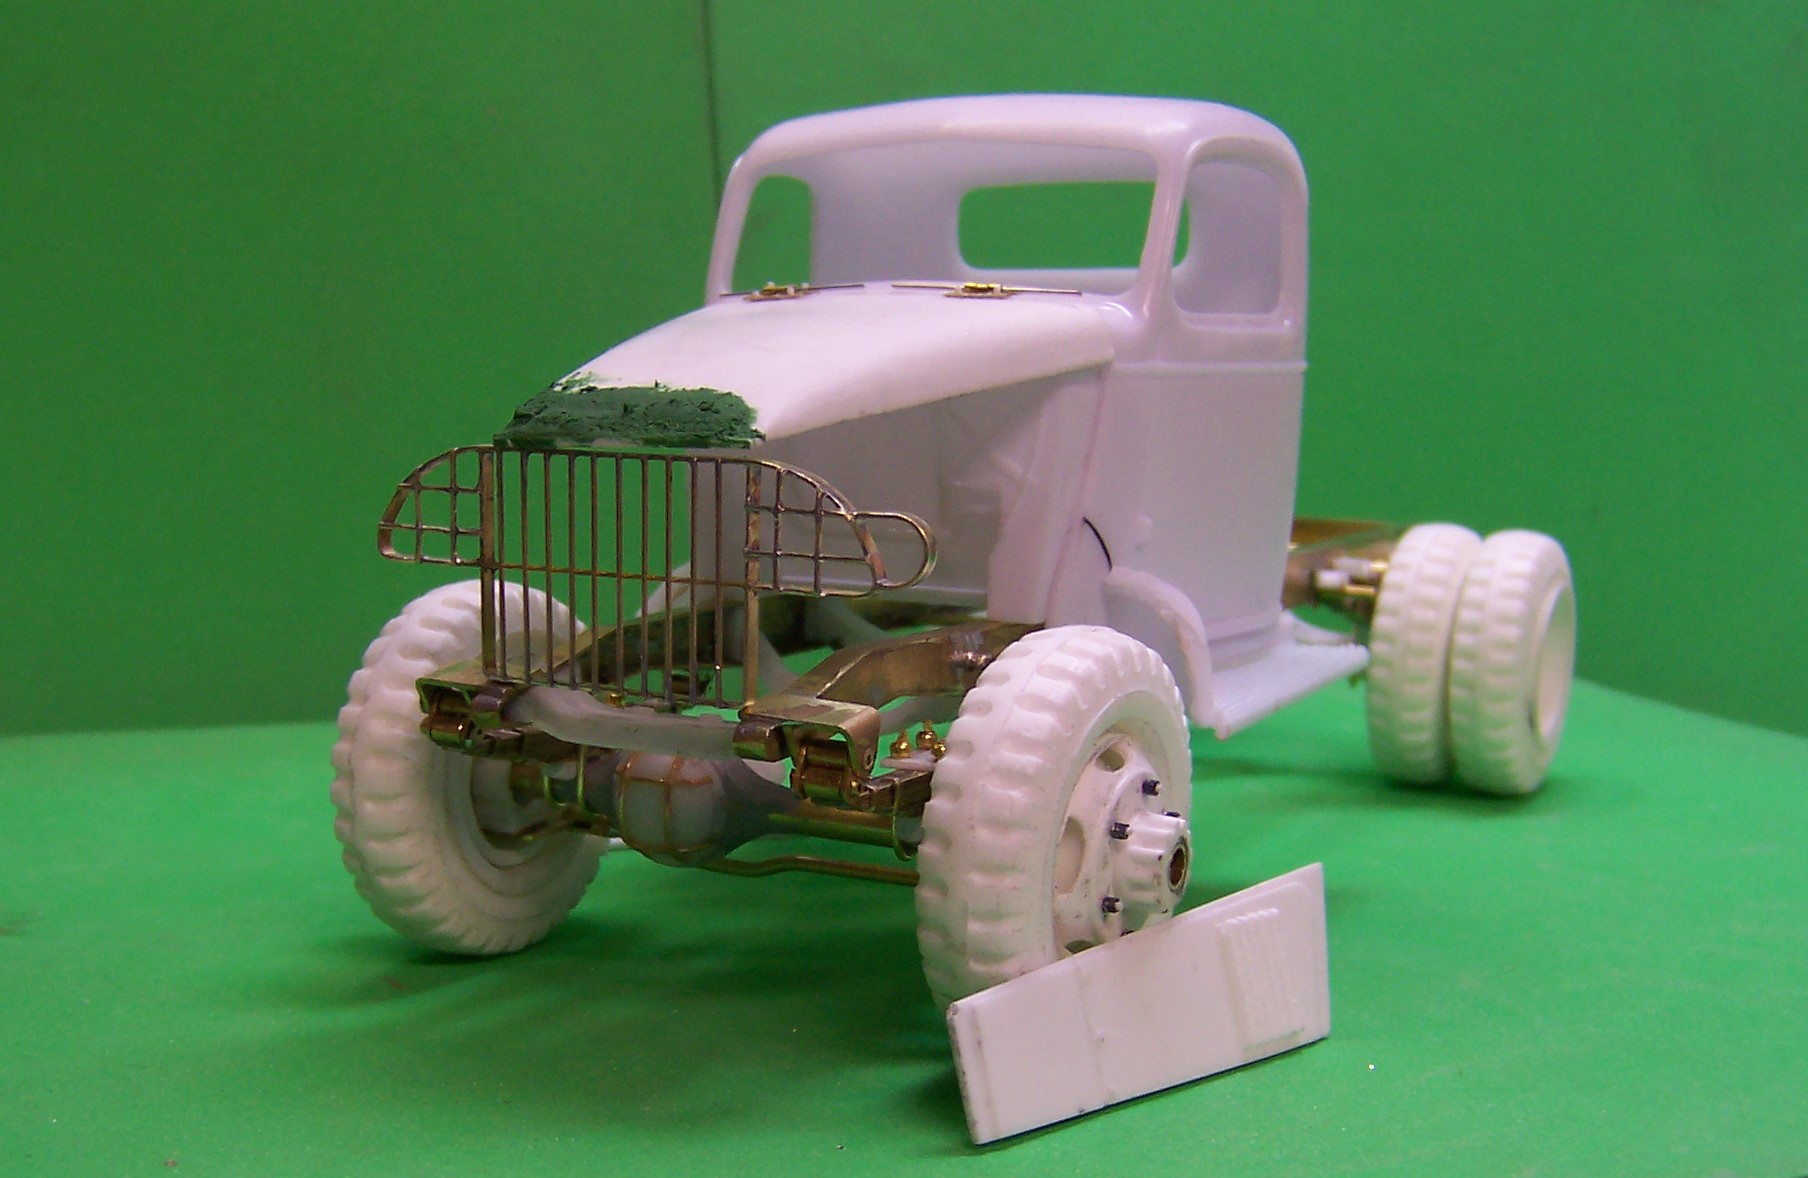
With the doors scribed and removed the hinges were set in place. Positioning was marked on the cab prior to scribing so that the brass hinges could be set correctly. They were glued and pinned in place on the cab side and the door jam. The hood was similarly hinged but it needs to be altered slightly after doing some study of photos of the real thing. Only one place on the right door had to be built up with some 0.010 strip stock to close up the door openings. Scribing with a sharp Xacto knife did a good job of keeping the opening closed up nicely. The hinge pins are long for now as the doors and hood will have to be removed for painting and other detailing. When they are ready for final assembly the pins can be cut off. Next up is to establish the headlight location and get them prepped for installation after painting is done.

-
I like your work! Nice color combination. Engine and stack is really neat! Looking forward to seeing this one completed!
-
Using the two part resin from Micro Mark. They make a 300 series and a 600 series. This happens to be the 600 series that takes a bit longer to set up. It is mixed 50:50 unlike the alumilite that is mixed in a 10:1 ratio (I think).
-
Here are the results of casting the front fenders. The two originals are in the mold box ready for pouring the mold rubber. And here is the first pop from the mold. They are a bit sticky which makes me think the mixing of the two part resin was not up to par. So I will mix up another batch and try again. I'll leave them in the mold overnight to be sure they have fully set and cured before pulling them out again.
-
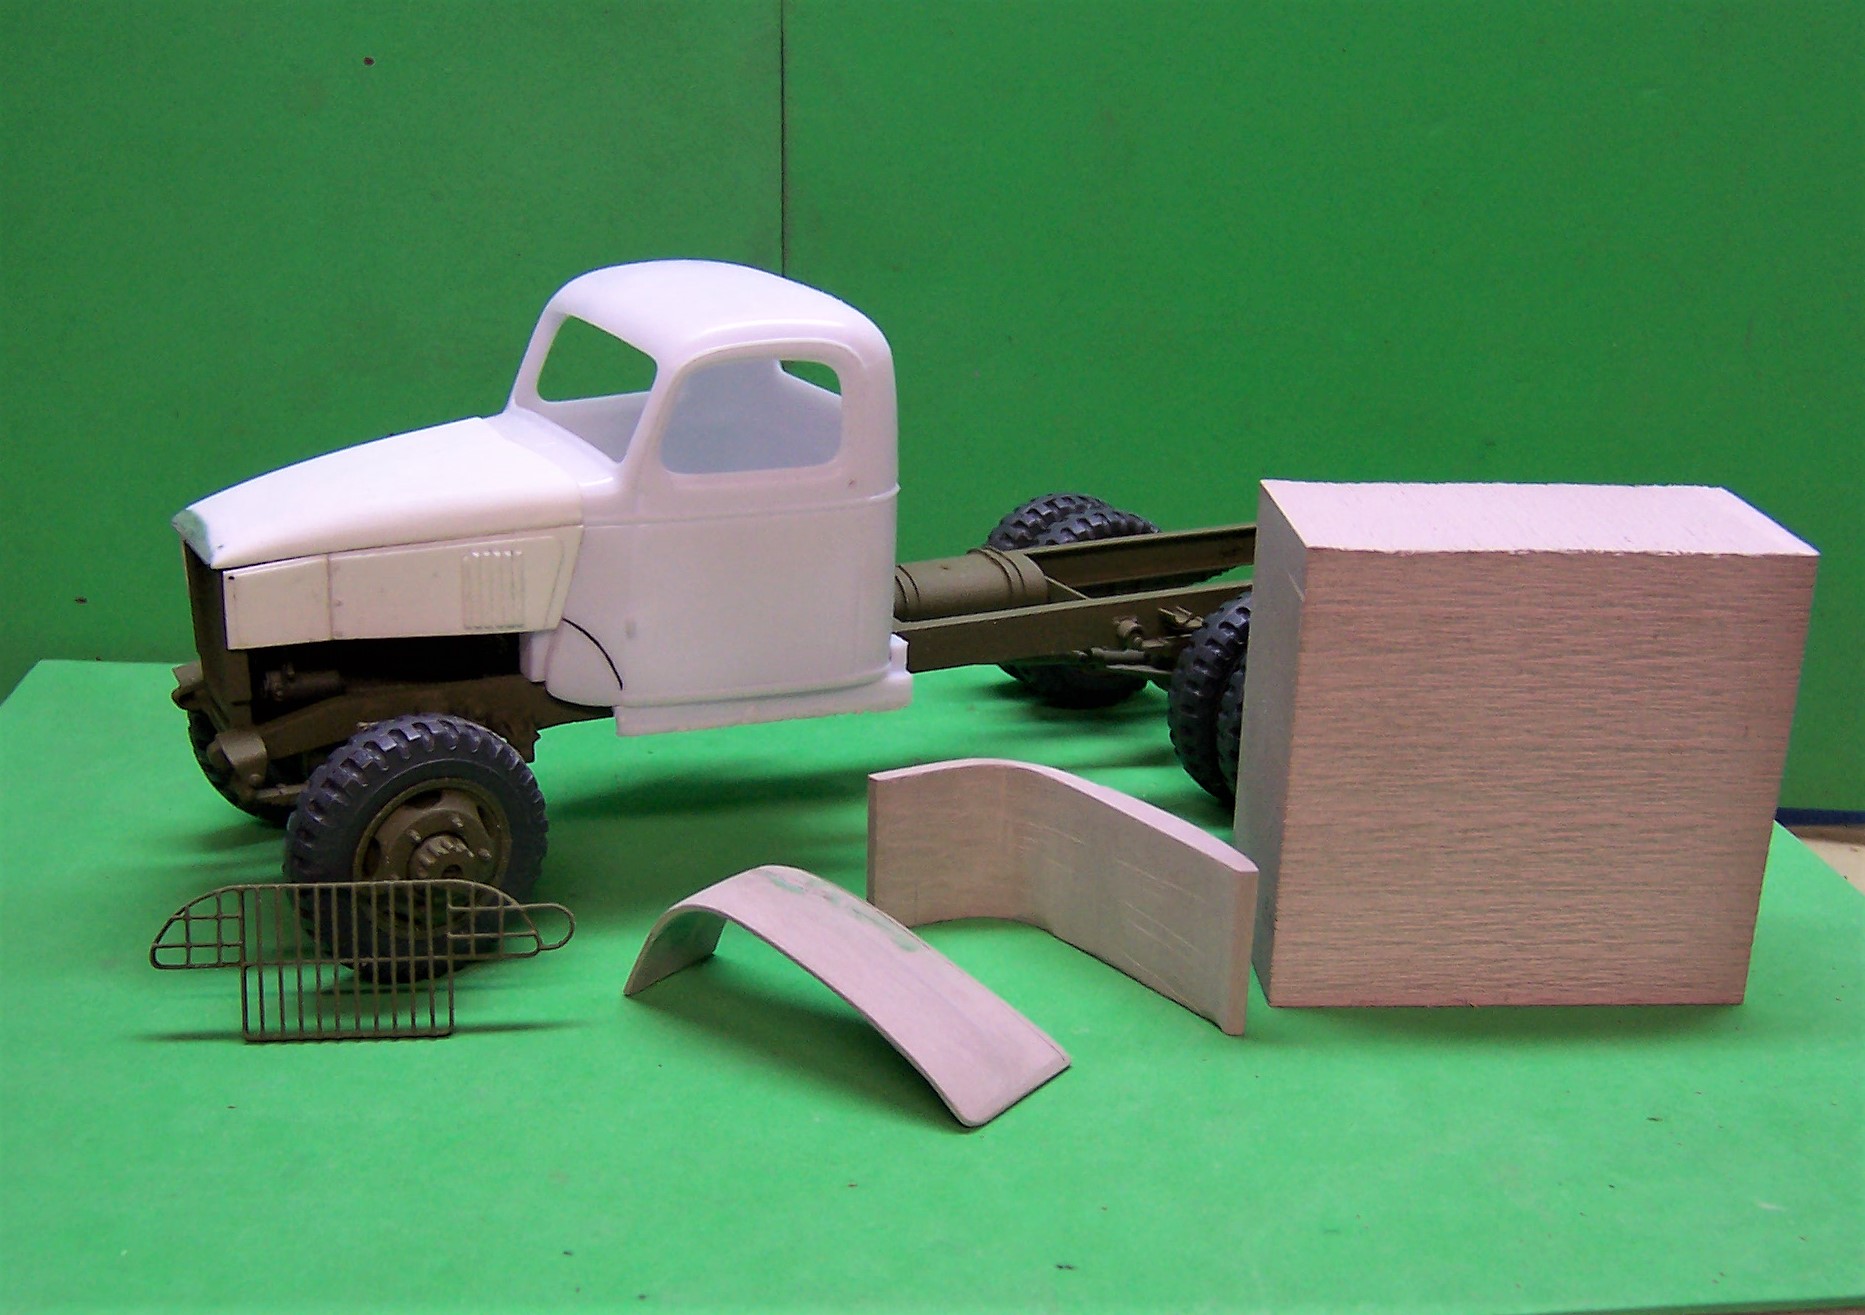
I got started on the fenders for the rig last night. That is a block of Renshape on the right in the photo. Beside it is a fender blank cut out using a paper template that was created from photos of the real fender profile. It was trimmed to rough shape on a disc sander. The finished right fender is to the left. Now the challenge is to make the left fender from the blank look like the right one!
-
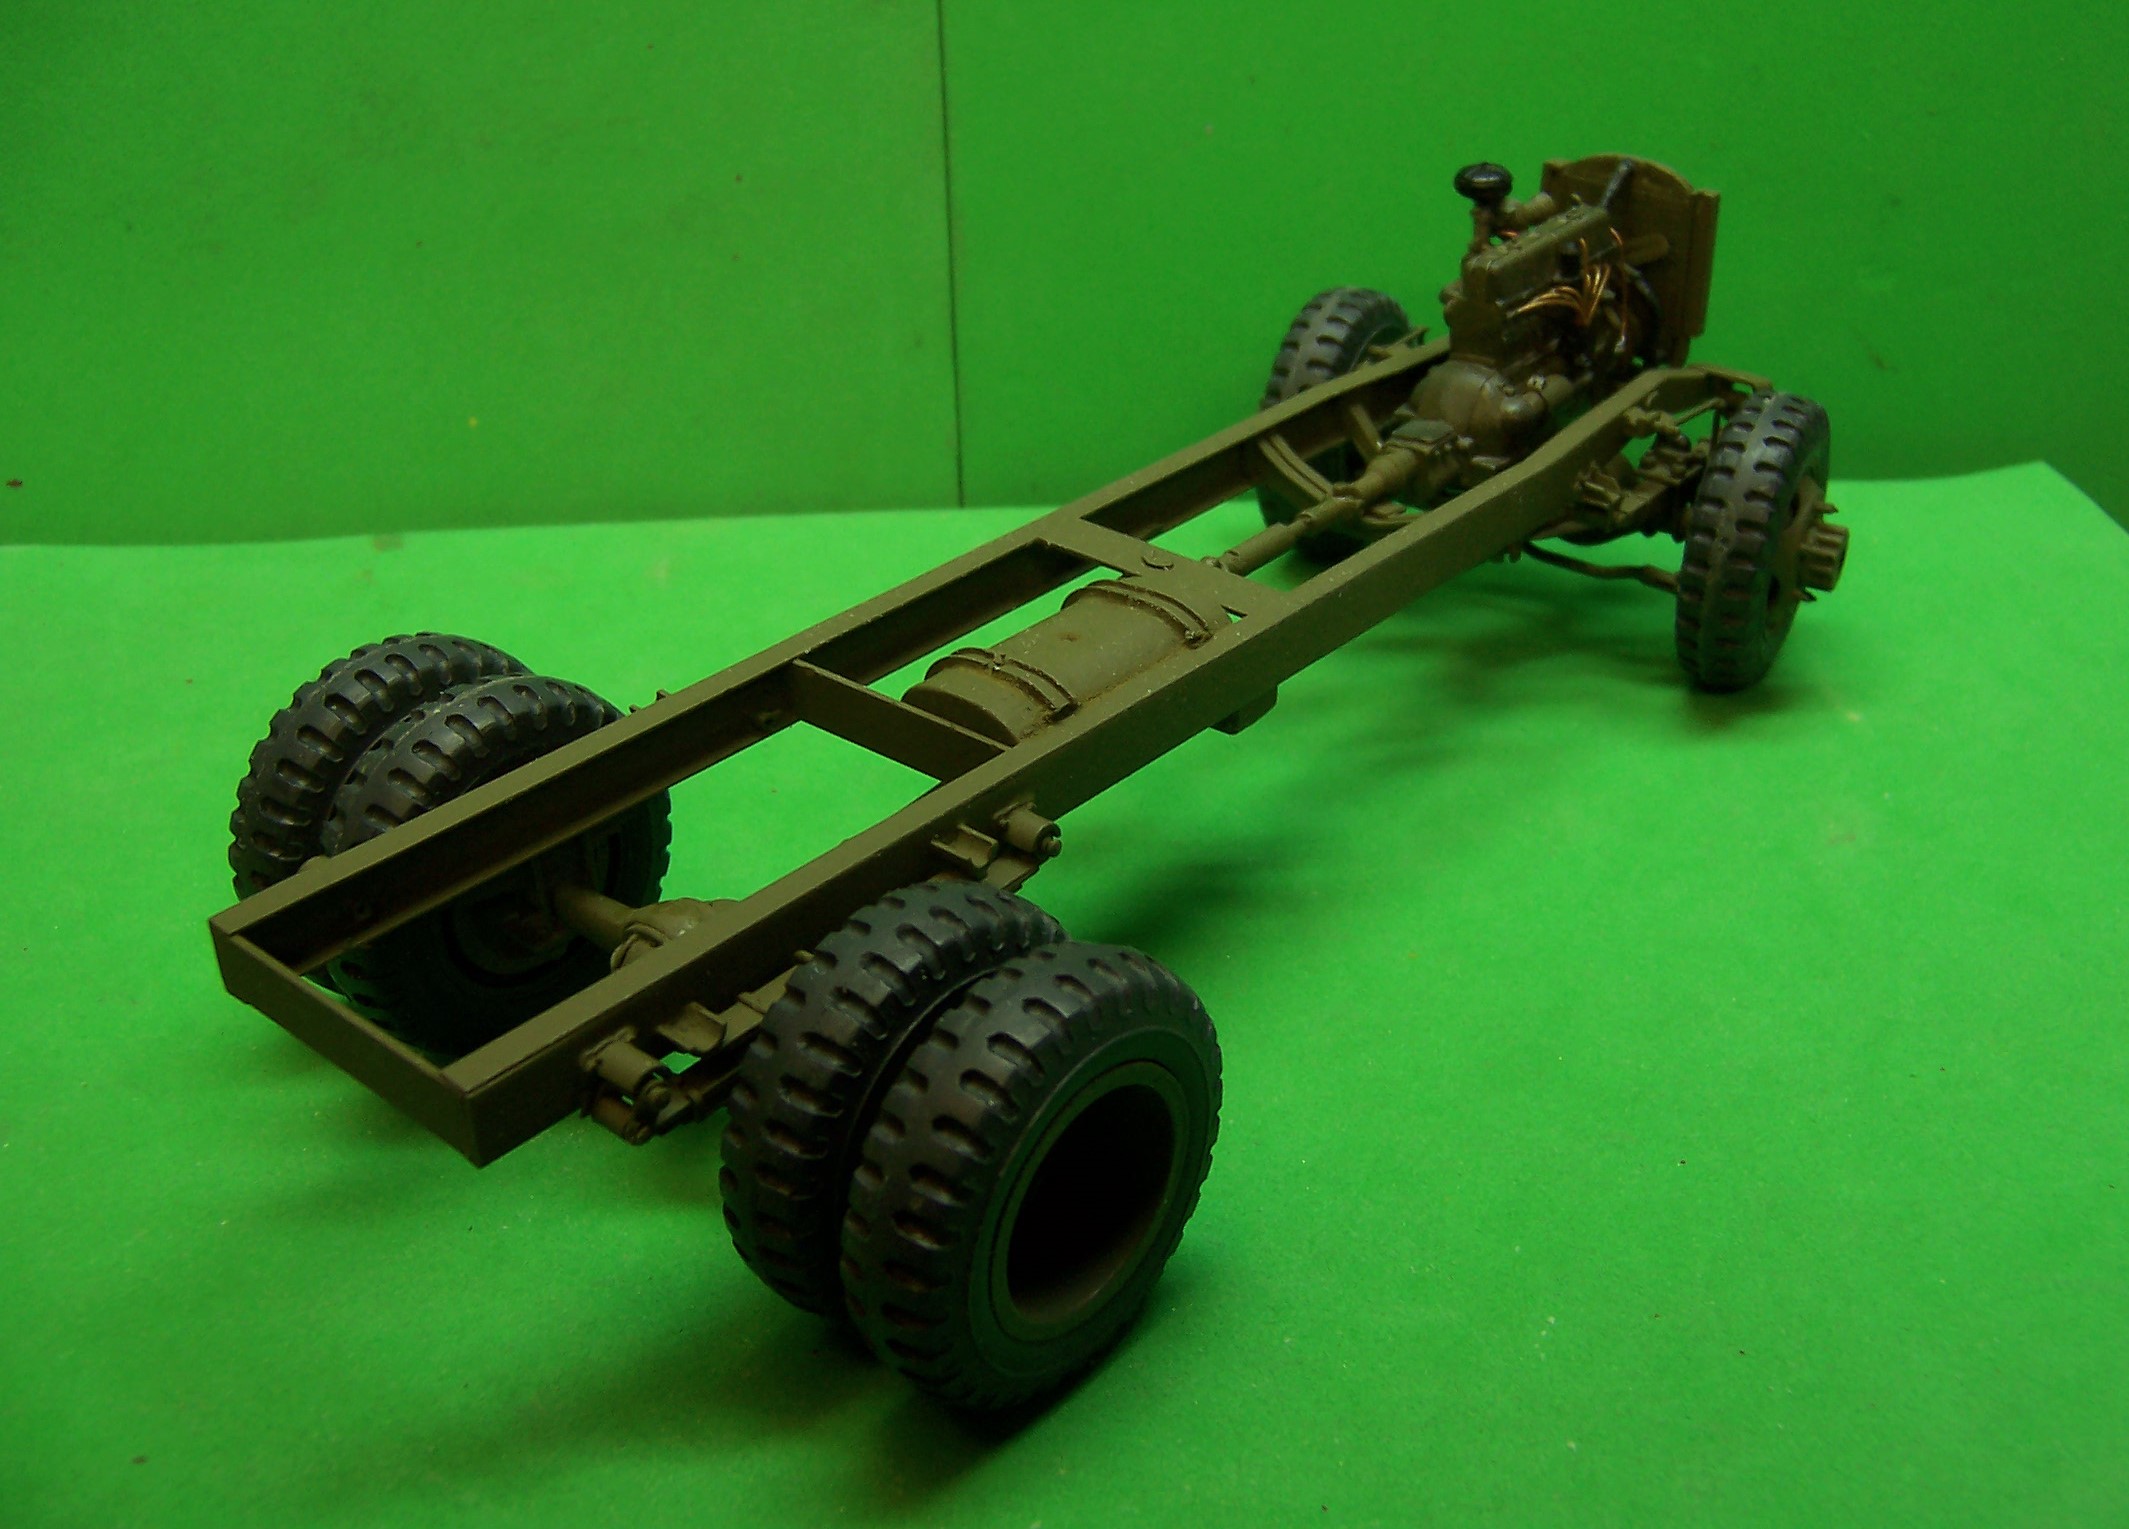
And here is what it looks like in paint. Frame was coated with etching primer and then sprayed with Model Master Olive Drab. Tires and wheels are now mounted on the hubs but both can still be removed by backing out the screws at the hub centers. Eventually hub caps will hide them. The engine is also mounted and a gas tank is in place. Fuel filler will be added after the cab is located.
-
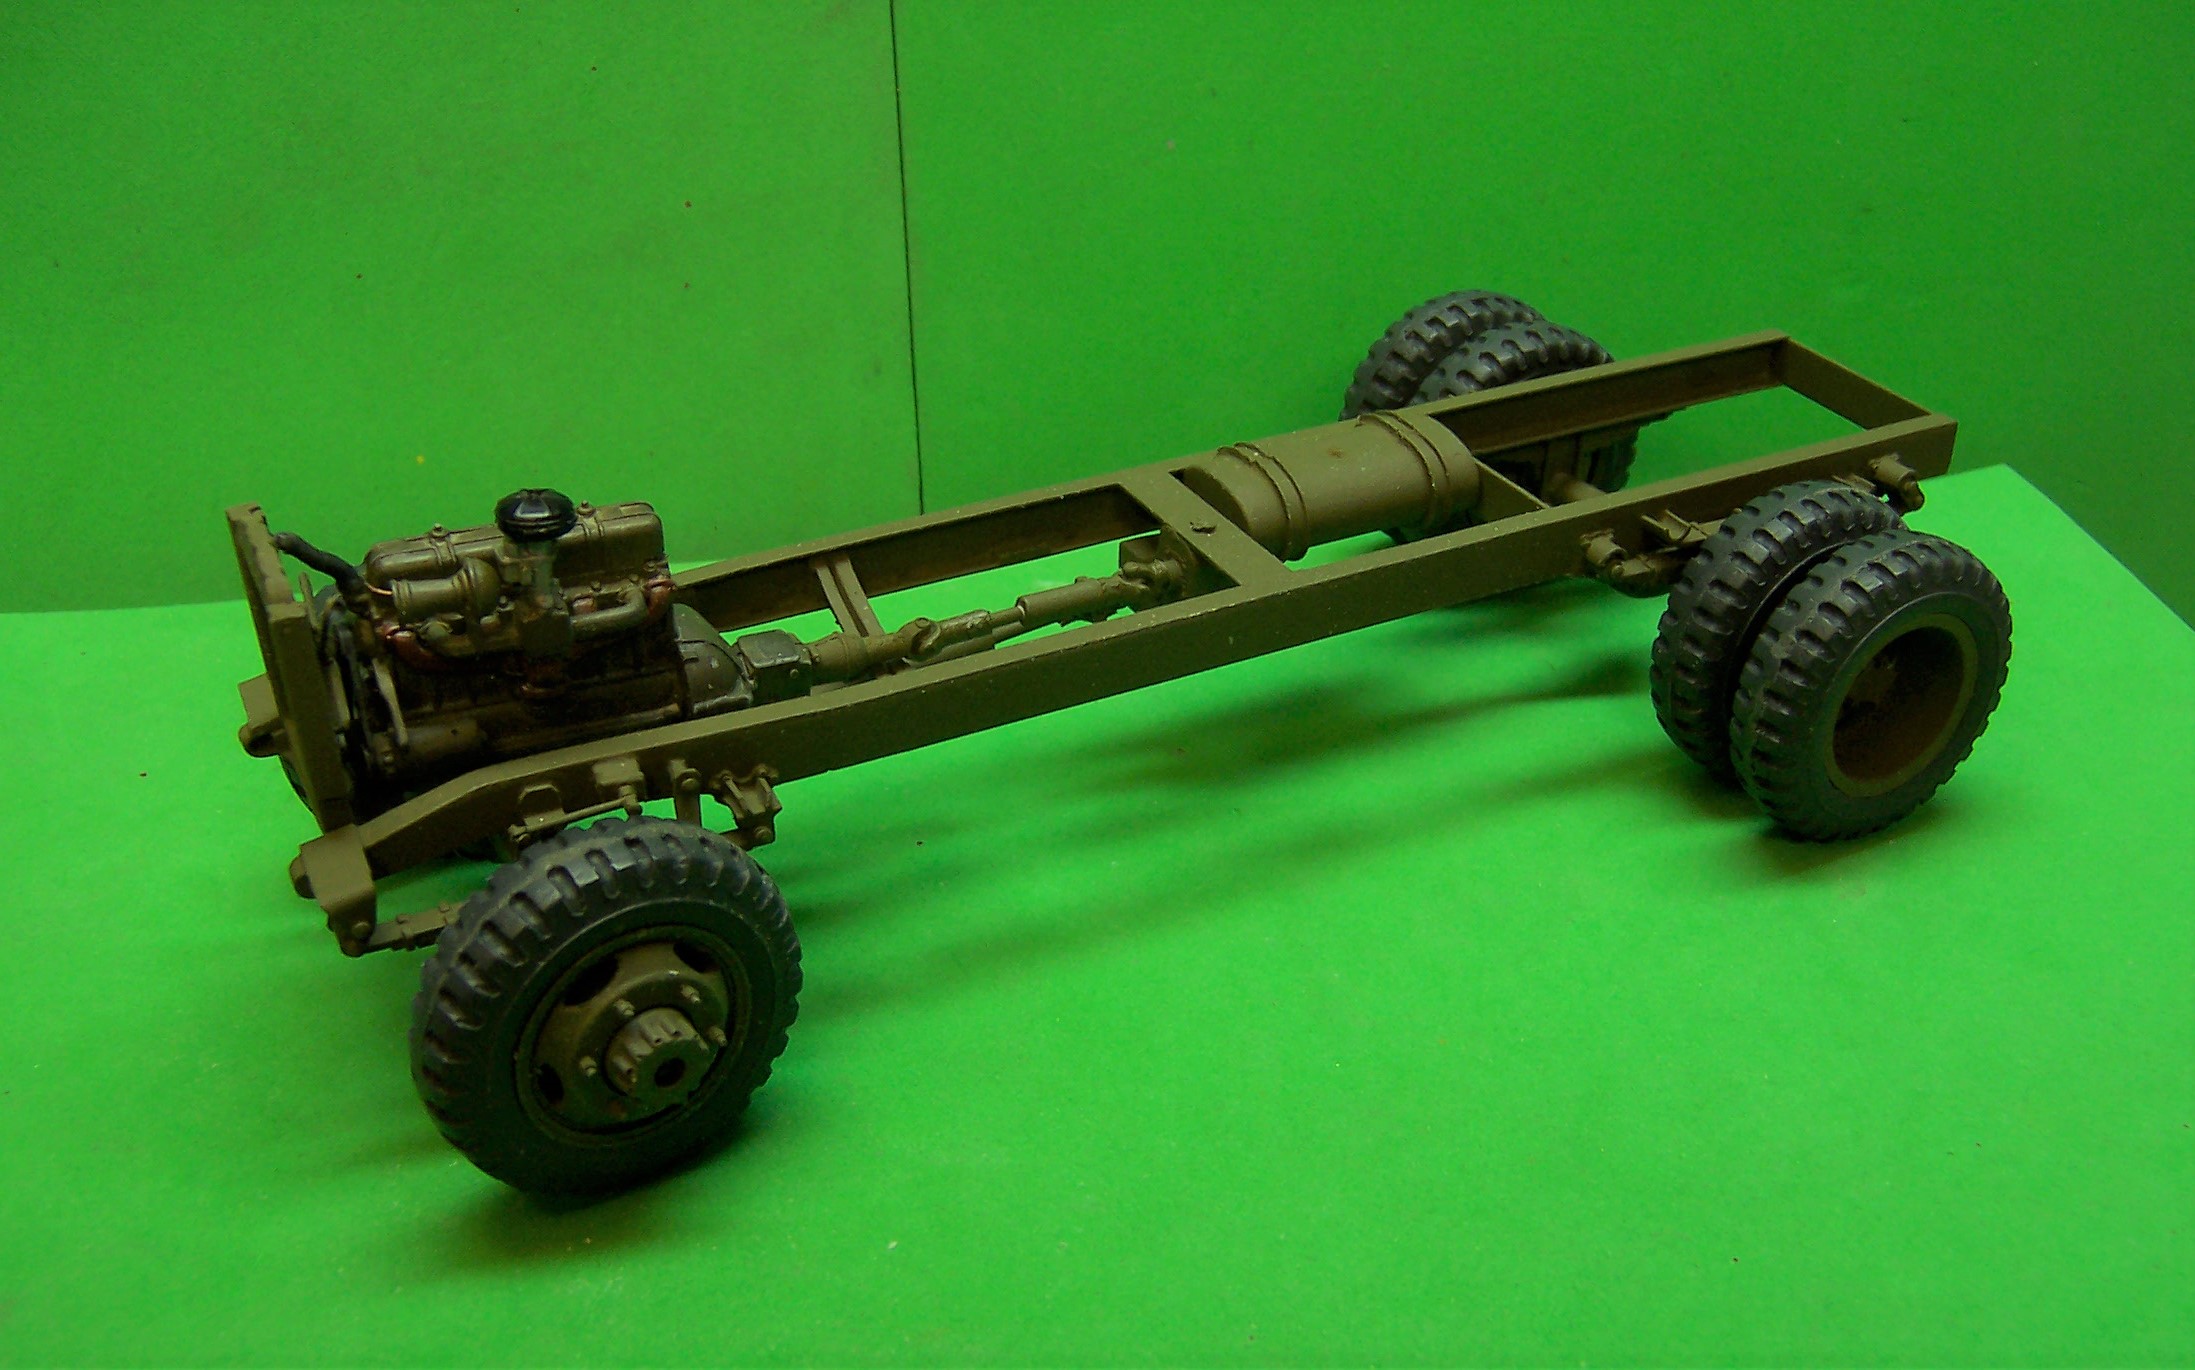
The frame is now finished and has been primed with etching primer. Will photograph it when the paint dries. In the meantime here is the frame with all of the details. Gas tank is also done and has been primed. Still have the mounting straps to make. The driveshaft hanging in mid air will go to the transmission when the engine gets mounted. Since these photos were taken I relocated the front of the rear driveshaft to a slightly lower position so I could get the gas tank in place. It looks better also not being on quite an angle. The Universal joints are from Shapeways and are 3D printed. They will show up better in the photo of the primed frame.
-
Here's a mockup of the frame and cab with the newly created grill guard. All soldered brass.
-
GMC Daycab done 10/21
Chariots of Fire replied to k100's topic in WIP: Model Trucks: Big Rigs and Heavy Equipment
What Landman said. -
Anyone make a resin 1 ton dump bed
Chariots of Fire replied to fordf-100's topic in Truck Aftermarket / Resin / 3D Printed
I'd take you up on the steak if we did live closer, believe me! Been at it a while so experimentation has been part of the process over the years. I'm always looking for things to see how they might work to my advantage. When I do find something that works, however, I tend to stick with it. No sense in re-inventing wheels. Casting them works though. -
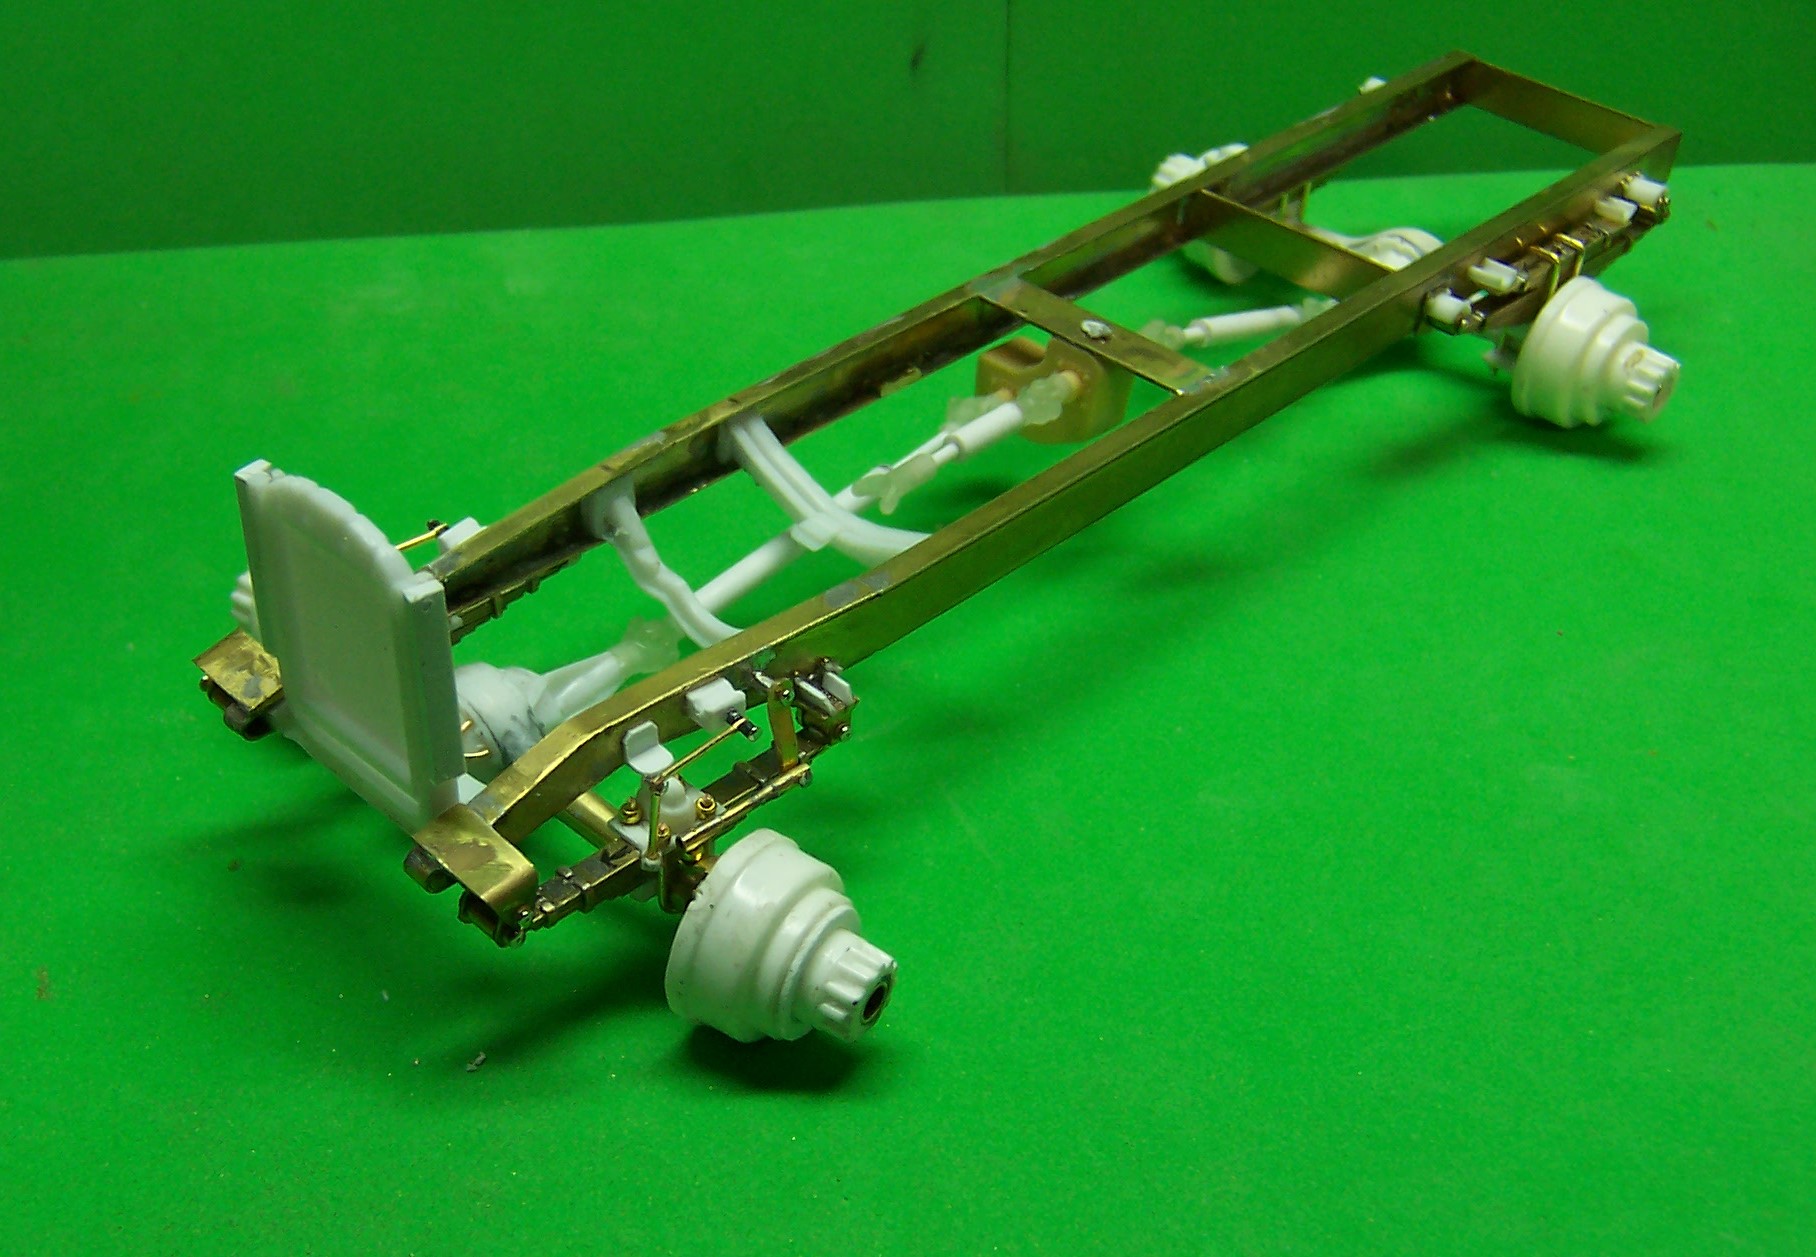
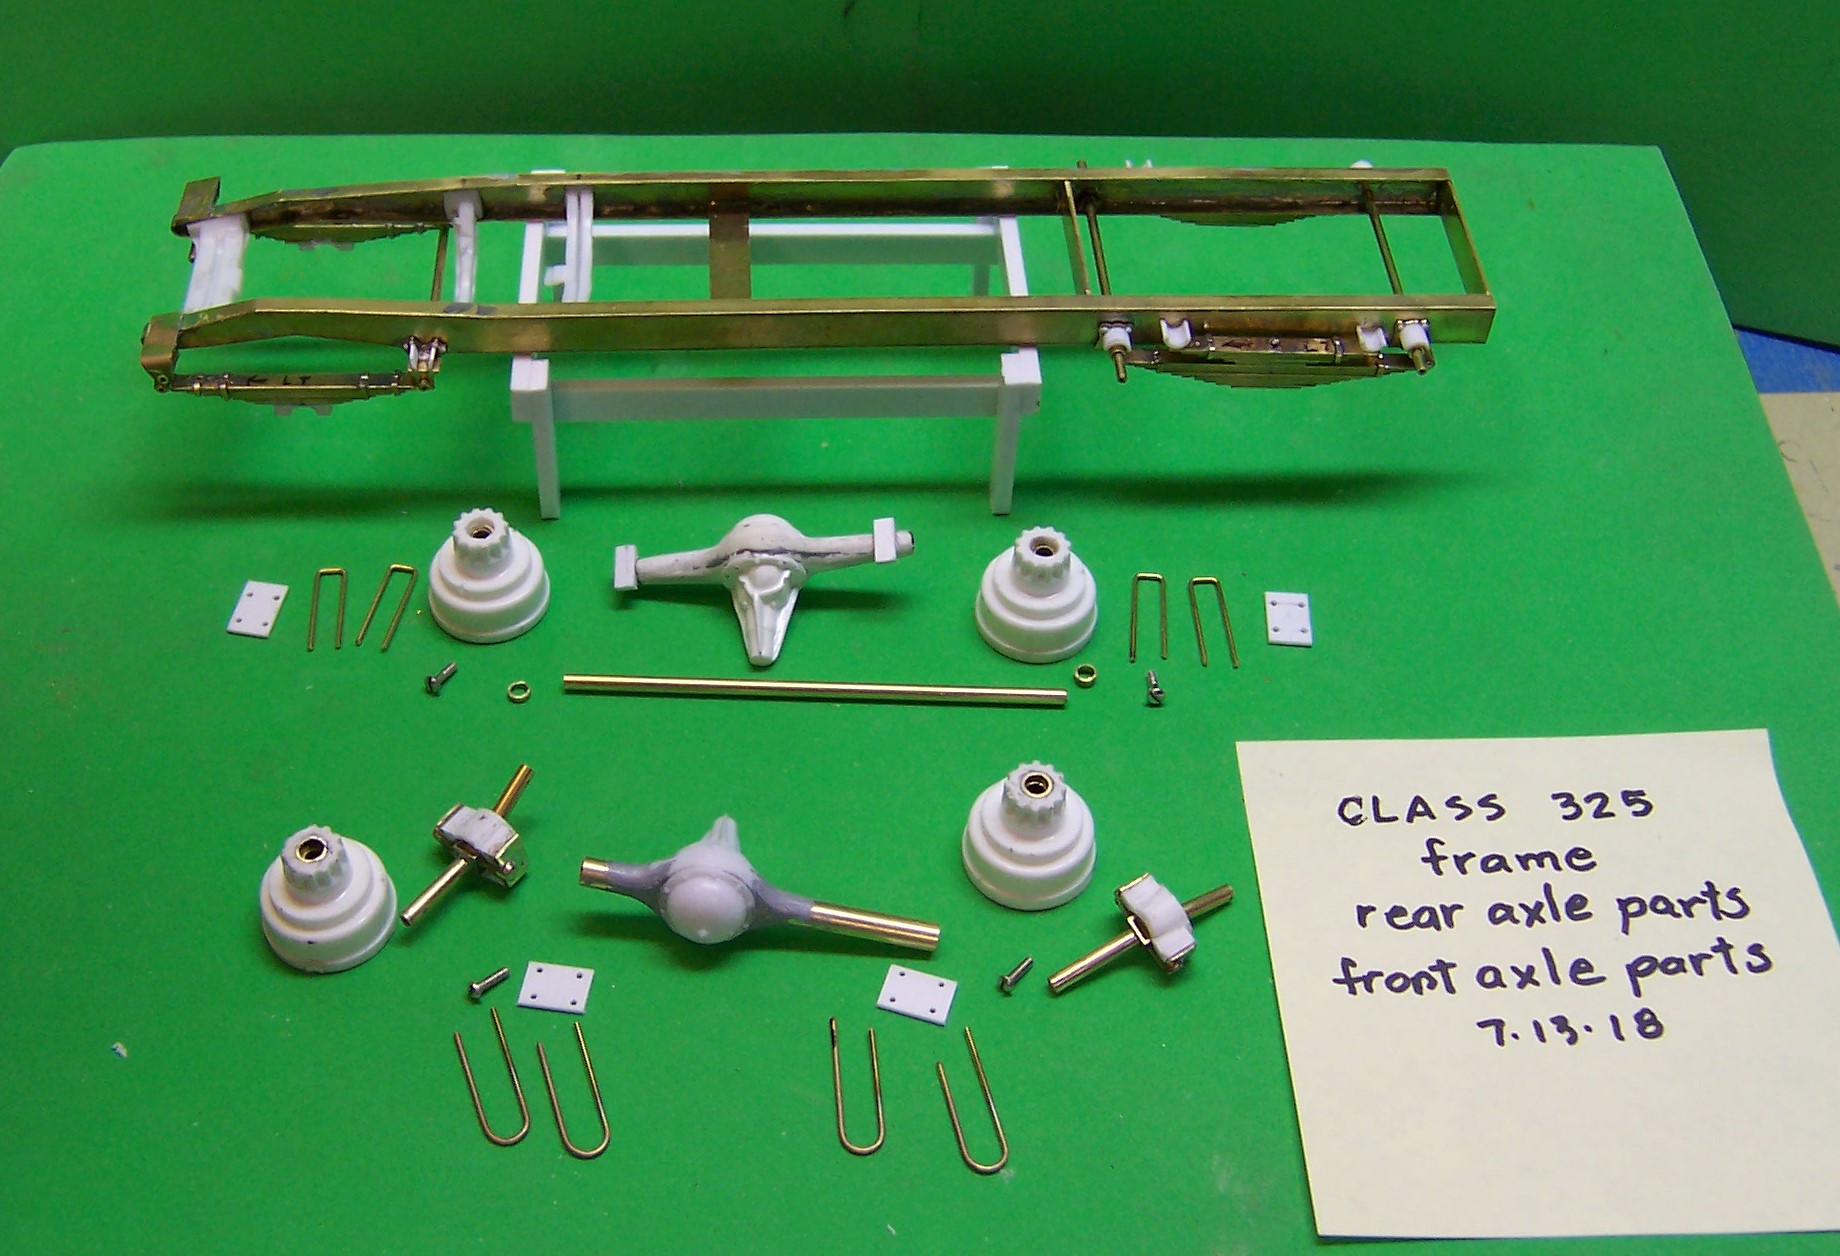
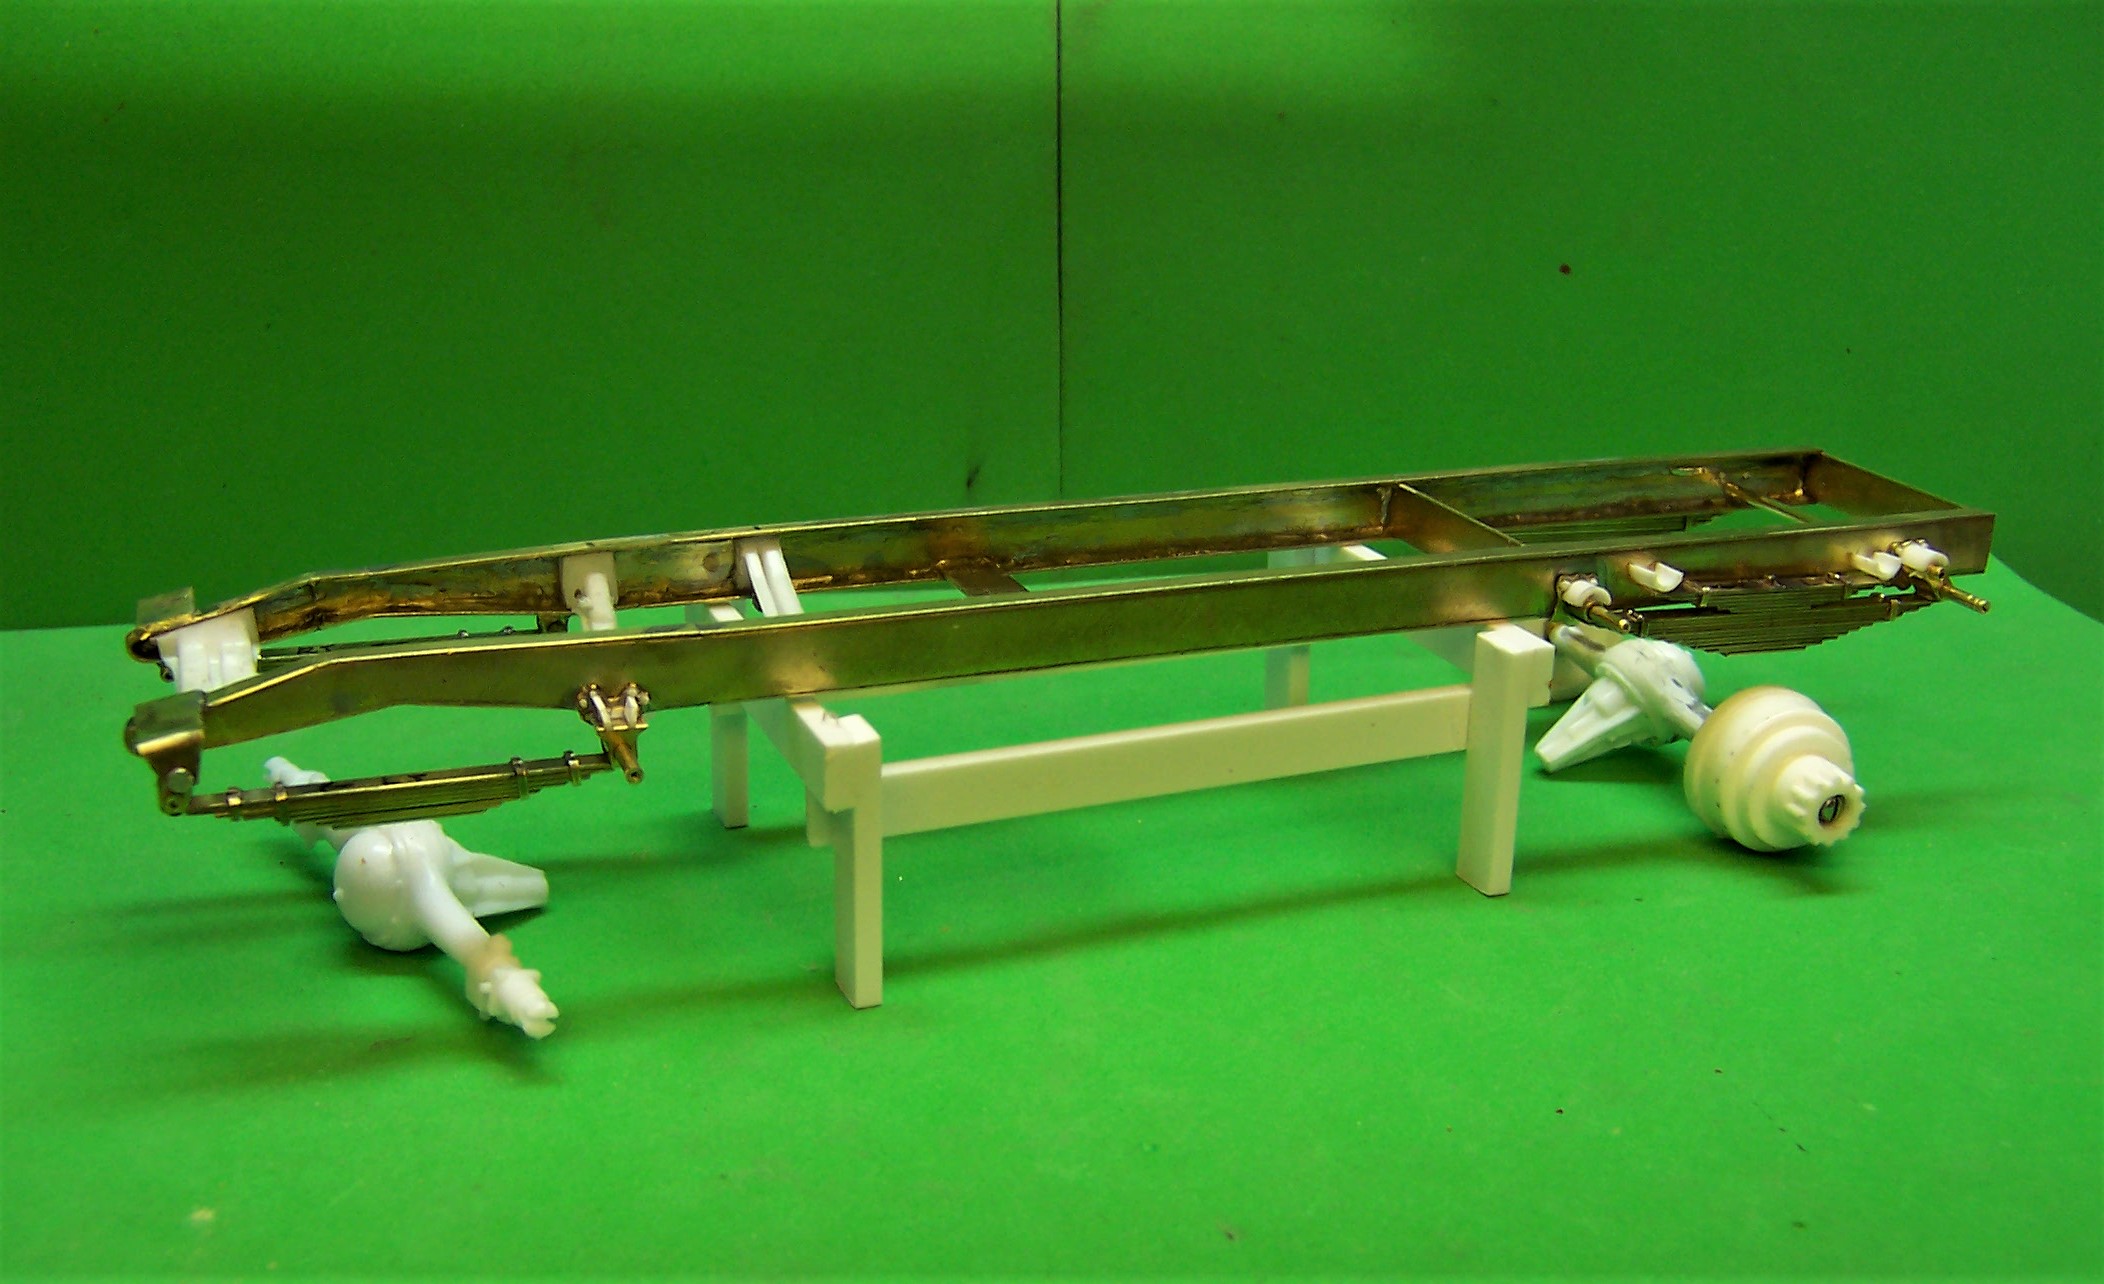
Front and rear axles are now done. Last things will be tie rod and tie rod ends, steering arm, etc. before attachment to the frame. A slight issue with the frame not being quite level with the ground but that will be addressed by adjusting the shims between axles and springs.
-
GMC Daycab done 10/21
Chariots of Fire replied to k100's topic in WIP: Model Trucks: Big Rigs and Heavy Equipment
Nice piece of work! Well put together! -
A couple more pix of work in progress. The rear axle is up temporarily on the rear springs. U-bolts and plates are in place. They will be permanently attached after the frame is painted. Still some minor adjusting to do. Tolerances between tires, springs and U-bolts are quite small so a shave here or there will make a big difference in the long run. The front axle has to be cut to put the pumpkin off center. Then the hubs can be made up for front steering.
-
Got some more work done on springs yesterday and today. Here are some pics of the latest . Springs are individual 1/64" x 18" brass strips soldered at the ends. Brass tubing soldered to each end and then cut off. 1/16" tubing temporarily holds the springs in place. Eventually the tubing will be cut off for final assembly.
-
anyone ever 'kit' the original Dodge Power Wagon?
Chariots of Fire replied to fiatboy's topic in Truck Kit News & Reviews
Ertl did one also but slightly smaller than the Matchbox version. Both were pretty well done. I had a green one in 1/24th scale. The Ertl one was red with black fenders. Made a nice brush rig! -
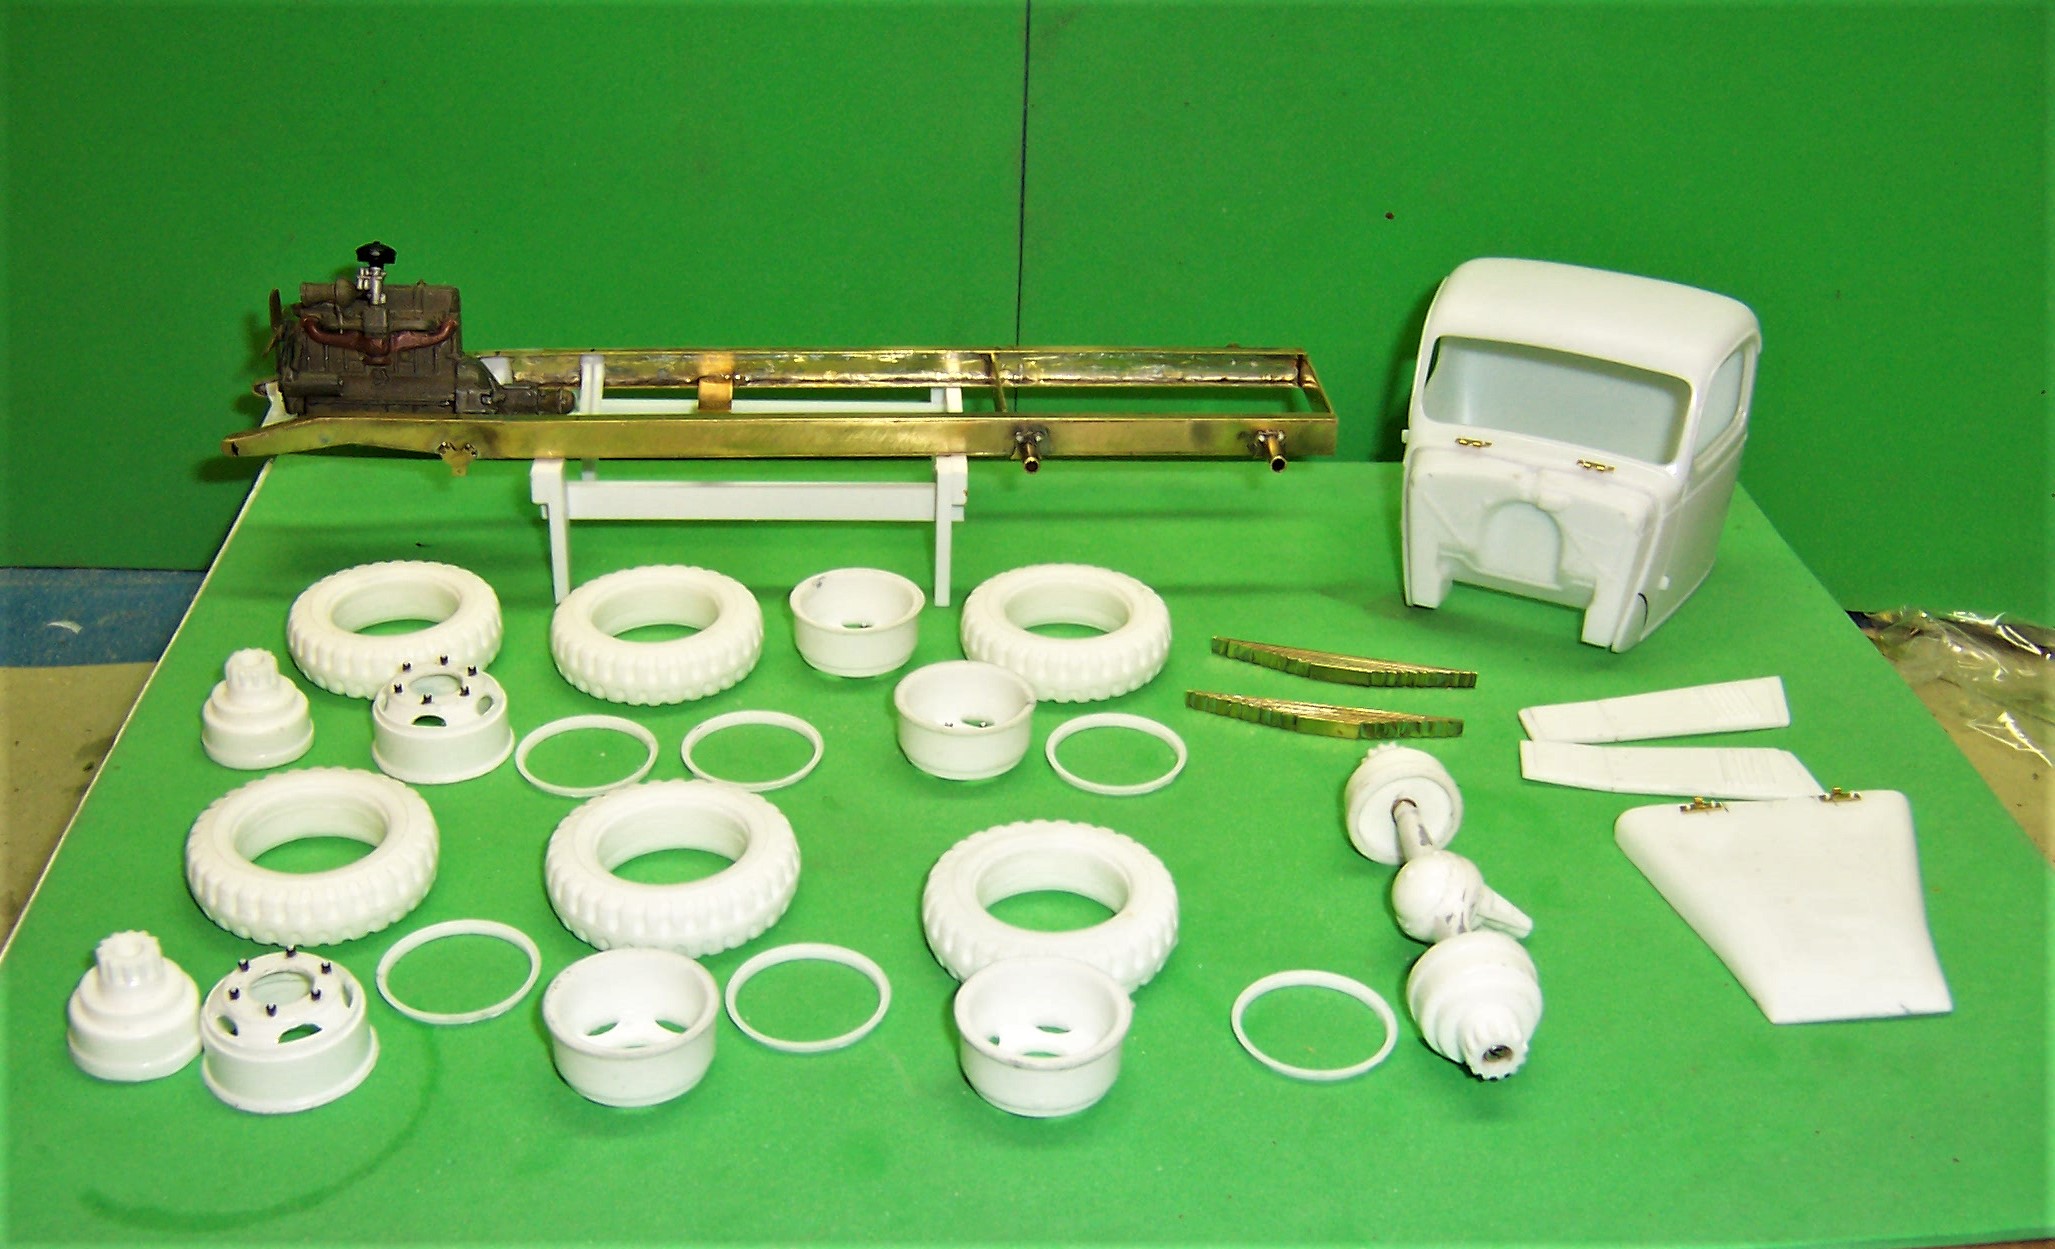
Here are the parts so far. Tires, wheels, hubs and trim rings are all resin castings. So is the hood and hood sides. Just finished up the two rear spring clusters last nite. Now to get them detailed and with some ends that can be attached to the frame!
-
A few weeks ago I received a 1/35 scale Merit International model kit of a Diamond T M19 tank hauler tractor and trailer. Looks like your kit has the same level of detail. The box says M19 but the walkaround that I also have says that if it has the front bumper open for a winch cable it is actually an M20. Box art of the truck shows the M20. Nice soft military tread tires for the tractor and many, many smaller standard tread tires for the trailer.
-
Who says you don't?? What kind of model work do you find most satisfying and rewarding?
-
Attachment points for springs have been added since the photo above was taken. Waiting to go to the LHS on Tuesday to get my stock for making the springs. Then we can set the axles and begin the wheel hubs etc.
-
Drills For Plastic (making holes!)
Chariots of Fire replied to Miatatom's topic in Model Building Questions and Answers
I use mine in a pin vise and in very thin metals like brass and aluminum. They work in plastic too but if you are doing deep drilling, chances are they will snap. The slightest off center pressure will do it. Nothing worse that having one snap in a hole you are drilling and the broken piece is just inside the hole where you can't get at it! Can't push it through and can't pull it out! -
I agree that just filler alone with still allow the ghosting to show through. Small plastic strip stock applied to the scribing area is best but use glue sparingly, especially ACC as it gets real hard, more so than the plastic and will cause uneven surfaces to sand. Use as little filler as possible to reduce shrinkage as well.
-
Micro-Mark does have it. I am not sure if ordinary silicone spray would work or not. I have not experimented with it.
-
Question on making gauge bezels
Chariots of Fire replied to Duncan4114's topic in Model Building Questions and Answers
You can also make them out of aluminum tubing and can cut the tubing with an S&K tubing cutter. Drill out the hole for the tubing and slide it in. Use some plastic as a filler and then add the gage. Coat with Testors clear afterward to seal it all. -
what to do whan a part is lost?
Chariots of Fire replied to foxbat426's topic in Model Building Questions and Answers
Better yet make two with the one you have and you will have two clear lenses! Just make sure you use a good quality epoxy that does not yellow over time. Craft stores sell a clear resin that works well also.