Chariots of Fire
-
Posts
2,782 -
Joined
-
Last visited
Content Type
Profiles
Forums
Events
Gallery
Everything posted by Chariots of Fire
-
 I just got through doing some of what you have been doing! Working on the IH brush truck I built up an engine using a old Mack block. Got it all done but quickly found that it was way too big! The firewall would have been sitting about 1/2" behind the cowl! Tried moving the engine forward and that didn't work. So it was a couple of steps backward to get another engine. Back in 1967 when this truck was built they were still using relatively small gas engines for this type of use so I dragged out one of the 1950 Chevy pickup kits and rebuilt its engine. I had to cut the transmission loose and put it on the other end of the block though, because the IH manifolds and plugs are opposite to the Chevy. Here is a comparison of the two engines and you can see how much smaller the Chevy engine is. Notice where the transmission sits in the first photo. It is way up inder the raised cross member. In the second photo that's the transfer case that sits under it. And here is a look at the engine inside the cab area. The firewall also came from the Chevy kit and was only trimmed a small amount at the corners and sides to get it to fit. Much of the thick resin cowl was ground away to allow it to fit better. Note how thick the hood is that was cut loose from the cab. I made a mold and have cast the outside shape of the hood. I'll slush cast it so that it is thin all the way around. That way I can cut it down the center and add a hinge.
-
Oshkosh snow plow
Chariots of Fire replied to gotnitro?'s topic in WIP: Model Trucks: Big Rigs and Heavy Equipment
The details on the frame really pop now that you have primer on it. That's a lot of widgets!! -
Oshkosh snow plow
Chariots of Fire replied to gotnitro?'s topic in WIP: Model Trucks: Big Rigs and Heavy Equipment
Attention to detail is what it is all about! I'm betting that when you get to the primer stage it will present an opportunity for a lot of fine tuning. I've found that out in my own scratch building. Just when I think something looks great, I do the primer thing and every little flaw stands out. There's something about working in white plastic that hides everything until that first coat of primer goes on. But taking the time to clean up a lot of little areas will reward you spades! Keep up the great work! It's fun watching the progress.? -
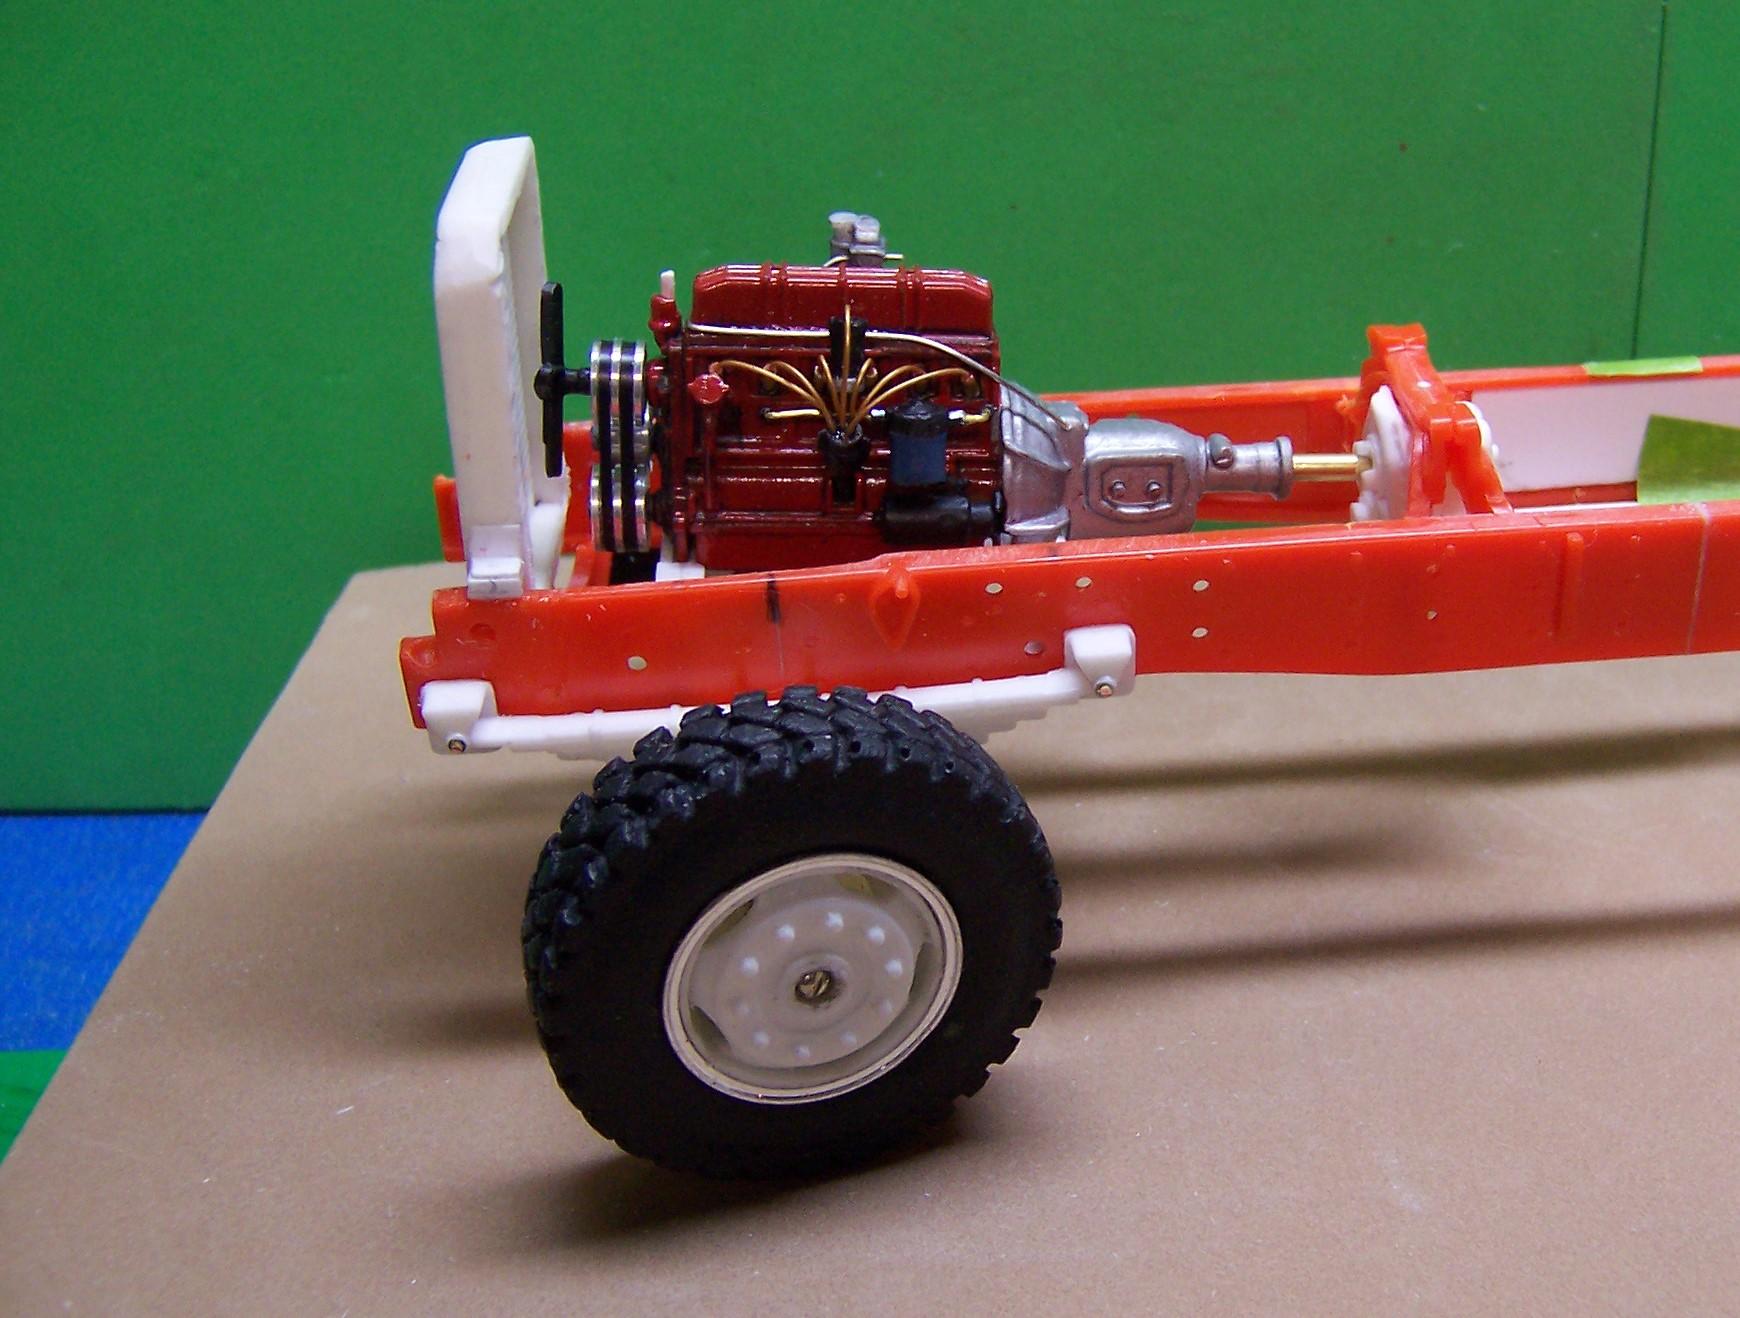
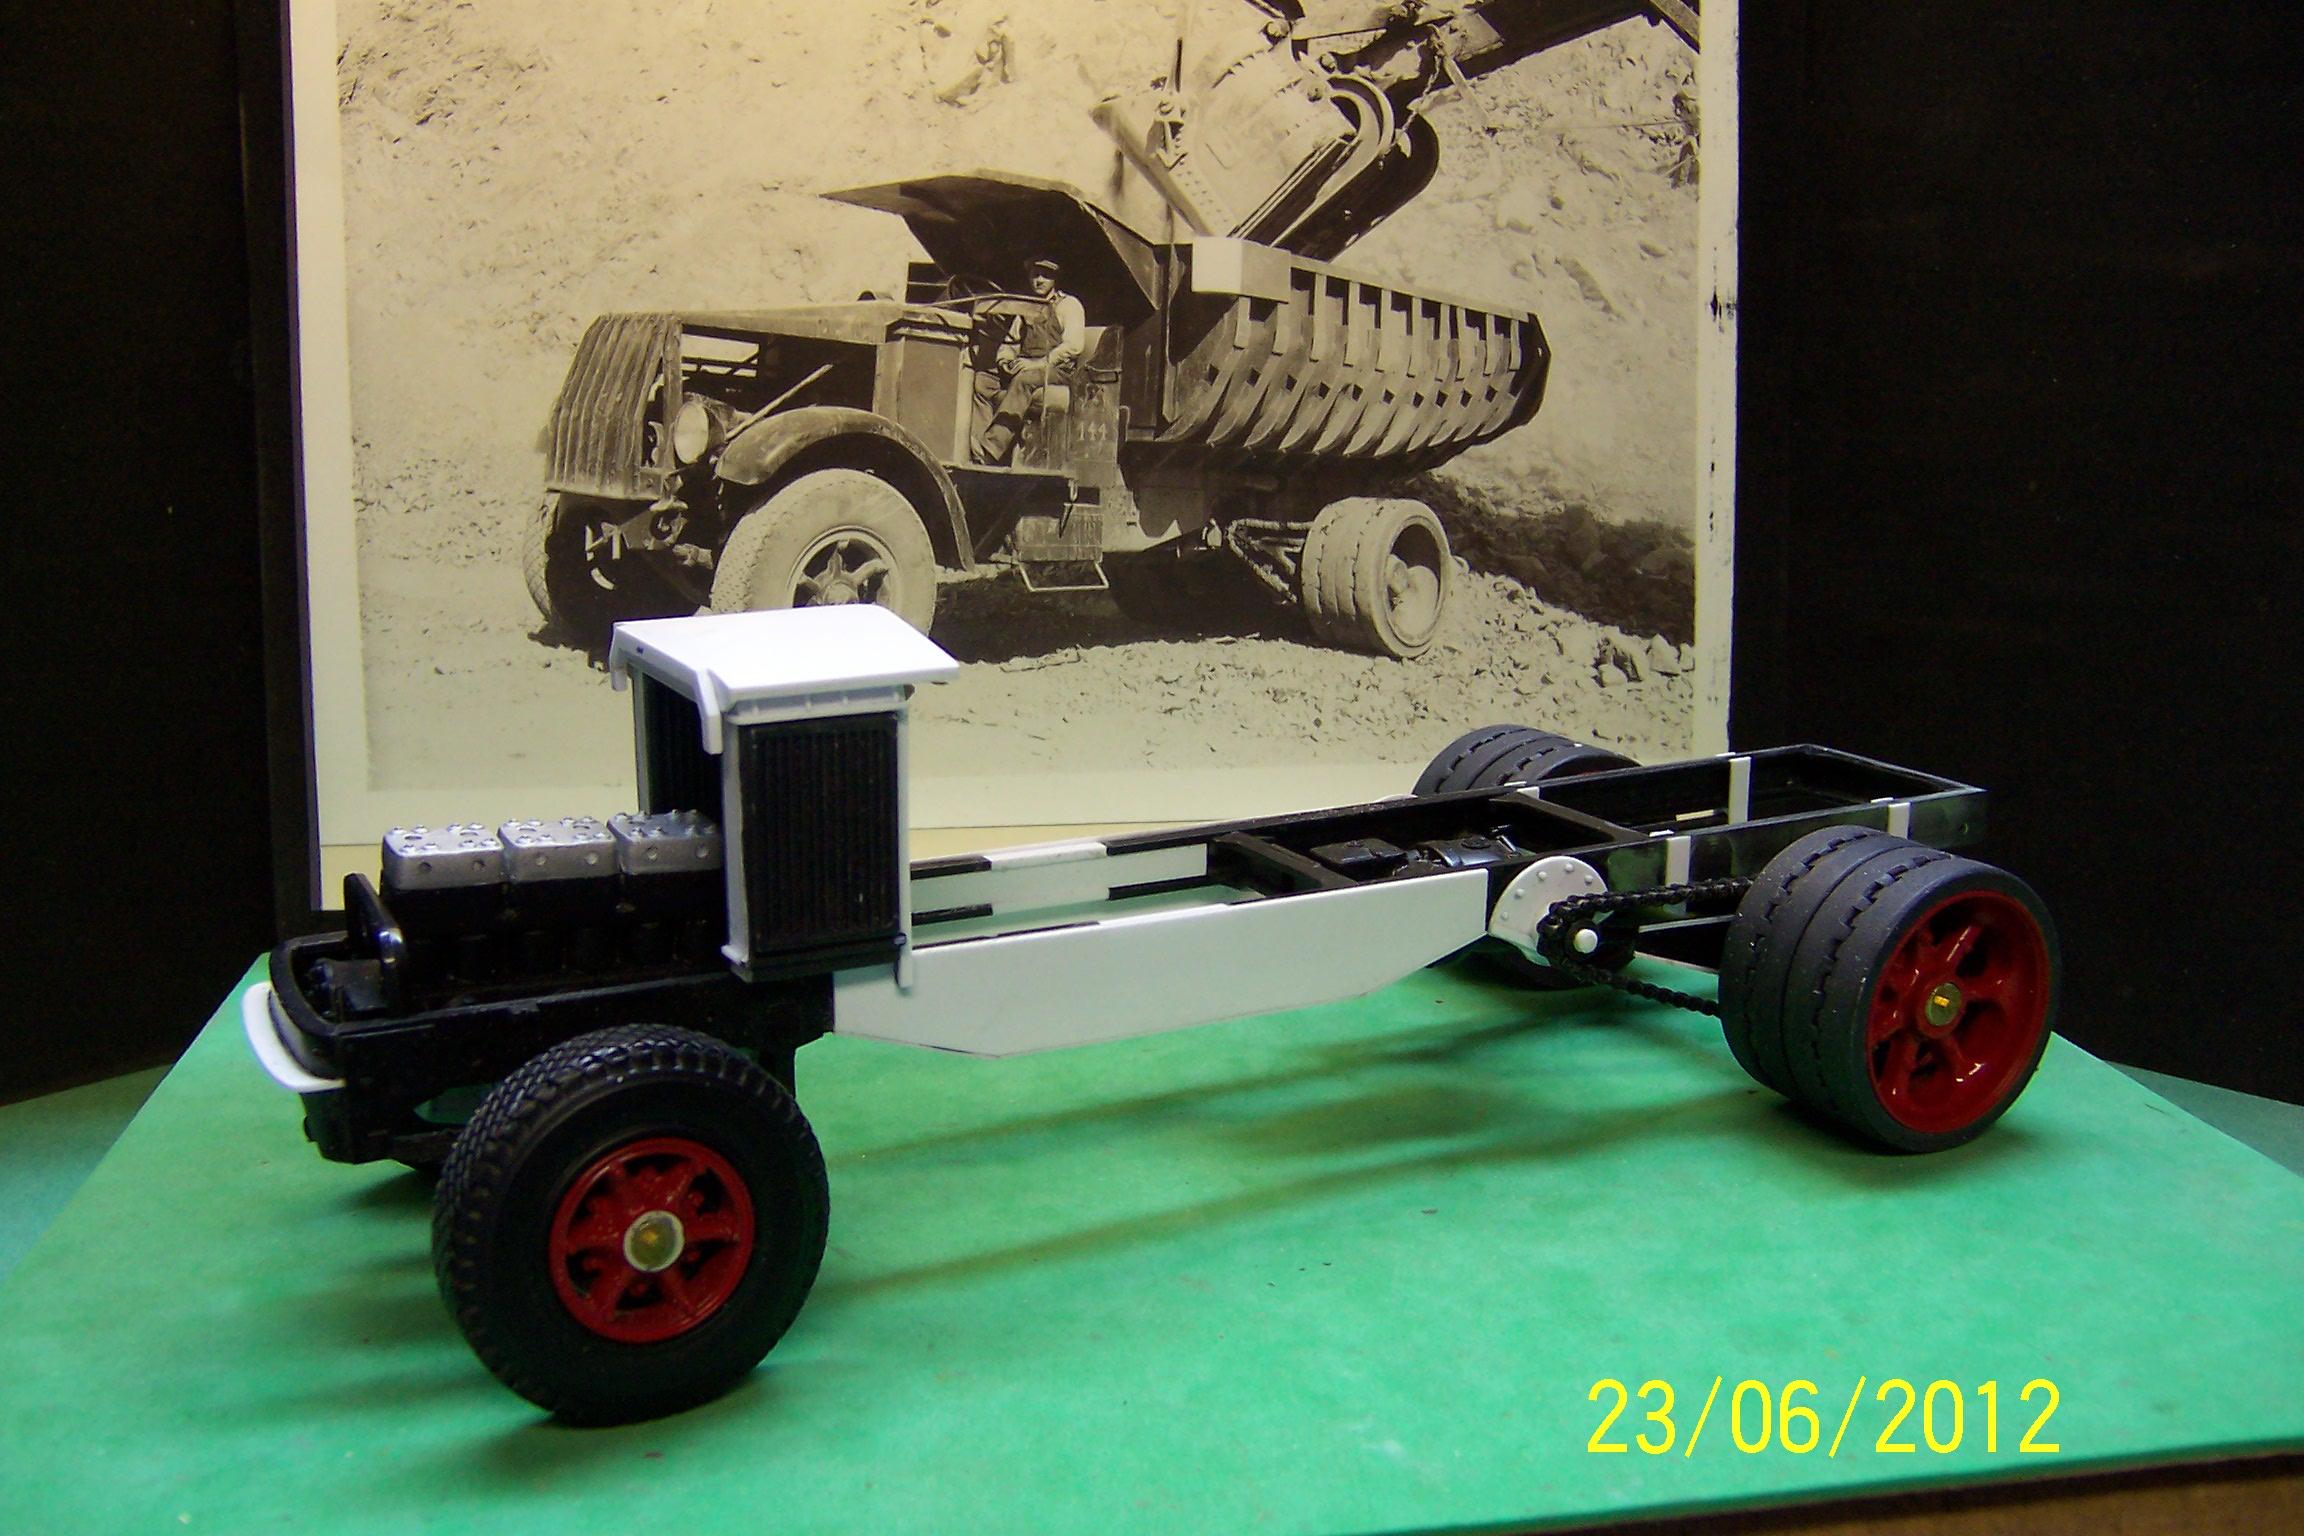
With the engine basically done the front end of the chassis can be worked on. Springs and front axle are in place and set with U-bolts and some small beads. The steering knuckles have been made of brass tubing, both round and square. One side of the square tubing was removed to make a C section. The round tubing has been soldered to form a pivot point inside the wheel. With proper backing and setting in place the front wheels will be posable. The cab sits a bit high in the front because of the radiator. Some trimming on both the top of the radiator and the inner portion of the hood will bring it down to where it should be.
-
Got some weathering done, or should I say oily dirt. Perhaps just a bit more high lighting to bring out some detail.
-
Got some work done on the engine today. It's a representation; not an exact replica as good photos are hard to come by. But I've tried to imagine what it might look like after it is uncrated and ready for installing on the chassis. Believe me, a couple of trips into a wooded area with smoke, charring and dust and it won't look like this for very long. It will get dirtied up a bit before calling it done. Not so as to render it uncared for but so it looks like it has seen some work. Those lines sticking out in mid-air will be connected once the engine is installed on the chassis and there is a firewall to go to. I ended up using some thin strips of electrical tape for the fan belts.
-
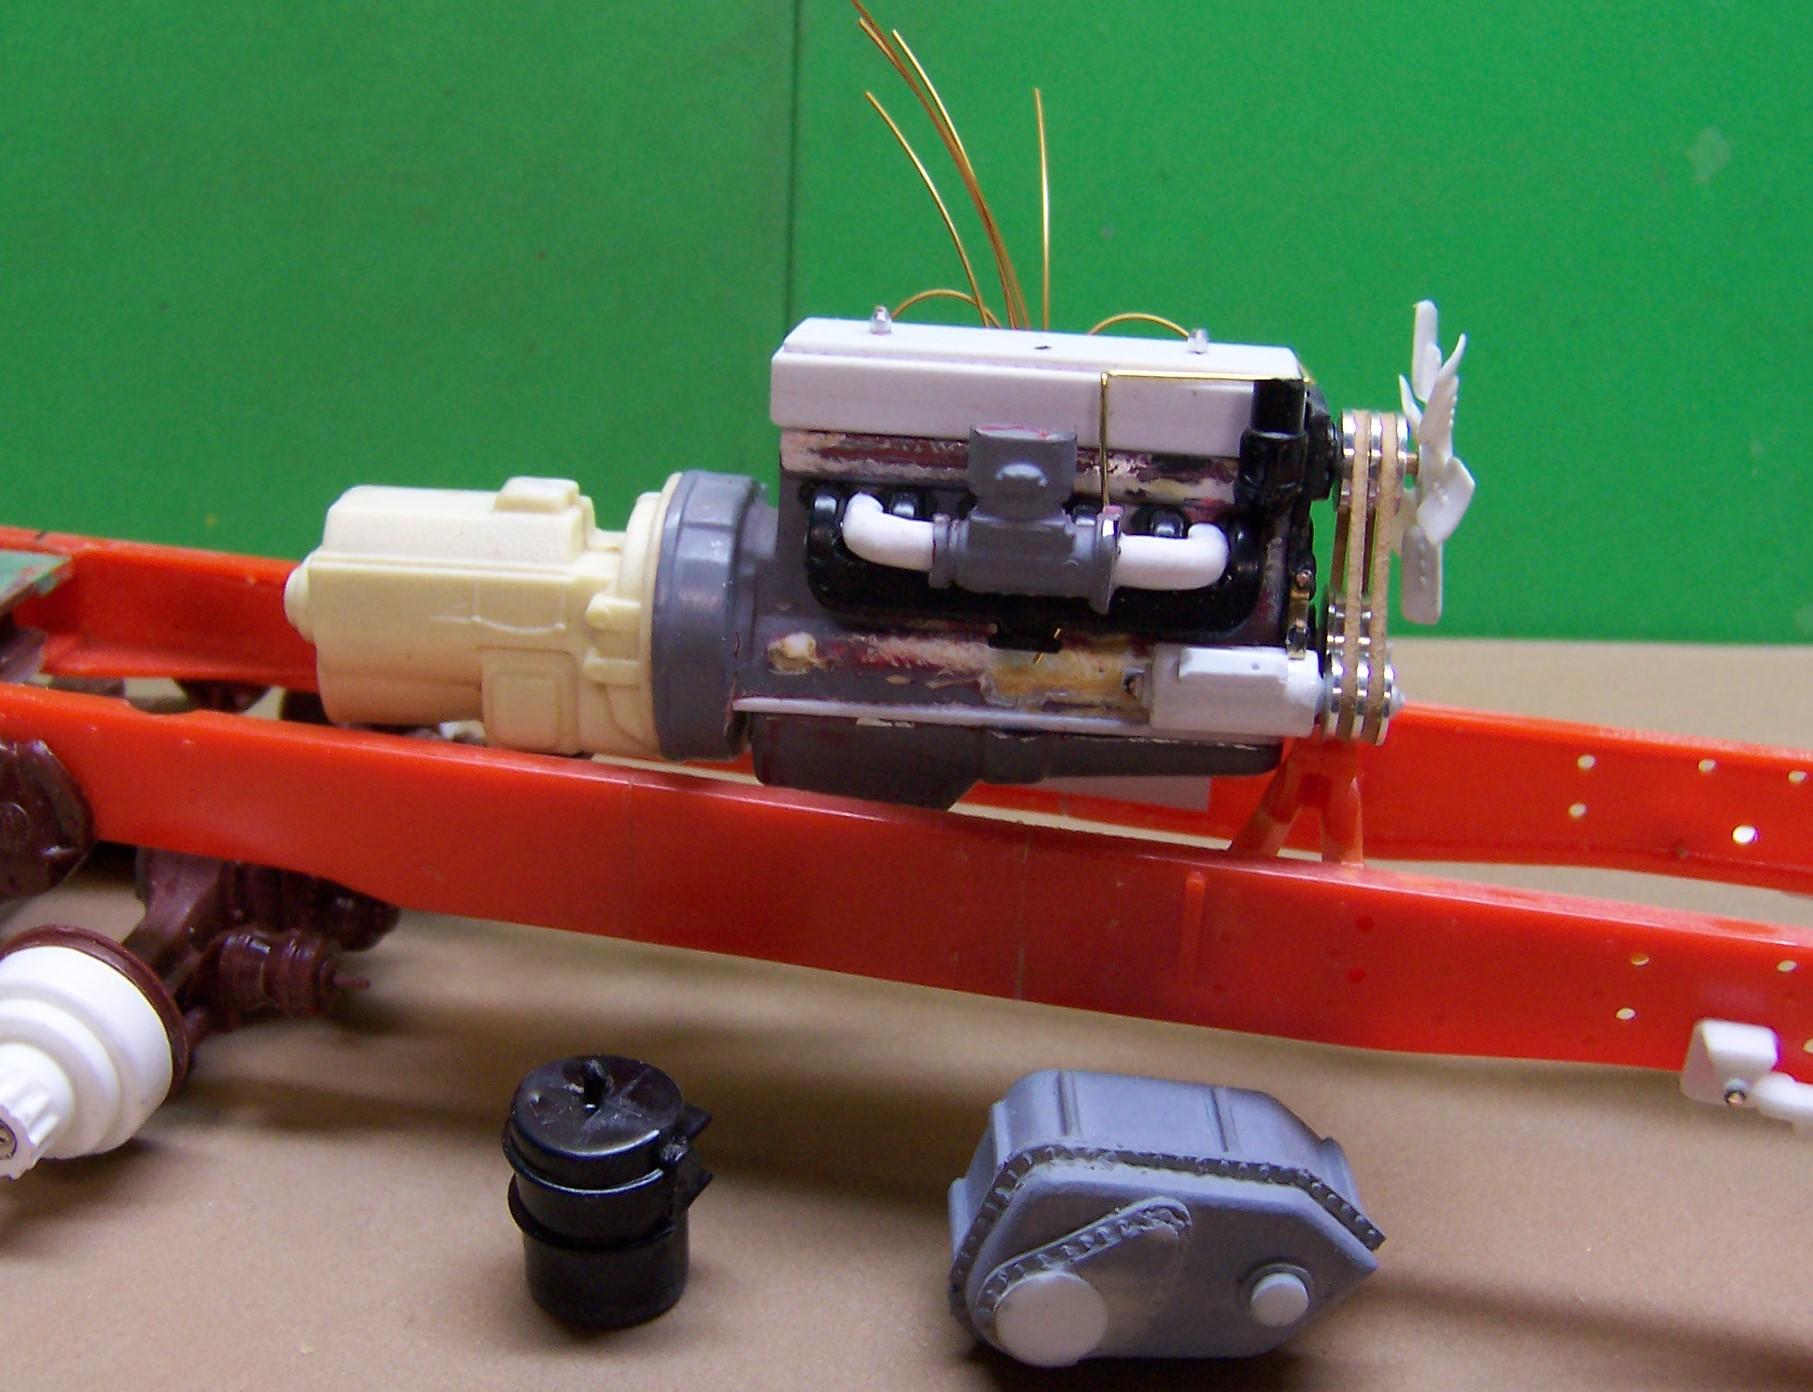
The front end is on hold until I can get to the LHS and pick up some brass tubing. Just when you think you've got what you need in the stash it isn't there! In the meantime I did some research on the Red Diamond 501 engine that will power the truck. I found some images along with a not so good picture in the instructions that came with the cab. An old KW block and reversed oil plan was the start. I found some manifolds in the stash box that fit the exhaust ok but had to manufacture one for the intake and carb mounting. The valve cover is just a block of plastic. The transmission was also out of the scrap box with a small addition for the starting motor. Distributor and coil are plastic tubing. The plugs on the 501 are booted so I inserted some tubing in the block and drilled out the tops for the wiring. A bit or detailing such as nuts and bolts, dip stick and other little things will make the engine look more like a working piece. The engine has dual fan belts so three double pulleys were turned from aluminum rod. The fan belts for now are paper strips. The fan came from the ALF lit. The generator is also plastic tubing. Beside the frame are the air intake and transfer case.
-
Some of the neatest and cleanest work I have seen in a long time! That is outstanding!?
-
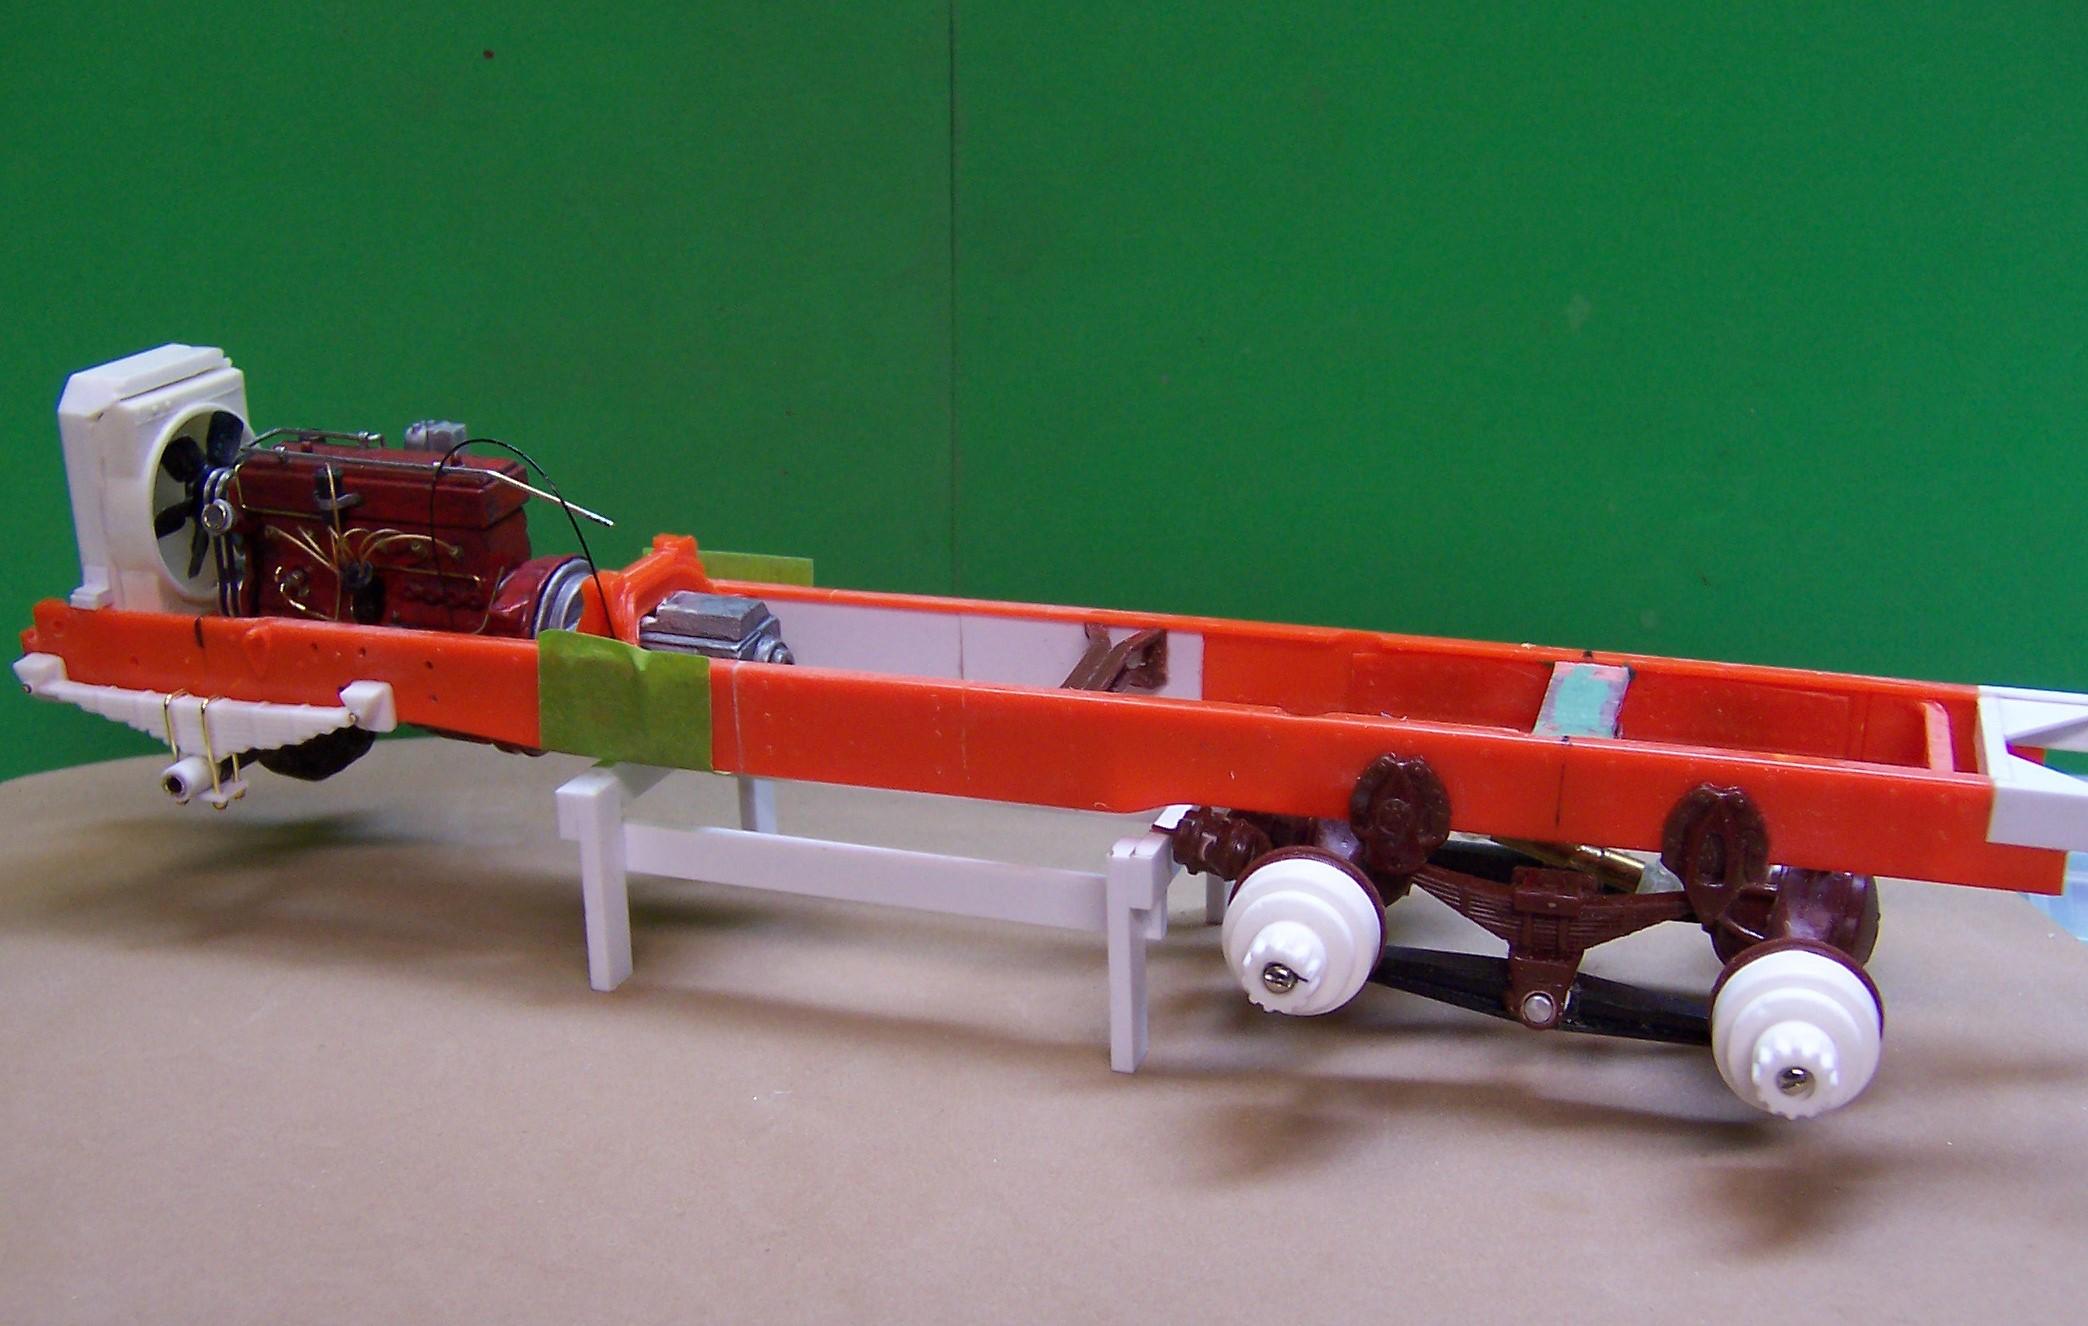
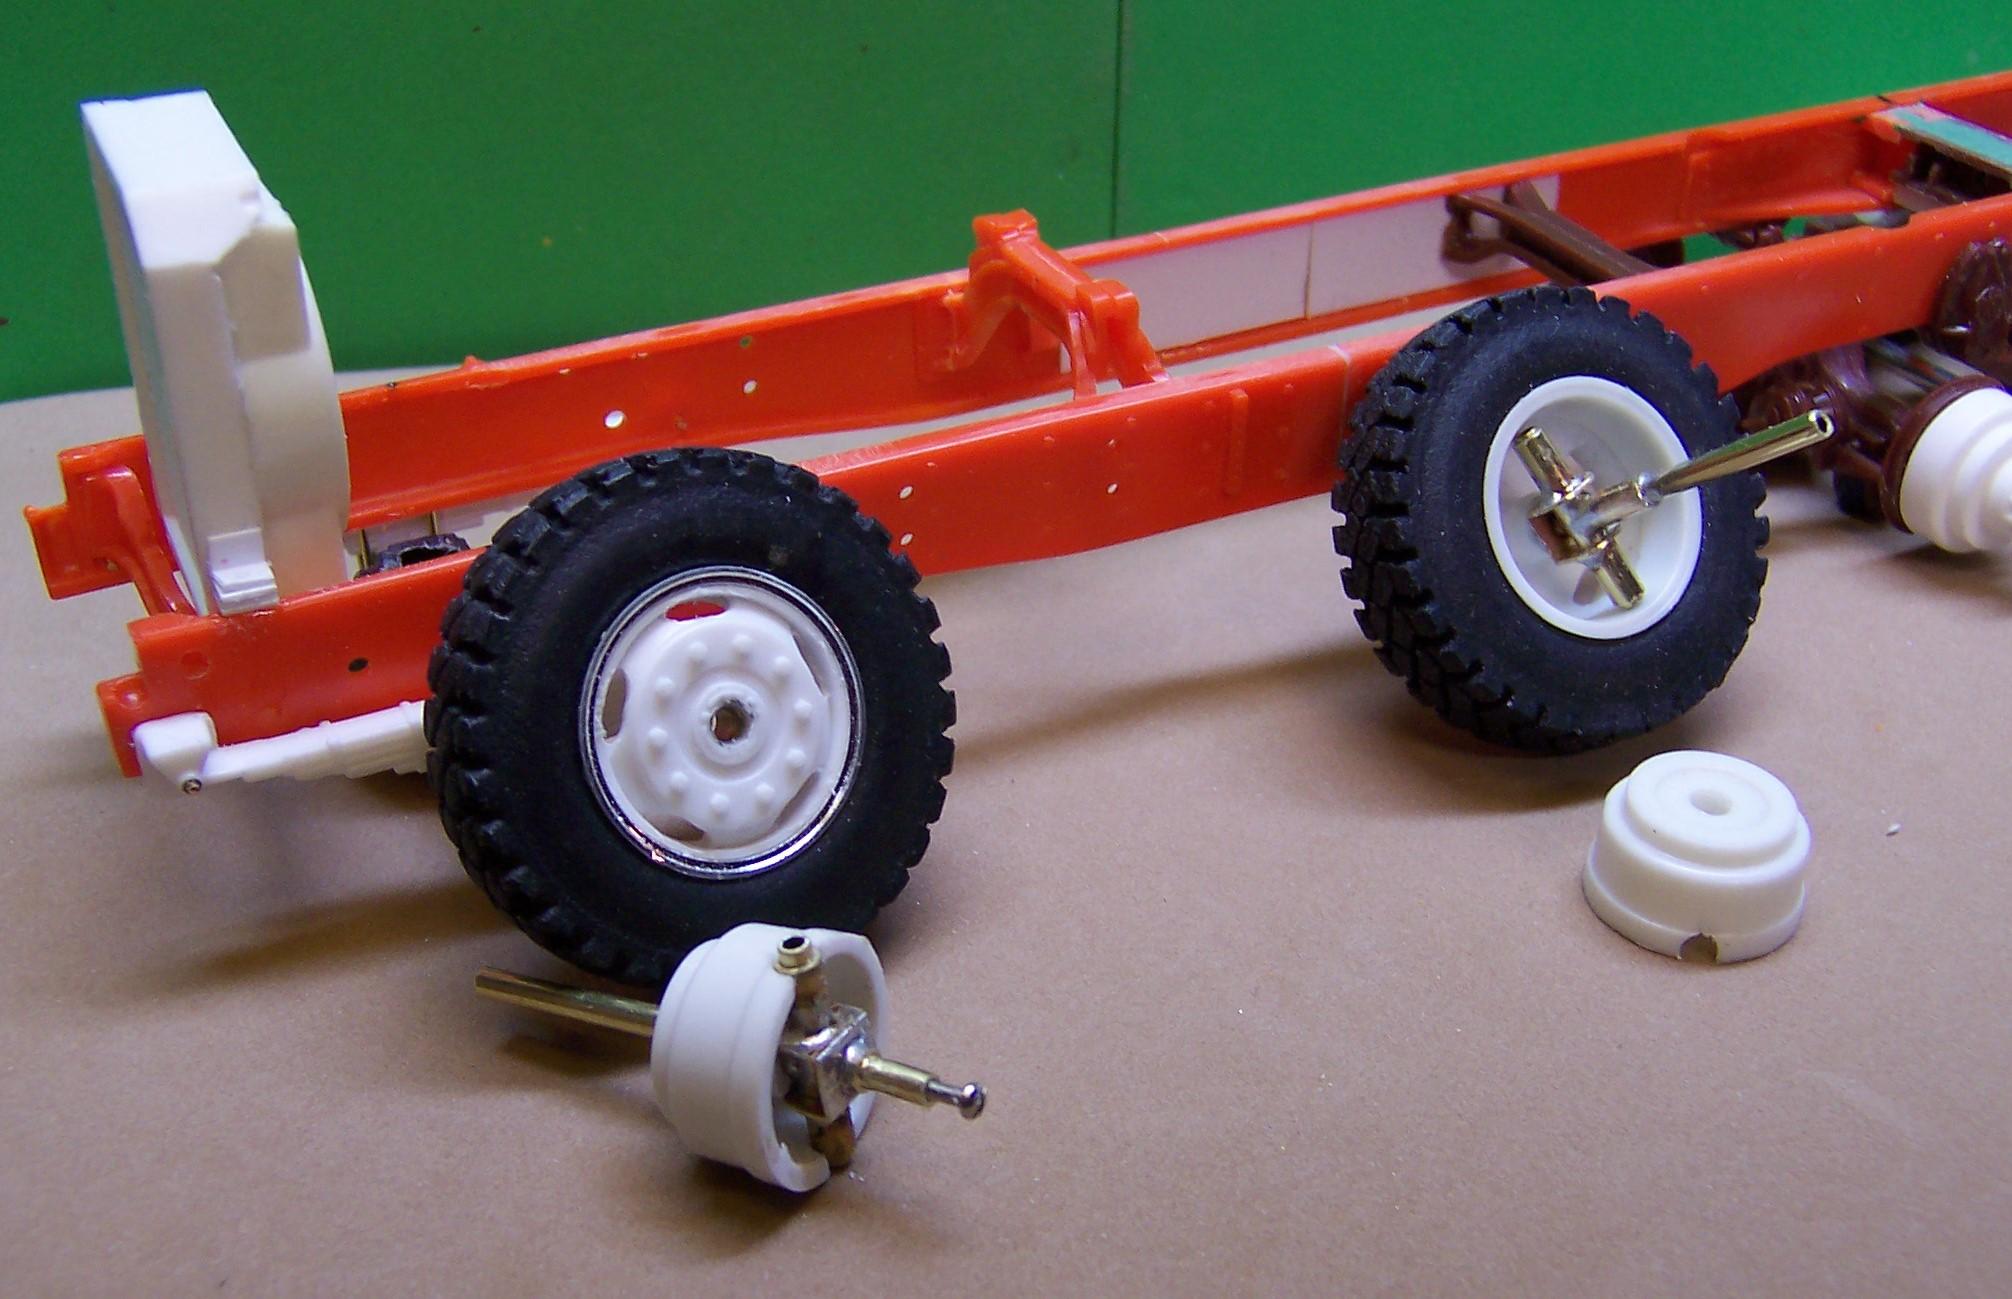
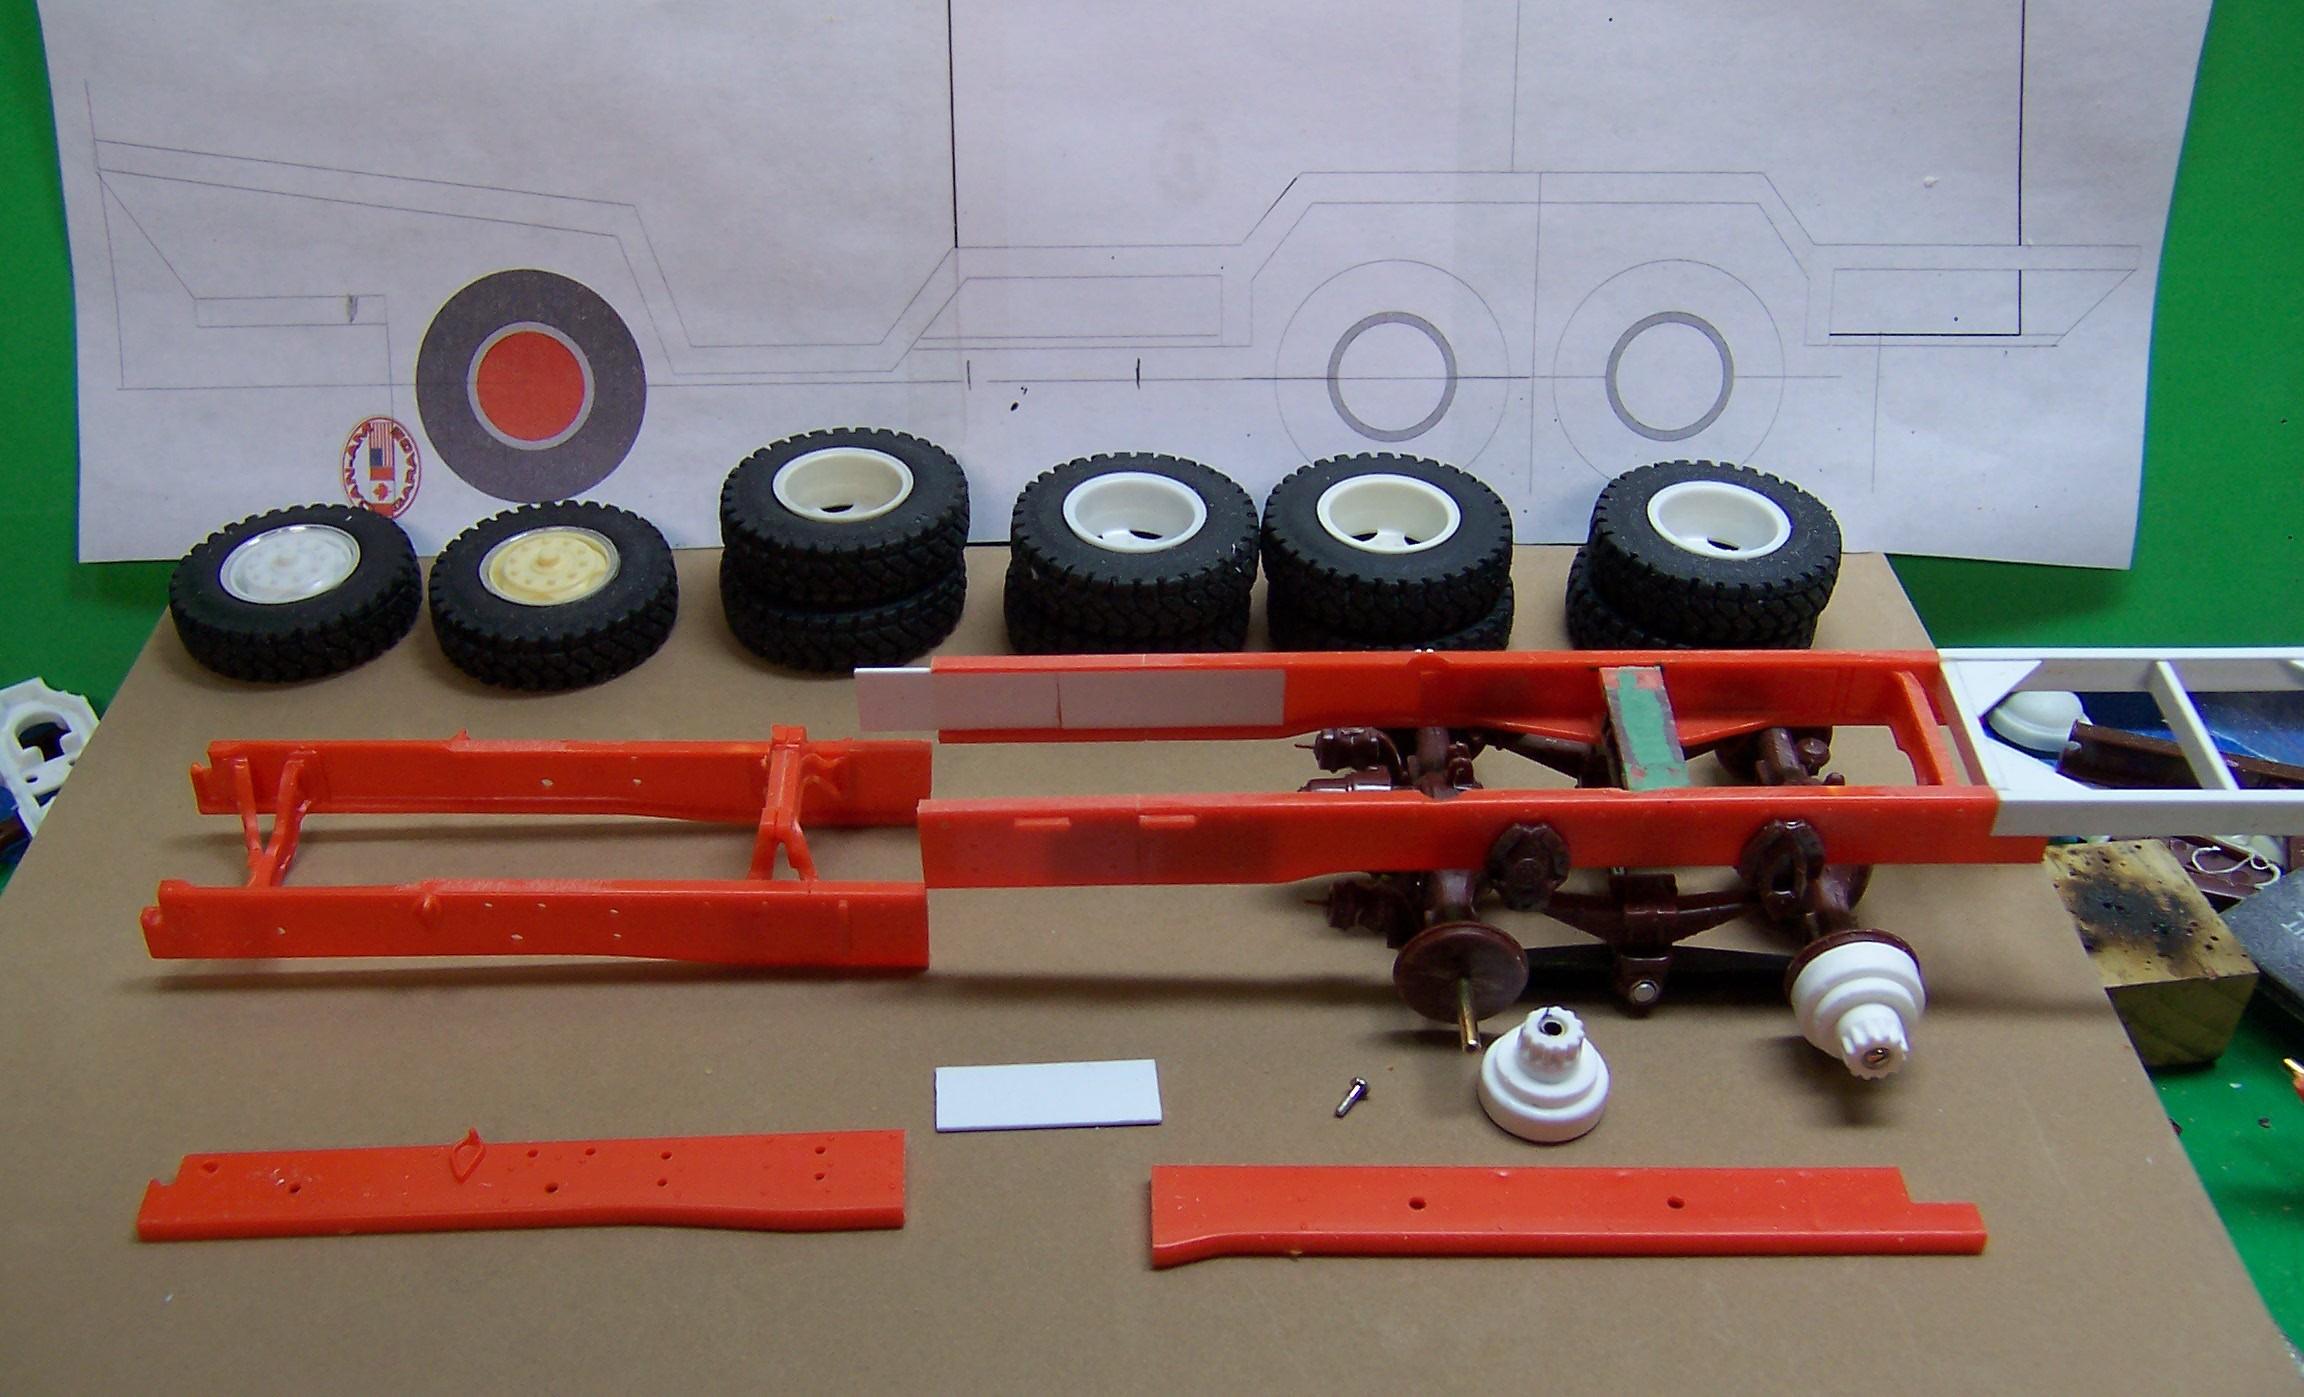
Continuing on with frame and axle work here are some photos of the splice that was put into the frame to lengthen it to the proper wheel base and to add an extension onto the rear the way it was done on the real truck. In another post I described how to make a frame extension but did not show any good photos. In the first two photos that follow it should be a bit clearer what I tried to describe. Above is a drawing of the length of the truck showing where the wheel base should be. In the middle of the drawing are two short lines indicating the amount of extension that was needed. I used a second Ford dump truck frame to cut a section out of the dropped portion. Inside the back frame rail you can see the plastic sheet shim that was used to back up the cut out section. I used two pieces but I could have easily used a single one as long as the two together. In front of the frame is a piece of plastic that will be used behind the front frame. The piece that was cut from the second Ford frame has already been added to both sides of the rear portion of the frame. The frame is now complete with both splices done. I added another crossmember from the IH kit to strengthen the extended section. When the frame is sanded and lightly filled at the joints it should appear as a single frame from the outside. The white extension at the rear was added as a partial support for the rear mounted pump that will go there. A piece of diamond plate will be added to the top and it will all be blended in with the body. The next project is to get the front axle and steering knuckles done so I can mount the front tires and wheels. With the front end held up with a block the frame sits level. This is about where it should be and the front springs and axle will have to fit this stance.
-
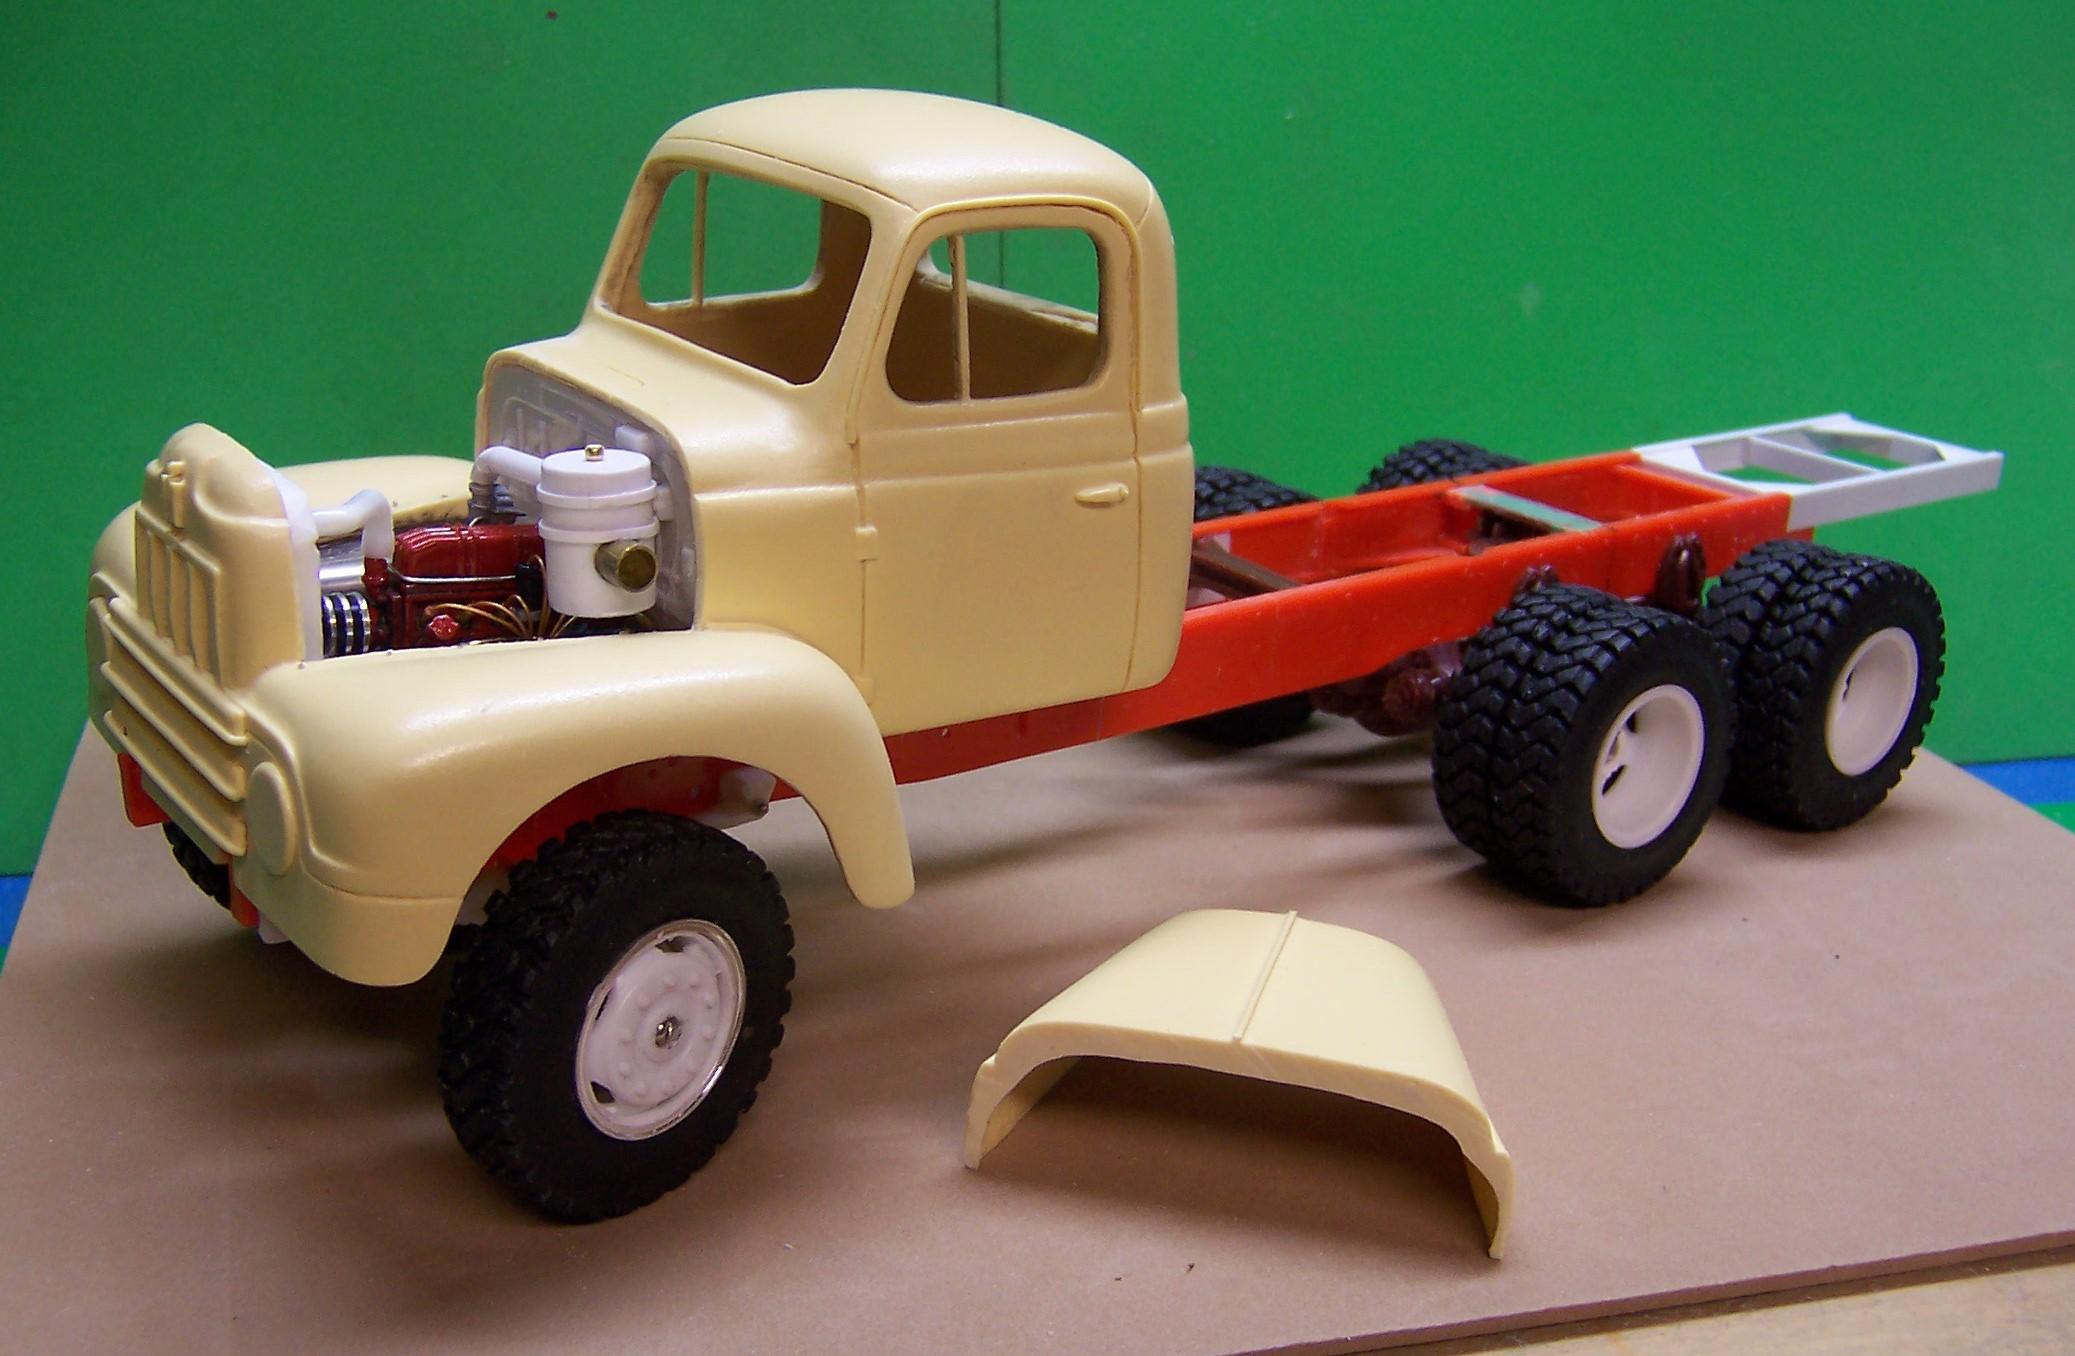
Now that the preliminaries are over I got down to doing some actual modeling. Getting back into it after doing the ship model I'm finding that I'm a bit rusty! Nevertheless it's a bit like learning to ride a bike or skate. It all comes back after a while. Here's were we are at with the project so far. Tires are all cast based on a 3D printed master. The frame awaits some modifications in length and the front axle and hubs need to be made. The tandem rear axles are completed. I like using brass rods and brass bushings for tires and wheels. I know lots of modelers who don't want the tires to roll but that's not me. So each axle will have tires and wheels that turn independent of each other. I cast up some hubs from the AMT ALF kit and then drilled out the centers. Doing castings, I don't have to worry about the thin backing. The casting is solid and the brass bushing fits snugly in the drilled out center. Biggest problem is drilling the hole on center and making sure the hub doesn't wobble afterward. So far so good. The IH cab is pretty good albeit somewhat thick in places. The doors will be scribed and cut away allowing for new hinges for opening. The hood will also be cut open for displaying the engine. In the foreground is the front axle. The turning hubs have not been built yet. Front wheels need modifying also but all in due time.
-
Oshkosh snow plow
Chariots of Fire replied to gotnitro?'s topic in WIP: Model Trucks: Big Rigs and Heavy Equipment
Details! Details! I love it! Scratch building offers so many opportunities to make them. Having the real rig to go by is a huge advantage. Doing something special, Jeff! -
BRBO International LoneStar
Chariots of Fire replied to DPNM's topic in WIP: Model Trucks: Big Rigs and Heavy Equipment
The biggest thing about frame construction is keeping it from ending up curved. It is very easy to do unless you are careful. When I have built frames I have glued all of the cross members to one side first. Then the opposite frame rail is glued in one cross member at time checking frequently to be sure that the first rail is not curving. If it curves you cannot get the curve out after all of the cross members are glued in place. So take you time of this part. Build the frame on a good flat surface also so that it won't be warped. You also want to be sure that all of the cross members are even and at right angles to the frame rail. Lengthening a frame is a different proposition altogether. First determine the amount of length you need to add. Then cut both frame rails in a place where it won't be obvious. I'd do this after the frame in its original length has been put together and the glue as set well. Then take a piece of plastic strip stock and glue a section of it to the inside of one frame member. Make sure it is long enough to overlap the new joint by at least a half inch on both ends. Do the same to the other side of the frame half that you glued the first one to. On one side mark on the plastic strip the amount you want to lengthen the frame starting at the end of the frame where you cut it. Now take the second frame piece and place it with the plastic strip inside the frame so that the end of the second frame is where you made the mark. Make sure the two frame sections line up and clamp the sections together. When one side is in alignment, glue the plastic strip to the second frame piece. Note this all occurs on one side of the frame. Then do the same to the other side of the frame after the first side glue has set well. This is where checking and re-checking is important to be sure that you don't introduce curvature in the frame and that both sides are square to each other. Make sure also that before you glue the second side that it is not warped. After this is all done you can add strip stock to the web and flanges of the frame where you made the extension. A bit of sanding and filling should make the extension invisible after priming. Hope this helps. Probably sounds a lot more daunting than it really is. Here's an example of a stretched frame I did for aType 0-5 crash truck. Two frames have been spliced with the white plastic piece showing. The other side has been filled with putty. And here is a better look at a frame I lengthened from a '26 AC Mack to build a Mack AP. On the far frame rail you can see the splice much better with pieces inserted for the flanges as well as the strip on the inside. You can't see it behind the fishplate but there would be a similar piece of strip plastic on the outside of the frame as well and would be the same length as the pieces used on the flanges. That would get sanded smooth with the rest of the frame web and the seams filled with putty.
-
How about that! Small world. I still do engineering consulting work for the Town of Mashpee. About 11 years ago I had some resin castings done by Tom Coolidge. He lived on Stuart Street in Denver. Not sure if he still does.
-
I' have a resin cab with an interior from Illini Replicas (I think) Got it in a trade. I'll do a little surgery on it though, to open the doors and hood.
-
Yes, It is! And how did you know that??
-
It's been a while since starting a new truck project. The Bluenose schooner was time consuming but now that it is done there is time to get back into some new rigs. In keeping with my fire apparatus bent, this is the next in line. An IH R190 brushbreaker that was built by Thibault of Pierreville, Quebec. It has long since been replaced but I was fortunate to get some photos and I have the R190 cab so we are good to go.
-
38 Ford custom
Chariots of Fire replied to Ben269's topic in Model Trucks: Pickups, Vans, SUVs, Light Commercial
Yup! that's nice! -
Oshkosh snow plow
Chariots of Fire replied to gotnitro?'s topic in WIP: Model Trucks: Big Rigs and Heavy Equipment
Fine piece of work! Can't wait to get back building trucks again!? -
Art Dump Truck (Holy Cow!)
Chariots of Fire replied to Bills72sj's topic in General Automotive Talk (Trucks and Cars)
? YECH! ? -
Thanks, Nells! The Autocar is different for sure. Lots of Maxims there.
-
Oshkosh snow plow
Chariots of Fire replied to gotnitro?'s topic in WIP: Model Trucks: Big Rigs and Heavy Equipment
Thanks, Bob. I will be glad to be getting back to truck building! Once the sails are furled, there won't be much left to do. -
Oshkosh snow plow
Chariots of Fire replied to gotnitro?'s topic in WIP: Model Trucks: Big Rigs and Heavy Equipment
??? -
Oshkosh snow plow
Chariots of Fire replied to gotnitro?'s topic in WIP: Model Trucks: Big Rigs and Heavy Equipment
That looks just right.? -
Christmas Tree Truck
Chariots of Fire replied to gasser59's topic in WIP: Model Trucks: Pickups, Vans, SUVs, Light Commercial
?? That's cool! -
Oshkosh snow plow
Chariots of Fire replied to gotnitro?'s topic in WIP: Model Trucks: Big Rigs and Heavy Equipment
I was looking at the cab after reading the comments above. The cab is easily modified if you are willing to do a bit of sanding. Take off the two out of scale trim strips and replace them with smaller half round Evergreen. You can even adjust the windshield with a piece of sheet stock glued to the inside of the windshield opening. Fill it right in and use some Squadron putty or putty of your choice to fill in seams. After that is done re-mark the windshield opening in the correct orientation and cut away the sheet plastic accordingly. The rubber gasket can be formed afterward.