Rocking Rodney Rat
-
Posts
1,995 -
Joined
-
Last visited
Content Type
Profiles
Forums
Events
Gallery
Everything posted by Rocking Rodney Rat
-
 Wow! I missed a few things while I haven't been here. Nice work as always to all involved! -RRR
 -
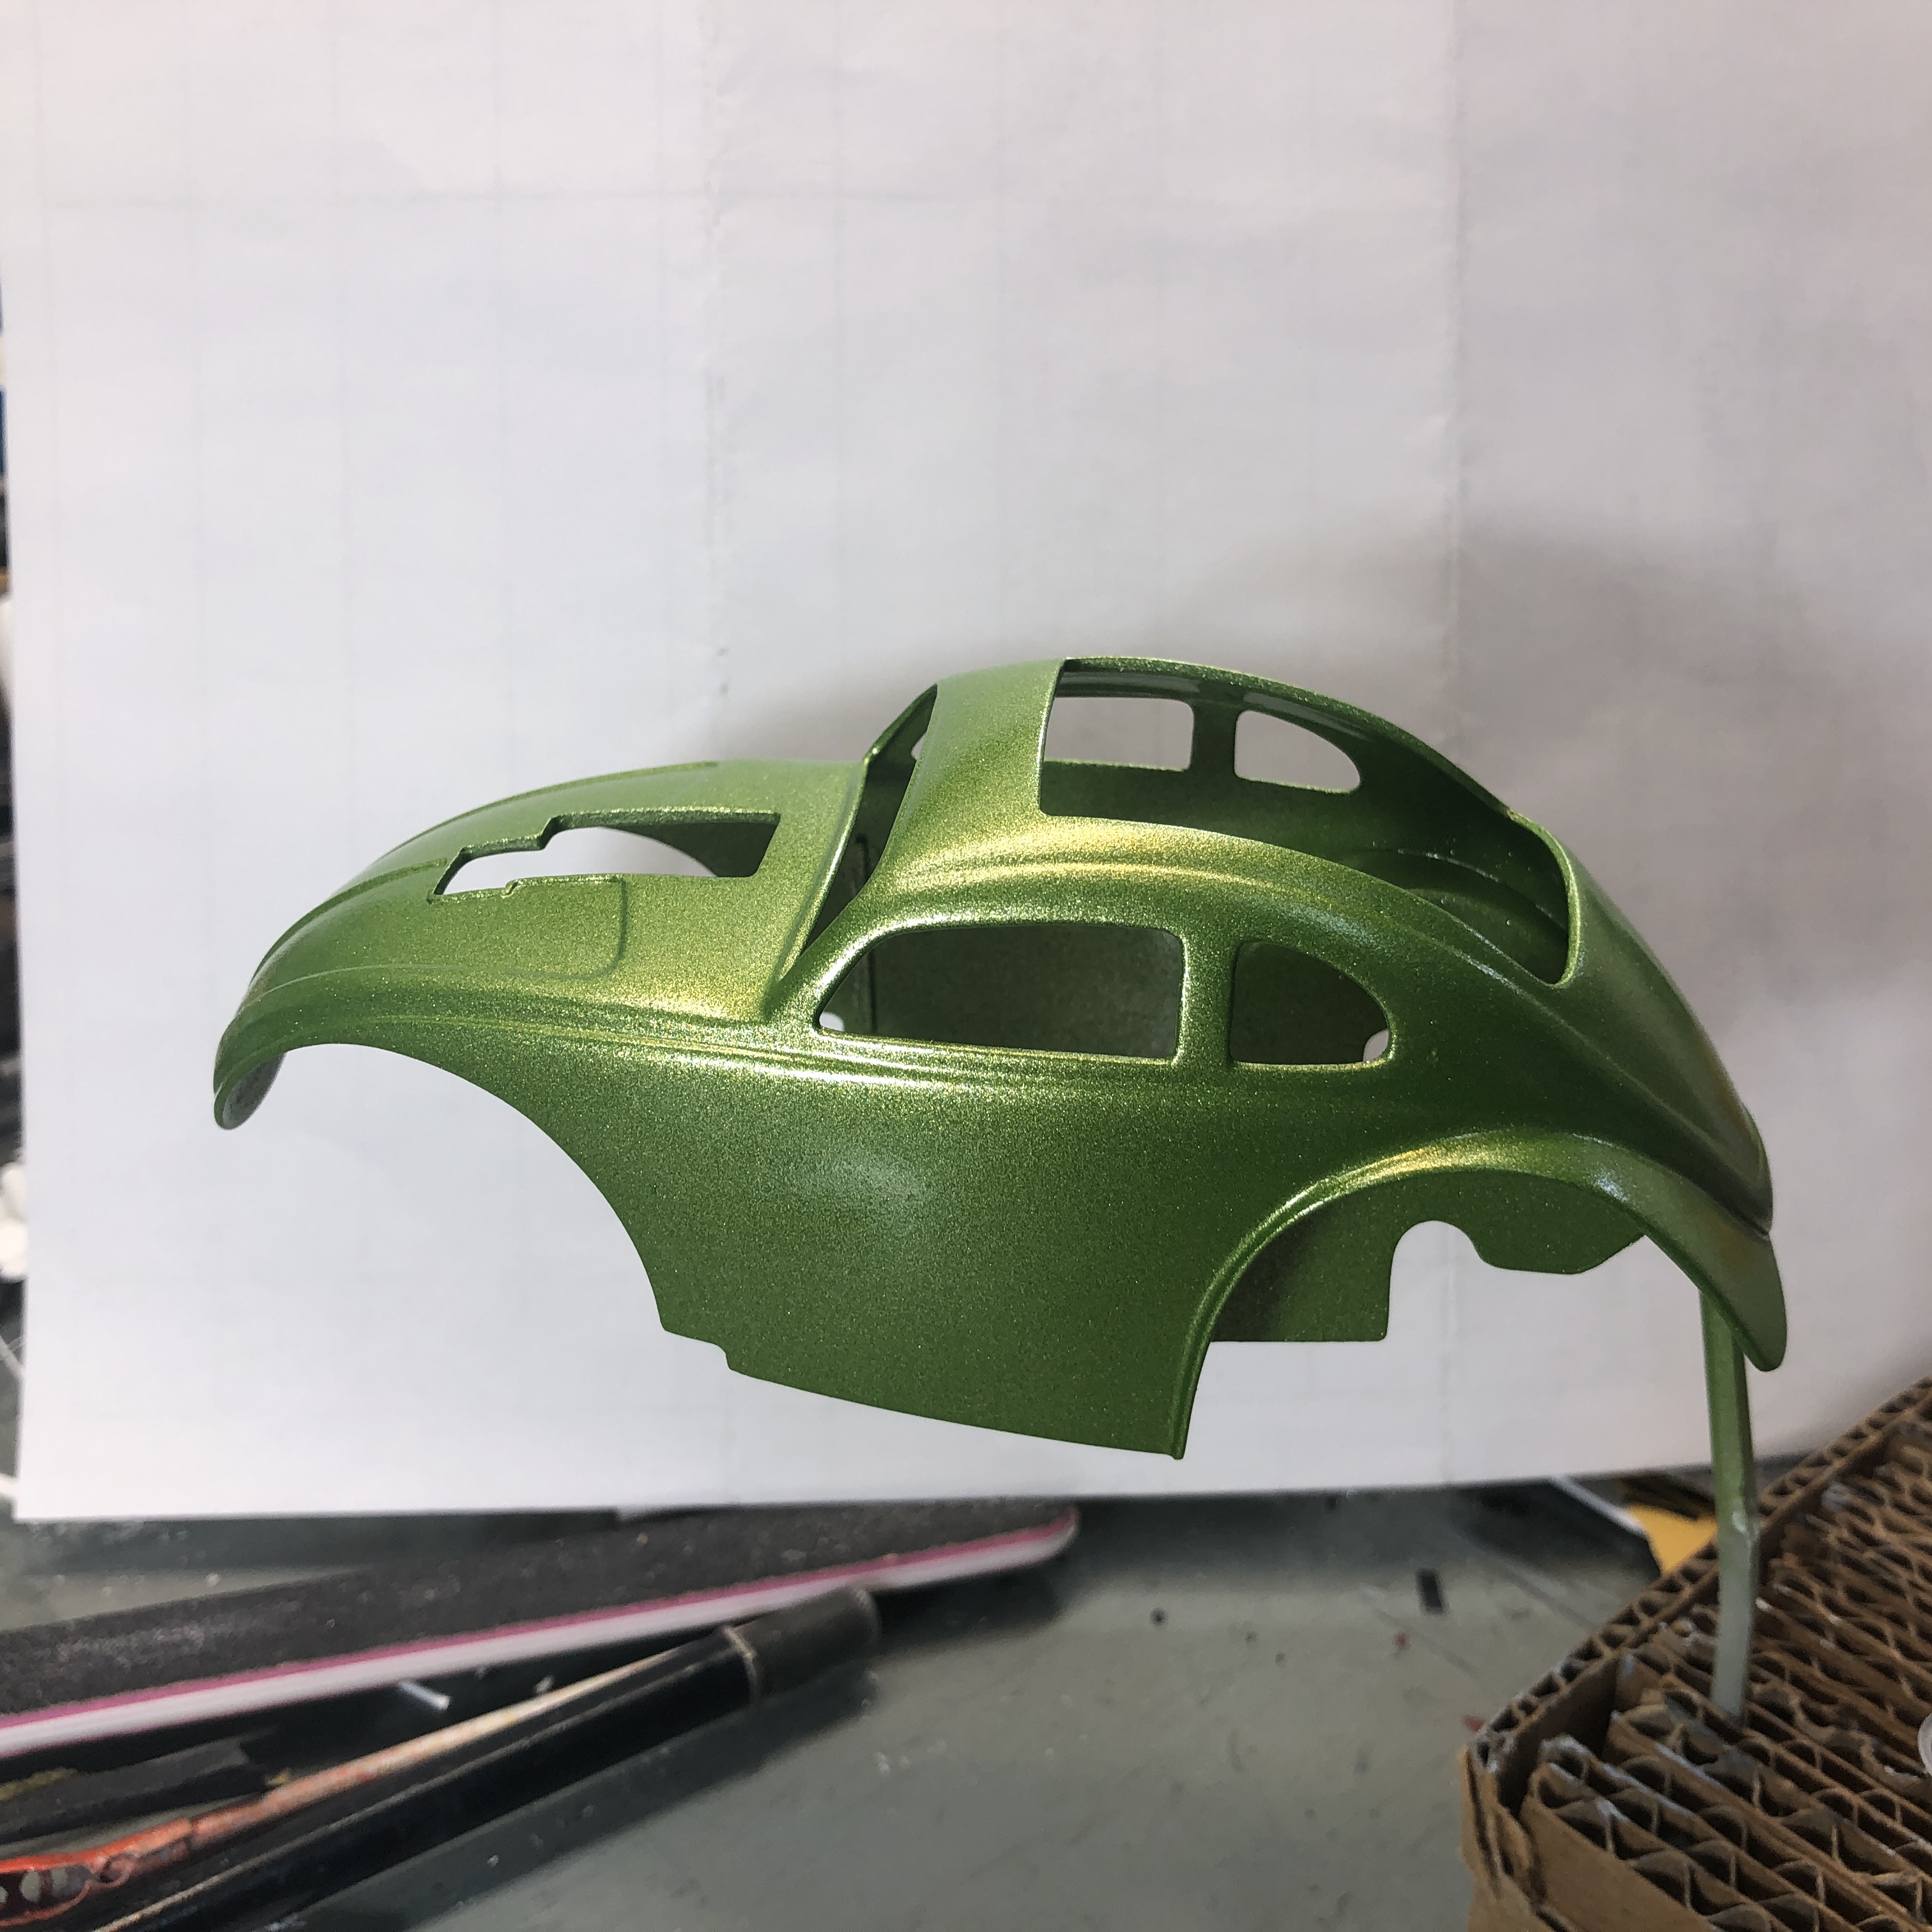
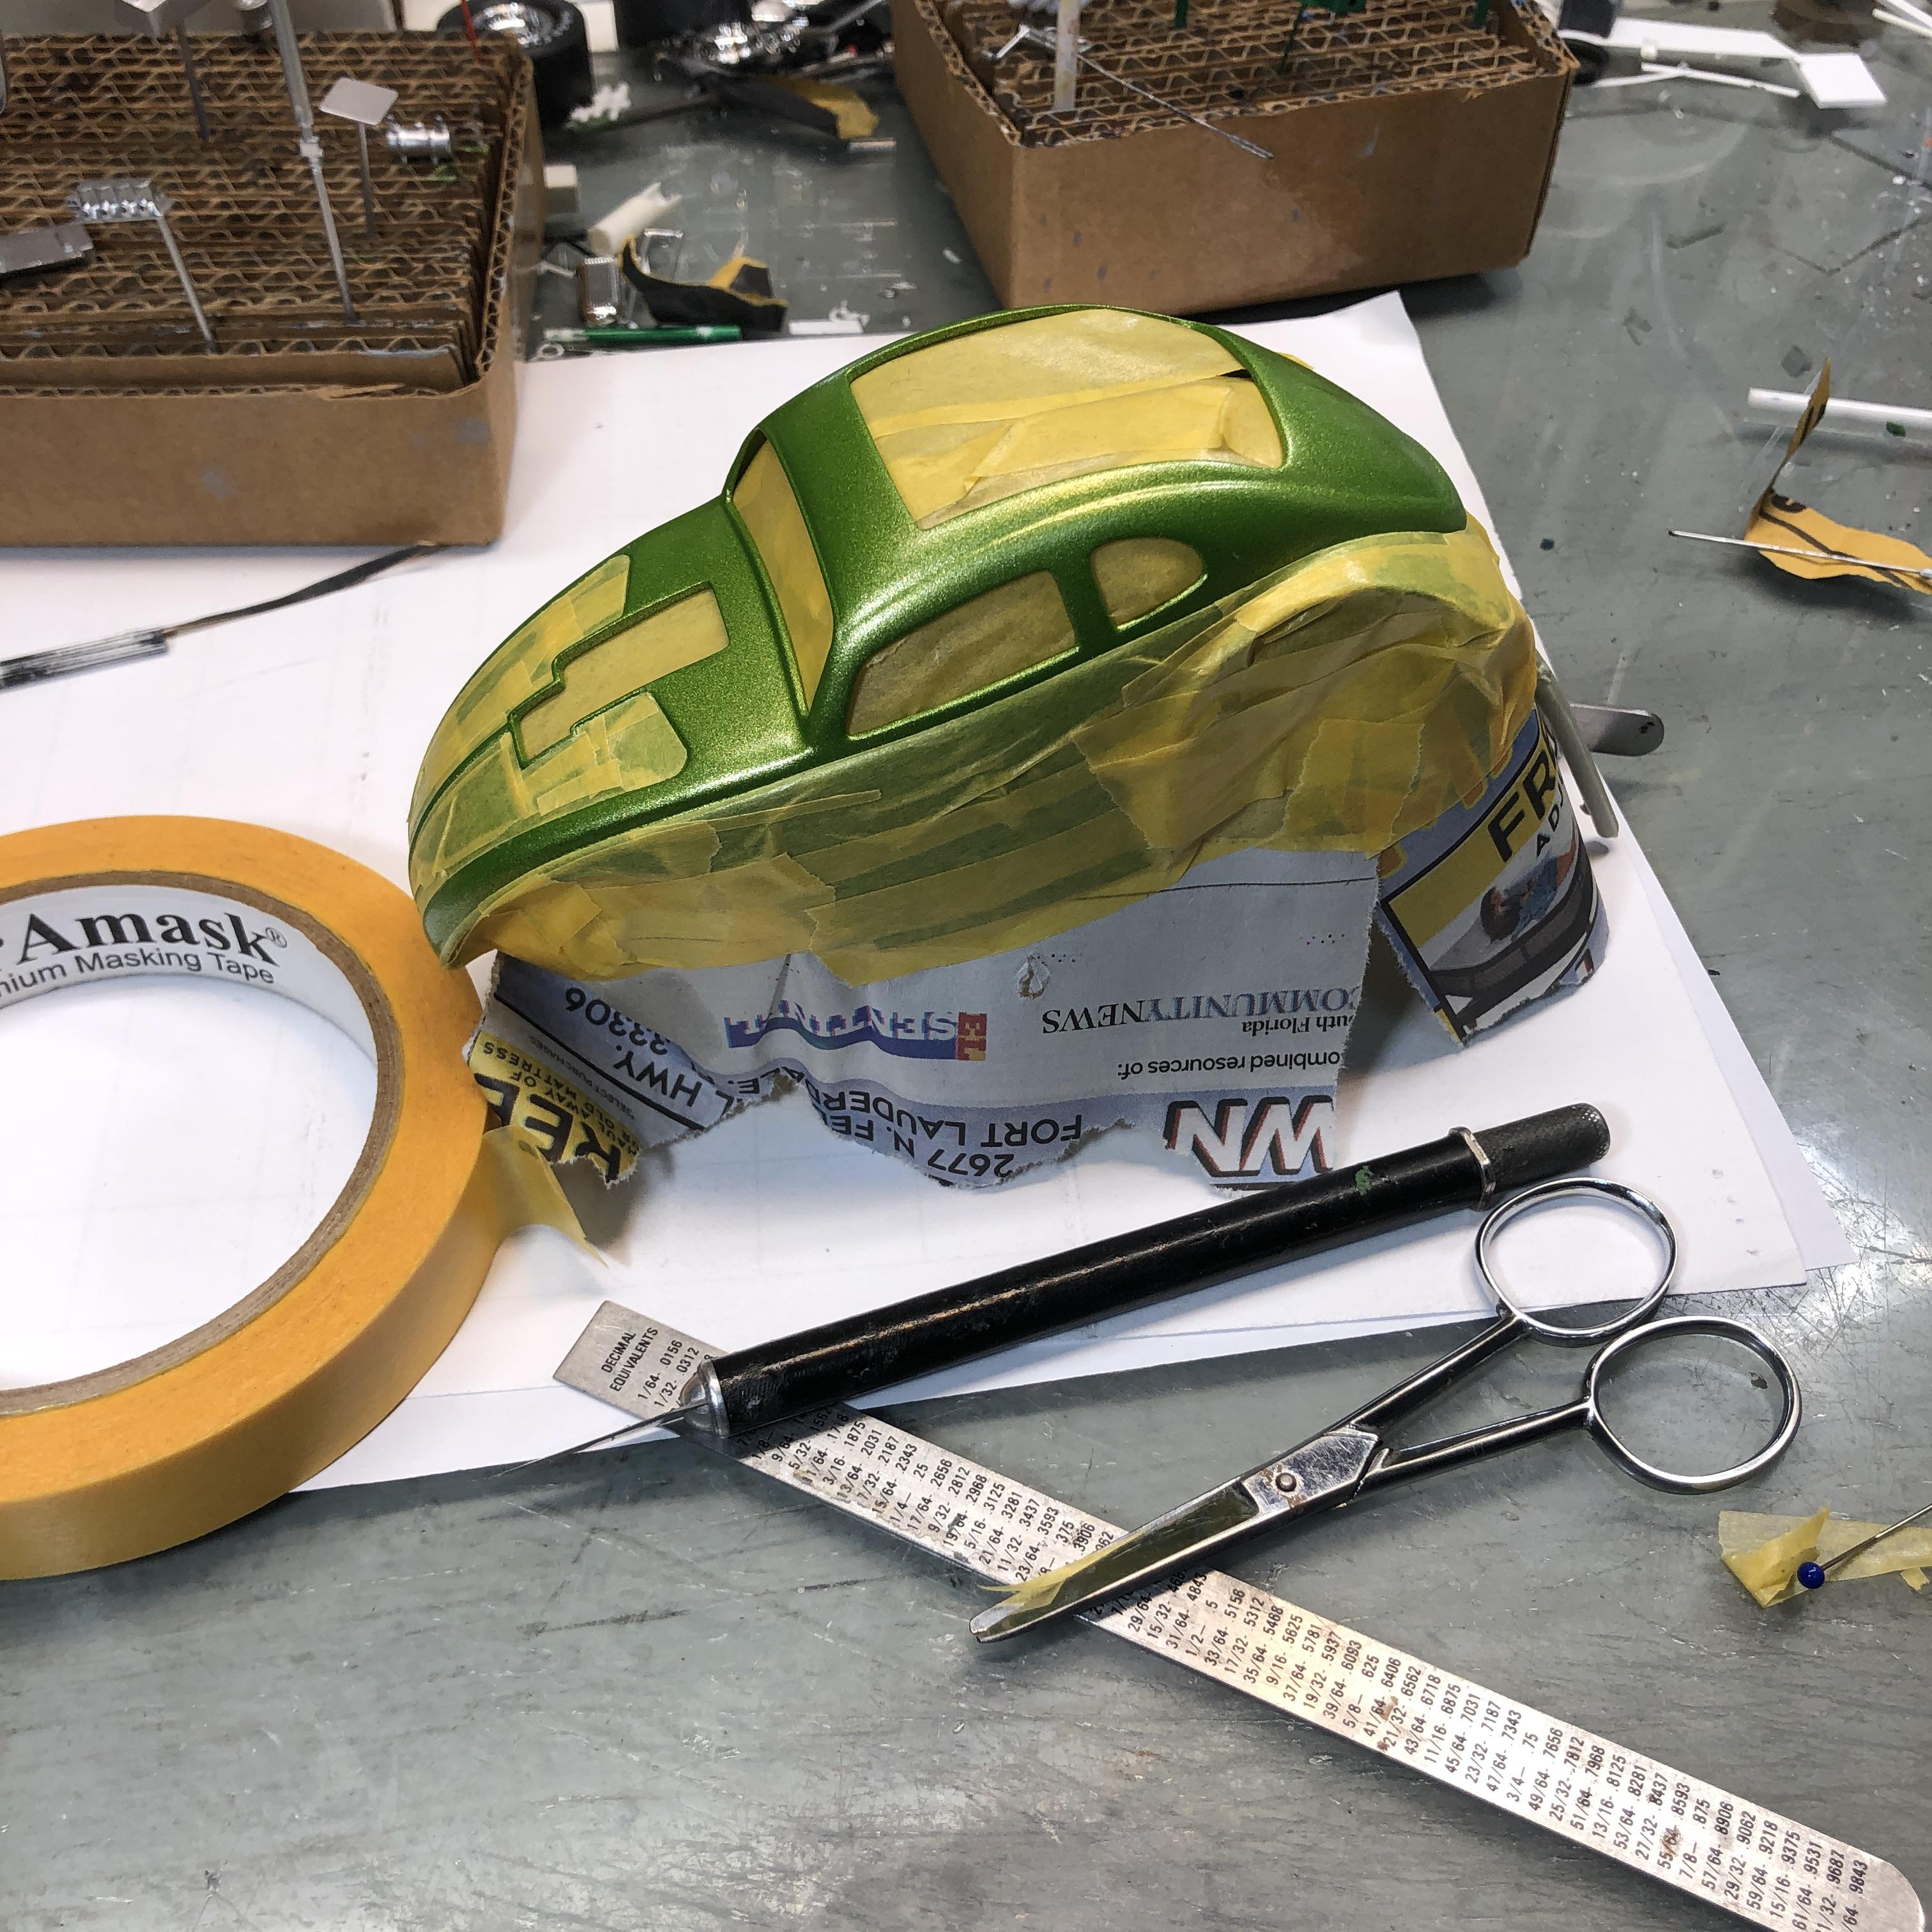
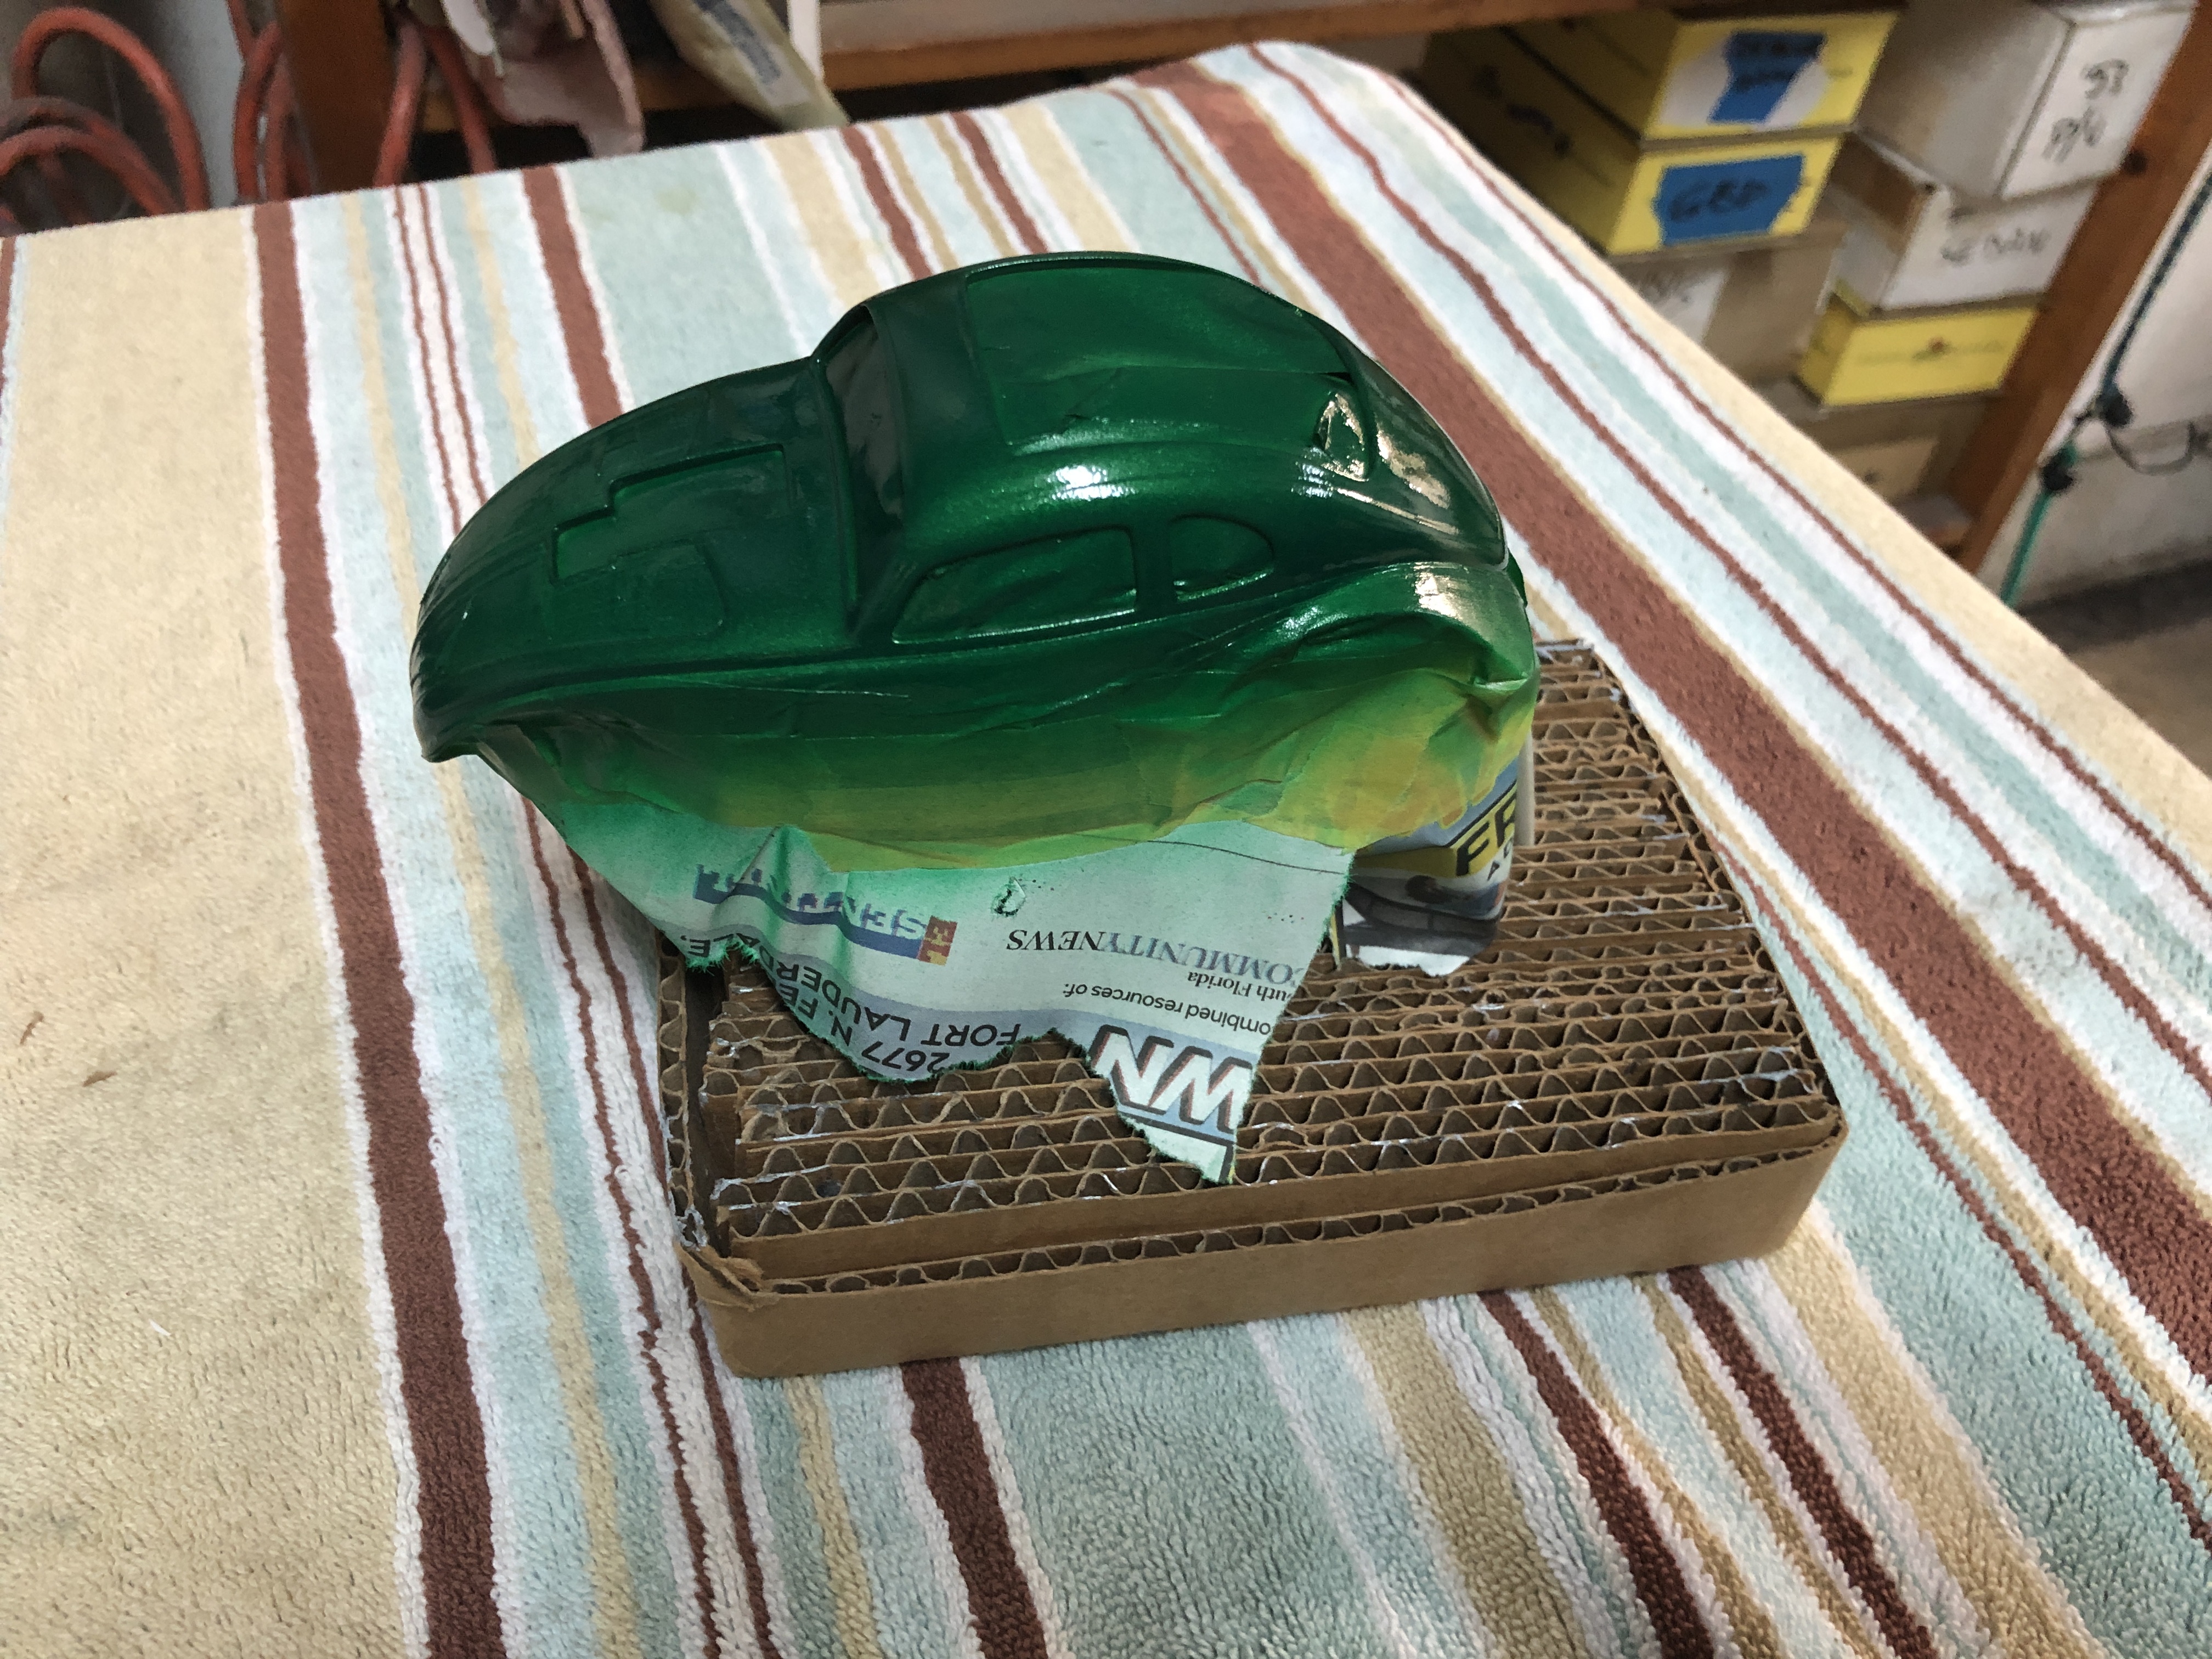
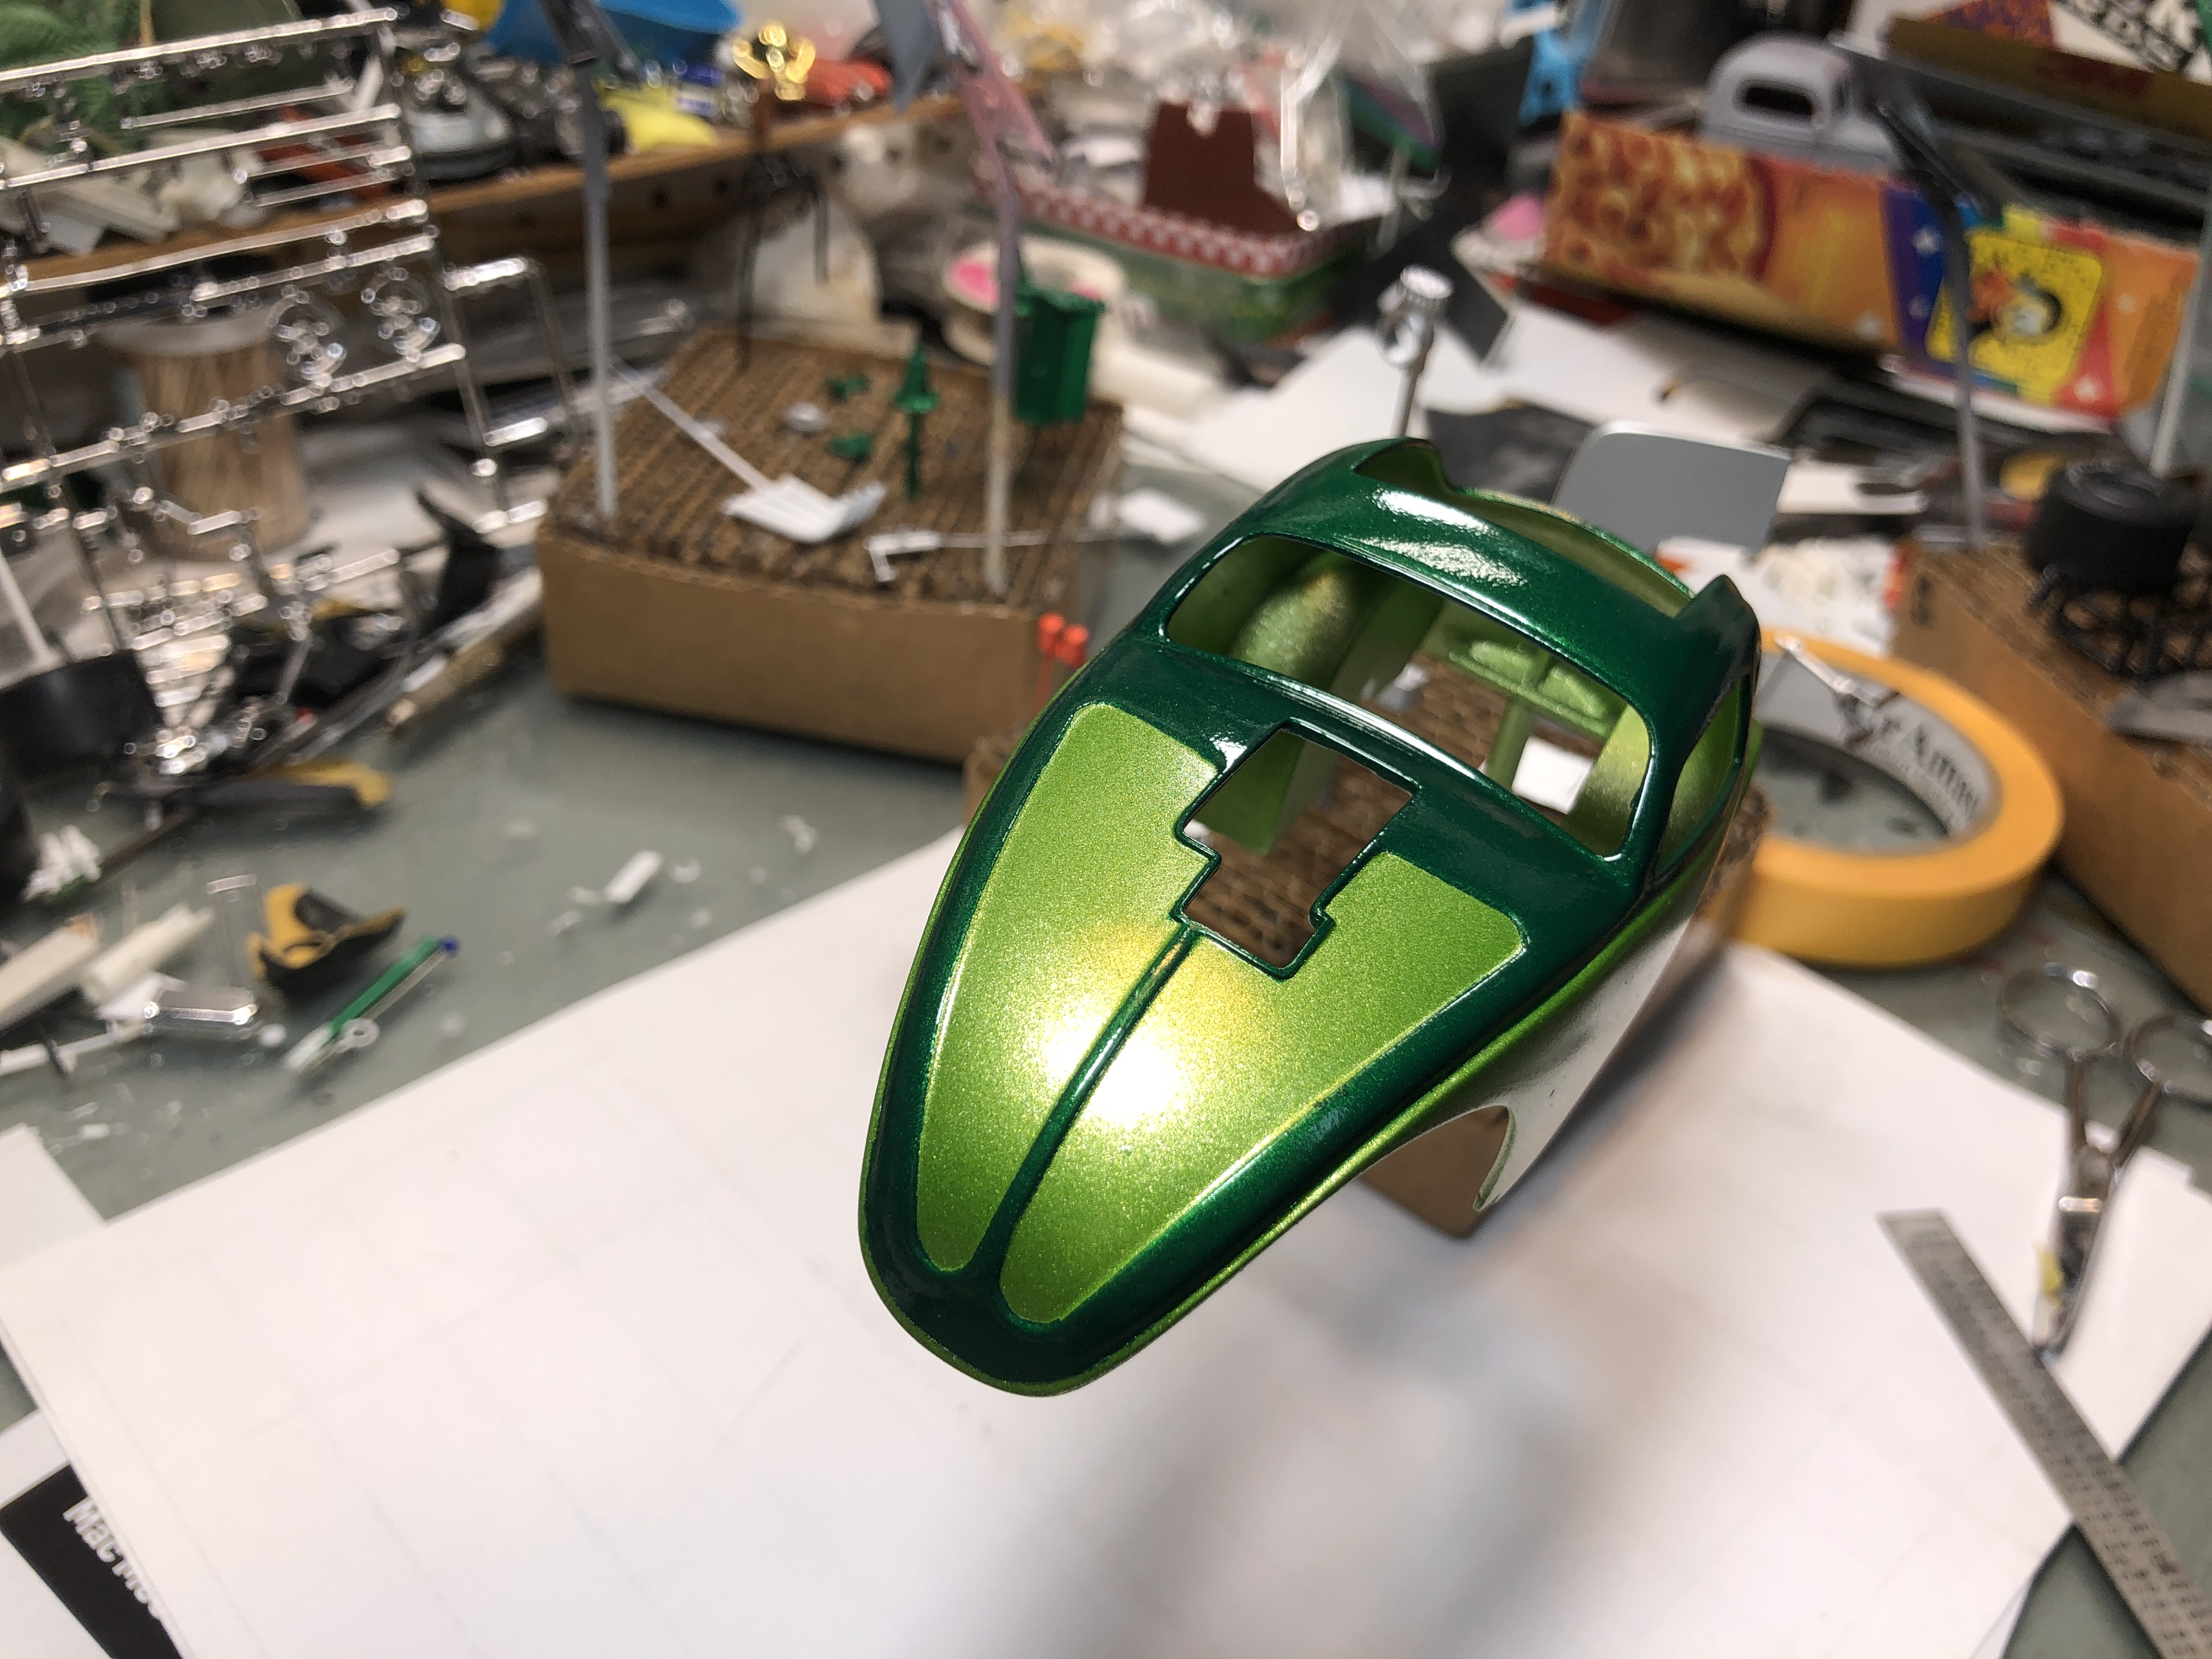
Painting weekend.... I decided to use a couple of partial cans of the now discontinued Testors lacquer "Extreme" or "One Coat" as it was called. This paint goes on way too thick and tends to bubble up if too much is applied. I decided to decant it and shoot it through my airbrush rather than take any risks....I glue a piece of Evergreen tube to the nozzle to decant without a big mess. This works great. the base color is Lime Ice, with Emerald Green accents... Masking off around the area to be sprayed emerald.... Ready to shoot....fingers crossed... Emerald green applied... pulling off the tape.... WOW!!!! Came out better than I expected!!! Wheels and tires painted up.... Thanks for looking. I'll be getting this assembled soon. I have a plan for decals.... -RRR

-
58 Ferrari Testarossa....now hear me out....
Rocking Rodney Rat replied to chris chabre's topic in WIP: Drag Racing Models
Looking good!!!! -RRR -
How much do you charge to do BMF work for your best buds? Asking for a friend....J/K....you certainly made it look easy....a stiff drink and a sharp blade! Well done! -RRR
-
I like to see this kind of scratch building going on. I'm "hooked".... -RRR
-
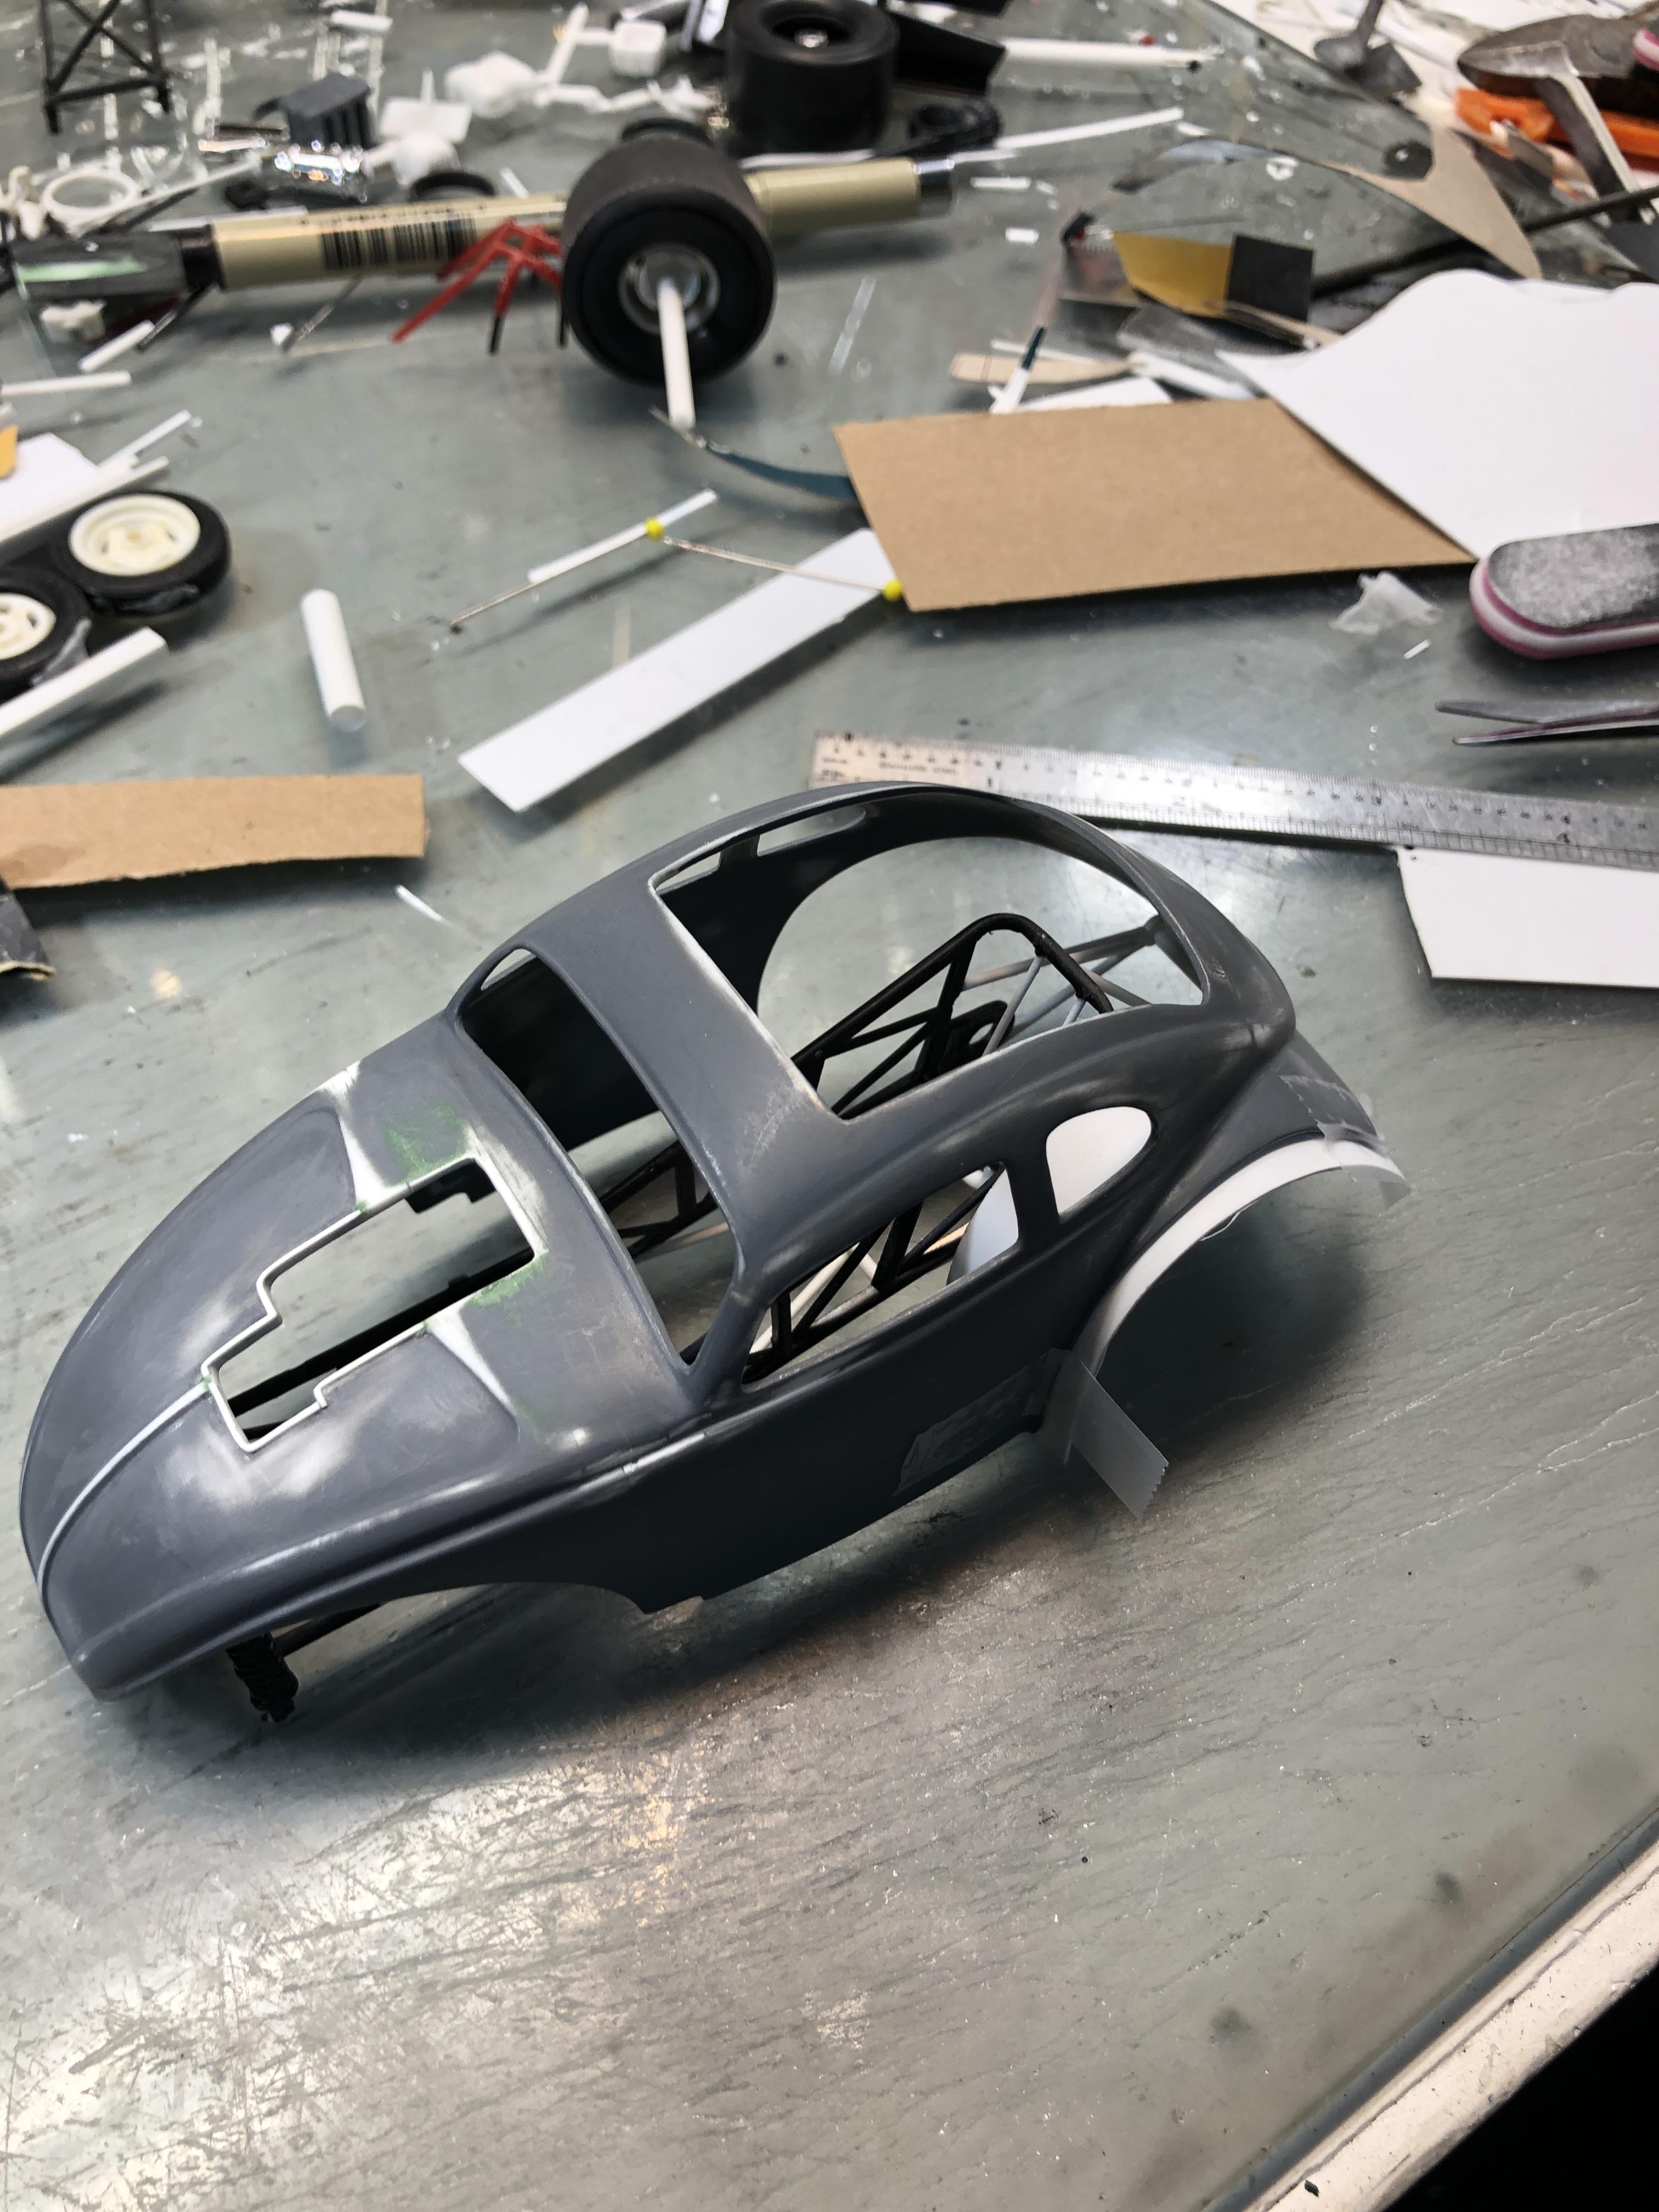
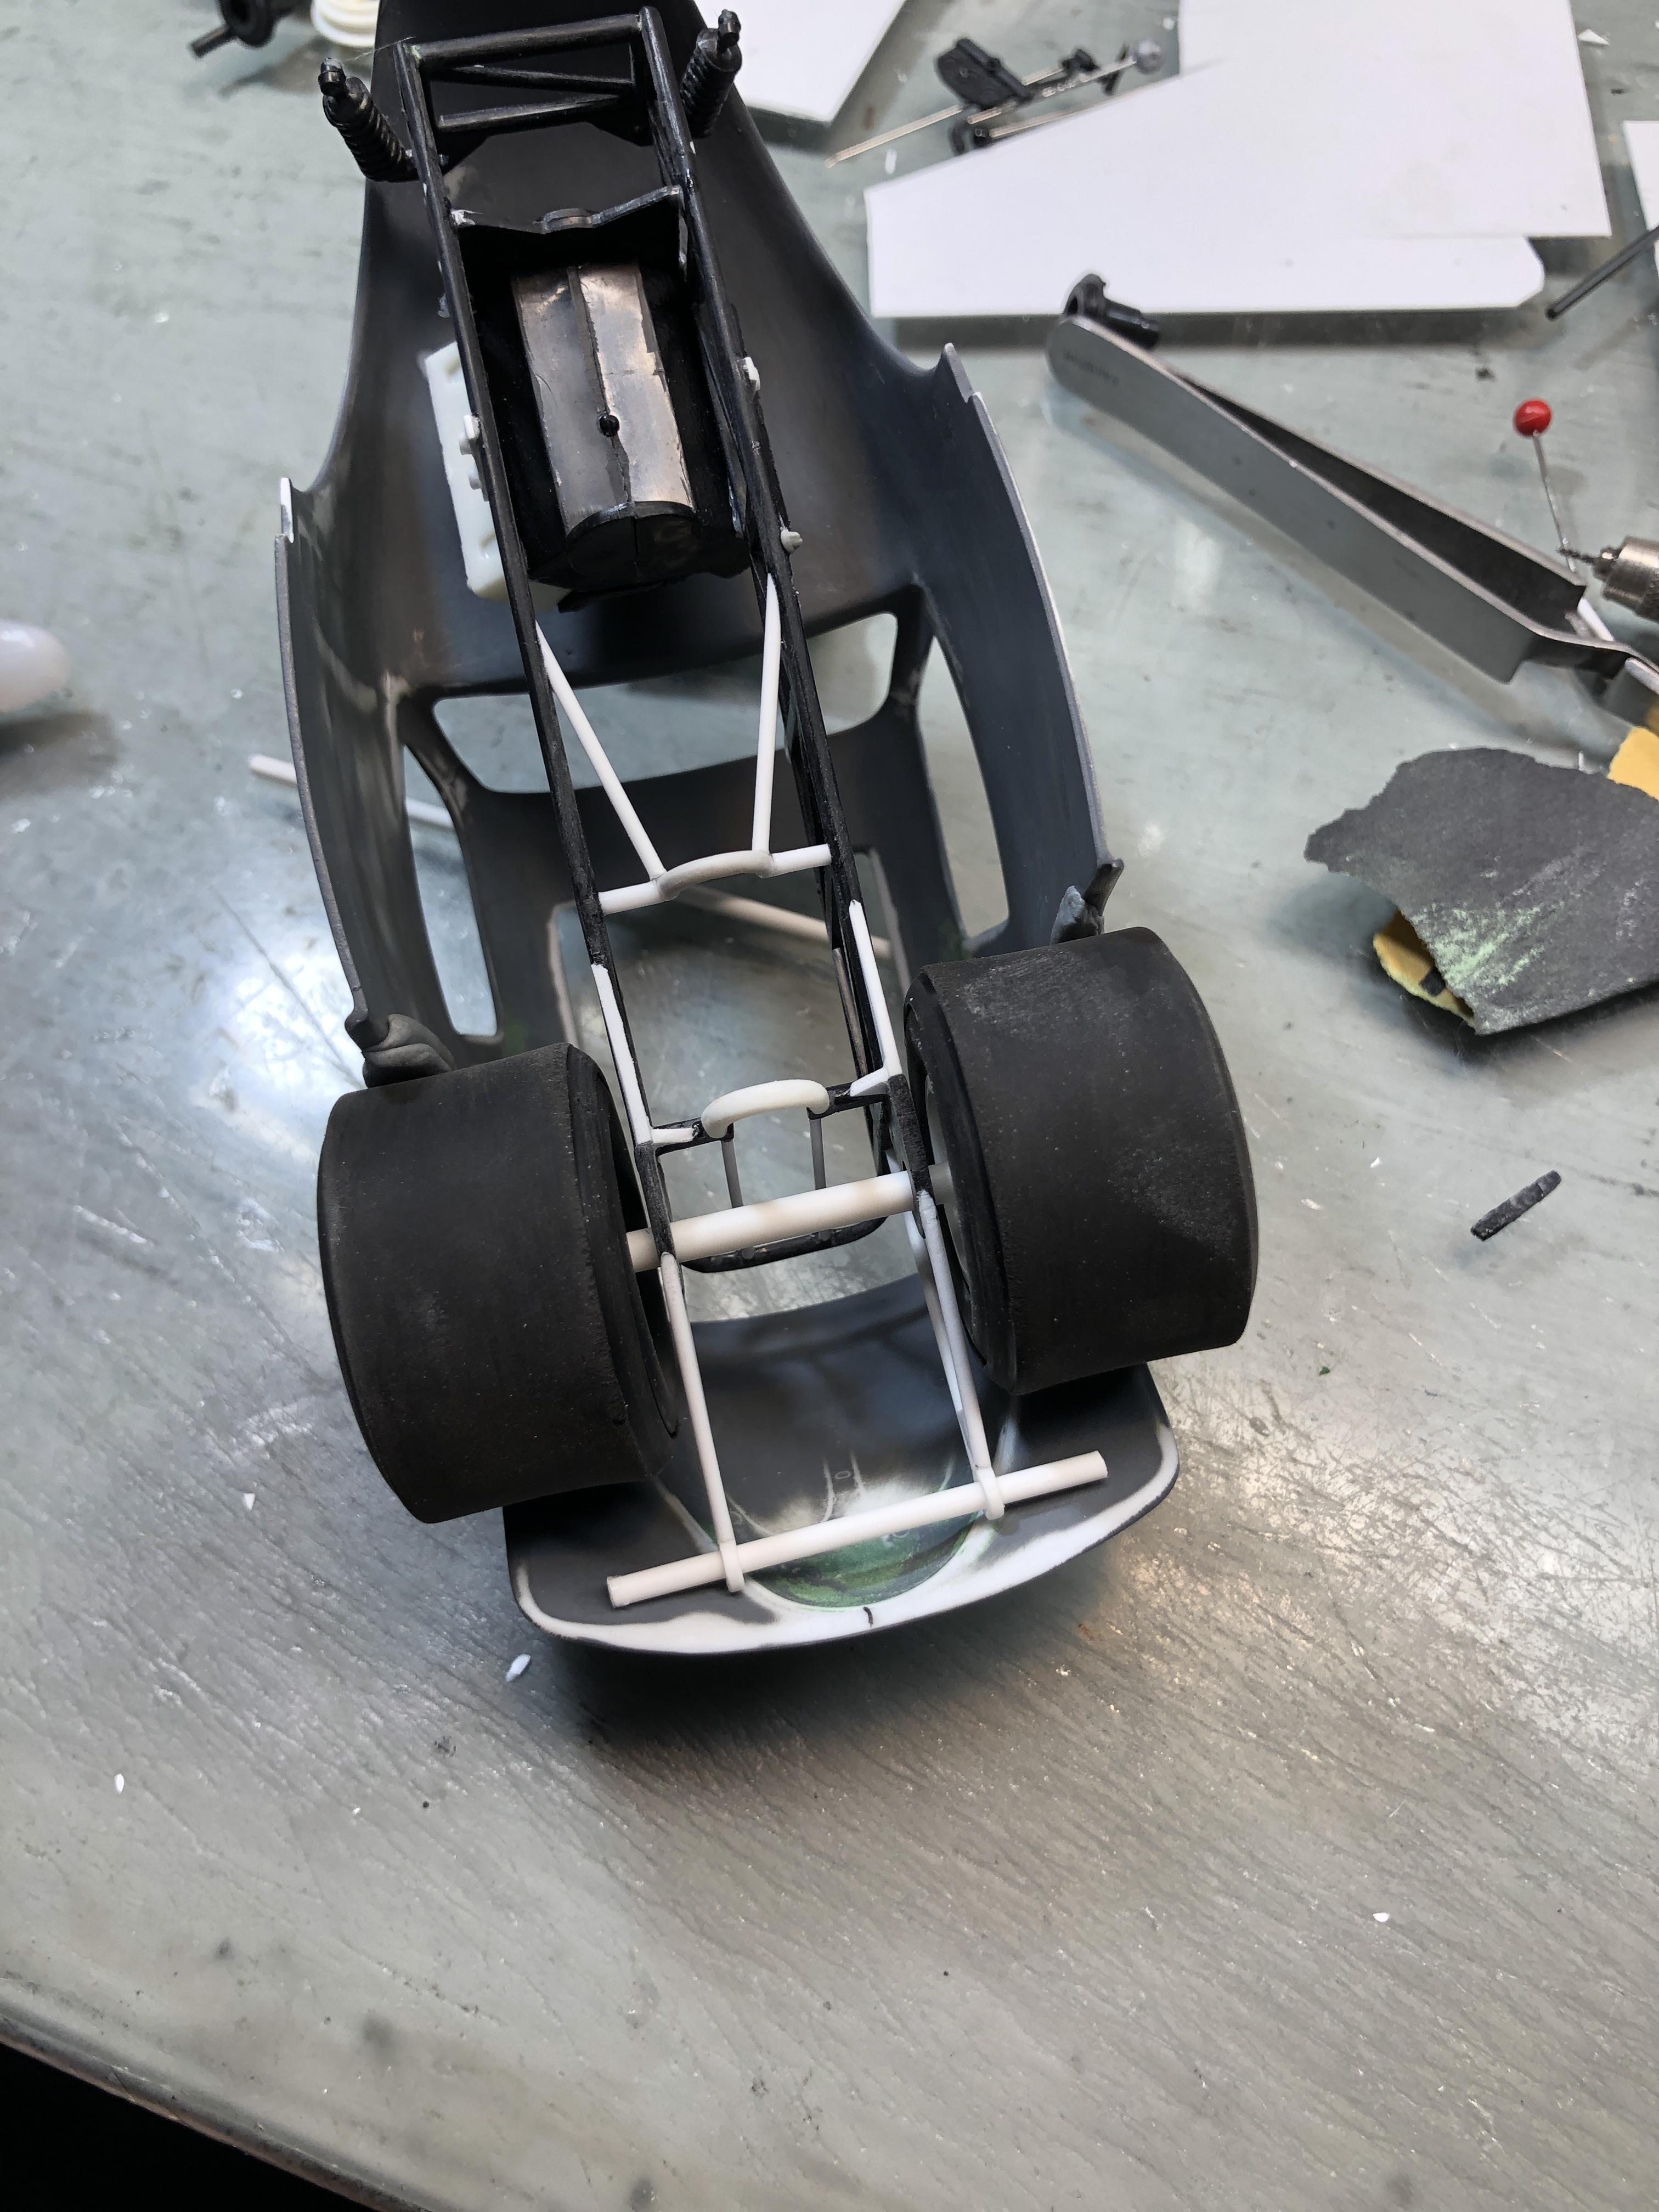
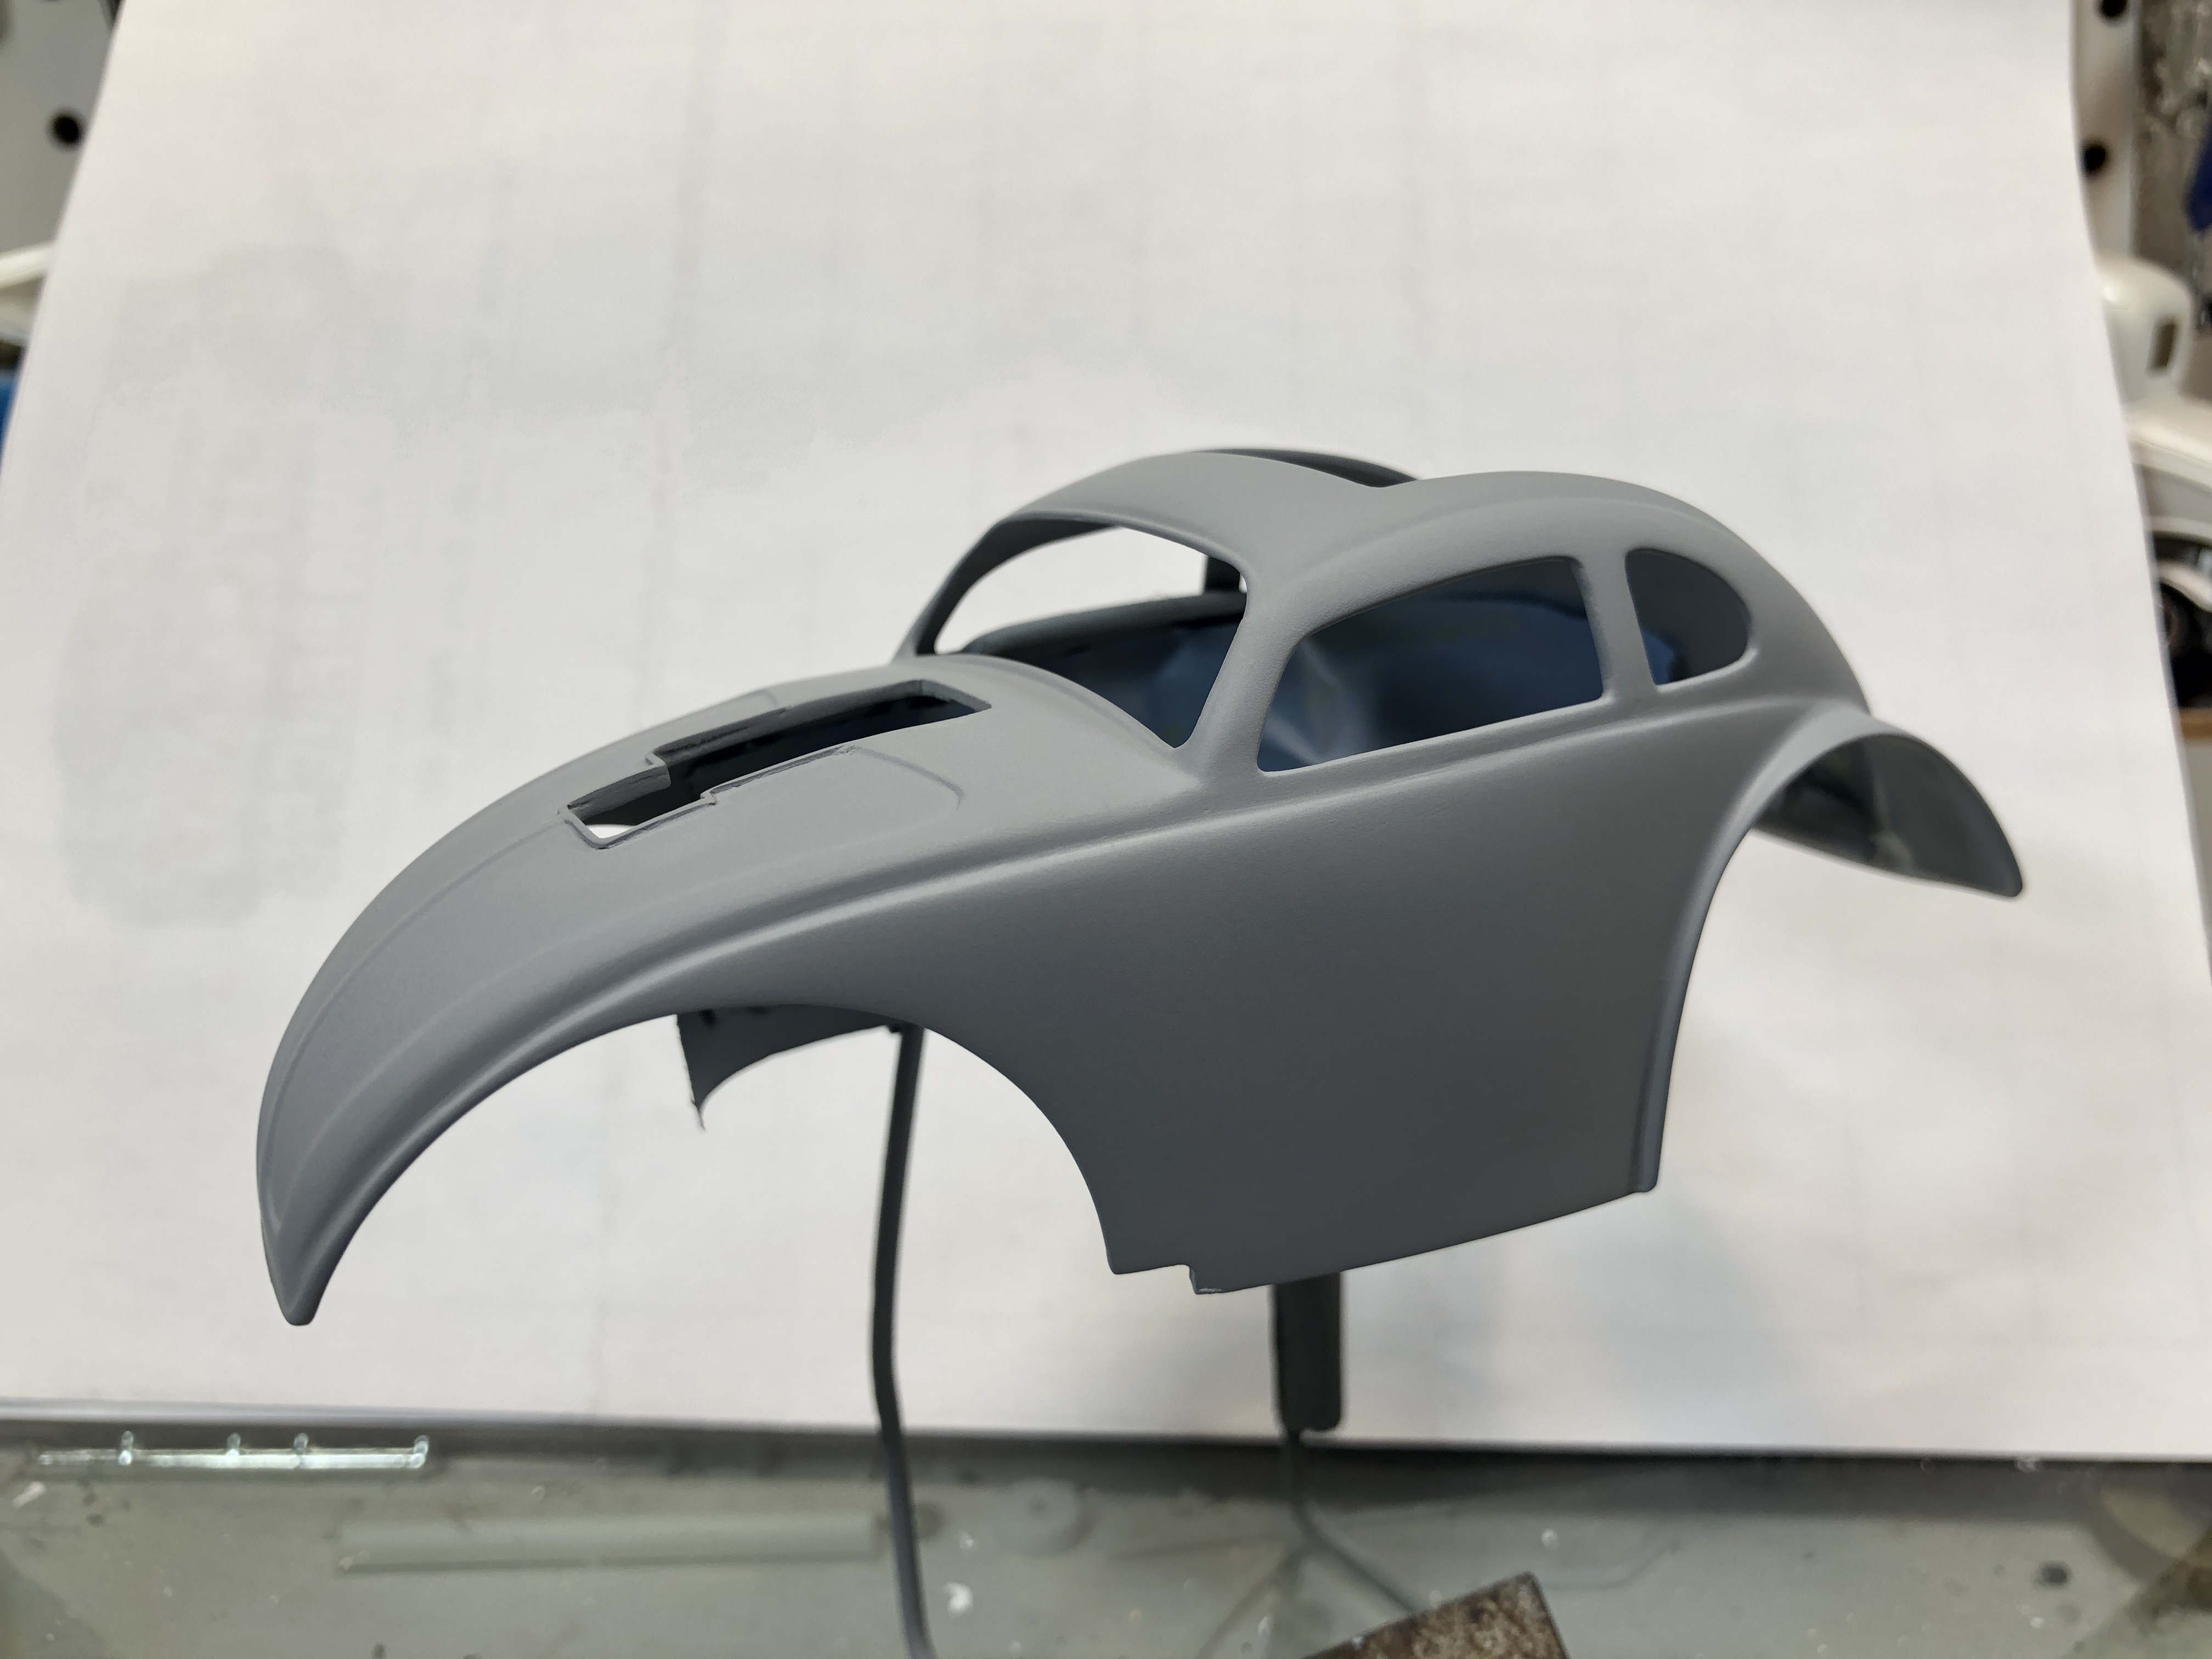
Pretty much got done what I wanted to do this weekend. Frame to body mount, brought rear axle higher in the fame, necessitating changing the frame... wheel wells, blower hole cut on hood and firewall....I'll let the pictures tell the story... -RRR
-
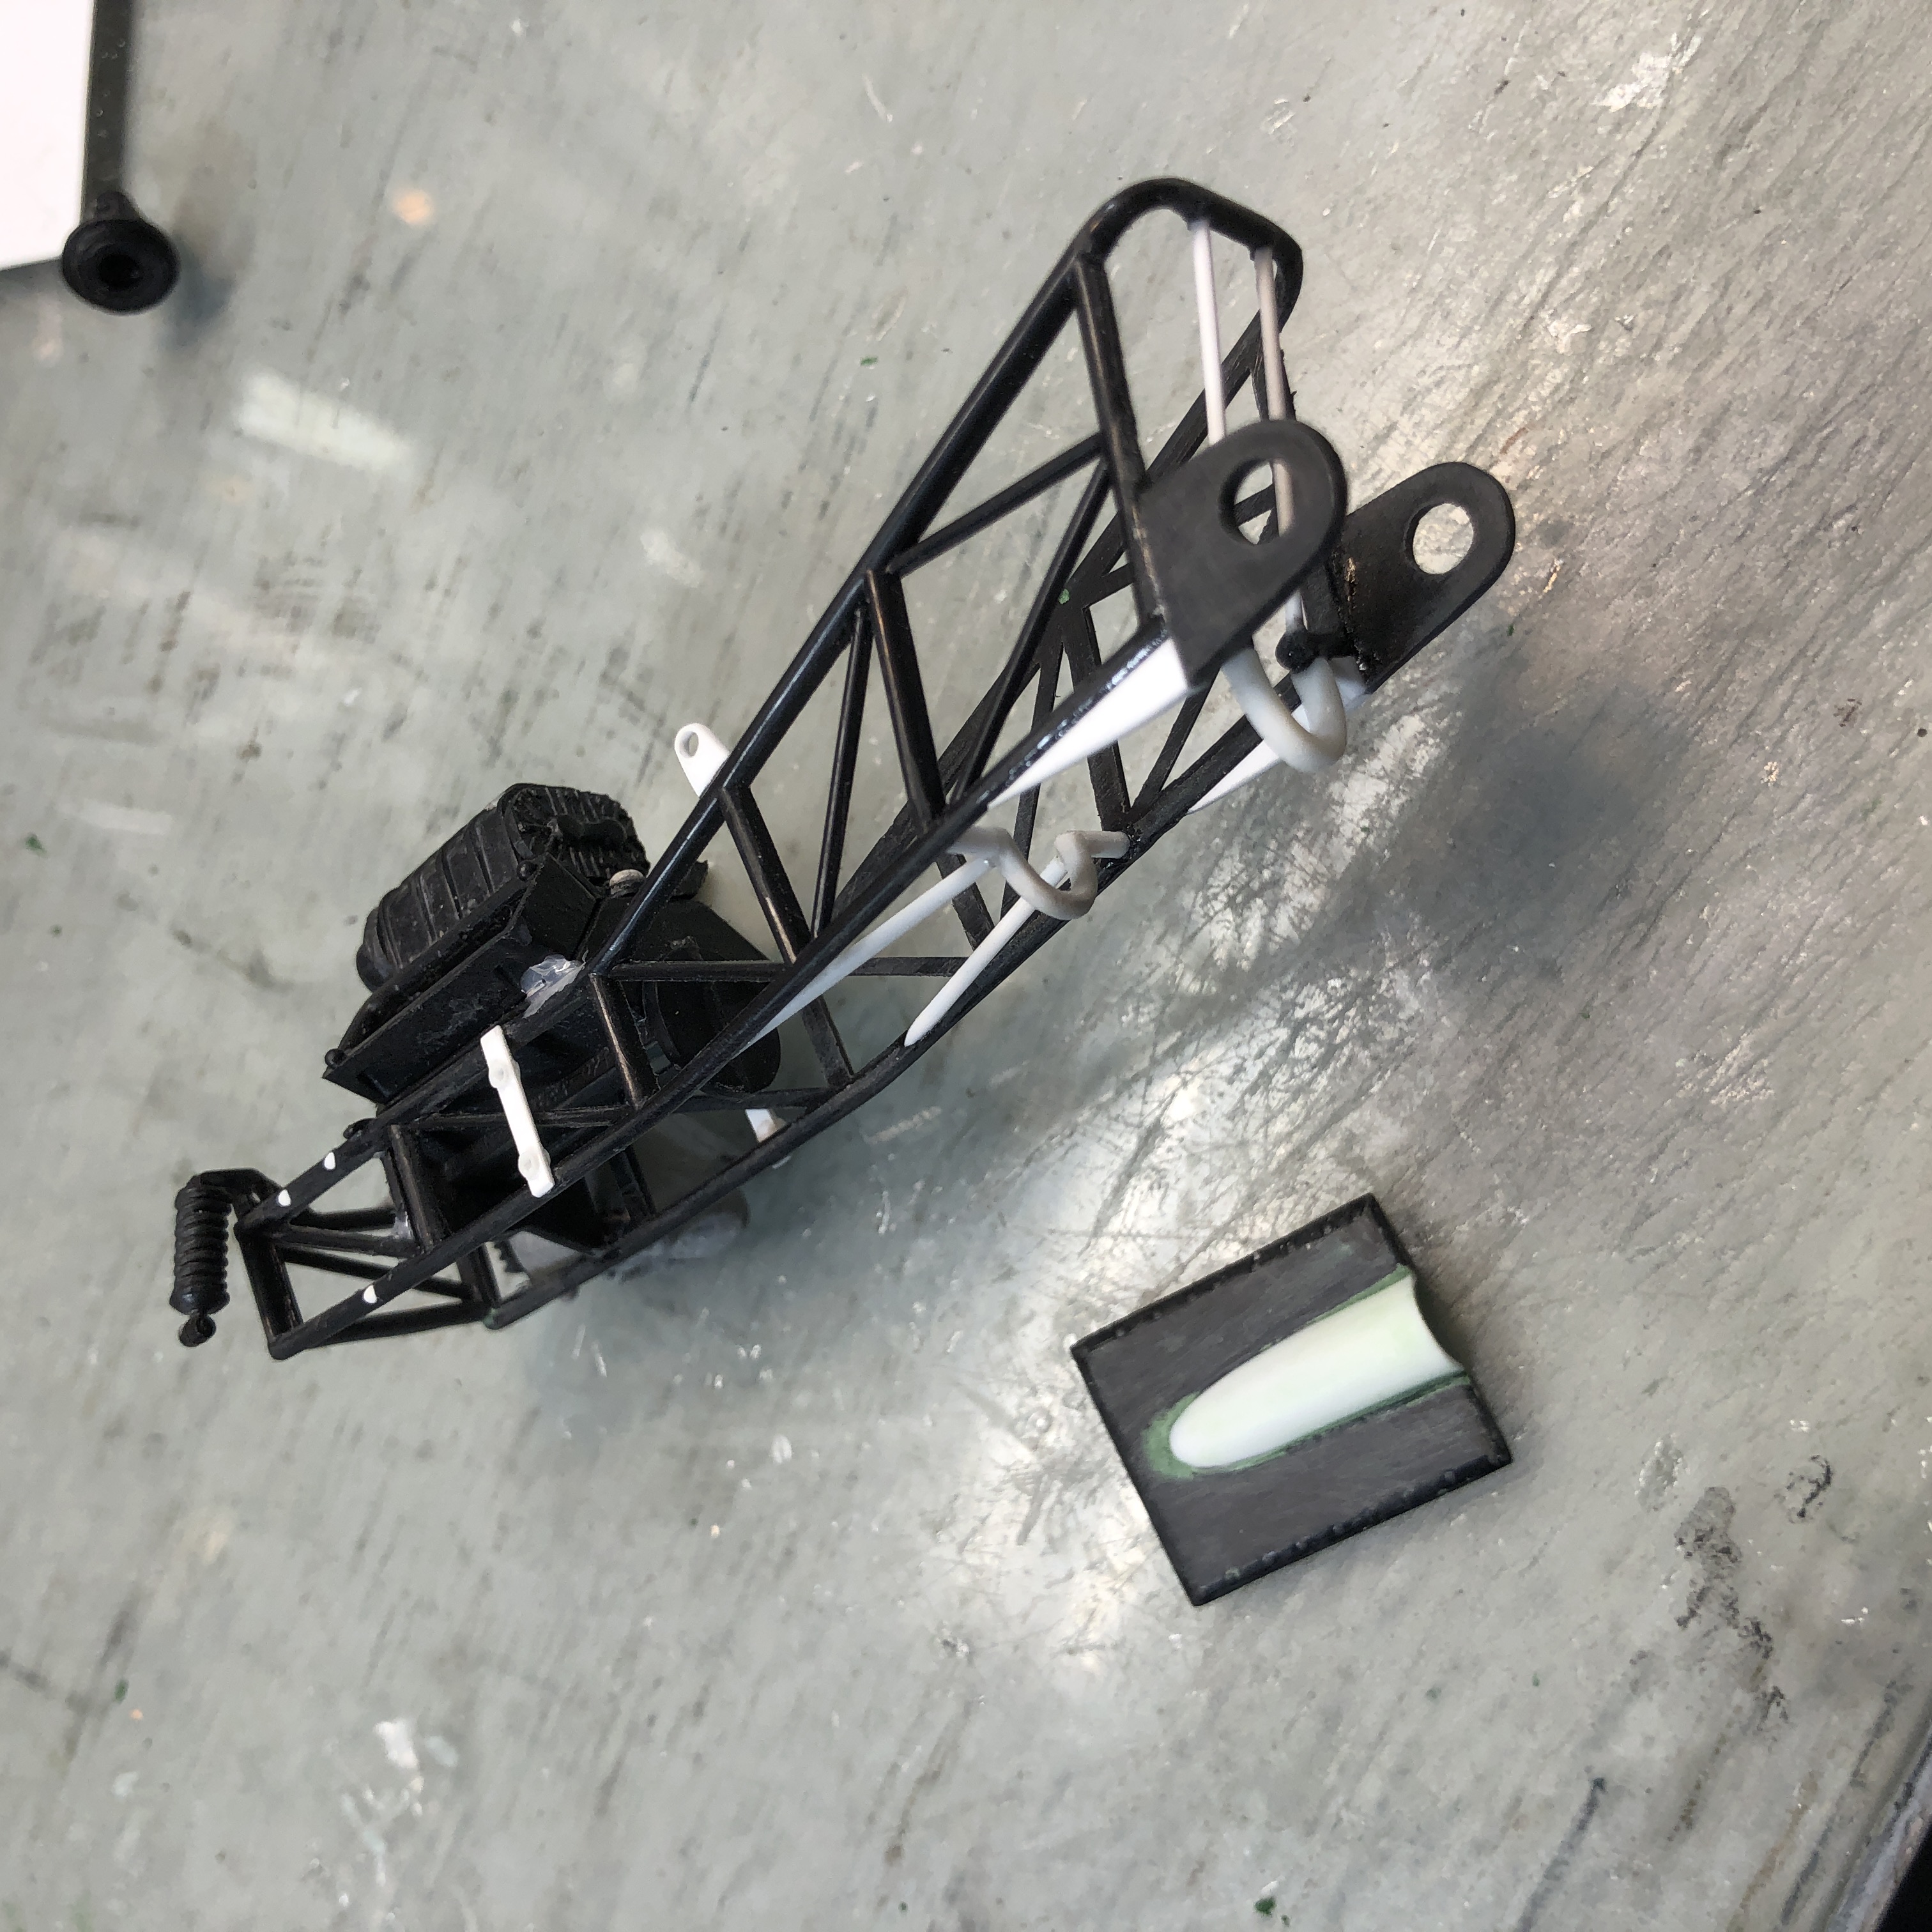
I'm hoping to get back on this project this weekend, I guess I'll see what the honey-do list looks like when wifey gets up.... I messed around with a bunch of little things, brakes, pulleys, magneto, roll cage, interior bucket, steering and bits and pieces....I made up mounts for the attach/pivot point for frame to body. I have to get the ride height established and attach the mounts (bottom edge of pic, way too long until cut to length) to the back of the frame.... i didn't like the way the frame sat so deep into the body, it needs to sit up higher in the back end...gotta make rear axle mount lower in the frame, pushing the frame up higher... If I get the frame pushed up a bit, looks much better...(below)... back to the bench..... -RRR
-
New Dodge Muscle Car for '24?
Rocking Rodney Rat replied to MrObsessive's topic in General Automotive Talk (Trucks and Cars)
there's no such thing as a free lunch.... -RRR -
Looks like a promising start.... -RRR
-
58 Ferrari Testarossa....now hear me out....
Rocking Rodney Rat replied to chris chabre's topic in WIP: Drag Racing Models
I'm on board with this...carry on.... -RRR -
1963 Chevy Nova Wagon Street Rod FINISHED 3/20/22
Rocking Rodney Rat replied to Dennis Lacy's topic in WIP: Model Cars
Ya shoulda put a Ford powerplant in it....? -RRR -
This is making me thirsty.... -RRR
-
1963 Chevy Nova Wagon Street Rod FINISHED 3/20/22
Rocking Rodney Rat replied to Dennis Lacy's topic in WIP: Model Cars
I'm sure most cops enjoy some Ben & Jerry's ice cream......I'm tempted to get one of these kits but it looks like too much BMF work for me (or sanding off the trim).... -RRR -
1963 Chevy Nova Wagon Street Rod FINISHED 3/20/22
Rocking Rodney Rat replied to Dennis Lacy's topic in WIP: Model Cars
That will certainly get those groceries back from the store before the ice cream melts!! -RRR -
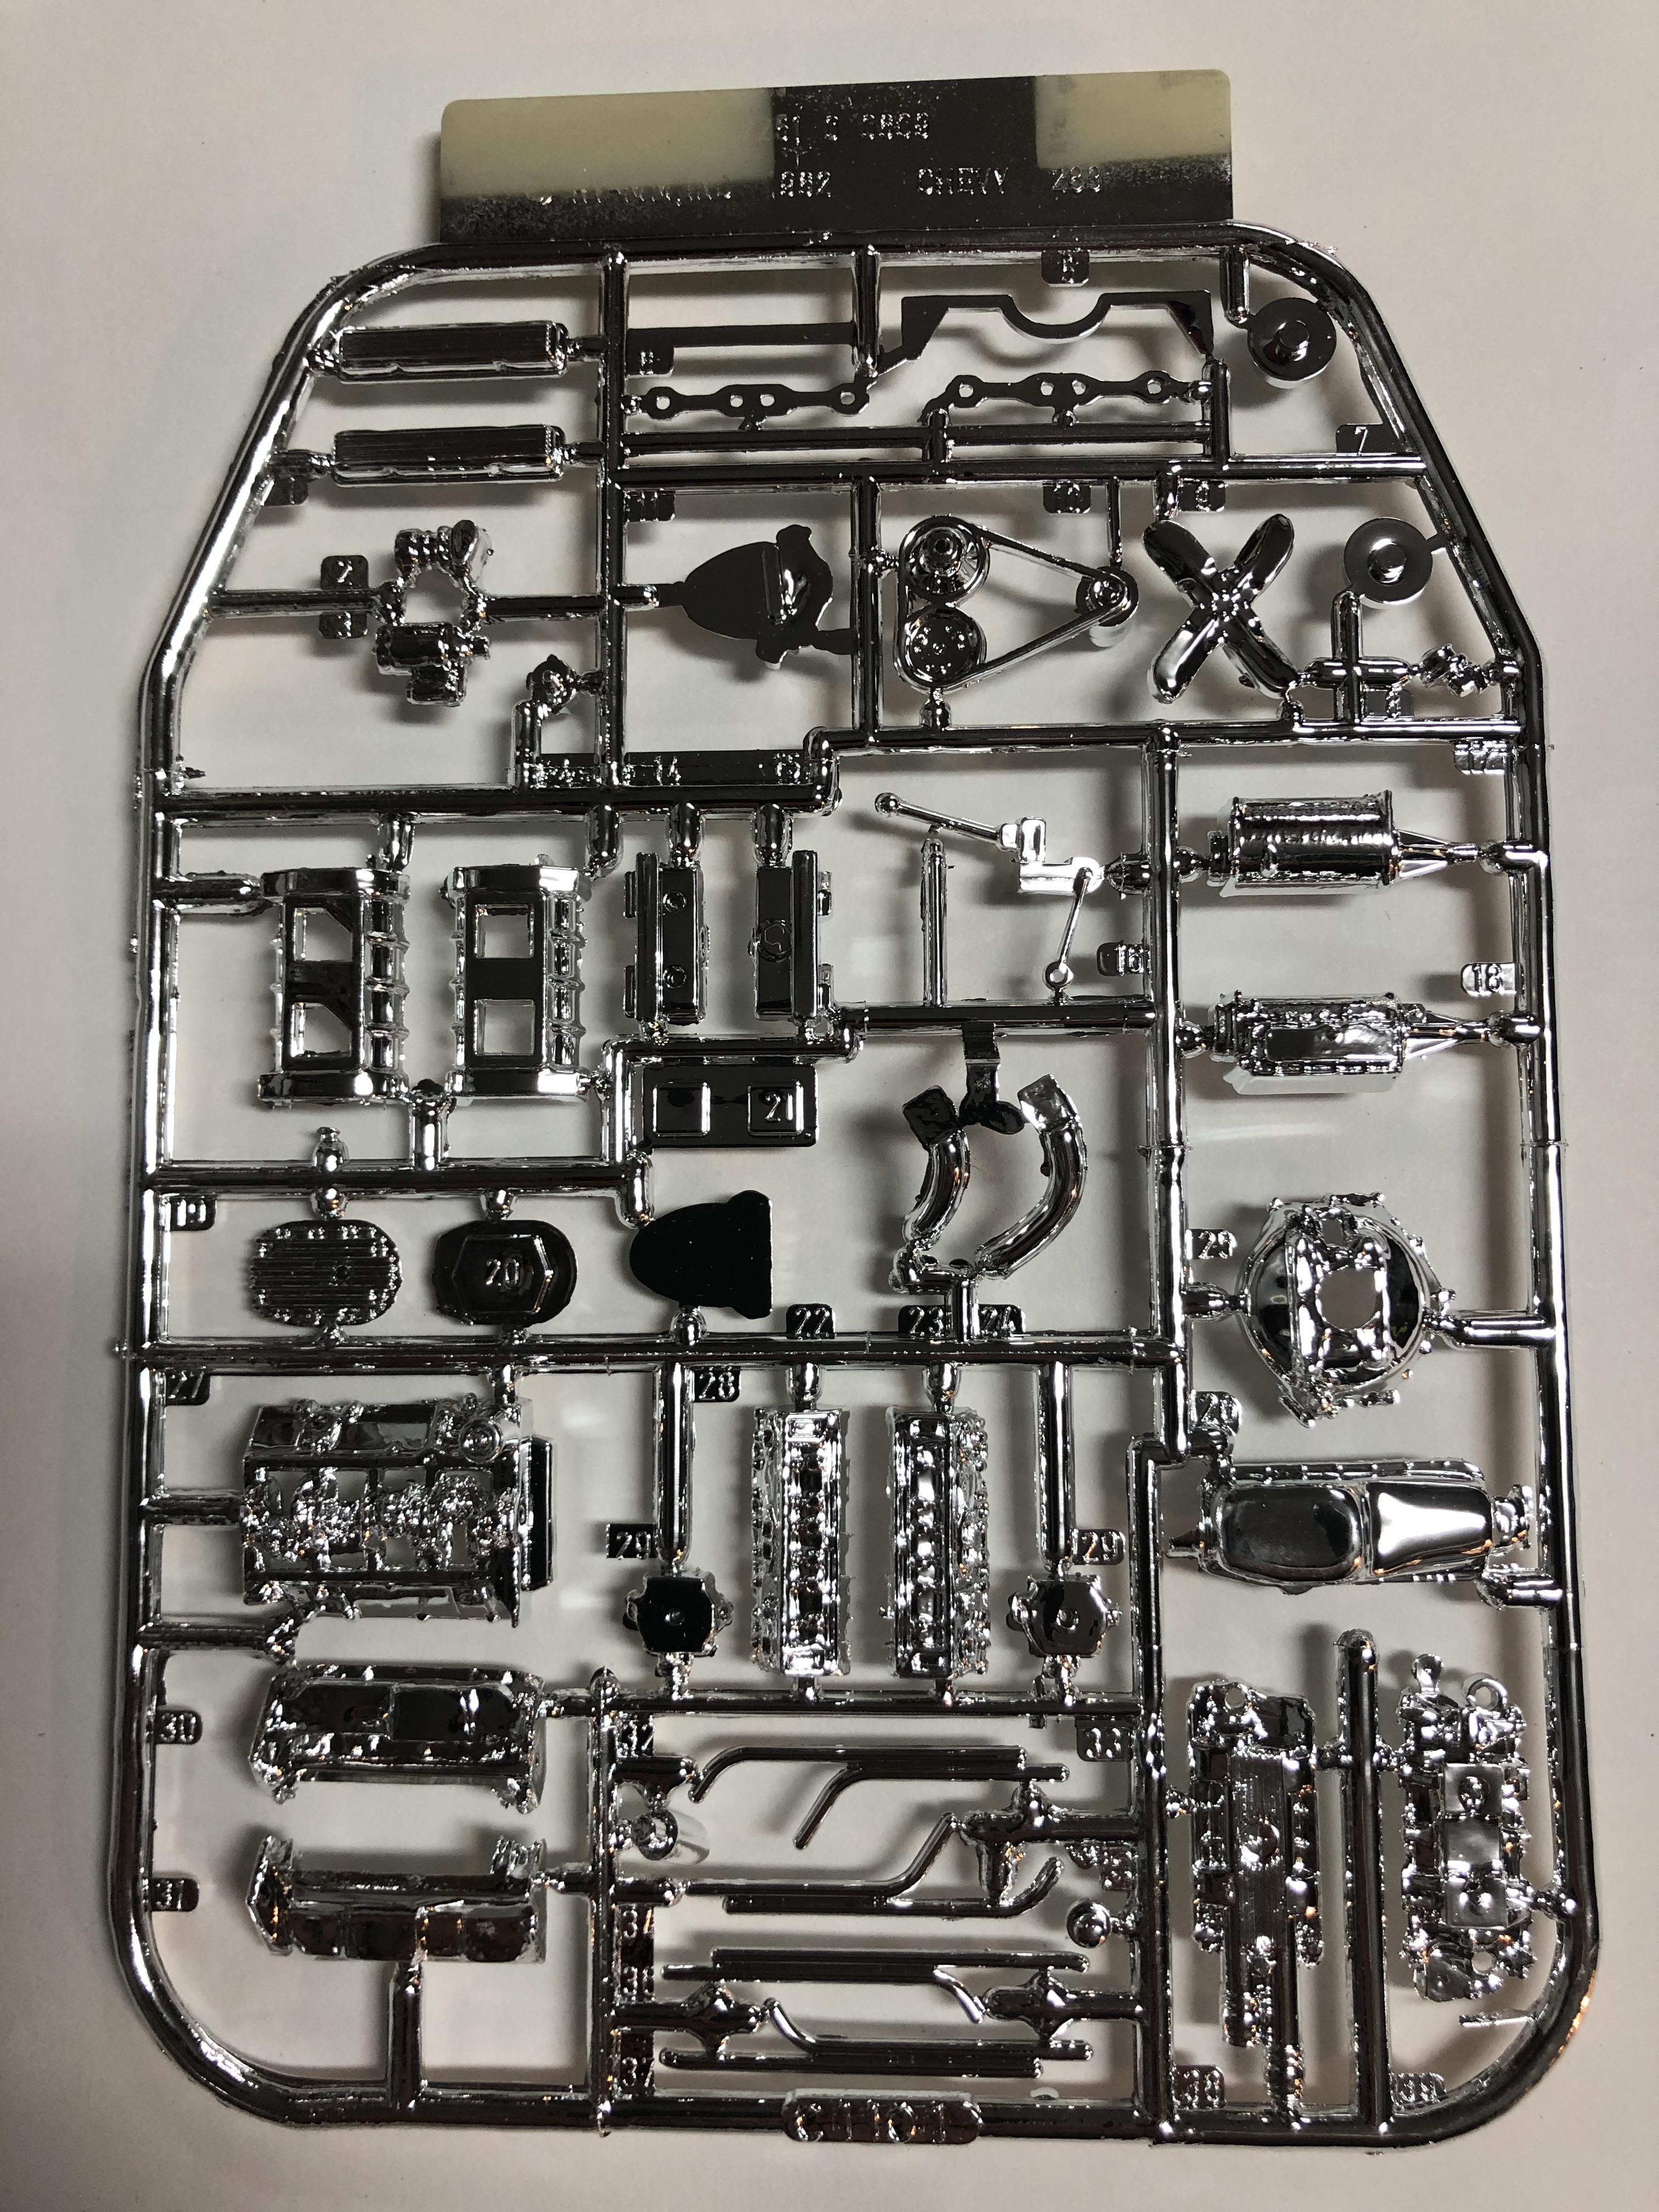
Go back to the pic of C1107 below, same fuel injector halves as in the Tony Nancy kit, shown here above. Also the chrome air intake scoop in the Tony Nancy kit is real close to the one in C1107. It might not have been cut from the same tooling, Revell was sharing some designs of bits and pieces across a few kits? As I stated, it's interesting..... -RRR
-
I missed this one somehow. That's just what a street rod should look like. Outstanding paint! -RRR
-
It's pretty interesting, the history of the parts packs. I do believe that some of those C1107 SBC parts were also put in to the Tony Nancy 22Jr. double drag car kit..... -RRR
-
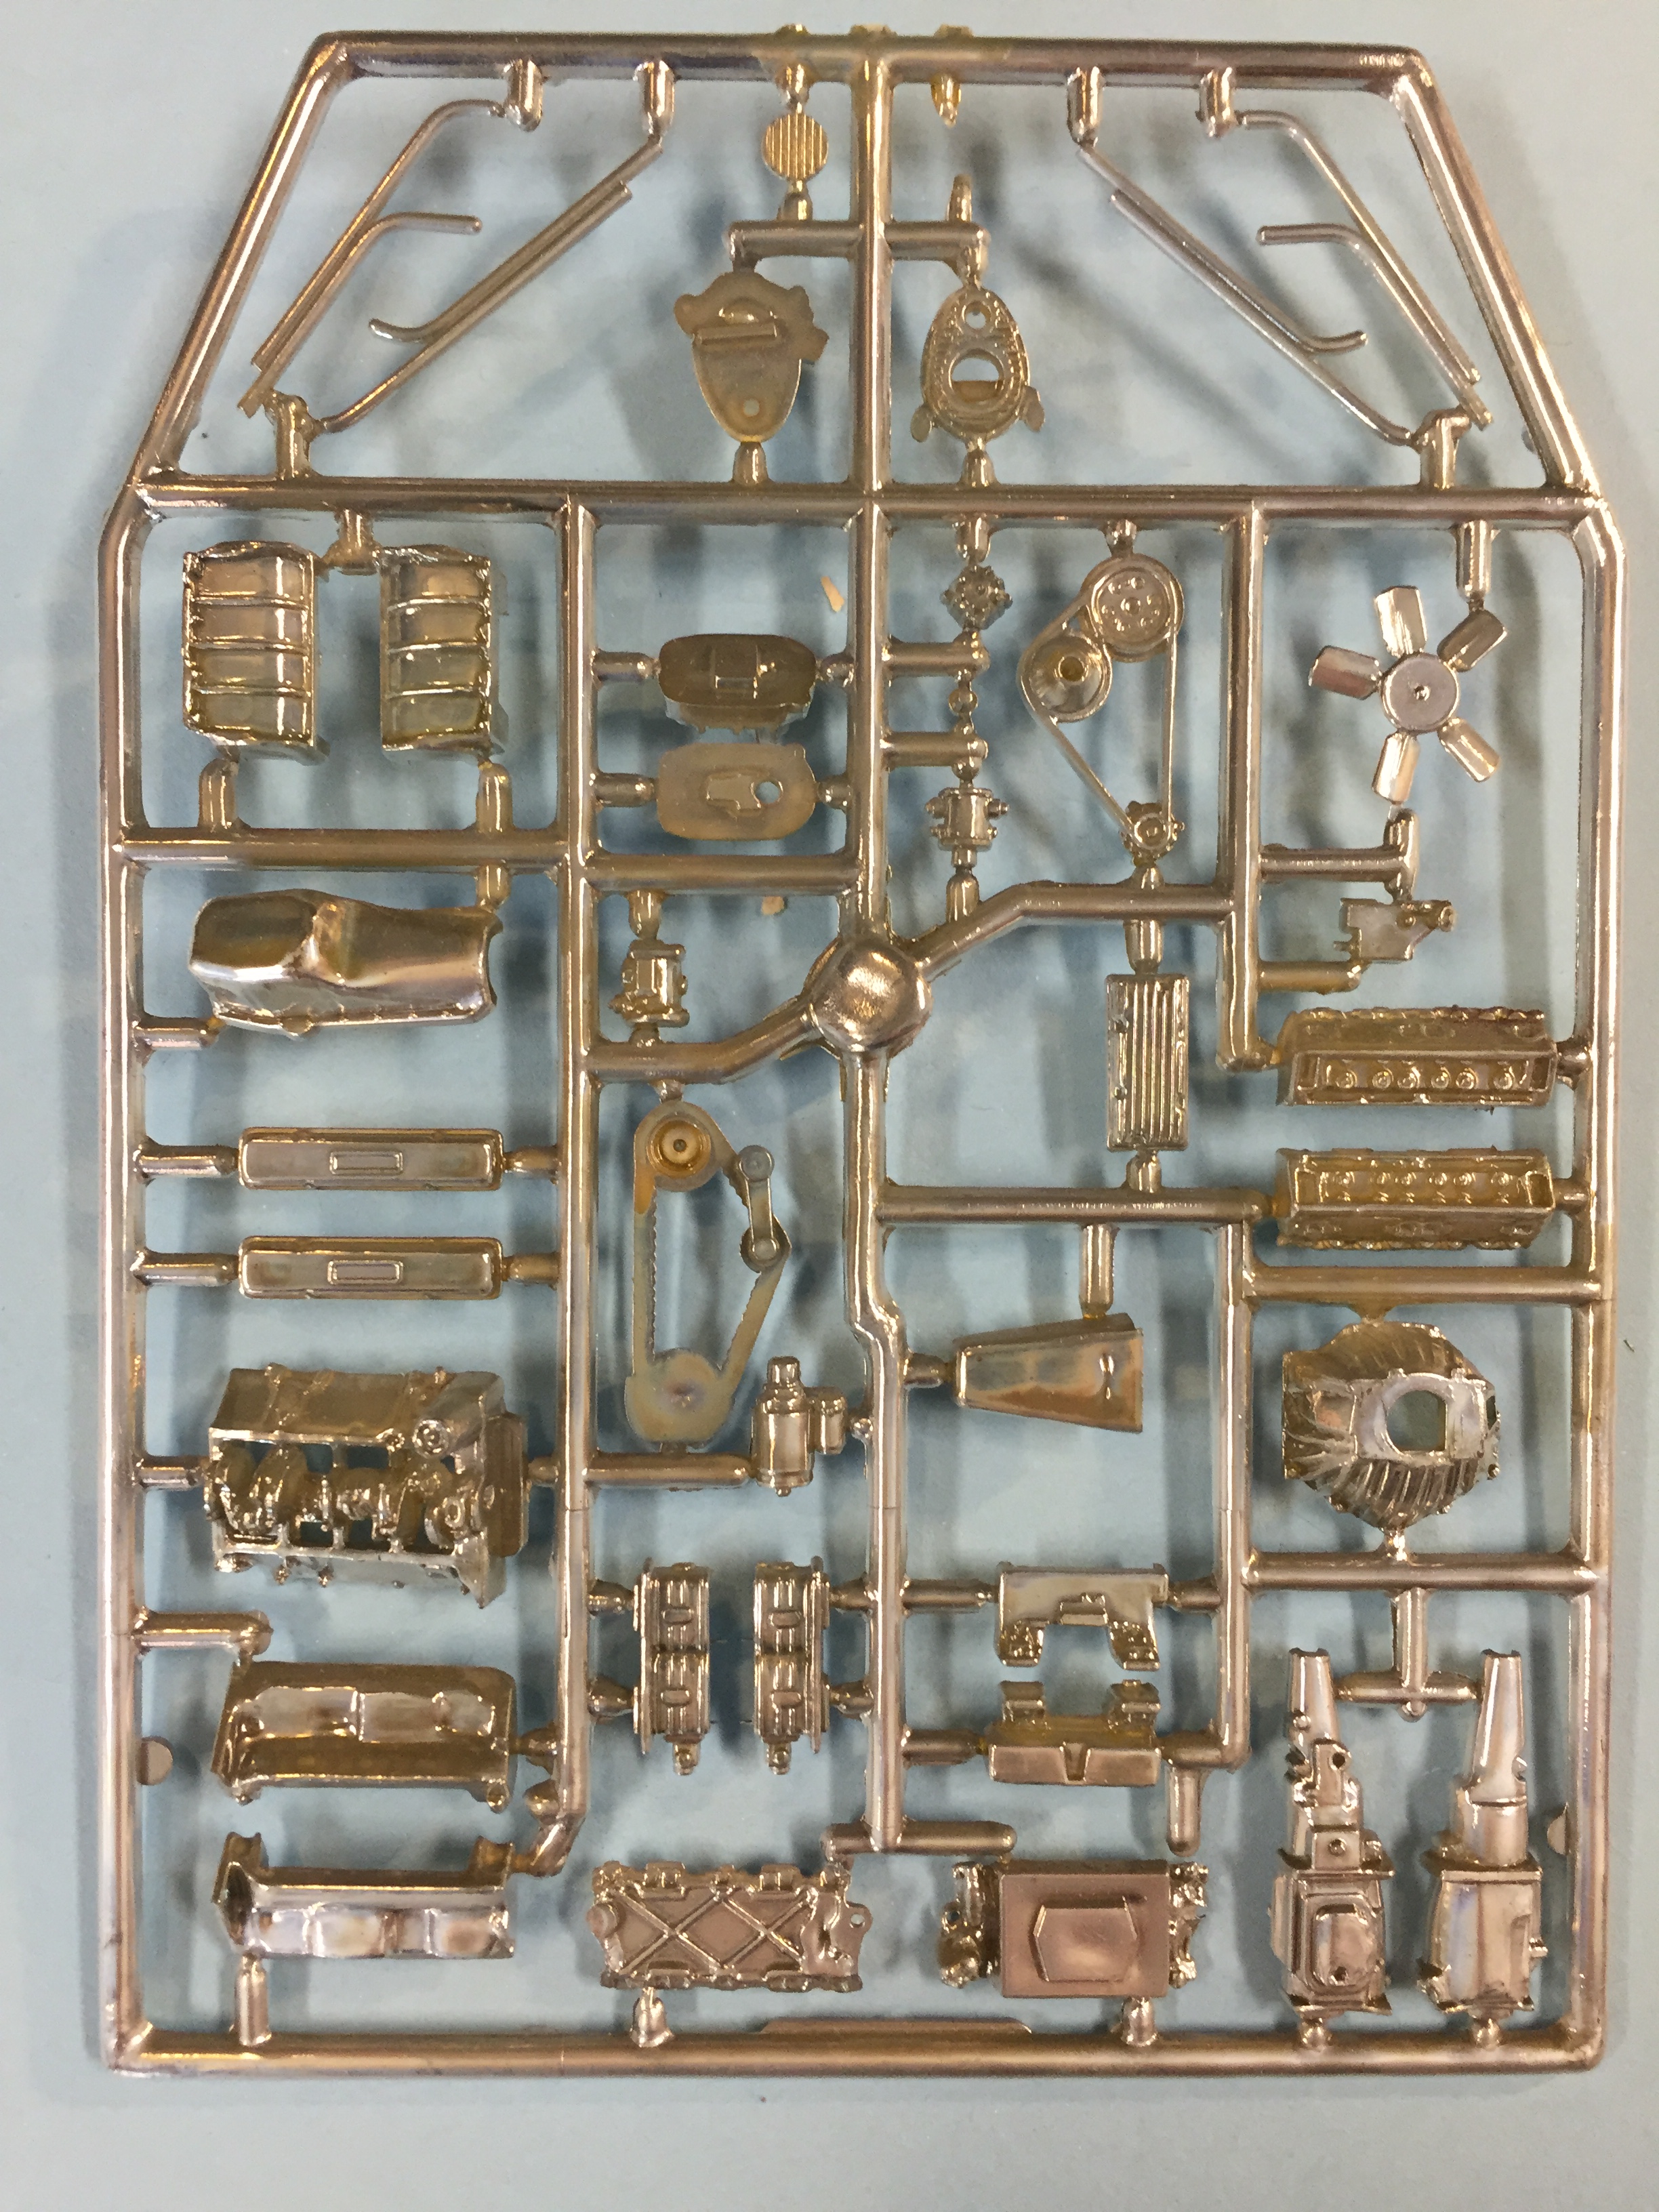
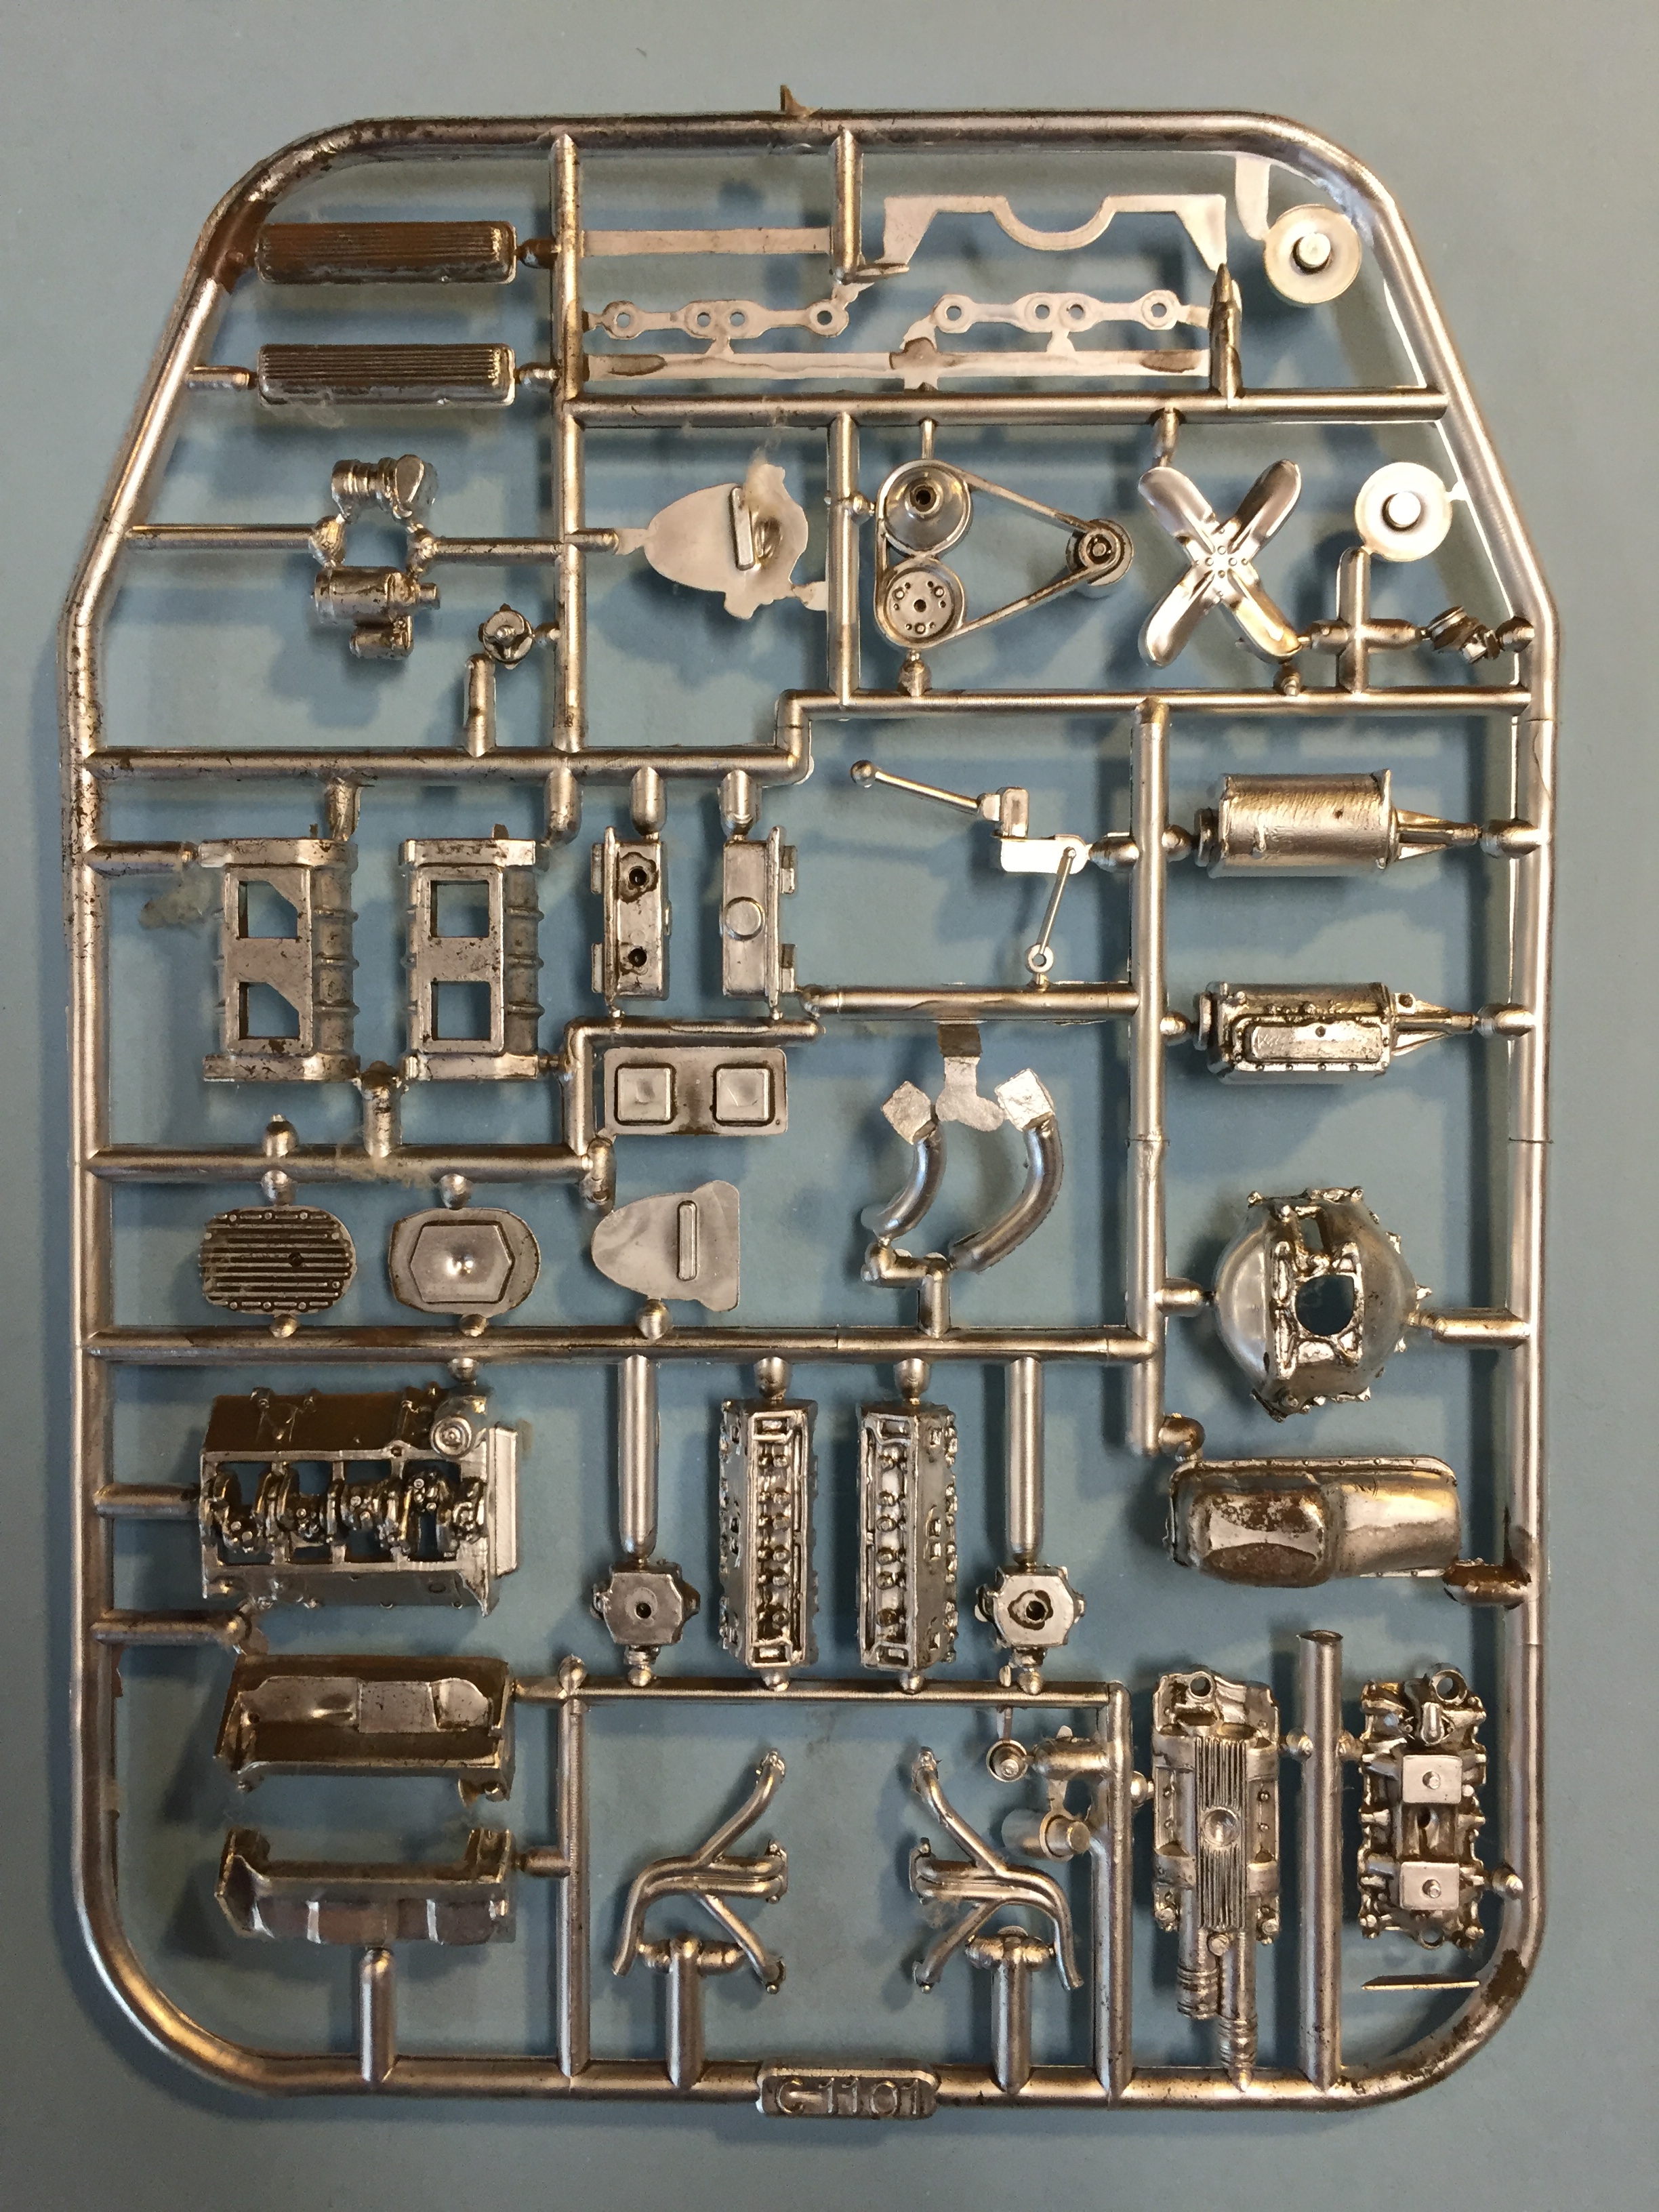
It will interesting to see what Atlantis issues. Parts Pack C1101 has the SBC with potvin blower but not the dragster headers. Pack C1107 has the right headers but not the front mounted blower..... This is C1107 (above). See at the top of the pic, the side swept headers.... This is pack C1101, potvin blower but sans dragster swept side headers....hmmmmm....these pix are from my collection of original parts packs, maybe they were changed over the years? ...and as I go to the bench while I'm typing and check out a newer C1101 (the ones in the yellow and blue packaging) and snap a quick pic, and as I suspected, the C1101 pack has been changed, removing the block hugger headers and adding the swept back headers (they seem kinda short, don't they?)!!! Interesting, huh???? You can check out the Revell parts packs here: https://public.fotki.com/jferren/revell-parts-packs/ -RRR
-
Heavily Chopped & Channeled '32 Ford 3-window
Rocking Rodney Rat replied to Bernard Kron's topic in WIP: Model Cars
I approve! Six thumbs up!! -RRR -
The above pic of the Mooneyes dragster is my build. More pix here if you'd like to eyeball: https://public.fotki.com/jferren/mooneyes-dragster/ That other little '49er dragster is something I'm not real familiar with. Interesting...the roll bar is attached to the body (WTF???)...seems a pretty simple kit, will take some doing to make it look reasonable. That's what scratch building is for. Looking forward to seeing both...some day... -RRR
-
Groovy, man!!! -RRR
-
This is coming along swimmingly!! I'm anxiously awaiting to see how your battle with BMF progresses. That's the main reason I don't attempt vehicles that have chrome trim. Good luck, keep the blade sharp and don't overdo the adult beverages, it's only effective to a point?.... I'm keeping you in my thoughts and prayers. -RRR
-
It's still around, at the Don Garlits Museum of Drag Racing in Ocala, FL. Worth the trip if you ever get the chance....
-
C'mon!!! The trunk mounted spare is all part of the schtick!!!! -RRR
-
Yes it does look very much like one! https://public.fotki.com/jferren/fiat-aafa/dsc00314.html