Rocking Rodney Rat
-
Posts
1,995 -
Joined
-
Last visited
Content Type
Profiles
Forums
Events
Gallery
Everything posted by Rocking Rodney Rat
-

-
Now that the chop is completed, it's time to stretch the body a bit. First order of business is to separate the front end from the body. The hood has been (or is it a frunk?) glued on... The plan is to stretch the body about this much. I lined up the frame with it's proposed length, the front frame crossmember including springs is dropped on.... Notice that the width is off once the two pieces are separated. The sides of the body will need to be spread apart just a skoshe..... I made cuts along the beltline that will give me the ability to push it body apart just enough to get the panels to line up.... stretched panels glued in.... The filler panel across the hood is slowly futzed in place... With a few pieces glued into the corner and a bit of sanding, it's looking pretty good. A schmear of putty will clean that up... a quick mockup, and it's starting to look like something...... With a wedge shaped piece added to the bottom of the body and it's really looking TUFF!!!! Thanks for checking it out! More to come.... -RRR
-
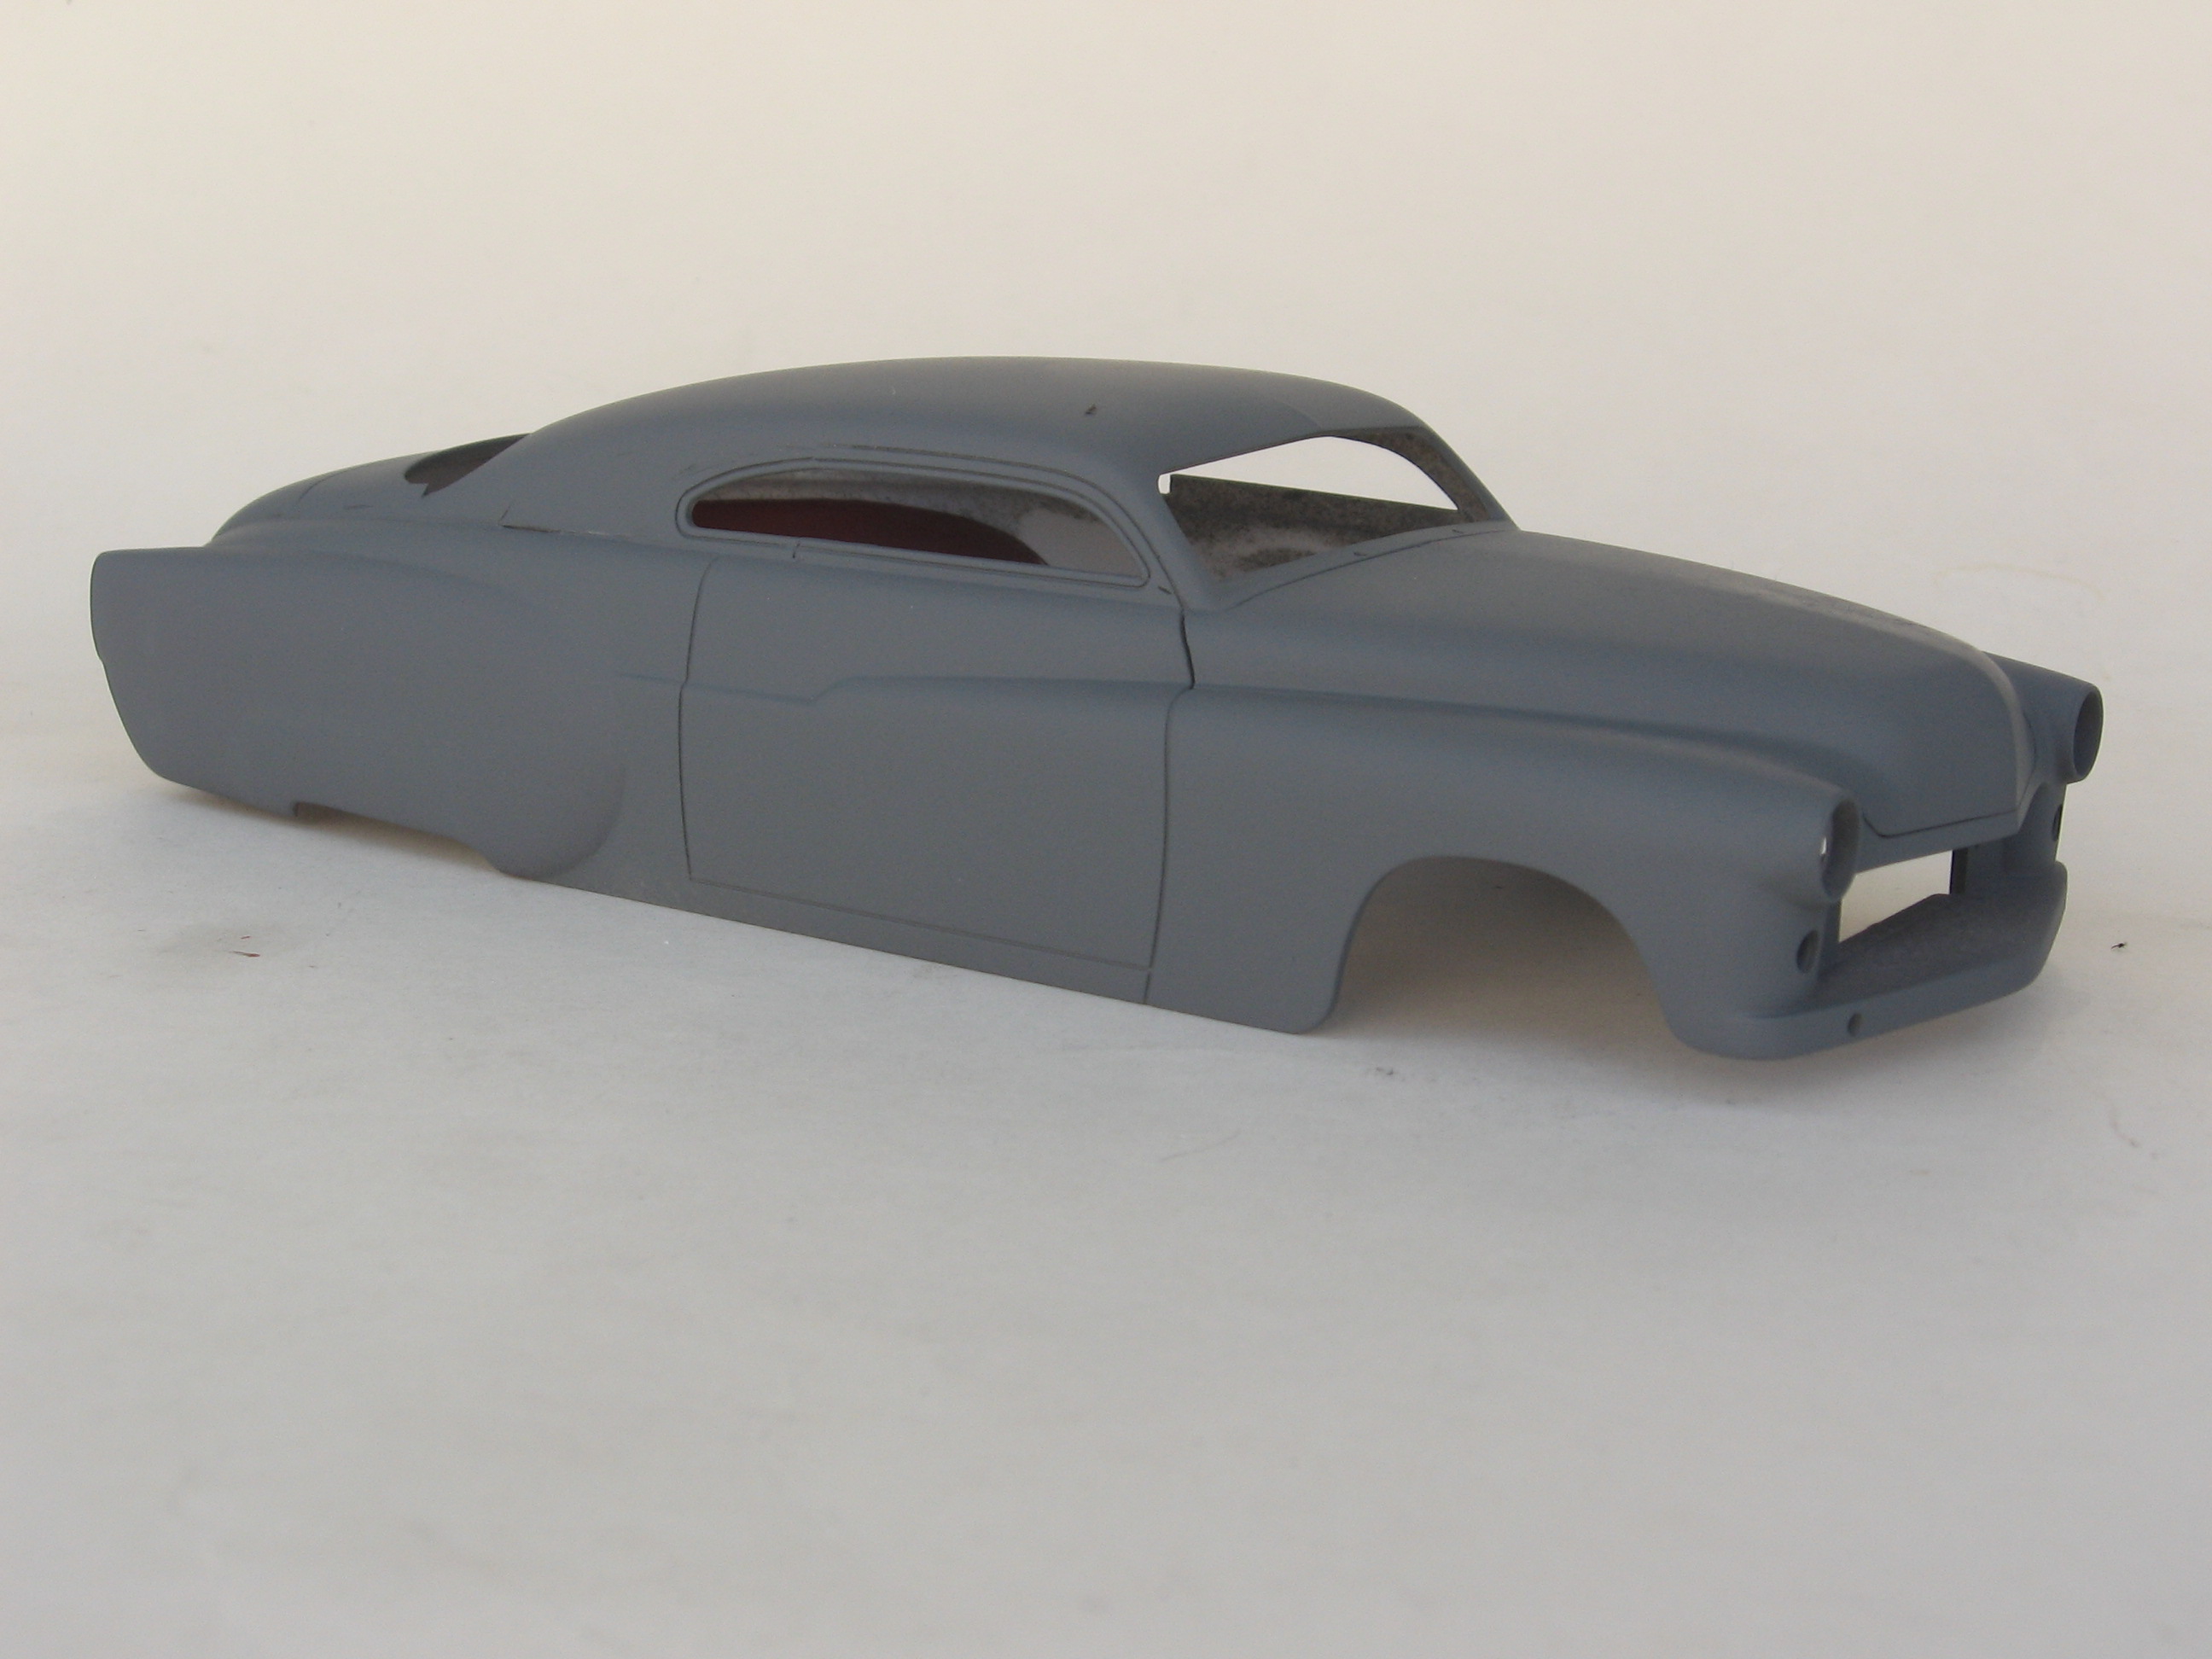
Chopped Merc COE slantback hauler... -RRR
-
 I had to chuckle at this tailgate....
-
On to the top chop.... Roof has been removed, notice the two pieces of sprue temporarily glued in the body to make sure it maintains the proper shape.... My original idea was to cut off the cowl and slide it back to meet the shorter A pillar. Once I got the roof removed I realized I could stretch the roof a bit. Since most of the top of the roof had been removed, bending the roof to "lengthen" it was easy. No need to mess with the cowl.... With a bit of persuasion and some deft massaging, the roof is re-attached..... This pic shows small triangle pieces being added to the upper corners of the B pillar, then shaped to form the curve between the pillar and the roof.... Next step is to lengthen the body a bit. The Sawzall is getting a work out!!! With a long weekend, much more will be done. Stay tuned and thanks for checking in.... -RRR
-
Here's one I started and then stalled out.... -RRR
-
Chopped '32 Tudor Sedan hot rod
Rocking Rodney Rat replied to Rocking Rodney Rat's topic in Model Cars
Thanks for all of the compliments.... -RRR -
Clamping that would be very hard. What I do is drill out both attach points, insert a common pin in one side, snip off leaving just a small piece then and slide it into the other end. This gives you a very solid attachment. I use a #75 (or so) sized drill in a pin vise. I give me a starter hole by pushing the point of a pin into the part first, That gives your drill a place to start and helps preventing the bit from wandering. Take it slow and check your hole to make sure it's on center. A lighted magnifying lamp helps my olde eyes to do this. If you do this on two attach points, the other points line up. -RRR
-
Nice work as always....-RRR
-
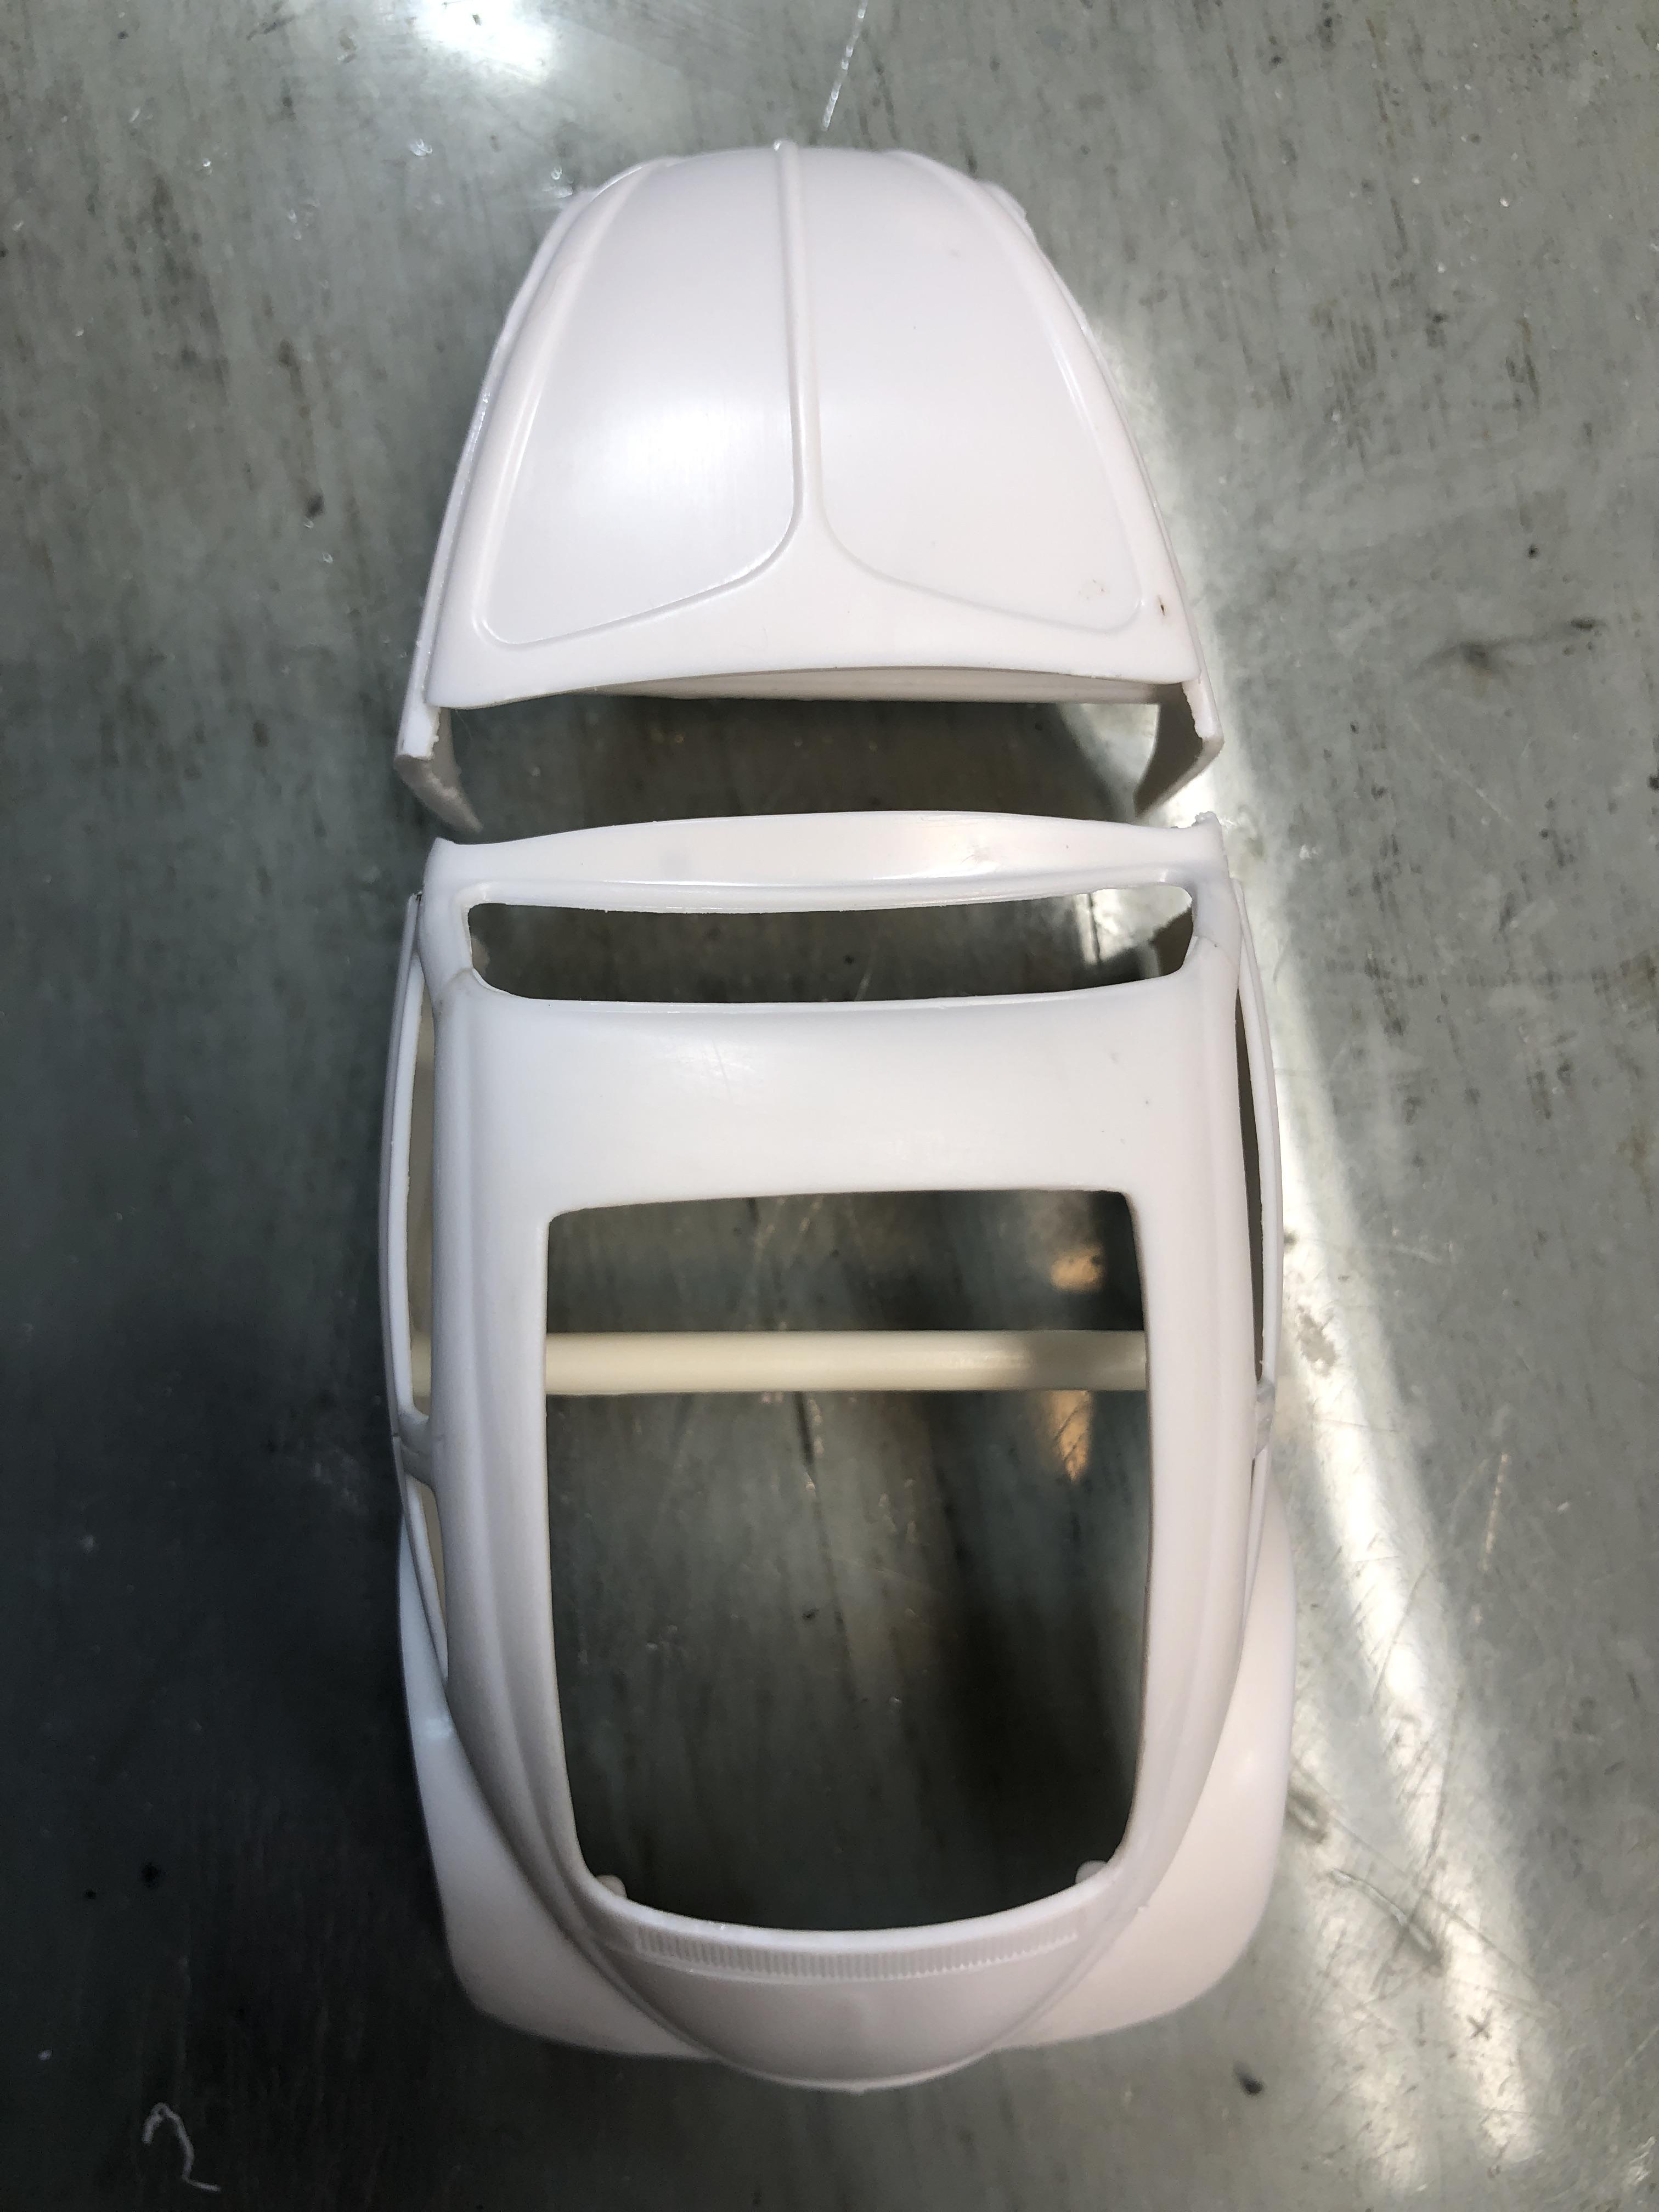
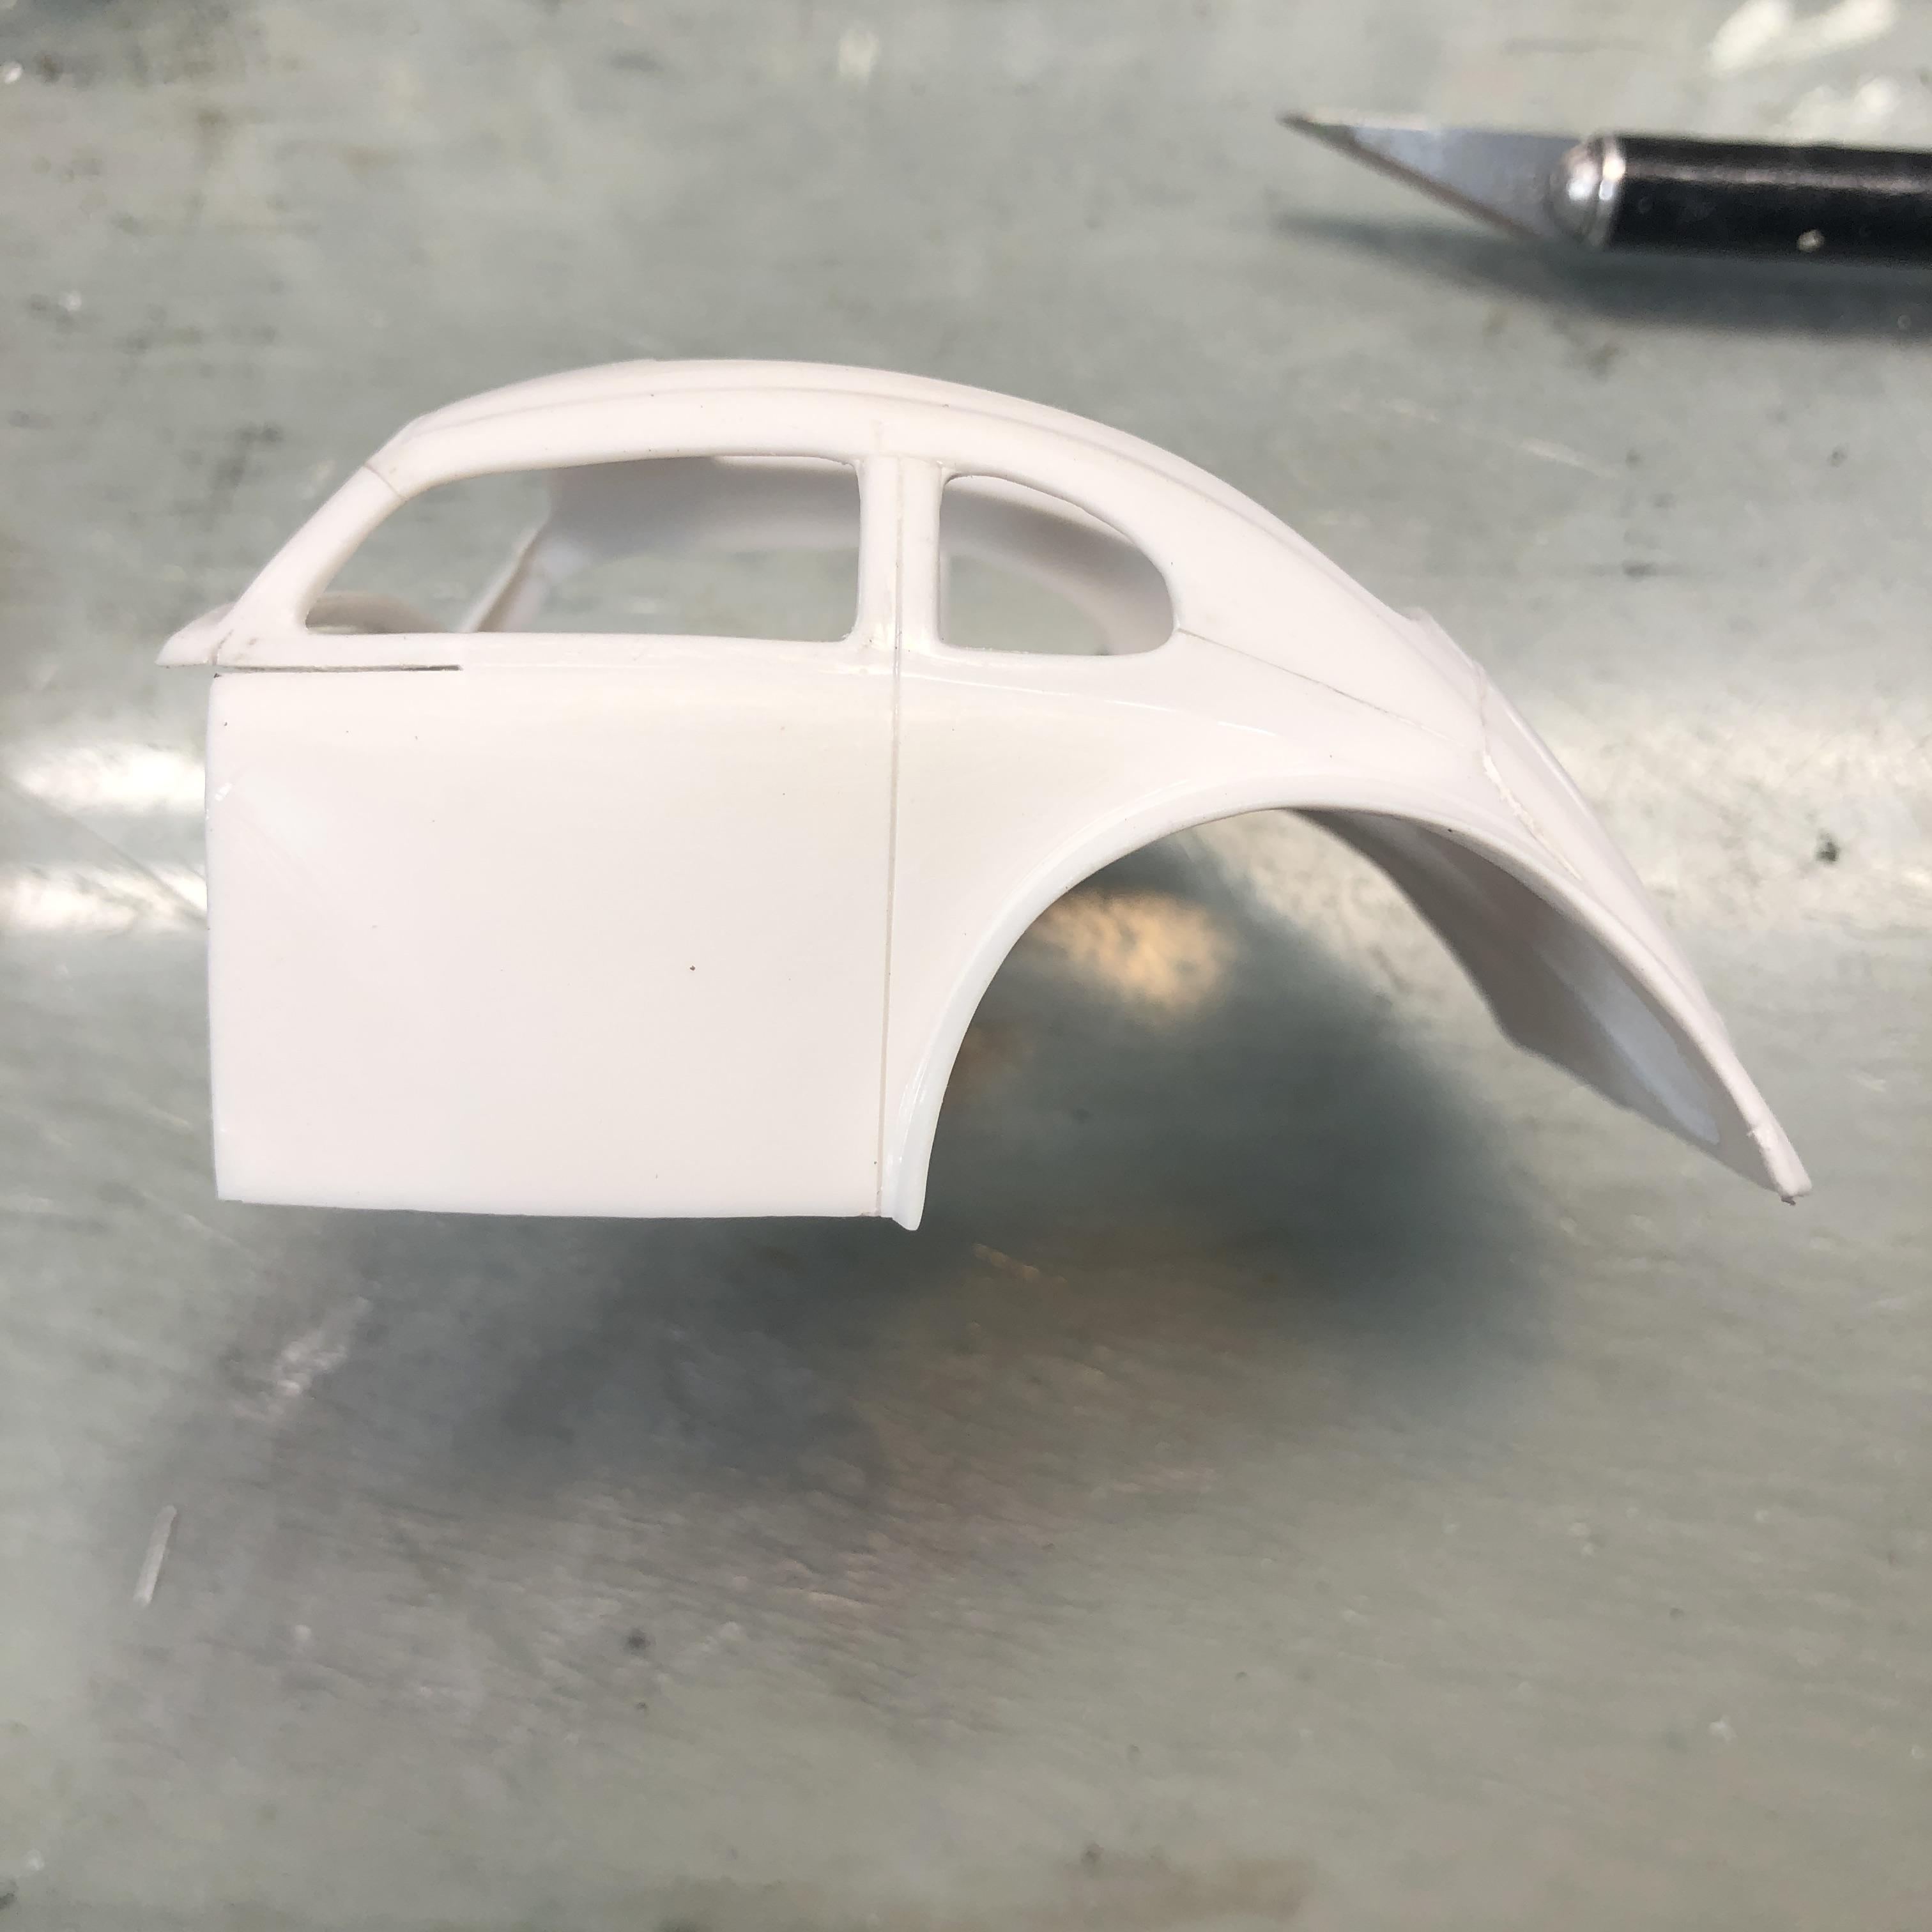
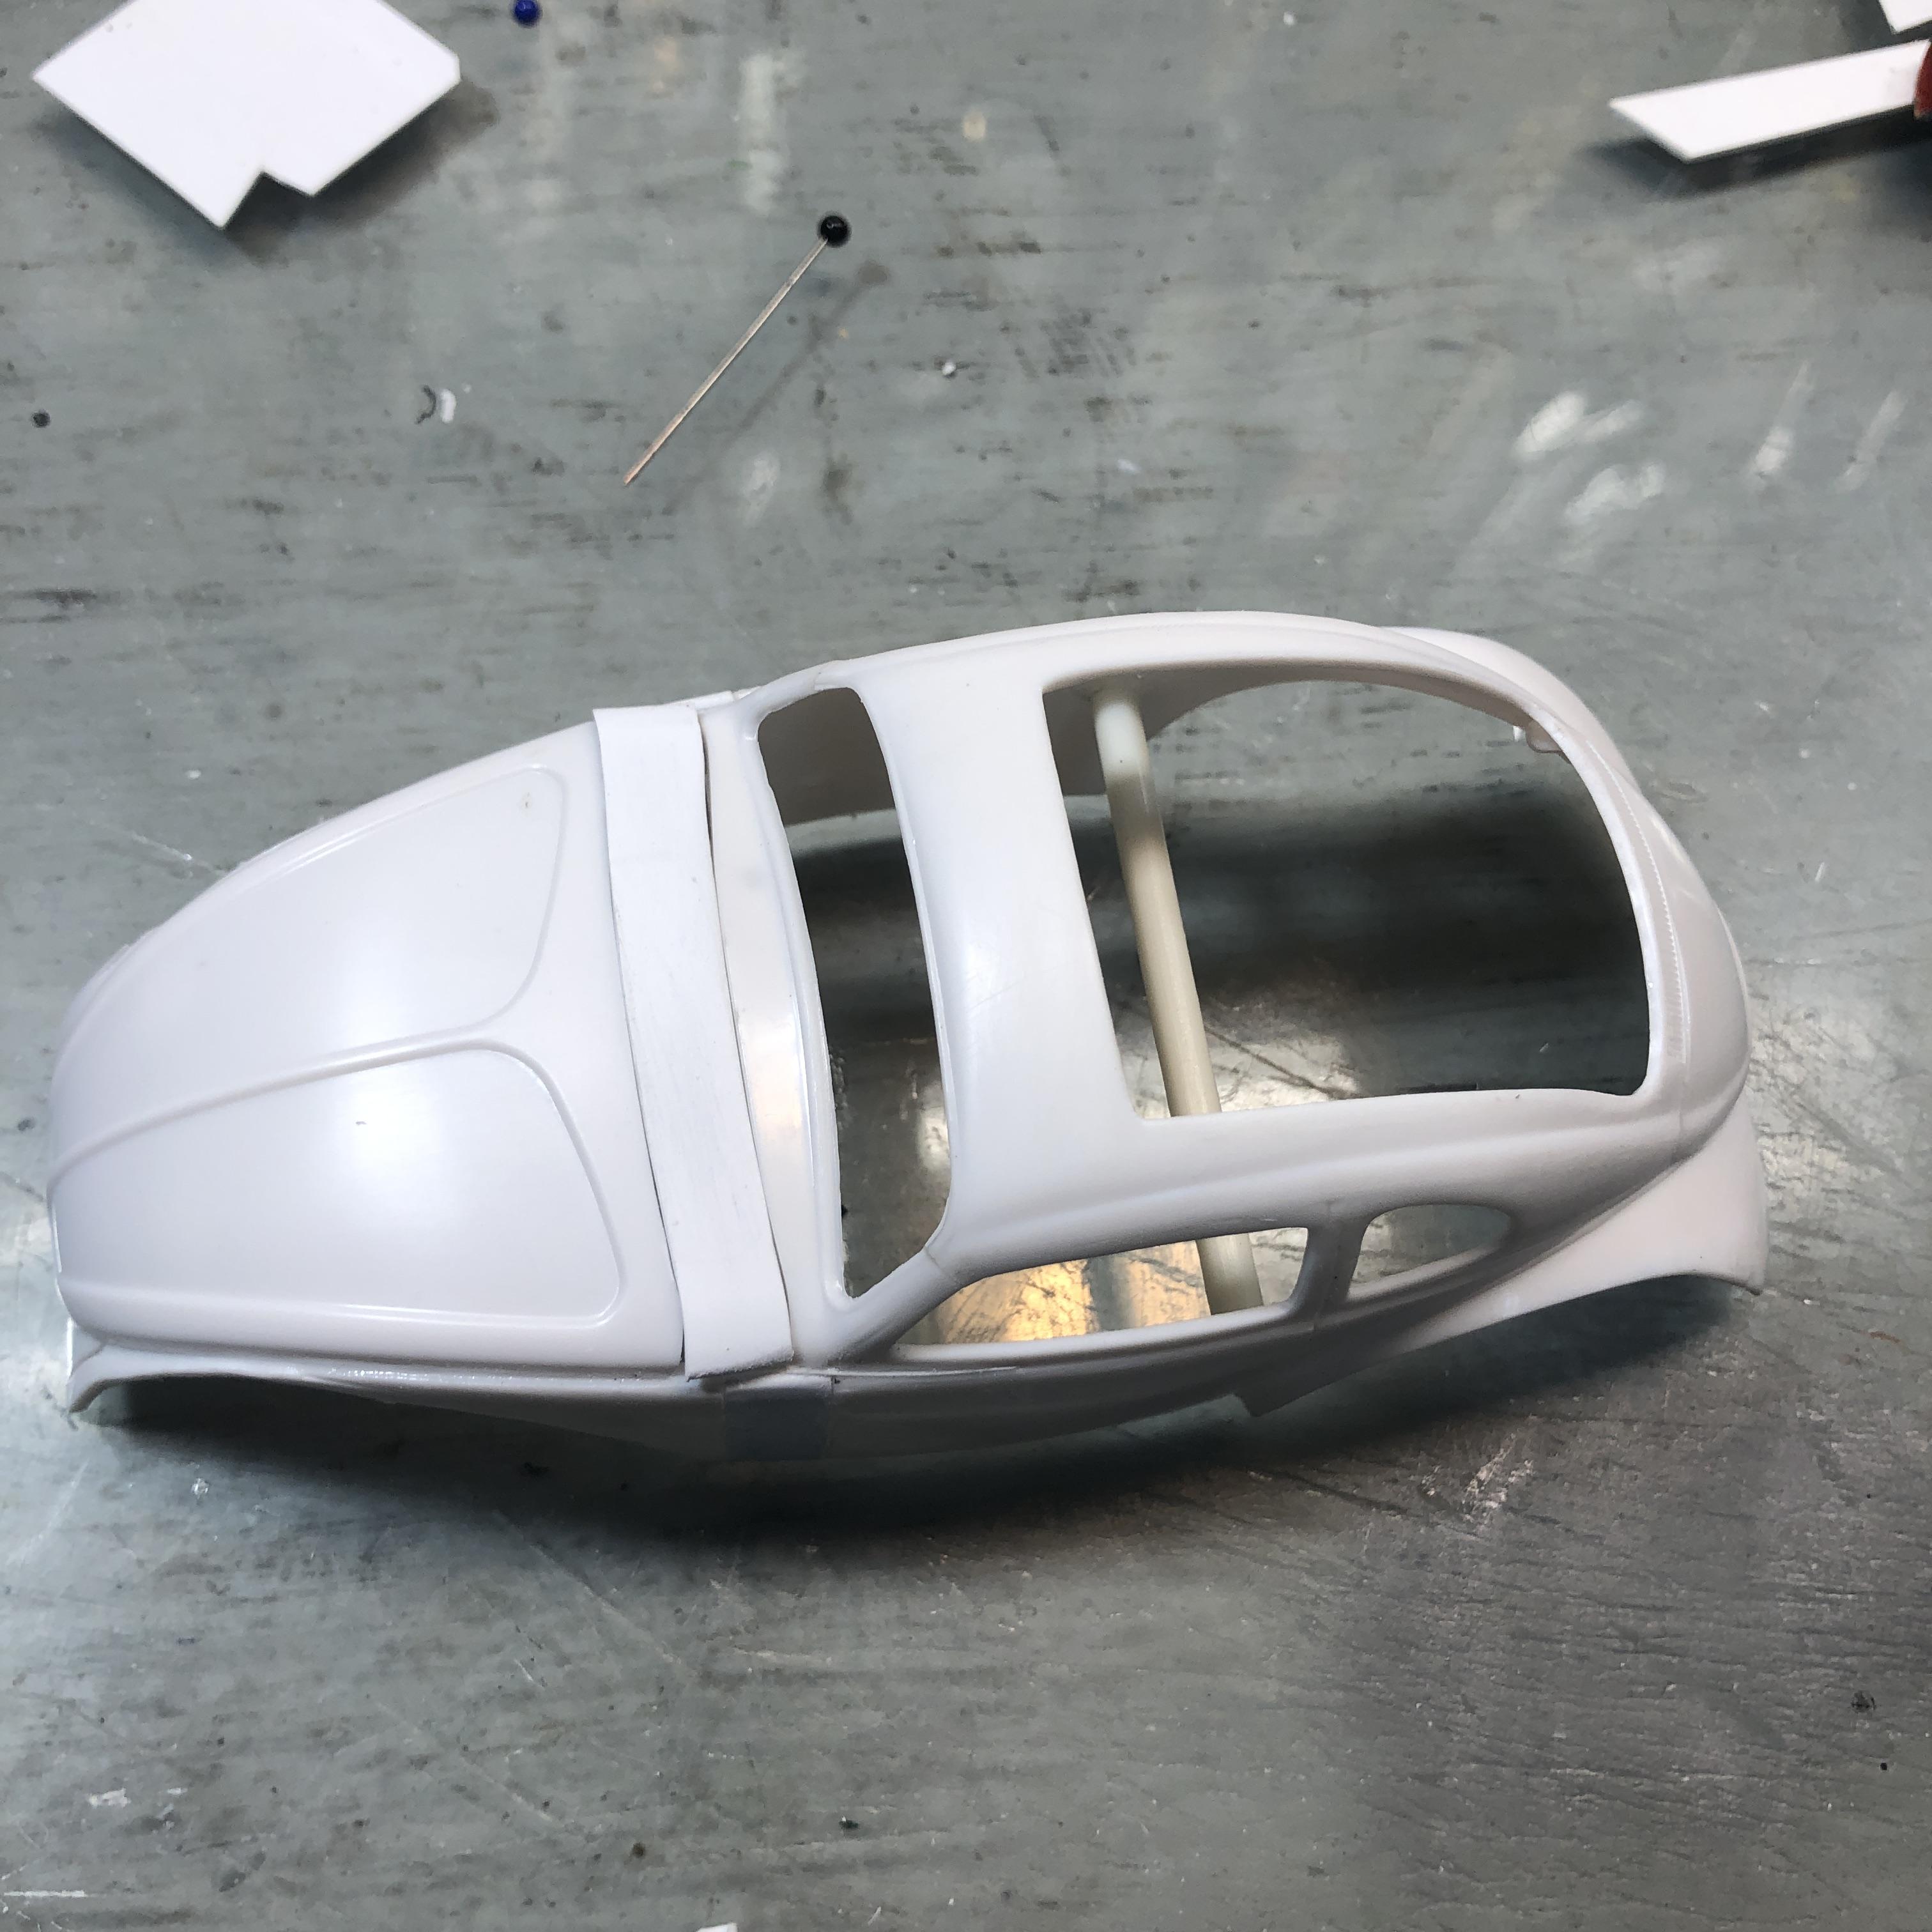
Time to start a new project and I figured a drag car is in order. This is a concept I've been mulling over for a while. AMT recently re-issued the shorty VW bug kit they call the 'Superbug Gasser' (?) whatever. The VW bug body lends itself to a AA/FA style (I know, it's been done before) and I figured I'd give it a try. I'm using an MPC funny car chassis components. I'm not in love with these MPC frames, but it will do fine for this project. The frame will be shortened. The plans are to heavily modify the body with fenders cut off, top chopped, front extended and body made taller...let's rev up the Sawzall, shall we???? The majority of the parts will be from these two kits, with a few other bits and pieces added from other kits.... The 'yard sale' of parts thrown on the bench. I have made a few markings on the body where the surgery will be performed.... I hogged out the rear fenders.... I cut away most of the roof.... I removed the front fenders... Next the chop. I'm going to brace the body with some sprue so it doesn't get all wonky while the roof is taken off. The plan is to cut off the cowl and then slide it back so the dropped down A pillars on the top and bottom will align. I'm most likely to separate the hood and fender pieces on the body (cut along the front door line?) and then extend that part and fill in middle section....more to follow.... -RRR
-
Sweet!!! -RRR
-
PACERS, Fuel Altered, 1:16 brass, 1965
Rocking Rodney Rat replied to Mike Williams's topic in WIP: Drag Racing Models
This is next level stuff. Very interesting.... -RRR -
Thanks for the link!!! There is some MAD stuff in here, especially that Voodoo Larry kar!!! KRAZEEE!!!! That's a show I would definitely attend! -RRR
-
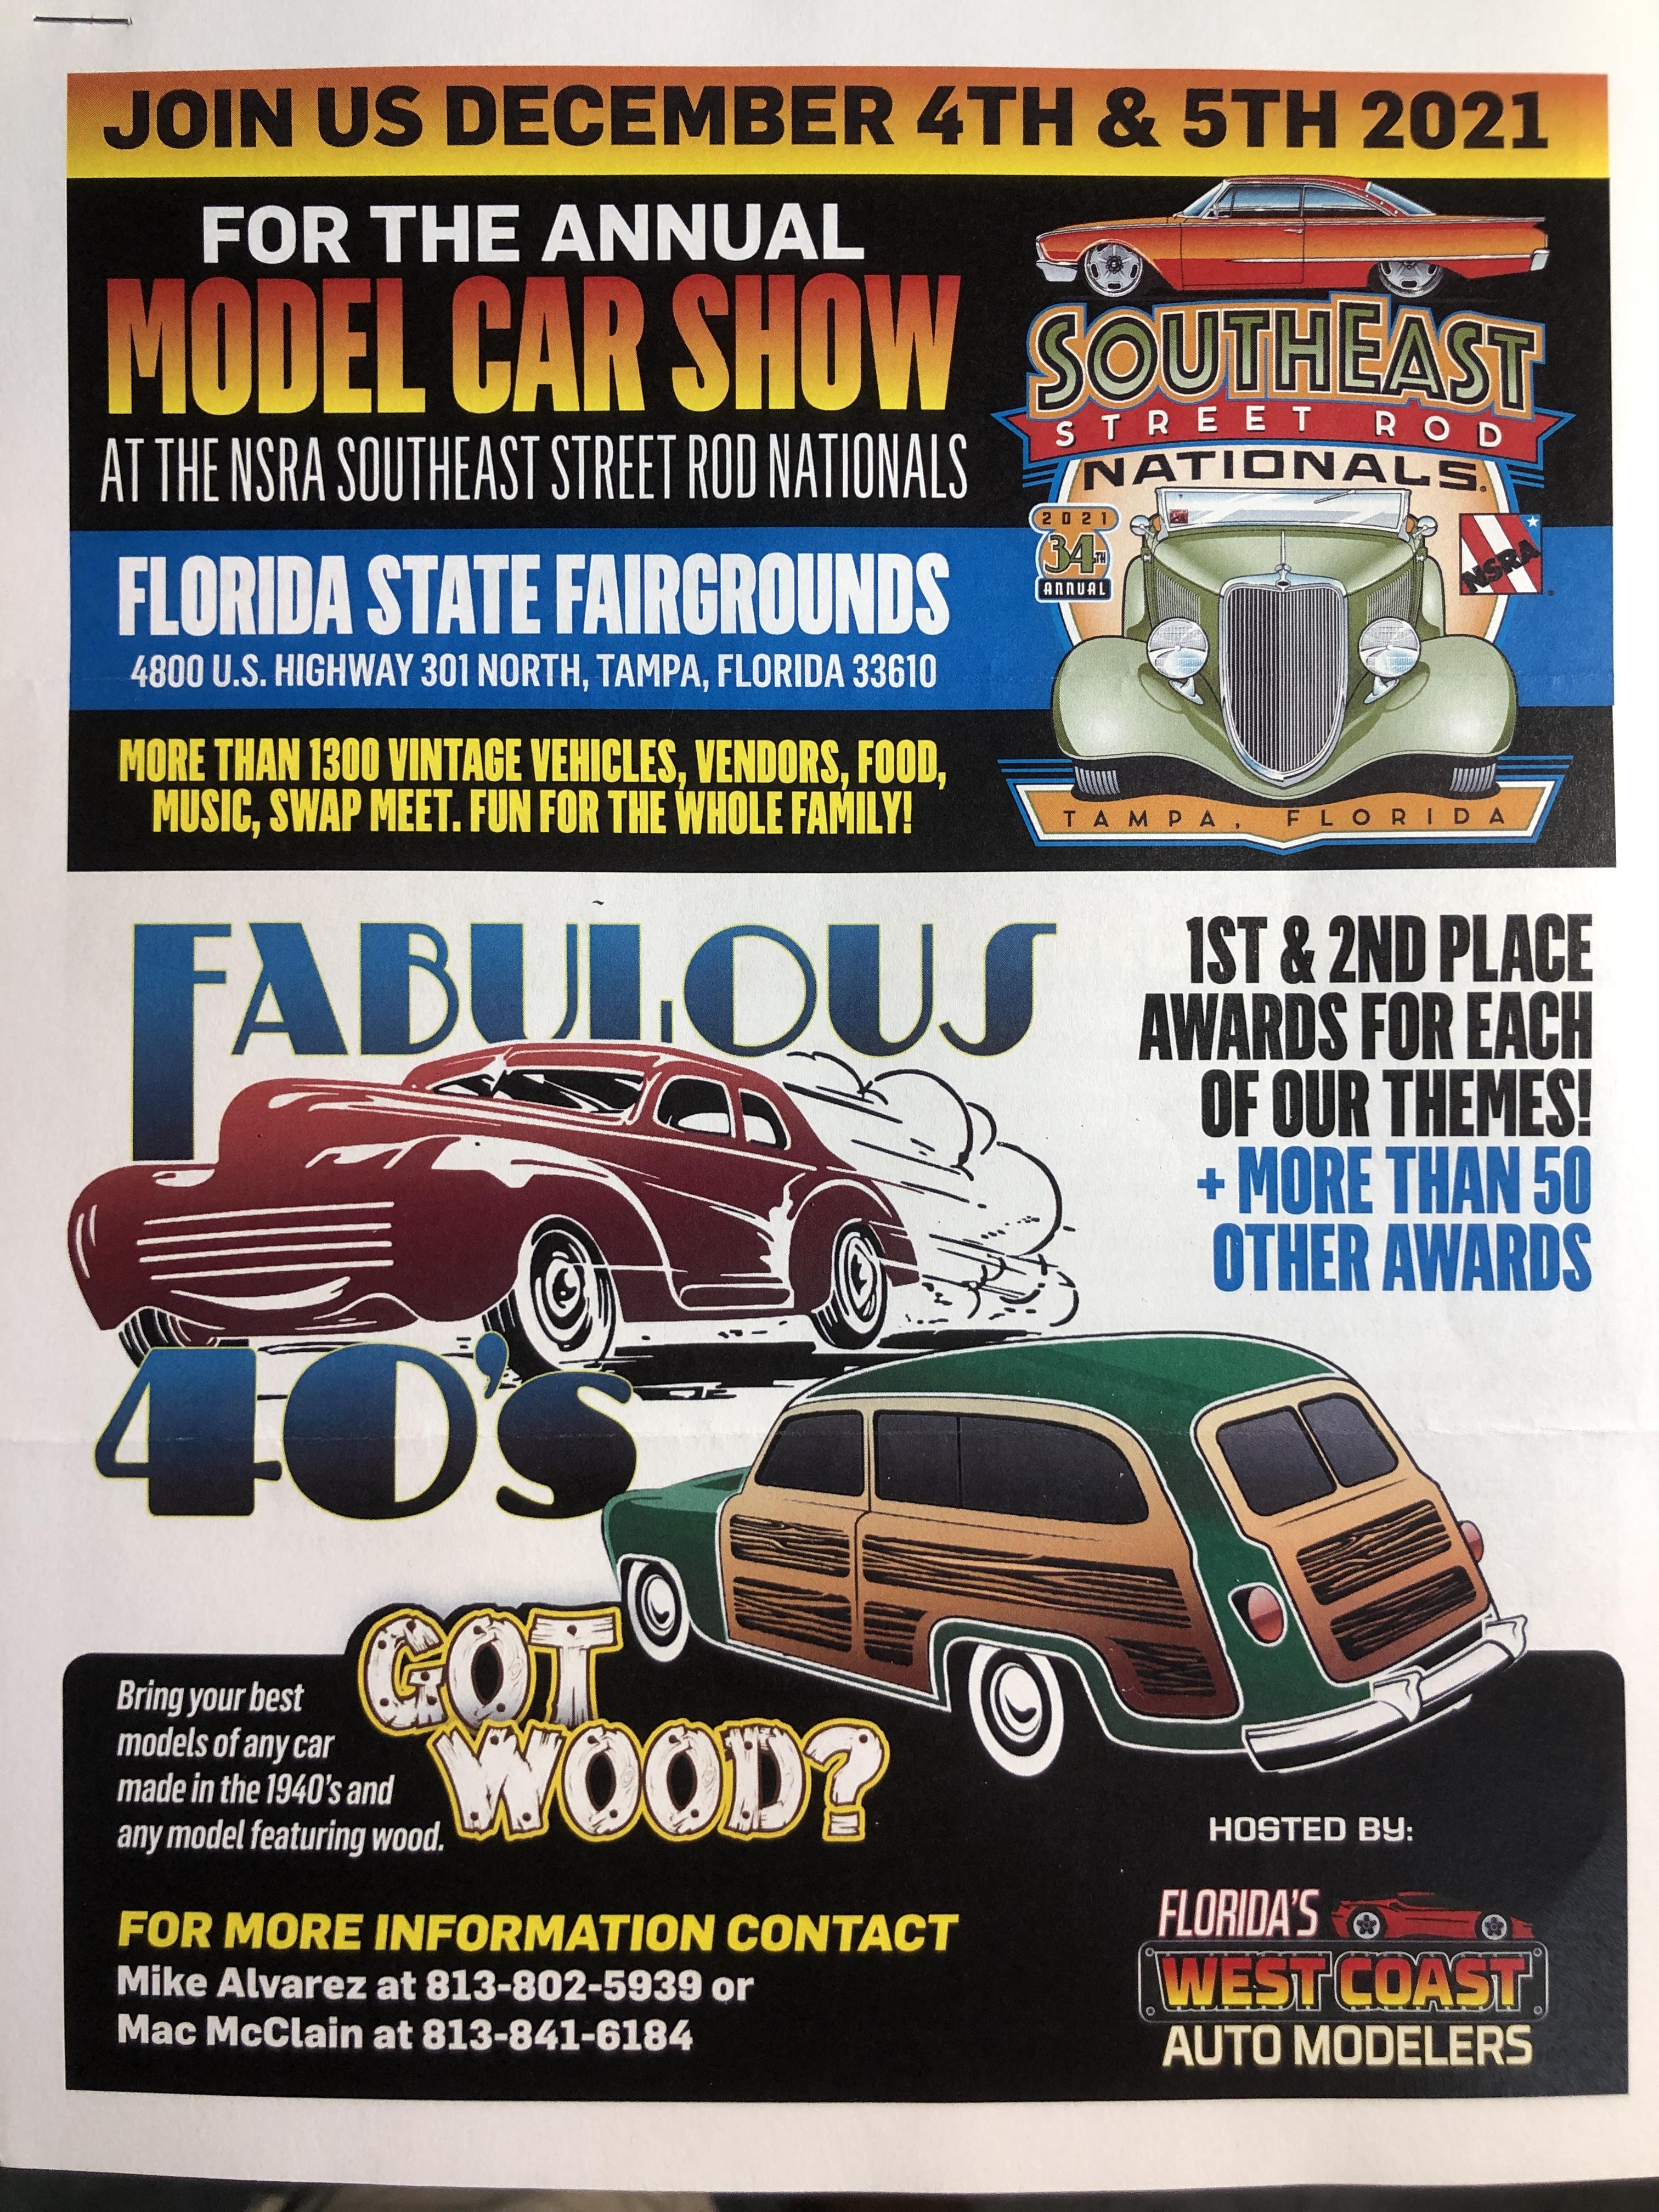
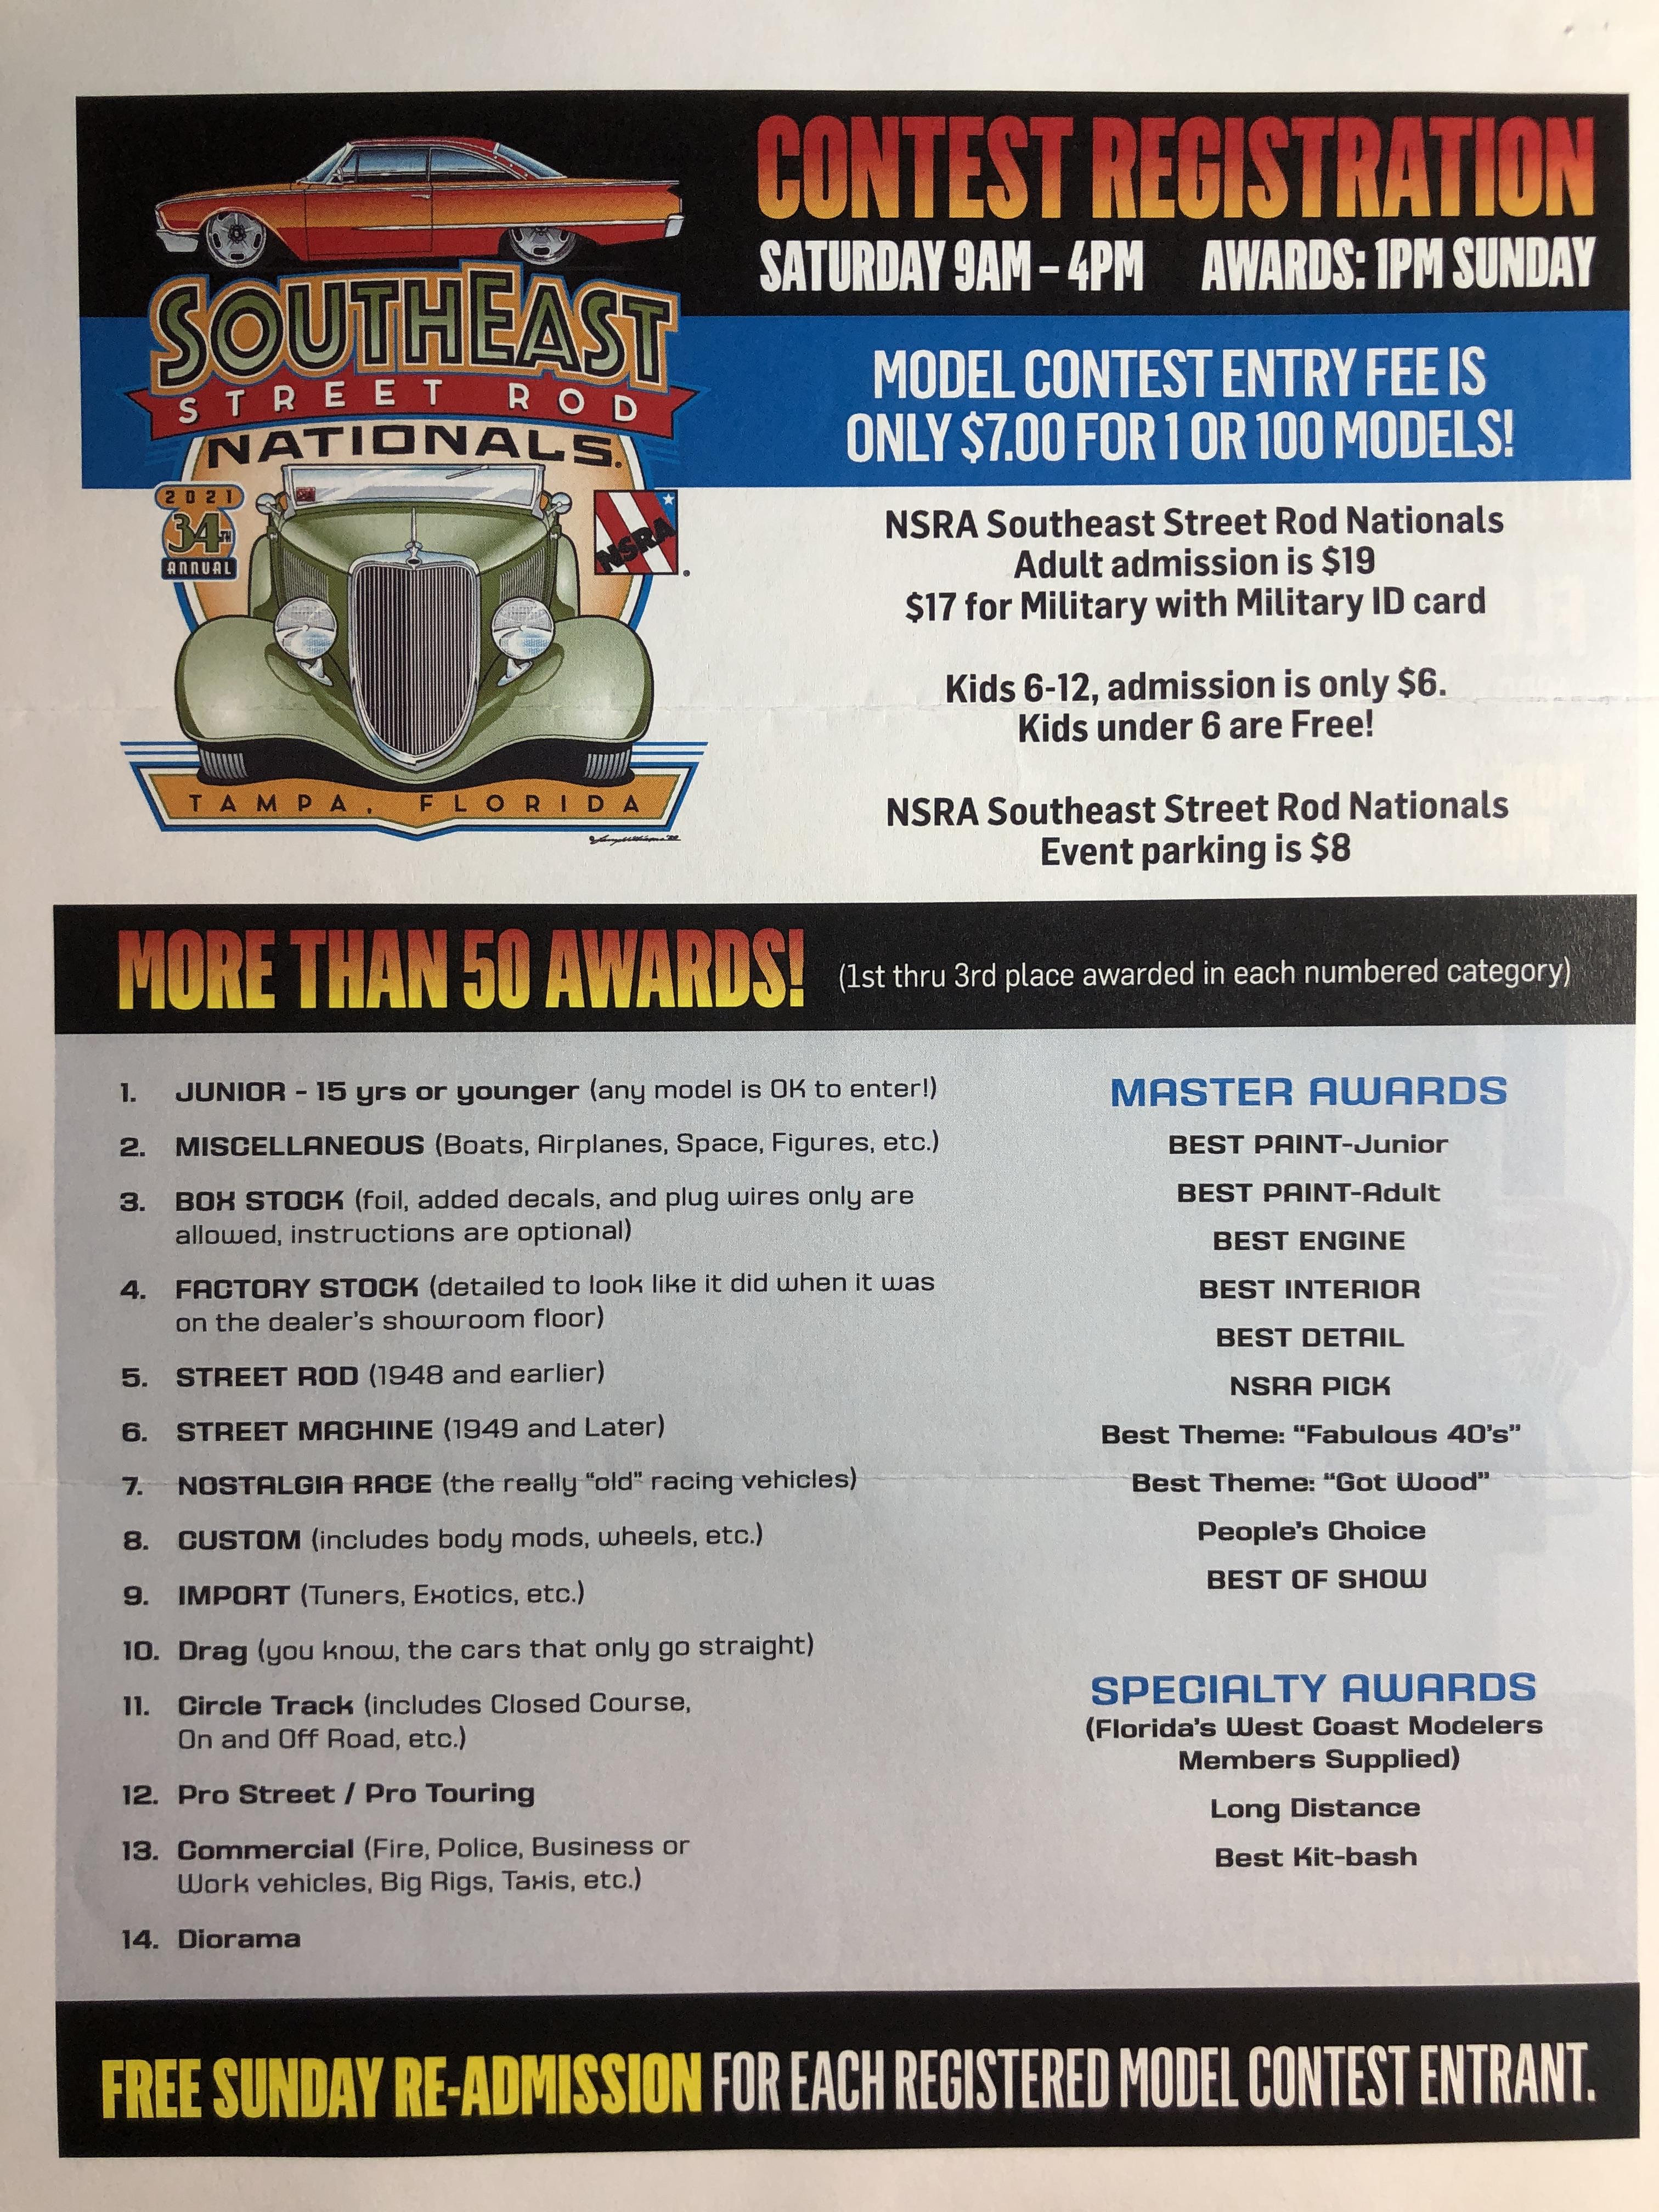
Contest/Show Announcements
Rocking Rodney Rat replied to Xingu's topic in General Automotive Talk (Trucks and Cars)
-
Chopped '32 Tudor Sedan hot rod
Rocking Rodney Rat replied to Rocking Rodney Rat's topic in Model Cars
I hear ya. I'm a year younger.... -RRR -
I'm surprised it didn't have "FREE CANDY!" spray painted on the side..... -RRR
-
Chopped '32 Tudor Sedan hot rod
Rocking Rodney Rat replied to Rocking Rodney Rat's topic in Model Cars
Thanks, Claude. It seemed to me that the Testors "One Coat", "Extreme" (or whatever they were calling it before it was disco'd) was on the heavy side. I had problems with that series of paints bubbling up if it was applied a bit too heavy (a trend I have). I started decanting and spraying through the airbrush. I'm very interested to see what Revell comes up with for paints (not just clear). From what I understand it will be enamels. I really miss the Testors Metallizer colors. I'm getting a bit off topic here.... -RRR -
Chopped '32 Tudor Sedan hot rod
Rocking Rodney Rat replied to Rocking Rodney Rat's topic in Model Cars
Thanks for the kind compliments Claude. The Minwax seems to work well, it's giving me the best shine I've seen on my work (not saying that much?). I can lay on ten coats of Tamiya clear and it never gets as shiny as Minwax. That's the positive. Yes, it is thin and can run, but will level out nicely. I will hold on to a part after clearing and then move the part around to make sure any heavy paint runs away and levels out. The trick to painting, is lay down a light coat, wait for about 7 to 10 minutes and lay on a heavy coat. It stays tacky for about 24 hours but dries very hard once it is. Cleared parts usually sit in the dehydrator for about 48 hours to make sure they're good and dry. The body of the sedan orange peeled because I put on the second coat too soon. The other thing I don't like about the Minwax is that it's very easy to lift after its on and dry. I tried masking over it to shoot flat black enamel for a cloth roof and the tape took the Minwax off (one reason I sanded of the cloth top on the sedan). Minwax is an enamel, I found that out when I painted some steering wheel spokes with Tamiya silver brushed on. Instant crazing. The Minwax does seem to sand well, I'm always very concerned about sanding through the clearcoat so I prevent that from happening by not doing it....? I hope this informative. What do you use/recommend as a clear top coat? I'm not married to this stuff, but I did buy a quart and seems it will last a few lifetimes.... -RRR -
Chopped '32 Tudor Sedan hot rod
Rocking Rodney Rat replied to Rocking Rodney Rat's topic in Model Cars
Thanks, TIM. It's always nice to get a compliment from the guy who is as close to a rock star as our hobby has.... -RRR -
Chopped '32 Tudor Sedan hot rod
Rocking Rodney Rat replied to Rocking Rodney Rat's topic in Model Cars
Yeah, I know, the colo(u)r choice was a trifle trendy...I promise I won't do it again any time soon. Thanks for the compliment, though! -
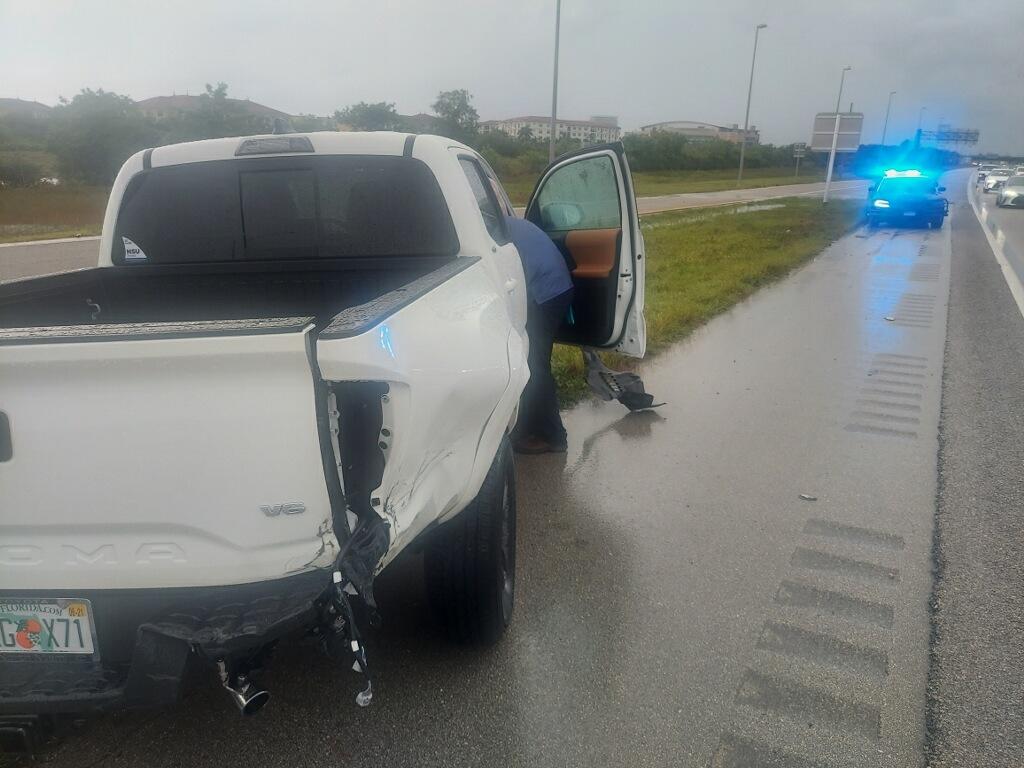
Brother of one of my customers, they're friends of mine. Driving too fast in the rain, hydroplanes into the jersey barrier, bounces off, takes another car with him, spins around facing traffic. Luckily no one was hurt..... -RRR
-
Chopped '32 Tudor Sedan hot rod
Rocking Rodney Rat replied to Rocking Rodney Rat's topic in Model Cars
-
Nice save! I love some of these wacky kits from yesteryear. Better without the decals, IMHO.... -RRR
-
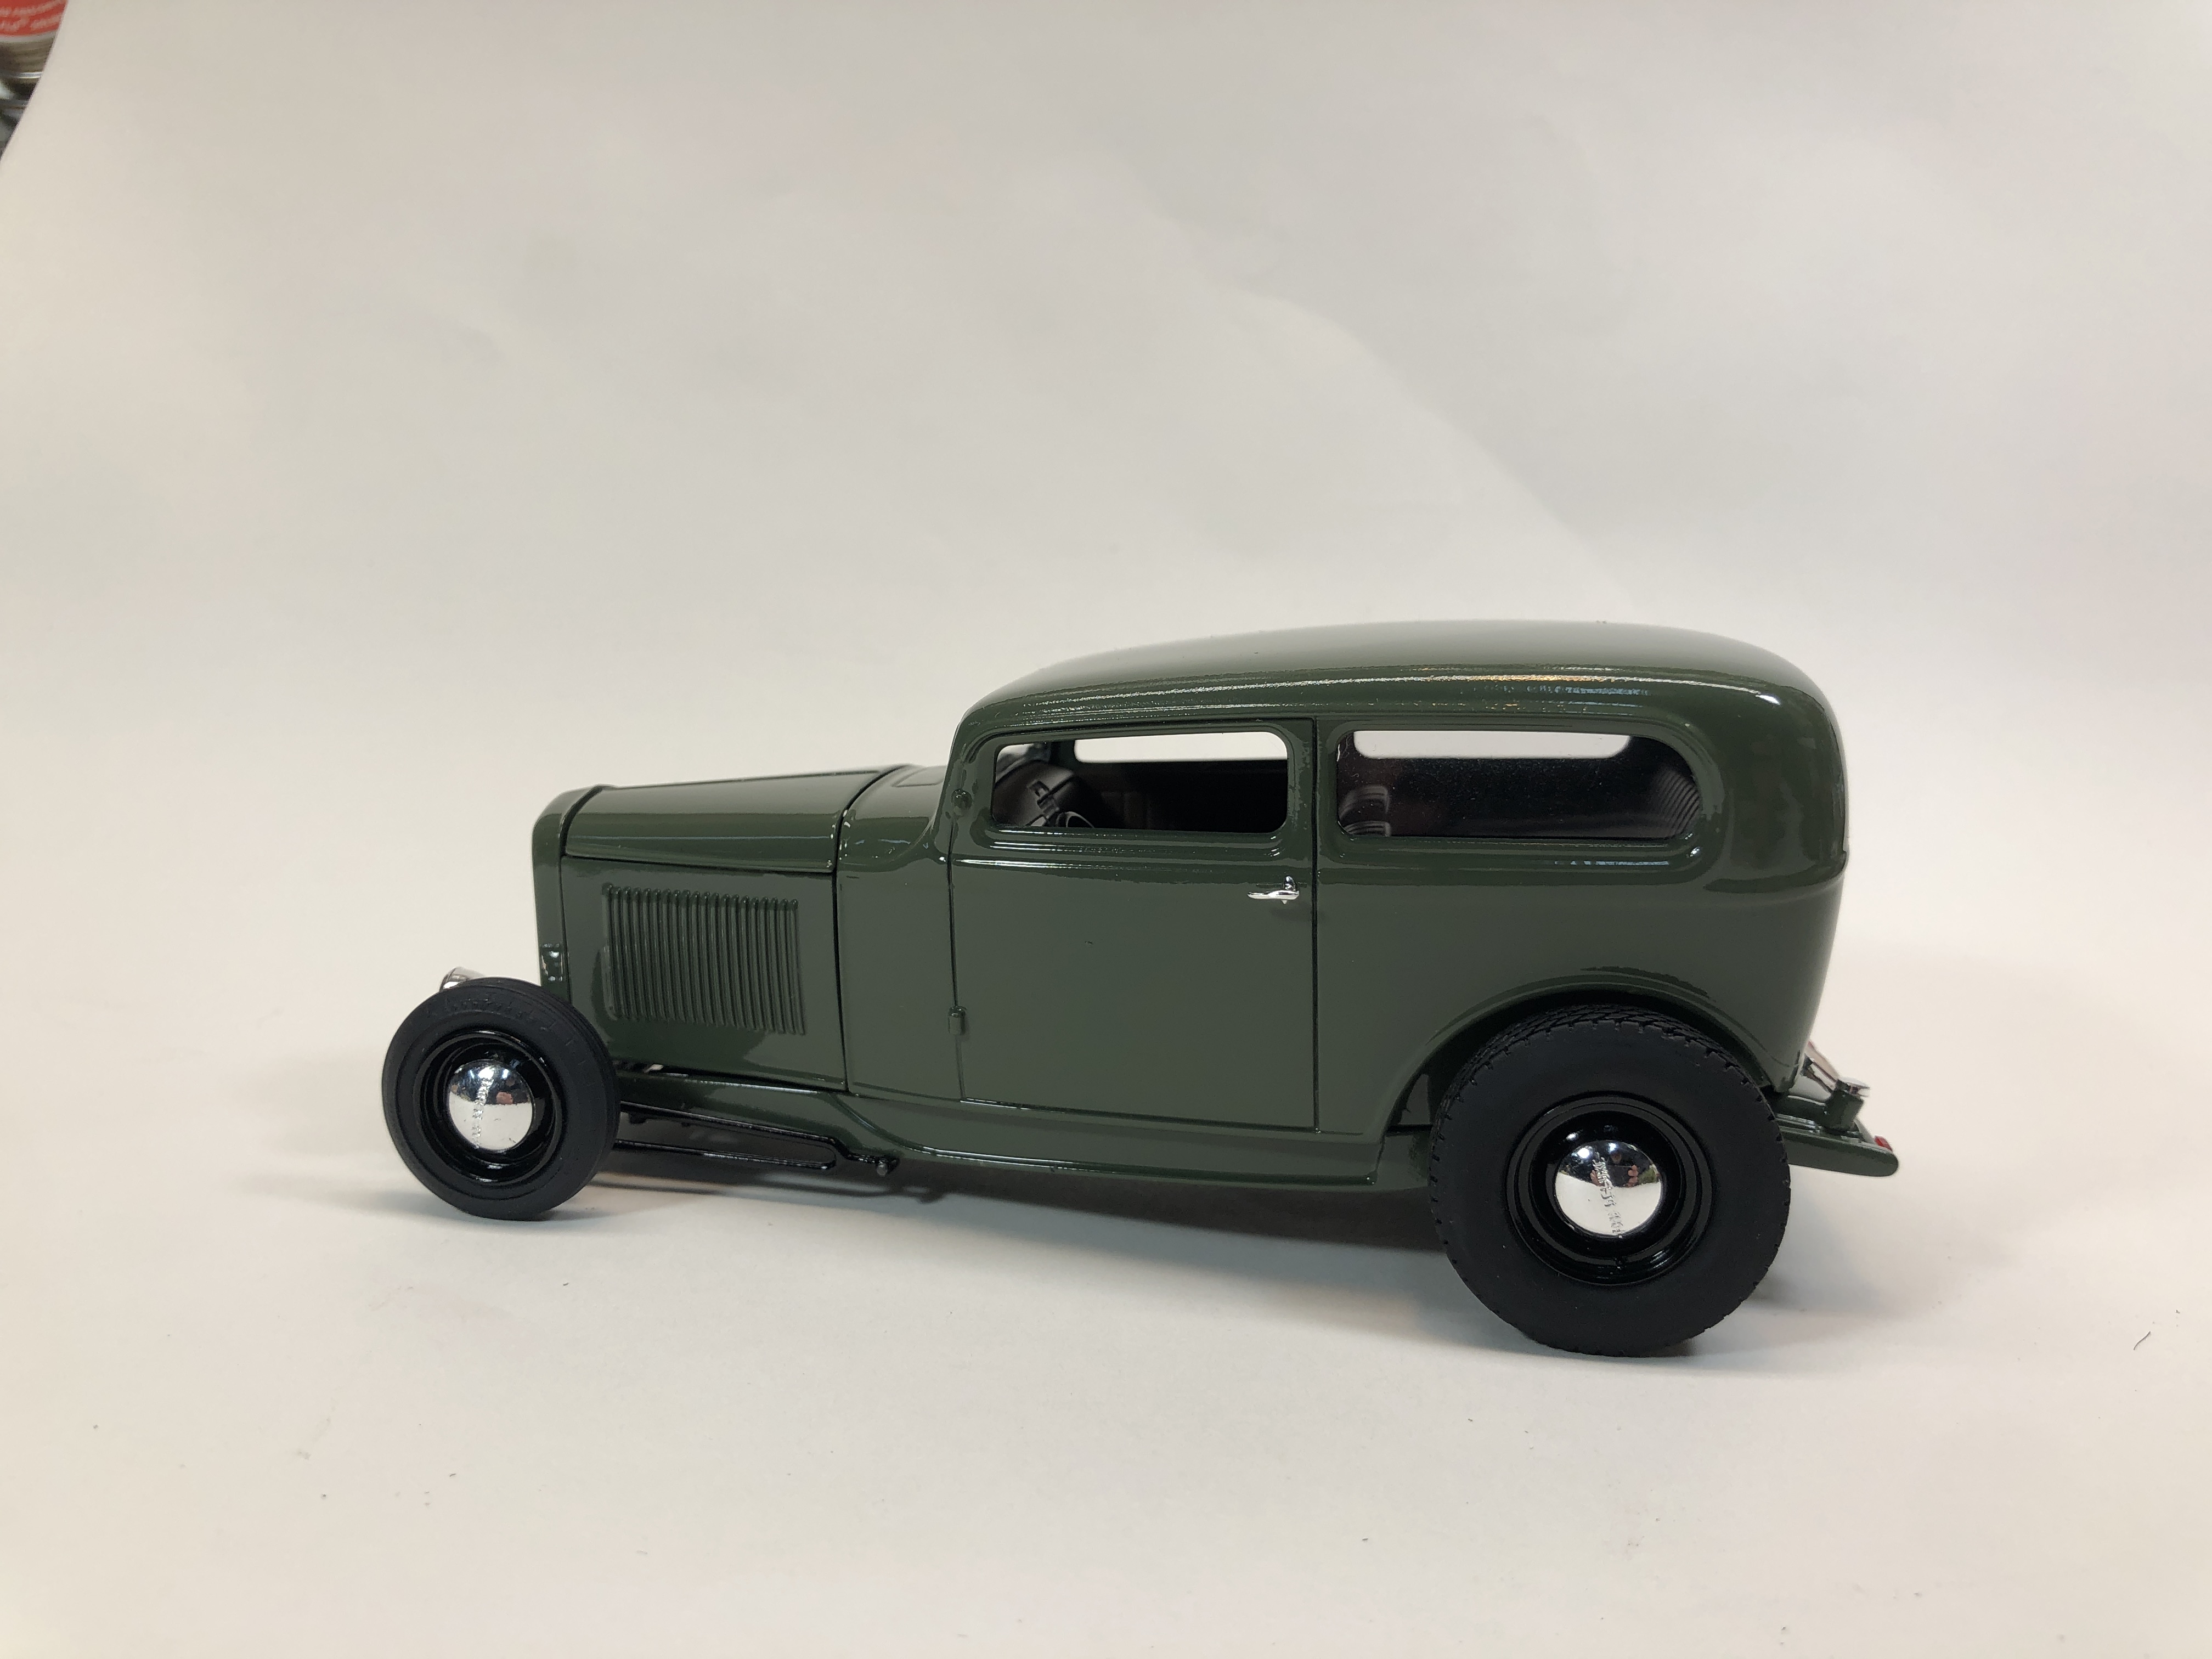
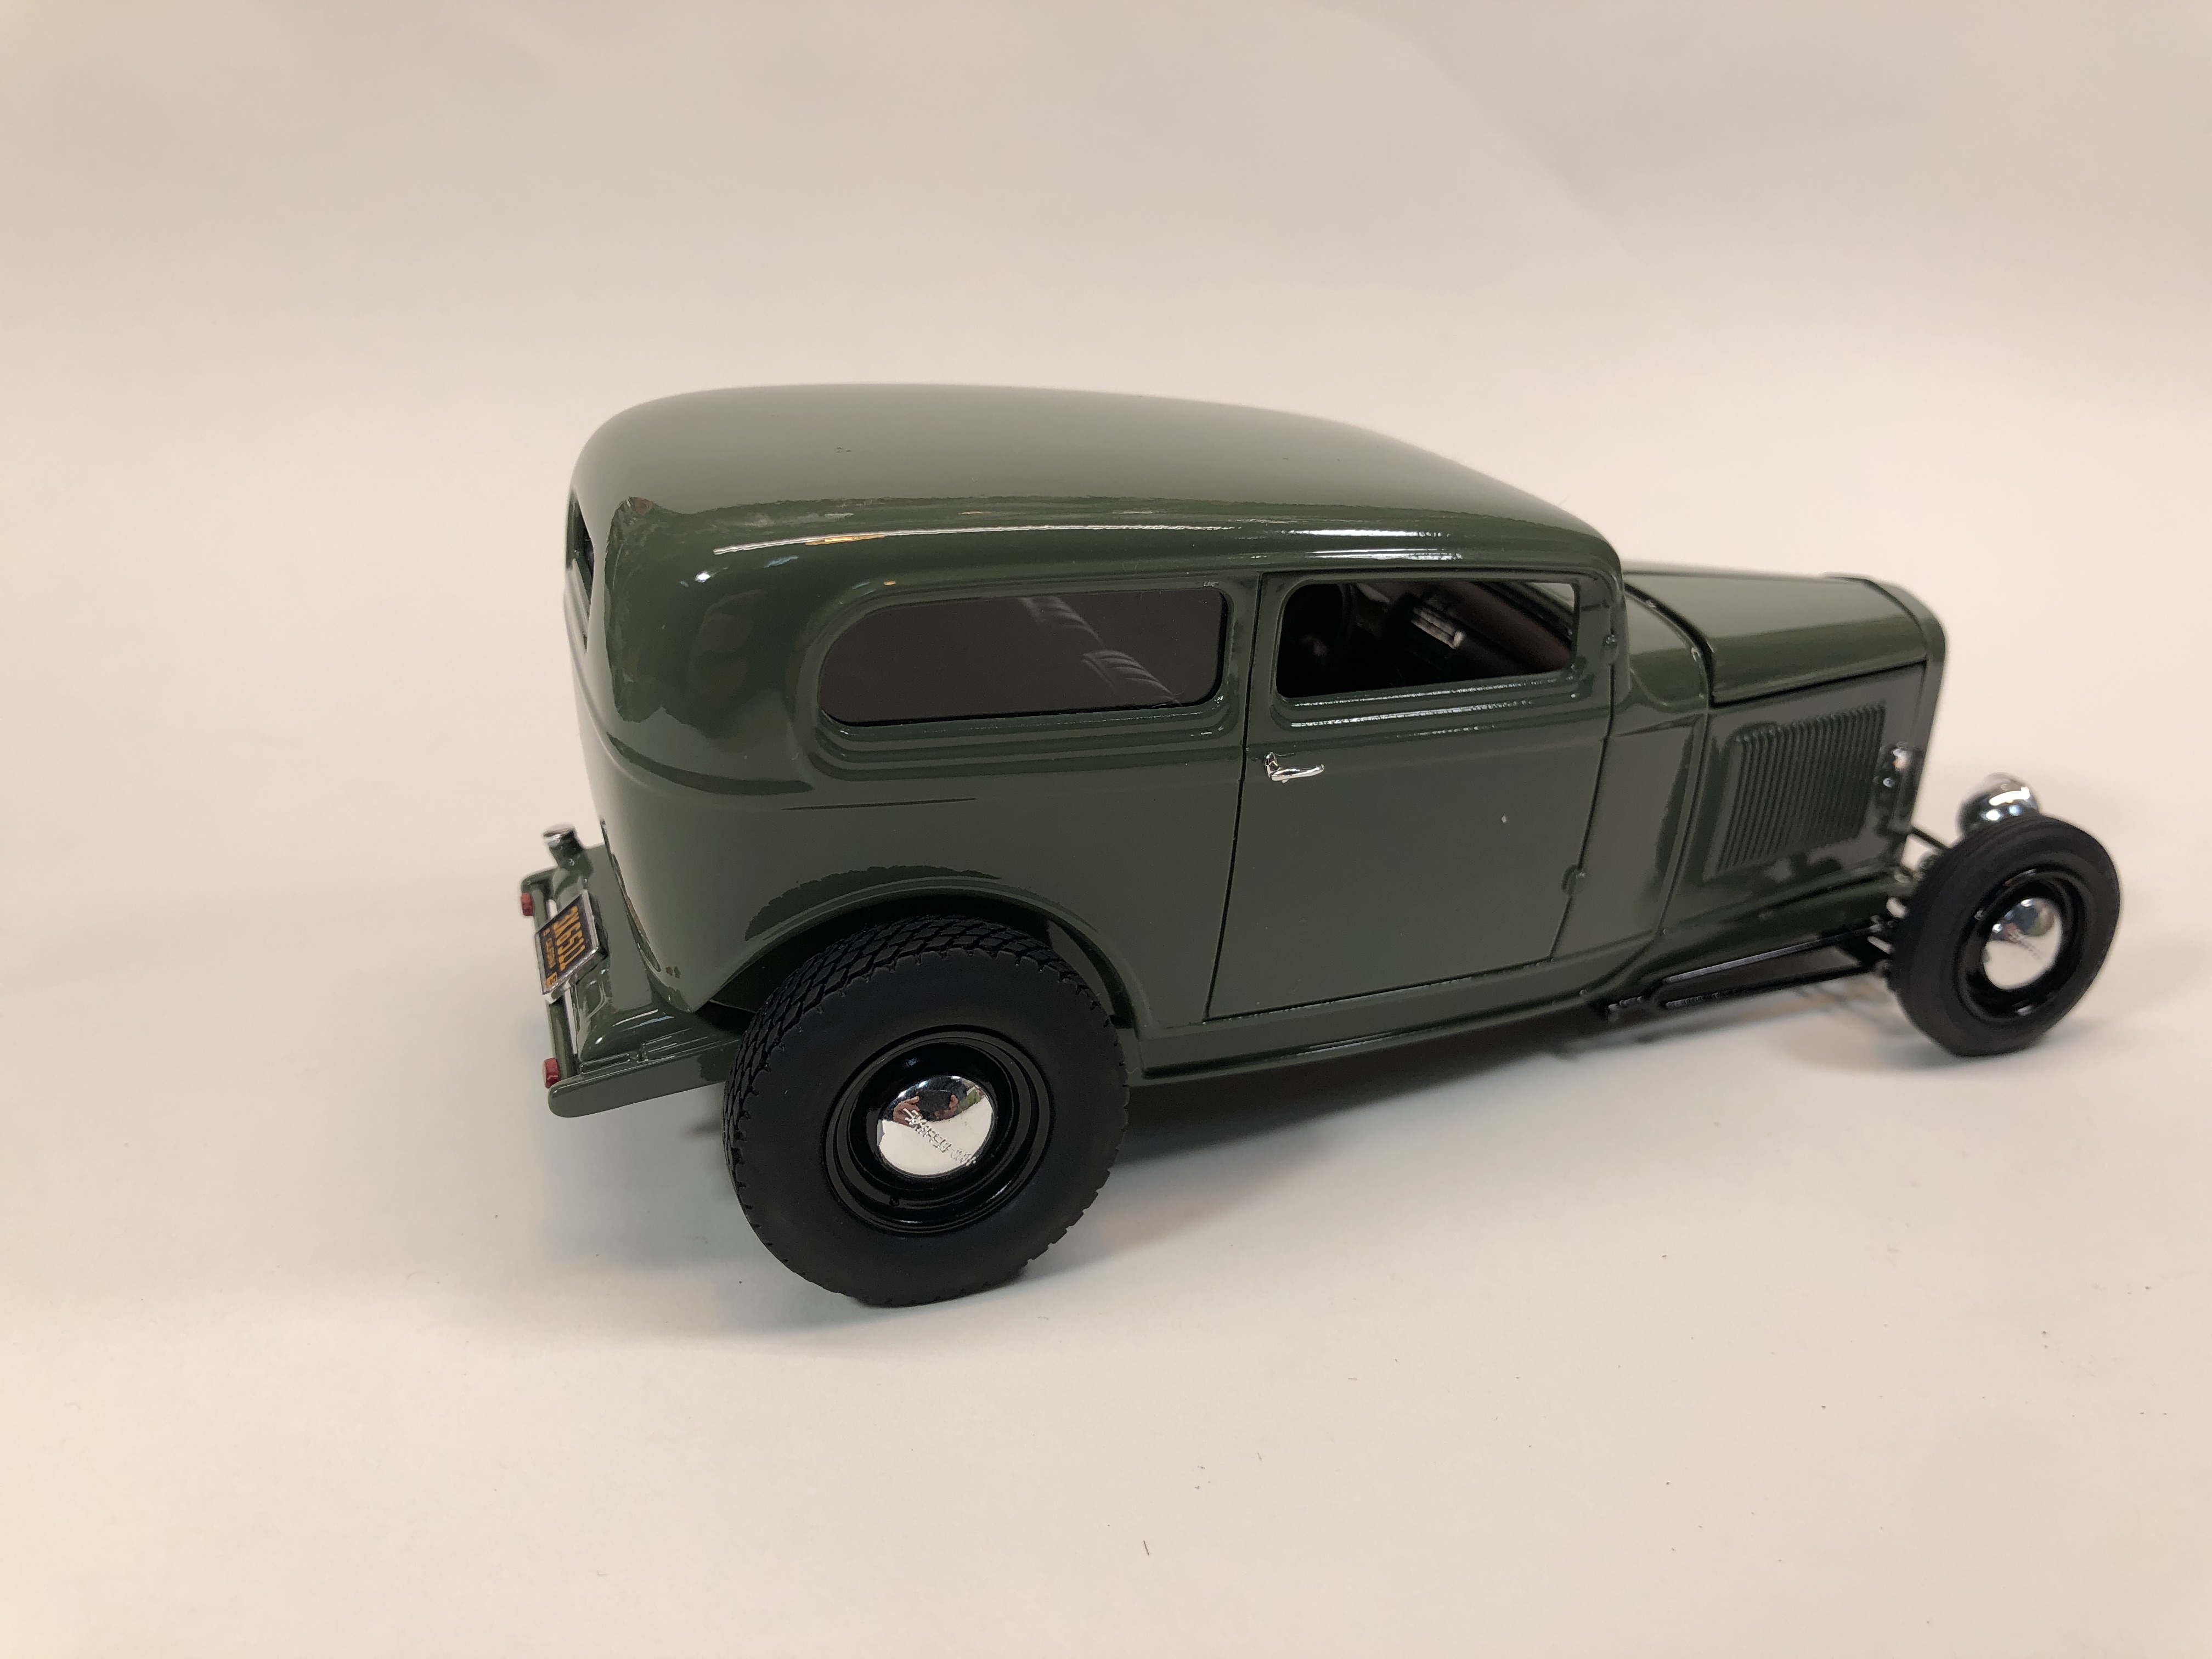
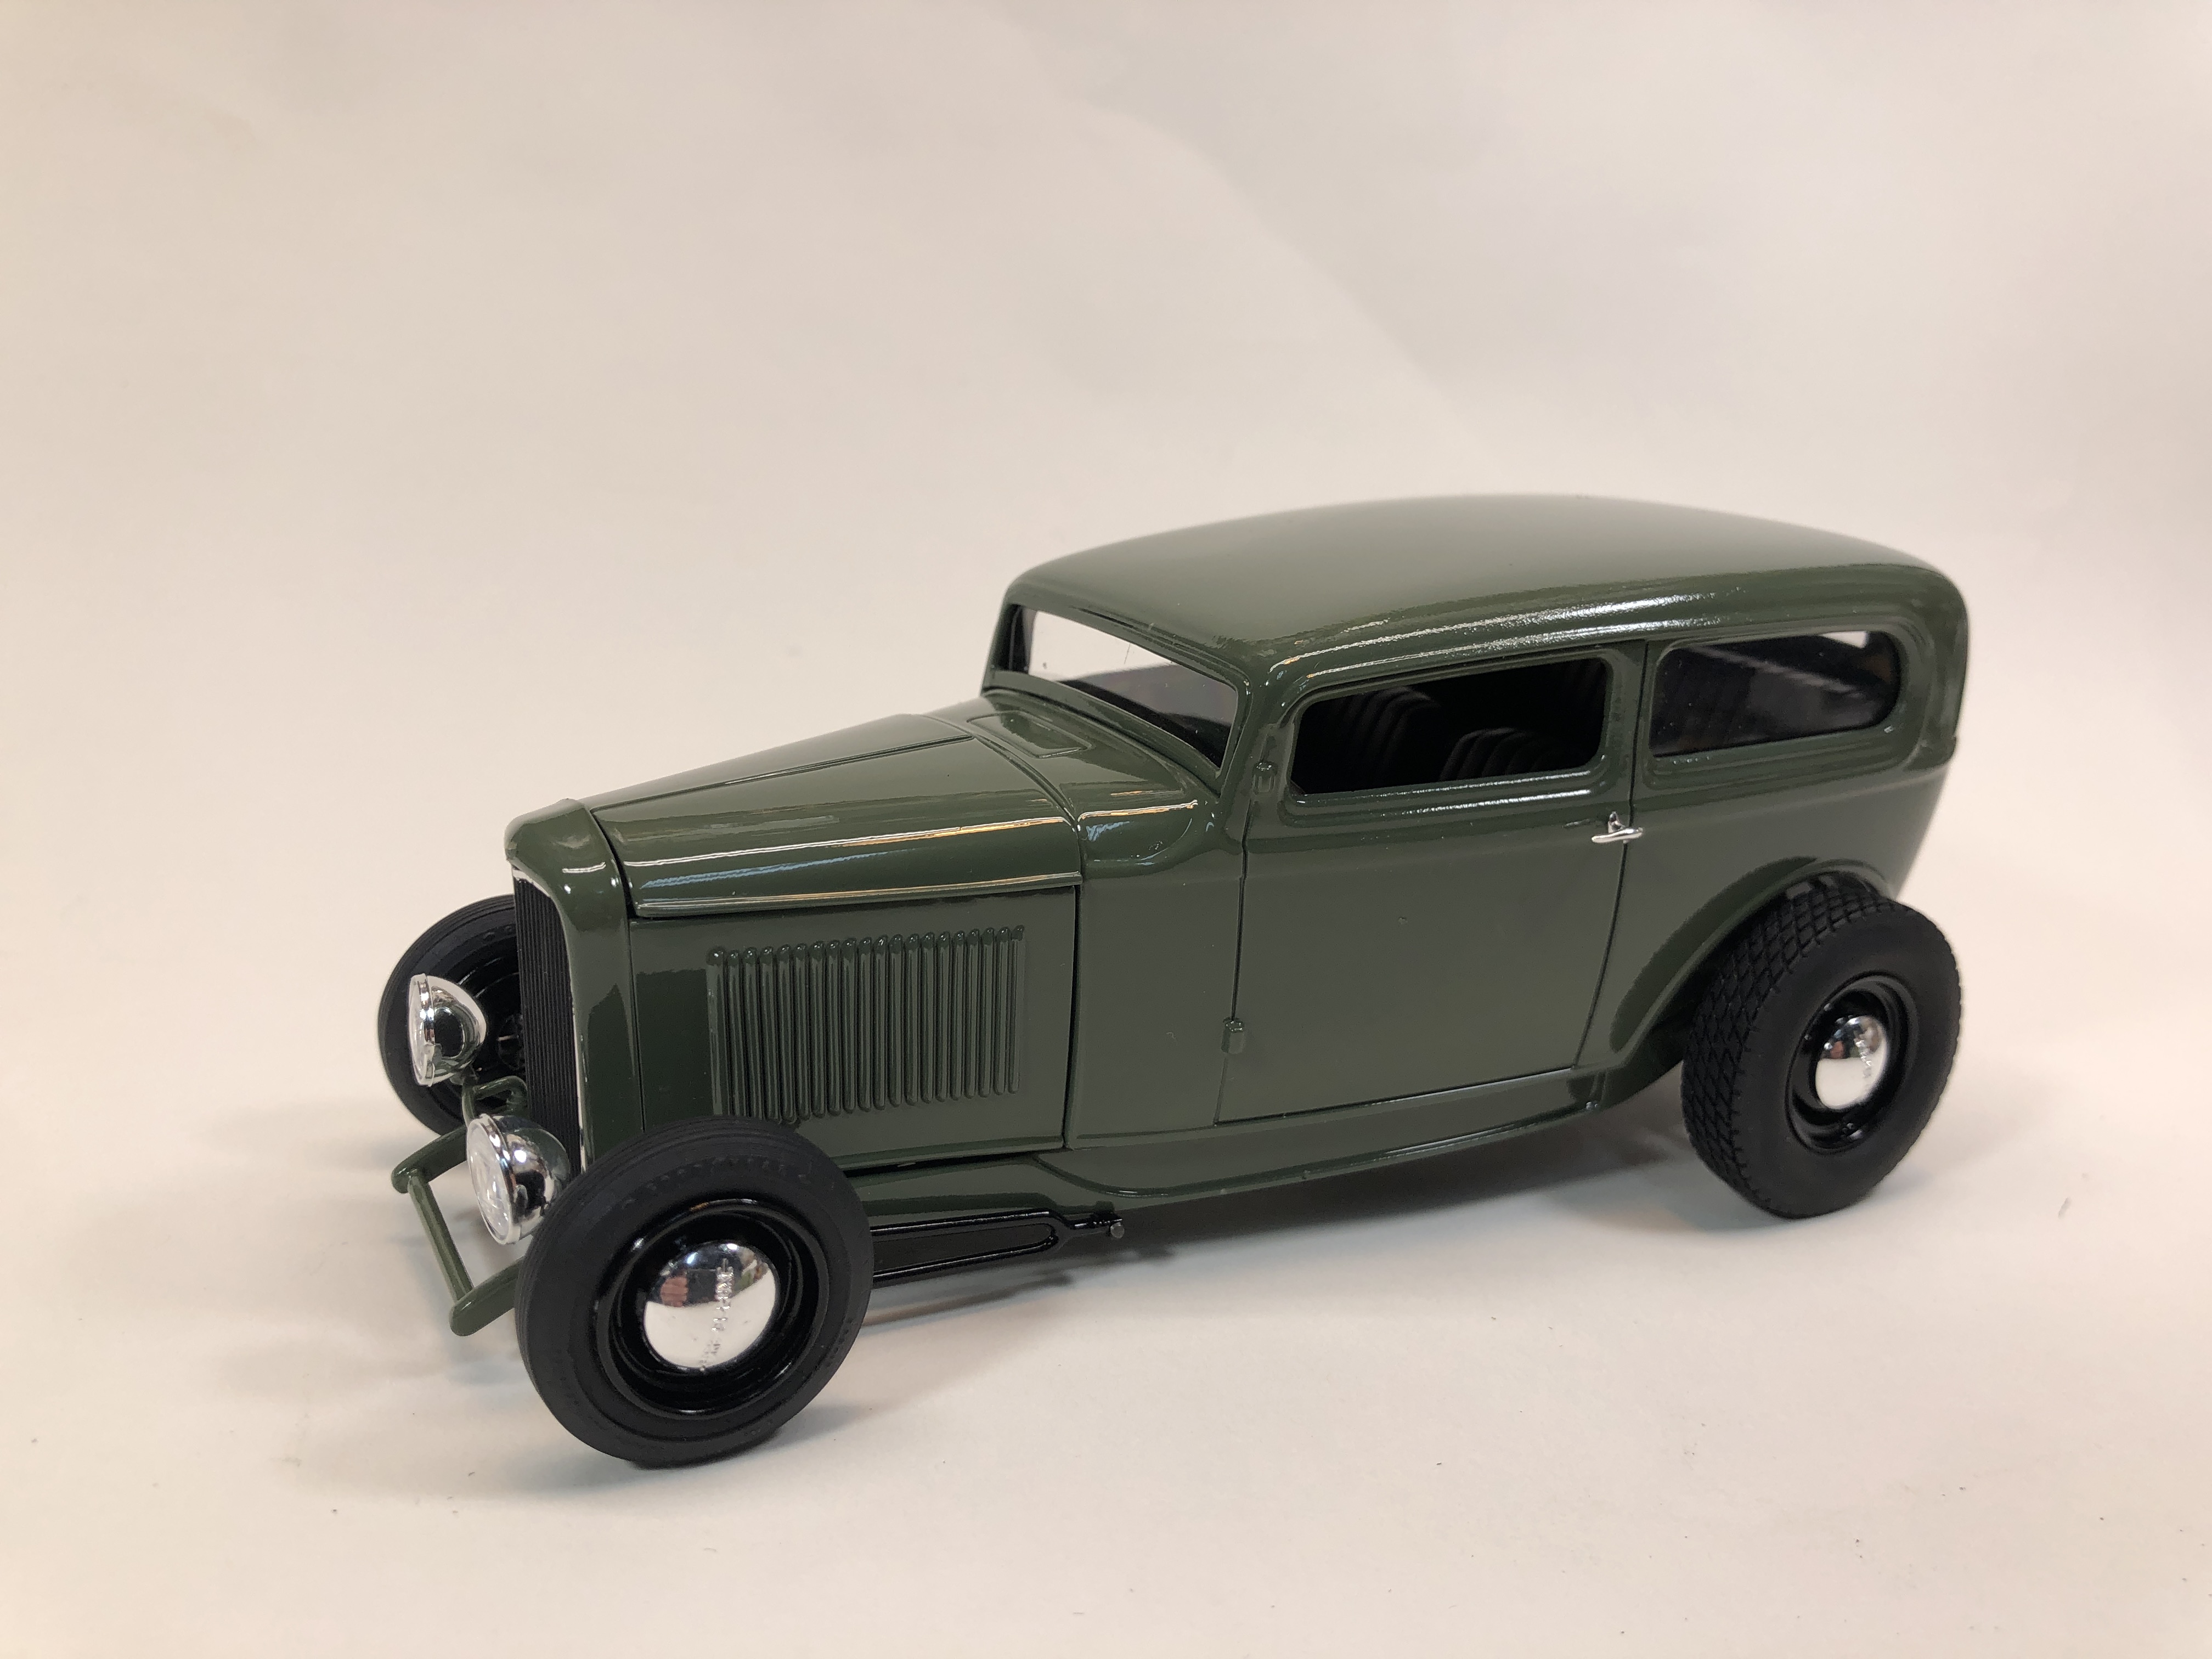
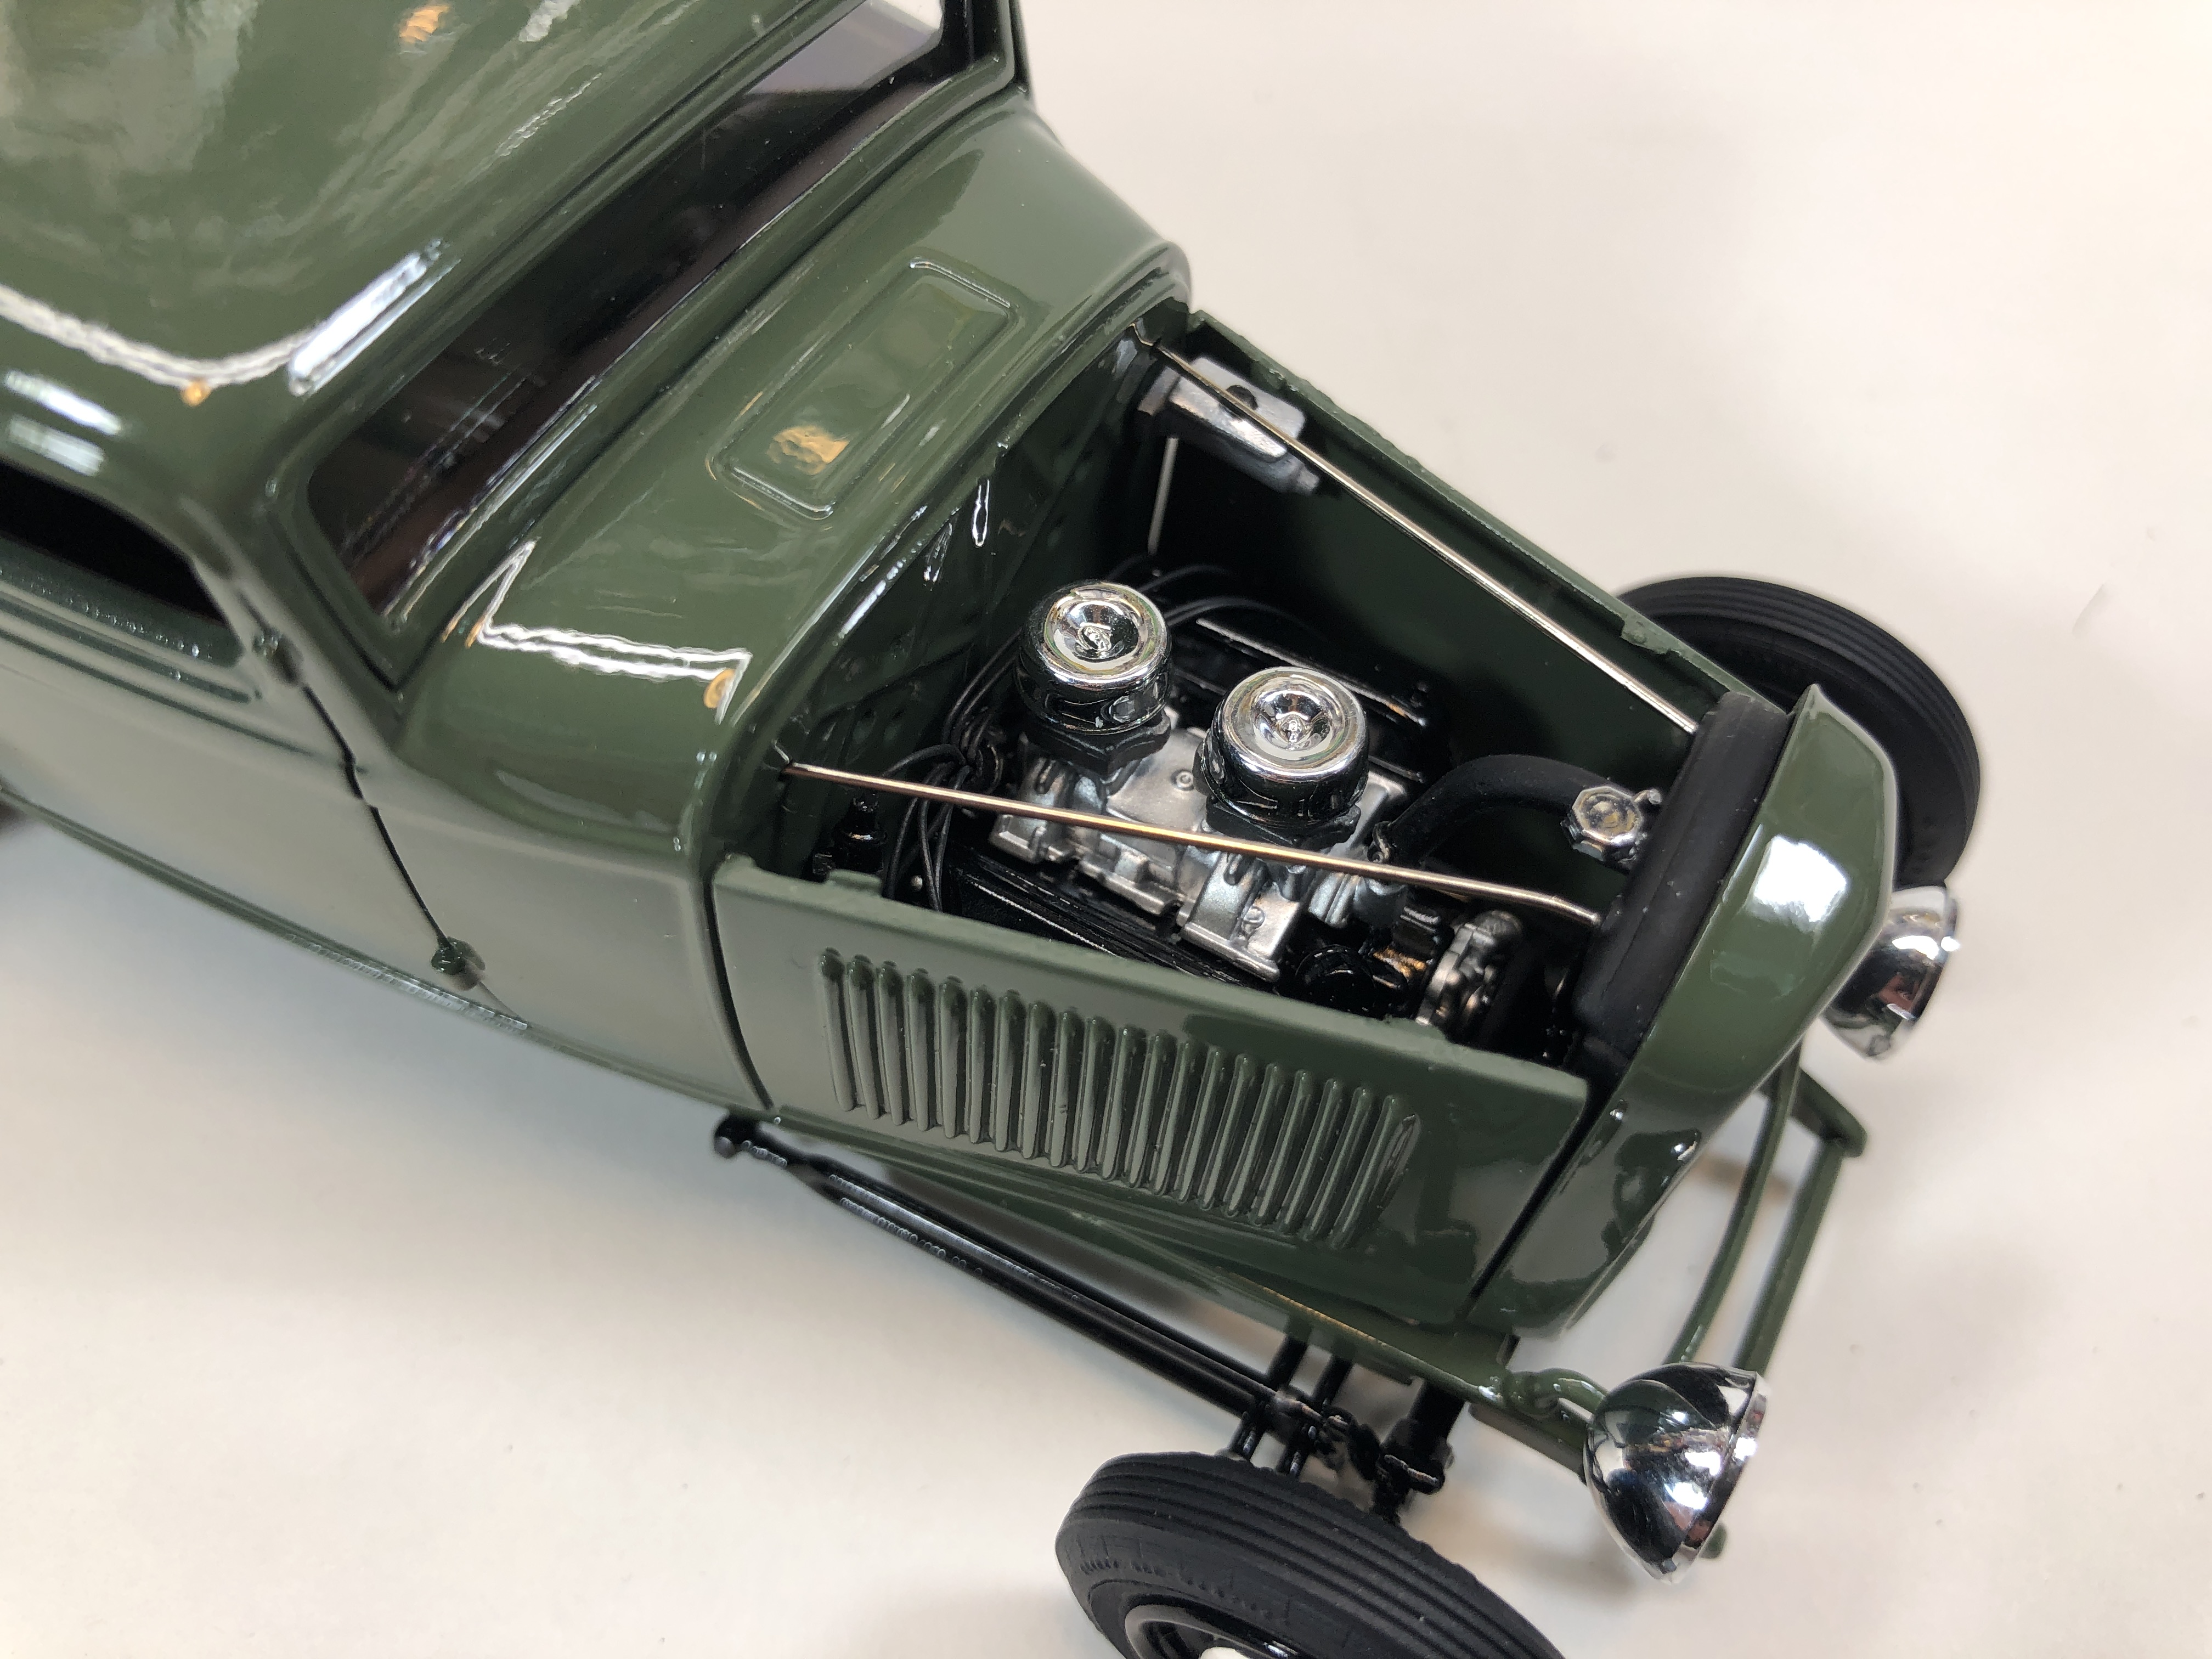
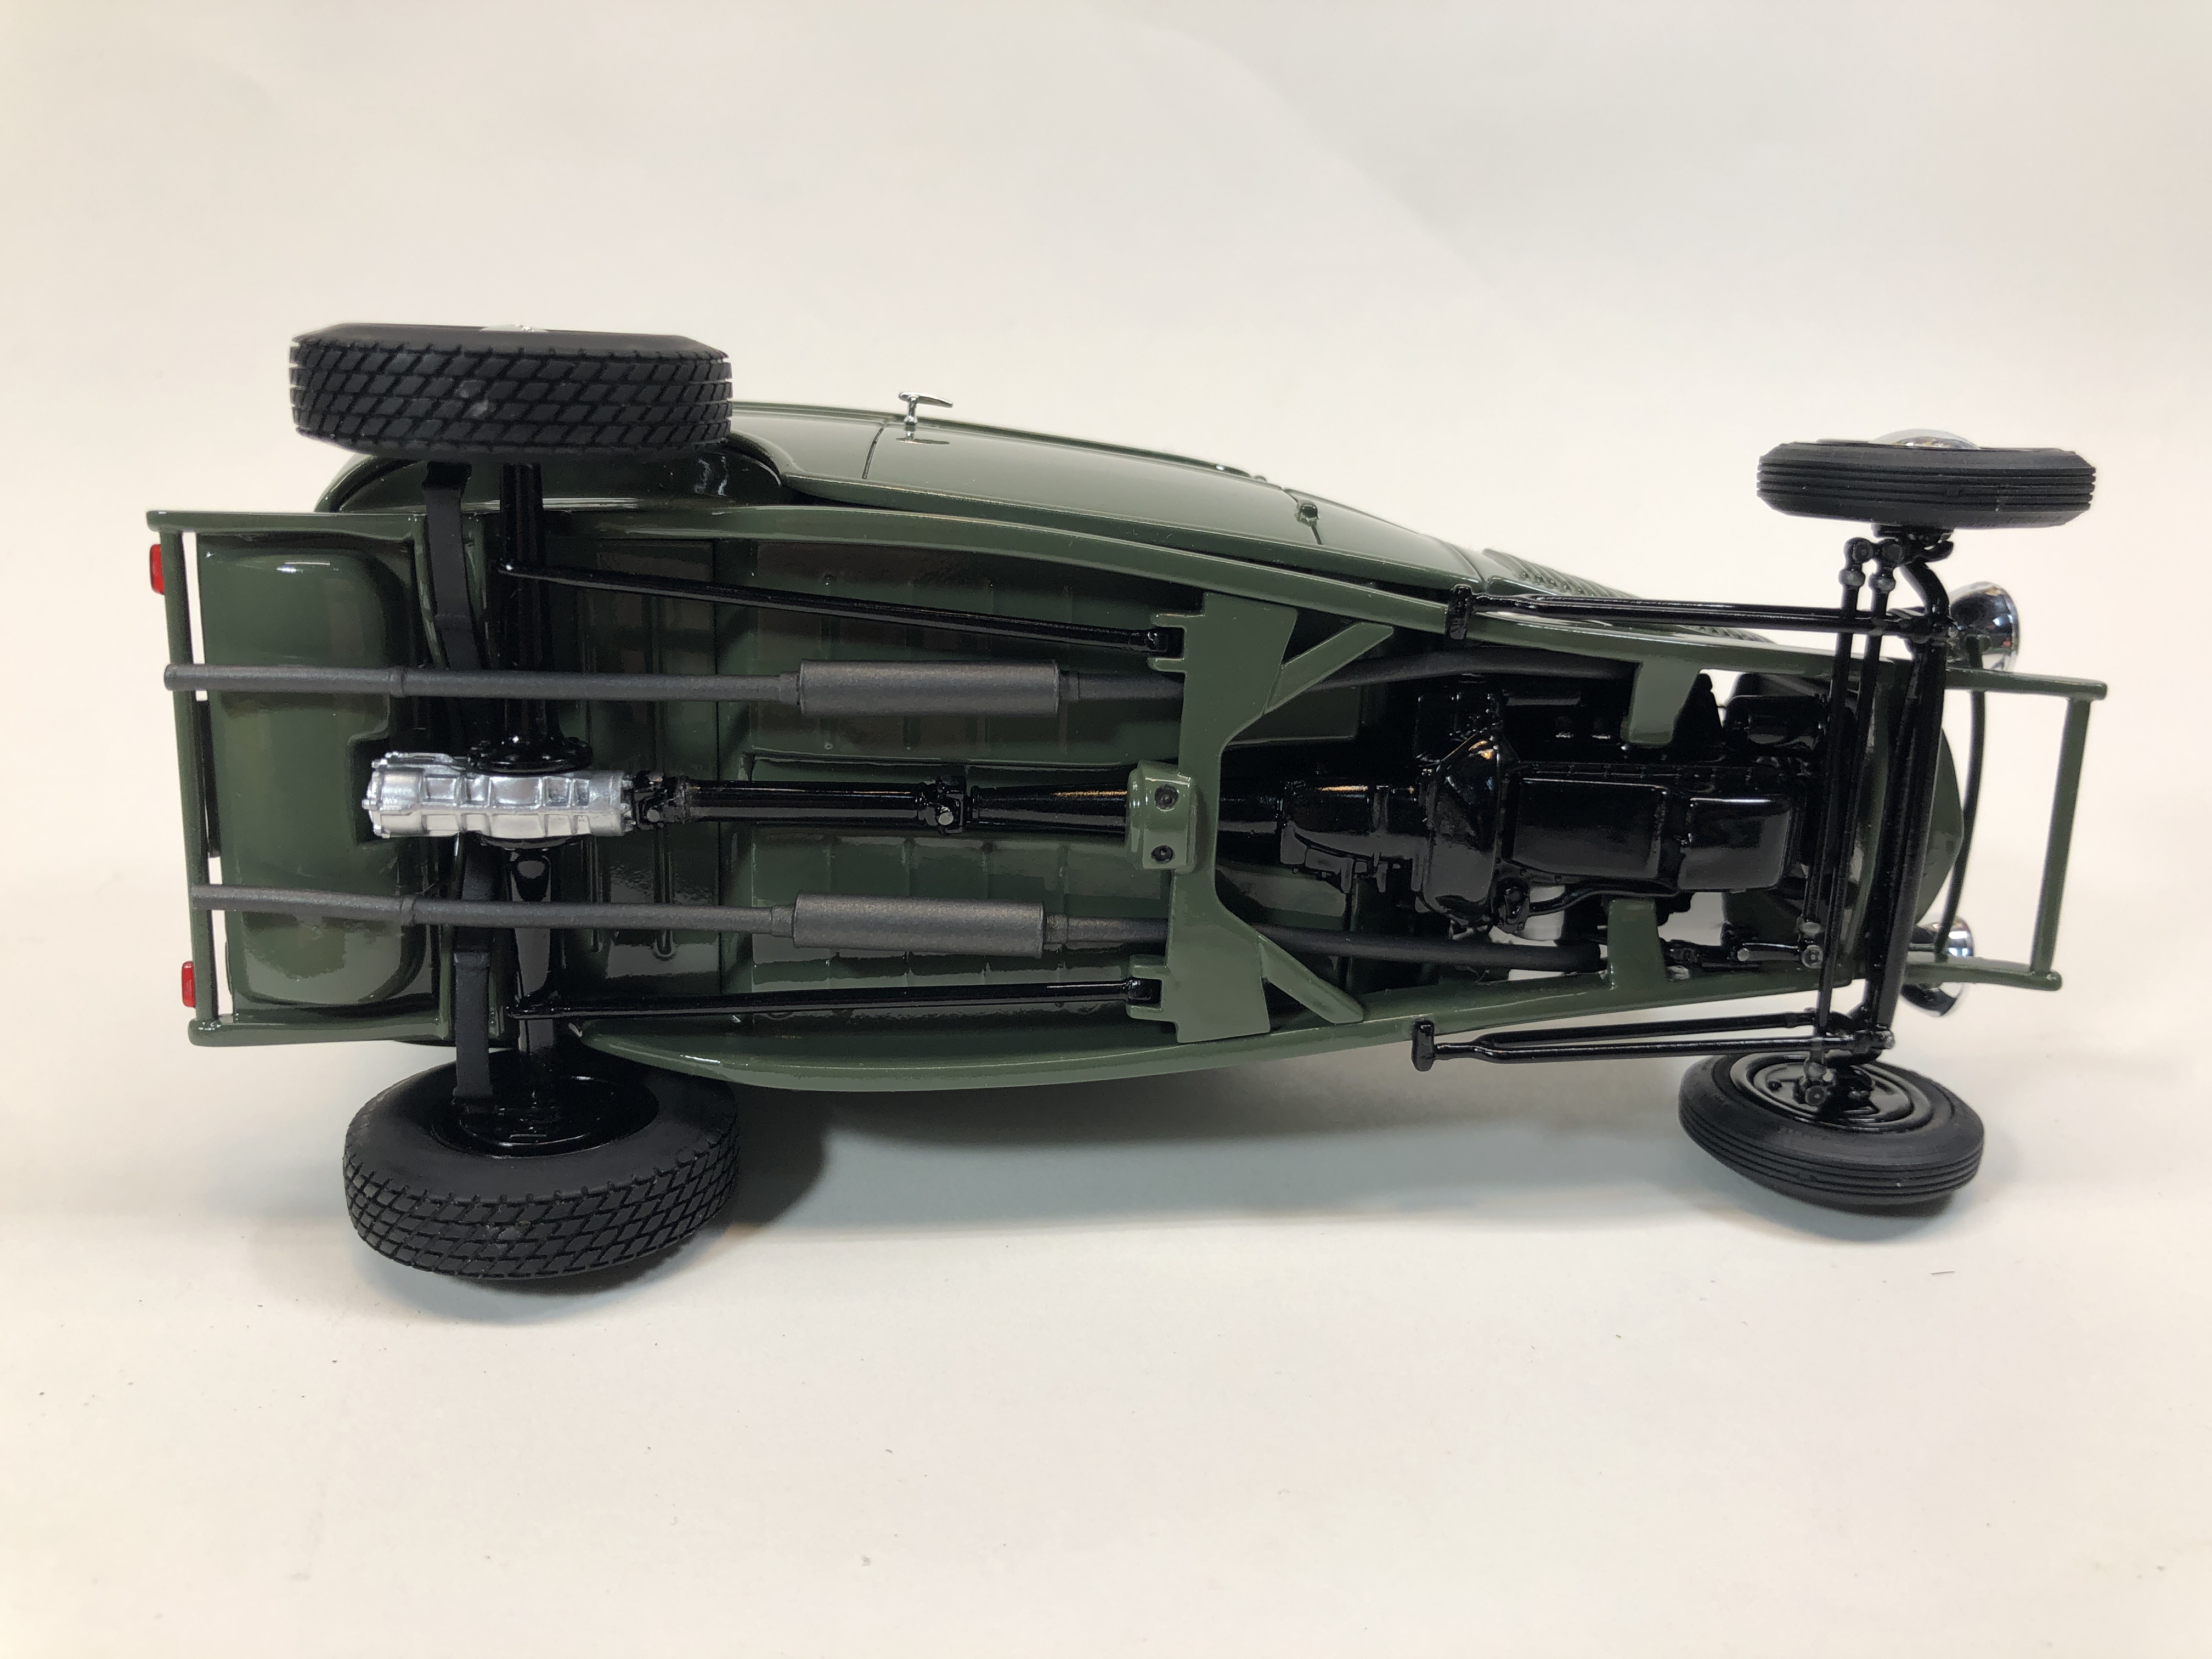
Howdy campers! I finally got this one on the bench. Our friend ADL (Dennis Lacy) got me all jazzed with his chopped sedan for Drag City Casting, then I realized it wasn't going to be out for awhile and I already had designs on it....so.... -Revell 1932 sedan kit, top chopped, roof "filled". -Stock style firewall from the Revell 'Rat Roaster' roadster kit. -Interior from the sedan kit with a '40 dash from the Revell 5ive window coupe. -Chassis was treated to a Model A rear crossmember and spring from the Revell venerable '30/'31 Model A sedan/pickup kit. The floor was raised to clear the pumpkin and the gas tank was notched to clear the QC. Scratched built rear split bones with the crossmember altered to move mounting points, clearing the exhaust. -Rear axle with QC differential from Replicas and Miniatures of MD. -Ford Y-Block power from the Revell '57 Ford kit, ran horn headers used to clear the hood sides. -Rear tires and wheels from the Revell '29 Model A roadster kit. -Front tires from Modelhaus with AMT wheels, from....??? -Paint is Tamiya TS-91 Dark Green (JGSDF) look that one up. Tamiya black accent color with interior shot with TS-69 Linoleum Deck Brown. Body cleared with Minwax polyurethane clear through my airbrush, orange peel, no extra charge... -Buildup pix and more here: https://public.fotki.com/jferren/32-tudor-sedan-in-green-/ Thanks for looking.... -RRR
-
Agreed, quite a nice save. Well done.... -RRR