ShakyCraftsman
-
Posts
796 -
Joined
-
Last visited
Content Type
Profiles
Forums
Events
Gallery
Everything posted by ShakyCraftsman
-
Hey Jeff You could get a couple of large cranes. You could use them to lift the dump box like your removing it, or installing it. That would make a cool 😎 display. 😁😆 Ron G
-
 Hey all Just a mock-up picture. I have all the axles mounted along with all the brake chambers. This view shows all three wheel types used. The lift axle ones aren't the final ones, there in the mail from Paul at ST Supply. Ron G
-
DUHH! I tought you would figure it out Pal. 😁😆😅🤣😂🤣😂🤣😍 Ron G
-
Hey Nitro The lift axle is from KFS VIA Paul at ST Supply. Ron G
-
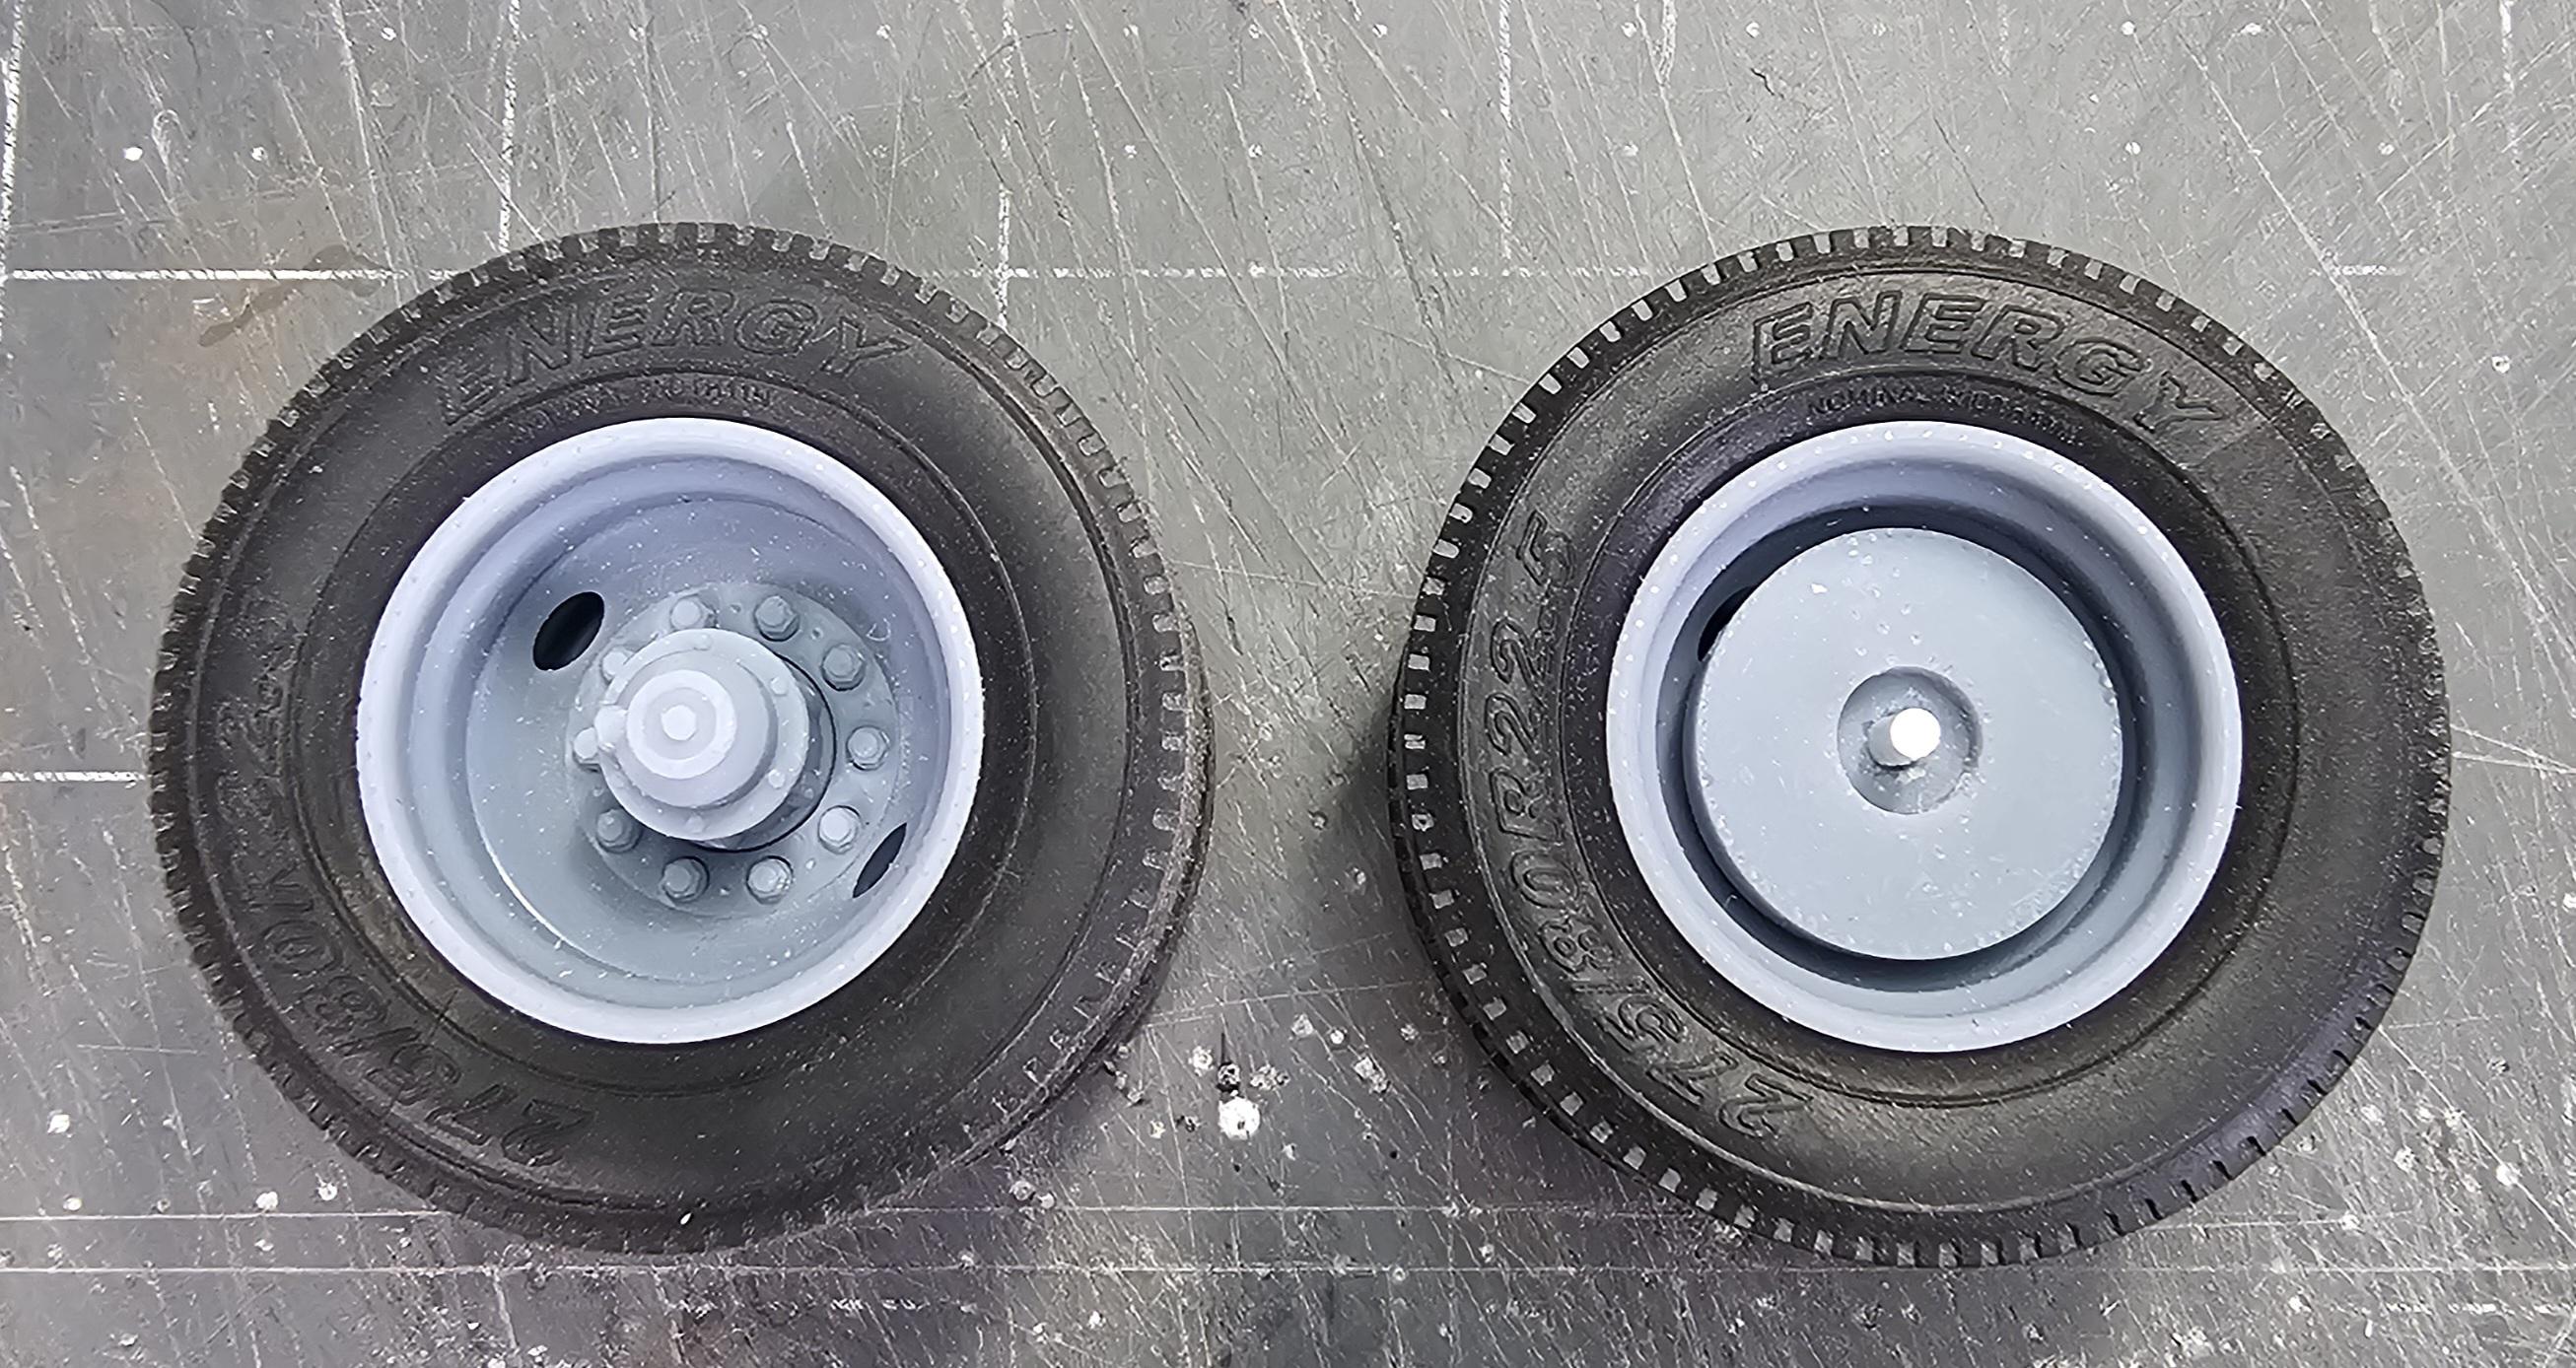
Hey all Okay, I have the front axle mounted. This view shows the front axle mounted with the front tires in place. The tires are from Jamie at Mo'luminum. They are Bridgestone M844 425/85R 22.5. This view shows the front axle turned right. This view shows the front axle turned left. Side view of the front axle. These are the front tires and wheels. Wheels are from Paul at ST Supply. They are 5 hole Budds that I modified into wide float rims. That's it for now be back with more updates soon. Ron G
-
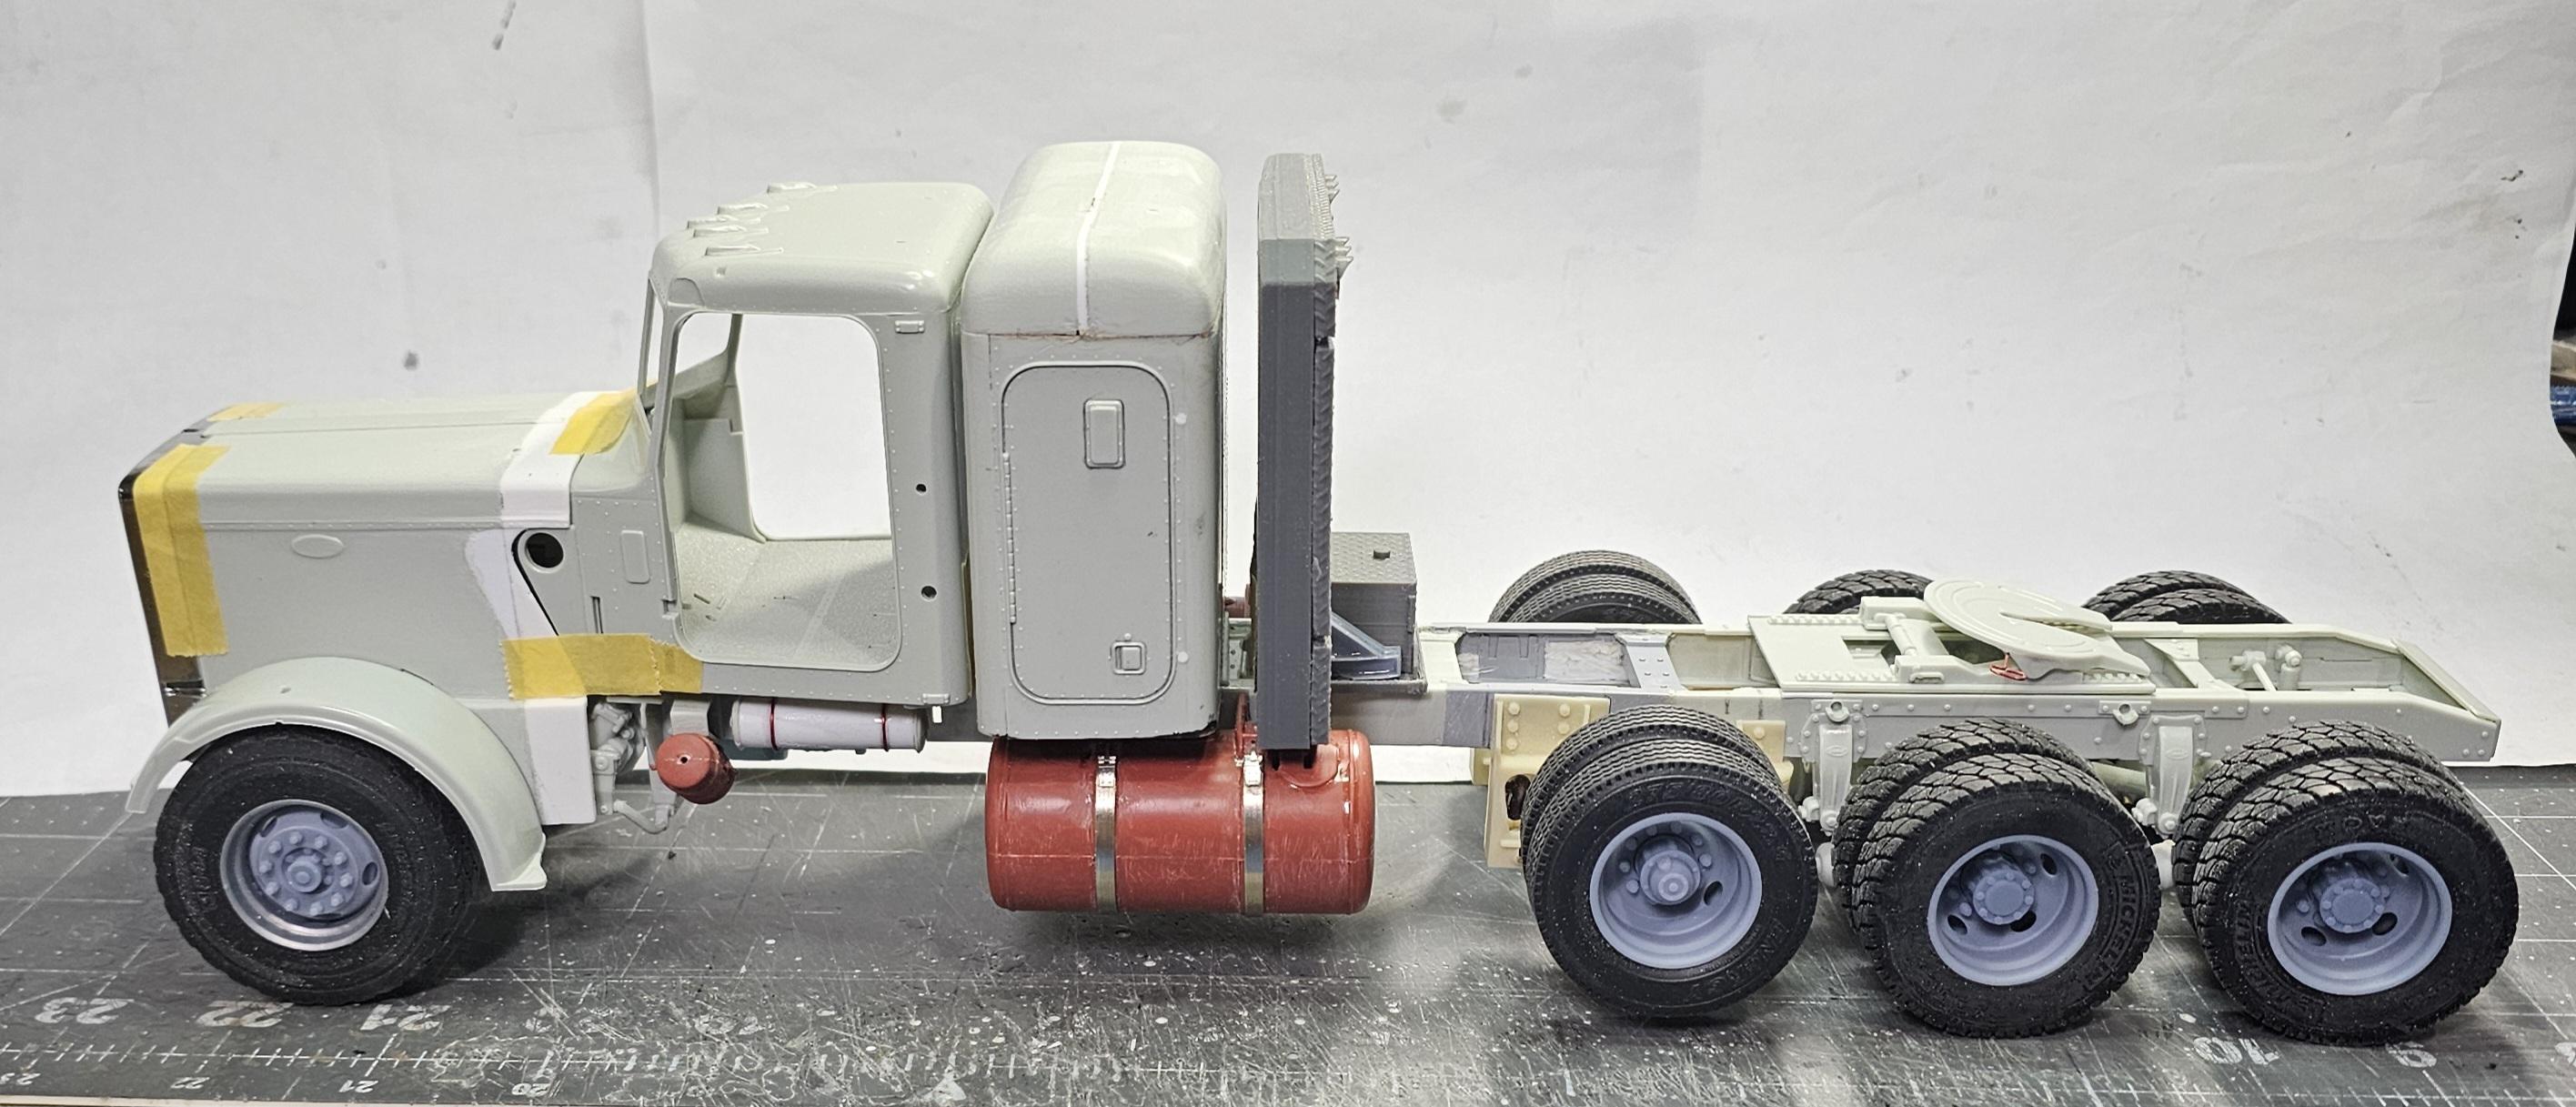
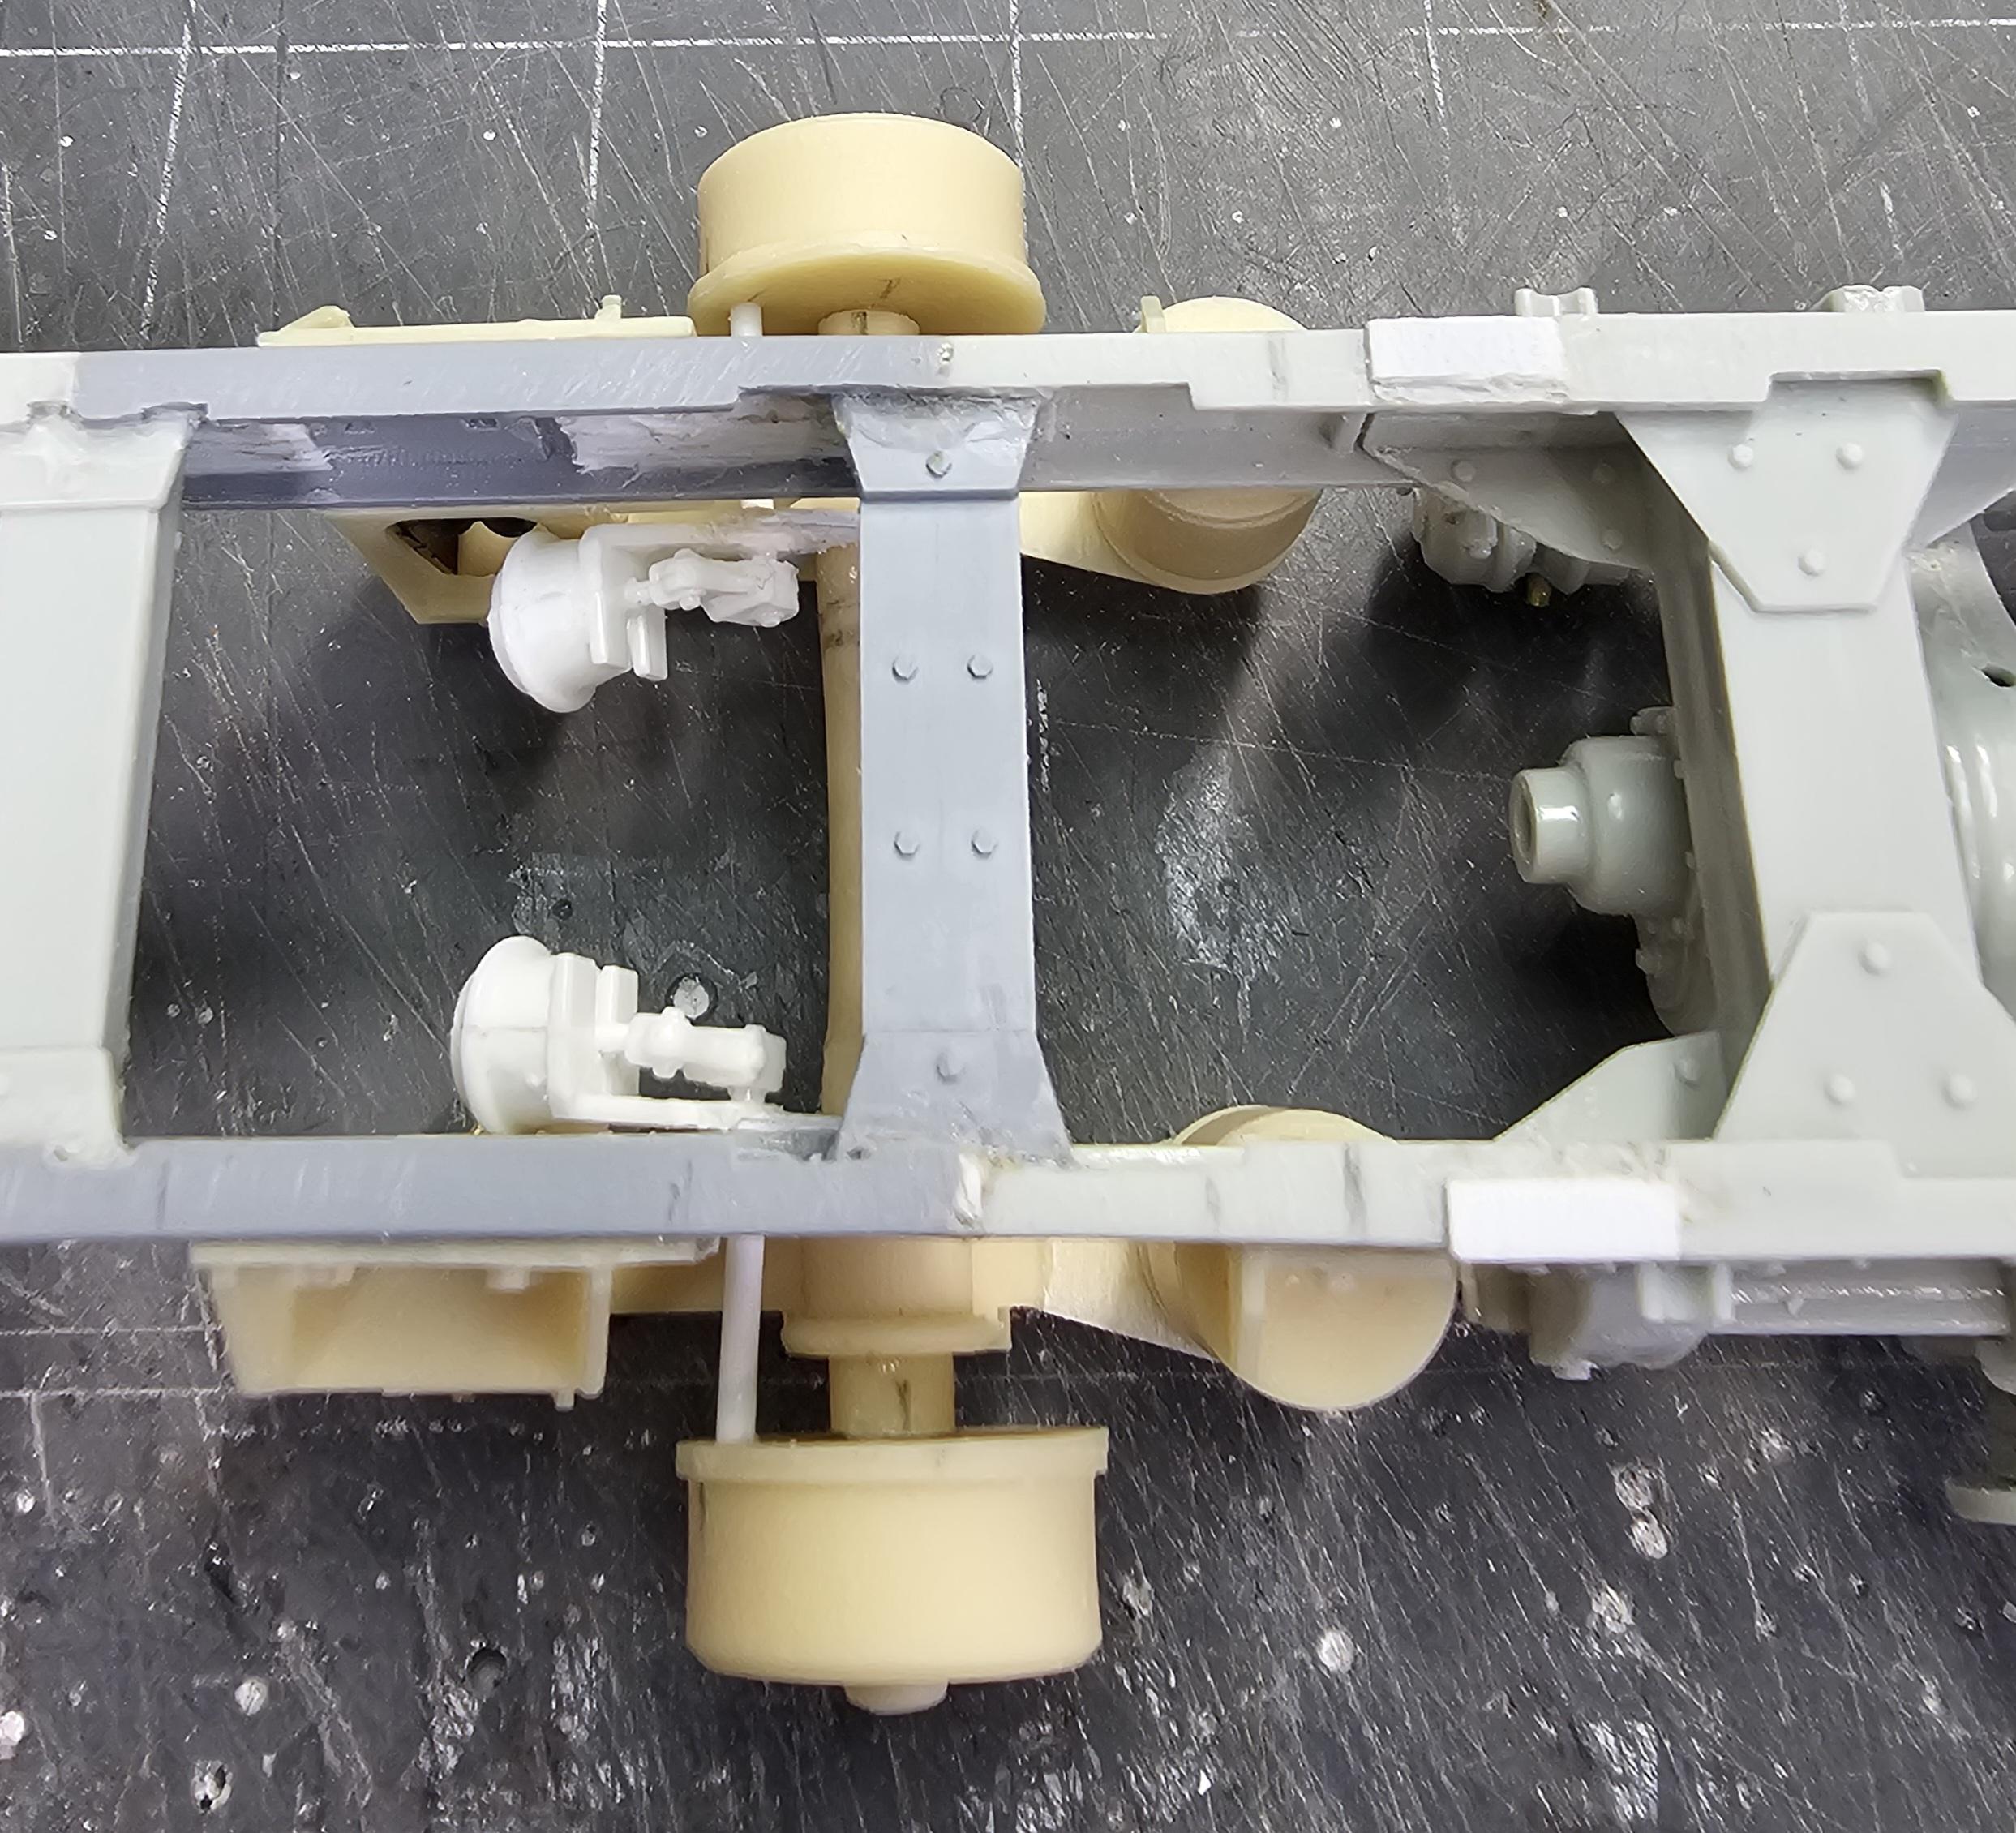
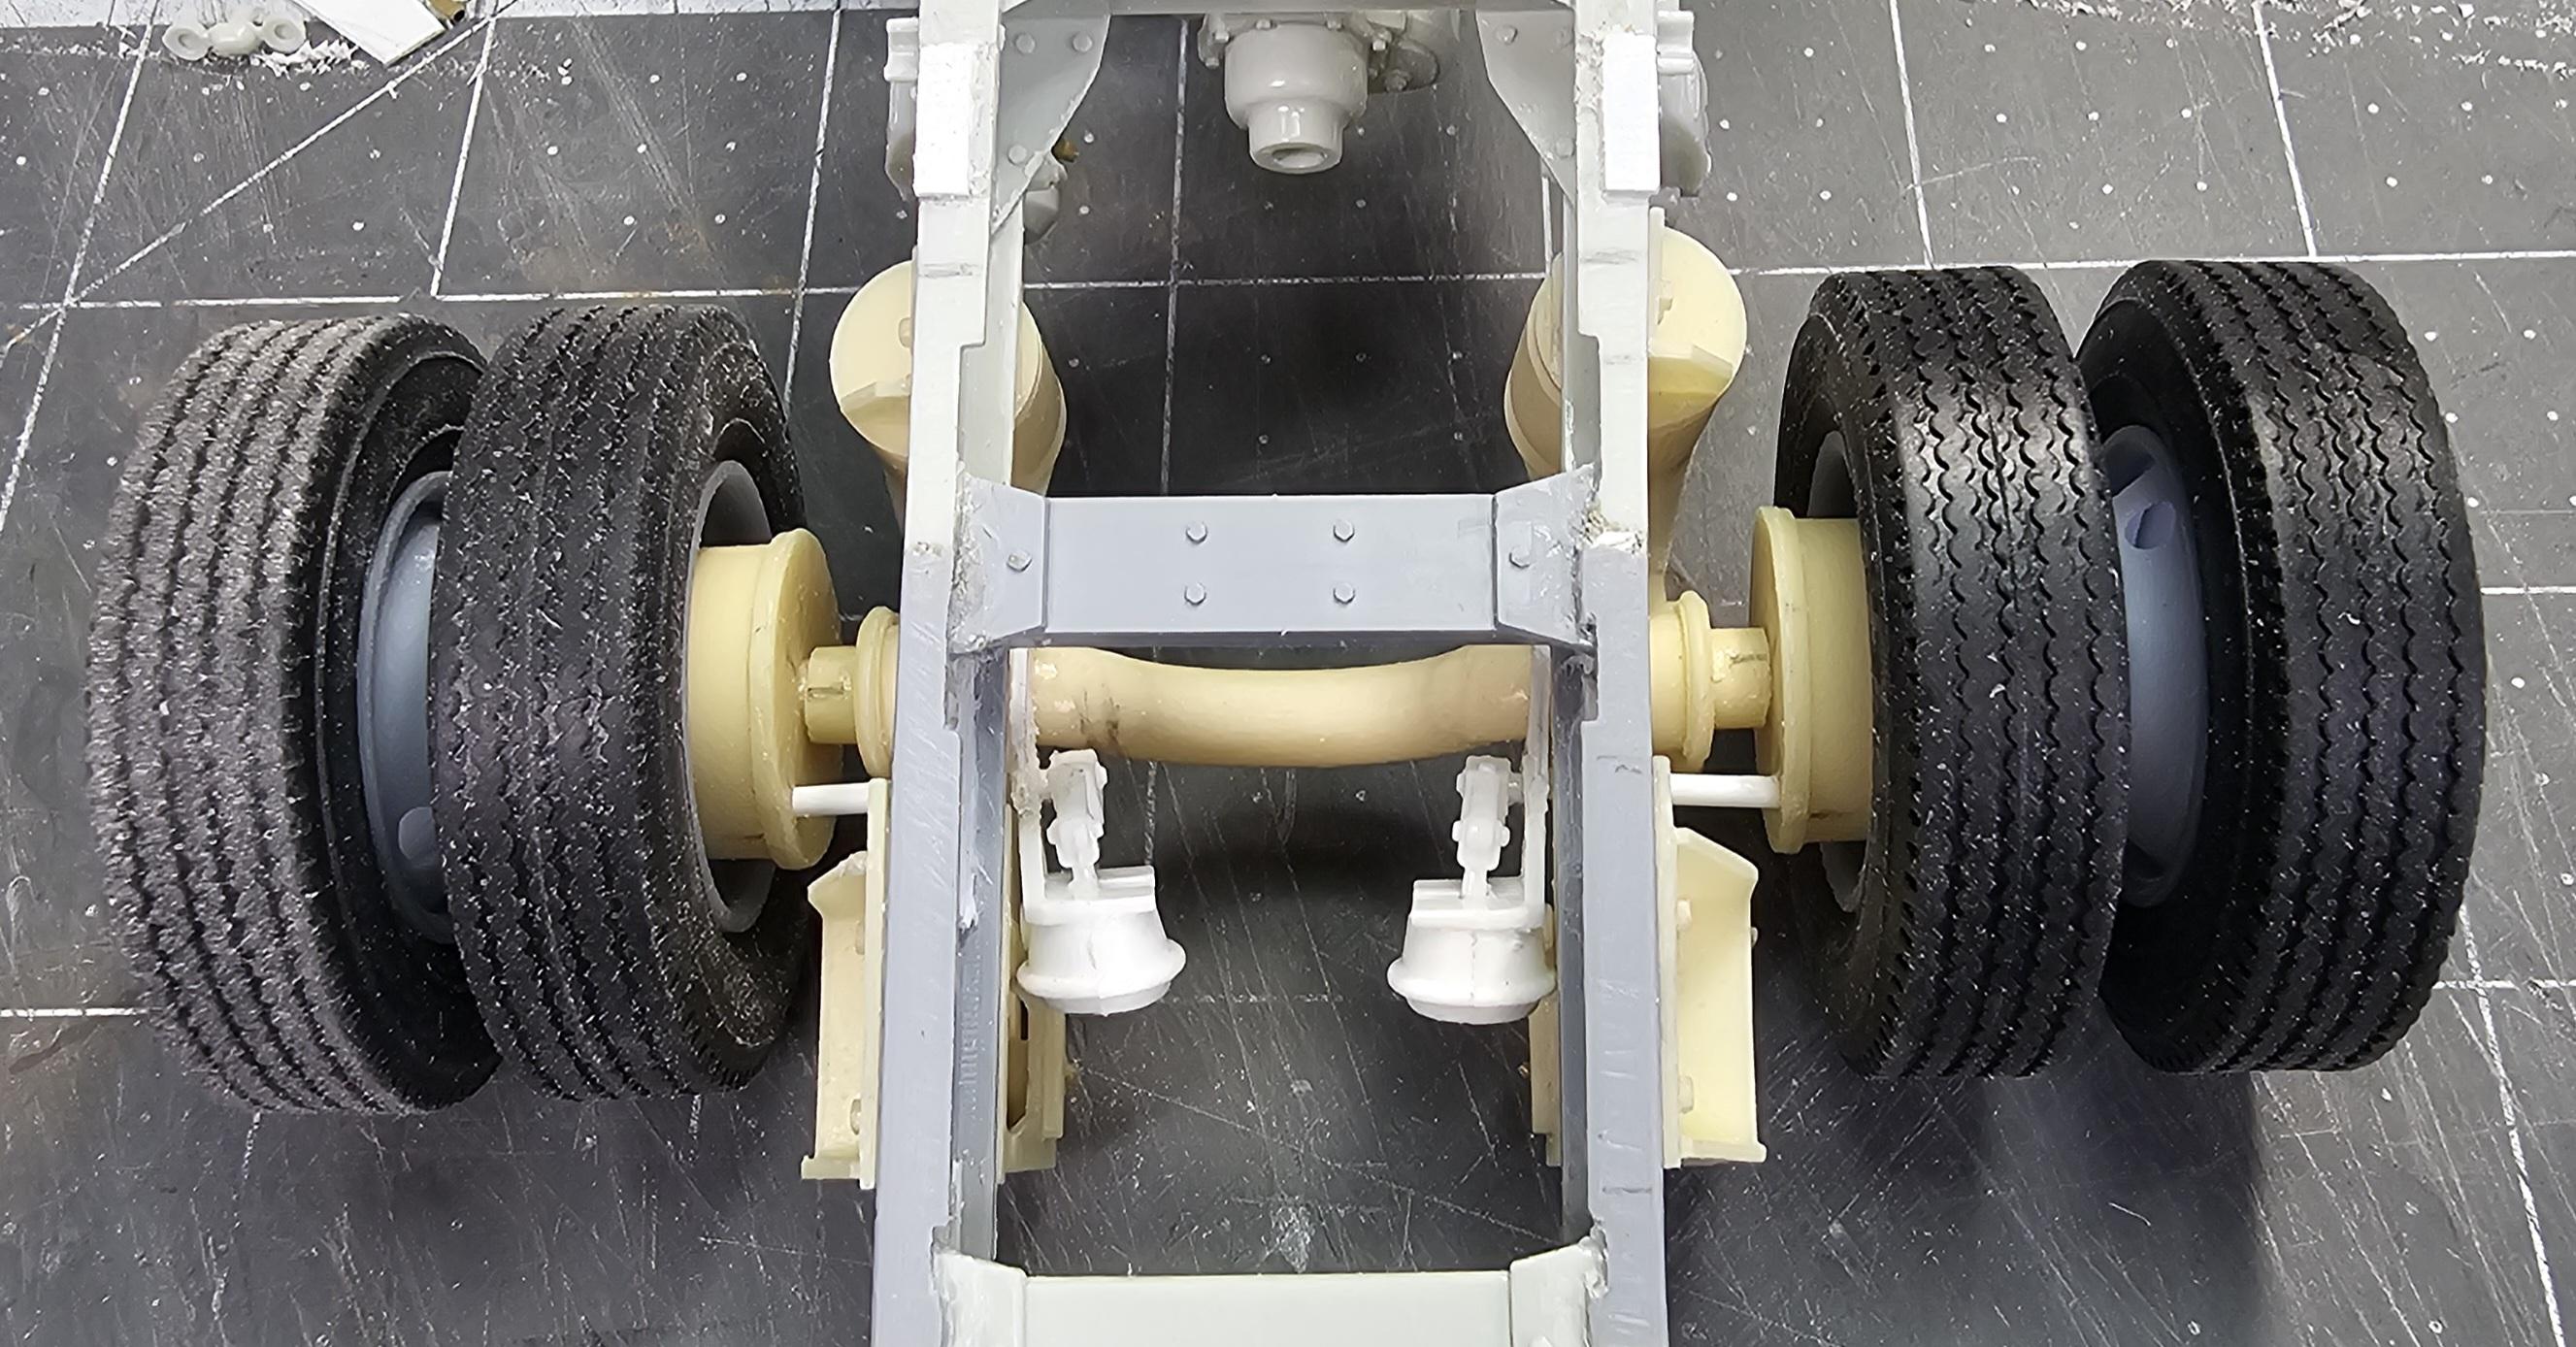
Hey guys A little more done on the "BS" Peterbilt. I have the lift Axle in place. View from the top looking down. View from the bottom looking up. You can see the brake chambers and where the air lines will attach. I stole these from my other Revell Peterbilt 359 kit. I will replace them when the ones from RoninUtah get here. View looking forward of the lift axle. View looking to the rear of the lift axle. This view shows the lift axle wheels and tires. These are temporary. They are 22.5's and I have 20.0" wheels and tires coming from Paul at ST Supply. Ron G
-
I always wanted this kit, but never got around to it. I'll be following this one. Ron G
-
R.O.G Peterbilt 359 Custom
ShakyCraftsman replied to BOZ's topic in WIP: Model Trucks: Big Rigs and Heavy Equipment
Anything to help my Friend. Ron G -
R.O.G Peterbilt 359 Custom
ShakyCraftsman replied to BOZ's topic in WIP: Model Trucks: Big Rigs and Heavy Equipment
Hey Boz You need to get ride of the line that runs down the front window pillar to the hood, on both sides. It should not be there. The horizontal one from the door opening to the hood is okay. Ron G -
My 1st Big Rig "Blue Collar"
ShakyCraftsman replied to James2's topic in WIP: Model Trucks: Big Rigs and Heavy Equipment
Sweet. It looks amazing. Ron G -
My 1st Big Rig "Blue Collar"
ShakyCraftsman replied to James2's topic in WIP: Model Trucks: Big Rigs and Heavy Equipment
Hey James Your killing it man! This is going to be great when you get it done. Ron G -
No problem, what ever you need just ask. Ron G
-
You can get some from Pappyhobbys in Canada. I think they are around $70.00 bucks. Ron G
-
Brake chambers.....HELP!
ShakyCraftsman replied to ShakyCraftsman's topic in WIP: Model Trucks: Big Rigs and Heavy Equipment
Not on a heavy haul tractor. When you get 170,000 lbs. Rolling you need to be able to STOP! 😁 Ron G -
Okay, I'm in. Hey Dan see if you can get a set of 3D printed tracks for your AMT Cat D8H dozer. They will make a HUGE difference. And your doing great for not modeling in awhile. Ron G
-
Western Star Classic heavy haul
ShakyCraftsman replied to Biggu's topic in WIP: Model Trucks: Big Rigs and Heavy Equipment
Yeah, but it's not just that YOU want to do something different. If you had a front sump oil pan in a truck were it sits directly over the front axle, the sump part that is. If you hit a big pot hole at speed you would shove the front axle through the oil pan and bye bye engine! And I don't know any trucker that can afford a new engine at what they cost today, because someone put the oil pan on backwards. OUCH!!! You need a good 5" to 6" of clearance from the oil pan and the front axle, for suspension travel. Ron G -
AMT Exterior Post Doubles Vans
ShakyCraftsman replied to Bren's topic in WIP: Model Trucks: Big Rigs and Heavy Equipment
It's looking good Bren. Ron G -
Western Star Classic heavy haul
ShakyCraftsman replied to Biggu's topic in WIP: Model Trucks: Big Rigs and Heavy Equipment
Hey Jeff Was that because Italeri came out with the 377 first, which is a set-back axle truck, and they just carried it over into the 378 kits🤔🤔🤔 Ron G -
Western Star Classic heavy haul
ShakyCraftsman replied to Biggu's topic in WIP: Model Trucks: Big Rigs and Heavy Equipment
Or set-back axle. Ron G -
Western Star Classic heavy haul
ShakyCraftsman replied to Biggu's topic in WIP: Model Trucks: Big Rigs and Heavy Equipment
See, I told you it would fit. Now it just needs some detail wiring, psint and a little weathering and it will look fantastic. 😁😁😁😁😏😉 Ron G -
Thanks Jeff
-
Hey all A little update today. I stripped the chrome off of the fuel tanks and lubrafiner. This view shows the CTM PE tank straps temperaly attached. I took a black sharpie and colored the cast on straps to look like rubber inserts. This view shows that I have removed the cast on lines and drilled out the two fittings to accept new lines. This view shows the lubrafiner. I added two pieces of brass wire to the bottom so I can attach lines to them. I drilled out the top for a line. Okay, that's all there is. Ron G This view shows the rear kit brake chamber. I modified it so I have a place attach the brake lines. OH, and I cut the caging bolt off.This view shows the front brake chamber. I modified it so I can attach the air line to it.
-
Cool, send me a PM. Ron G
-
Brake chambers.....HELP!
ShakyCraftsman replied to ShakyCraftsman's topic in WIP: Model Trucks: Big Rigs and Heavy Equipment
Yeah the rare ones can get up in the hundreds. Ron G