ShakyCraftsman
-
Posts
788 -
Joined
-
Last visited
Content Type
Profiles
Forums
Events
Gallery
Everything posted by ShakyCraftsman
-
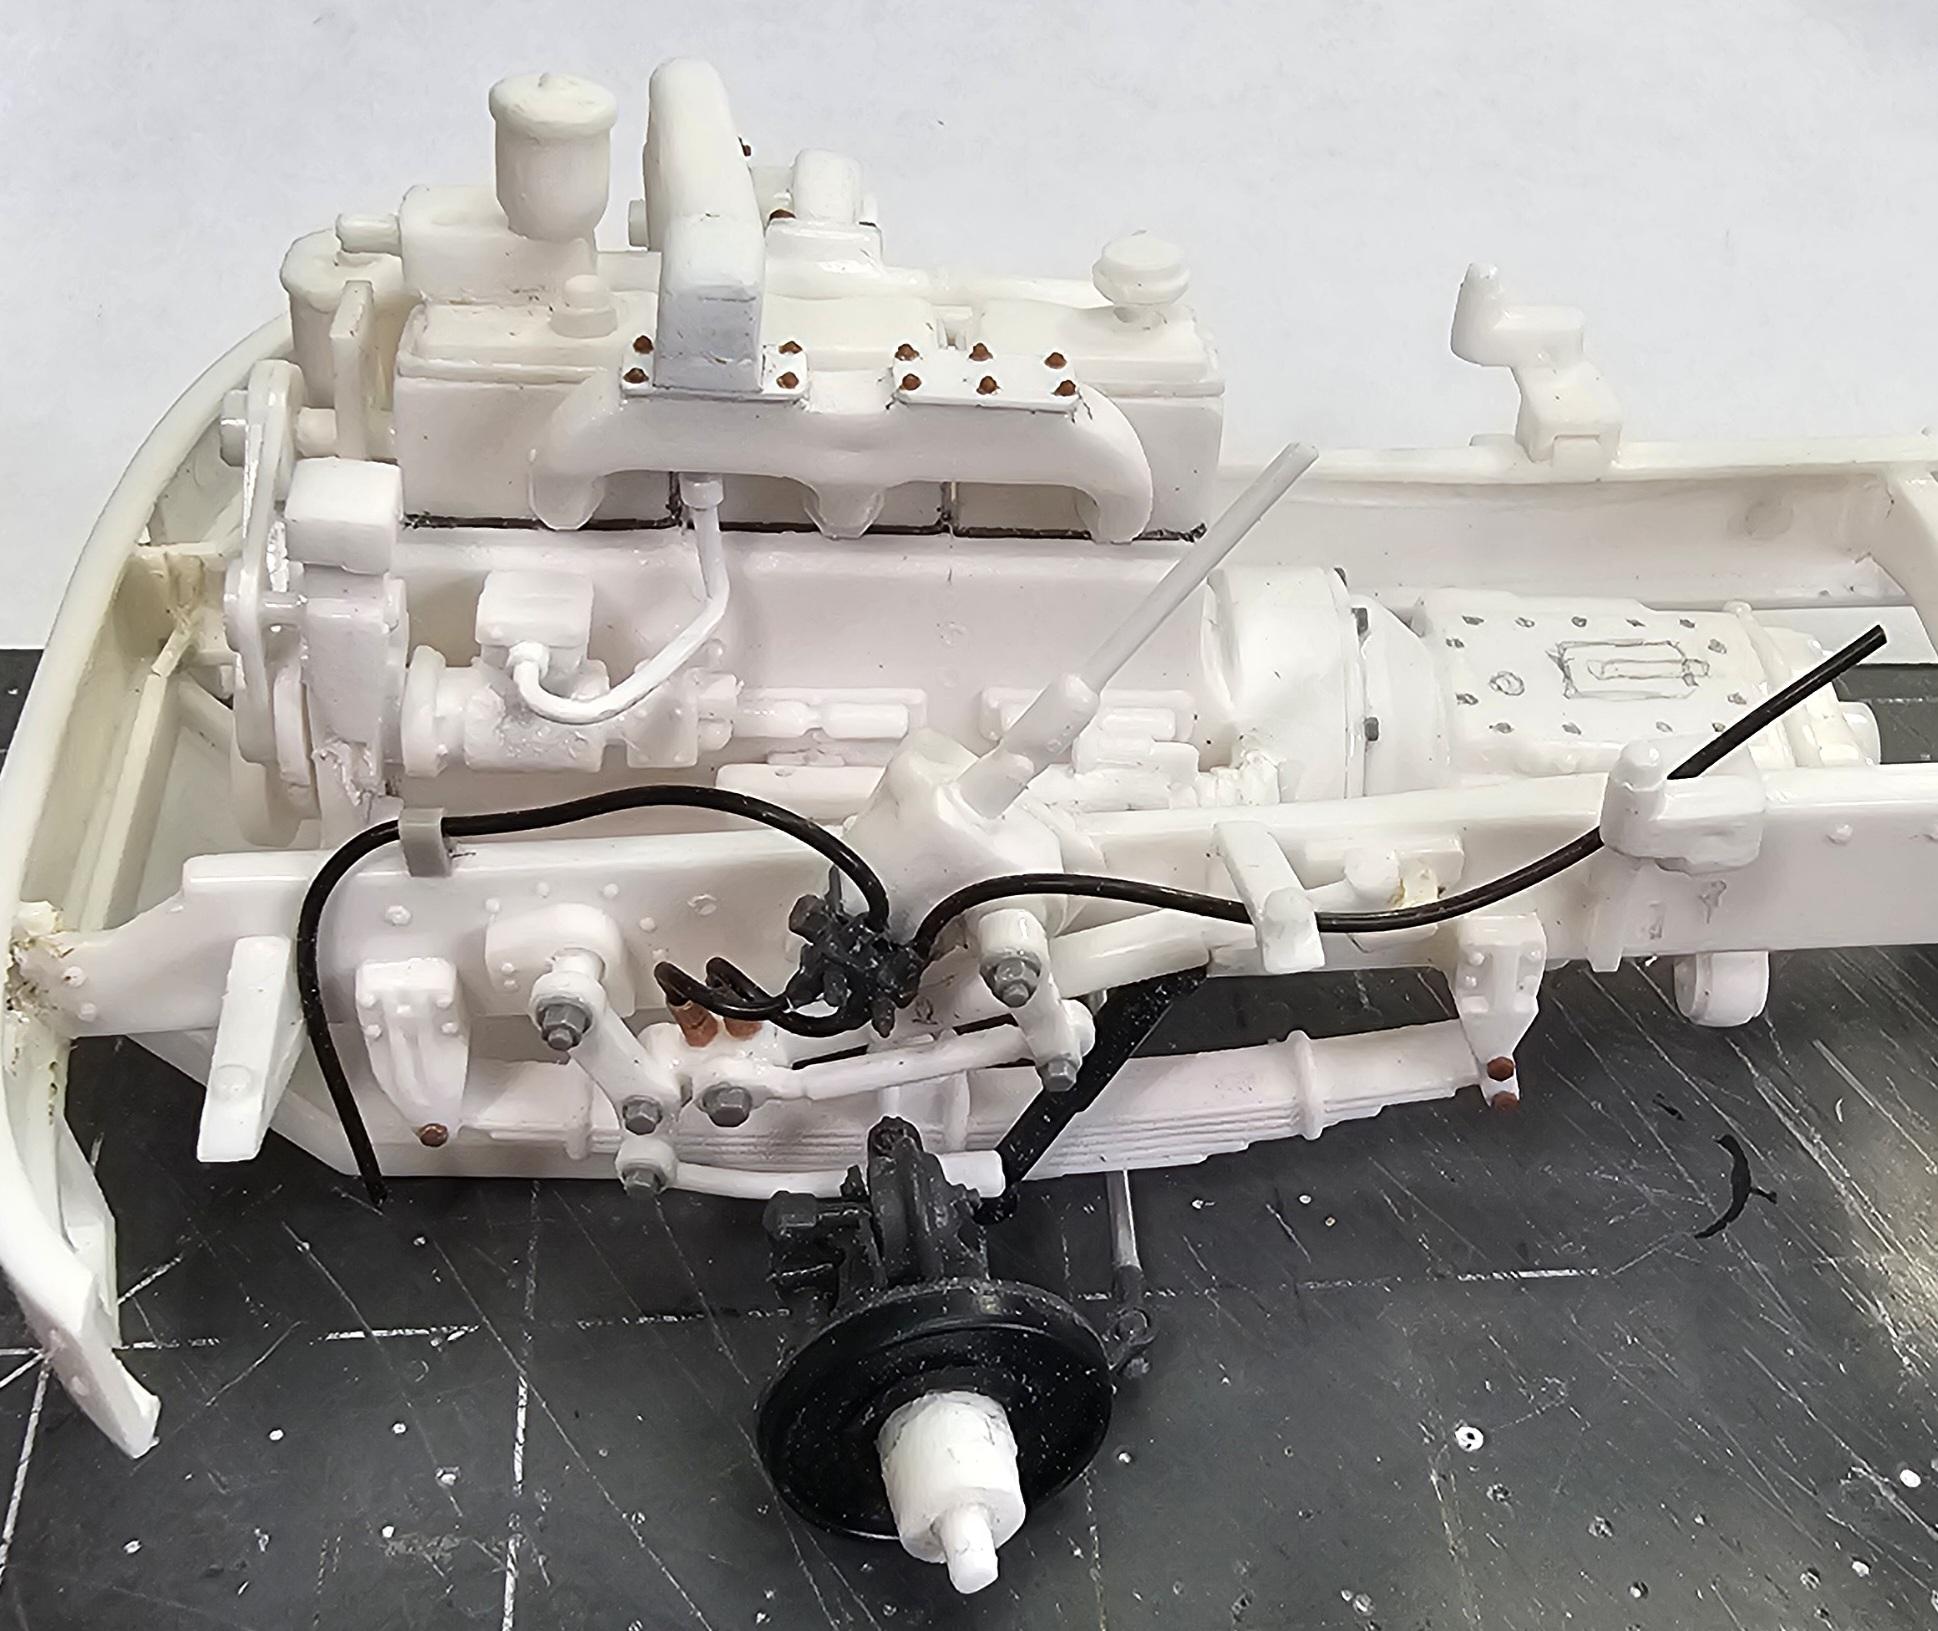
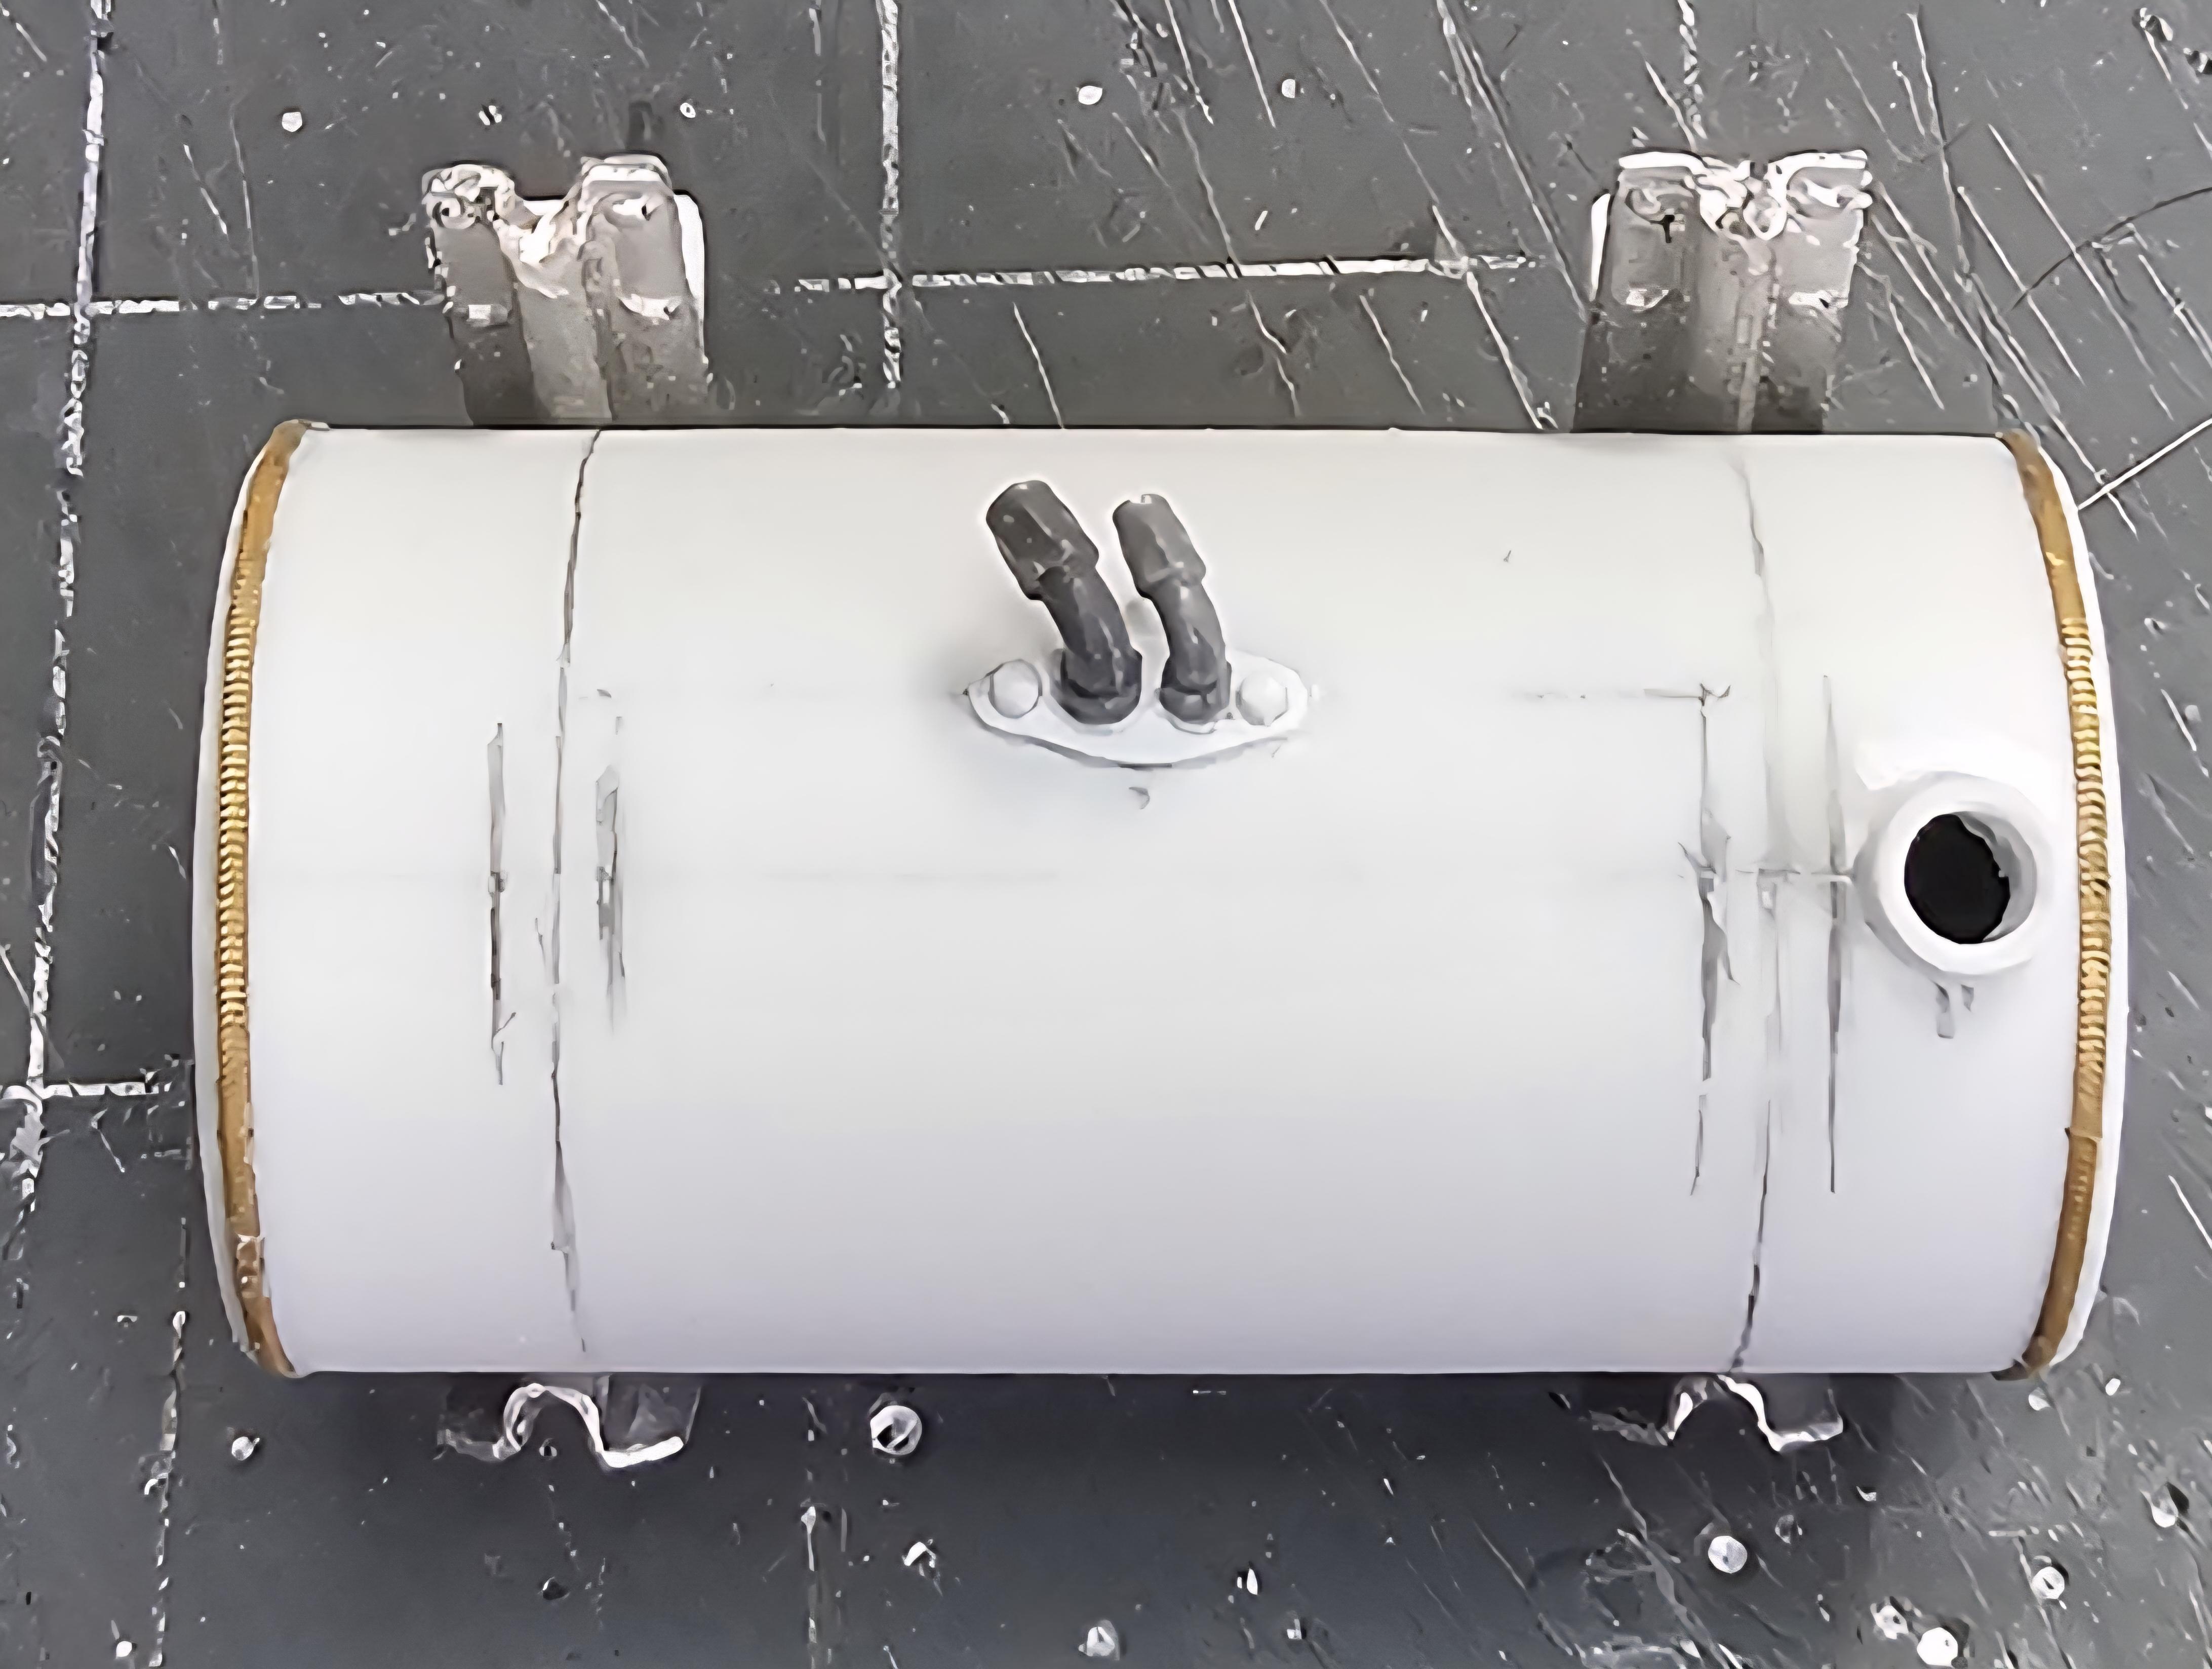
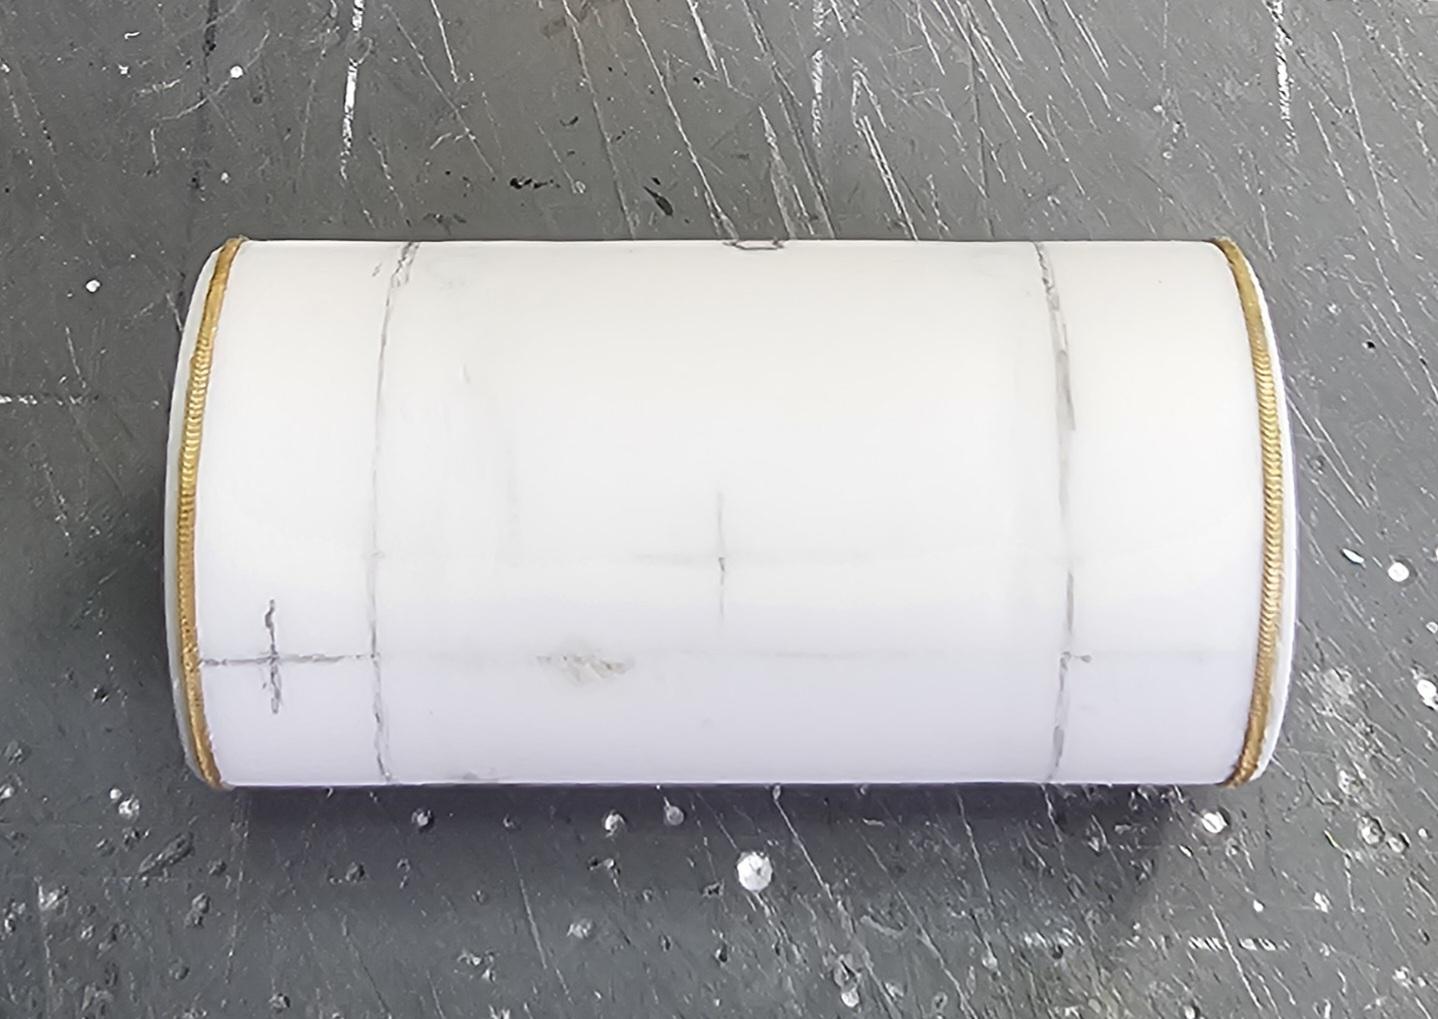
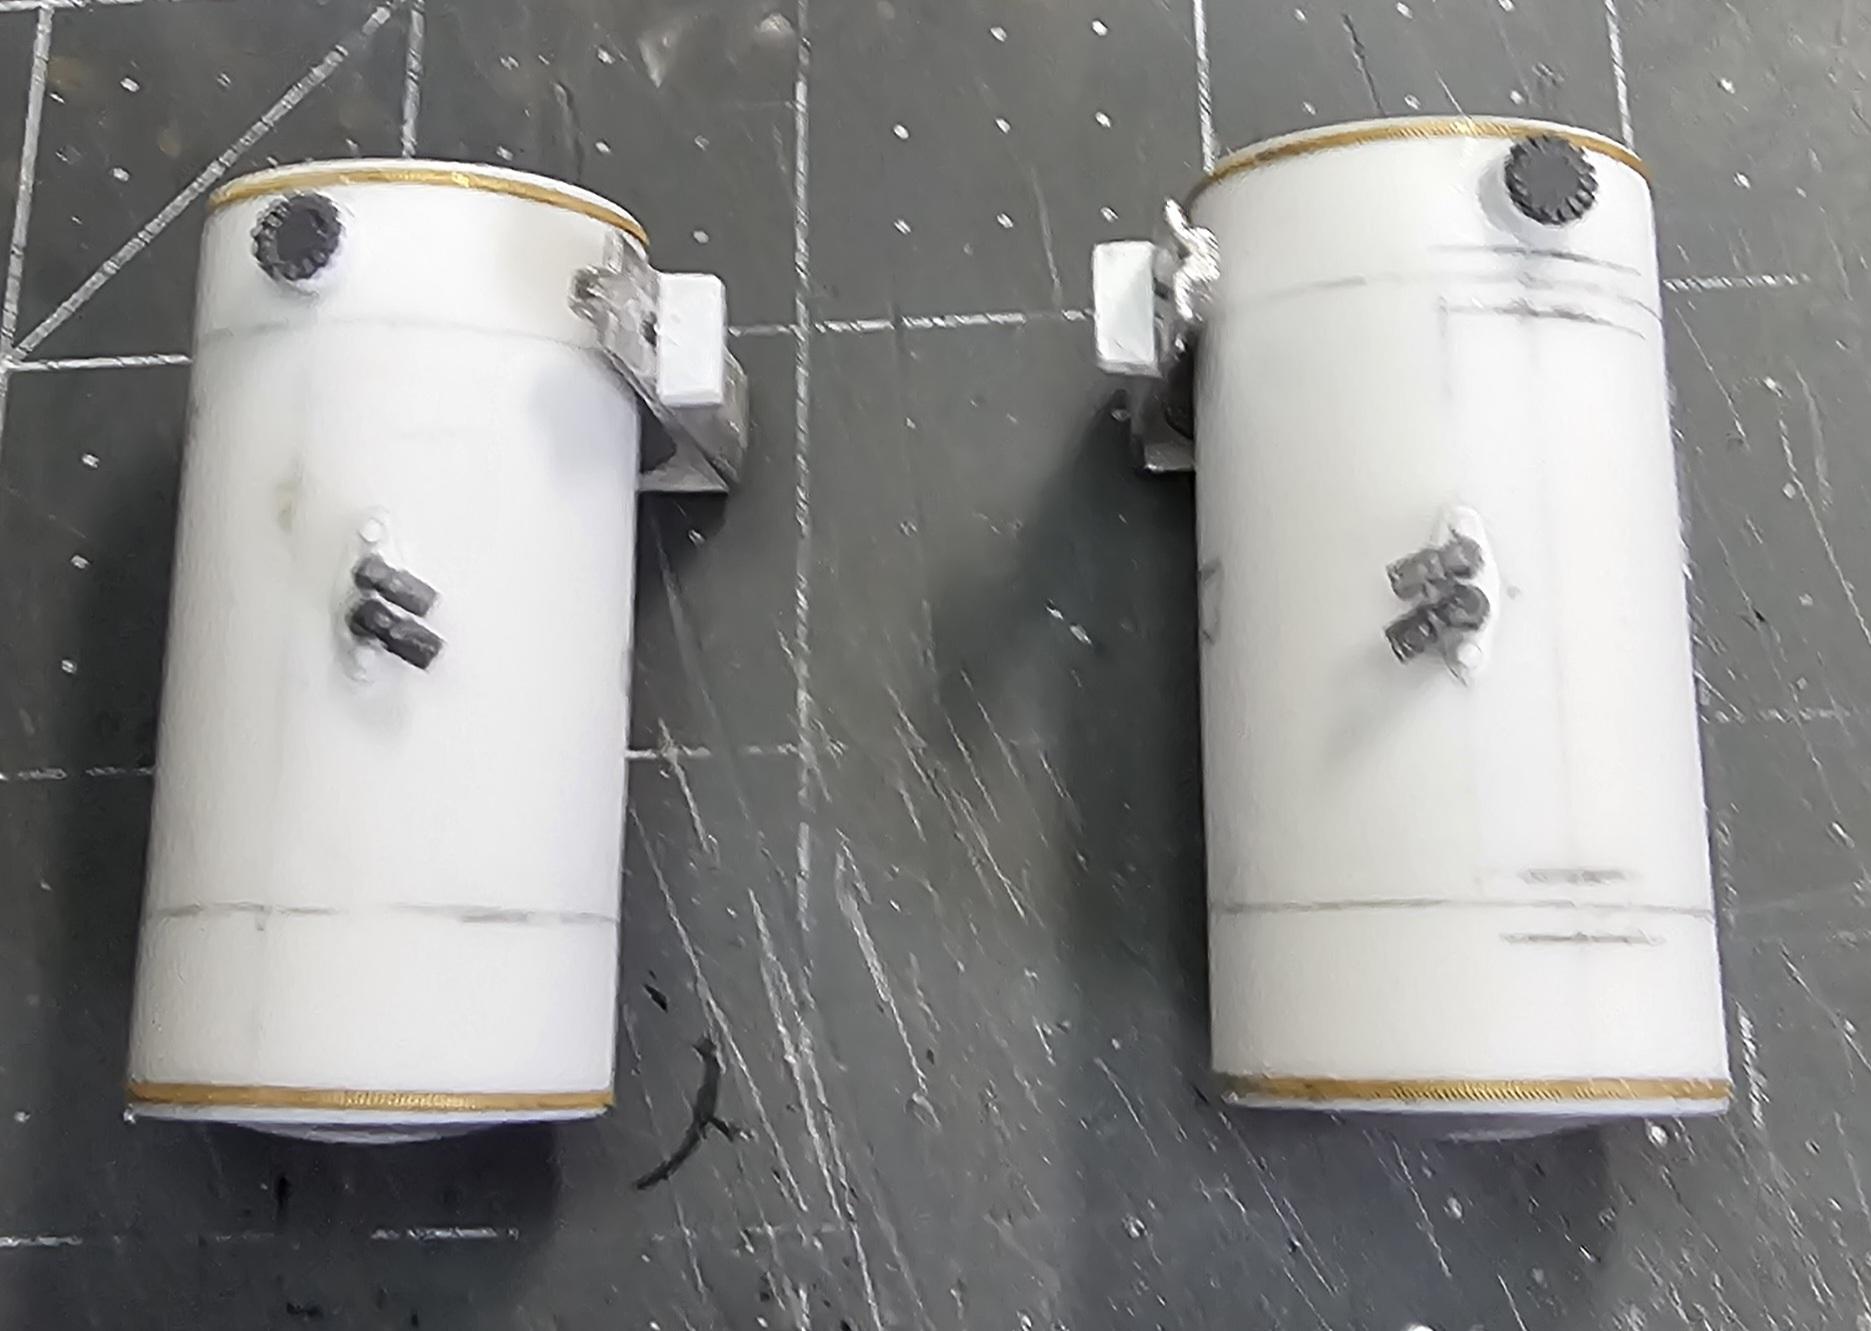
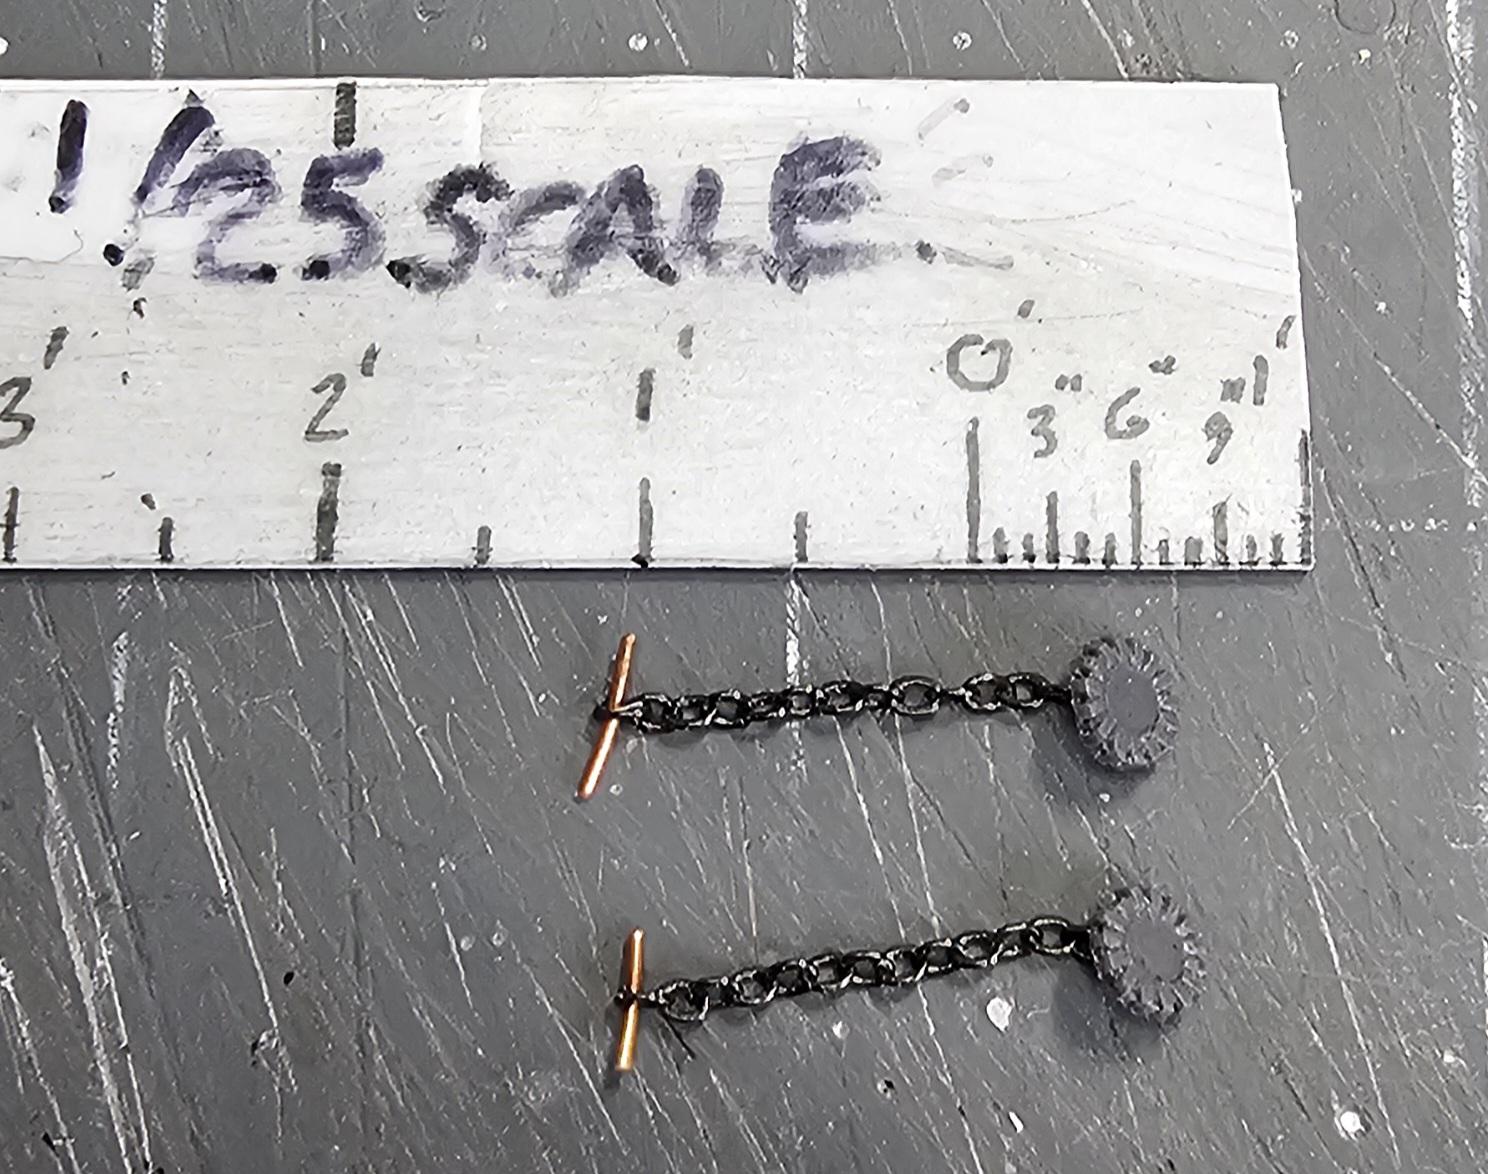
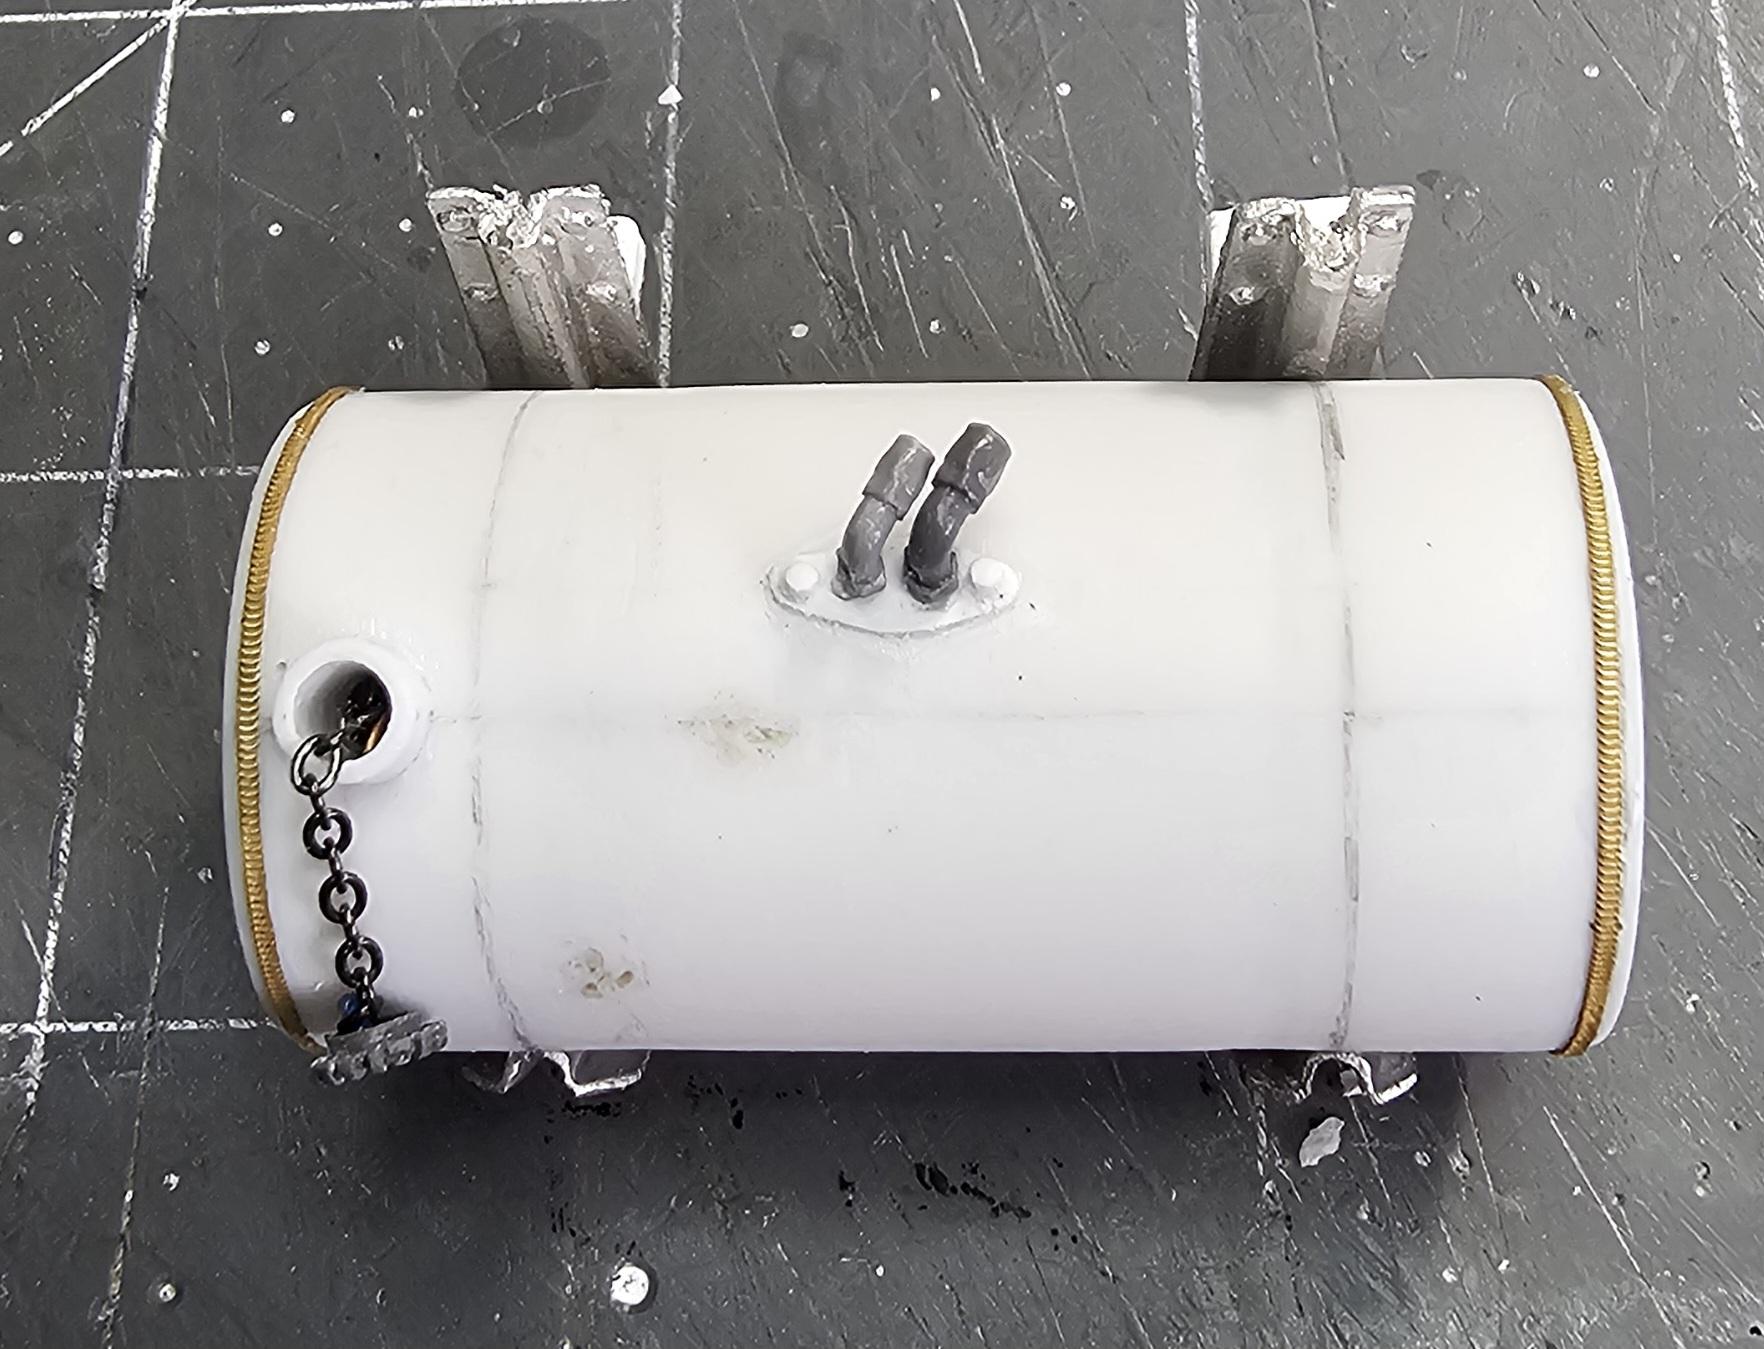
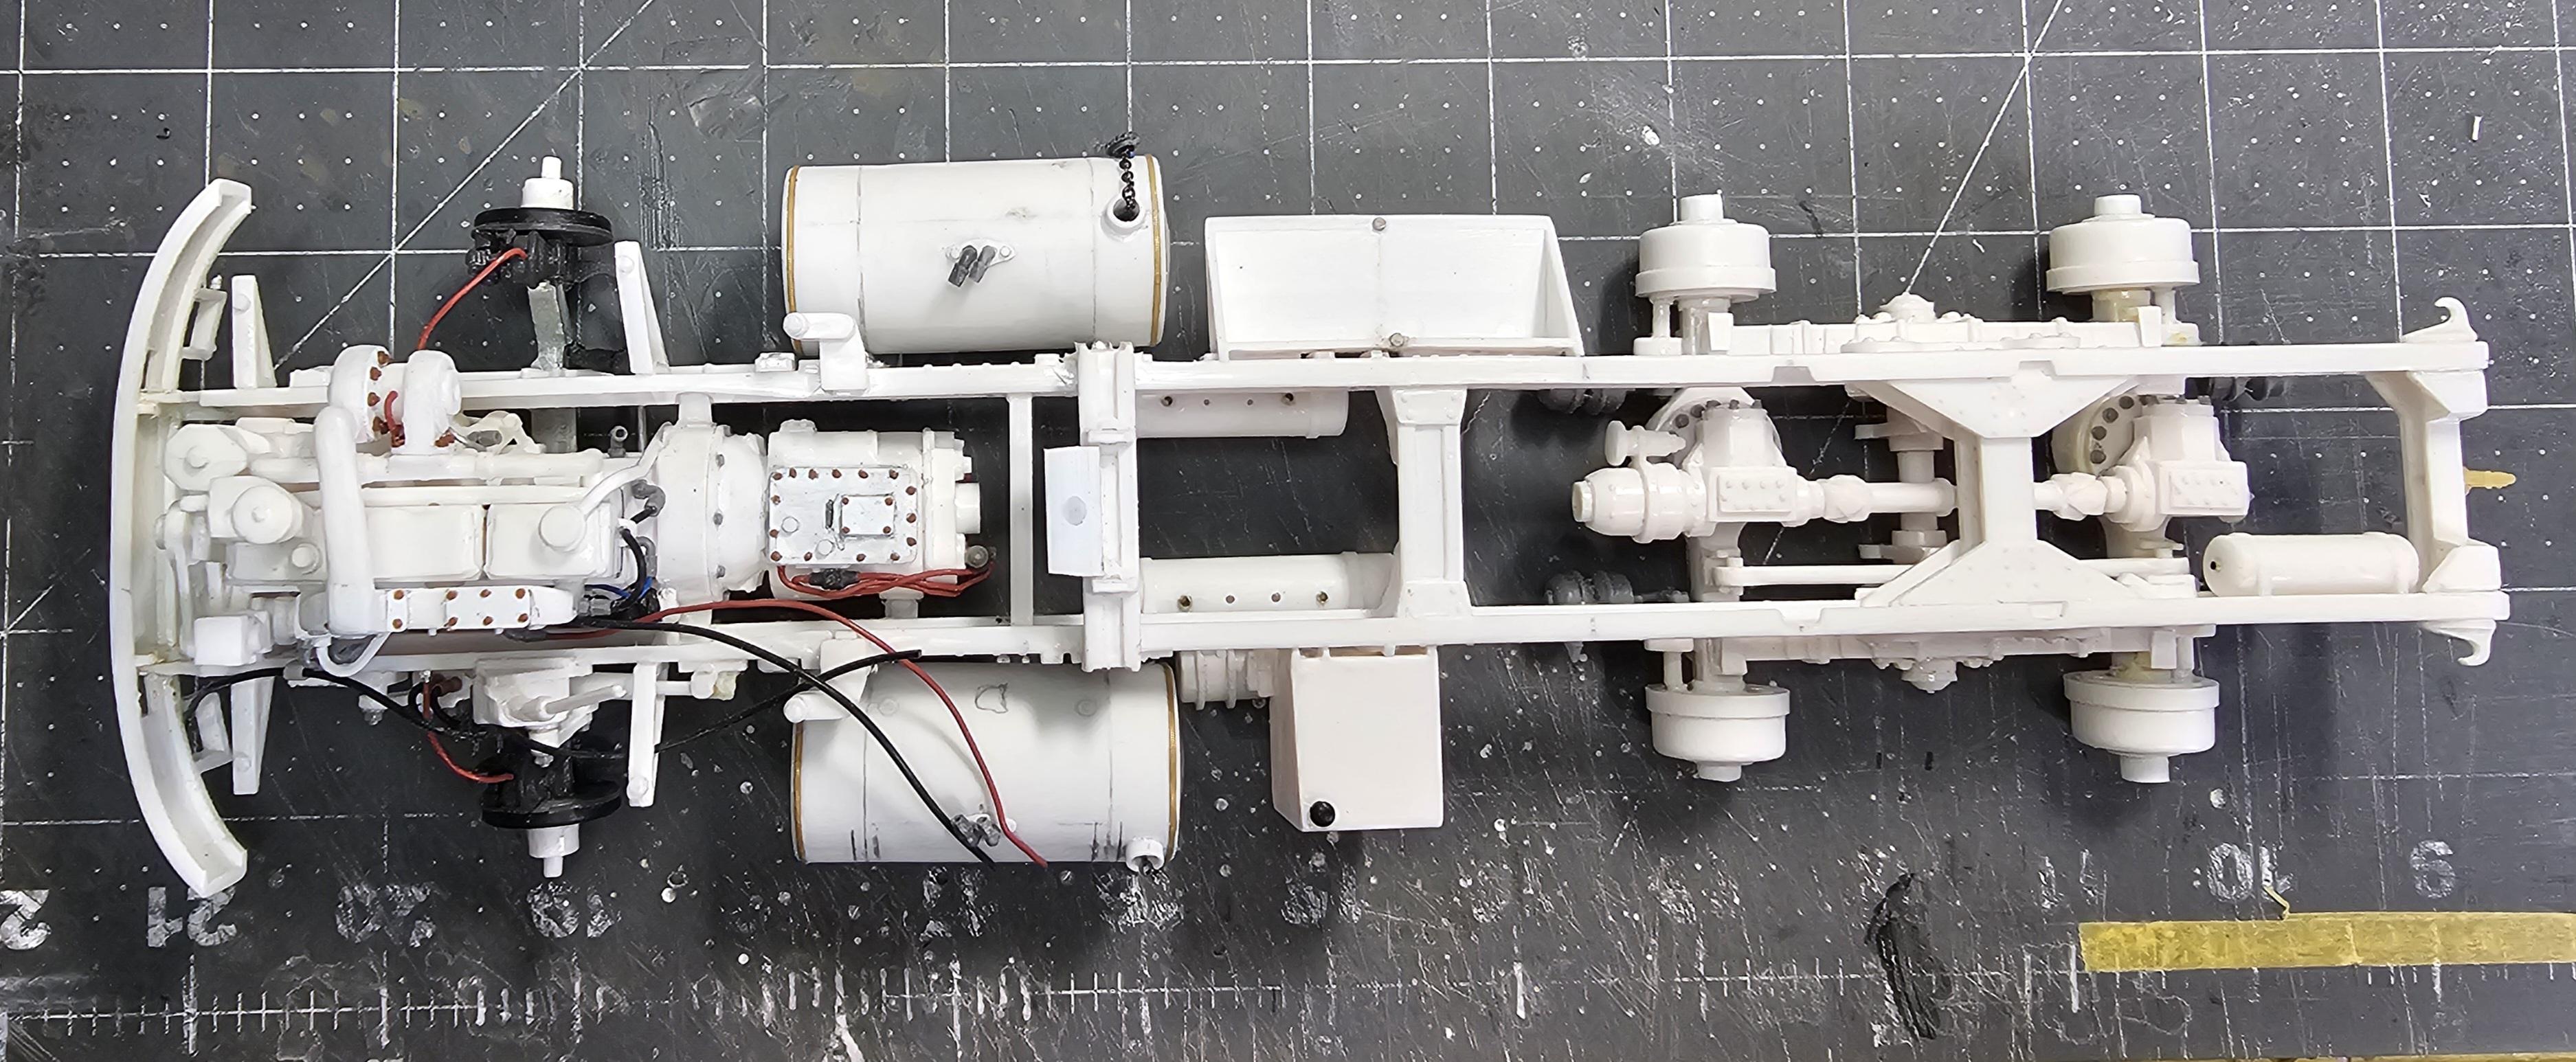
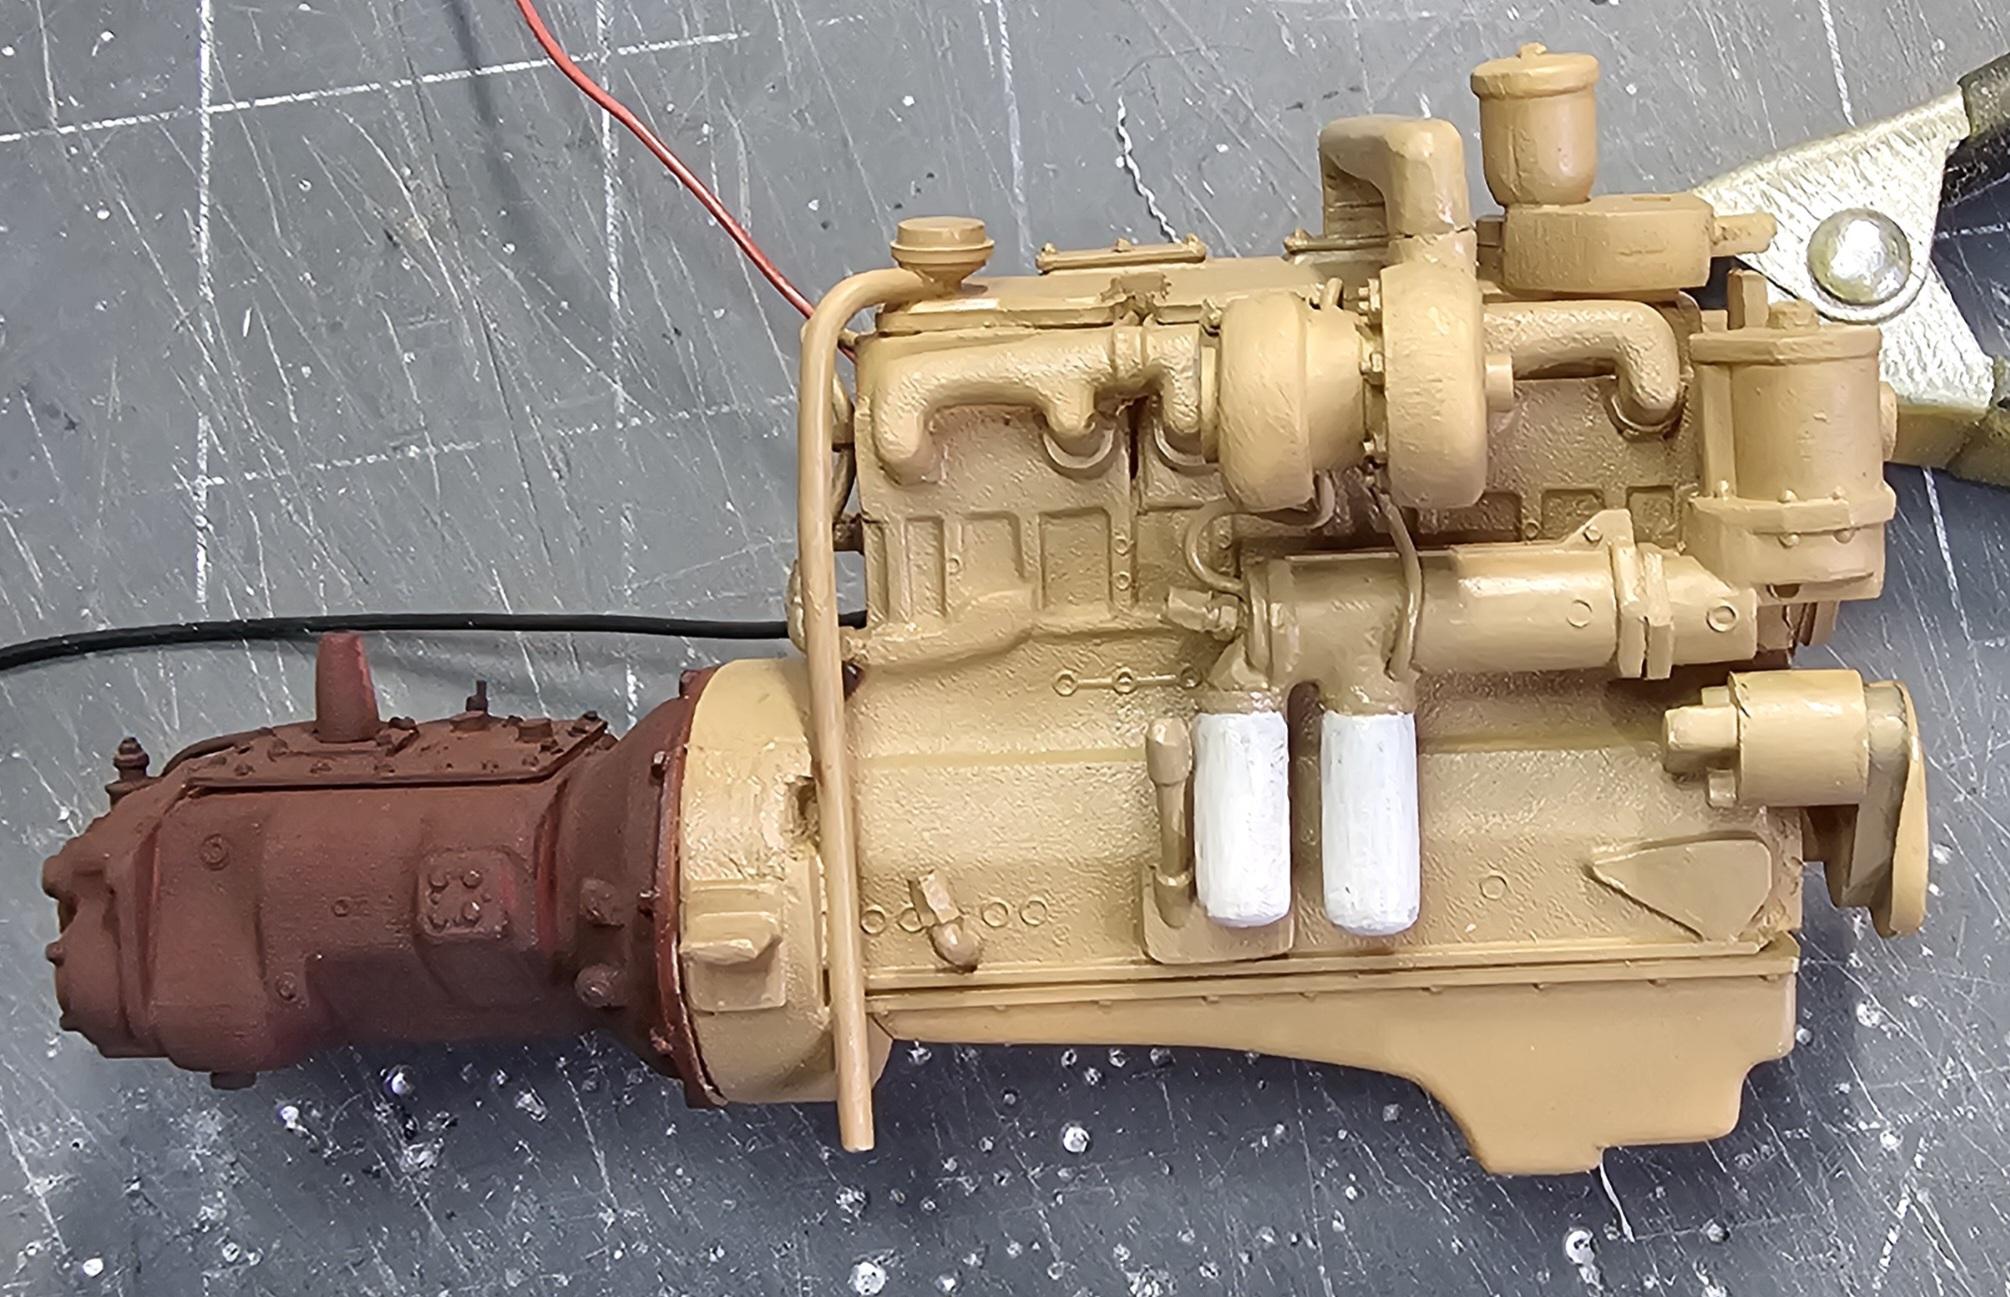
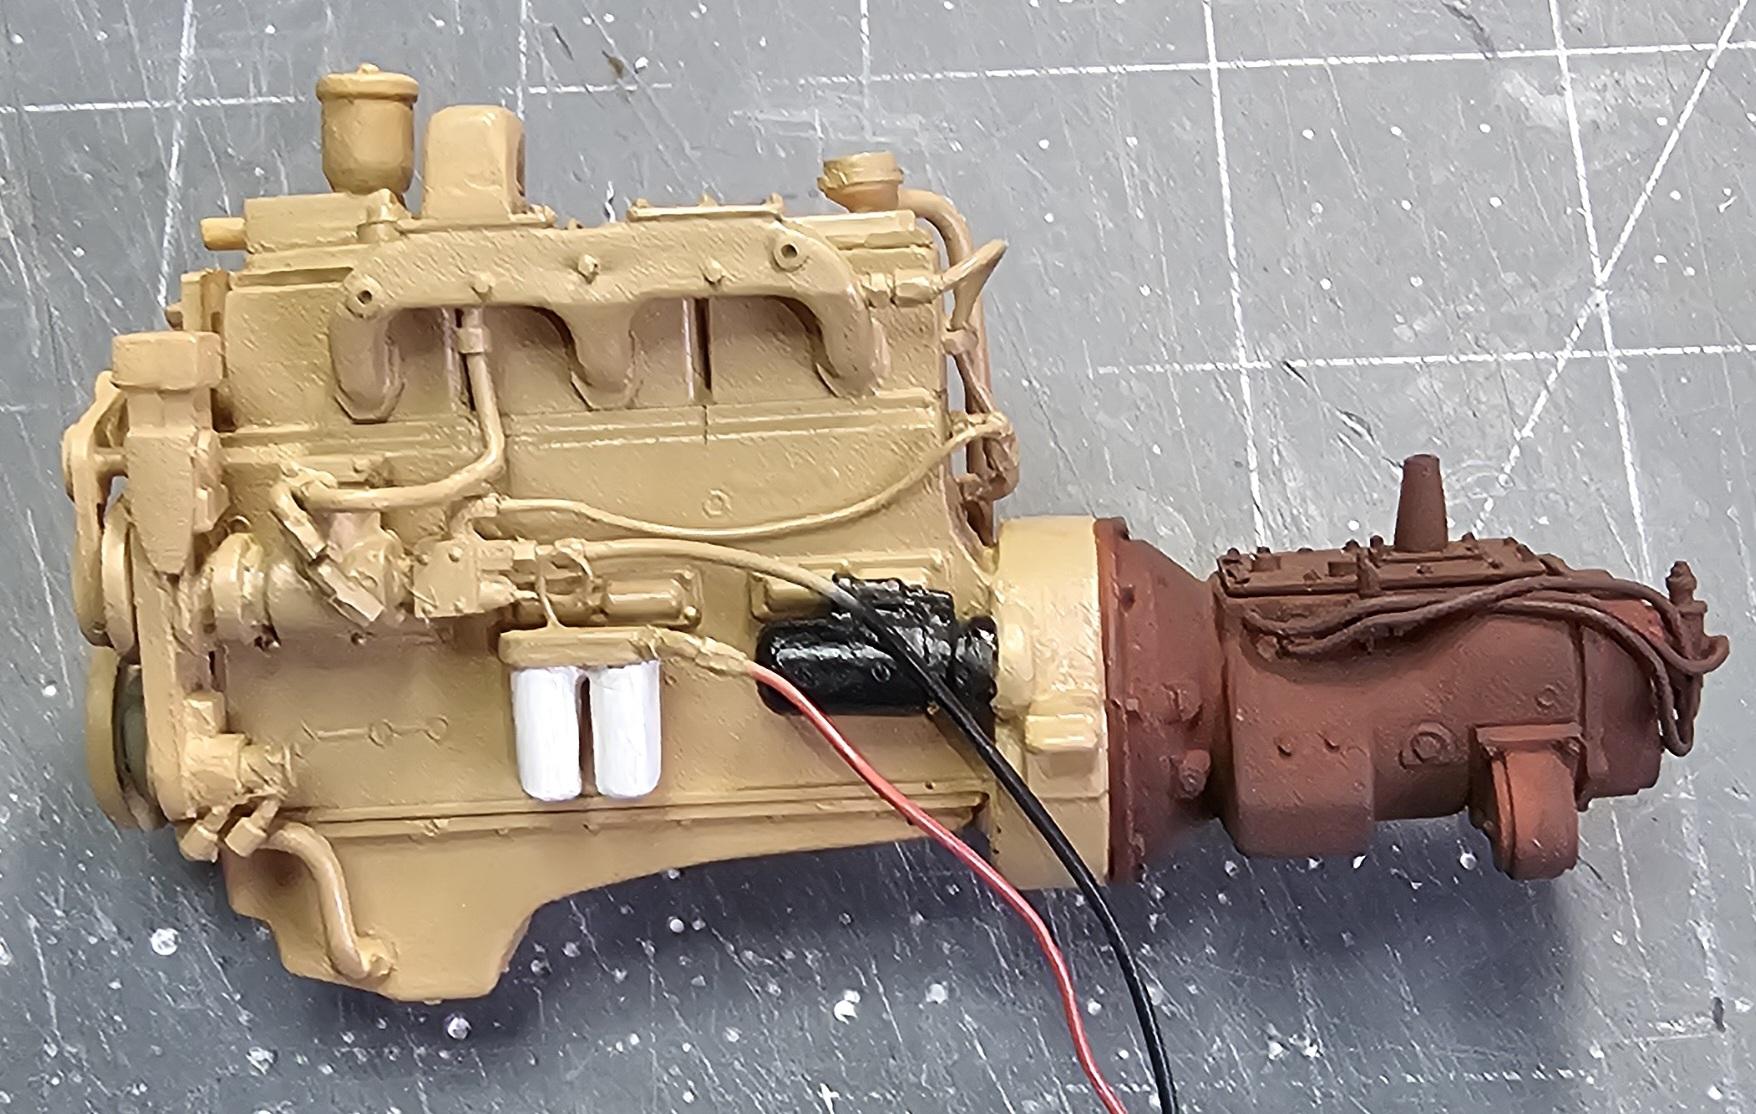
 Hello Everybody Well I got some more work done on this build. I worked on the fuel tanks, power steering reservoir and lubrafiner, hood and the engine. This view shows the drivers side fuel tank with the brass weld beads and fuel fittings that I added. This view shows the drain fitting on the bottom of the fuel tank. This view shows the tank before adding fittings and fuel filler neck. This view shows both fuel tanks done and ready for paint or dull aluminuming. This view shows the tanks with there fuel caps. This view shows the modifications I did to the fuel caps. (I know it's kinda anal...lol)😁 This View shows the cap hanging on it's chain. This view shows the cap in place. This view shows the tanks sitting on the frame. I had to bend these fittings up so that they will clear the front fender. I sprayed some Tamiya semi-gloss black on the inside of the hood. This view shows the front brake lines and fittings added to the frame. This view shows the oil drain plug and transmission drain plug I added. This view shows the black fuel feed line and the red return line added to the fuel pump & fuel filters on the engine. This view shows the shift tower I added to the transmission top cover. I got a little color added to the NTC-290 Cummins. This view shows the other side of the engine. Still more detail painting to be done plus weathering. Well that's it for now be back soon with more. Ron G
-
Thanks everyone Ron G
-
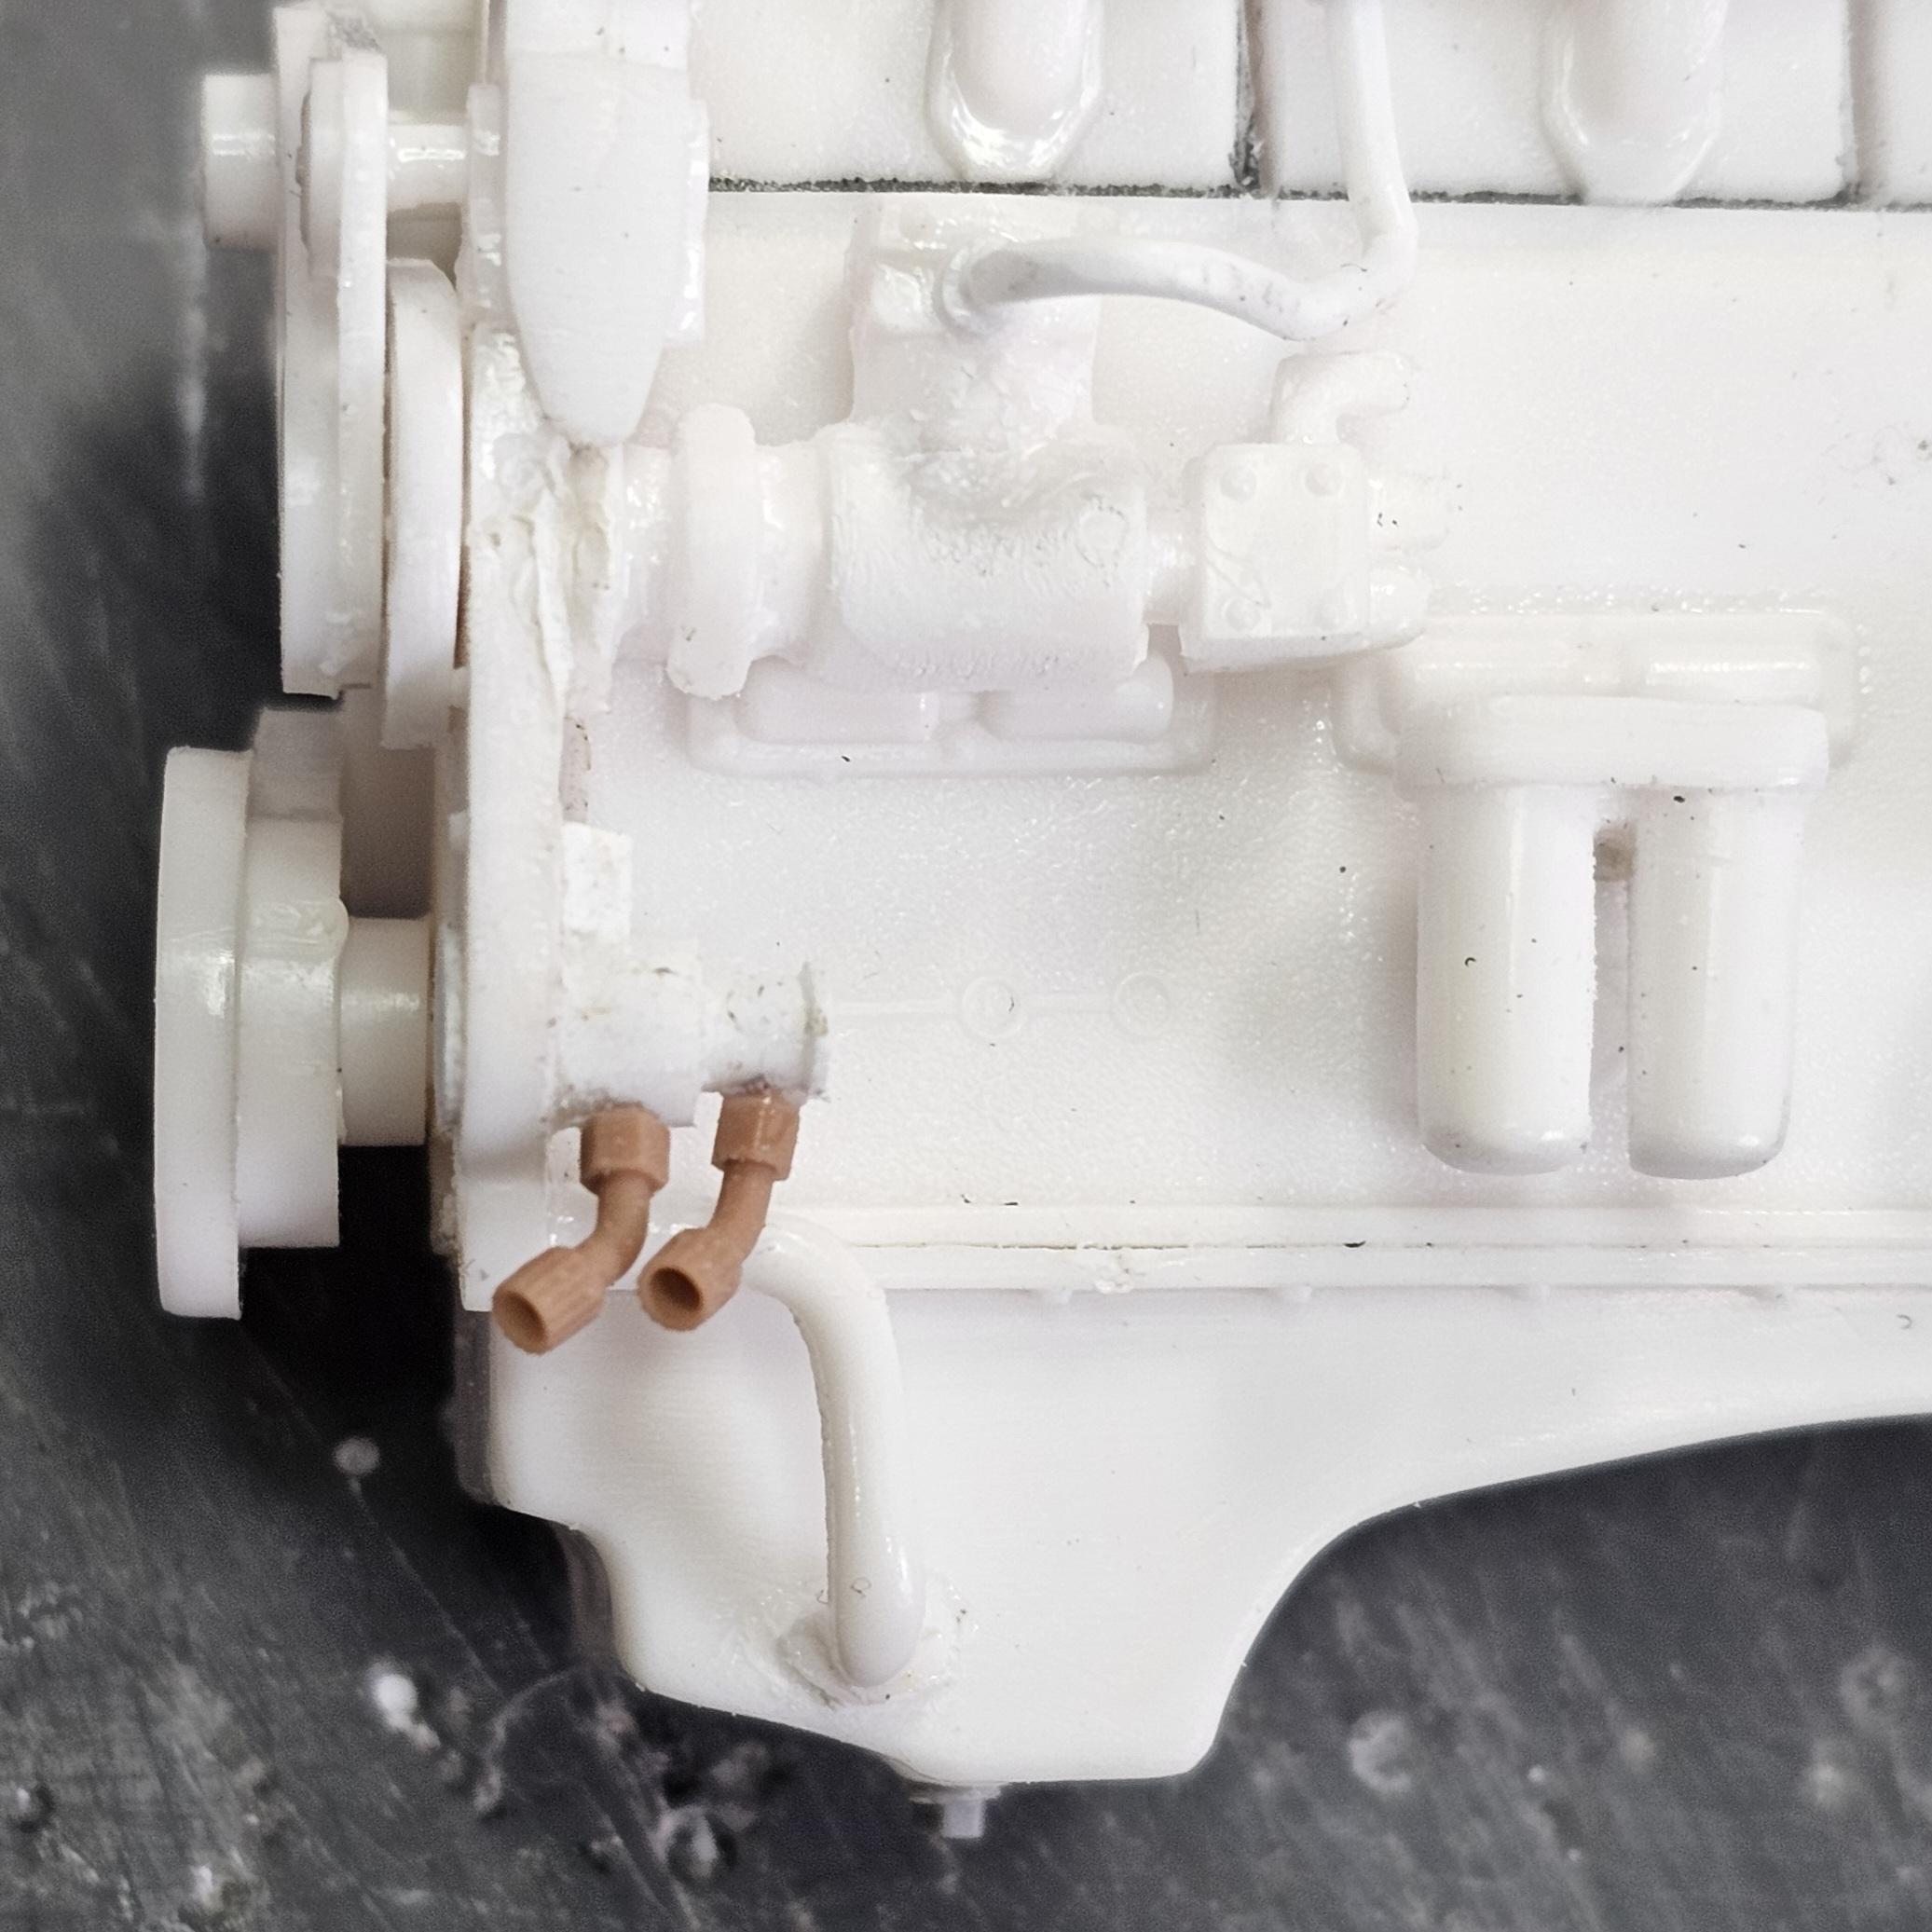
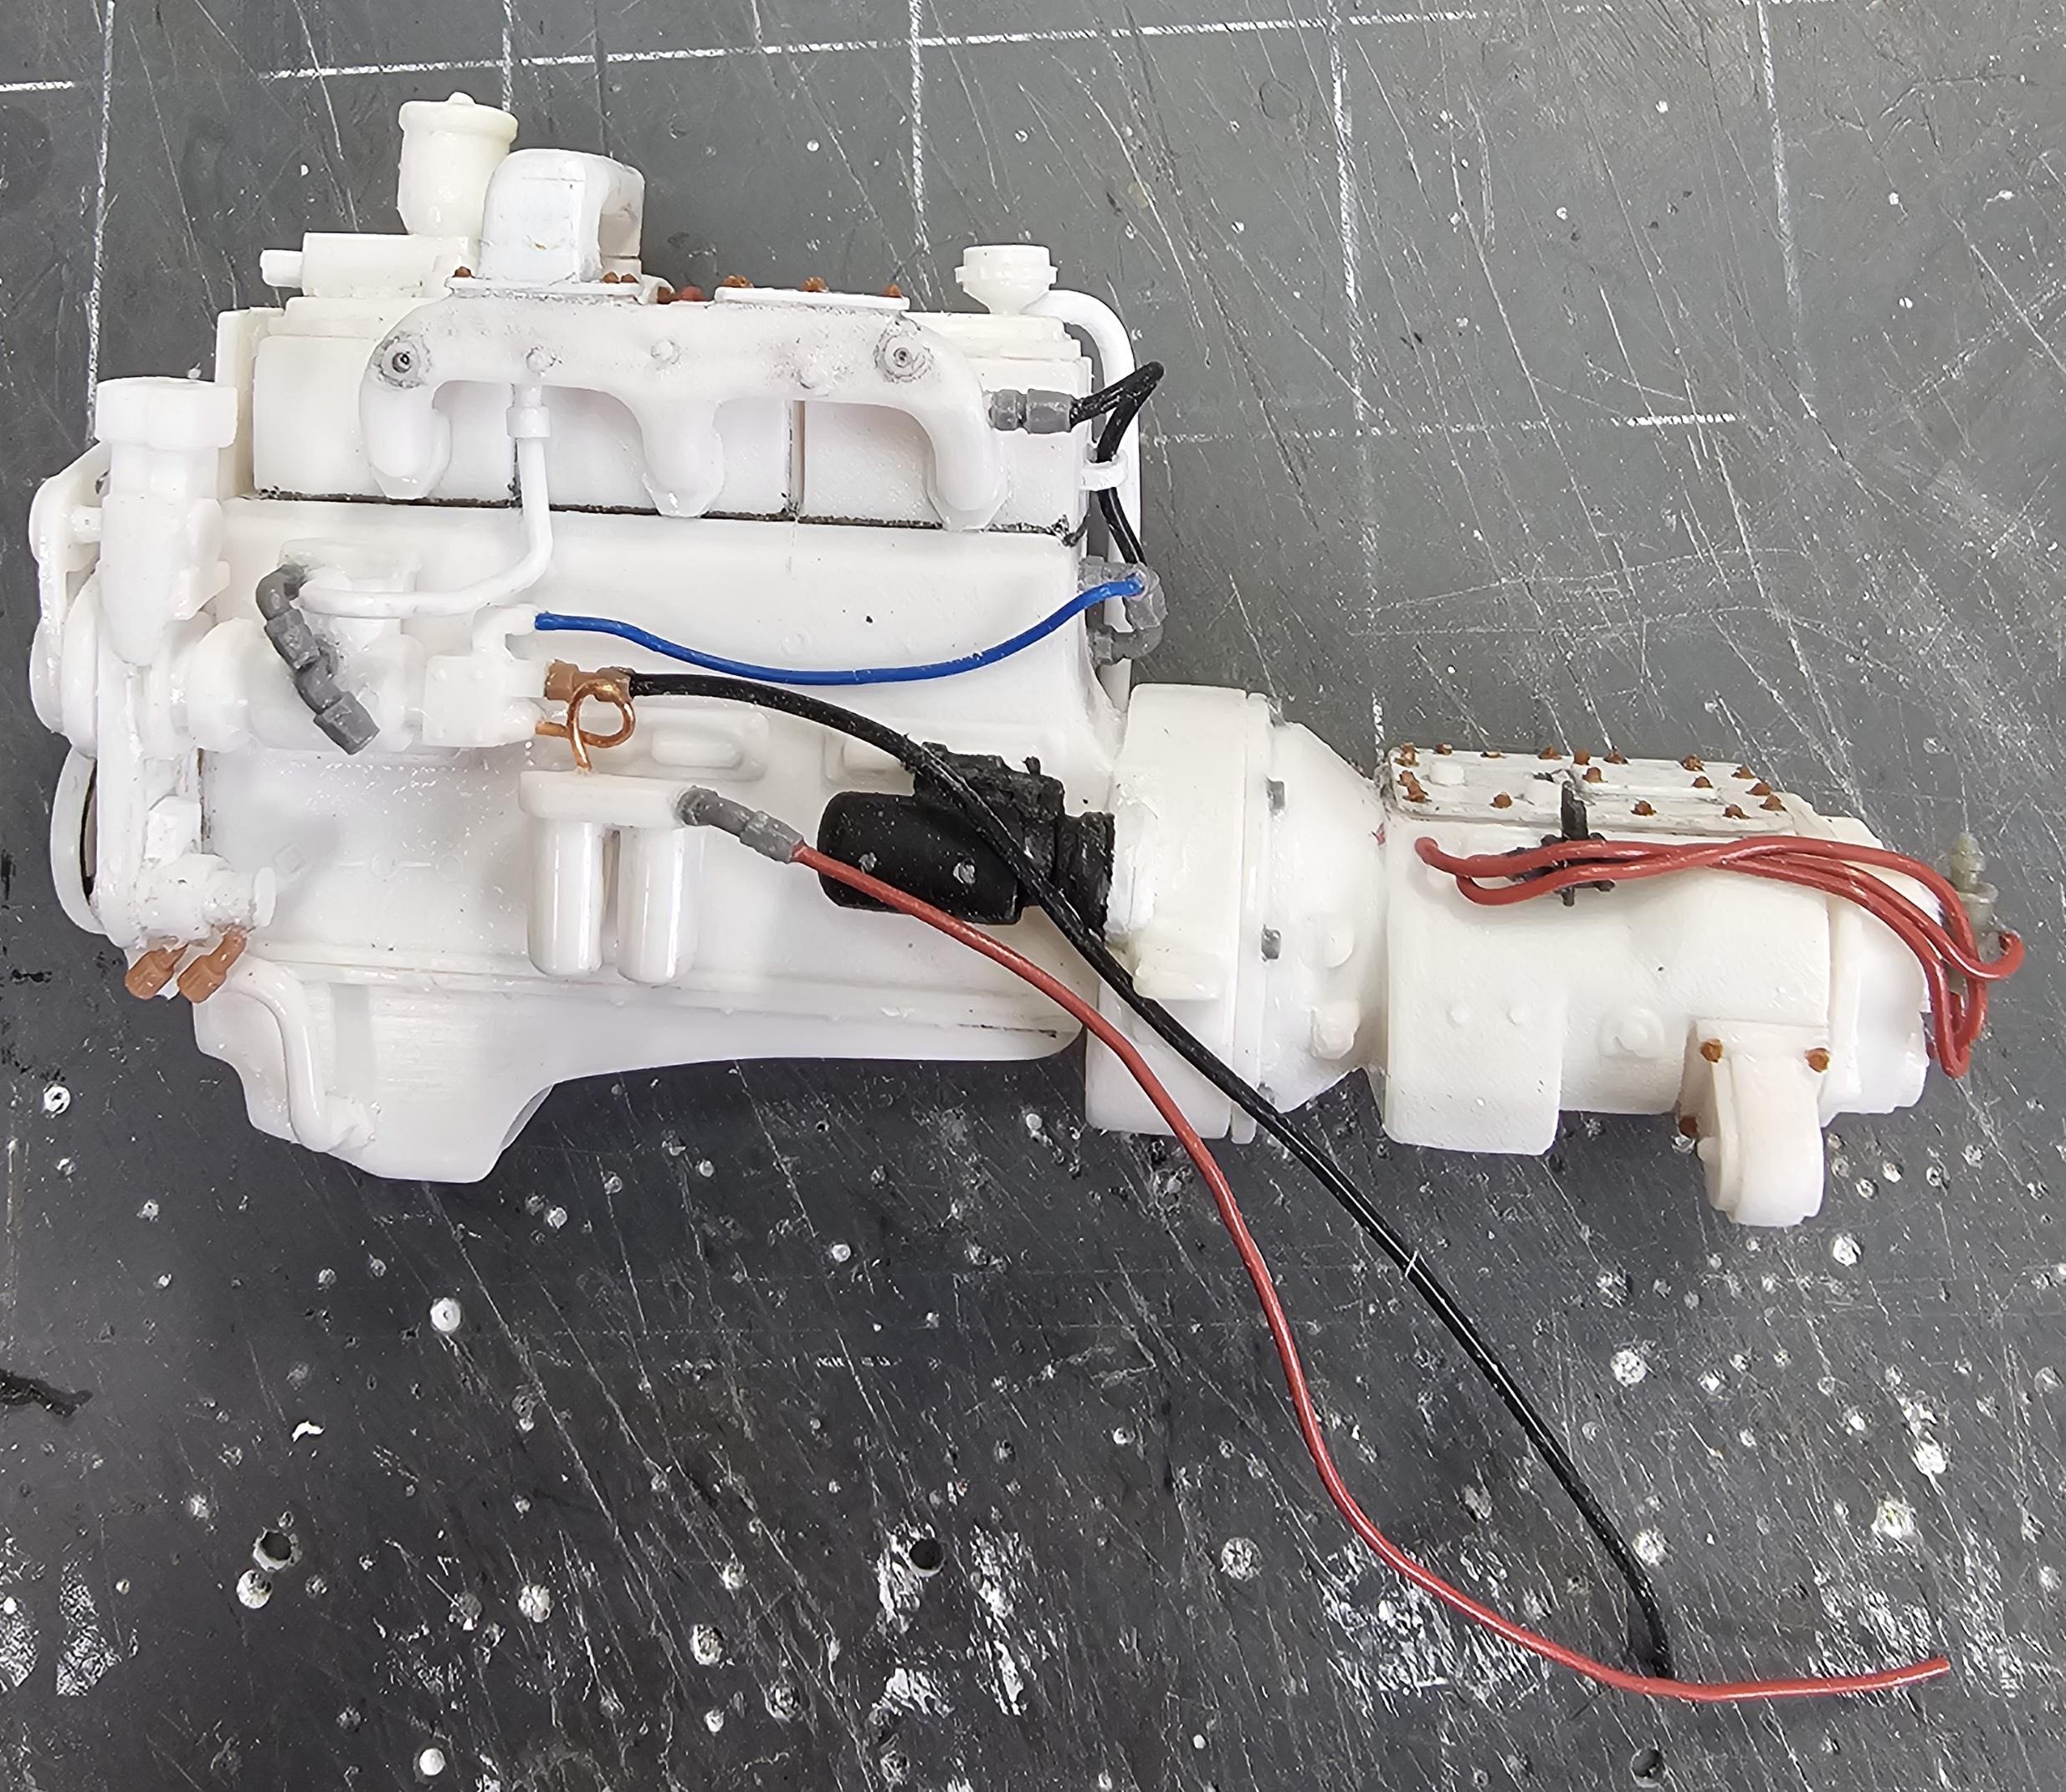
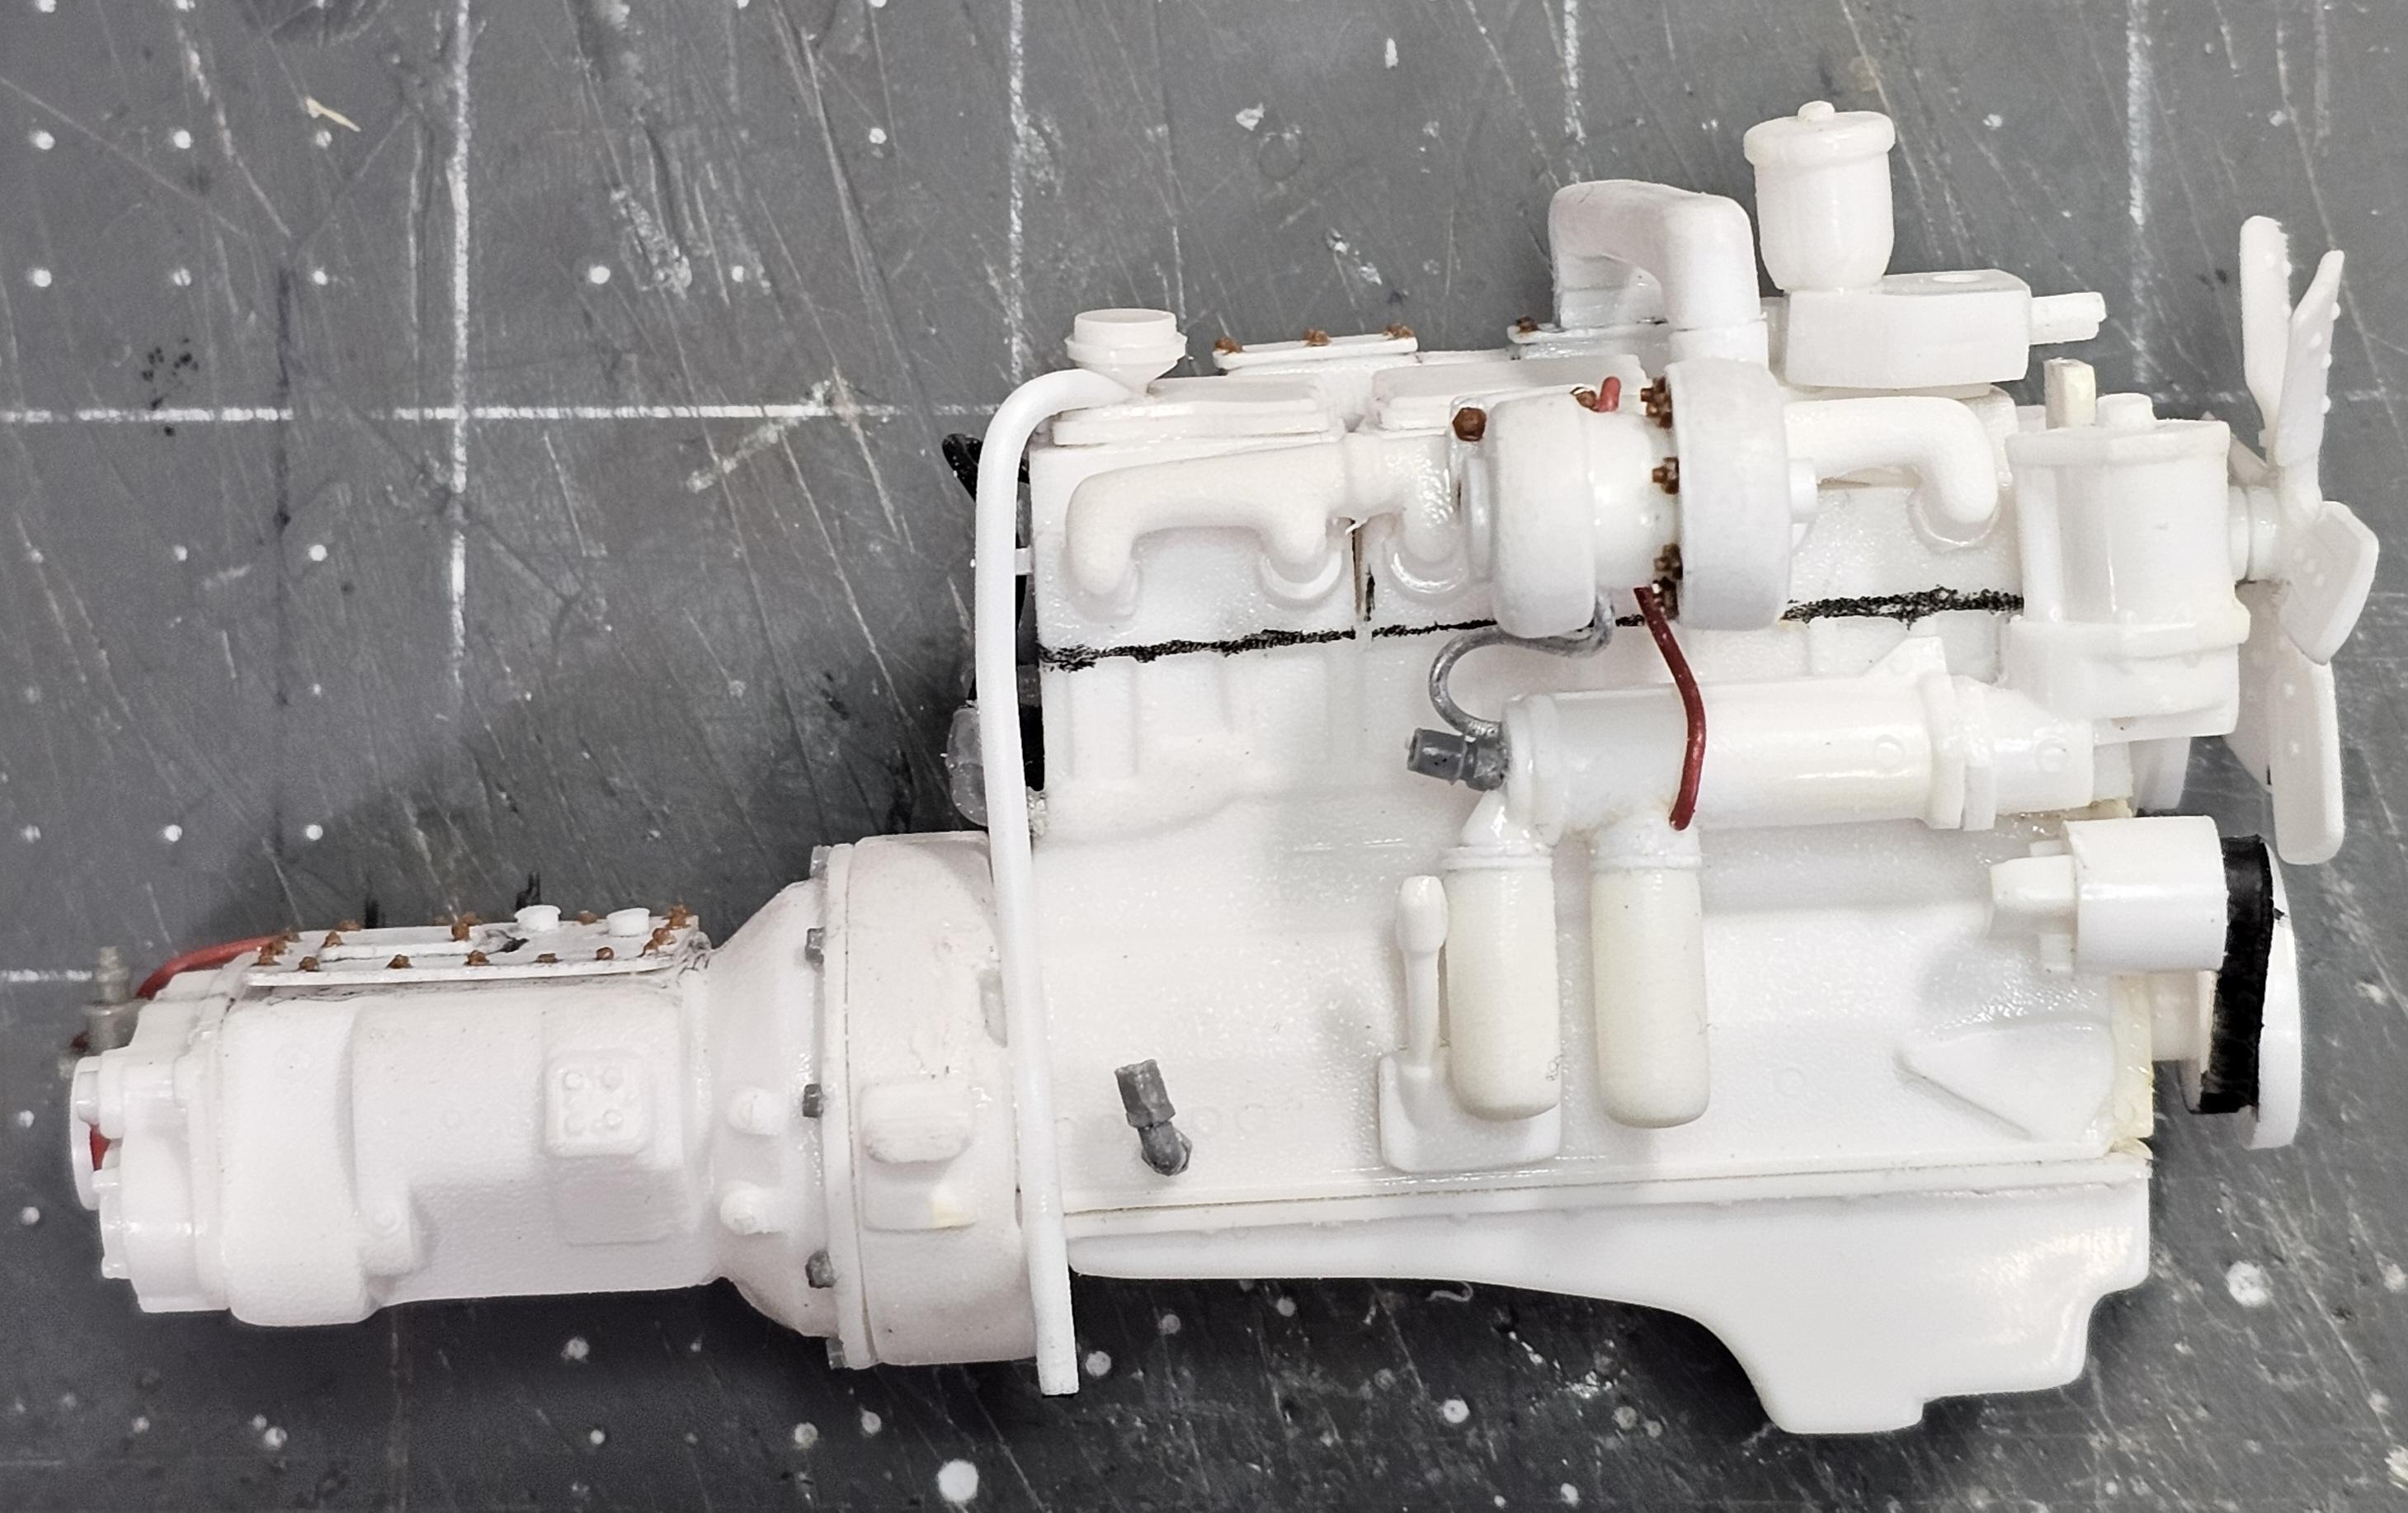
Hey everyone Small update today. I worked on the NTC-290 Cummins for the Autocar by adding some details and plumbing. It doesn't look like much work, but those fittings are very fiddly and time consuming. This view shows the oil lines added to the turbos. It shows the two fittings that will eventually connect to the luberfiner. Also I added a valve cover vent tube to the engine. This view shows the line added from the fuel filters to the fuel pump (loop). I also added a fitting to the fuel pump that will attach to the line from the tank. I added a fuel feed line from the pump to the head. Also a line from the block to the intake manifold all with fittings. It's hard to see but I added two flat head screws to the starter moter with a rivet making tool and sharp #11 blade (the silver dots). You can just barely see the tiny Tichy bolts I added to the PTO on the trans. This view shows the transmission shift lines and valves. Also the lines running to the head. A closer look at the starter screws. This view shows the air filter can I'm going to use for this build. It's from a Revell ROG Peterbilt kit, modified slightly. Well that's it for now be back soon with more updates. Ron G
-
Actually,my bad. The individual rubber cords are from Modelltruck.at they have 1.0mm & 1.5mm. Ron G
-
They are from CTM and are actually not hollow, they are a rubber cord to be specific. They come in their hydraulic fittings and rubber lines kit #24007. They are 1.0mm (0.984"), 1.5mm (1.476") & 1.9mm (1.870") in diameter. They also sell the 1.0mm & 1.5mm in individual packs. Thanks Pal for your comments. Ron G
-
Hello Everybody I got a little more work done on this build today. This view shows the power steering reservoir and lubrafiner temperaly attached to the cab. This view shows the battery box that I modified. I cut the two (don't know why there were two in the kit) boxes ends off and then joined them together to make a bigger box to fit all four of the batteries in it. This view shows the battery box lid and box with the kit batteries sitting in it. I took the lid and added tiny Tamiya magnets and a couple of tiny pieces of metal to it to keep it closed. This view shows the fuel tank I'm using and the brass weld beads that I'm adding to it. This view shows the batteries. I cut them in half. AMT molded them together. Dumb. This view shows the four batteries I ended up with. I'm cutting all the molded on detail off like the bottom right so I can add on better details. This view shows the step I added to the frame. This view shows the fuel tank and mounting brackets. This view shows the detail I added to the battery, just three more to do. This view shows the transmission top cover I scratch built and the Tichy bolts that I added to it. Well that's it for today be back soon. Ron G
-
Hey Tom It sounds like your going to need a miniature power hack saw.😁tthats alot of tube to cut and keep square. But with your skills you'll pull it off. Great work so far. Ron G
-
Hey Bren As I said in my previous posts I got them from Micromark. They are the same hinges that Redneckrigger used on his link belt crane build. He listed the number in his post, mine didn't have a number on them. They are doll house hinges. Ron G
-
If you are talking about the fittings they are these. They are from CTM (Czech Truck Models) I got them from Paul at ST Supply. If you were talking about the hinges they are from Micromark. I don't have a number, they didn't have one. They are the ones redneckrigger used on his link belt crane build. He listed the number. Check his post for number. Ron G
-
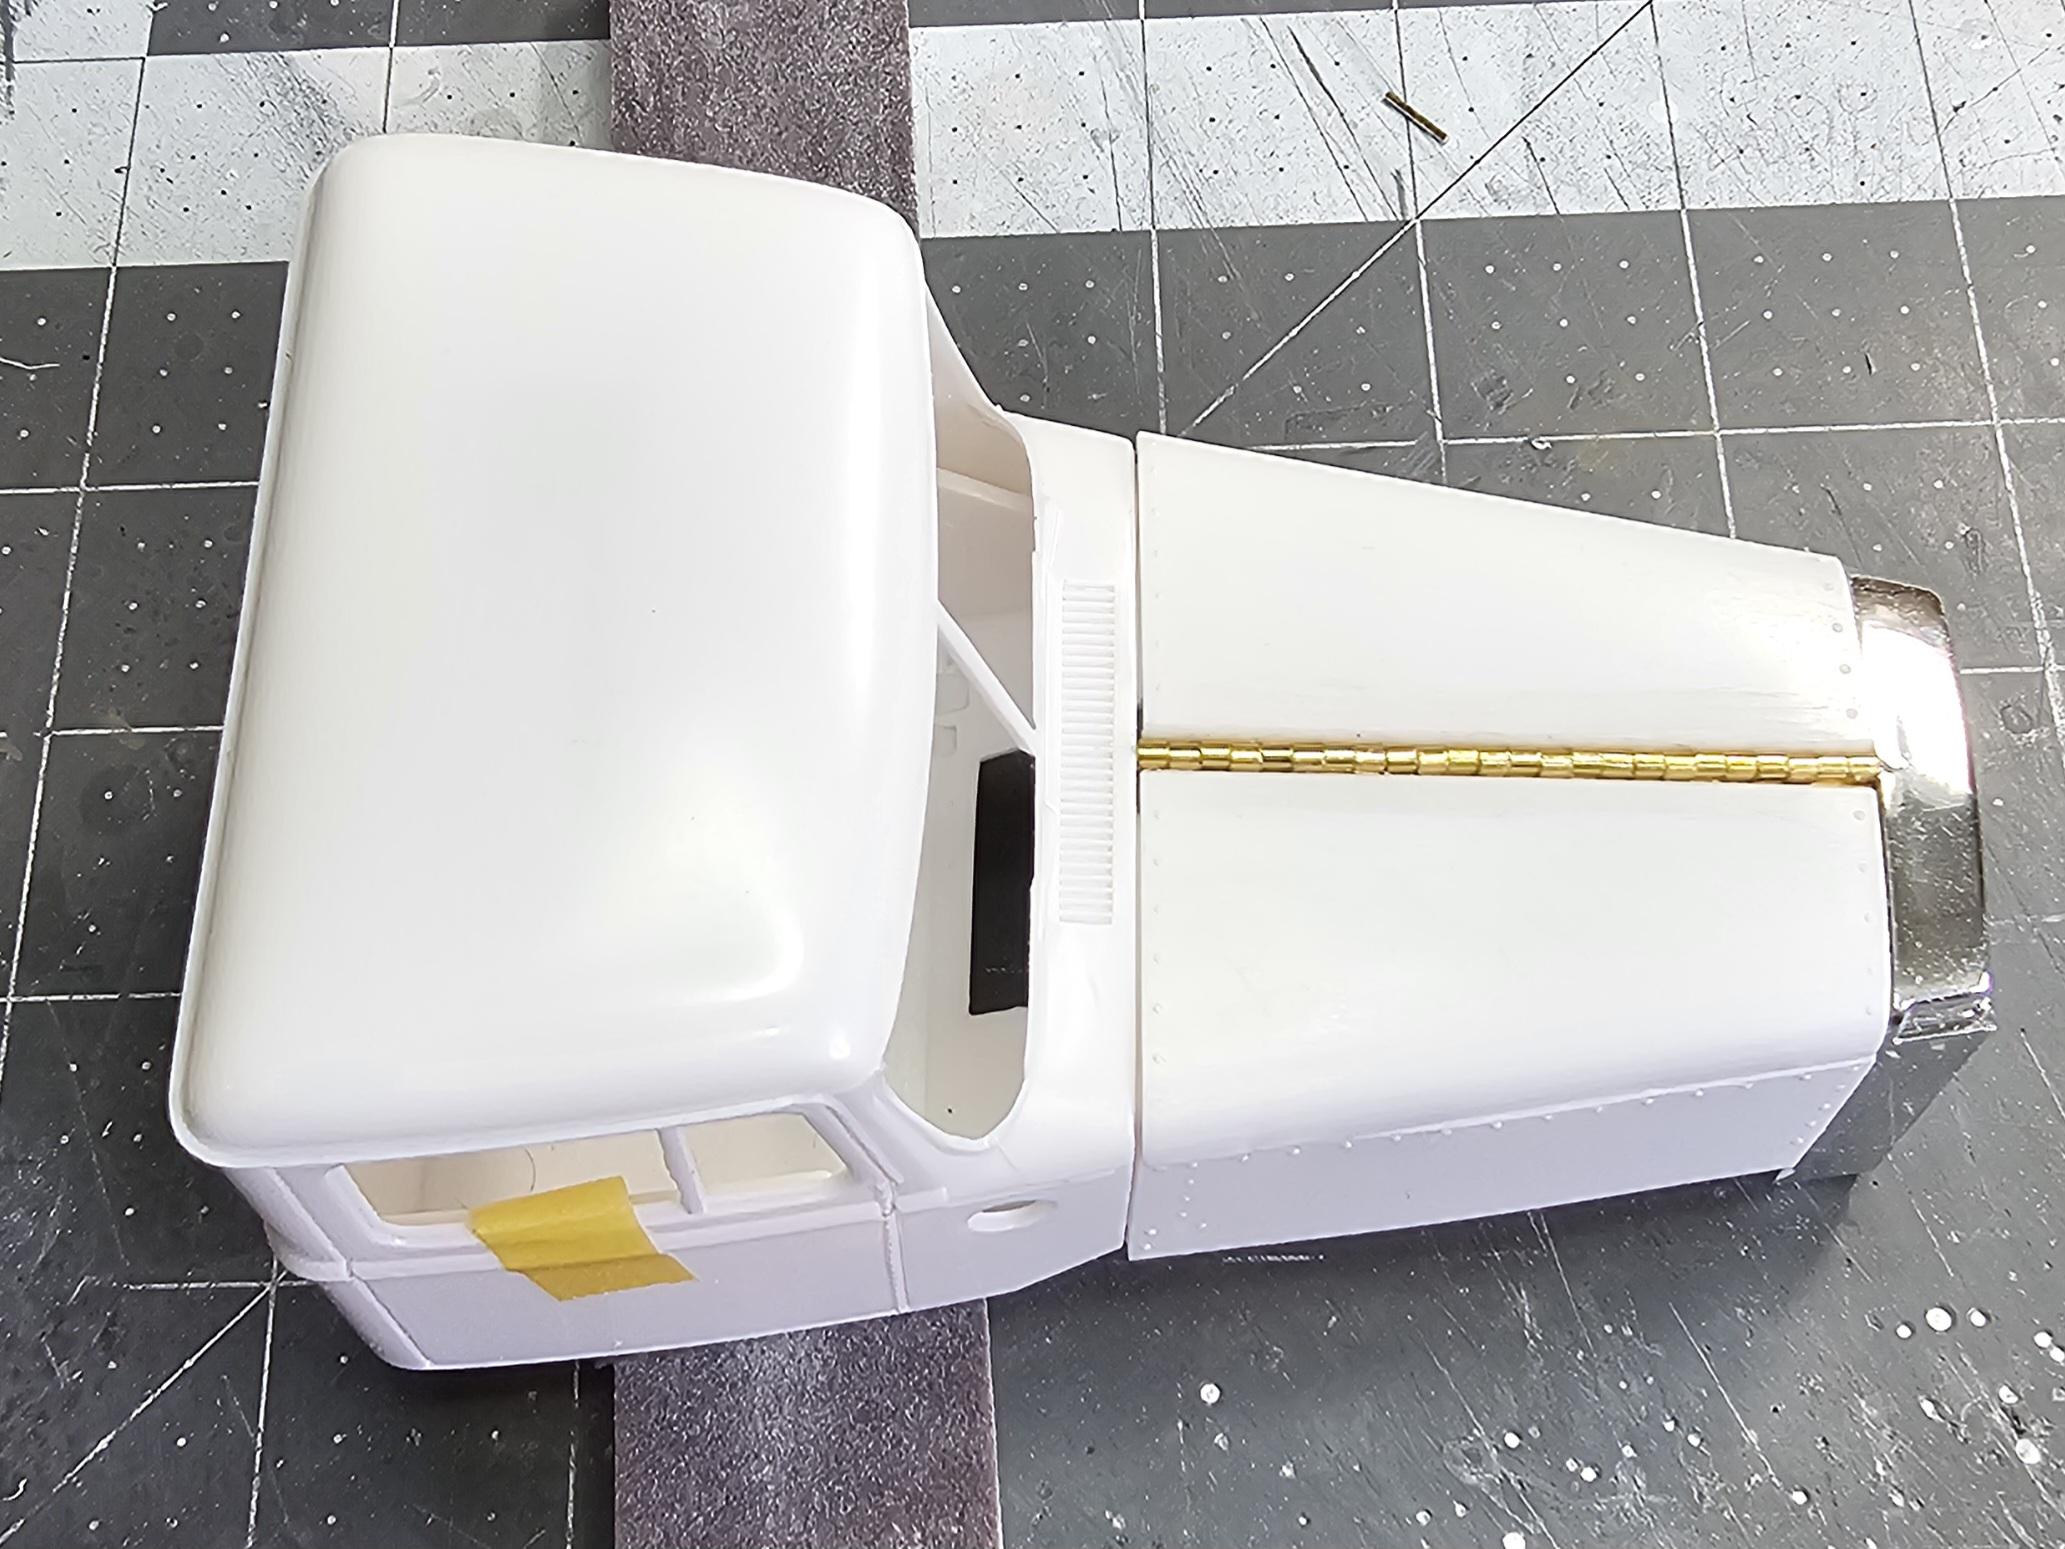
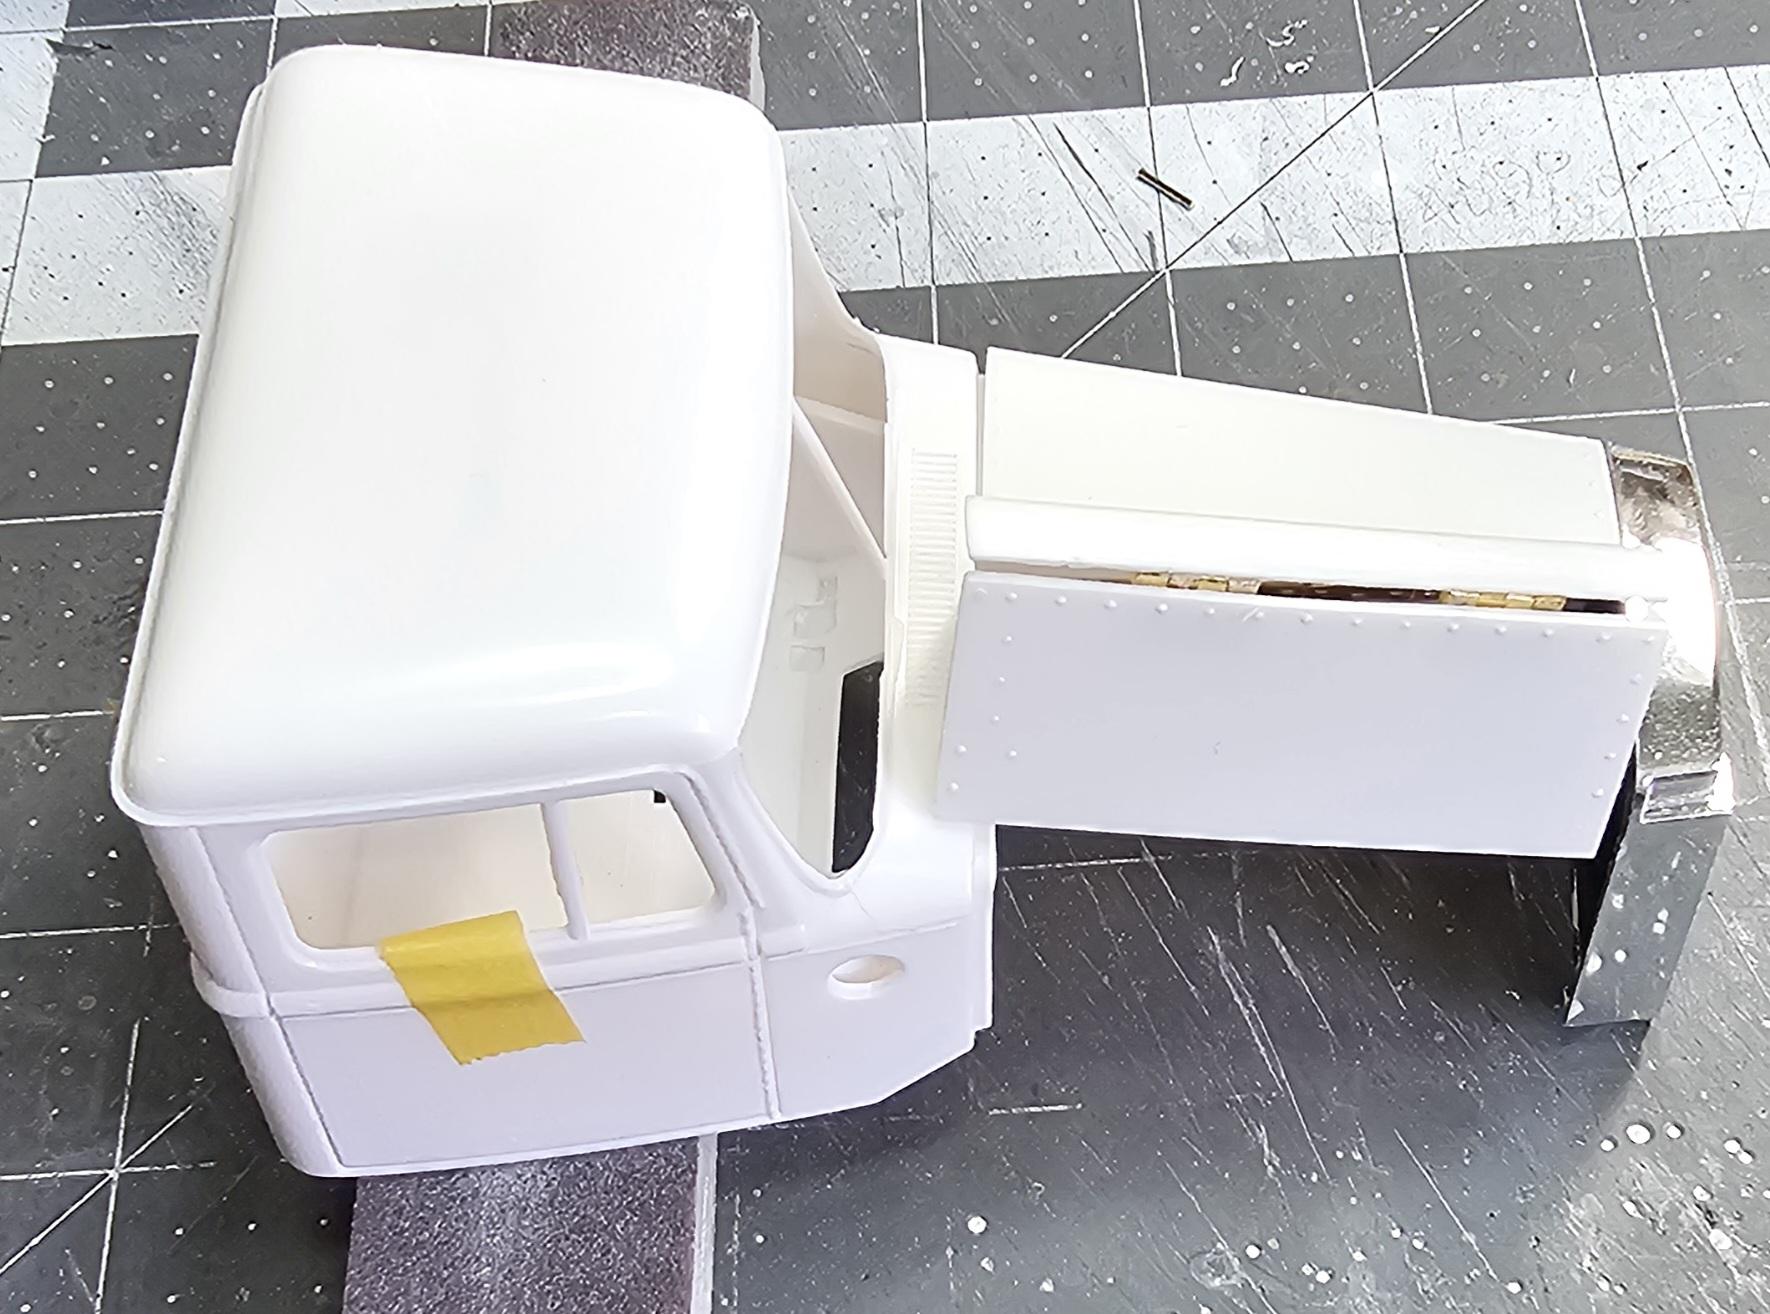
Hey all Got some more work done on this build. Started the front steering system plumbing. This view shows the floor that I added to the kit interior bucket. This view shows what the floor looks like on the truck. This view shows the parts I'm using to plumb the front steering mechanism. They are from CTM. This view shows the steering box control valves that I added. This view shows the different front wheel centers I'm thinking about using. I'm going with the oil center cap, on the right. This view shows the rear wheel center caps I'm going to use. This is the winch headache rack I'm going to be using. This view shows the headache rack. It's from 3D Concepts. This view shows the two tan hydraulic fittings I added to the front hydraulic steering assist cylinder. Also the bolt heads I added to the front steering mechanism. This view shows the hydraulic fittings I added to the hydraulic pump. This view shows the plumbing on the front steering system. I can't add more till the truck is further along. This view shows the radiator to cab bracing rods. This view shows the hood in place and open on the truck. Well that's it for now I'll be back soon with more updates. Ron G
-
WOW! Thanks alot David,your the best. Ron G
-
Hello all I'm trying to find one, possibly two of P&P resin works 1/25 scale Cummins KTA 600 engines. Does anyone know if Eric is still selling these? I tried to email him but it wouldn't go through. Any help on this would be greatly appreciated. Thank you Ron G
-
Hey Tom I know exactly what you mean. No matter how good I do something it just doesn't meet my vision, to much of a perfectionist I guess.😆 It can be a curse, but also a good thing, because it makes us better modelers. Keep up the outstanding work you are doing I definitely want to see this done. Ron G
-
Yeah, I tought it was a little big, but it looks okay on your build, doesn't stand out. If you look at my Autocar build I used the little hinges (forgot what #) to make a long piano hinge for my hoods center hinge. I then used two on each side for the side hinges, worked out perfectly. All this was inspired by you and your build. Thanks Ron G
-
You are welcome. Ron G
-
She's looking real nice Brenton. Ron G
-
This is absolutely astounding! When you are done with this it should be in a museum for everyone to look at. Fantastic work on this, and thanks for the hinge information, it came in very handy on my Autocar build. Ron G
-
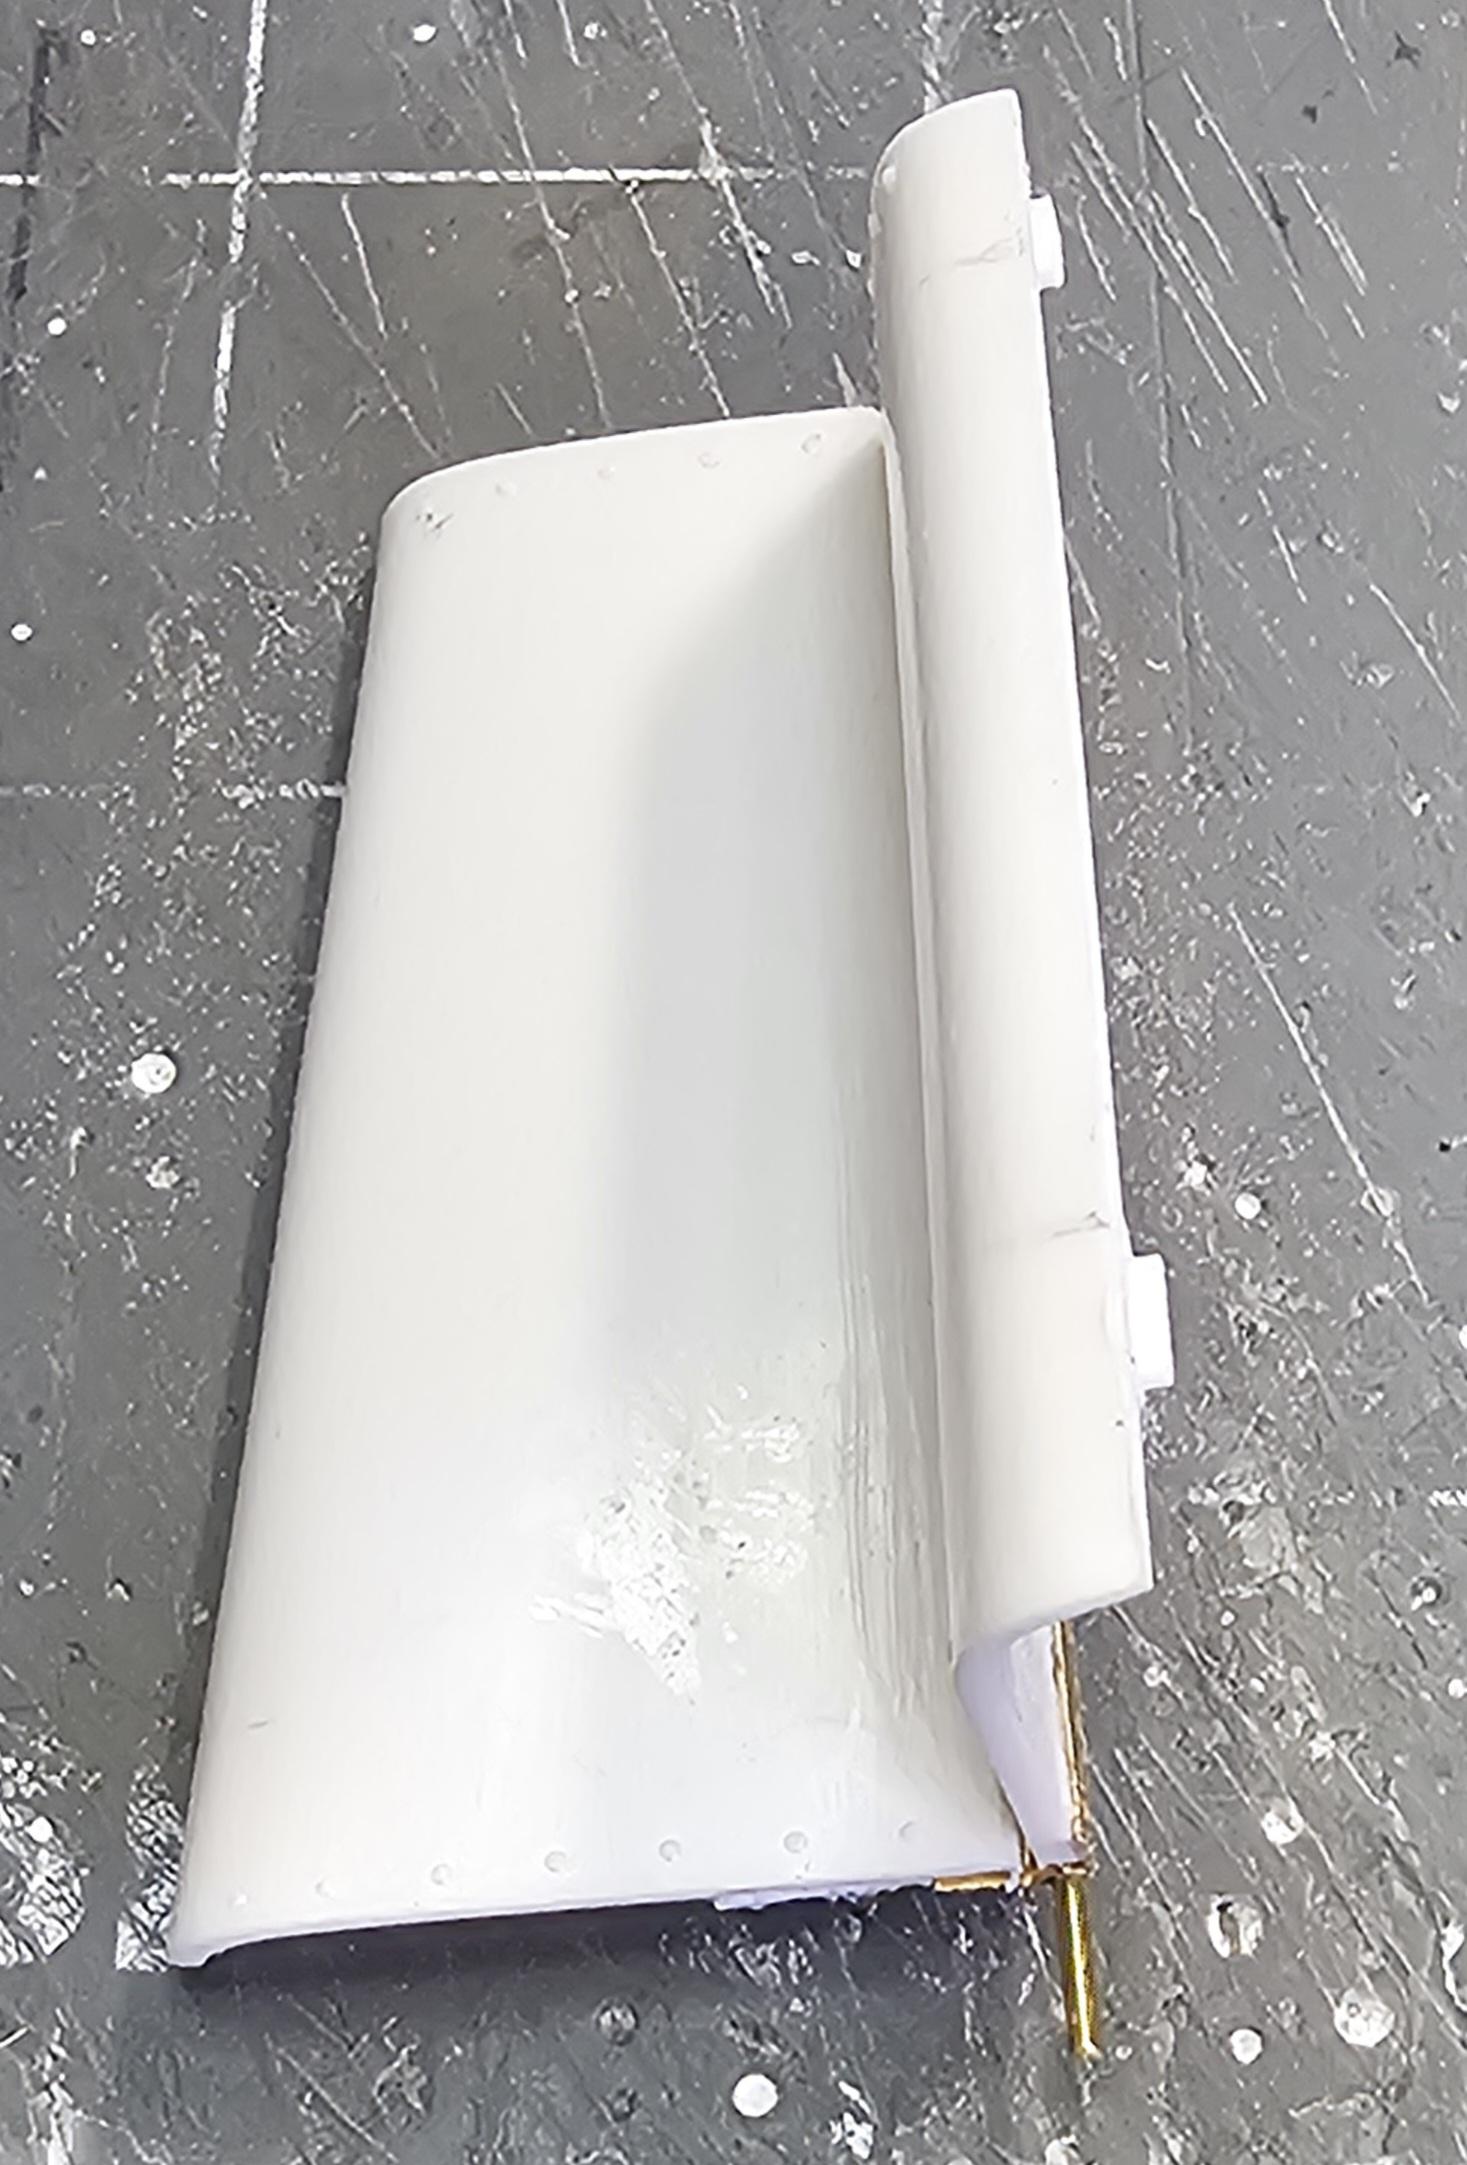
Hey all Well let's try this again. I added the side pieces to the hood. As I tried to say in my previous post this was inspired by redneckriggers link belt crane build. This view shows the hood closed. This view shows the hoods left side open. This view shows the hoods right side open. We'll that's it for now be back soon with more Ron G
-
Thanks Gary
-
Hello Why can't I edit my posts? It's in the large truck WIP section. It ket me load the pictures, then when I went to added text (edit) It said I could no longer edit it. Said it might have been moved or timed out. Why is this happening. If this keeps up your going to loose people. Respectfully Ronald G Gardner
-
Hey all This forum won't let me edit my post.🤬😡 Sorry everyone,I tried to add to my post but it won't let me.🤨 Ron G
-
Hey all Okay, this update is on Redneckrigger. He inspired me to attempt this. I am going to make the hood on the Autocar work! That's right a fully working hood. So let's get i to this. This view shows the little hinges
-
Hey Brenton I meant the Revell spray chrome, not the kit chrome. Ron G
-
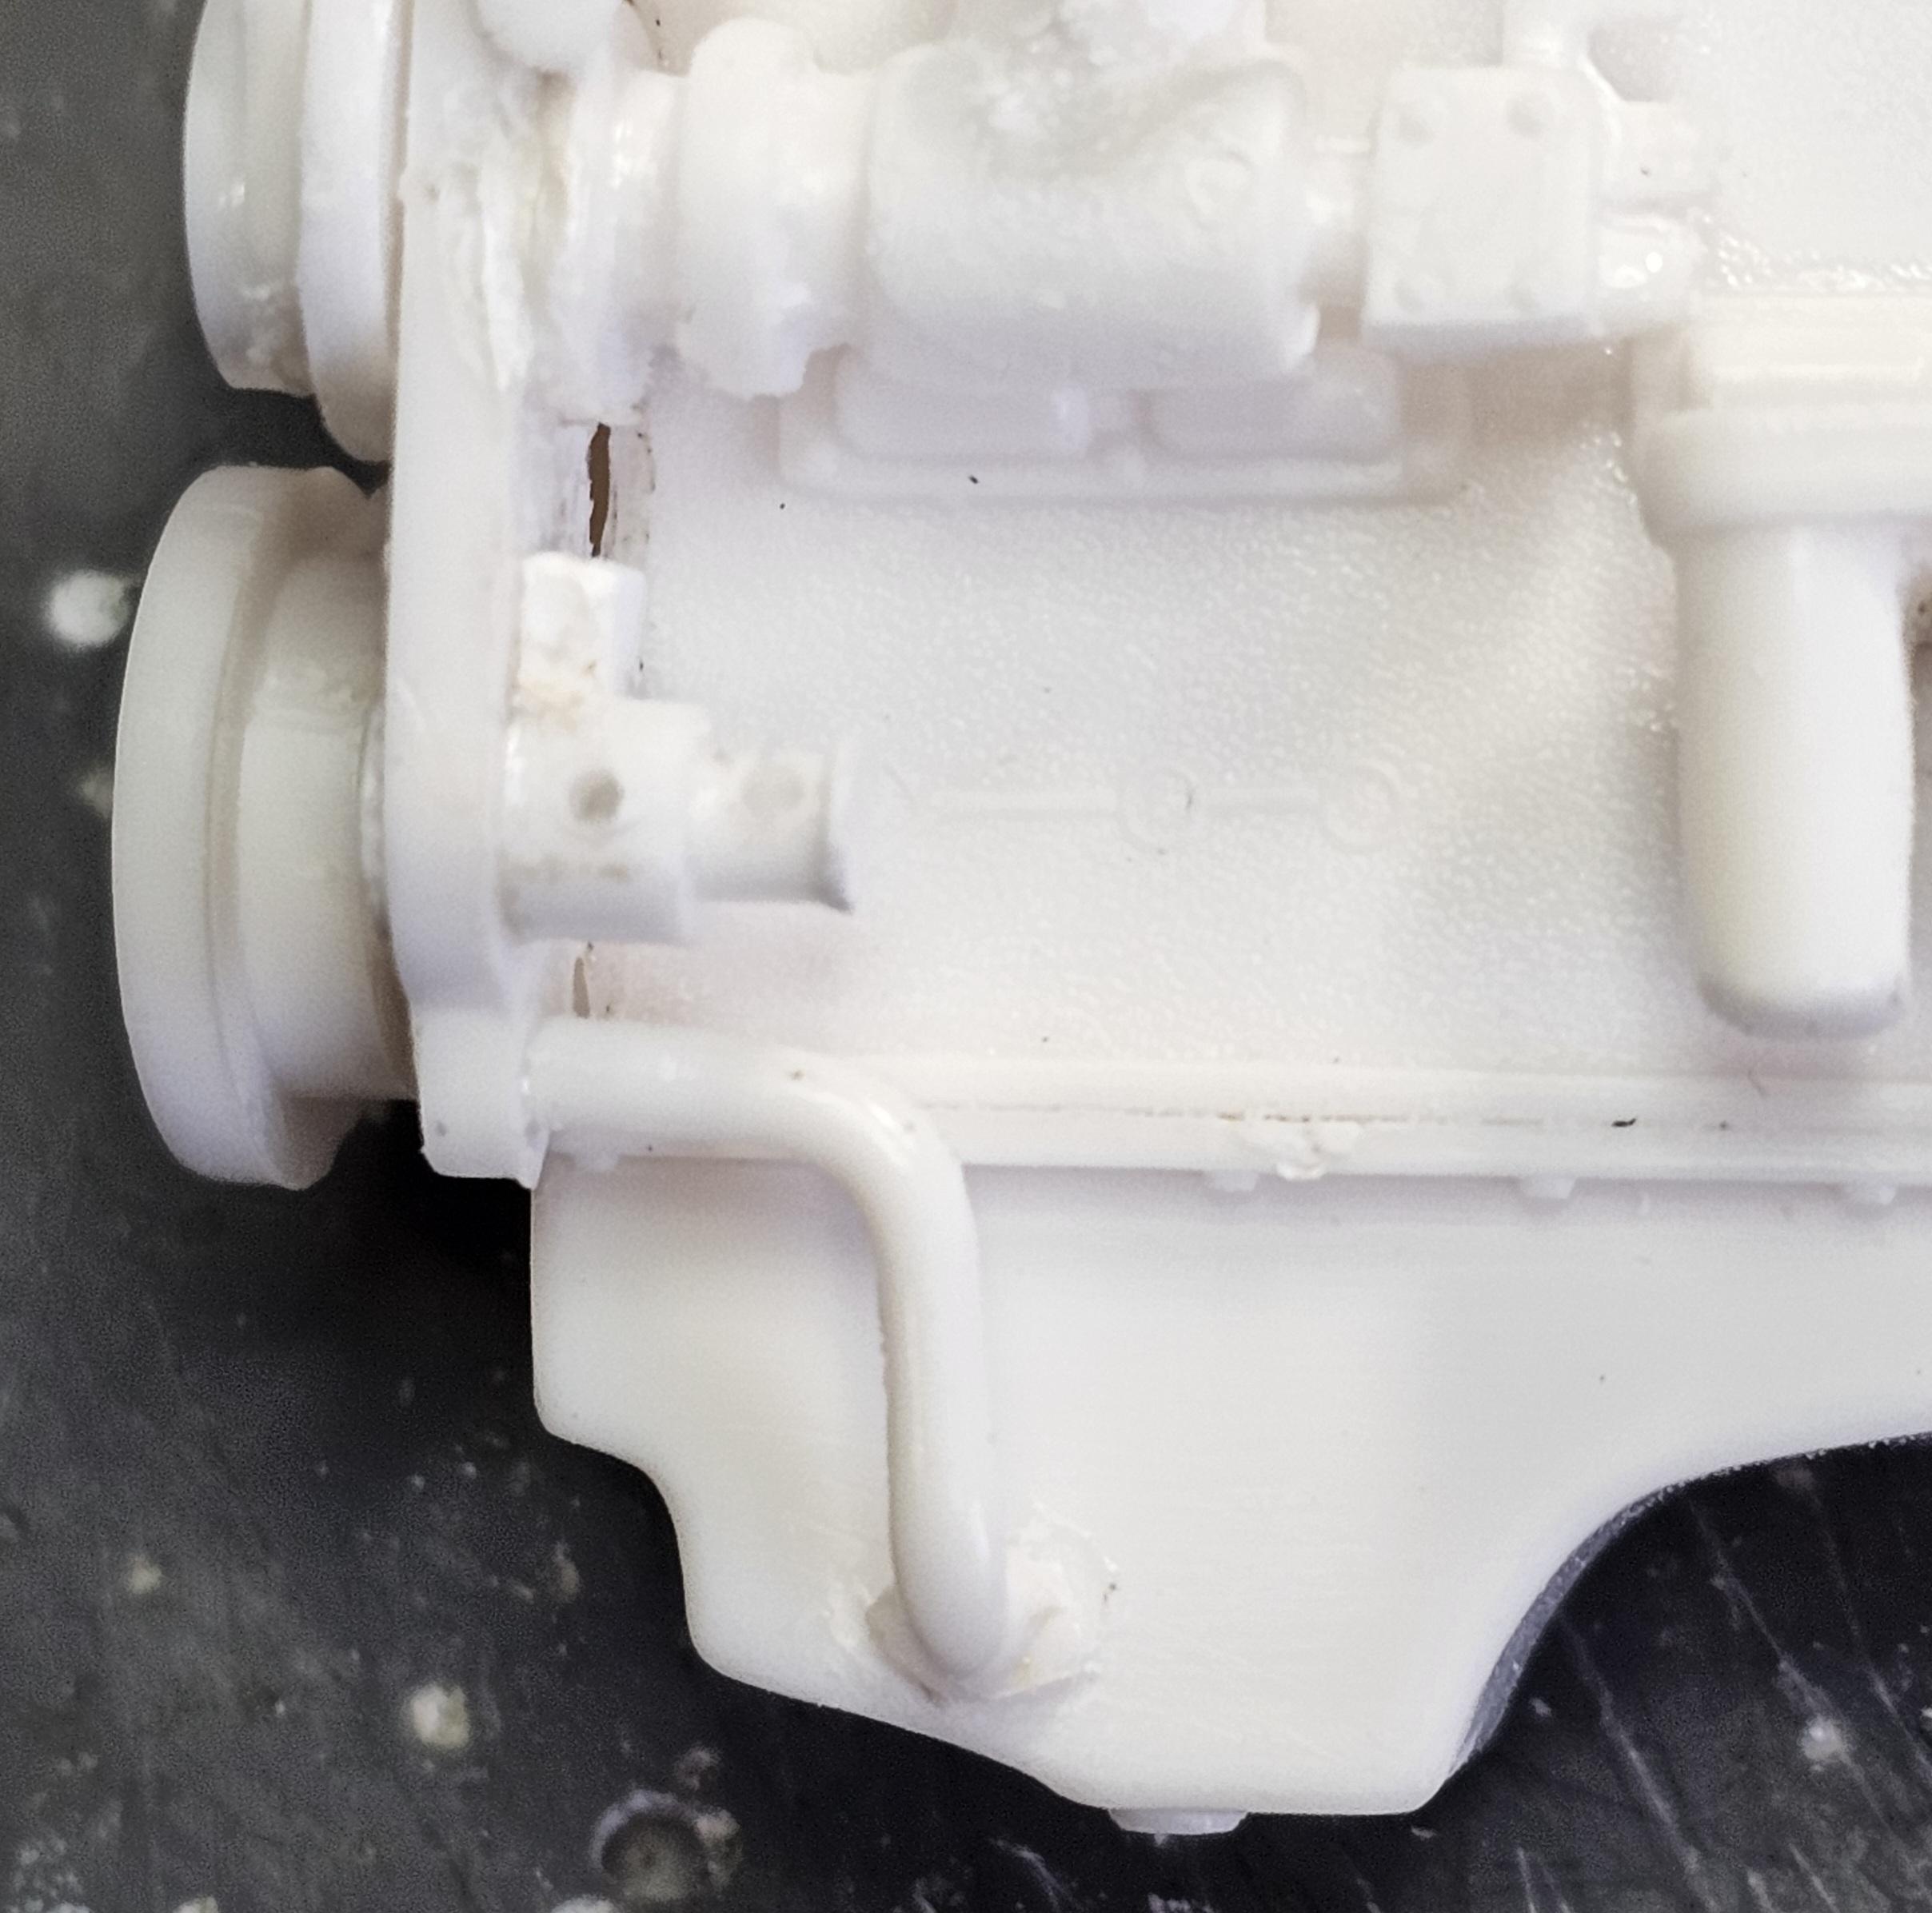
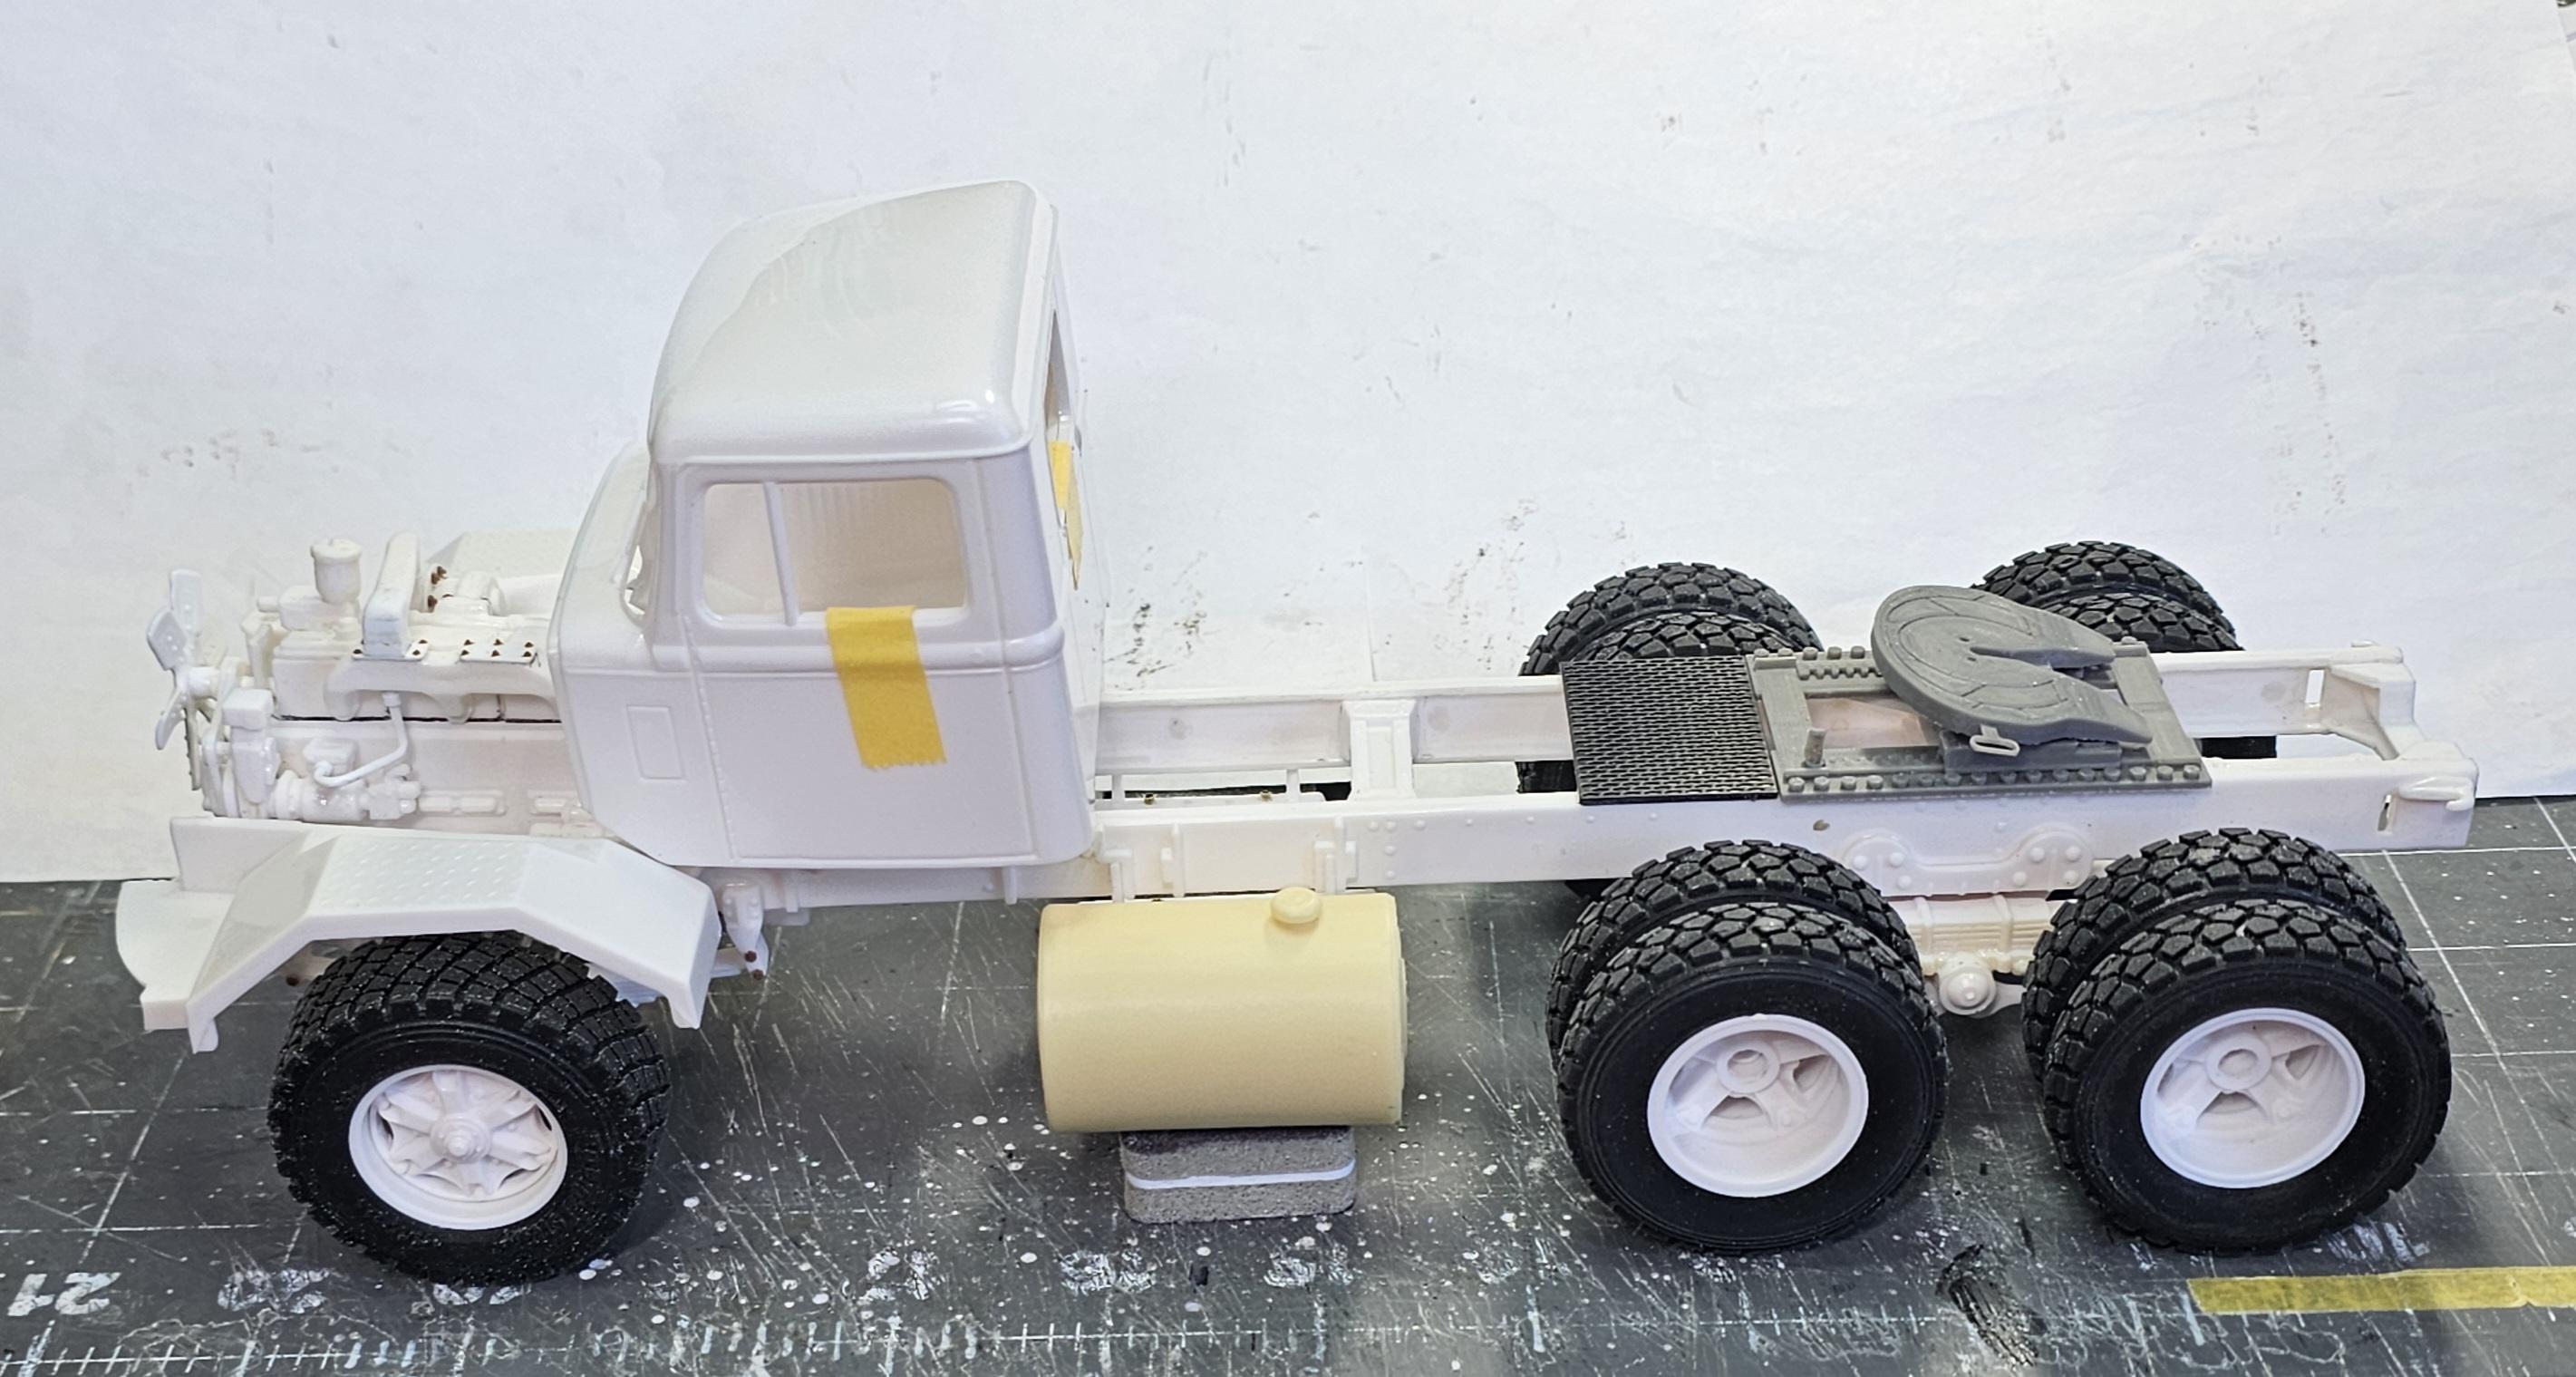
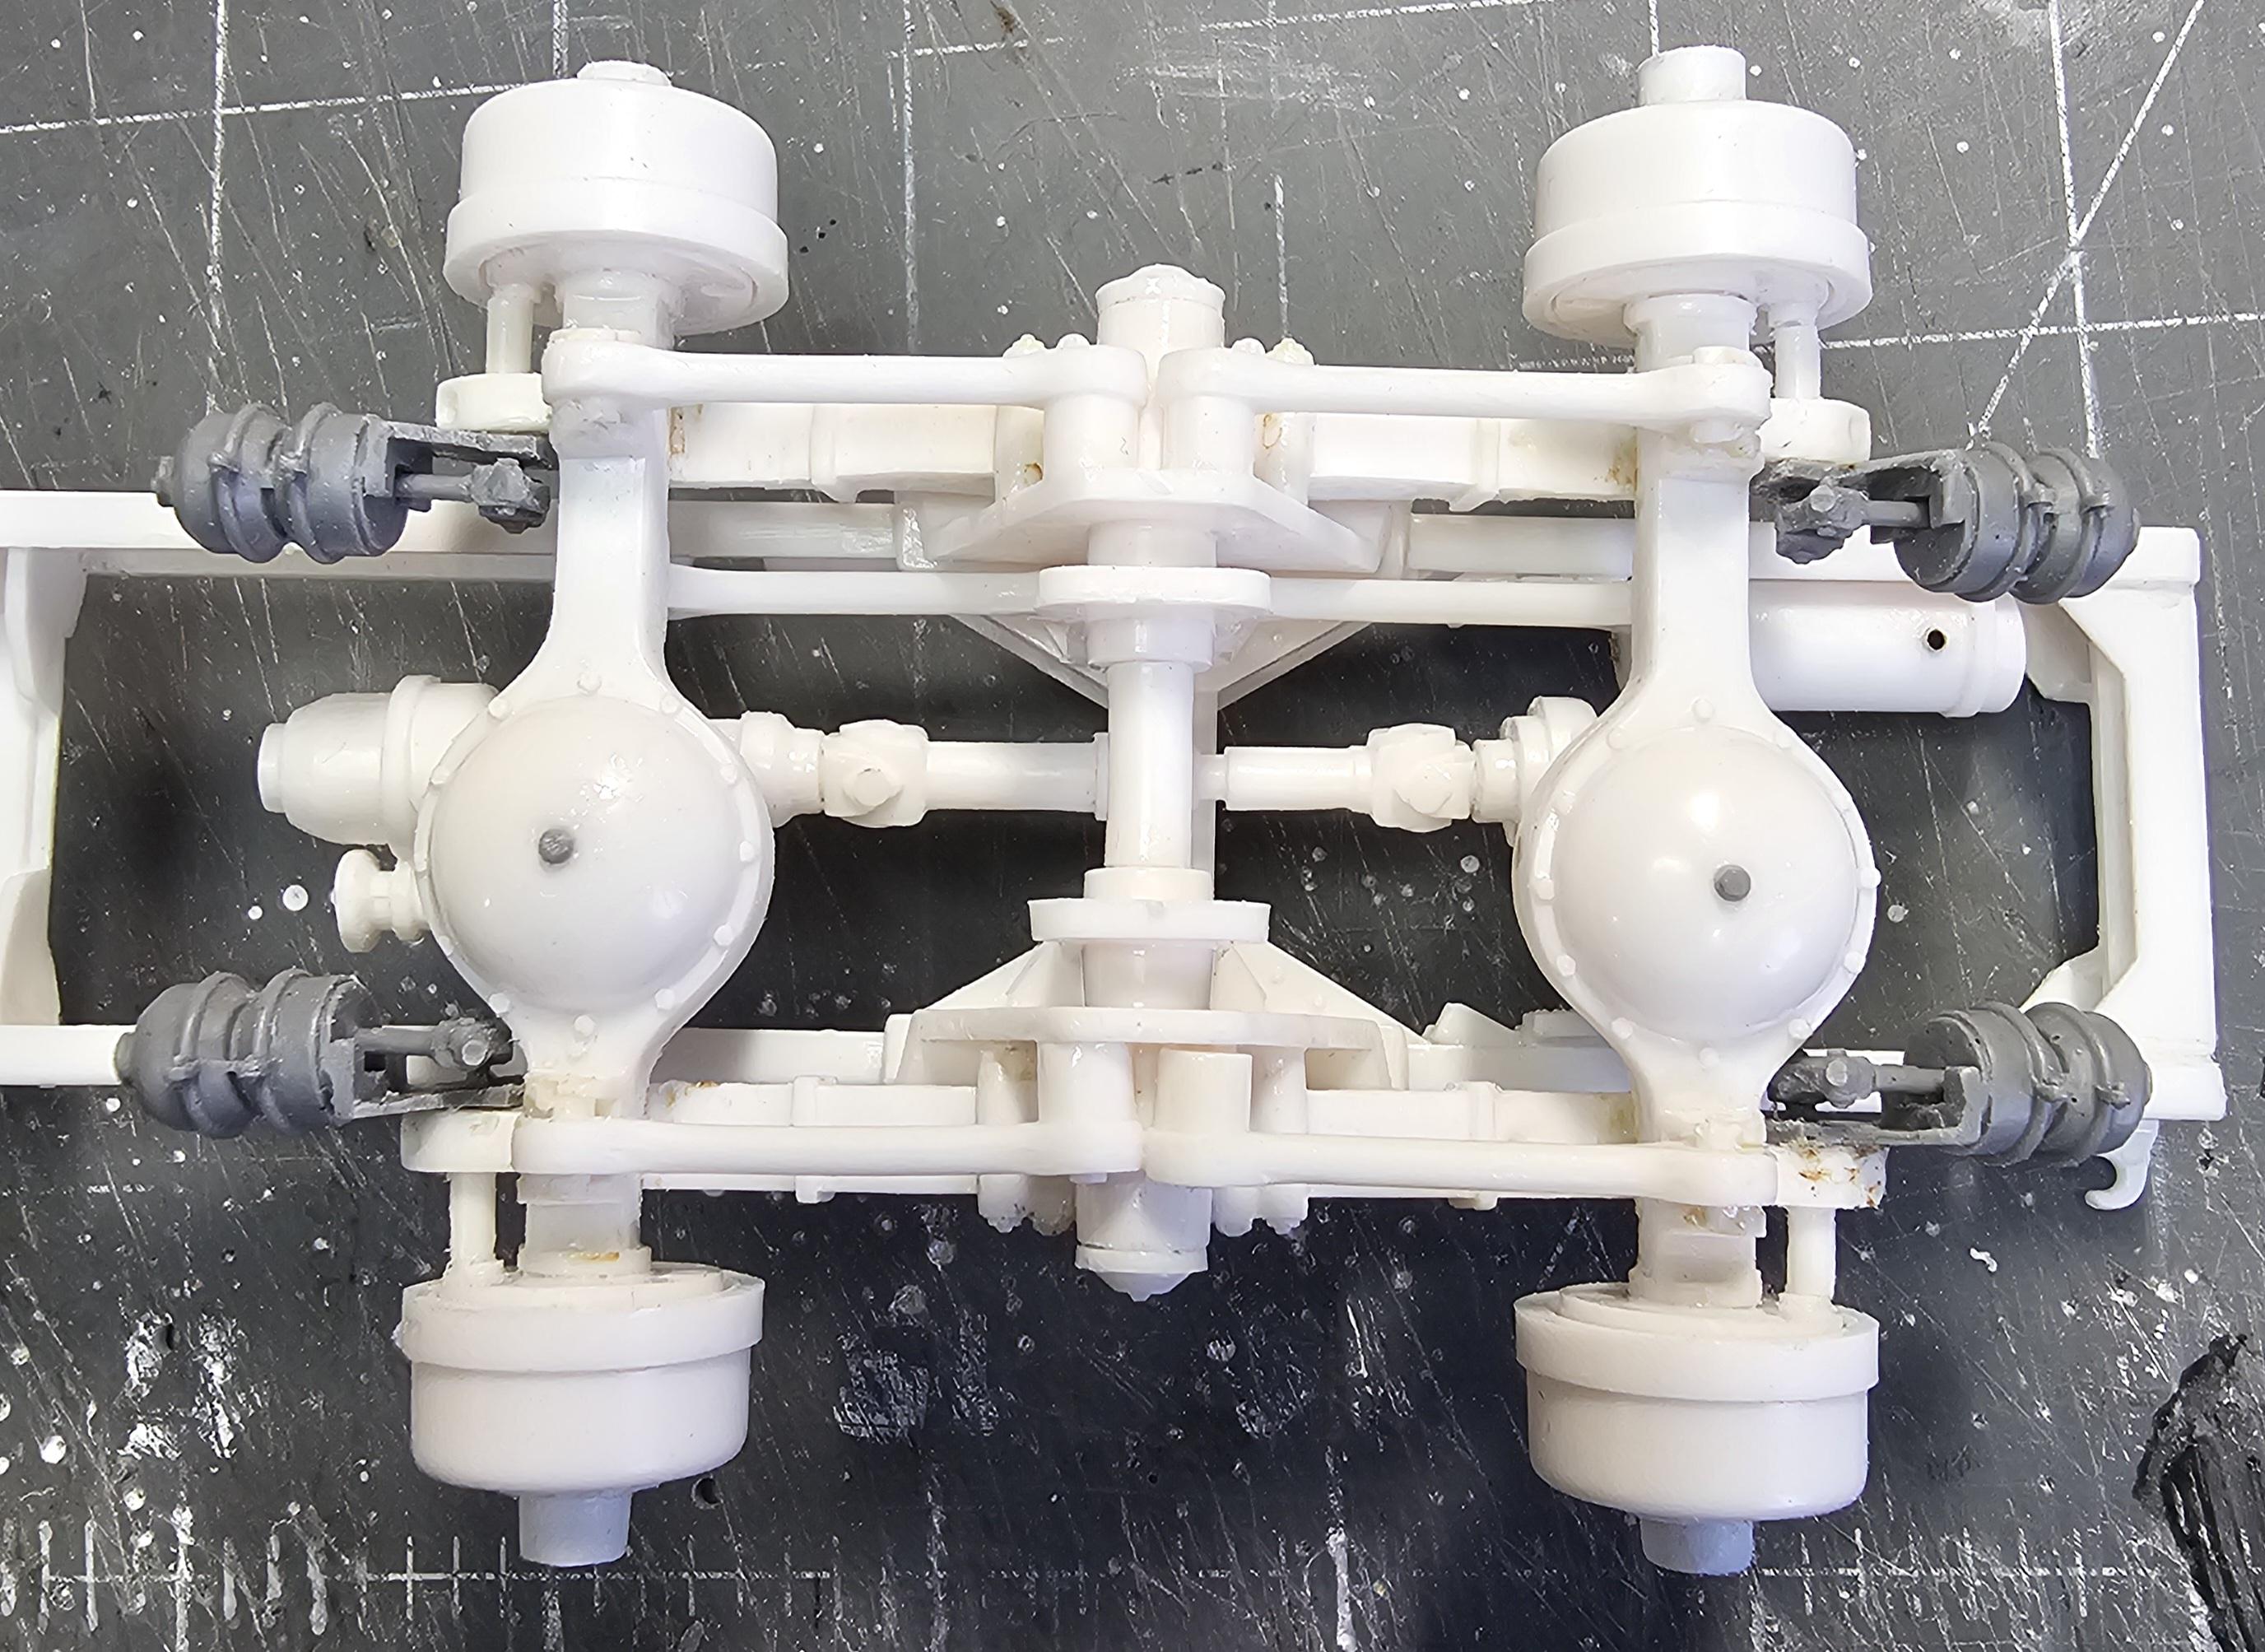
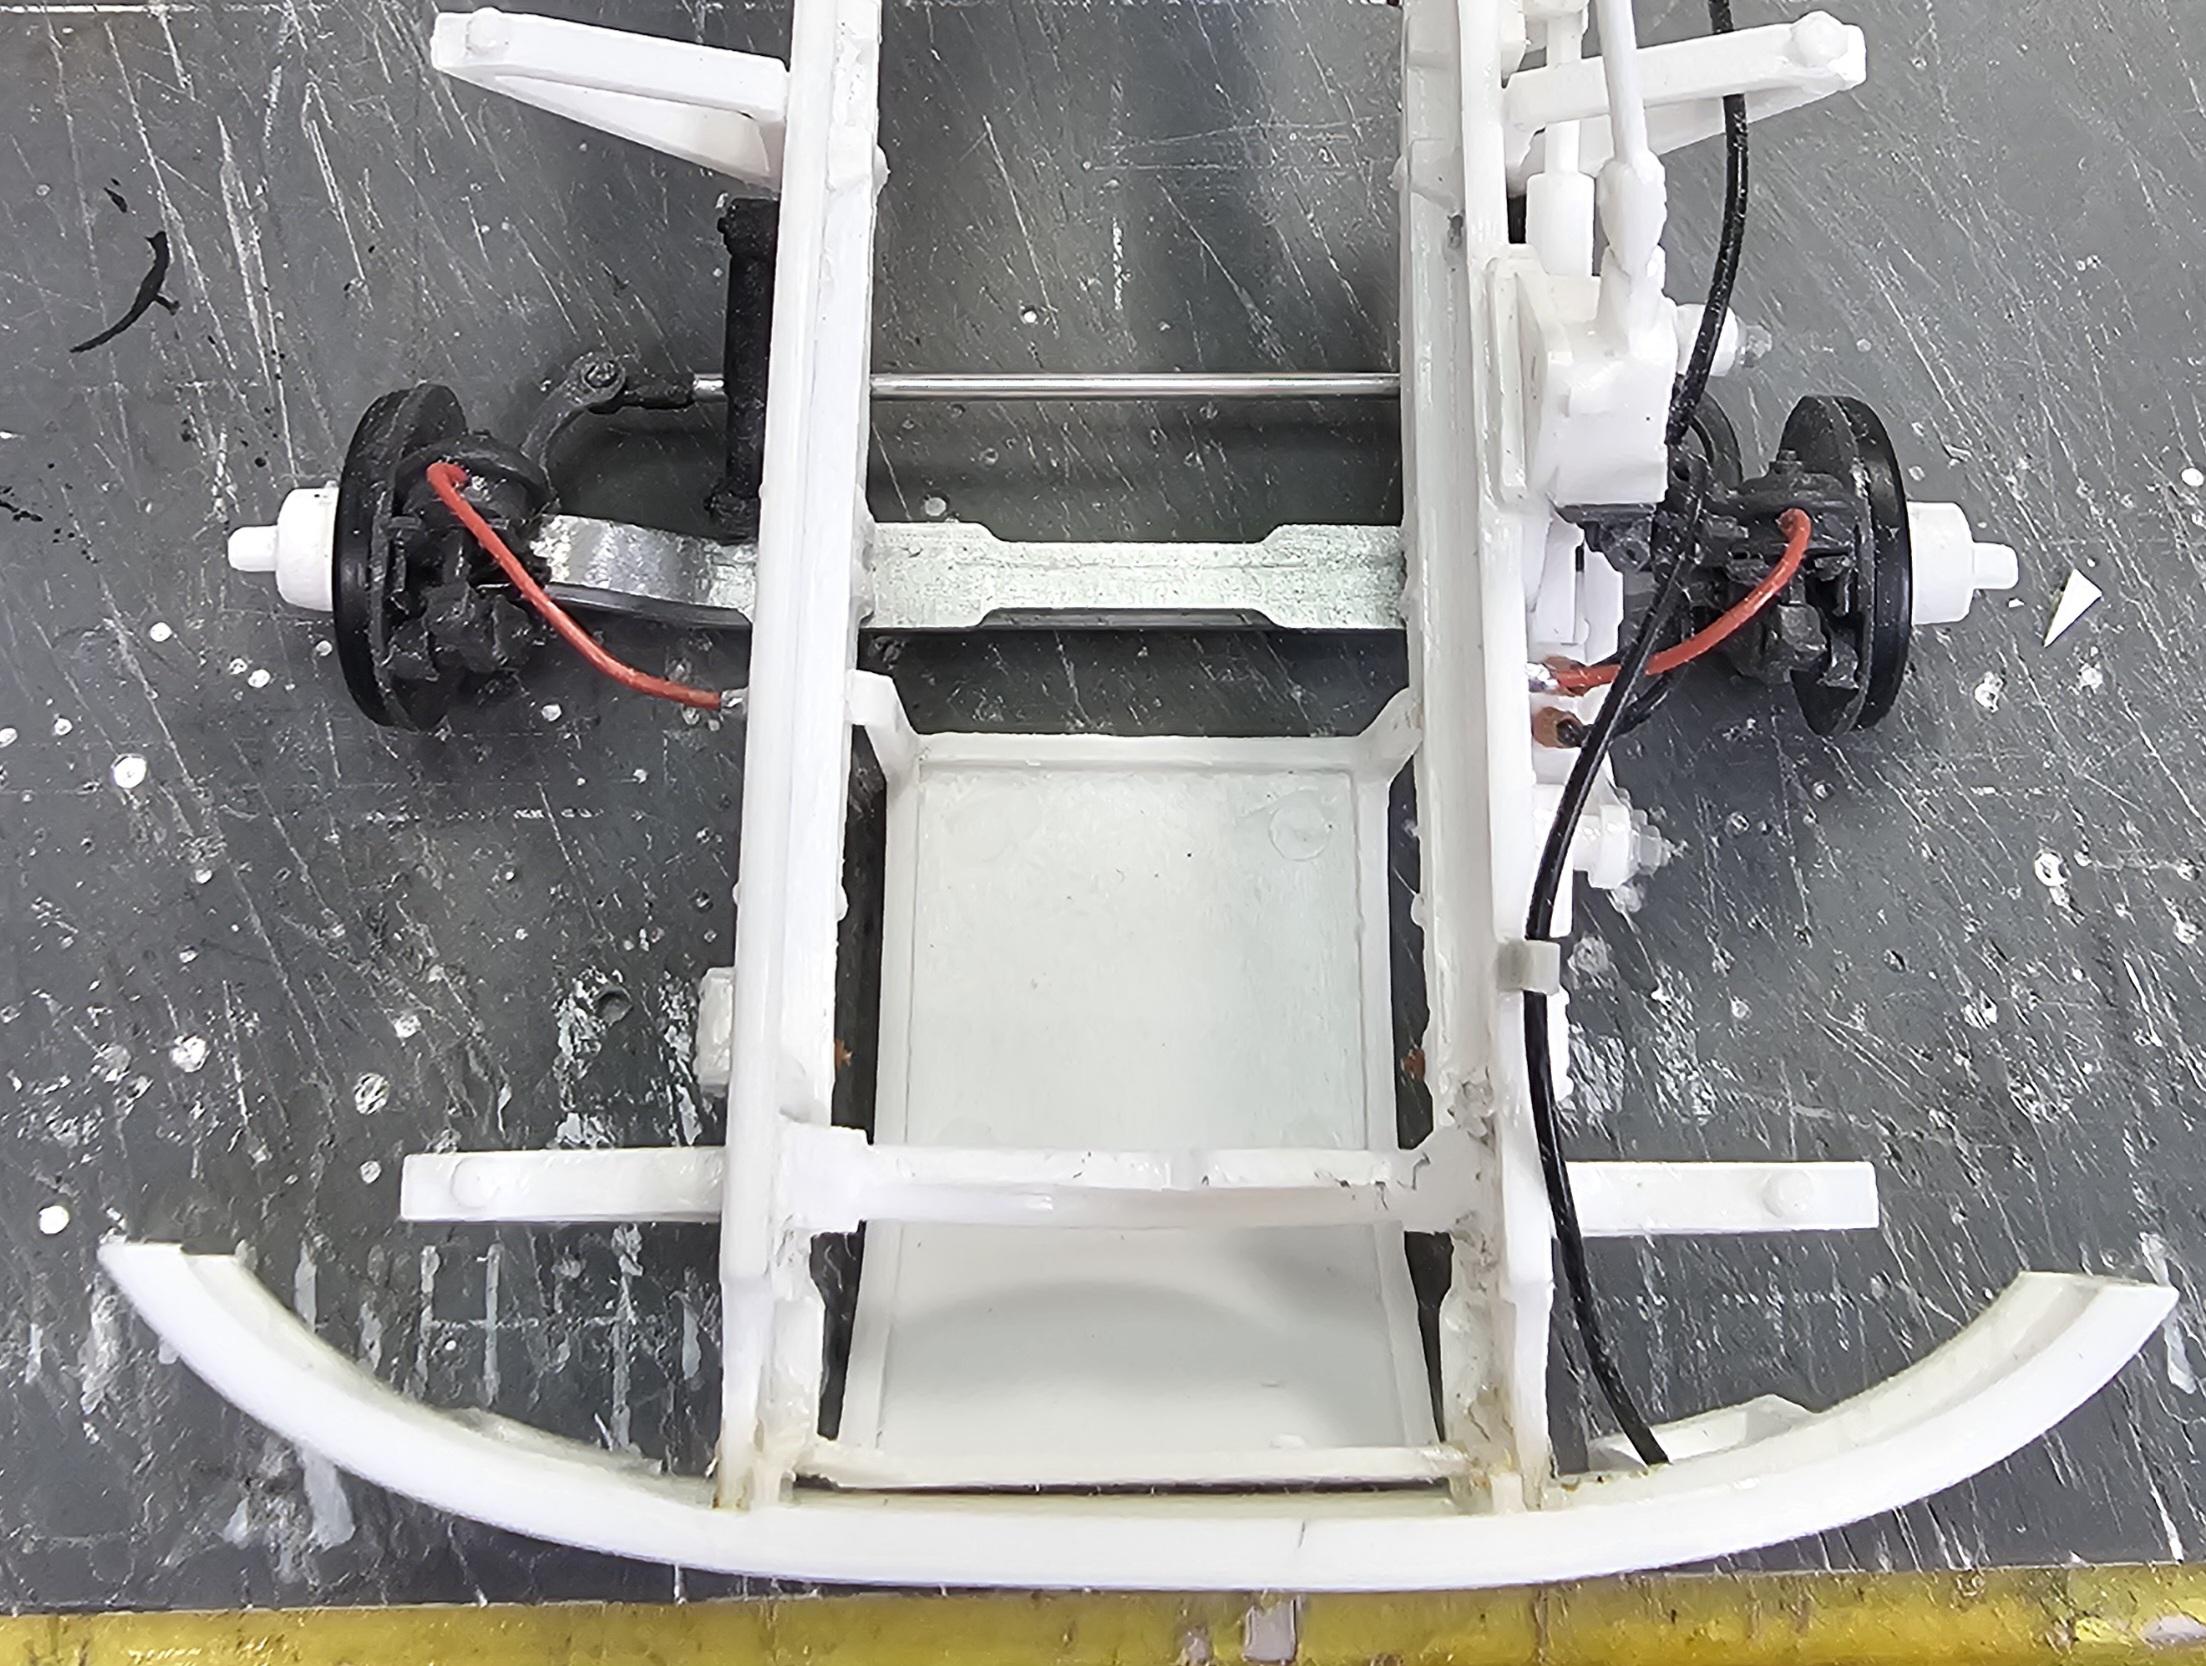
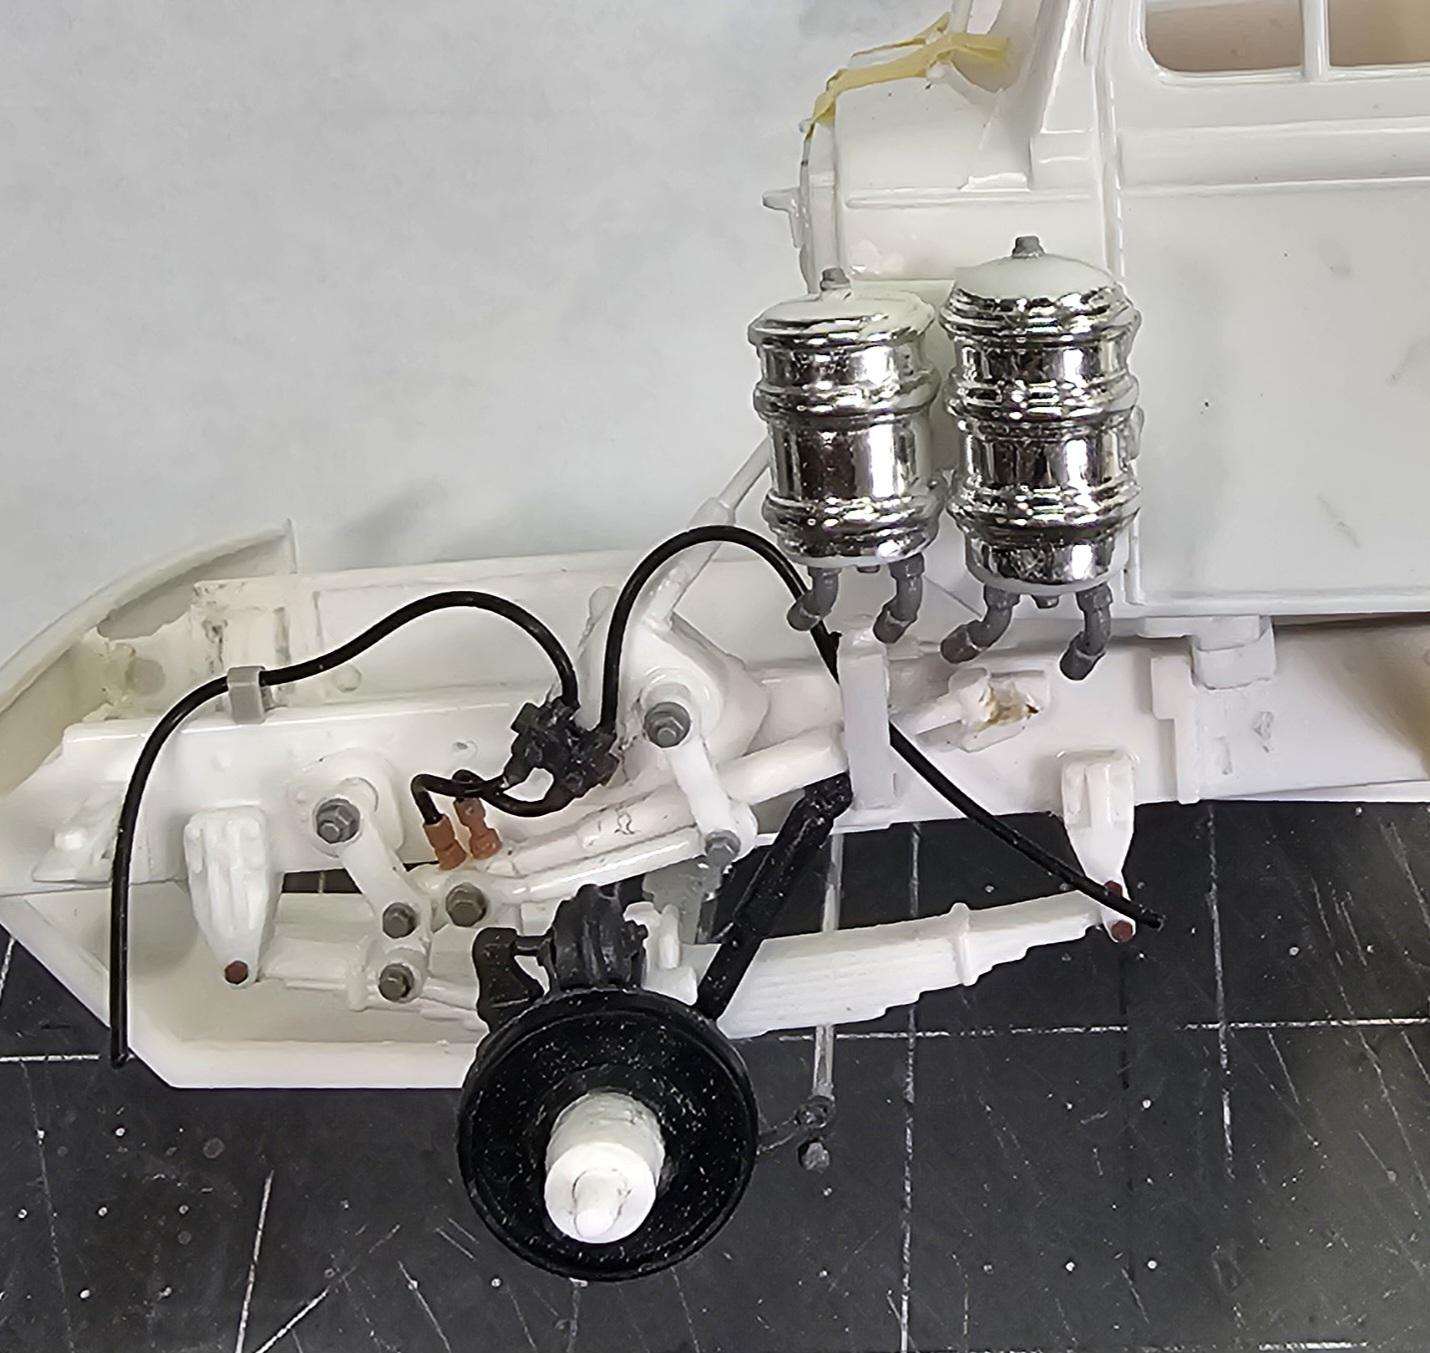
Hey all Got some more work done on this build. Here are some pictures for yous all to look at. This view shows the Italeri rear backing plates I added to the front axle. They will represent the brake drums. It's all you can see when the wheels are attached. This view shows the kits axle pin retainers This view shows them mounted to the axle. This will allow the W/T's to rotate. This view shows the front axle looking down on it. This view shows the new front floats that I'm going to use. They are Bridgestones from Paul at ST Supply. This view shows them temperaly in place on the front axle. This is a mock-up picture of the truck. Another mock-up view with the engine, cab & tank. Bottom view of the front axle and the Italeri front shocks I added. (Black items) This view shows the front steering mechanism added. I've done this so it looks like it's attached to the front axle, but it's not, this way the steering still works. You can see the front shocks I added in this picture also. Top down picture of the frame and the rear brake chambers that I added. They are the ones from Paul at ST Supply. (Revell level 5 copys) This view shows the brake chambers I added better. Well that's it for now be back soon with more updates. Ron G
-
Hey Brenton Glad you want to get an airbrush, but that Revell chrome looks just as good or better then Alclad. And it's way easier to do with out screwing it up. Alclad takes alot of practice to get right, just saying. Ron G


.png.aef1274f97edf672cd78fb21727f6b1a.png)