89AKurt
-
Posts
8,429 -
Joined
-
Last visited
Content Type
Profiles
Forums
Events
Gallery
Everything posted by 89AKurt
-
 Yes, don't tell everyone your secret weapons. You're killing me! ? Not only labeled, but workable. ?
 -
I was going to say that I built the Lorinser last century, first time I tried Bare Metal Foil was on the wheel arches. I also built the S 600 AMG, which was the sedan of that time. Those emblem transfers really help, where did they come from? Awesome build!
-
You are way too kind! I never heard of him, had to do a quick search, again, way to kind to compare. To be inspired by is a better thing to say. ?
-
I've used those too! Really adds to the whole picture. One for oil slick, two for back running & brake lights off, three for? I was planning this on my project too.
-
Nice color choice. The Honda Civic or Integra "tuner" kits have nice wheels, I've used them. Making me wonder if you put an F1 engine in there. ? You have other projects to obsess being perfect on? ?
-
the most voluptuous
-
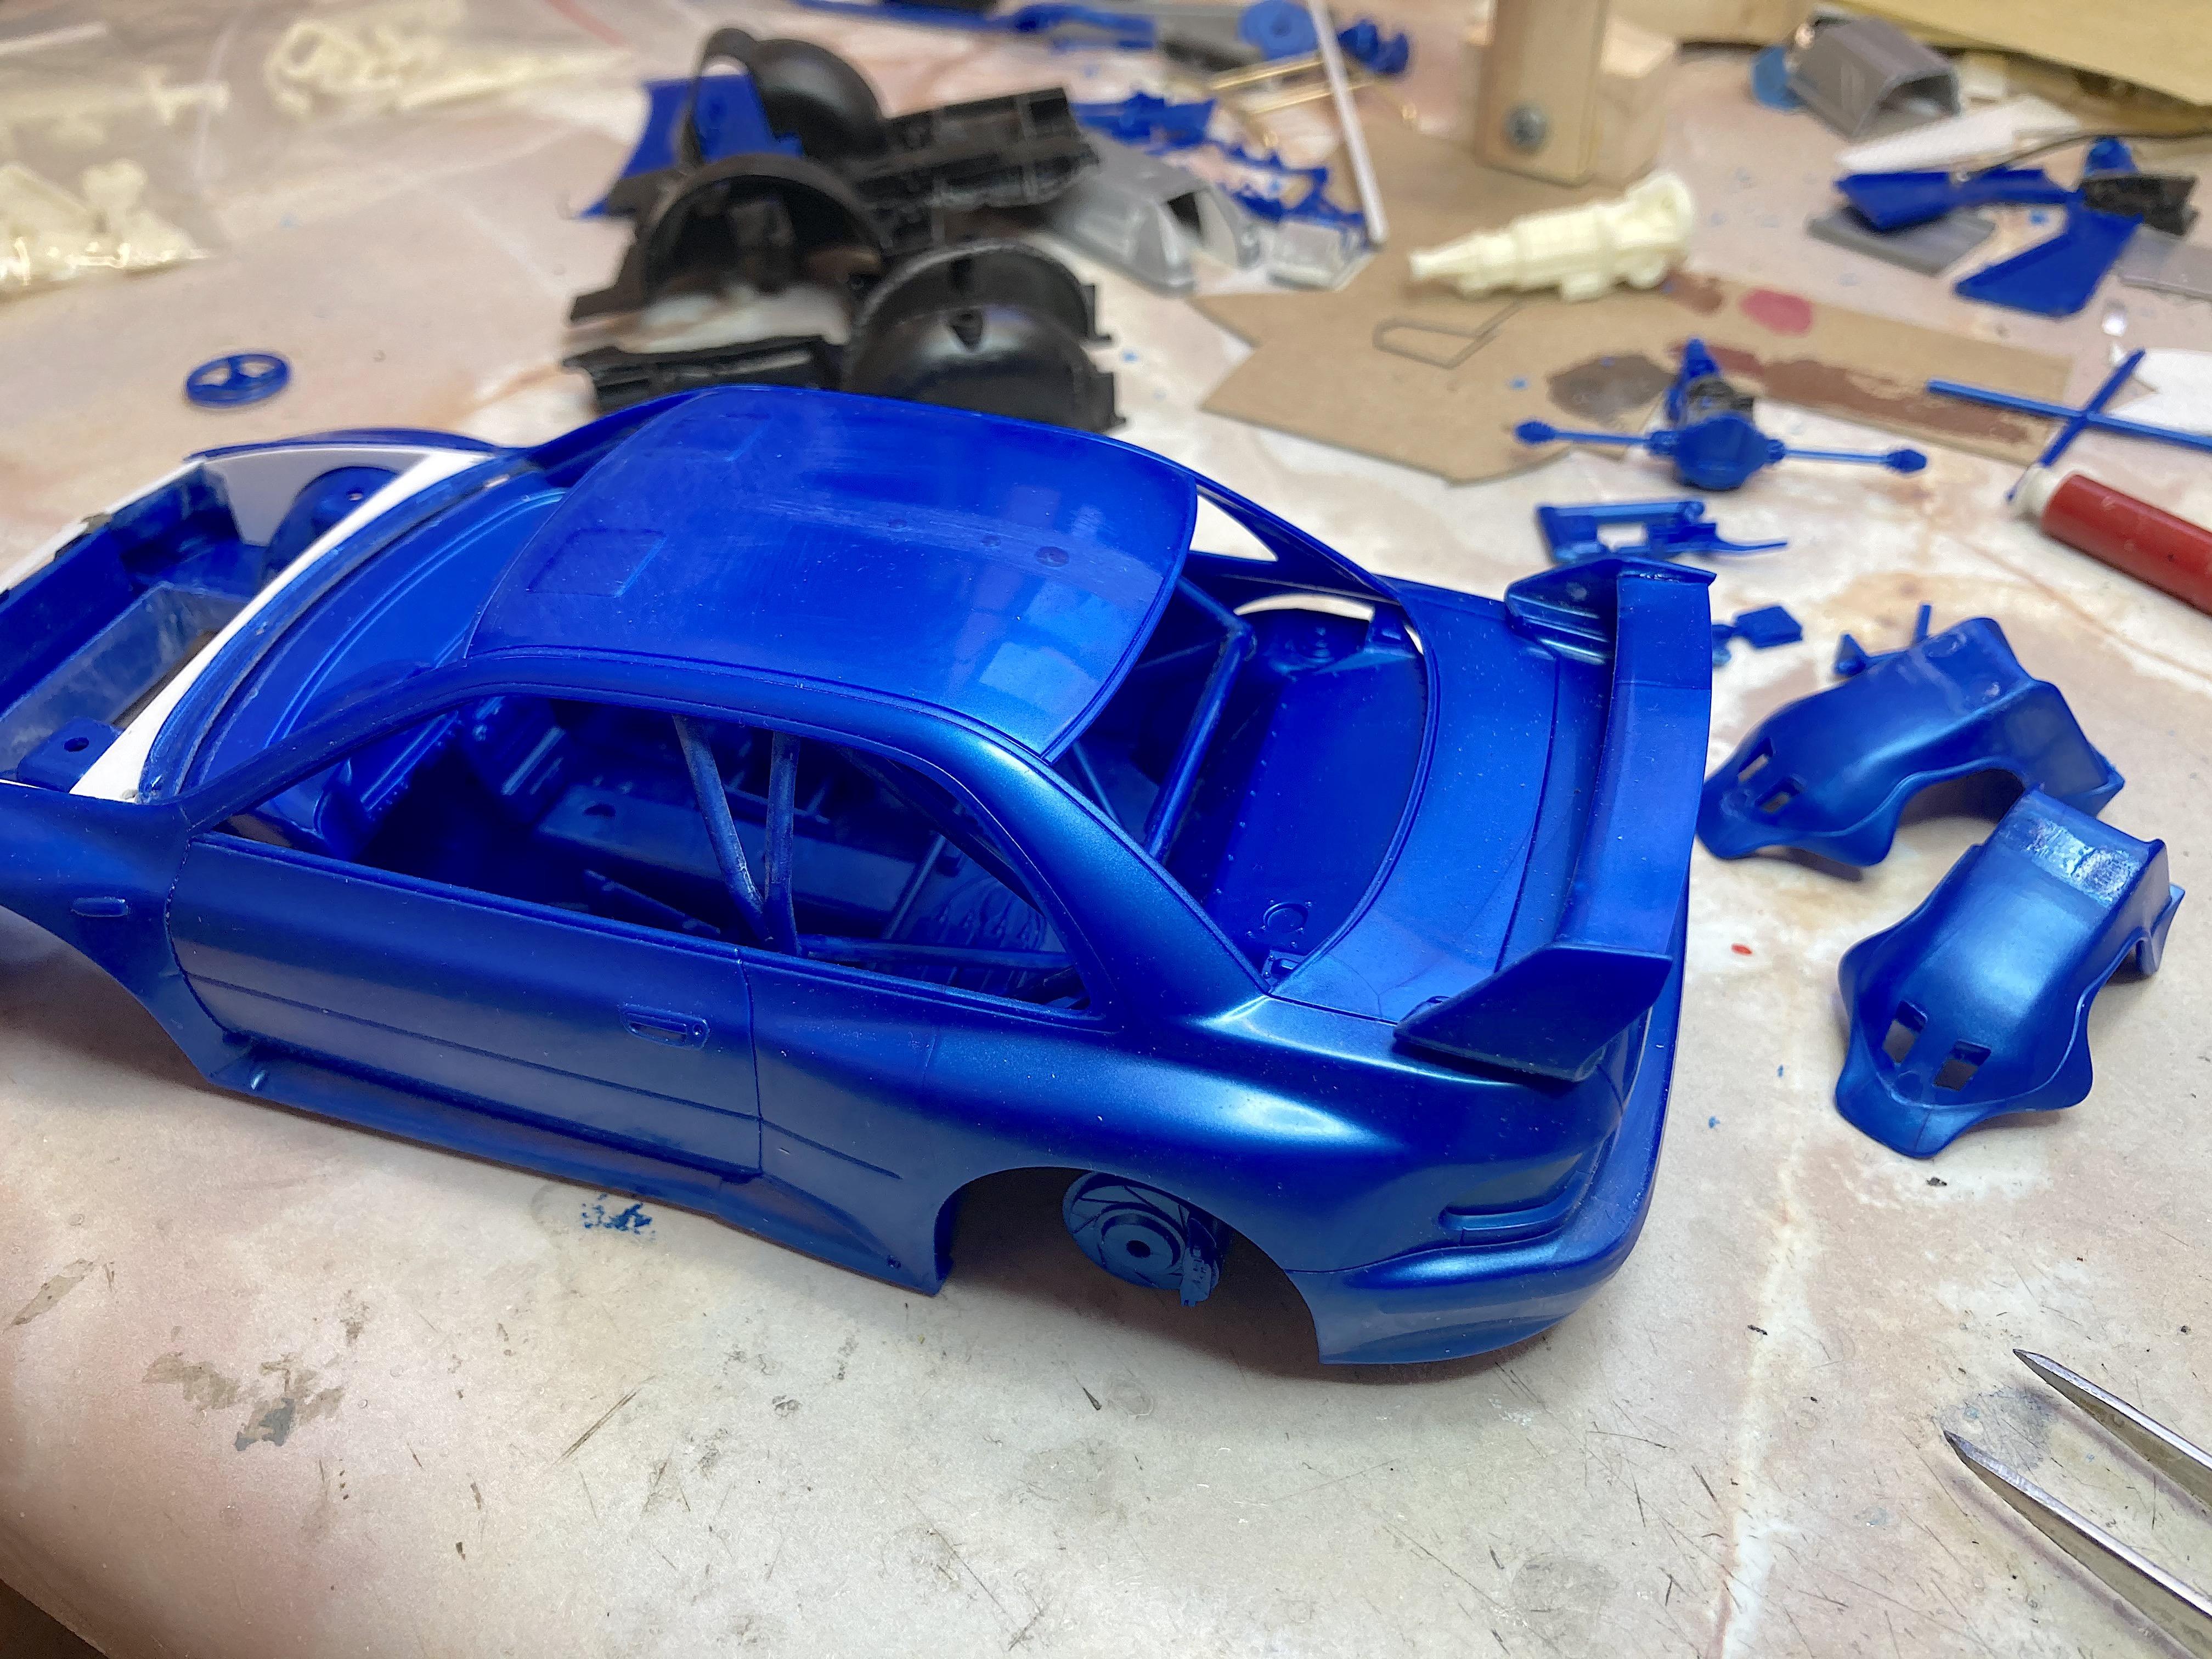
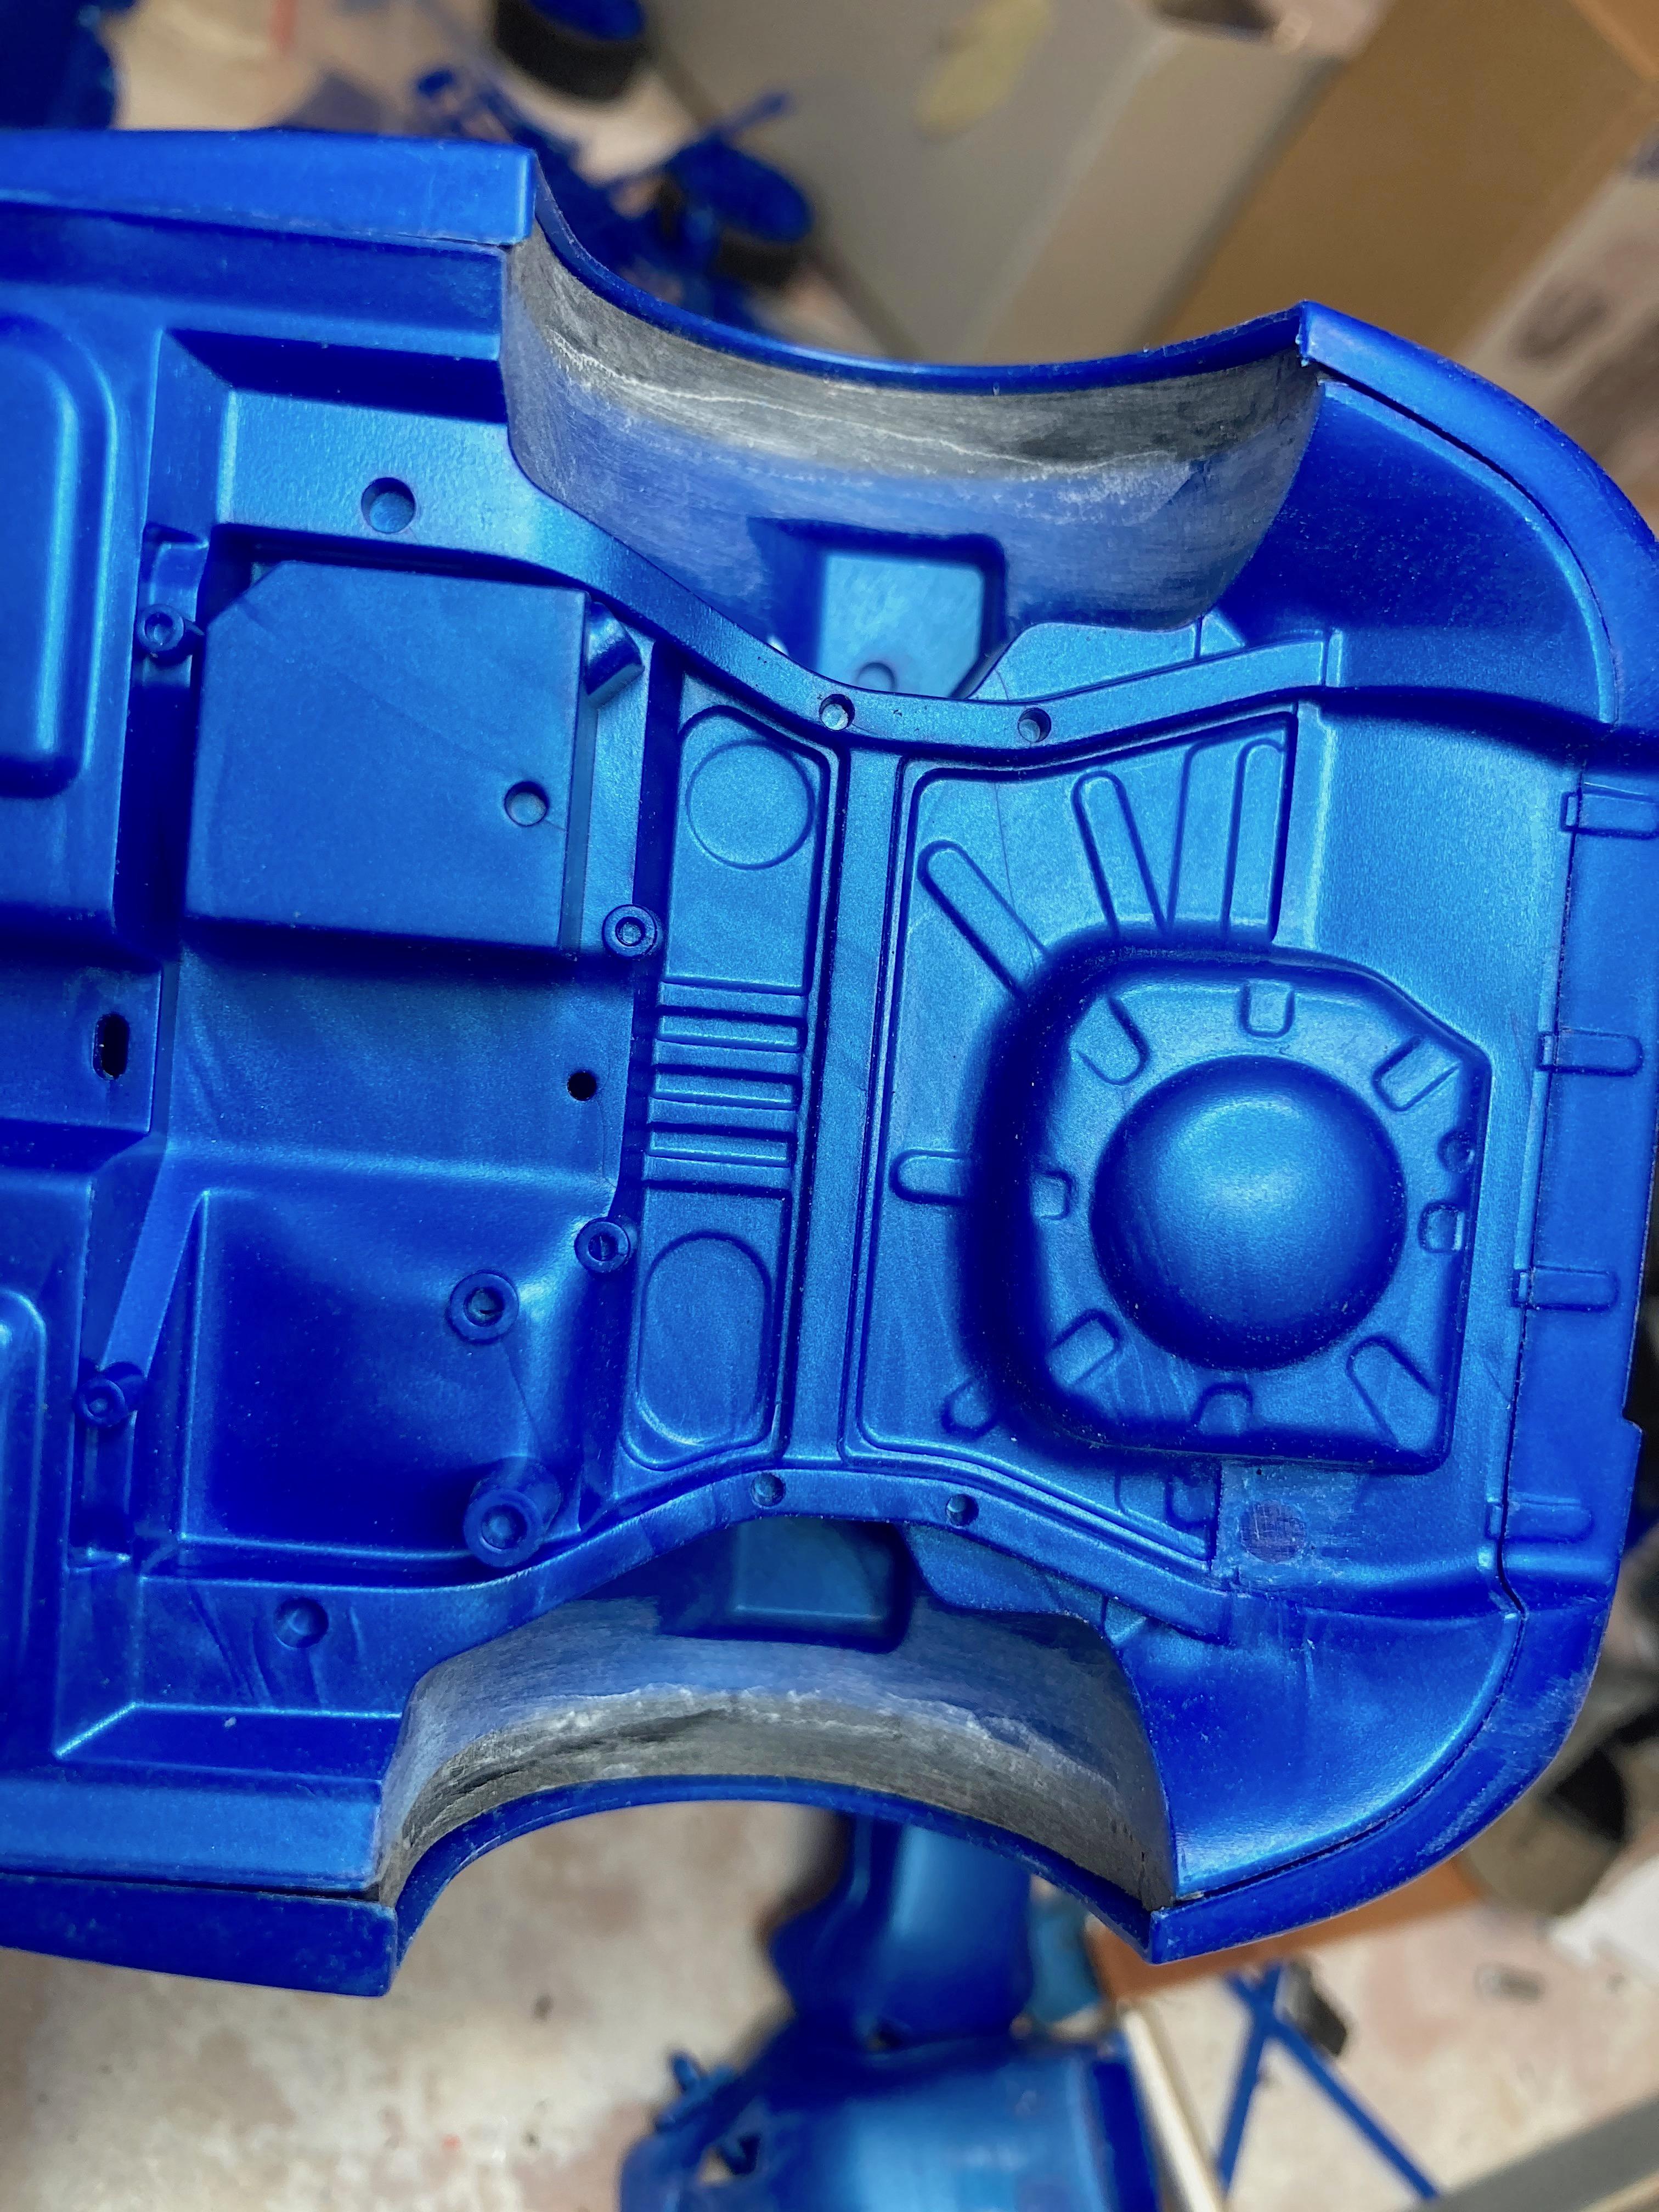
Front wheel wells are done. Could not toss the X-brace, so put it out-of-sight on top. I better not add any more stuff to the chassis, it's a challenge to put the body on now. ? Nobody is going to see any of this either. ?

-
intestines, char broiled
-
Even without arthritis, it's a PITA to use a pin vice. Rechargeable battery?
-
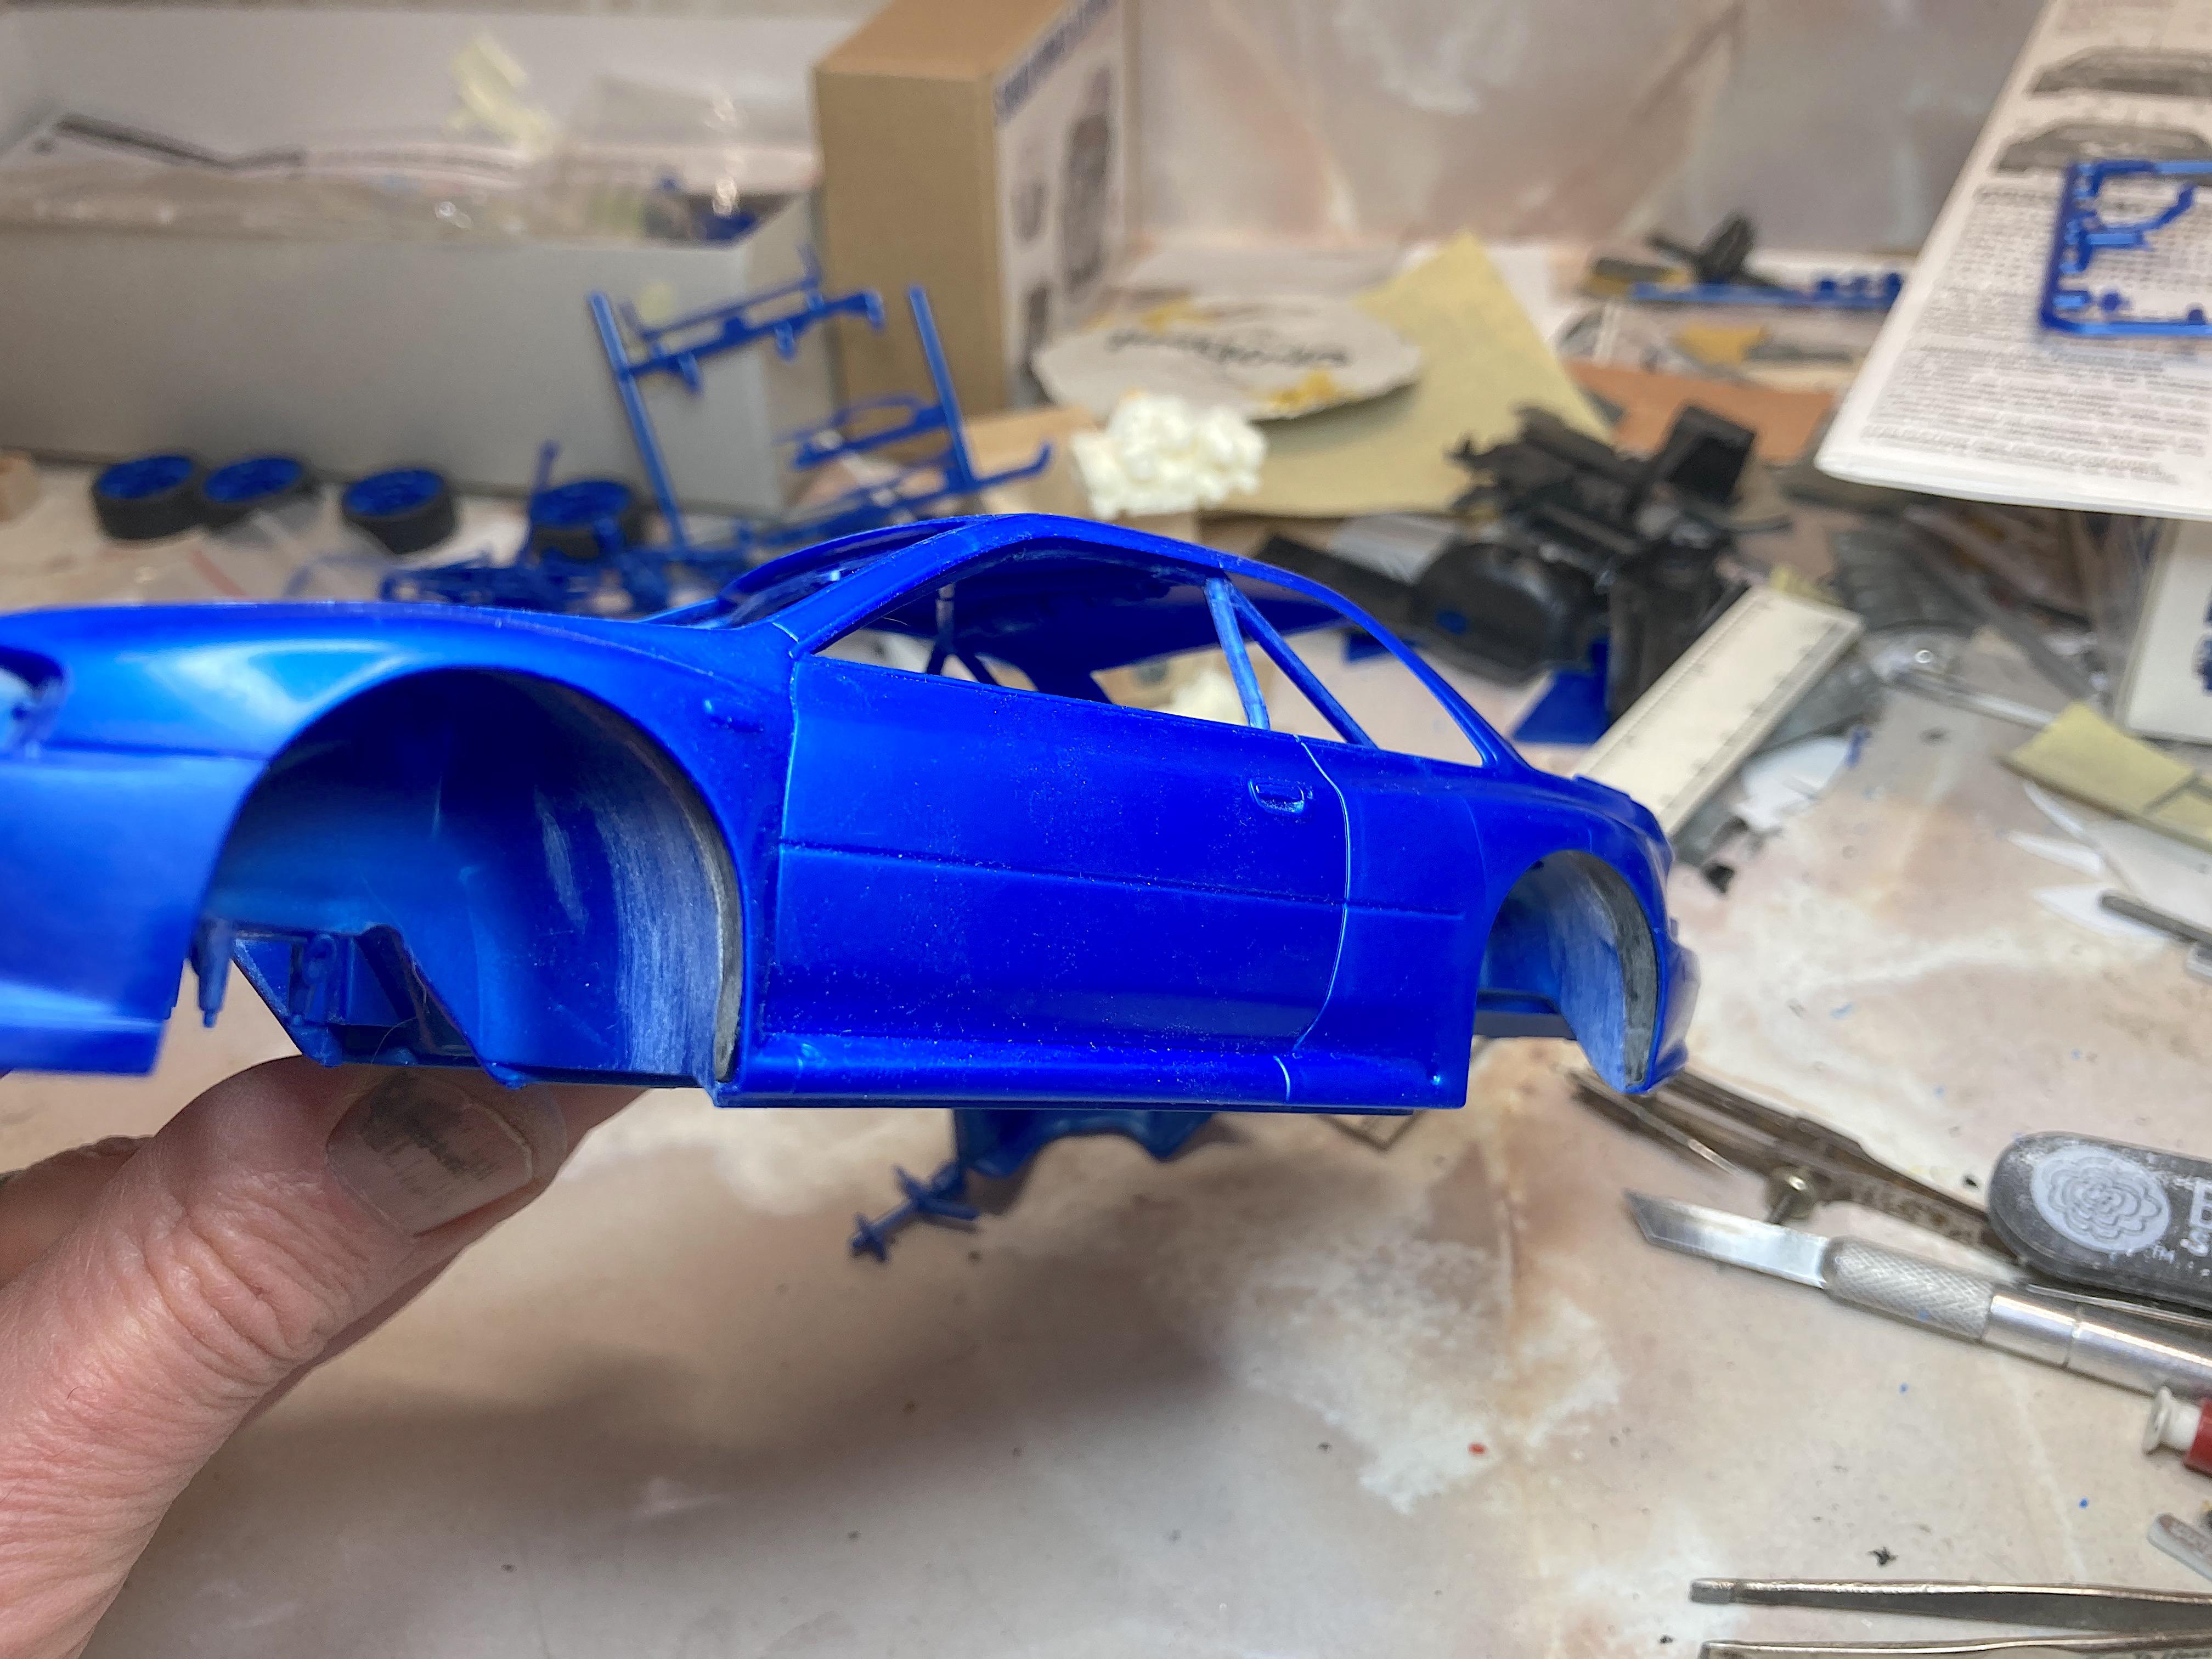
Upper roll cage was modified. First to go were the pads on the side bars. But after looking at it, decided to remove the diagonal tube by their heads, more for convenience than increasing stealth. Fixed a usual pet peeve, incomplete wheel wells. I know why they don't do this, makes it much harder to get together. Hot-wire cut the Celica floor pan wheel well, almost the same radius. Used the divider to scribe the cuts. I have also added the fuel filler, one of the first parts I copied when getting into resin, from the Isuzu Vehicross. Could have saved some time not dealing with those pads. Think I need to do the front wheel wells next, just the rear part against the interior.
-
soaked with gasoline
-
Thanks for asking. 89AKurt 2020 stash reduction mitigation of 6 Current WIP: Tamiya Subaru Impreza (not WRC but Cannonball Ruse) with Hobby Design engine Here is the last flat black, but technically it's semi-gloss, car that I did. Got a nasty sandpaper scratch on the fender. I sometimes weather to hide blemishes. Anyway, hope the best for the 2021.
-
Cool, thanks for the tip. I used the Tamiya scriber, green tip (does .015" sound right?). I have the Xacto saw blade for the knife, it's wider, also have a bigger saw with a narrow blade, but still to wide and hard to use. Doing the old school dragging a #11 blade is still a viable technique. I treated four areas differently on this cut. Appreciate that! I make mountains out of molehills, don't worry about it. Thanks!
-
with flat black
-
Love your imagination! FREE CANDY is a riot! I was thinking of painting my current WIP flat black, but I tend to mess up the finish, and after seeing yours I'm changing my mind. ?
-
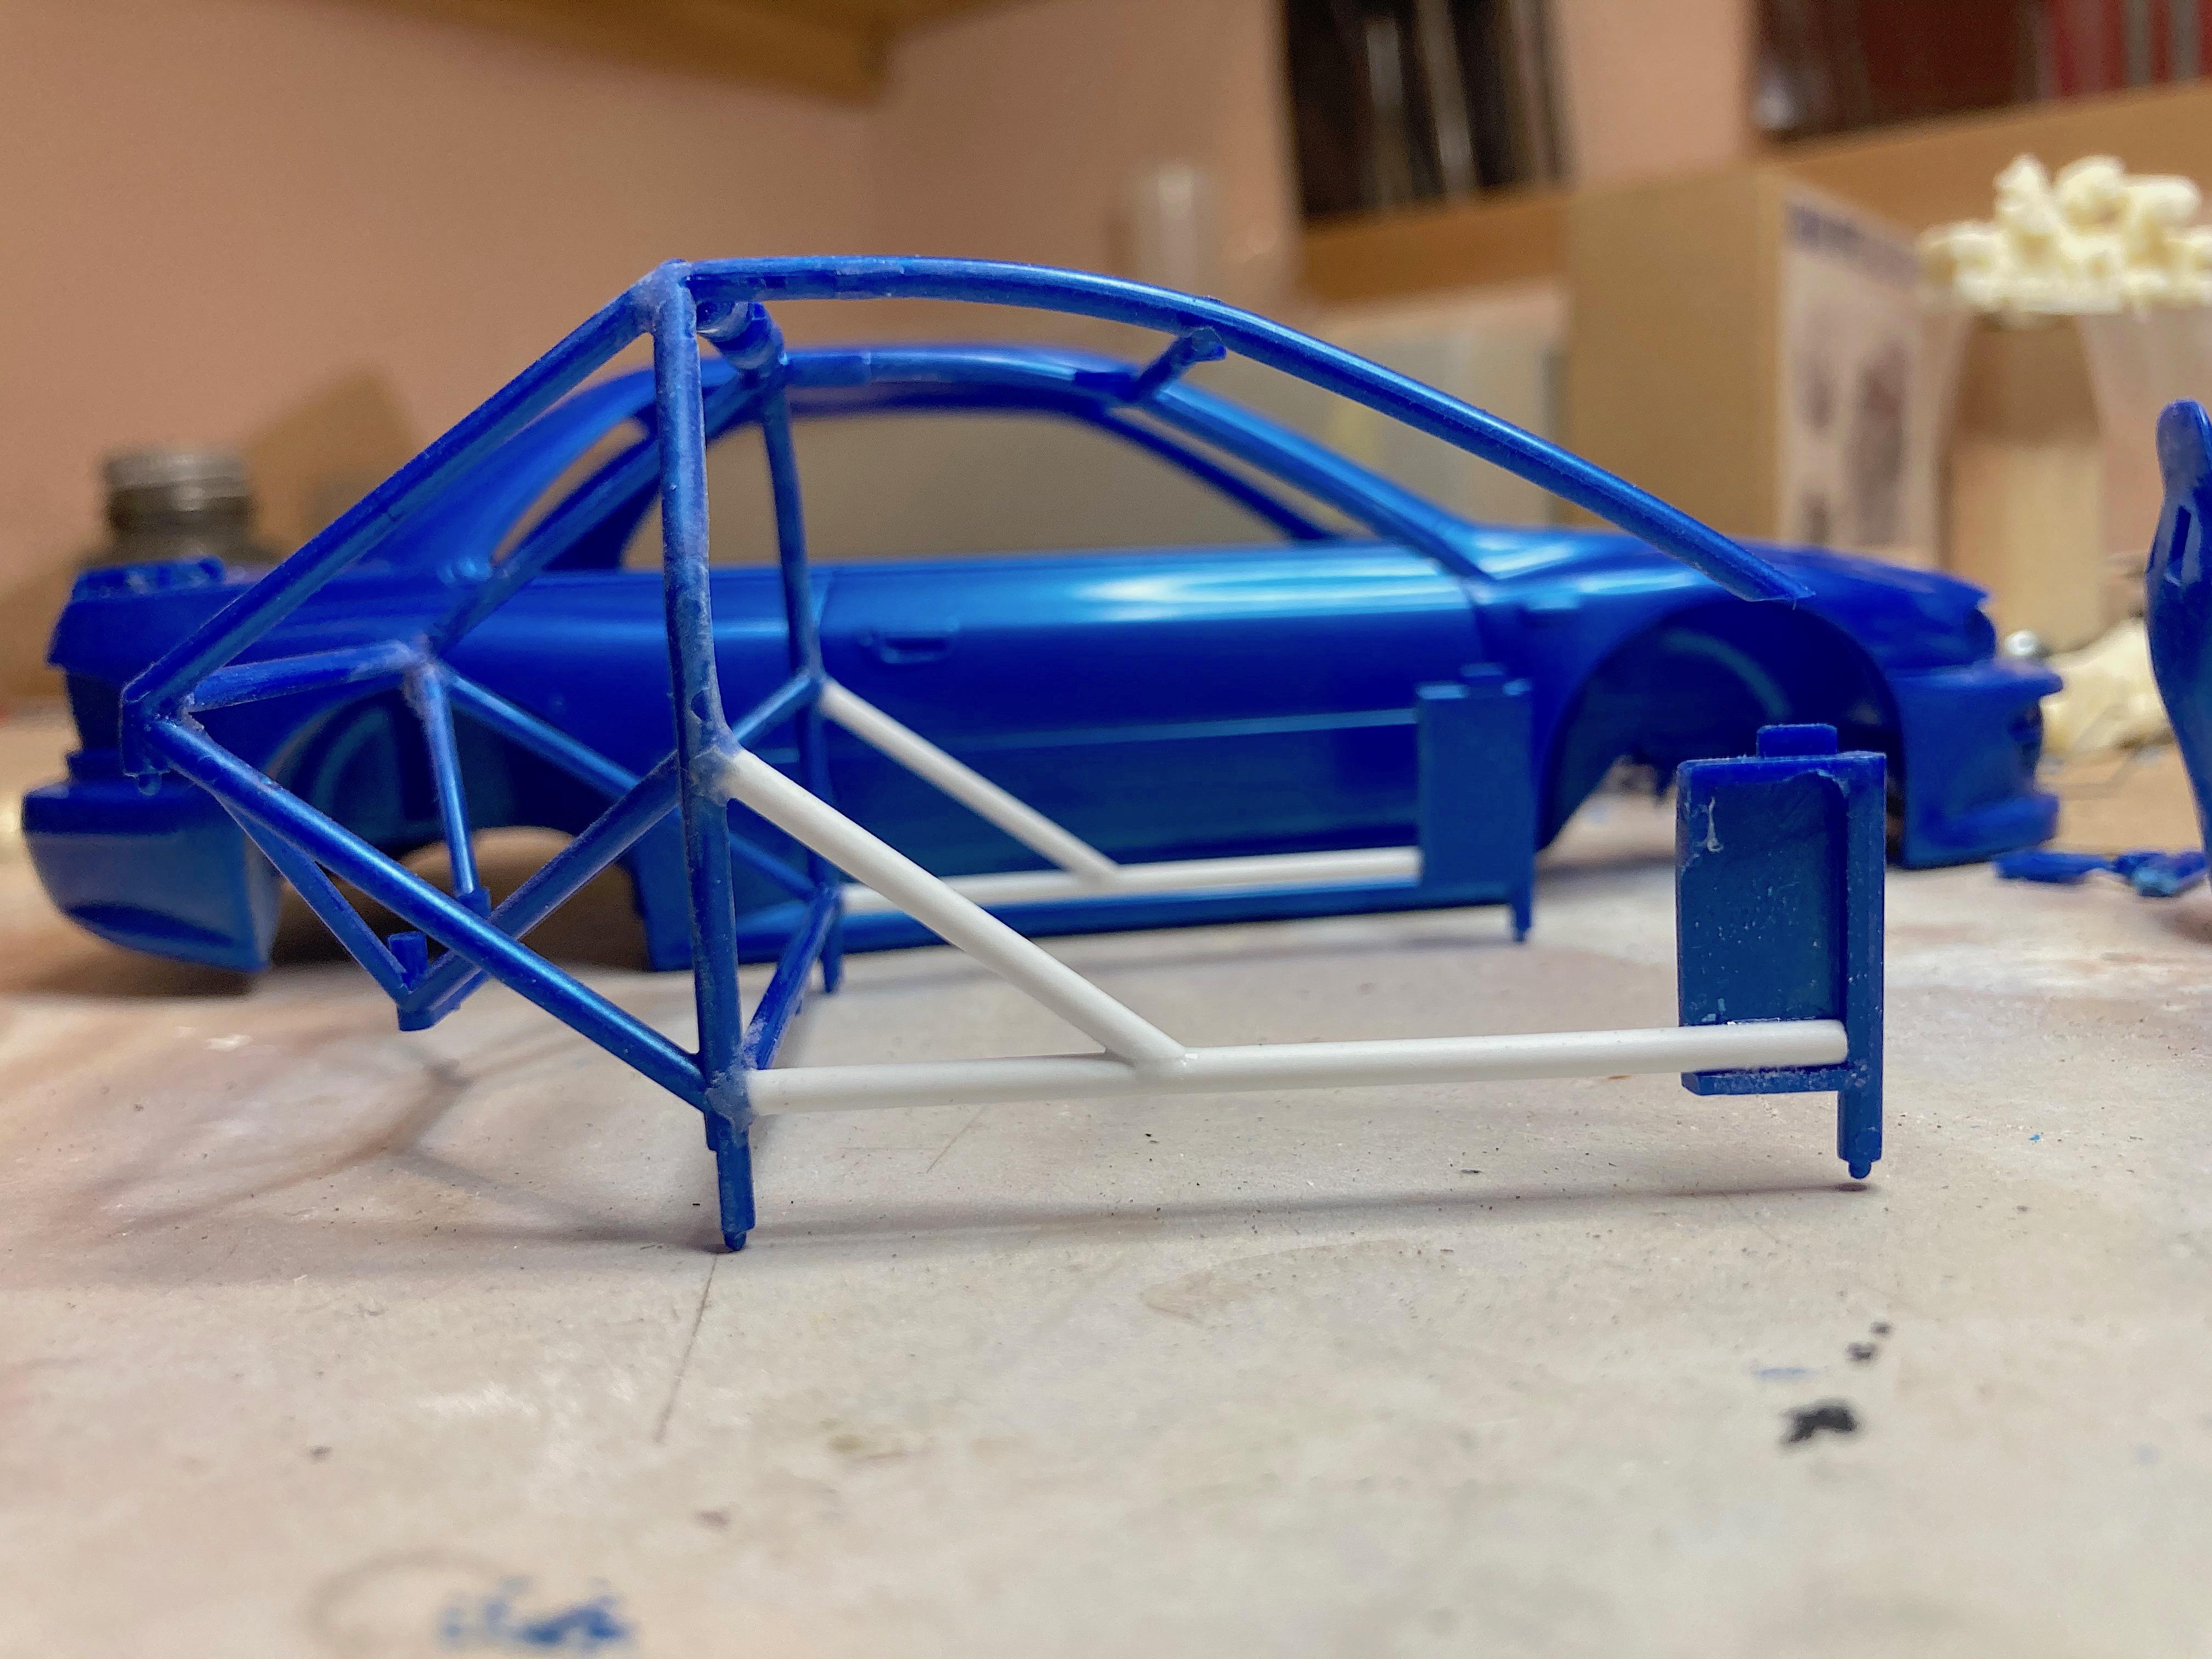
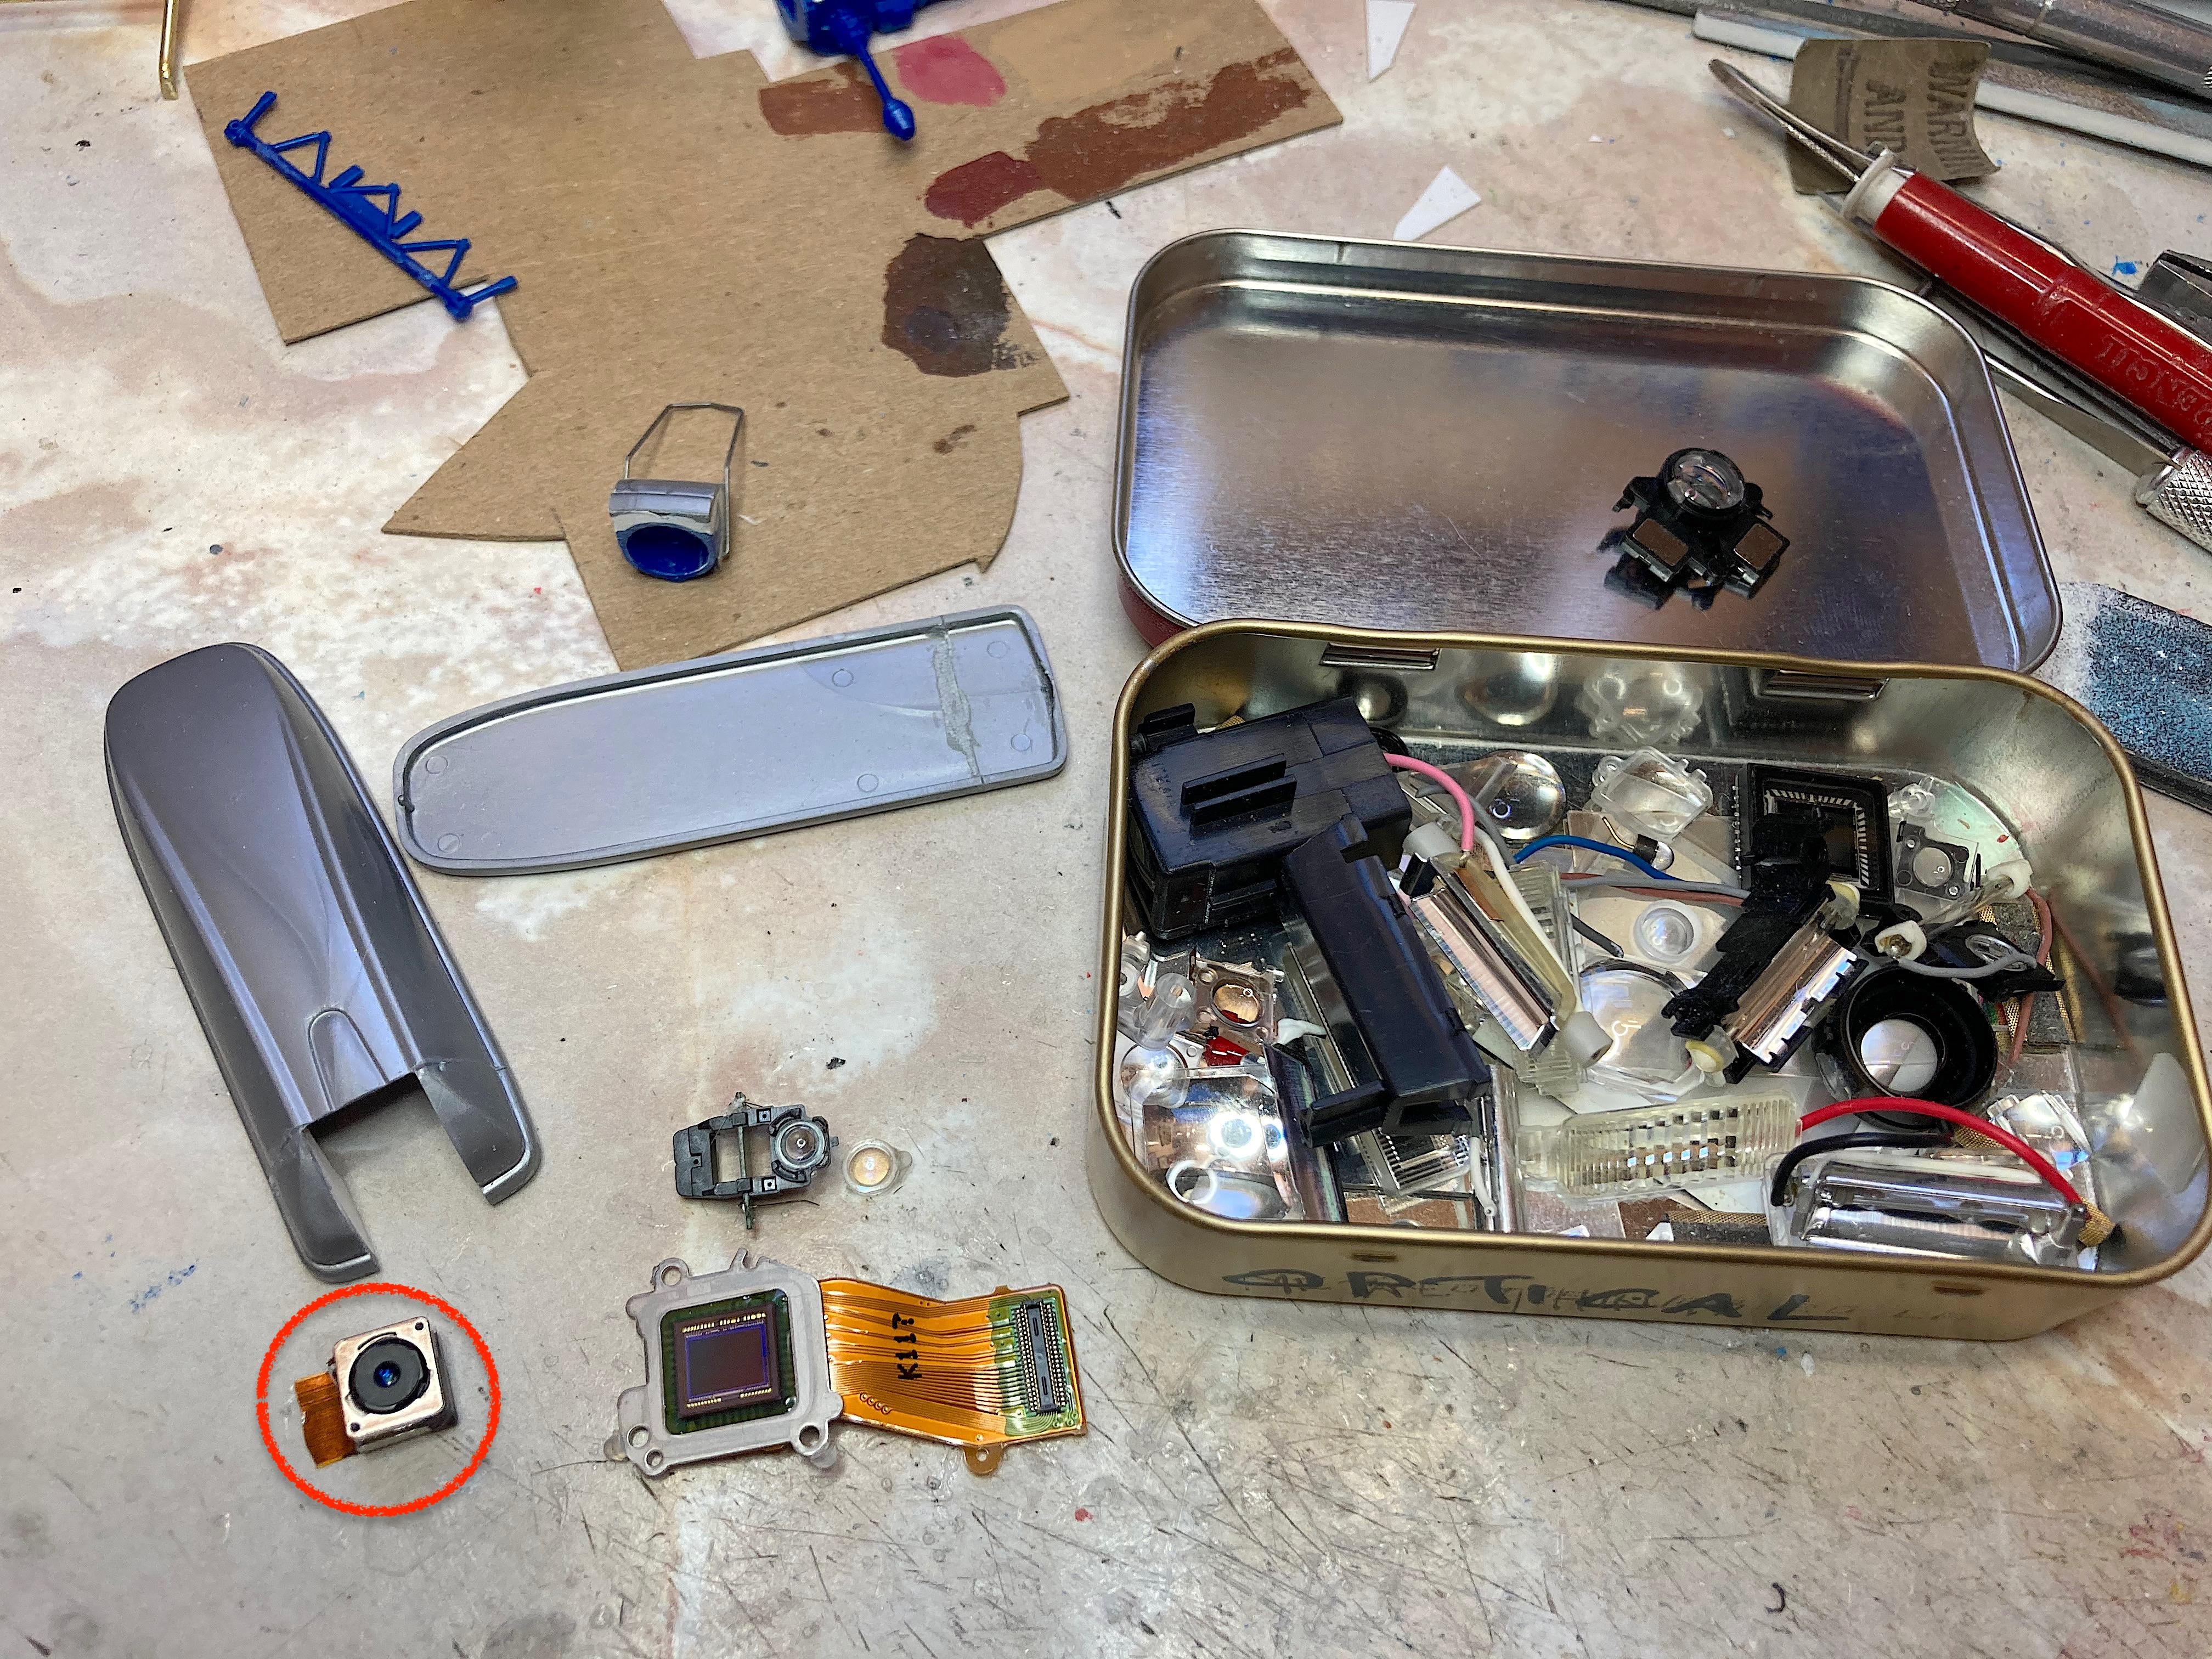
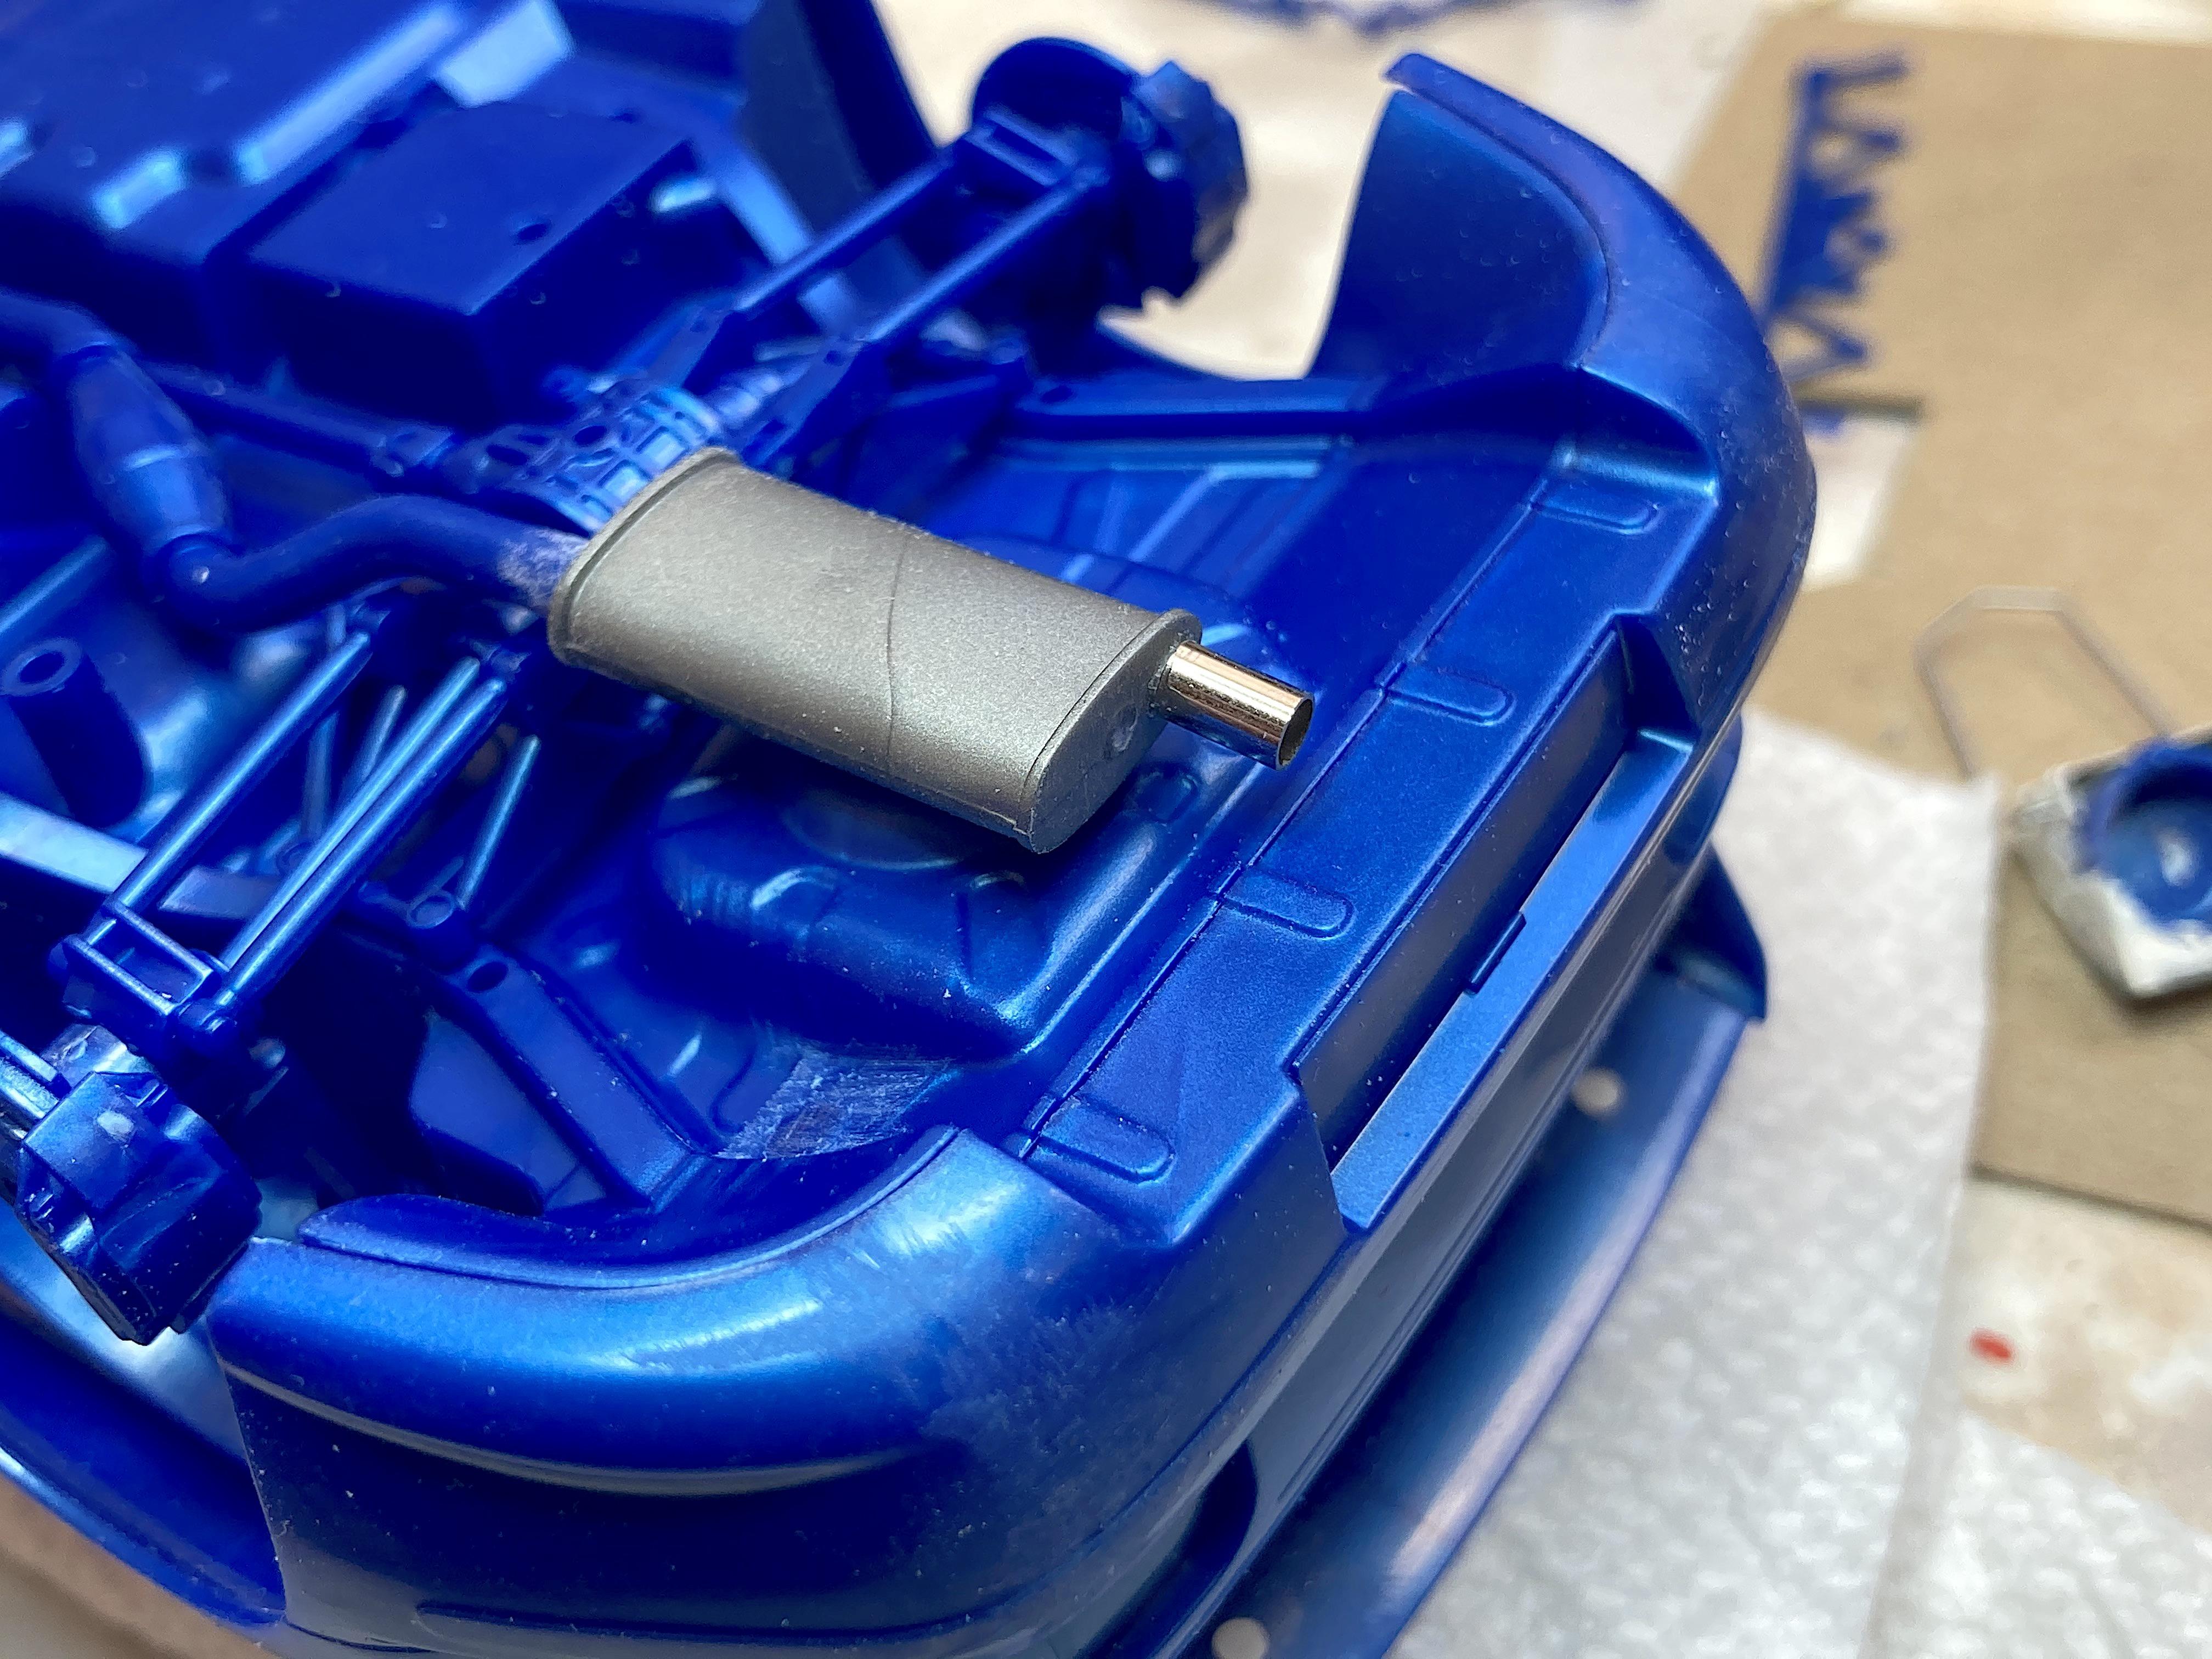
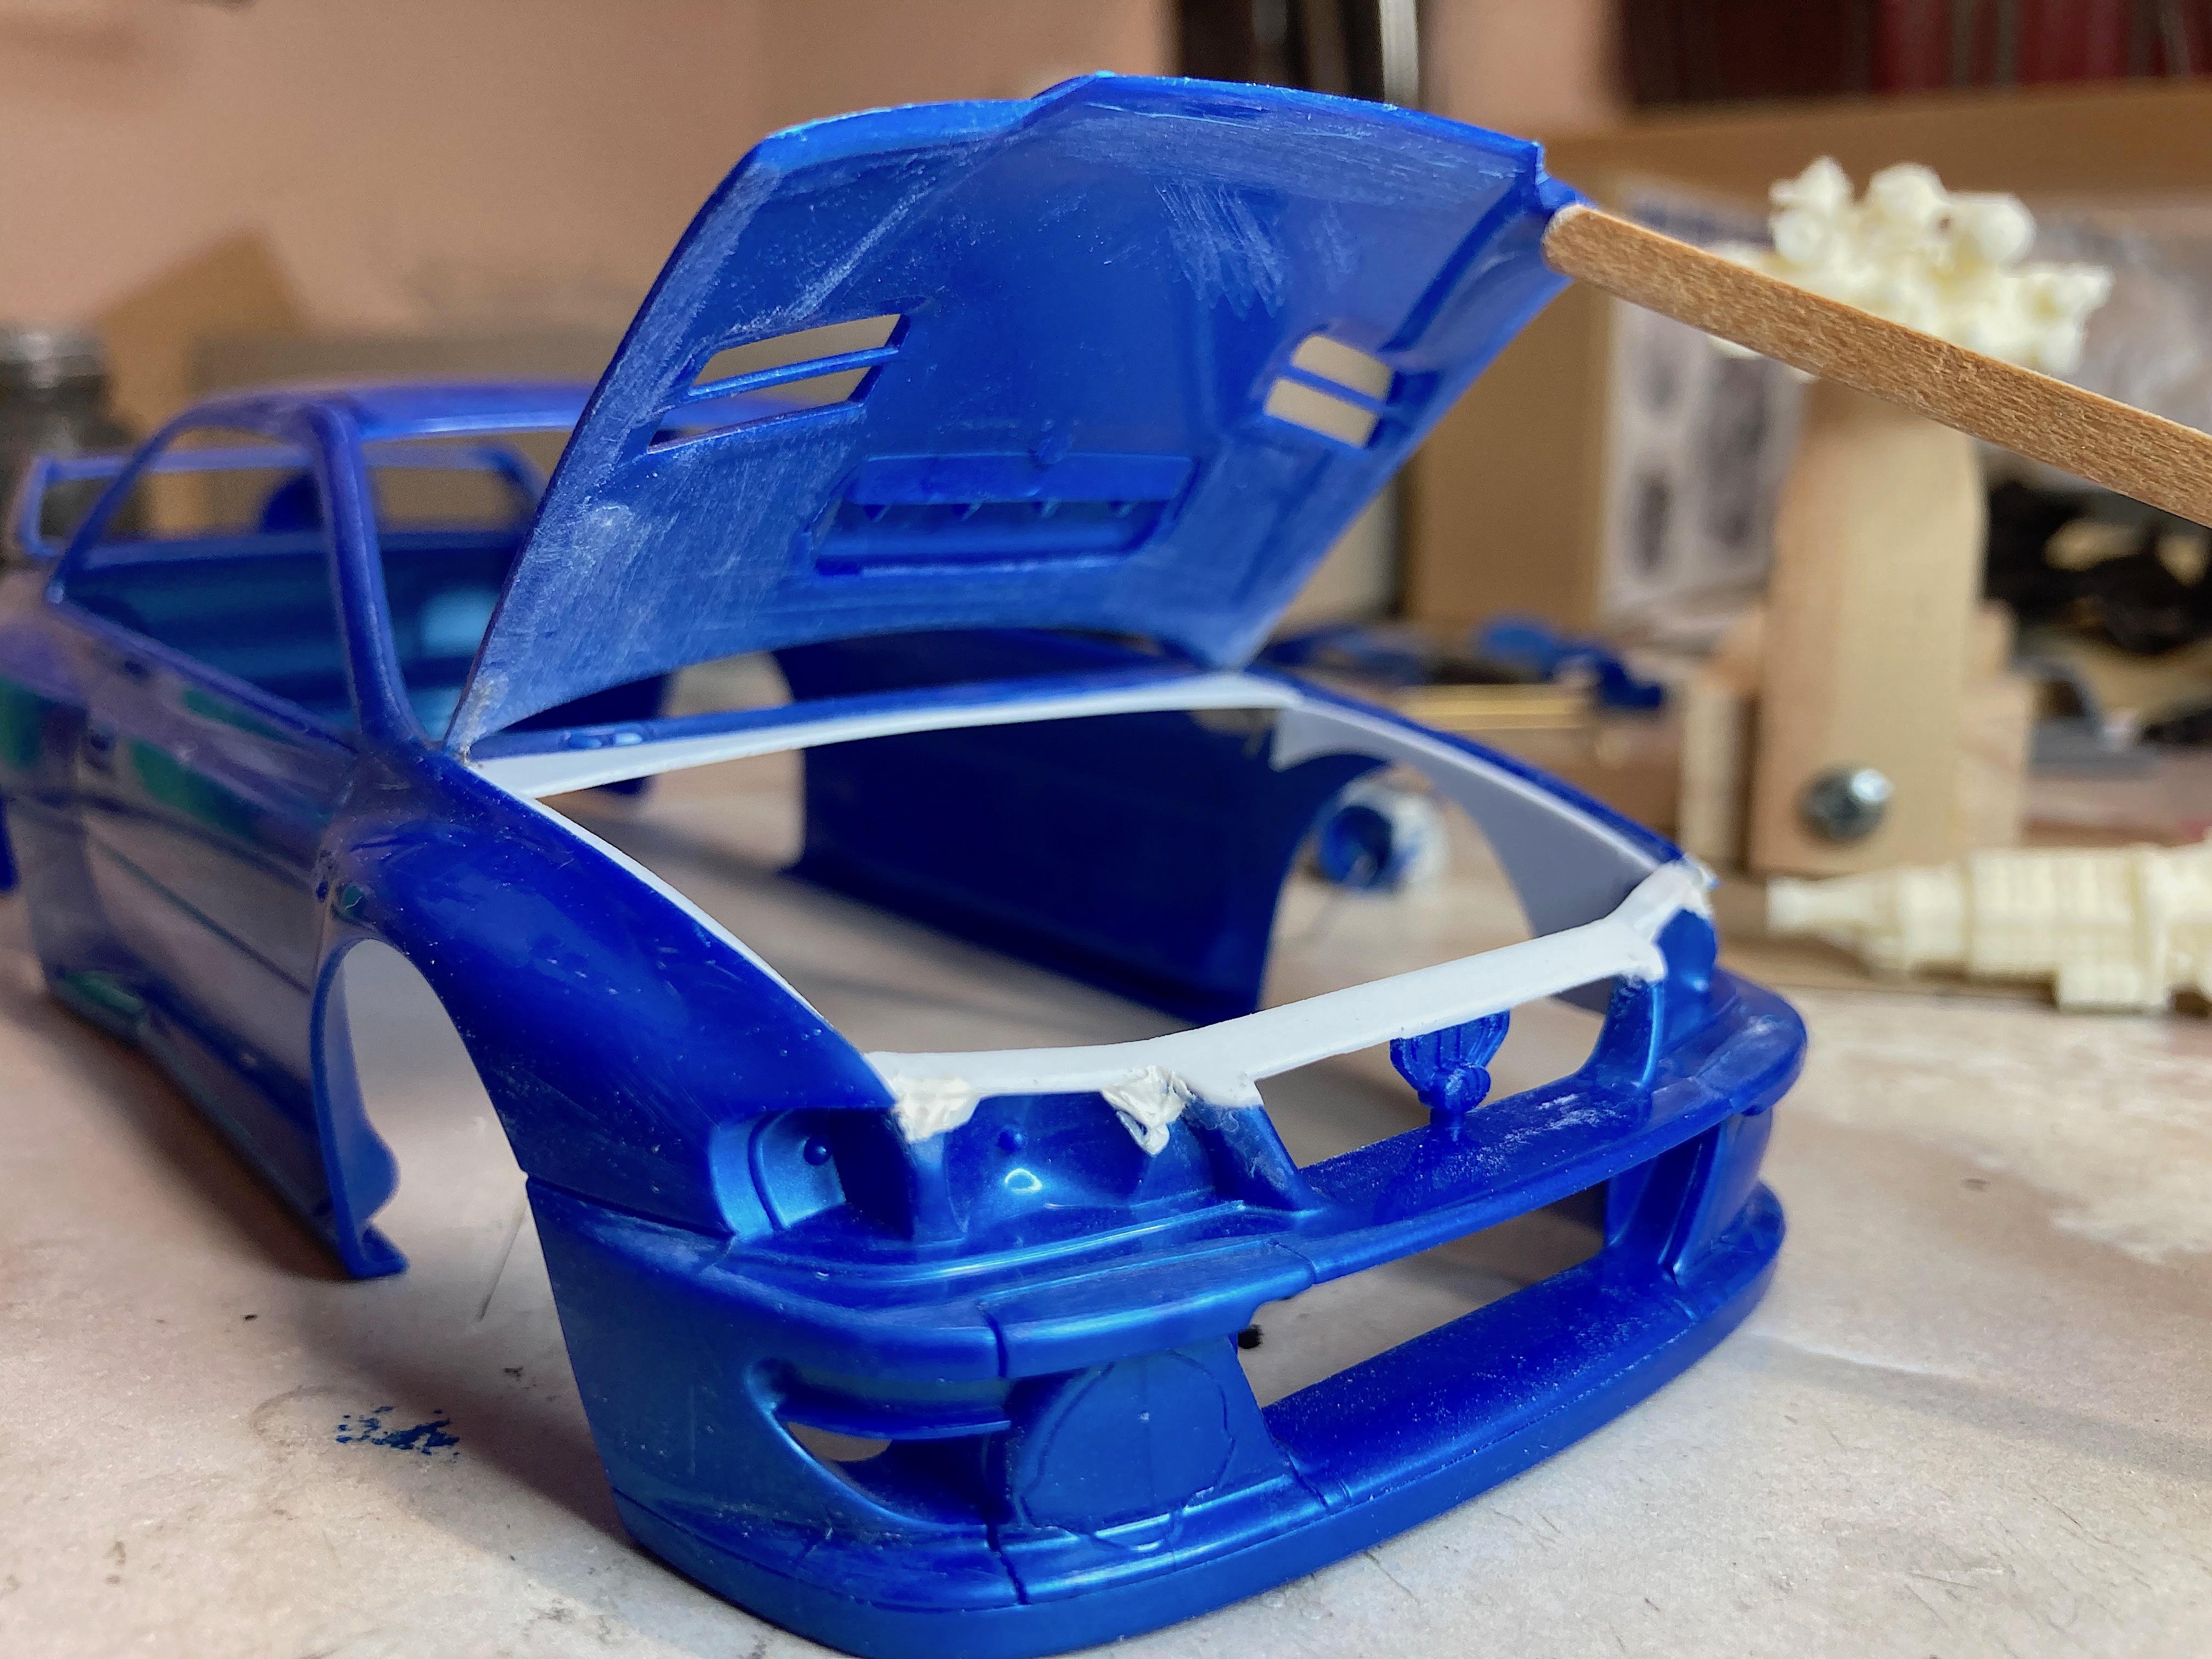
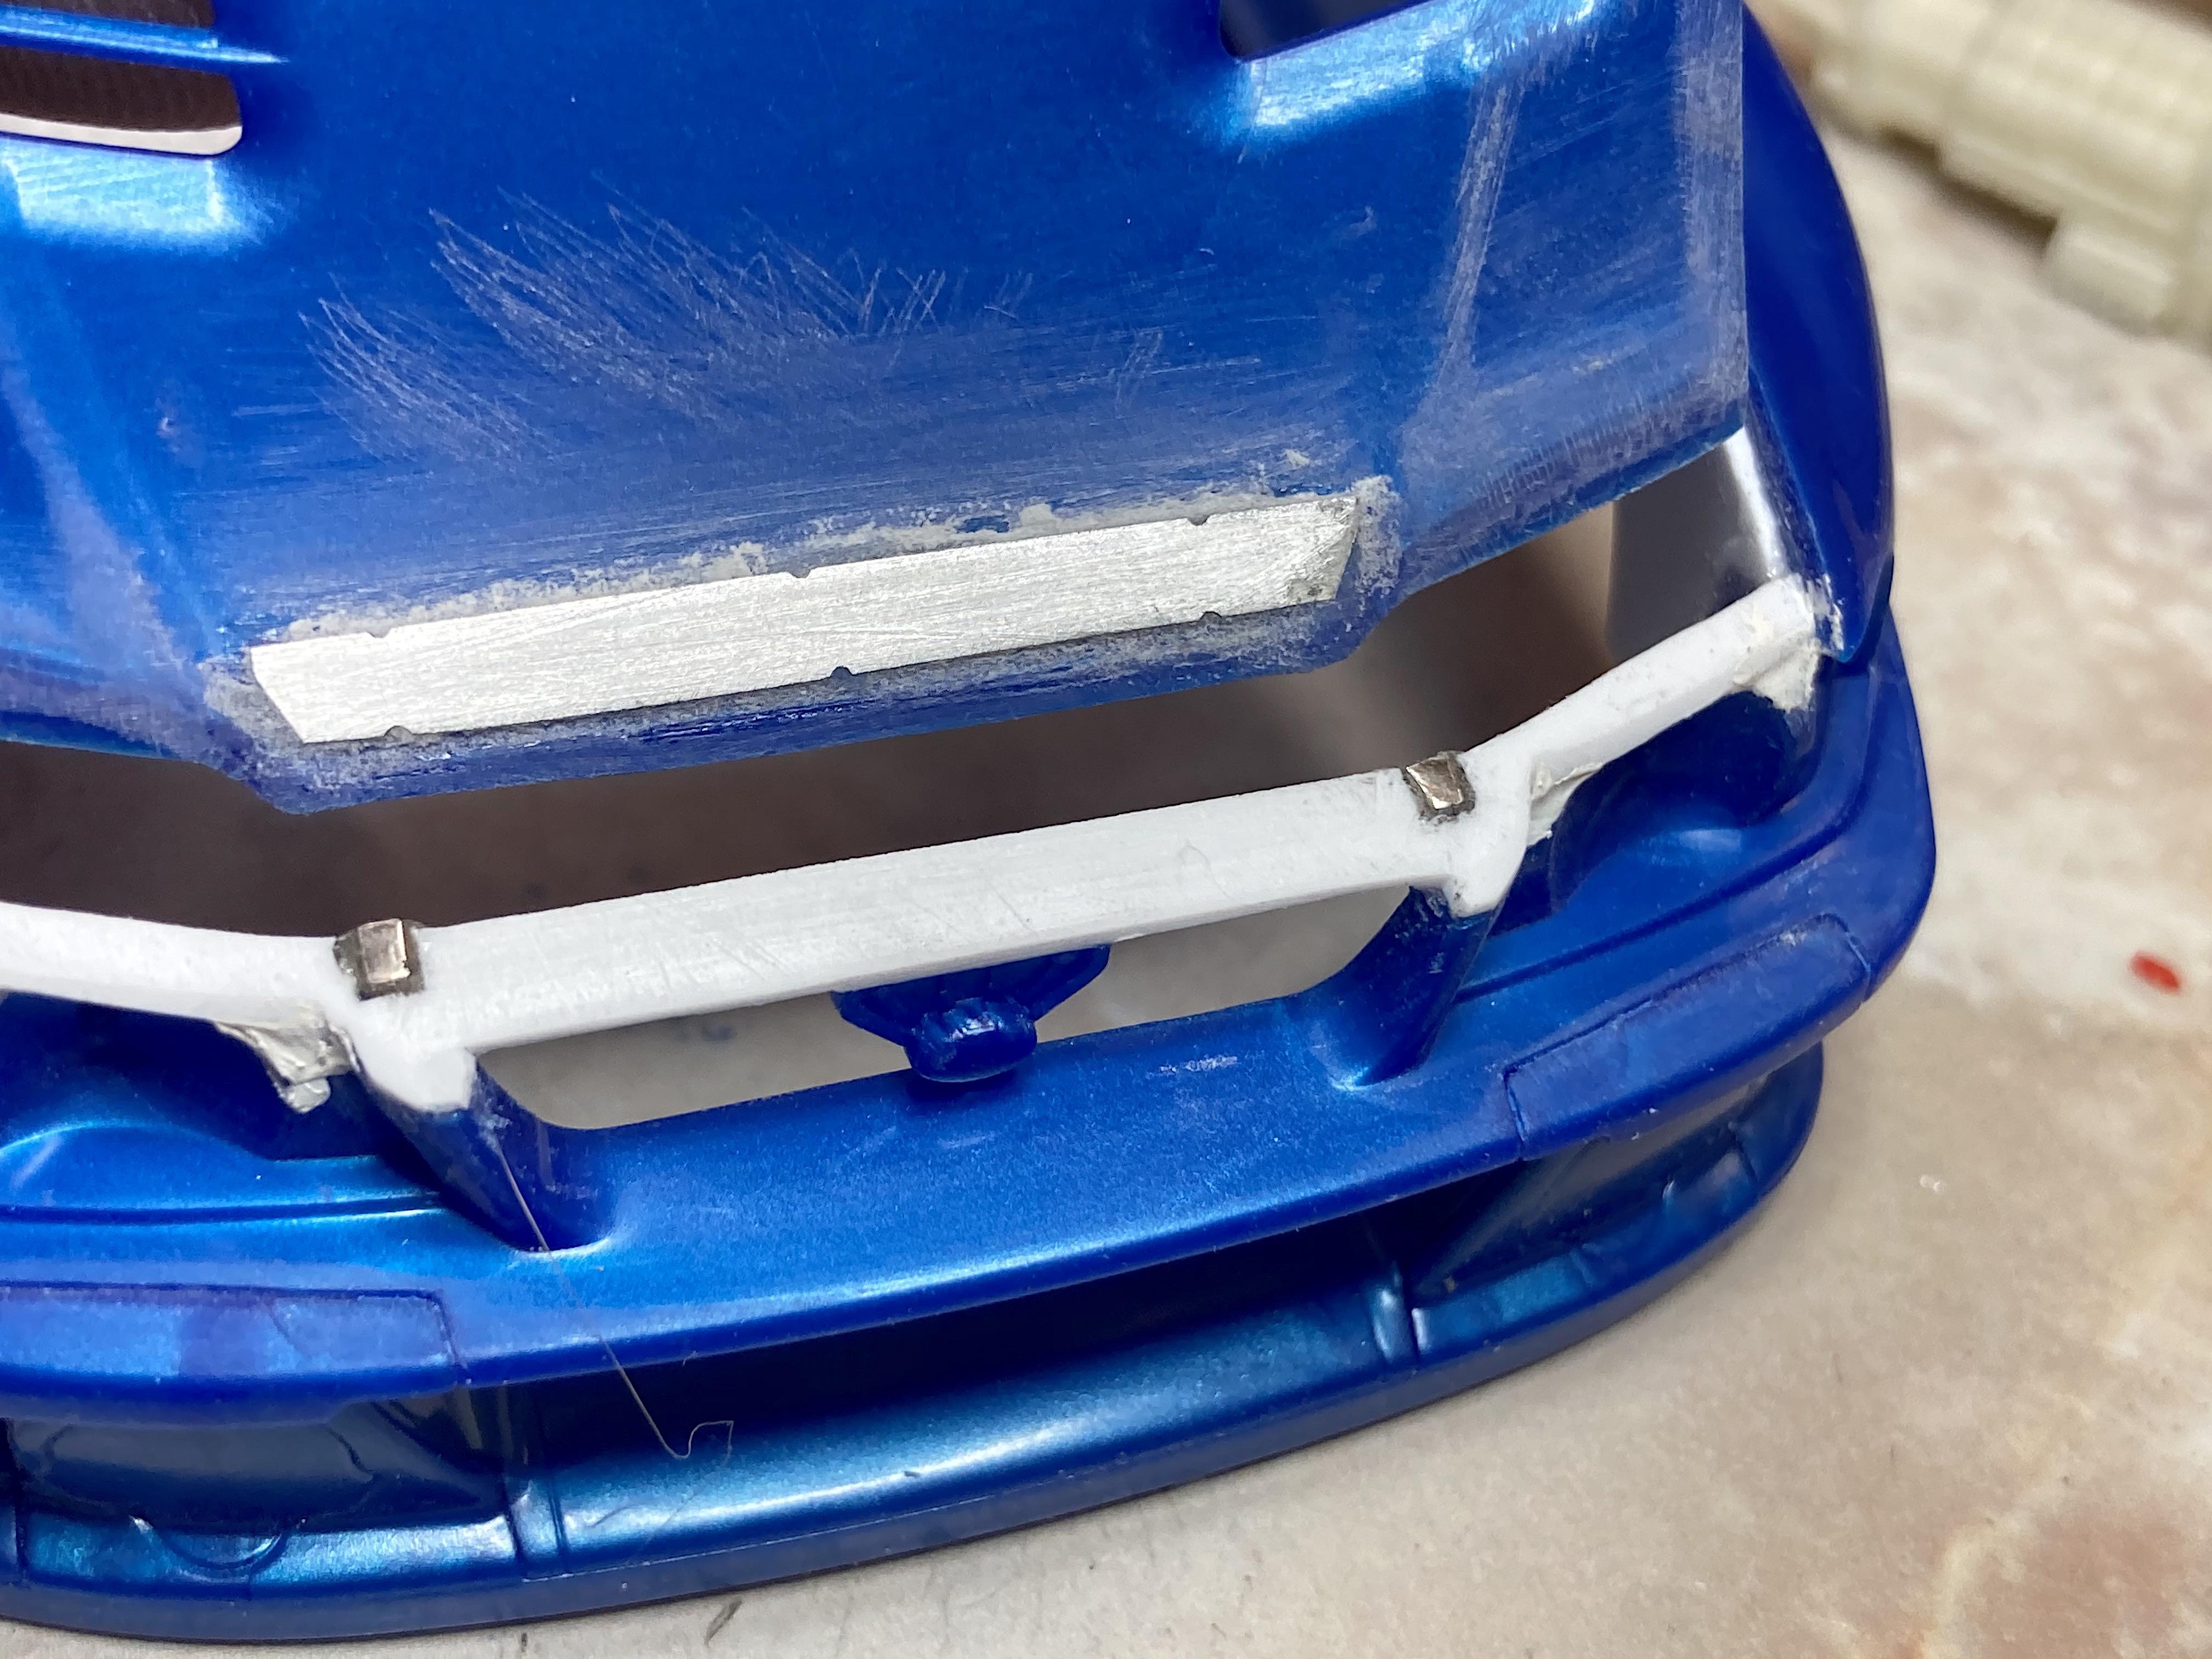
Lights, camera, action! First thing today was look in the scavenged electronic parts, specifically named "optical" that came from cameras. Picked what is circled. (I'm trying the graphics to point out details) Destroyed this part because the lens is so small, and has the optical tint. Discovered it has tiny rare-earth magnets! The video screen will be, well that's what the sensor in digital cameras looks like, found out the "frame" it's in is extremely hard, the cutoff disk doesn't touch it! Used a sanding stick to trim down the tiny lenses. Glued together with Testors canopy glue. Drilled a hole in the cargo box. Will see if it's convincing enough, and not too obvious that's for spotting cops ahead. ? I've heard Subarus at rallies, with this size exhaust pipe and little silencer, they make enough noise to know they're coming. Parts box Lexus muffler, will cut a longer steel tip for final assembly. This may never be seen, but the hollow top of the transmission bugged me. The Milliput blob bugged me more. ? The Celica transmission was hot-wire cut out of the chassis, ground to shape with the Dremel. Also cut out the starter, and stuck on top, similar to what the Hobby Design transmission has. Didn't want the hood to simply lift off, that's a pet peeve of mine. Used fusee chain: Used the Tamiya scriber to create a groove to glue under the hood. Drilled holes in the cowl (a little bigger than shown here, need adjustment and operation latitude). Put two of those magnets to use, glued on the radiator support. Cut out coffee can lid steel and glued under the hood. Will glue the other end of the chain to the body during final assembly, but this gives a good idea how it works: Next is the interior. Hope the roll cage can be assembled in one piece, so it can be painted and put in after the other stuff is done.
-
1948 Chevrolet COE Cannonball
89AKurt replied to 89AKurt's topic in Model Trucks: Pickups, Vans, SUVs, Light Commercial
Thanks! There have been. But they usually blow the front fender to rear fender height. Thank you! I snuck it into the forum, built a long time ago. -
Thank you! Busy forum, understand. Thank you! Appreciate it! Yea, it's a signature detail of mine. Cool! It's better than most motorized kits, been using parts for details.
-
Thank you! Easier than other kit bash projects I've done. (sorry about double quote/tag, page one to two glitch)
-
Cool! Like the lights, what is the source for those? You blended in the lower light blank too. As much as I like the color, won't be doing it because it's almost like RED. ?
-
You know how that works! Especially after Jan. 7 events.
-
Vintage Top Fuel FEDs, 1:16 brass chassis
89AKurt replied to Mike Williams's topic in WIP: Drag Racing Models
Thank you for this basic information, very helpful. I do almost everything by eye, at least my good eye. I get their catalogs, so will take a look. Thank you. -
Painting interior parts to look like cloth?
89AKurt replied to crowe-t's topic in Model Building Questions and Answers
You looking for texture, more than pattern? -
Very cool the Bring Out Your Dead inspired you to finish these. The Firebird paint job is amazing, but the sprint car is very special.
-
with spikes, flailing