89AKurt
-
Posts
8,429 -
Joined
-
Last visited
Content Type
Profiles
Forums
Events
Gallery
Everything posted by 89AKurt
-
As of now, I'm doing well. We aren't under house arrest like some countries and states, Arizona is counting on the honor system. I'm already set, since I'm self-employed, work at home (separate office out back), no employees to worry about, lucky to have more work than I care but trying to not complain, have been buying paint and kits and such for awhile so have a fresh supply and about 300 years of kits. I've also had a lifestyle change past few years, I was a barfly going out several times a week and shooting pool and drinking and karaoke, met a woman, which changed for the better in several ways, now I'm not hungover and tired all the time, and have money for models for some reason. So I'm sort of hoping the copy shop will have to close for awhile so I can have a legit excuse to only build models. I can be a hermit, but this internet wrecks my image as being anti-social. As of now......
-
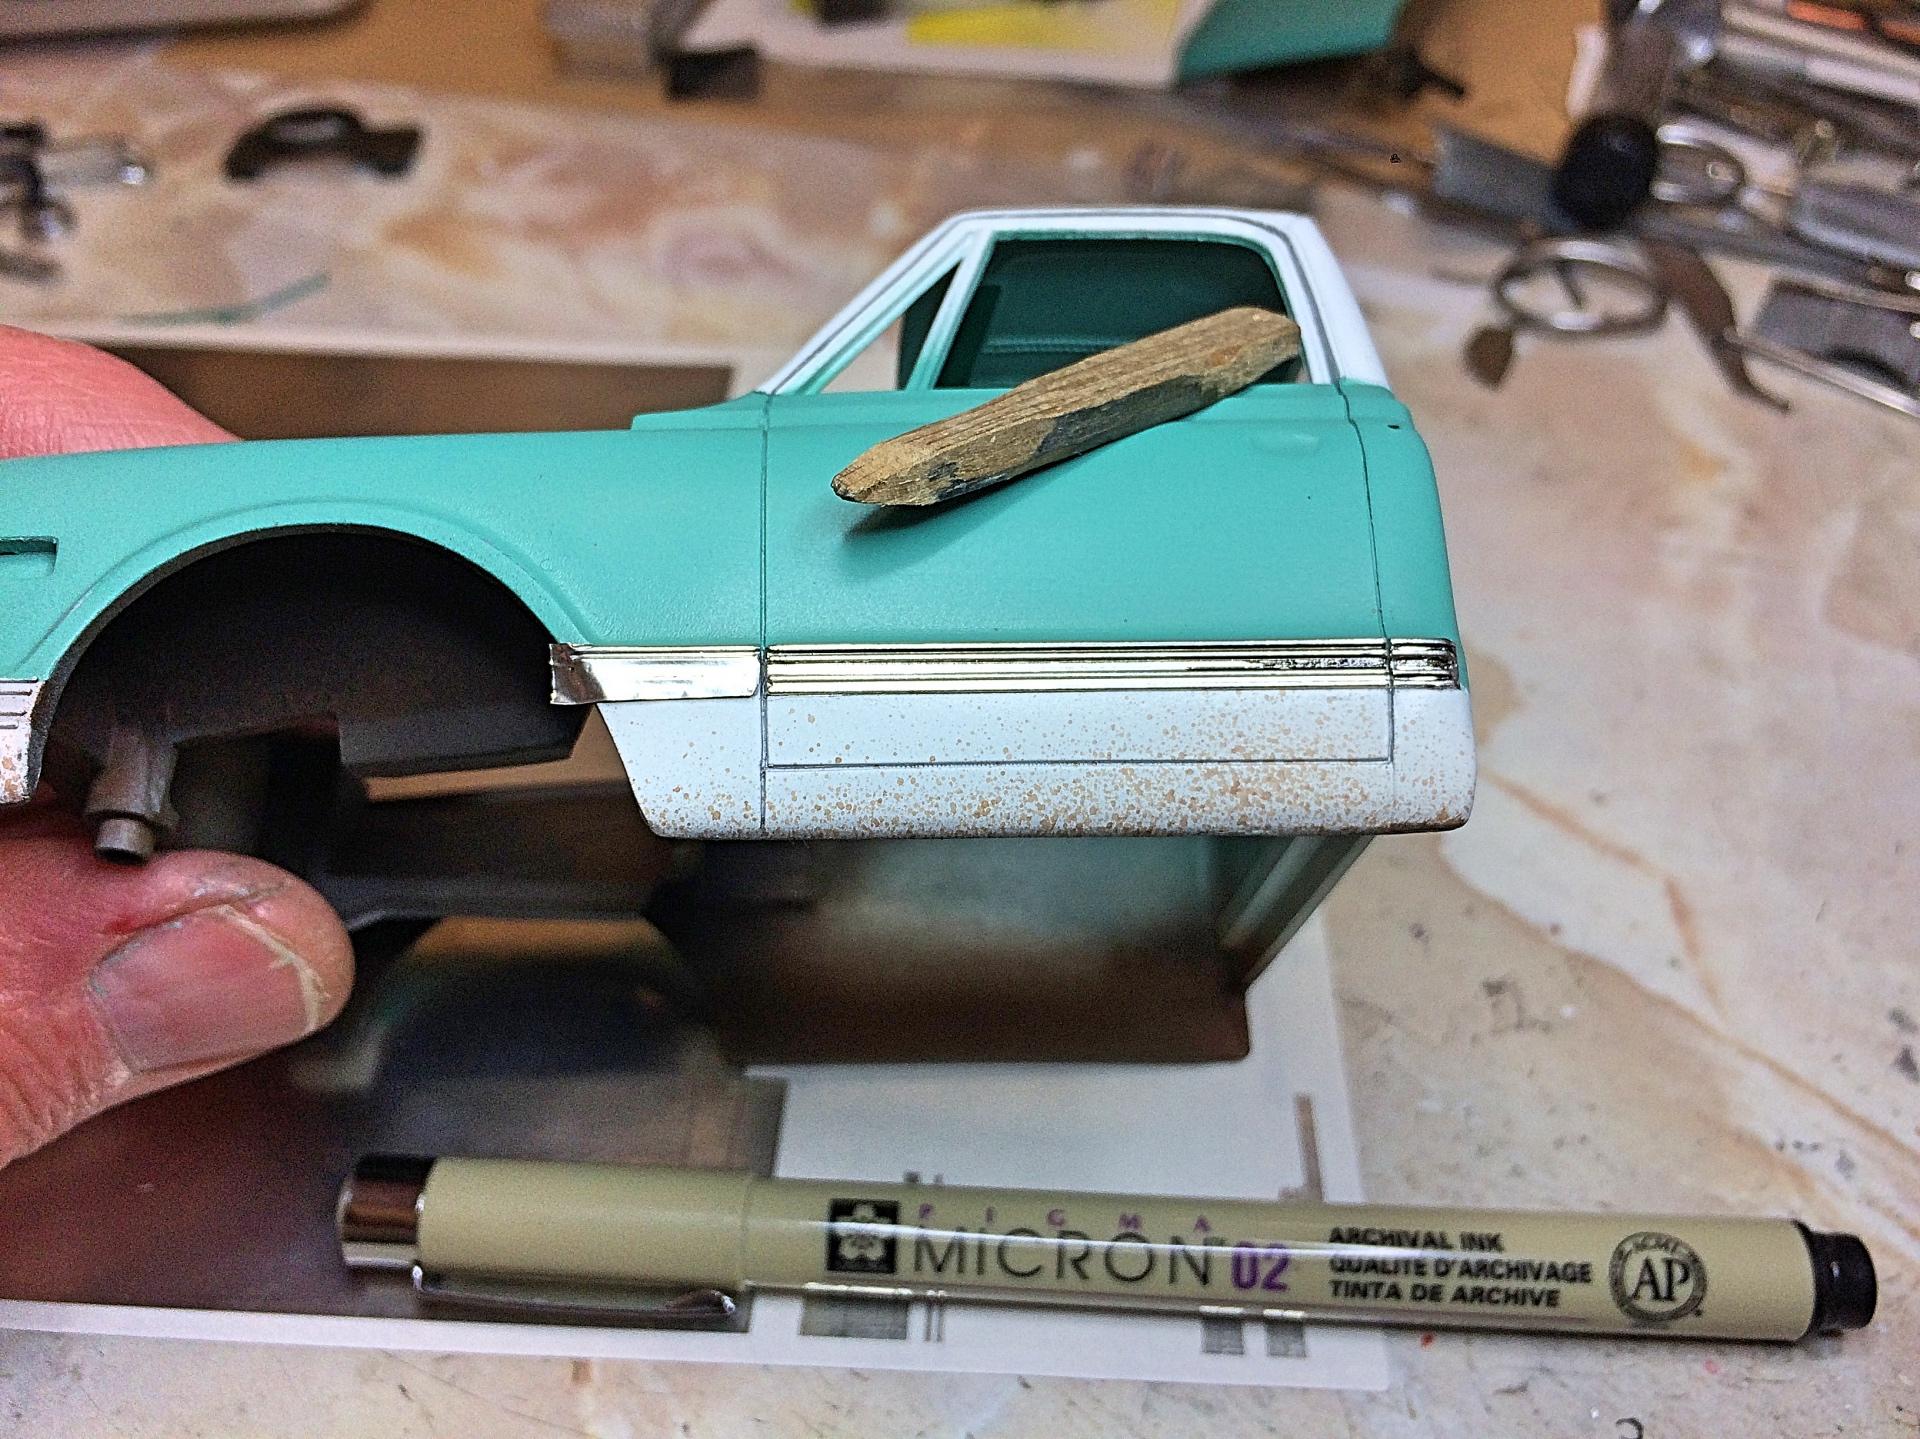
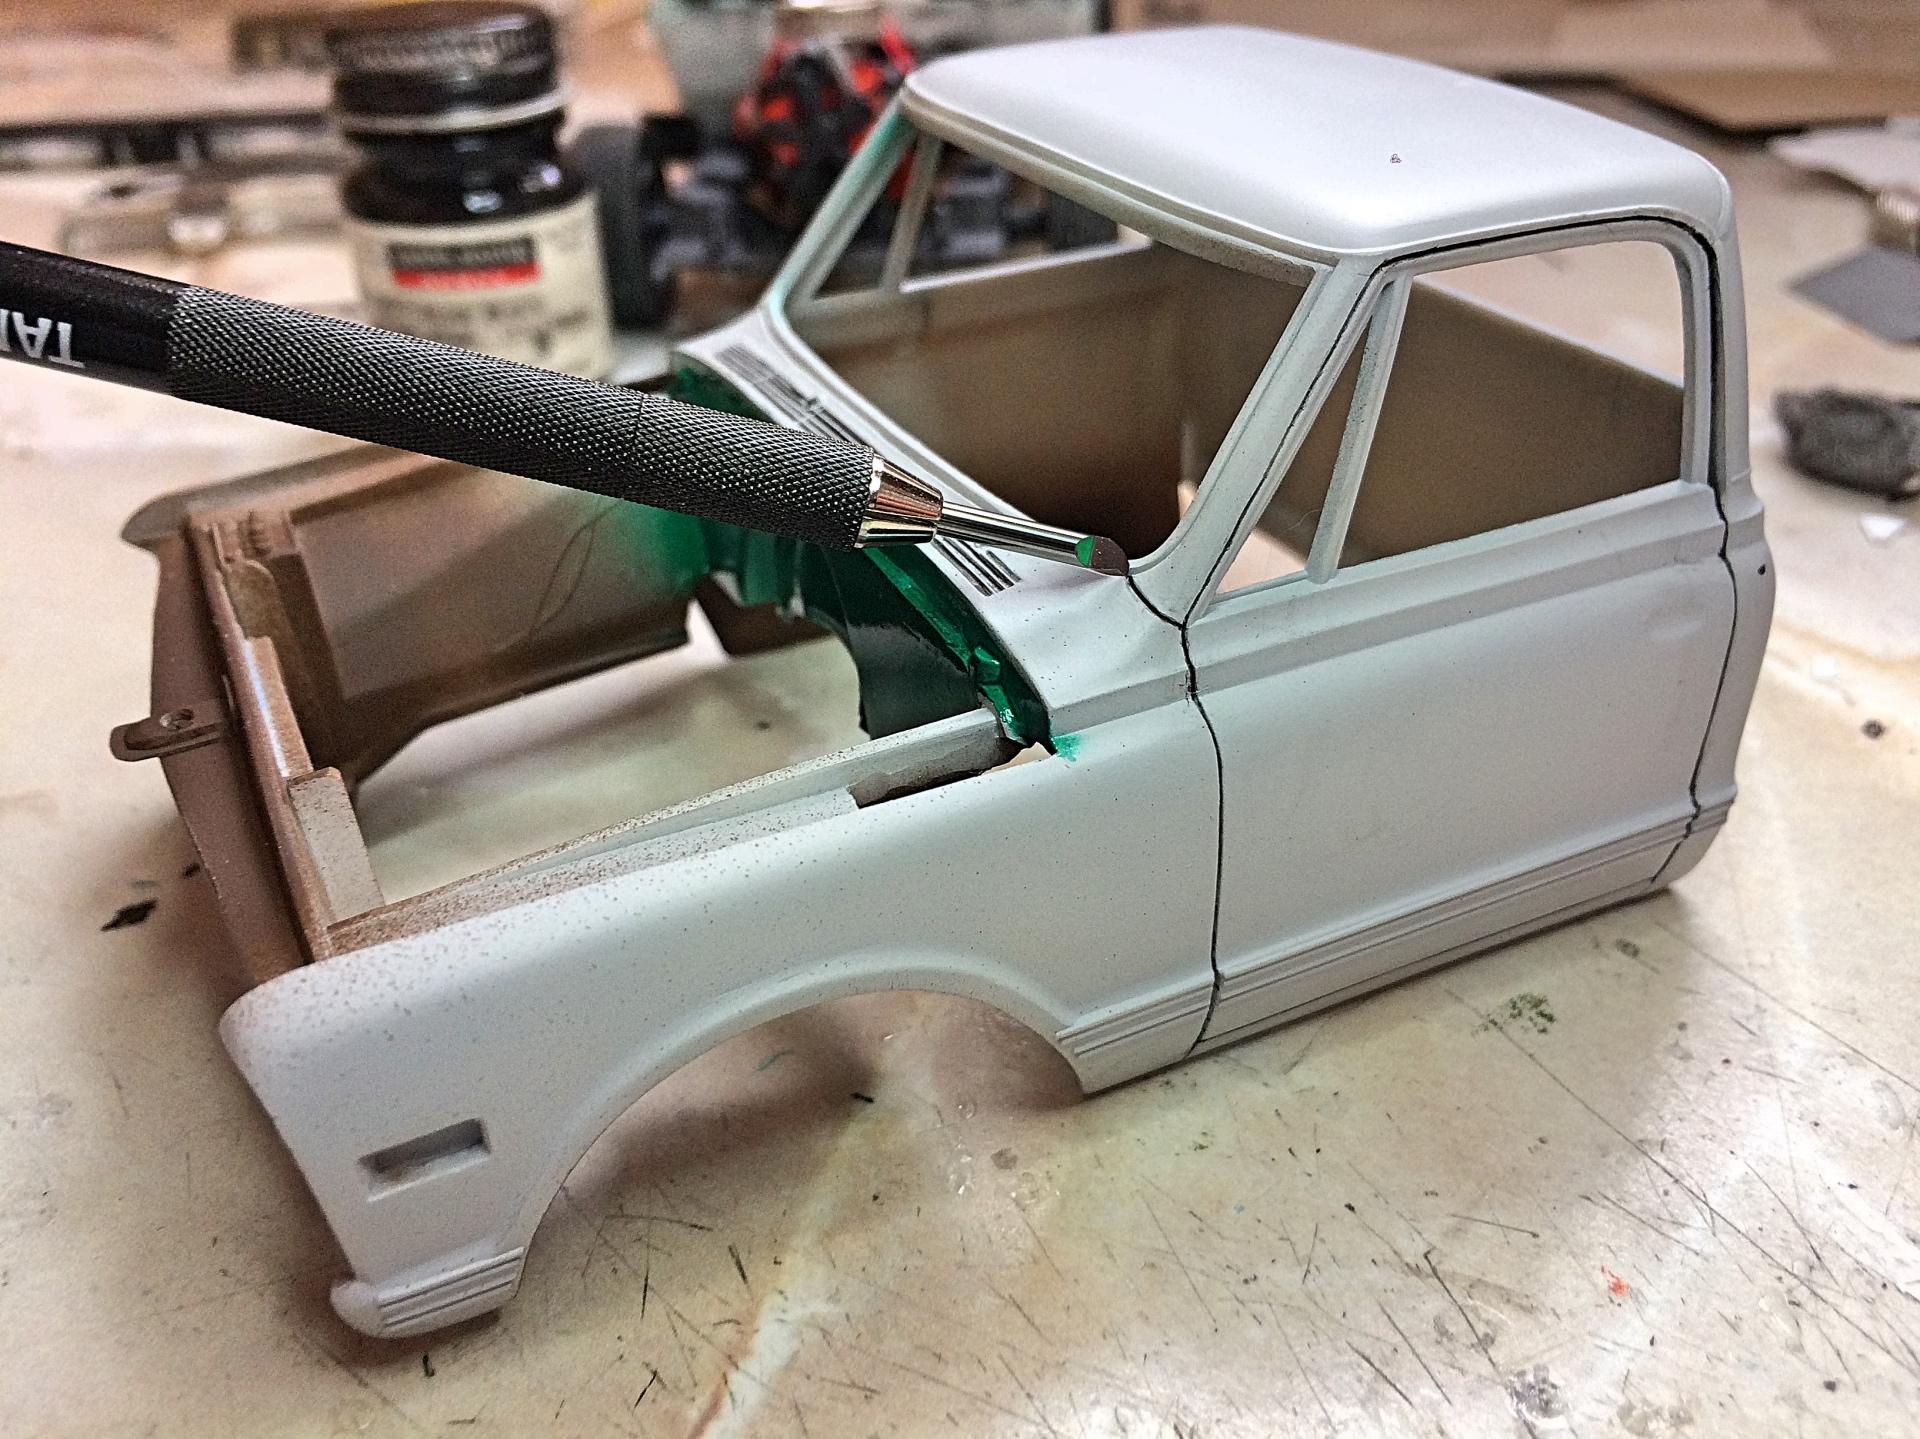
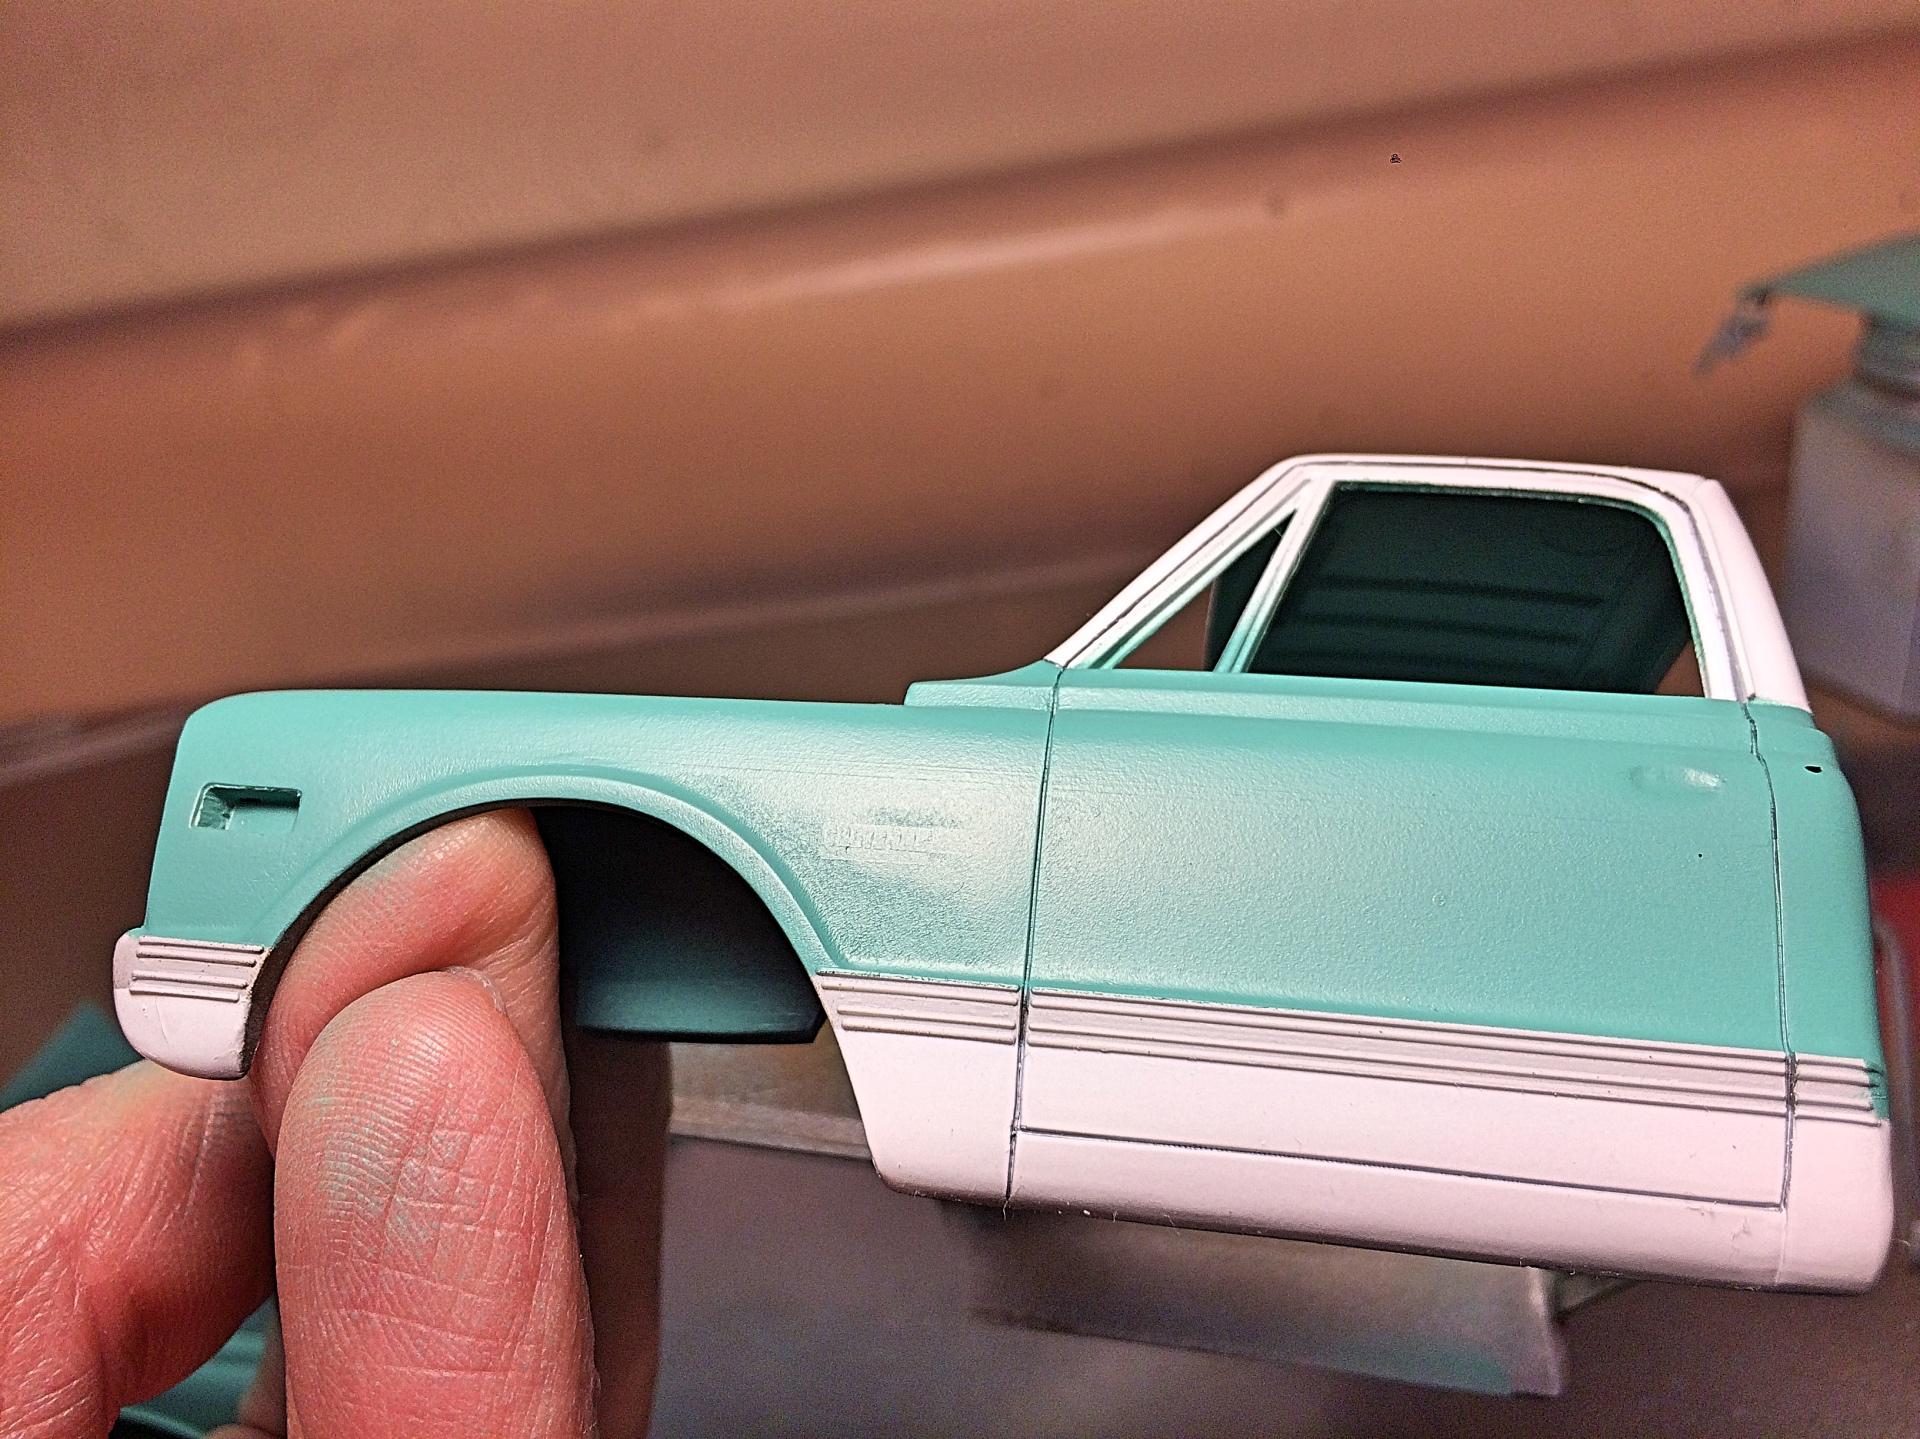
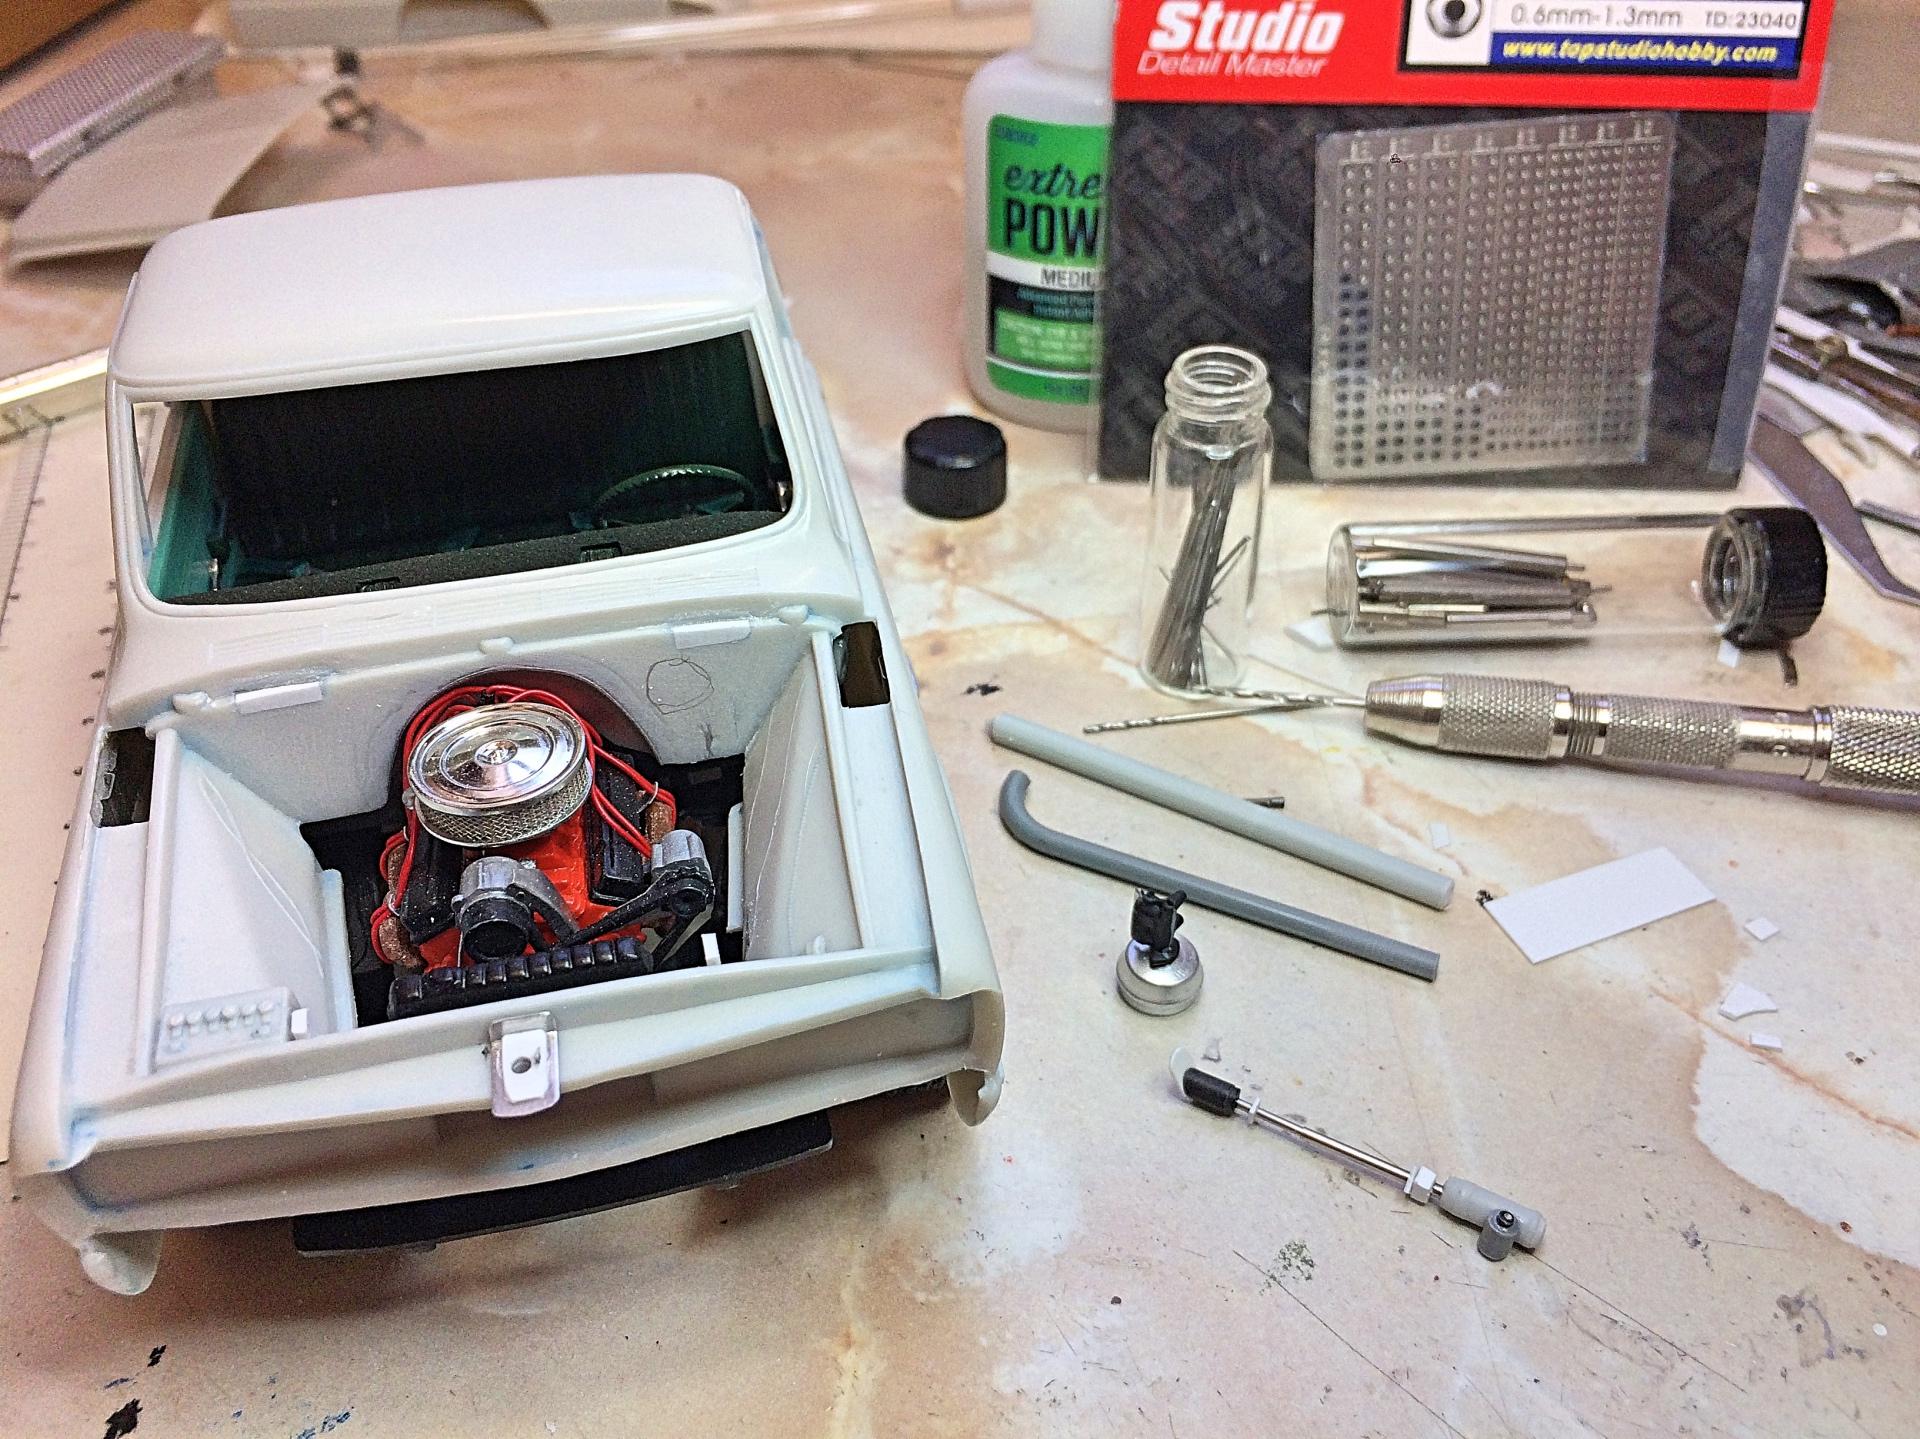
 Getting to the fun part now... Bare Metal foil the limited amount of trim. Using two sizes of Micron pens to do the black. I use a cedar stick to burnish, starting at the top line, then working down to the next..... Front bumper is getting attention, driving lights aren't exact replicas, but good enough. Can hardly wait to get my door handles on, that's going to fix a pet peeve of molded on door handles. The glass is a little messed up, thinking of wet-sanding and polishing, need to get some Future and try that, since I read so many use it. Thinking of removing the vent wing part of the windshield, it looks like bullet-proof glass behind the trim molding. Making taillight, back-up, and sidelight lenses is another upcoming task.
-
Bathtub gin kits
-
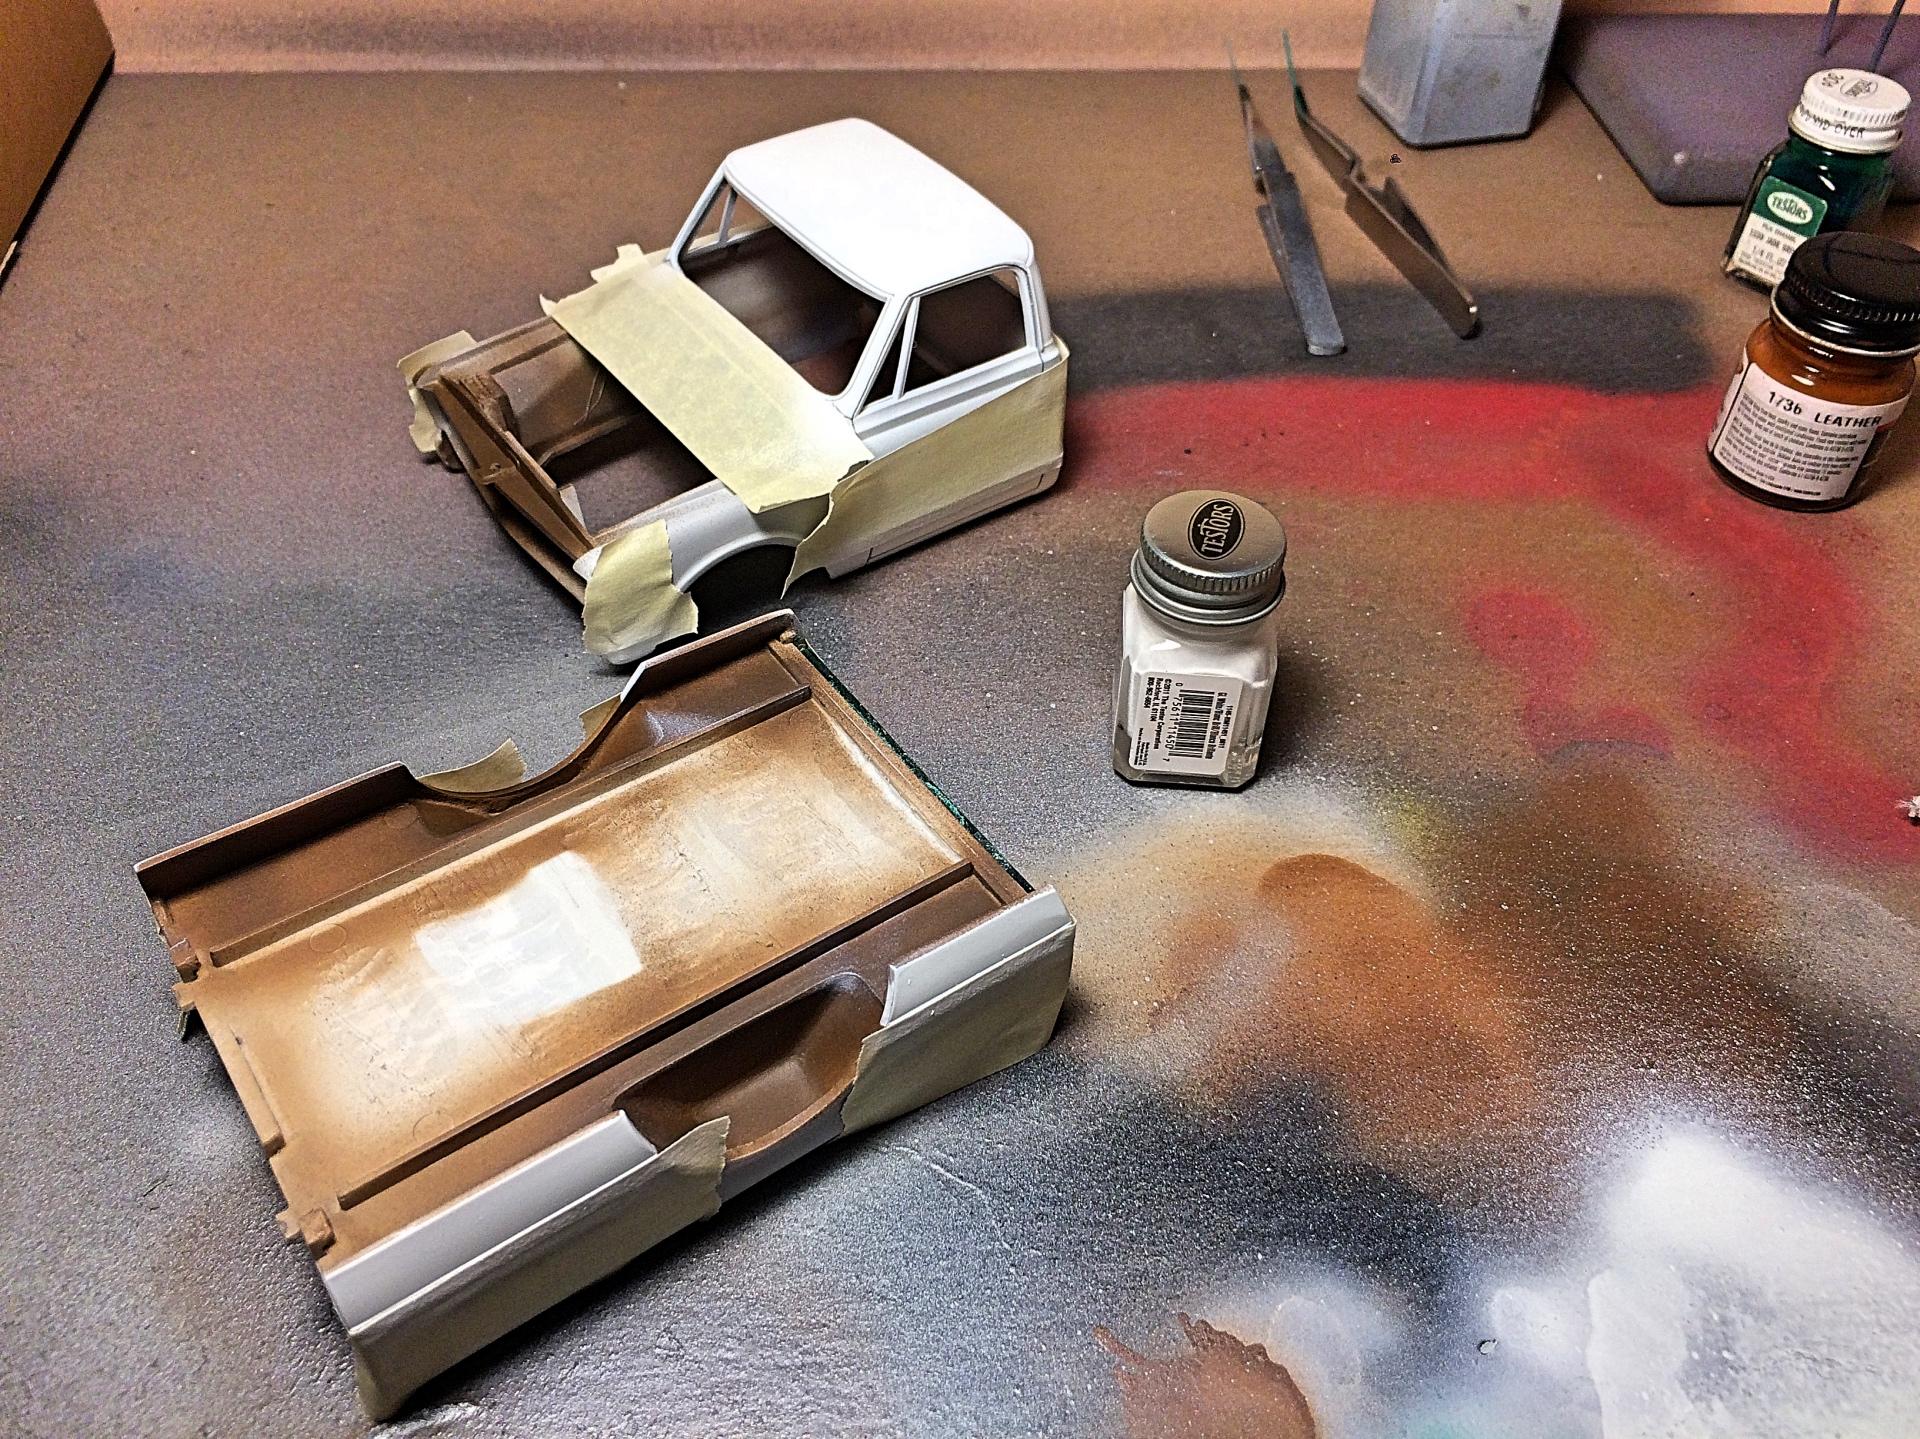
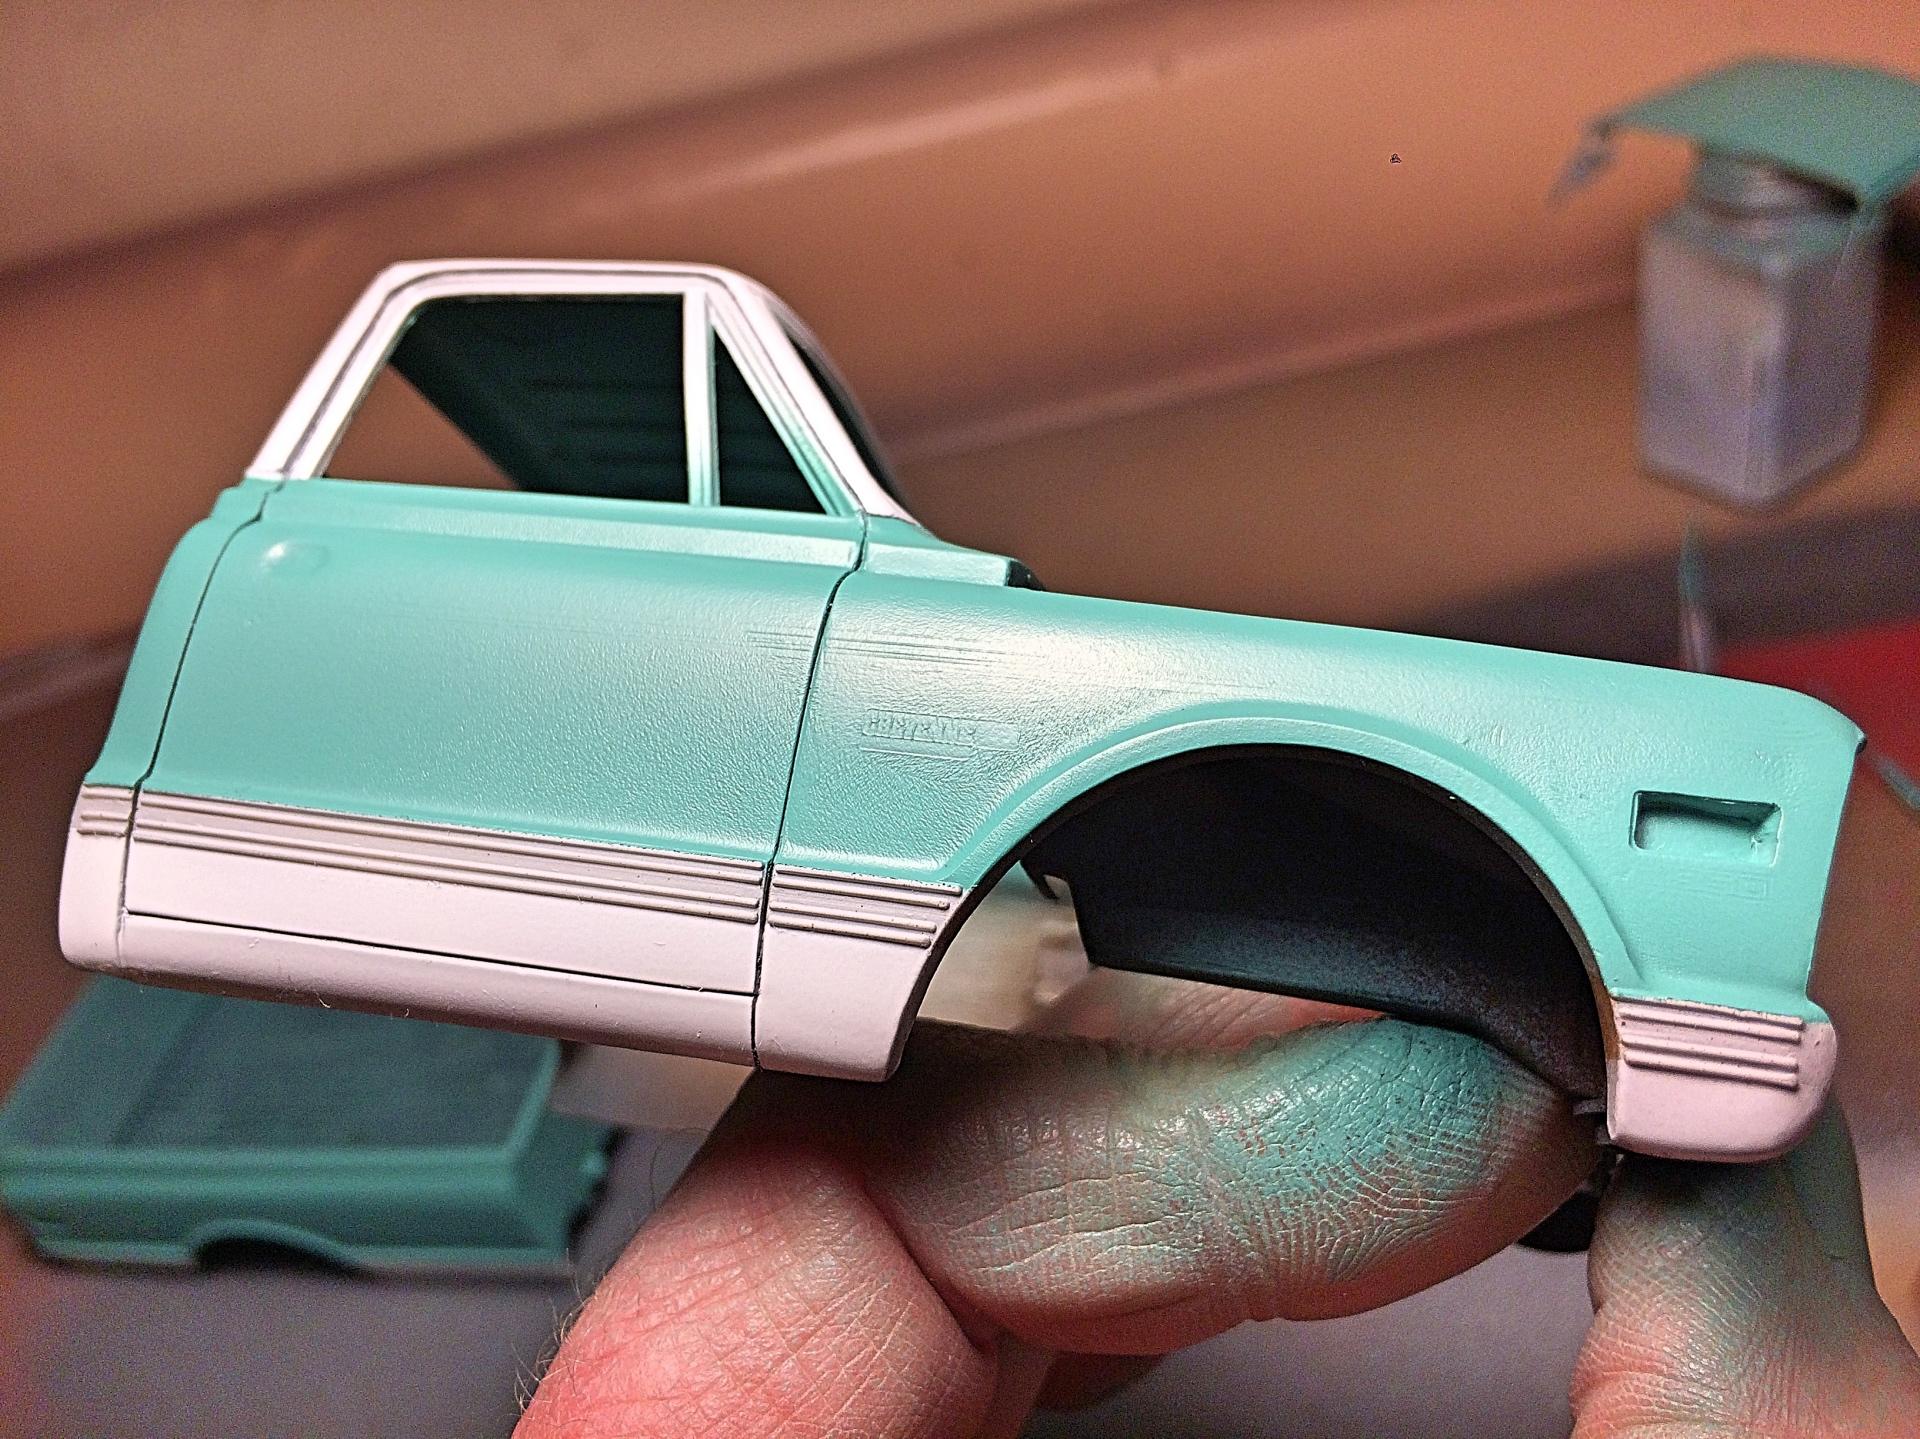
Wet-sanded the green, painted a second coat, this time really fast back & forth, around and around I went. Better luck. Still did a final wet-sand, both colors, before spraying "Dullcoat" over the whole body (the real truck was never waxed and had a dull patina). Painted the mirrors. Painted everything else a variable mixture of "Dullcoat", dust, leather, flat black. Got the driving lights that were cut out of the custom grill shaped, and painted. I had painted black in the cowl grill, but paint covered it, so used this pen to detail.
-
Italeri: Ferrari 275 N.A.R.T. - Thomas Crown Affair
89AKurt replied to 89AKurt's topic in Model Cars
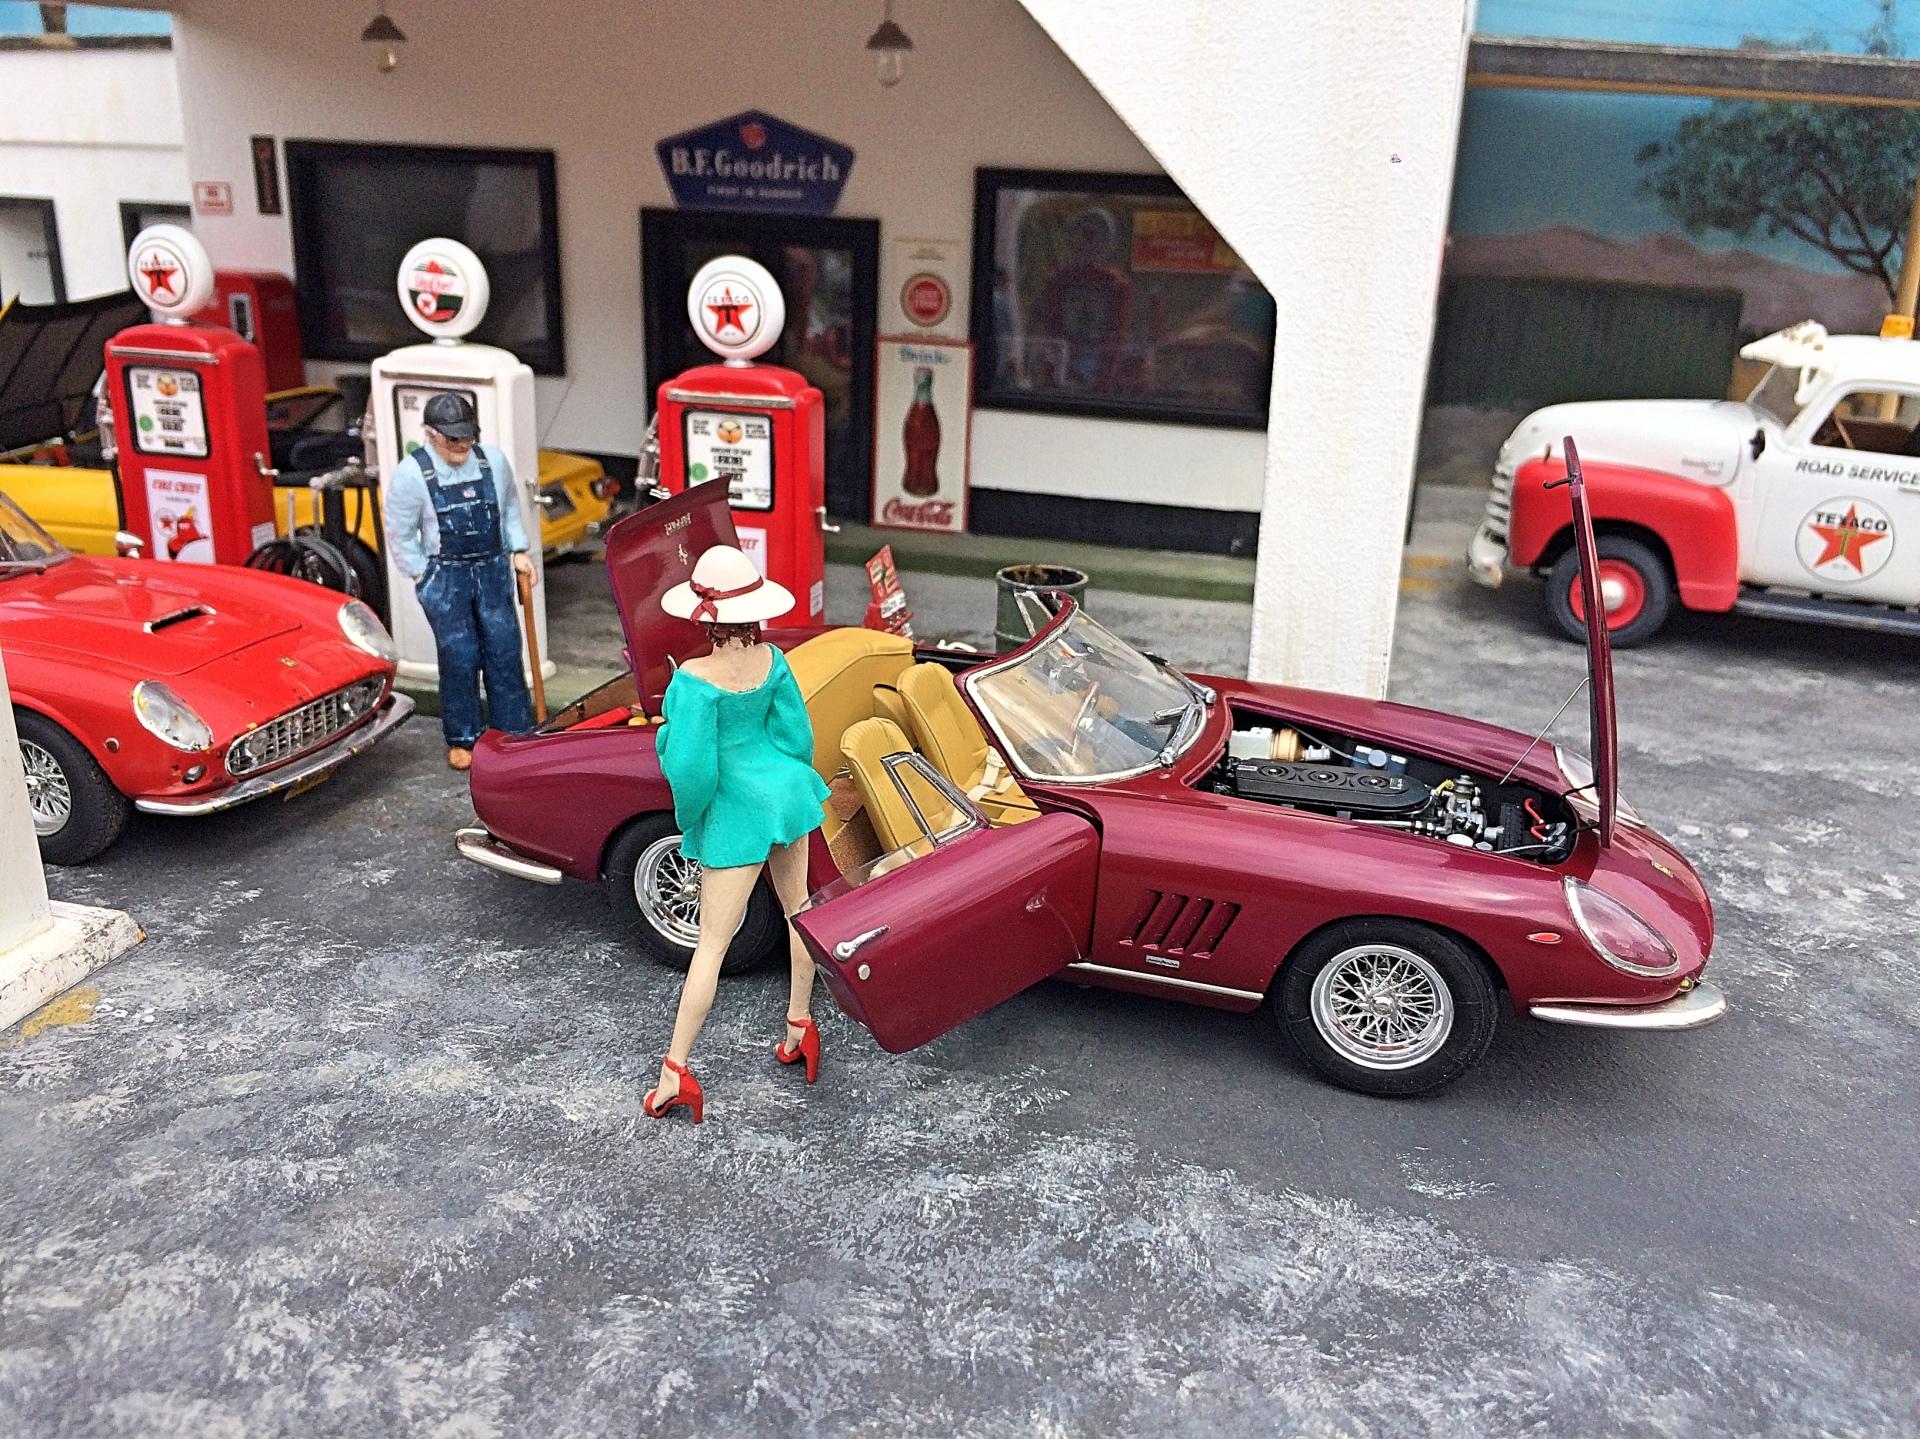
Thank you too! Just like a Cars & Coffee, never know what is going to show up. The California is the Italeri kit spoke wheels which are pretty decent (Fujimi is the best plastic), I have a Herb Deeks photo-etch set but used only the tires (I don't like the white metal rims). -
Cool idea, the Spanish version of a Shooting Brake. I owned a '91 Jetta GLi, which would be an El Camino conversion candidate. Thanks for sharing.
-
if they care
-
Italeri: Ferrari 275 N.A.R.T. - Thomas Crown Affair
89AKurt replied to 89AKurt's topic in Model Cars
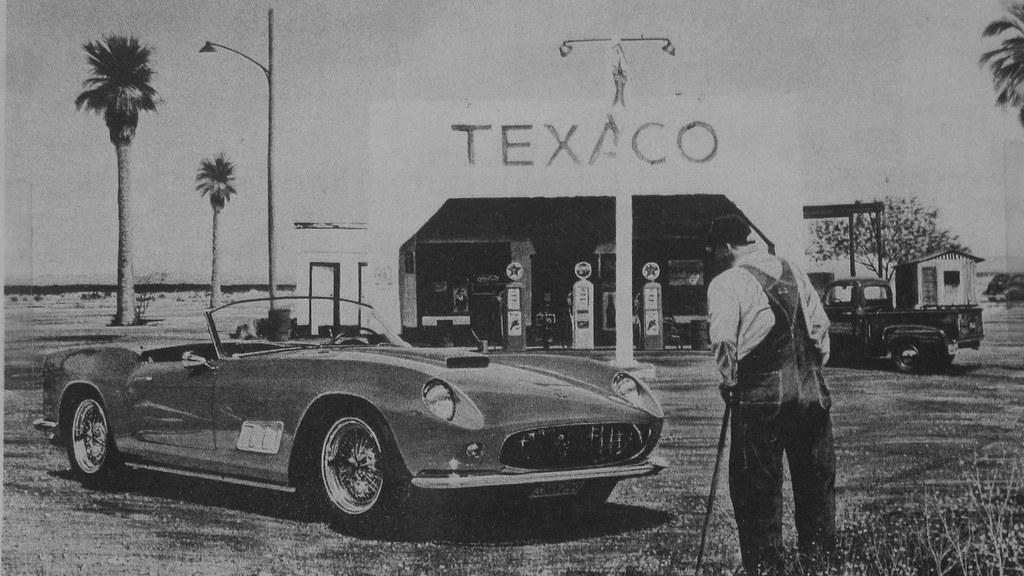
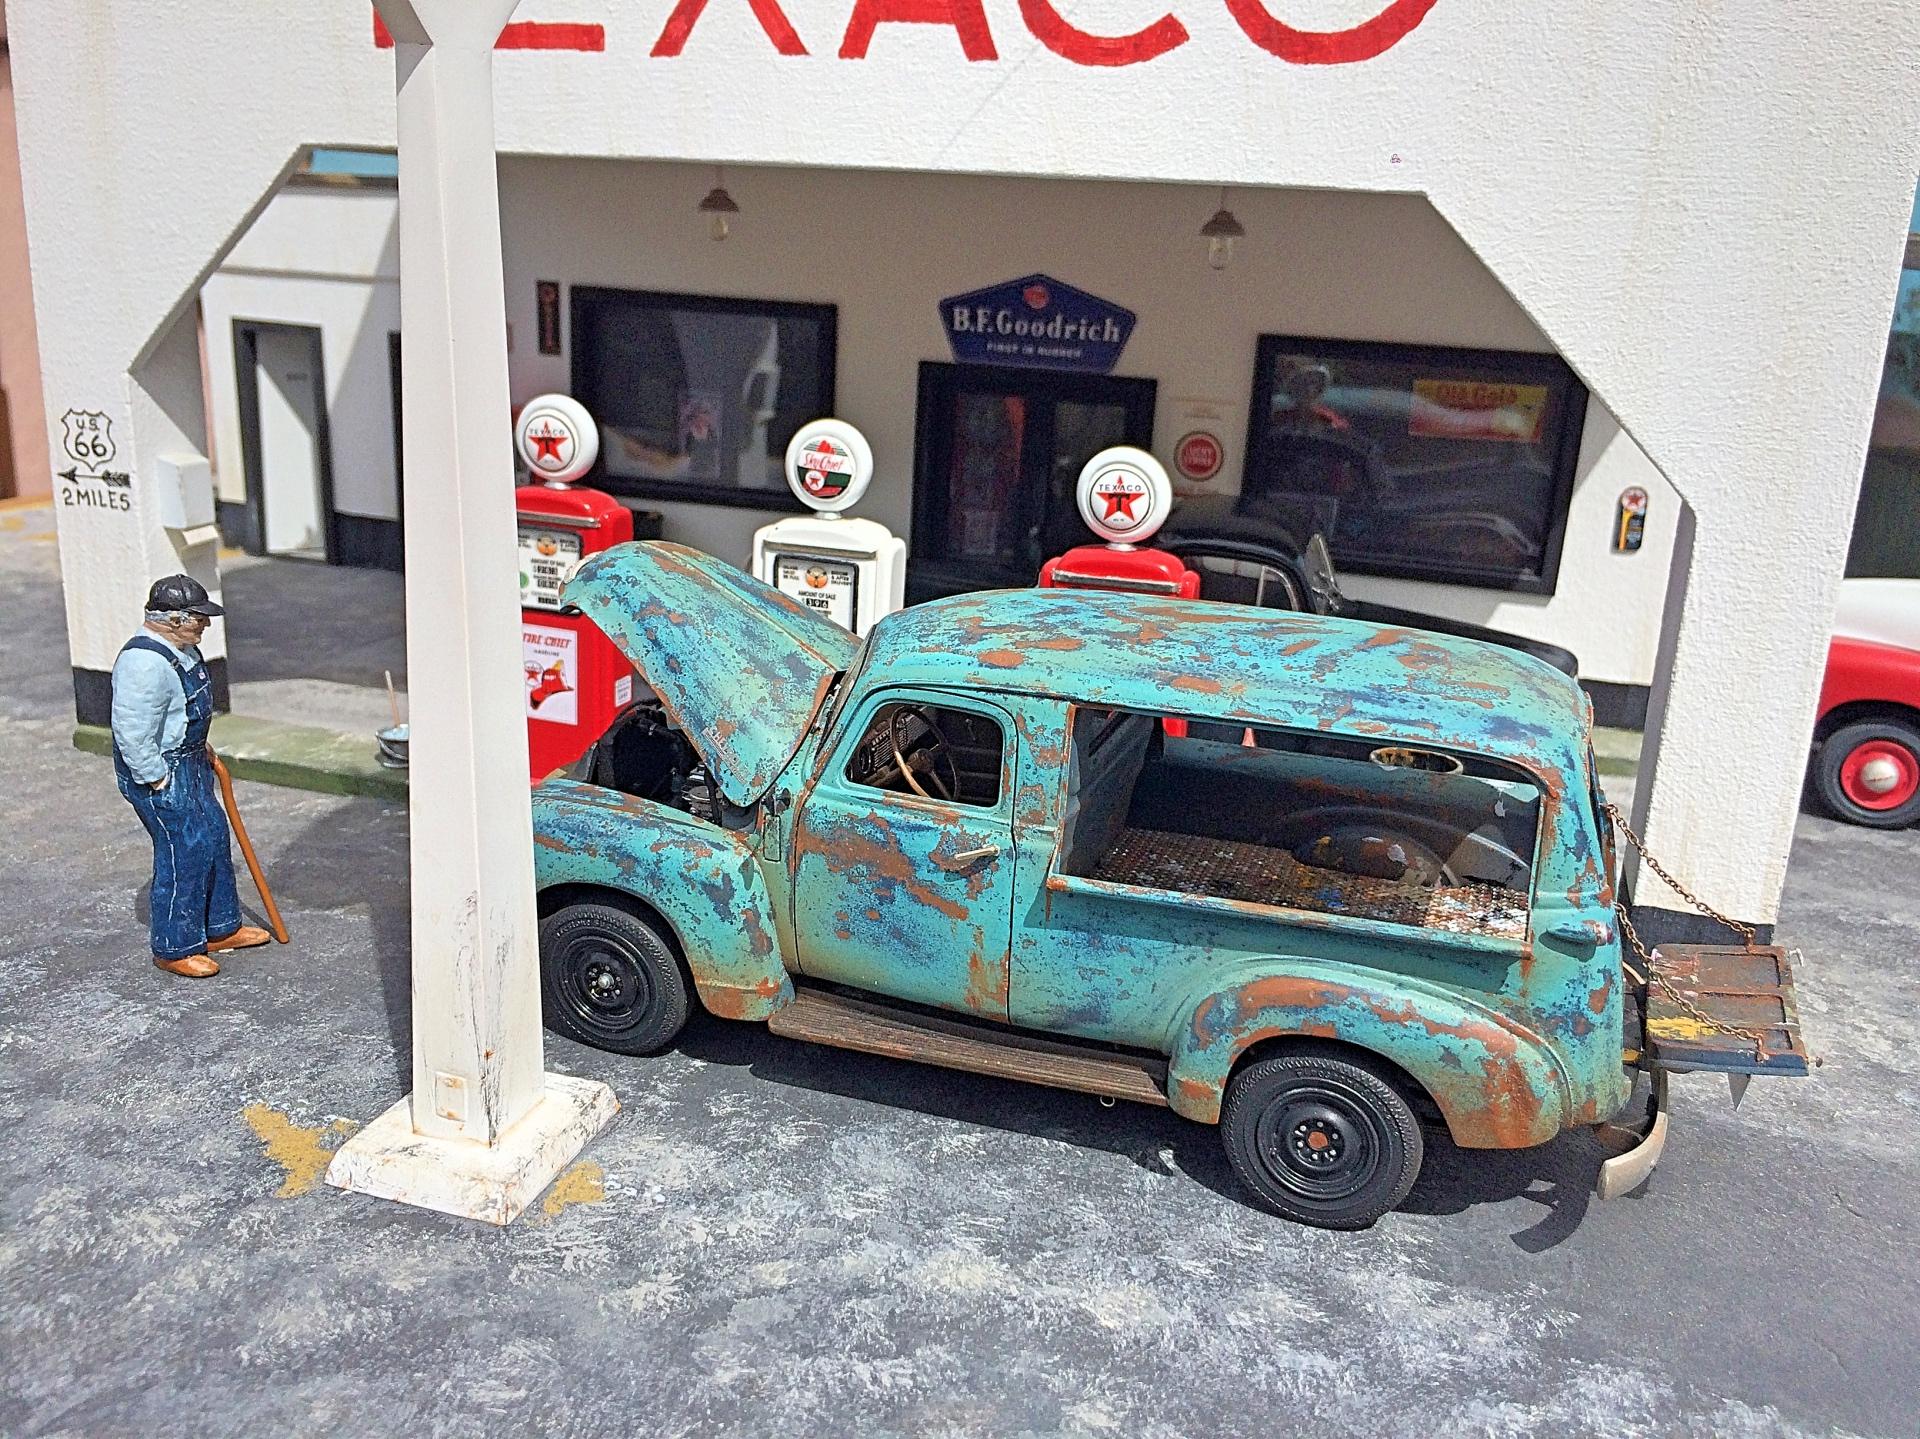
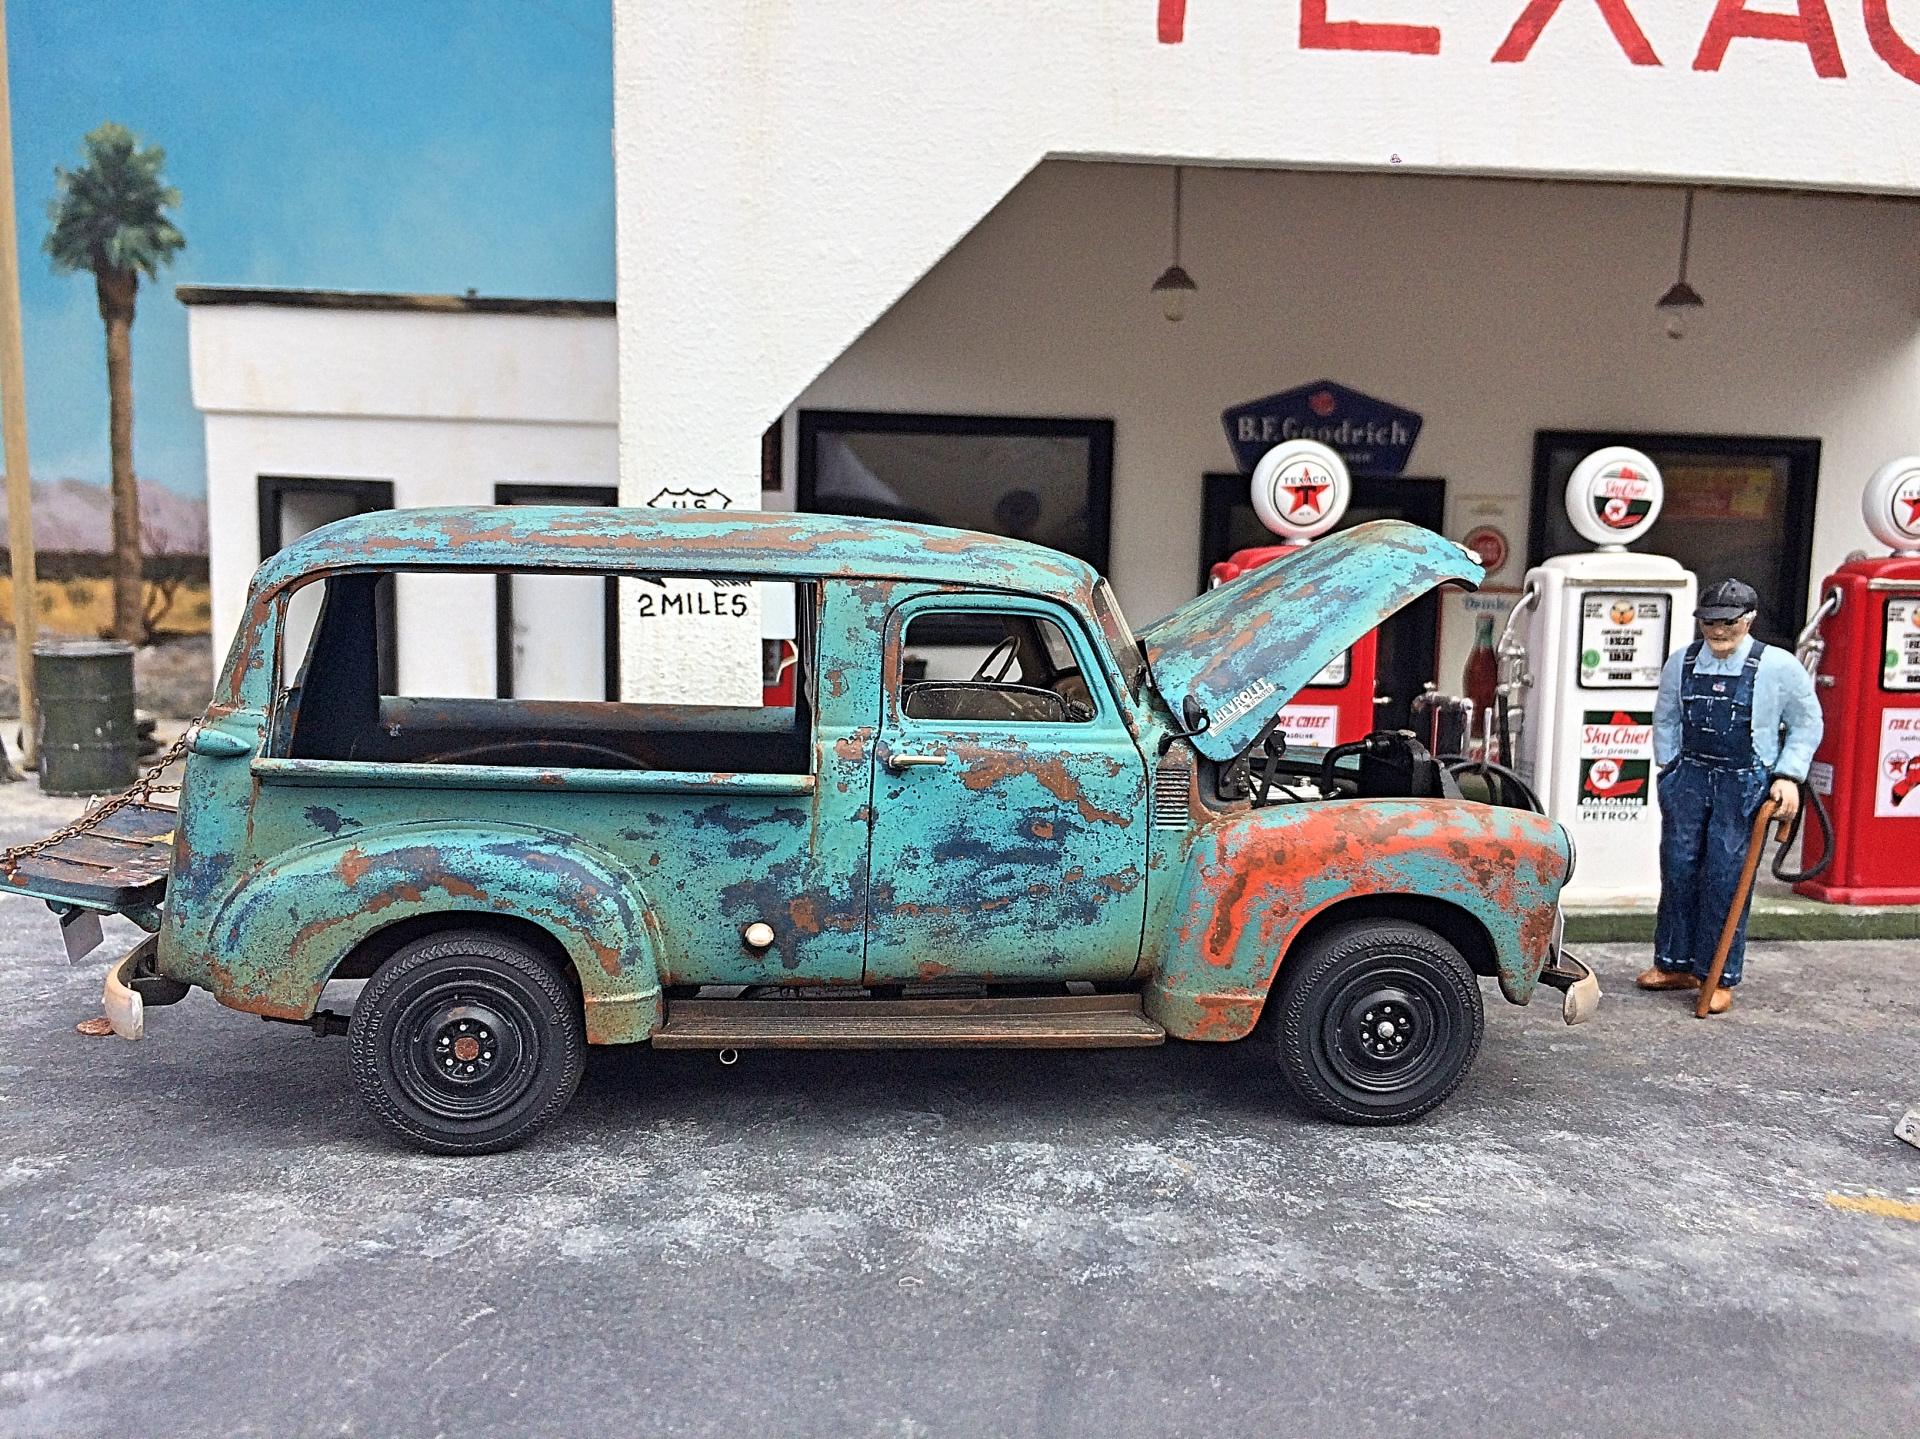
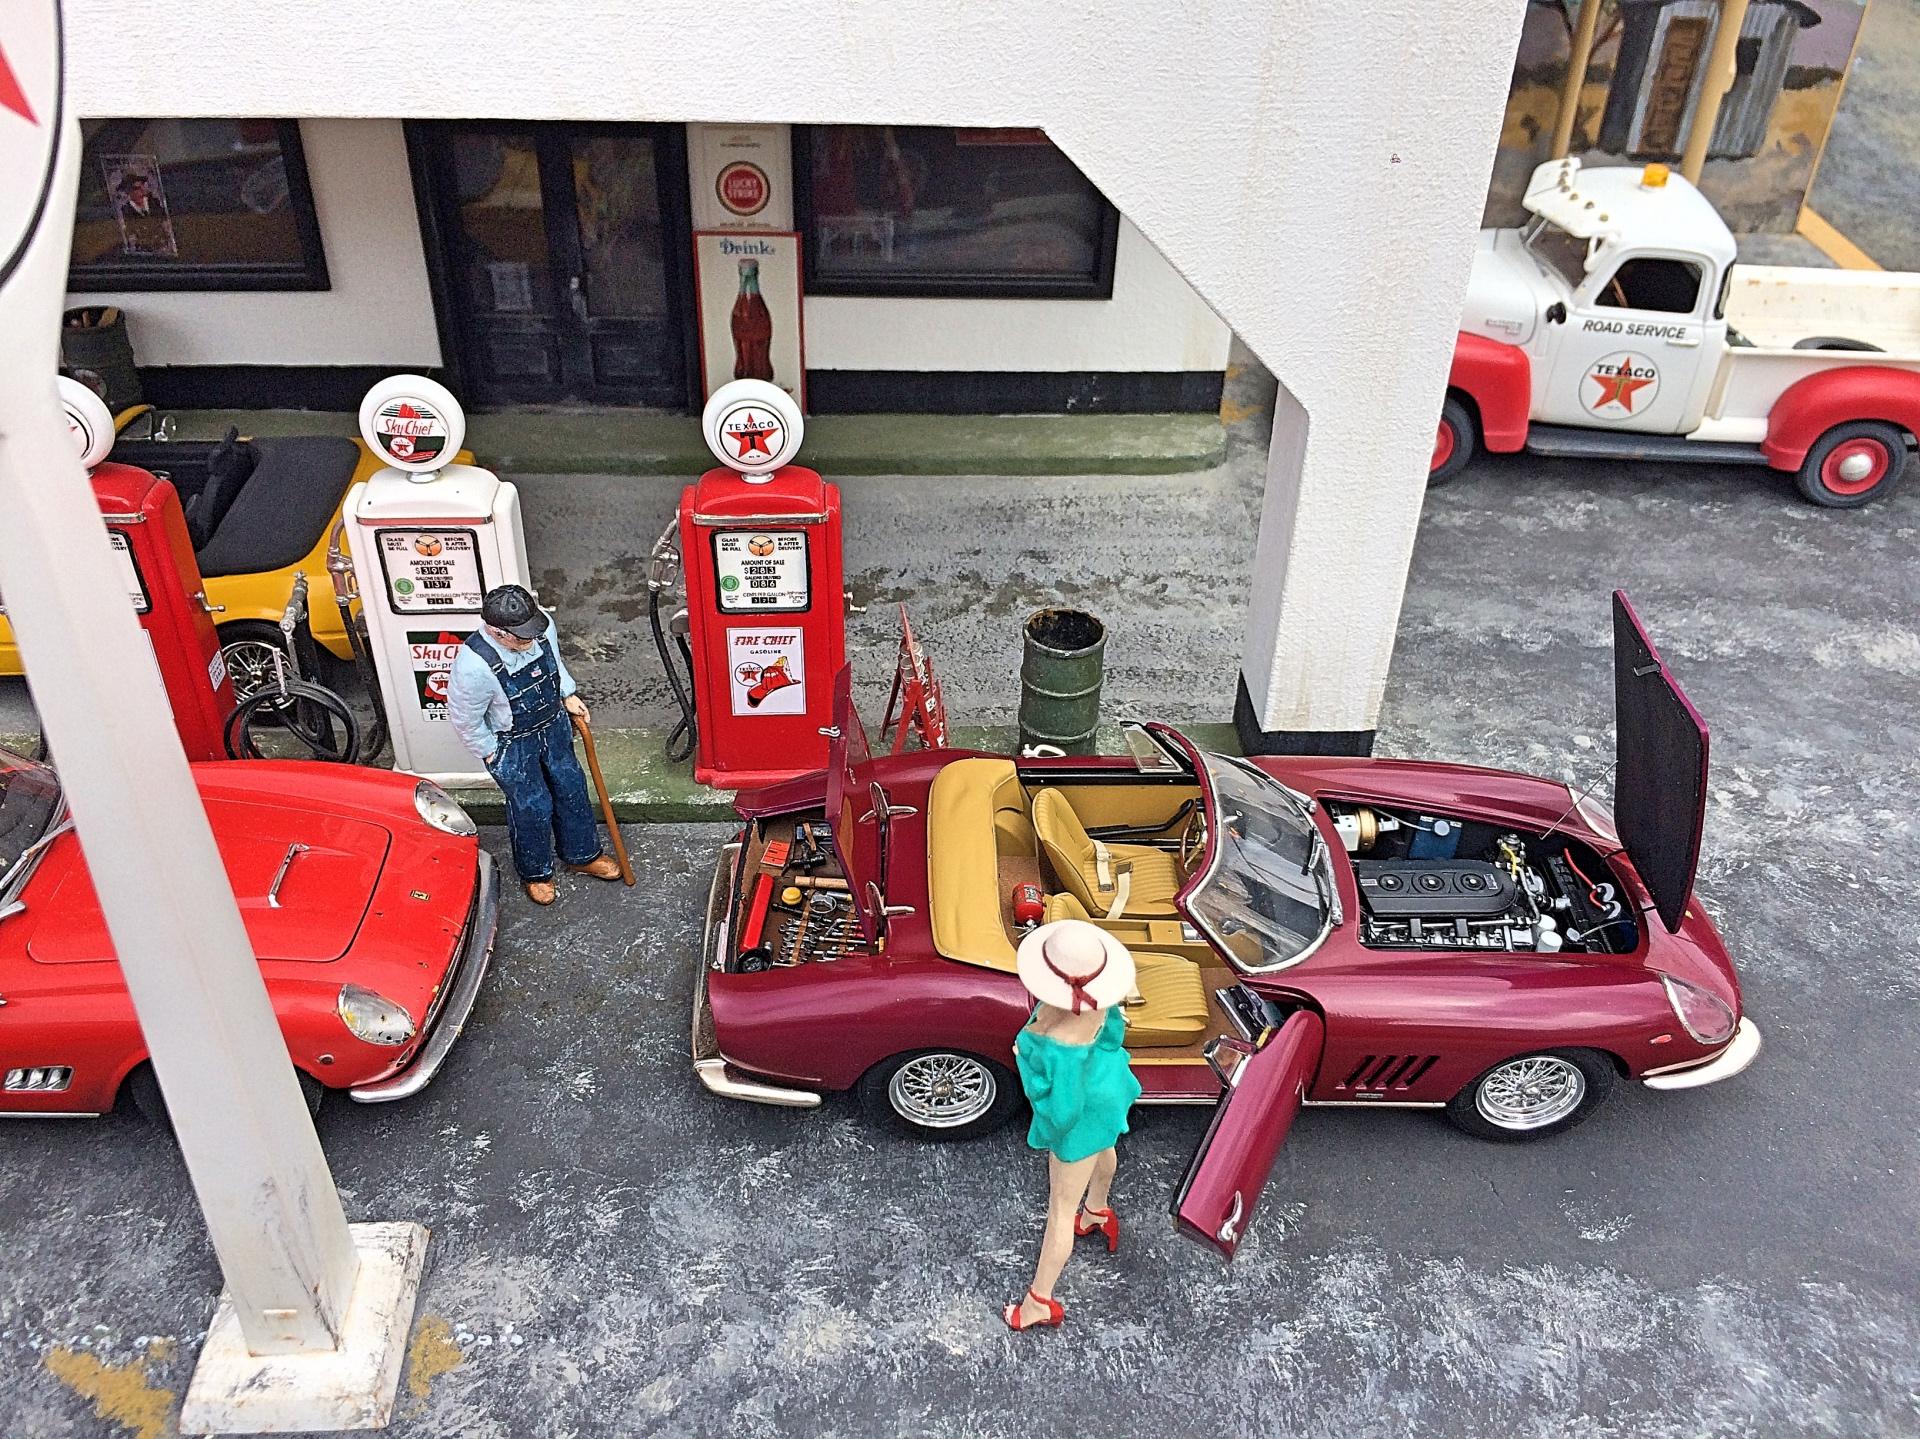
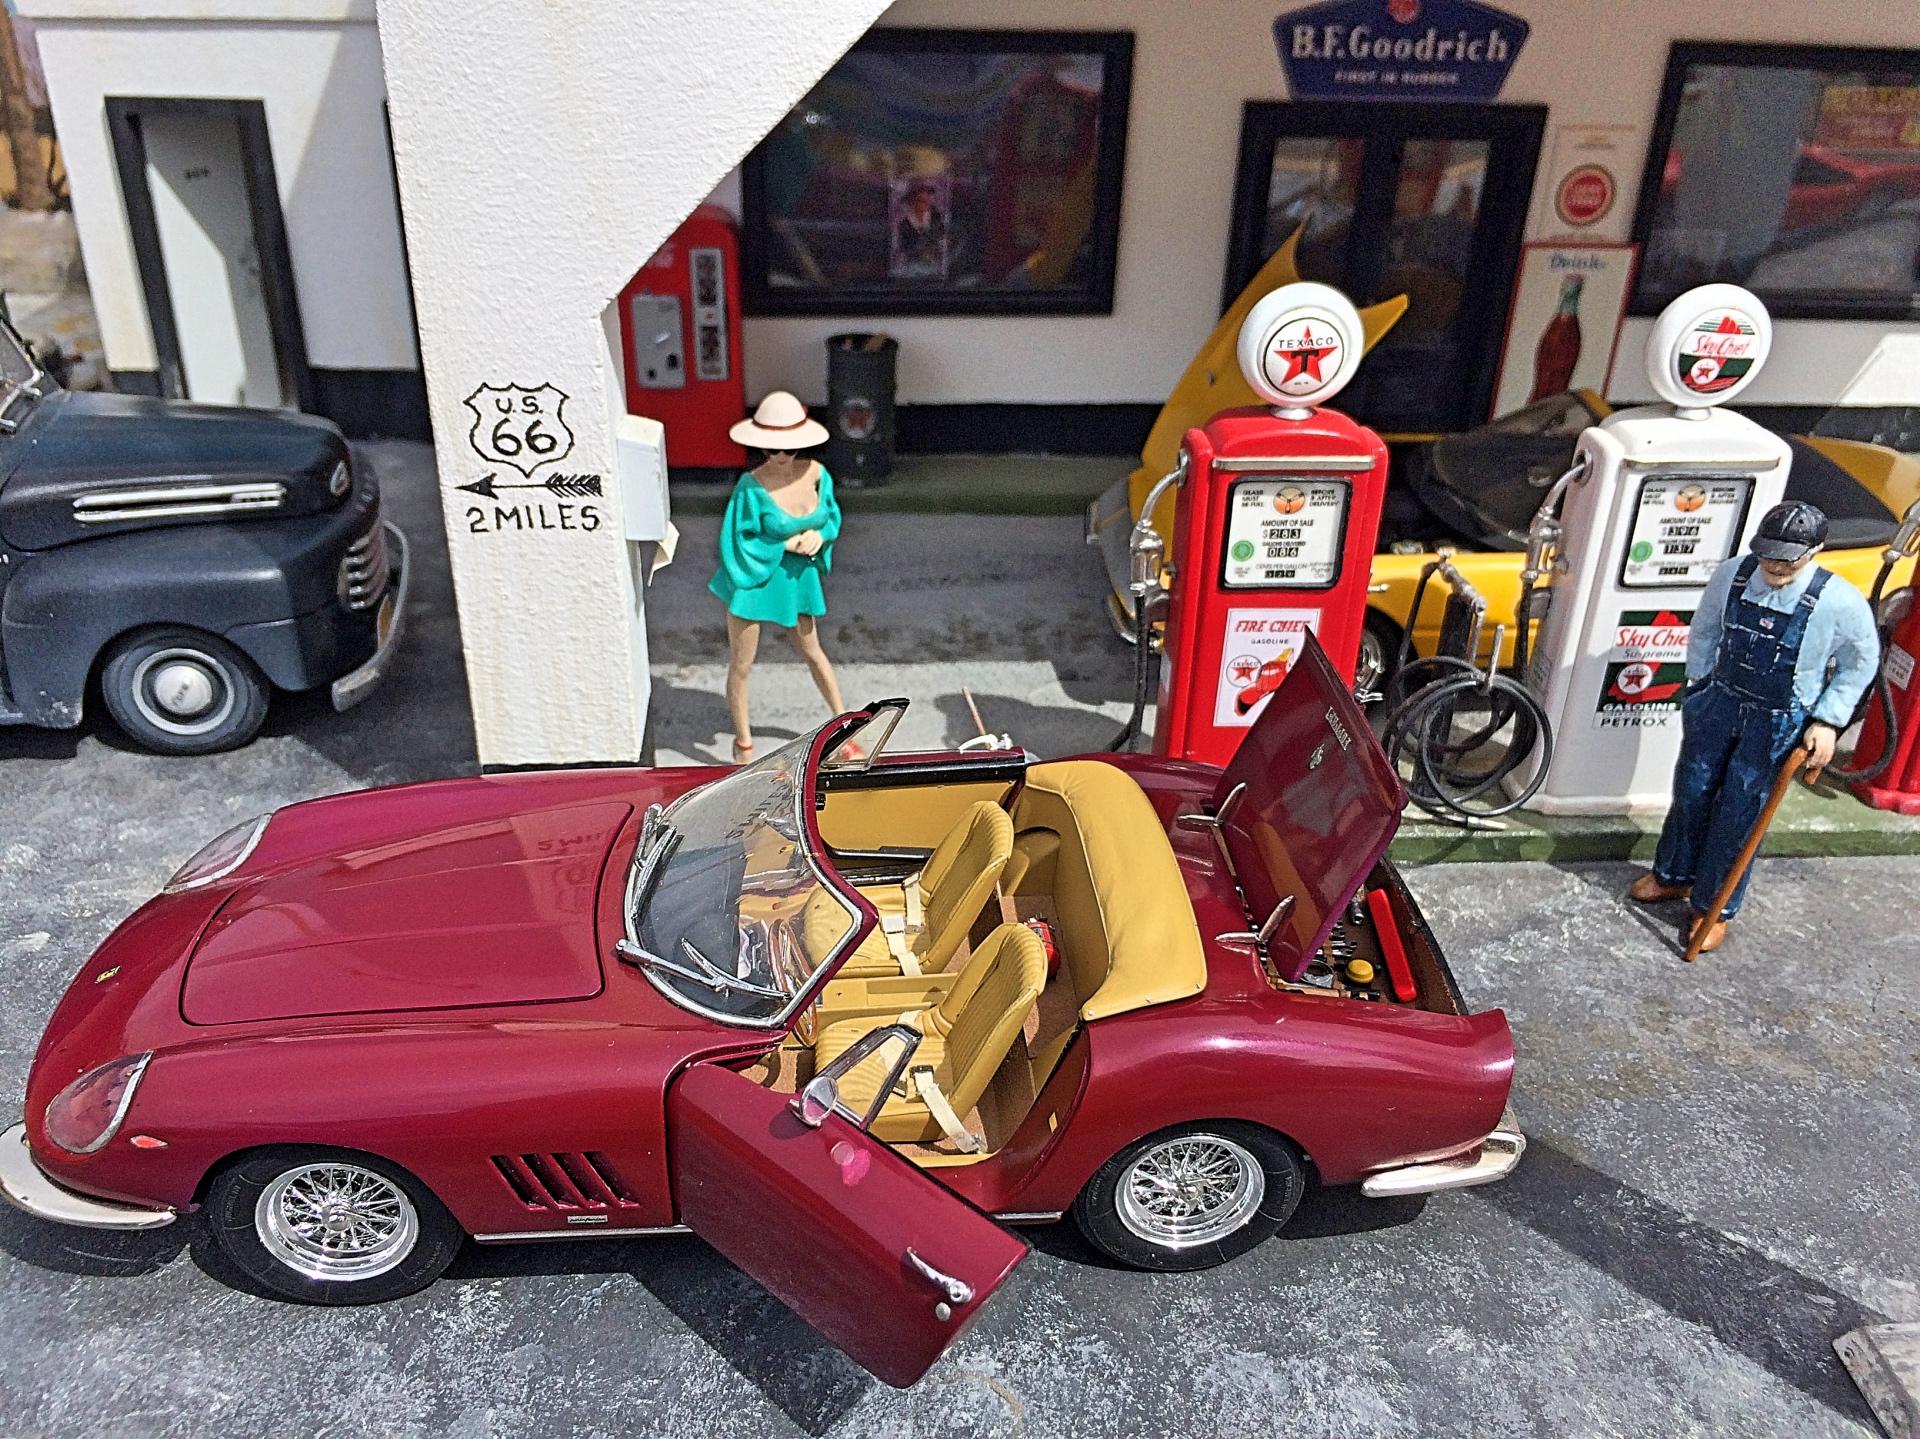
Thank you. I'm glad that I built the diorama. Was inspired by an ad in a collector car publication, eventually got the Texaco parts luckily before the economy tanked 2008, then got a color print via Ken Ebberts the artist . THANK YOU! Much appreciated. Thank you, it is a beauty. ? Thanks! Wow, appreciate your comment too! ? Thank you. He loves the tools. ?
-
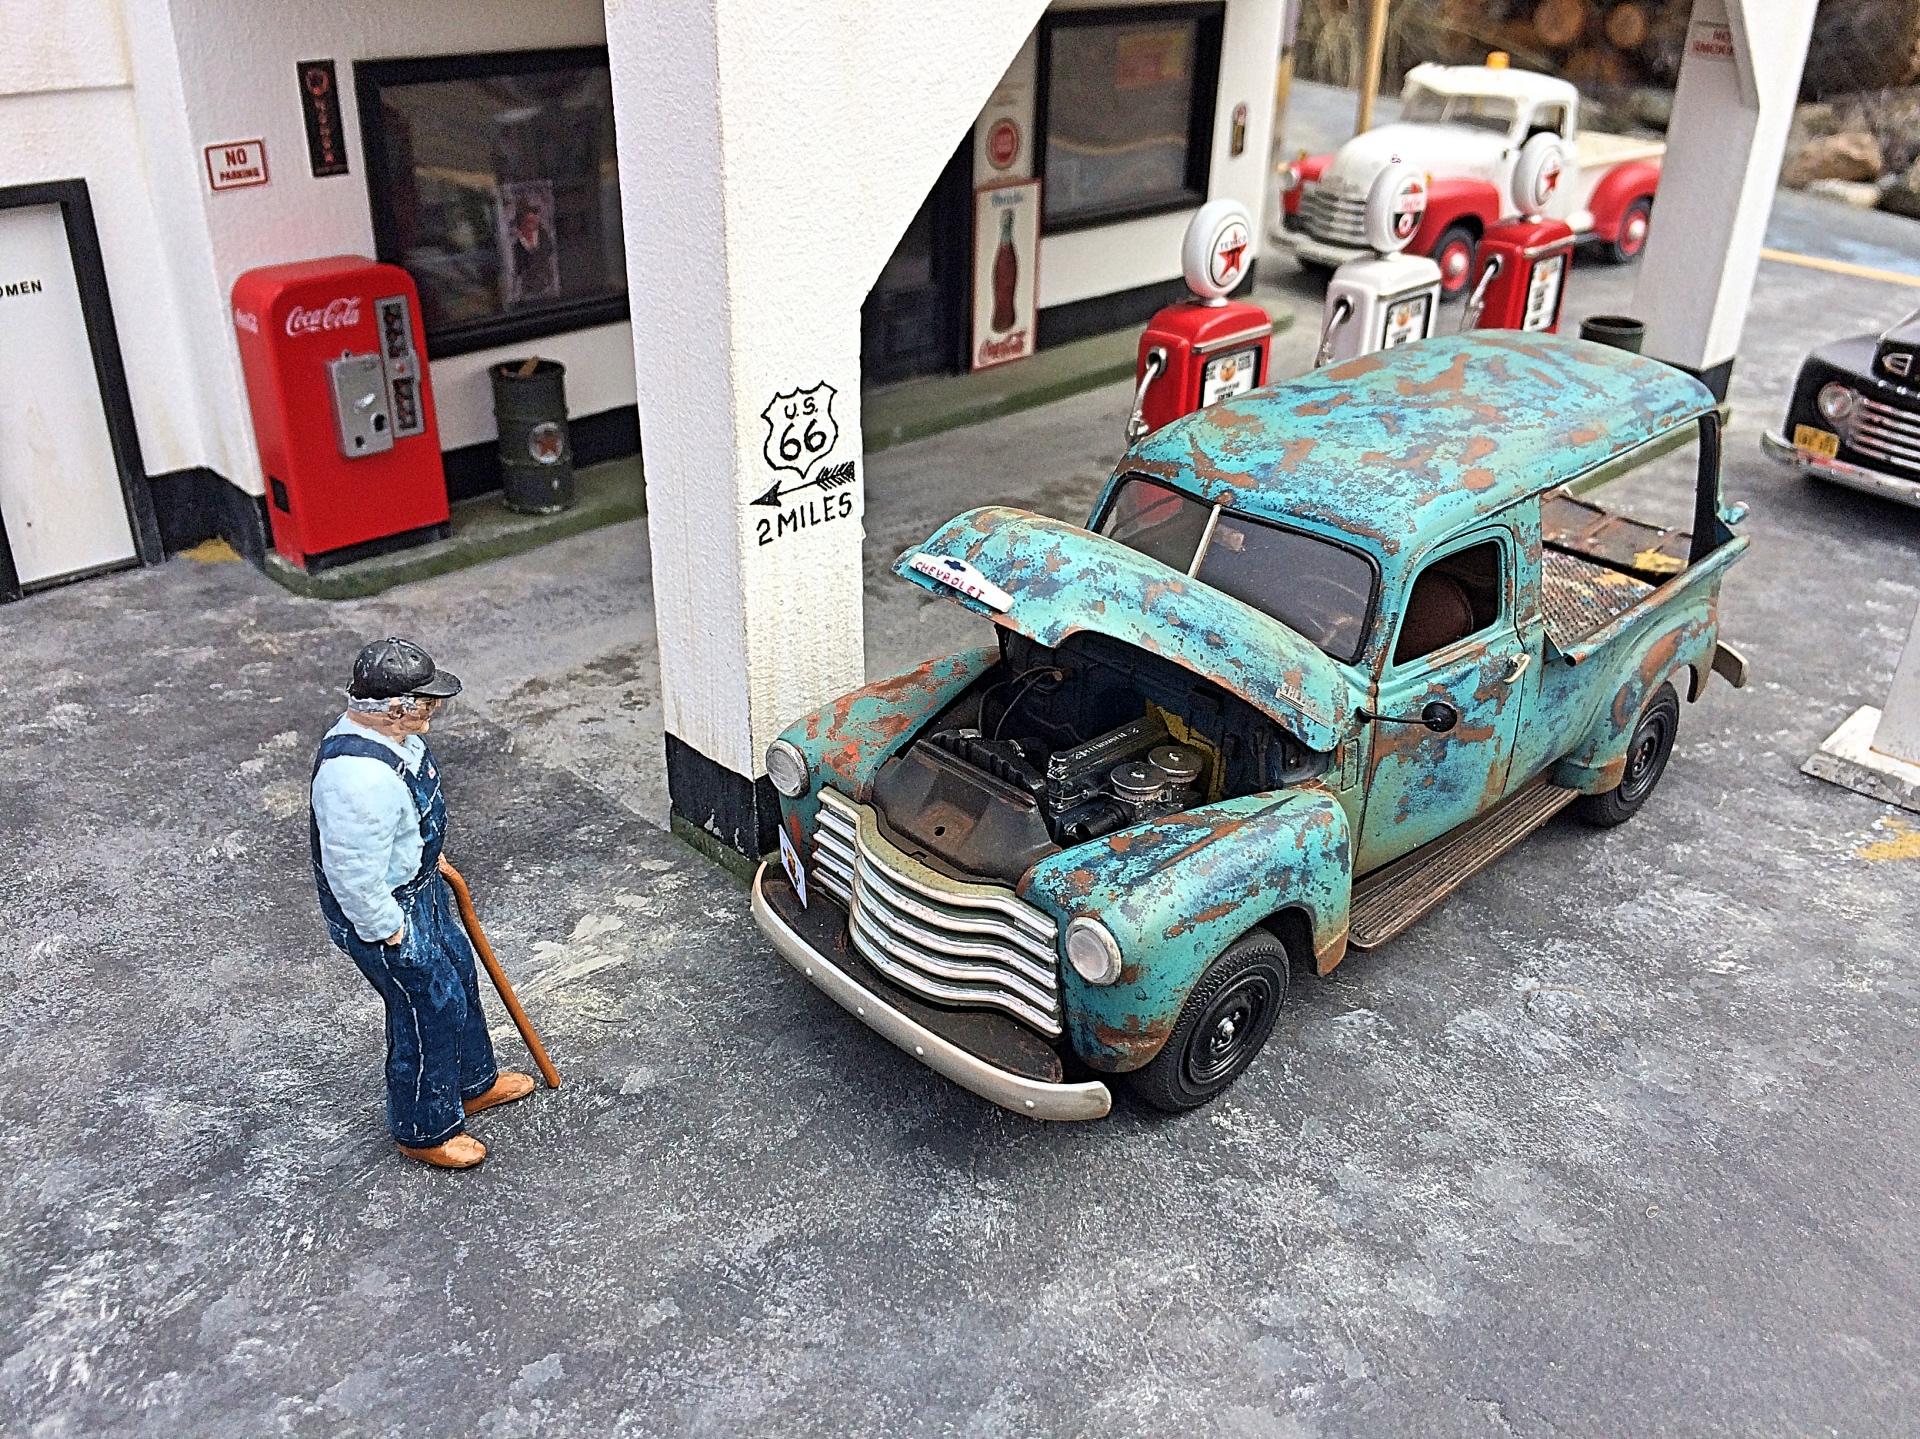
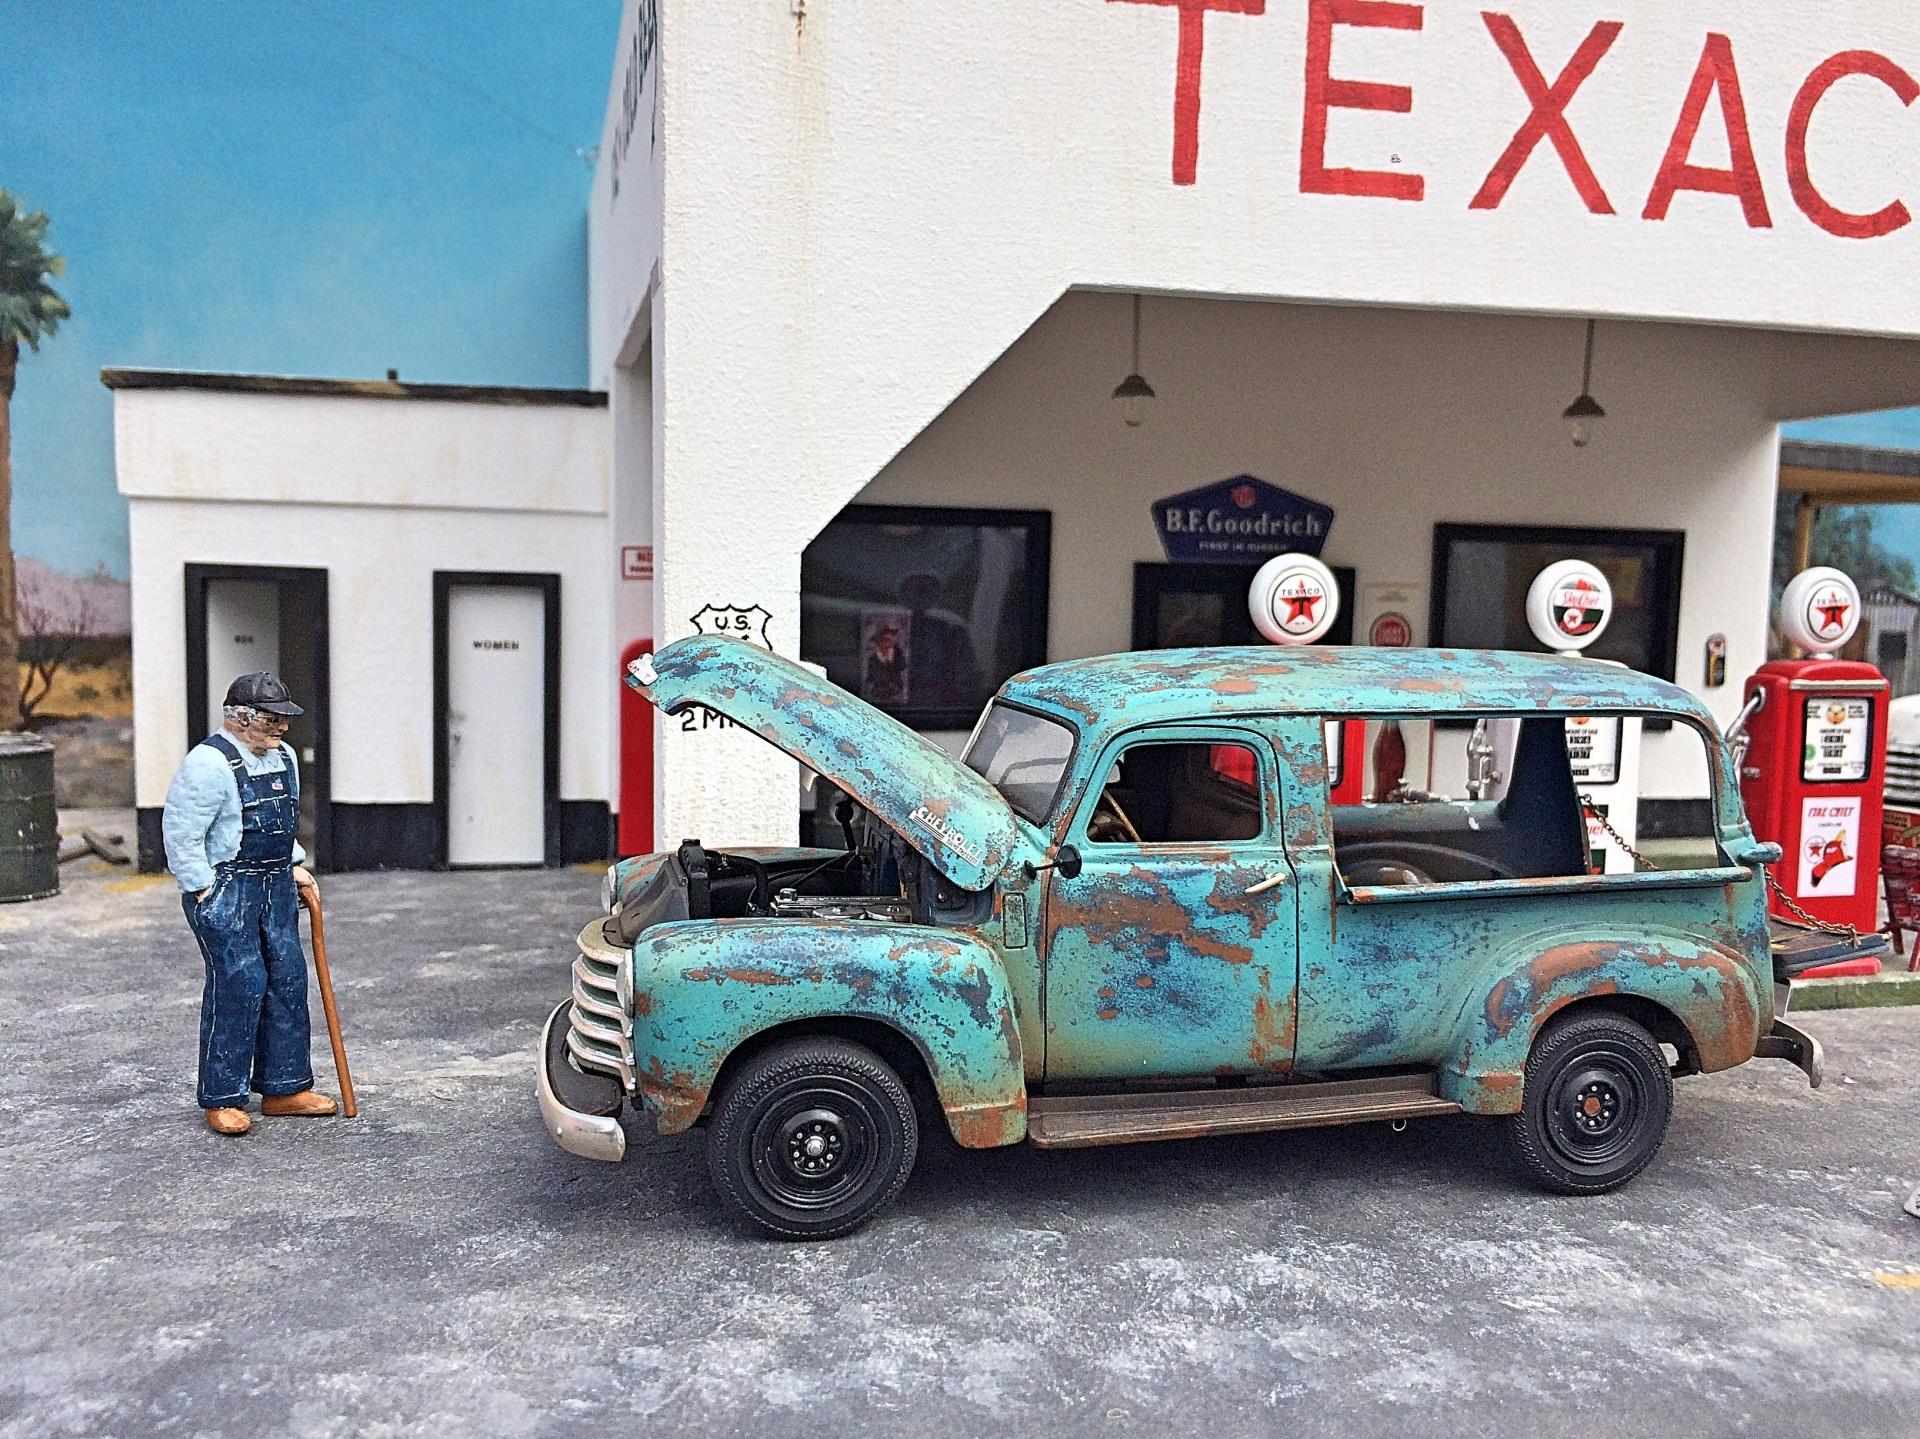
1948 Chevrolet Canopy Express
89AKurt replied to 89AKurt's topic in Model Trucks: Pickups, Vans, SUVs, Light Commercial
Took final (I promise) official photos, there was overcast, and no breeze to knock the old man over. ?
-
Wow, I was there when this was auctioned off, you got a good deal on this rare kit. I have this too, a different box, but have always been intimidated to build it. As expected, you did a great job on it. You didn't bother doing a WIP, did you?
-
Italeri: Ferrari 275 N.A.R.T. - Thomas Crown Affair
89AKurt replied to 89AKurt's topic in Model Cars
Thank you. Thank you very much! -
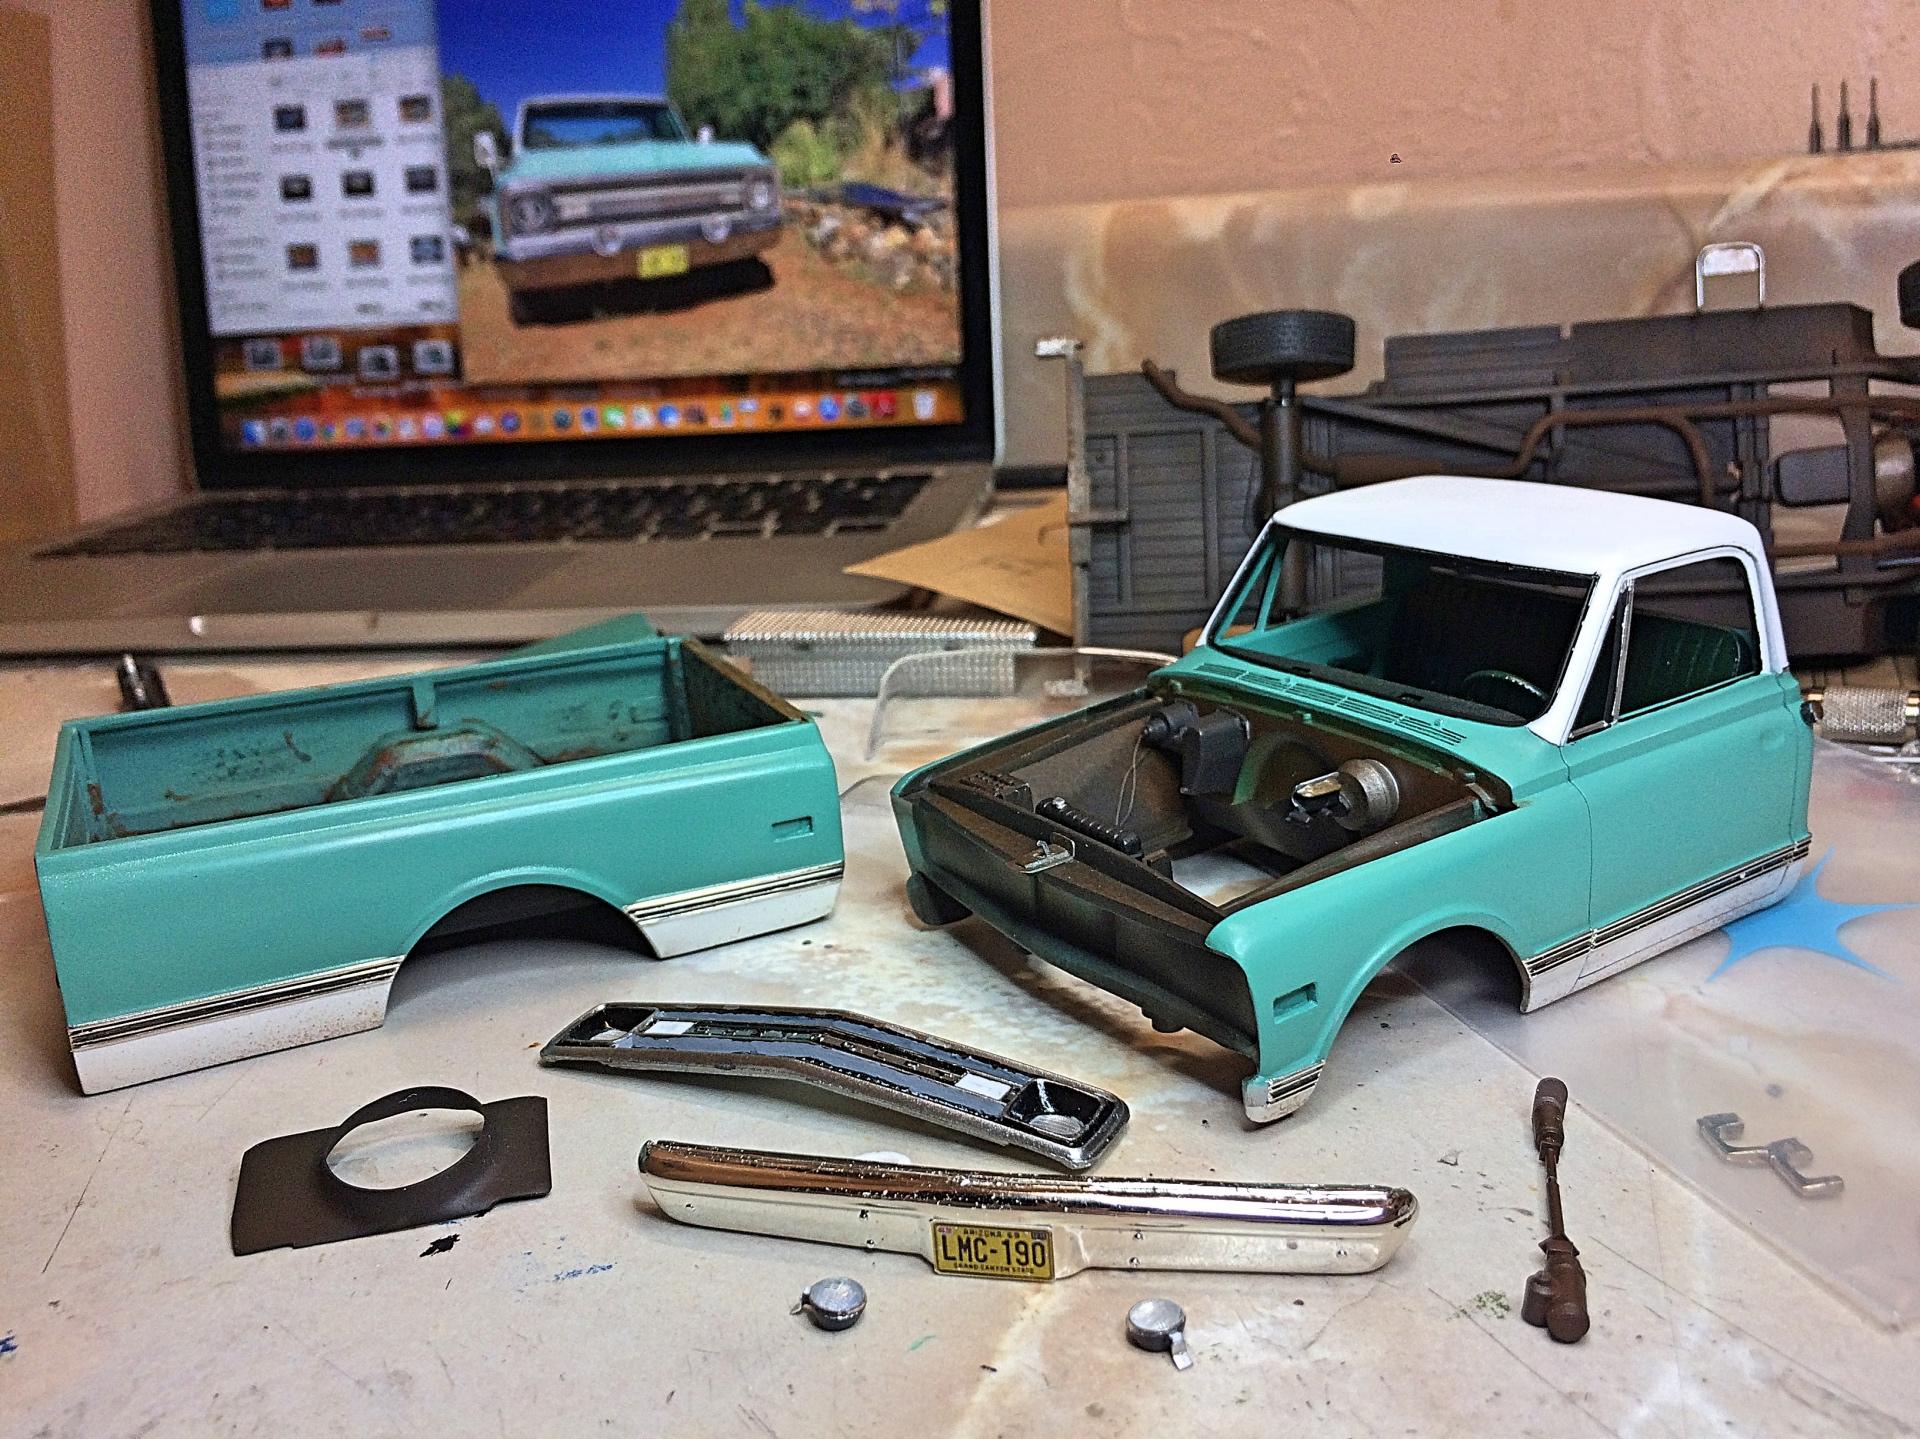
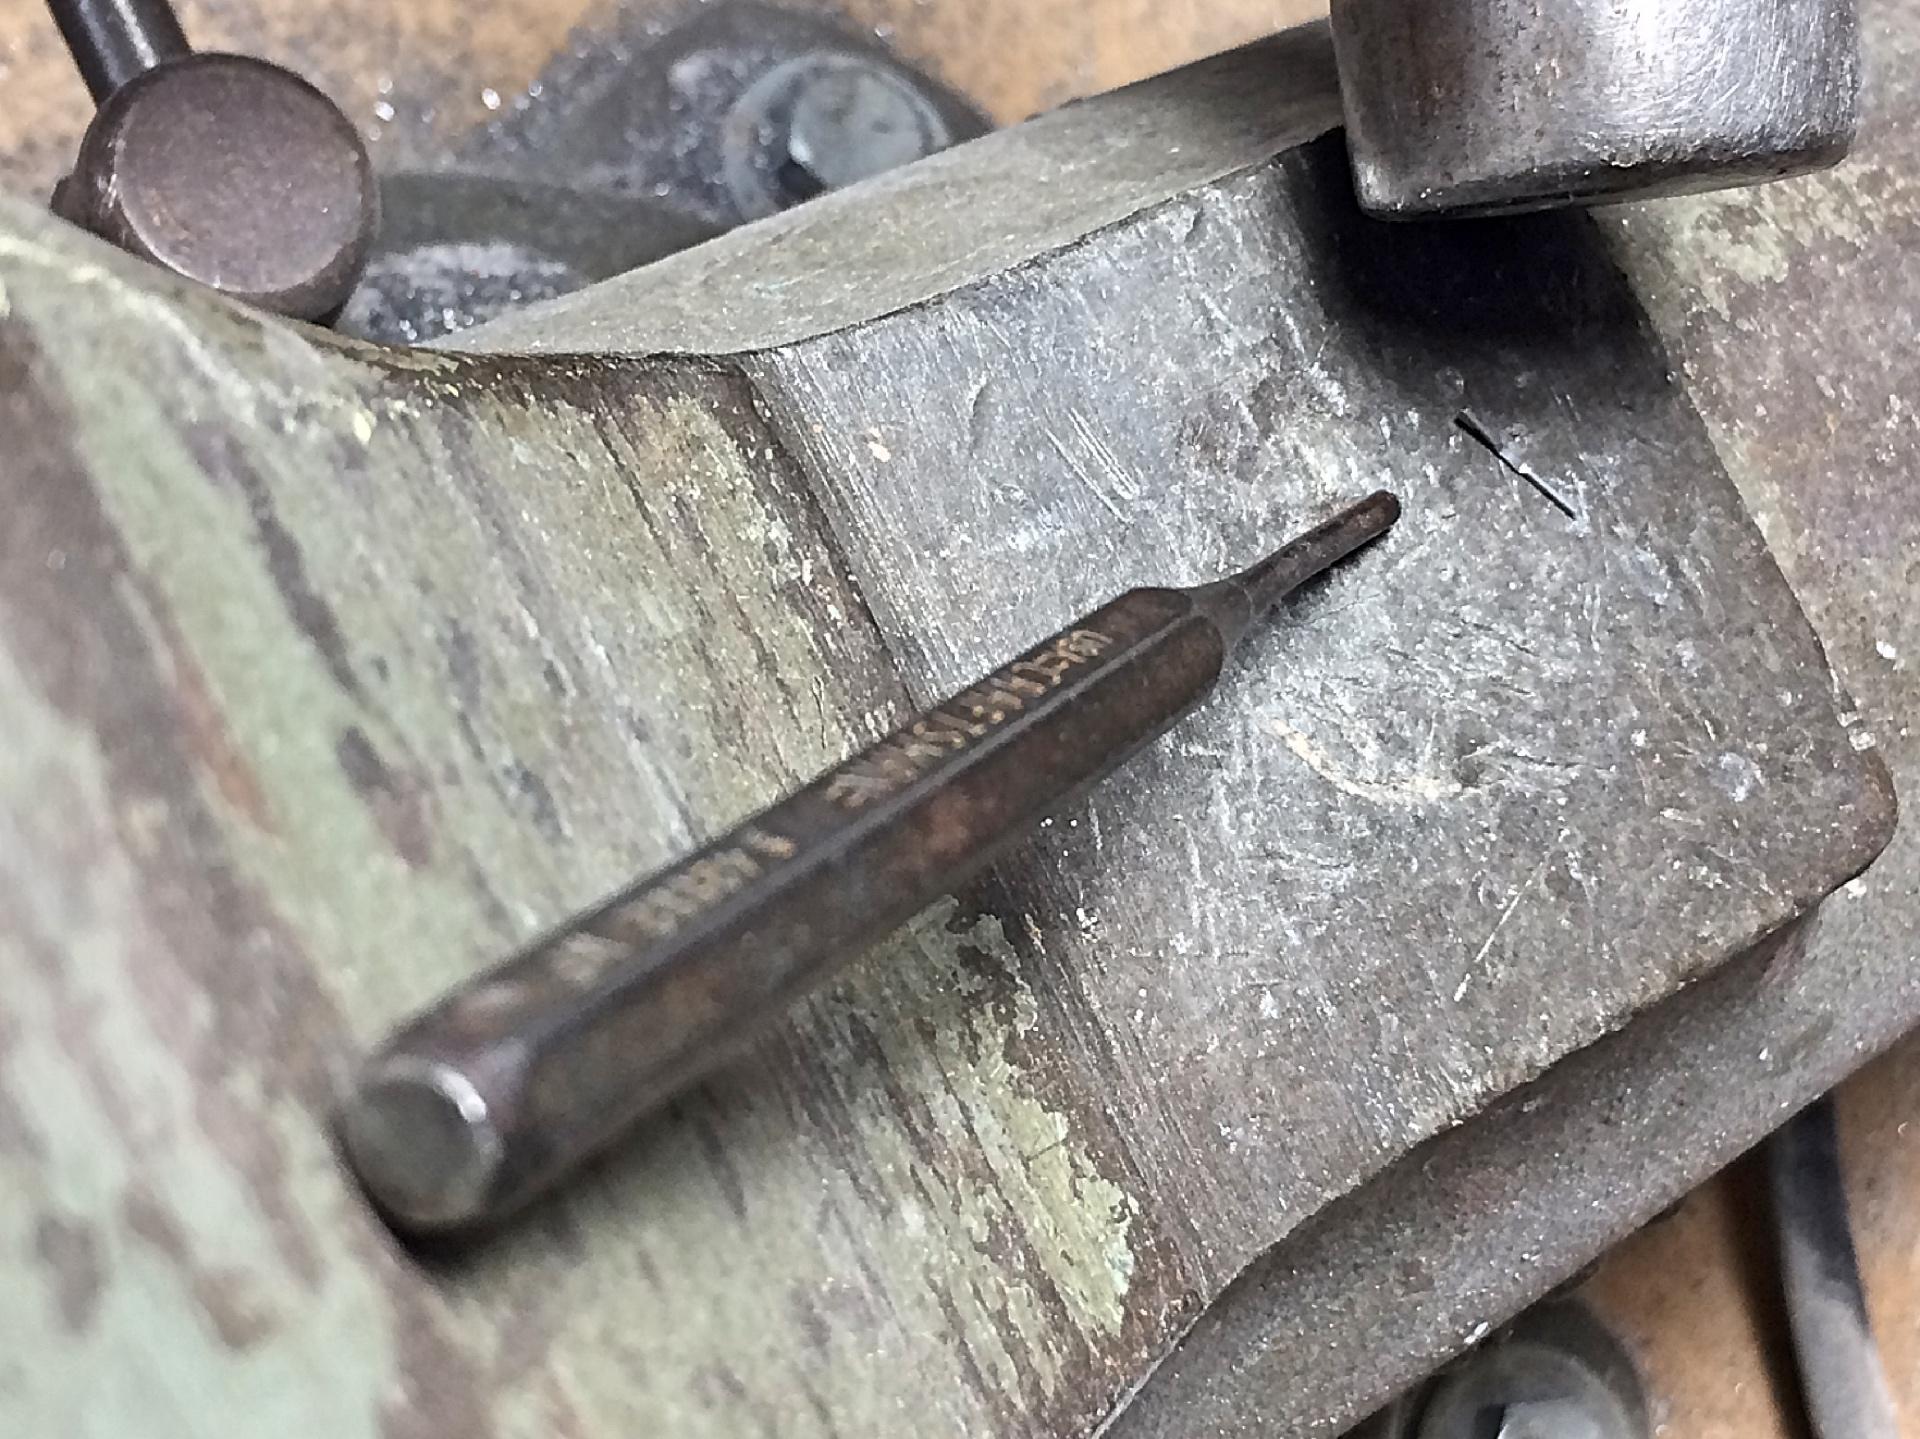
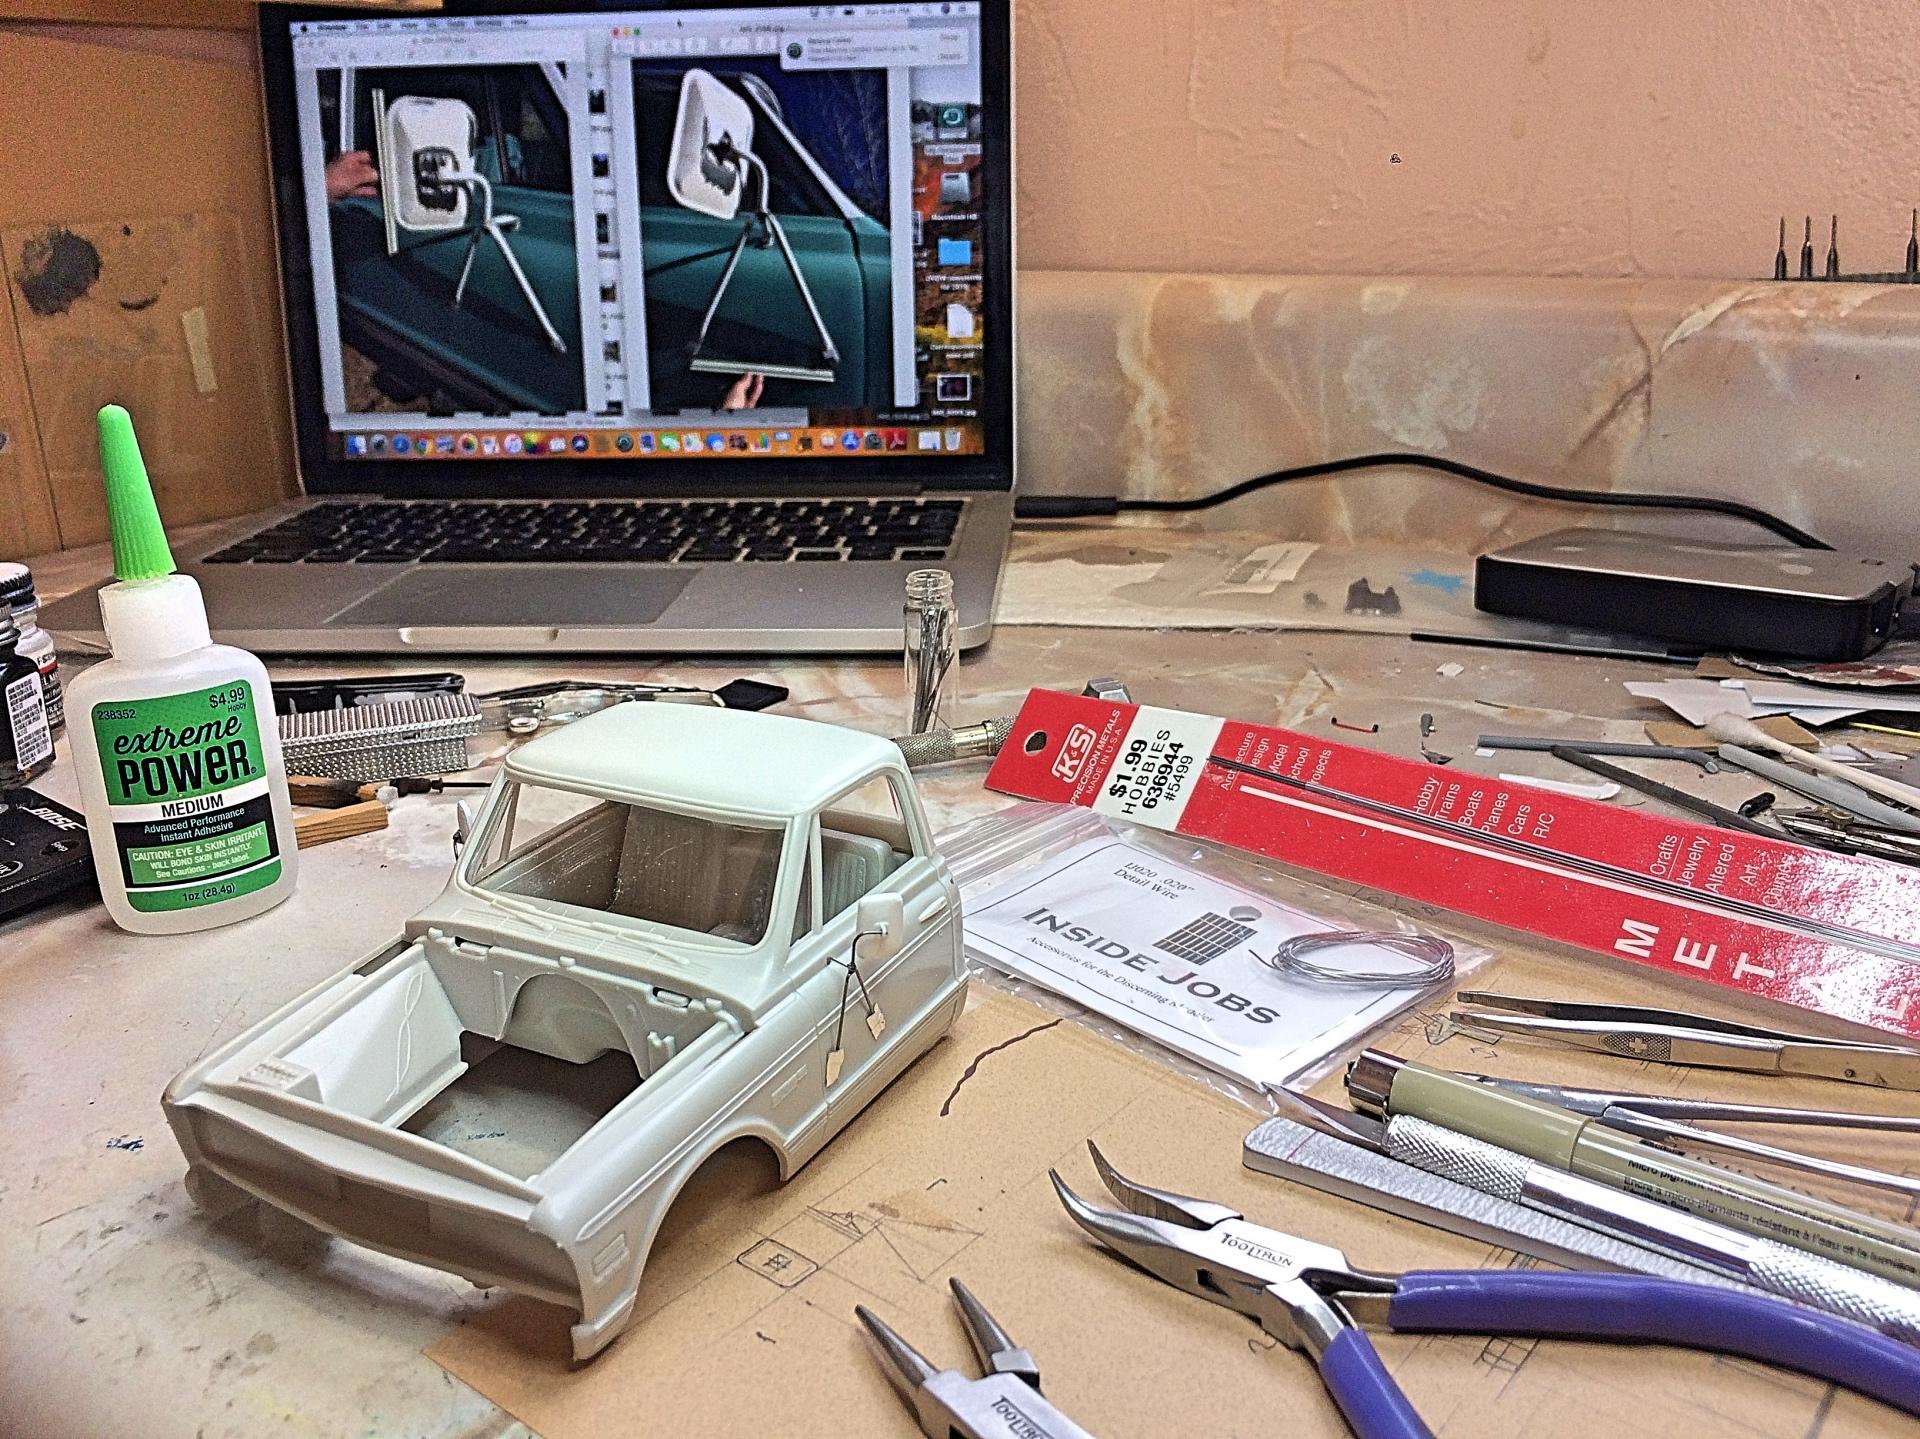
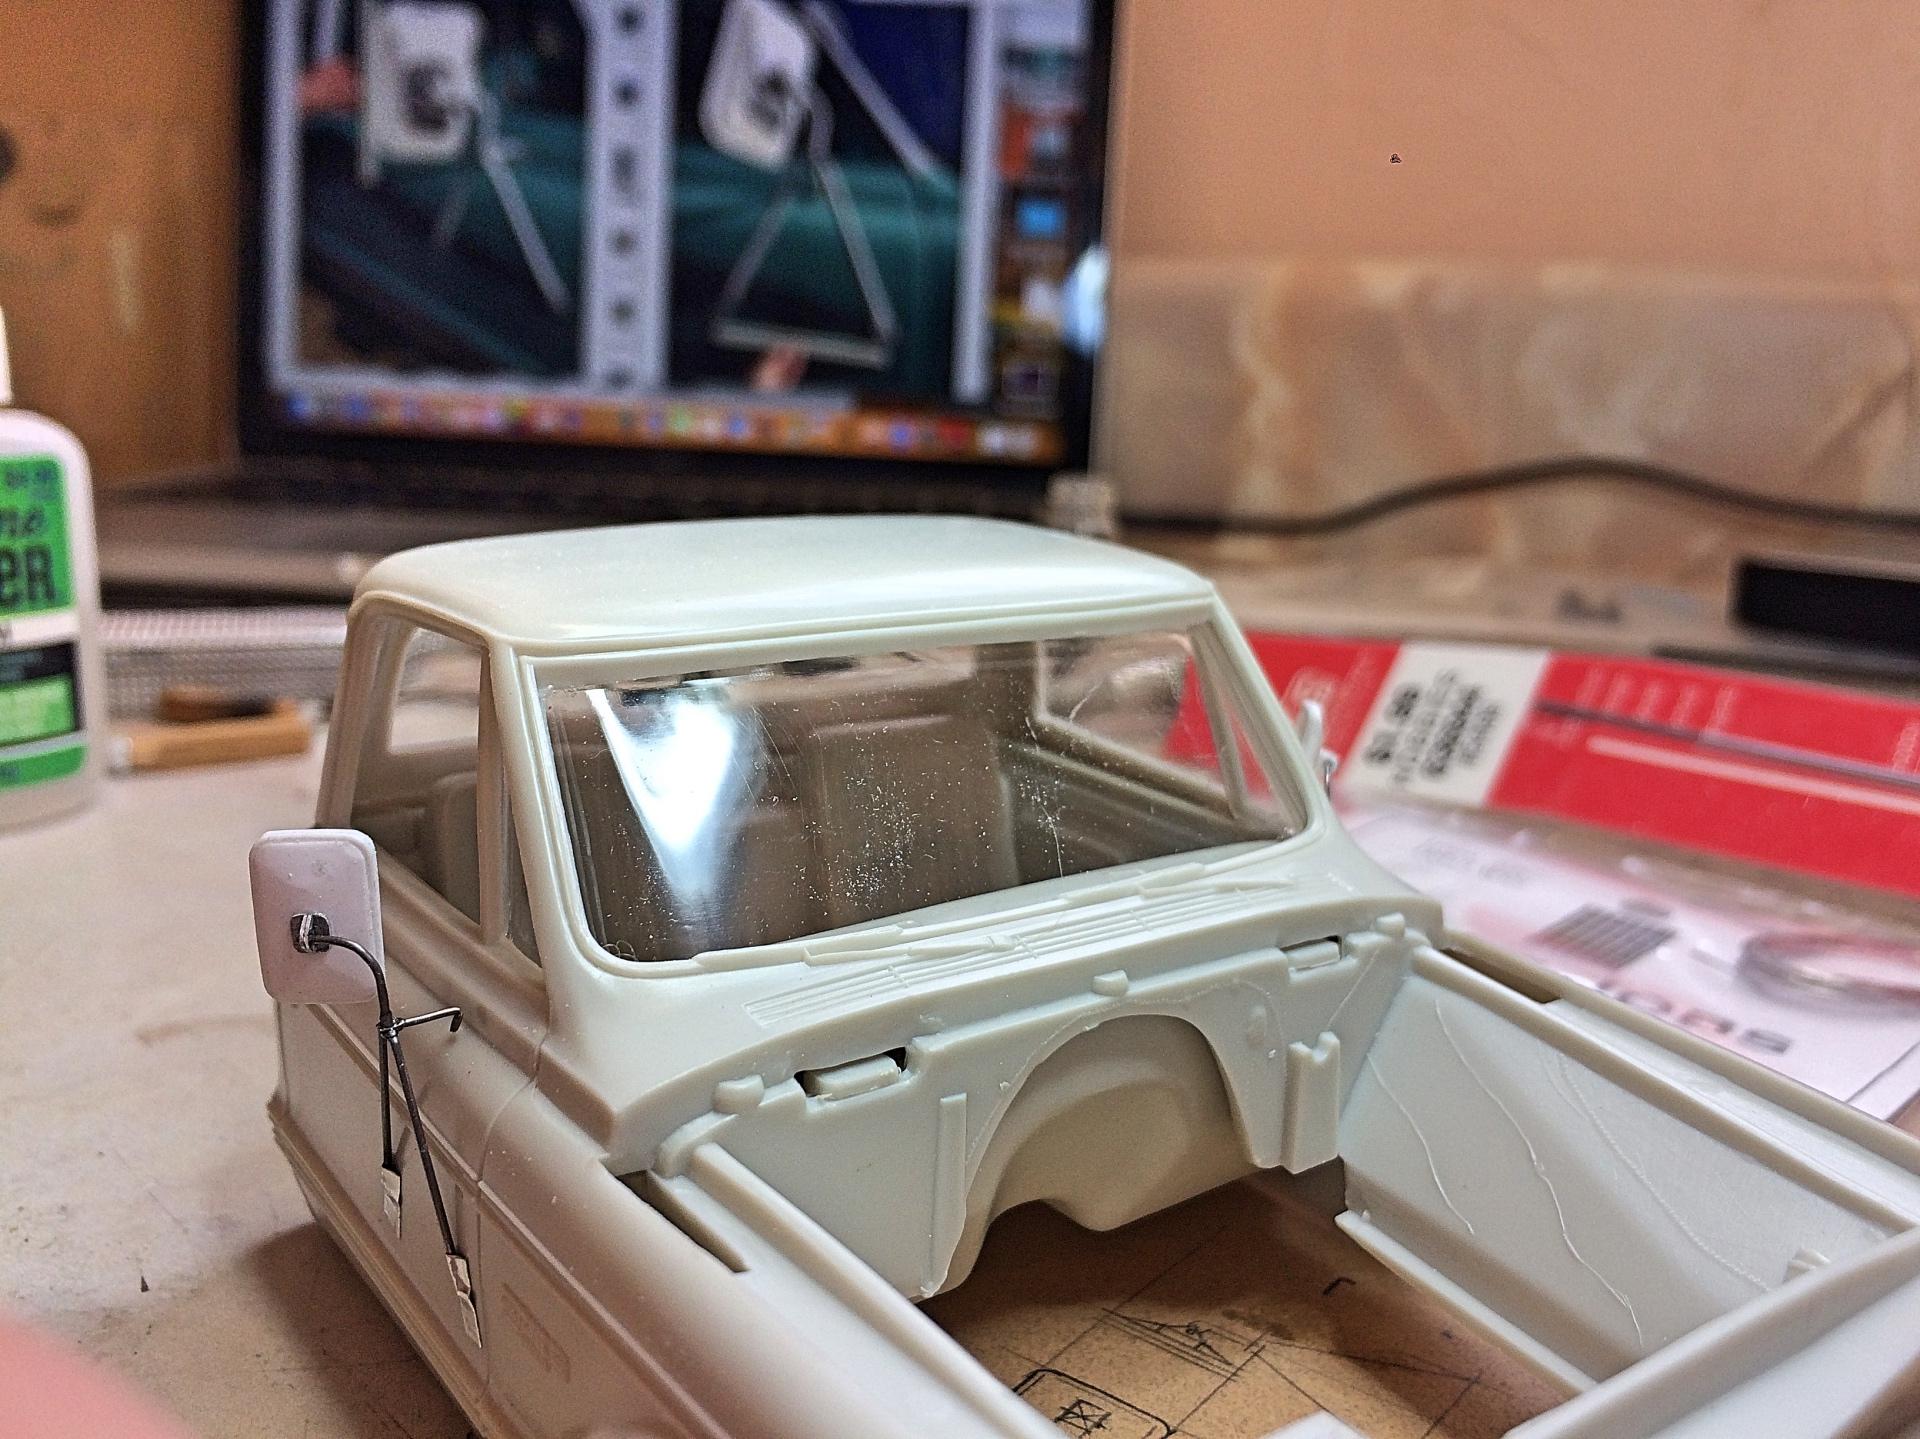
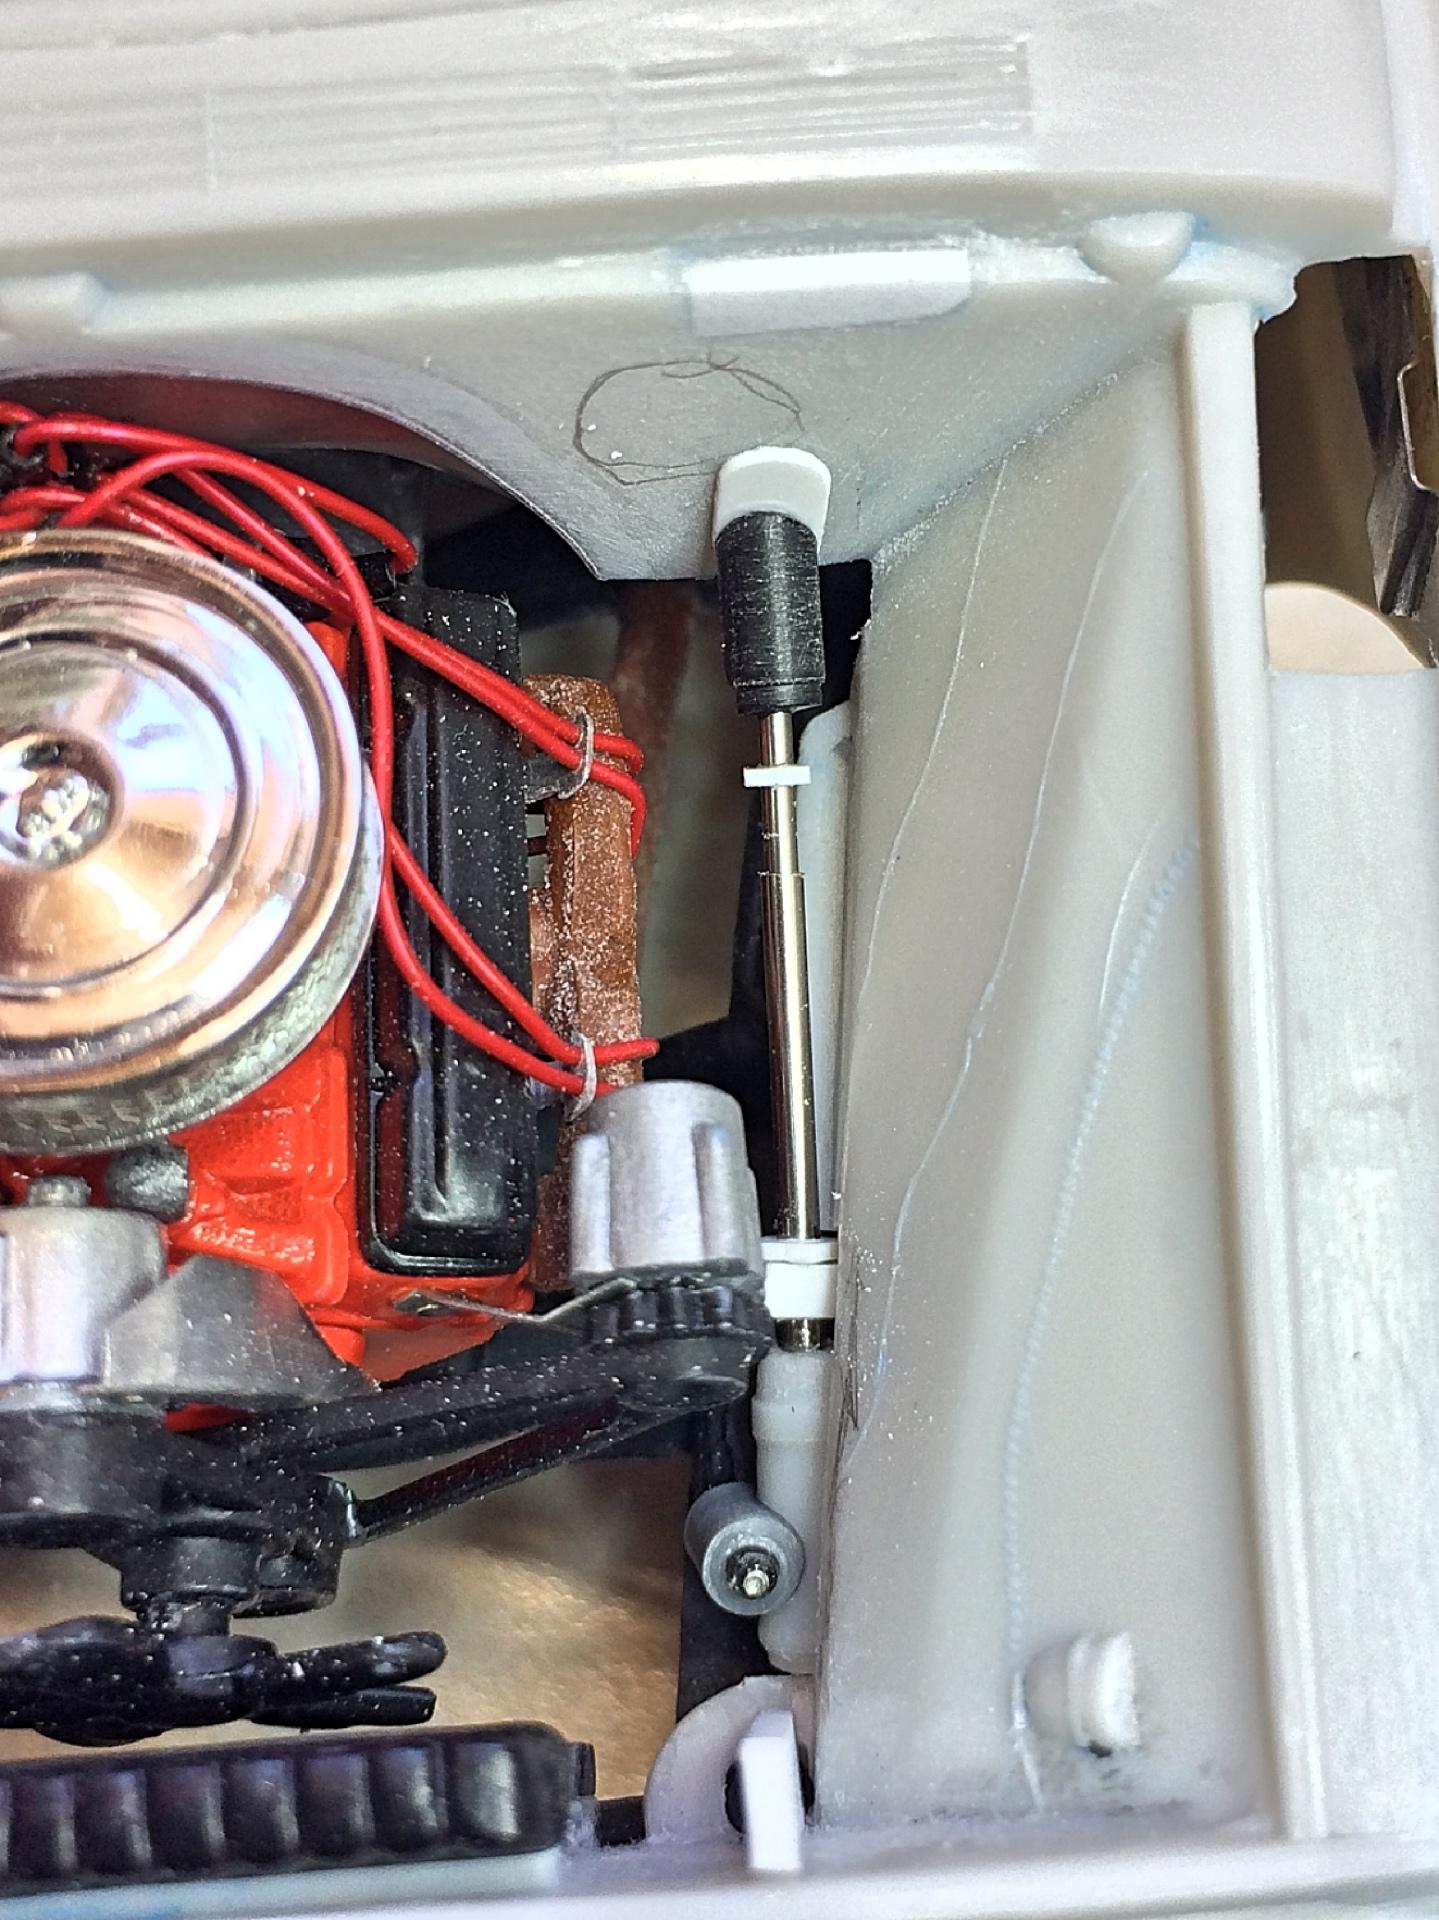
Thank you. You did a really nice job on your pickup, considering what you had to work with. OMG that grill is really bad, just another reason why AMT shouldn't waste everyone's time, as you said the perimeter isn't correct, and the center bar with the turn signals is just wrong. But at least the headlights look more realistic. I separated the '72 grill from the bumper and filled in the turn signals, then made a copy, and got that chromed. When looking how the colors are separated, I discovered another lack of panel line, A-pillar to cowl, so scribed that. Squirted Testors gloss white. I should have done the mirrors first, DUH! While that paint cured, made the RV mirrors, using steel wire for the A brace and L to the mirror. Bending a 90° for the short part kept breaking, so decided to use solder wire, which is packaged by Inside Jobs cottage industry aftermarket who was at a model show. I made a resin copy of the mirror, not really thrilled with my work, the original looks much better. Use an bench vise for an anvil, punch and hammer to smash the wire flat. It's going to be super vulnerable to breakage, have to expect numerous repairs. Used another kit for the mockup, can see what I modified so far. I'm disappointed in Splash paint, they have excellent service, color match is perfect, but it's solvent is too temperamental. I sprayed quick coats, it splatters out but dries sort of flat, but I found it telegraphed the sanded off details. The Tamiya primer did not do this. Will have to wet-sand and try another session, spraying even faster and stopping much longer to allow it to dry.
-
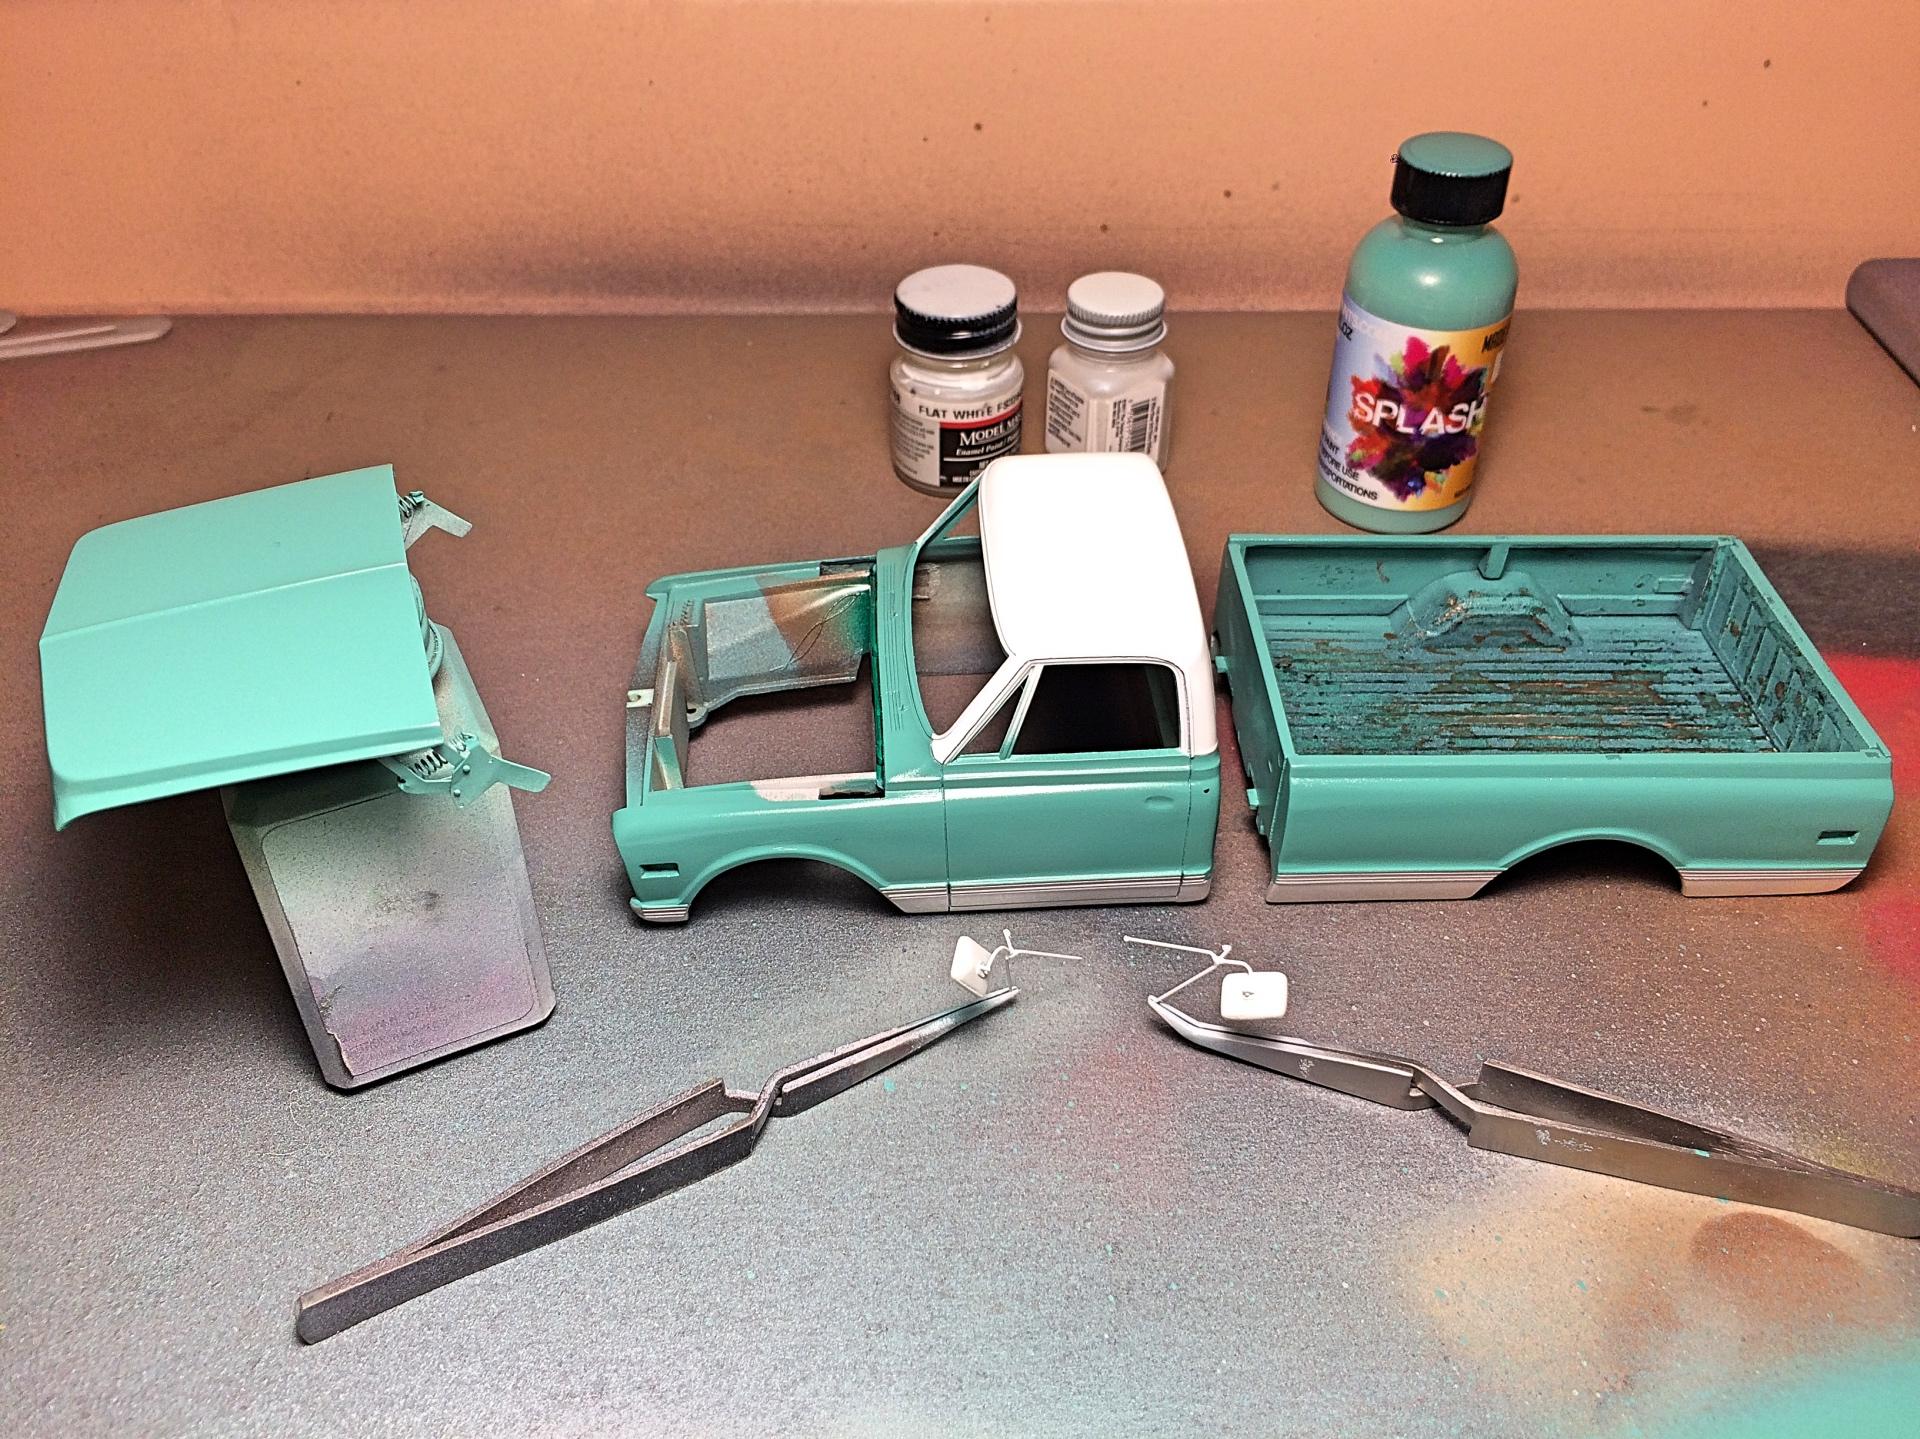
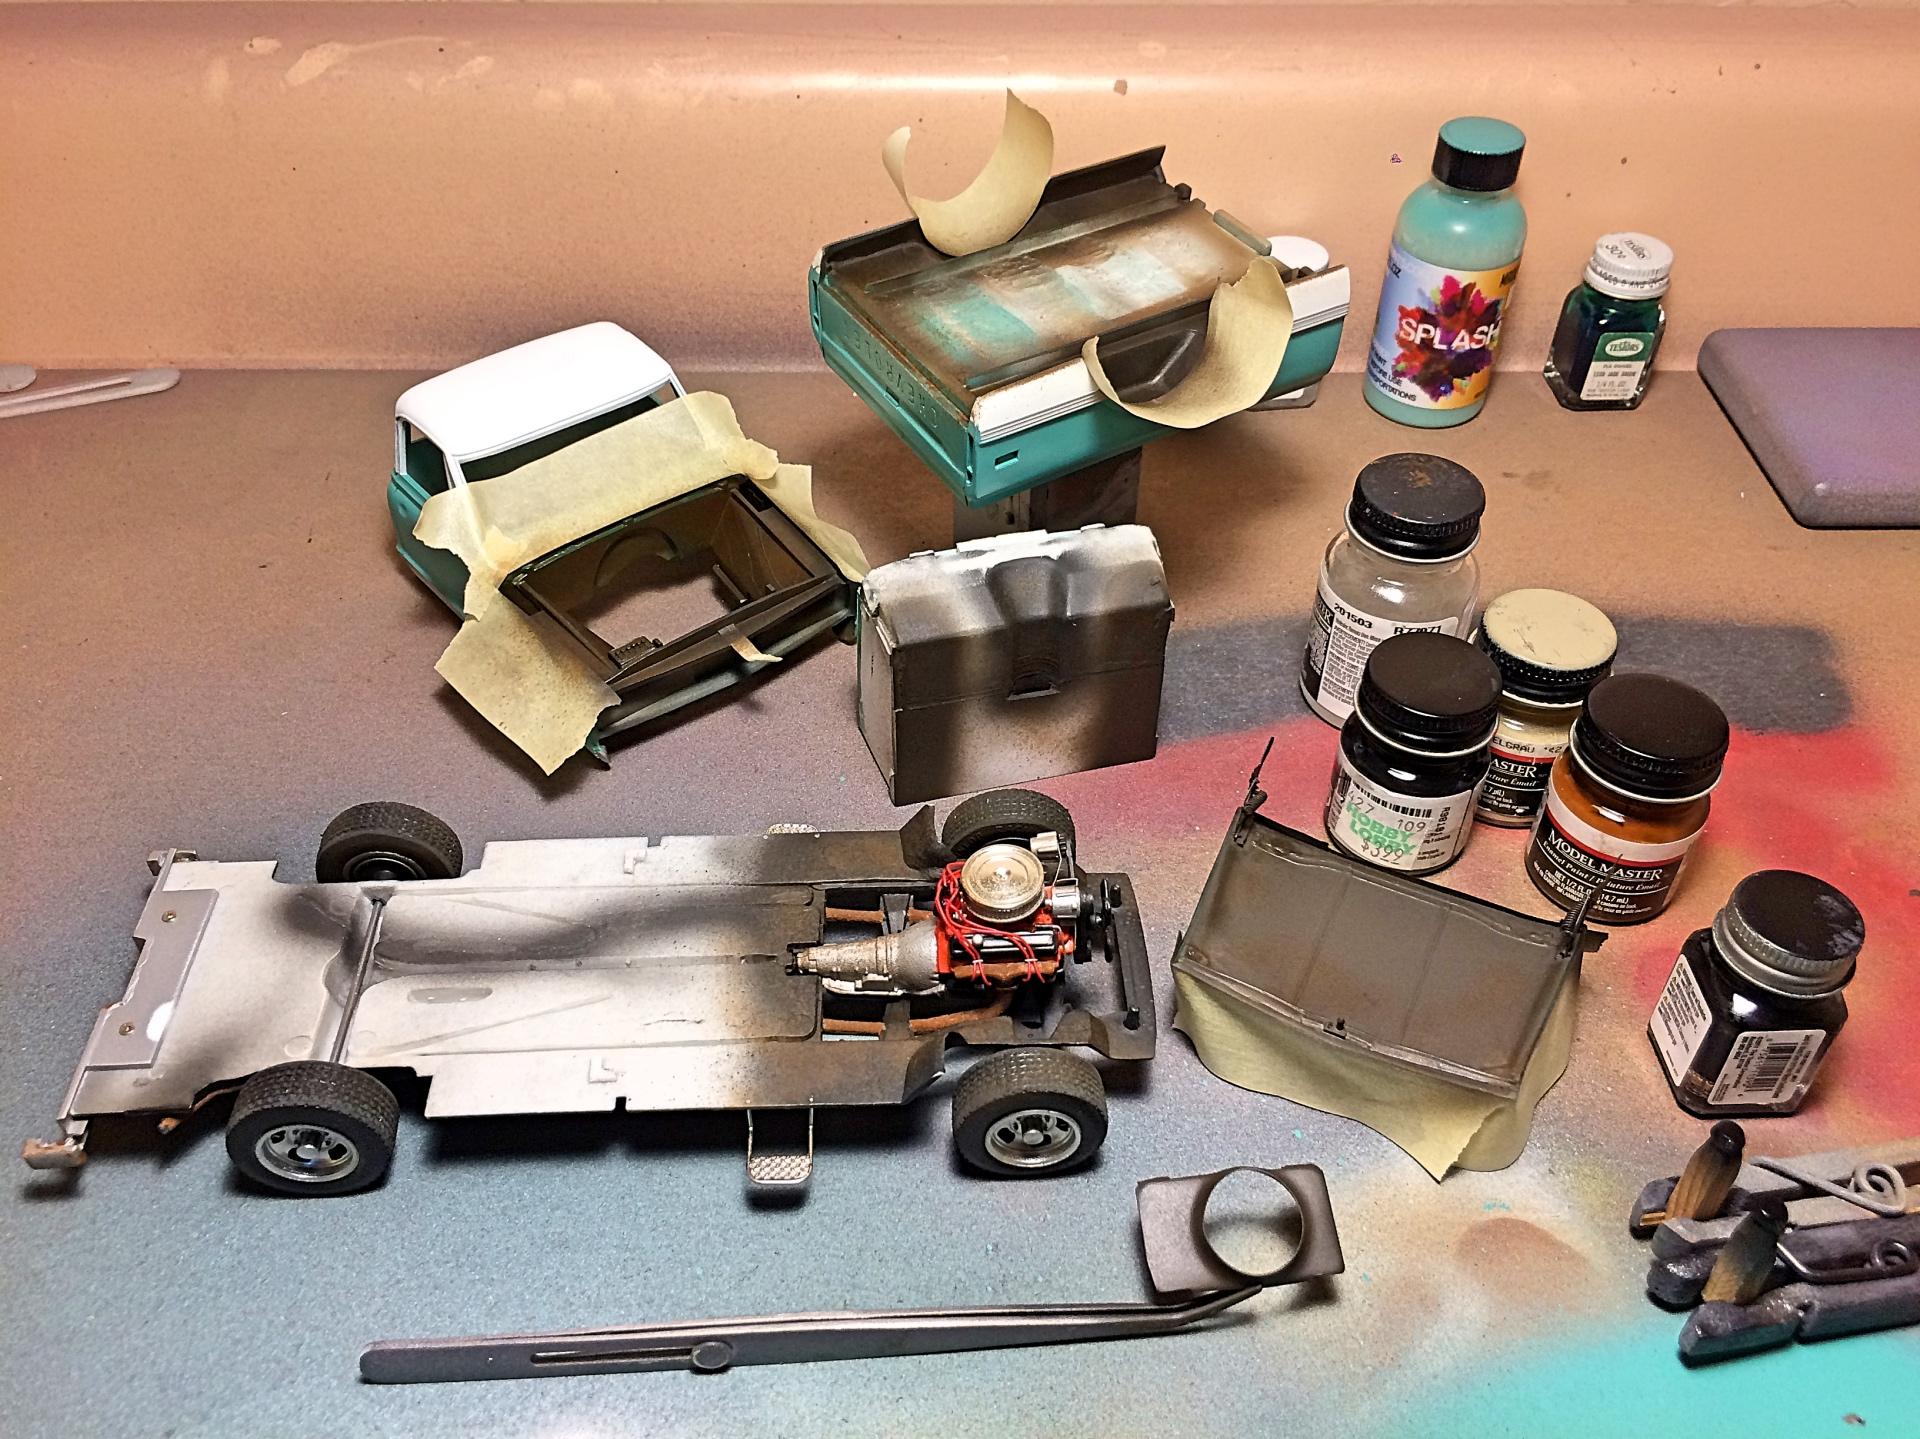
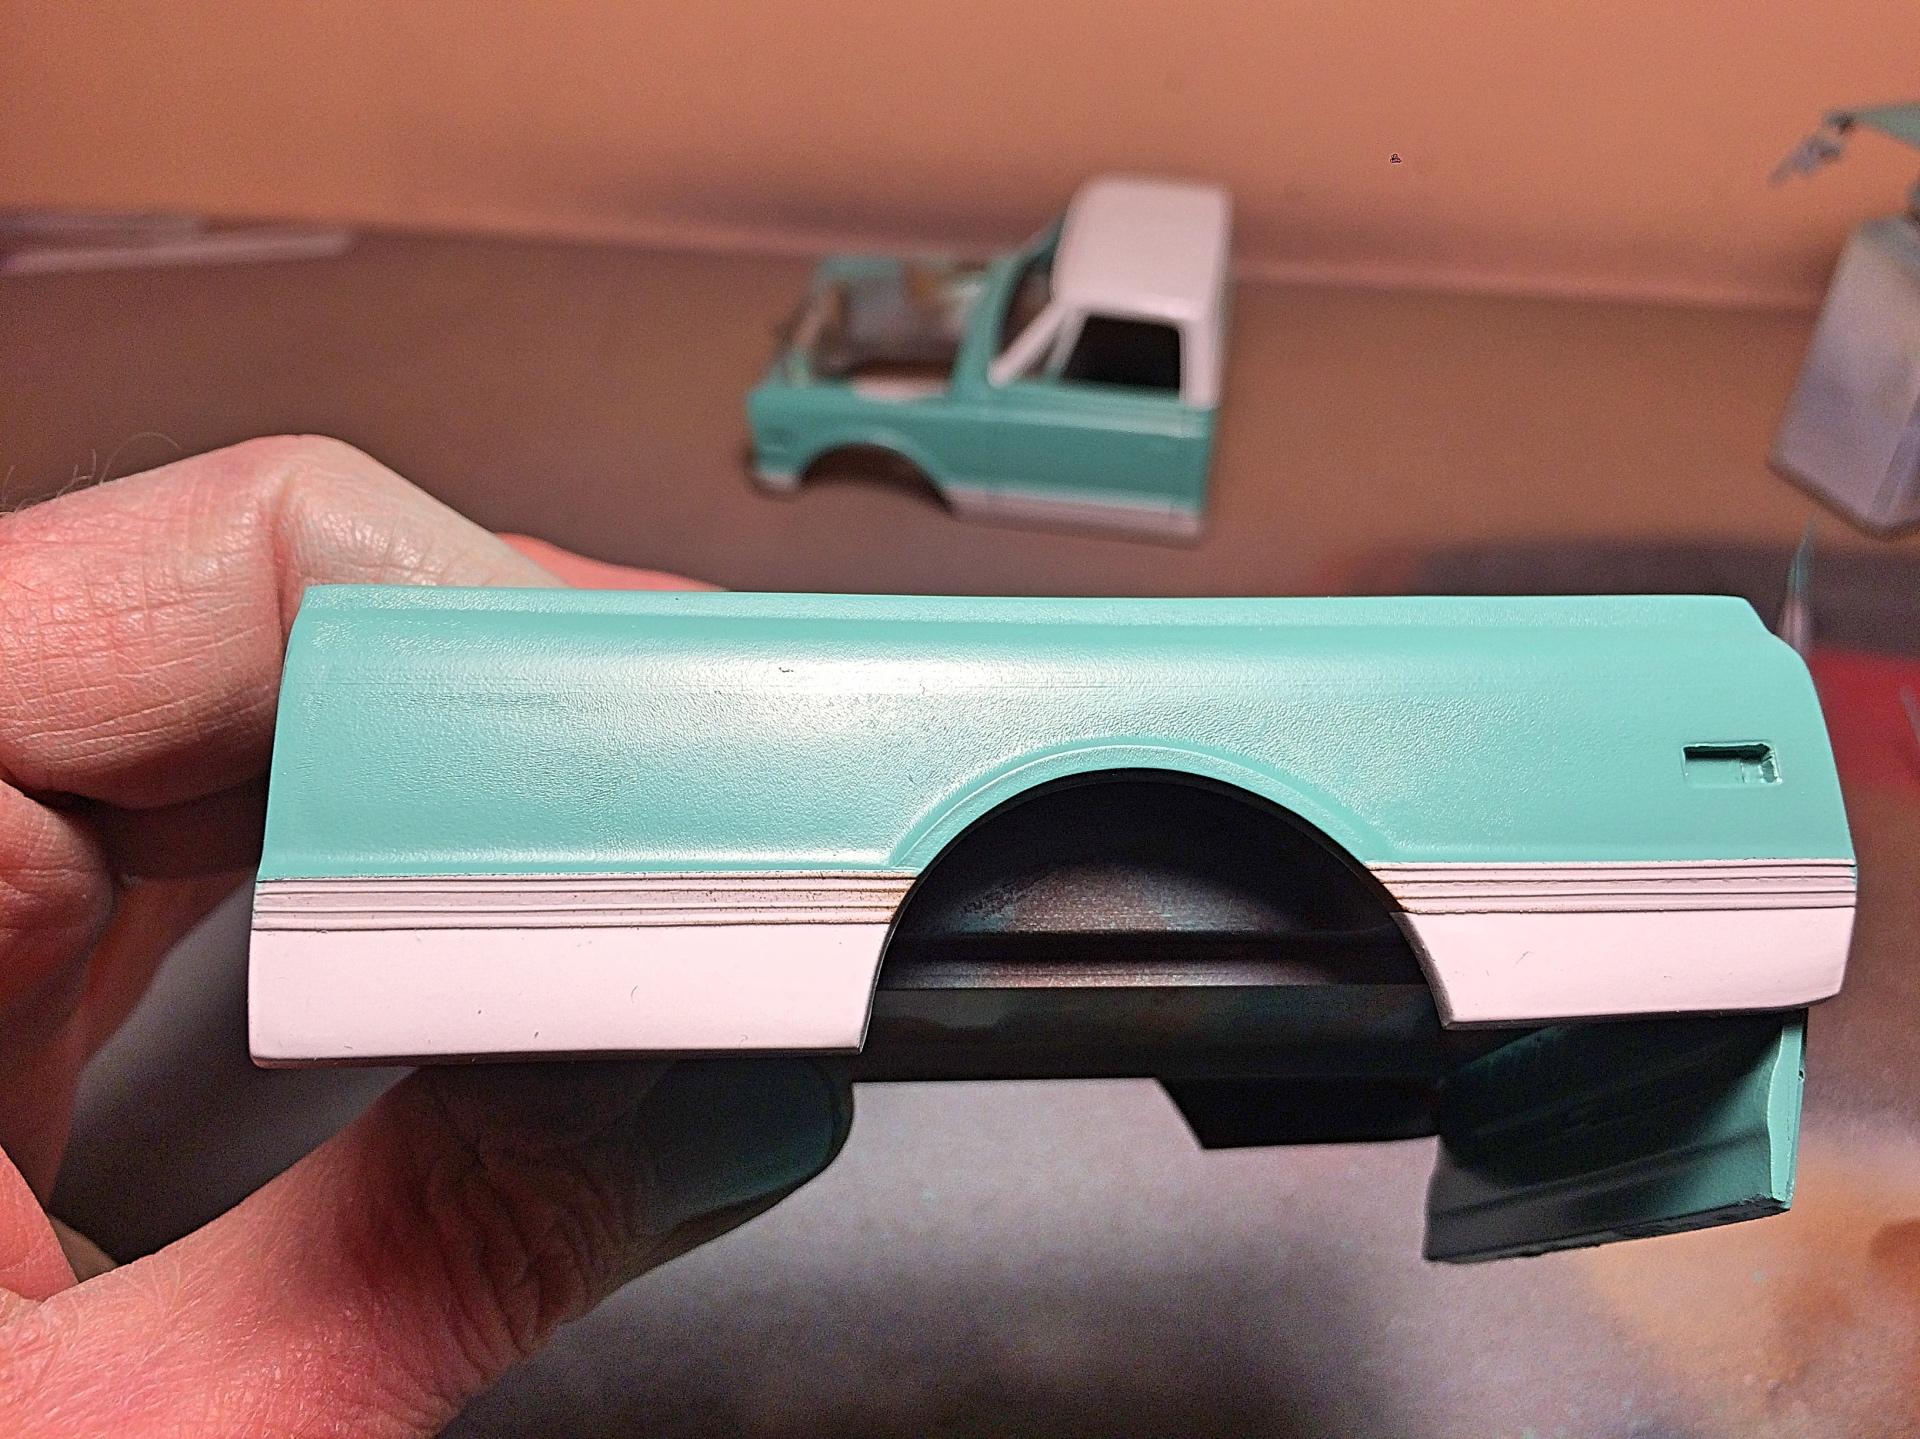
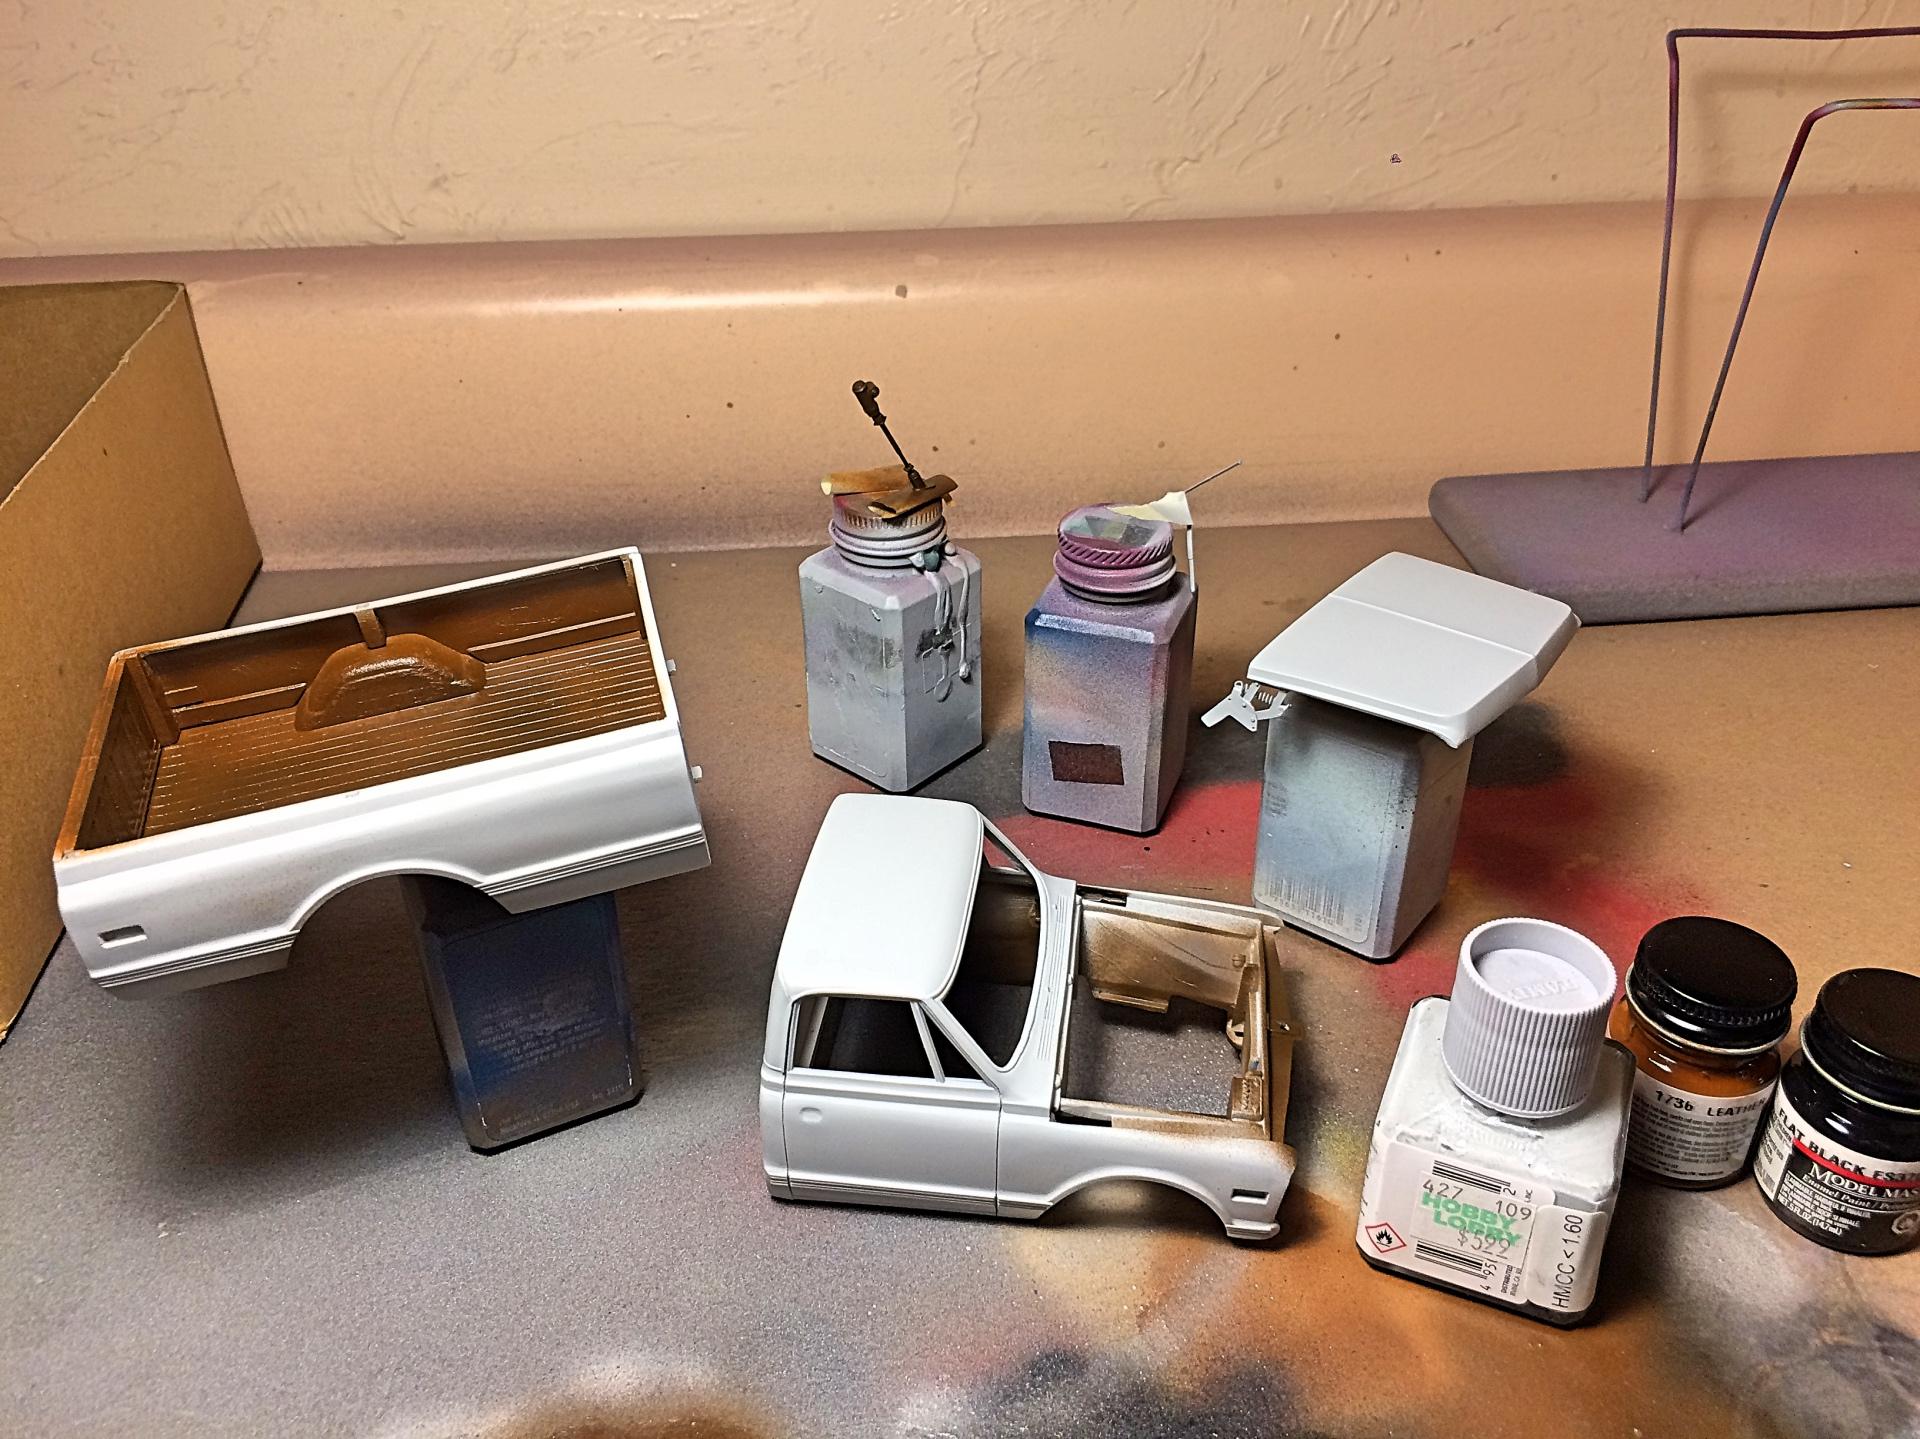
Well thank you very much! It's difficult to see everything posted, and will be deluged with the forced quarantine nowadays, which I'm sure many here are really sad and wondering why everyone else is already showing signs of cabin fever. ? So far today, all I've done is paint the bed and firewall with something close to the original color of the truck, which I found when working on the steering column, the interior had been repainted the green too. Put into the cab of my '68 to help cure, and then took pictures of my last completed projects. The original owner had a plastic bed liner, and saddle tanks, and chrome bed edge protectors which blinded me every time I walked by the truck. ? Lost about 186 pounds of useless weight when I removed all that. So this model is not going to be an exact replica, but close.
-
Thank you very much! Finally posted in Under Glass section.
-
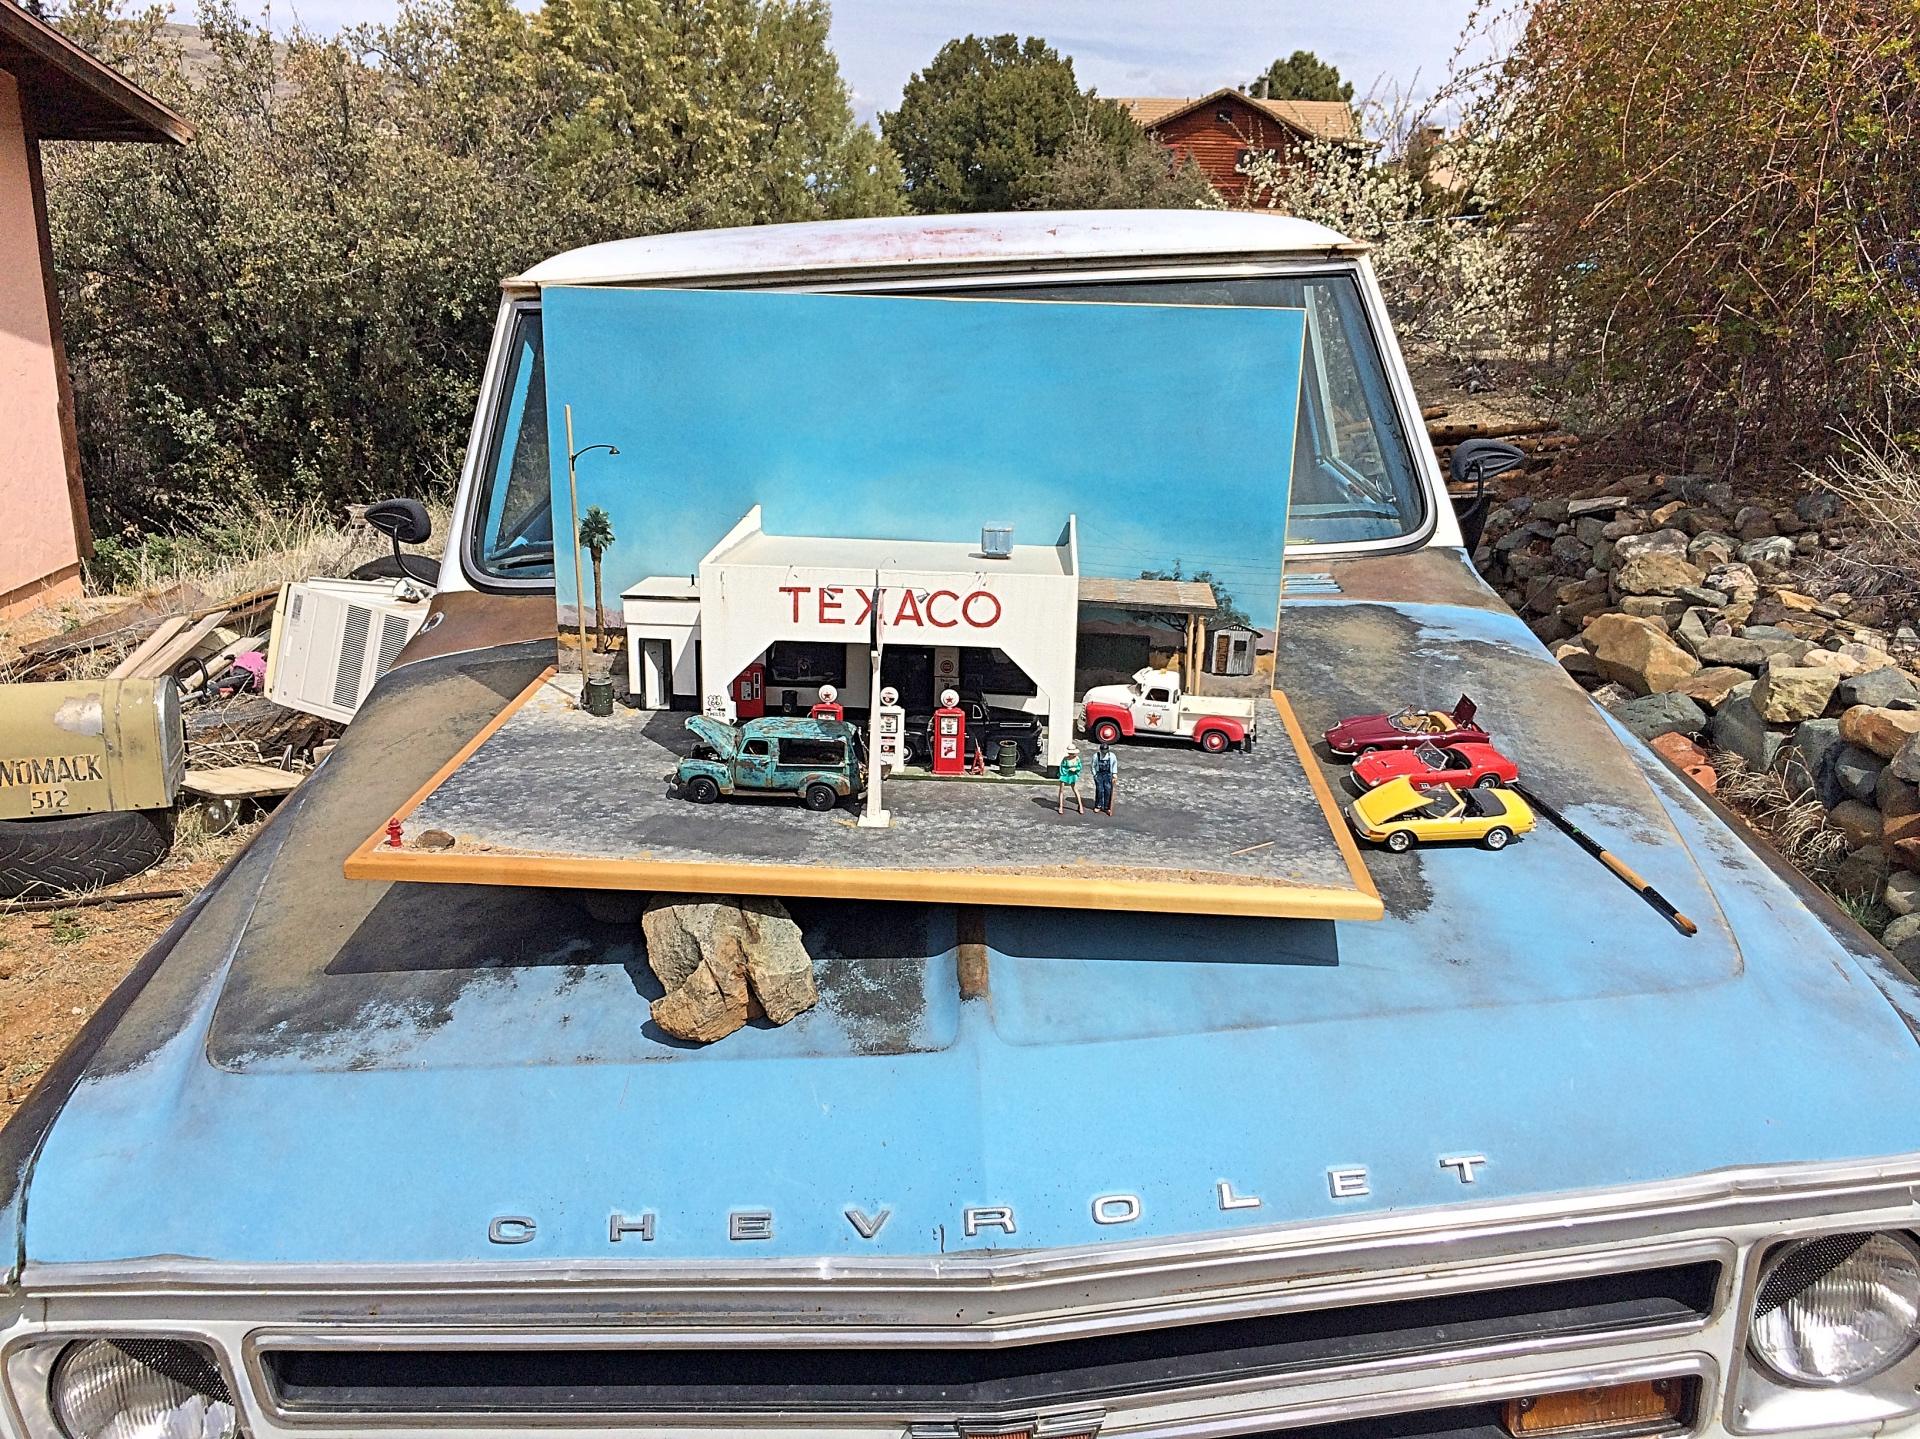
WIP: Italeri - Ferrari 275 GTS (Spyder N.A.R.T.) Started October 1, 2019, finished March 11 after over 186 hours. A decent kit to begin with, other than truck tires which ended up on my '69 Chevy pickup. ? Opened the doors and trunk, painted with nail 'polish', many scratch-built parts added. Not an exact replica of the Thomas Crown Affair car which had the alloy wheels. Woman is a Shapeways product. Diorama is California Pit Stop, the California Spyder is the focus of that project, but have been utilizing for a studio. My studio, was waiting for an overcast and not breezy day. ?
- 26 replies
-
- 1
-

-
- ferrari
- 275 n.a.r.t.
- (and 2 more)
-
2020 TP build
89AKurt replied to gotnitro?'s topic in WIP: Model Trucks: Big Rigs and Heavy Equipment
You picked the wrong vehicle to start with. ?
-
Mecum Auctioning Model Cars !!!
89AKurt replied to Mike 1017's topic in General Automotive Talk (Trucks and Cars)
Tempting..... -
for limited time
-
Thank you, that's what having OCD does. ? Got the grill painted. While that was in the cab drying, scratch-built the steering shaft/box. Because there is no suspension or chassis detail, didn't get very accurate and detailed, because when all this gets painted black, it sort of disappears. One thing I noticed, the trim on the right side of the bed is not in line with each side, the other side is fine. This is another reason I don't care if AMT re-pops this kit. I blow at brush detail painting, not really happy with the grill. ☹️ I've noticed on real trucks that are restored, almost nobody does the black accent or letters, the truck I had was original and still was in decent shape. The headlight surrounds are supposed to be black, most restored trucks aren't done correctly. The mesh on my truck was very delicate, due to UV rays, and weathered to a grey. Headlight lenses are barchetta aftermarket. Final detail was to sand off the raised scroll detail down the middle of the side trim. Tamiya primer, the Testors 'leather' and 'flat black' rust in the bed and fender wells. I would have got more done, but last snow storm knocked some limbs down, so got some free firewood.
-
Have that and the '55 kit, so curious what the issue with the bed is. I also shoulda coulda woulda bought a '55 Cameo in the 90s, for only $5,000, dumbest decision I made. ?
-
That's all it took. Check is in the mail. ?
-
That's a long two day drive, good weather then, will keep in mind.
-
Heck of a project! I have a few Route 66 ideas, but no ambition. More Power to you!
-
Everyone should check out your '49 Suburban Woody to see another very creative iteration of this popular kit. Thanks again for your support.
-
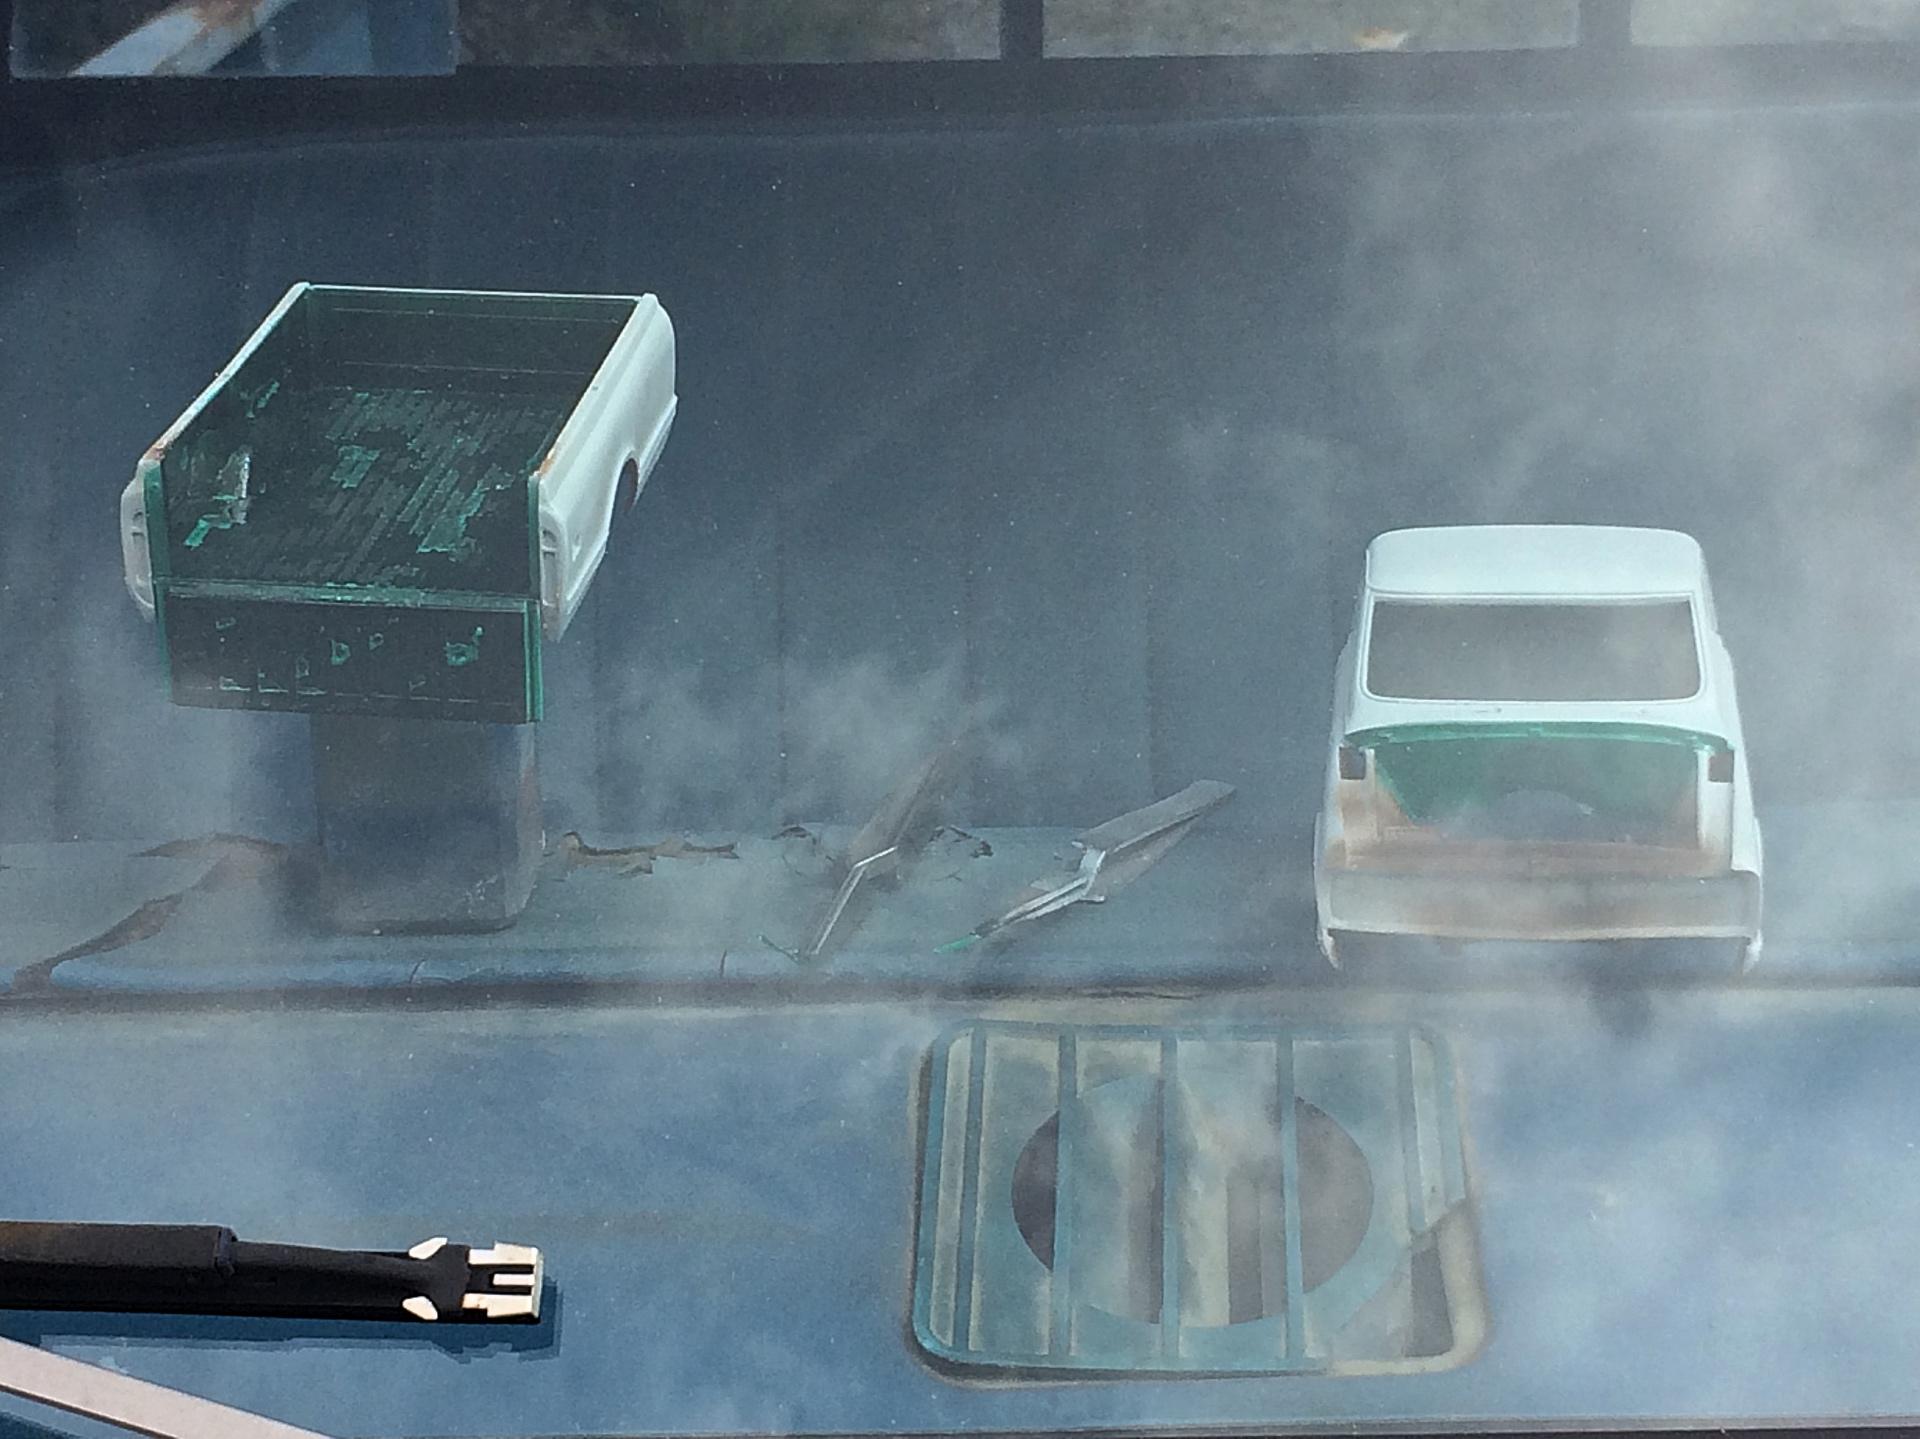
Here is a teaser, this was started last century, trying to get psyched out to resume after finishing the 1969 Chevy pickup. I got in way over my head, so I chickened out. Hoping to start a new WIP soon, and get this little monster done!