89AKurt
-
Posts
8,426 -
Joined
-
Last visited
Content Type
Profiles
Forums
Events
Gallery
Everything posted by 89AKurt
-
That's something I've not seen built before, much less a kit. Like how you are picking it apart for improvements.
-

The High Cost of the Hobby
89AKurt replied to Nitrobarry's topic in General Automotive Talk (Trucks and Cars)
When I was a kid, Bandai 1/48 scale WW2 military kits were about $2-$3 at Kmart. Inflation is a HUGE factor. When car manufacturers started licensing fees so their vehicles could be produced, that was tacked on. Look at how much mailing a kit is now! ? Foreign kits get Customs tacked on. Friends who started a model club, also started a business as a digital storefront, so they can now order kits at wholesale cost and pass onto our club members. They complained about the cost that Squadron charges, is why they are doing this. No wonder kids aren't into models nowadays. But I think video games cost money too, no? -
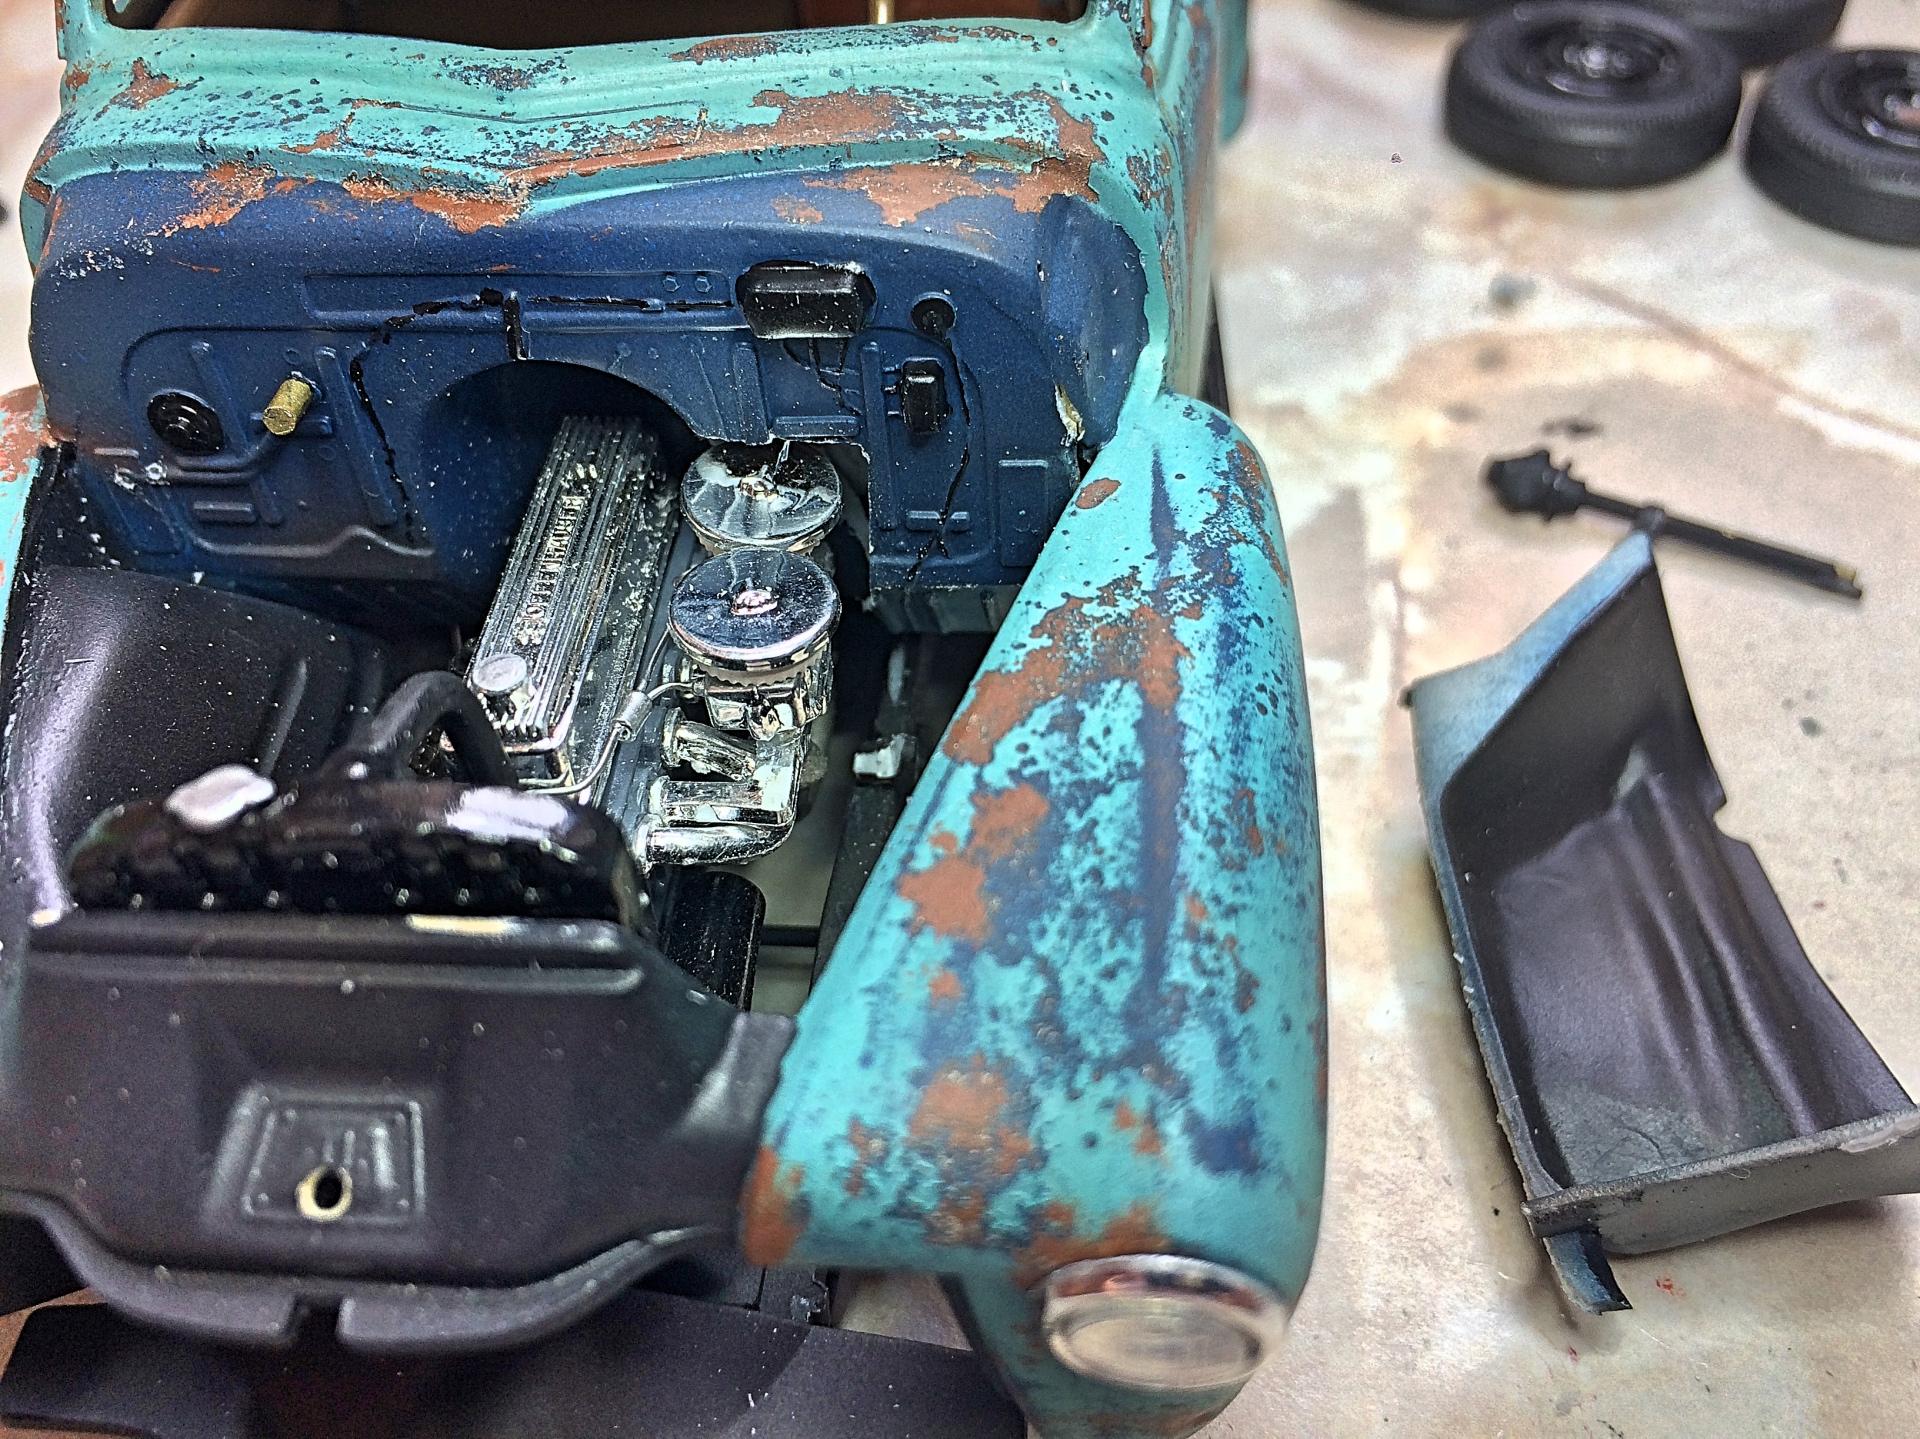
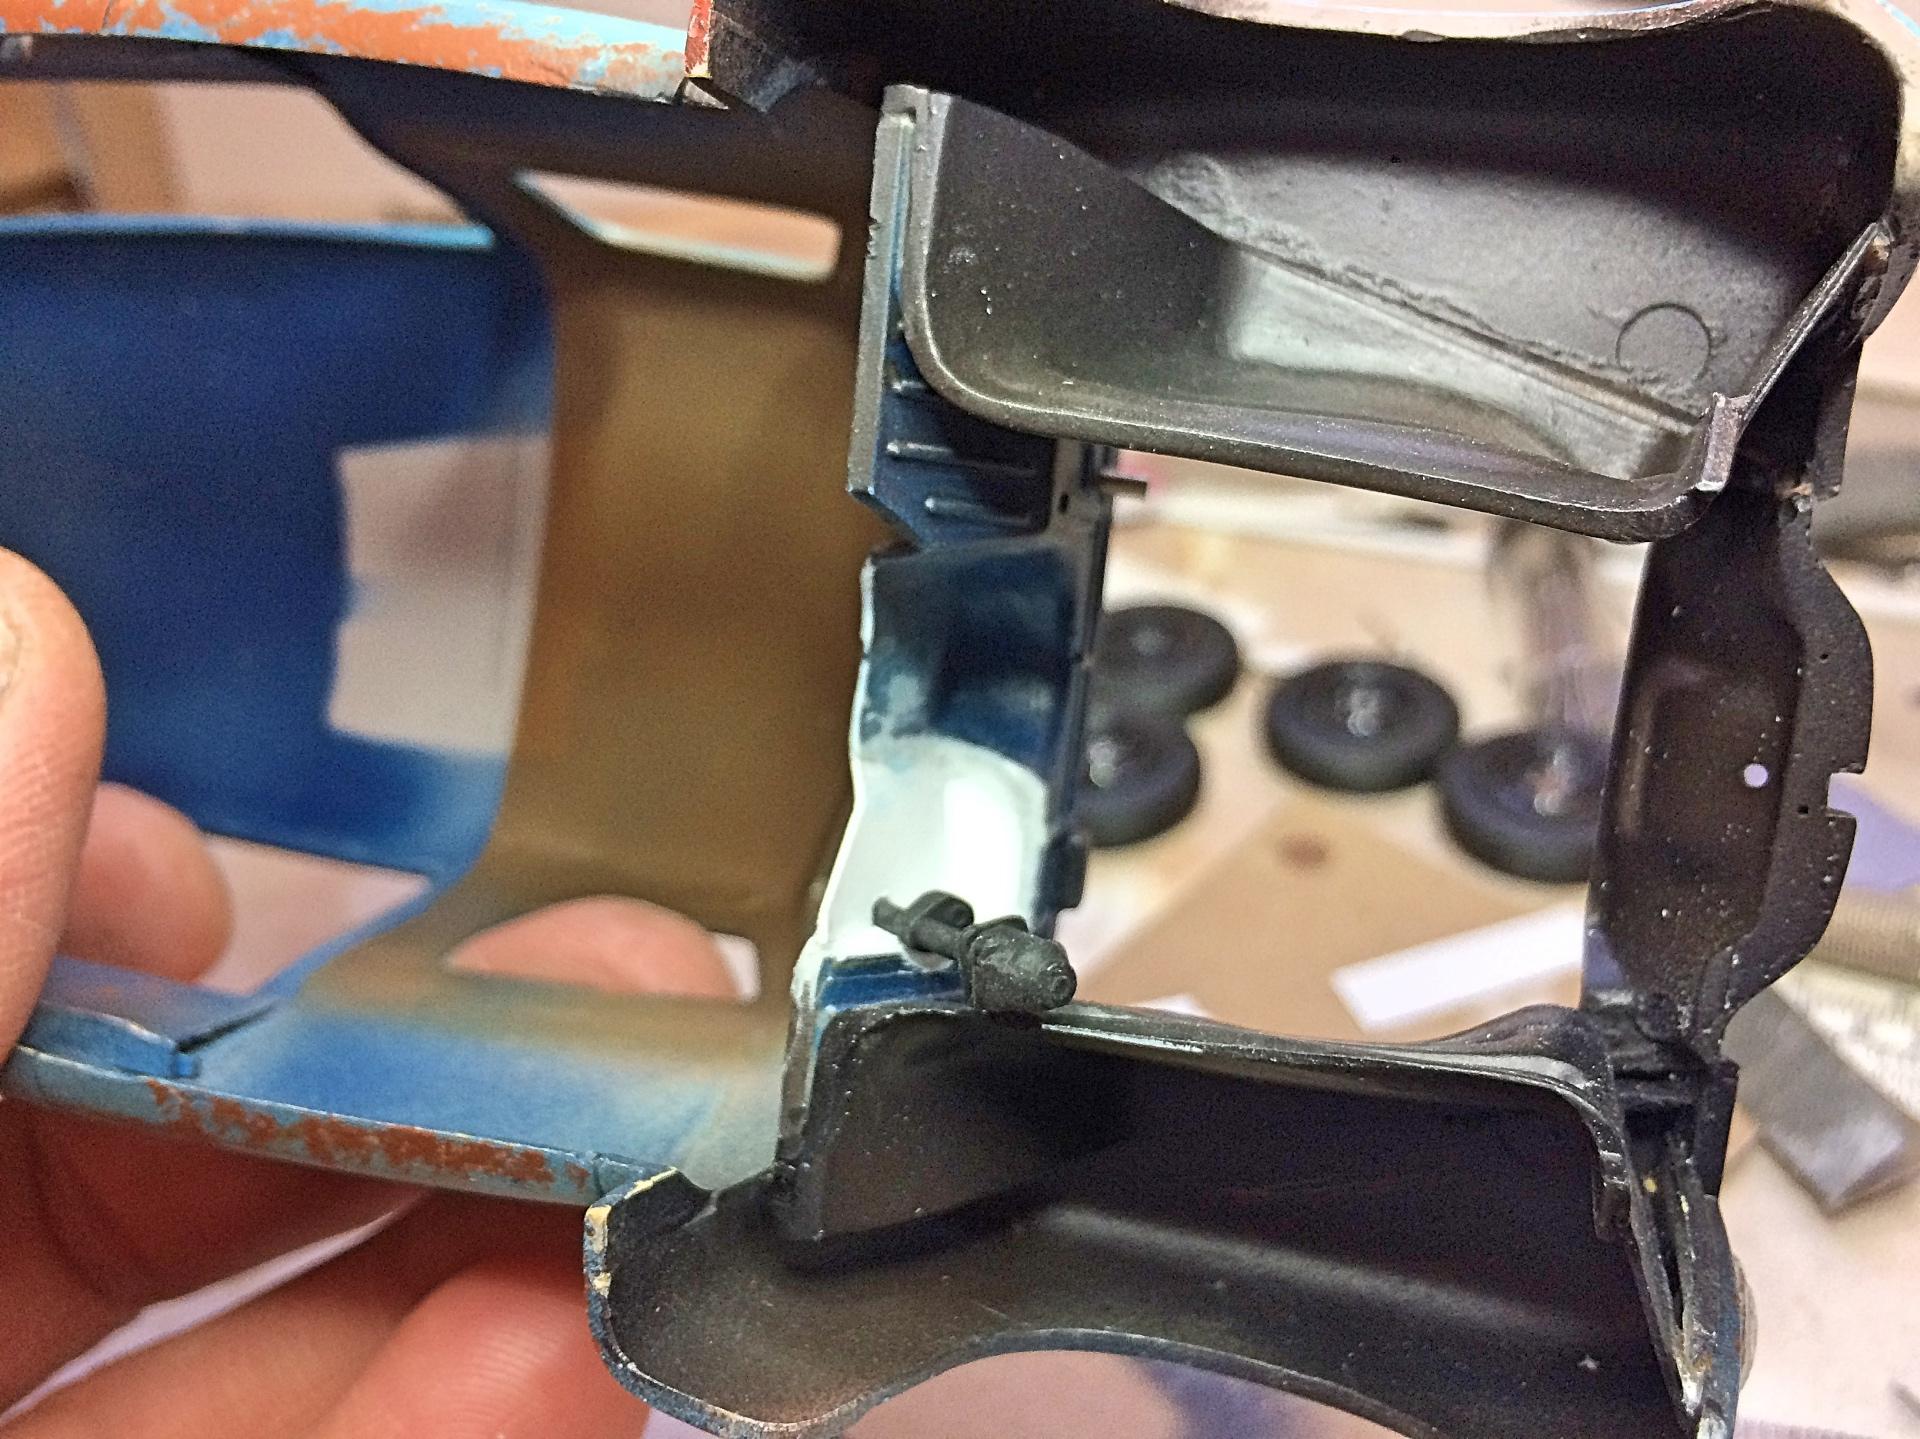
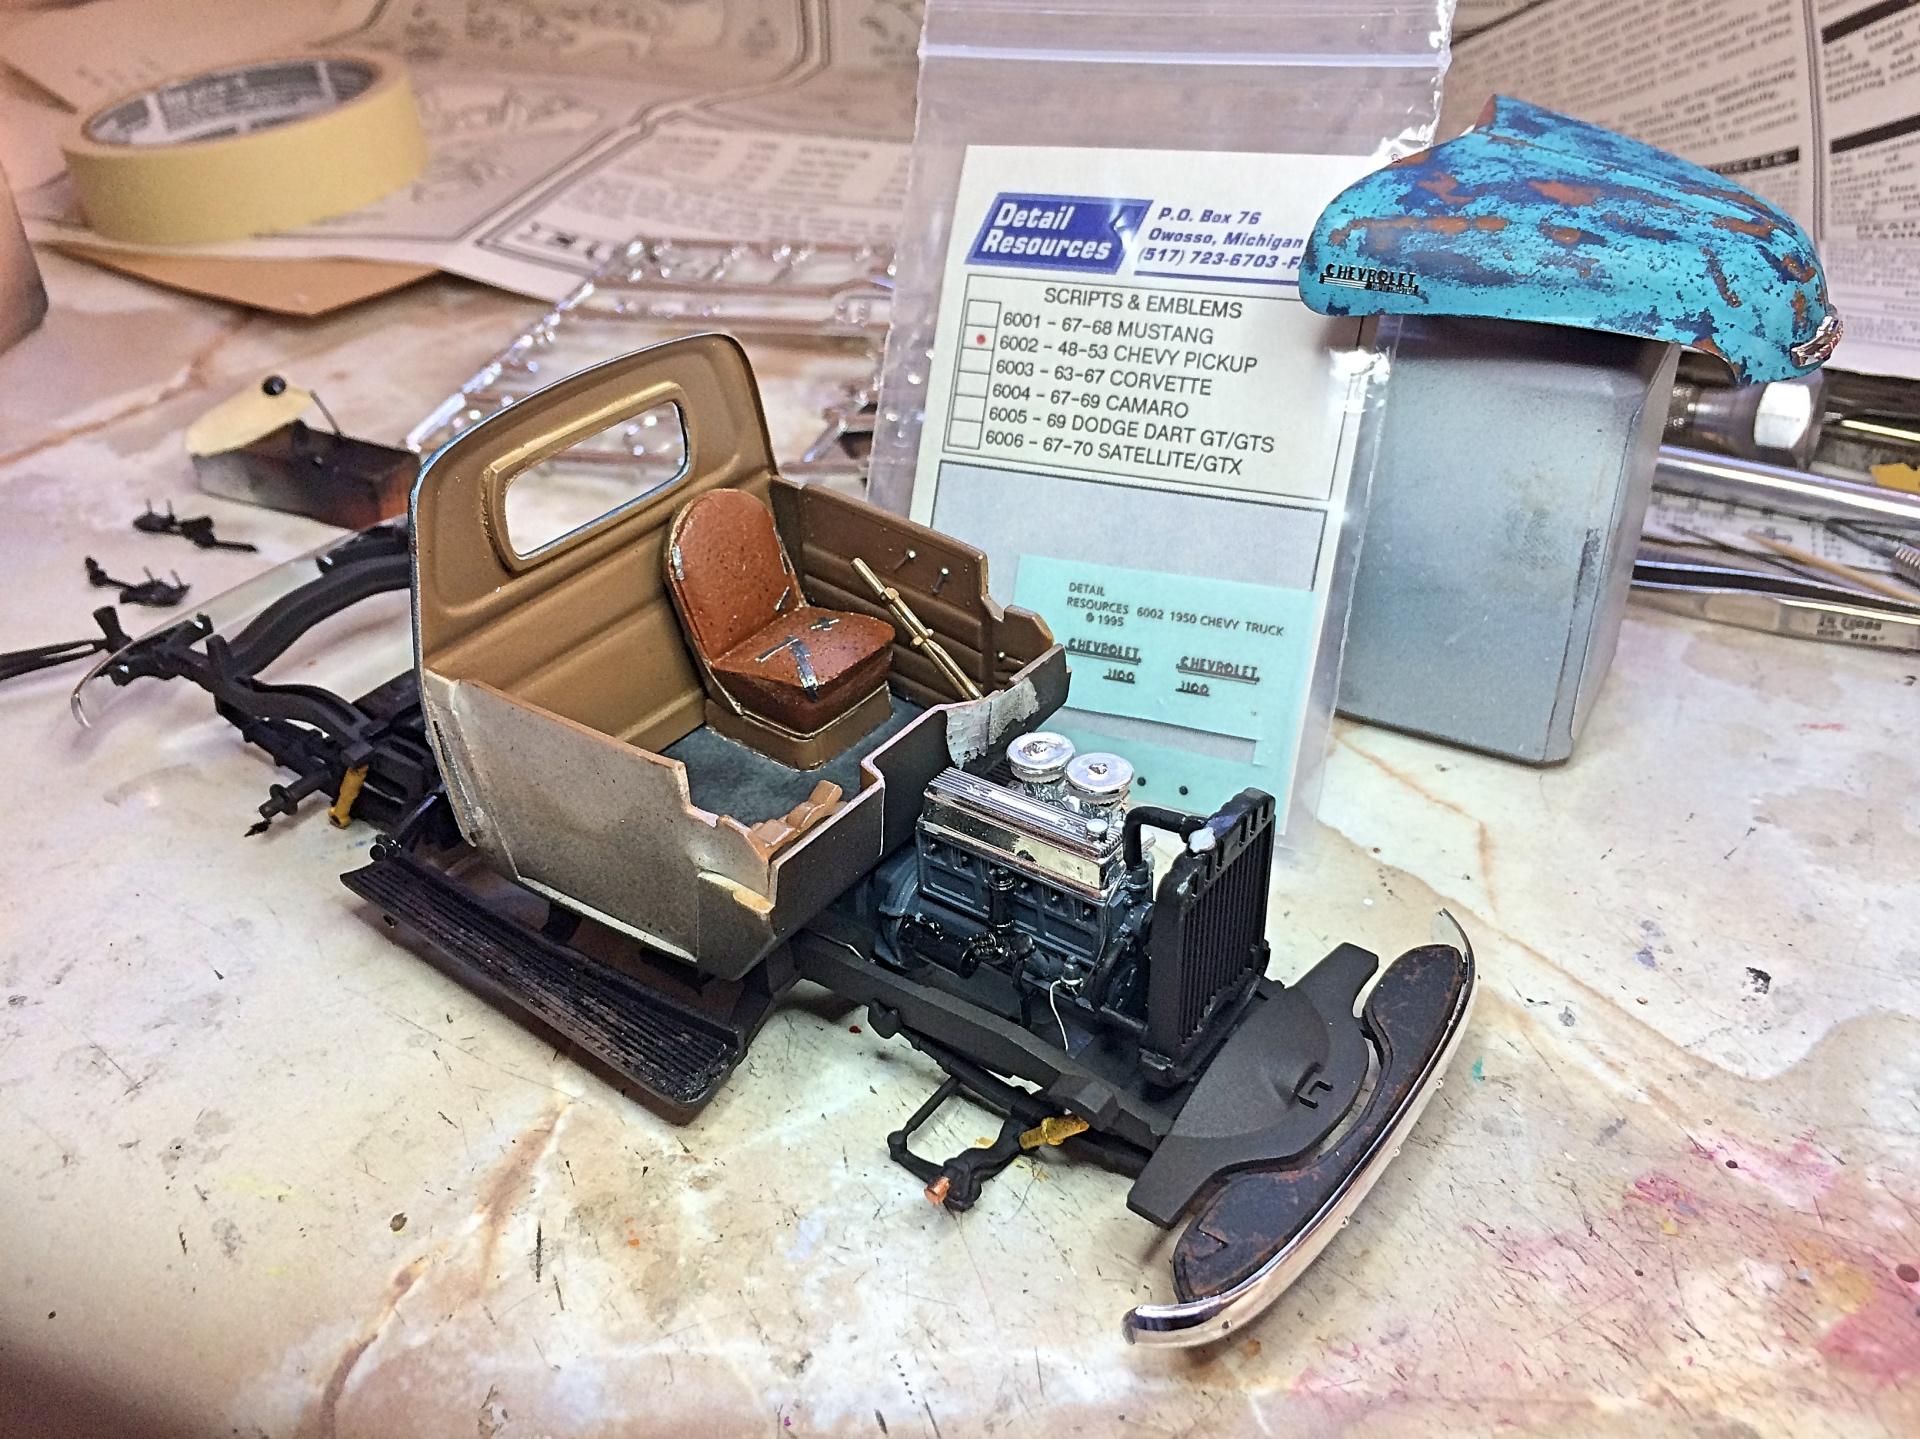
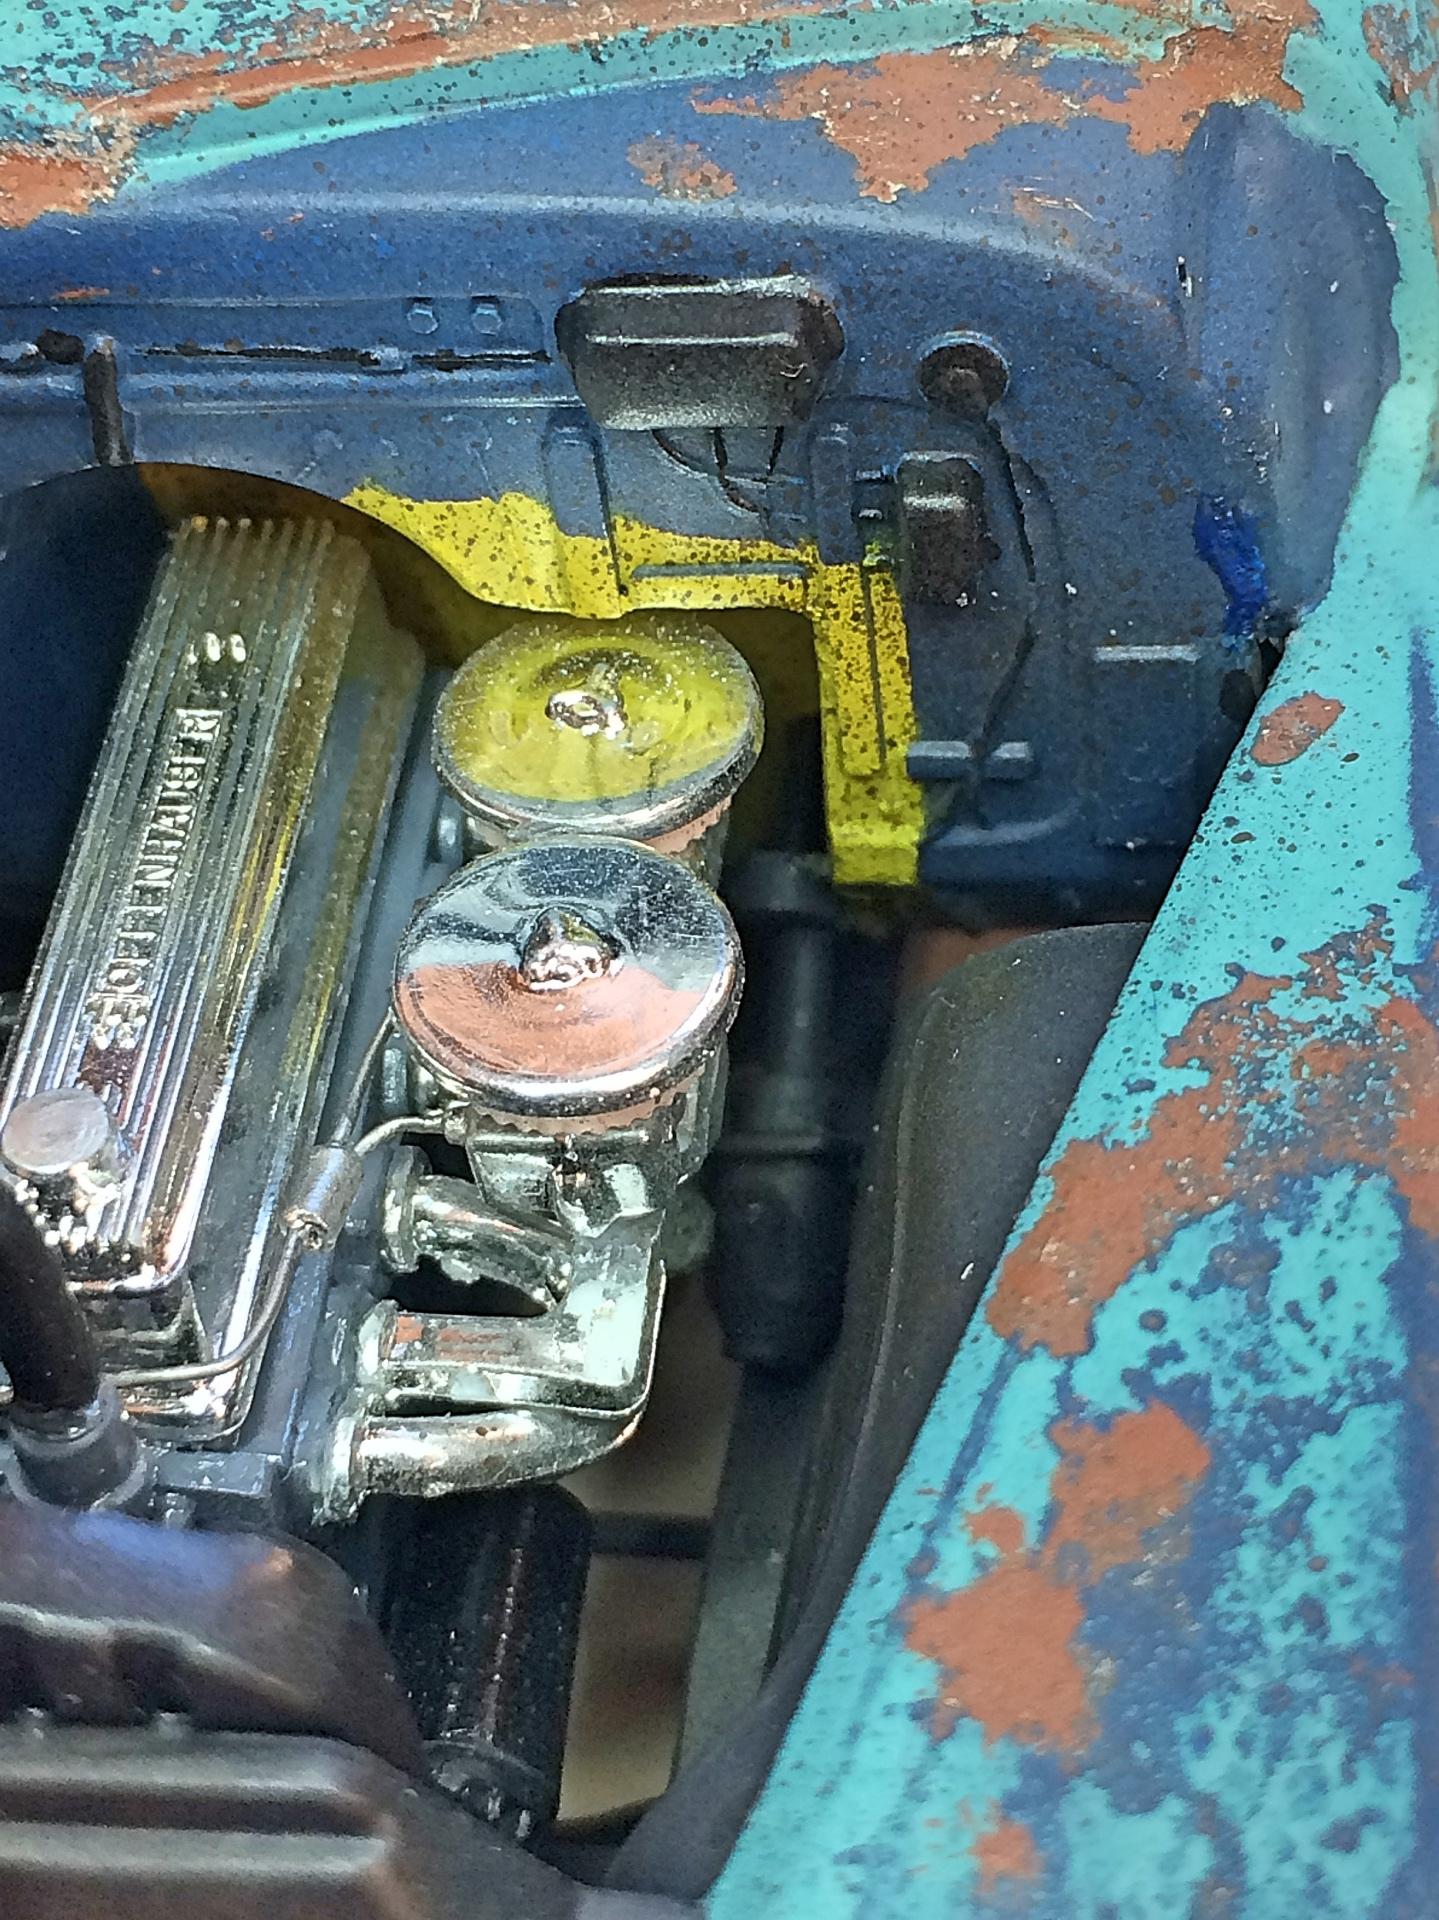
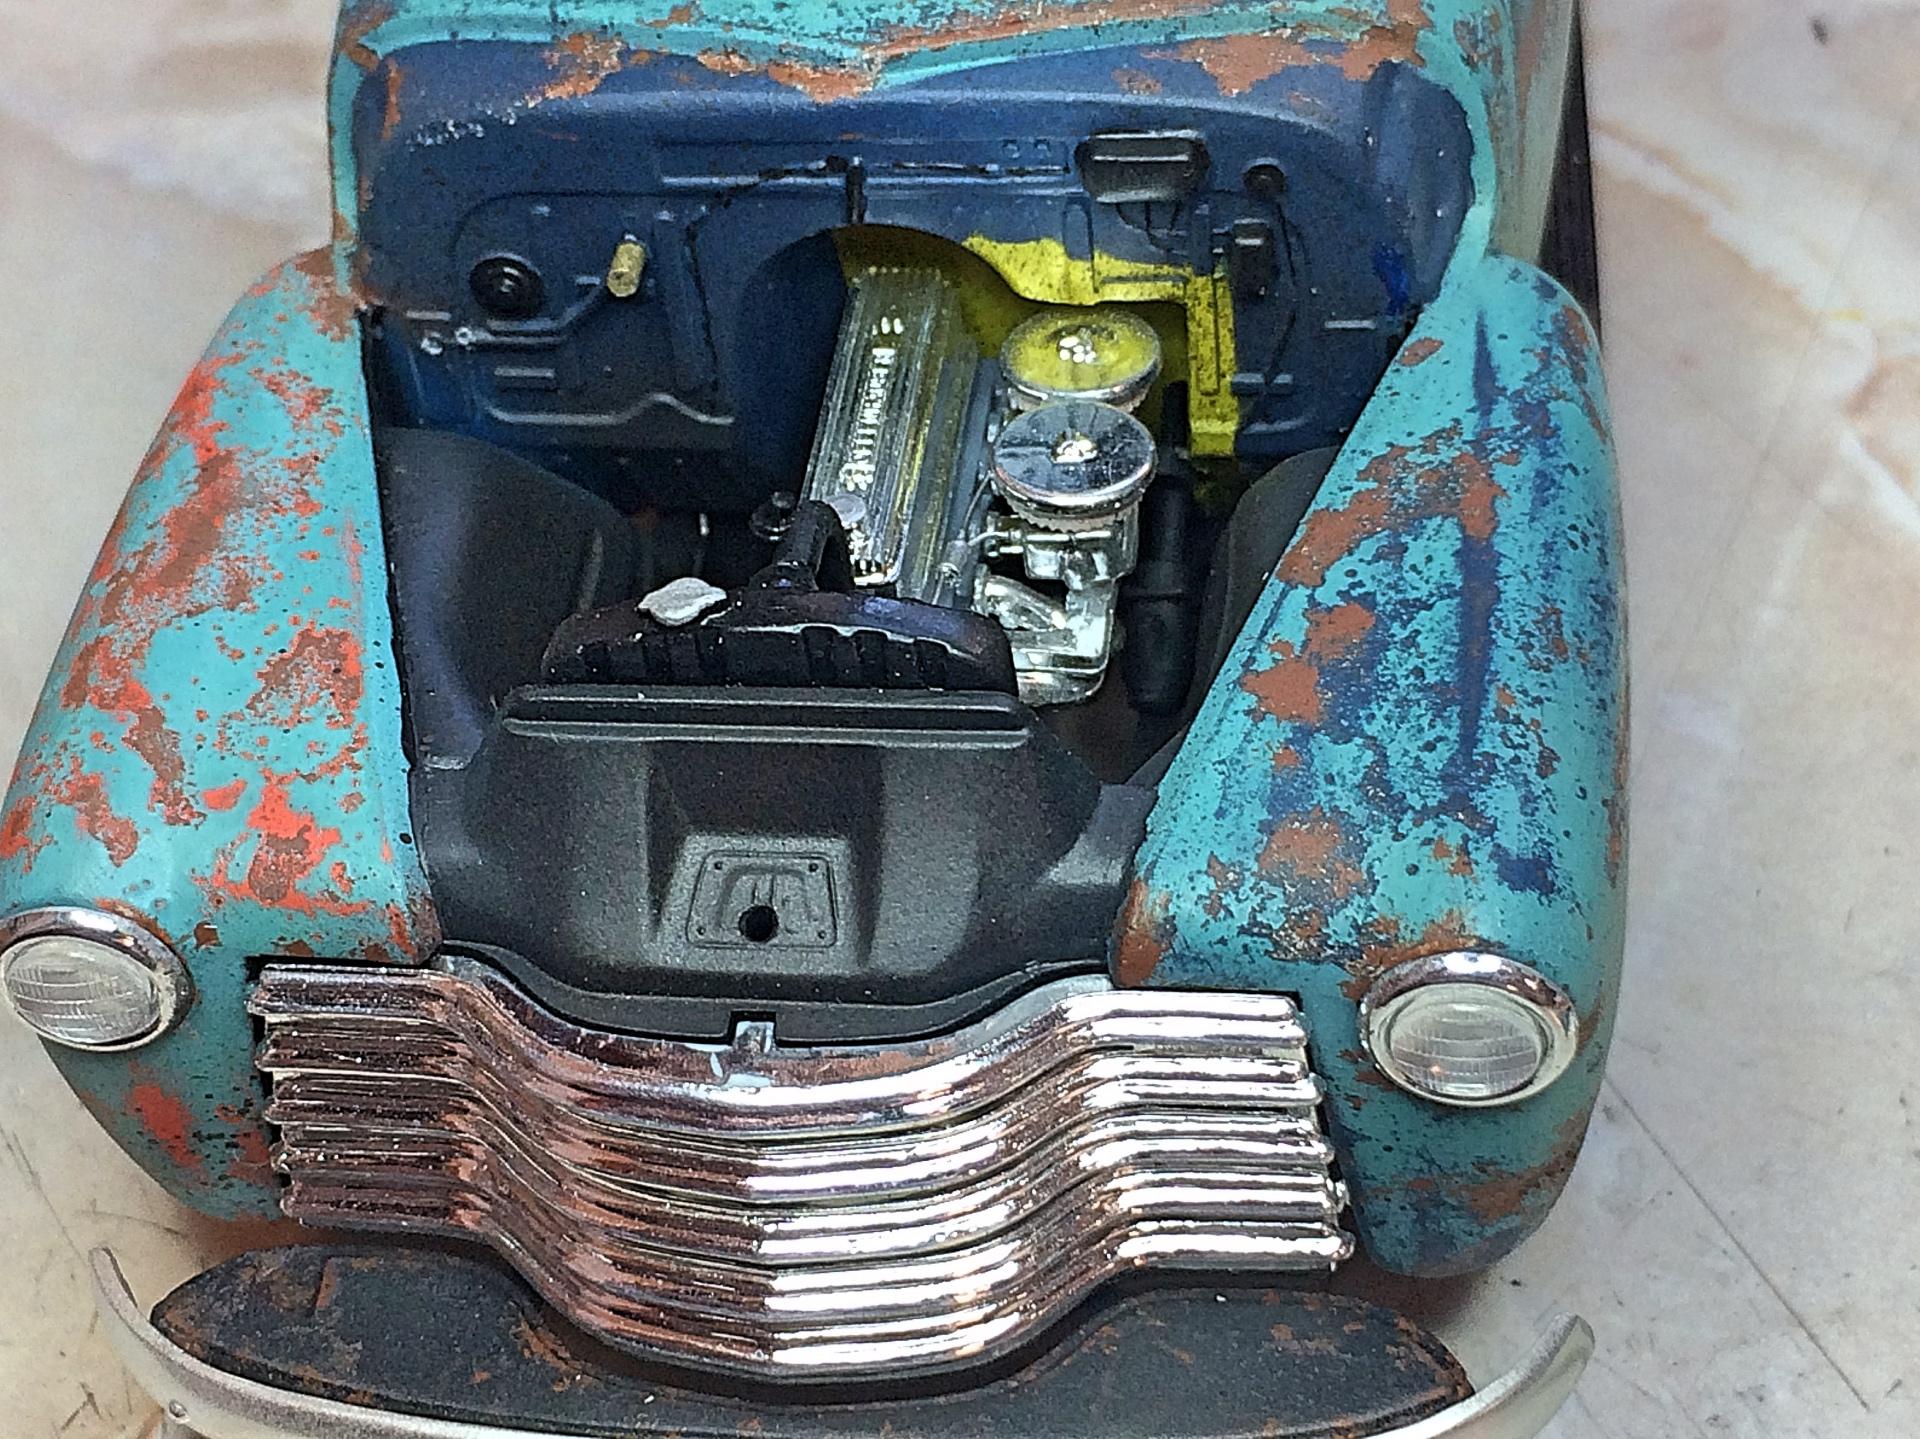
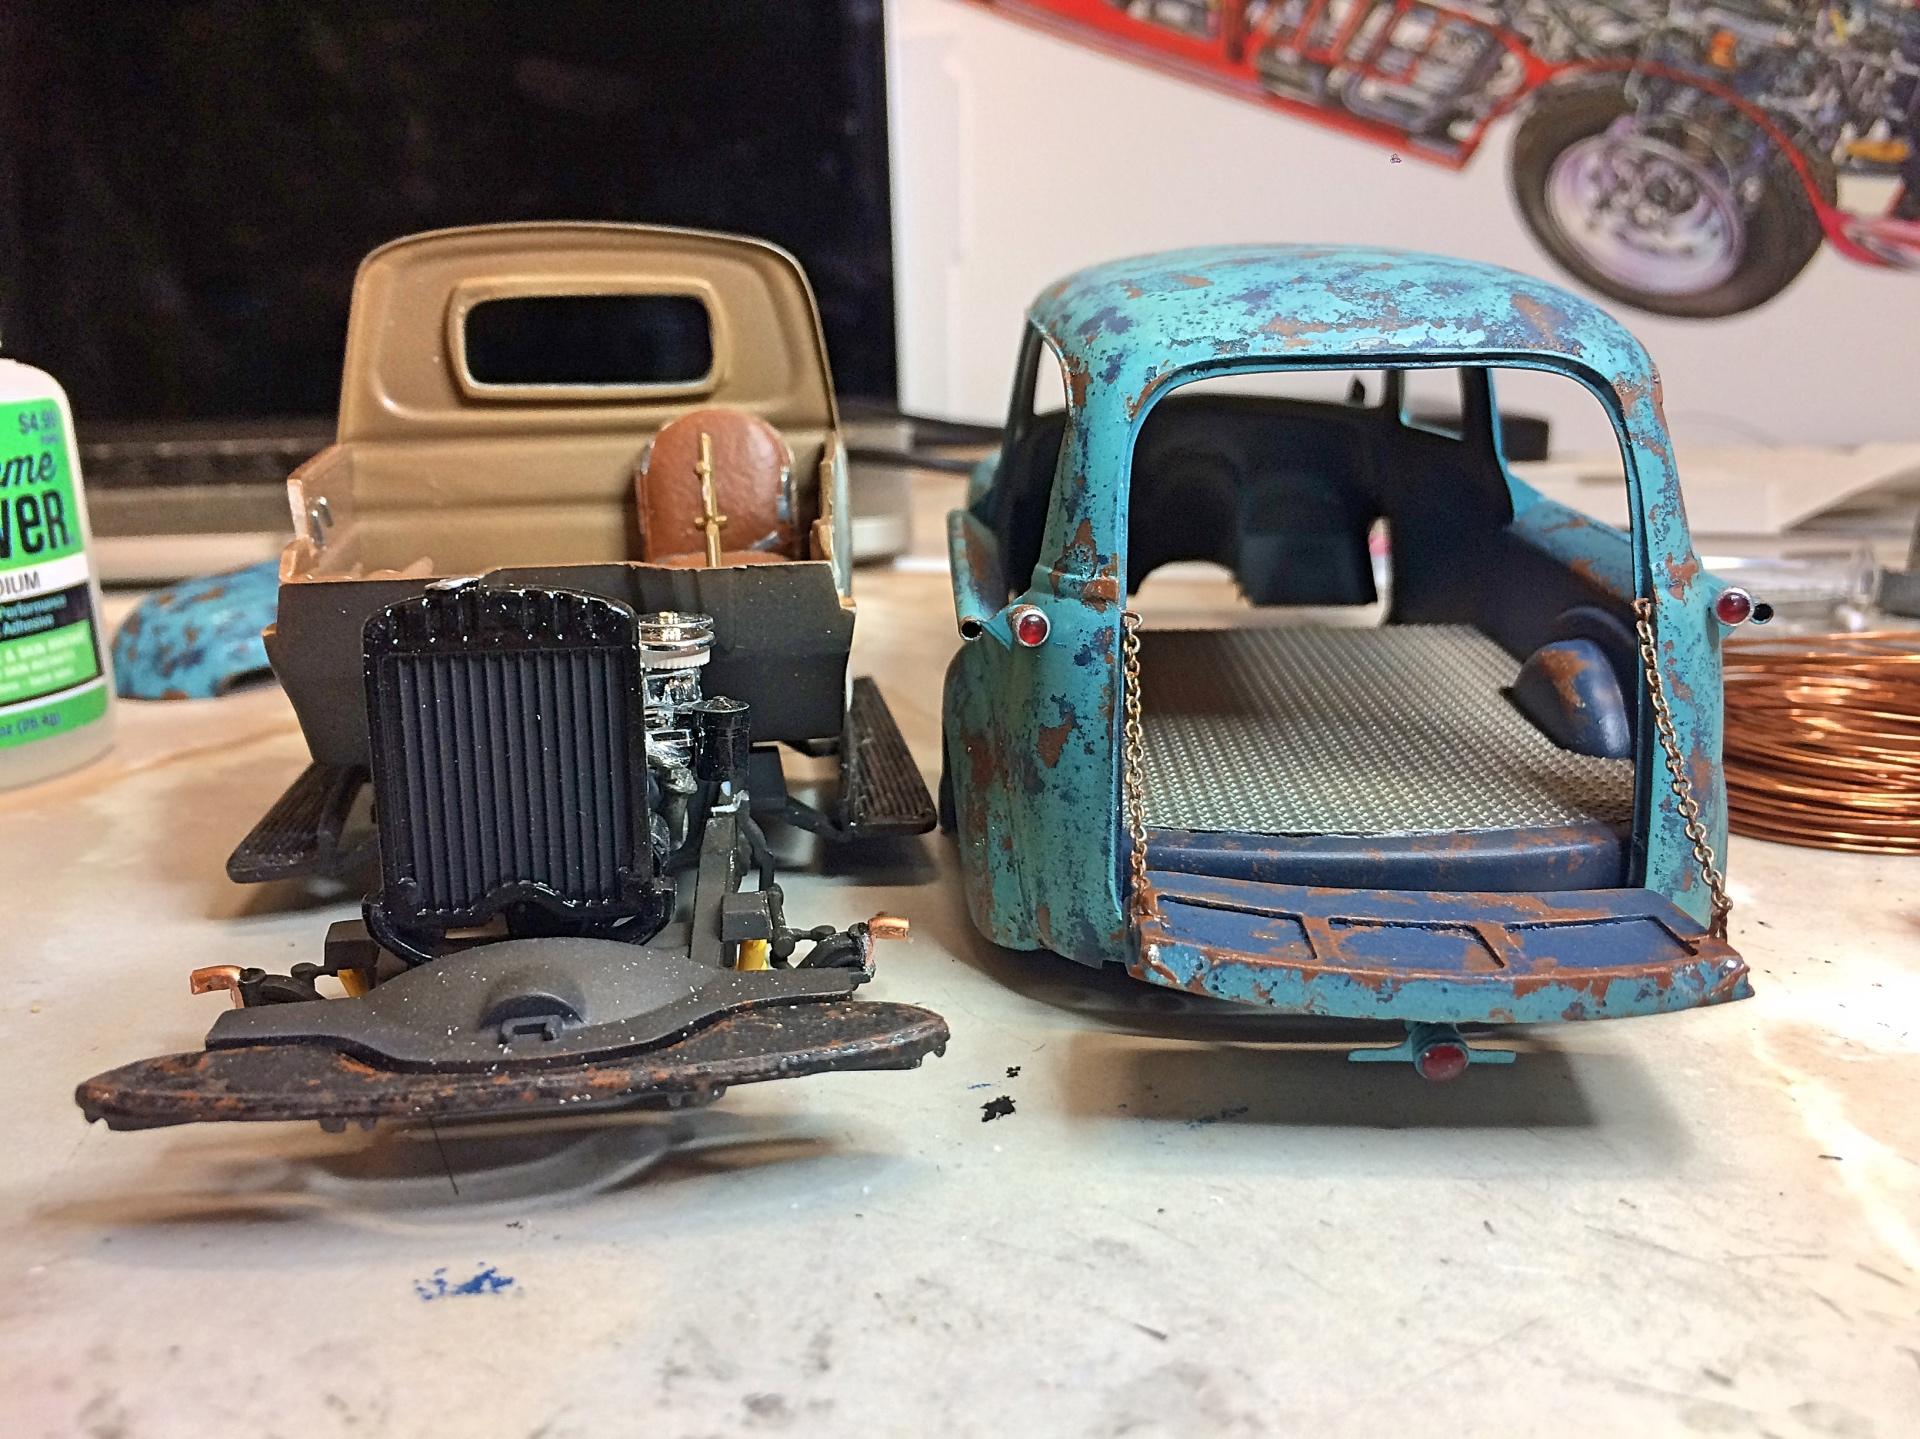
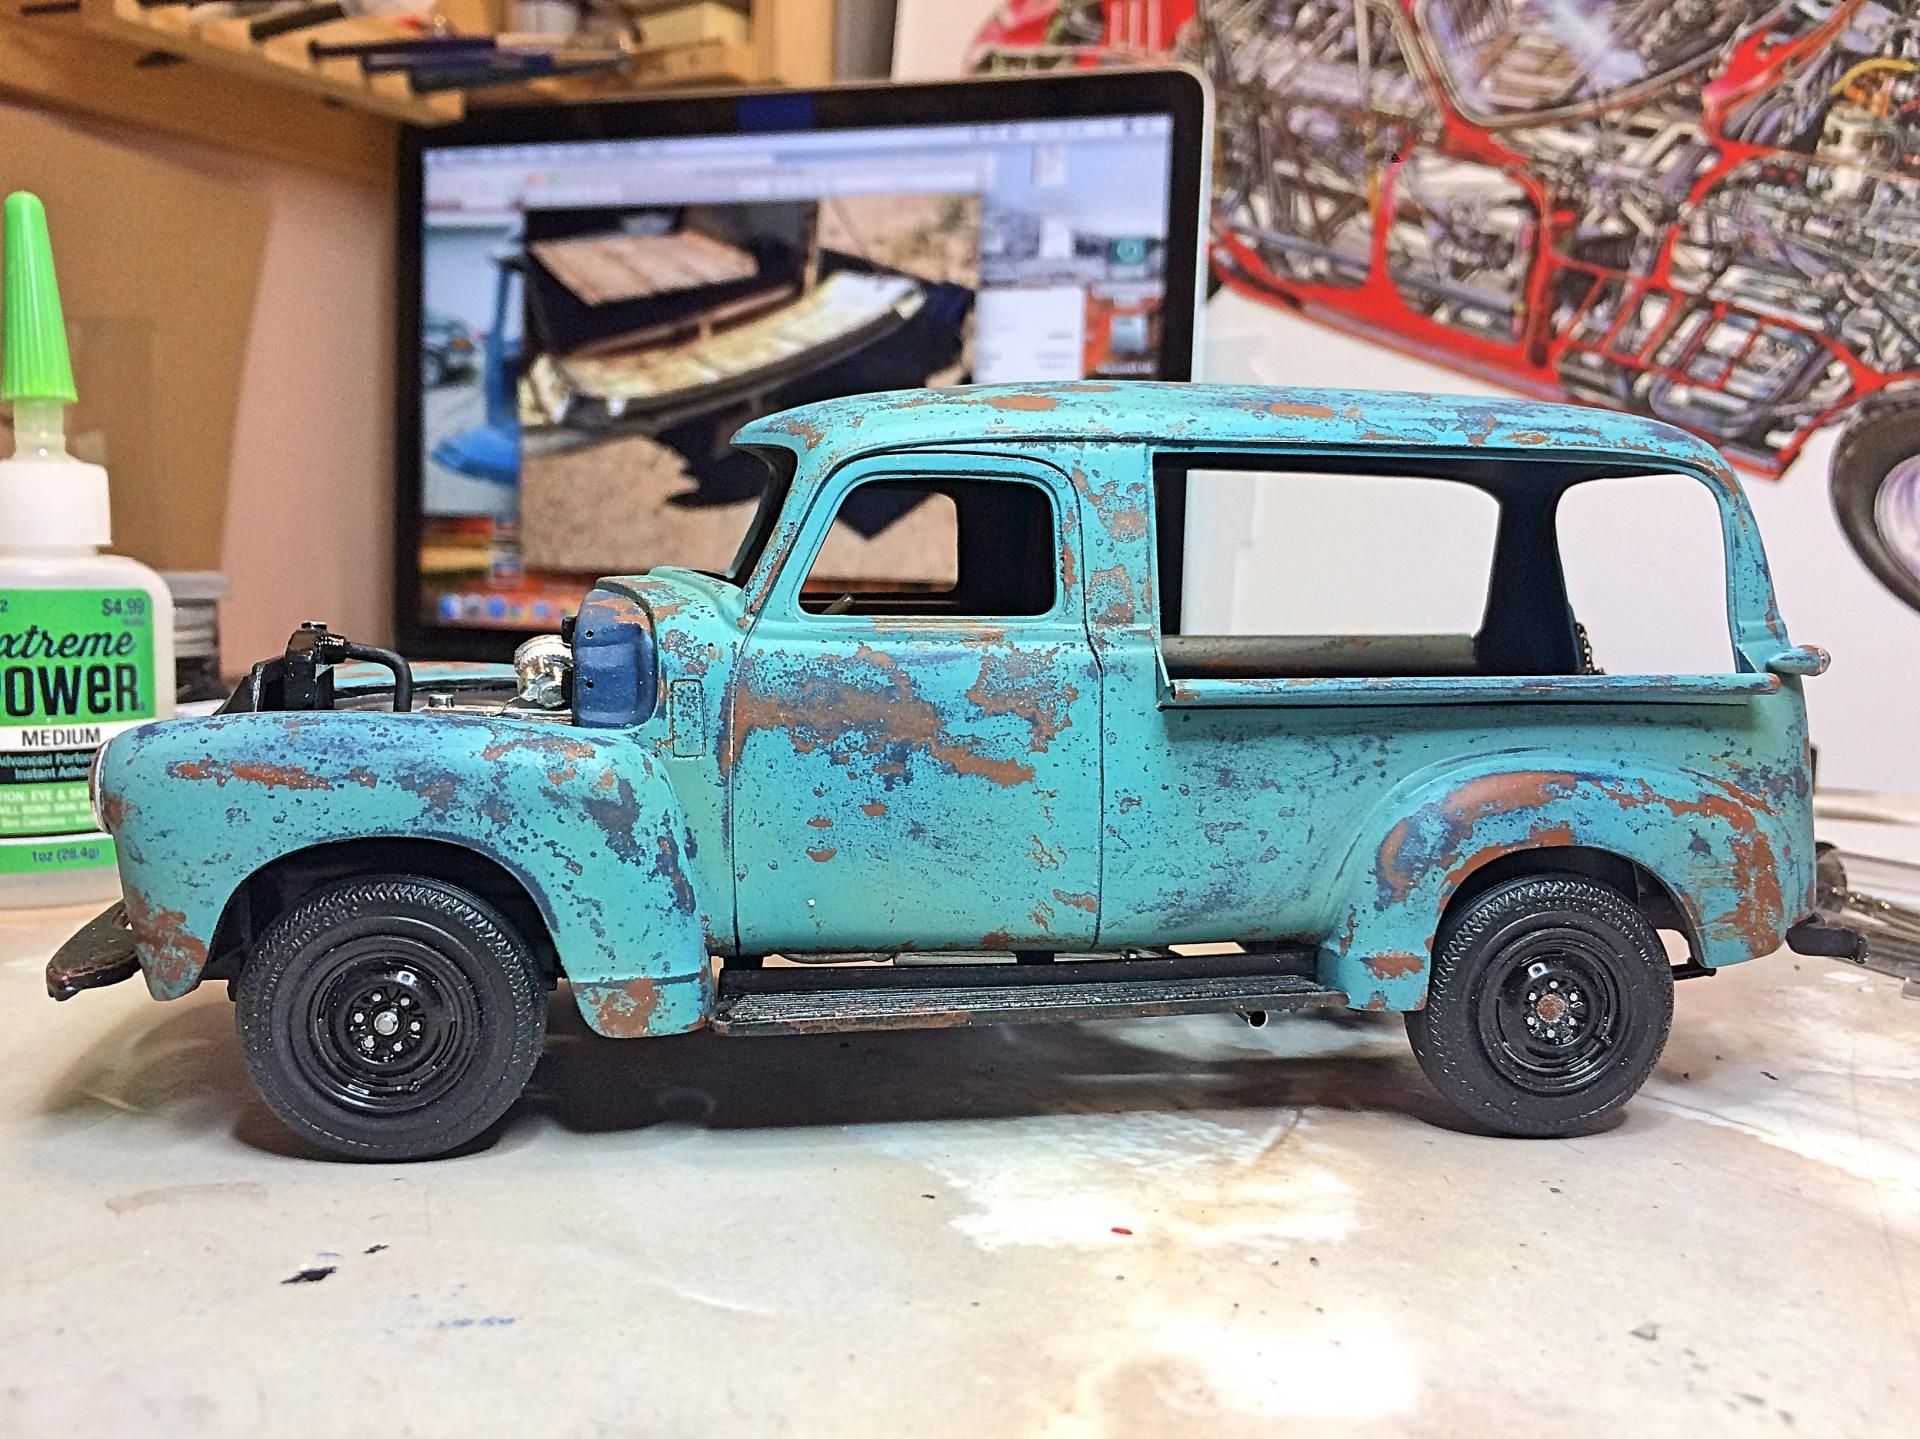
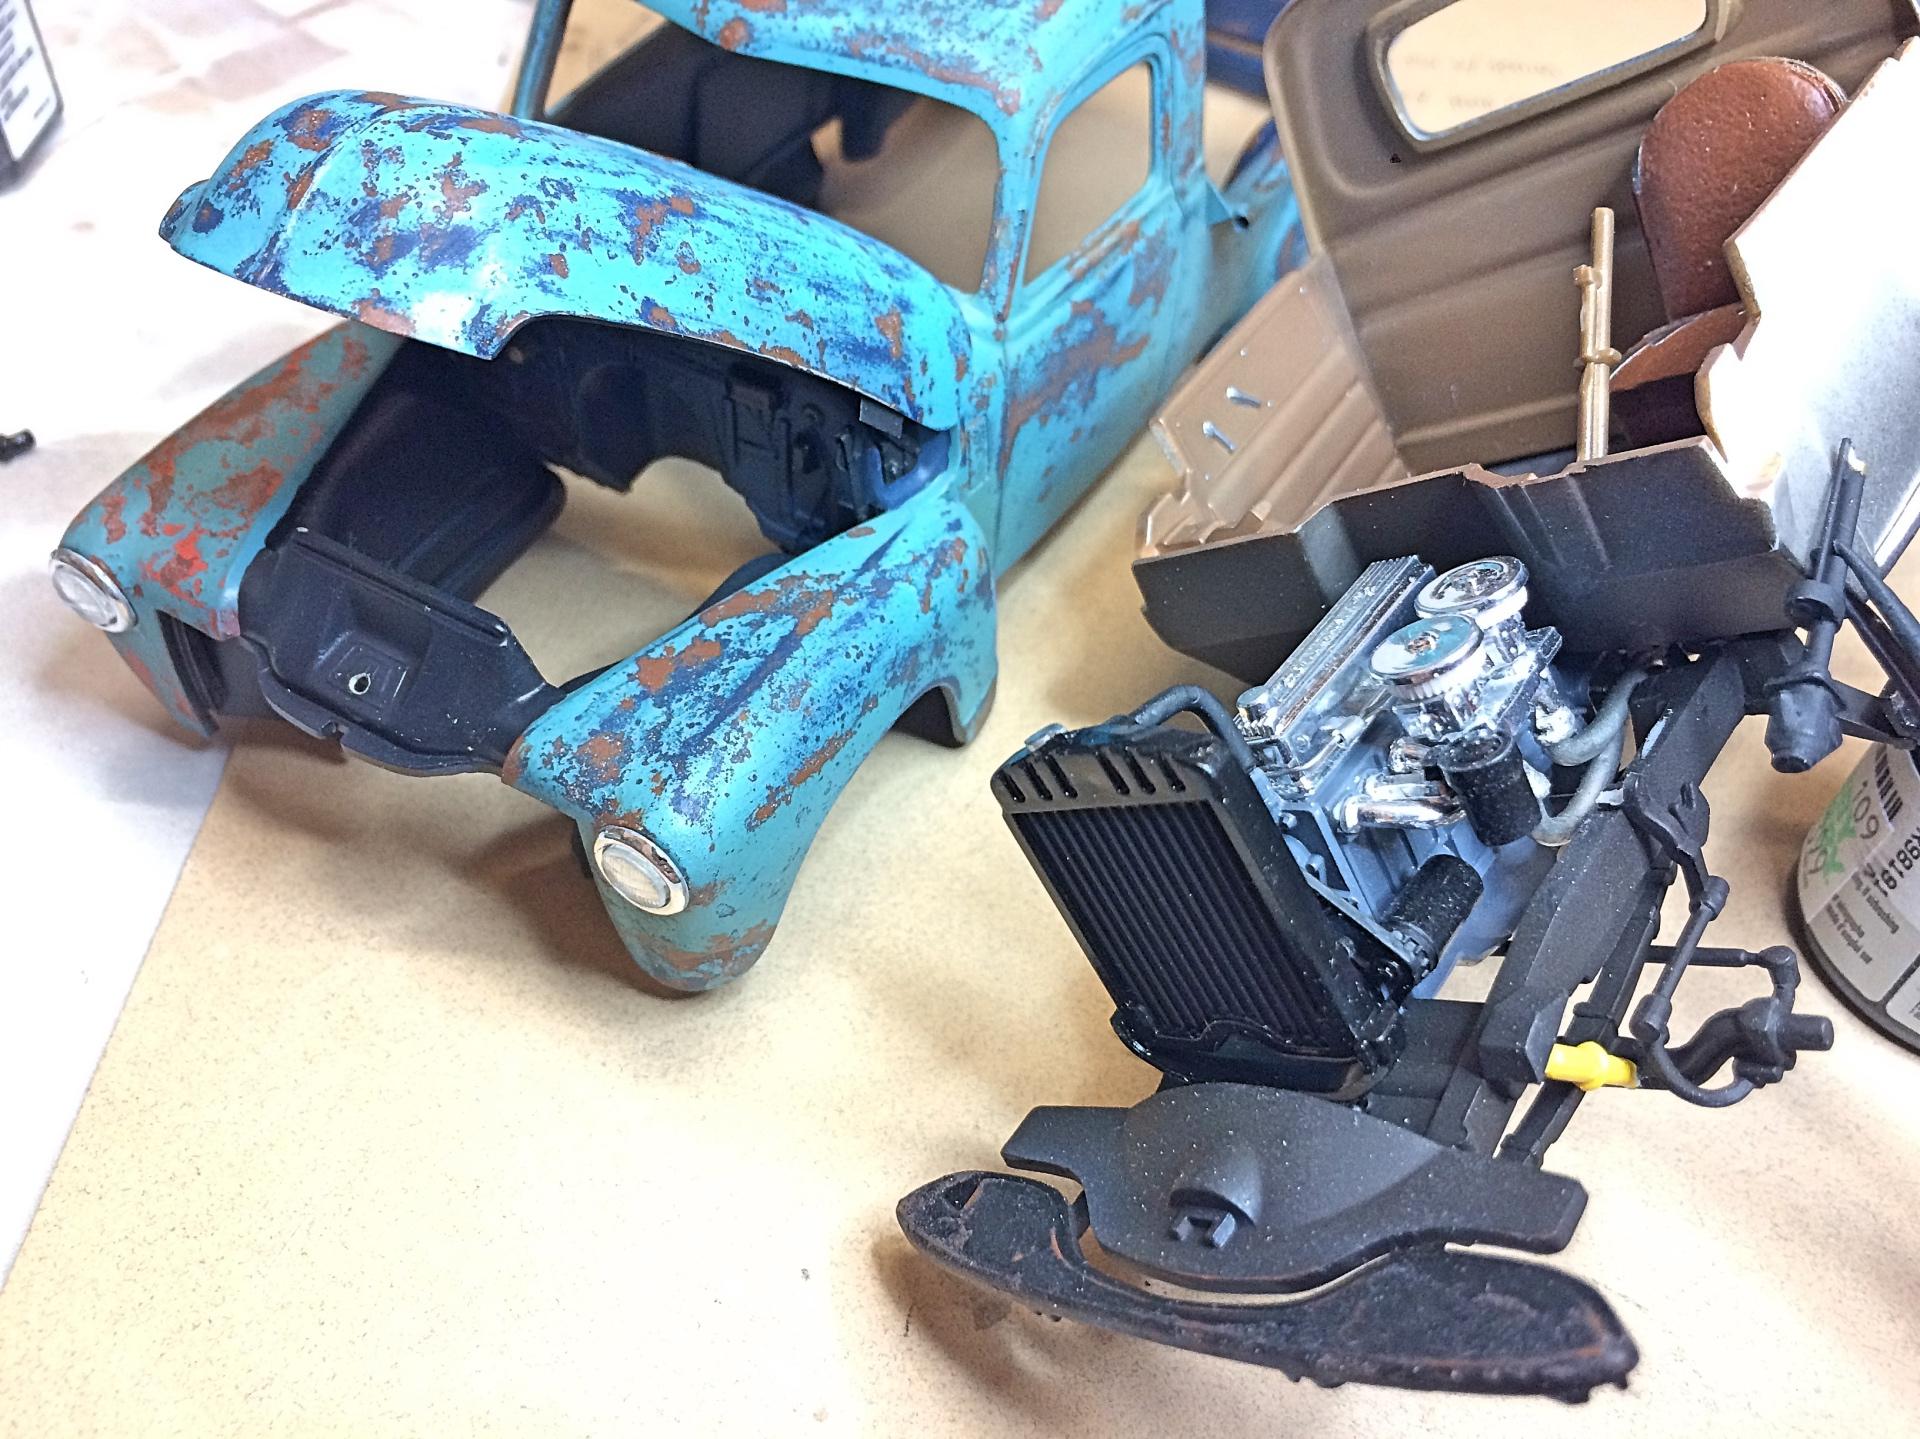
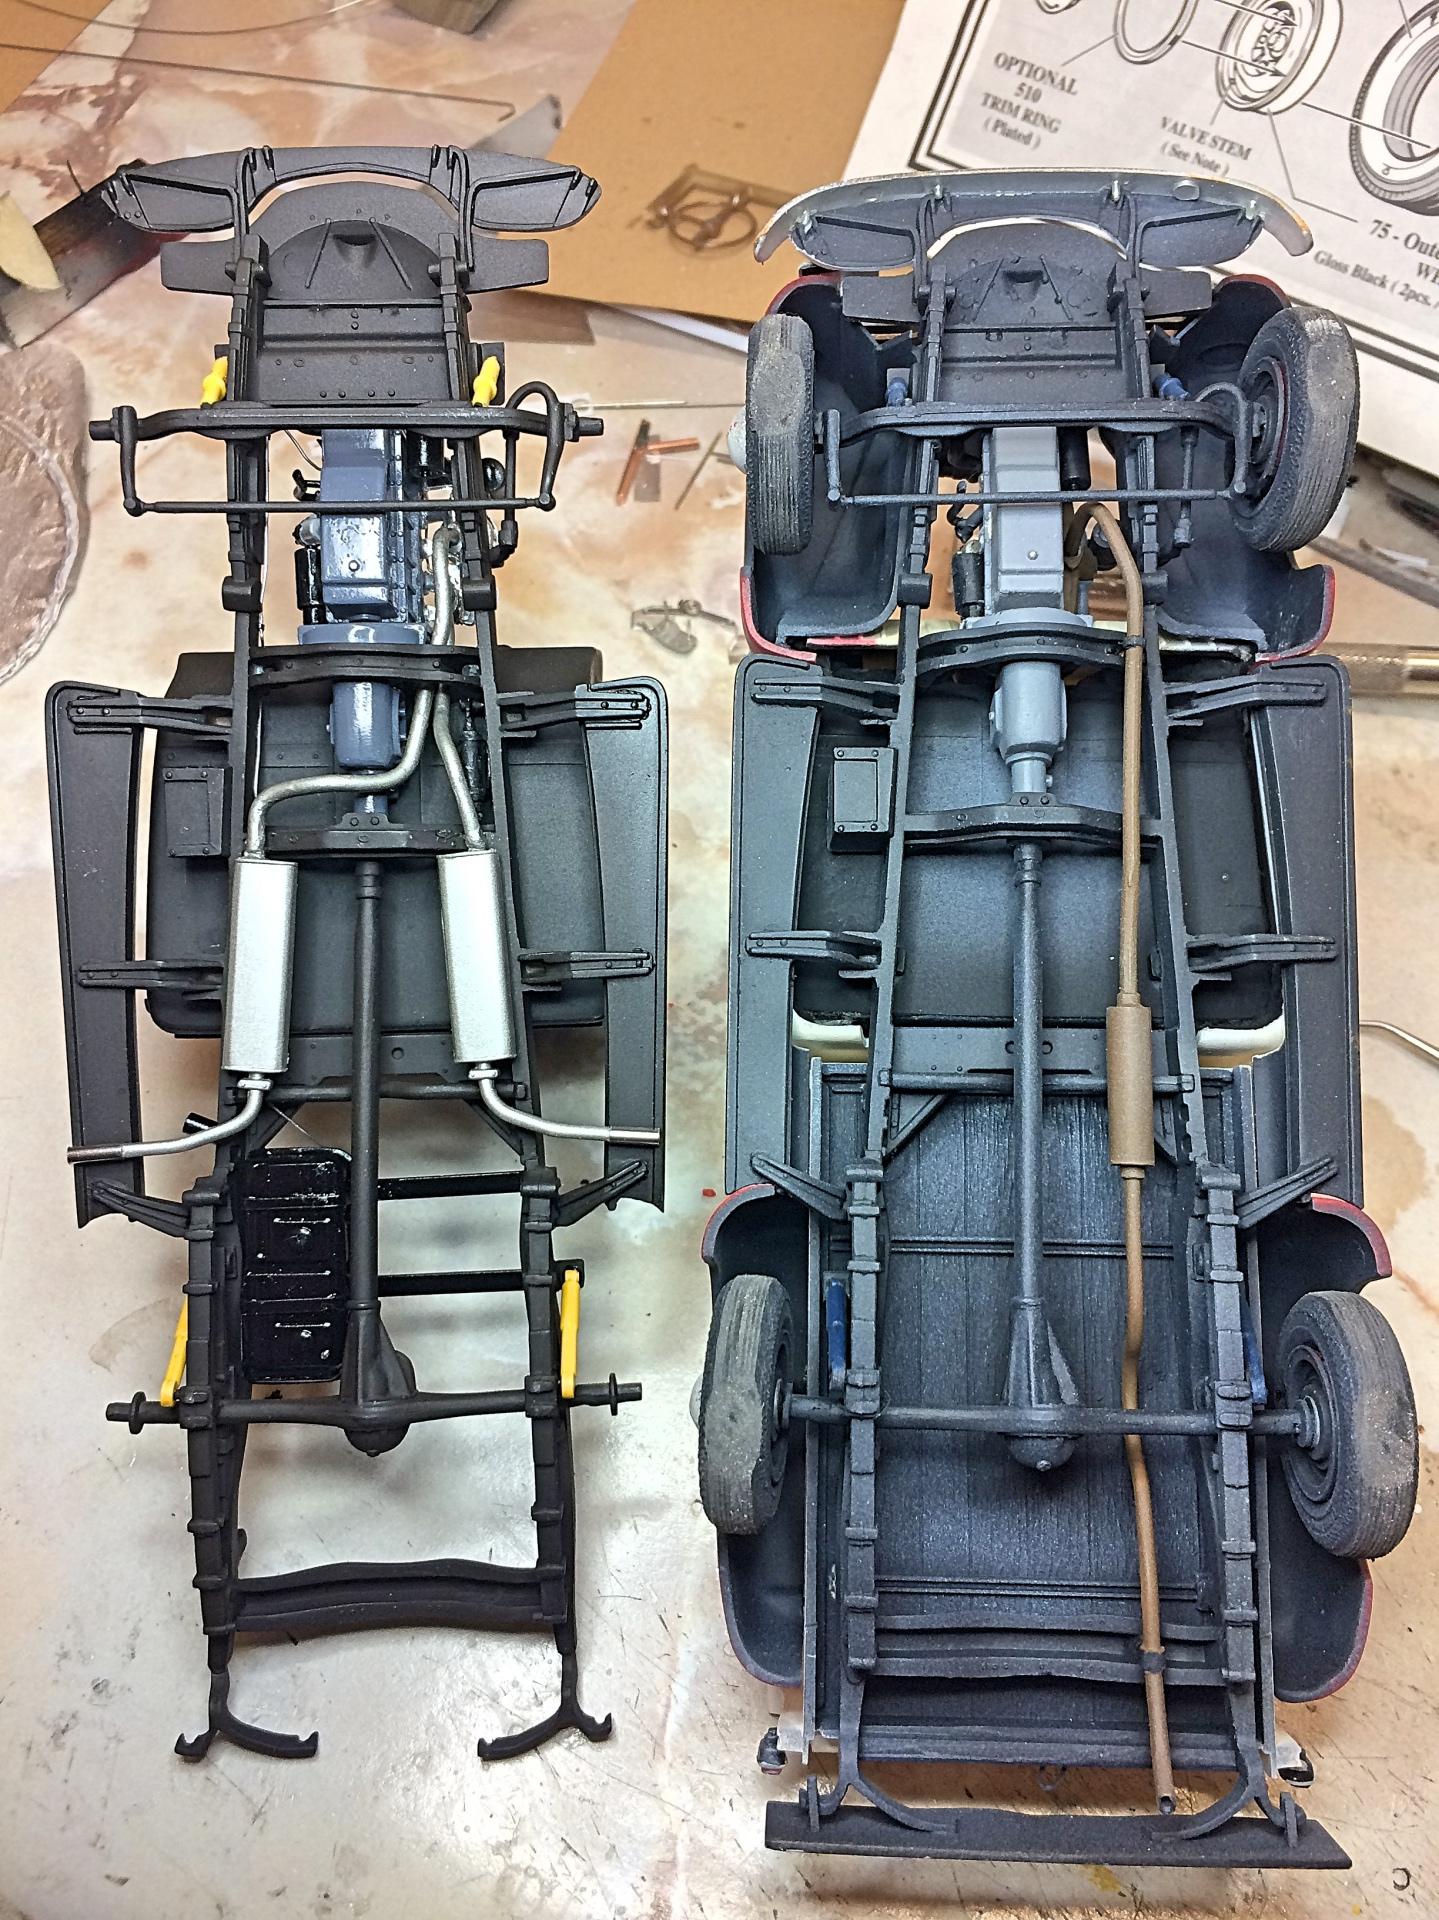
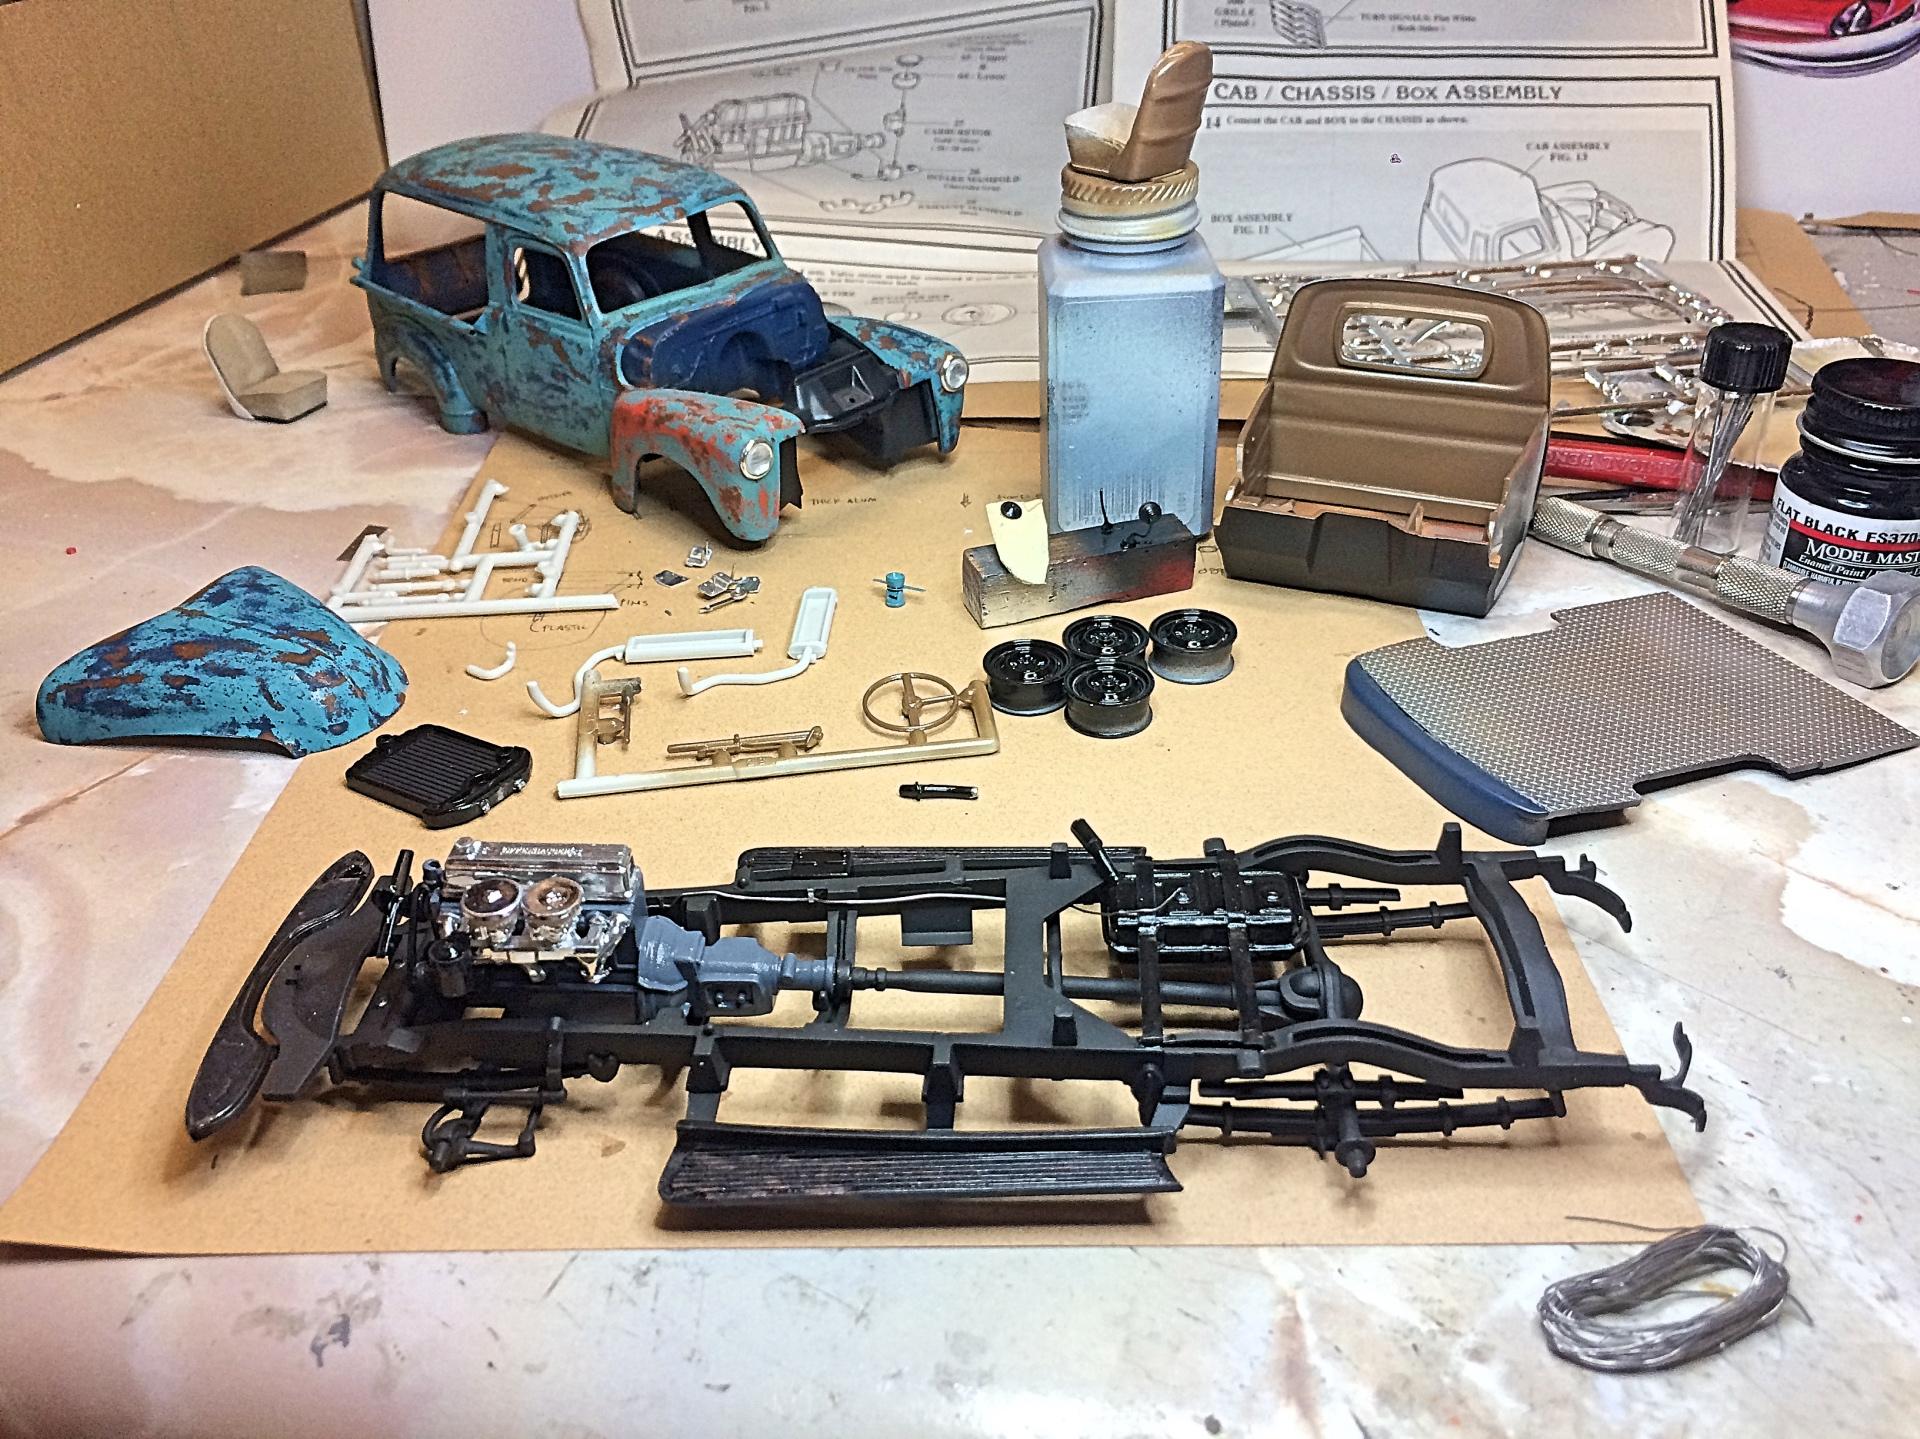
... screw up? ? Thank you. I was able to save this. The beauty of building beaters, when you need to fix something, you can't really tell. First thing was to grind out the firewall, also could tell the steering shaft/box wasn't going to fit, so ripped out the fender well. Fabricated new "sheet metal" from sheet styrene, and fit the steering unit. Guess I really just wanted to use the WW2 era zinc chromate primer color, which gave it a bomber look. Glued on the bumpers, which I didn't distress, sometimes one gets new bumpers when fixing up a beater like this. Also put the hood badges on, the Detail Resources were acquired a long time ago, one pair is Thriftmaster which is really cool, the Detail Master photo-etch does not have this (which I also have, but decided not to use). Bumper looks crooked, but it's put on correctly. But these old trucks are never straight. ? I constructed this so tight, that I don't really need to glue the body to the chassis, but will in critical spots when I do the final assembly. Set it up, with the super fragile mirrors in place (not glued), and grill in place (needs detailing). The front drop is almost imperceptible, but with the other model for comparison it shows. I'm pleased with the headlights, with curved reflectors, the Texaco ones just look blah. Next will be the glass. Needs a front license plate bracket, those usually broke off anyway, but have something in mind..... Taking a break from this project, since I'm waiting on the chromed dash. Wife is demanding some time with me too. ?

-
Oh hi there, thanks for the comment. This project is on the back burner at the moment. On the real thing, there is barely any room, would have to remove under the skin to paper thin, which would make it vulnerable to getting screwed up. As it is, on the real thing, the arms can interfere and screw up the bed side, there is a nice dent where that's happened over the decades. Plus the plastic pin would end up being about 2" (to scale) thick, taking up even more space. A dude has got know know his limits.
-
I always think of Vic, can link the video, but the language.... ? Great, need to reset the Honda, it does not know this is Arizona.
-
I like it! But the wing needs to be bigger. ? Like how you took the pictures too.
-
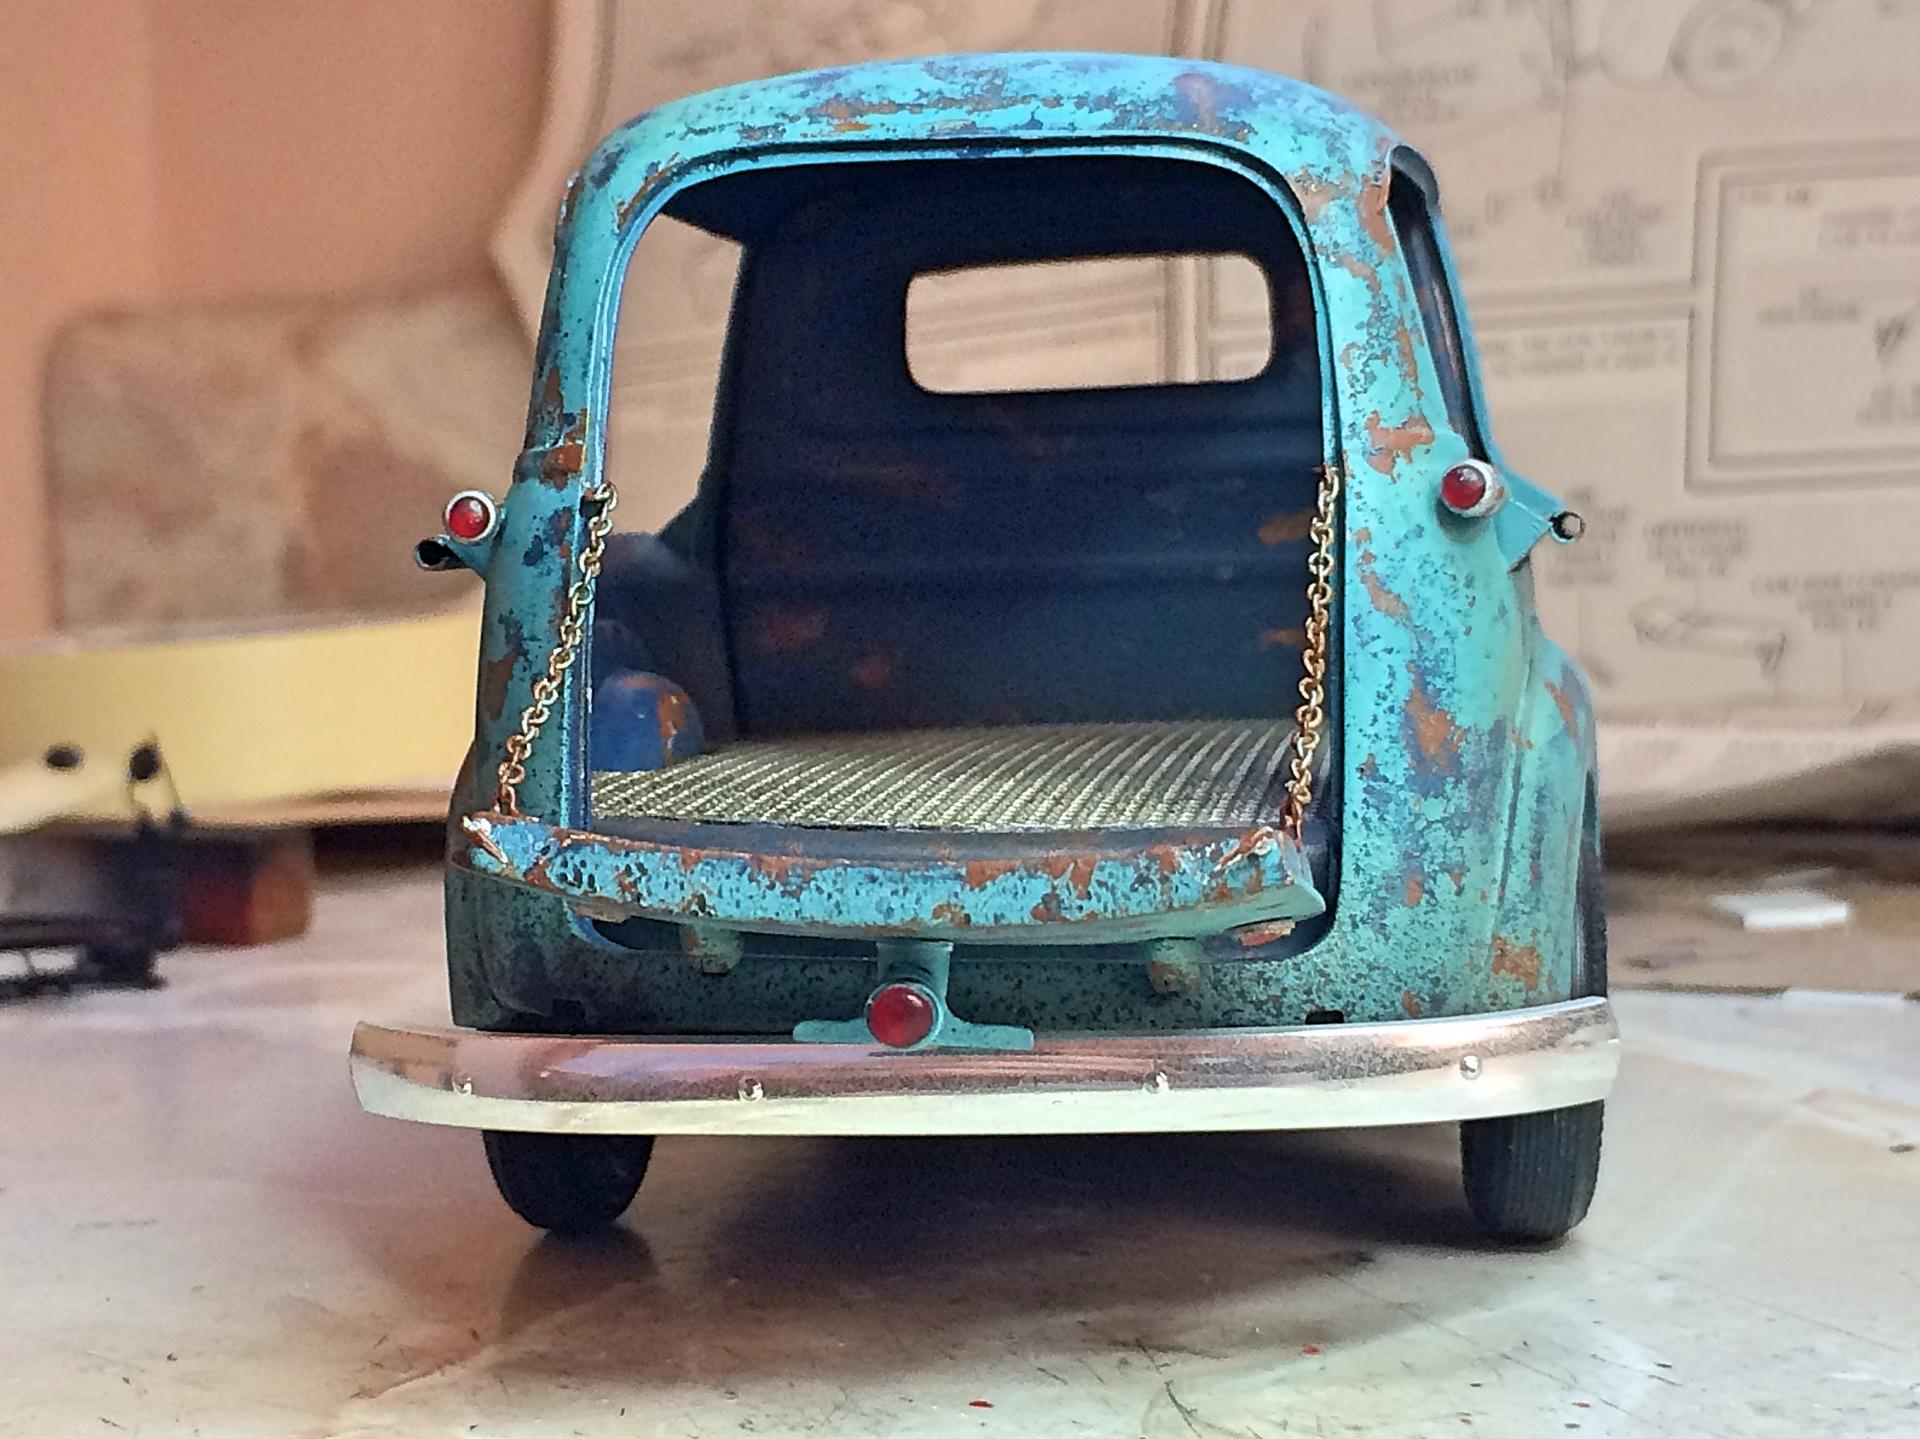
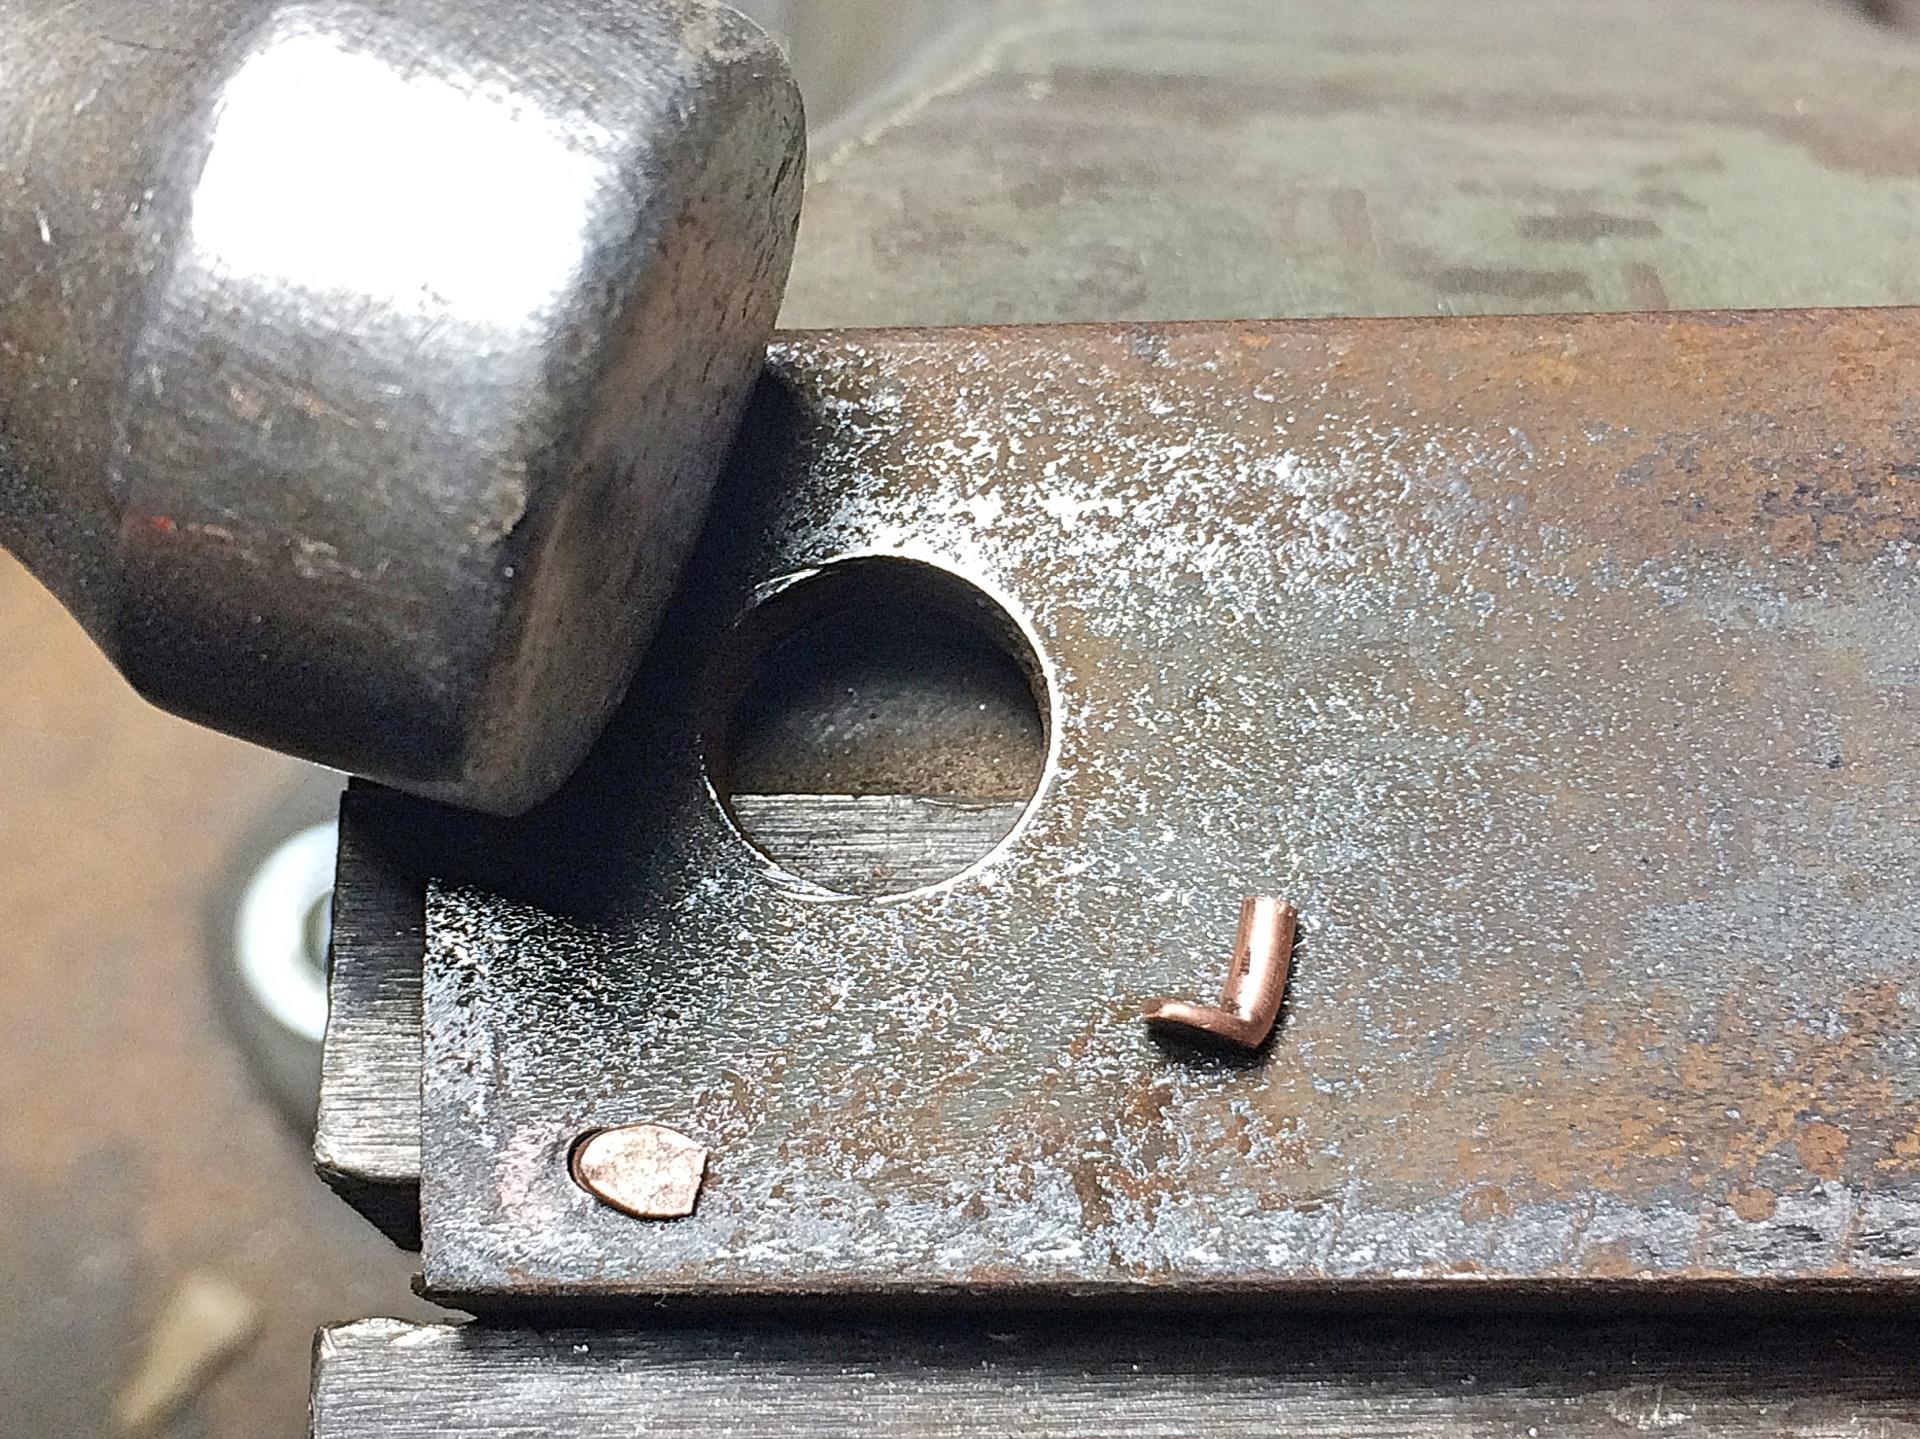
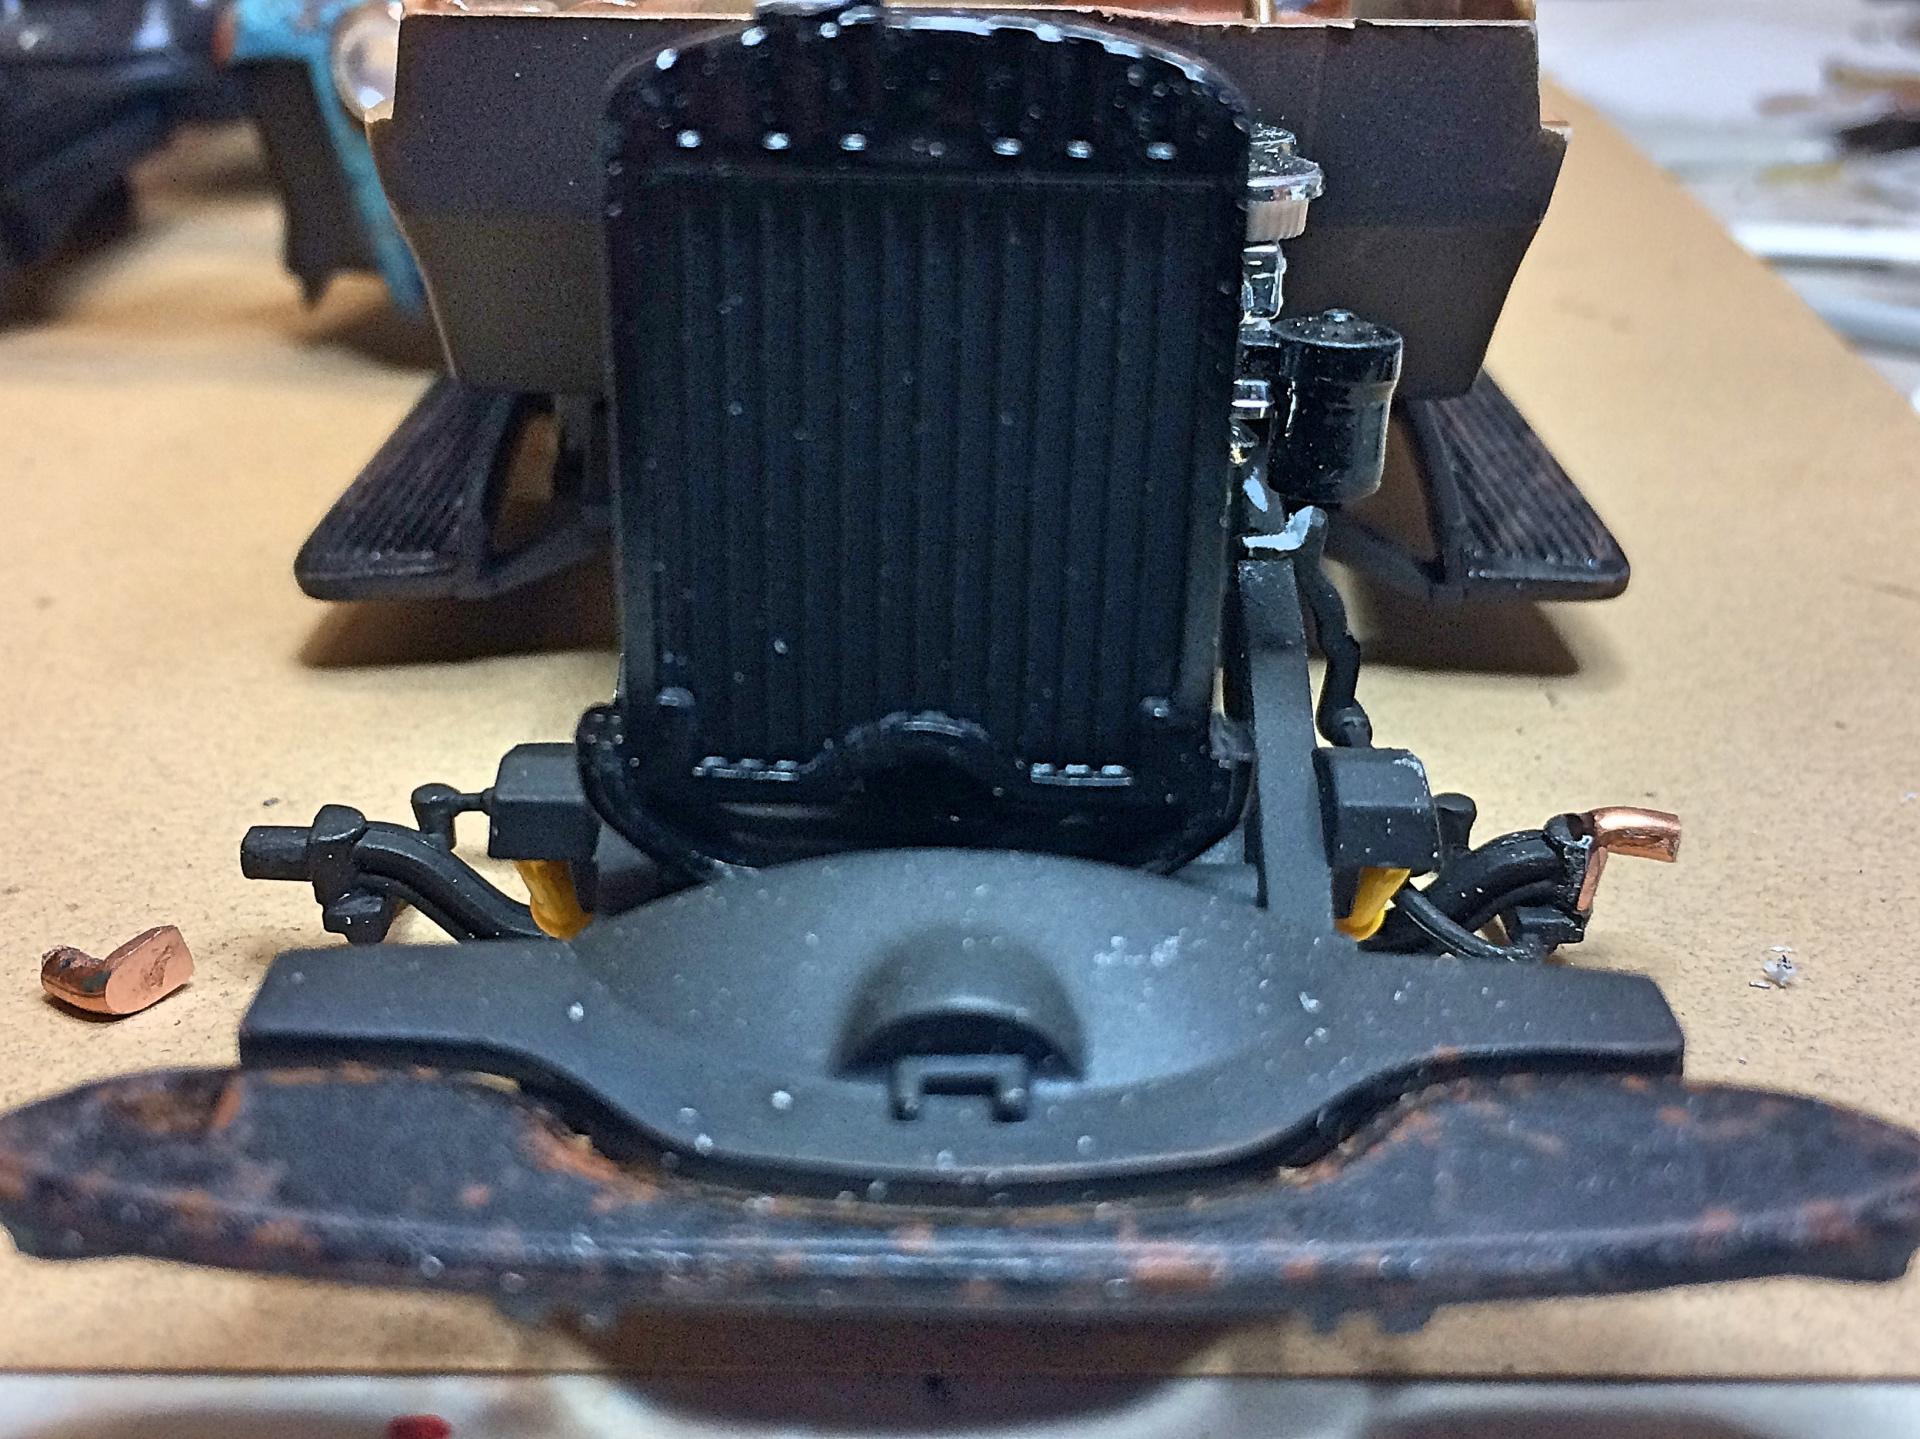
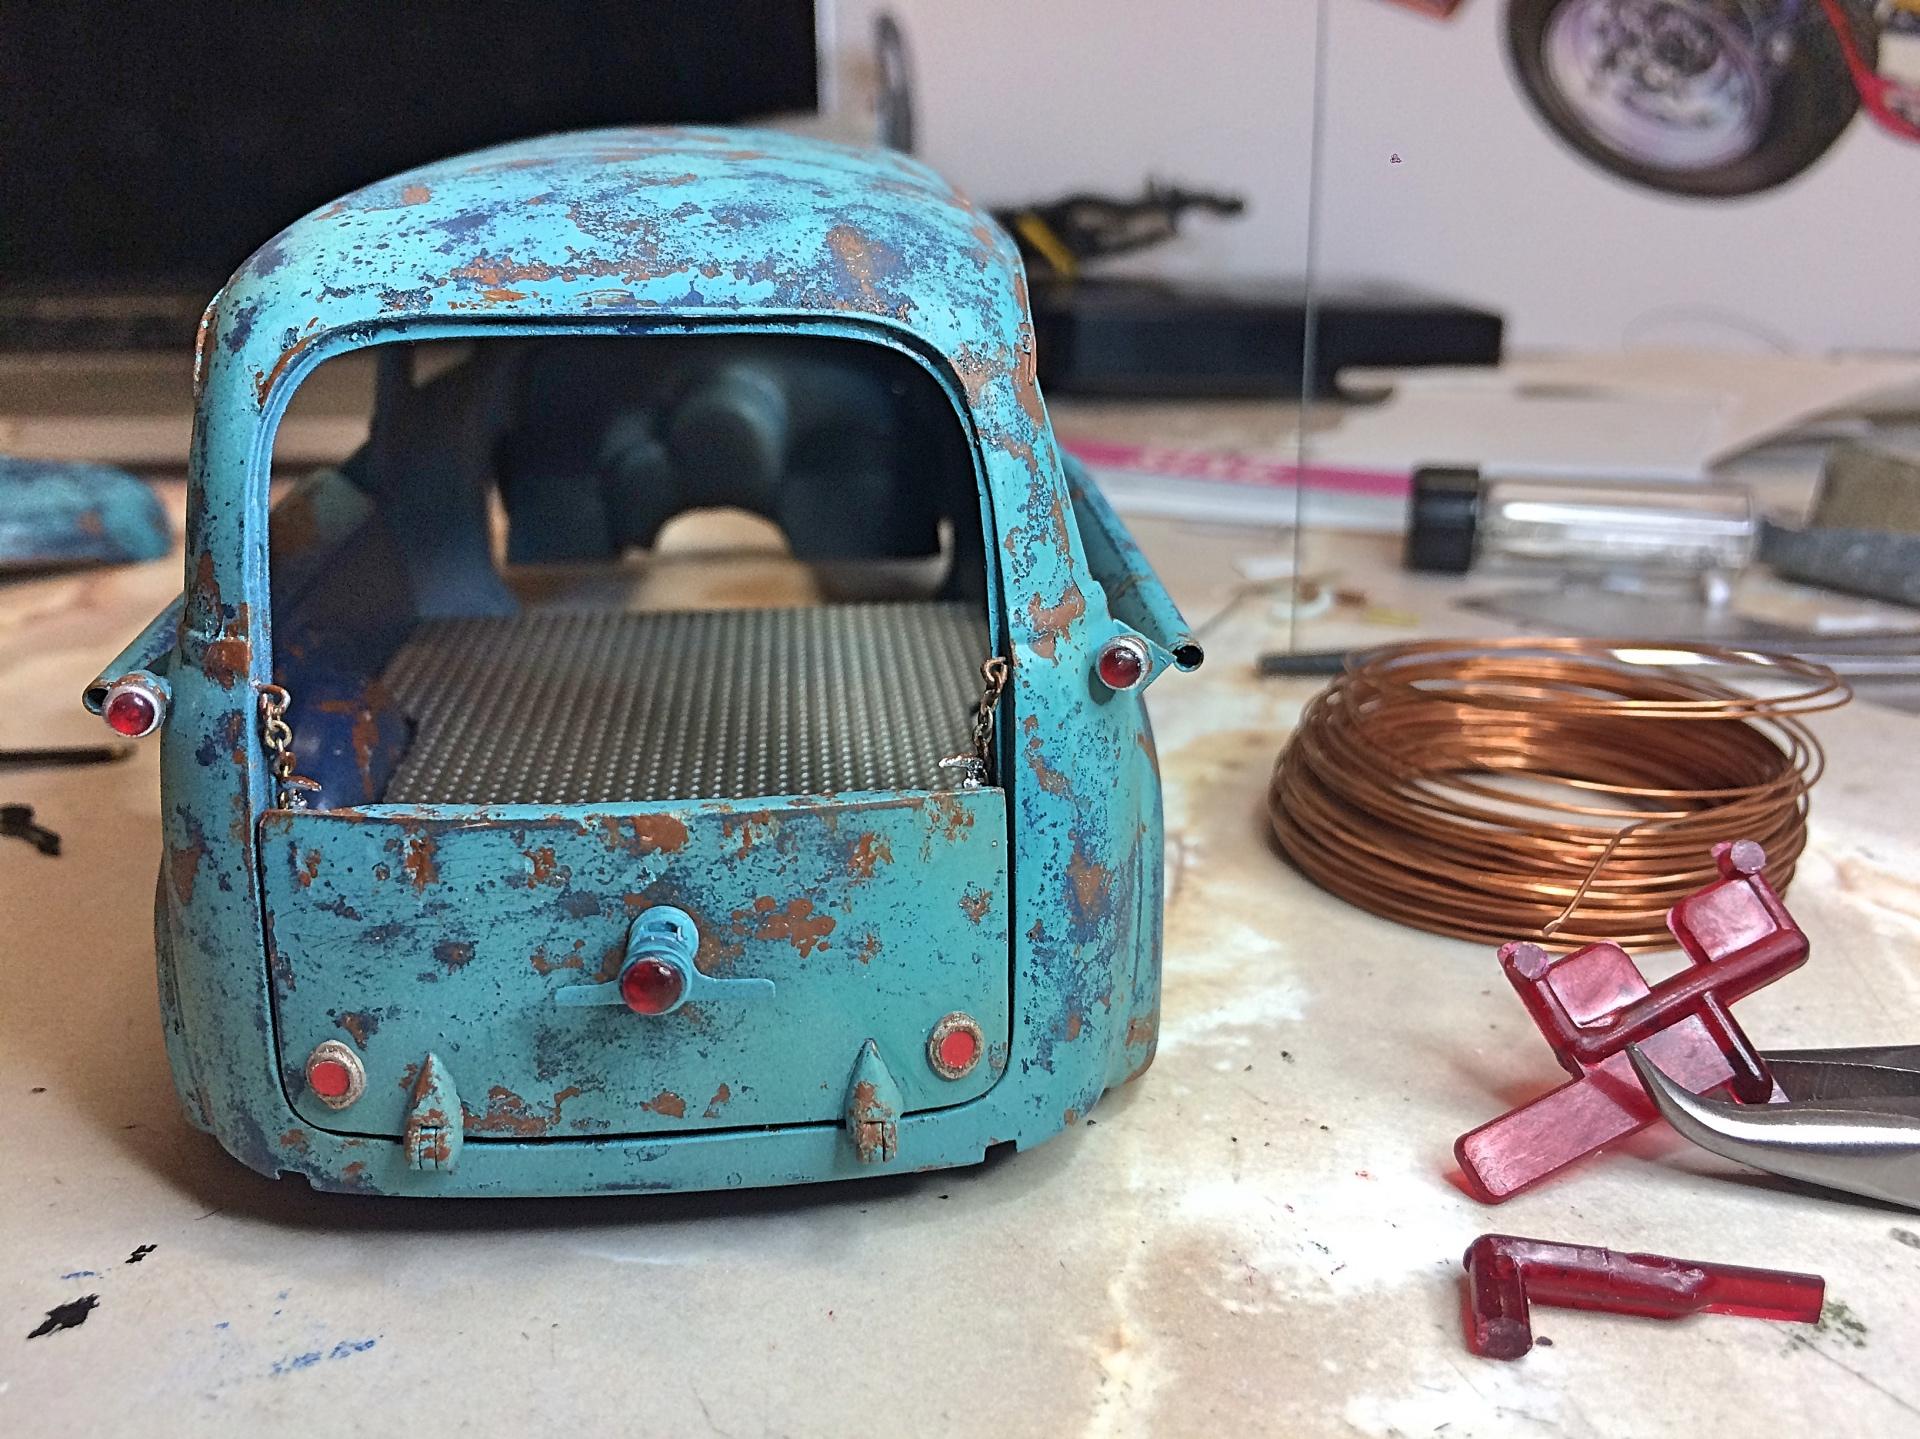
Hey, thank you Art for the comment! You might want to retract it after seeing the last photo. ? Simple guerrilla customization, drill hole in thick steel, hammer the copper wire down. Ground off the axle pin, superglued the copper axle on. Spidy sense eyeball measuring, center line now on the top of the beam axle. Taillights are done. This was dumb luck, the clear red sprue had the (almost) perfect sizes needed. Sanded round, rubbed on the t-shirt to polish out, sawed off with photo-etch blade. Painted the "reflector" holes steel, because Chevy didn't do shiny back then. Made the tailgate chains. The end on the gate are copper wire, smashed ends with the pliers, other end is bent steel wire. It's a tight squeeze to get together, more this time ......? But I'm digging the slight lowering of the front, not drop-in-the-weeds castration, but enough. Now I'm feeling really stupid. ? But I thought of how it will be remedied when going to sleep last night, sign of a crapsman is fixing something and make it looked like it was planned. ? The 'brass' thing is for the heater hoses.
-
Upcoming Astro 1 project , Opinions ??
89AKurt replied to Can-Con's topic in Model Building Questions and Answers
Second choice, different enough for a show car. Engine, that's what is fun about building models, sky is the limit. -
When are your special license plates getting mailed out? I have a project that needs them.
-
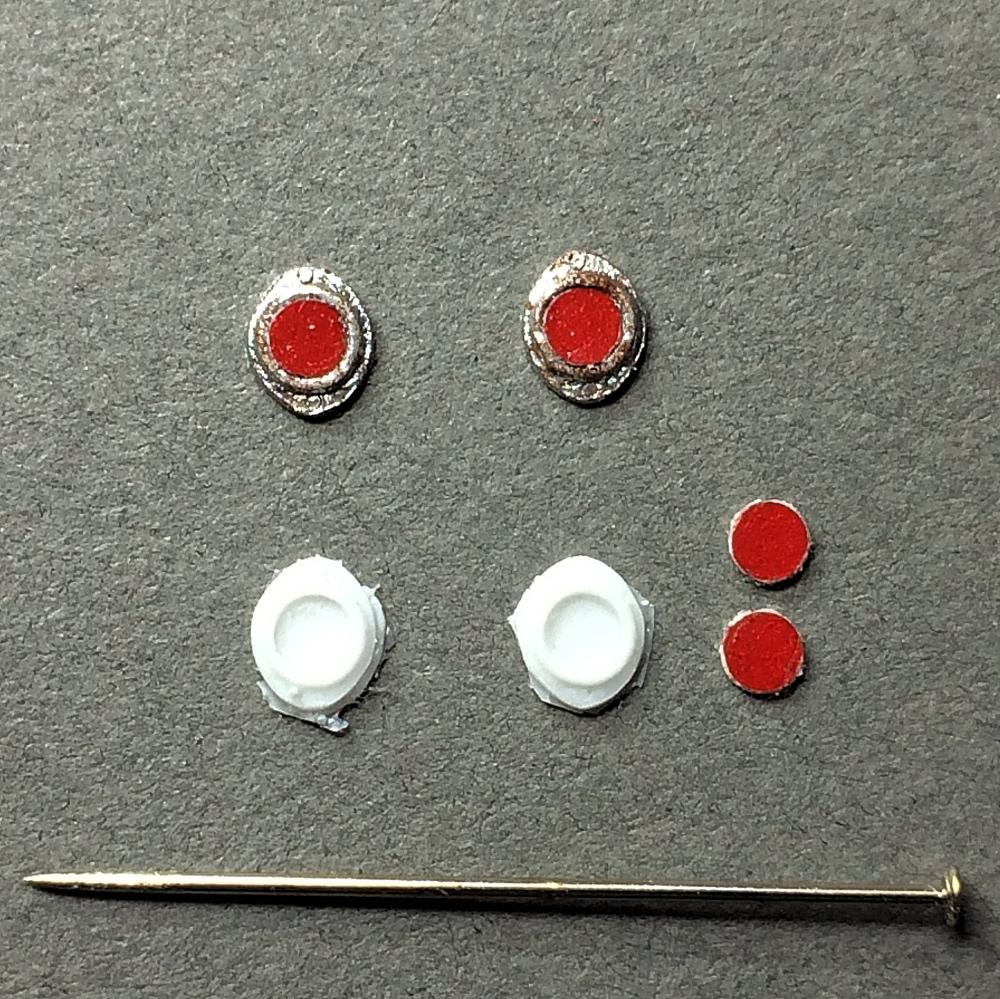
Cool to see someone doing casting. I've been doing a bunch lately, but could use some education on two - part mold technique. The taillights are something I've done on this project.
-
Introducing a new item, there were several manufacturers (Stratolite, Peterson, Tiger-ey, United Pacific), found on pickups, trucks and farm equipment. Resin, comes with real reflective sticker. US $2 per pair.
-
OK
-
Hello! Off to a roaring start, that looks well done. I wanted to get that kit, and when I offered a model for trade, got it! I owned a '91 GLi some time ago, built the Revell kit of the Golf II, the engine among other things had much to be desired, so this kit looks really good. I've built the Tamiya 959 in 3 flavors, the rear frame, engine and body assembly is tricky.
-
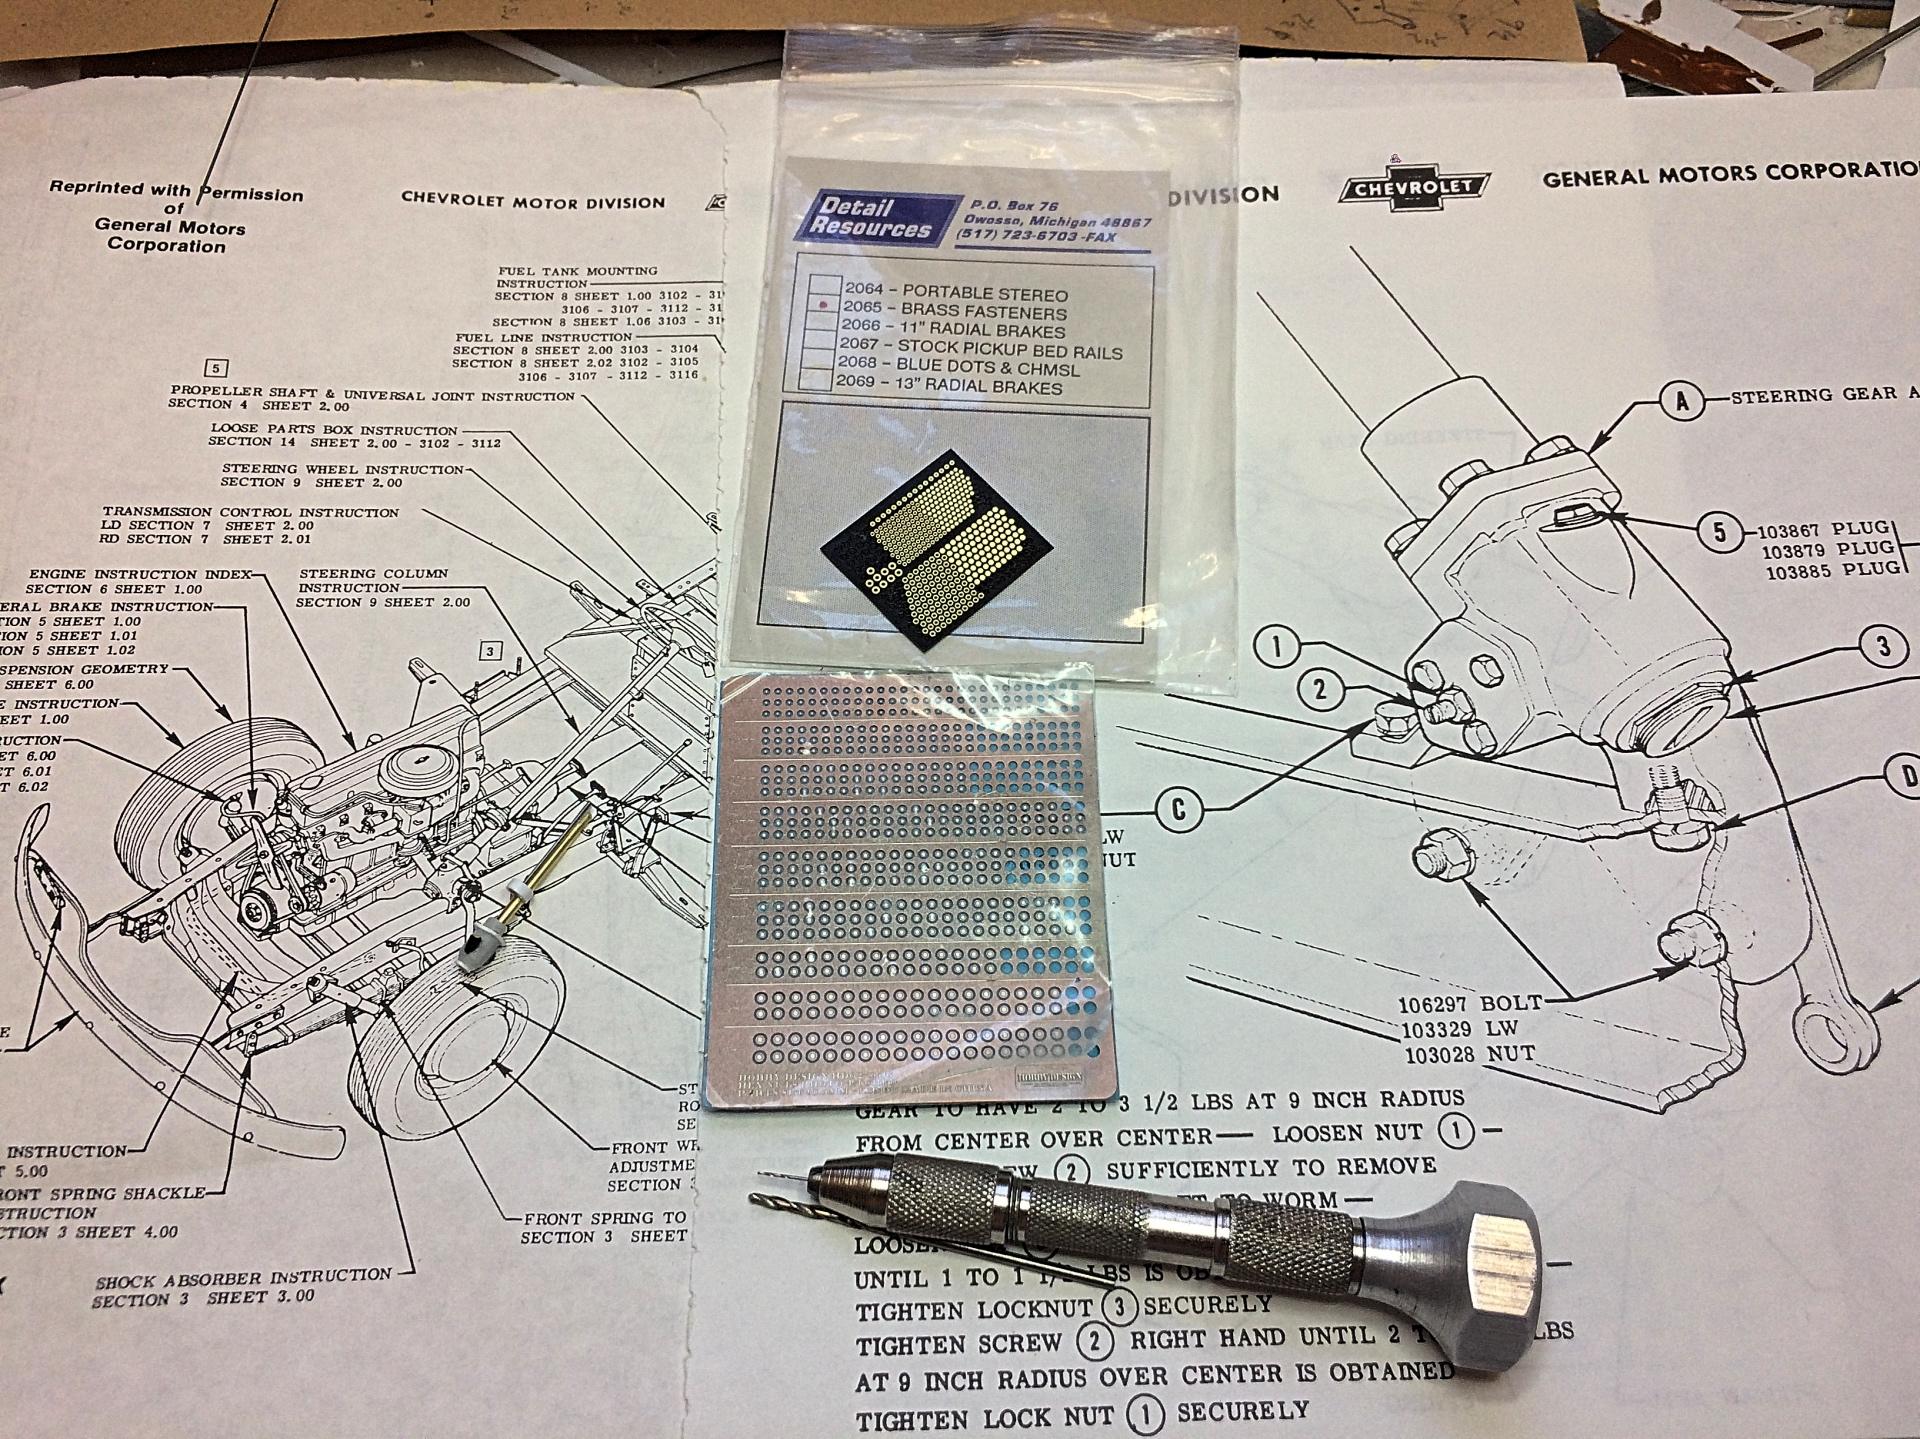
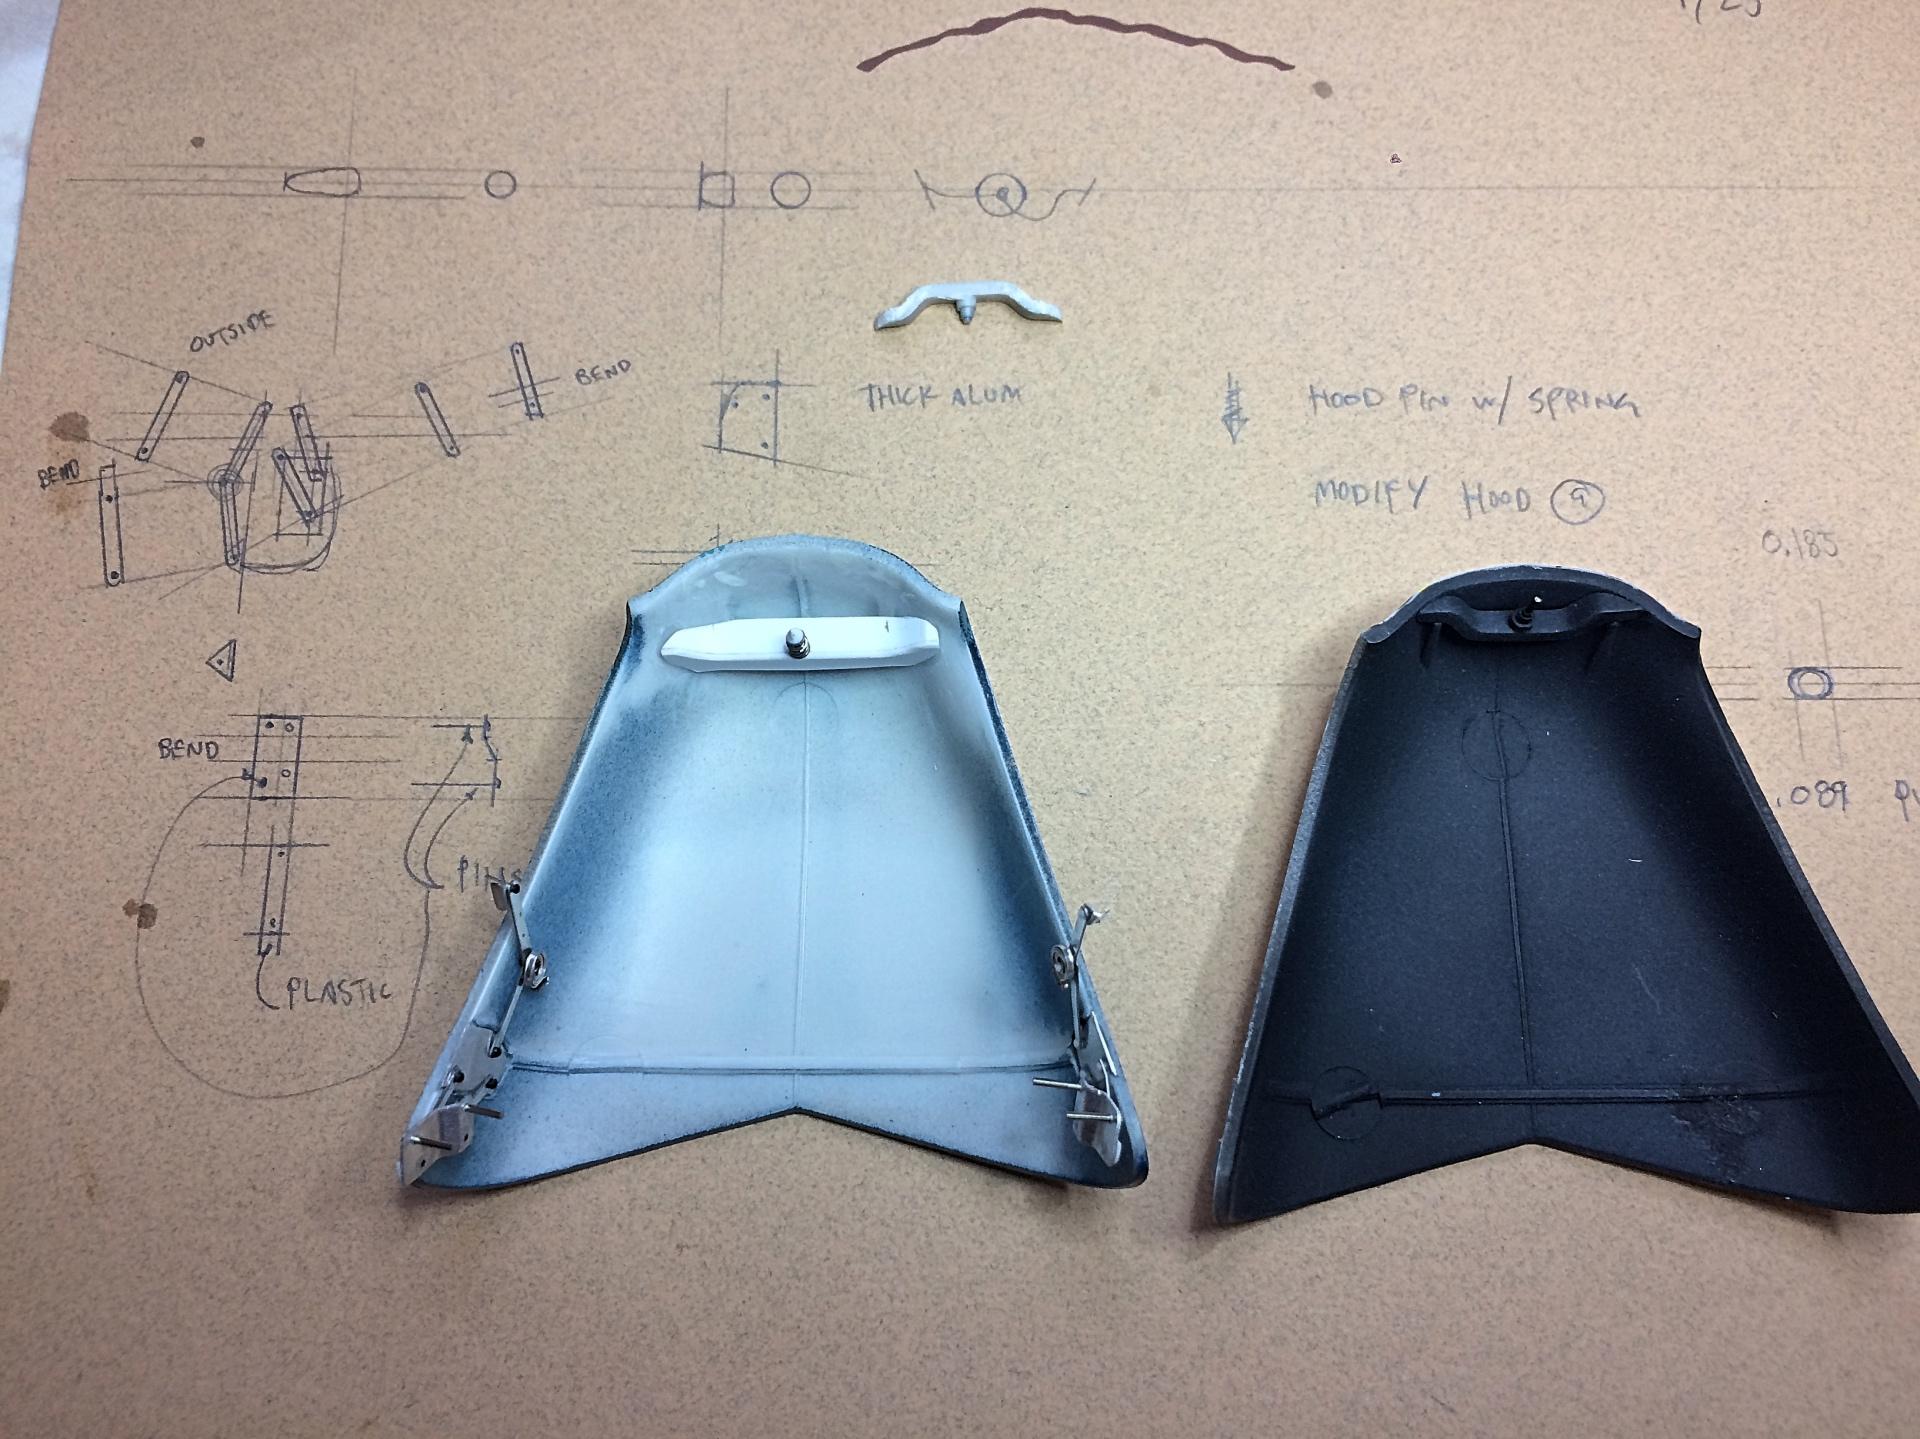
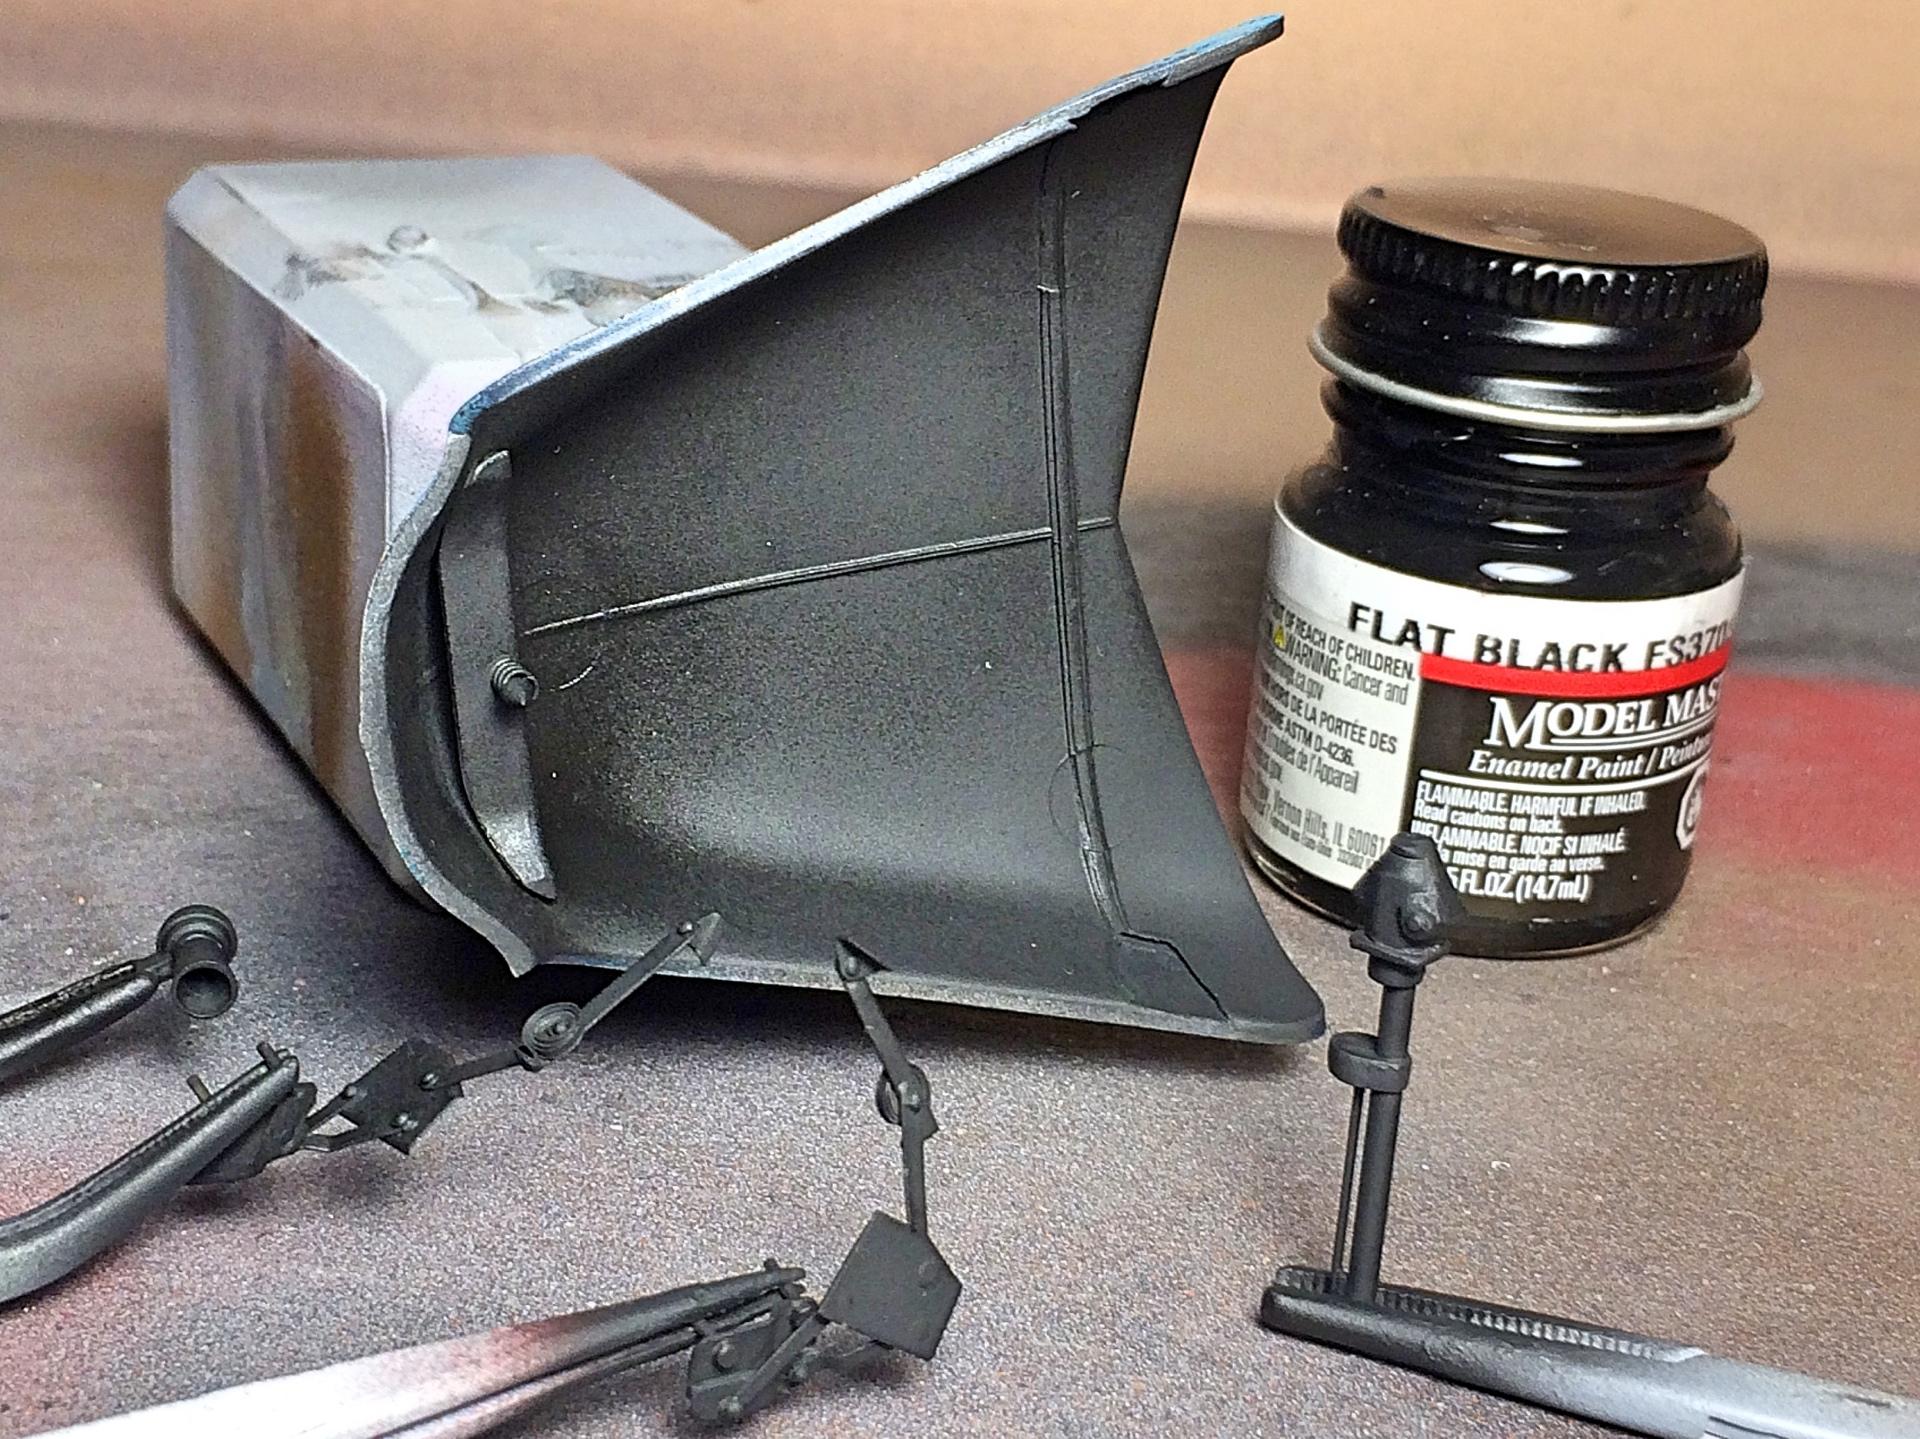
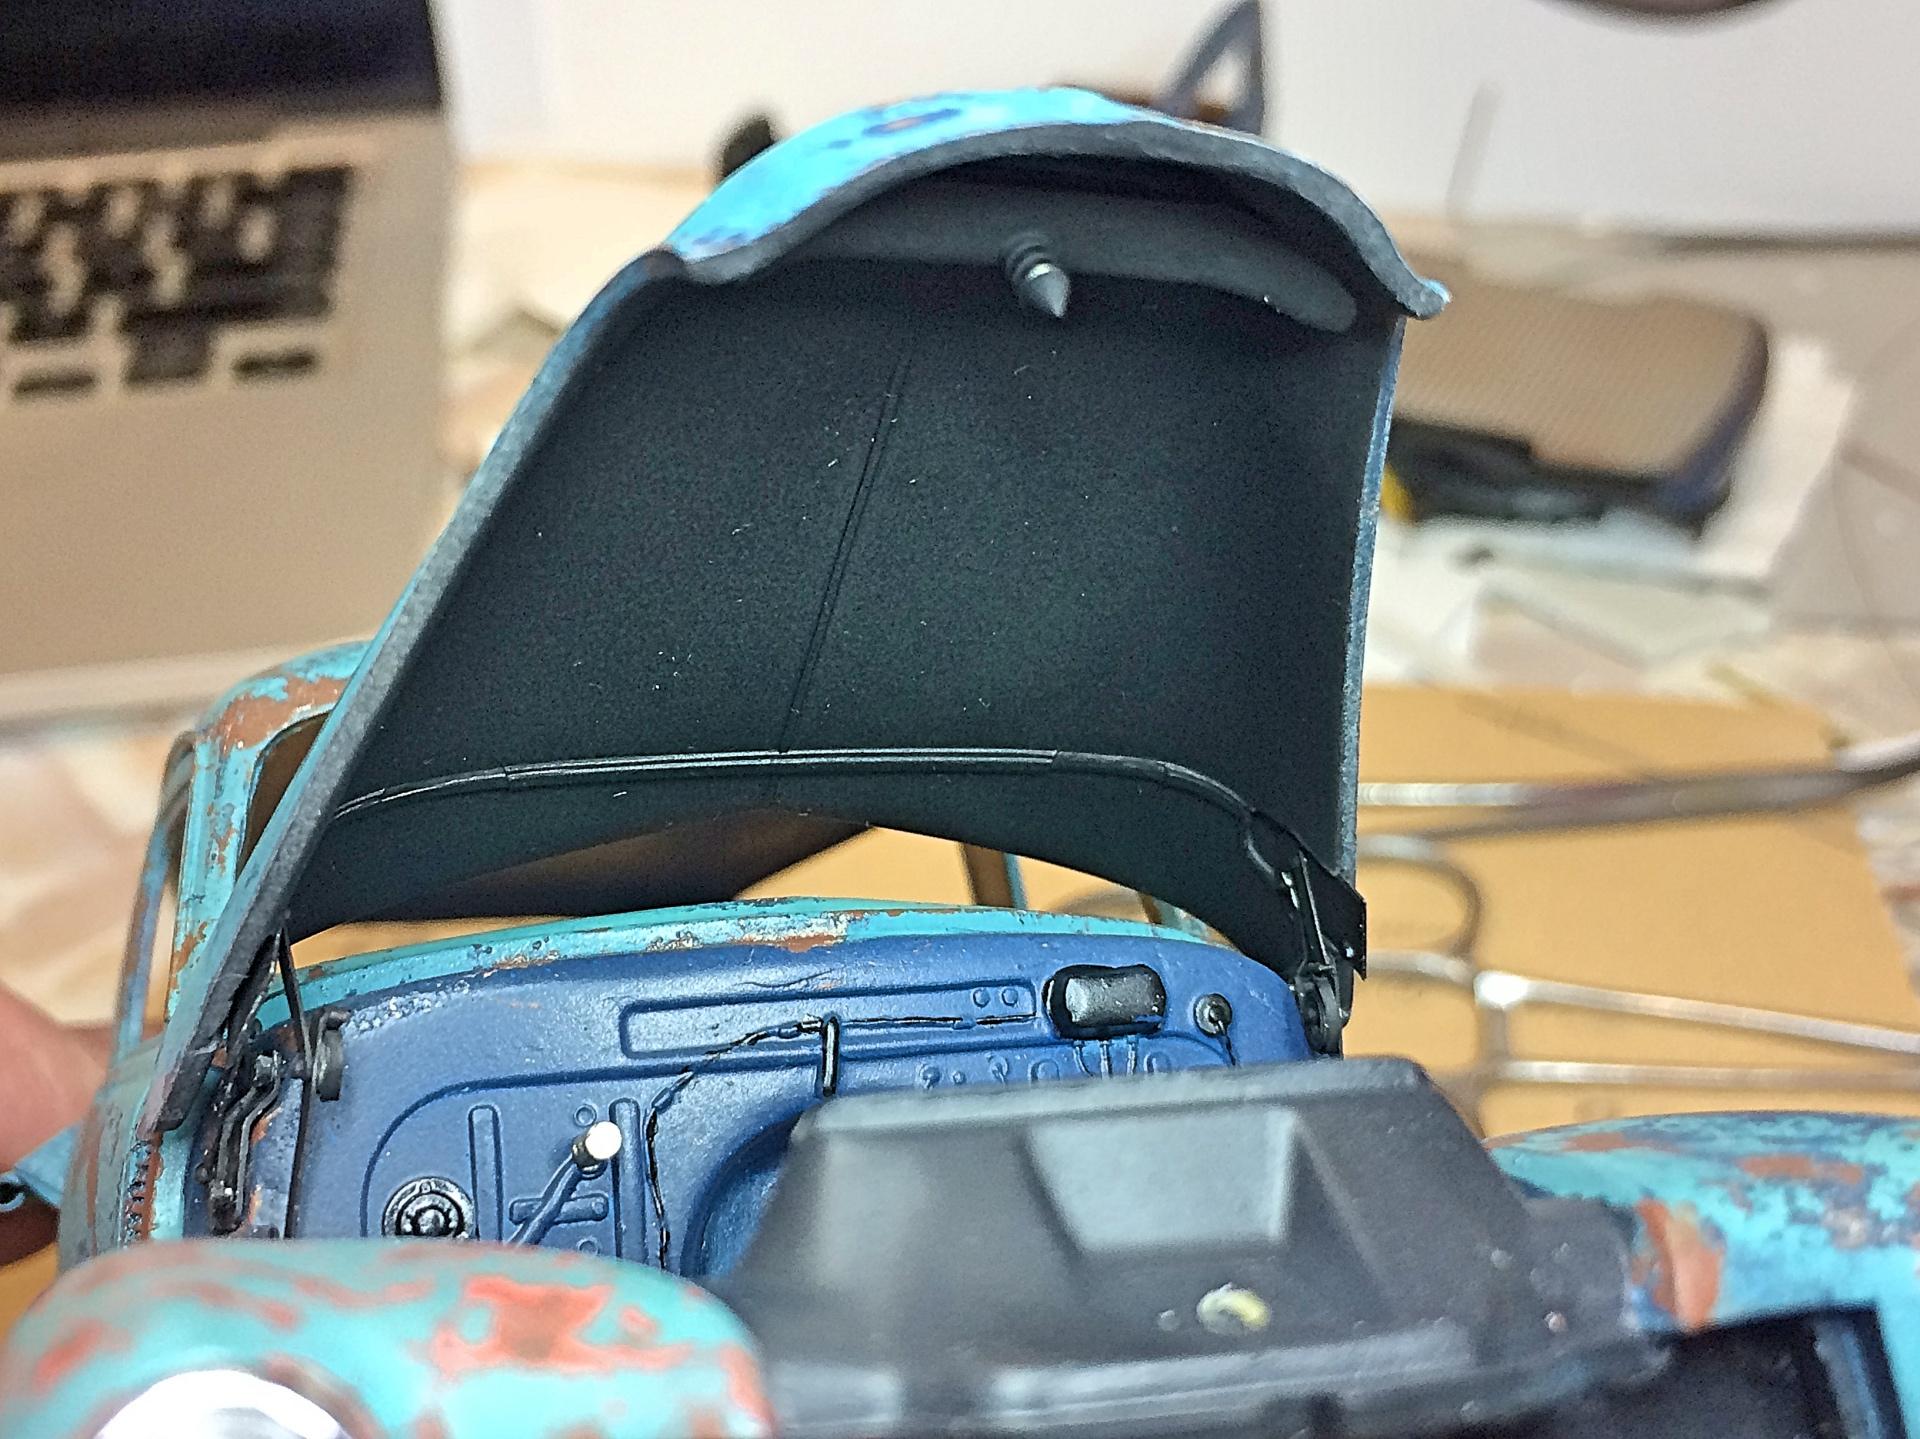
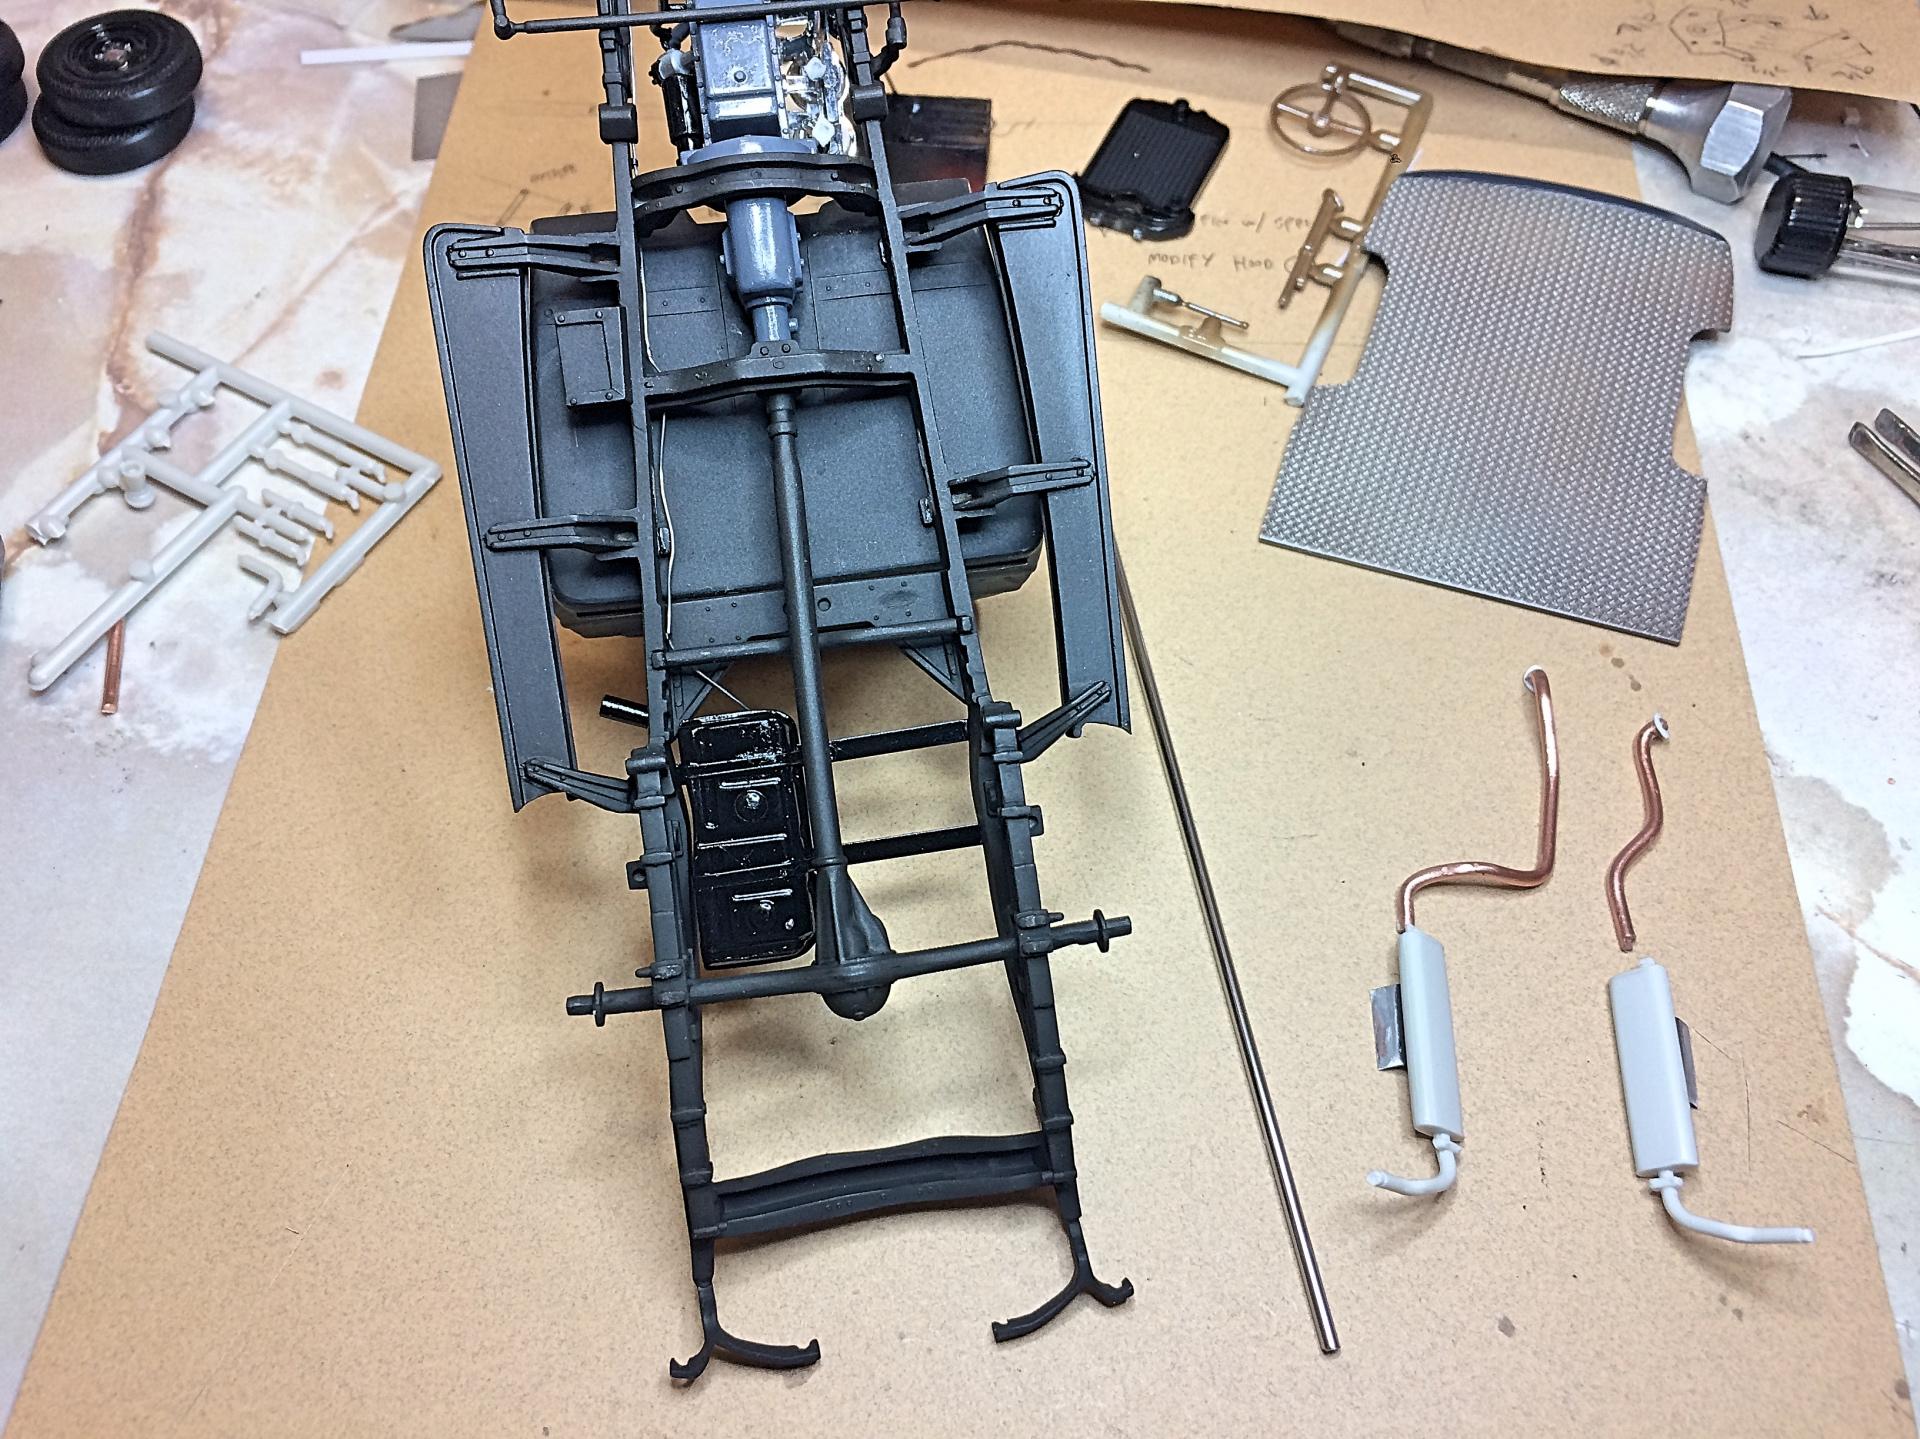
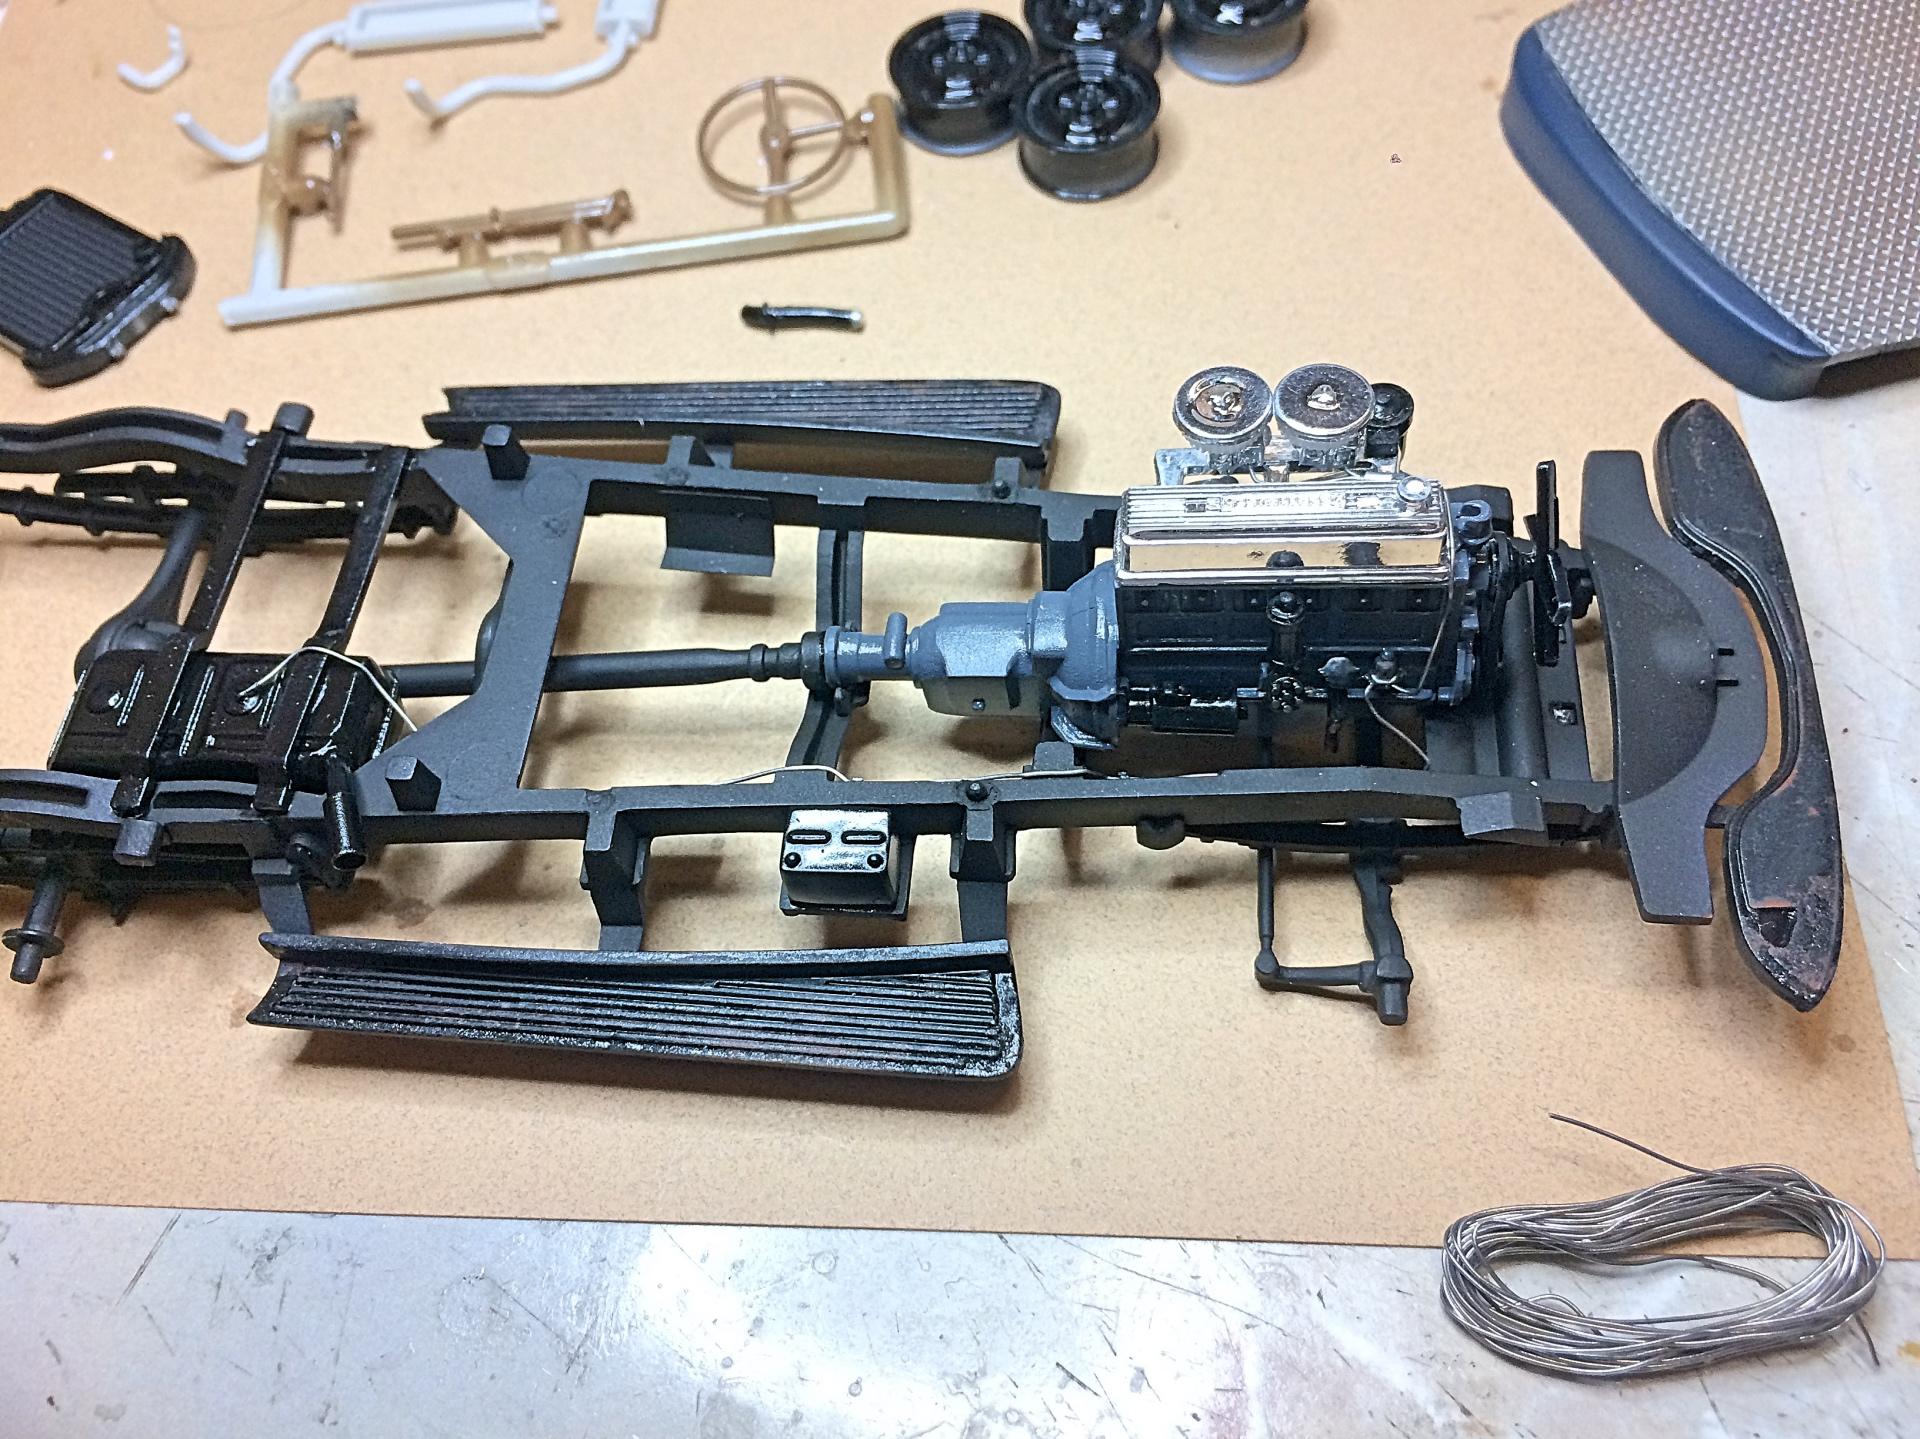
Steering shaft/box is done! Used the Assembly Manual for reference, had trouble finding a photo of a truck under restoration that wasn't being hot rodded. Brass rod, sprue, photo-etch nuts, and wire. Made a mold, still having issues. Added to the underside of the hood, spring and pin in a new brace, using a catalog drawing. Also finished the other hinge. Check out the lack of quality control on the right hood ejection pins. Sprayed flat black. Set into place, not slid all the way in, I should loosen up the tolerance of the dovetailed mounts in the hood. I intentionally made the shaft long, in case someone doesn't go to the trouble of moving the firewall forward. Some of the kit pitman arm mount is cut back. I'm going to drop the front axle pins, have an idea how without tearing apart the suspension.
-
Biggest pet peeves on builds.
89AKurt replied to LL3 Model Worx's topic in General Automotive Talk (Trucks and Cars)
DITTO that! Try stacking a bunch of those kits too. FYI: use Scotch tape at the corners, not masking tape. I've noticed many, if not all kits, don't include the steering shaft running through the engine compartment, with the steering box. Most of the time they have nice detail at the suspension, but there is this missing link. -
I got a big bottle of the stuff long time ago. It has a shelf life, separates, and think mold was growing in it. Small bottle is the way to go. When I did use it, was a bit of a PITA, still needed to cut the edge if applied to an inside corner. My two cents.
-
I recognize a few guys in that picture! Amazing a one-off can be allowed to waste away, but I understand the Sultan of Brunei is doing it with many cars.
-
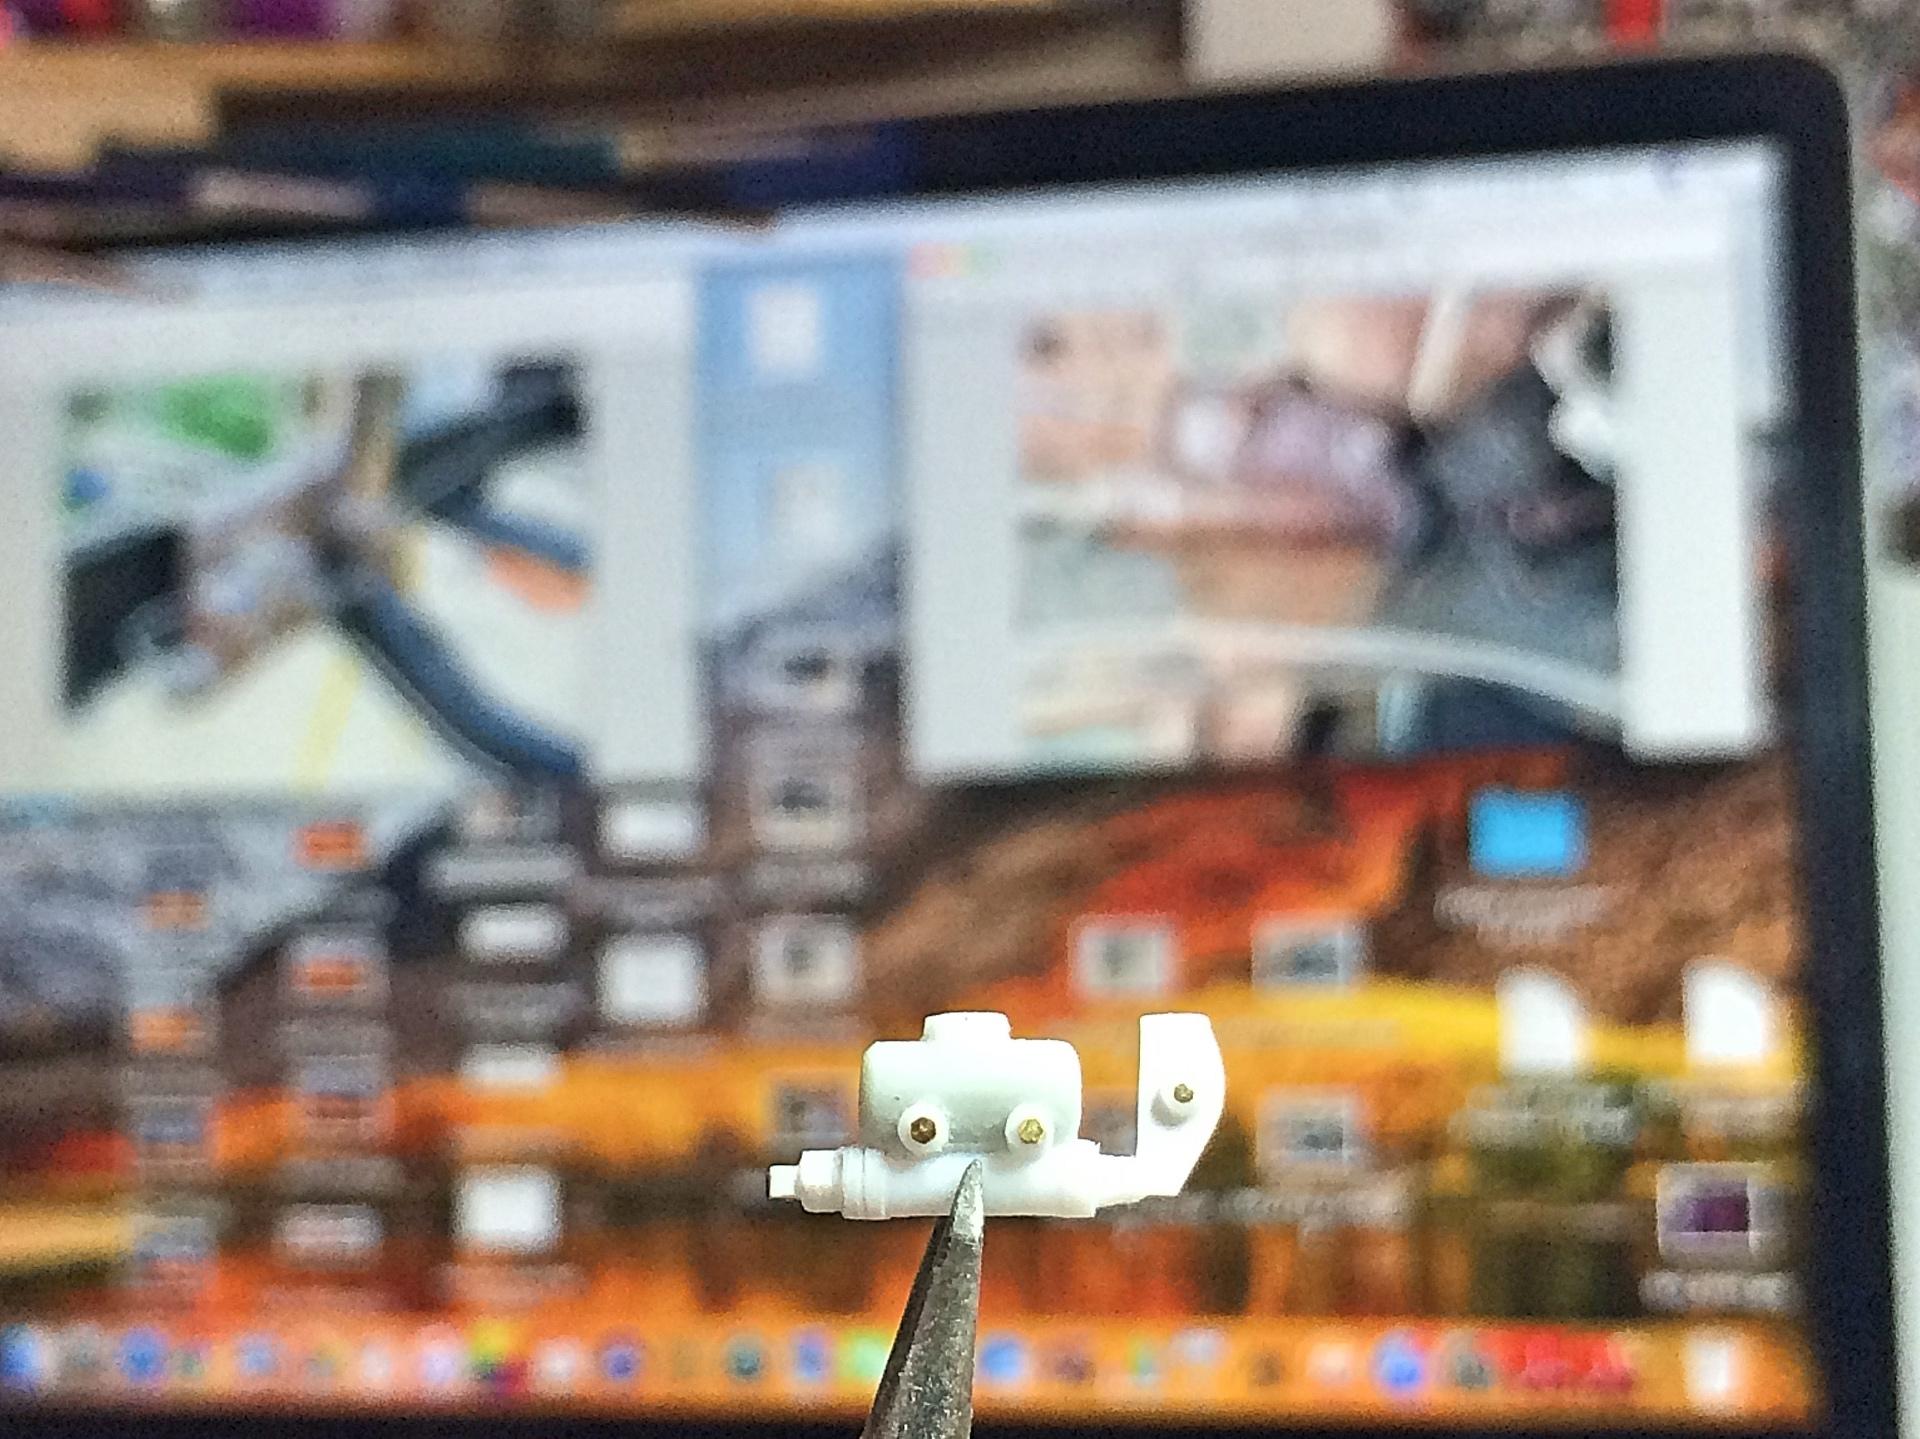
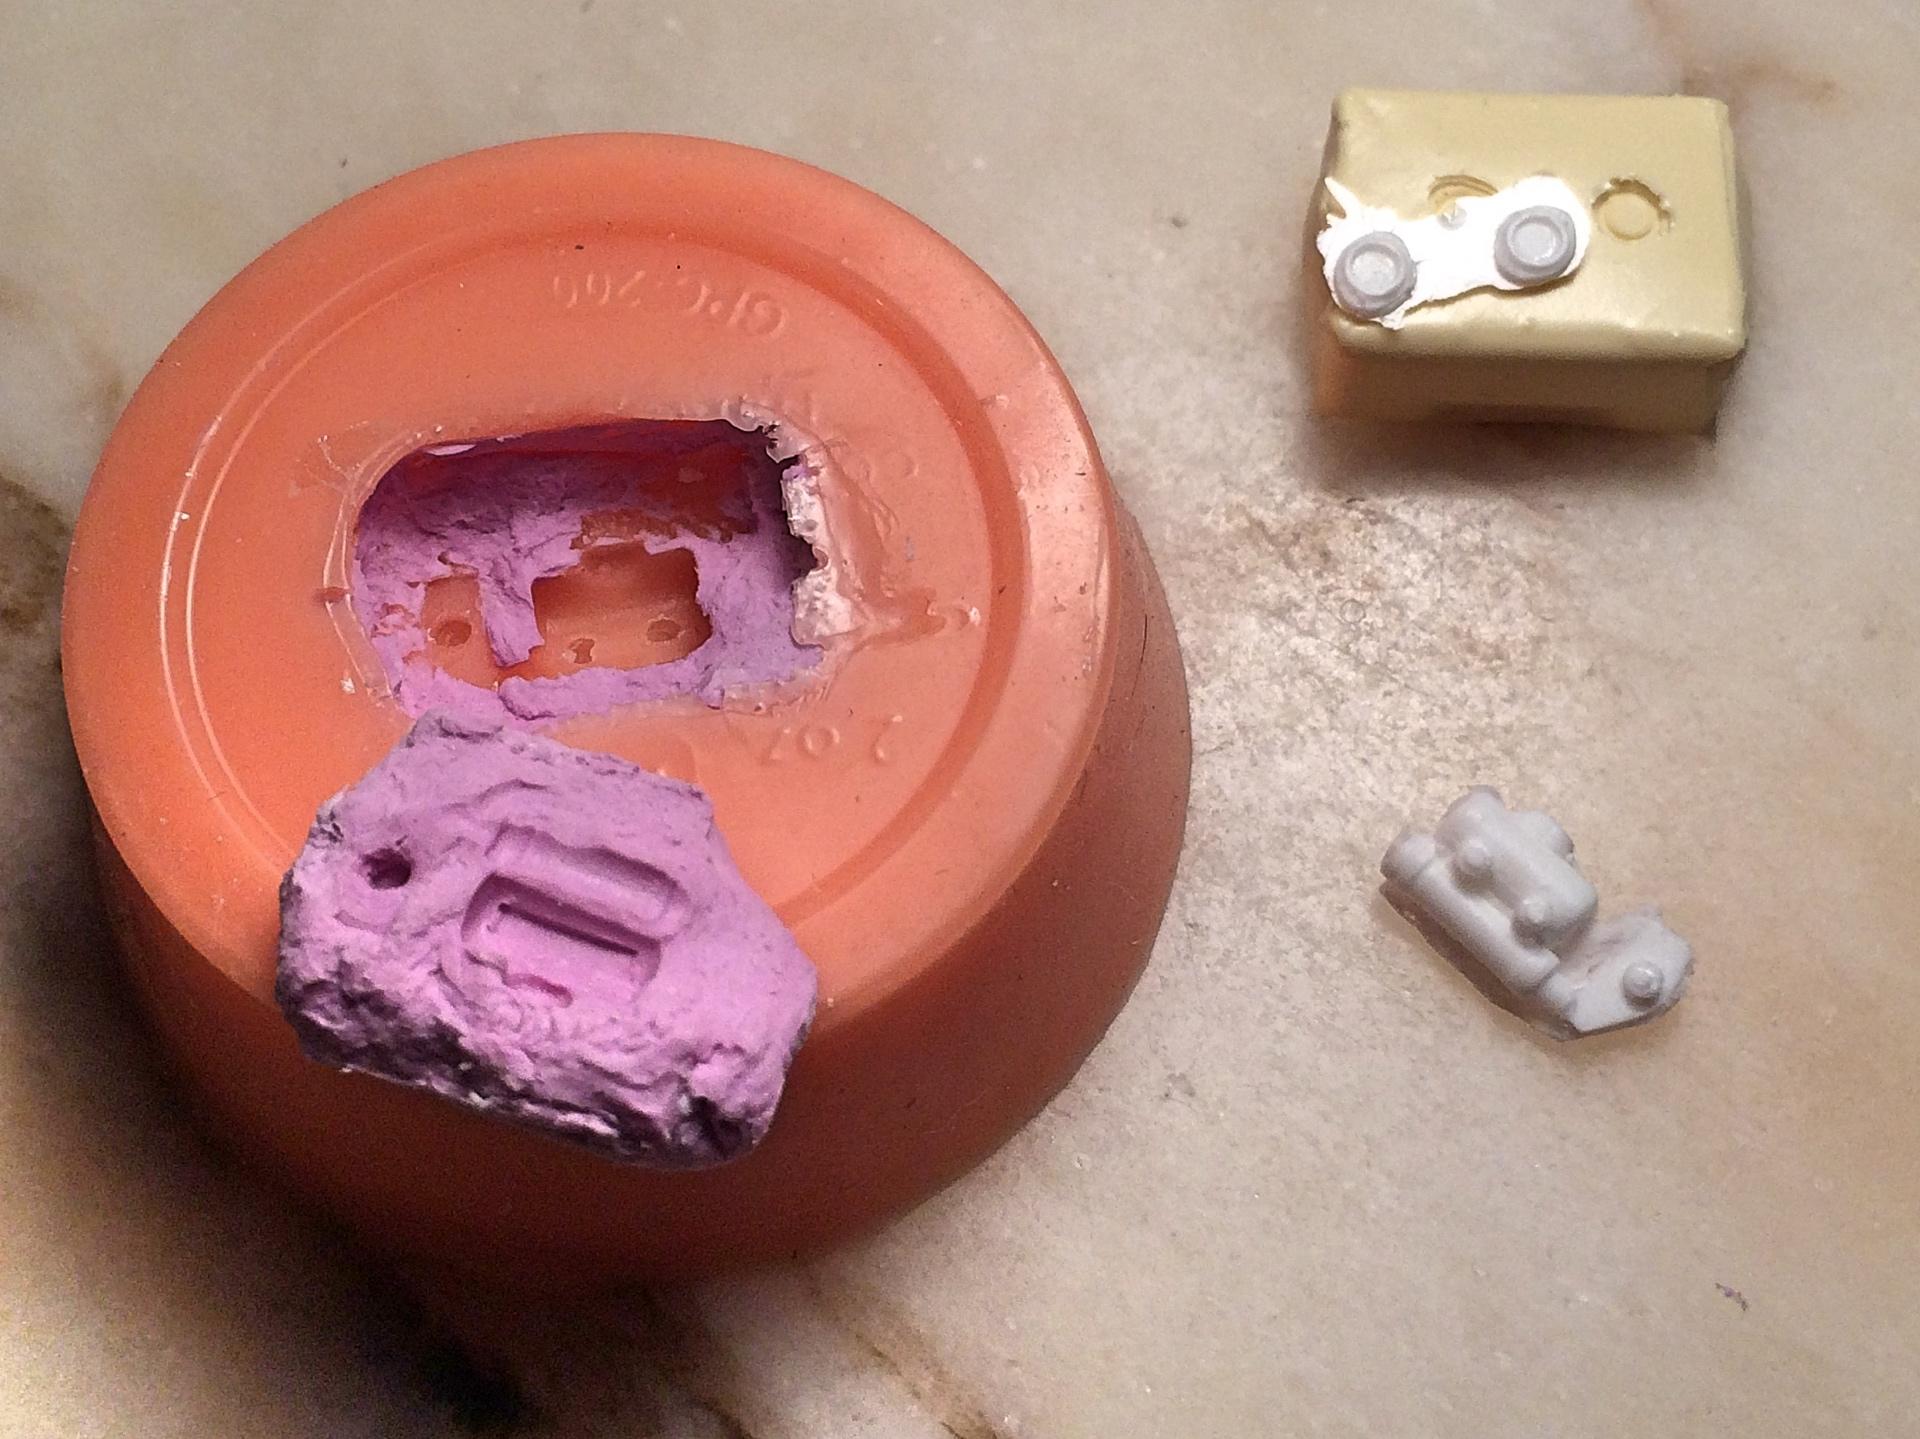
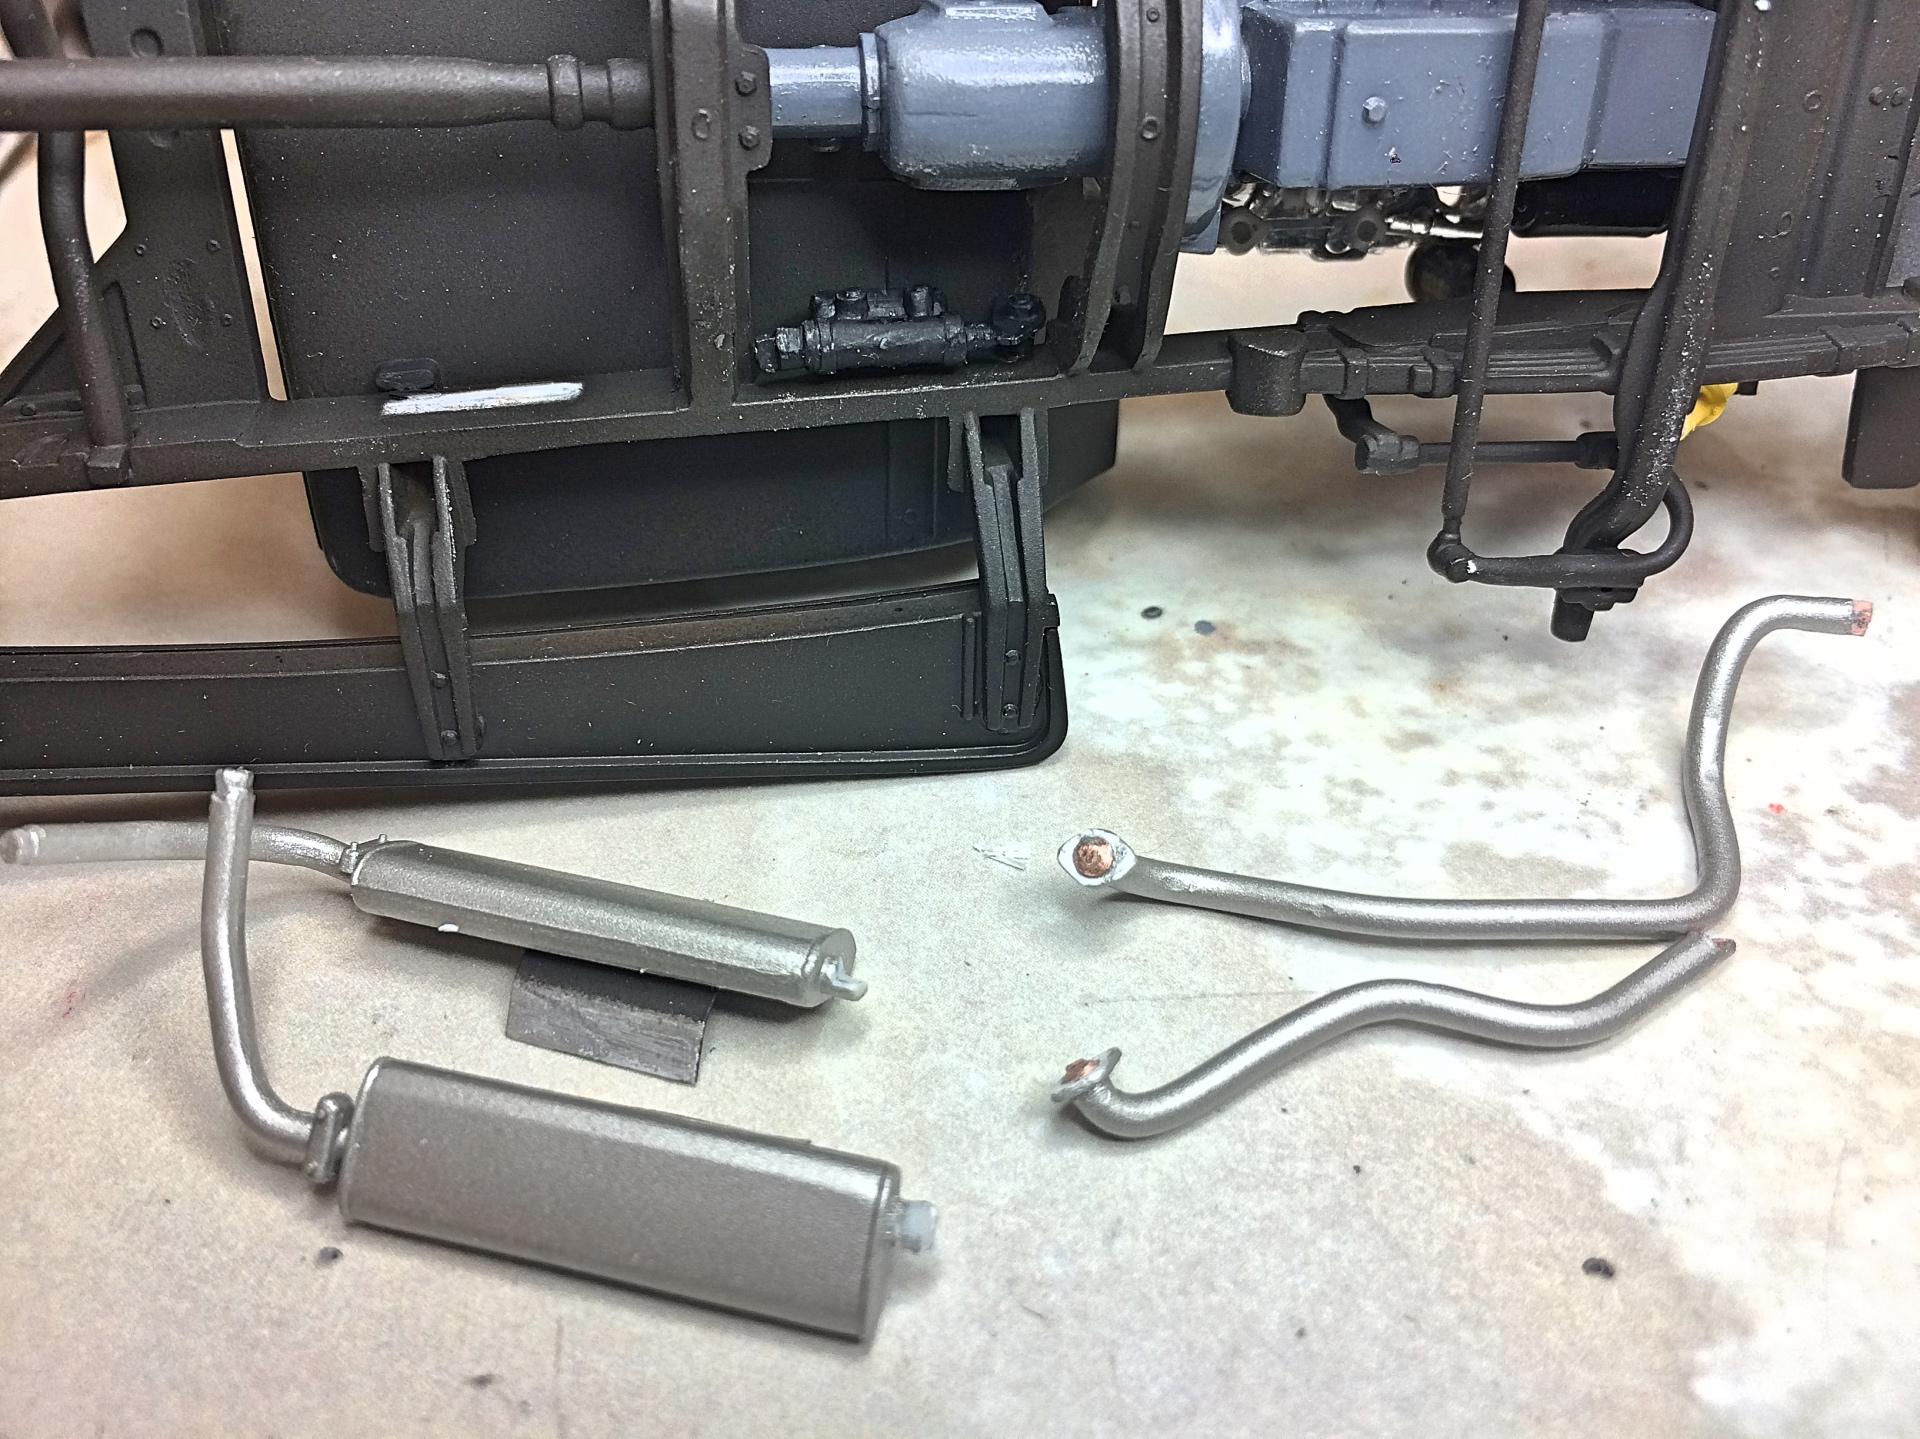
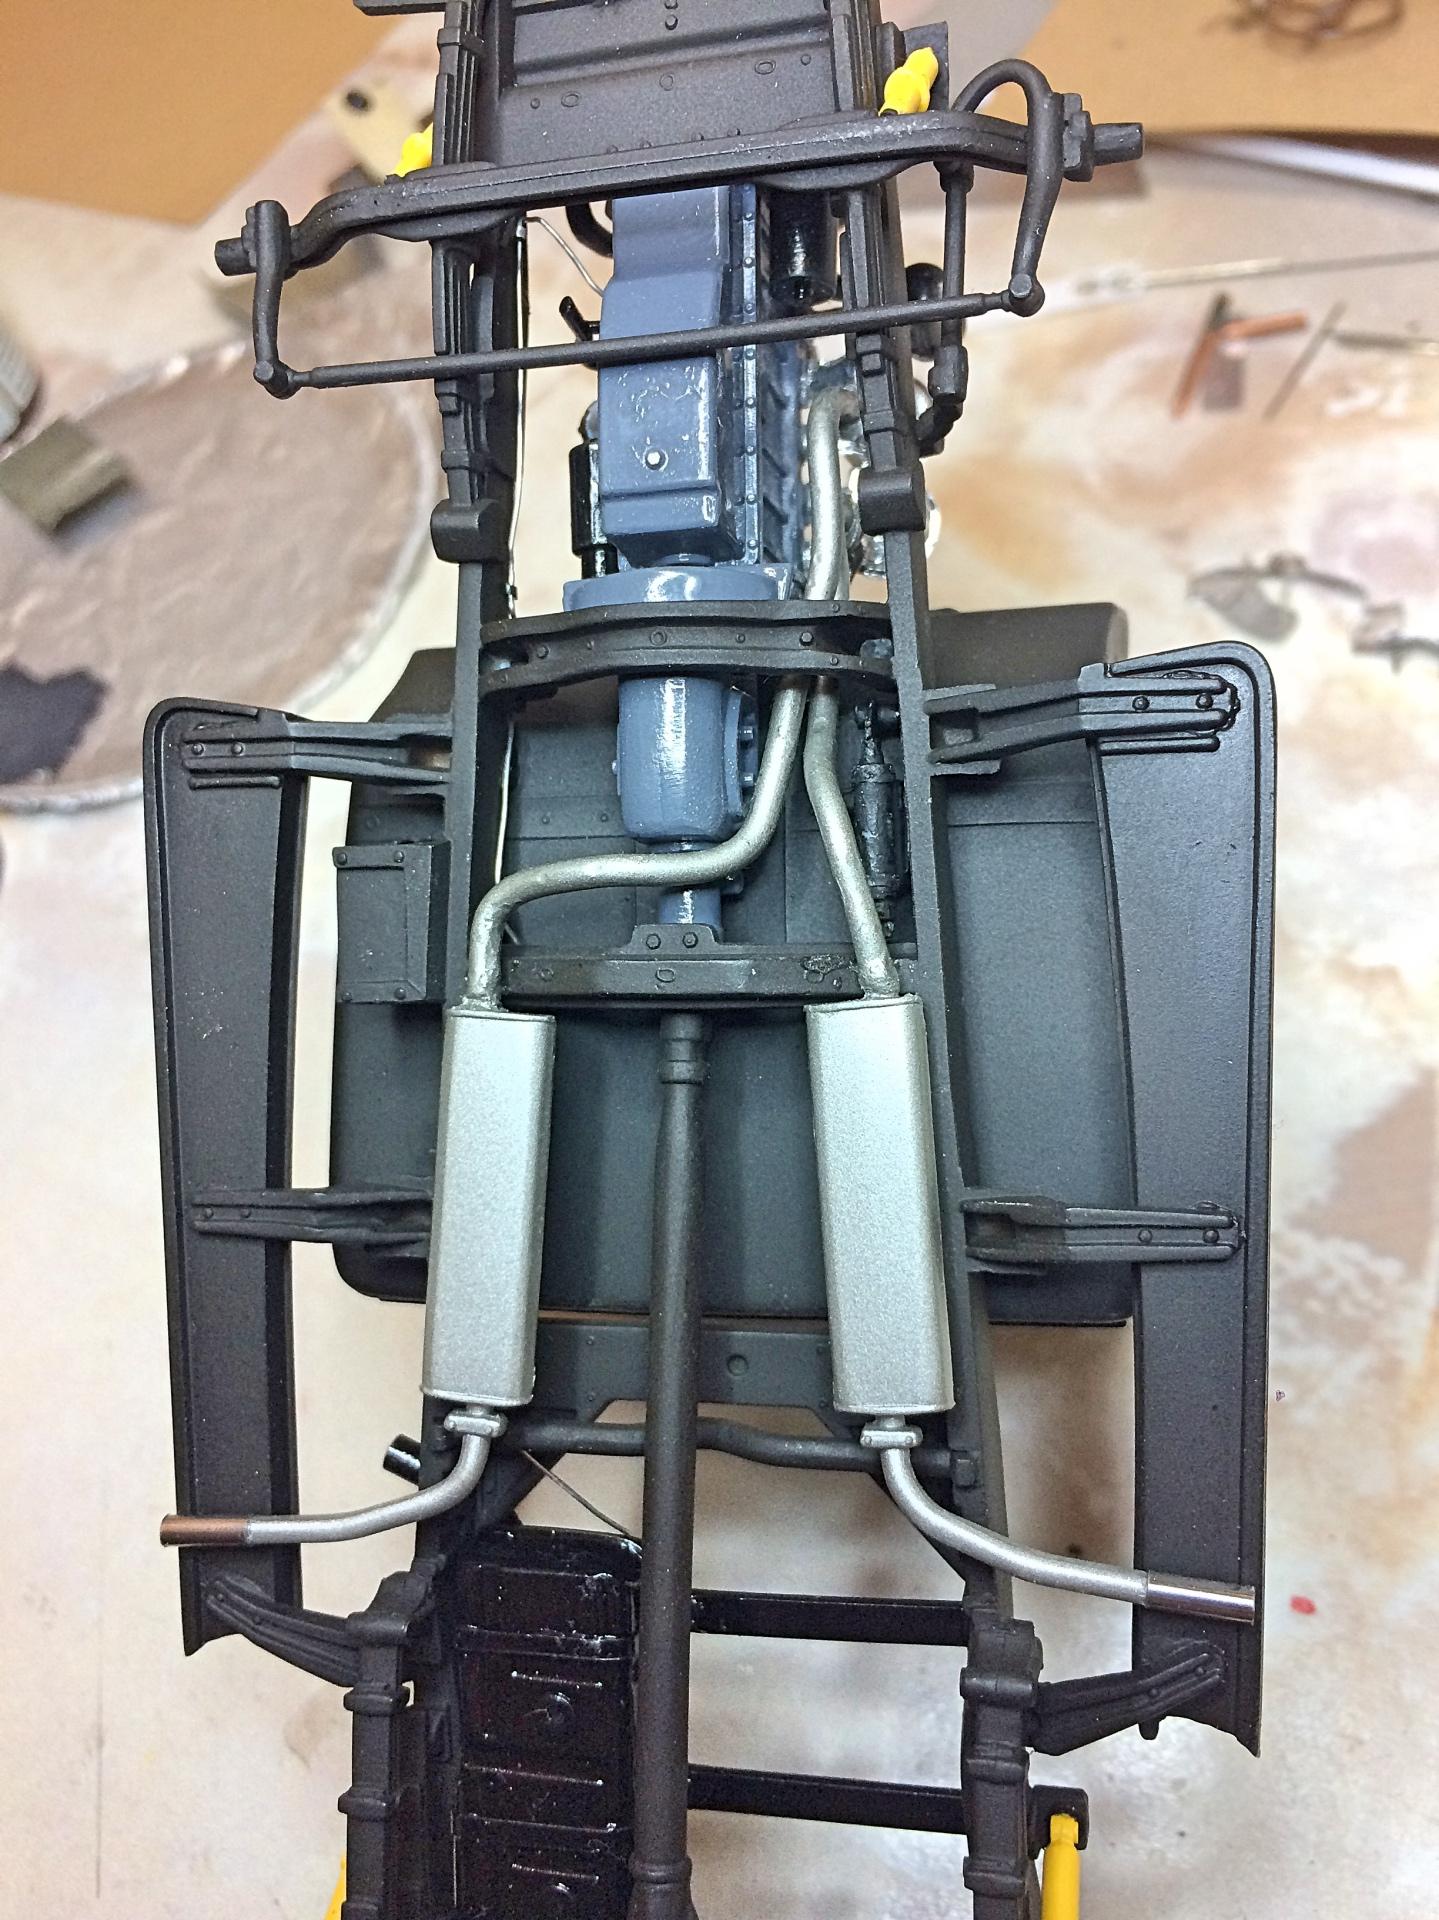
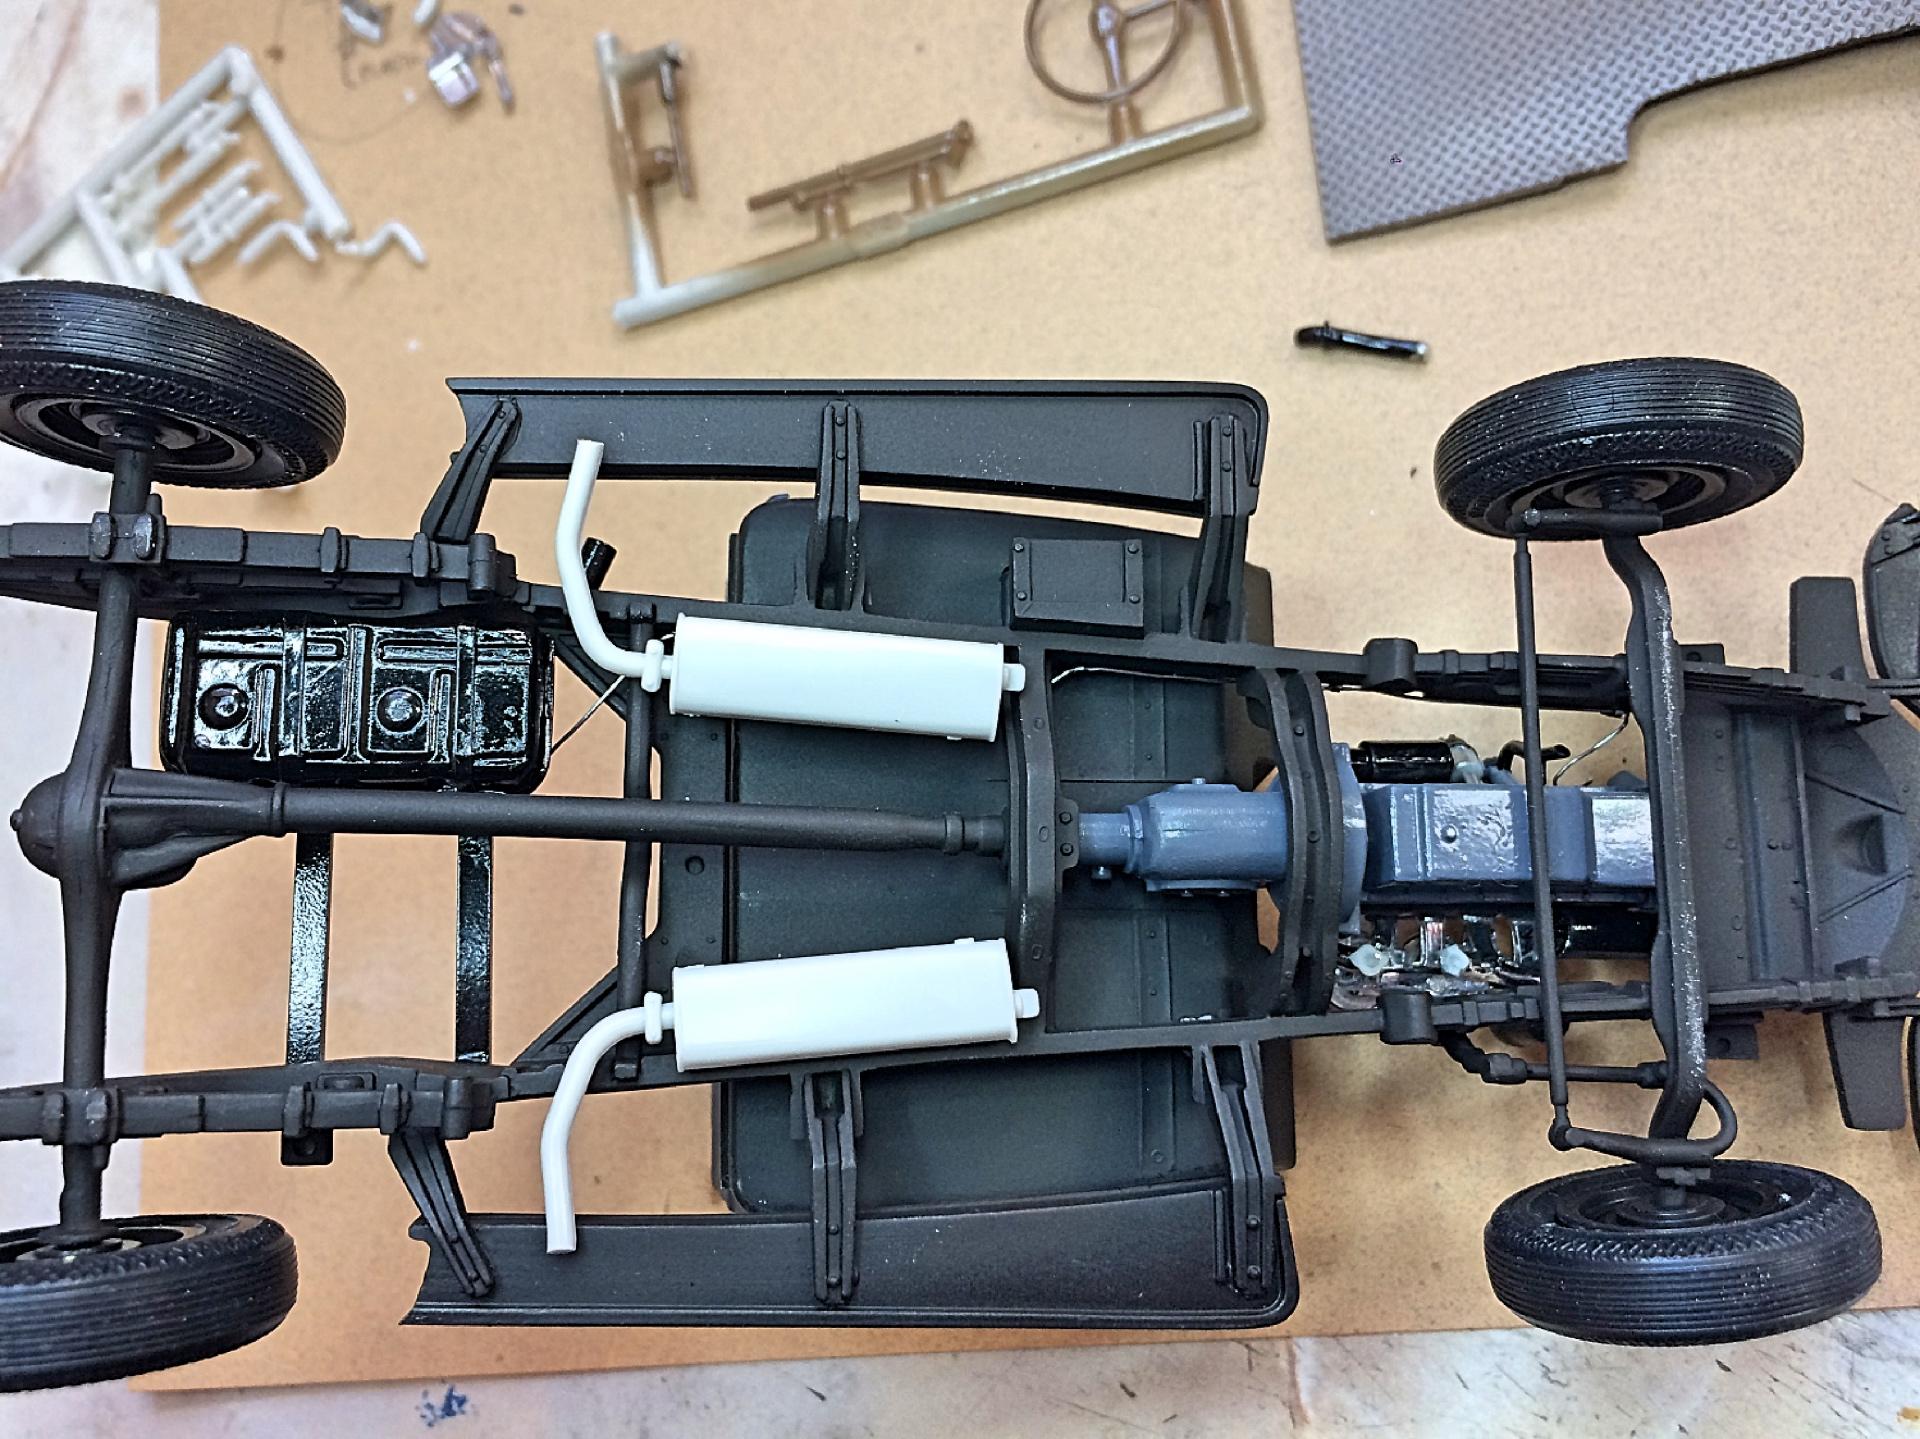
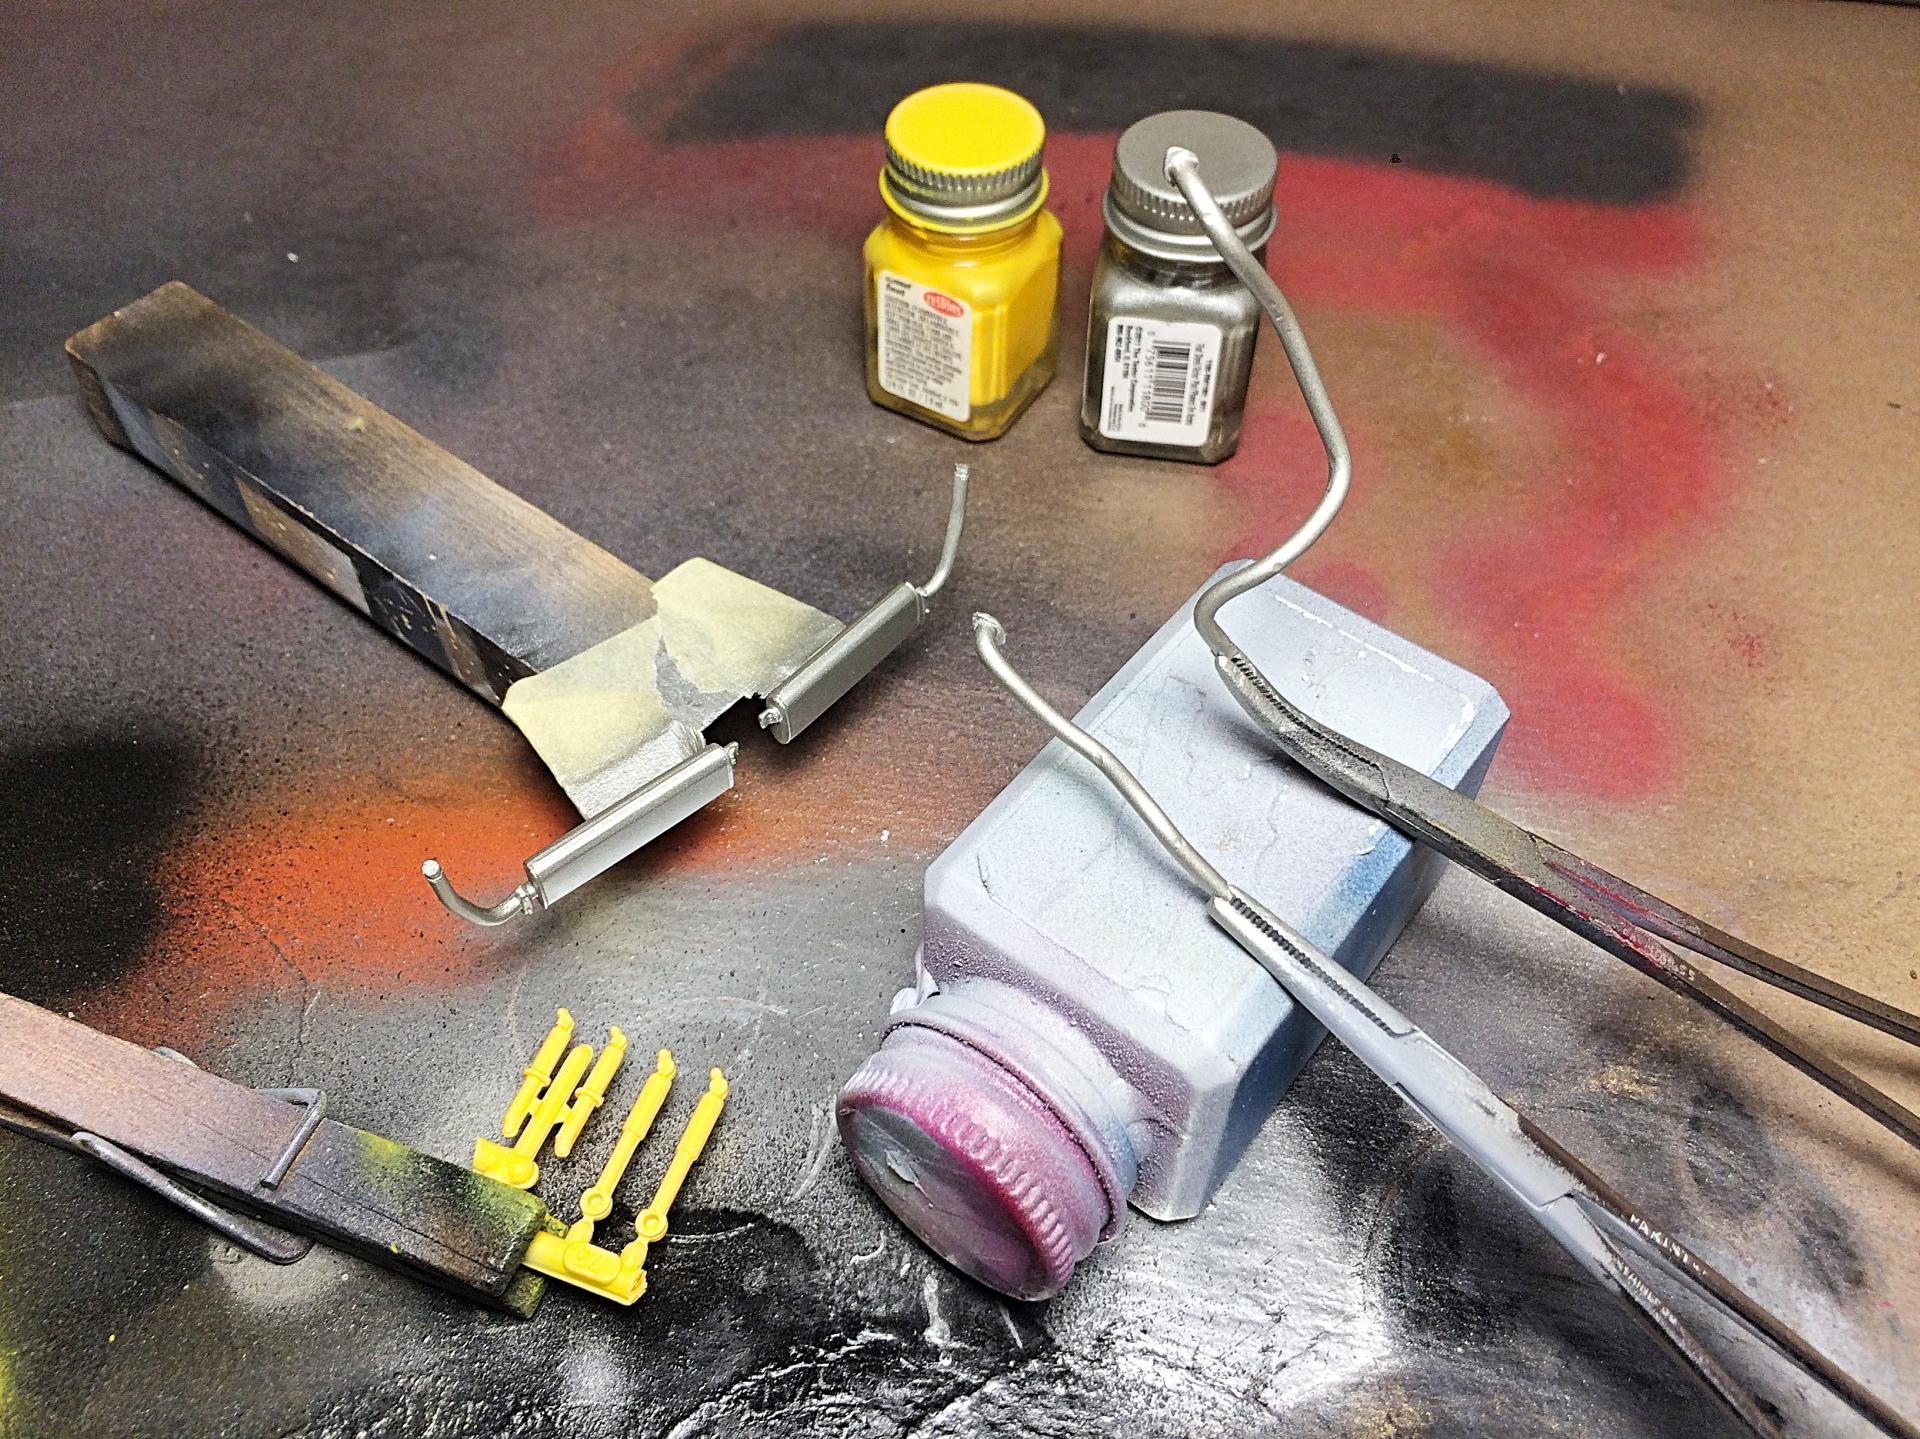
Brake cylinder is done (not a booster). Used two photos stolen off the web, plus the Assembly Manual. It's a basic shape unit, different sized sprue, some photo-etch nuts, call it good. Lesson on how NOT to do a mold. ☹️ The Alumilite Quick-set RTV is good stuff, but it sure sets fast. Should use a smooth blunt tool, the surface I ended up with was so rough that the two parts did not come apart cleanly. But I was able to cast a half-decent part, which I will clean up and redo this process later. Painted the master part and glued on. Next was to get the exhaust pipes in. After much fussing and cursing, got the pipes on. Previous build on the right, except for moving the firewall forward, it's Box Stock. Hope my allergies won't be killing me tomorrow, hope to get the steering column/box done. Maybe spark plug wires, and heater hoses. NOTE: For anyone building the kit, be sure to shorten the top radiator hose about 1/8" at the radiator end. Also work at the rear axle, the driveshaft is pushing it back and bending the axle, I should have thought of removing about 1MM from the driveshaft at the transmission end. Also a major incorrect error with the instructions, the driveshaft mounts solid to the differential, only the front pivots (switch ends). I replaced the bearing on my real truck, and can show the drawing in the Assembly Manual if nobody believes me.
-
Best built-right-from-the-box kits?
89AKurt replied to Jantrix's topic in Model Building Questions and Answers
Subjective opinions, really depends on what you like to build, doesn't it? Also depends on your mood, I've busted my slumps in different ways, OOB is a safe bet, but once I kit-bashed a horrible kit with a previously built junk model, in a week. Since you really didn't ask for brand (mine is Tamiya), pick one with fewer parts, just get it slapped together! -
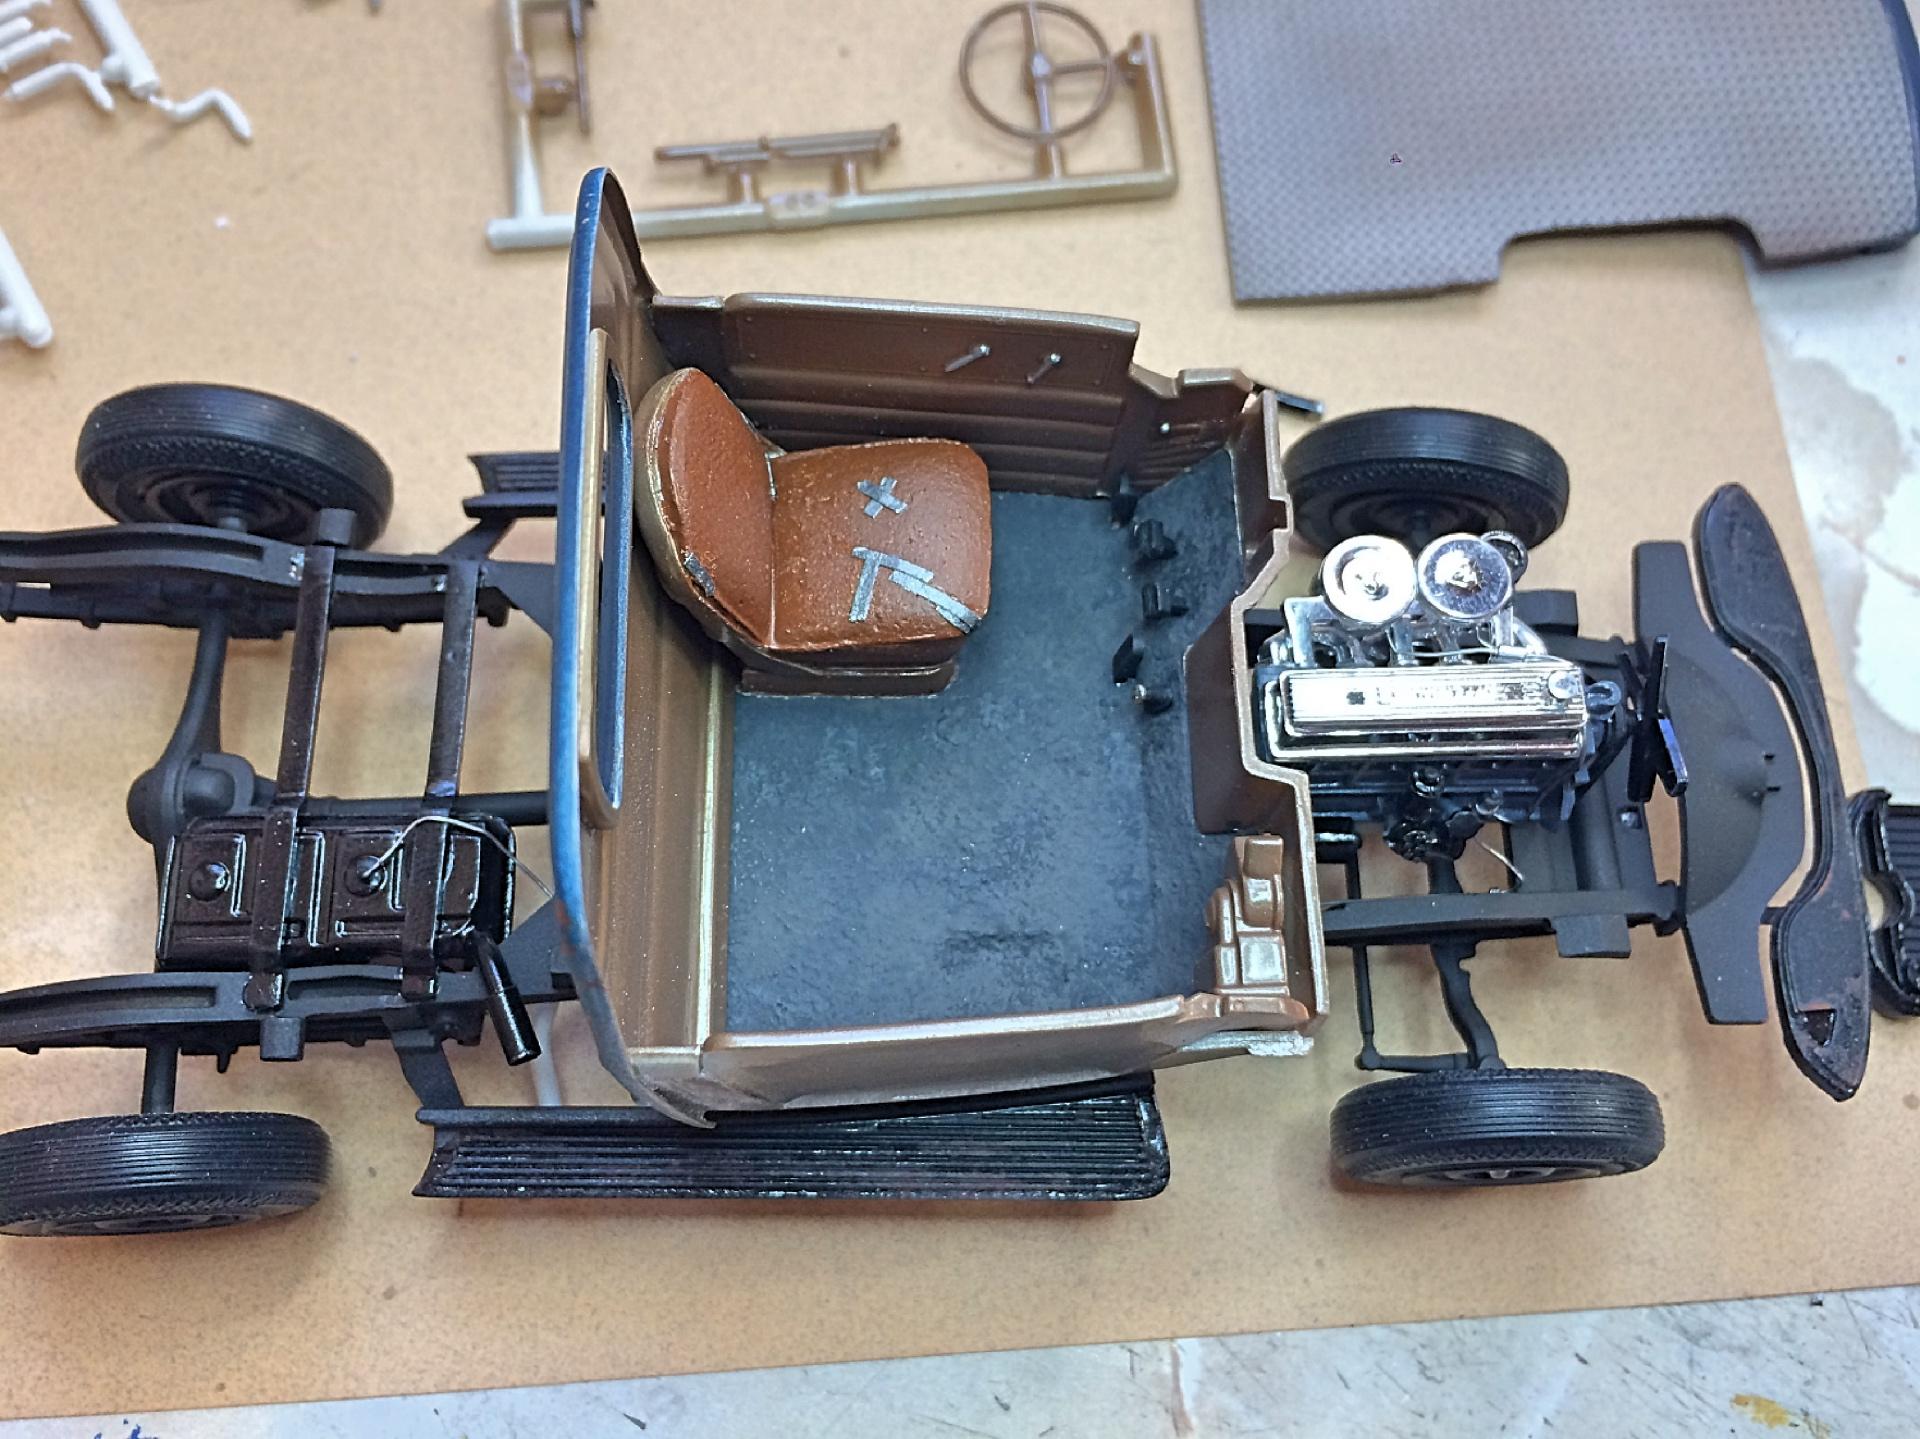
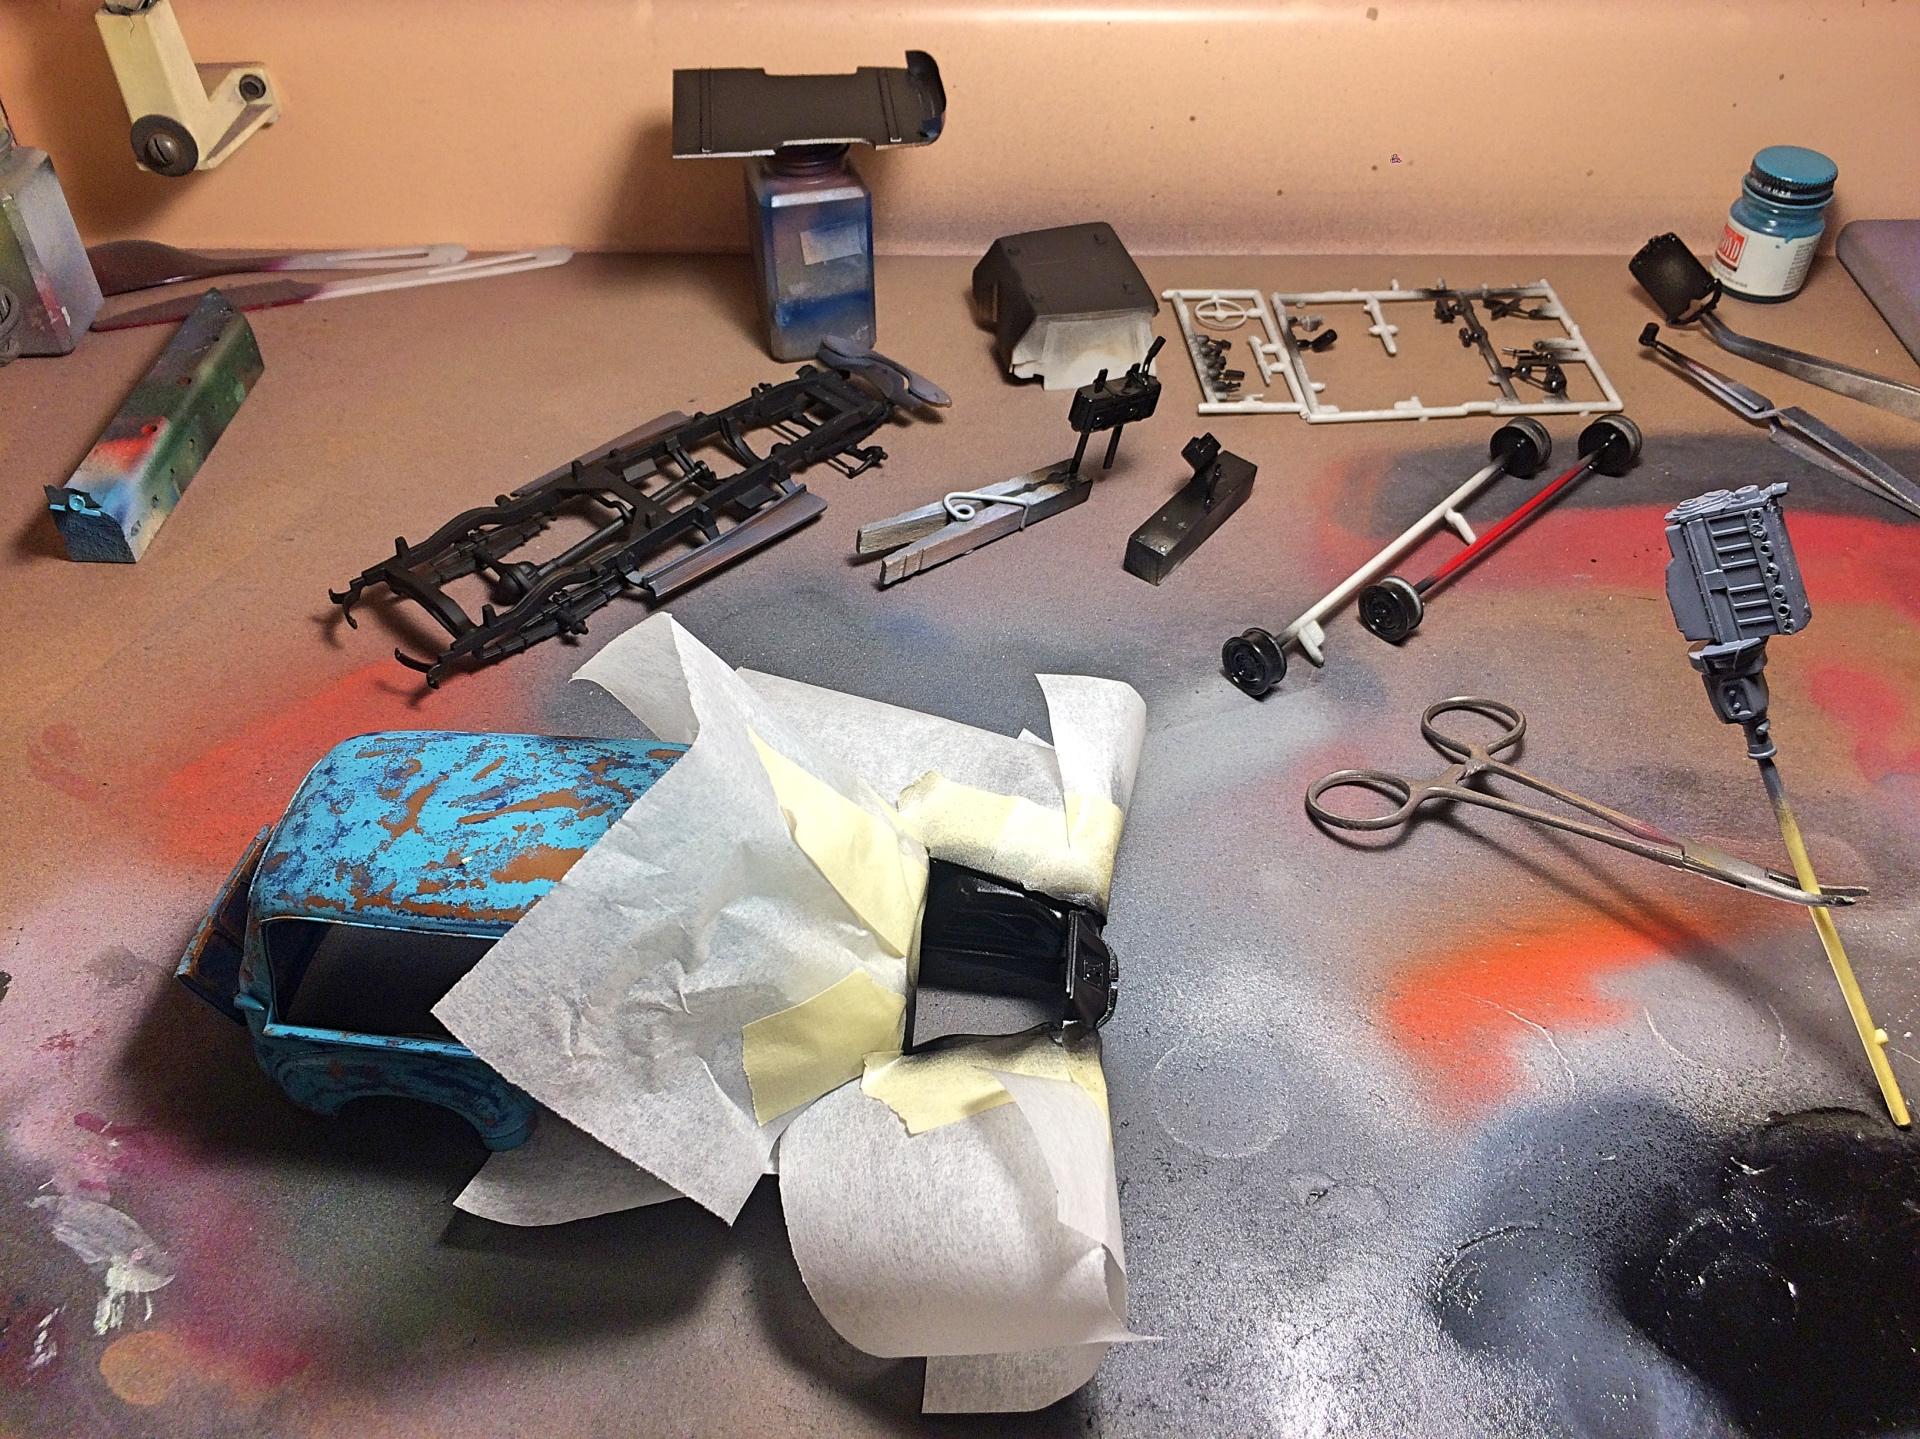
Interior is basically done, with exception of no dash, with attached steering column and wheel. I used a bad resin copy of my seat, added duct tape to cover the bubbles. ? Also added the high/low beam switch. Rubber floor mat is good enough, with sag over missing battery access cover. BTW: The starter pedal (Millennial's - what's that?) is steel, no rubber pad. Also need to add the back window, and will have one door window half way up (or is it down?). This is how the mufflers set underneath. Oh yea, used different tires, slightly different sidewall tread. Fabricated the pipes from the headers out of copper wire. Will use the stainless steel tubing that I got recently for the tips (I've always been fascinated by exhaust tips since I was about 4 years old). ? Painted regular steel. Instructions say the shocks are blue, have enough of that color, just like yellow.
-
Looking really good!
-
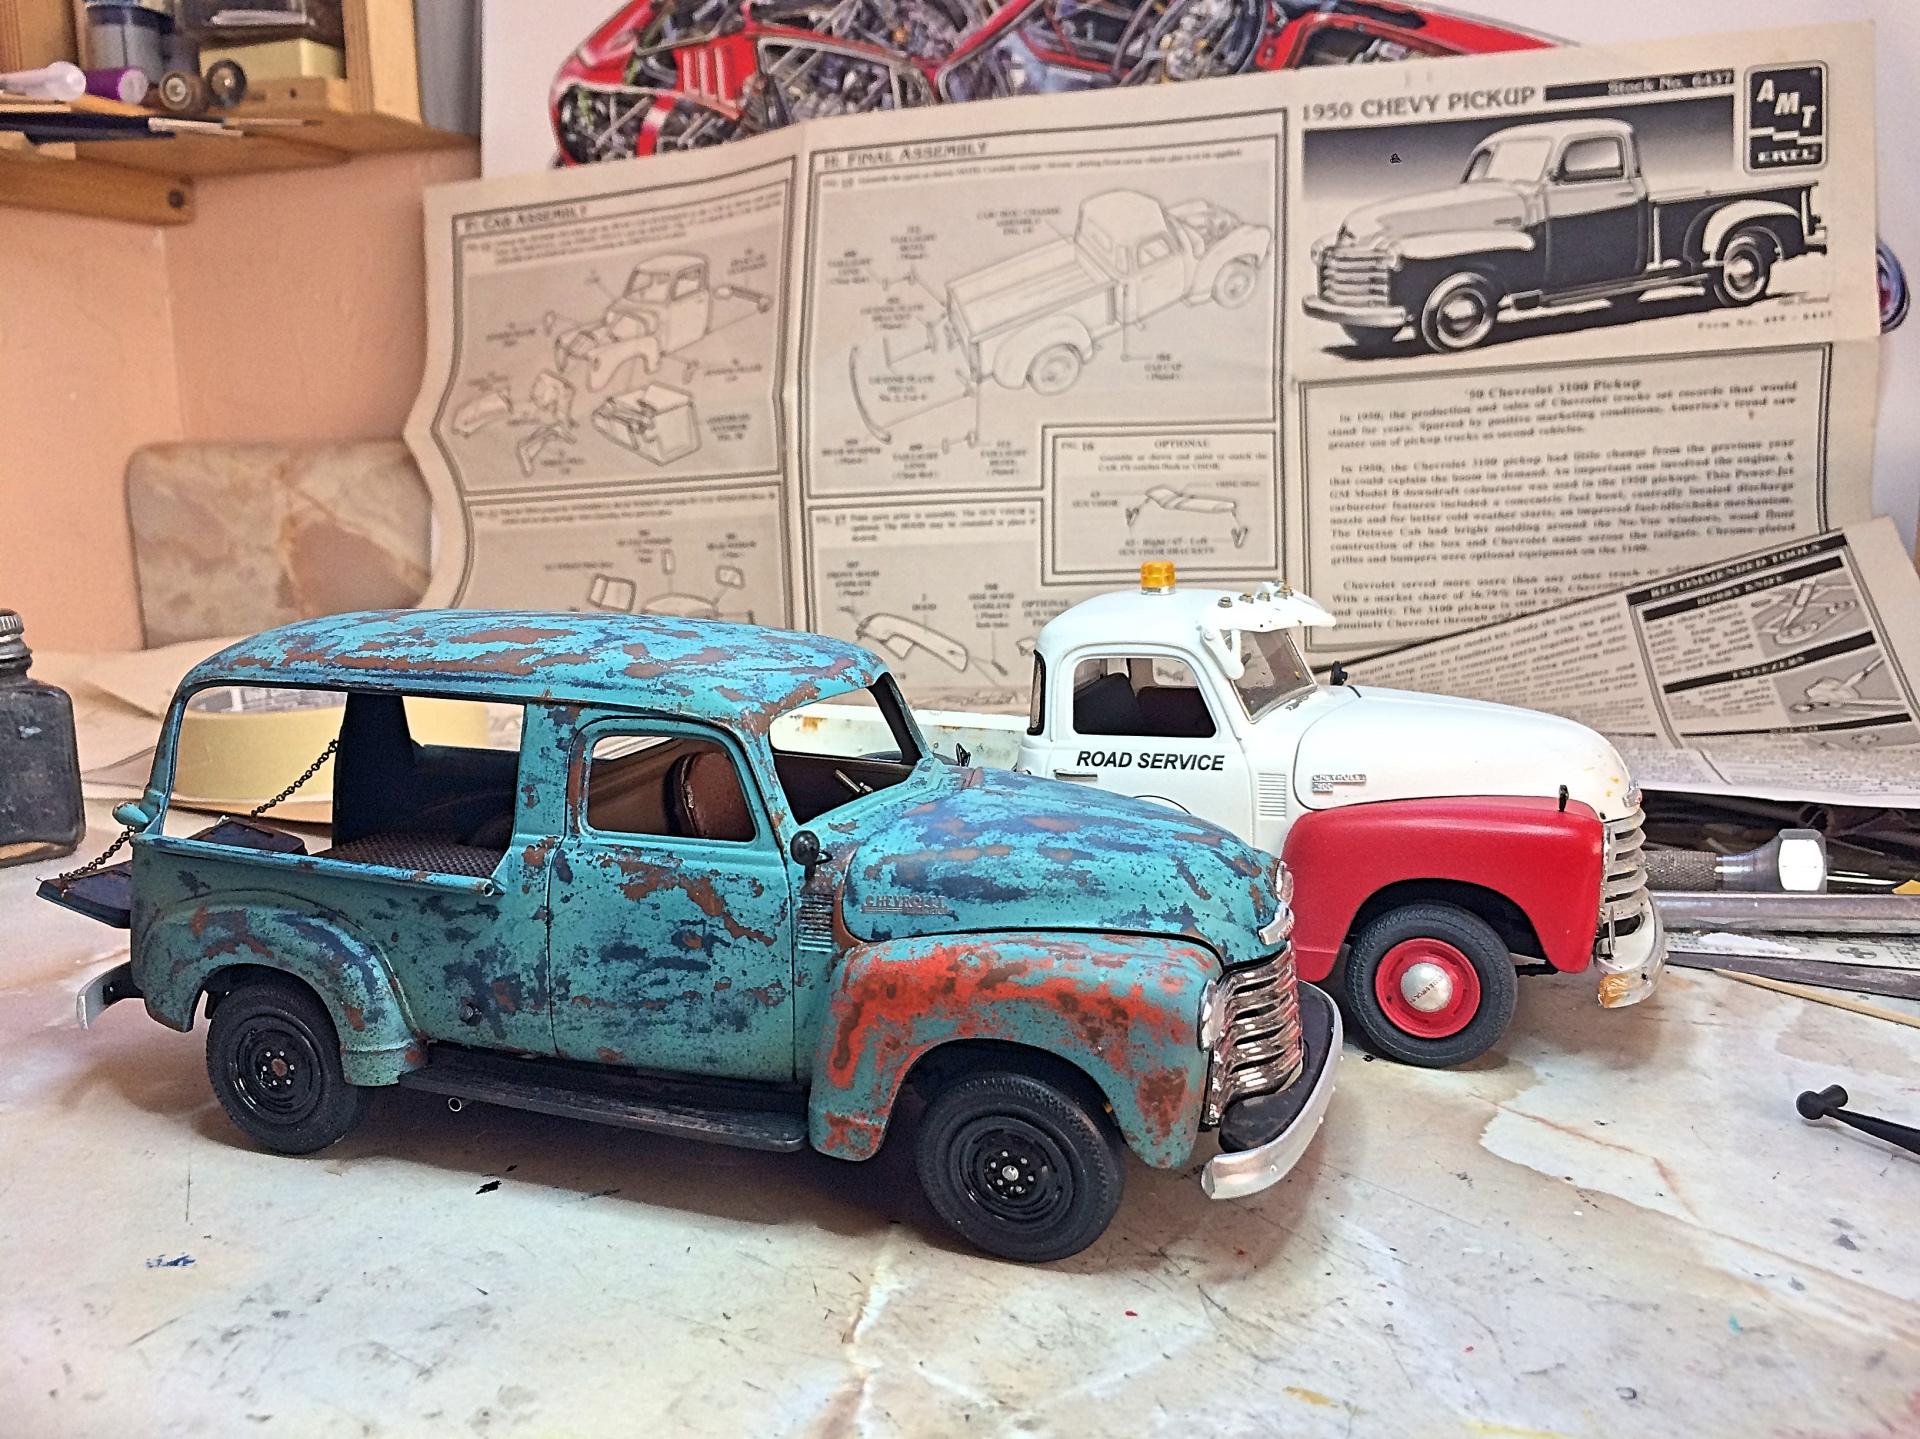
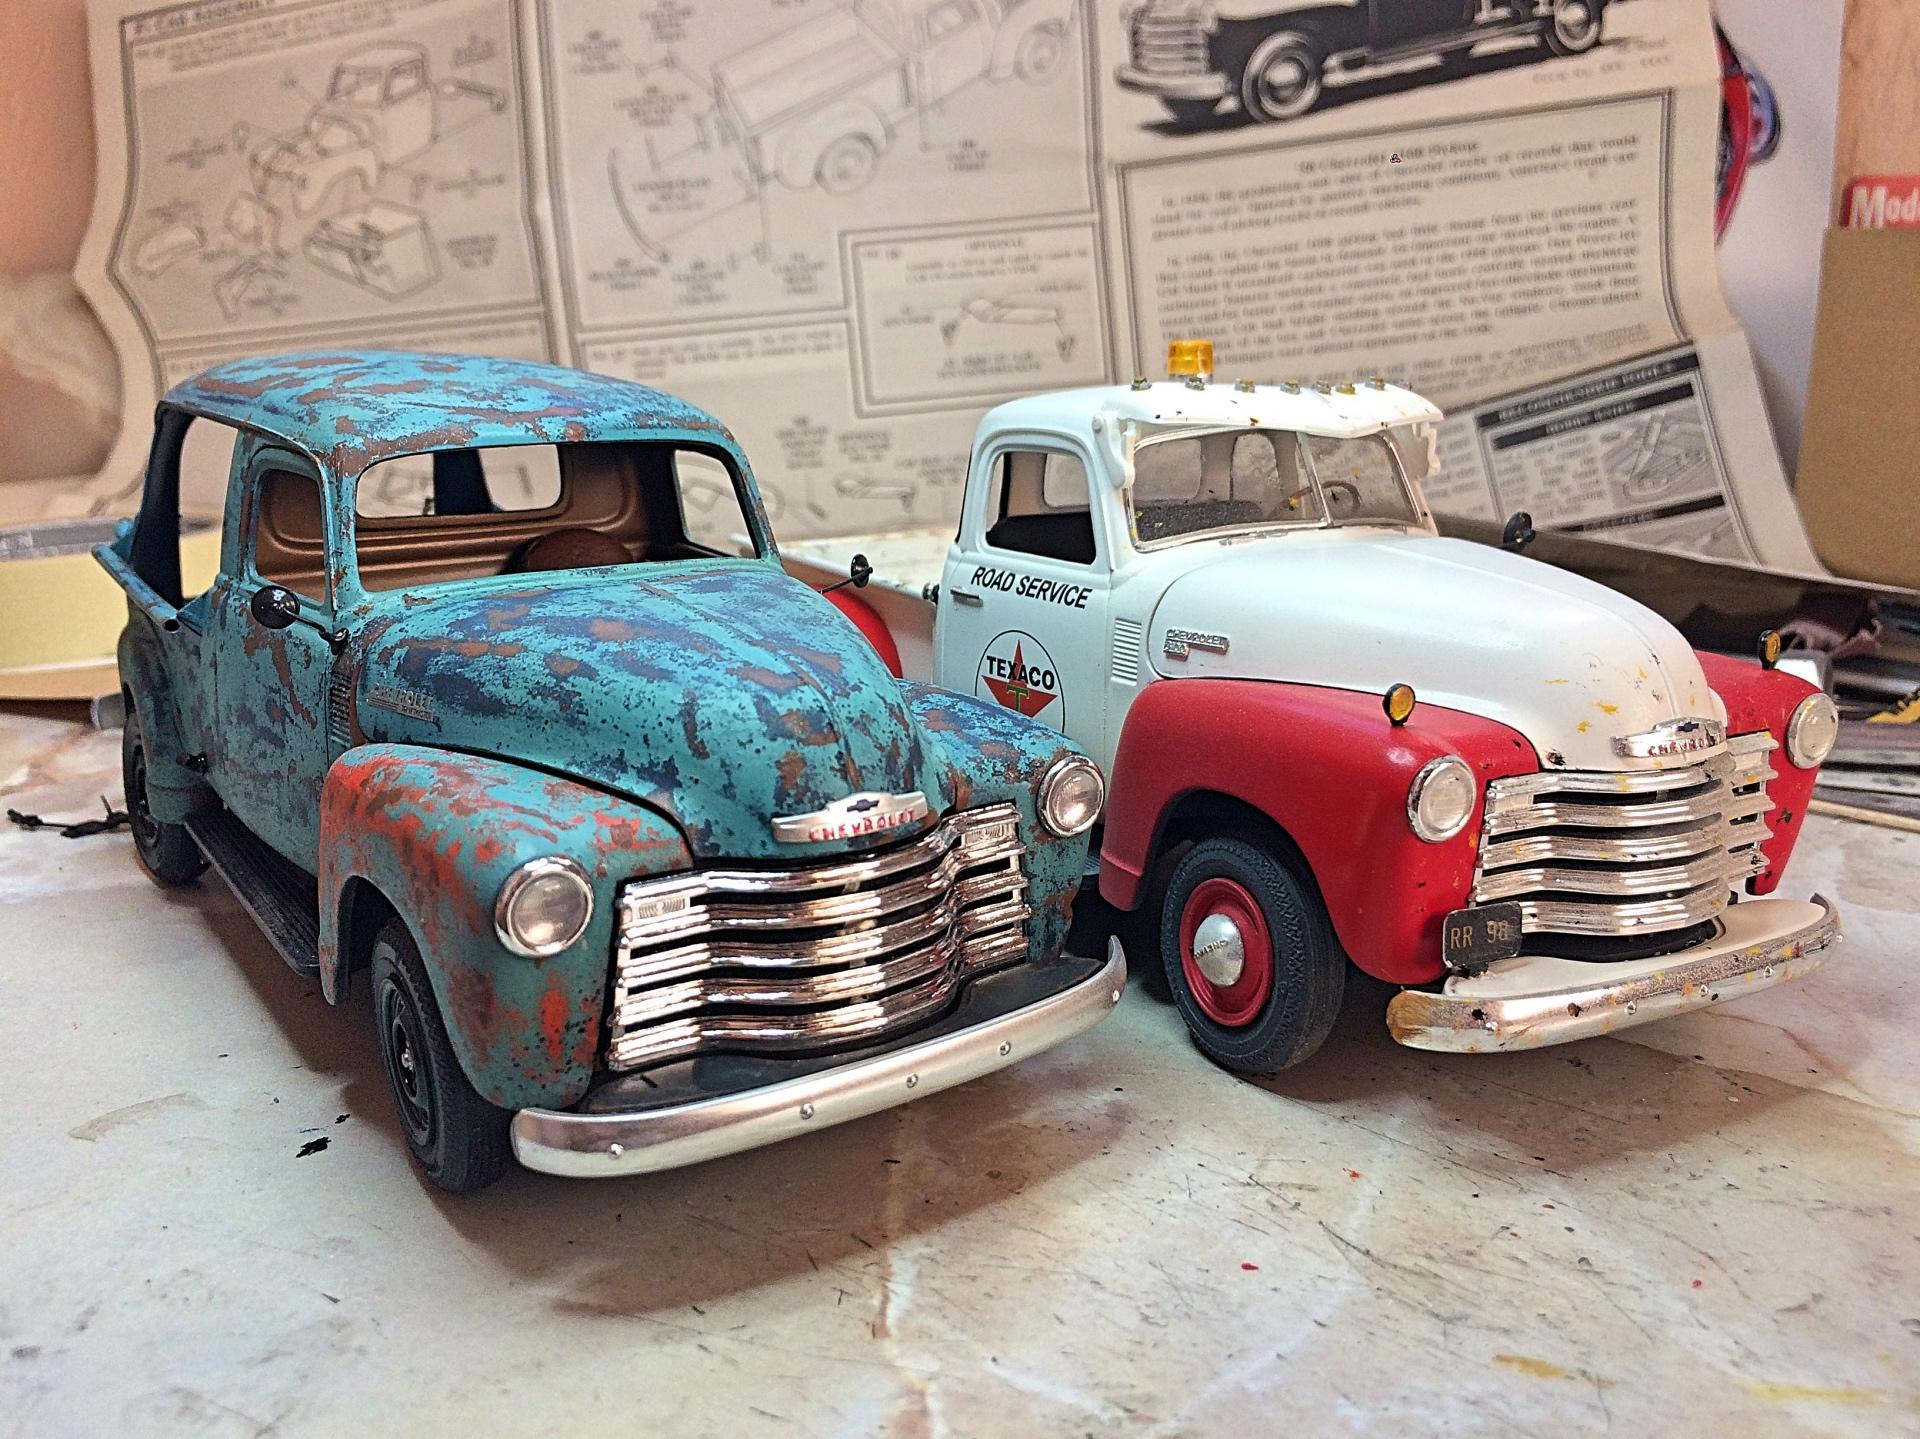
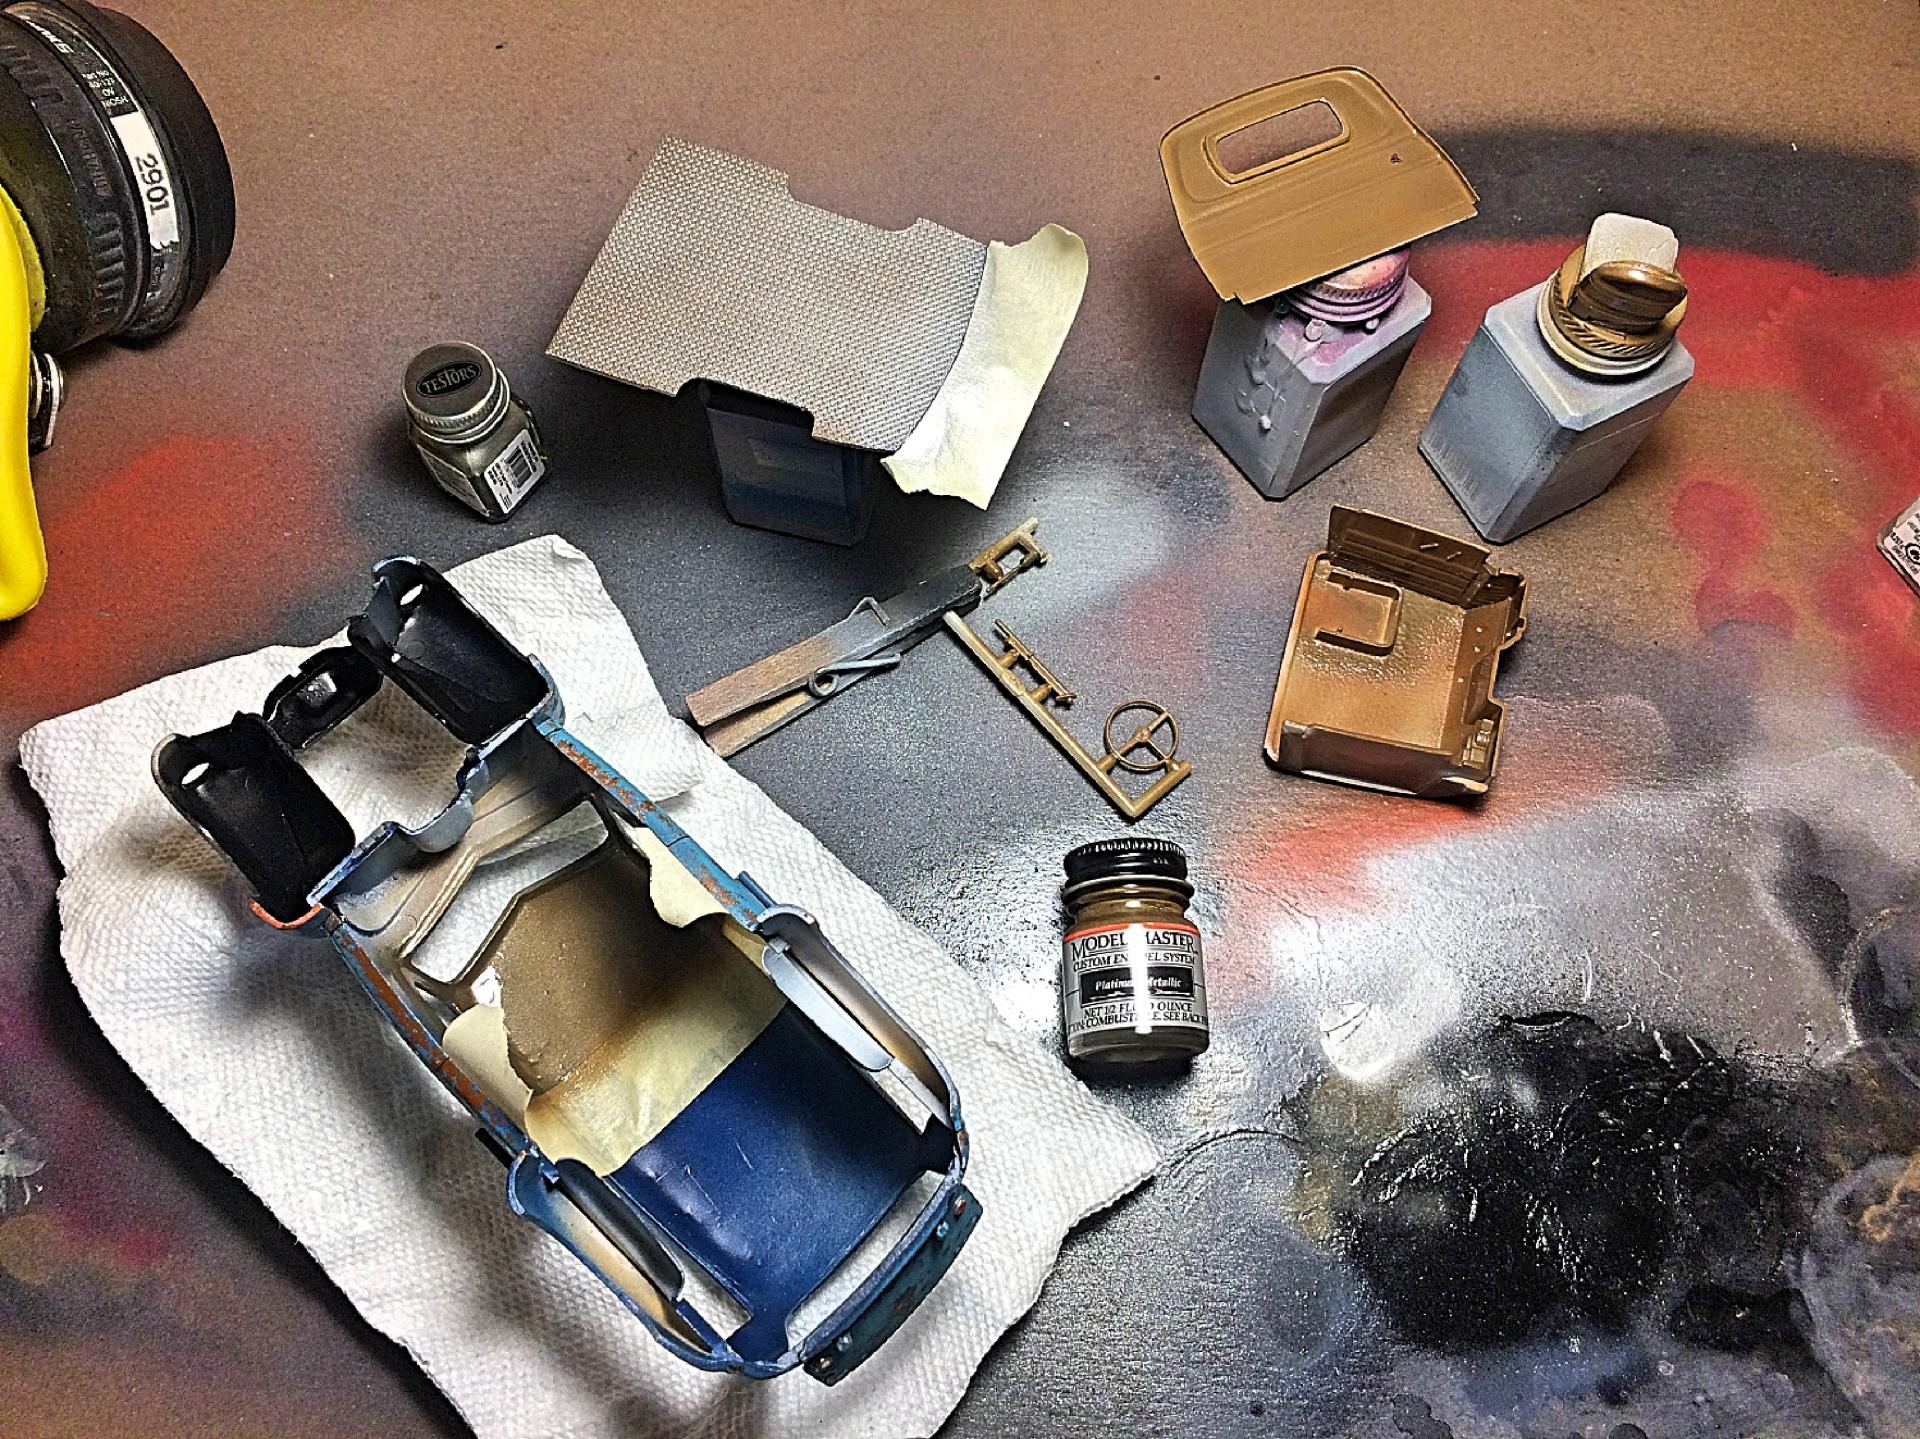
Thank you. Nothing like piling on the pressure. ? I'm jonesing to build a Porsche thanks to you. ? Thanks, took awhile. ? It's not quite the typical Rat Rod, but where I live in backwoods of Arizona, many guys have unrestored vehicles with hopped up original engines. I have added to my list, while lying awake early this morning from an allergy attack. Scratch-building two parts that should have been included in the kit, brake cylinder, and steering shaft/box. Also, a unique feature of the Advance Design trucks, the battery had a lid in the floor, it has a twist handle, thought of cutting a hole, putting foil over it like the lid is missing with the rubber mat sagging in the hole. Seems like a silly detail, but that stuff adds up. I'm also obsessing about the grill, most builders are oblivious to the fact that the back part of the grill bars was painted, and I tried to find out what the original colors were on the Chevy truck forum, so started my own topic to ask the burning question.
-
Sorry to point that out. ? It's a really nice model to be proud of. Now I need to send manifest energy towards Moebius to produce the '67-'72 Chevy Custom series pickup.
-
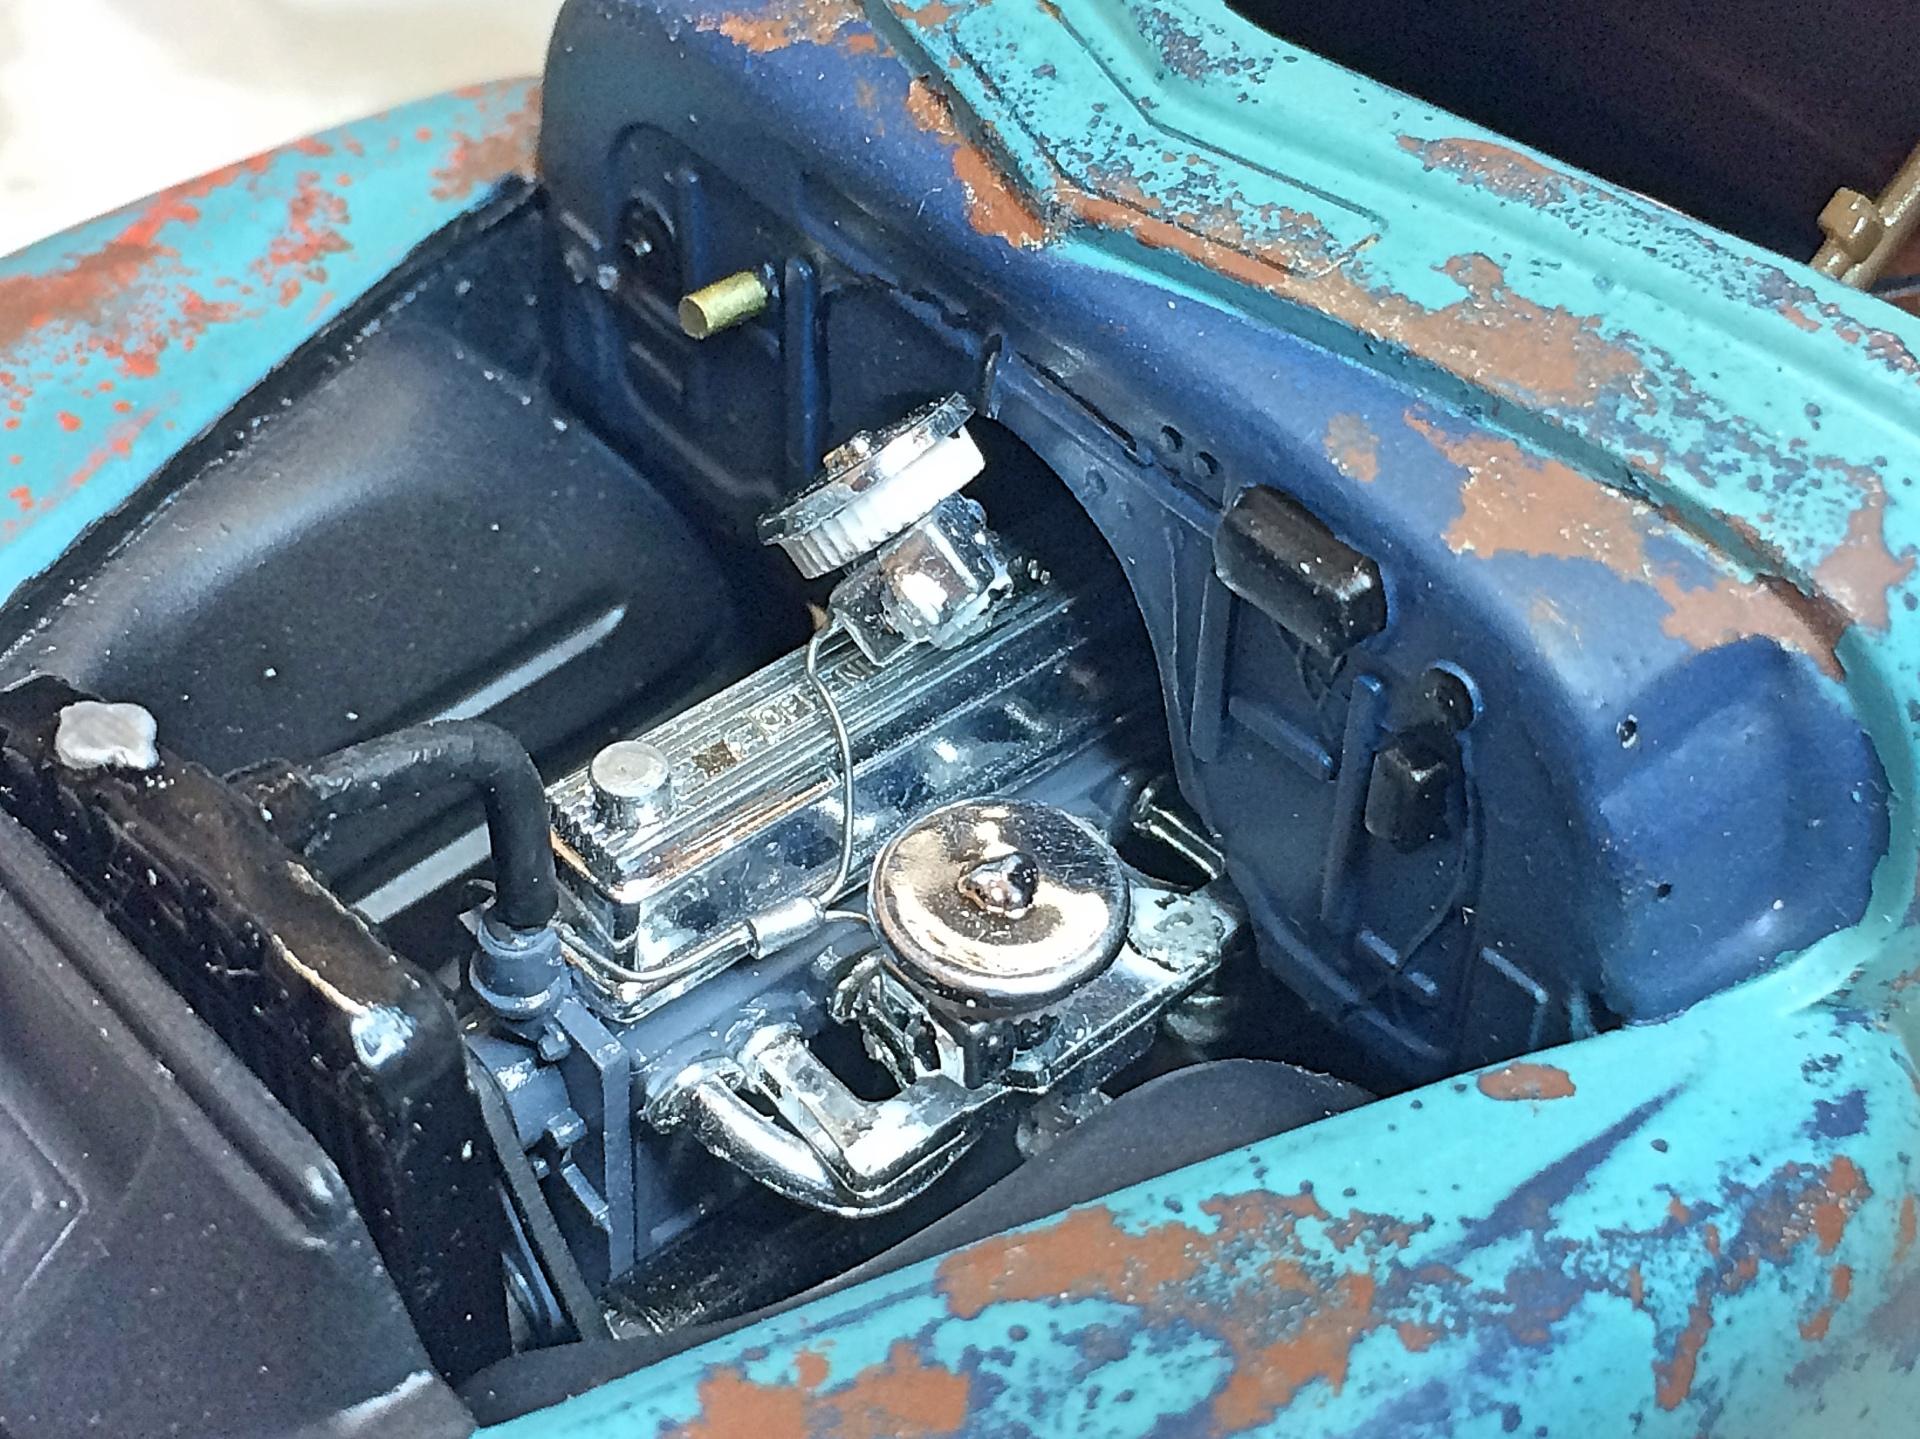
Appreciate the tip. I've sanded rusty iron to get real rust powder, sprinkled on the wet paint, which stains when wet-sanded, but didn't do it this time. Well thank you very much! BTW: I have a friend's brother who was a client, name is Kit Carson, a jeweler in Prescott. Blew off work today (the risk of being self-employed). I am so close after 25 years (holy cow THAT long?!?!?!) that I really wanted to see some paint sprayed all over this puppy! First was 5 shades of black. The interior color of most of these trucks was a gold sort of color, based on fading memory of my real pickup. I think the Testors 'champagne metallic' is close enough, which is good for when I get the dash back from the chrome plater. It's a bear to get consistent, should have primer base coat all the parts, but good enough for government work. I got the twin carb and twice pipe headers last century from someone in the antique auto club. I had Fenton headers and aluminum intake on my '57 Chevy wagon, so am somewhat familiar with knowing it's Stromberg carburetors, so I searched and found pictures to know which way is up on those and where the fuel line enters. Fine solder is the fuel line (I used copper on the pickup), split with a short piece of Tamiya hose. I had glued on aluminum newspaper printing plate clips onto the frame rails, which were crimped to hold the line. The battery was separated from the frame. I'm building this like the drivetrain has been restored, wheels and tires are new, but everything else will be untouched. Next scratch-built item is the twice pipes, have the mufflers from something long forgotten, perhaps the Chevy 409 demolition derby. Someone started a thread, asking if anyone makes fan blades, this project is sort of begging for that...... ?
-
Cool subject, will watch from the sidelines!