89AKurt
-
Posts
8,426 -
Joined
-
Last visited
Content Type
Profiles
Forums
Events
Gallery
Everything posted by 89AKurt
-
 How cool! Pulling up a chair to watch this. You want door handles?
-
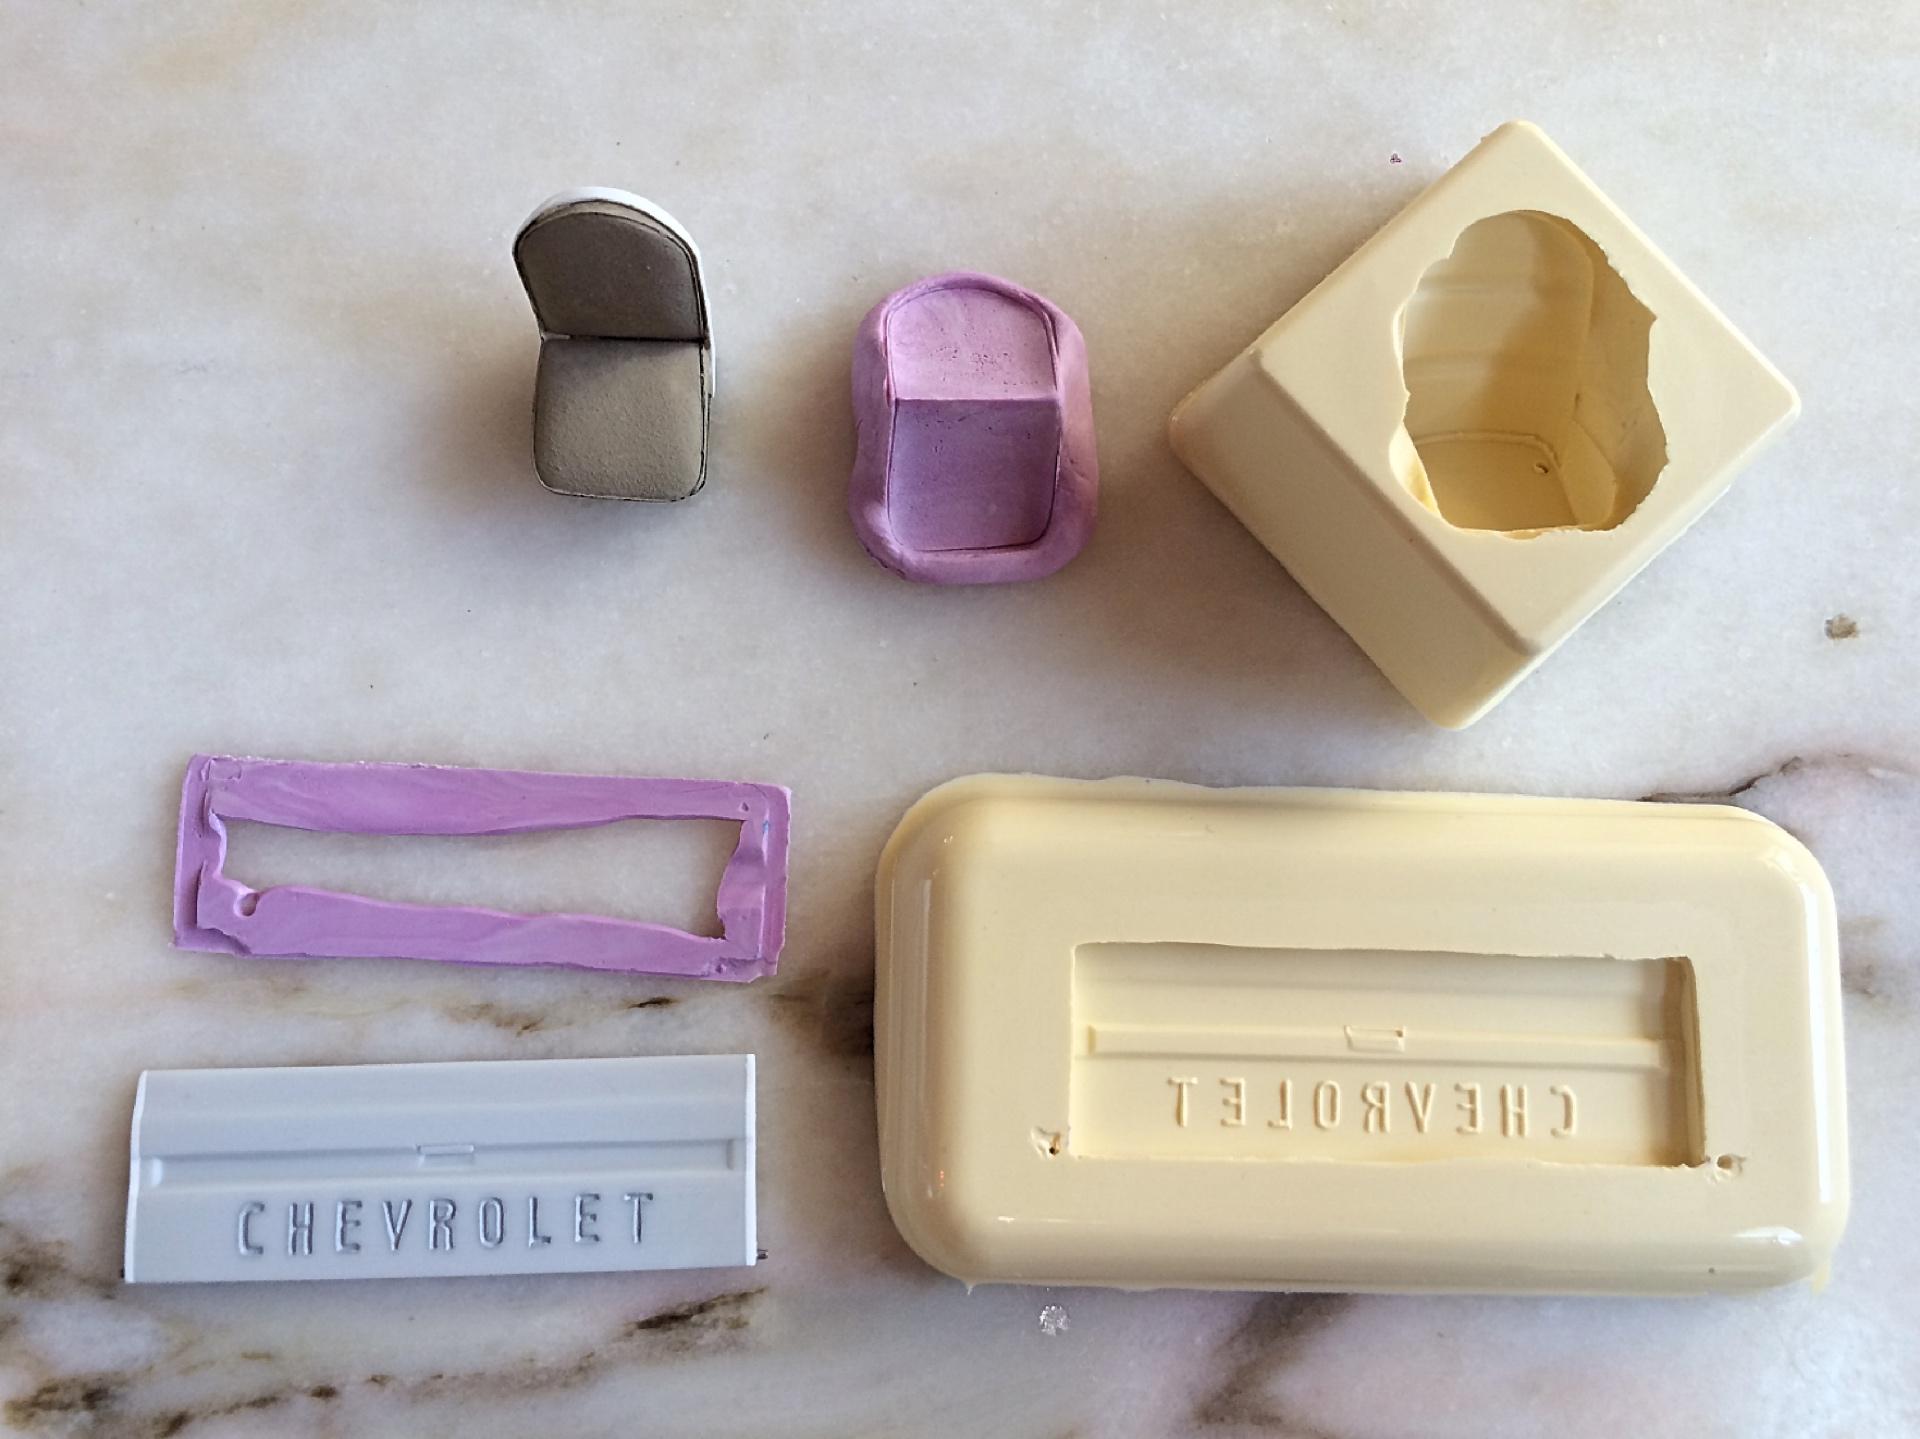
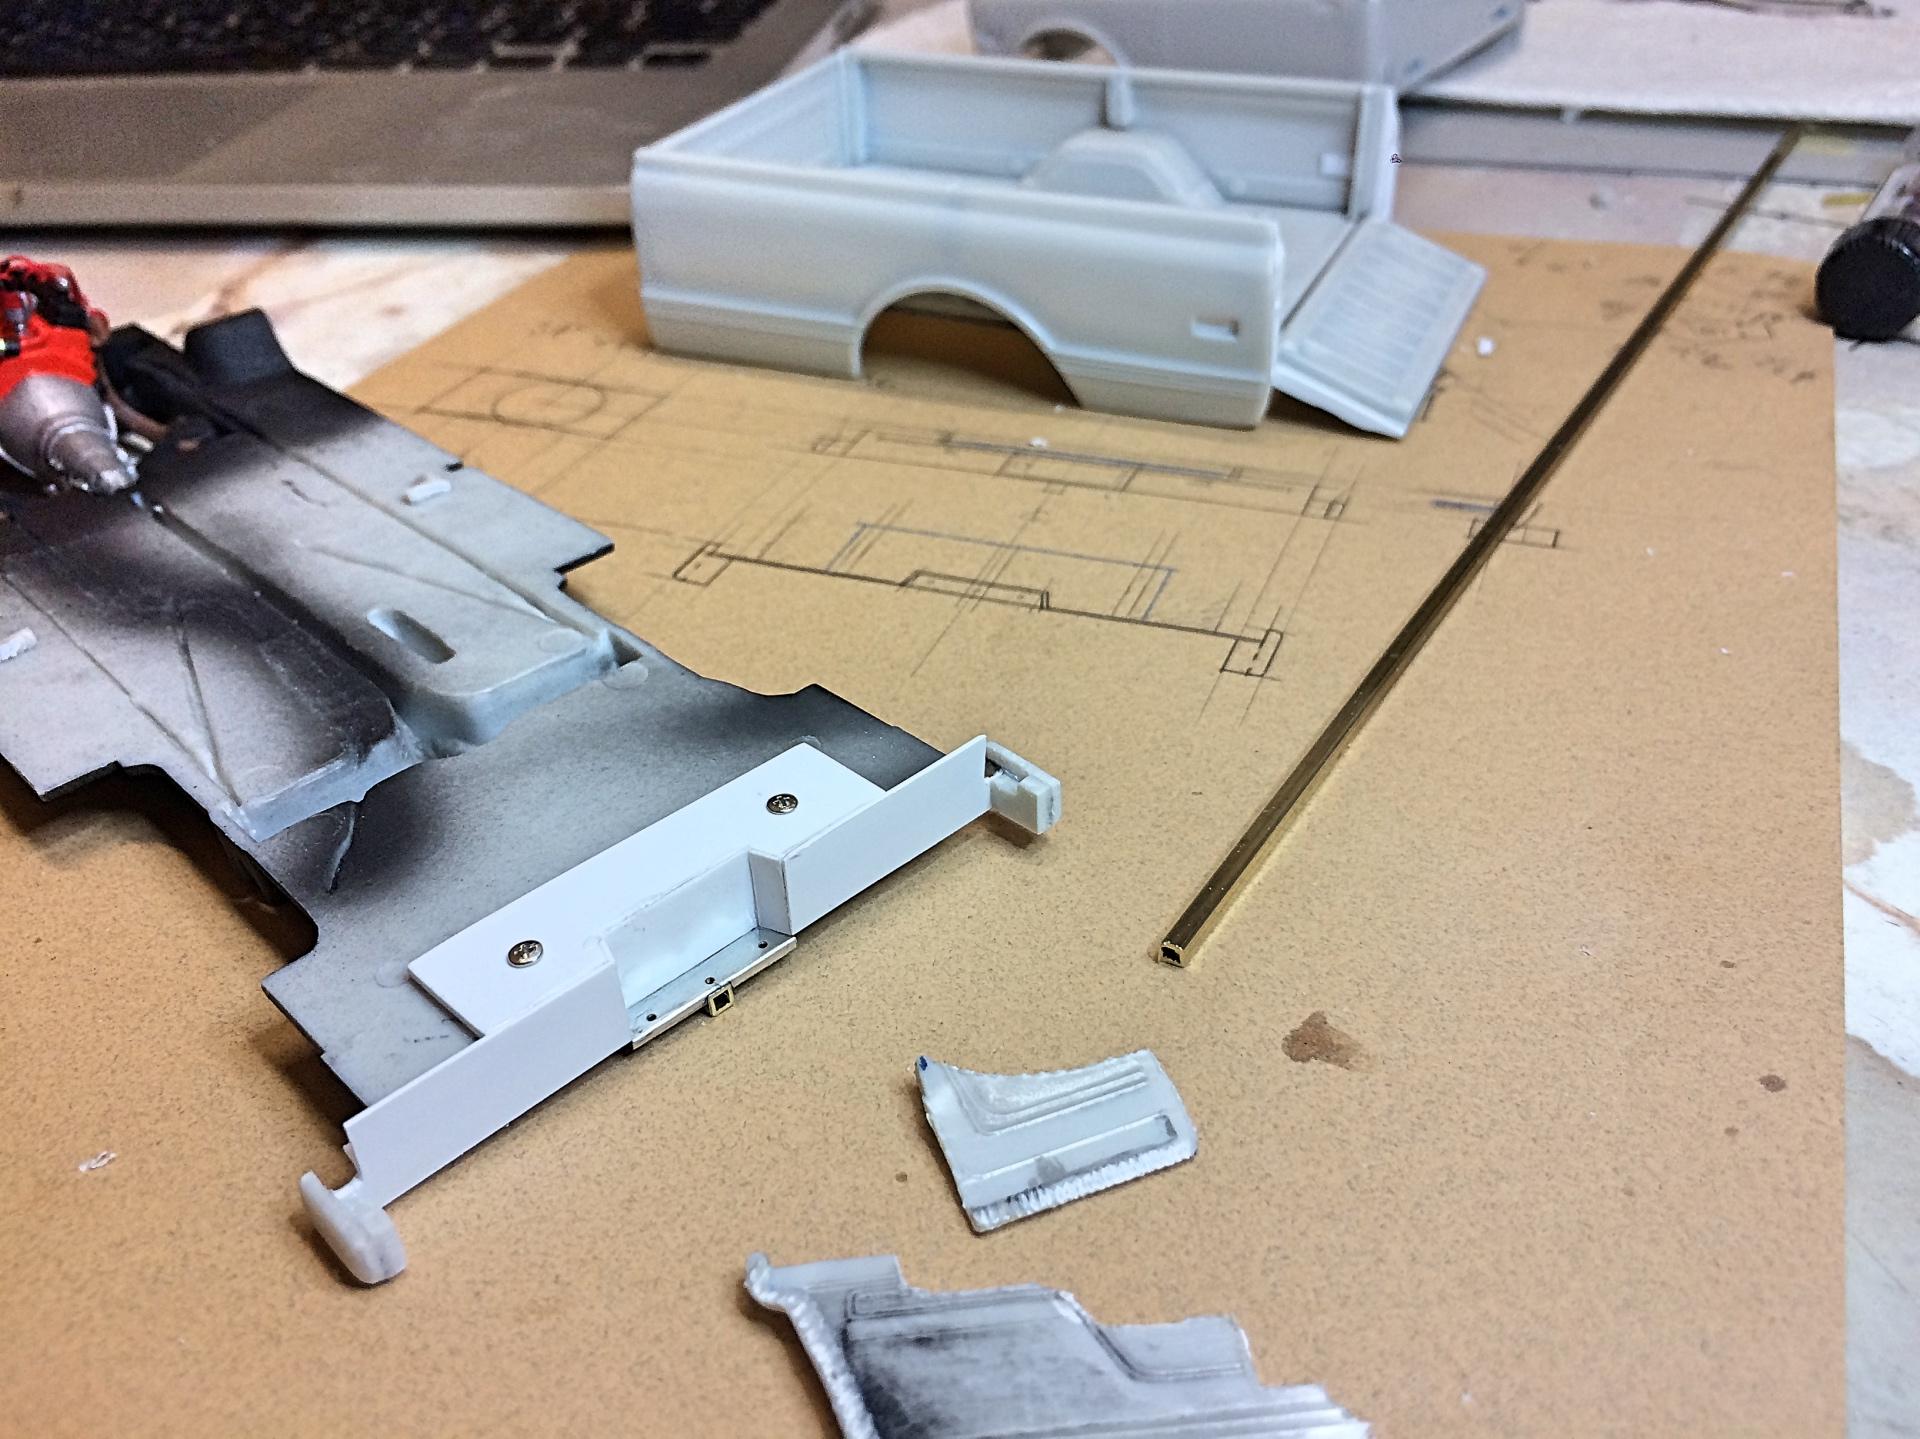
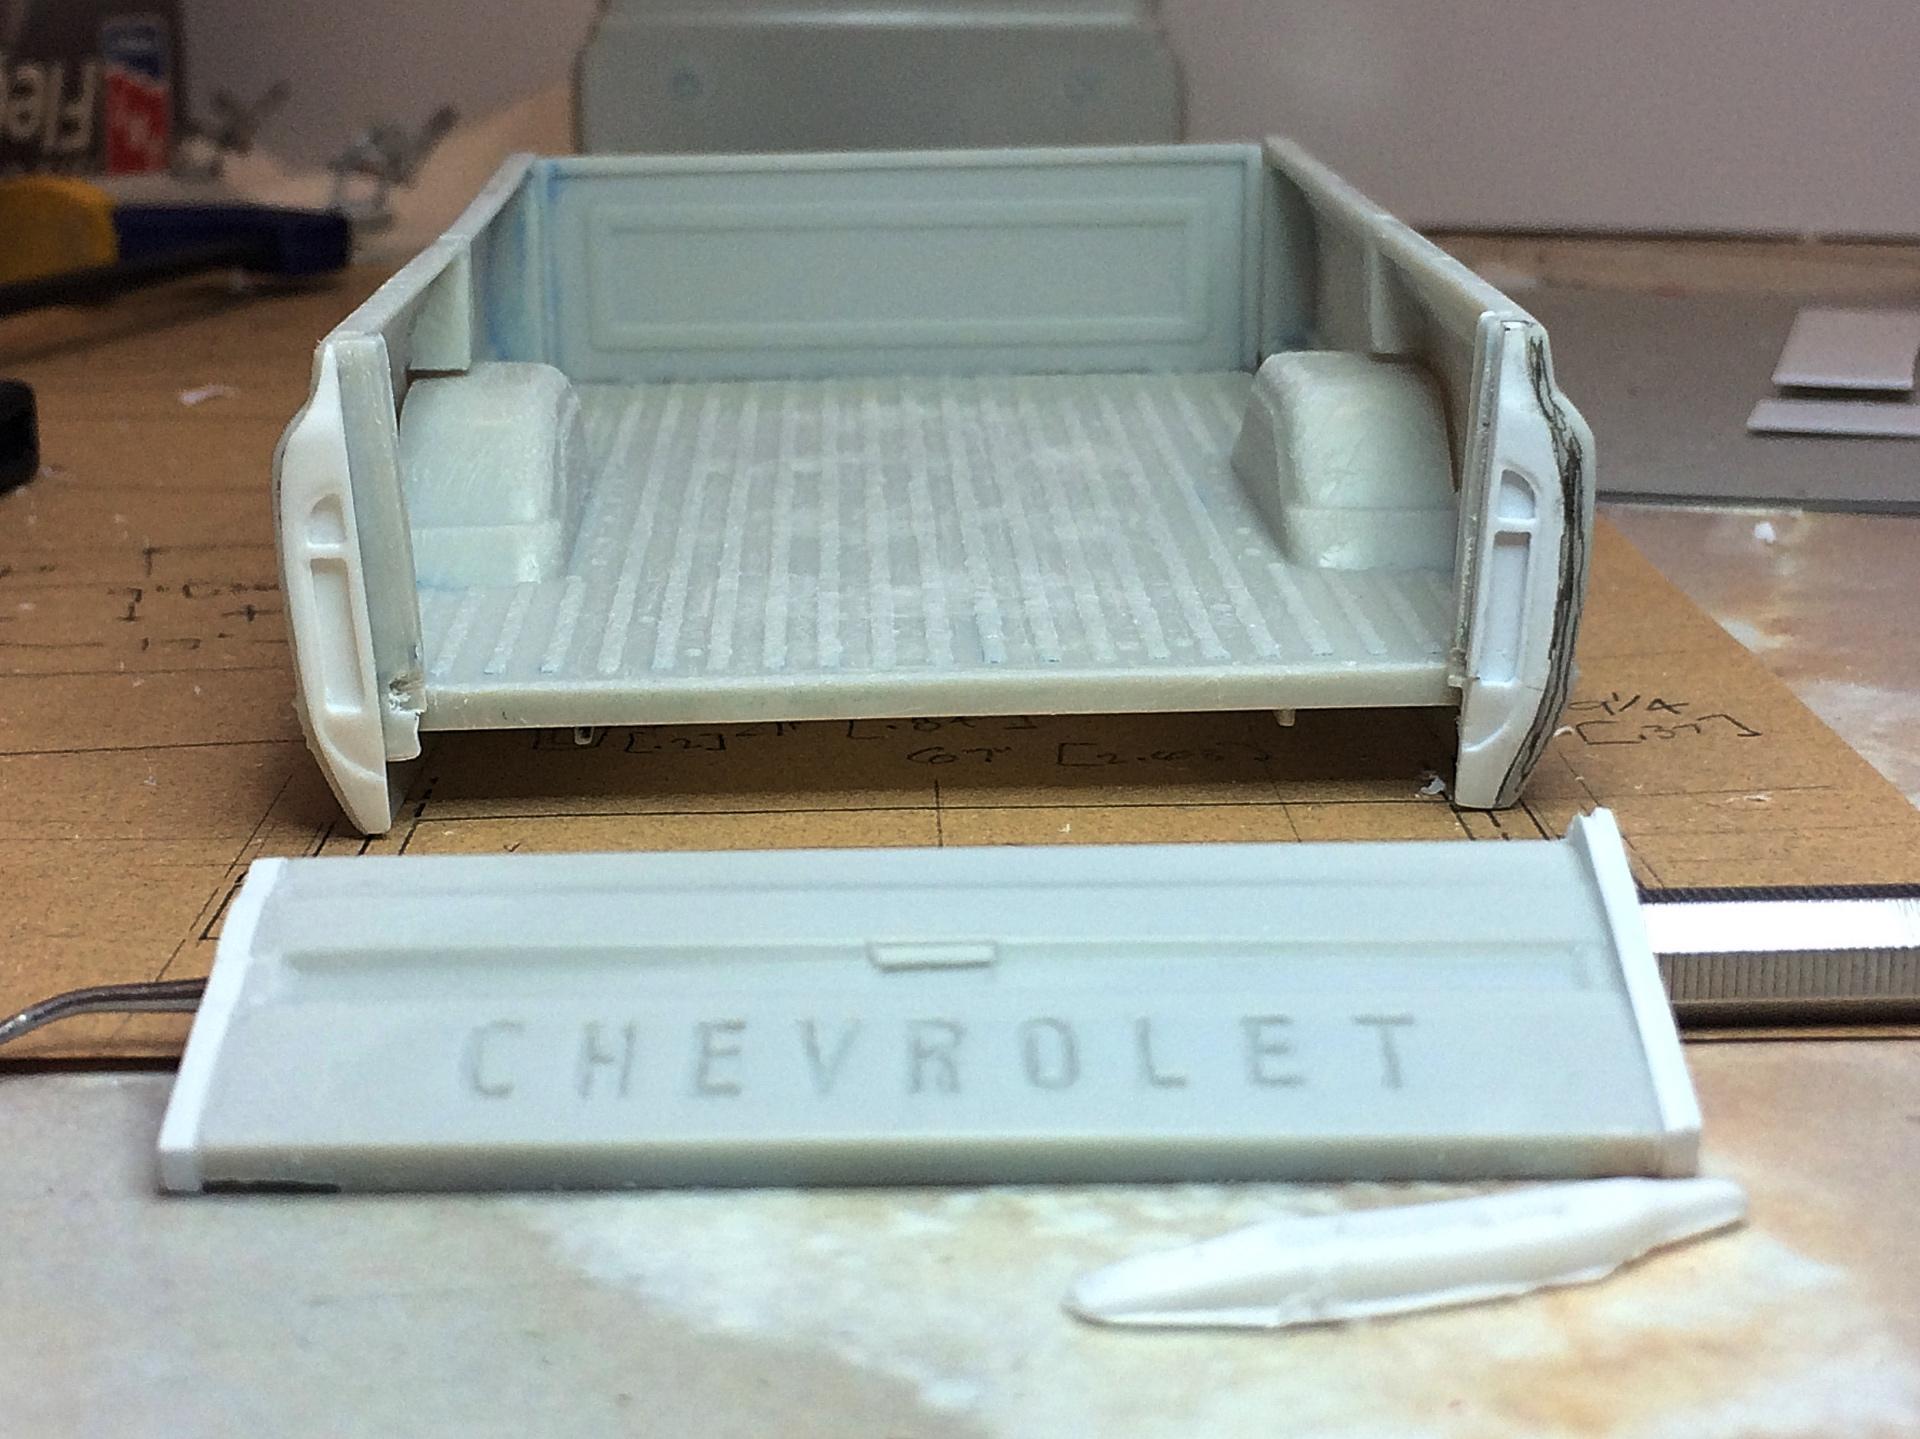
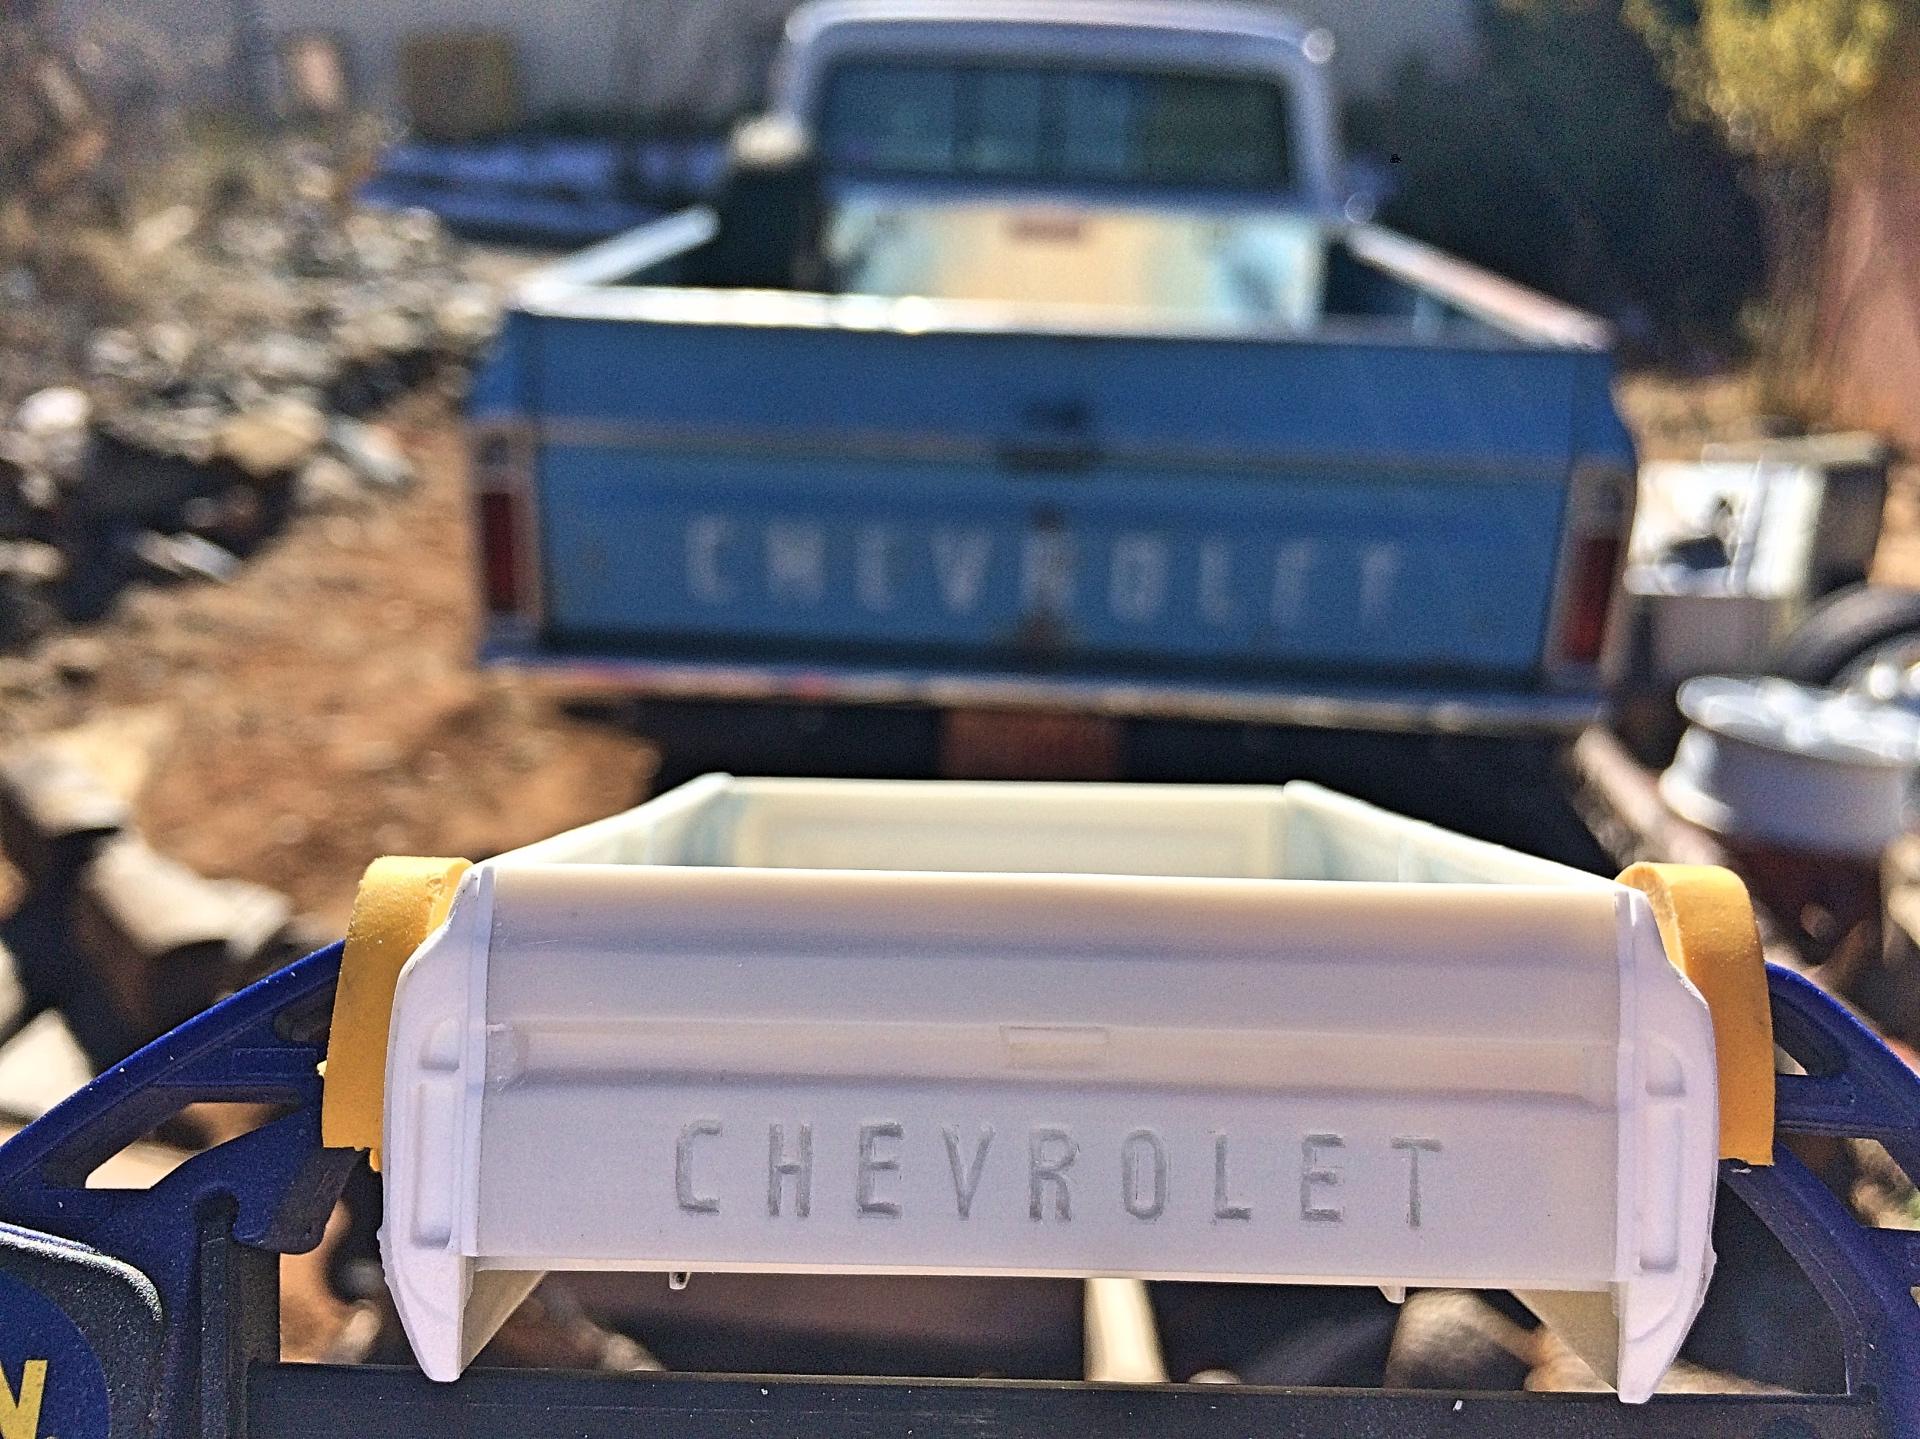
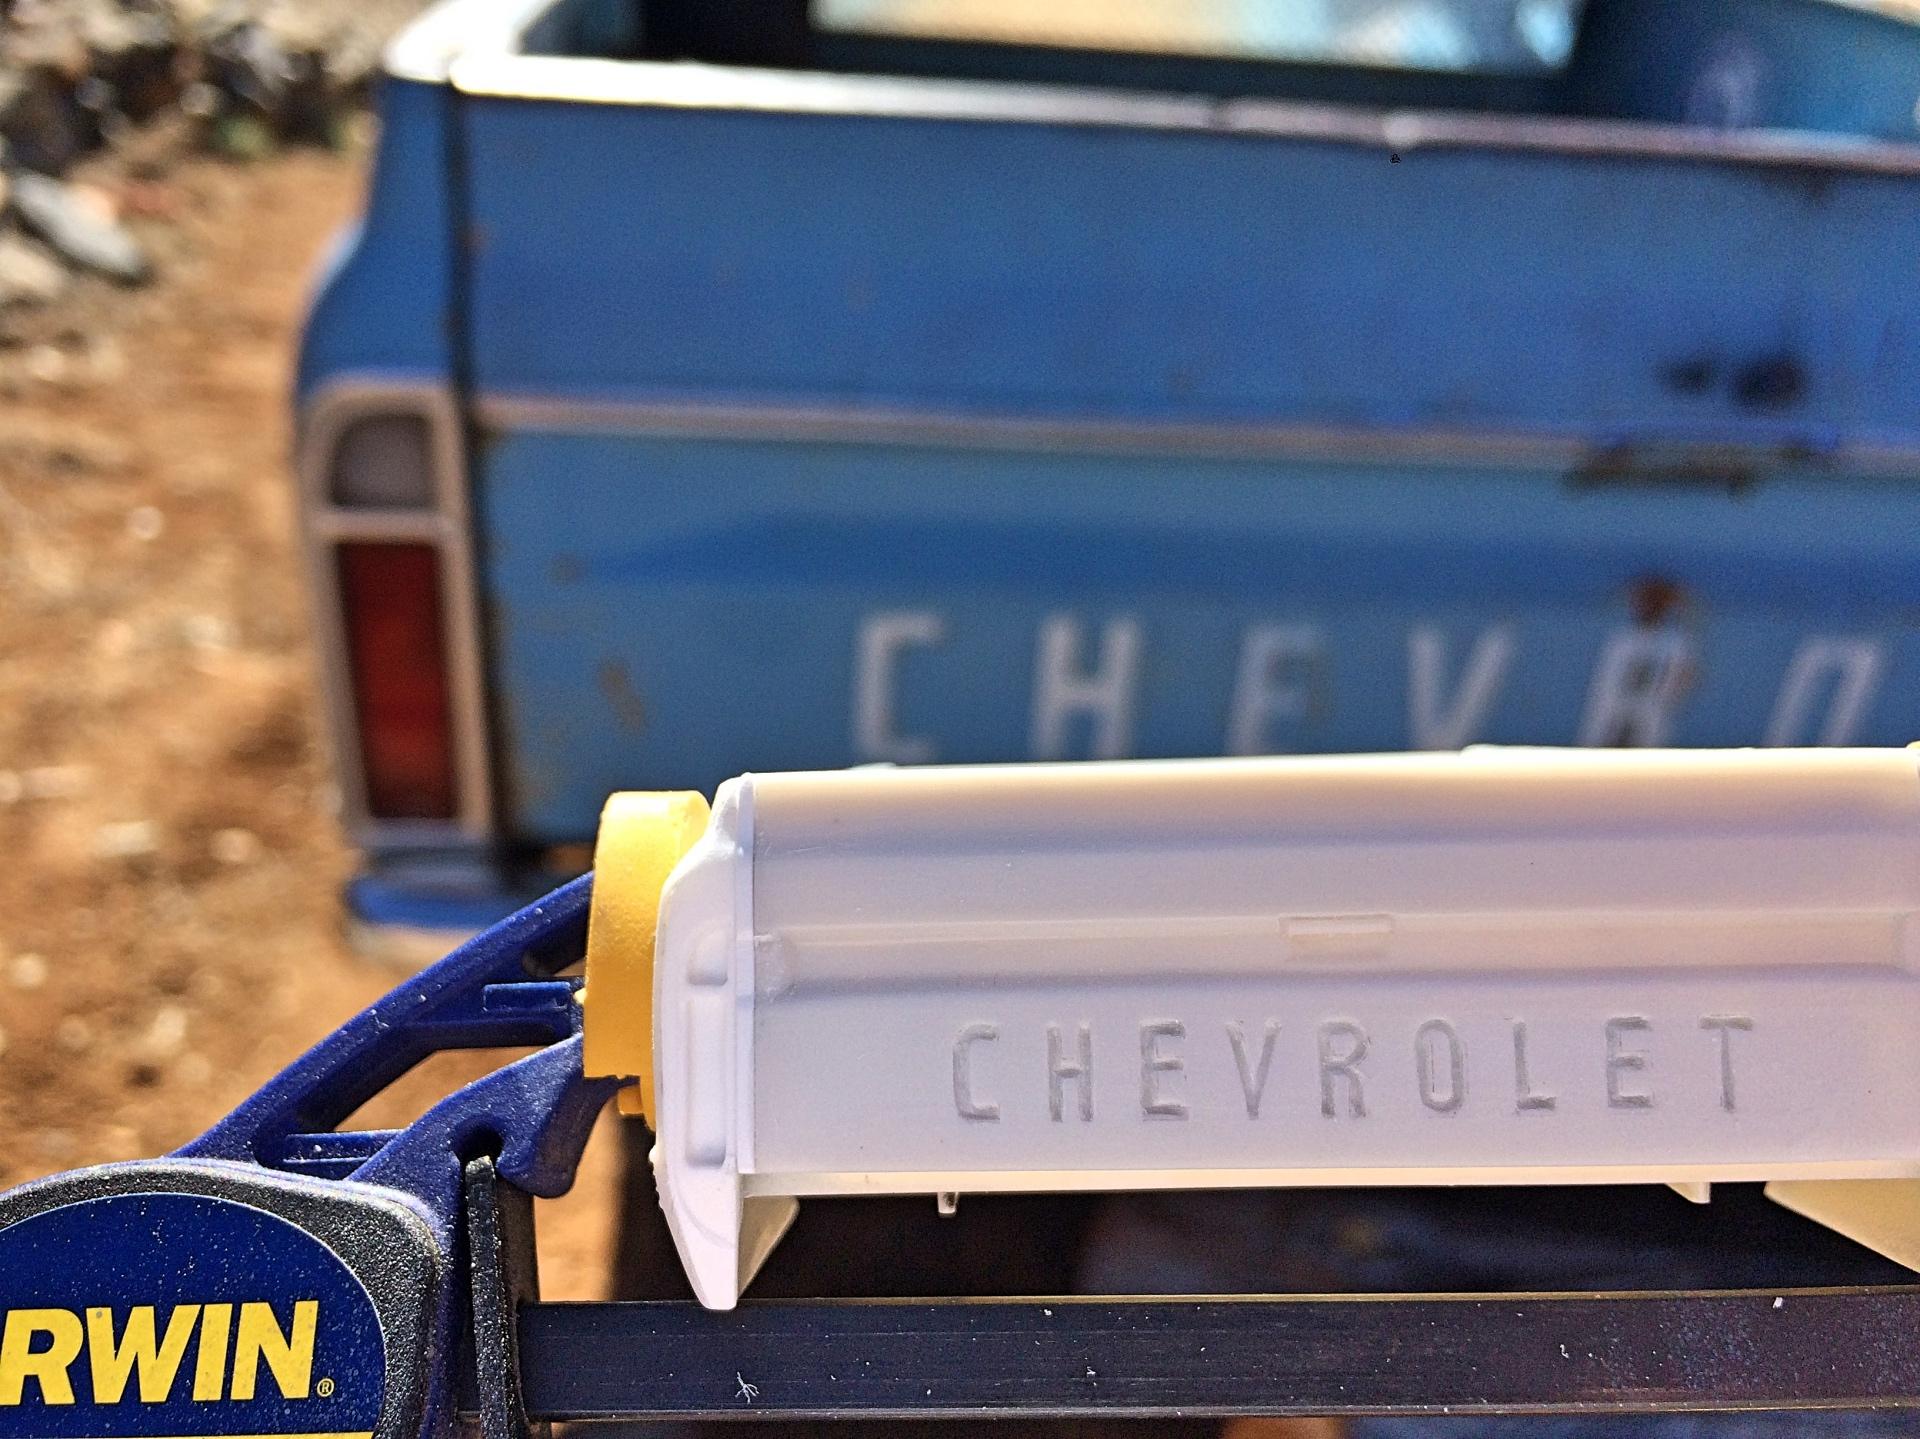
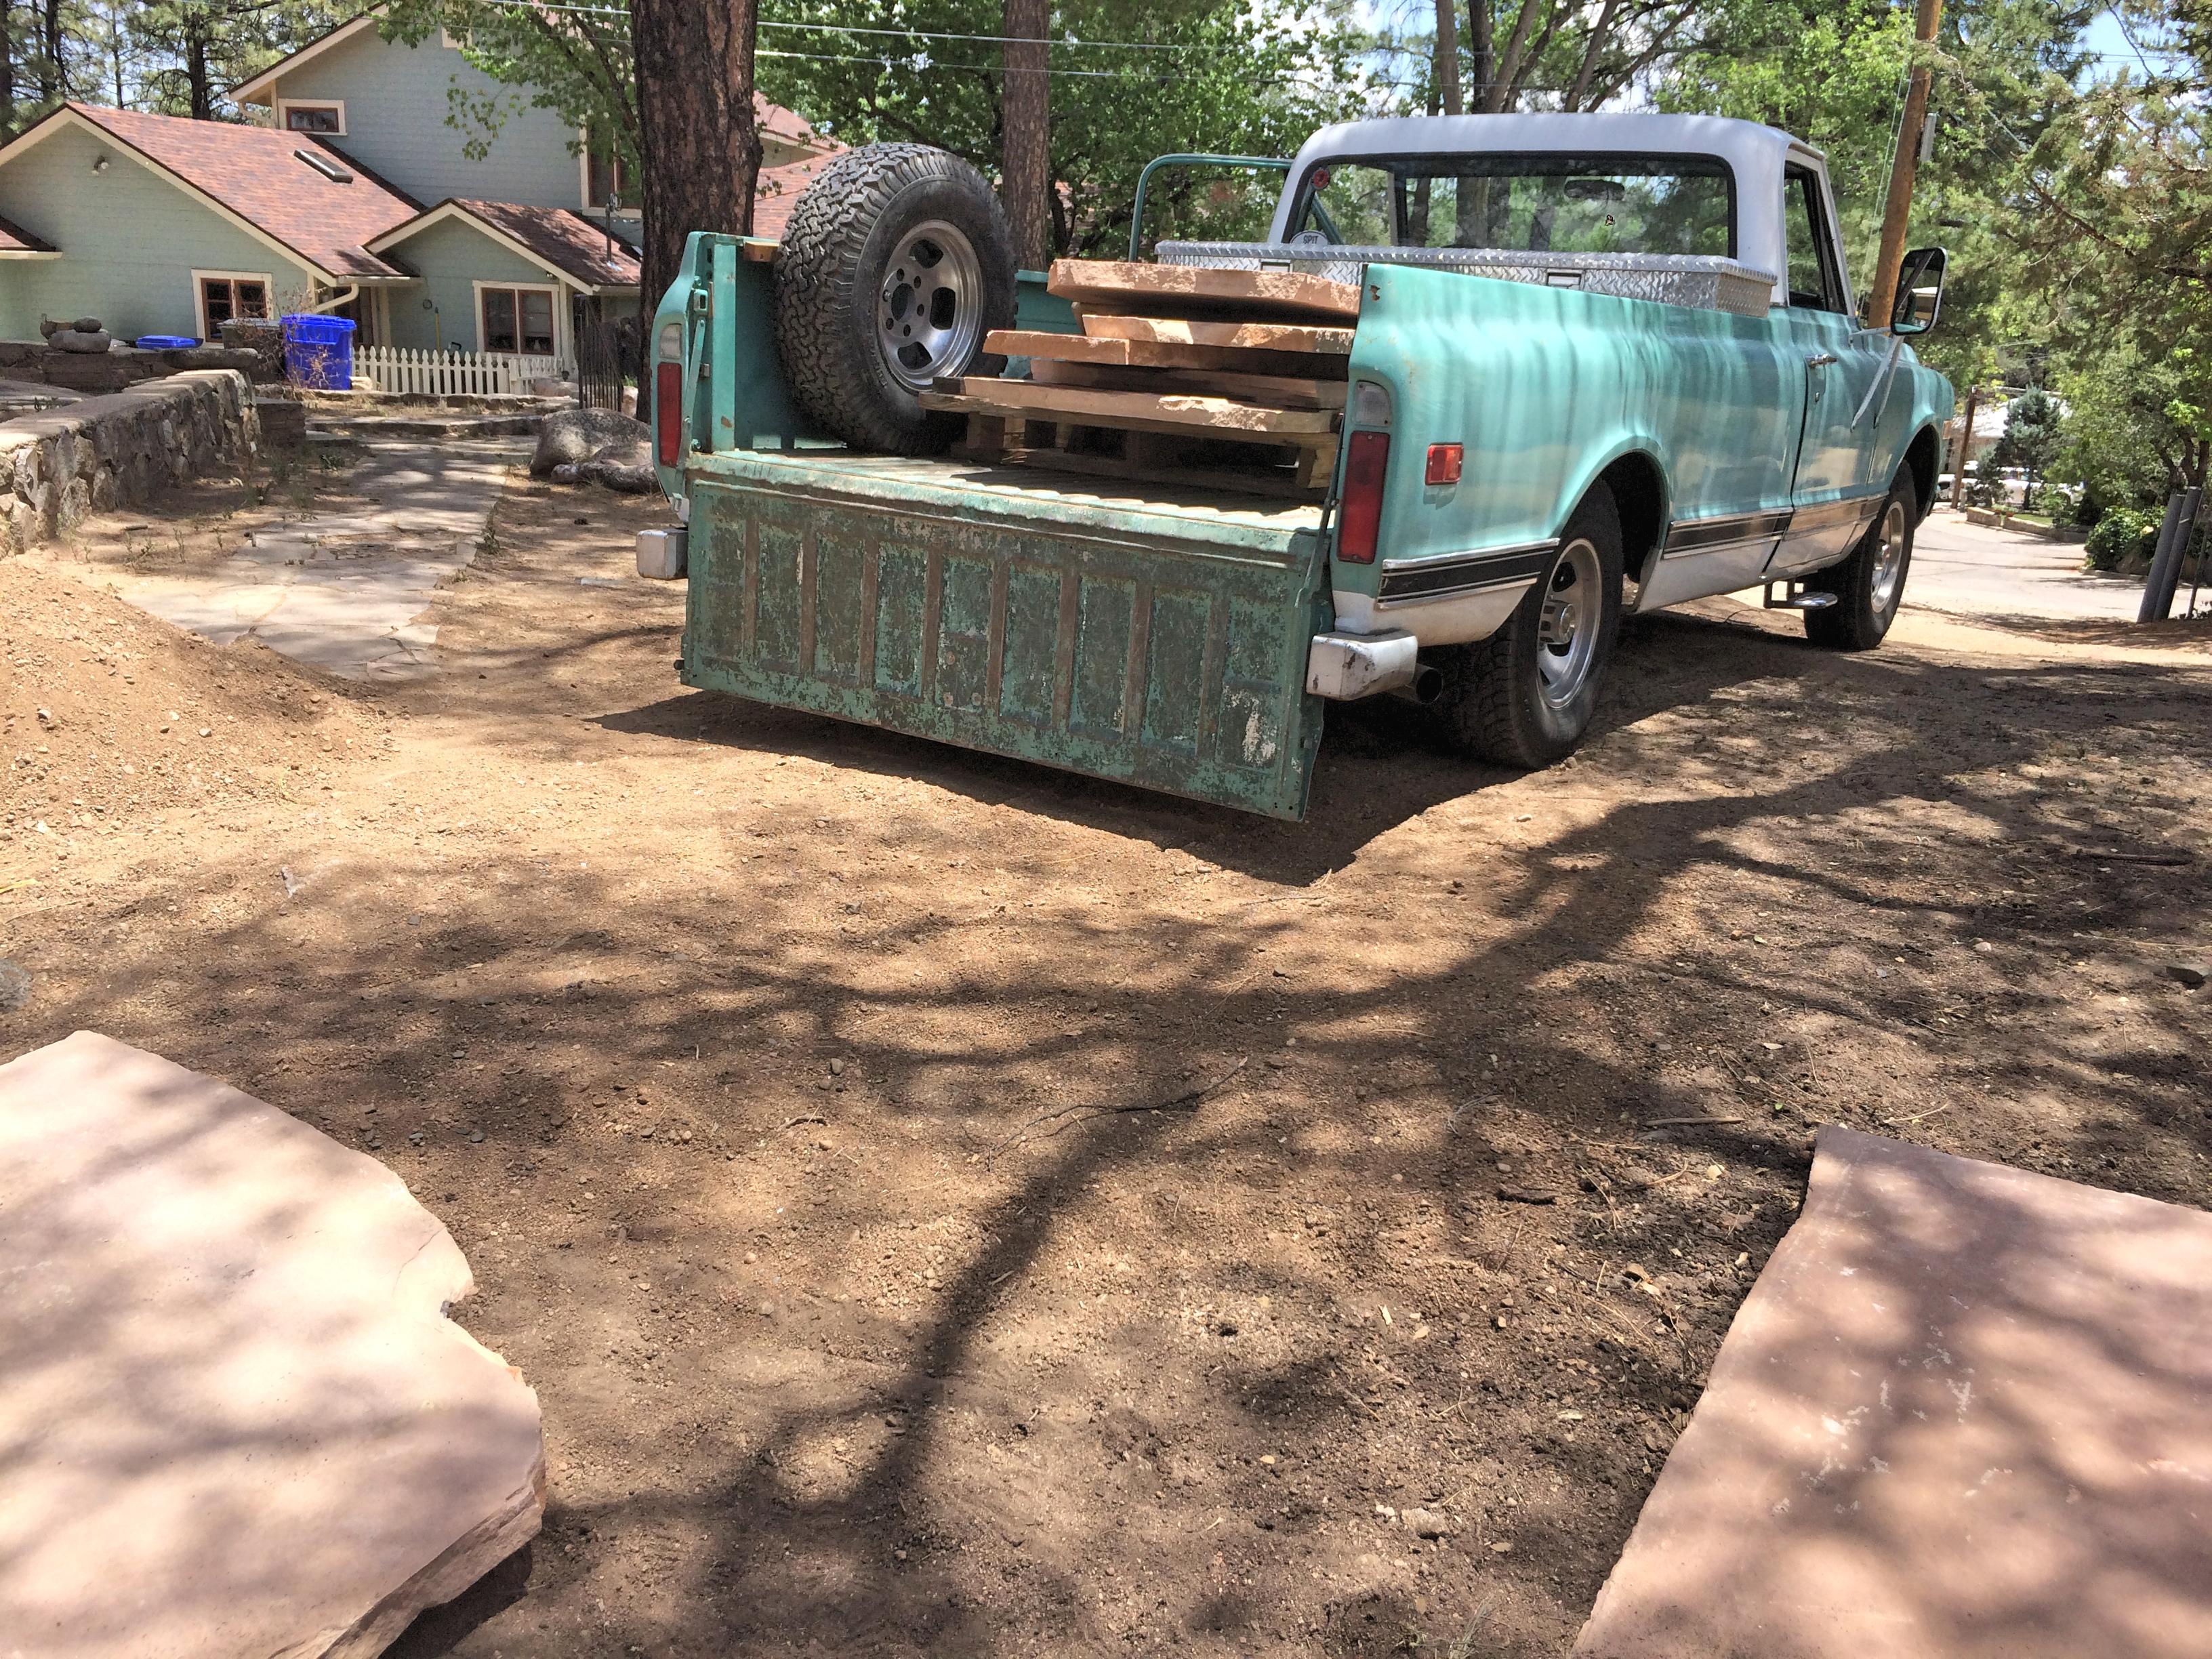
? Oh great, I've corrupted you. Look forward to what you use any tips on. One tip, always double-check modifications before you use RTV, you don't need to duplicate mistakes. I noticed the tailgate is still not correct, the indent above the letters has an angled slope inward, and the plane the letters are on is just a little 'lower', there is no dip at the recess belt line. Also, a weird thing with this Alumalite RTV, the catalyst changed color in the short time since opened. First major part to be scratch-built that is unique to the real pickup, the ranch type back bumper. Had to fudge a few things, drew it first. Screwed it to the chassis plate, just in case it needs adjusting after painting. Used some of the interior left-over pieces for the ends.
-
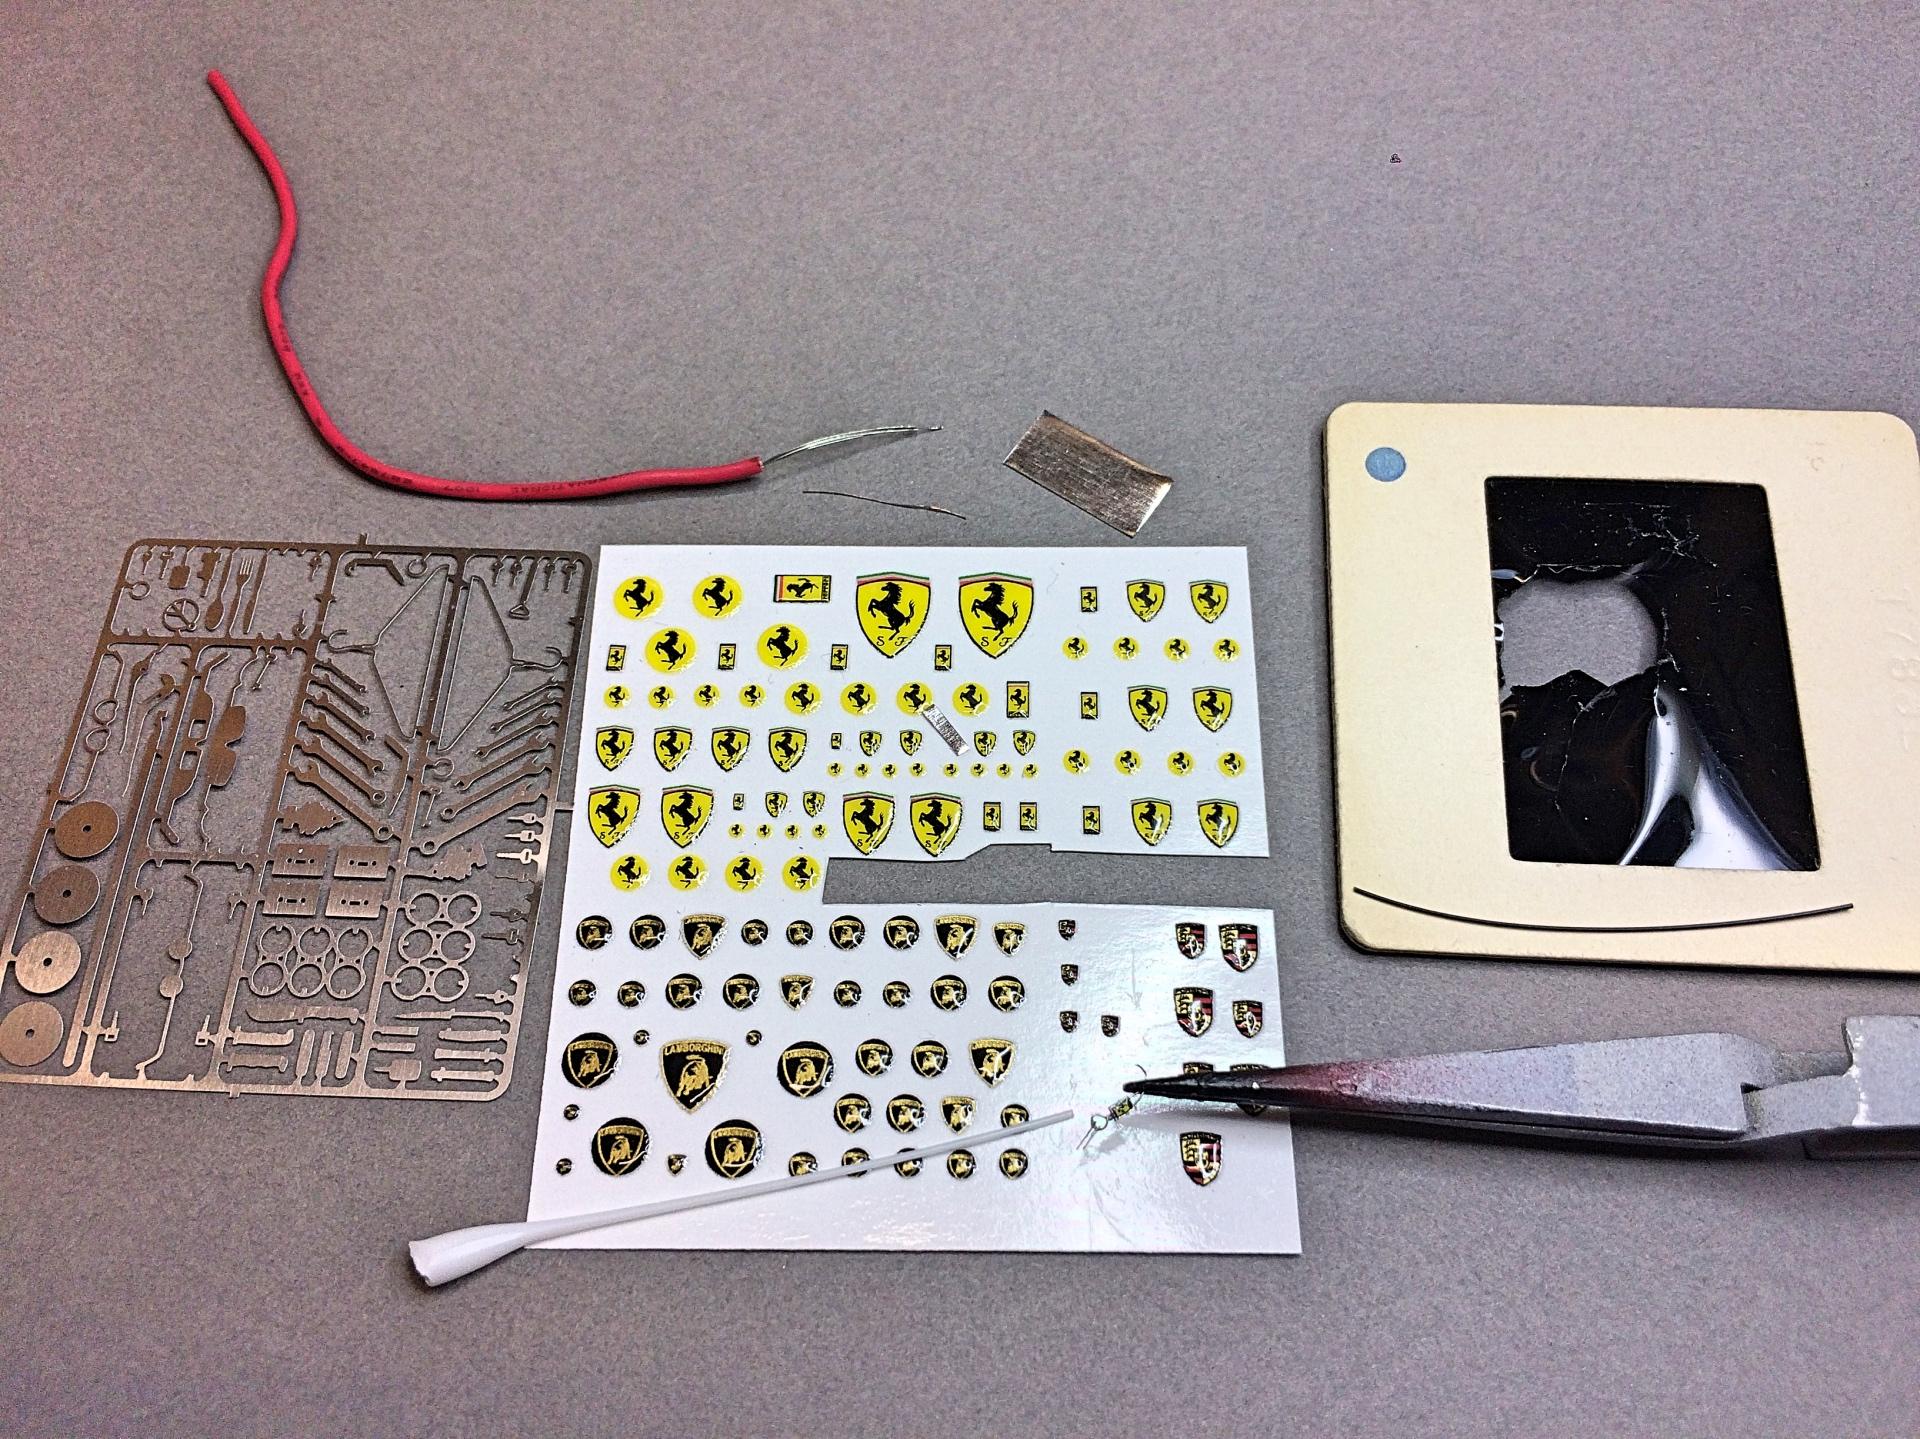
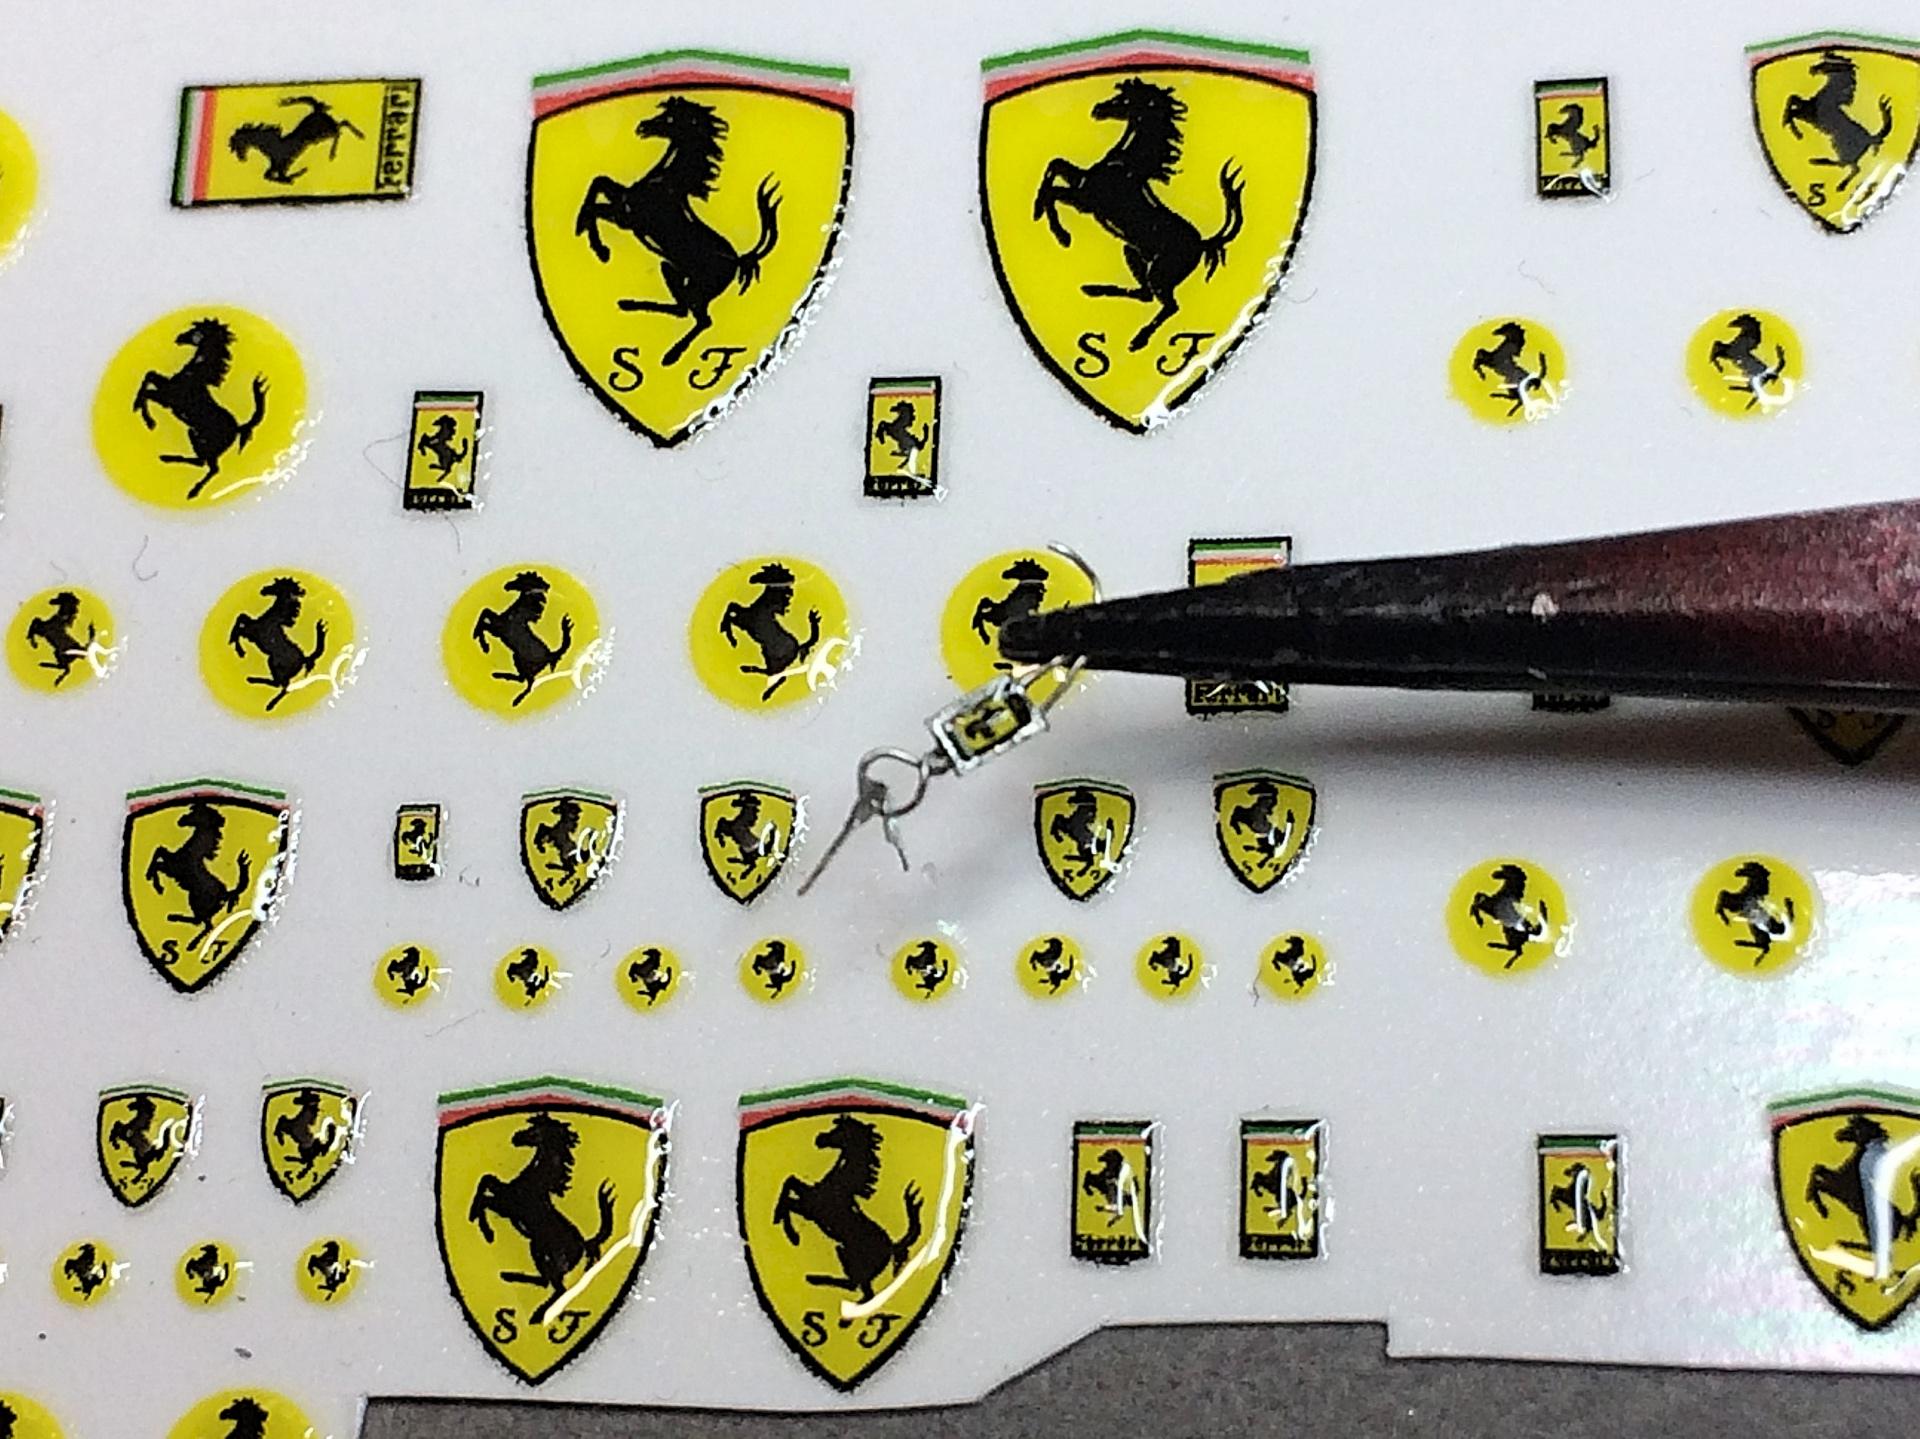
Responded. Note the 4 sizes of roundels.
-
Love the concept. What are you using for putty?
-
with rare models
-
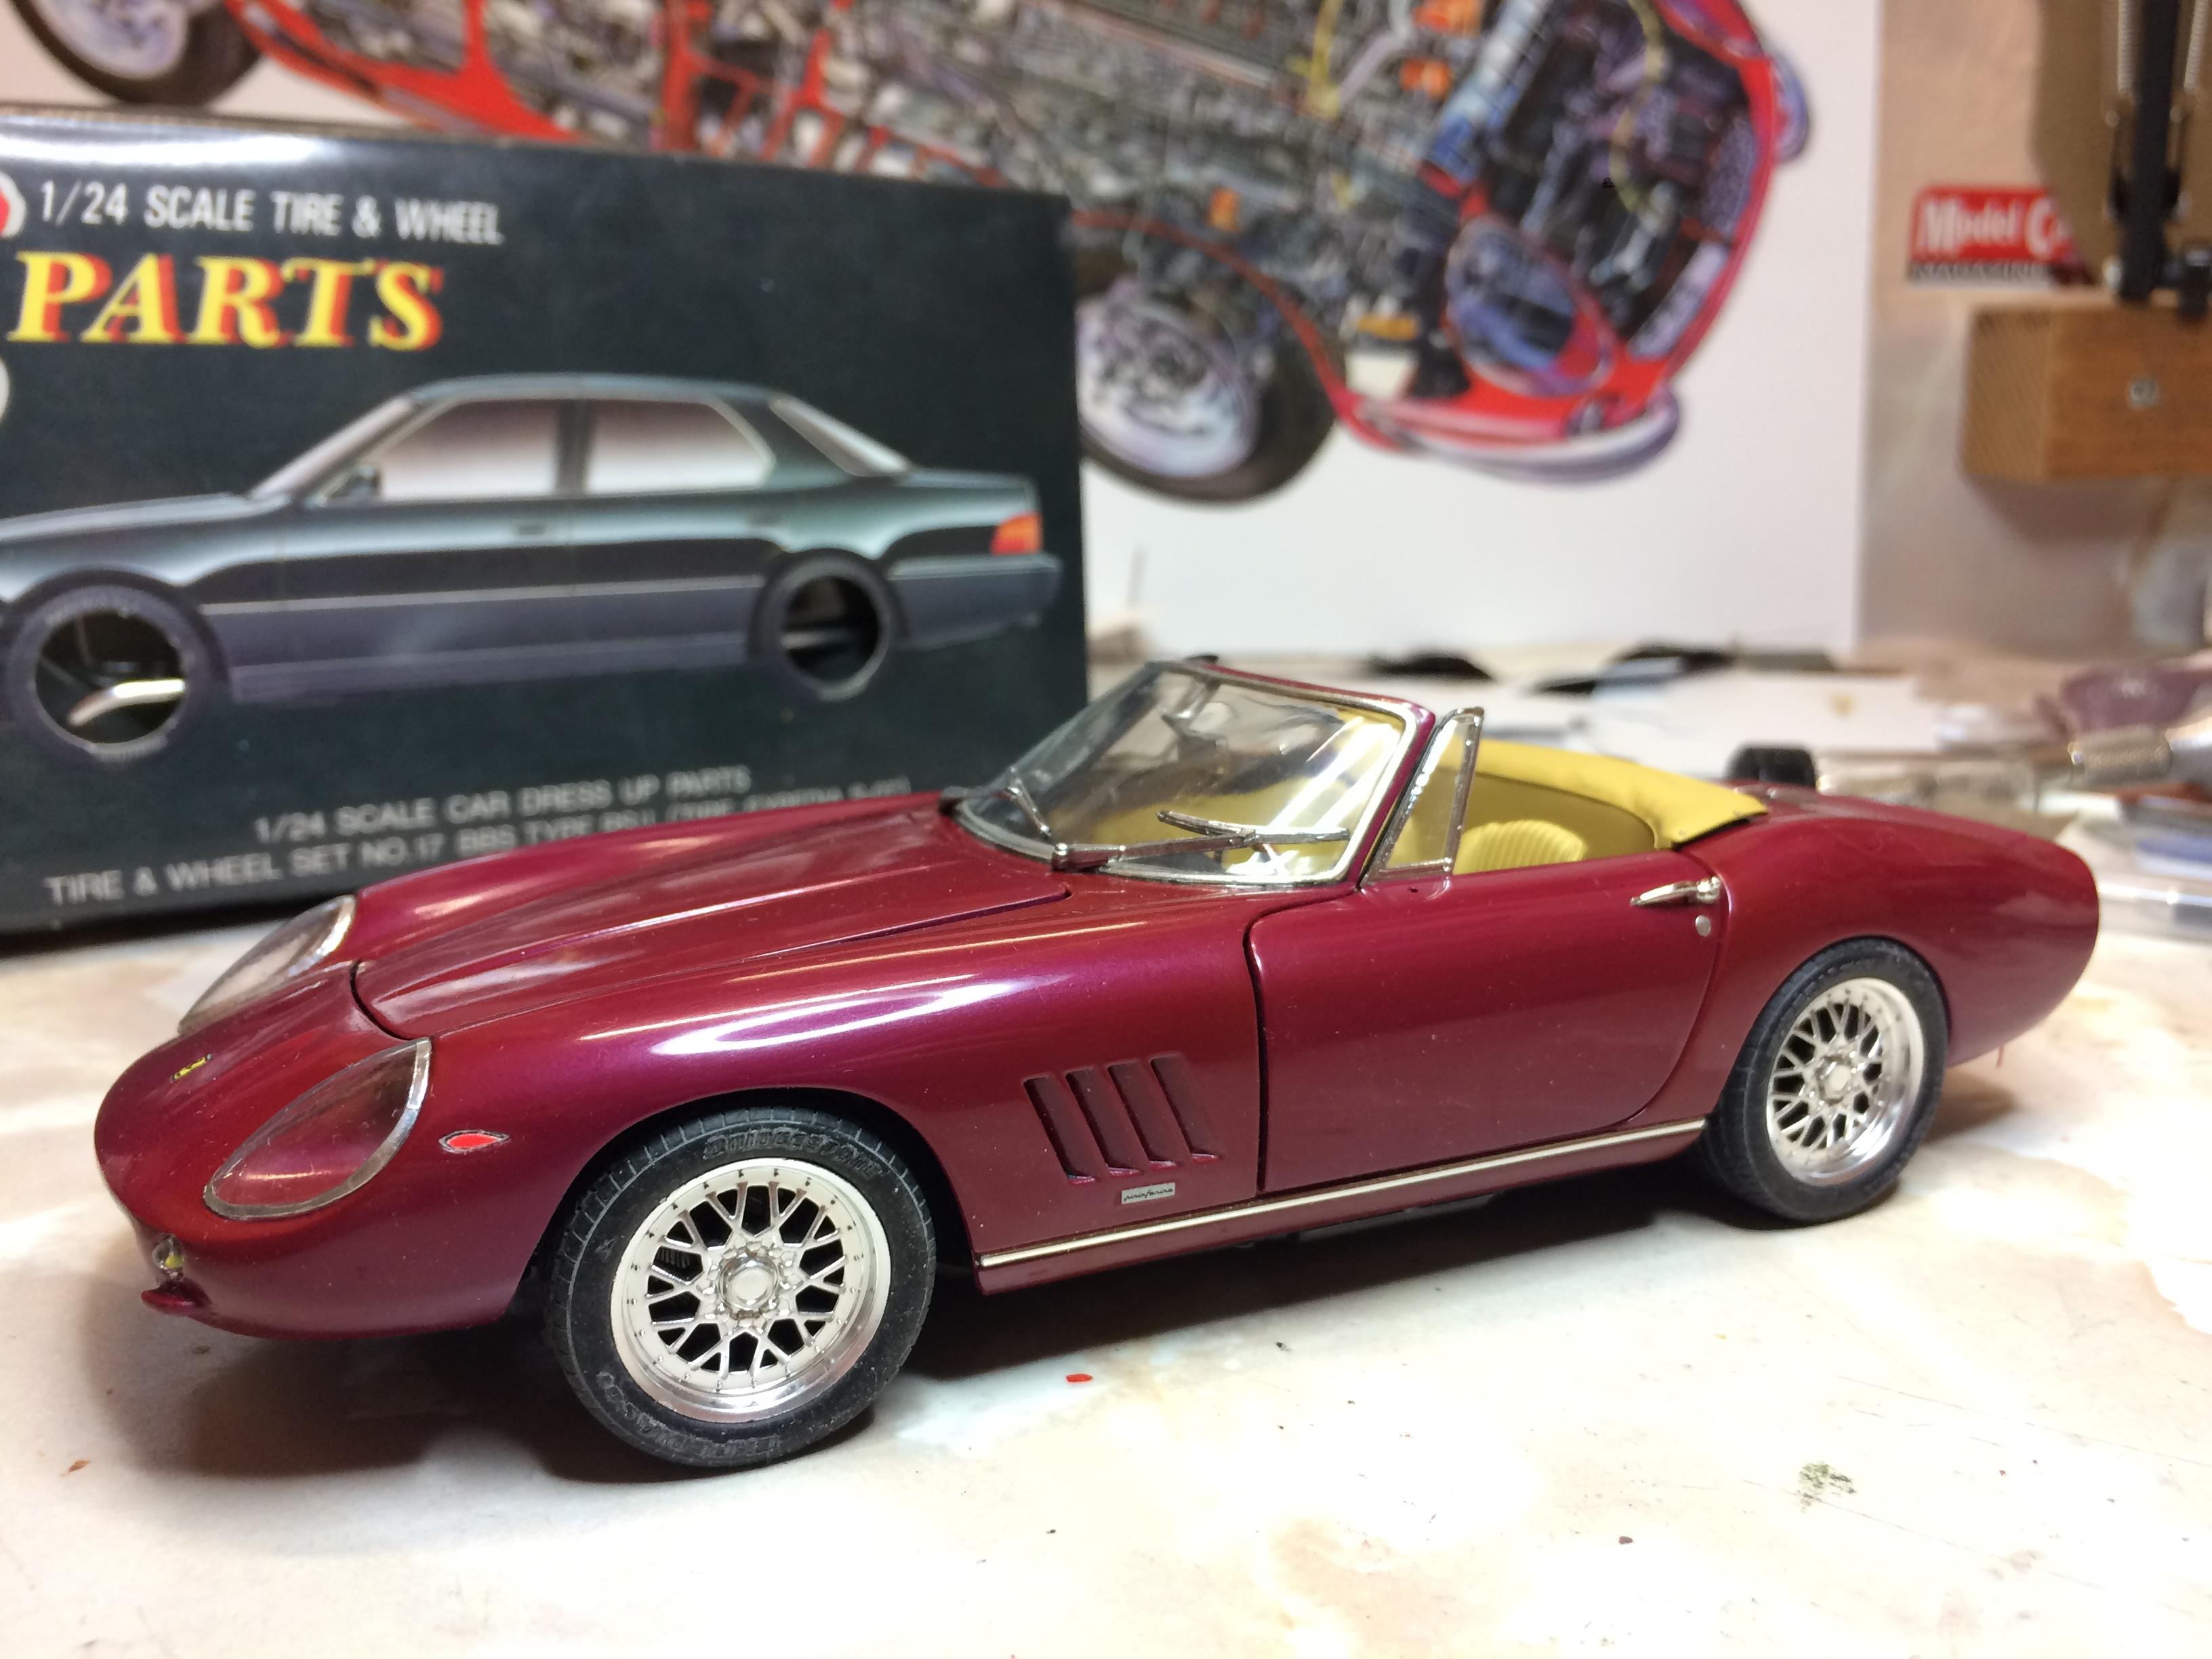
? Thank you! Got the second headlight cover done. Only after making 3 attempts with Bare Metal foil, and trying out the Testors canopy glue, did I notice they don't match very well. The kit parts don't either. Oh well. Until the re-chromed bumpers return, I won't be doing updates (thank god, collective sigh of relief). All I can do is play with it, check out what modern wheels look like. ? And this officially makes 3 projects worked on simultaneously today. ?
-
officer embezzled millions
-
I have one in the closet, think someone gave it to me last century. I made my own box, with a larger top, but I've almost never used the whole area. You could get a wood cigar box, think there are metal plates with tiny holes available, I drilled mine. I use an Oreck vacuum, and the electric range.
-
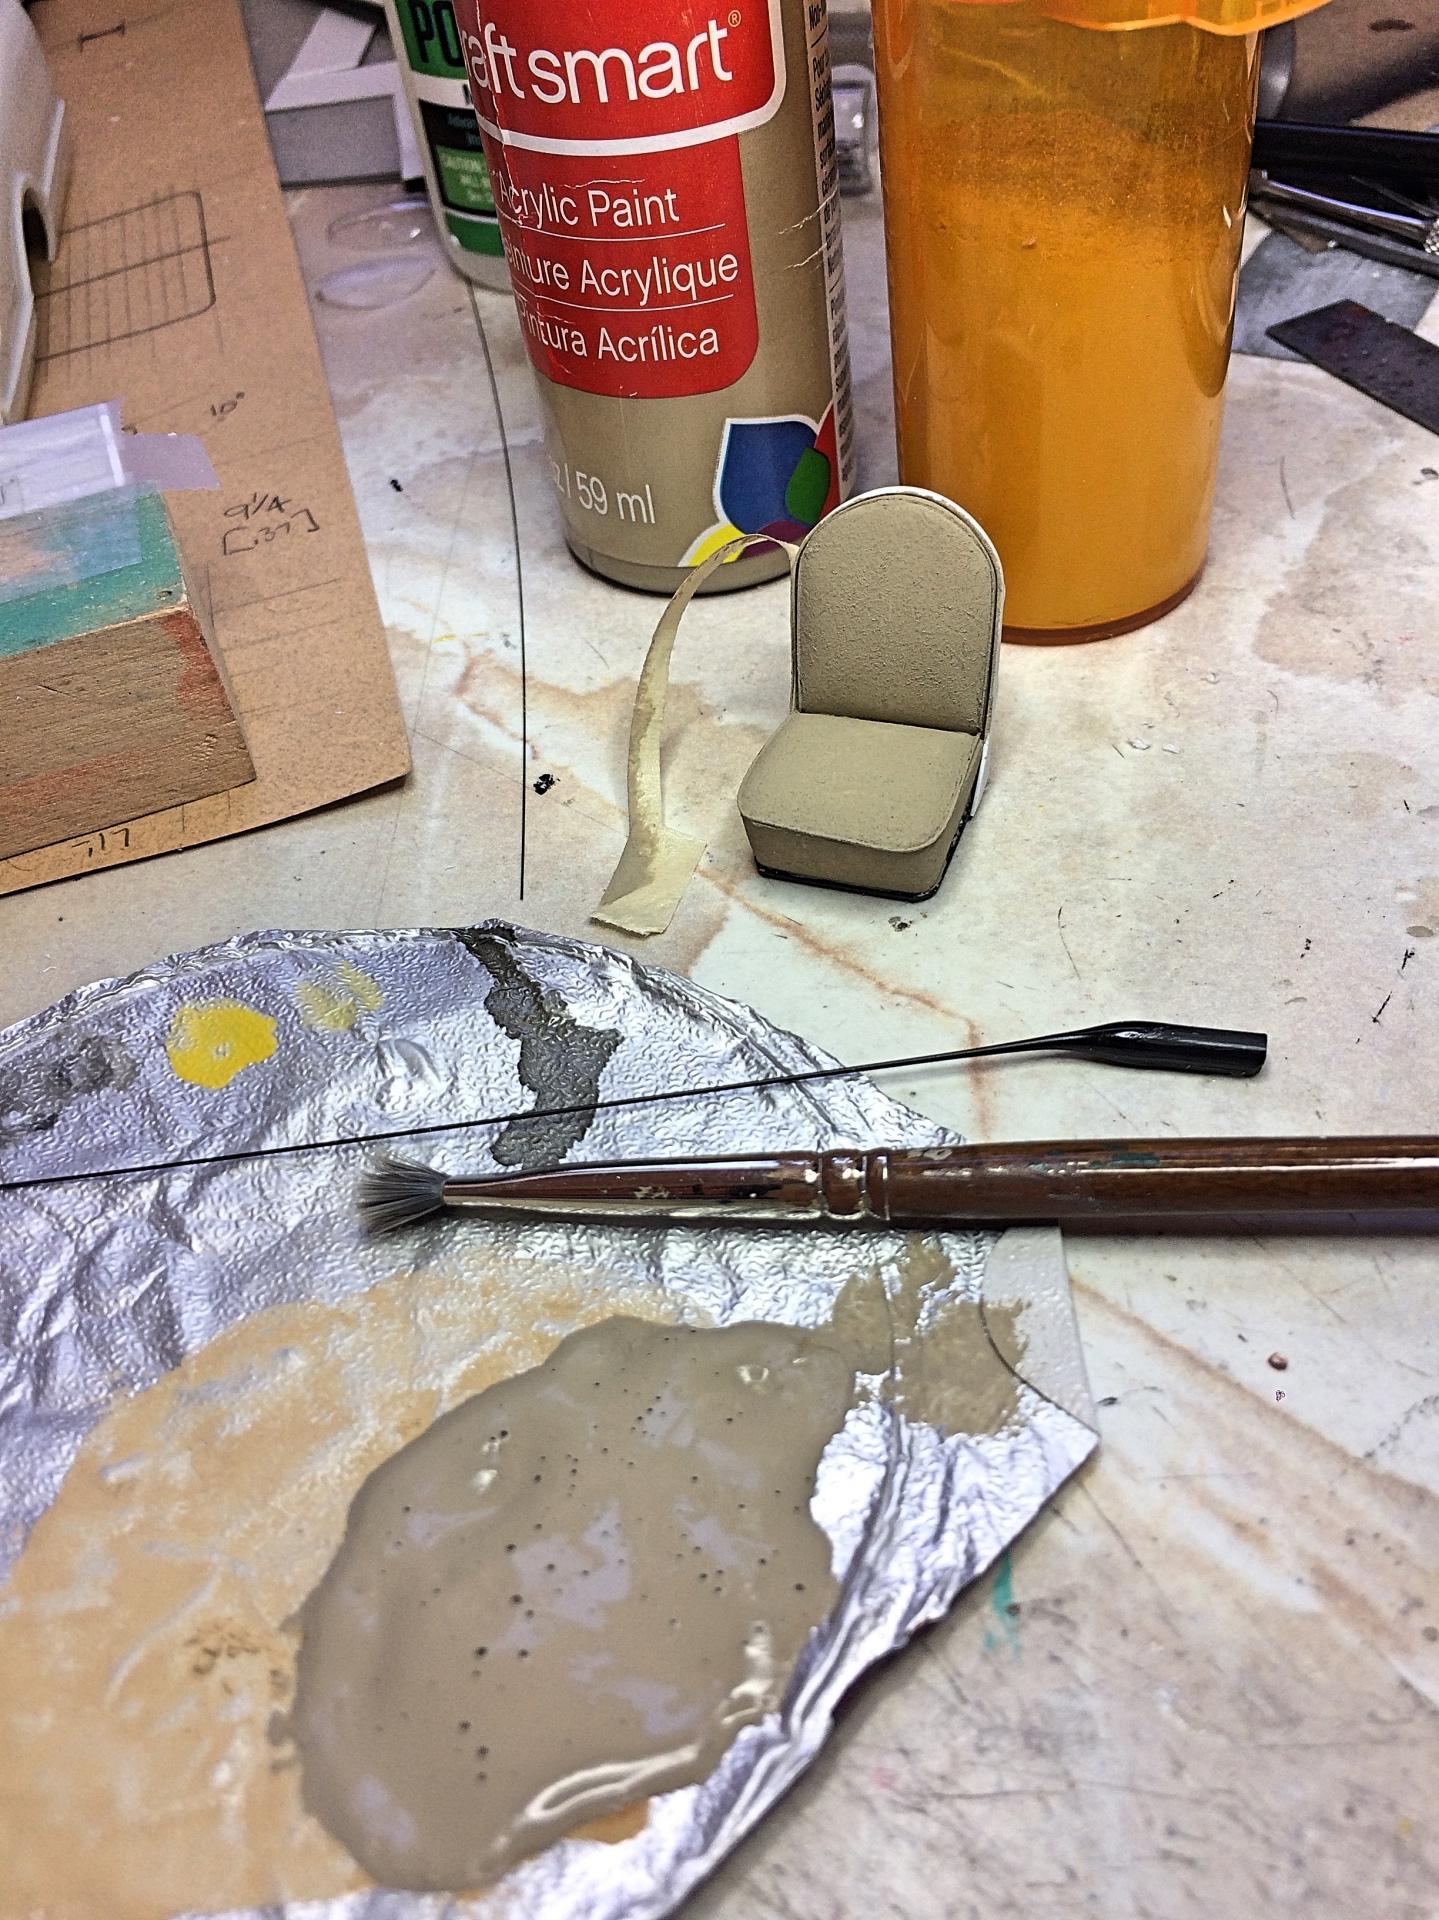
ATTENTION ADMINS: I made the mistake of not posting in the Pickup section, would you mind migrating over there? Worked on the seat, added piping and texture. I had a request to make resin copies, so doing that along with the '69 Chevy pickup tailgate.
-
Very cool, you're torturing yourself with c-f decals! ? Looking really good!
-
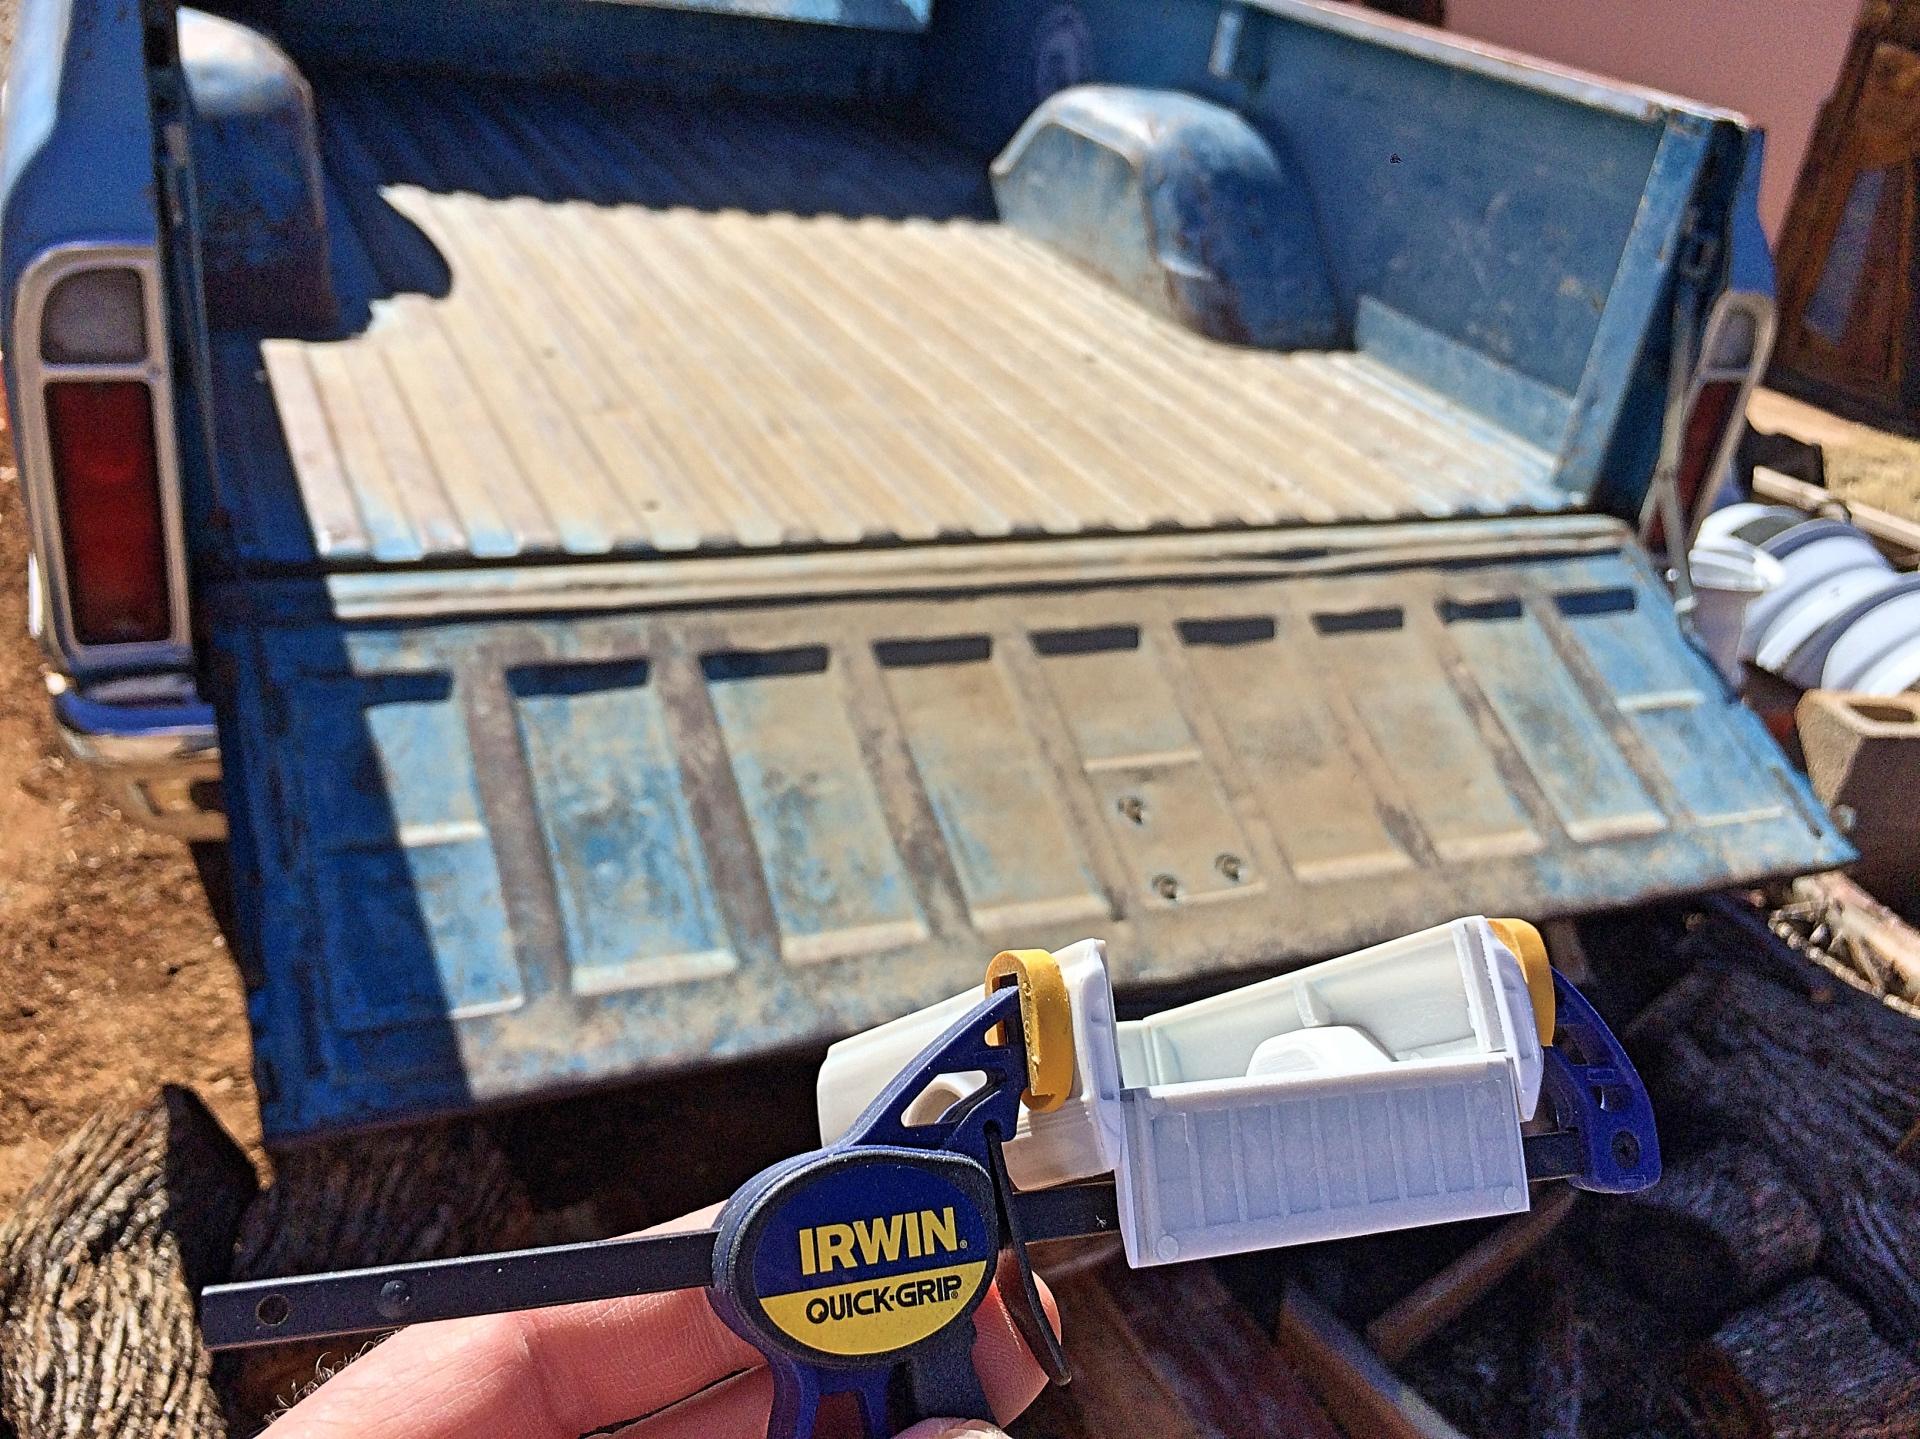
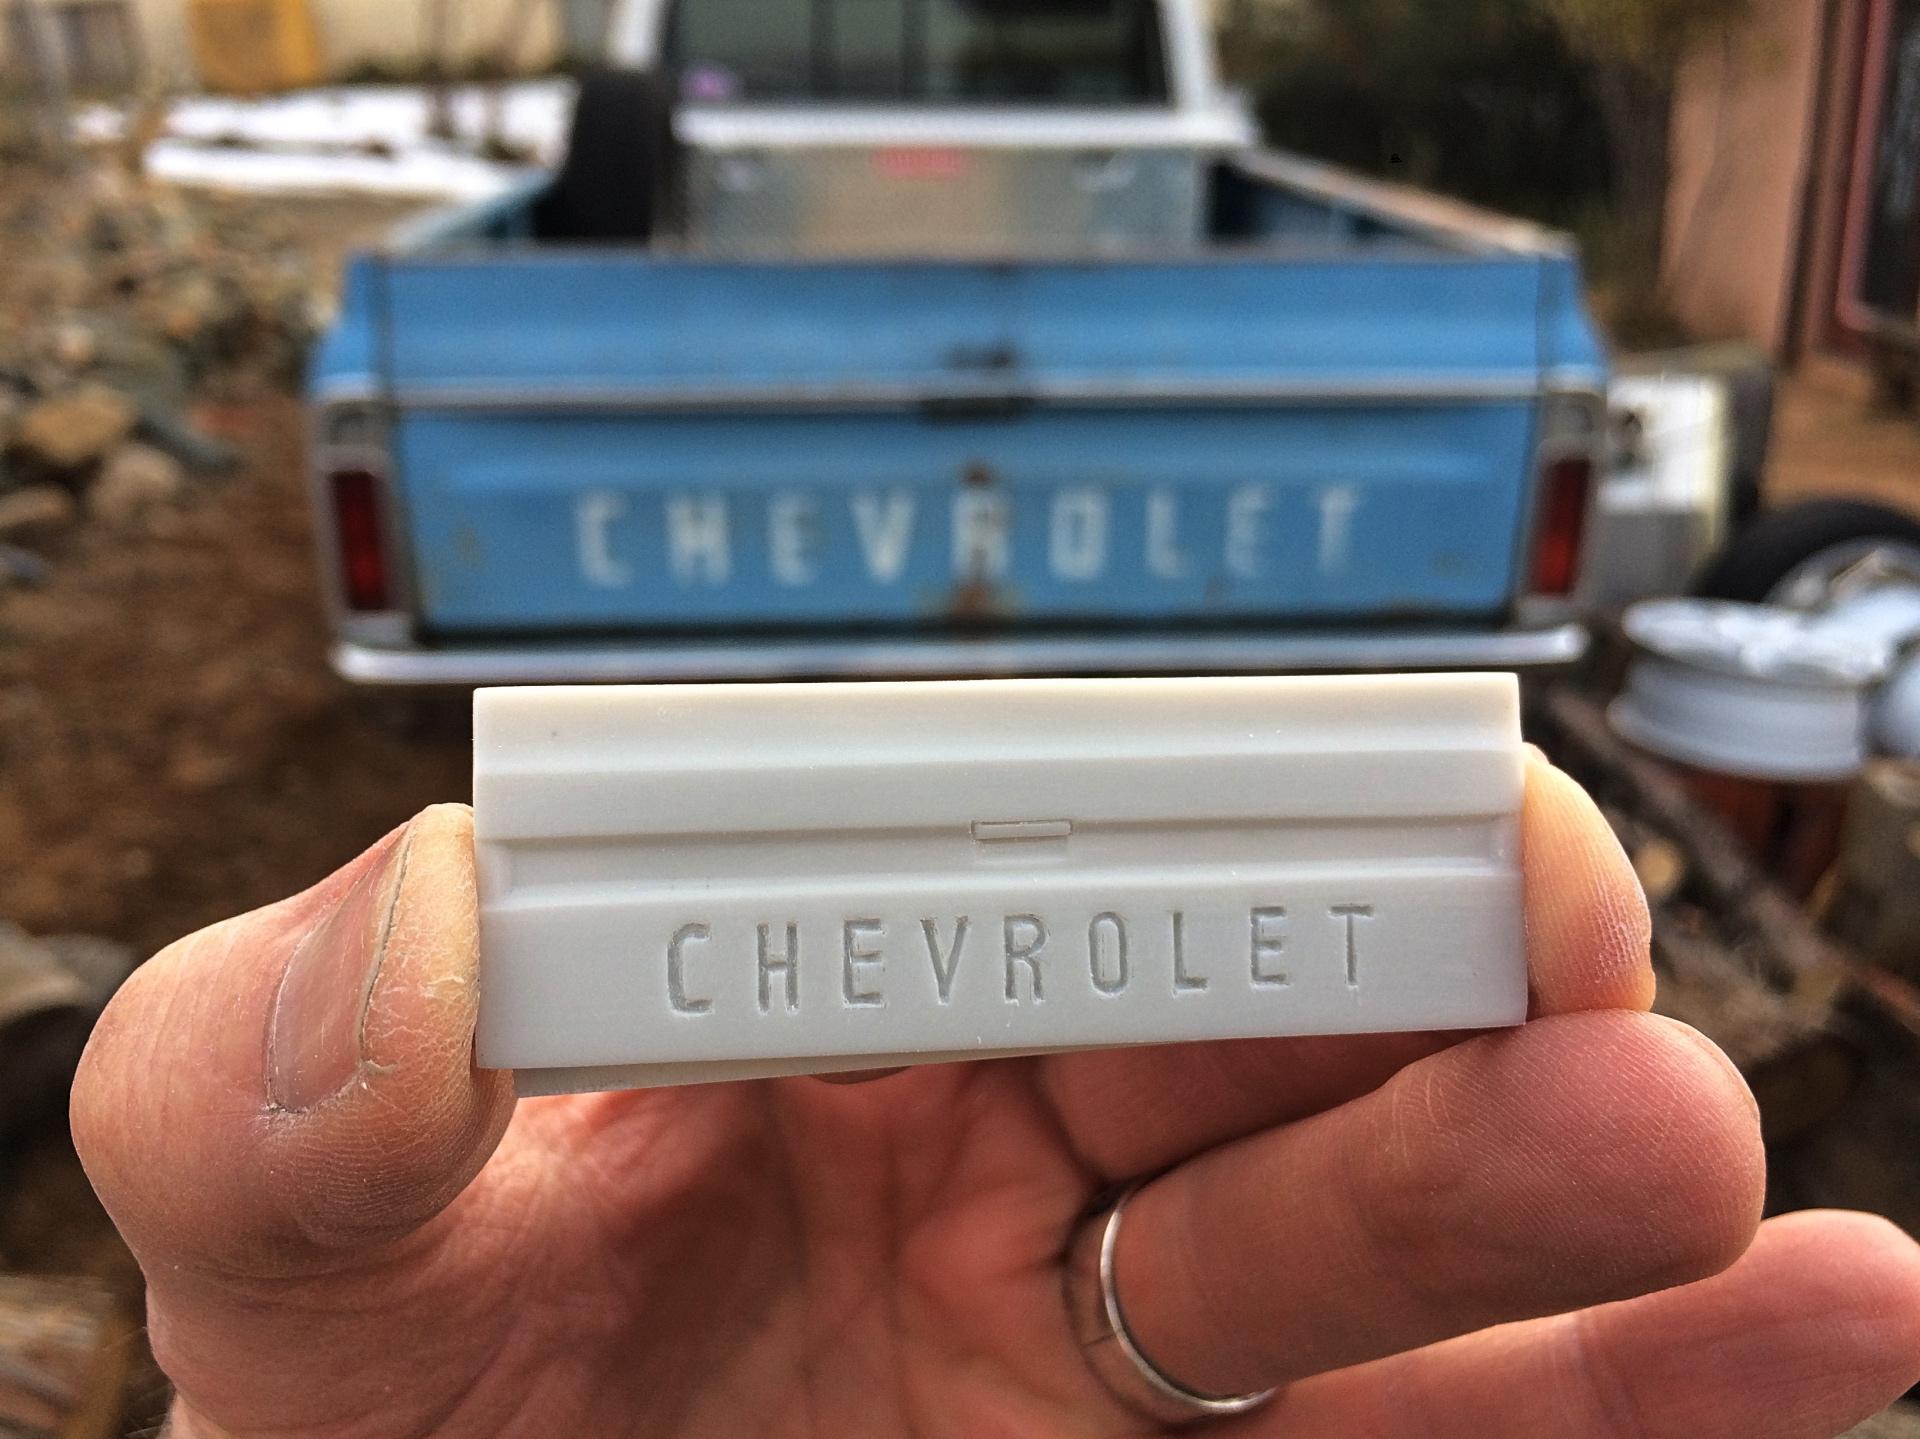
Alright, managed to improve the tailgate area 1000%! ? Squint and see it's close enough. The more important thing, the real truck tailgate can open all the way down, when you take the support arms off. In the case of my '68, no, but the '69 had what was a ranch bumper, which came in handy a few times.
-
Why are so many wives slavedrivers? Looks like a challenging project, will be watching. I saw an Andy Warhol decal for sale on a Facebbook Marketplace, but seller wanted resin / p-e wheels and resin hood to go with it (for the ESCI kit). I have 4 lifetimes supply of these badges, if you want any.
-
Appreciate it . Thanks for watching, and the comment!
-
Agree with Snake, wrong forum. I should talk, my '48 Canopy Express was started the wrong section too. I really like the 3rd one.
-
the beans, cleanup
-
Hi from the arctic circle! Sweden
89AKurt replied to Mattilacken's topic in Welcome! Introduce Yourself
Welcome! I'm always amused how people in Europe are into American cars. You didn't mention Rally racing, I've watched a few winter events and am blown away at the driving skills, in Arizona people freak out about a dusting of snow. -
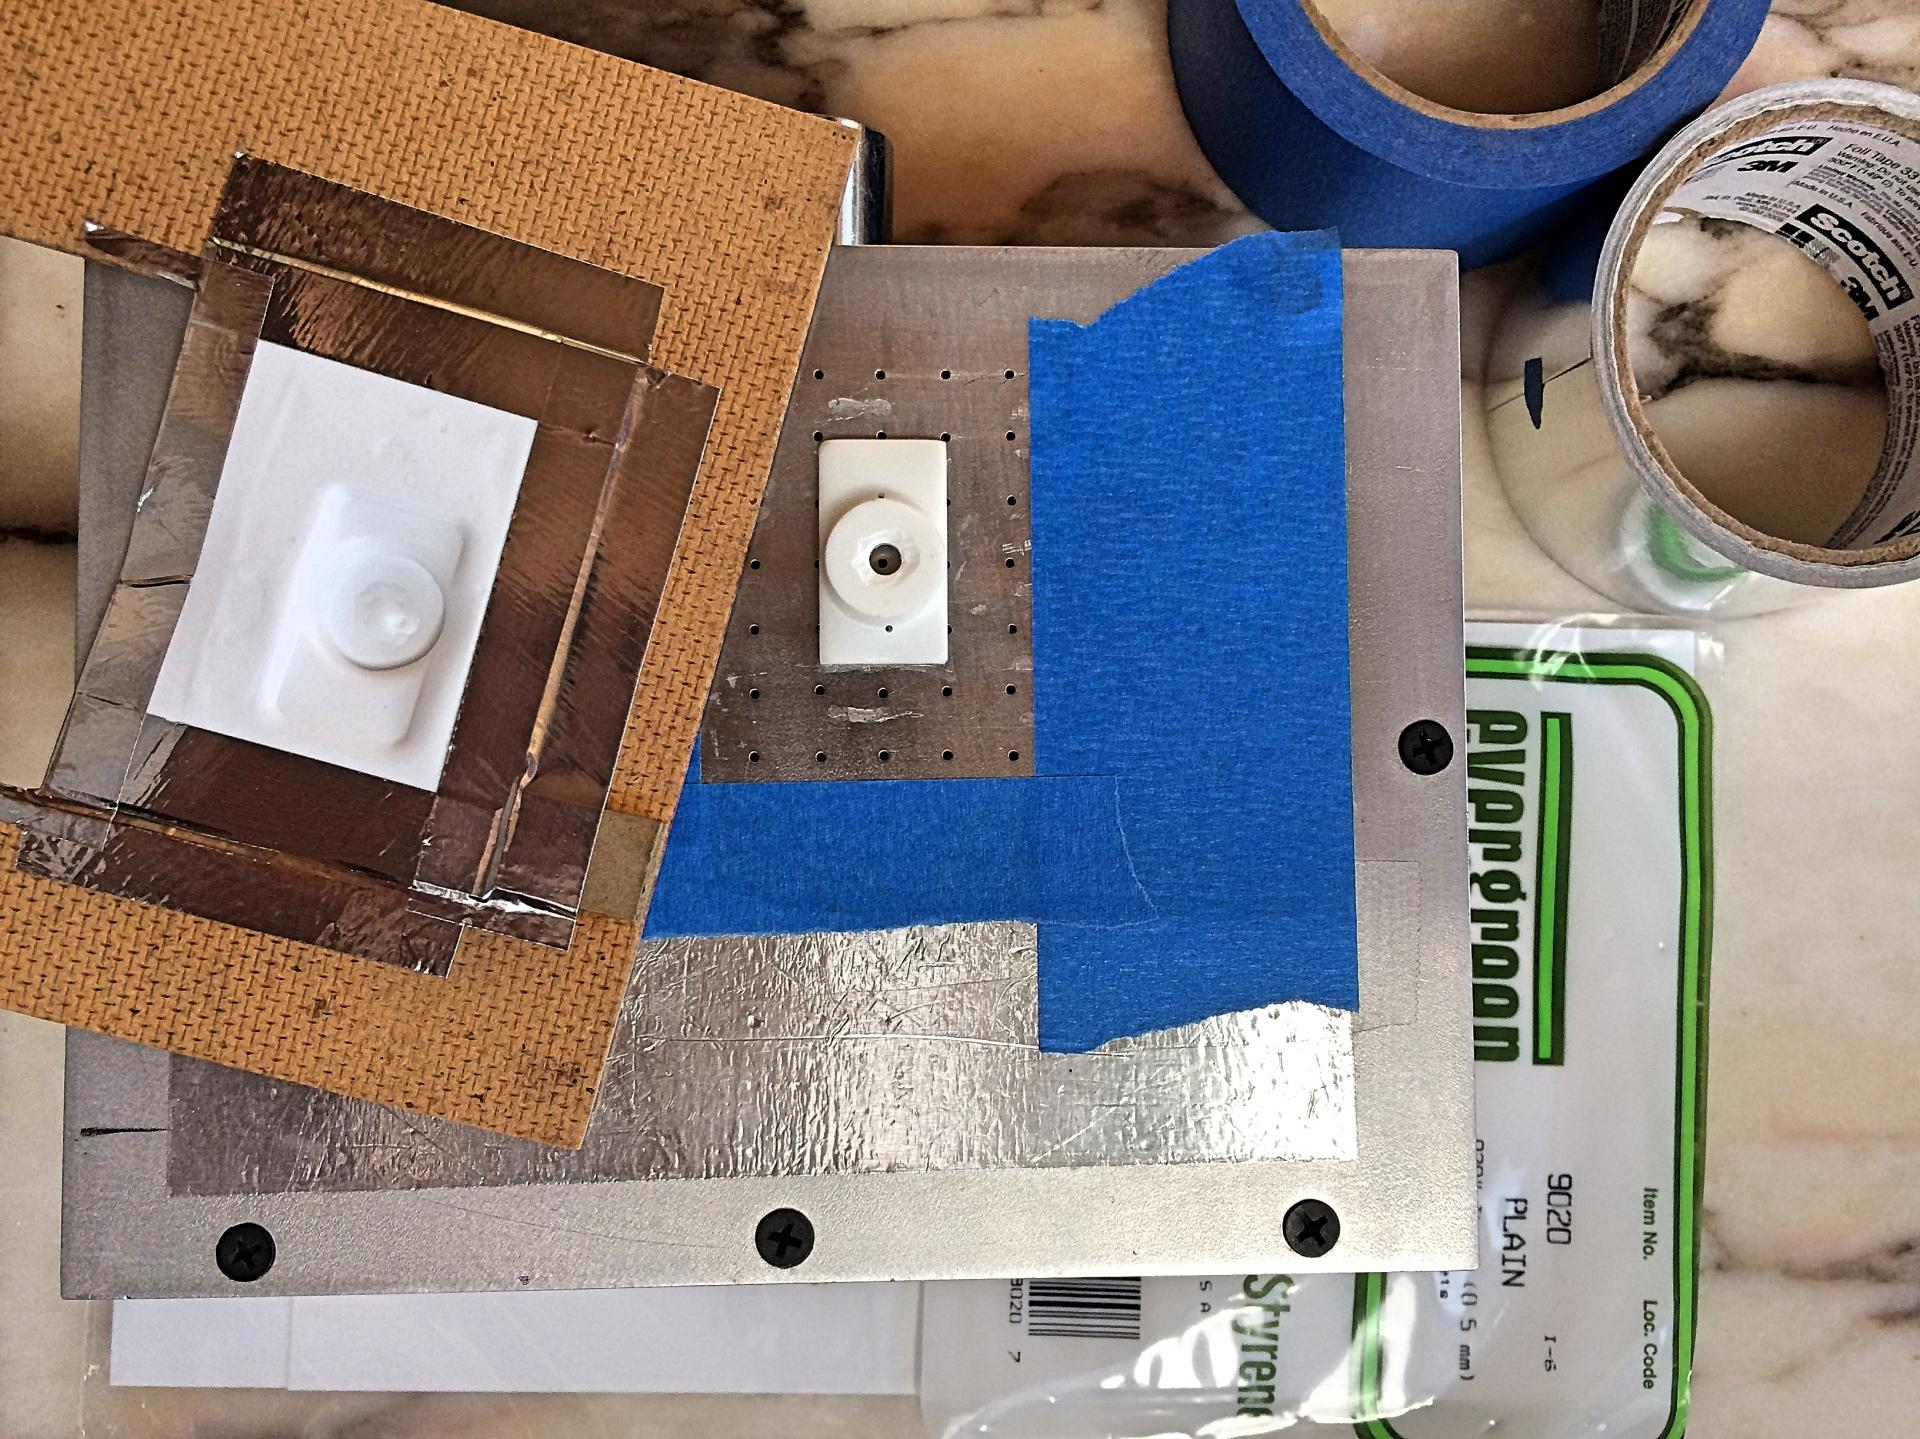
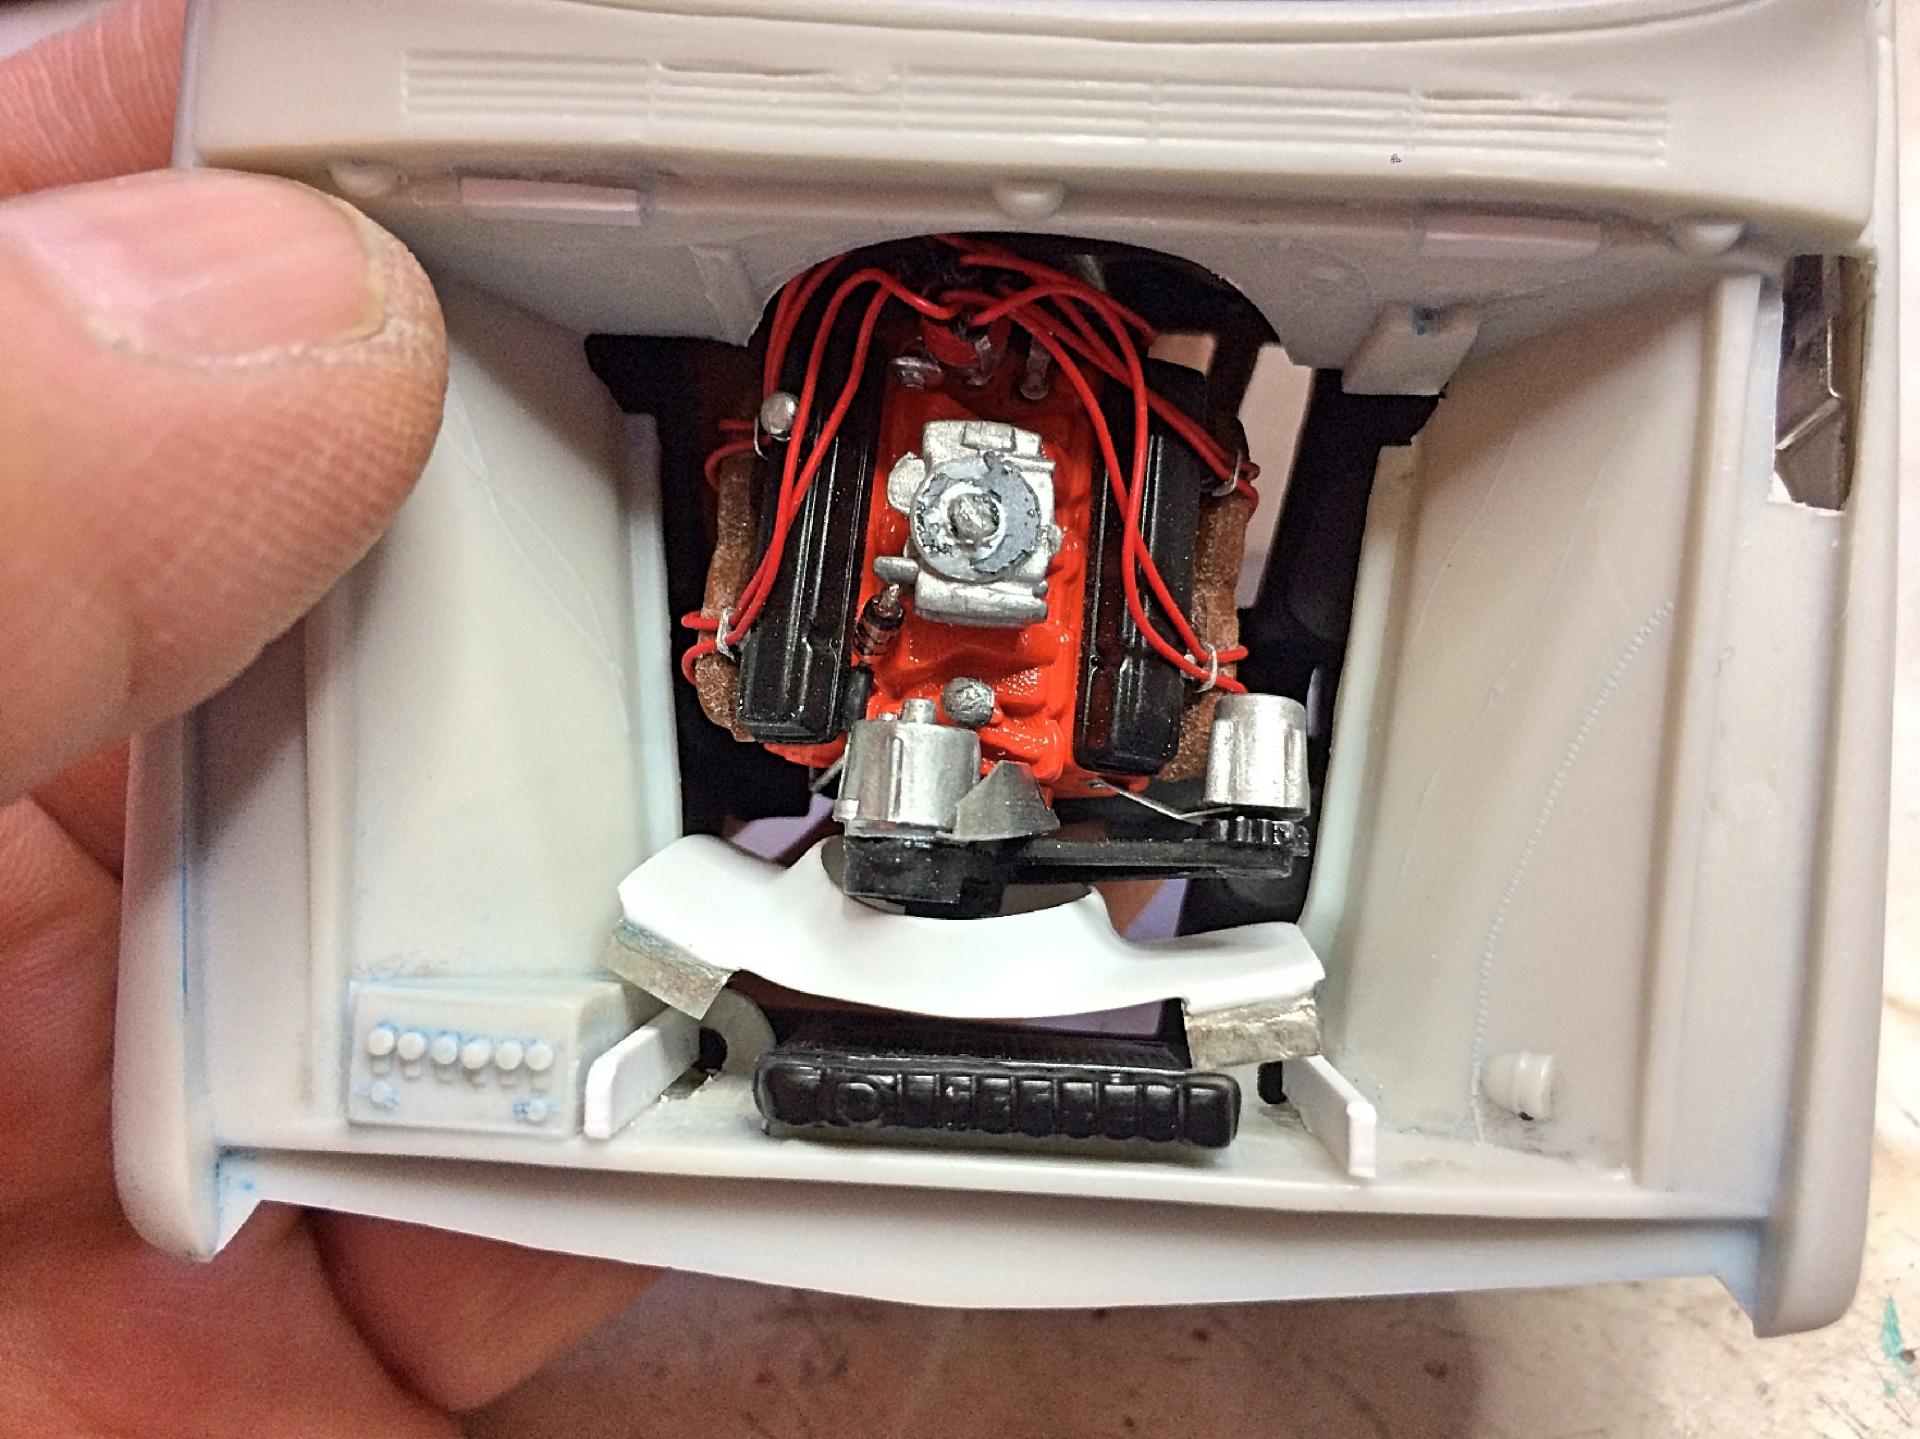
I have not. Sounds like a proprietary thing only certified installers would have. I paint everything, so no need for it. Thought I would post latest projects using this stuff. Hat pattern: Fan shroud pattern:
-
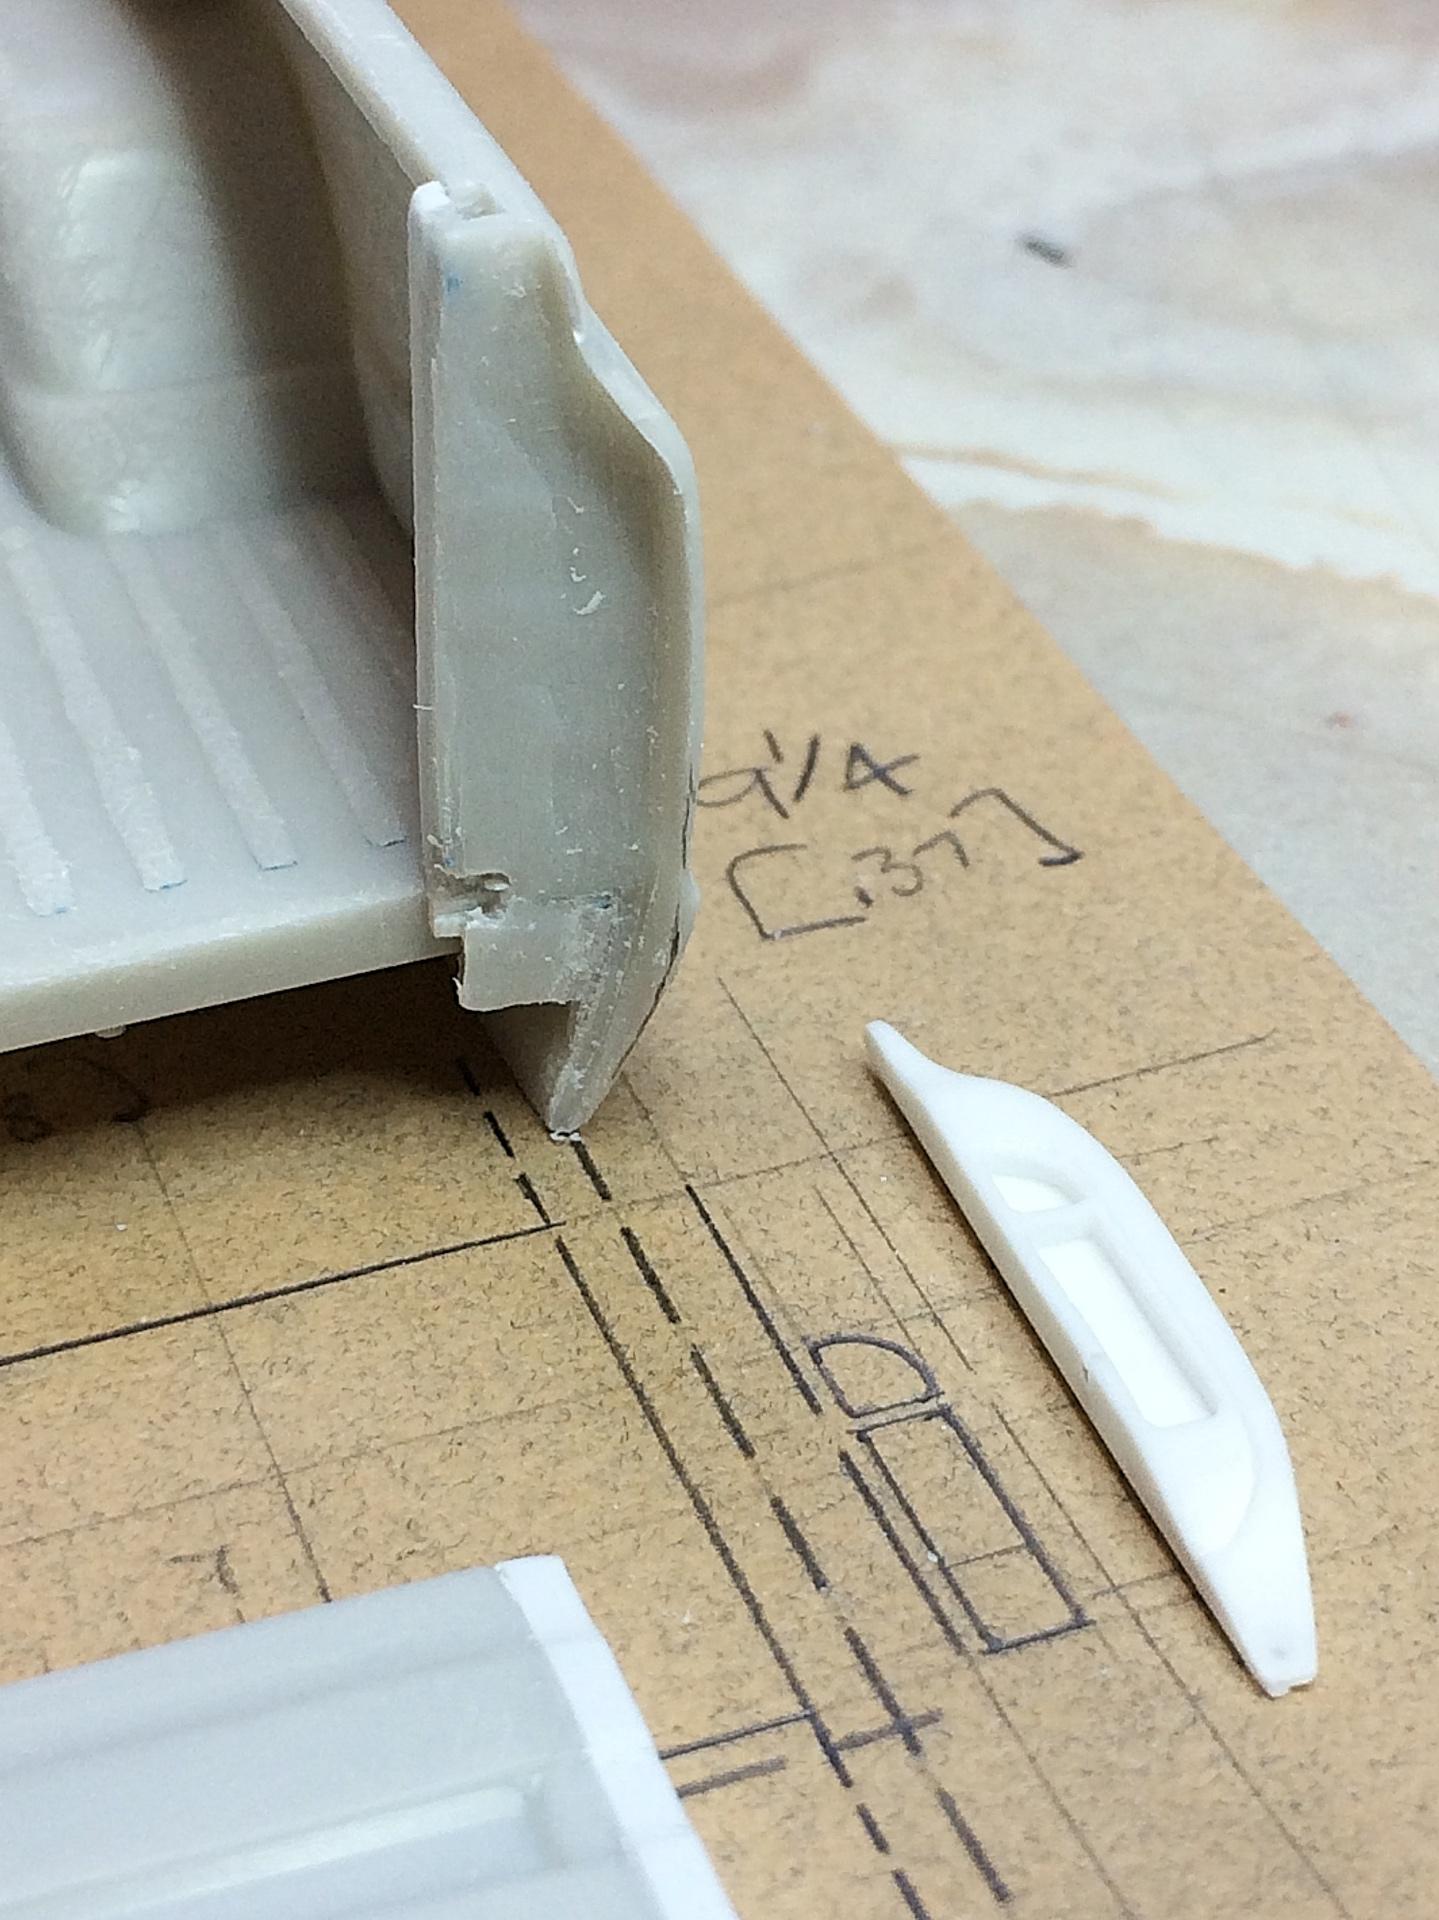
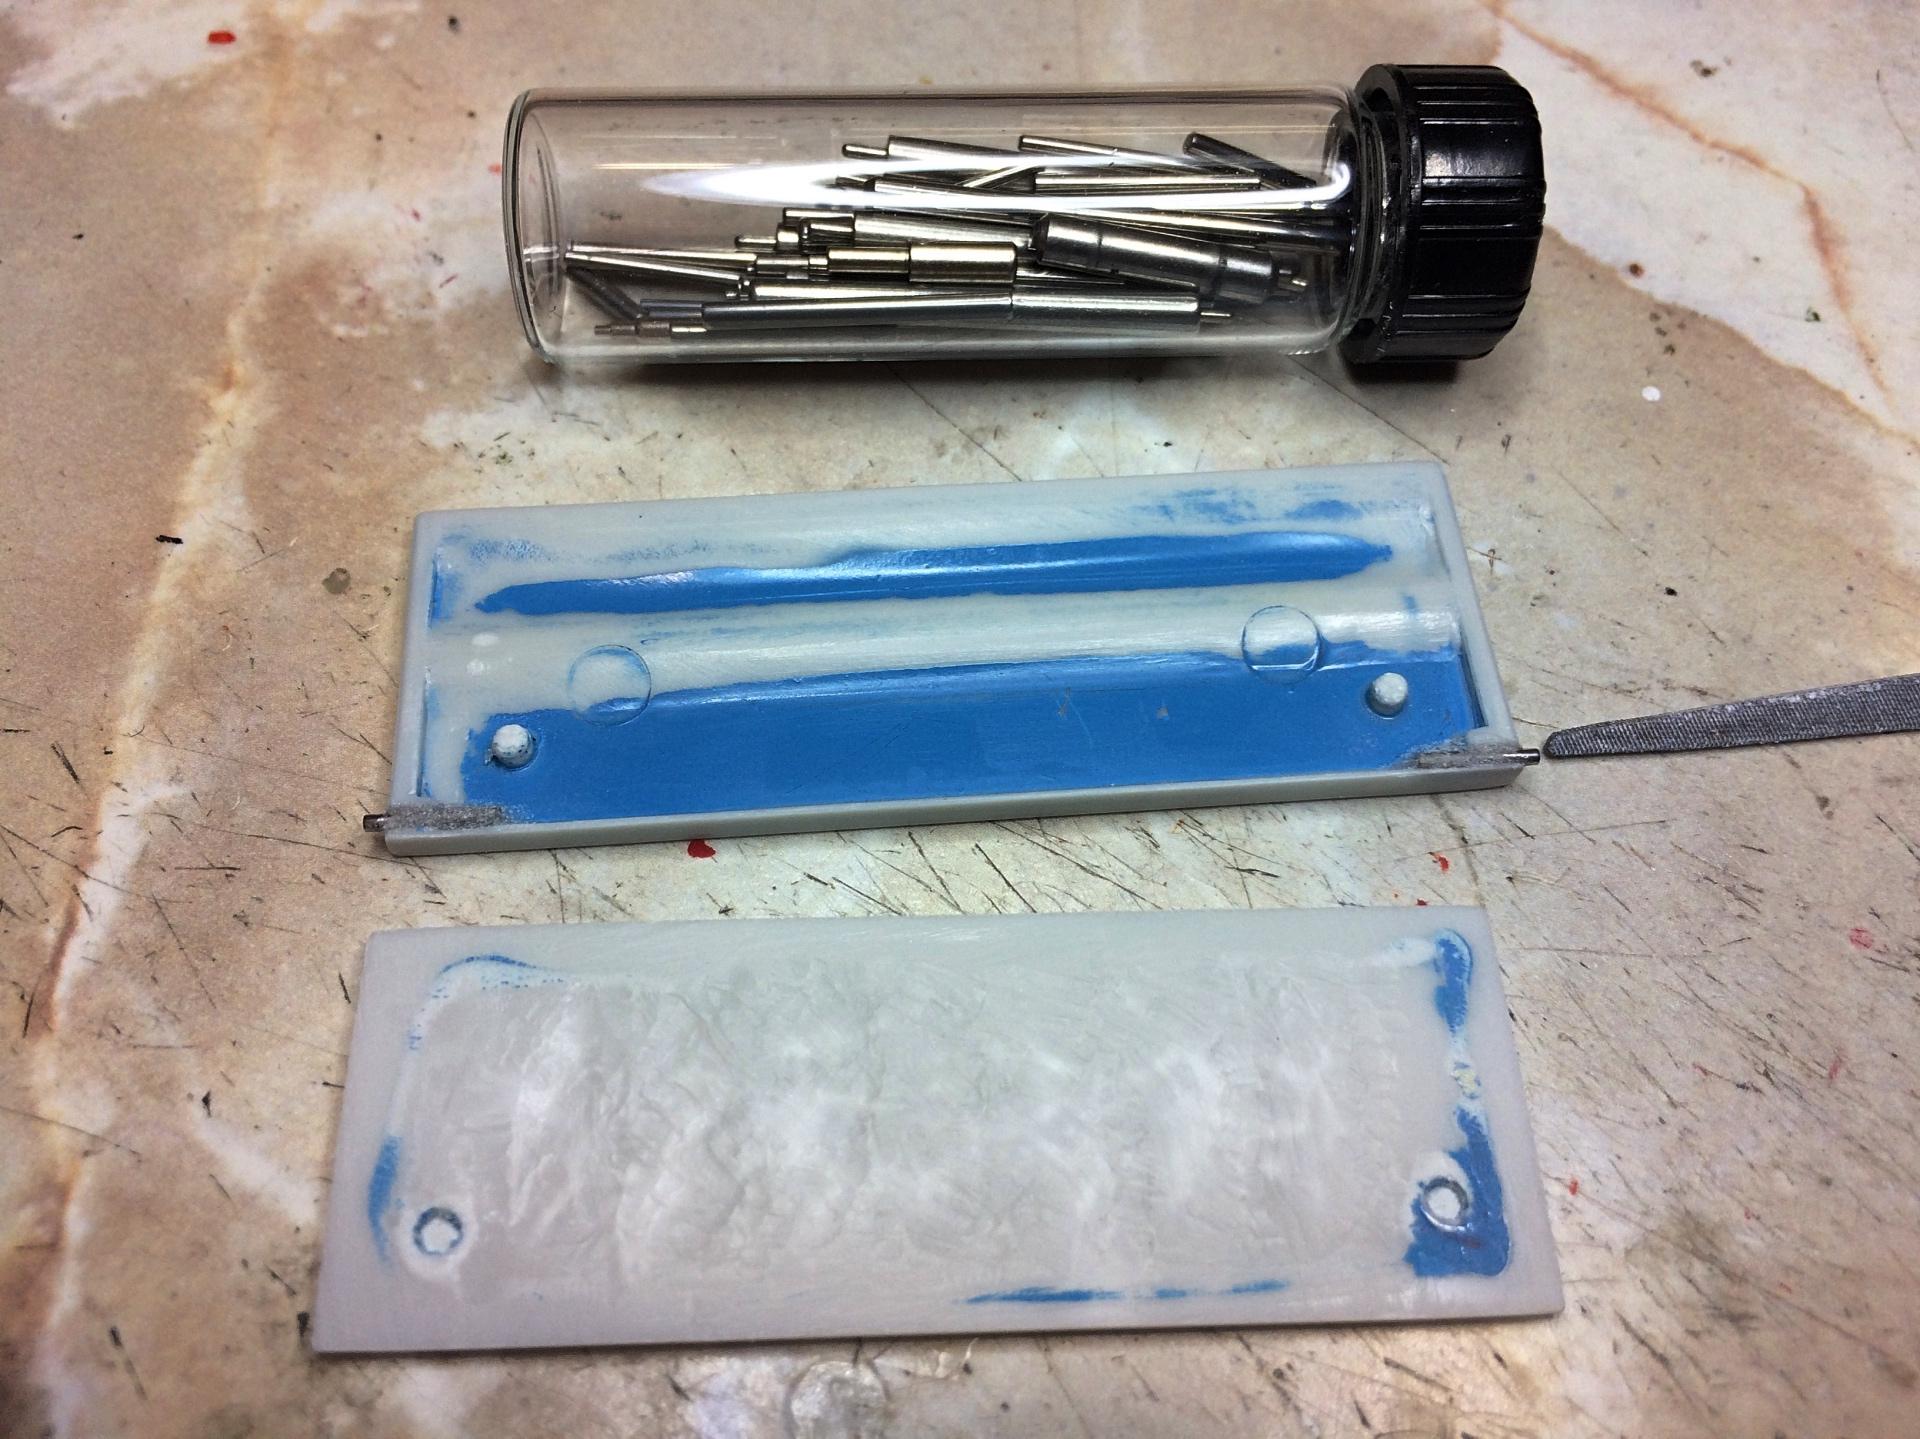
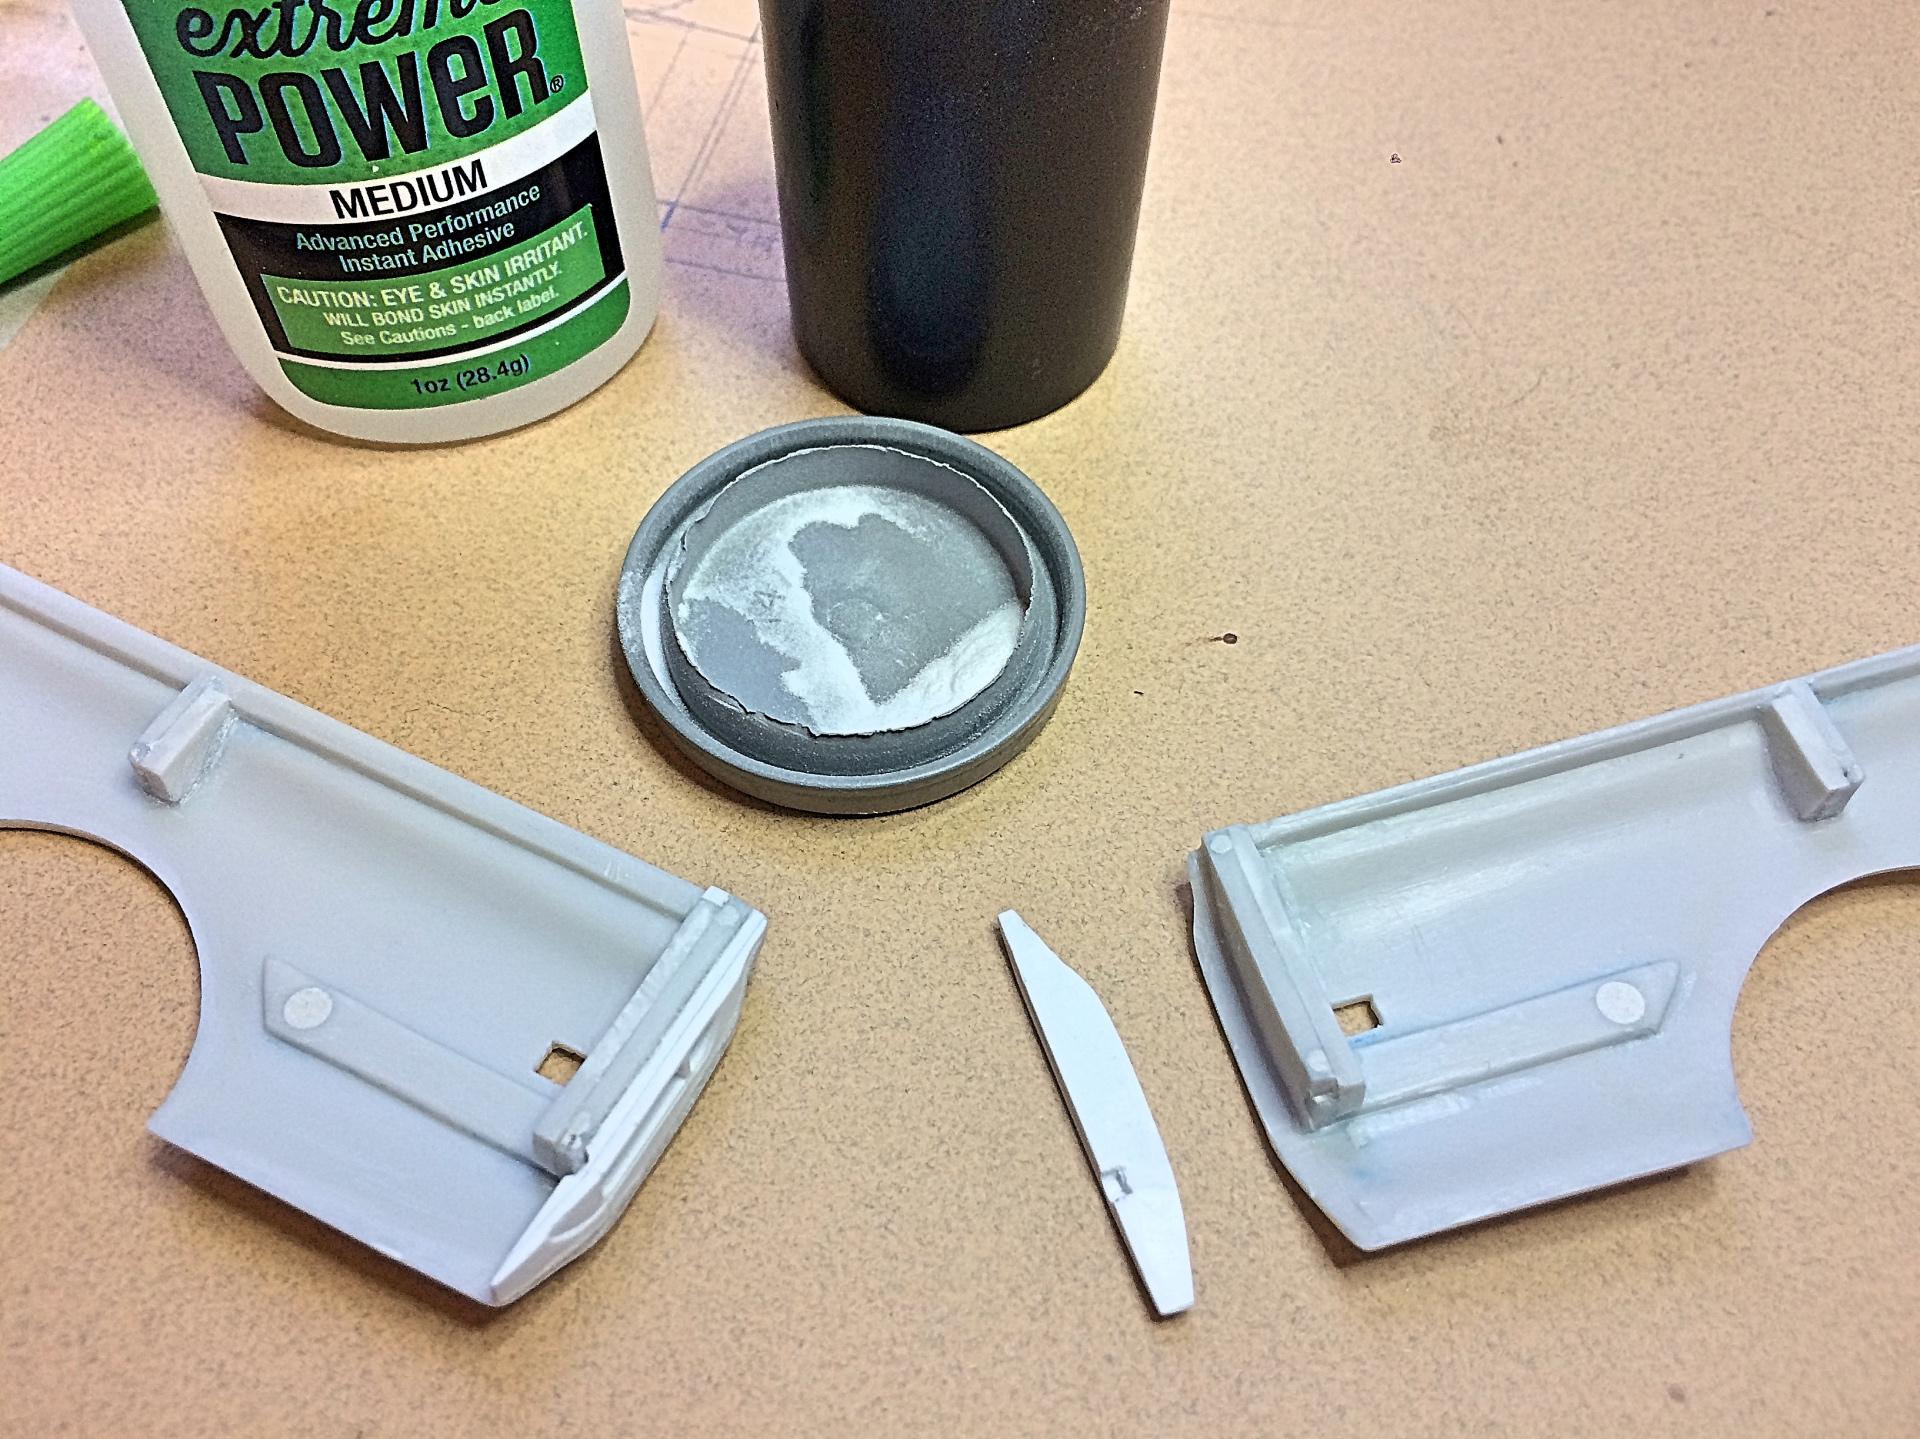
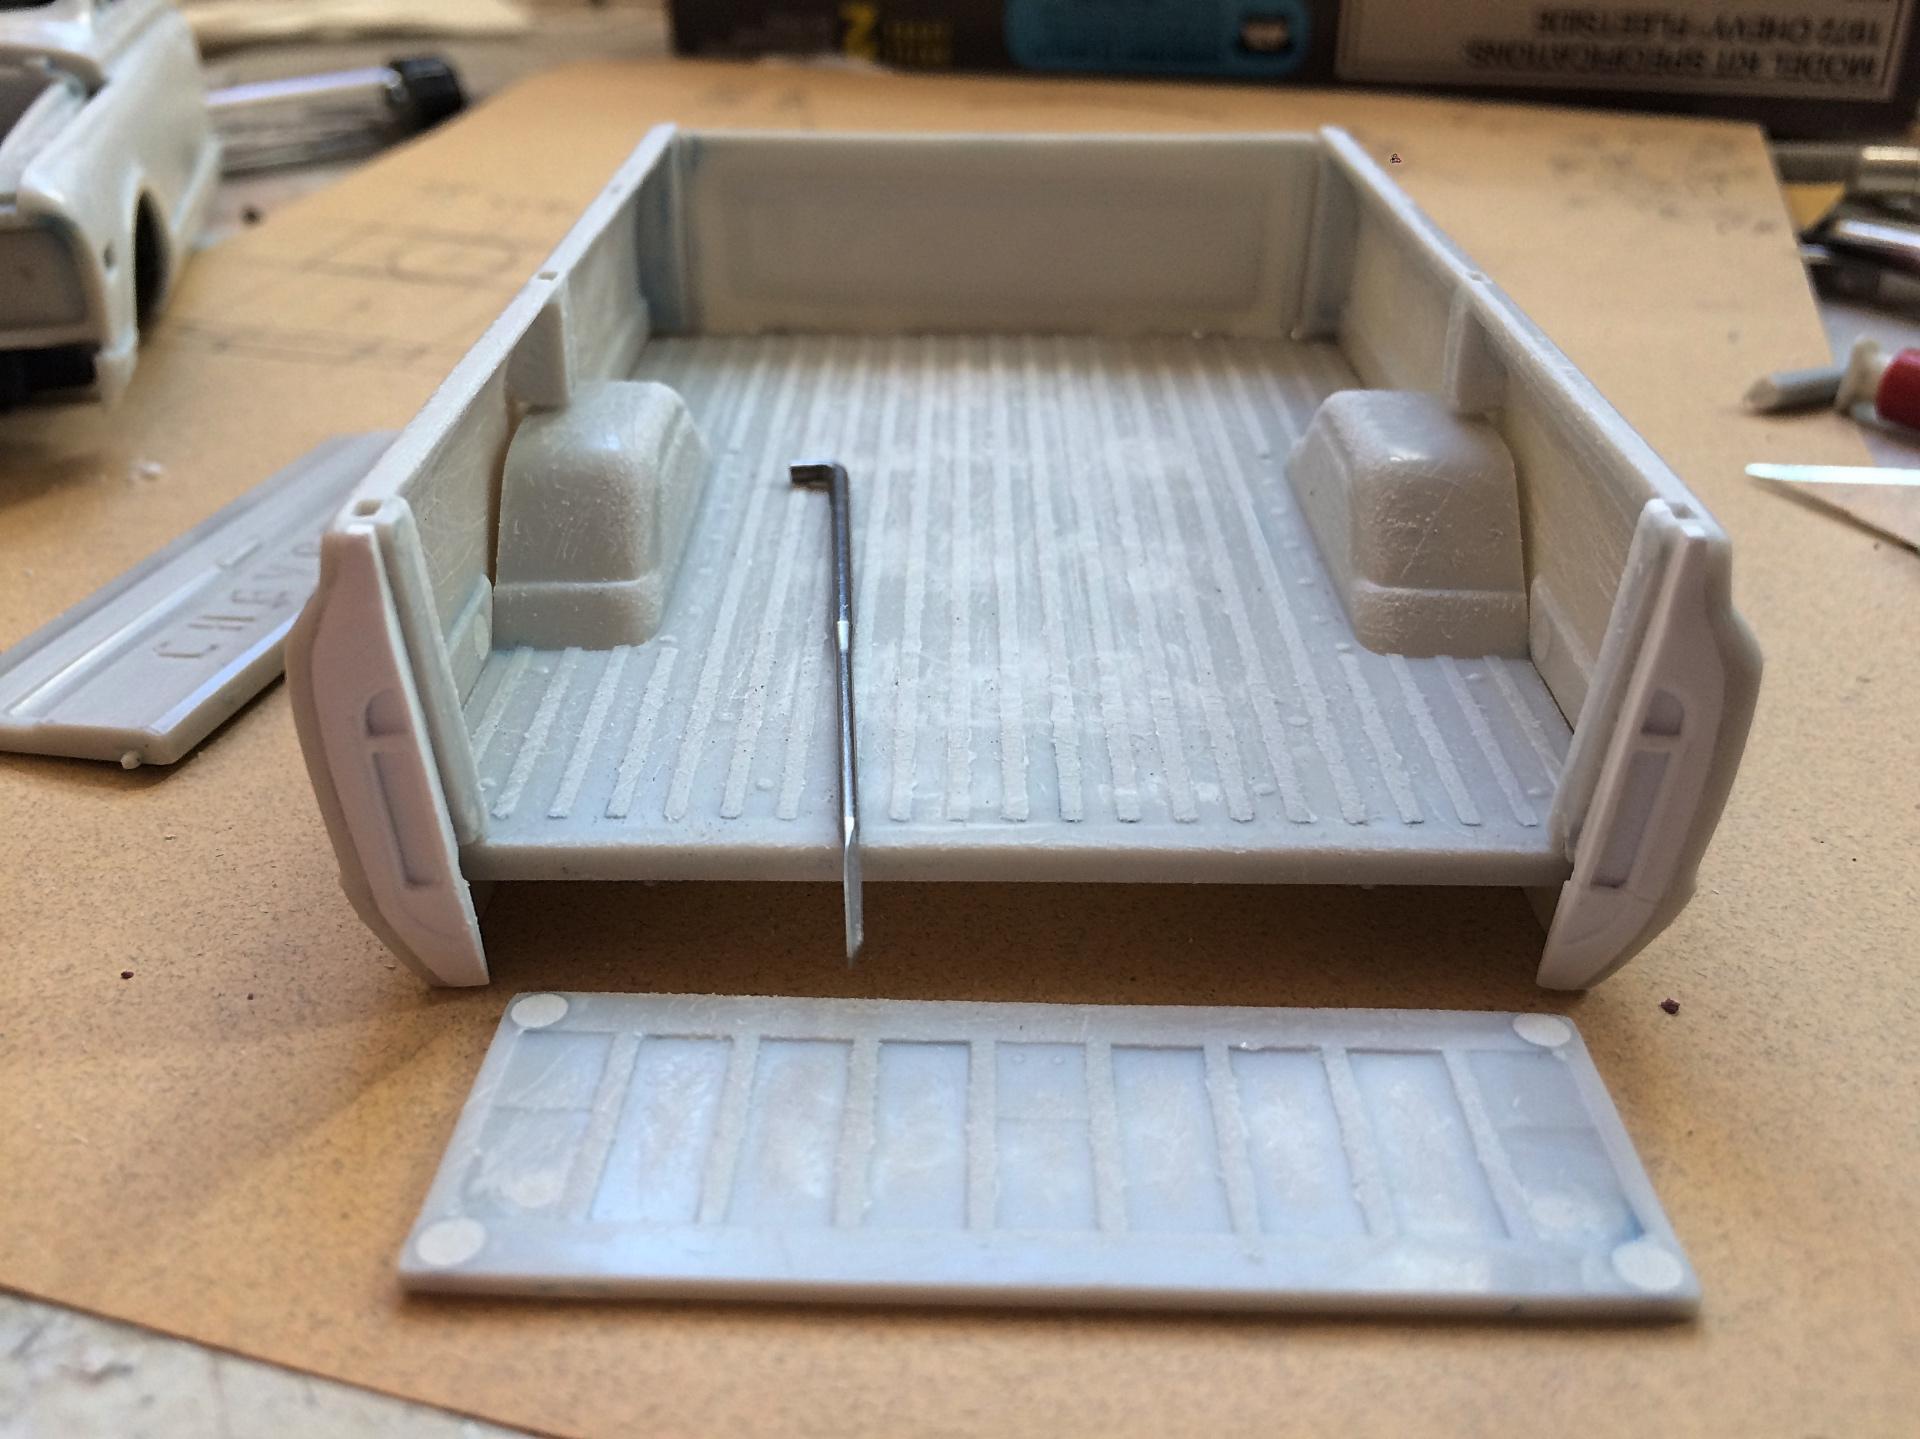
Great, nothing like thinking you got past a step, then the next one forces you to re-evaluate and say "since I'm going to all this work, why half-*$$ it?" Good thing I made a mold and have cast some resin parts already. I have a collection of salvaged electronic parts, this bottle is pins, cut one in half for the tailgate pivots which are relocated on the original part. You can also see how I ground down the back of the tailgate panel, to distress. I wasn't happy with how the taillights were too far in. I knew the tailgate is narrower than measured on the real truck, wasn't really sure why AMT did that. Only after assembling this area, do I see how to fix it. Will need to waste the taillight parts, grind almost to the corner. The outer tailgate will be easy to make longer, need to redo the pivots. Won't add to the inner tailgate. Discovered other things that need attention before final gluing the back end (the front of the sides are glued to the bed and front panel).
-
makes it easier
-
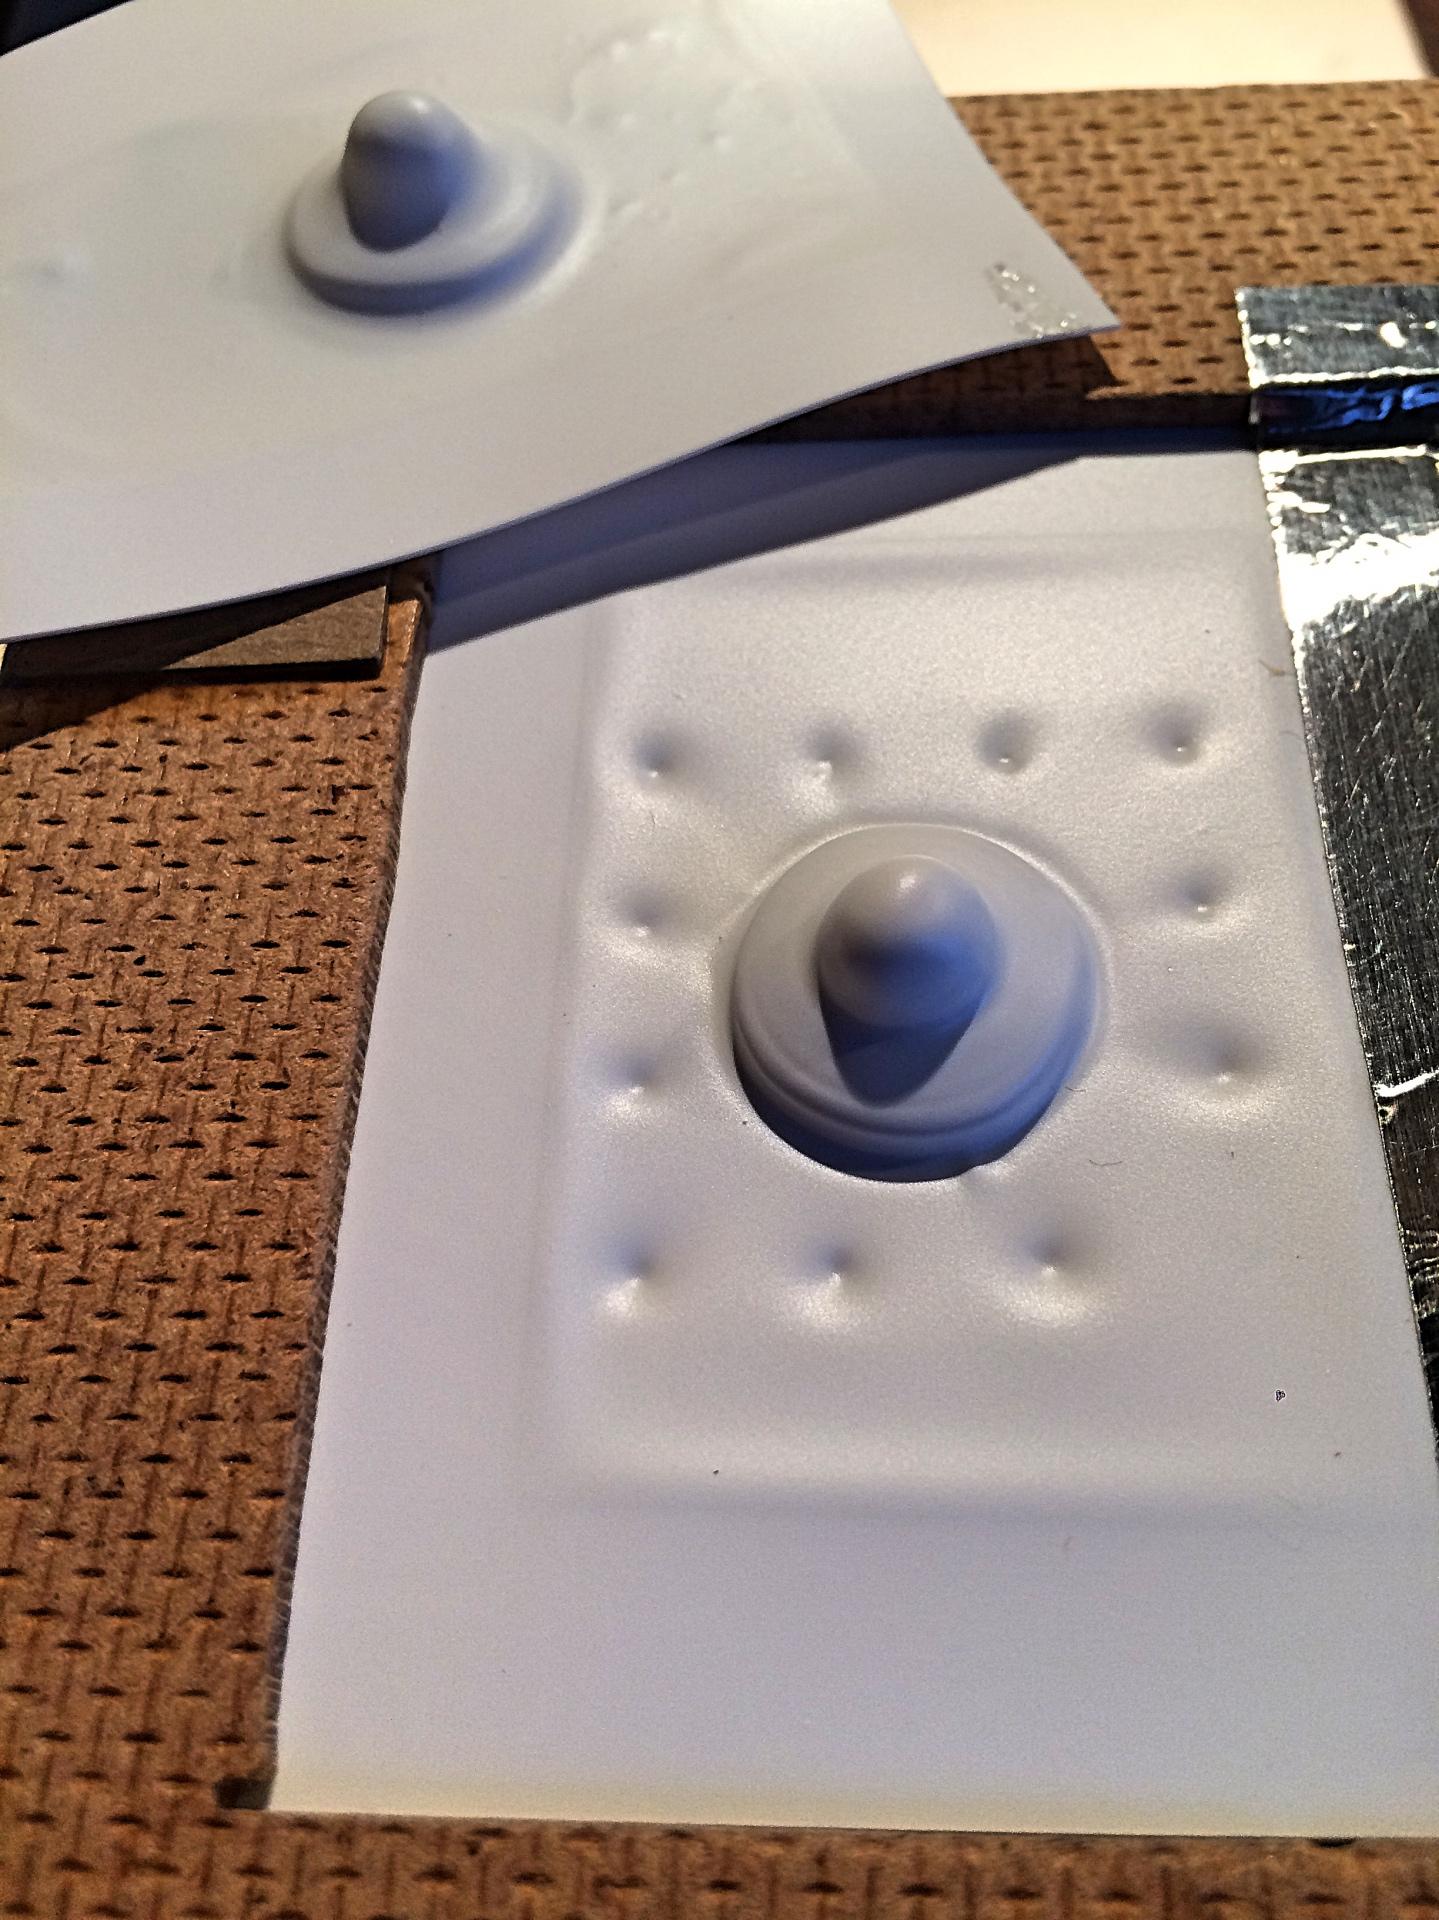
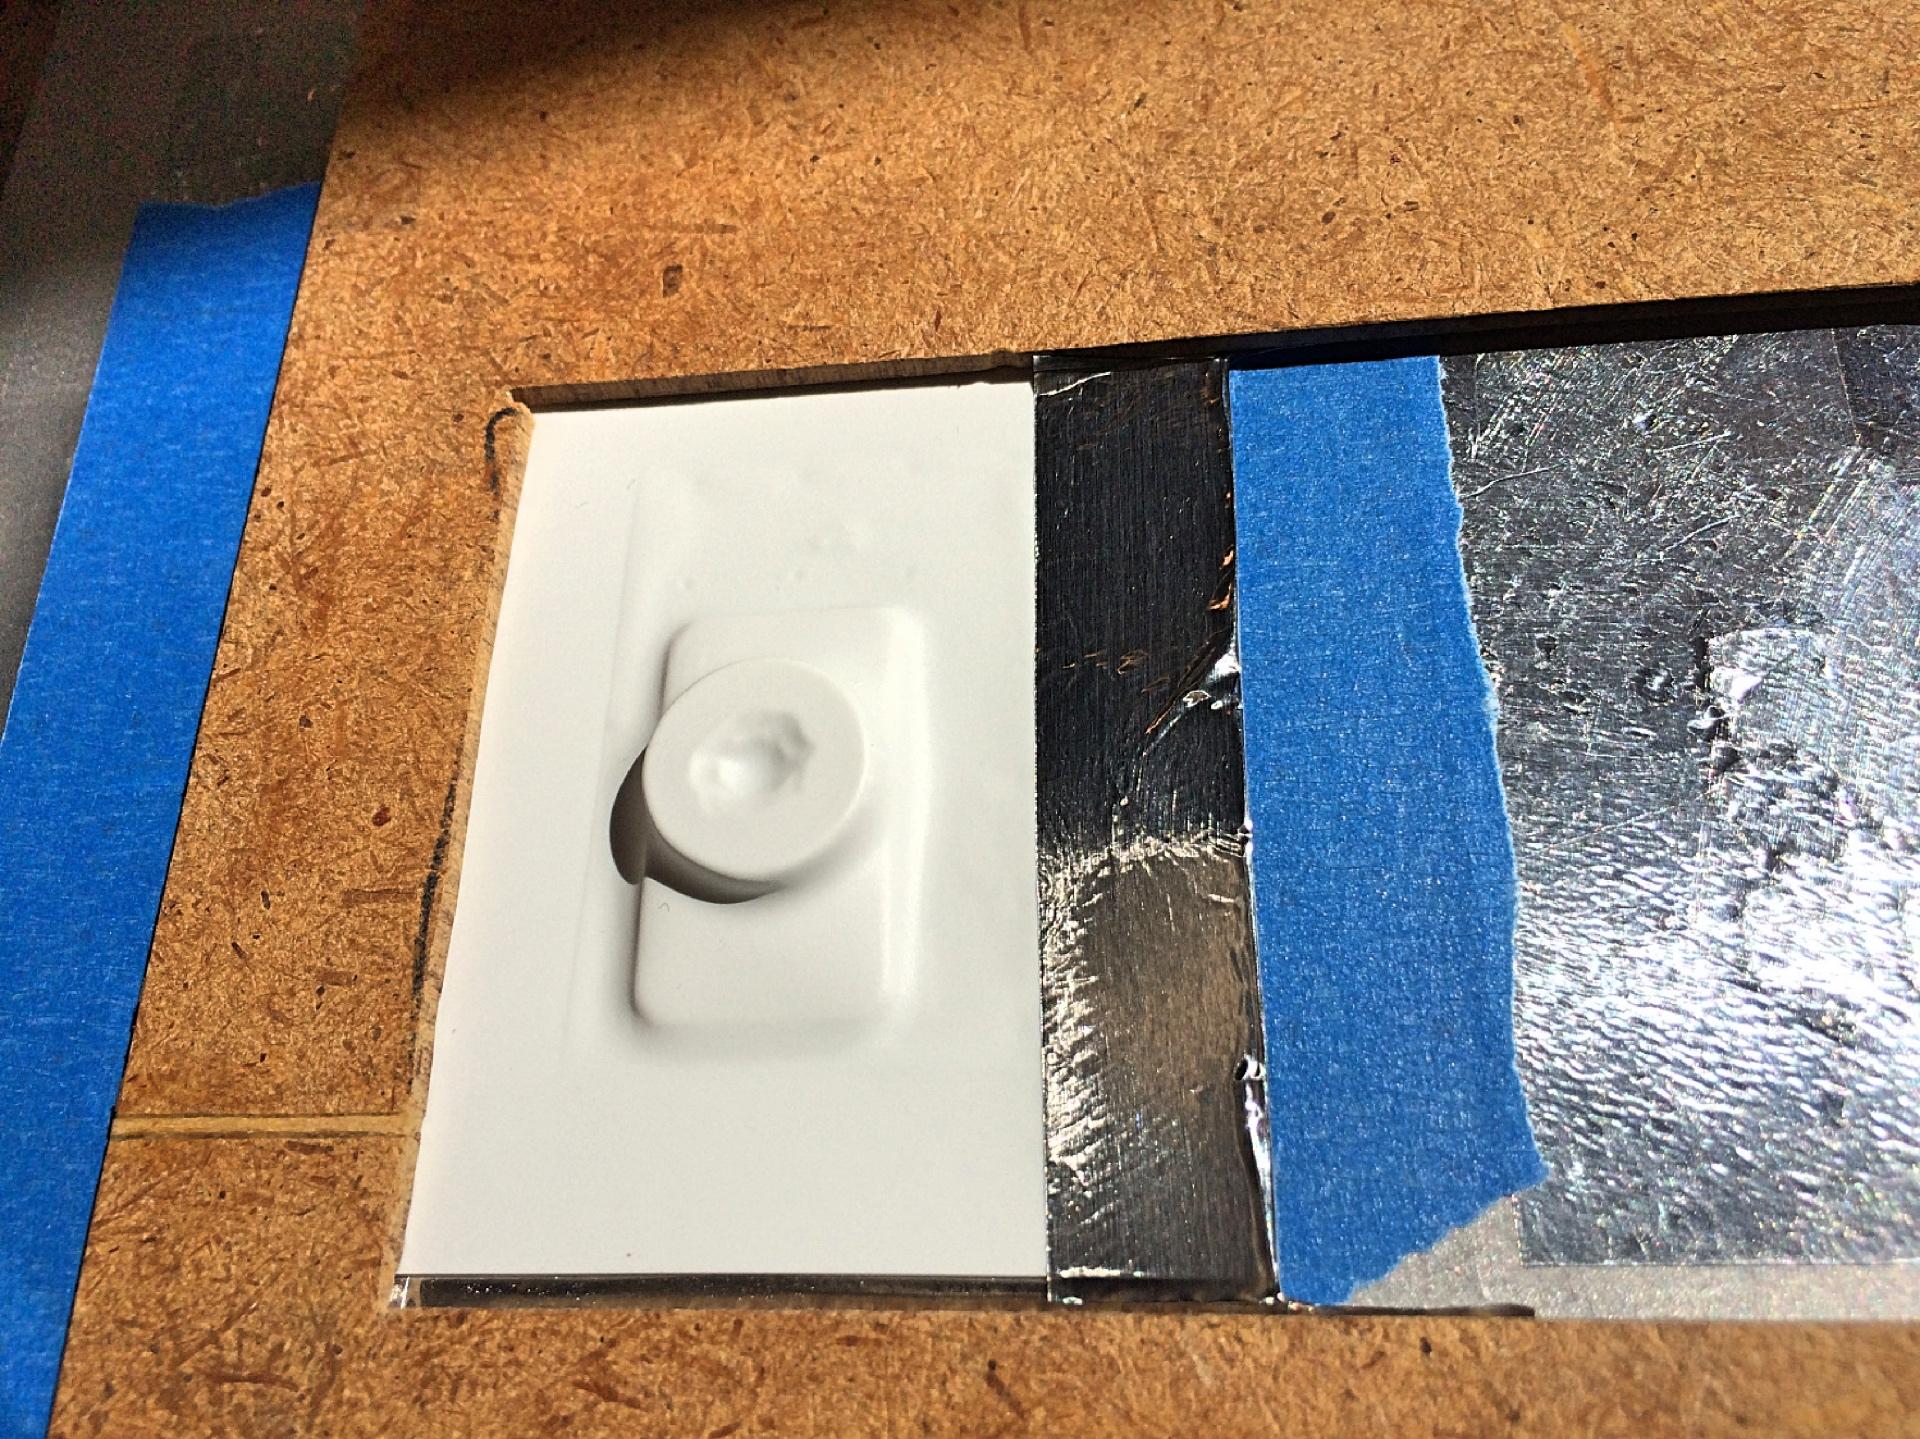
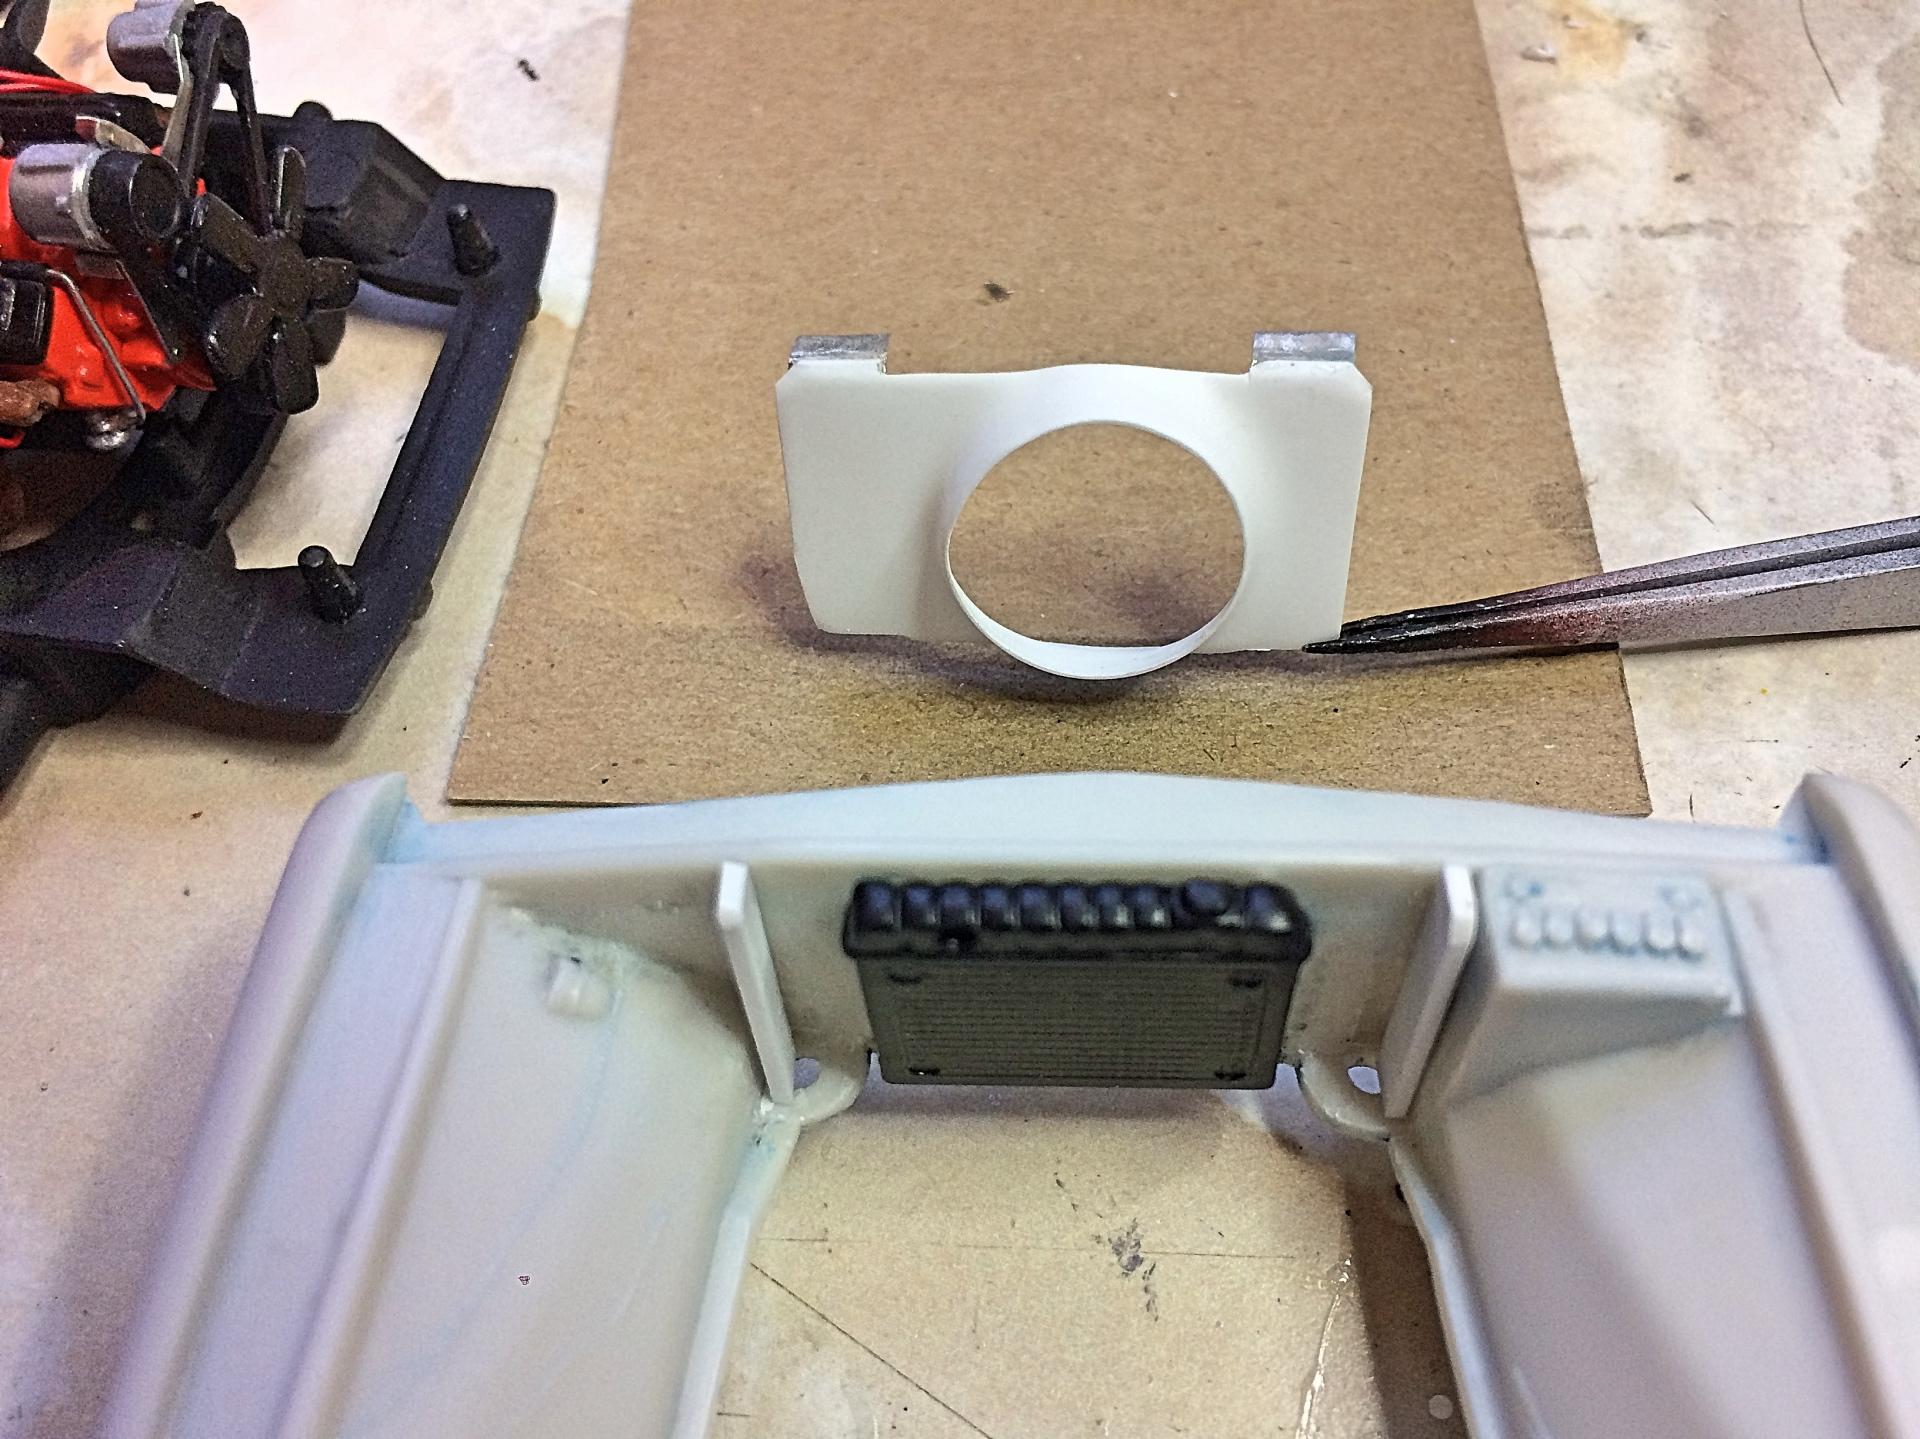
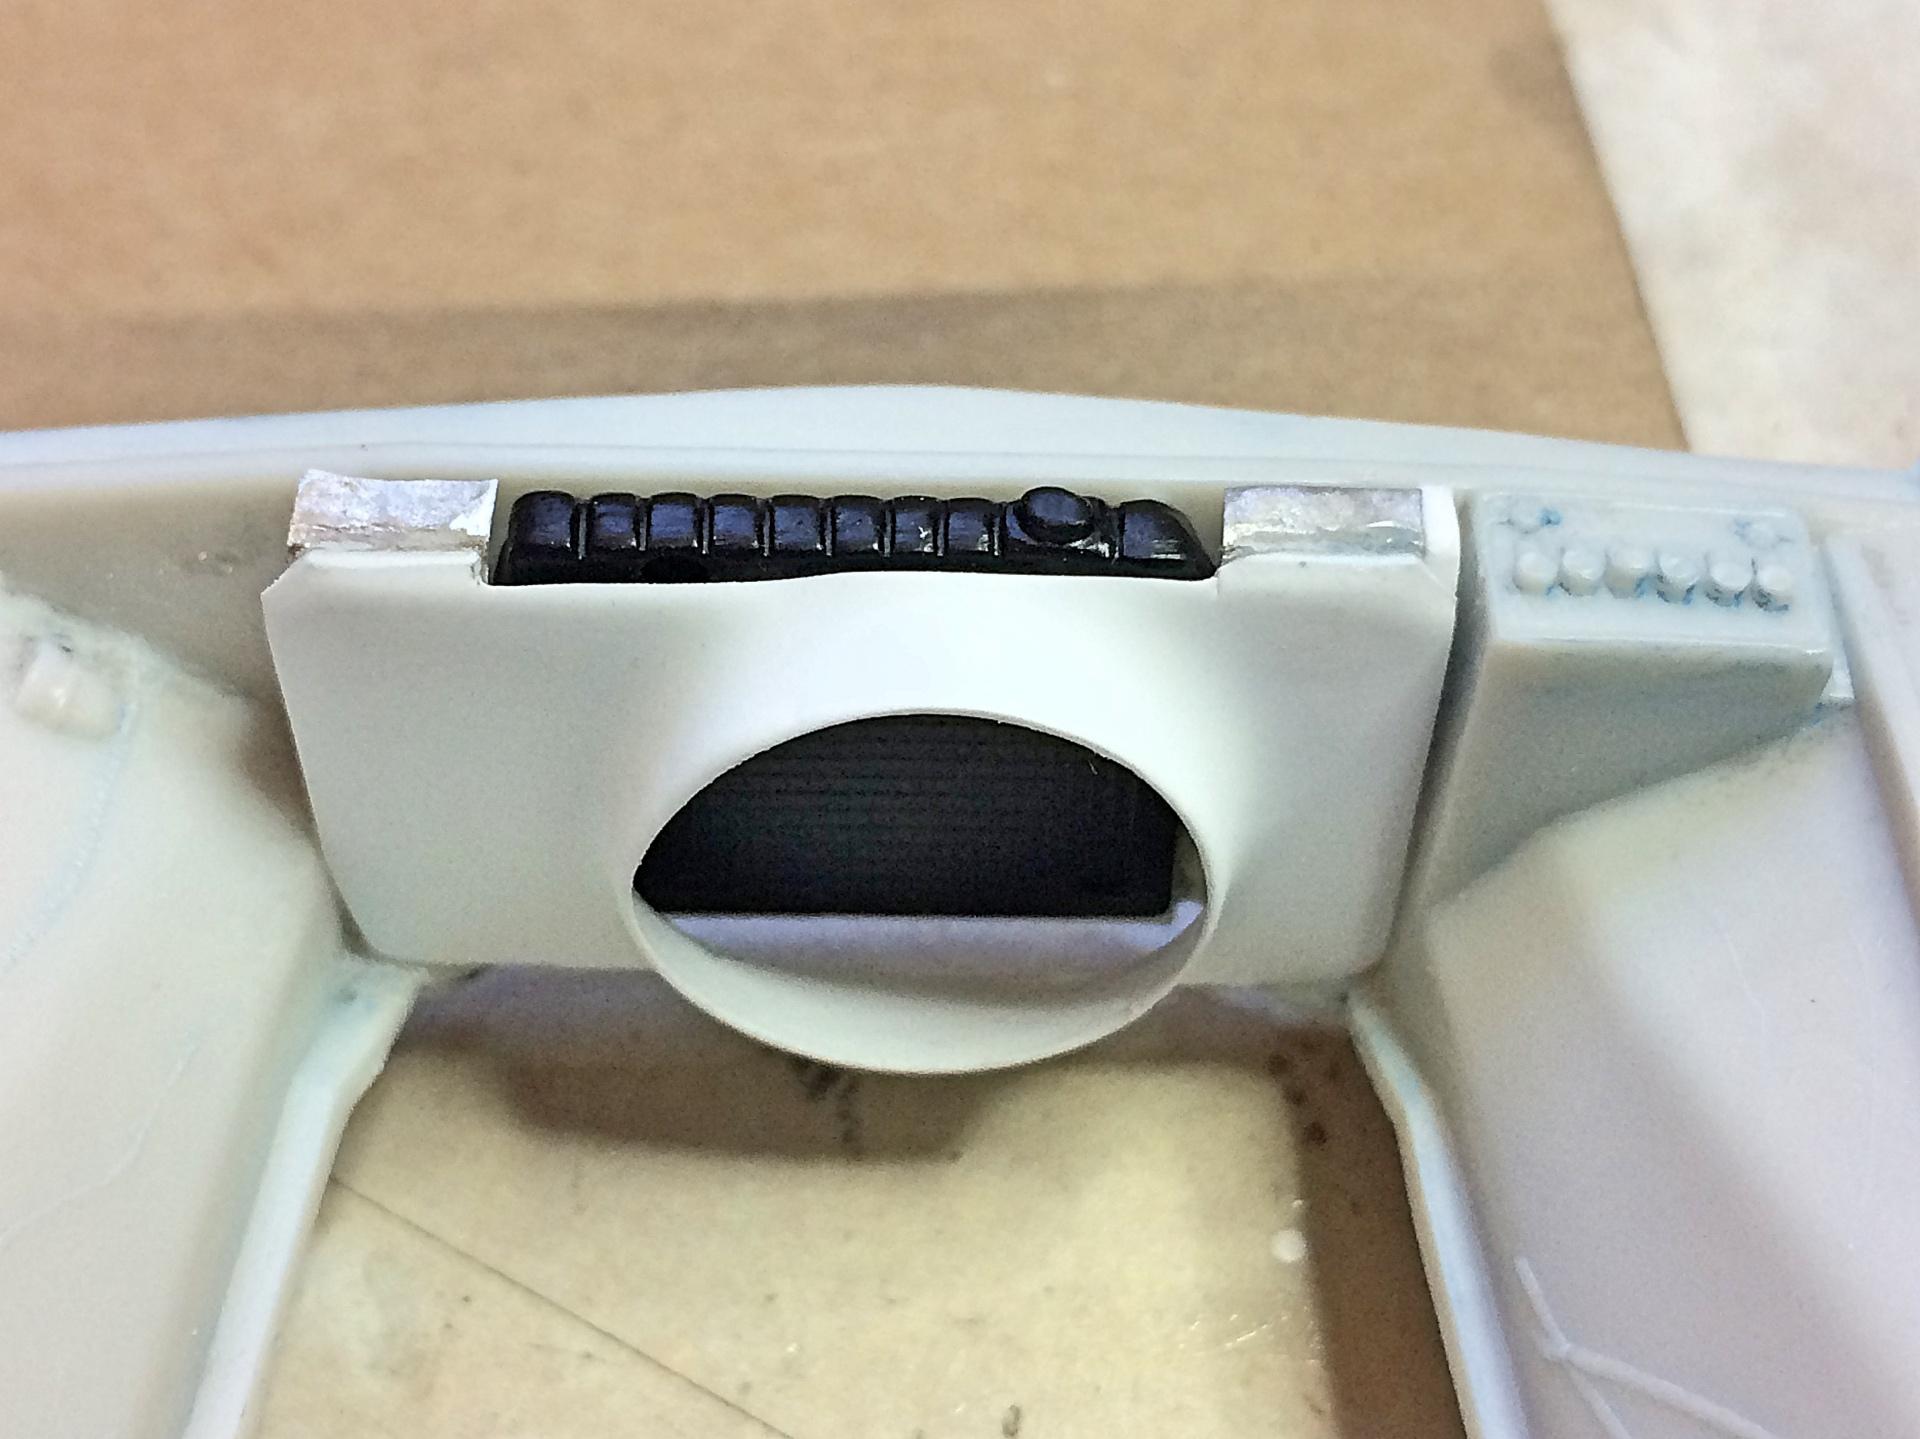
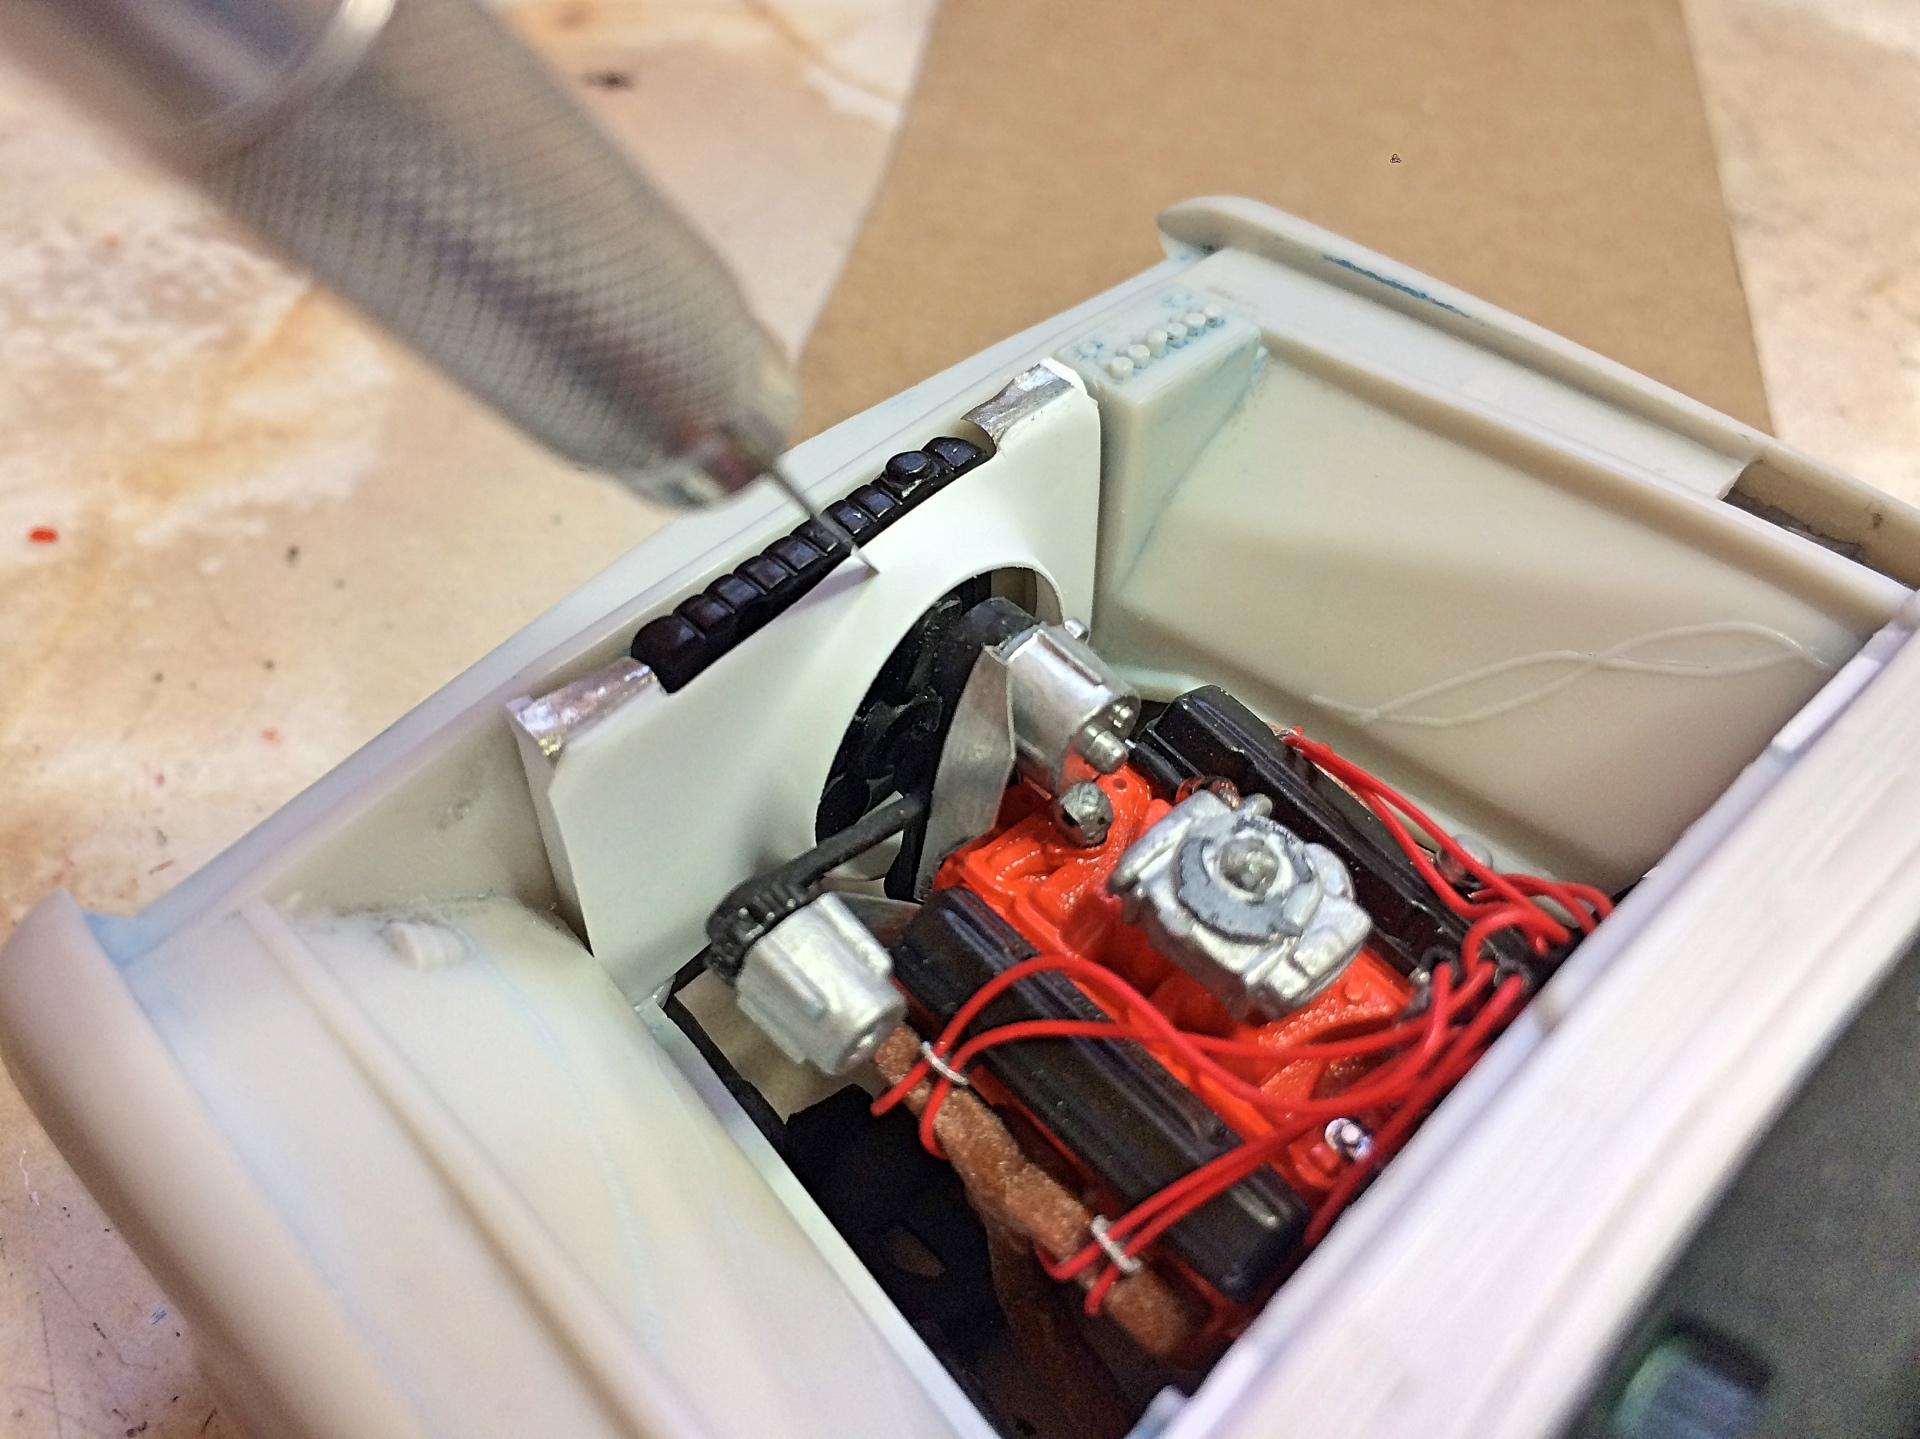
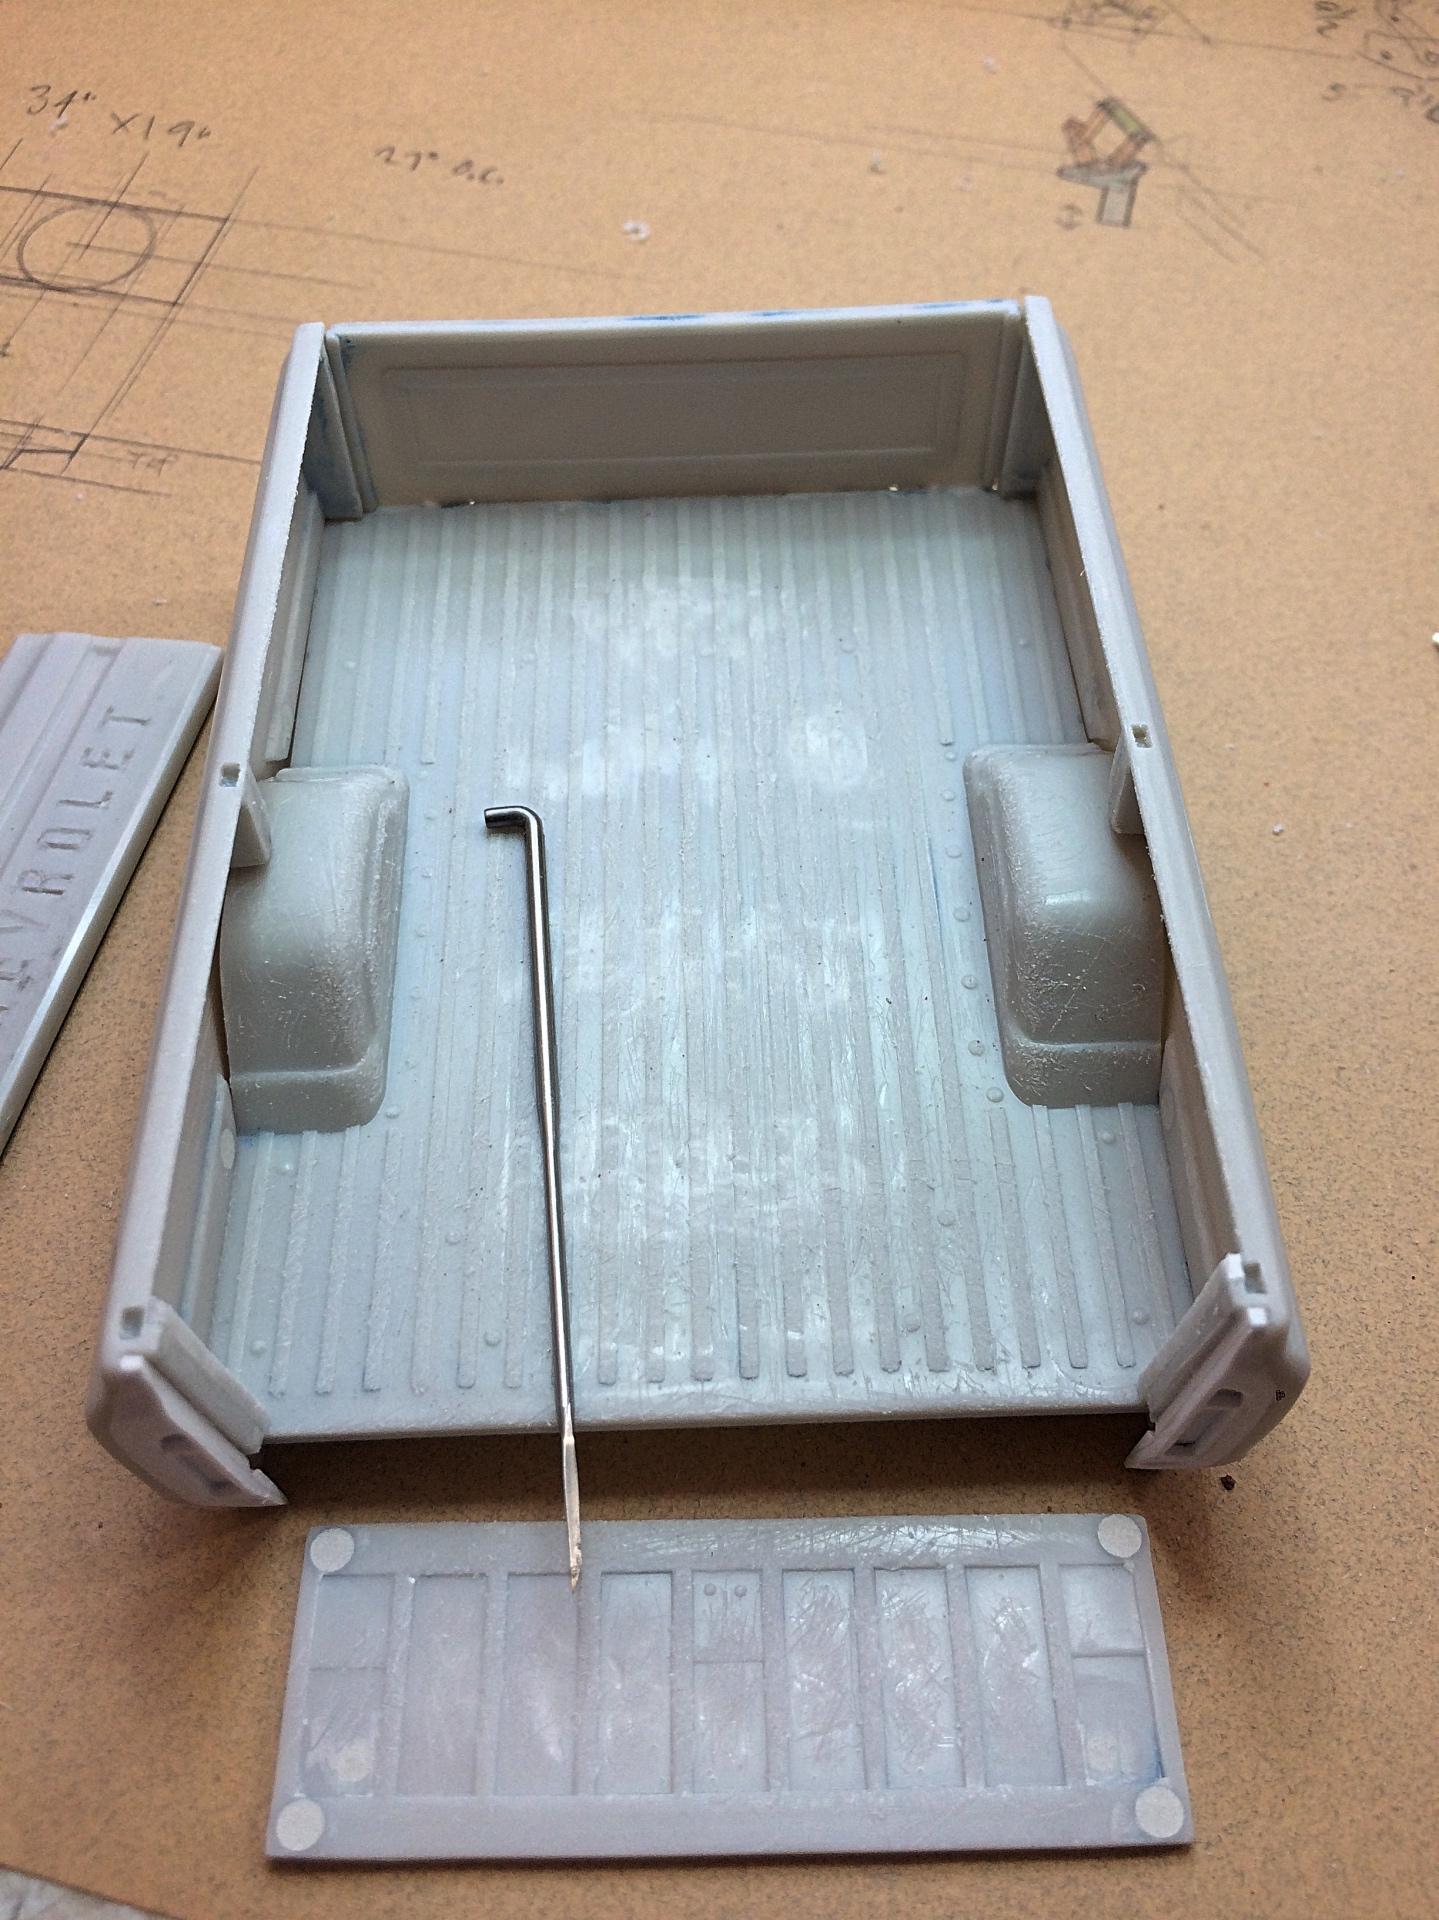
Decided to fabricate a fan shroud. This item is obvious in most vehicles, thought it would add a little detail while disguising the inaccurate radiator and inner fenders, and fat fan blades. Turned the pattern out of Corian, using the drill press and Dremel. For once, the first attempt was successful on the vacuum-form. Cut out, several test fits later..... The promo style engineering had big round things on each side of the radiator, not at all representative, so grinding them out helped a bunch. I don't like the battery, but if I did that, next would be vac-formed inner fenders, then correct suspension, and then you would never see this done. ? I figured getting everything together would be a trick, easy enough to bend the shroud. Was looking forward to gluing the taillight parts in, superglue and baking soda used. Will be sure to check for pinholes after washing. The real truck had bodywork done before painting, but the bed floor was not touched. It worked on a ranch, was beat up by livestock; distressed by grinding down the underside until it could be bent, hit with the knife handle and file tip, sanded with the roughest emory cloth I got. Also added the stake pockets; made a tiny chisel from a machine sewing needle, sharpened on oil stones. Cleaned up the tailgate letters best I could. Need to figure out how to evenly smooth the bottom on all.
-
plus permit fees
-
since it's free
-
When I was scanning my topics list, found this, thought it was a good excuse to dredge up. ?
-
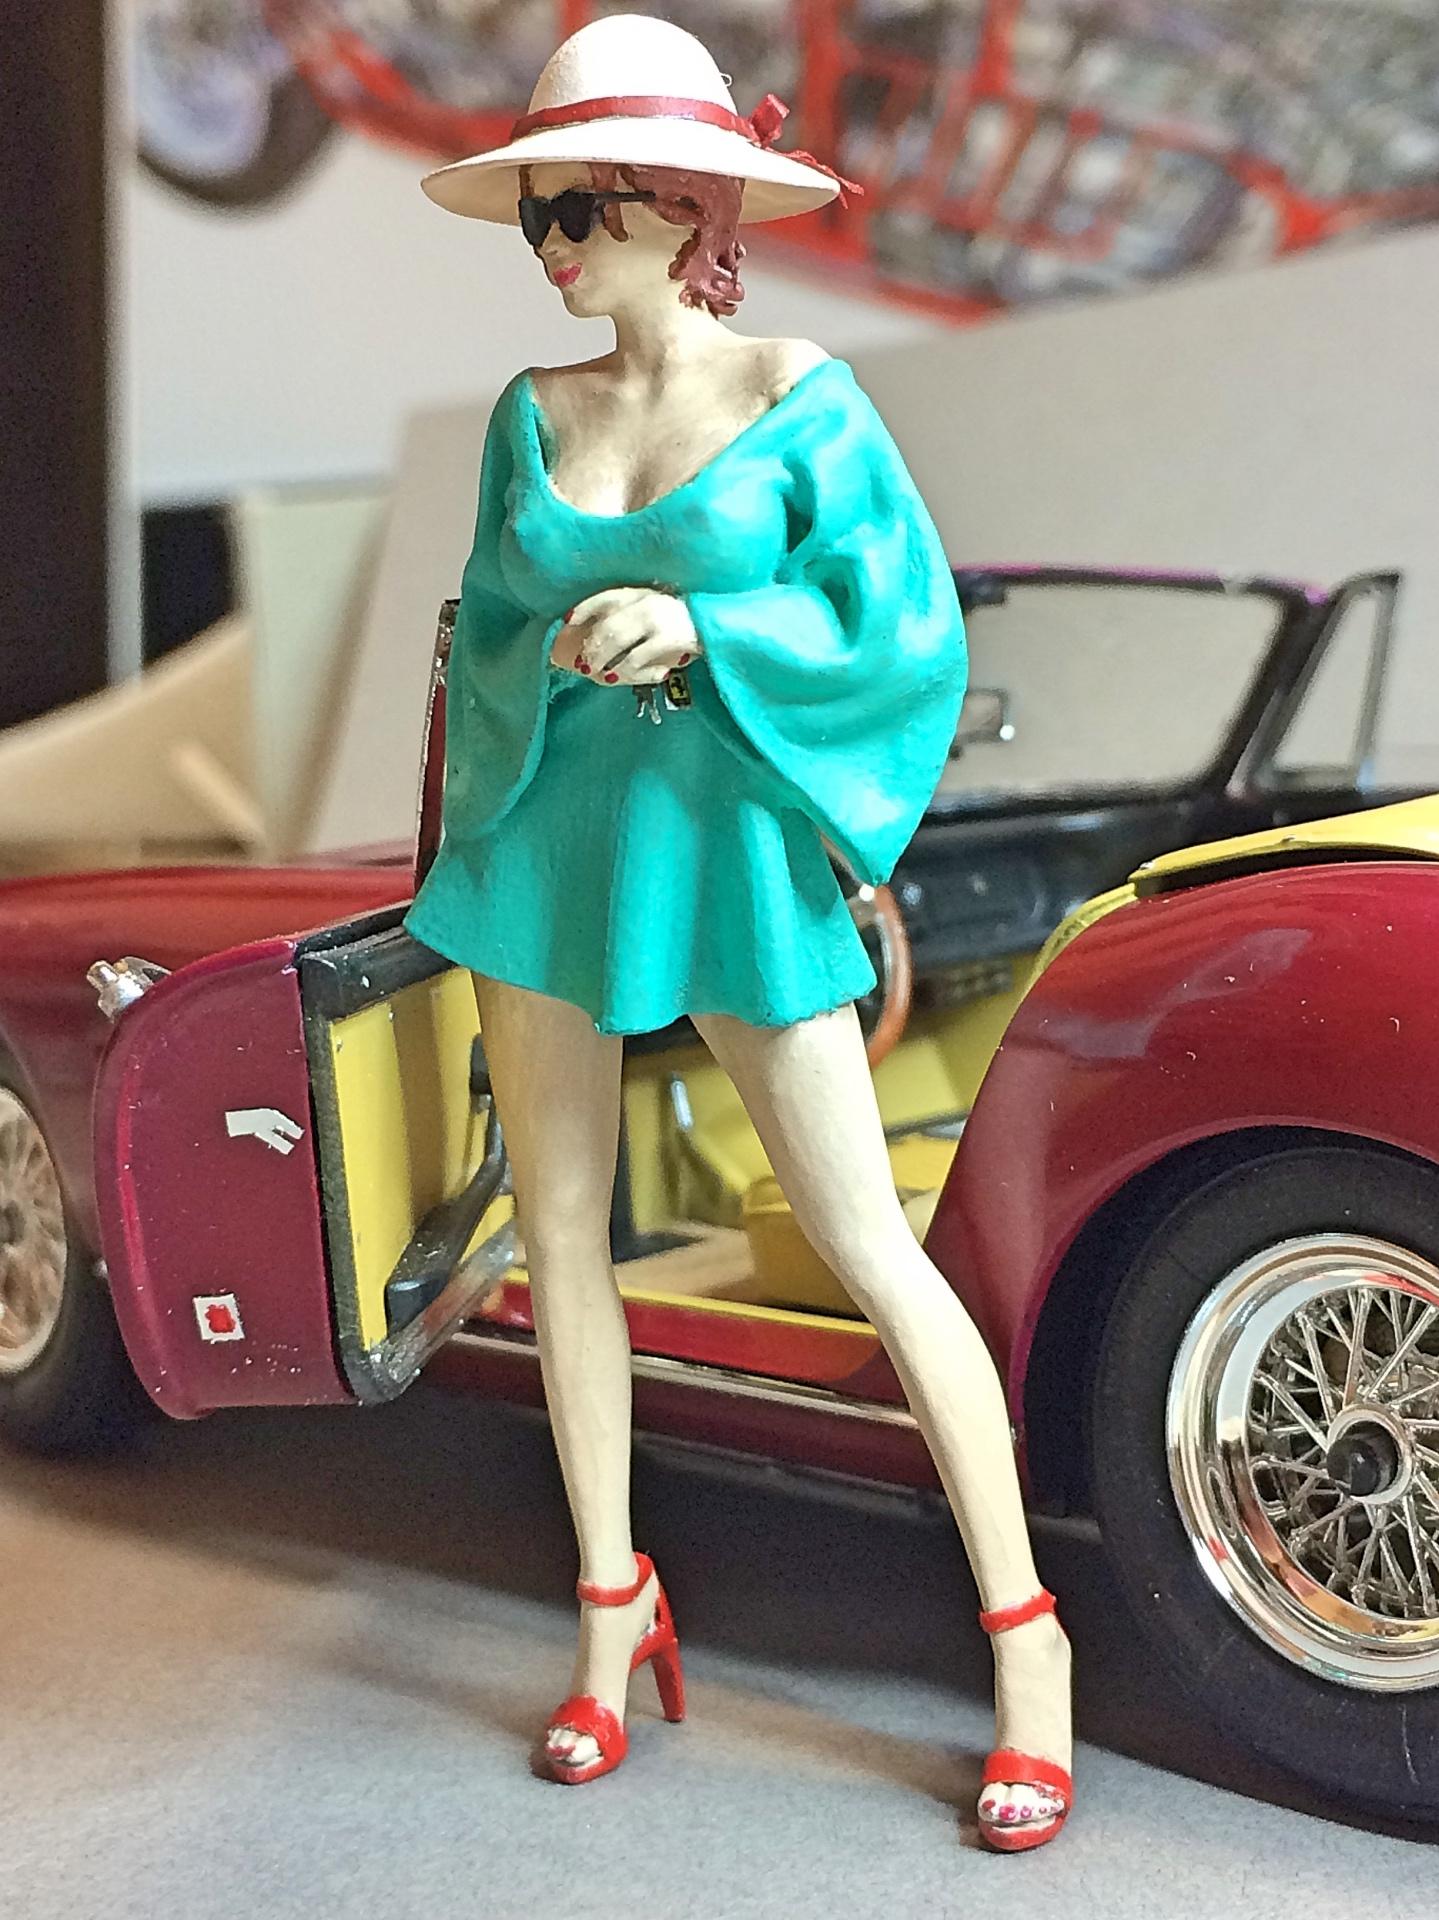
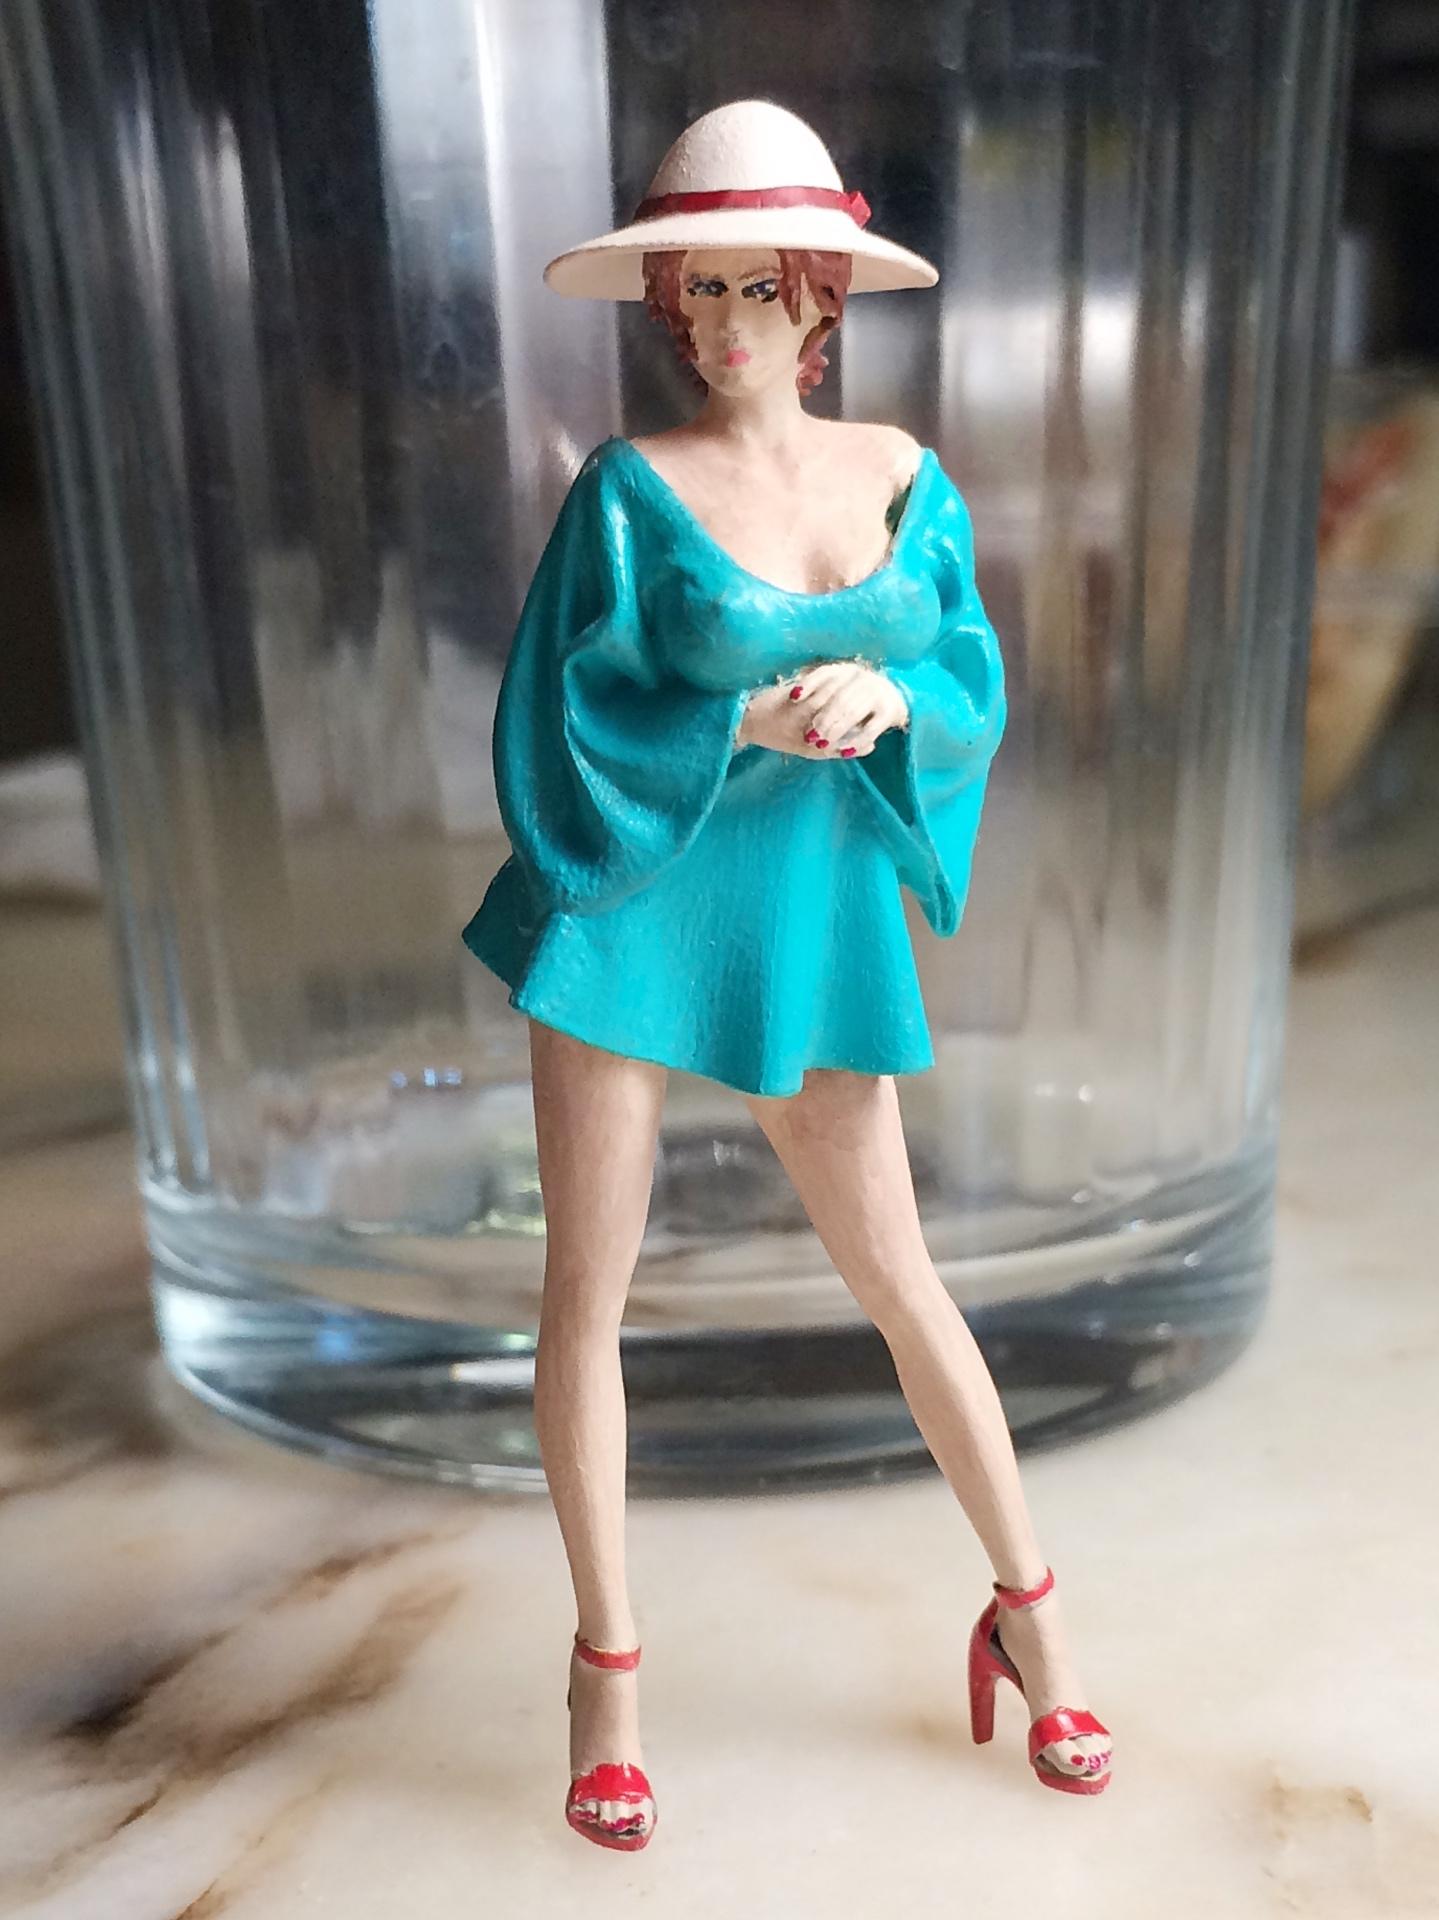
The driver is done! Dullcoat didn't really kill the gloss, but helped. I looked for Rayban sunglass images, and found Ferrari special, with a special case with red stitching and a certificate to go along with it, so this fixed the eye issue for me. ? Made the keys with a strand of wire, coffee can lid scrap, blank film slide, the teeny tiny badge, and Detail Master keys. Guess I need to make a pair of driving shoes now, eh?
-
Oh heck ya, totally different art, all without touching the airbrush, which is really hard for me. Skipping the flesh stage, sort of pornographic. ? The dress is artist paint that I got for the Grand Canyon Roadster diorama. It wasn't as transluscent as I wanted. The hat is vacuum-formed over Corian pattern, turned on the drill press. Basically done, but will refine a few things (eyes suck!), then spray with Dullcoat. Nails are painted with the same 'polish' used on the car. Photo-etch key with Ferrari badge for 1/43 models will be the final touch.