89AKurt
-
Posts
8,426 -
Joined
-
Last visited
Content Type
Profiles
Forums
Events
Gallery
Everything posted by 89AKurt
-
Egads! ? More power to you for making something out of this. I pulled myself out of a slump, by building a Nitto Lamborghini Countach that was horrible, into something cool. Pass the popcorn.... ?
-
spiked with Jack
-
Got the engine bay done last night. Stripped chrome from the bumpers, spinners, and mirror, will send out so expecting a pause.

-
Really wanna know? Note my creative cheating of using slang word. LOL
-

1950 Ford pickup
89AKurt replied to crazyjim's topic in Model Trucks: Pickups, Vans, SUVs, Light Commercial
Great first patina job! Well loved vehicles aren't always trashed, nice subtle sunburn. -
You would notice that. ? The whole brake part is inaccurate, so seemed pointless to do anything more. But if you insist on enabling my OCD..... Oh, now you are enabling alcohol abuse? ? Thanks. ? Thank you! Brake lines wouldn't show up with this angle. ?
-
Ferrari 312T
89AKurt replied to Chris Smith's topic in WIP: Other Racing: Road Racing, Land Speed Racers
I built this when I was a teen, did an average job, and screwed up the wheels by spraying Krylon over the paint, and didn't know the brake fluid trick. Going to watch this! -
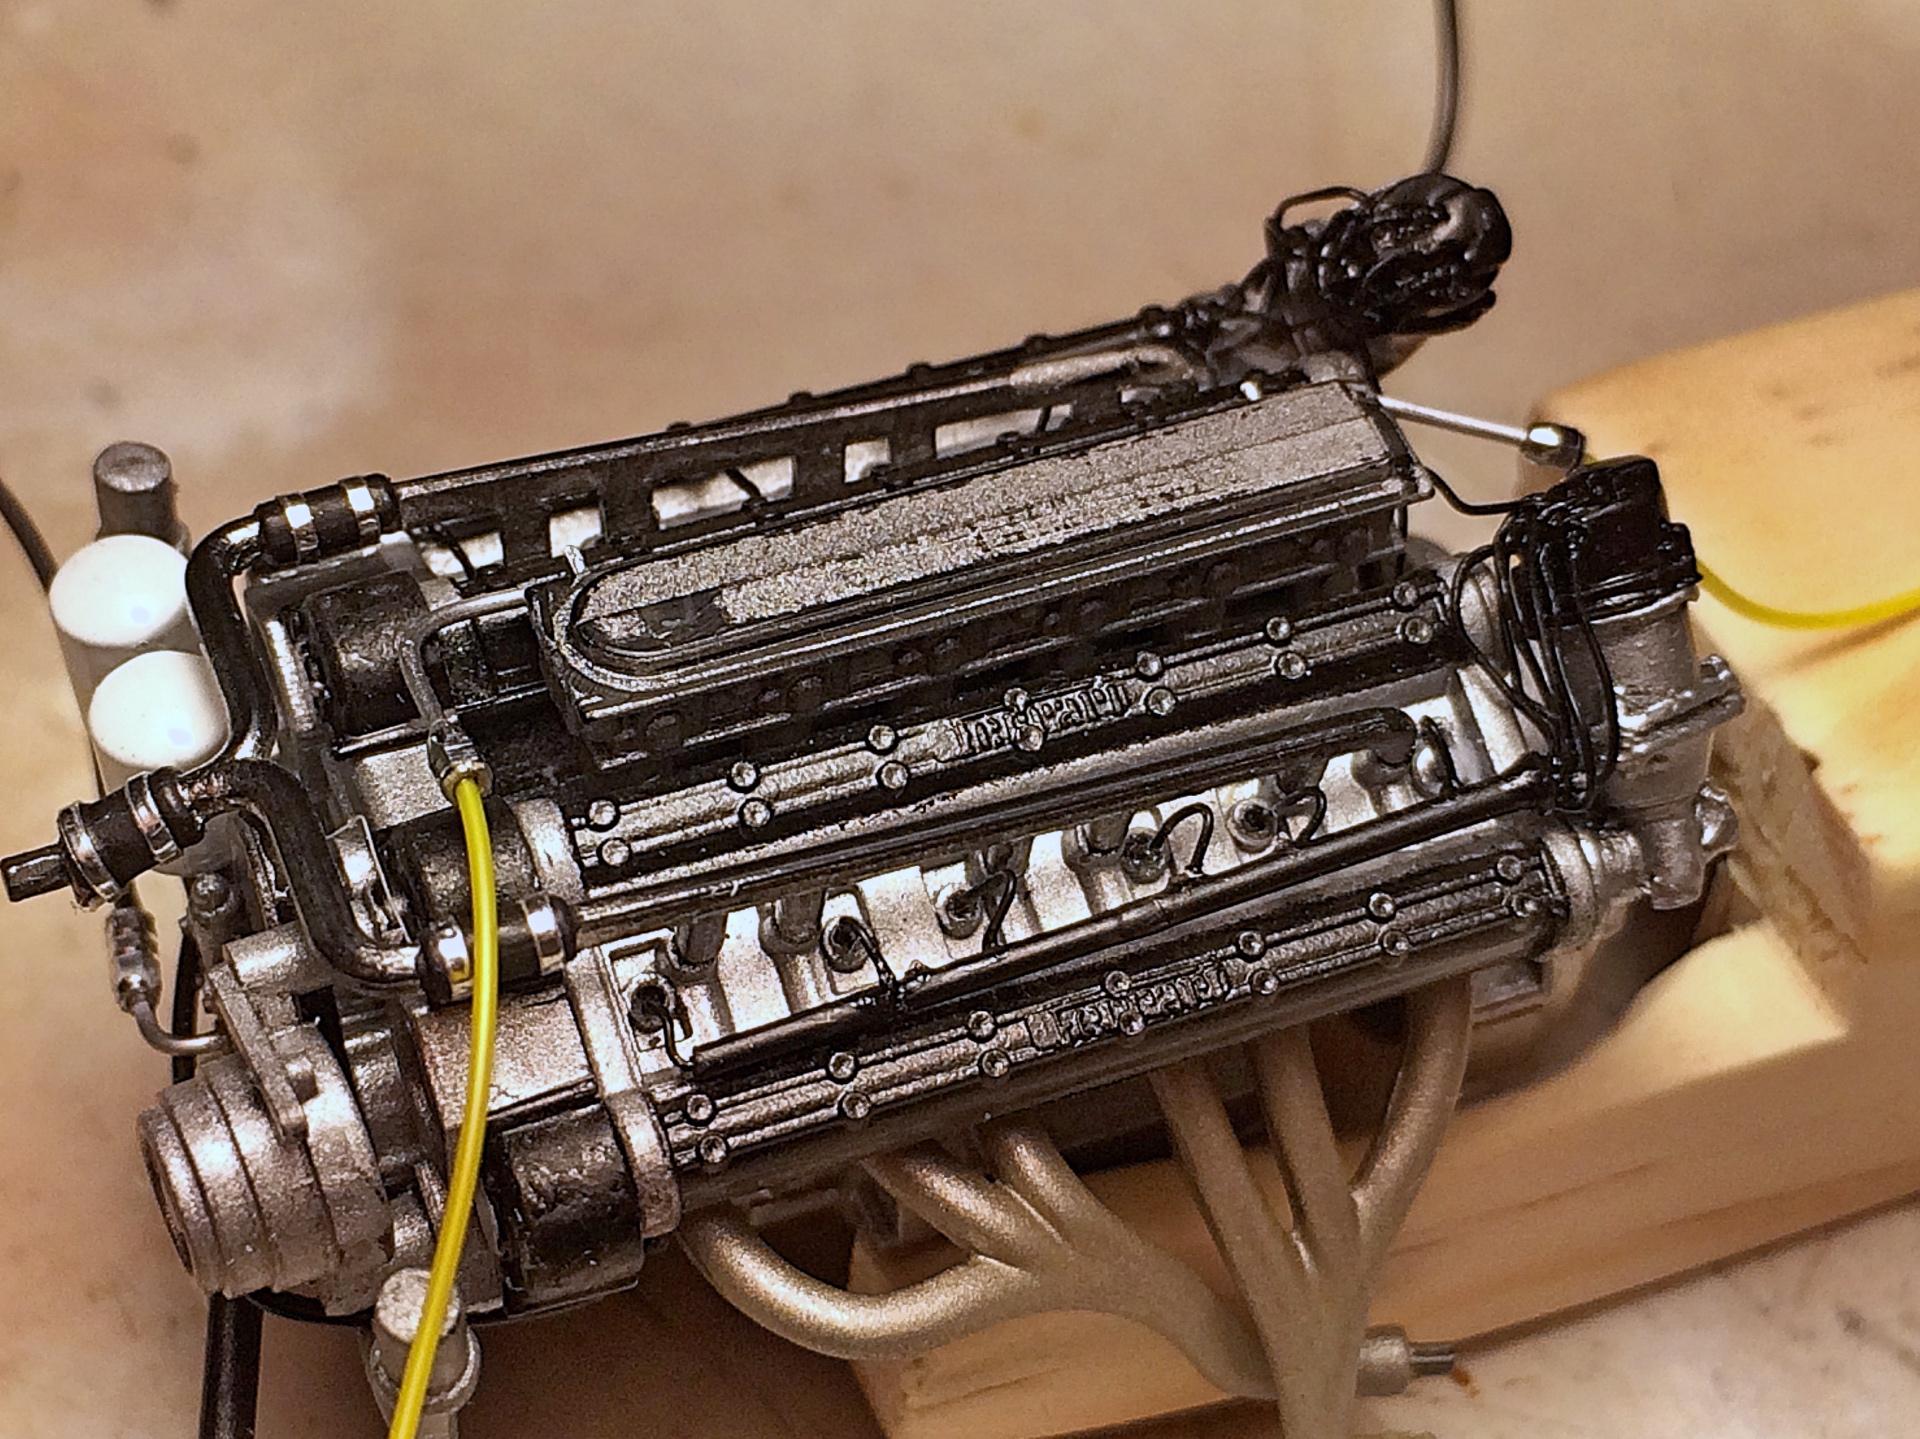
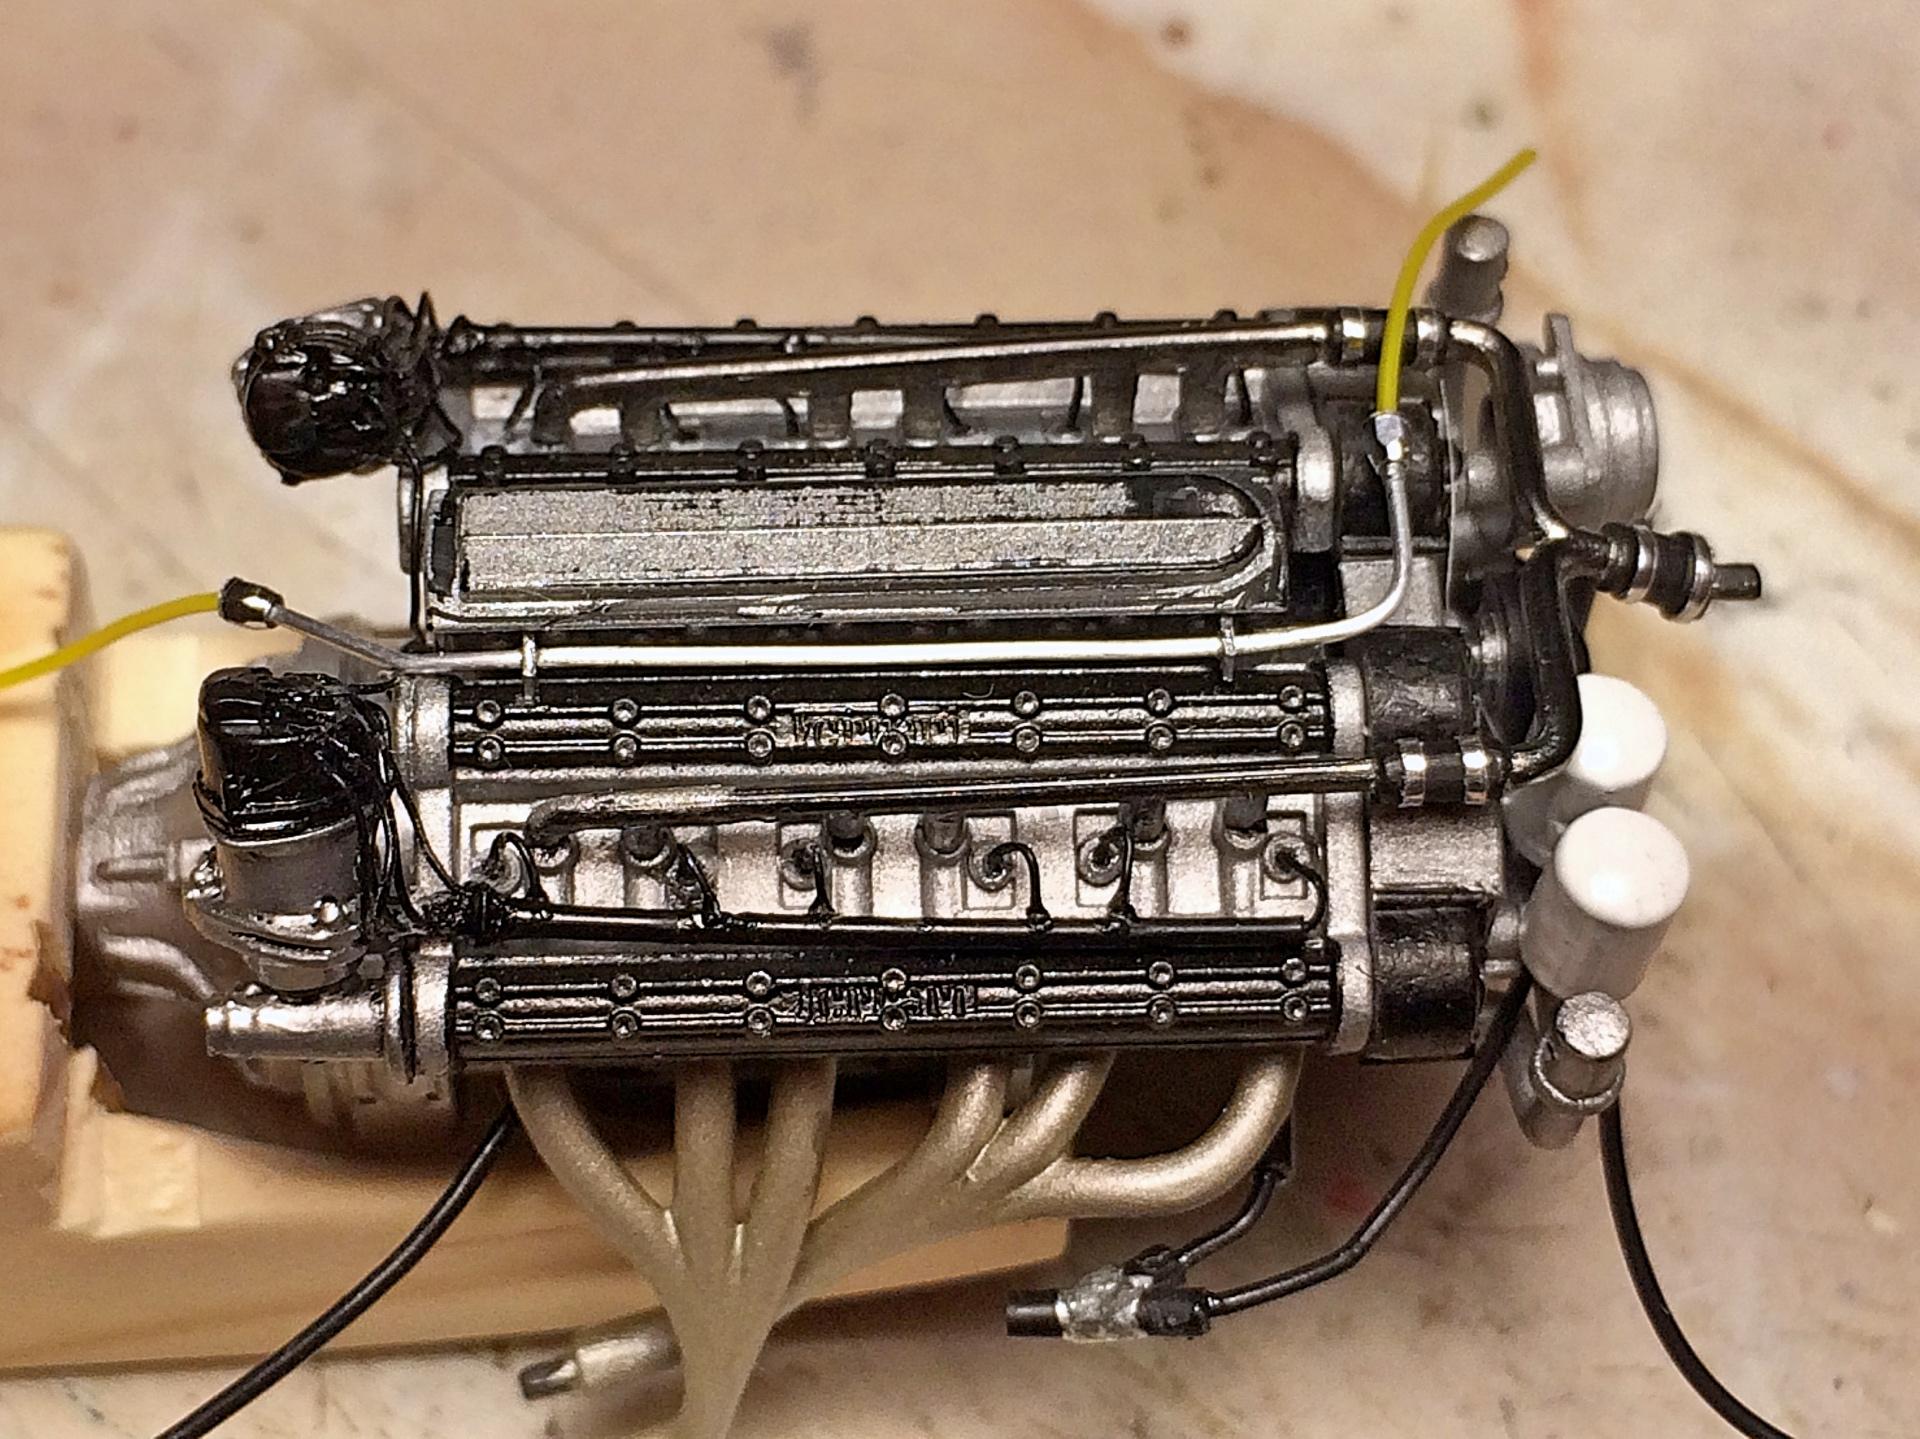
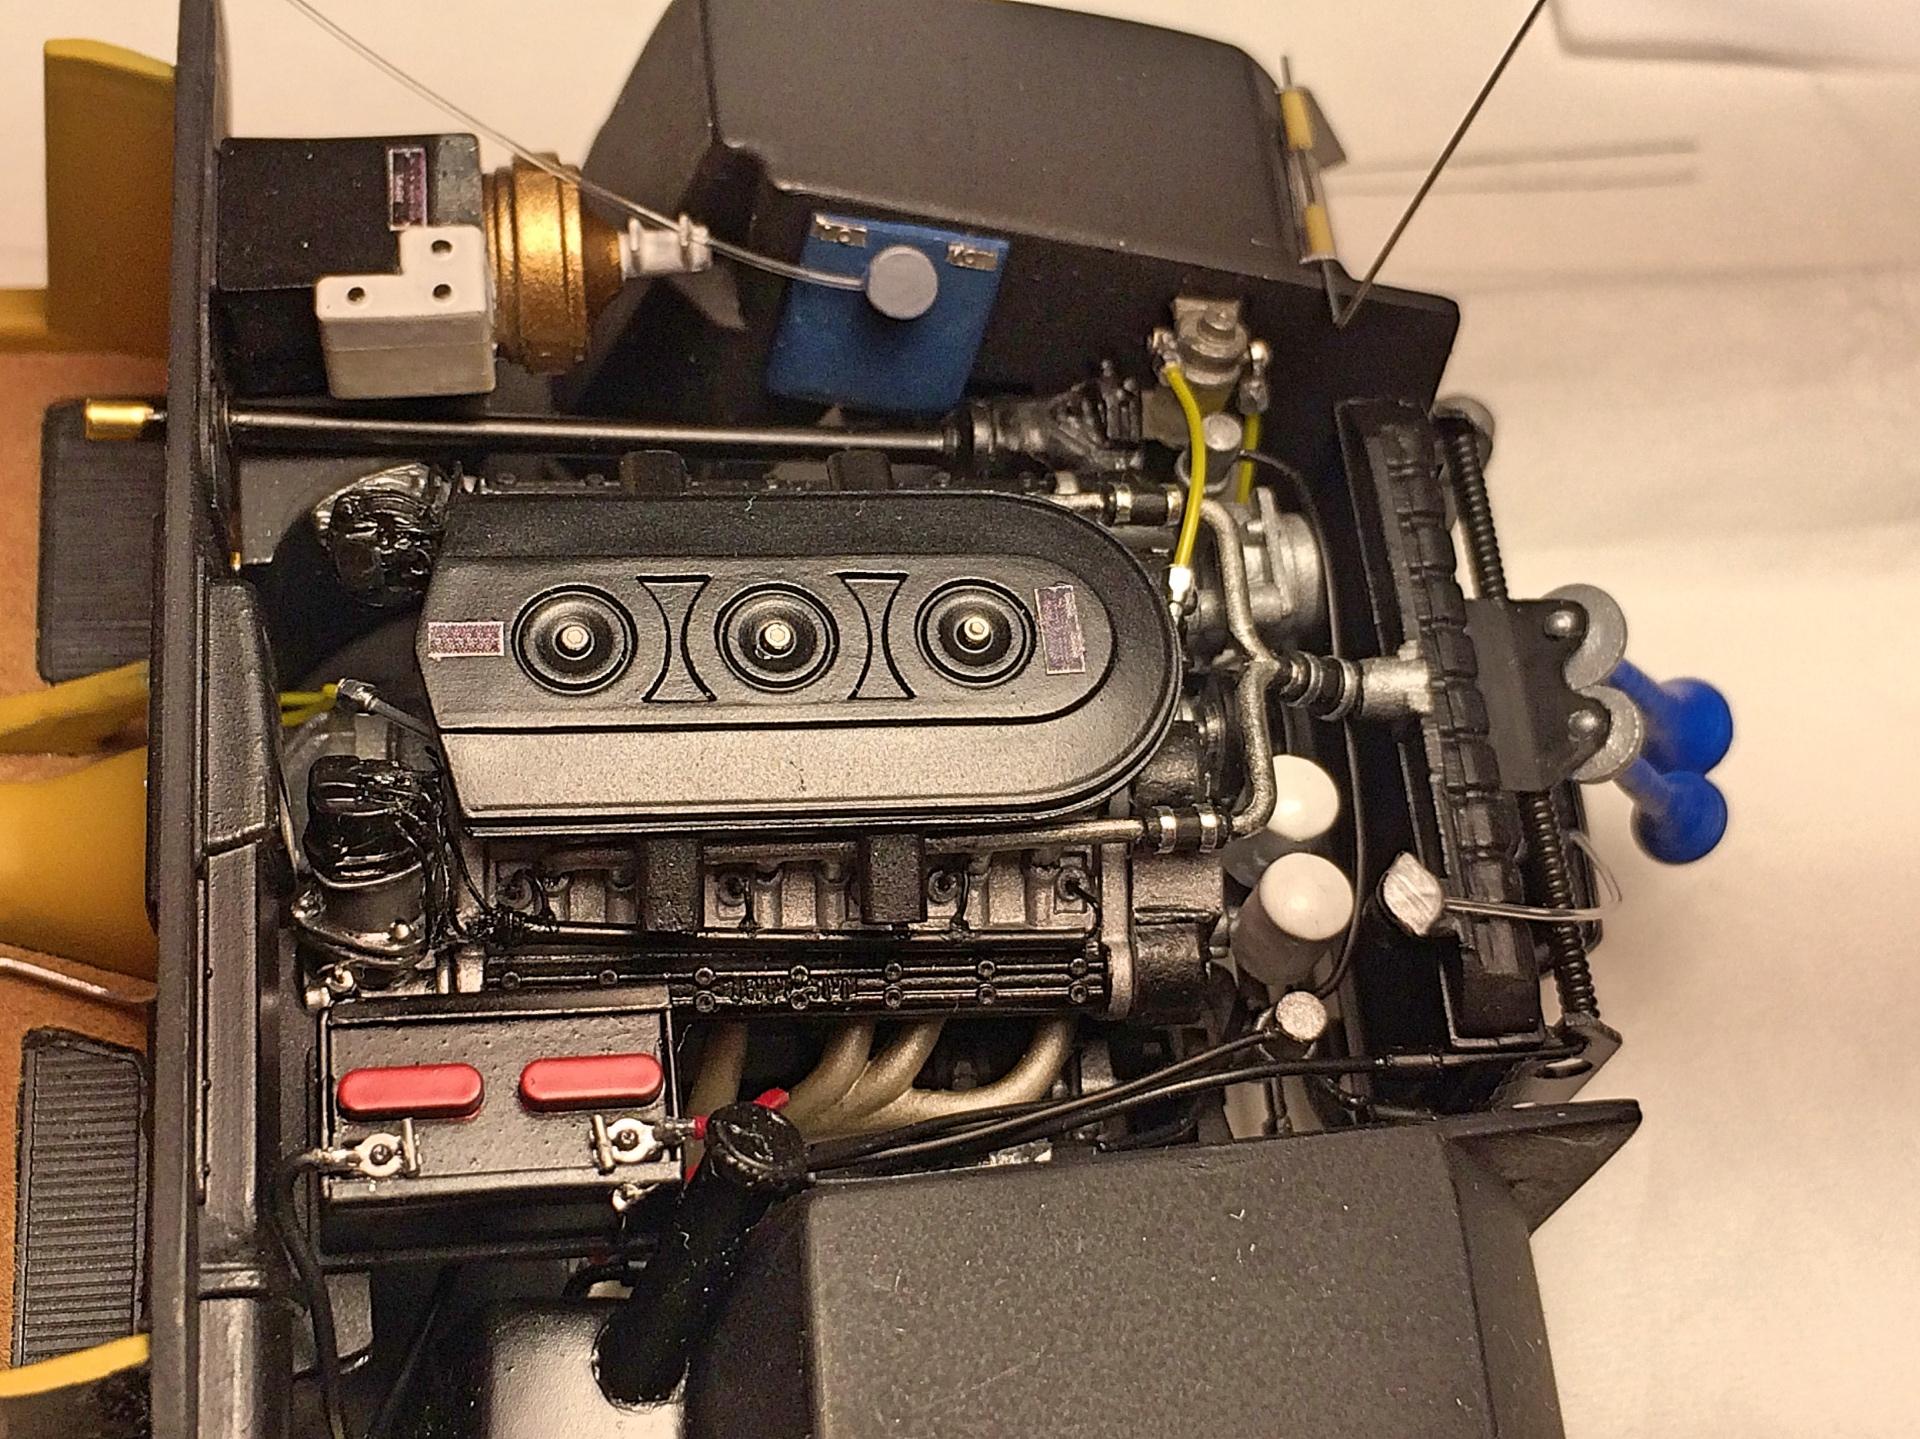
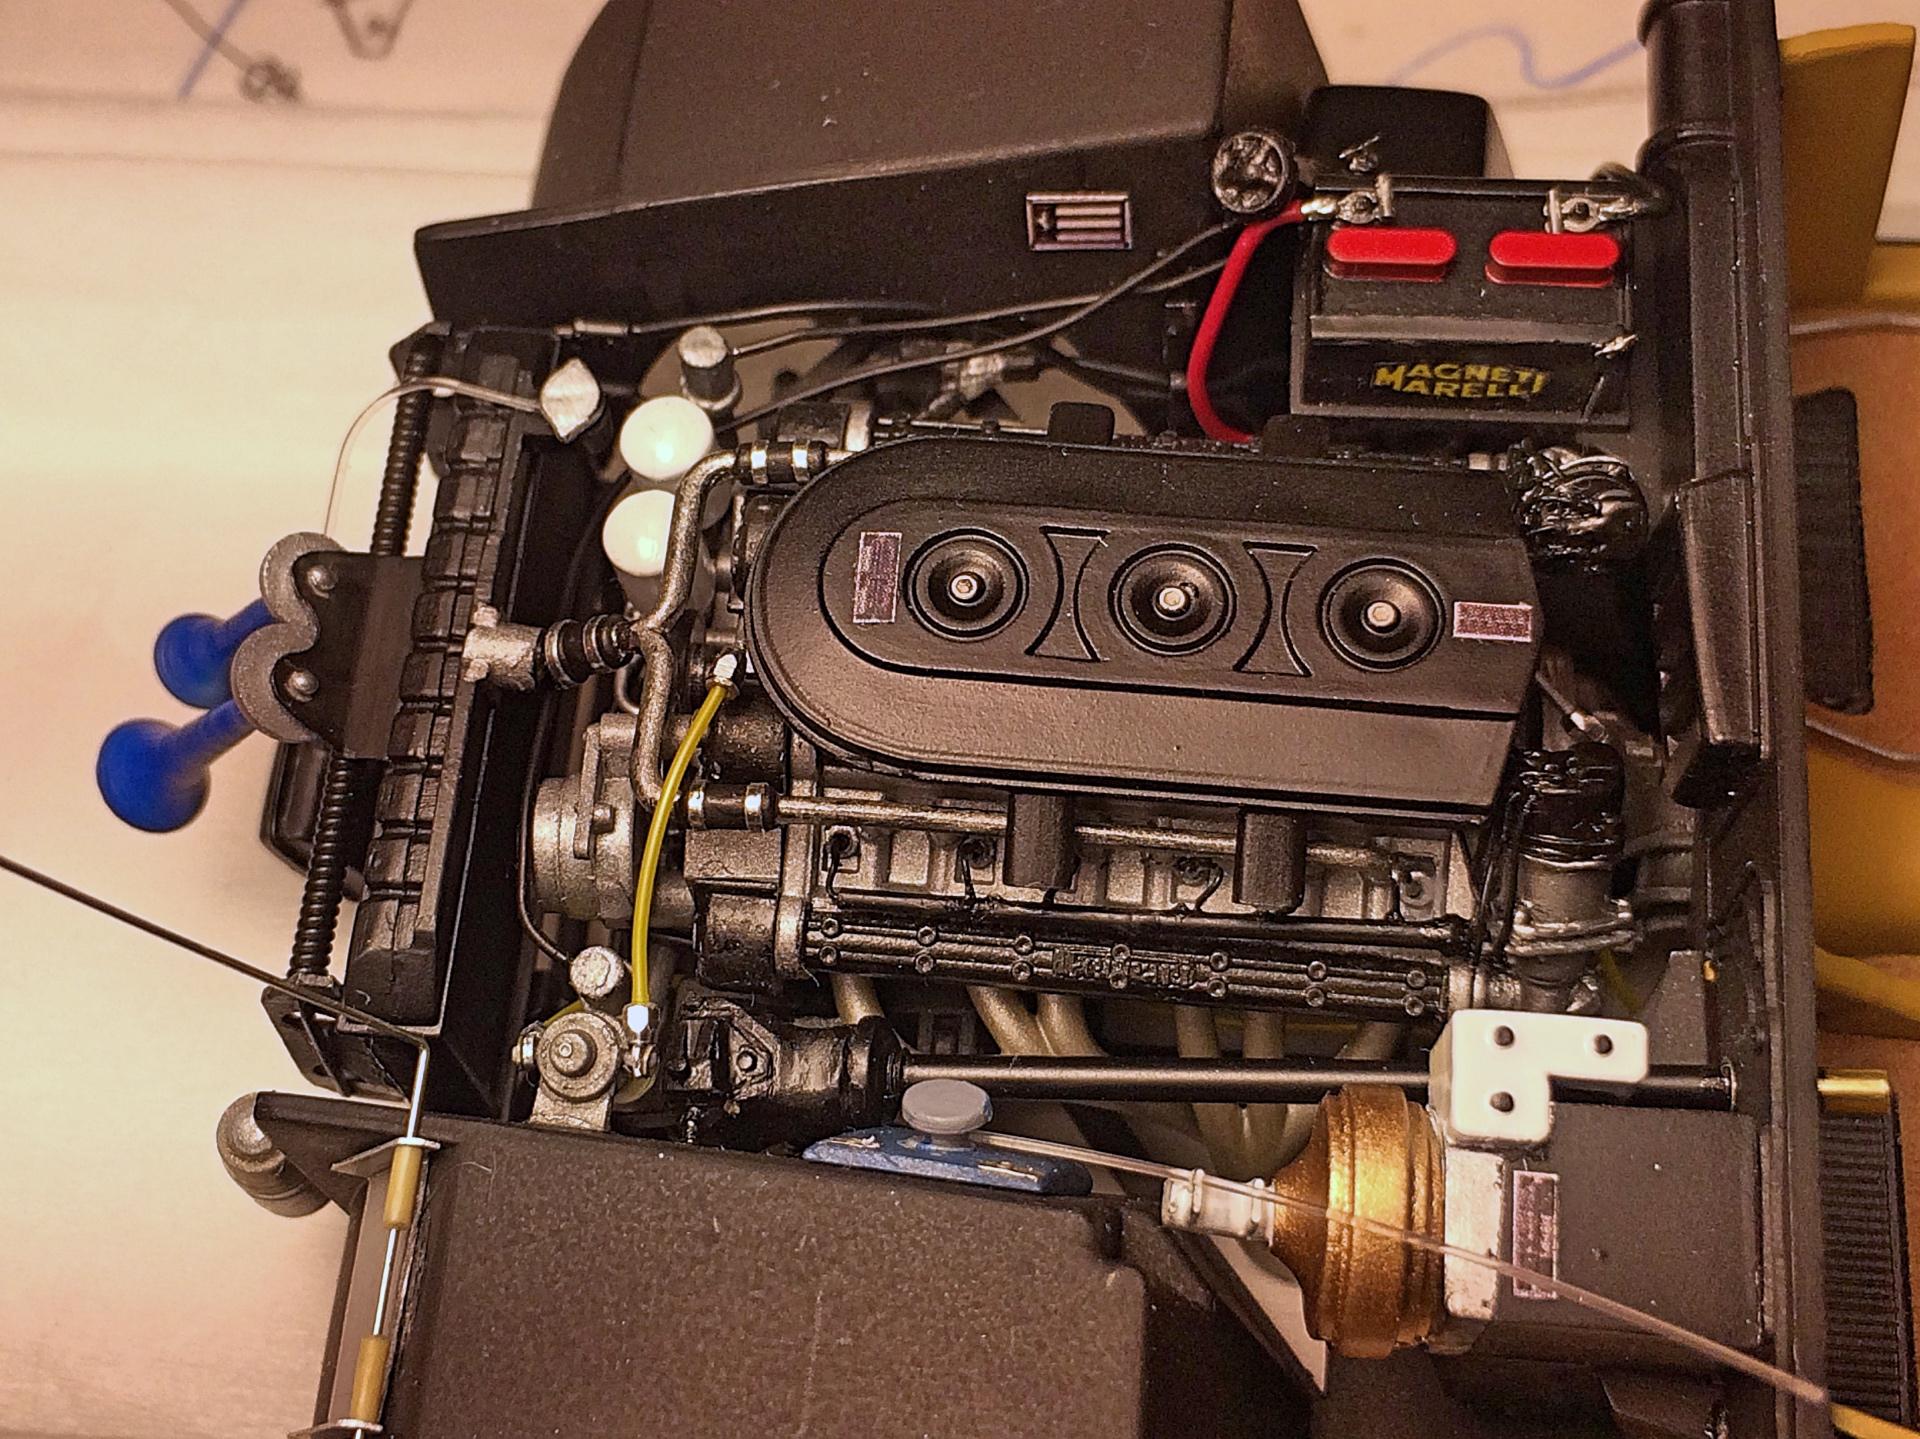
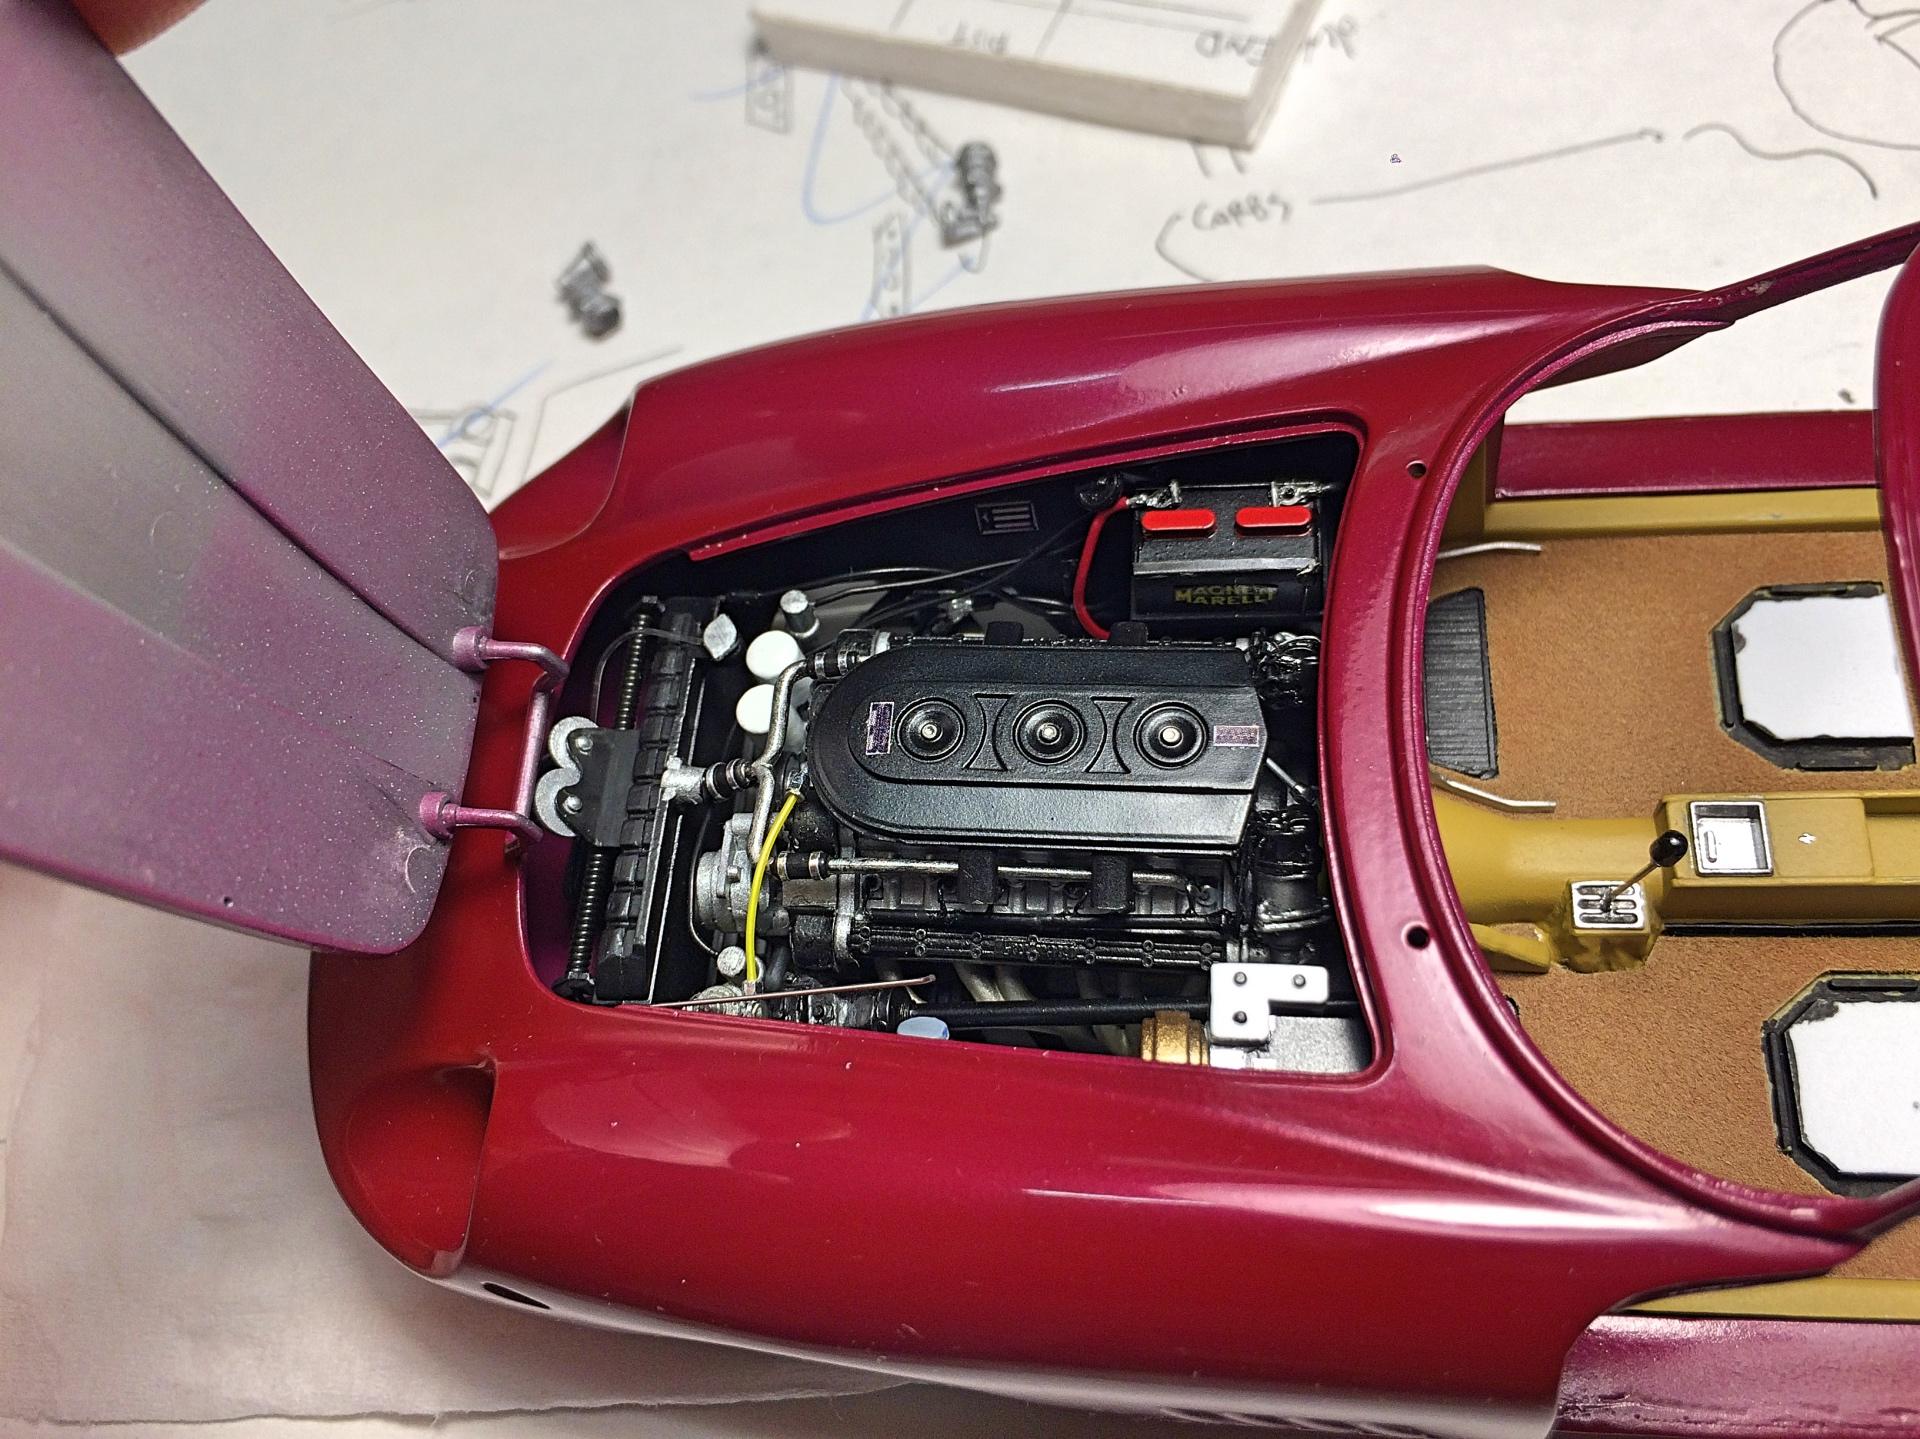
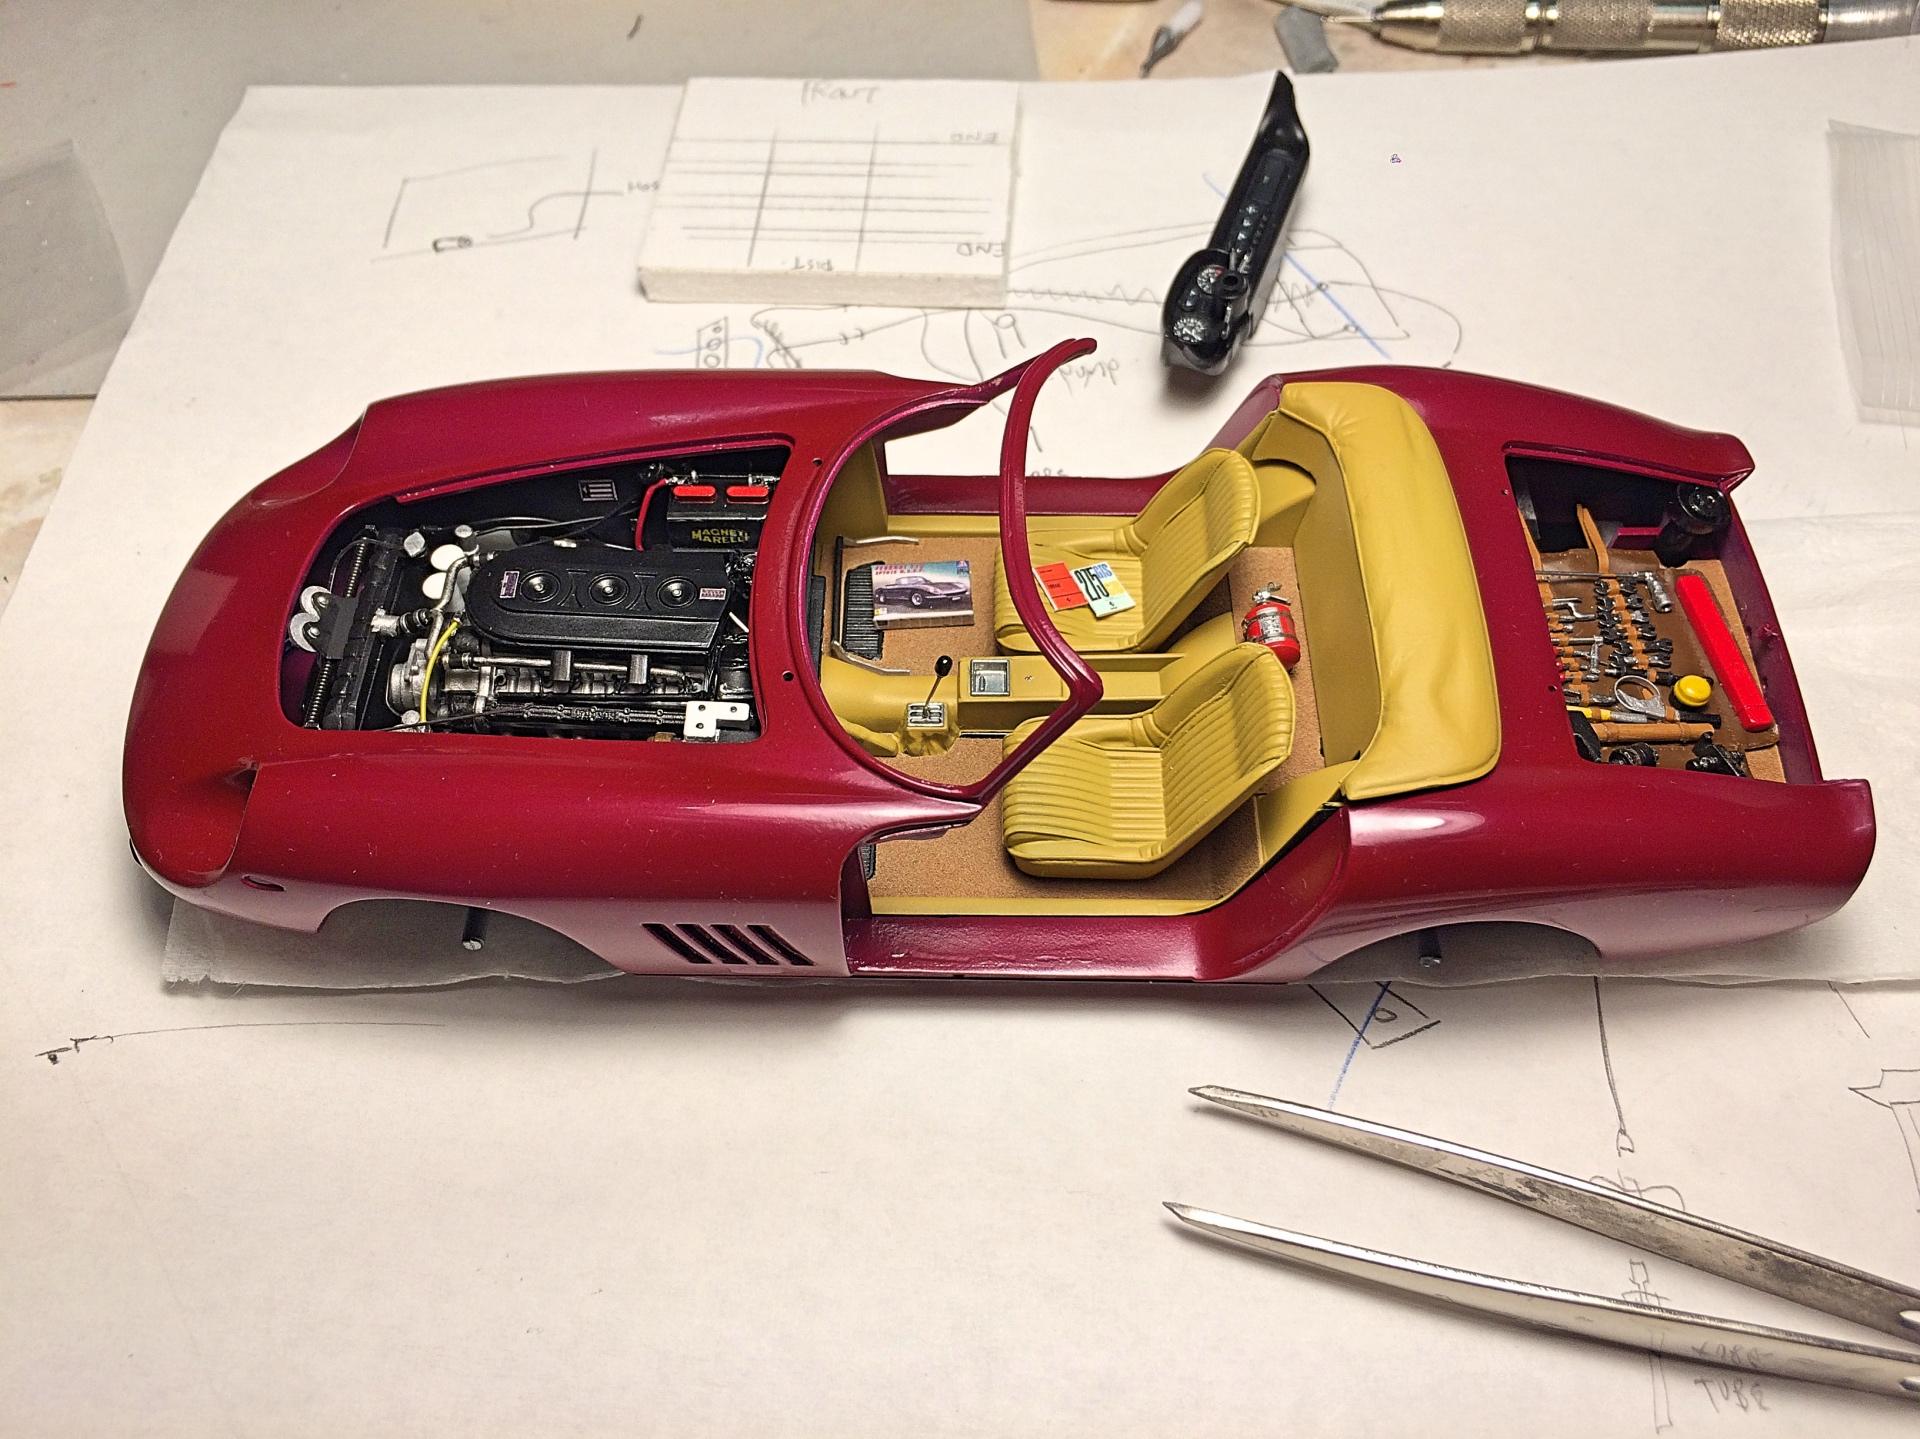
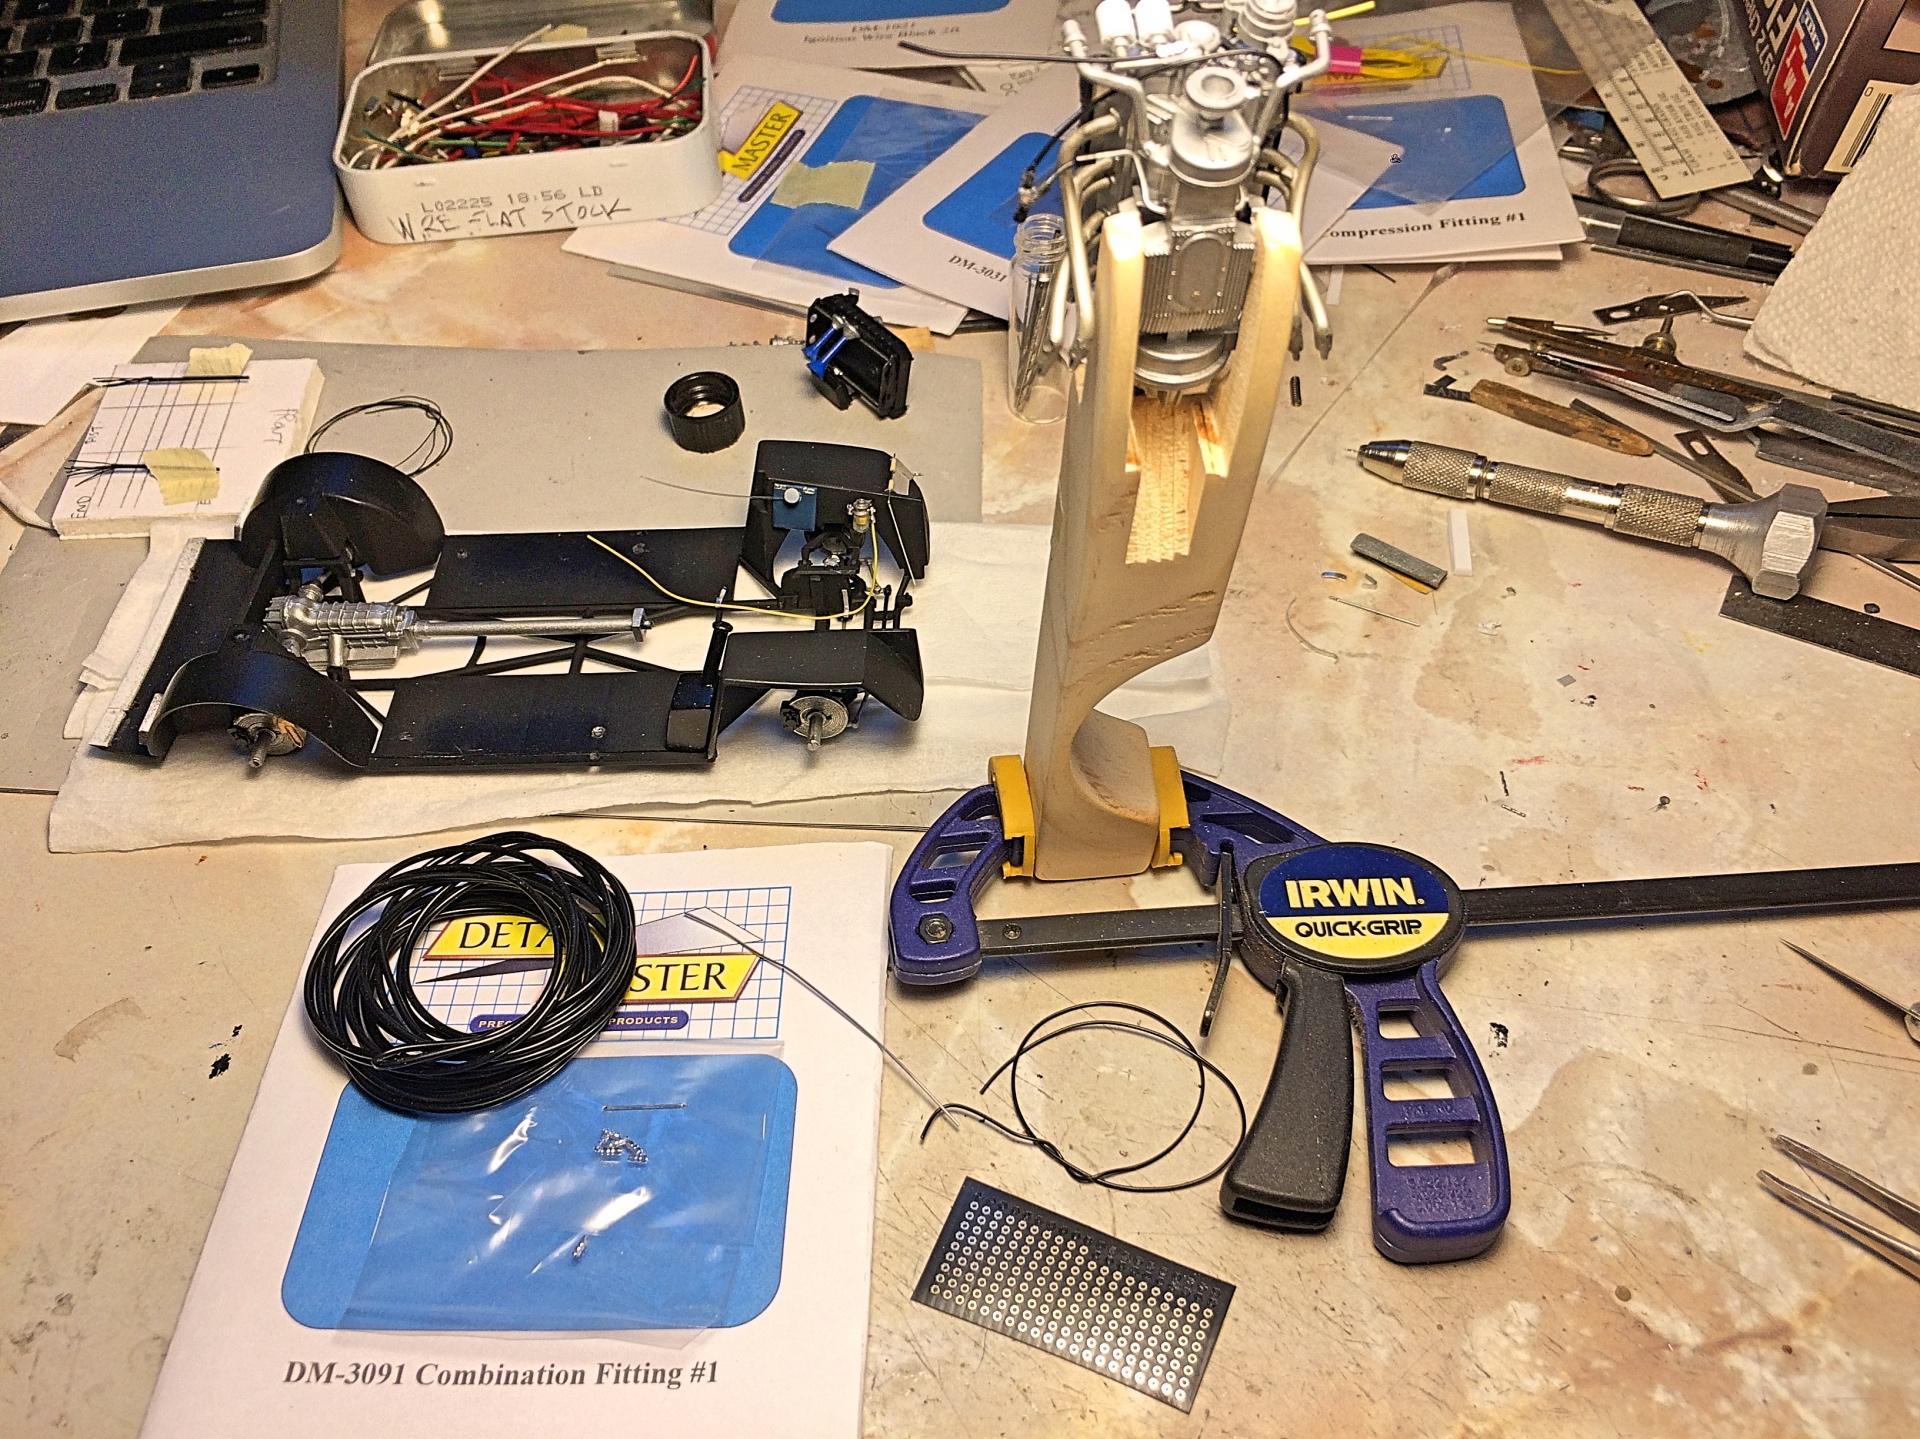
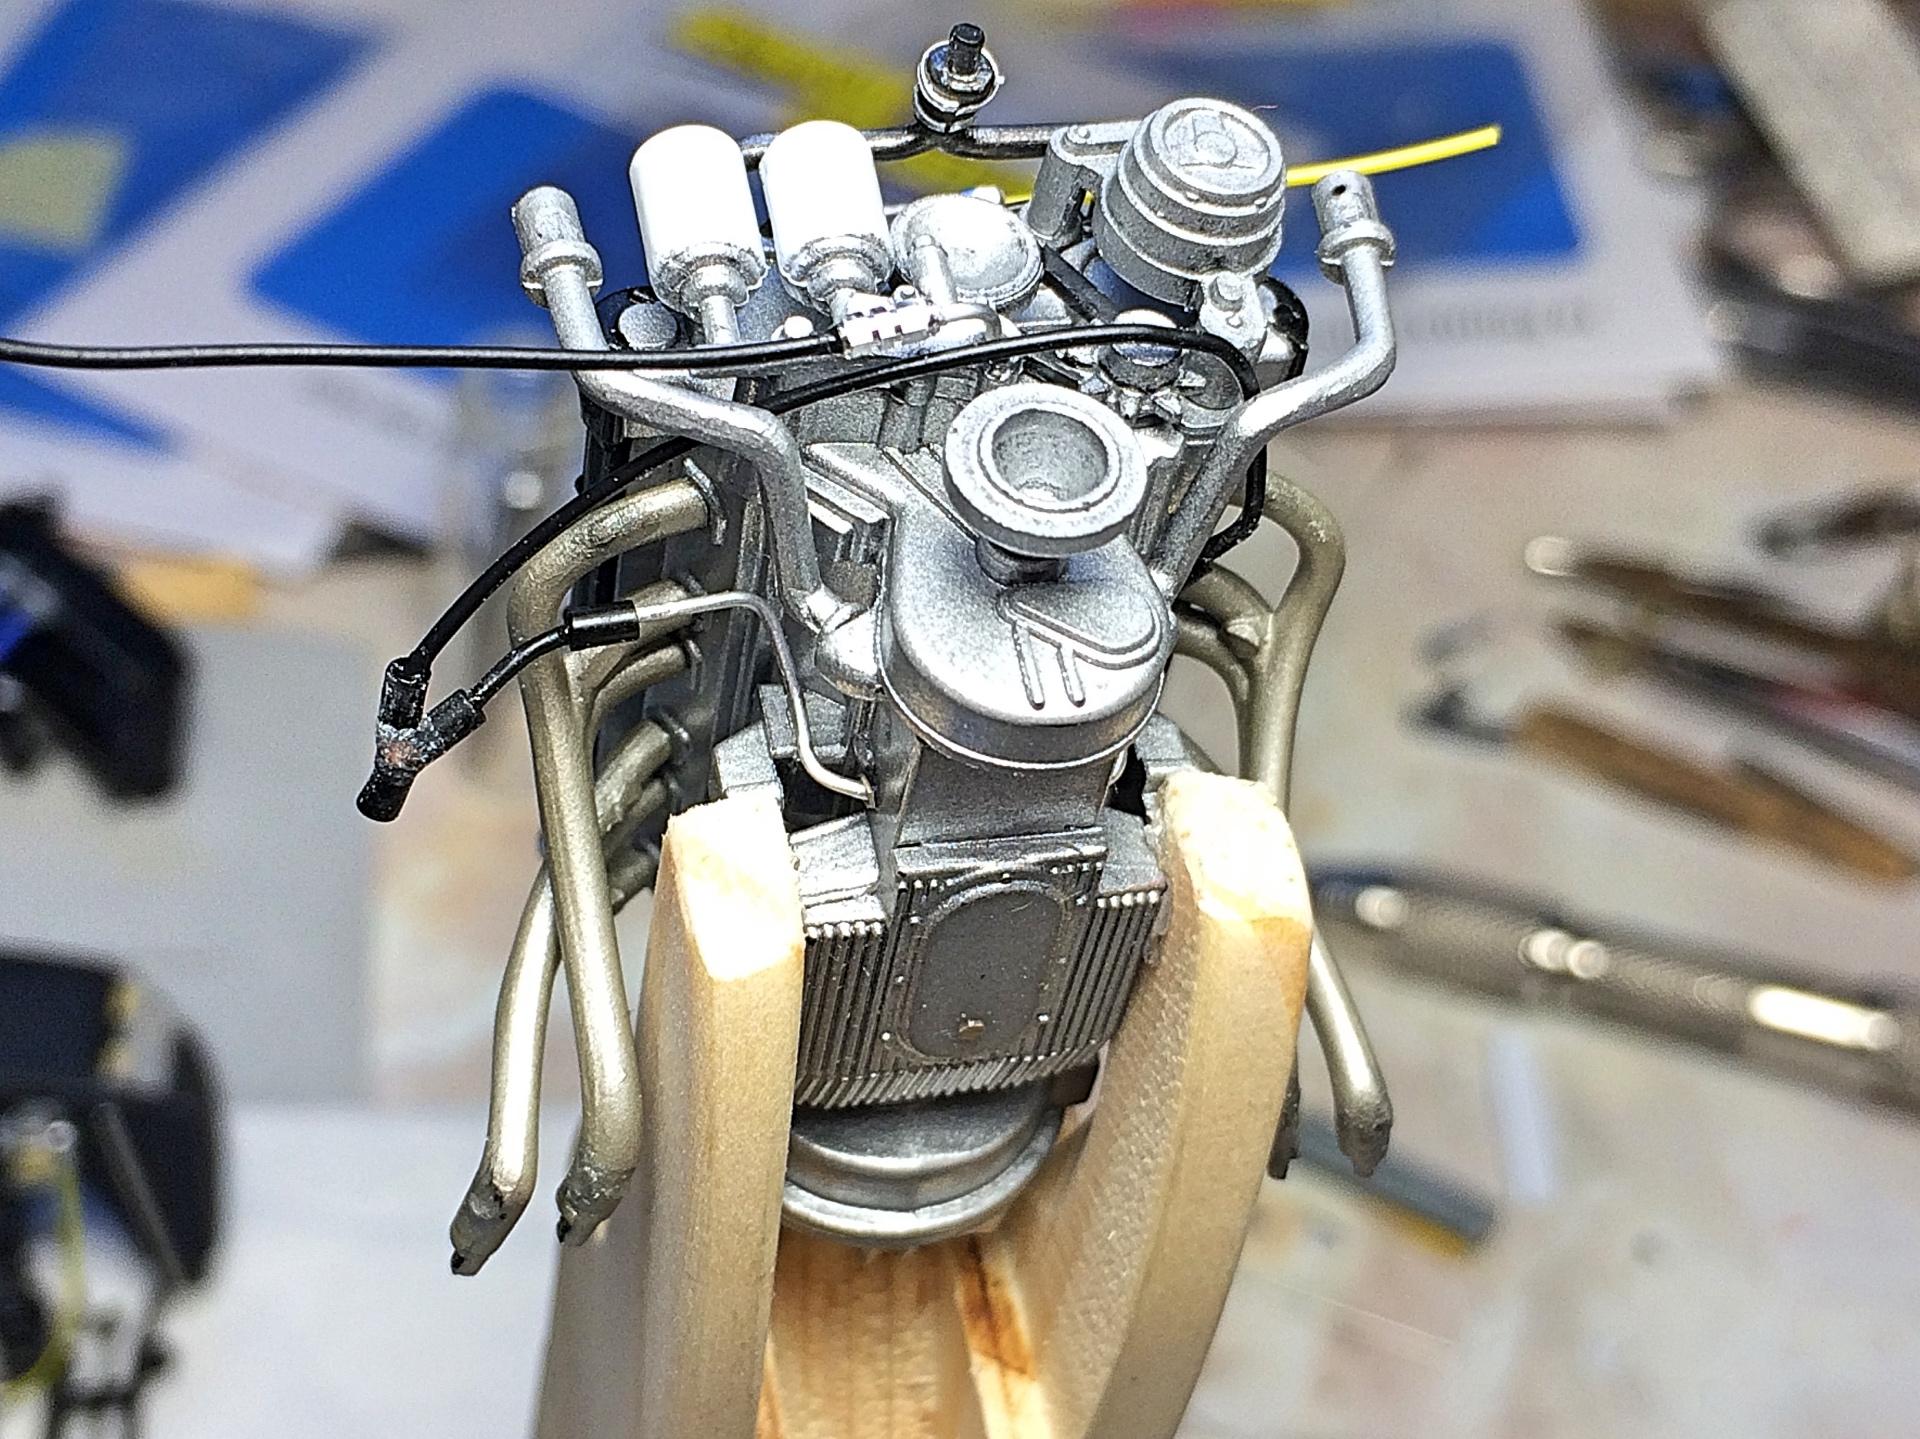
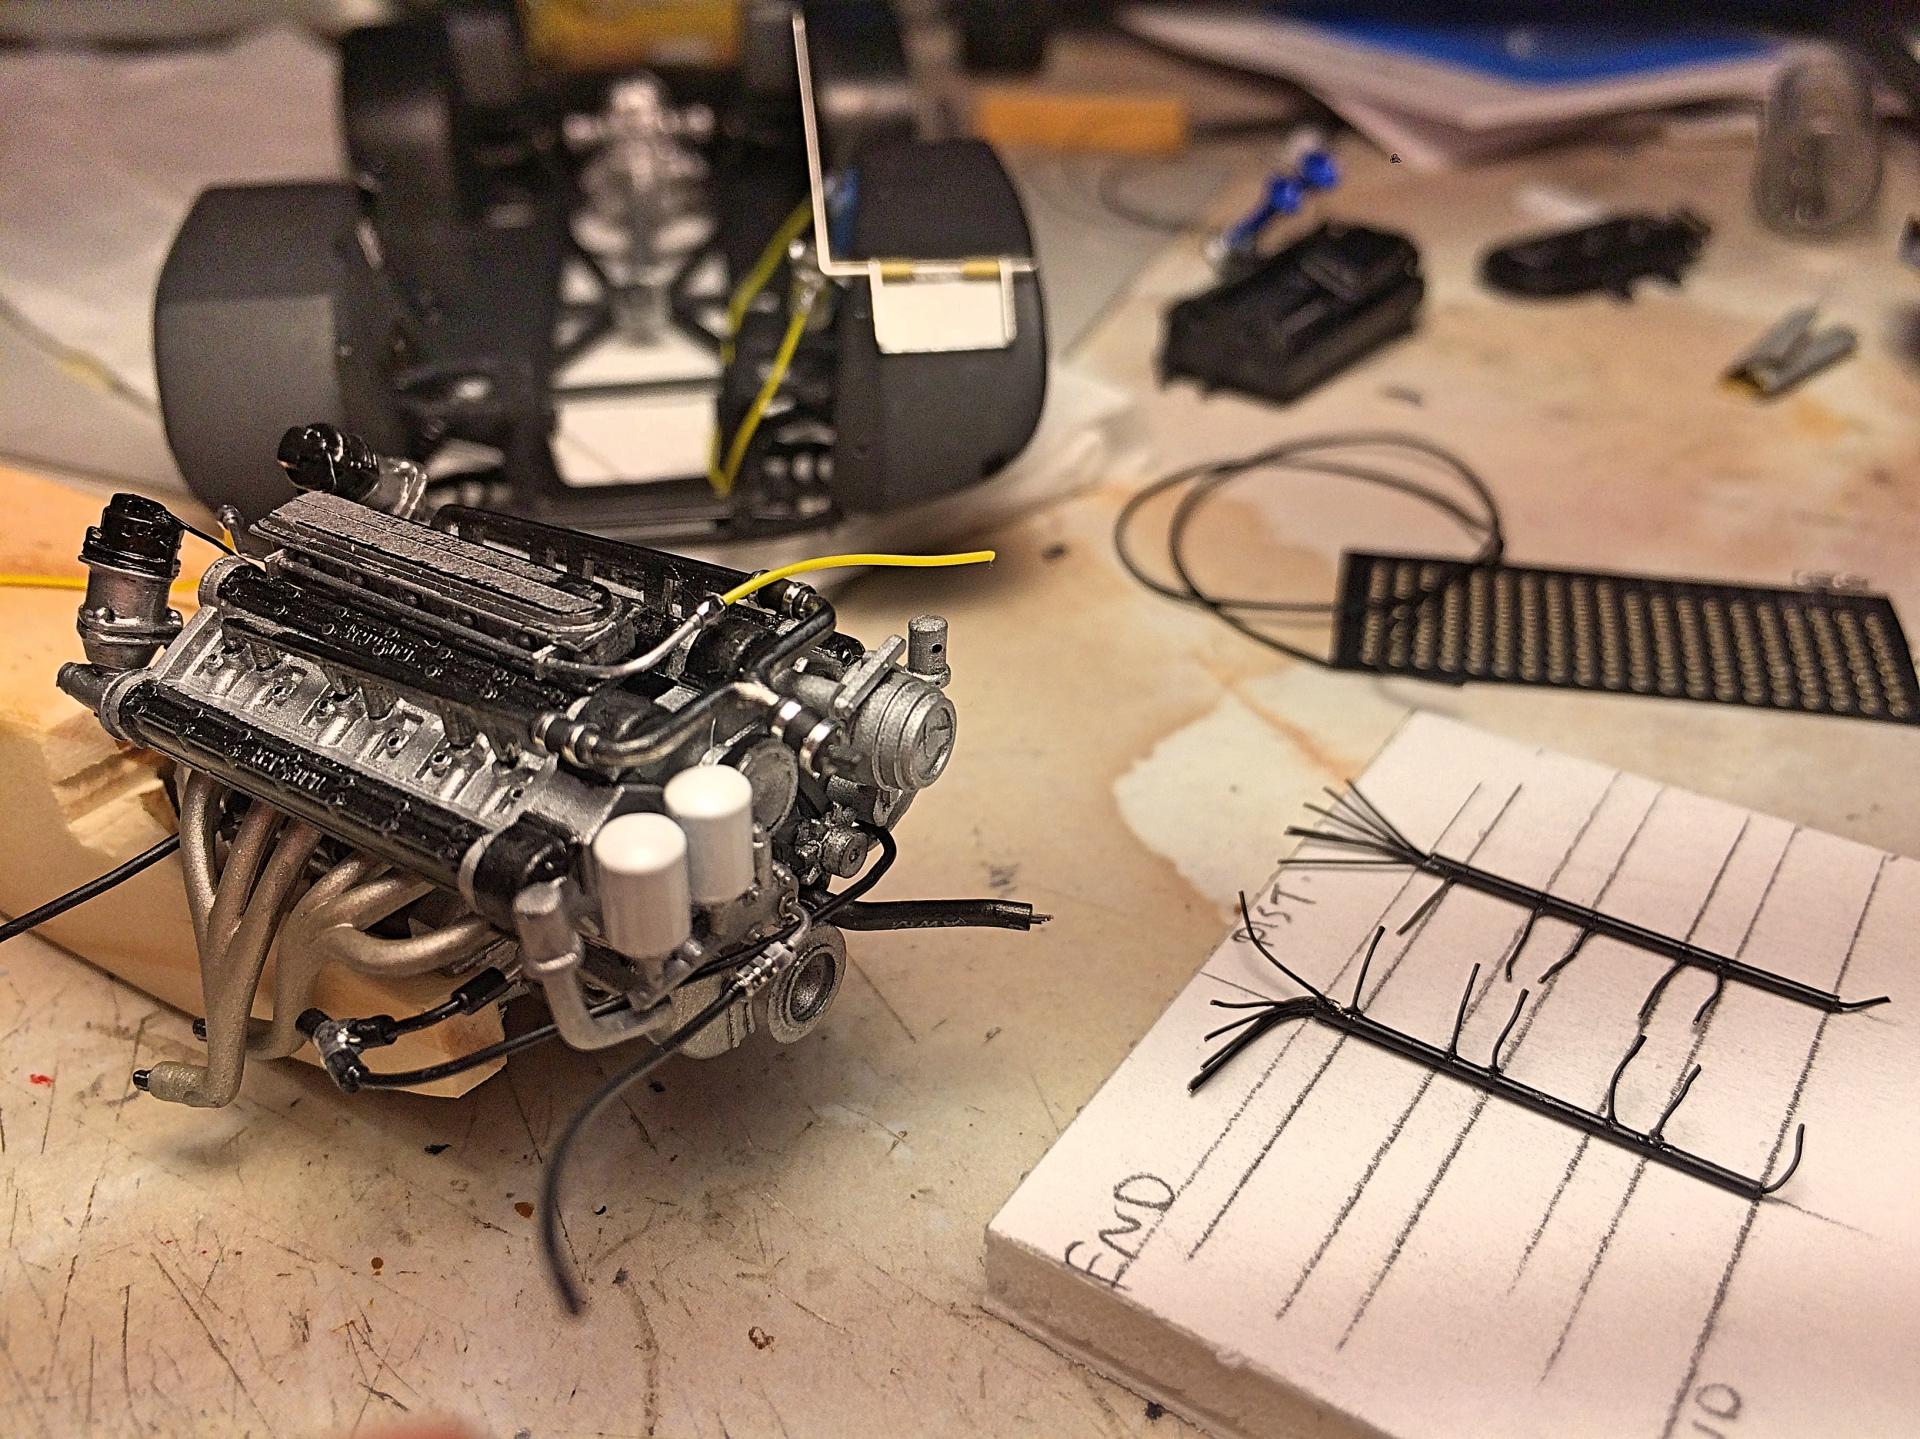
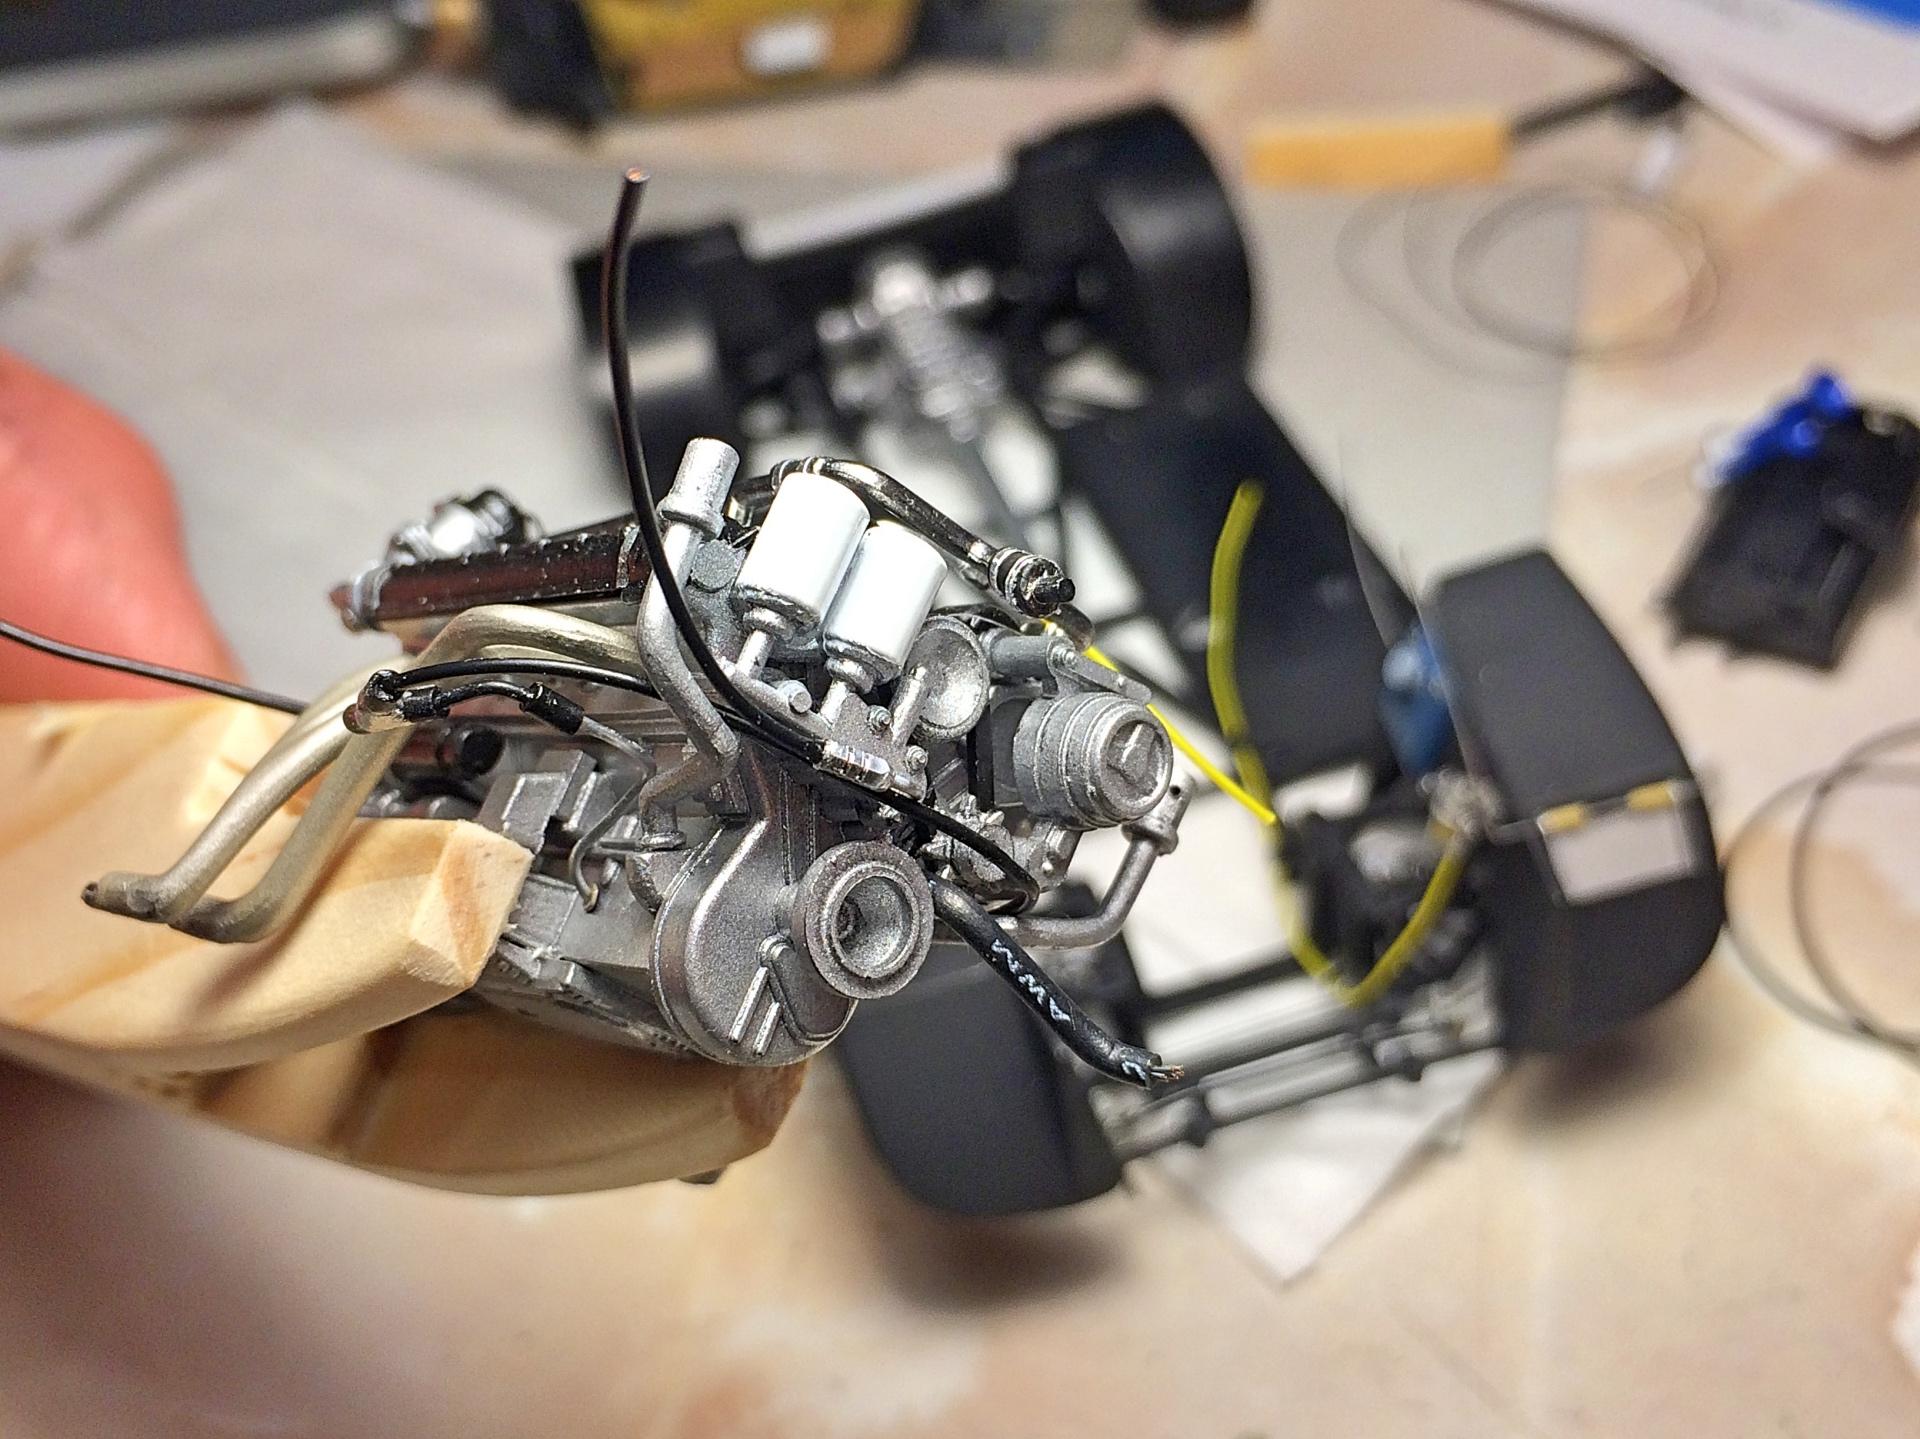
I am certified looney INSANE. ? 52 glue points (4 for the coils). Each time I glued an end, must have taken 10 minutes. Wasn't working to just glue the wire end to the 'tube' loom, so smashed the end with pliers to get some surface area. Had oversized spark plug holes, but still needed to start at one end and get two glued in, then the other side, then back and forth one at a time, then re-glue what I broke off, then re-drill holes when they came out, then around the merry go round. At the distributor end, wrapped fine wire around the bunch of wires, and added superglue. The distributors were just as much of a pain, could have used just a little longer wire, so am sloppy on a few connections. Even with the holder, rubbed off the coolant paint, so that's now ugly Testors steel. Installed the engine, and got everything hooked up. Here are most of the detail parts used: Like plug wires weren't enough to drive me crazy, also have oil lines, I'm sure it's not accurate, but have a loop from pump on the engine front, to the cooler, then to the dry sump tank, then to the pan with a split (I don't even know which direction of flow ?). Have slightly smaller lines from the draft tubes to the sump tank. Fuel lines are run, have aluminum clamps. Battery cables added, positive to the starter, red negative to the frame. Clear stretched sprue for the windshield washer, and the overflow tank. My steering box was squeezed in. The interior tub is now permanently glued in. Ok, see how it looks in the body..... oh rats, horns and hinge are conflicting. Had to see how the other parts look. Looking pretty sexy! ? And I'm really INSANE!
-
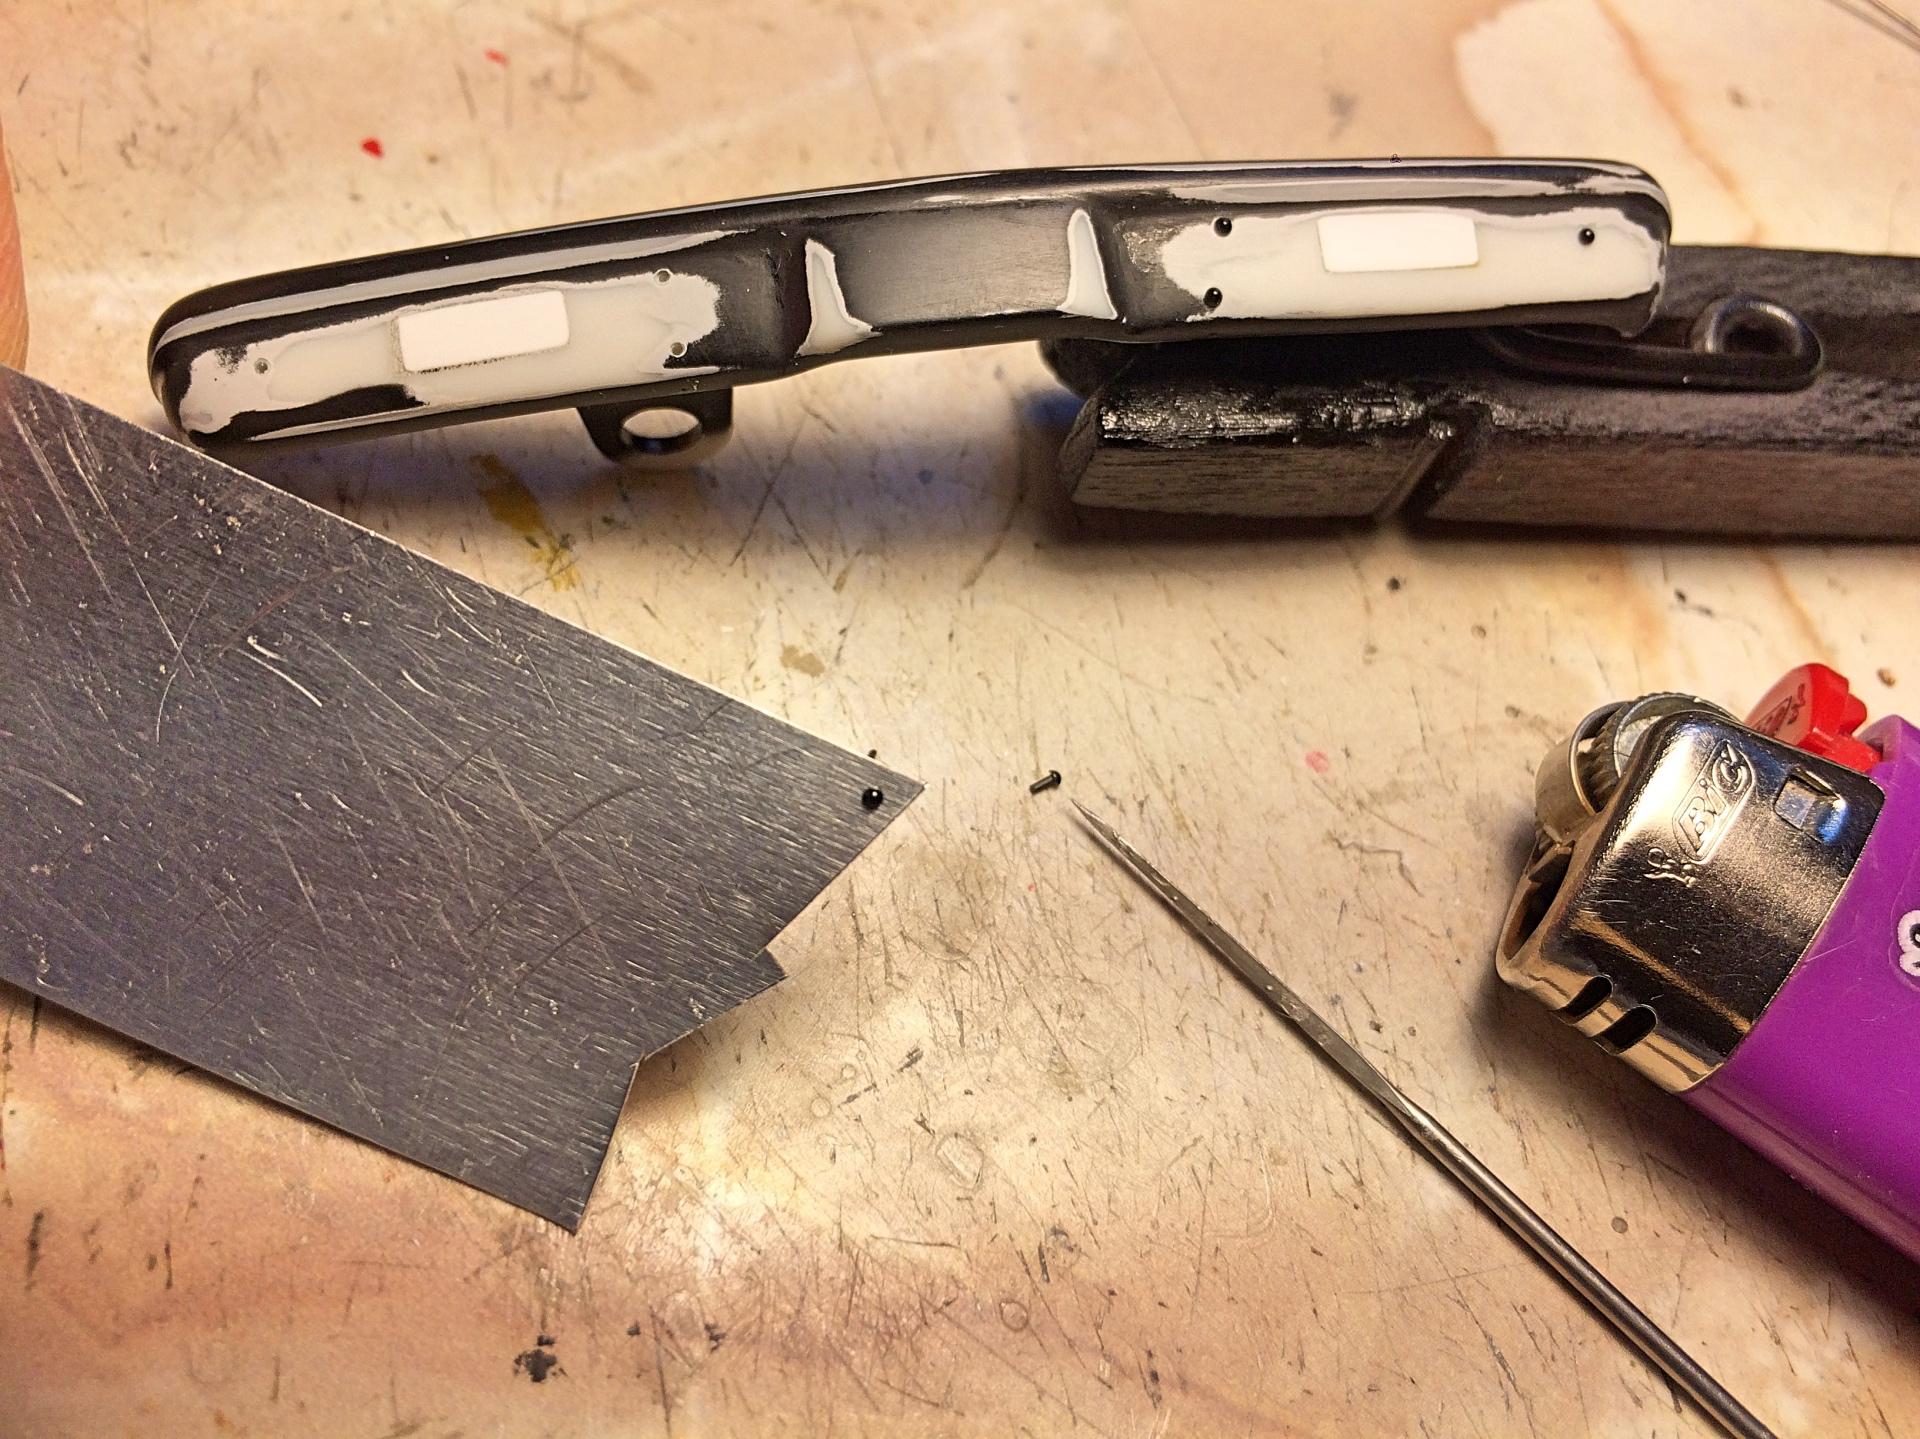
I've never known you could be speechless. ? All I did, was make rivets. Since the bumper has been giving me fits, been sanding so much that I decided just to take the rivets off. Then drilled holes, one in the aluminum plate. Stretched sprue put in the hole, extended exactly 1.0 mm, then melted with the lighter.
-
Site Can't Be Reached
89AKurt replied to BigTallDad's topic in Forum News and Questions (formerly: How To Use This Board)
Took over a dozen attempts tonight. -
weasel hunting targets
-
Site Can't Be Reached
89AKurt replied to BigTallDad's topic in Forum News and Questions (formerly: How To Use This Board)
I was having this problem too, using the bookmark icon on my Safari home page! It's a conspiracy...... ? -
Thanks for looking and commenting! ?
-
Took only a half century for me to figure out! With the aluminizer type of paint, it's a requirement. I'm still rubbing off the top of the carbs, because I needed to remove and place in the chassis for checking clearance of new parts. Since Tacky glue was used, it's working great for this. I acquired one of those Bugattis from an estate. It's a really nice kit, even had simulated leather for the spare. I was really tempted to think about building, but decided the other 100 projects were enough. Today will be the test of patience. The loom reminds me of the cadaver display of the human circulatory system.
-
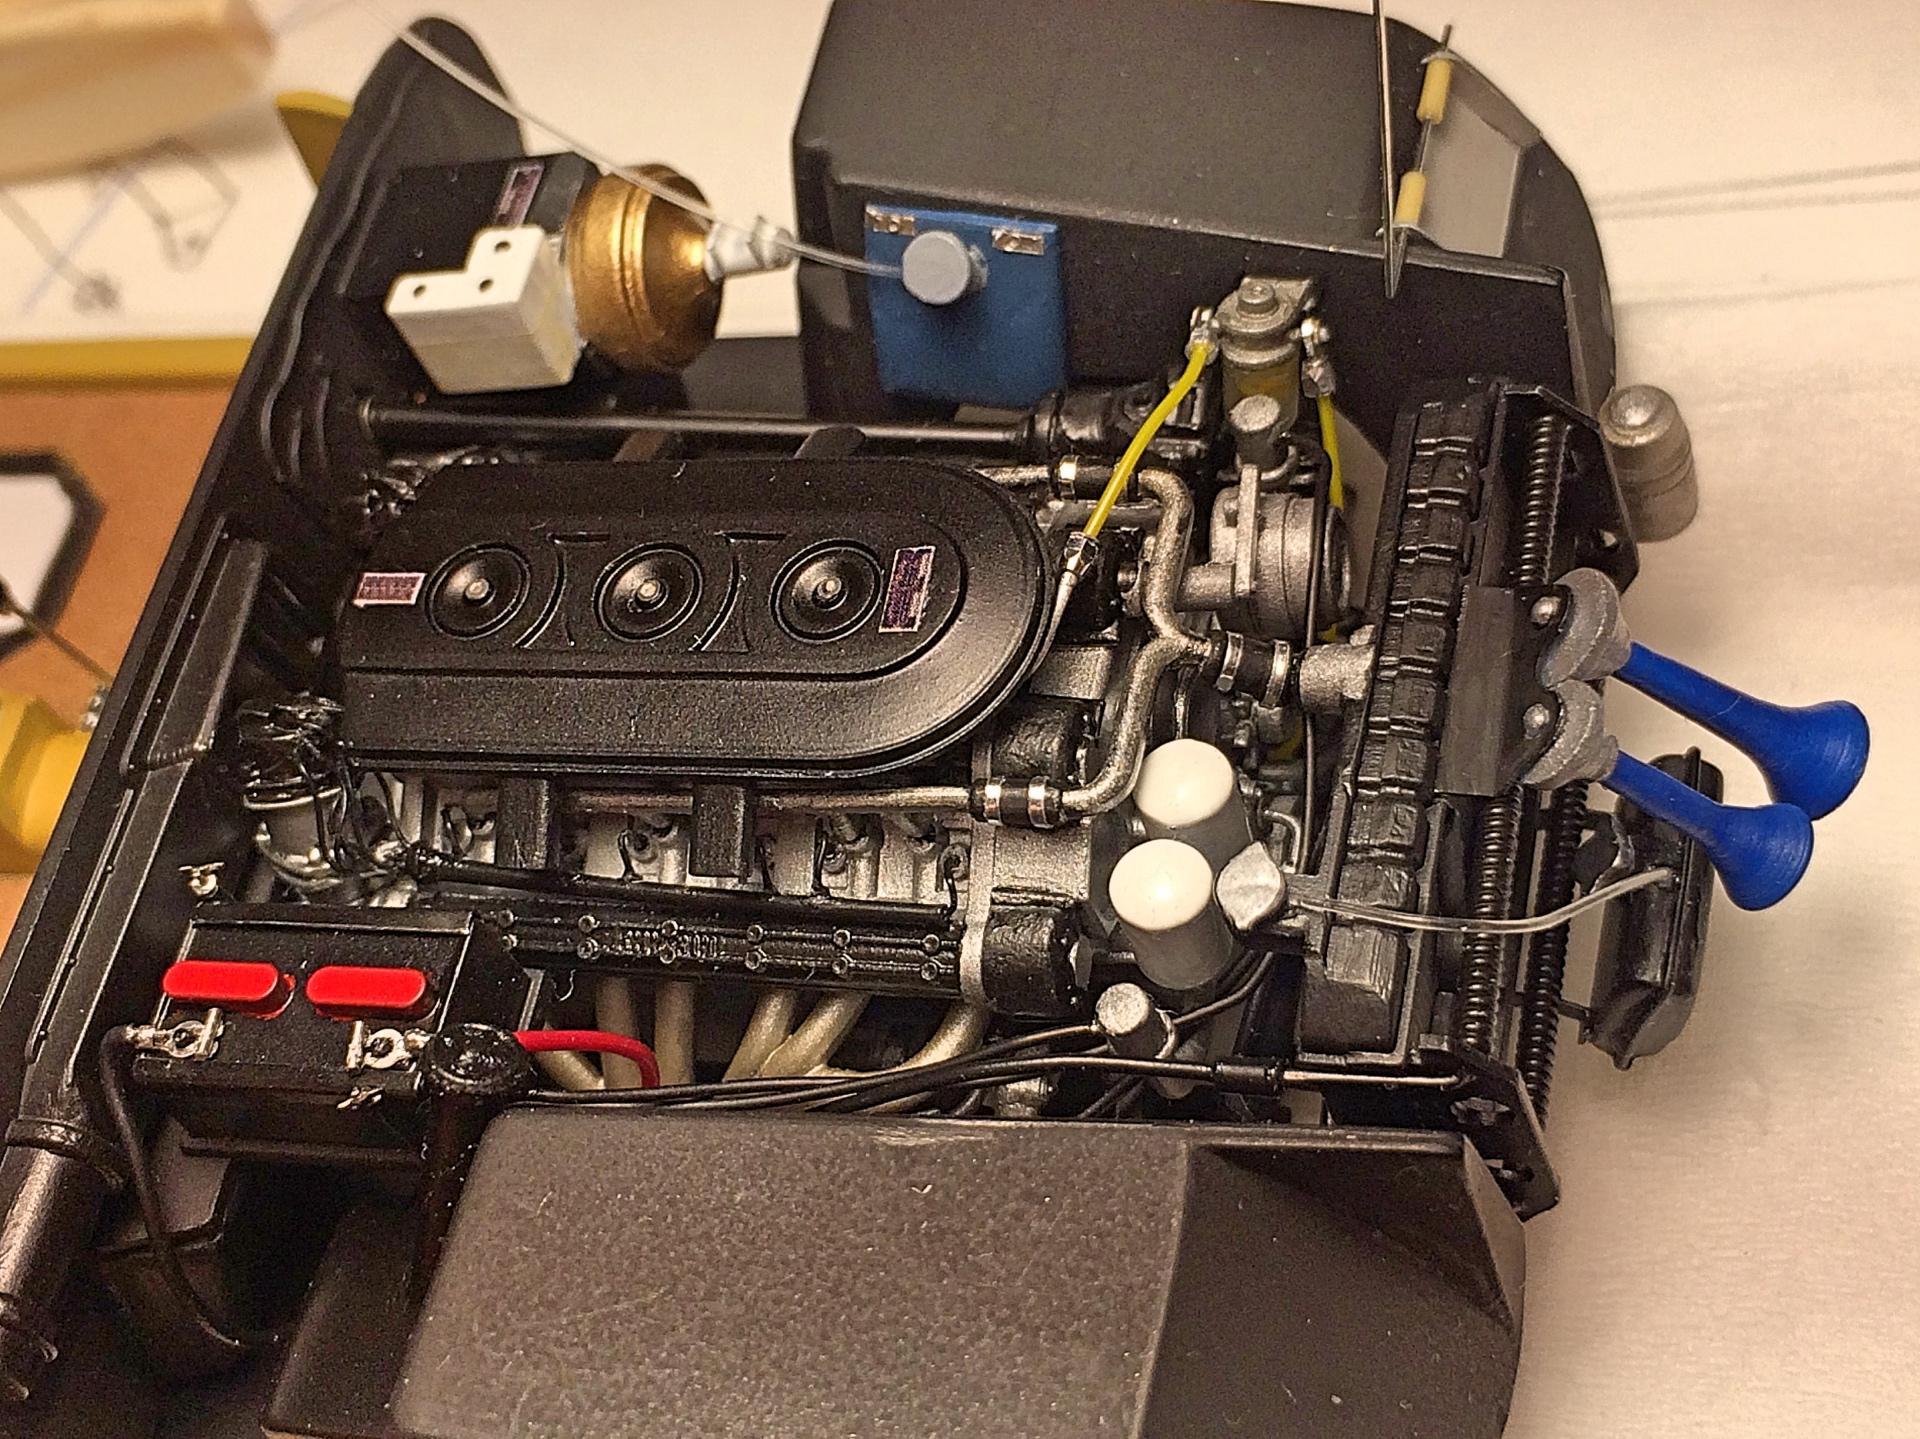
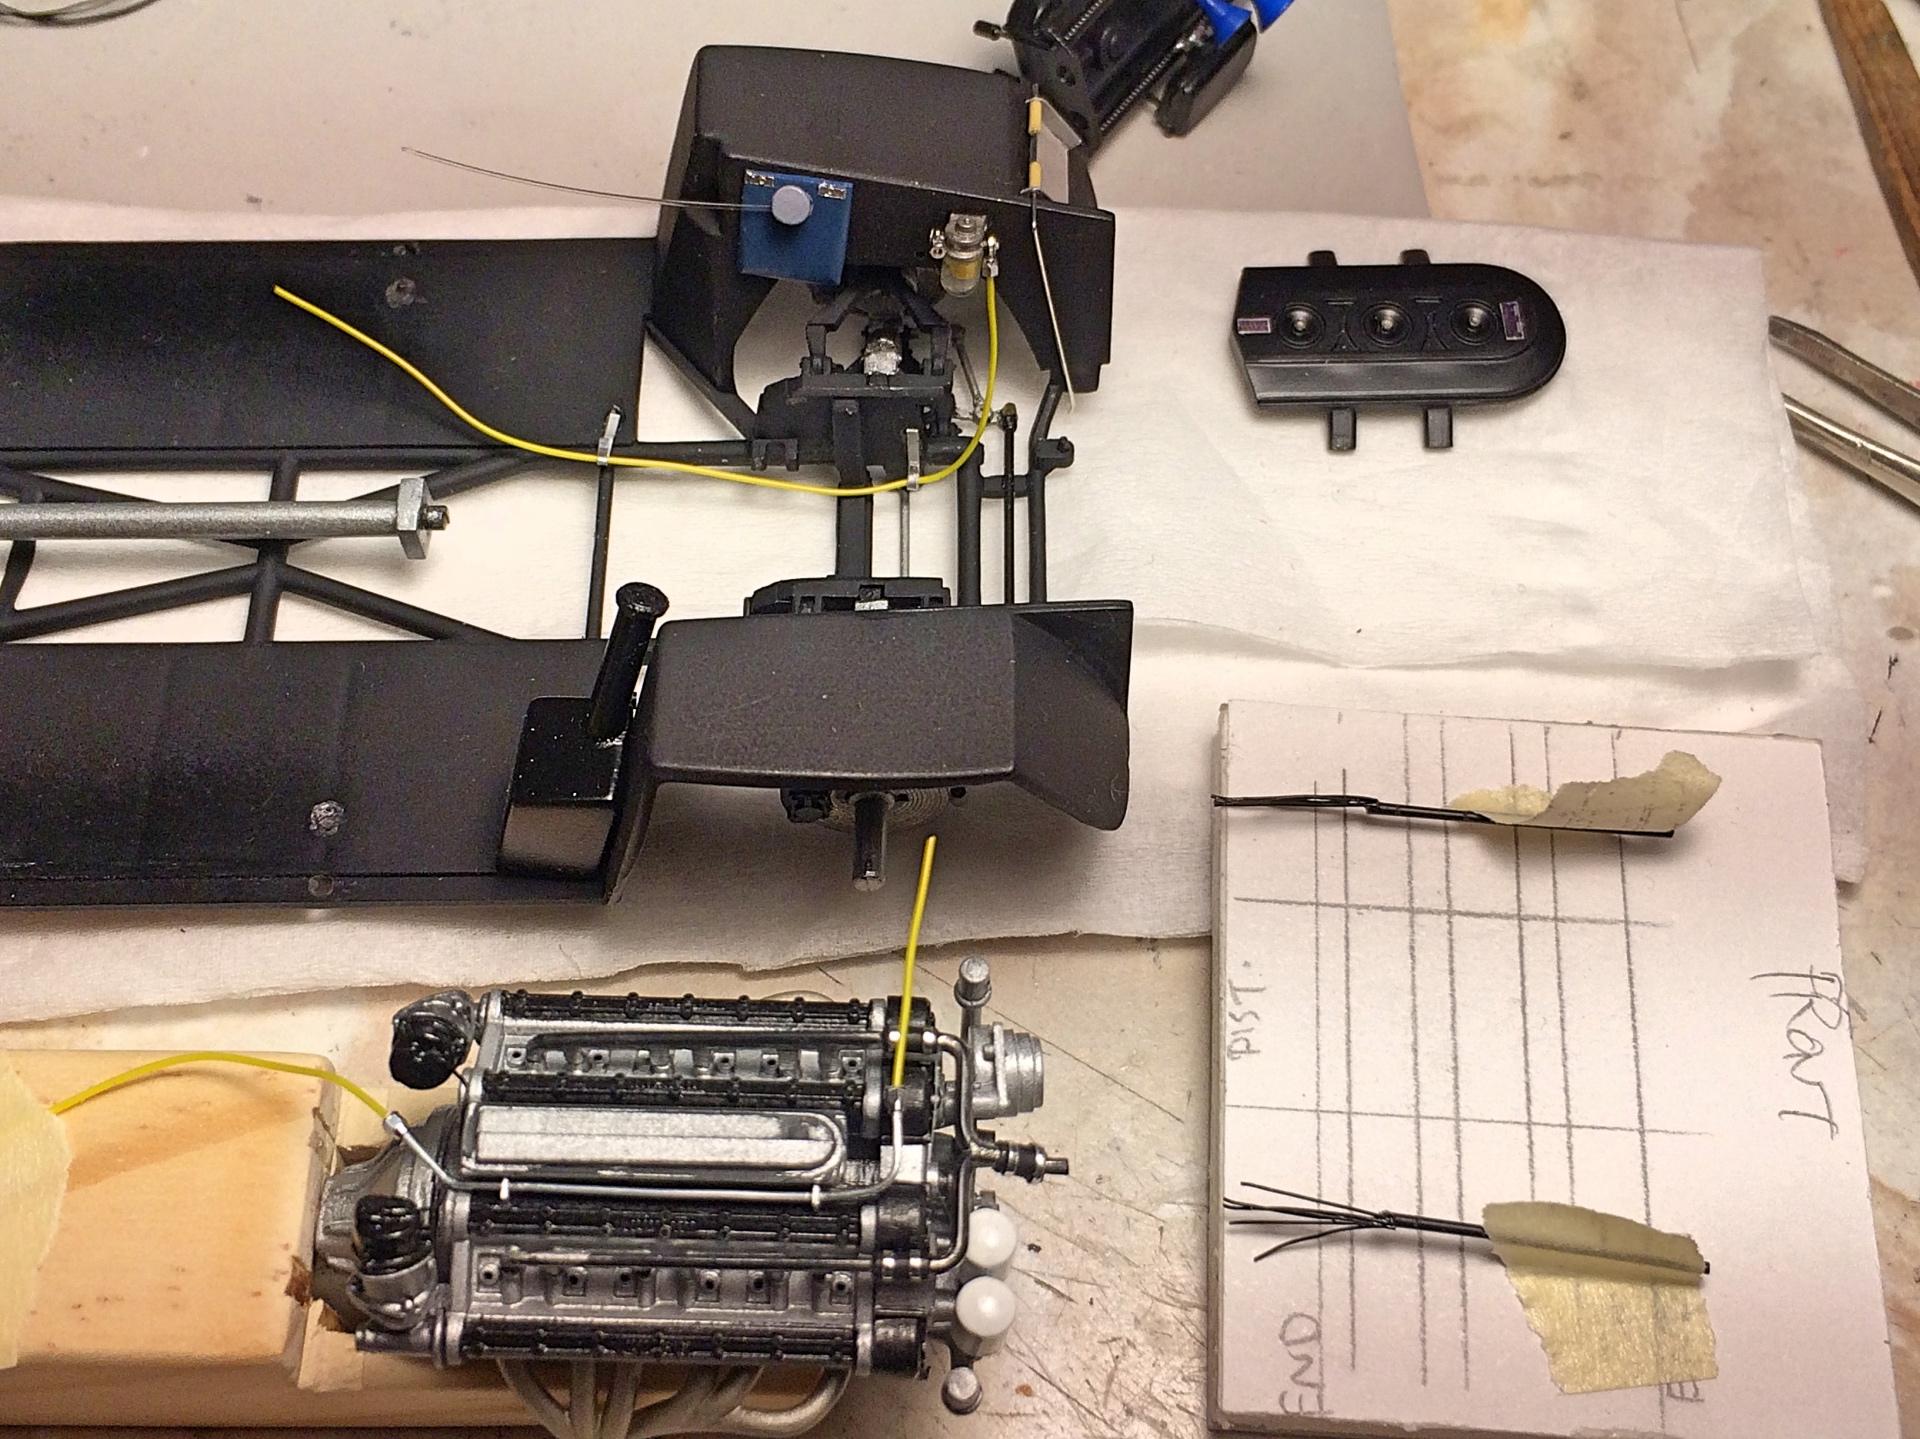
Great, everyone wants to help, drive me nuts. ? I was thinking of doing a Bugatti Veyron, W16, 4 turbos, can't be that much more complicated. ? Trying! ? Worked on oil lines and plug wires. Used some Detail Master fittings, Tamiya hose, misc. wire. Needed to cut back the engine "stand", so the oil lines coming out the pan could be done. Hard to tell that I did anything....
-
I want patience, and I want it NOW!!!!! ? Thank you. Good to know about the Novus.
-
? Yea, and a Jeep style bumper, and mud flaps, and a trailer hitch, and ..... ? Paris-Dakar Ferrari N.A.R.T. (North Africa Racing Team).
-
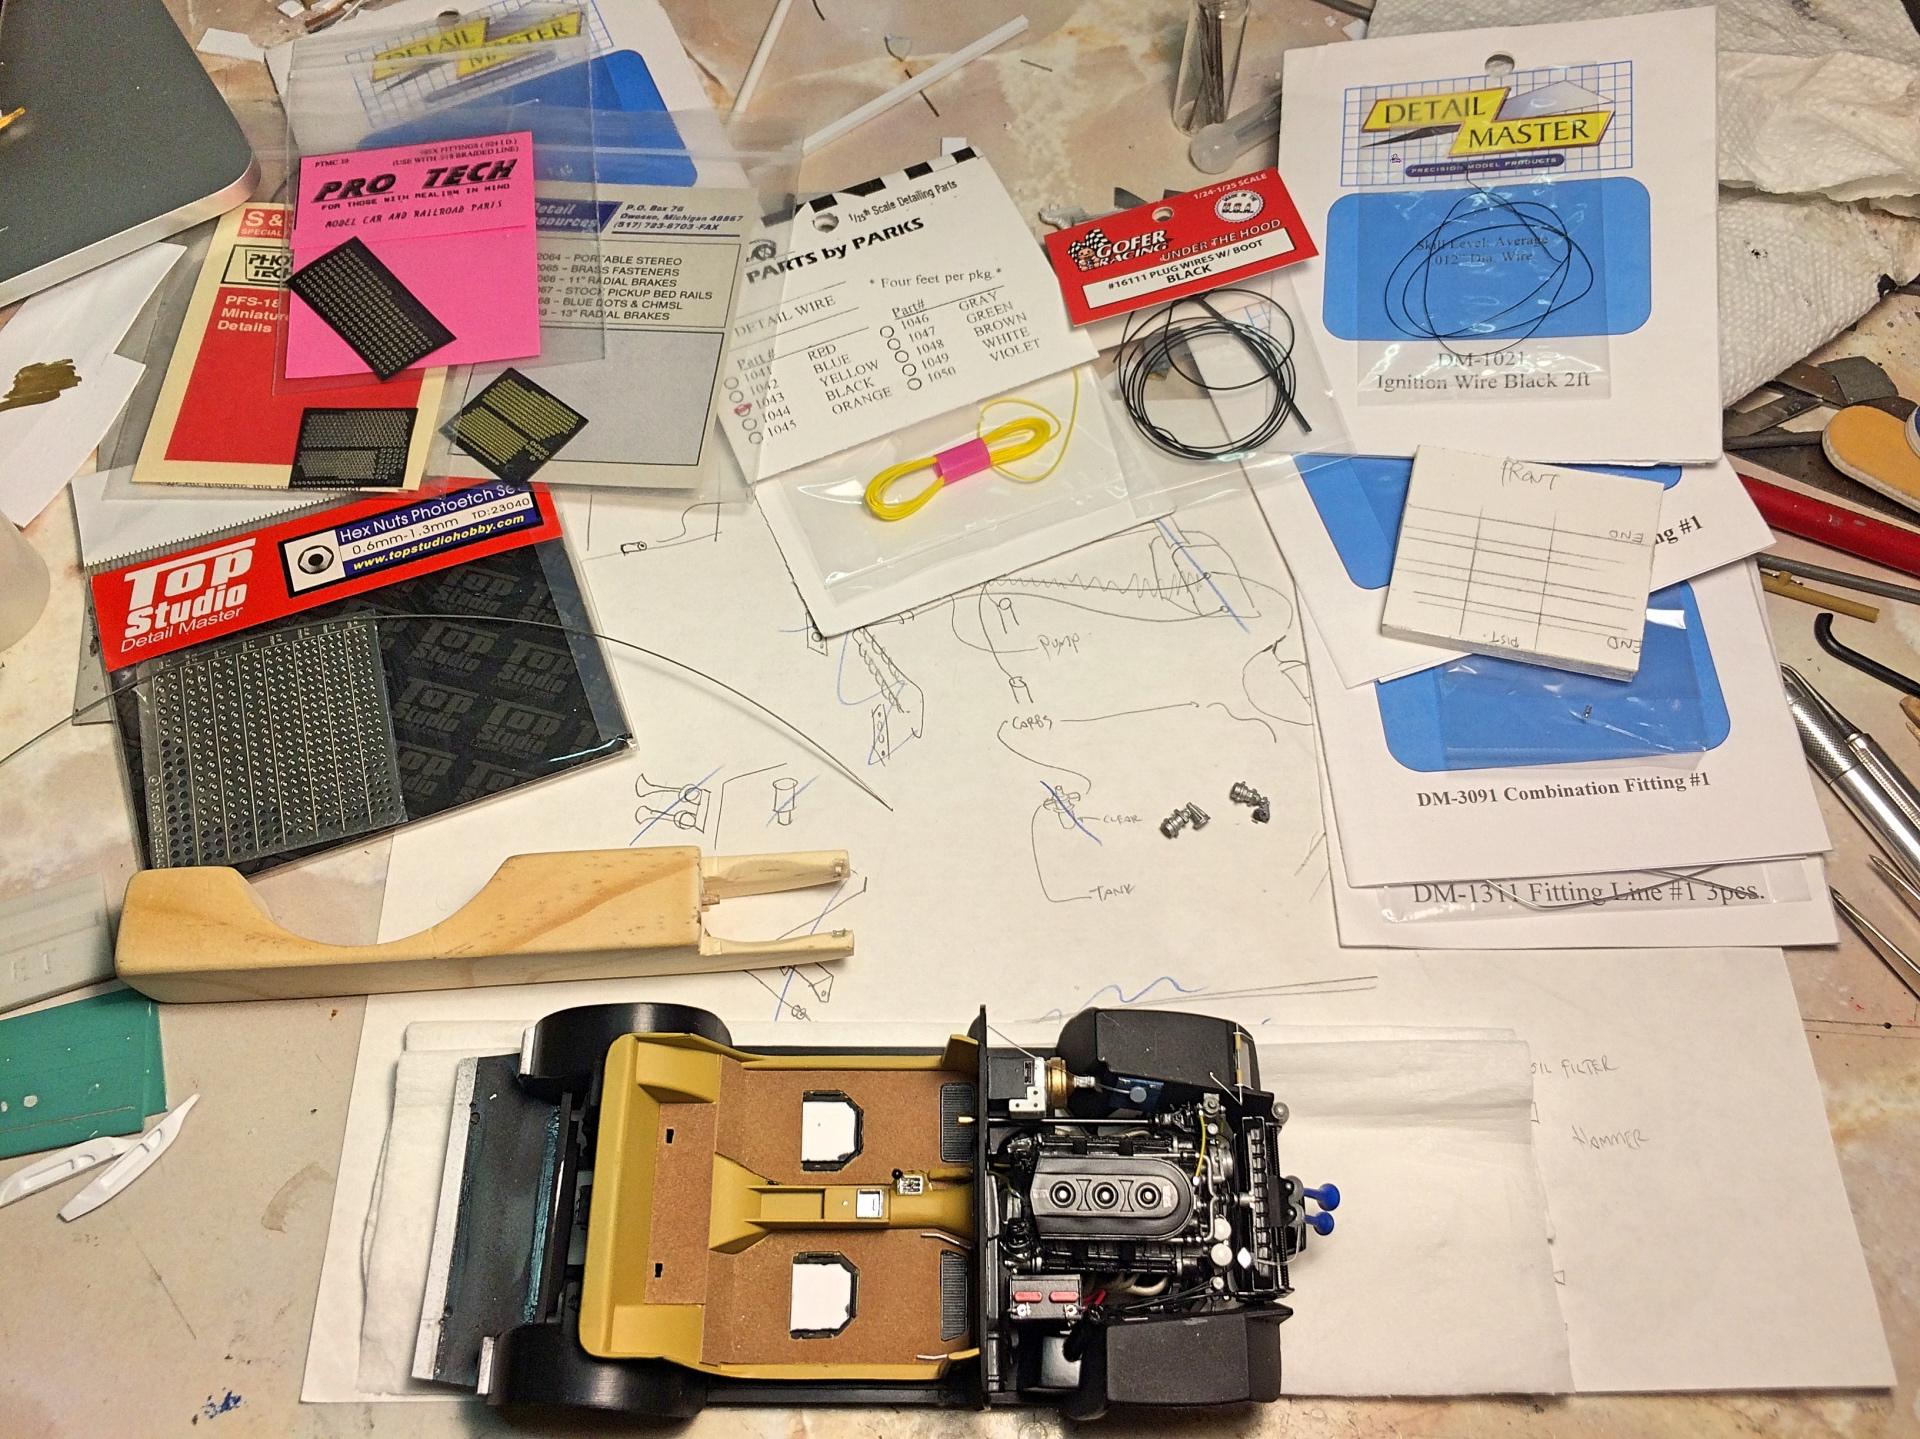
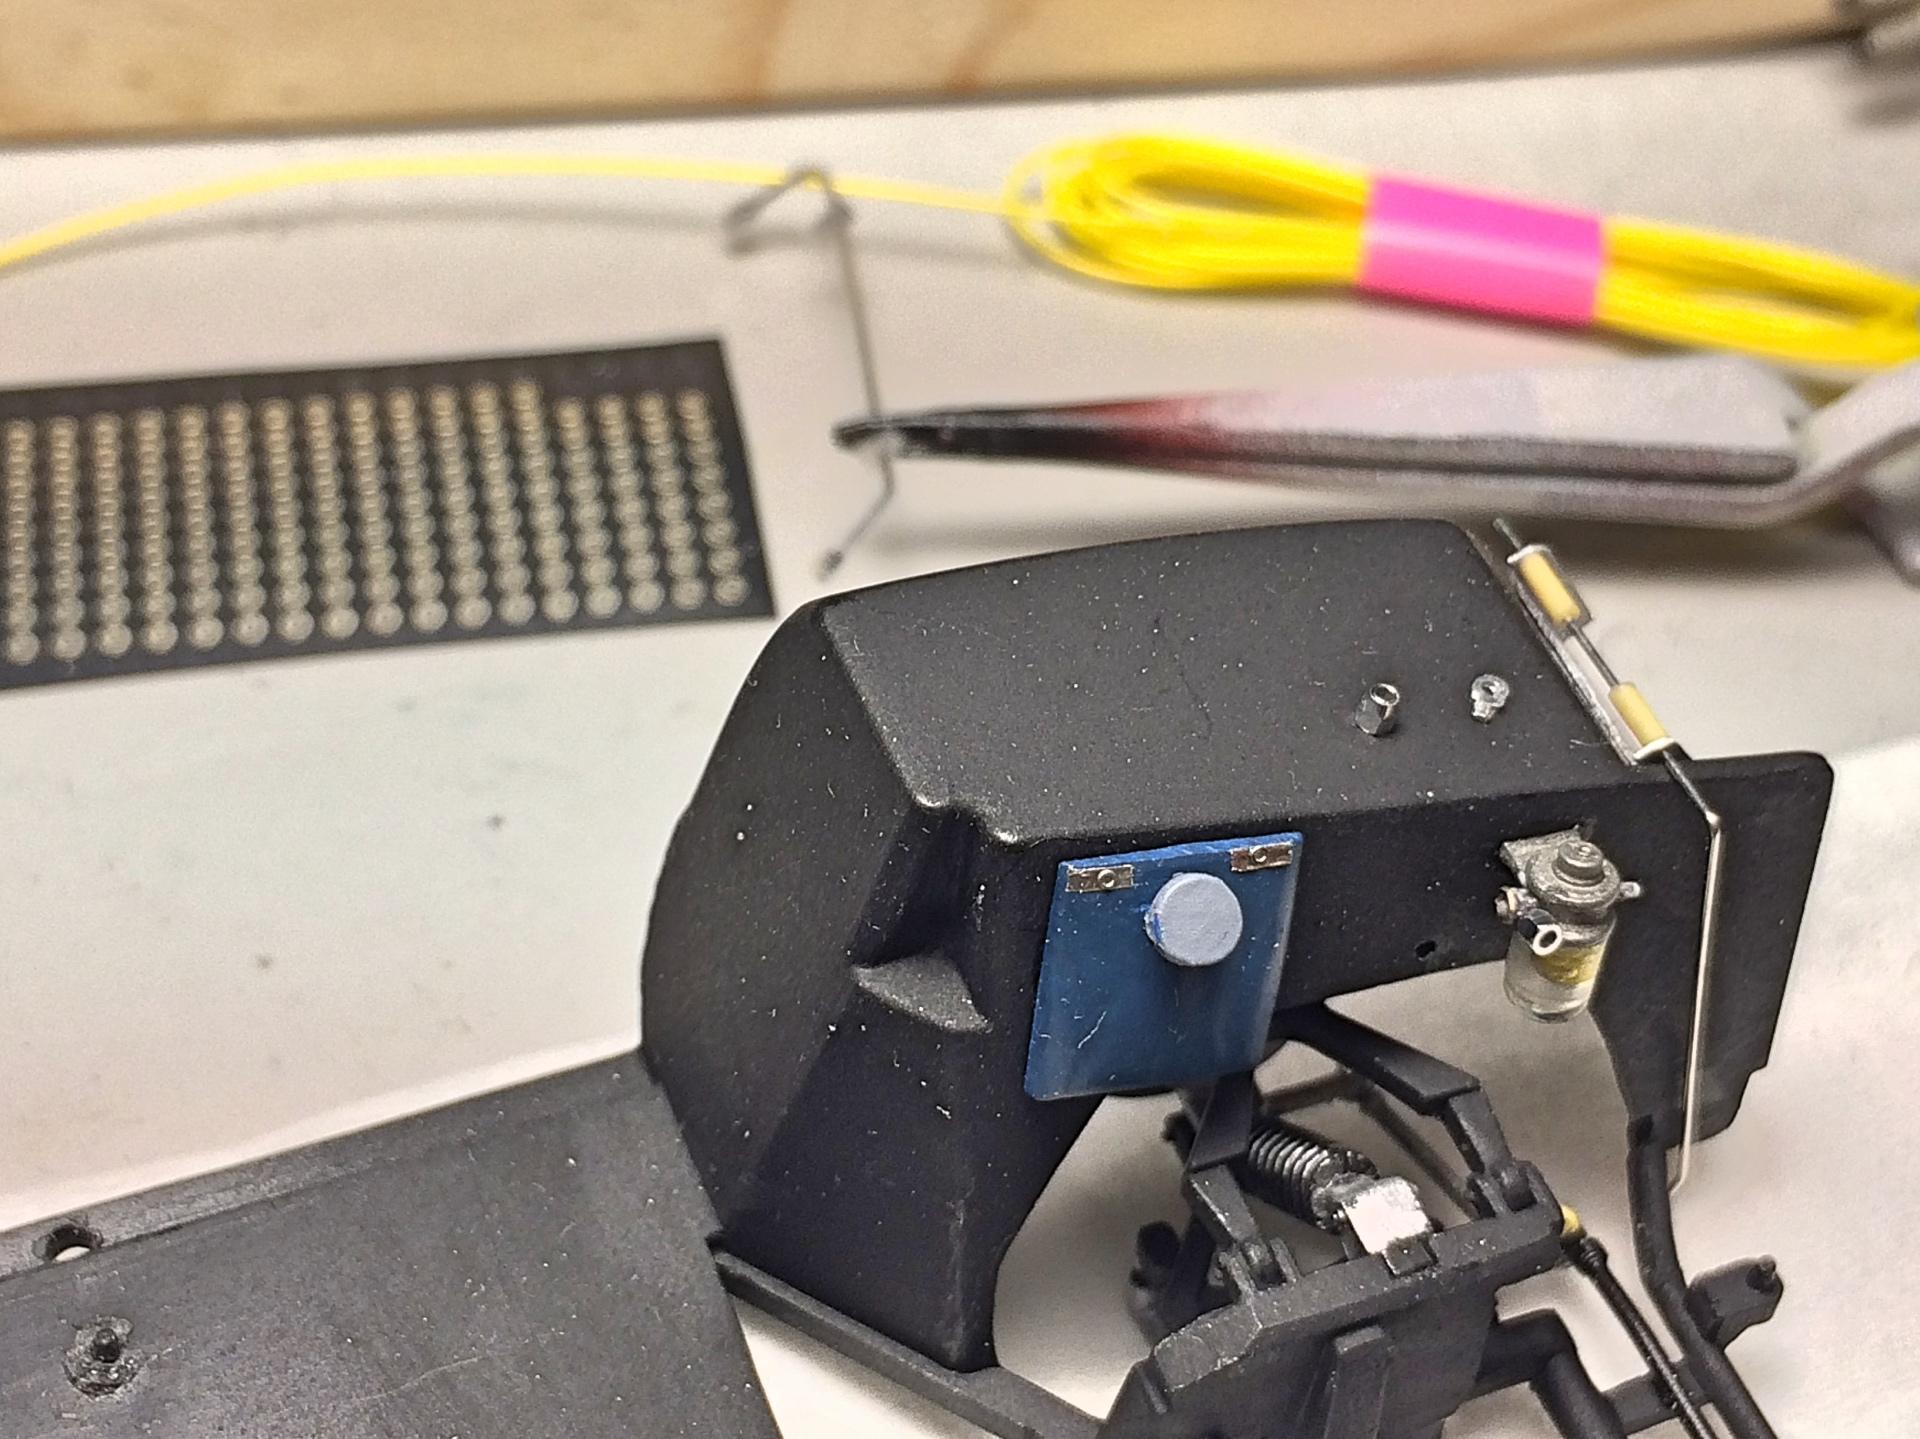
Thanks for the tip! I have a 246GTS in my stash, just in case. And thank you! Received wire and Detail Master goodies today, so started on the engine bay rats nest. Made the fittings that go on the fuel pump, with DM nut, you can barely see the second on on the fender. Since the air cleaner covers so much of the engine, was not too worried about carb details, but the yellow fuel line is an obvious feature. Adding aluminum wire/hose support clamps. Started the wire loom, what a PITA that is.
-
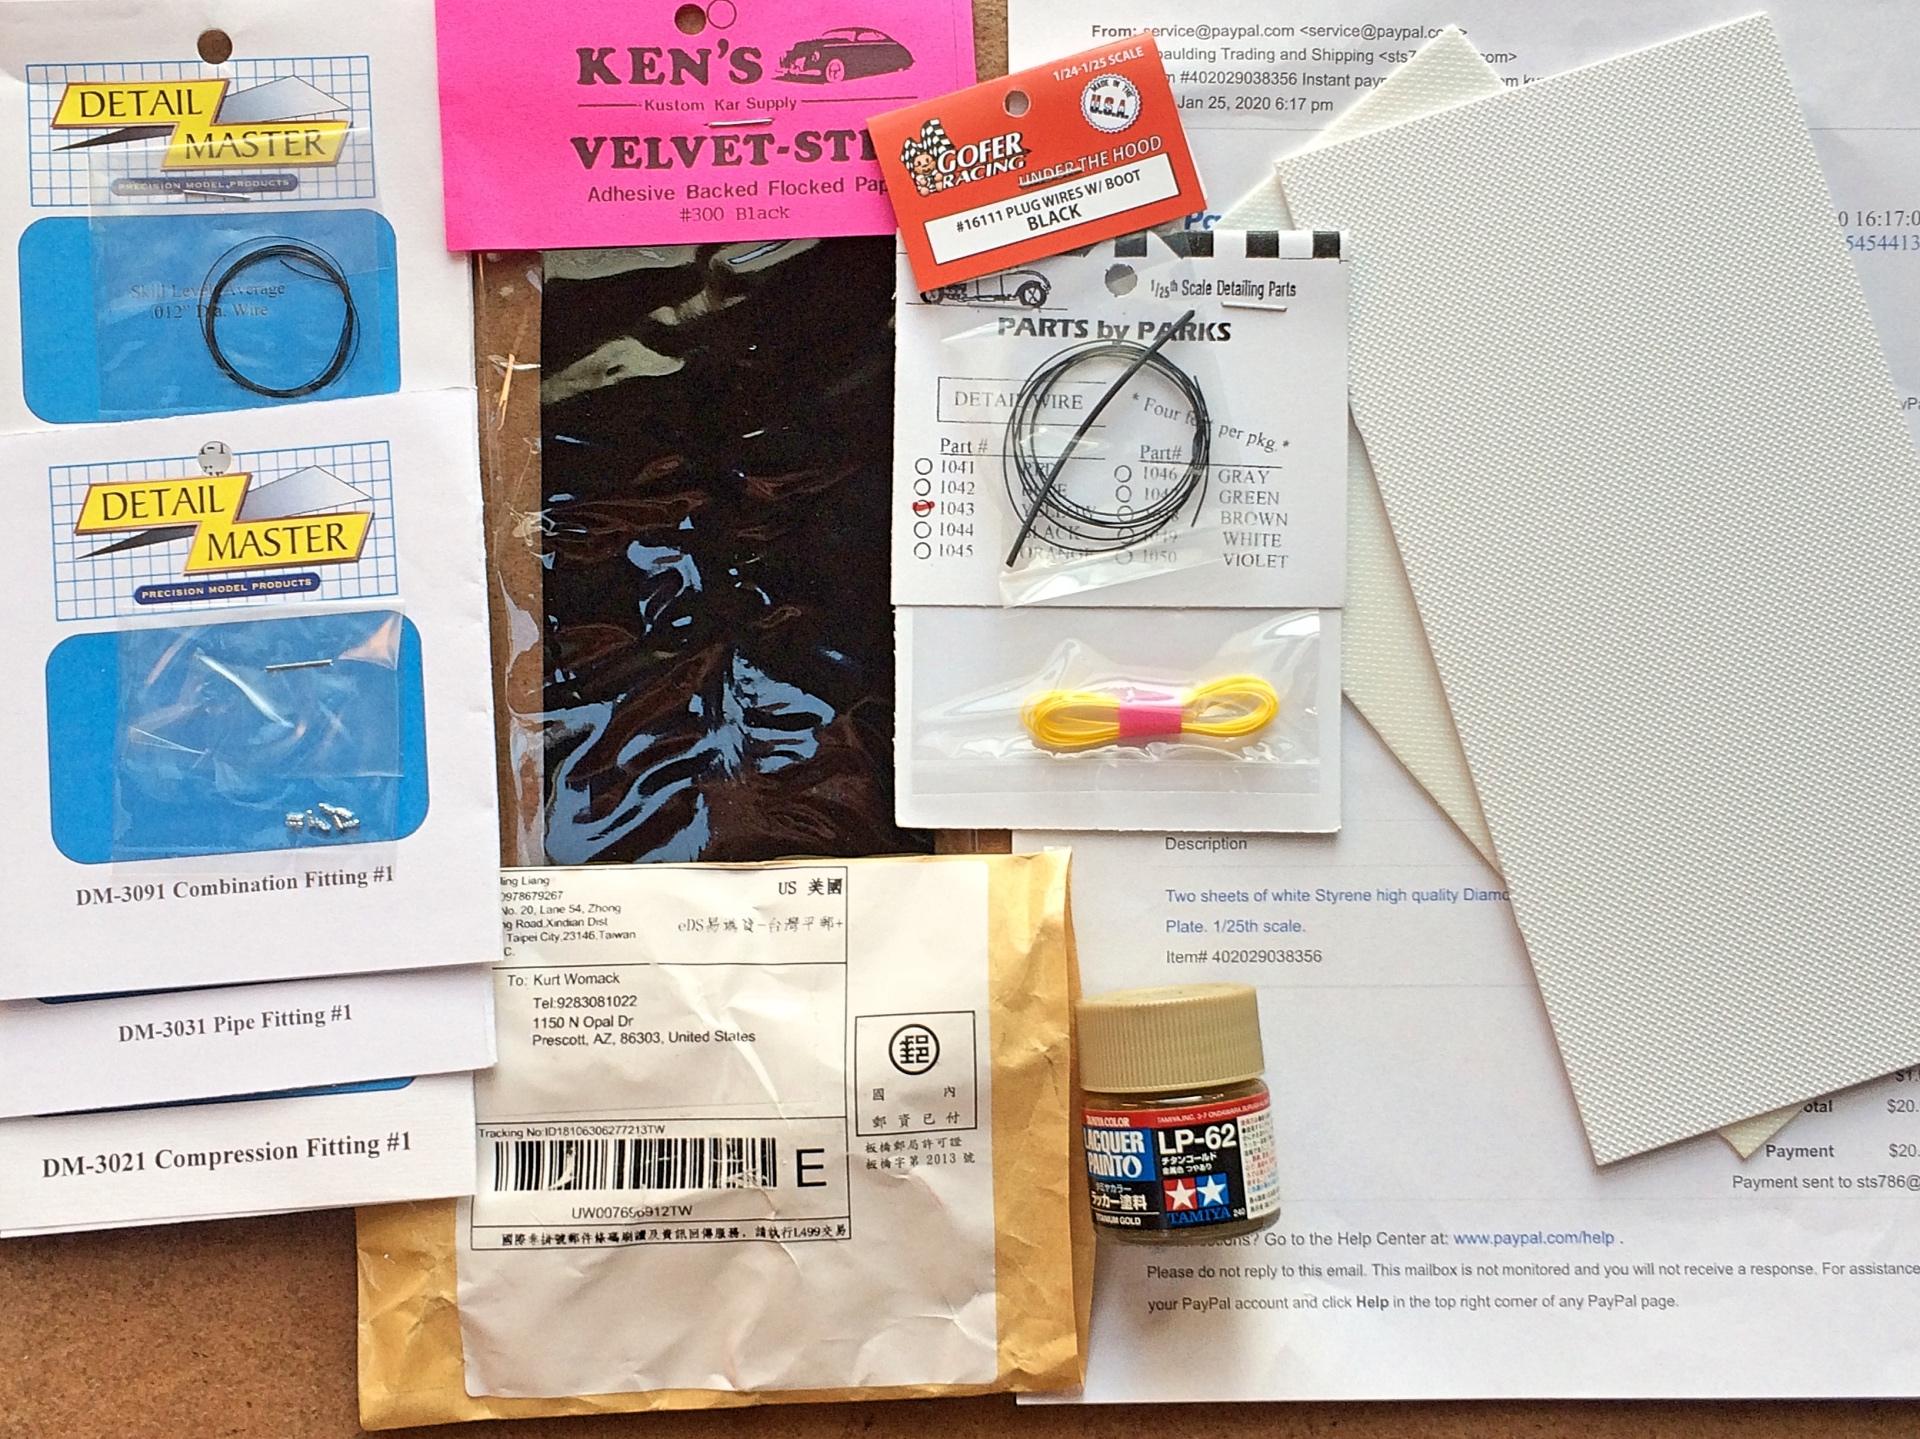
Sounds like a long time, but let's see how it compares to how long it takes for you to build .... both of them. ? I'm just amazed how much stuff we can get from around the world, such as Russia, that was interesting to see tracking to the border, then the wait for a few weeks. I just got something from Taiwan. I'm more excited about getting detail parts anymore, than kits. Friends locally have been able to order at distributor prices and pass on to club members, so got wiring from different sources to compare, and of course Detail Master, and wanted to see how Kens carpet compares to Hiroboy that I've been using. Who didn't know Tamiya makes lacquer paint? cheyenne93 led me to the diamond plate sheets, was thinking of running boards on the Ferrari. ?
-
Thanks for telling me that. Your priorities are in line for great Carma, proceed on angle's wings! ?
-
I have that kit and p-e. Great start! Really look forward to your decal work, first what brand are you using, solvent, etc. Don't forget the exhaust tips too. The chassis tub is their "forged carbon", I got decals for that texture but does not look convincing.
-
I'm running out of room.
89AKurt replied to ewetwo's topic in General Automotive Talk (Trucks and Cars)
Someone else showing off some rare Chevy truck kits. ? I'll take those off your hands, that would solve 5% of your "problem". ? I made a built-in display case in my office, filled up long ago, so have old models in various places collecting dust. Should cruise Facebook Marketplace for cases...... The Stash is another story. -
Thank you! I could go overboard, but trying to focus on what is seen from above.
-
Oh good.... thanks! Thank you too! ? Appreciate it. ? Thinking of putting in the truck cab to help cure some more, trying to not touch it! I'm also waiting on wires that I ordered.
-
but smarter cats