89AKurt
-
Posts
8,426 -
Joined
-
Last visited
Content Type
Profiles
Forums
Events
Gallery
Everything posted by 89AKurt
-
all covered with
-

Sodium Glider fantasy Bonneville Streamliner
89AKurt replied to Claude Thibodeau's topic in WIP: Drag Racing Models
WOW! That's really slick! I like the break away red paint job. -
It's reflective mylar.
-
Tamiya VW Beetle GSL Common Kit build - Tribute of parent's 1960
89AKurt replied to 89AKurt's topic in Model Cars
Thanks, and you are the only one to comment on the photography! That's another hobby of mine. That seems to be the running pun. You are too kind! Thank you! Glad I can inspire, many others on this forum inspire me too. Tomorrow is Desert Scale Classic, they have a Volkswagen class. -
Oh good, have only 4 complete with the decals.
-
Really nice collection! I'm focused on the 2J Sucker Car, just because I have a Mini Exotics (r&d unique) kit that I got last century. I've heard about that magazine having plans to make it. It is such a basic shape, can see someone skilled as you doing it.
-
Bumpy bumping this up. I got supporting documents done for the two entries, yea, only 2, where has the time gone? I will also bring some kits for sale, some of the guys from my model club will have a swap table. Most important, will have a few of my Coca-Cola coolers.

-
in smoldering ruins.
-
with HazMat robot
-
Tamiya VW Beetle GSL Common Kit build - Tribute of parent's 1960
89AKurt replied to 89AKurt's topic in Model Cars
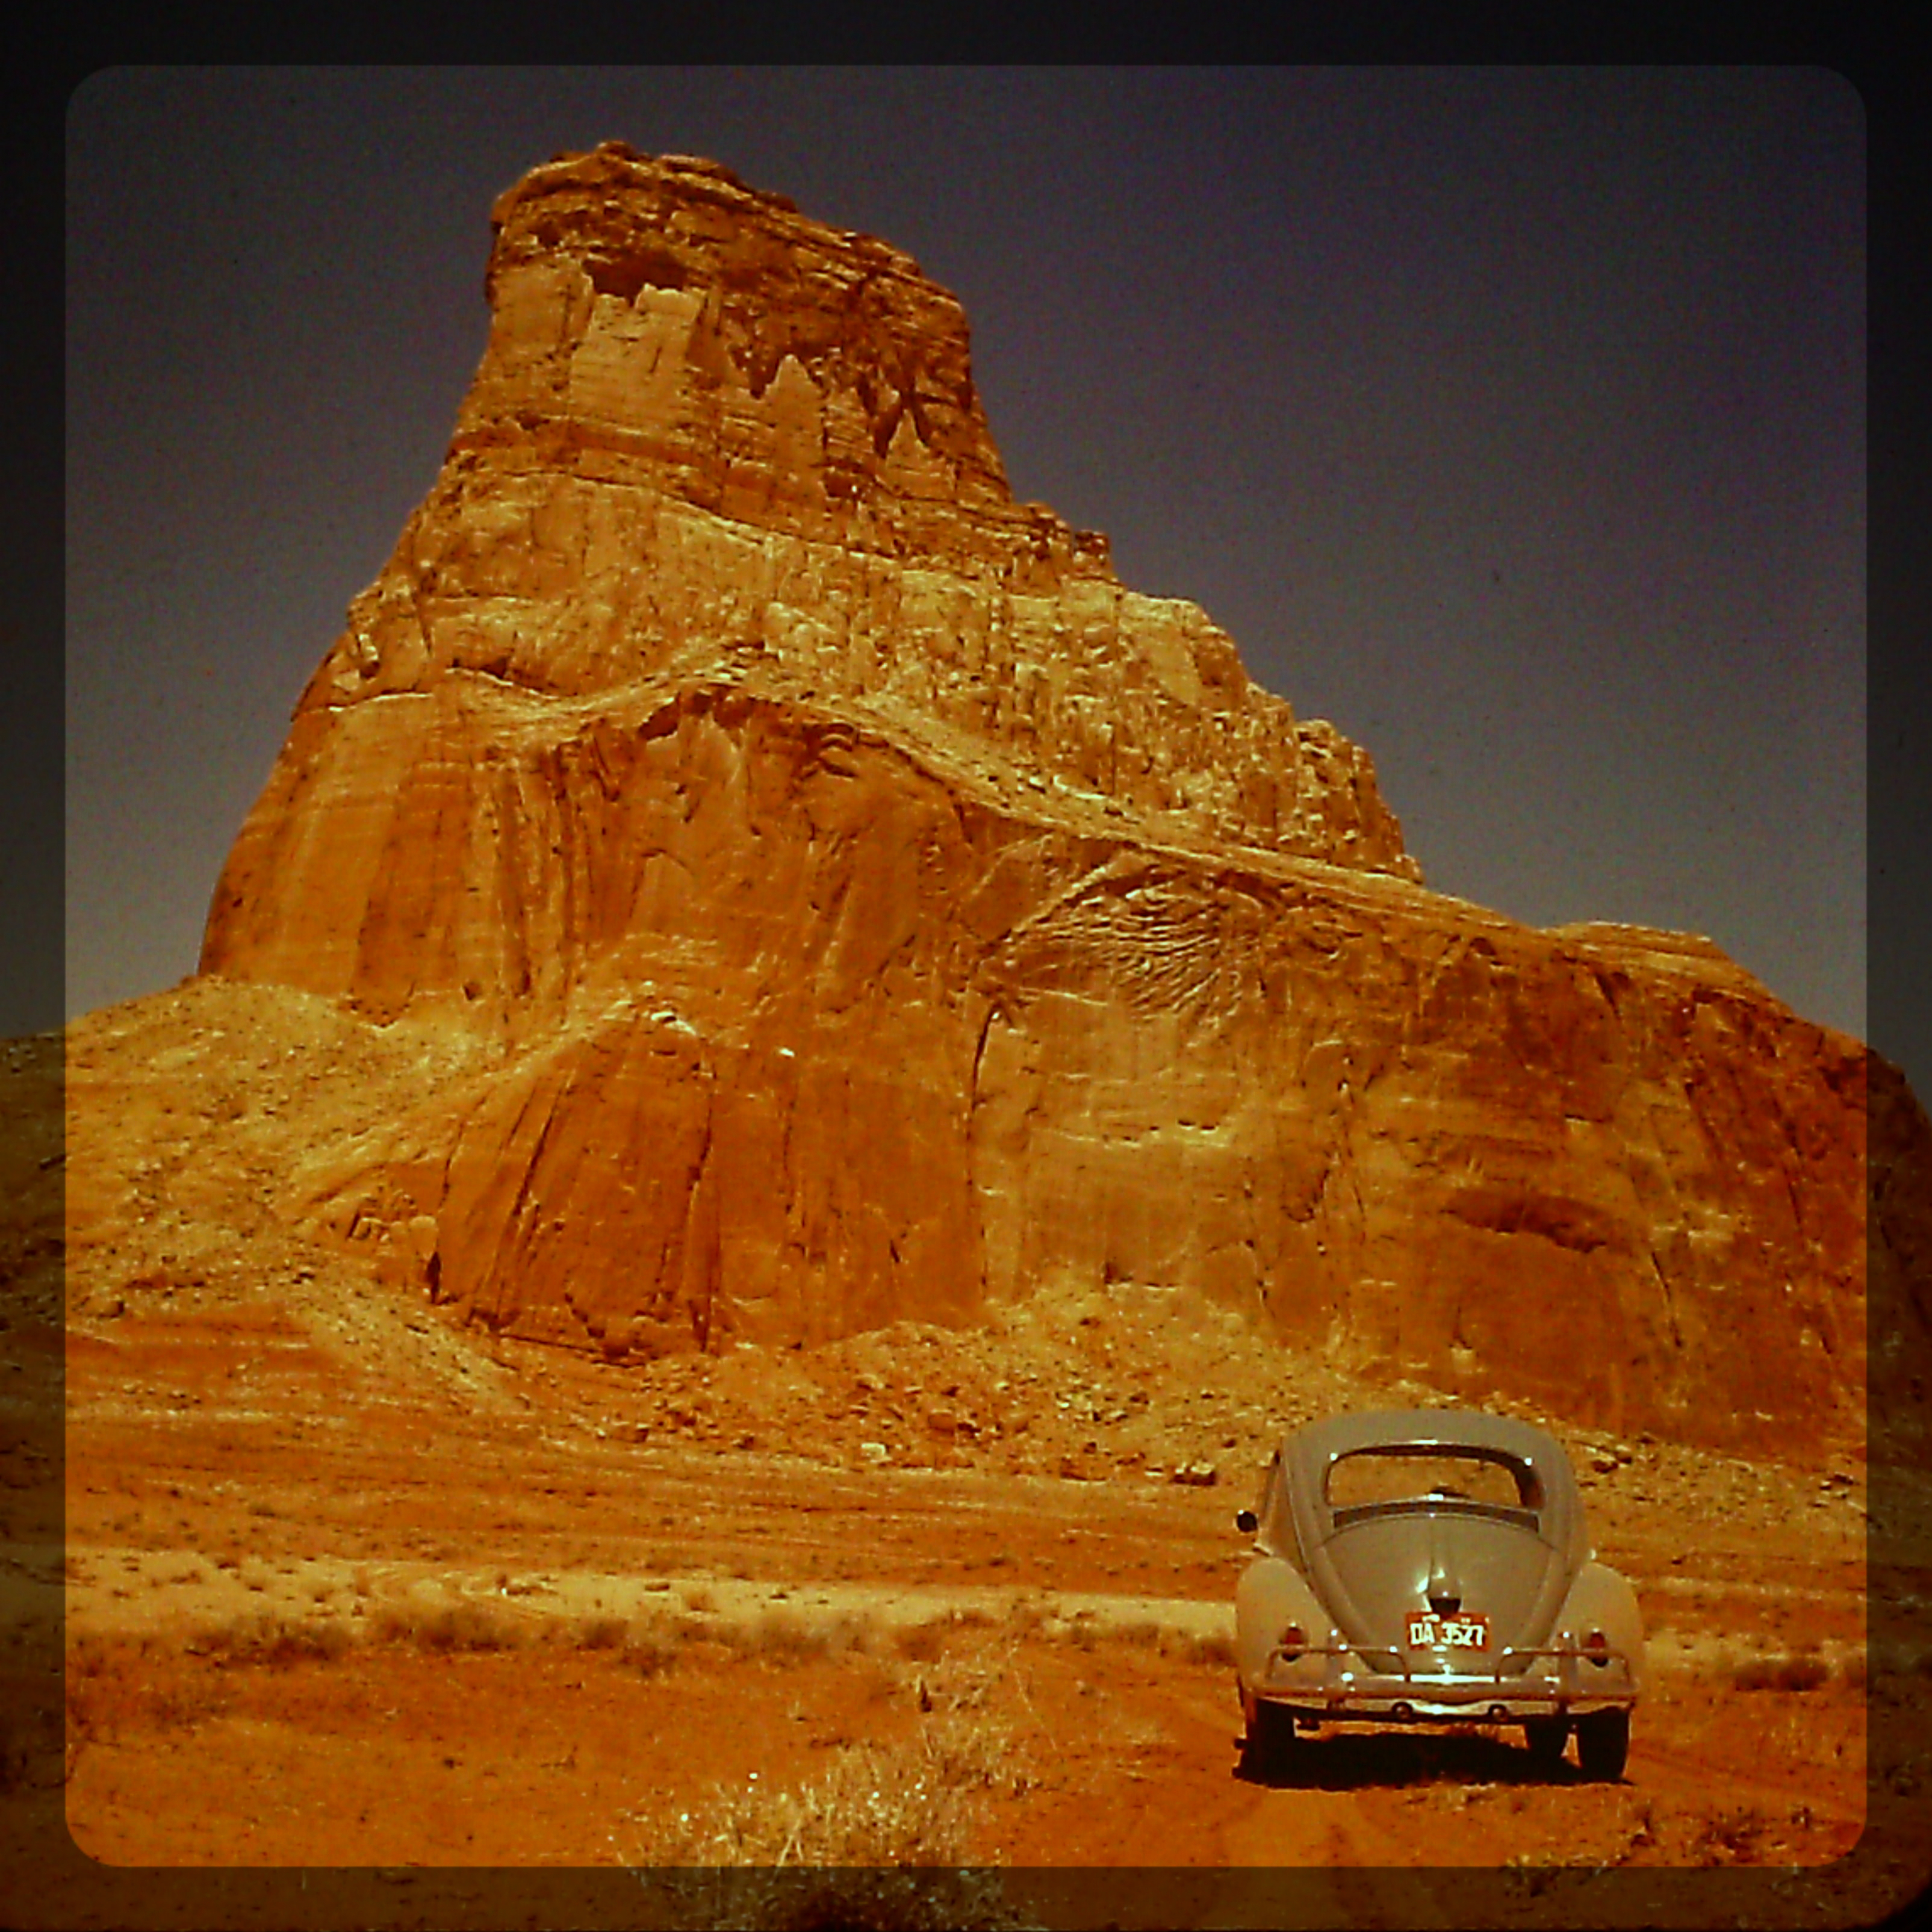
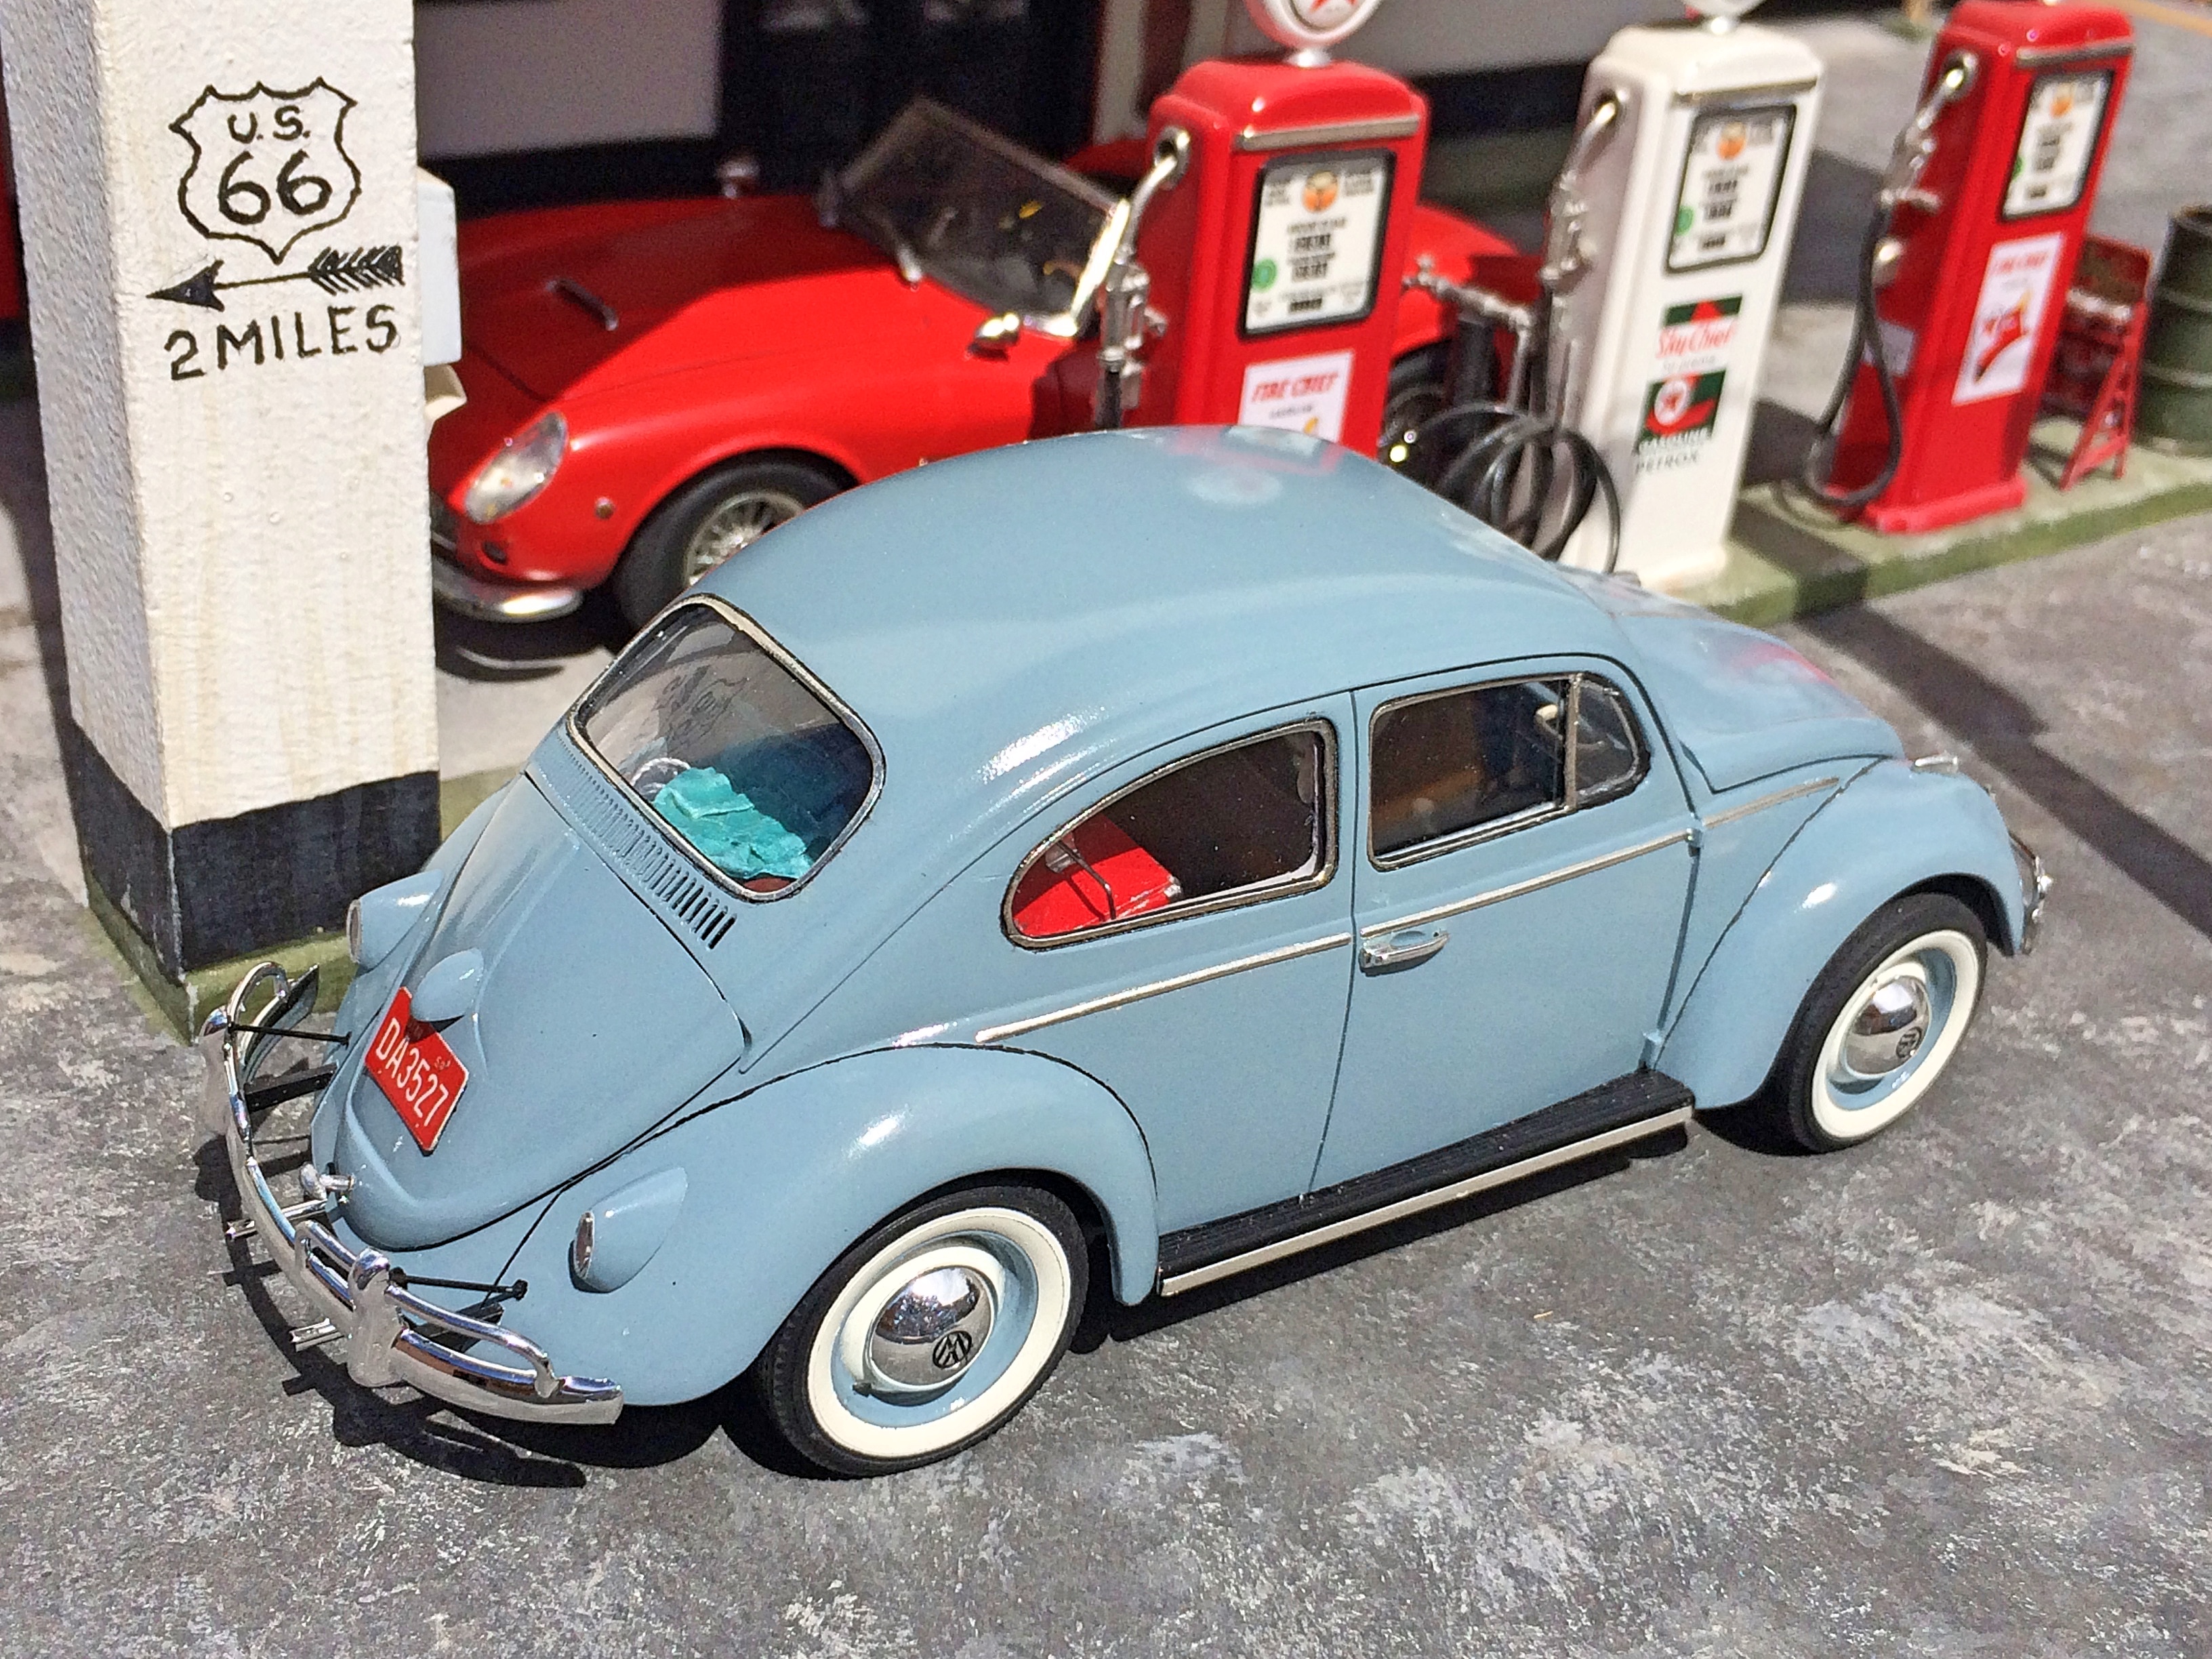
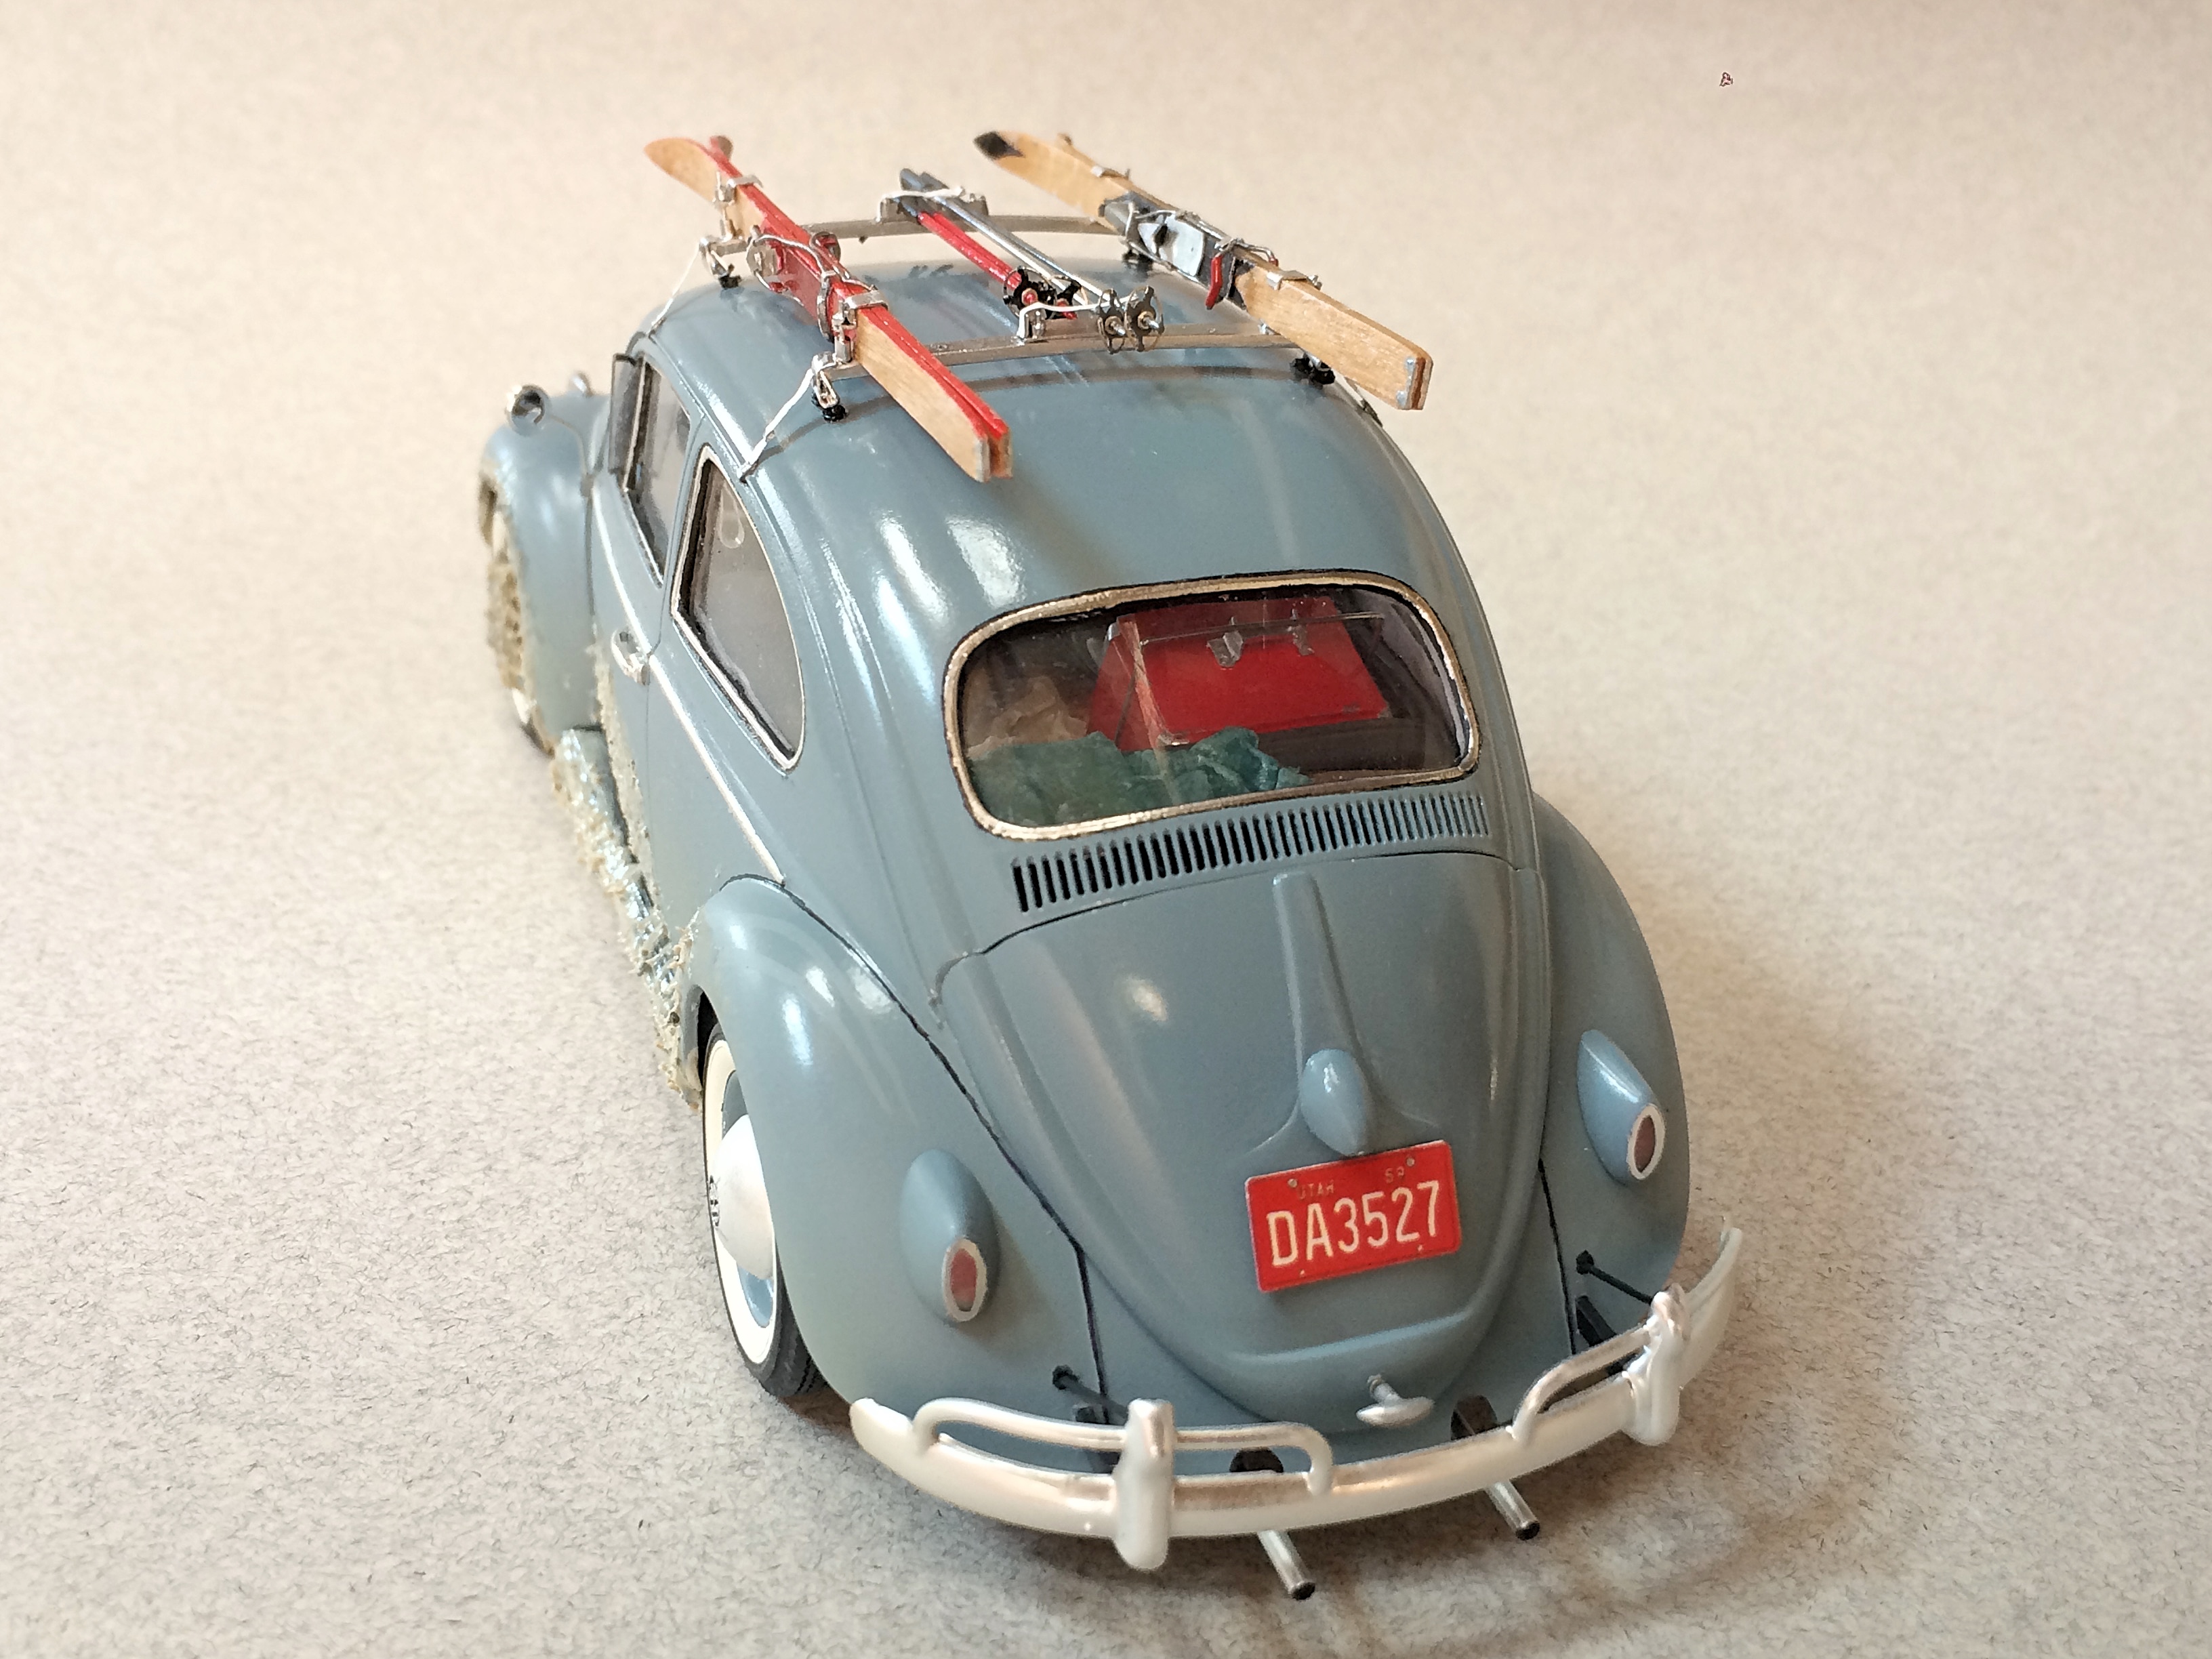
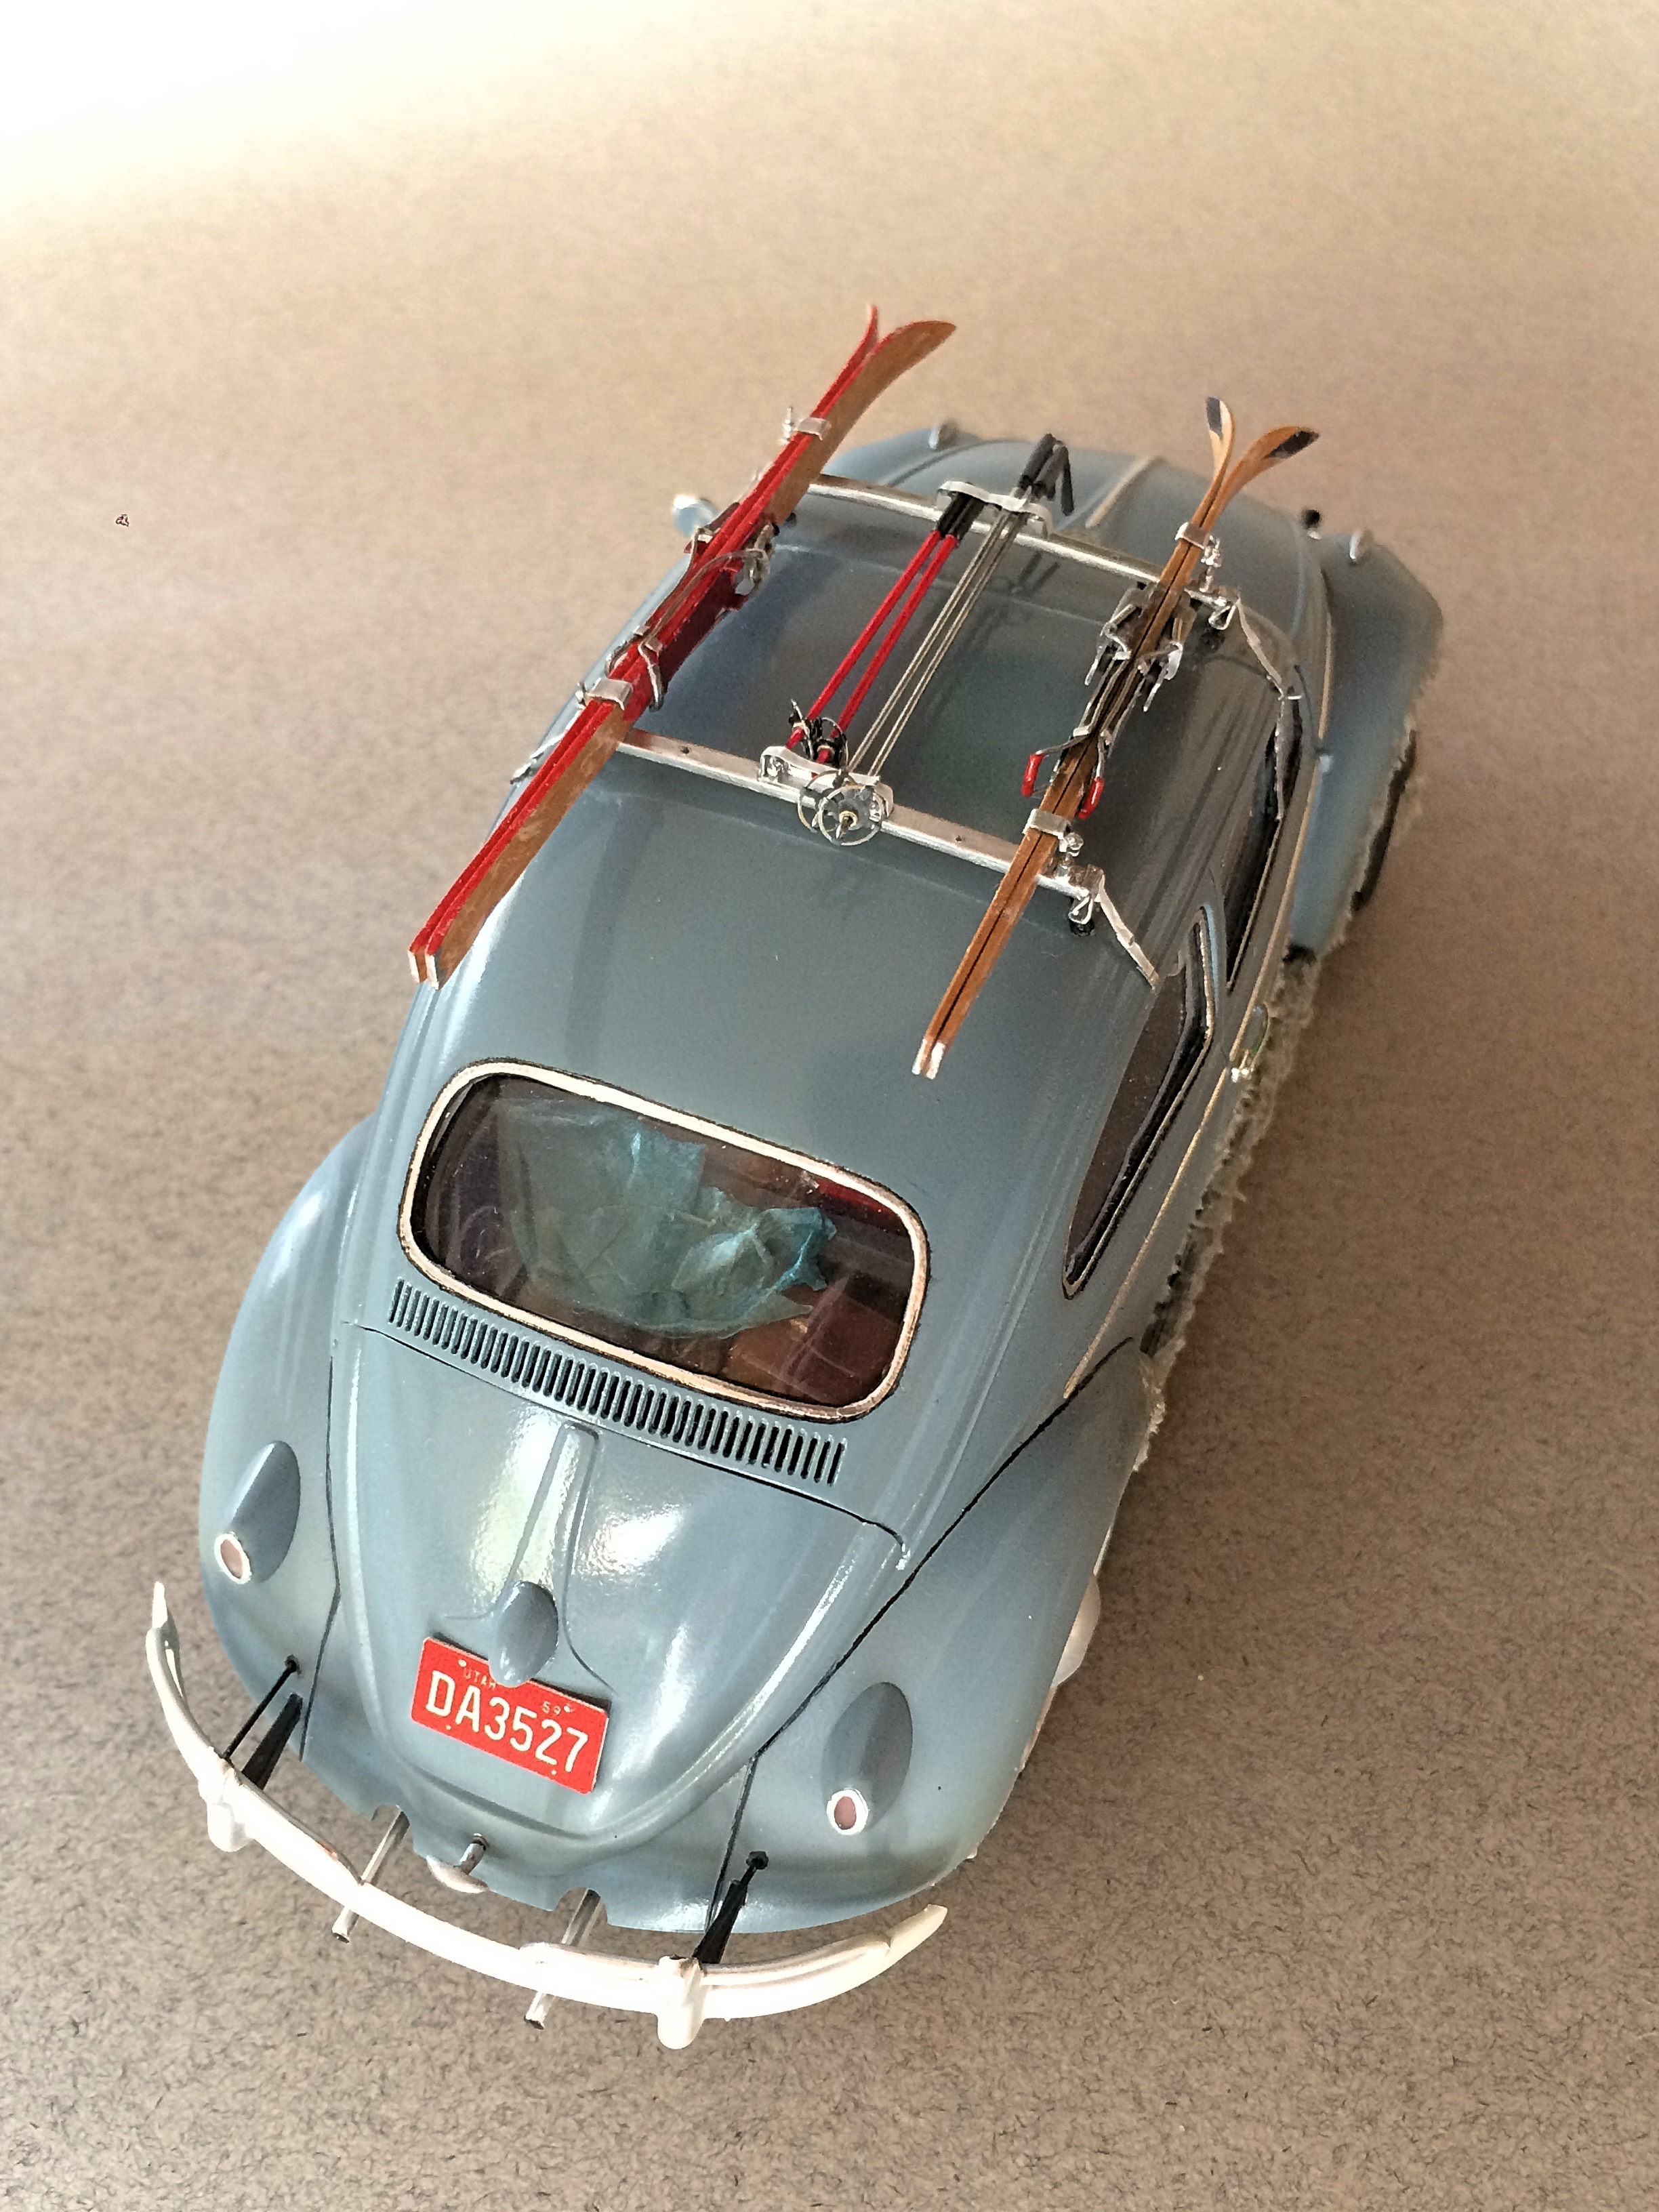
Thank you! Thanks again. About 143 hours, not including lying awake before going to sleep, or waking up early, thinking about how to do the next step. Thanks again, as always. Thanks, and for watching. Thank you too! Might as well drop this here, it's what I used for the license plate. They drove into Glen Canyon before Lake Powell filled up, Gunsight Butte is beyond, it's a landmark that can be seen from 89A.
-
with lit matches
-
Tamiya VW Beetle GSL Common Kit build - Tribute of parent's 1960
89AKurt replied to 89AKurt's topic in Model Cars
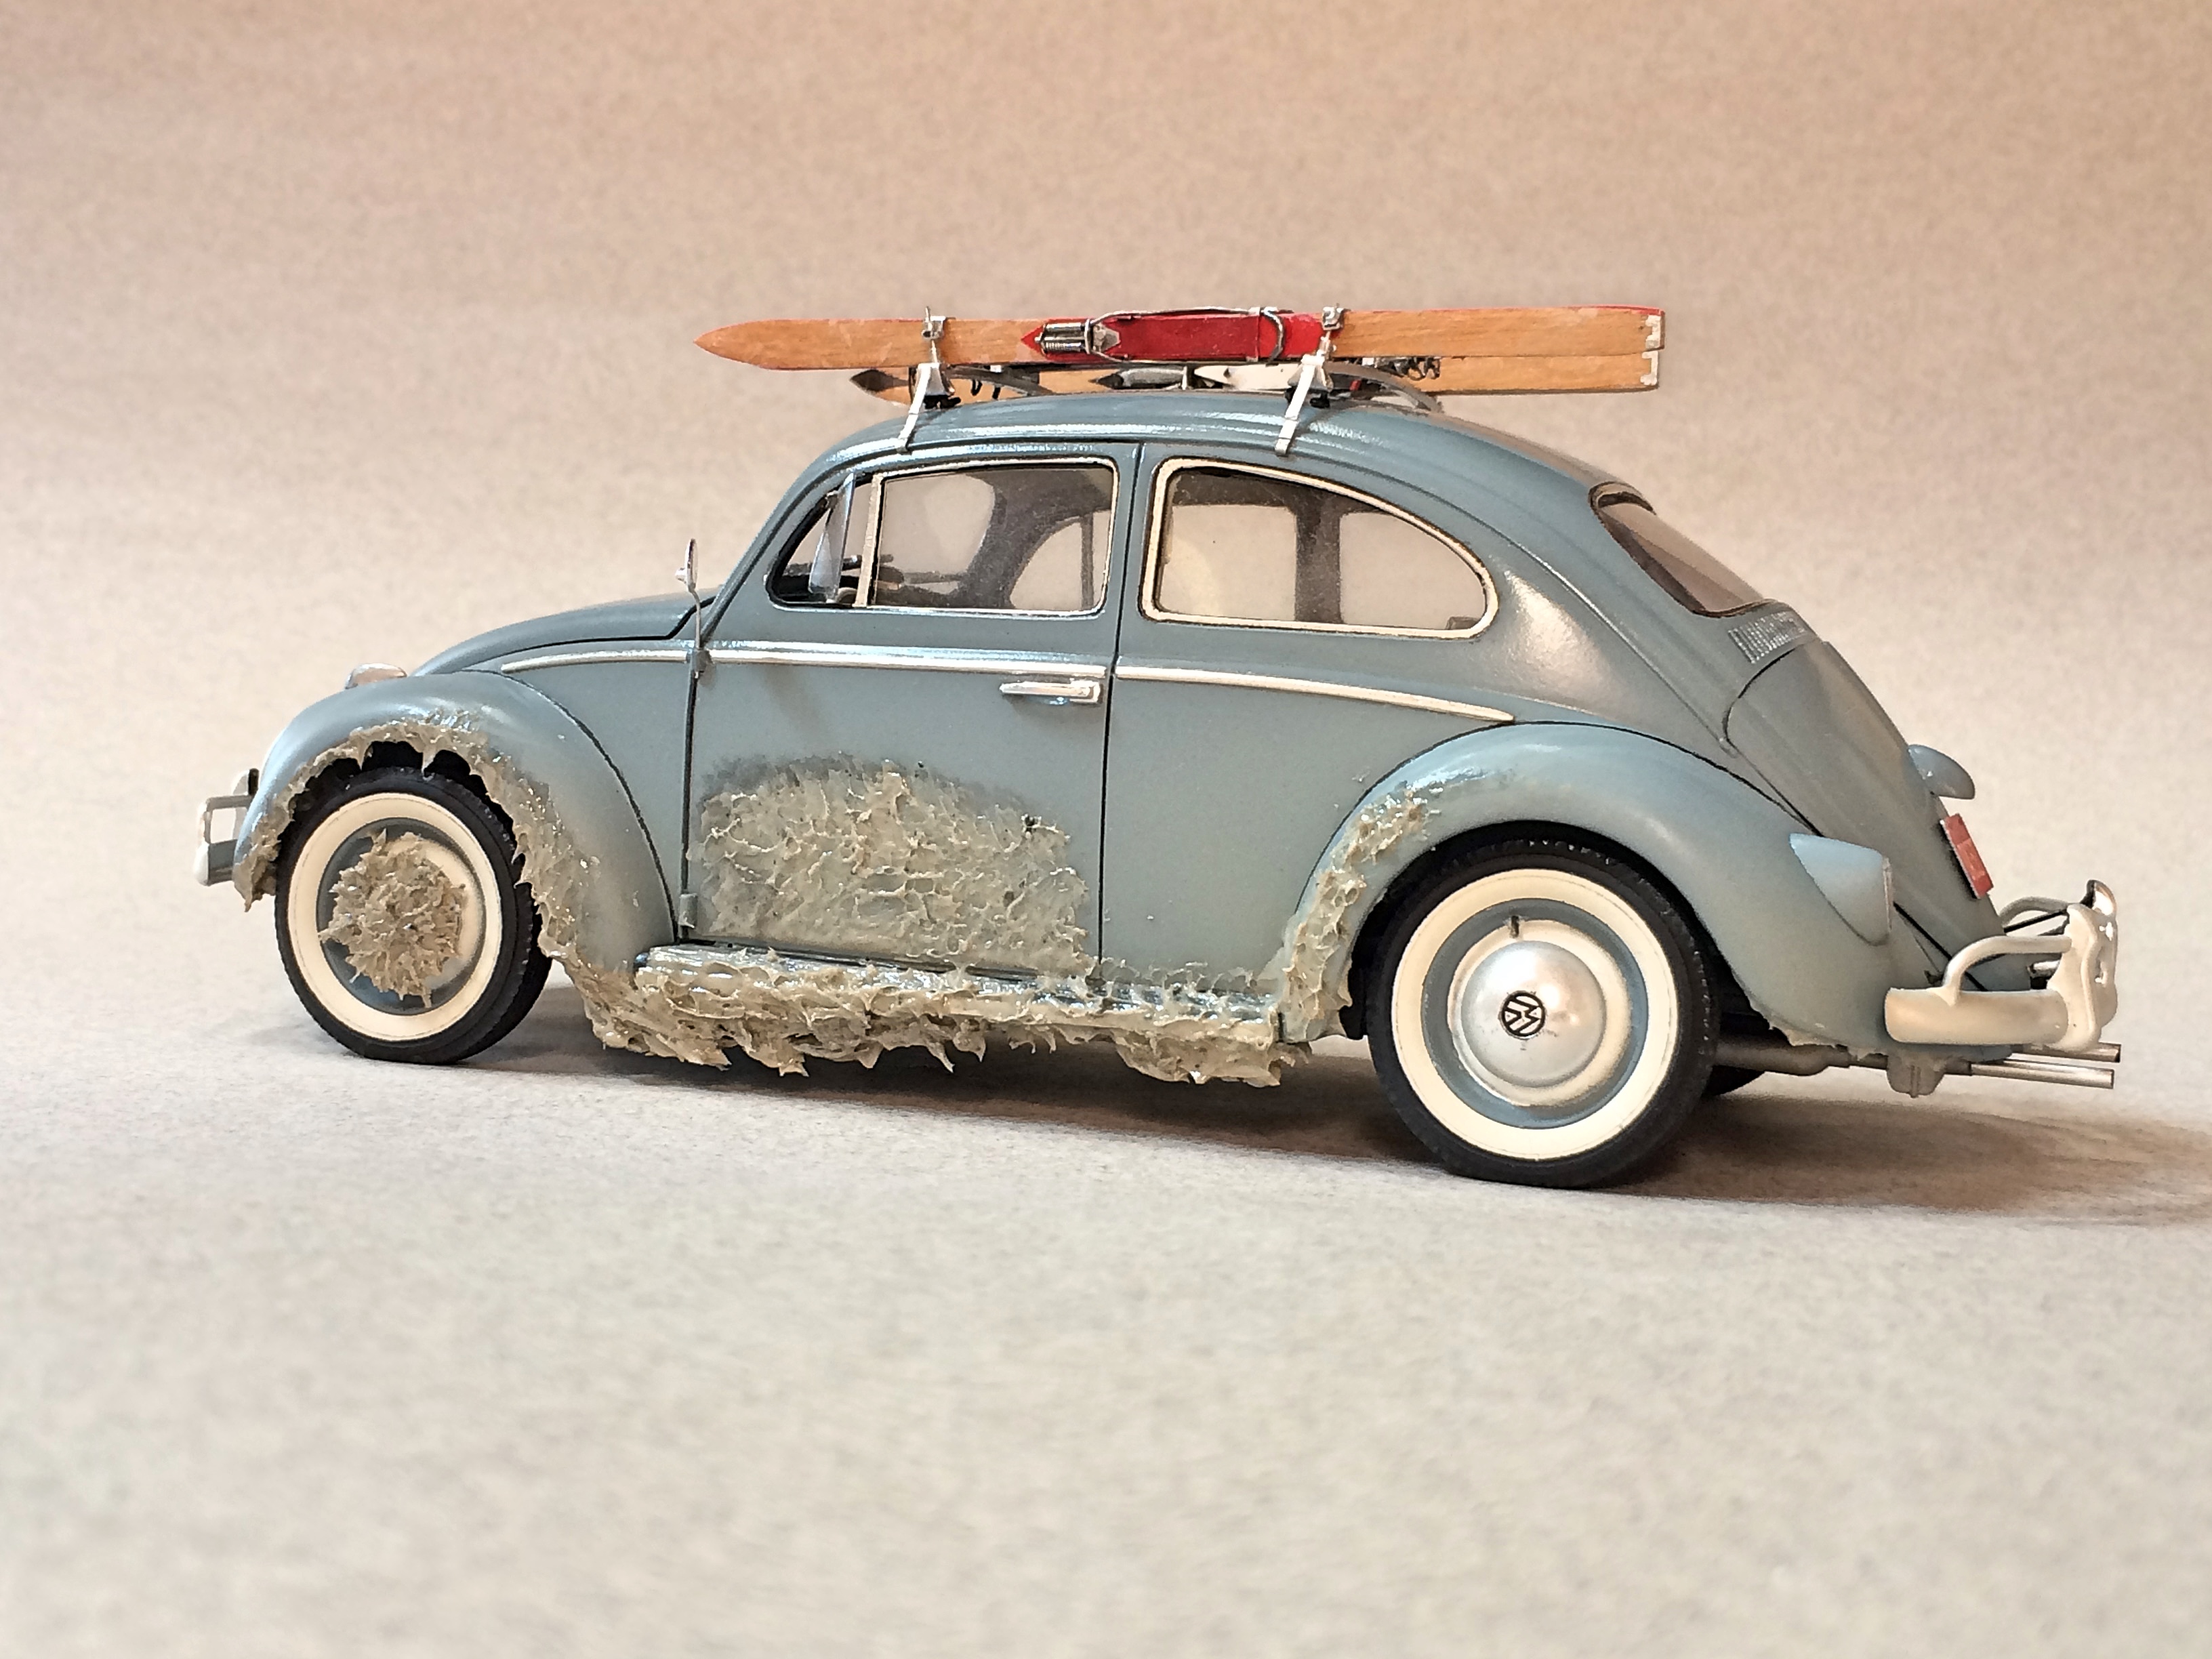
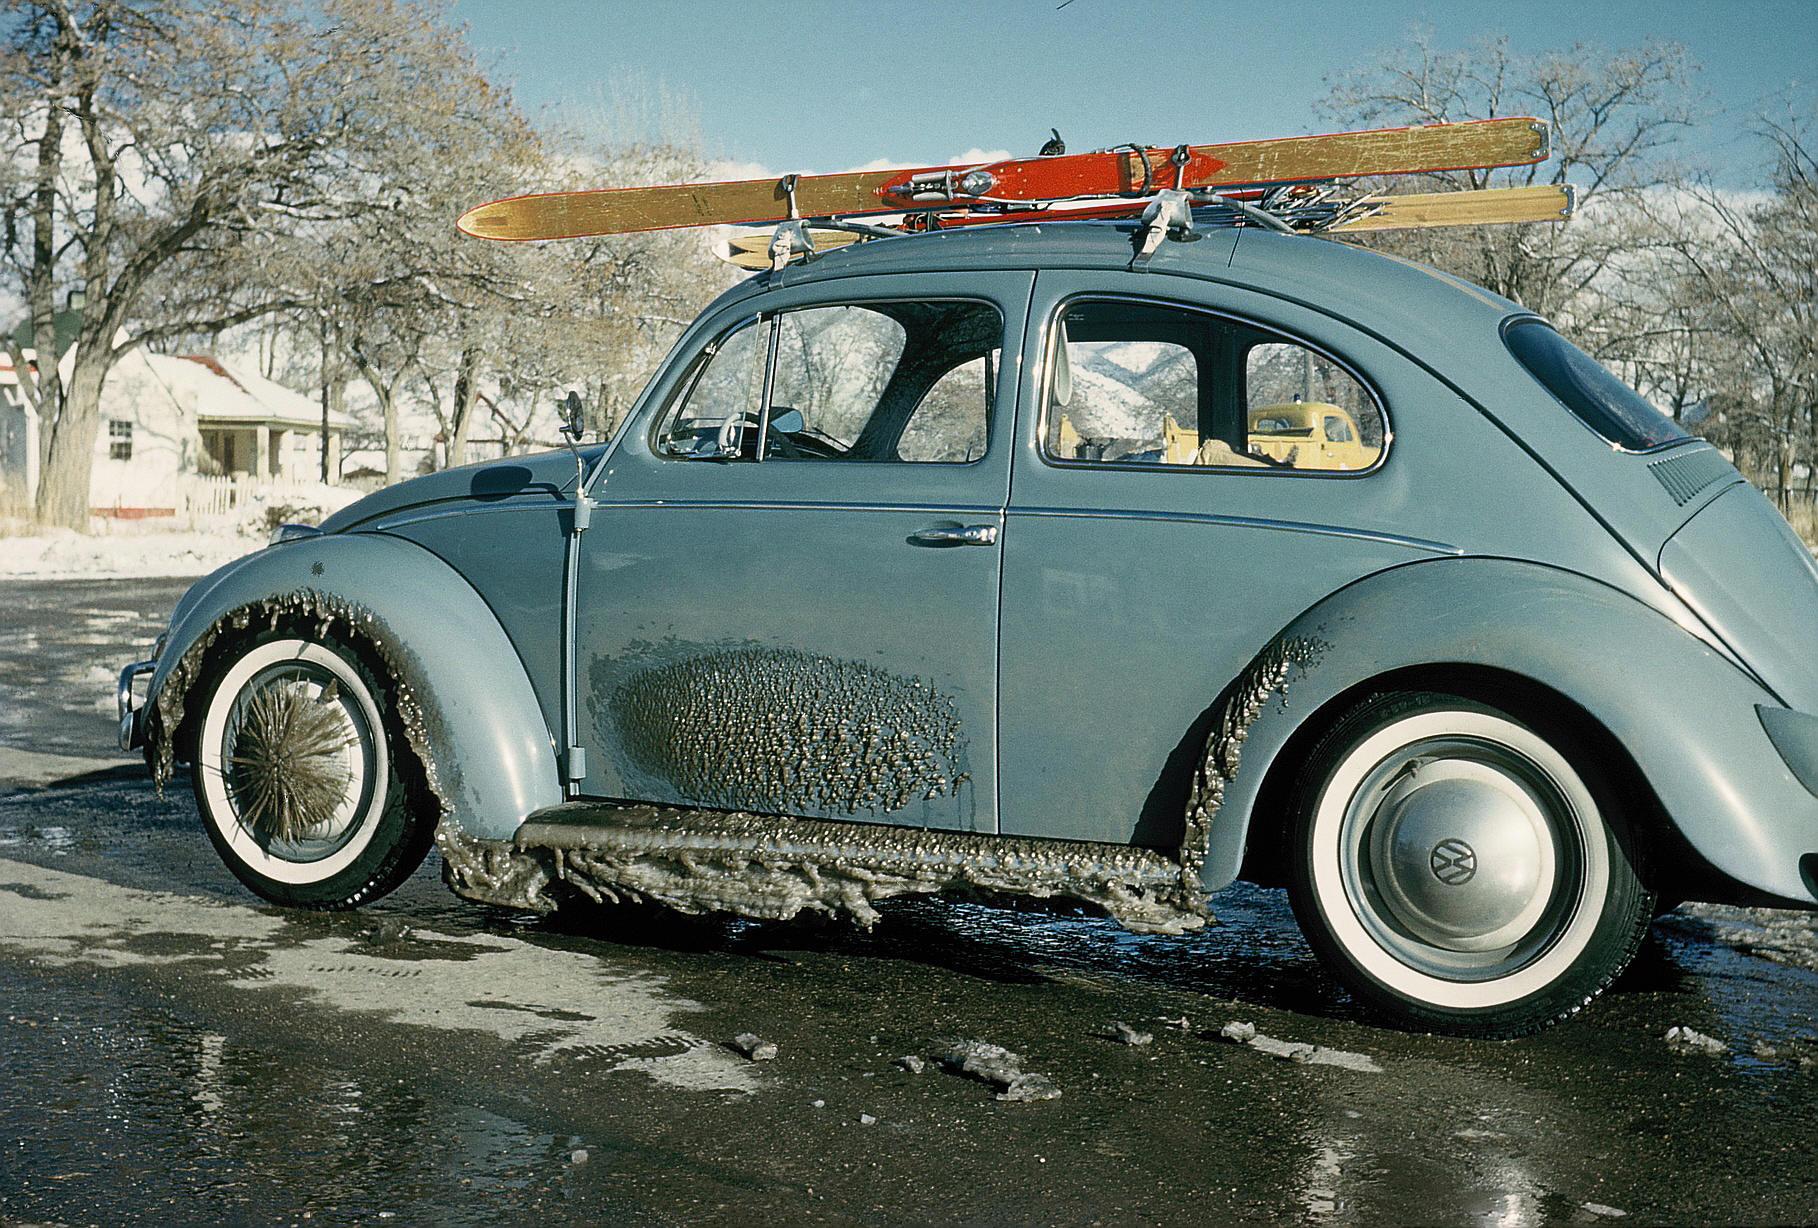
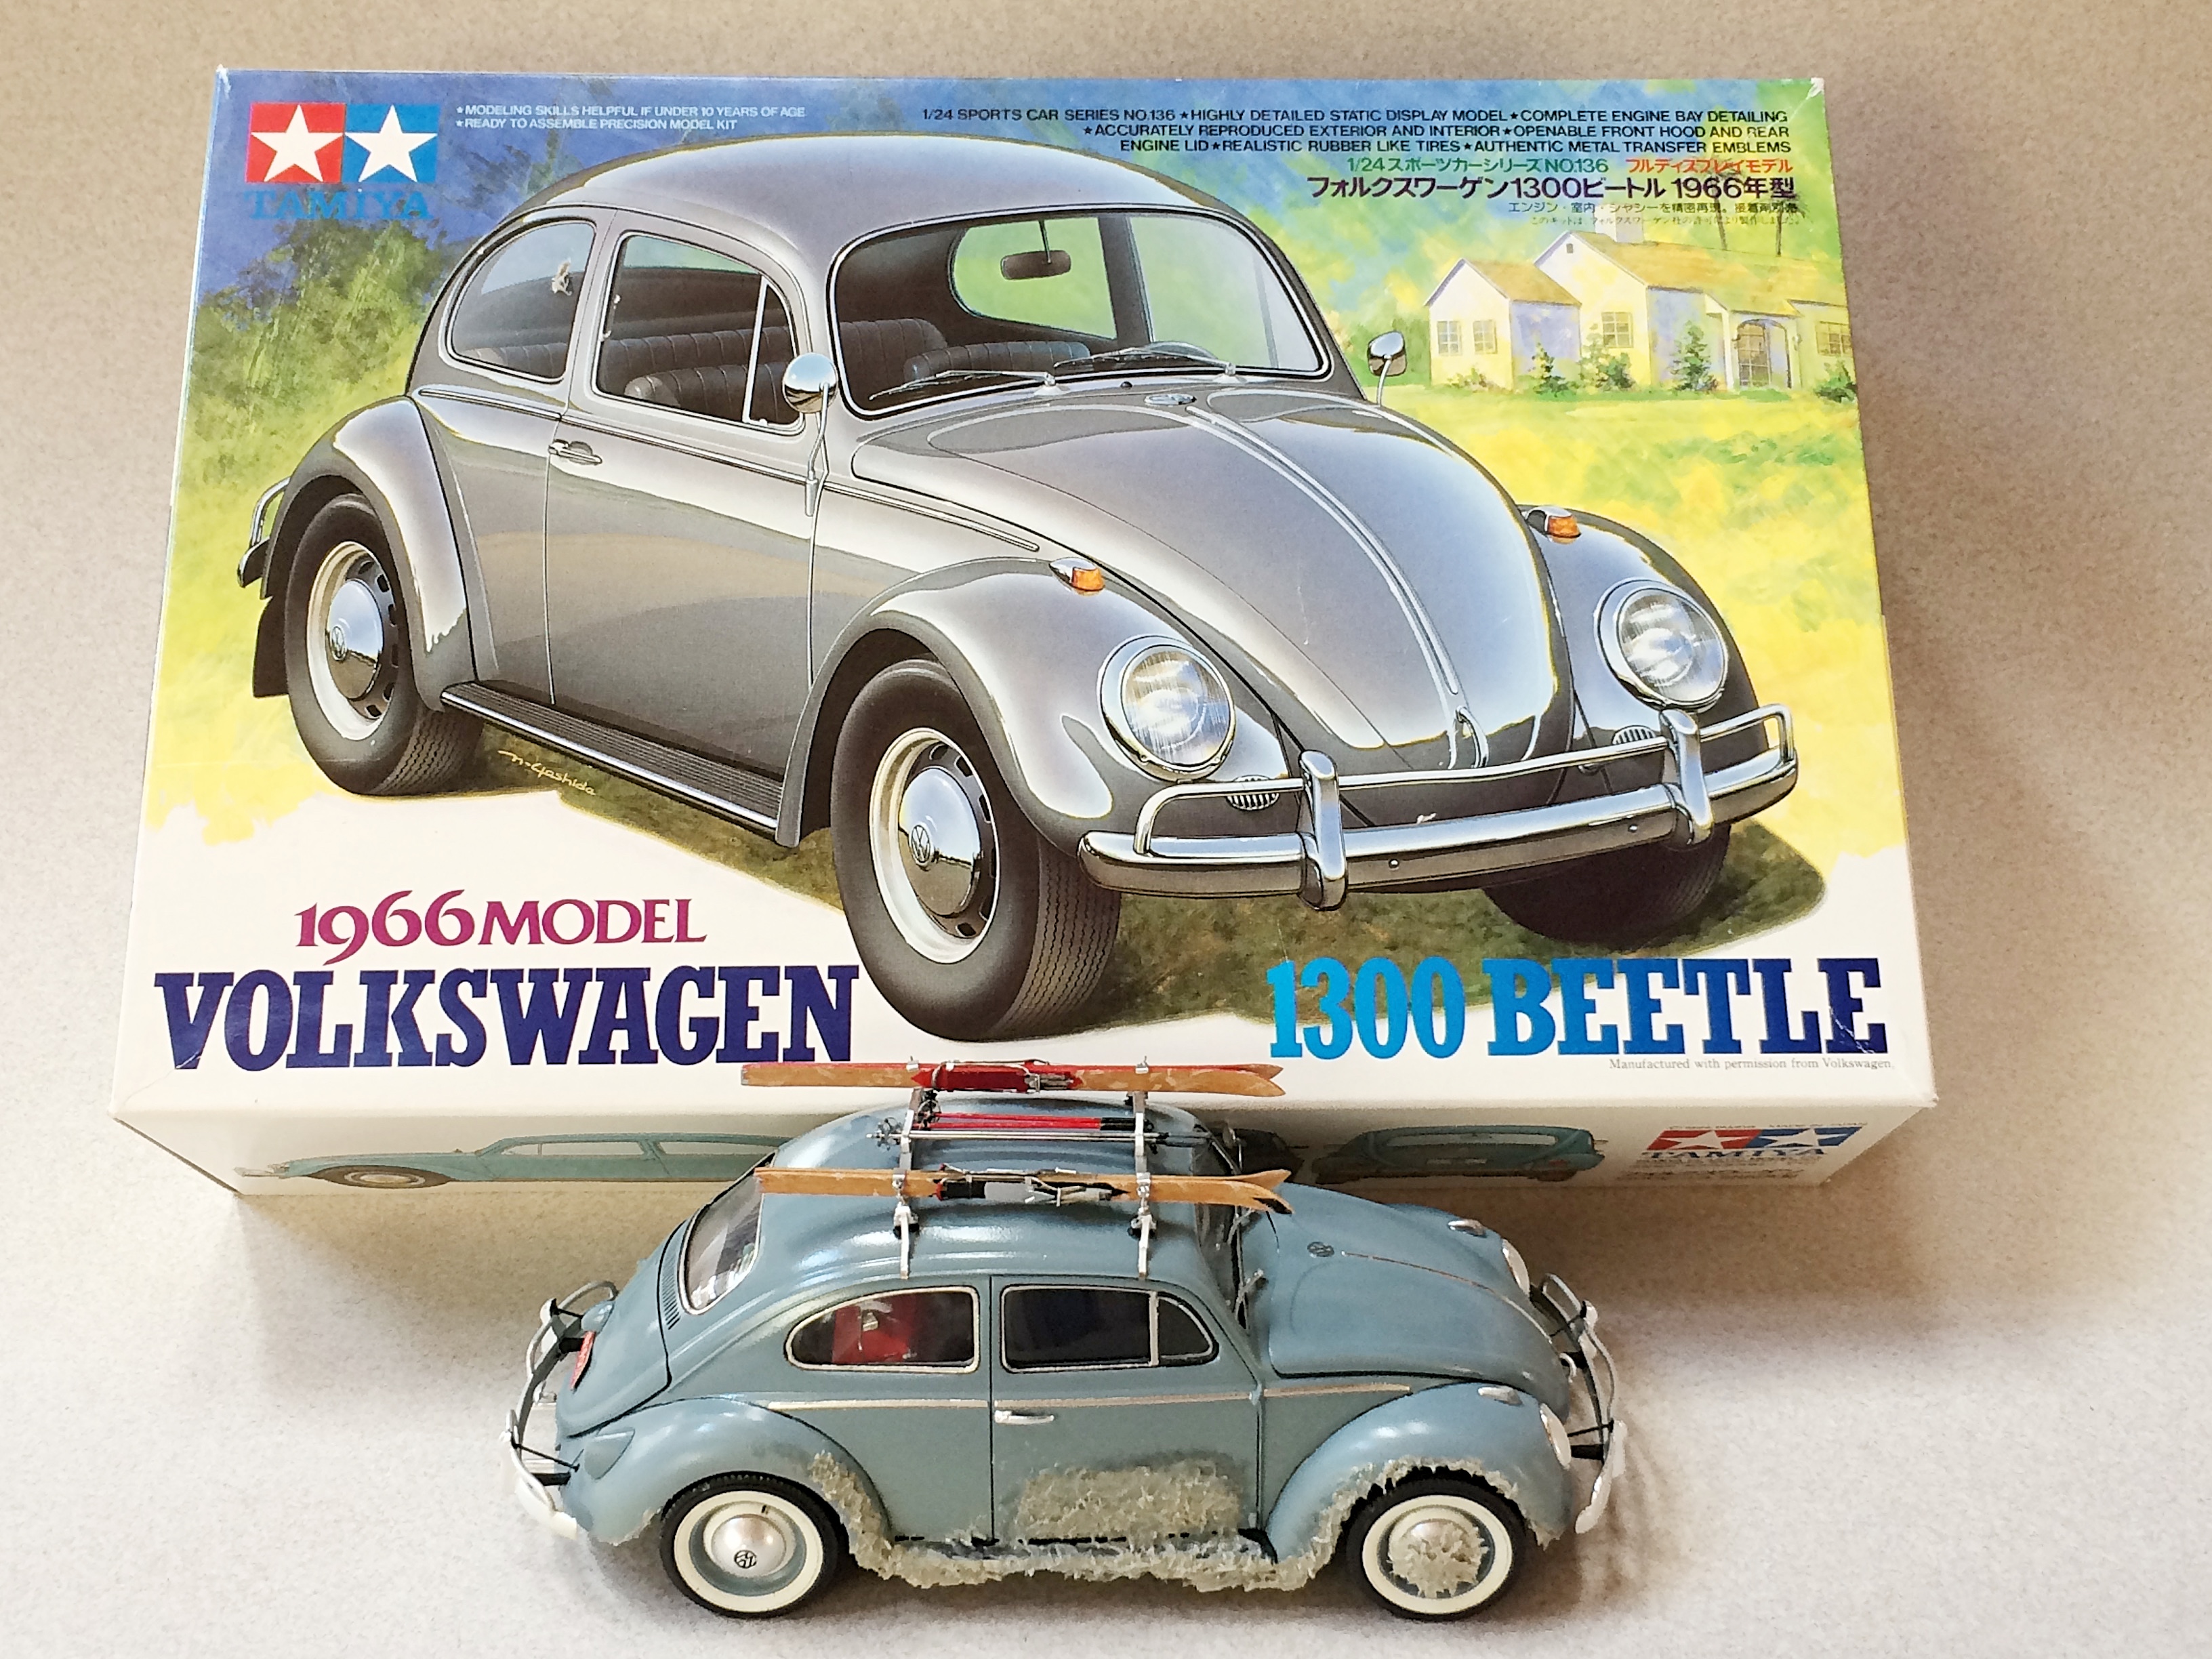
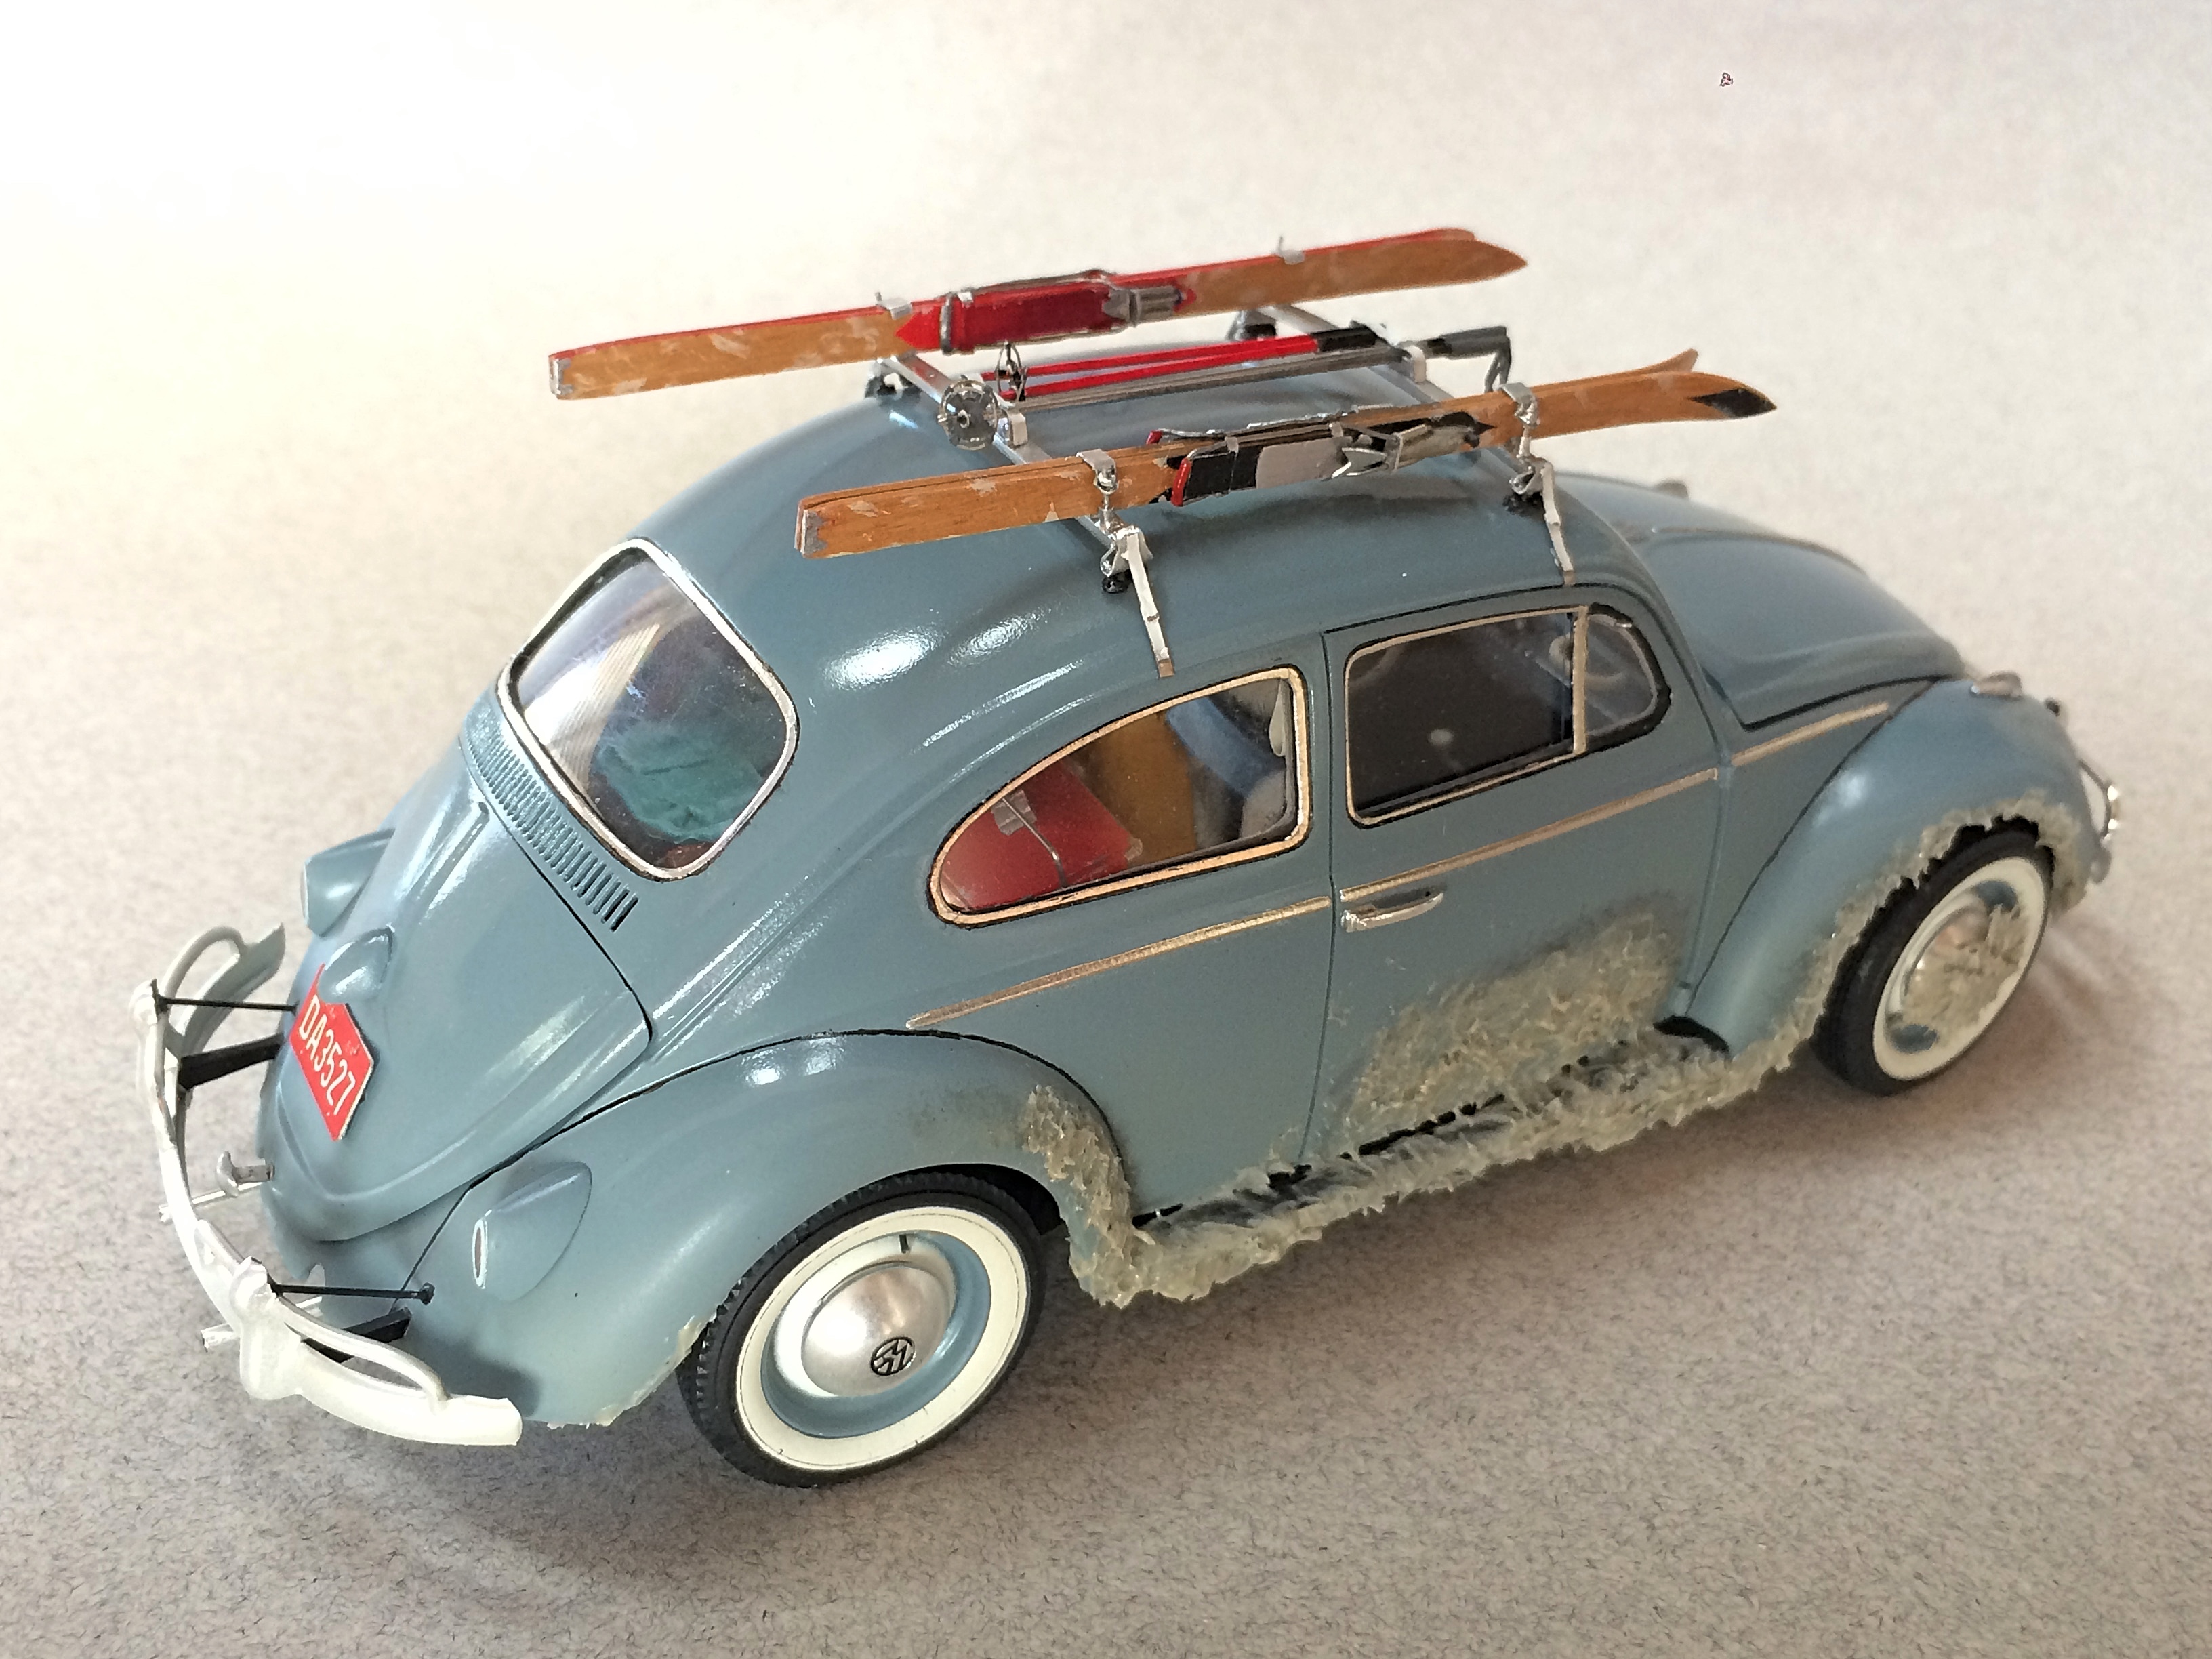
Thank you. Thank you too! Appreciate that. I'm glad. Appreciate your attention and input. Glad I've inspired you, I think everyone needs to build a Bug, it's an iconic automobile that needs to be experienced. Thank you, at least give everyone a run for their money. Thank you. I'm being my own worst critic, it could have been done better by sacrificing a stiff brush, and paying more attention to the shape in the picture. When I showed my mom, she said dad's skis were 8 feet long, so that error is bugging me (pun there). Thank you too! I'll add this picture just because. Dad worked at Zion NP East Entrance, I'm guessing this was start of the trip to Brian Head ski area, which was closer than Salt Lake City.
-
using oxygen mask
-
gas for days
-
65 Continental Roadster Pick-up (Ranchero style)
89AKurt replied to Claude Thibodeau's topic in Model Cars
That's trick, and well executed! -
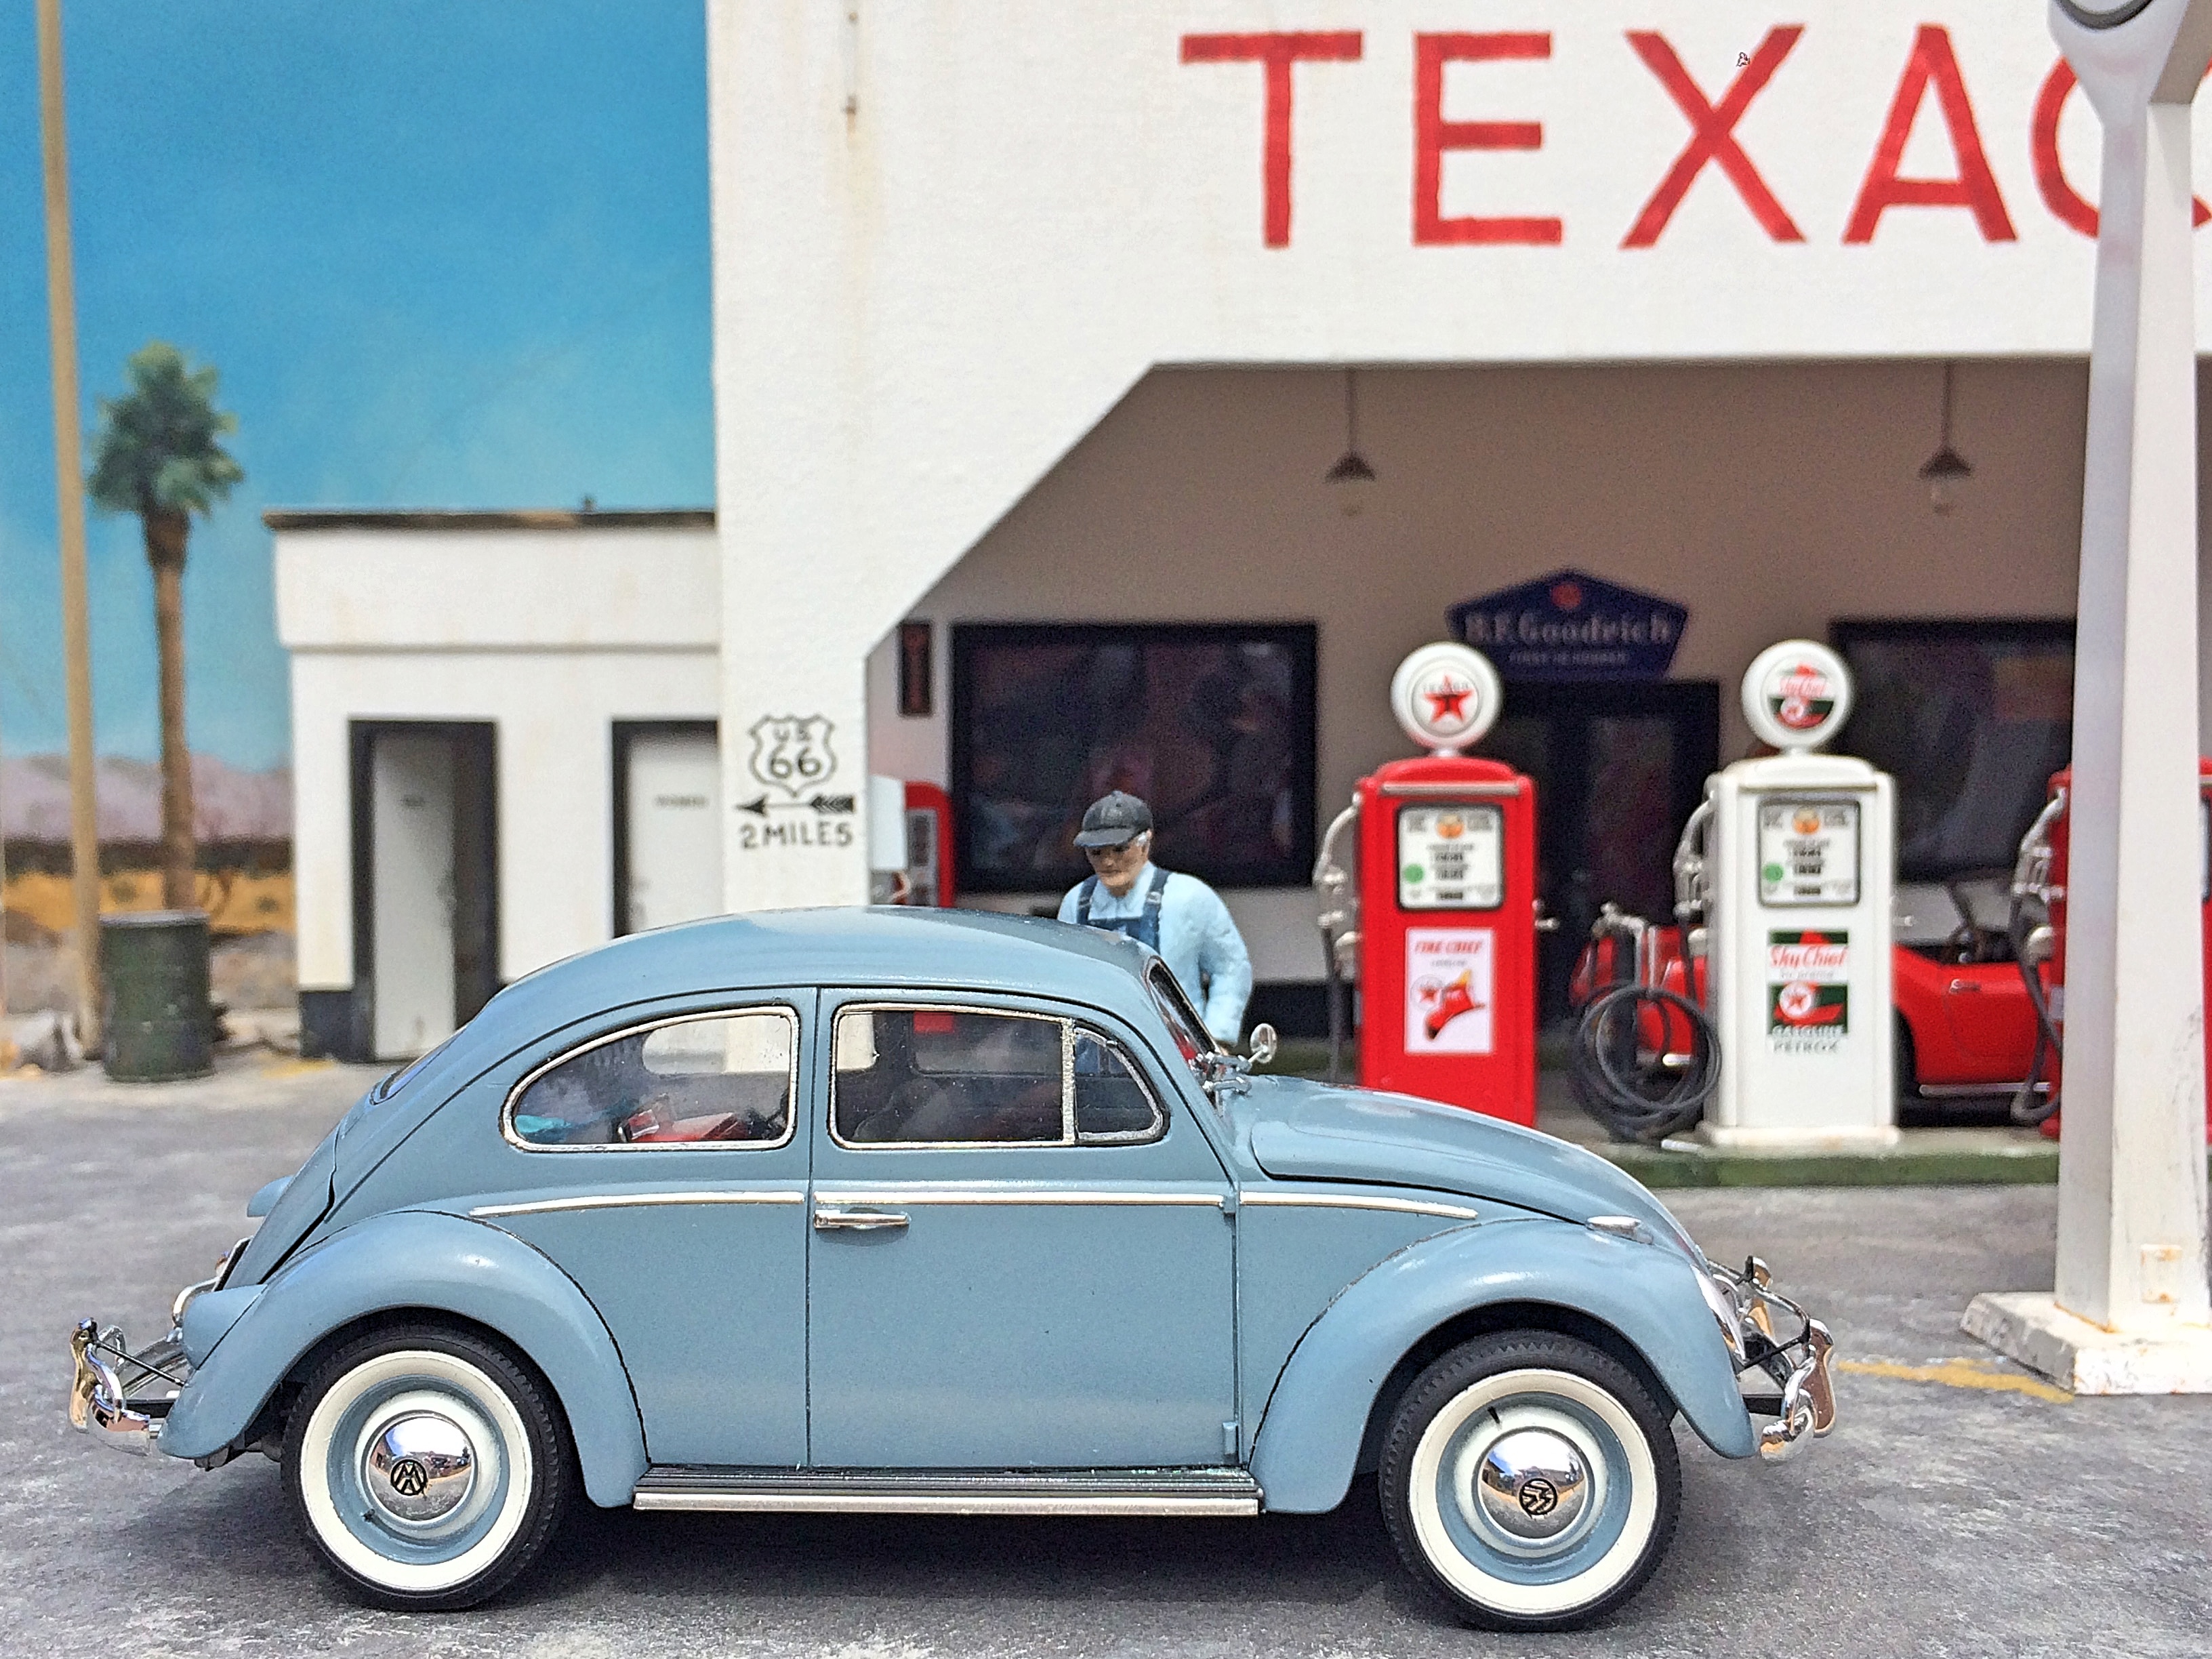
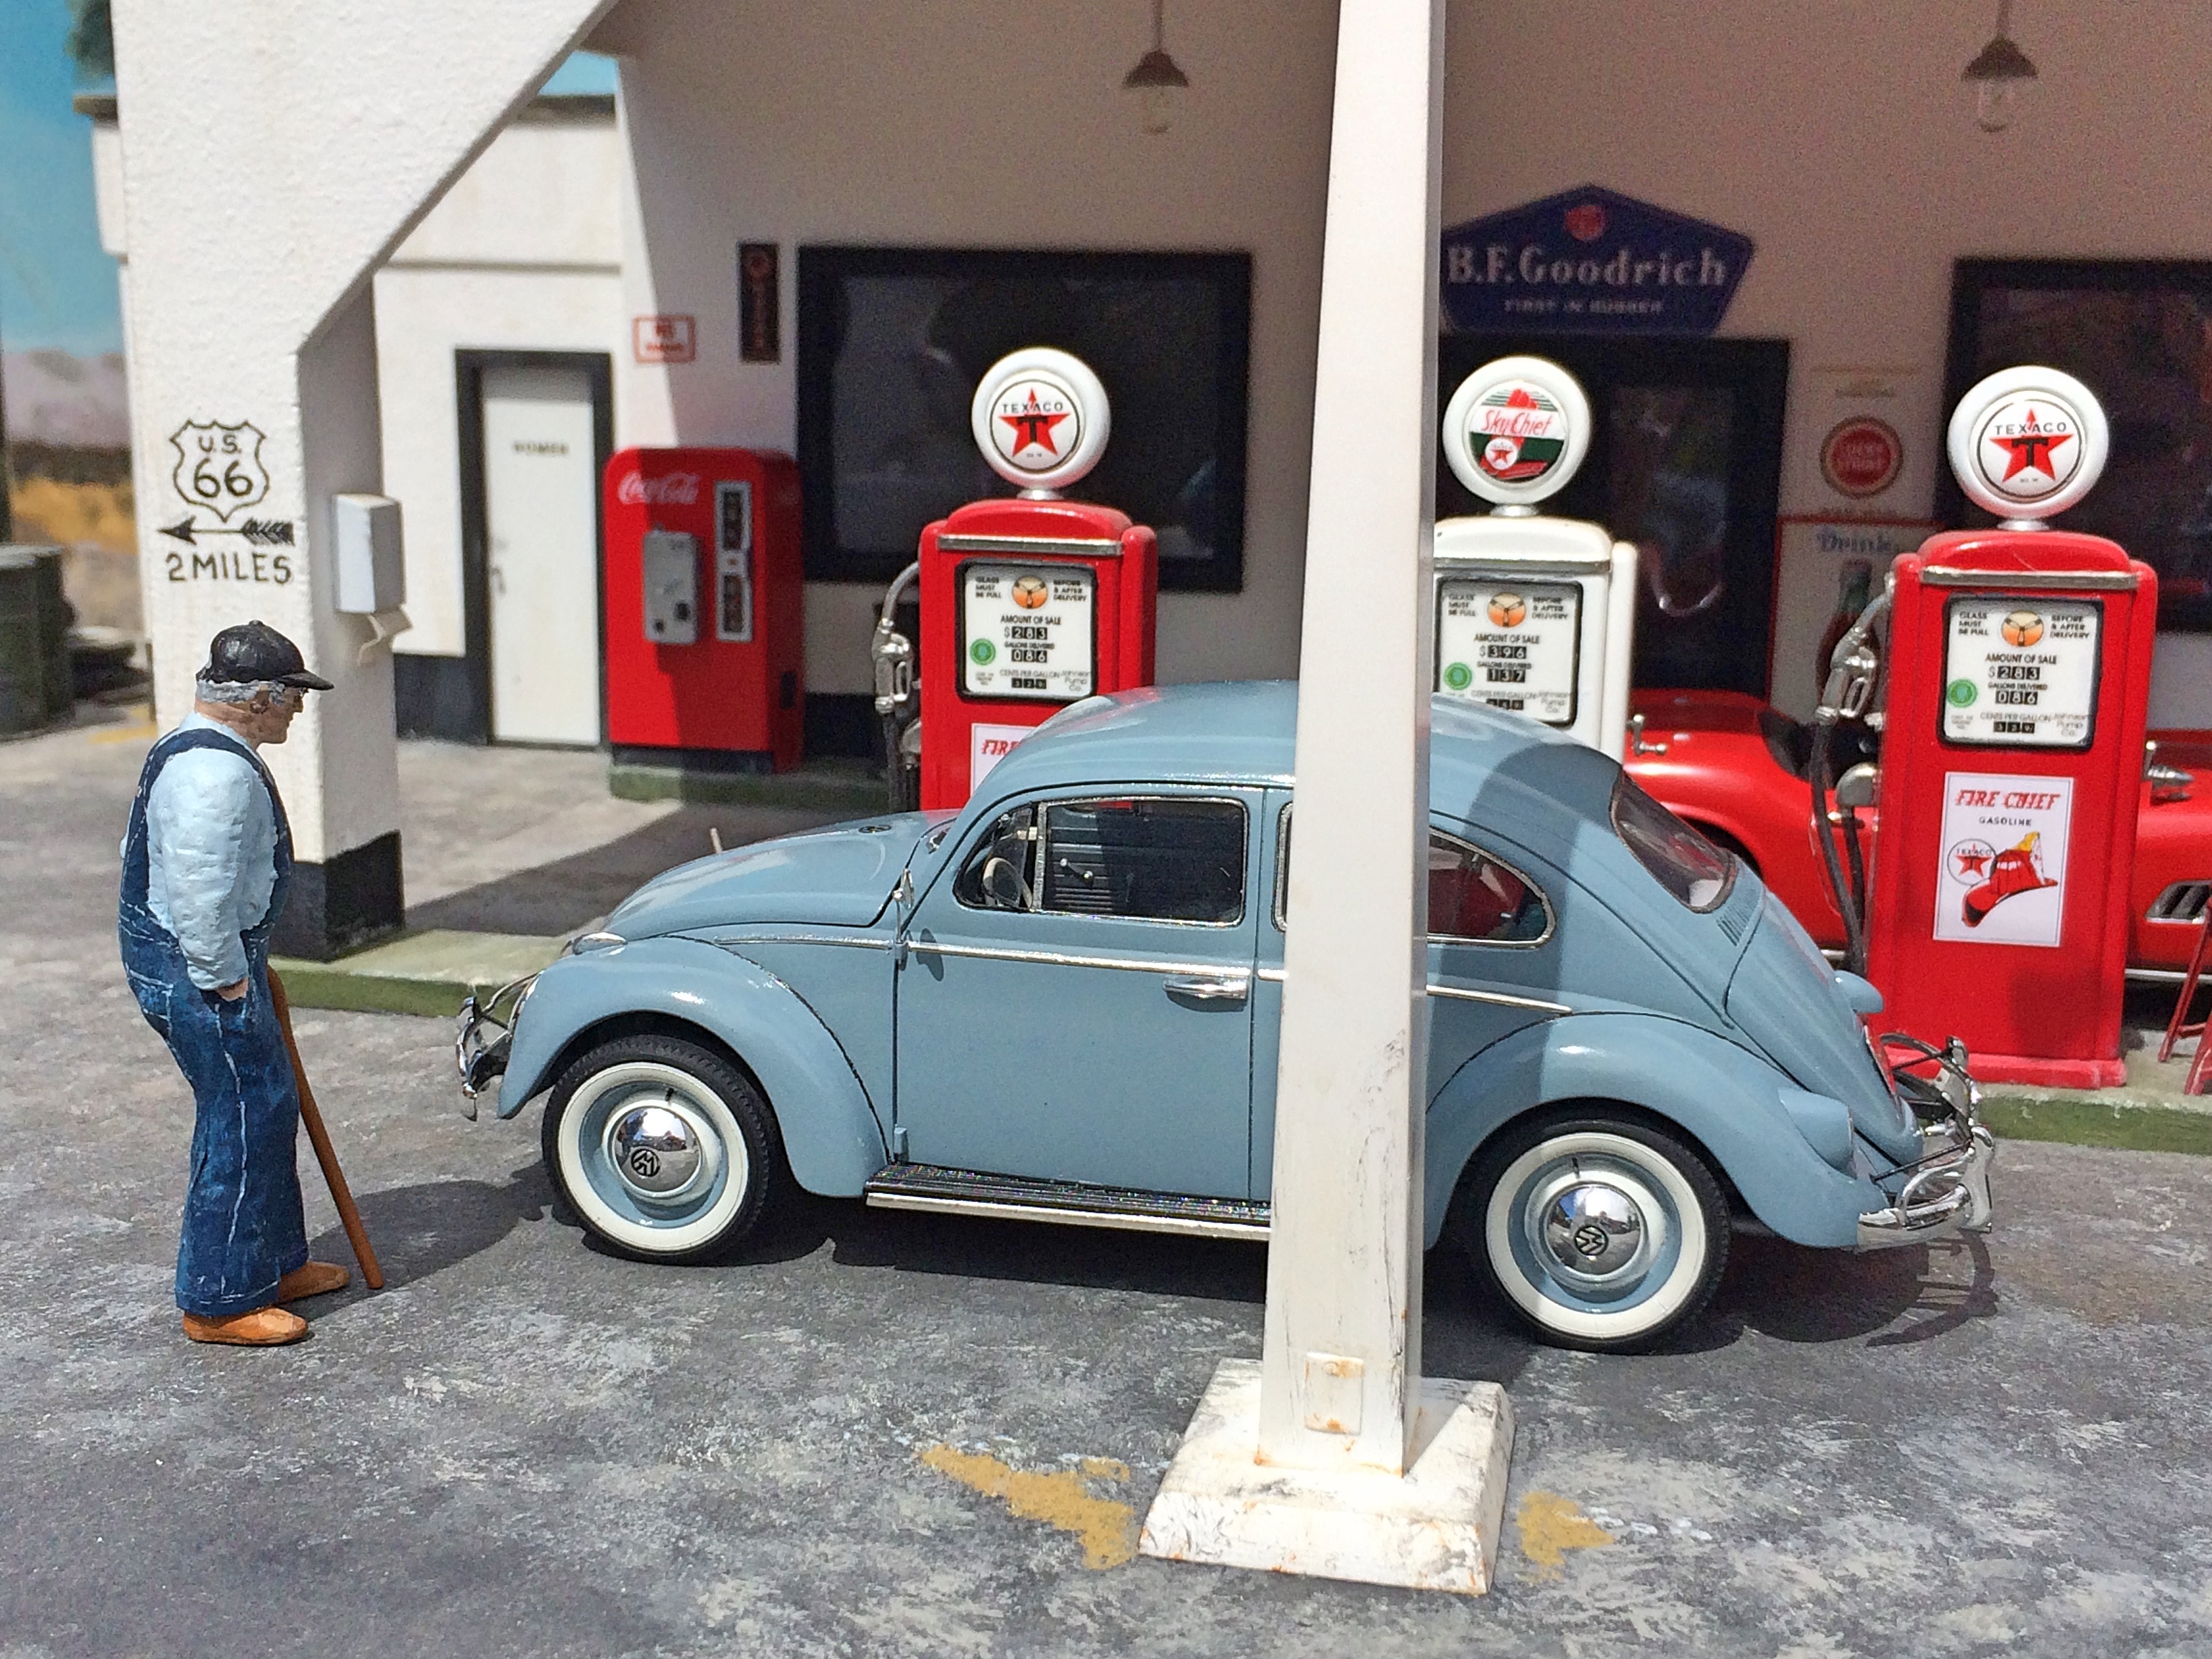
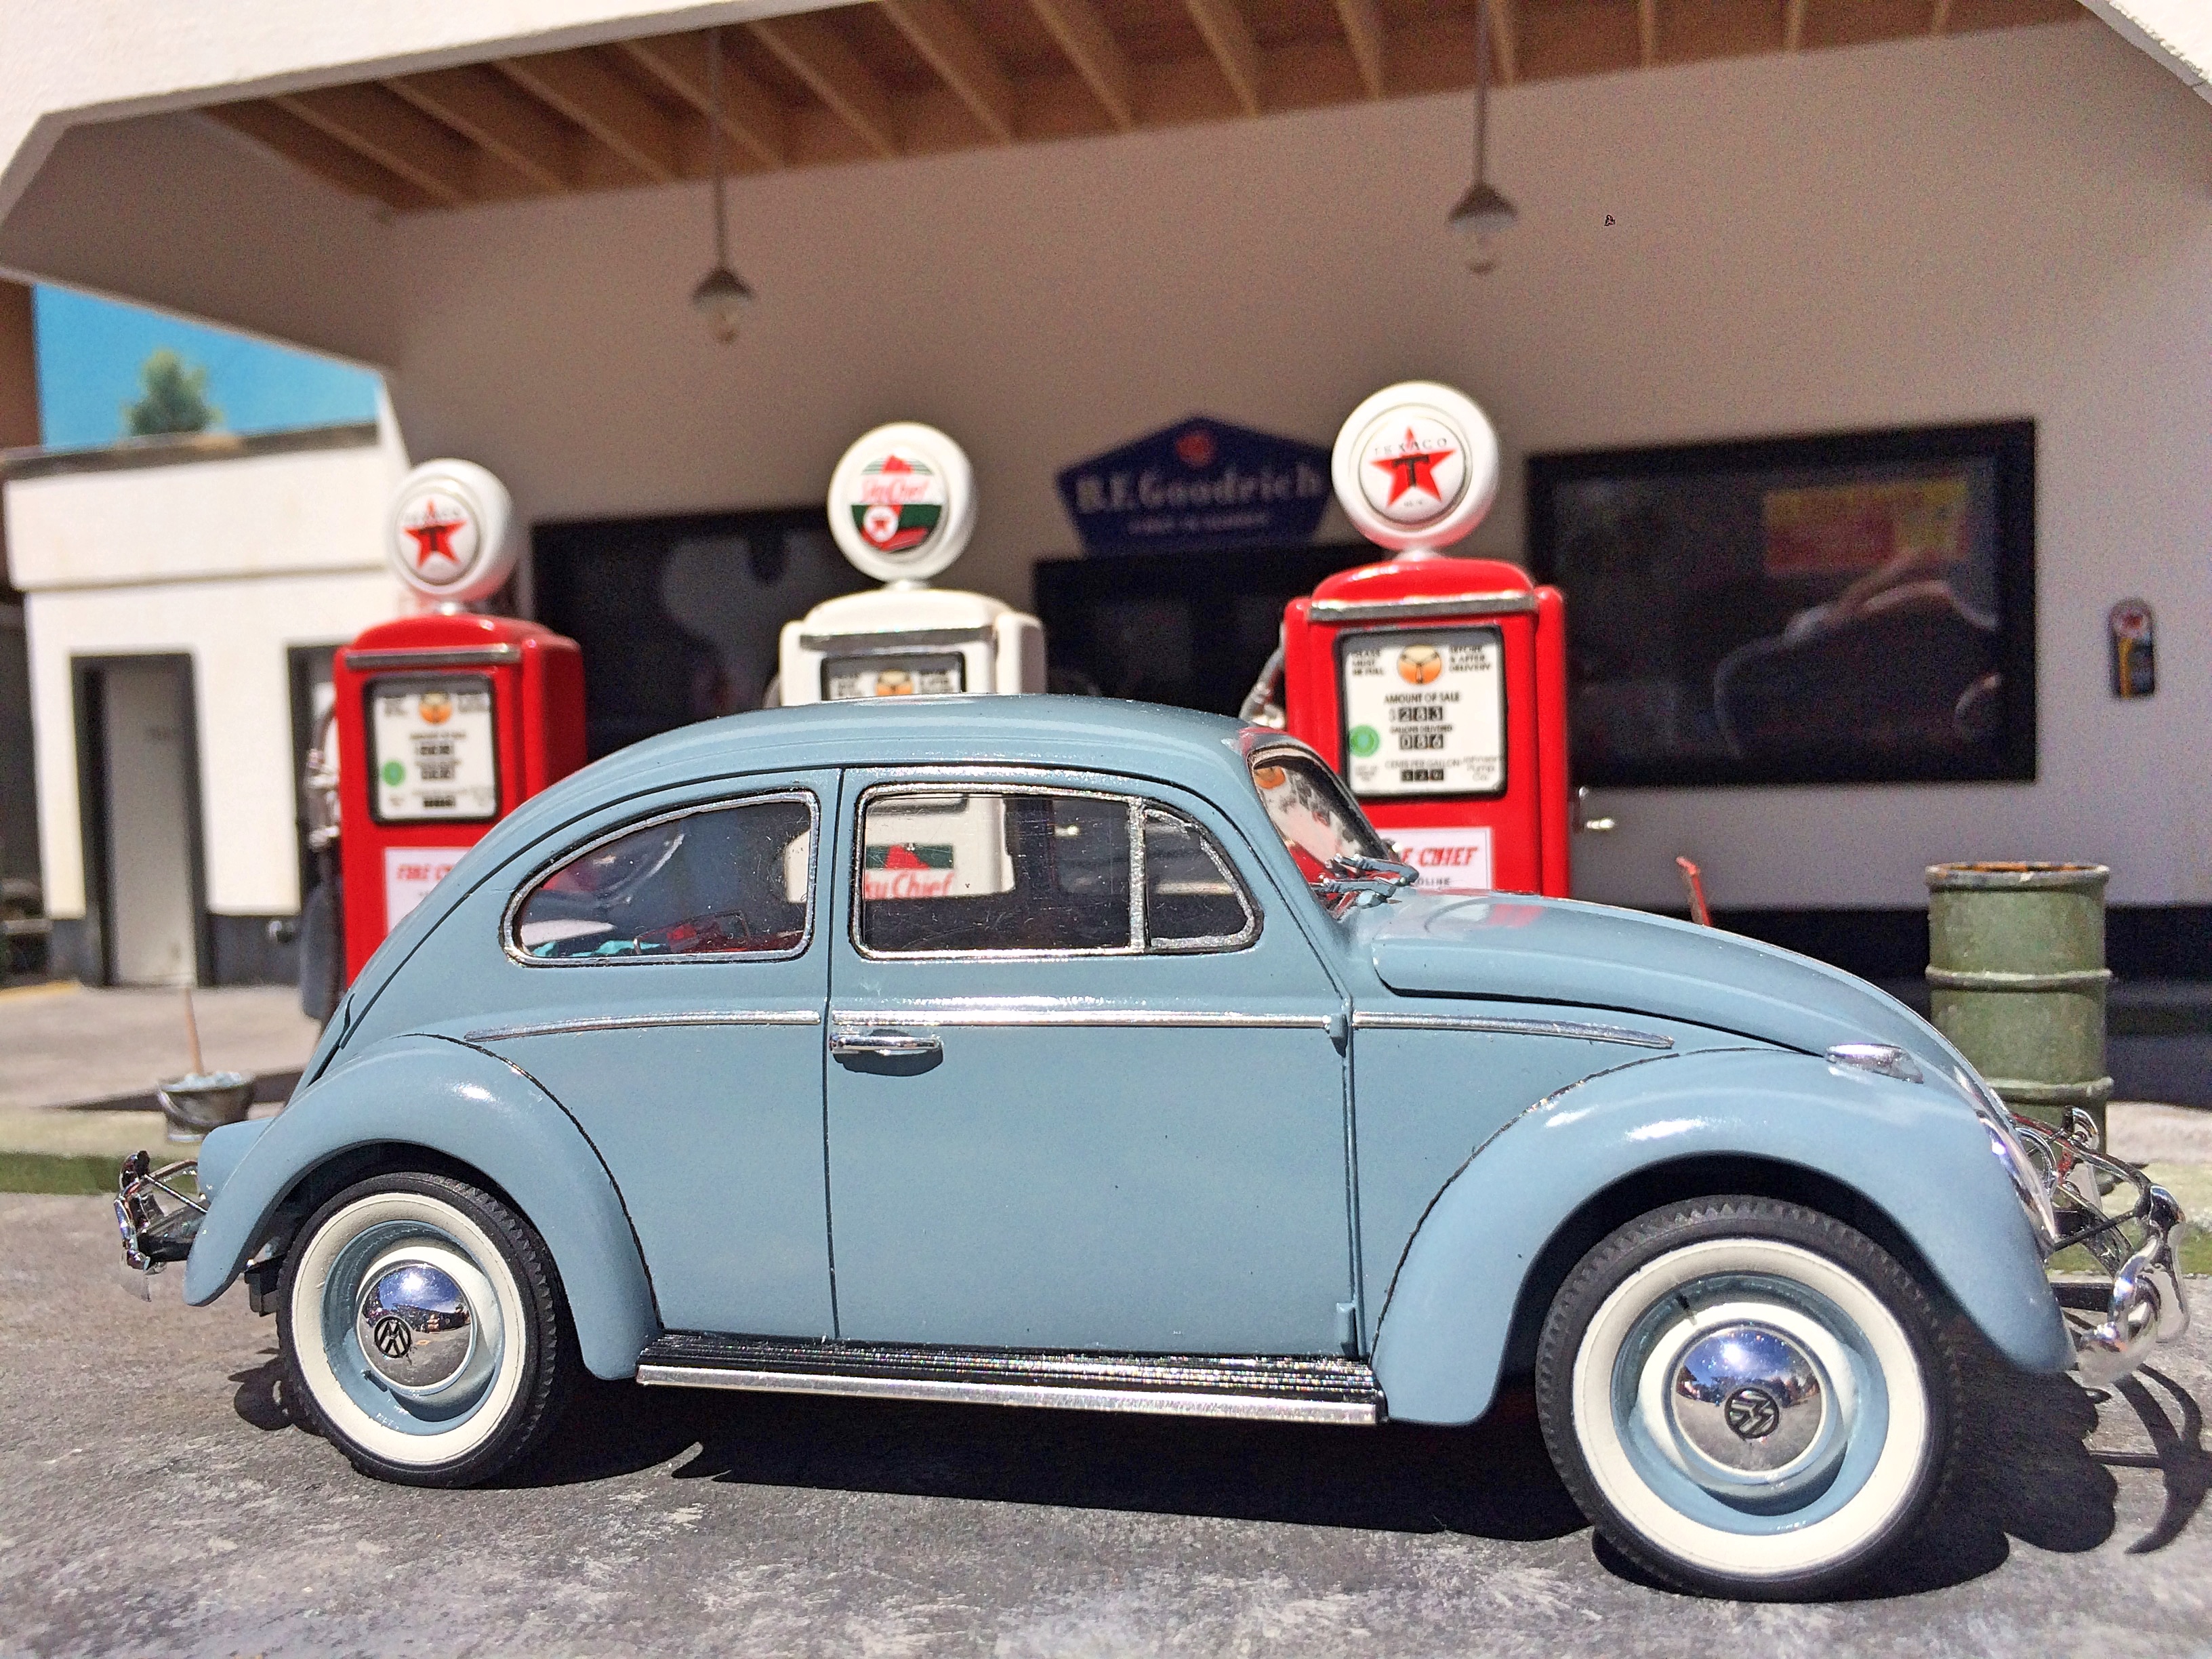
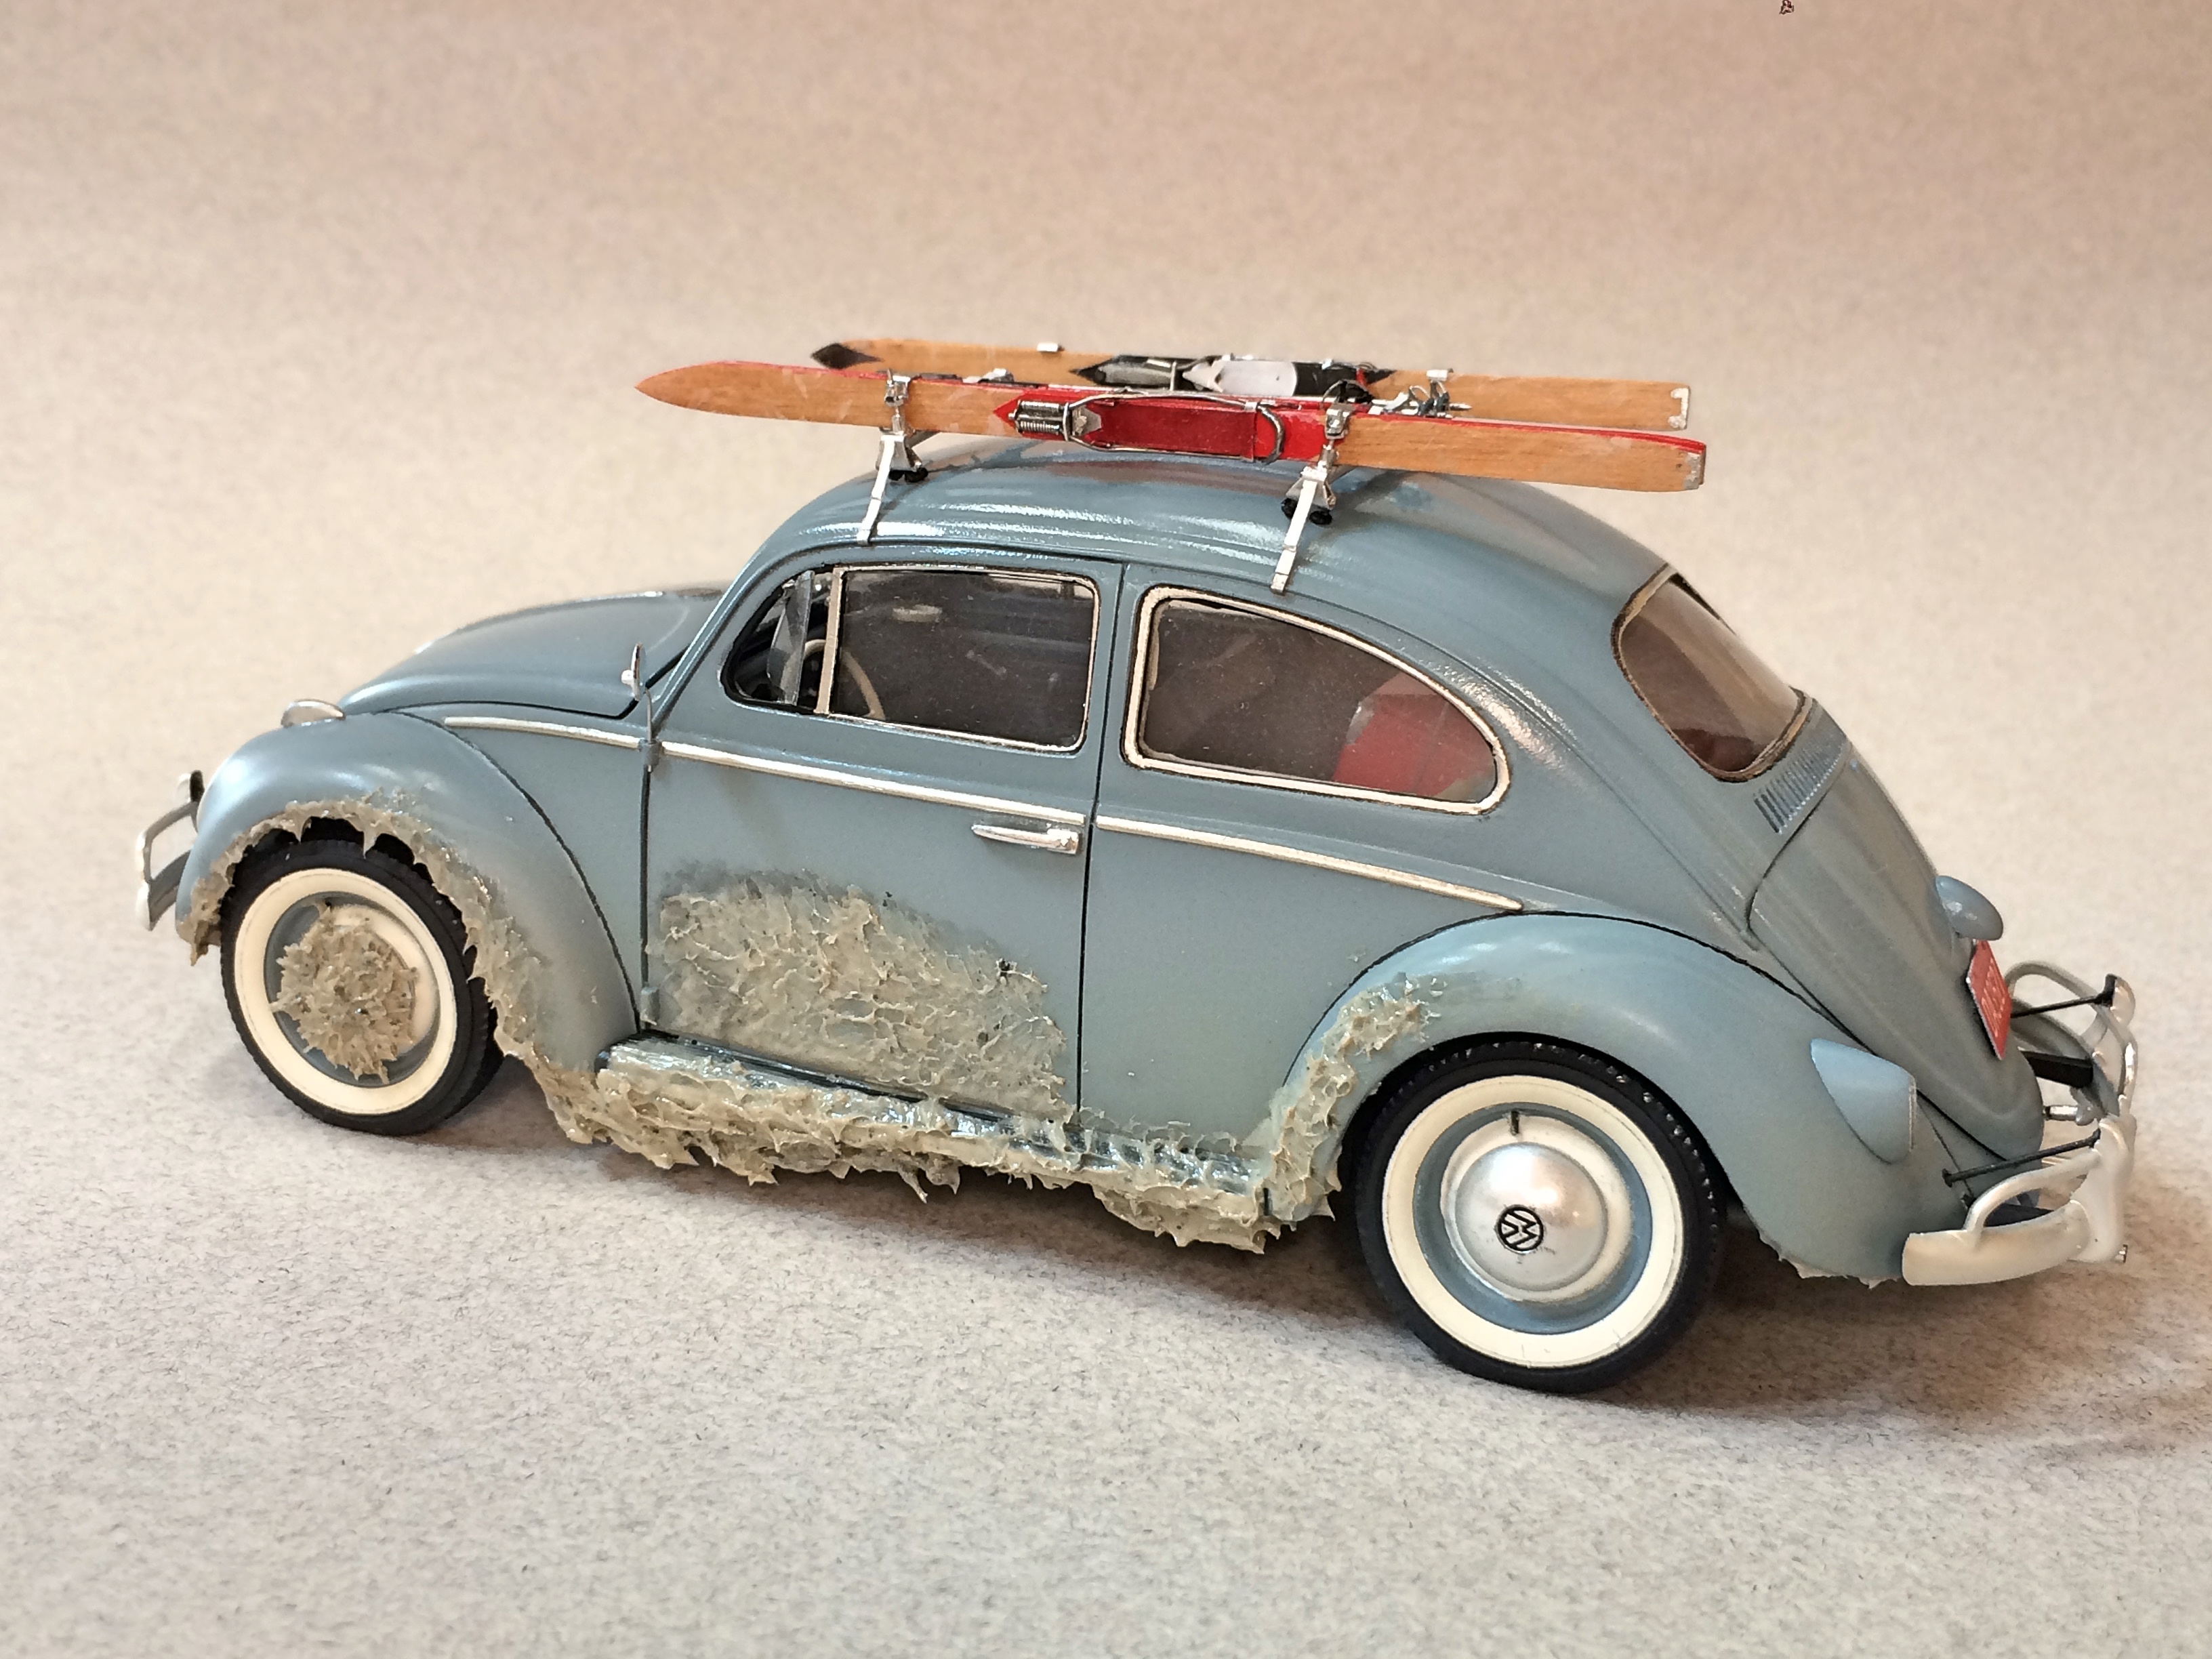
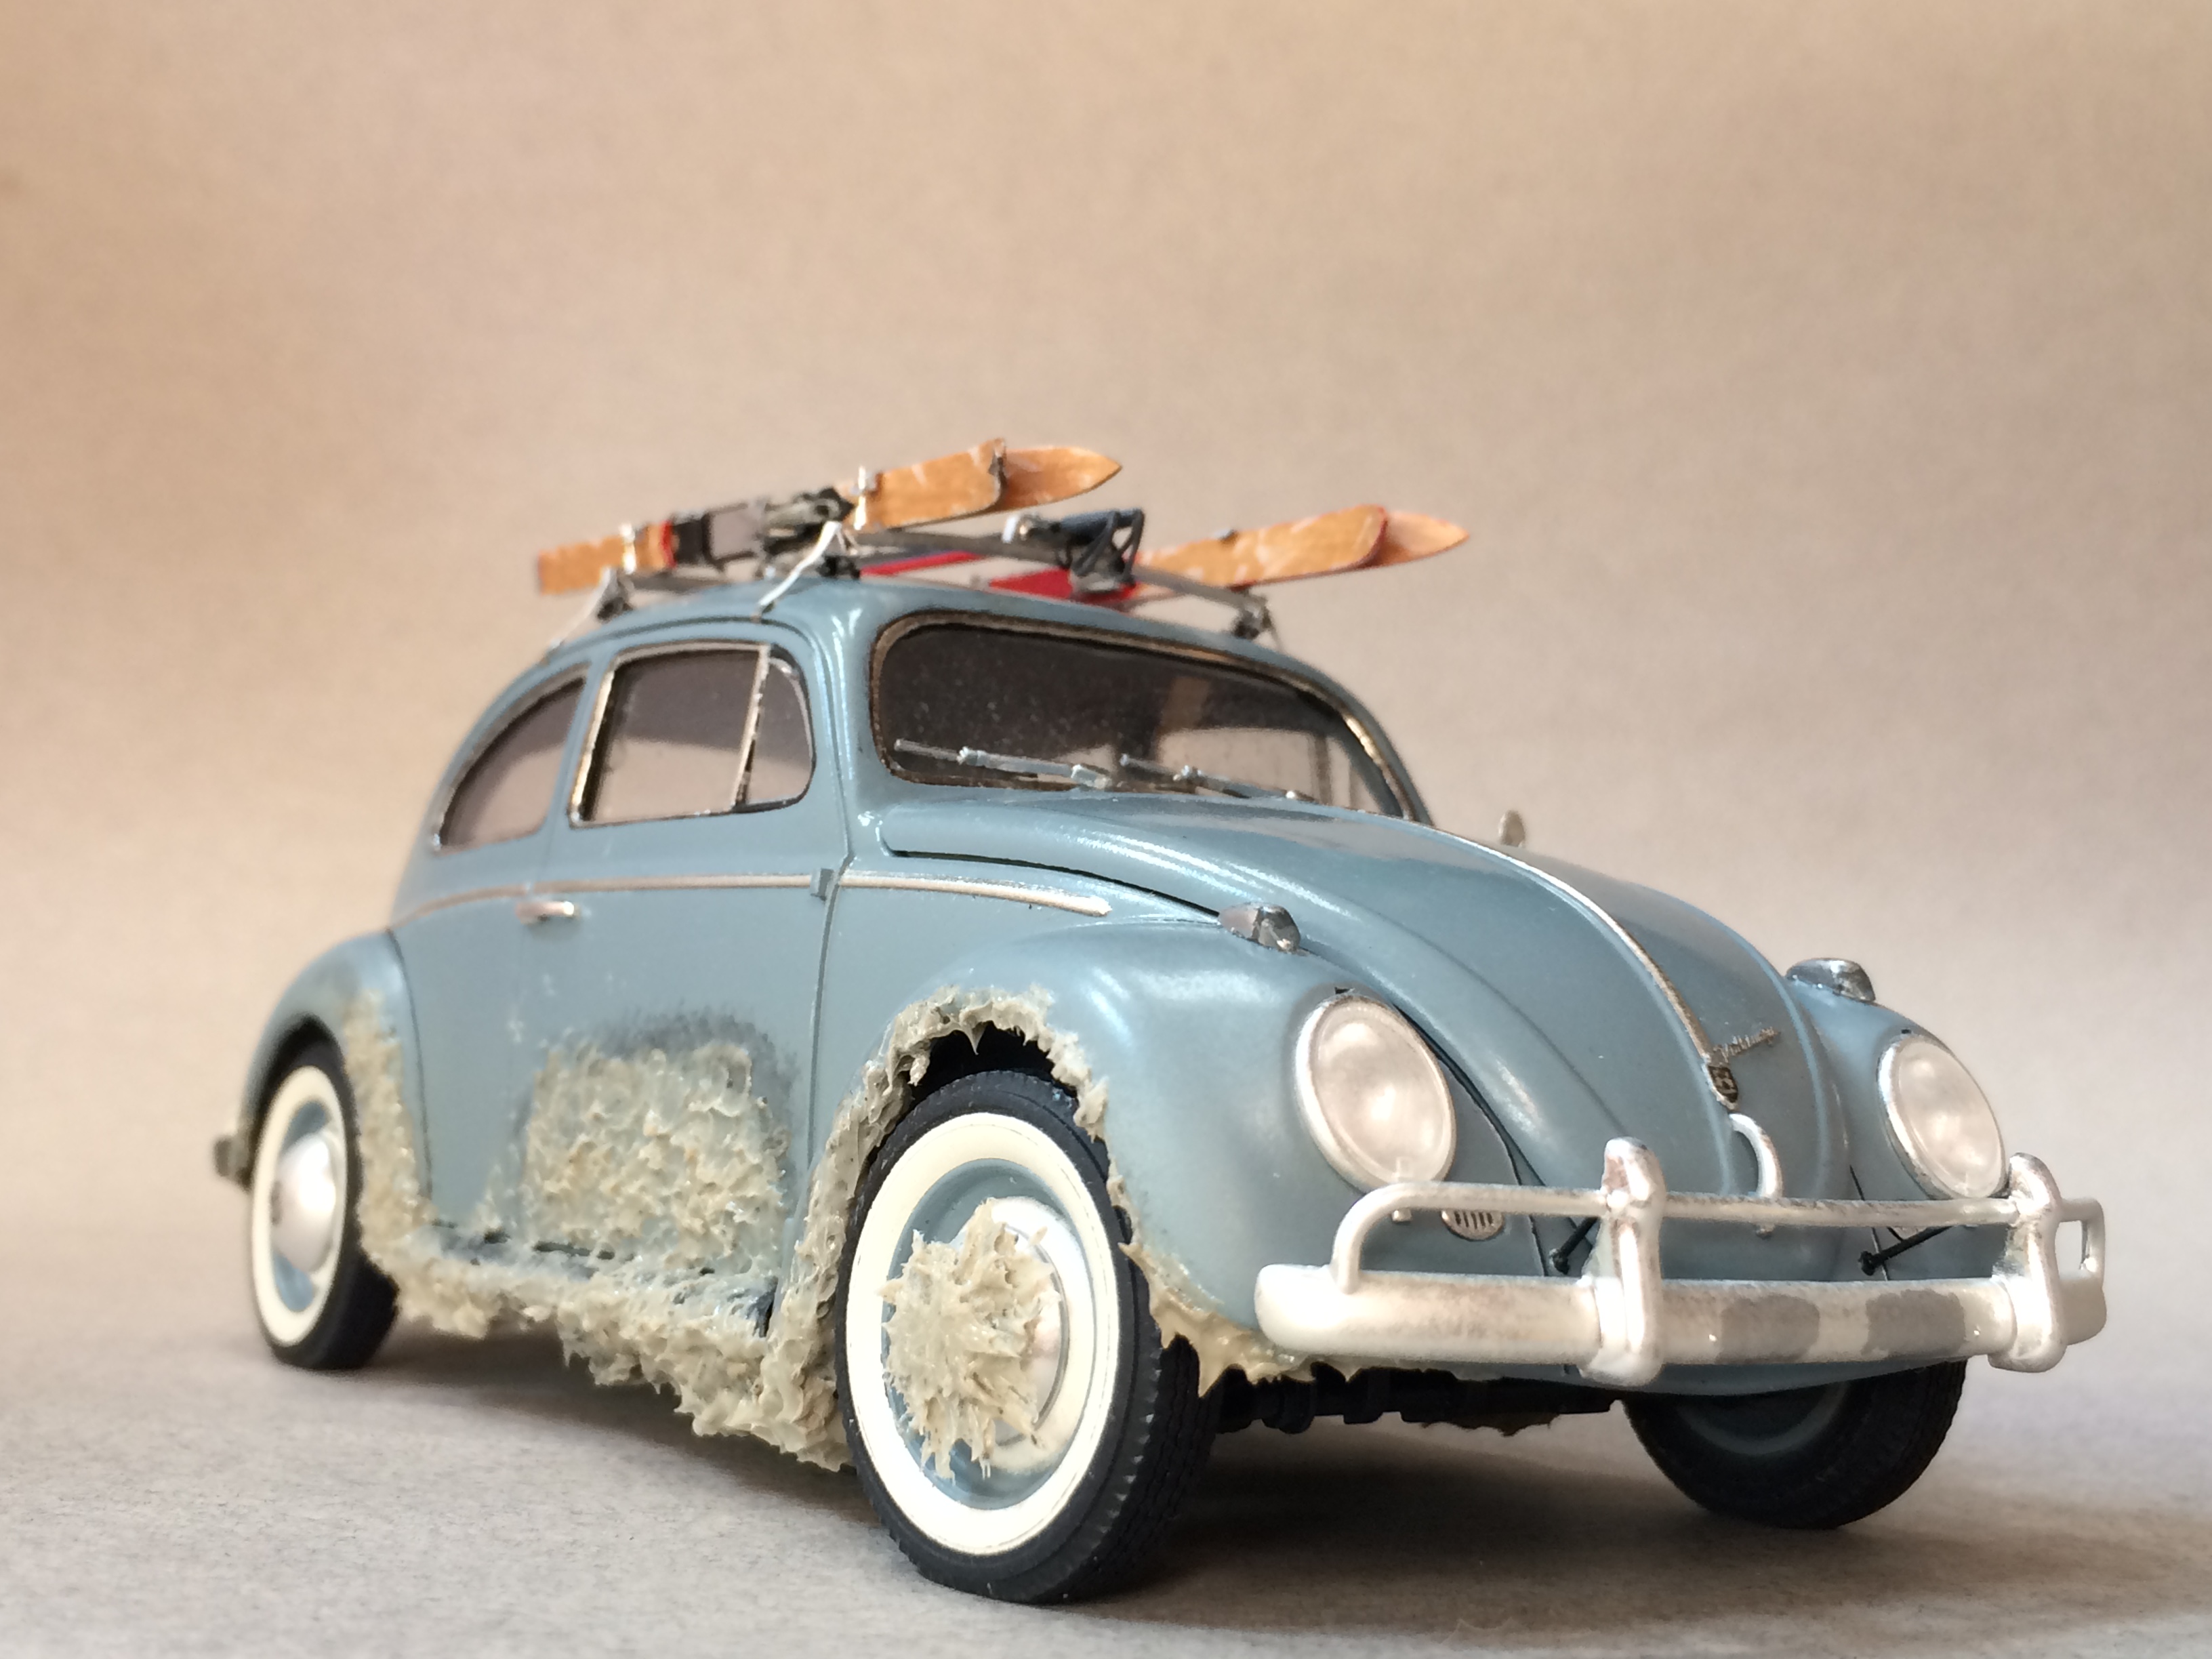
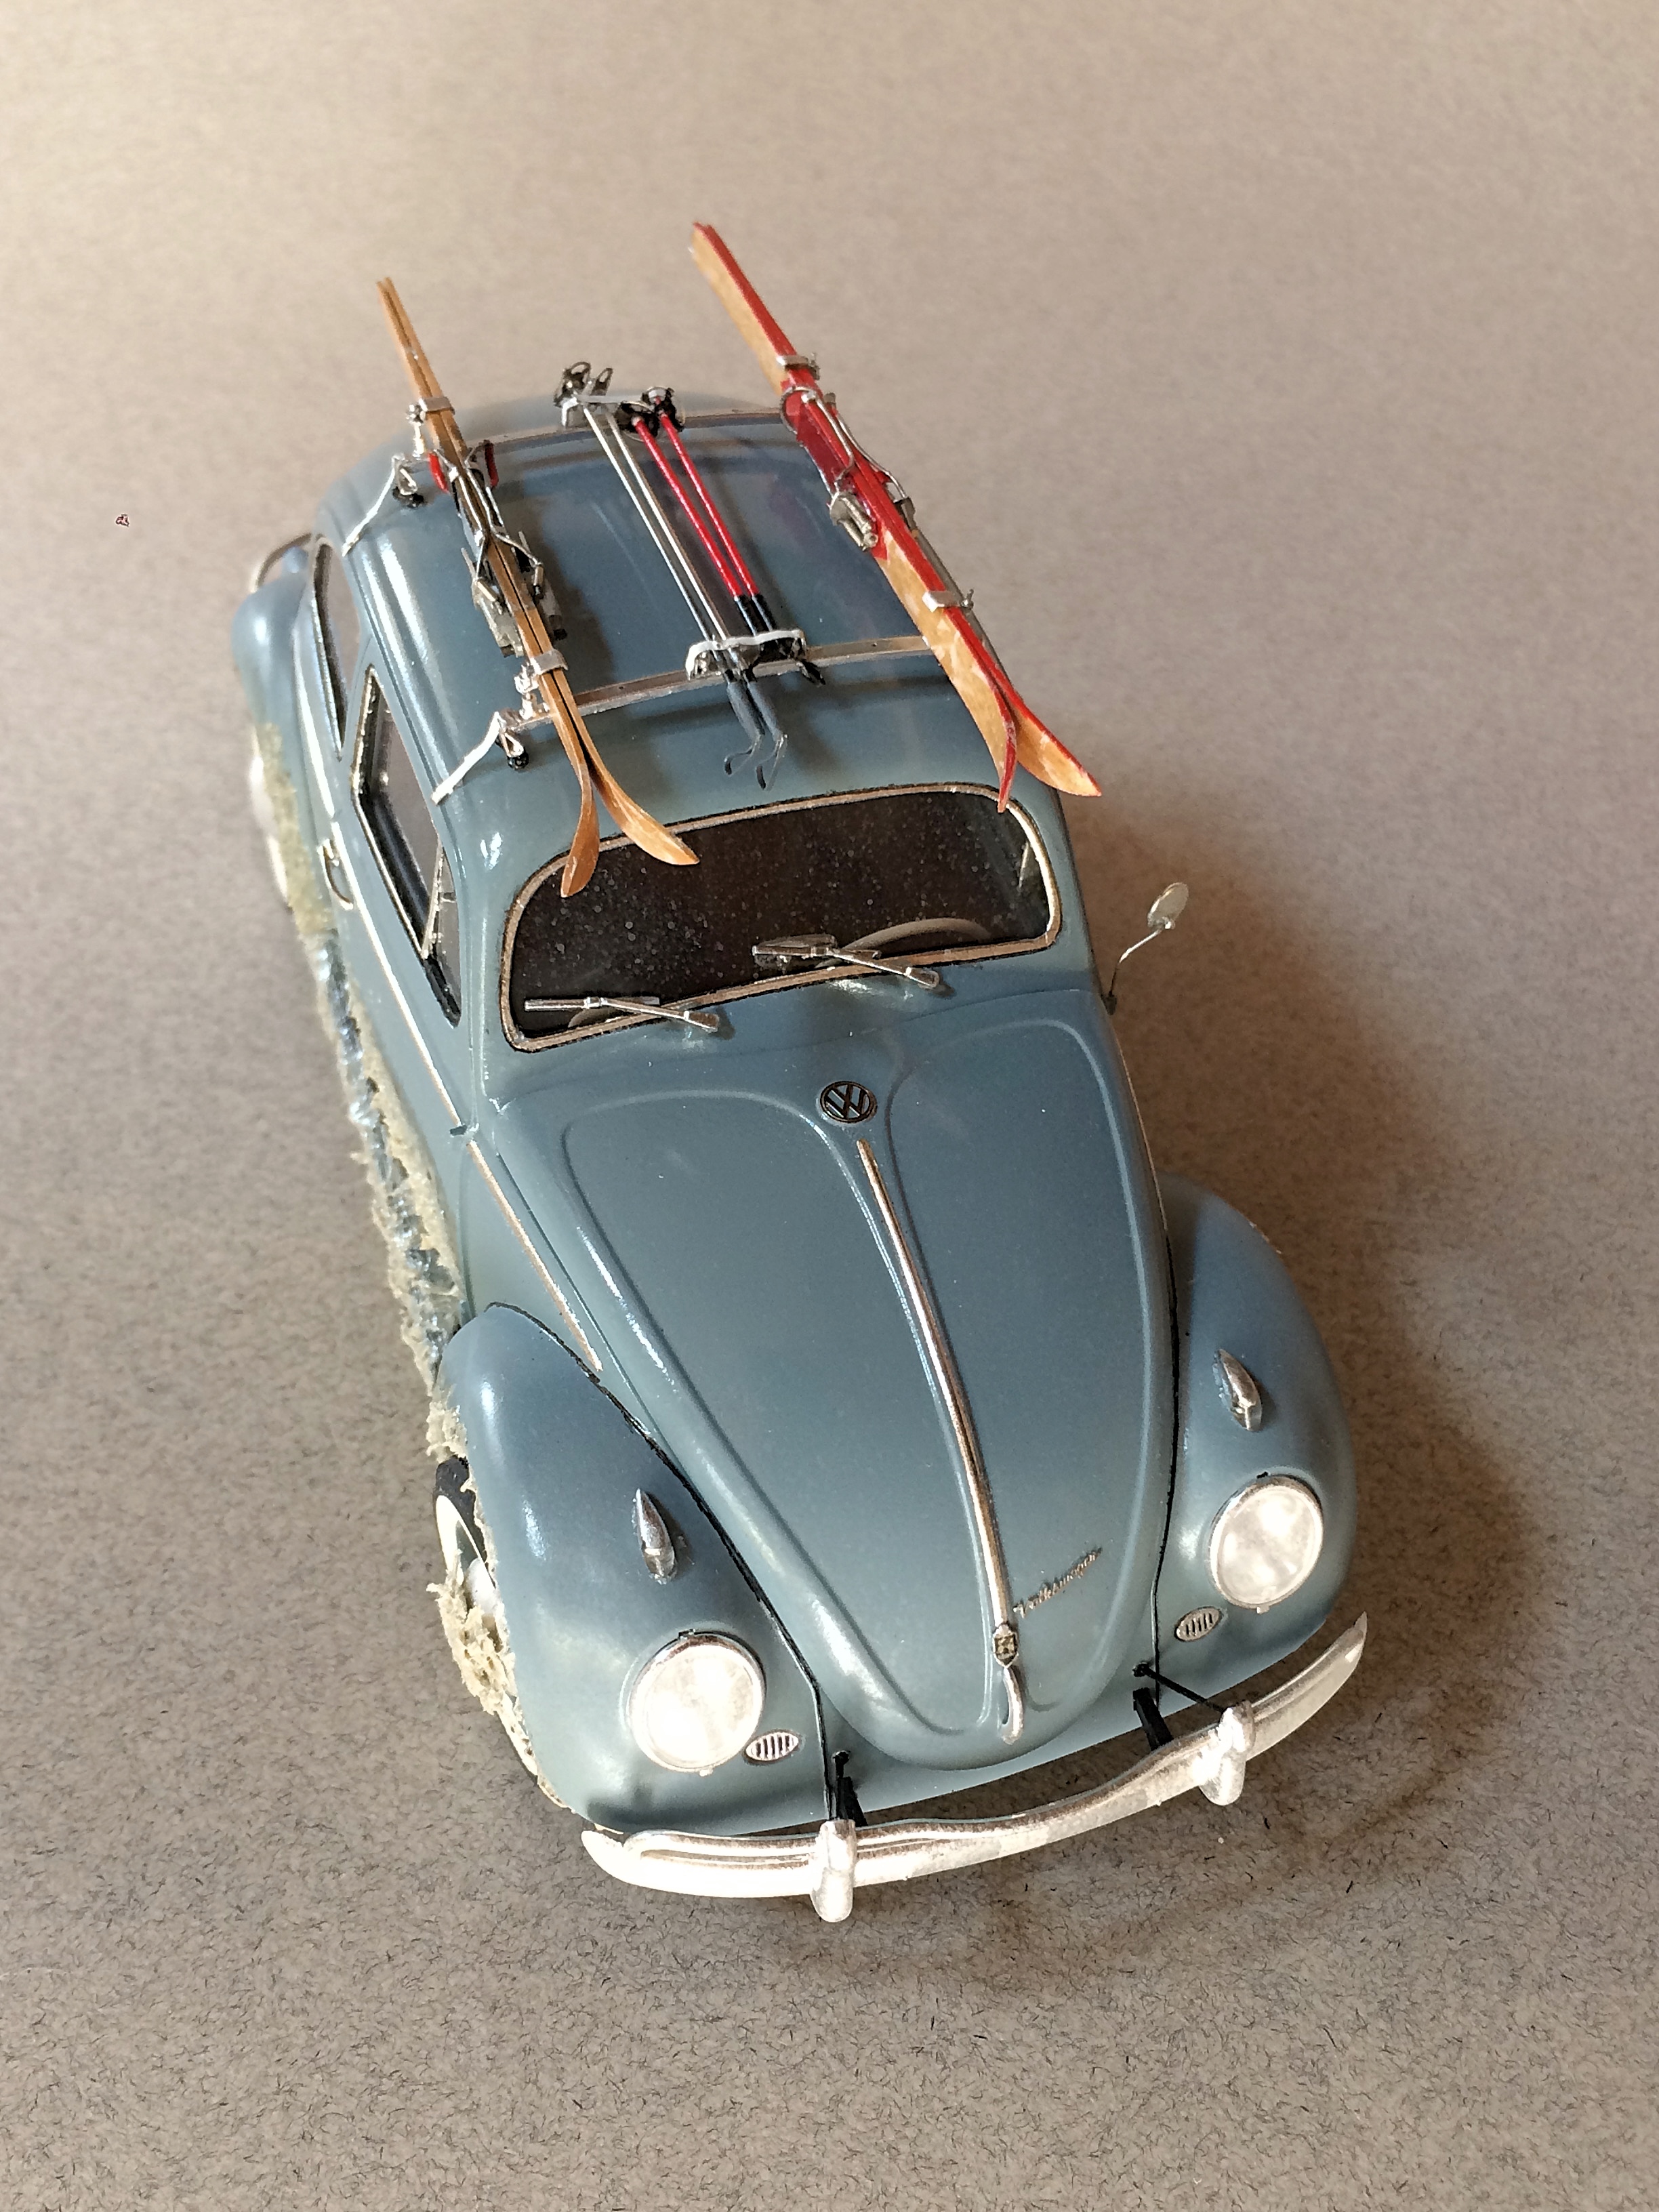
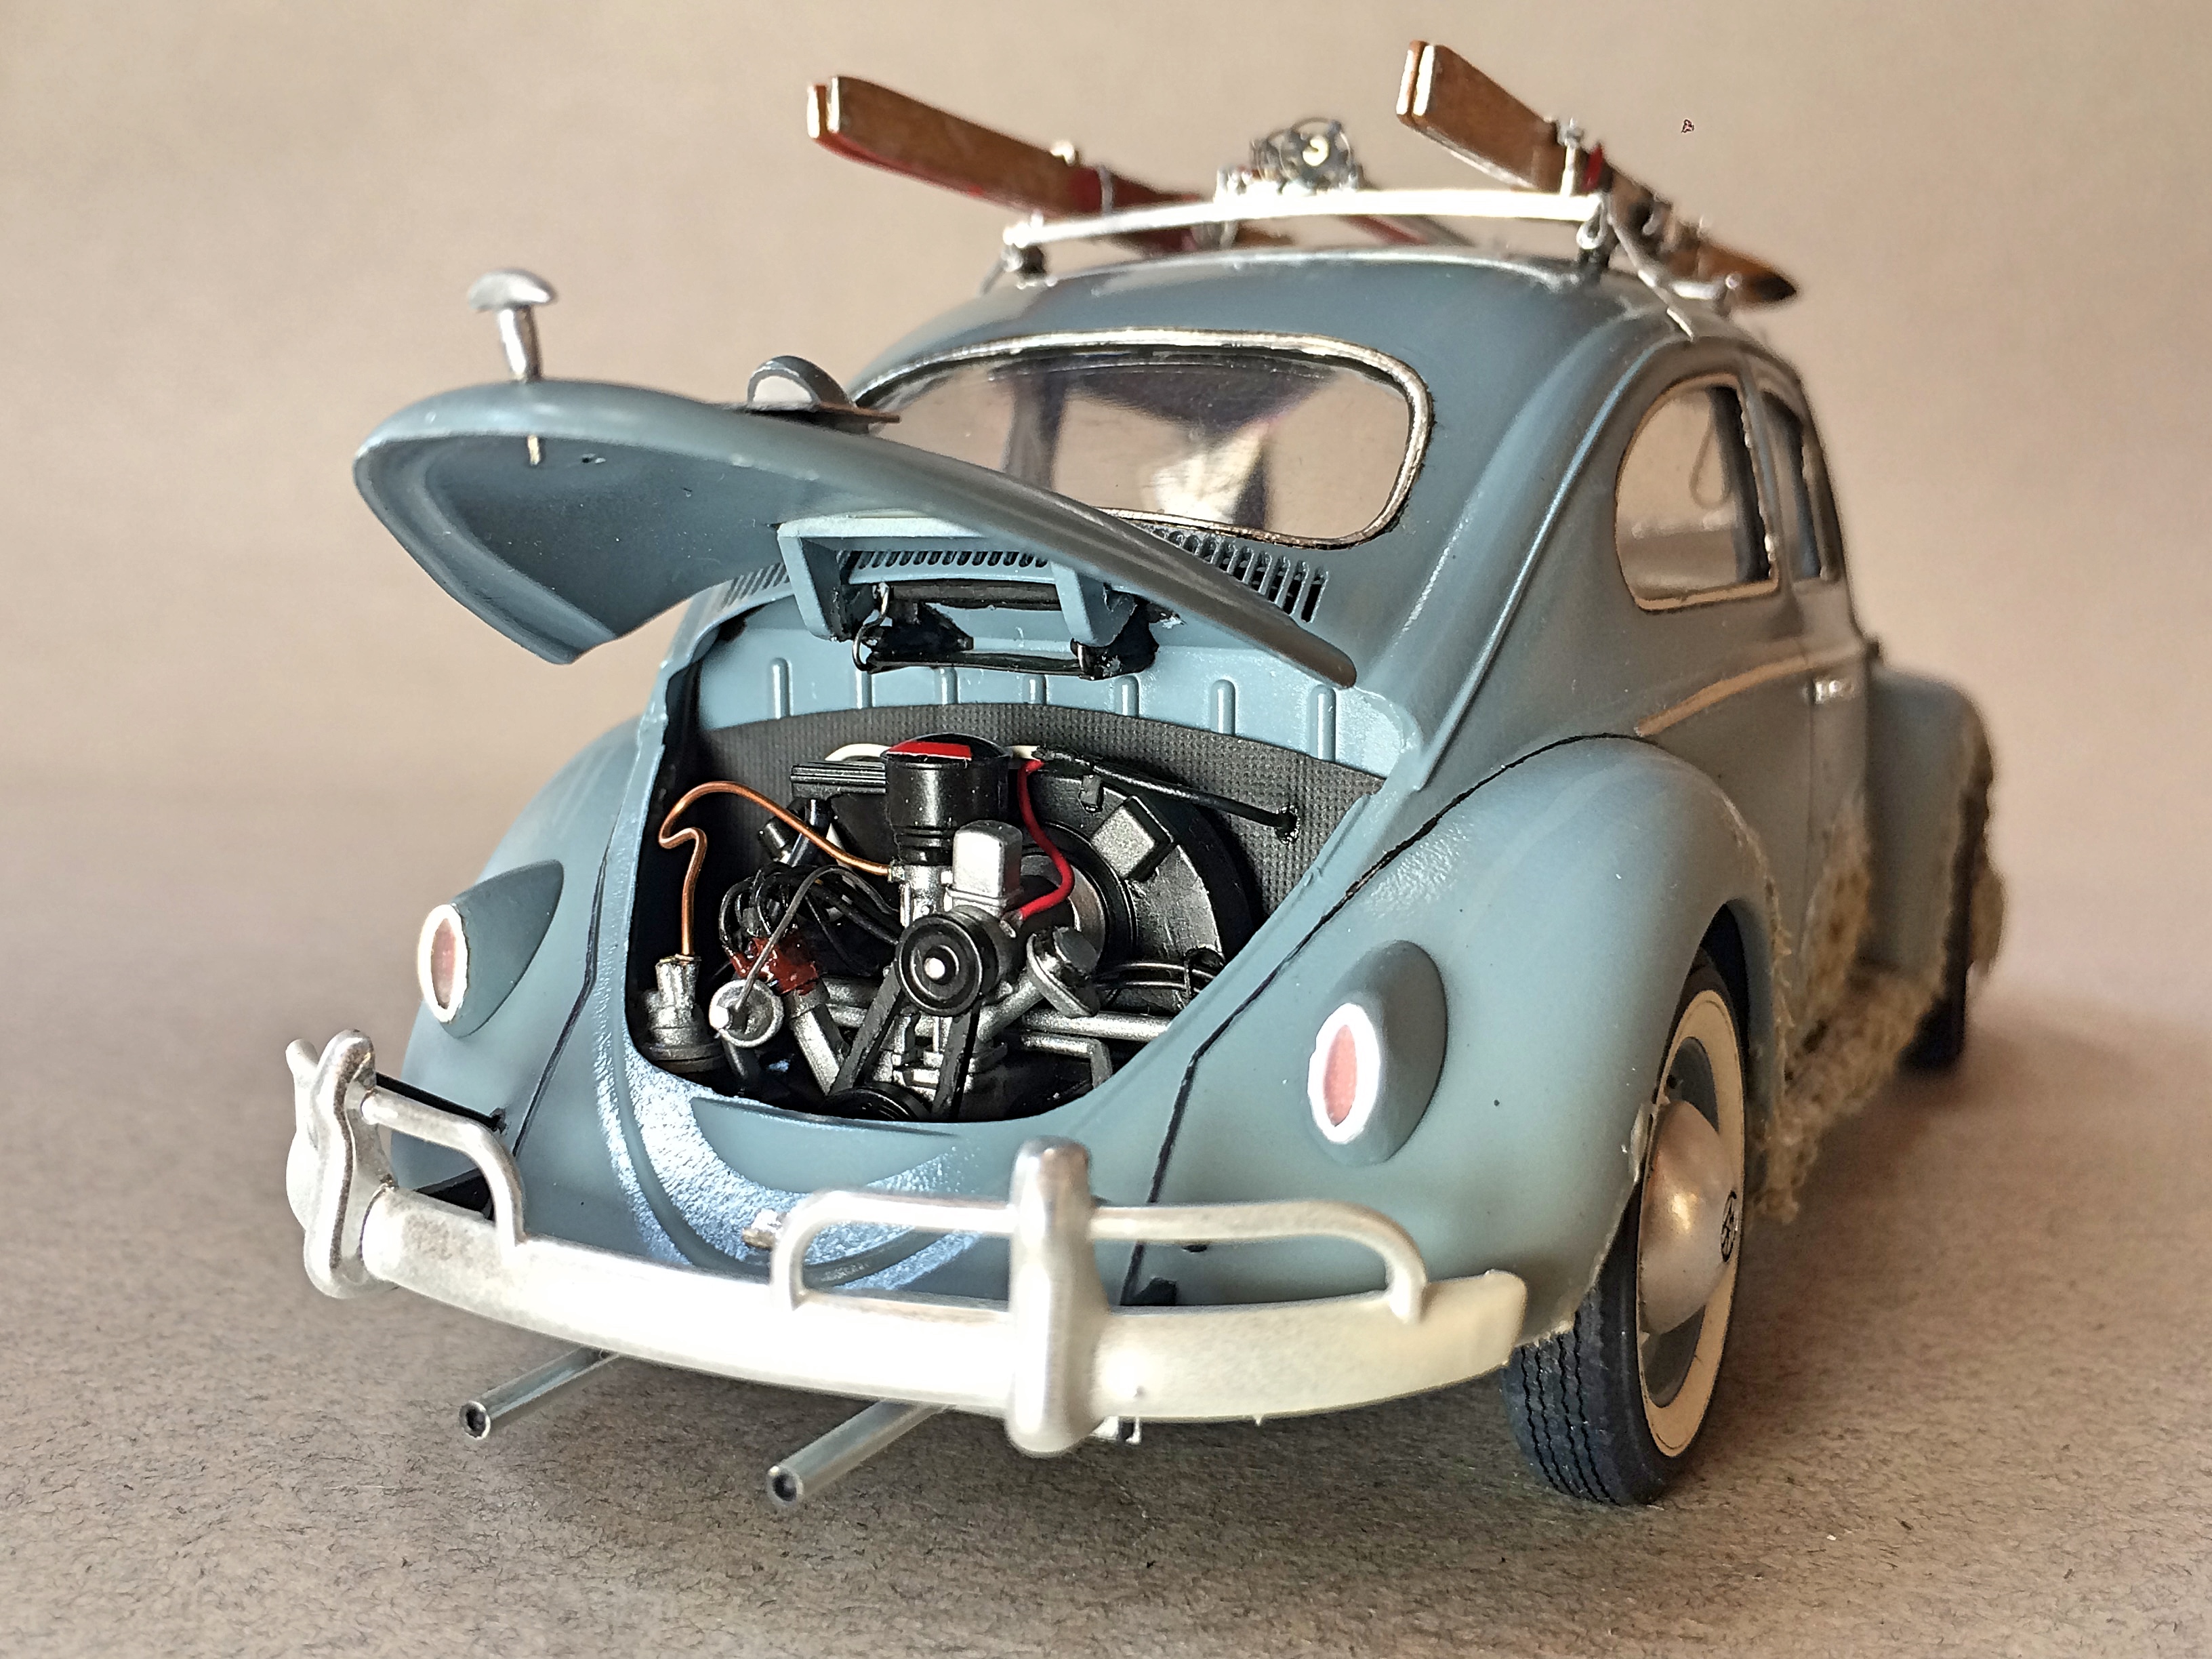
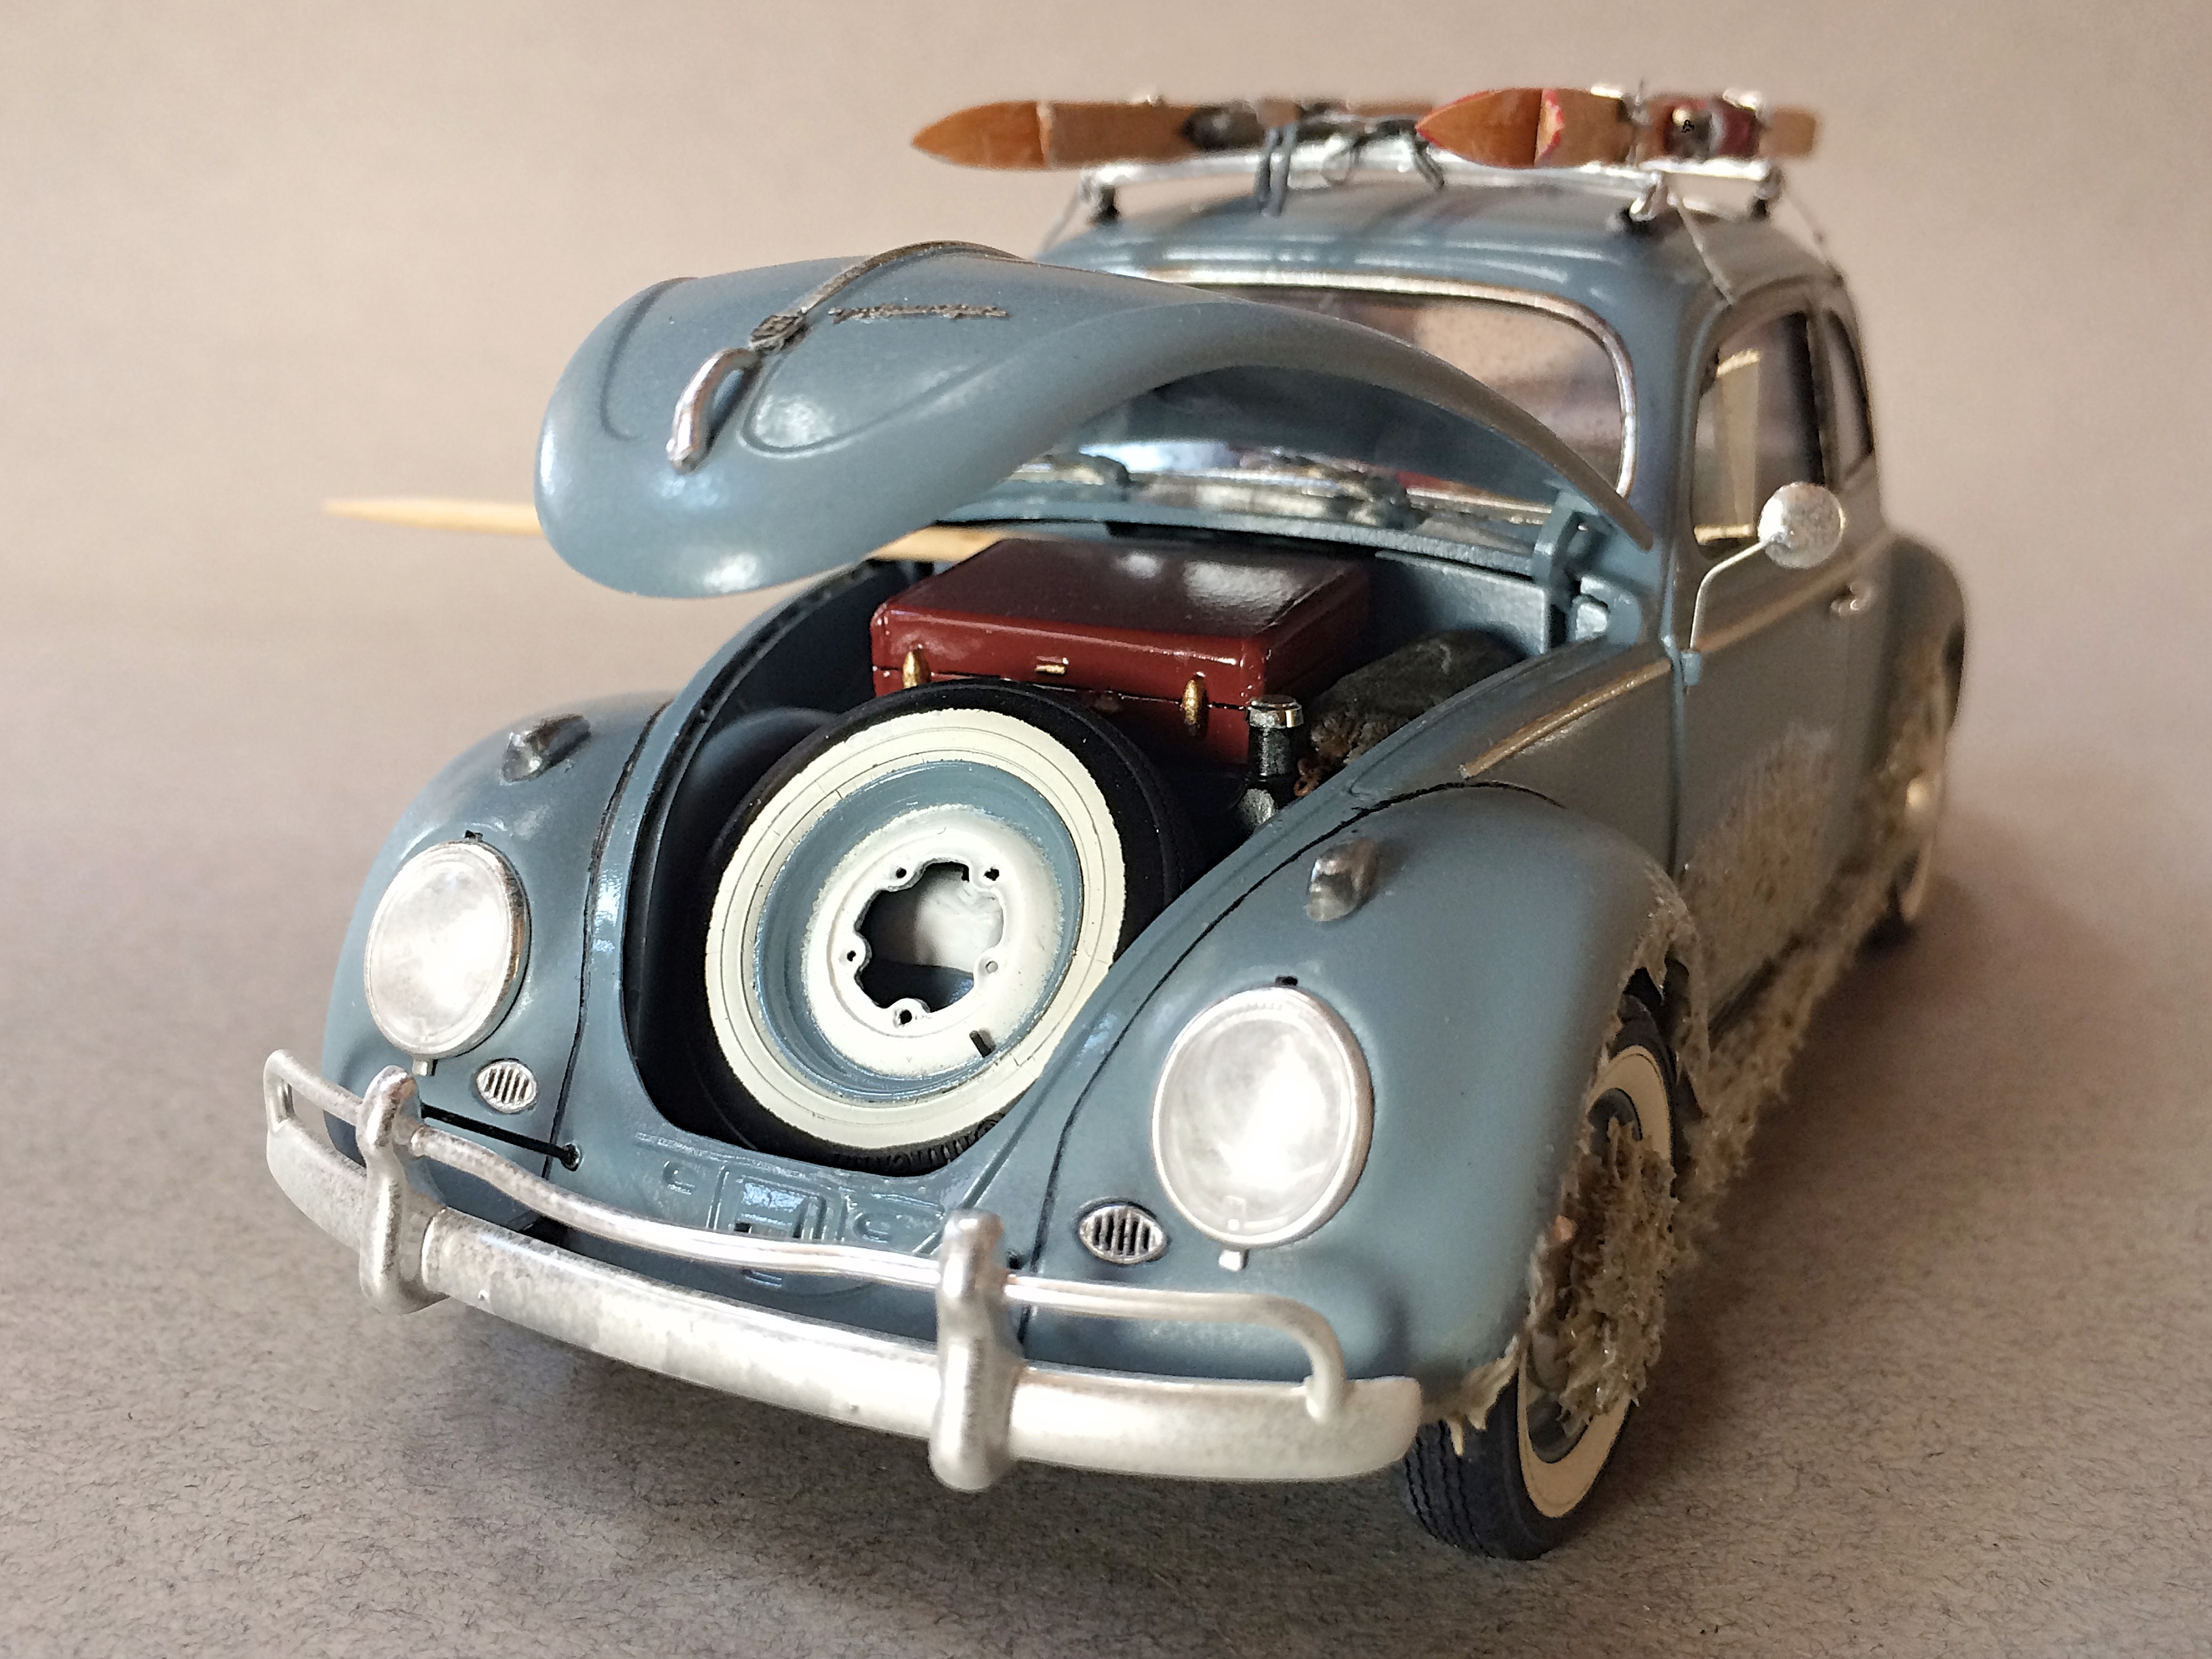
Work In Progress Thanks to everyone who stopped by! Glad that GSL picked the Tamiya VW Beetle for the Common Kit. I've entered that category three times. I suspect there will be more entries than ever because everyone loves Bugs! I'm calling this FROZEN IN TIME, a tribute model of the 1960 Beetle my parents had before I was born. I'm into weathering my builds, this is extreme without having any rust. But I took some pictures before I ruined it. LOL There are some things I'm not happy with, but oh well, IT'S FINISHED! I detailed the engine, though the lid will be closed all the time except at shows. Question to everyone who built this, the front hood is a tight fit and challenge to get opened? I reworked the engine lid hinge, no toothpick required to stay open.
-
Thank you! Dude, I can only try to match your skills! I'm still afraid to do the Pagani.
-
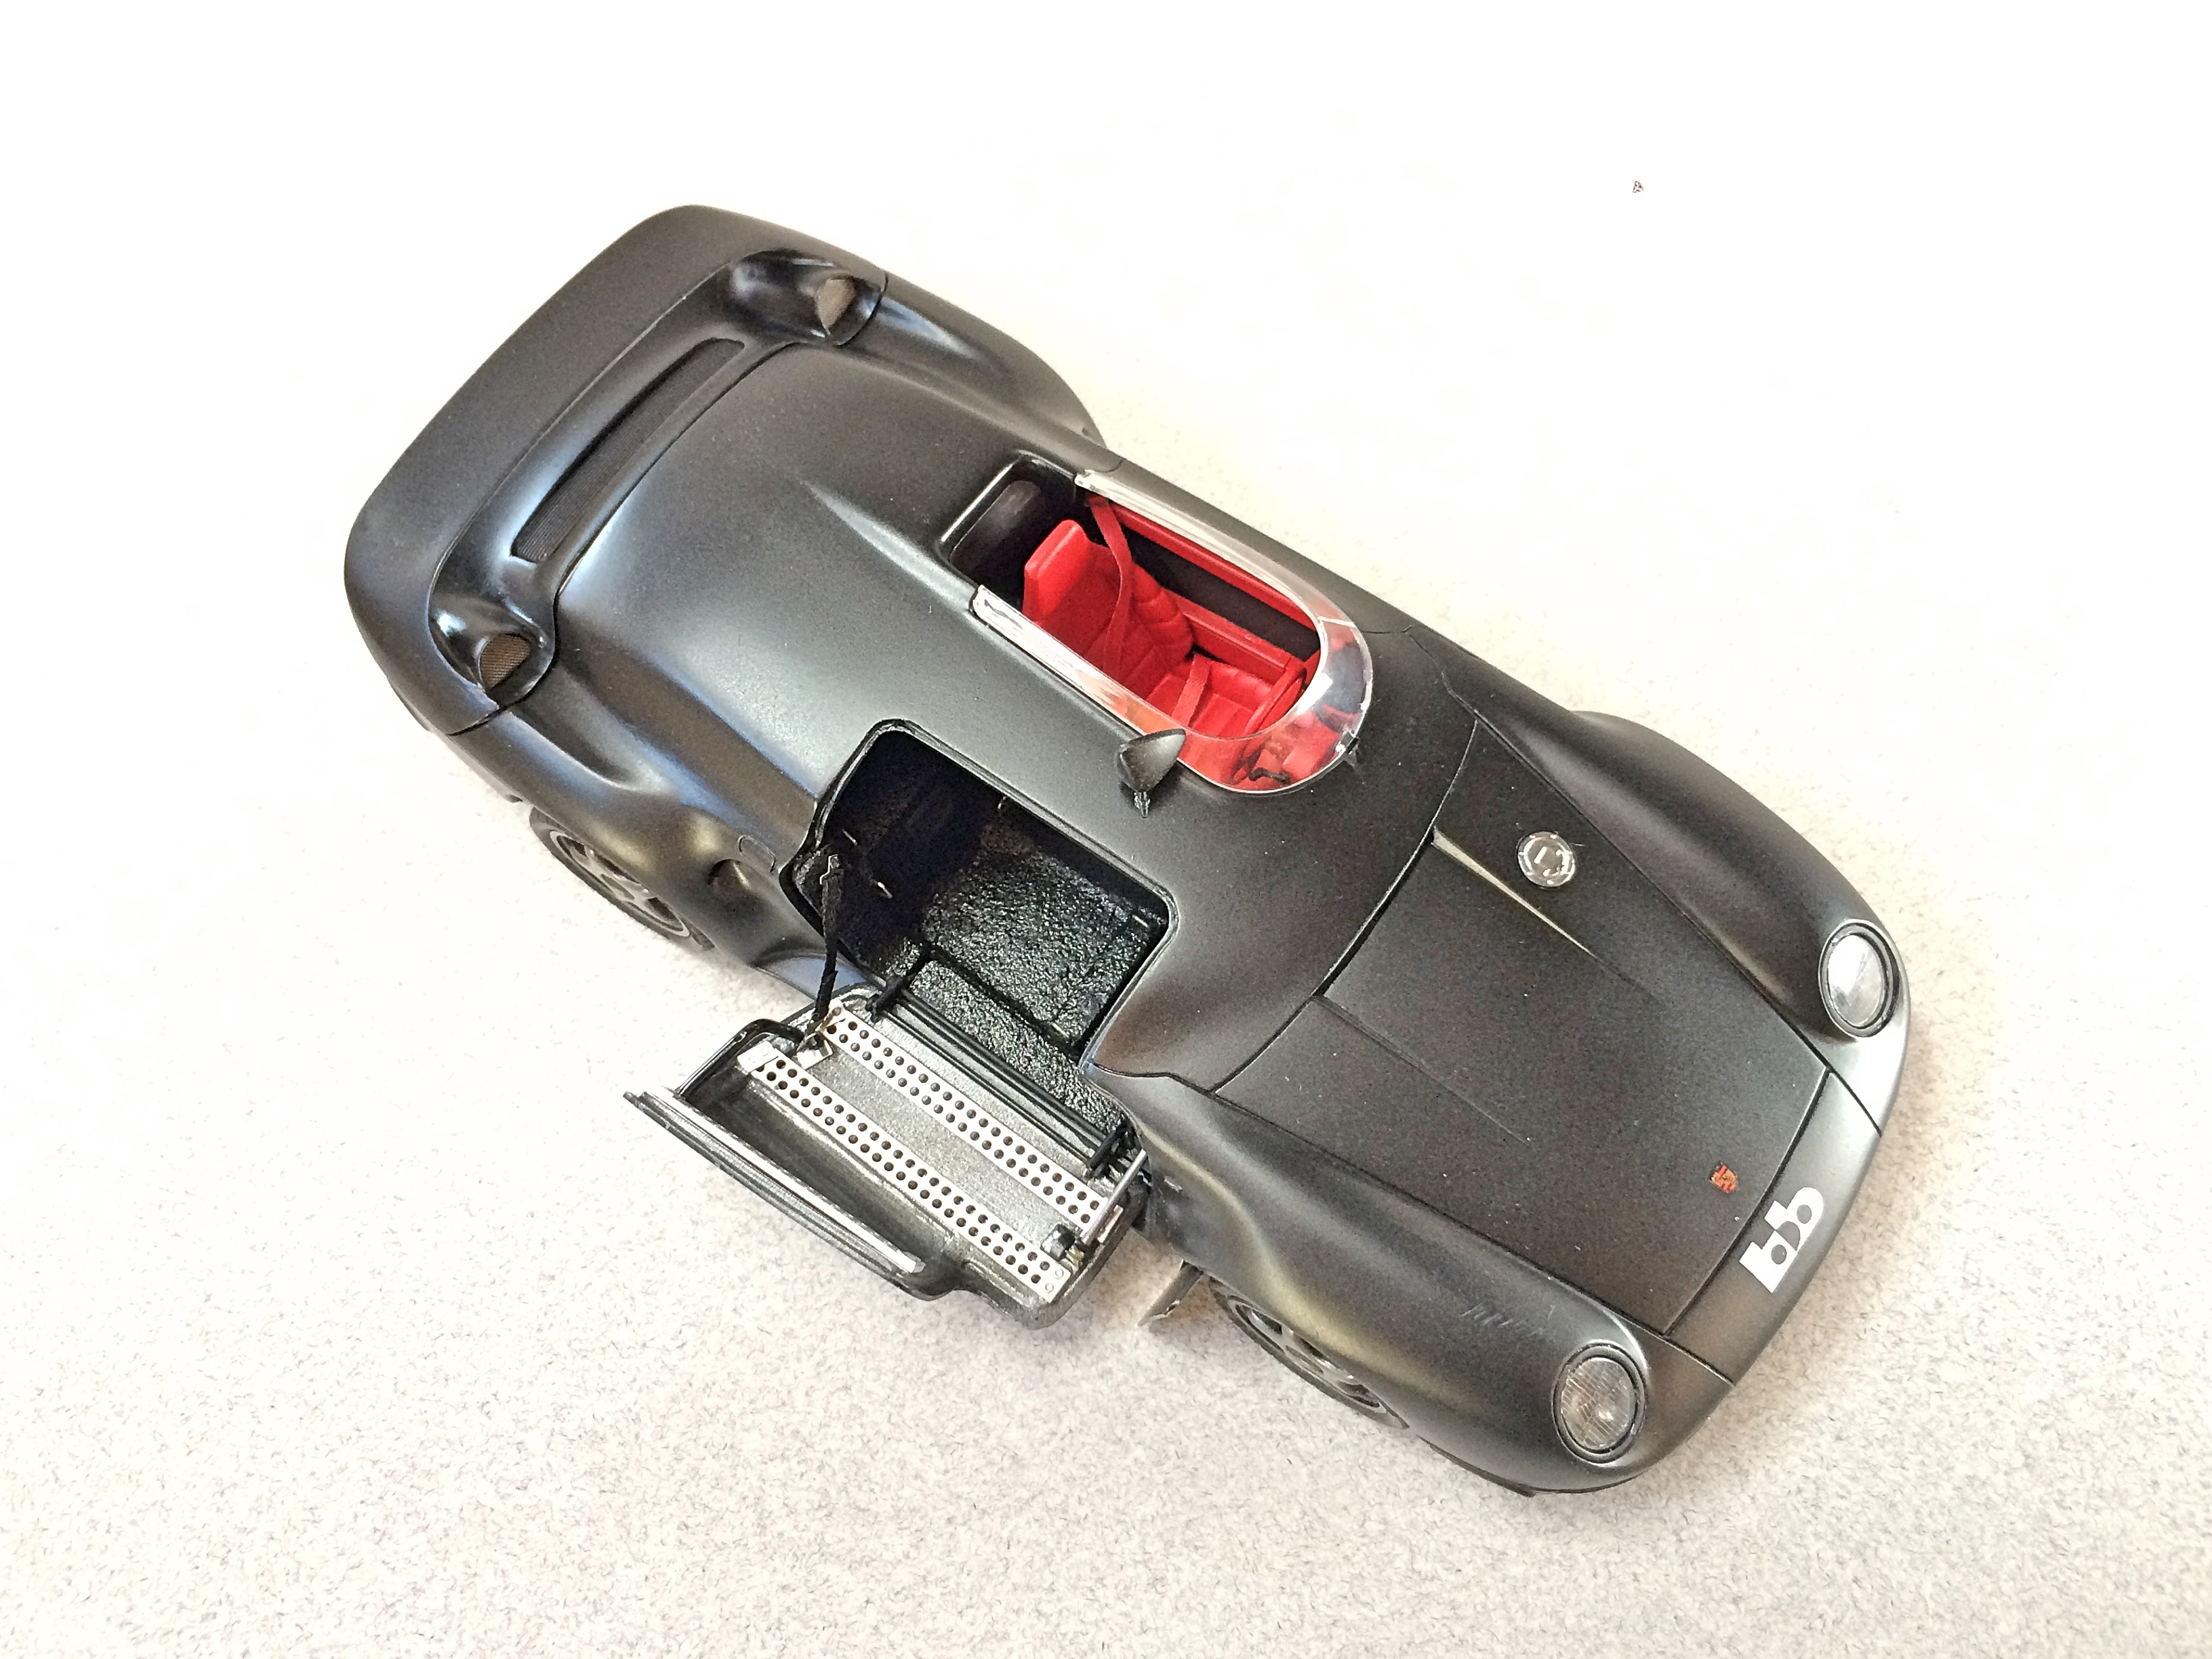
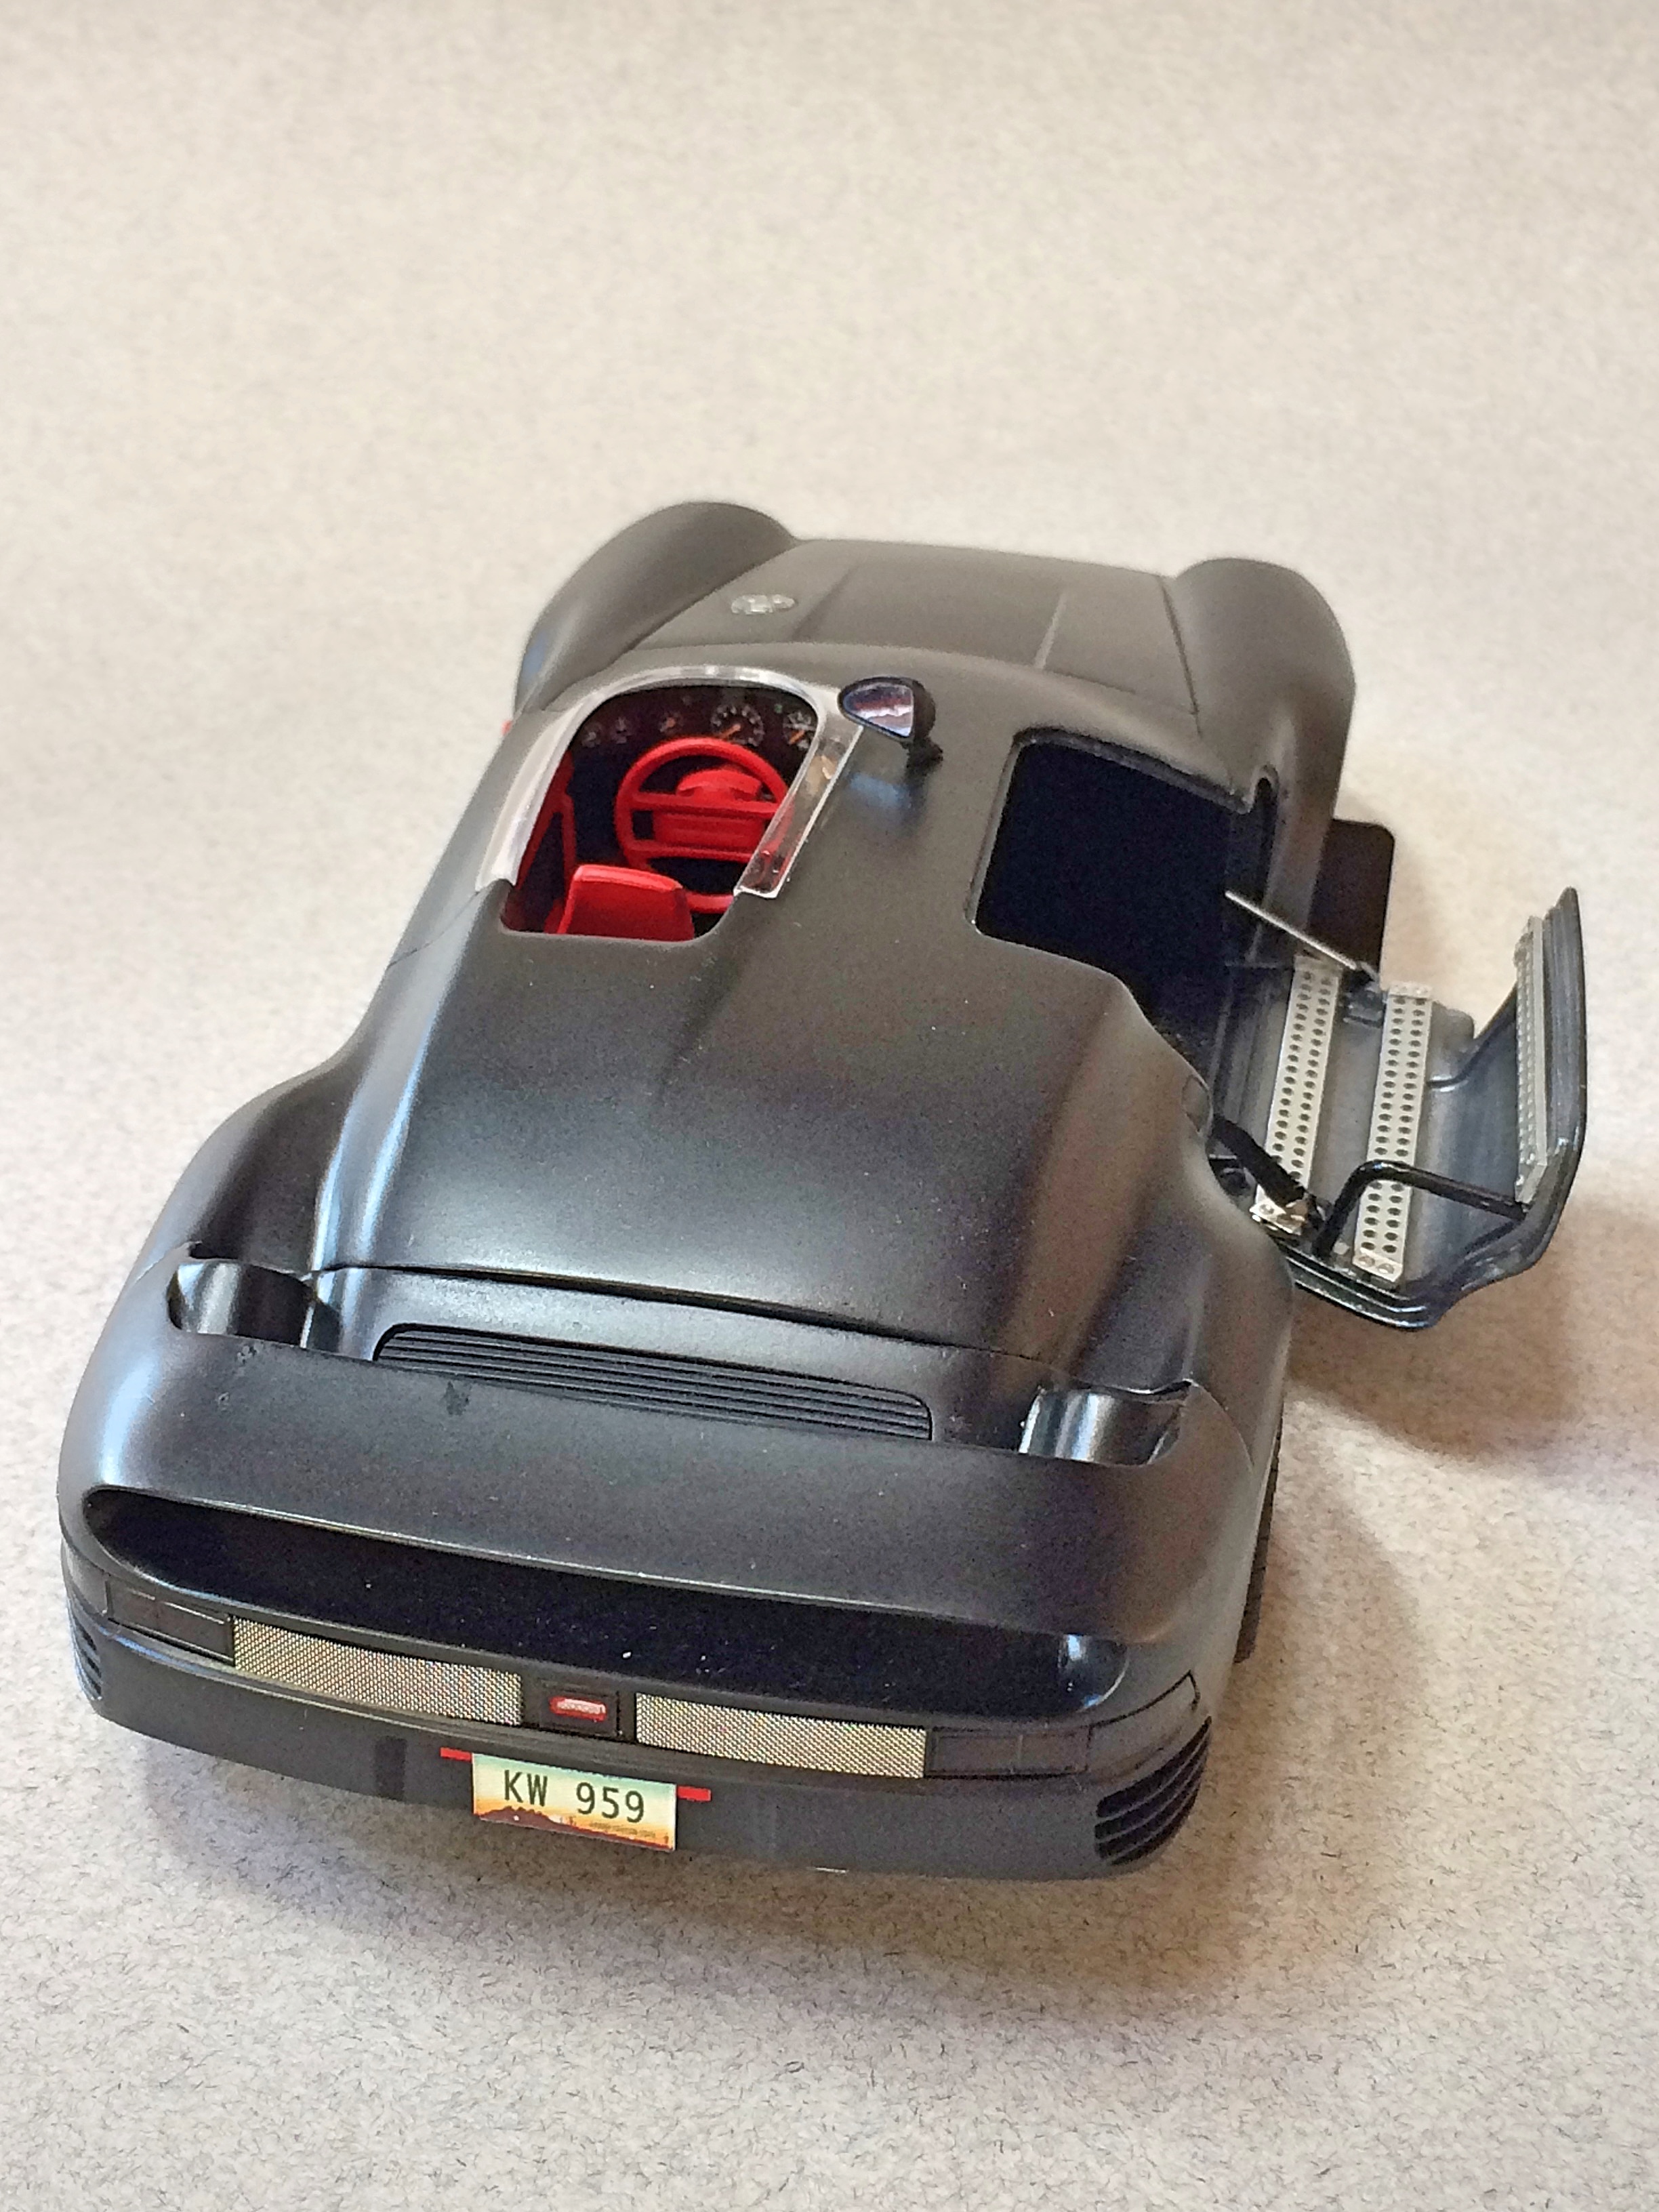
I just saw this, sorry I didn't respond. Appreciate the offer, but that's ok. Days need to be 36 hours if I have any chance to add camera equipment. I found the license plates made for my first 959. Took some pictures after the VW session. Might as well show the bottom. Because it's a parts box curbside, I covered the engine bay with the foil lid from a baking soda can.
-
grown in psilocybin
-
unexpectedly, because sloppy
-
That is very cool, well done! Would like to see the ugly stage of when you wondered what you were doing, the point of no return.
-
Magnetic Panel Line Accent
89AKurt replied to NOBLNG's topic in Model Building Questions and Answers
I've had this phenomena happen too. In my case it was applying superglue, it arced out and laid down a nice permanent hair line. I think polishing the plastic body builds up a static charge. It also depends what you are wearing, polyester clothes, have you ever rubbed clothing really fast at night to see the little lightning bolts? Are you sitting on carpet? Shoes instead of barefoot? Environment is very important. -
Cool to see someone finished one of these! The detailing at the rear, with red lines, must have taken half the time. Good the wheel rings are optional.
-
until the nitrous
-
ANY REVIEWS? ACADEMY 1961 FERARRI 350 GT CALIFORNIA
89AKurt replied to cooltoys1's topic in Car Kit News & Reviews
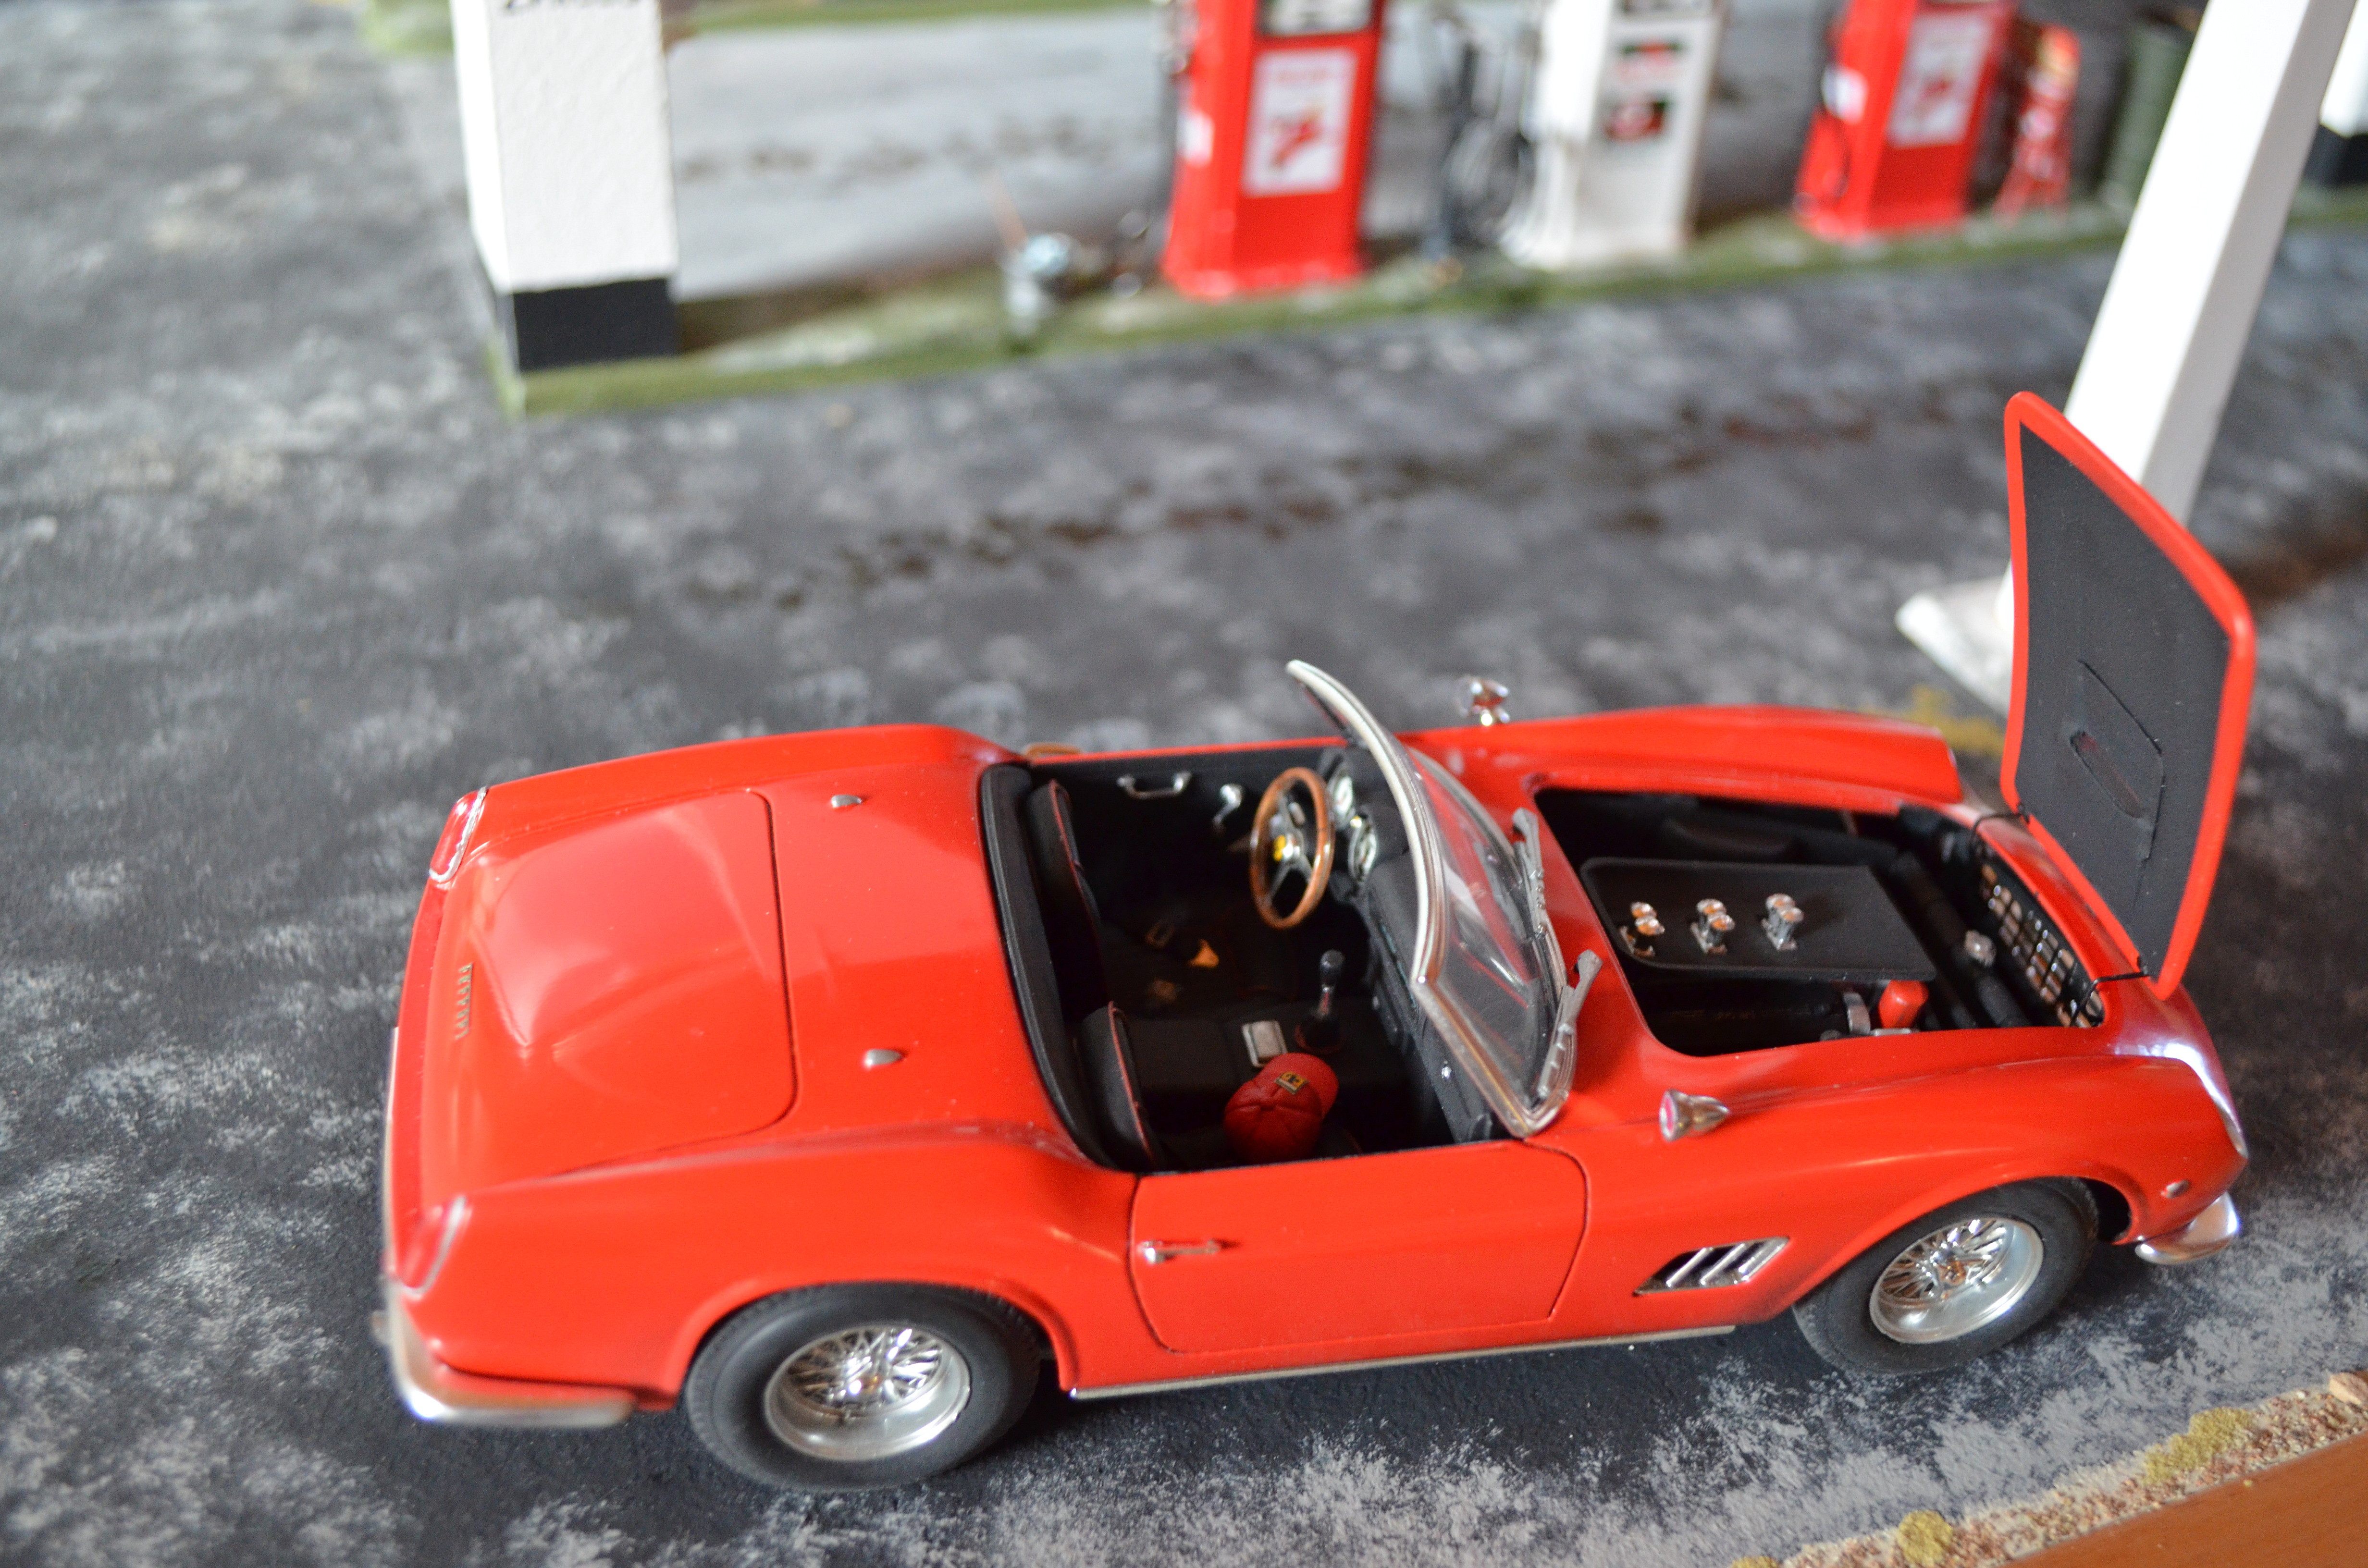
<< As you can see, I've built it! I used Replicas & Miniatures of Maryland seats and door panels, the kit seats really suck. I have a Herb Deeks photo-etch set, didn't like the cast metal rims, but used the tires (kit tires are horrible). Because it's for a diorama, I didn't detail the engine, but I have the R & M engine kit too. I corrected the side vents. I also vacuum-formed headlight covers and detailed with aluminum tape. Added mirrors from two different kits so had to modify to match. R & M steering wheel, that has real wood rim. I did a few other details. I picked up another kit last year at Desert Scale. I've bought K A Details p-e and turned aluminum rims for the 250 GTO, think they would look good on this.