89AKurt
-
Posts
8,426 -
Joined
-
Last visited
Content Type
Profiles
Forums
Events
Gallery
Everything posted by 89AKurt
-
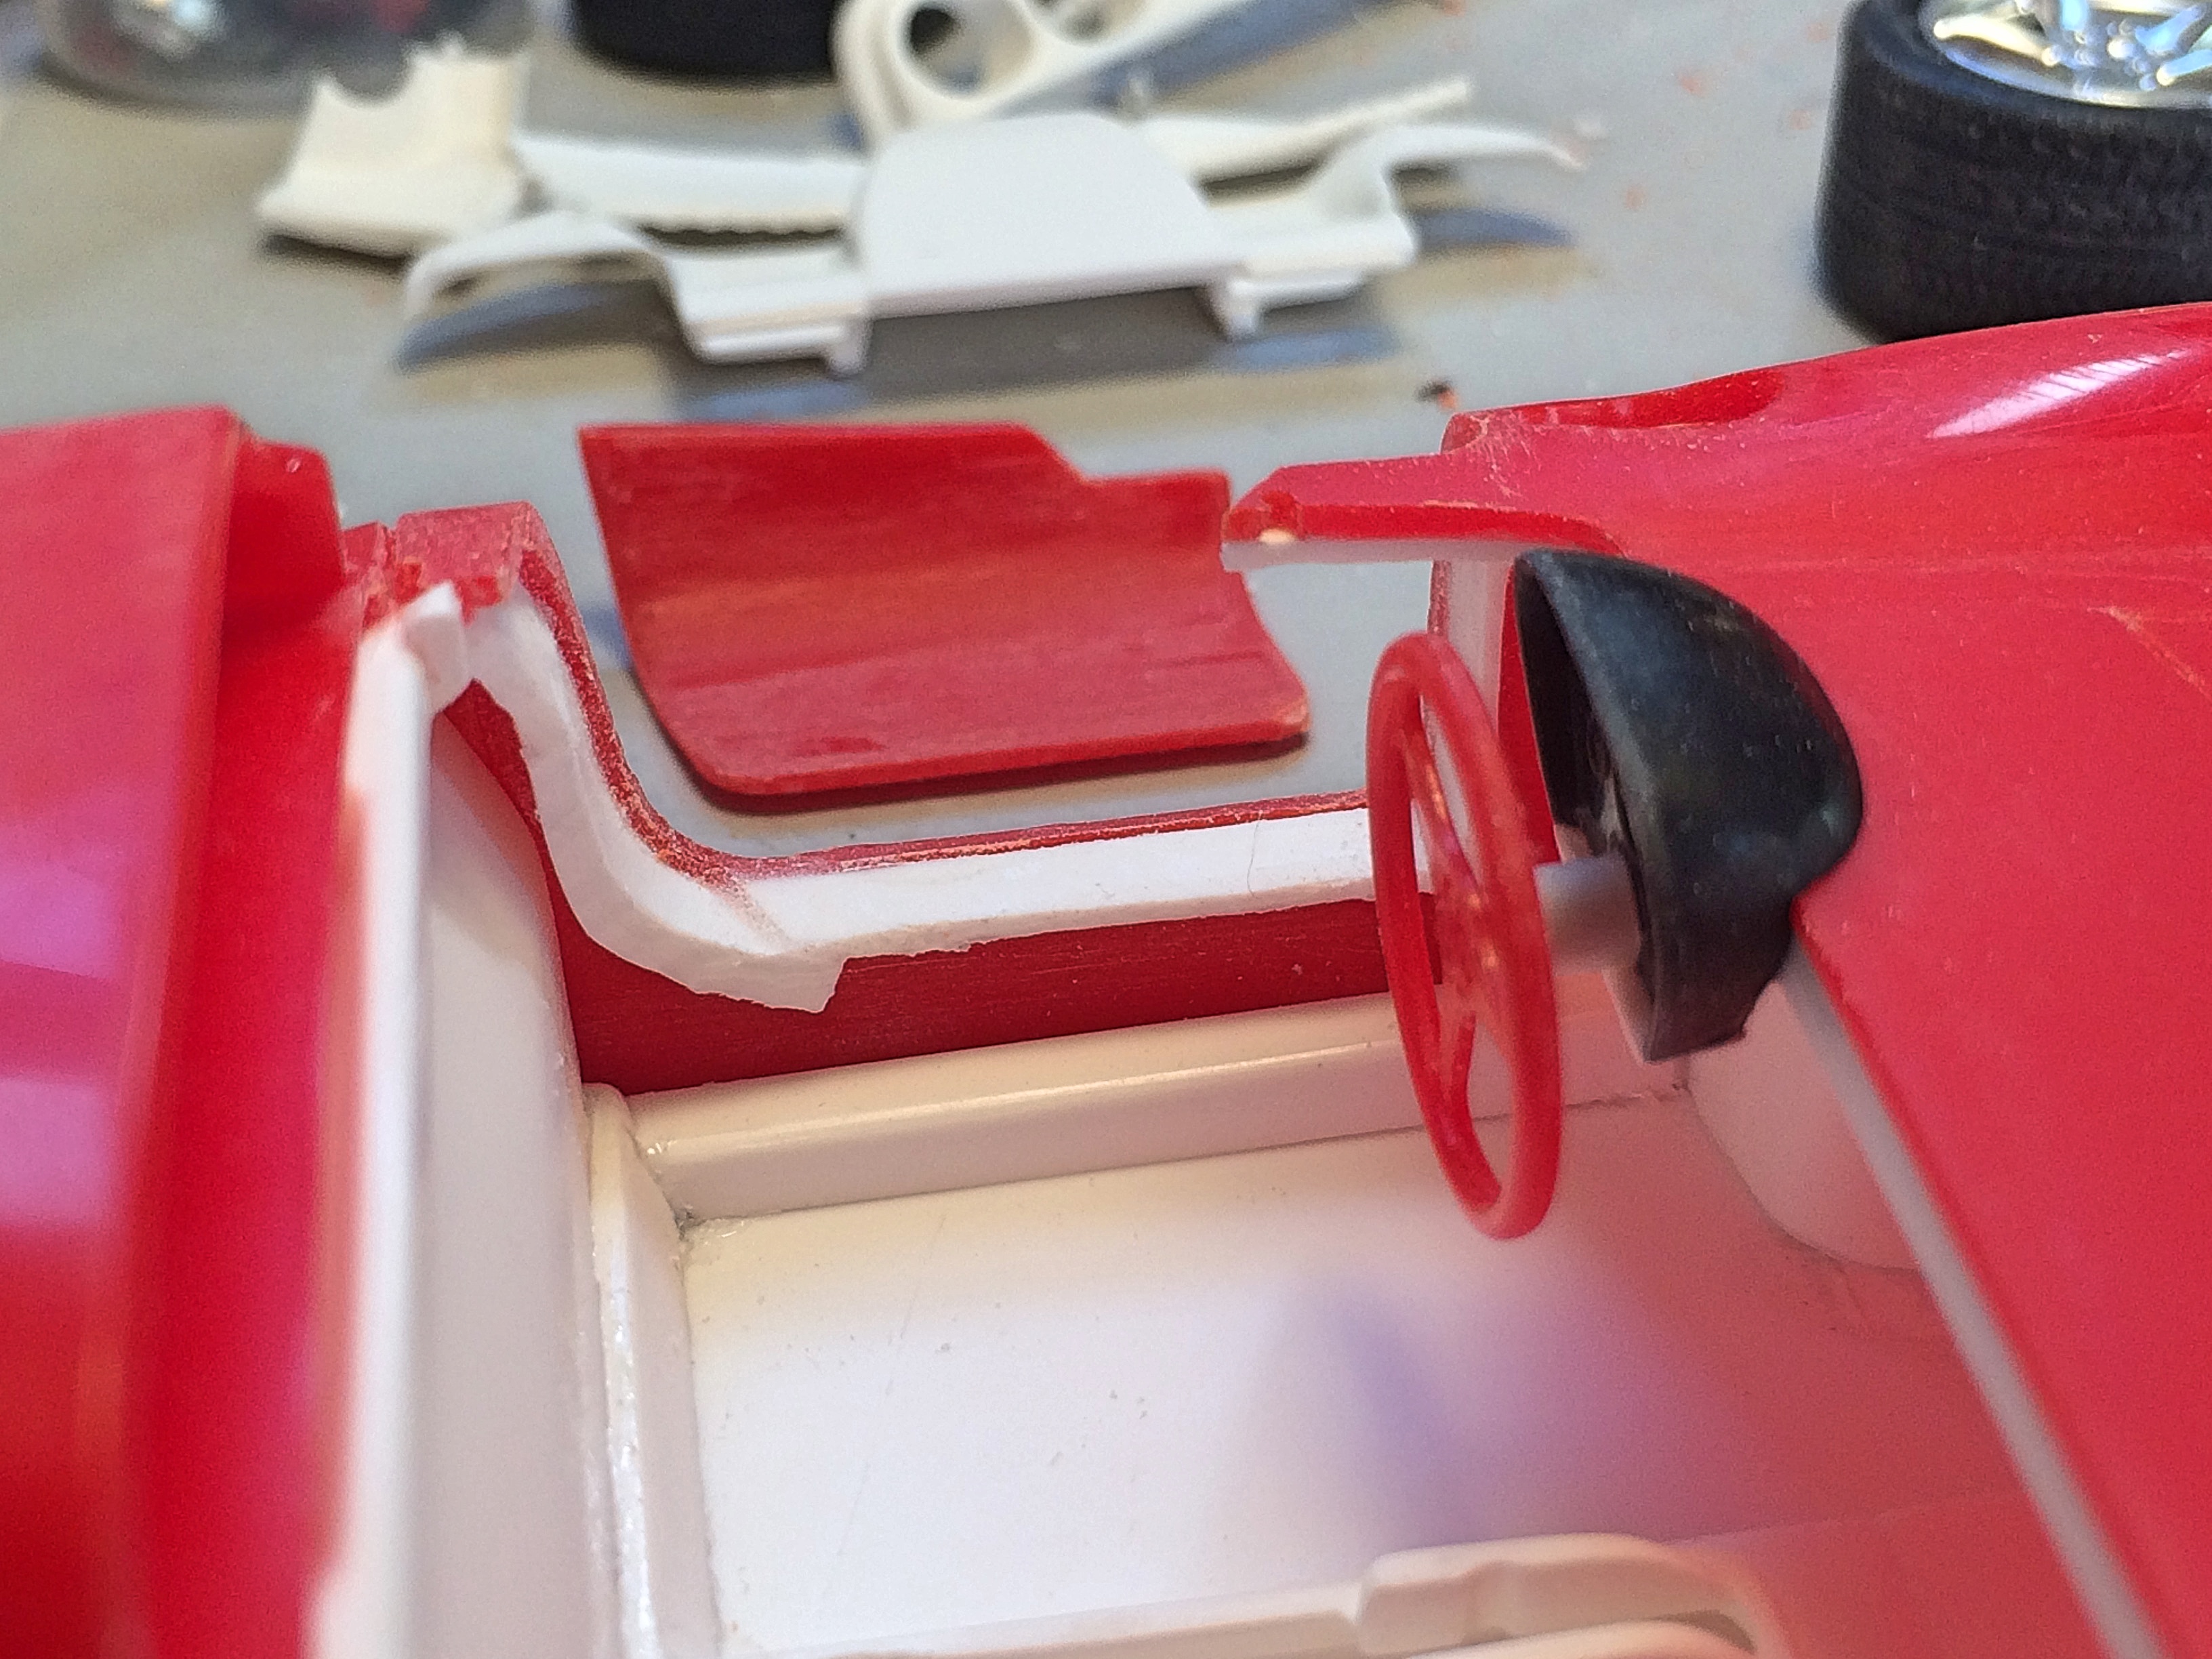
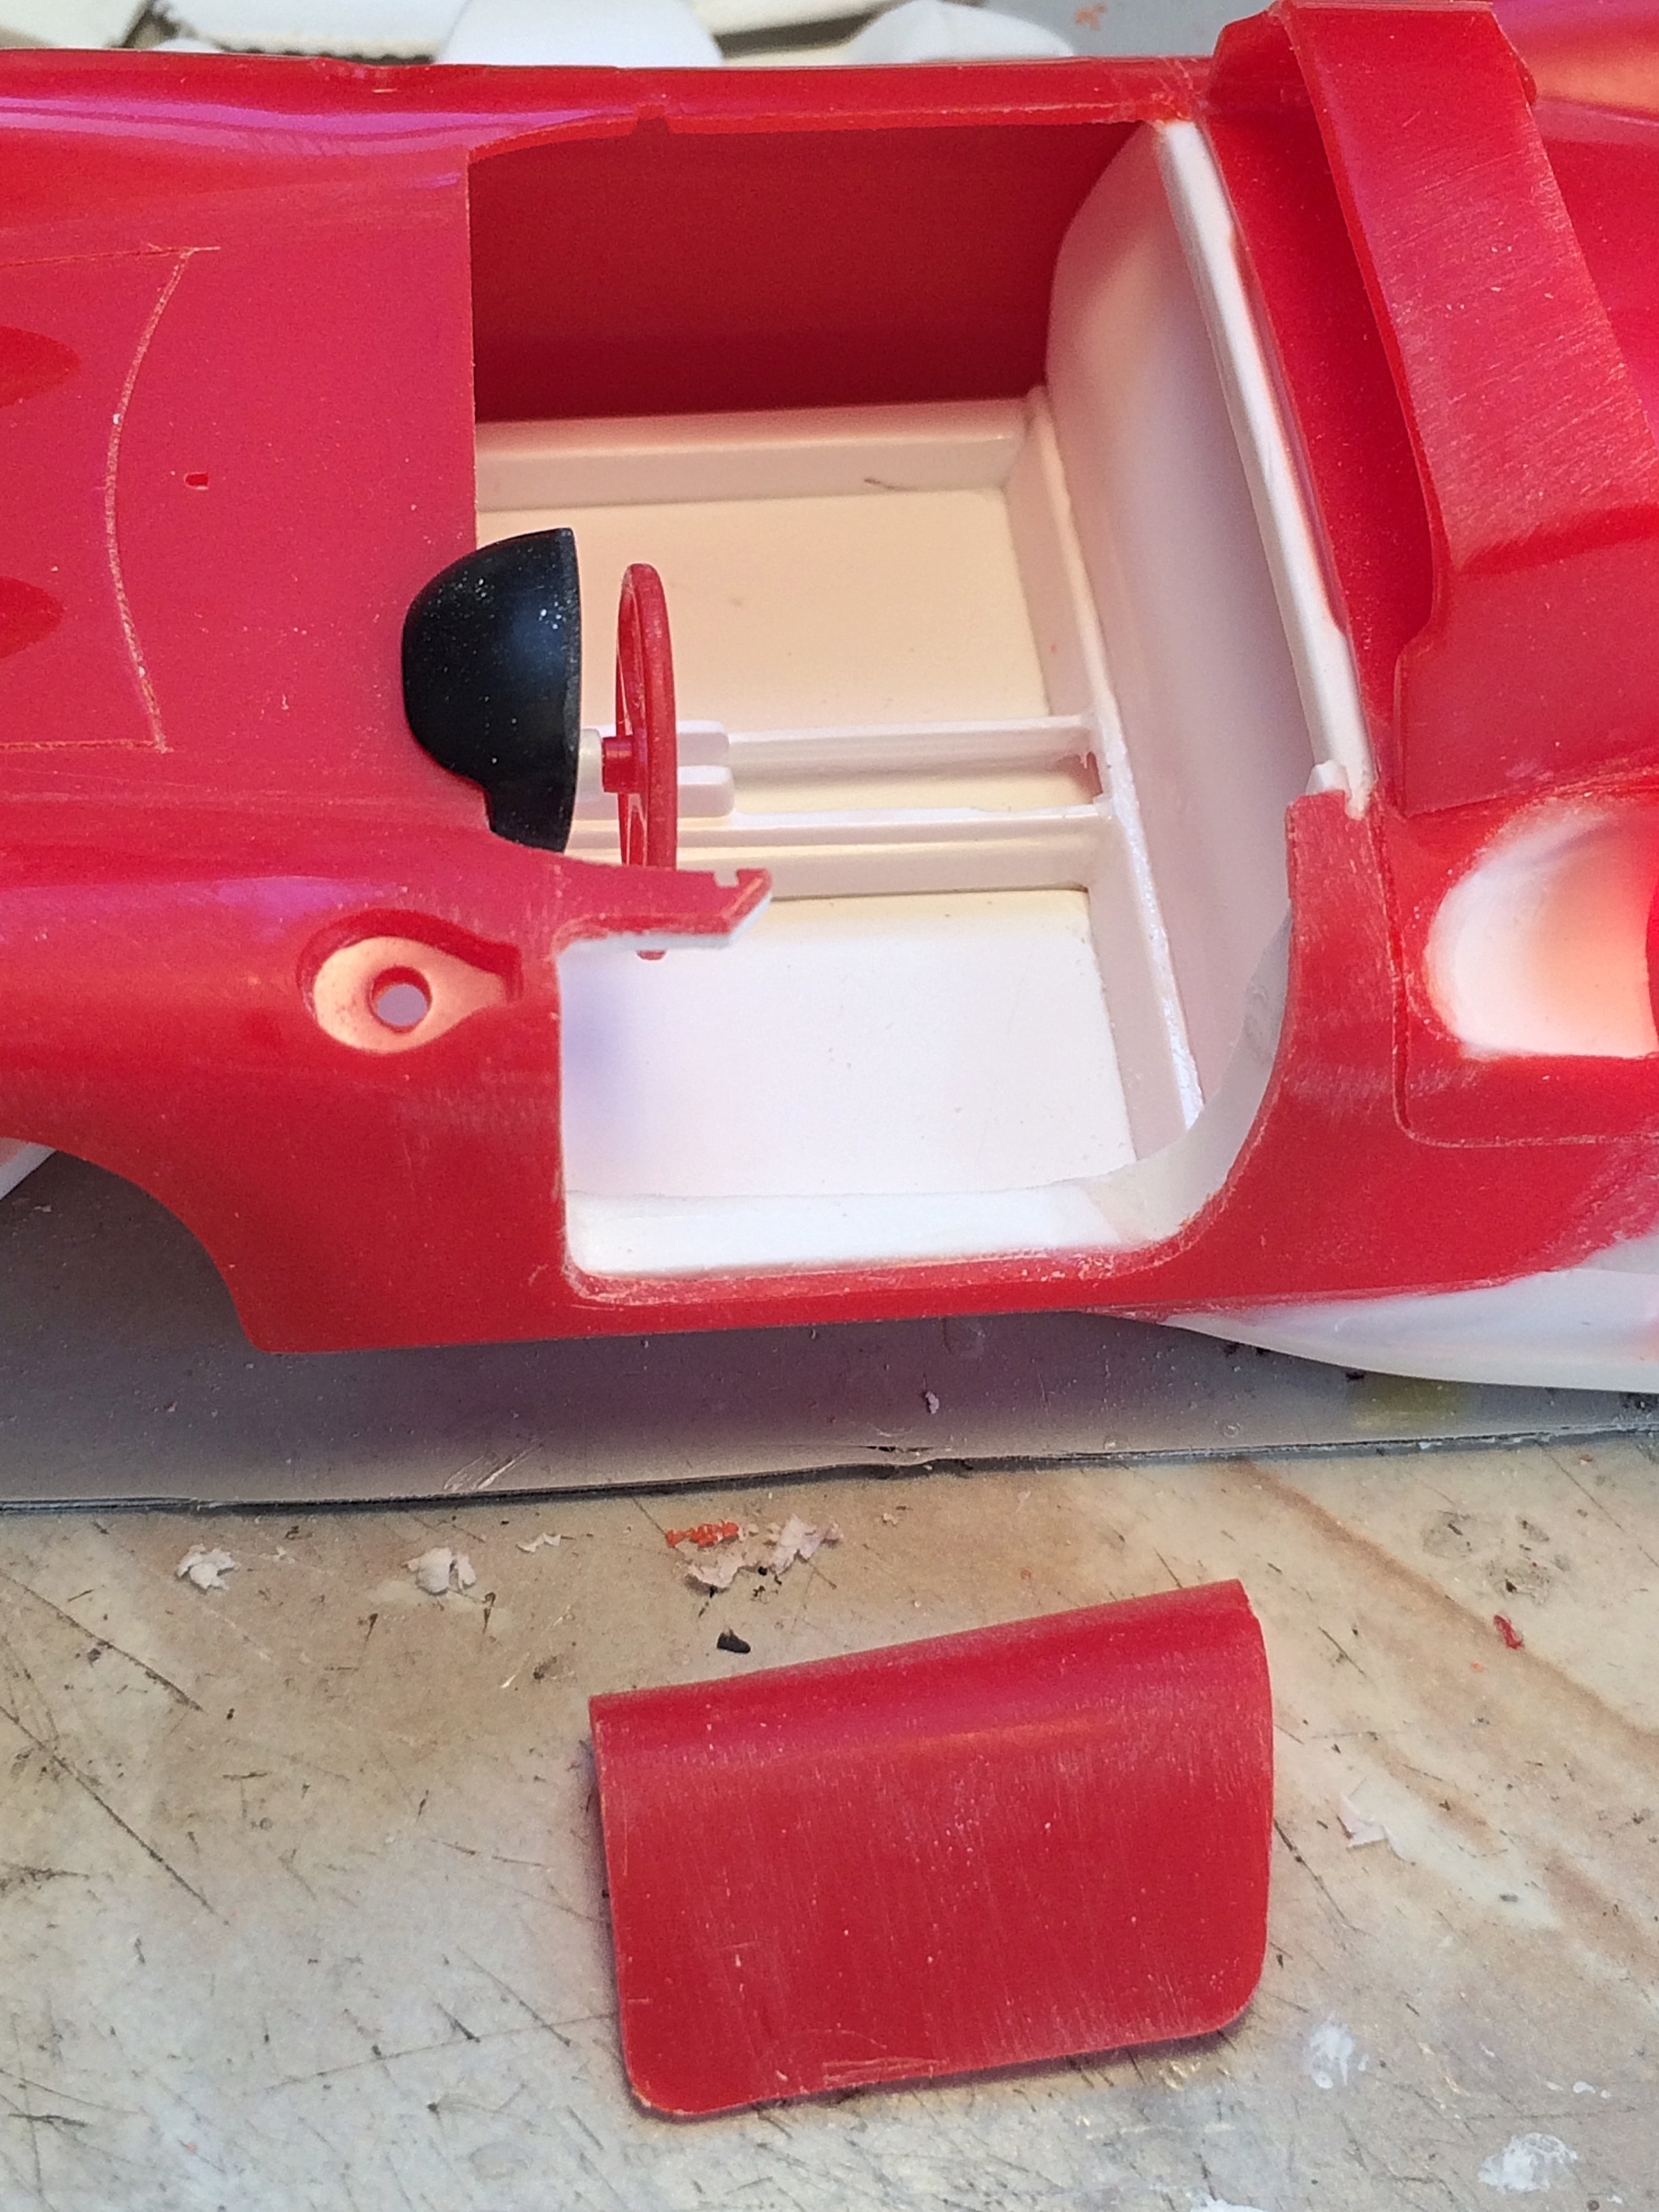
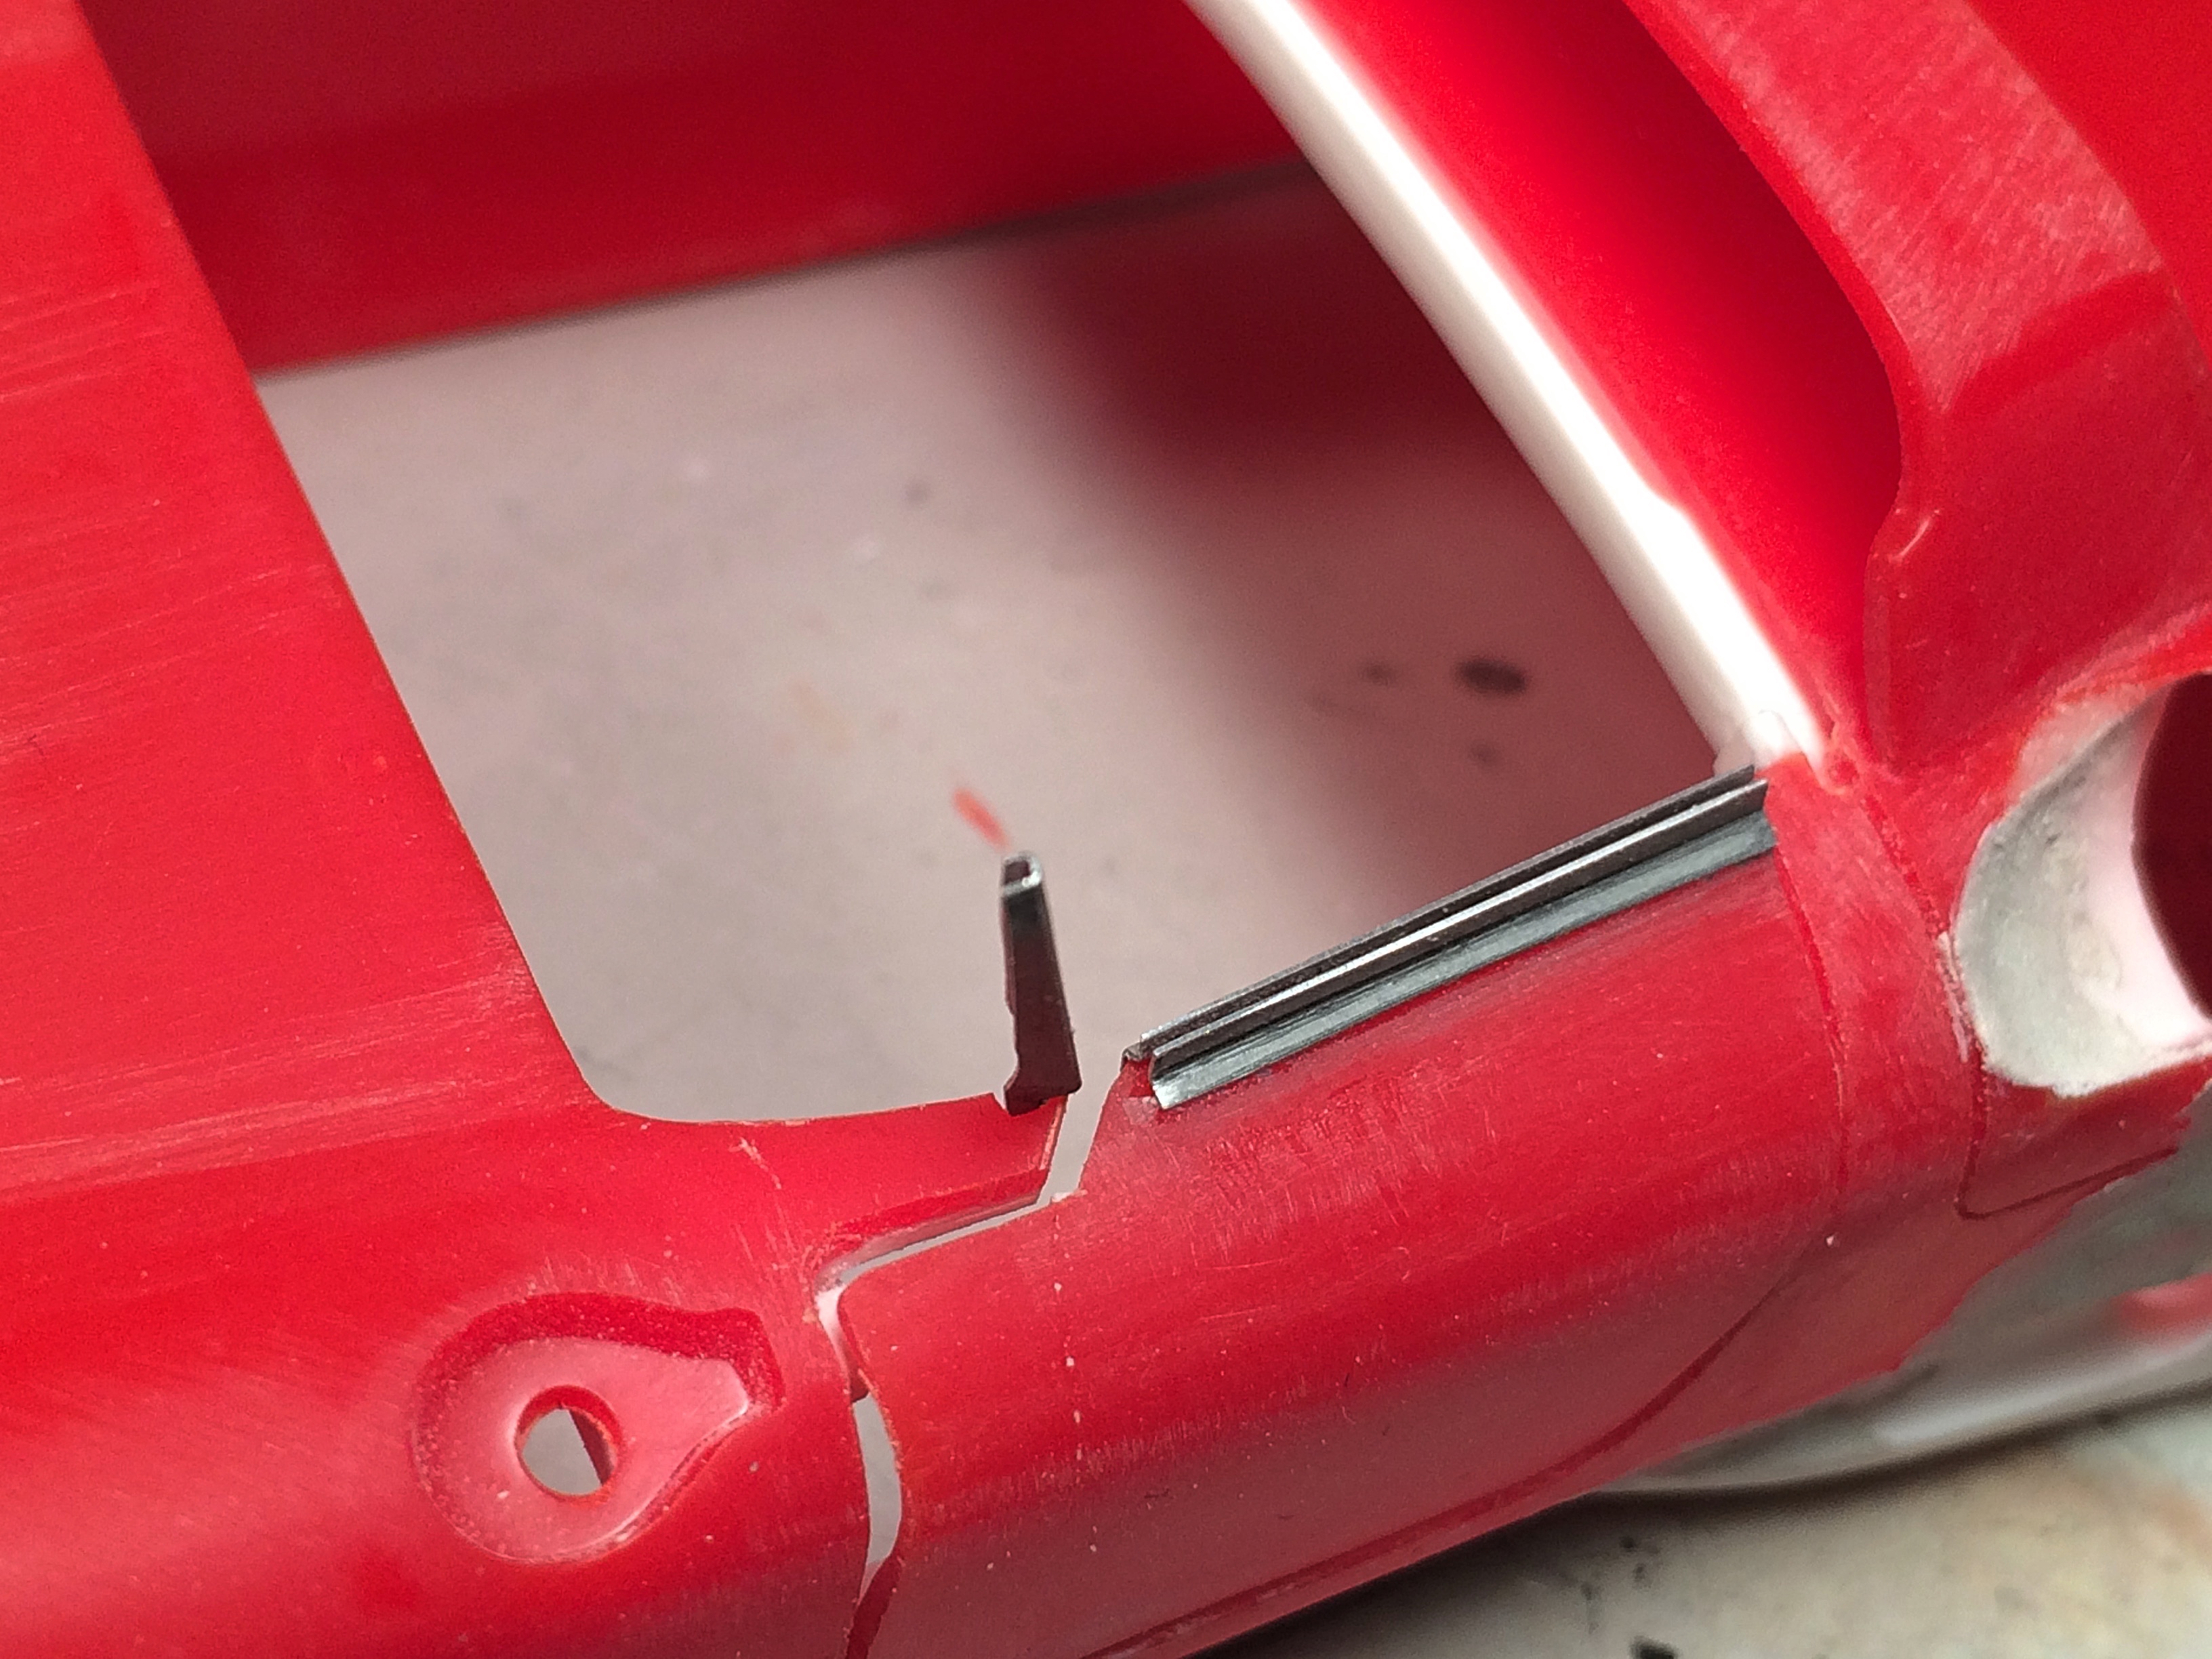
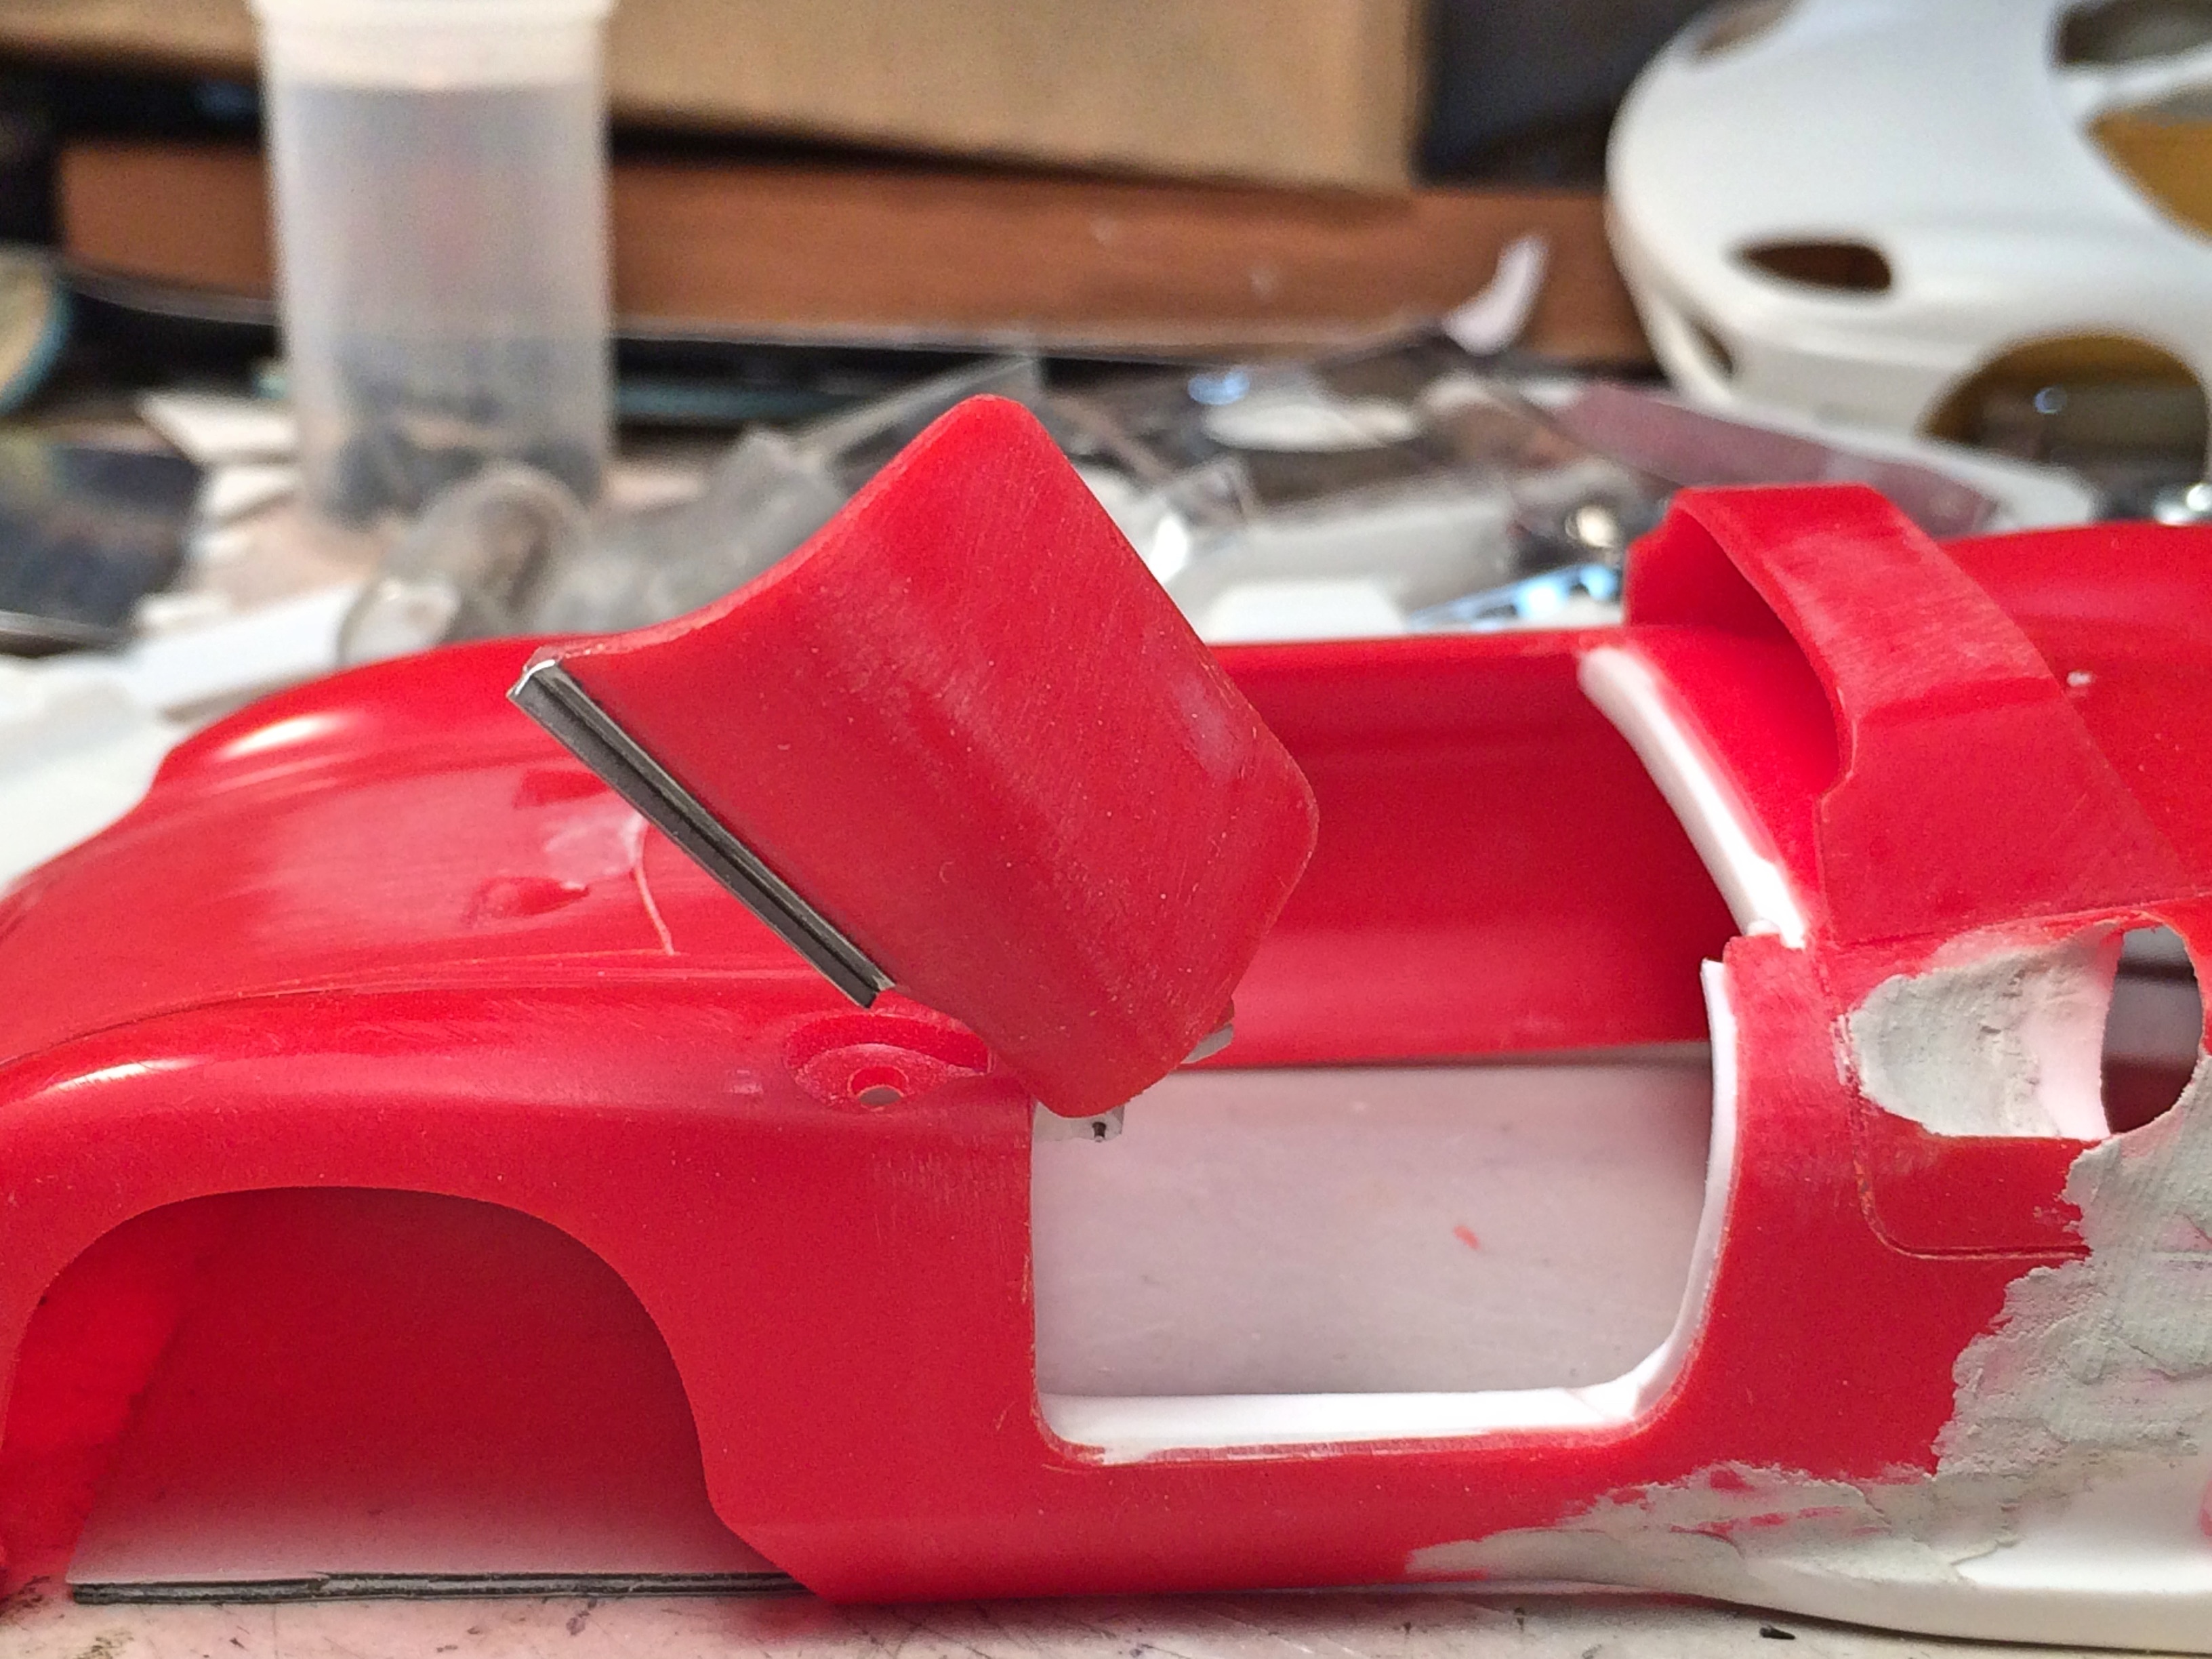
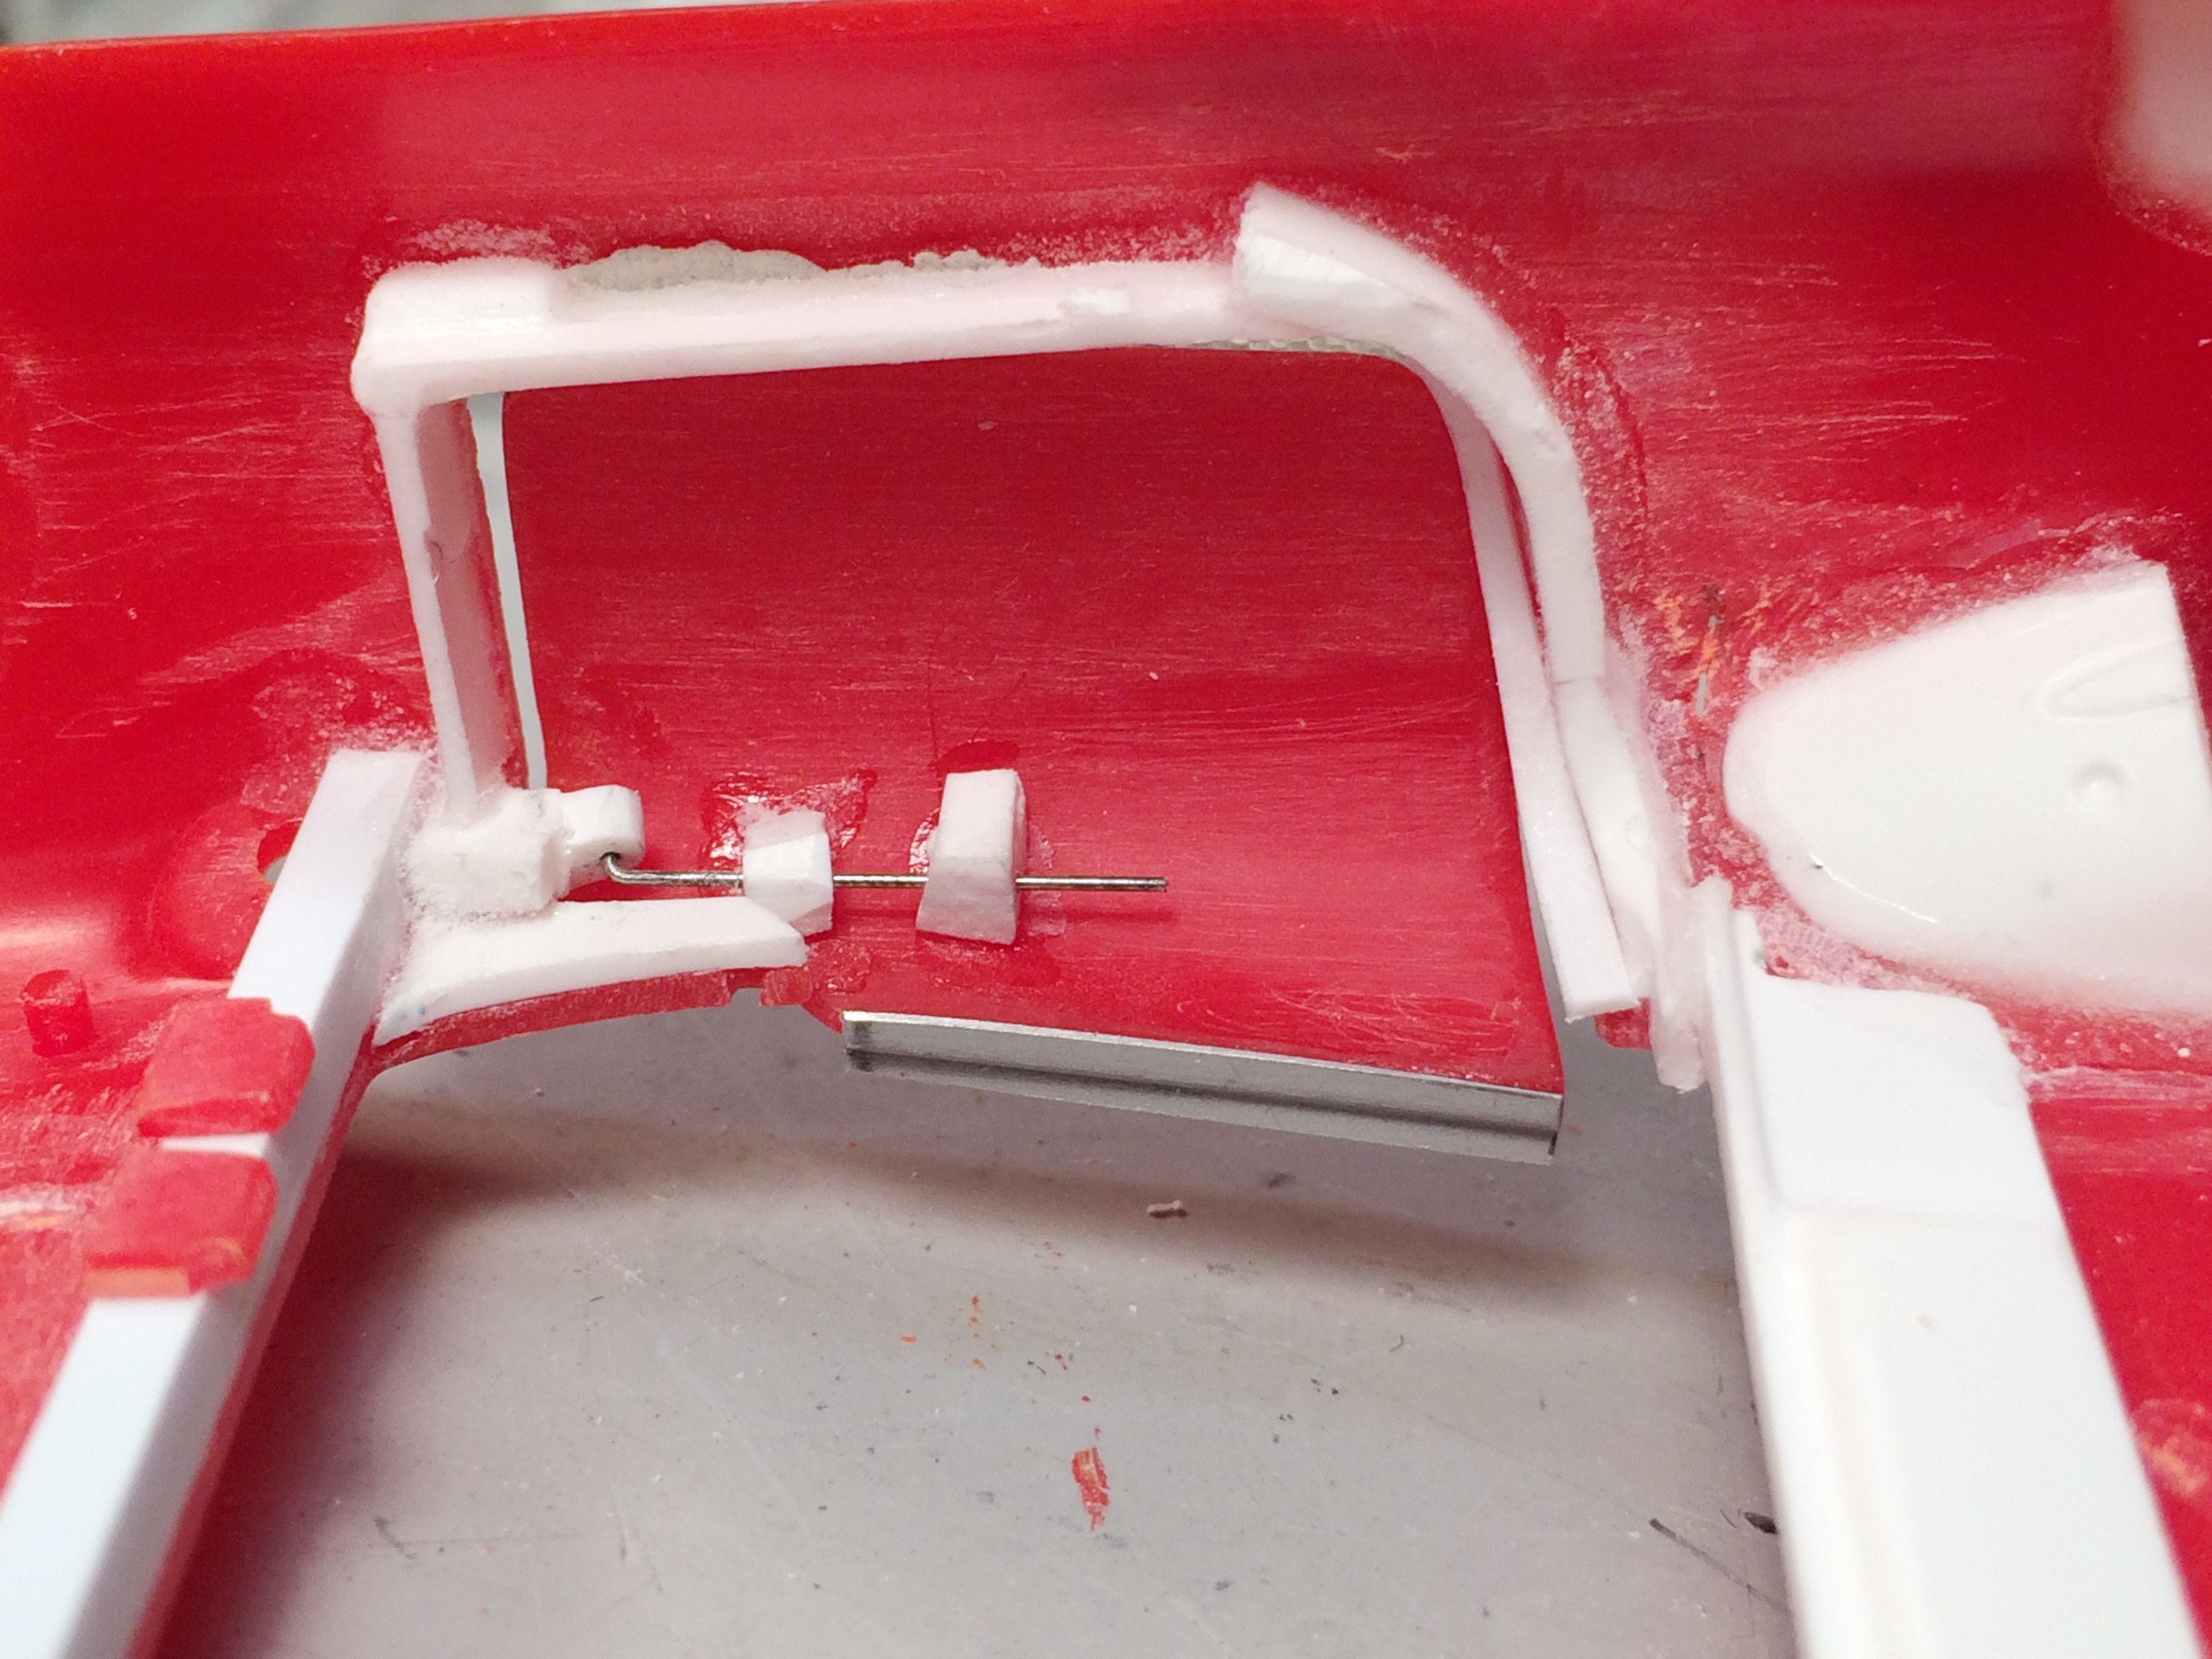
And I'm adding gas to the fire.... I know what you mean! Wait until I paint it RED. I added a construction detail, which is using screws that were salvaged from dead electronic devices. I like these types of screws, thin flat phillips heads, threads that tap into the plastic nicely. Now the body and chassis won't shift from now on. I might add another one, don't like the gap. Still futzing with the dash panel. Cut out the driver door, and made the jamb from Mondial scraps. Started on the window frames. The kit is lacking the correct lip that held the windows in. This kit also has vacuum-formed widows, surprising addition by Monogram, but the quality is bad. I've been wanting to use the new tool, for bending photo-etch parts. Used newspaper printing plate. I ordered MicroMark rivet decals today, something I learned about from Teresi. Russell will like this, Lambo door on a Ferrari. I'm not really happy with it, plan to make a new hinge block that will be more of an angle. I have one wire, that slides on the door blocks. I will make a third block to glue on the end, so the door will not spin around. At least that's the plan, with no drawings or experience.

-
with THREE traps
-
4 words
-
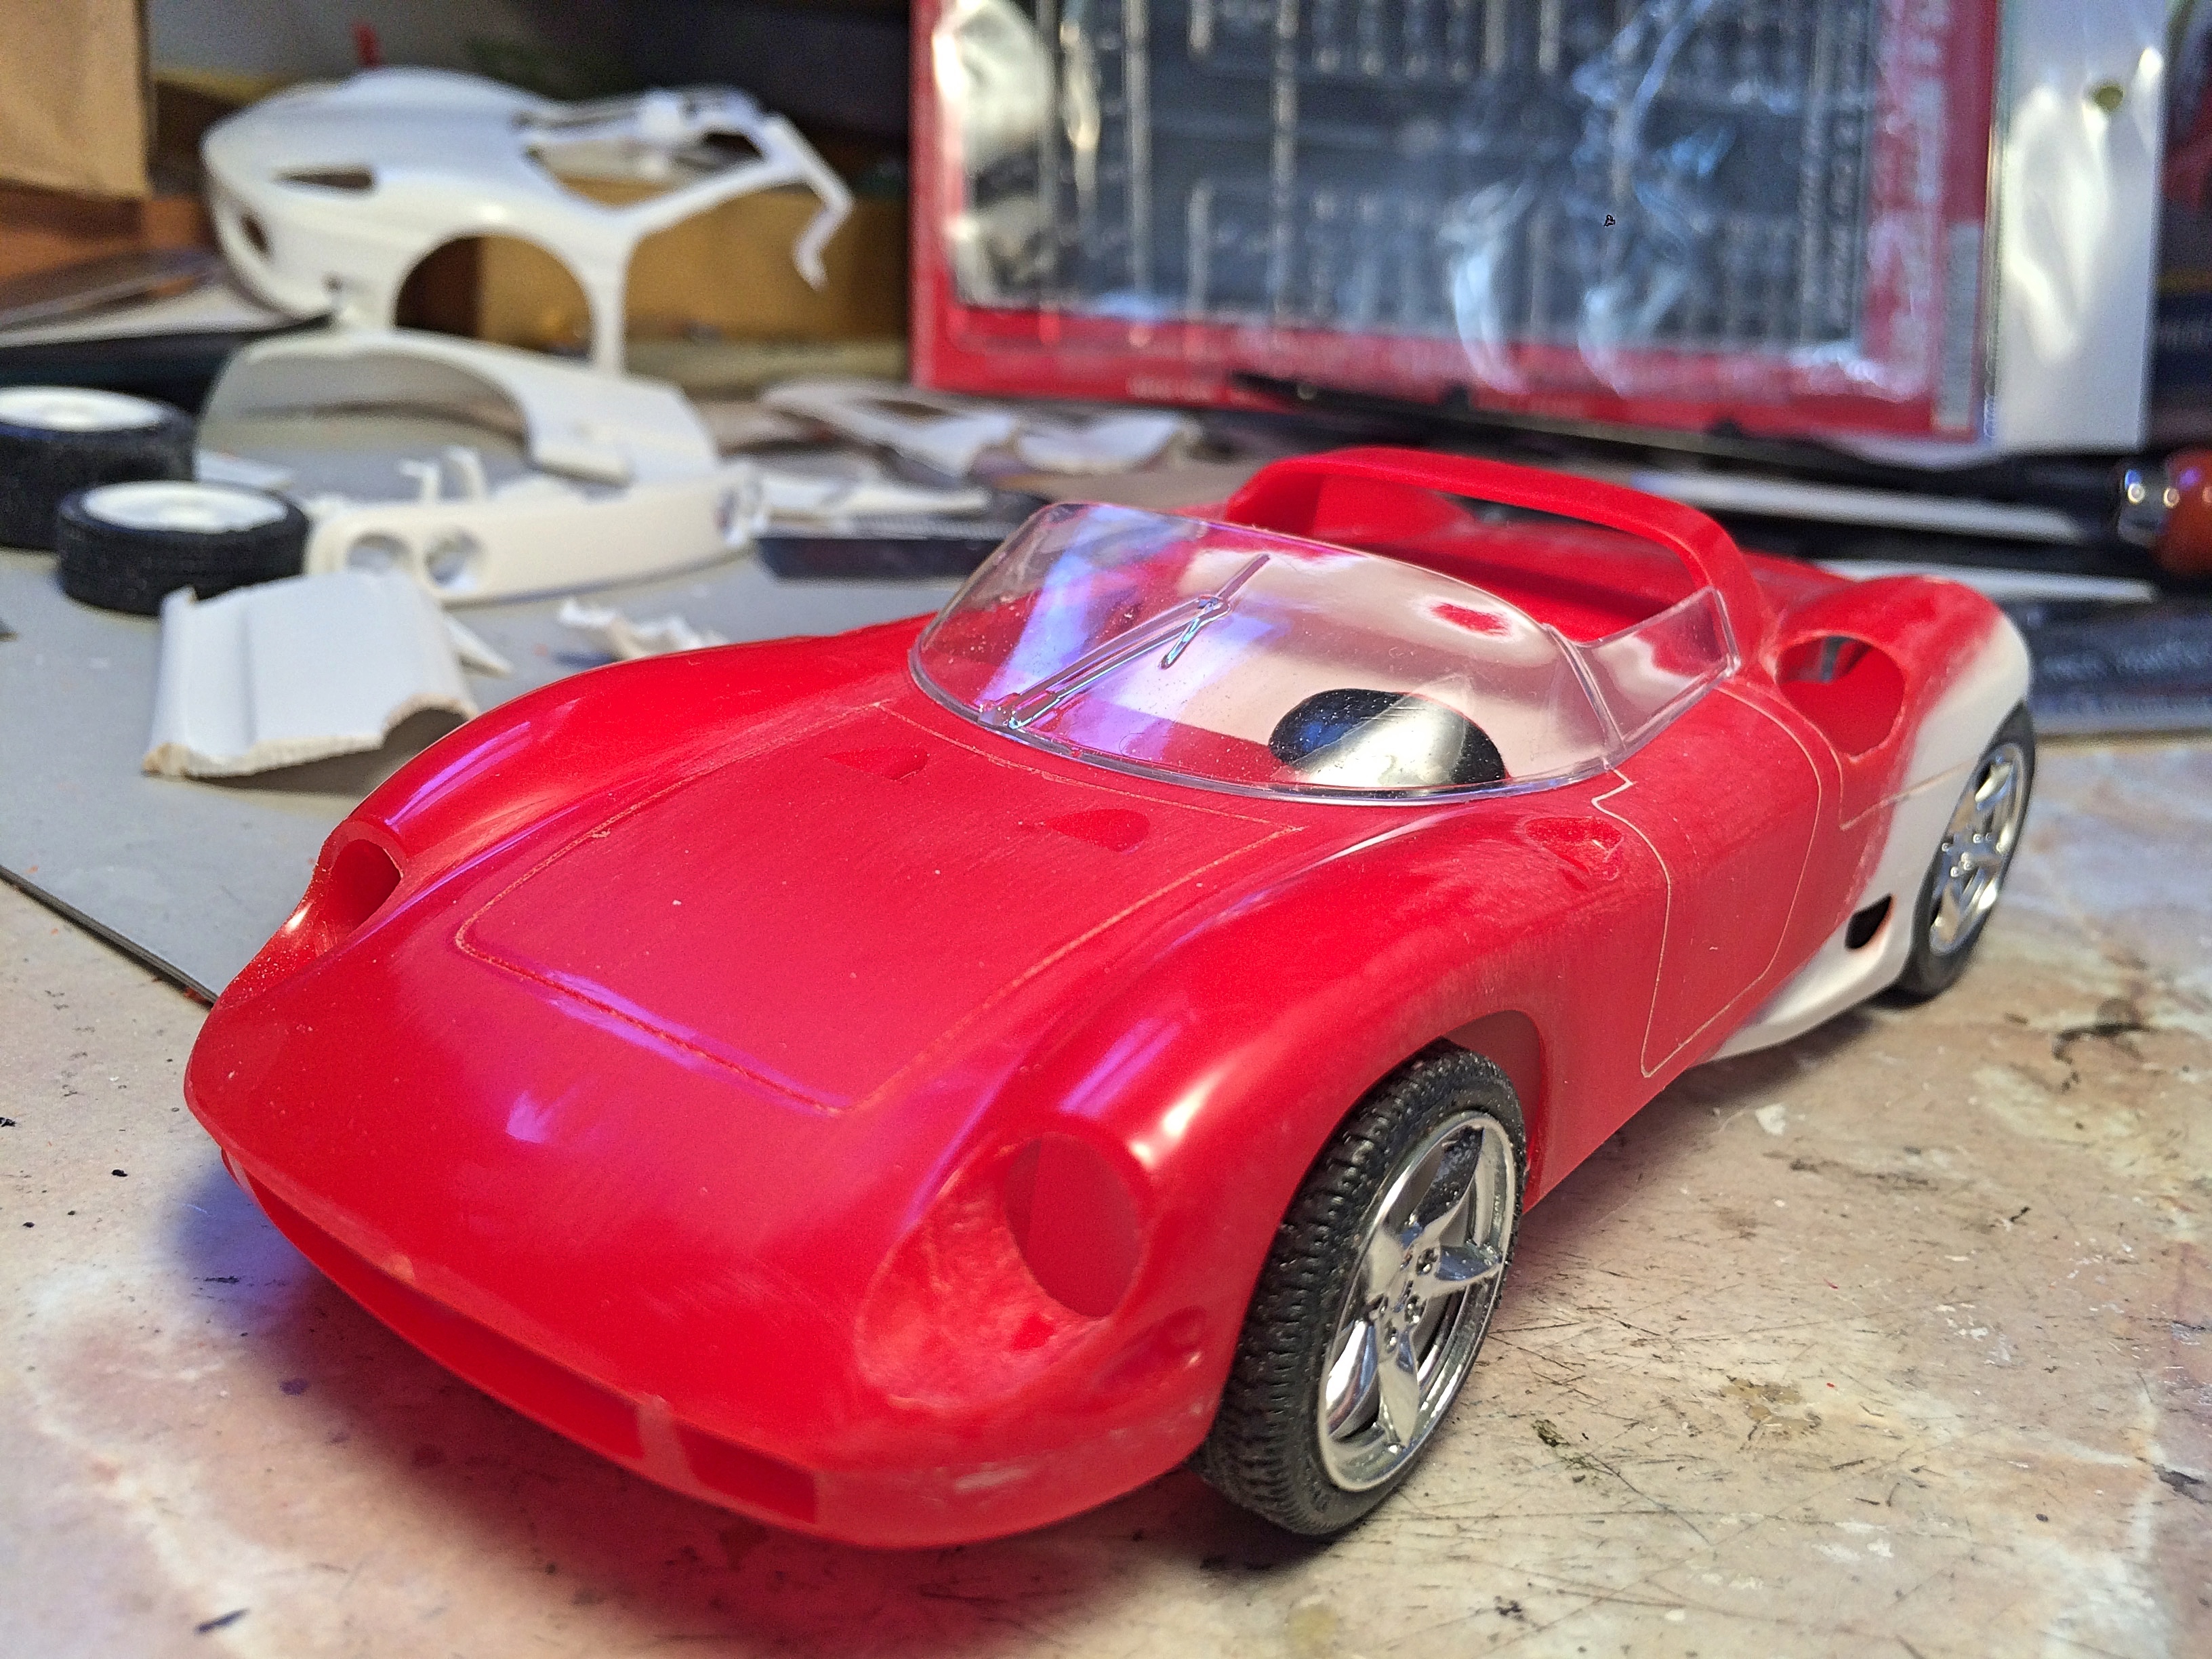
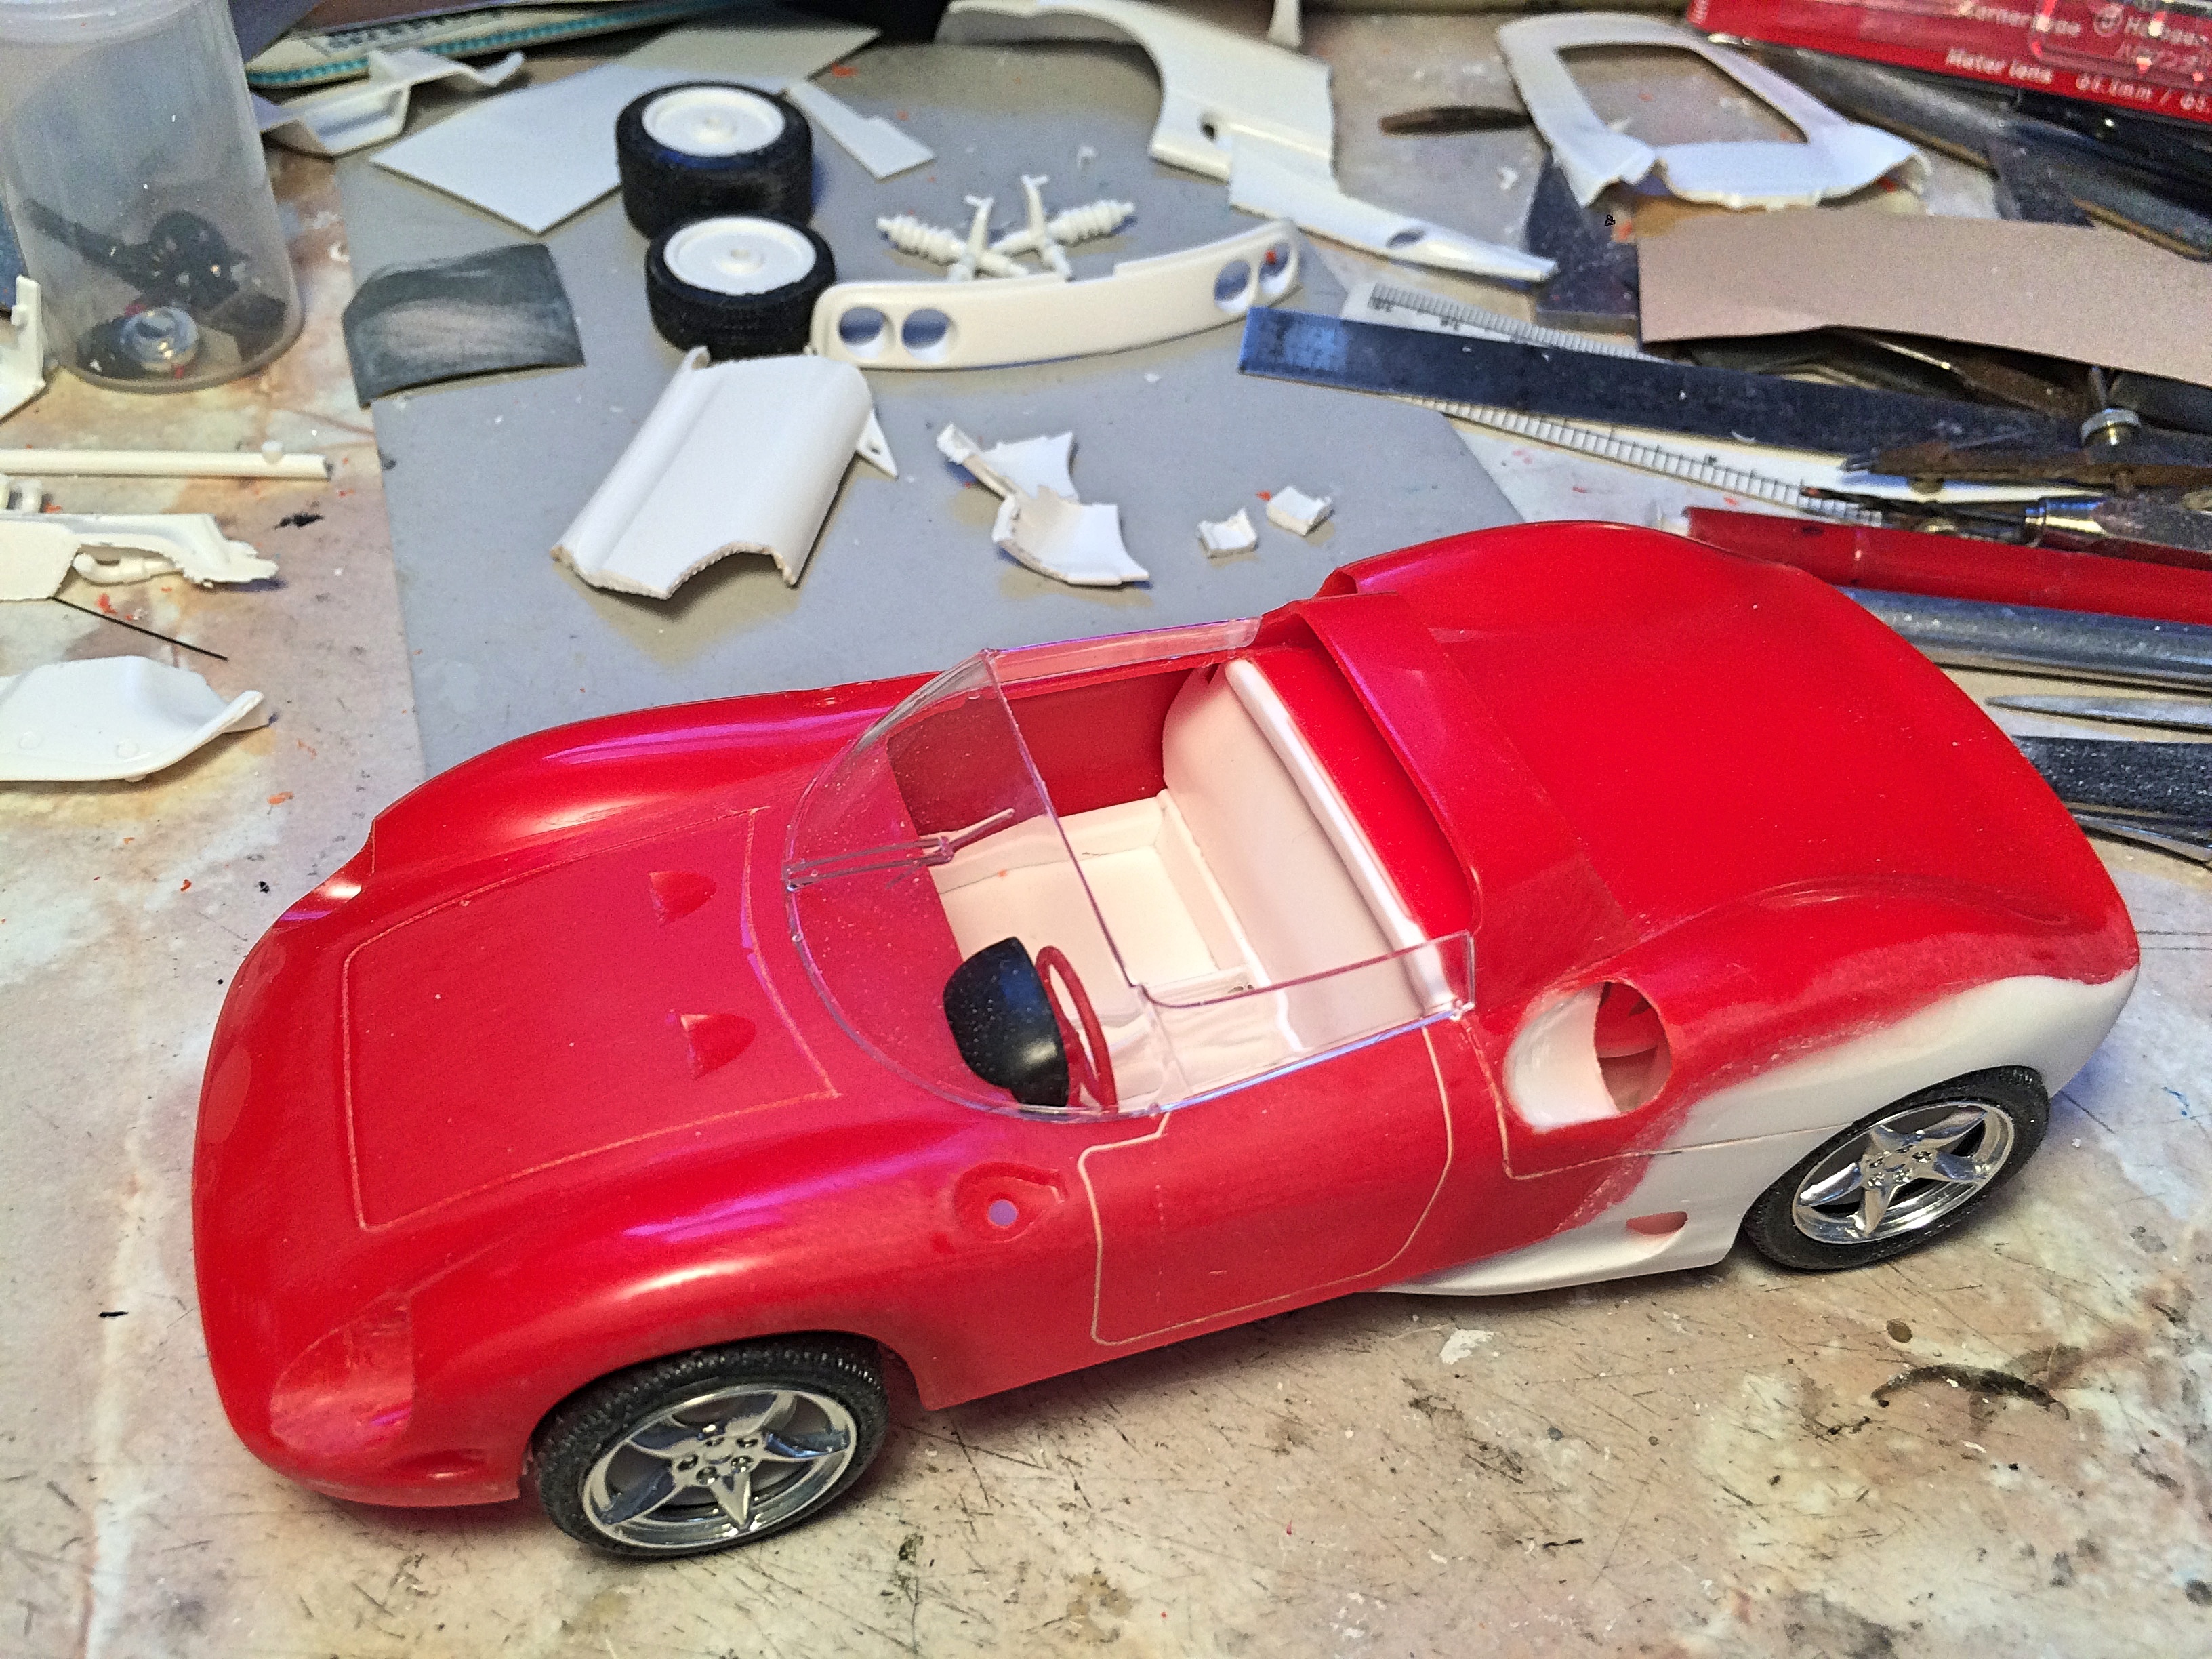
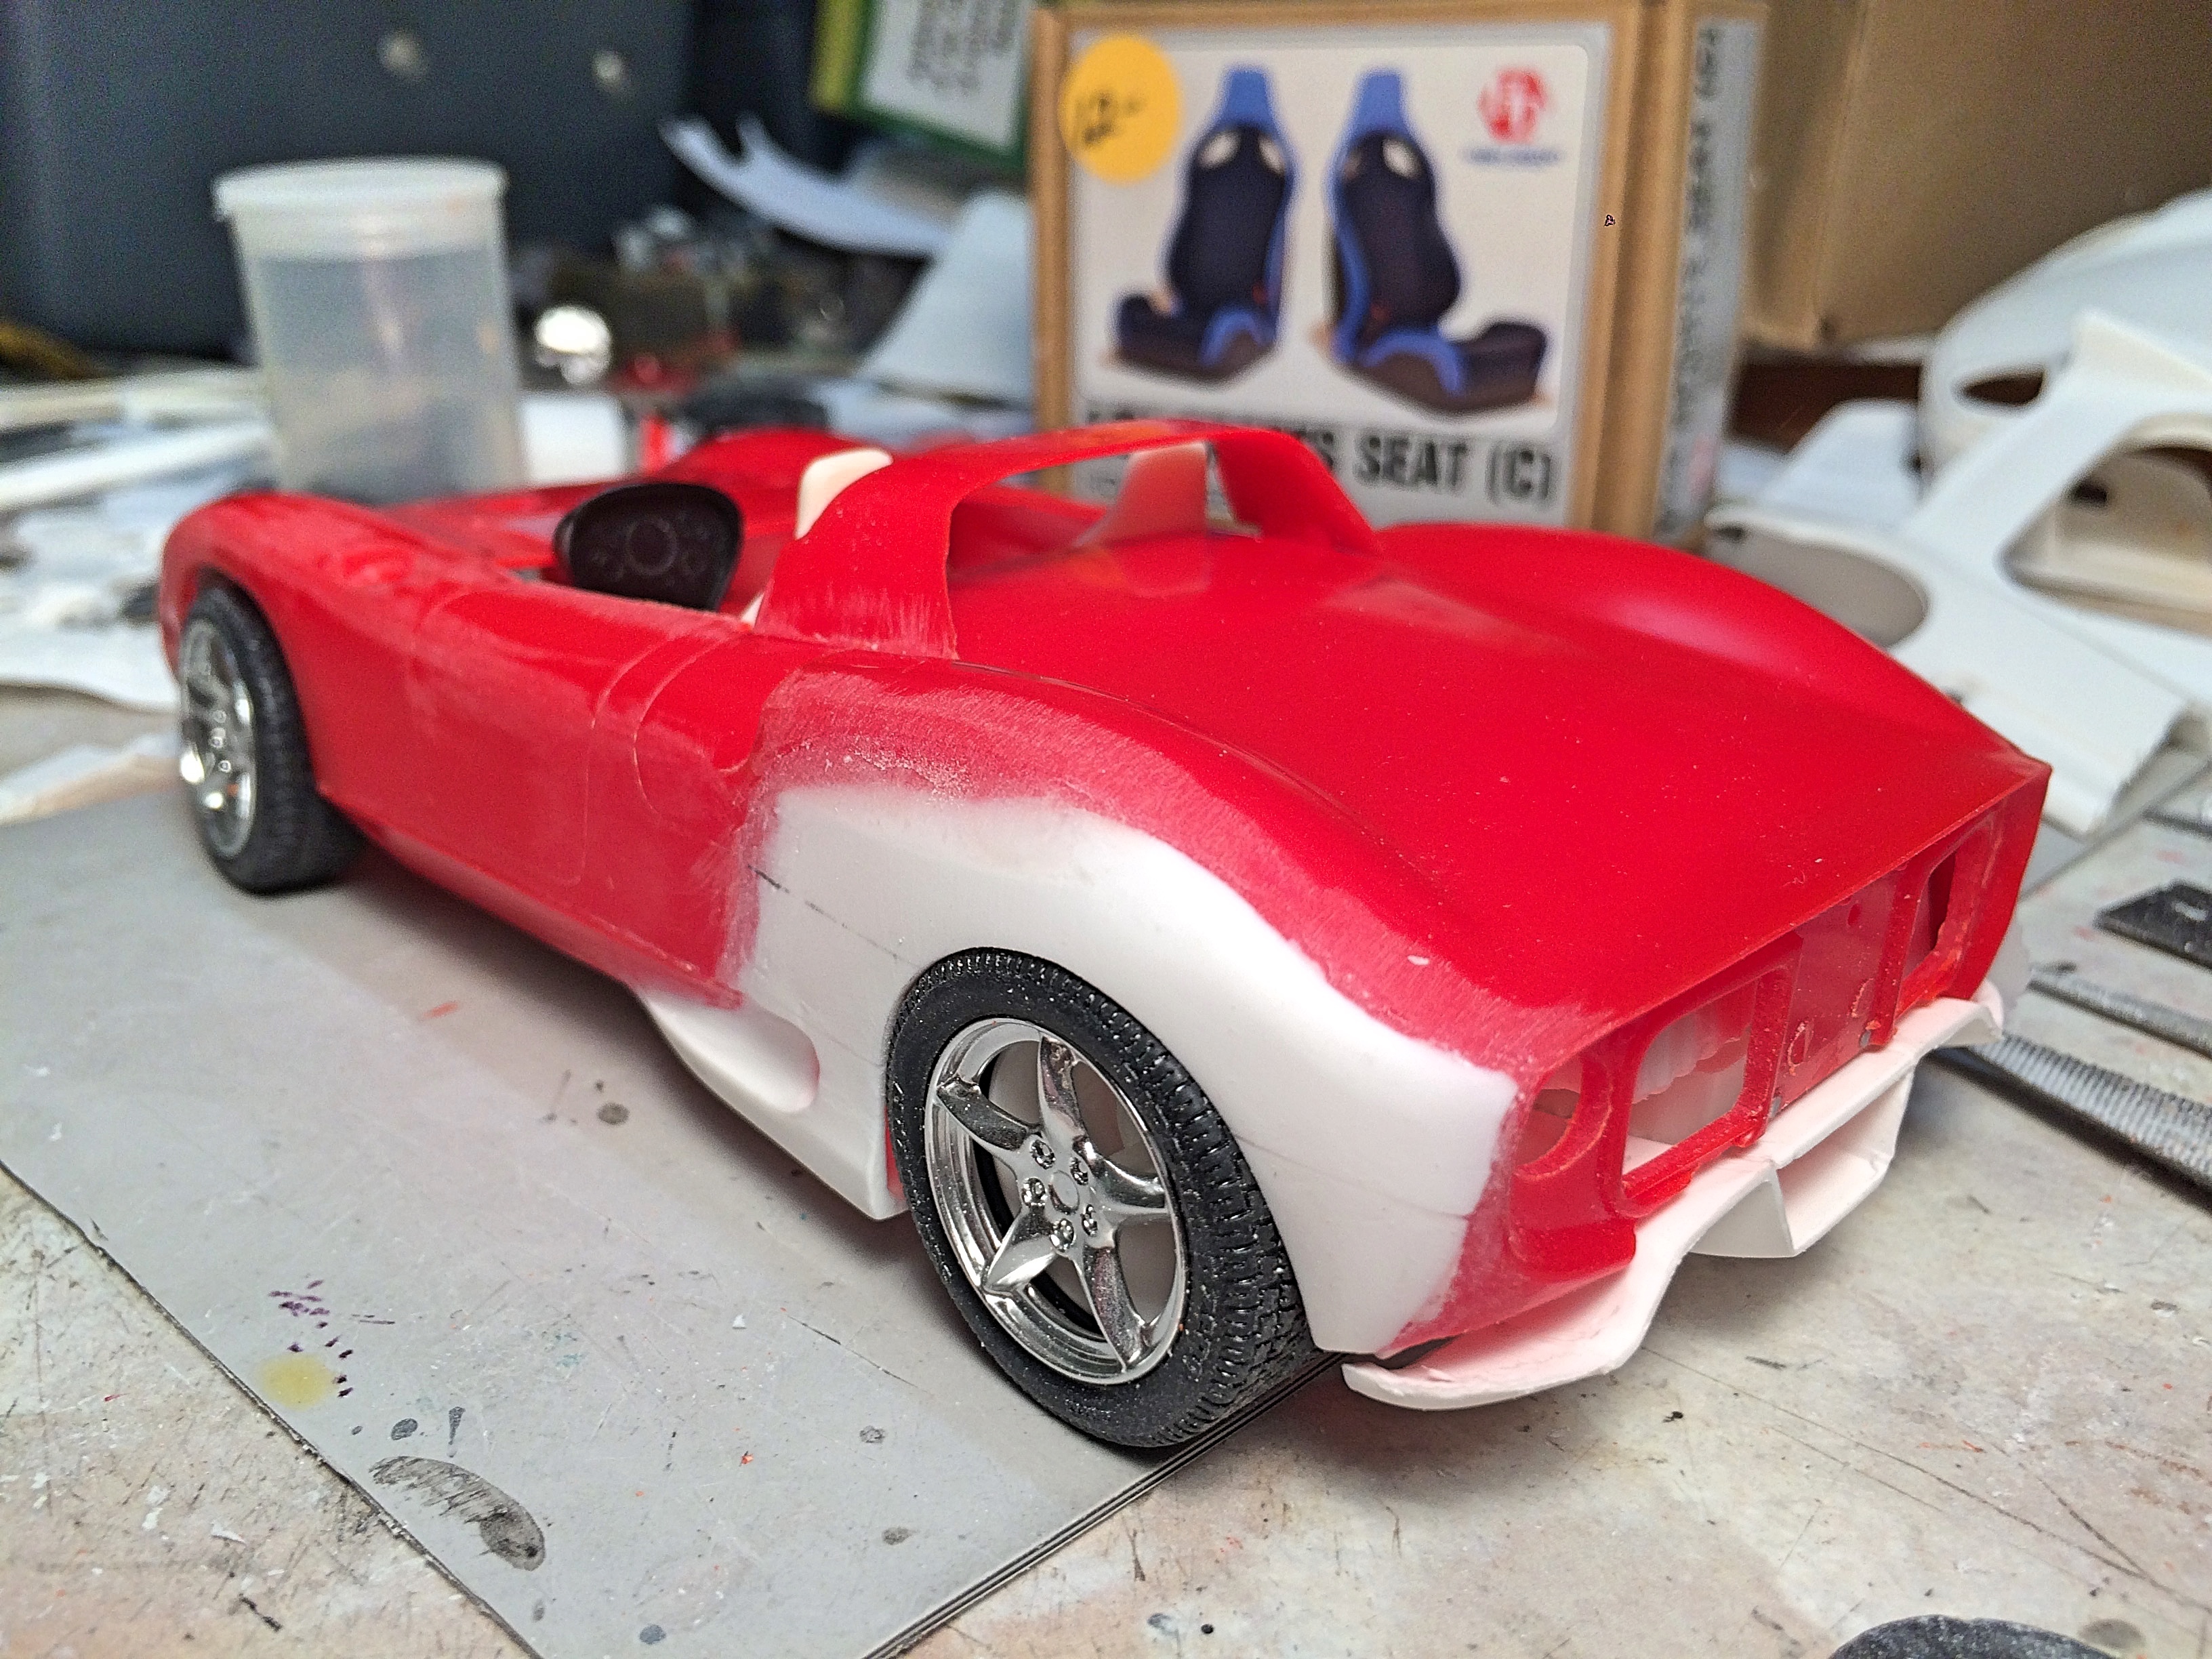
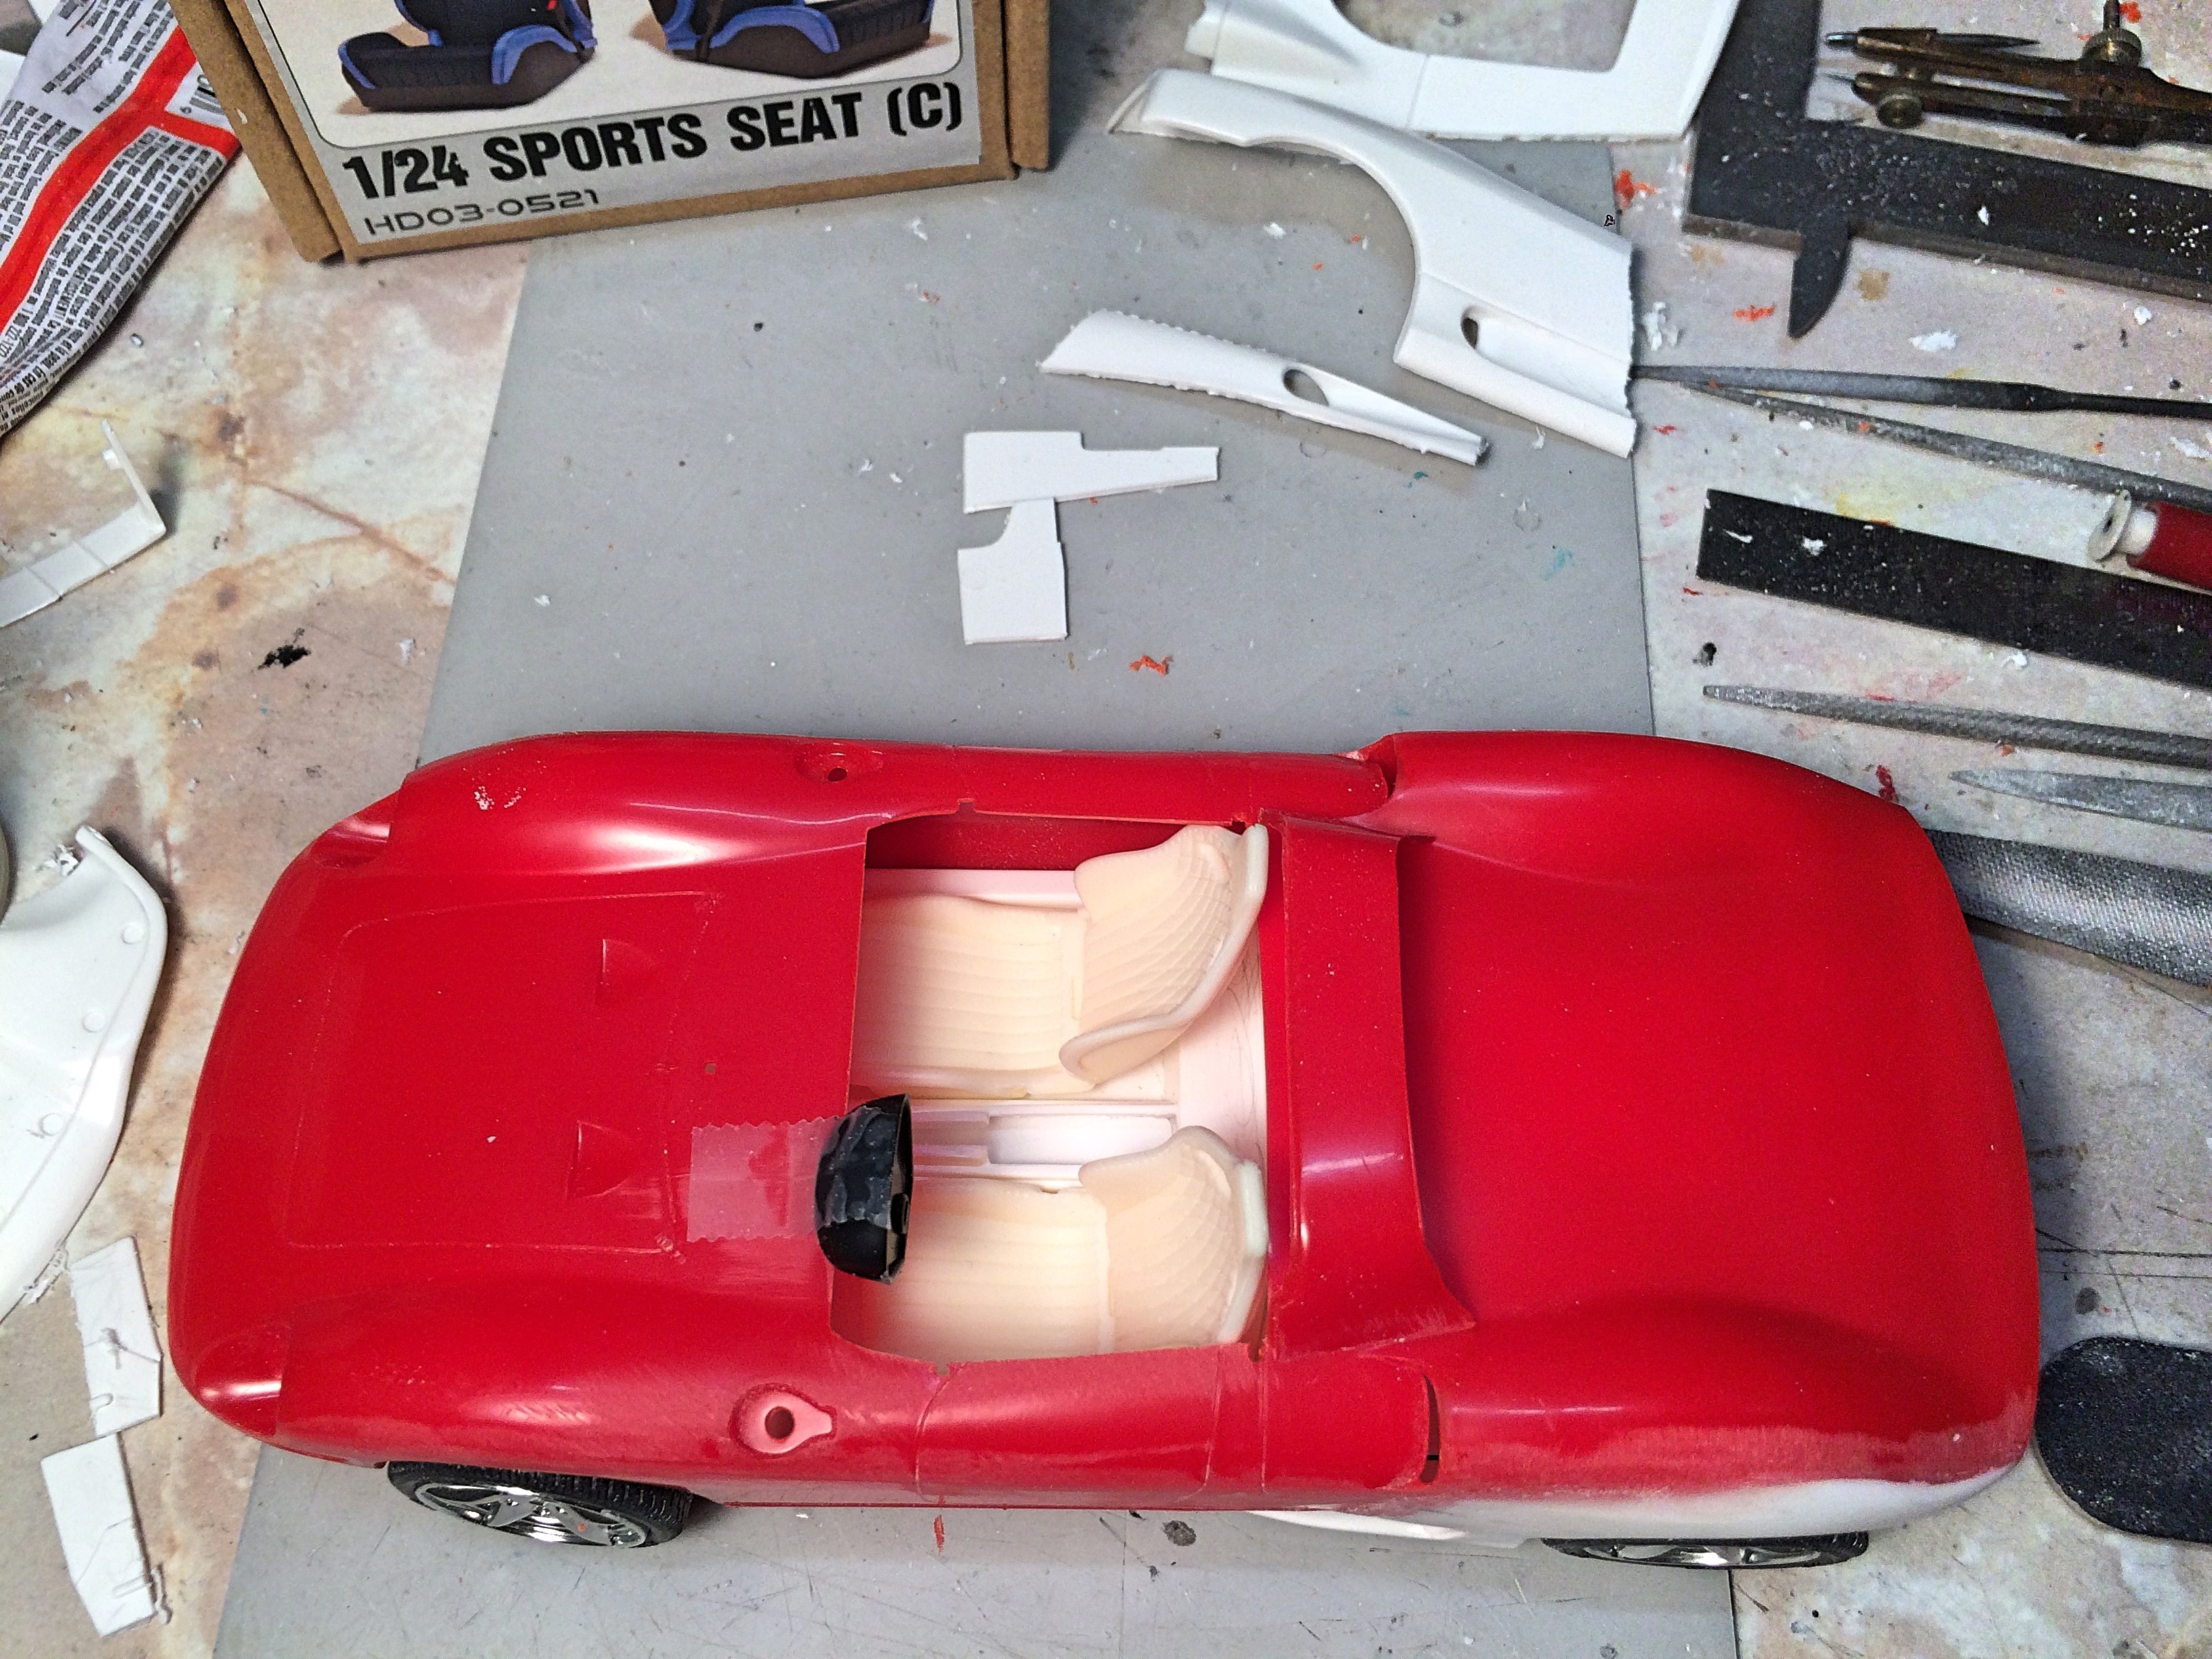
Thank you, still needs some putty. I'm getting to refining what was done before, and working on smaller details. The headlight buckets need some correction. Square light recess needs infill. Also found the after market lenses. Modified the radiator duct, using part of a door from the Mondial. Modified the dash pod. Scribed panel lines, and modified the door, thinking about opening at least one. Also looked at pictures of the real car, the kit has numerous inaccurate details, but I'm not concerned. Thinking about relocating the fuel tank behind the seats, but keep the cool gas caps just for looks.
-
Sorry, missed your question before..... the C-111 has no engine to speak of, just a square chromed lump for holding batteries. I was planning a restorod as I'm currently doing on the Ferrari 275P/360M. Since my initial post, have seen rotary engines on Shapeways, but not convinced they would suffice. Back to Nathan: Did you use cigarette package foil for heat insulation? Project is looking *really* good!
-
Thanks. True test will be painting the primer. Thanks. Yes, perhaps the easiest modification for this project. LOL
-
like dried twigs
-
Only because I've owned a '69, and now a '68, I picked up 3 Fleetsides and one GMC stepside (for $10 ). This is a very popular vintage pickup, they would do very well.
-
I won't pretend to know everything, never heard of "tanker" before, I'm sure it was handy for getting across town. Very well done. Dumb question, is the Split Window the other reason for the transkit?
-
Nicely done! So cool we can build models for friends, I've done it, great satisfaction. Now I have a movie to watch, never have seen it.
-
then suddenly snags
-
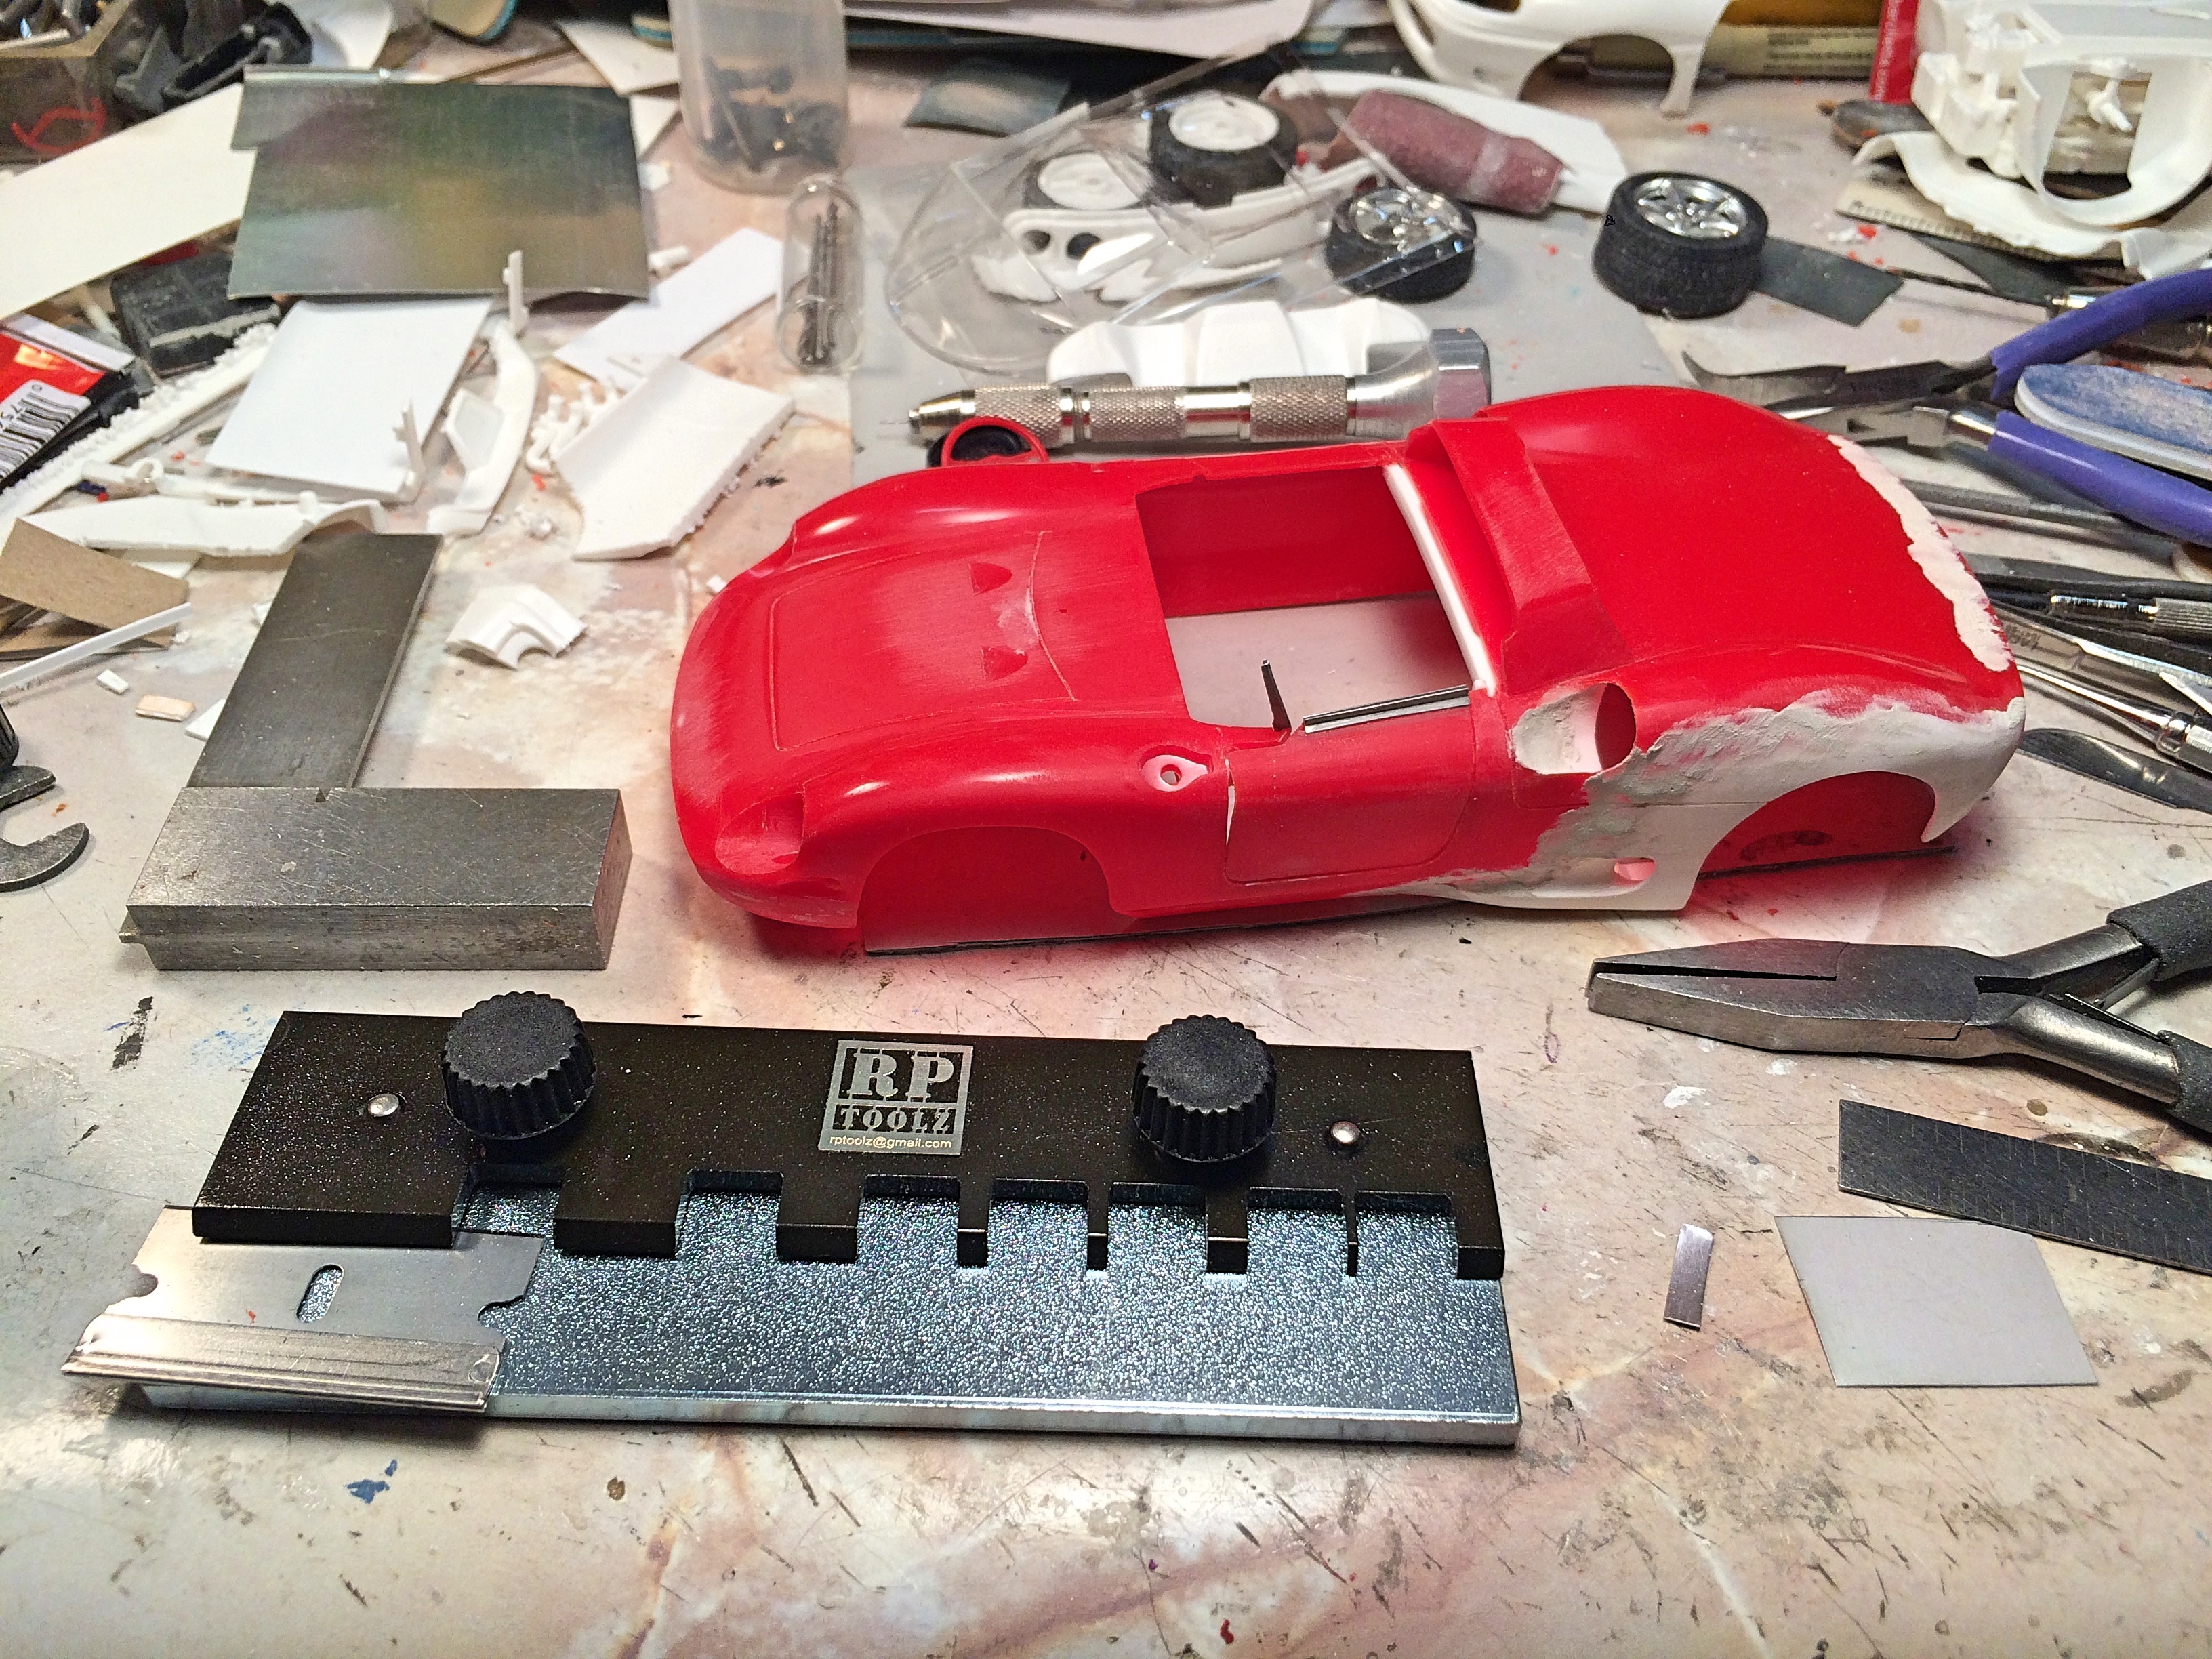
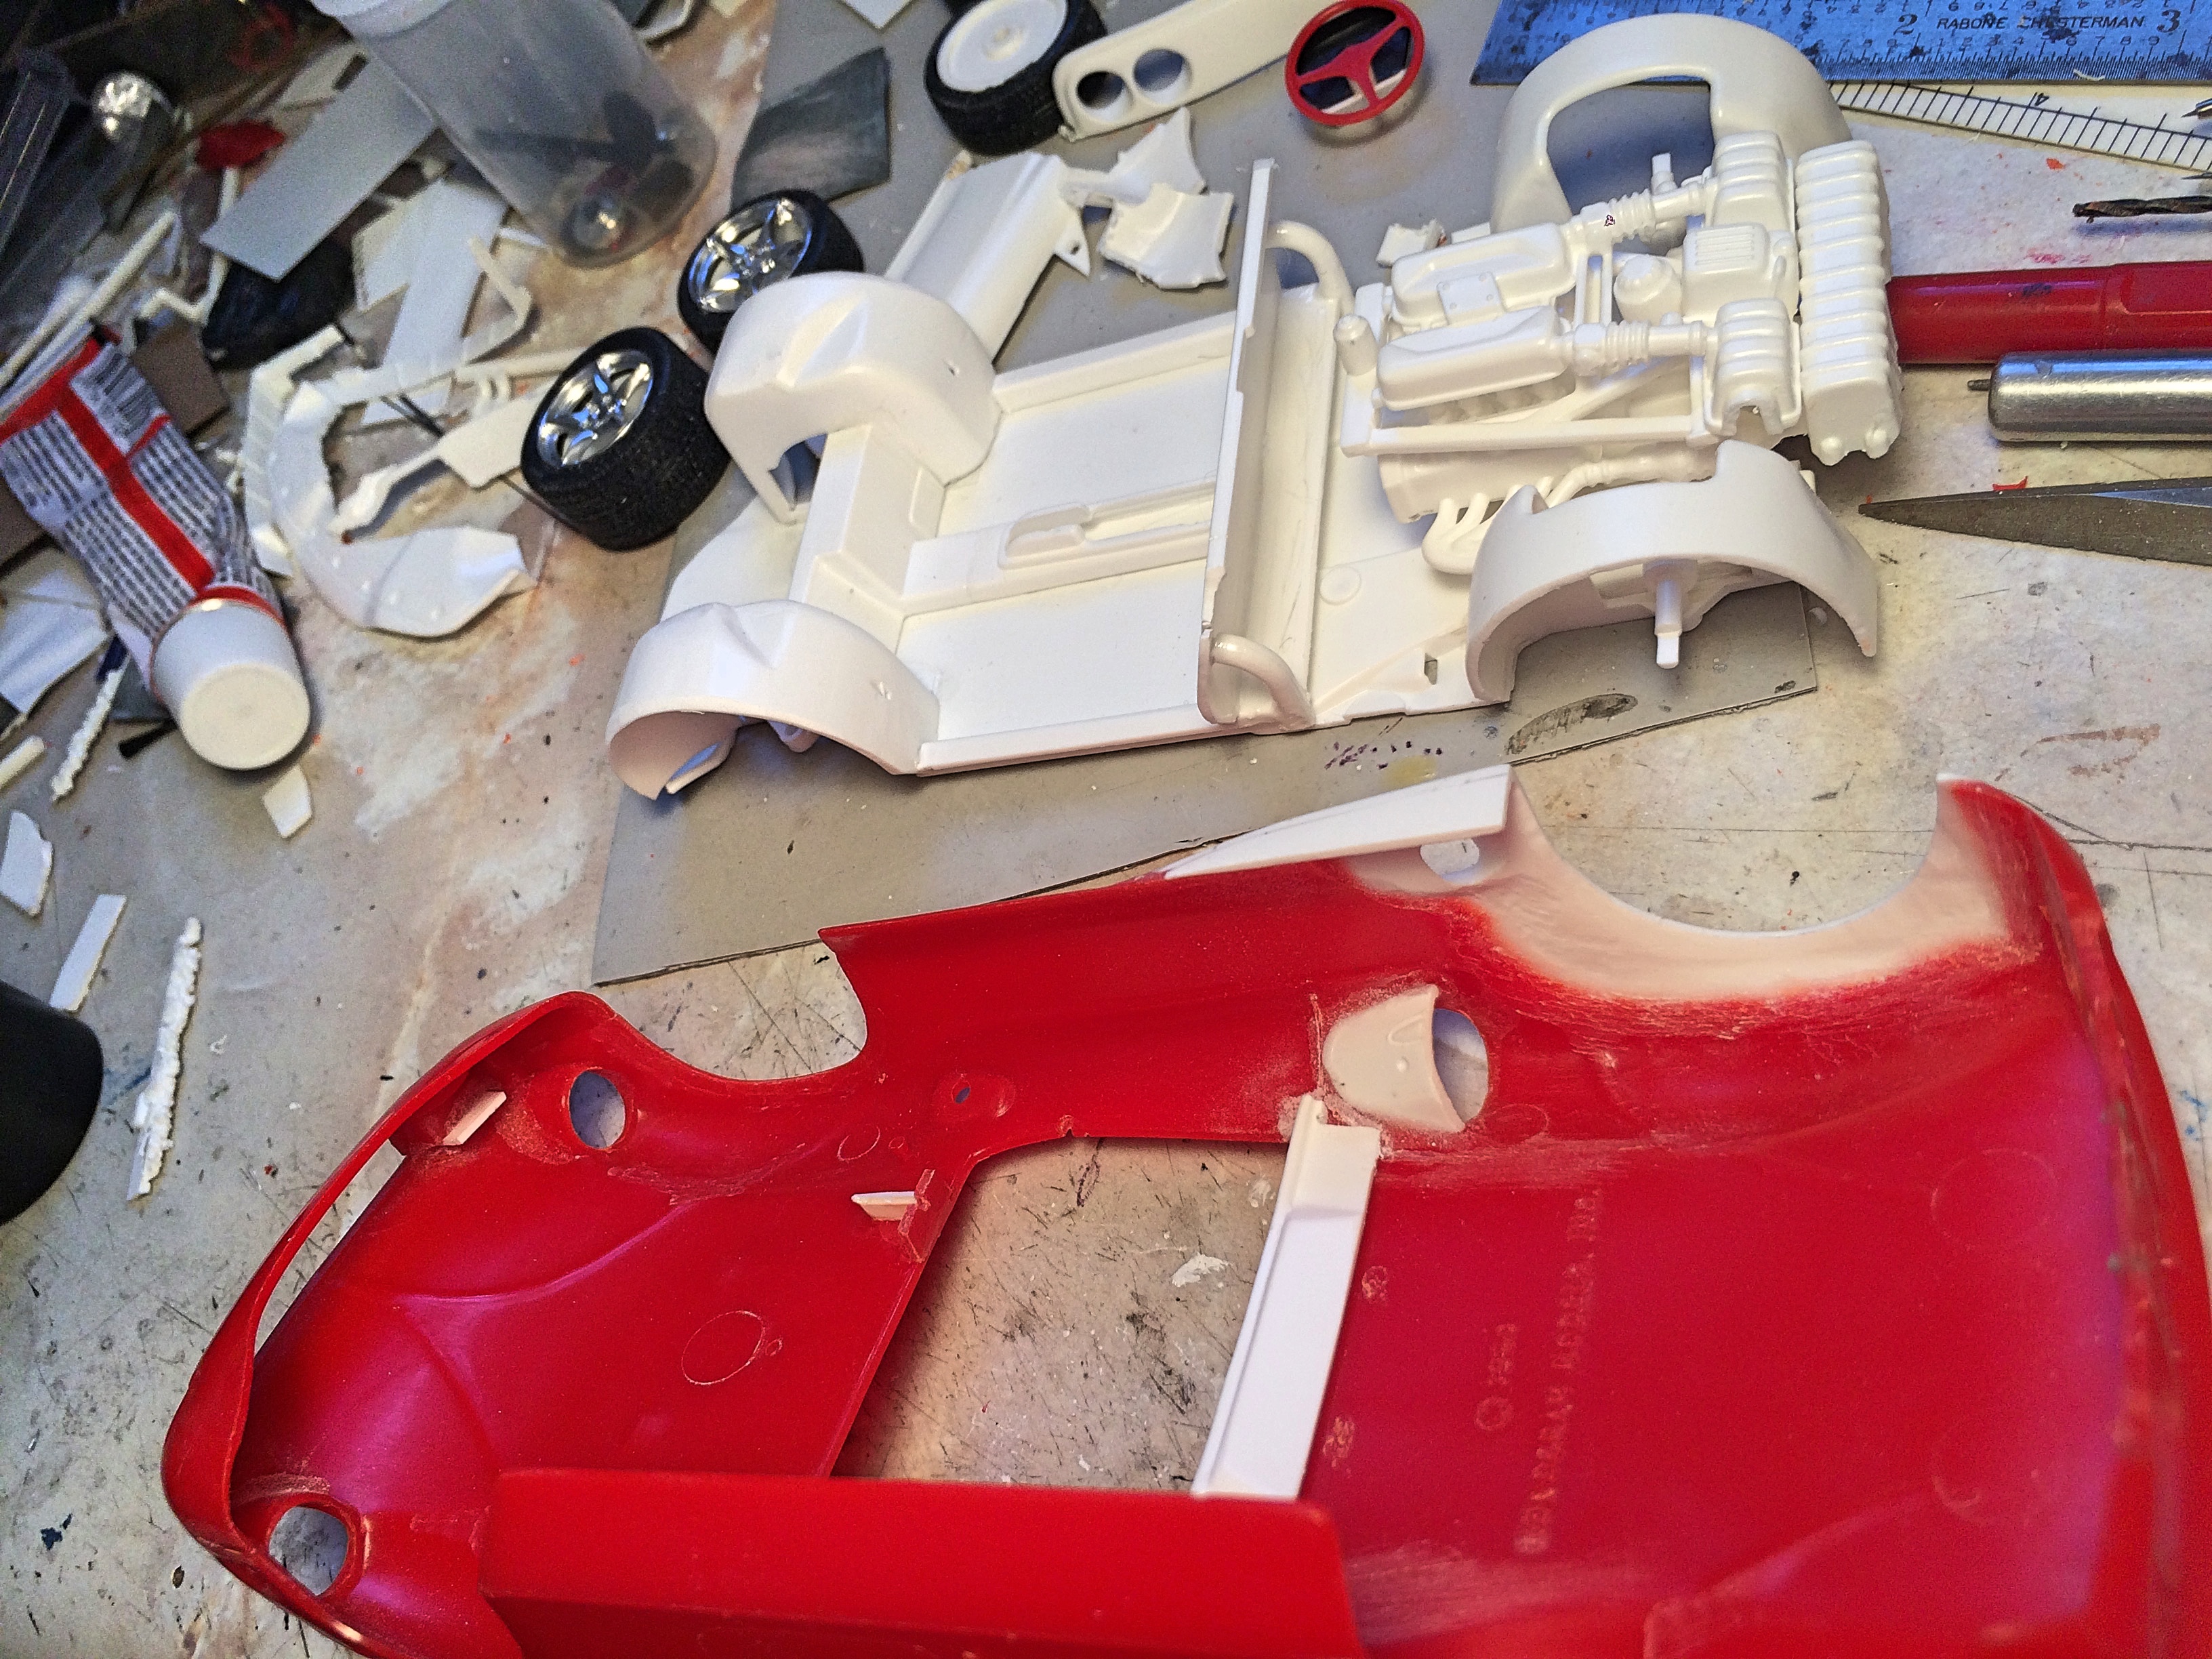
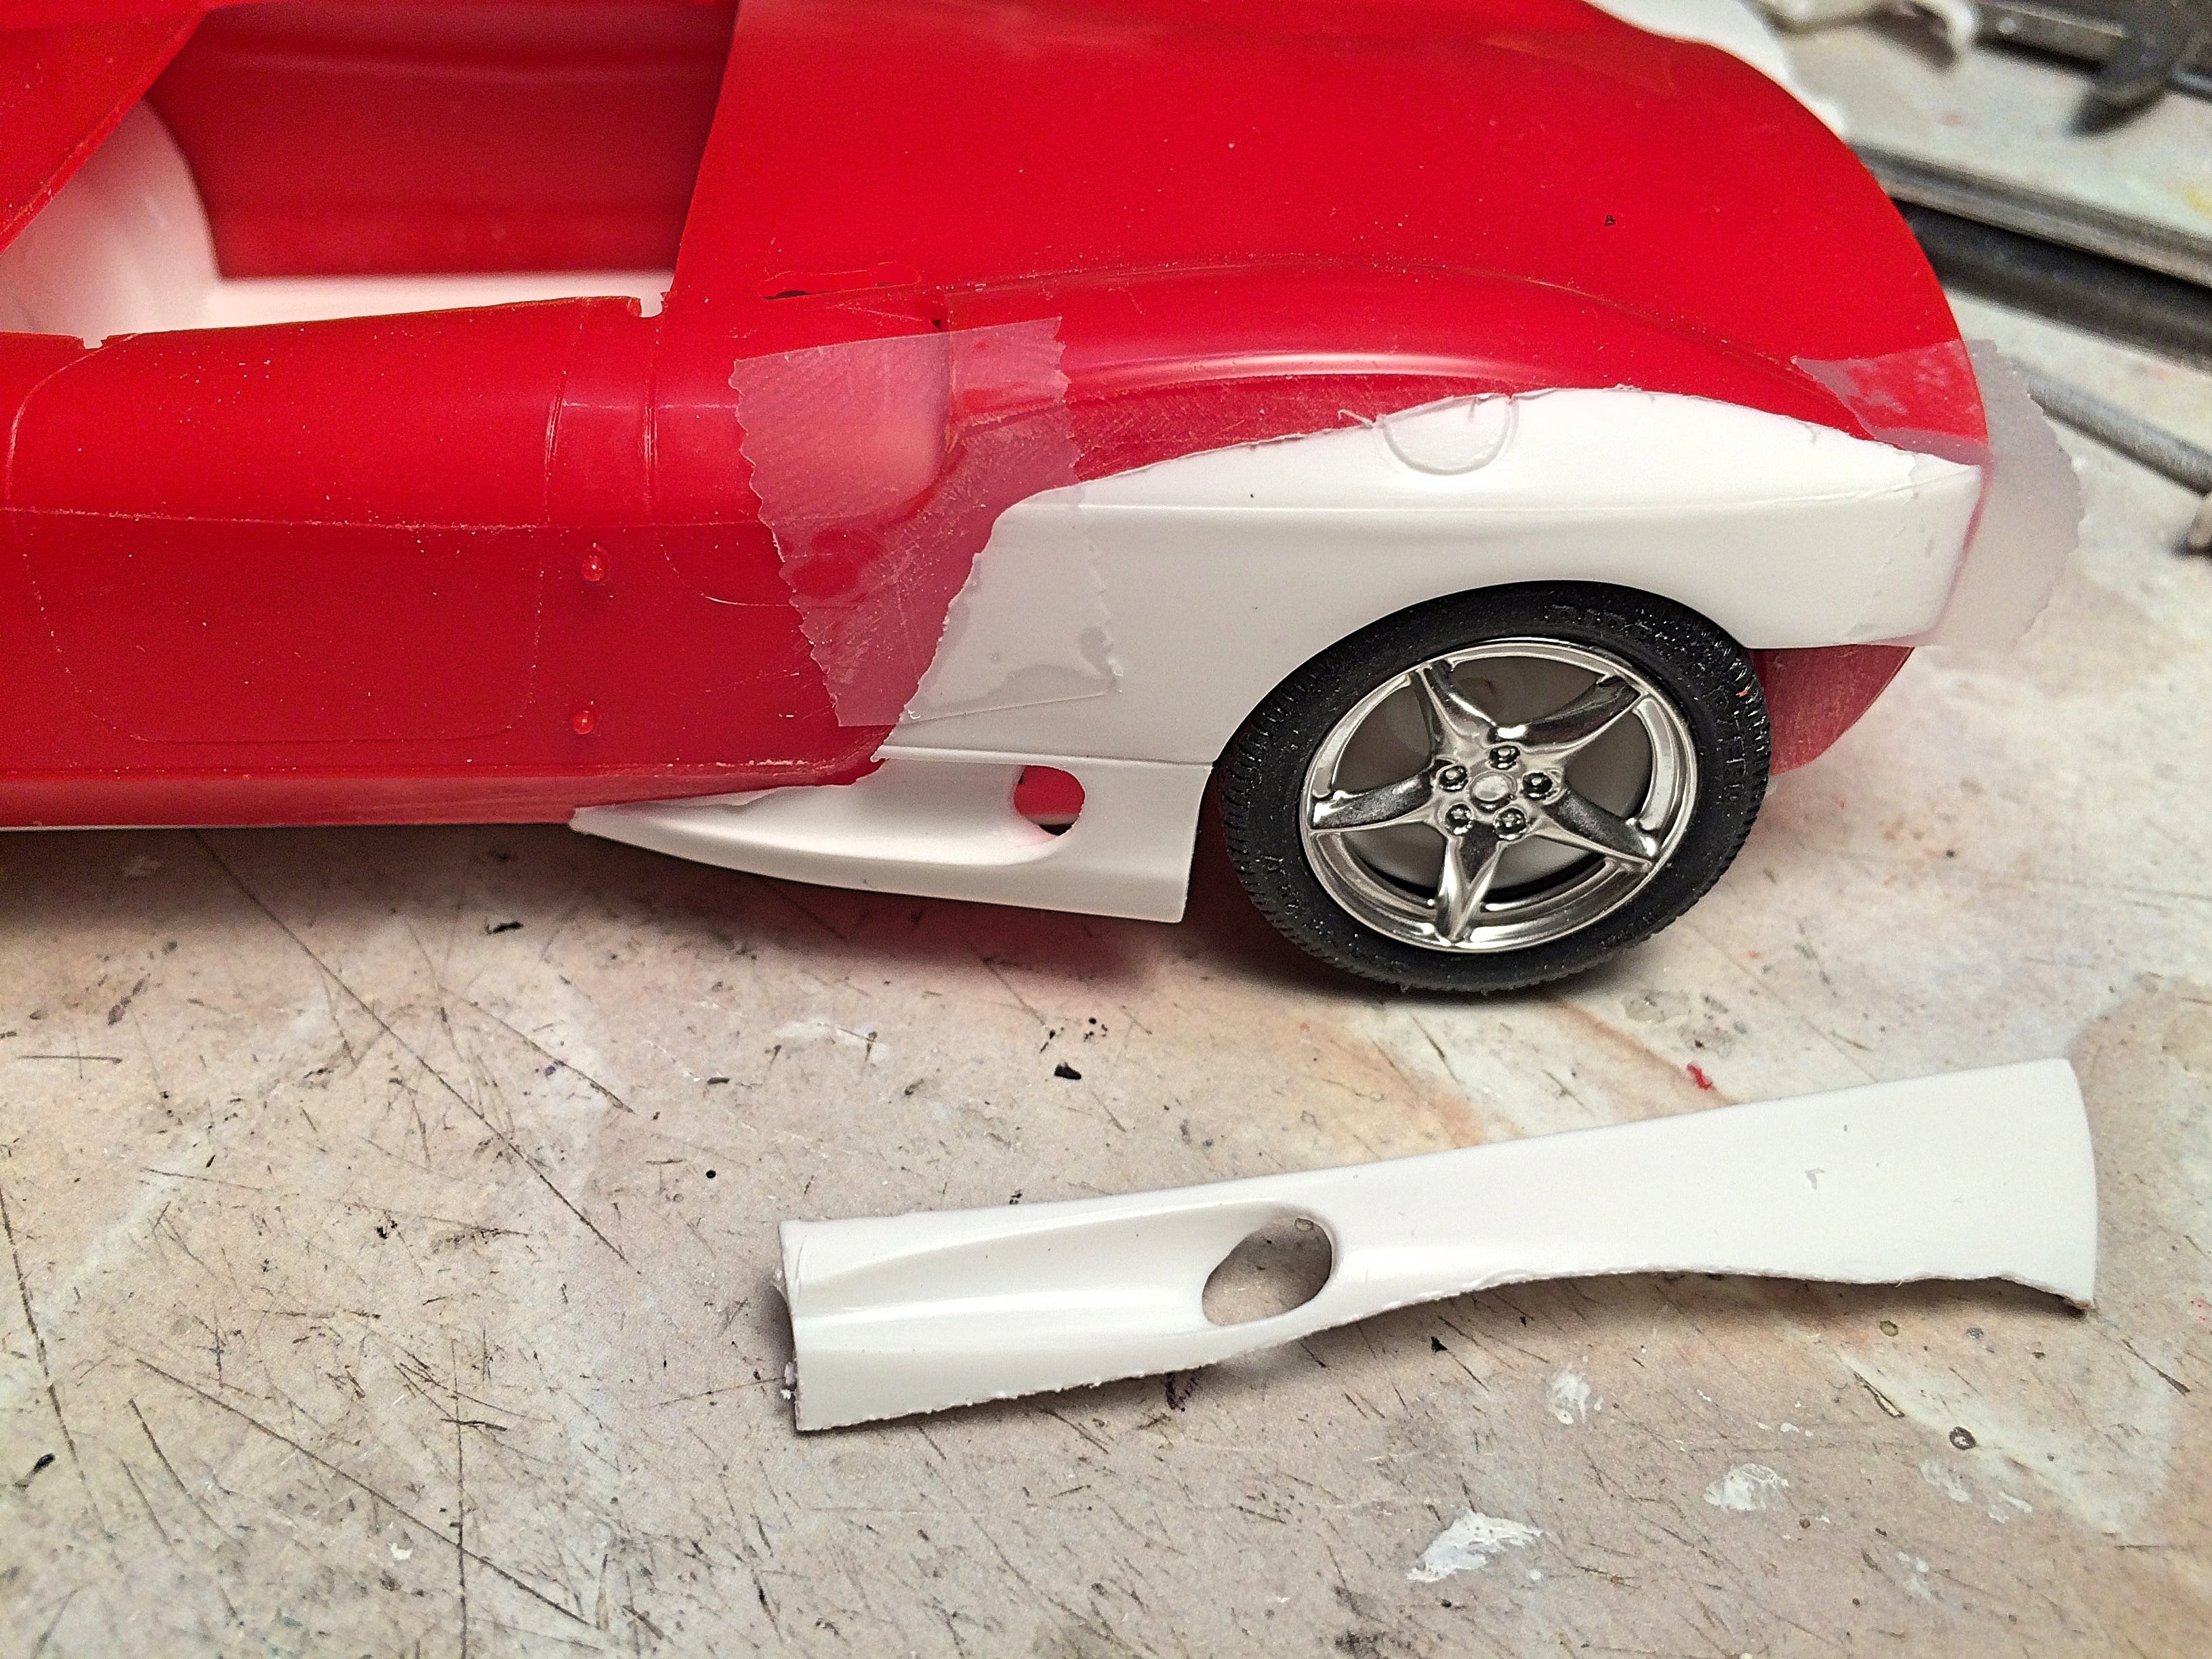
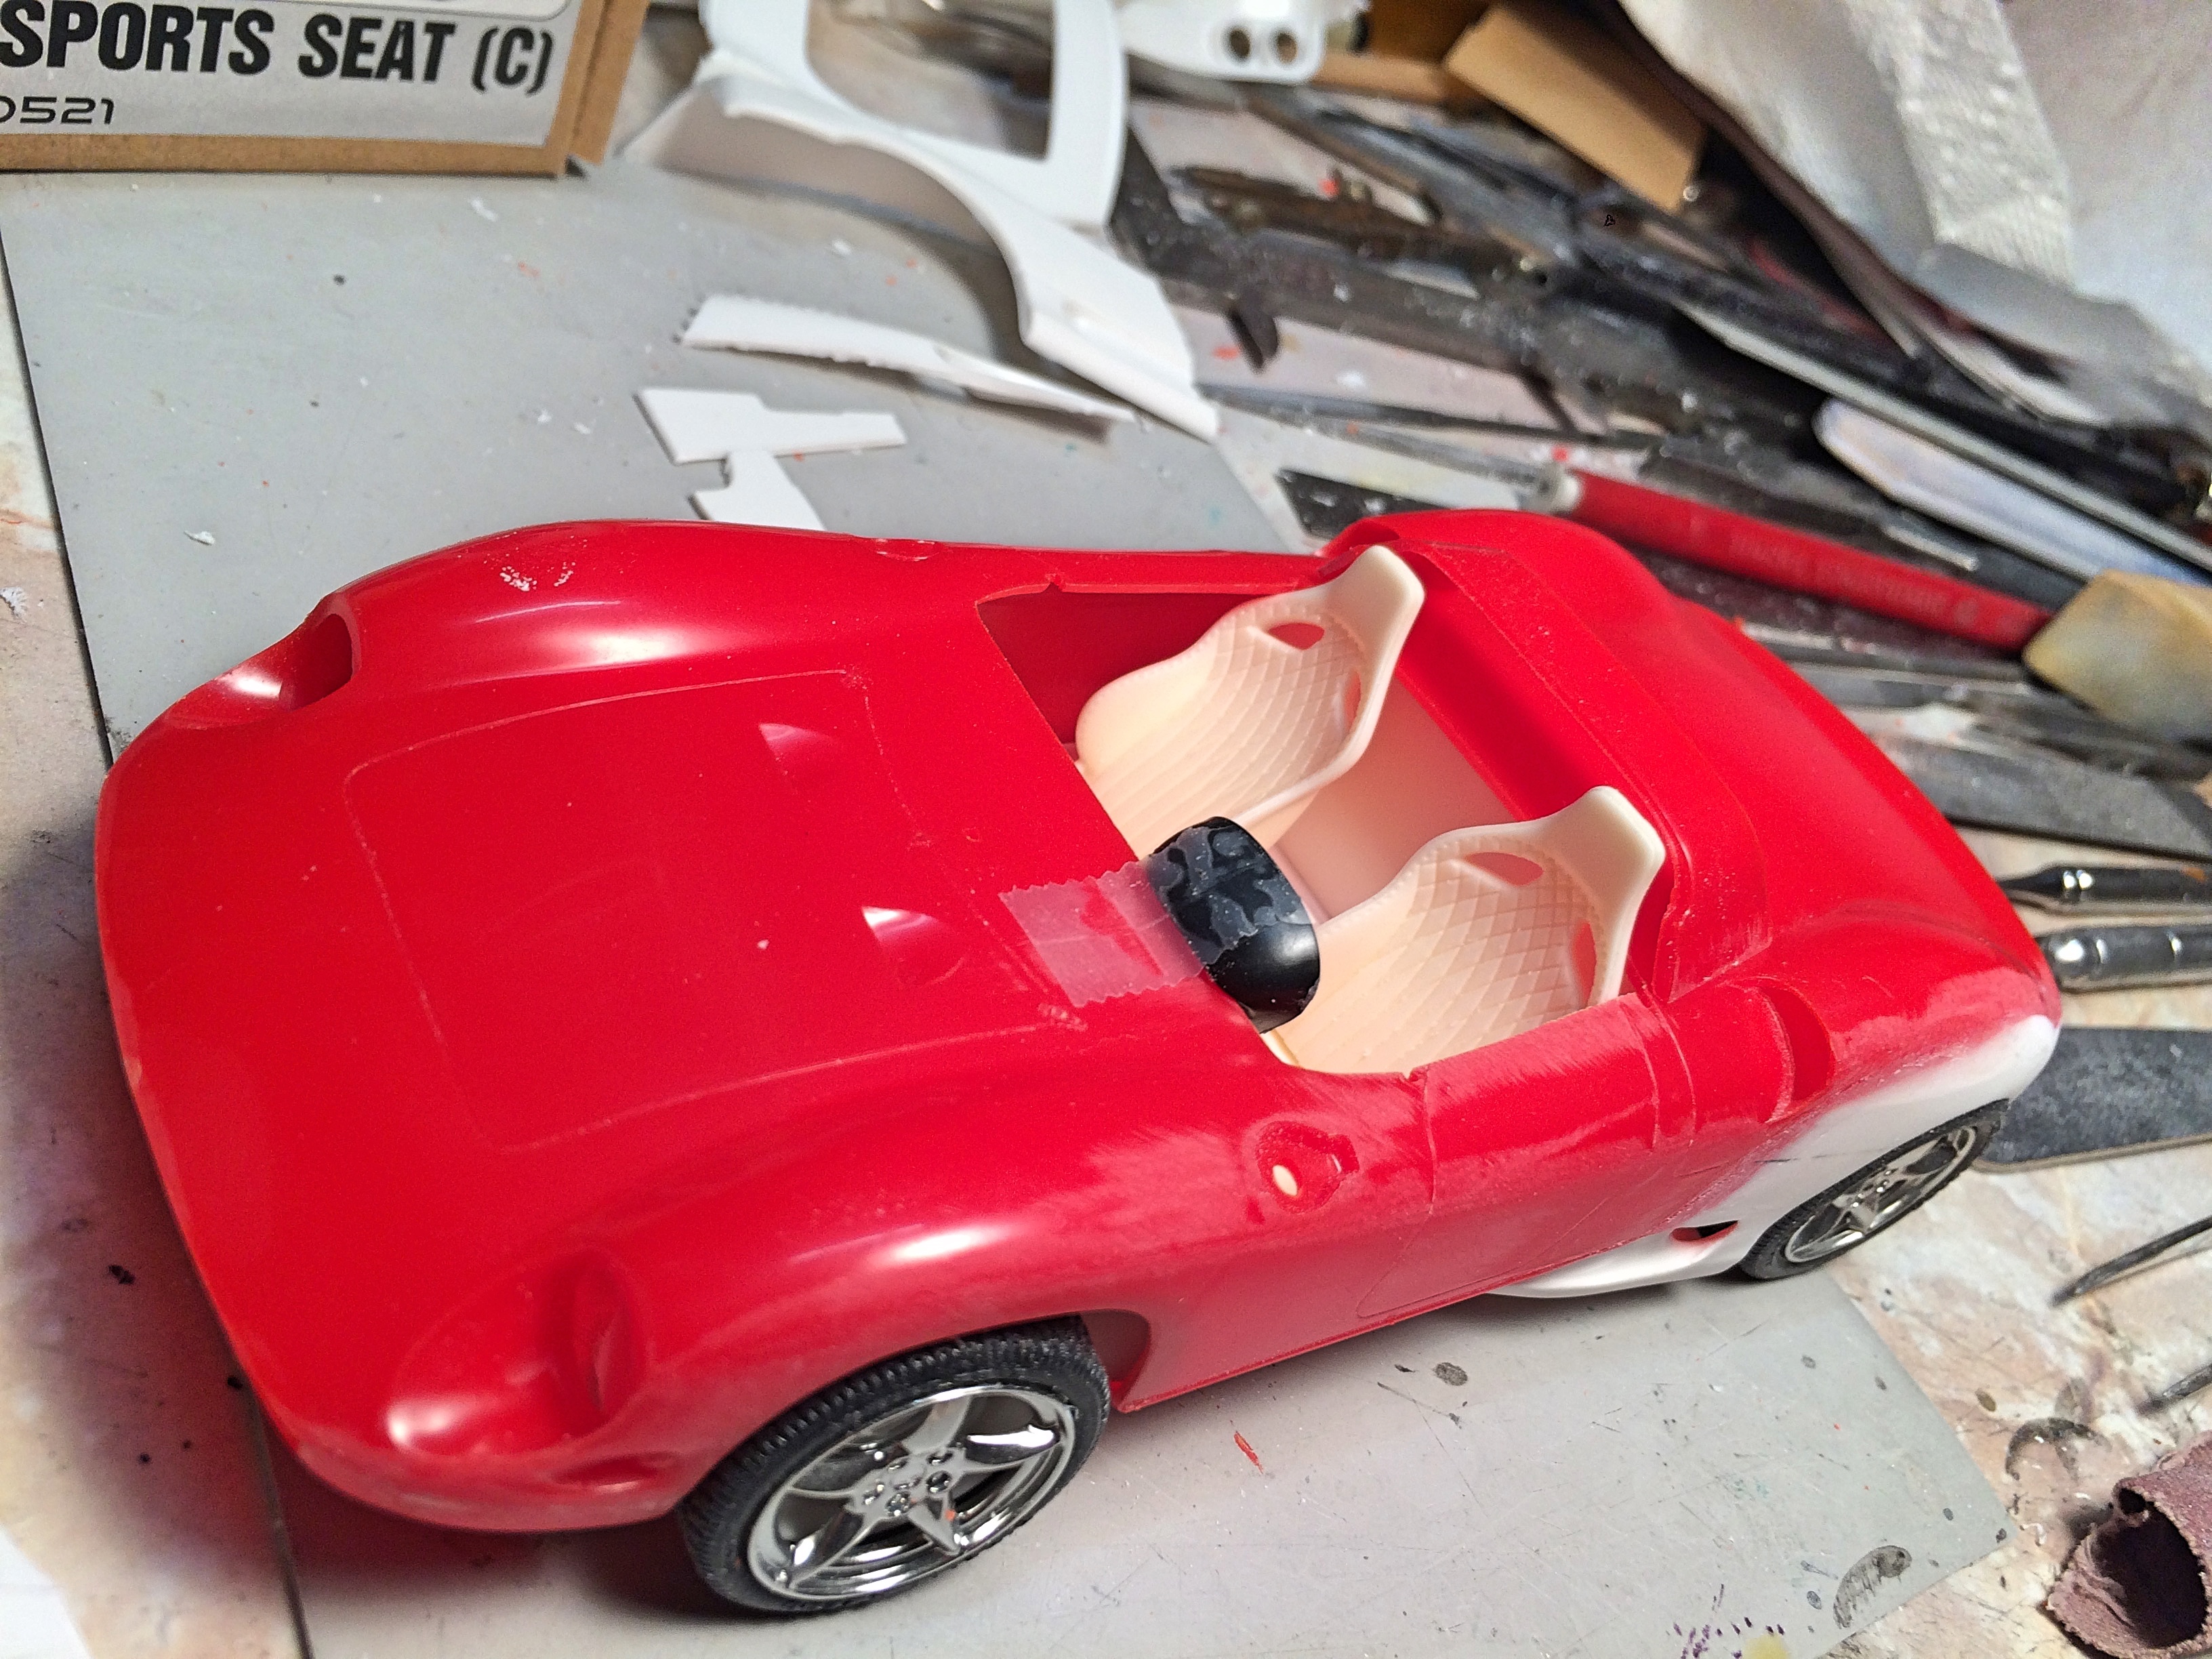
Thank you. It's only the beginning..... I decided the chop up the Mondial body. Started off neat by using the #11 blade drag on the straight lines, but got the hot-wire and hogged through the side cuts, and then slicing the fender. Used the Dremel to final shape and thin the edges. Nice thing about the Revel plastic, it bends without breaking, was able to warp to profile. I removed only enough of the body to fit. I superglued this stage, adding baking soda to set and act like filler. After I was happy with the position, I added more glue and soda. Nice thing about superglue, can work it soon after (unlike tube cement). Glad I got these seats! Also found some cool parts in the stash, such as the Ferrari GTO dashboard. I will make the wheel opening a little bigger, after getting the other side done. I'm expecting to need some putty work to blend in. I also need to figure out how to make the ducts dip in for the radiators. I considered using the wire wheels, even a set of photo-etch that I also got at the DSC show, to keep it as a sleeper. A Ferrari sleeper .
-
I've seen how they have smoothed the engine bay on real ones. There was a guy in town with one, always had to take a look at the cruise nights and car shows. That thin strip will always be begging to get broken. I would get it over with, and make a steel piece.
-
Hope so, even in RED! Good, at least the basic construction worked out. Thank you sir! I'm going to get executed?
-
with silicon bolt-ons
-
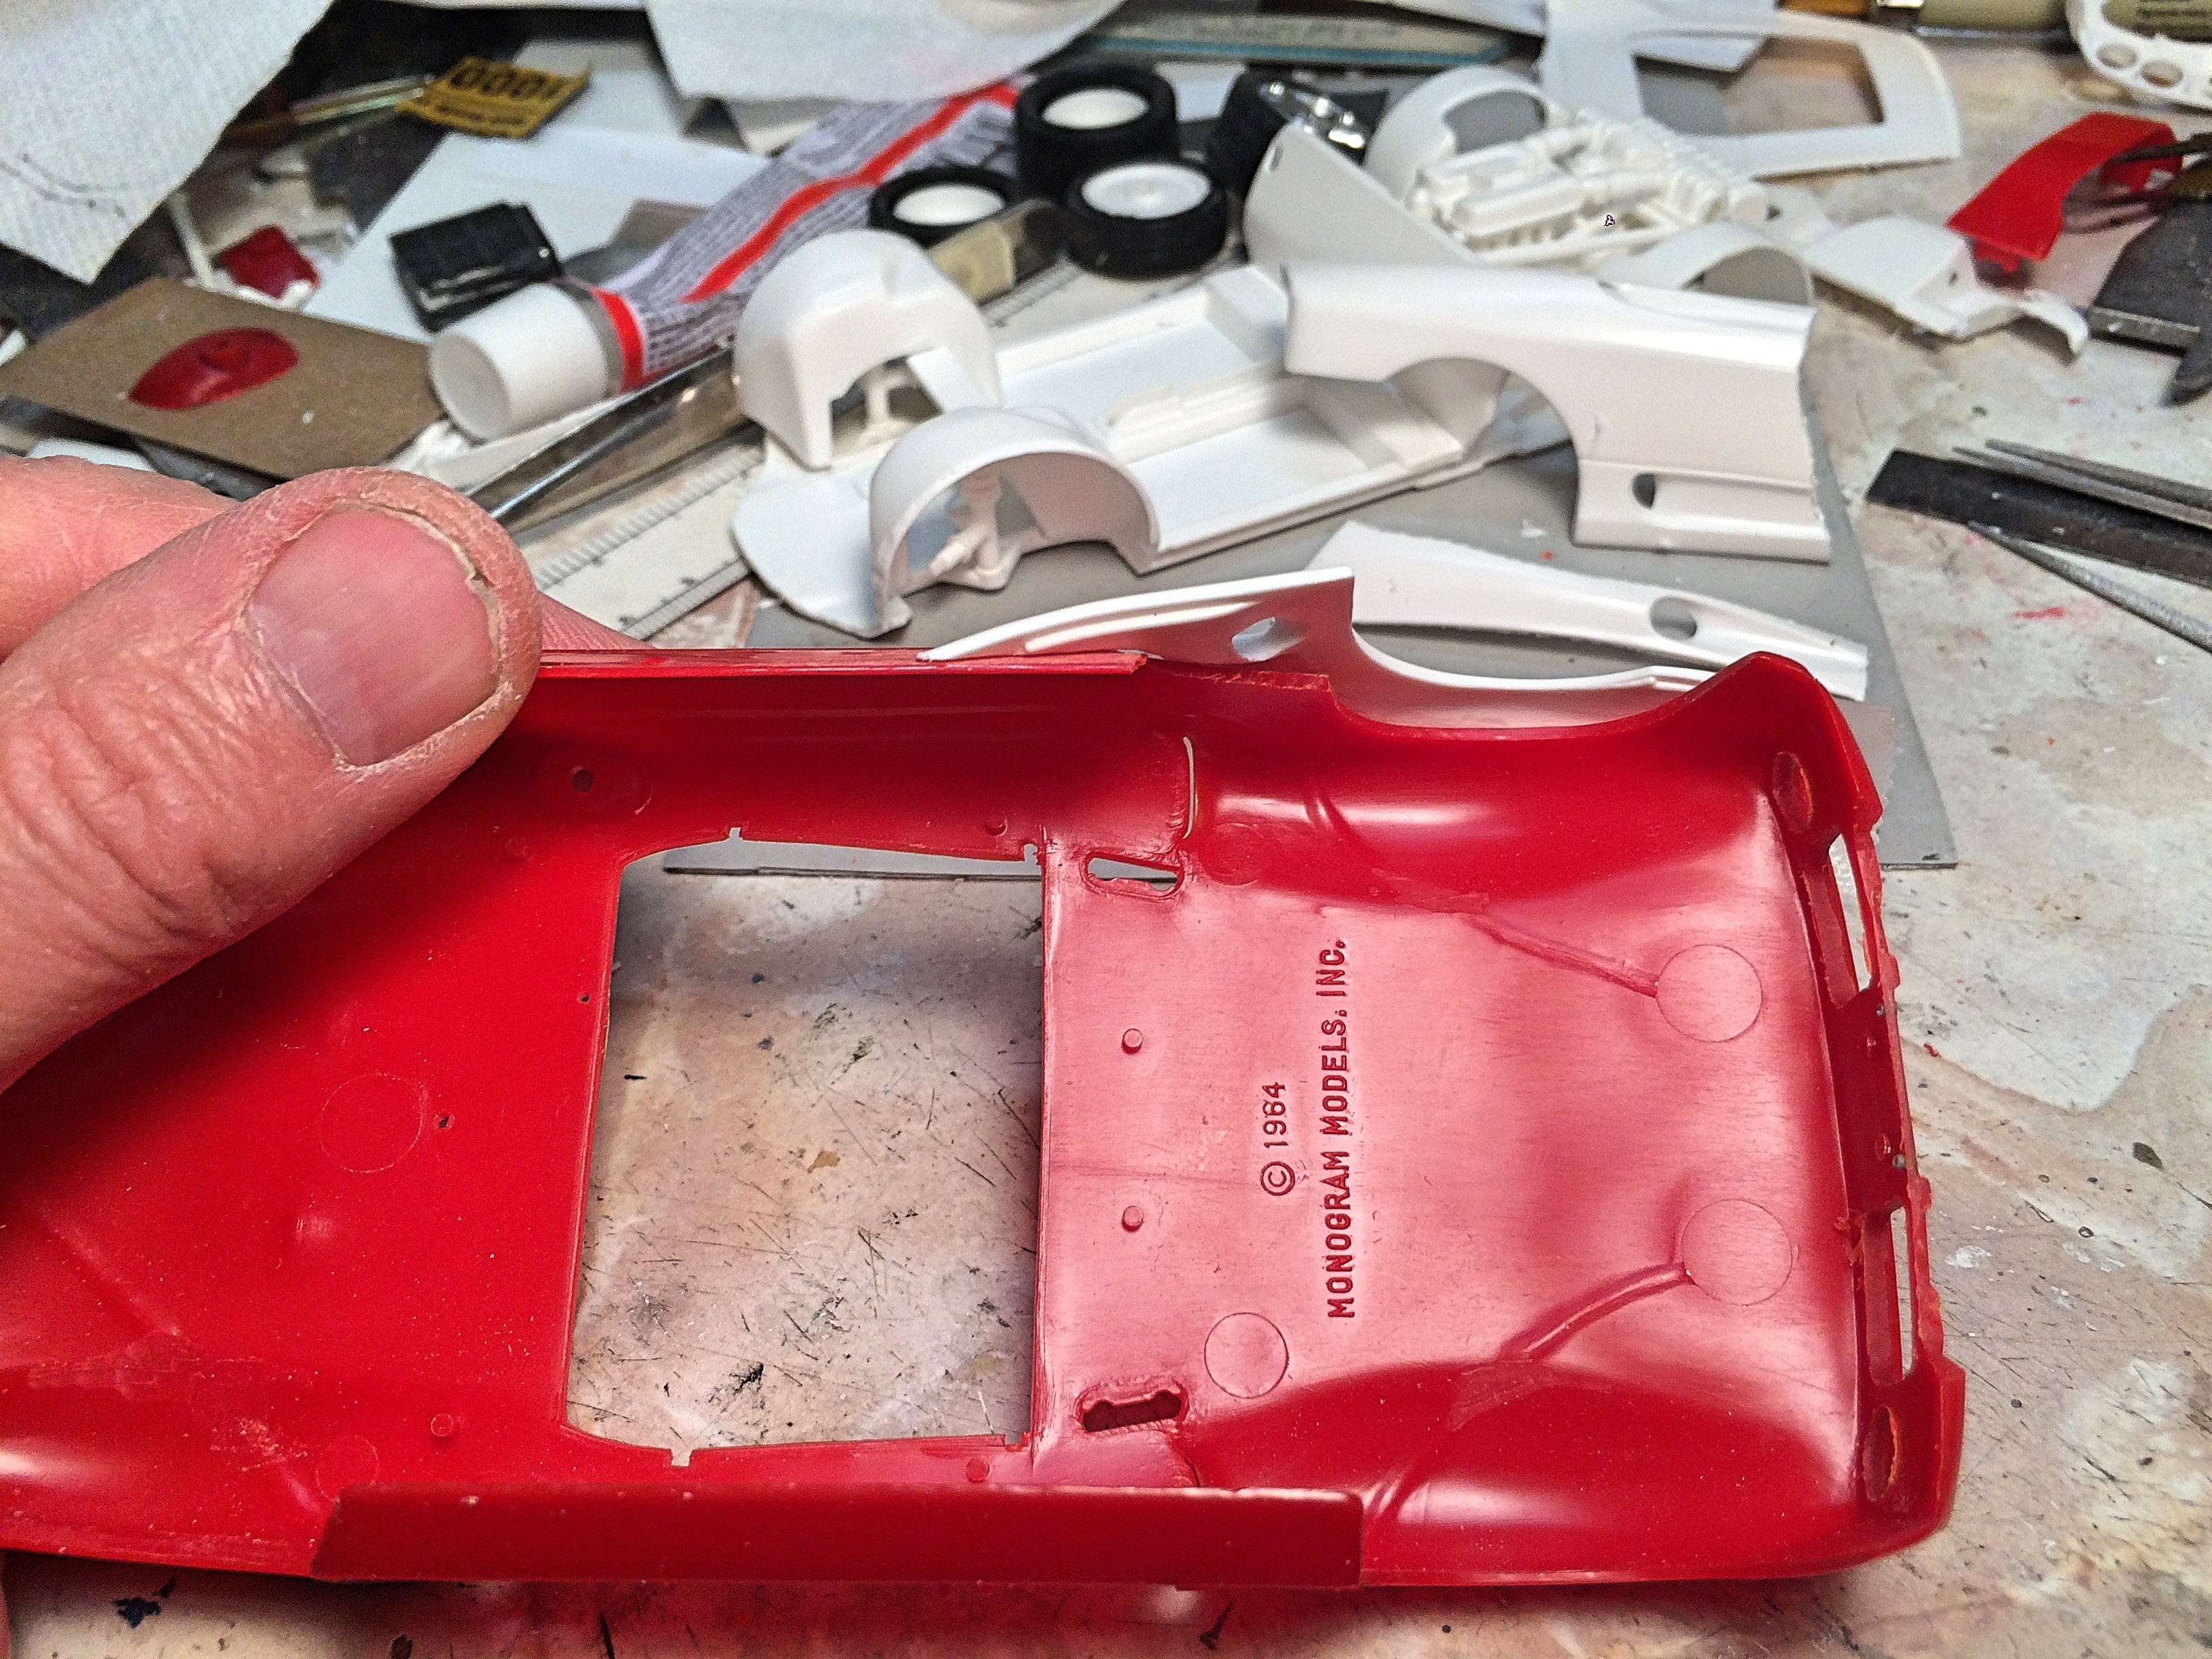
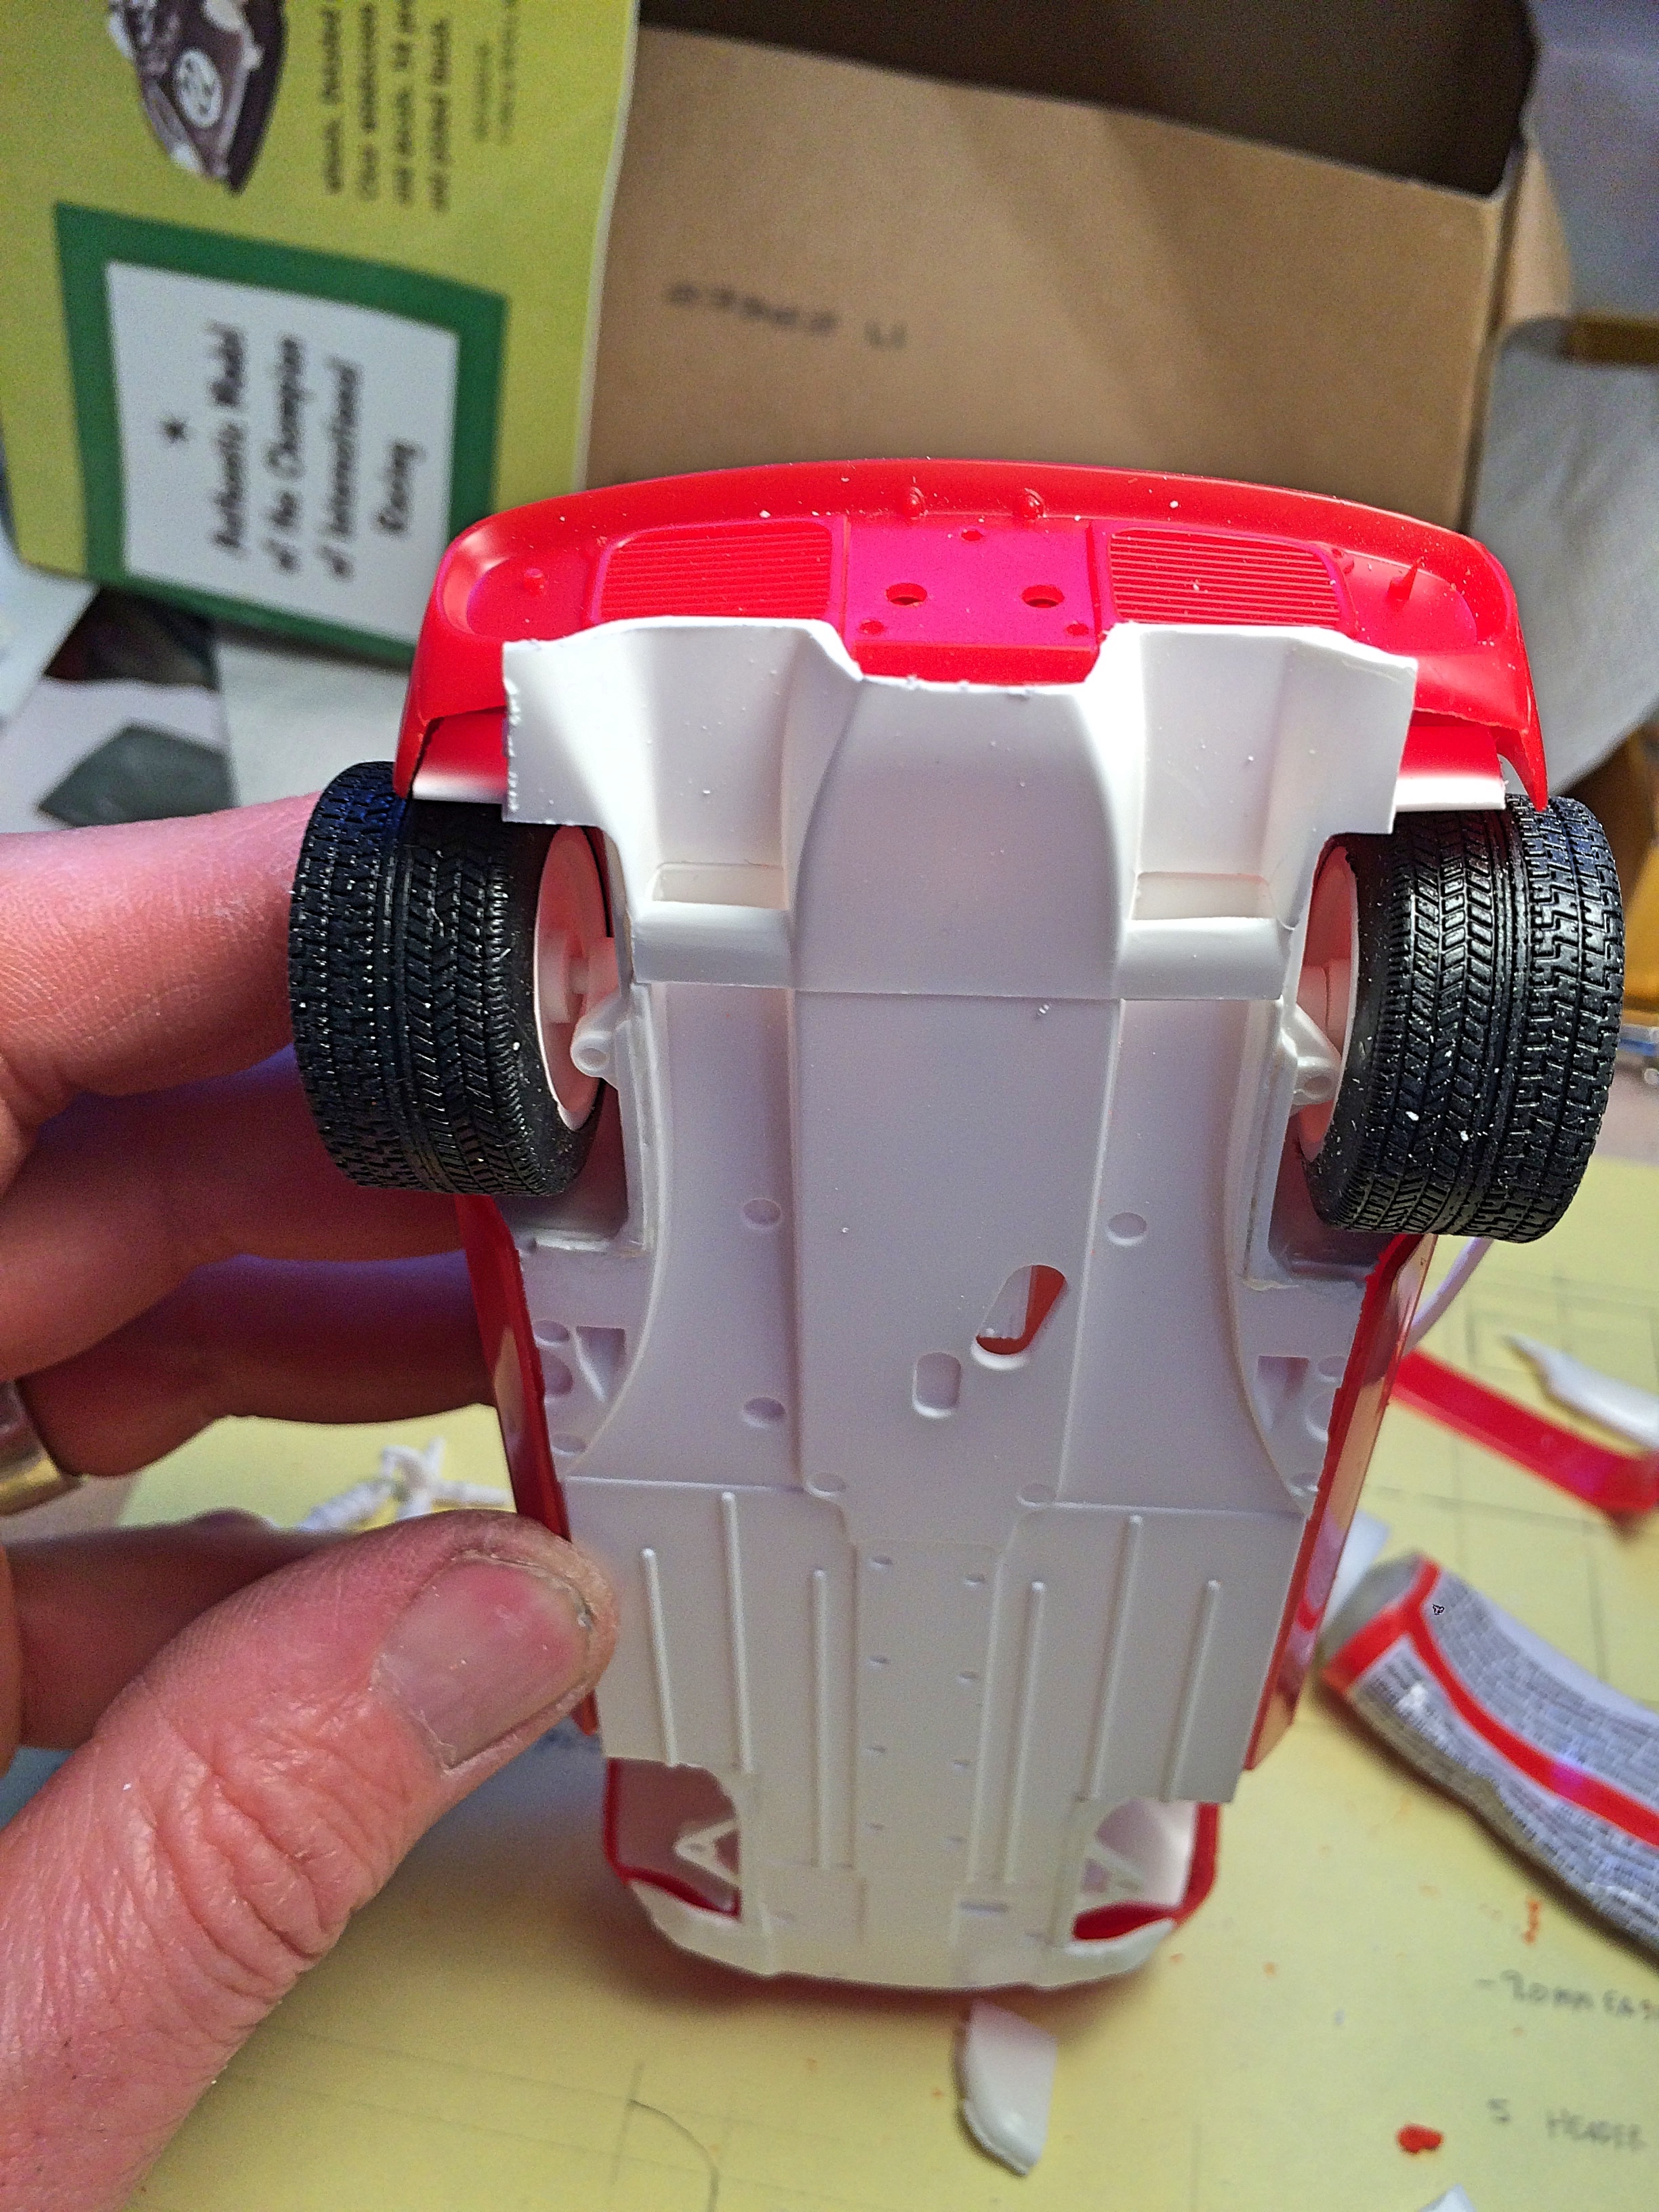
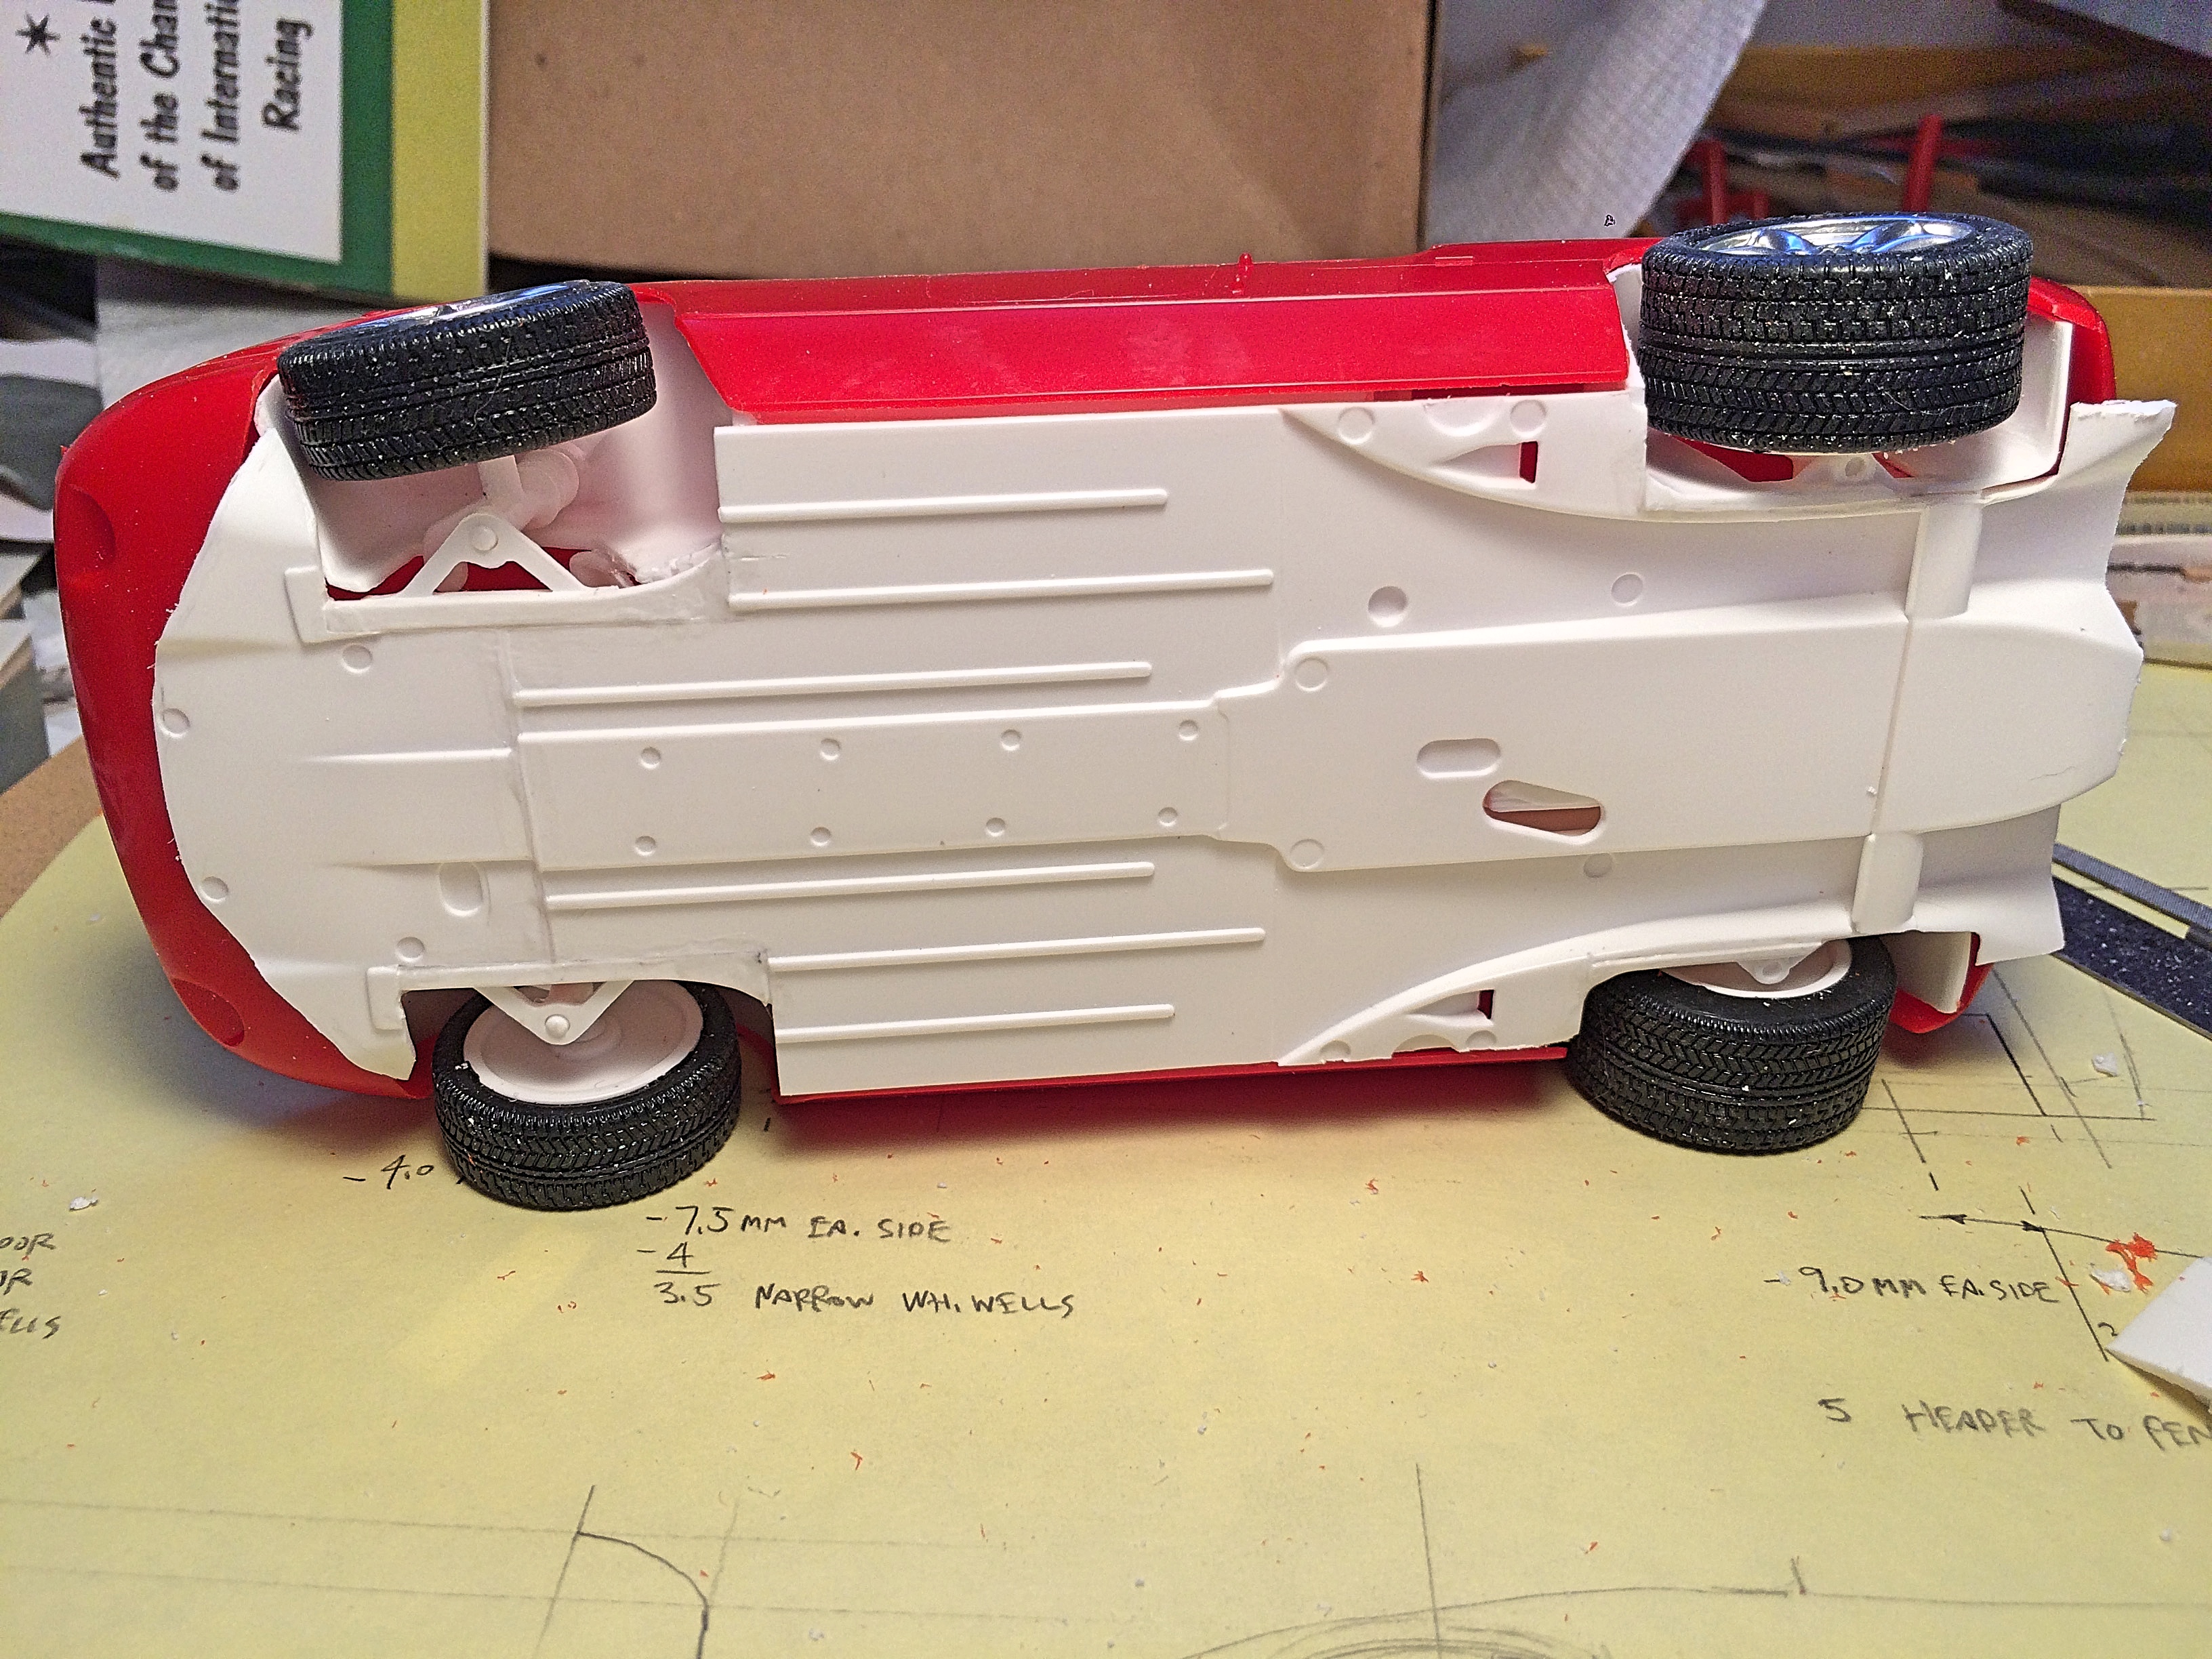
LOL That's why I add such details, to drive some people nuts. Thanks! I don't recall the radiator being a problem (using vague memory). Think the tilt is important, when you glue in, set the top towards the rear so it clears the body. Scrape any mold lines along the bottom (I do every mold line) so it sets down too. It goes in after the engine is installed. A general rule of thumb, scrape all mold lines, especially older Revell and AMT kits. I think there are no positive glue points when mating the chassis to the body, that is another issue I had with this project, think you need to add a perch in the trunk. You can see in the picture, I had a major issue, solved with the trusty Dremel.
-
Nice... there was more than sticking a roof on the body! Well done.
-
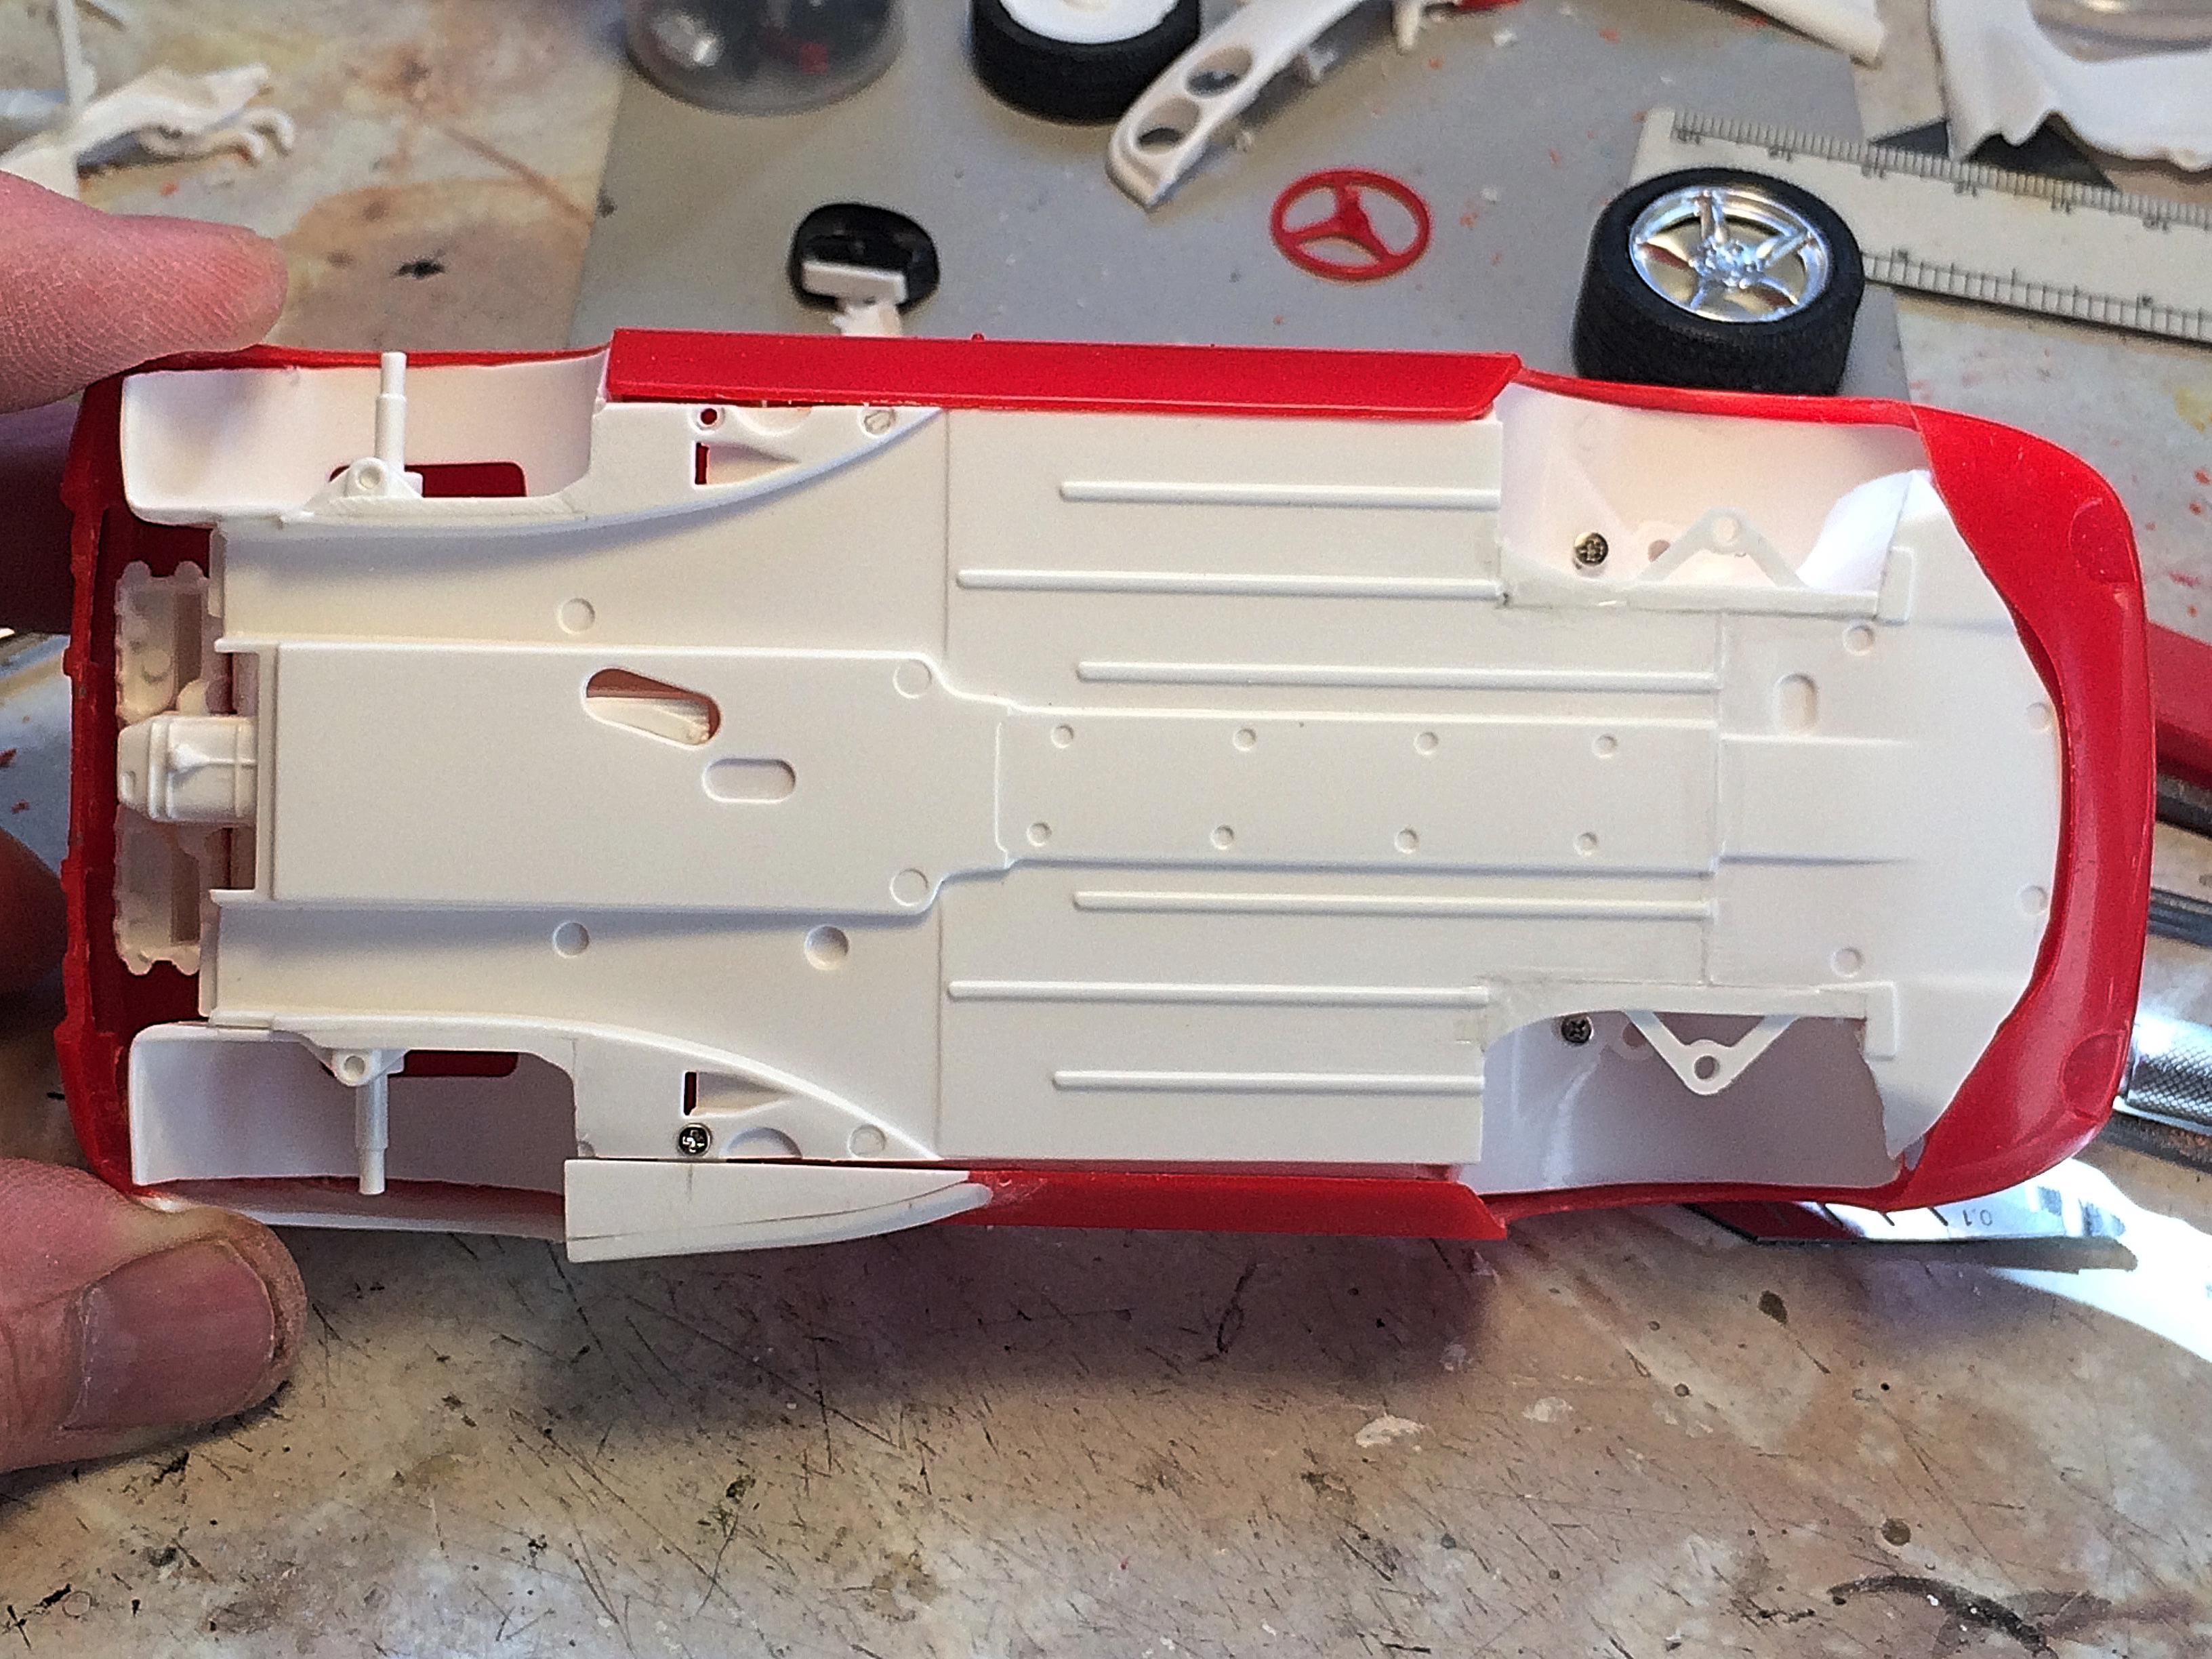
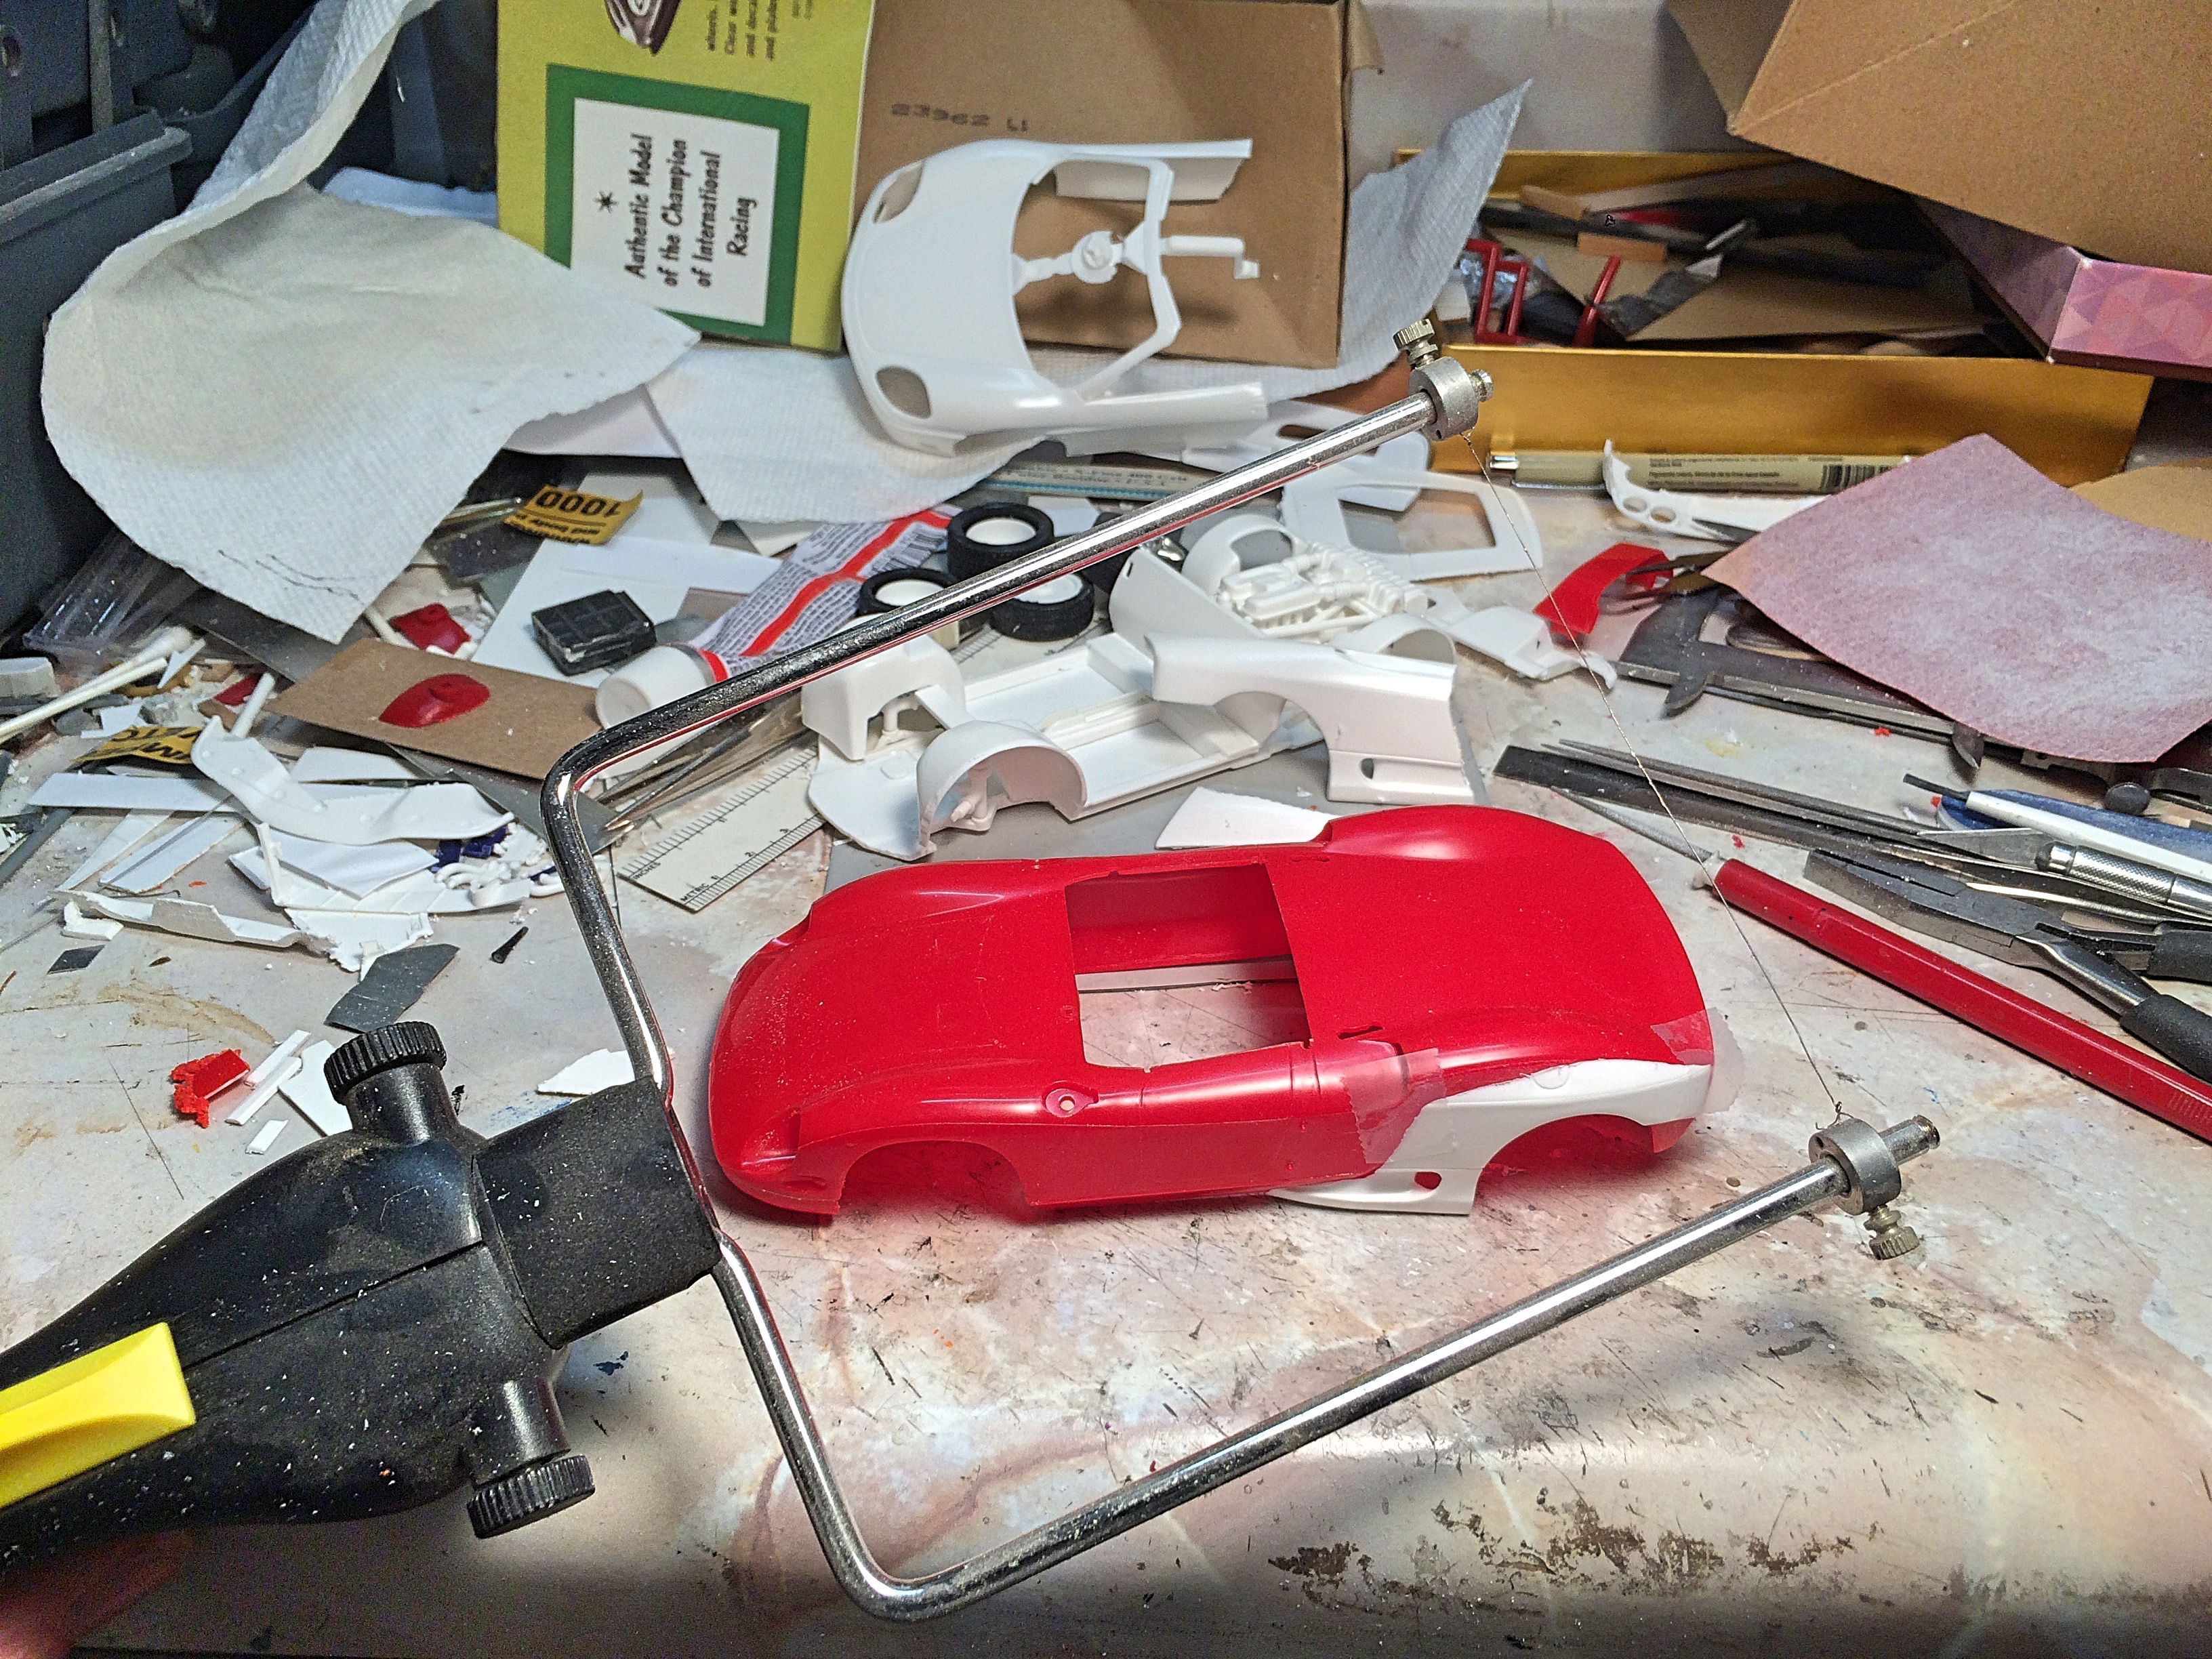
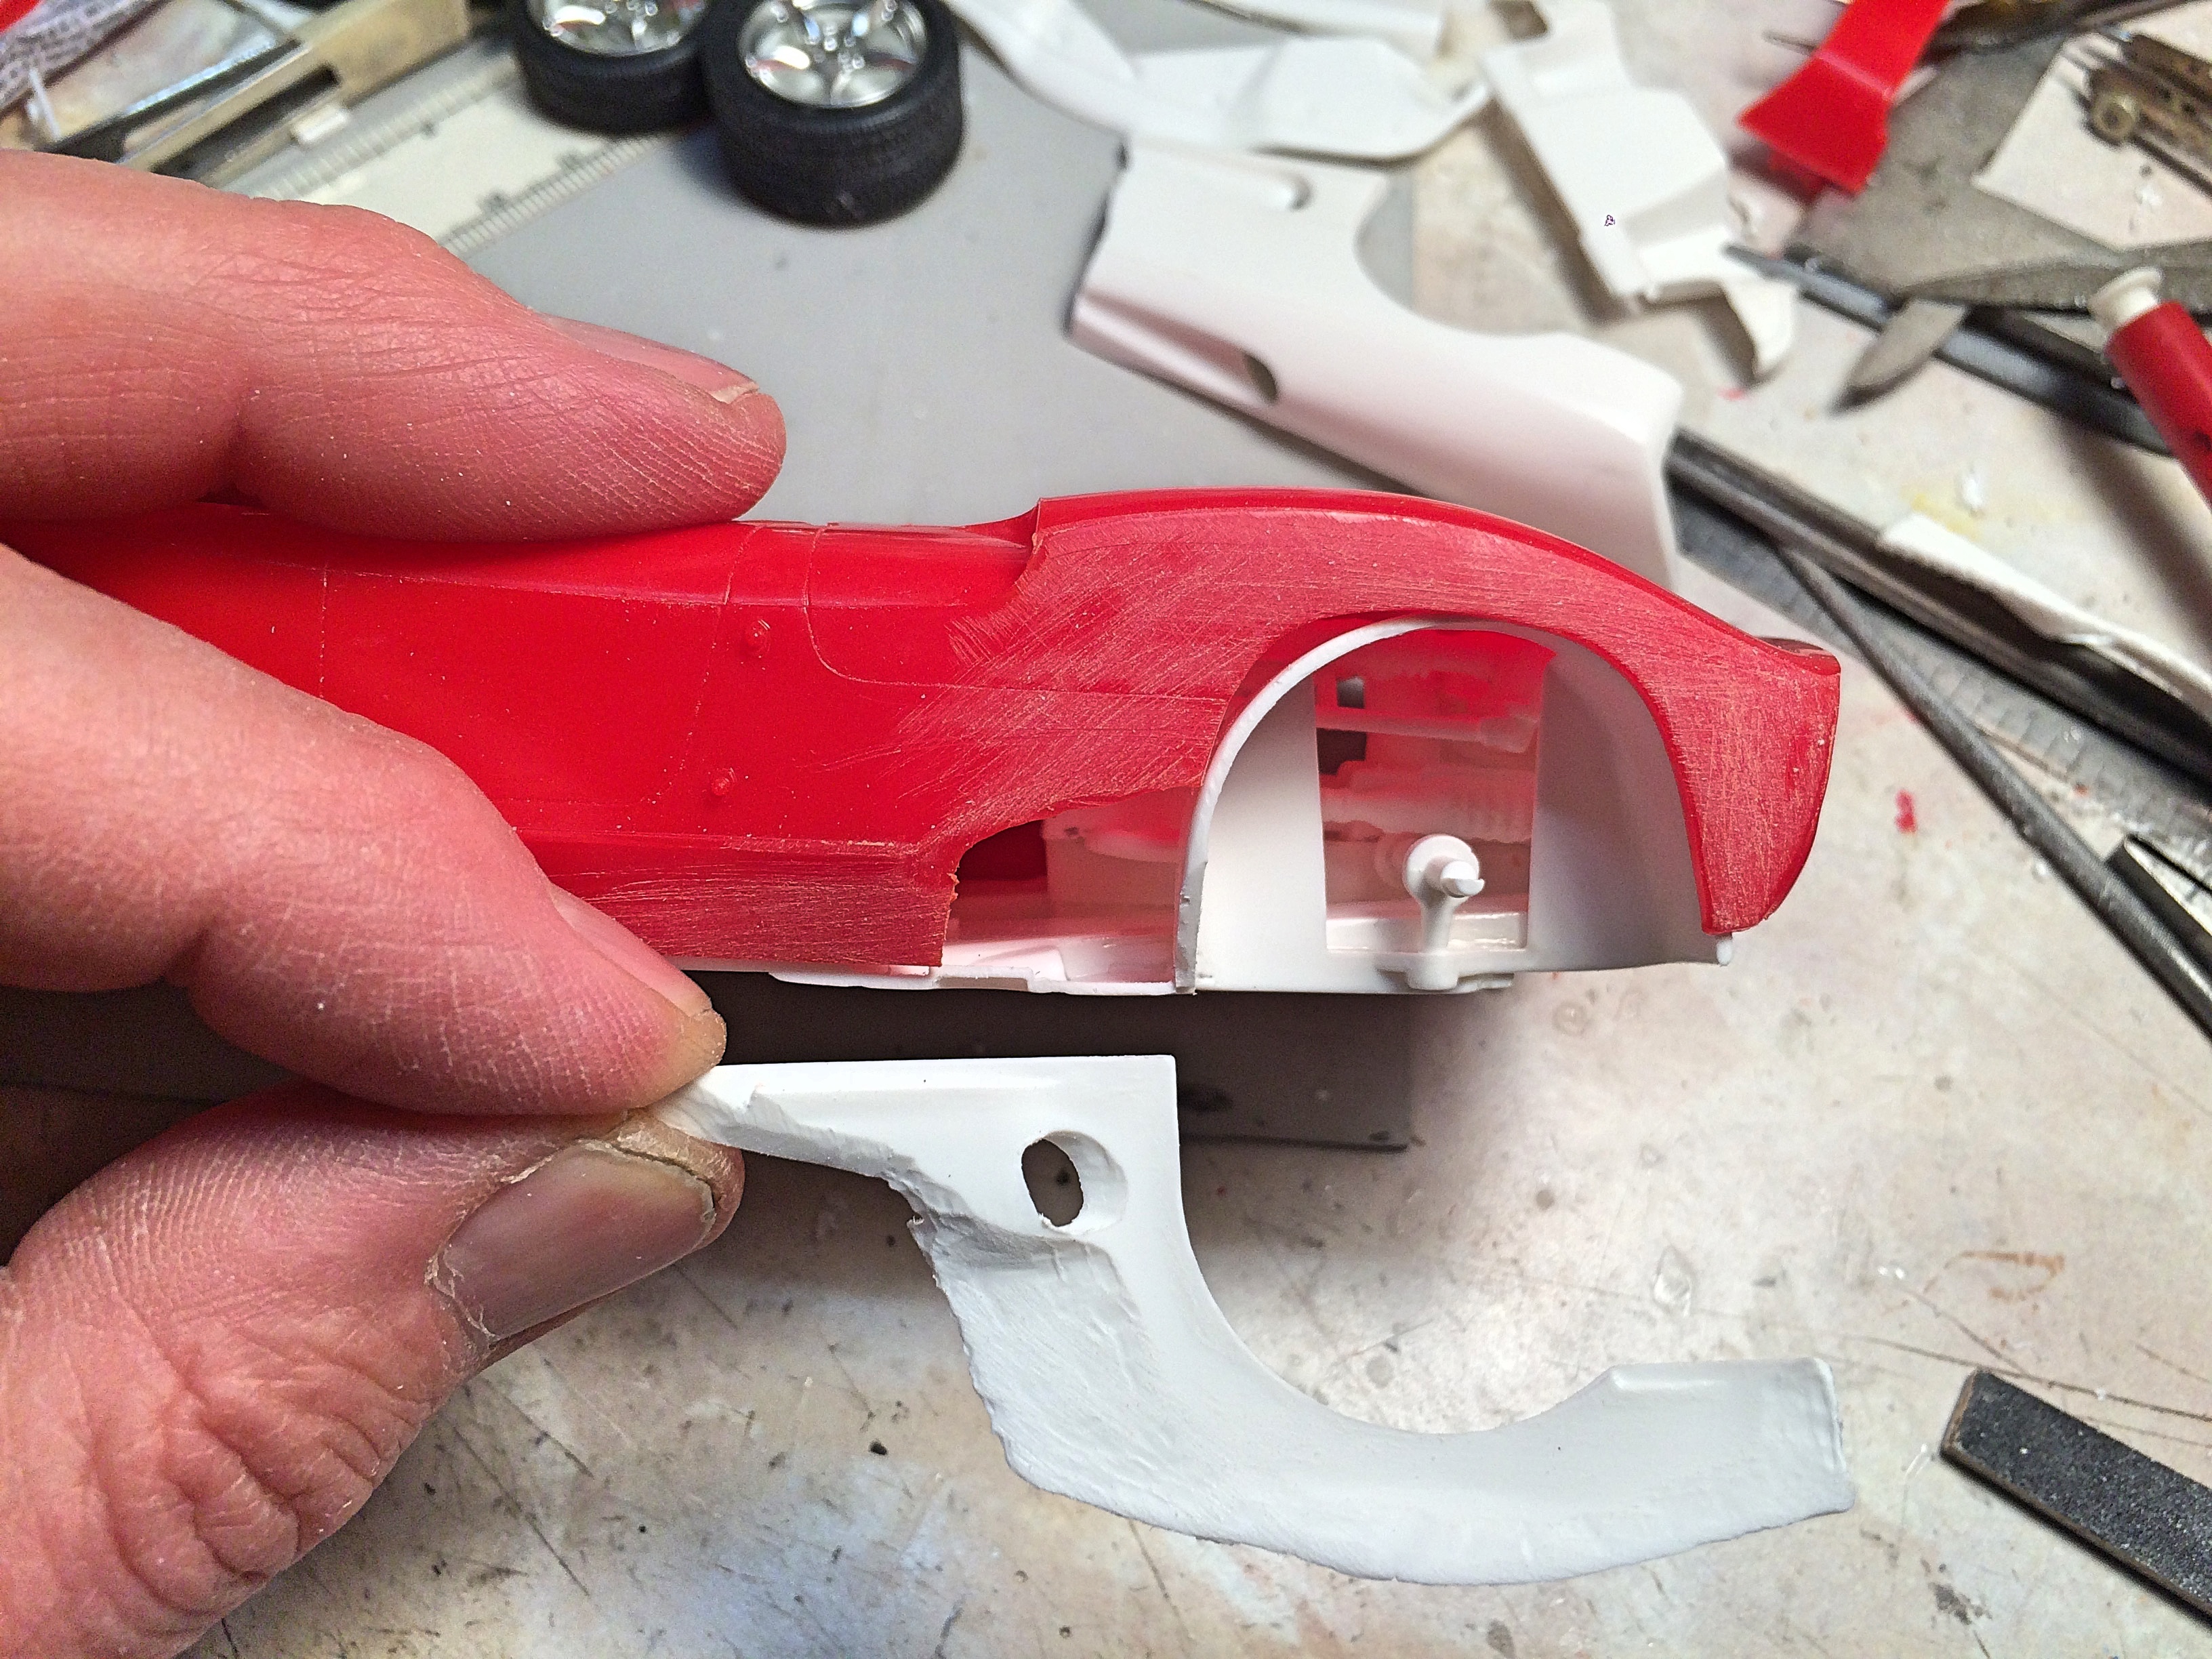
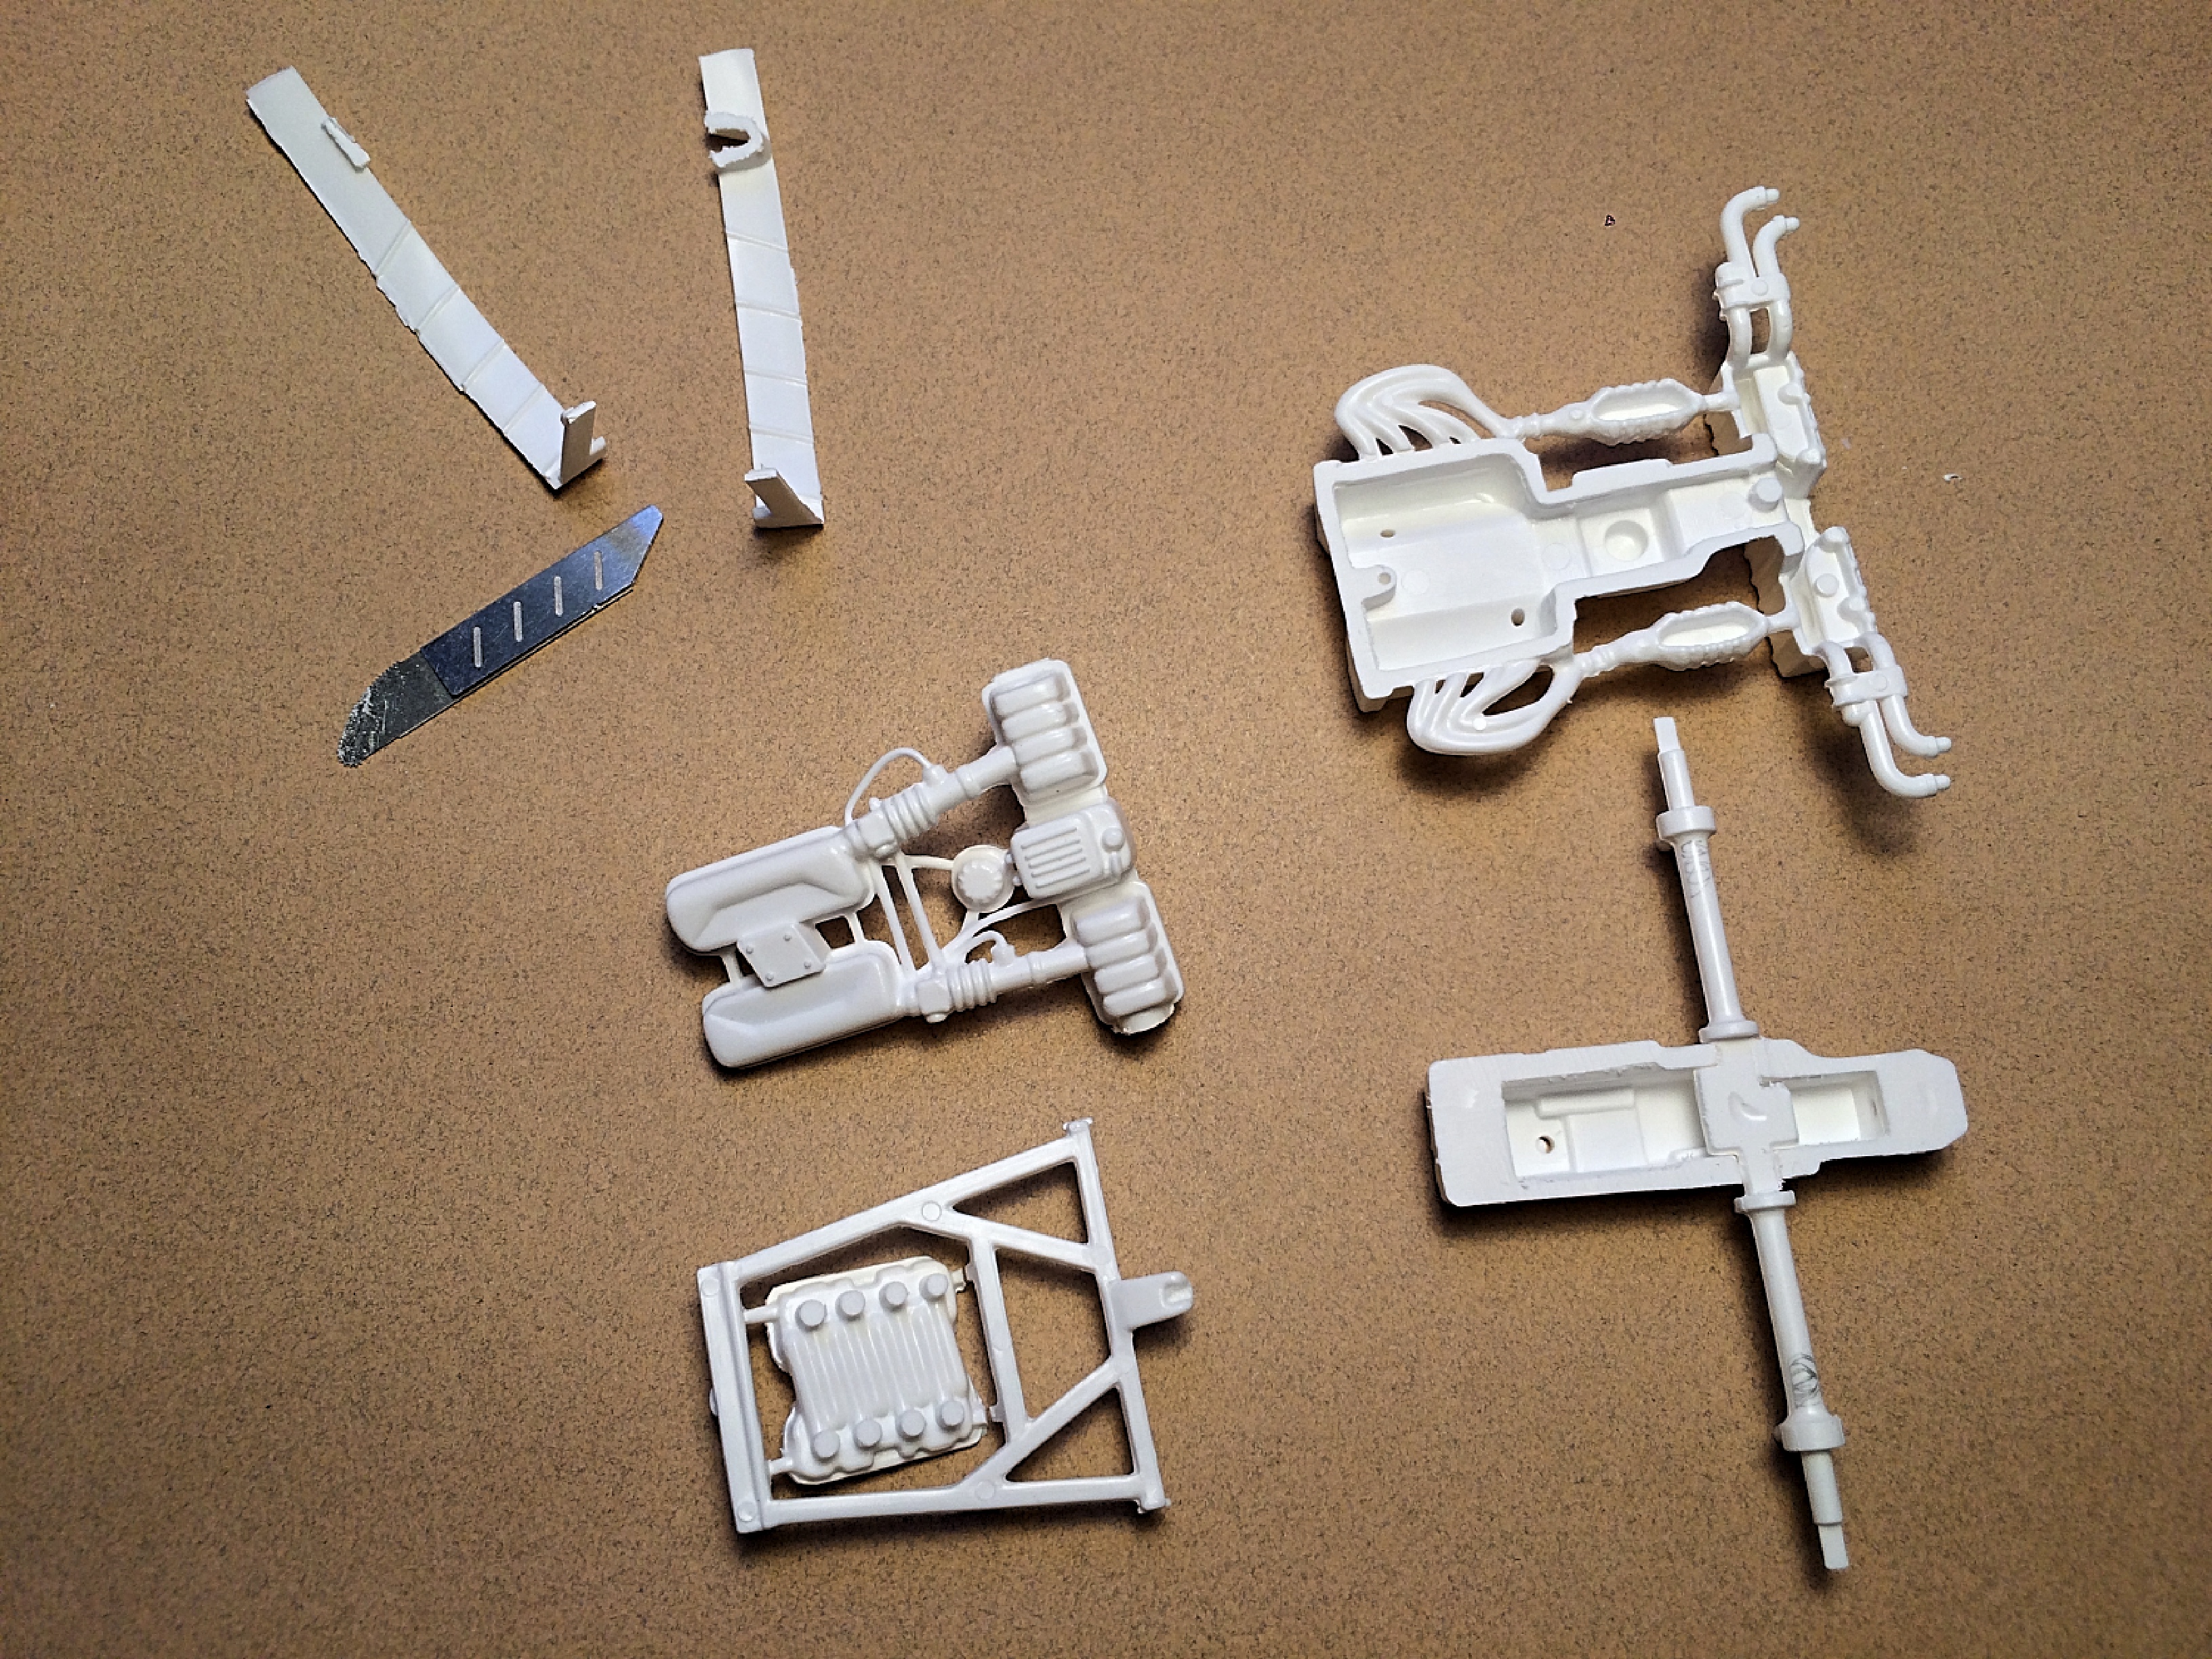
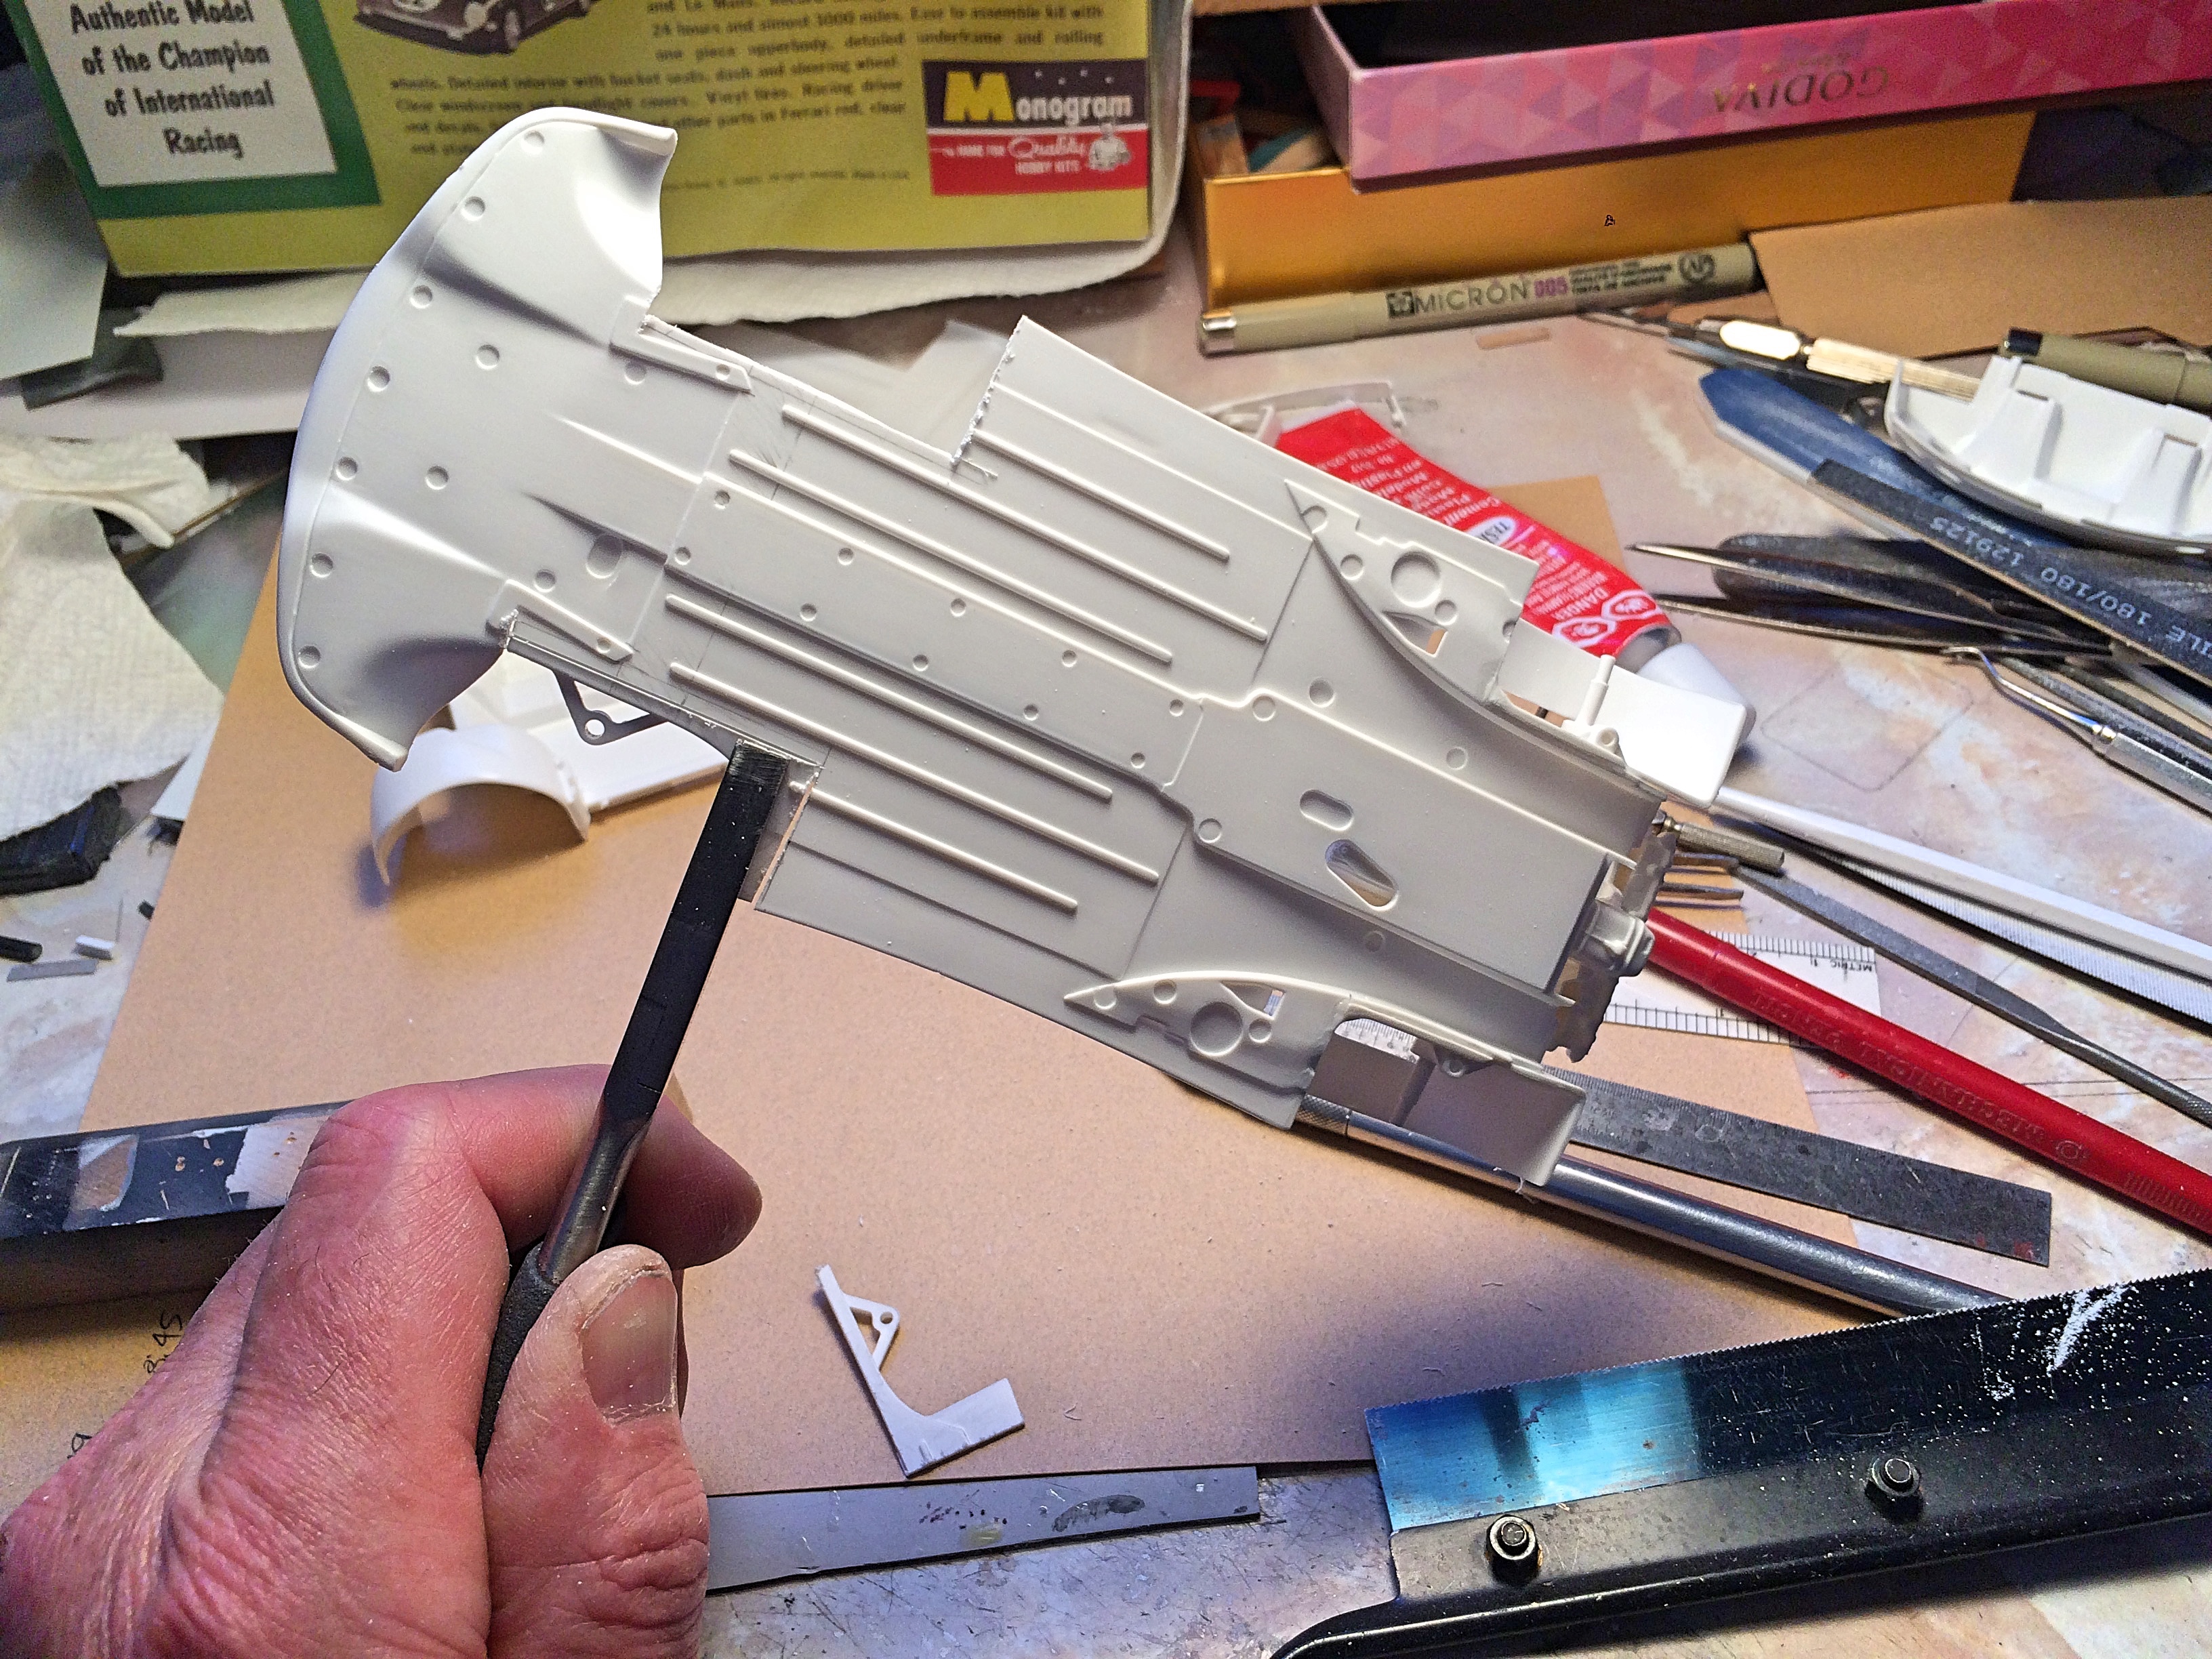
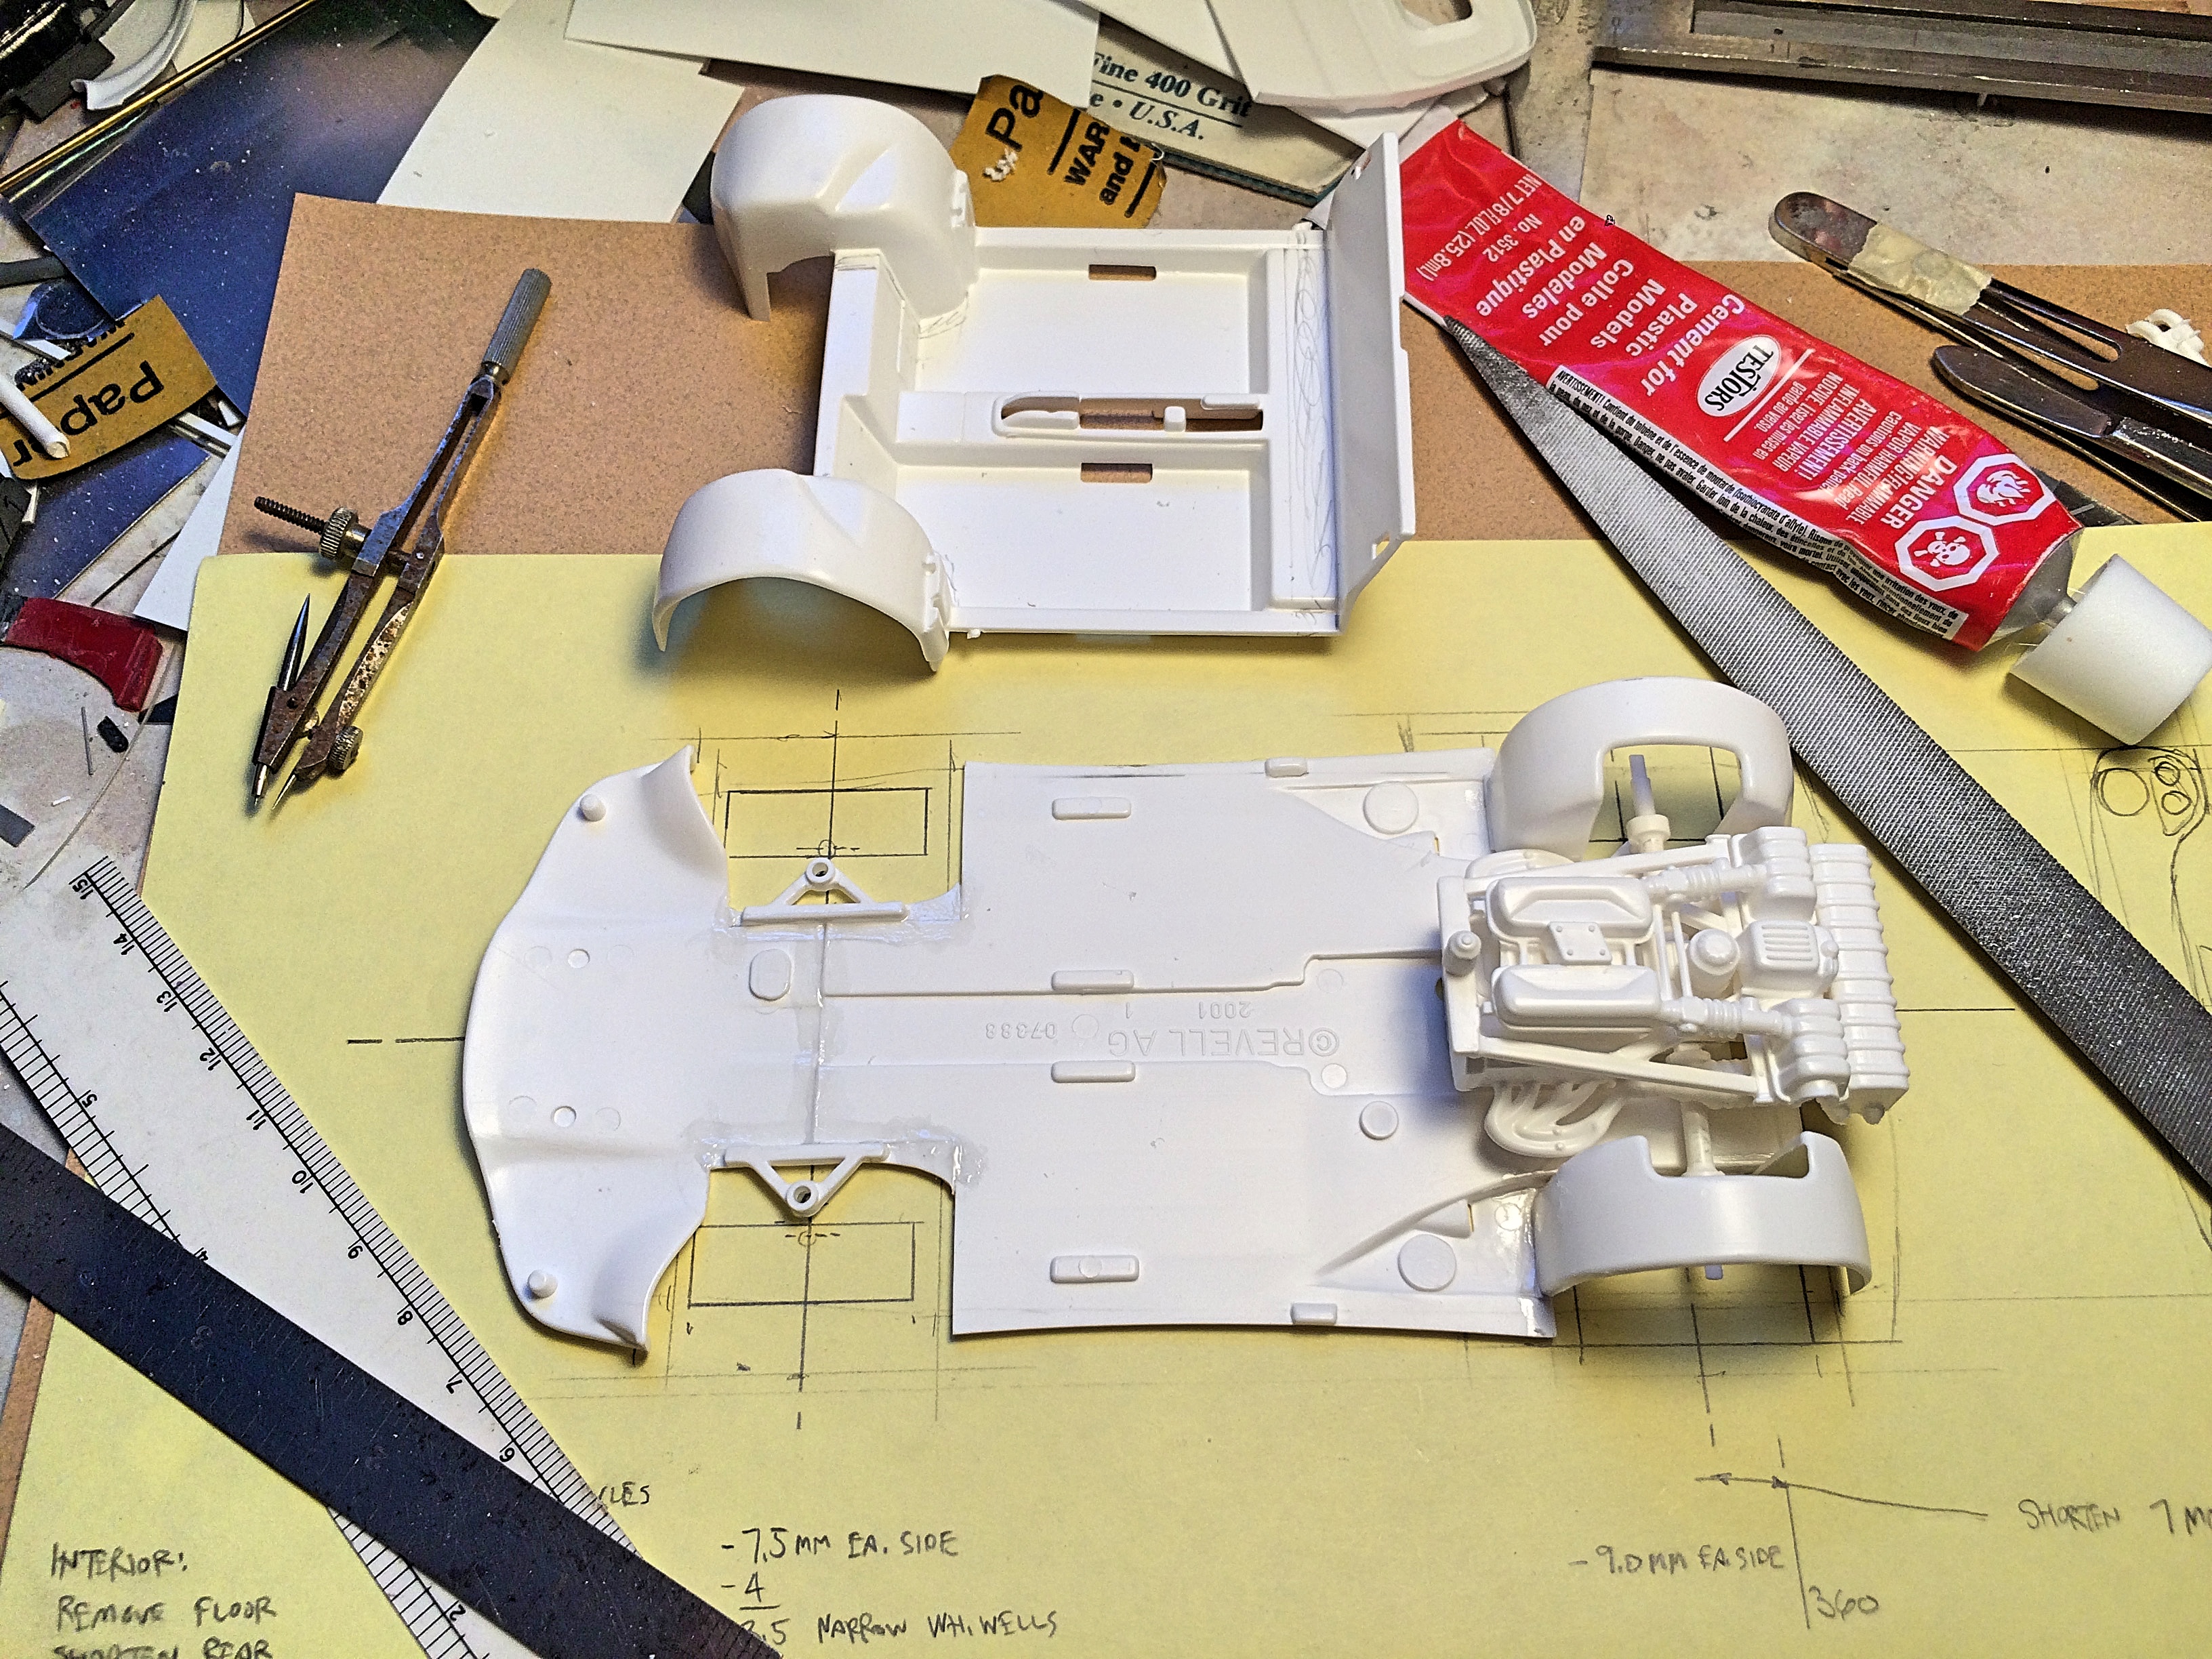
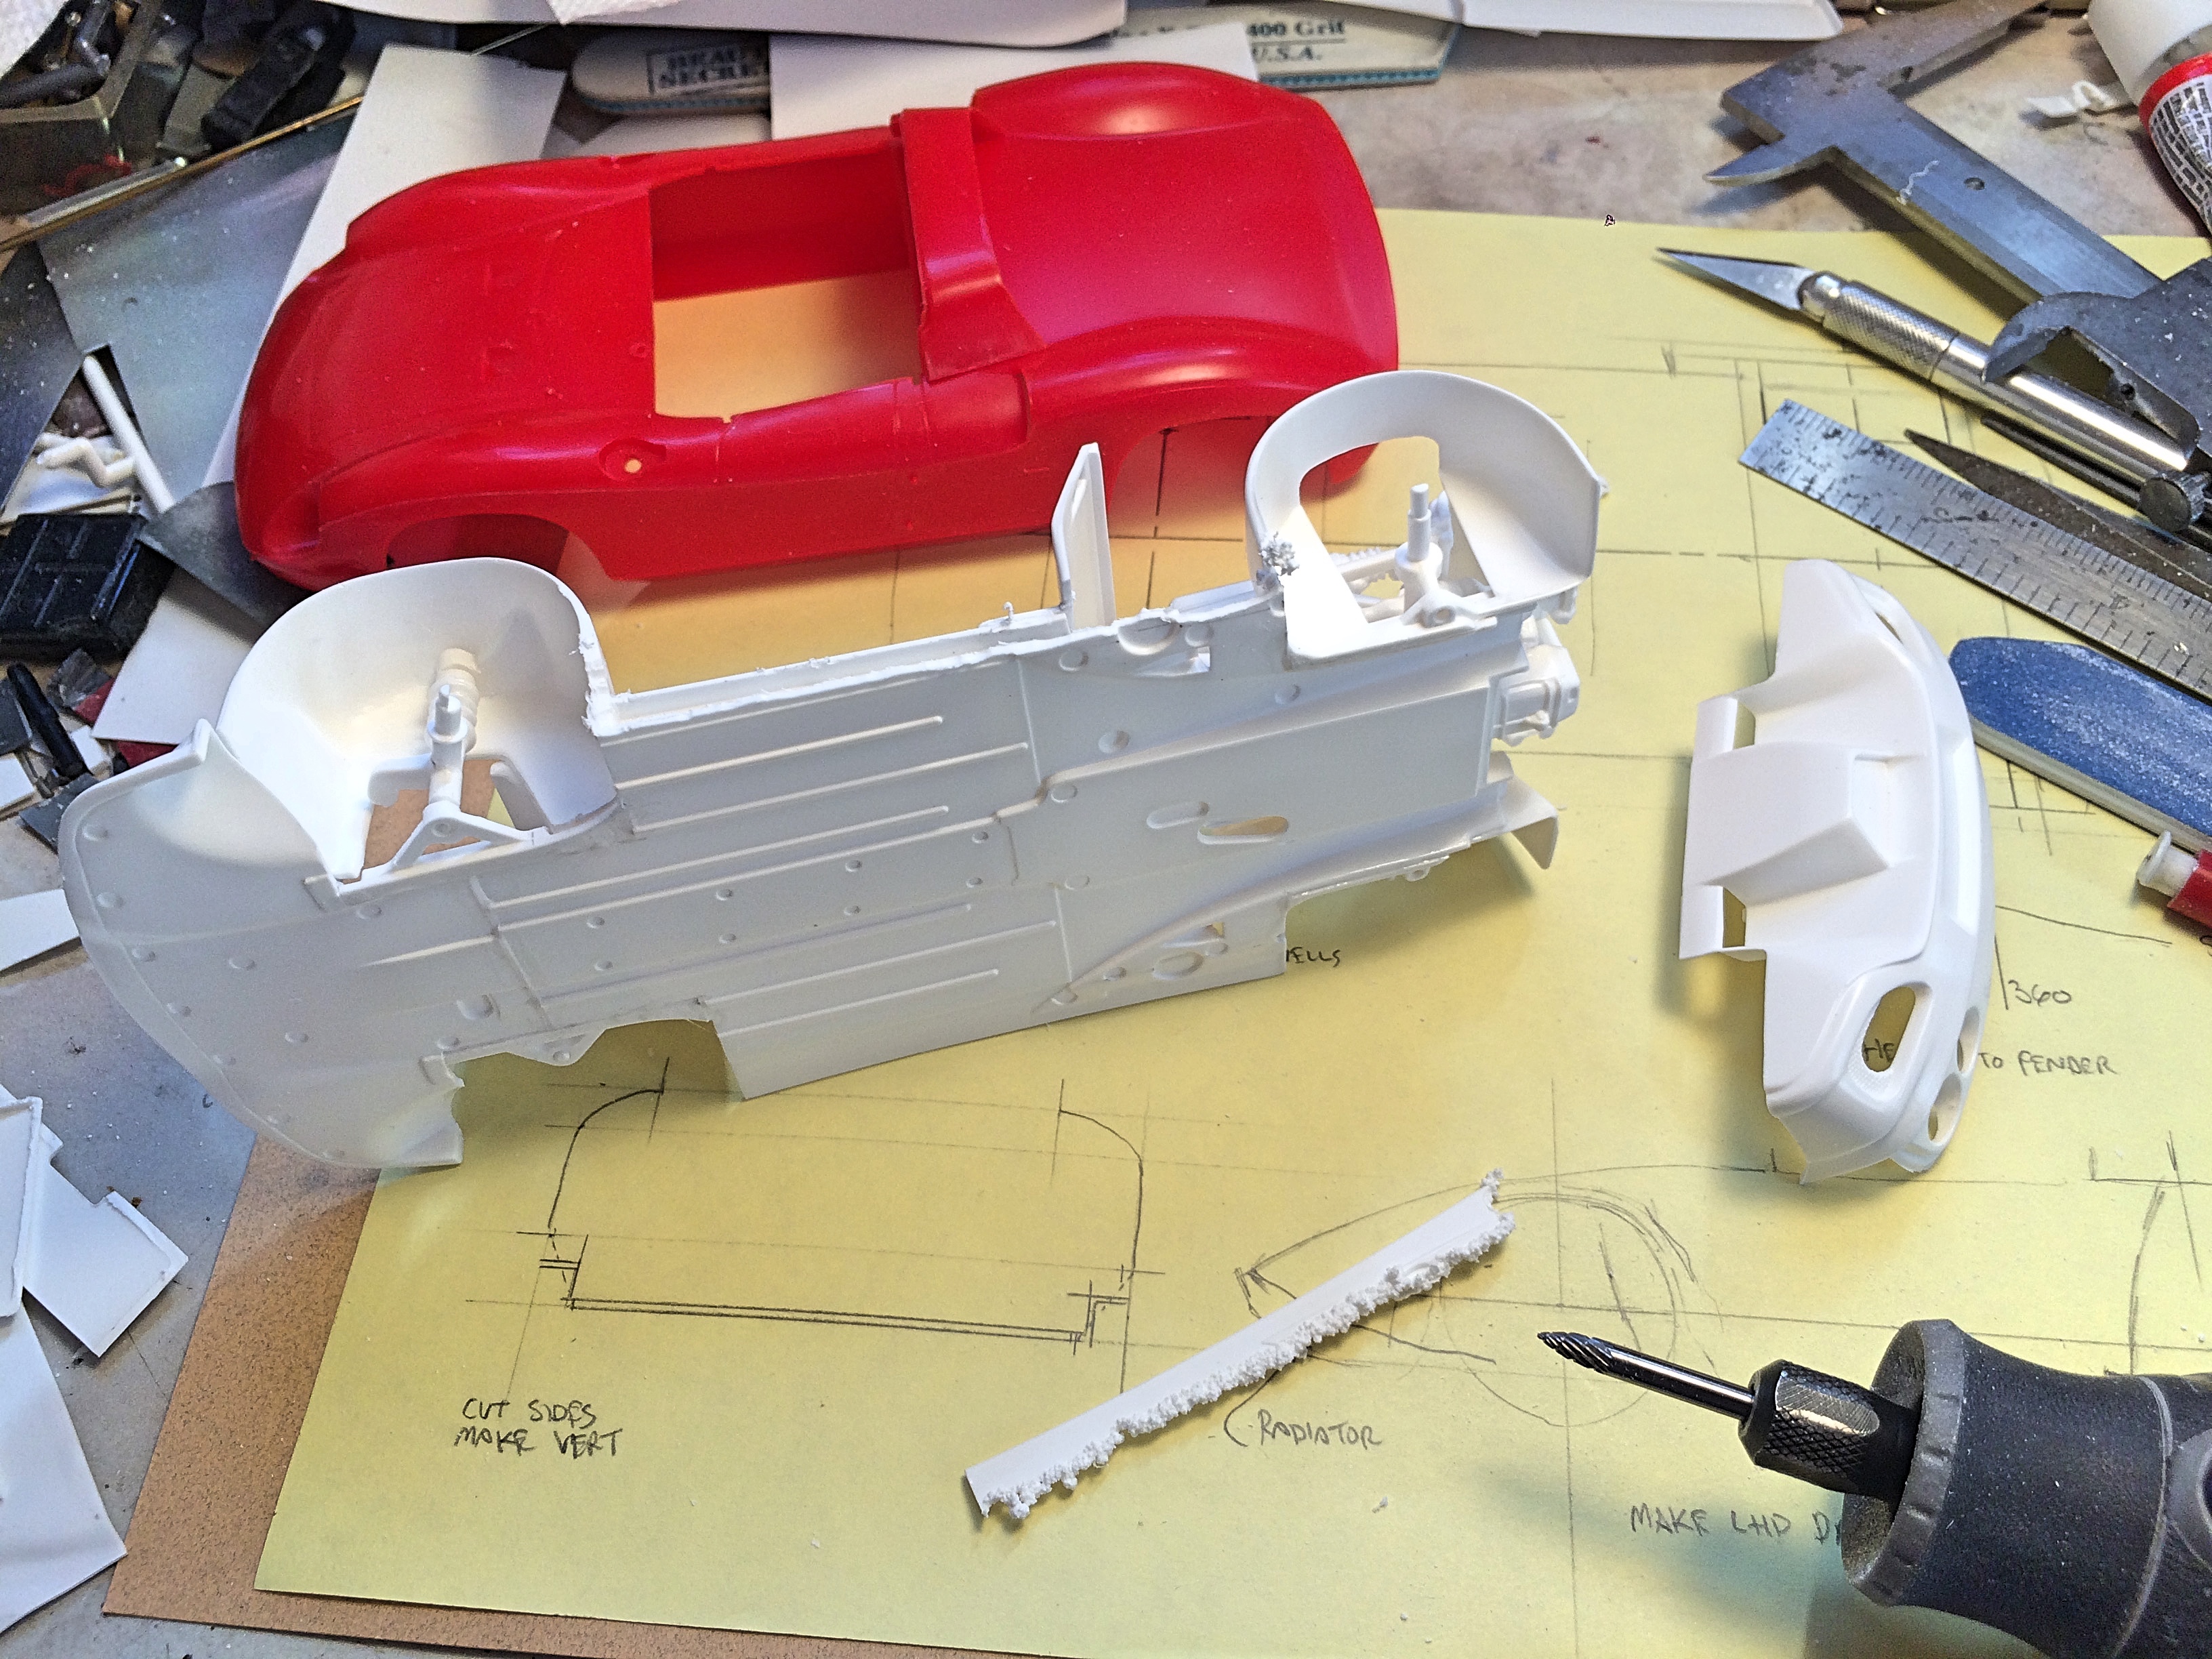
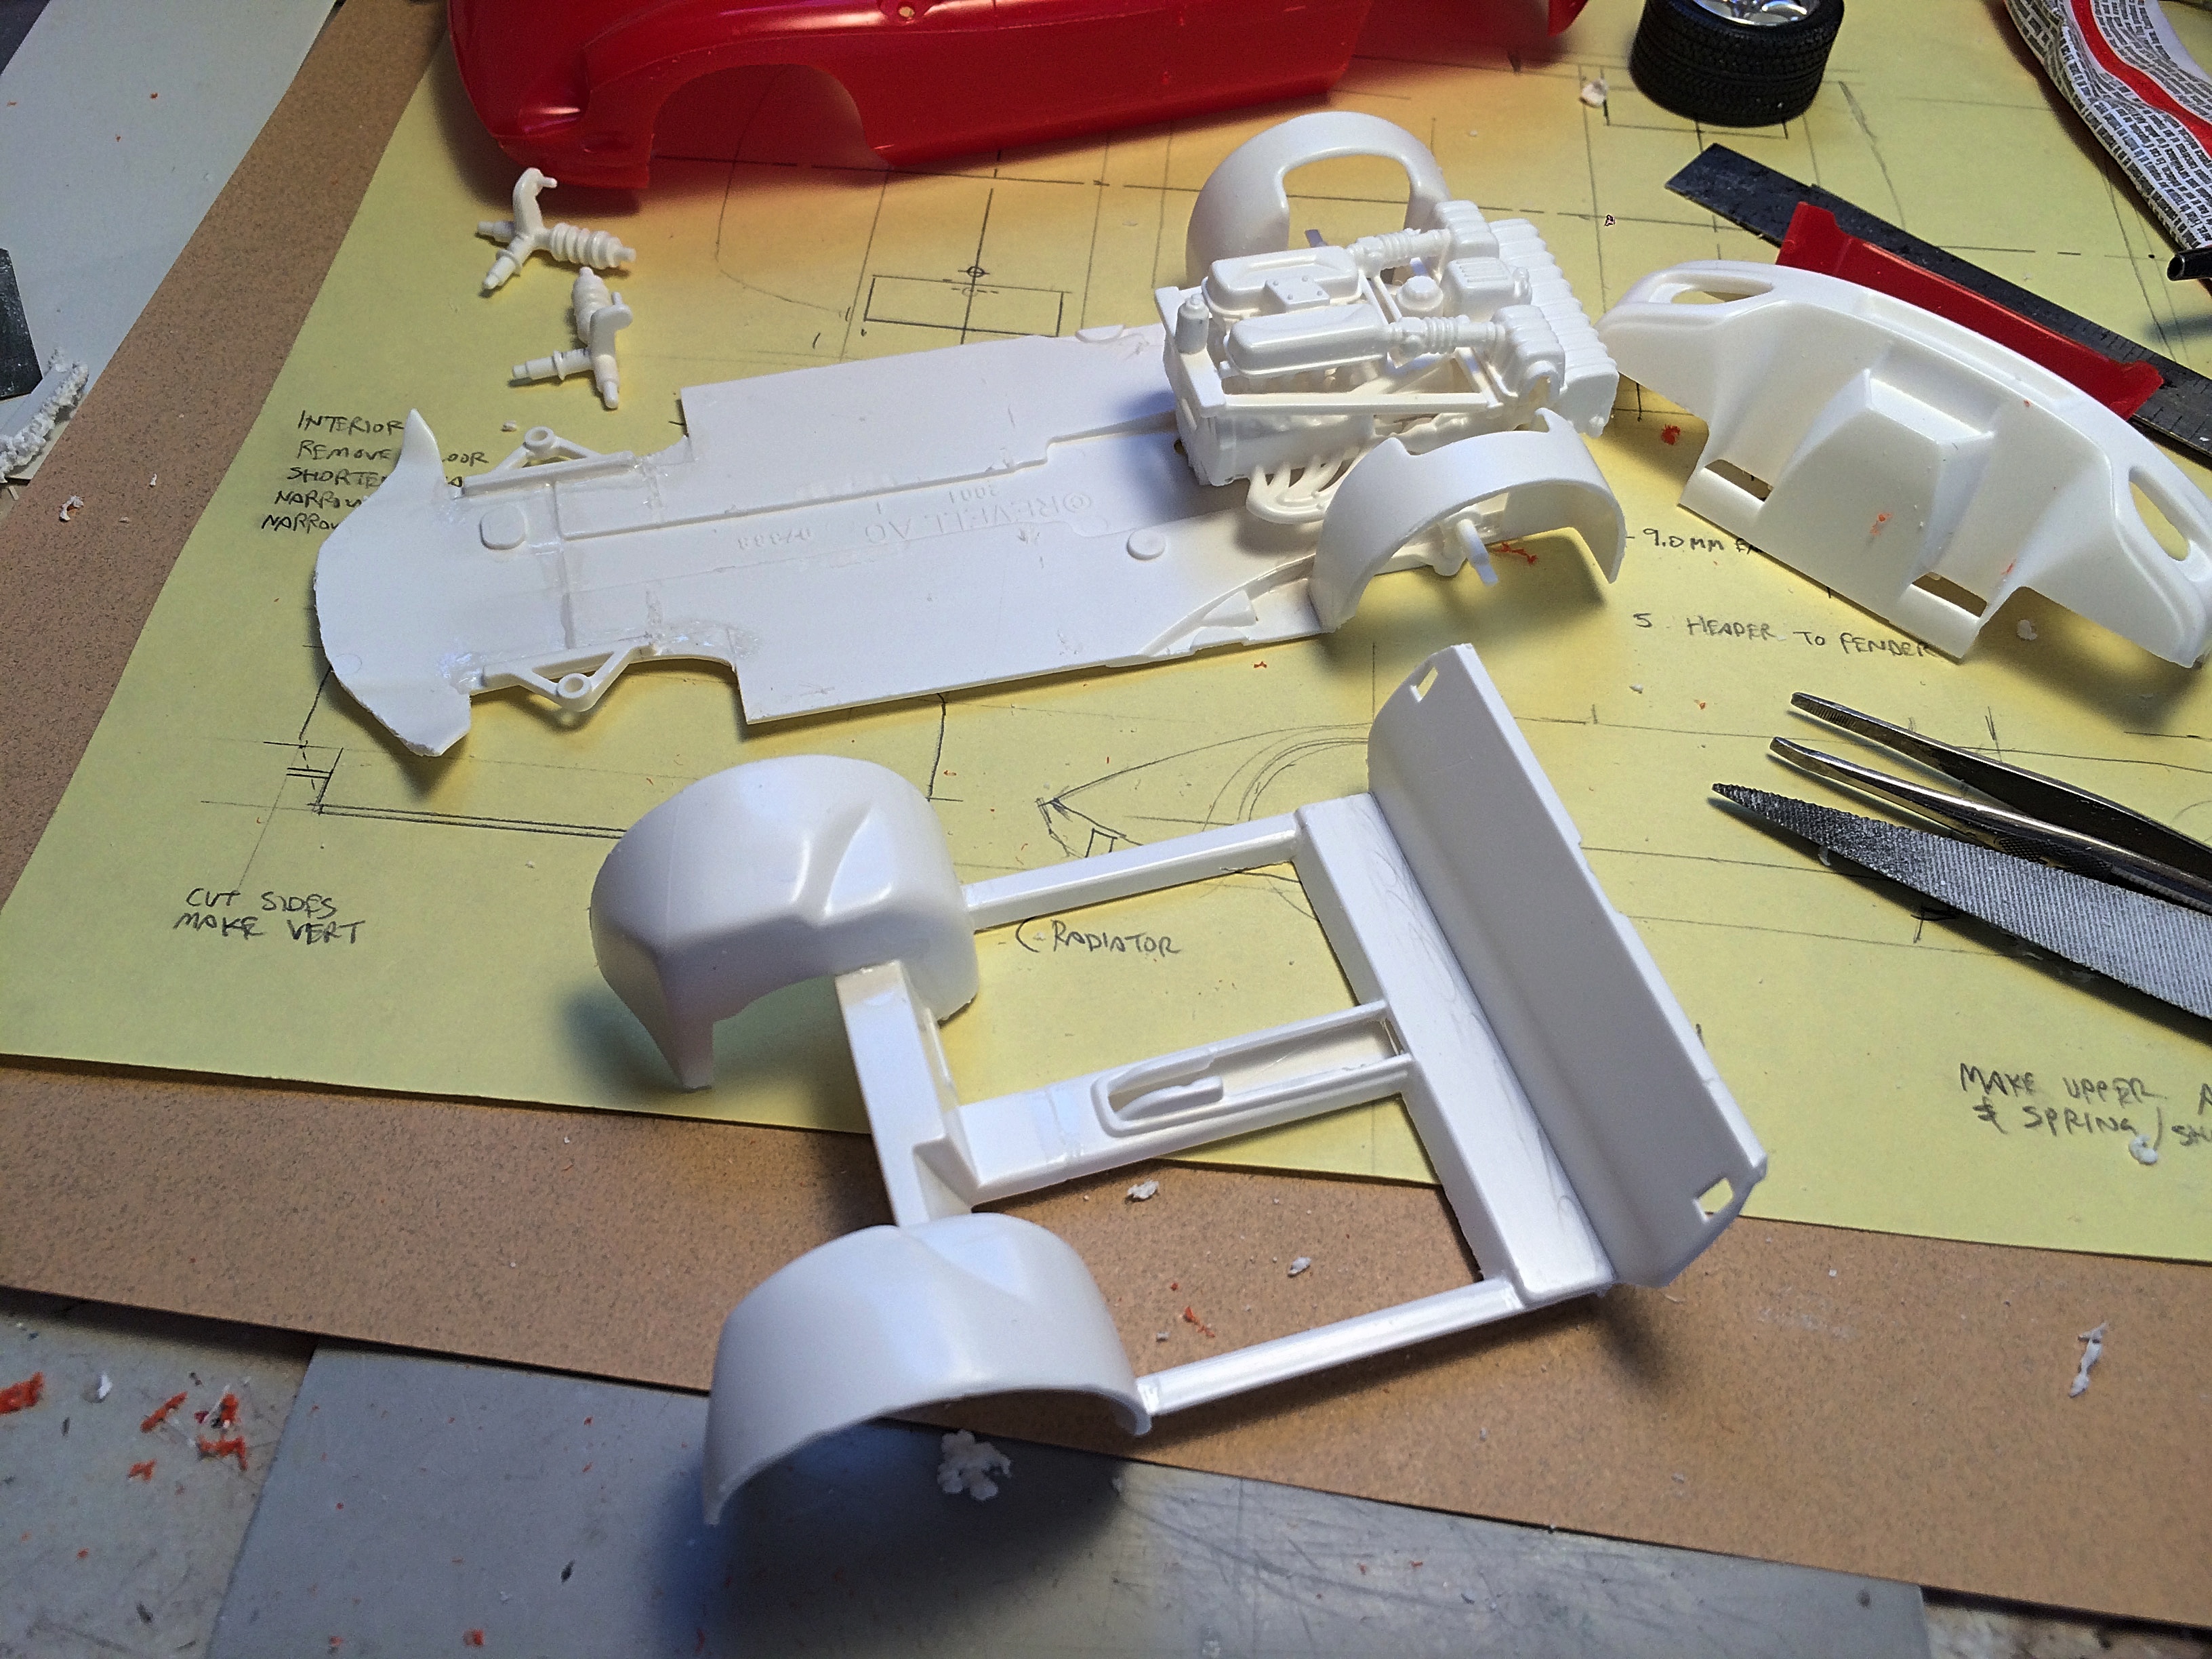
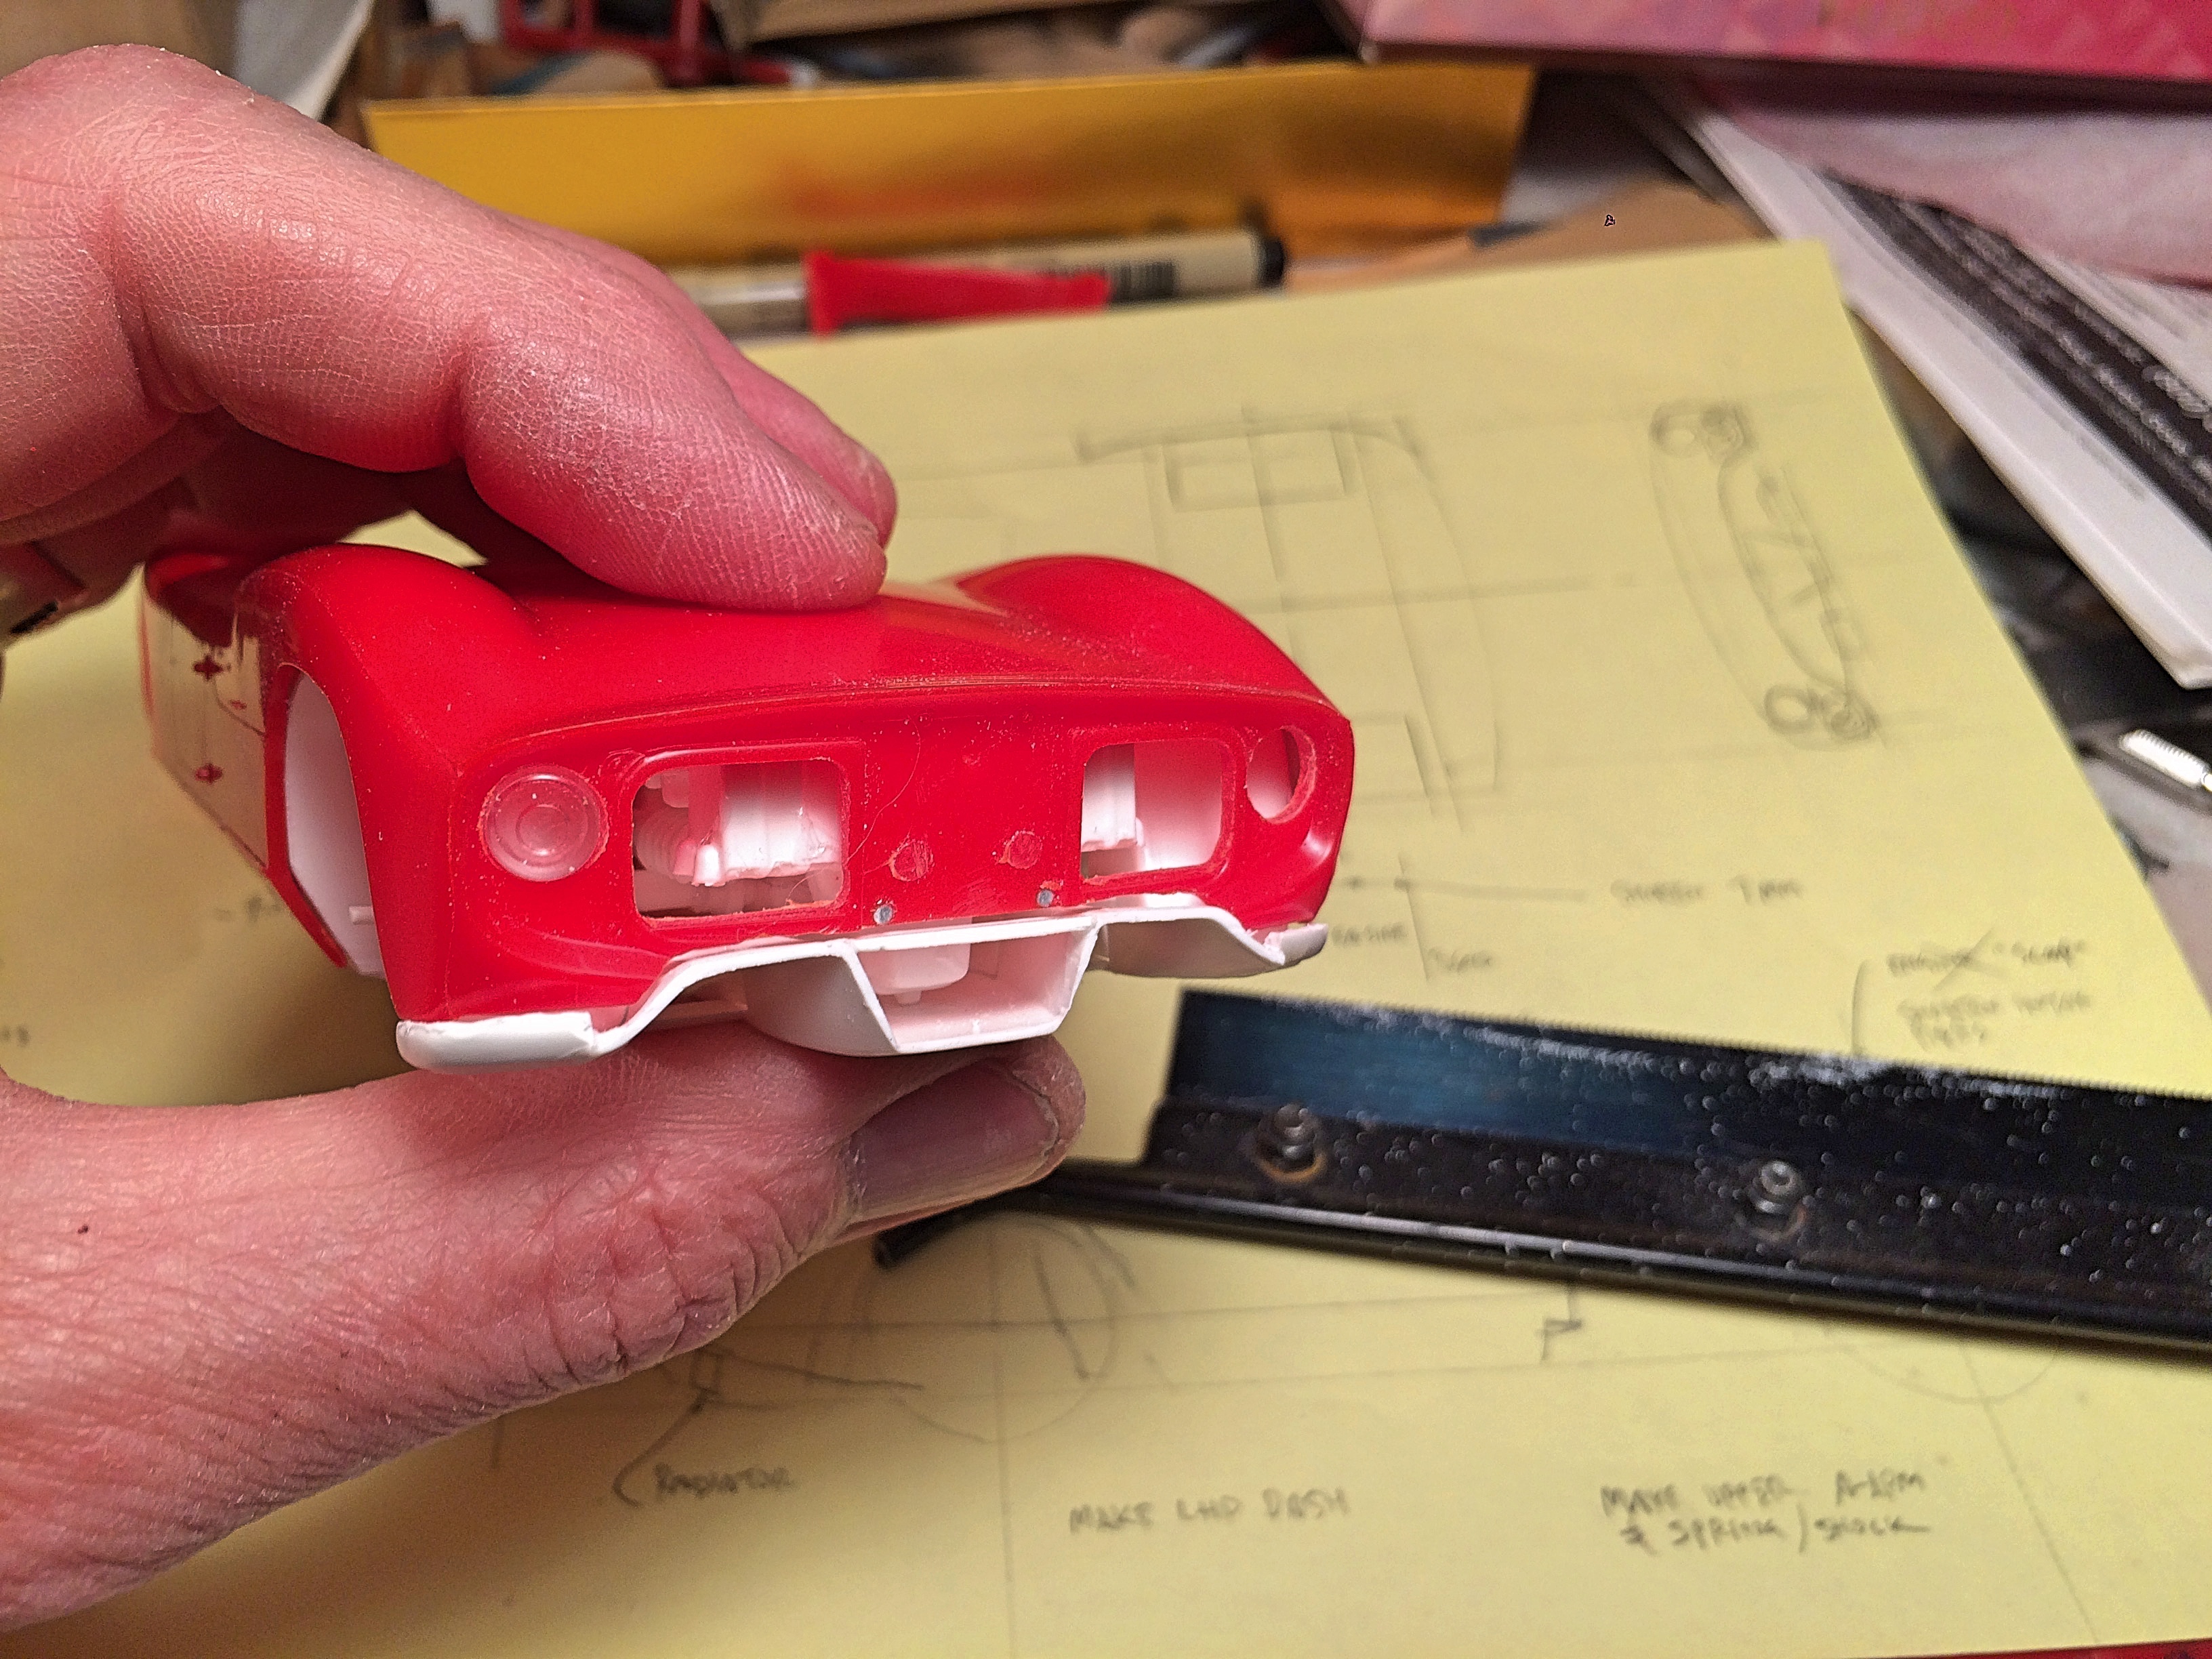
Gestation happened in my Monogram Ferrari 275P vintage kit review thread. I started by barely tacking the engine together and onto the chassis pan. Measured and drew plans to figure out where to chop and modify. I thought cutting down the engine components would help, and considering the way Revell engineered it, nobody would notice. Each surface was filed down before reassembling with just a little more glue, but still can separate to paint. Cut apart the plenum, air filter and canister part. Sawed off the engine bay sides. I sawed, and in some cases scribed and broke apart the chassis pan. The suspension is really non-existent, lower A-arms were easy to relocate. The back has been narrowed. Shortened the pan behind the front axle line. I glued all this with regular toxic Testors glue, and Flex-i-file liquid cement, much like welding. That way if I needed to adjust, could pull apart, and I could squirm it around for adjustment (supergluing does not allow this). I used the Dremel with this bit for everything, here I just removed the edge of the pan. I really cut apart the interior tub, with a saw, and filed down and straightened the cuts. I needed to keep this as a separate piece, for being able to get the struts in later. I tacked parts onto the pan, but welded all together as I went. I adjusted my plan as needed, kept the tunnel which will need some modification to the chrome trim part. I really like the tunnels, so cut off the rear body part, made several saw cuts. Front of the pan was sawed off, some Dremel grinding to shape, real rough at this time. But it all fits in great, and don't need an engine hump! Thinking of how to add fender flares, simple round bumps most likely. Still need to shorten front axles. Modified the rear, decided to keep the original grills, but going to be modified at the bottom, and will be mesh. Drilled holes for the Mondial taillights, have also done for the headlights. The valance edge will be refined later. I was going to have the exhausts exit through holes similar to the Mondial, but it will be easier (I hope) to direct down from the mufflers into the tunnels, and then back. Now I need to leave it alone, so the cement will cure. I discovered the body is twisted, so need to consider how to straighten with strategic body mounts using screws. The fender flares will be fun. Interior should have simple door panels, and dashboard. Need to figure out the radiator in front, thinking laid almost flat, with channels exiting before the wheels. Then when all that is done, cut off the engine lid, and then will need to fabricate chassis box thingies and framework continued from the engine part. Two more radiators in back, modify the body ducts. Then exhaust pipes. Then seats, I got some cool aftermarket units at the DSC show. Color, Ferrari red with a pearl overcoat. Dann will hate that.
-
Prolly not, since it's part of the original release kit, and would need a whole figure. BTW: I *had to* start it today.
-
Ditto! [how does one paste a GIF, such as Michael Jackson eating popcorn?]
-

any reviews: Italeri's 'new' Alfa '60s spider?
89AKurt replied to fiatboy's topic in Car Kit News & Reviews
Thank you! -
IMHO, rebuilding with structural steel that isn't seen anyway, is the way to go. Can't use lead now, that kills people ~rolls eyes~, so use titanium for the roofing. https://arstechnica.com/science/2019/04/notre-dame-cathedral-will-never-be-the-same-but-it-can-be-rebuilt/?fbclid=IwAR2NxjdPjJ5-36inqaLq61gPAIqrgnnW0jRw1O9IDkZh2AFzWzzsWVVg0Rk
-
any reviews: Italeri's 'new' Alfa '60s spider?
89AKurt replied to fiatboy's topic in Car Kit News & Reviews
Can any Alfa experts tell me if this would work for an engine, for this car?
-
to mop up
-
New decal set for when Michele Mouton raced. Audi Quattro Sport S1 - British Midland Ulster Rally 1985