89AKurt
-
Posts
8,426 -
Joined
-
Last visited
Content Type
Profiles
Forums
Events
Gallery
Everything posted by 89AKurt
-
DONE!!!

-
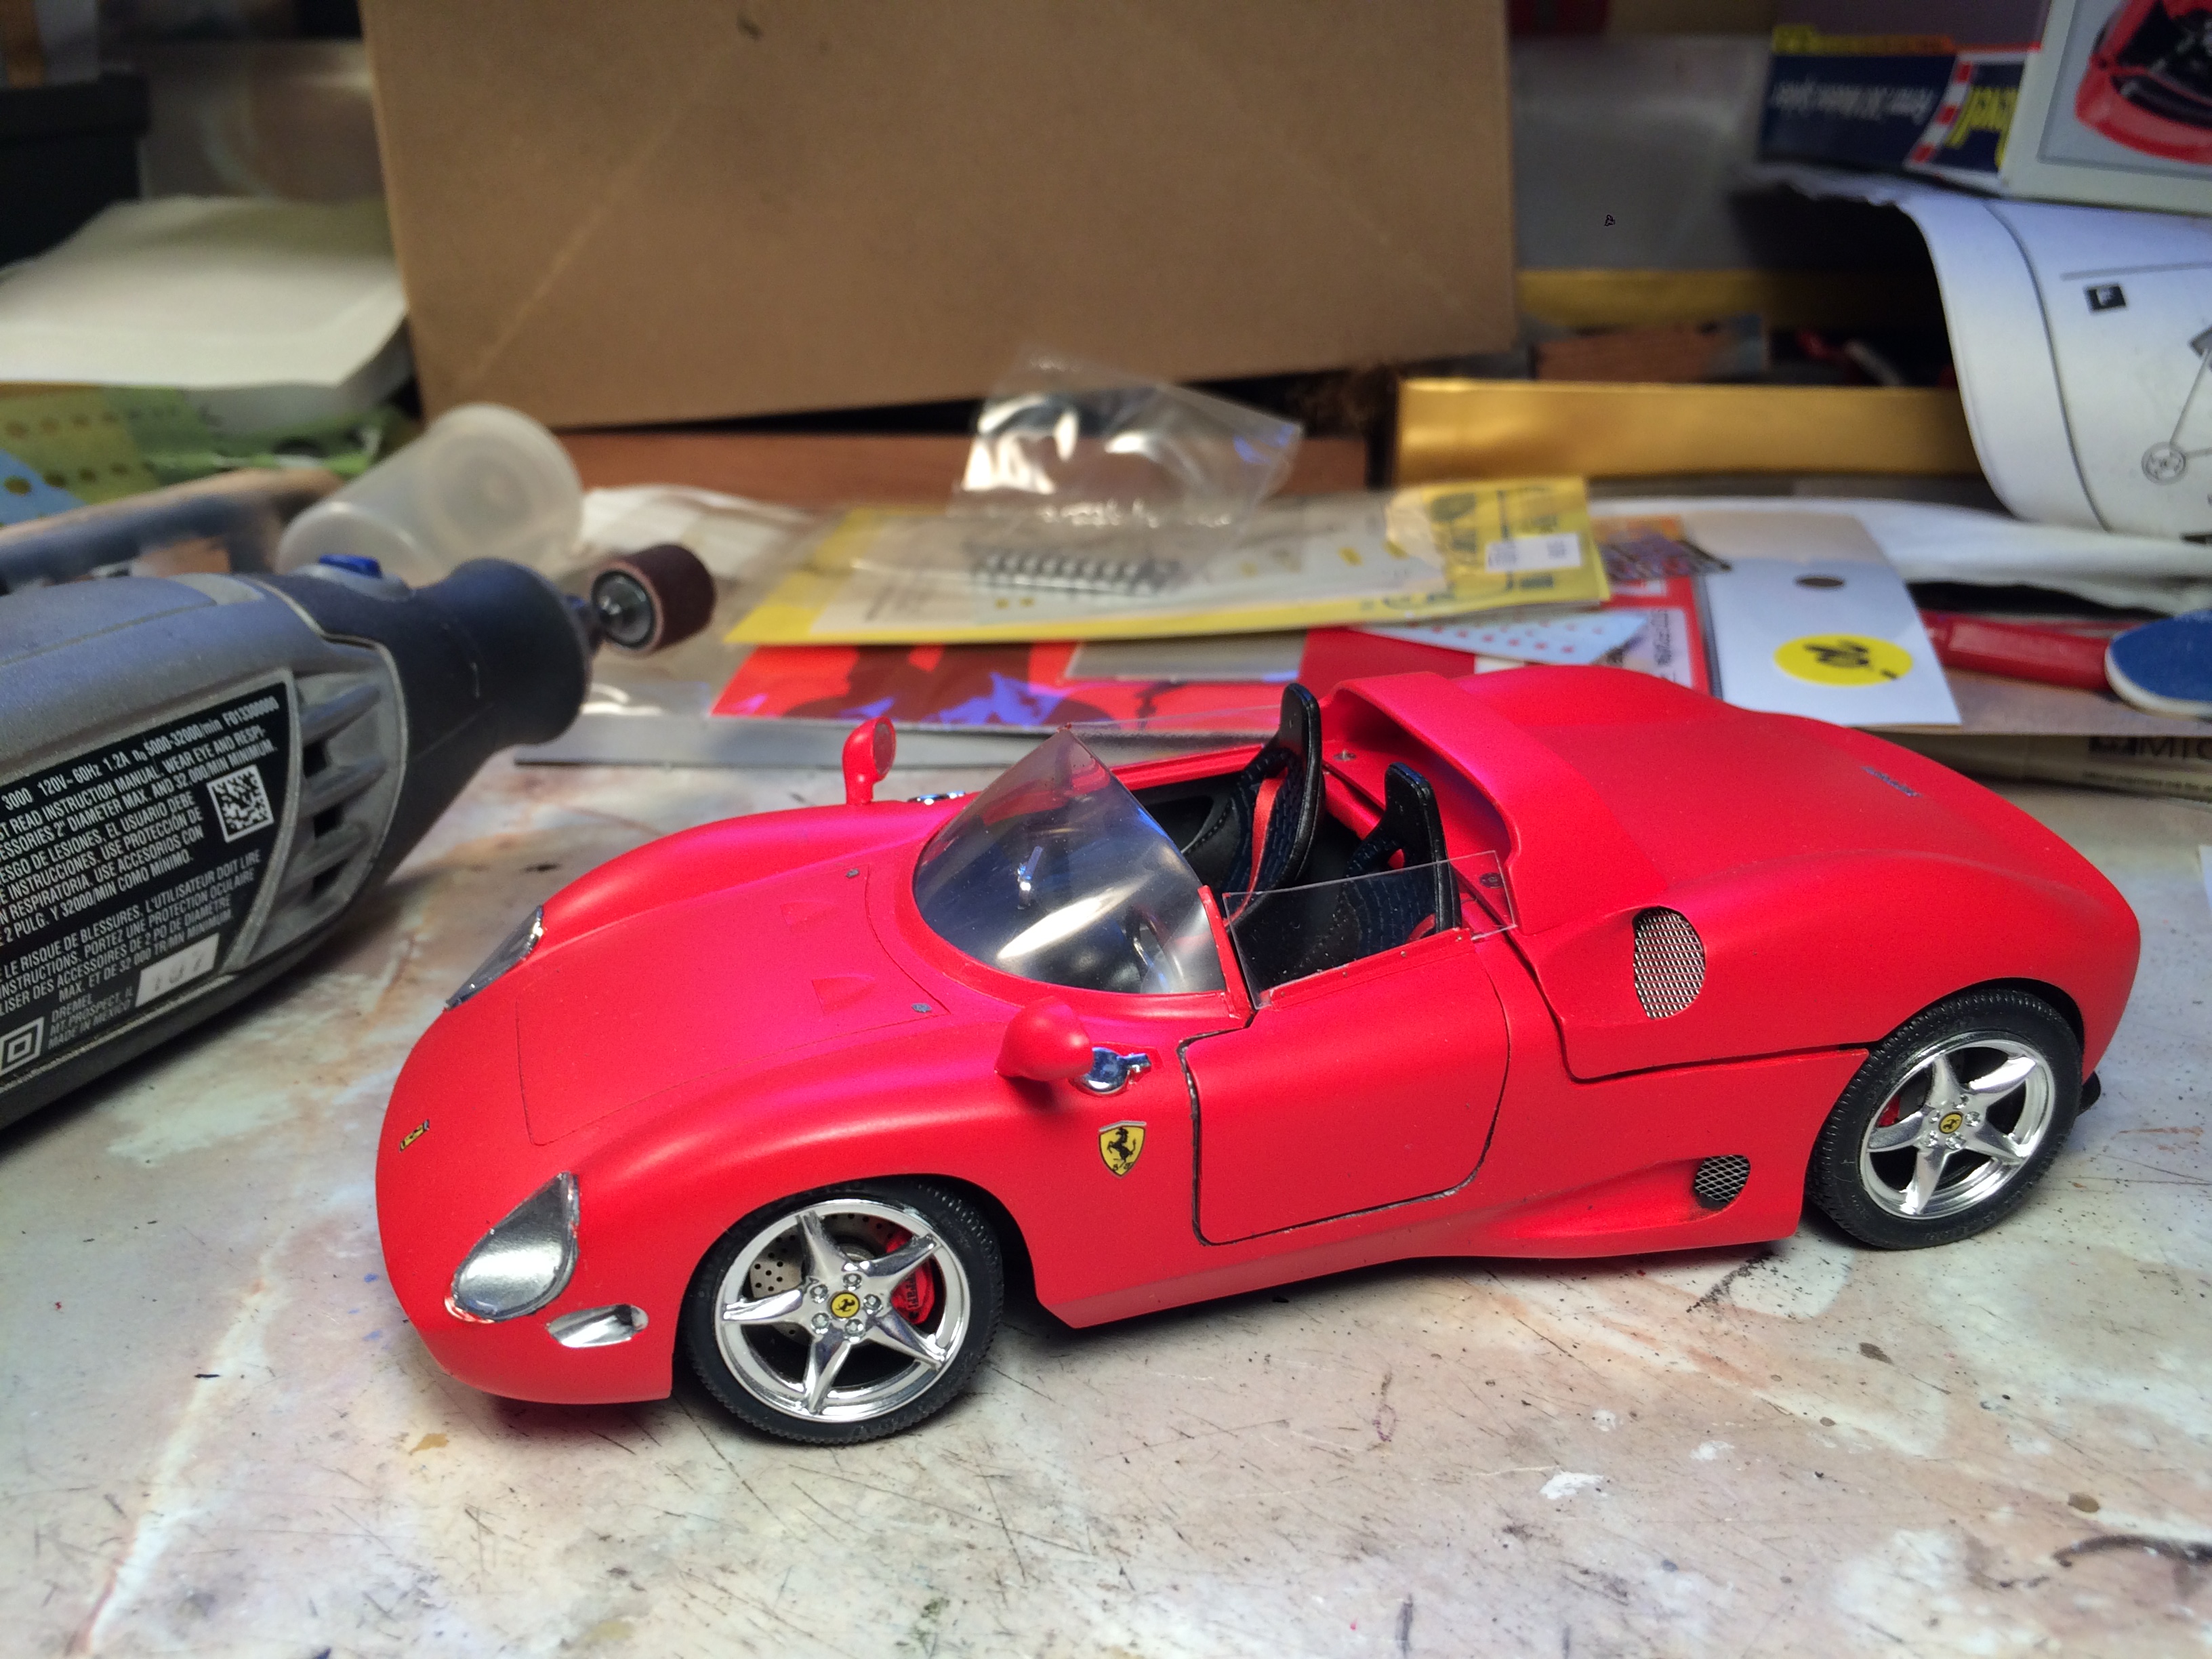
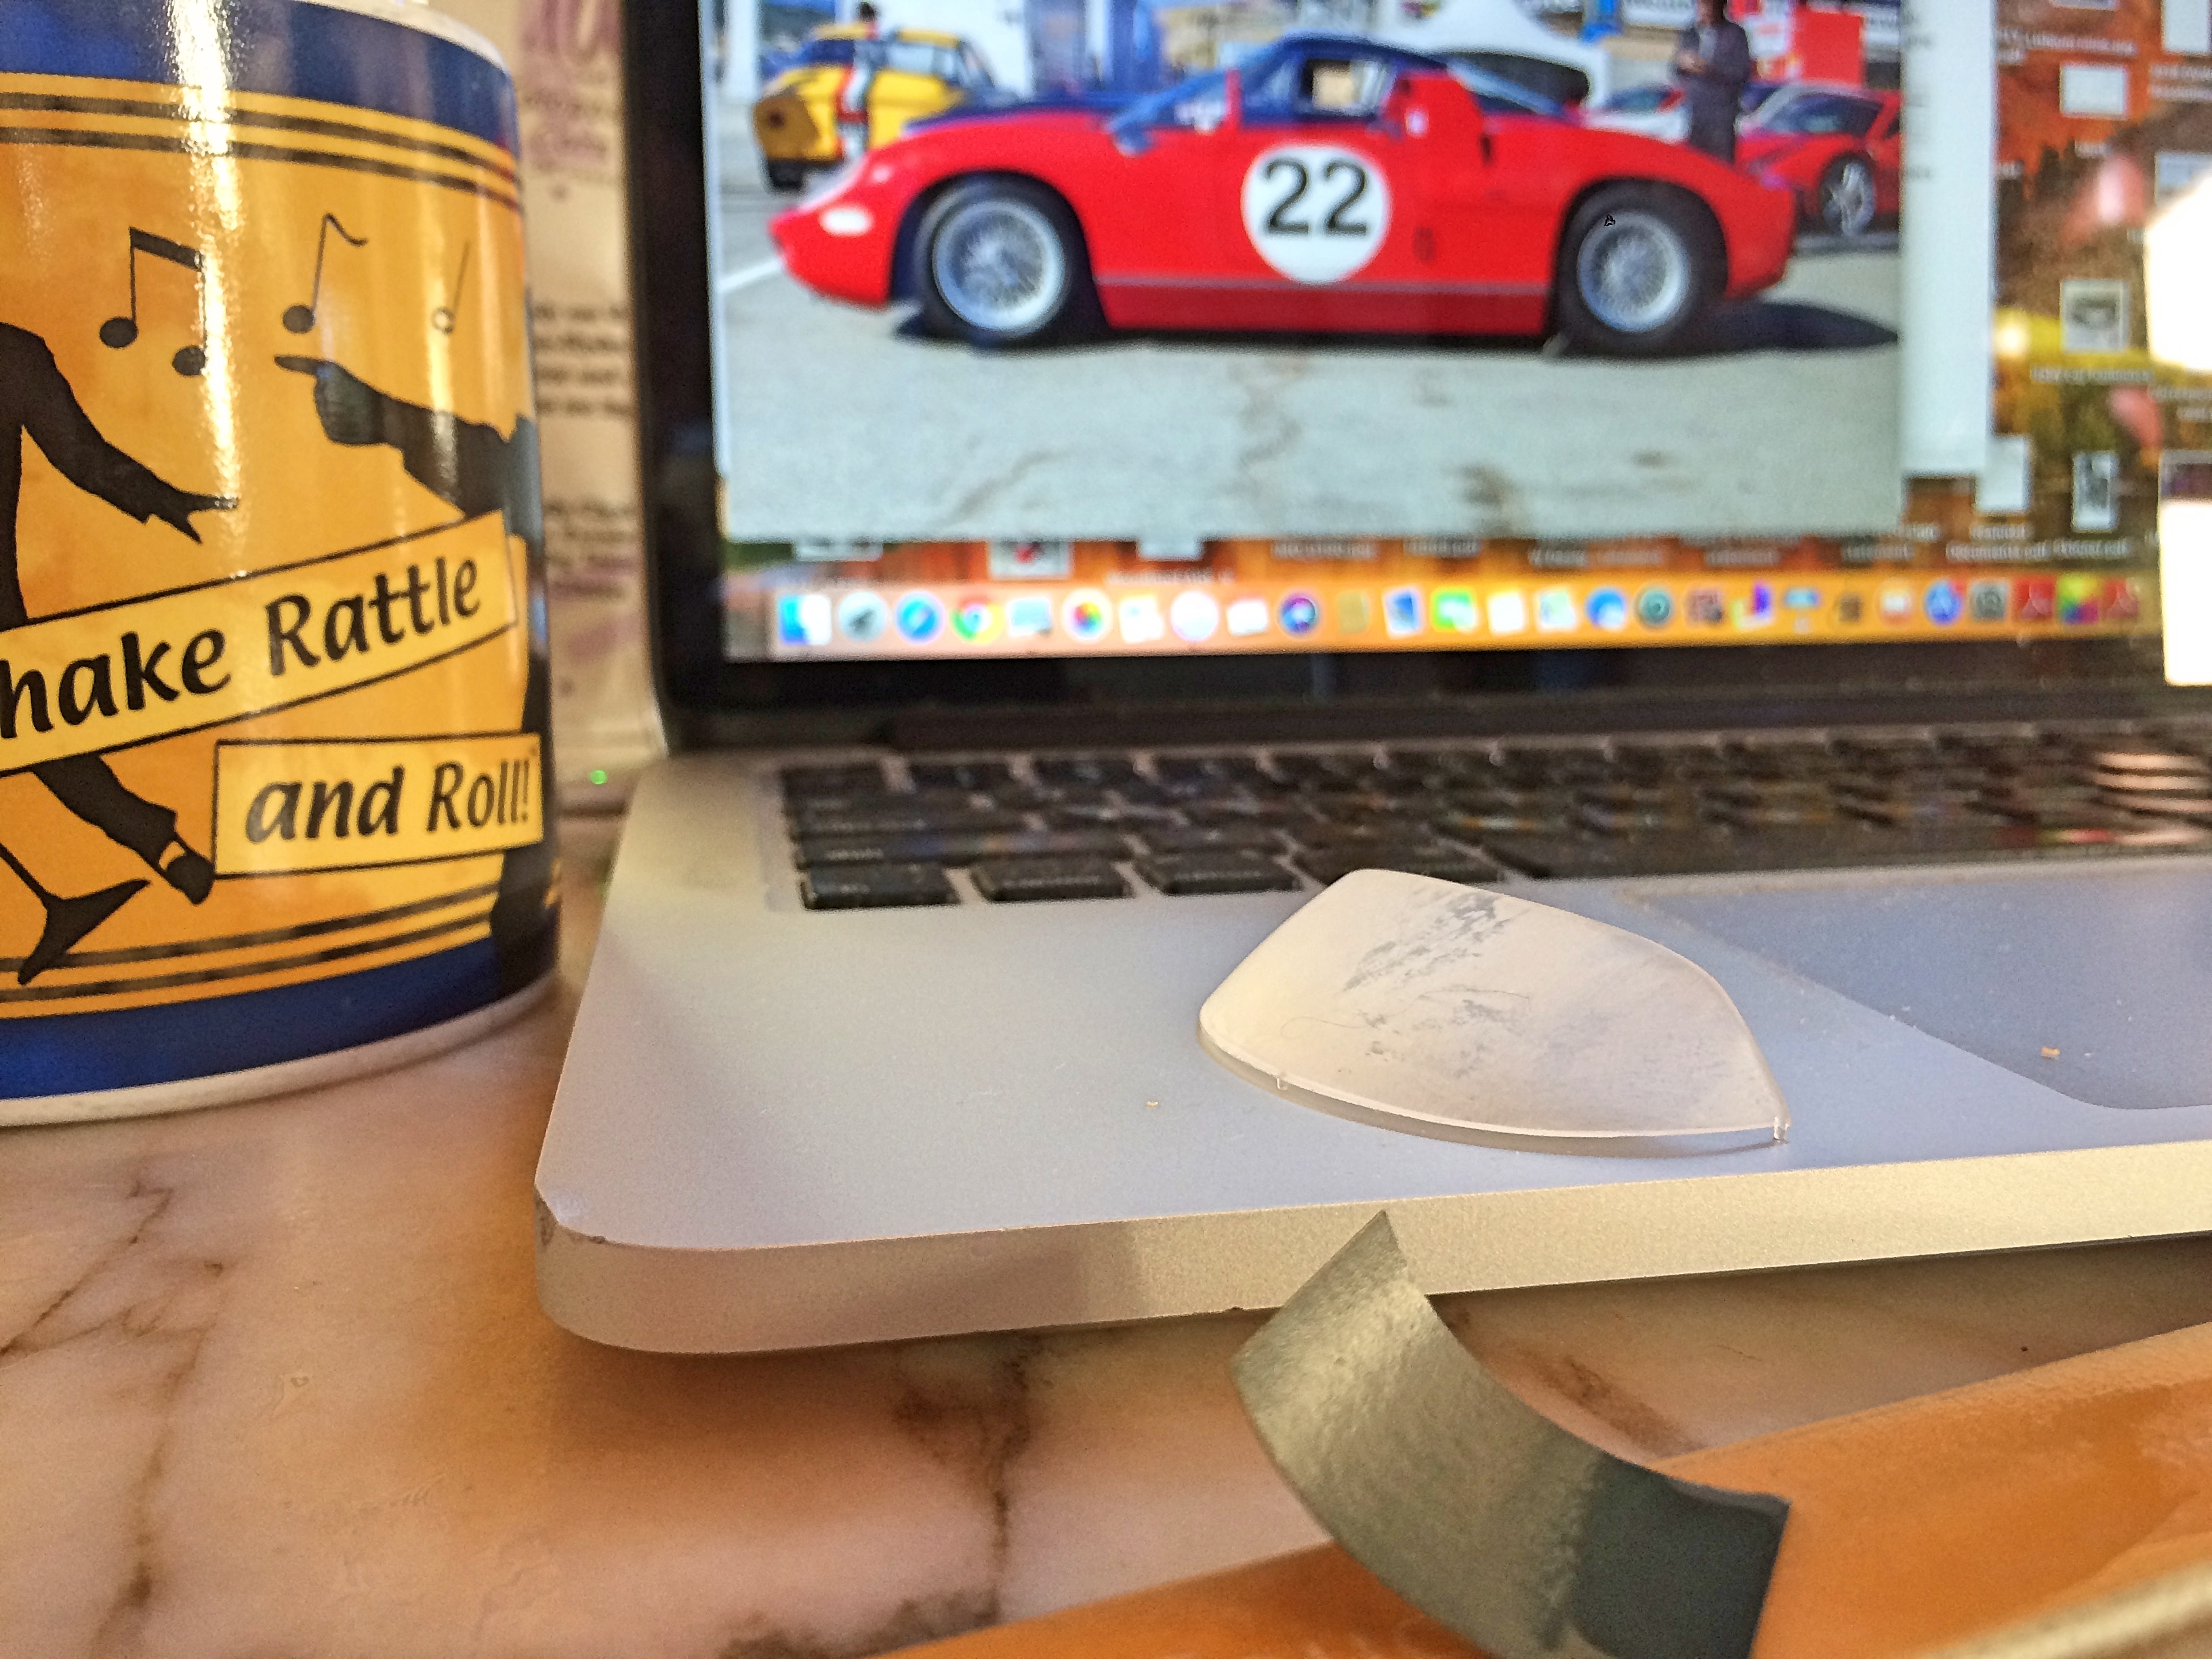
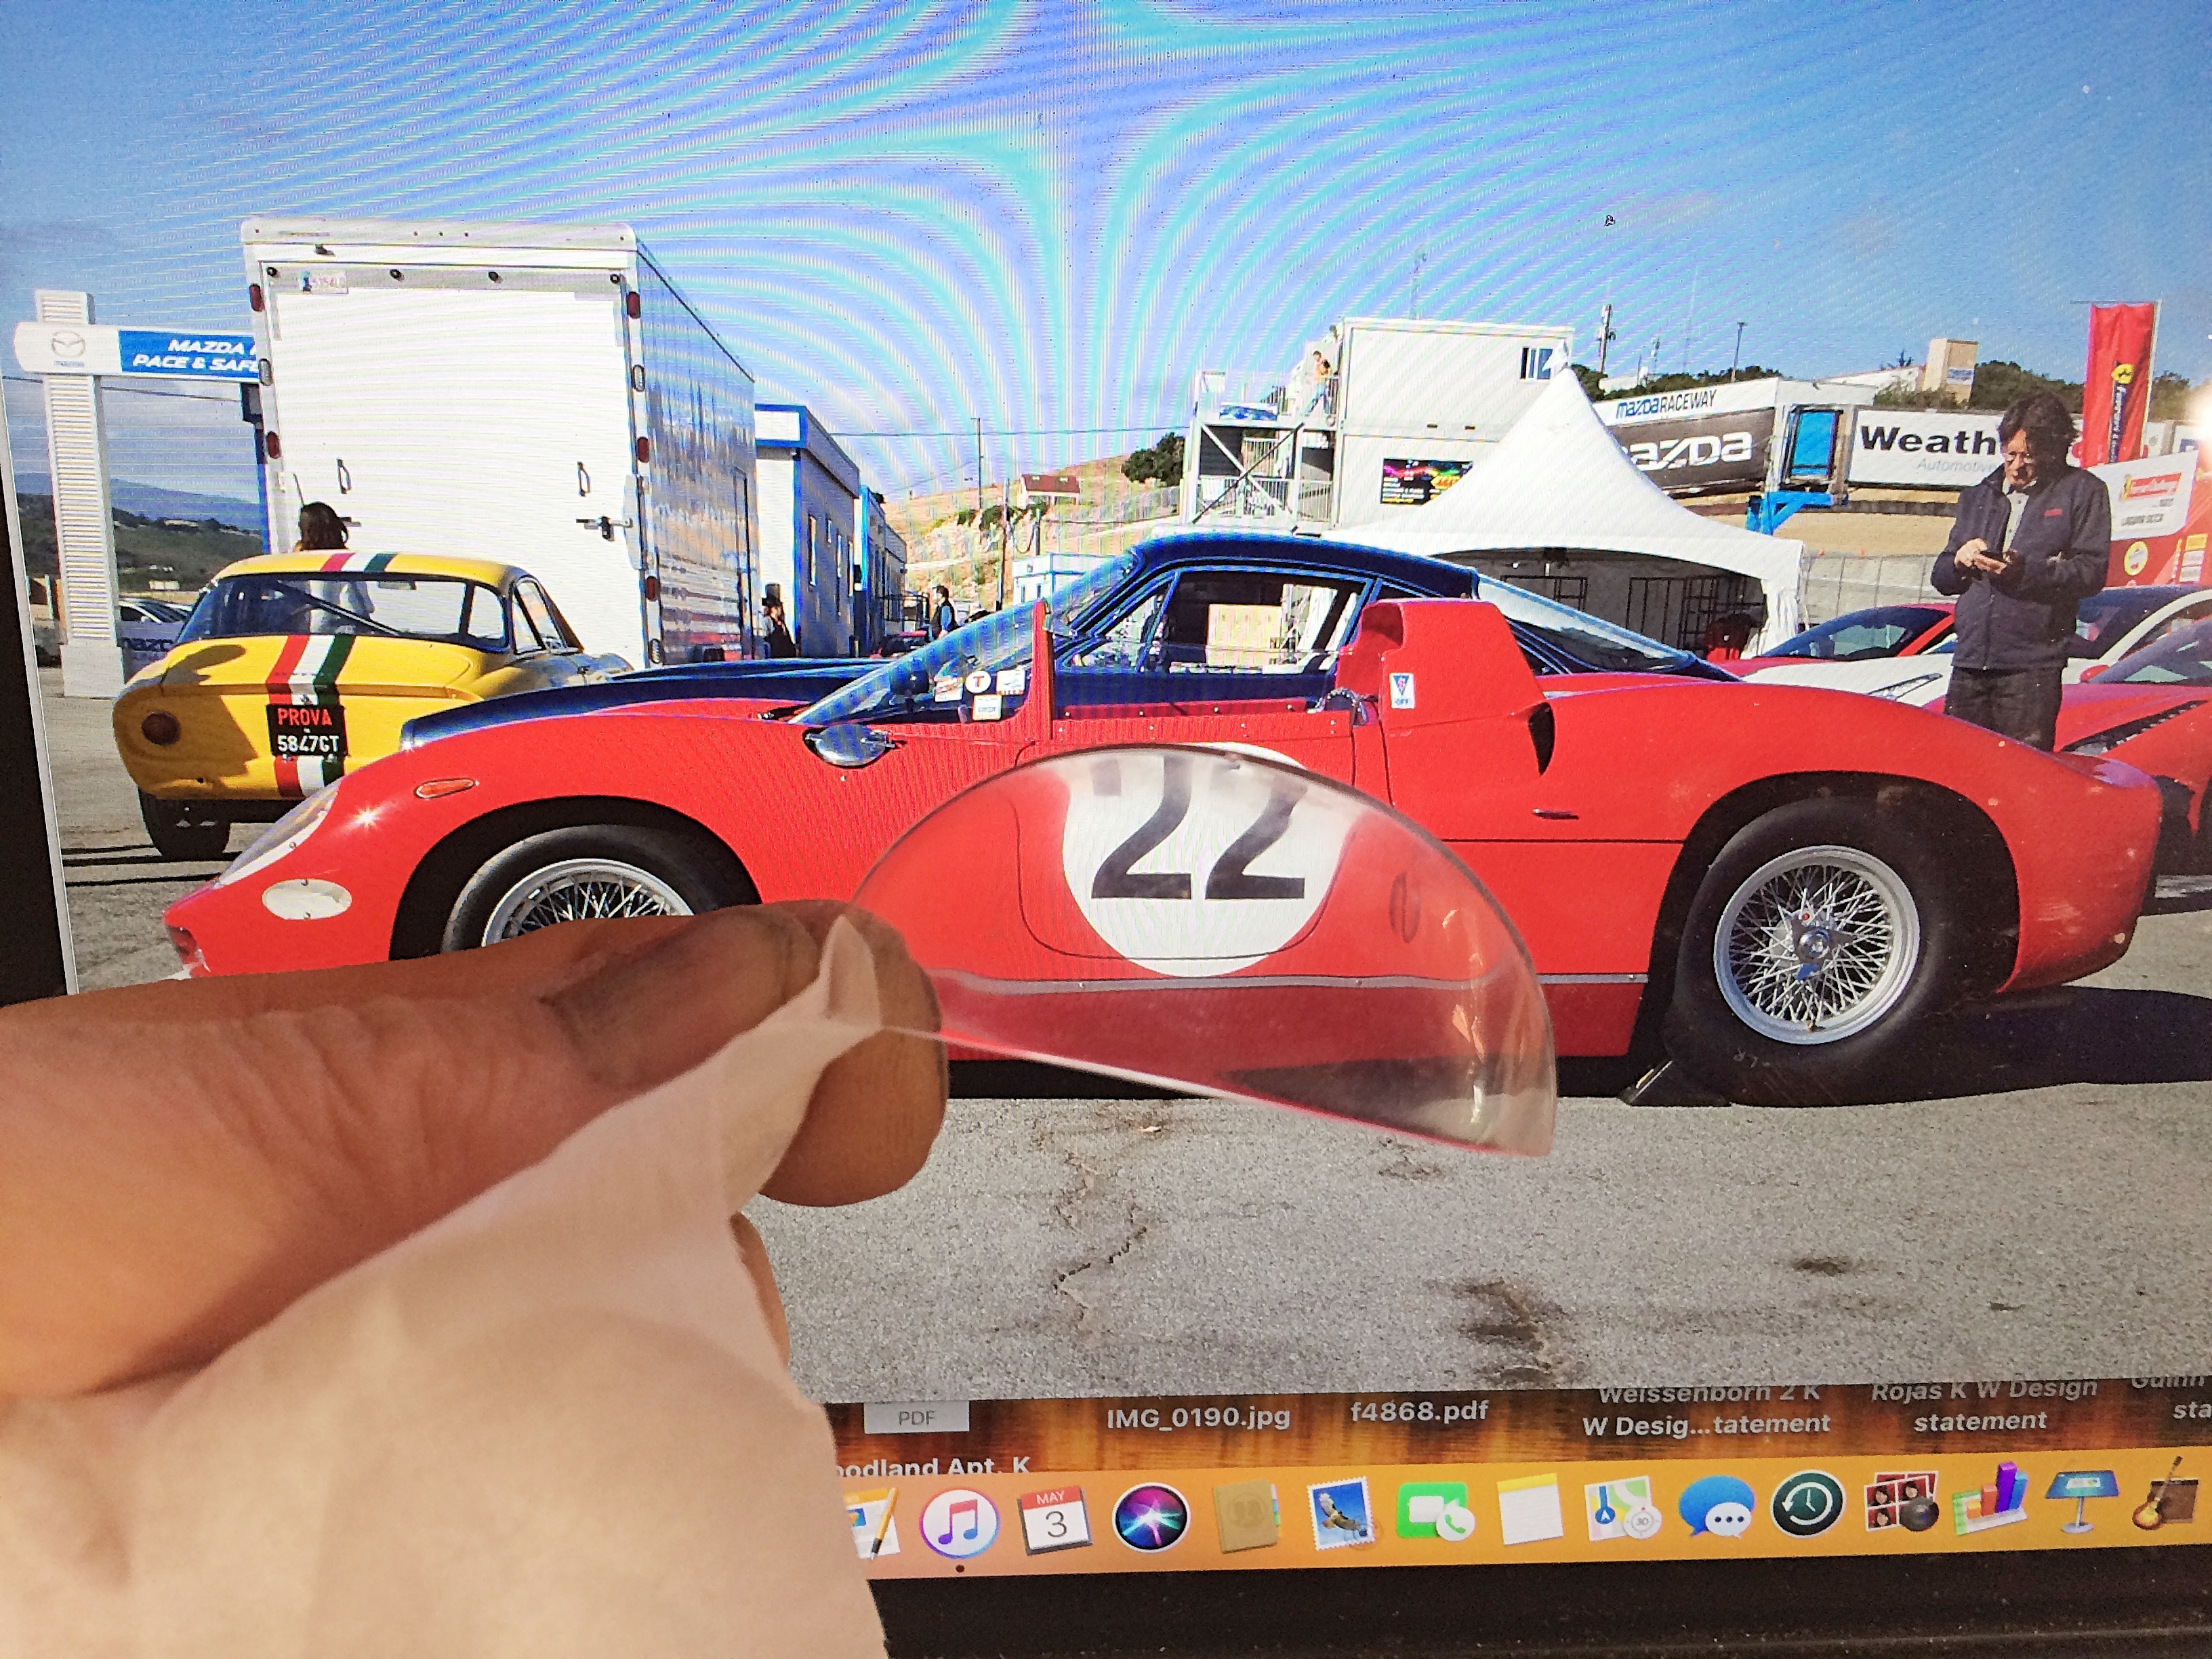
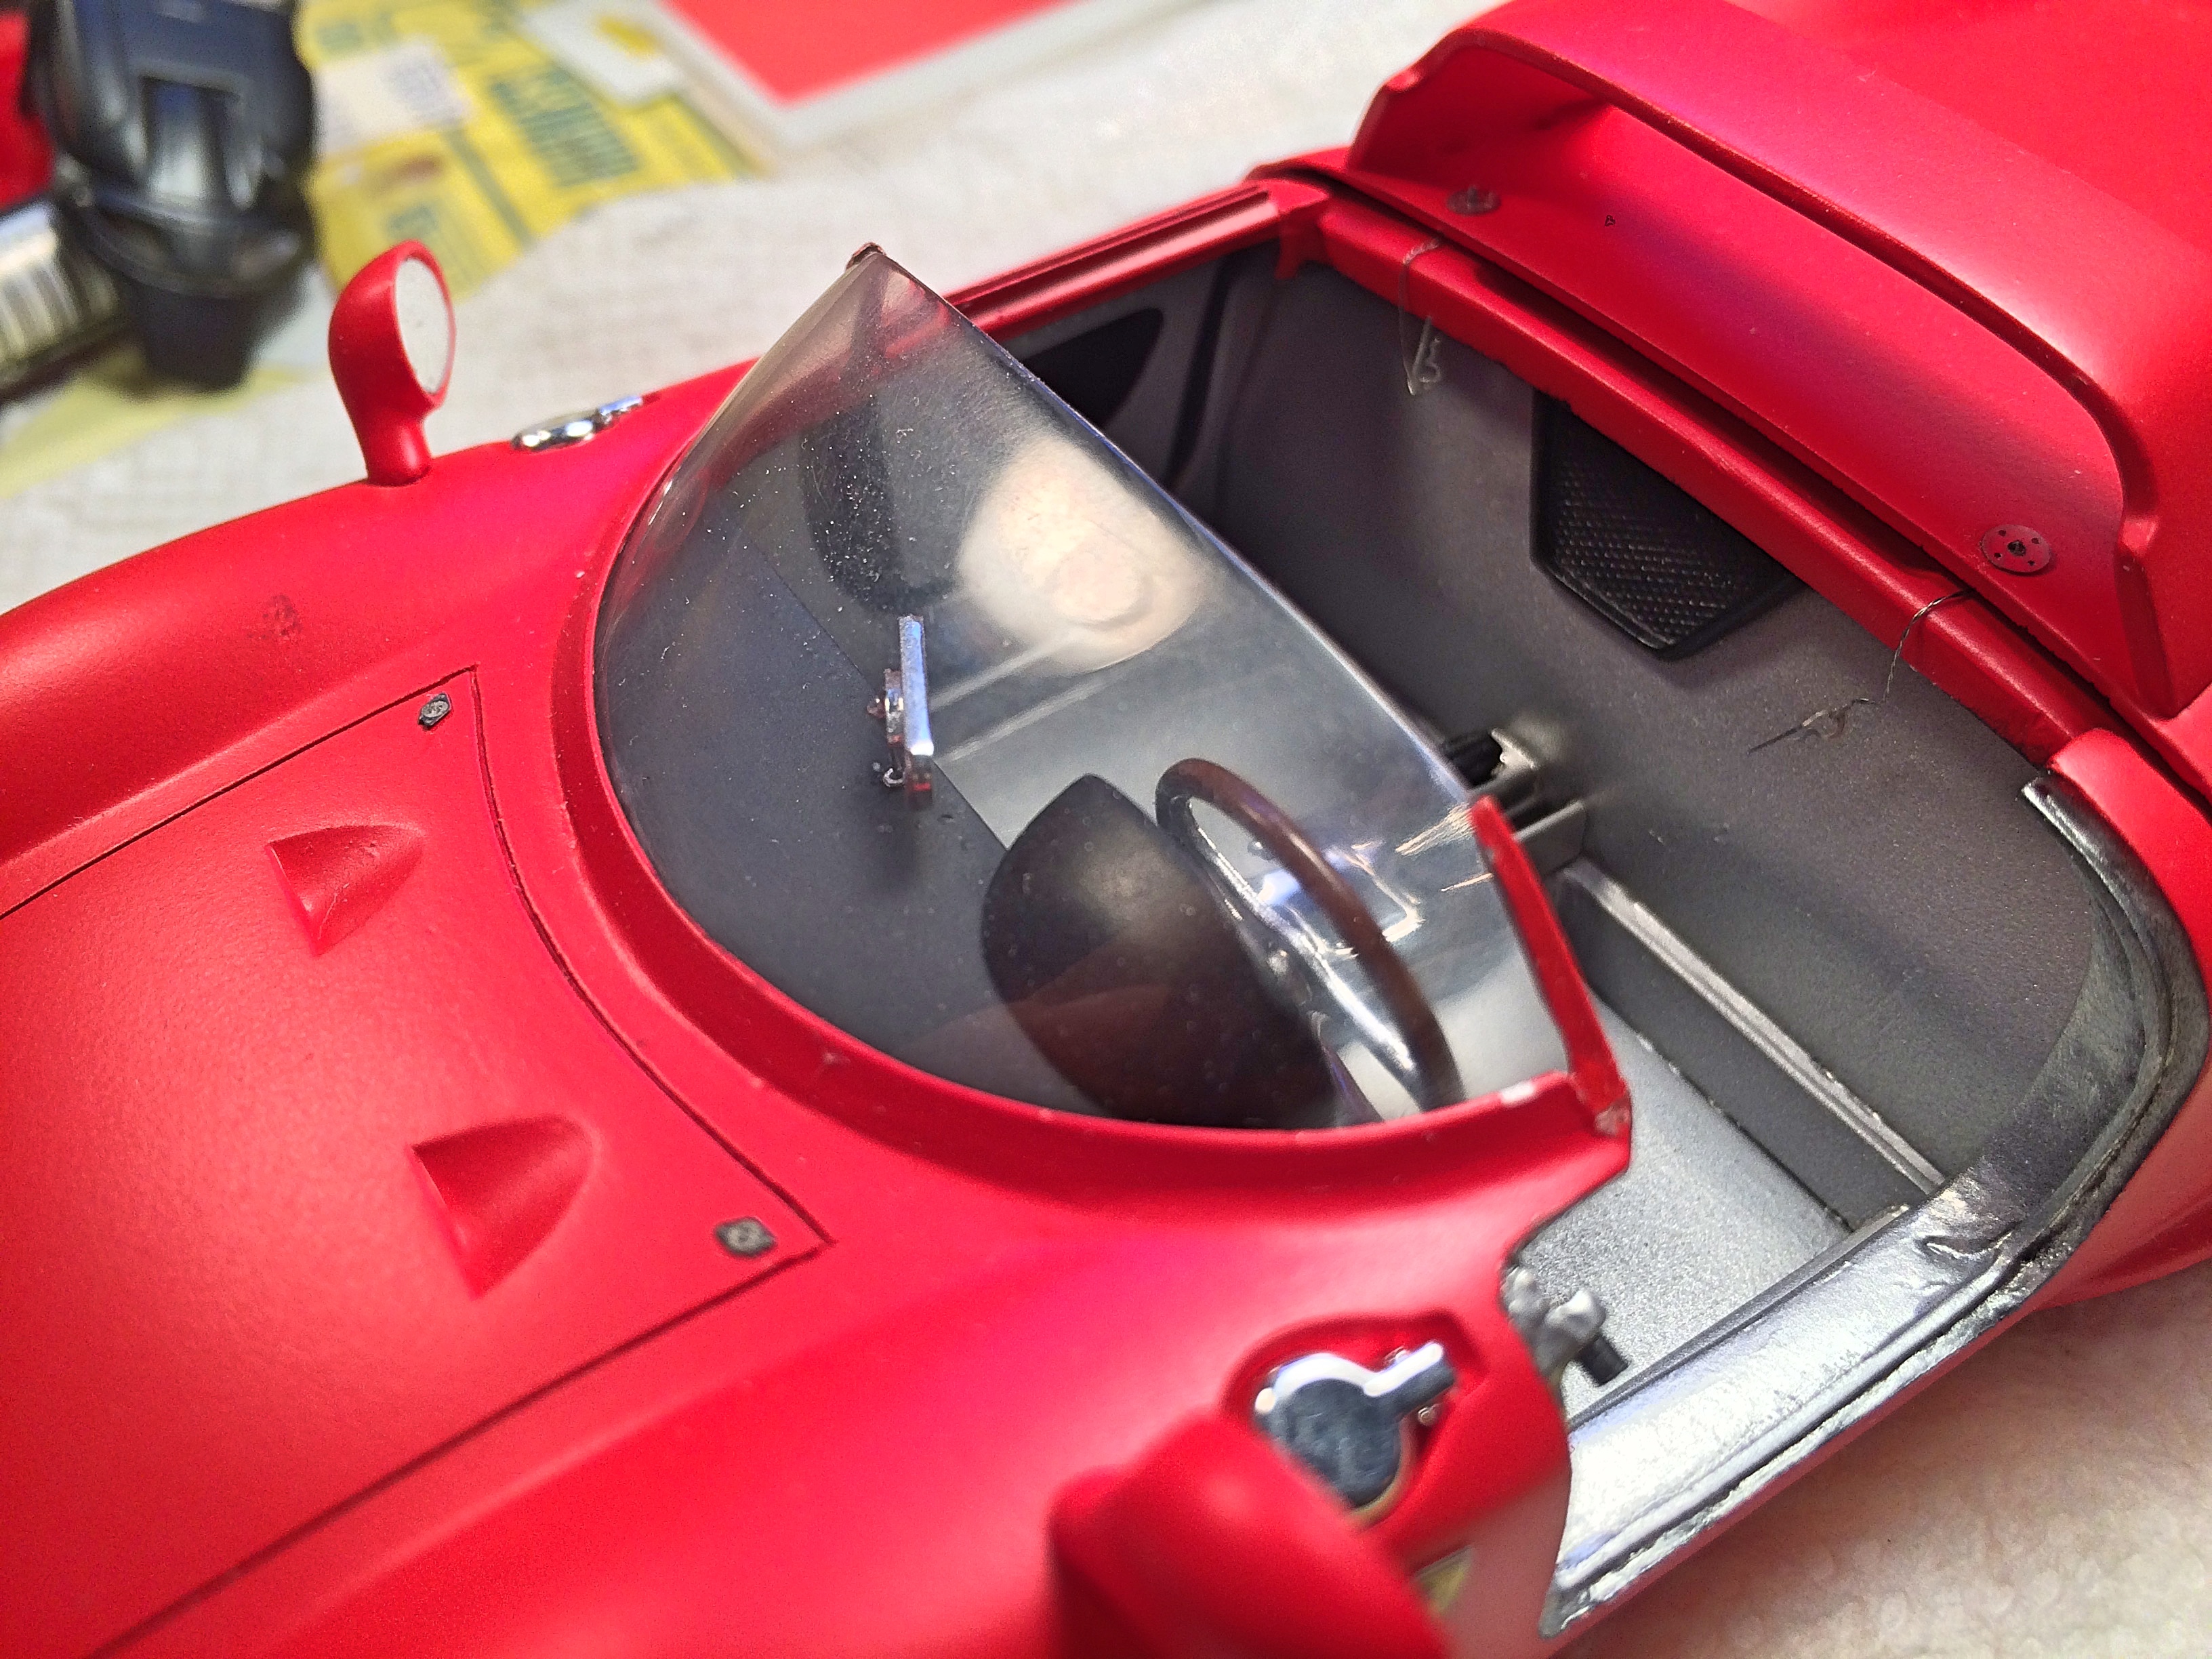
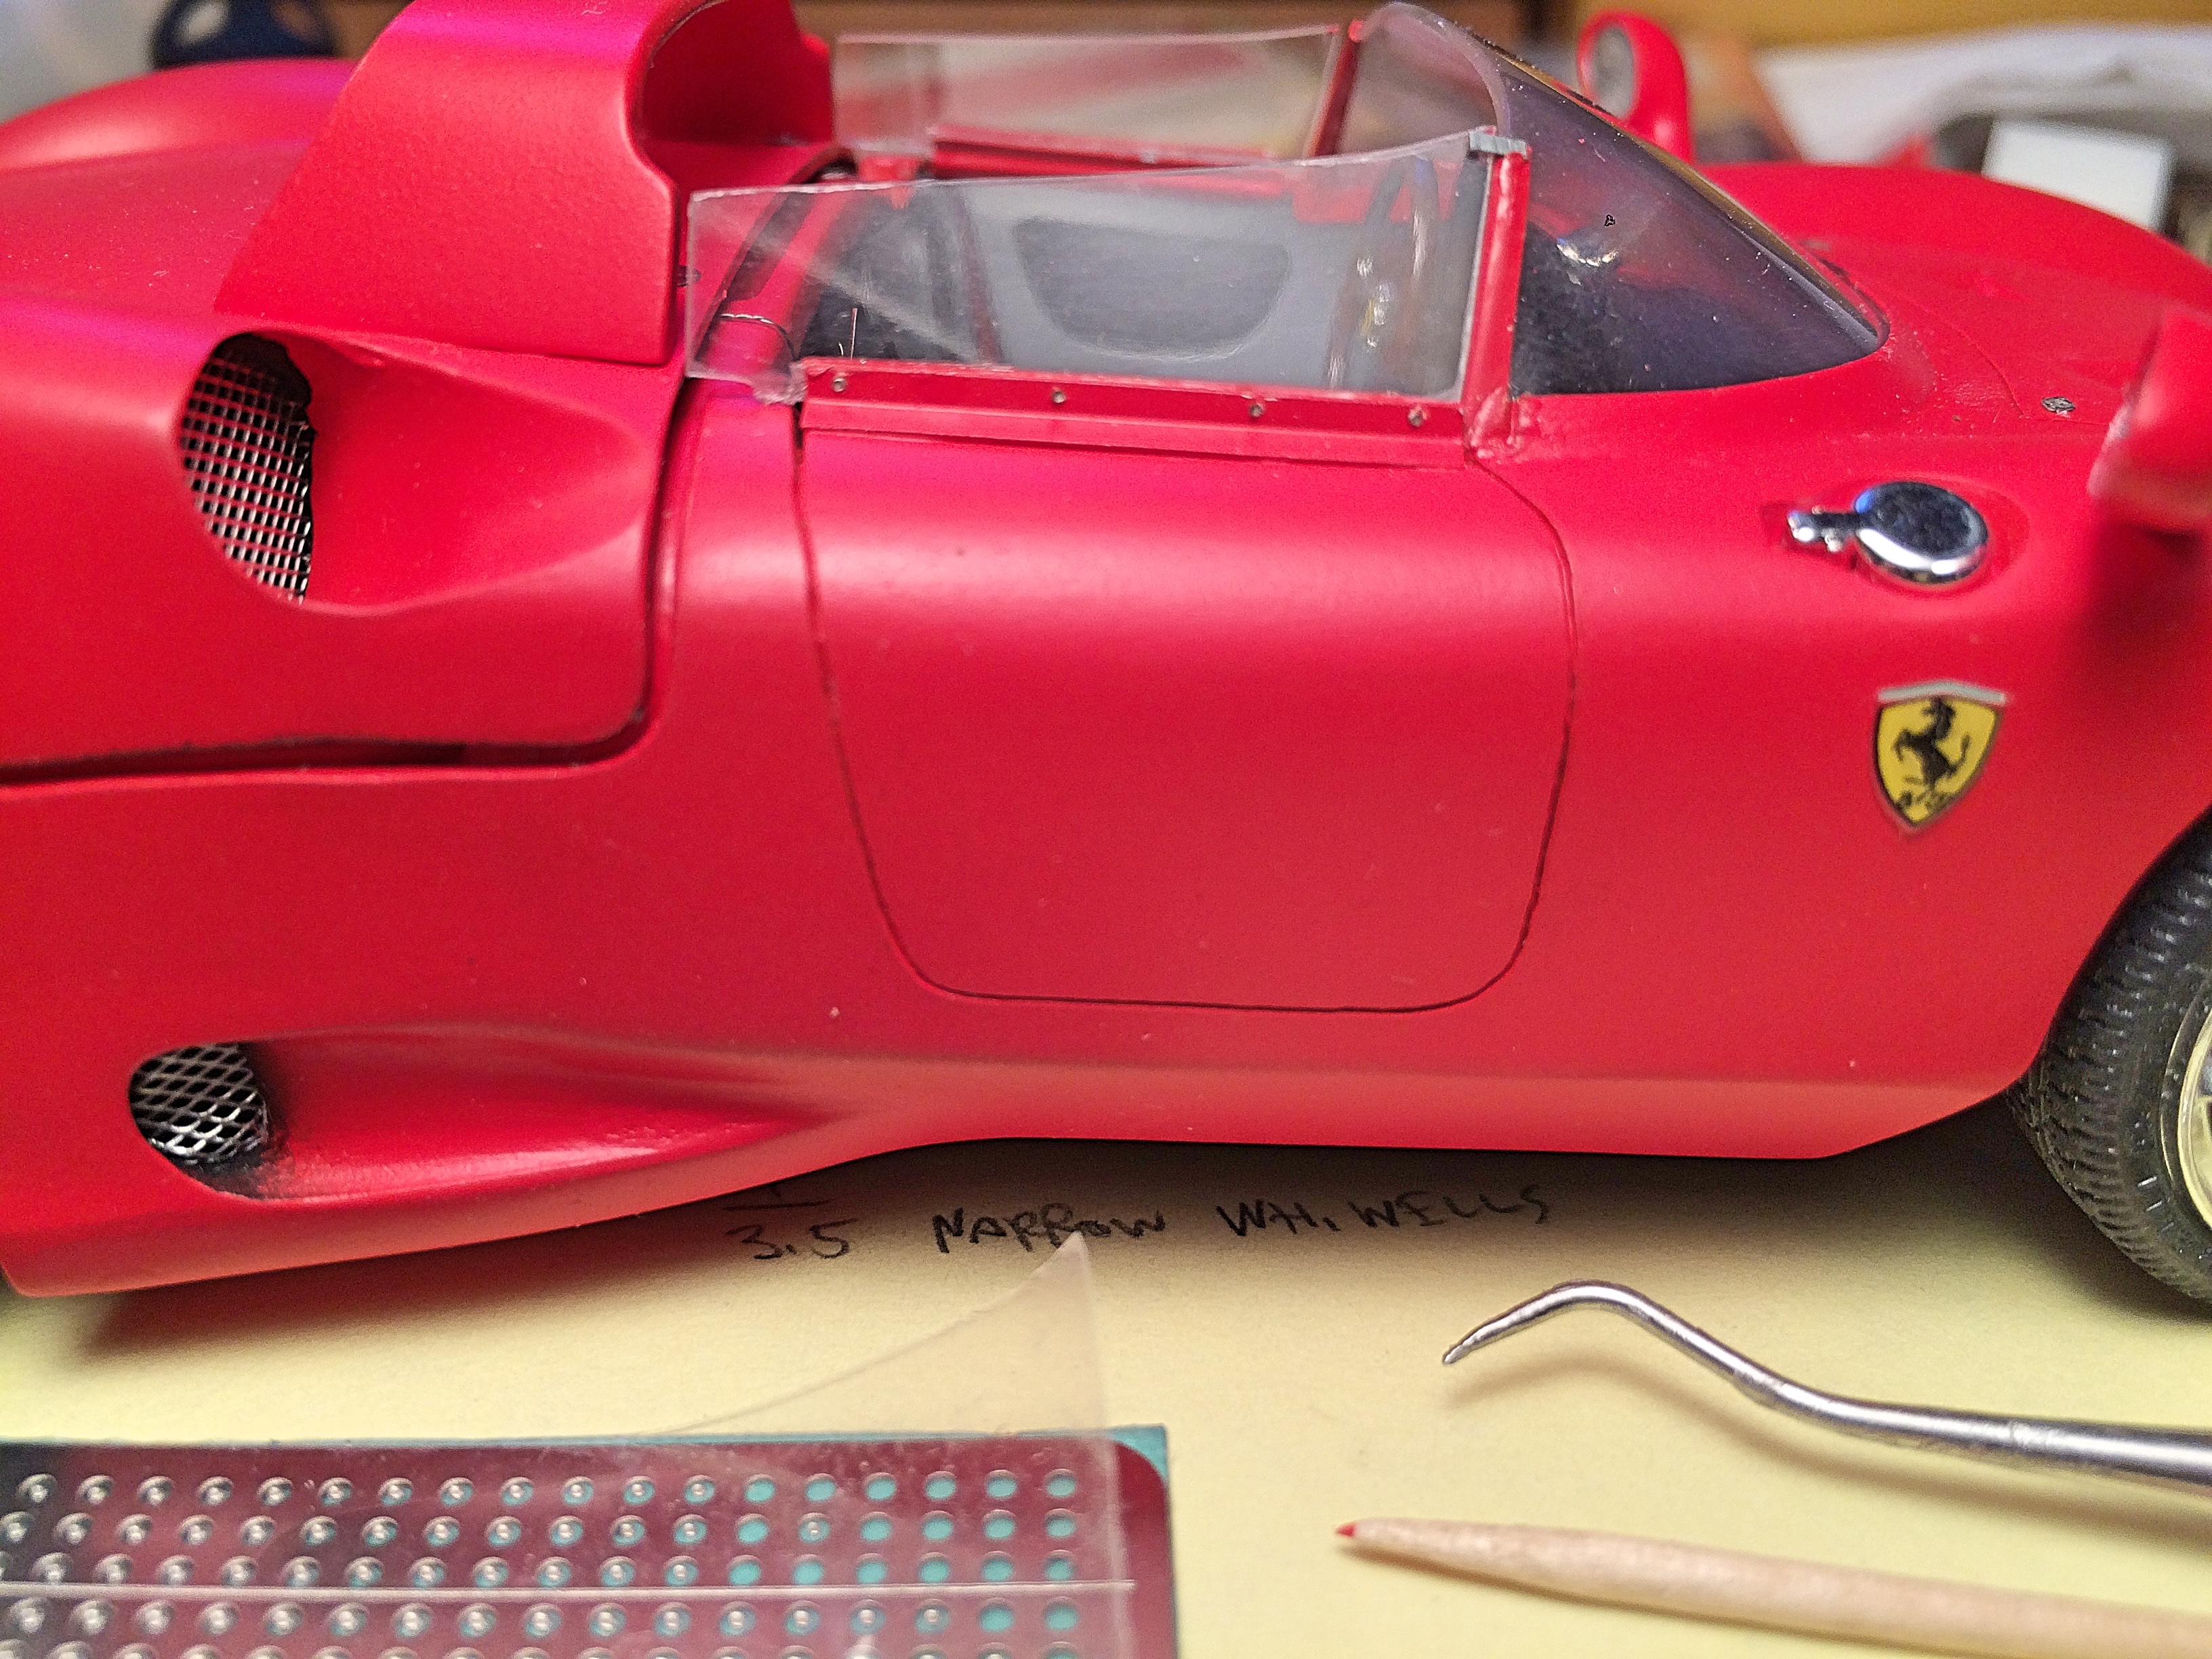
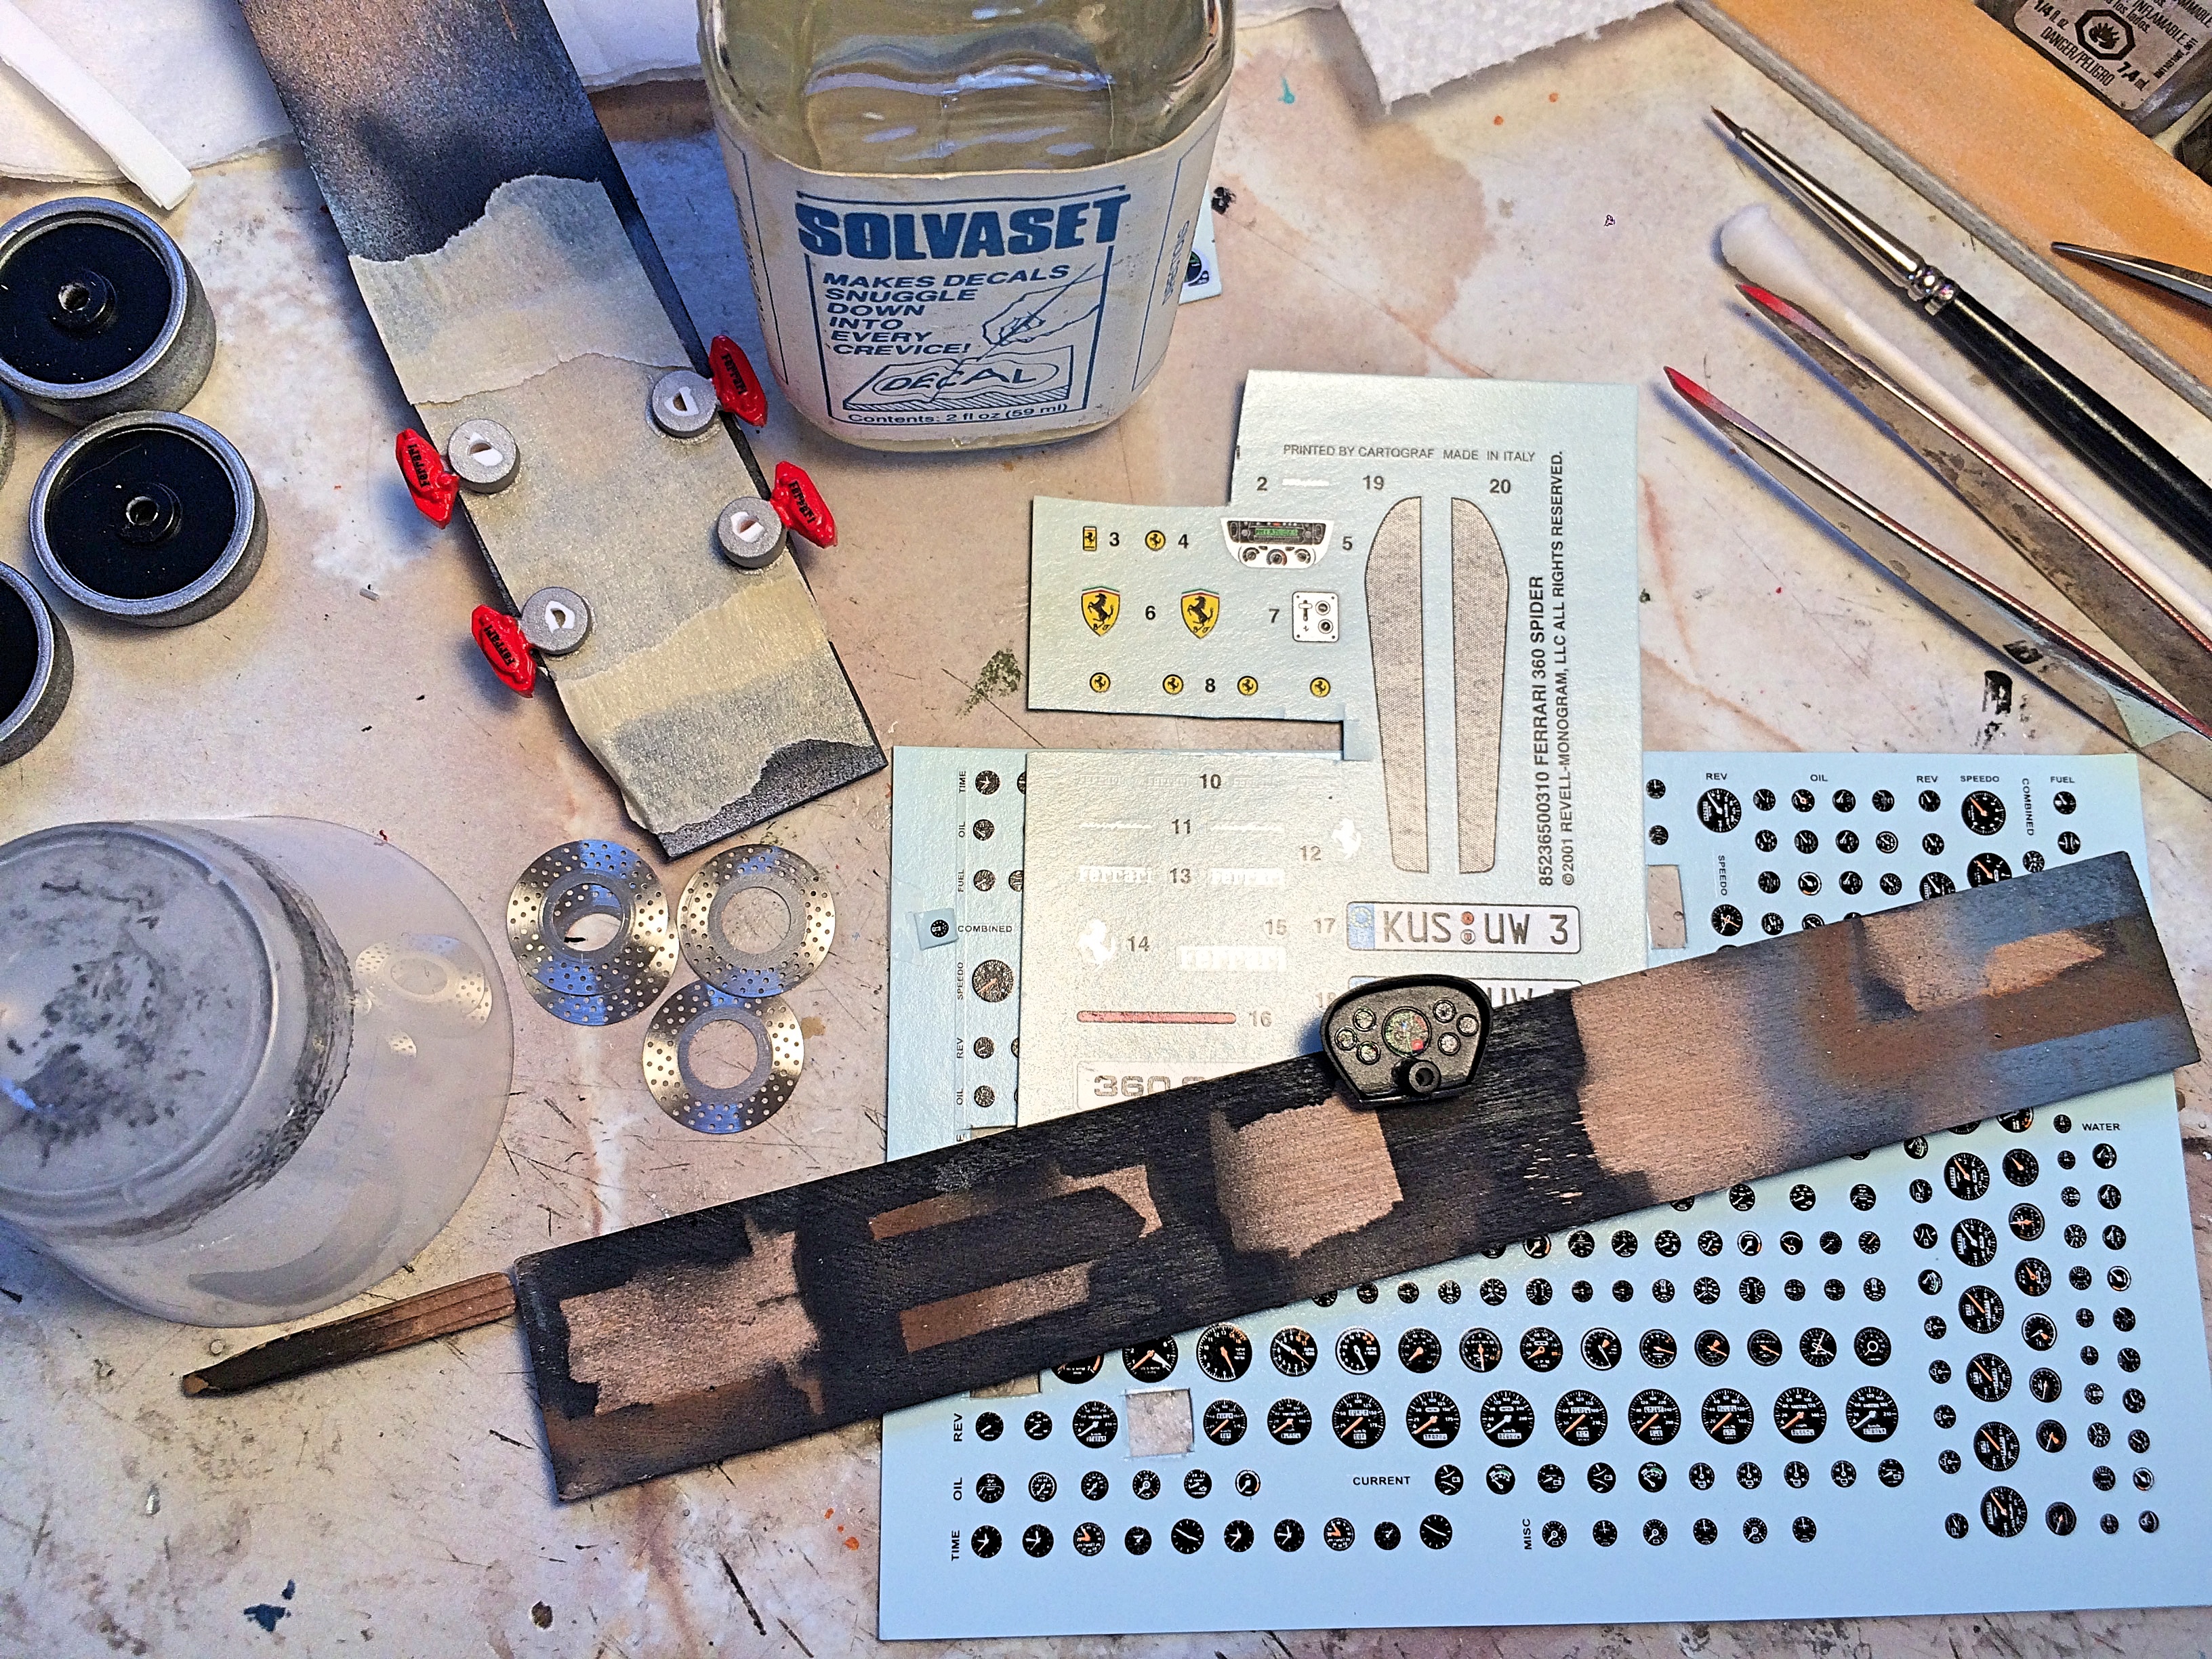
Now that it's almost done, totally stoked. Thanks. Well DUH, it's getting done, not sitting for years in a box. It's easy, will do when I get back from GSL. I was concerned about the "glass". The kit had the wiper molded on, which I hated. Also had a crappy vac-formed window. I used the polishing system for doing paint, and made a HUGE improvement. And the best part, it fit without almost no glue, and the aluminum plate end parts were modified without wrecking them. Final photo-etch body detail, rivets for the door "glass". After I wolf my cereal, do the seatbelts. Then pack, shower, then blaze up to GSL!
-
More like did I work this week? It's now.... 3:00 AM. So close.
-
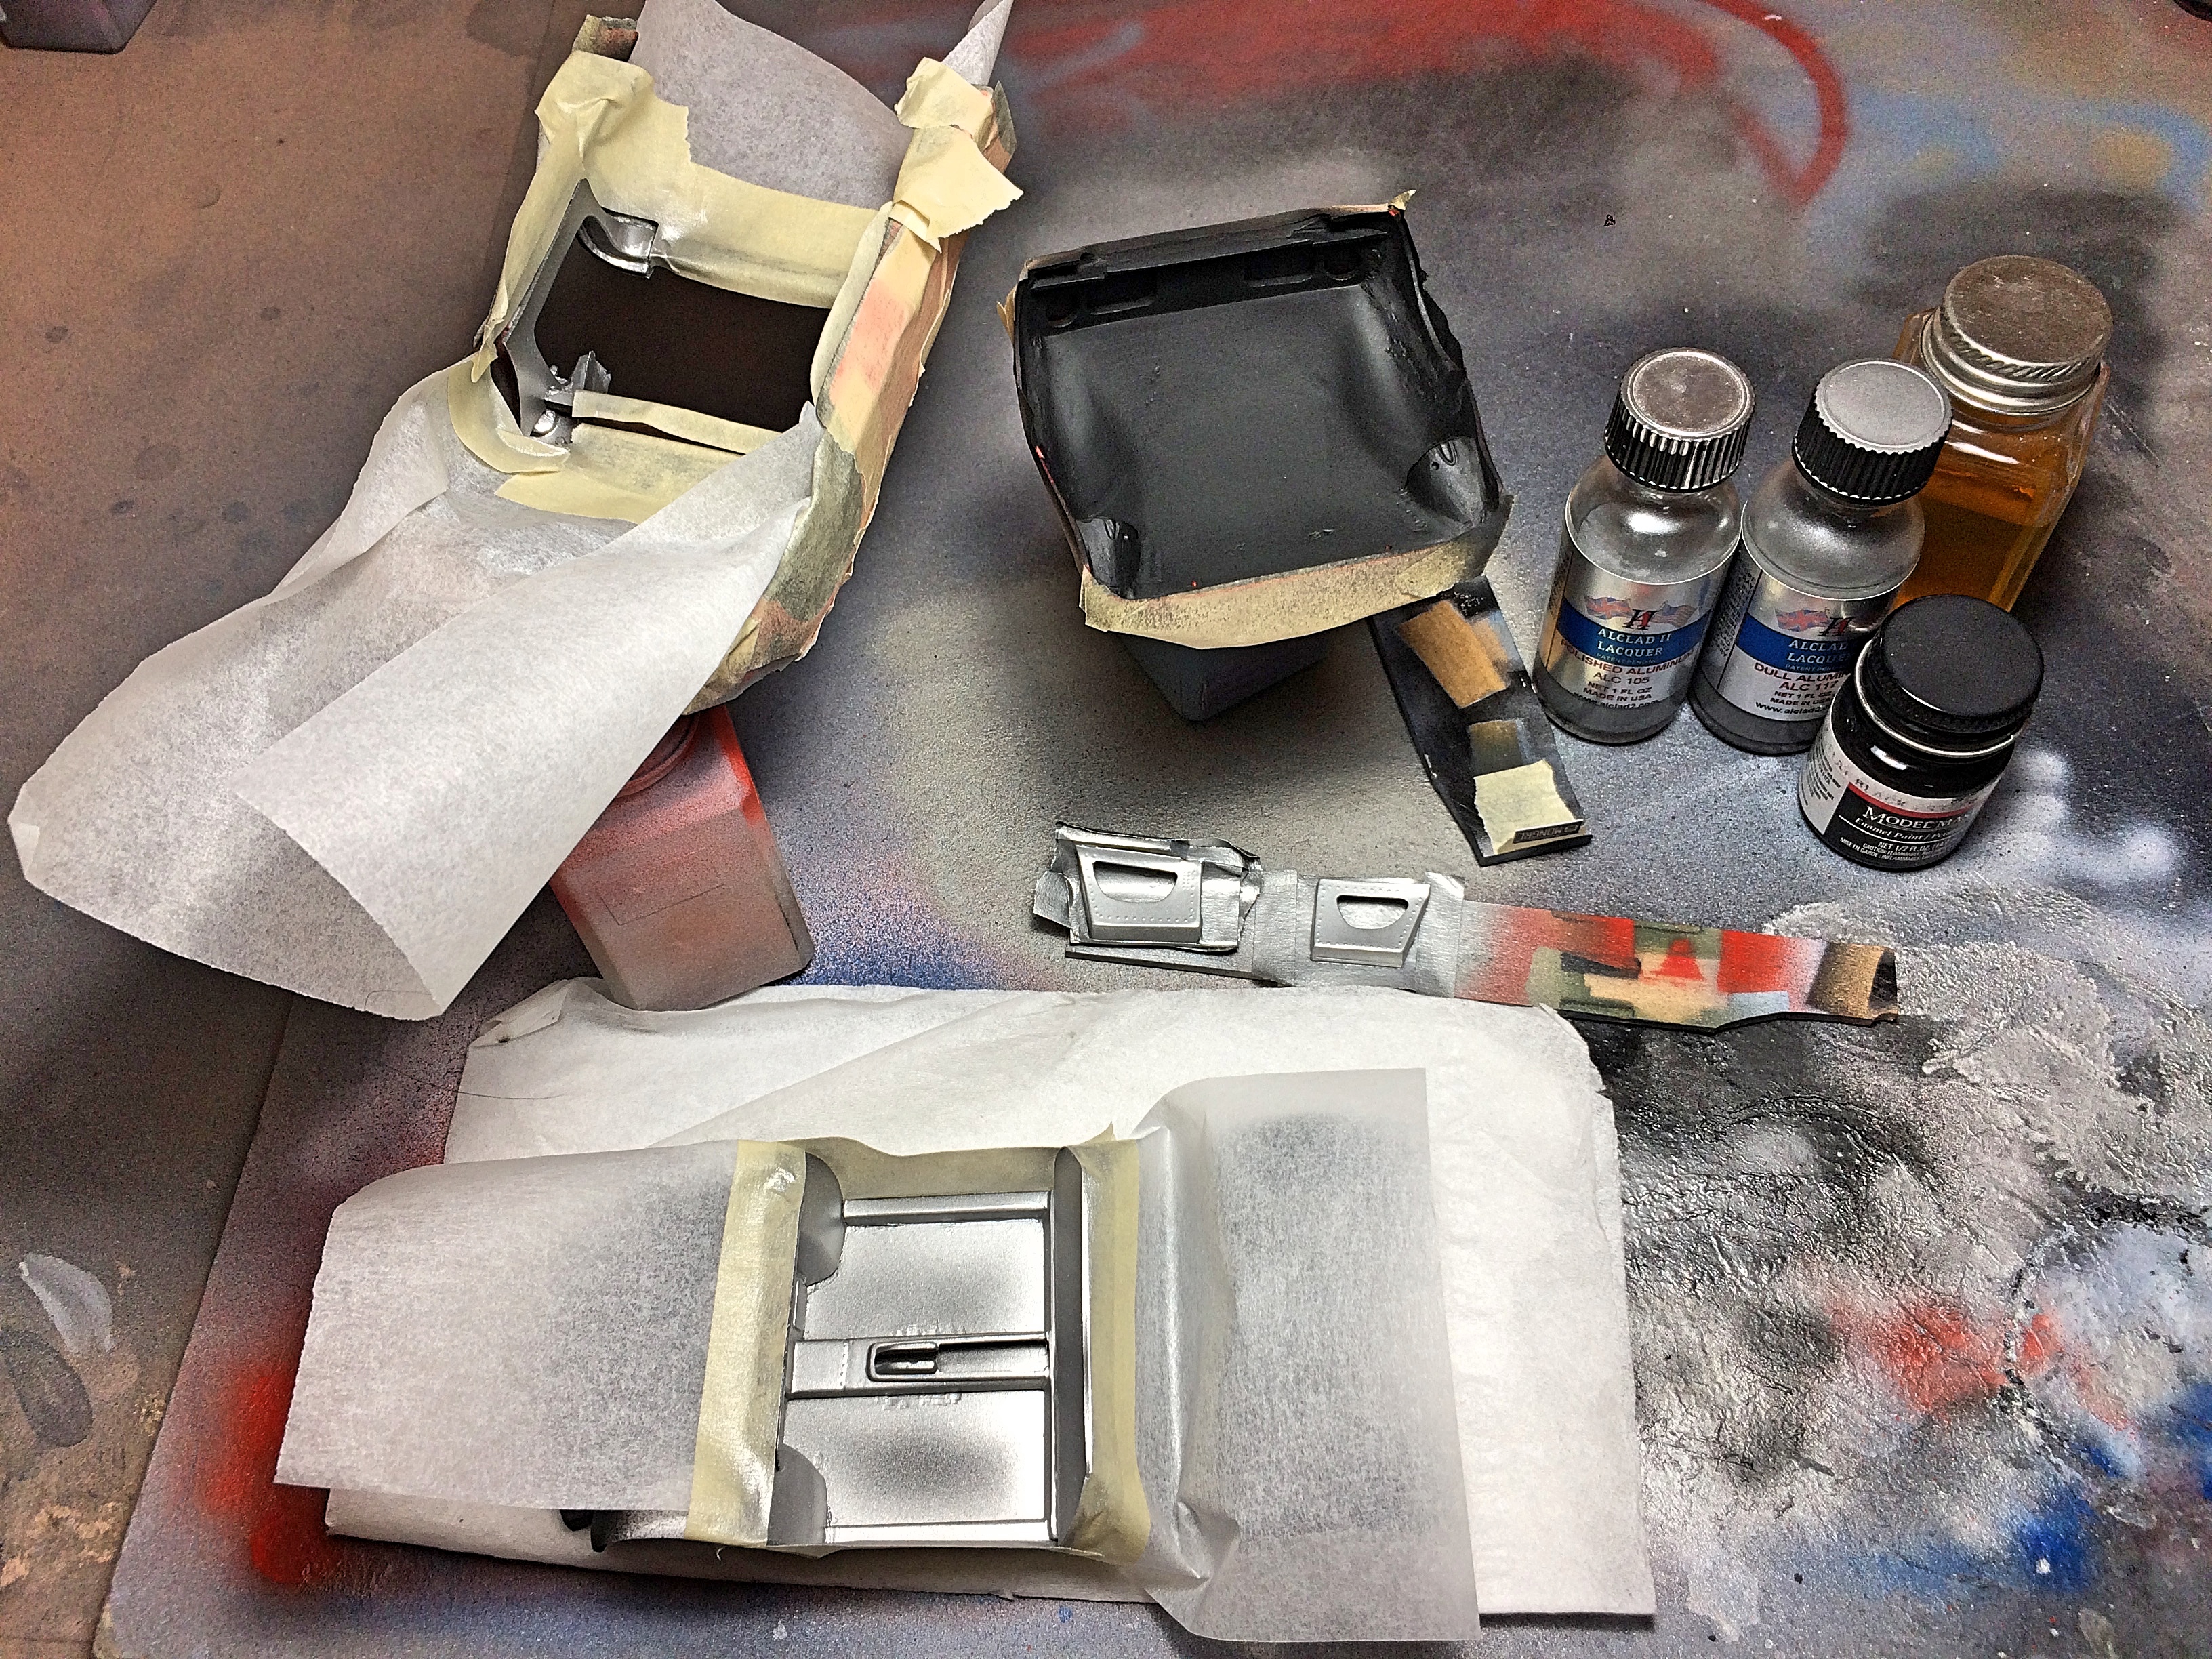
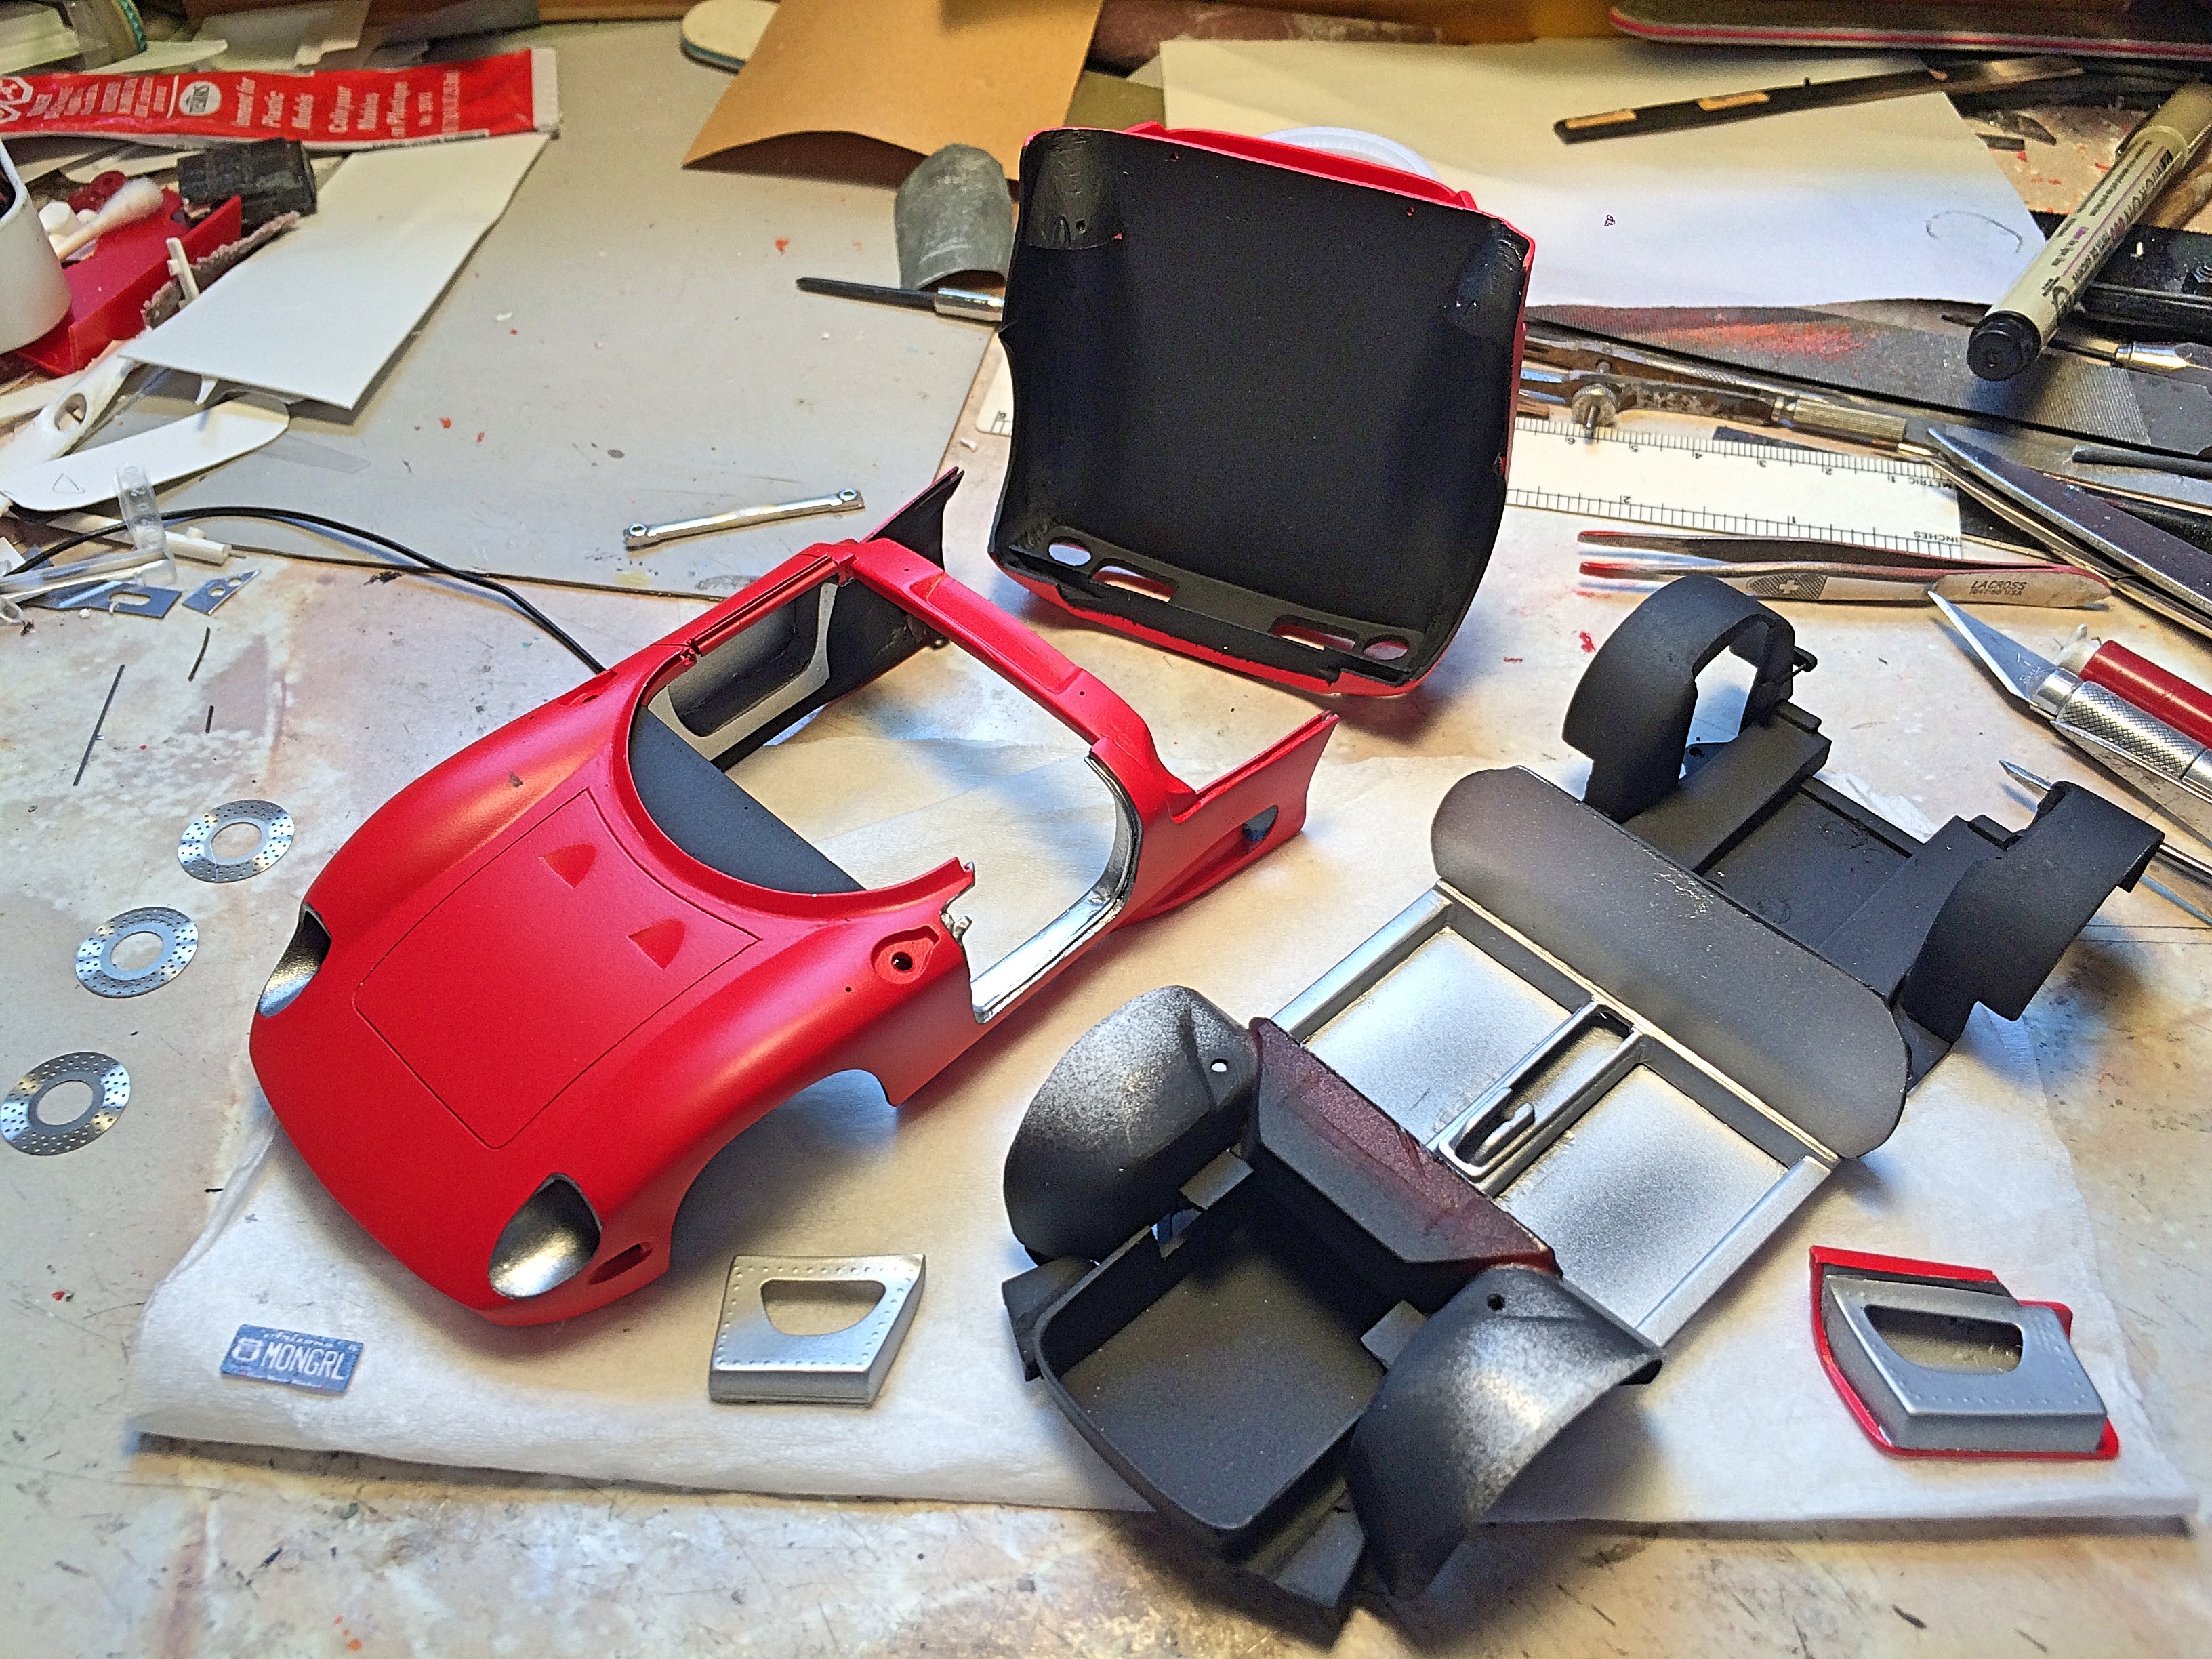
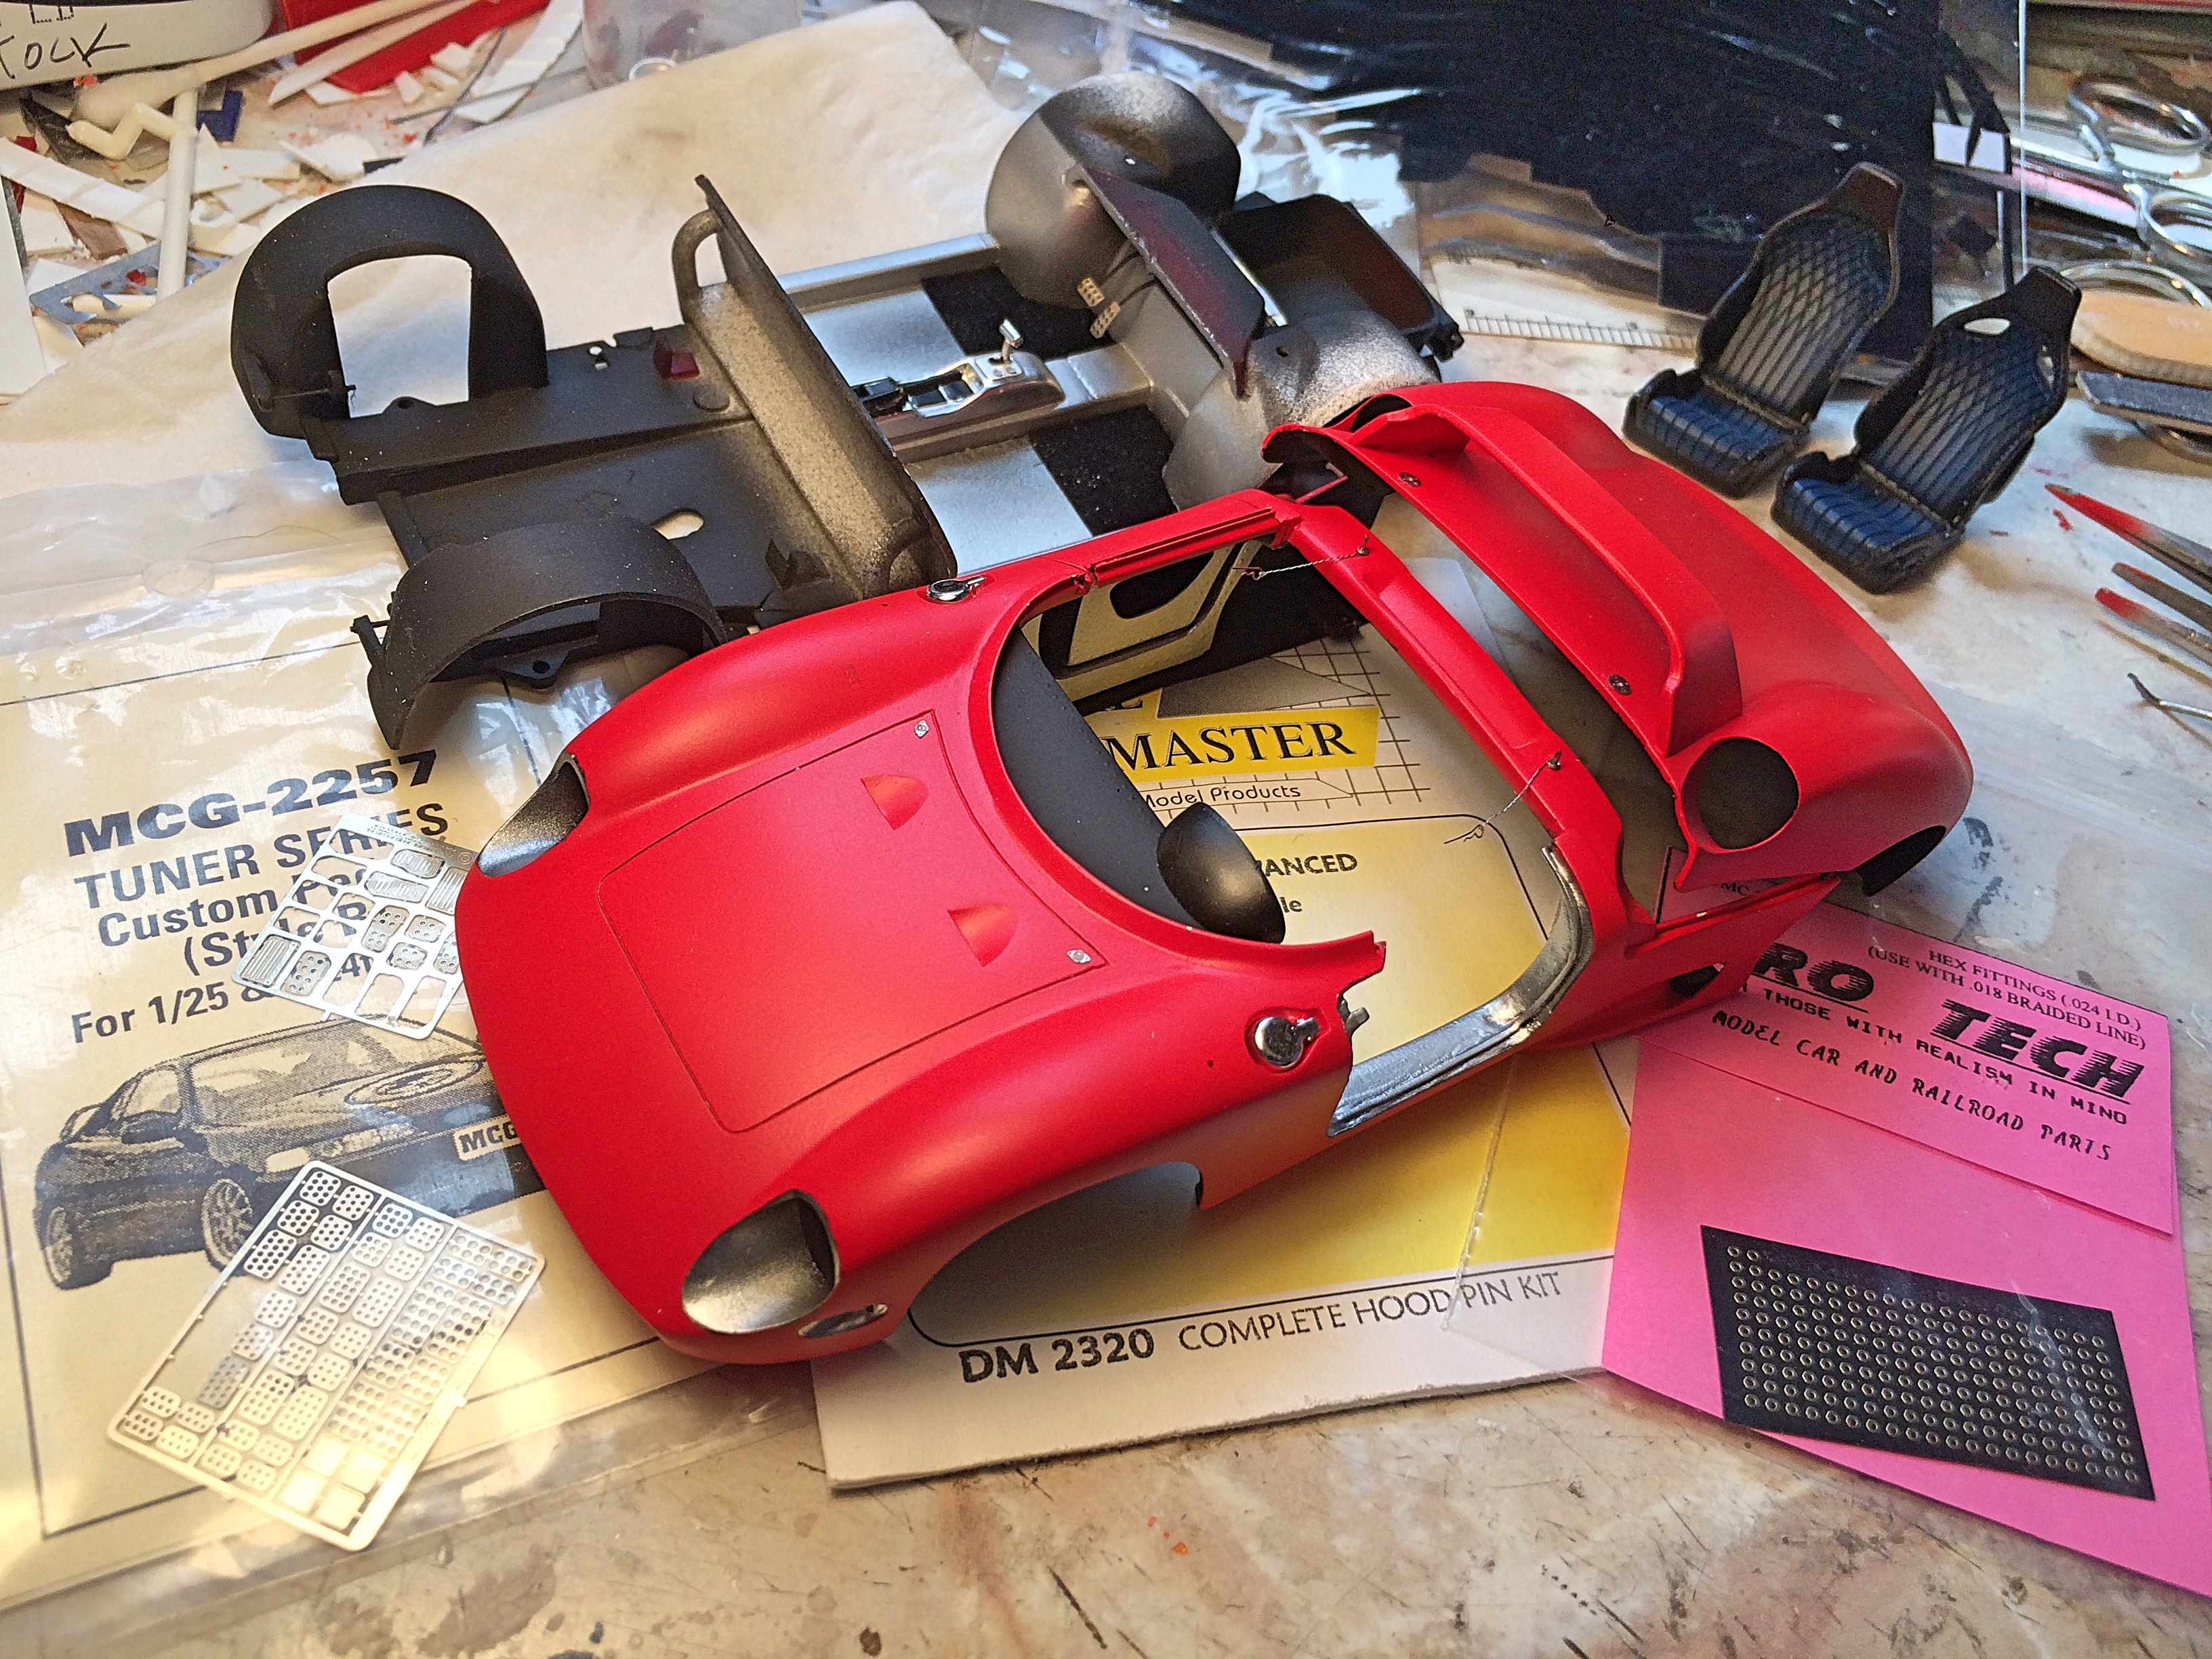
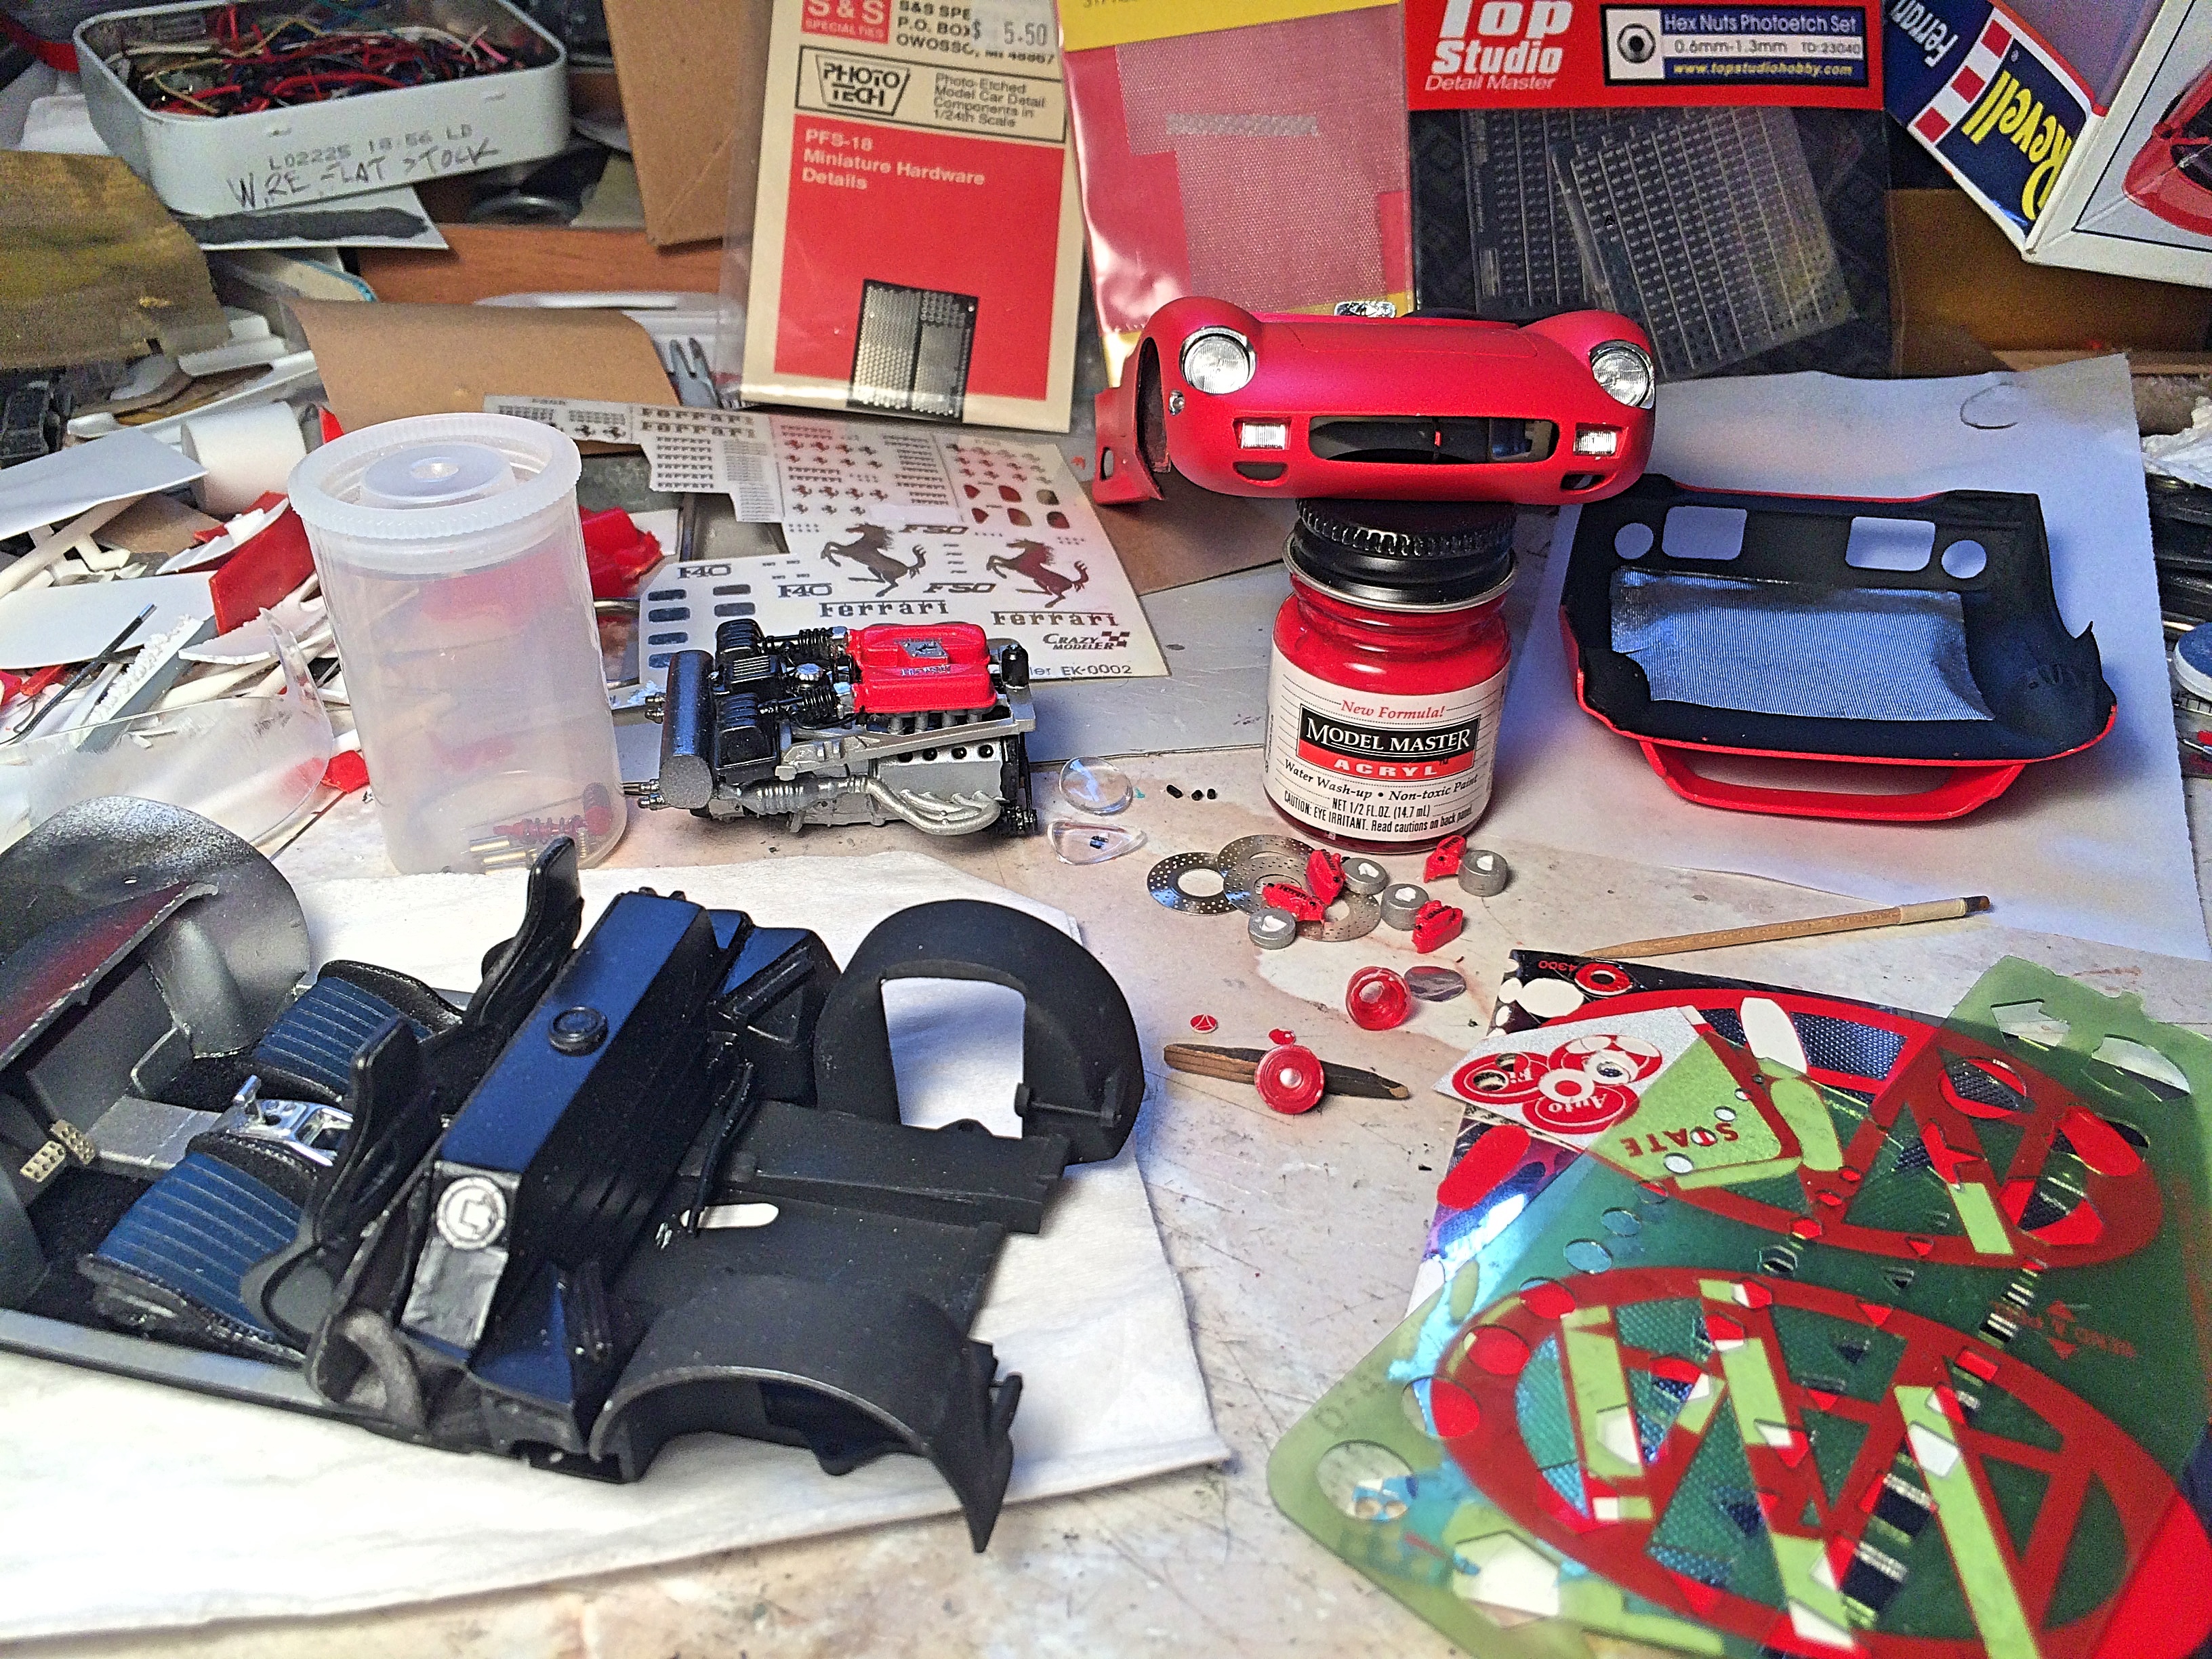
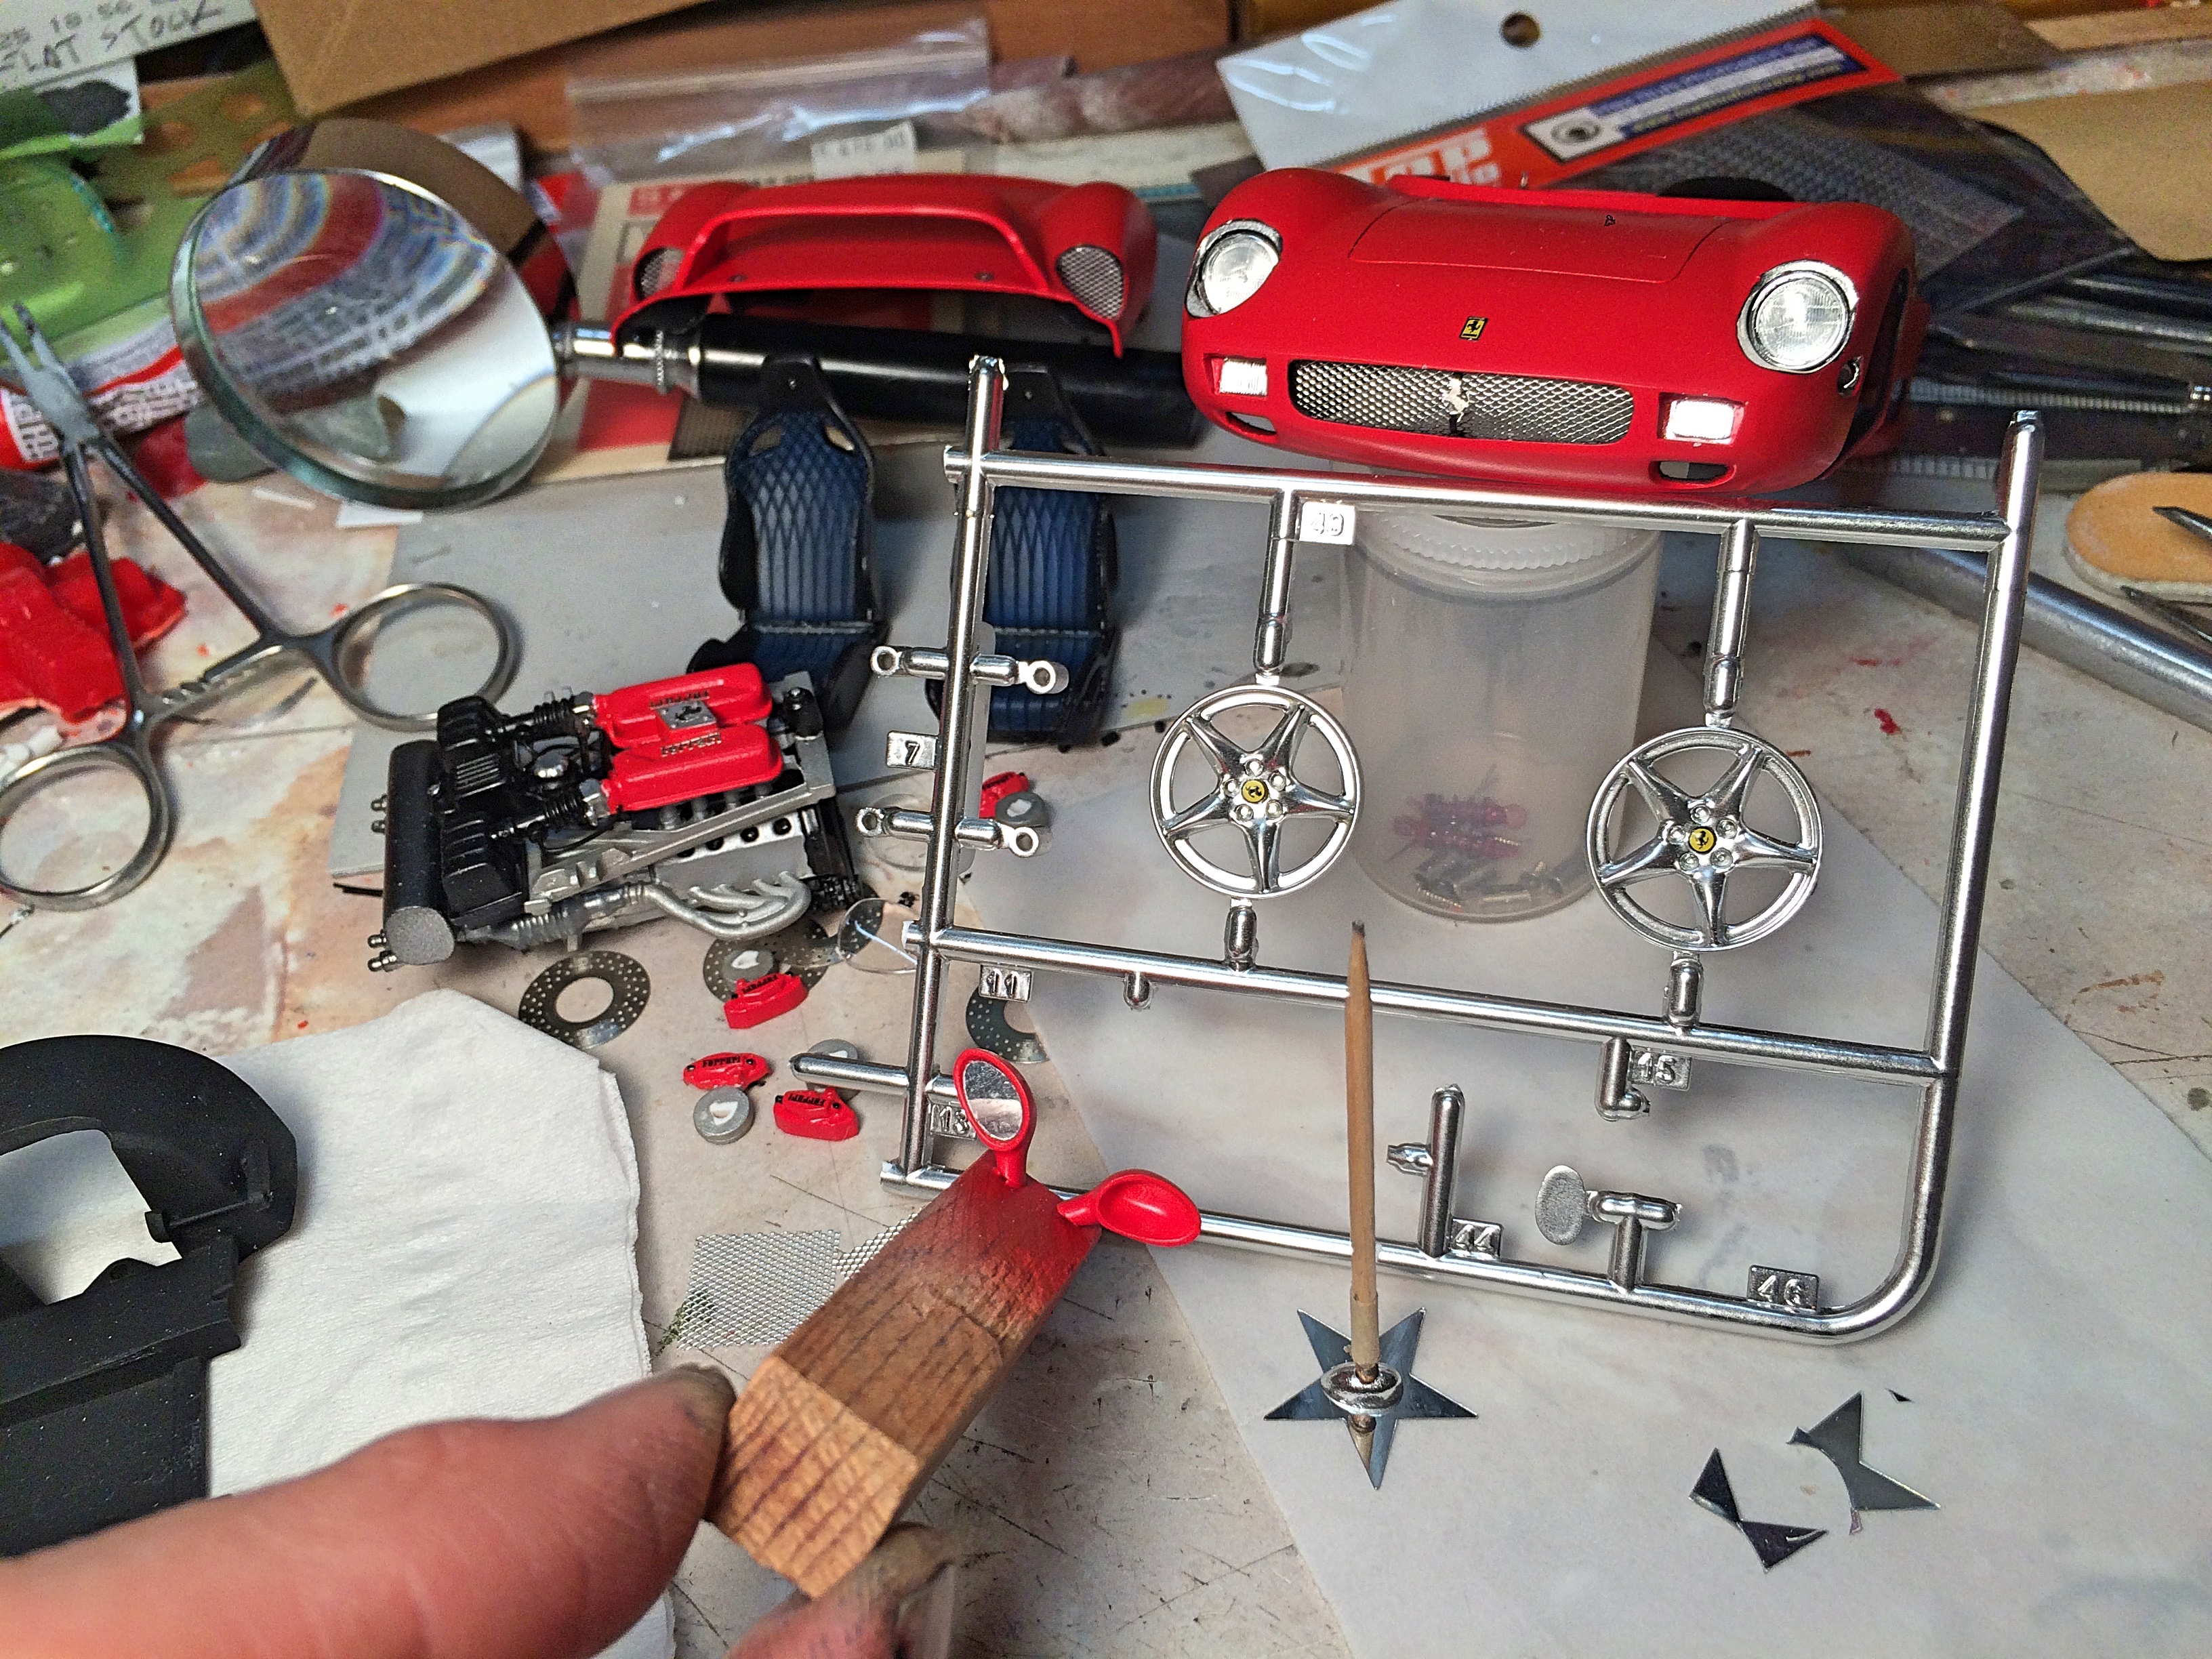
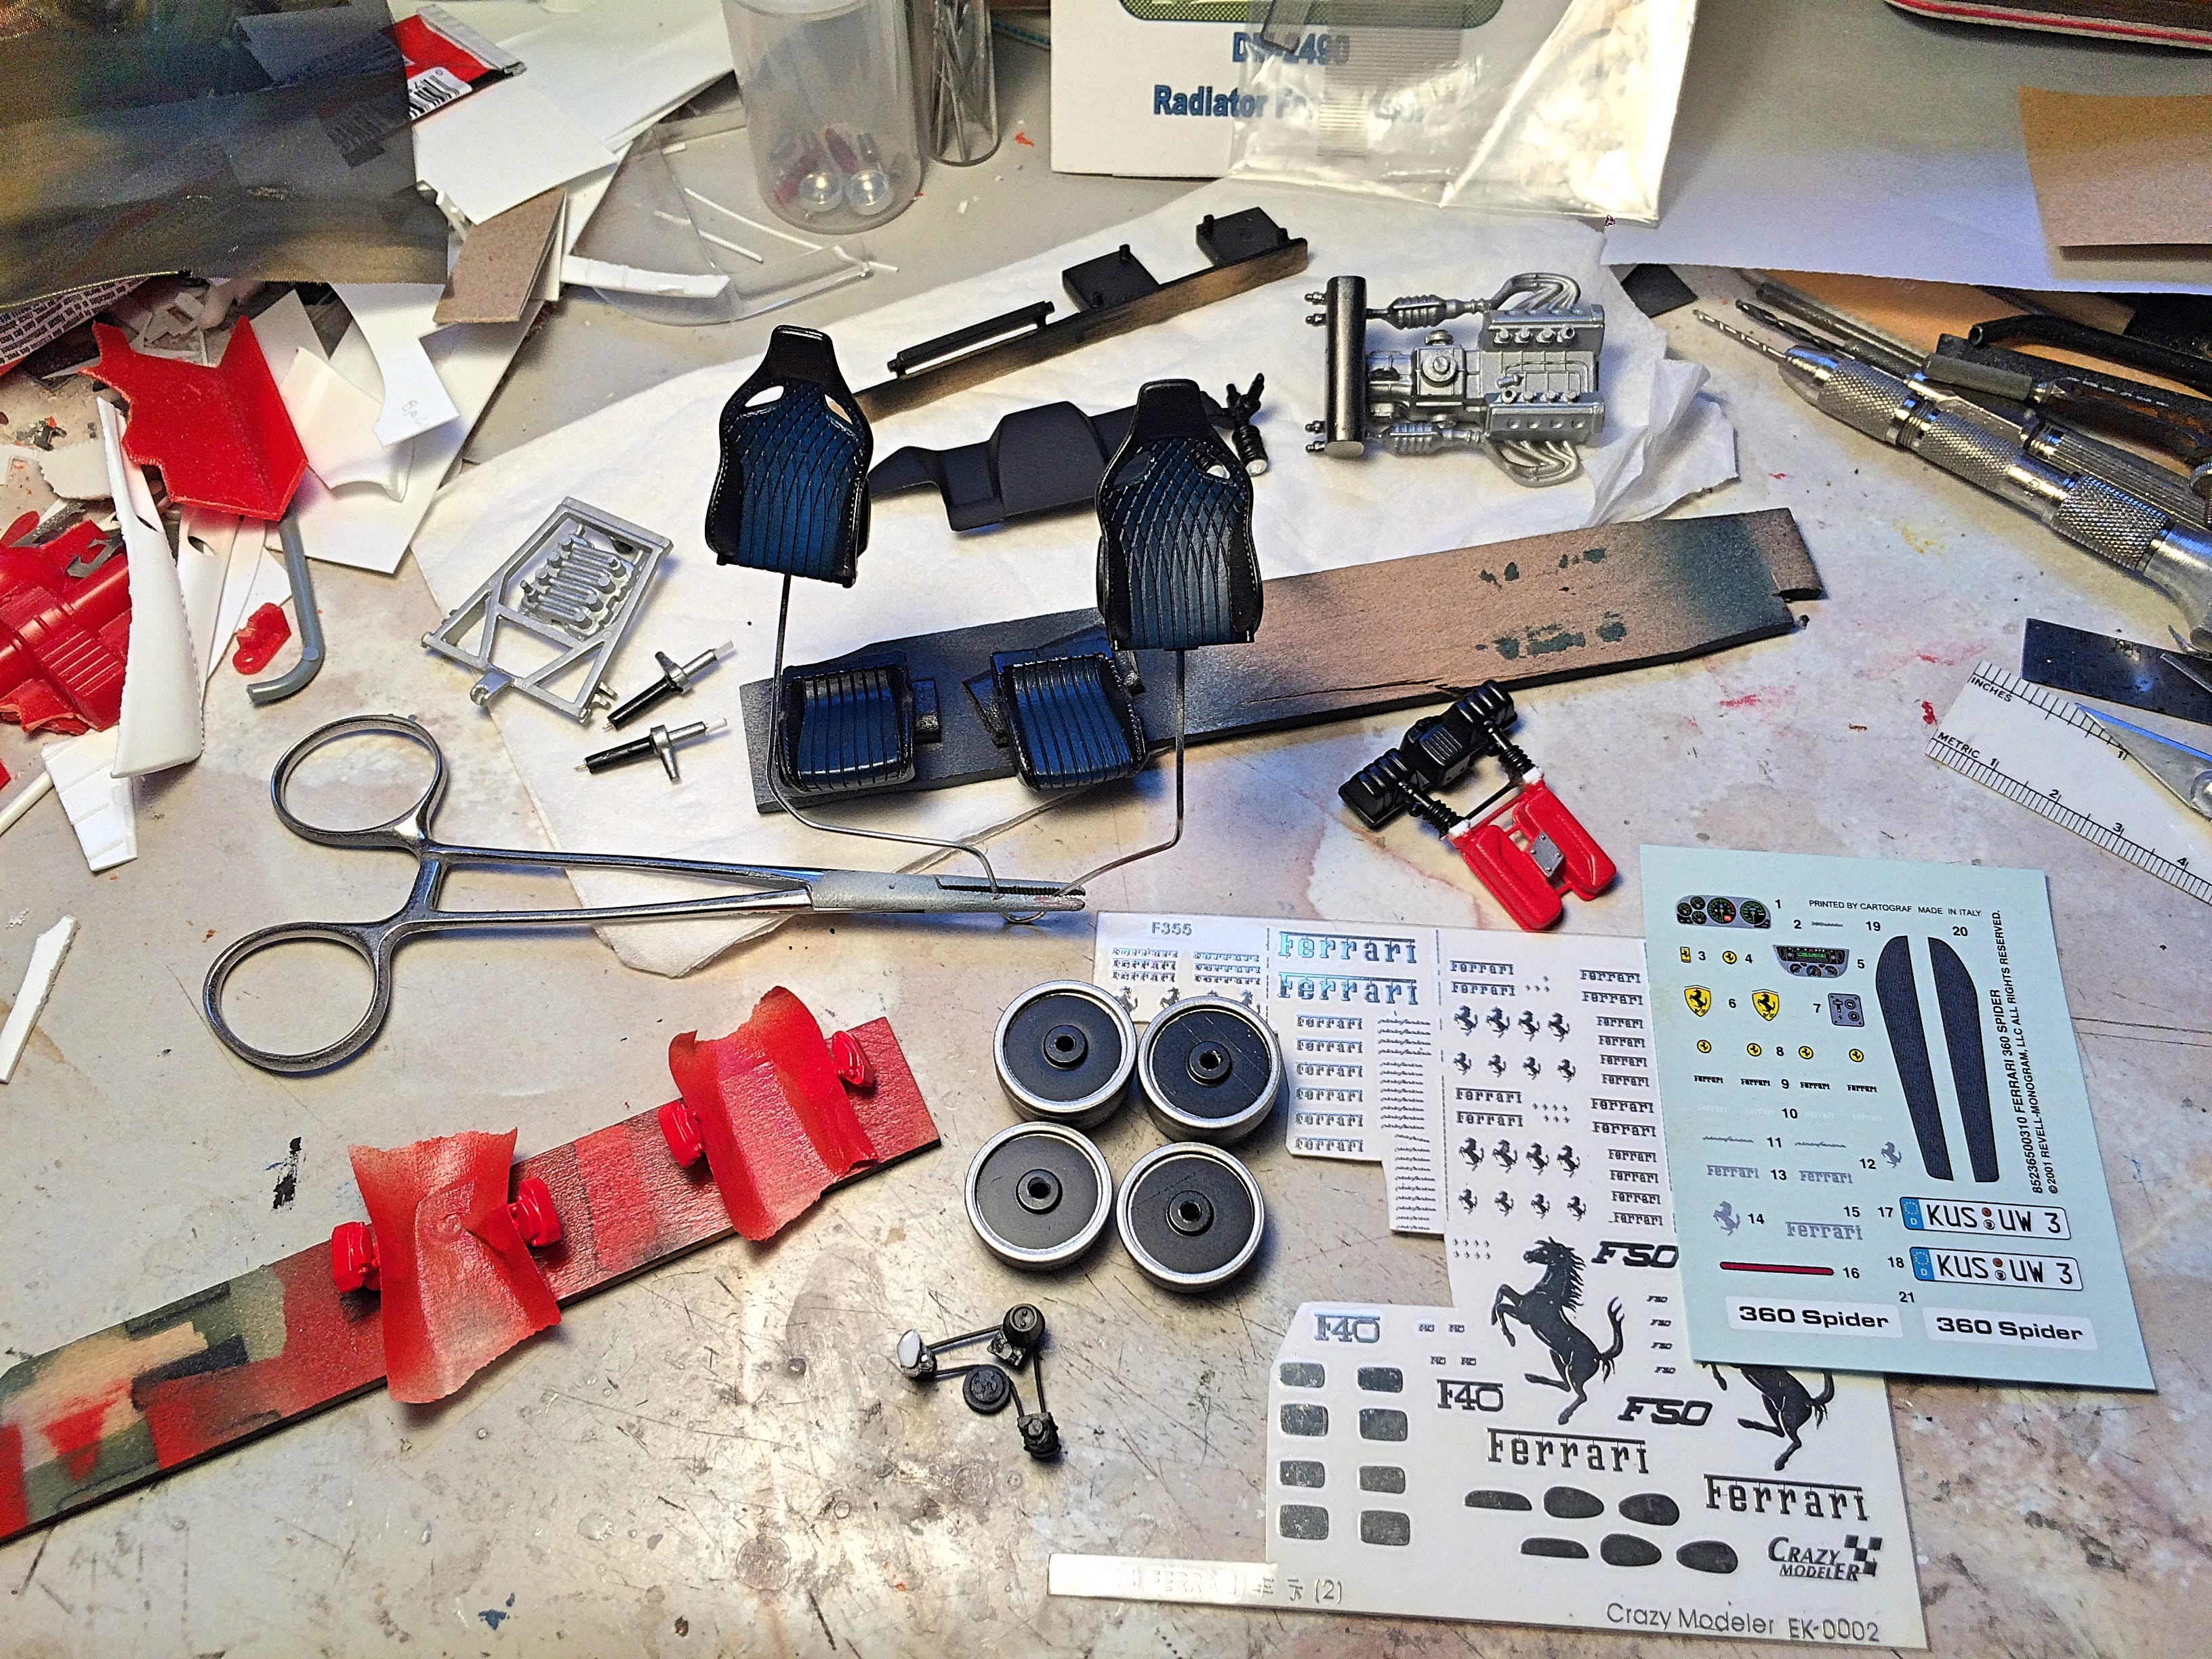
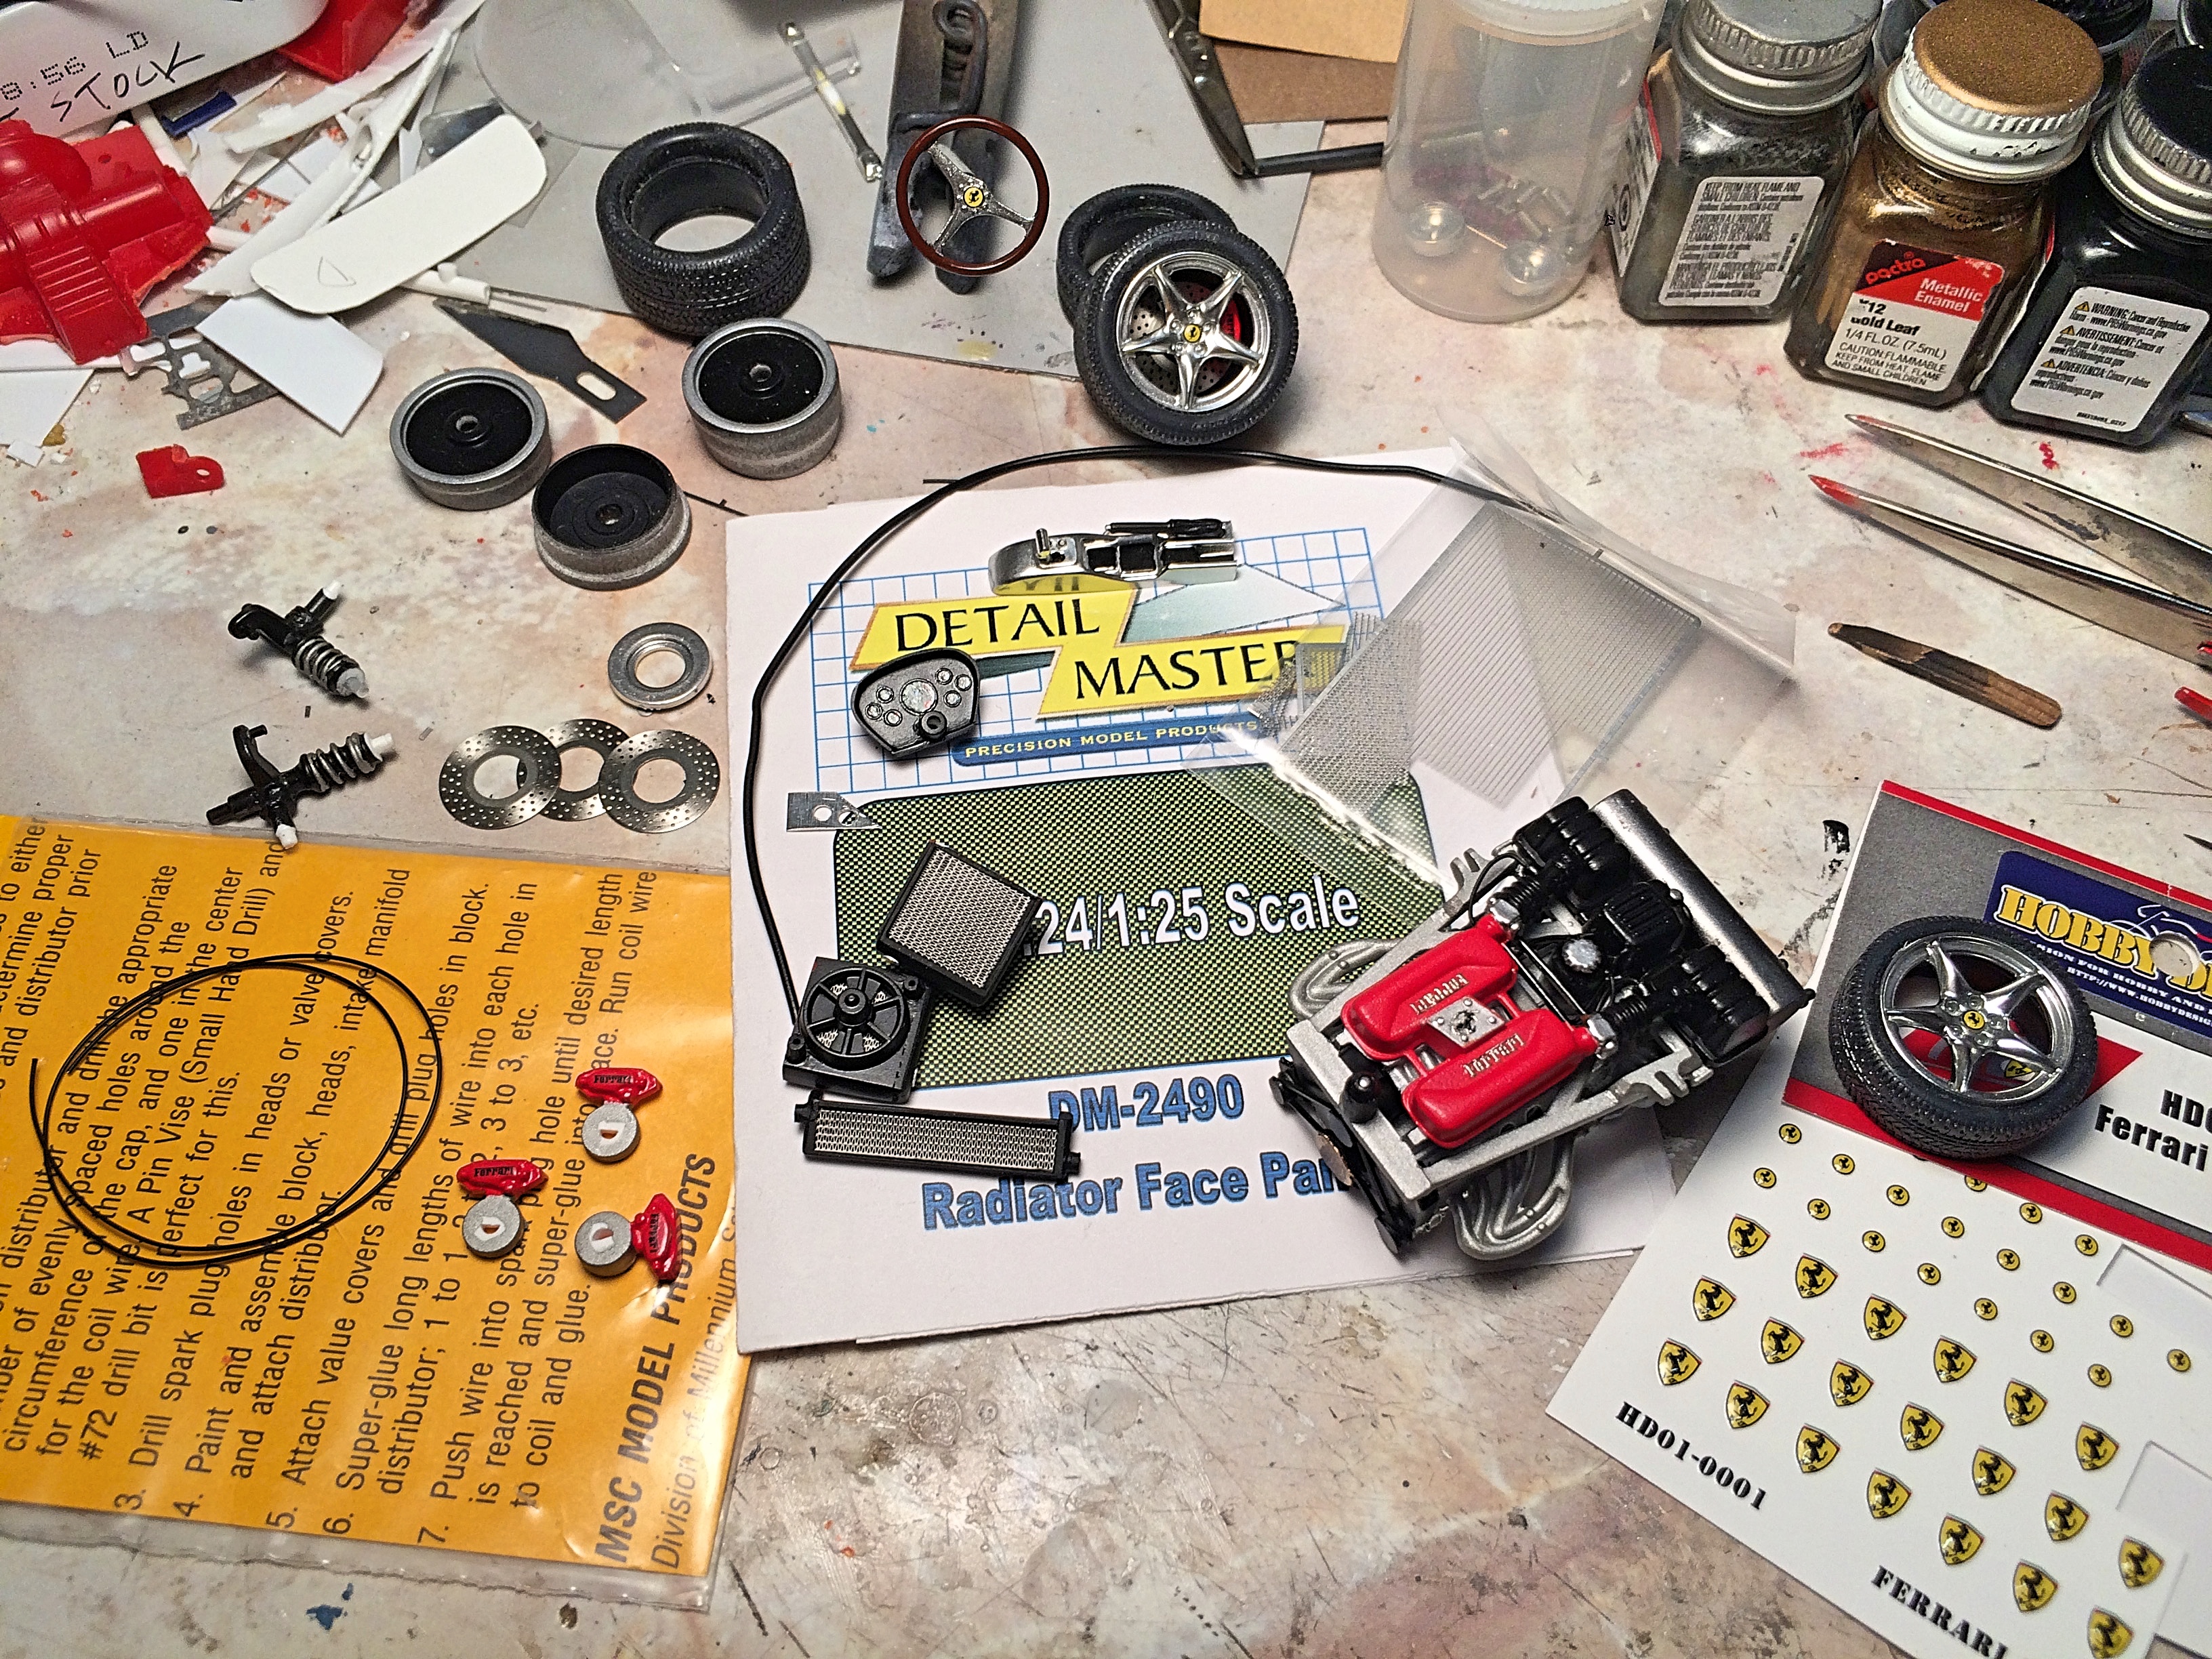
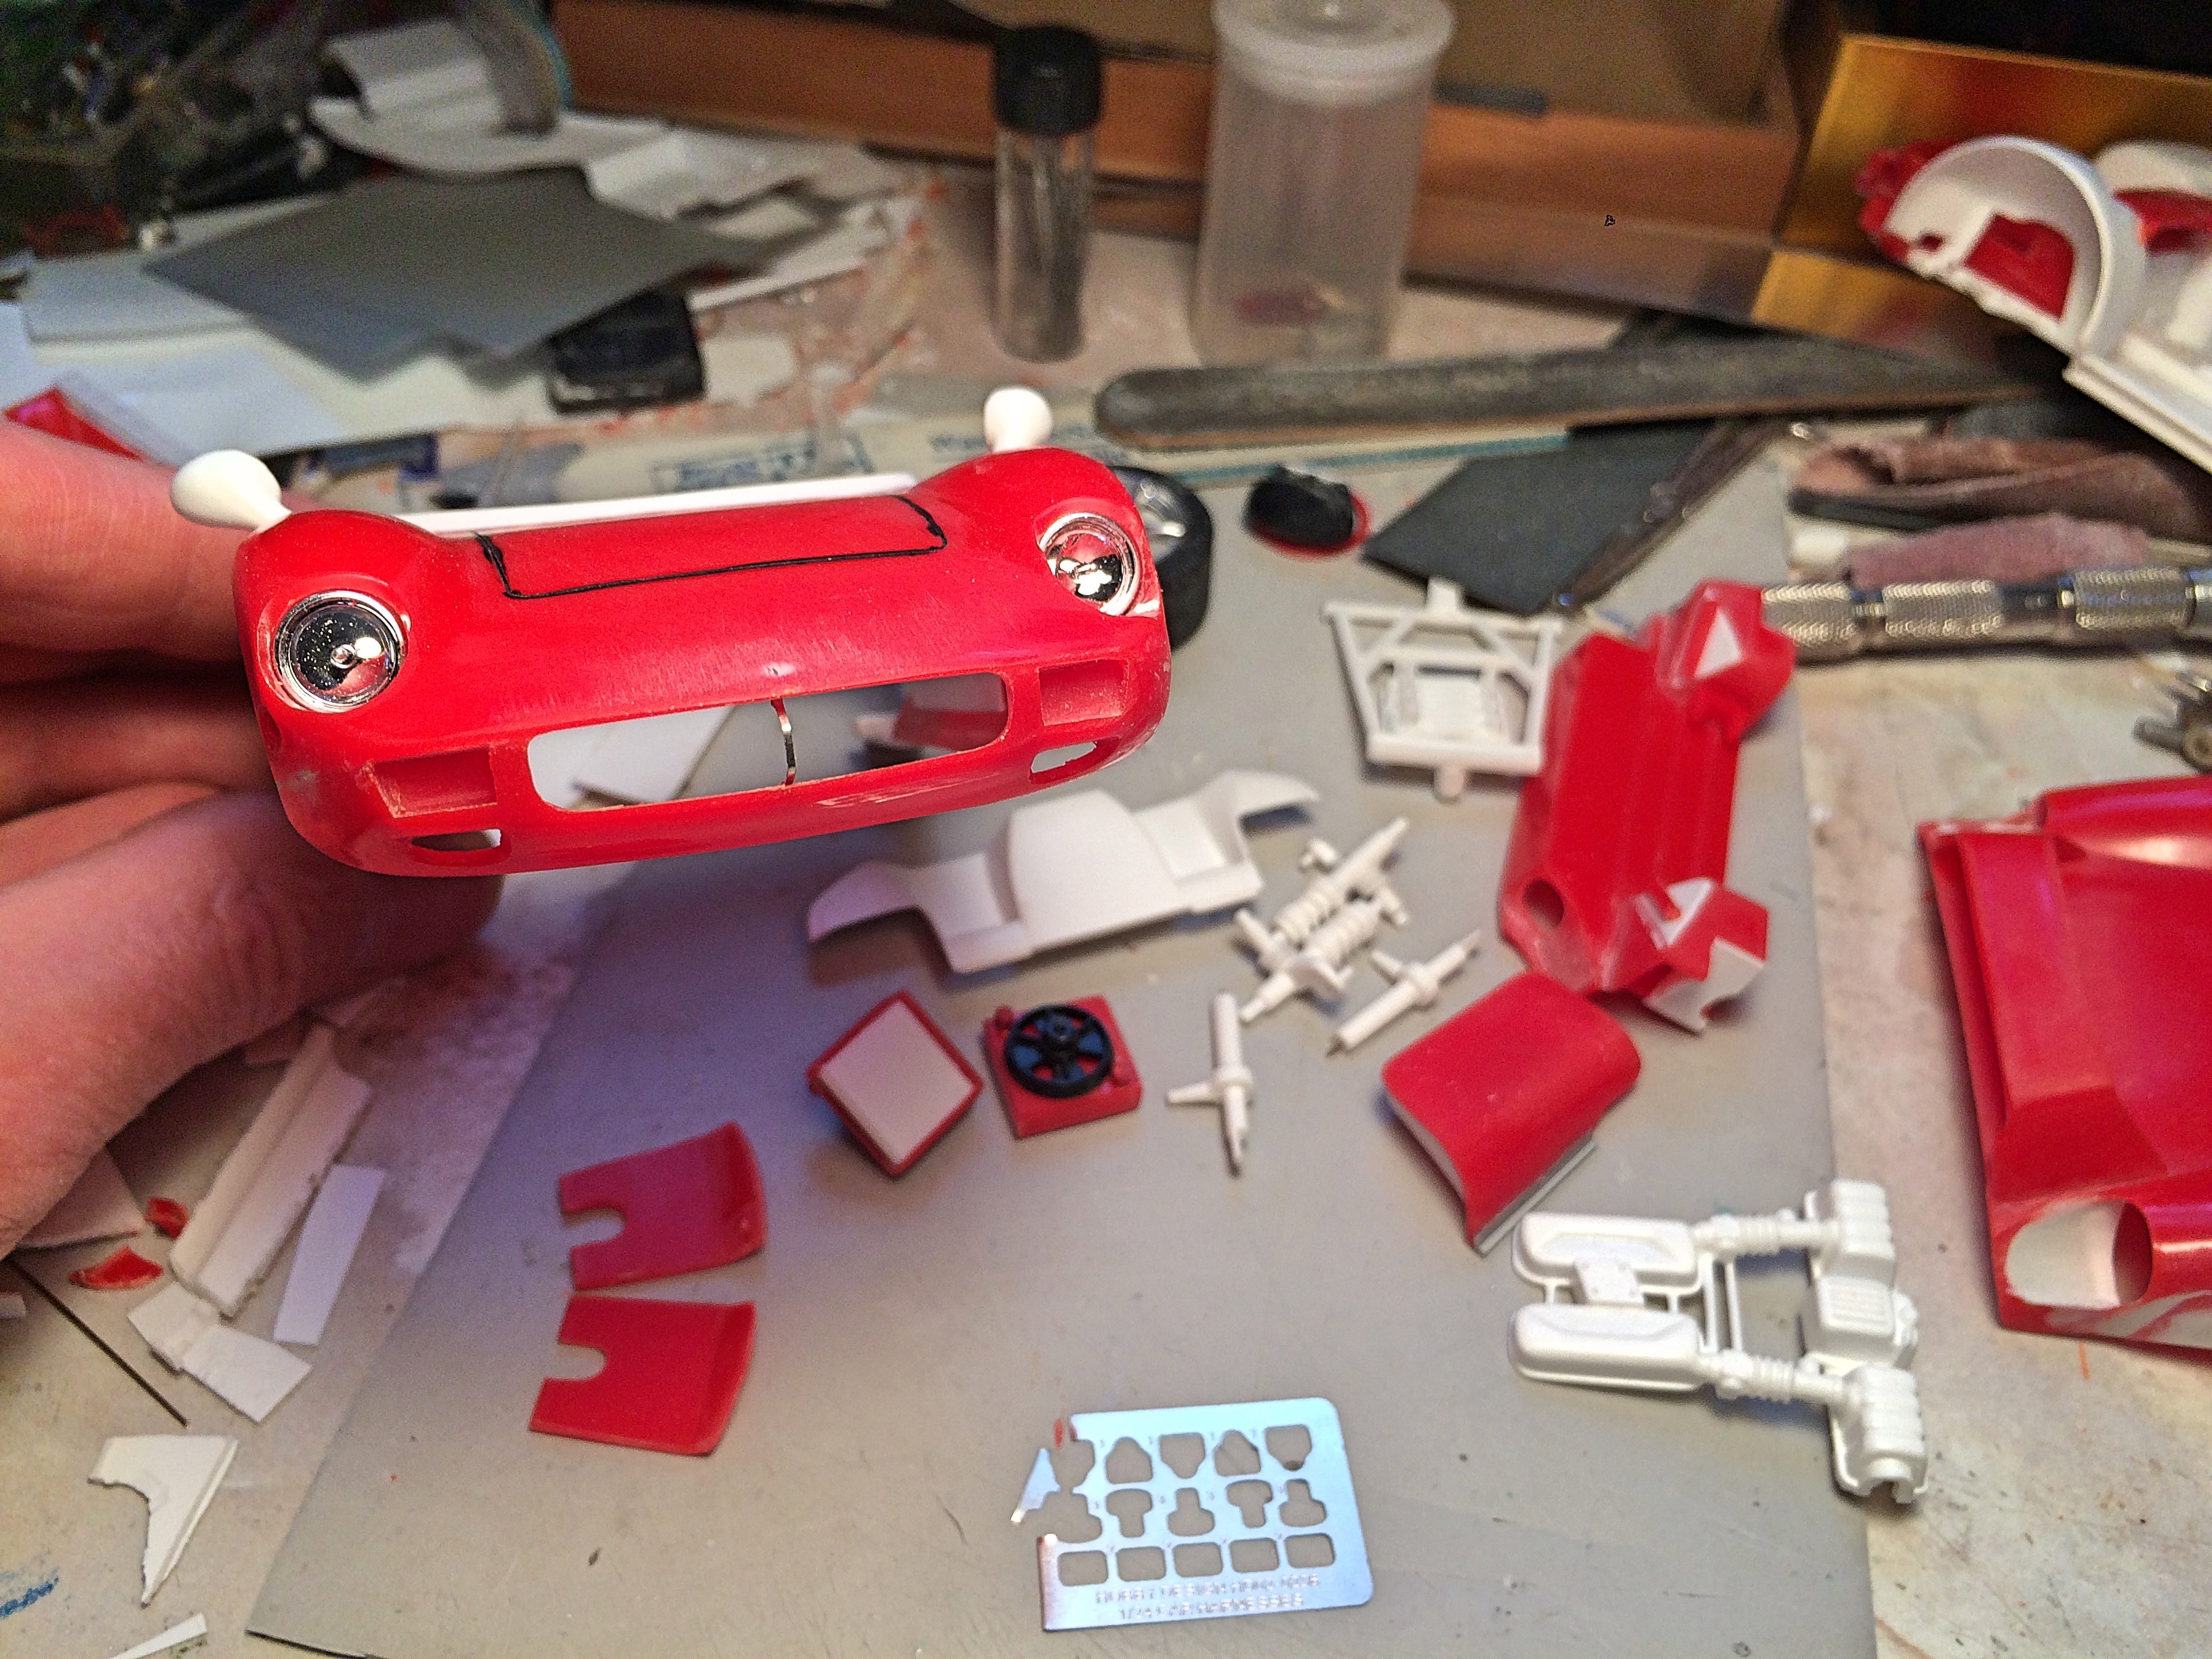
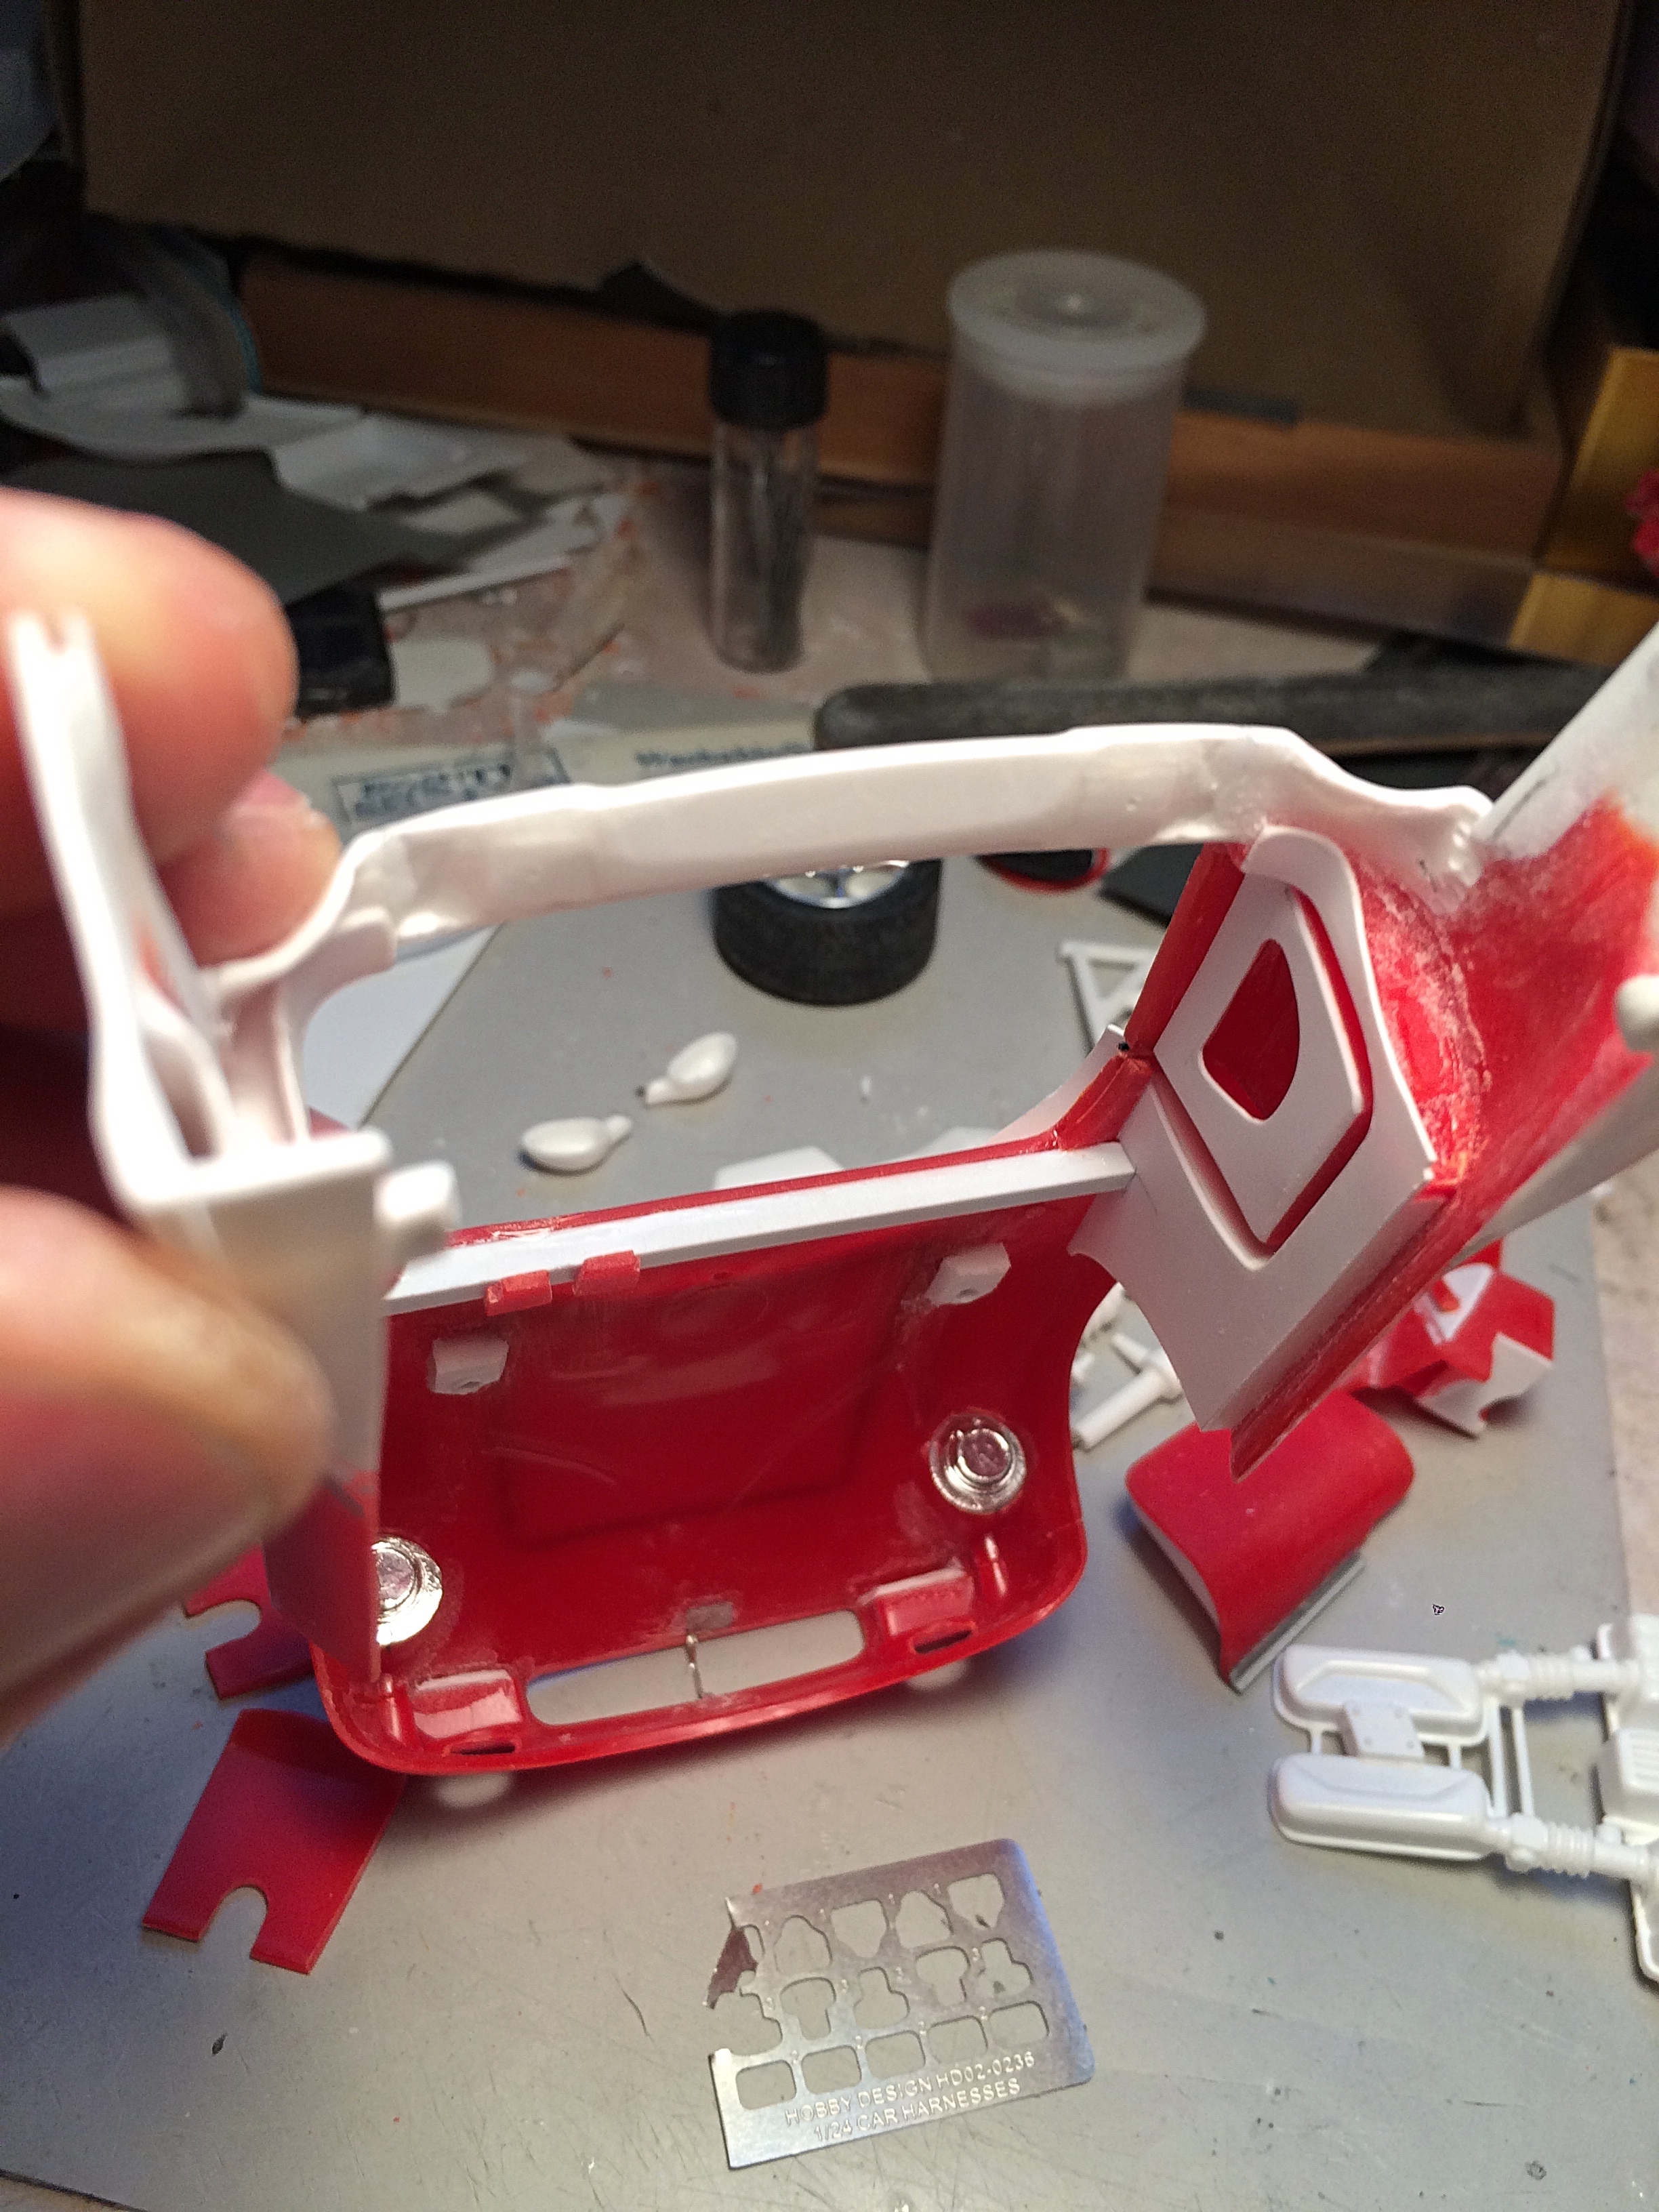
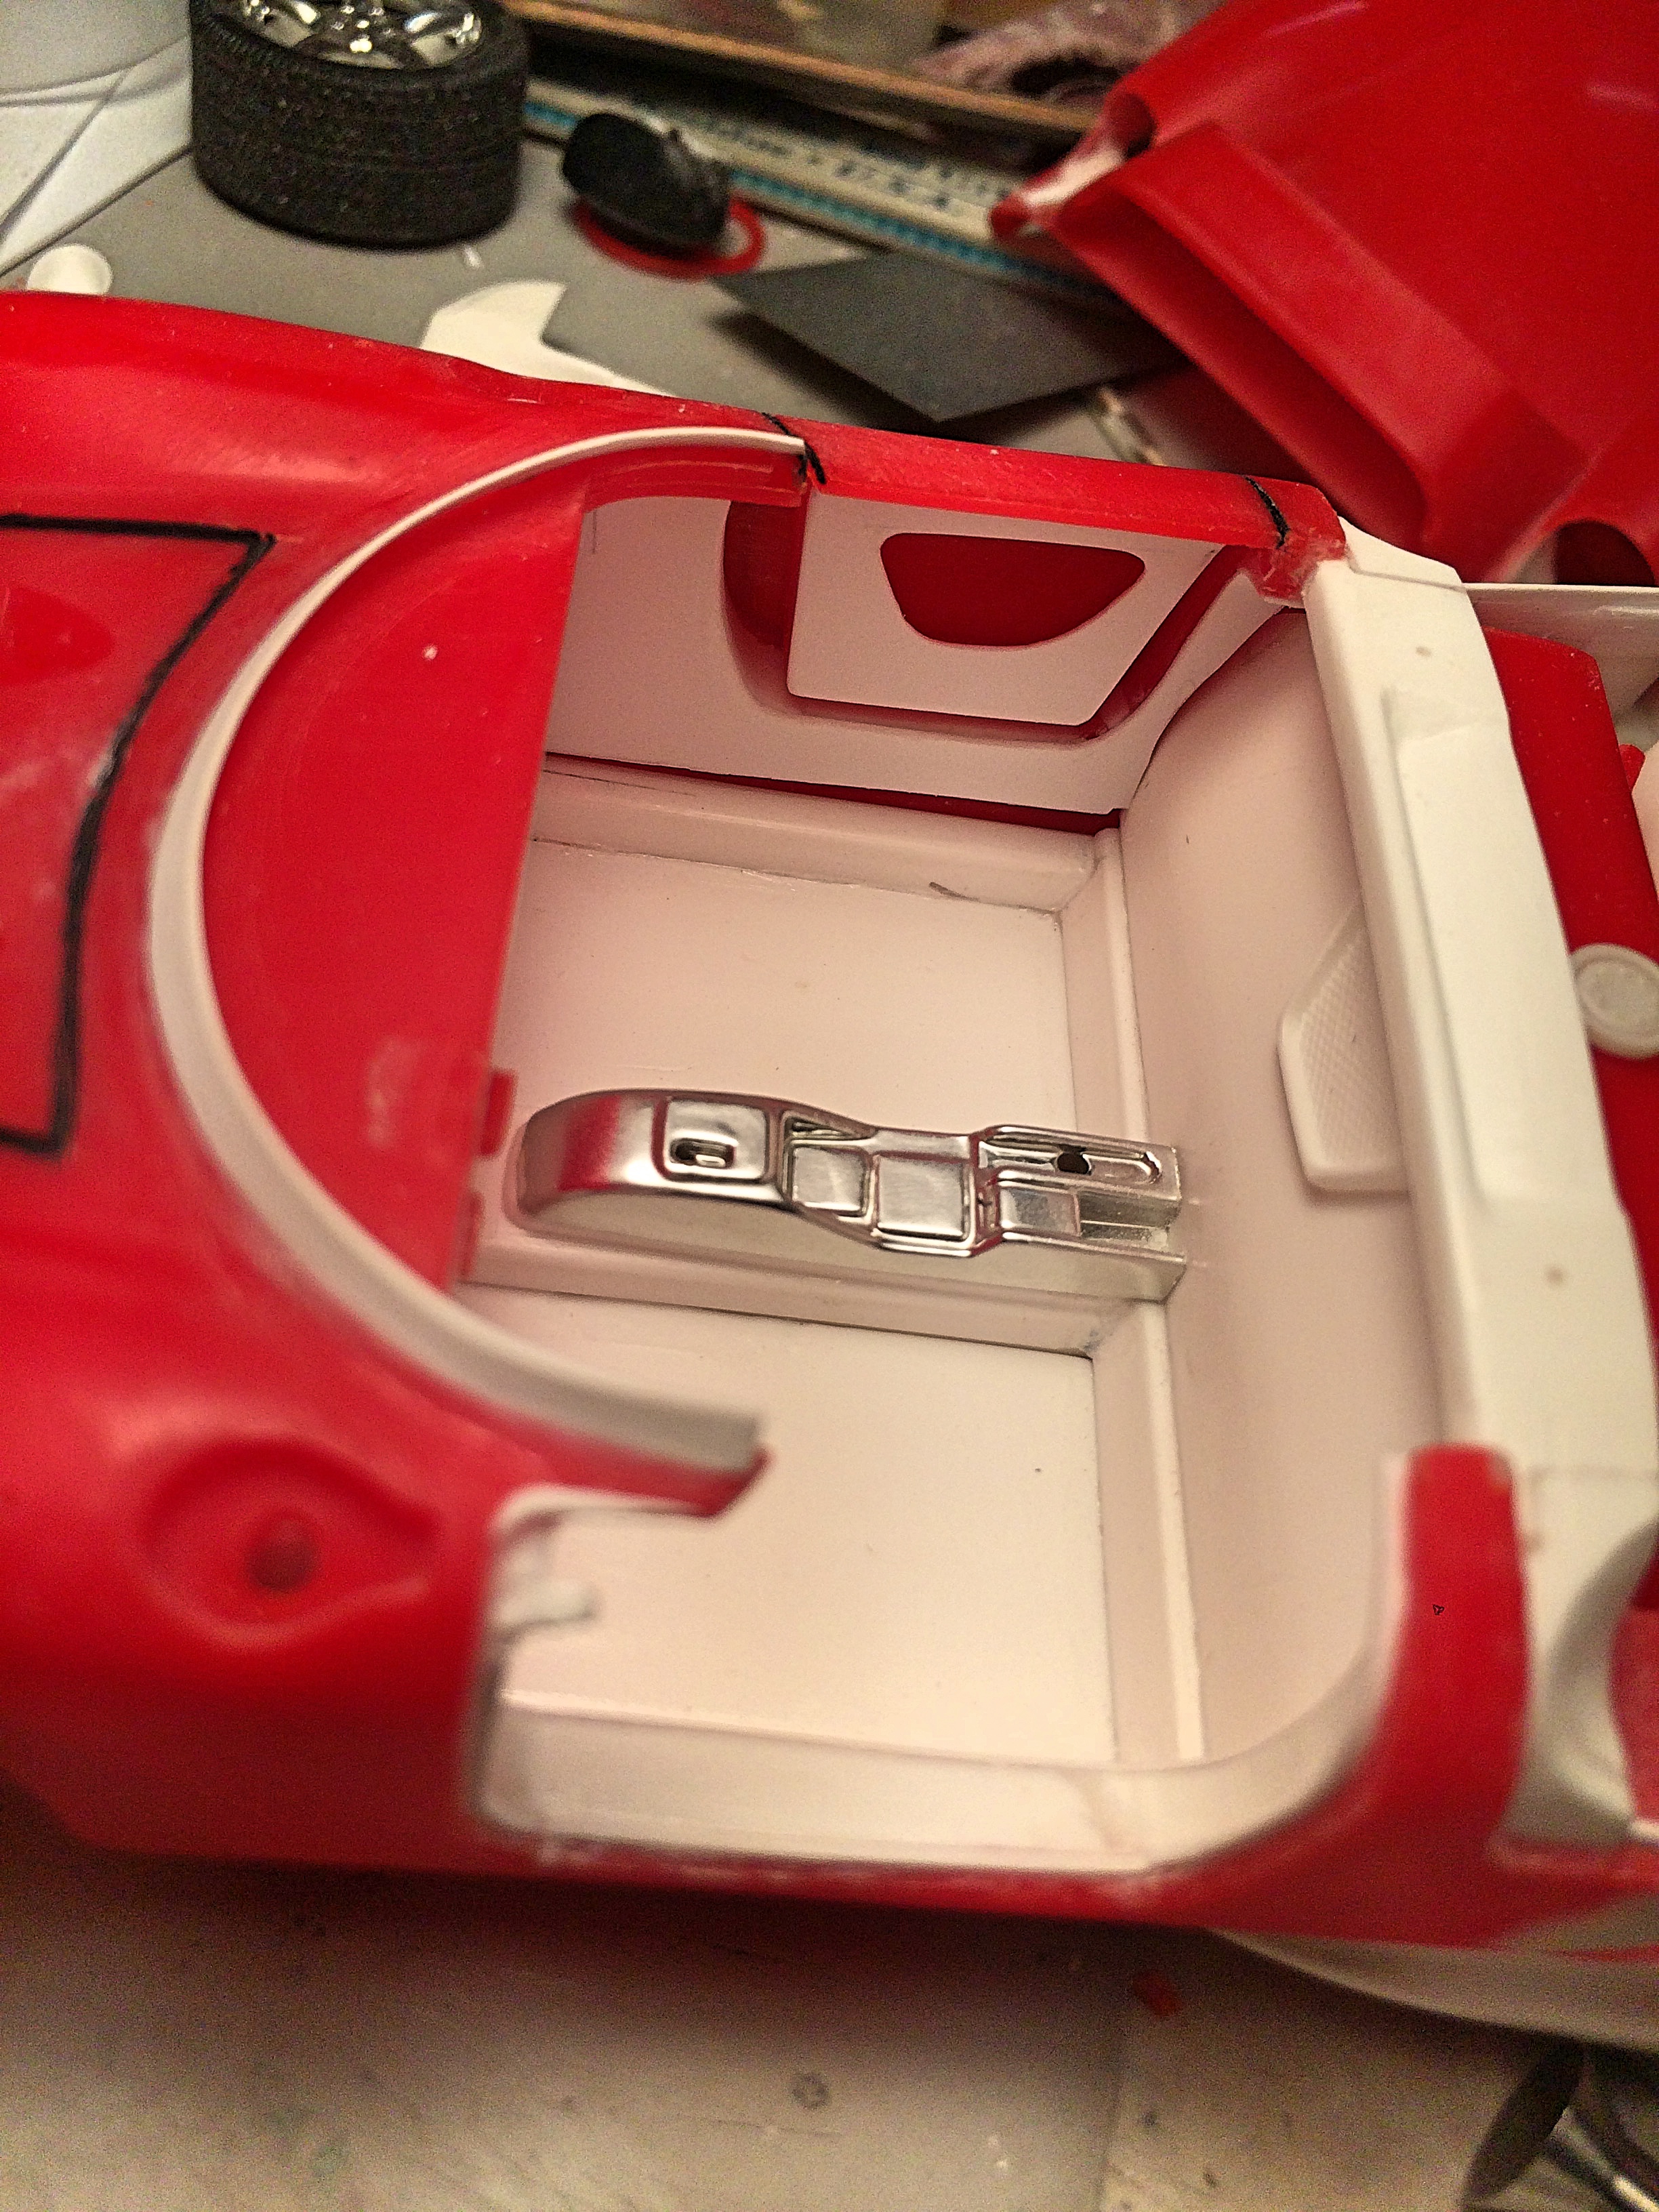
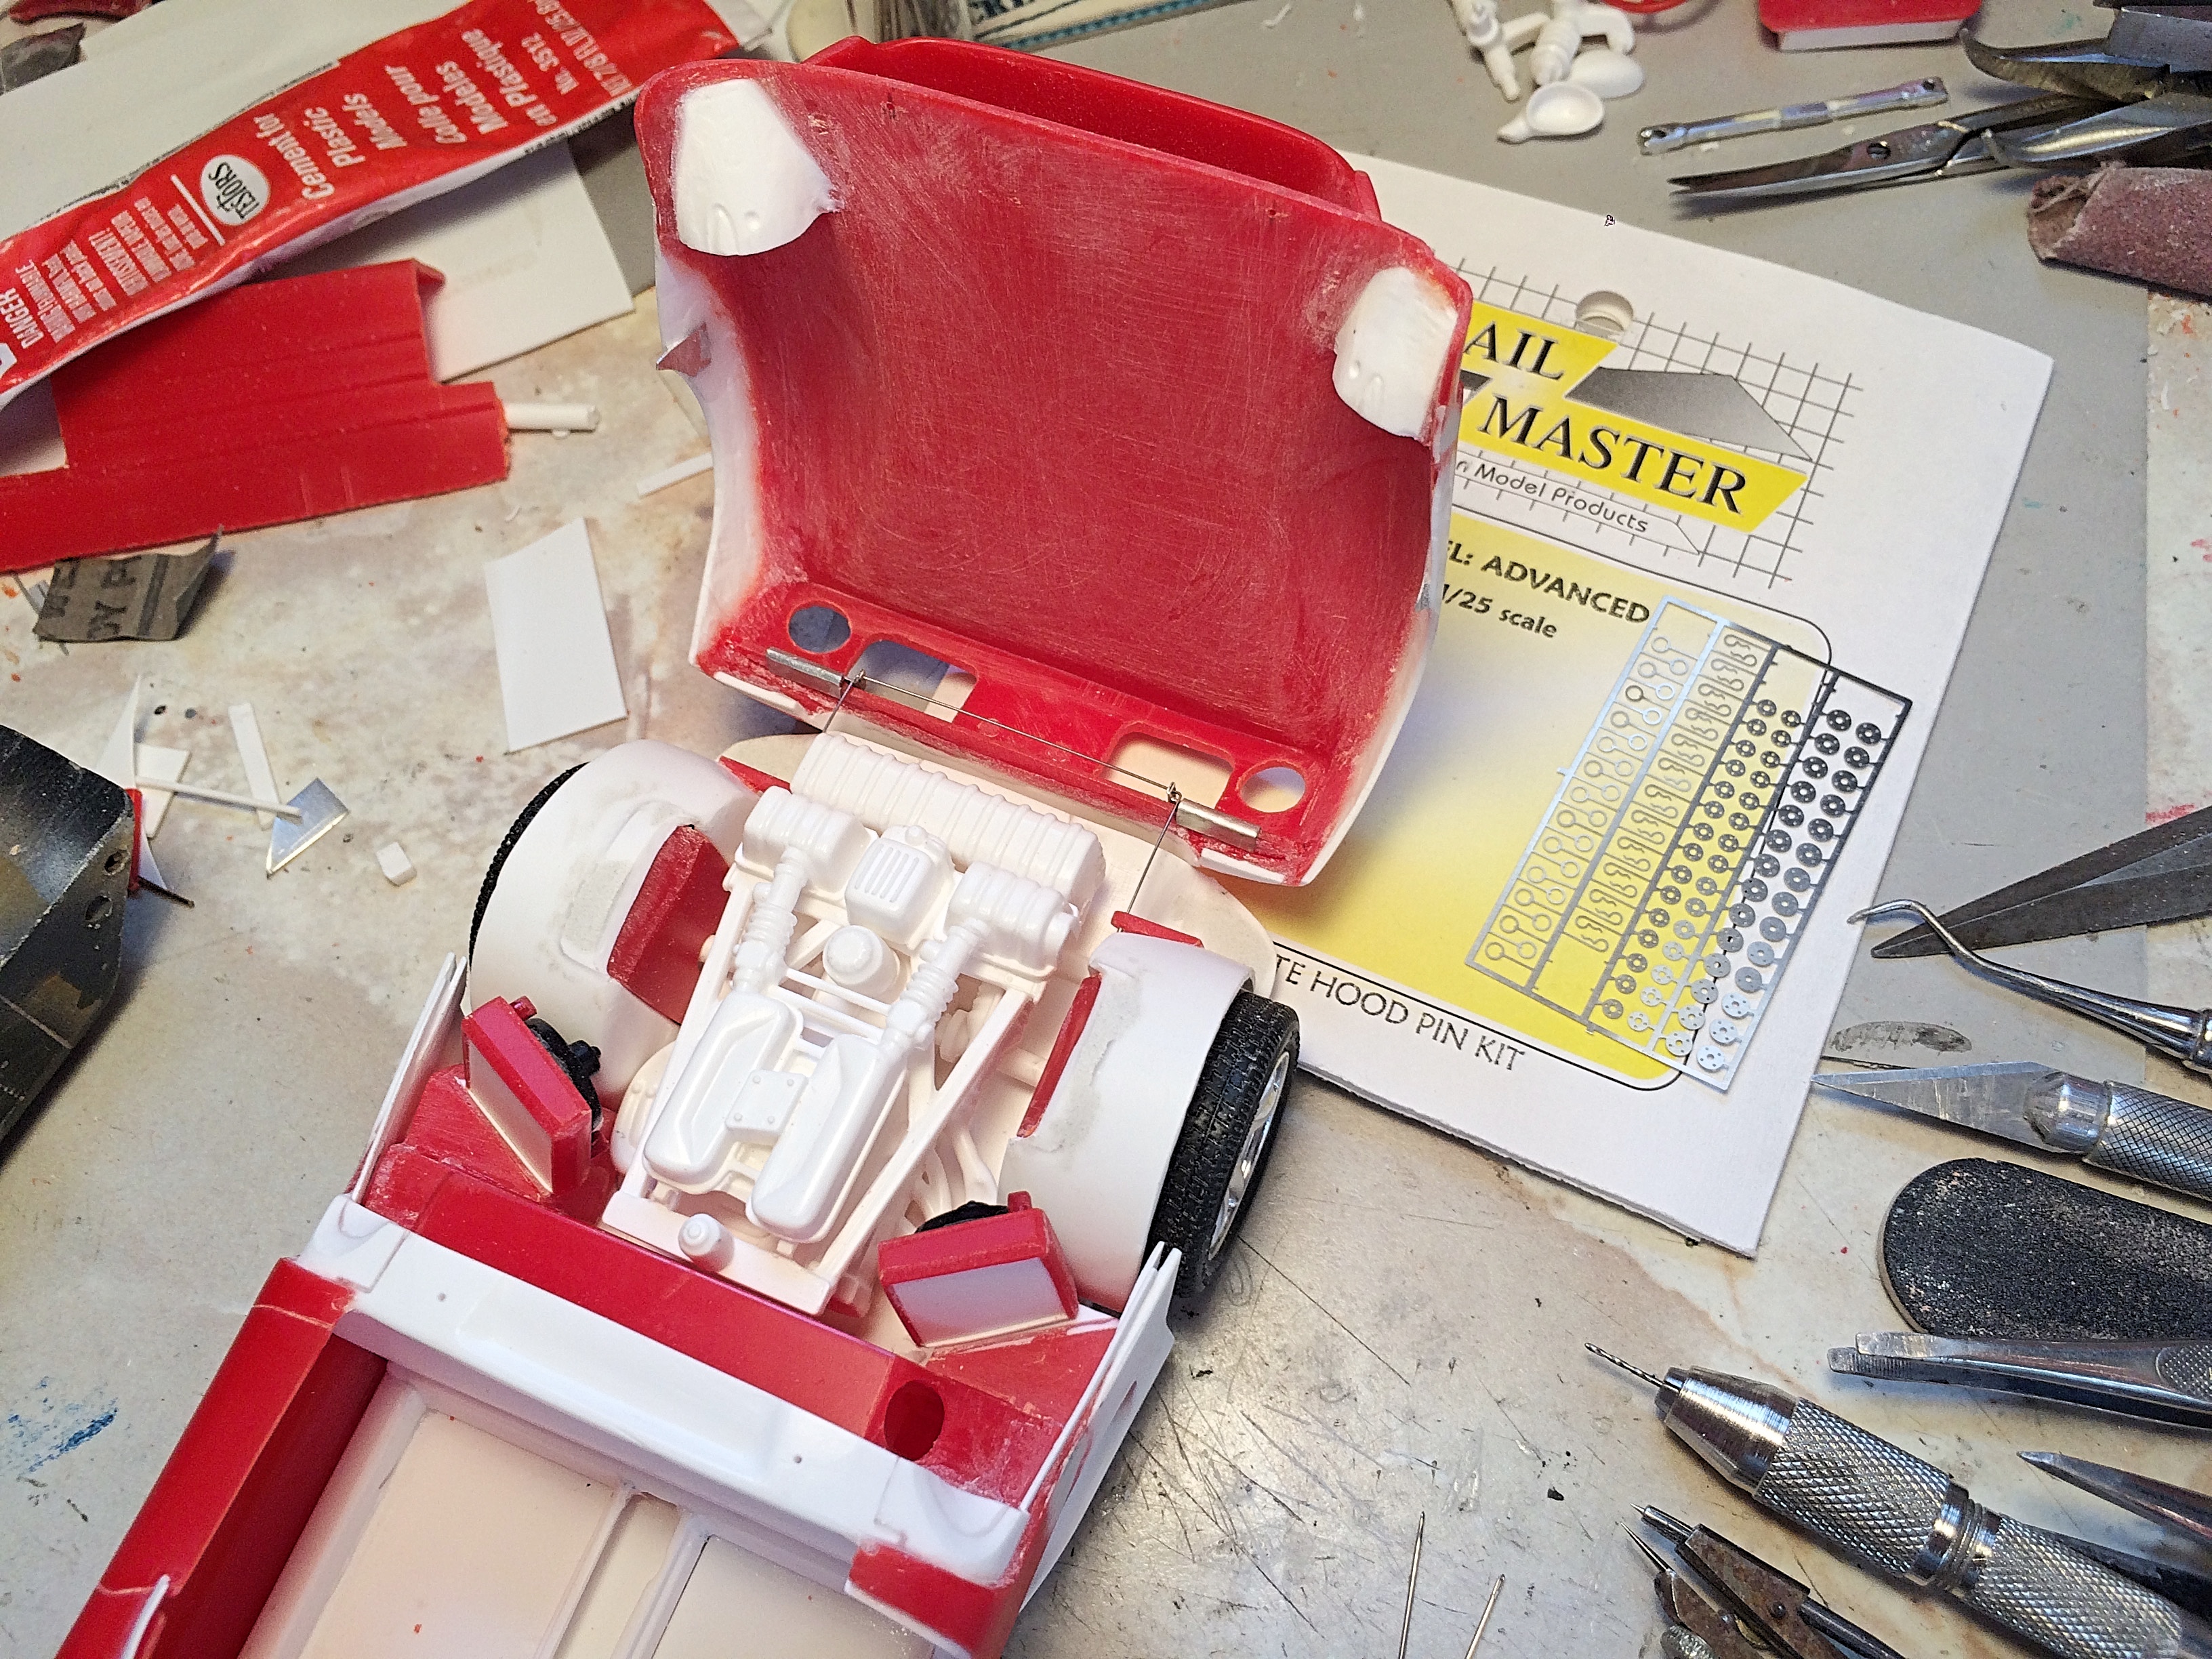
Hi there, thanks for stopping by, and thanks! I'm so proud of myself, that I started a new topic about the disk brakes. Doing all that for the paint would take a whole week. I have to leave by Noon tomarrow. Since I have to eat, posting progress while frozen pizza is baking. Last paint was doing inside the body flat black, and then the interior aluminum. Then I could start final assembly! Lots of masking, I'm lucky no paint peeled off with the masking tape. I had one tiny gap in the tape that got nailed, and some around the edges. I used Alclad matt aluminum at first, then changed to polished aluminum because I didn't like it that matt! Glad the work with the rivets shows up. Unmasked. Added Detail Master hood pins, used the traditional hairpin type. Had to work on the eye so it would go over the hood disk. Added a Pro Tech nut to each pin to help hold the wire on. Detail Master tuner pedals, on left-over photo-etch fret, so they move. (that's like really important ) Made the little lights using the clear sprue, the cordless drill, started the shaping by also using the Dremel, then sandpaper and my shorts to polish. Light lenses are barchetta aftermarket from Japan, looks like Cibie. The rectangle lights have chrome mylar reflectors. Glued on with clear Elmers. The taillights are Farmers Insurance red reflective, over AAA chrome mylar, stuck on baking soda can foil (it was in that mess pile), painted inside with Testors acrylic clear red, but left unpainted in the center where I punched the FI sticker. Cigarette package foil for hood insulation. Model Factory Hiro carpet. I hate the kit mirrors, most of the time I detail anyway, but these are bad! I competed with a little girl to gather up these party favor stars, wish someone would sell sheets of this mirrored plastic. Used the kit mirror for a pattern, glued in with a couple globs of Water Effects to glue. Added Replicas & Miniatures of MD aluminum screen in all the openings. Crazy Modelers chrome emblems, Hobby Design 3D emblems added. Put the body and chassis together for the last time! It's going to be a long night. Have radiator hoses, seatbelts, wheels/brakes to glue on. Looks like the headlights covers will work with some beveling. I should be able to polish the kit windshield, use sheet plastic for door windows. Engine bay details, hope I can make the exhaust work without futzing too much.
-
destroying an outhouse
-
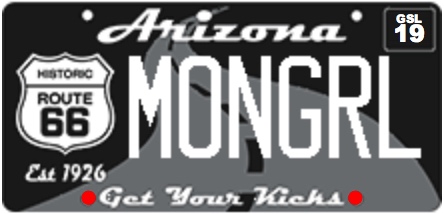
This isn't a democracy here, I'm benevolent dictator, and I will allow you to live. I would not have been able to progress as quickly, having to polish, and avoid fingerprints. I'm up early this morning, in total obsession possessed mode. Came up with a name, MONGREL: Definition of mongrel 1: an individual resulting from the interbreeding of diverse breeds (see BREEDentry 2 sense 1) or strains (see STRAIN entry 1 sense 1)especially : one of unknown ancestry She owns several dogs, one of which is a mongrel. 2: a cross between types of persons or things the cinema is … a mongrel of virtually all the other arts I Needed a license plate, used the AZ Motor Vehicle Division website to almost order it, nobody happens to have this. LOL Modified using the Fotor app.
-

Dodge L-700 V12
89AKurt replied to Sportabout's topic in WIP: Model Trucks: Big Rigs and Heavy Equipment
I'm checking out your carb setup, and how you take off the power to the transmission. Did you use any online pictures for reference? -
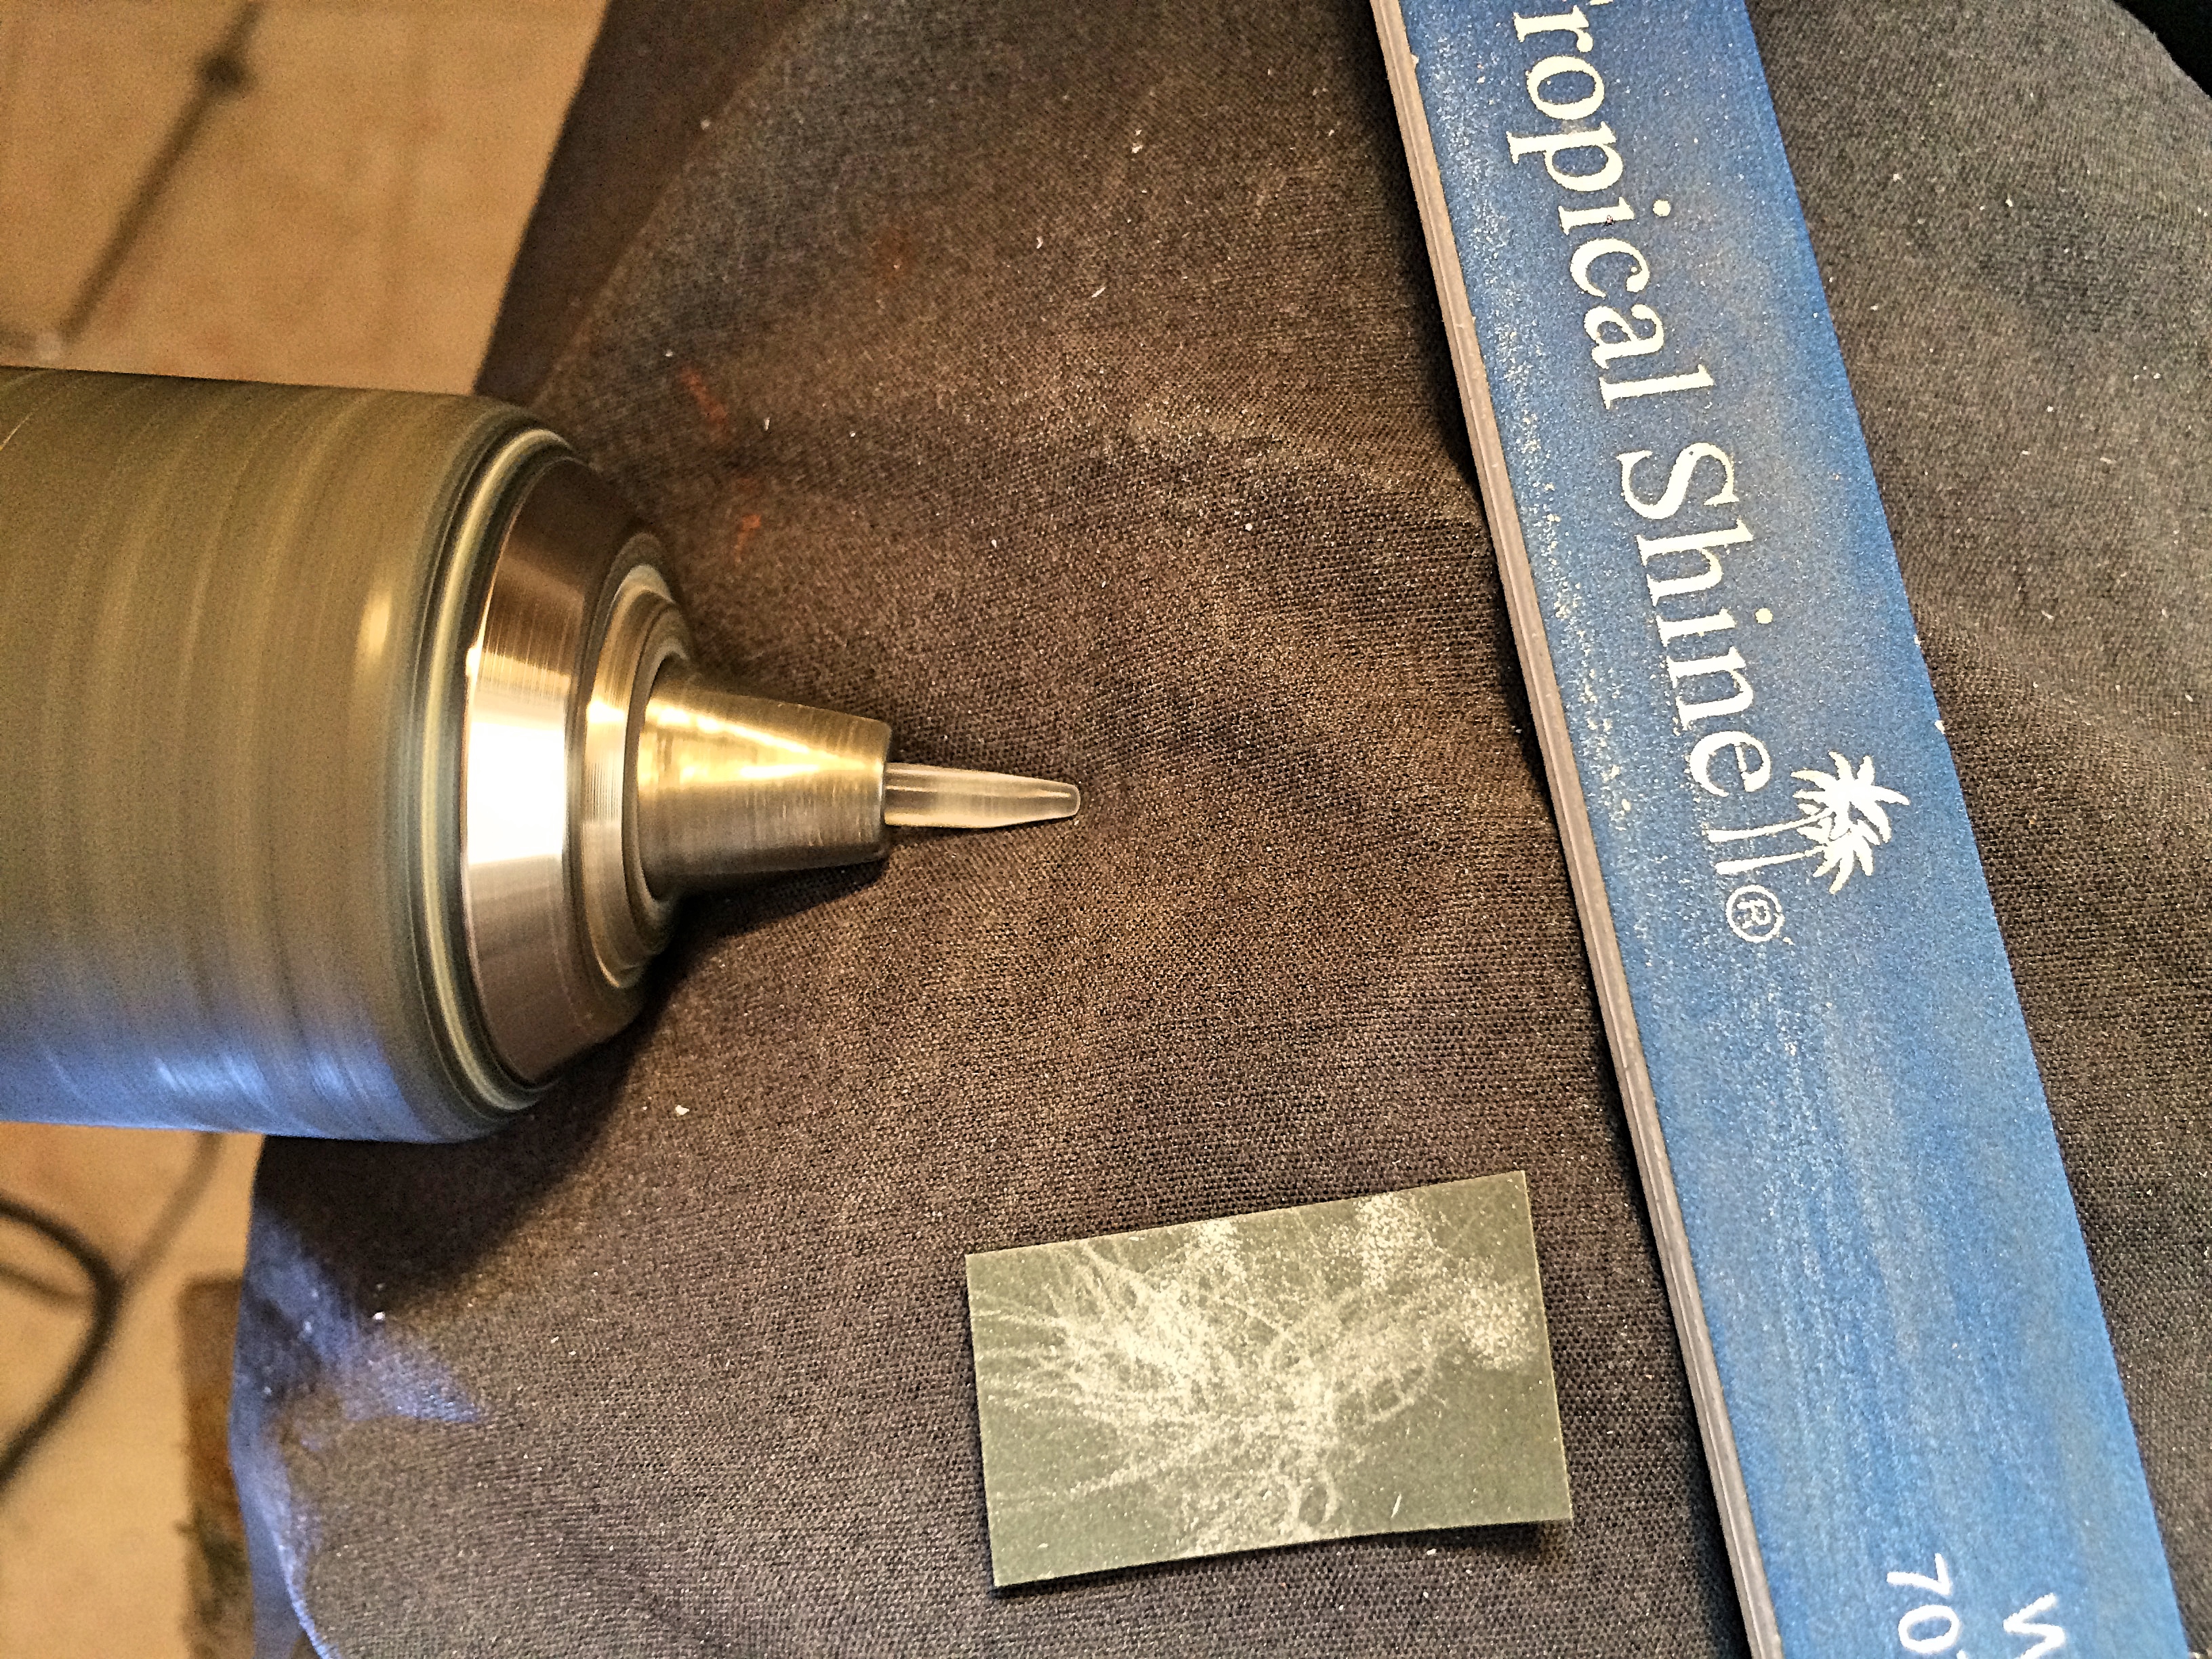
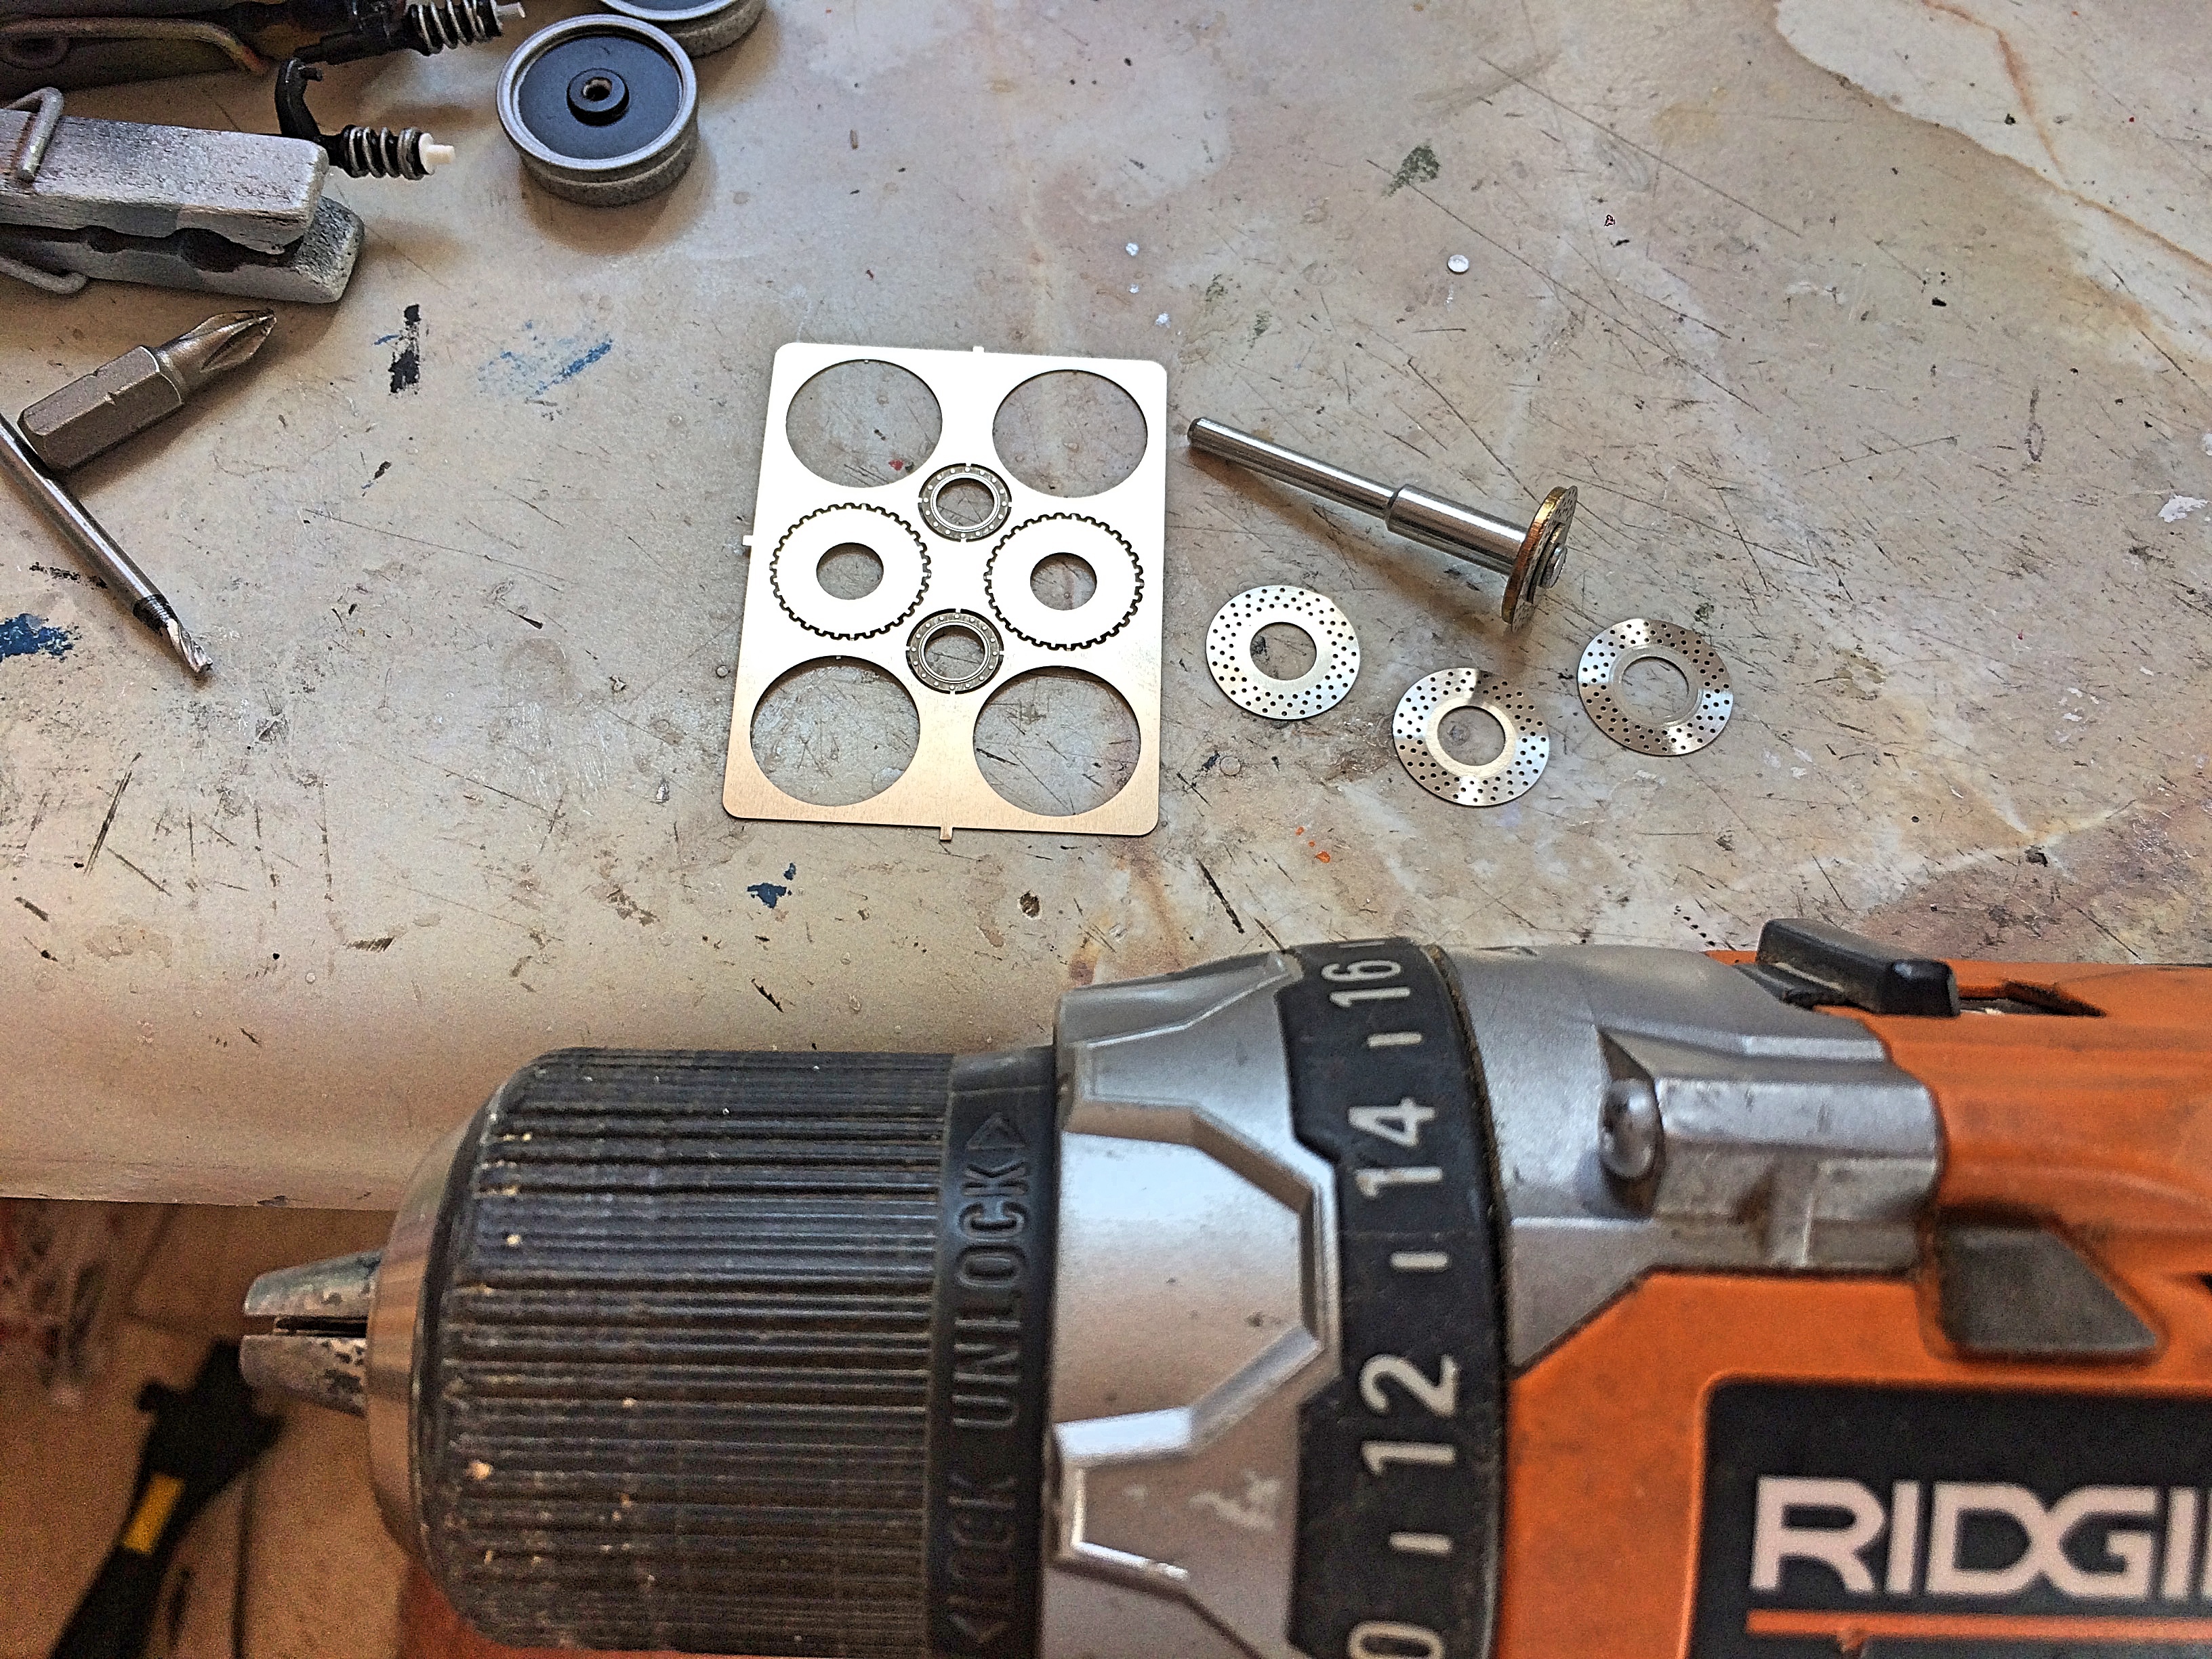
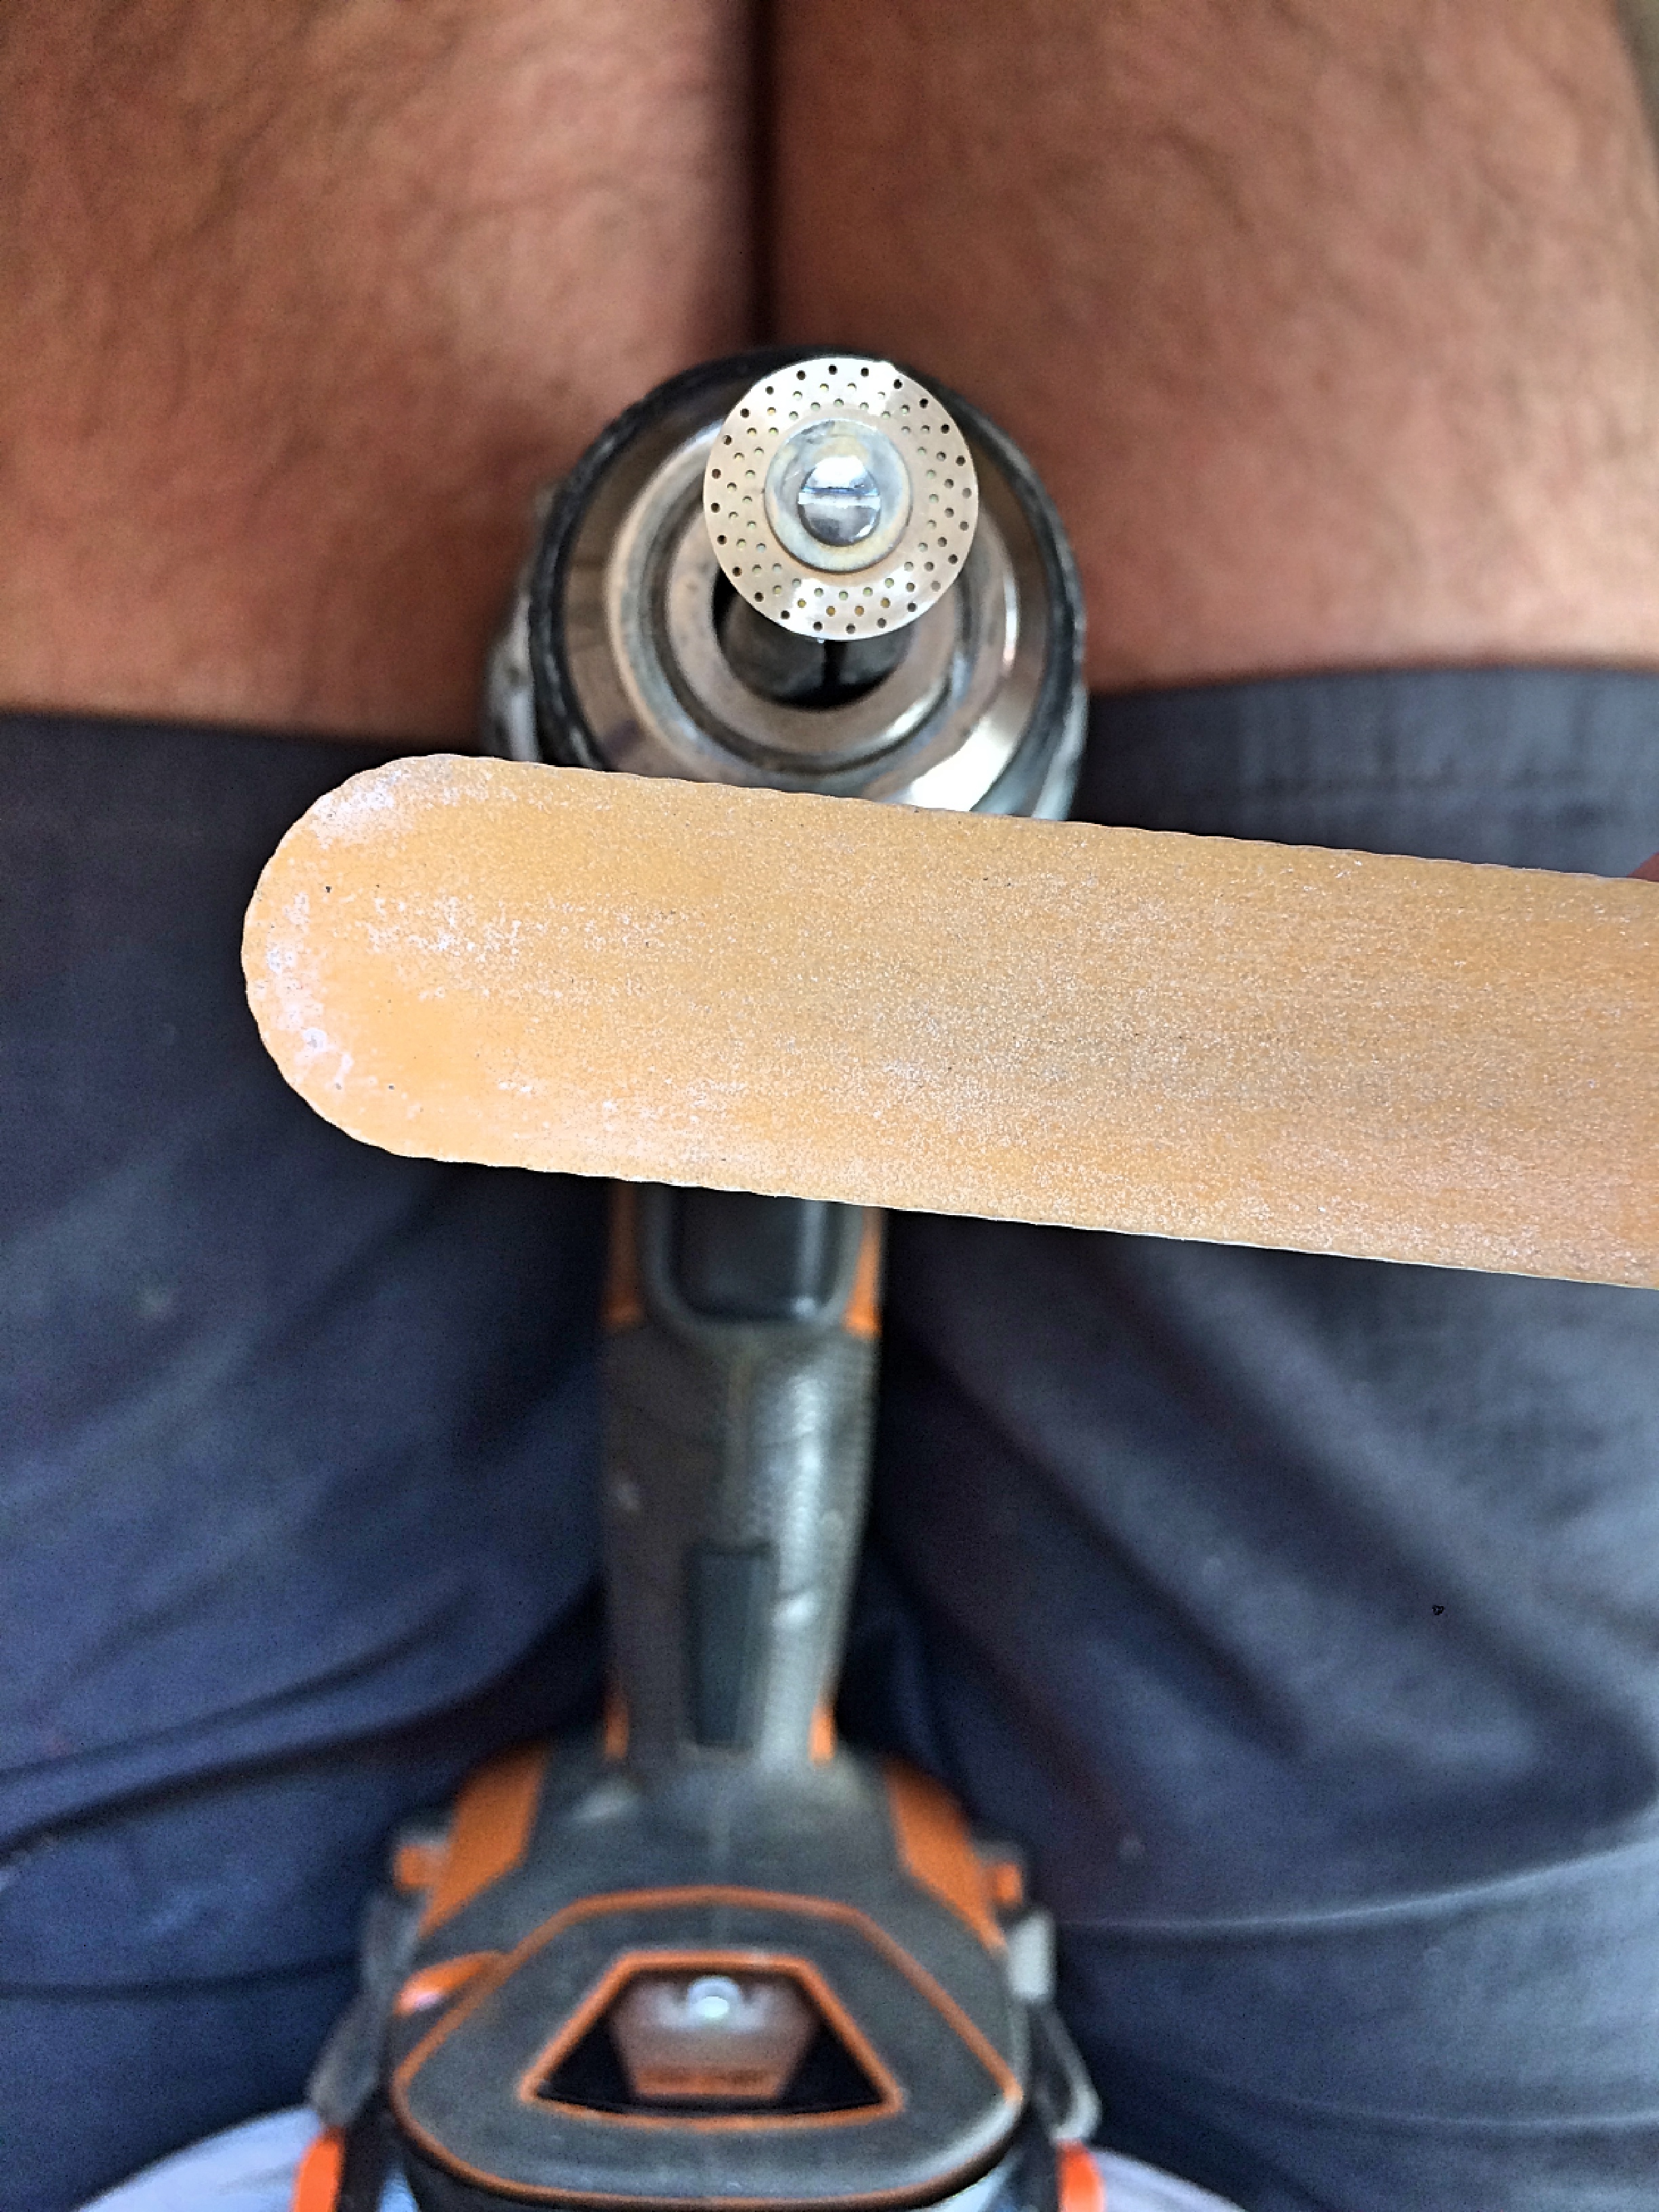
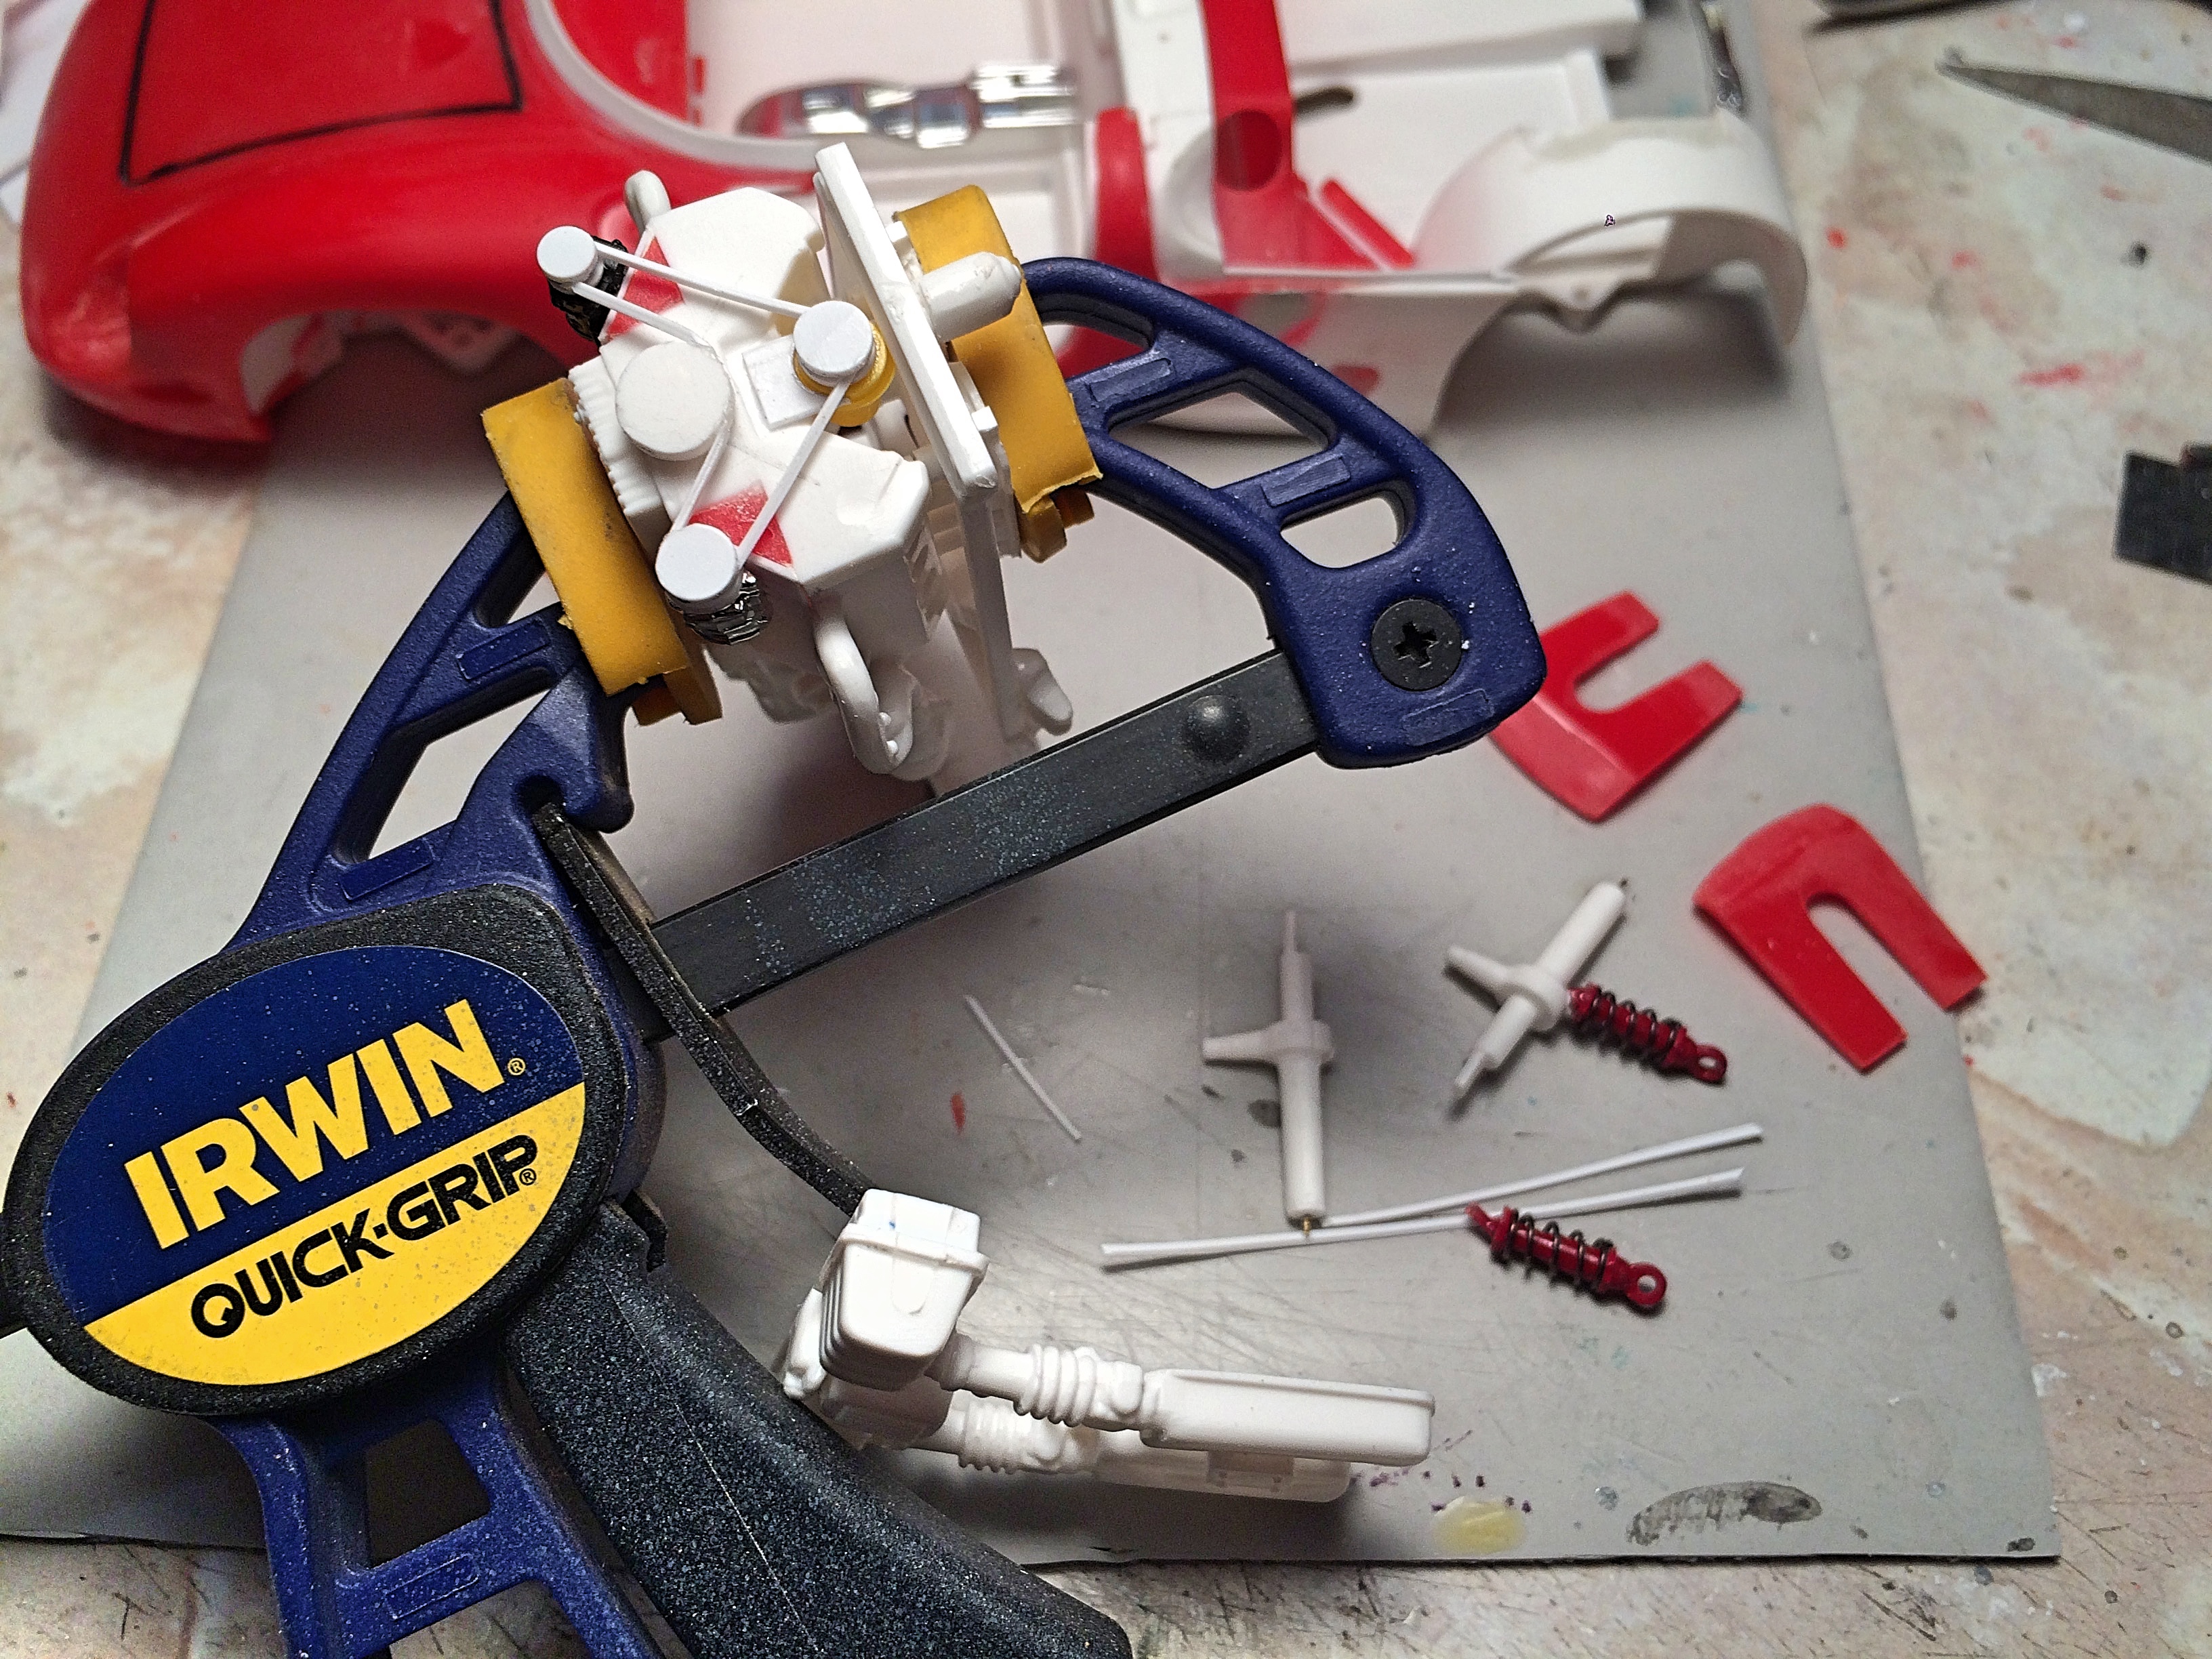
Pet peeve of mine is photo-etch disk brakes that still don't look real. Someone who can lathe turn an arbor could sell these! Tools required: Dremel motor tool Cordless drill Cut-off disk arbor Washers Nail sanding stick Optional: Waldon punch, aluminum plate First thing I did was make a washer that fit inside these brakes, out of aluminum printing plate. Found appropriate sized washers in my stash box. It took numerous attempts to get the disk centered, this cordless drill is variable speed, so I would watch and then adjust. It doesn't require high speed to do this. I held the drill between my legs, turned on with my left hand, and held the sanding stick working it back and forth. I would have done a video, but I have only two hands. Note to photo-etch makers, would be nice to have a washer that fits inside. I could see a machined arbor that would make it so much easier.
-
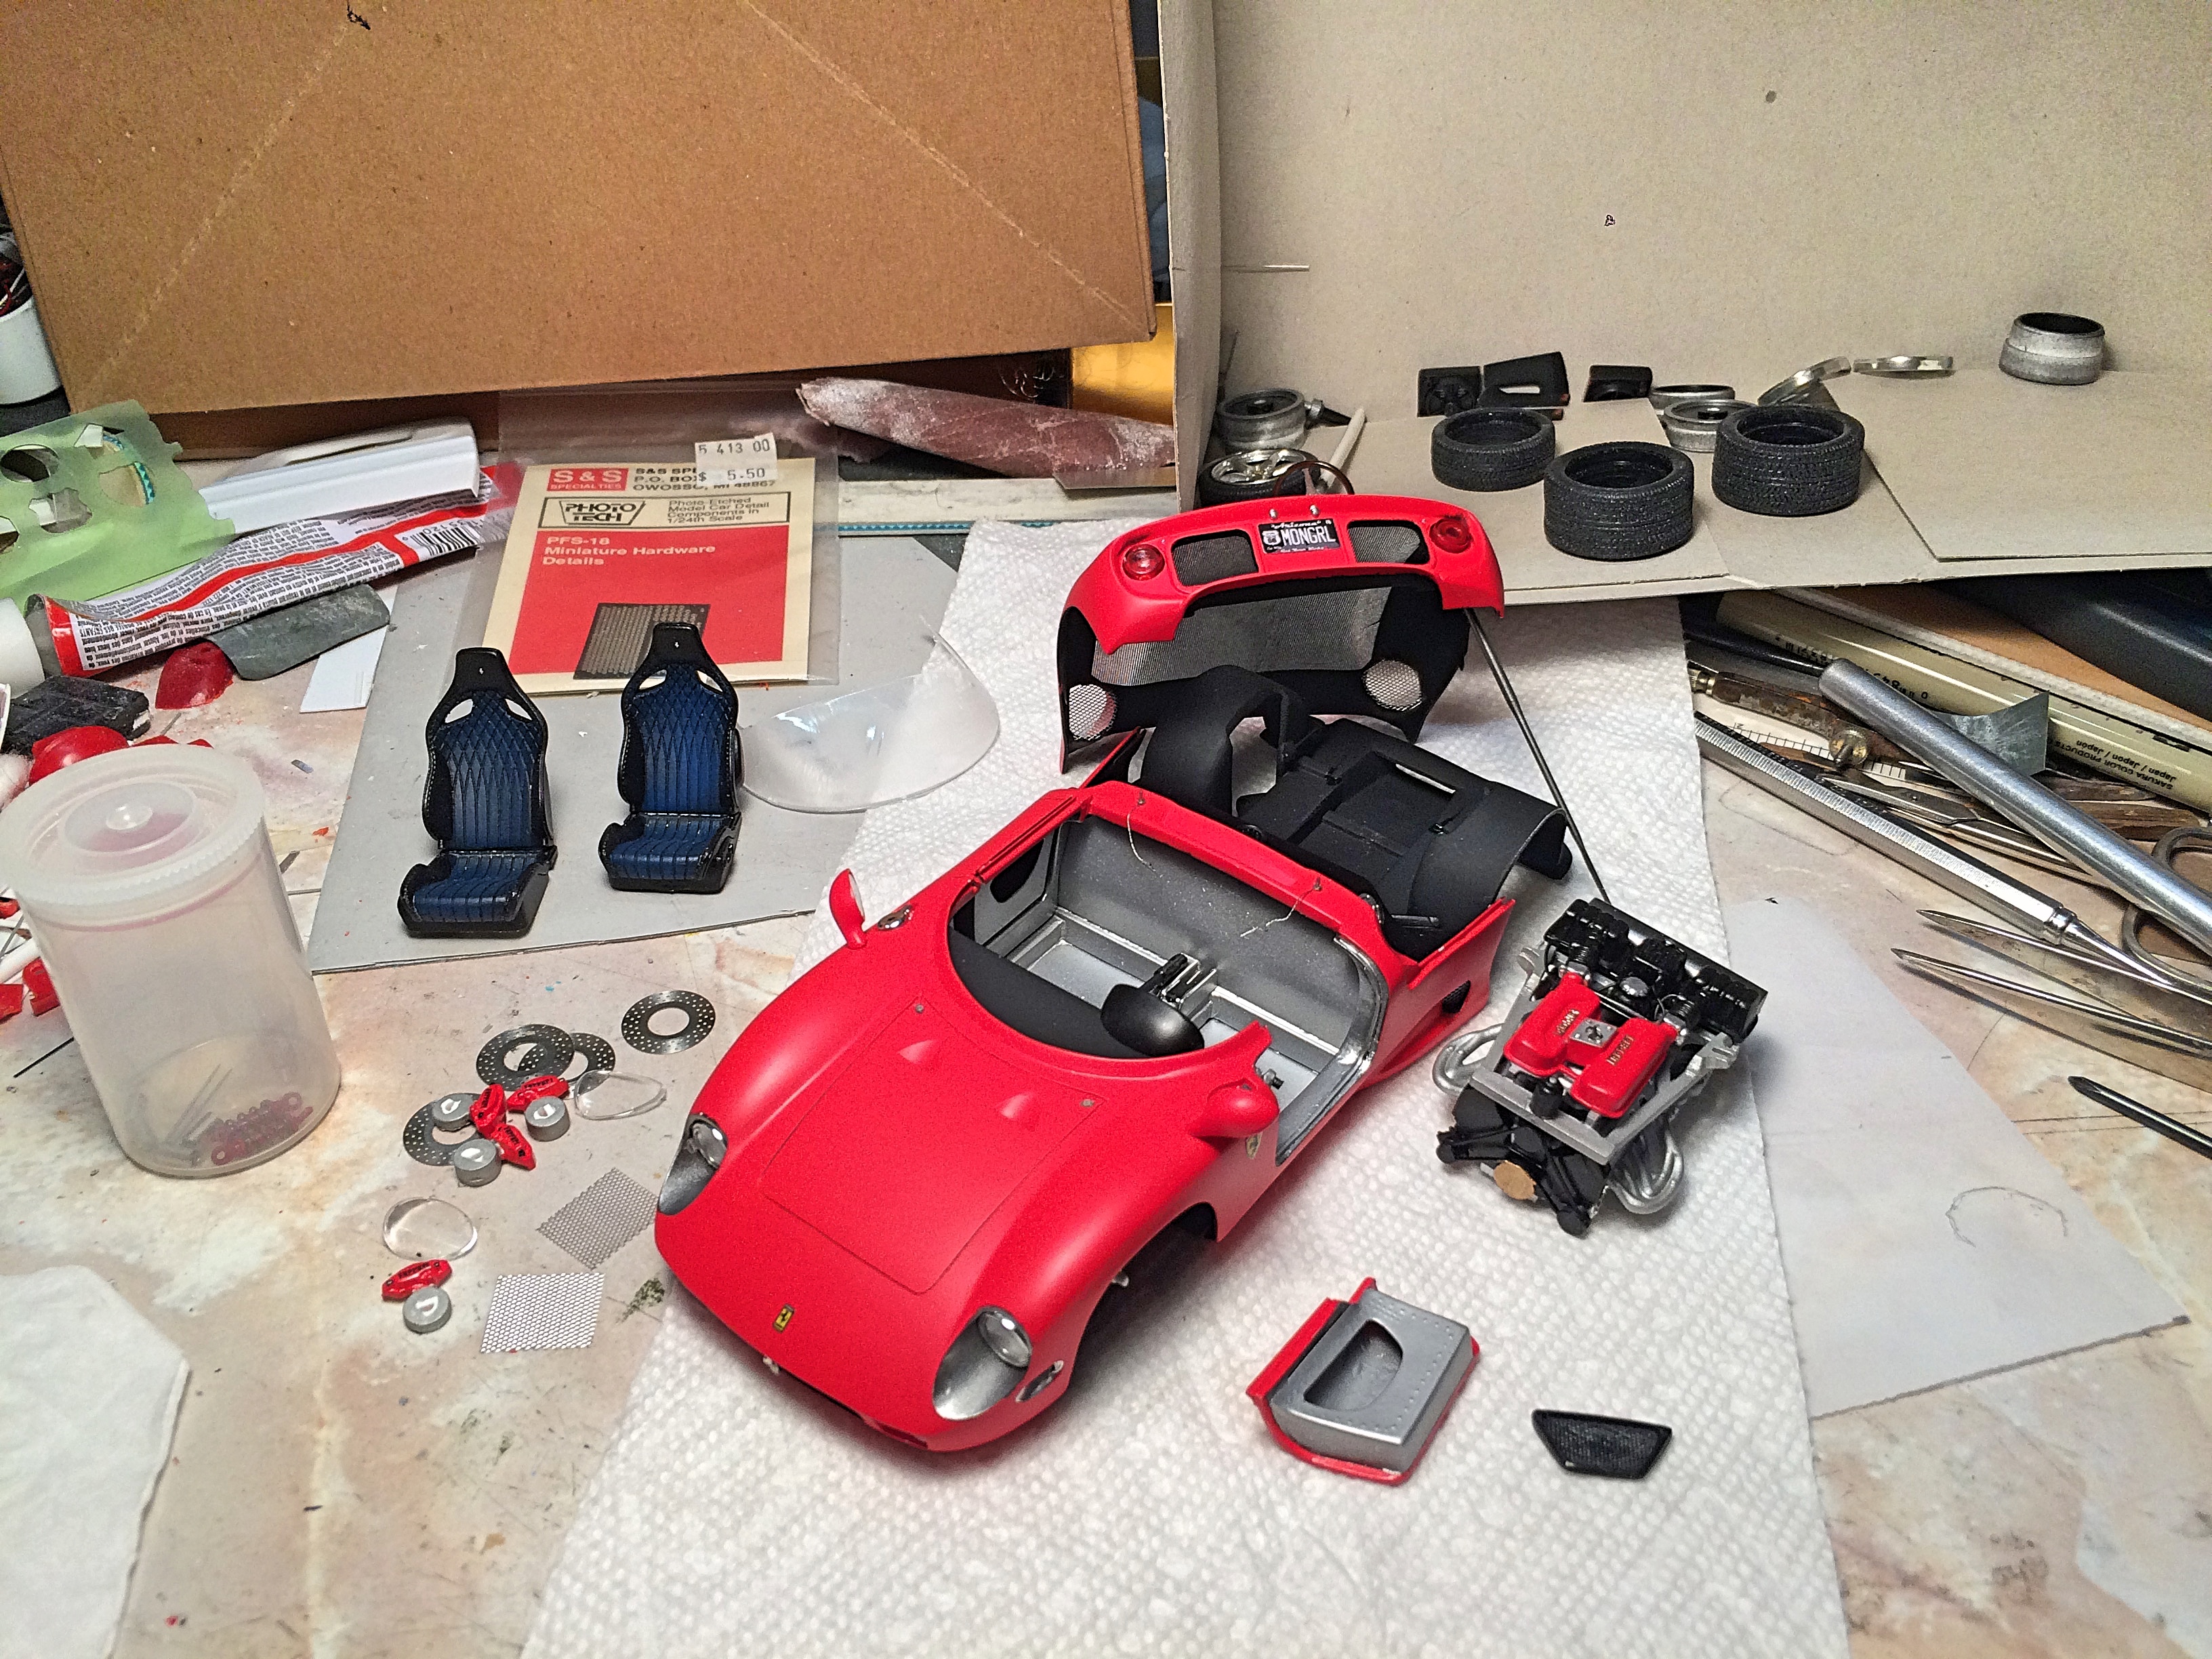
I was just kidding! I've seen plenty of one-off carbon fiber projects, so not out of the question. At this time, I don't care to screw around with more decals, but then again.... Thank you. One screw up, but I ain't perfect. Wet sanding the body was the first task today. In general, helped a bunch, but I would need a week to make it perfect. Painted the body Testors Italian Red, then flat clear. Seats blue, used brass screen to try a fabric weave, not as successful as the VW was. Engine flat aluminum and steel, and red valve covers that I finished up by splattering to try and get a crinkle texture, note how I masked the aluminum center cover. Unmasked! Started with the decals, the Revell decals look really nice, but do not come off the paper very well, and break if you're not careful. I ruined the shifter plate decal, also discovered Solv-a-Set attacks chrome. I try to airbrush everything, but sometimes have to use the brush. I'm going to start a new topic about this trick I developed. Photo-etched brake disks are cool, but still not realistic enough for me. Made an arbor to mount the disk, and used a cordless drill to turn using a nail sanding stick. My Dremel has always annoyed me by being off-center, so it took some time to get centered. Got more decals done. Cut up the Modena instruments, and added some other ones. Gloss clear over for a lens finish. Got the engine done, added the Crazy Modeler emblems, MSC wire. The steering wheel and wheels got the Hobby Design 3D emblems. The radiators and oil cooler got Detail Master photo-etch. More decals, not carbon-fiber, or Forged Carbon® (yes I have decals for that), but Micro-Mark HO scale rivets. Those railroad modelers are freaking nuts! Teresi turned me onto these, and he is really nuts for doing the Plymouth airplane engine pickup, he has the patience of a freaking saint. Tomorrow, paint the interior aluminum, make the windshield, final assembly, hopefully seatbelts. I'm freaking nuts!
-
Thanks for posting this, I'm cutting edge and didn't know it! [...] minimises the chances of any drag from sponsor logos. [...] Oh, so I better not use the aftermarket Ferrari logos that are thicker than the kit decals..... huh. NOT! Reminds me of when Mercedes didn't even paint their cars, the Silver Arrows kicked butt while naked. Some exotic sports cars have unpainted carbon-fiber. I was just thinking of a way to shorten build time, but all this justifies a matt finish.
-
when invaded by
-
When I built my 1960 Beetle using the Tamiya 1966 kit, this Volkswagen Beetle Spotter's Guide: How to tell the age of a Volkswagen, from Small Wonder: The Amazing Story of the Volkswagen Beetle by Walter Henry Nelson was invaluable. I wouldn't waste my time on this kit. Bet it doesn't come with a cooler. The hubcaps are early, like the Hasegawa Bus. The windshield wipers look wrong. But without seeing the actual kit, it's a guess. I have the Gunze Sangyo kits, they are crude compared to the Tamiya. I'll bet the Revell is not very good. I had an Aoshima Super Beetle, horrid interior.
-
lacks redeeming holidays
-
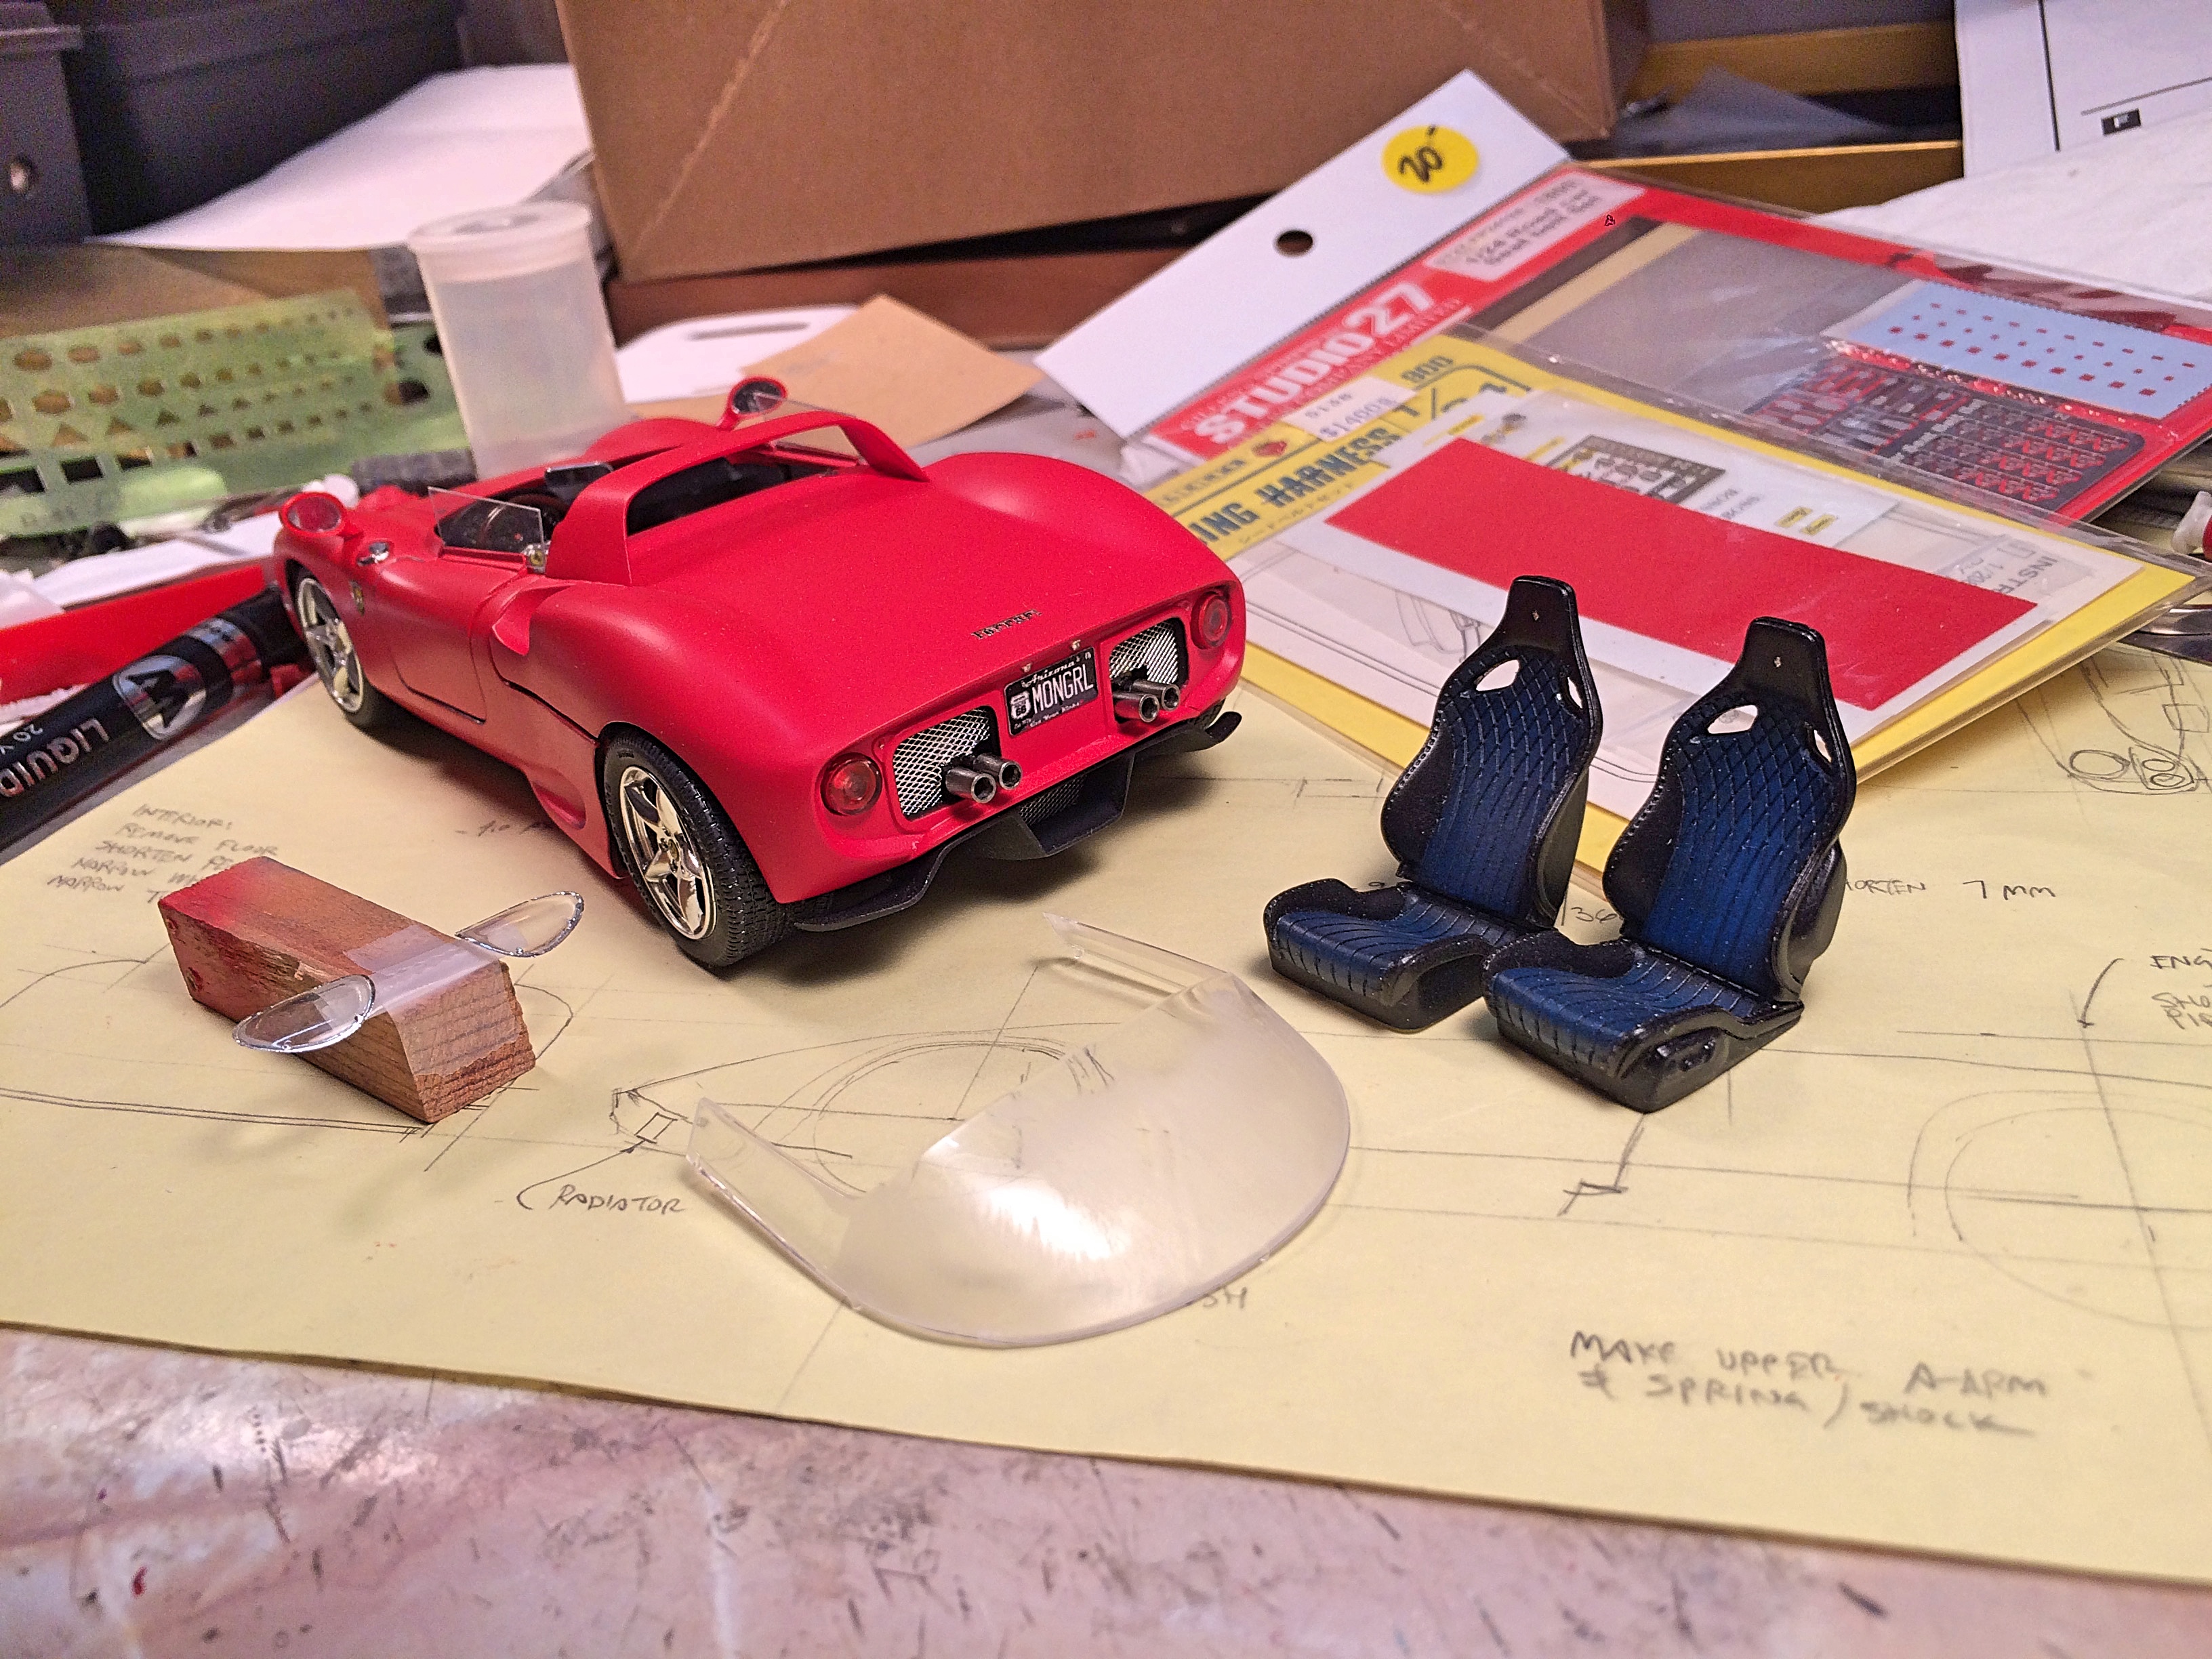
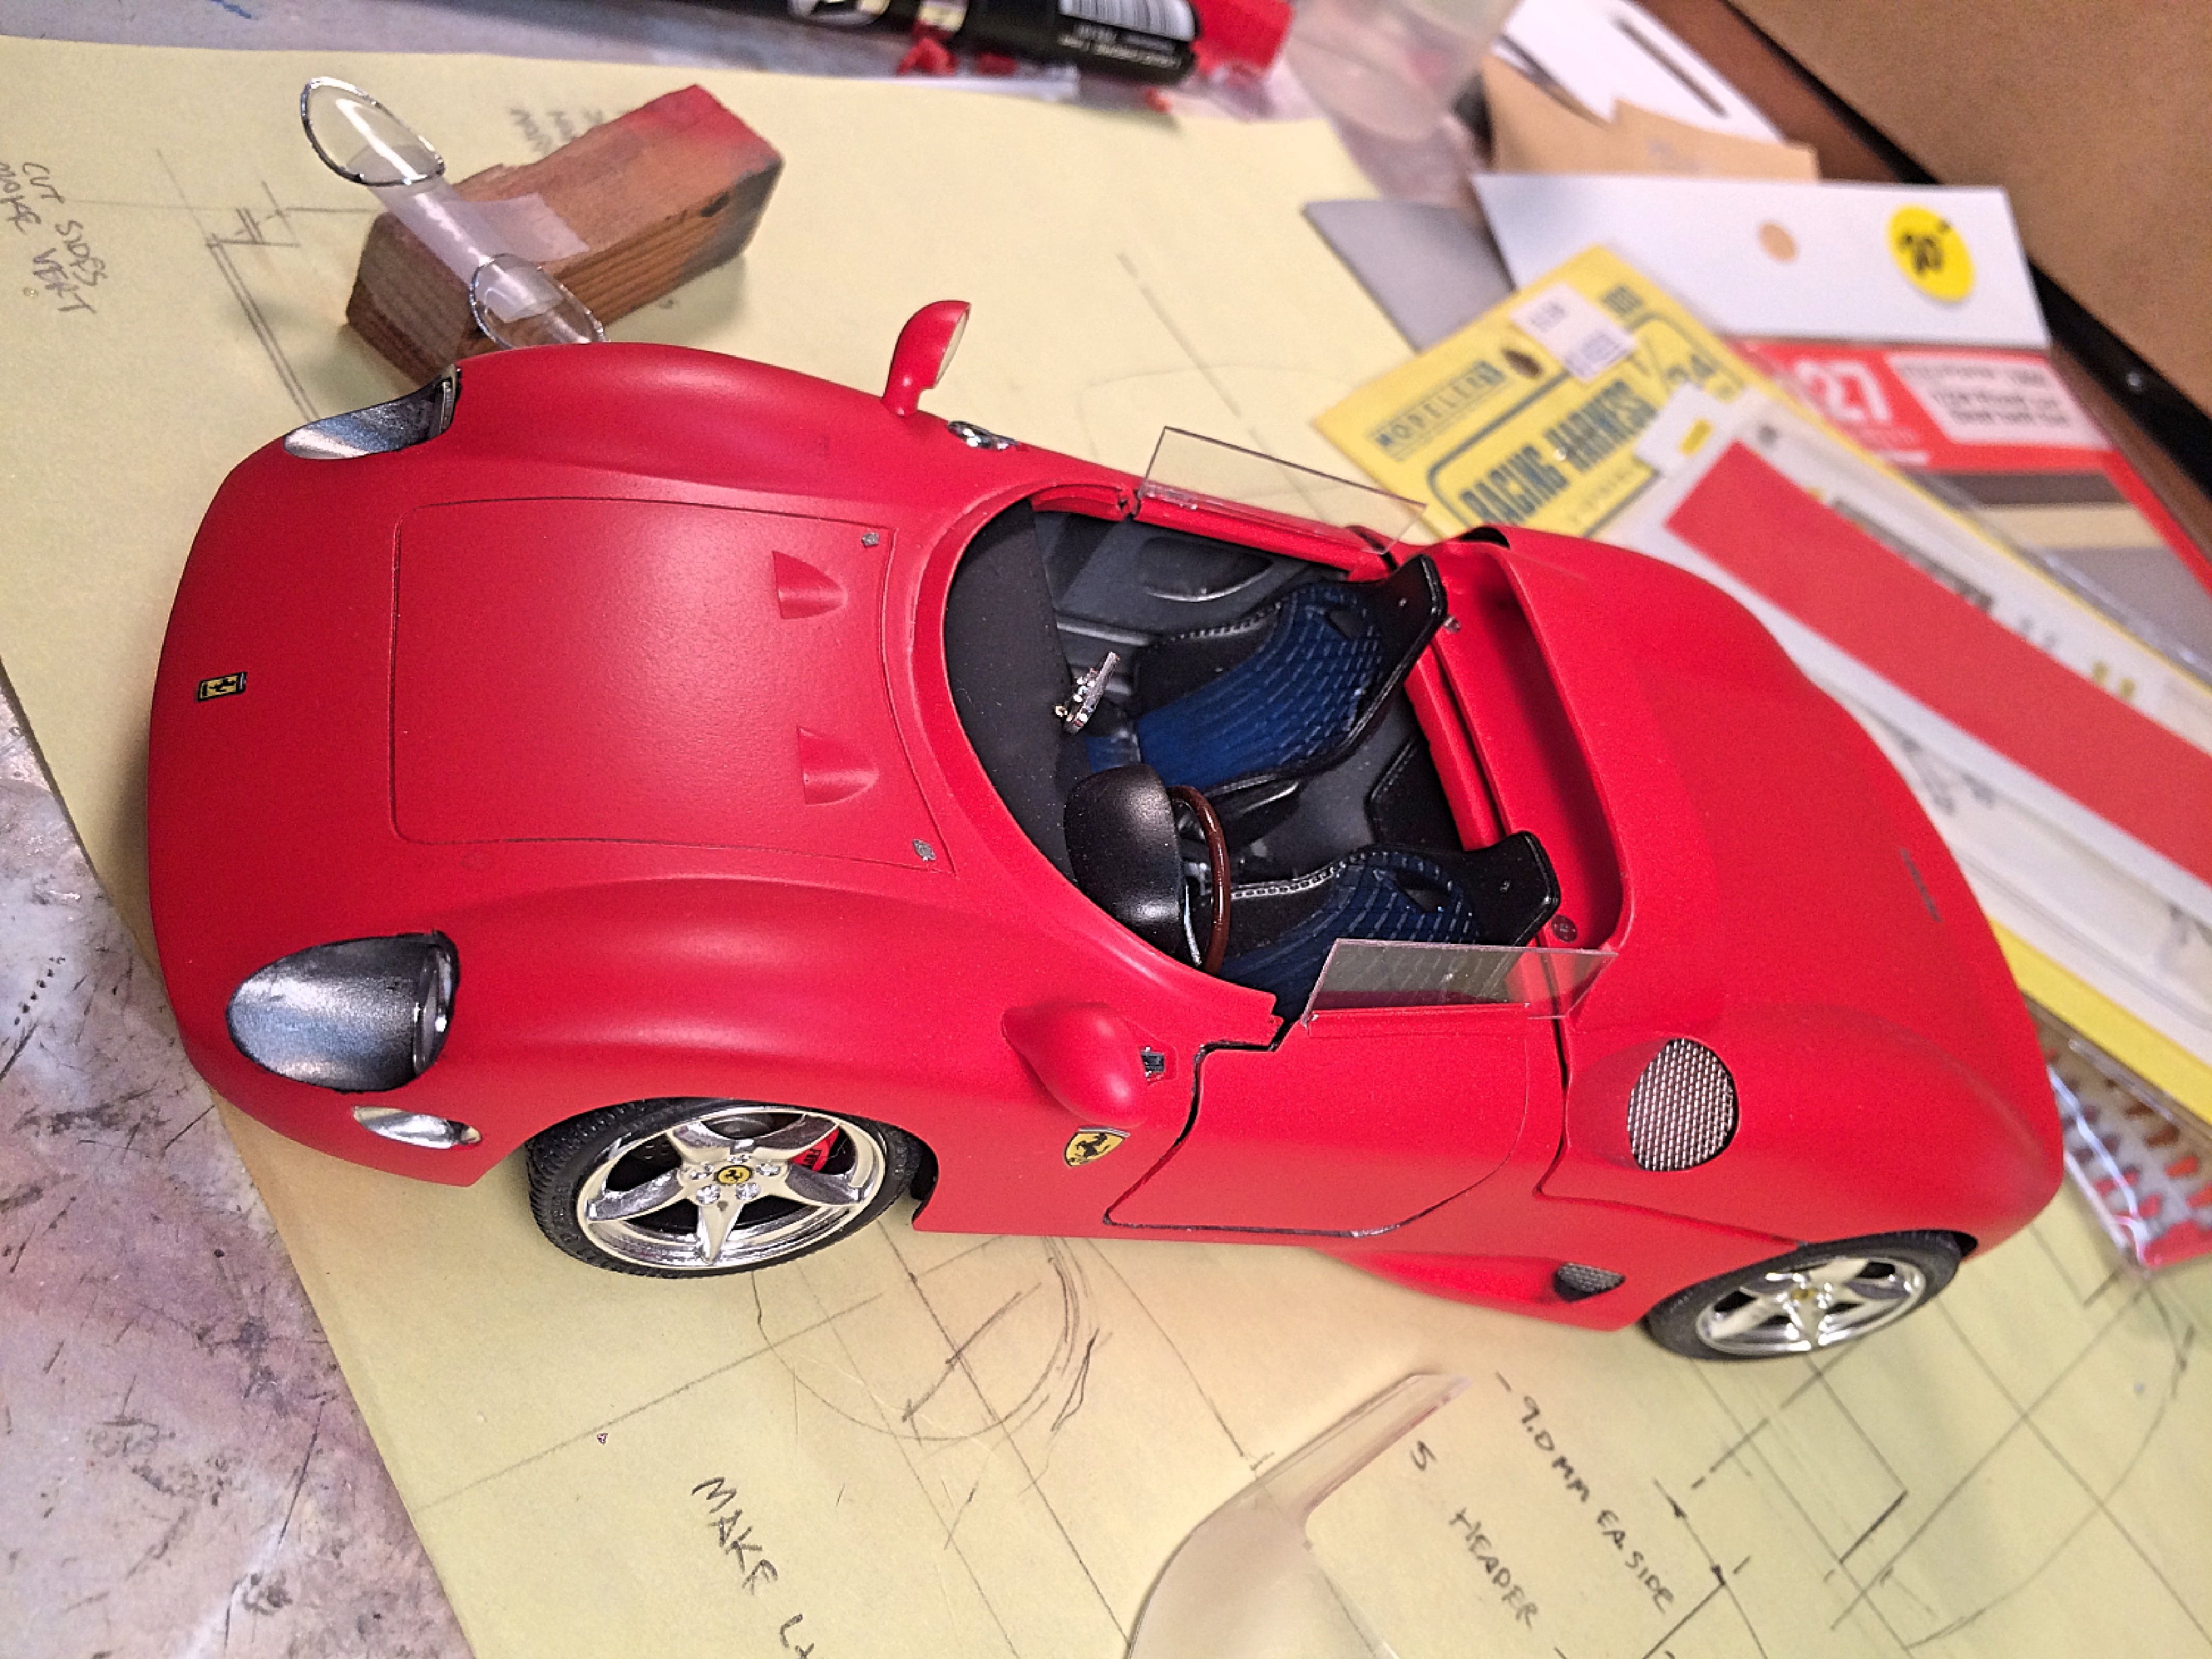
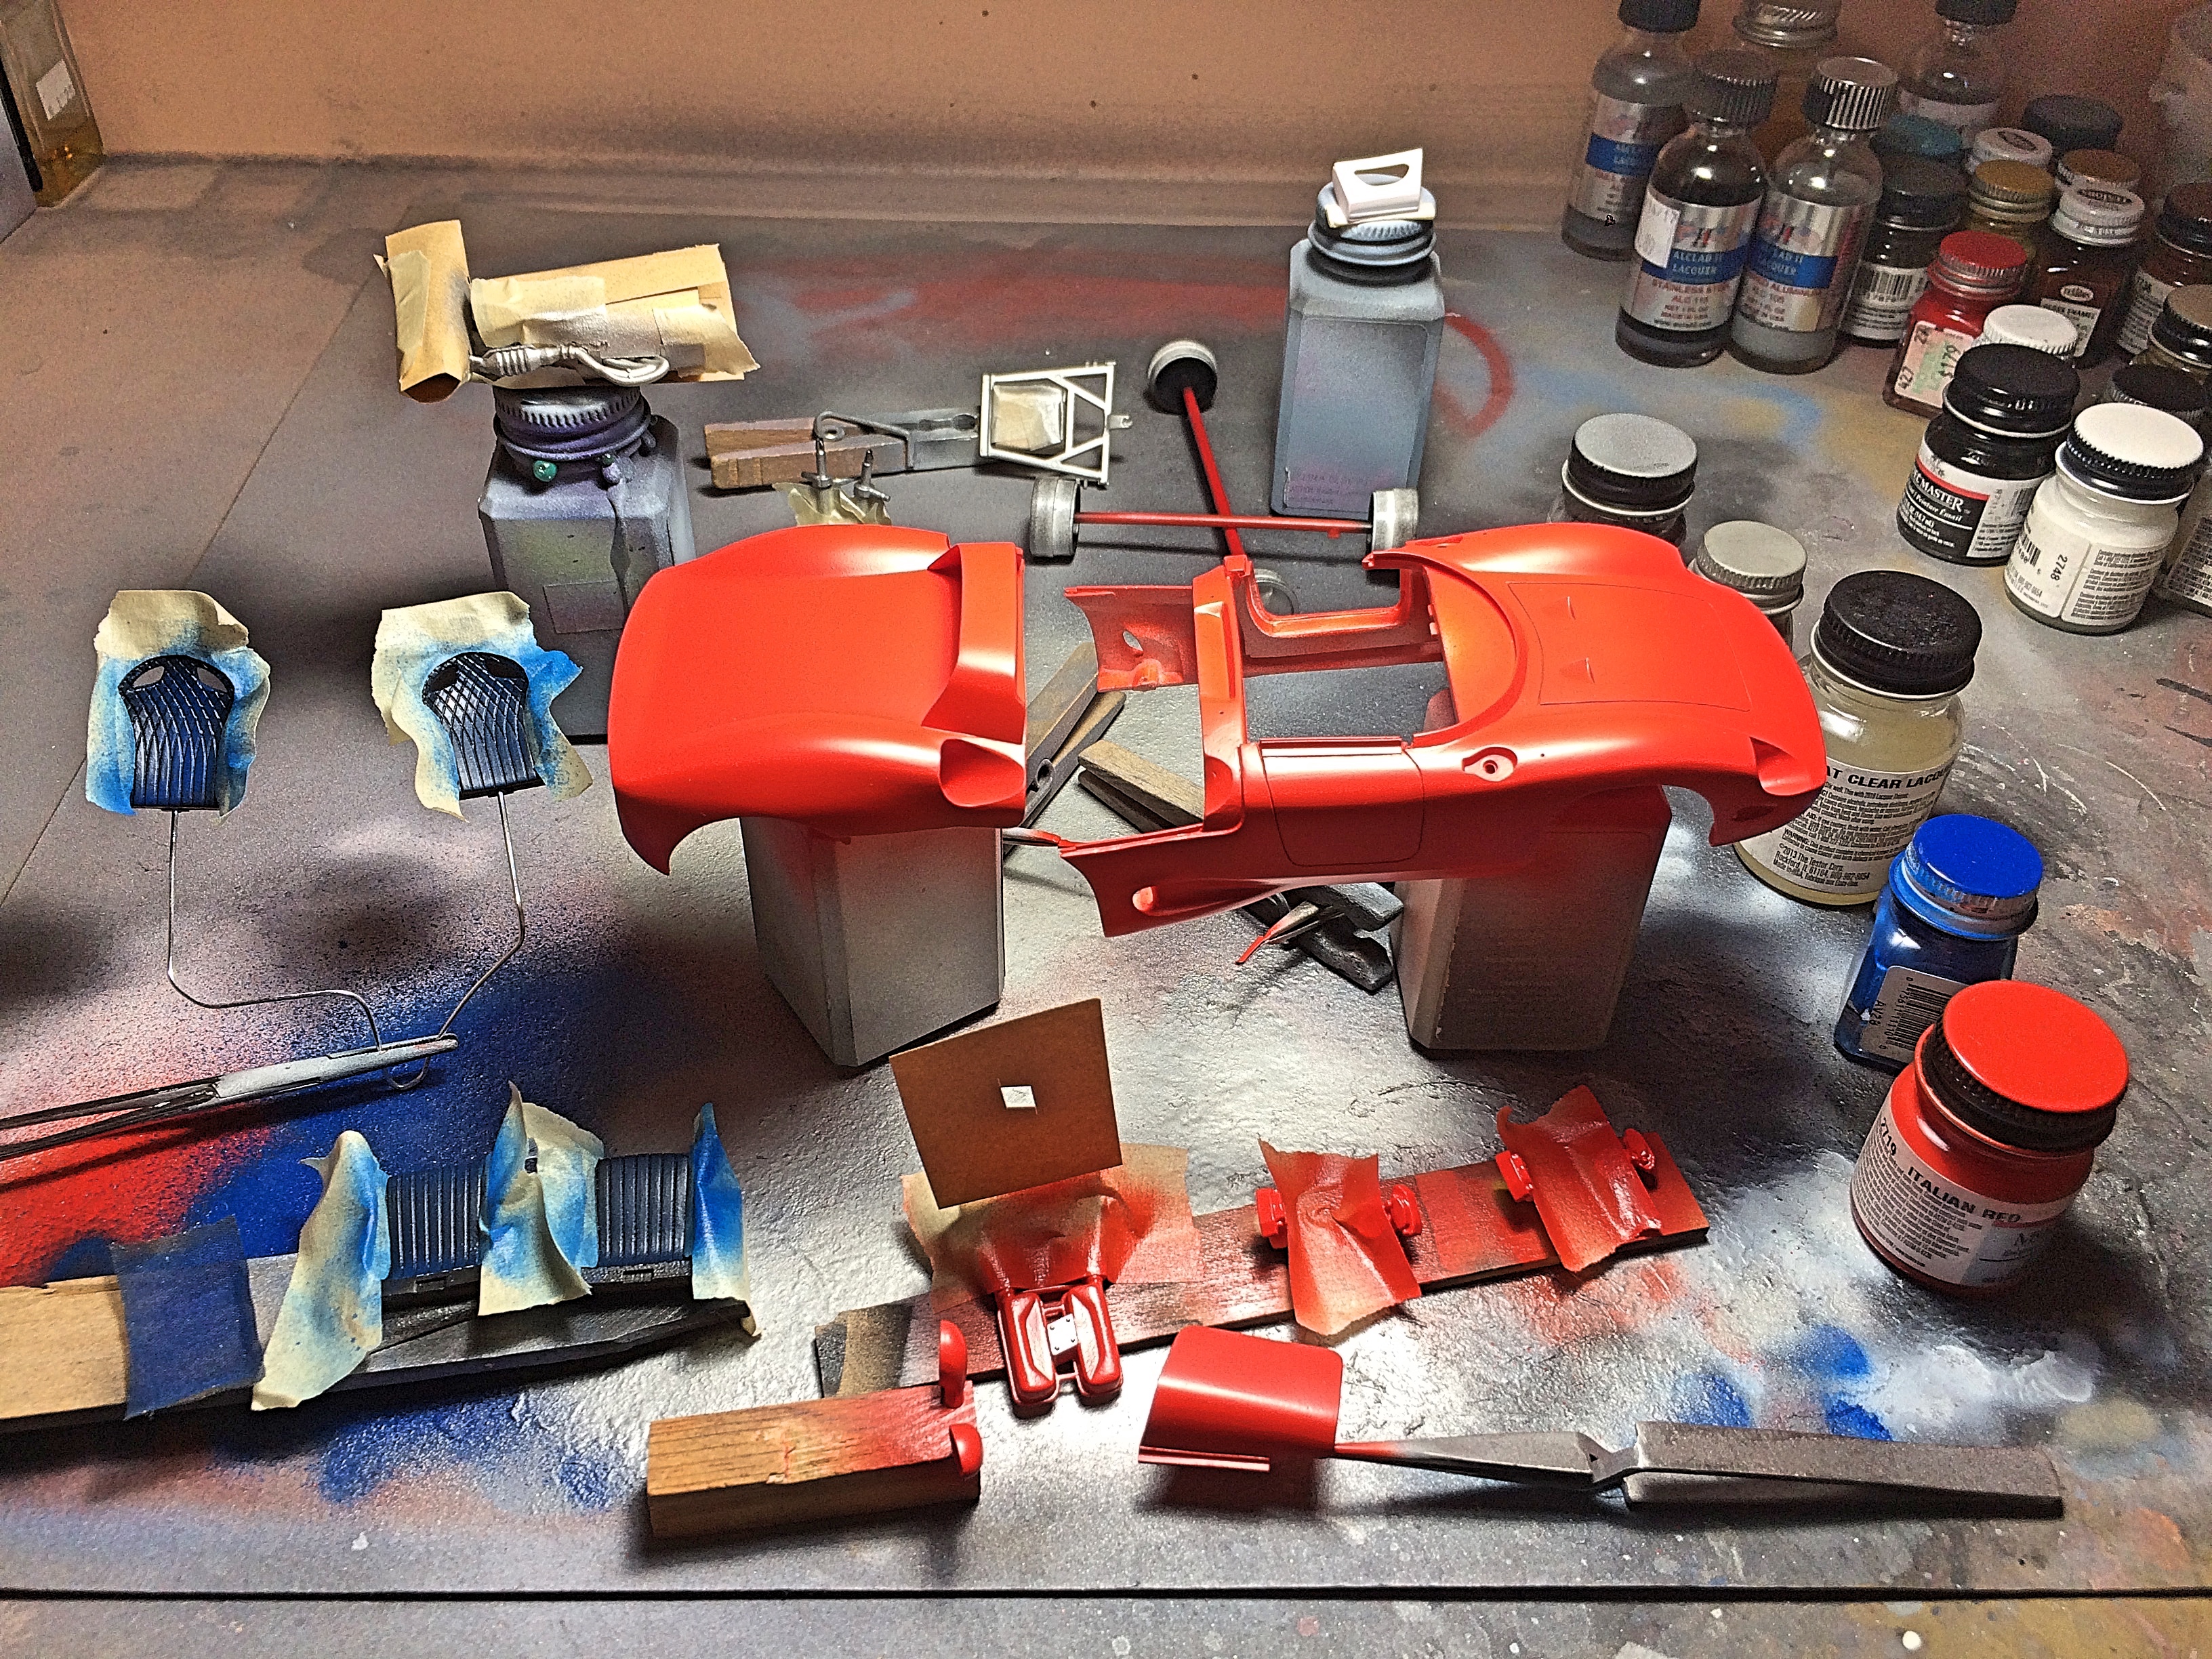
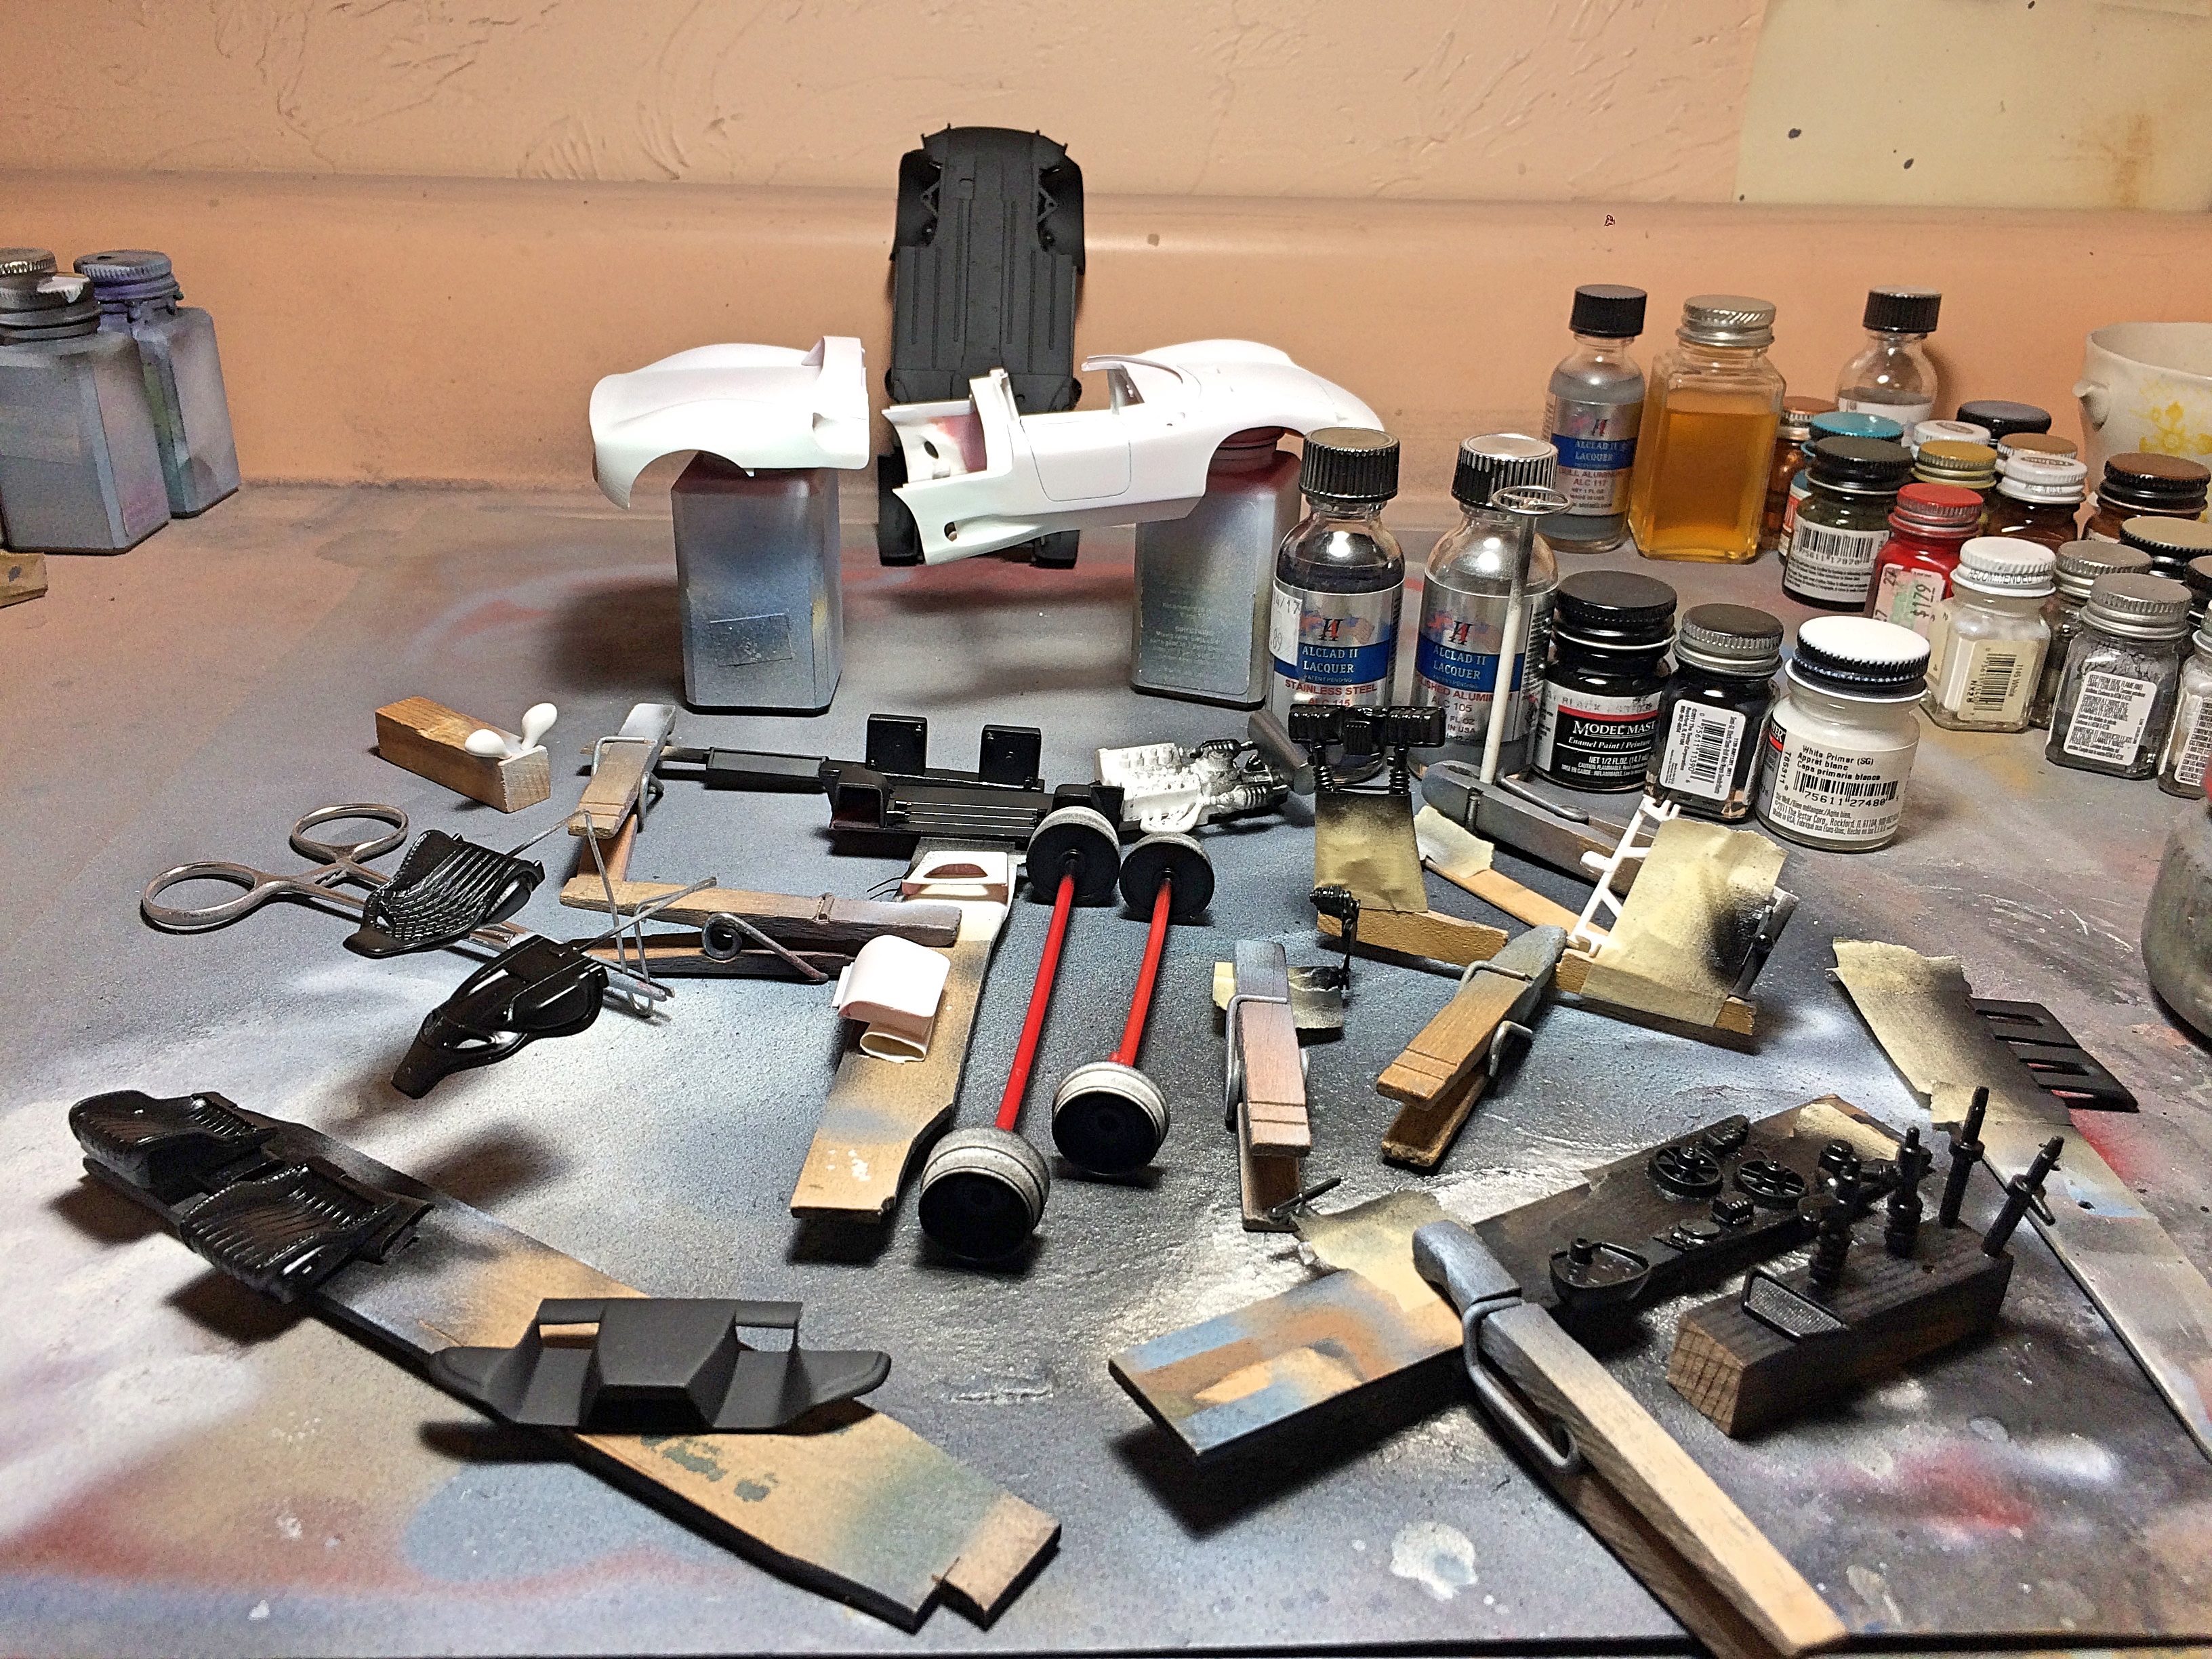
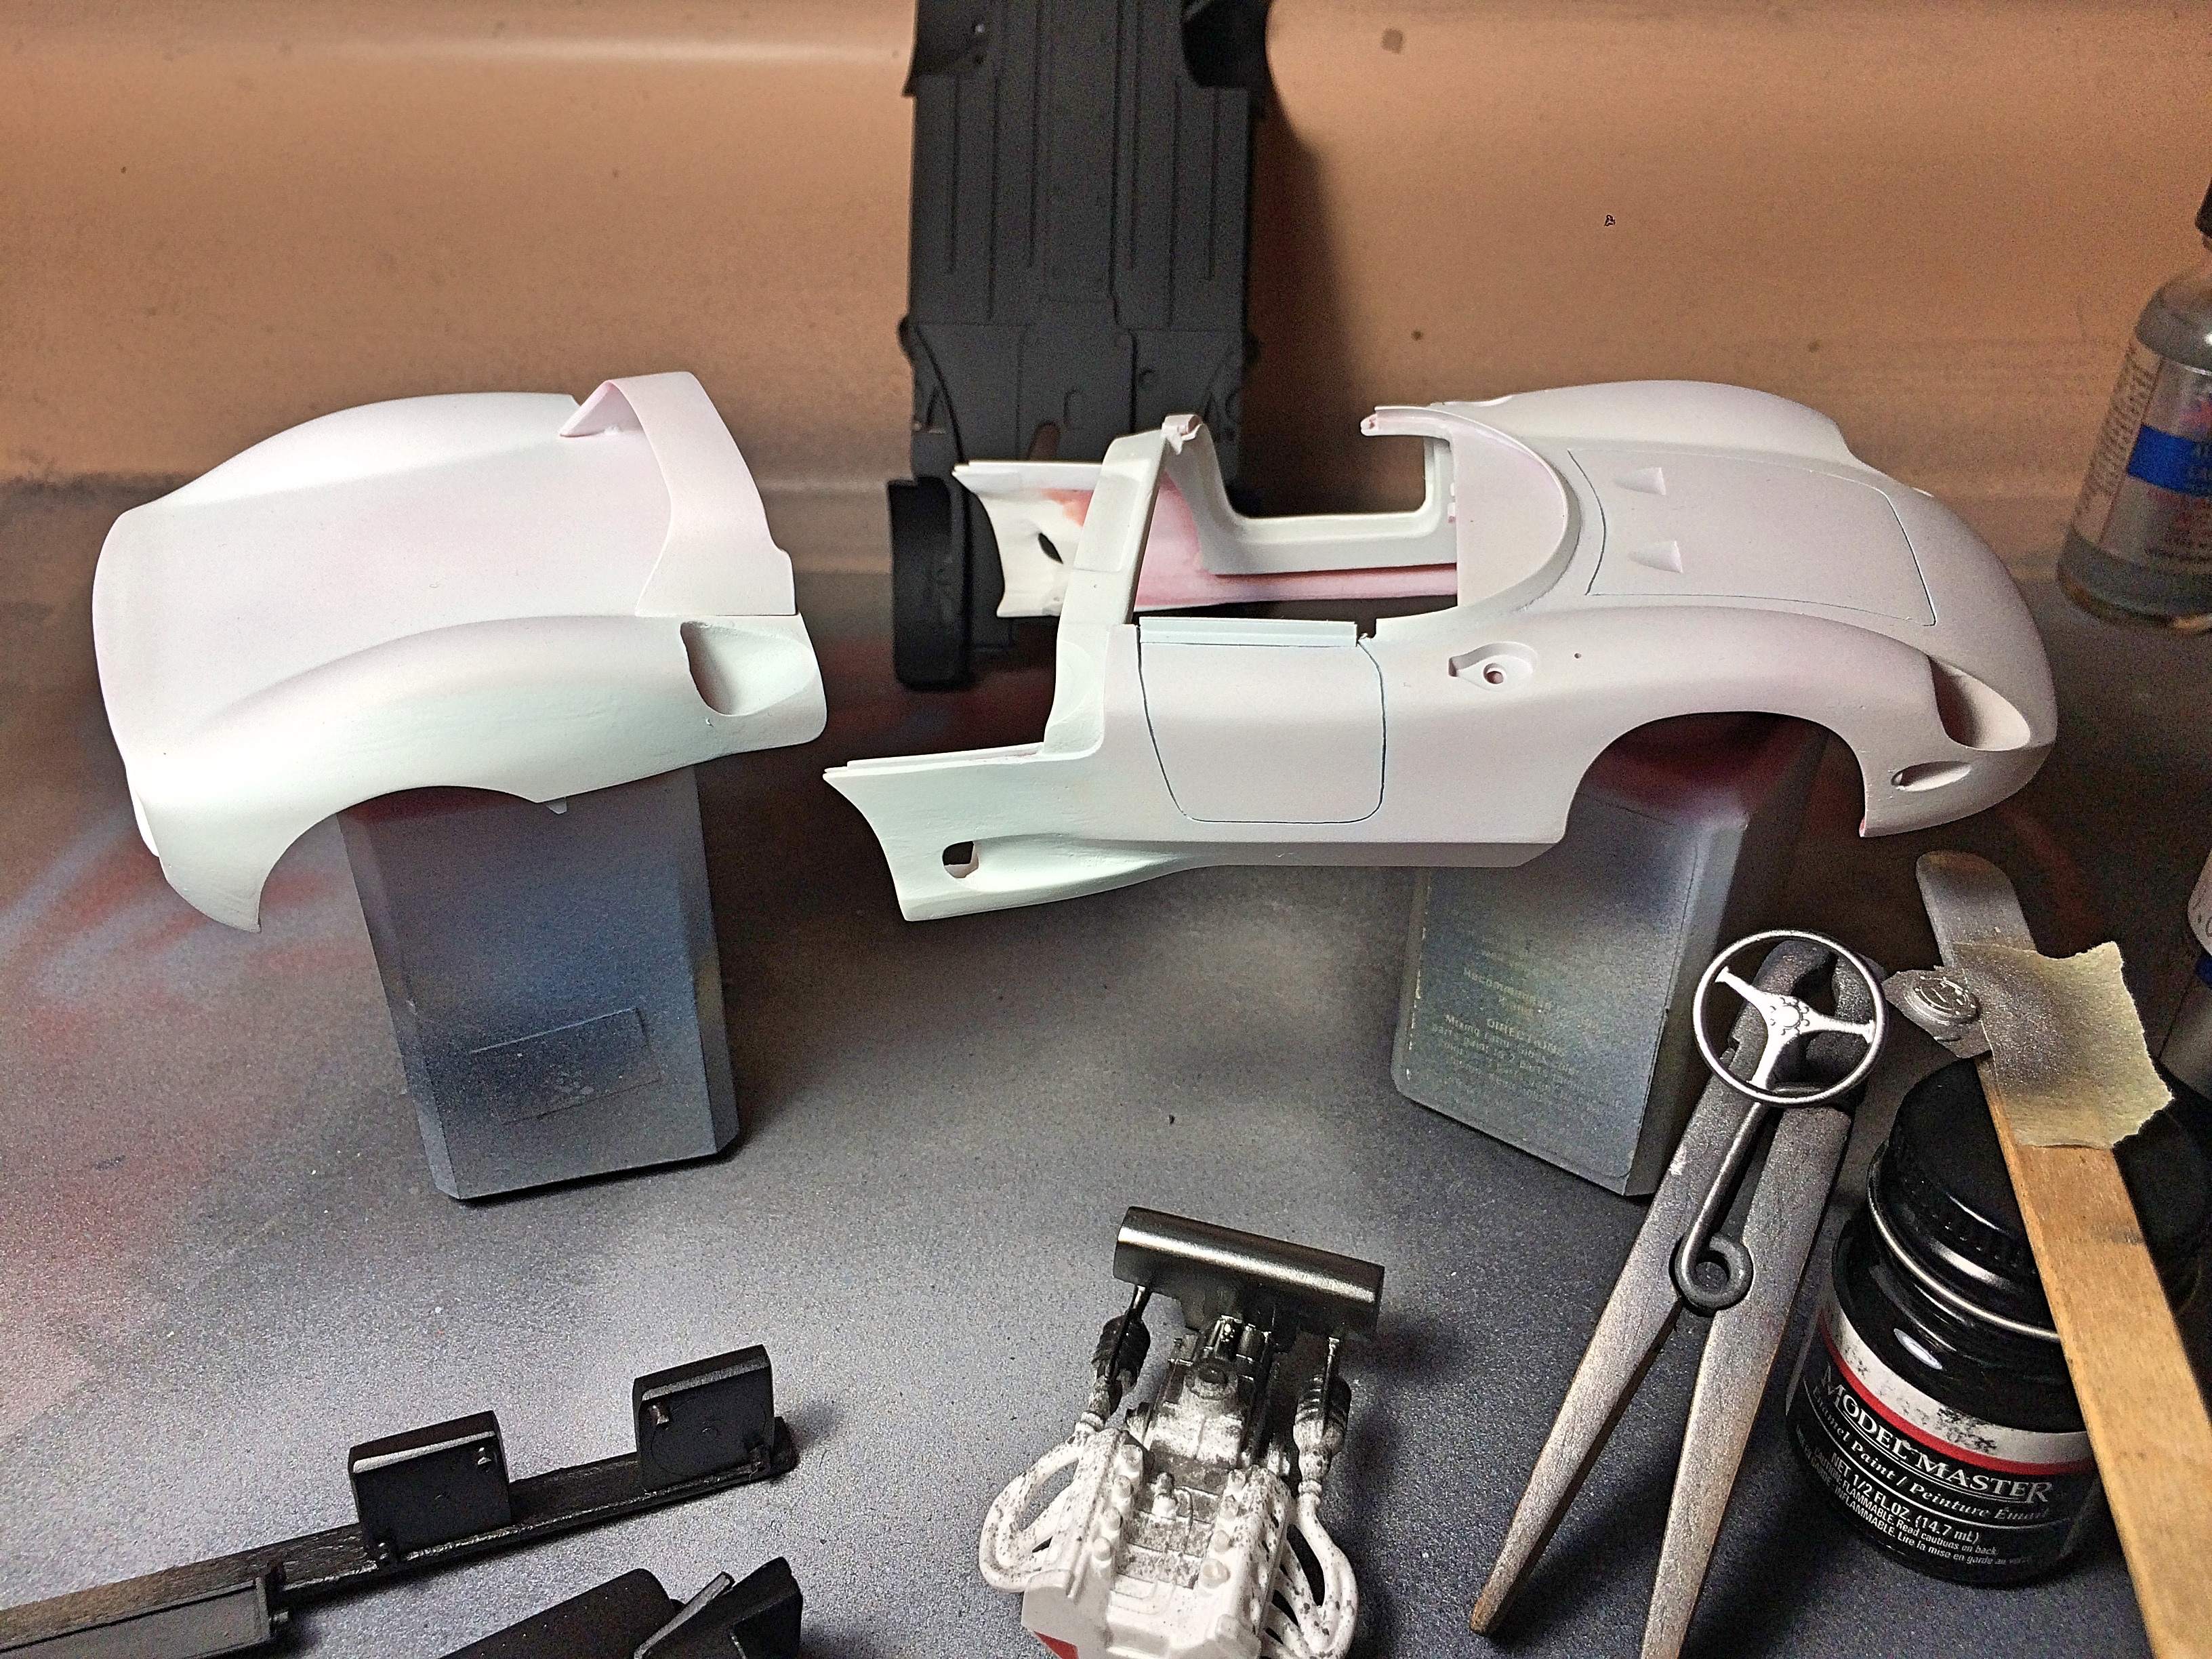
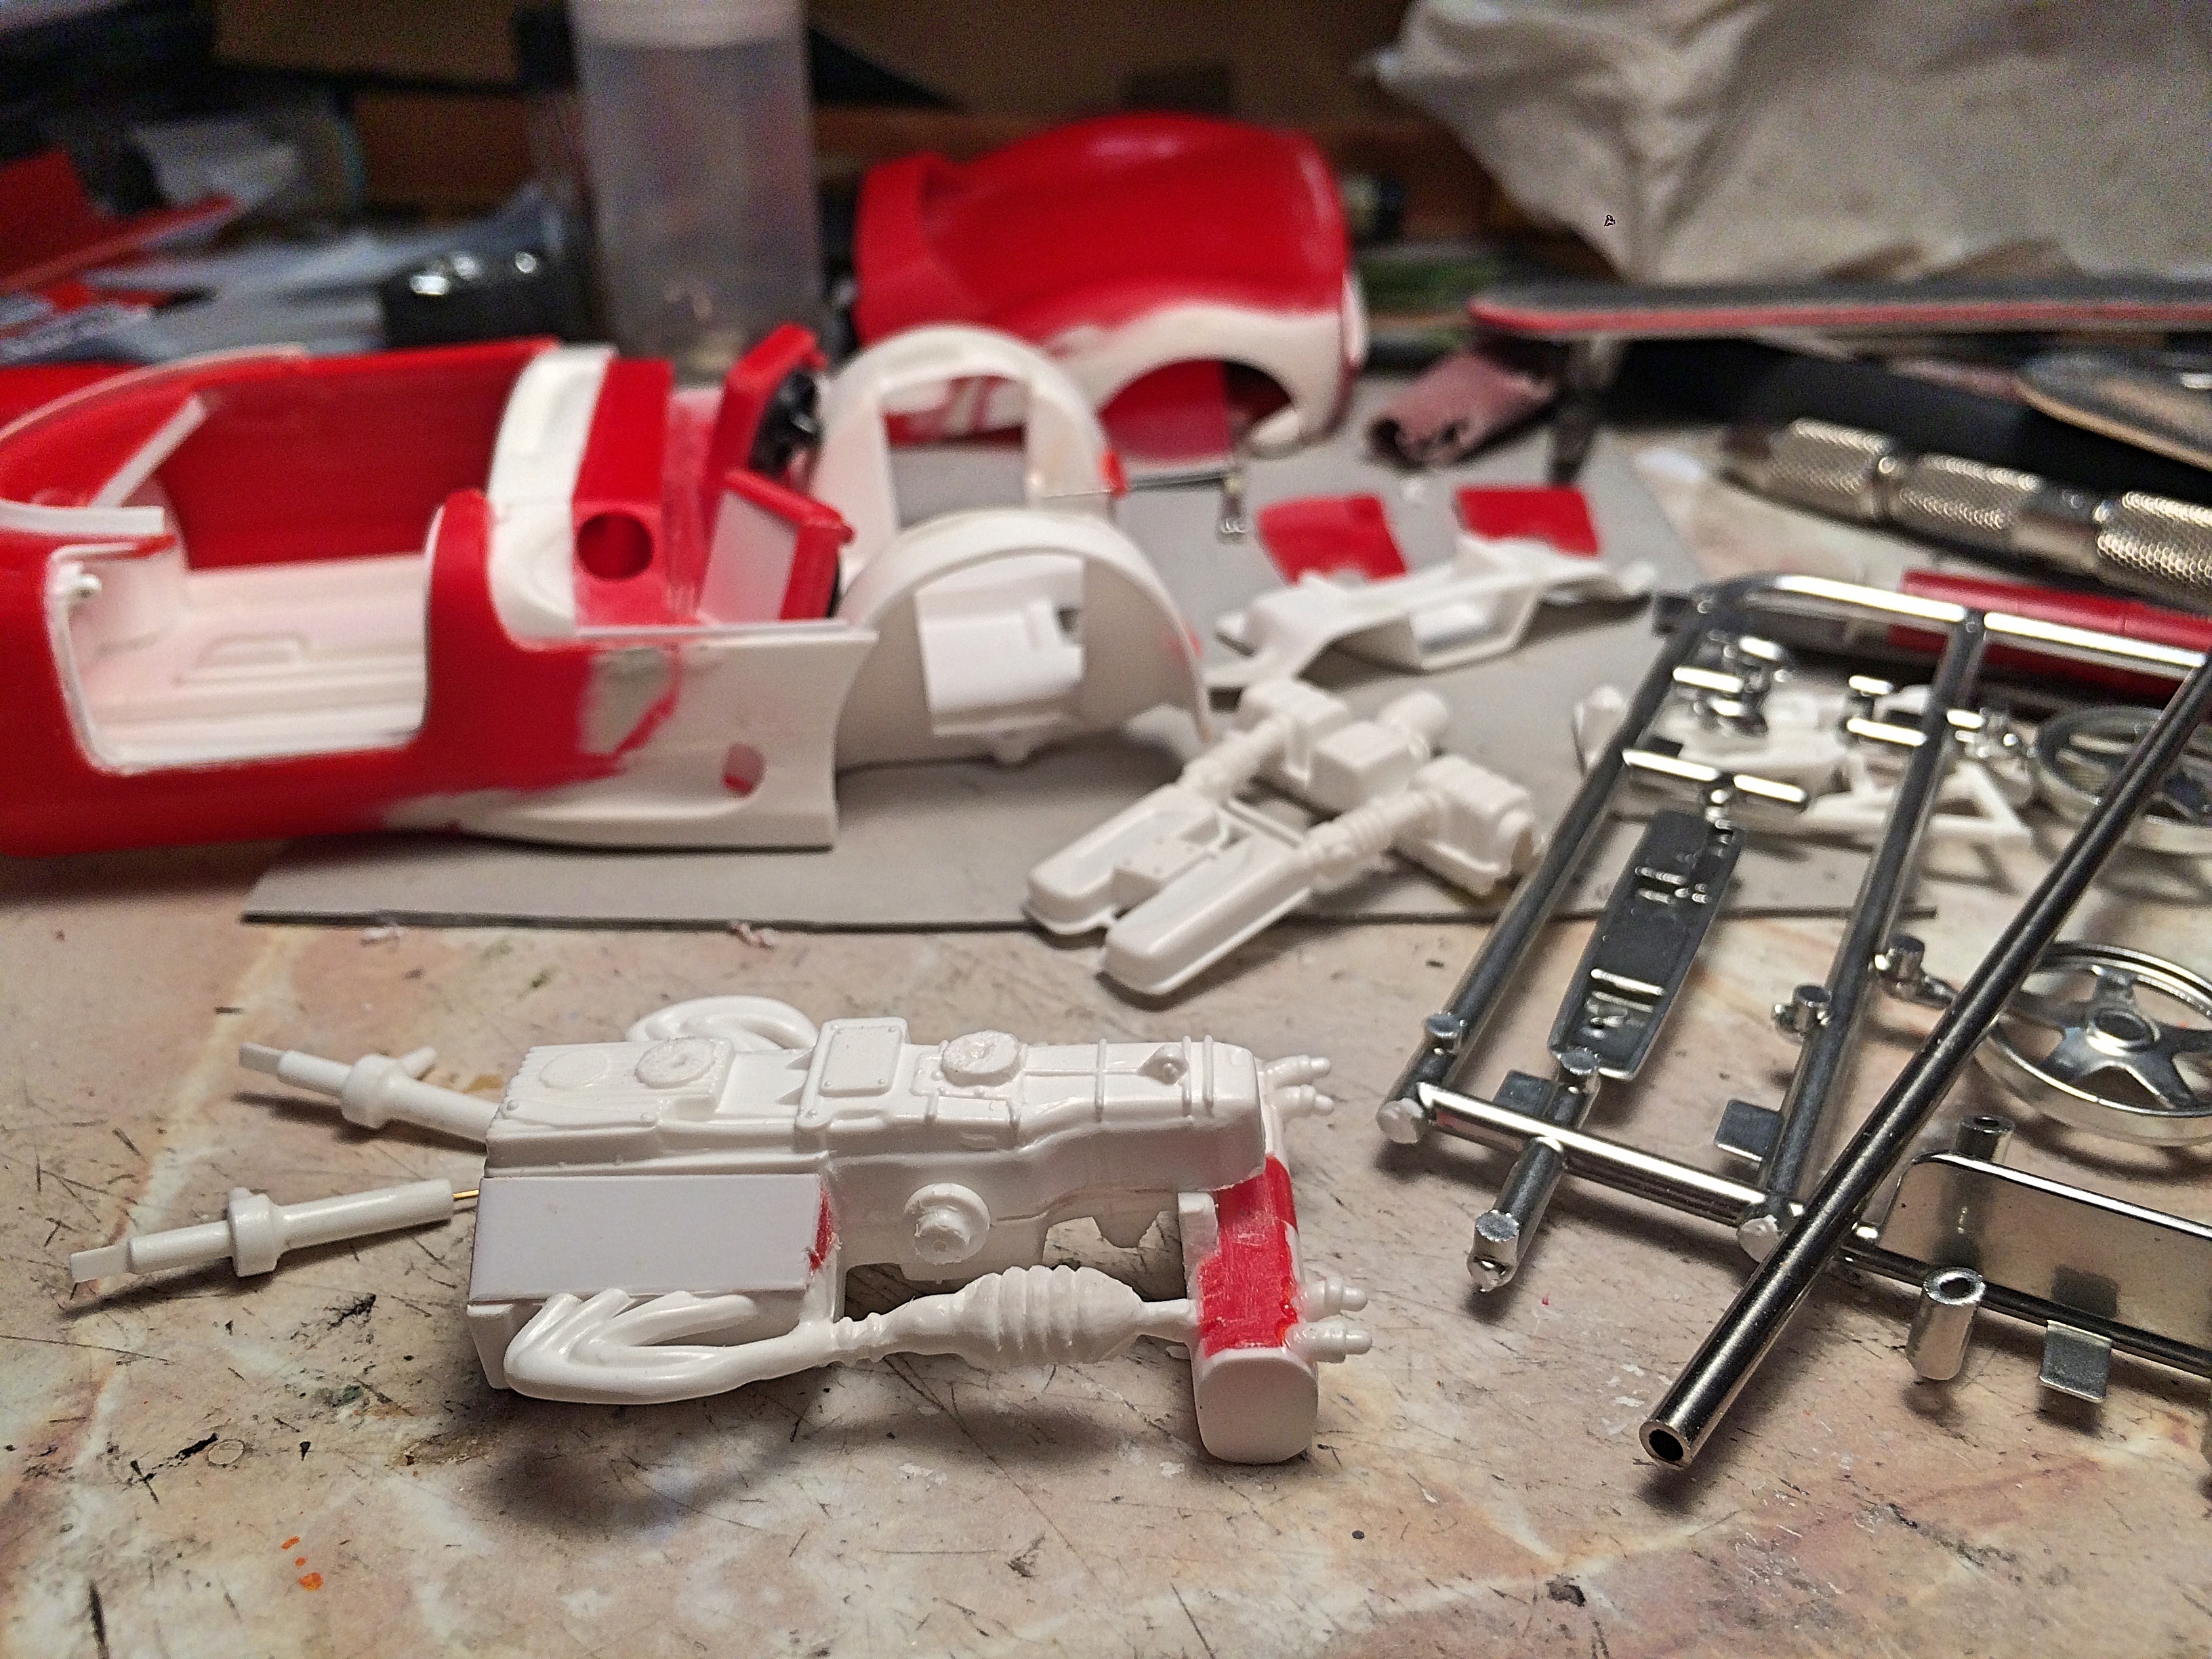
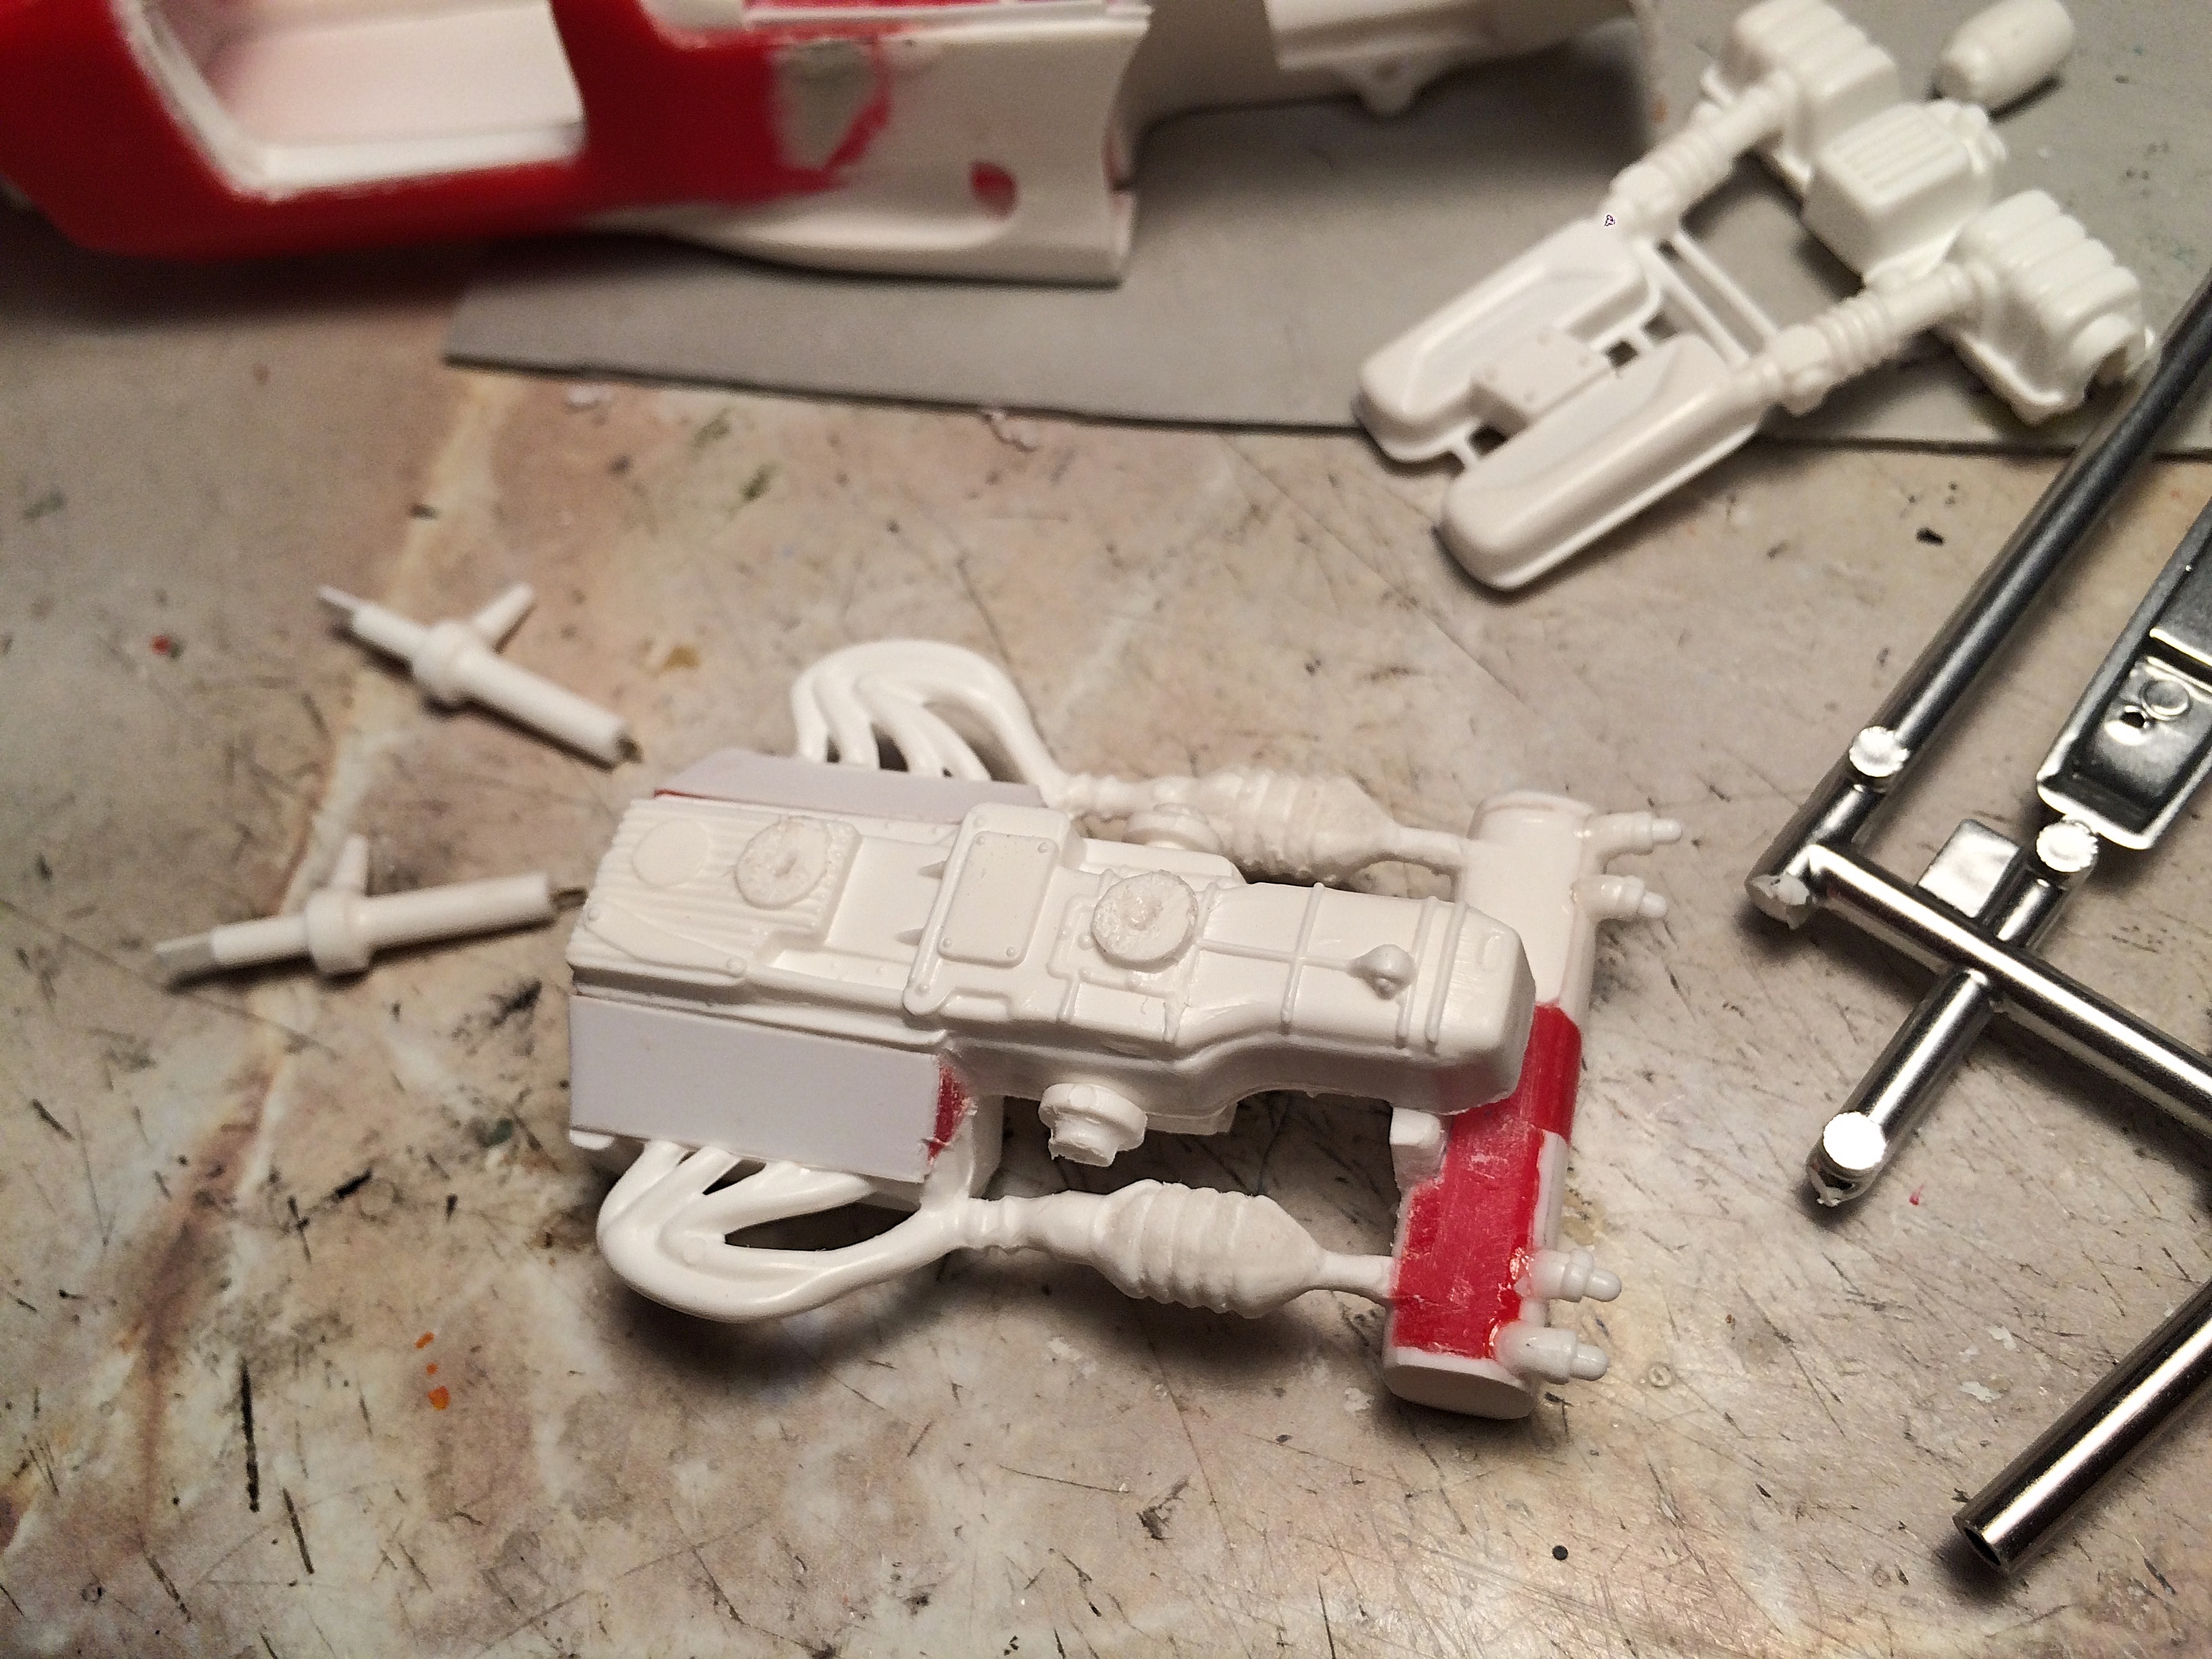
Hey, I would say the collective brainpower and skill on this forum is an awesome inspiration, you are a little more prominent than most members. And thank you, appreciate you leaving a compliment. You think I should put any Forged Carbon® on this? Unlike the VW Beetle, where I had to be faithful and accurate while adding detail, I've been detailing this project just for the sake of making it look realistic. The only underside detail the Monogram had, is around the engine, so I cut off an access plate and one of the funny renditions for shocks, to make something like the shifter control on the transmission. Pried off the accessory belt unit, I'm sure someone can recognize the carbs. I'm tempted to make spark plug coil units, but I want to finish this! I'm using Detail Master photo-etch brake disks, but only one side (not with the fin center and other disk). Had to Dremel the caliper to almost nothing. I'm tempted to chuck the disk in the Dremel, and use sandpaper for a proper finish. I made a few other tiny detail parts, and drilled out the small round lights below the headlights, which will get turned down clear sprue. I finally have started painting! ~whoo hoo!~ My biggest concern is the body, of course. Testors white primer, thicker over the filler areas, which show up really bad after spraying paint. Semi gloss black many parts. Flat black on the chassis, radiator faces and inside the wheels. Alclad polished aluminum on the steering wheel, and stainless steel on the radiator. I messed up the first fuel filler, got another of my resin copies, sprayed flat black, the Alclad came out flat too, very interesting how important the black needs to be very smooth. I'm so engrossed working on this non-stop, work can wait, shower once a week (ha ha), I'm thinking about several next steps when not building, but my eyes were having trouble focusing today. It's kind of fun, having a deadline, knowing I will (think positive) finish. I'm undecided on seat color, the original car had blue seats, the resin seat illustration is blue (and really nice units, no cleanup other the casting pins). Playing with the idea of flat red paint, just to avoid the pitfalls and the extra careful work of a shiny concours quality finish, that alone would take a week, it would add to the blasphemy and sacrilege of this theme (grey primer really would ).
-
Very cool! The wheels modernized the classic design. What tires and sizes are they?
-
I'm following this build too! I have a project that needs similar modifications.
-
near bubble-headed bleached
-
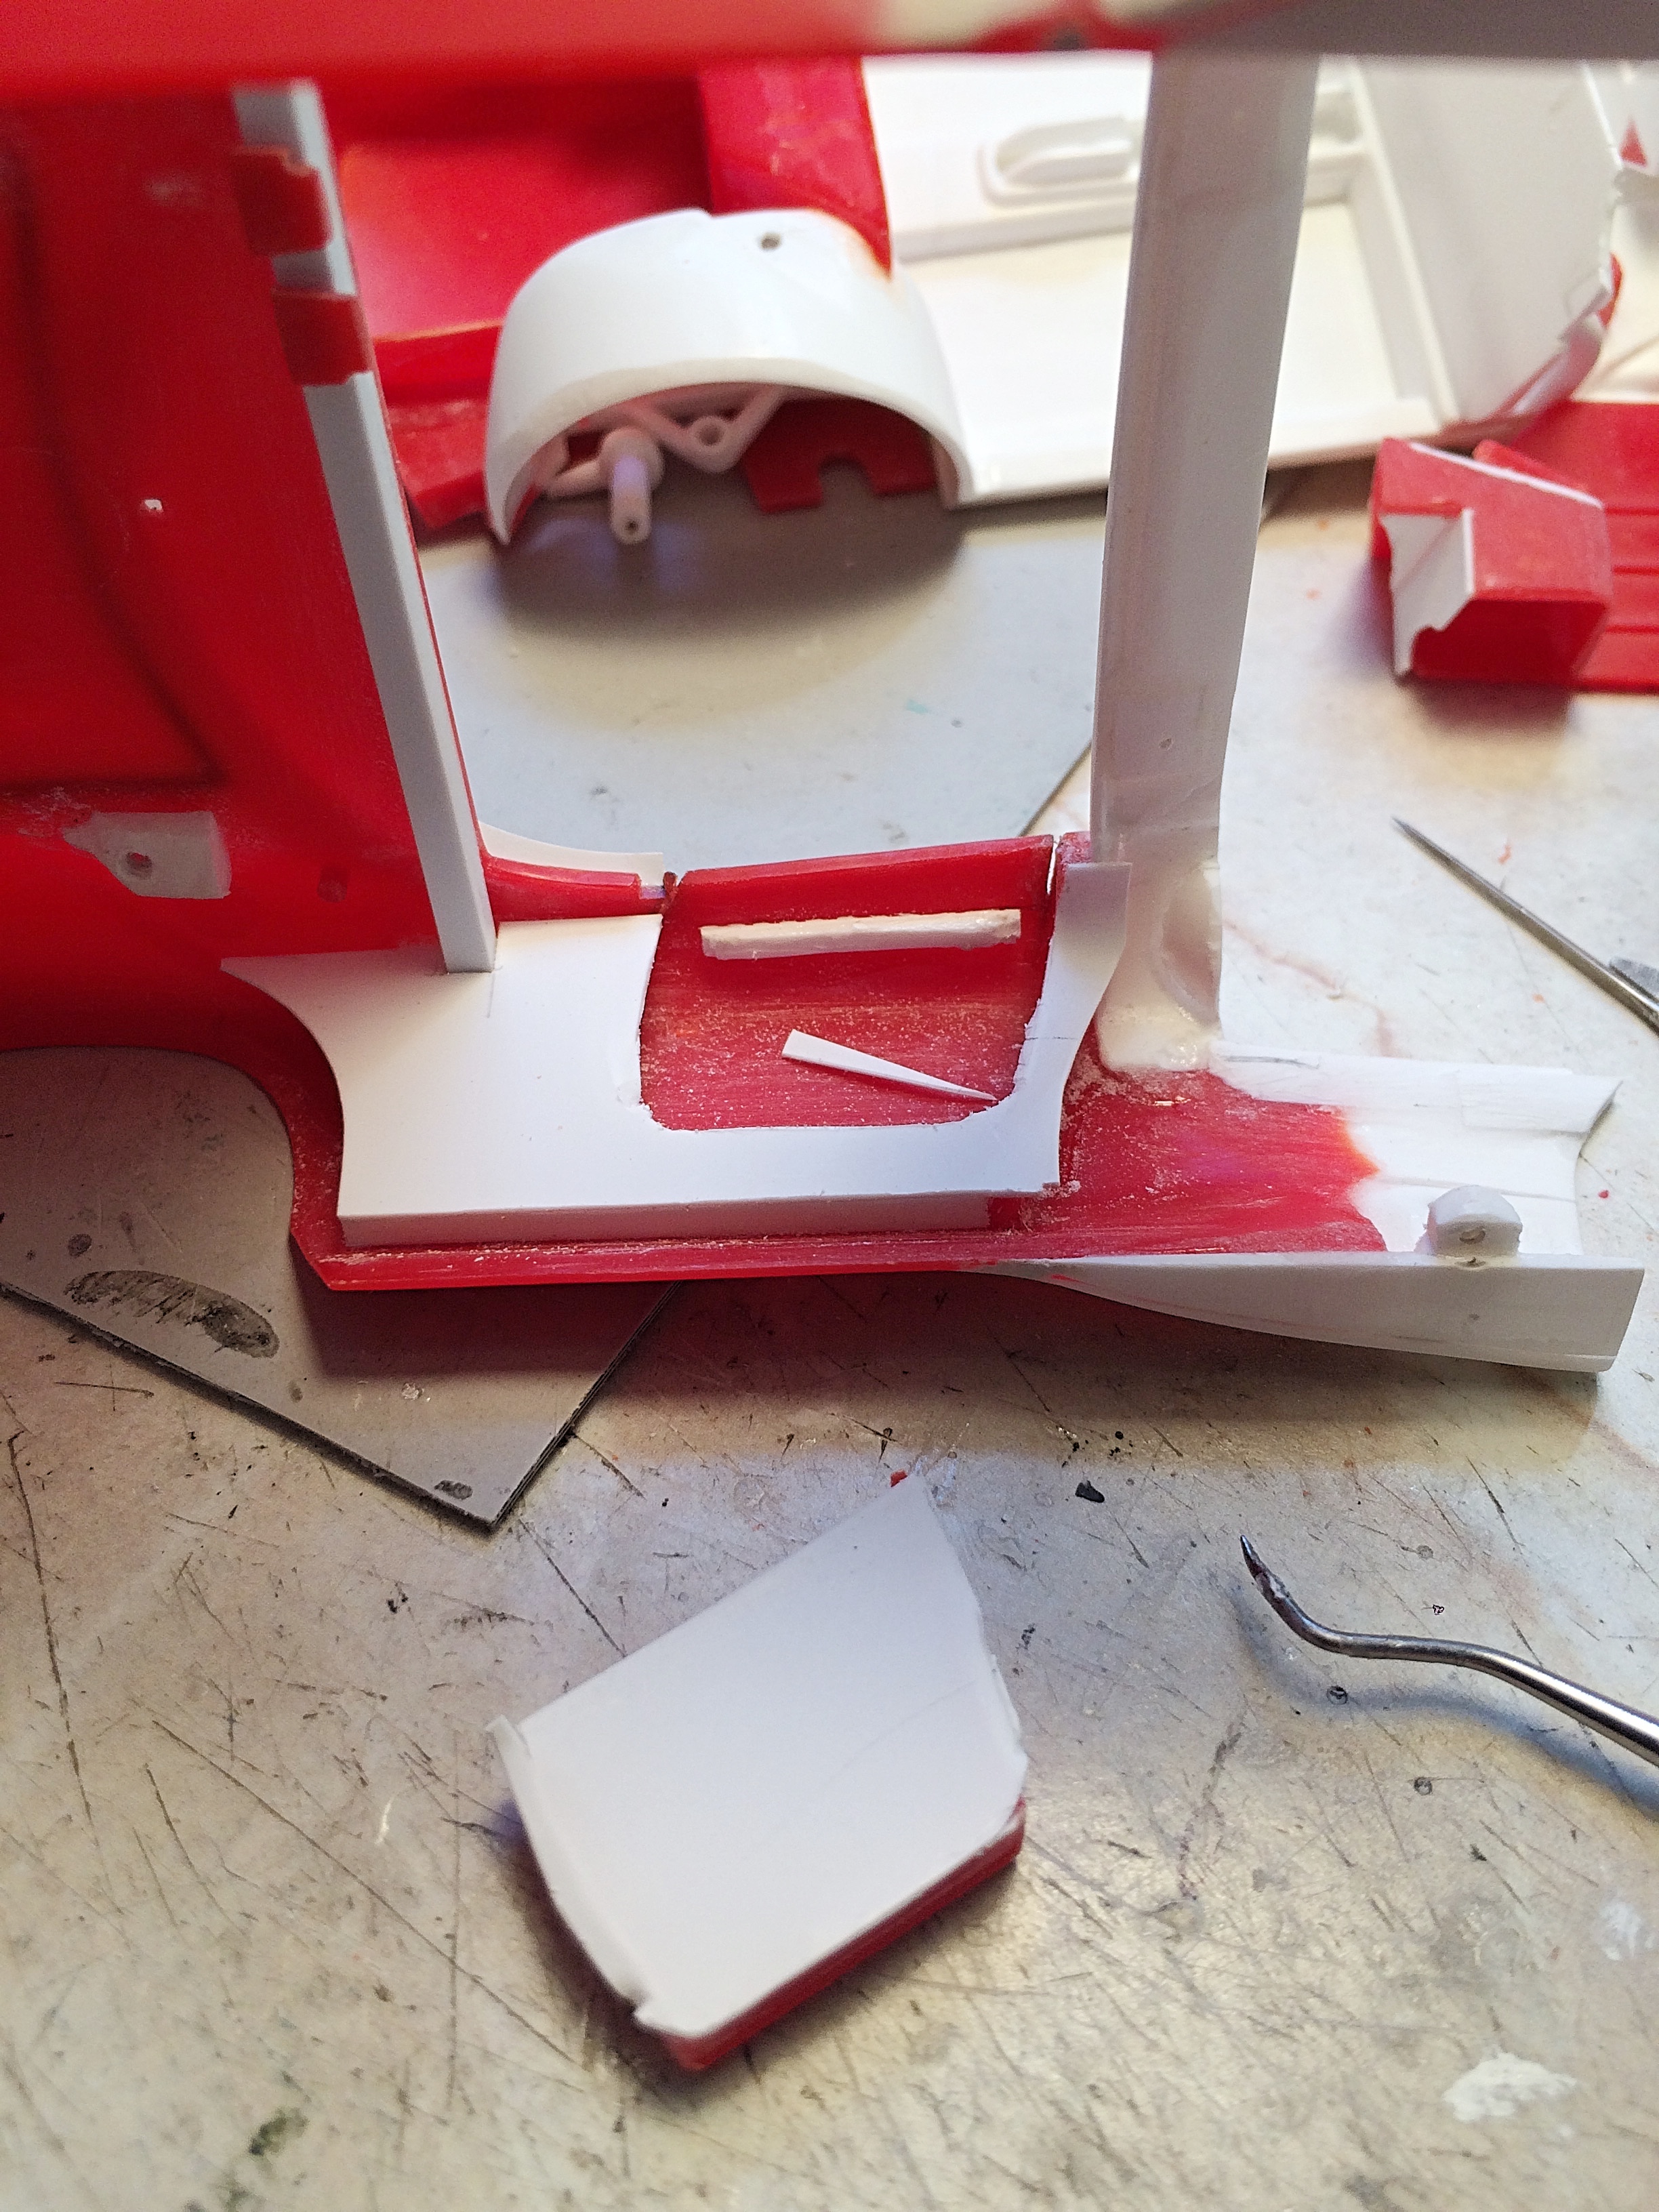
Hey, you inspired me during your Pagani build! I'm wiped out tonight, just posting pictures, can add explanations later. I need to start painting tomorrow. Right door "panel" next interior subject to make. Barely tacked on the door jamb, glued the whole panel on. Then I cut out the door, since the gap is so large, had room for error, pried out the door after cutting through. I painted the scribed line so I could see where to place the jamb pieces. The headlights are from the parts box, their design is odd, the bulb sticks out so much, the lenses have holes, will carefully cut down for the new lenses. Friction fit within the holes that have been filed to shape. Also fabricated a mount for the prancing horse in the grill, cut out of photo-etch fret. Door is done. Marked the headlights so they go in perfect again. I've been building up inside the body with superglue and baking soda, I'm impressed how strong this glue is. Detailing the engine, Hollywood style. The accessories are parts box carburetors, cut off one side enough so they mount on the block. Used the Waldon punch to make pulleys. The console needed just a little trimming at the rear, add to use the off-cut bumper part somewhere, looks like a speaker grill, even though there is no radio (plug in the smartphone). Another parts box find added to the fuel tank. I made these spring/shocks decades ago, finally found a home. Made mounts from body off-cut (some of the Modena body is really thick), hot-wire cut out, filed and sanded to shape. Accessory belt is simply cut styrene sheet, cut ends at an angle. Had to modify the air cleaner box a little. [sorry for the sloppiness, don't know what's going on with links I never added]
-
the lumberyard ripsaw
-
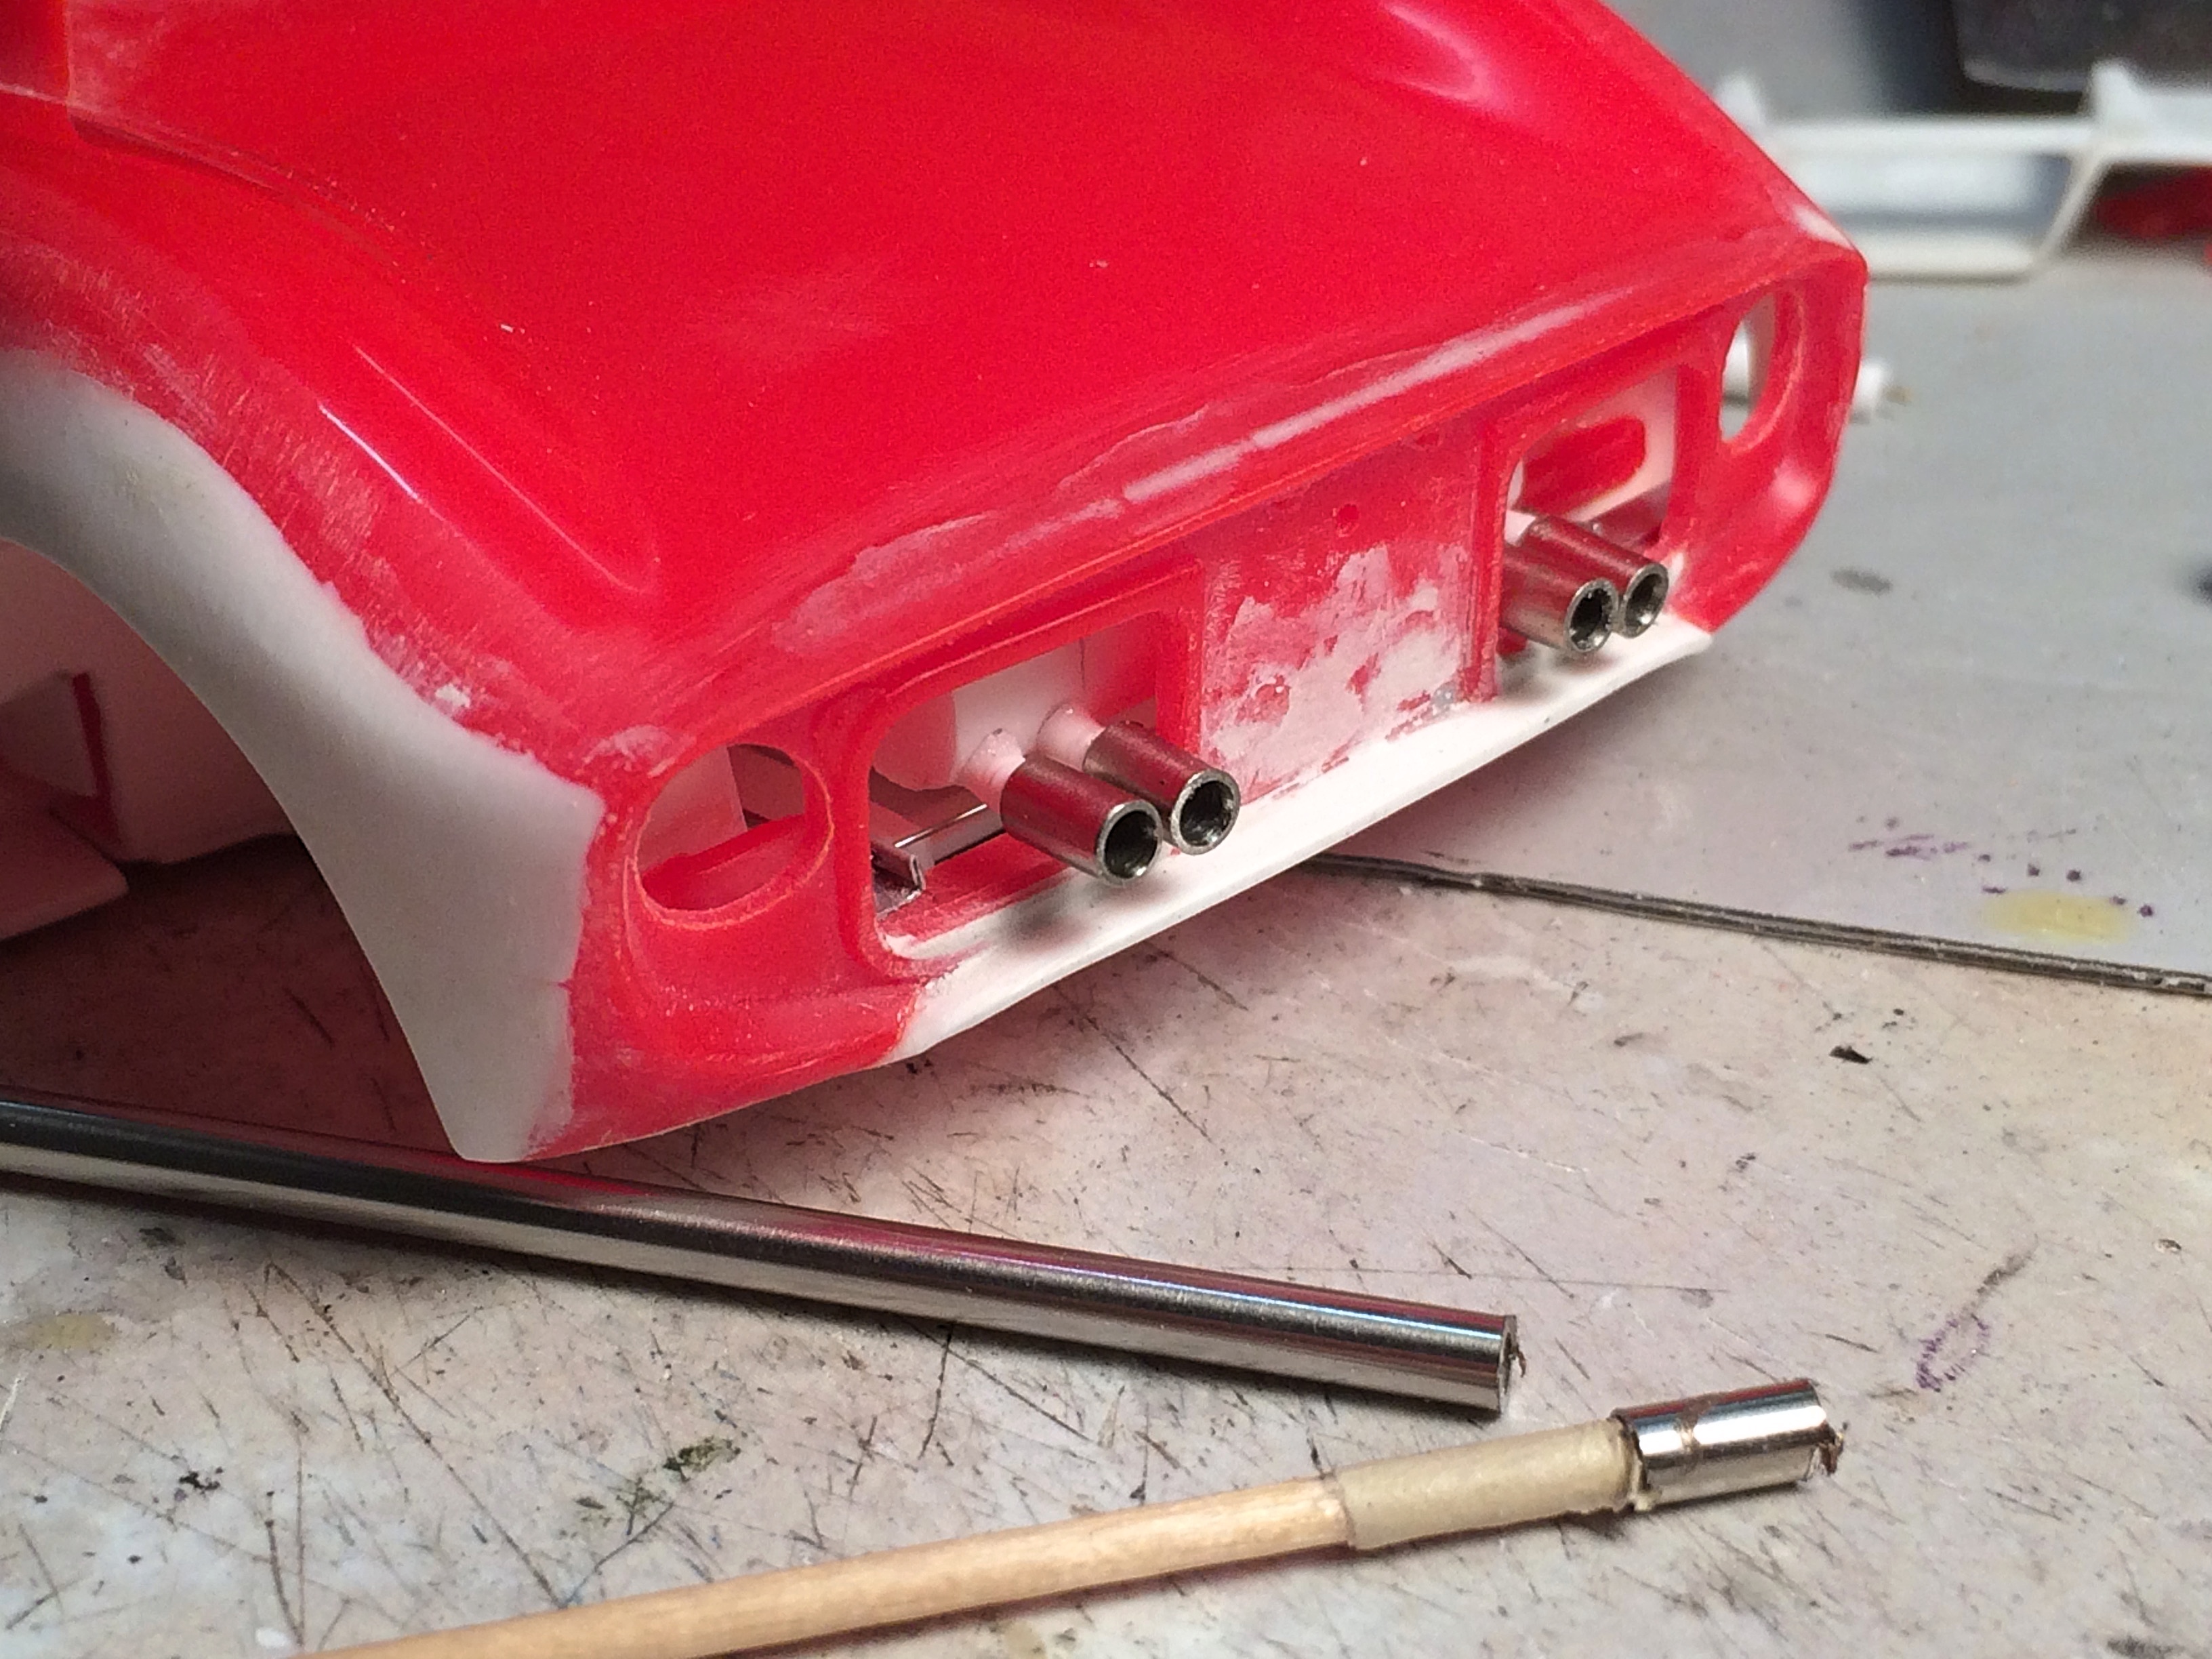
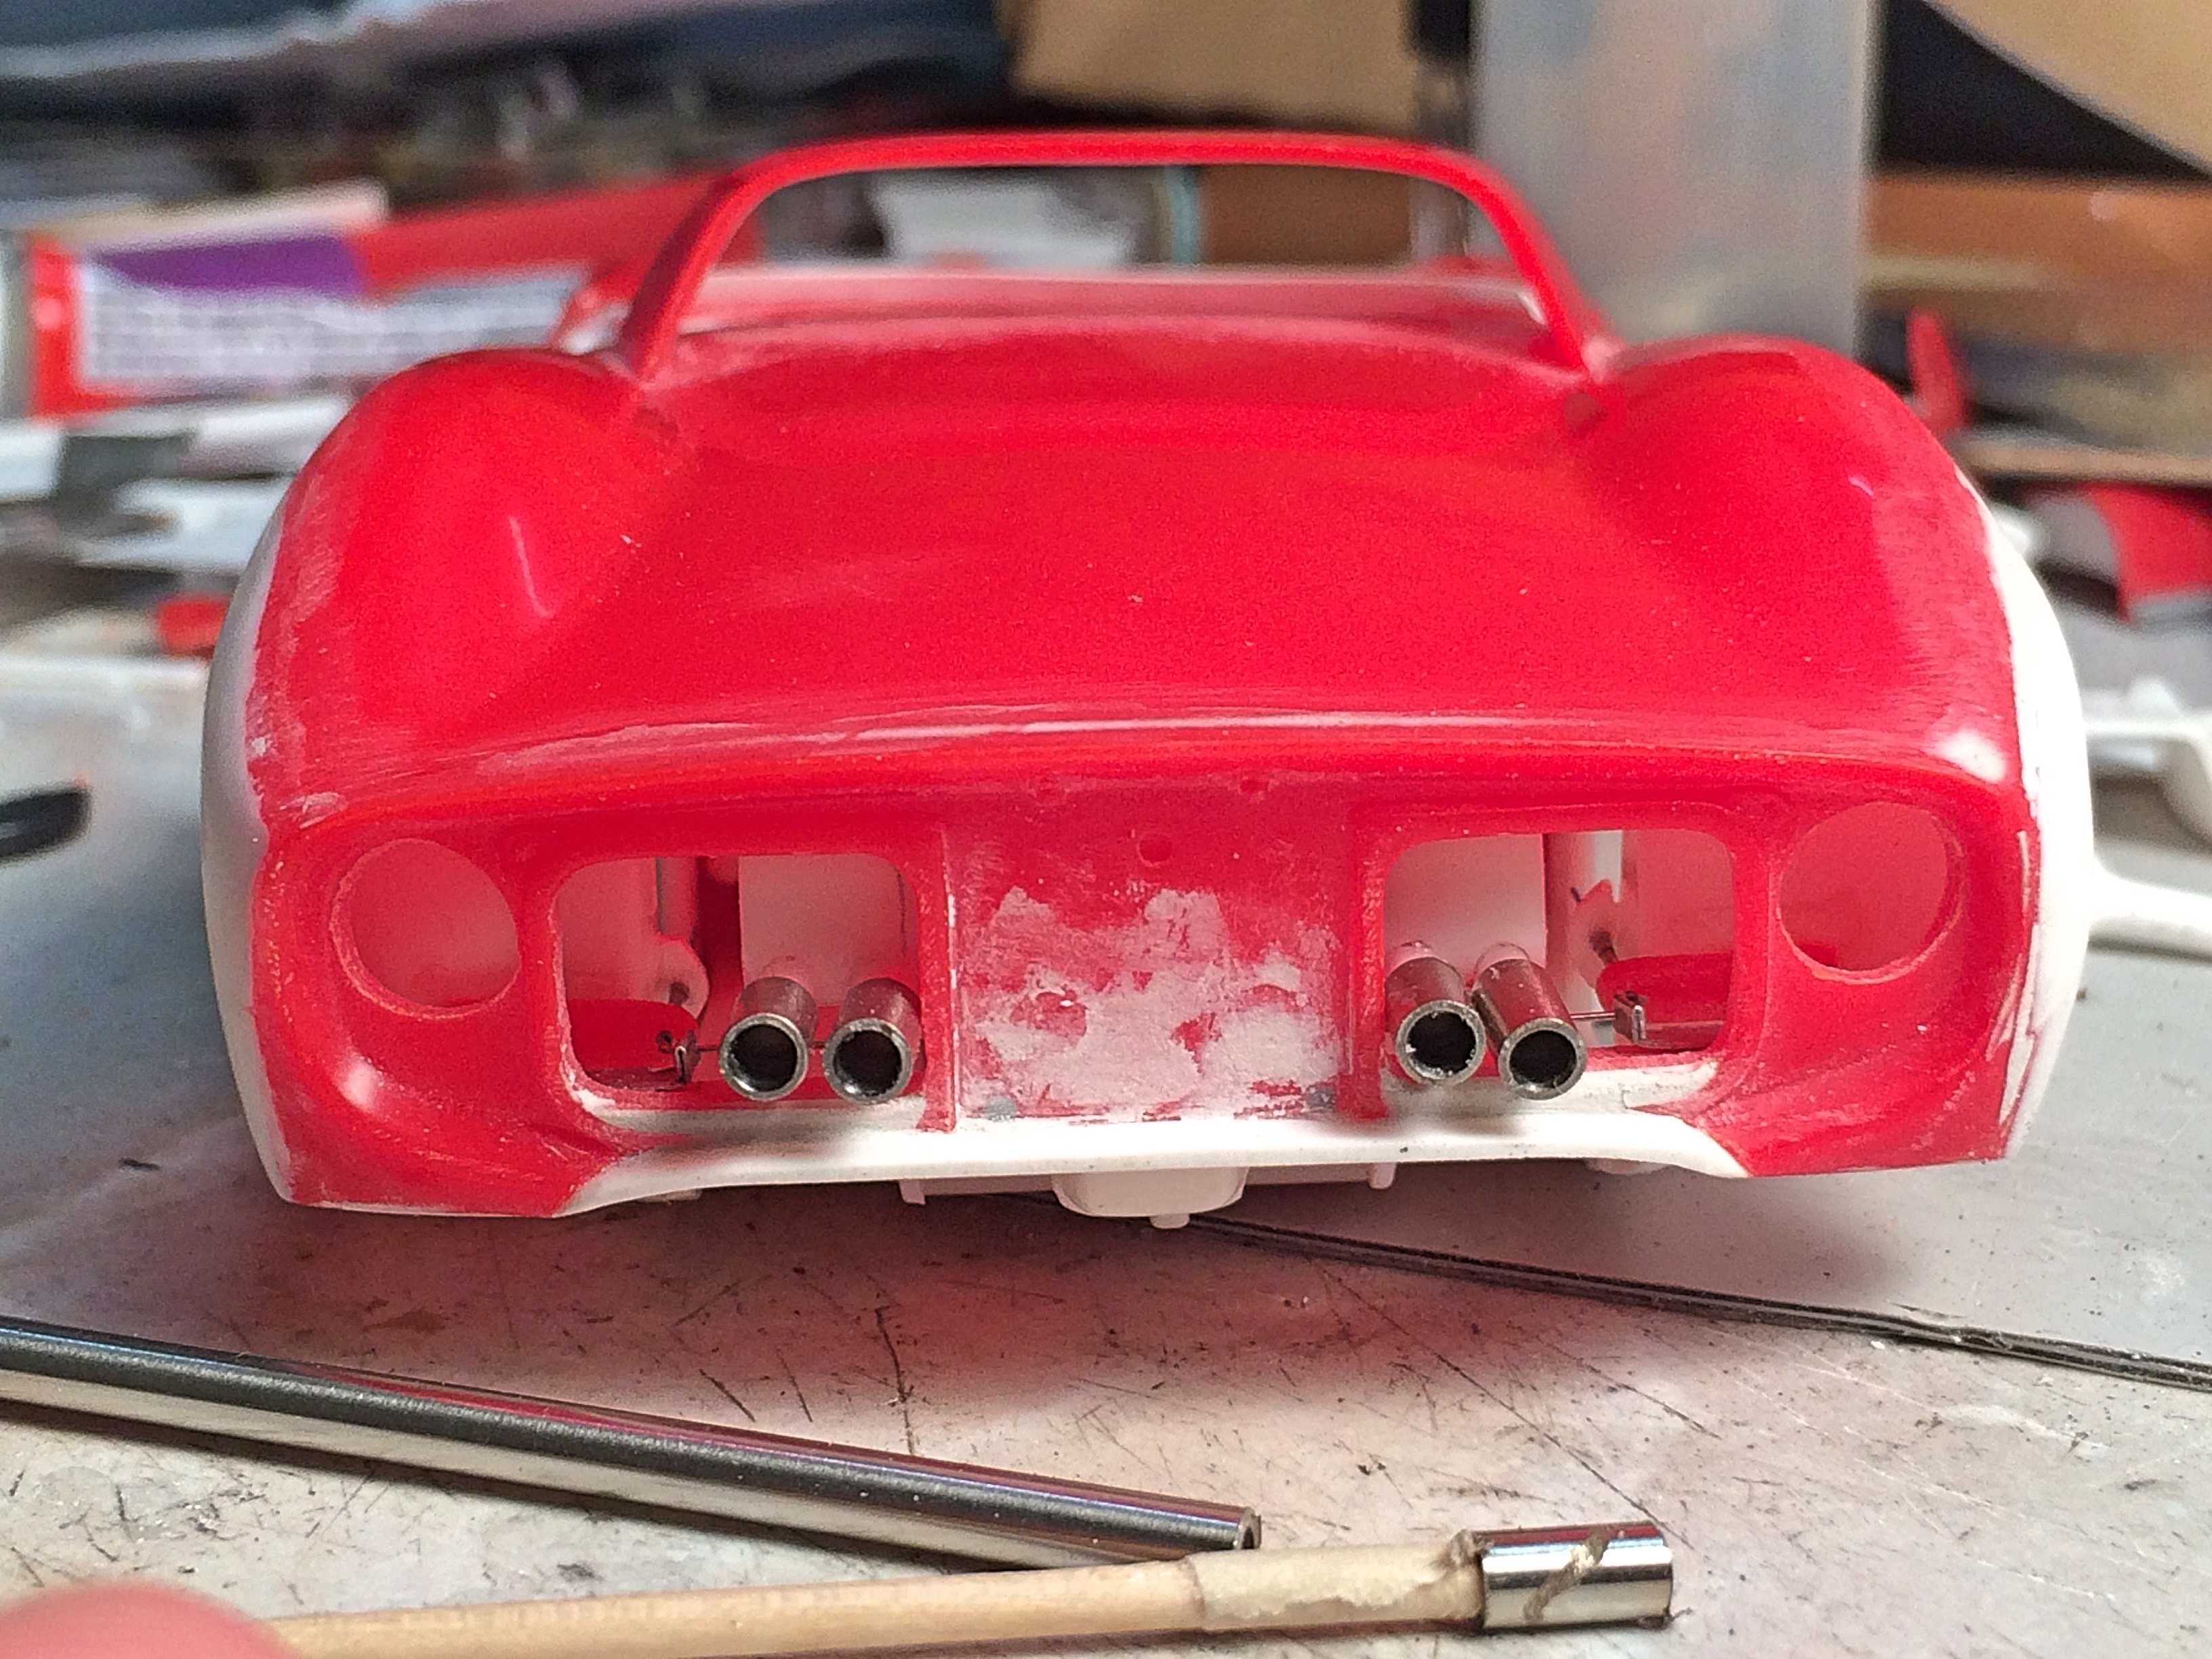
Engine time. The Revell lacks many lower details that the Tamiya kit has (I saw pictures while researching the engine), funny they detailed the bottom of the pan so well. I filled the cat and muffler voids, and added to the engine block. Used a file to continue the cat corrugations around the bottom. I decided to make the muffler look like an aftermarket unit, especially since the exhaust tips will be different. I have stainless steel tubing that is about the same size as the kit tips. Used up a #11 blade to ream out the inside, cut with a Dremel cutoff disk, and turned on a toothpick to finish the other end. Screwed up one tip by the disk spiraling around the tube, takes vice grip hands! Yea, horrid alignment, need to adjust everything later. One reason I wanted to do only two tips, but you gotta have four to be cool, look at a Skyline, Maxima, Cadillac, etc. (ever notice how many American cars have fake tips, one has soot, the other you can see though). Can hardly wait to make the grill mesh with and edge around the tips.
-
Lights can make or break a build, looking forward to your result!
-
It was yesterday, MicoMark rivet decals, and scraper tools.
-
are allowed here.
-
The term "forged" is used by Lamborghini, since they are using it on their cars, mostly as trim parts. I have a few kits, namely the Setso Elemento, that pioneered using carbon-fiber for everything, even the exhaust tips; the tub is this stuff. Hope to find this when I get around to building a Lamborghini.
-
Thanks. I need to call it quits, or I'll never finish. Thank you. Since it's difficult to see that I'm revising some things, not taking so many pictures (yea right). The engine fuel tank part is really tight, and I have to slip in as the body gets spread over the chassis, wish I could glue in but the body can't spread any more. Today I wanted to hinge the engine bonnet. Always need to think how all this will go together after paint, I have glued in a plastic strip under the grills on the bonnet, which the hinge mounts to. Used the photo-etch bender to fabricate aluminum plate, finished unit being held in the tweezers, other unit in the bender. The bonnet needed to move back in order to clear the exhaust tips, and be able to open. I have what is basically hypodermic needles, and matching size guitar wire. I used two different pliers to bend the hinge plate. When I bent the tab for the wire, doubled up and superglued. Drilled using the wood block for support. First hinge has been slipped on, for now I crimp with the pliers, will glue during final assembly. I use the steel square to help make sharp bends. Thought I would add hood pins, the real car uses leather straps at this location, this adds a street machine detail. Took some file work so the wire clears the hinge plate, and I don't need a prop stick! The radiators have been a fitment issue. I have also added a locator plate to the hood, at the wheel opening. I had mounted the tubing in plastic blocks, in case adjustment was needed, used tube cement. That was fun!