absmiami
-
Posts
4,780 -
Joined
-
Last visited
Content Type
Profiles
Forums
Events
Gallery
Everything posted by absmiami
-
photo 1 Bob leaning into the engine bay of the Belond Special photo 2 of the Belanger Special while being restored in one of the Museum's off site restoration shops - circa - about 1992 - Bob gave me a behind the scenes Museum tour - including a trip to this restoration shop I've also got a number of his drawings - the Chaparral, and Cummins Special - and some frame drawings and some others .... he studied and drew the features of the Watson and the Kurtis frames - in great detail

-
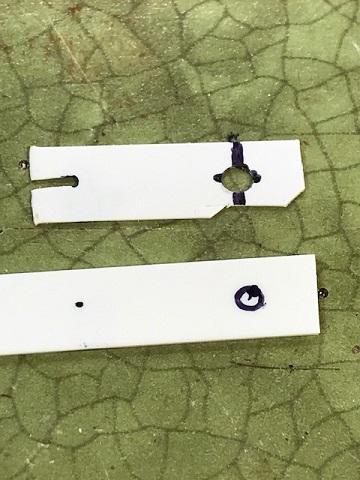
here's something odd the profile openings on the kit nose for the suspension pickups are different left and right the left side opens nearly at the peak or of the nose - the right farther back studying the frame shots and the Clidinst drawing .... the car ran offset torsion bars - front and back - meaning the torsion bar at the front left is about 2 scale inches longer than the right - same at the back - not sure but the other Watsons probably had this same feature ... so I'll make these changes to the frame and then make changes to the sides of the nose ...
-
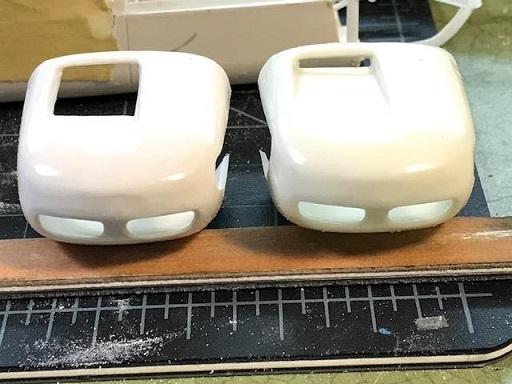
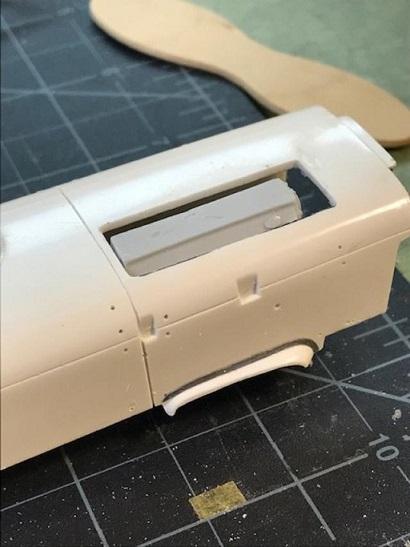
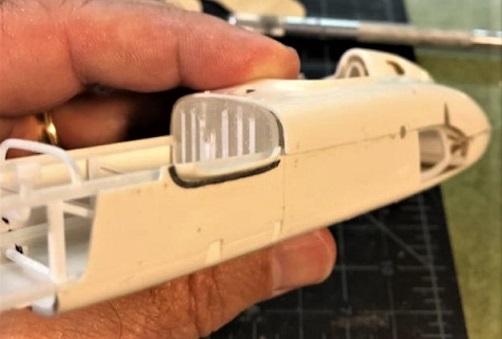
thing 4 the kit nose has a scoop that is too shallow the engine compartment scoop on the Willard Battery Special is deeper - at least 4 scale inches in height so I removed the plastic forming the base of the scoop and replaced it with evergreen plastic to form a deeper scoop after a lot of sanding and filing - still need to add a small vertical stake at the mid-line of the nose Foyt's car has a scoop that is even larger - there is an aftermarket mod for that ...
-
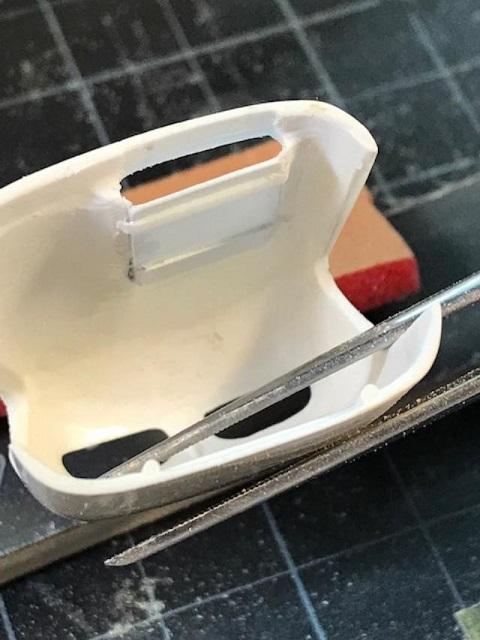
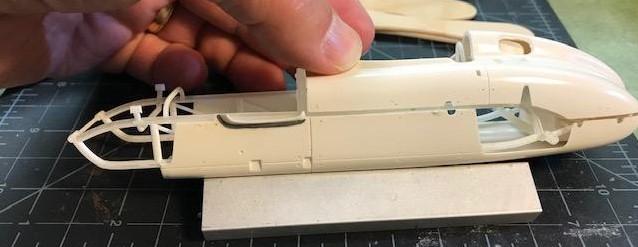
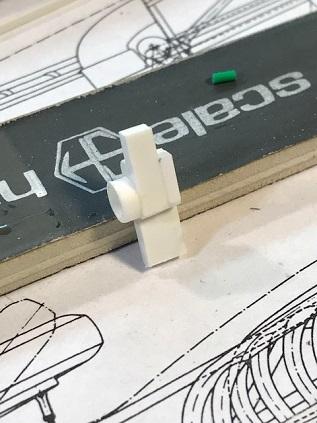
thank you Ranchero so some test fitting - that's why I made the front brace first ... the peak of the timing chain cover still interferes with the engine cover - but not too much there is enough room under the bulge with the new renshape profile IF i make a small reduction in the height of the timing chain cover which is what I've done here with a razor saw and some files this seems to work so I'll make the same change on the other side
-
have you seen the Netflix Shelby doc put together by his sons and grandson ???? better than the Ford v Ferrari movie in some ways more car stuff and less Hollywood ....
-
forgot to mention something that maybe you already know ... "Jones" is Parnelli Jones - whose place in Indy lore is secured not just as an Indy winner, but also as one of the few brave men who won in front engined roadsters - and was also willing to race a car with a turbine engine and with an engine in the rear - so as a teen - he, and Mario - and of course Jimmy - were three of my first racing heroes .... and for those of you newer to the hobby - Chris Etzel is no longer with us - so this is a sort of tribute build... treat yourself to some of his kits or castings - anything that you can get your hands on ..... - he was a cottage industry resin casting pioneer - sorry that I never got to meet him .... will also be using the scale drawings of the Willard Battery special as drawn by the late Bob Clidinst - these are very valuable - he too is missed I actually did get to spend a day with Bob on my trip to Indy years ago - I know that some of you may have also crossed paths with Bob - he was - for those of you who did not know him - an excellent modeler himself - for the record ....
-
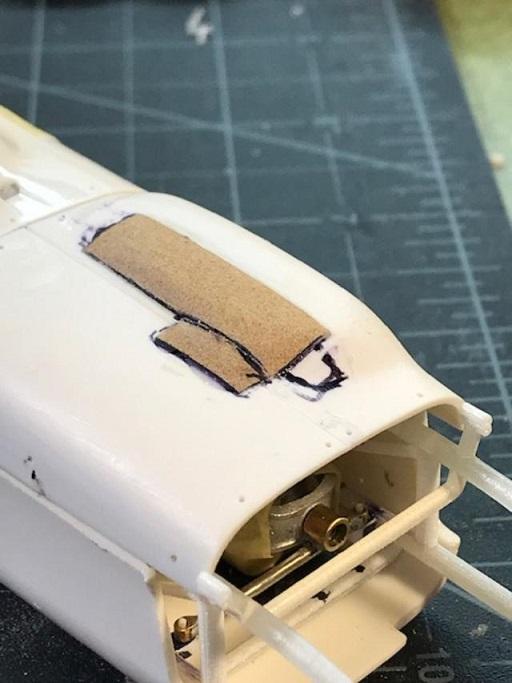
I always have some scraps of renshape handy .... 2 plugs of renshape were superglued into the opening made in the engine cover the kit eng cover bulge has a taper that I have to eliminate to make room for the top of the cyl head the idea is to shape and sand the renshape to follow the bulge front to back without the taper so once I've got some putty and paint and decals on the cover - there won't be much difference between the kit part and the modified part but since I am re-shaping a portion of the cover on either side of the mid line - I can make an engine cover hinge but probably can't use a working hinge - that's okay .... the shaping and finishing of the renshape is done with some sanding drums, sanding sticks, and some diamond coated foredom bits ...
-
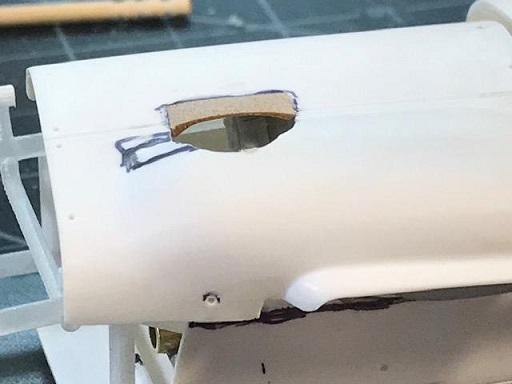
so in order to fit the Etzel engine I have to perform some plastic surgery ..... the hole in the engine cover was cut to see what sort of profile I would need to clear the top of the timing chain cover - now for a plug of renshape .... the idea is to slightly change the profile of the bulge in the engine cover without a drastic change to the basic shape of the engine cover .... forgot to include the shot of the engine brace from the old Road & Track Salon ....
-
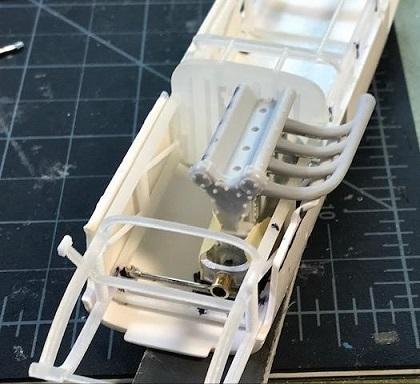
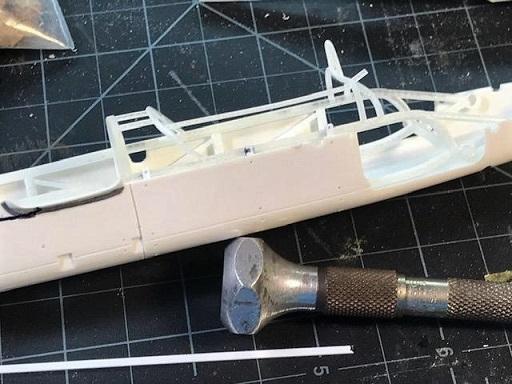
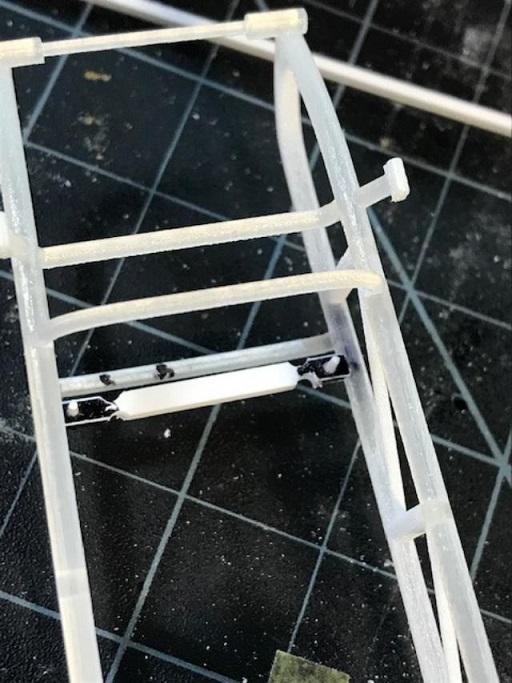
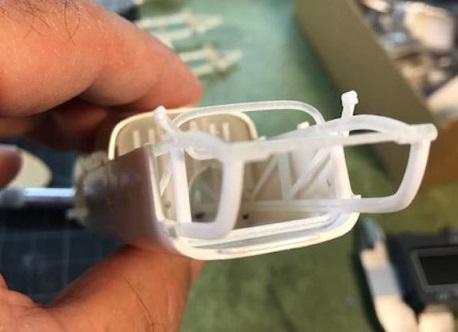
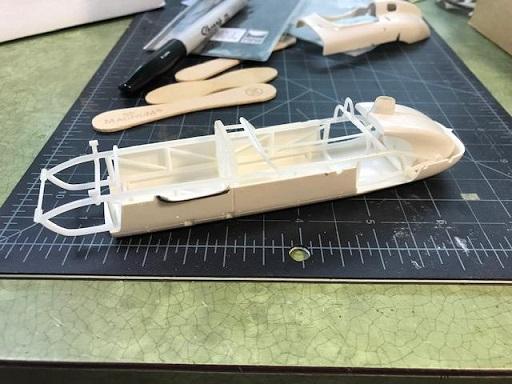
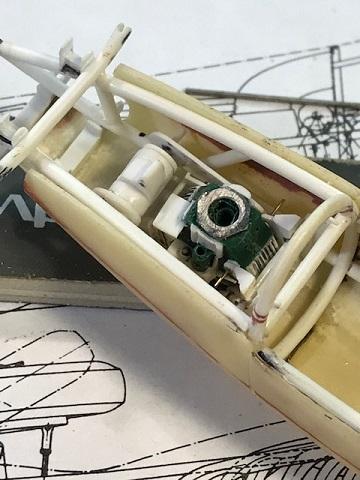
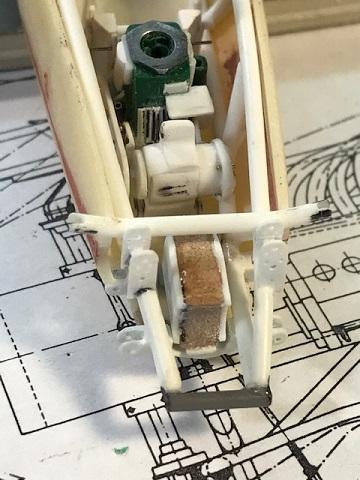
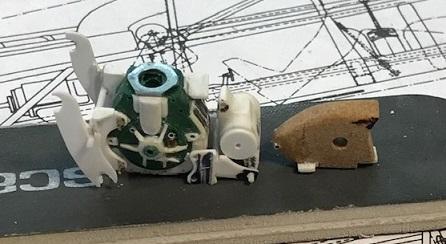
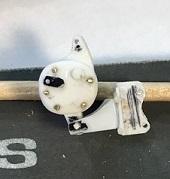
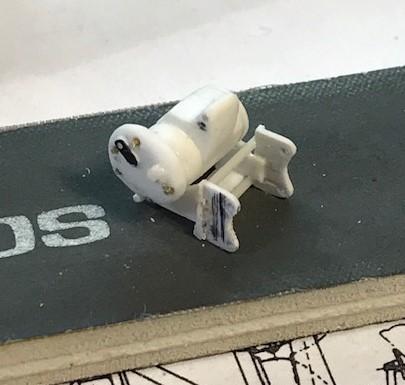
I'll need to make a vertical brace for the lower eng brace but these shots show how the Etzel casting fits into the 3D frame and the kit bodywork
-
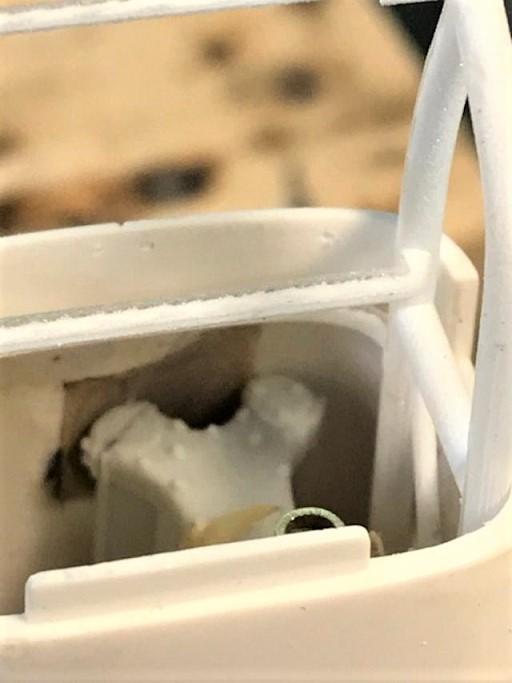
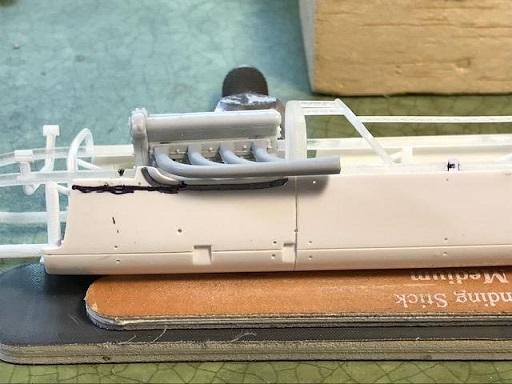
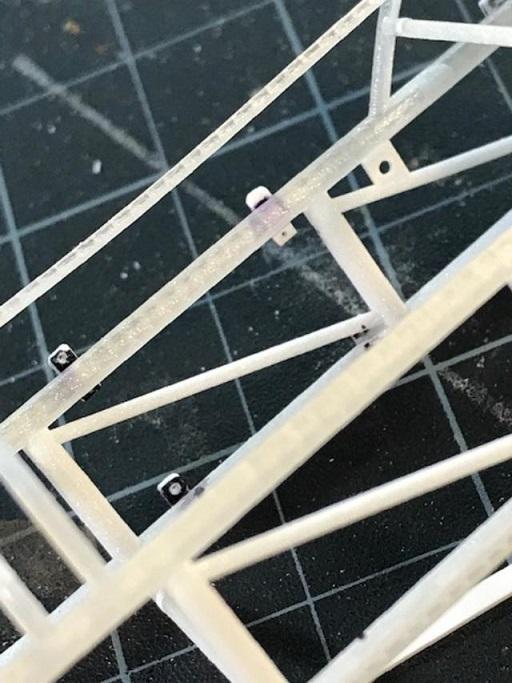
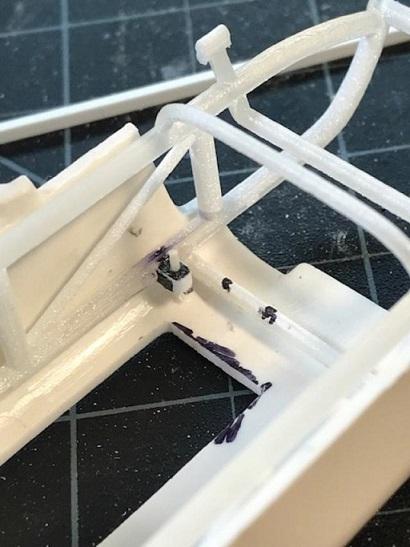
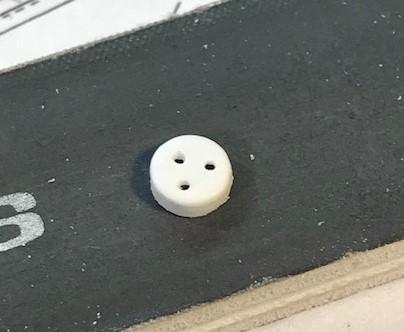
thing 3 your can't fit the Etzel engine too low in the chassis because the exhaust manifold has to leave the engine bay through the corresponding manifold opening - which of course means that the engine cover will not fit over the profile of the cyl head - particularly the timing chain cover at the front of the engine - I think that I've got a fix for that ... the other shots show some of the fastener posts made from Evergreen stock and glued to the frame members - there will be quite a few more of these ...
-
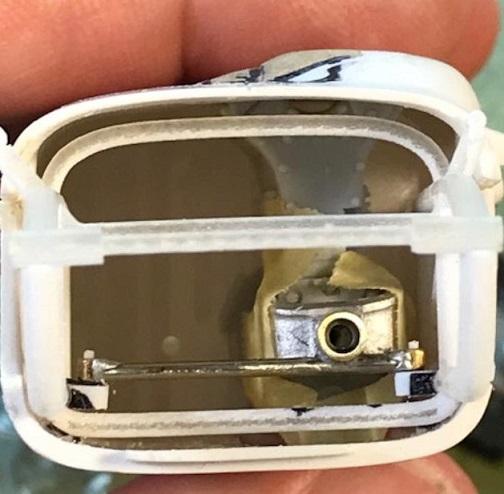
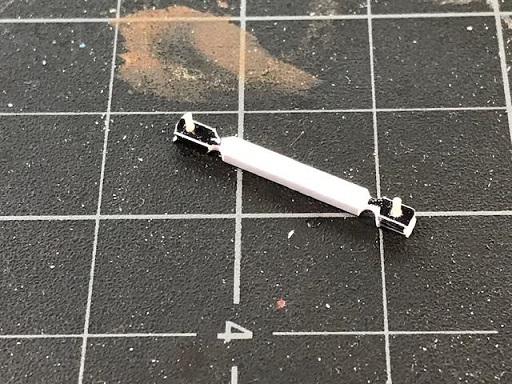
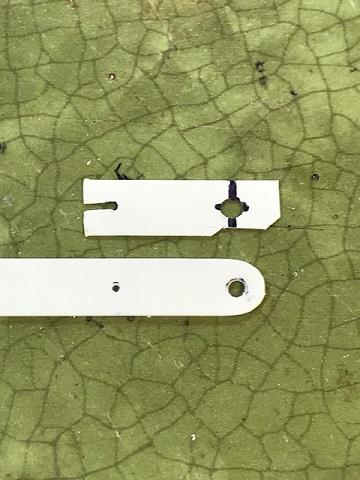
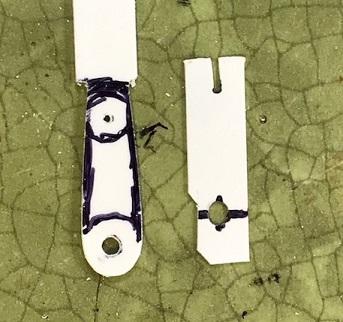
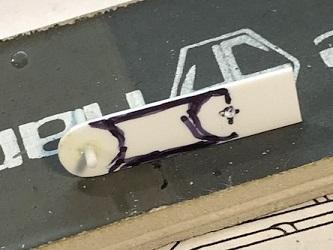
the first photo shows the kit engine brace that I'm replacing with a nickel and brass soldered brace that will sit on frame posts made from Evergreen stock and round rod this will look more accurate and give me a good sound fitting for the Etzel white metal casting - so I can fit the engine casting and figure out what fits where - or doesn't ...
-
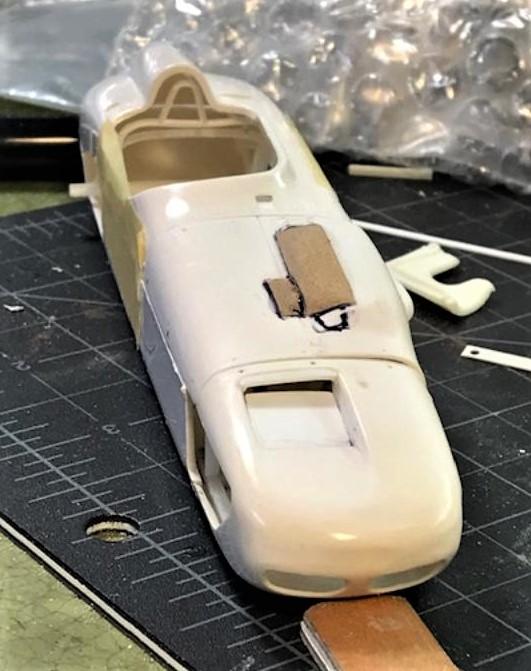
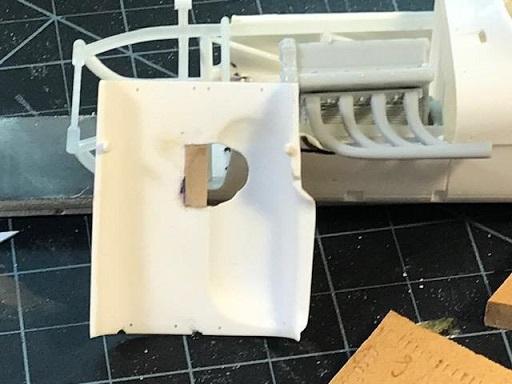
thing 2 these Watsons had the 255 Offy installed without a tilt - straight up and down - but with a very slight pitch down at the front the Etzel casting is a super accurate 270 Offy - which is about 1/2 inch taller than the 255s that were used at Indy from about 56 onwards but that's only .020 inches so let's see if the Etzel casting will fit ... many of you know that the kit engine is undersized and too short and just plain funny looking so I started by cutting an opening in the body at the base - because the Watsons raced with the sumps protruding down through these openings - the Etzel engine casting has a separate part for the sump cover - don't need that yet .....
-
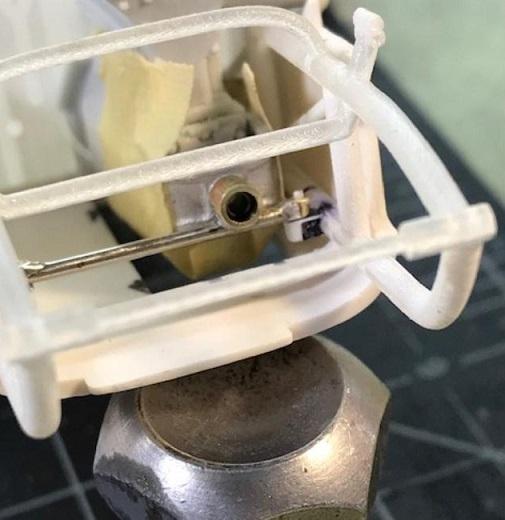
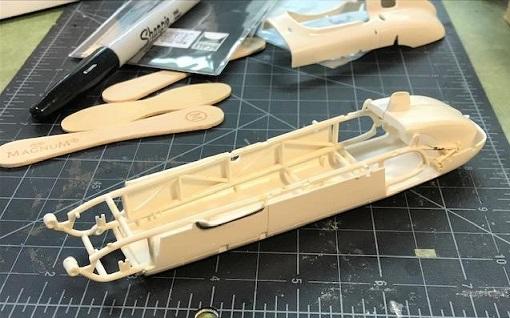
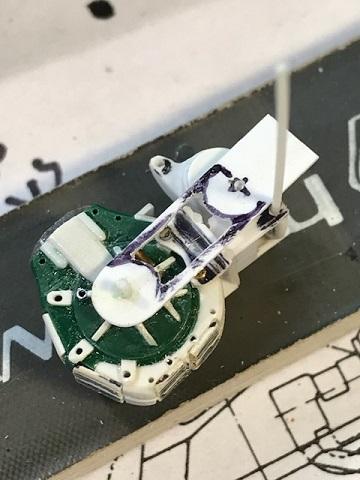
the third shot has the kit frame in place, with the kit fuel tank for reference the plugs at the base of the body were reduced / trimmed to better site the 3D frame after the trimming, the last shot shows that, yes, the frame will fit nicely into the kit body but the intrepid modeler will have add all of the various suspension bits and the many braces and fastener plates visible on period frame photos and if you are making Jones' Willard Battery Special - the front spring pickups - which protrude up and away from the bodywork on the Foyt car - have to be clipped off - the Jones Watson roadster brought the pickups inside the profile of the frame ...
-
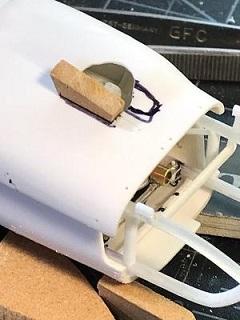
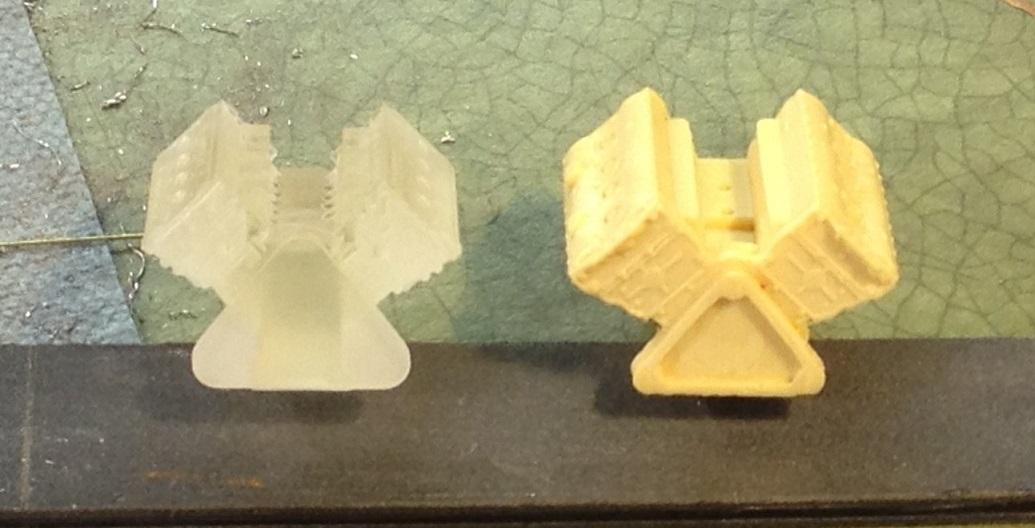
thing 1 the 3D printed frame is much more accurate than the kit frame - which has frame members that are too large but the Indycals frame won't fit into the kit body without some trimming and changes trimmed the top of the engine bulkhead but also thinned the corresponding profile of the cockpit covering the idea is to get the frame cross members and the bottom of the bulkhead as close to the base of the body work as possible the sides of the kit body also has to be scribed with the panel lines and drilled for the openings for the fasteners this won't be real time for a few postings - I've done most of this stuff over the past two months
-
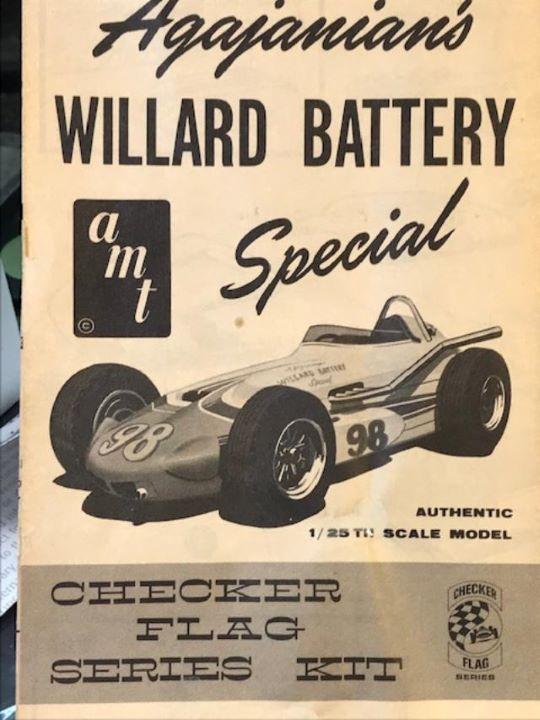
so i've had a couple of AMT kits forever and then I got some offy engine kits - casted originally by Chris Etzel but they were not designed to fit into the AMT kit - Etzel designed them for one of his great resin kits - the dirt track car then last year I got the Indycals Watson roadster frame - they are sold on Shapeways - which is intended to be used in the AMT kit ... which was one of the first detailed 25th sc race car kits - but the detail is, well, kind of vague - a lot .... and dimensions were guess work so down the rabbit hole I go ......
-
these photos were taken at the Indy Museum many moons ago always figured i'd get around to building the AMT 25th sc kit ....
-
RB Motion makes a set of hardware for the Ebbro Cosworth engines in 20th scale I think the bolts and cap screws are small enough to use in 24th scale - I've ordered a couple of sets scale hardware can also be used …. the other engine parts can be modified from the Heller kits - the pumps, filters, fuel injection parts etc thinking about making a Lotus 79 Chassis to display with this one …. does it bother anyone else that we've never had properly detailed 24th scale Lotus 72 and 79 kits ??
-
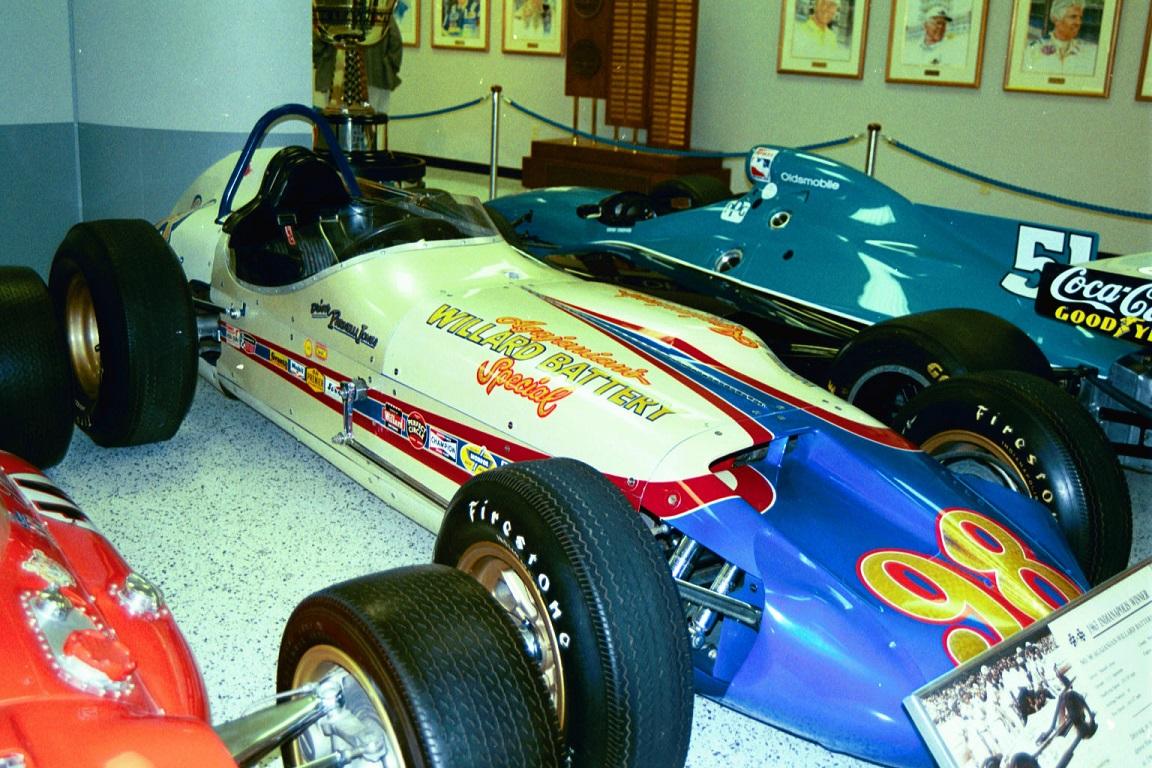
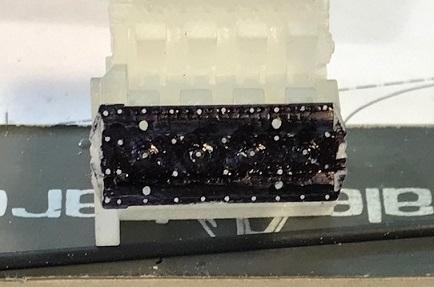
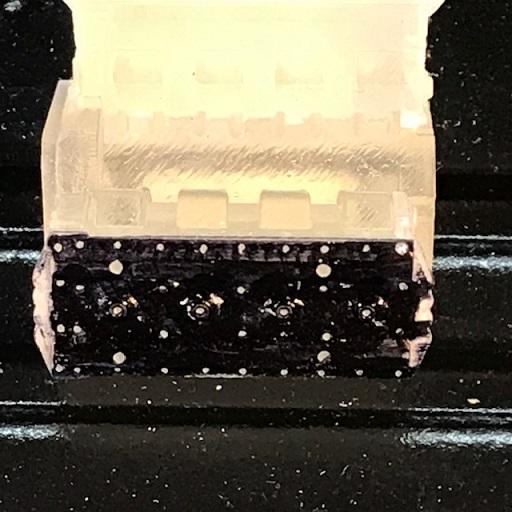
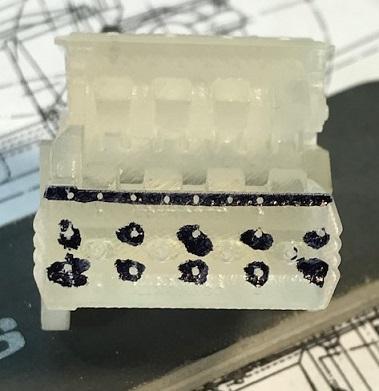
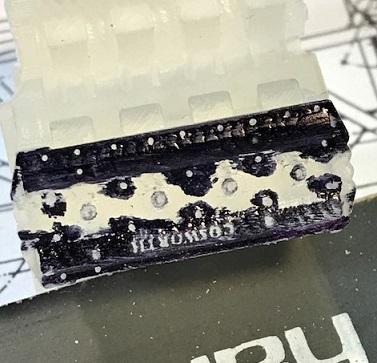
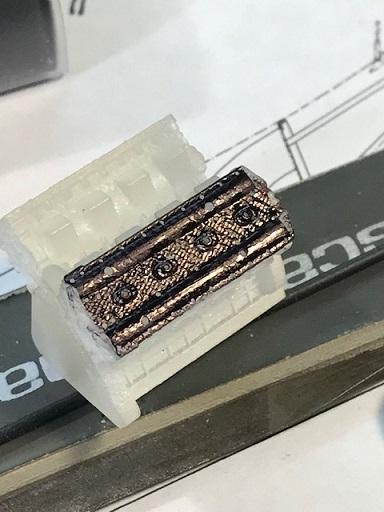
the resin castings in the above photos are a repop from the old Heller engine - with all of the mistakes think its fr one of the old Joker kits …. for this engine - I'm drilling holes for some after market hardware each cam cover has about 36 bolts of differing sizes the Cosworth script if sanded off - to be replaced with FORD script ...
-
Indycals' shapeways listings include a very nice Cosworth you can order it in 24th or 25th script on cam covers is "Cosworth" - so it is designed to be used in Indy cars but the printed engine corrects several major flaws in the old 24th scale Heller GP Cosworth engines ... 1 the cam cover has the correct scale dimensions - the Heller did not 2 the exhaust ports are located correctly - not so for the Heller 3 the sump is depicted accurately - the Heller? not so much ... 4 the cyl heads are correctly offset - the Heller heads were symmetrical - oops ... so it is worth the trouble to modify this engine for use in 24th sc grand prix cars ...
-
thanks to both and a question for gramps has Mike ever posted a build on this forum ??? I've got most of his hauler drawings got an idea ....
-
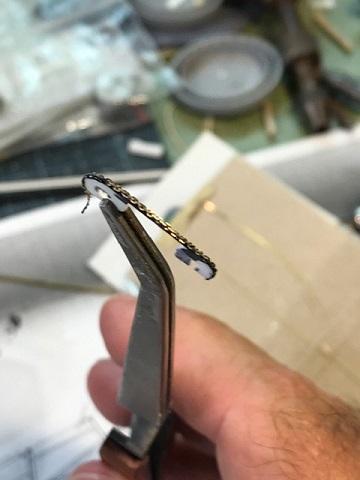
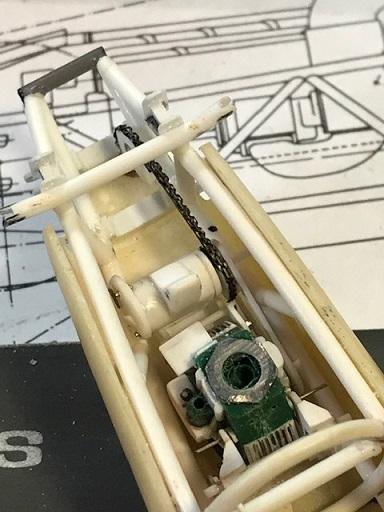
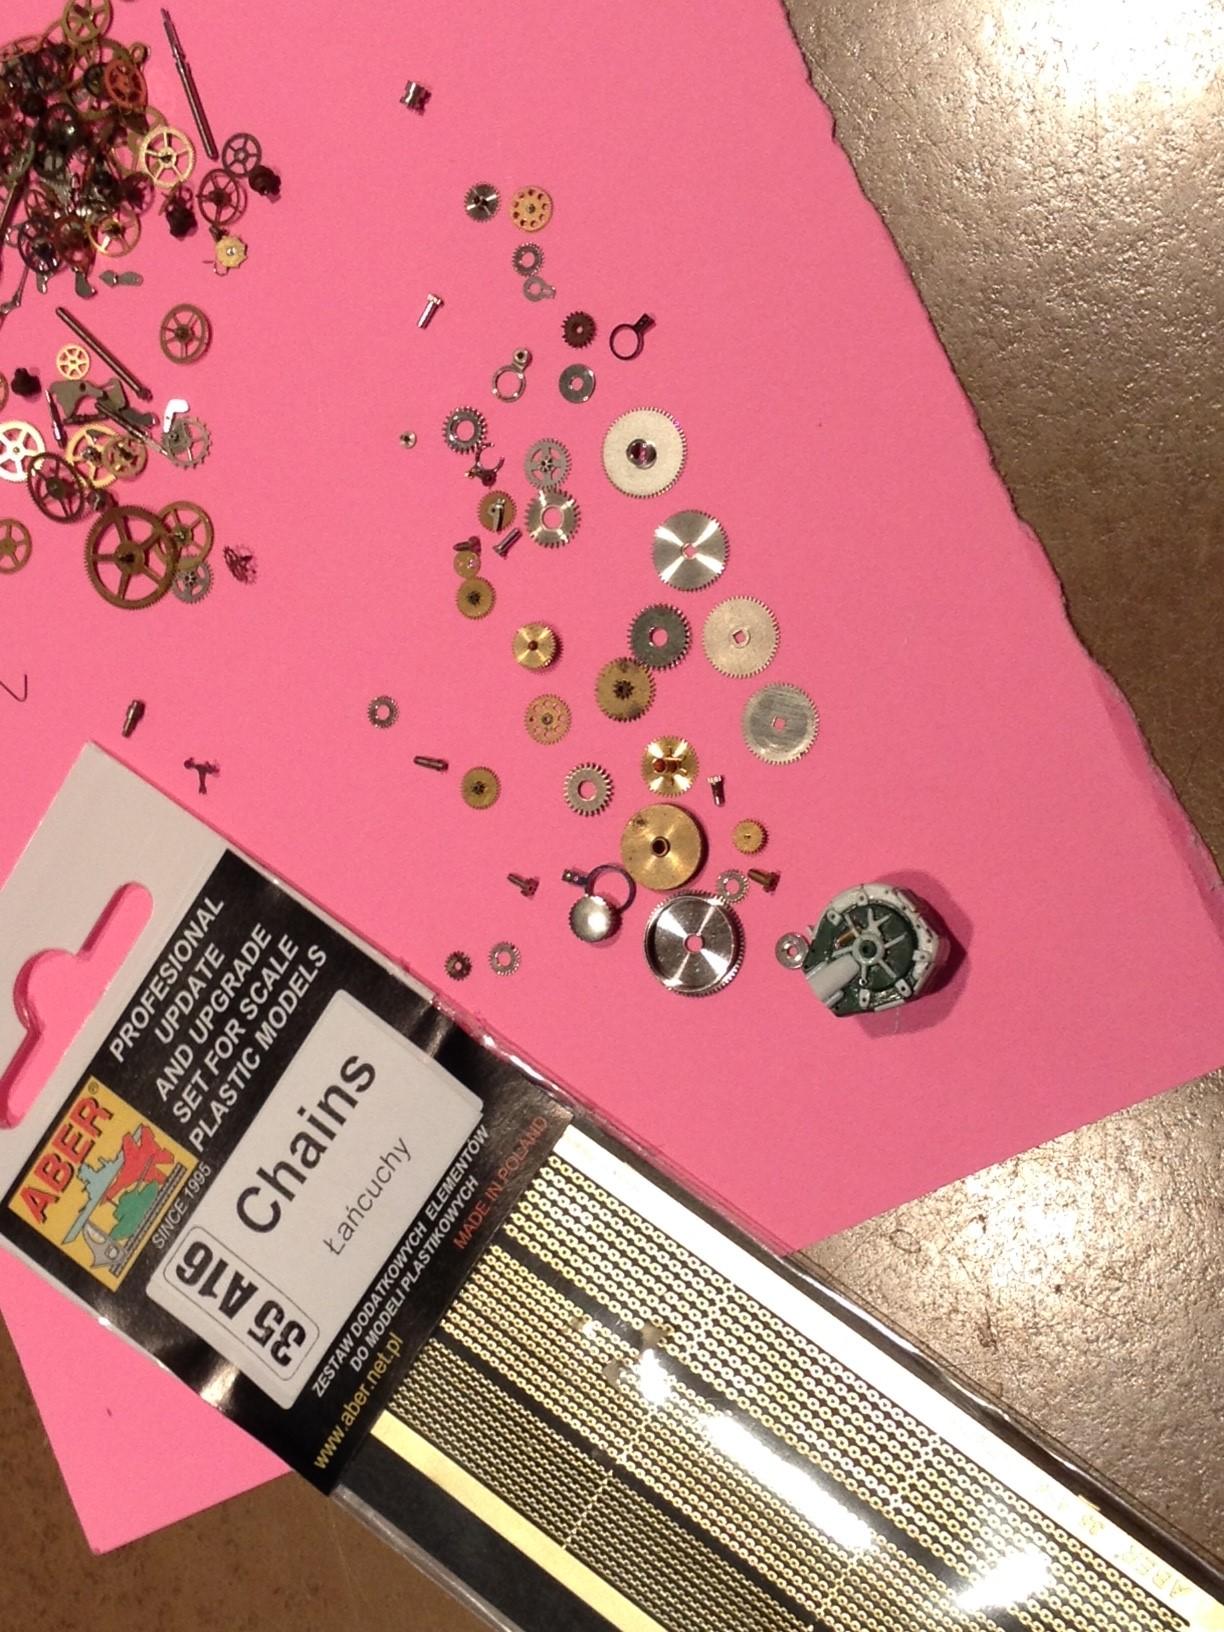
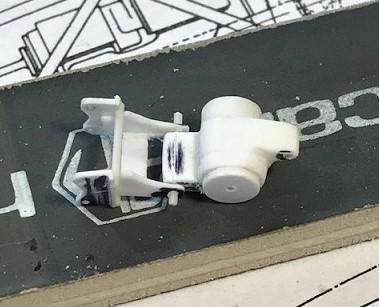
the chain drive back to the transaxle is squeezed by the frame rails - which converge as they run back to the tail and the oil tank so I snipped off a portion of the drive for a better fit then epoxied the photo-etched Aber chain around what was left will finish this in black - should look convincing .... this will fit ....
-
turkey ......
-
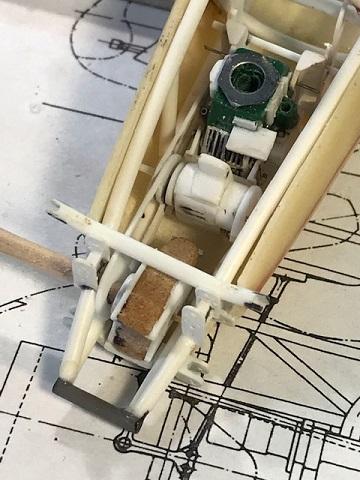
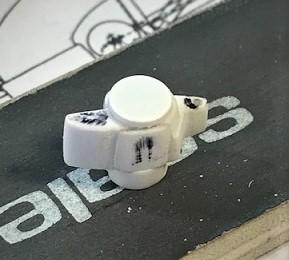
more work on the chain drives and check fit in the frame it's tight .... the disc will attach to the left side of the gear case and house the clutch discs ...
-
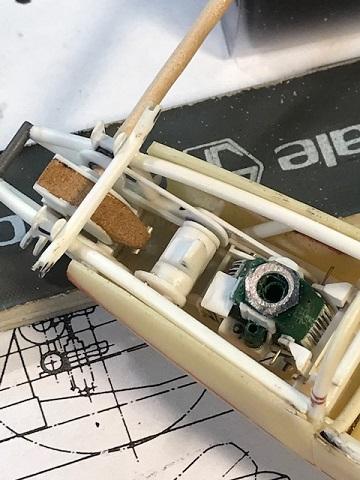
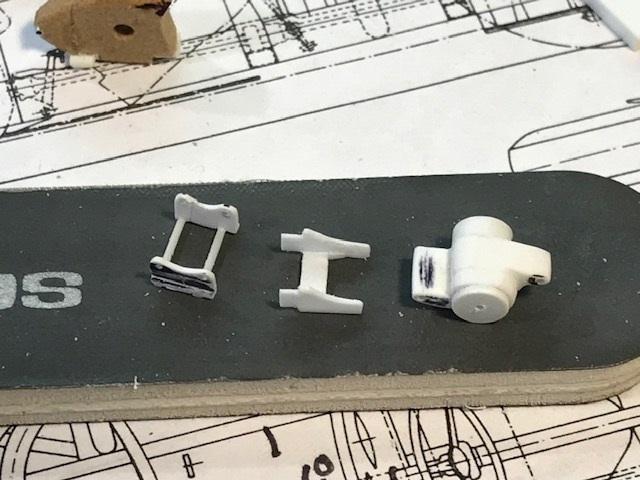
the first shot shows the drive train arrangement outside of the frame - I'll need to make another bracket that runs from the top of the transaxle back to the top of the gear case then some detail nuts added to the right side of the gear case - the link from the gear shift lever will attach to a lever on this side and work begins on the chain drives - one from the crank case to the gear case and a second one back to the transaxle -
-
lets see ...where was I ?? the Cooper engine sits in front of a gear case that sits in front of the transaxle the merit kit had no gear case so I made one with - of course - evergreen stock - tube and bar etc the bracket is an educated guess - it sits down low in the frame and I do not have a good photo - so I made one that looks like the bracket that mounts the engine to the frame.