absmiami
-
Posts
4,785 -
Joined
-
Last visited
Content Type
Profiles
Forums
Events
Gallery
Everything posted by absmiami
-
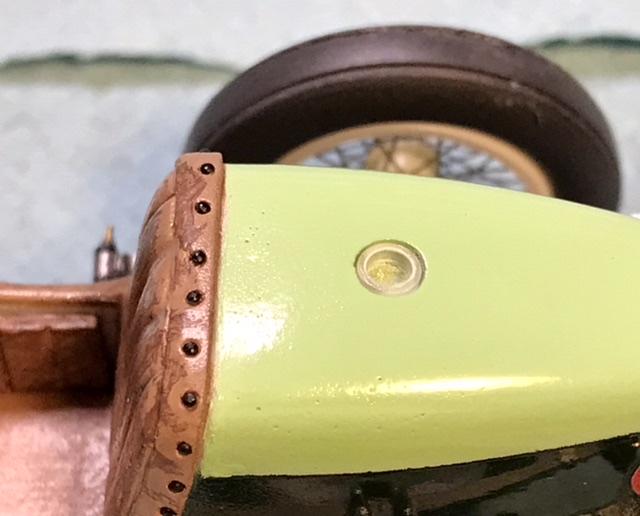
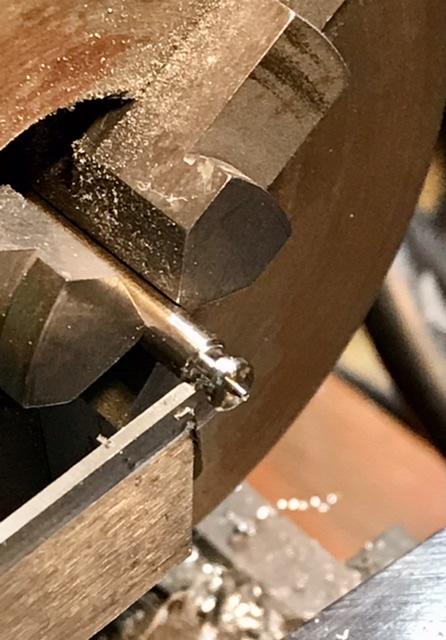
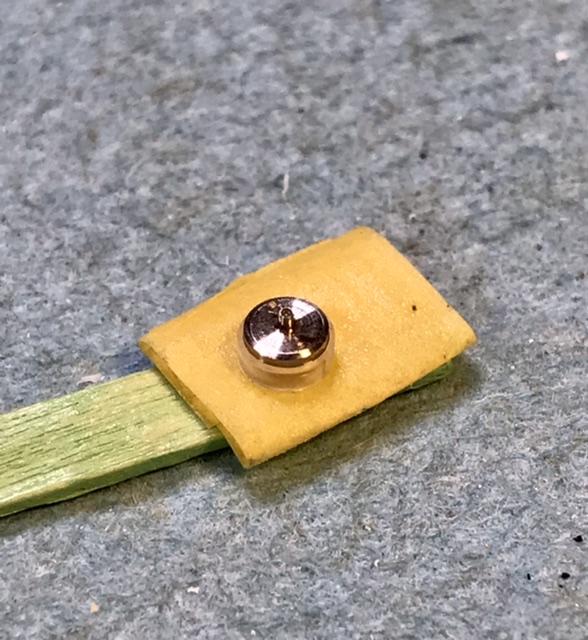
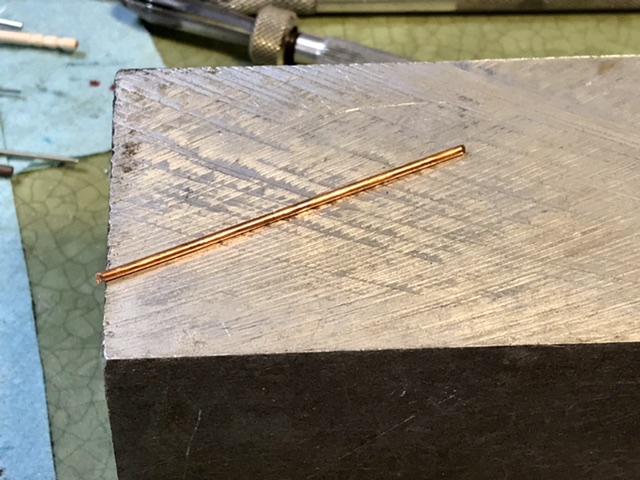
 Time for the nickel silver fuel cap … the cap is turned on the Sherline …
-
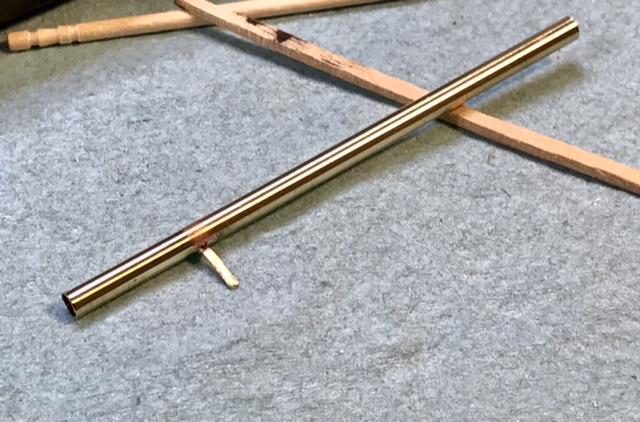
The pictures are out of order - cut some brass tube - just about 3 sc inches - soldered a post on - and painted it black and then Molotow chrome - not yet installed - probably add some blue and gold heat stains ro the pipe first …
- 406 replies
-
- 1
-

-
- harry miller
- indy
- (and 1 more)
-
Cant say that these are improvements- but I couldn’t resist - these were made with the Becasso photo mod app thats on my phone …
-
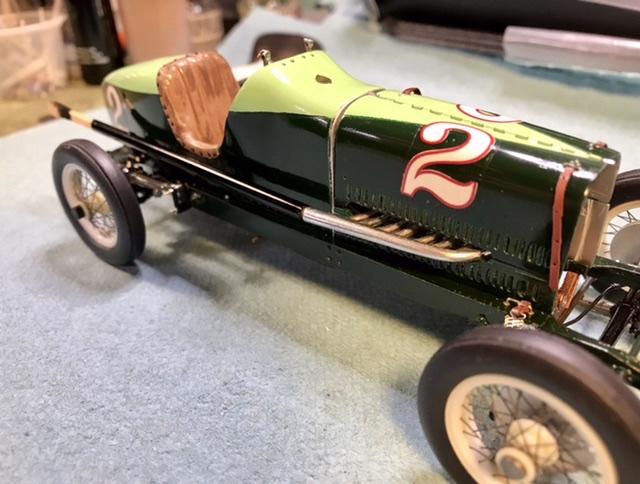
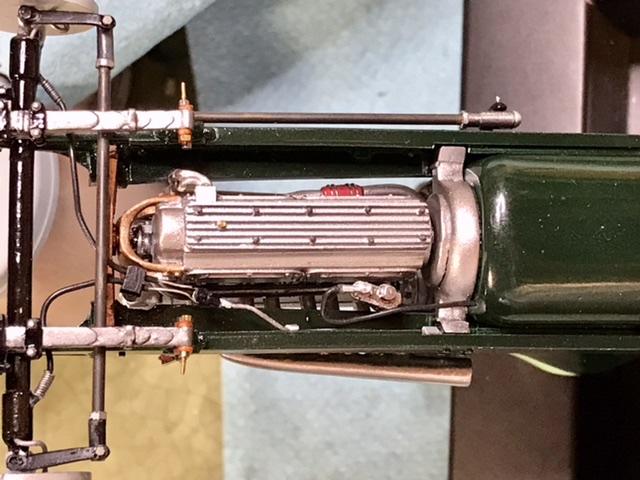
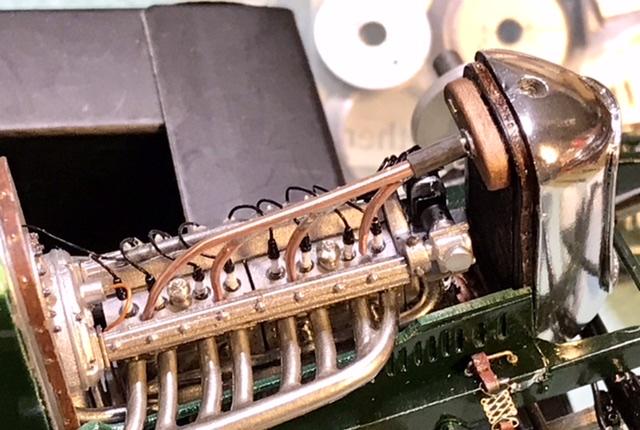
Before installing the radiator and the exhaust pipe - ive finished work under the frame - i re-routed and attached the fr brake line - knocked askew when the engine went in - and added the fuel line to the carbureter … and i made and attached the rear friction shocks ….
- 406 replies
-
- 1
-
-
- harry miller
- indy
- (and 1 more)
-
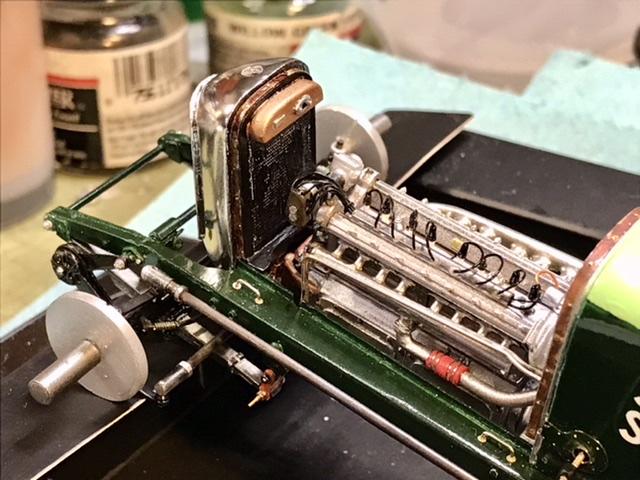
Ok - now the neck of manifold reaches the fitting at the top Of the radiator - which is a big deal … actually the first pipe doesnt quite reach the cyl head - but the judges wont know - ill bridge that gap with the RB Motion fitting - our secret -
-
And added some fittings that RB Motion makes for fuel lines …
-
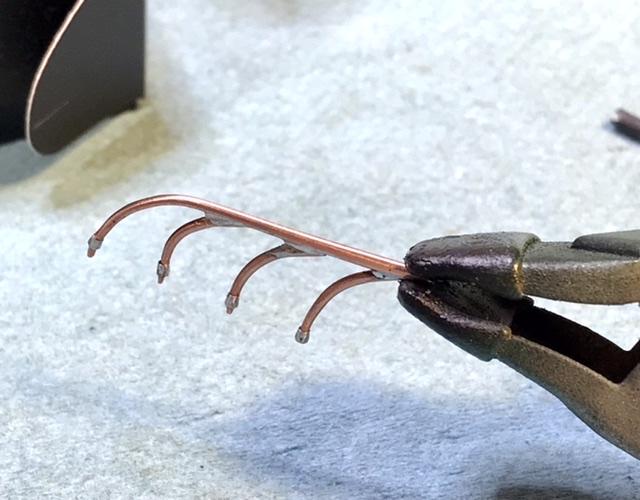
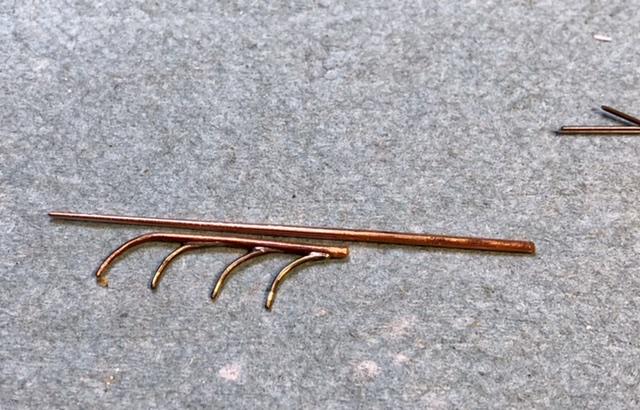
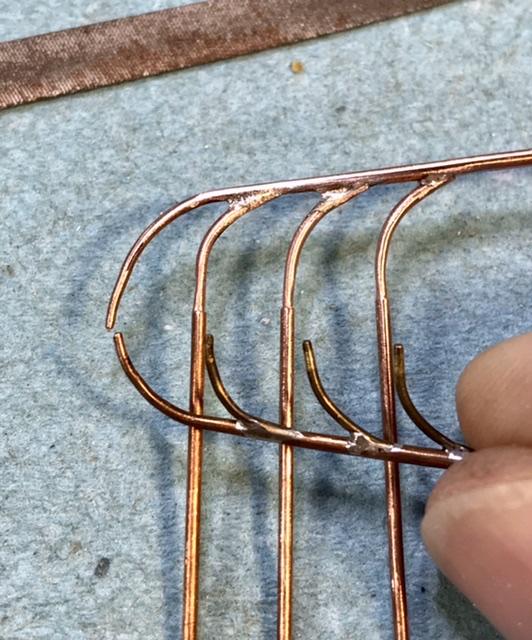
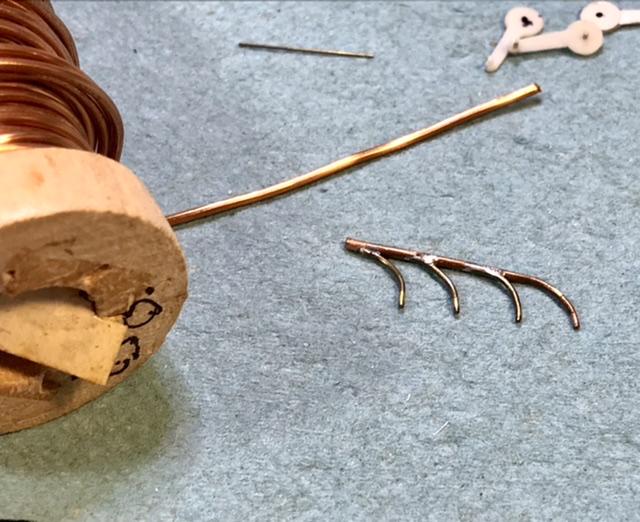
The pipe is tapered fr .050 to about .040 by chucking it into my Foredom handpiece and running the part between a file and a sanding stick - then i silver soldered pipes 2, 3, and 4 - which were also tapered and shaped - the idea was to duplicate my first part - only taller …
-
Now that the engine is installed and i know exaxtly where everything needs to go - its time to make a taller manifold …. Starting with some .050 copper wire … its flattened by rolling it under this chunk of aluminum …
-
I made a master part a long time ago - but i cant use it because its not tall enough for rhe neck to reach the opening at the top of the radiator - because i was did not correctly judge the location of the engine in the frame - i hadn’t installed one yet …I missed by about a scale 2 inches …
-
The water return manifold is really cool …
-
Finishing the radiator - the shell was painted w air-brushed Molitow chrome - ive had a refill bottle of this stuff in my workshop for a couple of years - i noticed that the “paint” was starting to thicken - but it sprayed nicely after thinning w some Gunze alc thinner - tamiya thinner mite work too - not sure … the finish mite be a little more durable than Alclad - but im going to avoid handling the part as much as possible …
-
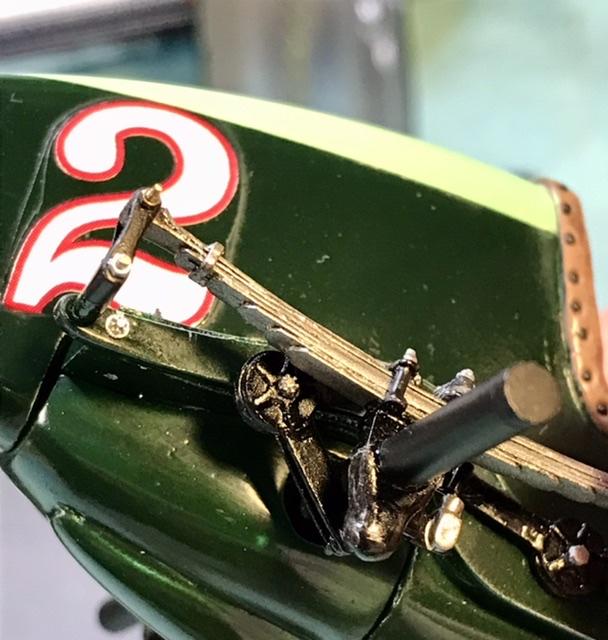
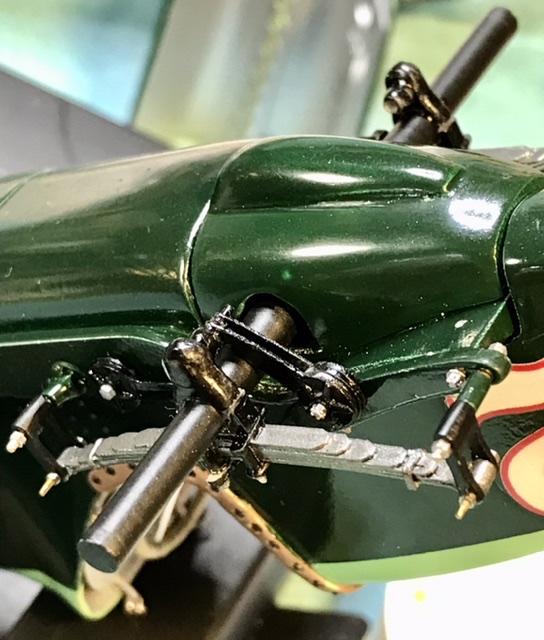
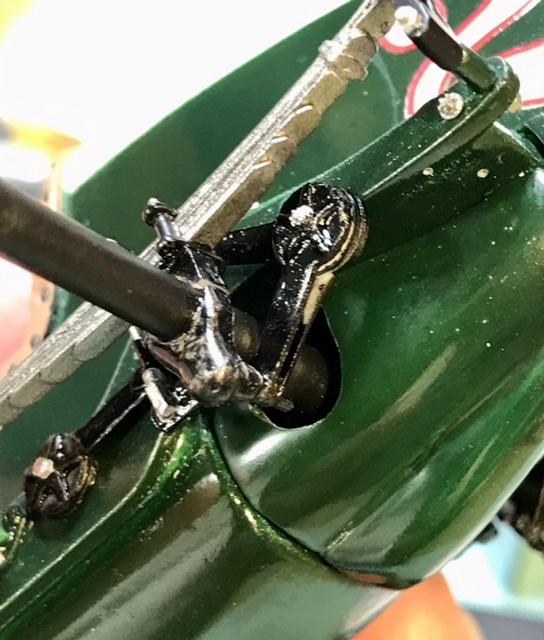
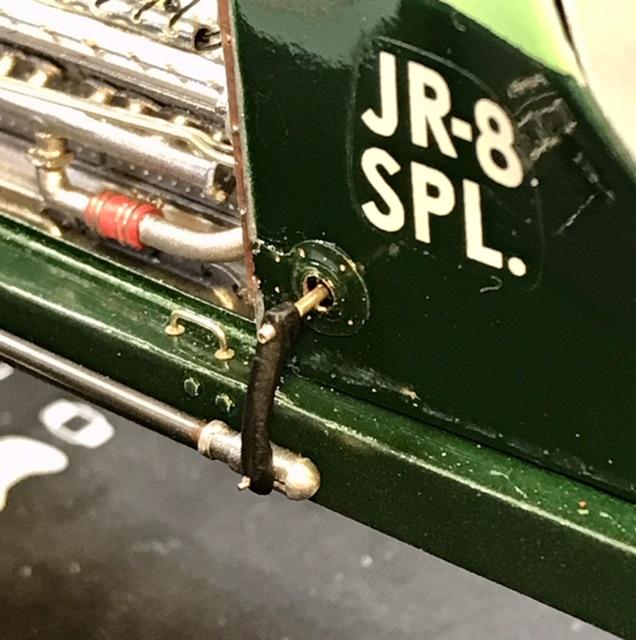
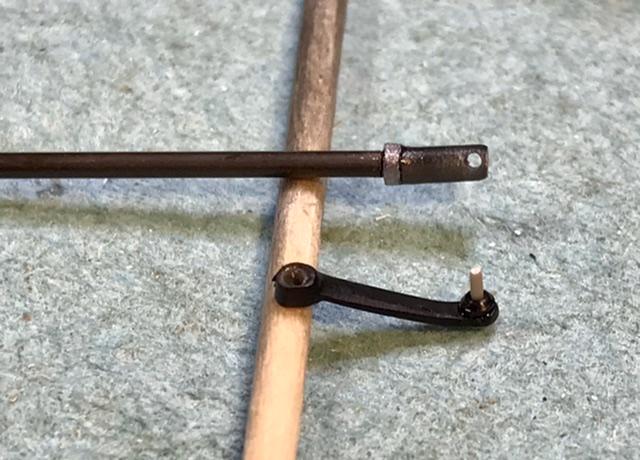
The steering arm on the restored car is polished - I finished mine with a chemical dipped gun blued finish - which Mark Dees - author of the Miller Dynasty - believed was more accurate …
-
This is what it looks like on the Jr 8 Special - i think this came to be known as a Pittman arm …
-
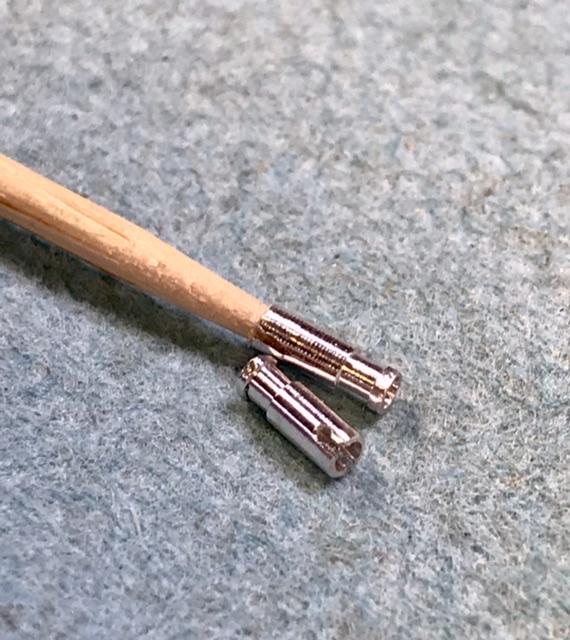
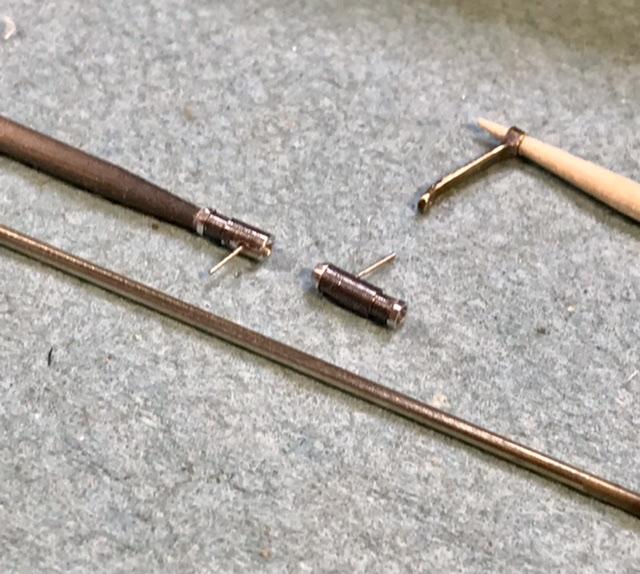
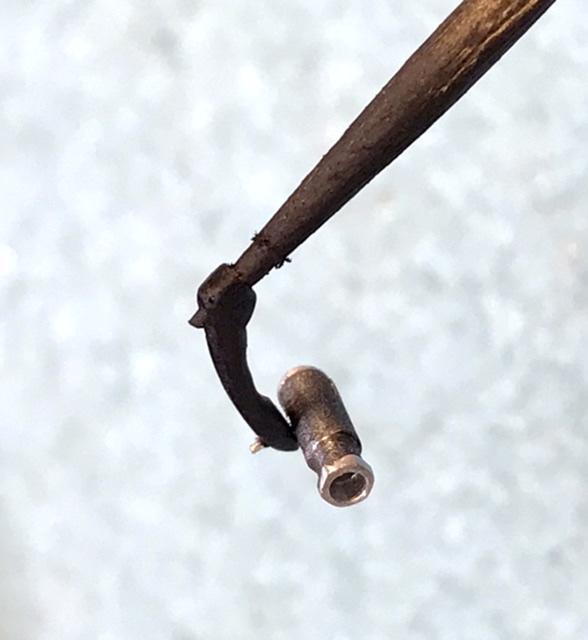
Welcome back X hope you got some snow this year … the steering links have ball and socket joints - hard to do in this scale - i first experimented with this on the Delage …. The joints were turned on a Sherline fr nickel alu -
-
https://newatlas.com/monterey-2018-preview-275p-ferrari-le-mans-winner/55954/#gallery:1 if you do the winner - dont do it as it finished! someone - one of the drivers ? - probably leaned their butt on to the wing and mashed it - not a good look !!
-
Jochen Rindt Lotus 72C
absmiami replied to Rich Chernosky's topic in Other Racing: Road Racing, Salt Flat Racers
Gotta finish my Miller and scratch my Lotus itch …. -
Jochen Rindt Lotus 72C
absmiami replied to Rich Chernosky's topic in Other Racing: Road Racing, Salt Flat Racers
good tip on the clear coat - gotta check it out always liked the first livery on the 72's ... -
kit ? If you don't build Hill's car - you'll get - the scowl .....
-
can't tell if you have a sit down or standing w bench ... your back might like a standing level bench a bit more ...
-
Nostalgia Fuel Dragster--Blower Manifold (01/28/23)
absmiami replied to Straightliner59's topic in WIP: Drag Racing Models
breast and thighs -
’72 Dodge Demon Drag Racer 1/25 scale
absmiami replied to AmericanMuscleFan's topic in WIP: Drag Racing Models
nice scale tolerance hell ... -
and I have made managed to put page 13 behind me - thats good - maybe no more parts will fall off ...
-
thanks Pierre - i'm making masters for a resin casted early Ferrari 12 cyl racing engine - the first Ferrari 12 - which had a broad based sump, 3 Weber carbs, no decorative ribs on the valve covers, and "inside" spark plugs - What Daytona Coupe ?? just kidding .... and yes - I am nearing completion - as I have a deadline ....
-
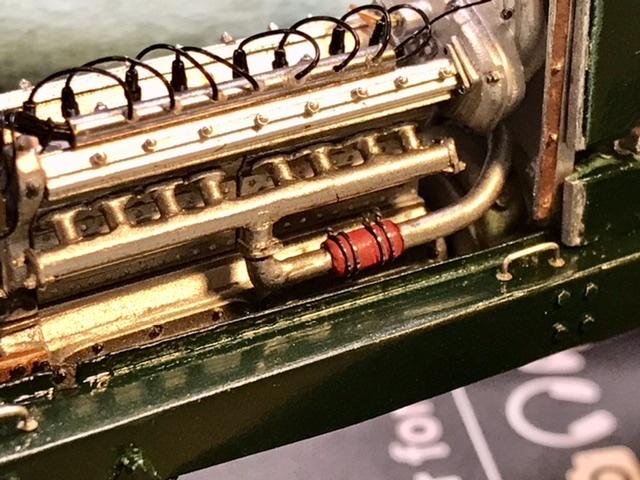
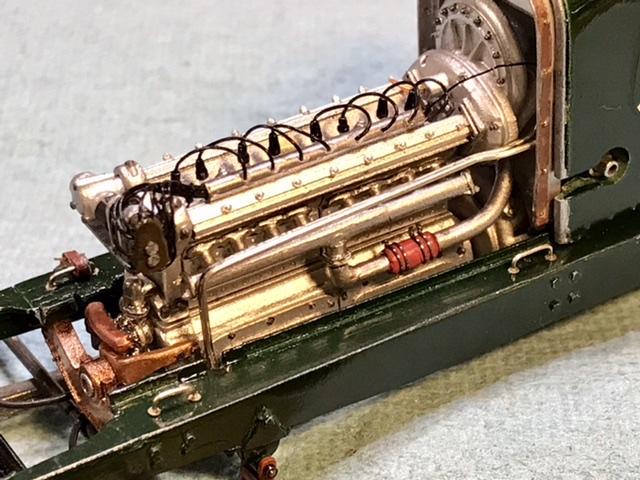
Gracias - as soon as this is done i can turn my attn back to a certain Ferrari engine …. The pipe with the red banding is the feeder for the manifold - and i managed to install the in/out lines for the oil pump that is located at the forward corner of the sump pan…