Fantom
-
Posts
267 -
Joined
-
Last visited
Content Type
Profiles
Forums
Events
Gallery
Everything posted by Fantom
-
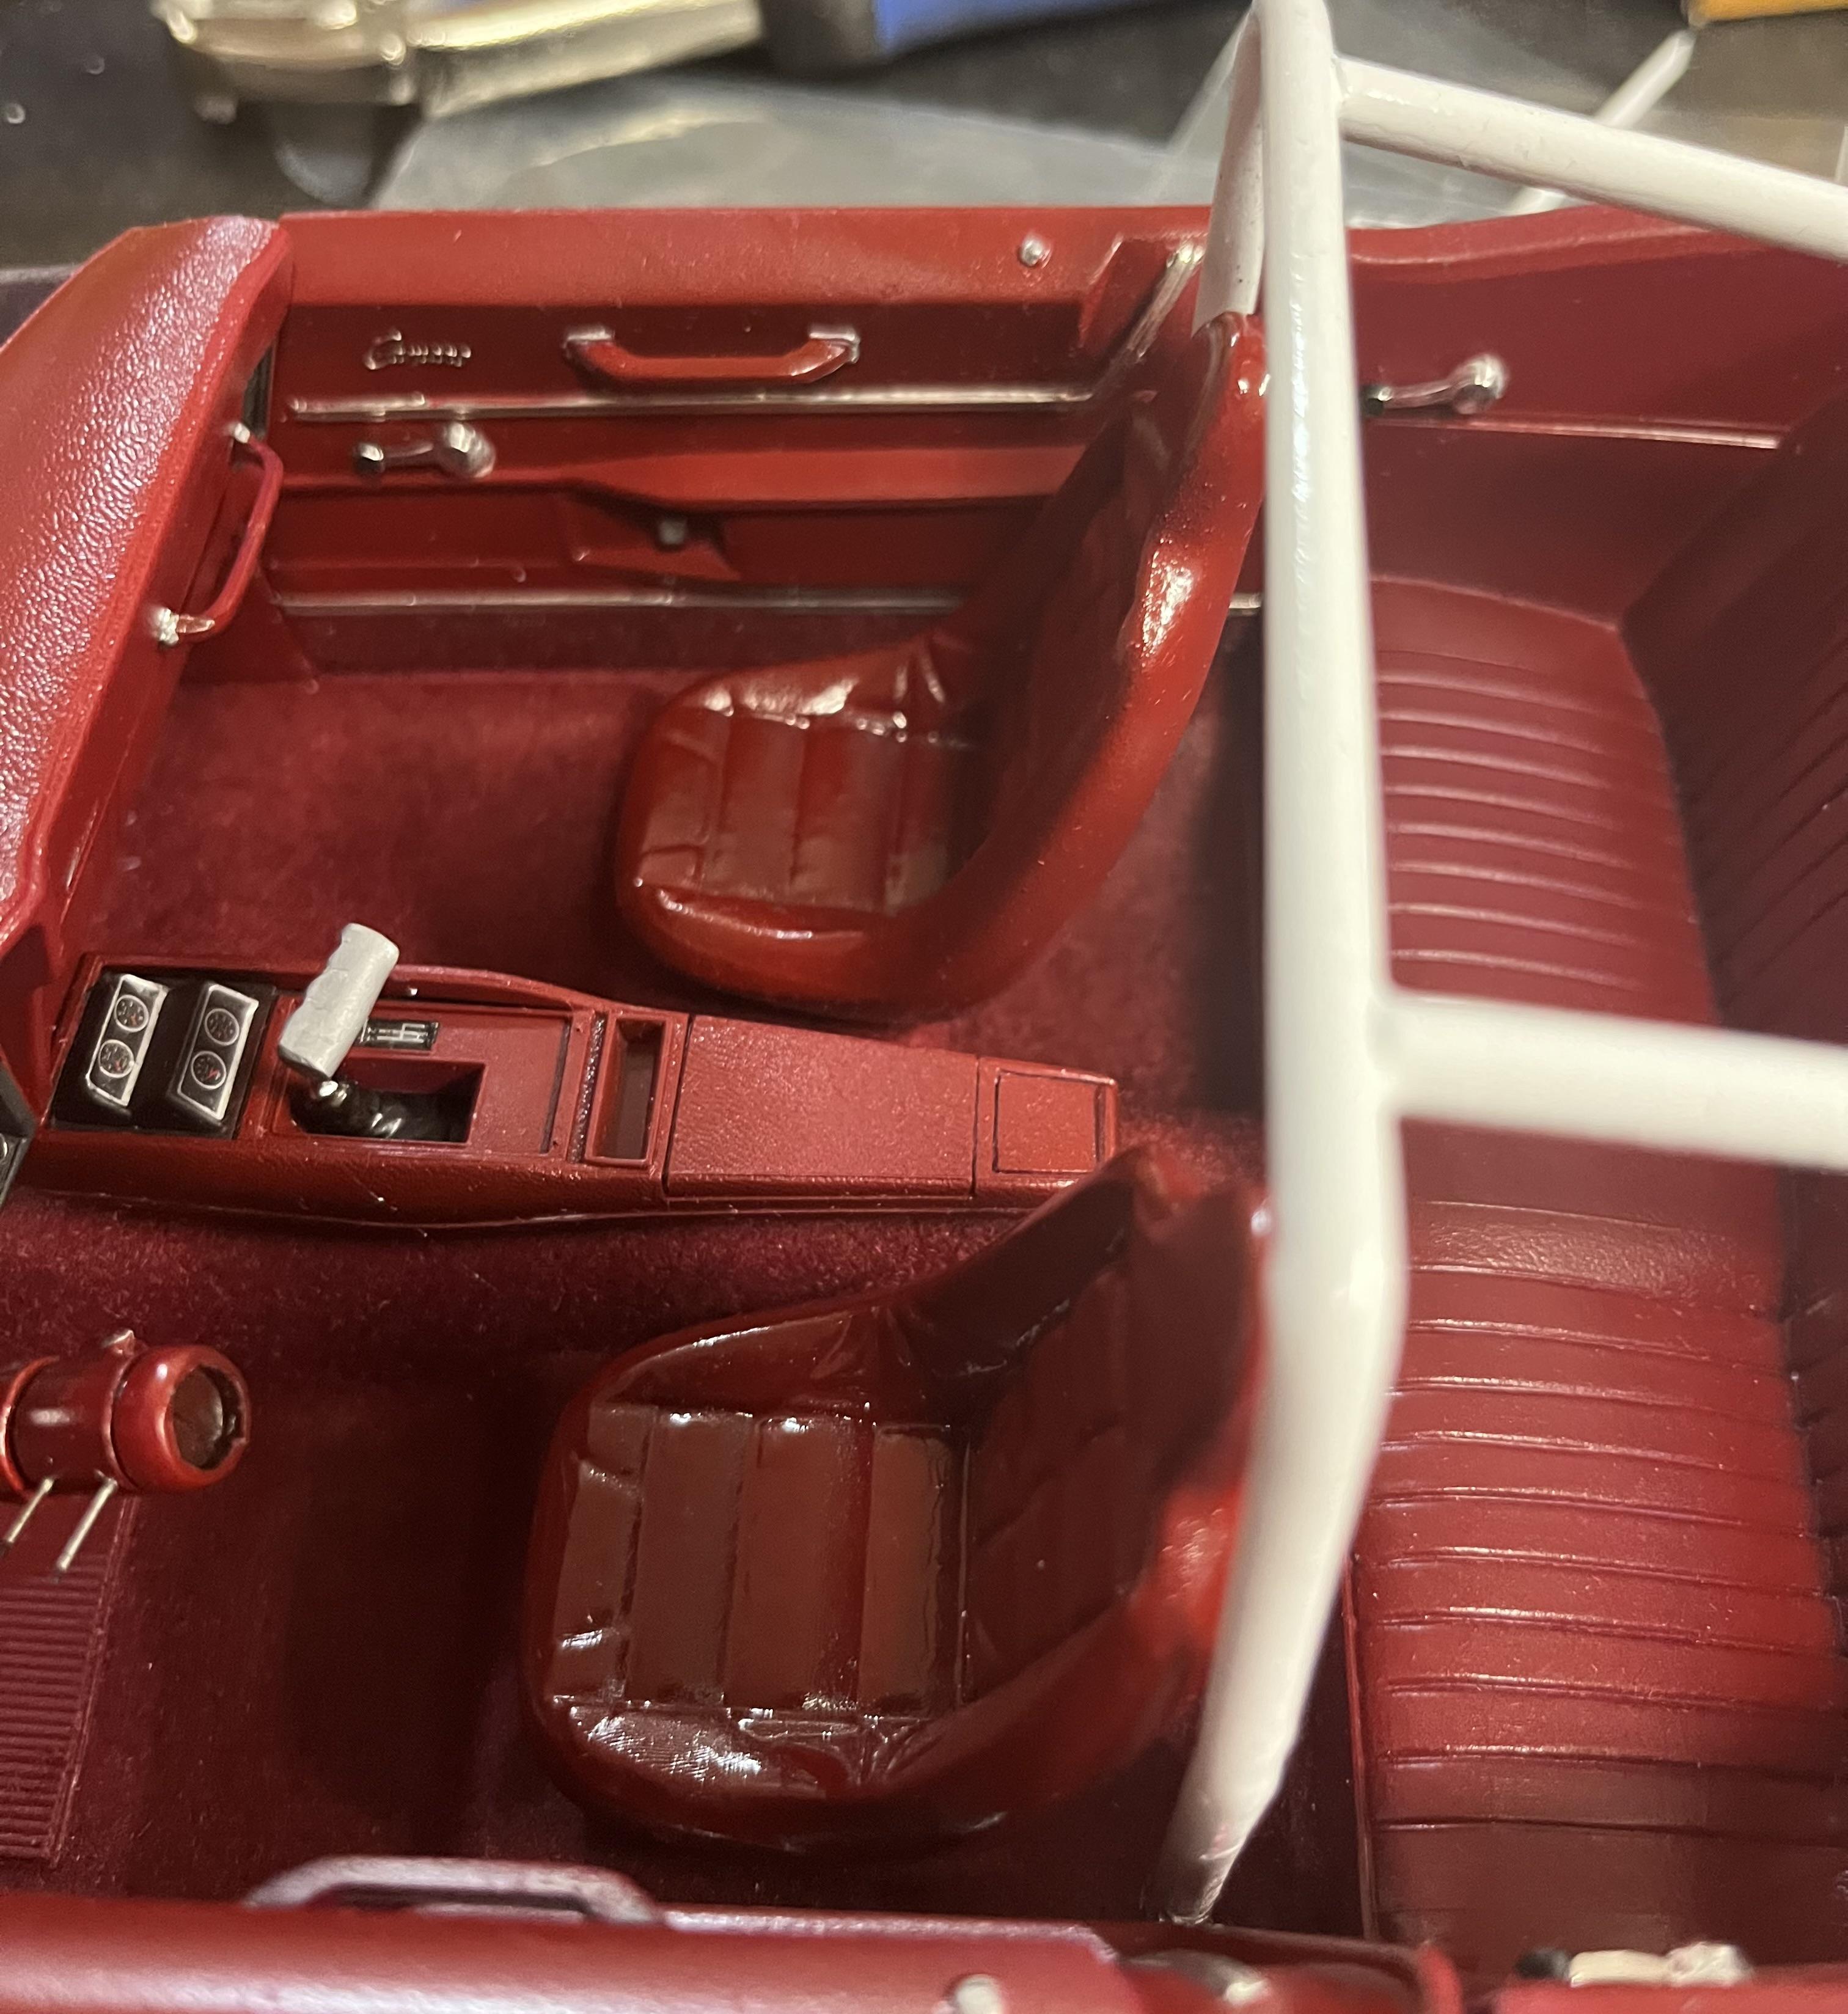
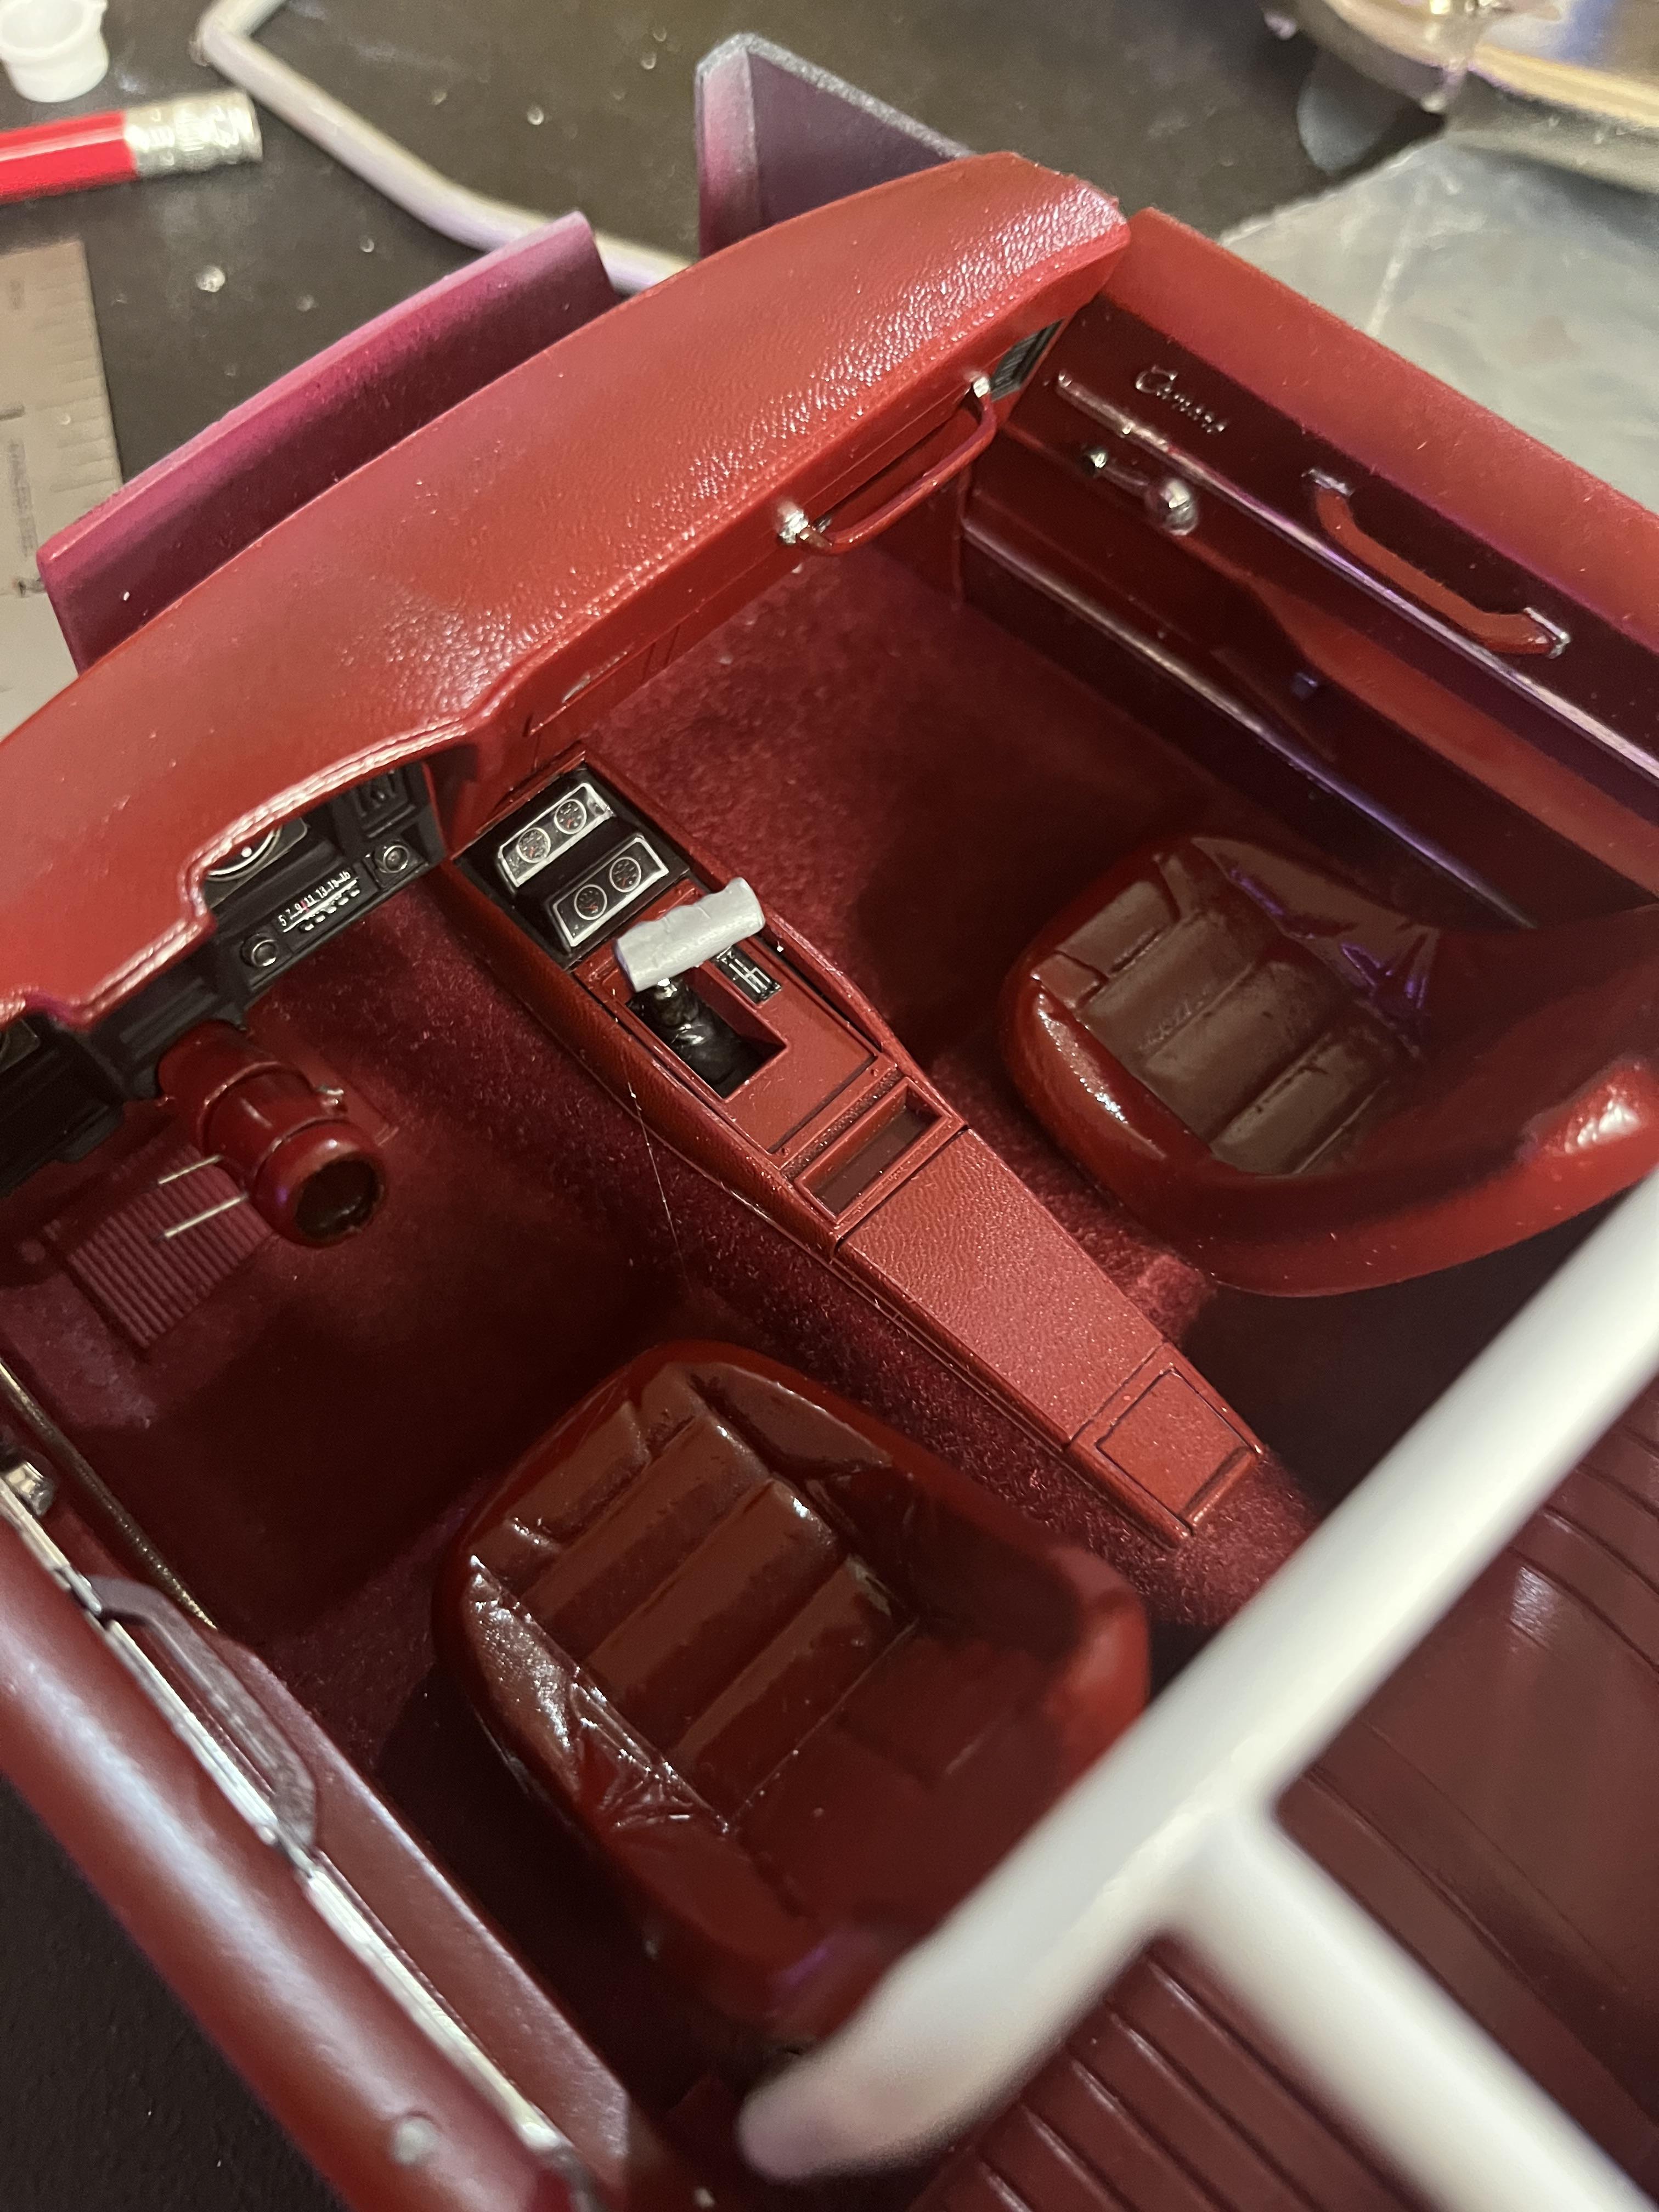
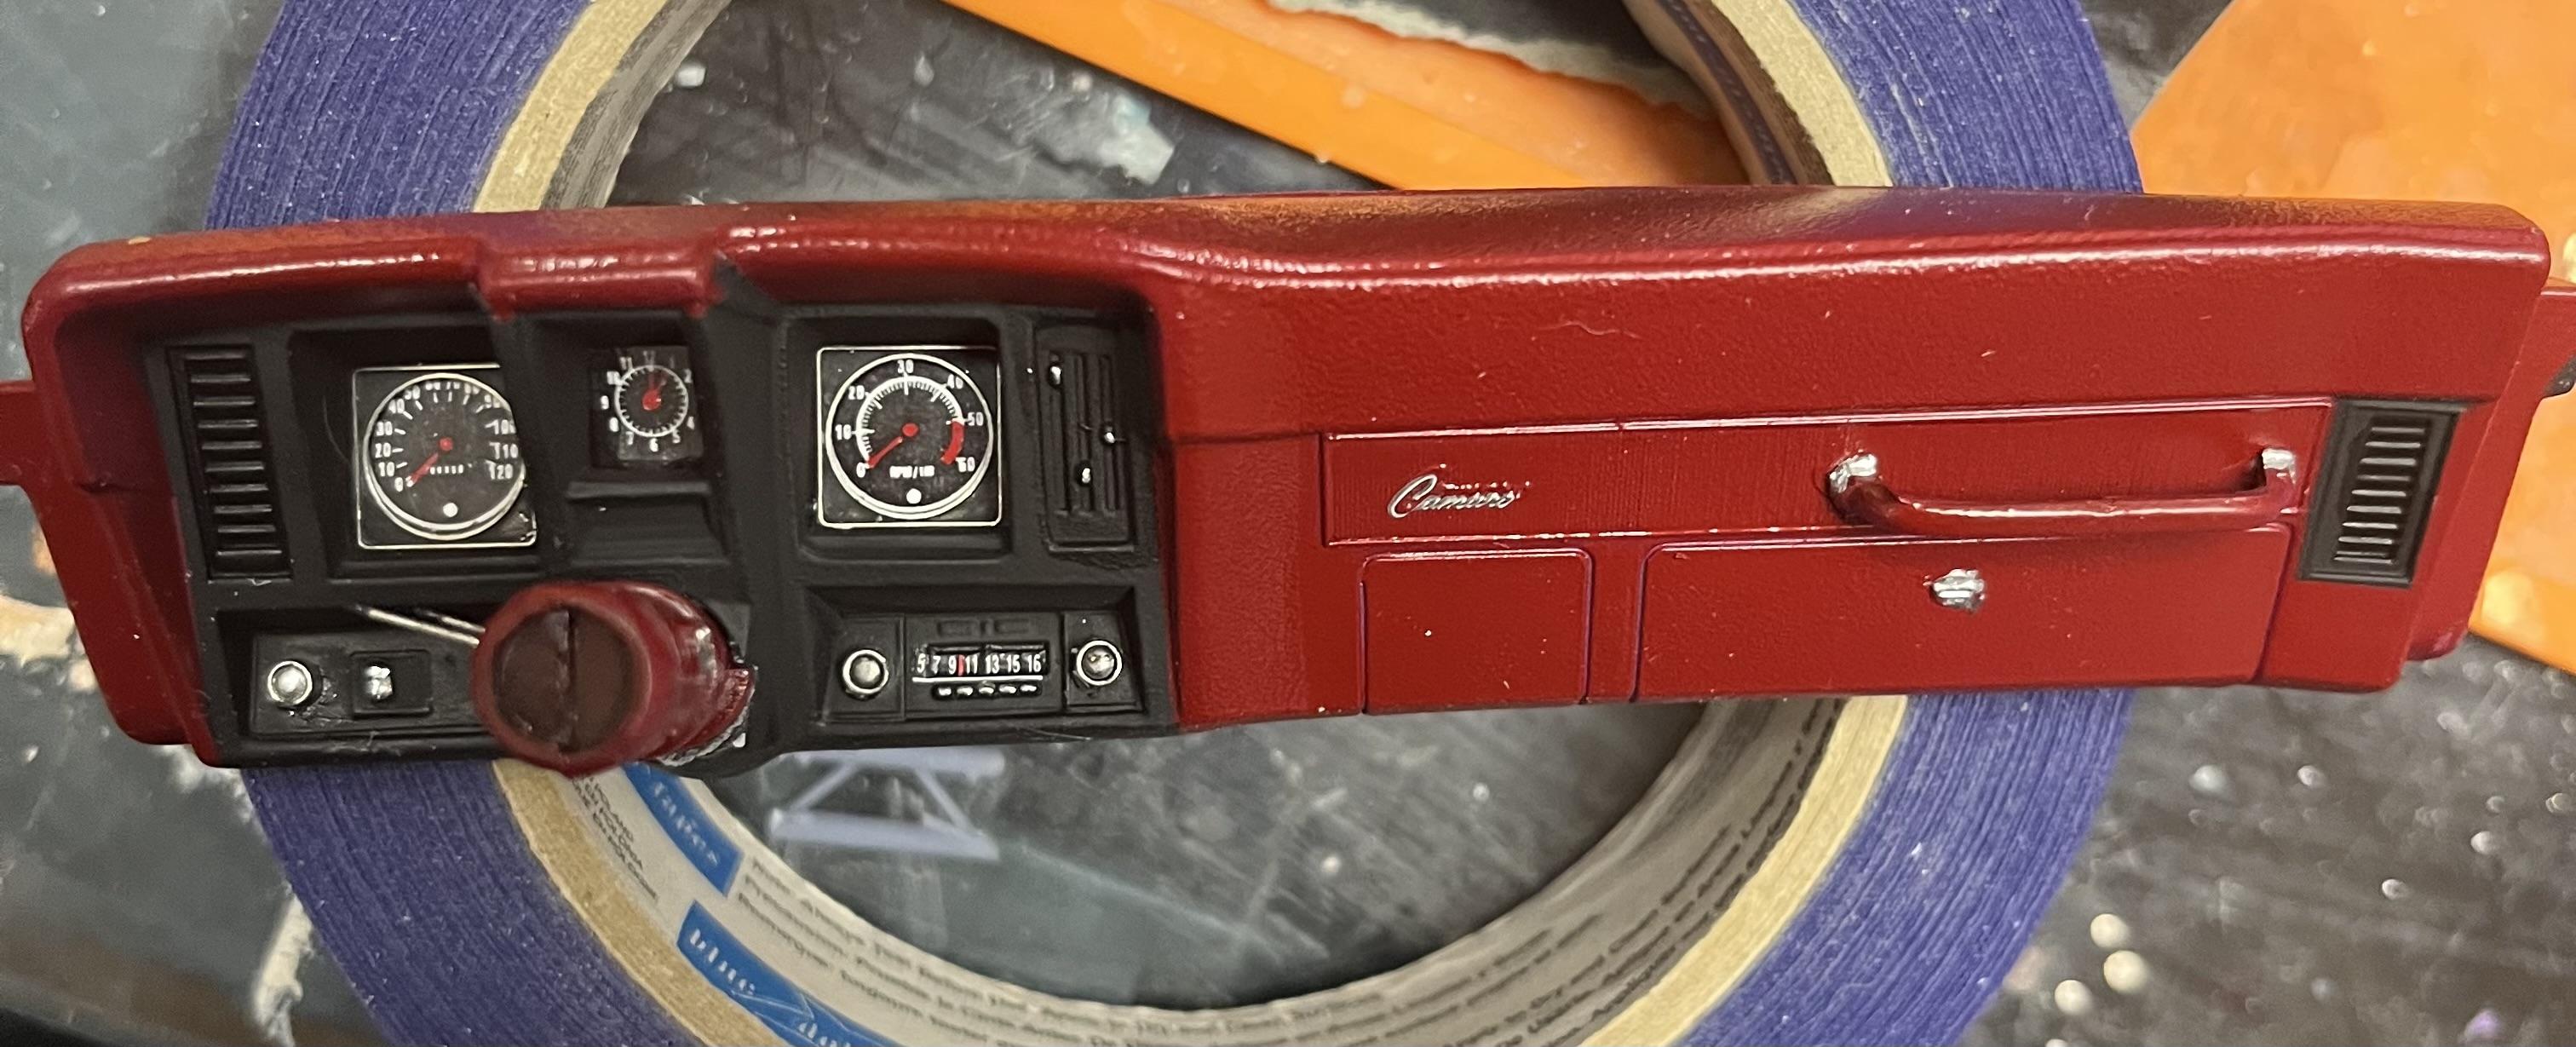
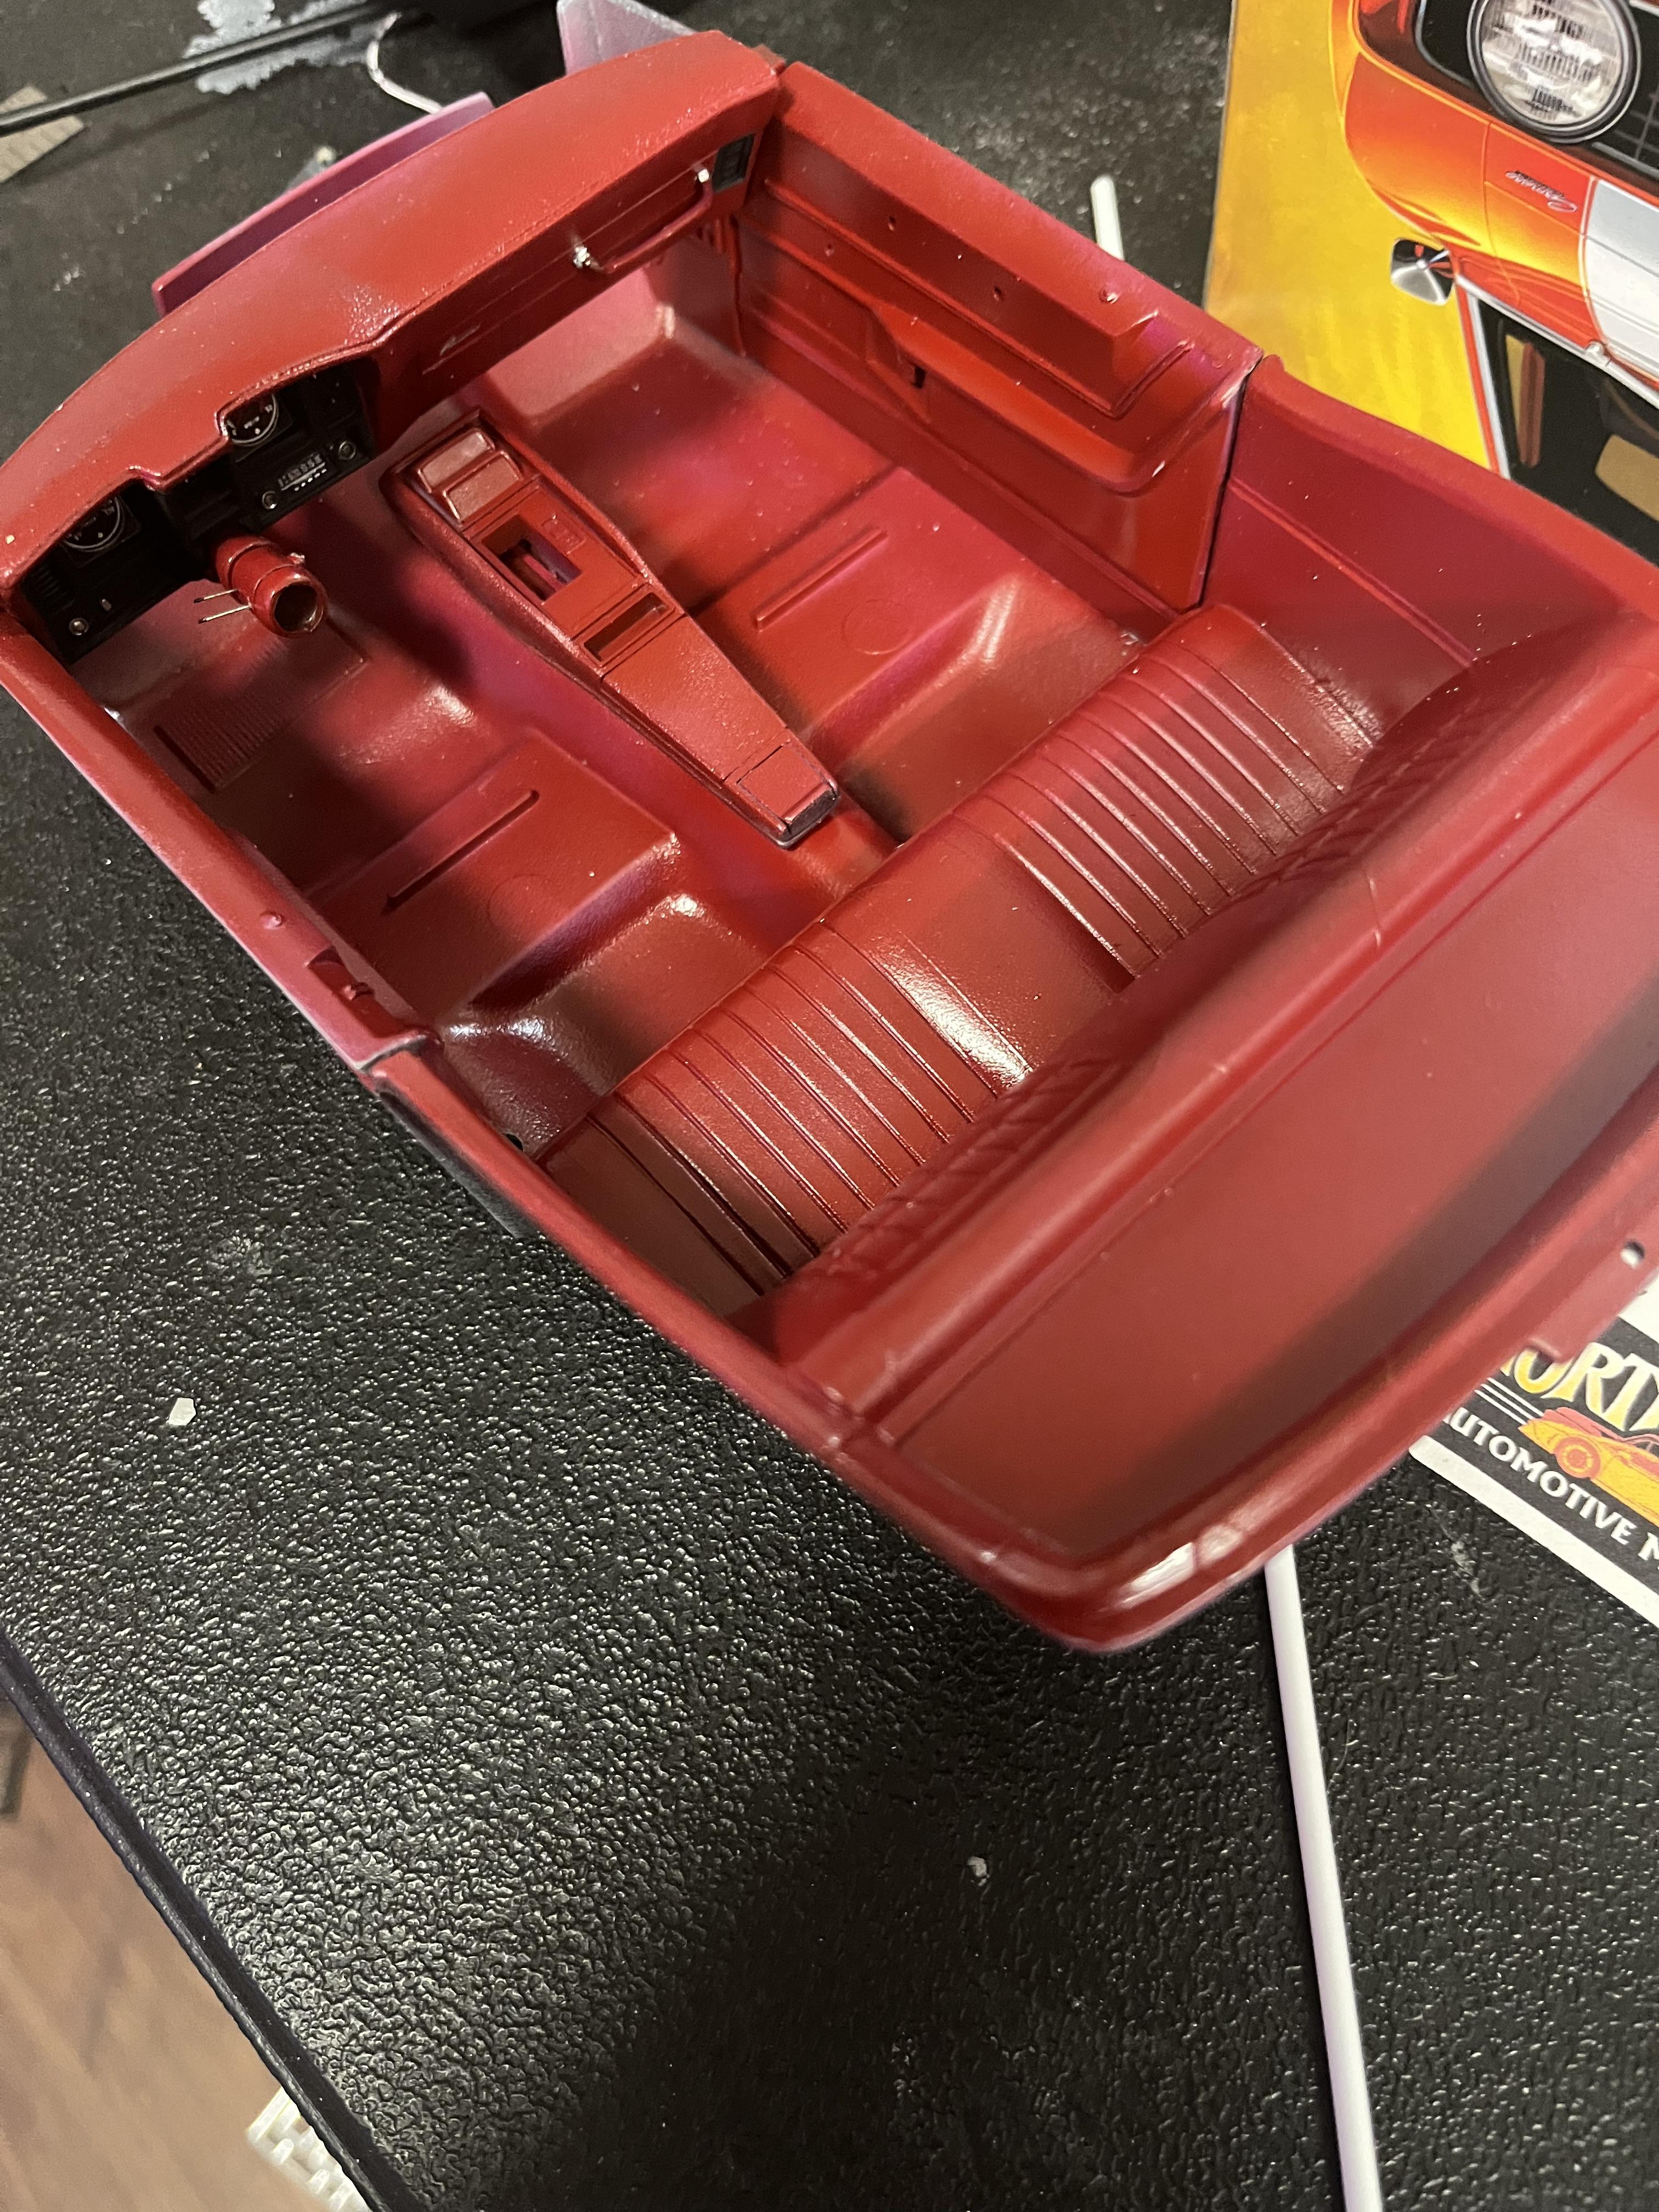
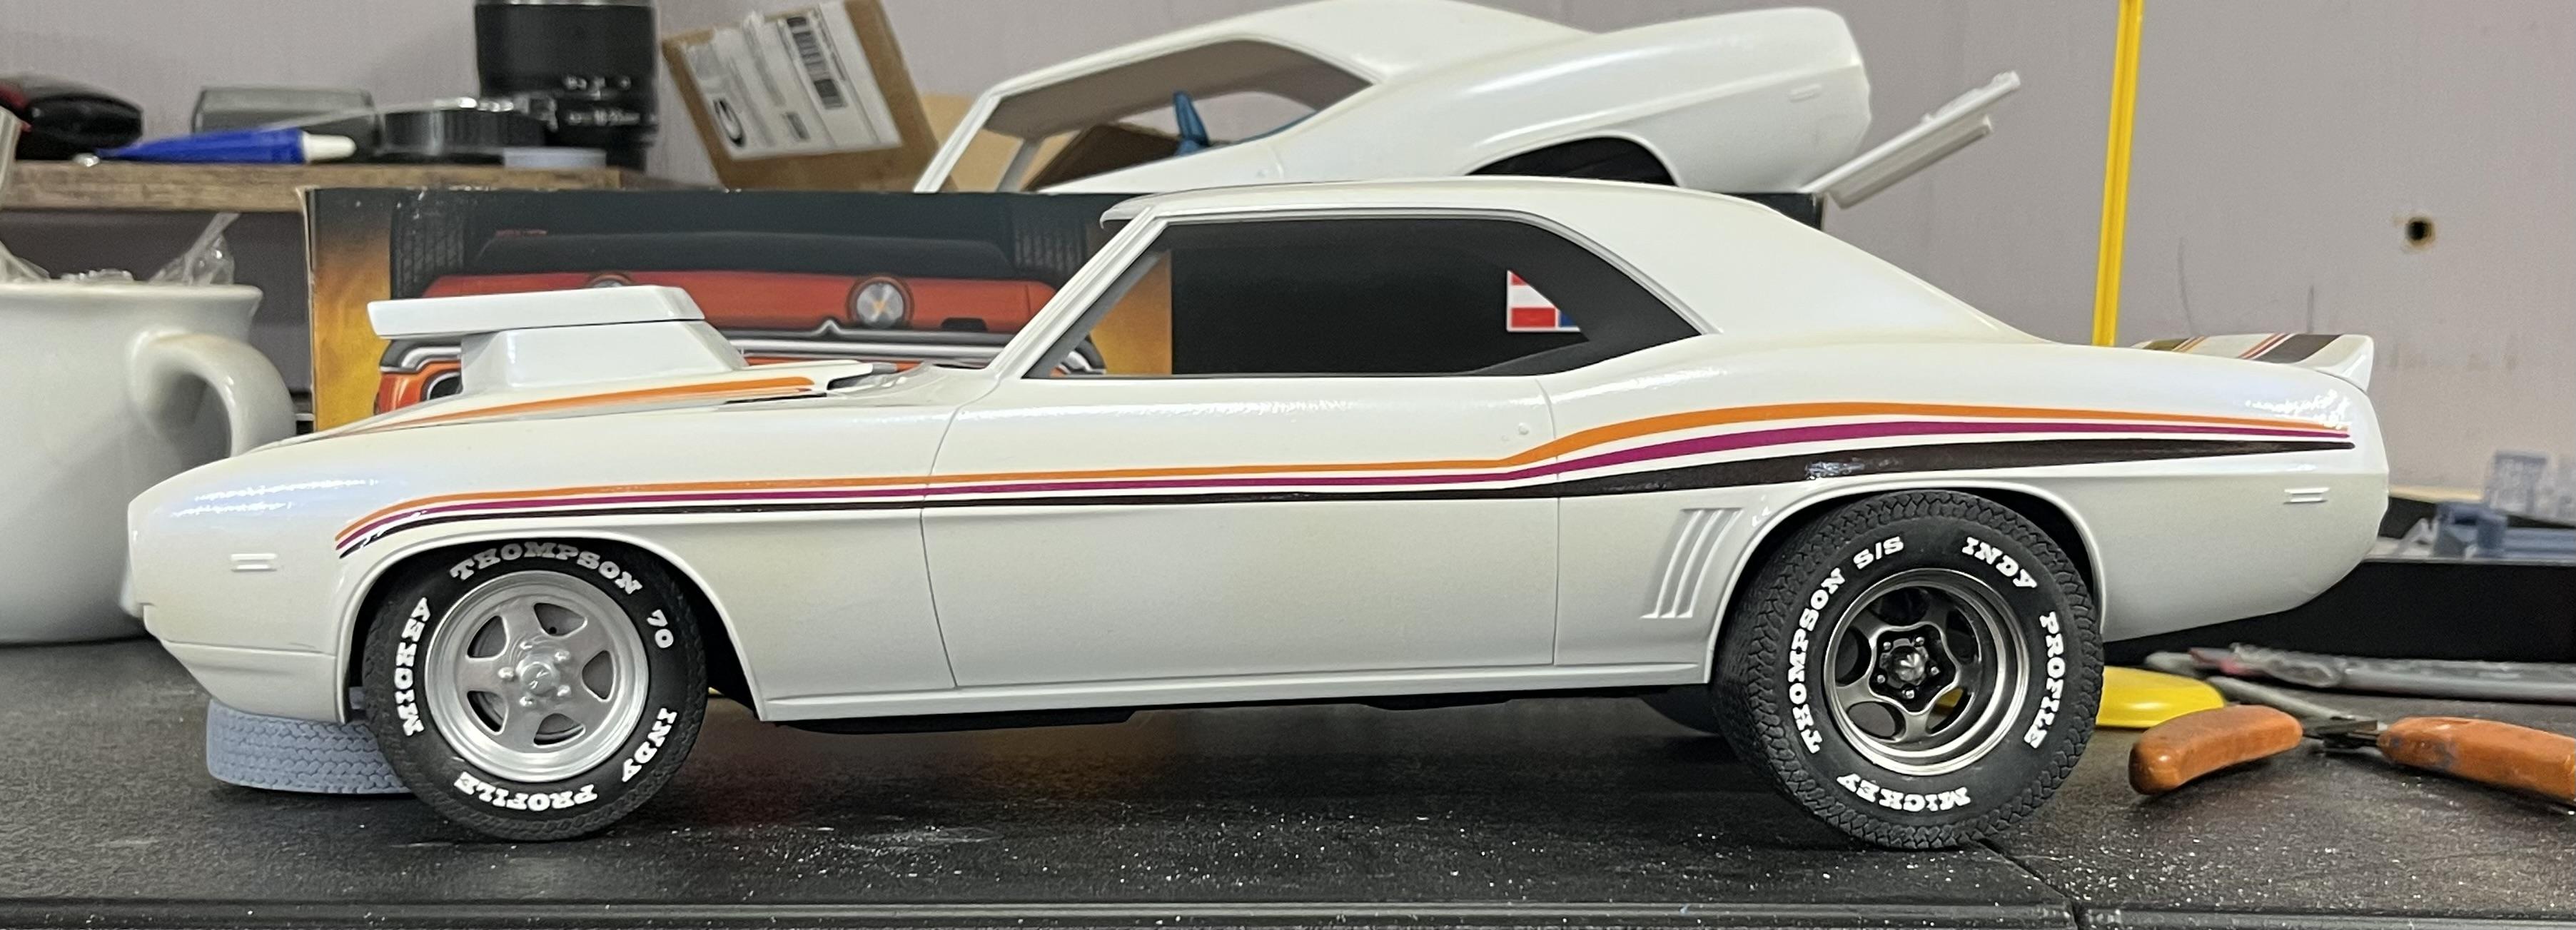
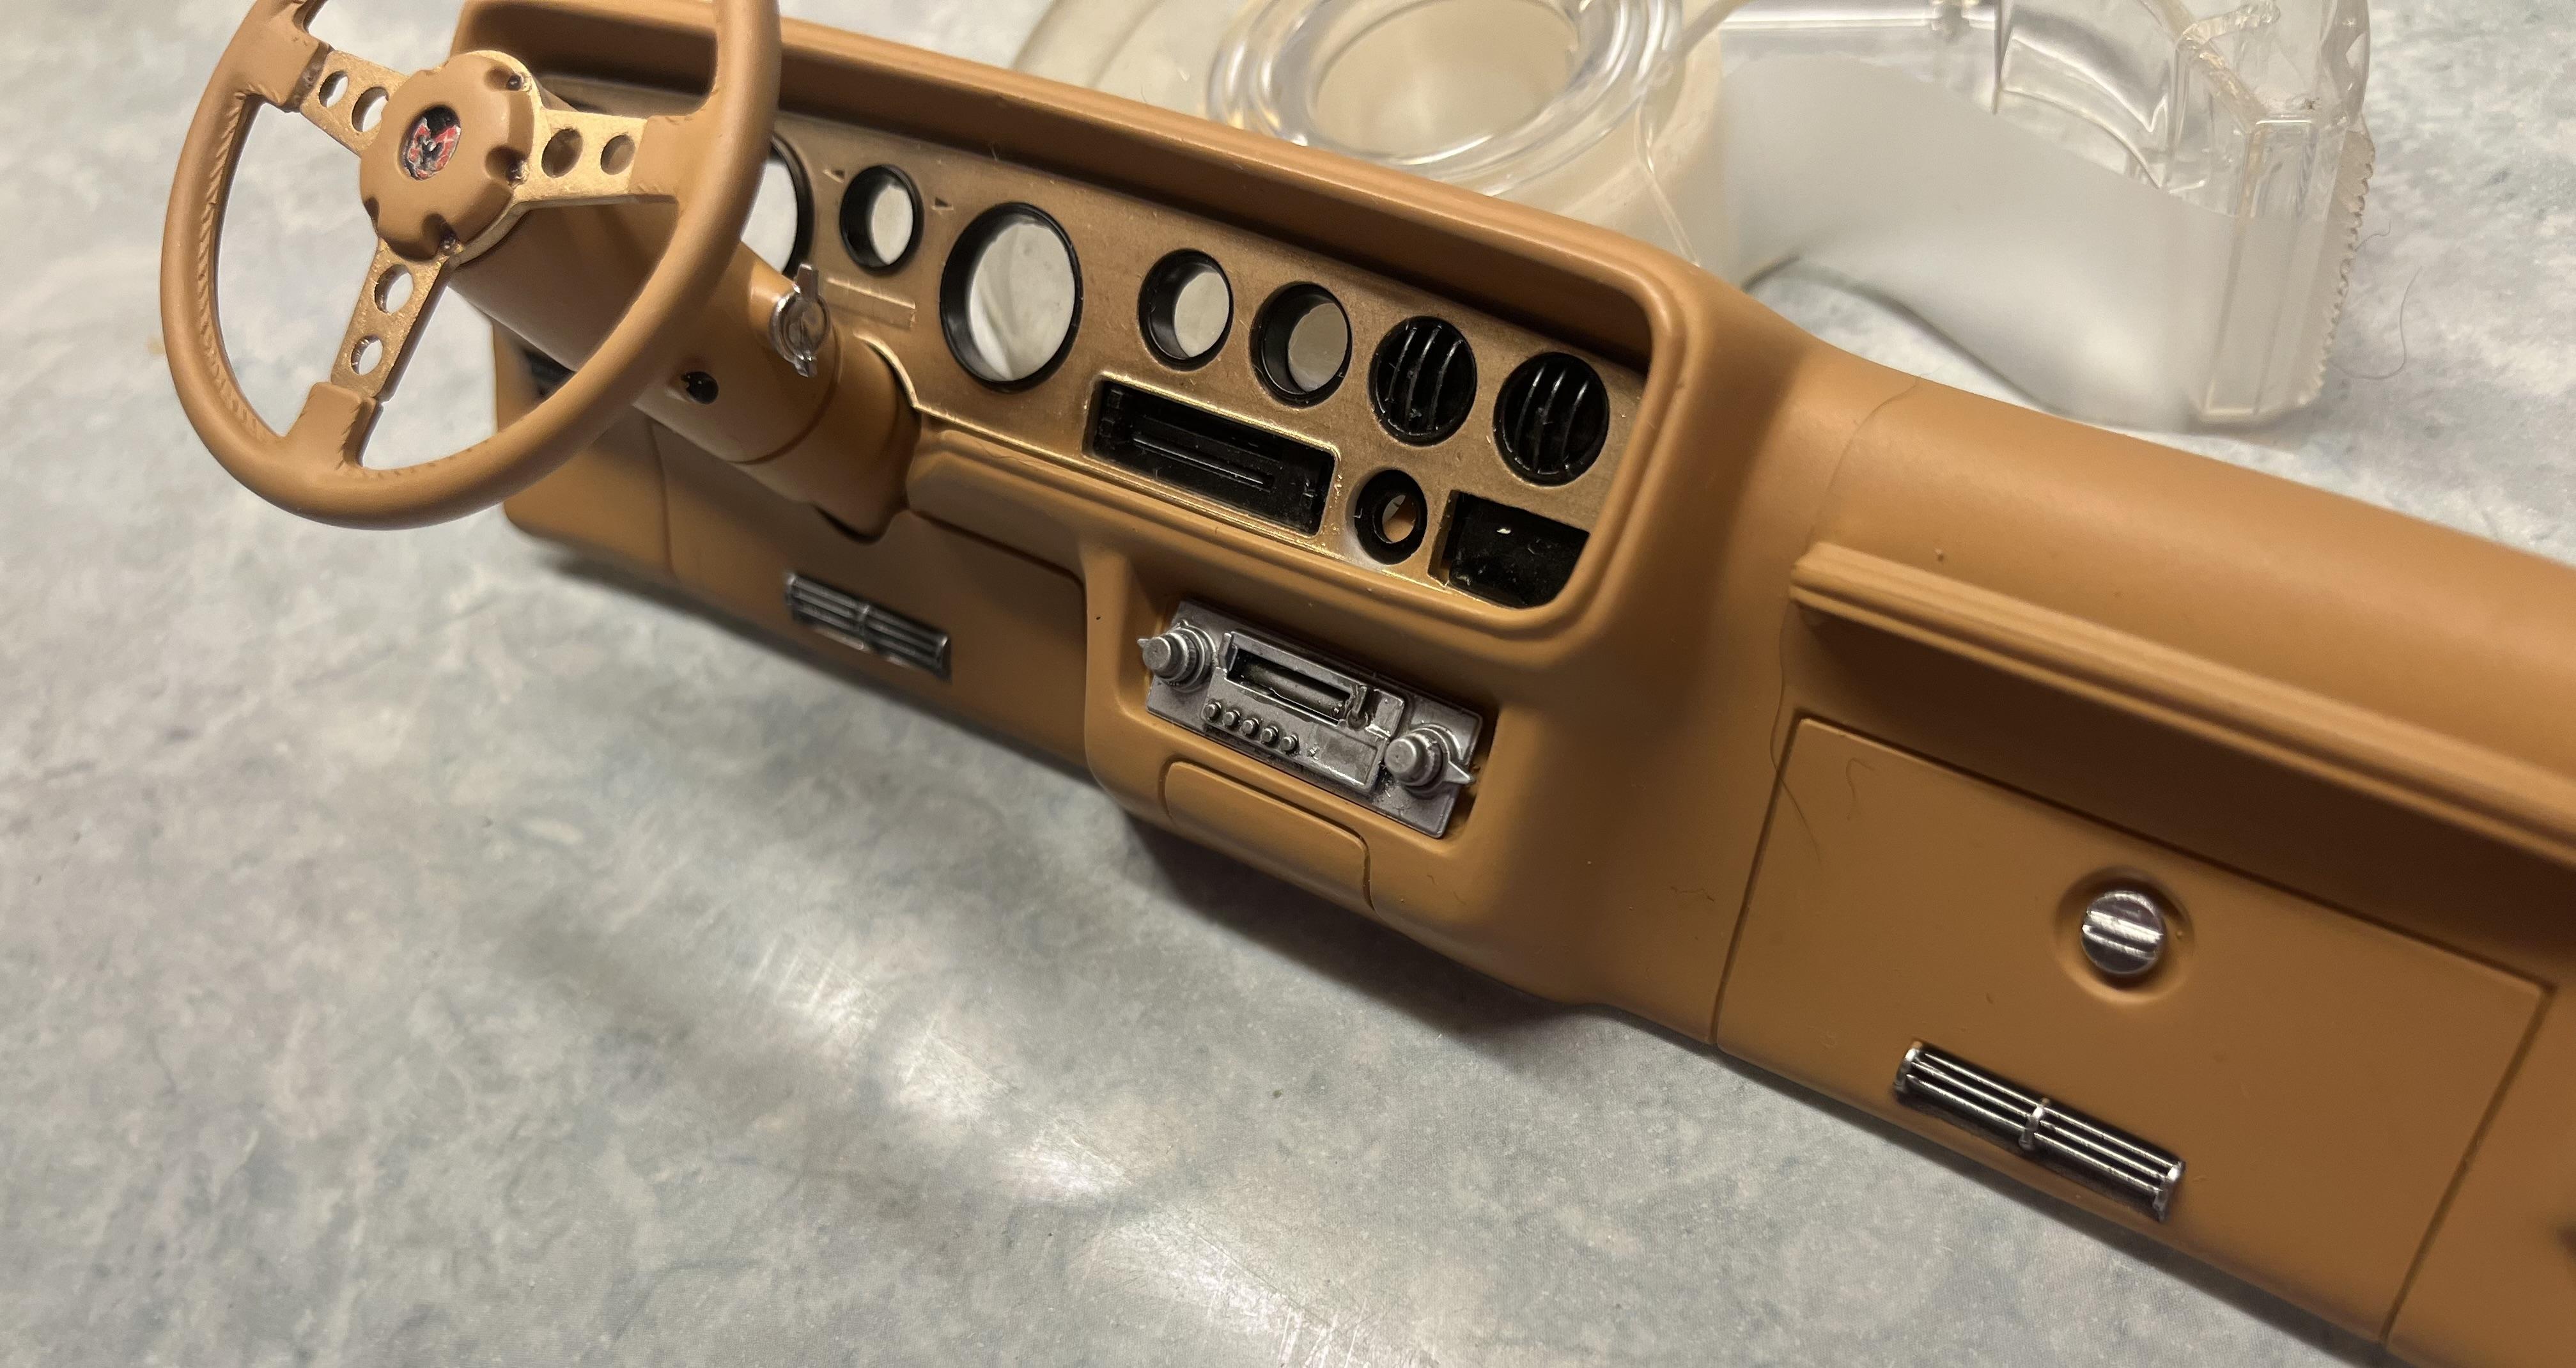
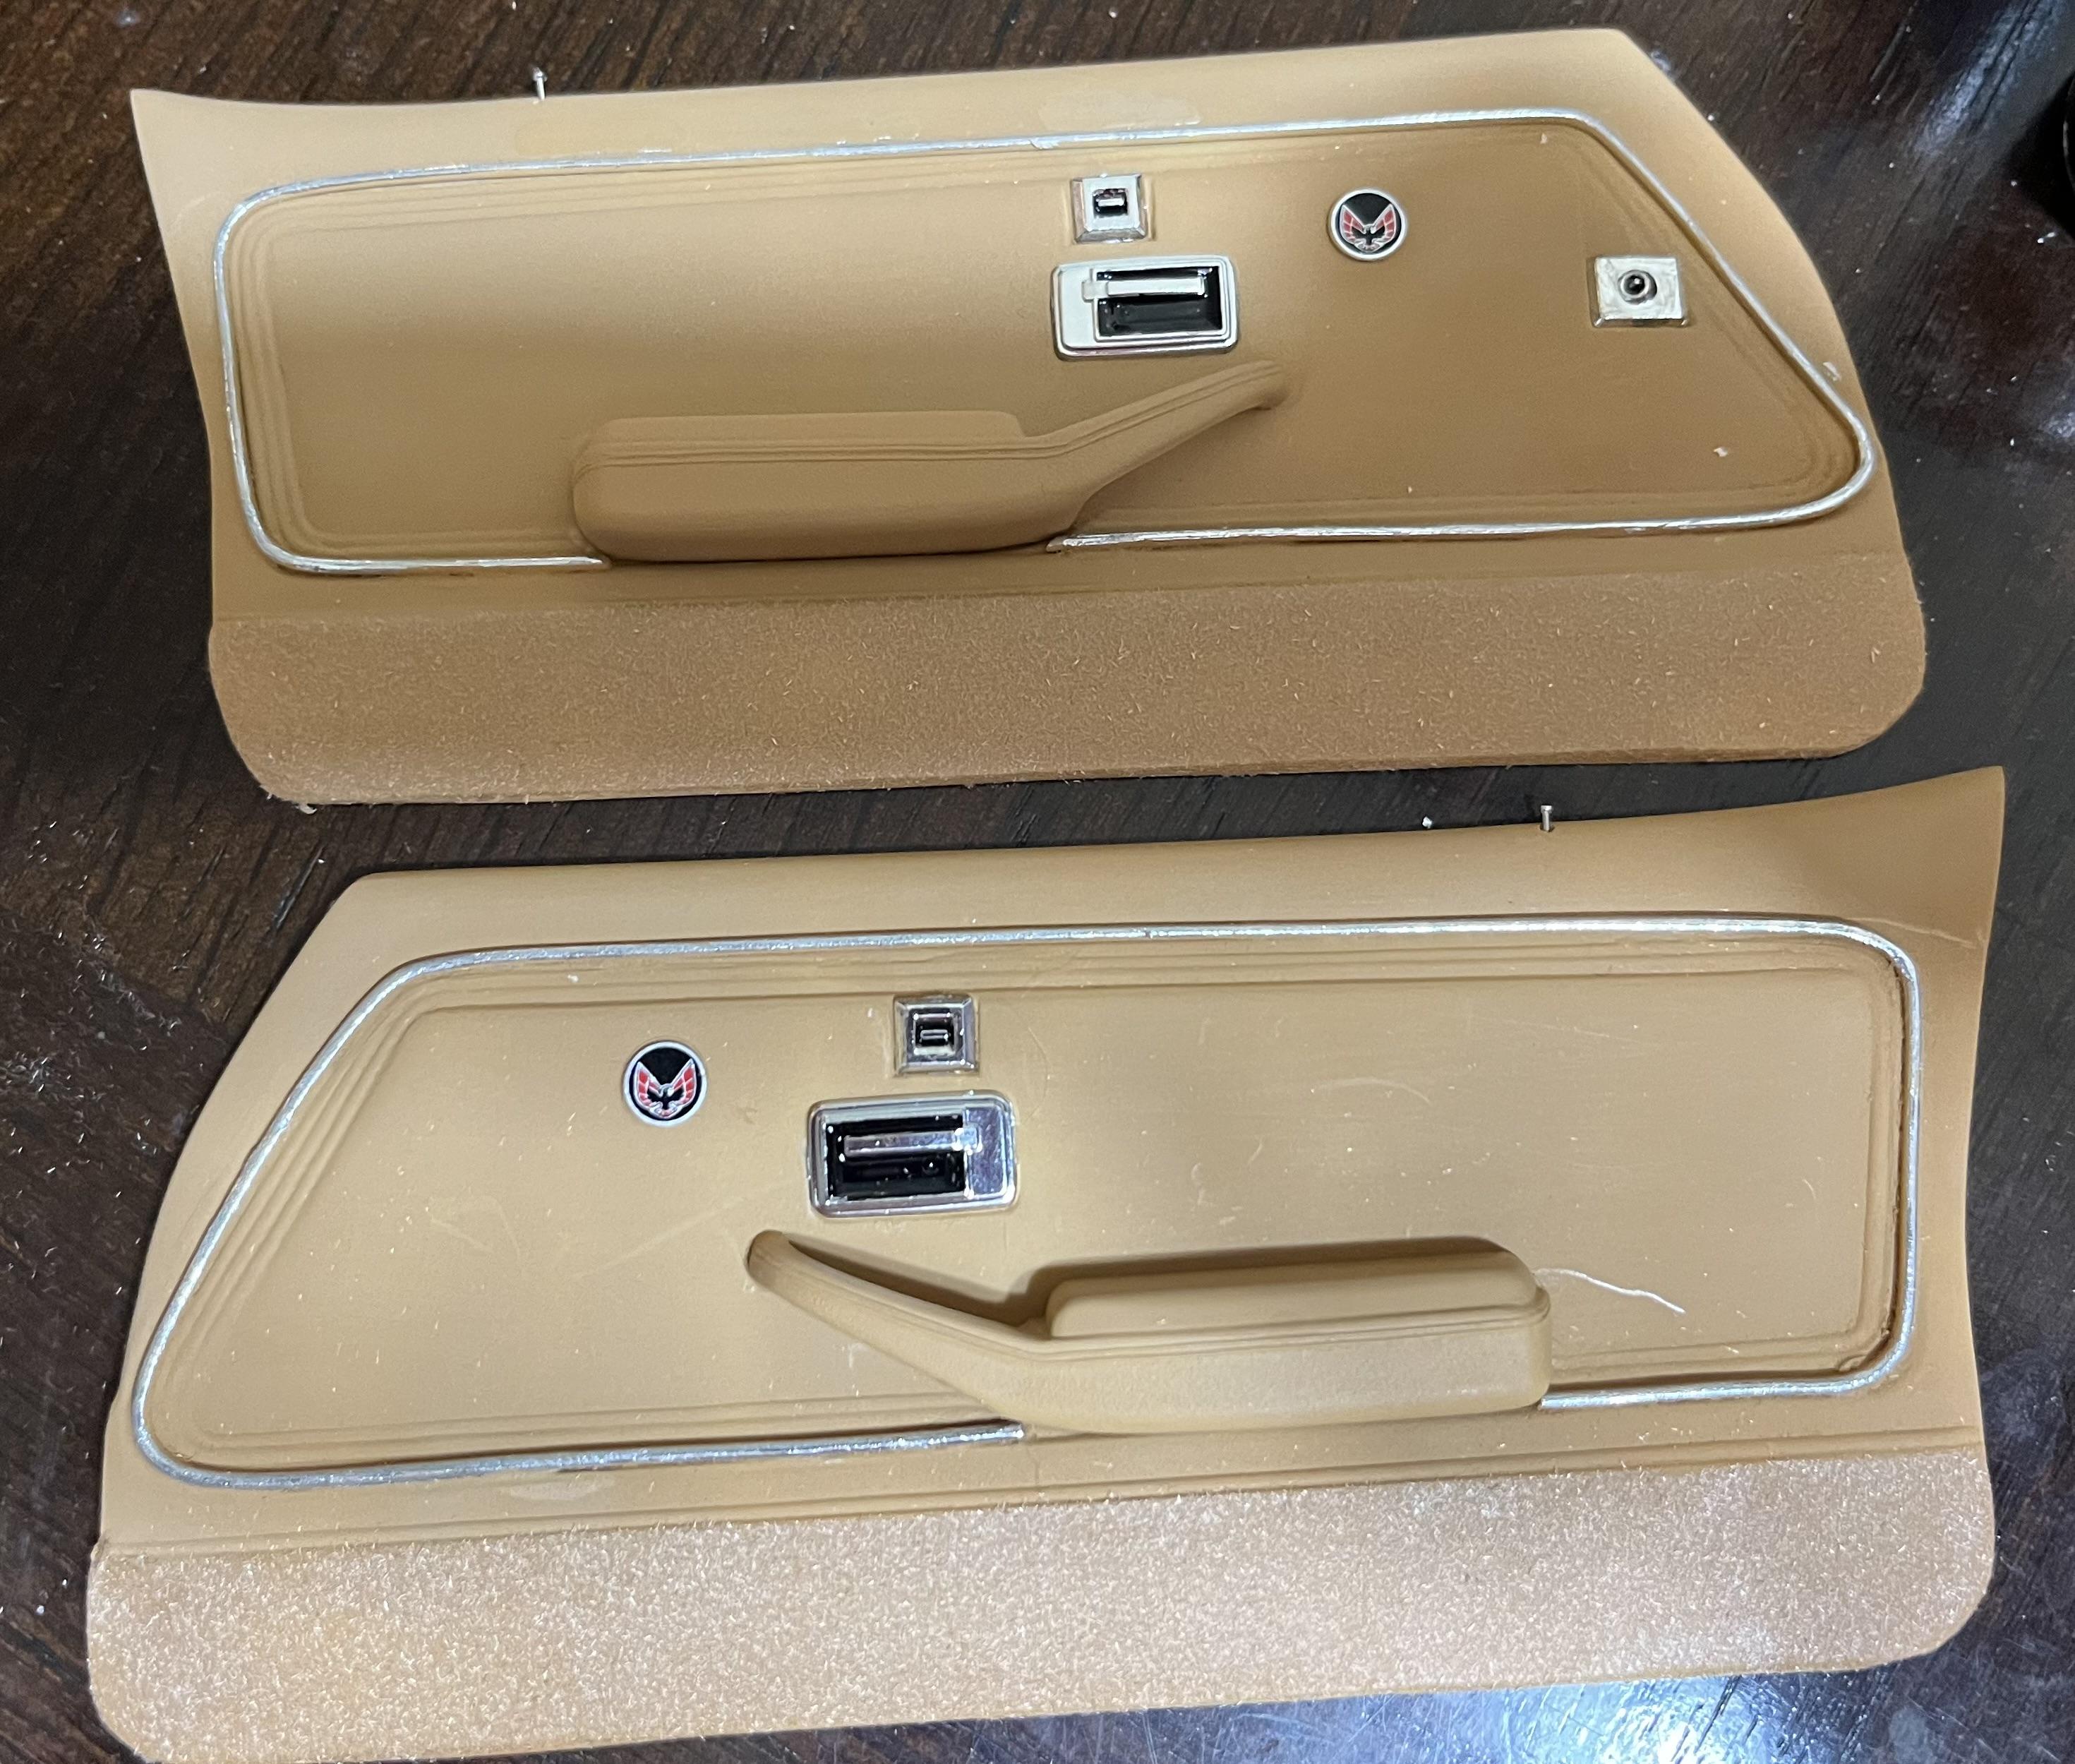
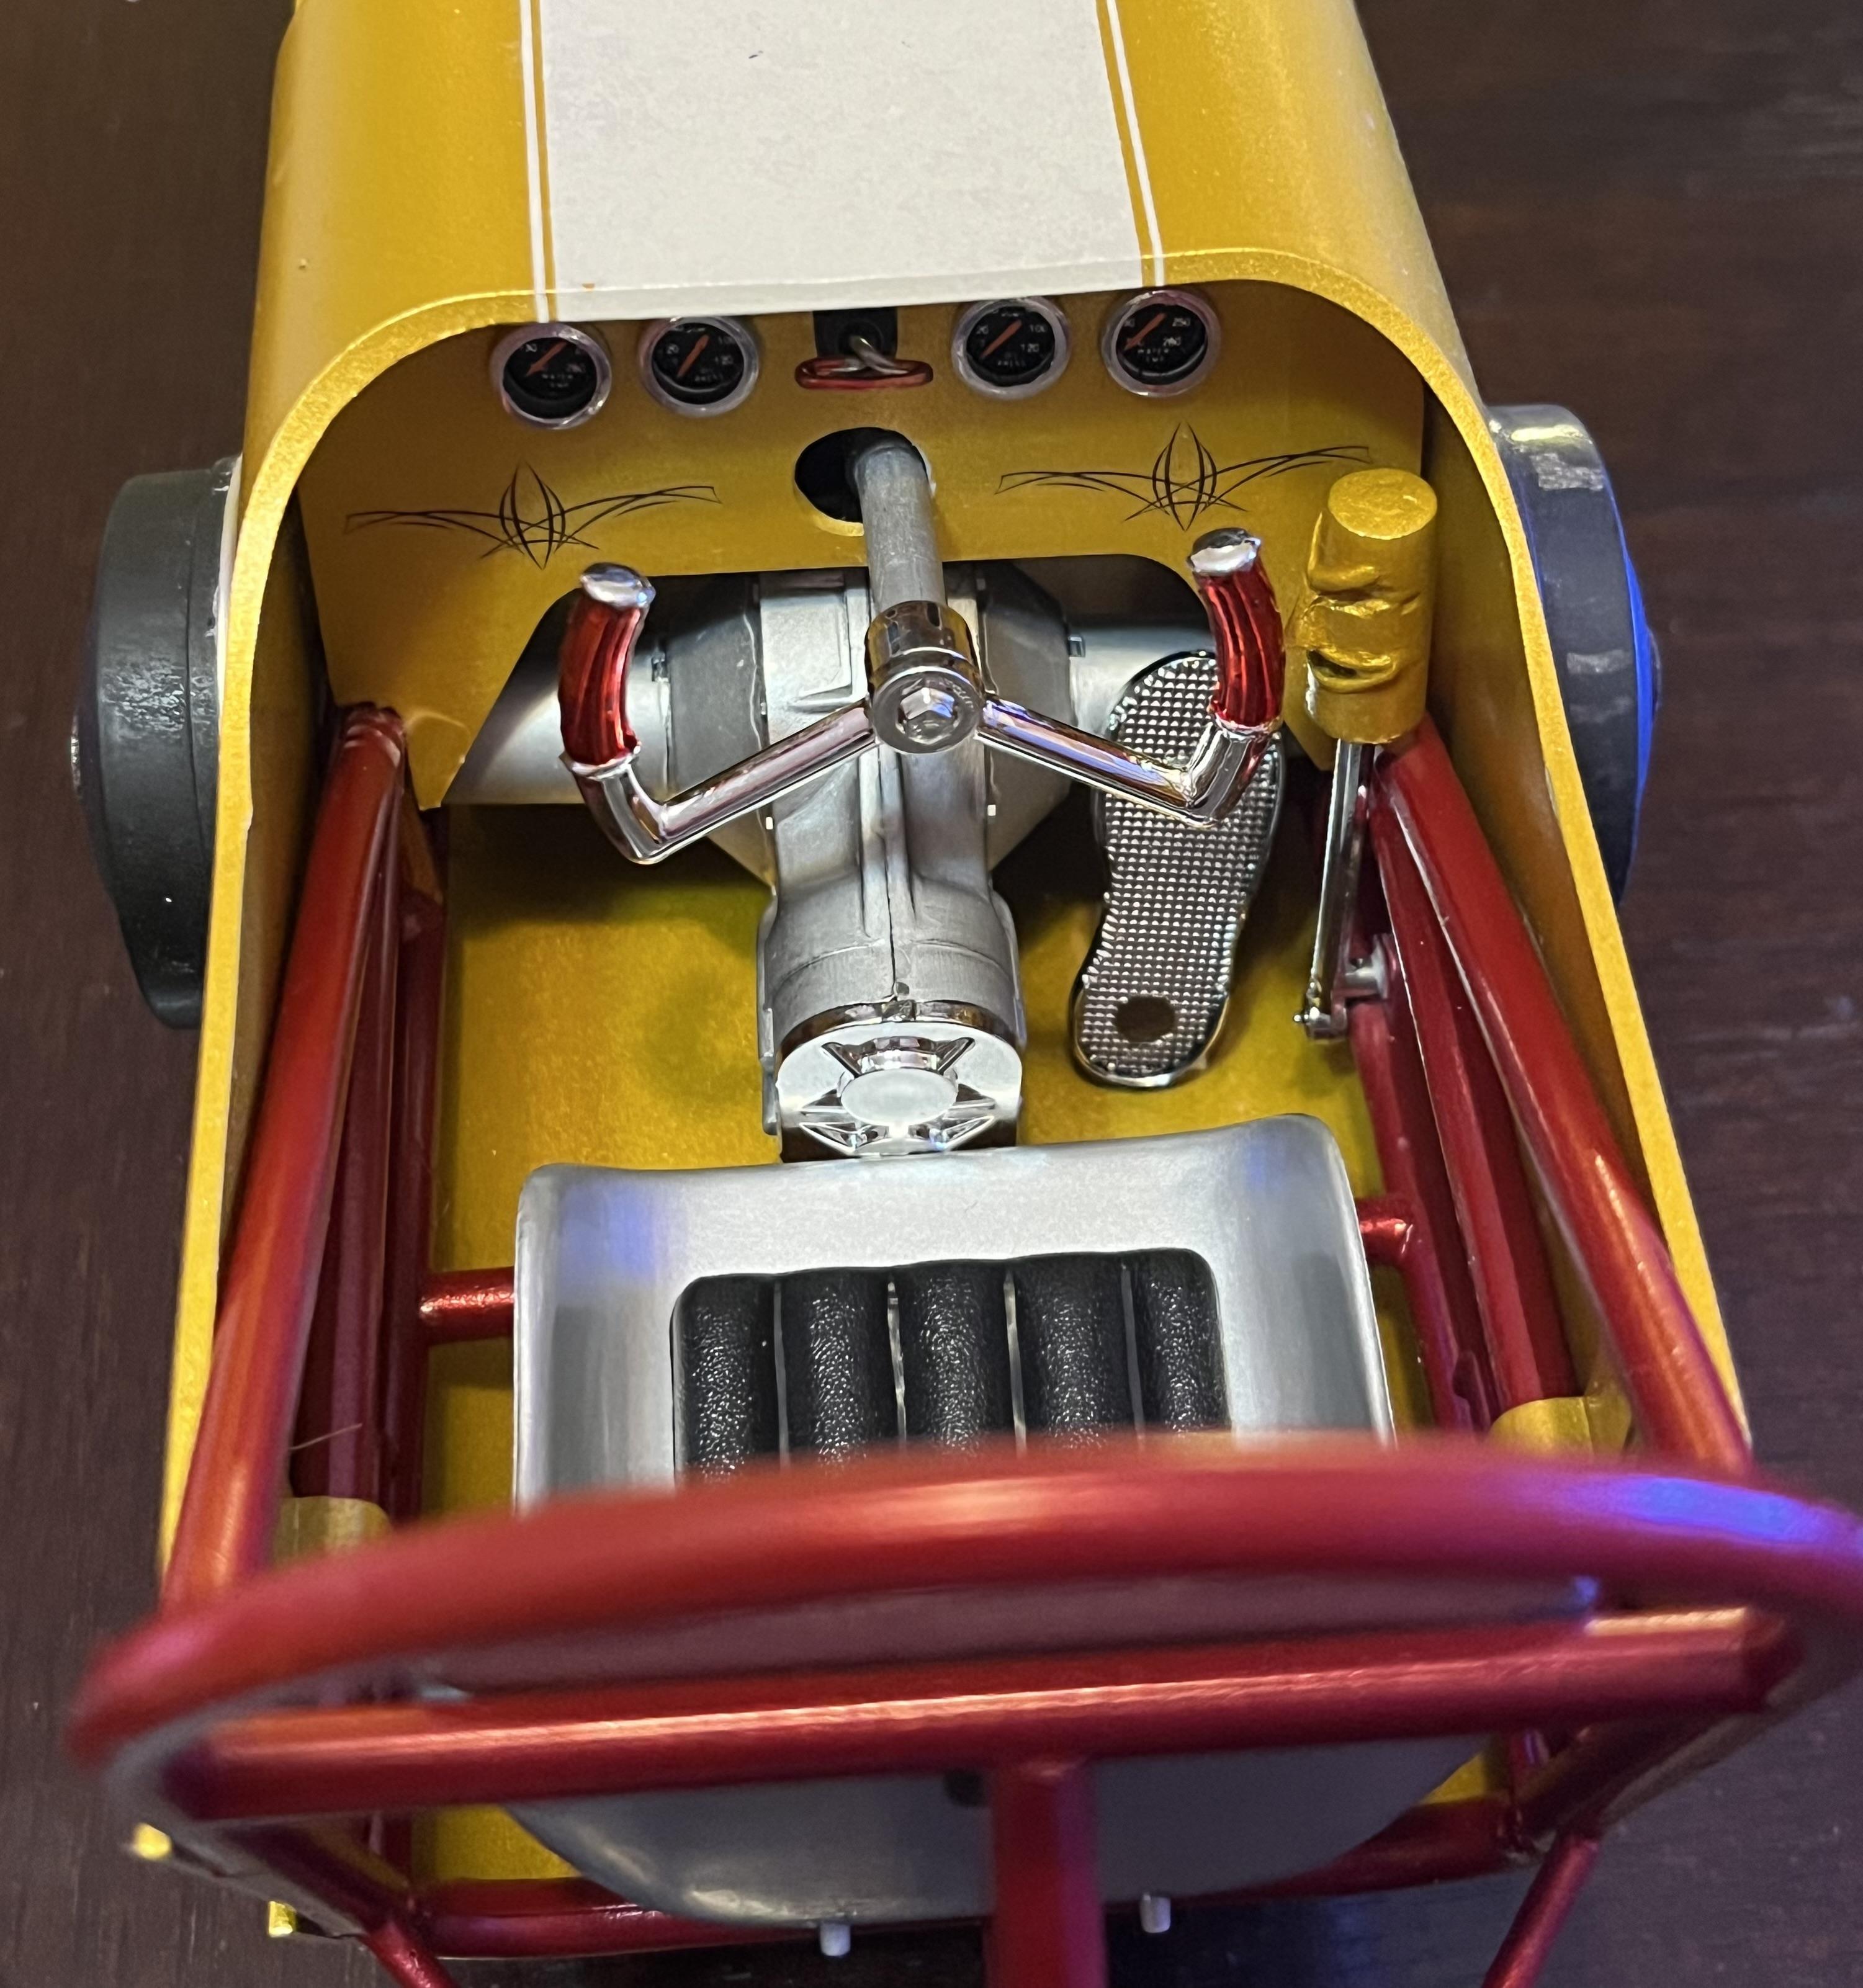
Interior is nearly done, just need to finish the steering wheel and some minor things.

-
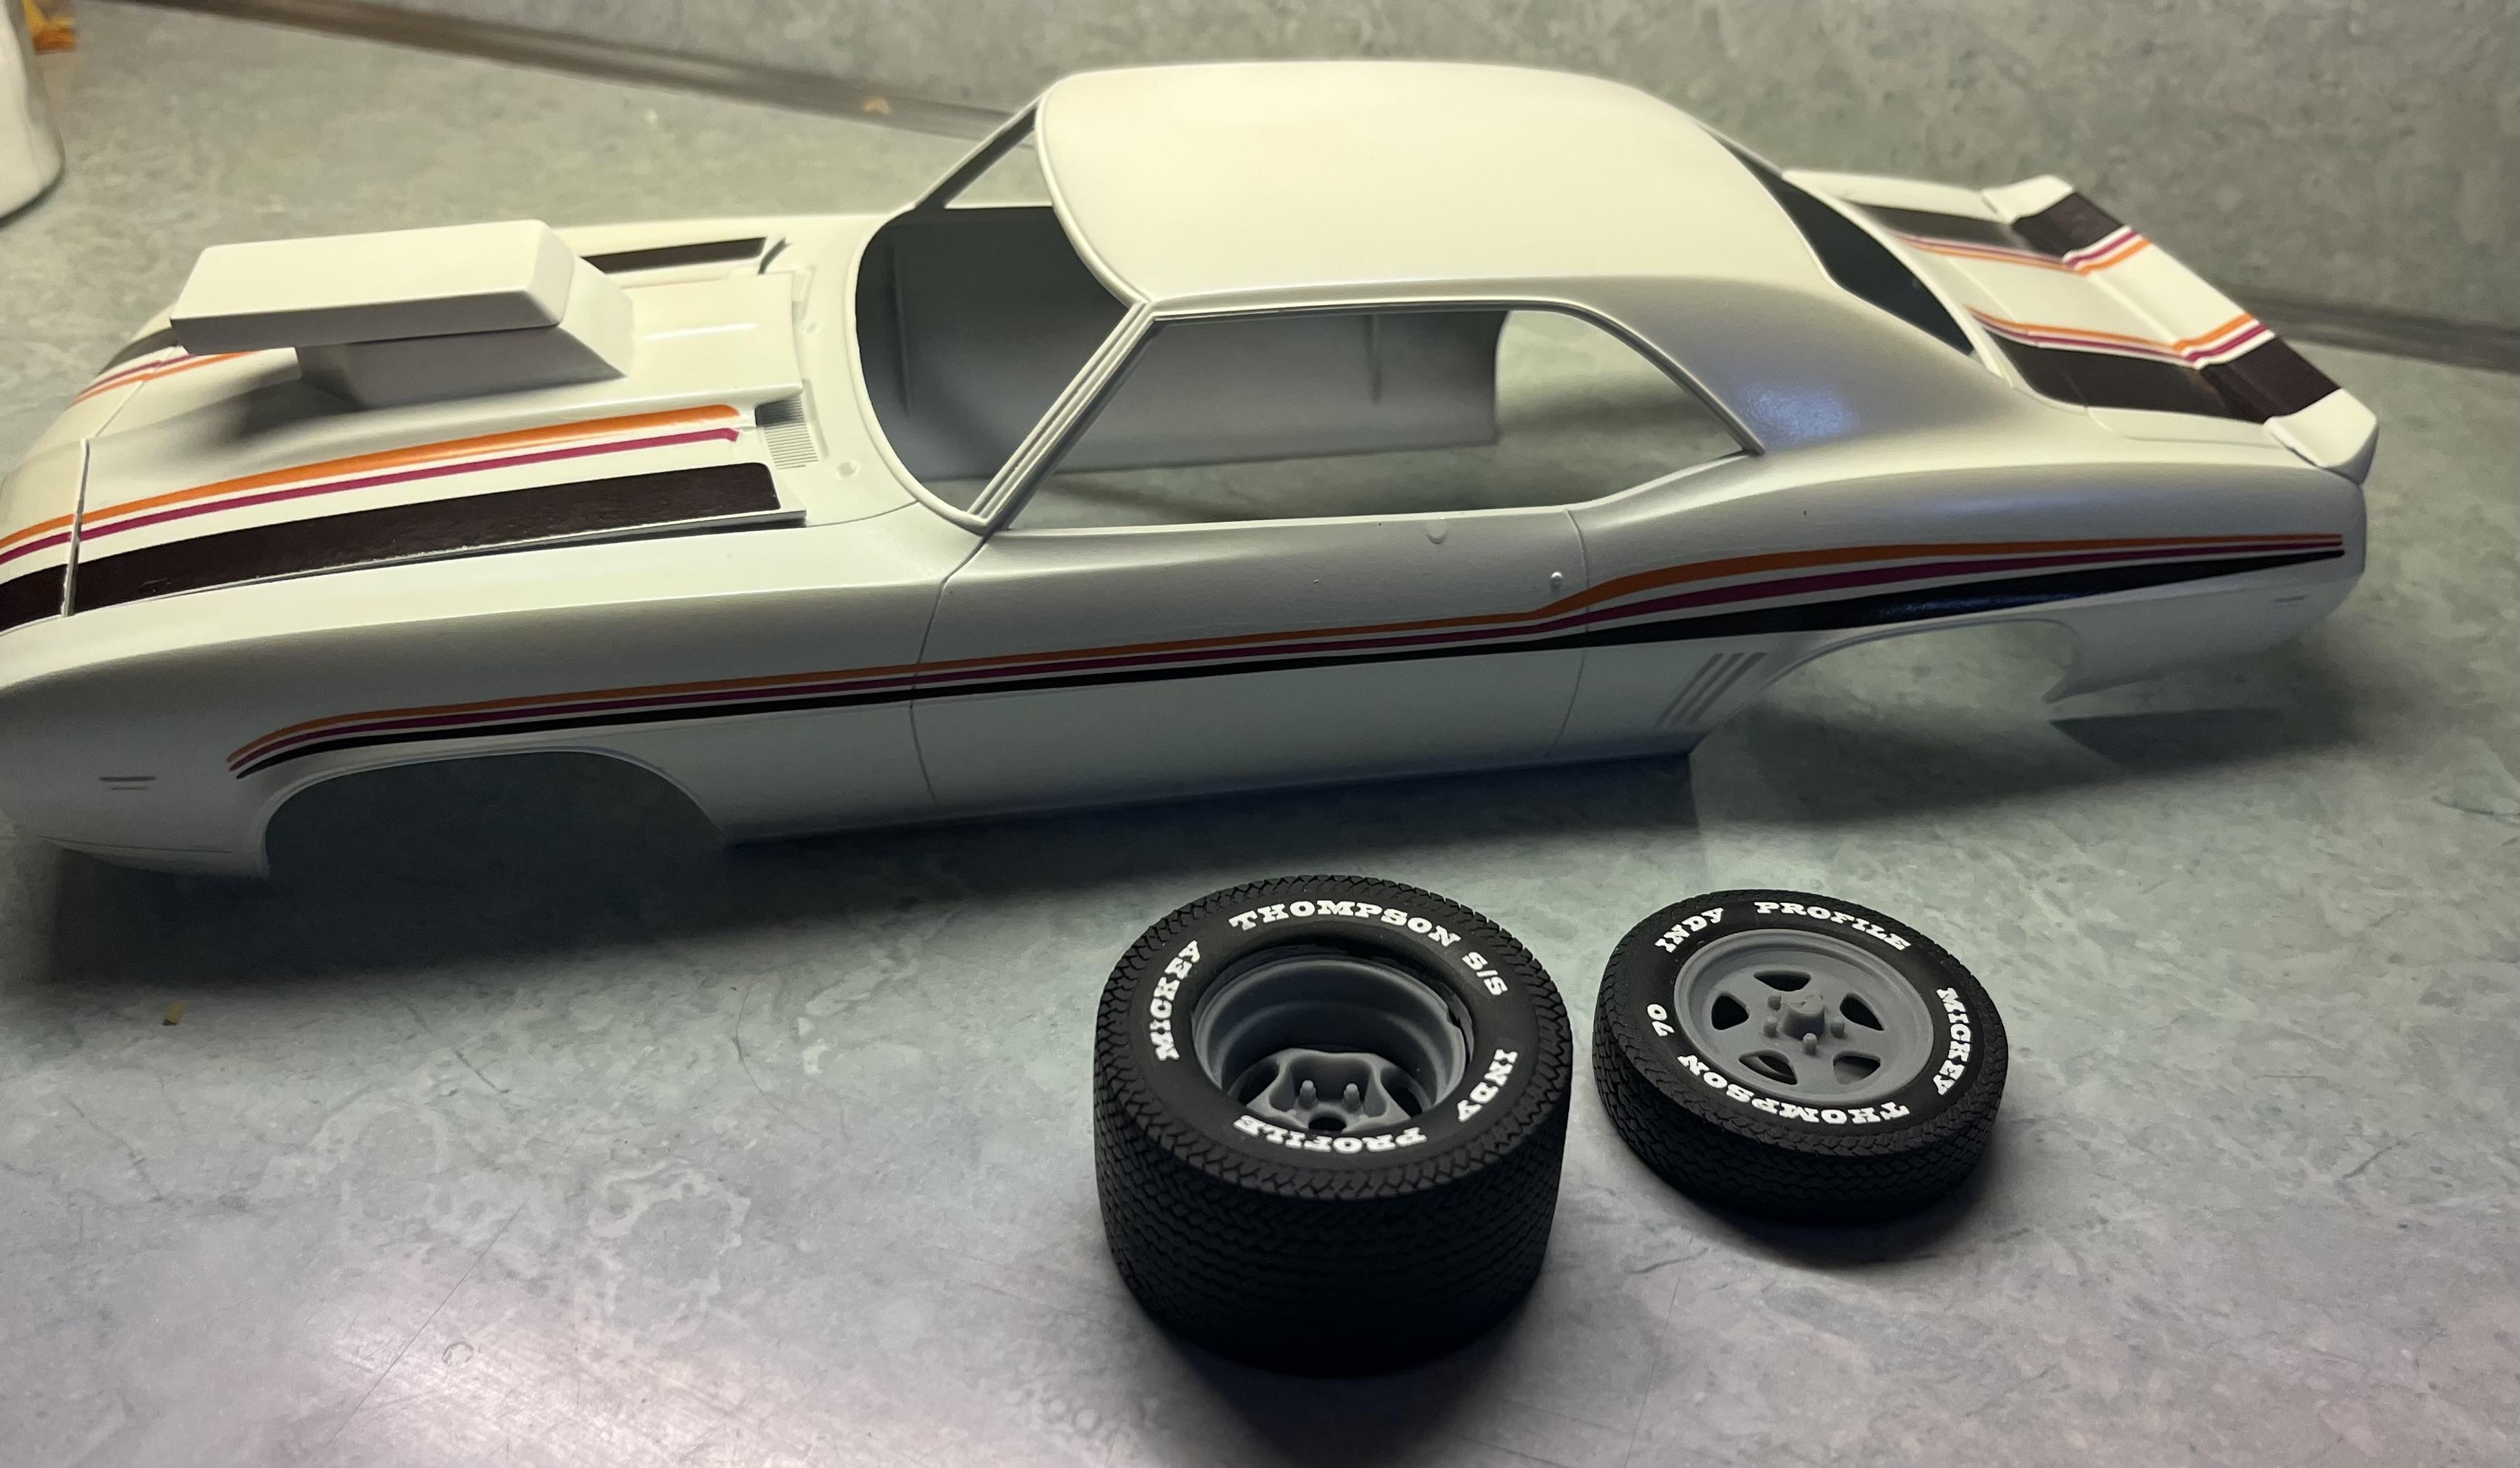
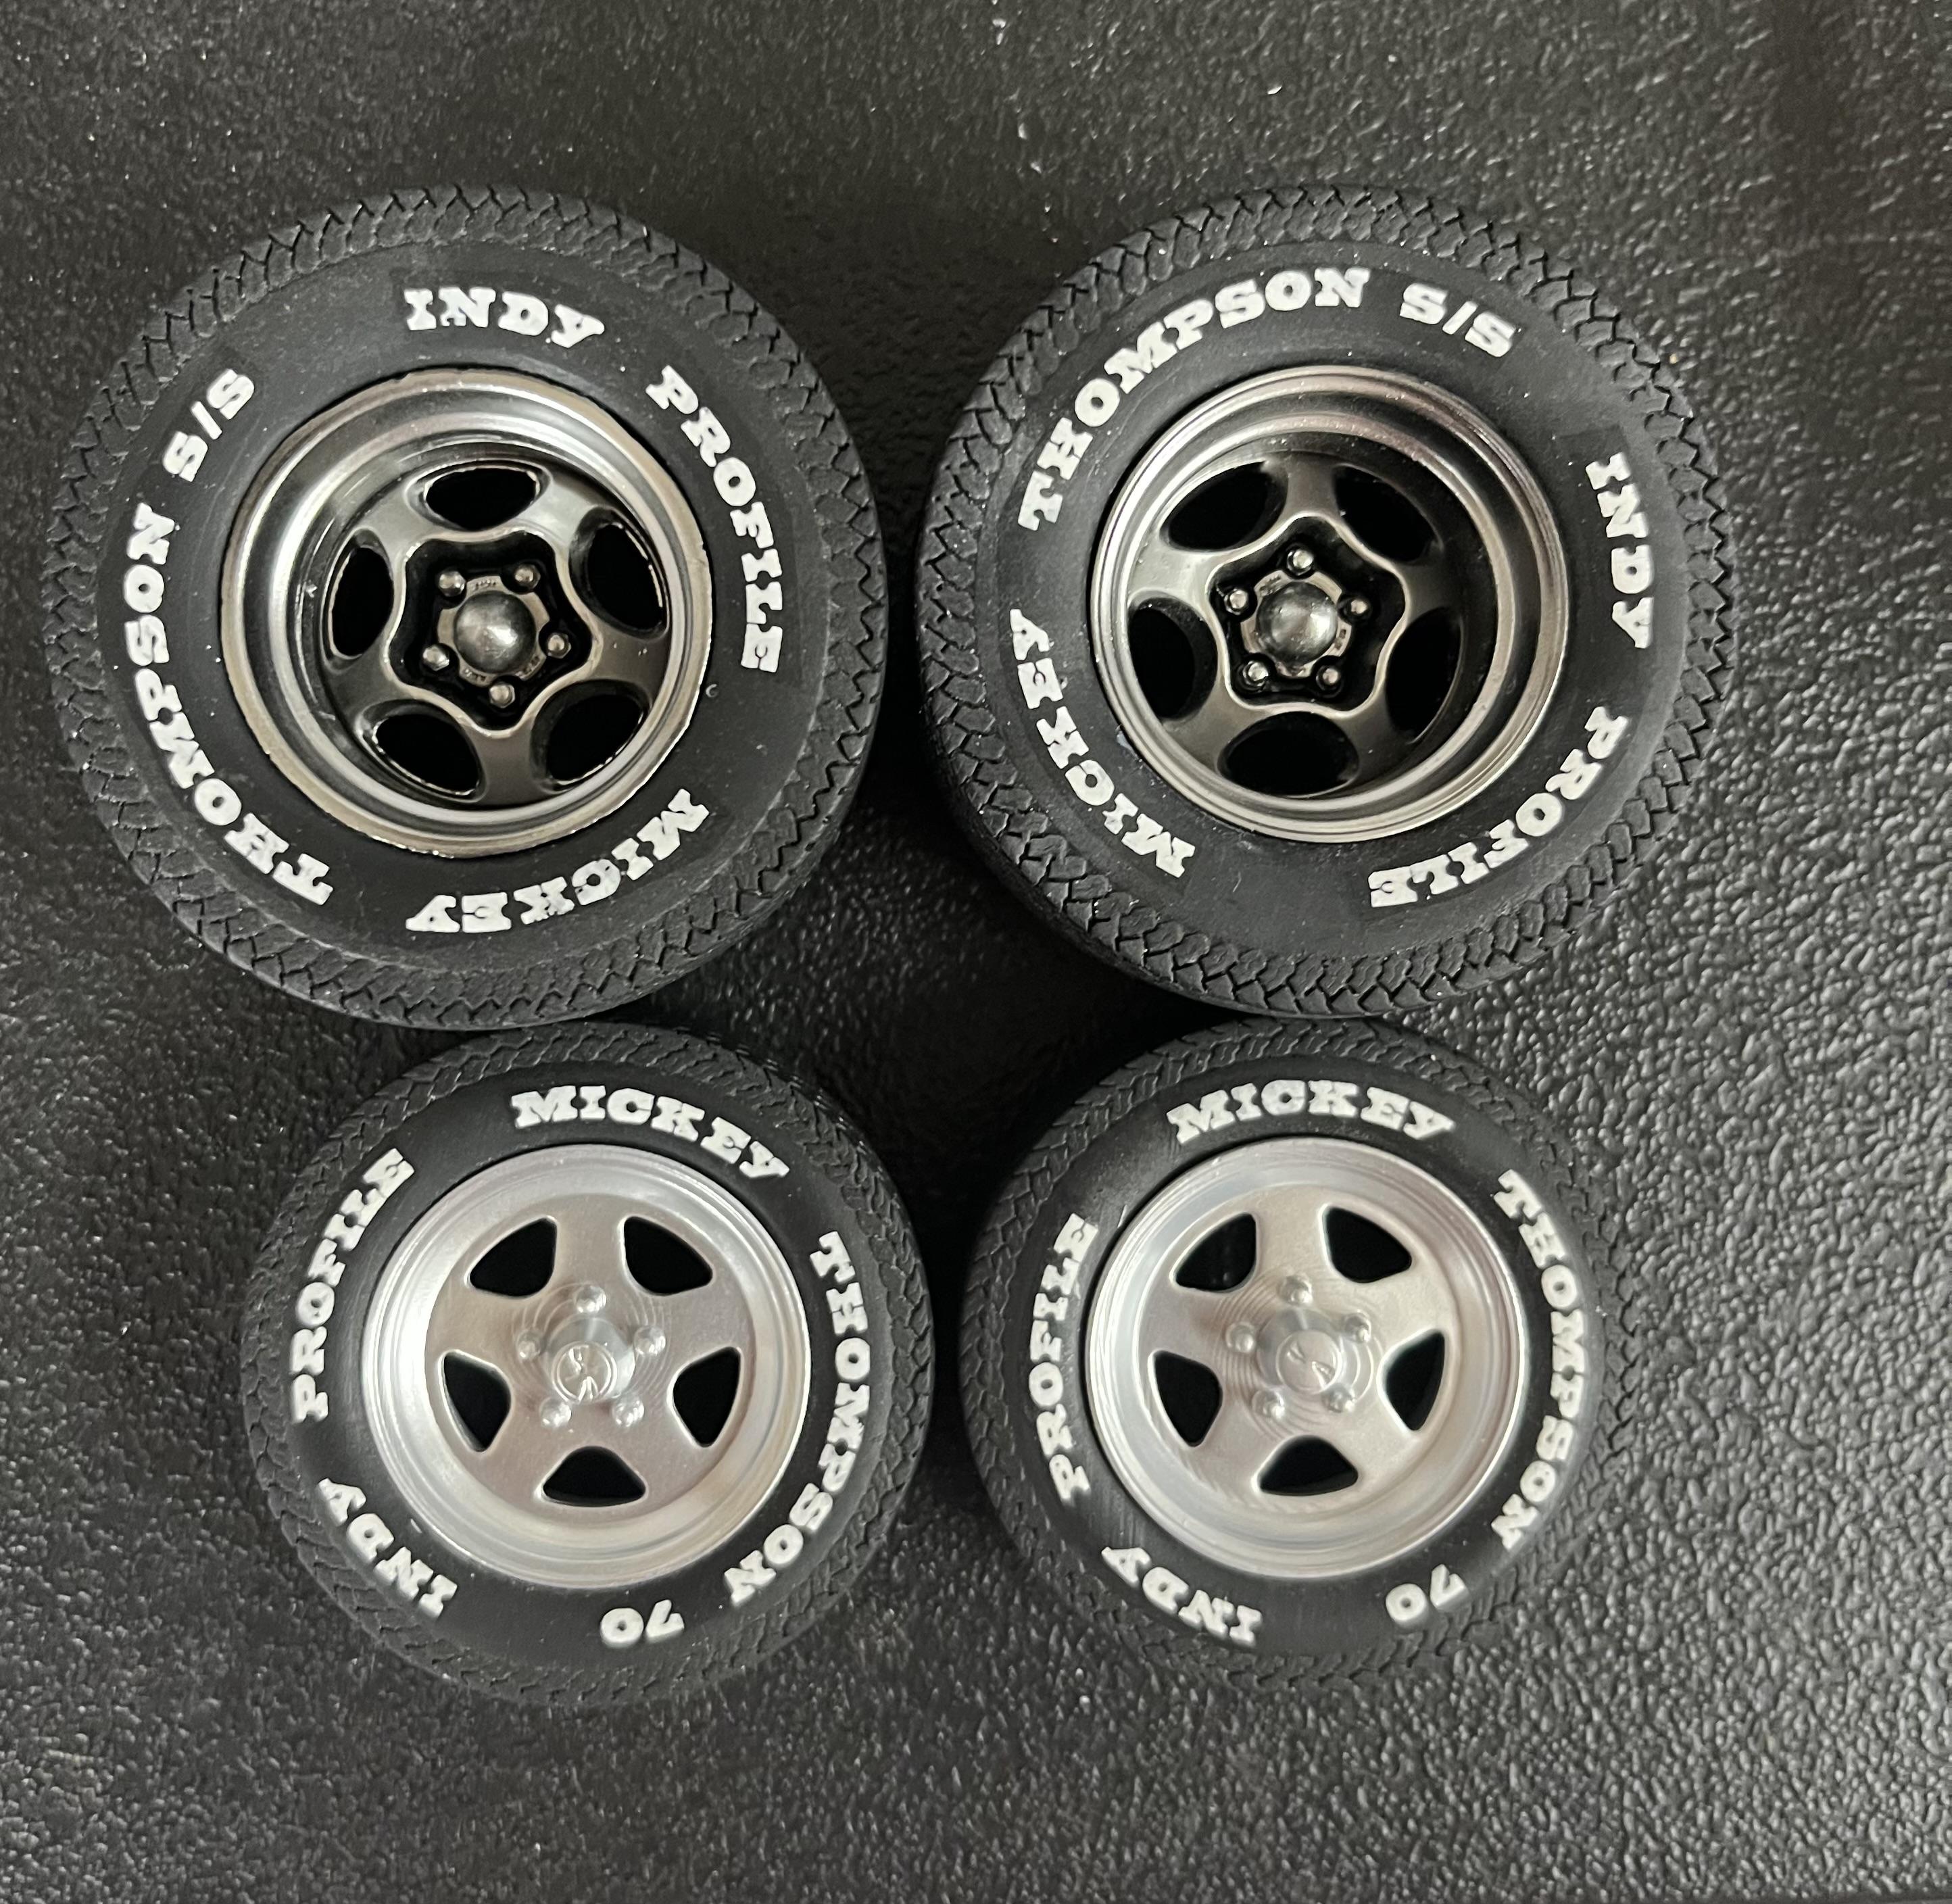
Tires and rims are 3D printed from Frankie’s Hobby and Horror, can be found on Facebook
-
I’ve been working on this 1/12 Camaro. The idea was to closely match the old Monogram box art as close as I can, but with a few changes. Pics of where it’s at now.
-

Best decal printing services in 2025?
Fantom replied to LOBBS's topic in Model Building Questions and Answers
For what’s it worth, I have always communicated with him through private messages in Facebook. He has always responded quickly to that. -
Best decal printing services in 2025?
Fantom replied to LOBBS's topic in Model Building Questions and Answers
All my experience with StS , I had to provide payment before work progressed, I have had several sheets printed that way without incident. -
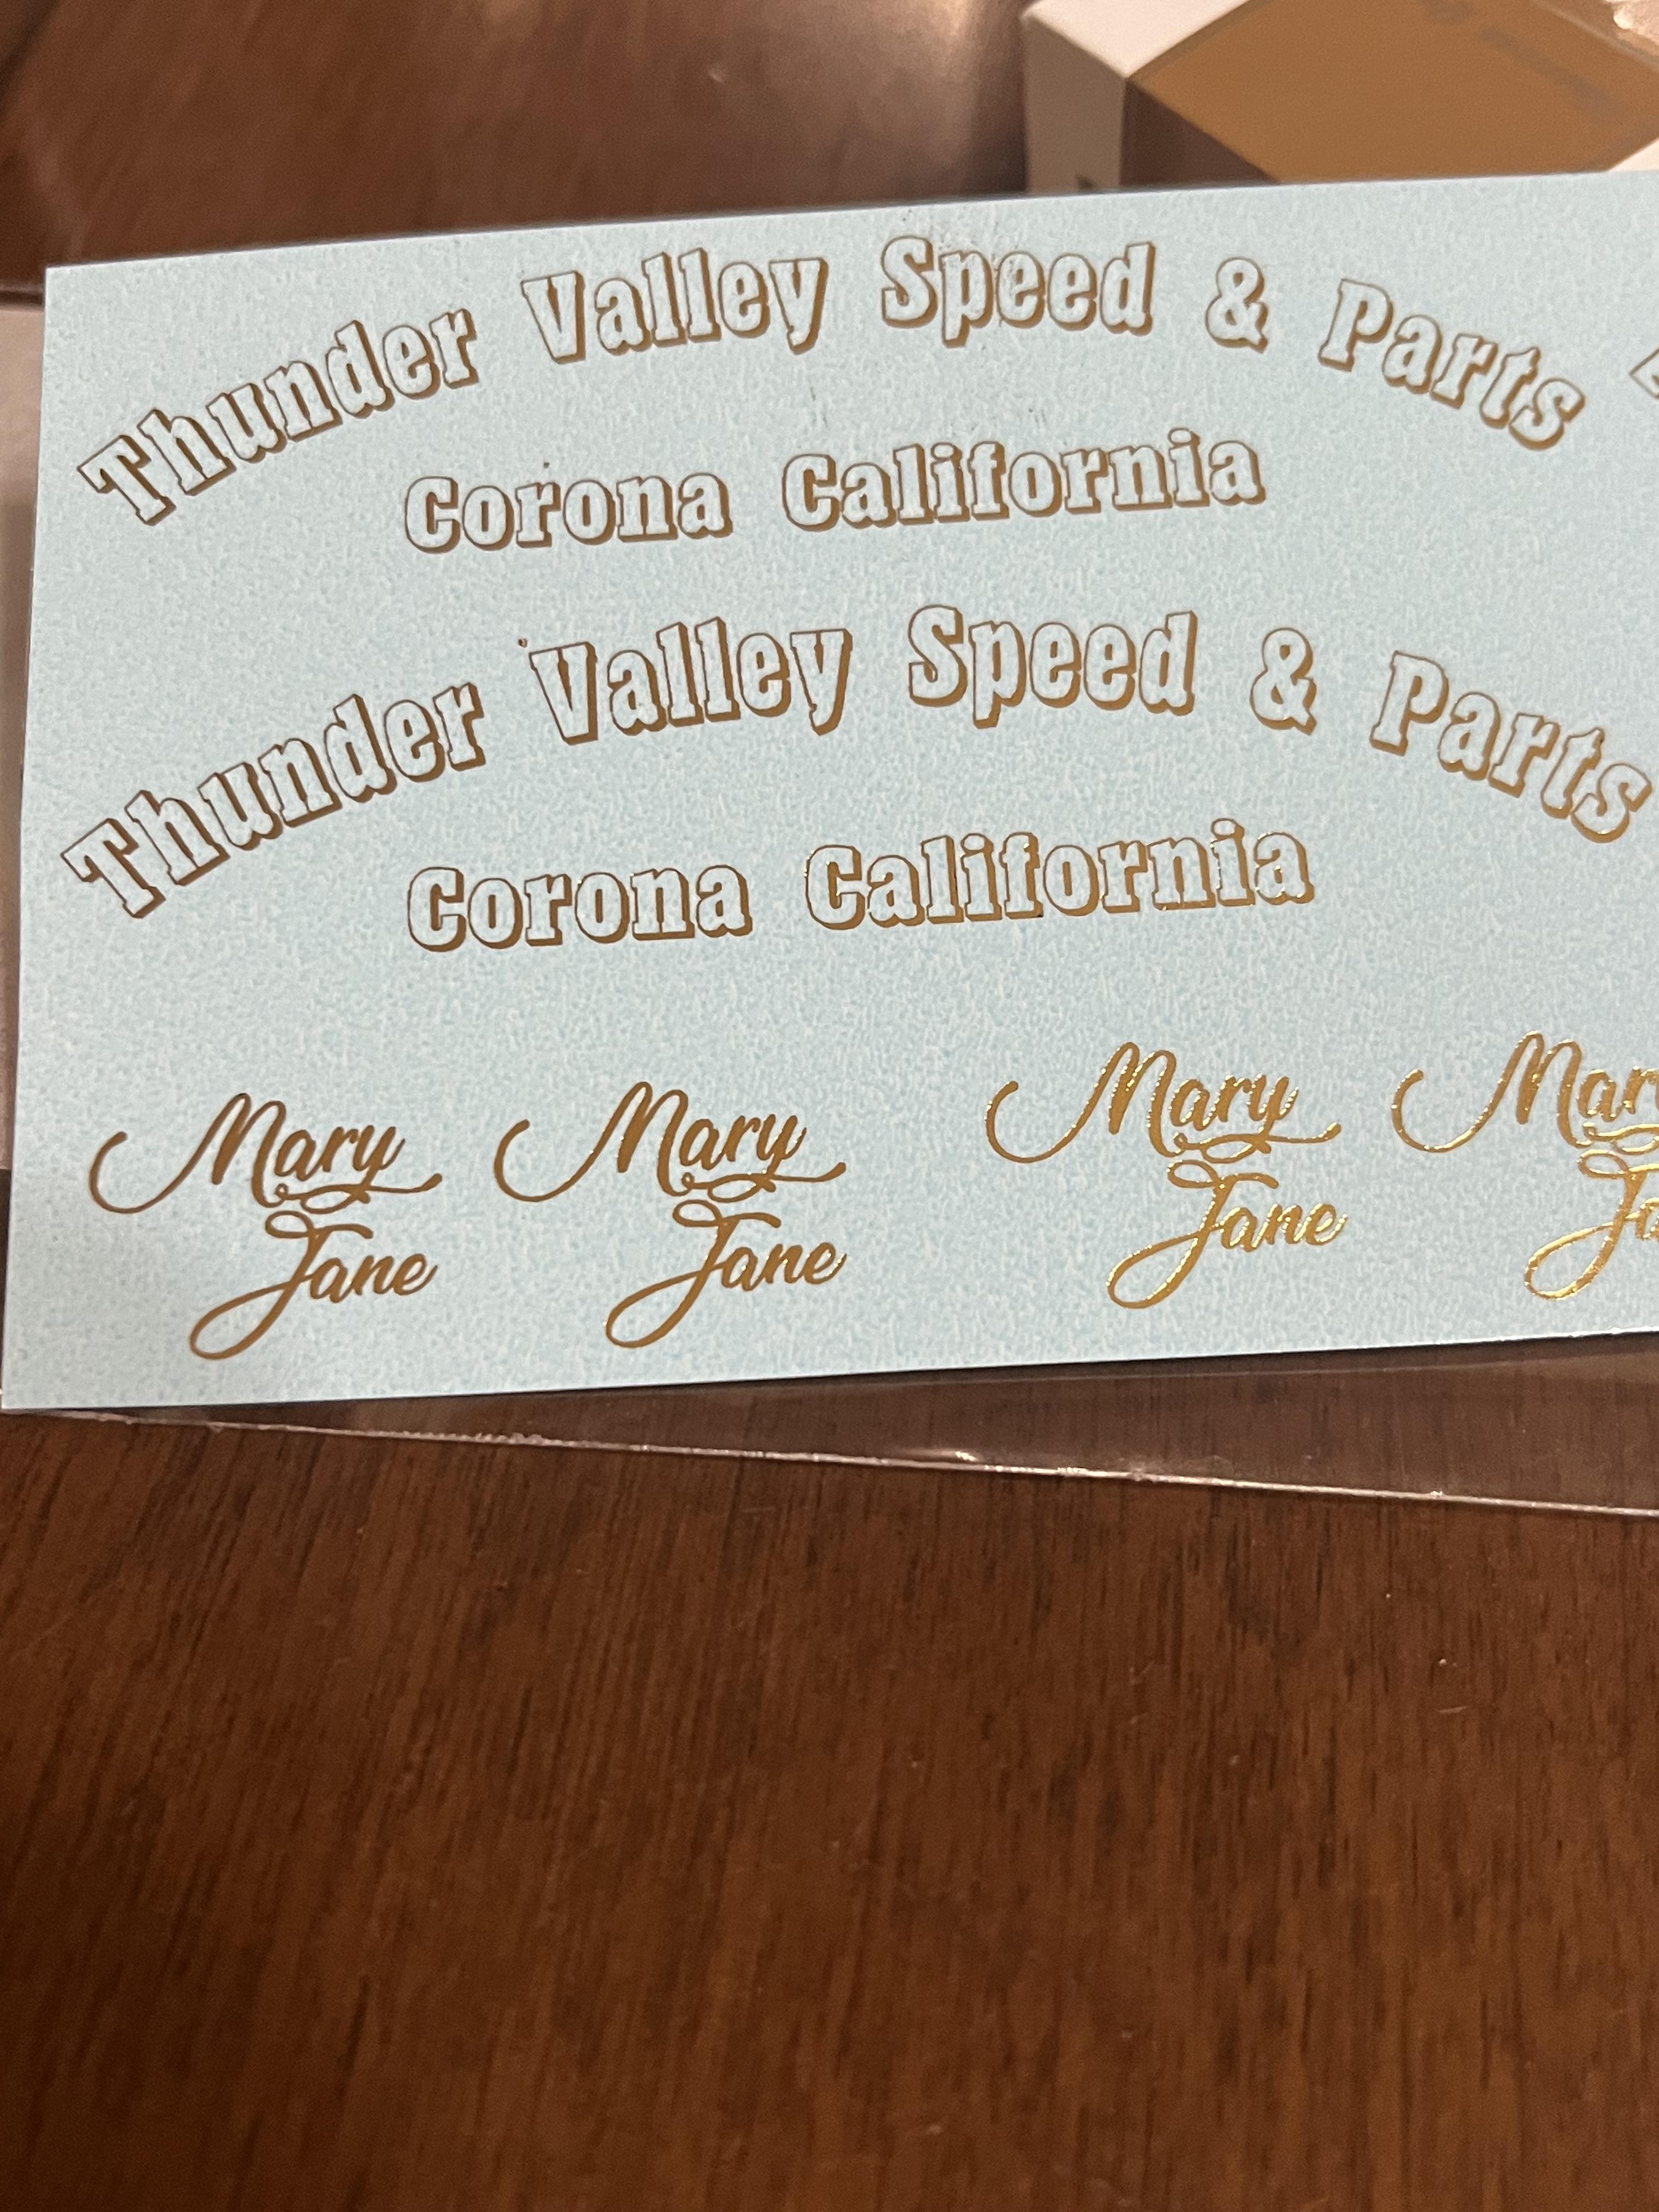
Decals for the car, custom made by STS
-
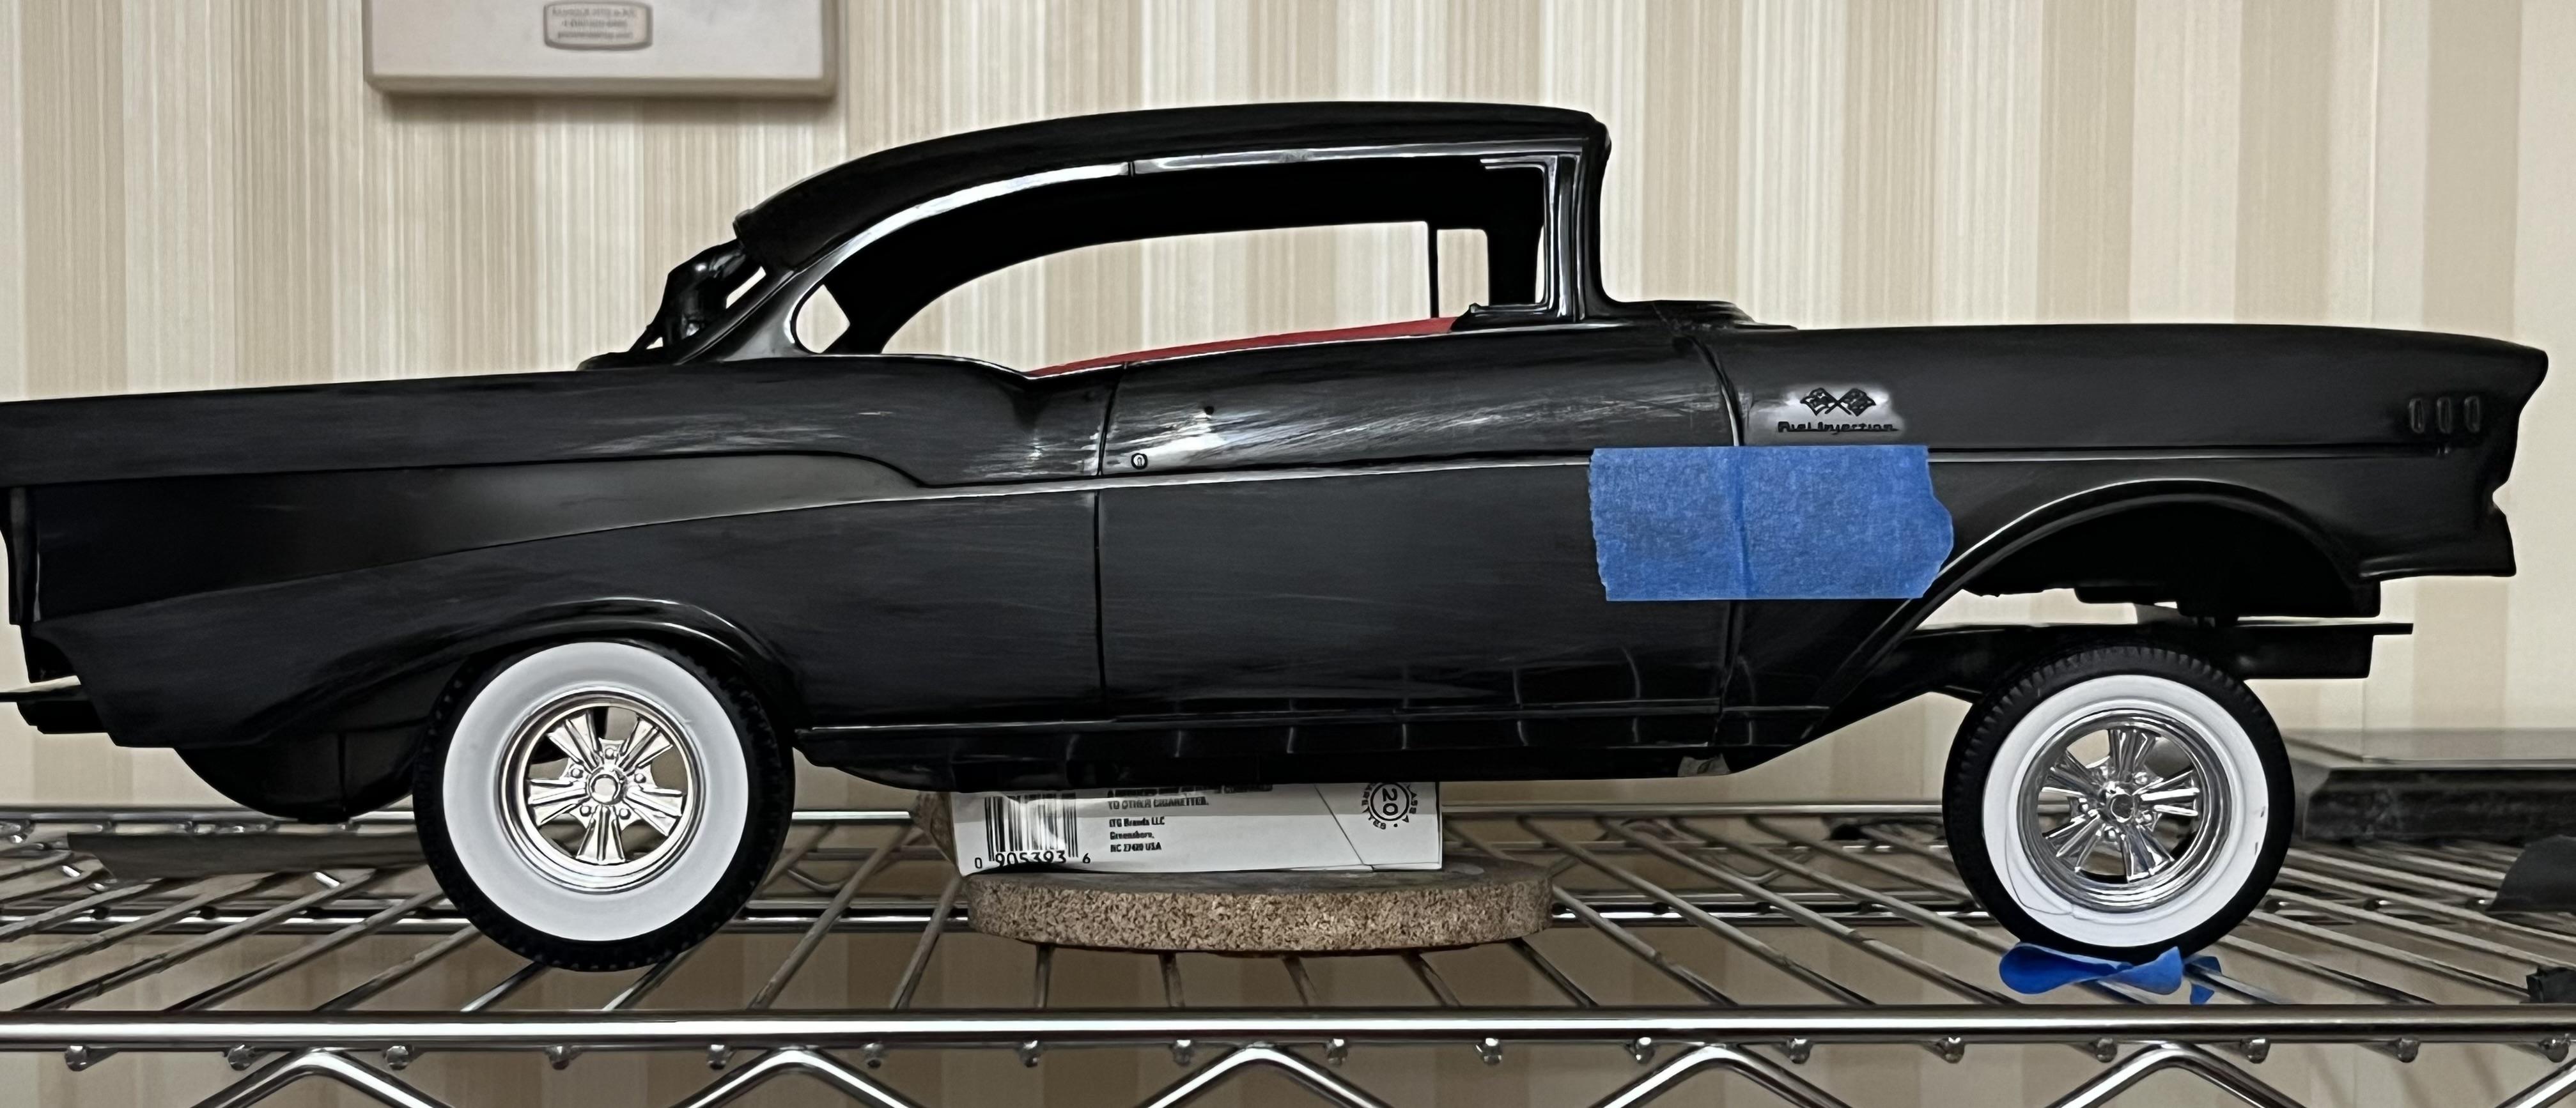
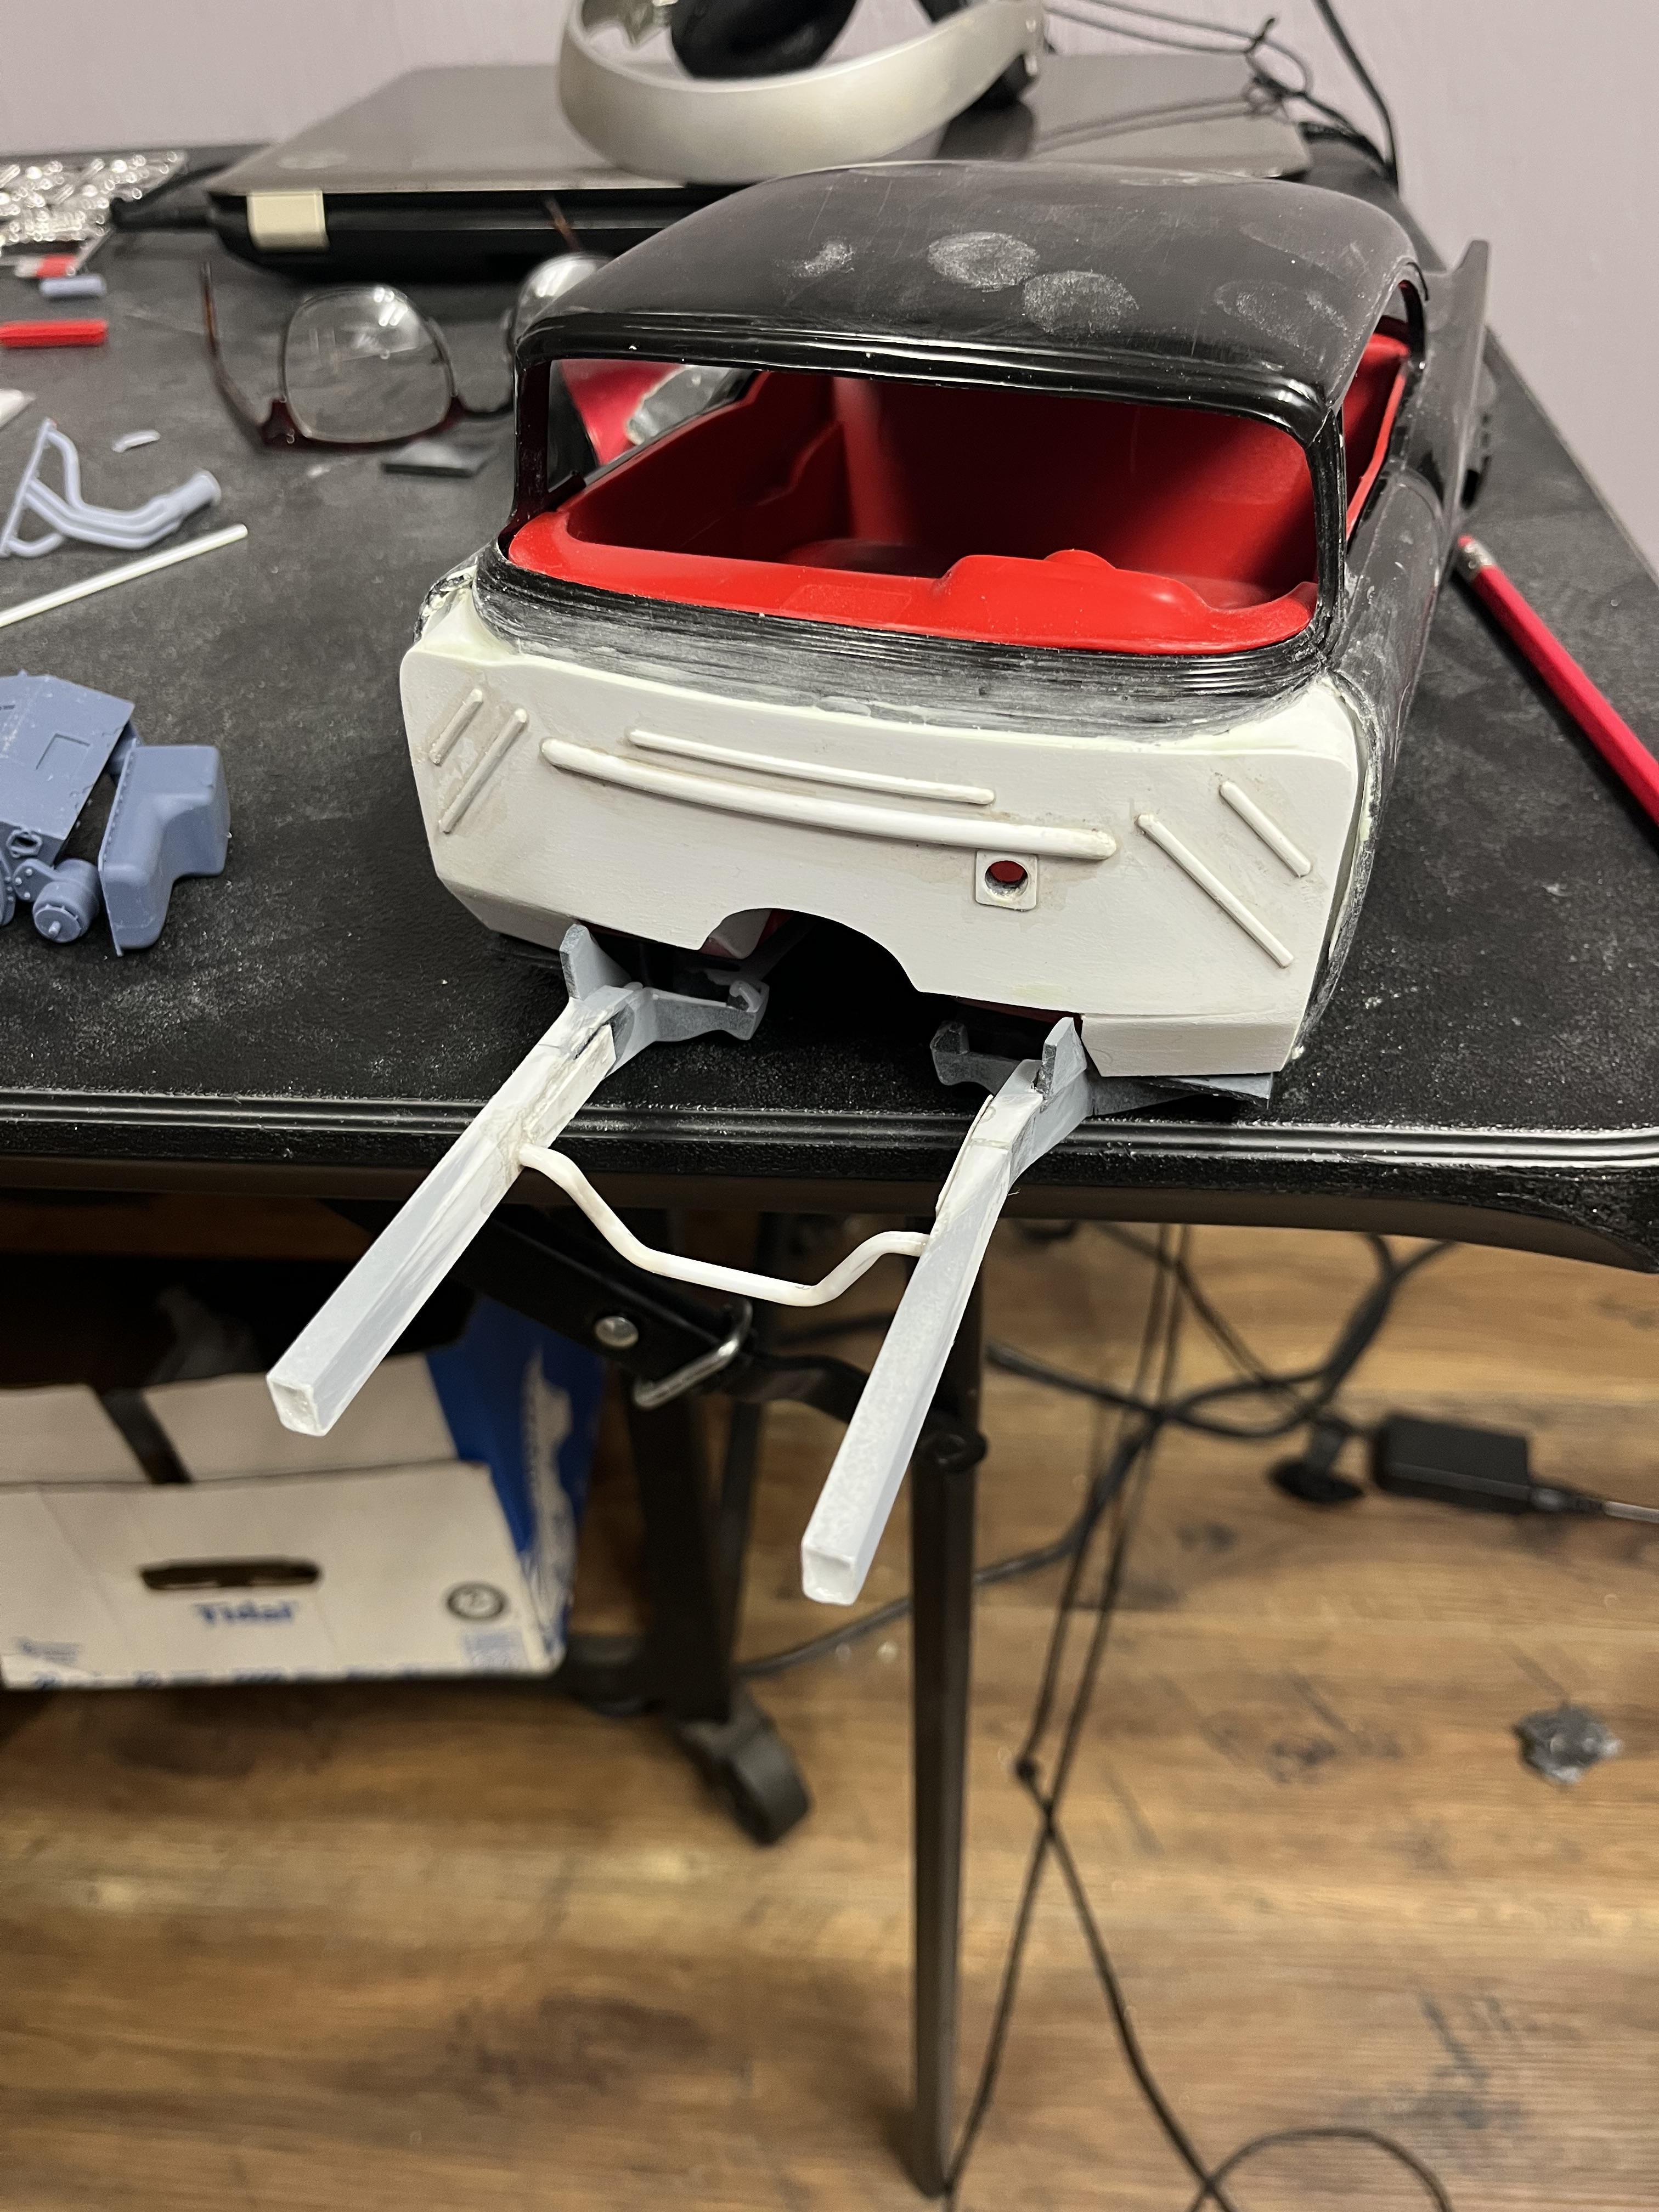
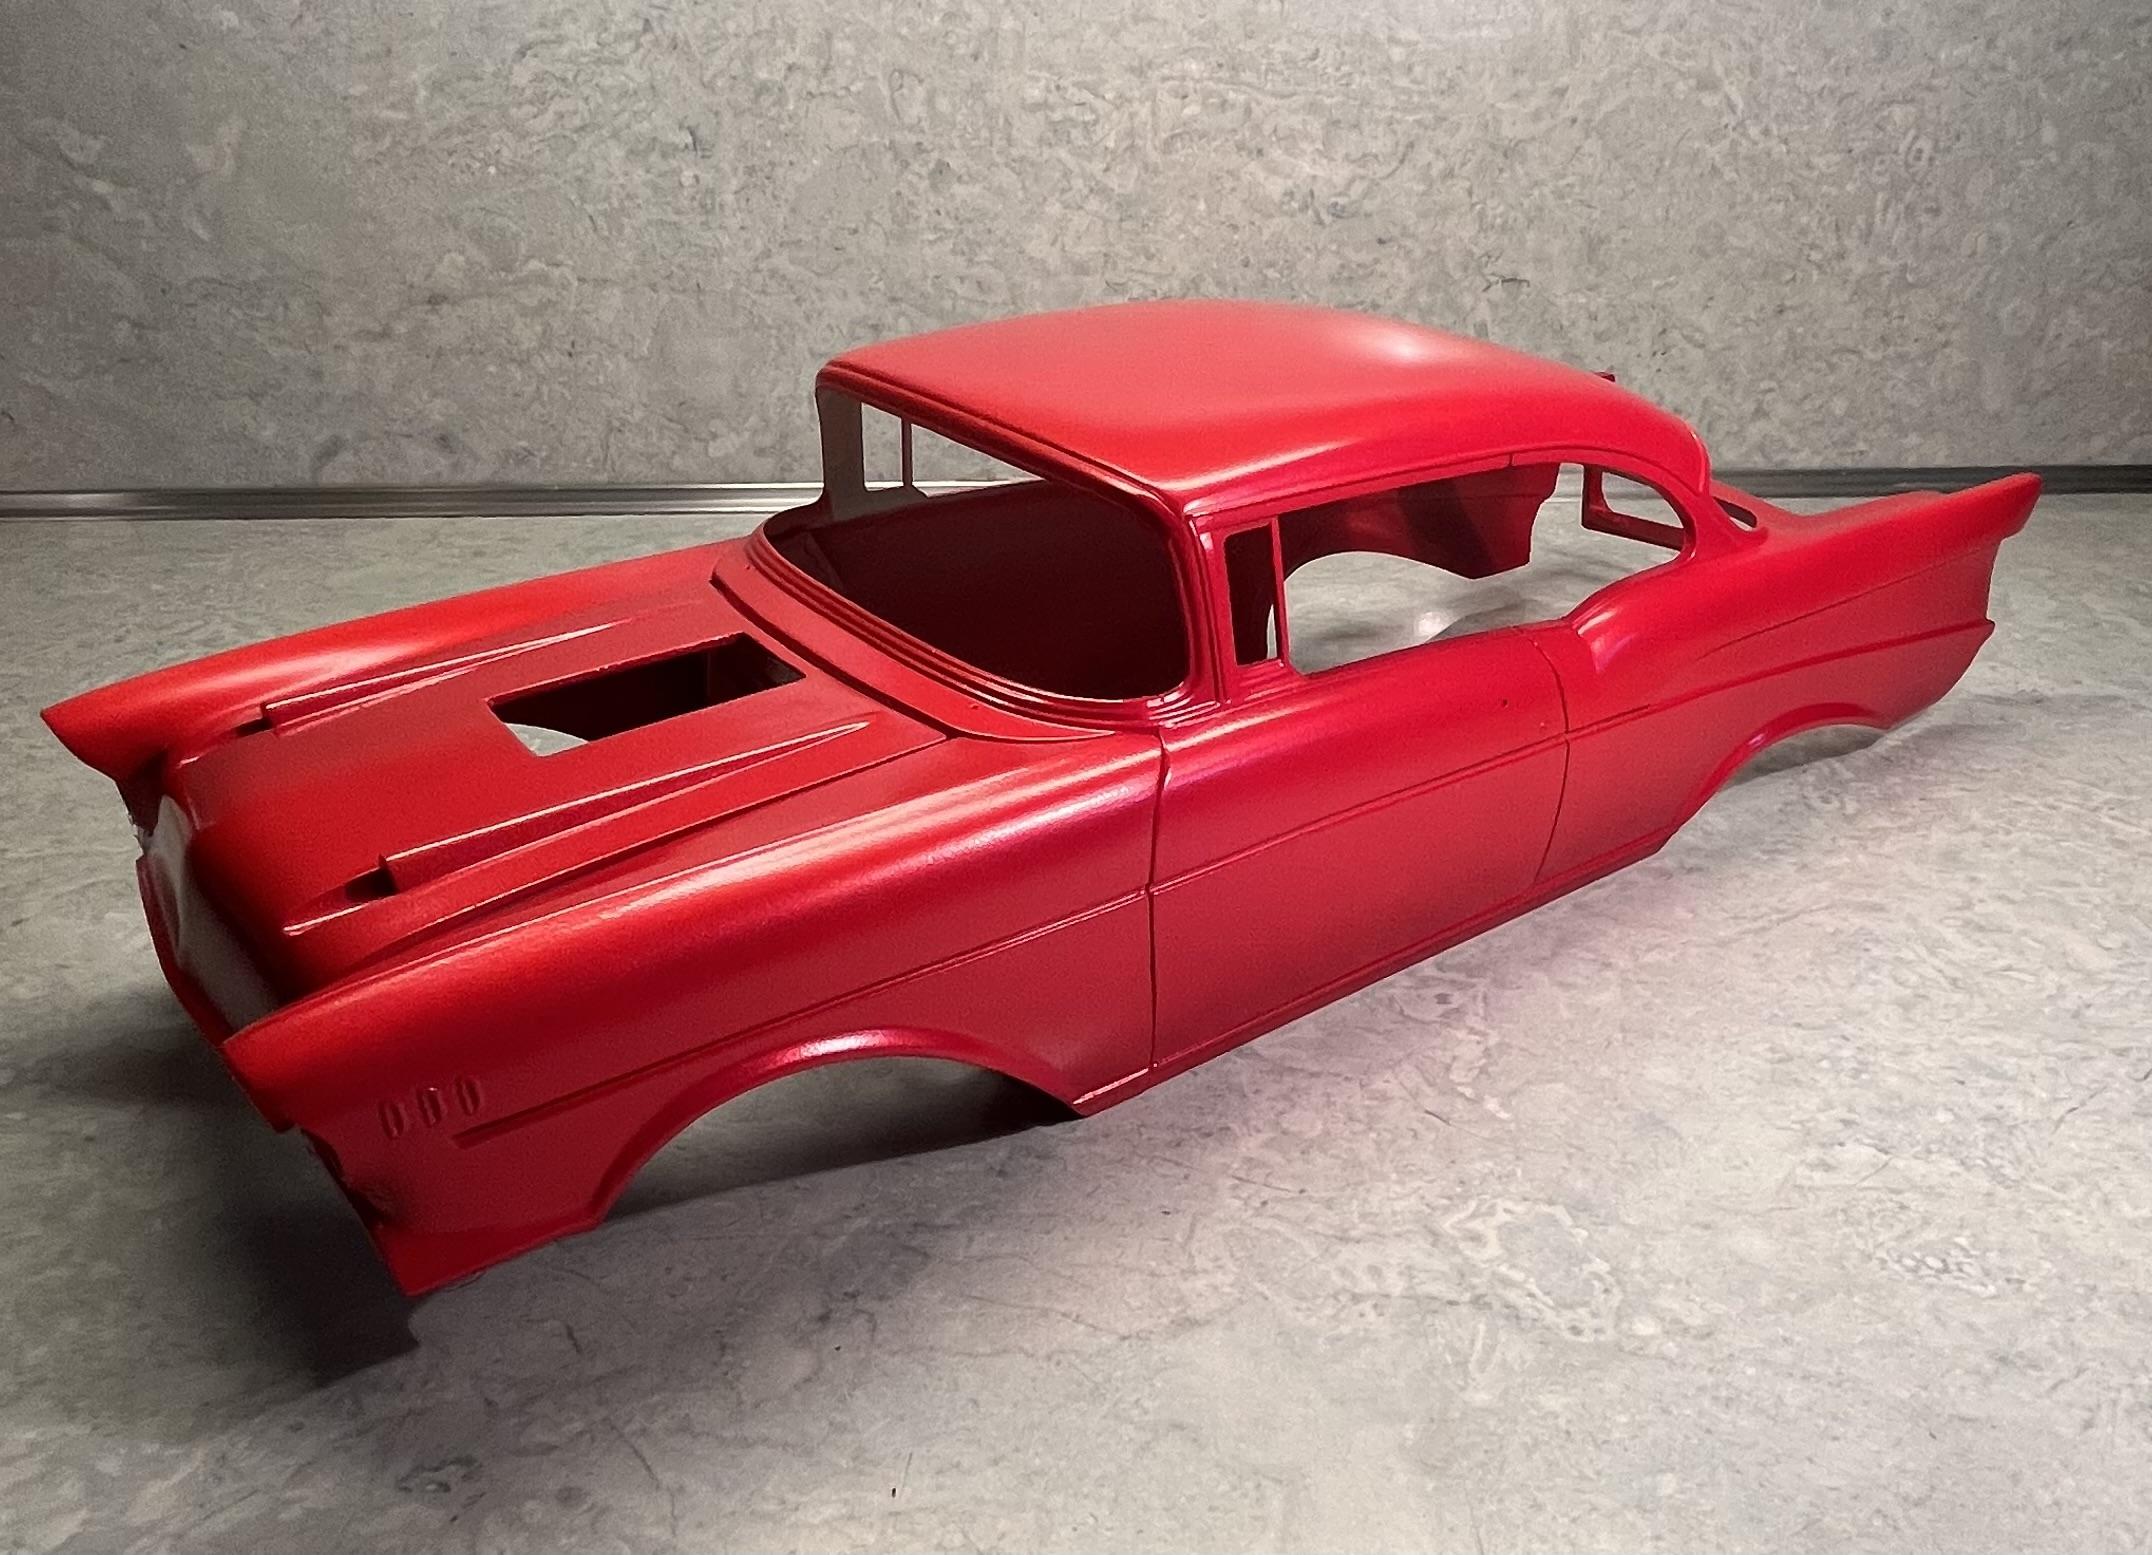
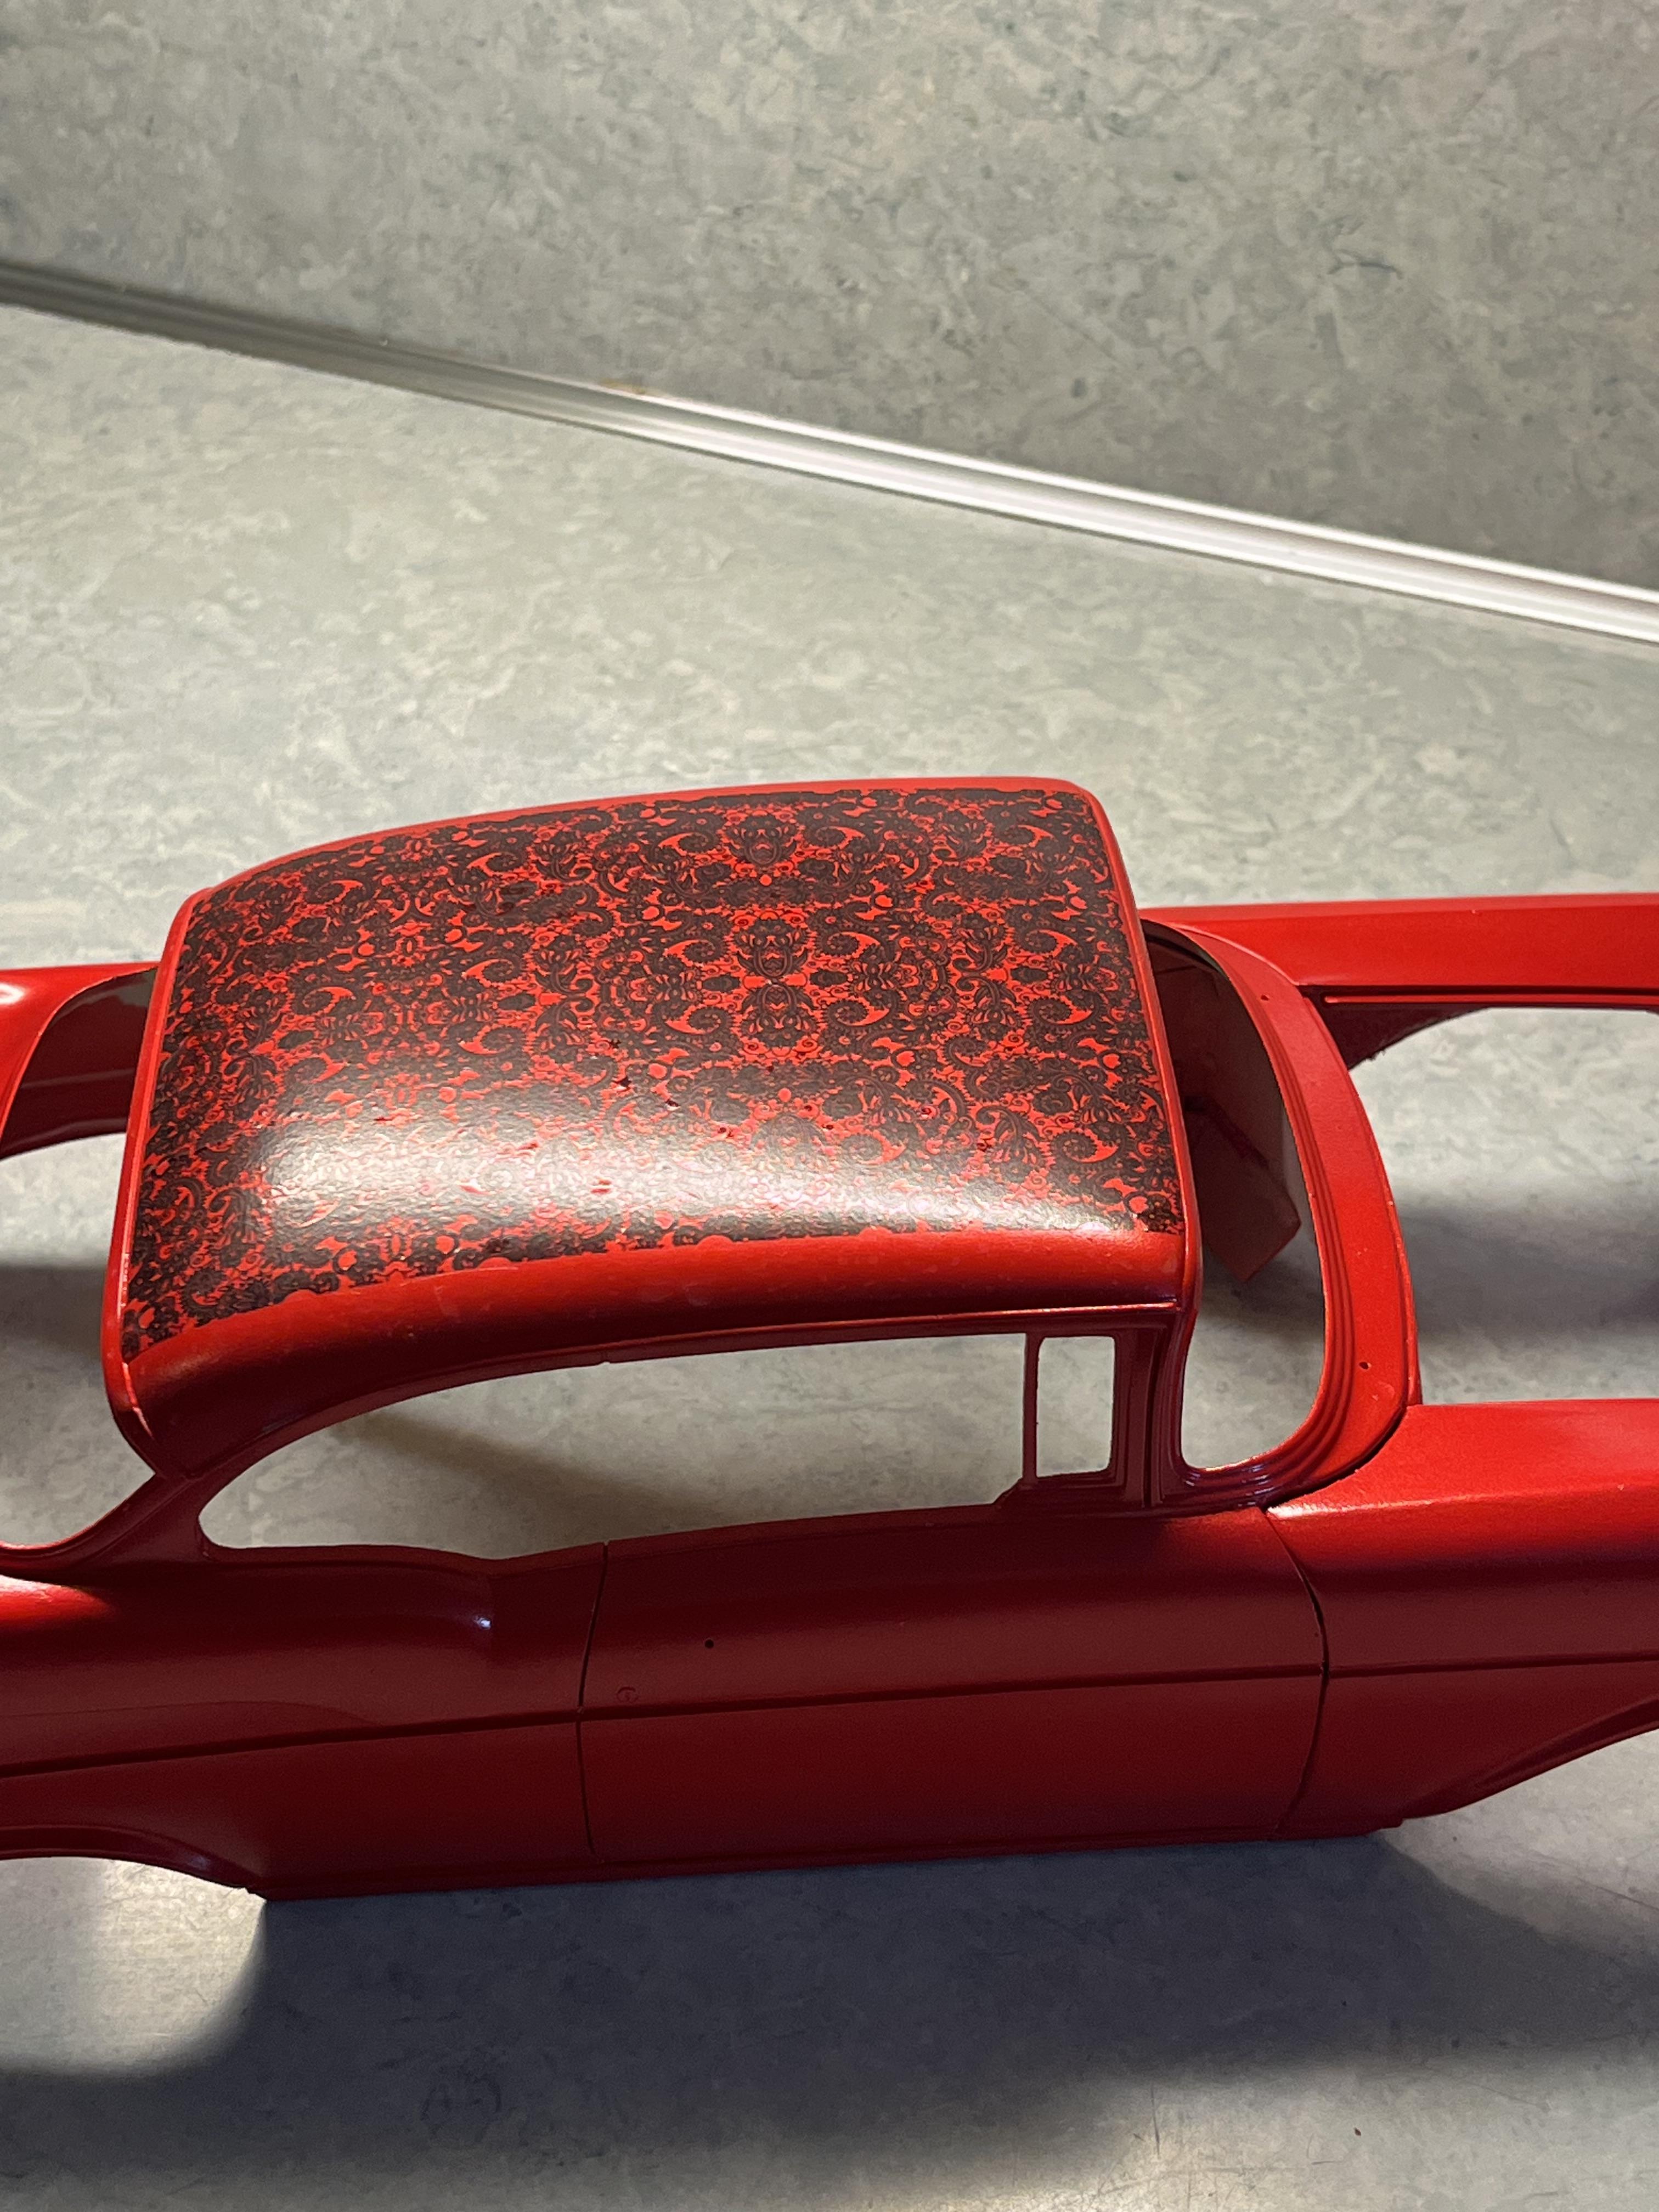
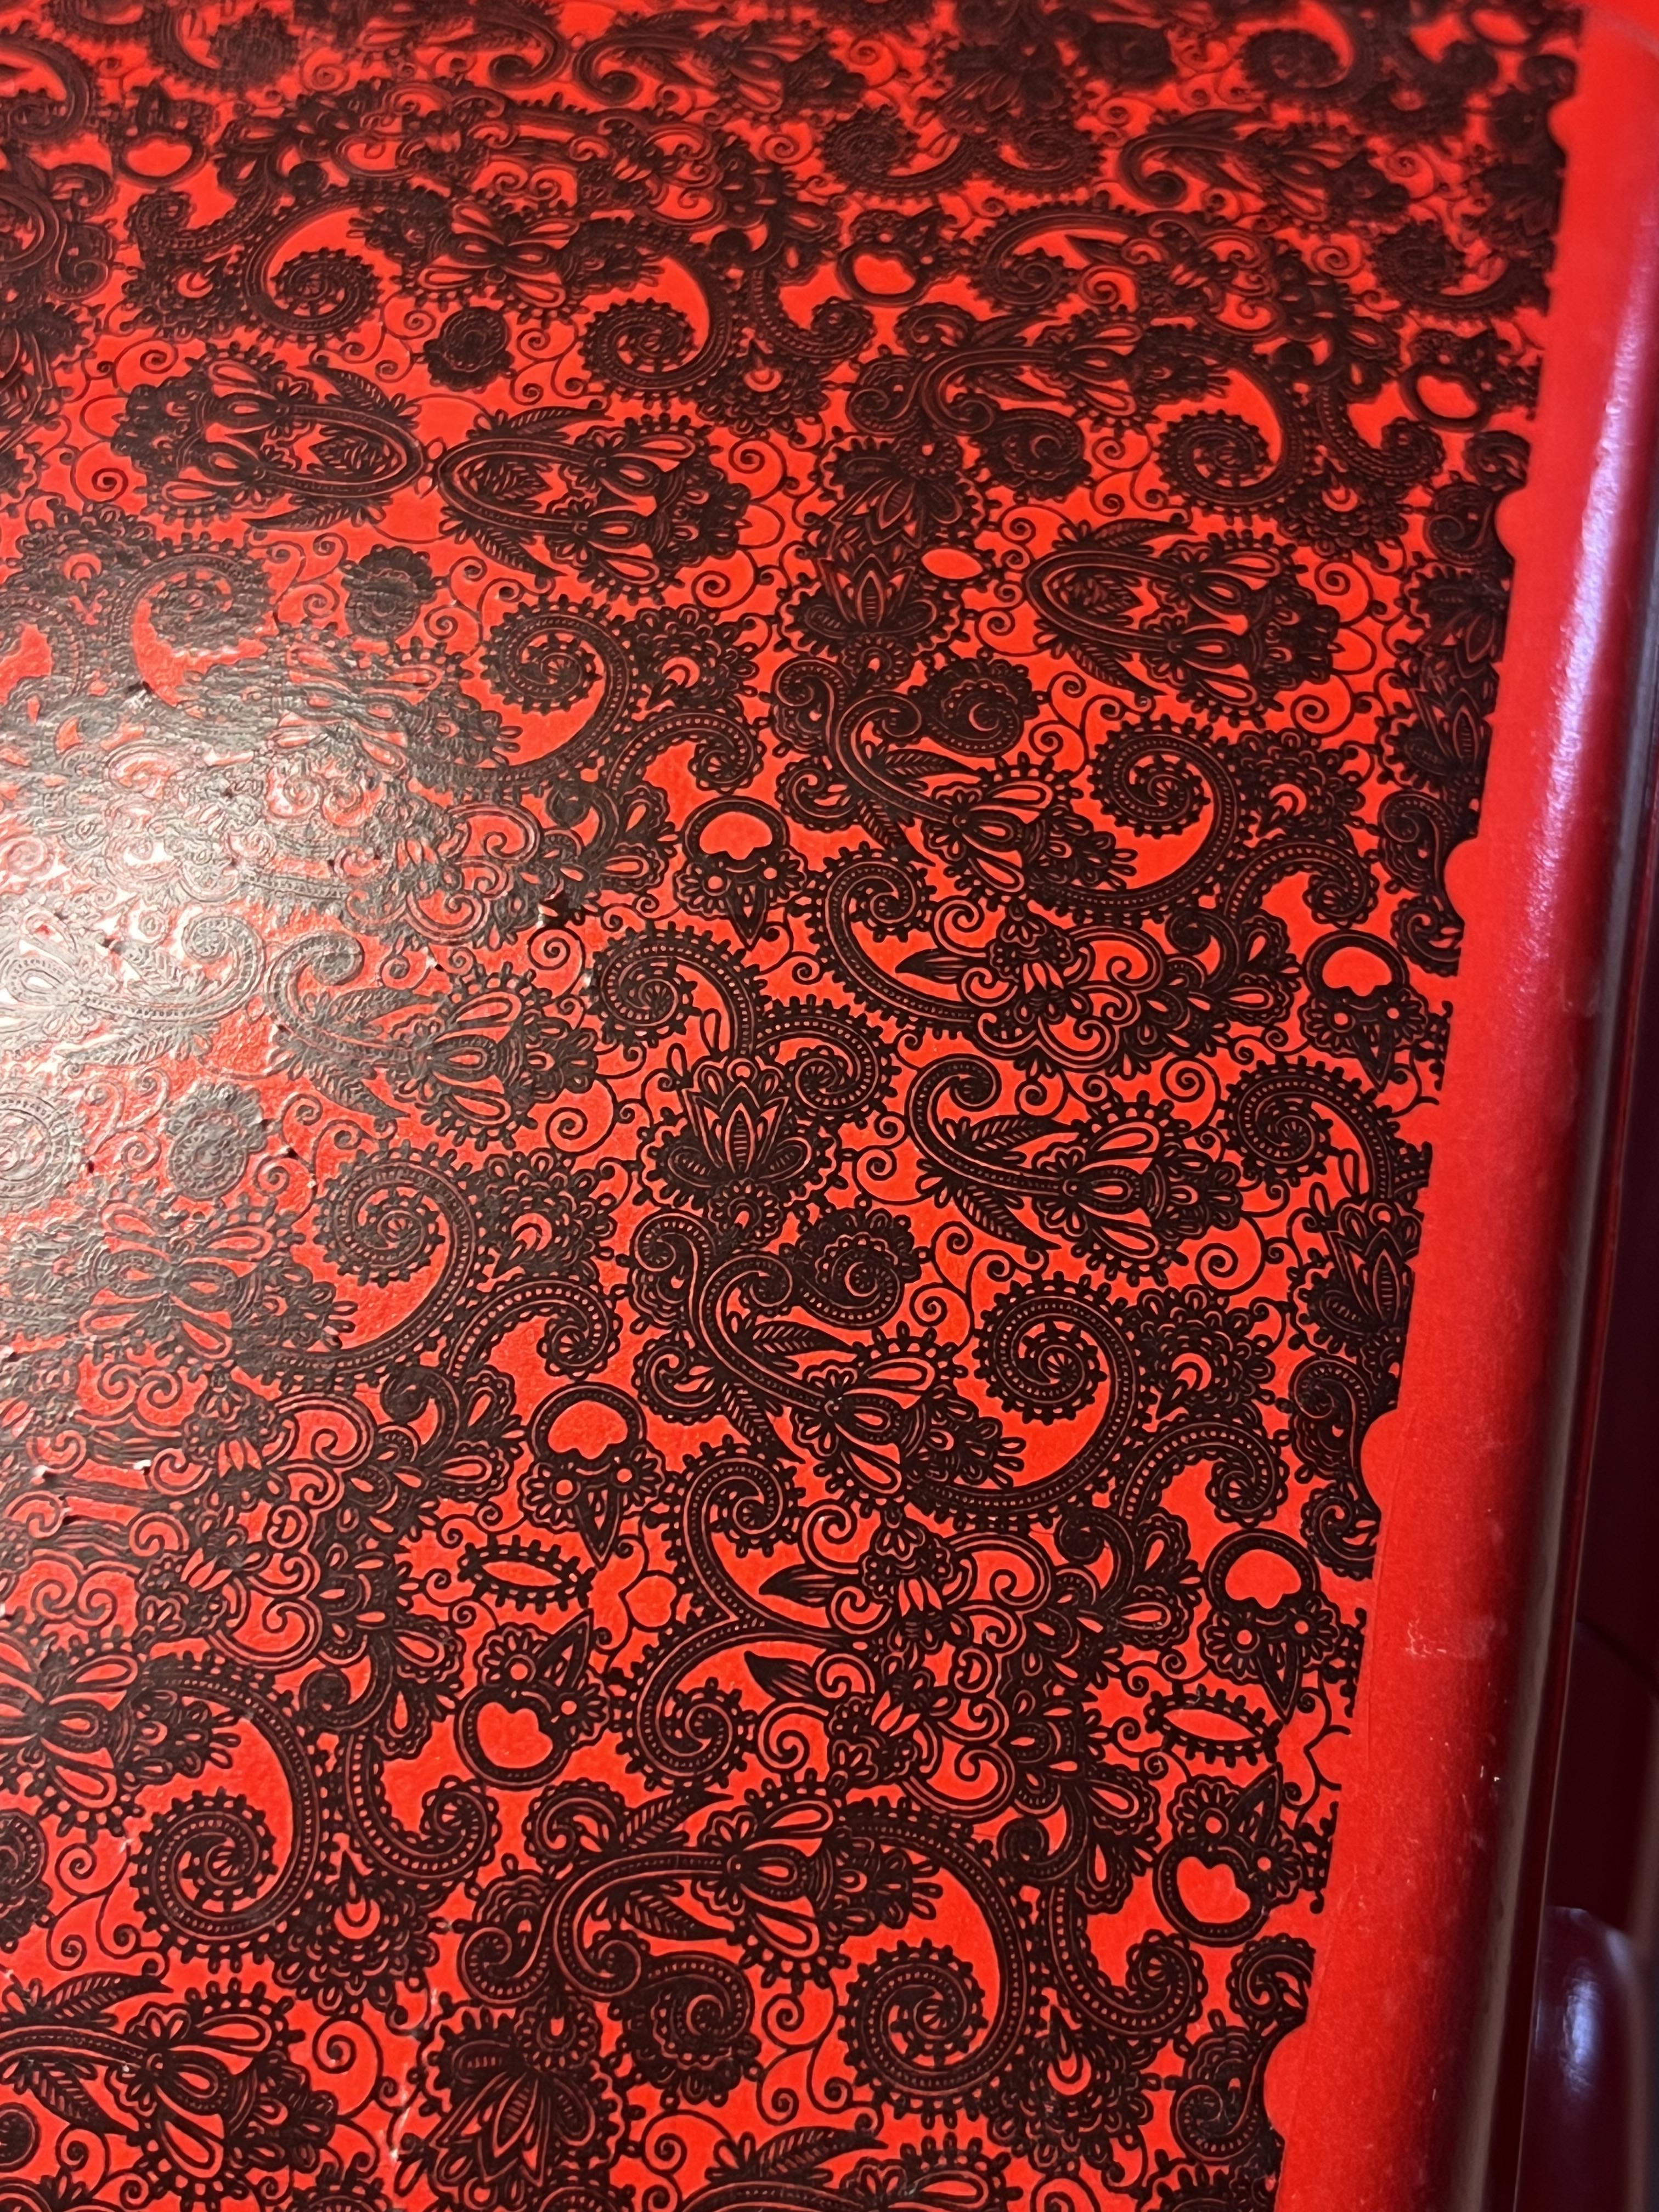
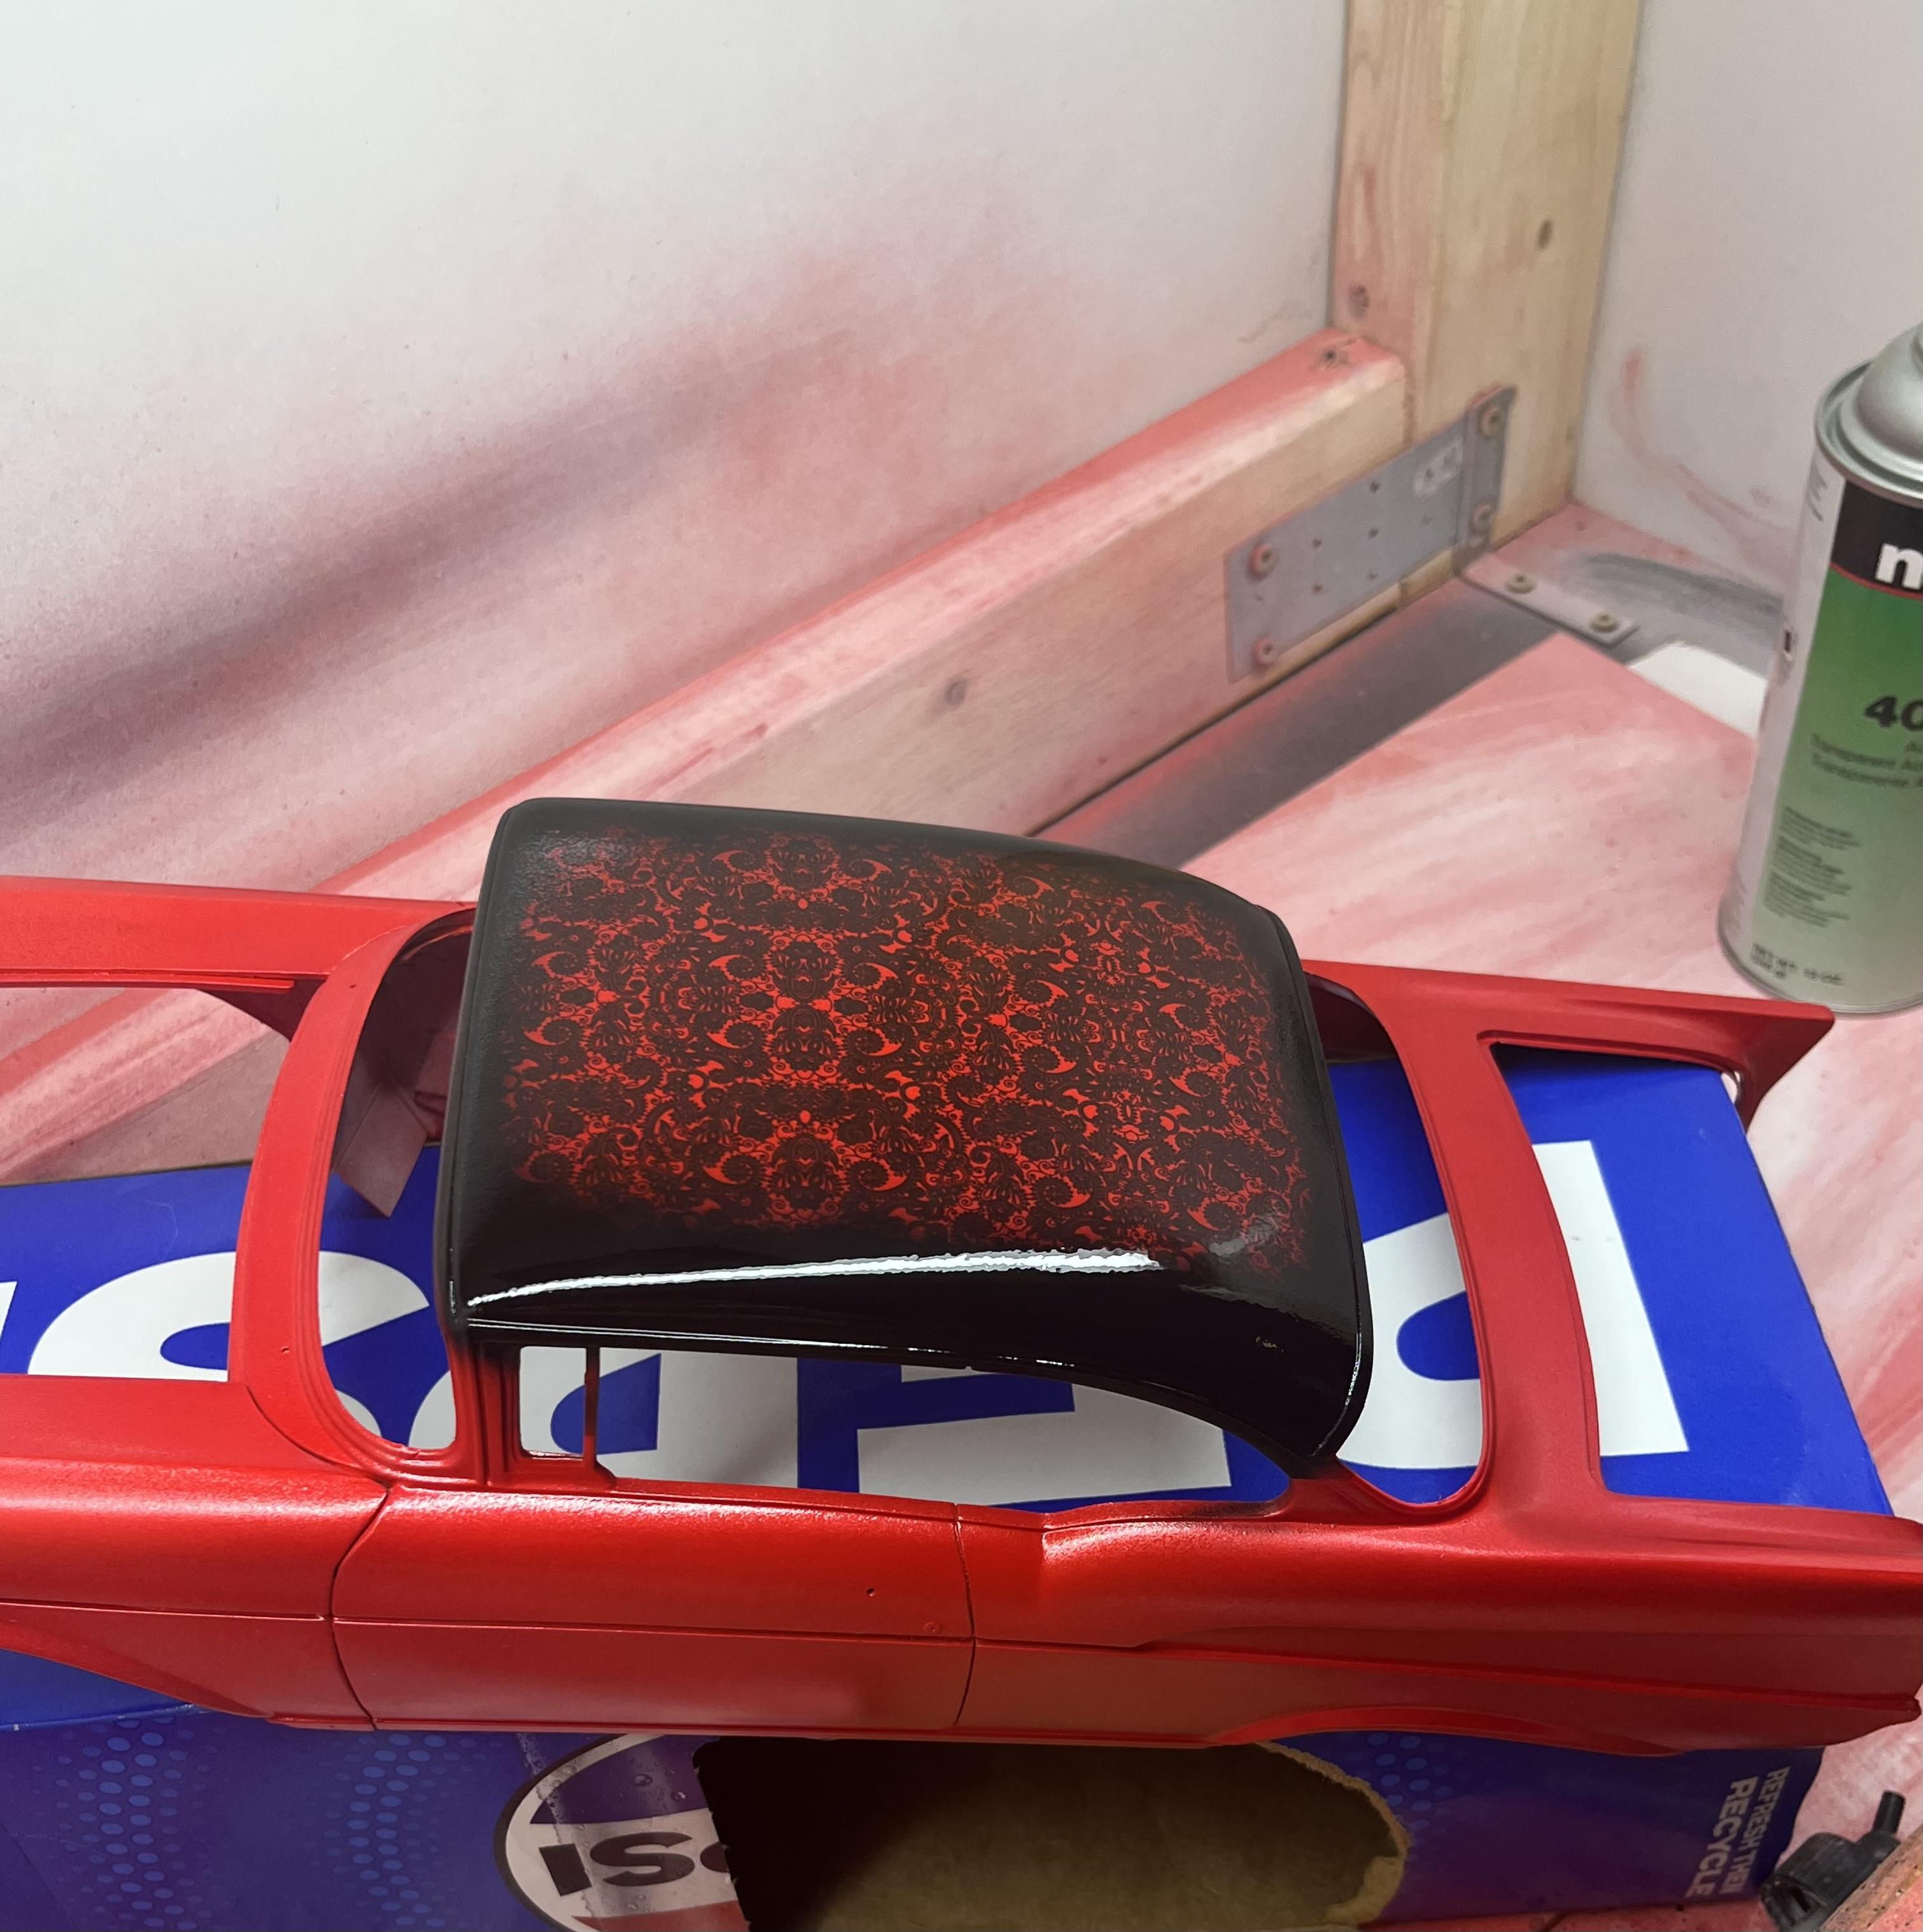
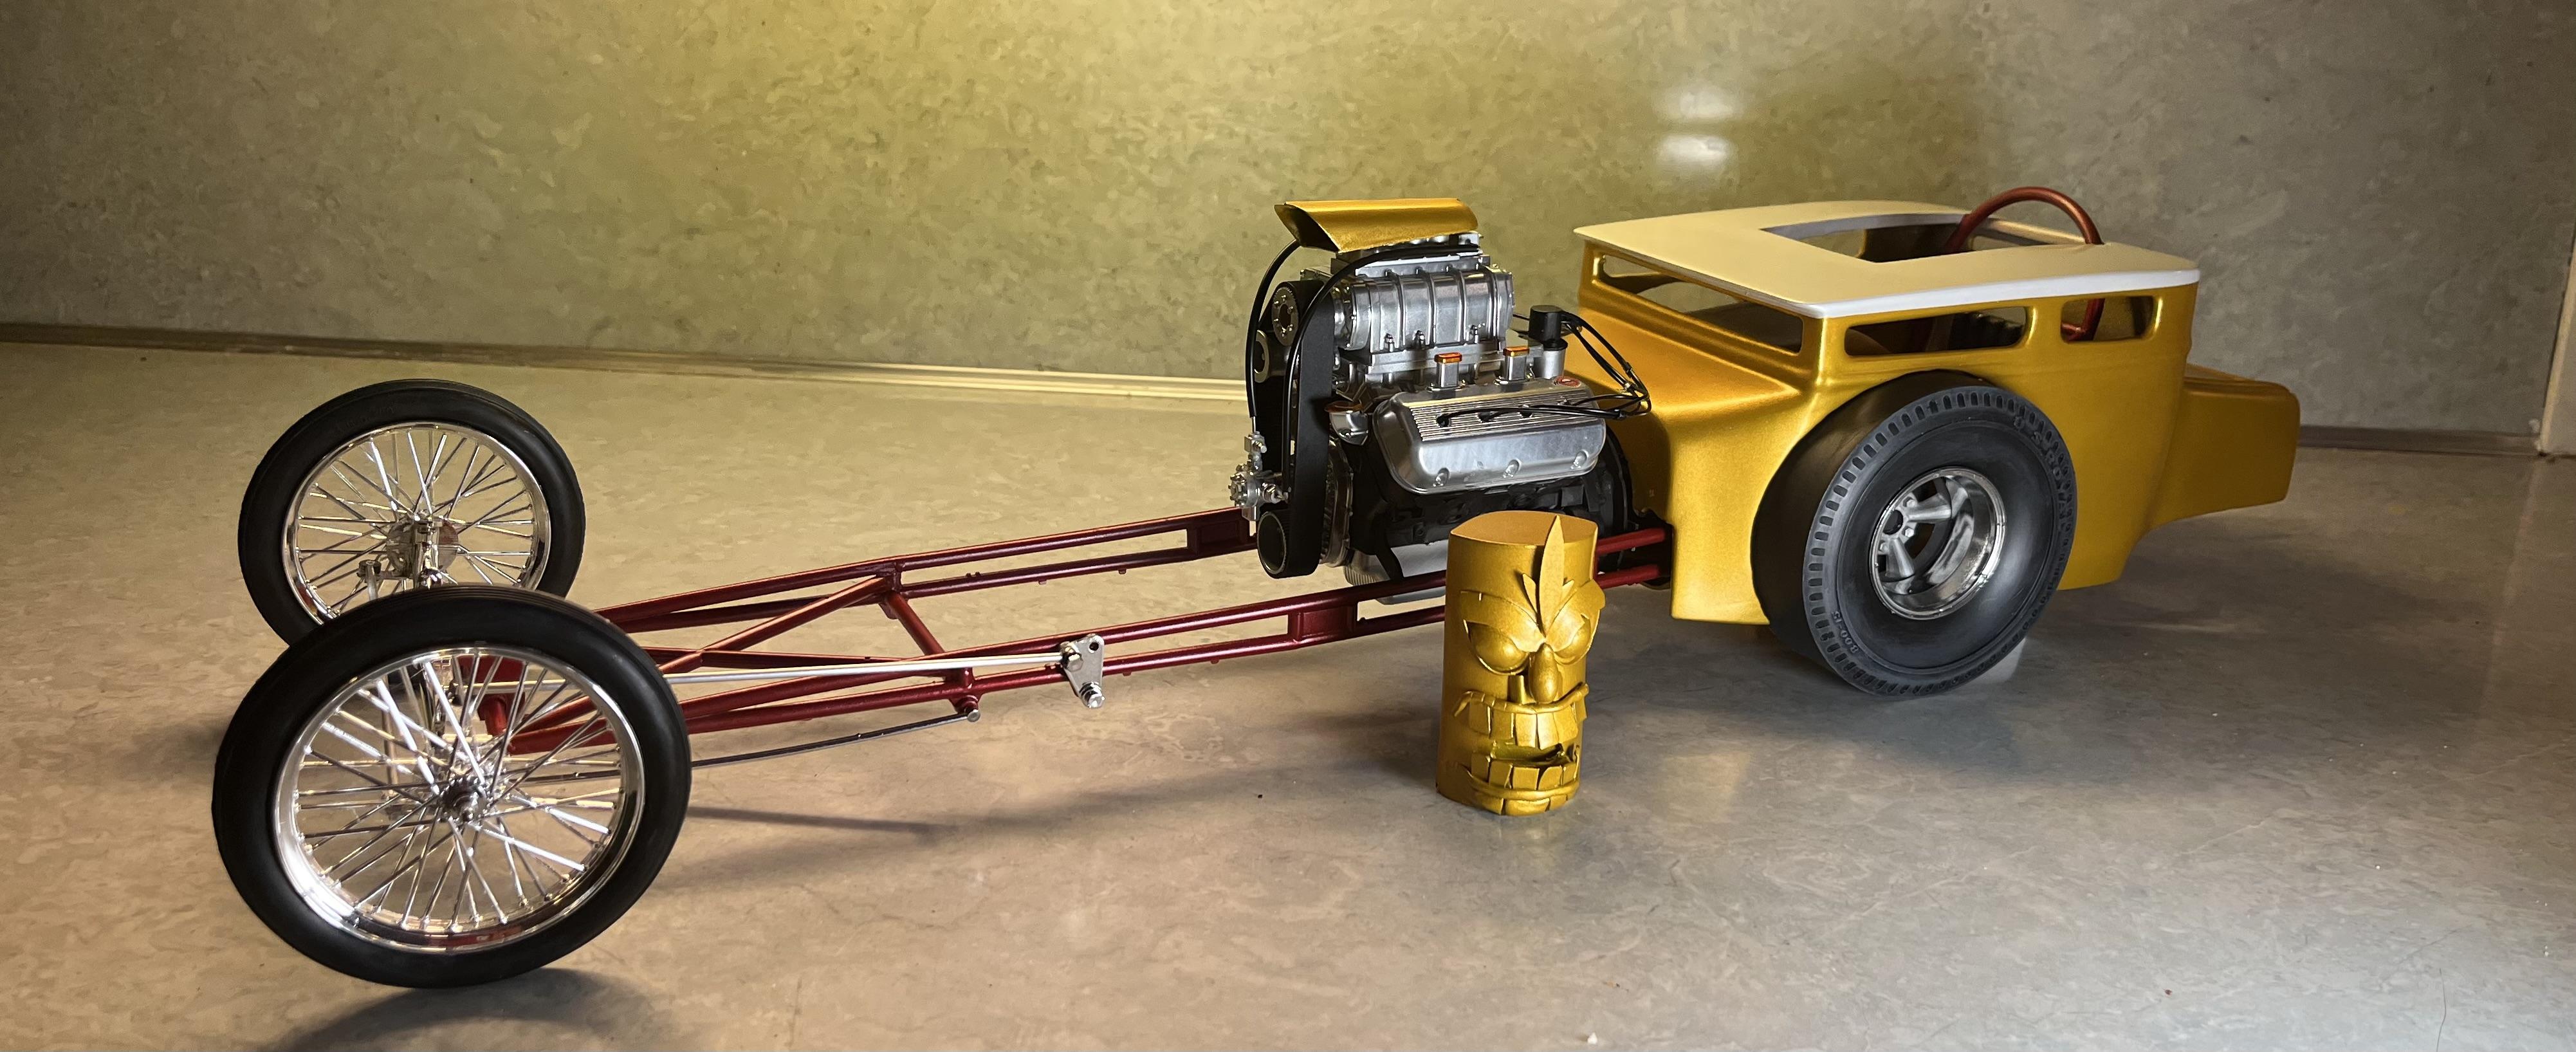
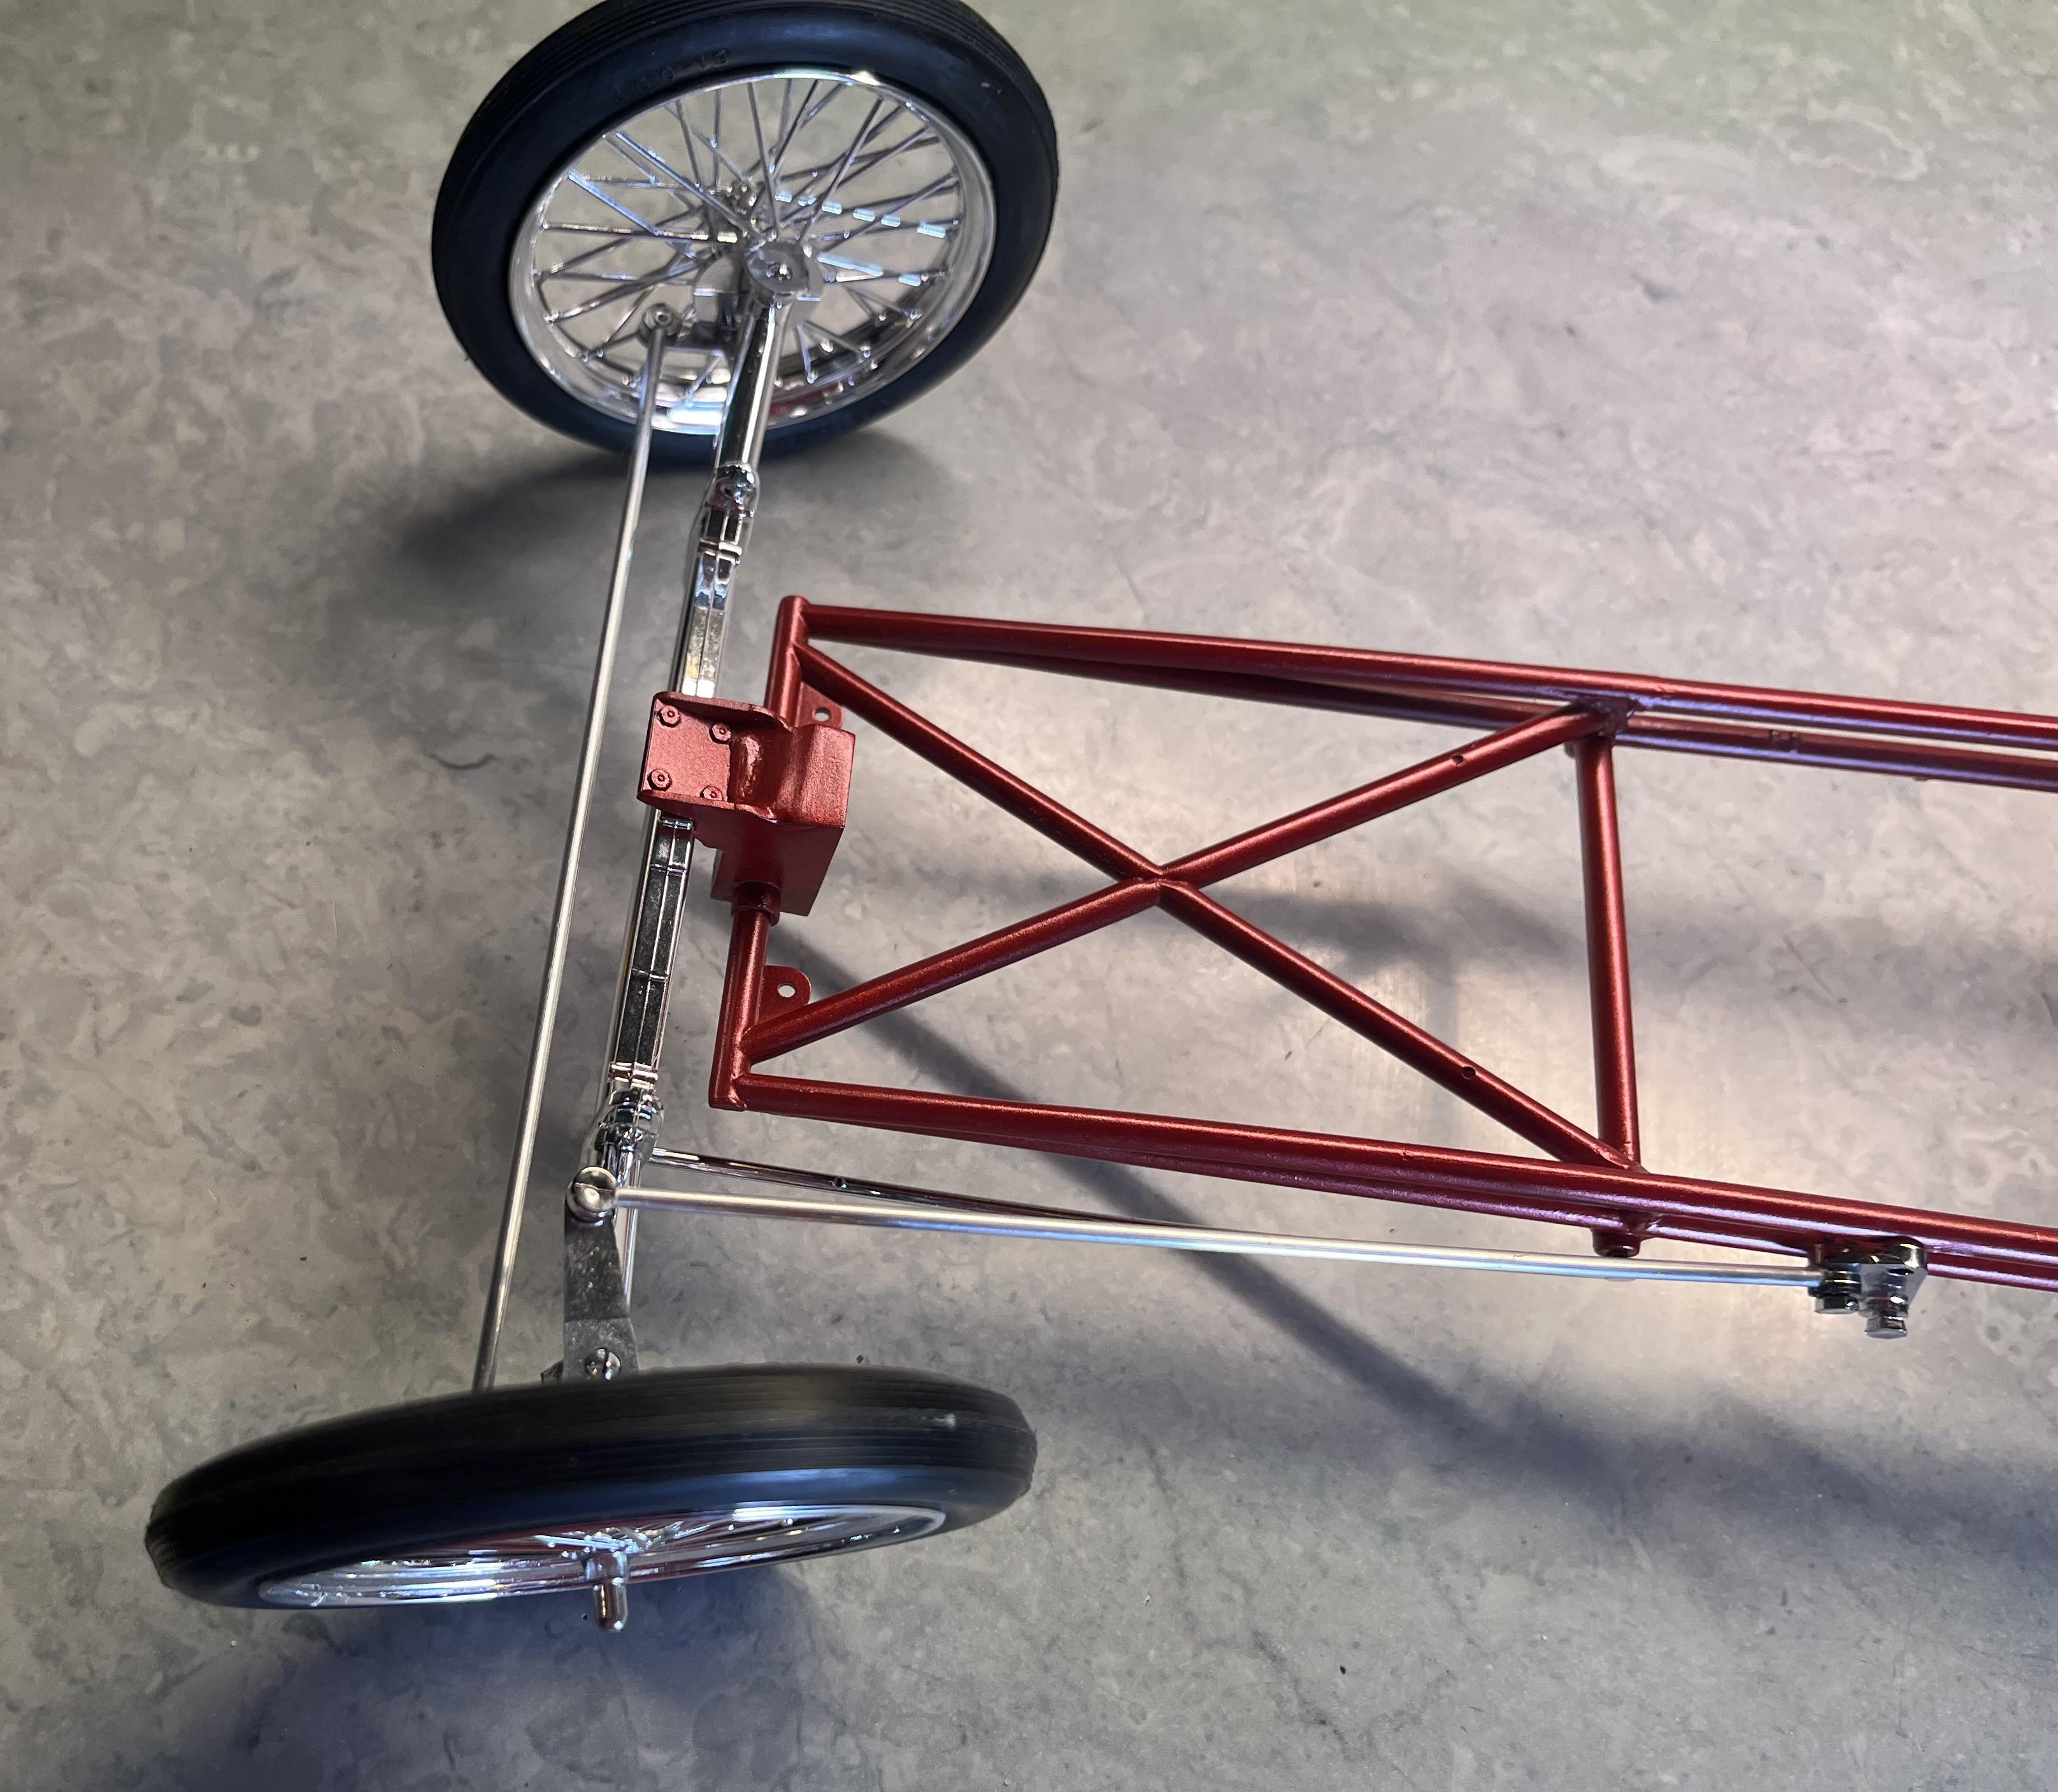
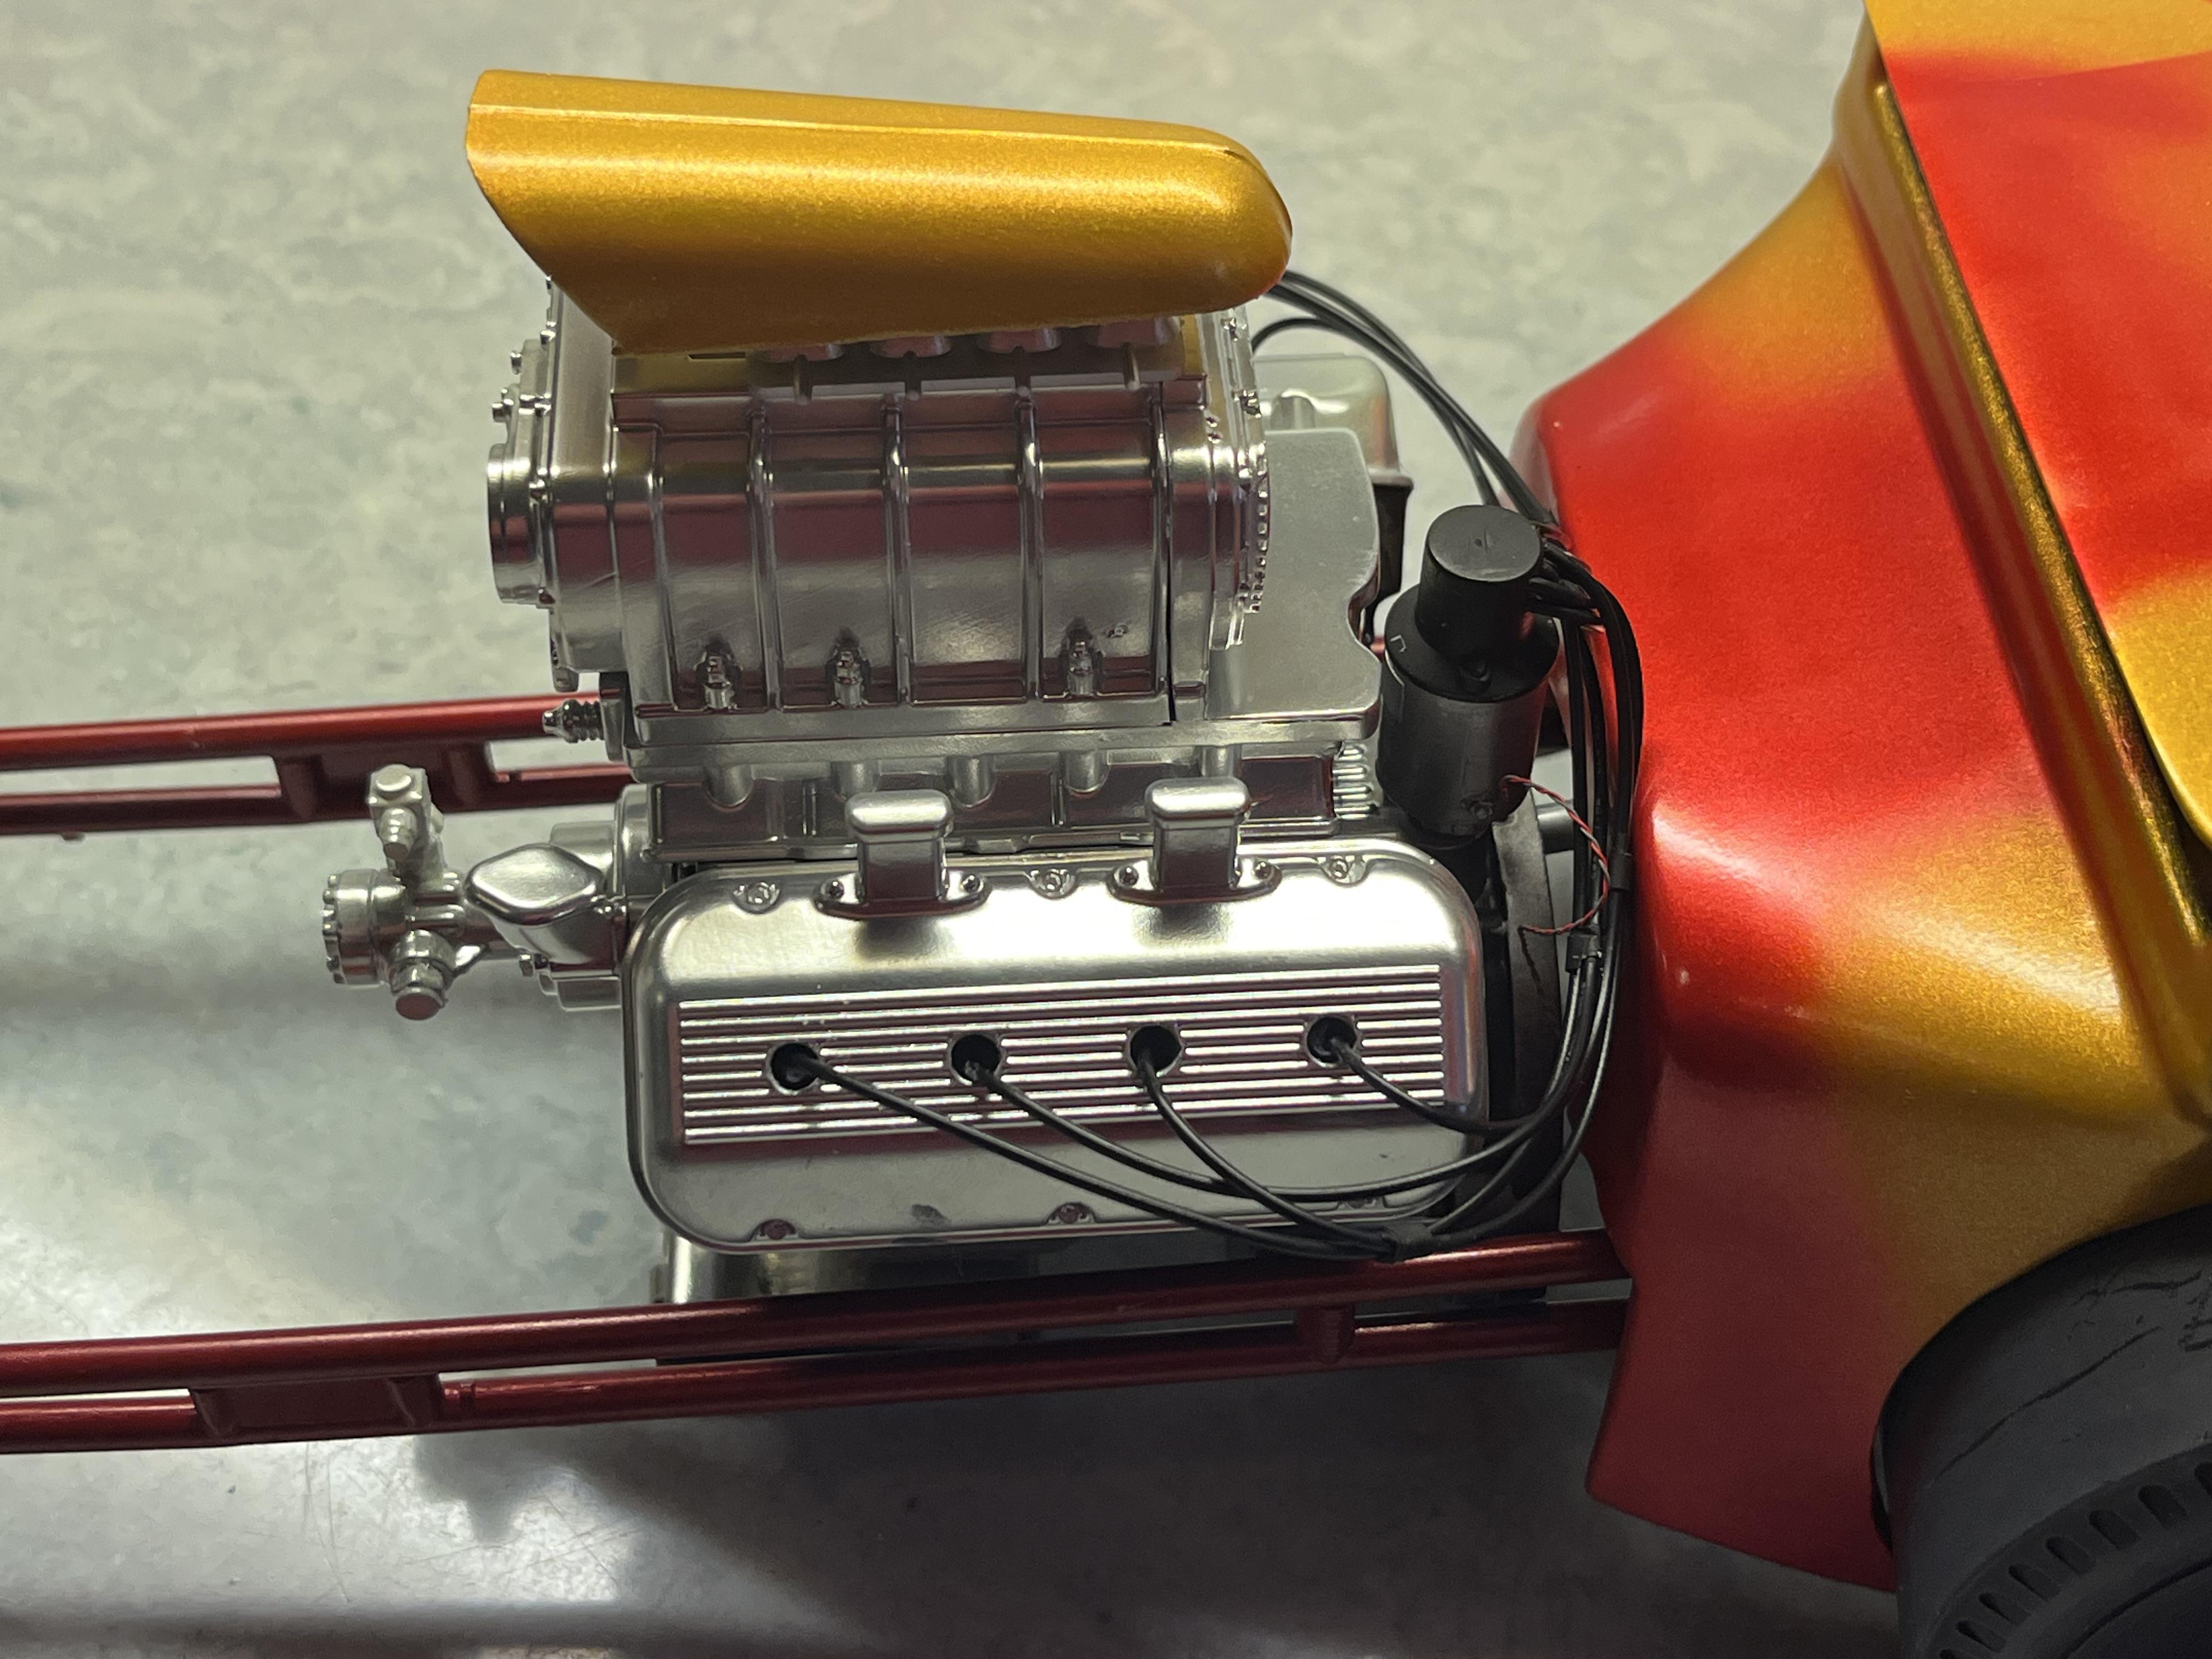
So I have been working on this for quite awhile and I still have tons to do , but I thought I’d share where it’s at now. The plan is a gasser style, not necessarily period correct but more of a tribute. The rear suspension has had the leaf springs moved in with spring sliders,rear axle is a Ford 9 inch. Front end is straight axle on leafs. Engine is an injected 409 from Texas 3D. I had a friend print me some tuck and roll seats, I made new door panels with half round, and made an insert for the trunk to match. Paint is Tamiya Mica Red, and I used a sheet of Lace decal for the roof that STS decals made for me and fogged it in. Like I said, lots more to do.
- 9 replies
-
- 10
-

-

-
There are a few guys printing some very nice stuff on Facebook in large scale. Check out the group large scale modelers
-
STS decals had engine turned decal sheets in gold and silver. I used them on this dashboard.
-
Seeing reports he has passed. Very sad news. Another icon lost.
-
Aluminum paint for mag wheels
Fantom replied to Steamboat's topic in Model Building Questions and Answers
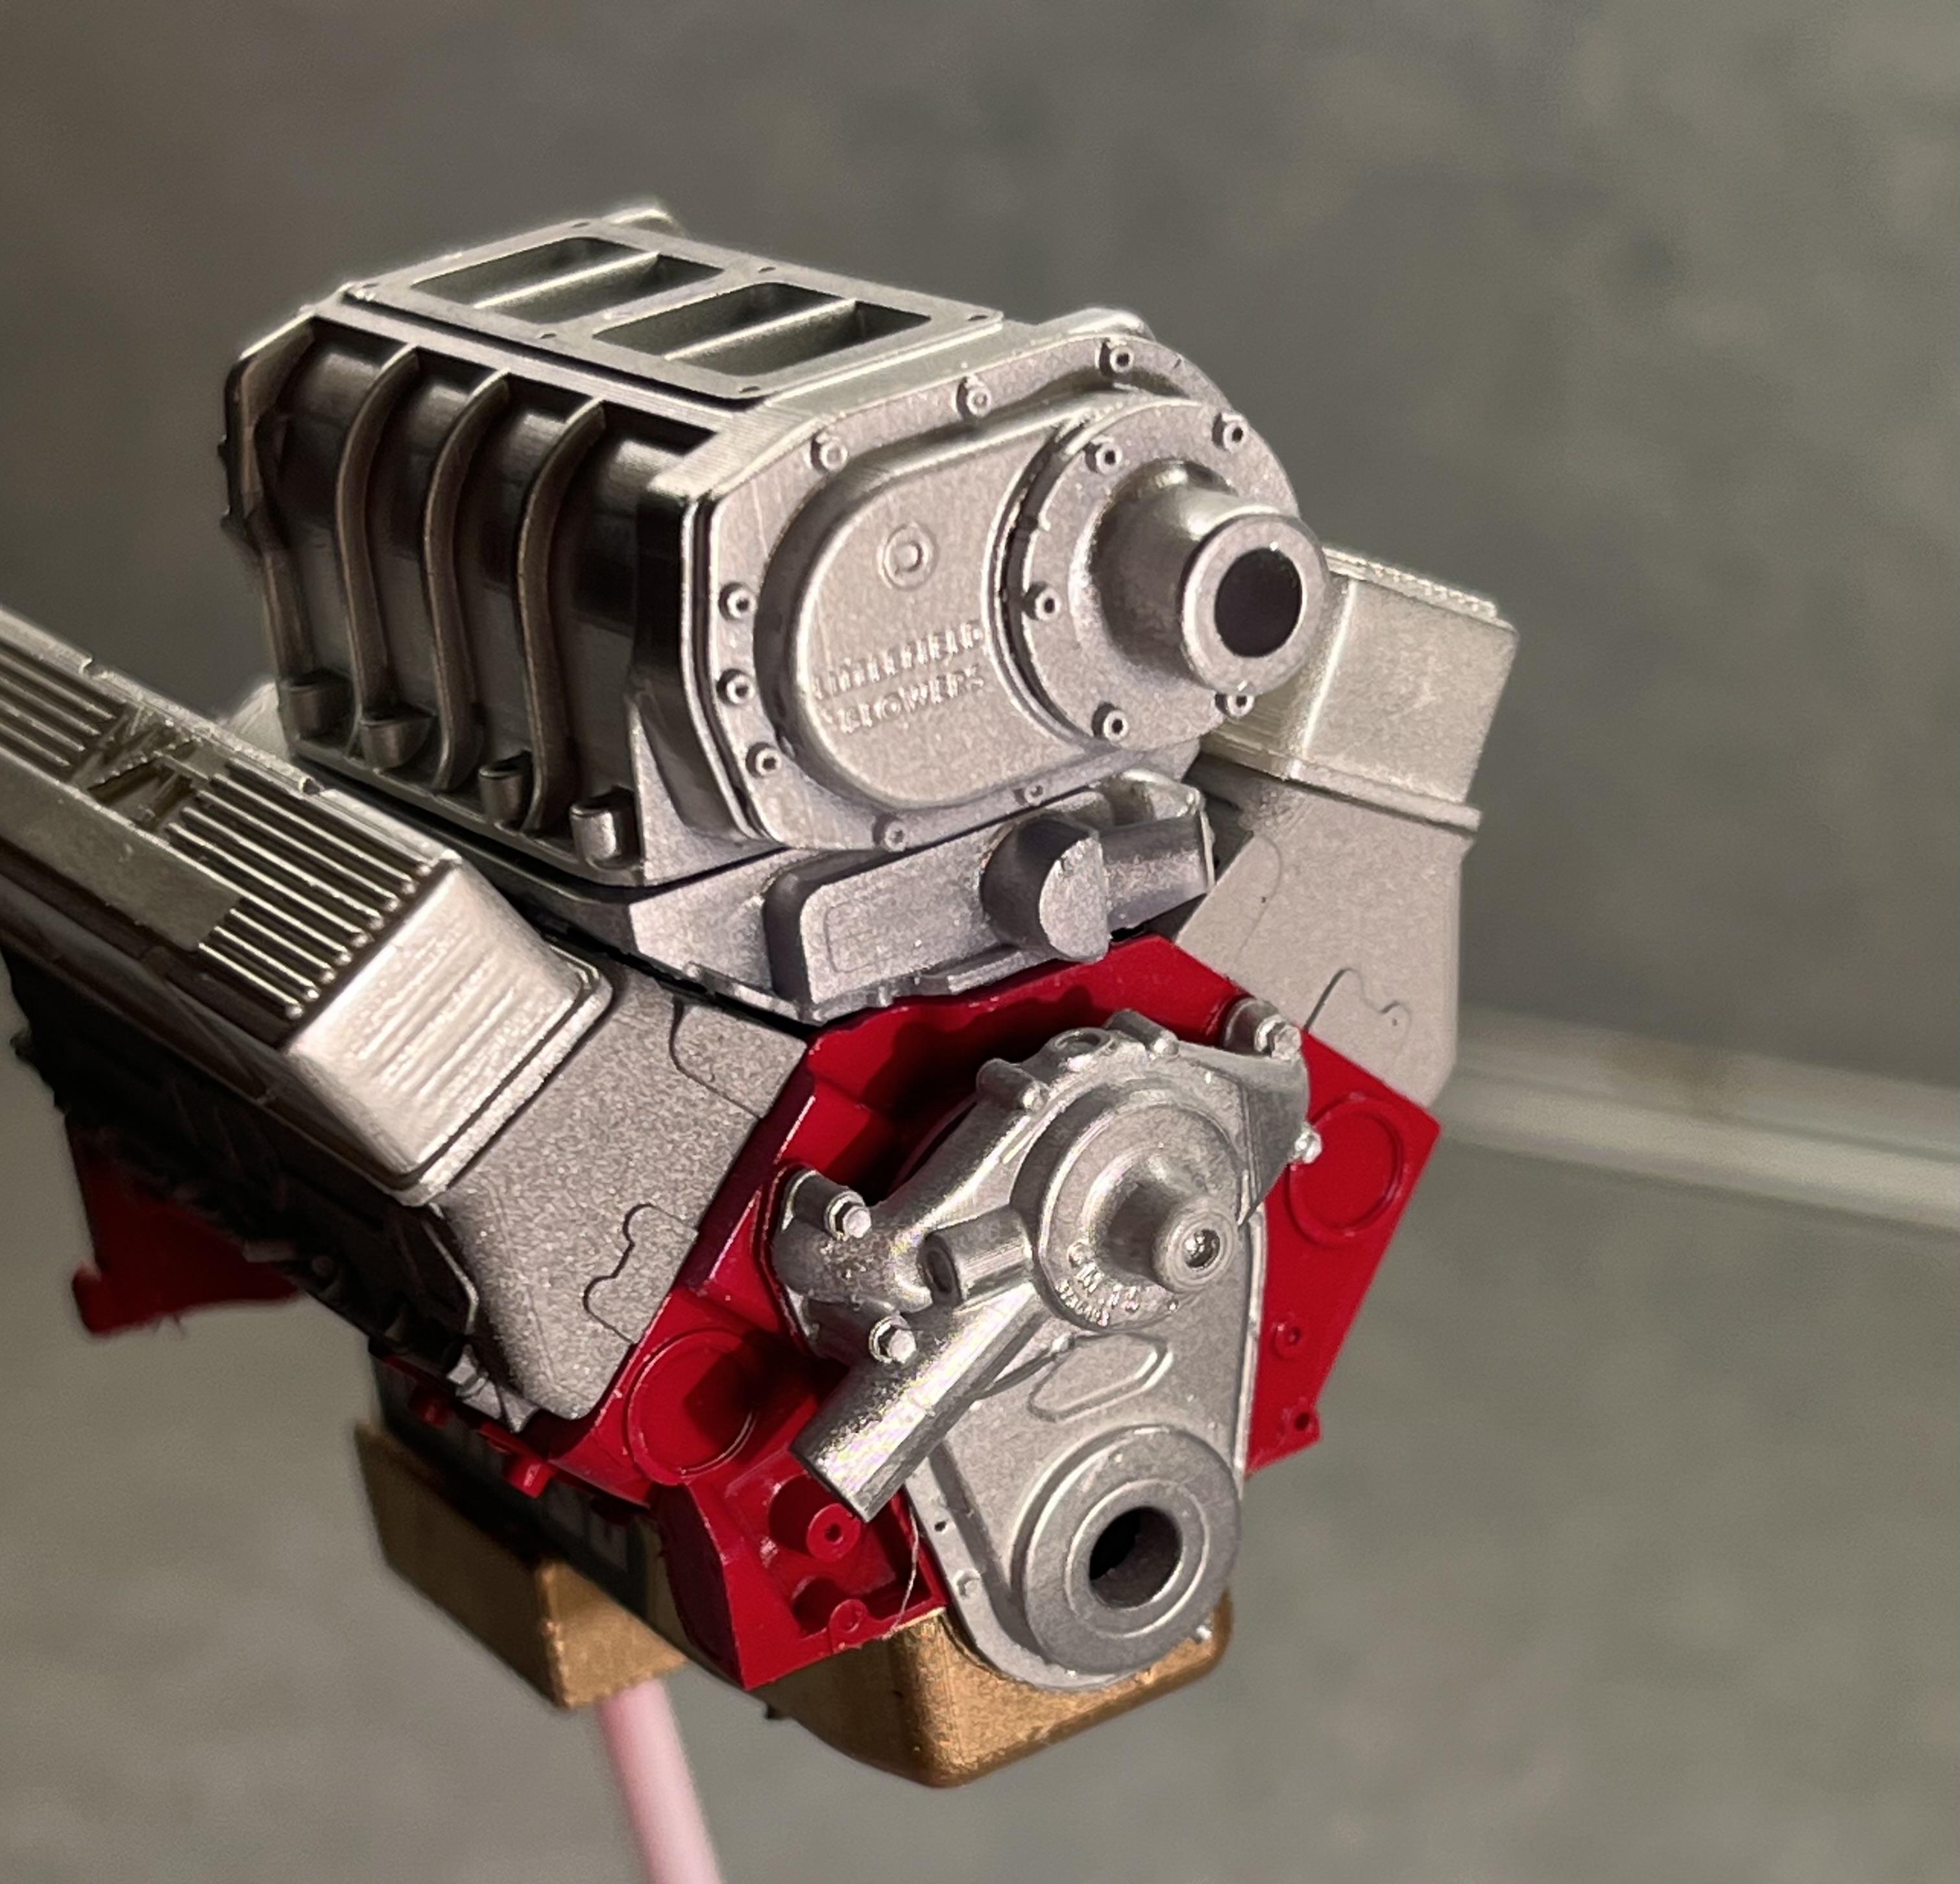
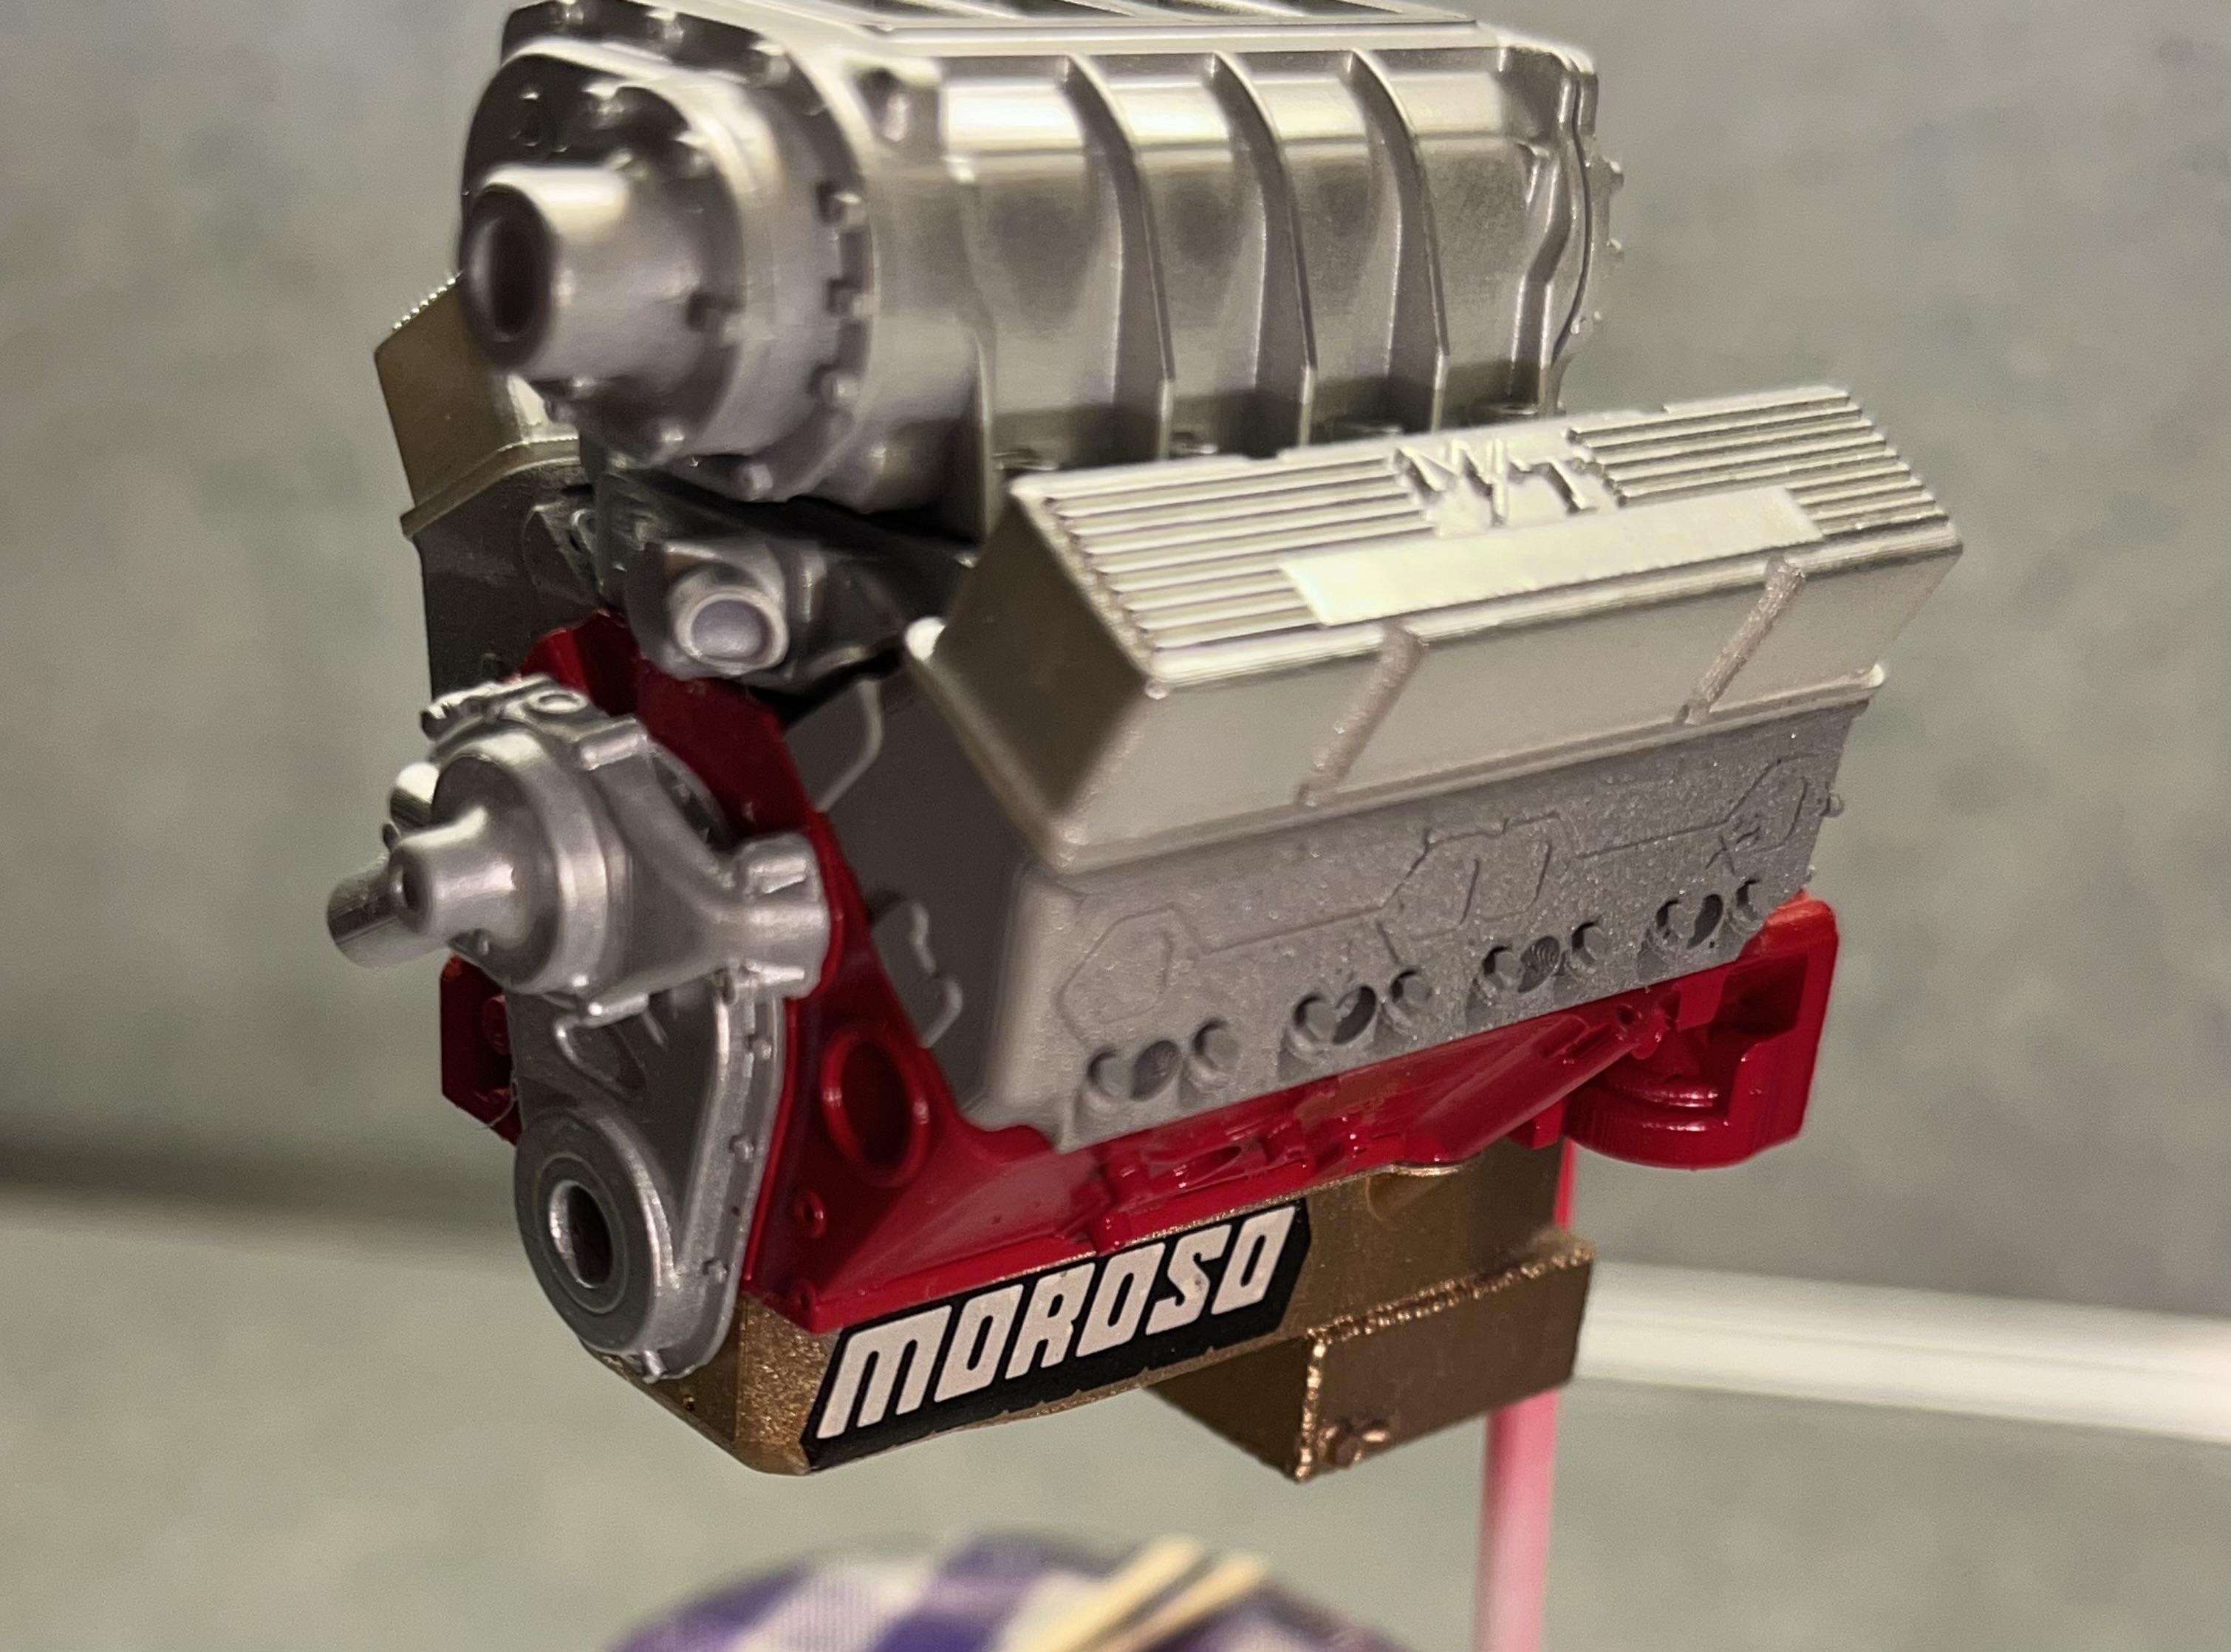
I sprayed Alclad chrome over a gloss white base on this engine, looks like polished aluminum to me.
-
Bucket T frame in 1/16th?
Fantom replied to Jon Haigwood's topic in Car Aftermarket / Resin / 3D Printed
Facebook group “large scale modelers” Jo Scmocan prints many different frames for T’s , and 32’s in all scales . He does nice work. -
Got 3D, now what? HELP!
Fantom replied to customline's topic in Model Building Questions and Answers
I have bought a lot of stuff from that guy, his stuff fits well and just take your time and trim the parts out carefully. -
I have bought several things from Jo, the guy printing this body. I’d almost bet he’d print the tank if asked.
-
Custom scale rubber tires and rims
Fantom replied to jpolacchi's topic in Model Building Questions and Answers
Check out the facebook group large scale modelers…the owner prints and sells many parts for drag bikes including tires and rims -
Check out the group 1/8 scale detail on Facebook…Jamison Swimm makes a ton of upgrades for this kit…rims, derail parts, complete engines, even a trans kit to back date the car…I used many of his parts on my build
- 129 replies
-
- 3
-
-
- revell 07710
- trans am
- (and 2 more)
-
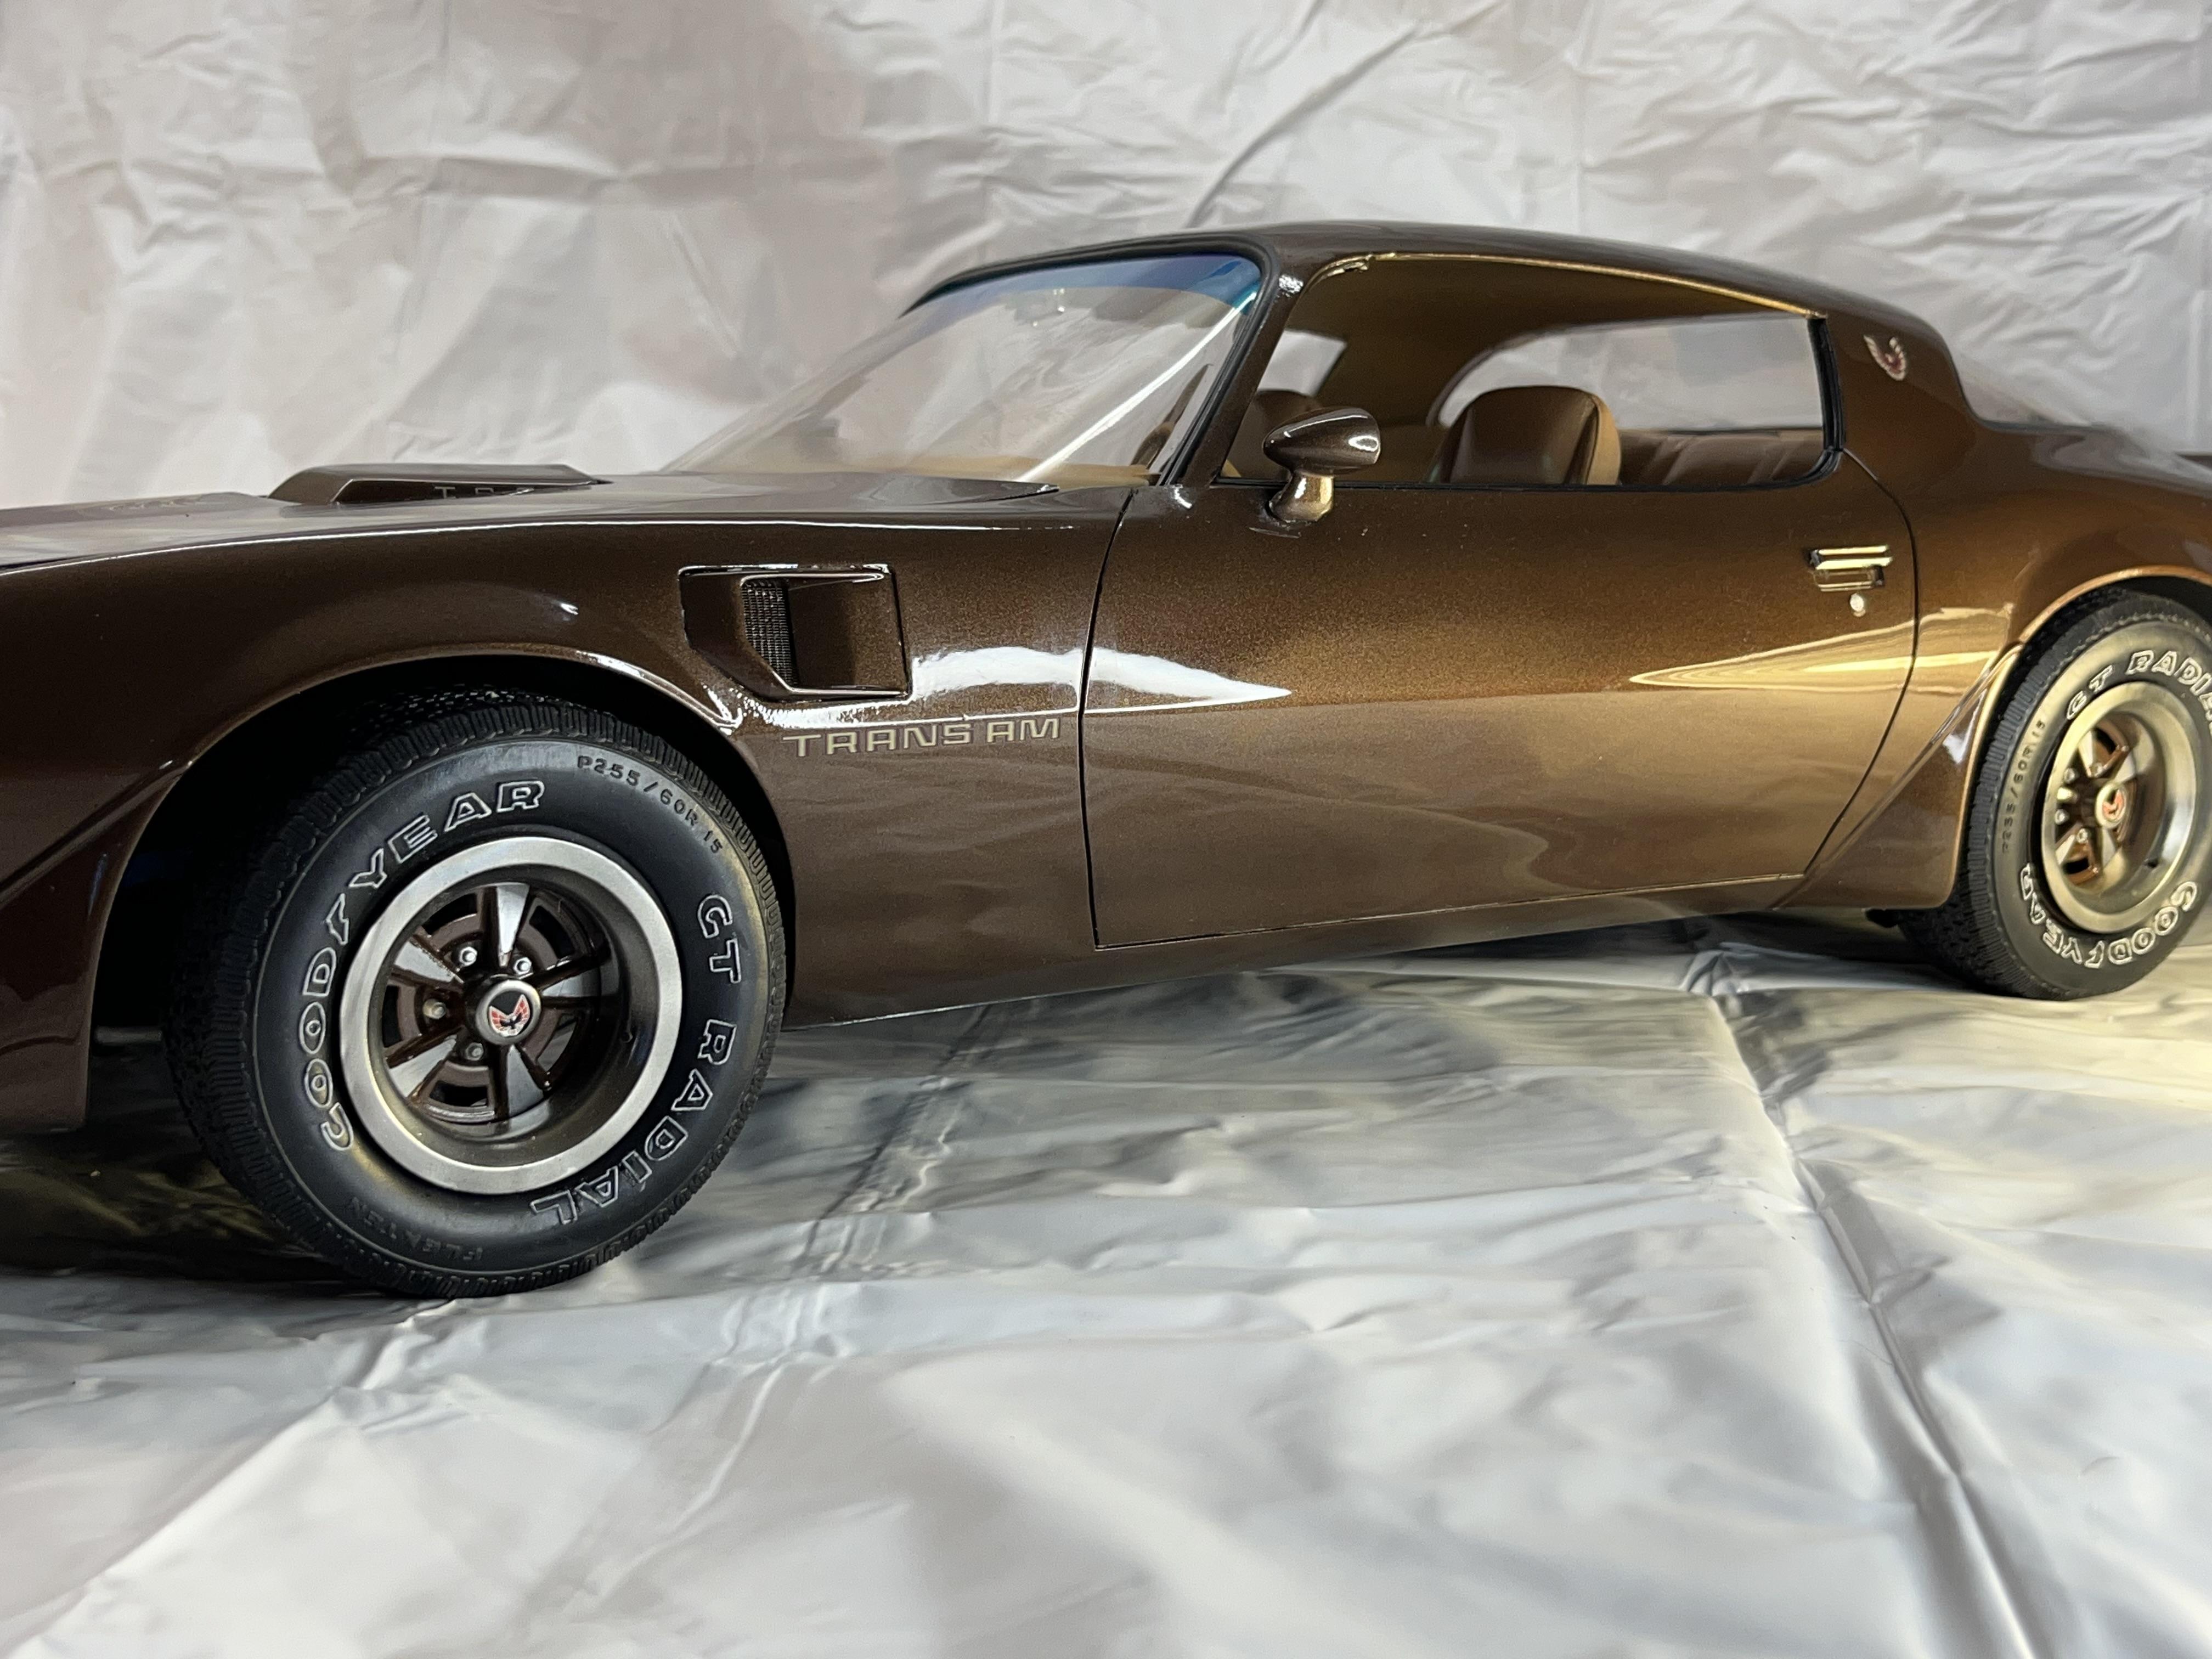
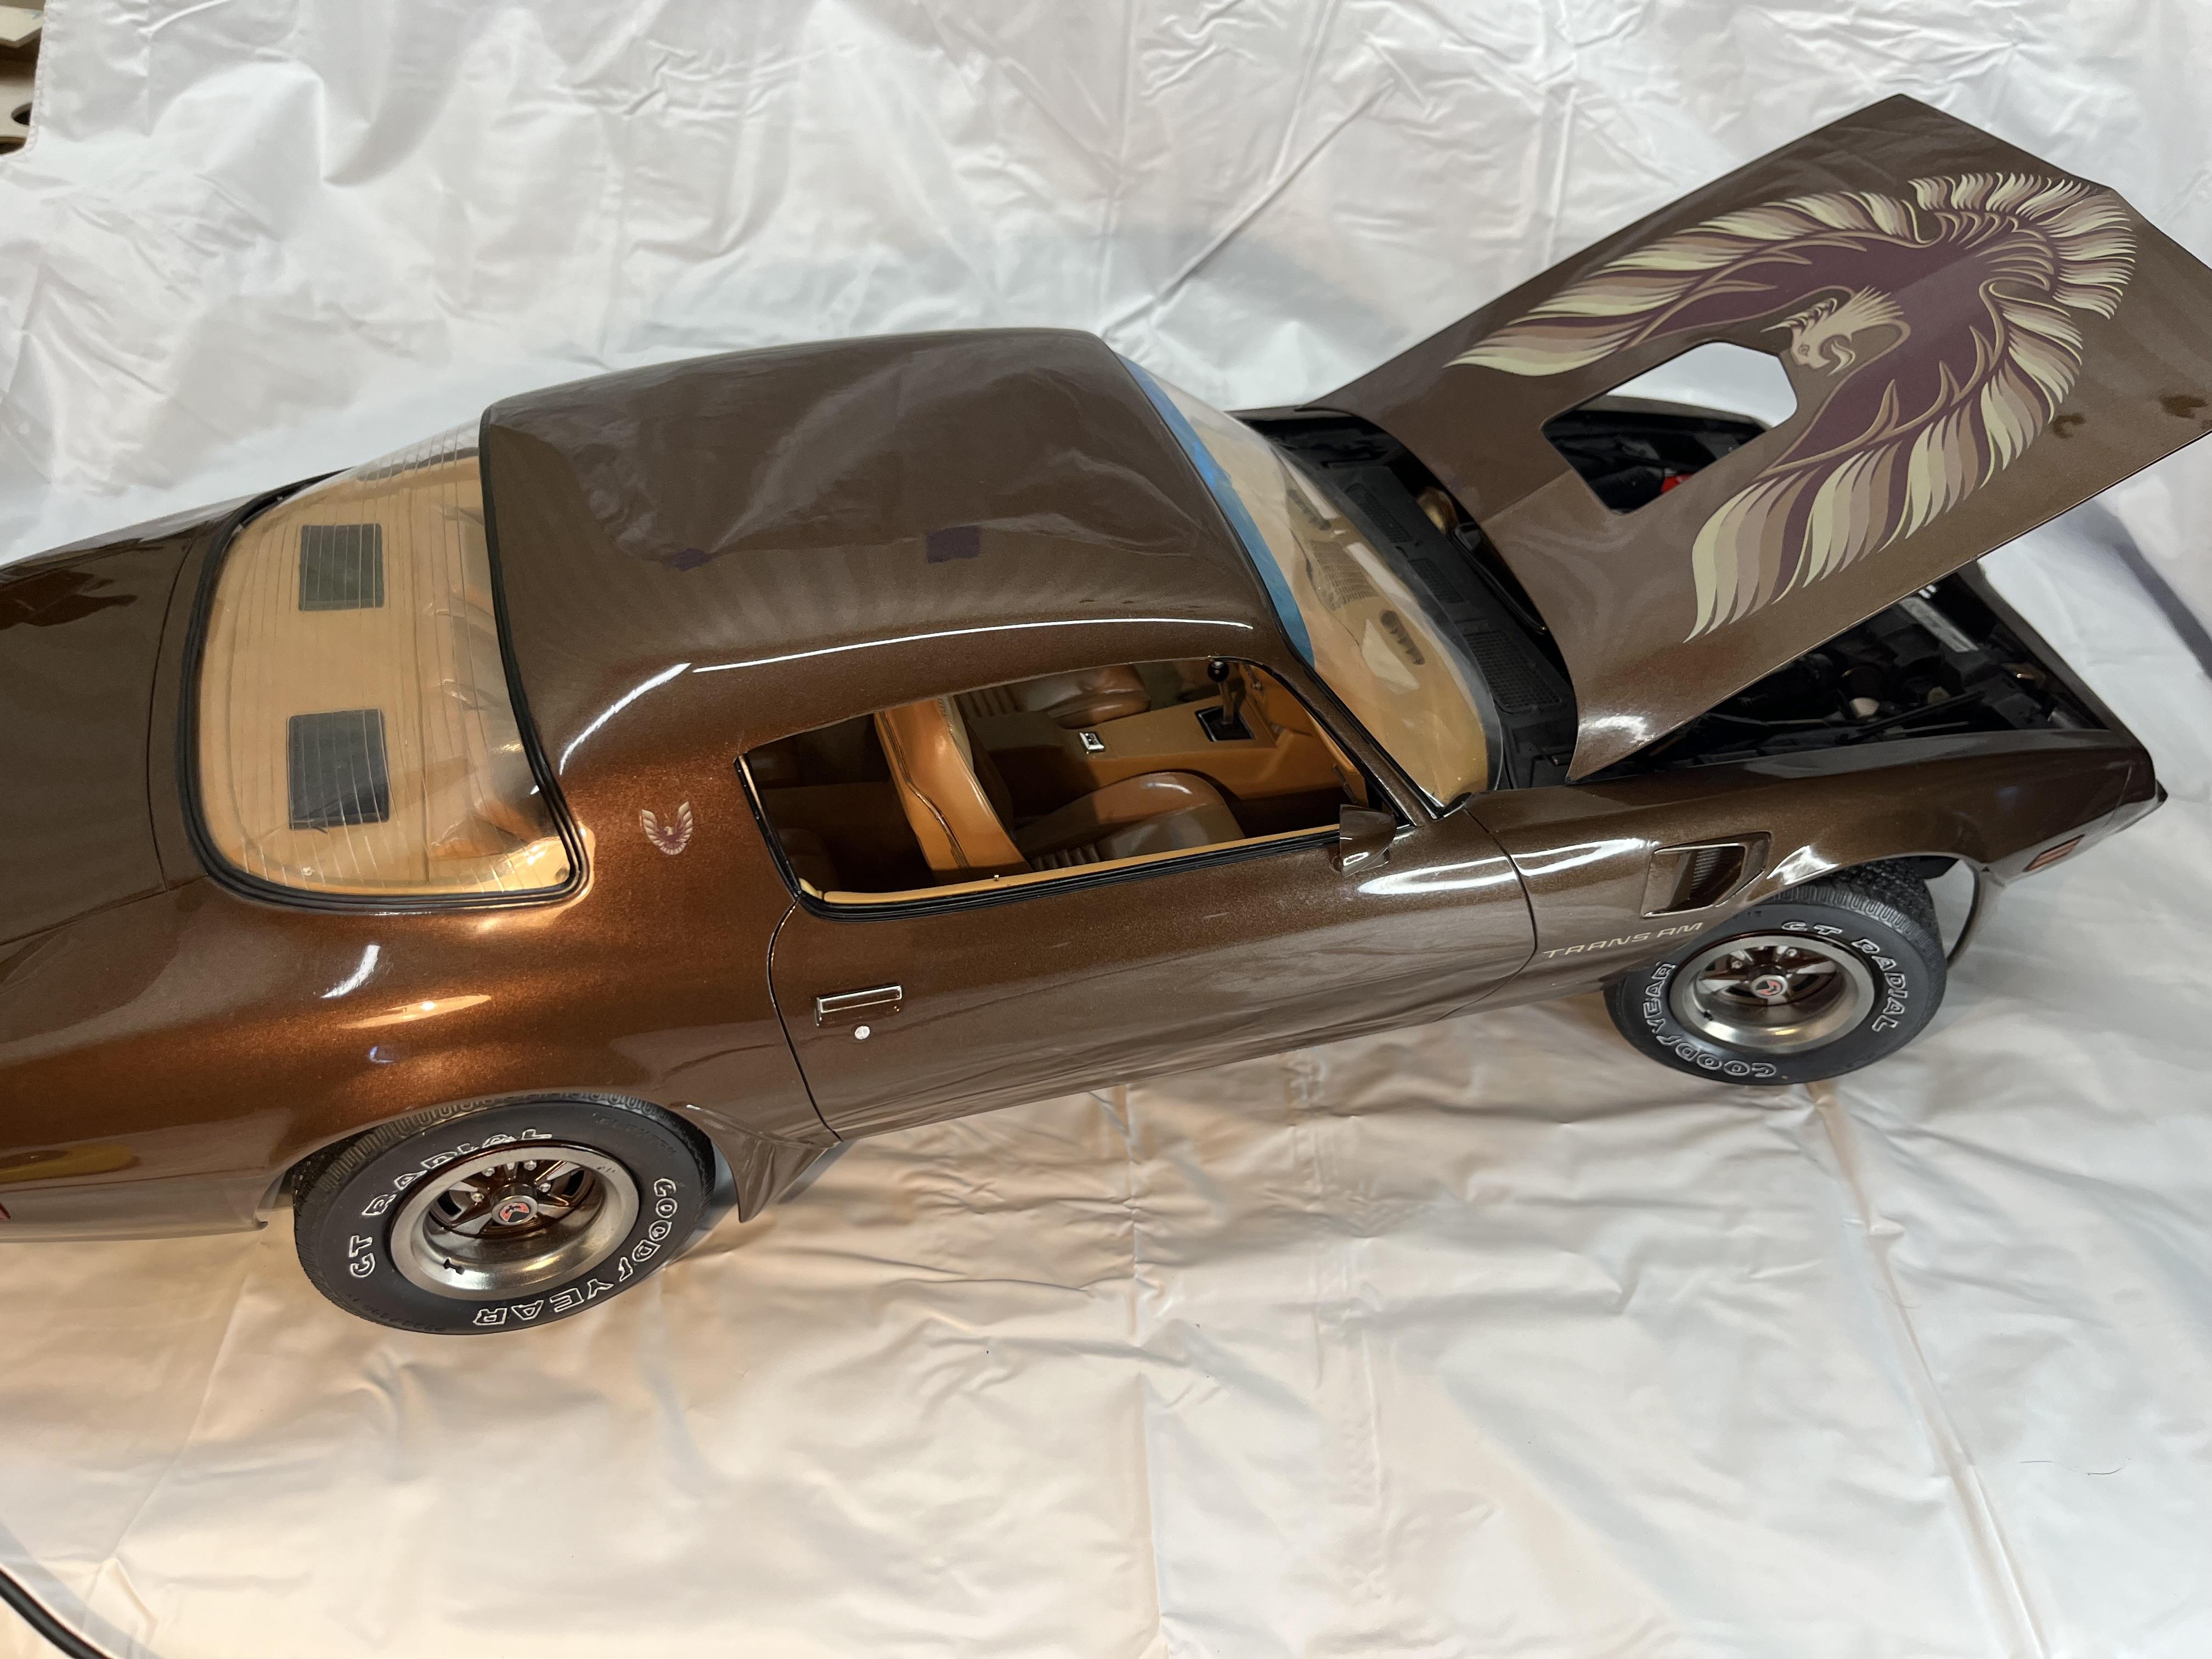
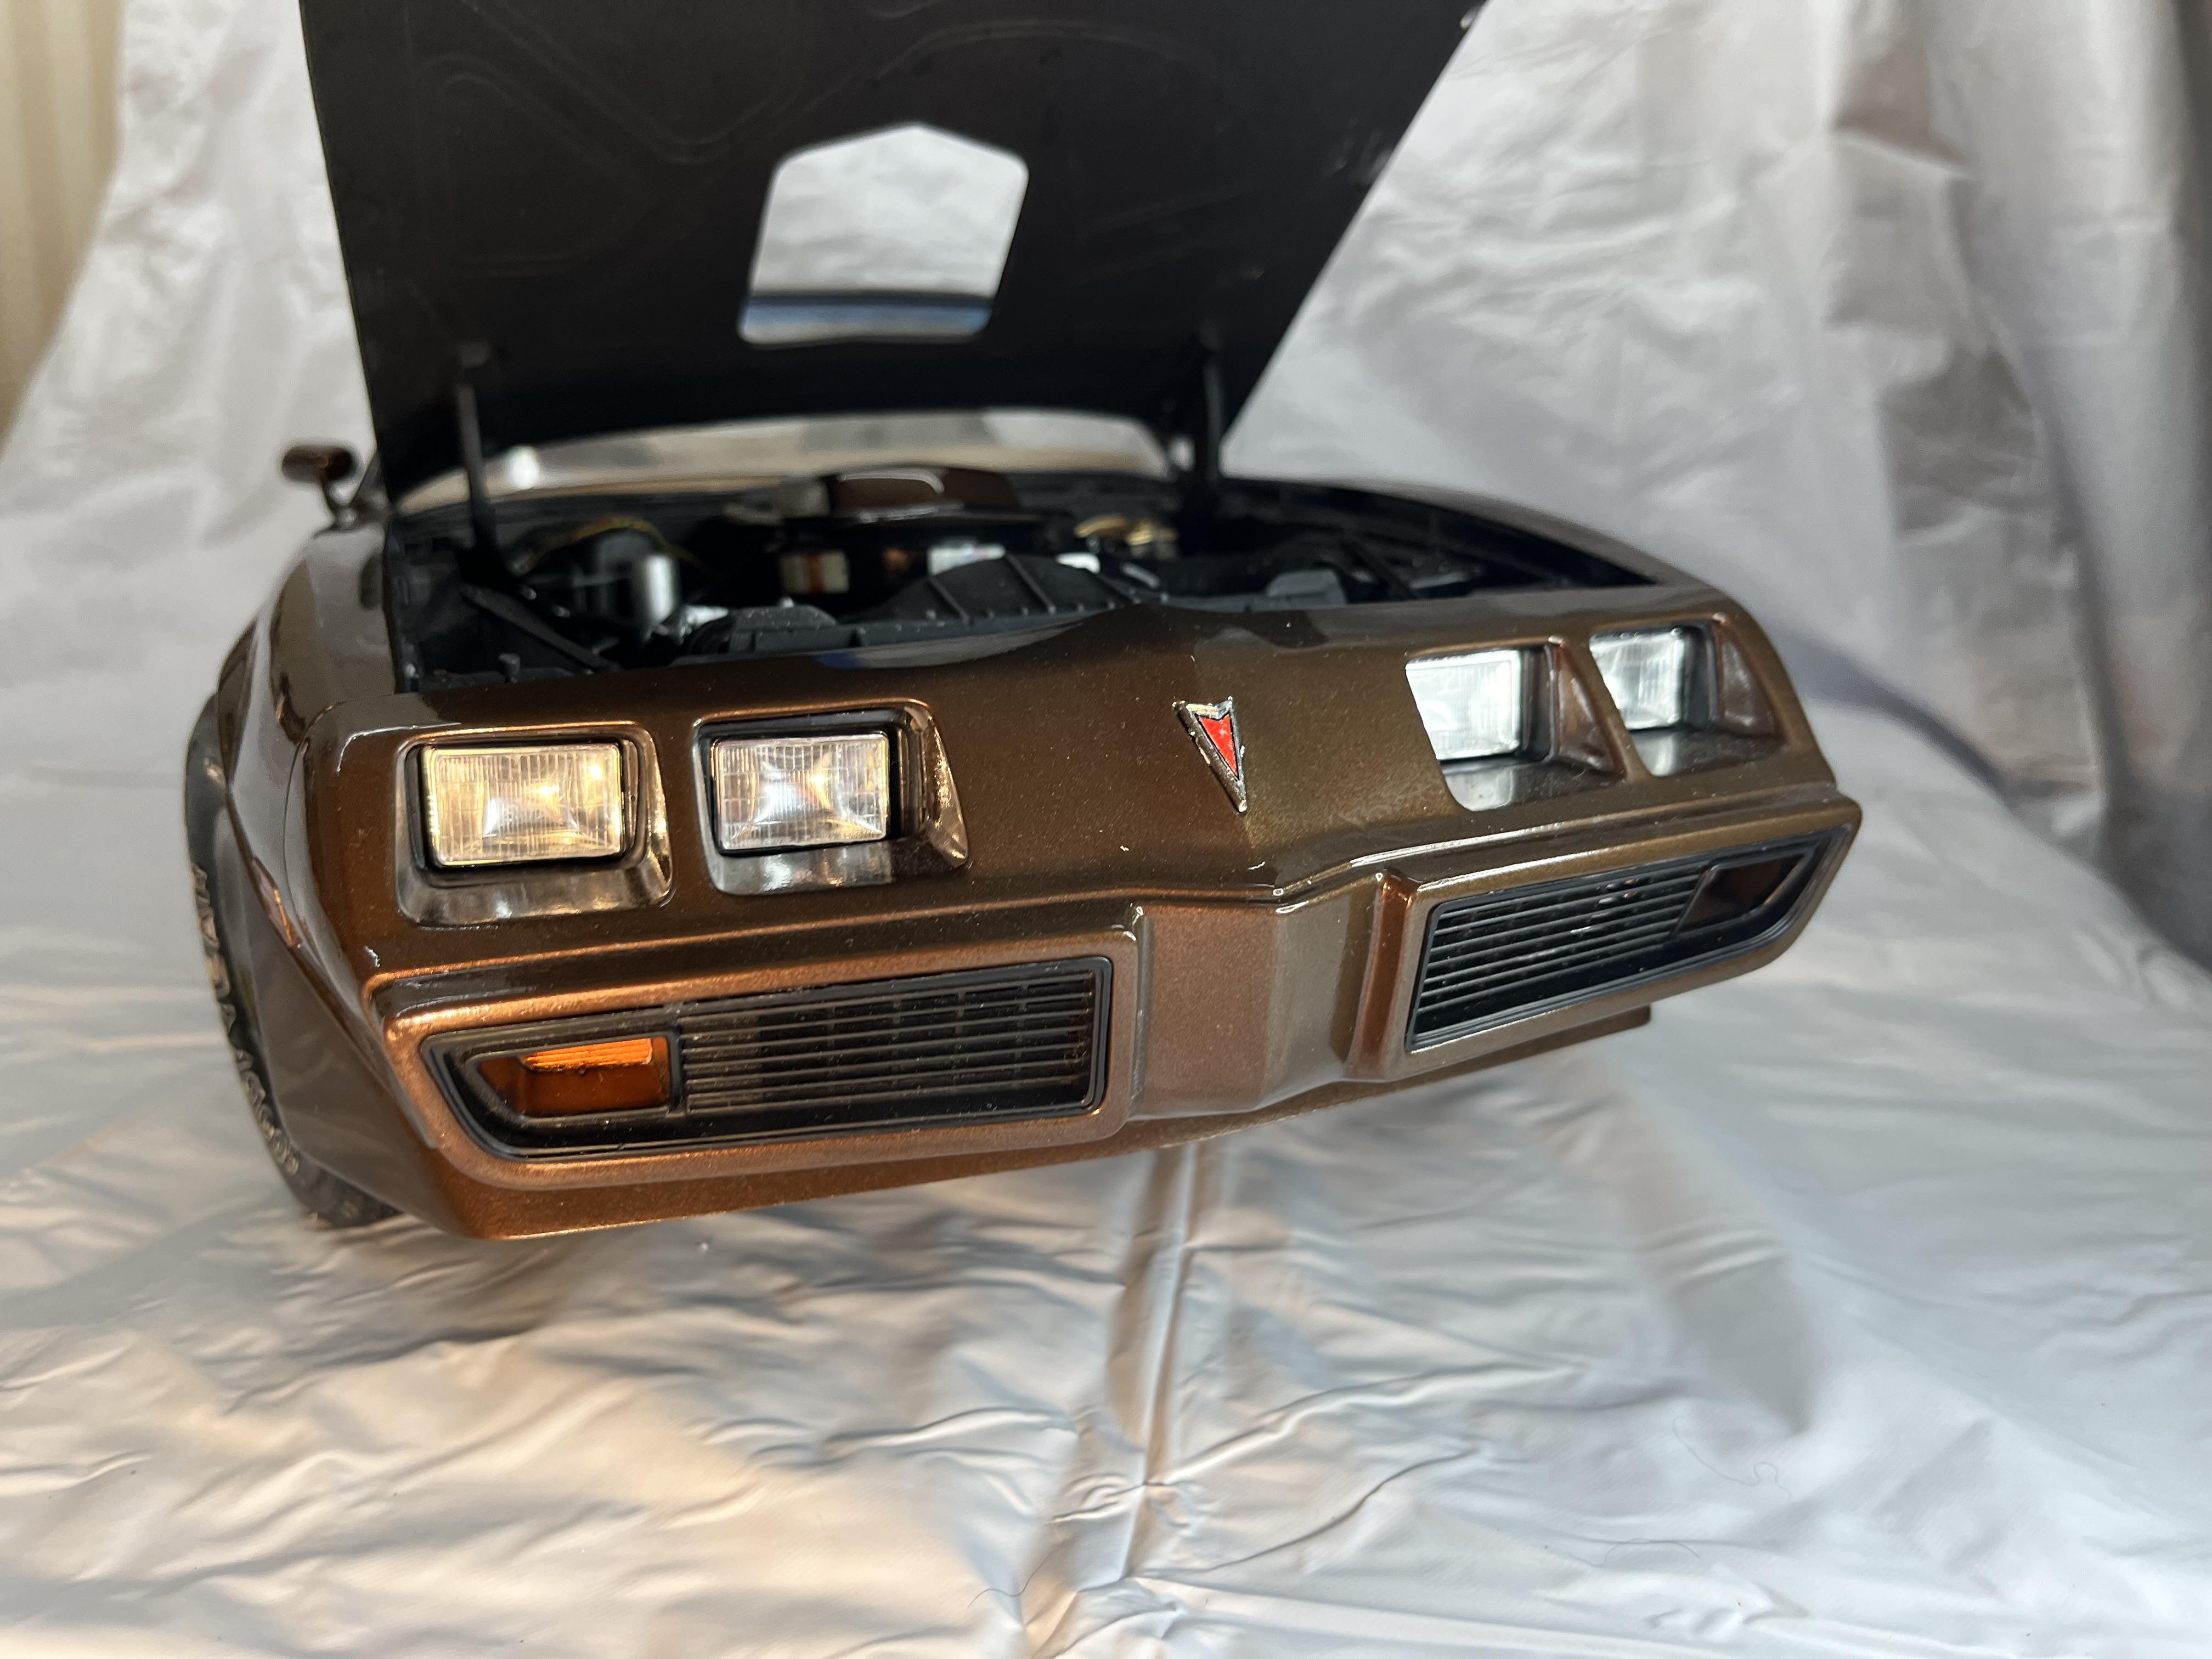
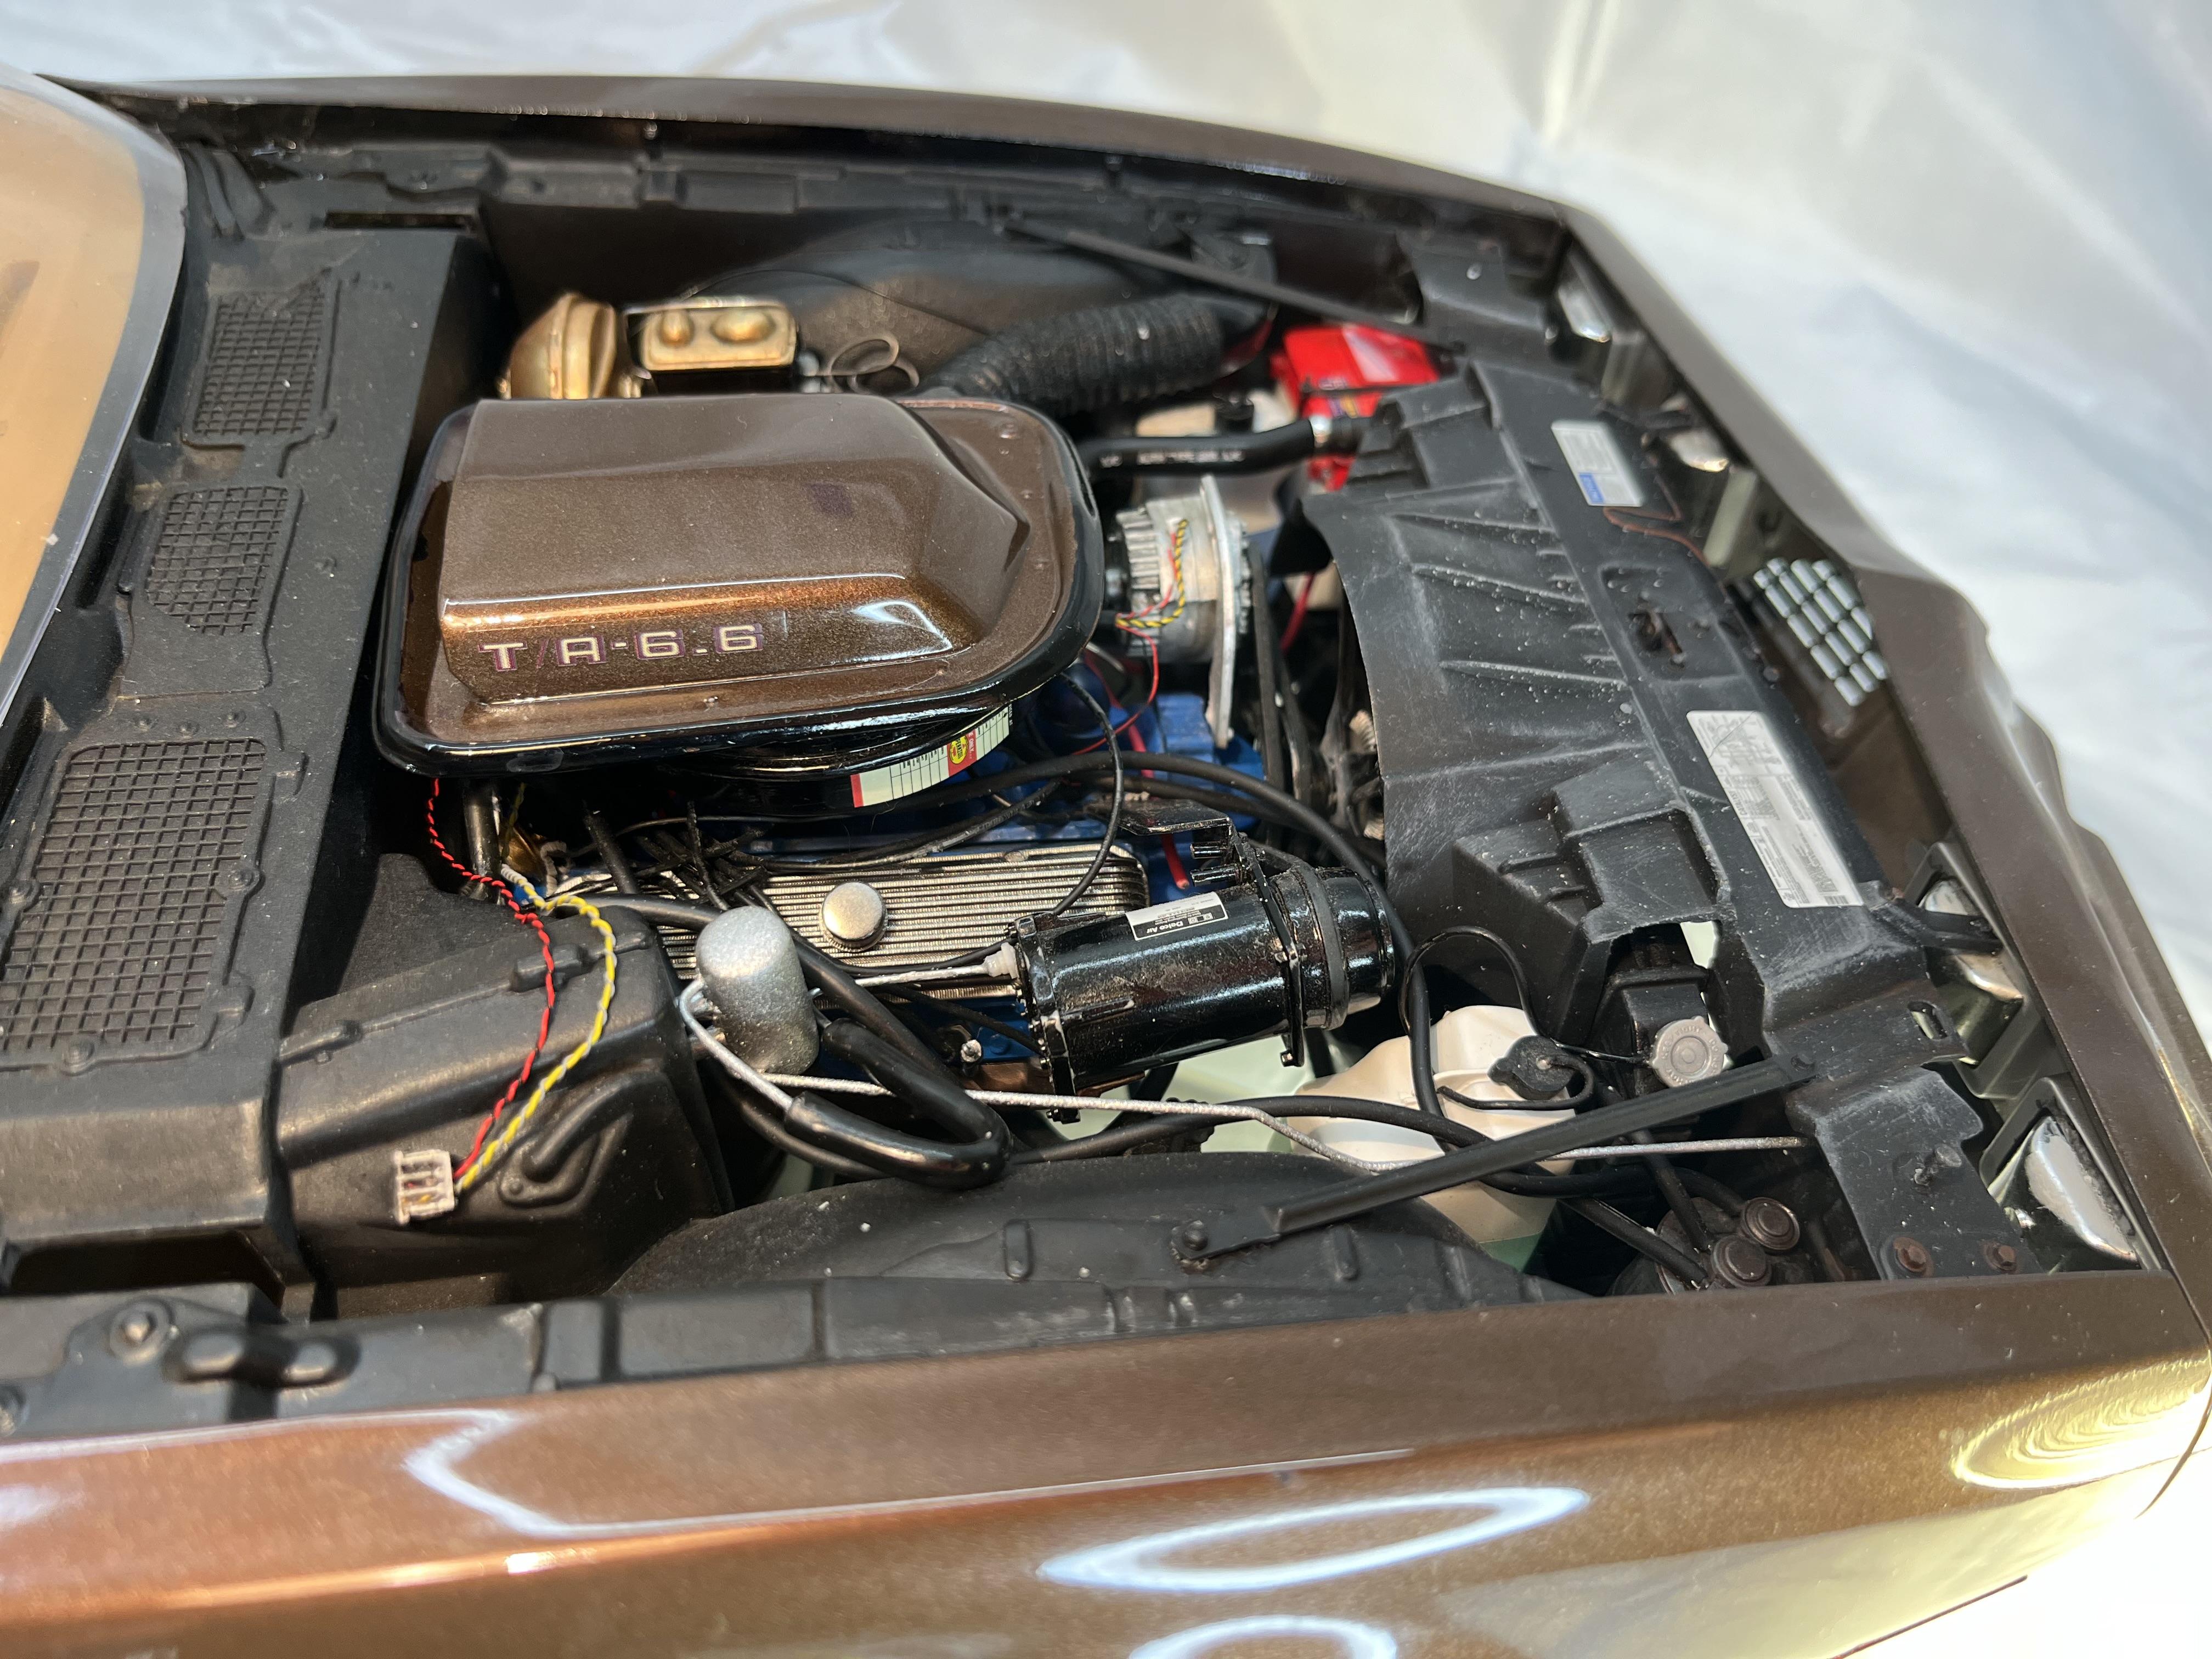
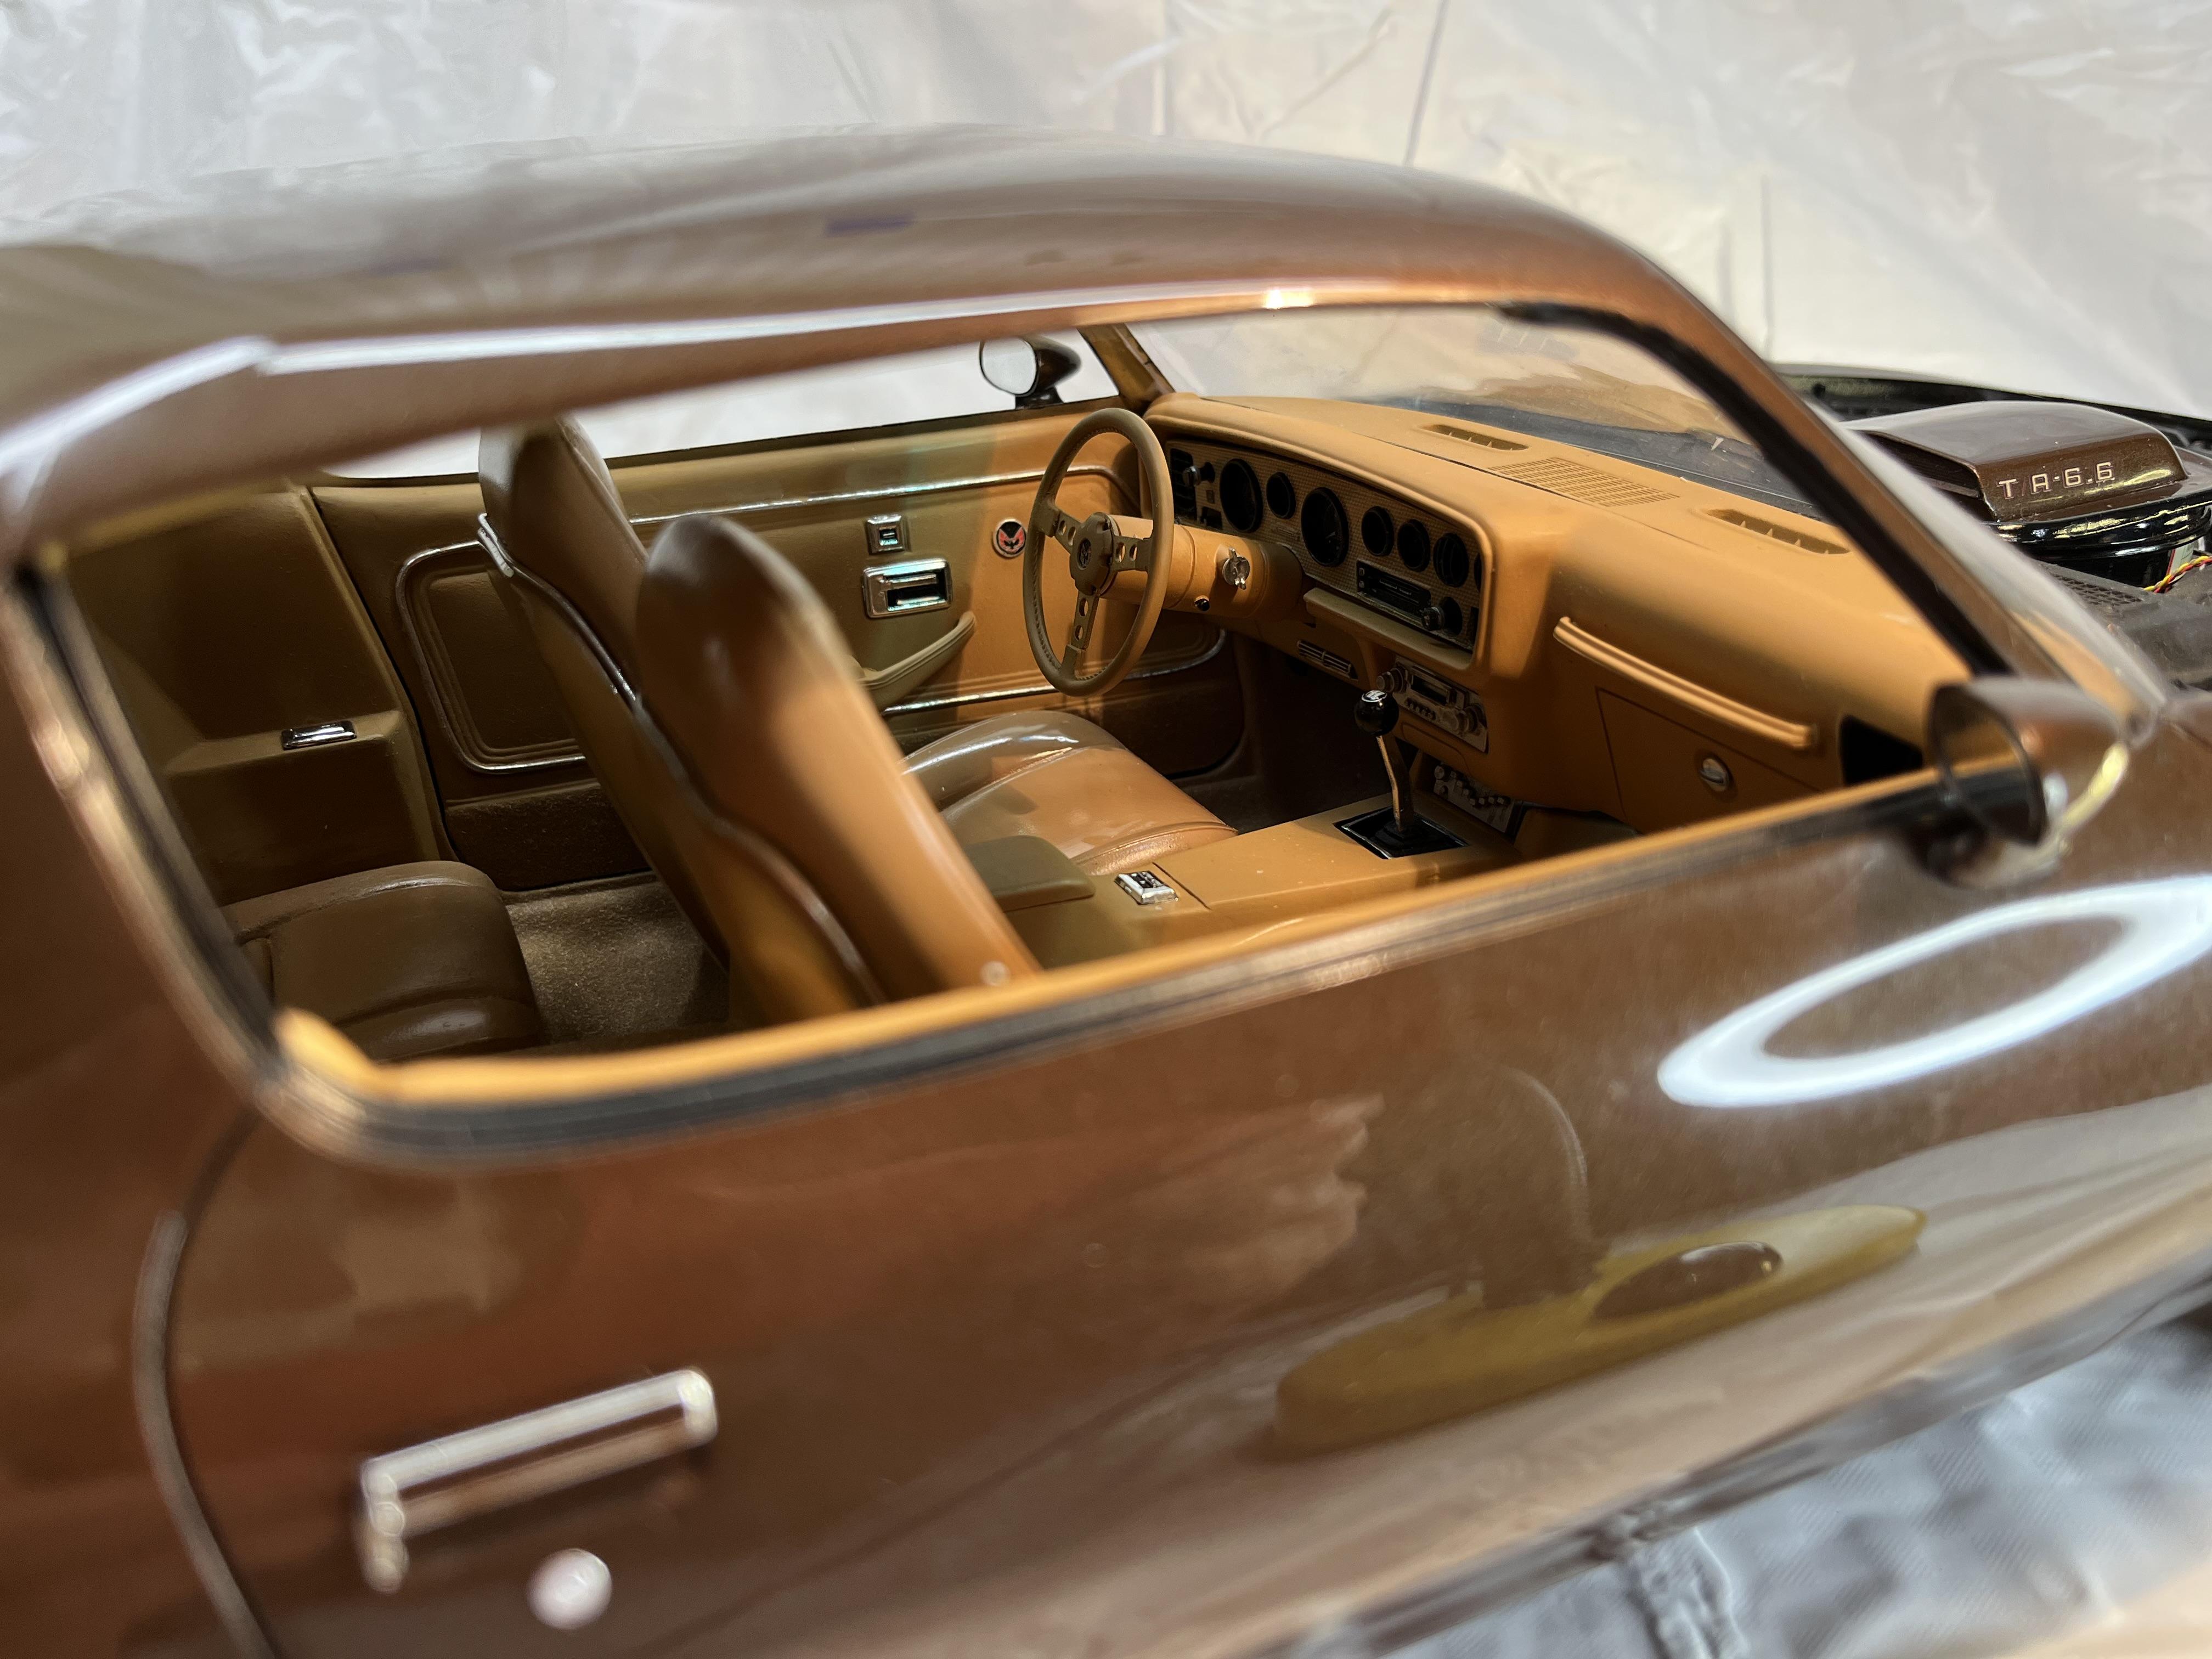
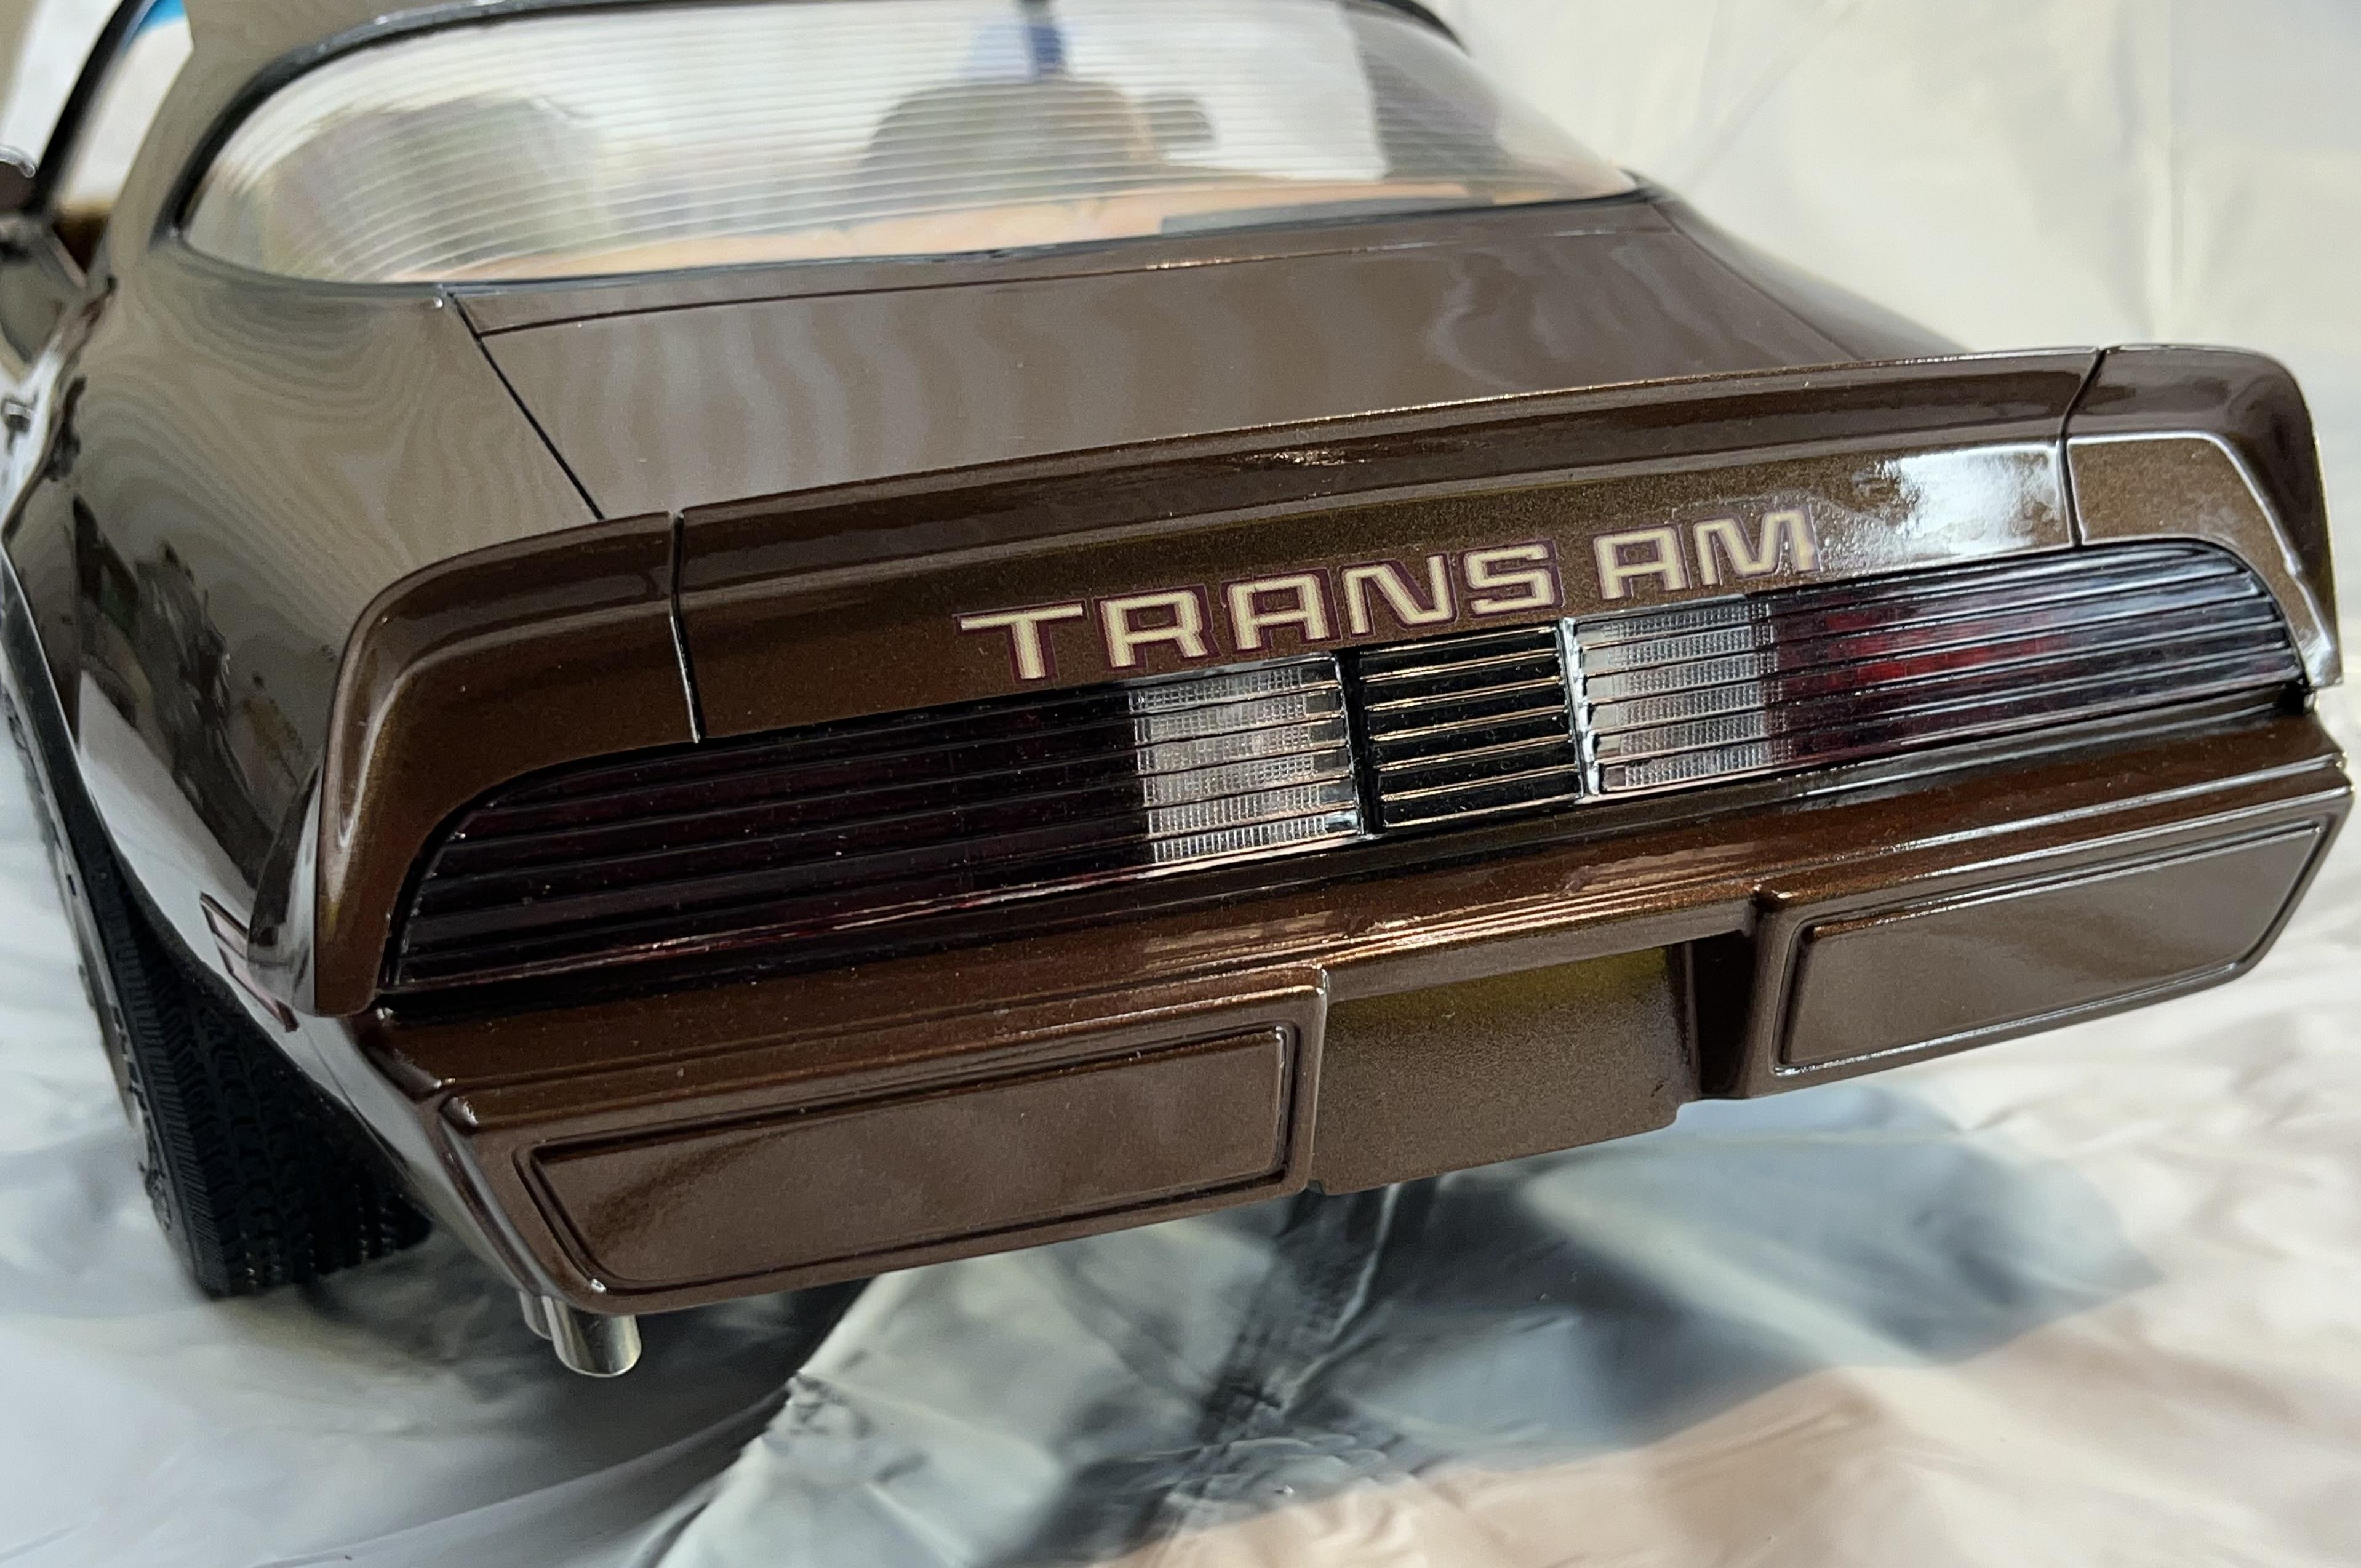
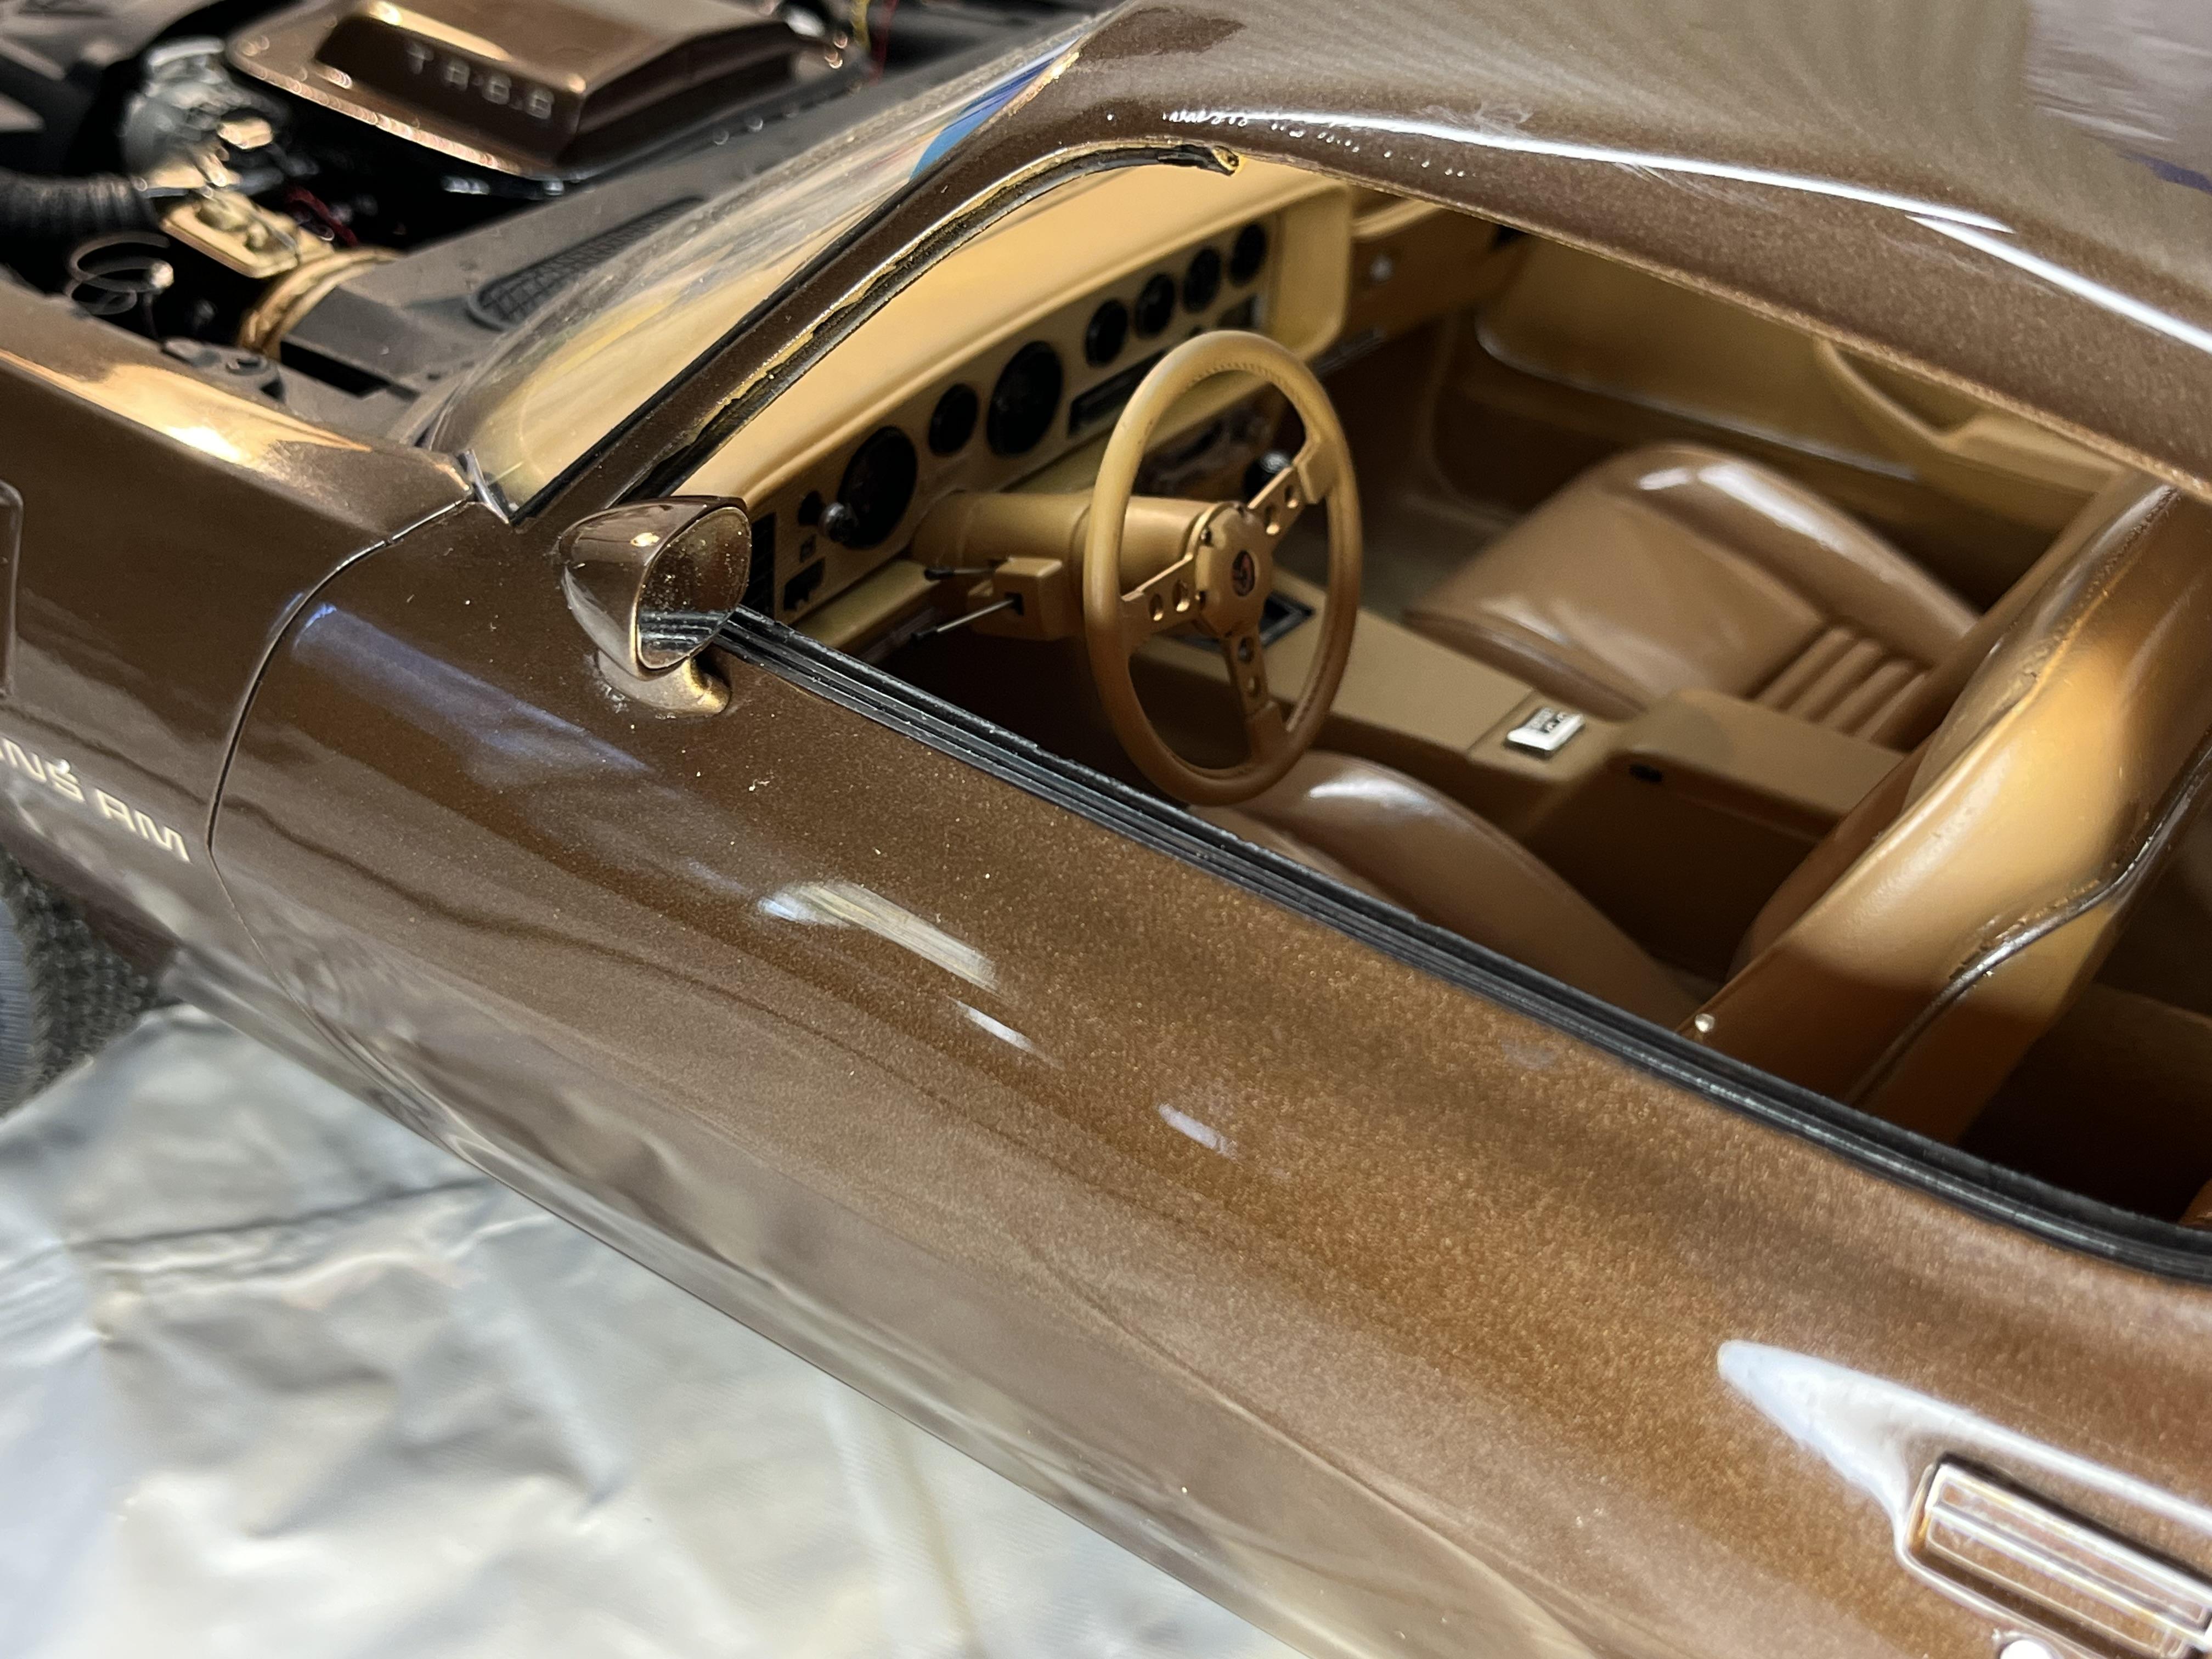
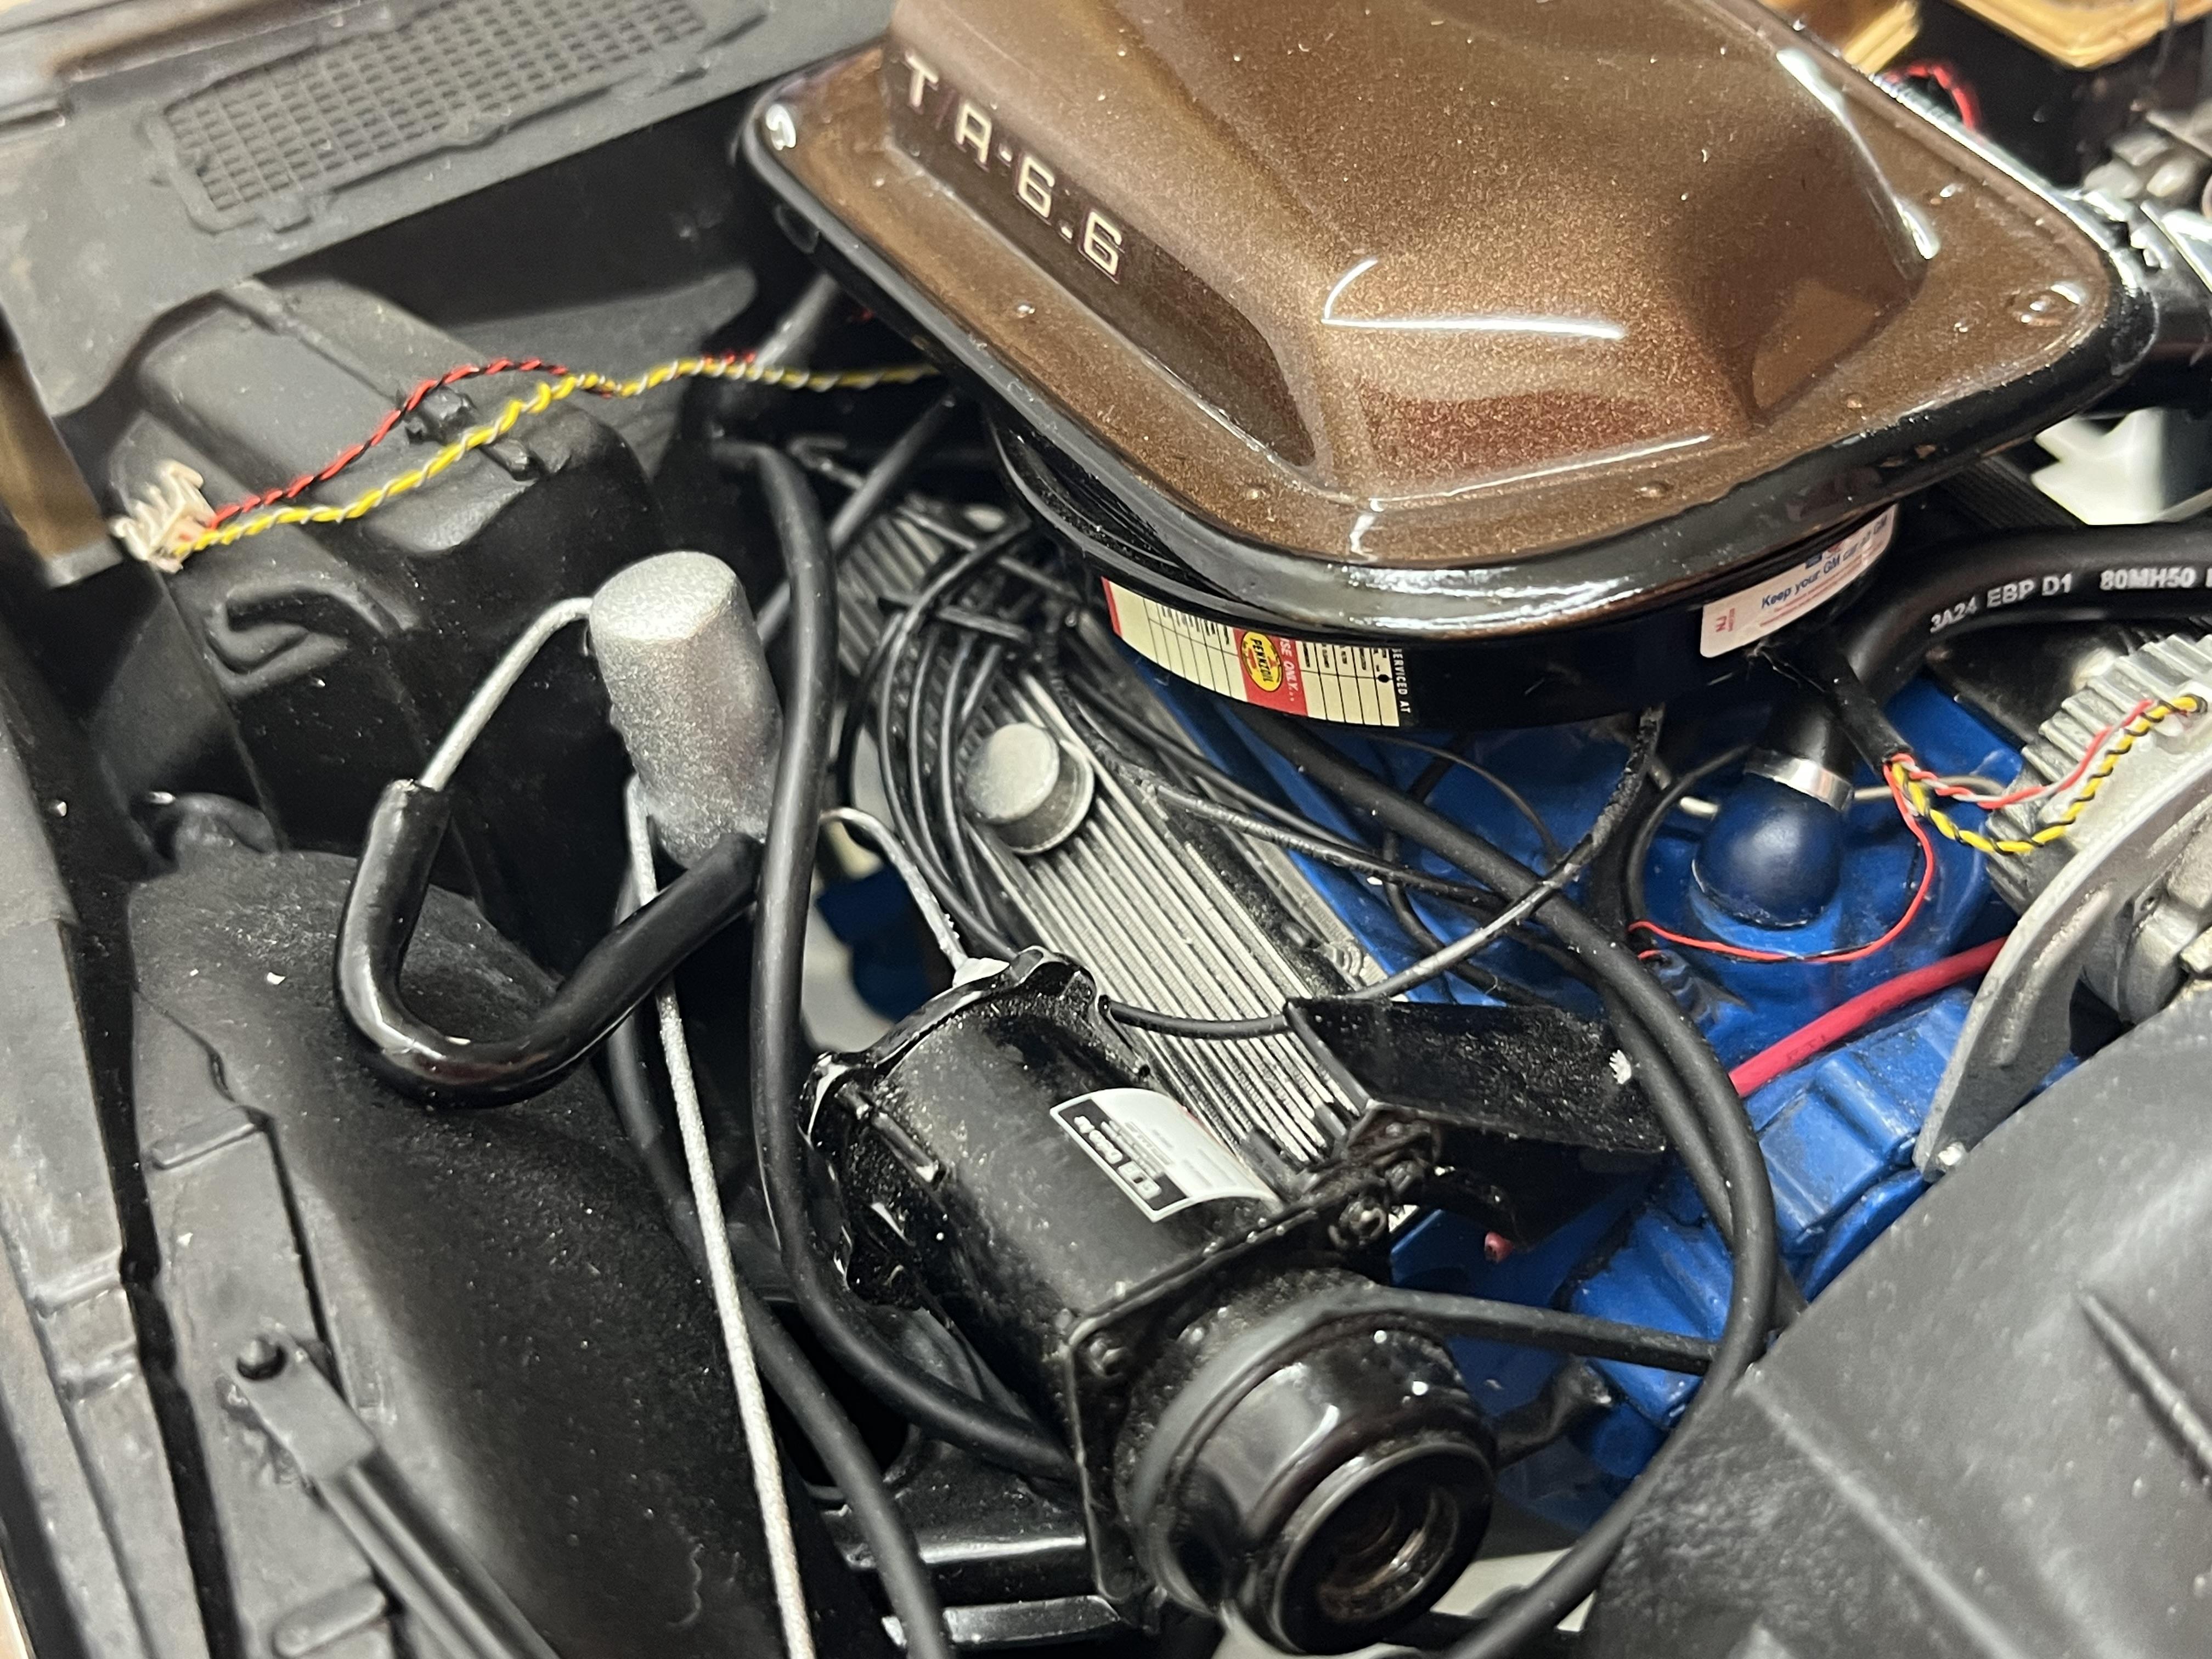
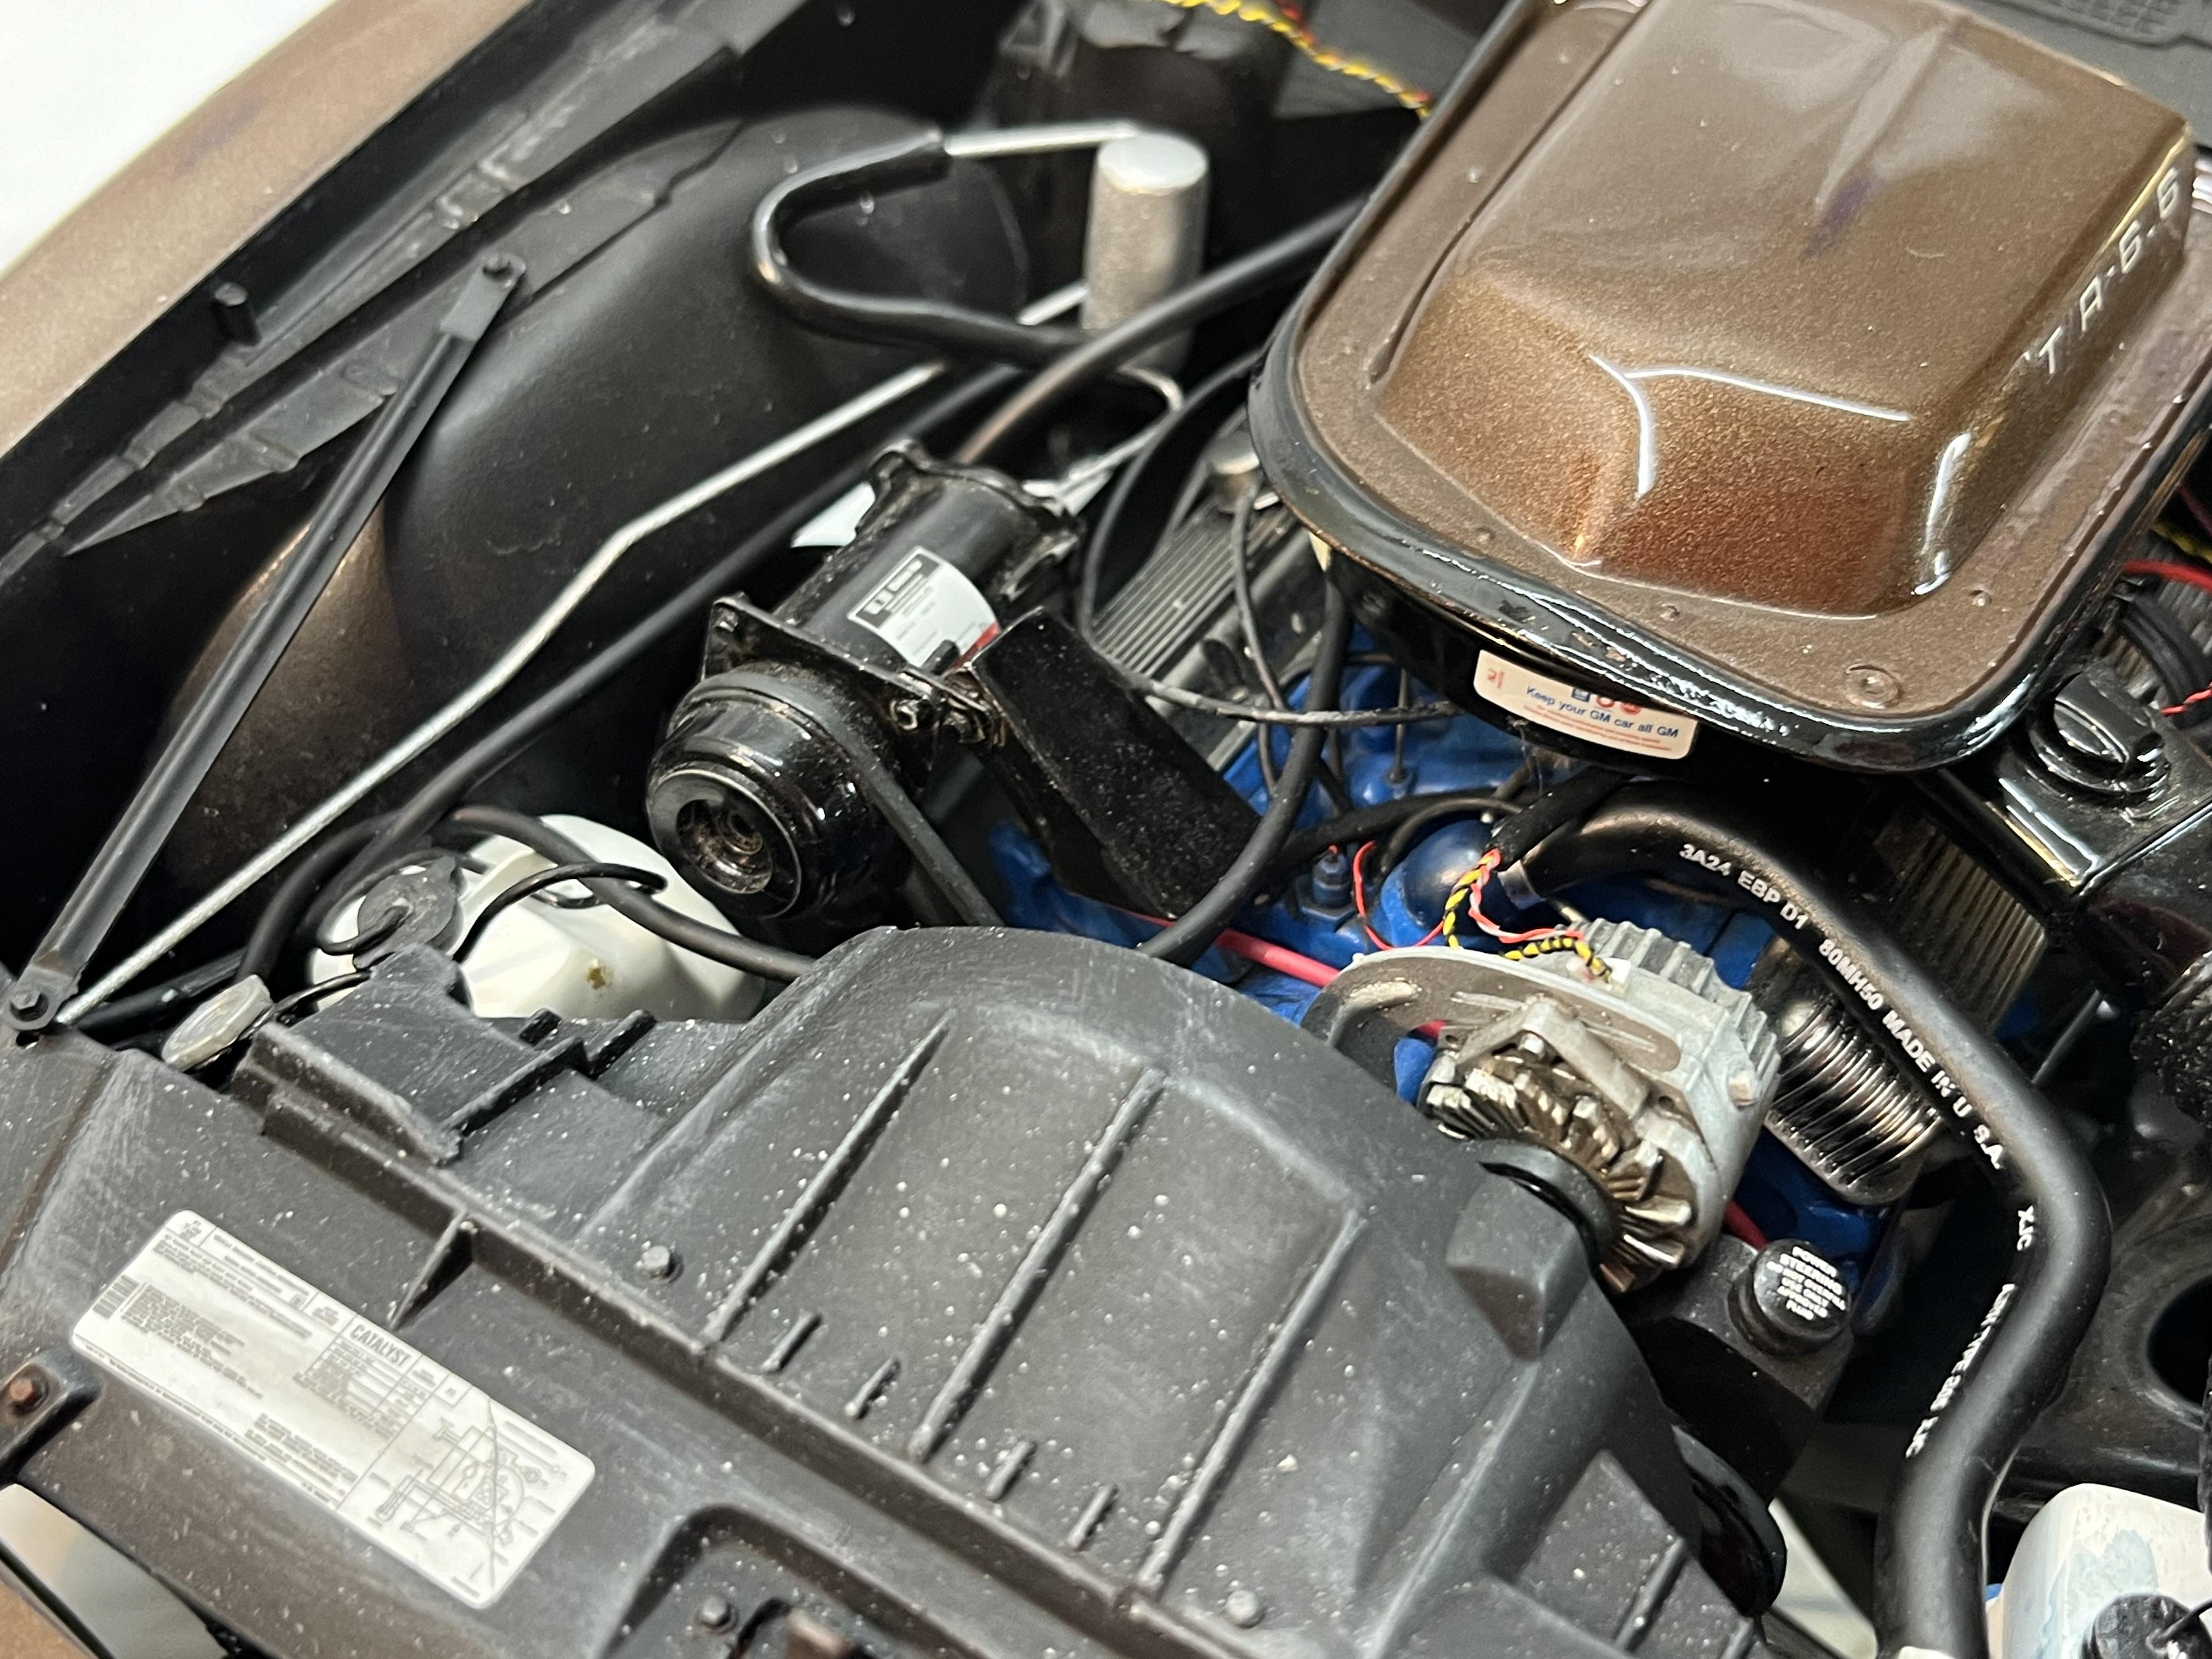
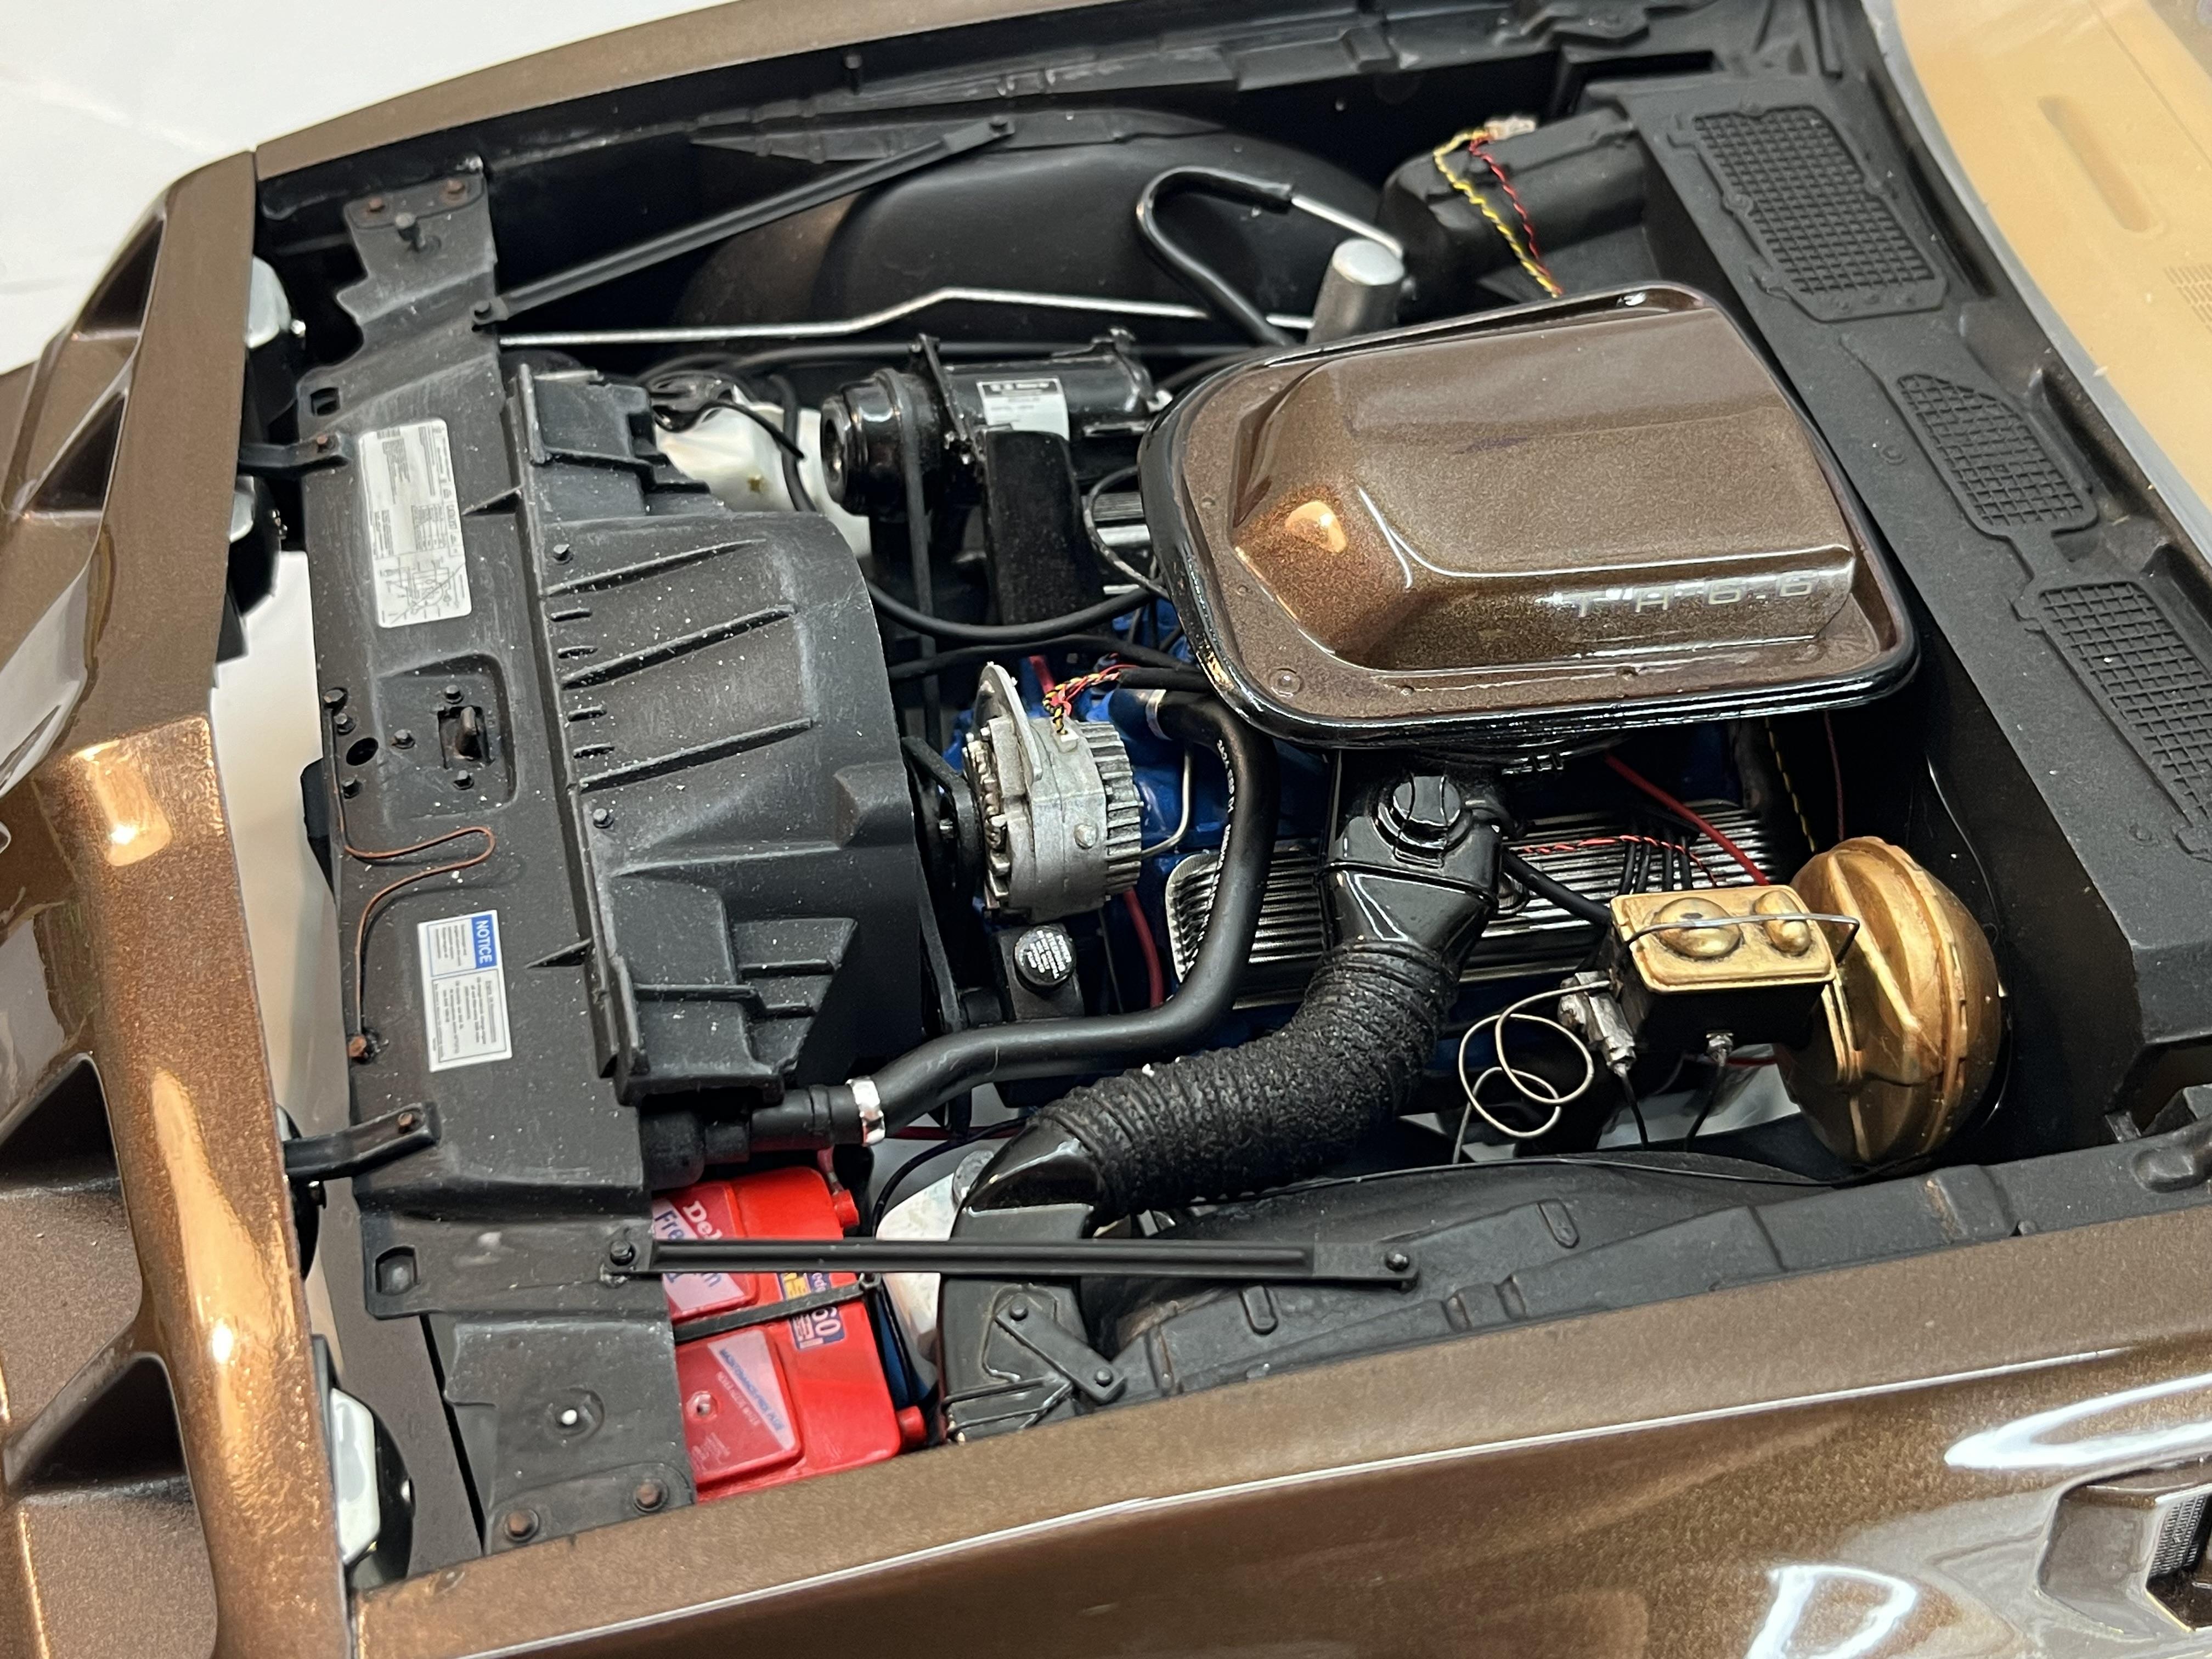
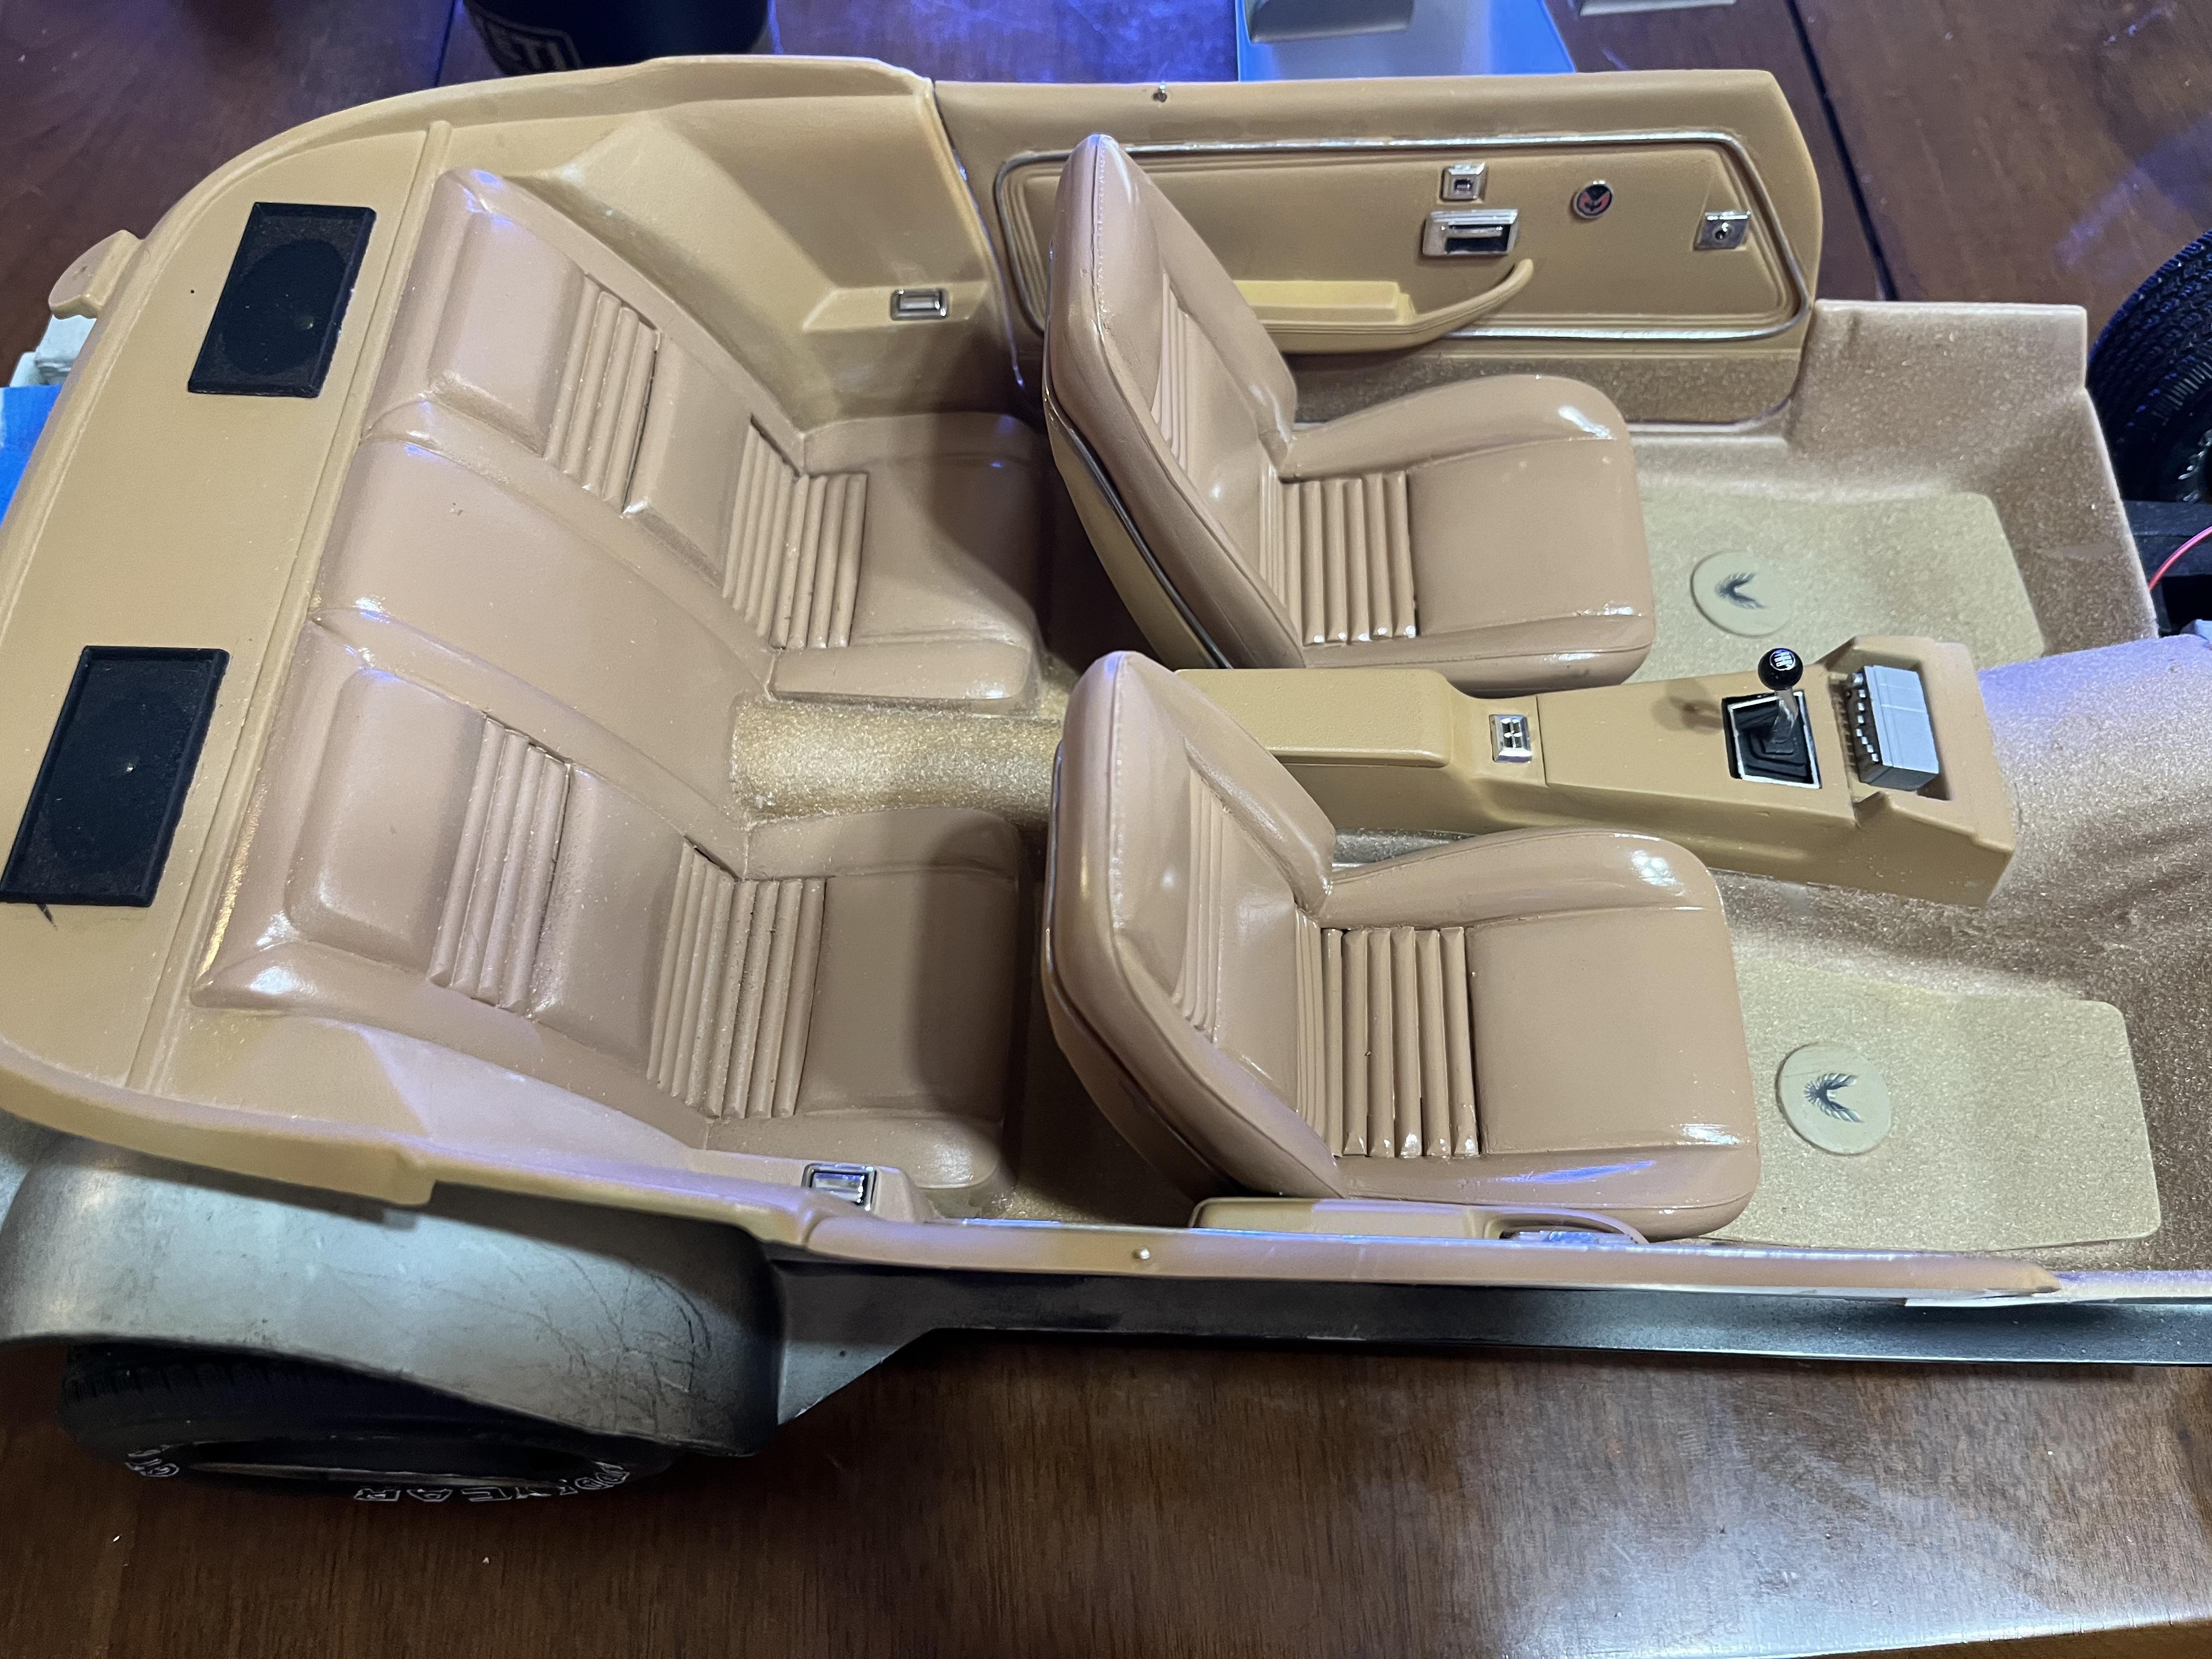
After 2 years it’s done. List of modifications Filled in t tops Converted to a 4 speed car using transmission from Monogram 1/8 Vette and converted the console for the manual,and reconfigured pedals for a clutch Converted to all vinyl seats Dash instruments and detail from Jamison Swimm 3D, added correct chrome trim to seats and door panels. Added many details to engine including a/c bracket and a/c plumbing, added ignition wires,vacuum hoses, fuel lines,emission lines, rebuilt the battery, coolant over flow and washer reservoir used radiator and core support from Jamison Swimm 3D, Ralley wheels 3D printed by Jamison Swimm Scratch built all 4 shocks and replaced all bolts on chassis with 3D printed bolt heads, added welds to exhaust system and made new exhaust tips from aluminum Decals from Rays decals, color matched automotive laquer mixed to factory Heritage Brown by local paint supplier.
- 24 replies
-
- 17
-
-
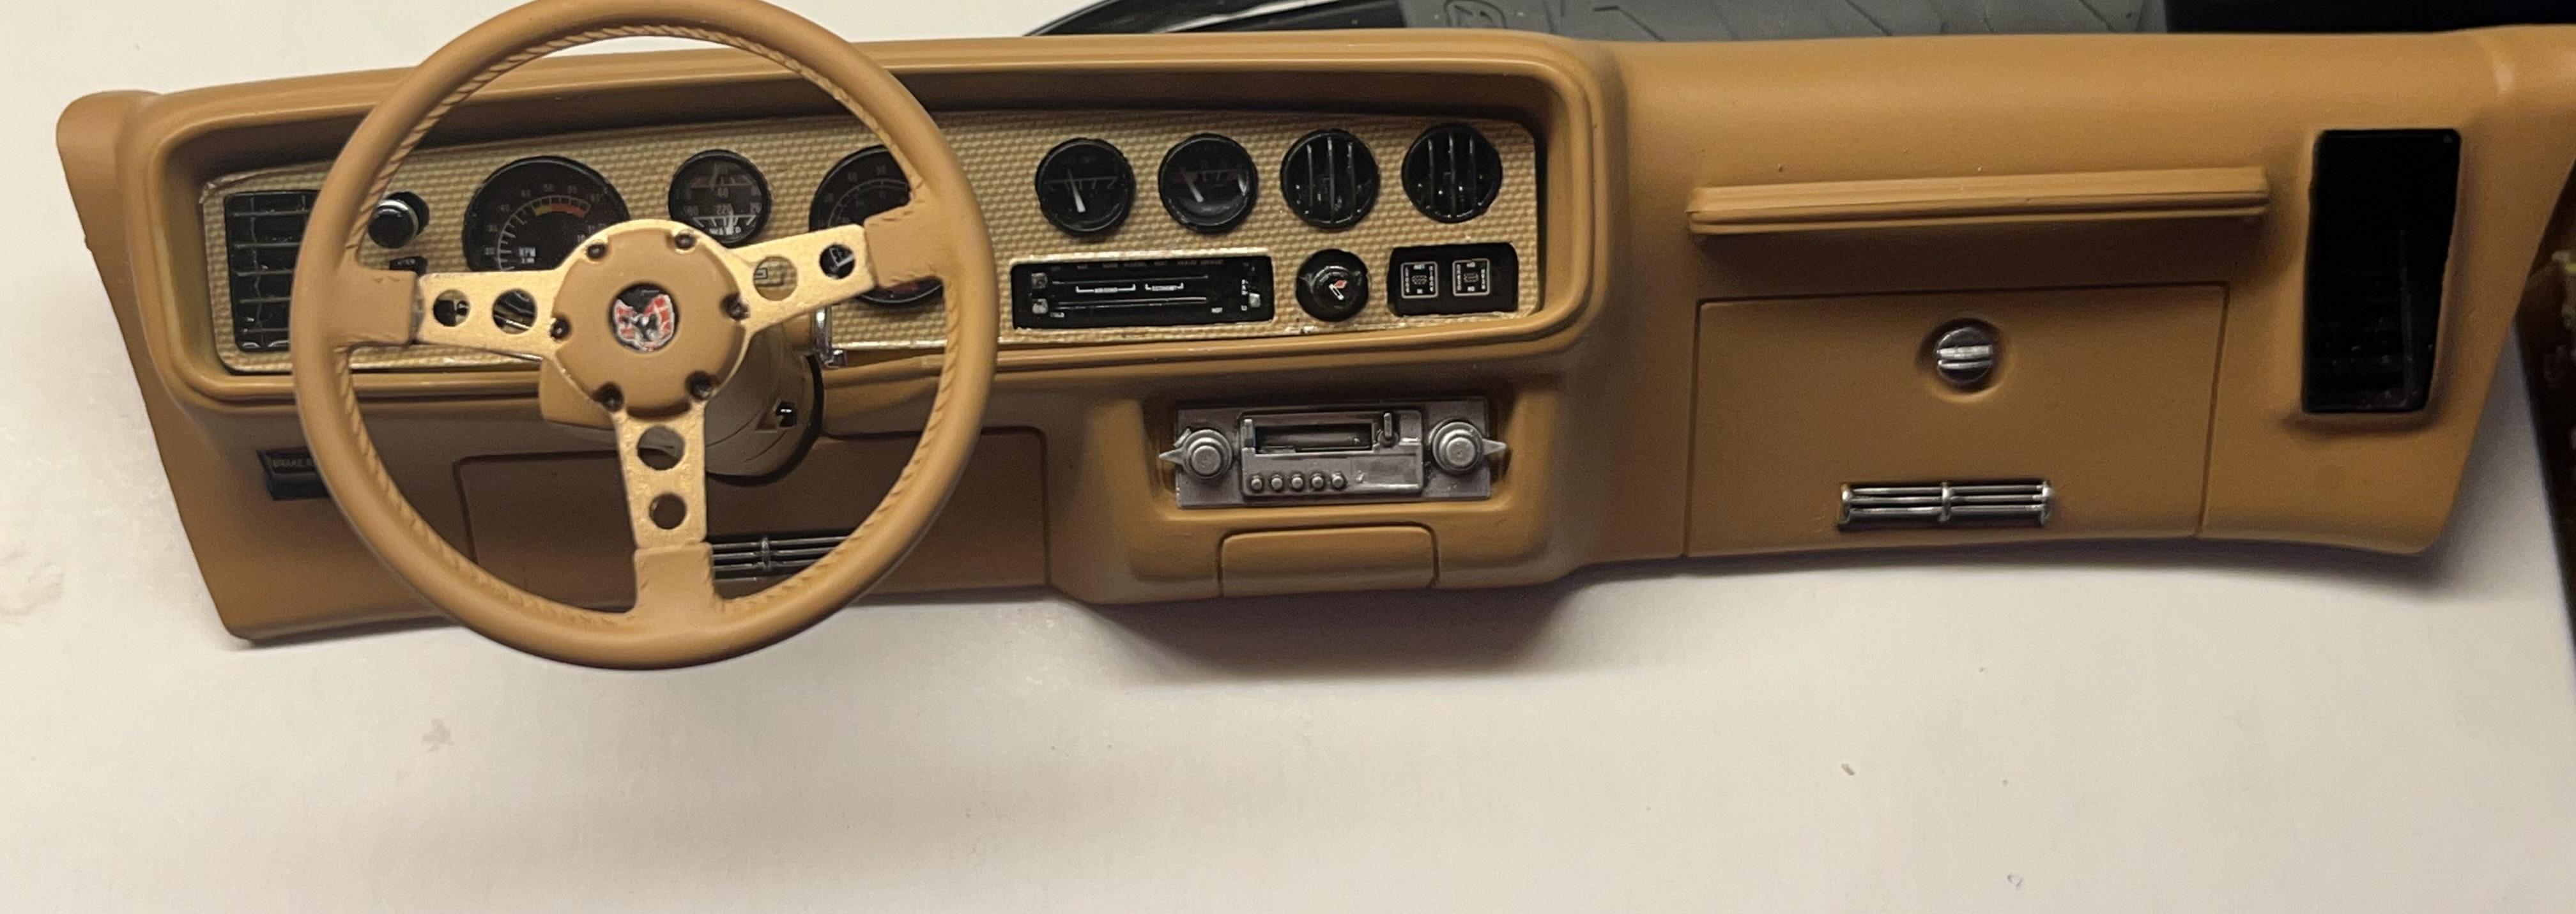
Dash board finished
-
Made some progress…finally got color on the body, factory matched Heritage Brown, from a local supplier…I have a new radiator, core support, charcoal cannister, and battery tray from a 3 d printer. Interior is coming along nicely, dashboard is almost complete using 3D printed instrument bezels, Pioneer head unit, made new steering wheel stalks, still waiting on some decals for instrument panel. Seats and door panels got the chrome trim that Monogram left off, door panels are done, waiting on decals for the herringbone pattern for the seats. I also converted the console to accommodate a 4 speed shifter.
-
1/16 scale kits, good ,bad, ugly?
Fantom replied to Oldmopars's topic in Model Building Questions and Answers
3D printing has really opened up the possibilities in the larger scales. There’s several companies that print some pretty sweet large scale parts and bodies. -
1964, Brissette FED. 1:16, brass, scale build.
Fantom replied to Mike Williams's topic in Drag Racing
Beautiful rail!!!! -
Started with Lindbergs Exterminator chassis, body from Custom 3D Creations, engine from Texas 3D. Decals were custom made by STS decals.
-
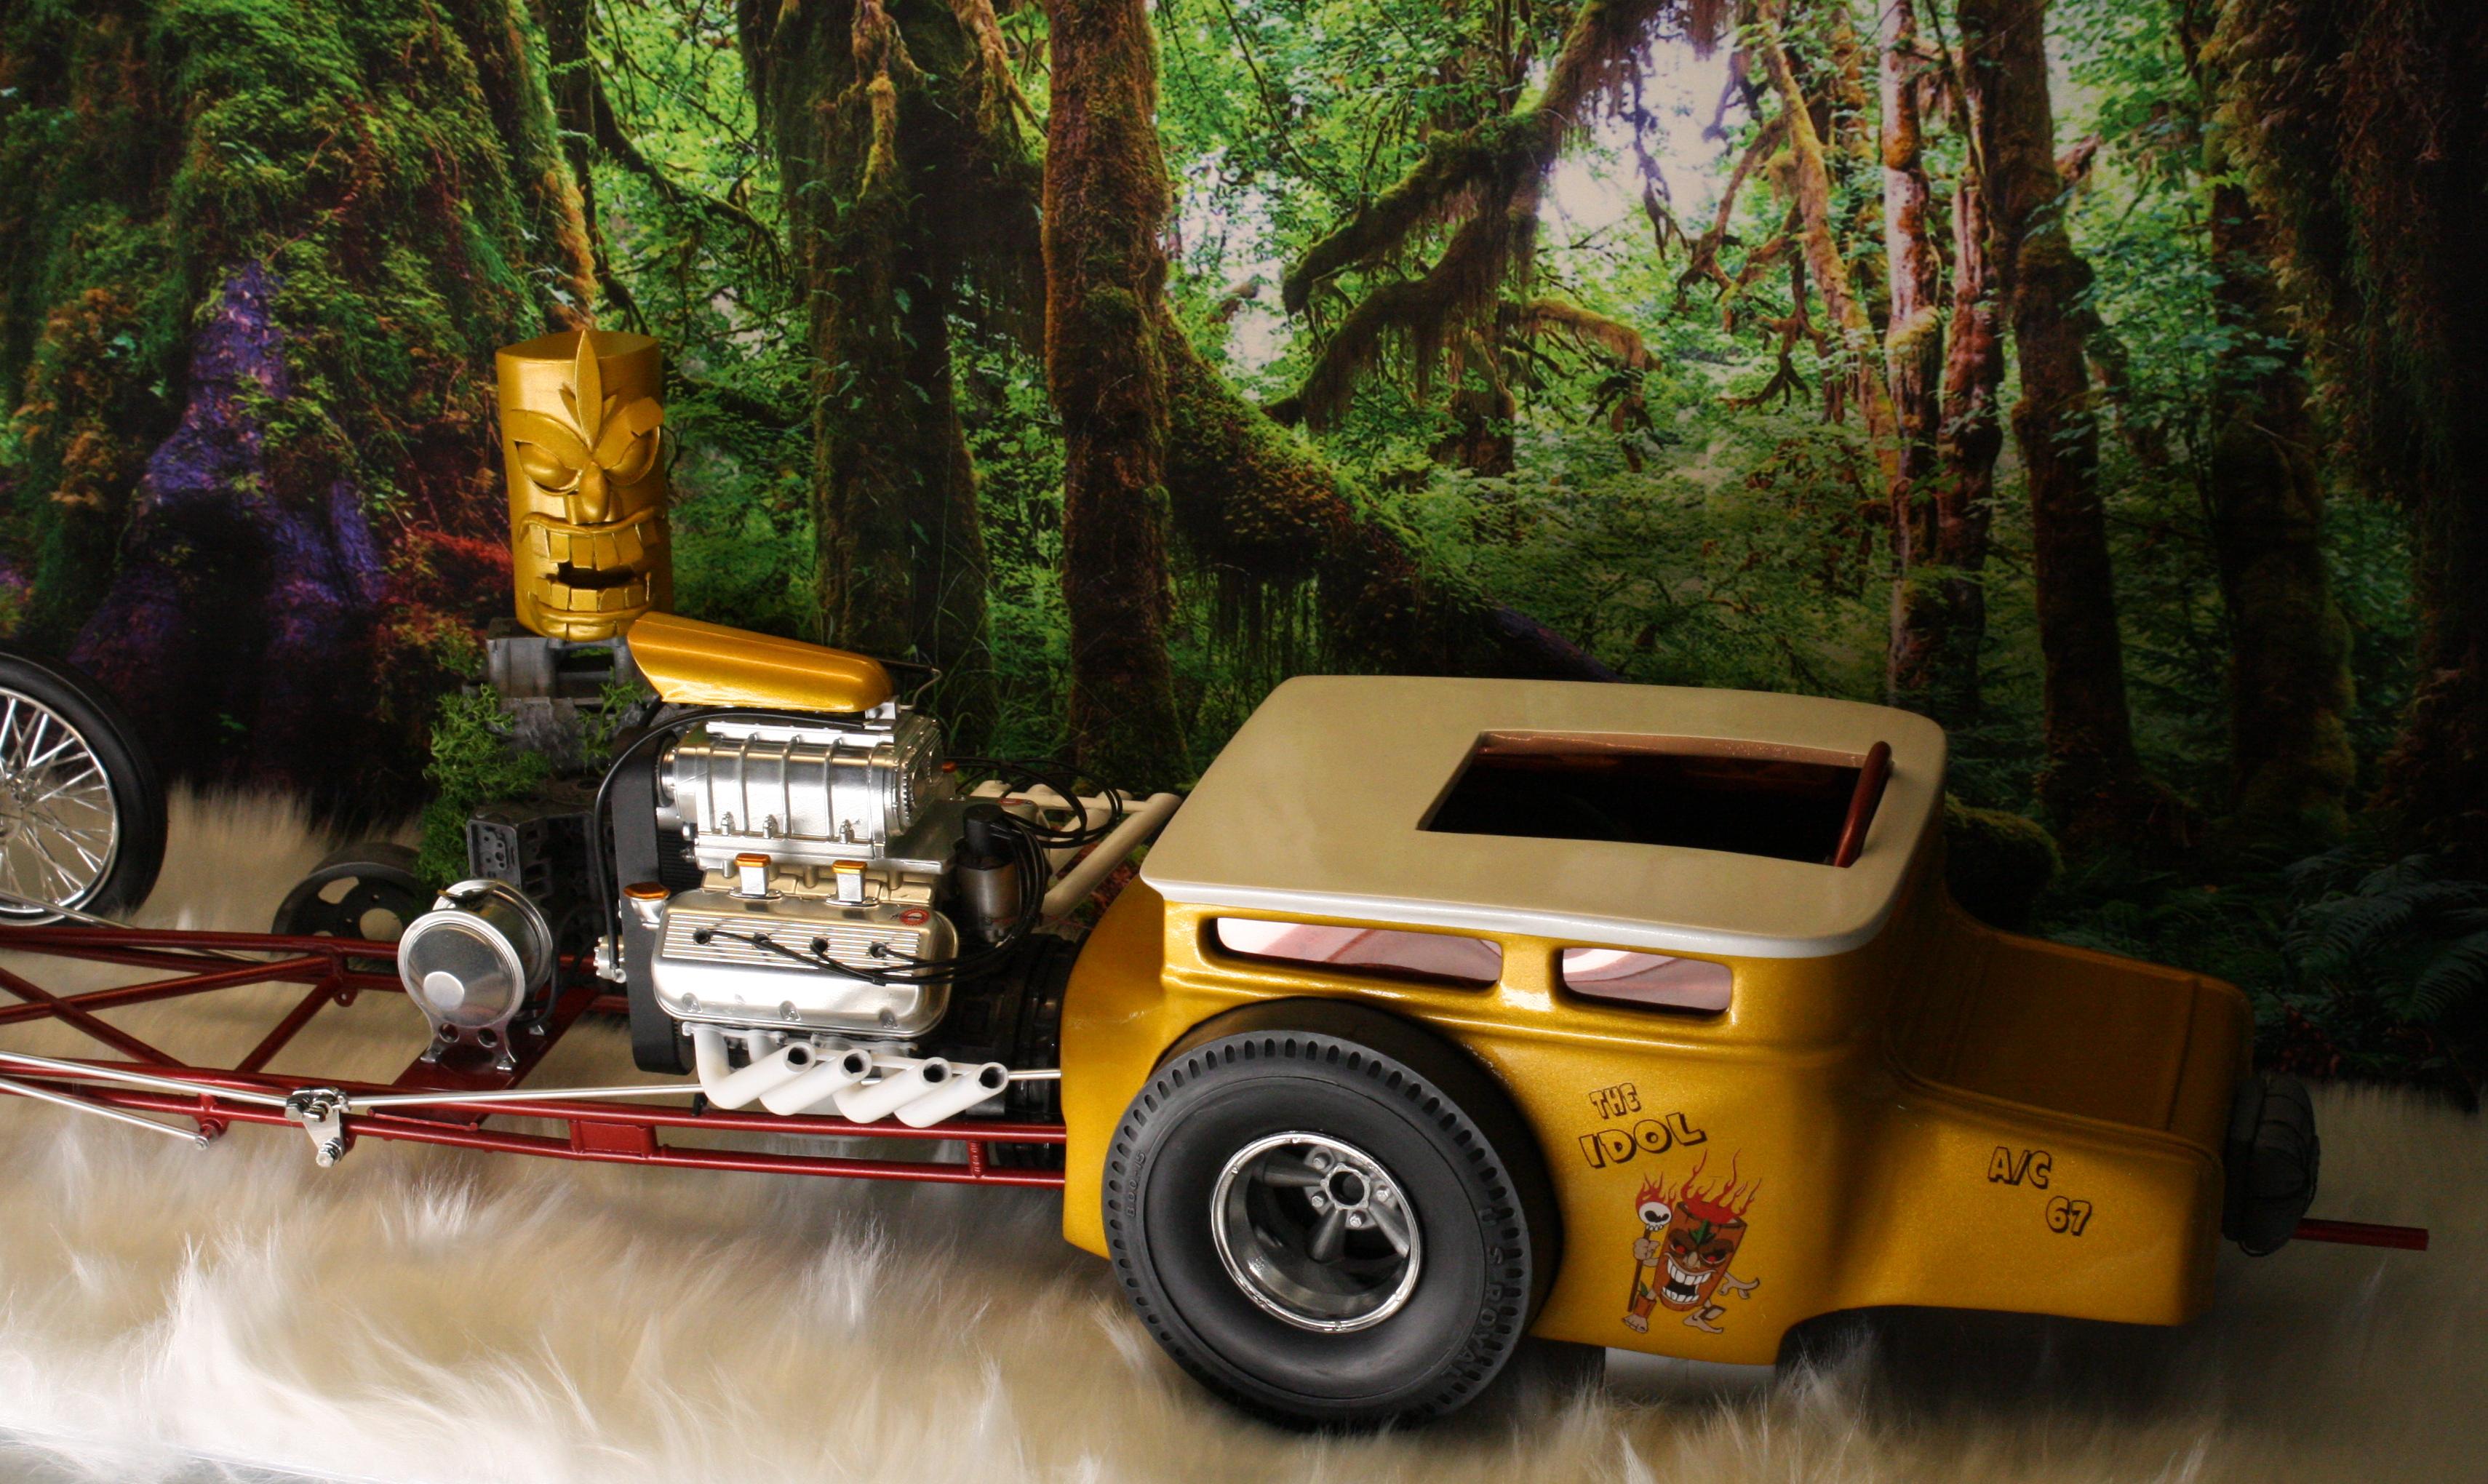
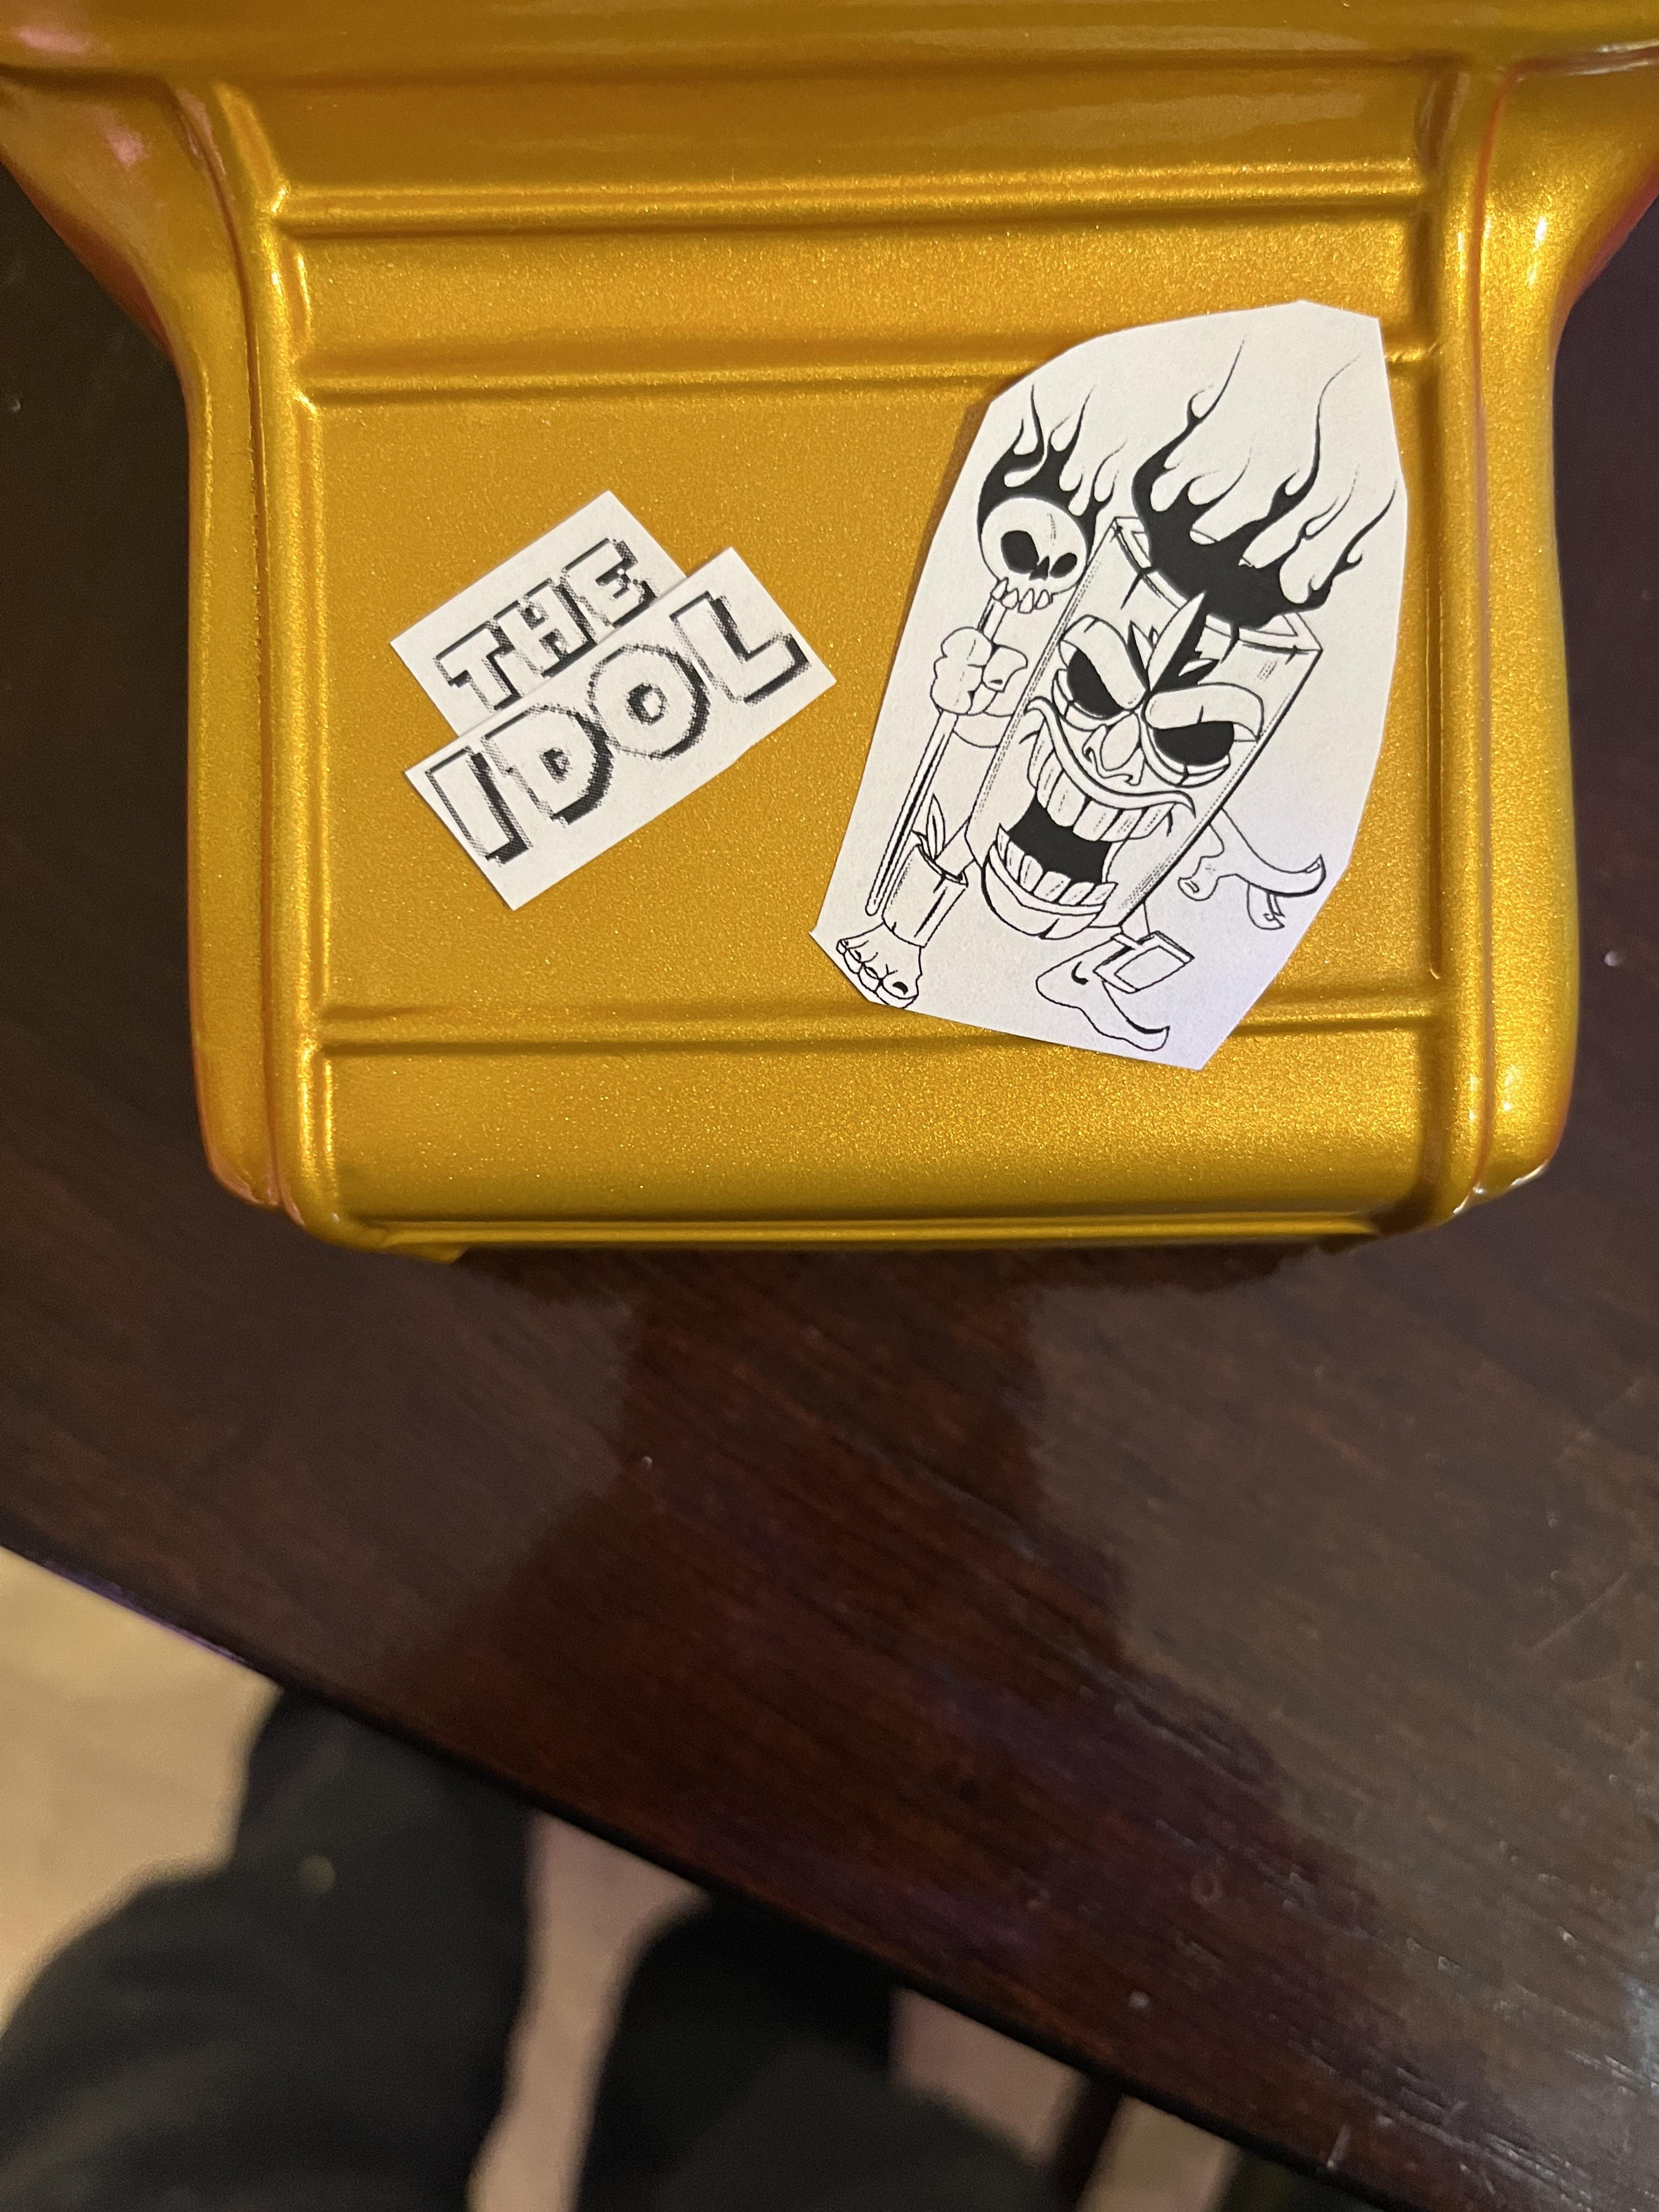
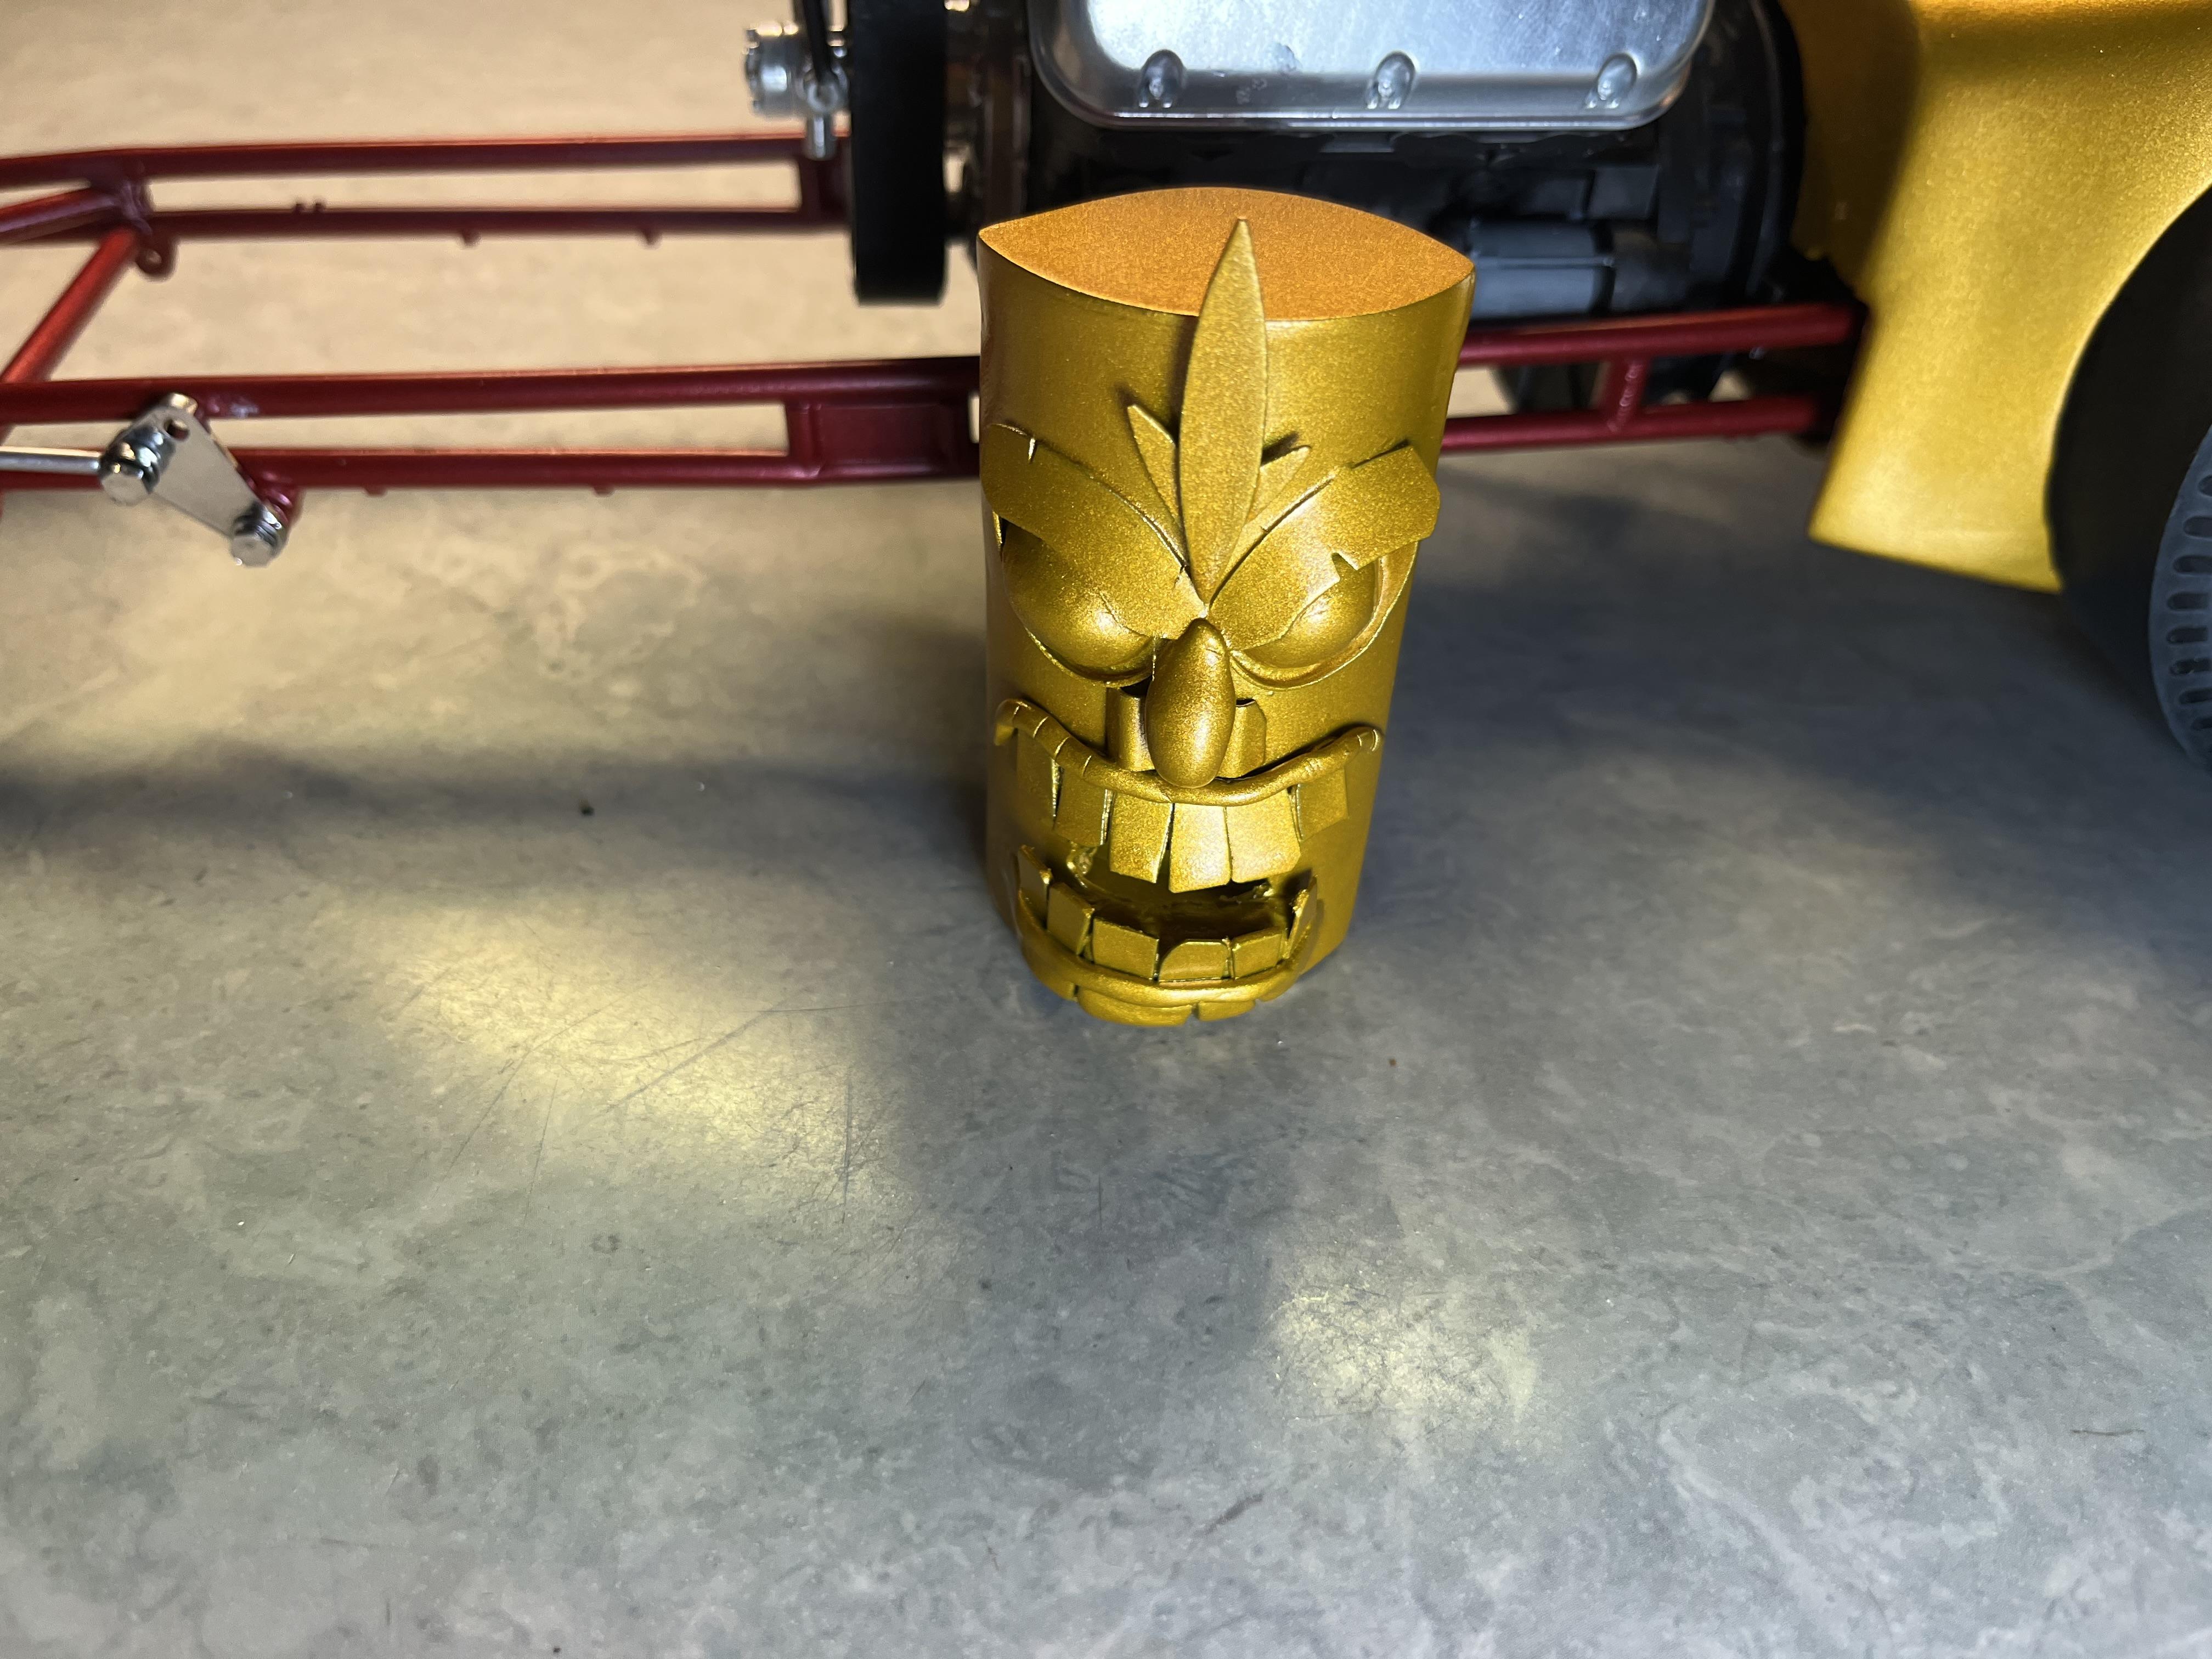
Progress…finally got a paint job I like, Testors pearl white over Inca gold. With the graphics shown. STS is making the decals as shown. Engine is glued in. Front axle got new steering gear,and the wheels are mounted. Driver’s compartment is done except seatbelts. I also made a little Idol mascot to match the decals.
-
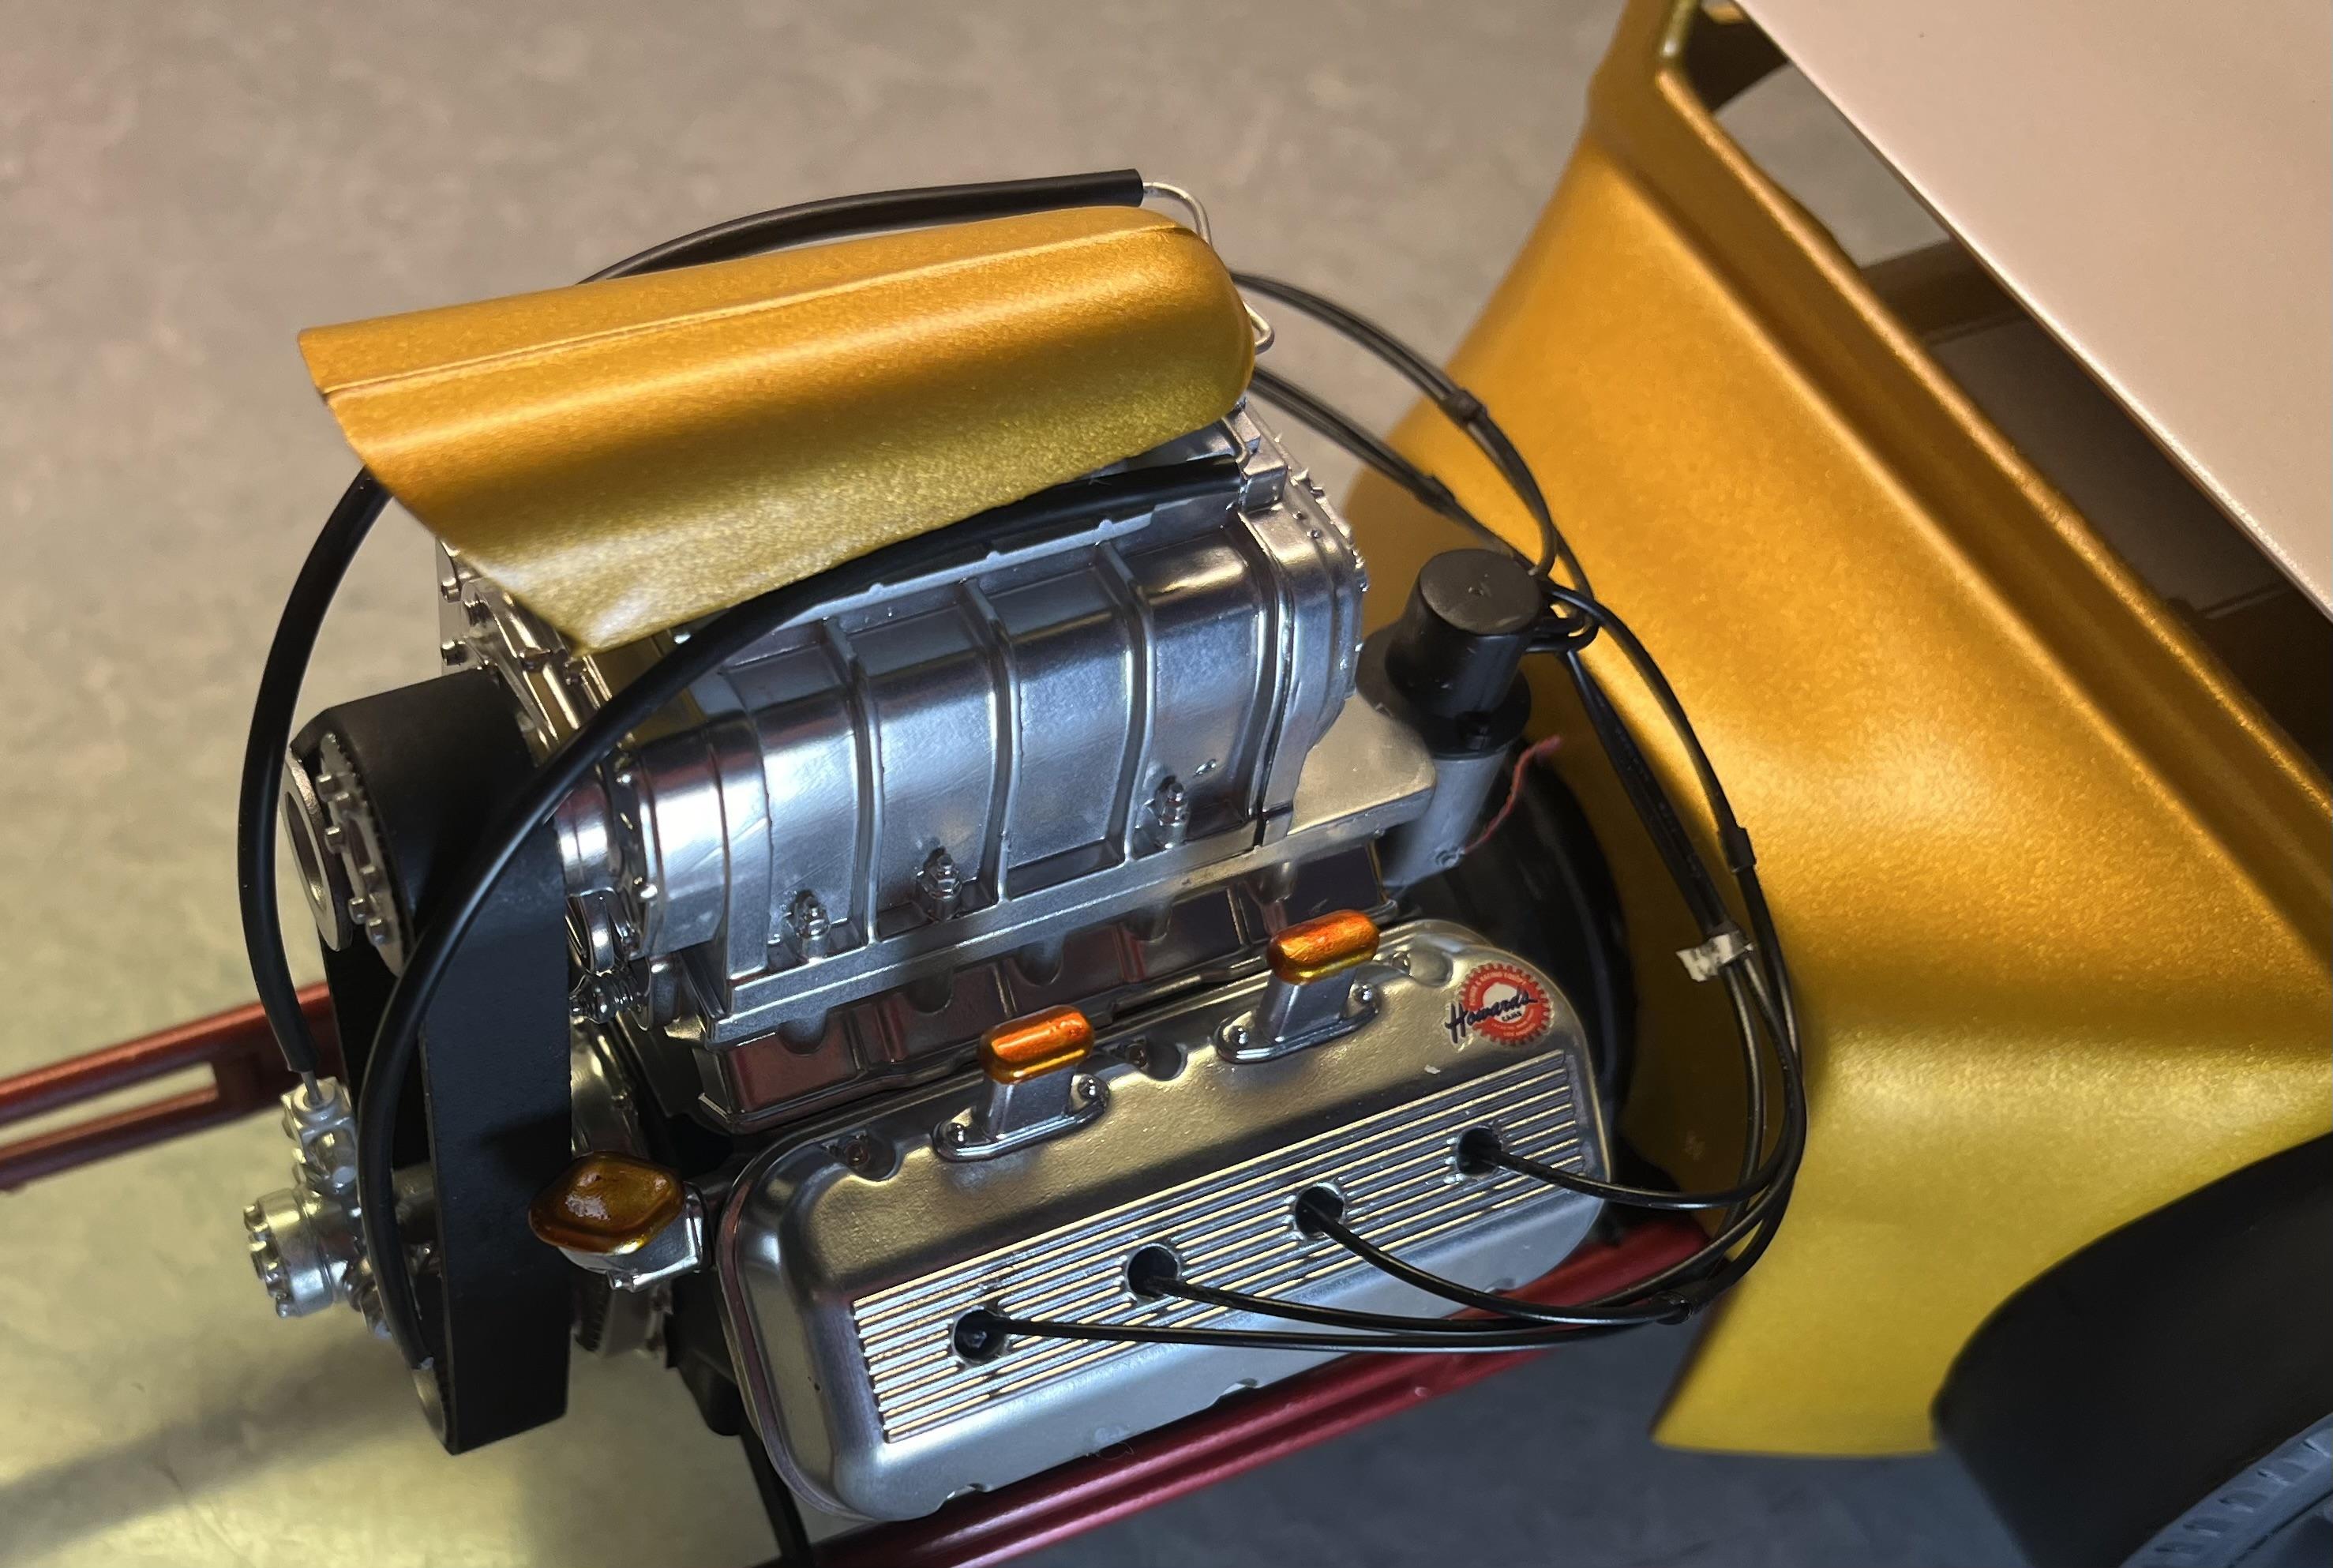
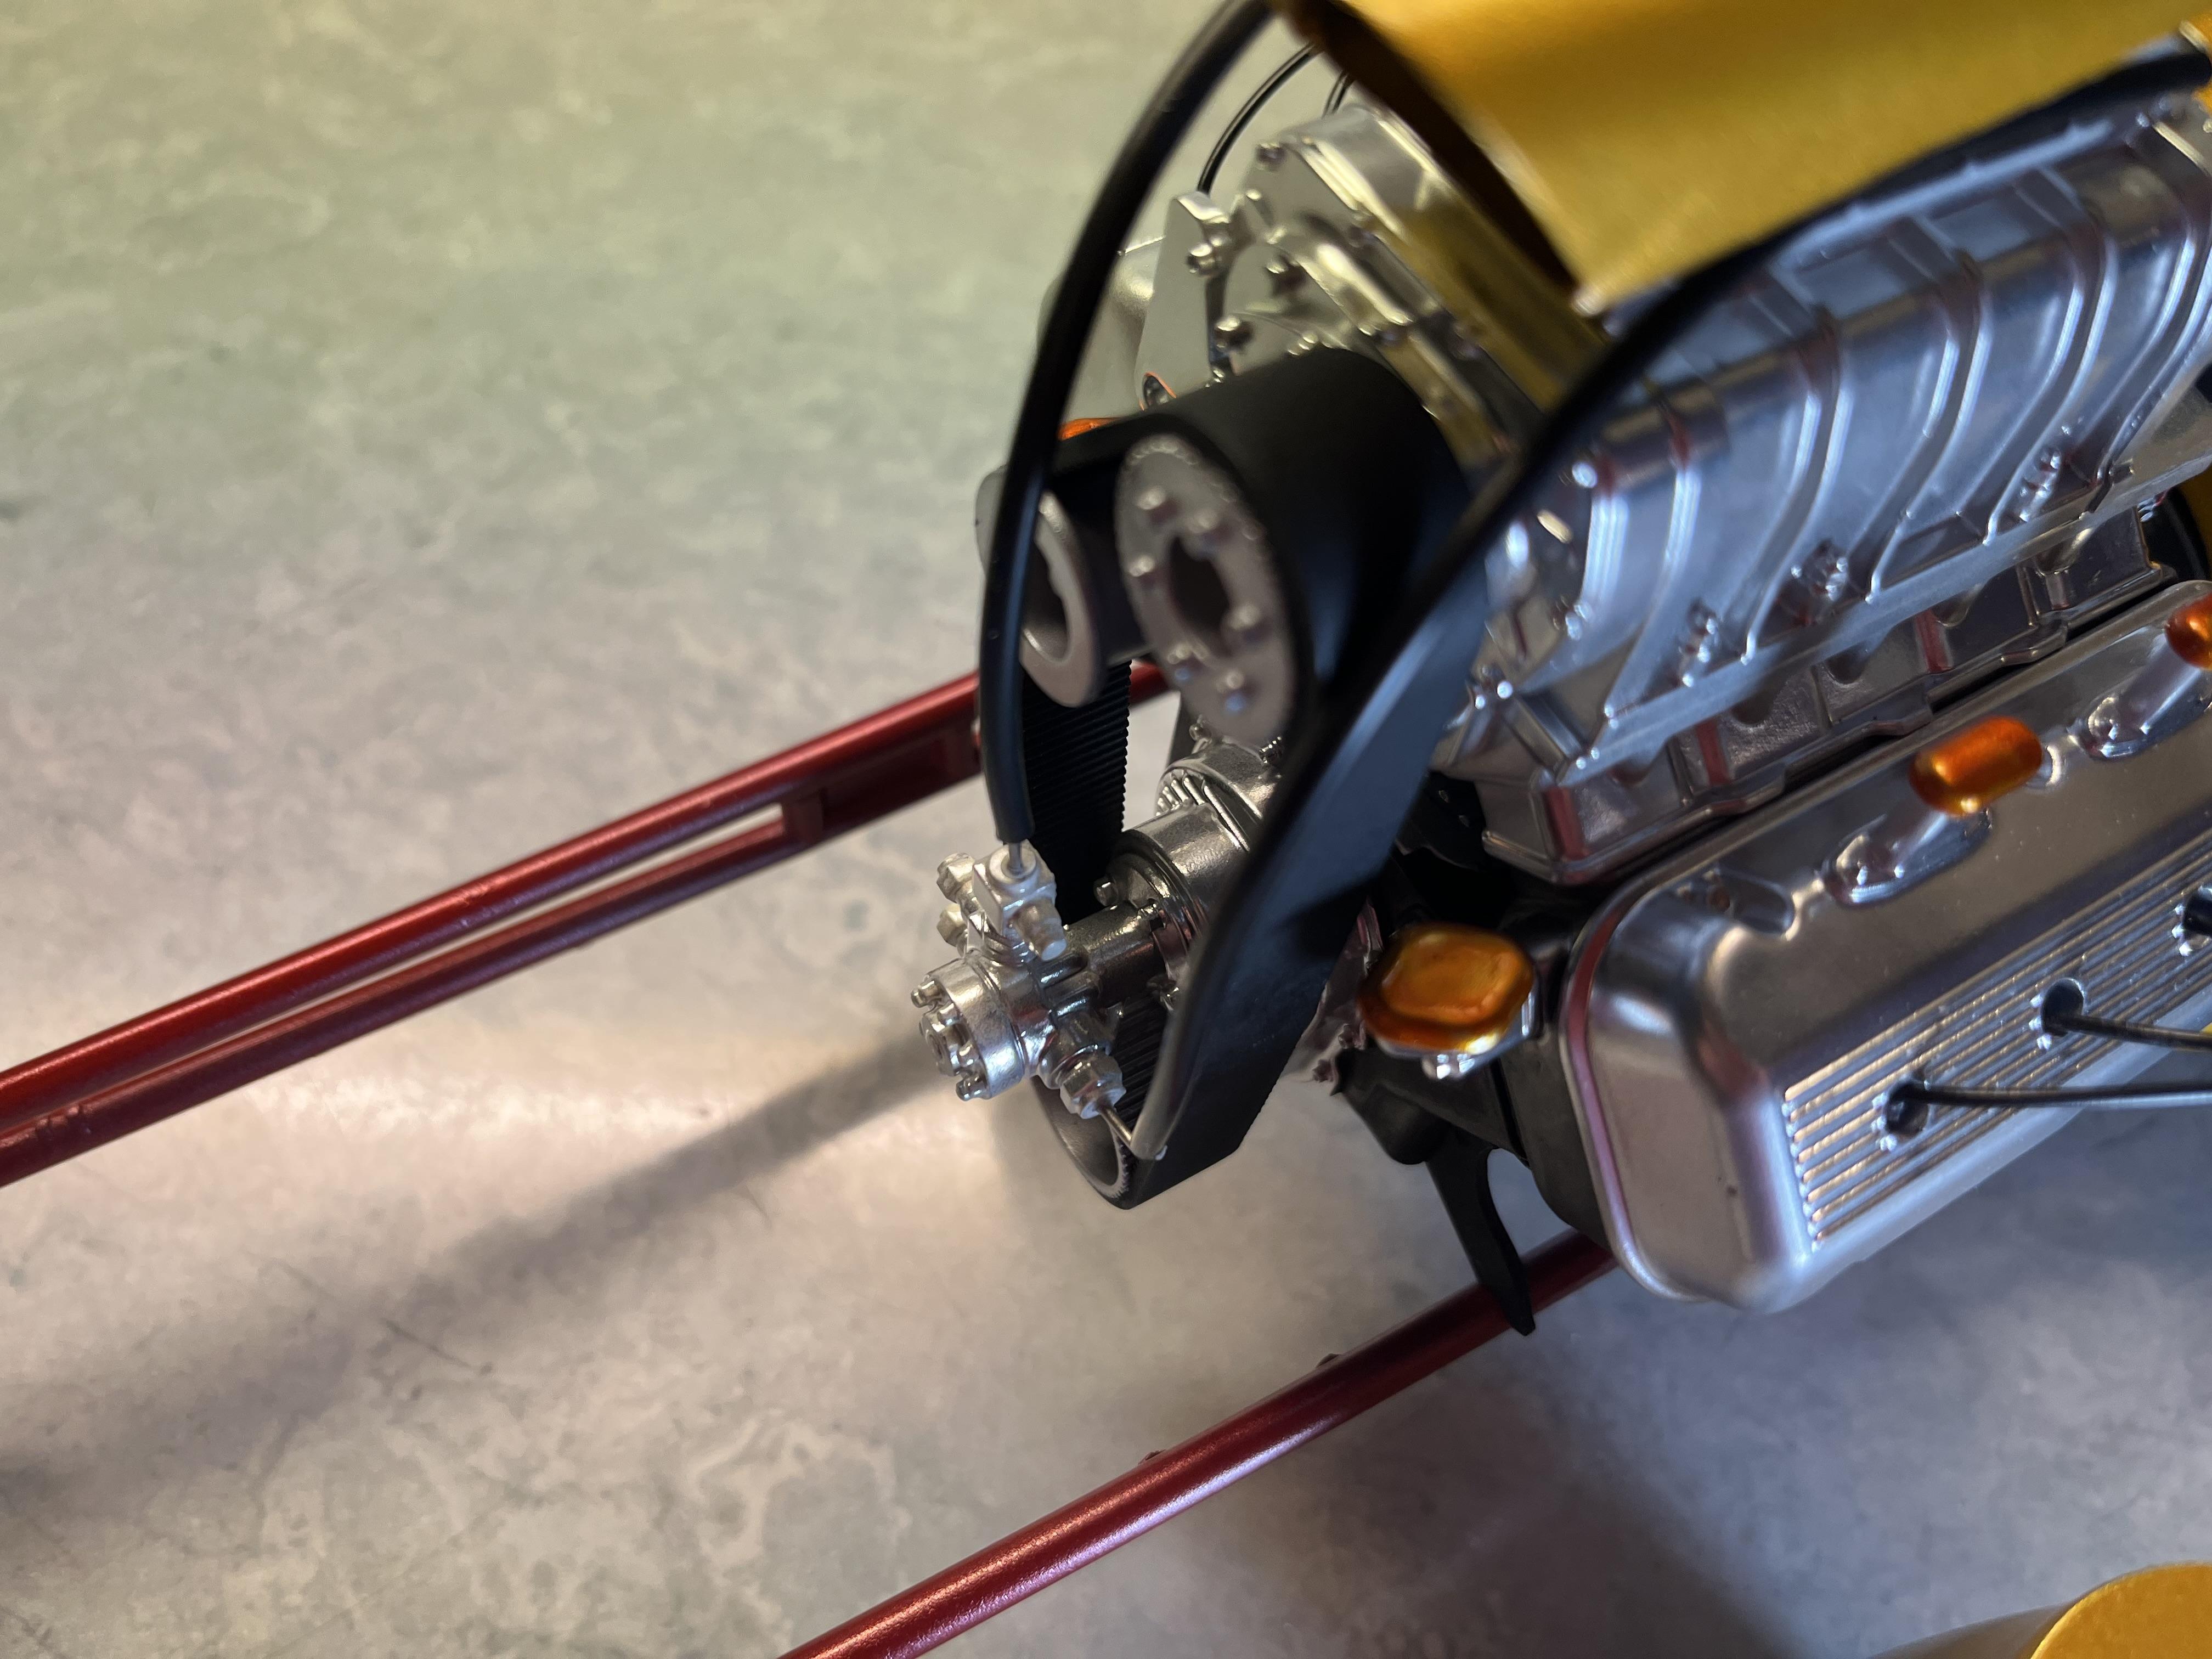
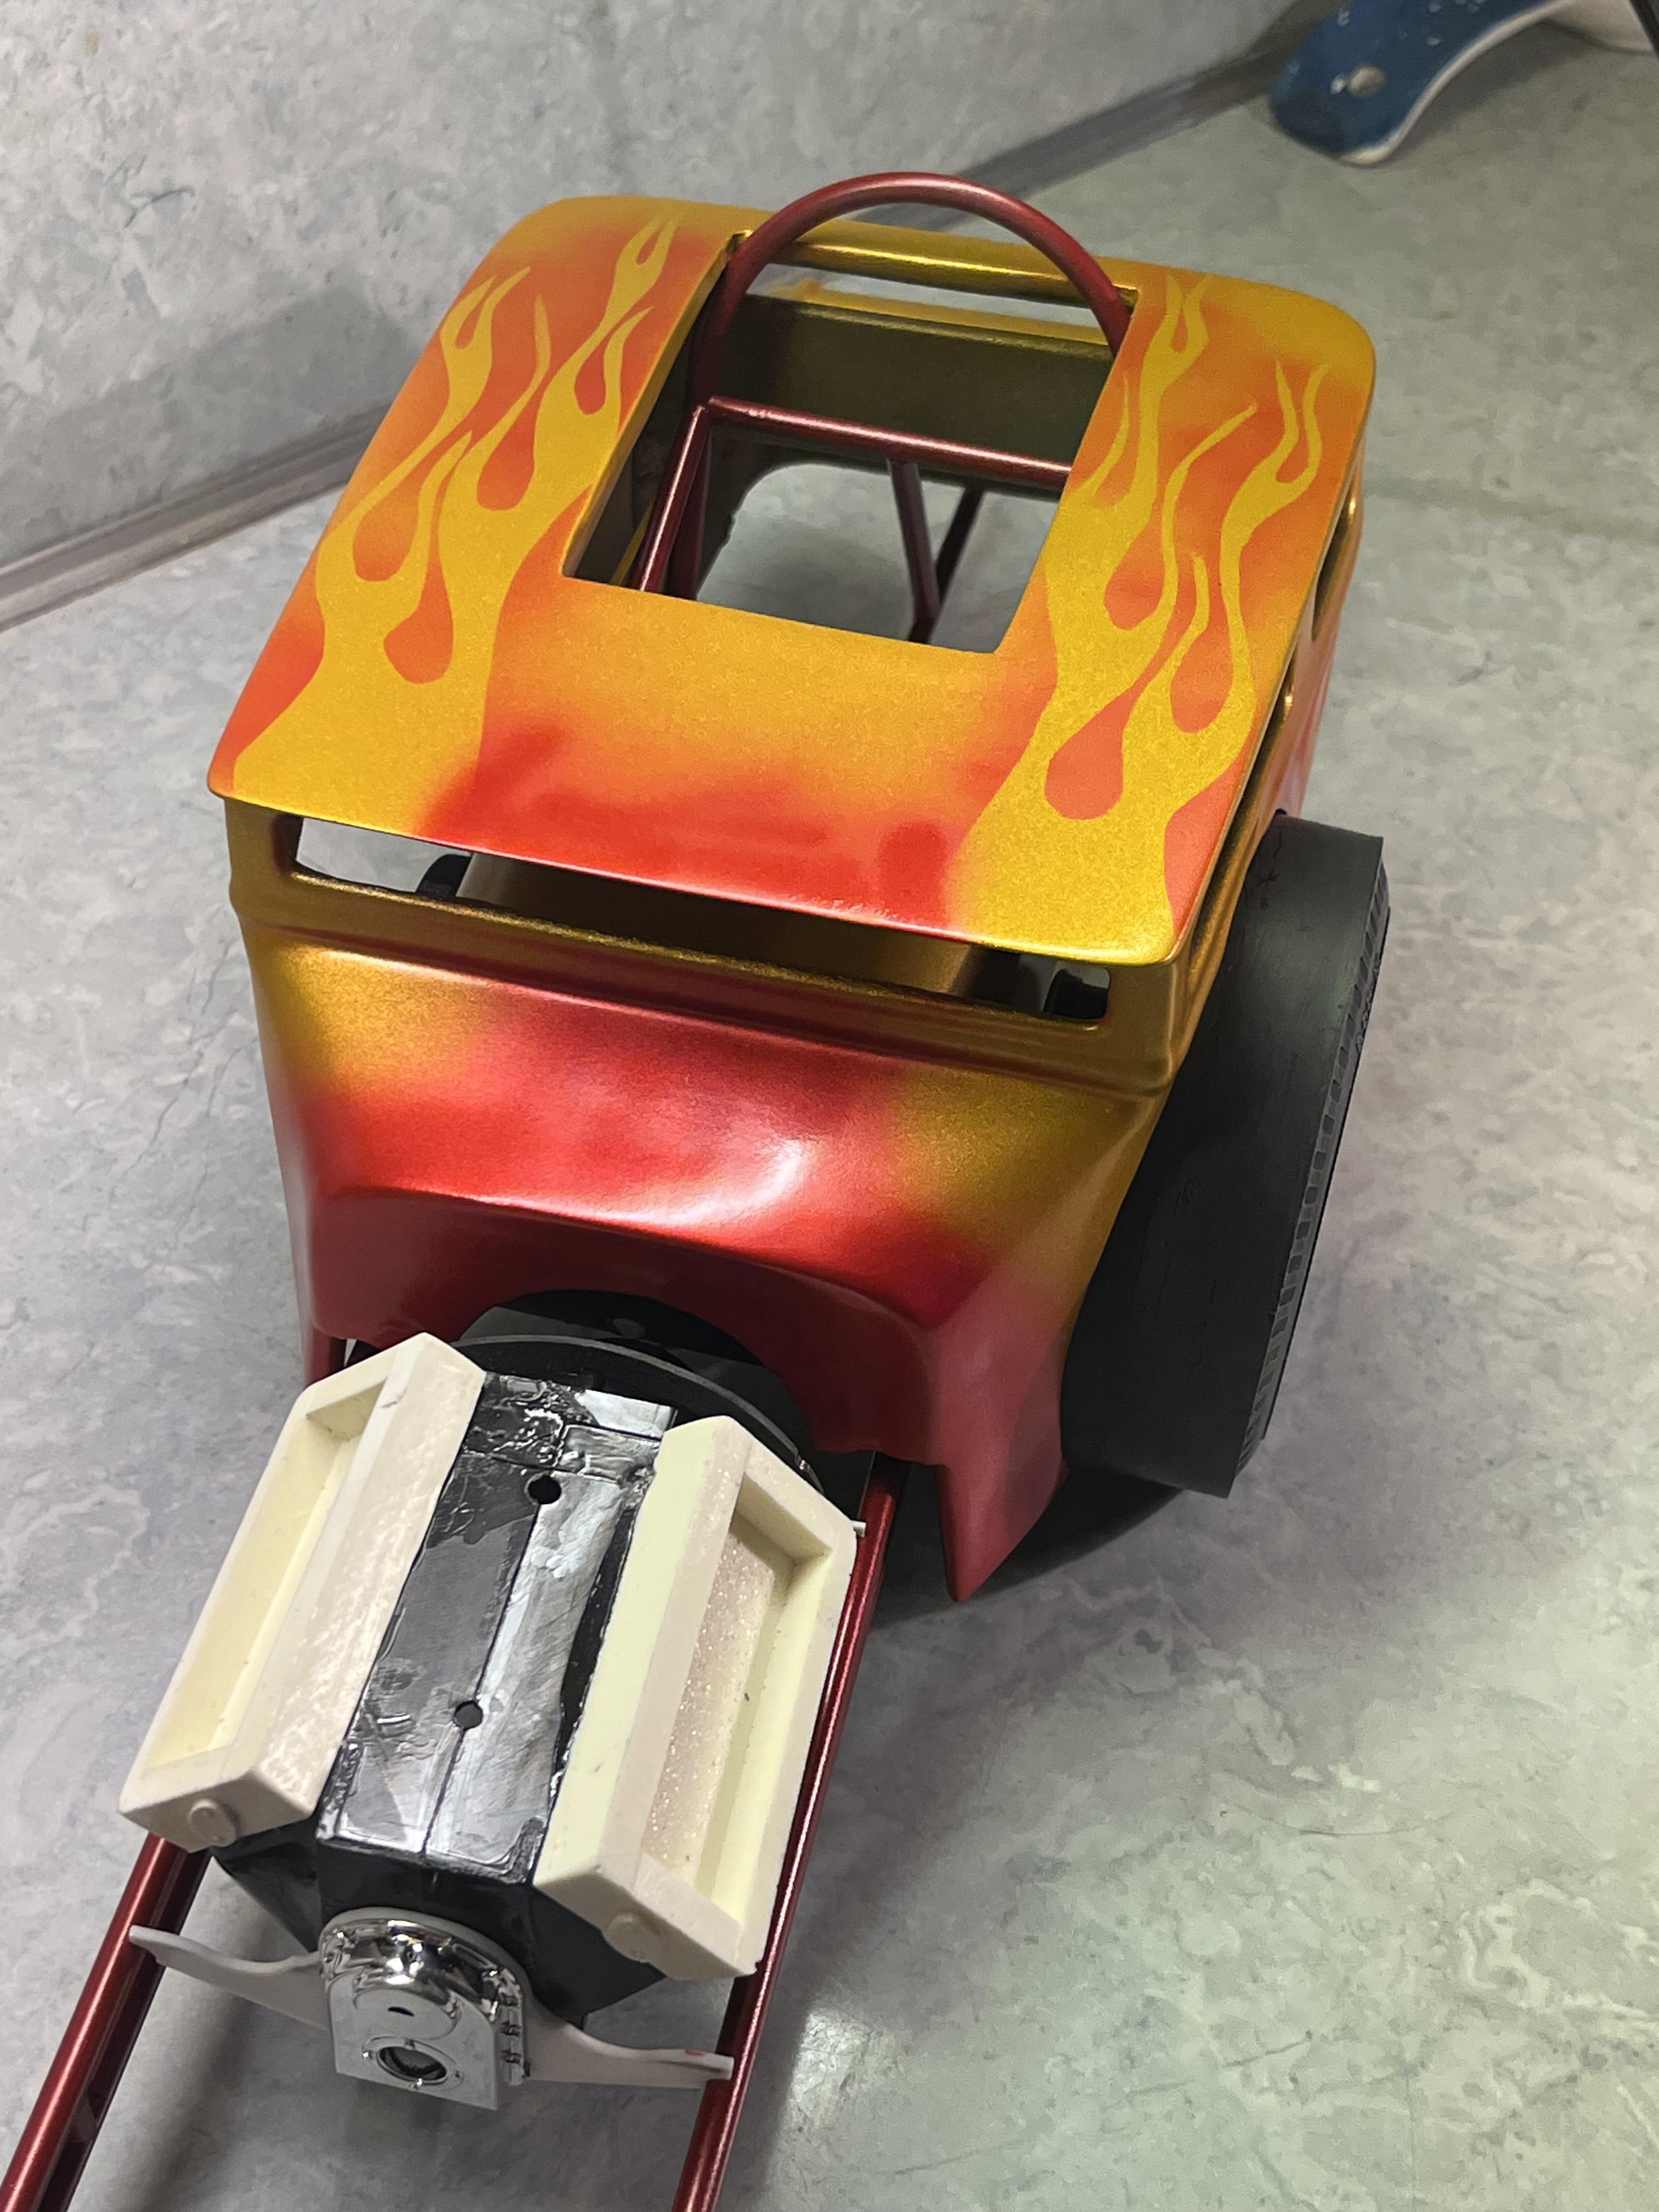
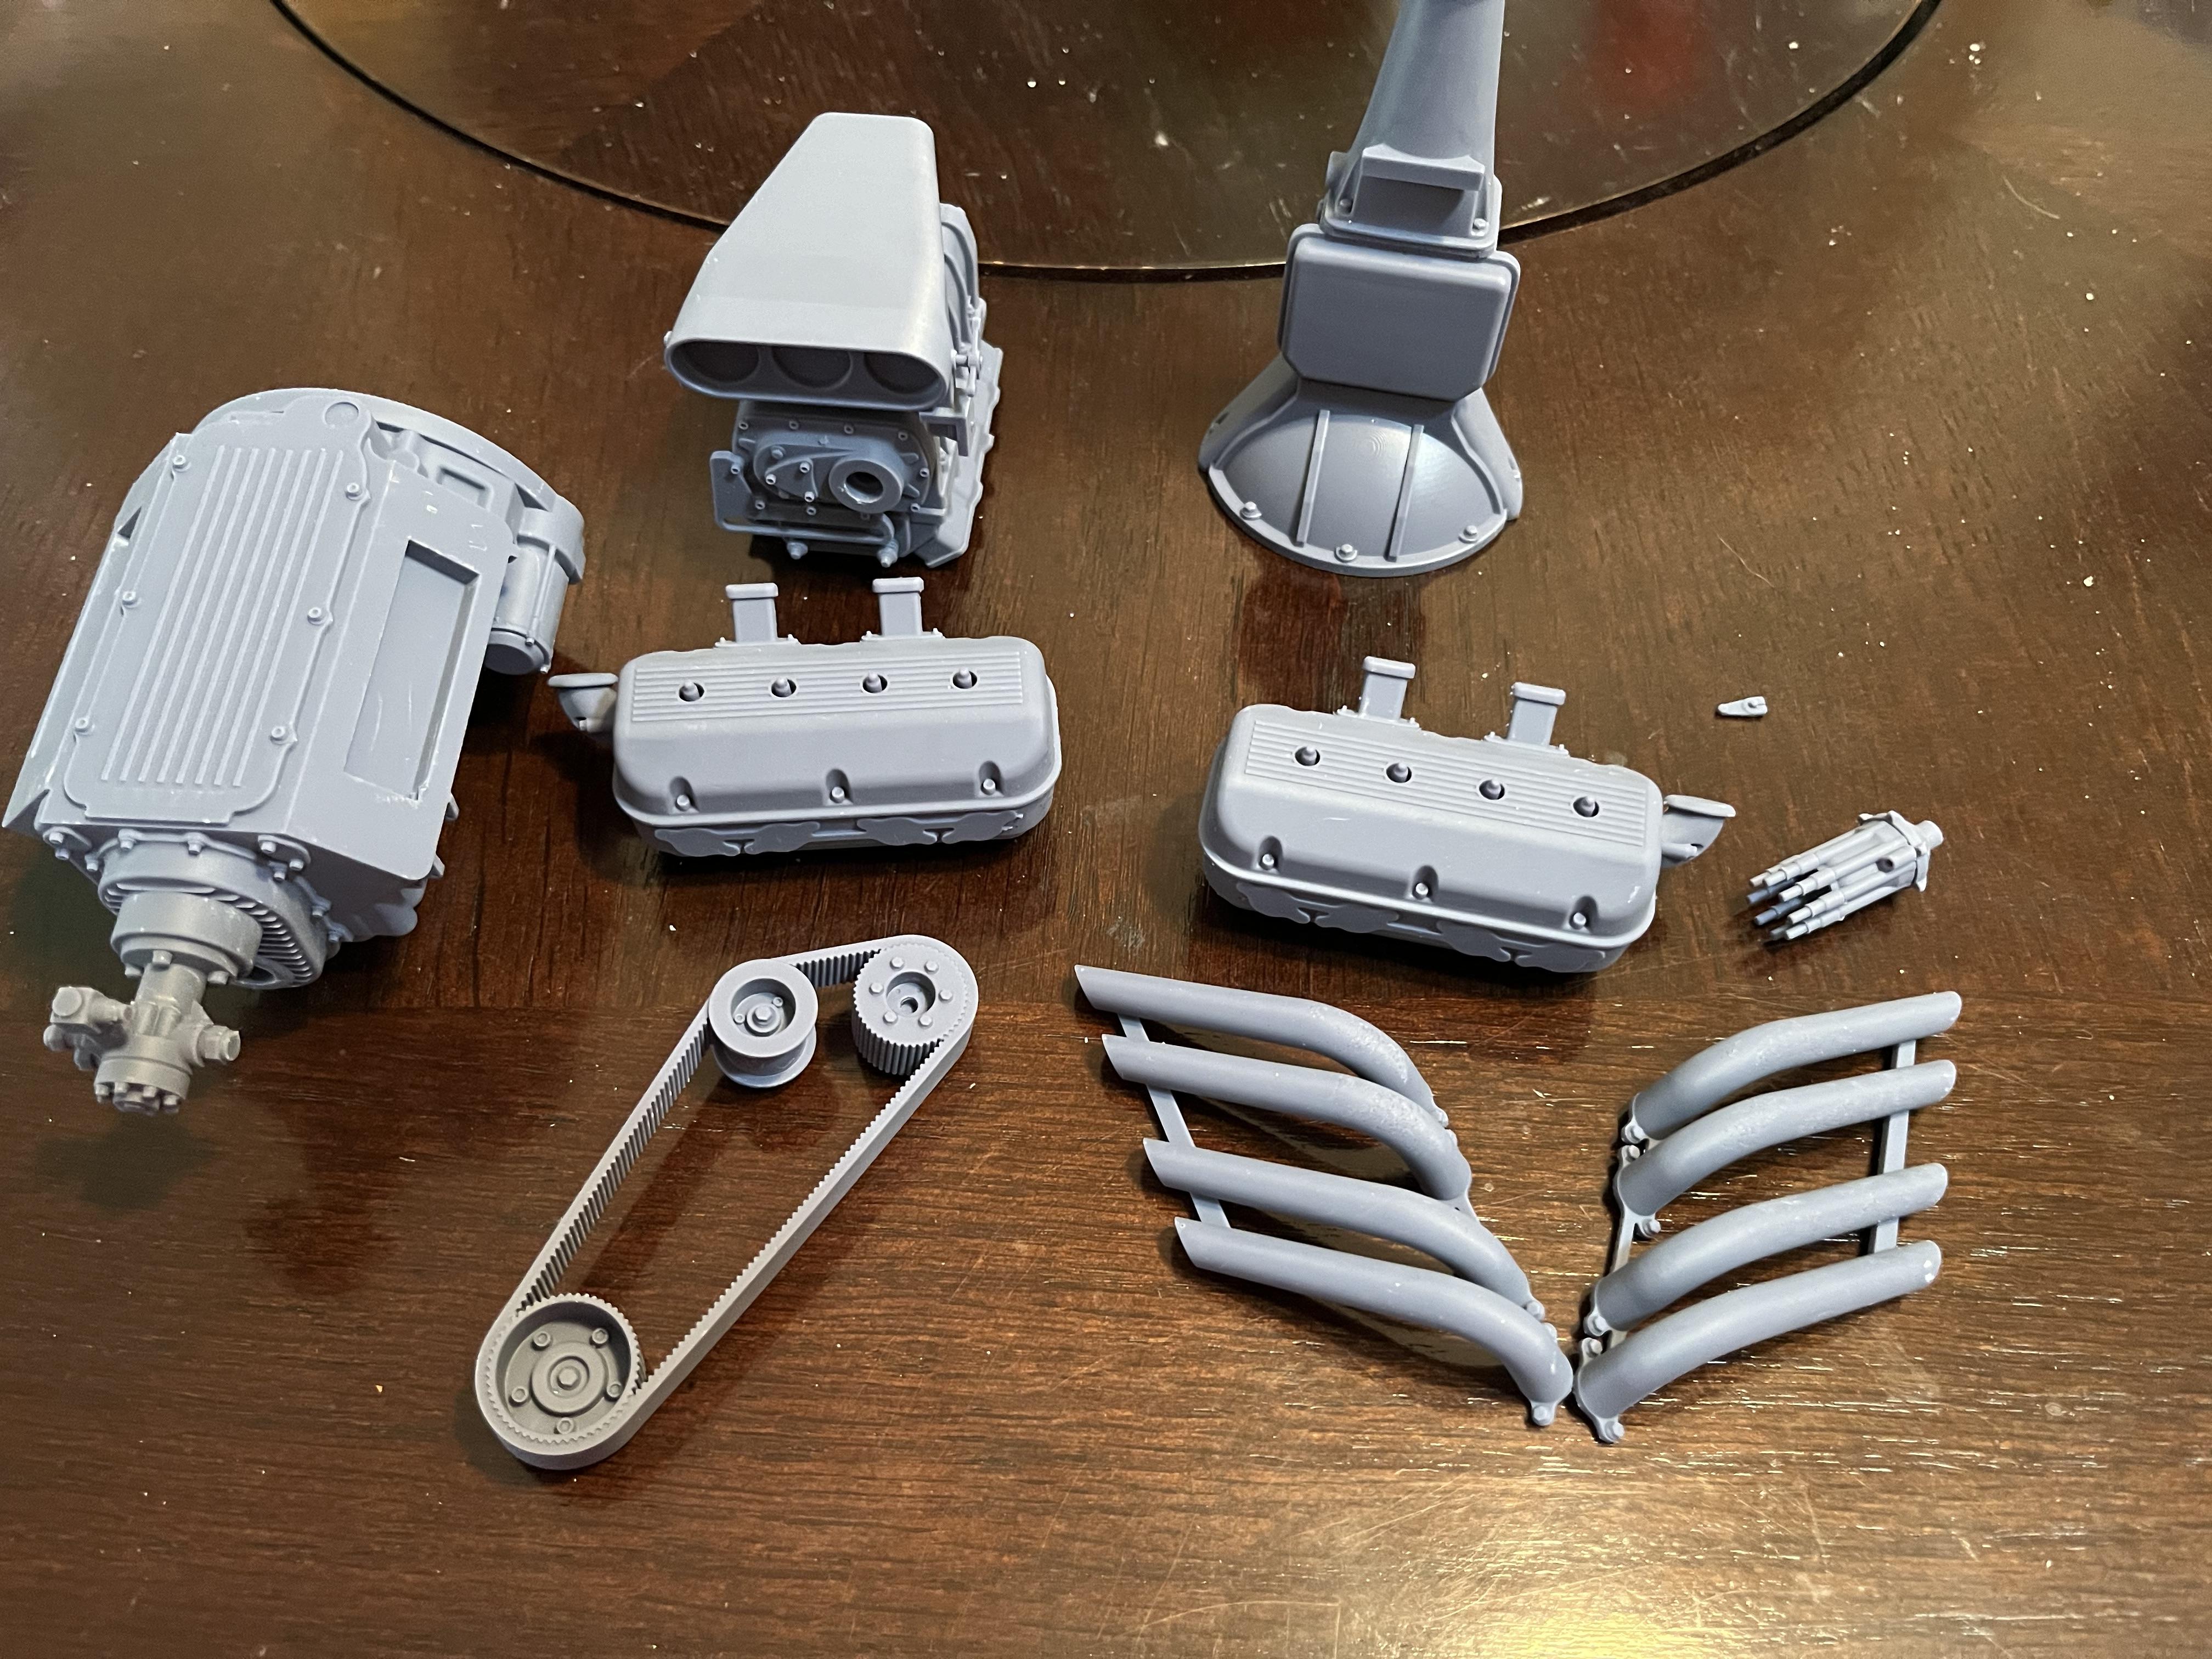
Progress on the build. Re- Painted using Testors extreme laquer, although I’m not sure I’m going to keep this paint, I’m on e the fence as to whether I like it or not. I ditched the kit engine and bought an early Hemi from Texas 3D and started on it.
-
Hit and Miss With Chrome Plating
Fantom replied to dusty_shelf's topic in Tips, Tricks, and Tutorials
I agree with everything said above … I don’t think oven cleaner is the necessarily the best at all, but I use it because it’s convenient for me to buy. I have had success with super clean etc, but I can get oven cleaner at the grocery store ?