GeeBee
-
Posts
4,030 -
Joined
-
Last visited
Content Type
Profiles
Forums
Events
Gallery
Everything posted by GeeBee
-
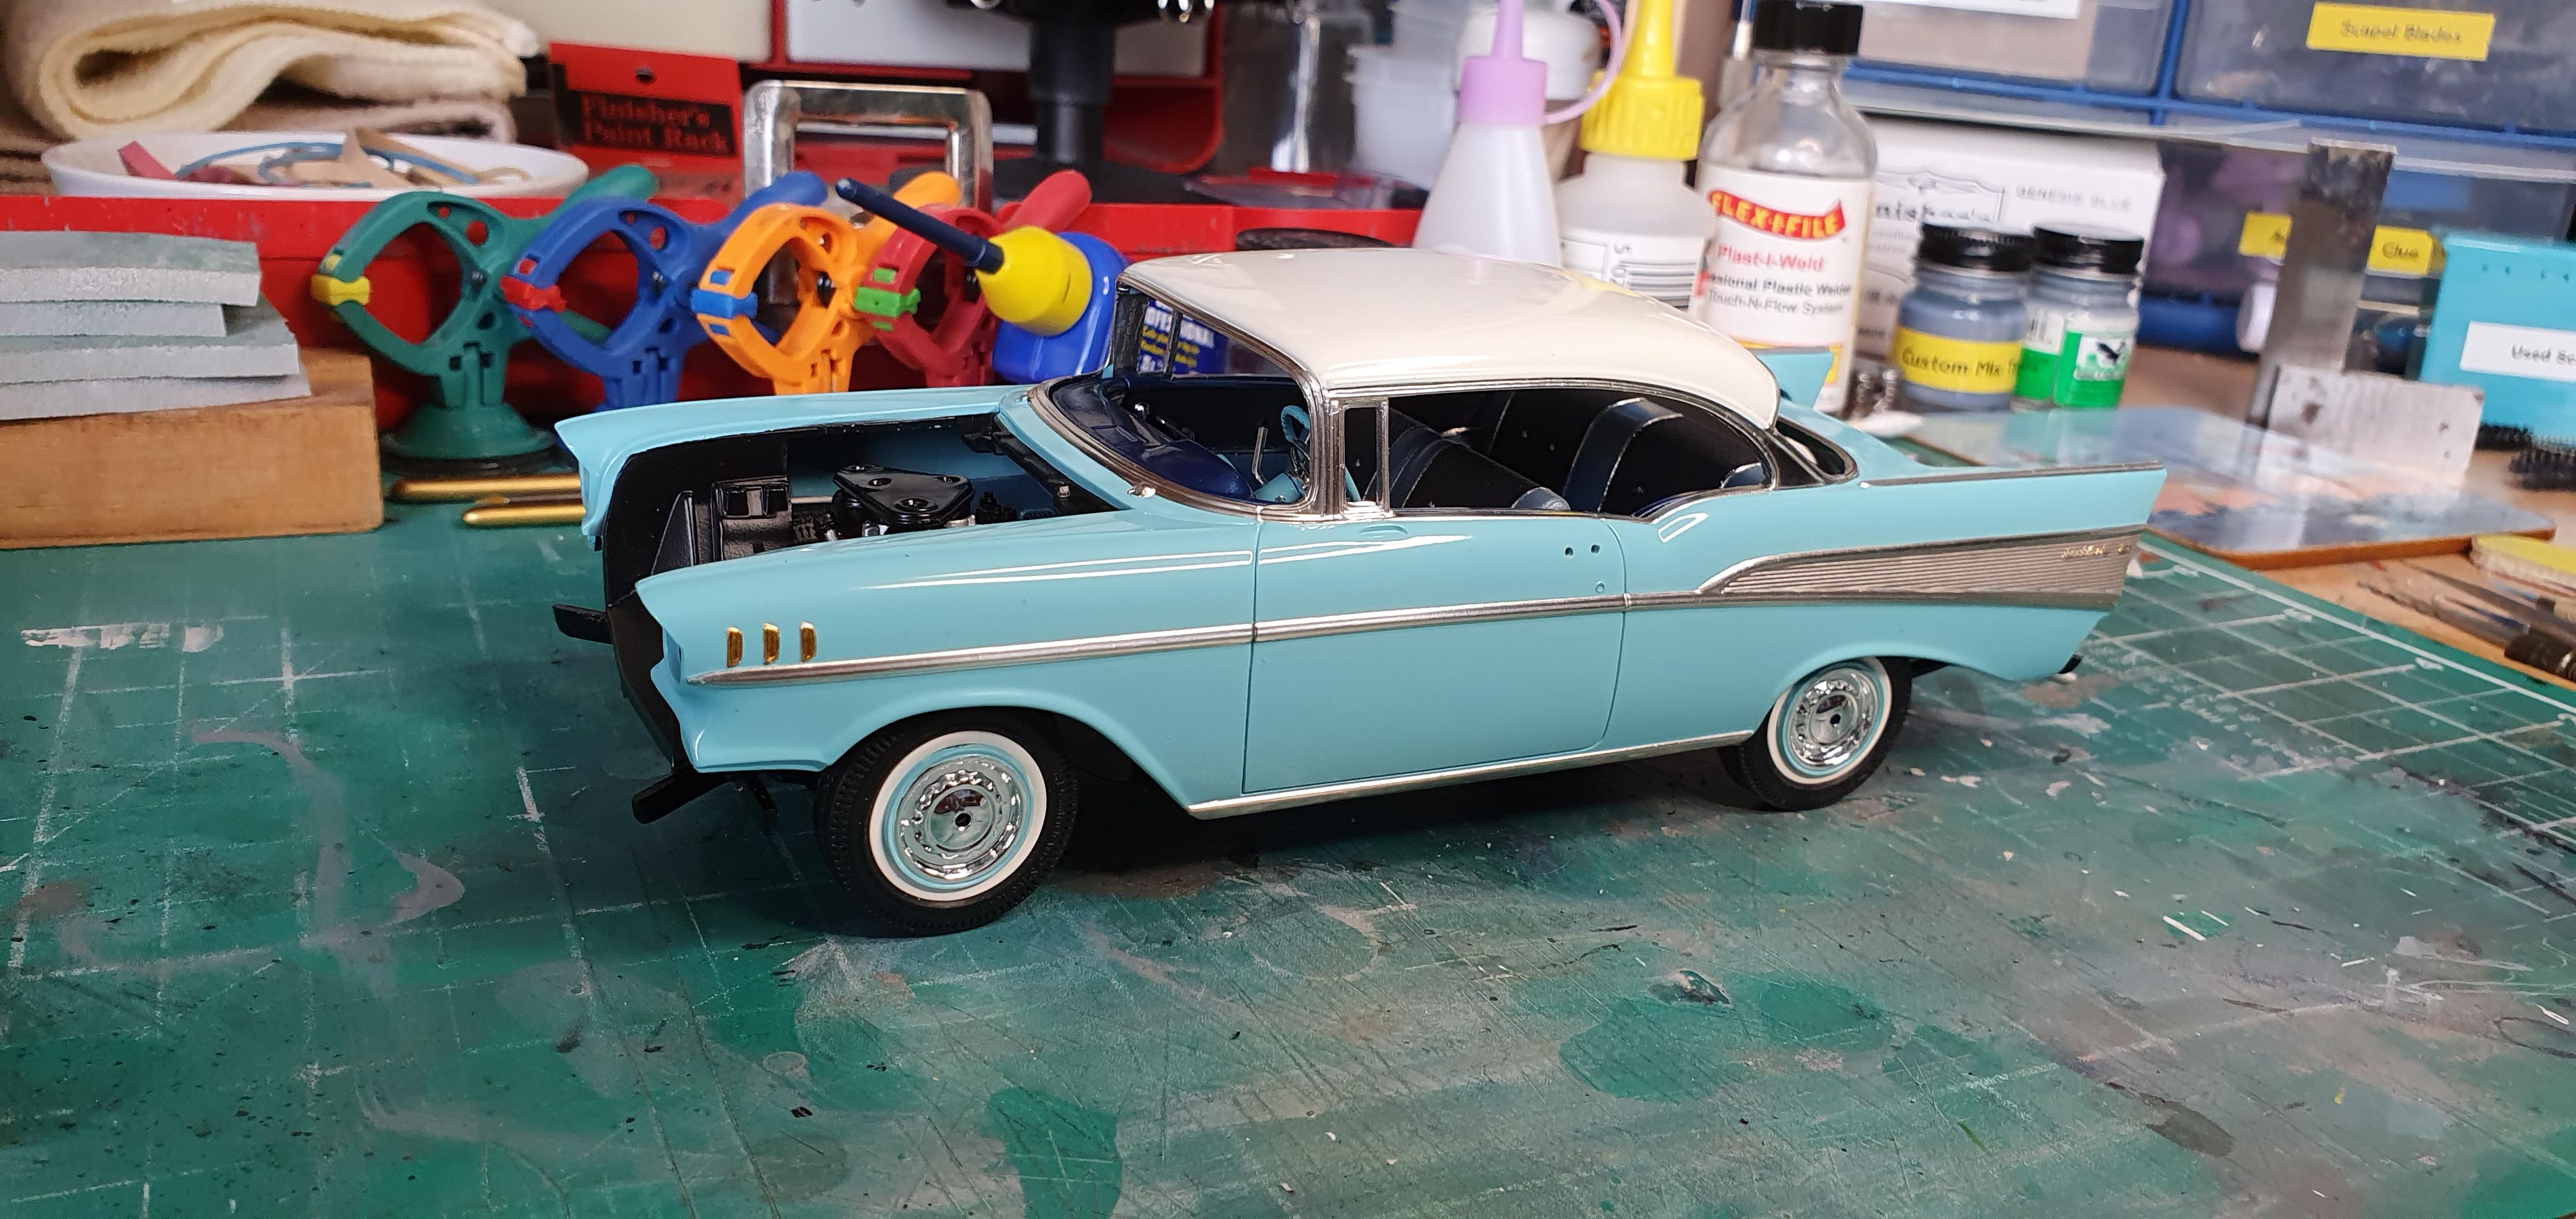
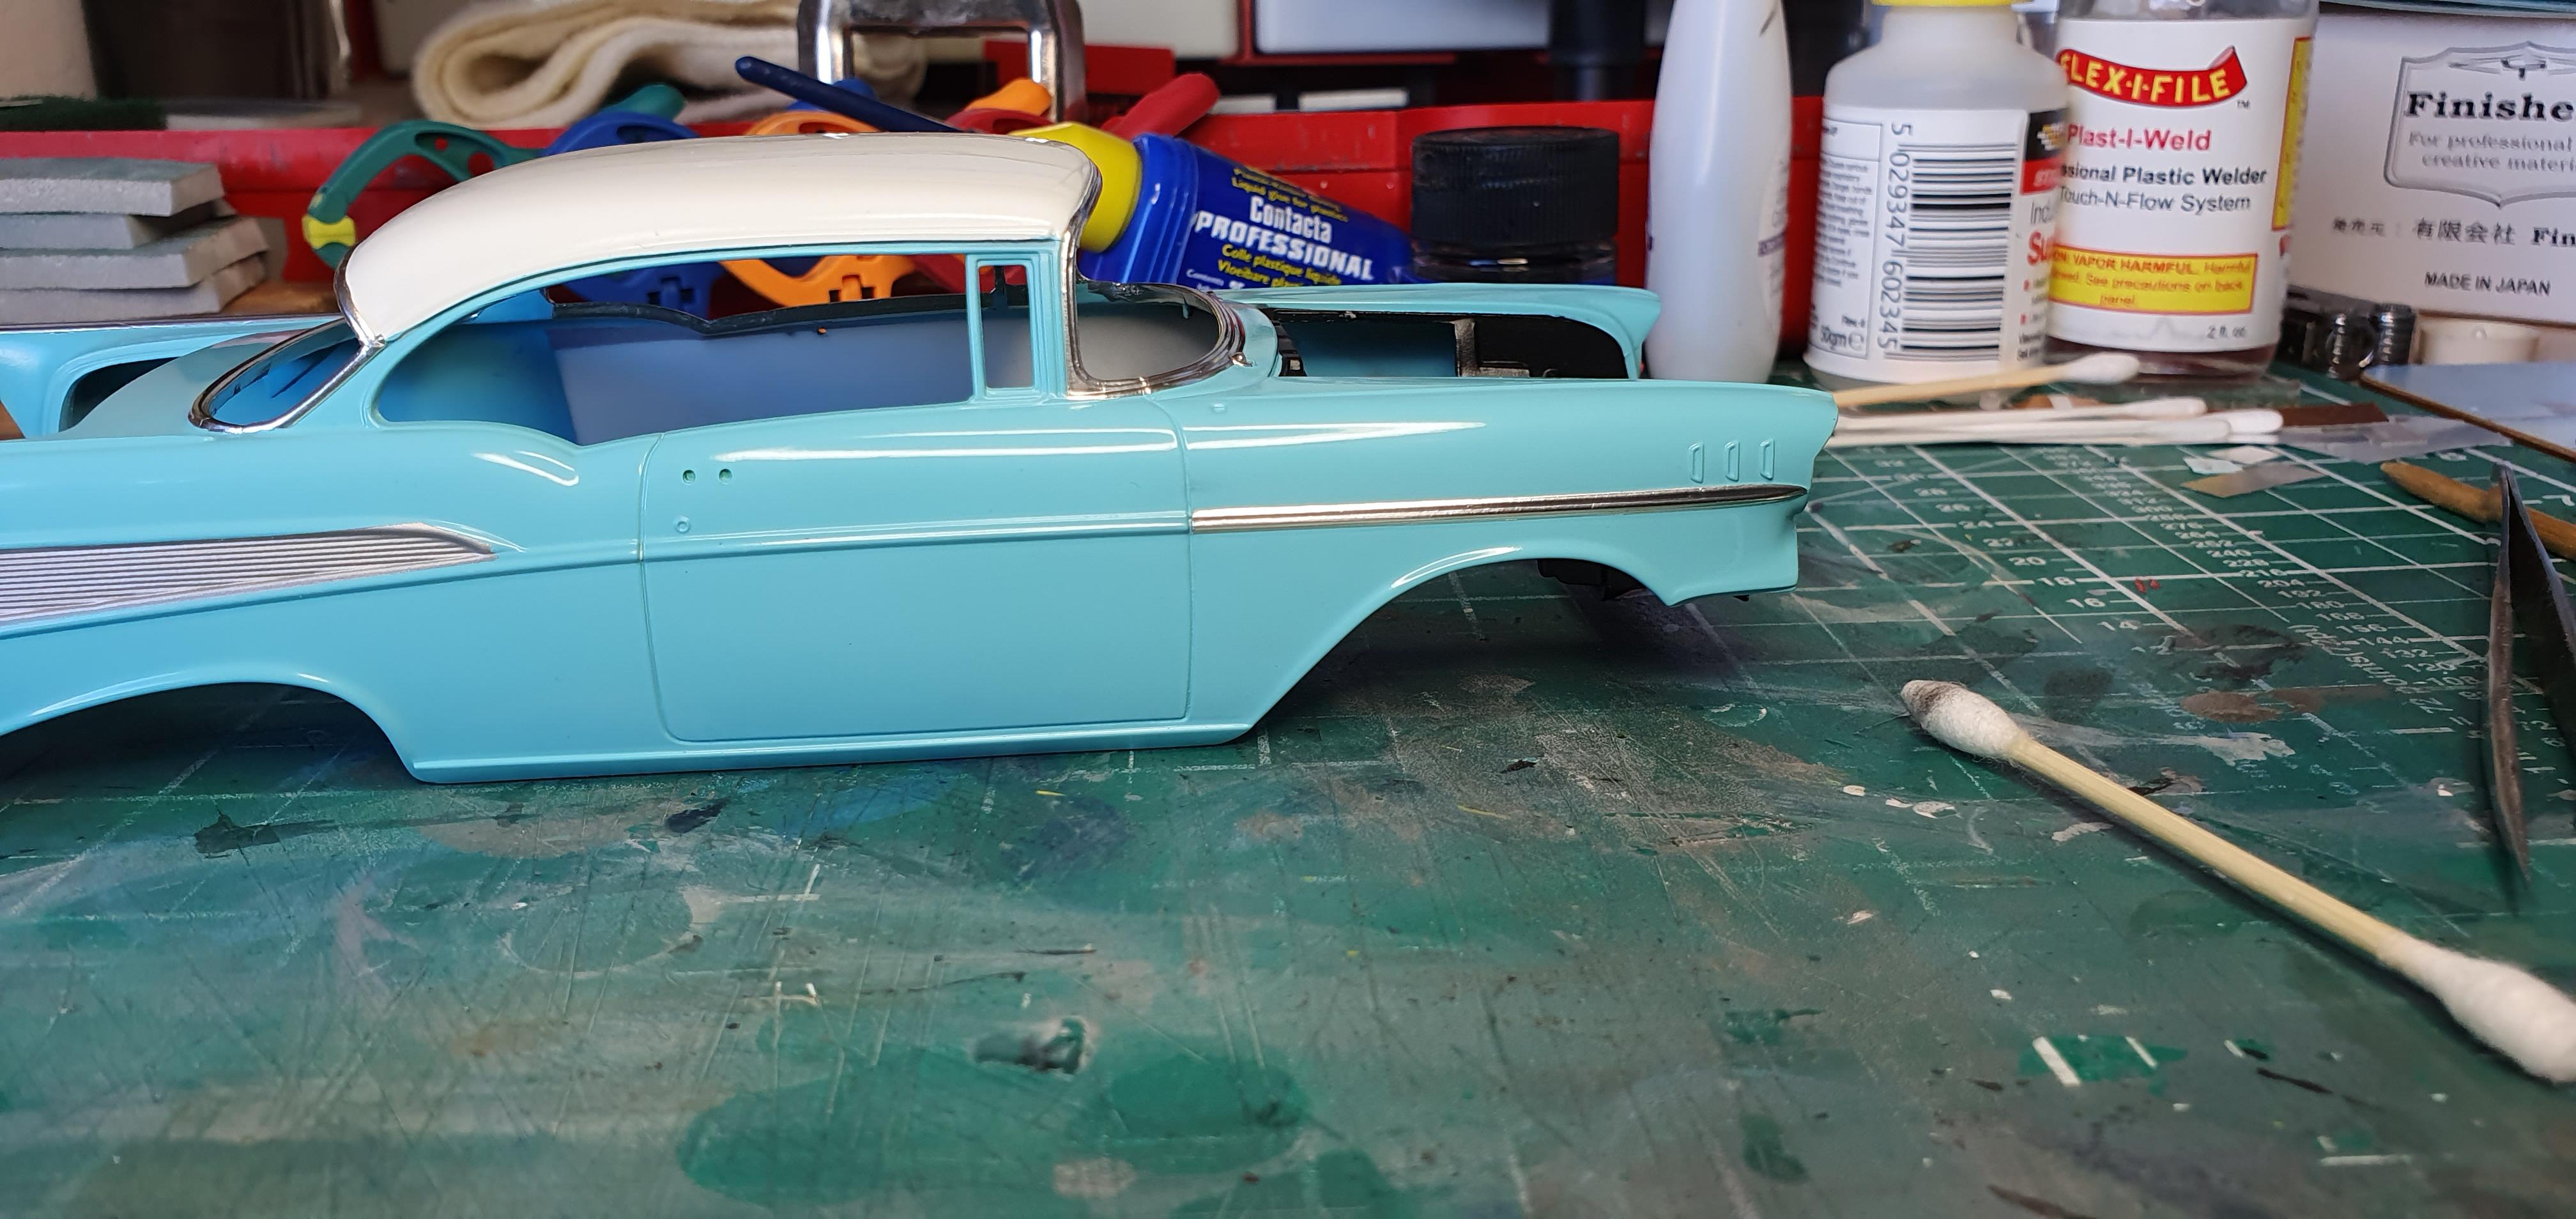
 How has it been since November last year since I've touched this one ?? As I'm waiting for supplies to arrive to carry on with the 57 Chevy Bel Air, I found this one in a box while tidying up in the hobby room, managed to get some time today to get all the parts ready for primer and top coat before the weekend.
-
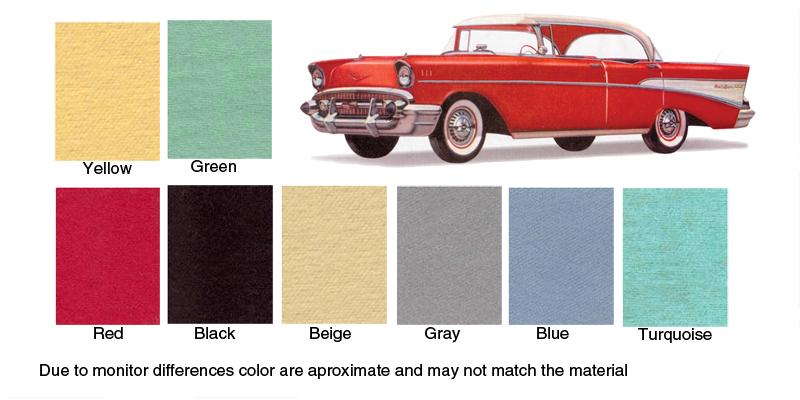
Cheers Mike, I'm still pretty new to building American car models, I've seen so many photos of restored cars with either body colour over spray, all black or red oxide, I think the Revell version I have will be black, mainly because the way that the chassis is molded as part of the floor, I've just ordered a load of Tamiya blue and grey paints to mix up the shade for the roof headlining, I was just going to paint it white before I checked online, good job I did, now I know they were all colour coded to the body colour and interior.
-
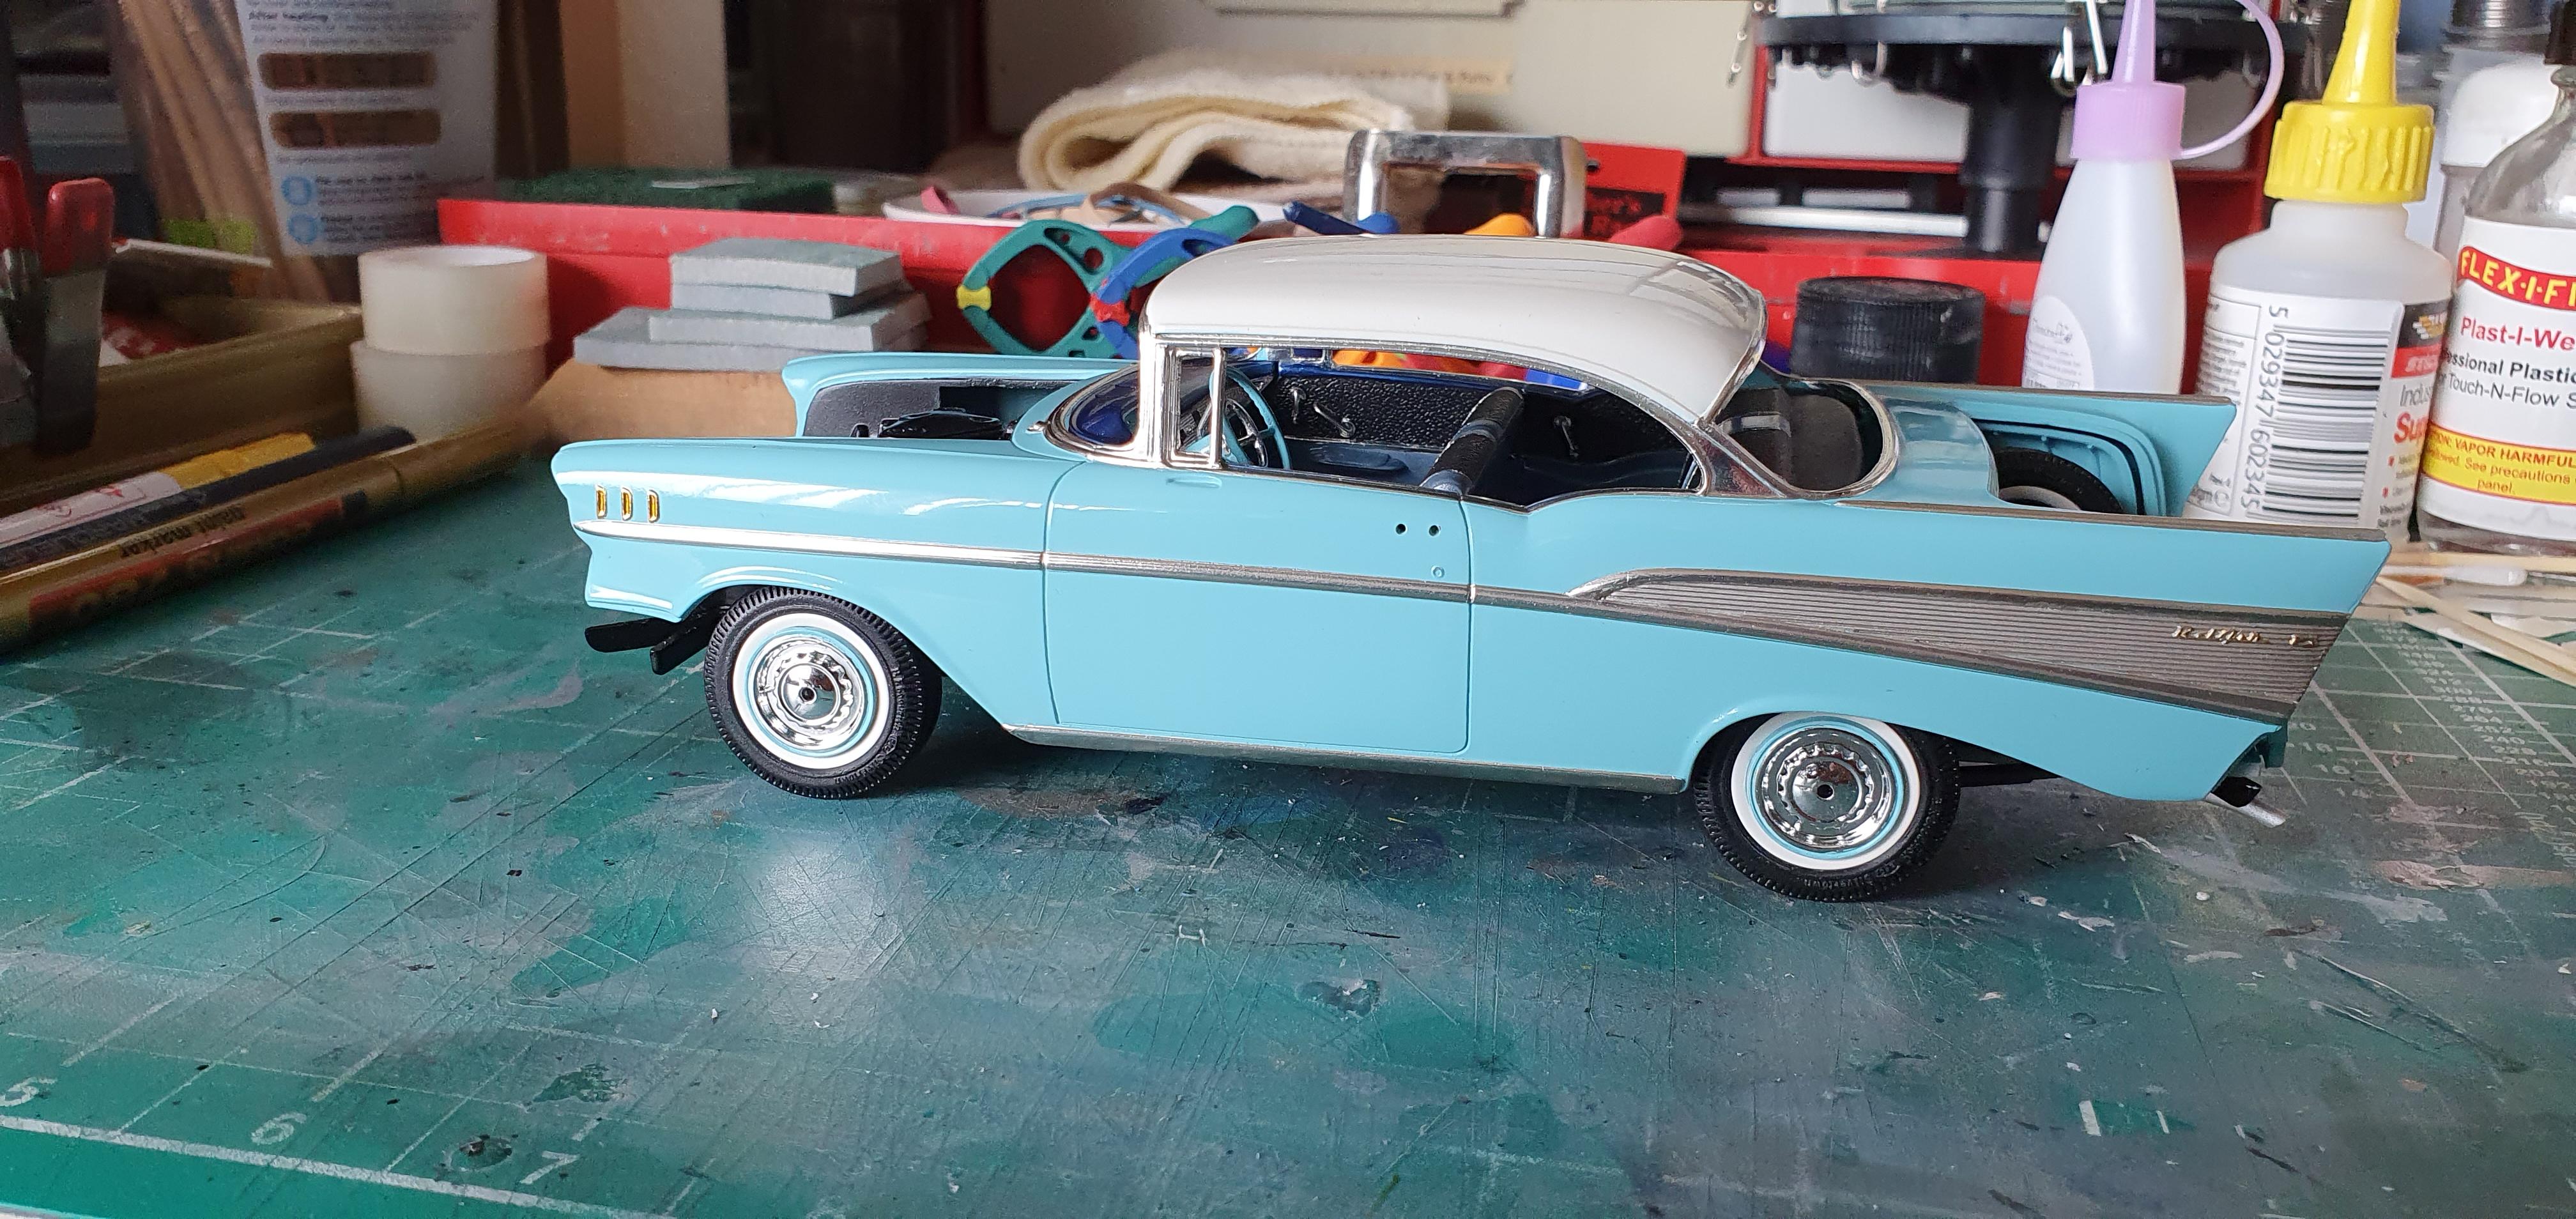
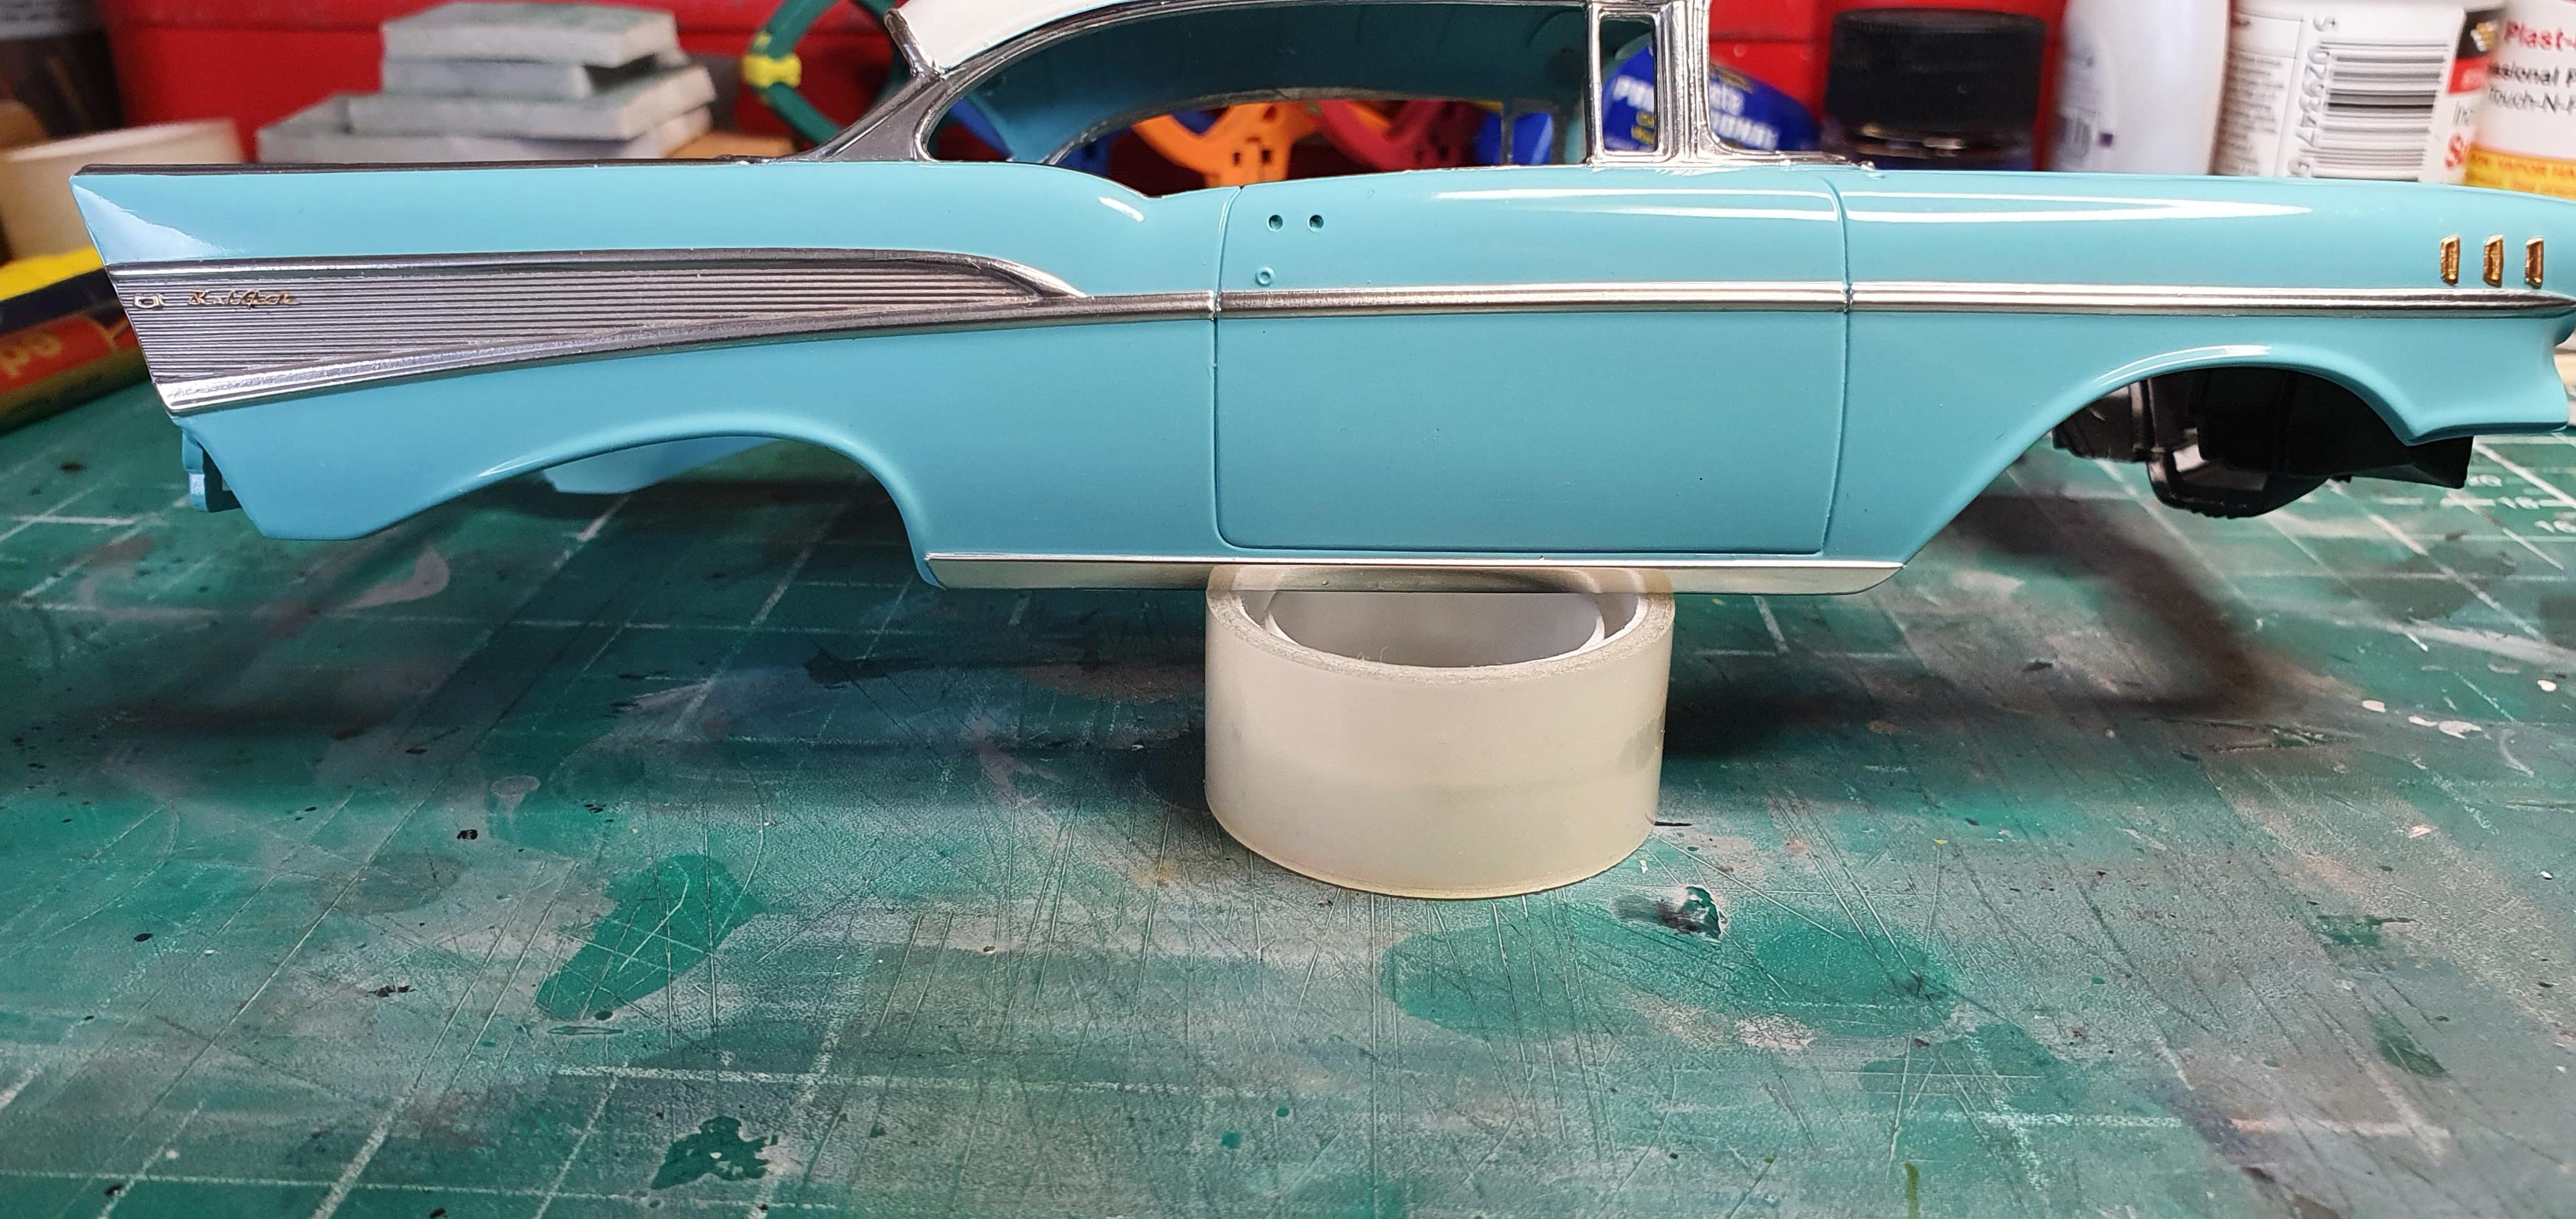
I really wasn't expecting this to be sitting on all four Wheels at the same time, the rear axle where the wheels needed to be mounted on were way oversized, in fact the drivers side one was more square than round, but after a lot of time using the edge of a scalpel blade and a sanding stick, i got them to fit the wheels, still not trusting things to be level, I've dry fitted the body, no one was more surprised than me to see it sitting on all fours at the same time, these AMT kits certainly make you work....
-
Another MCM Editor is Onboard
GeeBee replied to Dave Ambrose's topic in General Automotive Talk (Trucks and Cars)
There no longer importing any magazines from the USA http://www.americanautomags.com/ -
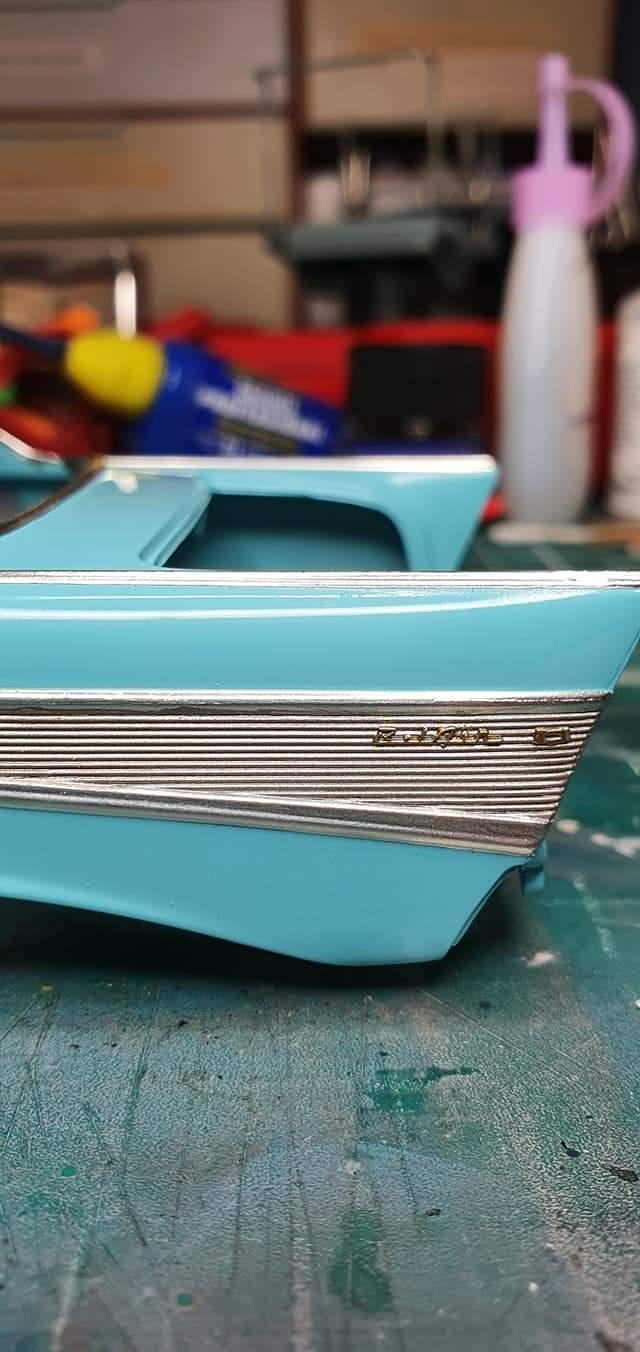
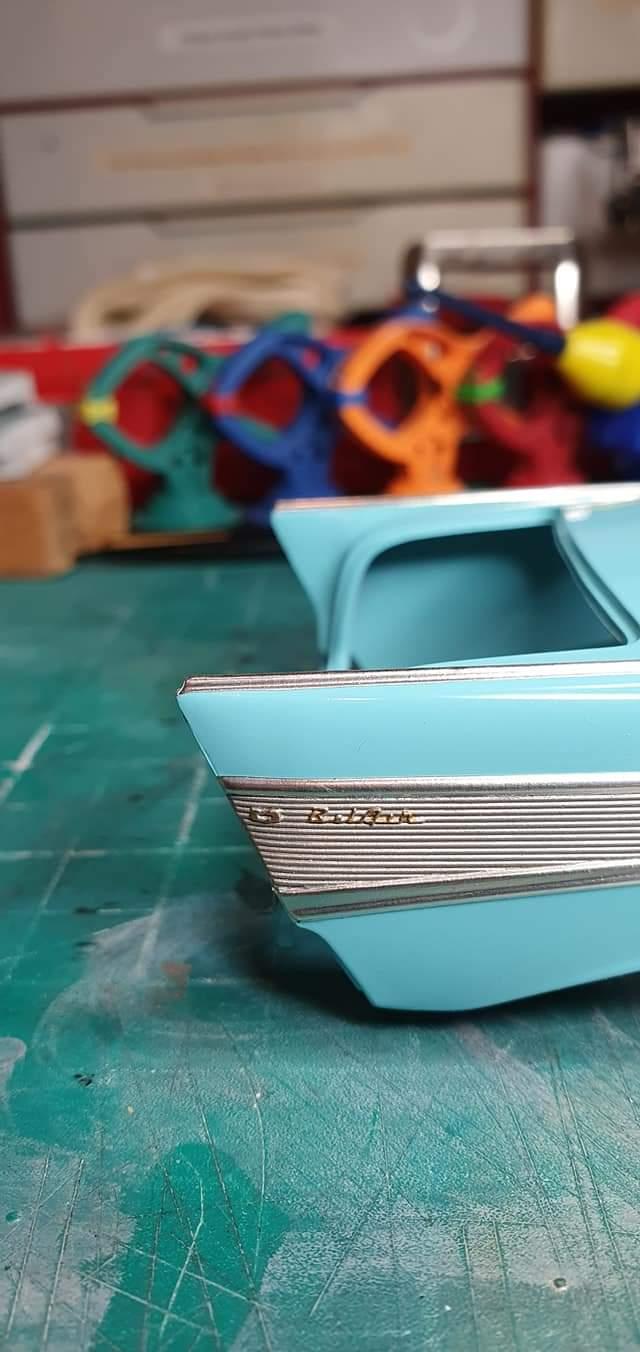
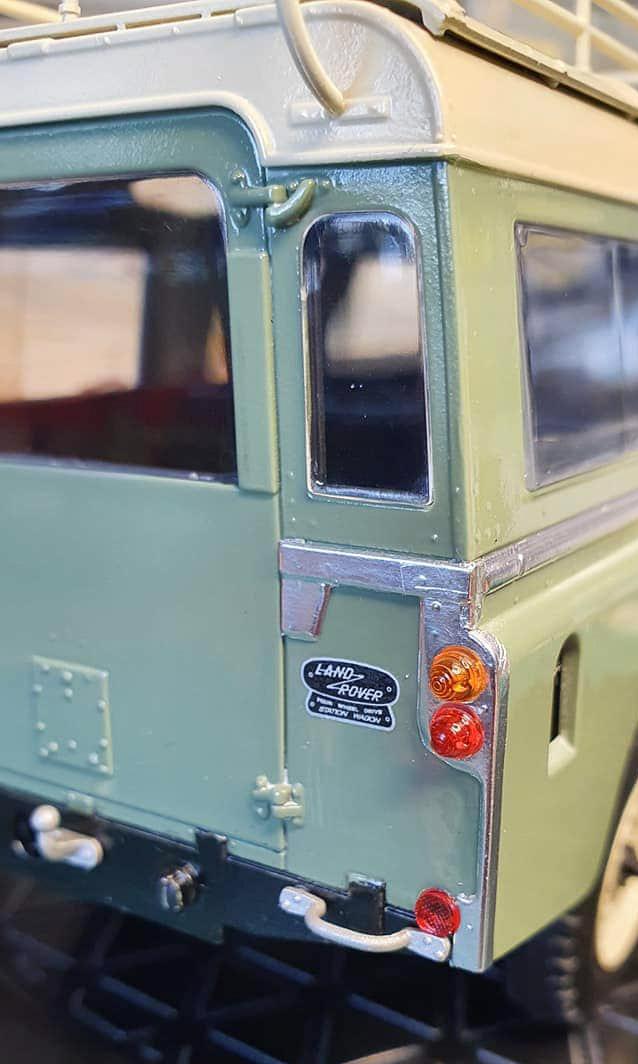
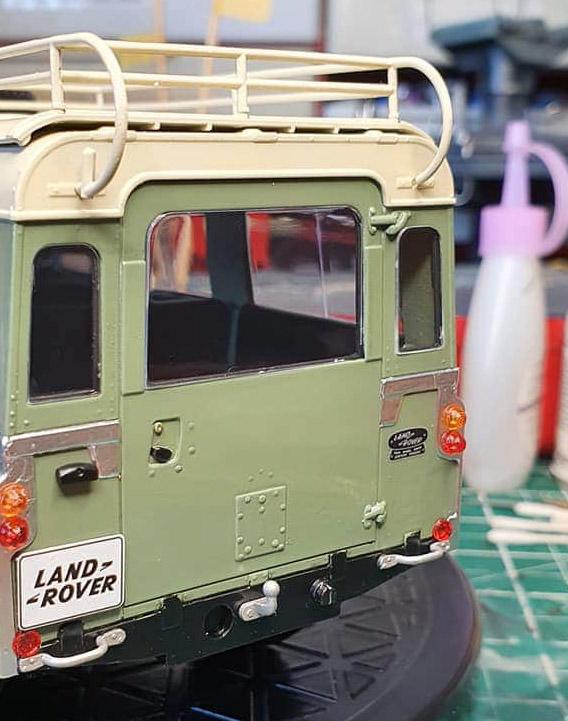
Just when I thought I'd finished all the BMF on this one, just realised I forgot to do the chrome trim on the rocker trim, all done now....
-
Bare Metal foil all finished, I did the Gold script using a gold paint pen
-
I'm hoping to get the Bare Metal foil finished on this one in the next few days.
-
Another alternative to bare metal foil
GeeBee replied to R. Thorne's topic in Tips, Tricks, and Tutorials
What he said...... -
The ‘other’ mag is stopping publication
GeeBee replied to cruz's topic in General Automotive Talk (Trucks and Cars)
Looking at that site, it's digital only and not a printed copy, some people still prefer the printed magazine. -
Thanks for the heads up, I'm leaning so much on these American cars, I'm not sure when I'm going to get chance to start anymore modelling for a while, even though I've got the paint for the Revell 57 Bel Air sedan.
-
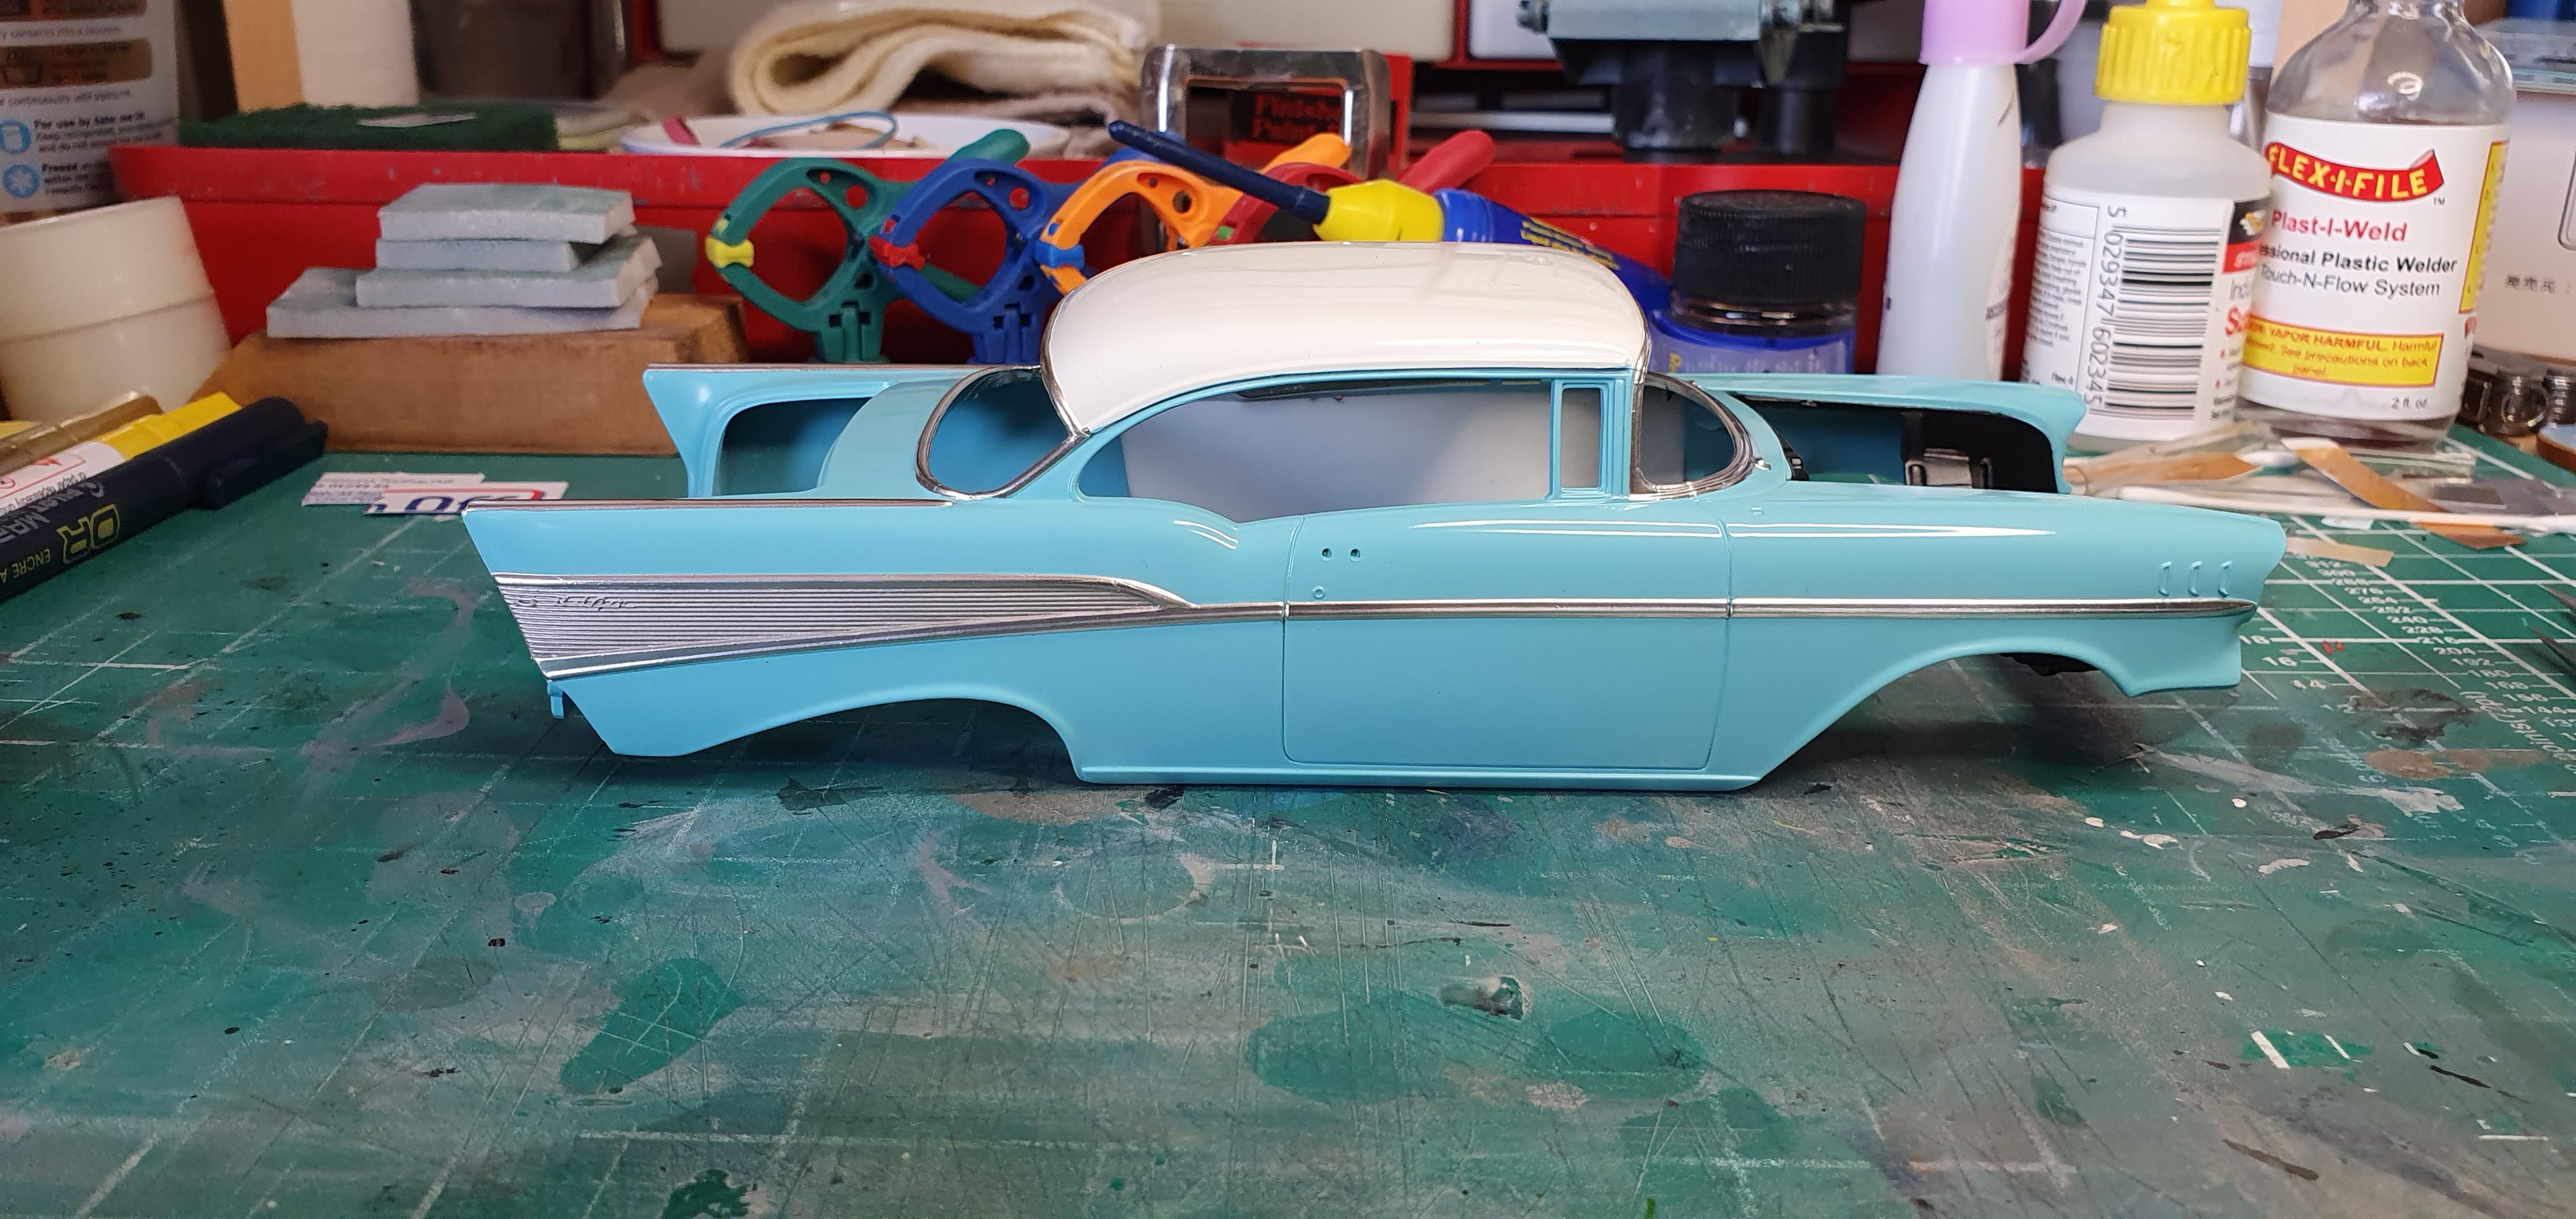
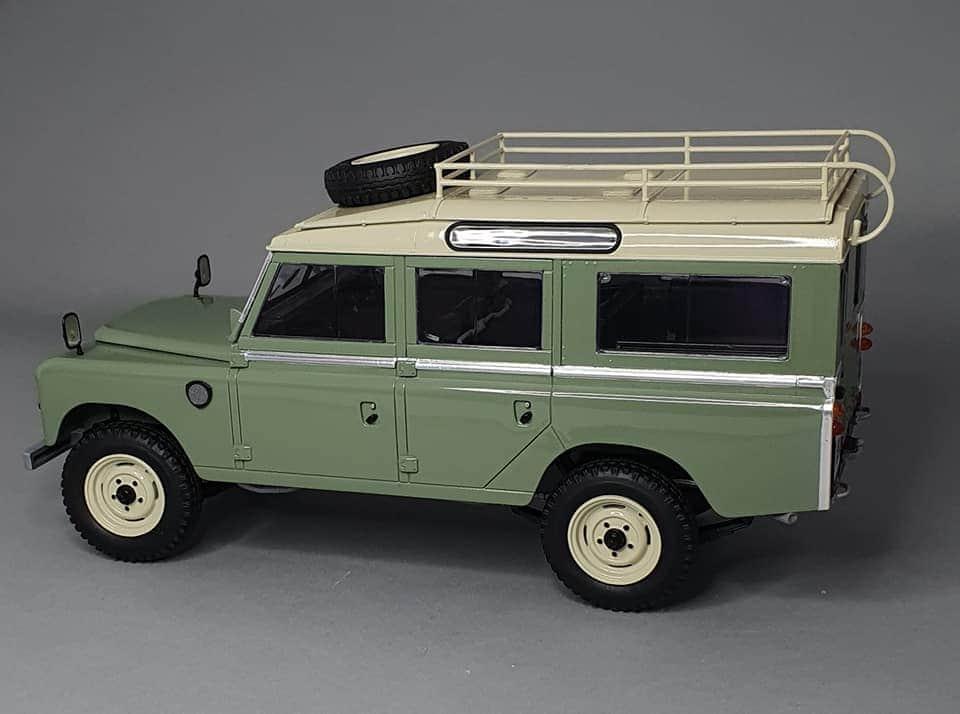
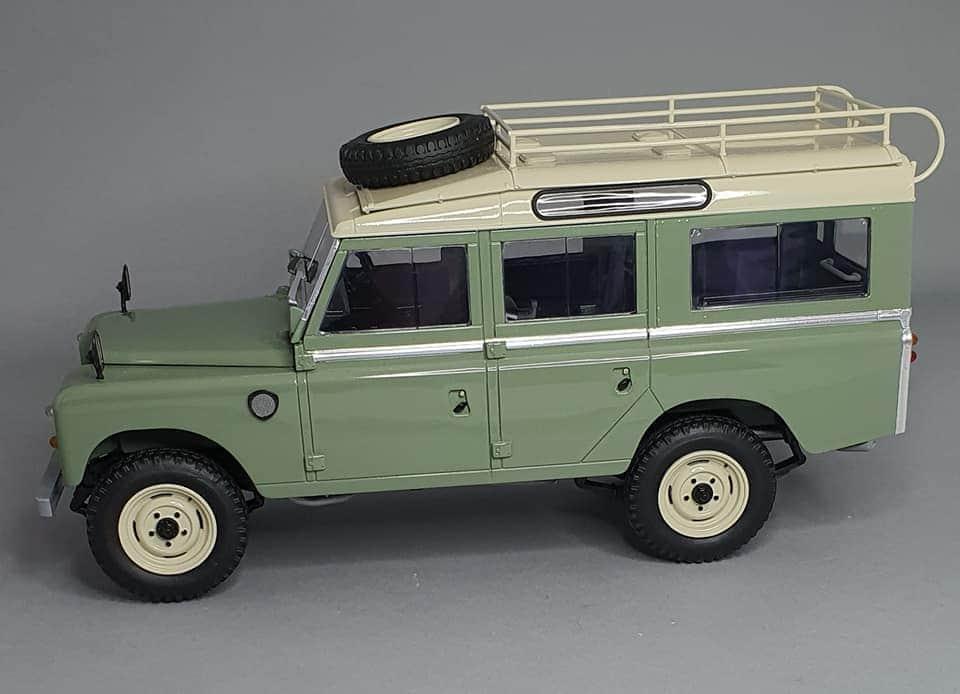
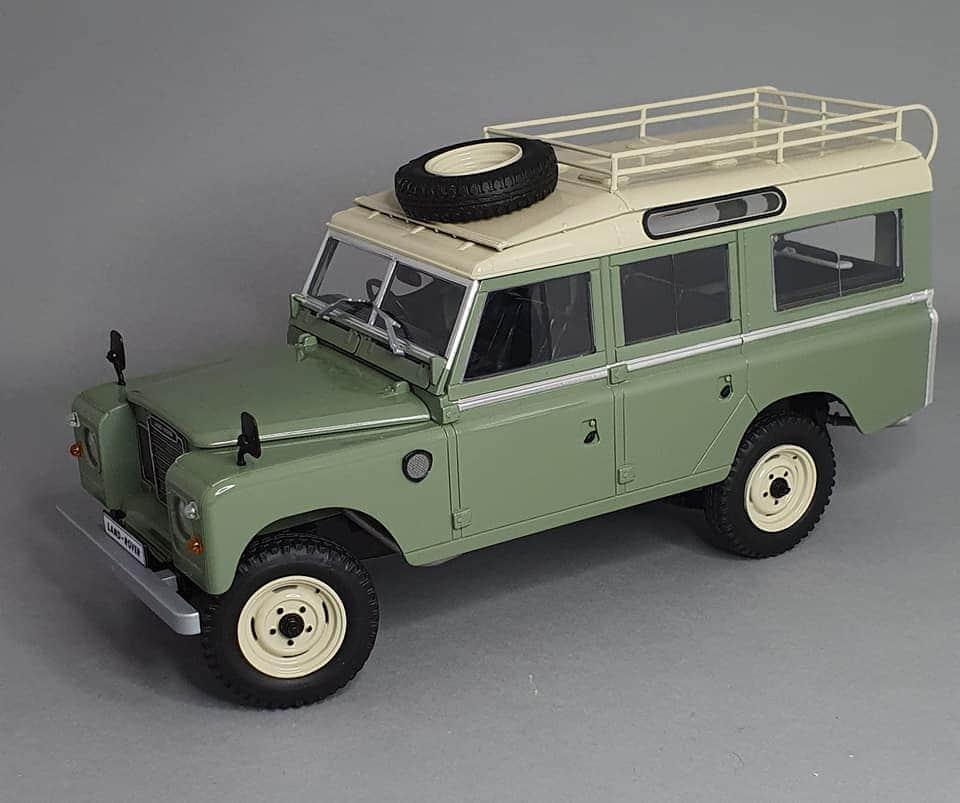
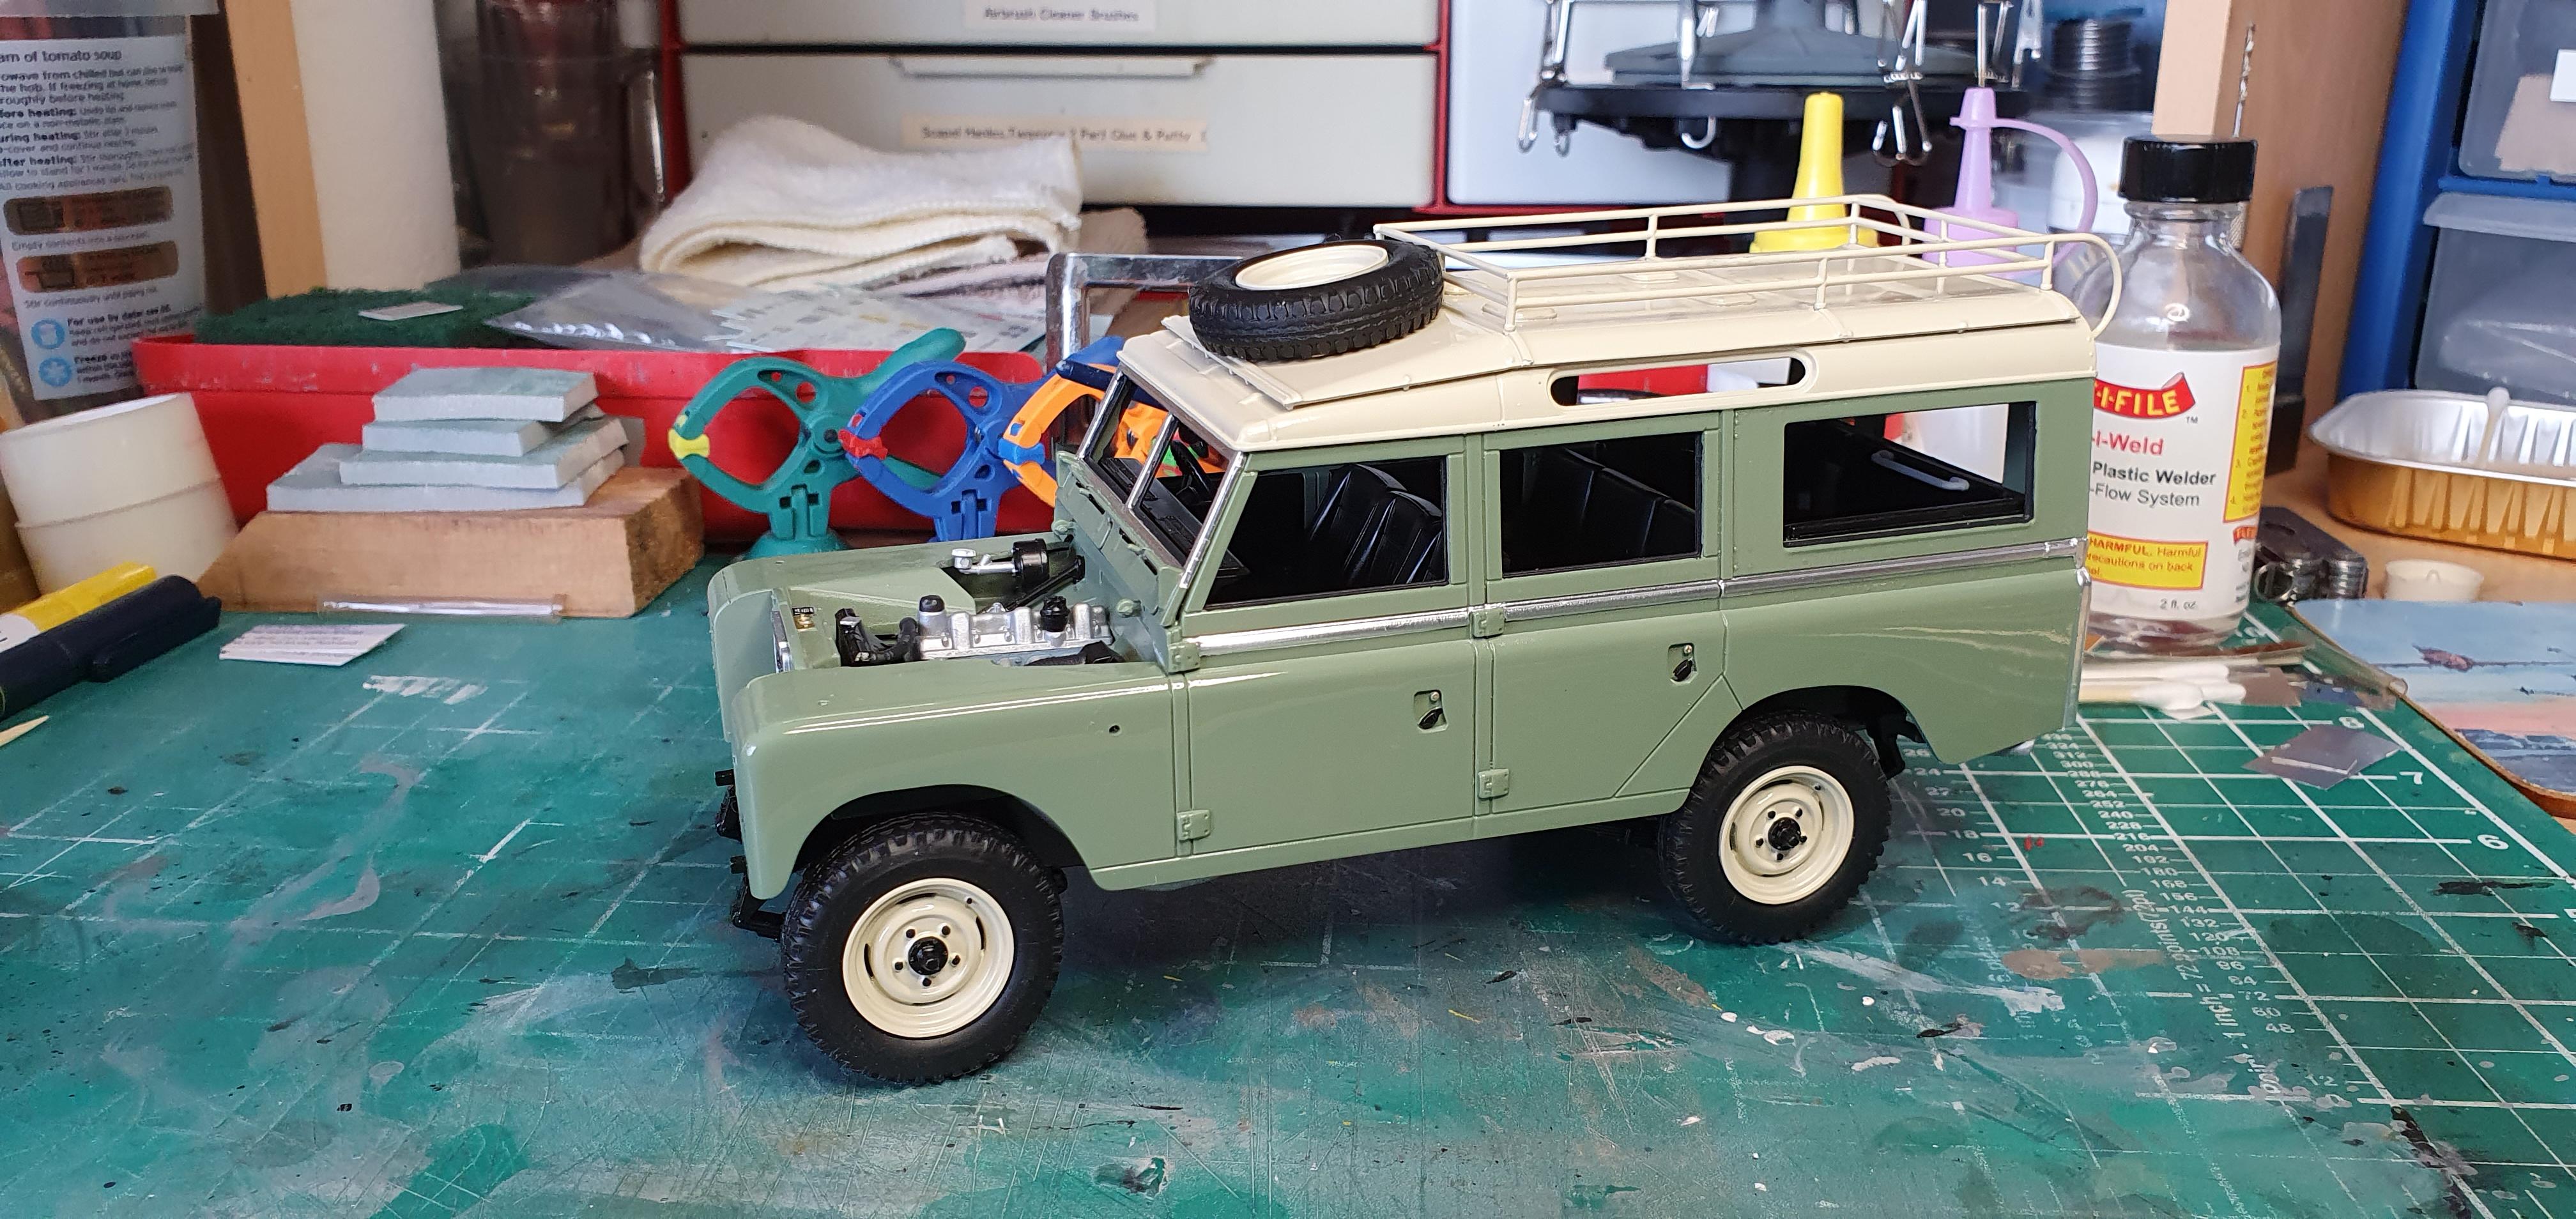
With the Land Rover finished, it's time to get back to the other models i have got to get finished, I've got a week before we move back down to London, although there's no more painting needed on this one, so I might take it with me, I can always do a little work on it when time allows. Making a start on the Bare Metal foil on the other side, starting with the front wing
-
The ‘other’ mag is stopping publication
GeeBee replied to cruz's topic in General Automotive Talk (Trucks and Cars)
There isn't a subscription option for Model Car Builder, but you either purchase a hard copy, digital copy, or both, you can get the magazine sent to a uk address ,postage is just over $6 https://www.magcloud.com/browse/issue/1812648 -
Revell Land Rover LWB
GeeBee replied to GeeBee's topic in Model Trucks: Pickups, Vans, SUVs, Light Commercial
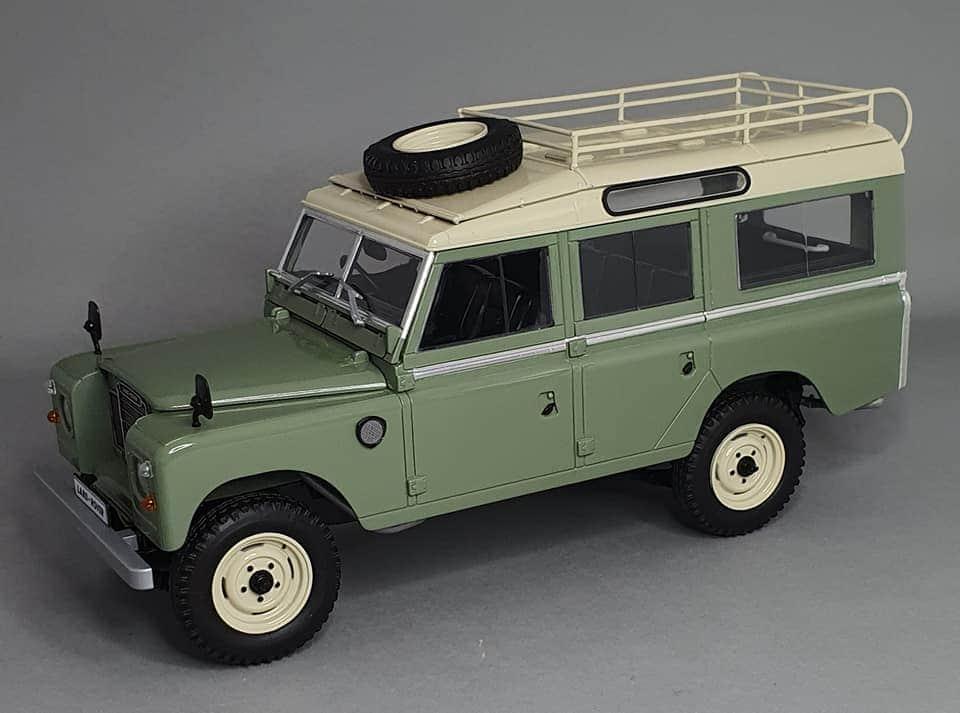
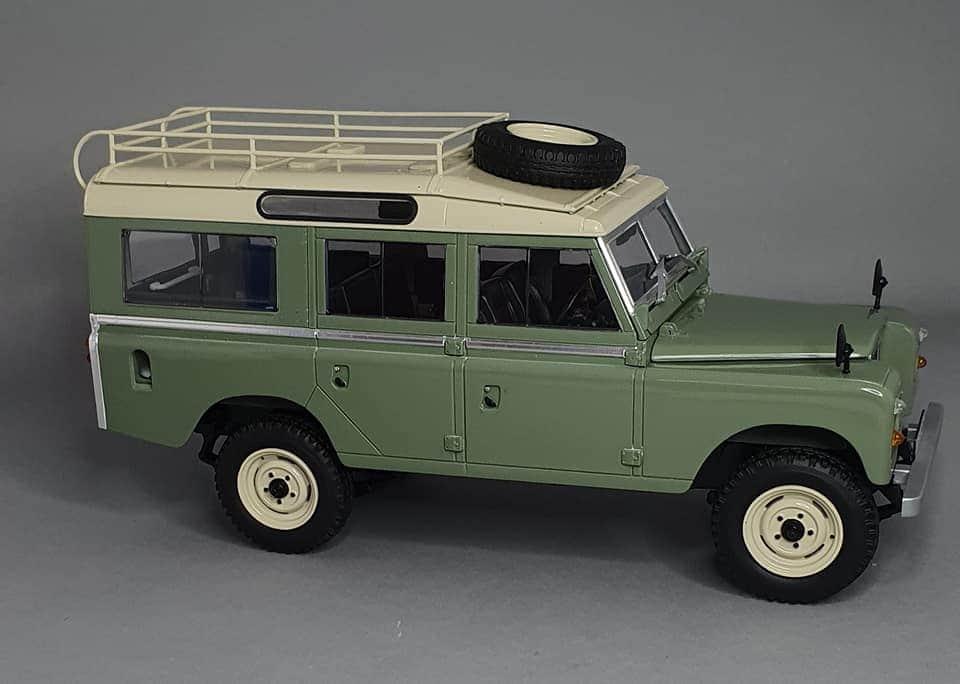
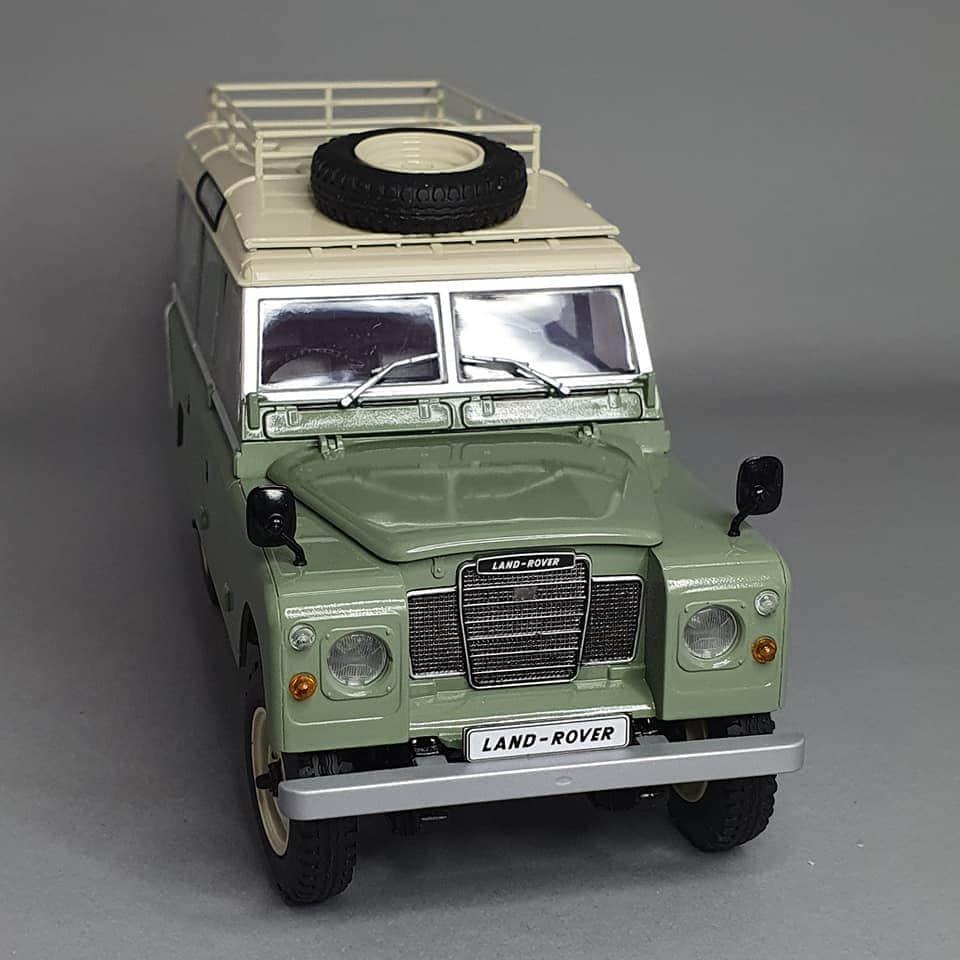
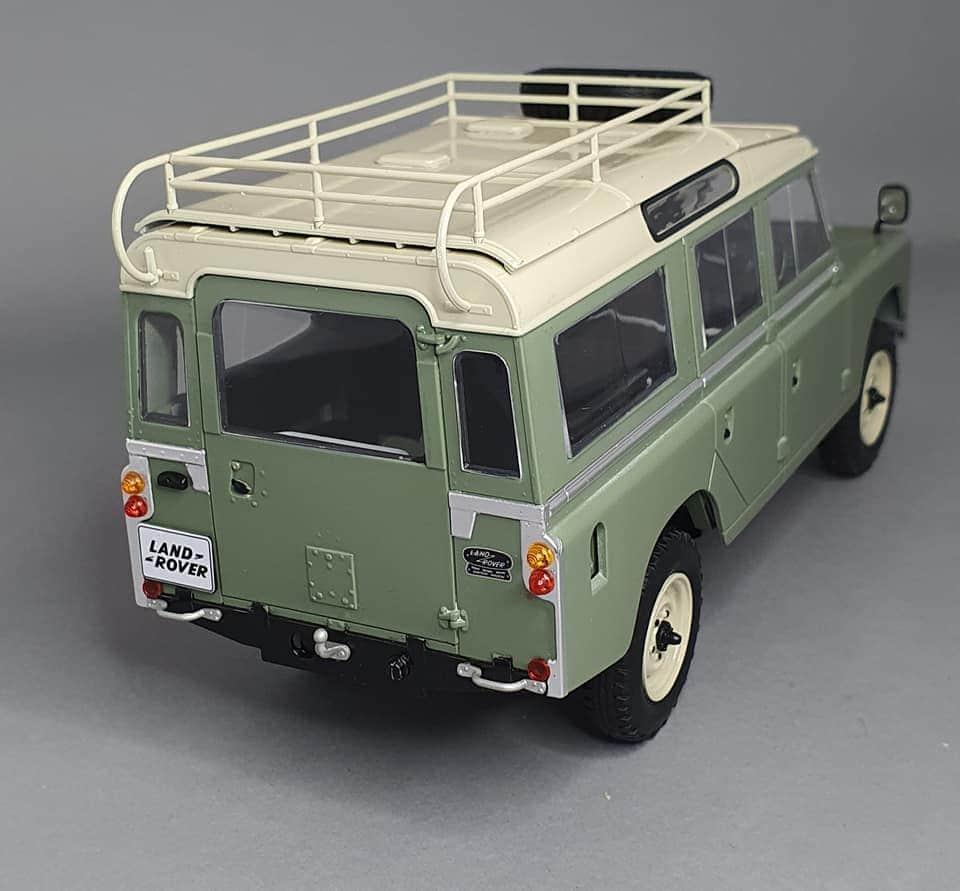
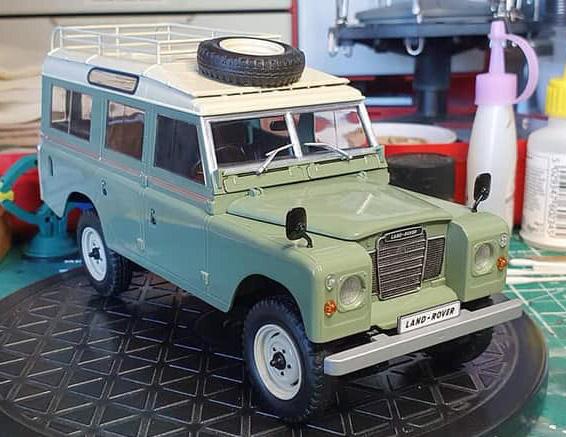
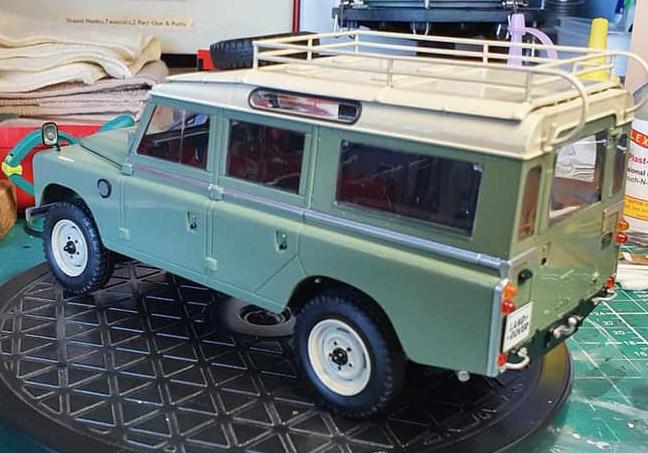
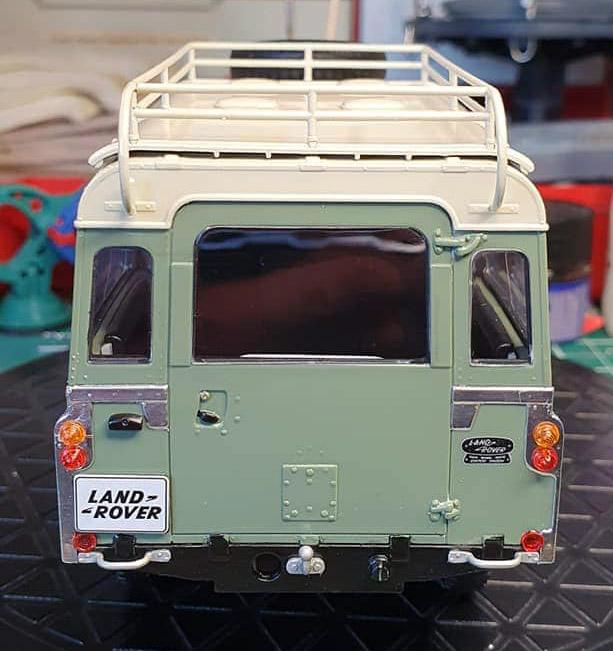
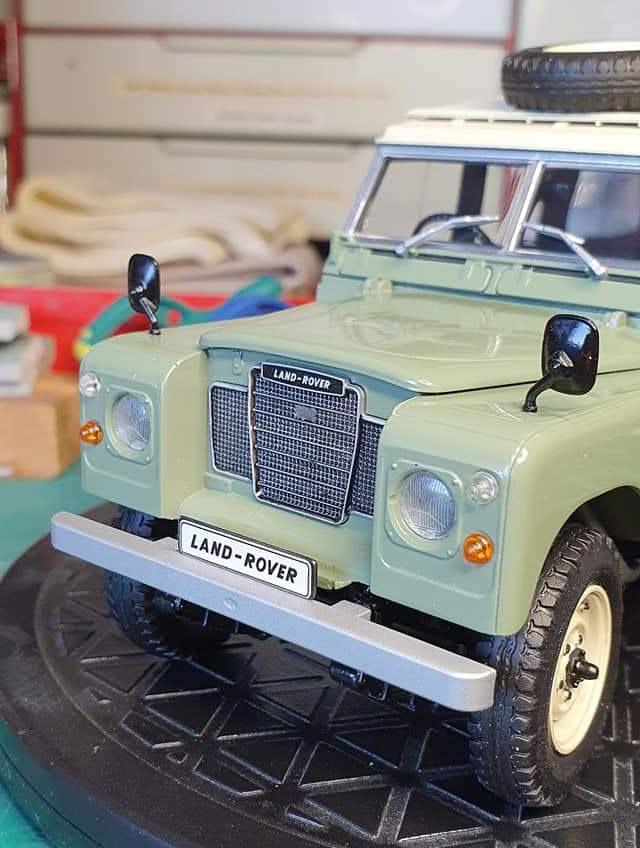
Photos of the Revell Land Rover taken in the studio, now it can be put away in the display cabinet for safety.
-
Bayswater, a very nice part of London, I'll be moving around 3 miles away in Pimlico very soon.
-
No.....
-
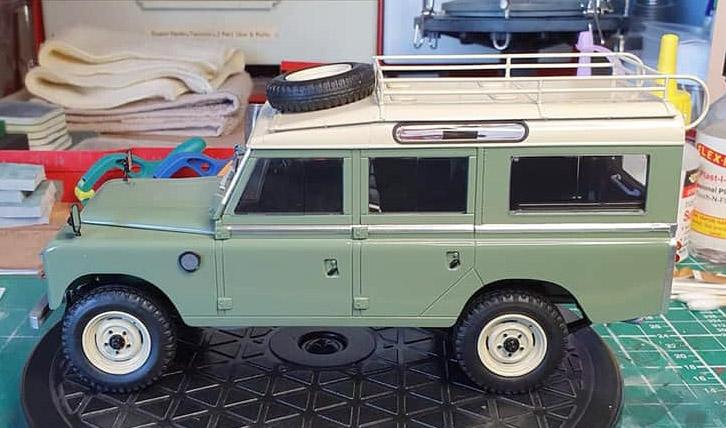
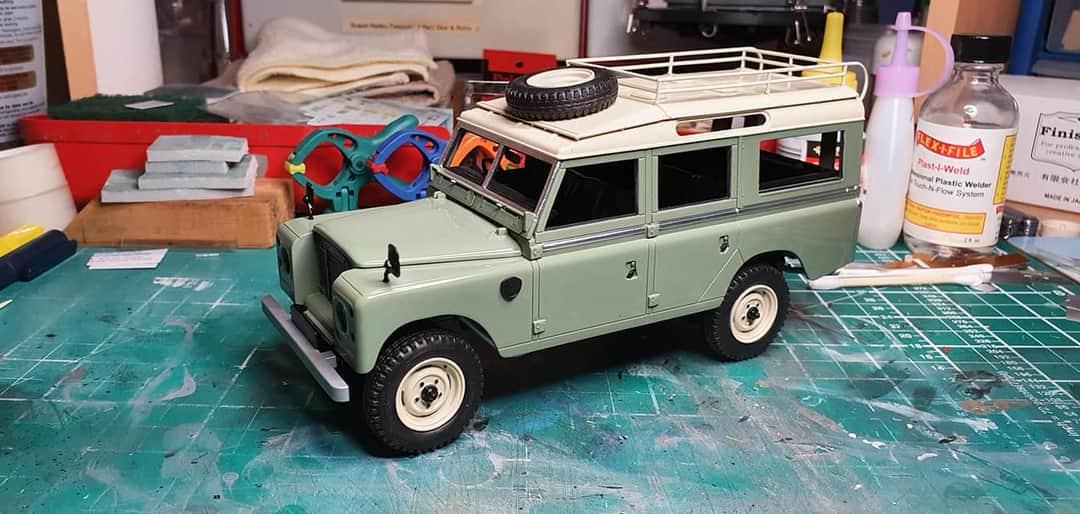
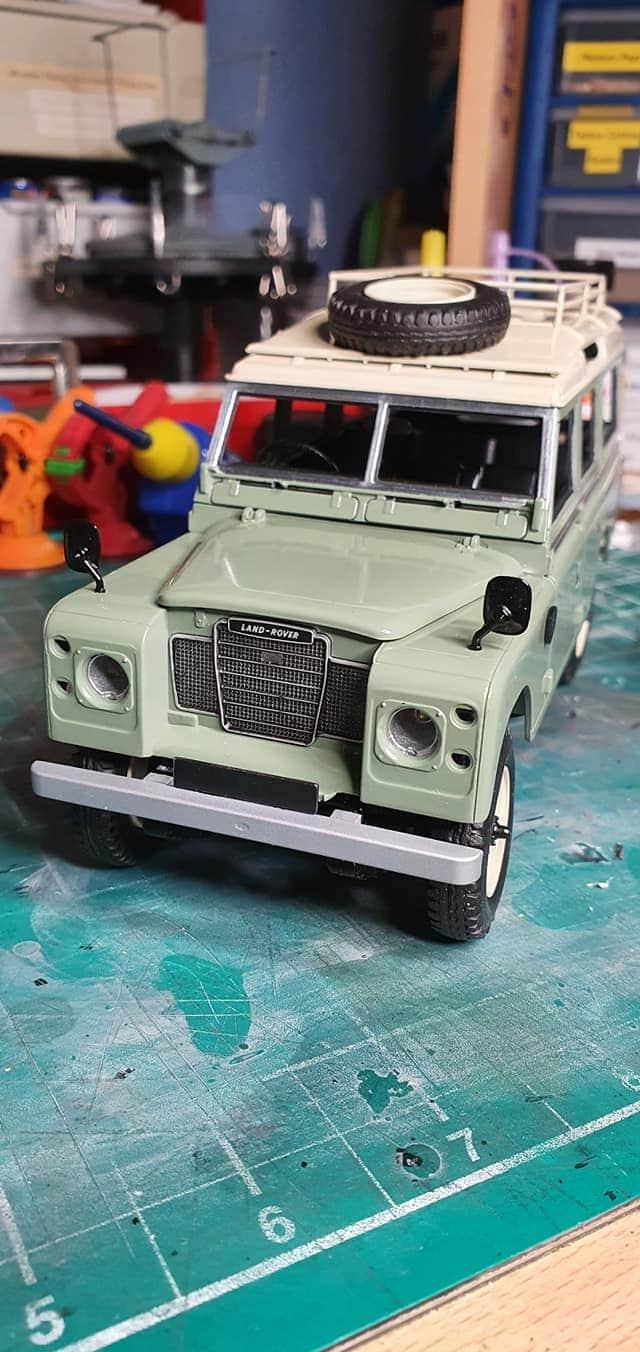
Finally got it finished this afternoon, airbrushed in Land Rover Pastel Green, I'll get some better photos taken in the next few days,
-
One of the things used in photography and filmmaking for this is commonly known as a "Dulling spray", the ones professionals use can be easily washed off after filming https://www.krylon.com/products/dulling-spray/
-
Good to hear you got it o.k, they certainly sell them at very competitive prices, plus their packaging is way beyond what they need to do, I'll be ordering the Revell Jaguar E Type from them. https://www.365games.co.uk/automotive-model-kits/jaguar-e-type-coupe-car-124-scale-level-3-revell-model-kit
-
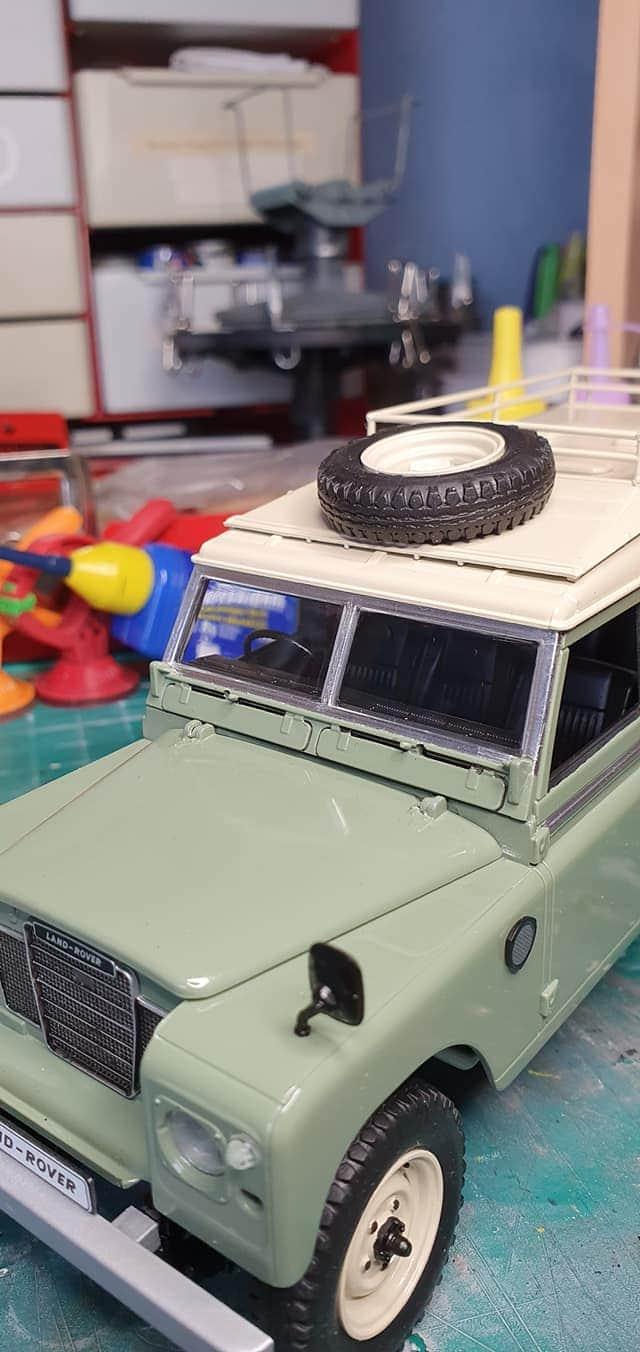
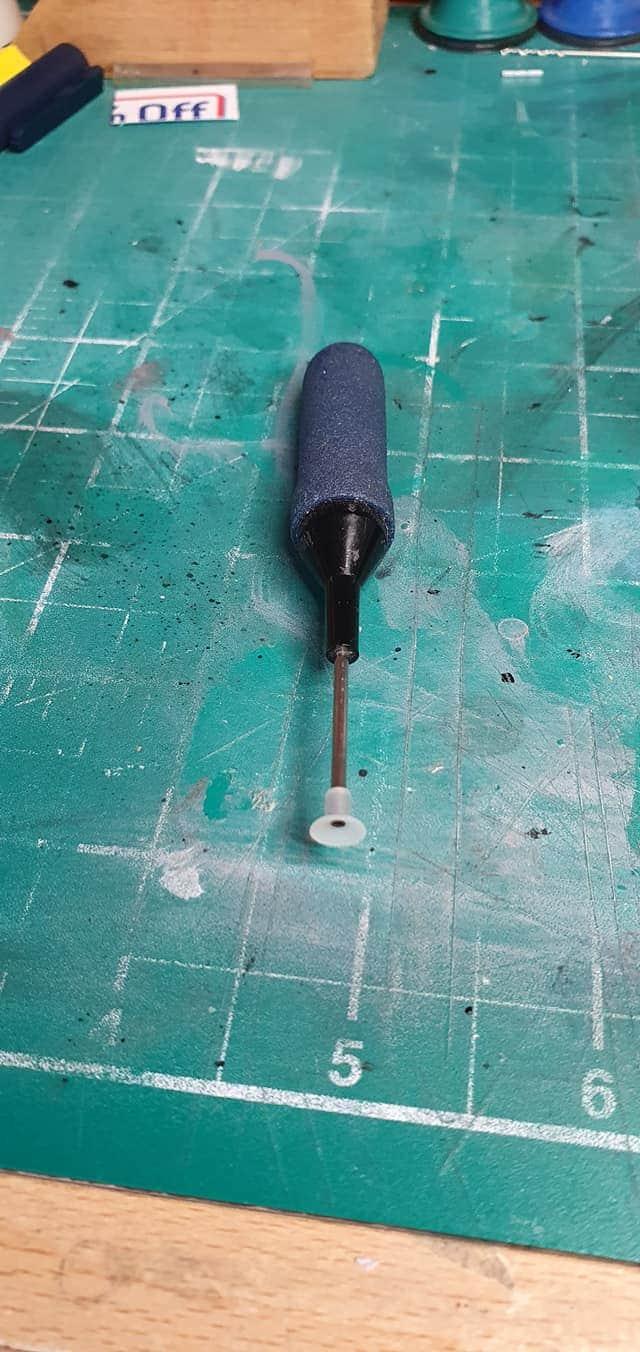
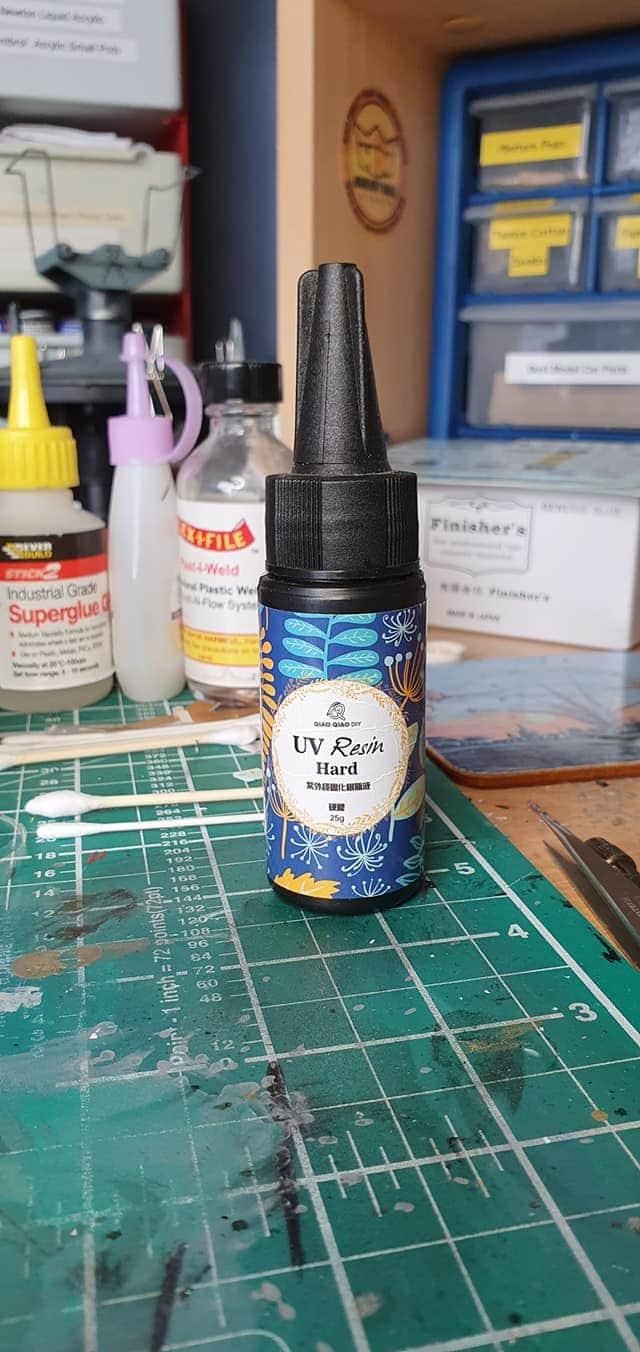
Front windscreen fitted, again using UV resin, 4 tiny drops in the corners is all that's needed, one tool i couldn't be without is this little suction tool I bought many years ago, no finger marks on any clear parts which was always a problem.
-
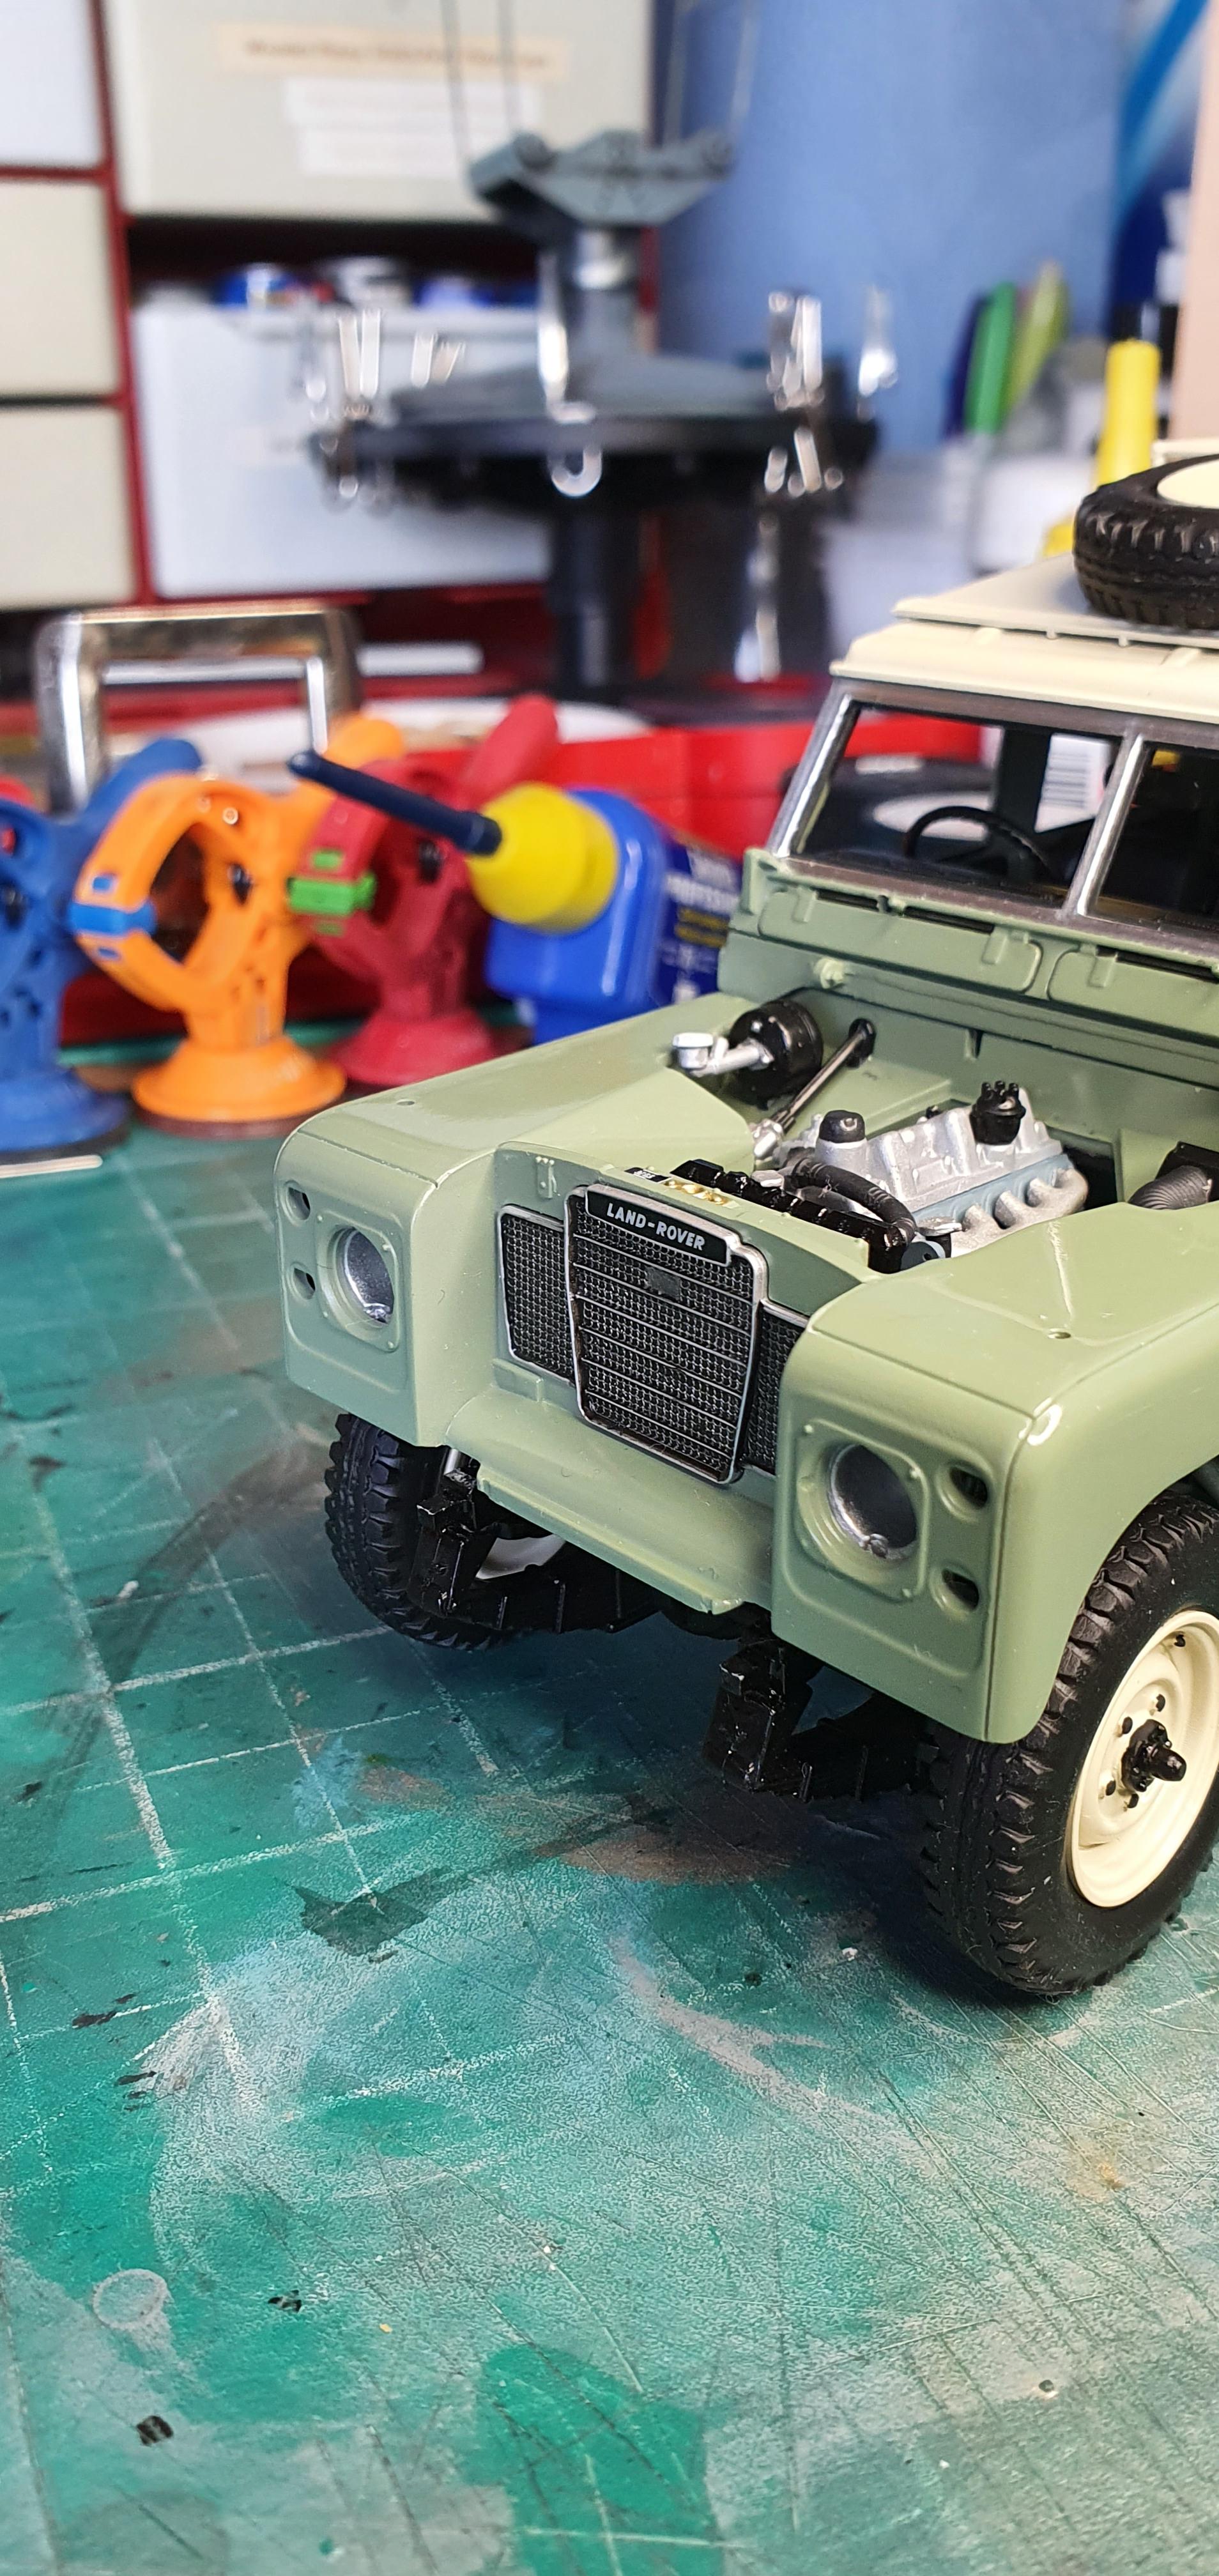
Headlight lenses and side lamps fitted, like I do for most clear parts, they were fixed in place using UV resin
-
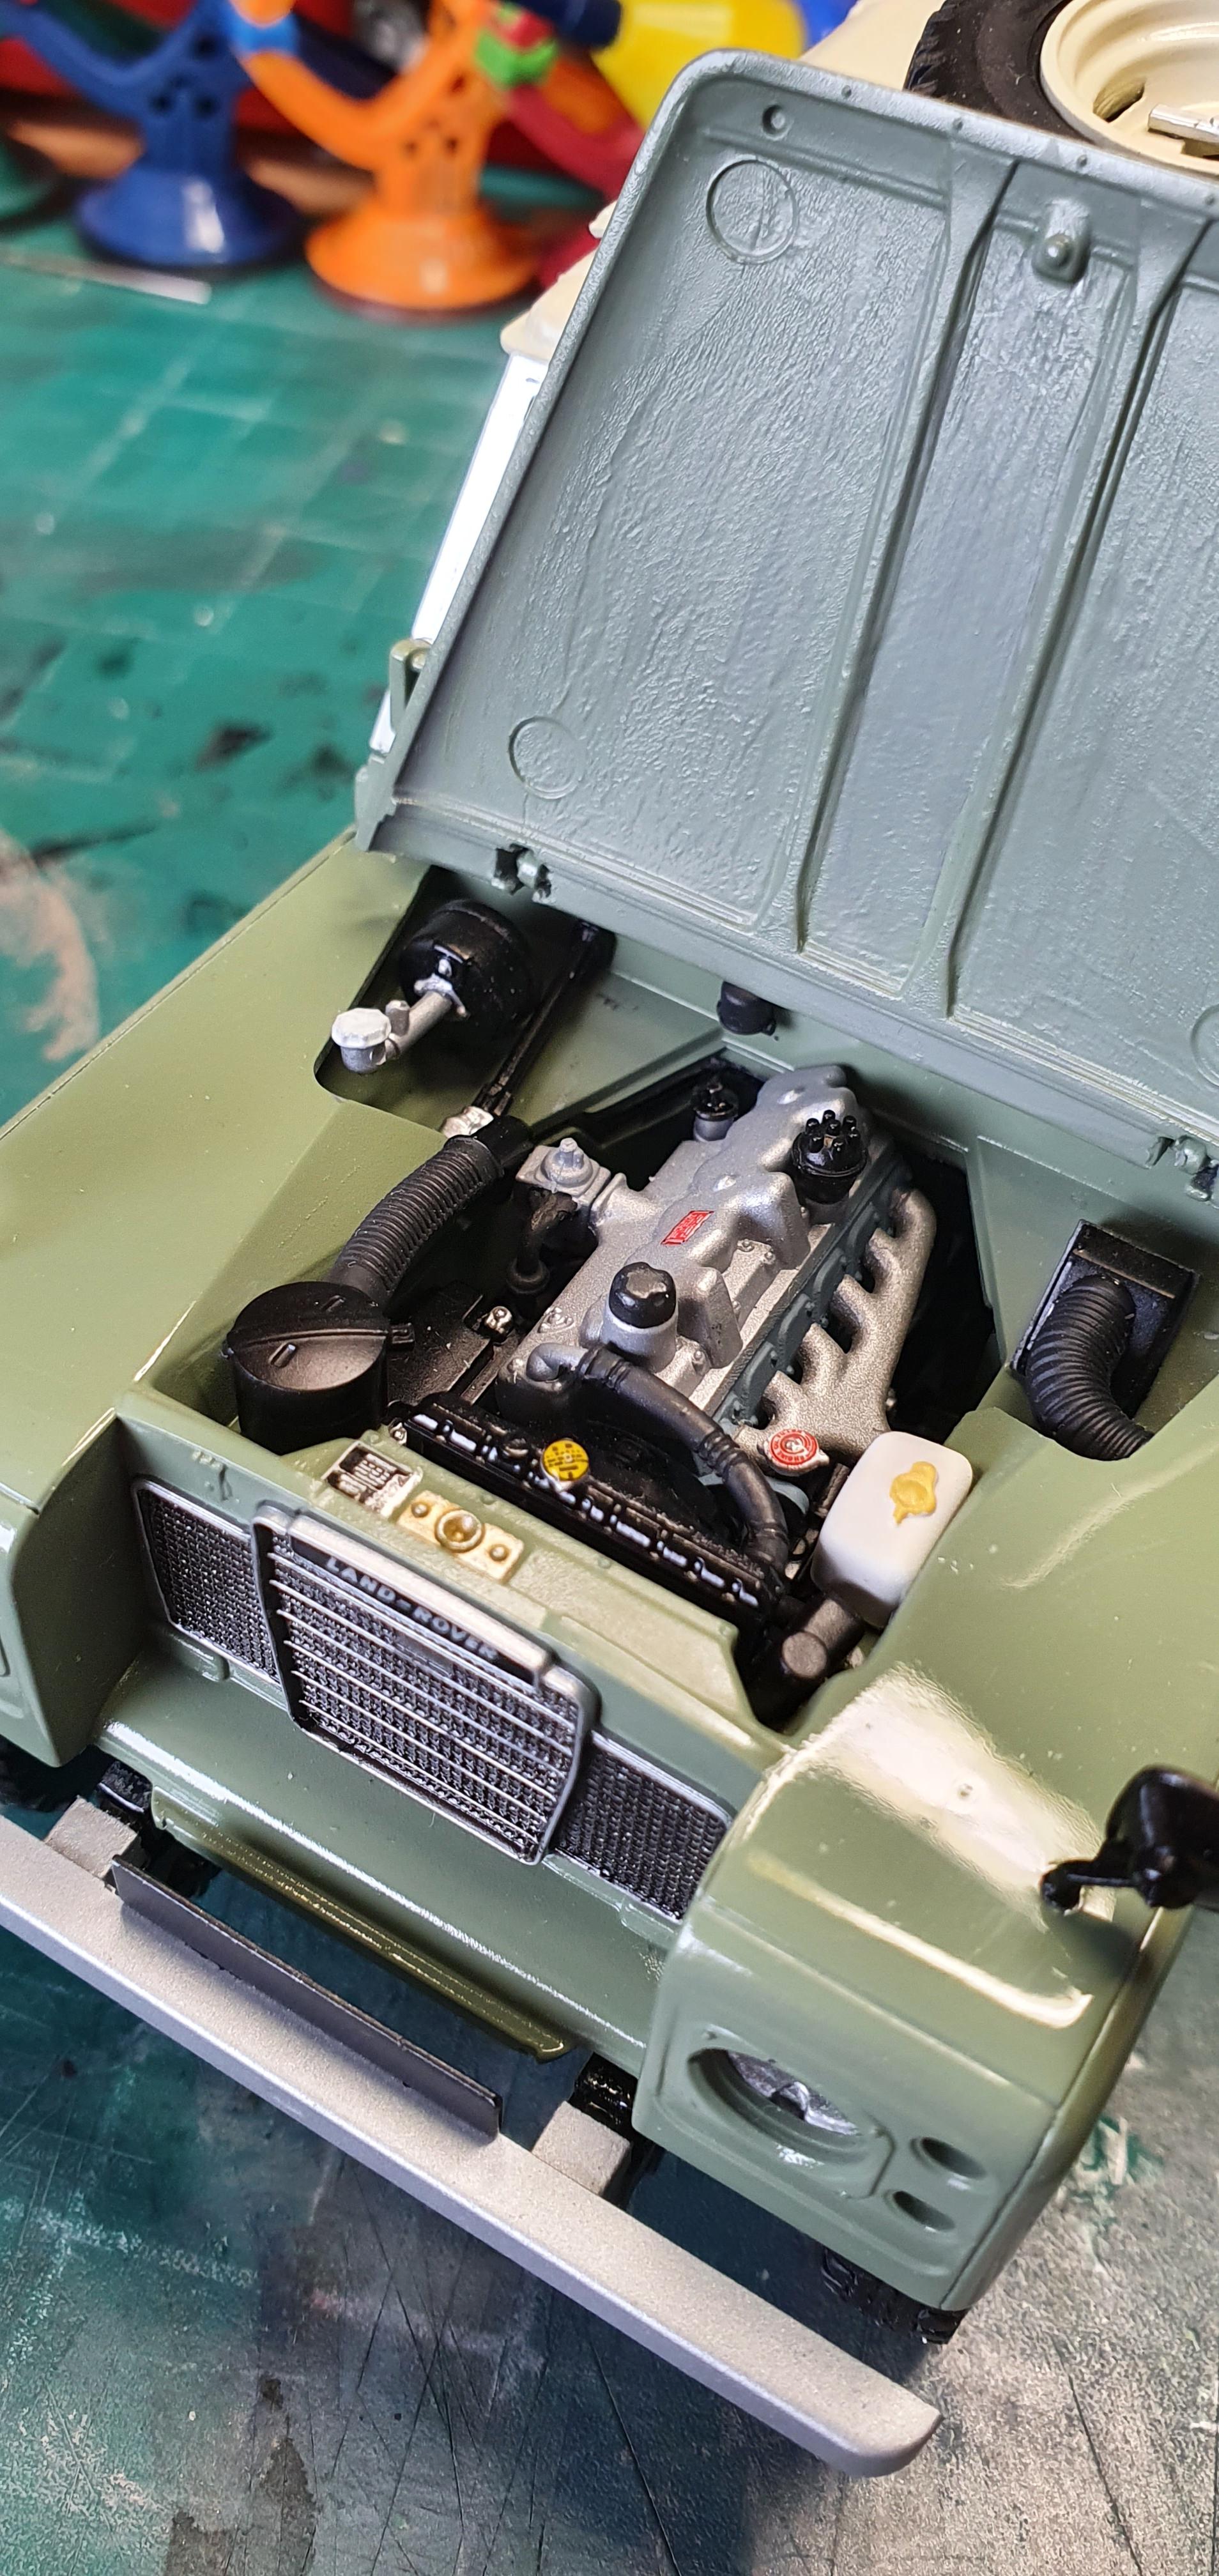
A quick under bonnet shot
-
Superb clean build.....
-
Superb build....
-
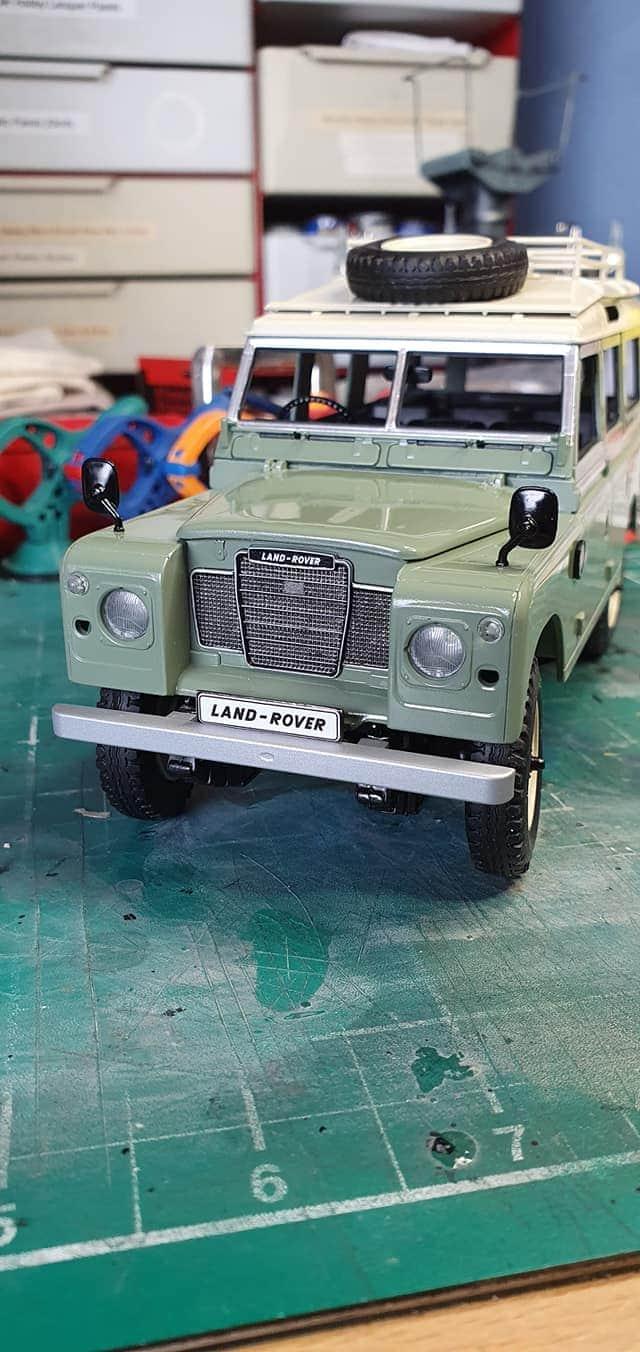
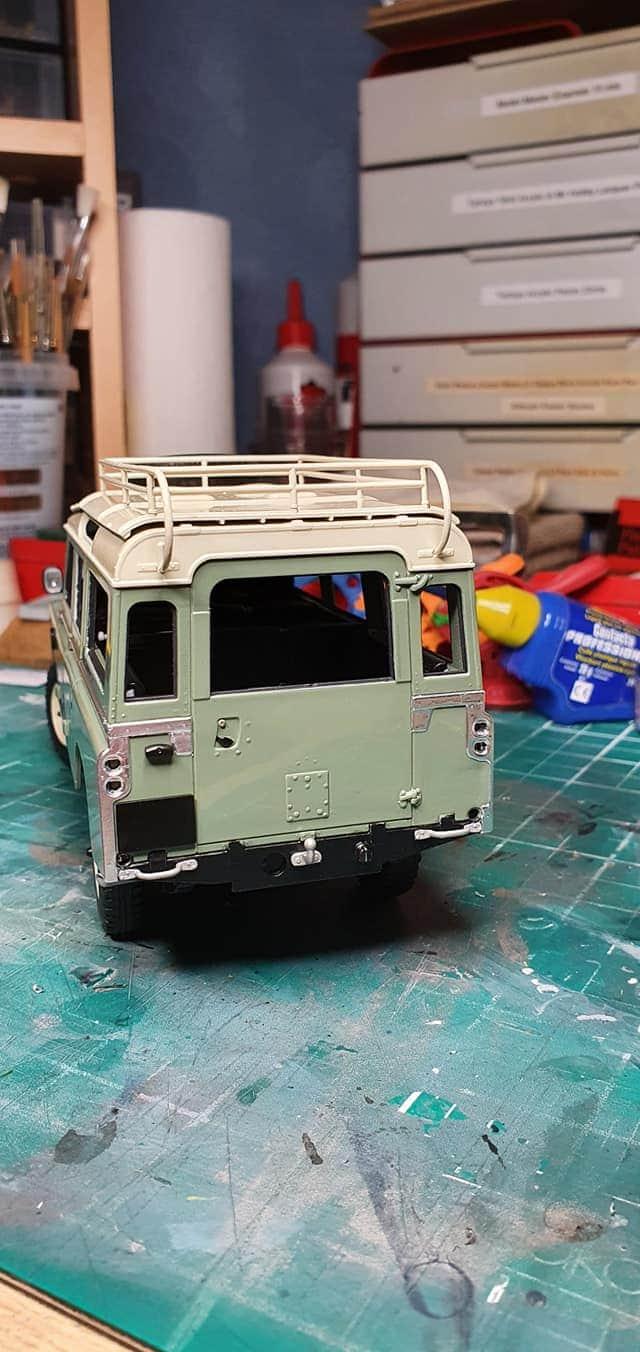
Just a few decals to apply, front and rear lamps, plus the windows and this one will be going into the display cabinet.
-
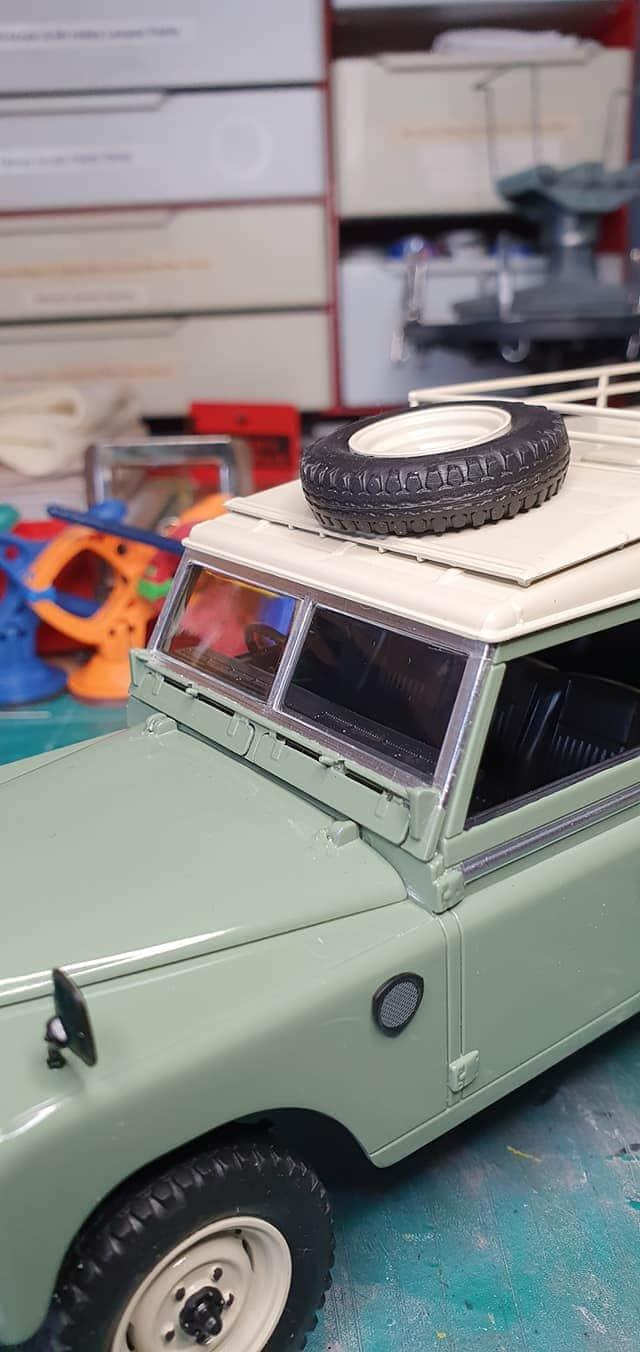
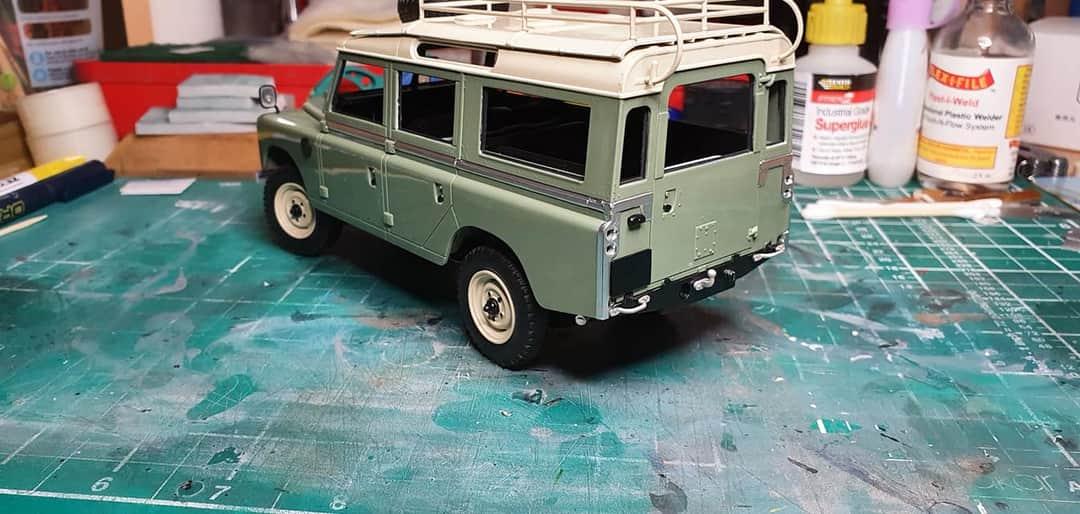
It's now officially a Land Rover, the decal, like all the others fitted perfectly, the safari roof panel and roof rack lined up perfectly with the holes in the roof panel