NOBLNG
-
Posts
10,231 -
Joined
-
Last visited
Content Type
Profiles
Forums
Events
Gallery
Everything posted by NOBLNG
-

'41 Chevy Pickup
NOBLNG replied to NOBLNG's topic in WIP: Model Trucks: Pickups, Vans, SUVs, Light Commercial
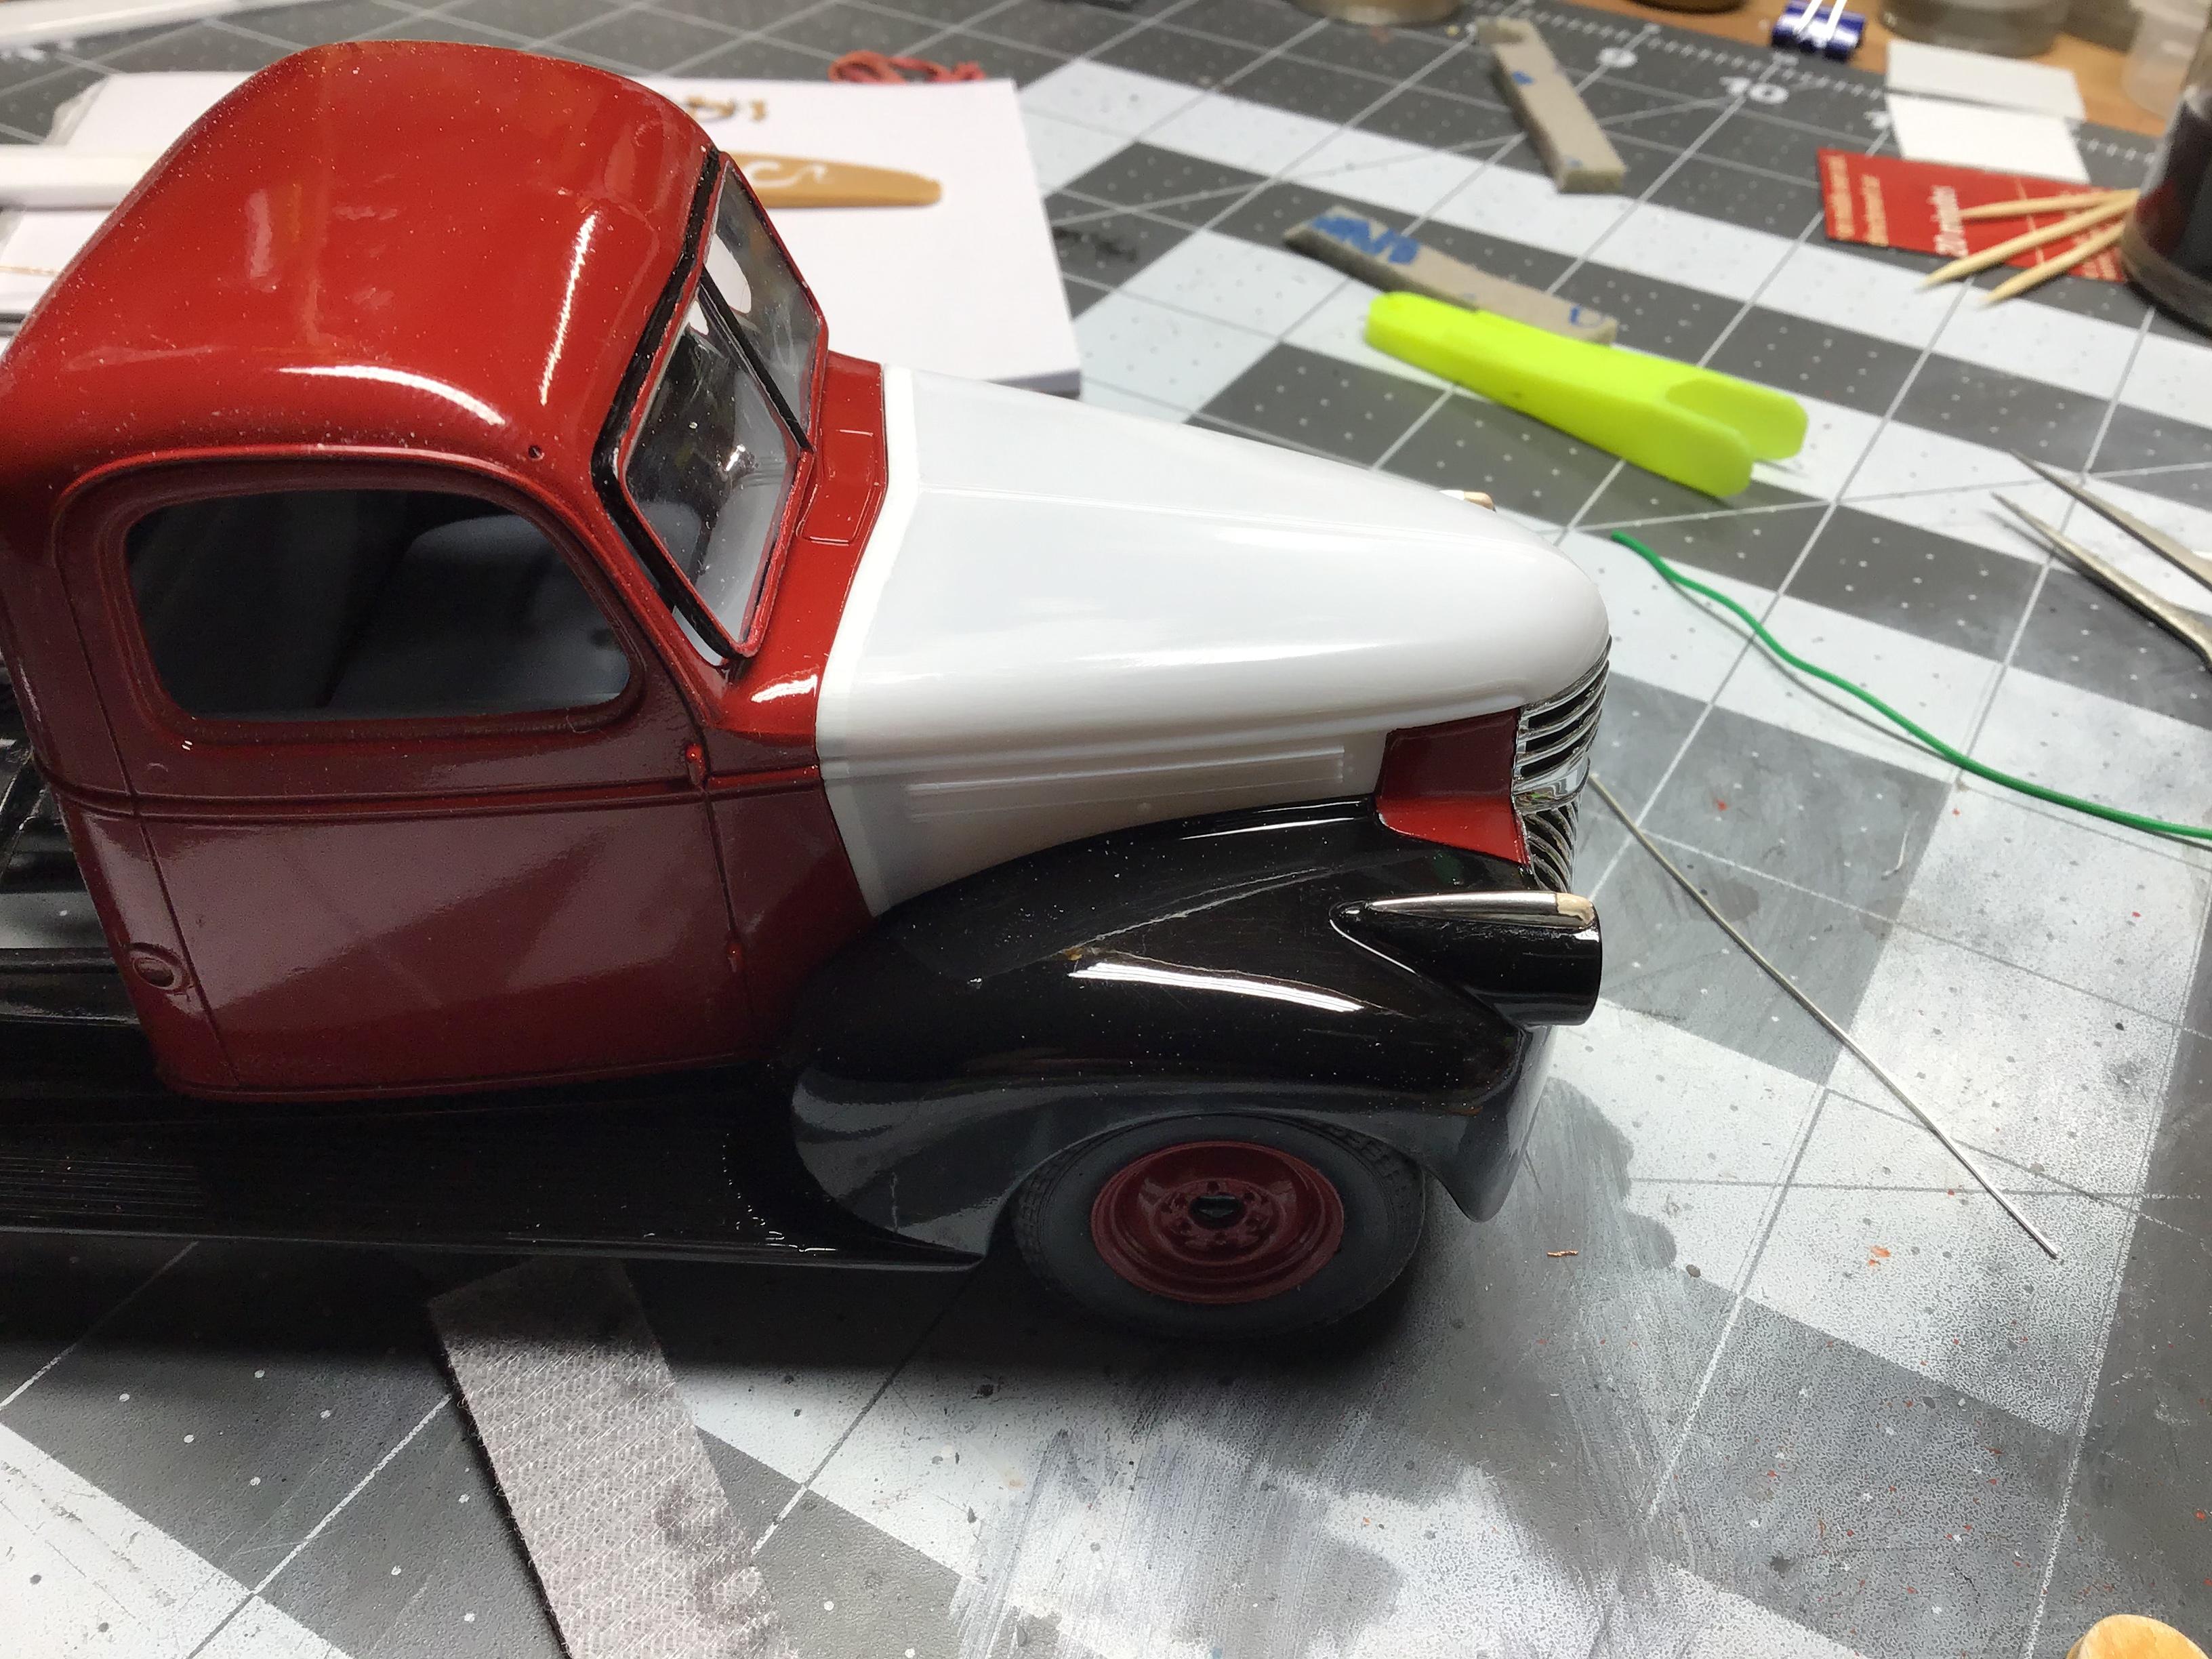
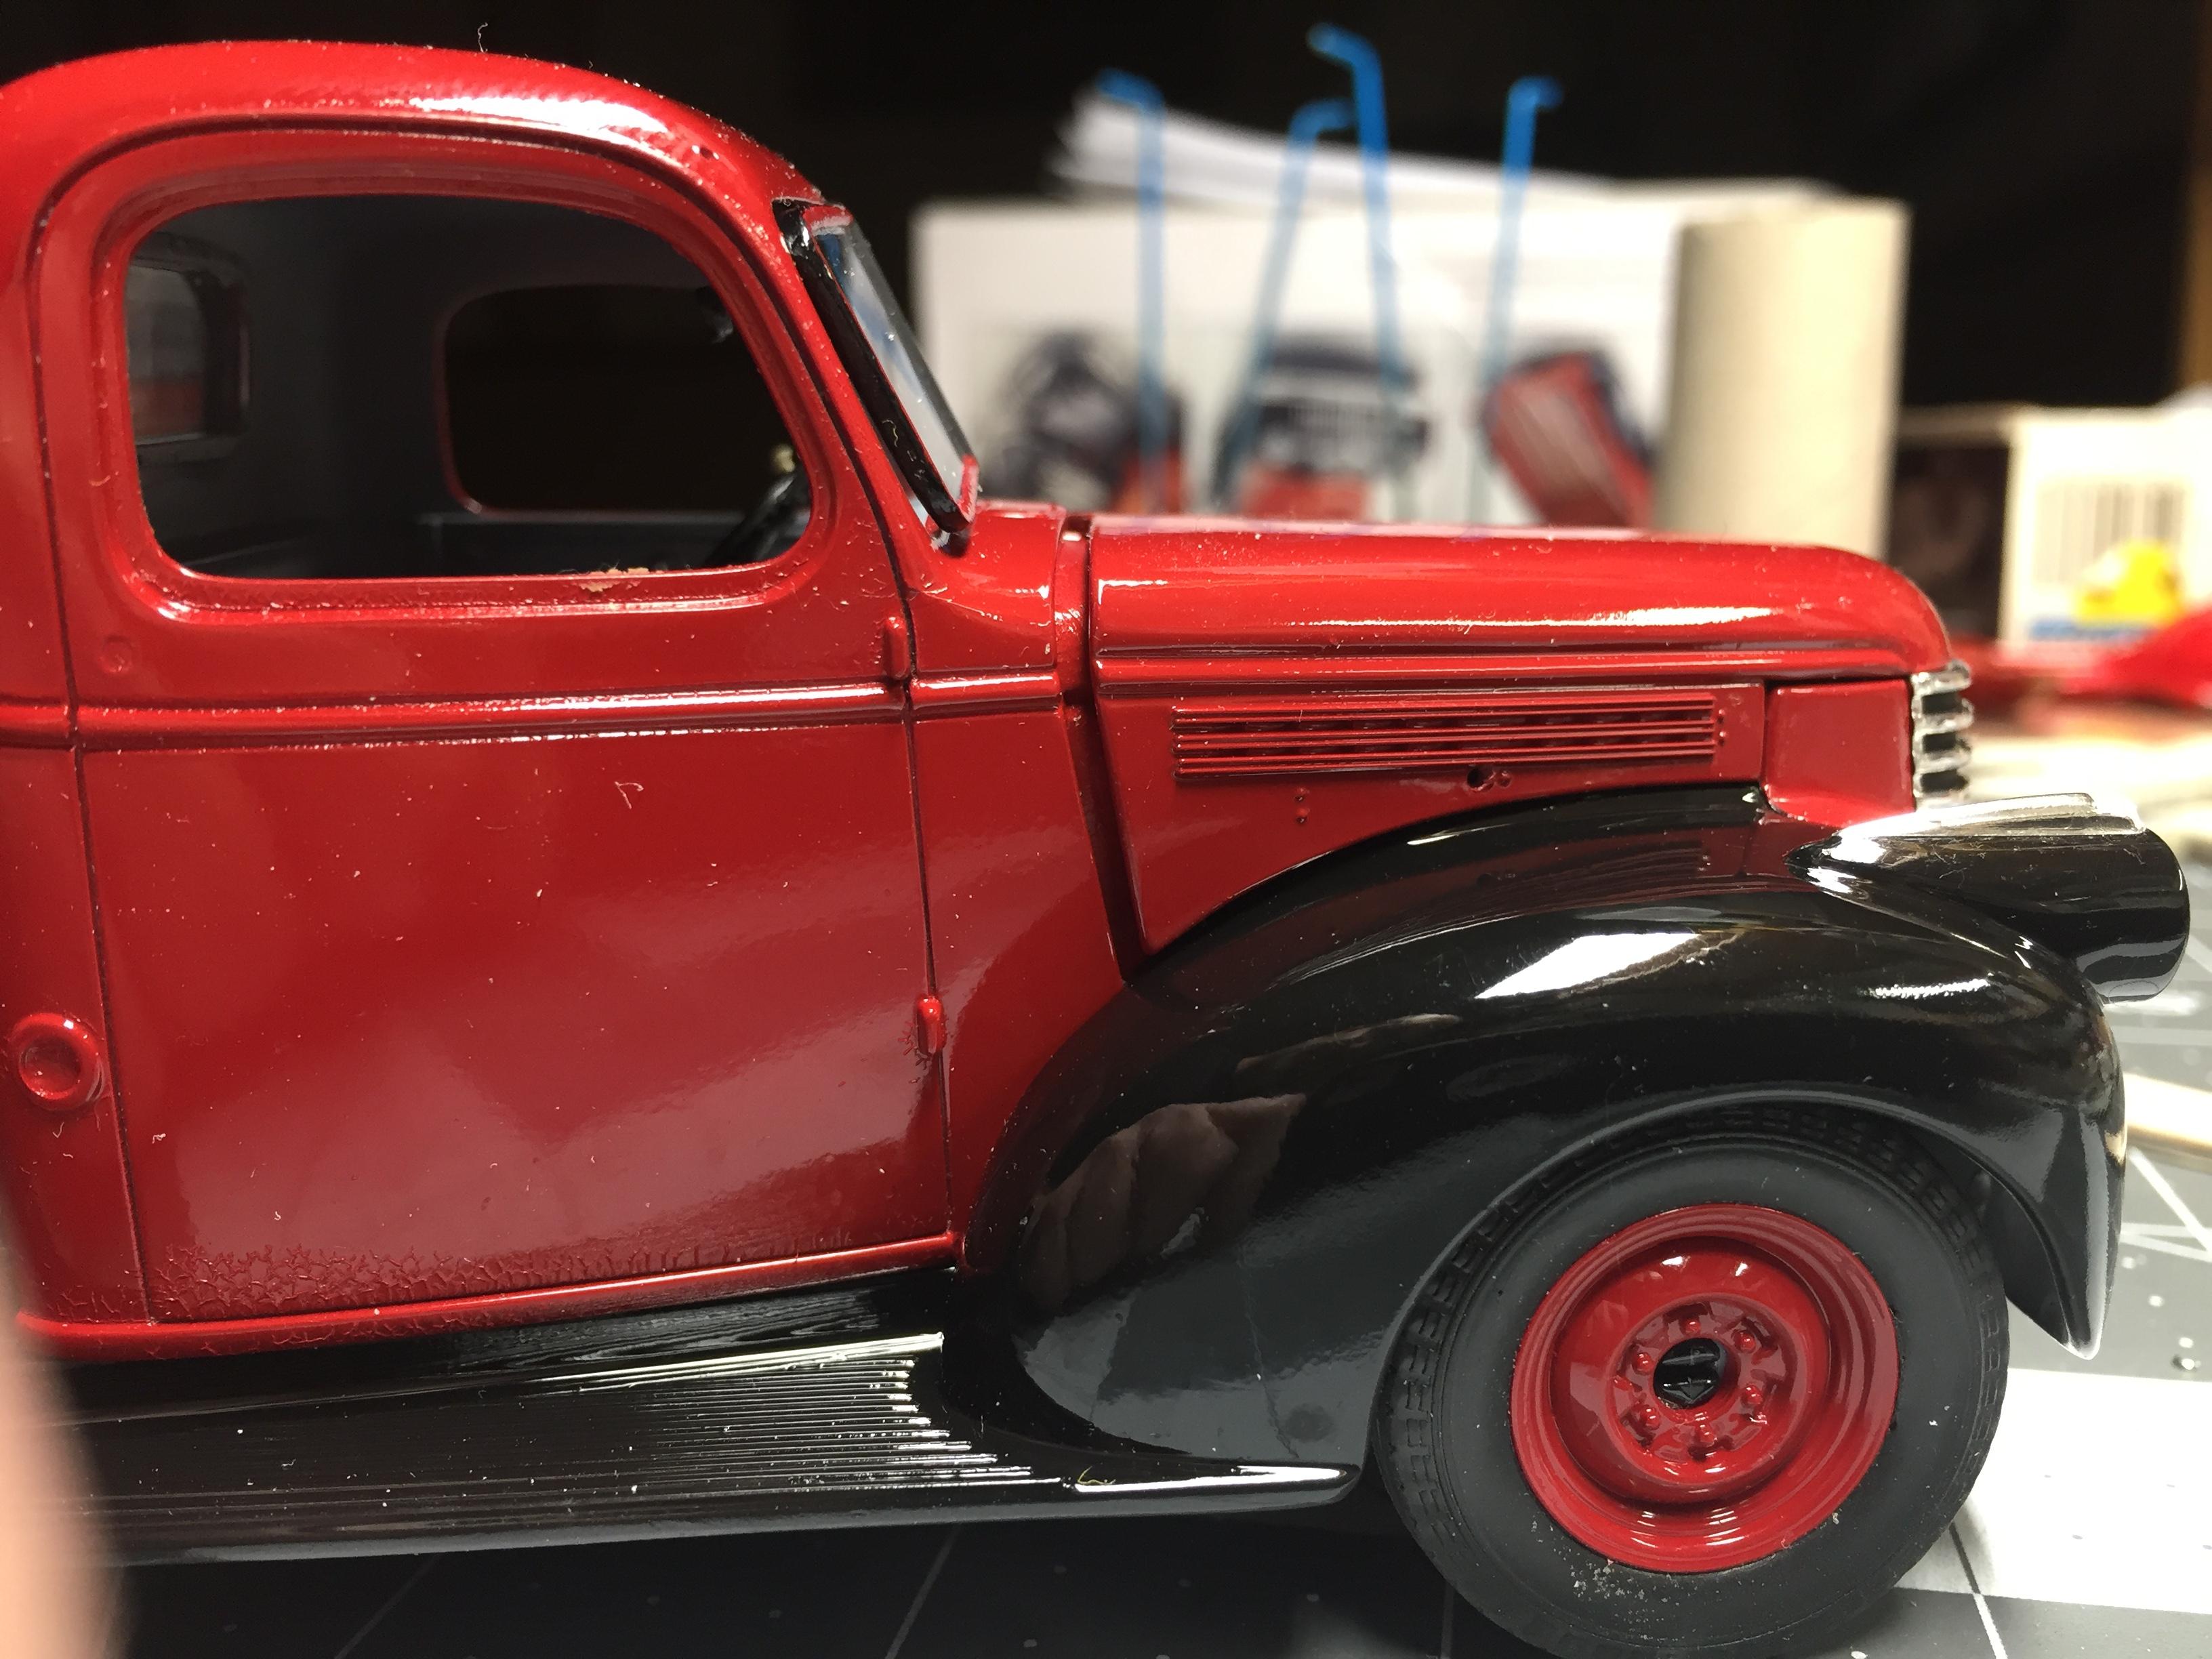
The cab couldn’t really go any farther forward due to the doors. Anyway, I added 0.156” all around the back of the hood and another 0.20” along the top back edge. A little final sanding and she will be ready for paint. I was thinking of hinging the hood down the center, but it is no easy task so I don’t think I will bother.
-
The High Cost of the Hobby
NOBLNG replied to Nitrobarry's topic in General Automotive Talk (Trucks and Cars)
I am on the “cheap” end of the spectrum. I find it hard to spend $45.00 on a new model, more for a Tamiya or...? So I bought just about everything at Michaels with a coupon, and frequent the flea markets. I haven’t bought much aftermarket stuff yet either. That said it is definitely one of the more affordable hobbies if you break it down to dollars per hour, especially if you scratch build parts. -
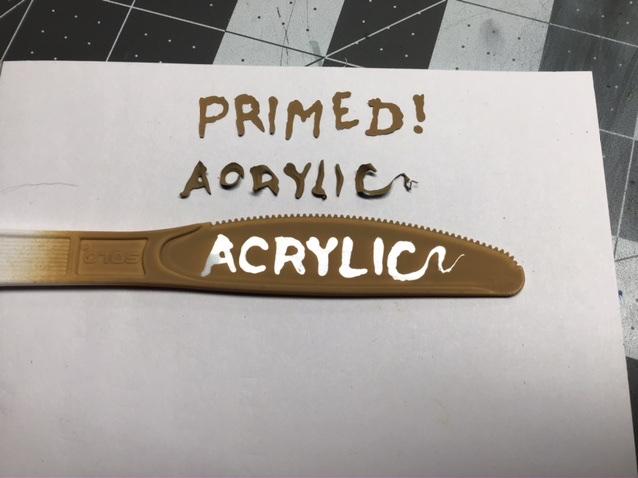
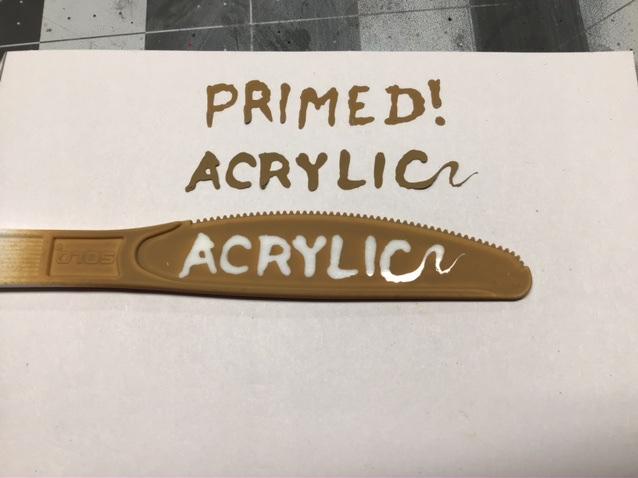
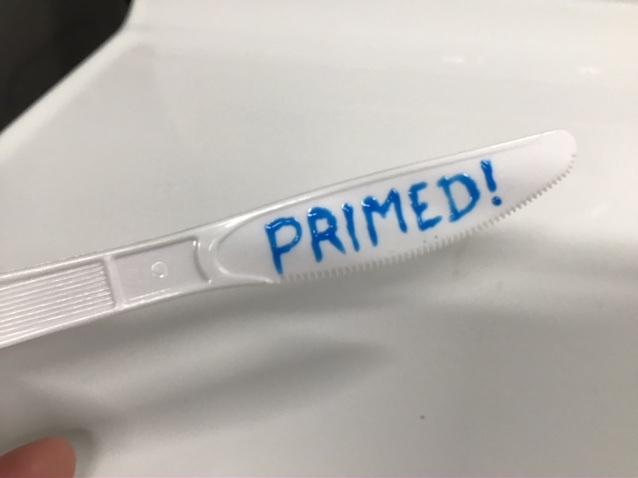
Quite a difference in shrinkage between the primed and non primed mask.
-
It seems to work well with and without primer.
-
Thanks, I will have to go through them and see if all the parts are the same (or close enough). I forgot to mention the kit # is 30083. Edit: Suspension pieces are slightly different, but certainly close enough for building.
-
Got these two today at a local flea market. $5 for the Buick and $15 for the Ford. Assembly instructions are missing from the Riviera, but shouldn’t be too hard to find. Edit: If anyone can send me a link to instructions I would appreciate it, TIA Greg.
-
Wow, that is a beautiful cabinet! How about a picture of your fence?
-
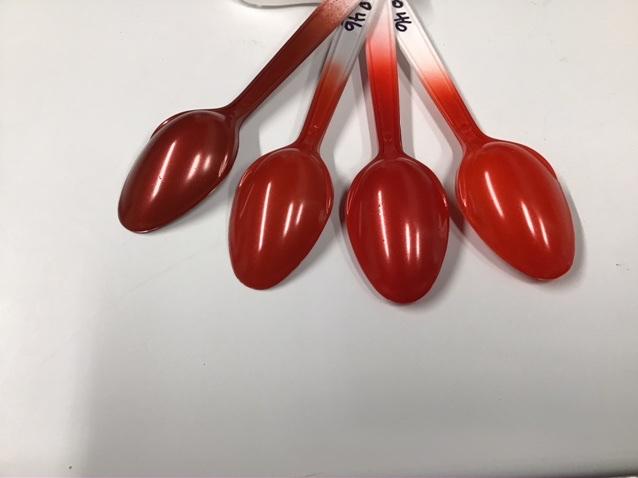
If I had stuck with the x-46 red metallic and the white primer on the left, it would be pretty close.
-
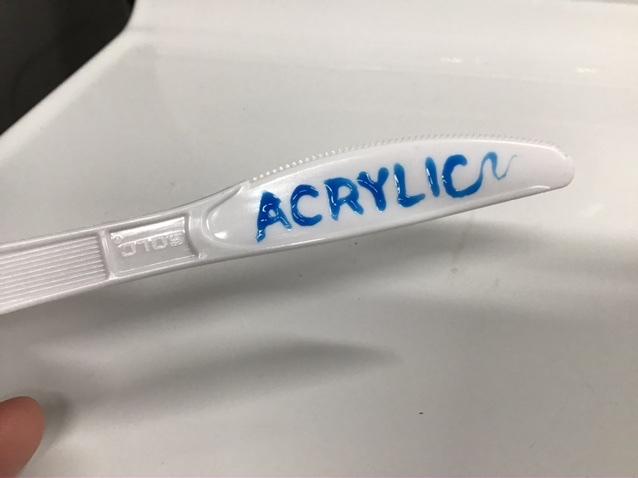
Ok, if the MM “connects” with acrylic paint, is the home made stuff less likely to bond with the paint?
-
In the works,? one side I will cover with tamiya primer, the other straight acrylic paint. I will post results.
-
Biggest pet peeves on builds.
NOBLNG replied to LL3 Model Worx's topic in General Automotive Talk (Trucks and Cars)
One thing that bugs me is those Revell/Monogram boxes that open like a clamshell! they always want to tip over if they aren't on a large flat surface. -
Has anyone used this stuff with acrylic paints, Tamiya in particular? It says not to use it with water-based paint. I want to do parts of a dashboard in acrylic and leave some parts unpainted. It’s too tiny to mask otherwise.? TIA, Greg.
-
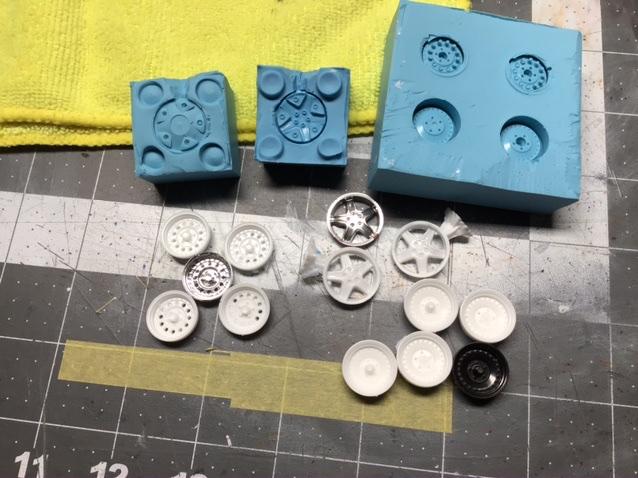
I signed up for a 3 day workshop on resin casting at Artists Emporium. Along with an ugly zombie head, I managed to cast the missing wheel rim for my Ferrari and a couple of the other sets that I only had 3 of. I didn’t do the best job of the mold for the rims with the holes in them...but the missing holes can be drilled out. The centerlines turned out nice.
-
Need some info on AMT '53 Corvette
NOBLNG replied to Hi-Po's topic in General Automotive Talk (Trucks and Cars)
I have the same kit, but mine says "ERTL Stock No. 6552. supercedes AMT Stock No. T310". I bought it at a flea market for $20.00 Cdn. -
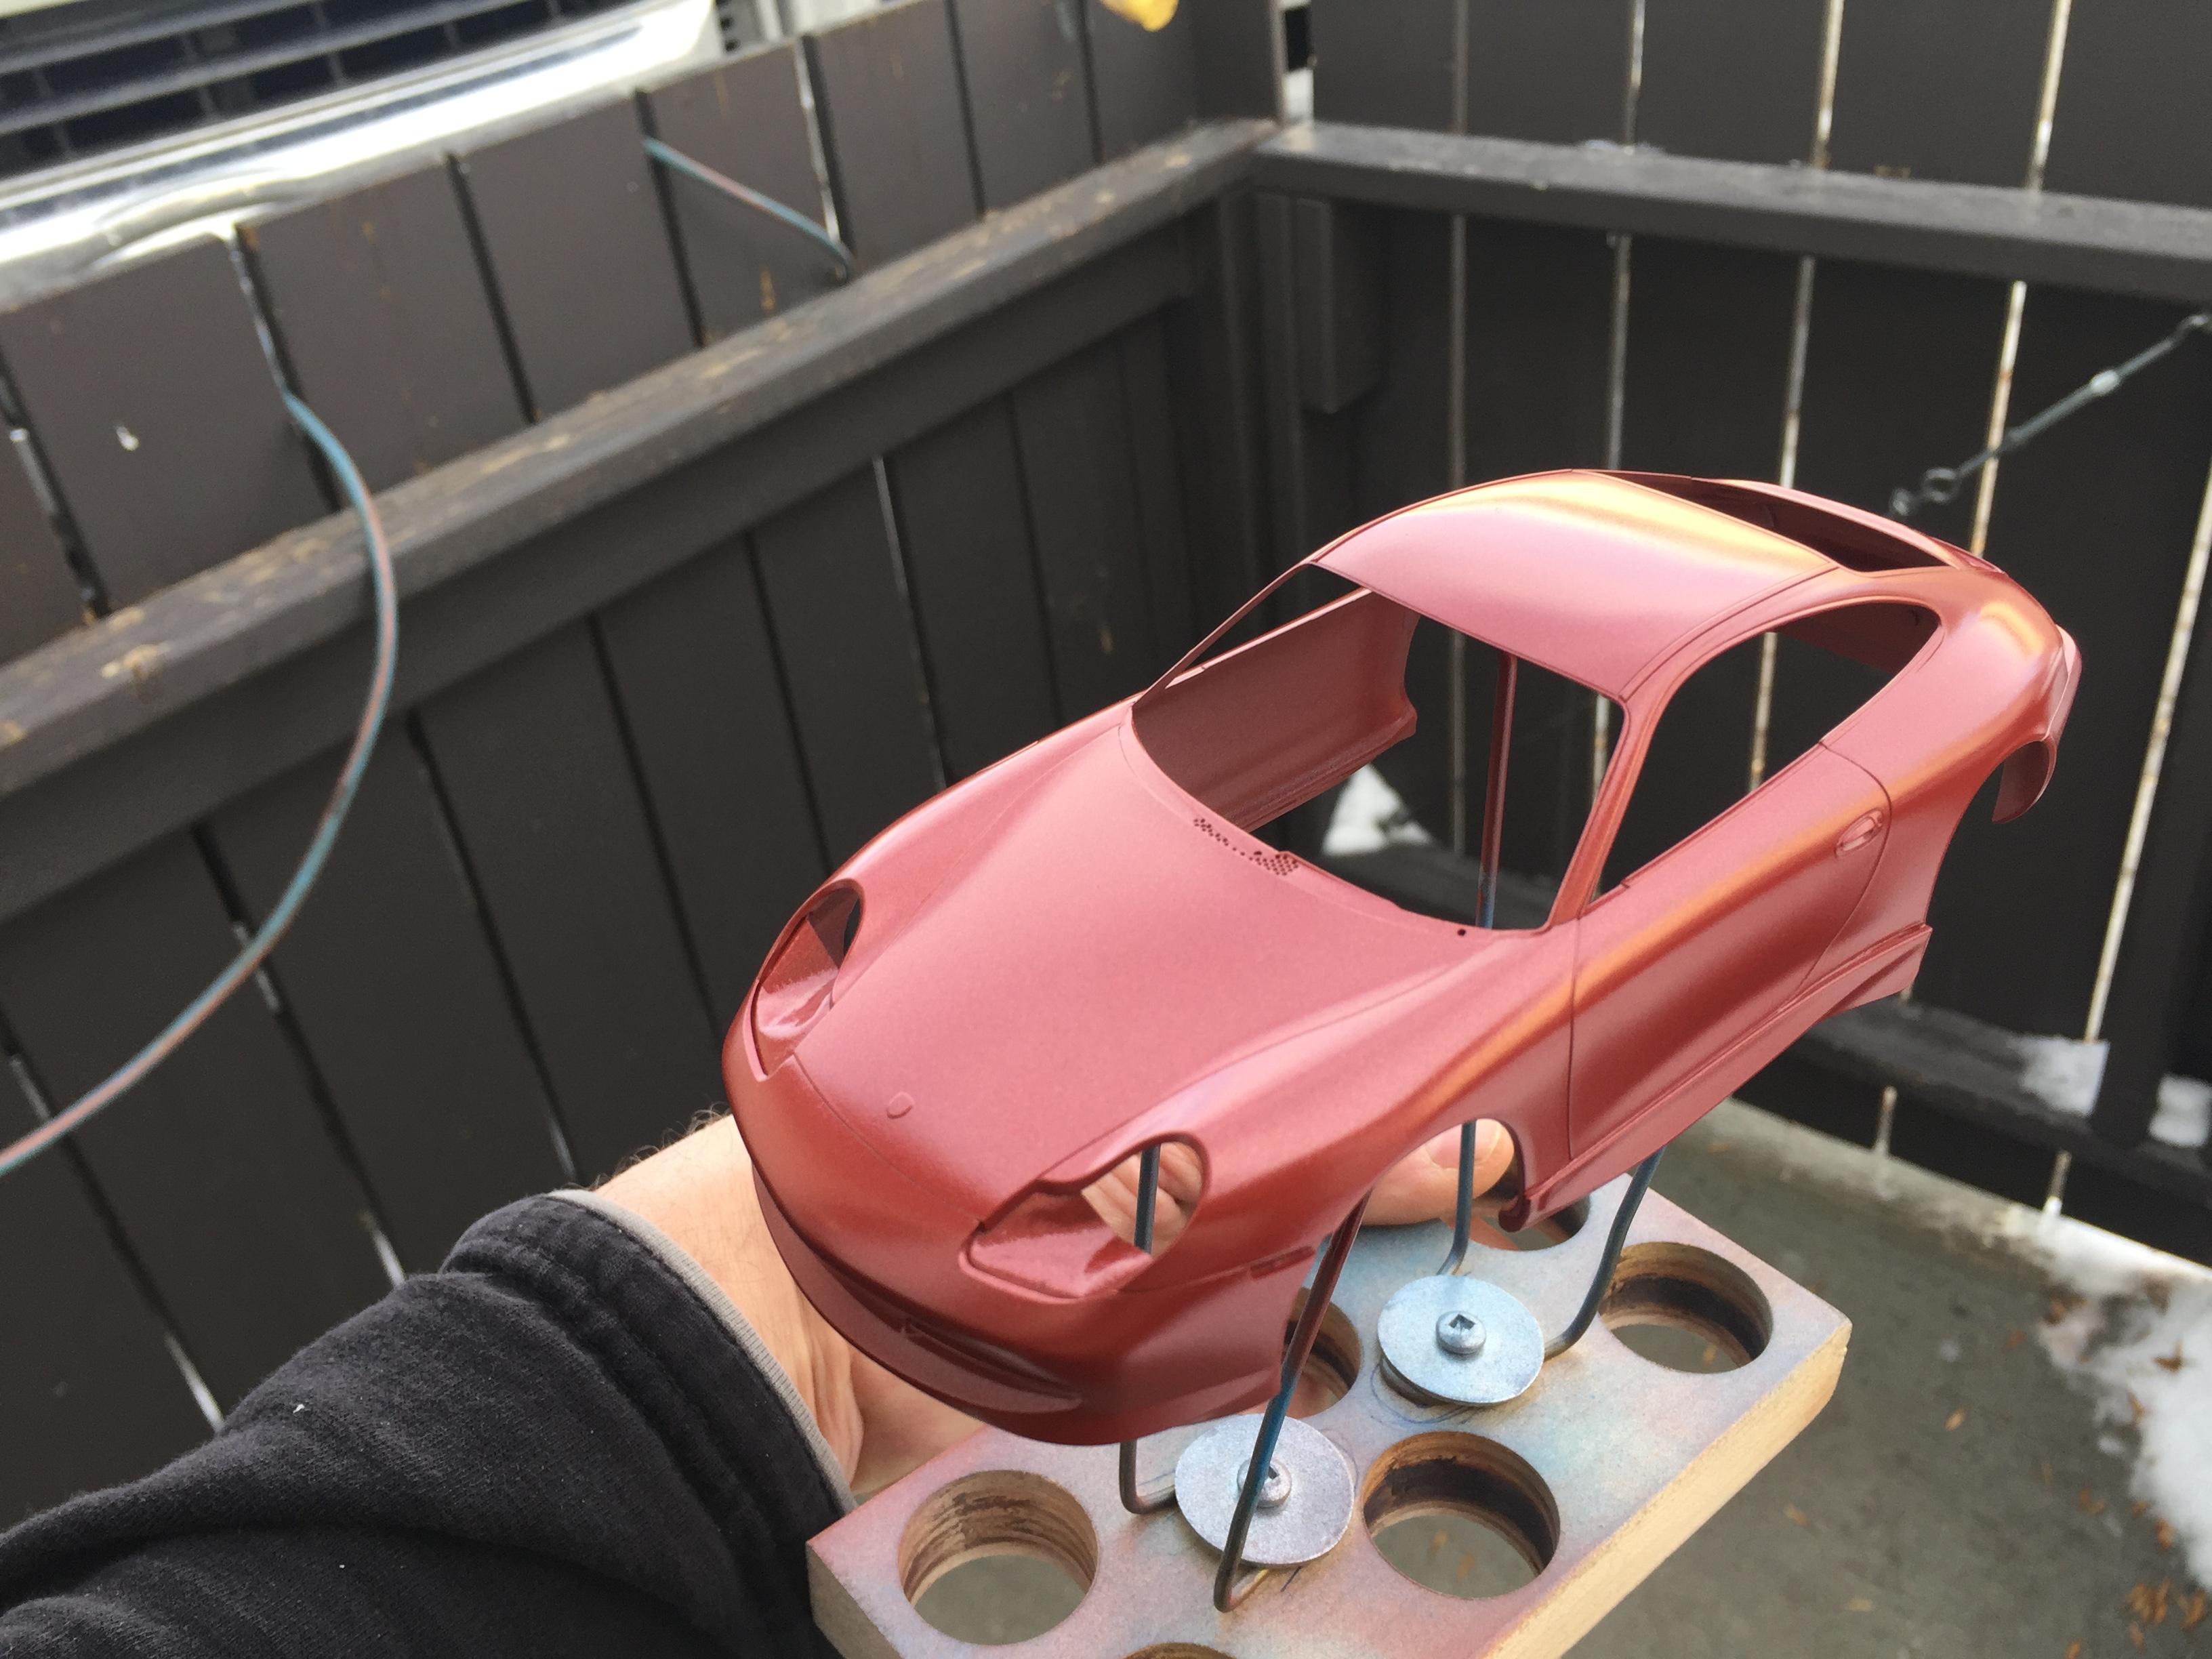
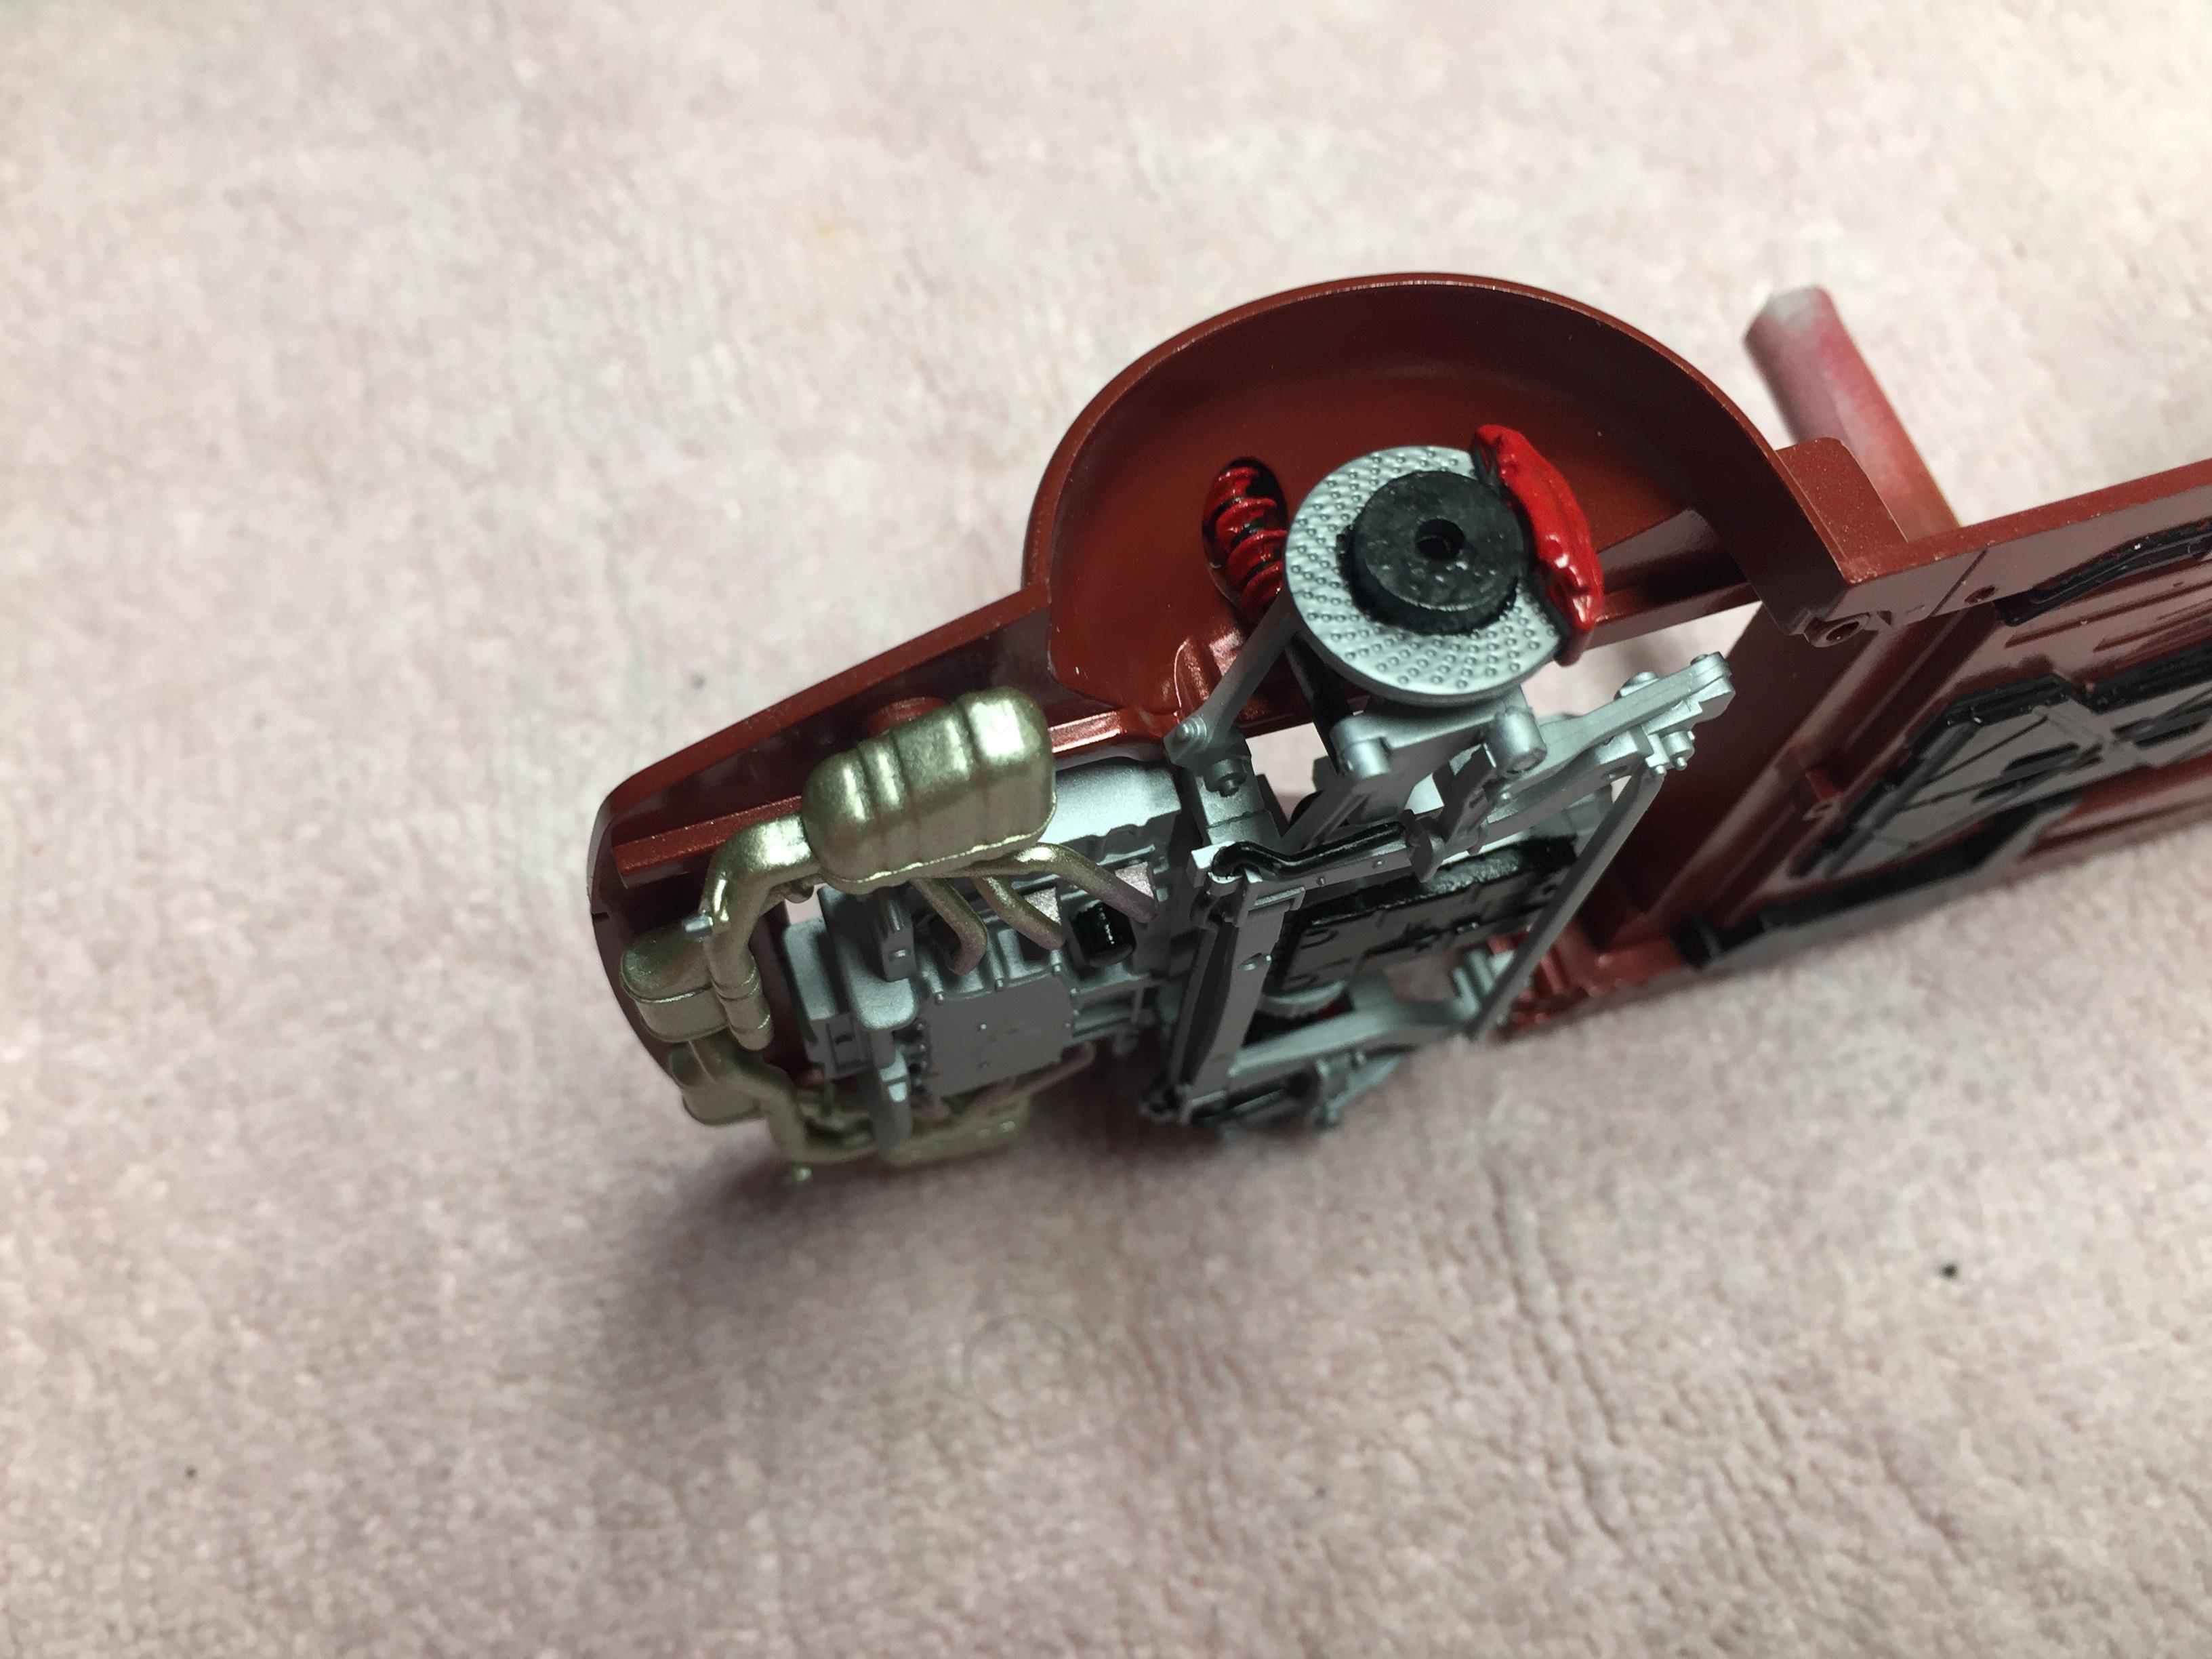
Got a few coats of paint on the body. The pictures don't show the paint very well. I would describe it as a metallic copper-ish color. The earlier chassis pic probably shows it best.
-
This kit is a very easy build since there is no engine to deal with and every thing fits nicely together. I am debating whether to paint the interior or leave it as I am not really a fan of black interiors. Color is Tamiya X-46 over red oxide primer.
-
Best built-right-from-the-box kits?
NOBLNG replied to Jantrix's topic in Model Building Questions and Answers
I am currently building the Tamiya Porsche 911 GT3 and it goes together beautifully! No engine to build and it's molded in three colors so it doesn't really even need paint. -
1955 Big Block Truck
NOBLNG replied to Lorne's topic in WIP: Model Trucks: Pickups, Vans, SUVs, Light Commercial
This looks like it could be a real nice truck! Looking forward to your build. -
'48 Ford F-1 Phantom
NOBLNG replied to Plowboy's topic in WIP: Model Trucks: Pickups, Vans, SUVs, Light Commercial
I agree. I like the looks of it now! -
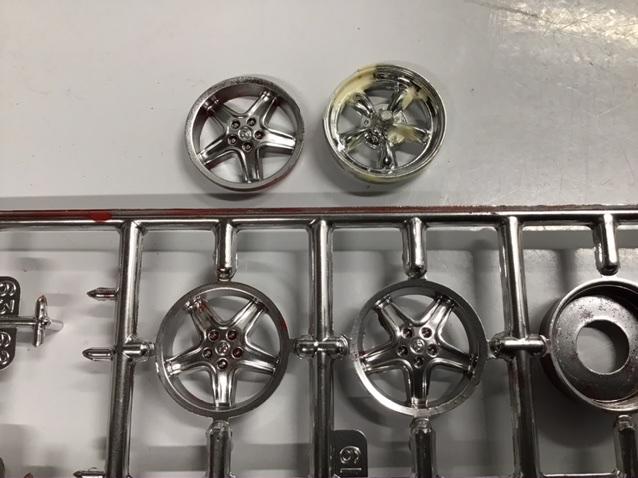
I started trimming the flash off a flea-market Ferrarri that I thought was complete, only to find that one wheel rim does not match the other three ?.
-
'41 Chevy Pickup
NOBLNG replied to NOBLNG's topic in WIP: Model Trucks: Pickups, Vans, SUVs, Light Commercial
Thanks All. Paint is Premier Colonial Red from Canadian Tire, decanted and airbrushed. The Testors gloss clear-coat didn't affect the paint on my test, but did wrinkle it on the cab a bit, but I don't feel like stripping it and starting over. It turns out the hood doesn't fit very well either. I did test fit the cab (it was pushed as far forward as possible) and I made some locating pins for it, but I didn't test fit the hood. If I had, I likely would have had to notch the front fenders a little deeper to get the cab farther forward?
-
Not actual work on a car...but an accomplishment. I made an airbrush cleaning pot. It cost me $3 for the PVC elbow and the copper I had laying around.
-
'66 Suburban
NOBLNG replied to avidinha's topic in Model Trucks: Pickups, Vans, SUVs, Light Commercial
Really nice. Great job on the rack and ladder! -
1969 C10 shortbed
NOBLNG replied to plasticfrog's topic in Model Trucks: Pickups, Vans, SUVs, Light Commercial
Excellent job on those flames! Love the stance and the wheels too. -
'53 Ford Pick Up
NOBLNG replied to lordorion1974's topic in Model Trucks: Pickups, Vans, SUVs, Light Commercial
Nice clean build. I like it!