Hermann Kersten
-
Posts
595 -
Joined
-
Last visited
Content Type
Profiles
Forums
Events
Gallery
Everything posted by Hermann Kersten
-
What semi would you like in a kit?
Hermann Kersten replied to Bobcat205's topic in General Automotive Talk (Trucks and Cars)
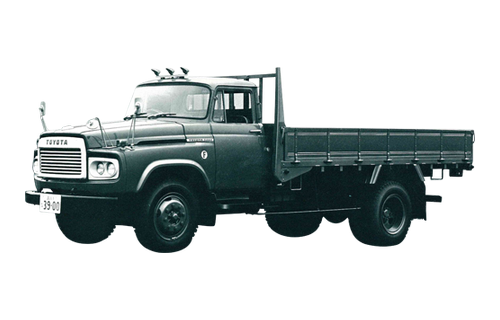
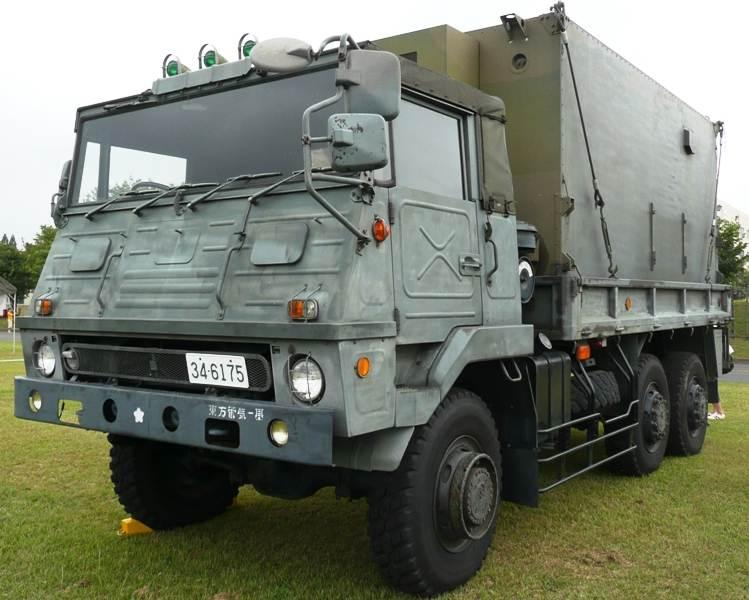
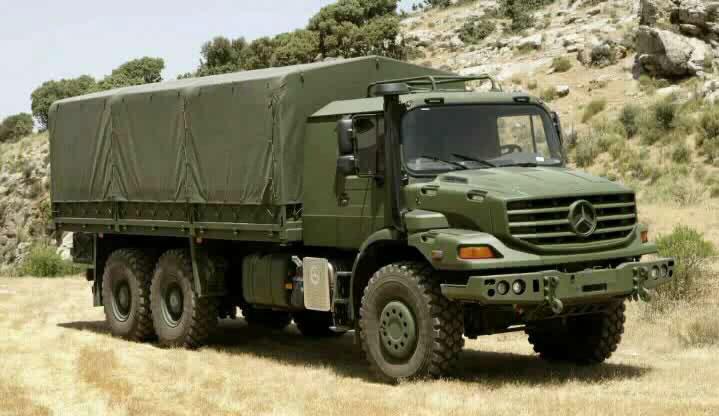
Mercedes Zetros, any model of the Marmon COE, and some Japanese trucks in 1/24, like the.... Isuzu SKW or a Toyota FA-100.....or another Japanese classic truck. Well.....it will stay with dreams, it will probably turn out that I have to scratch build them myself. Hermann.
-
Hahaha.....very recognizable to me.?? Hermann.
-
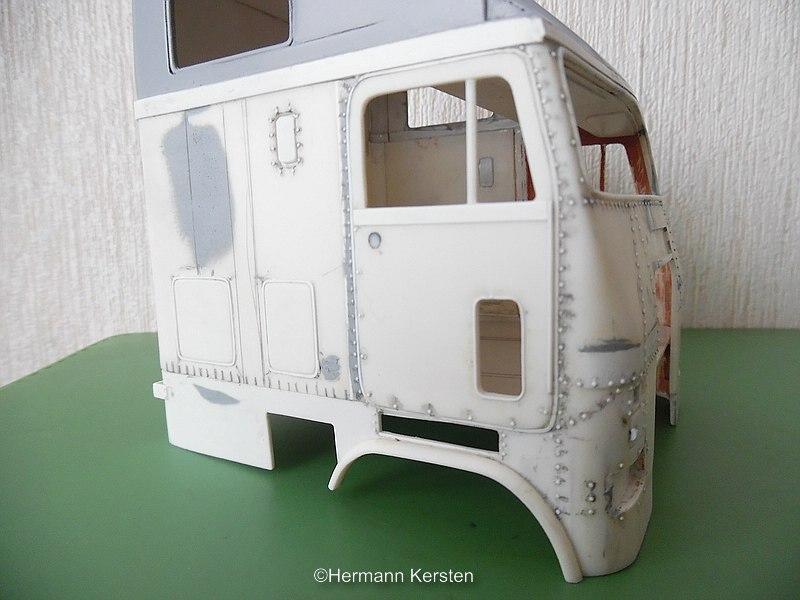
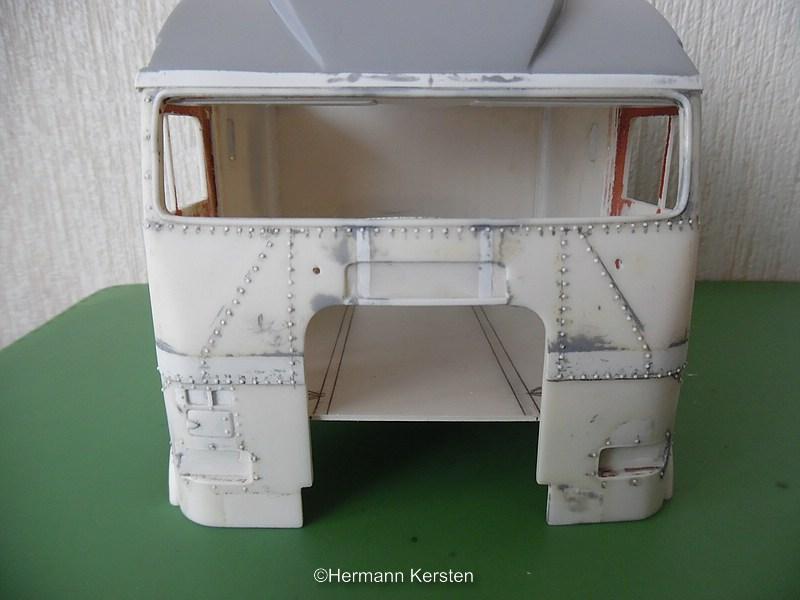
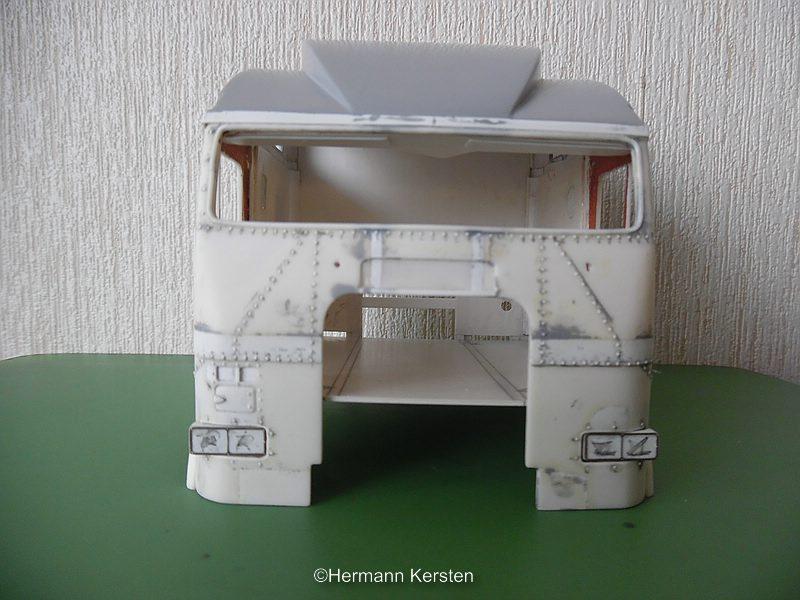
Thank you for the nice comments guys! Today i show you the start of the work of the rivets. The misleading thing about this work is that you are easily mistaken by the numbers of the rivets, there are more on a cabin than you actually think there would be. Anyway, i punched already 200 rivets and made a start with the front and passenger side. In the front i made also the inspection hatch and the air openings at the right side of the cab. And the headlight units loosely placed. The metal parts of the CTM headlight set are glued with Loc-tite super glue, and I put some extra glue at the metal and styrene area, all around the unit . When the glue has hardened, then you file and sand away the excess glue around the light unit to become a smooth surface without any seam between the metal- and the styrene part. With paint you will see that it looks like, that this part is made out of 1 whole. That's it for today and see you next round! Hermann.
-
Awesome details Tom, really awesome. When this project is finished, can you also play with it......because all the workable stuff like the chains, tracks, track tensioners etc? Hermann.
-
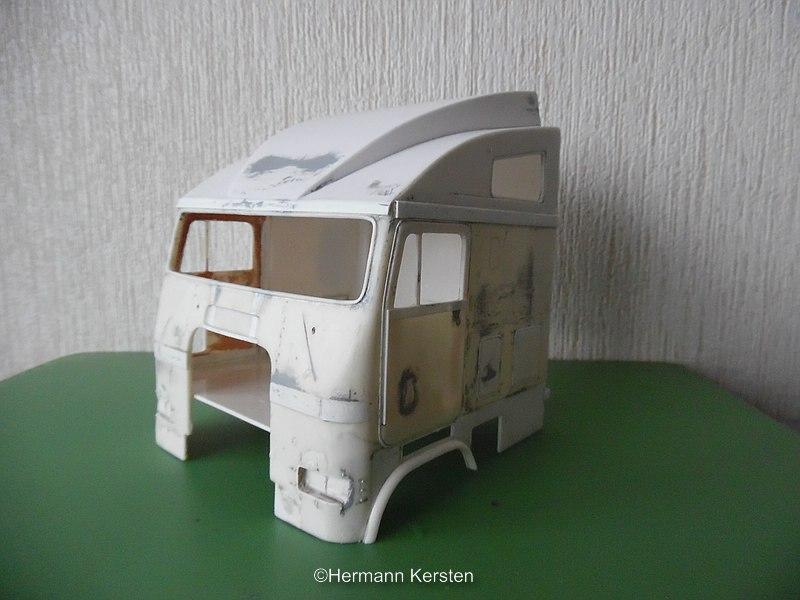
Hello everyone, Yep, i sprayed some primer to see if there were spots that needed some attention, but all was good and smooth. With 1 layer of grey primer the roof immediately gets a different look. At the both front corners I removed some material, because on later term the sun visor will be mounted on these spots. The side of the sun visor must be even with the side of the roof. The headlining of the ceiling with the storage compartments is also done now and attached on the inside of the roof. Now I can continue with the interior and later with the rivets. Fortunately the roof does not need rivets, because in this case it is a pretty long roof. That's it for today and see you next round! Source: Hank Truck Pictures by Gary Morton Hermann
-
Great subject and a great build. Hermann.
-
BRBO Mack B815 Logger
Hermann Kersten replied to Warren D's topic in WIP: Model Trucks: Big Rigs and Heavy Equipment
Here the same experience, and exactly the same thought.? Hermann. -
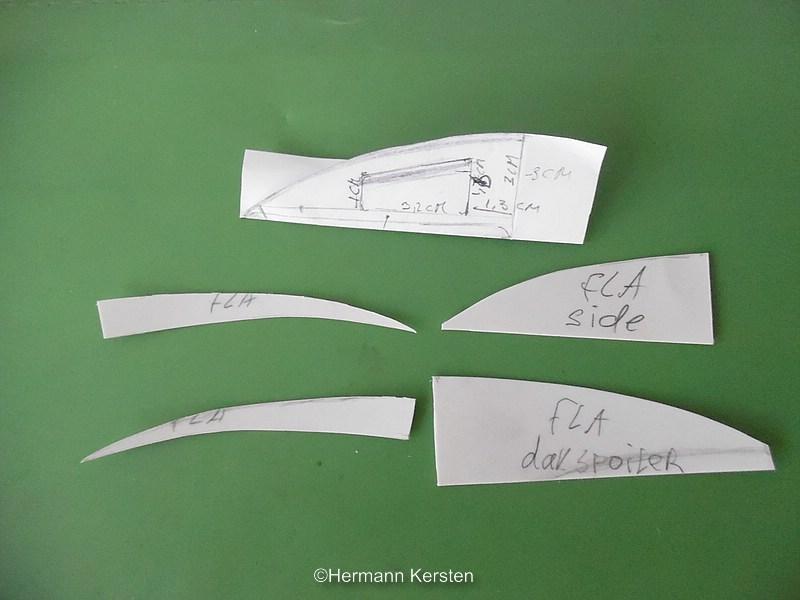
Thank you for the nice comments and liking this project guys! The Werner catches me, but there are so many nice choices, so at this point i really don't know what or which it's gonna be. Well guys, the roof is done. For this conversion, i keep the self made templates for just in case of a future build. On the inner side of the roof i drilled 3 small holes, so the fumes of the glue can leave the hollow space, this is better for the drying process. Then i try to show you that the side walls start from the back with an angle, and when the side wall follows the curve to the front, it will stand straight up. With a template i draw the curved lines on both sides of the roof, so that with the construction it's more easy to keep the upper roof symmetric. At the front i had to add a 0,5mm, or for the Americans a .020 thick plate to get the right shape at the front side. There is not really a good reference picture of that, because all the raised roof documentation i could find, there was or is always the sun visor what hides this area. After a lot of sanding and some filling and sanding again, i get the right finishing at the front. I can not promise or guarantee that these dimensions i made for this roof are accurate, but after some try and error i think it worked on this one. Then some pictures of the progress so far. Ok guys, that's all there is for today, see you next round! Source: Unknown Hermann.
-
Ah, good to know Patrick.......i only don't have that kit. It's not a problem anyway because i will modify the seats a bit, and i saw at various Fuso reference pictures also some differences in seats. Thank you for the nice comment Brian. Hermann.
-
Livestock Trailer
Hermann Kersten replied to dragstueck's topic in Model Trucks: Big Rigs and Heavy Equipment
Great build with awesome details. Hermann. -
International Unistar CO-7044a
Hermann Kersten replied to dragstueck's topic in Model Trucks: Big Rigs and Heavy Equipment
And another great build! Perfect build in a perfect setting! Hermann. -
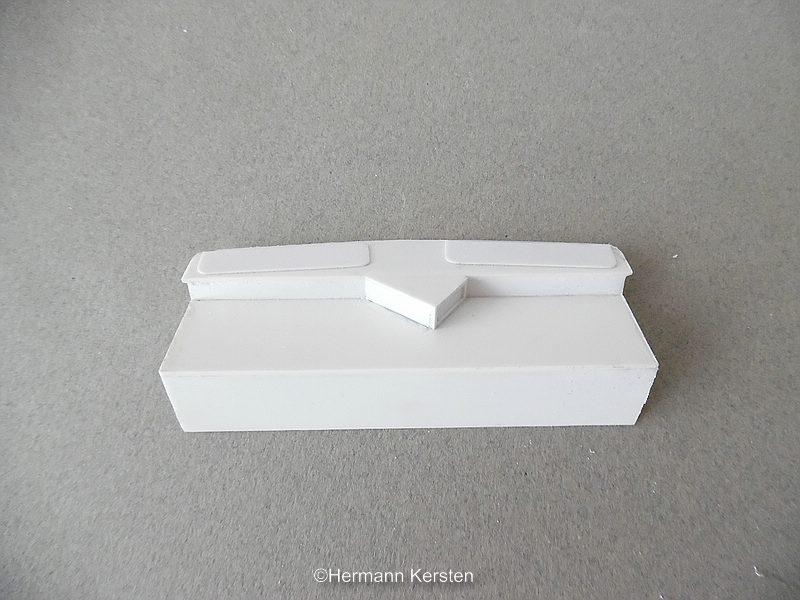
Thank you Chucky! Yes Vince......again and on my own.? Ok guys, the first part of the roof is done, which means that the roof is closed. With this job i have the strength for the cabin back, and after some checks on a flat surface for tipping or twistings, but i saw that the cab is absolutely straight all around. For the inside I made the headlining in the ceiling and the start of raw shape of the storage compartments in the raised roof area. Then a picture to show that i cut the upper part of the front shield area and keep it around a little less then 4mm left, to glue the roof on it. And a look from the window side...... And slowly an interior grows inside the cabin. With the bigger windows in the raised roof, there will be later a good sight into the cab. Now i have to make the higher middle spoiler on the roof to complete the whole appearance of the raised or high roof. Later i will make also the side fenders behind the cab to make the whole cab more massive. For the nice looks i ordered the 2 Hole rims for the rear and 10 Hole for the front, should be looking good on this one. That's all there is for today, and see you next round. Source: Hank Truck Pictures by Gary Morton. Hermann.
-
Ford Aeromax 120 RV Conversion
Hermann Kersten replied to vincen47's topic in WIP: Model Trucks: Big Rigs and Heavy Equipment
The RV looks Absolutely perfect, the decals are a really good fit with the colors. Hermann. -
BRBO Mack B815 Logger
Hermann Kersten replied to Warren D's topic in WIP: Model Trucks: Big Rigs and Heavy Equipment
Very nice project, the details are awesome. The chains are a very patience job, i did it once with a semi tractor, needed a lot of pins to keep the chains in 1 place.? Hermann. -
Nice paint job, colors match very well. Hermann.
-
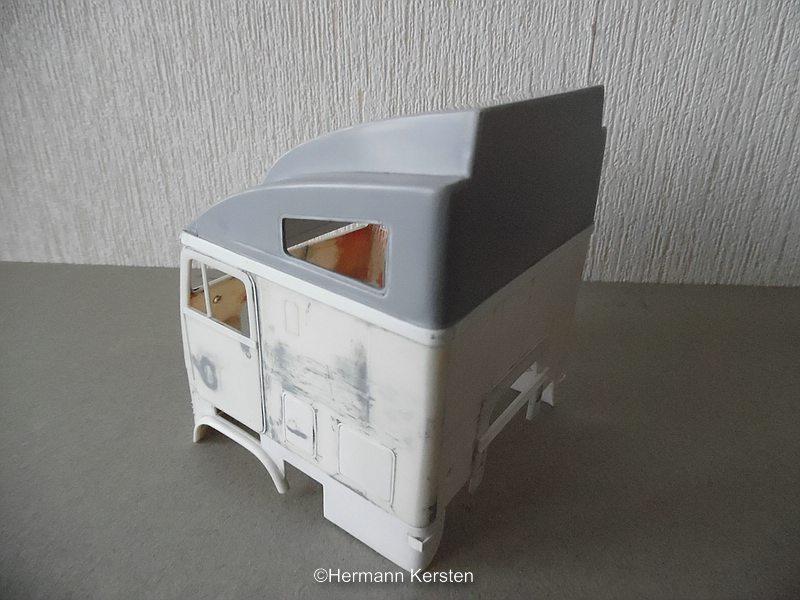
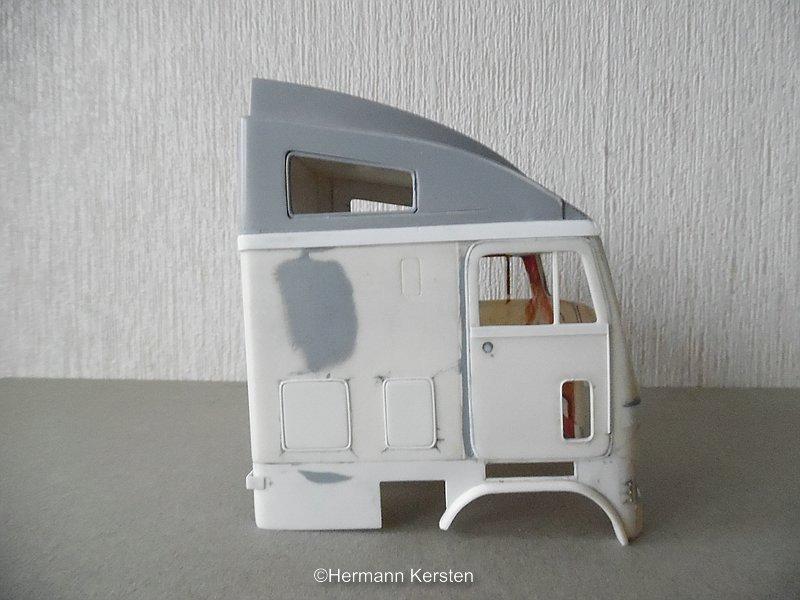
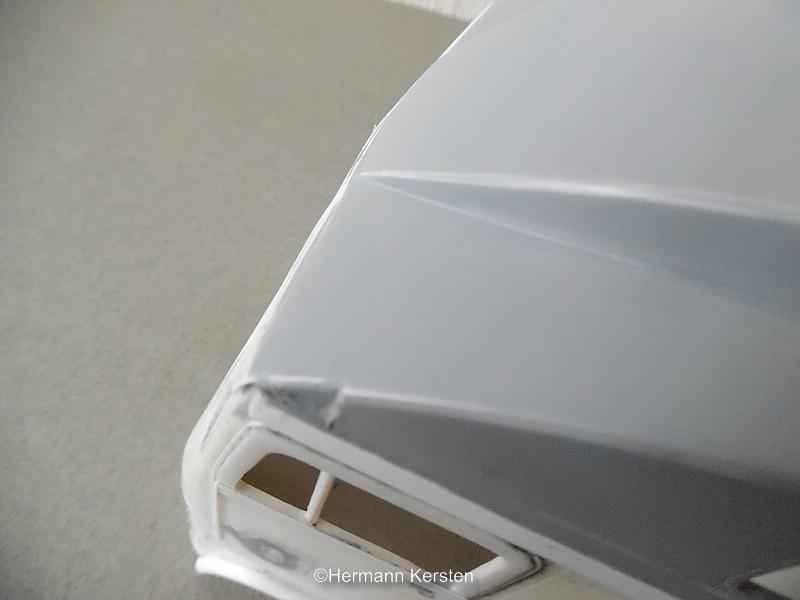
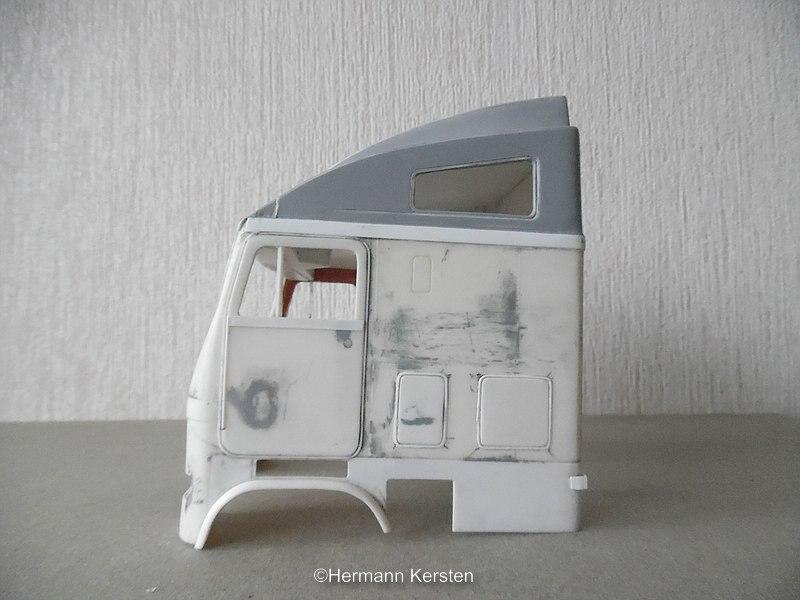
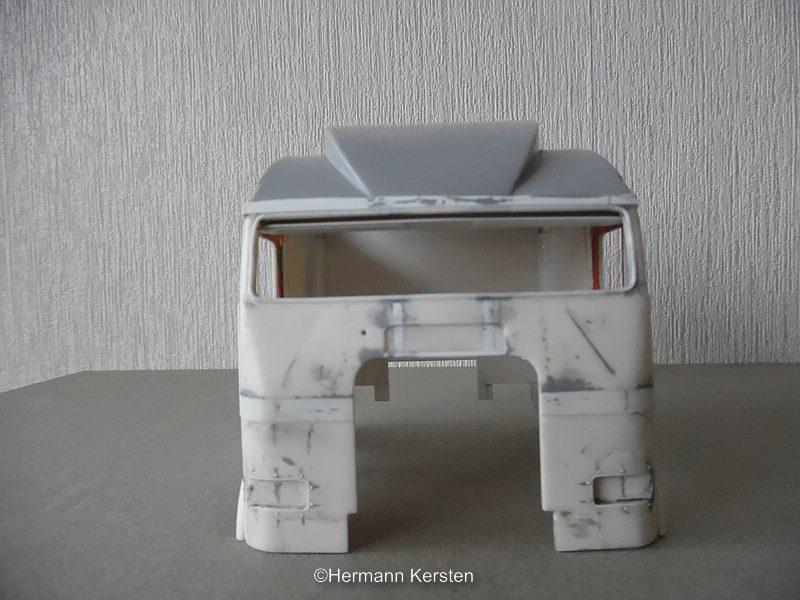
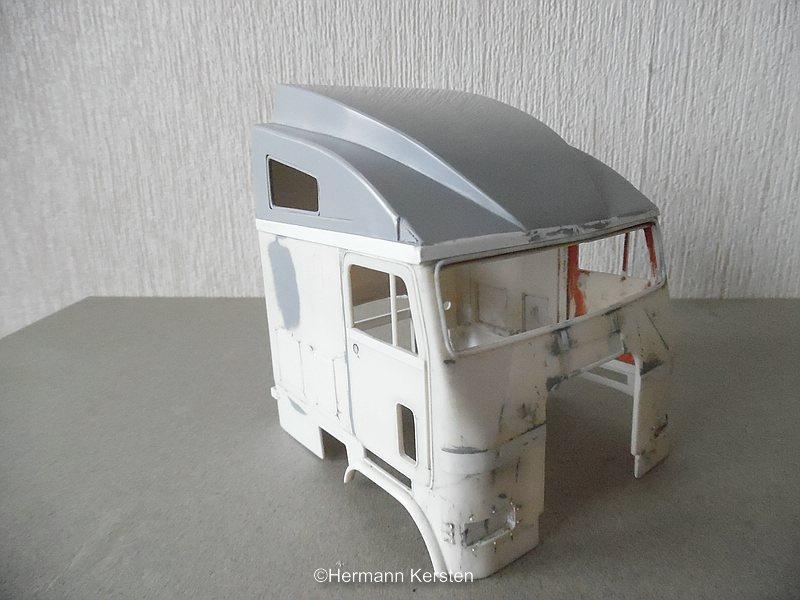
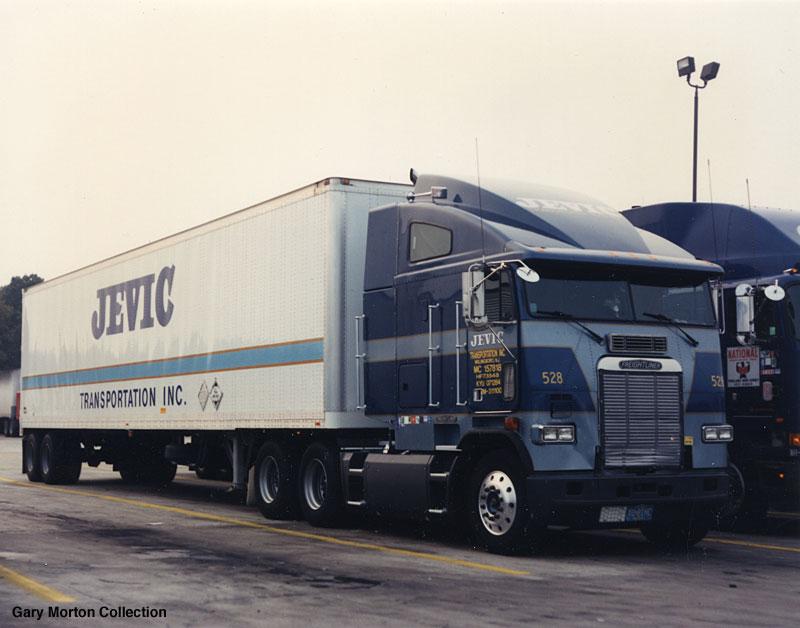
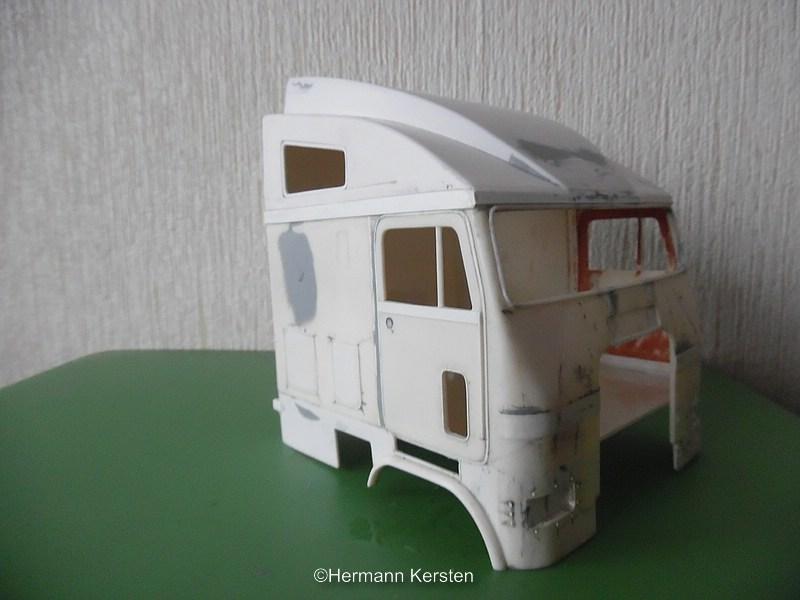
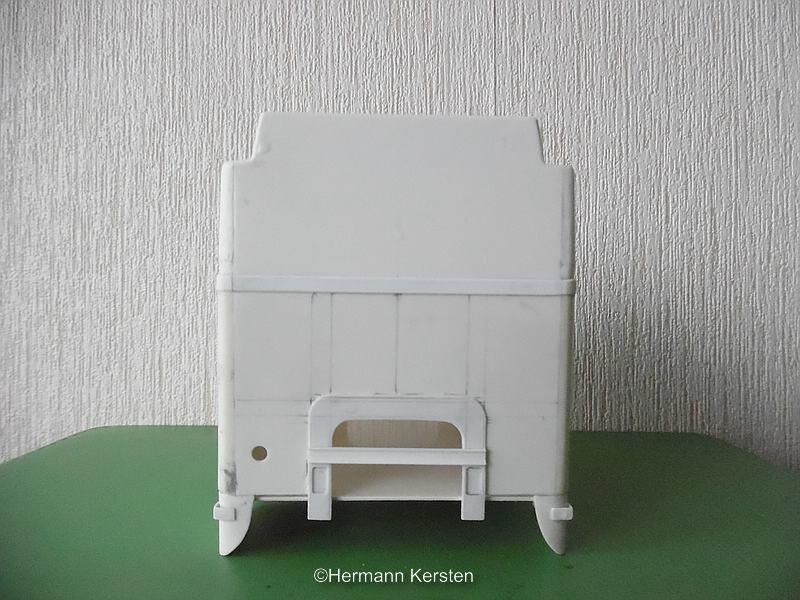
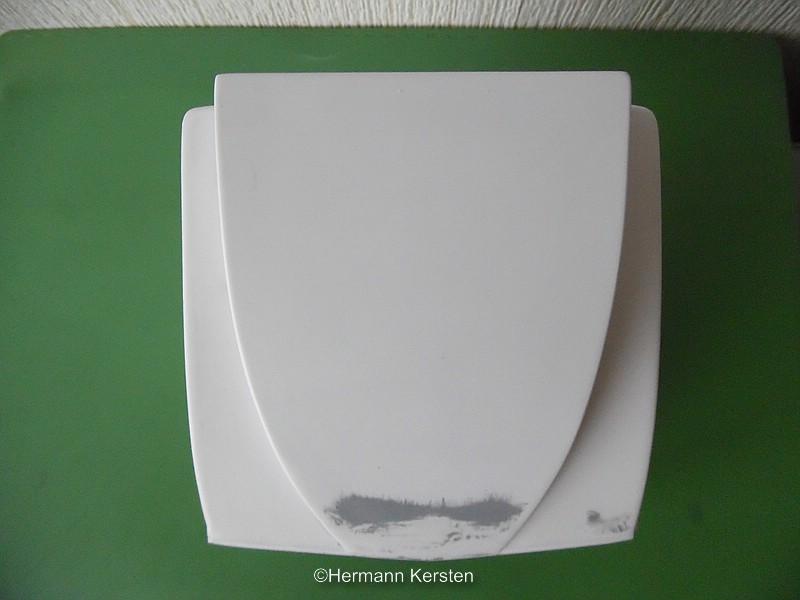
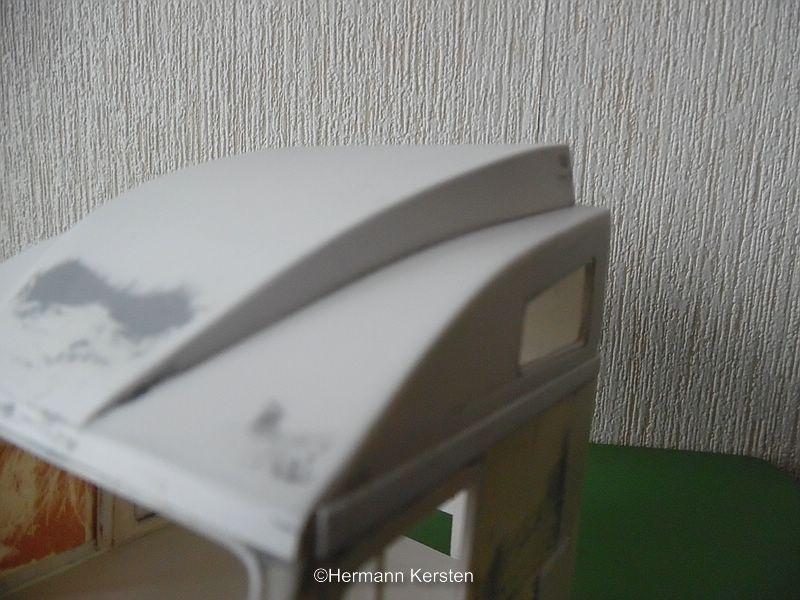
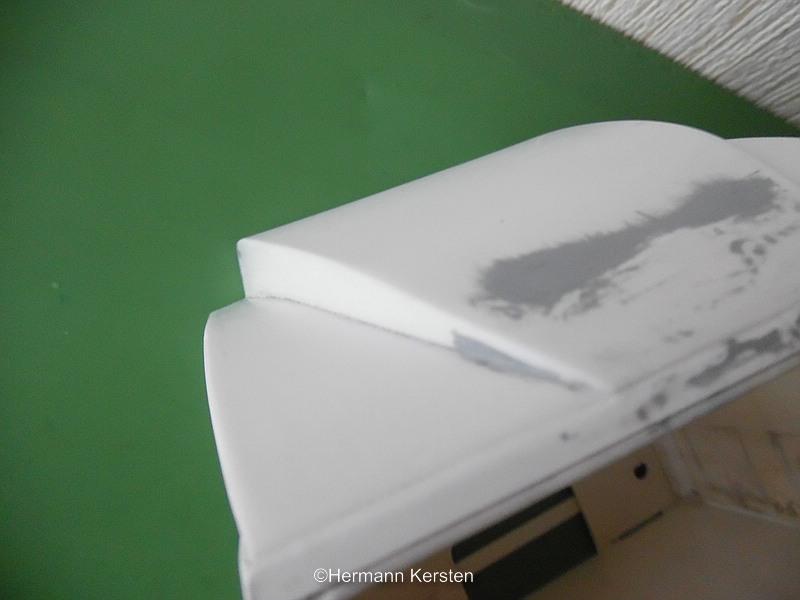
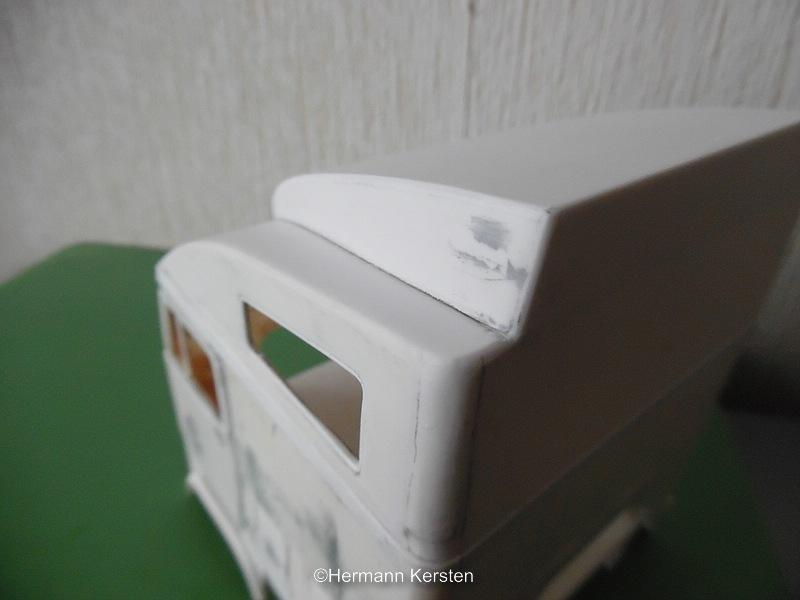
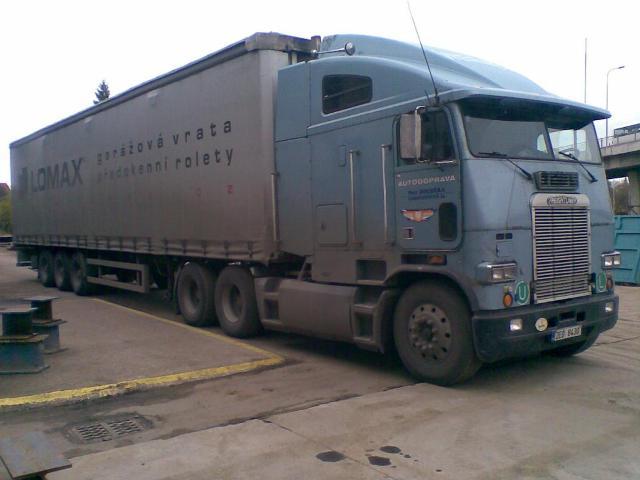
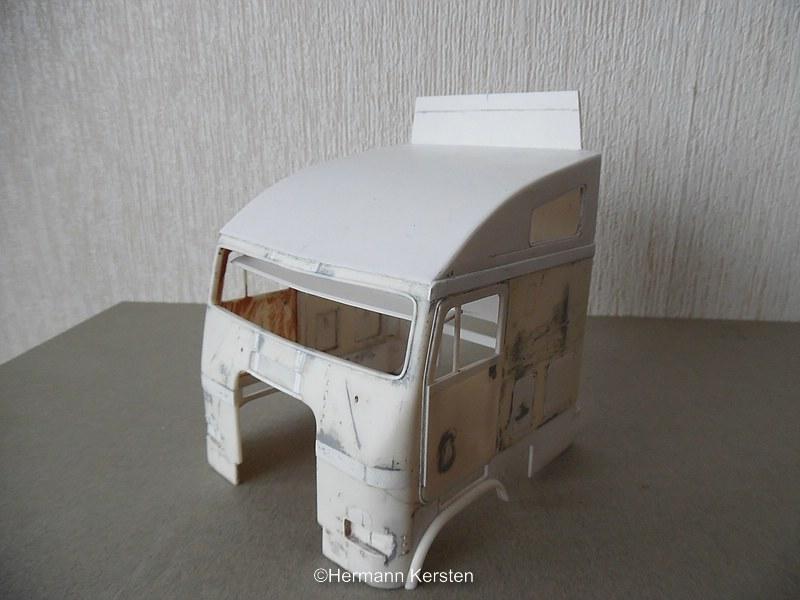
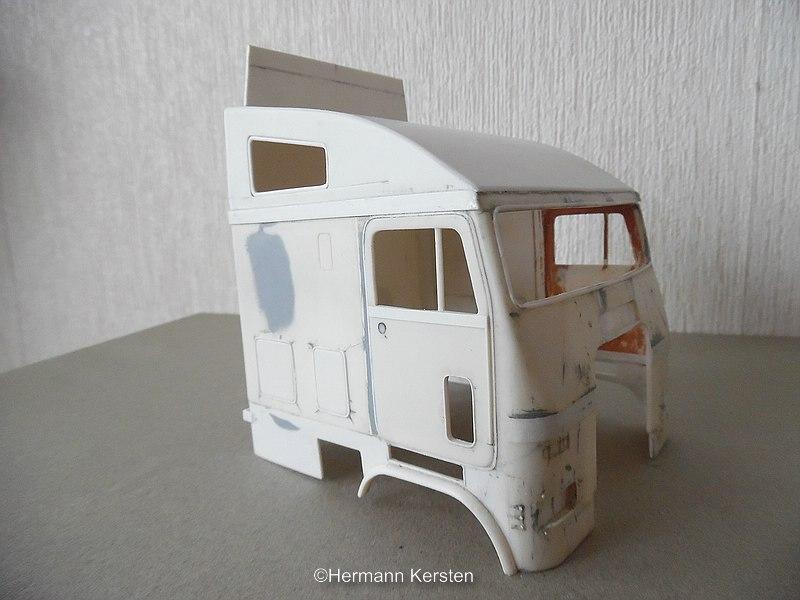
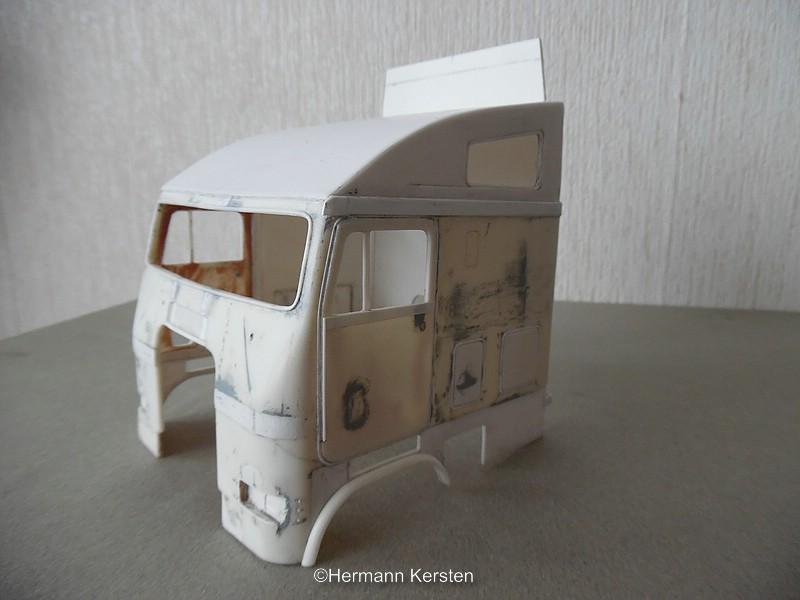
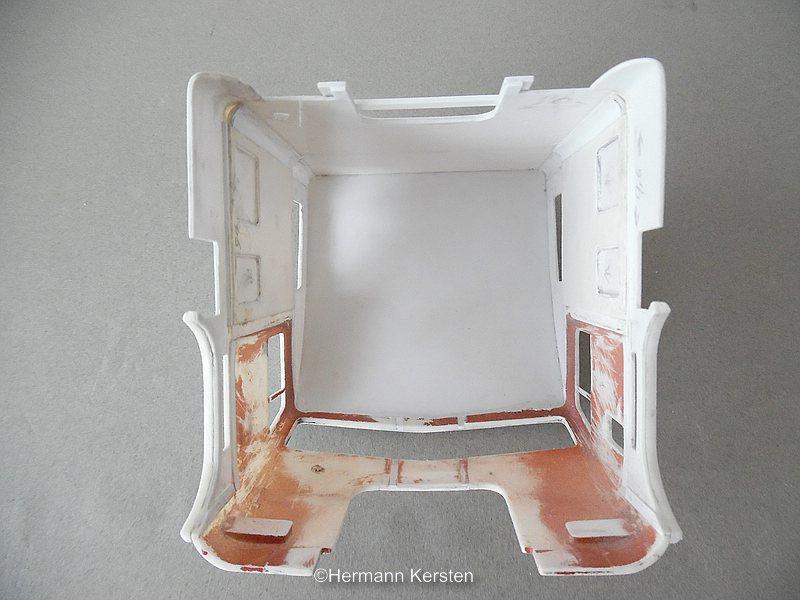
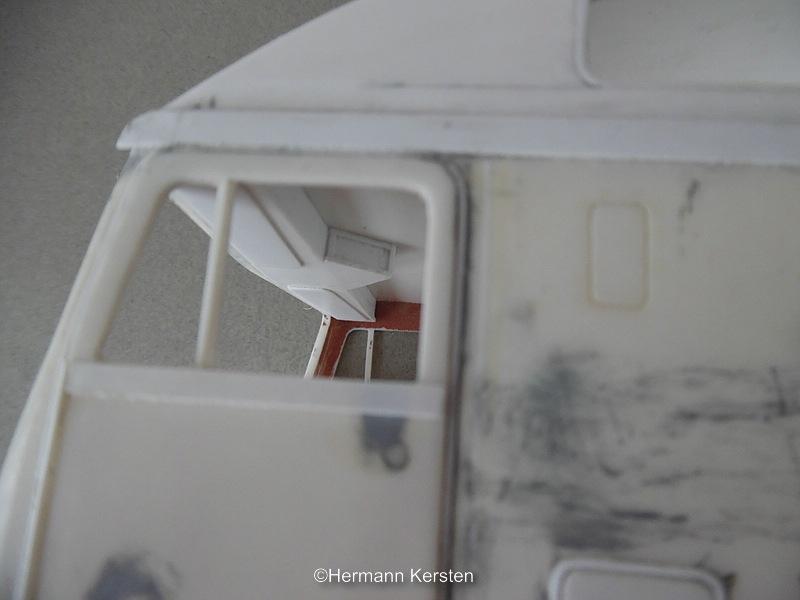
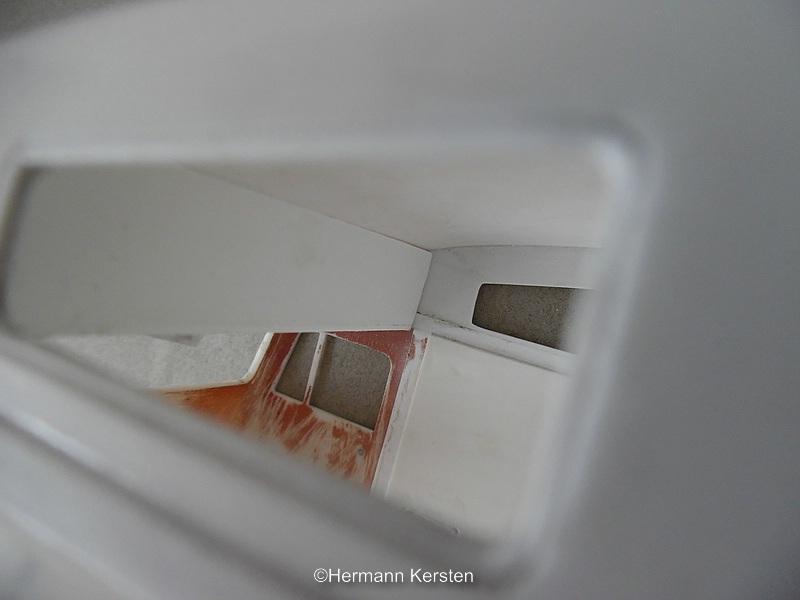
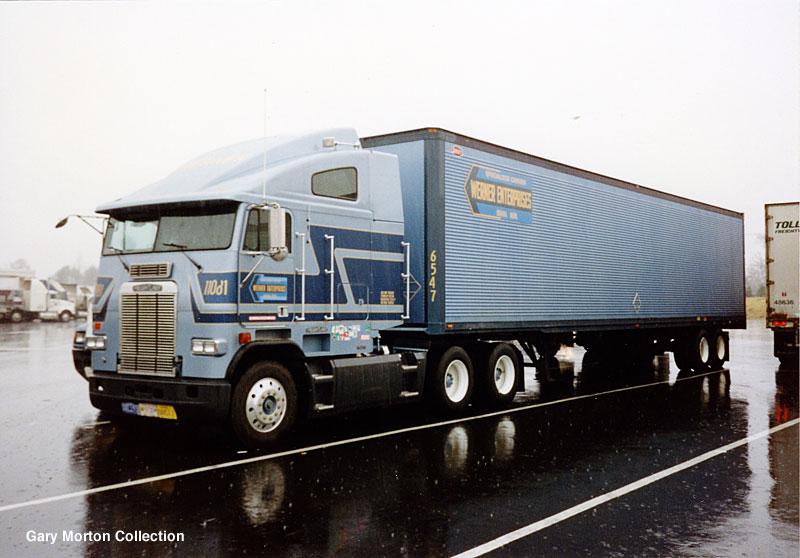
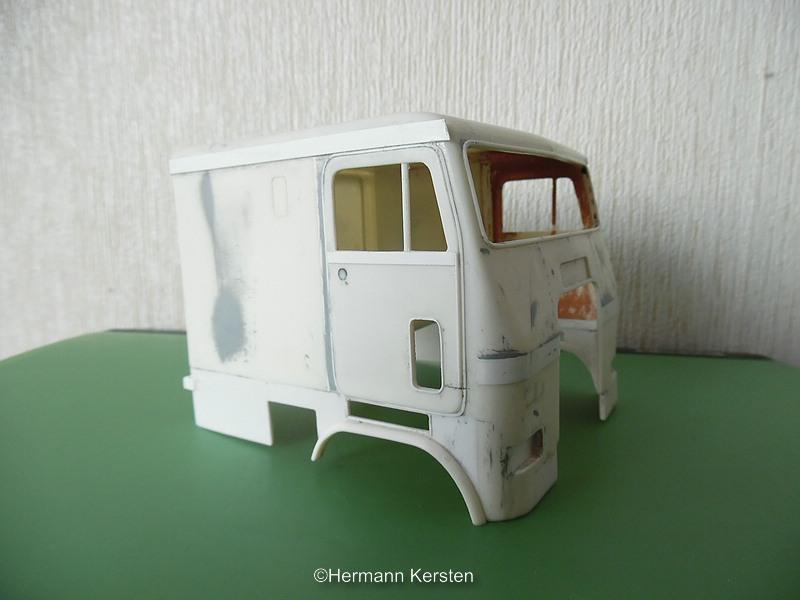
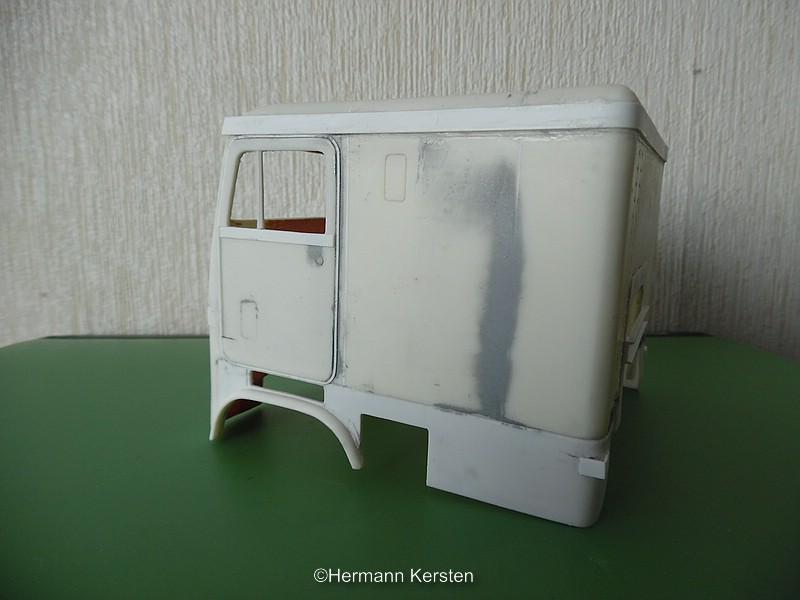
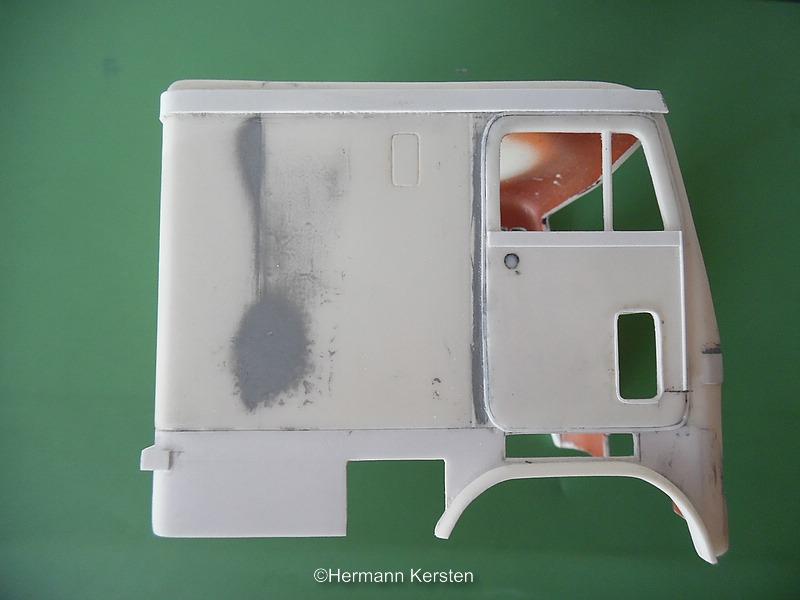
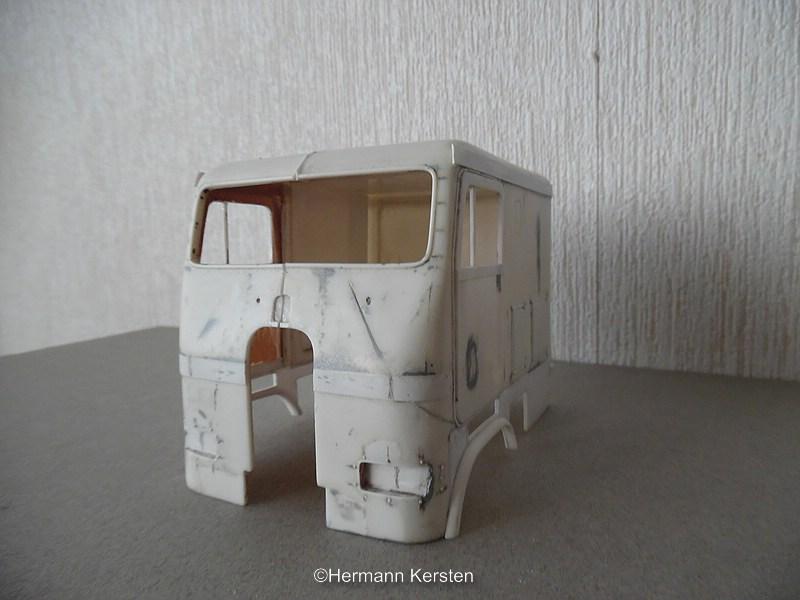
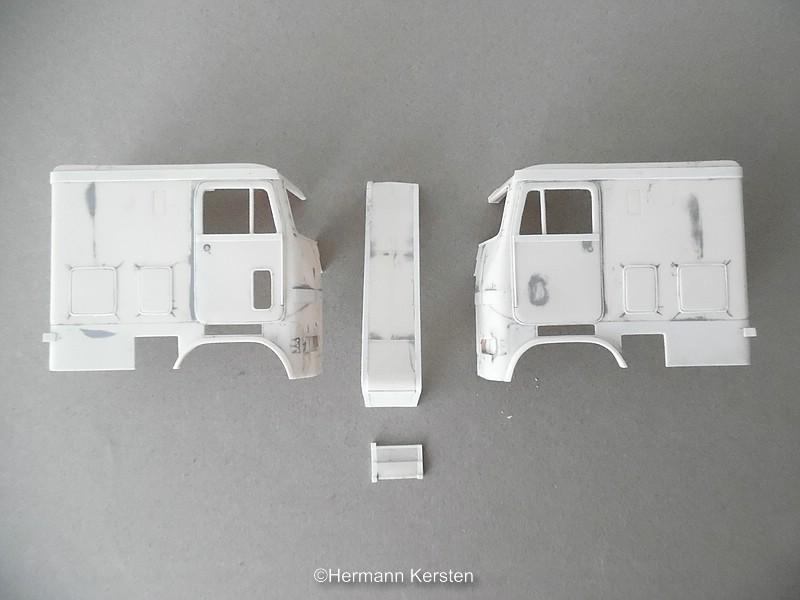
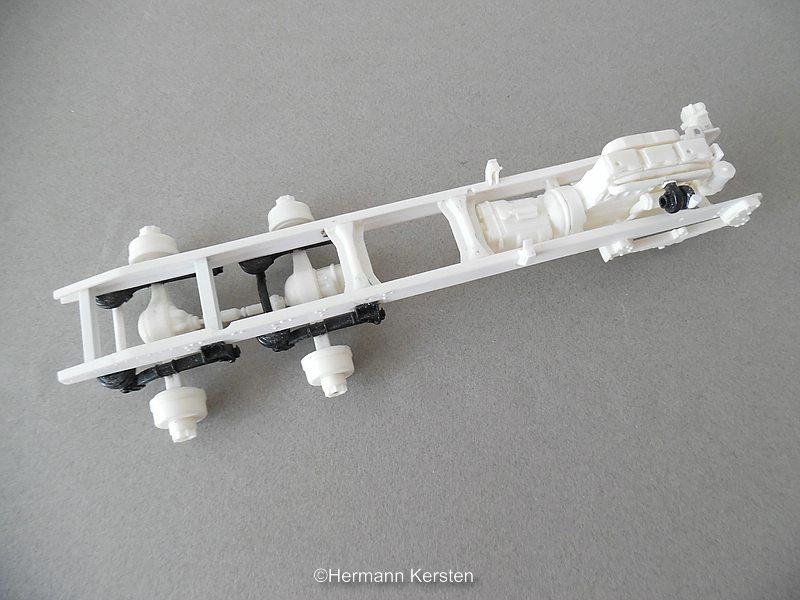
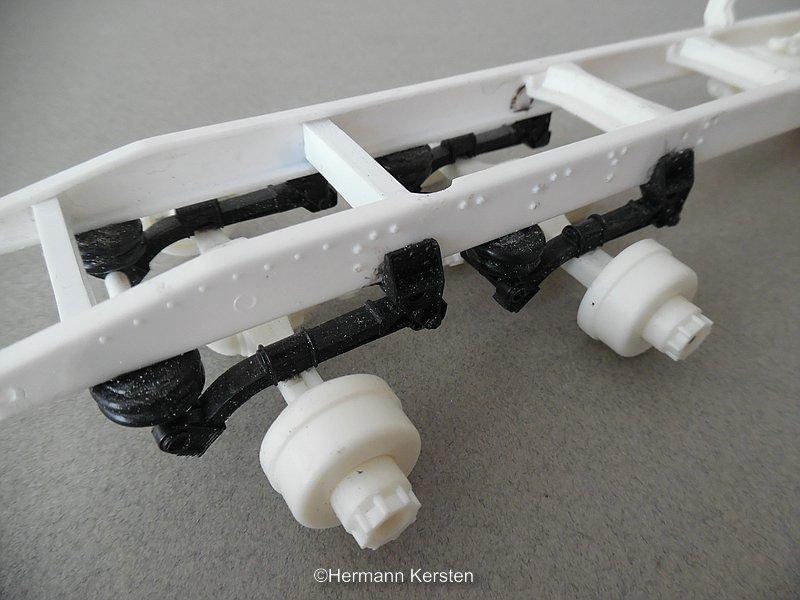
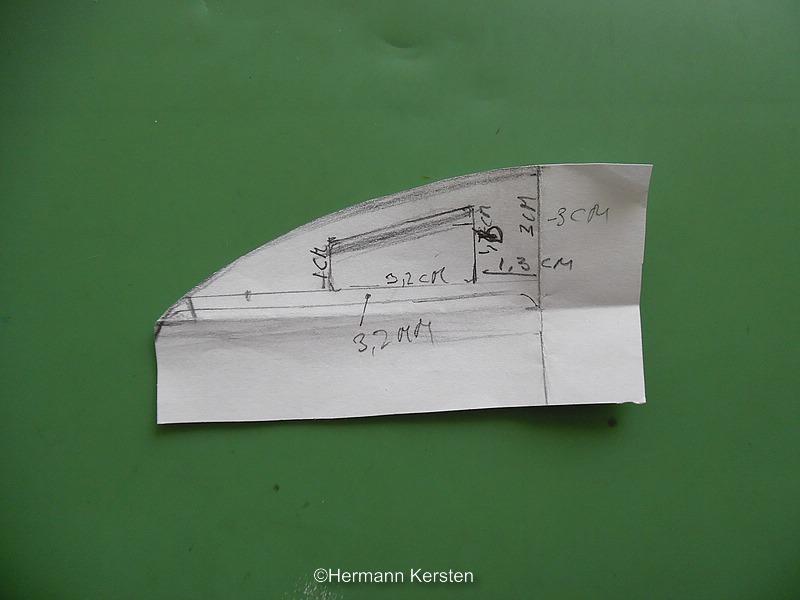
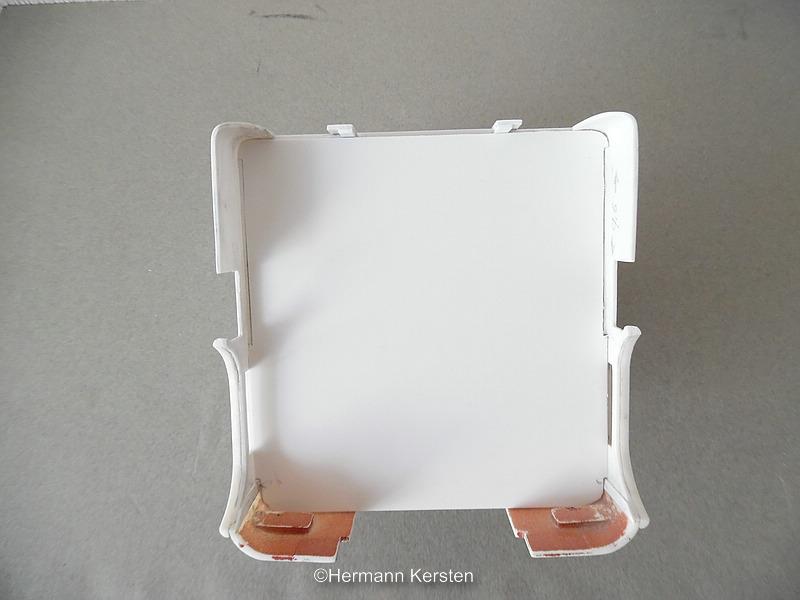
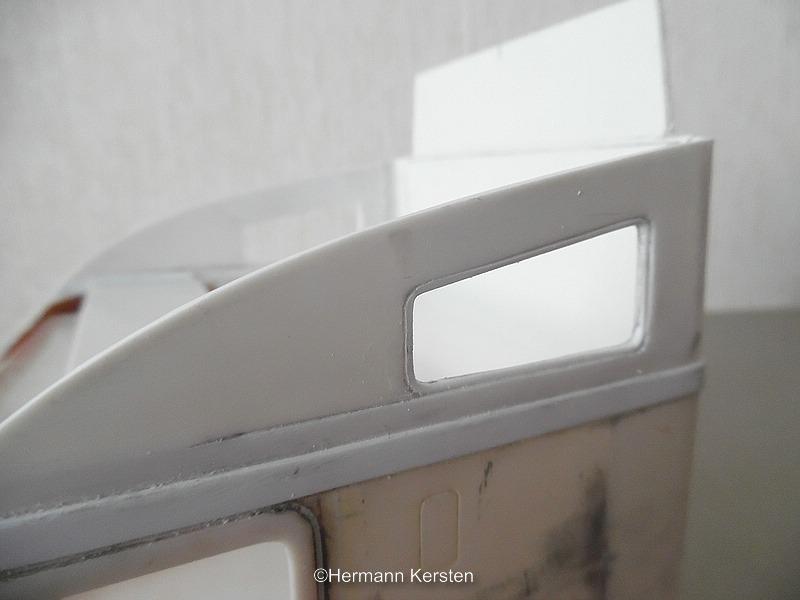
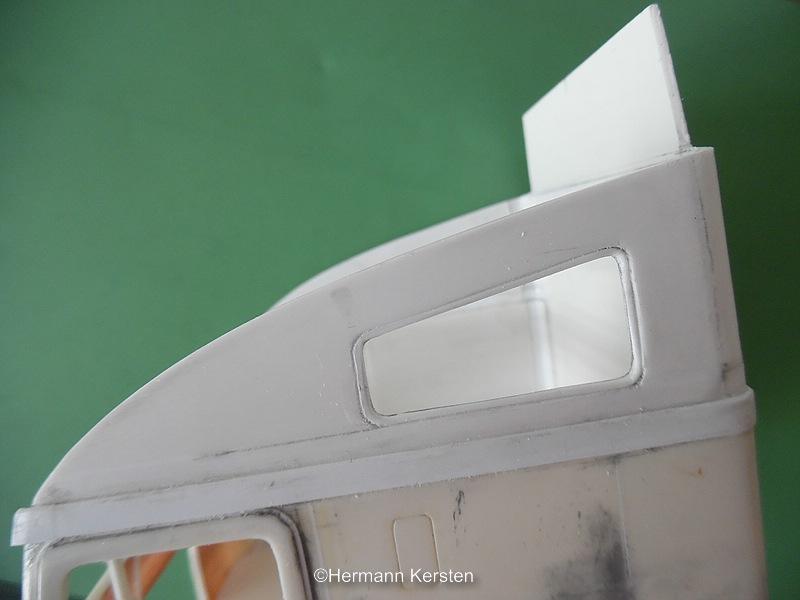
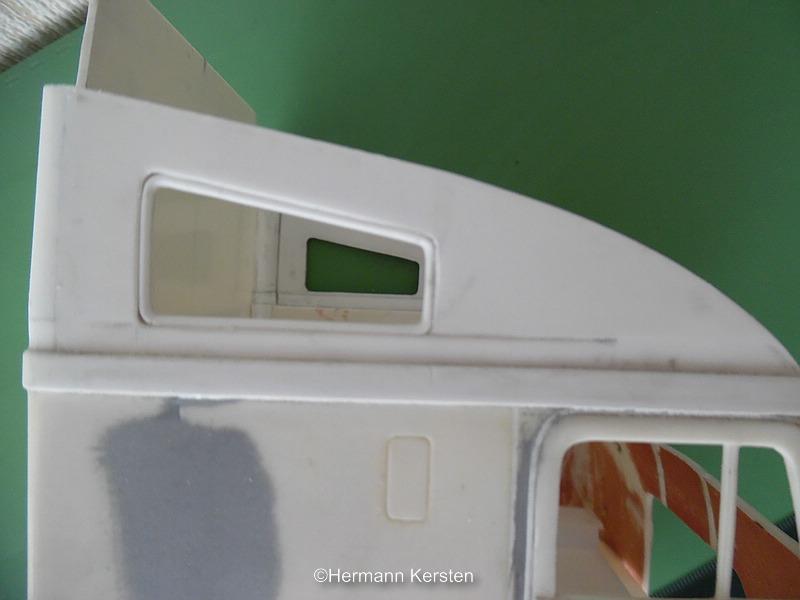
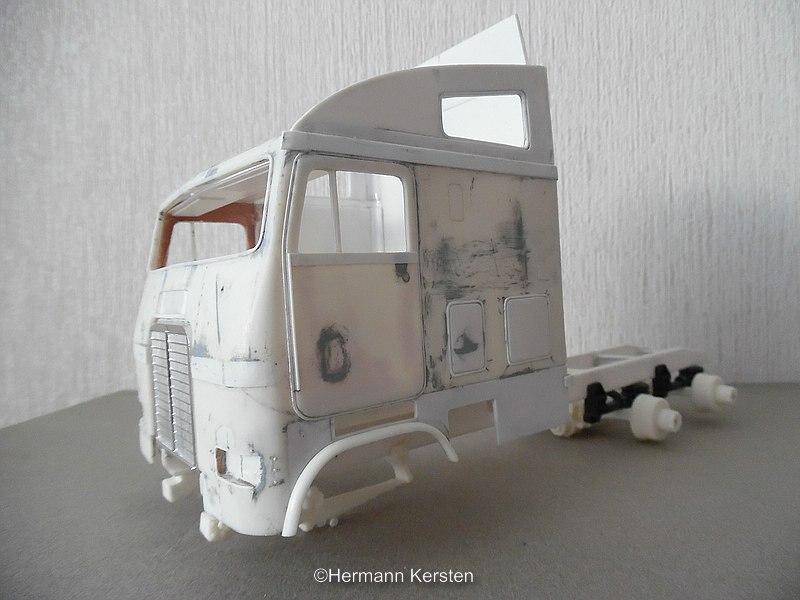
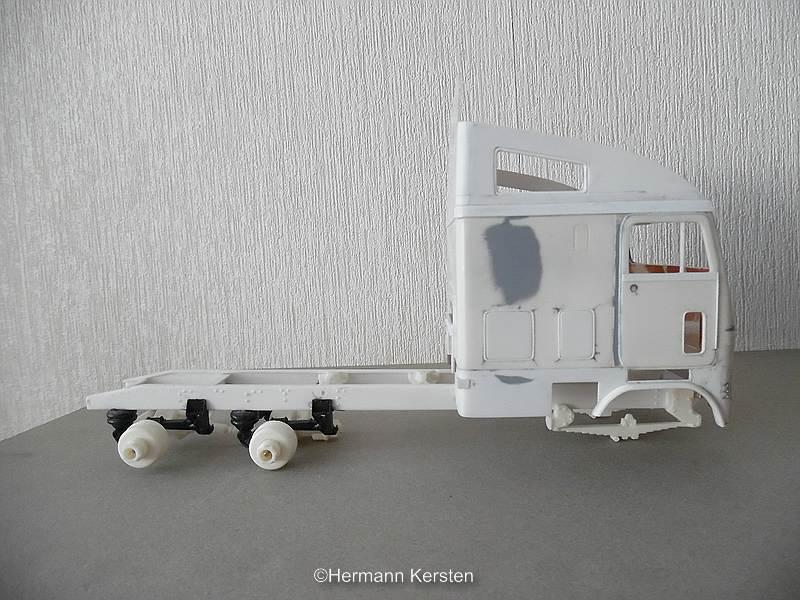
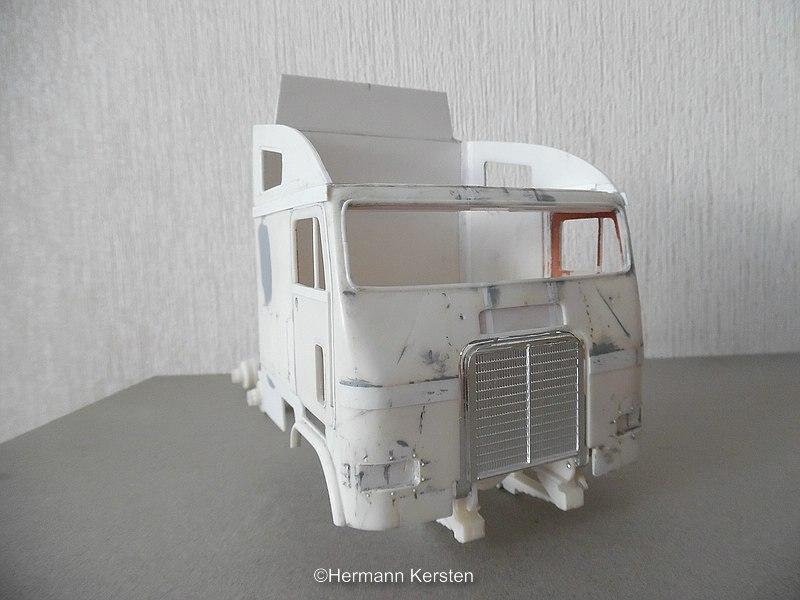
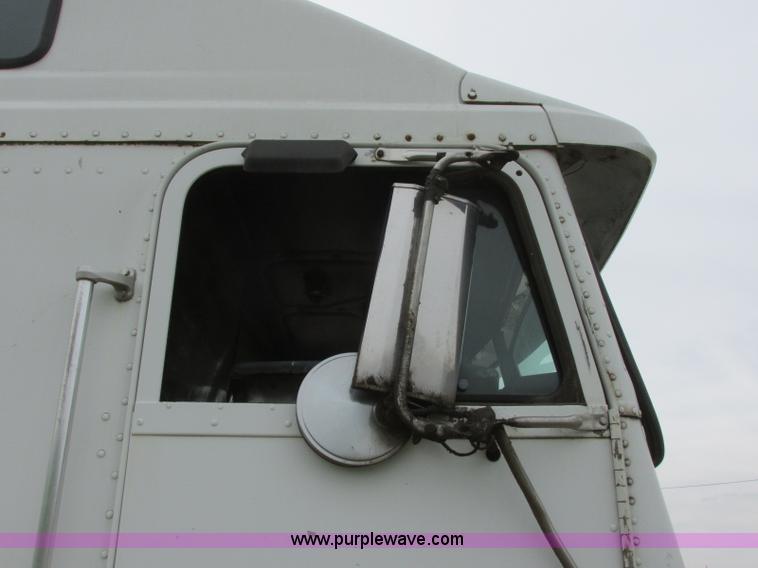
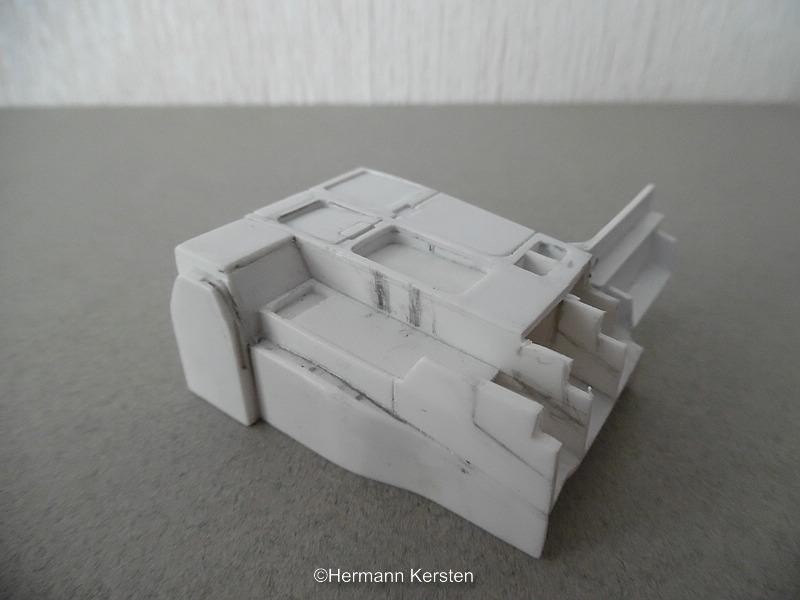
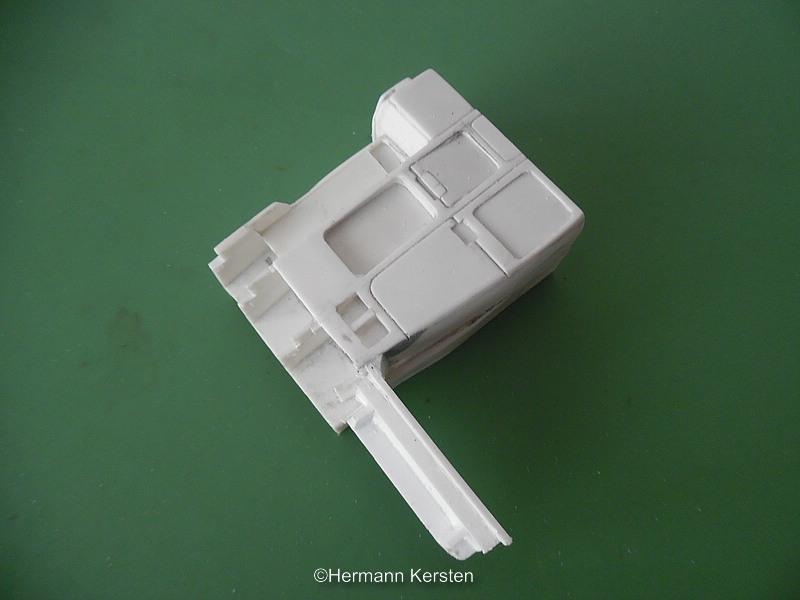
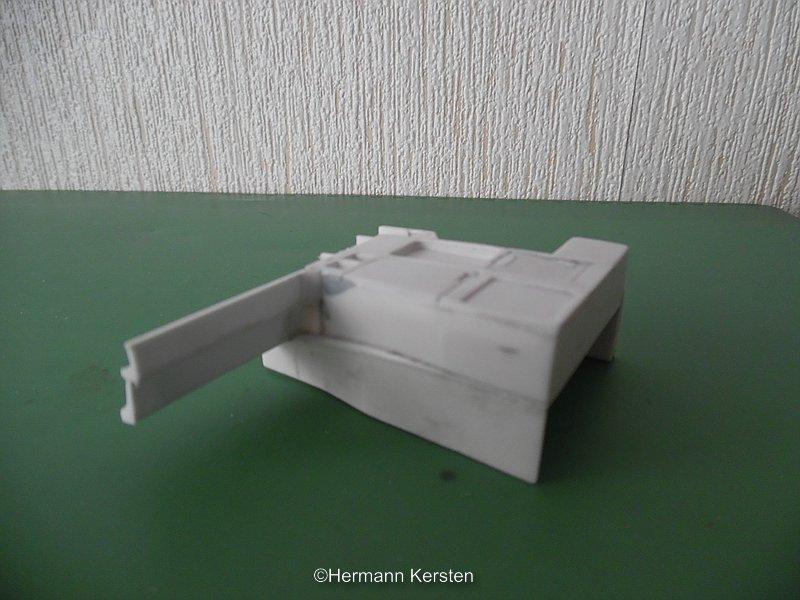
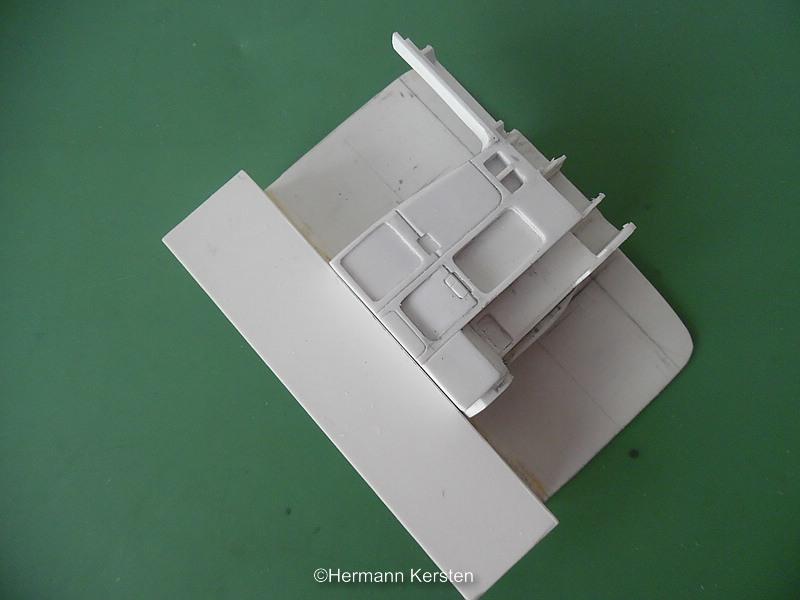
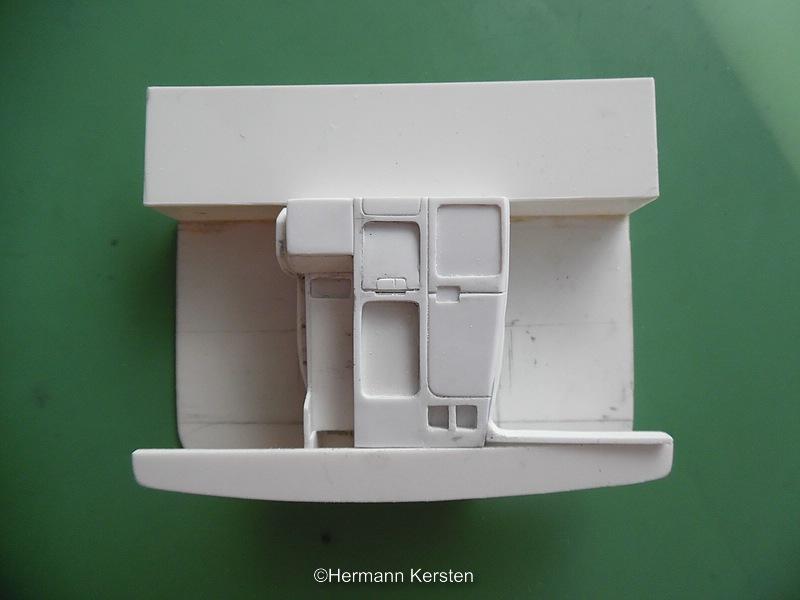
Hi guys! First of all, I have to apologize to start a new project, but I really couldn't wait anymore.? The problem is, there is a Freightliner virus break out and it catches me.?? Good, to be serious, i was already working on this cab and needed a lot of info to make the cab as good as possible. So i saved a lot of pictures and study them, the only problem was, there was no size about the height of the cabin. After i posted the question in the Truck Stop section, Matthew helped me out and after i calculated from pictures, his info convinces me that i was on the right track in relation to the height of the high roof. First of all i start with the chassis what is not shortened and modified the crossbeams just like with the FLB. The suspension came from the FLD kit and made them fit for this chassis. Then the cabin, first i made the longer cab with the sleeper and day cab parts of the AMT kit. On the inside i glued a 0,75mm plate to keep strength on these plates and in this way i could sand the whole side because the parts have some differences in wideness. After KJ mentioned the extra 4mm width in his FLA topic, i cut the cab in half and added the extra 2mm per side. For people who like to do something different with the Freighliner.......i have an idea for you......?? Then glue the whole cab together and made a new rear plate until the top and i keep this rear plate a bit longer on purpose, because it is better to cut then to add to a plate. After all was hardened, first i made the flooring plate so that the cabin cannot twist when the roof is off. Before i make the sides of the high roof, i had a picture of a high roof from the side and could made some measurements for the window and transferred this to a piece of paper. Source: Purplewave.com And the styrene version. After a lot of studying the pictures from many angles, i noticed that the back and side of this high roof is slightly angled. This was important to know, because there is a seam at the window, and it follows the window backwards and slightly inwards on the back. In the first place i didn't see that this roof was slightly angled, but in relation to that particular seam it makes sense now. Below you can see clearly that seam. Source: purplewave.com And the 1/25 version.... And the work so far..... Well guys, i hope you find this another interesting conversion. For me it is fun to do this, because there were so many different versions of Freightliners out there that, in my opinion, this AMT kit is a good base for all these many different versions. See you next round! Hermann.
-
Mashpee Breaker 354
Hermann Kersten replied to Chariots of Fire's topic in WIP: Model Trucks: Big Rigs and Heavy Equipment
Great work on this one Charles. The hood and the trim work on the doors and hinges are spot on, really great work what you showing us here. Hermann -
Oshkosh snow plow
Hermann Kersten replied to gotnitro?'s topic in WIP: Model Trucks: Big Rigs and Heavy Equipment
Great progress Jeff and indeed, the chains are awesome! The details at the snowplow are awesome. Hermann. -
Details , details and more details, it looks awesome Tom, the chains look also great and are a good fit related to the scale. Keep going!? Hermann.
-
Thank you for this info Matthew! I had indeed already made a drawing on paper based on various photos taken from the entire side. After some measuring and calculating, I indeed came up with the same measurements. In terms of size, I am in the range of your specified sizes and at the end i have to make a roof what is, in the metric system, about 4cm in scale 1/25. After your information, it is no longer a guess, but a knowledge.? Thanks again! Hermann.
-
Thank you Charles! Well Tom, i hope you choose for try cutting some plastic yourself because your options are unlimited and you are no longer dependent on after-market items, you can make the choice to buy them or make them yourself. I have to warn you........ once you start with this, it is very addictive, and there is no treatment or medication for this.??? Thank you Vince! Thank you Dennis, and i will keep posting photos and explaining how everything will be made. Thank you Patric, and indeed, in some cases i use "small" pre-used parts because sometimes I am a little lazy.?? Hermann.
-
1983 Freightliner FLA
Hermann Kersten replied to KJ790's topic in WIP: Model Trucks: Big Rigs and Heavy Equipment
Ah, the Archer rivets, it looks great on this cab. Hermann -
Hi everybody, can someone tell me what the height of the Freightliner FLA high roof is. This is from the bottom of the cabin, to the top of the roof, or from the roof line to the top. This is for my next project, and things will be easier when i have this info. Thanks in advanced! Hermann.
-
Peterbilt 352's
Hermann Kersten replied to Bronzekeg's topic in Model Trucks: Big Rigs and Heavy Equipment
And another 2 great builds with beautiful color schemes. Your colors are really your signature, love it! Hermann. -
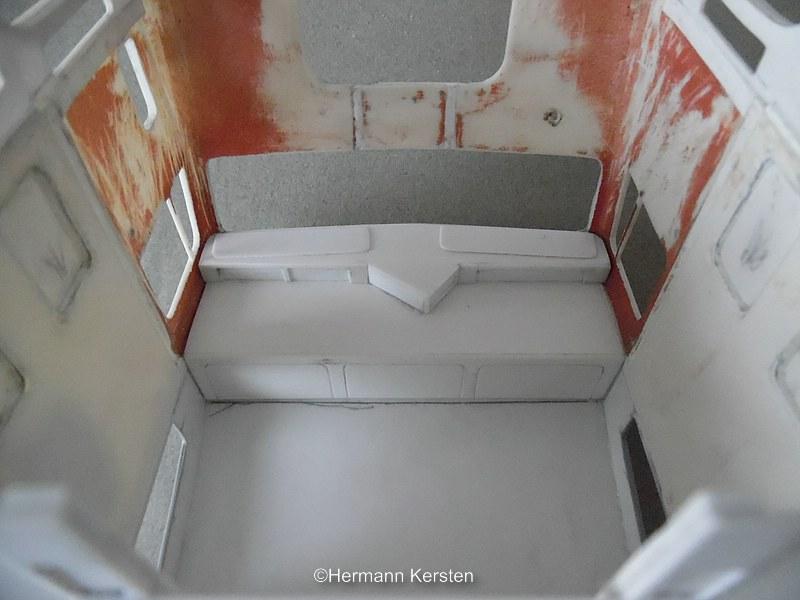
Thank you for the nice comments guys!! Today some progress on the tunnel console. The storage compartments are done now and i started with the rest of the dashboard, to be exactly, the lower side on the passenger side. On the driver side i still need to make some details in the lower "shifter" area, but that will be done when the cockpit is connected to the console. For the cockpit i took a Actros 2 dash, this cockpit has pretty the same shape as the Fuso cockpit. I taped this cockpit with Tamiya tape, follow the shape with a cutter, and this is the result. Now i have the shape of this cockpit and now i can transfer it to the styrene and cut the shape for this cockpit. For the Fuso it has to be mirror side, because Japanese drivers drive on the wrong side of the road. Then the base shape for the dash that will follow the line of the windshield, and from here i will build up the whole dashboard with cockpit. I can tell you, that this console and dash is more complicated to build then the cabin was. However, i hope it will pay off at the end when all is painted. That's it for today guys, see you next time! Hermann.