Hermann Kersten
-
Posts
595 -
Joined
-
Last visited
Content Type
Profiles
Forums
Events
Gallery
Everything posted by Hermann Kersten
-
 The best method, imo, is just de-chrome everything no matter what, I do this all the time on any kit. With Molotow chrome you can also airbrush, because they sell it also as a liquid for air brushes, or just put some from the marker in to the airbrush canister. The chrome looks are also more realistic. Hermann.
 -
1948 Sterling HC 175
Hermann Kersten replied to Chariots of Fire's topic in WIP: Model Trucks: Big Rigs and Heavy Equipment
Again a very nice project Charles. I will follow you along with the conversion of this one. Hermann. -
Marmon coe Topsleeper
Hermann Kersten replied to Hermann Kersten's topic in WIP: Model Trucks: Big Rigs and Heavy Equipment
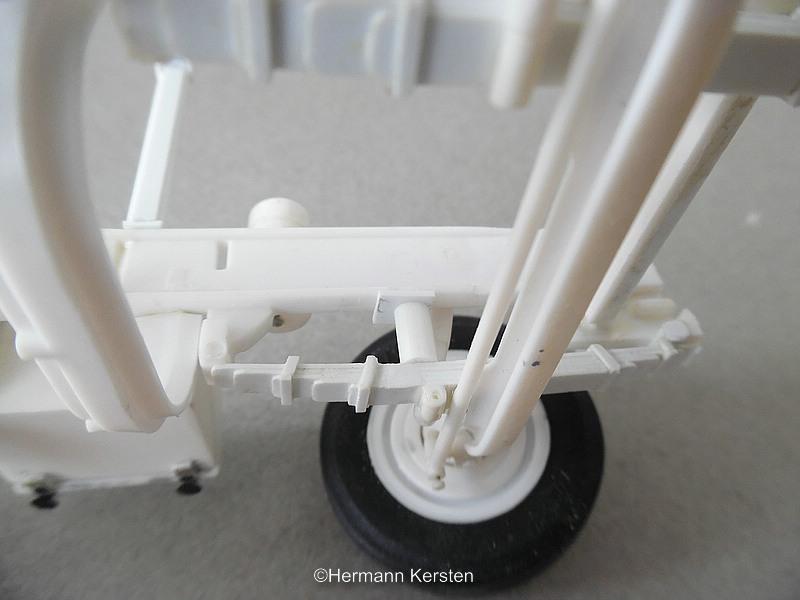
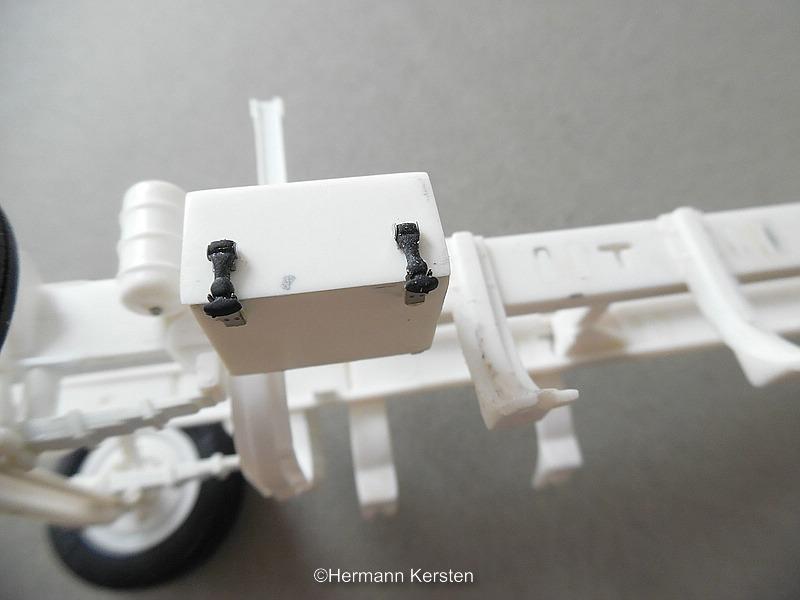
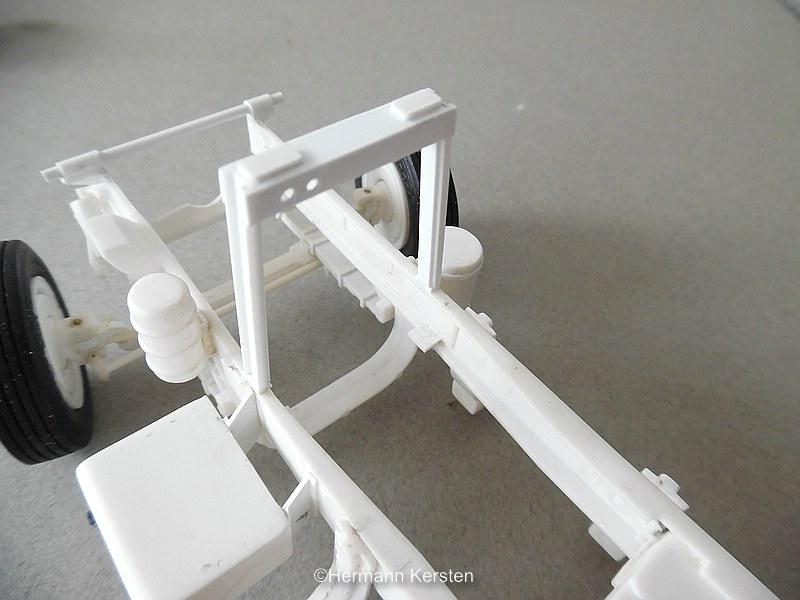
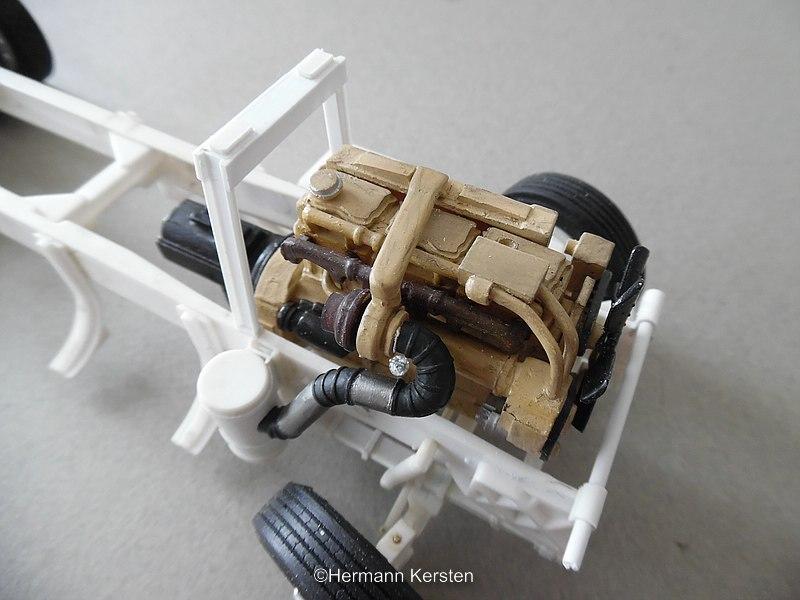
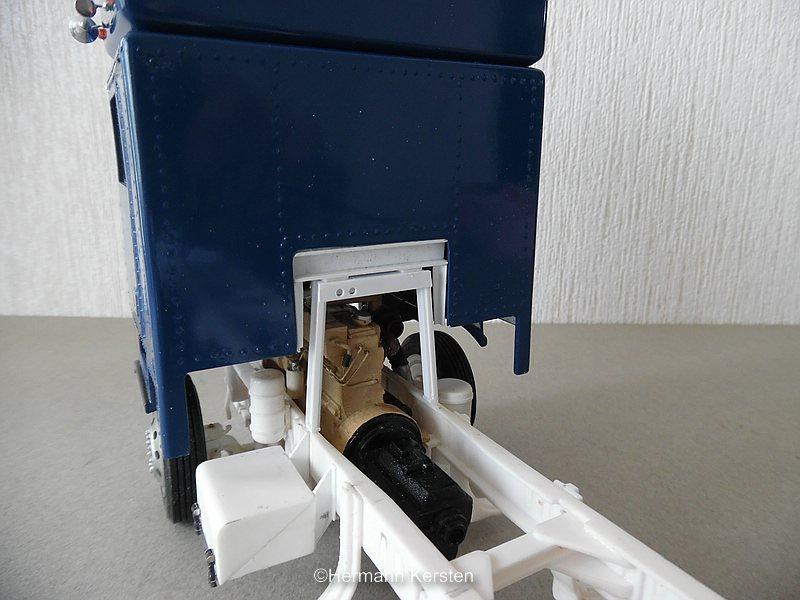
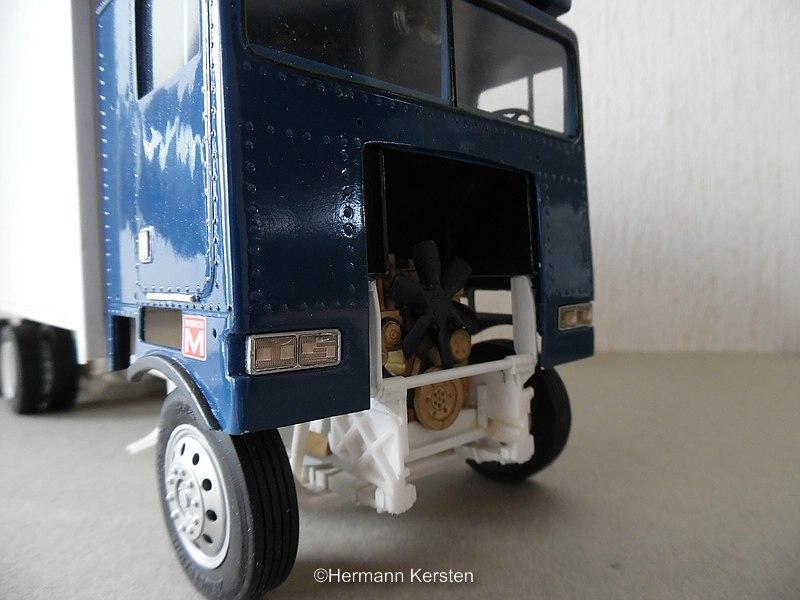
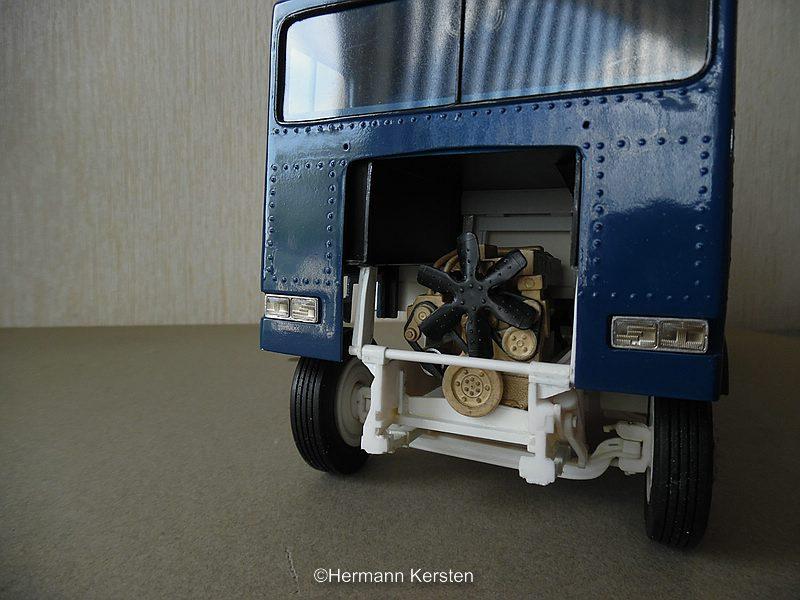
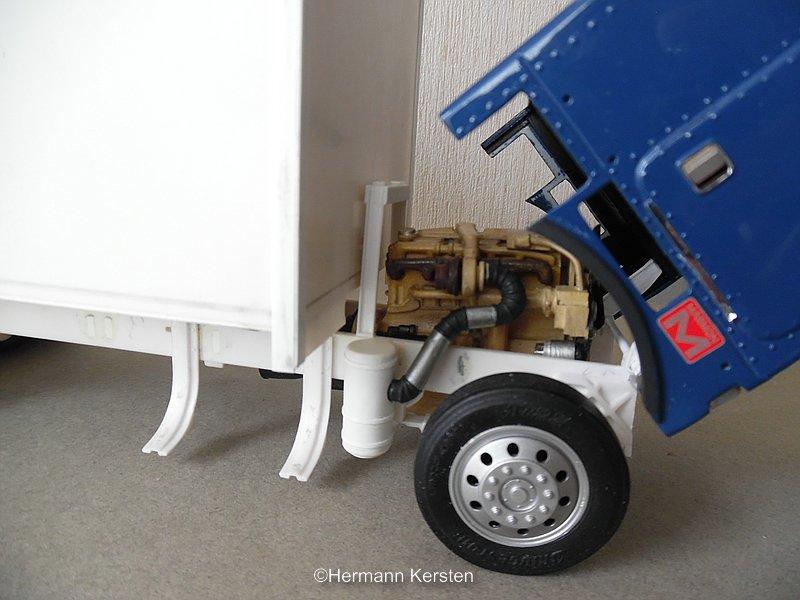
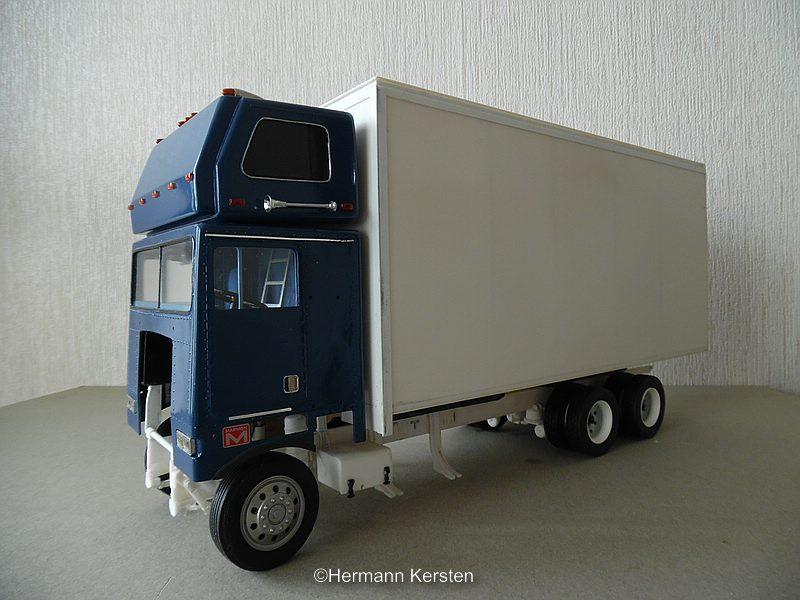
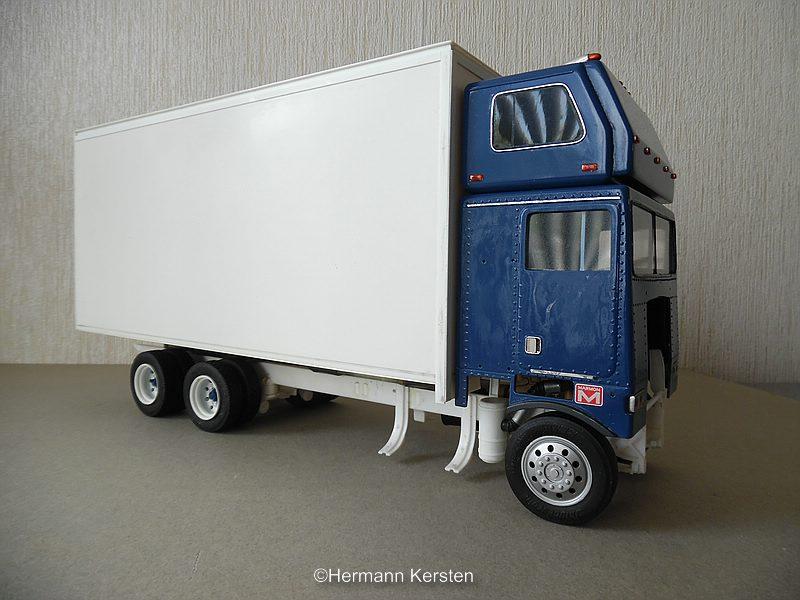
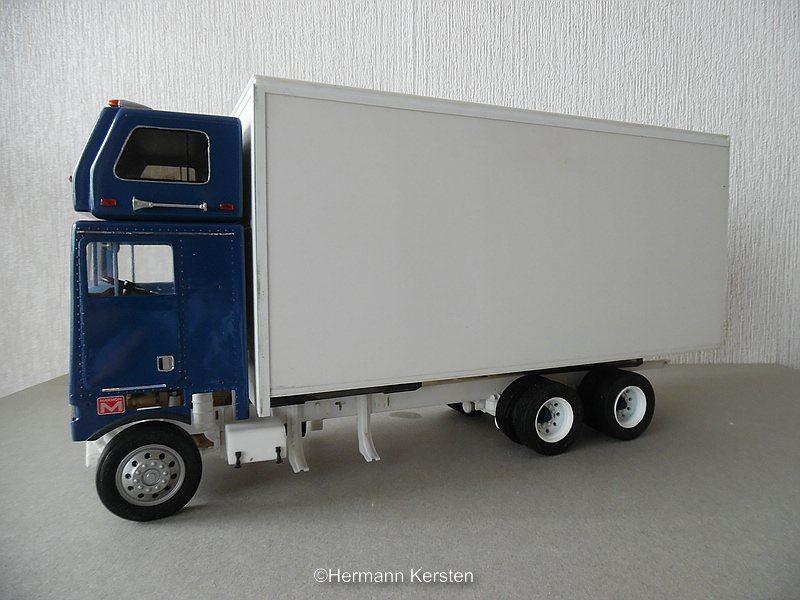
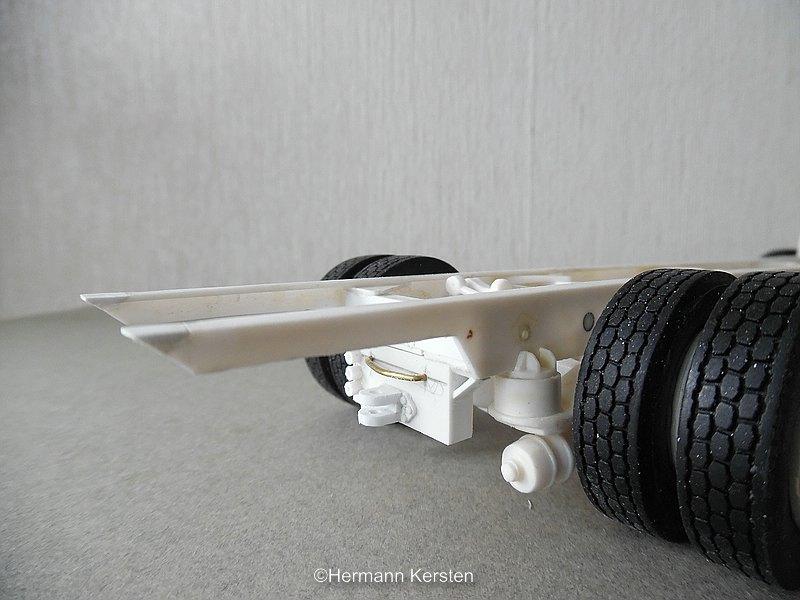
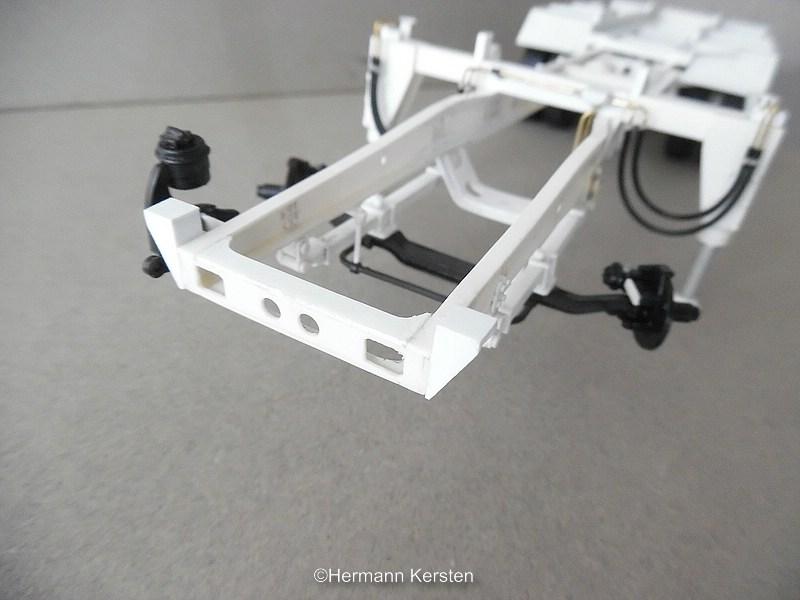
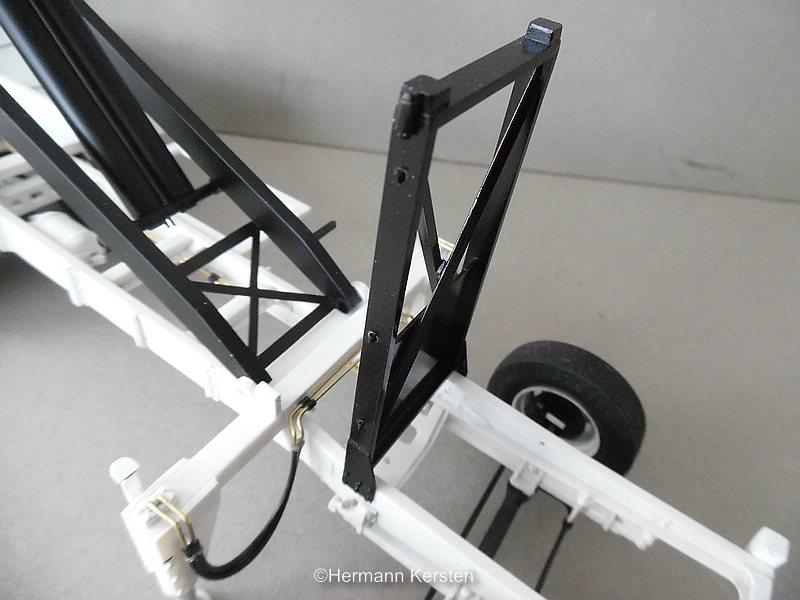
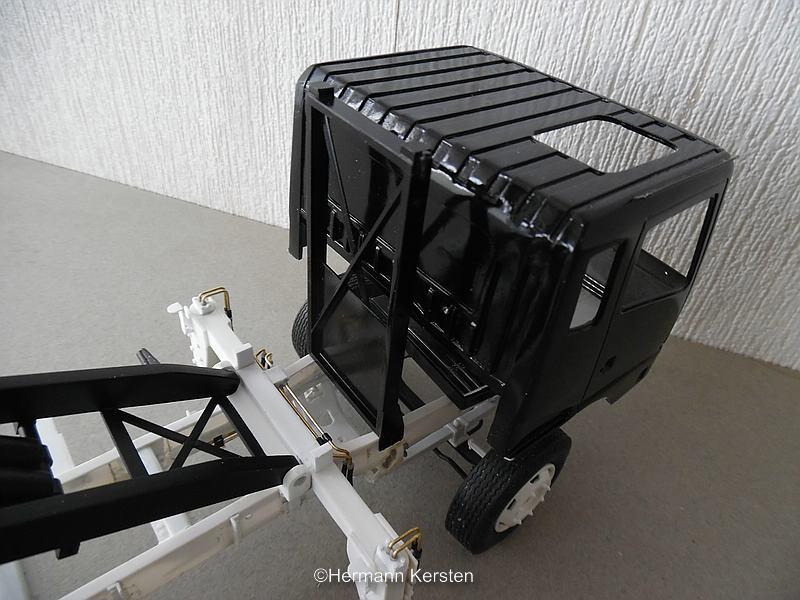
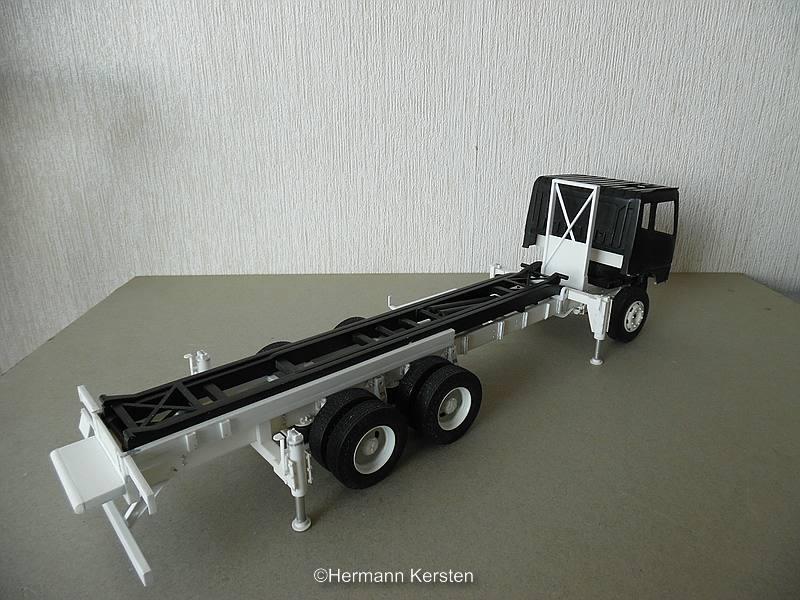
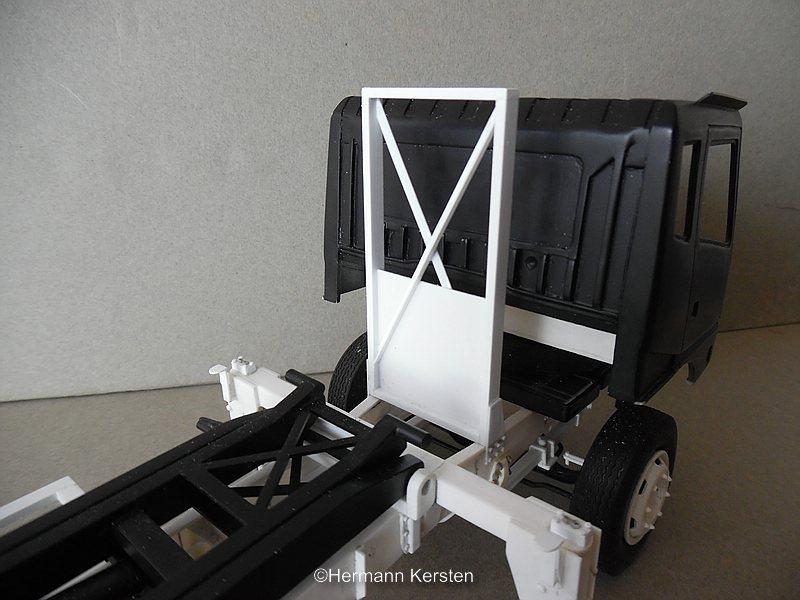
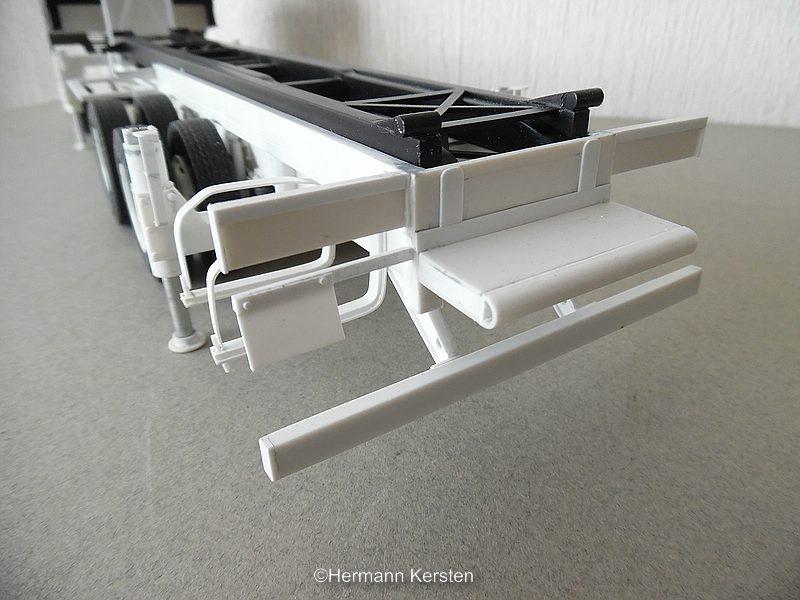
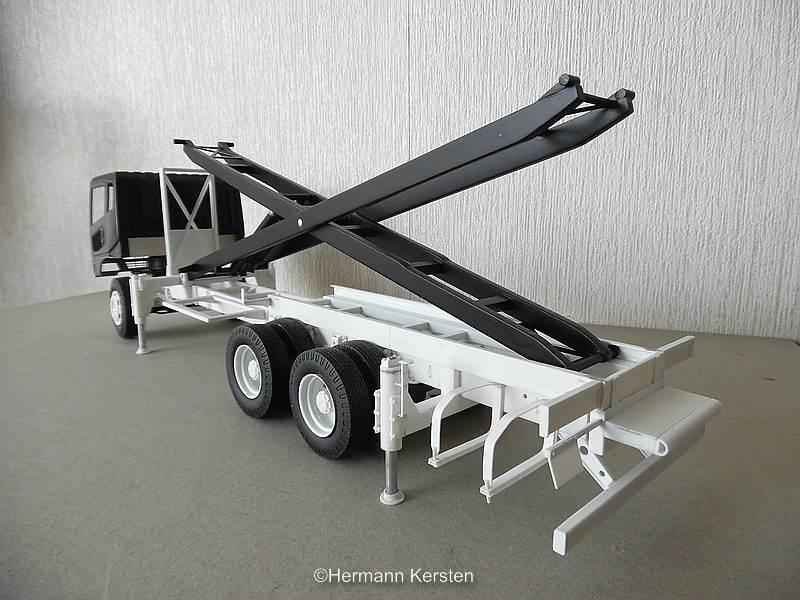
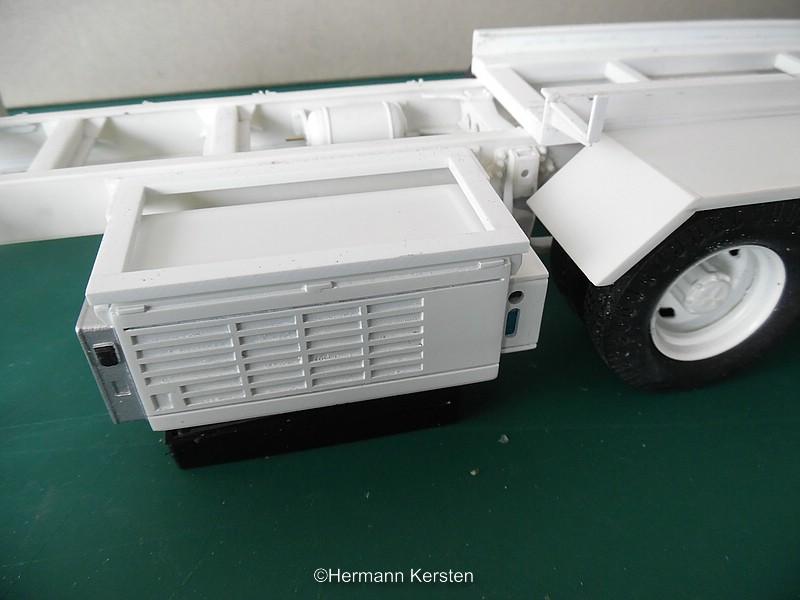
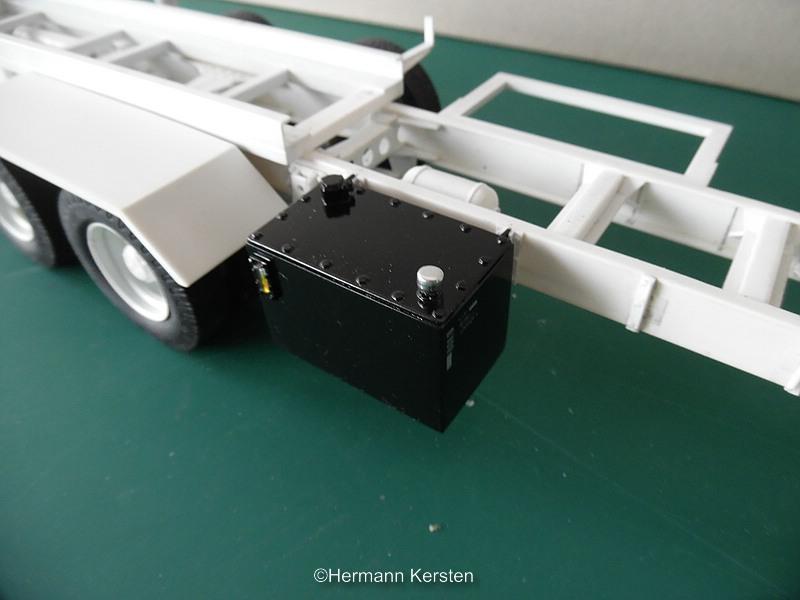
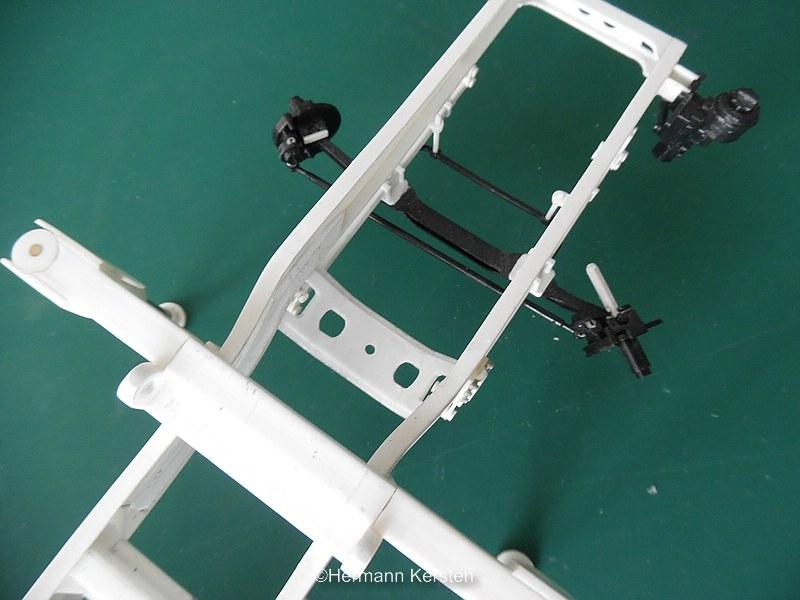
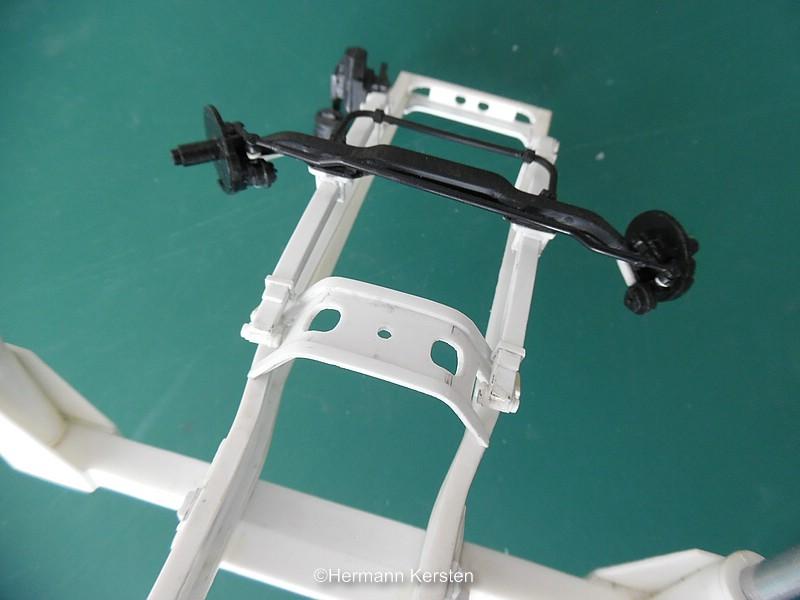
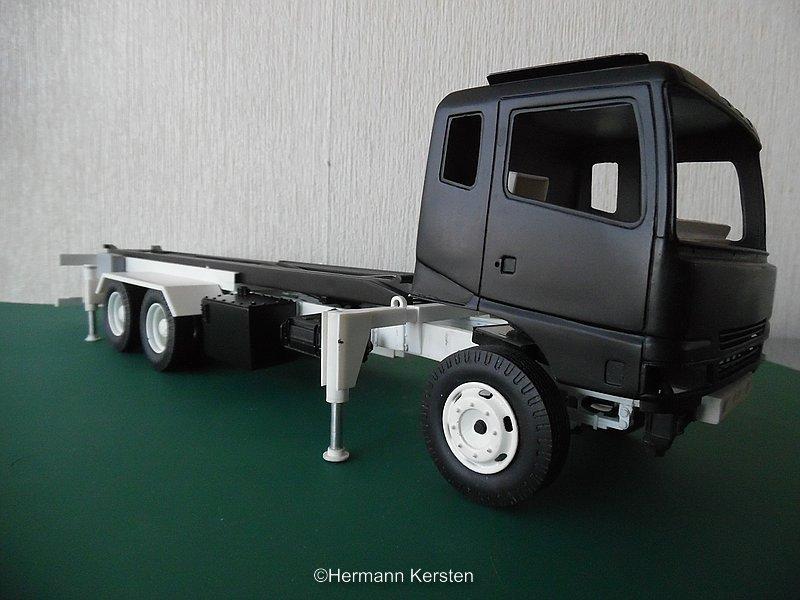
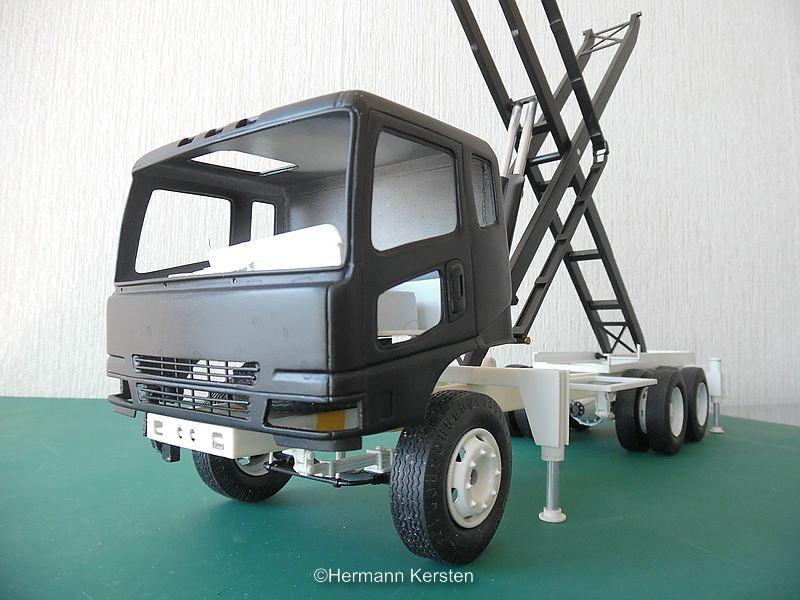
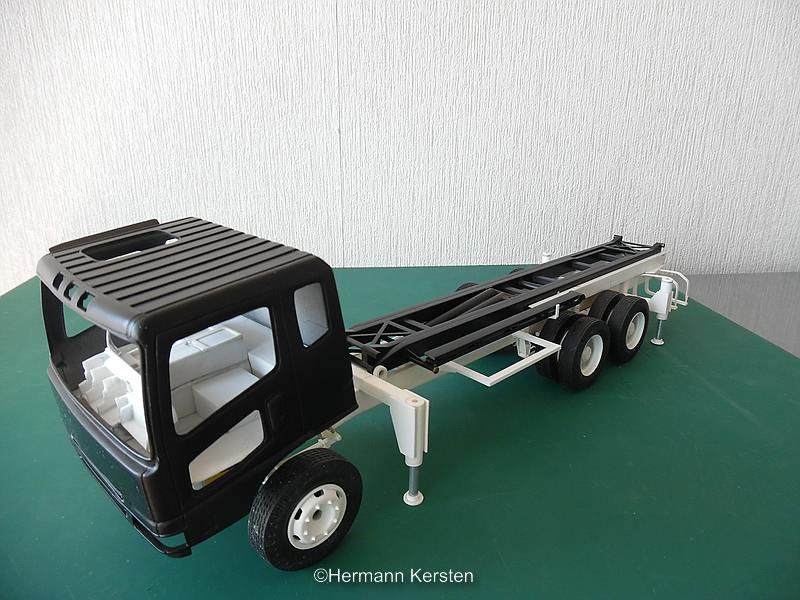
Hello everyone, With all the other projects, i made some time for this one. I now also want to paint this chassis in black paint, also to protect the plastic. Before that, there are still some final things to do and we start with the coupling of the pup trailer and the modification of the rear chassis beams. I had this situation from a photo of a Marmon Magnavan, which was for sale some time ago, and was taken a picture from this area. The only thing that cannot be seen is the coupling for the air and electric cables to the puppy trailer. On European trucks, there is a separate outward-facing plate on a support on the chassis for easy access by the driver. With this Marmon this cloupling plate is nowhere to be found in the pictures, so I will have to guess a bit. Then the tanks and the modified radiator painted in color. The tank tires will be made at a later stage, as I always do. Then it was the turn to place the cabin permanently on the chassis. After a lot of measurements I found out that there was a little less than 1mm deviation on the left side. Now I thought that this problem was on the tilt supports, but after additional measurements of the chassis, this deviation turned out to be on the leaf spring. First I carefully cut the shock absorber, made a custom piece that fits between the leaf spring and the chassis, with an extra piece of styrene of 0.75mm thick, which should compensate for the height deviation. Then glue the shock absorber back to the leaf spring and let it dry for a few days. After measuring again, the model, and therefore the cabin, is now straight as it should be. Even if it seems so obvious at first look, always measure everything before you adjust something, just to be sure. Things could be different then expected. Then the tilt supports for the cabin, and the cabin support at the rear of the cabin. For this support I used a photo of a Marmon tractor. Some extra details at the battery box... And the tilt supports on the front.... And checking if everything works.... And it does. And some overall pictures..... Ok guys, that's it for today and see you next round! Hermann.
-
1957 Reo Gold Comet
Hermann Kersten replied to Chariots of Fire's topic in WIP: Model Trucks: Big Rigs and Heavy Equipment
I followed this project Charles, and it is really a piece of art what you showed here. I'm sure the resin pop will should be of a good quality because the original is made with high quality. I am also looking forward for the result of the resin cab. Hermann -
Pete 378 long haul
Hermann Kersten replied to tbill's topic in WIP: Model Trucks: Big Rigs and Heavy Equipment
Really nice progress Tom. The color scheme looks awesome also. The chassis for the car trailer is a pretty large piece to paint. Hermann -
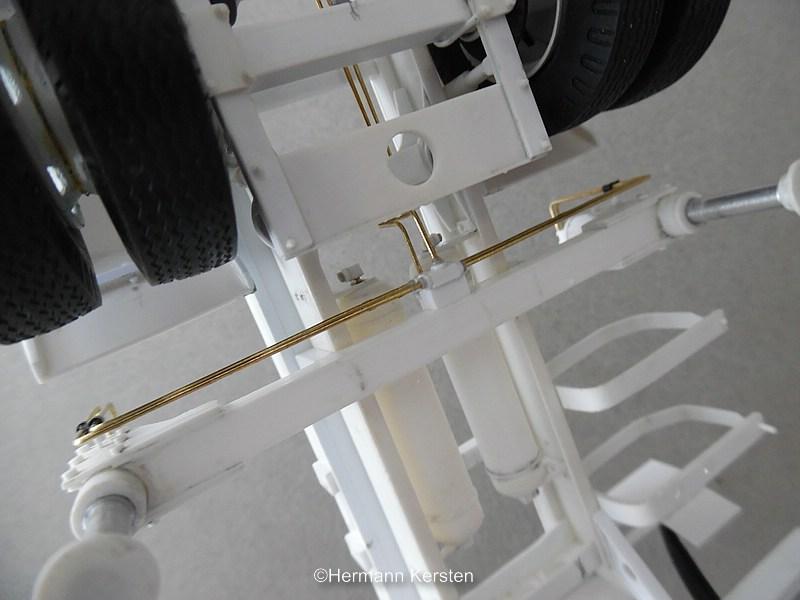
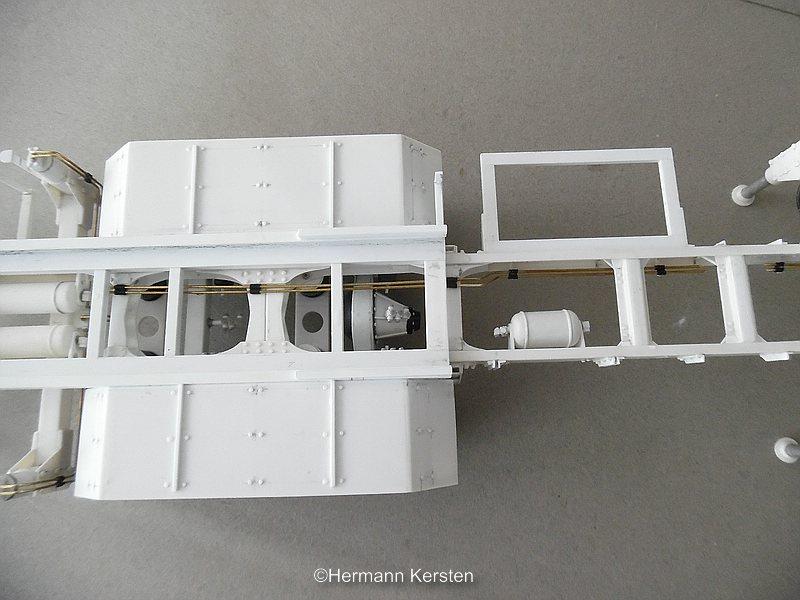
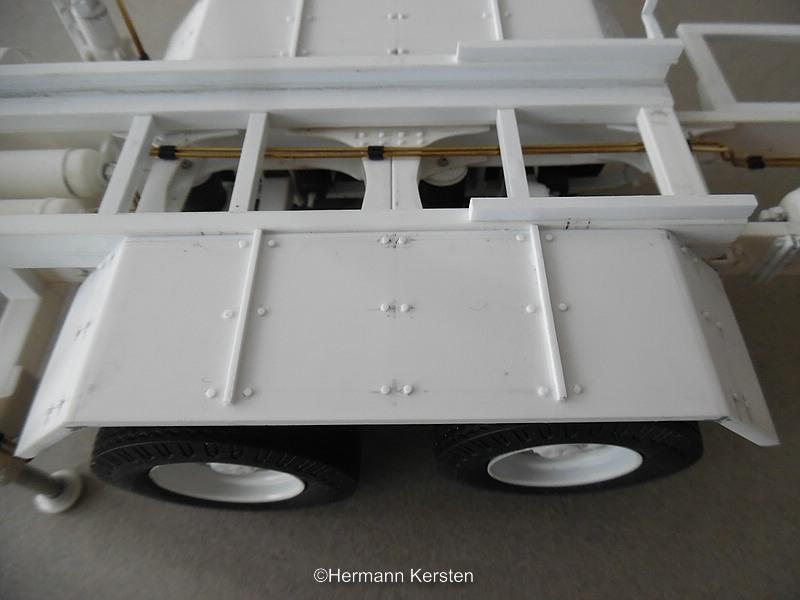
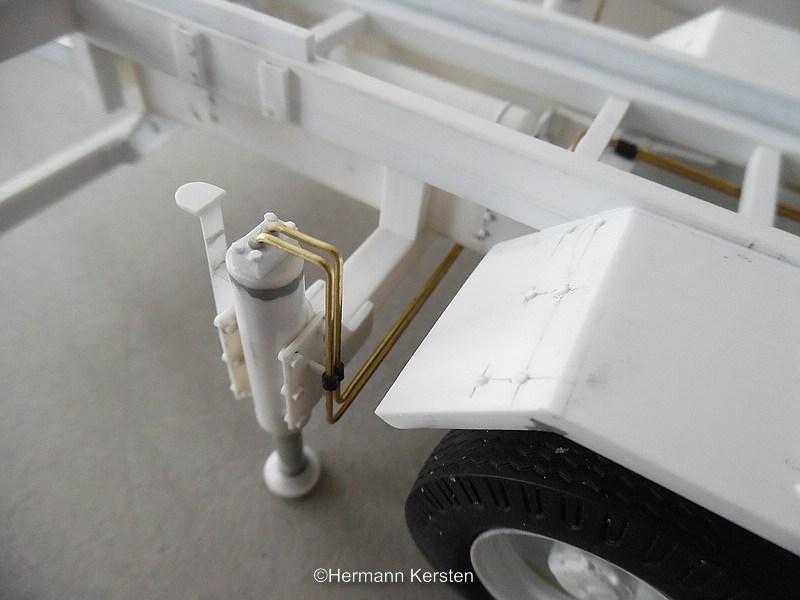
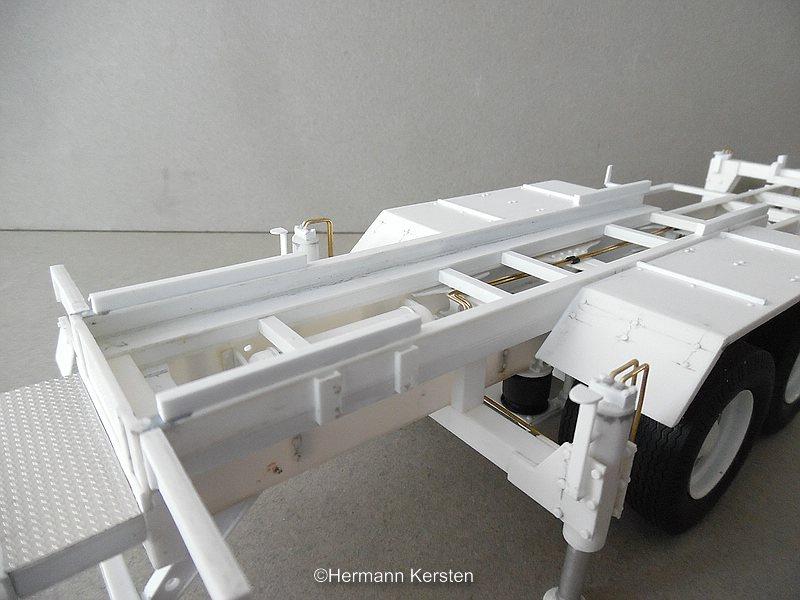
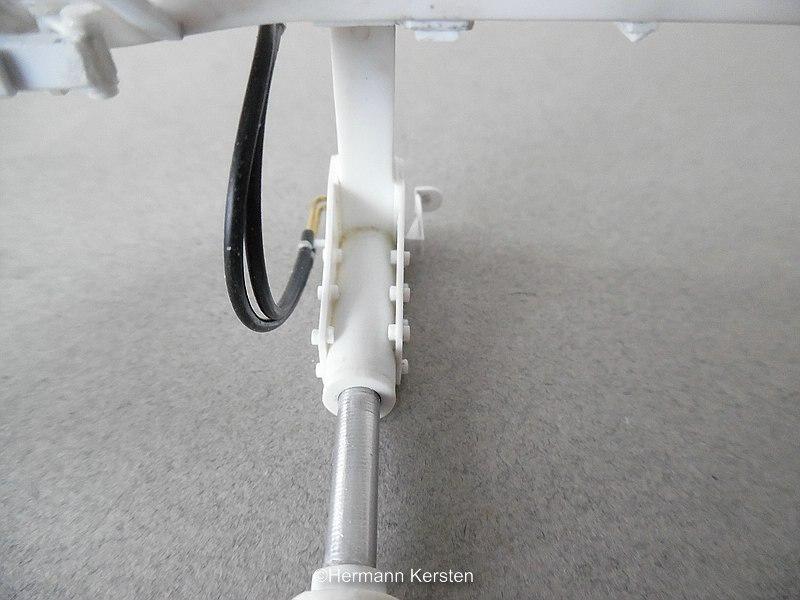
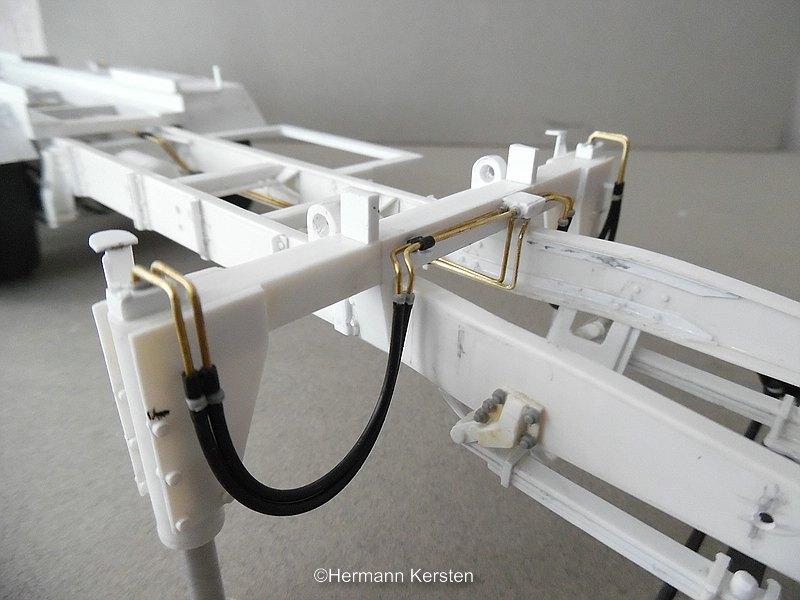
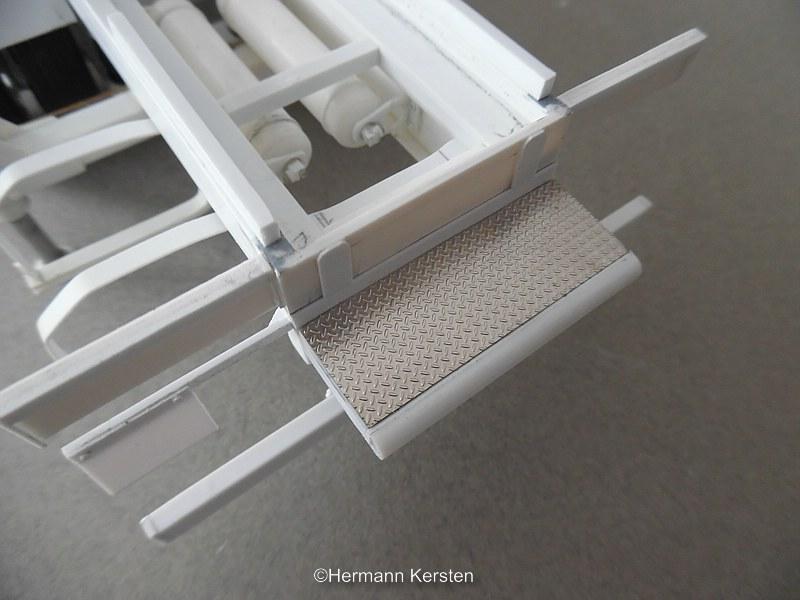
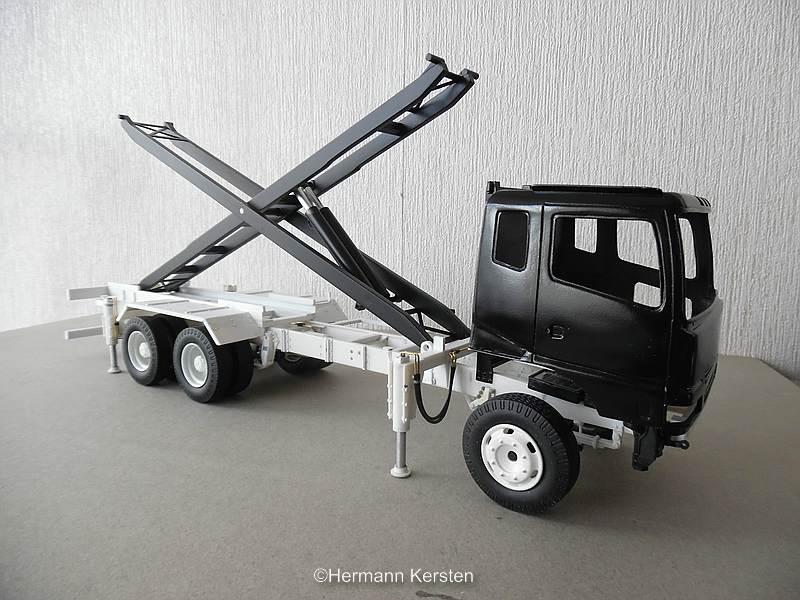
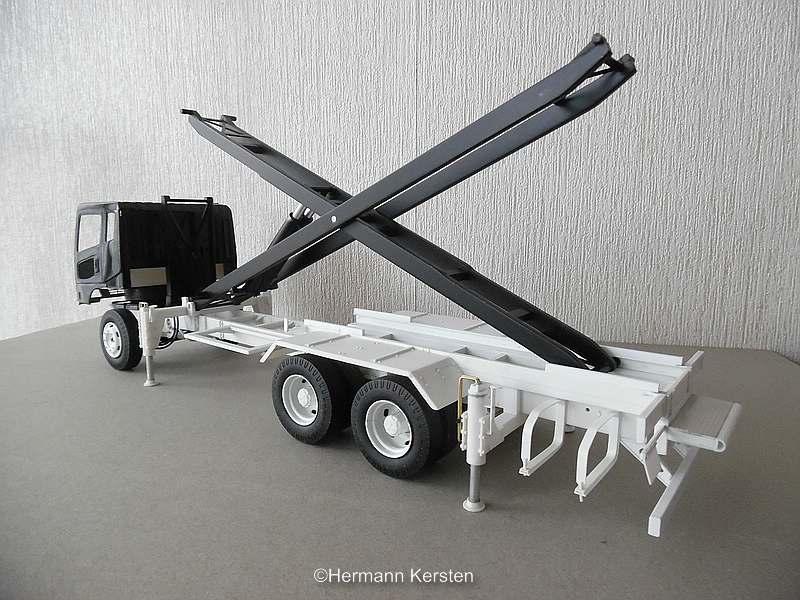
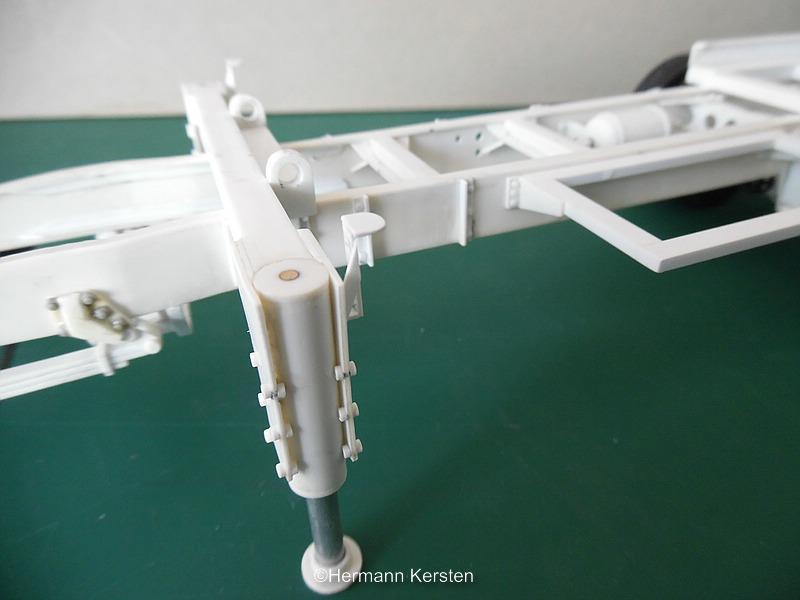
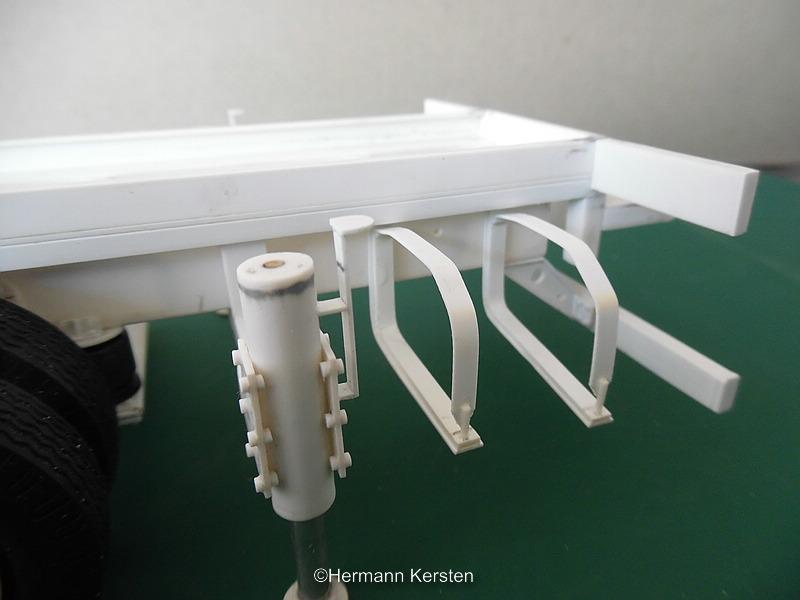
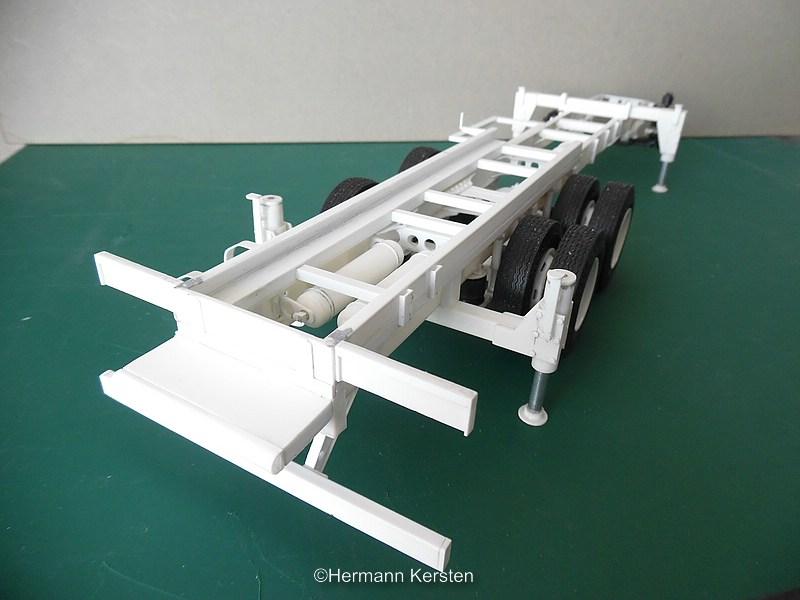
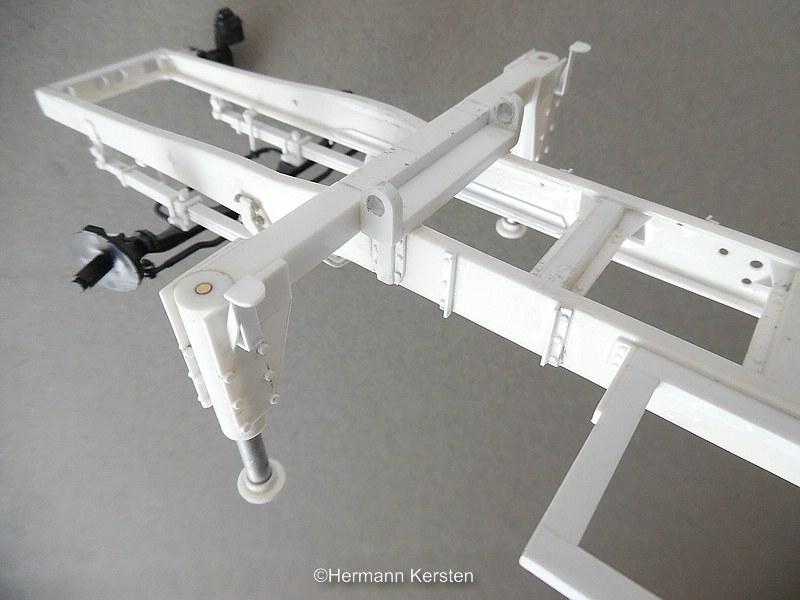
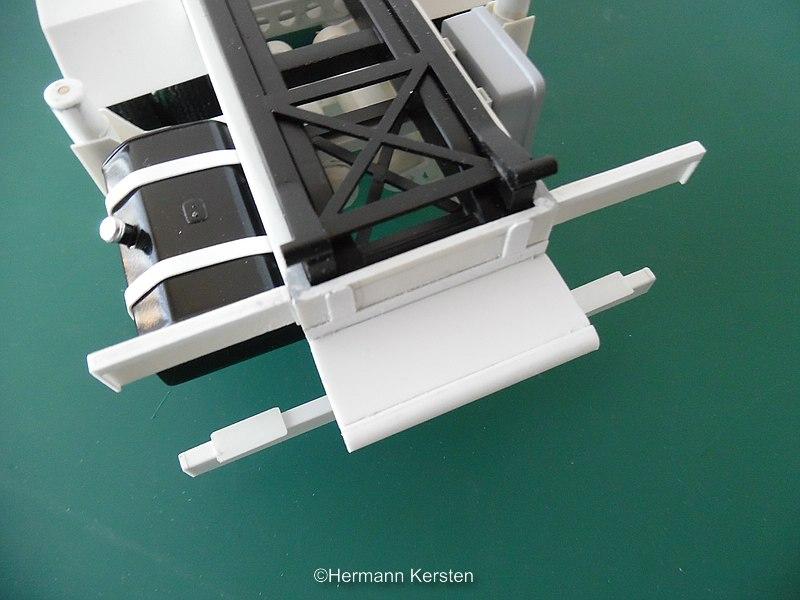
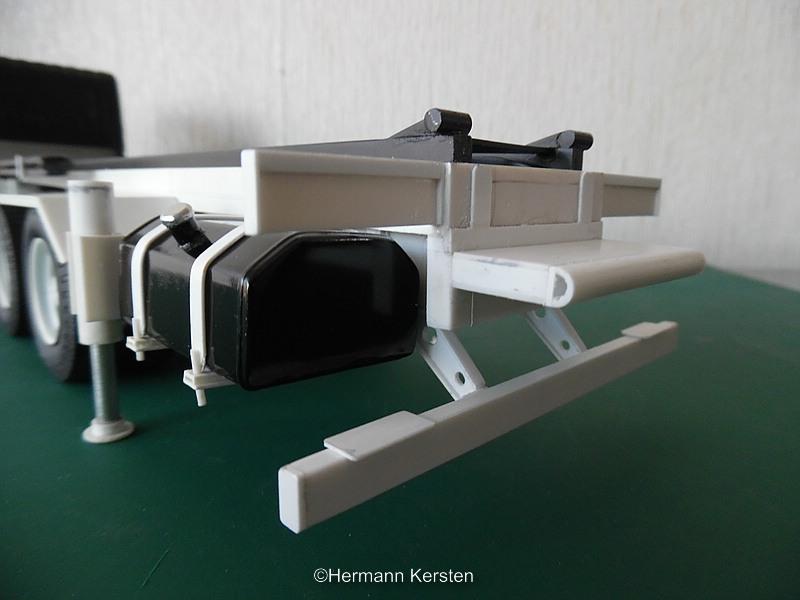
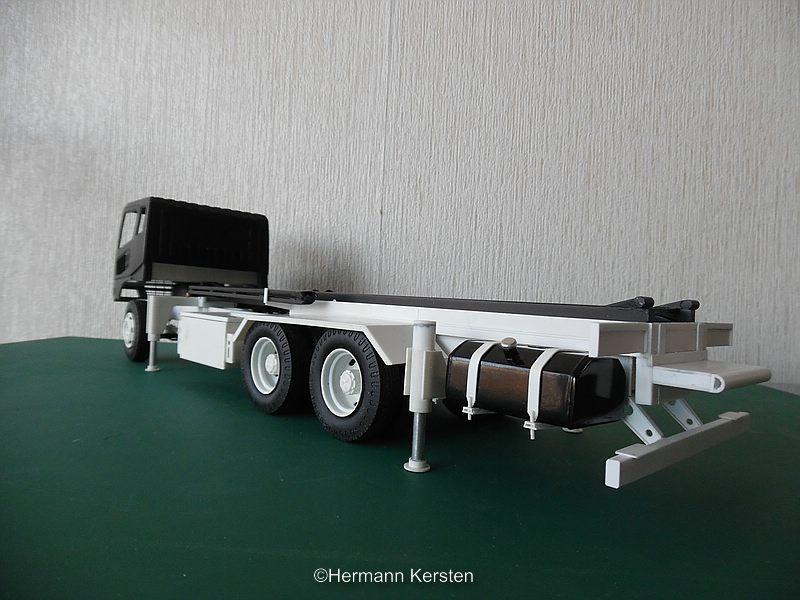
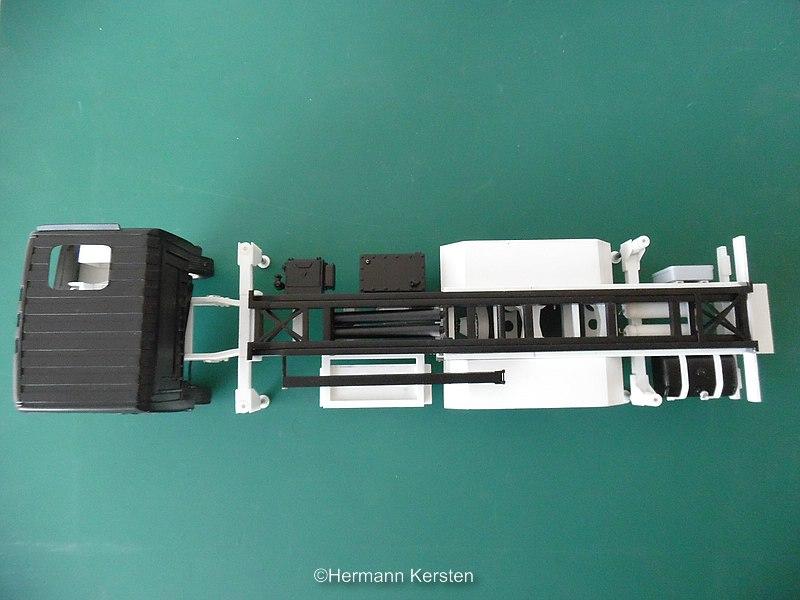
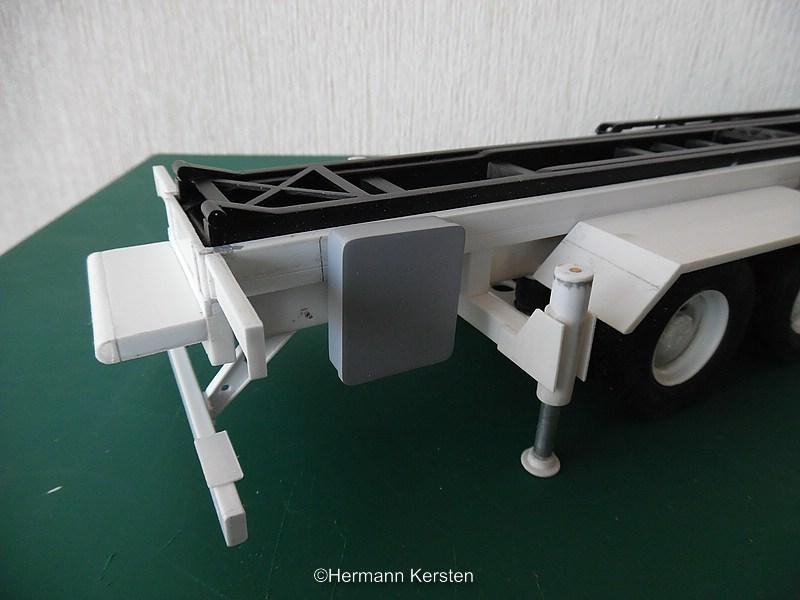
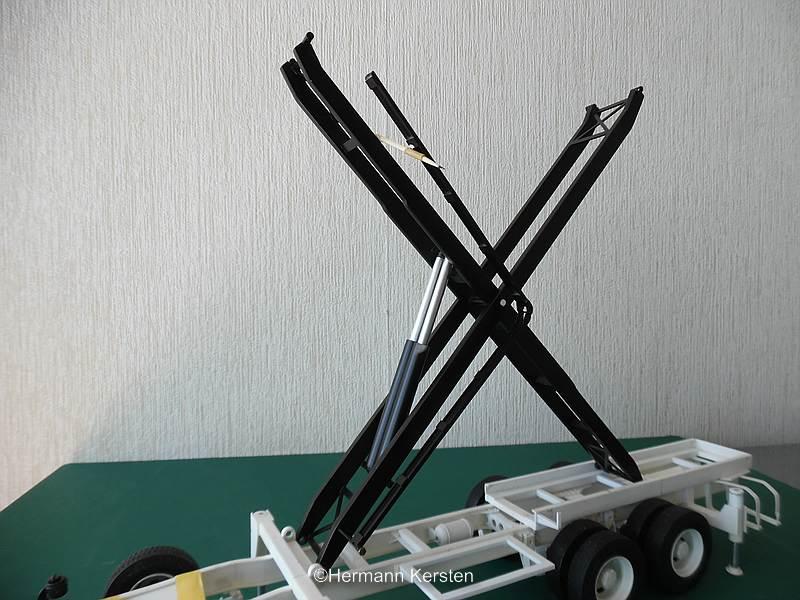
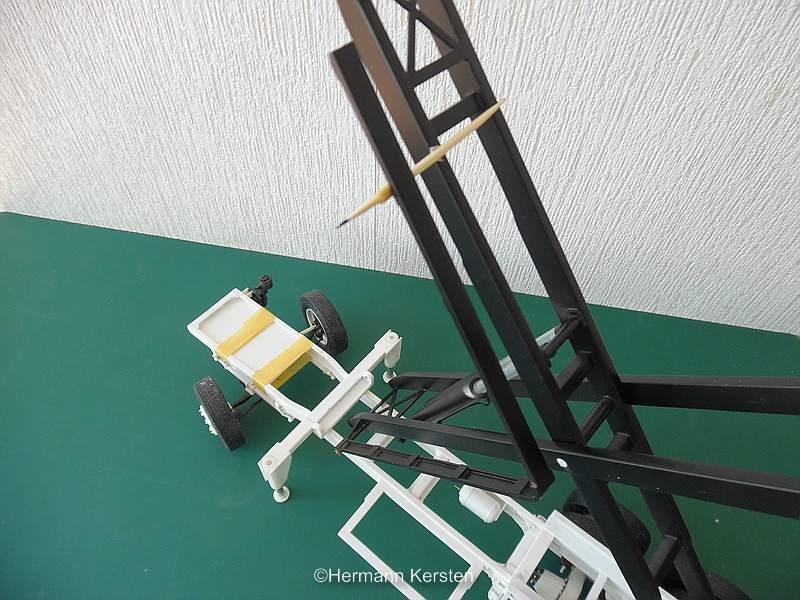
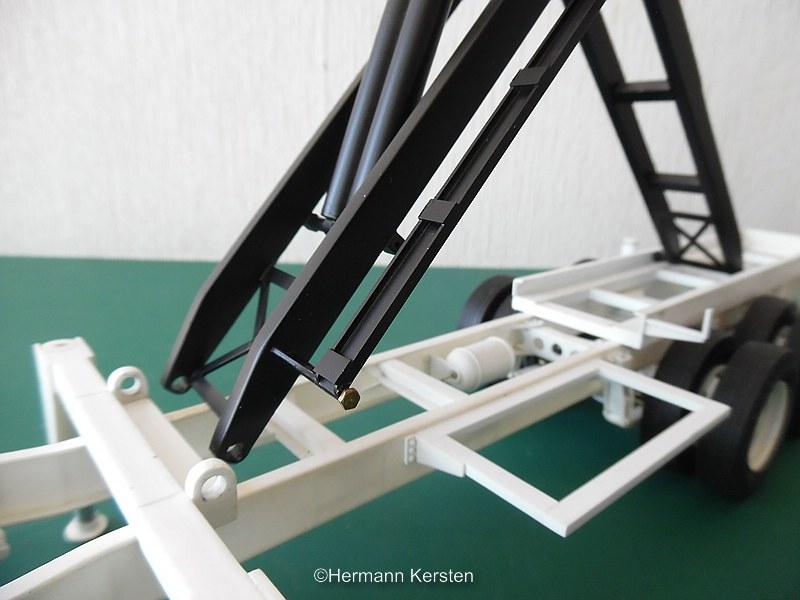
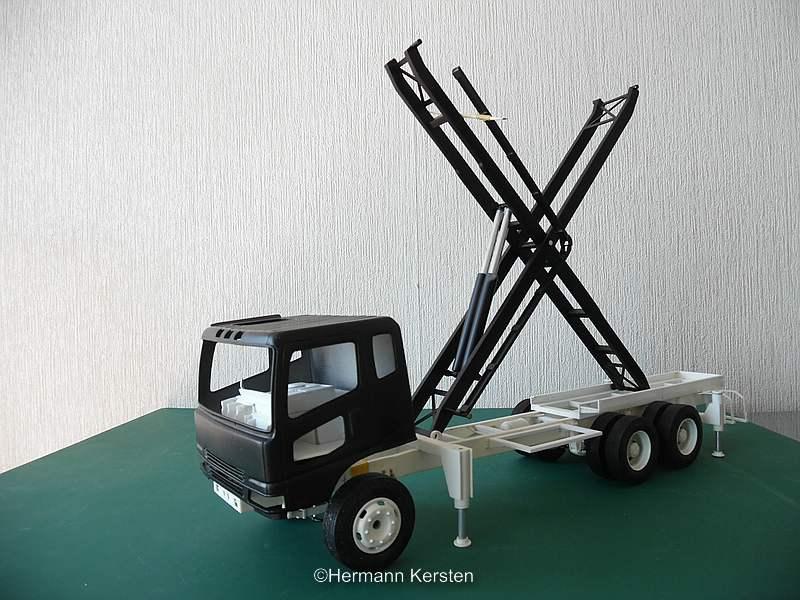
Hello everyone, Thank you for the nice comments guys! Today the progress of the chassis, which is now ready for the primer. After completion the last details, the torsion bars on the rear axles will be mounted separately, because when i do it in this stage, i cannot reach with the primer all the spots on inside of the chassis for 100% . The cabin support, at the rear of the cabin, will be also mounted on the chassis after the paint job, because iI still have to determine the exact spot for the cabin. We start with the rivets on the inside of the hydraulic support legs. Then the plumbing of the hydraulic lines from the support legs to the front. This is done with 6mm of brass wire, insulation tubes of electrical wires and super glue. And the fenders with the final details, as shown in the reference photos, and these fenders mounted at the correct height. The struts are made on the sub frame, on which the Van-Body will ultimately rest. This means that the Van-Body does not rest on the scissor lift. Then from the CTM tear plate, cut out a piece and glued on the large step. This will be also sprayed in the black color. And of course the detailing of the front hydraulic support legs. The frame of these hydraulic support legs also has two struts. Now a picture with extended legs And the supports for the cab tilting mechanism .... The support of the floor plate which is now also further detailed with a sensor in the top, and on the side of this support a number of cable fixings. Then a picture of the real situation .... And the model ... As you can see, I gave the cabin 2 layers of clear coat. I have done this so that the white color will reflects well on the black color, and does not run the risk of reactions with the bottom layer. Finally, an overall picture so far. That's it for today guys, see you next round! Hermann.
-
Hello everyone, Today an update of the small details of this Fuso. After study a lot of reference pictures, i saw that the 2 hydraulic lines are both connected at the top of the hydraulic cylinders of the support legs. At least, this was the case with the Fuso Super Great and the Isuzu Gigamax. With a cutter, some styrene and glue, i made this connectors on the top of these hydraulic support legs. Then the license plate holder, which is bent at an angle. And the big support of the floor plate of the "Van Body" that hangs above the cabin. This support is not yet glued, because it has to be painted white, unlike the chassis which has to be painted black. And everything so far..... Now I have to make the last few details of the chassis, and then the chassis can be sprayed in the black primer and the black lacquer . That's it for today and see you next round! Hermann.
-
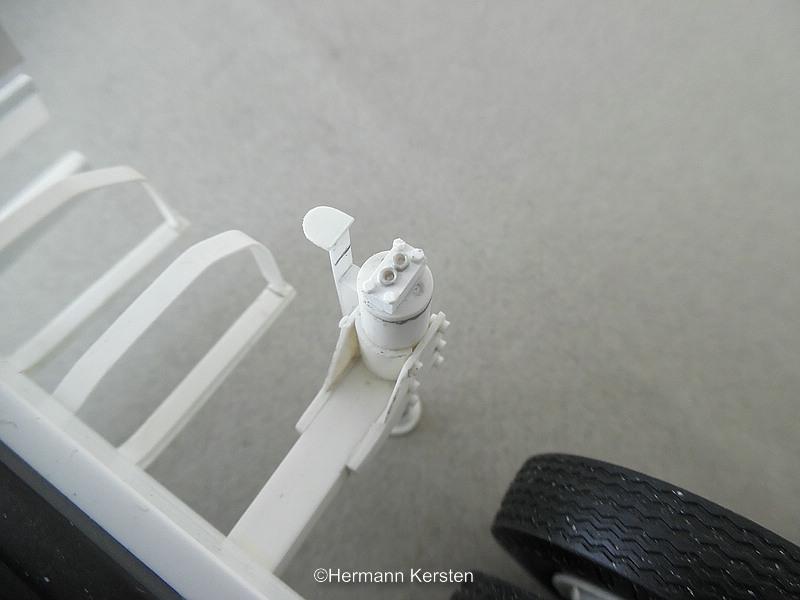
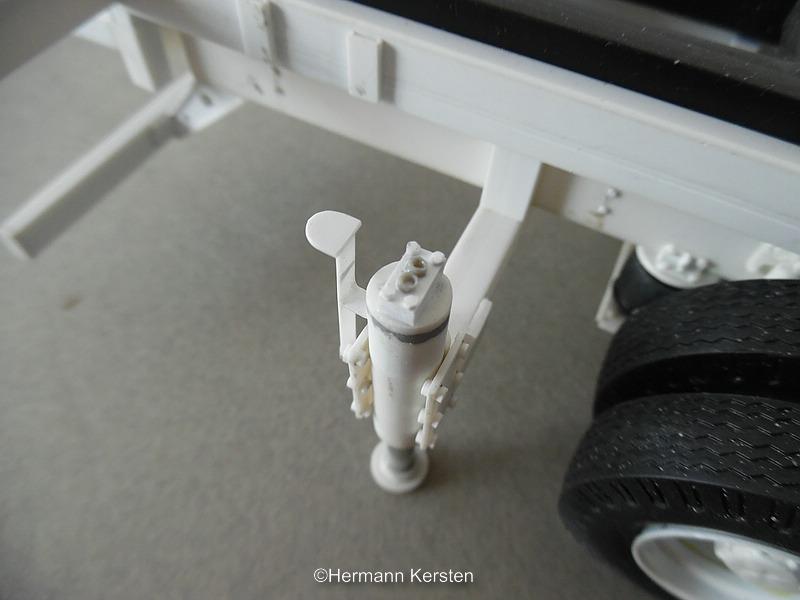
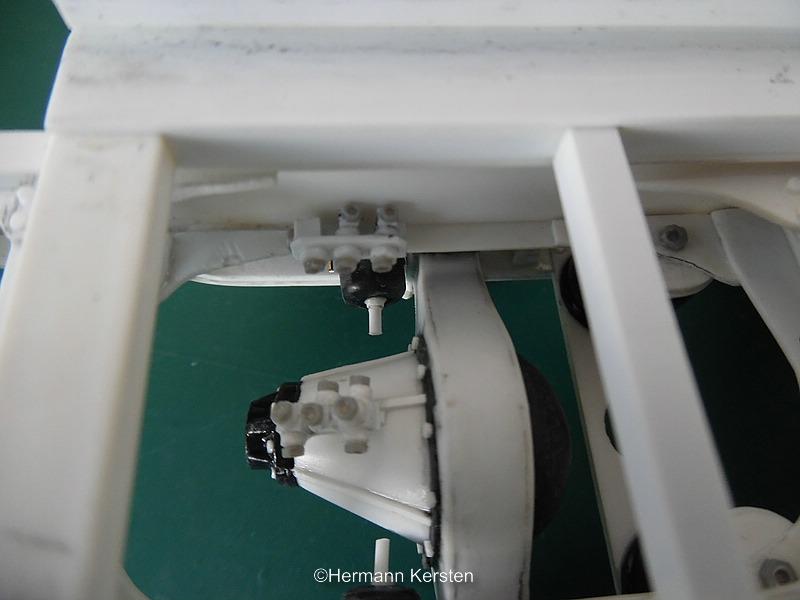
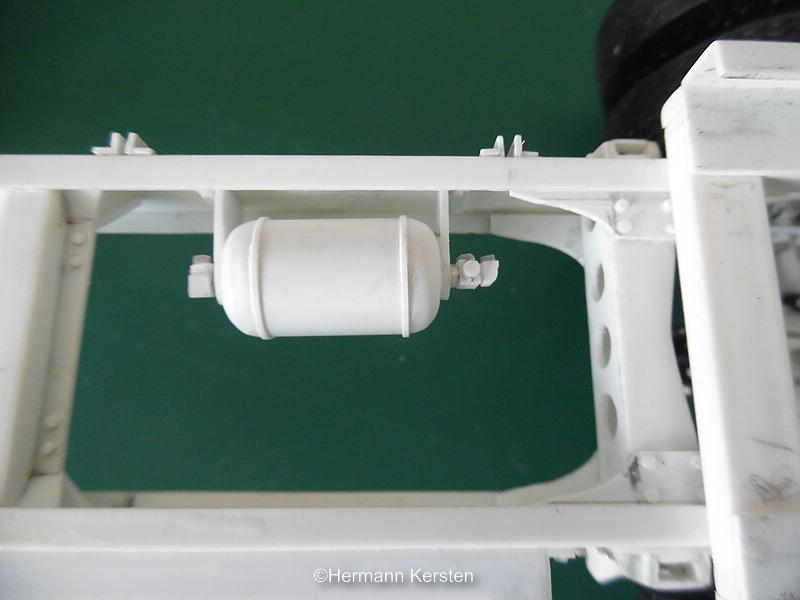
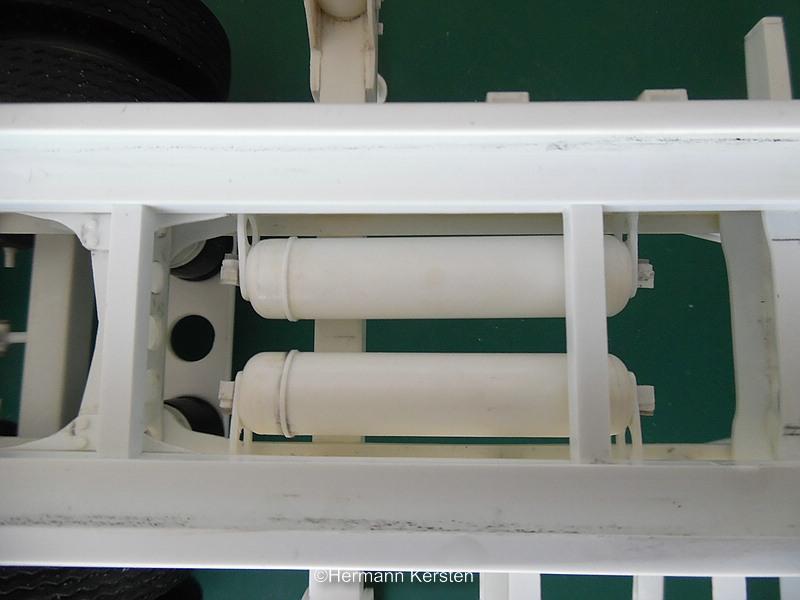
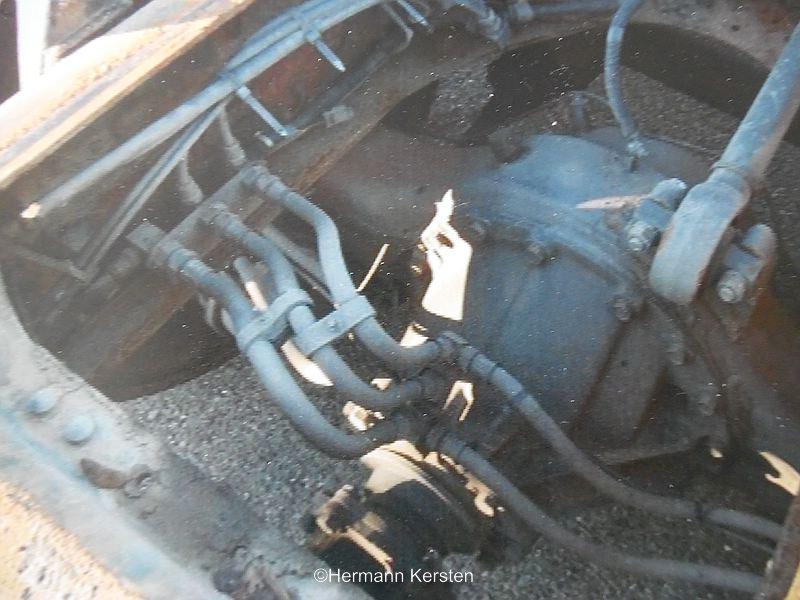
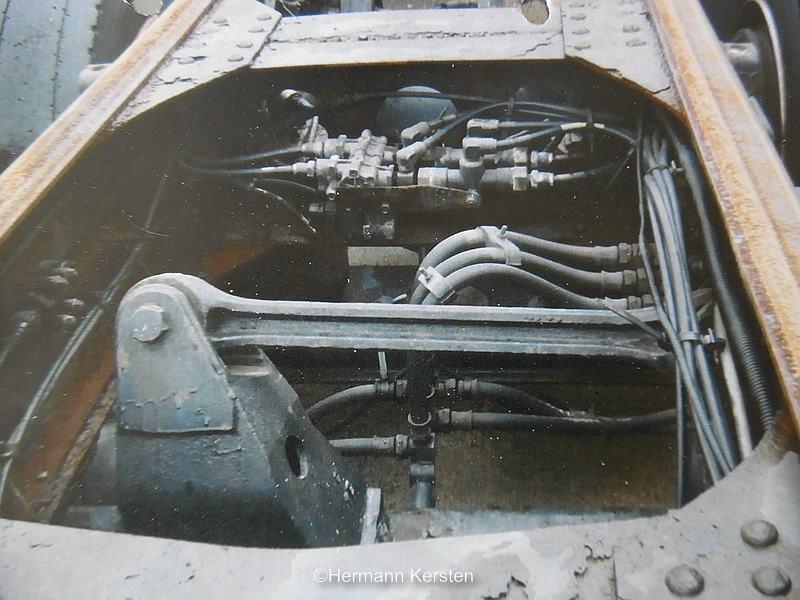
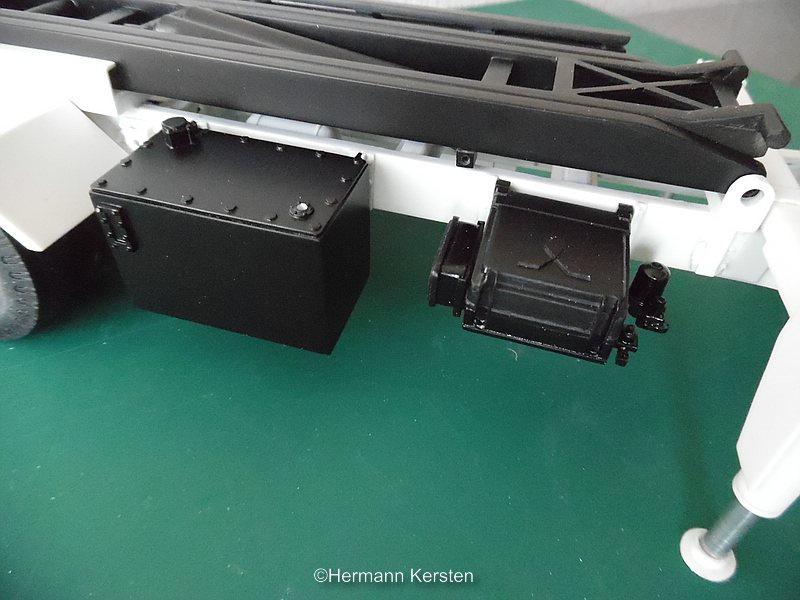
Thank you for the nice comments guys! yes Jeff, you will find out that it look like the real deal. Today i show you all some small and very small detail work. These items are very time consuming, but when the box is lifted you have a clear look at the open chassis. First i searched for the pictures in my big "Fuso Bible" what i needed for these air valves and air blocks. After study these pictures i made the small items. The first picture is a Fuso with leaf springs, but i only need the details of the air valves. And the next one is a picture of a a Fuso with air suspension, because the torsion bar is in an other direction then with the leaf springs. The air block near the cross-member is an air block for the air suspension. And the 1/24 item. The 2 supports are supports for the flashing indicators which are attached on the hydraulic legs and the flashing indicators are on top of these supports. And the air valves on the air bottles.... After this intensive work I attached the flashing lights supports on the hydraulic legs and add more details on these legs. Then the air bottles which are attached to the battery box and also with connectors for the wiring. And the progress so far. Ok guys, that's it for today and see you next round! Hermann.
-
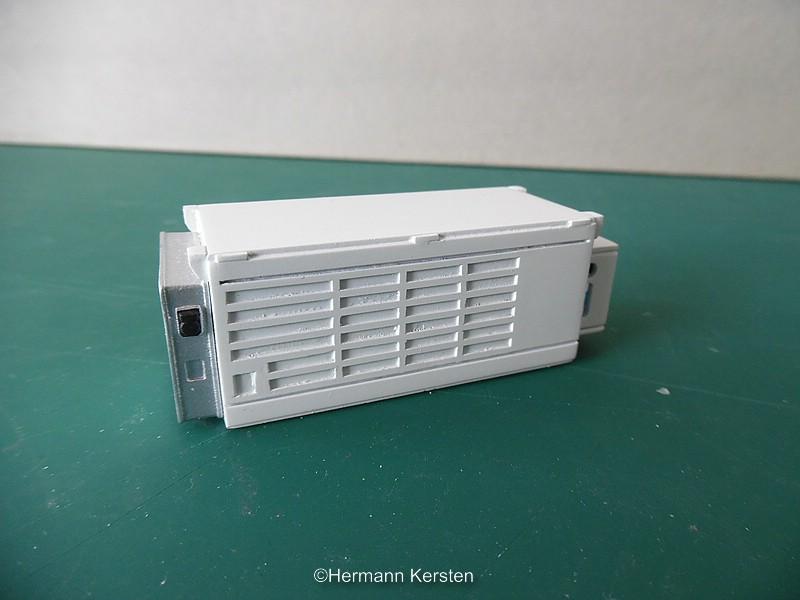
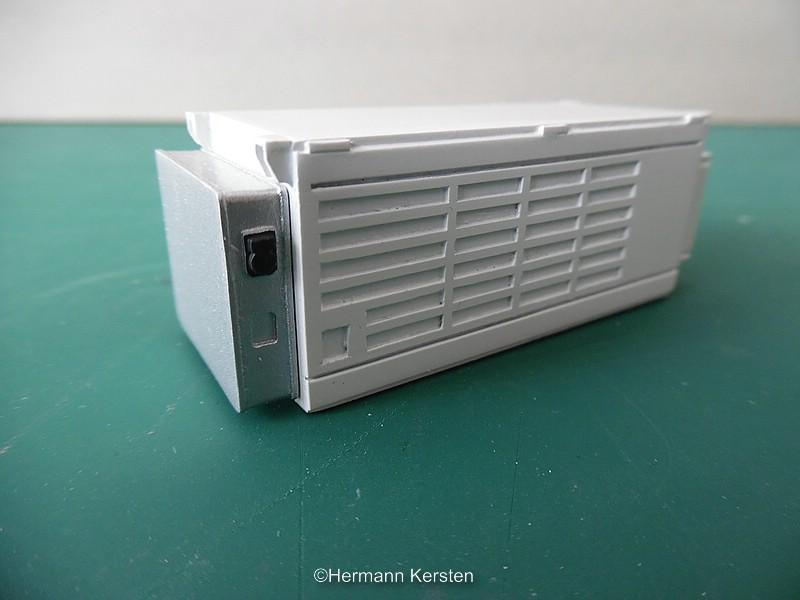
Thank you Brian! Today some small detail work. First i made a crossbar at the front of the chassis, in which the gearbox will later hang. After this job I finished the hydraulic tank wit some small details.... The cooling unit is now also ready. Made a sightglass with a transparent sprue piece and painted a level with blue Tamiya clear. And in this way, the chassis becomes more and more fuller and getting more and more color. That's it for today and see you next round. Hermann.
-
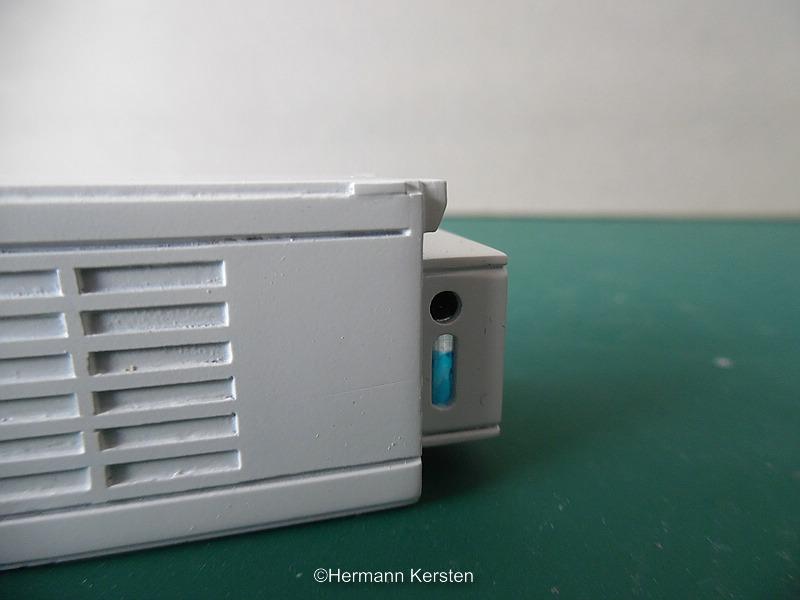
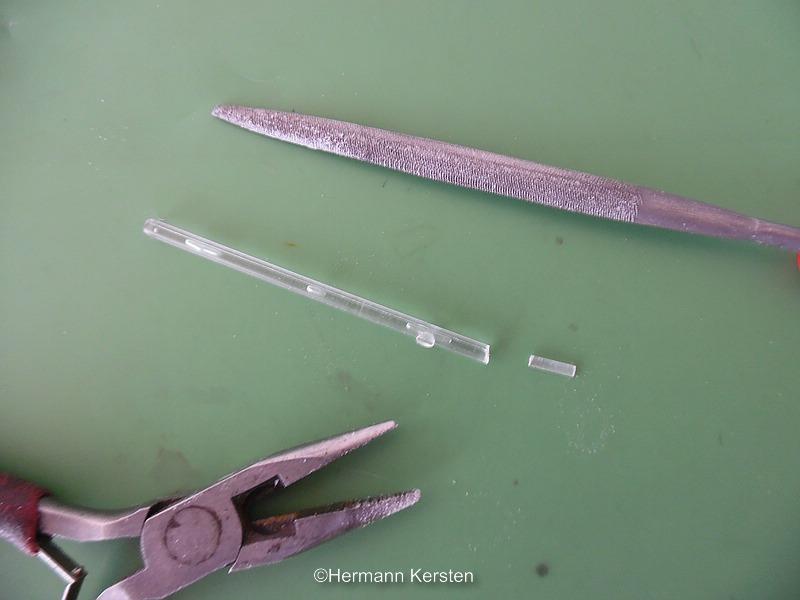
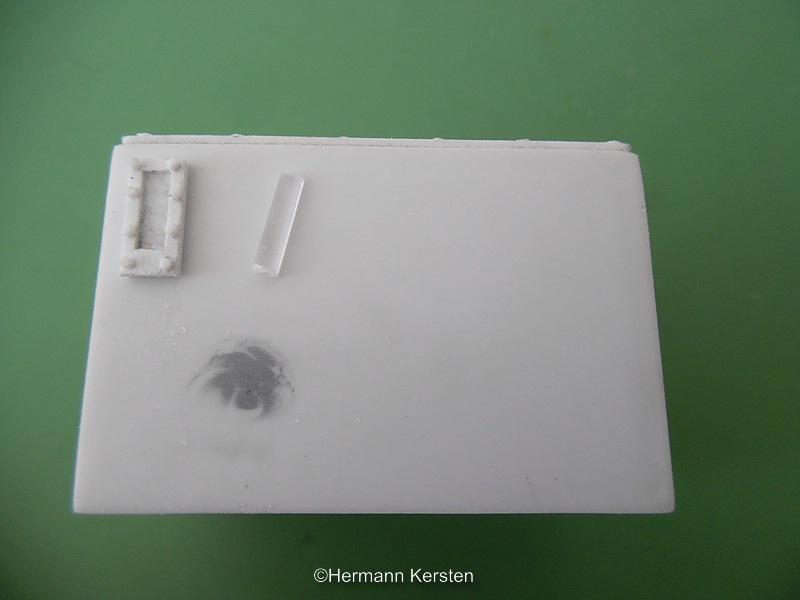
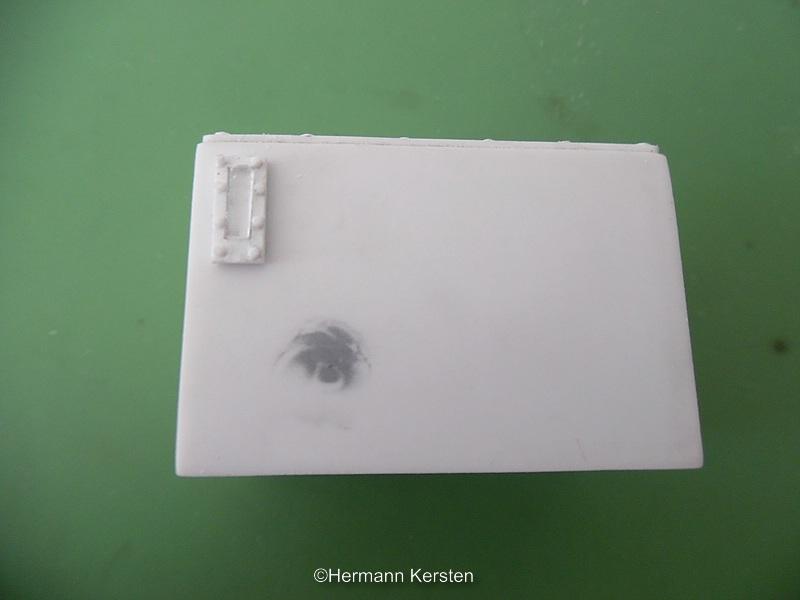
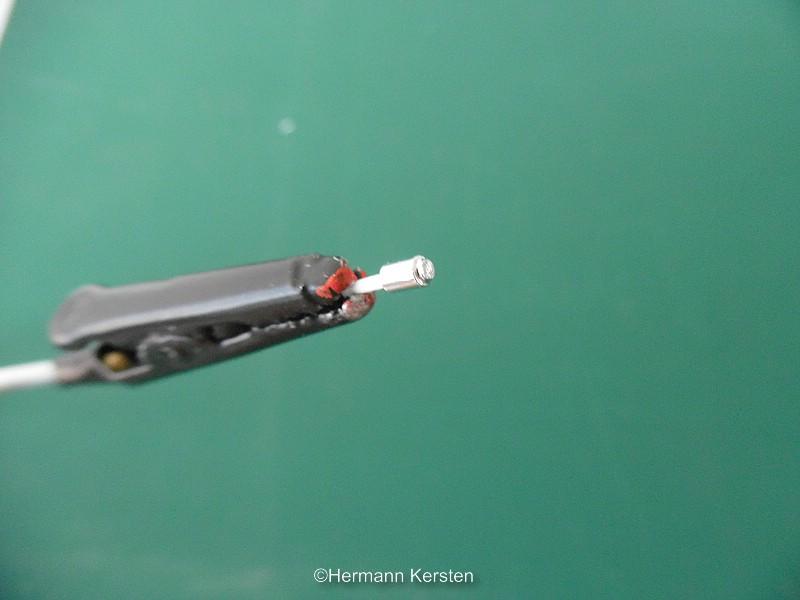
Today it is time to show the progress on the chassis. I am now mainly working on detailing all the components that were made in the raw form. I start with the hydraulic tank. First i made a separate cover with bolts and some other items to make it more realistic. The most fun job was making the gauge glass. First I made a window frame and then made a level glass from a transparent sprue. I started to file the transparent part half round, because it has to be half round glass. Because the glass is so small, you need pliers to hold it. Then cut this glass at the right size.... After this job i painted the inner side of the glass with Tamiya green, don't stir the paint so that you get the yellowish varnish. When this is dried, then i painted with Valejo gloss varnish the inner- and outside of the glass for the gloss finishing. And a self made cap for the filling pipe. This cap is edited with a Molotow chrome marker pen. Then the rear light units, the under ride protection and the large step with rubber bumper. This rubber bumper is made of a 4.8mm round tube cutted in half. An electrical box on the driver's side and the other attributes with double-sided tape placed on the chassis for the idea and proportions. So far so good. That's it for today and see you next round! Source: Hermann Kersten Hermann.
-
1957 Reo Gold Comet
Hermann Kersten replied to Chariots of Fire's topic in WIP: Model Trucks: Big Rigs and Heavy Equipment
Ah nice, a new project to follow. The nose job look awesome. Hermann. -
Oh yeah Tom, the hard work you put in it, the try and errors, the persistence, after all everything comes together in this beautiful masterpiece. I followed your topic with pleasure to see how you managed all the small "working" details. The rubber you made with paper also looks convincing, there are so many different applications with paper, I use it regularly, even for tarpaulins. Thank you also for sharing this model.? Hermann.
-
A beauty, an absolutely beauty! Hermann.
-
Yes It sounds contradictory, there are so many different shades of white and with black primer, you stay much closer to the shade of white you use. This was a tip from an auto paint shop and of course I tried this, with the desired result. Gray or white primers make the white lacquer more milky or make the white shade more pale. The white shade remains intact with the black primer, below an example with 2 cabins. It is hard to photograph with so much sunlight, but the 2 cabs are sprayed with polar white, the North Benz cabin is done with black primer and the Freightliner cabin with gray primer. There is now a difference in shade, the Freightliner cabin is more milky white and the North Benz has just remained polar white. Just take a test and you will see the difference. With the black primer, the white is a bit warmer or more vibrant ...... or whatever you may call it. Hermann.
-
SCENES UNLIMITED
Hermann Kersten replied to dannyi's topic in Truck Aftermarket / Resin / 3D Printed
Hi Daniel, I recently ordered rims and tire sets for my Freightliner projects, and after a test I found out that the material of these rims and hubs can be easily glued with Revell contact to the plastic of the kit. It is so tight that you have to break it loose if you want to get it off. Normally this is not possible with resin, so I am actually curious about what material these wheel sets are. In any case, the quality is excellent. Hermann. -
Hi everyone, First I made the mounting points on the ends of the scissor lift, on which the box with the rail will sit and the scissors are moving while lifting. These 4 points are in a slightly higher position. Then the hydraulic lines on the hydraulic pistons.... I also worked a little further on this project, the delicate job was to make the movable cable tray. This cable tray moves with the scissor lift and at the top end of the tray, the cables will hang in a large loop, because the box can slide a little forward and you need the extra lengt of the cables and hoses for the electric, hydraulics and cool unit. I had to make a hinge point on the scissor lift to fix the cable tray. And the whole thing in action. And finally, the cabin in the black primer, because this gives a much nicer result with the white car paint. The white color reflects better on a black surface and with 3 to 4 layers, the cabin is perfectly white. Ok guys, that's it for today and see you next round. Hermann.
-
Thank you for the nice compliment Tom! Yes Dave, these headlights are from the CTM set, CTM 24115 US front lights - oblong 1/25 They give the truck a really realistic look. Hermann.
-
Yes Dave, I did this more times with other models, because I find the result very convincing. On the other hand, I use black shoe polish for the rubber after market tires that are a bit grayish, this also gives a perfect result, I did this on the lowliner tires of the Actros Lowliners. And today the cab has his face. The headlight units and the headlights are now in it. For this work I had to remove the paint for a good adhesive surface. With a rotating blade and a tartar hook that dentists use, I carefully removed the paint. And the result after holding your breath for a while. Then the first deflector with spotlight..... And a few fun photos. Now prepare the other side and the rest of the cabin. For the time being I am quite happy with the result so far. See you next round. Hermann.
-
BRBO International KB8
Hermann Kersten replied to landman's topic in Model Trucks: Big Rigs and Heavy Equipment
Beautiful and flawless. The garage looks awesome too, I love the car couch. Hermann. -
Nice, it's the one with the lower front shield. There is a DC100 set back in the list. The D/N/C/S/T section has some nice pictures of the chassis, sideways. Here is one of the pictures. The chassis is from 1936 till 1940. Hermann.
-
Freight liner FLC
Hermann Kersten replied to tbill's topic in WIP: Model Trucks: Big Rigs and Heavy Equipment
Nice project and the paint job looks spot on. Nice blue color. Hermann. -
Hi Brian, It depends if you want the pre-war Autocar or the Autocar after 1945. The factory stopped end of 1940 and after 1945 they came with newer models and, as far as i know, different chassis. Anyway, I have a great link for you with a lot of info and pictures of the pre-war Autocar. Just klick the model you looking for. Truckplanet.com Hermann
-
I have some links for you Brian, hope these links help you out. Autocar Autocar restoration Autocar 2 Autocar DC100 Autocar youtube part 1 Autocar youtube part2 This one I'm not sure if it is the right model.... Purplewave Note: if a link doesn't work, just copy past it in the search bar. Hermann.
-
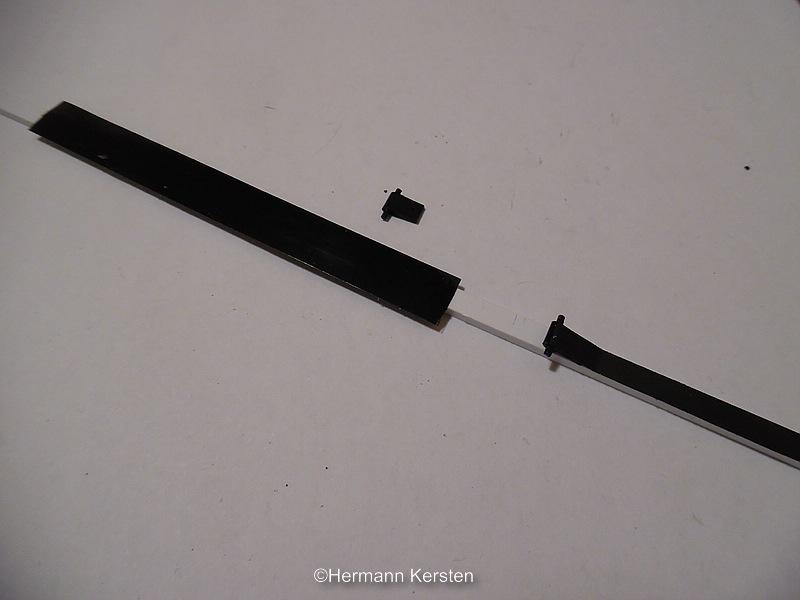
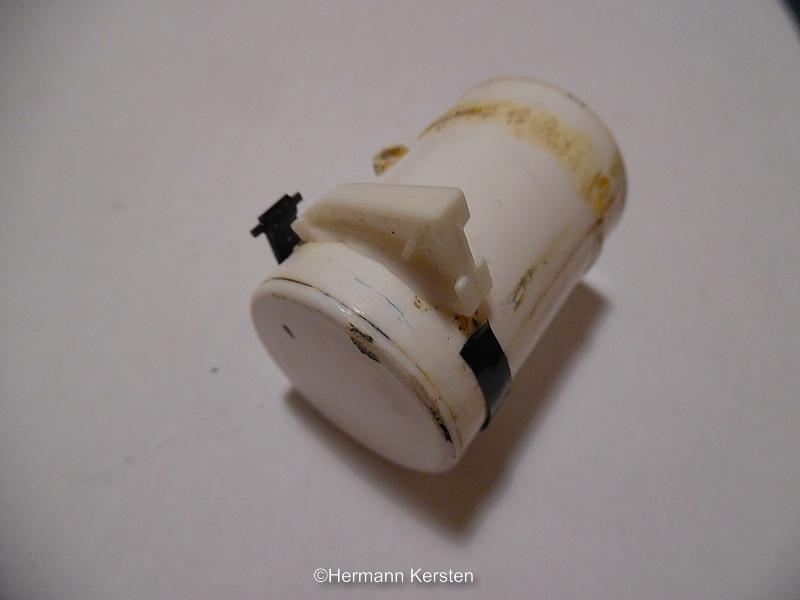
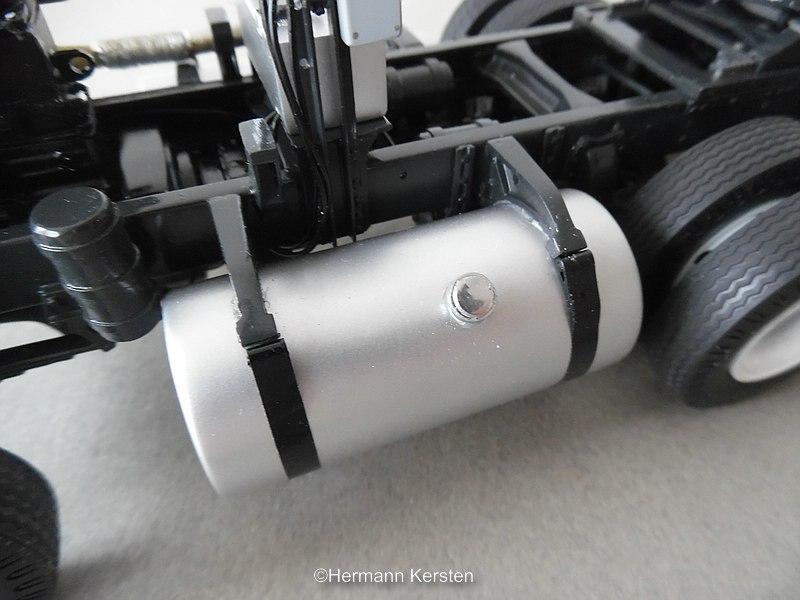
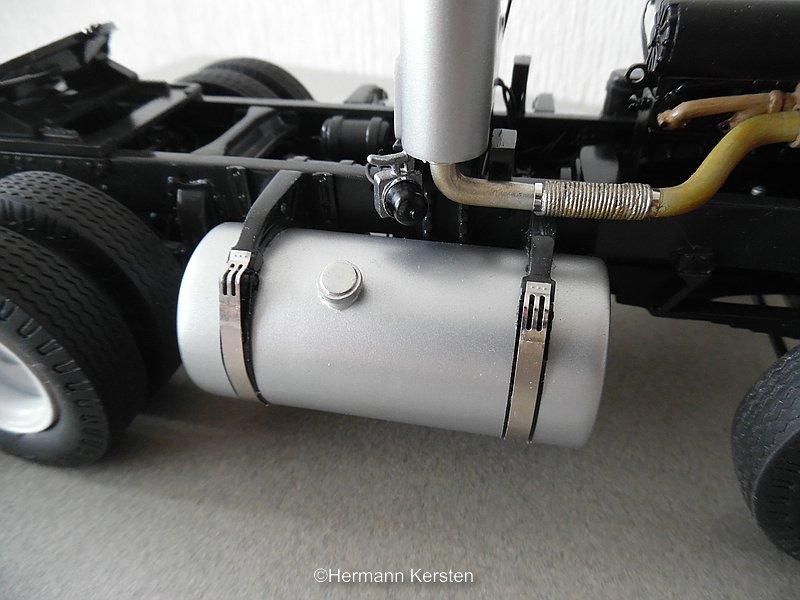
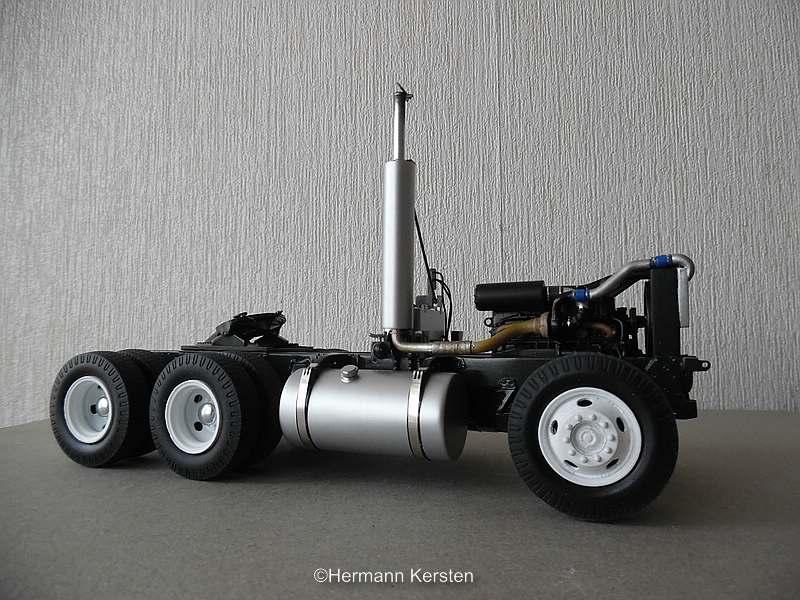
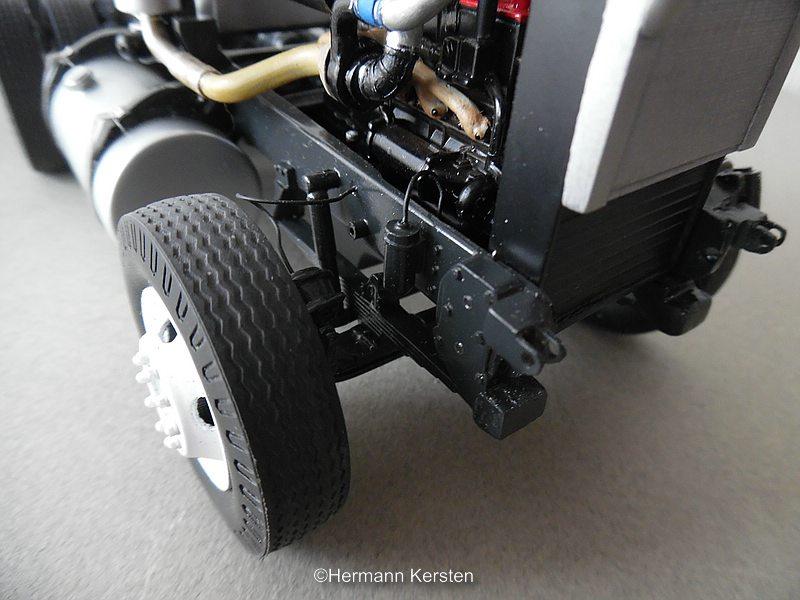
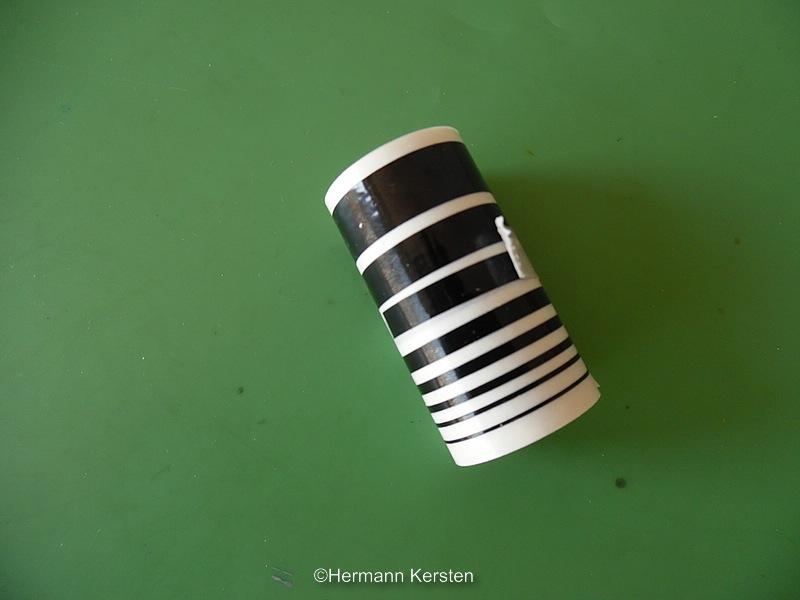
Dave and Brian, thanks for your enthusiasm! Yeah, at the moment I have the time by my side, but I guess I 'm not the only one , today some progress of small details. I started with the straps of the fuel tank, for this job I use real Car pin-striping. I bought this a while ago in an auto parts store, because these are nice vinyl stripes for tank rubbers. In this case I used the widest stripe and put it on a 4mm styreen strip, then cut it with a sharp knife. On a spare diesel tank with a bracket which is glued with wood glue, cut the tape with the connector to the right length. In the meantime I had made the connectors of the straps at the upper side and put the tape around this connectors and taped it to the fuel tank. And the last step, glue the CTM metal tank straps on to the vinyl straps, which is glued with ordinary hobby glue. Then some extra detailing of the fifth wheel with a tie rod, which is made of a brass rod. The last wiring for the brake lines..... And the tires treated with ash, to give them a used look. And the progress so far..... Yes guys, that's it for today! Hermann.
-
The Beast...KW winch truck
Hermann Kersten replied to gotnitro?'s topic in WIP: Model Trucks: Big Rigs and Heavy Equipment
Nice scratch build progress so far. Hermann.