Hermann Kersten
-
Posts
595 -
Joined
-
Last visited
Content Type
Profiles
Forums
Events
Gallery
Everything posted by Hermann Kersten
-
I read your topic from the beginning and love this art of build. Going all the way and everything is possible, just with a builder's fantasy the most beautiful ideas often emerge. And the blades of the propeller, oh well.....who cares....they are adjustable like the ATR 72 or the Bombardier Q400, just as I said, everything is possible. The nose job is awesome and very well executed. With this silver color it also has something industrial, and refers to the aluminum planes, at least I assume that this was your idea as an artist. Hermann.
-
Kenworth Expedite Truck
Hermann Kersten replied to Jonj238's topic in WIP: Model Trucks: Big Rigs and Heavy Equipment
Great subject and the first steps looks good. I saw a couple of them on pictures and saved them, these were mainly the Fed Ex trucks and looked very cool. Here in Europe we don't have that type of truck, that's why it gets my attention, and if we need a quick delivery over here, the driver just put the pedal to the metal.? As far as i can see, your truck gets 2 rear axles what looks, in my opinion, more cool then a single one. Have fun with this build and i will follow your progress. Hermann. -
Just use the normal primer like Motip or Duplo color, if I'm correct, they are from the same factory. I have good experience with this primer on my Freightliner cabs. May bye you can make it smooth with some layers of gloss varnish, just aware that the varnish is on the same base as the Rustoleum, otherwise the paint and varnish will solve each other. Hermann.
-
with no adress
-
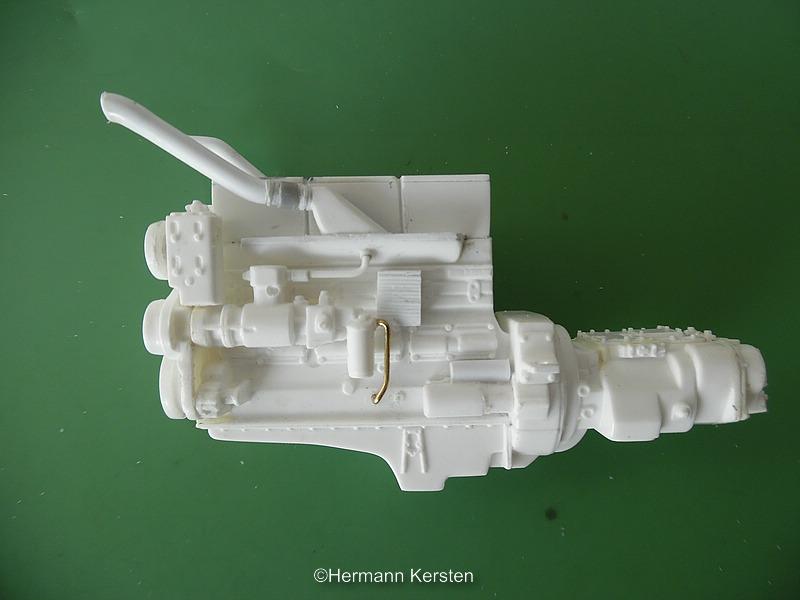
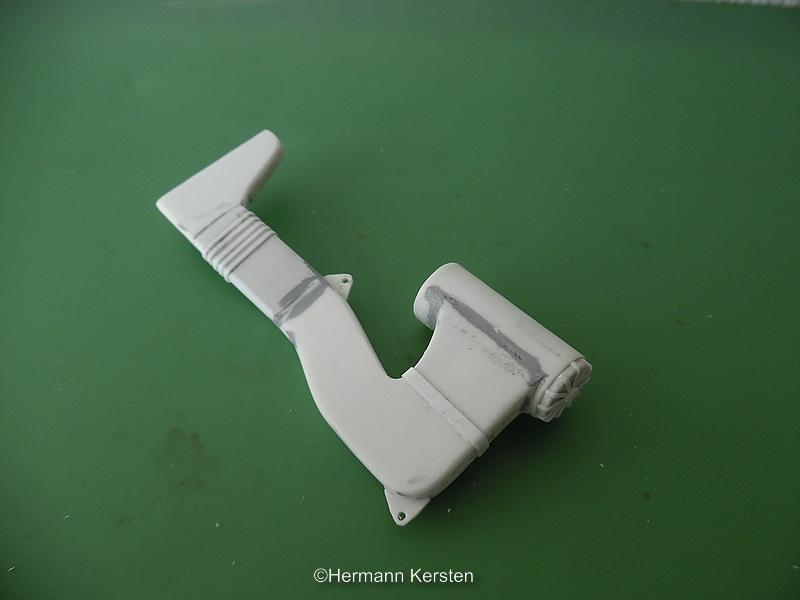
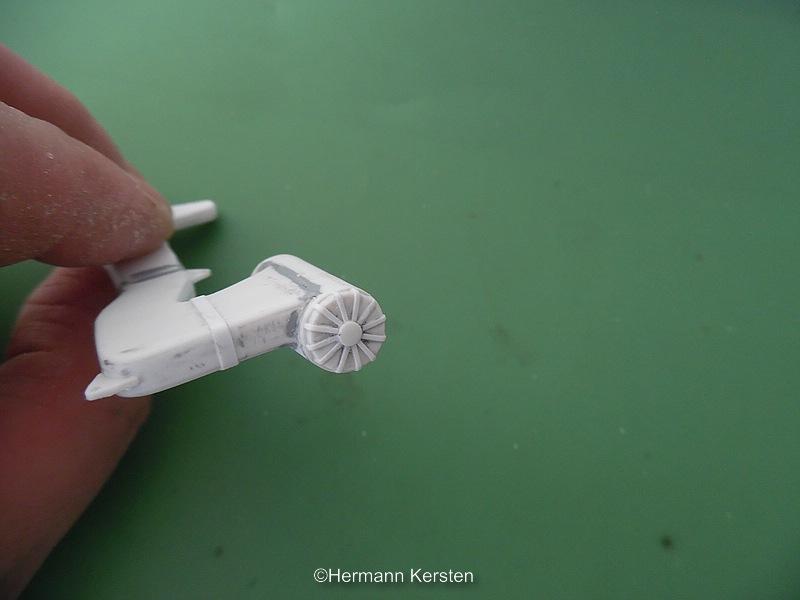
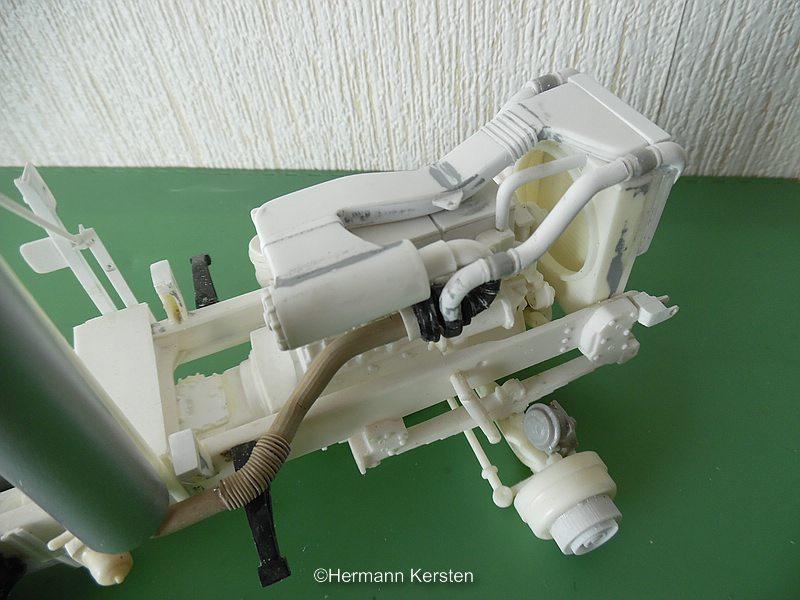
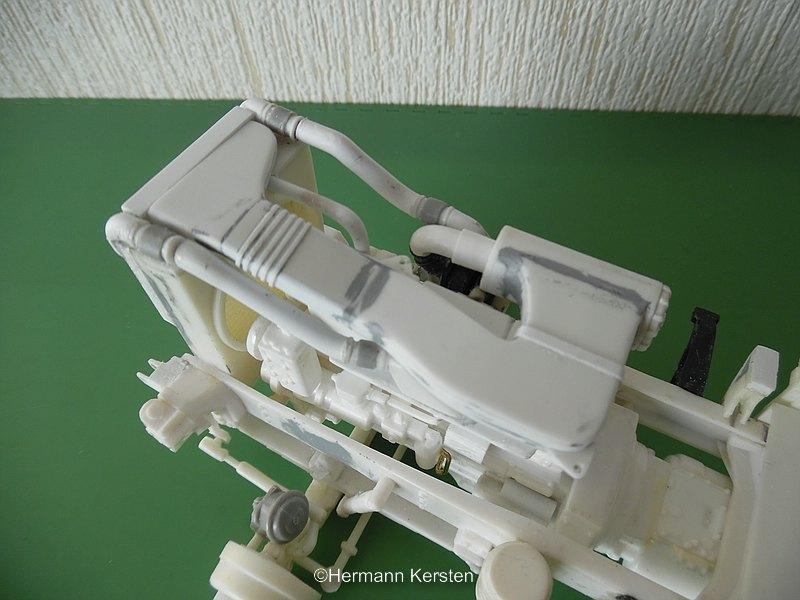
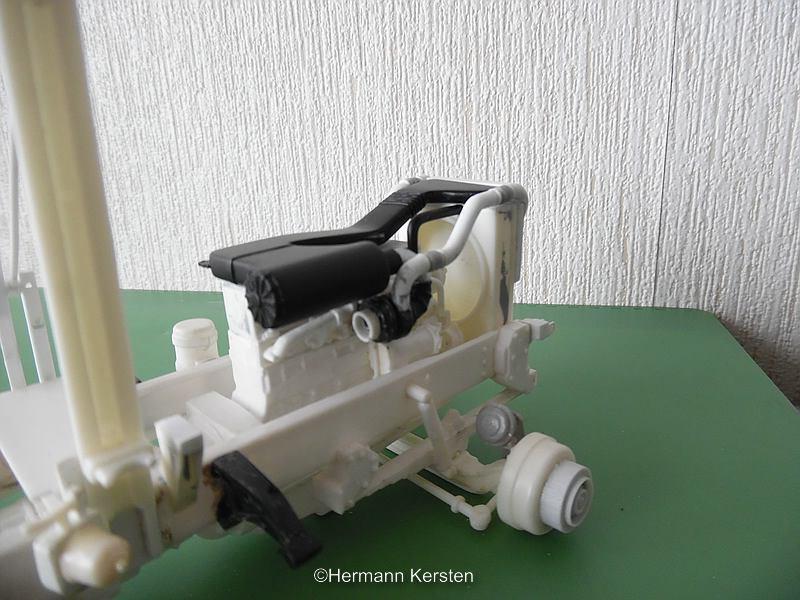
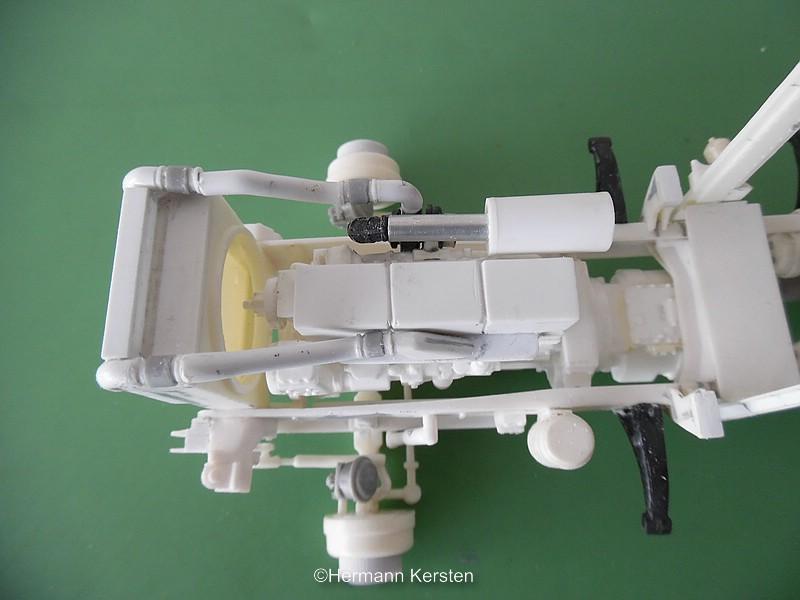
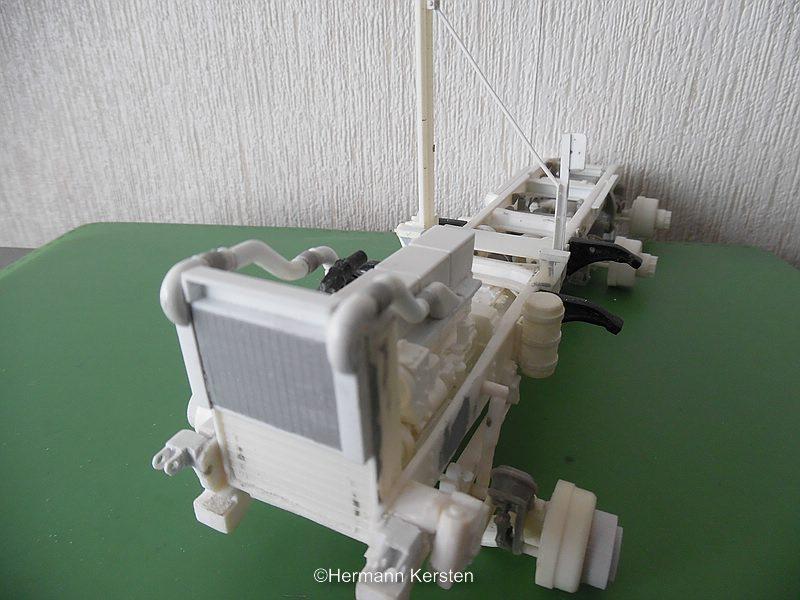
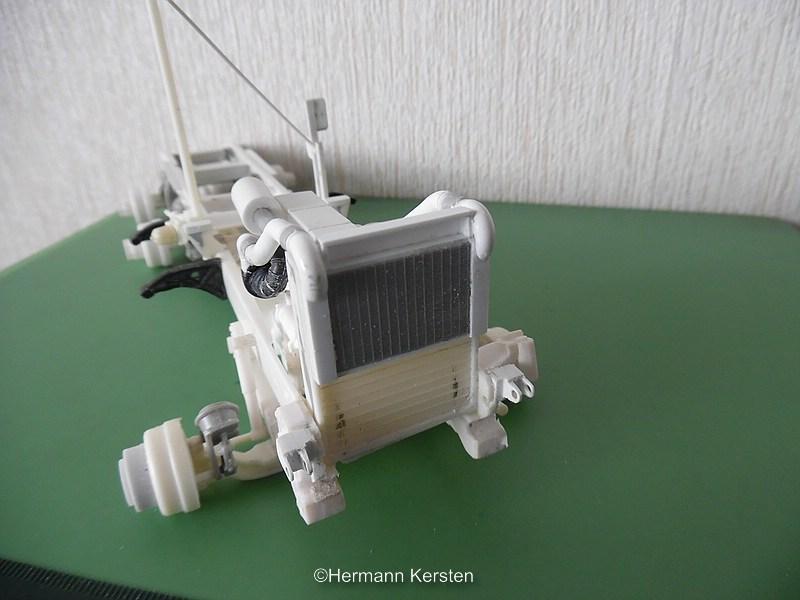
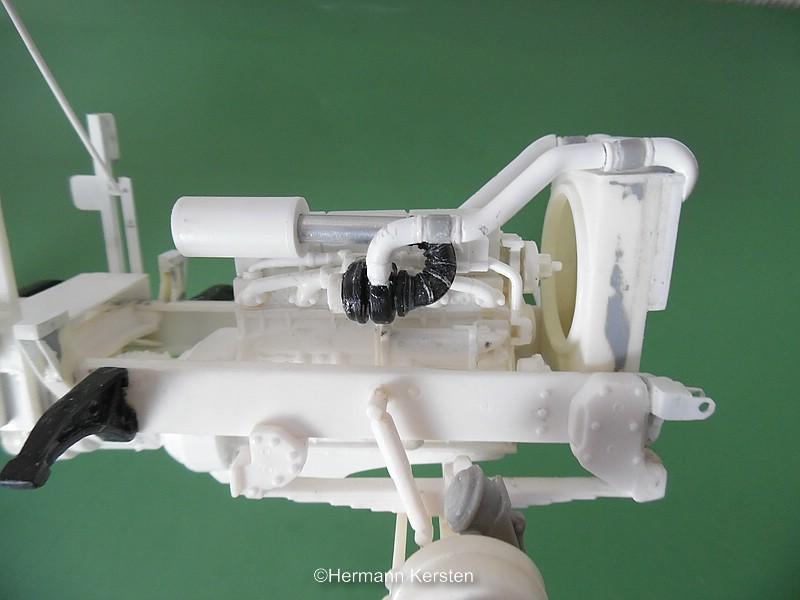
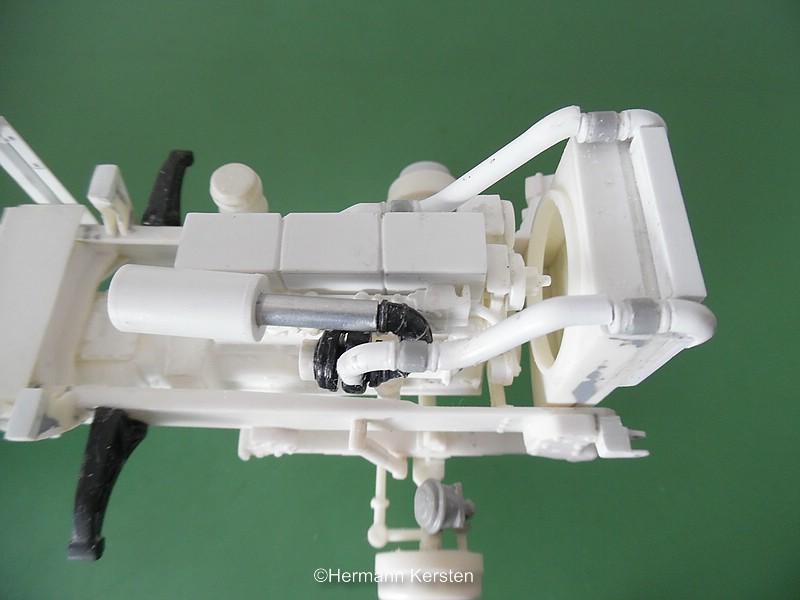
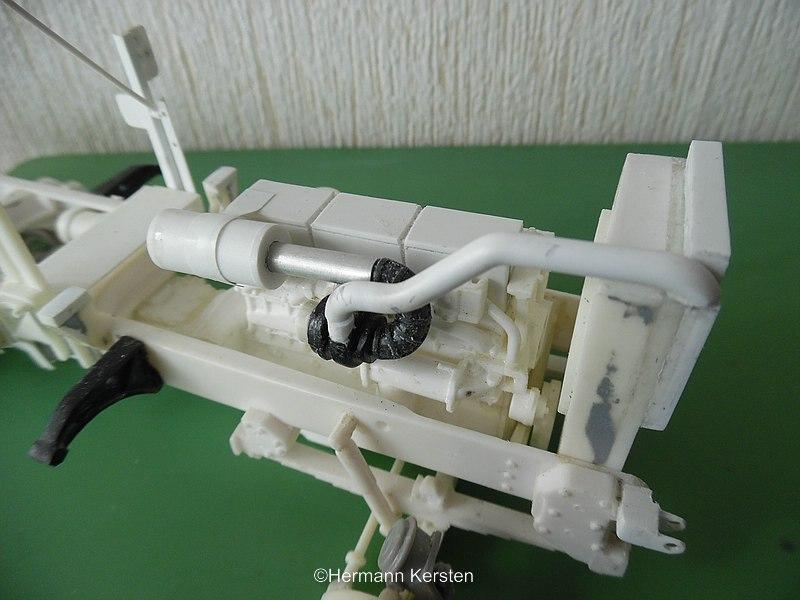
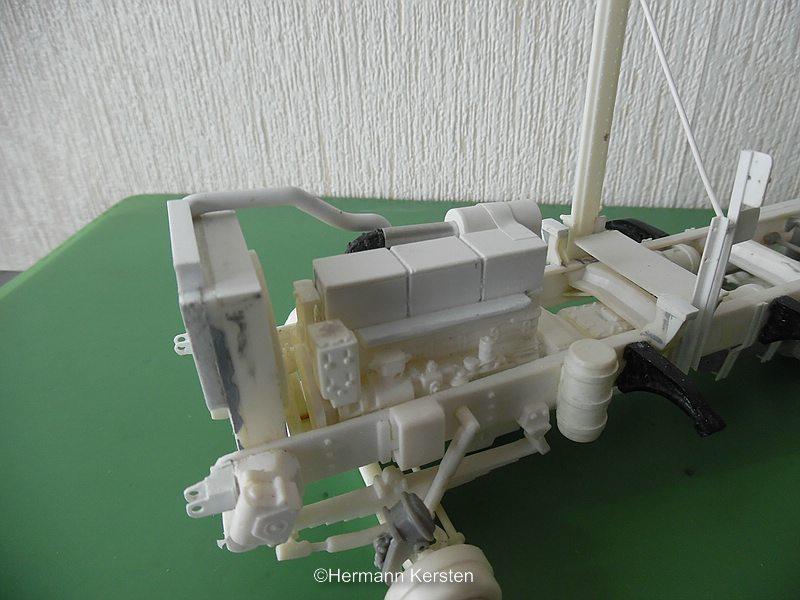
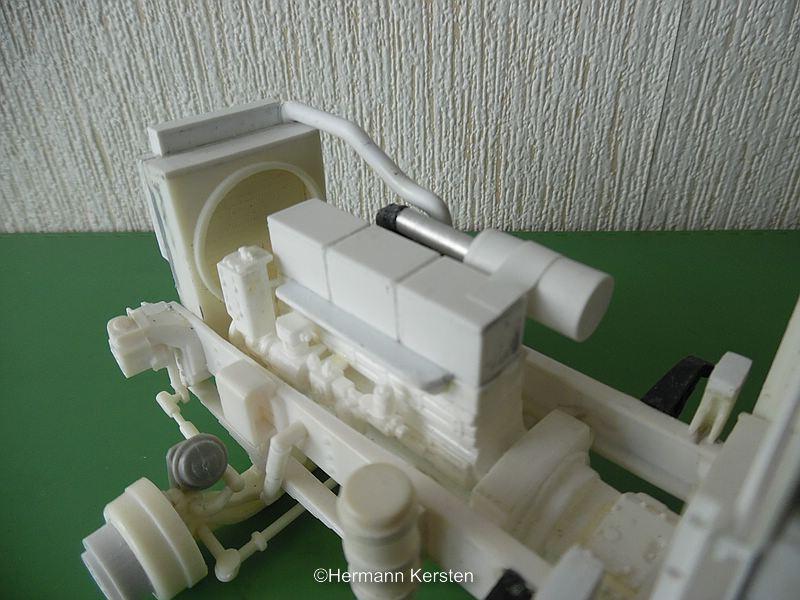
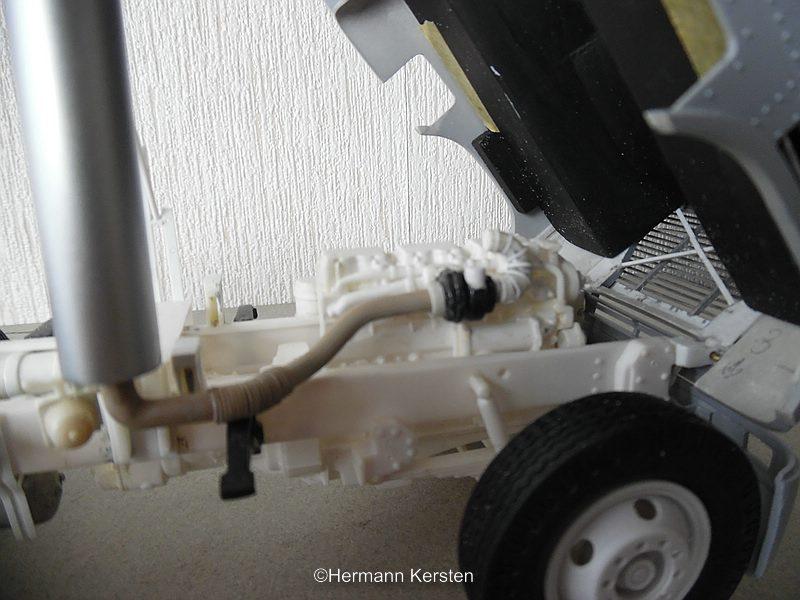
Hello everyone, The modification of the engine comes slowly to an end. First i made the electronic module at the left side of the engine, and add some piping. First i put a lot of time to make the air channel from the radiator to the turbo. This air channel is made out different sections and for the sizes, i estimated it from 2 reference pictures. At the reference pictures it was a Cat in line engine, but i noticed that the air supply on a Cummins, Cat or Detroit in line, is exactly the same. Yeah guys, i learned a lot with observing these pictures. First I started to build from the air filter, and made a turn to the right. Halfway i made the section what goes up, and from the upper i made another part, the off set pair collector, what is connected on the top of the radiator and the air cleaner. For an exact fitting I glued the radiator with wood glue on the chassis, and in this way I don't have to worry that the radiator will move, while measuring and building. The rubber elbow on the turbo i had to cut in half, because on the pictures i saw there was an aluminum elbow on the top of this rubber. And a fit on the engine. And painted the whole air supply in a semi gloss black color. Now i only have to make some small detail parts on this engine, and then I'm ready to paint the whole engine gloss black and the top of the cylinder heads in a red color. That's it for today and see you next round! Hermann.

-
Yes Jerry, it looks more better then the first try. Are you still use a second contrast color, like the first cab, or striping? Hermann.
-
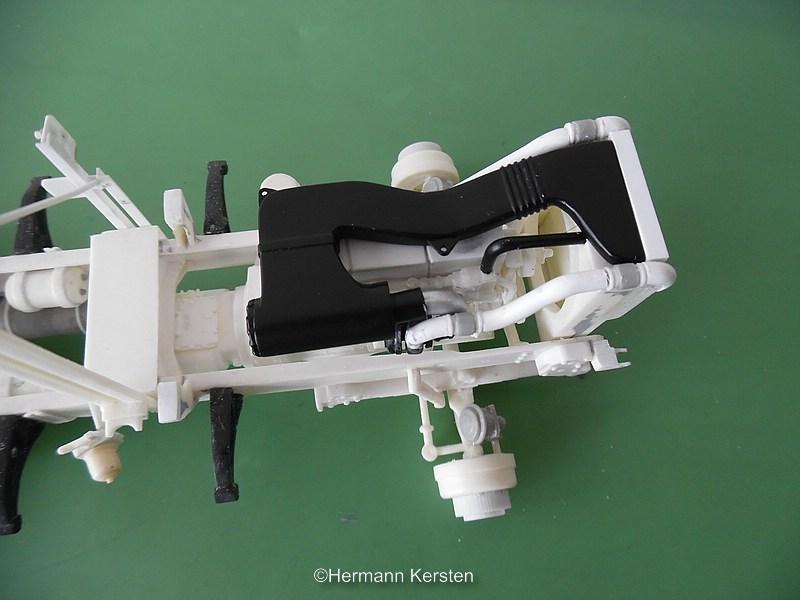
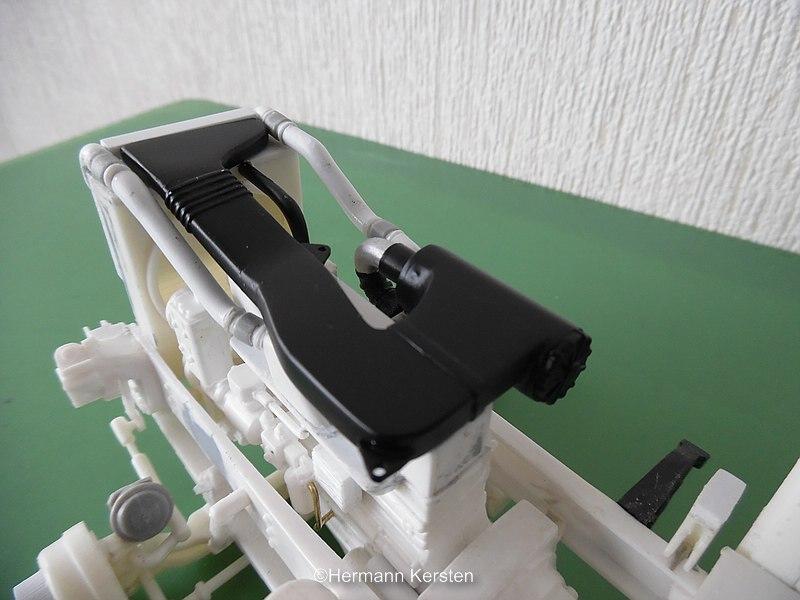
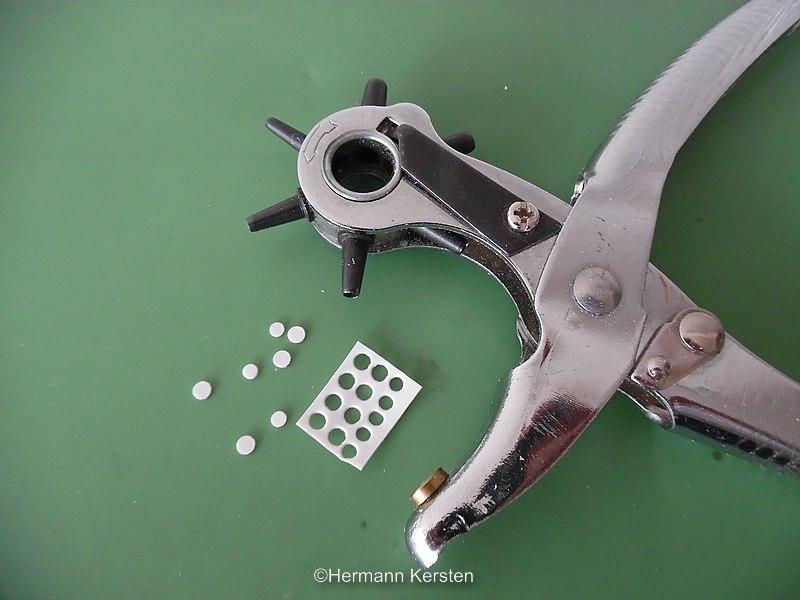
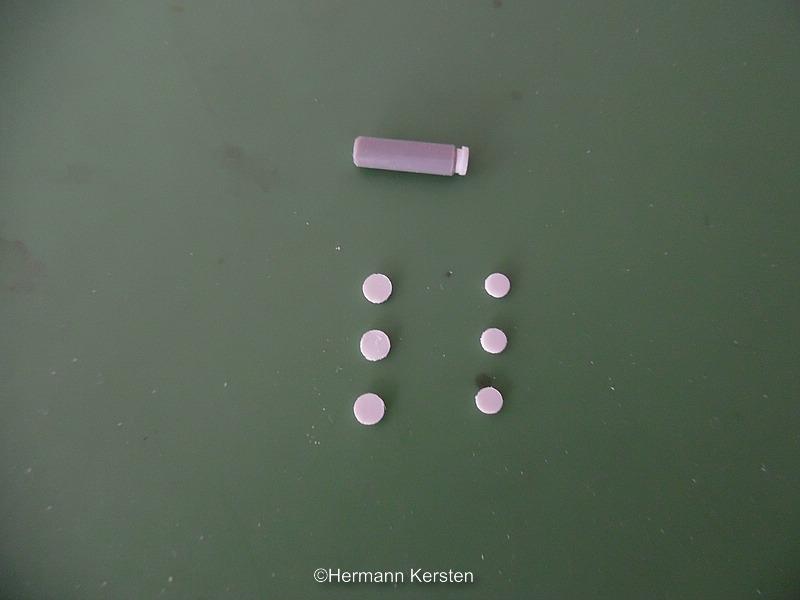
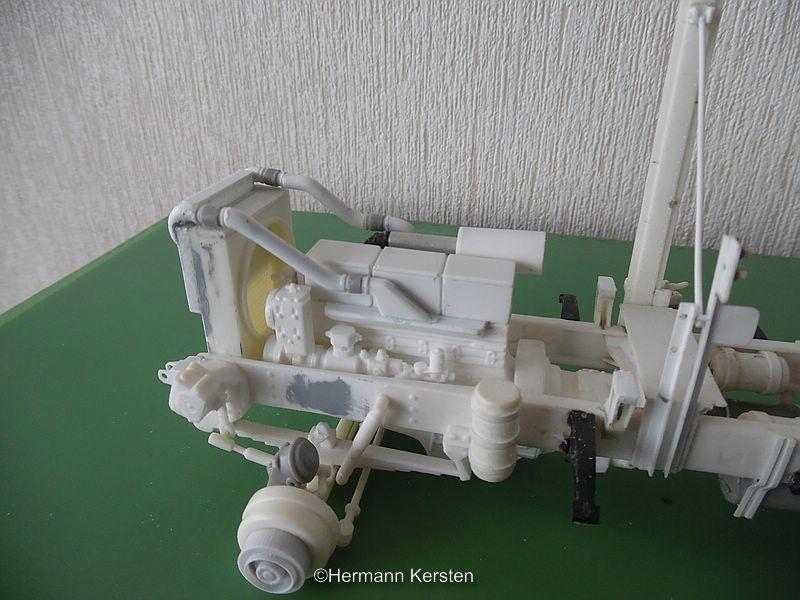
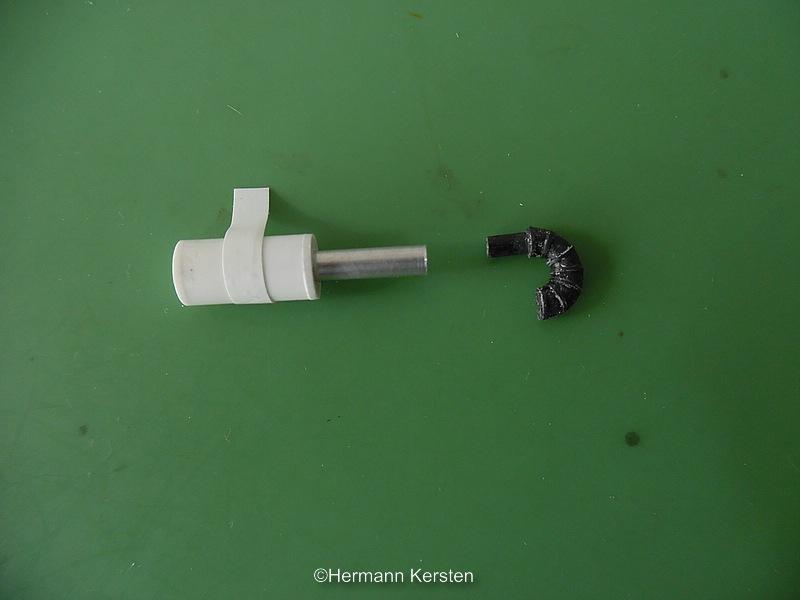
Thank you Vince! And we continue with the engine, this time I put my energy in making the pipes for the airsupply. These pipes are connected with some small flexible parts, and to make them as good as possible, i used a belt holes pliers, what is a wanted and needed tool for this kind of work, at least......for me then. First i cut out the two sizes for these flexible parts..... And glue them on a spreu part, which is a bit wider then the 3,2mm air supply tube. Then i made the elbow connection to the intake manifold and form and glued the rest of the air pipes. I didn't connect them to the radiator, because this is the last step after the paint job of engine and chassis. At the front of the engine, I cut the engine pulleys from the belts because 1 pulley has to be placed a little bit higher on the front of the engine. On a later term i will make some new belts with a polystyrene strip. Then the other side of the engine..... And finally, see if the cabin doesn't touch anything ...... And nothing is touched. Well guys, that's it for today and see you later! Hermann.
-
Favorite Obscure or Discovered Music Album
Hermann Kersten replied to afx's topic in The Off-Topic Lounge
Love this song from 2011, Arcade Fire- Ready to start. Arcade Fire Hermann -
Well Jerry, as far as my experience and knowledge goes, cry out, take a deep breath and start all over again. If it was me in this situation, I would use oven cleaner to strip the cabin and start again with primer. Keep an eye on temperature, same kind of paint and humidity. Hermann.
-
Hanks Truck Forum Shutting Down
Hermann Kersten replied to DRIPTROIT 71's topic in General Automotive Talk (Trucks and Cars)
That's really sad to read. I know the picture site was down already, for me a good and big source for vintage trucks like the Freightliners i build. The big issue for shutting down the picture site, was that an amount of people downloaded the pictures and used them without notify the source or clear out the original name and put their own name on the pictures and claiming that it is their pictures. For the future of the forum......here is a link. Hank Truck Pictures Hermann. -
Thank you for the nice comments guys! Today some progress at the modification of the Cummins engine. First i searched for some pictures, and i found a few of this engine with a COE setting, most of the pictures are conventional trucks. The most important was the shape of the air supply from the radiator to the air filter and turbo. Then the first steps for the air filter and the connection to the turbo. For the pipe to the filter, i used a 4mm aluminum tube, and connect it to an adapter what is made out of a piece of a kit sprue. The radiator itself i modified it also with the extra inter-cooler unit. Then the first piping from the radiator to the turbo, and as you all can see, i cut out the cylinder heads of the original kit engine, and made the typical straight angled cylinder heads of this type of engine. The other side i modified the intake area and later i will make the elbow connection and attach it on tthe modified intake manifold. And in this way I try to make the engine more realistic and credible. That's it for today and see you next round! Hermann.
-
BRBO 2020 Pete wrecker rebuild
Hermann Kersten replied to DrKerry's topic in WIP: Model Trucks: Big Rigs and Heavy Equipment
And BOOM, with the primer it looks like it's a standard kit part. Nice progress. Hermann. -
Mashpee Breaker 354
Hermann Kersten replied to Chariots of Fire's topic in WIP: Model Trucks: Big Rigs and Heavy Equipment
Very nice and clean build, look already exact like the reference pictures. Hermann. -
catch them first
-
drink a whisky
-
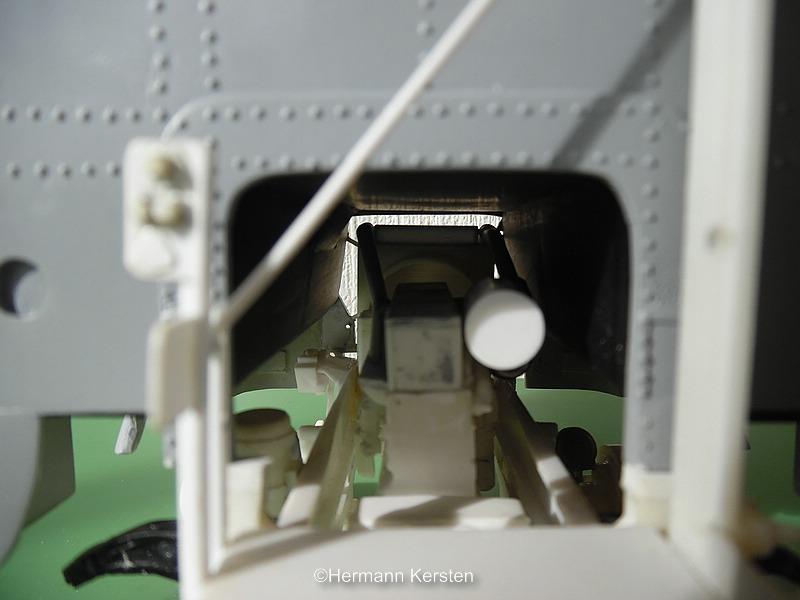
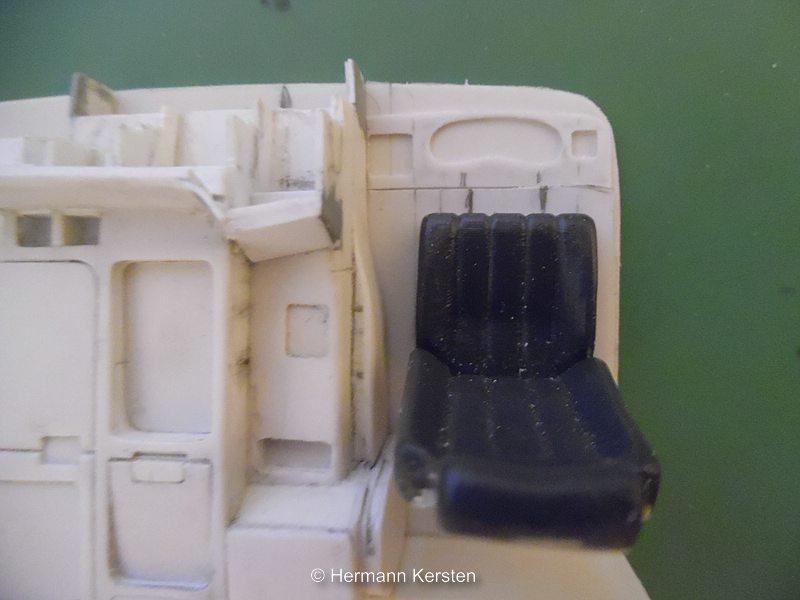
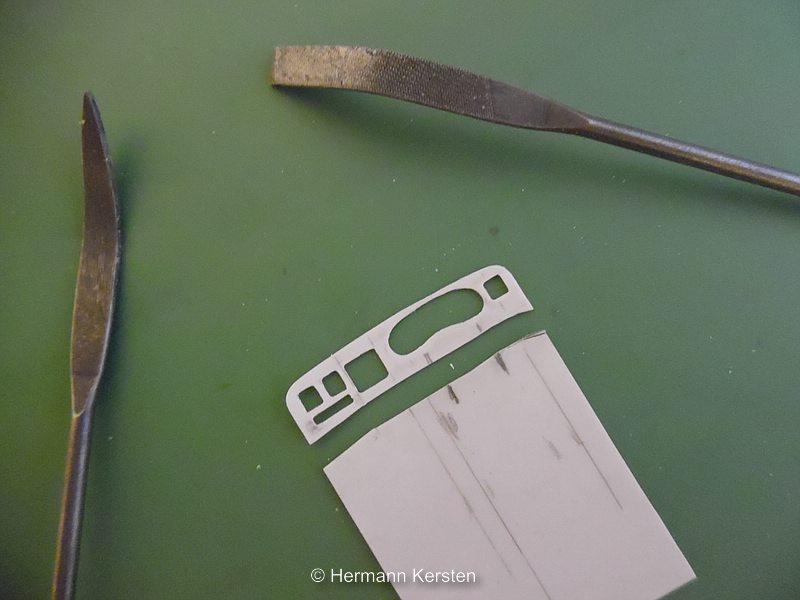
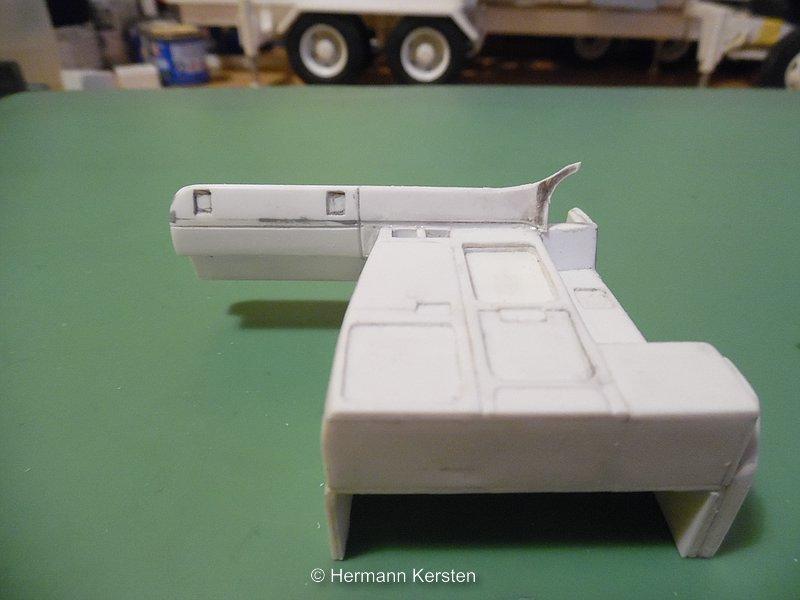
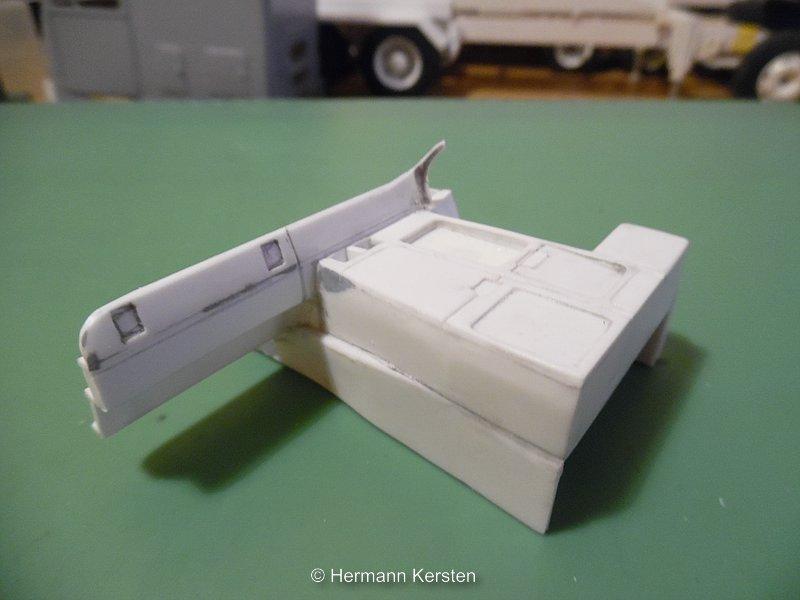
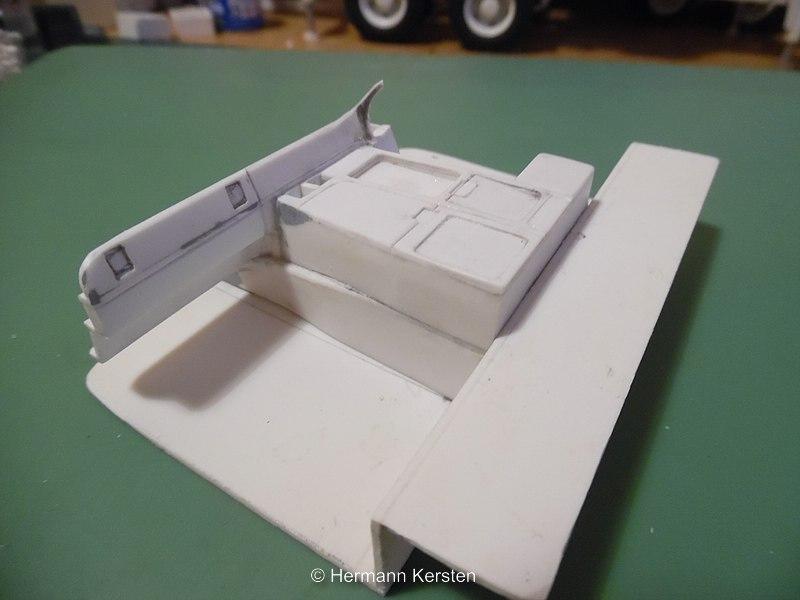
Hello guys! Today a small update of small and time-consuming work. I already started with the upper part of the dashboard and have done the passenger part. In a 0.20 "thick strip I filed 2 air ventilation holes and placed another 0.20" strip at the rear of this front strip. Then i made a second strip which follows the shape of the cockpit at the end. I keep this shape a little bigger so that at a later term, when everything is connected, i can sand eveything at the right size and shape. To determine the center of the meter unit, I placed a straight plate on the floor plate, then placed the center console on the part of which the cockpit part overlaps the console , then put the driver's seat in position, and determine and mark the center from the seat. Then the most difficult and most intensive work, the cockpit itself. With the photos at the ready, I try to copy these as well and as realistic as possible. With the photos at the ready, I first filed all forms from a 0.20 "styrene plate. First drilled the corners with 1 mm, keeping the drawn shape a bit smaller than the actual shape, then cut out most of it with an acto knife and file everything to size. This is the result of a lot of drilling, cutting, and filing. Yes guys, it is not much, but i can tell you, quite some time has gone into this work. That's it for now and see you next round! Hermann.
-
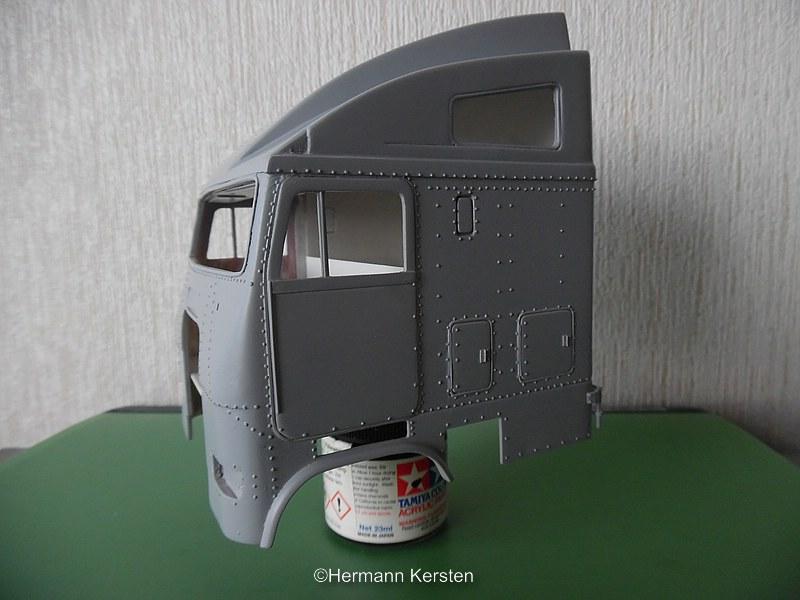
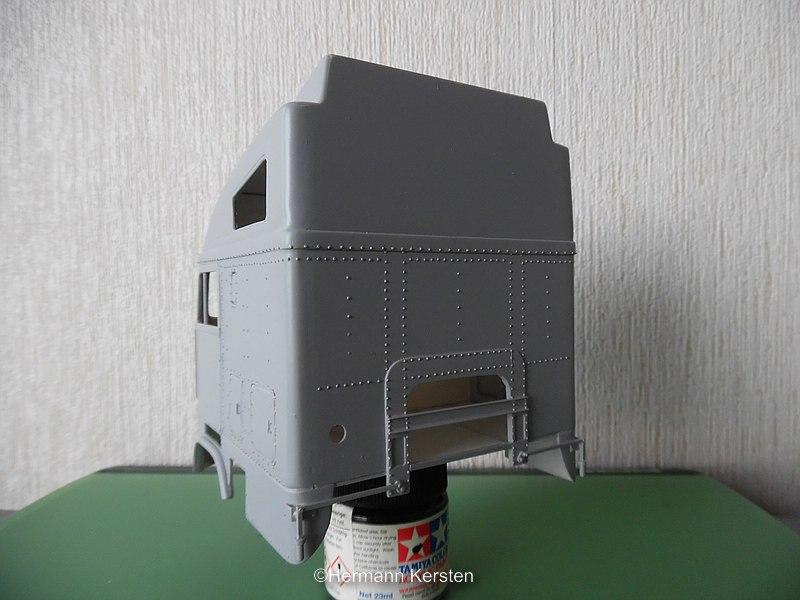
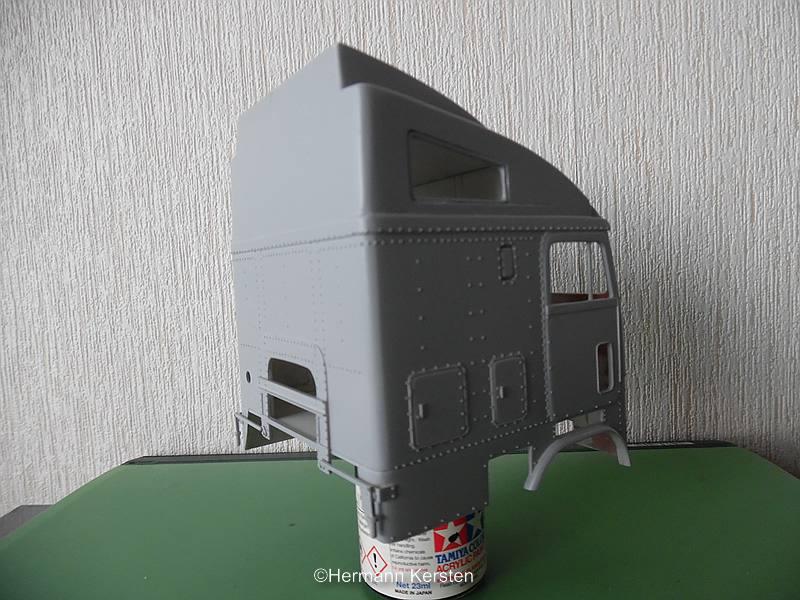
Thank you for the nice comments guys! Yes fellow modelers, today a tip, which I hope you can benefit from, and make certain work easier . After the cabin was sprayed into the primer, I did an inspection and checked the entire cabin. Now and then there are those annoying little and shallow spots that are too small to work with putty, and too visible to spray the cabin in the final color. What I do in this case, and have the best experience with this, is the Hermanns paint method. The cabin will be sprayed with acrylic car paint, so I also use acrylic paint to solve this problem, in this case I use small brush and the Tamiya light grey paint, almost the same shade as te primer, but you can also choose for adarker shade for more visibility. Then you add the paint in the small and shallow area's and make it a little thick. After the paint is dry and hardend, i use the self made waterproof sandpaper patches and sand very carefully the painted area's. After you sand this till you reach the normal surface, then the spots are filled and you just have to spray the small spots with primer. To get more control over the waterproof sanding, I always use a little diswashing liquid soap when I do the waterproof job. With this dishwashing liquid soap you immediately feel the difference between what is coarse and what is smooth. this also prevents you from sanding the corners bare. Well guys, I hope this was a usefull tip. See you next round! Hermann.
-
Great project, and nice to see the scratch build of the box/tank. Hermann.
-
What semi would you like in a kit?
Hermann Kersten replied to Bobcat205's topic in General Automotive Talk (Trucks and Cars)
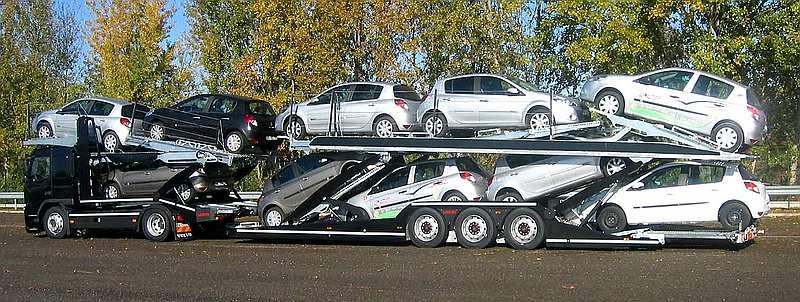
If we talk about the same system, then we call it here in Europe a Lohr car transporter. Source: https://lohr.fr/ Hermann.
-
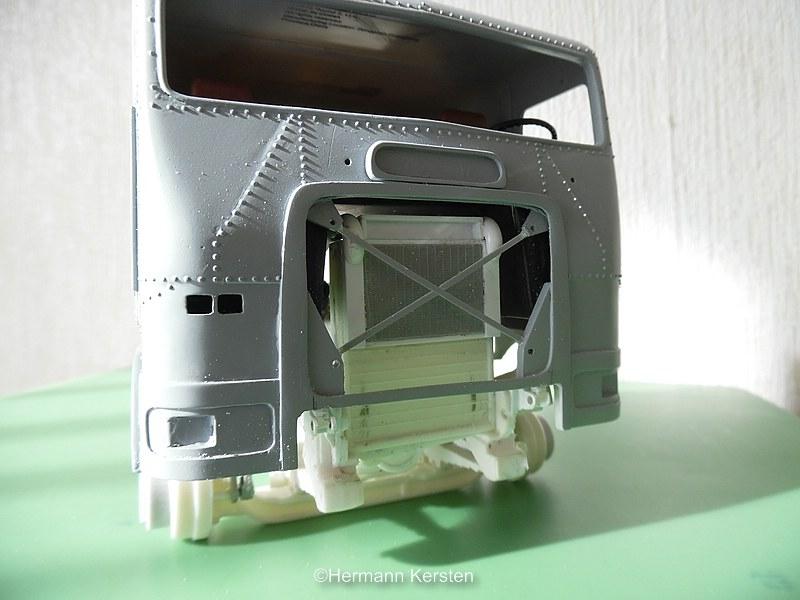
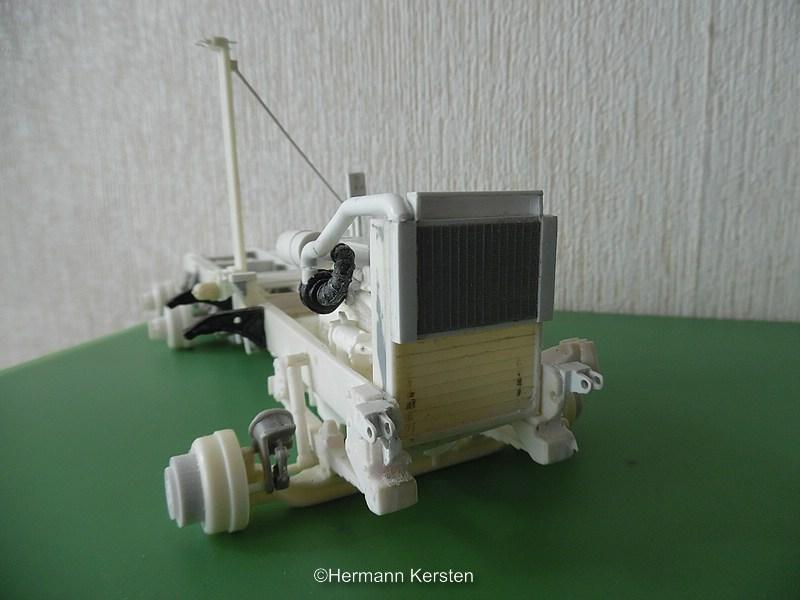
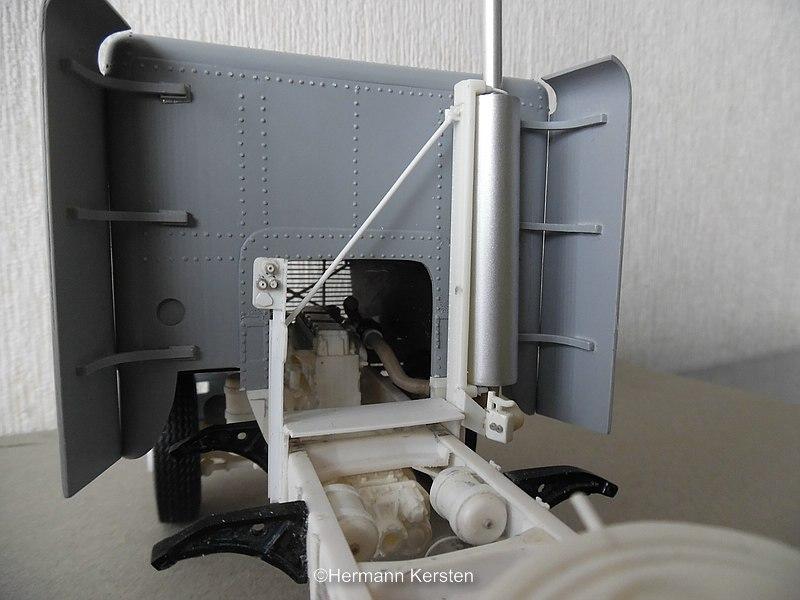
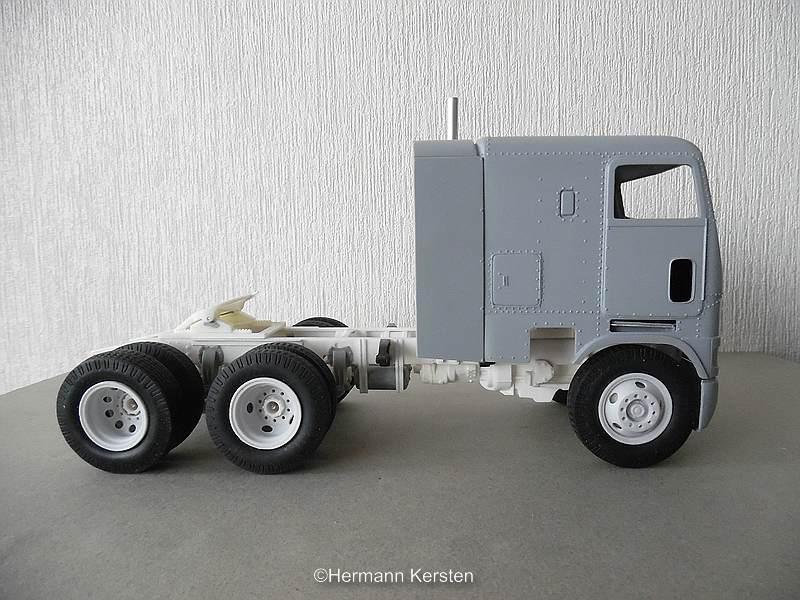
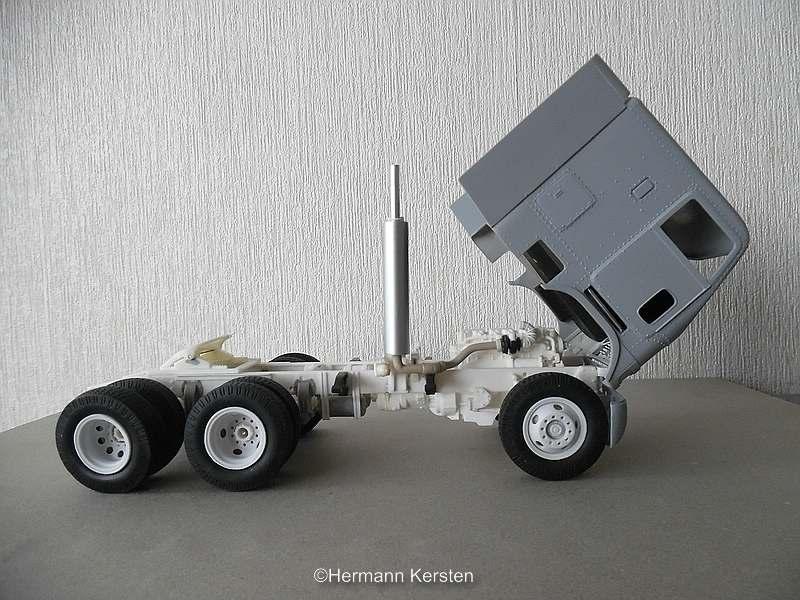
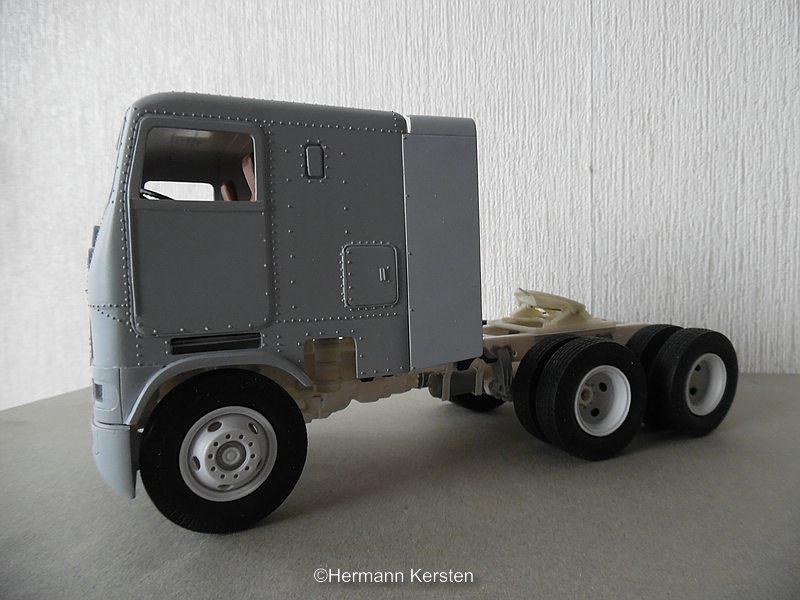
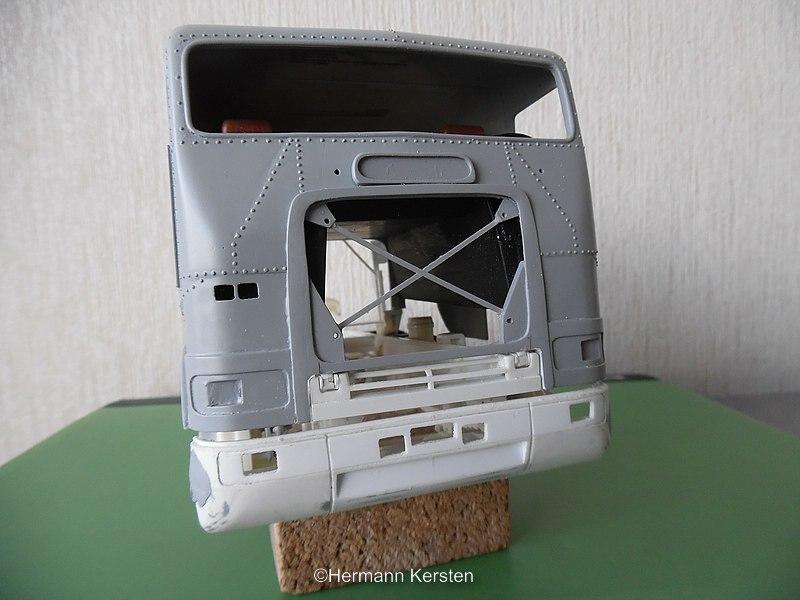
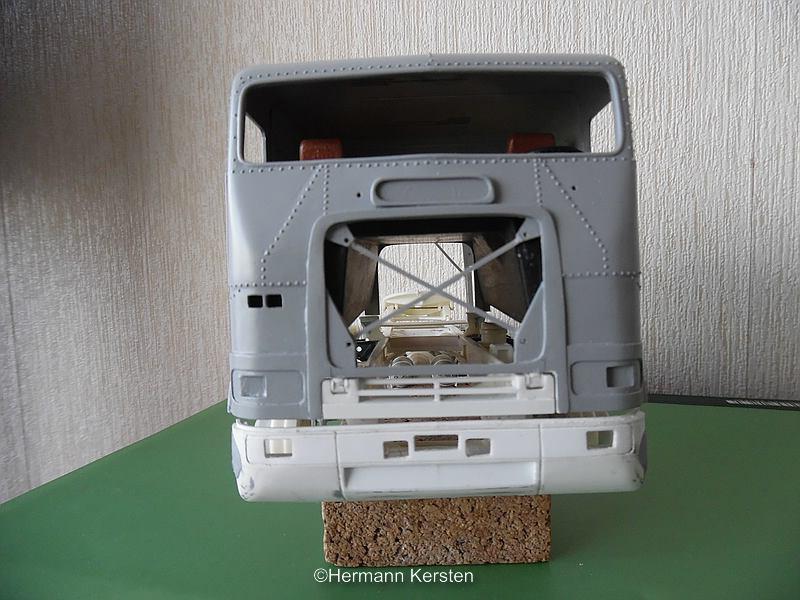
Thank you Marc! The building of the cab and bumper are done now, and i sprayed the whole thing into a grey primer. I also tested the hinges of the cab, to see if the cab tilt without touching the bumper, and it did. But first we look at some small details like the fifth wheel with the bolt....... and the nuts I still have to make them. Then the stack, which is now at the right length and loosely attached to the turbo. And the cab tilted..... The bumper is glued with wood glue so that it is attached to the chassis but can be removed easily without any damages. For the tires i used the tires of the AMT Kenworth Papa Truck and the new 5 hole rims all around. These tires are a little bit bigger than the tires in this kit, and I think they are a good fit for this Freightliner. And now some pictures of the progress so far. I will probably make the grill again, I am not completely satisfied with it yet. That's it for today guys and see you next round! Hermann.
-
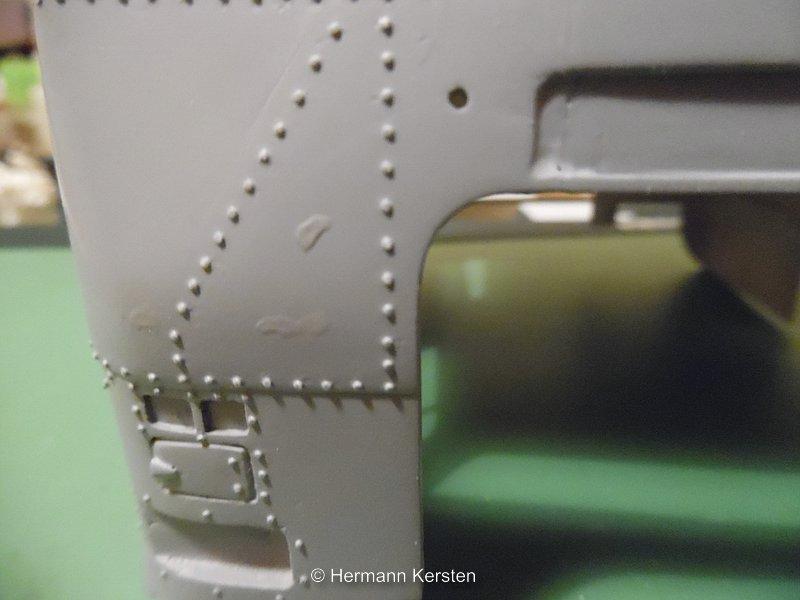
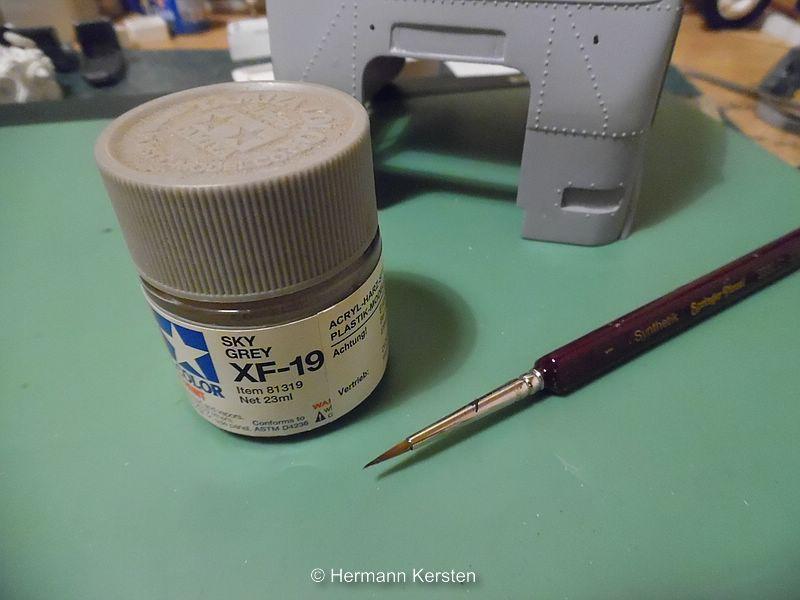
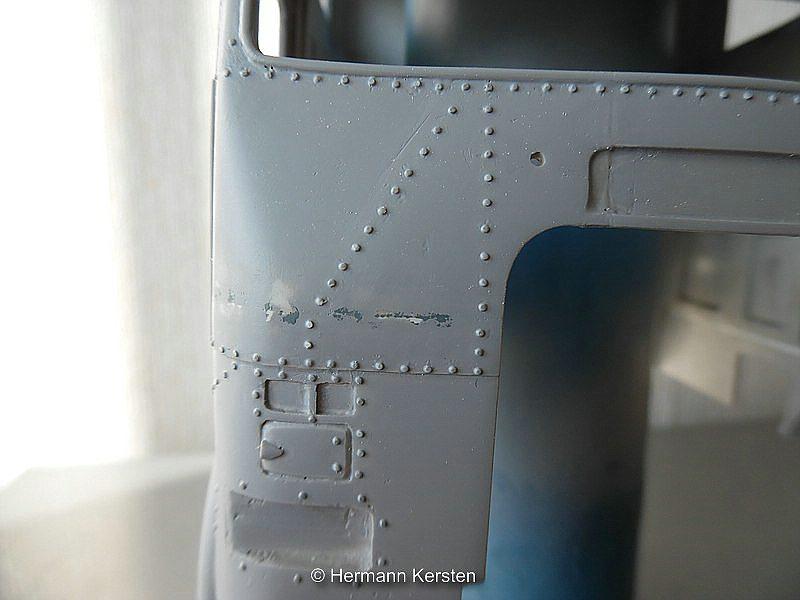
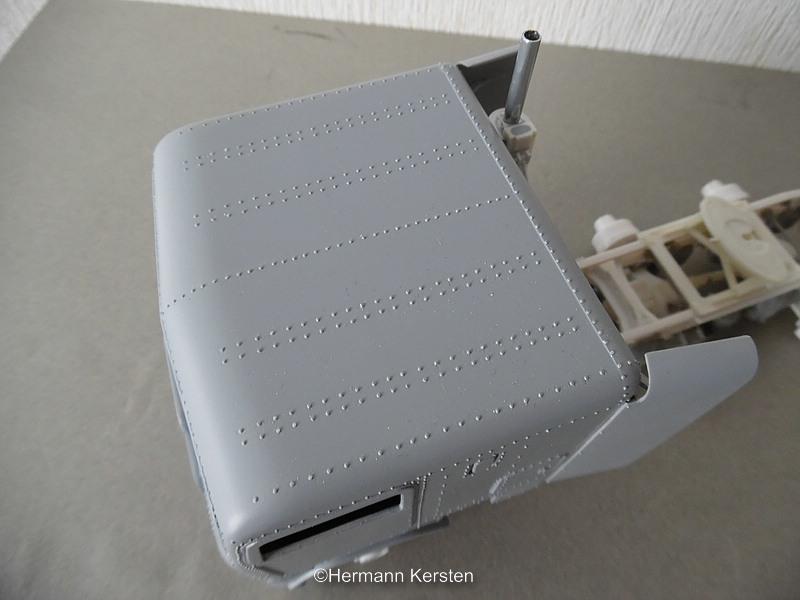
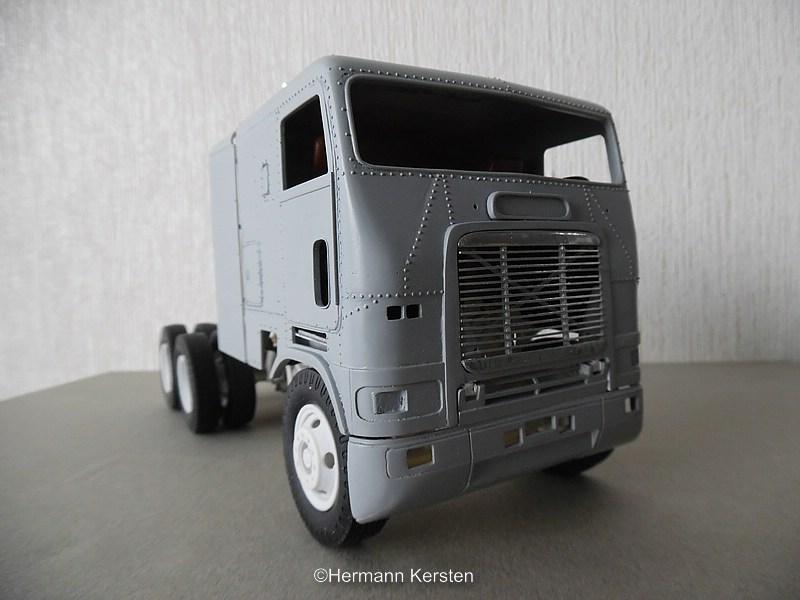
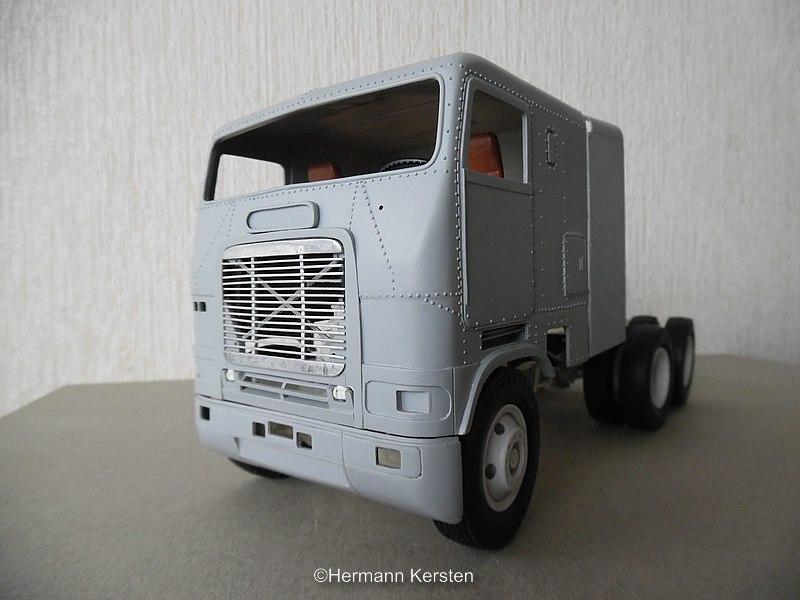
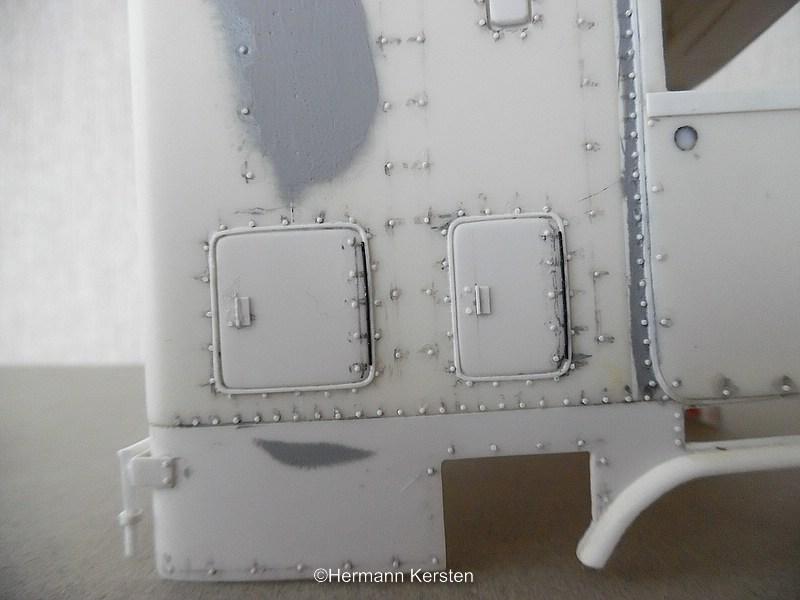
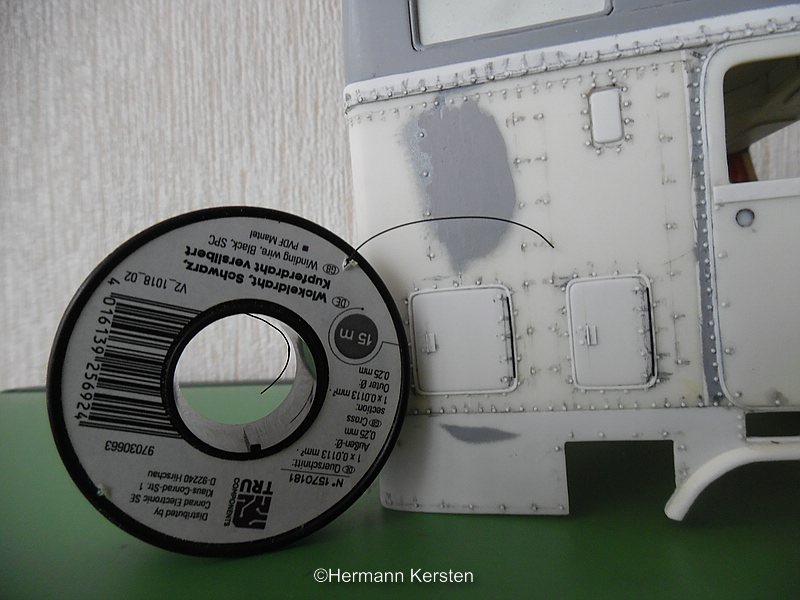
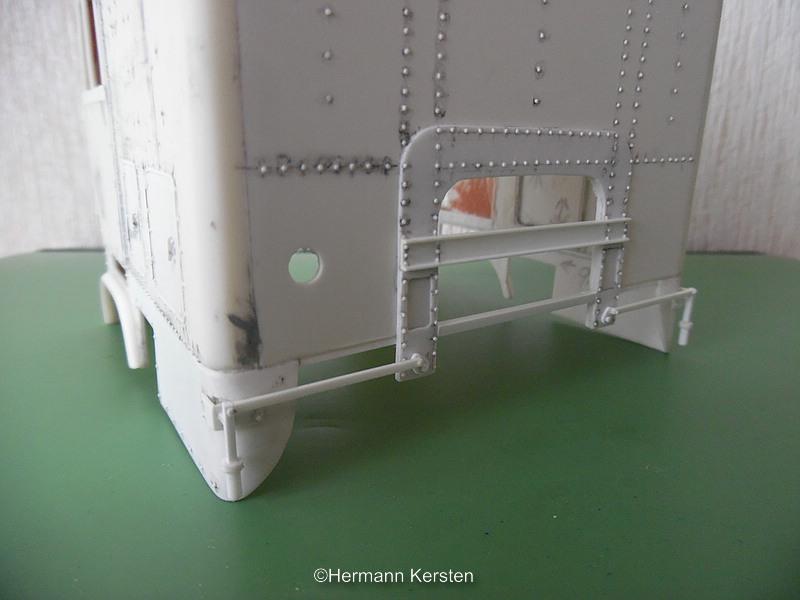
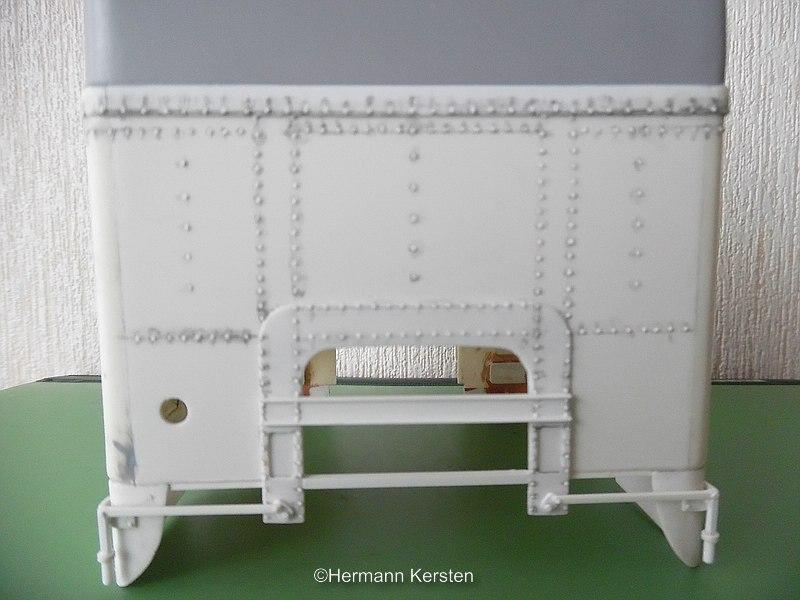
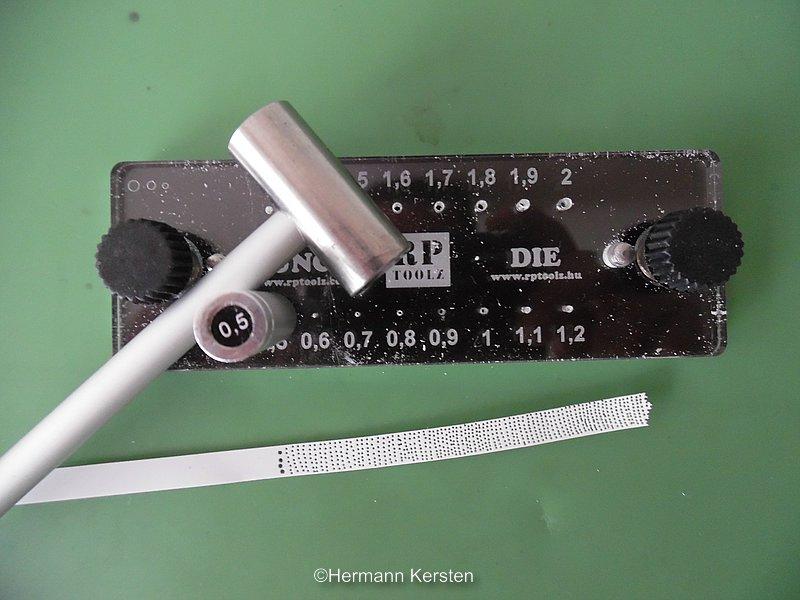
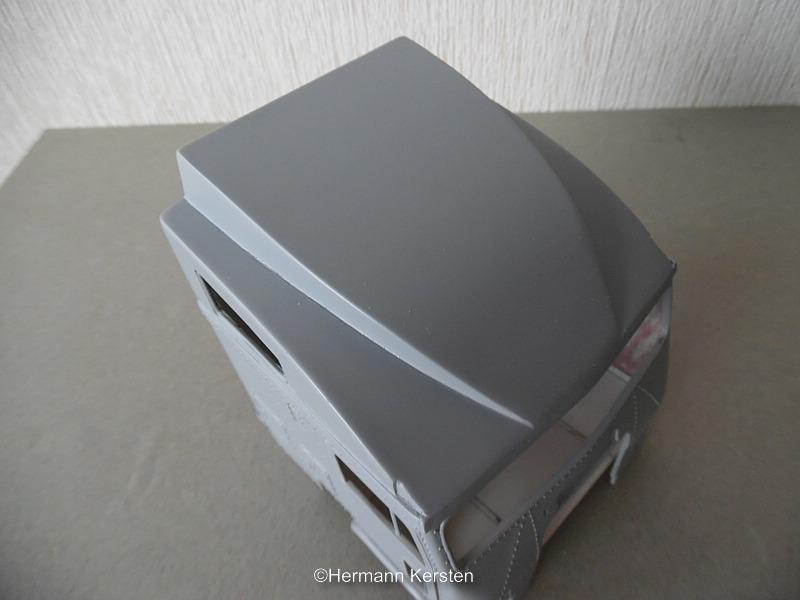
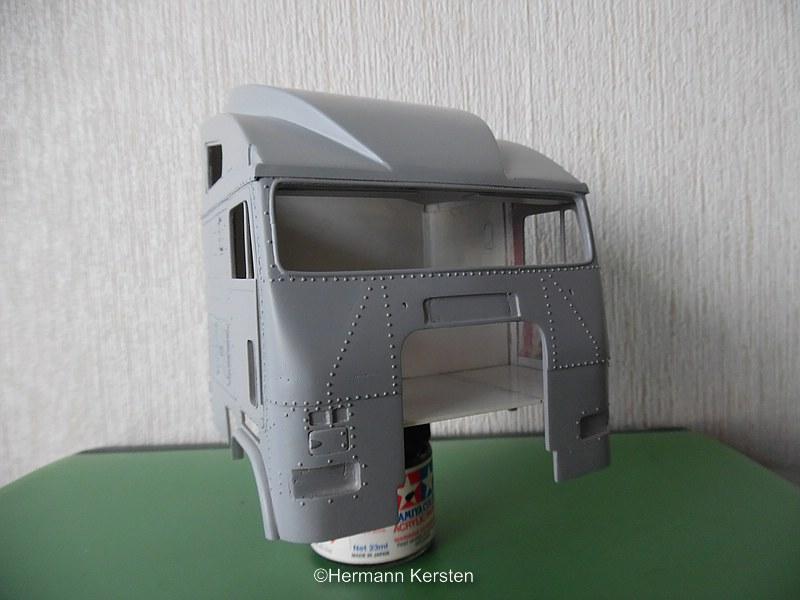
Thank you Vince and Marc! The cab is done with the rivet work and the last details. I sprayed the primer on it to see if everything was smooth, surprisingly it was, only 2 small spots what is easy to solve. First i show you the rivet work and the last details on the back of the cab. For the hinges of the doors of the storage compartments, i used 0,4mm electric wire for model trains. This wire, among others, i use also for wiring the chassis. And at the end of this rivet work what contains about 800 rivets......... This set can be back into the box. Ok guys, then the cab in the primer...... Yeah, that looks completely different then the leopard-like spots on the cabin.? That's it for today and see you next round. Hermann.
-
Thank you Marc! Yes i knew the story about the import of these trucks, today you see also many European brands in the Philippines like MAN and Mercedes, mainly in construction work like dump trucks and big concrete pump trucks. I saw also often the Isuzu V10-SS with a nice engine sound when this truck start driving, it sounds like music in my ears. Also the Isuzu SKW what was a Japanese military truck and now in the Philippines used as a civil truck, nice engine sound and lots of power, especially by climbing the mountains, for me also a nice future scratch project. Recently i purchased the Fujimi Fuso car transporter, i didn't pack it out, but i checked the kit and from what i saw, at the first sight it looks pretty good. Yeah Marc, we will see what the future brings, too much projects in mind and only 2 hands and limited time. Hermann.
-
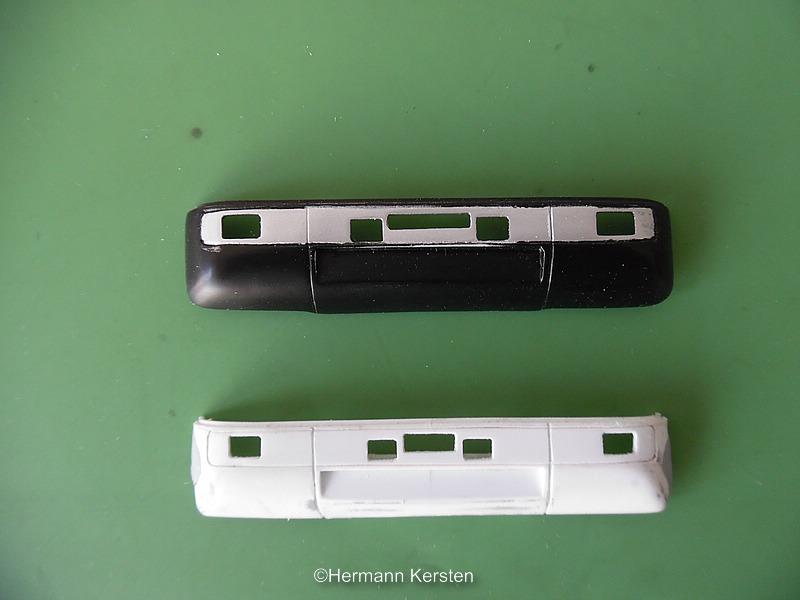
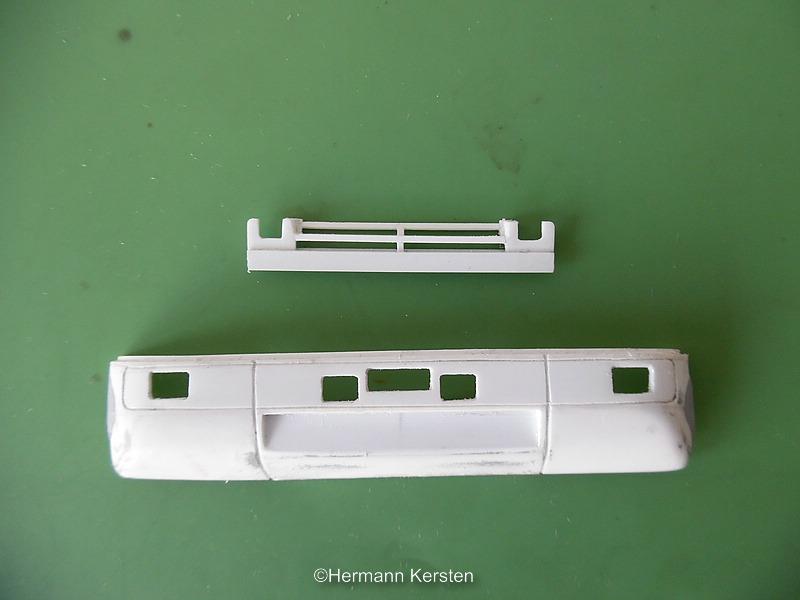
Thank you for the nice comments gentlemen! In the meantime i made some progress on this one. I made the bumper all over again, because i was not really satisfied with the first one. The holes in the bumper were not correct, and that means that i had to cut and glue again.....yeah guys..... always keep min mind that it is just plastic. Then it was time to make the under grill, this was a pretty fragile job, but at the end it gives this FLB the looks it needed . The grill itself are build from 1 mm strips. And loosely placed on the cab for the looks. Now I only have to sand the putty on the bumper and smoothen everything so that the bumper can be painted. Again I use 2 colors, the silver band at the light section and the rest of the bumper in the Motip black bumper spray, just like i did with the FLA. Then a last picture with the fenders in the grey primer. The white plastic is slowly becoming less and the gray color is getting more. The cabin color has already been chosen, but that is still a surprise. That's all for today and see you next round! Hermann.
-
Fantastic build! Hermann.
-
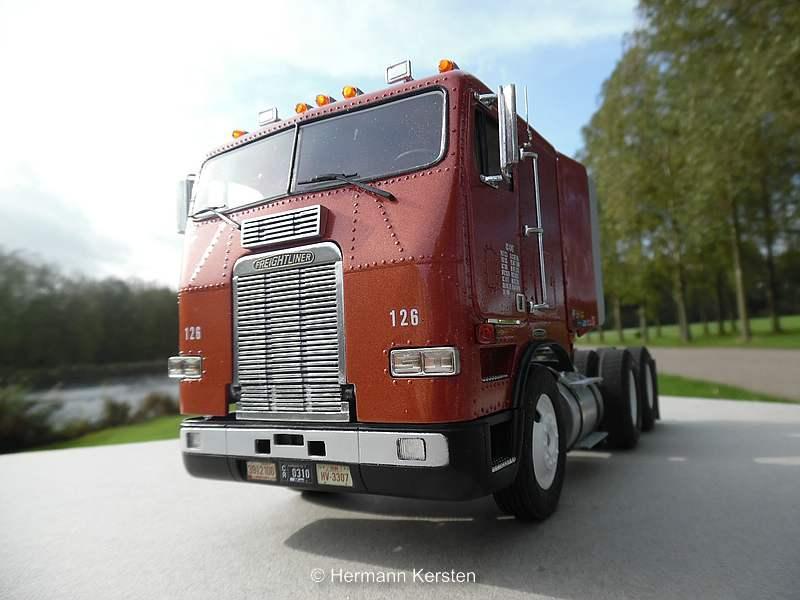
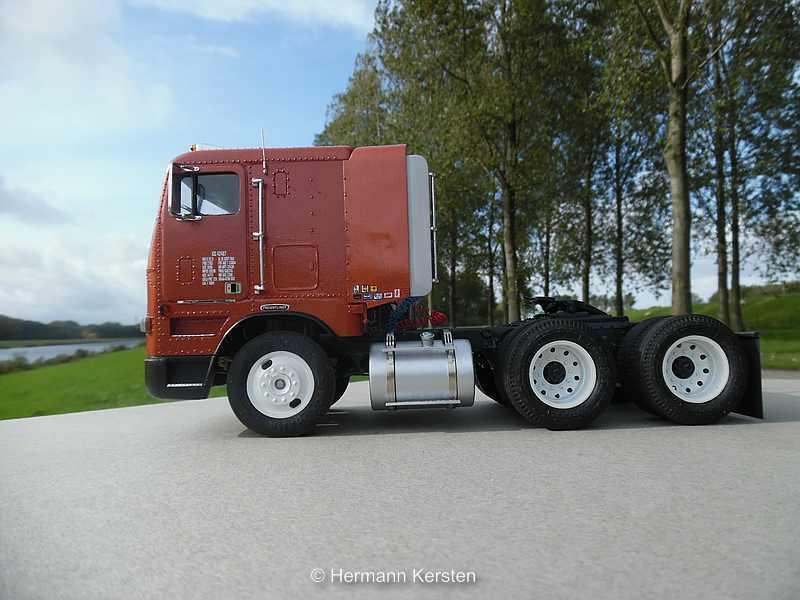
An AMT conversion from last year, a Freightliner without White. Hermann.