Hermann Kersten
-
Posts
595 -
Joined
-
Last visited
Content Type
Profiles
Forums
Events
Gallery
Everything posted by Hermann Kersten
-
 The end result of all modifications and scratch work is now paying off with a great replica of the tv show. Also the picture taking is great, the background has something post apocalyptic and completes the whole atmosphere. Hermann.
 -
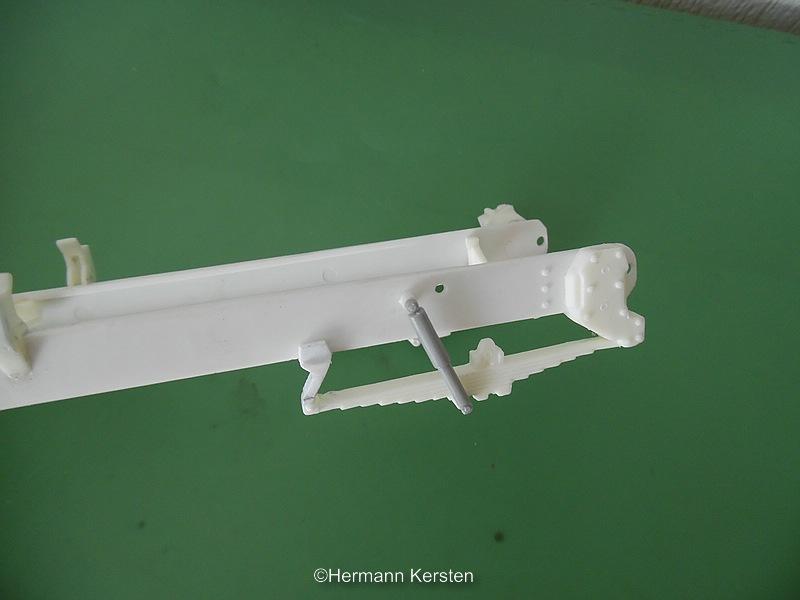
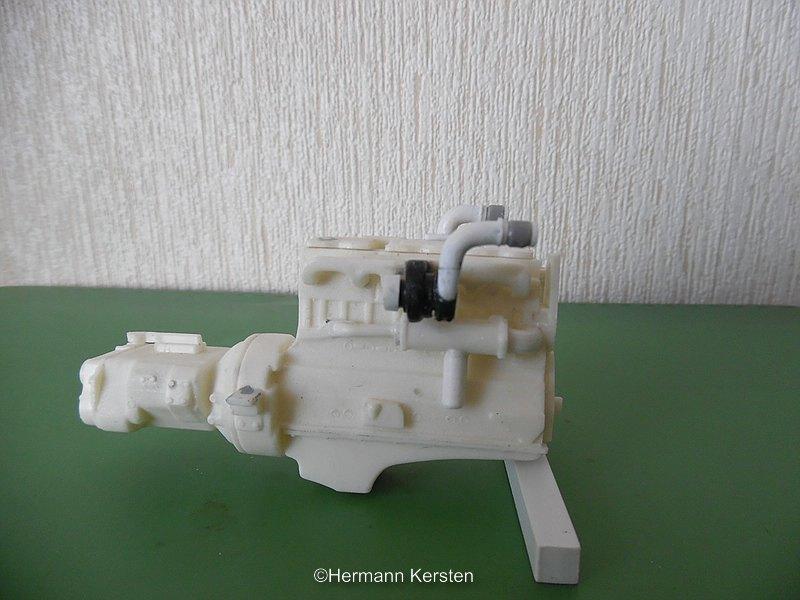
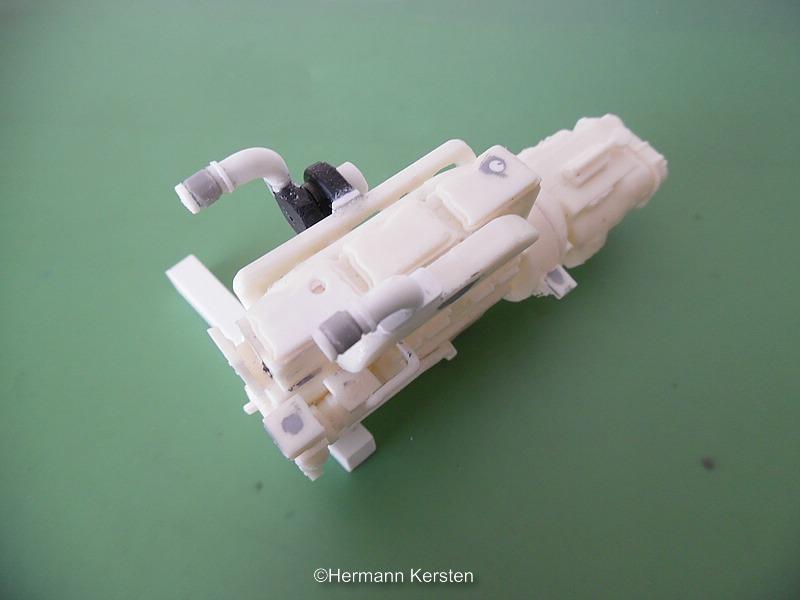
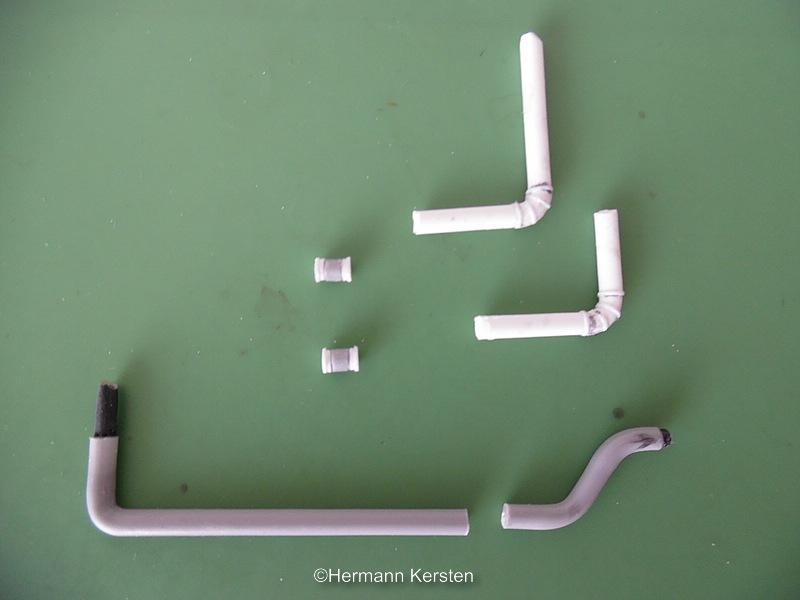
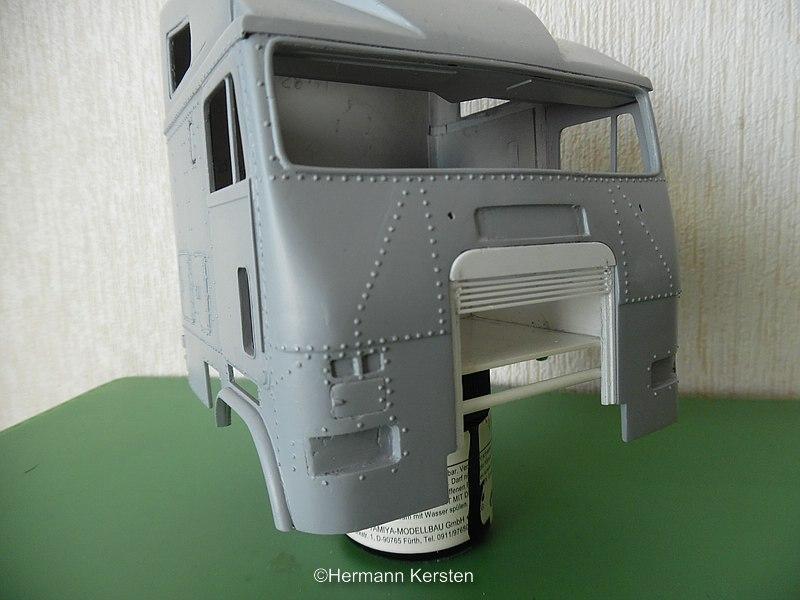
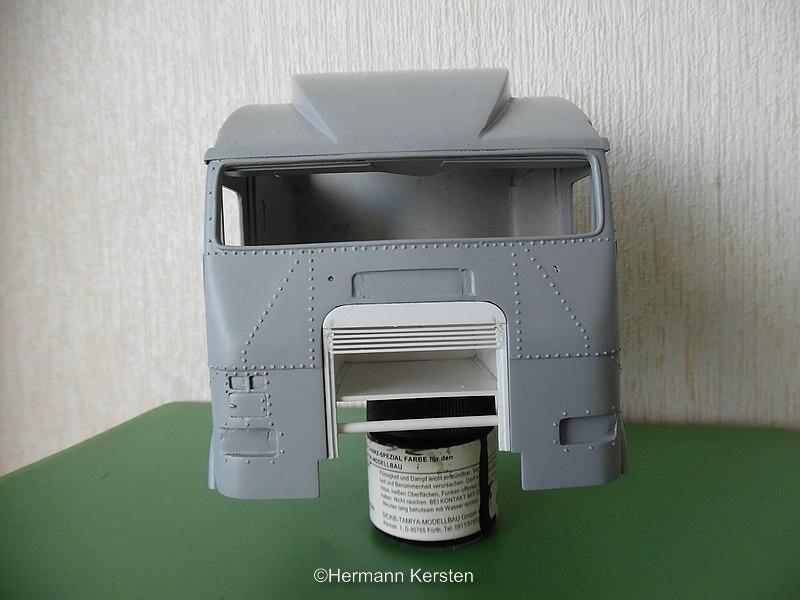
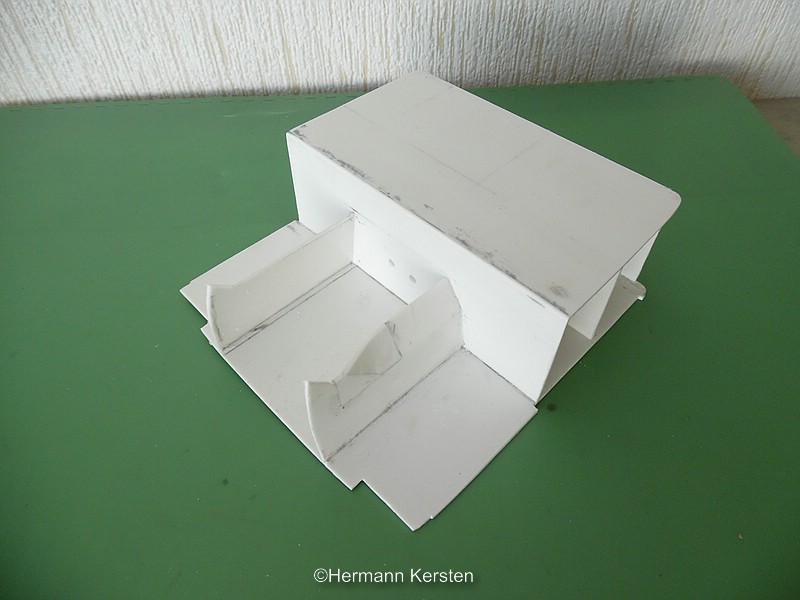
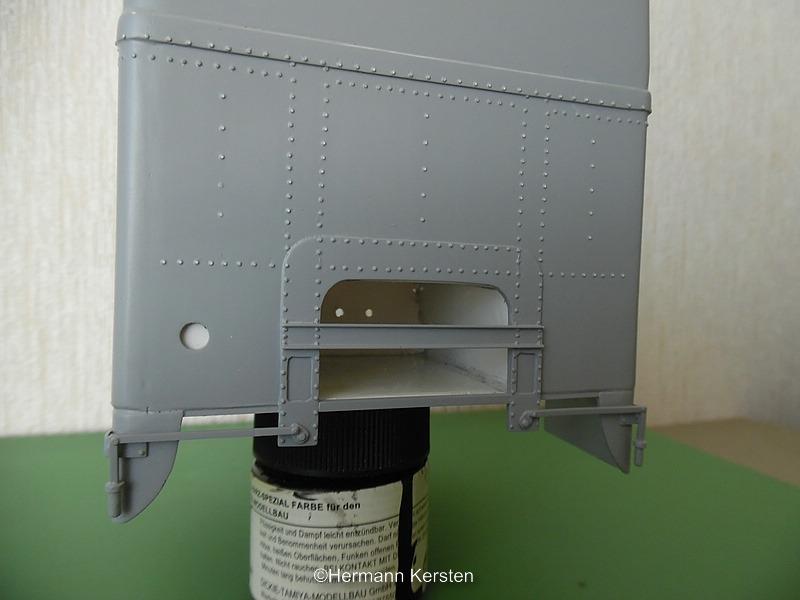
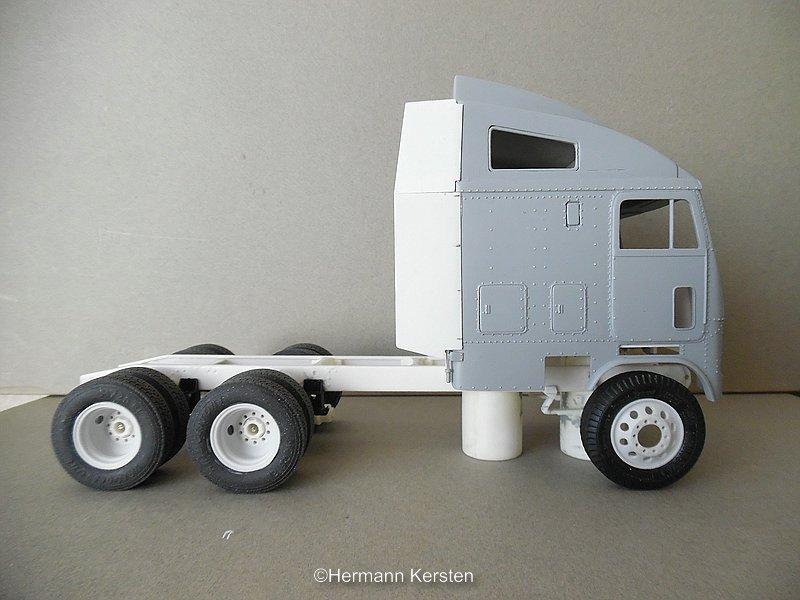
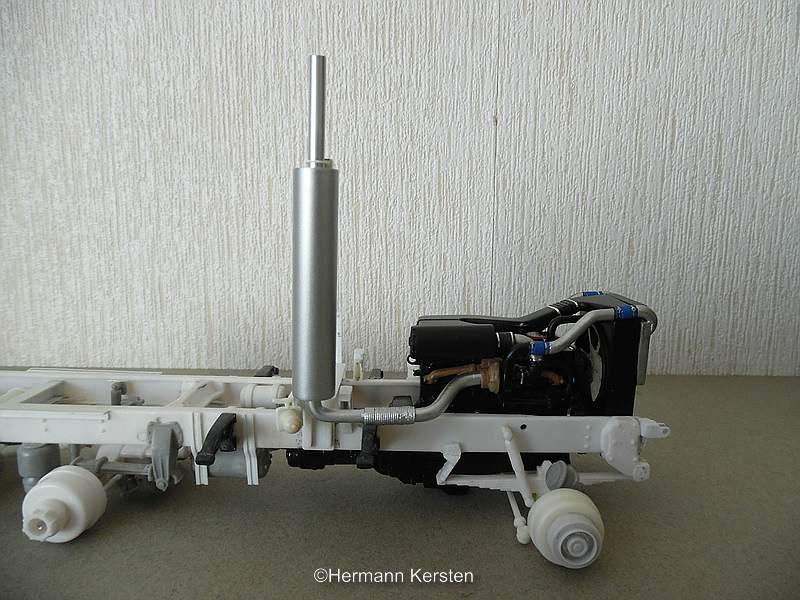
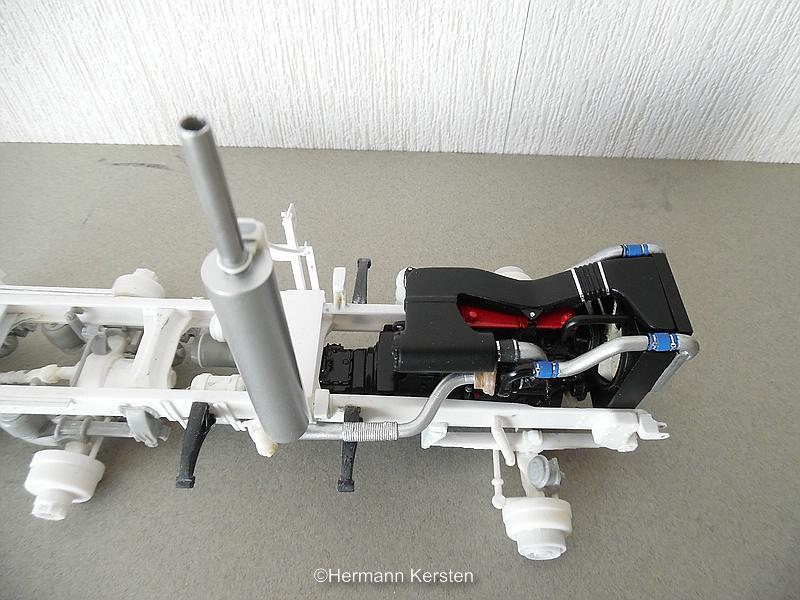
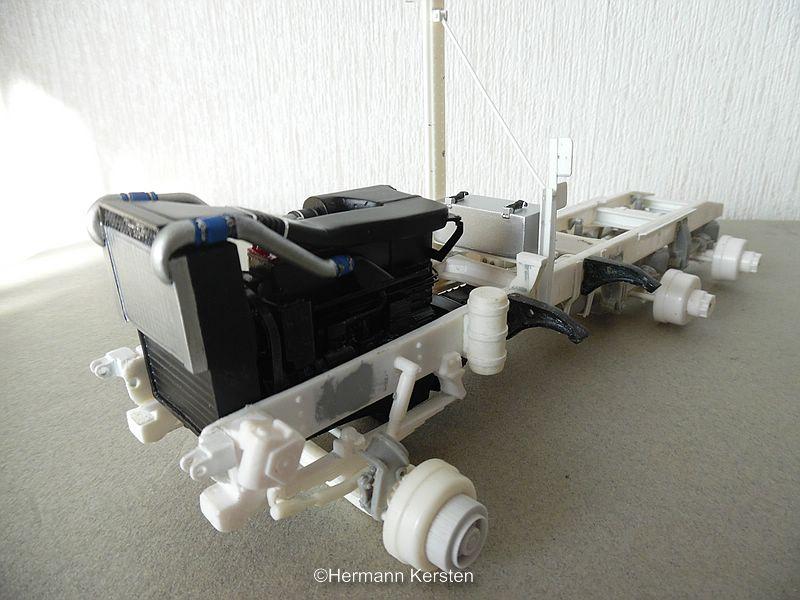
Hello everyone, Today i show you some progress on this project. At this chassis I modified the front spring at the same time as i did with the FLB. The leave springs was already glued on the chassis in an earlier stage, so the front side I will it leave it like it is, so that i don't damage more then i do good on this one. Then the modification of the engine. First i started with the forming of the exhaust pipe, which is made out of pieces of sprue. With a lighter i made it a bit soft so that i can make nice bends. The rubber connecting parts are done in the same way as i showed in the FLB topic. The engine will be a Cummins NT855, which means that I have to change and add some parts. For this engine is the air inlet the biggest change. In the mean time i worked at the flooring plate and made the bed and the start of the engine tunnel. Then i renewed the cover of the inspection hatch, because the previous one did not fit completely and nicely with the framework. And as you all can see, I started already with the construction of the radiator grill. And safe the best for last, the side fenders of the cab are also in shape now. I only still have to make the supports for these fenders, but for the moment I used some tape to see how these fenders looks when they are attached to the cabine. Yep, it looks cool to me, the 2 hole rims are also fitting very well with this FLA, at the moment I´m just still doubting to put these 2-hole rims also on the front axle instead of the 10-hole. Well guys, that's it for today and see you next round. Hermann.

-
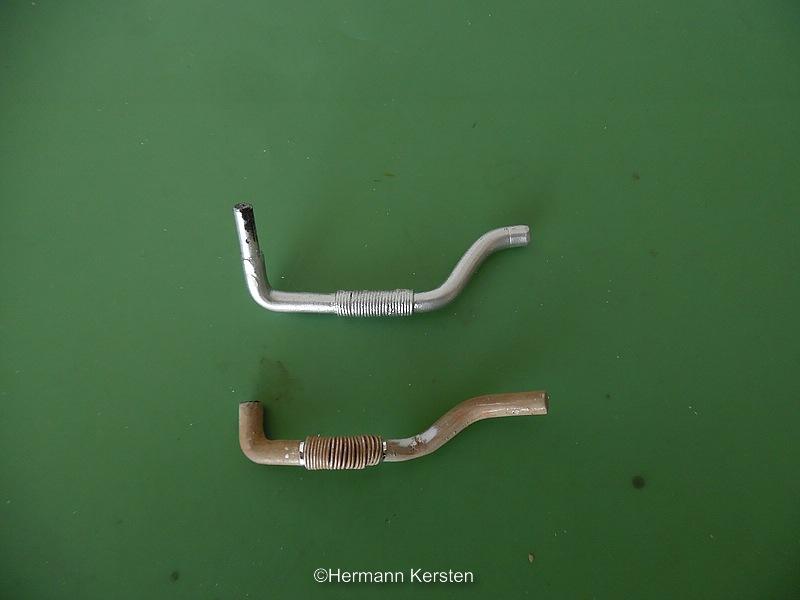
Dave and Brian, Thank you for your nice comments guys! Today a small update of a few changes, because i was not really satisfied about a few things. First of all, I renewed the exhaust pipe what is going from the turbo to the stack. In the picture below you can see the difference between this exhaust pipe. Then I dry-fit the pipe with the stack, and if you look good, you can see that i modified the rear of the front leave spring. The front side i keep it that way, because I'm afraid to do more harm then good in this situation. Now I can make the exhaust pipe a little bit burned and rusty. That's it for today and see you next round. Hermann.
-
with biscuit crumbs
-
and shiny again
-
A SERIOUS PUBLIC SAFETY ANNOUNCEMENT
Hermann Kersten replied to Ace-Garageguy's topic in The Off-Topic Lounge
You can also call me cold-hearted, but nowadays I often see people, do first and think after, and if it goes wrong, put the responsibility to others. Sigh ..... it seems that scared people are more likely to make stupid decisions. It's better to leave wise decisions to professionals, such as in this case, the doctors. I hope the survivor has learned a hard but wise lesson, condolences to the deceased. Hermann. -
to prevent vomiting
-
from releasing air
-
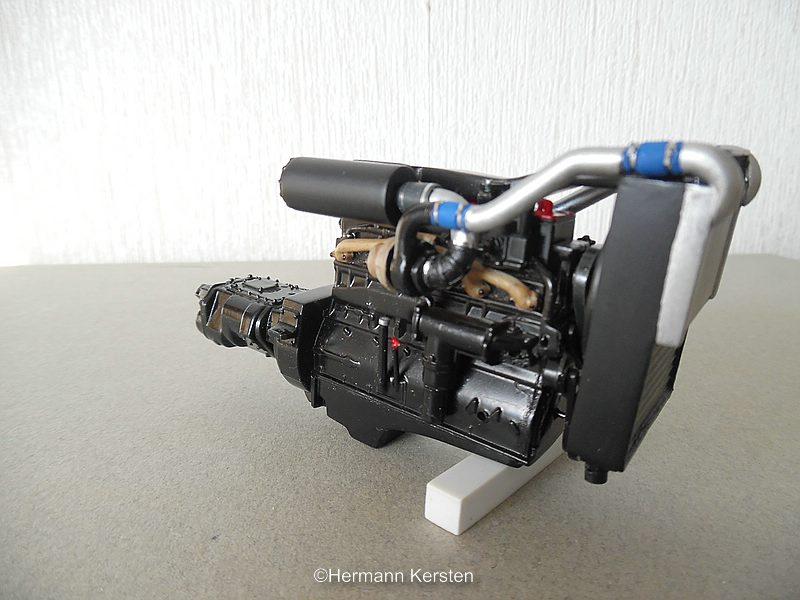
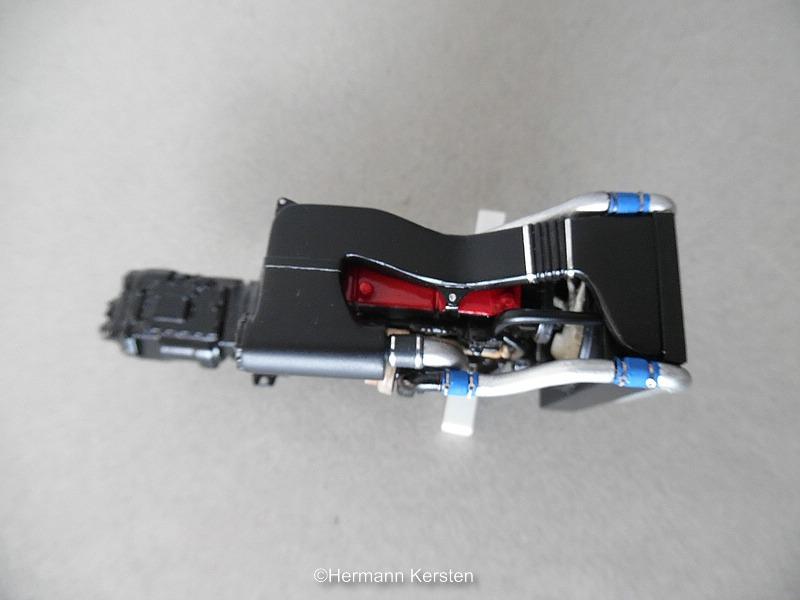
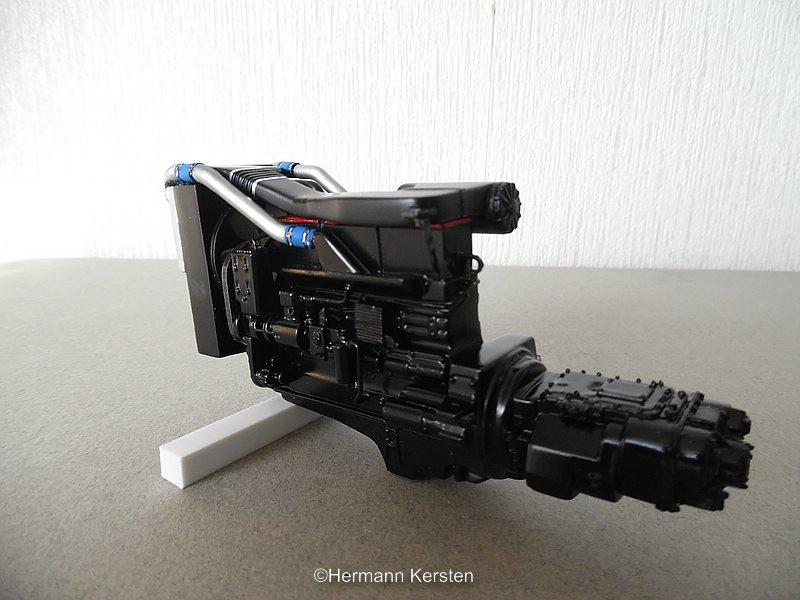
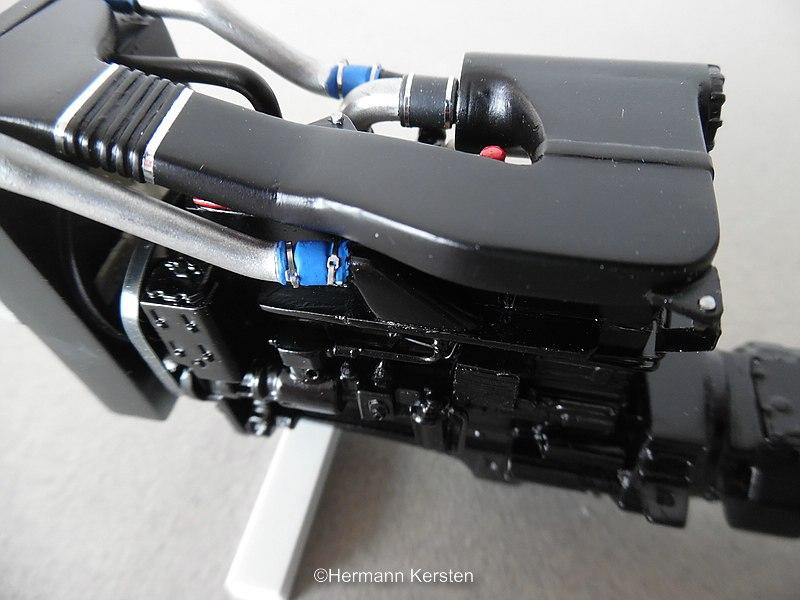
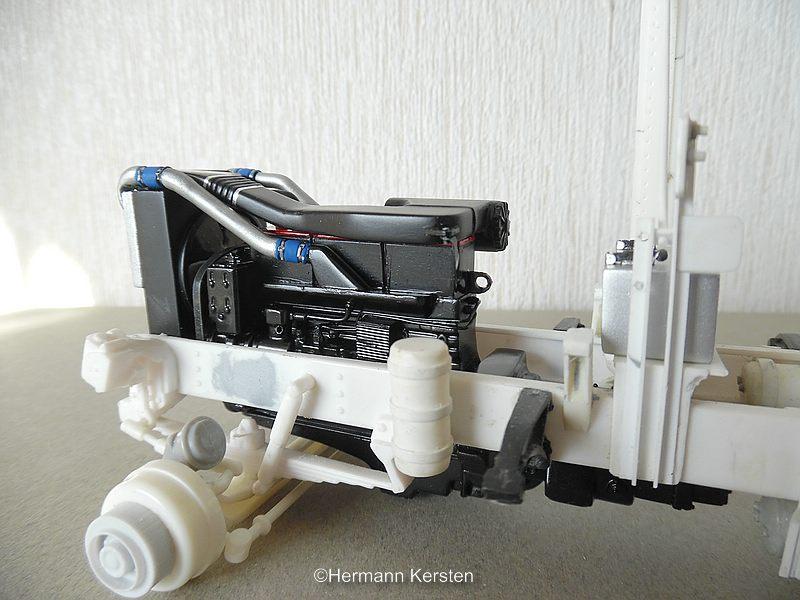
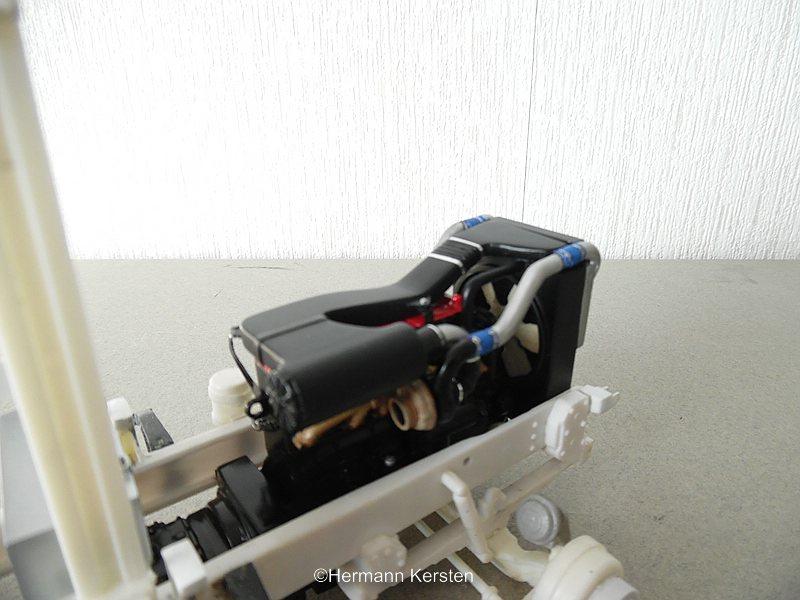
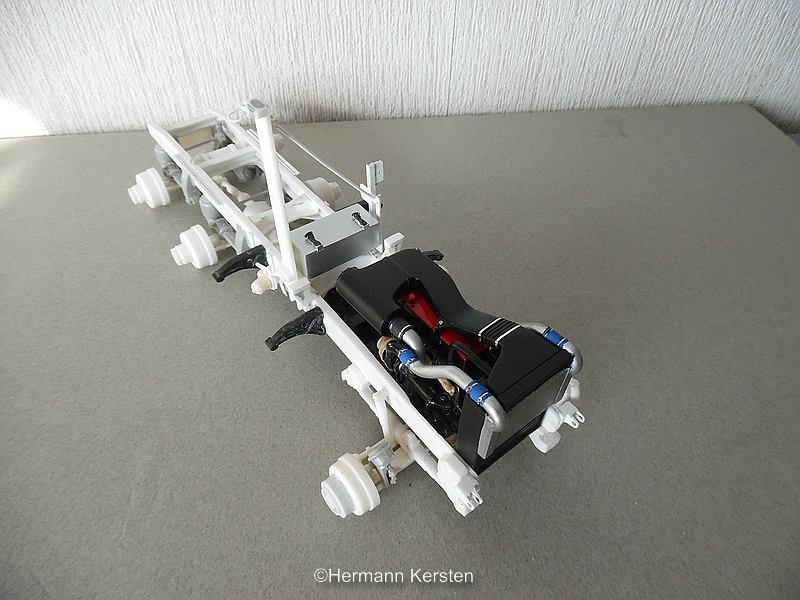
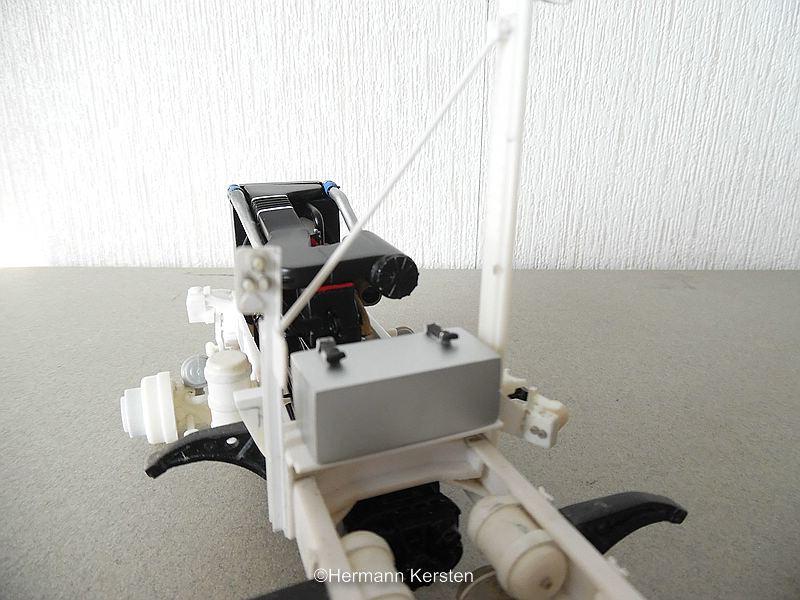
Your welcome Richard.? Yes guys, today i show you the completion of the Cummins N14, at least that is what this engine should look like. A lot of small detail work and after all these cut, drill and glue job, I painted the whole engine in the gloss black color. After the black paint job i painted the cylinder heads in a red color, just like the reference pictures, and at the very end I attached the small parts like the supports for the air intake channel. The disadvantage of black lacquer is that a lot of details disappear a bit, but it should not spoil the realism and fun. The metal straps around the blue rubbers are CTM hose clamps, for this work i like this more instead the BMF. The BMF I used for the wider clamps and straps. On the picture below I show you that i made the metal support for the air intake, I made this from a small sheet of tin and cut and bend it in the right shape. The battery box has also been adjusted in height, because it was still too high compared to the previous battery box. And put the new engine between the chassis for the looks.... With the completion of this engine, this Freightliner really starts to go to an end. The major conversion work is now almost finished, only some small extra things on the chassis and small parts for the cabin like handle bars and sunvisor. I only doubt whether I will make the plastic side panels of the chassis, or whether I will keep the chassis open. Ok gentlemen, that's it for today and see you next round! Hermann.
-
ask the moonshiners
-
more or less
-
Hi everyone, Here a nice link and a source for a lot of detailed pictures of trucks, semi's trailers and other equipment. Just click in the upper section what kind of item you looking for, then choose the brand and model in the lower left section, and in the left upper section the past auctions and where you are able to mark the years of the past auctions. When you mark the years, you can see how many items of that particular item is sold. There a tons of detailed pictures for your build.? PURPLE WAVE AUCTIONS I hope this resource helps you. Hermann.
-
I start drooling
-
There is also another idea, just ordinary paper, I used it often on my trucks as mudflaps. Just paint both sides and when its dry, you can bend them in any position you want, even you want them curved. I glued them with ordinary hobby glue. Keep up the awesome detailing work.? Hermann.
-
Very nice build of an odd but interesting race car. Hermann.
-
Beautiful pictures of a nice and a special project! Hermann
-
Mashpee Breaker 354
Hermann Kersten replied to Chariots of Fire's topic in WIP: Model Trucks: Big Rigs and Heavy Equipment
Beautiful! The details like the fire hose reel and pump are looking great, and they are the icing on the cake. Hermann -
2020 TP build
Hermann Kersten replied to gotnitro?'s topic in WIP: Model Trucks: Big Rigs and Heavy Equipment
Nice project Jeff,!!! The decals look great also, and somehow the bear remind me of the tv series, bear and lemmings. Have fun with the white paint job! Hermann. -
Kenworth Expedite Truck
Hermann Kersten replied to Jonj238's topic in WIP: Model Trucks: Big Rigs and Heavy Equipment
Nice progress!! For the nice atmosphere, I hope you don't mind otherwise i will delete it, a picture of a dual rear, from a sales site for expedite trucks, Maybe a nice site for some info and some details. Source; Expeditors for sale Hermann.
-
but no food
-
FG models are they gone?
Hermann Kersten replied to Mr mopar's topic in General Automotive Talk (Trucks and Cars)
You mean this one??? Britmodeller.com Hermann. -
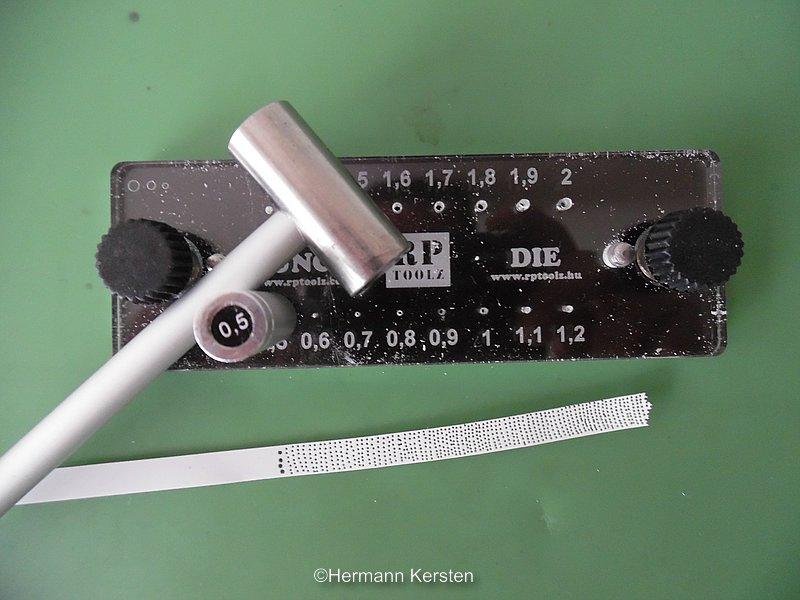
Thank you Dave! Well Richard, here it is..... And I ordered it here: RP TOOLZ It is a good quality tool, which I really enjoy, and makes a lot of things easier. They have also the hexagonal Punch & Die set, which i also used and use many times. Hermann.
-
full of stains
-
without the crowd
-
Nice project of a nice historic car. It is the first time that I see someone actually build this one. Regarding to the wrong kit delivery, I haven't heard that (yet) over here in my place, maybe this happens sometimes when shipping overseas. Anyway, I will follow with great interest. Have fun with this build. Hermann.