Rich Chernosky
-
Posts
2,104 -
Joined
-
Last visited
Content Type
Profiles
Forums
Events
Gallery
Everything posted by Rich Chernosky
-
This kit , and your build...which is great by the way...always brings back one of my fondest memories of all my years modeling. Found this kit as a "glue bomb" at one of my local hobby shops. Salvaged it and put a nice paint job on it similar to yours. (got a pic somewhere) When finished I put it on display at another hobby shop. Another modeler was admiring my build and commented he had the kit as a kid but traded it off and wished he had it back. Well....after some investigating it turns out that it actually was his kit he built as a 13yr old. We still have a good laugh about it 20yrs later.
-
Outstanding build Louis. Meng sure does make a nice kit but it still takes an artist to turn it into a masterpiece.
-
Me Louis Carabott from Malta
Rich Chernosky replied to louis Carabott's topic in Welcome! Introduce Yourself
Welcome Louis, seriously nice build on that Bentley. You will have a nice home here. I am like you, 75 and built continously since I was 8-9. Got hooked on cars at 14 and haven't stopped since. -
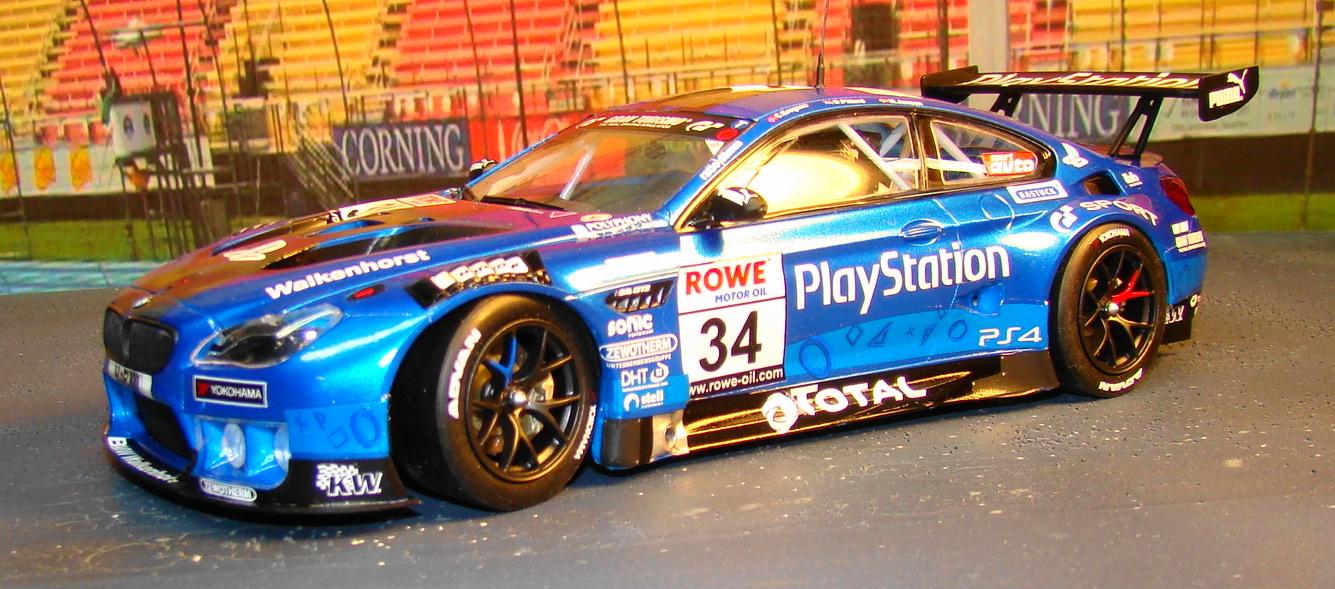
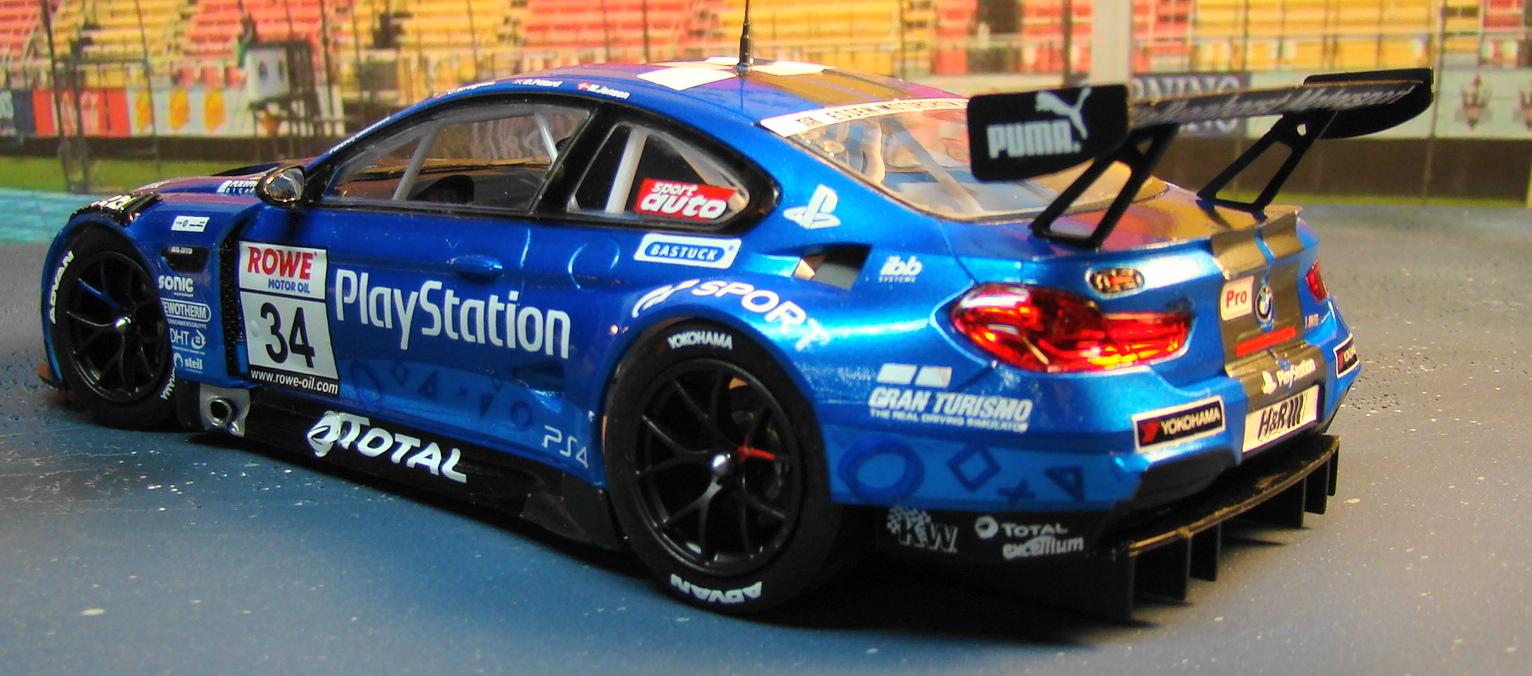
BMW M6 GT3
Rich Chernosky replied to Rich Chernosky's topic in Other Racing: Road Racing, Salt Flat Racers
John...thanks for the praise. Two things on this kit...at the back of the body, file or grind a step for the chassis to fit in the slot. Do the same to the chassis. This allows the chassis to slide into the body easily and it will just pop on the chassis. Do the chrome and silver decals first and let them dry overnight. Getting the silver strip on the roof is problematic and you may get some wrinkles. You may have to slice these with a sharp knife to get the air out. Enjoy the build..its a sharp model when done right. -
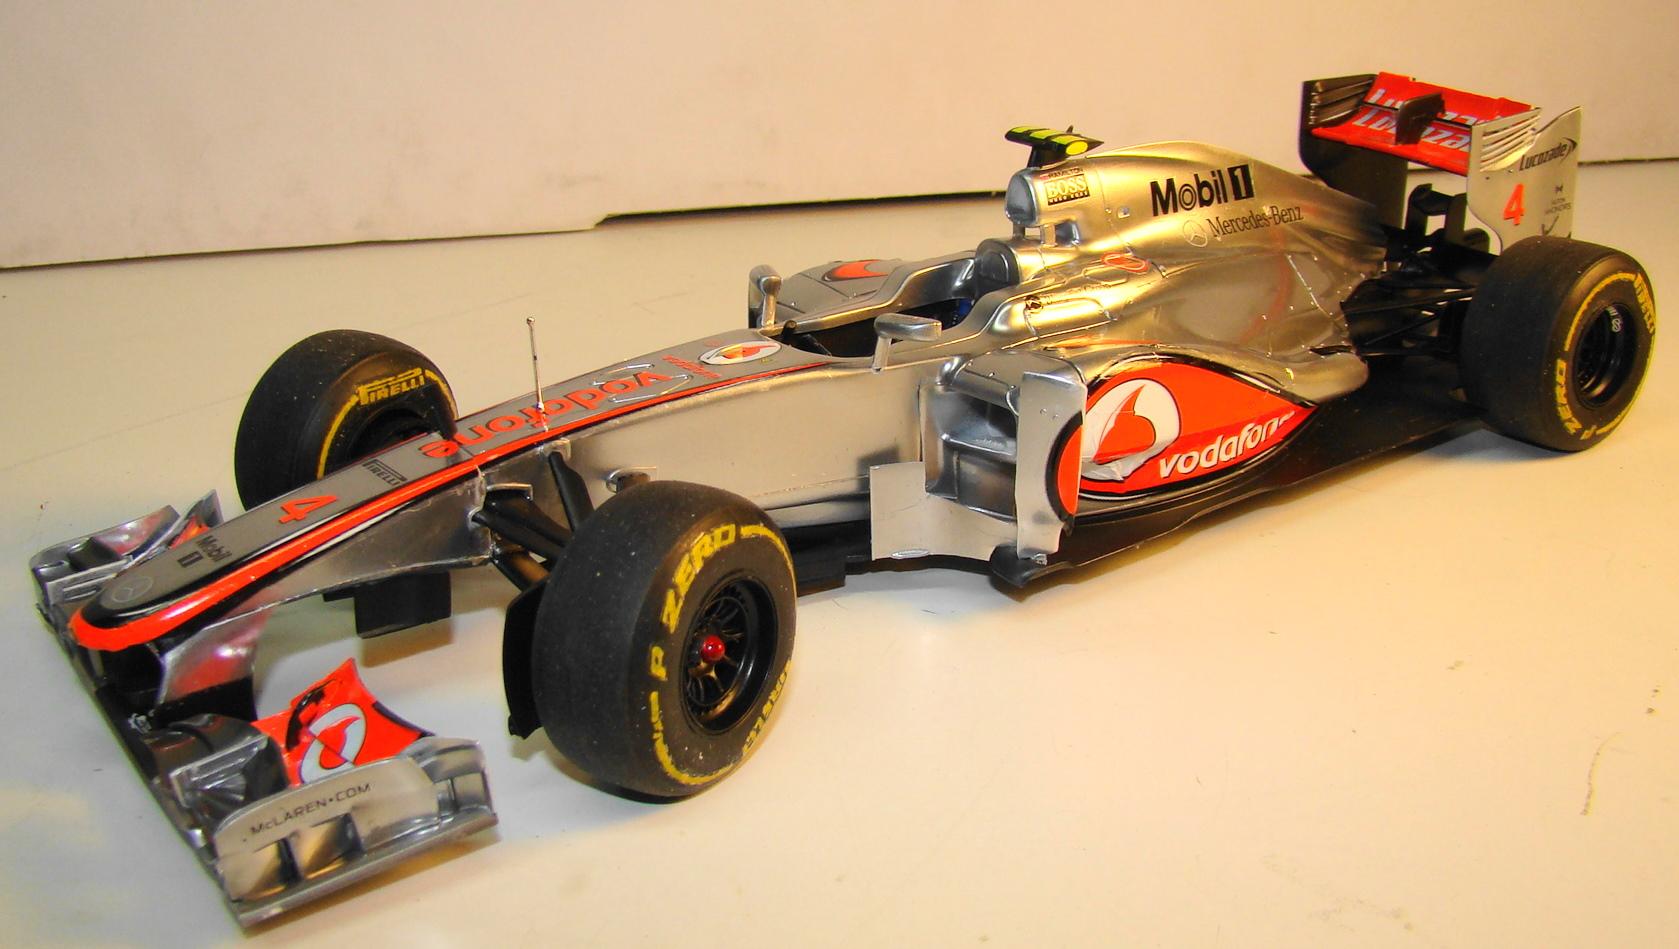
Clearcoat over Revell Chrome spray paint
Rich Chernosky replied to BKIN10SECS's topic in Tips, Tricks, and Tutorials
Here is a link to the completed build: http://www.modelcarsmag.com/forums/topic/179063-vodaphone-mclaren-mercedes-mp4-27/#comment-2694248 -
Clearcoat over Revell Chrome spray paint
Rich Chernosky replied to BKIN10SECS's topic in Tips, Tricks, and Tutorials

-
Fujimi Enthusiast 1/24 Dino 246GTS Spyder
Rich Chernosky replied to Justin Porter's topic in Model Cars
That really turned out nice Justin. Really enjoyed the WIP...thanks for doing that. Are you going to put a plate on the back and license it for the street. Be a shame not to. -
BMW M6 GT3
Rich Chernosky replied to Rich Chernosky's topic in Other Racing: Road Racing, Salt Flat Racers
-
Clearcoat over Revell Chrome spray paint
Rich Chernosky replied to BKIN10SECS's topic in Tips, Tricks, and Tutorials
All of my results were from airbrushing. Brushing X-22 allows too much of the solvent to sit on the finish and that is what dulls the finish. -
BMW M6 GT3
Rich Chernosky replied to Rich Chernosky's topic in Other Racing: Road Racing, Salt Flat Racers
-
Just a quick build while my hand heals from a bicycle accident. Just released by PLatz /NUNu this is a BMW M6 that ran in the GT3 category. Kit is all box stock but the 3 sheets of decals took two days to apply. Color is Mr Color #76 metallic blue with their super clear over coat. This is the second go round for this kit and i must say it went very smooth. I , particularly like the striking graphics and it was probably the main reason for buying it. More comments below the pictures. Finished kit. Here is a good idea of all the decals. the kit decals were amazing and went on very smooth....except for the twin silver stripes on the roof wihich required some extra surgery to get all the wrinkles out. Have to be v-e-r-y careful with silver as they are quite thin. These responded well to heat and solvent. rear veiw. Everything fit quite well and the body snapped onto the chassis quite easily...unlike the last time. There were a few tweaks that had to be made for this to happen. One of the advantages to doing it the second time. Thanks for looking.
-
Its an amazing kit and you really did it justice with your build and photography. But.....like a few others, would like to know more.
-
Porsche 356
Rich Chernosky replied to afx's topic in WIP: Other Racing: Road Racing, Land Speed Racers
JC...those engine parts look sooo good. What did you use for a base coat and wash. If I may ask? -
Clearcoat over Revell Chrome spray paint
Rich Chernosky replied to BKIN10SECS's topic in Tips, Tricks, and Tutorials
I have used Tamiya X-22 clear over AK Chrome (similar to Revell) and have found very little dulling and a nice shine. Thin with Tamiya X20 thinner. Other thinners,like Mr Color leveling thinner will eat into the chrome ands dull it. -
Now...there's a pair of Ferrari's. Well done.
-
Fujimi/Testors 1/24 Dino 246GTS Spyder
Rich Chernosky replied to Justin Porter's topic in WIP: Model Cars
Interesting...mine go thru my Paasche H med tip at 25psi thinned about 25%. I actually have all 3 of the Dinos. The Targa is built, latter type has been painted Tamiya TS8 and the early type is also painted but will be a racing version. That one will need some extra parts made. -
Fujimi/Testors 1/24 Dino 246GTS Spyder
Rich Chernosky replied to Justin Porter's topic in WIP: Model Cars
Justin...just gotta luv those AK Extreme Metal finishes. I got em all and use them extensively. Your window trim turned out great. Do you use the Mr Color Leveling thinner with them when you spray? Really liking this WIP...so much so that I pulled my two kits out and sorted all the parts. -
All I can say is WOW Hanjo. Pocher kits are certainly no walk in the park. ( I have this one) The engine, under carridge and paint are most impressive. A fine piece of craftsmanship..very well done.
-
Otaki 1/12 Lamborghini Countach Twin Turbo...Mission Statement
Rich Chernosky replied to Dann Tier's topic in WIP: Model Cars
He's back.....can't wait to see this puppy finished. We've waited a l-o-n-g time...eh! -
Tamiya JACCS Accord
Rich Chernosky replied to galaxyg's topic in Other Racing: Road Racing, Salt Flat Racers
That was indeed a decal challenge but I think you conquered it. Very nice job. -
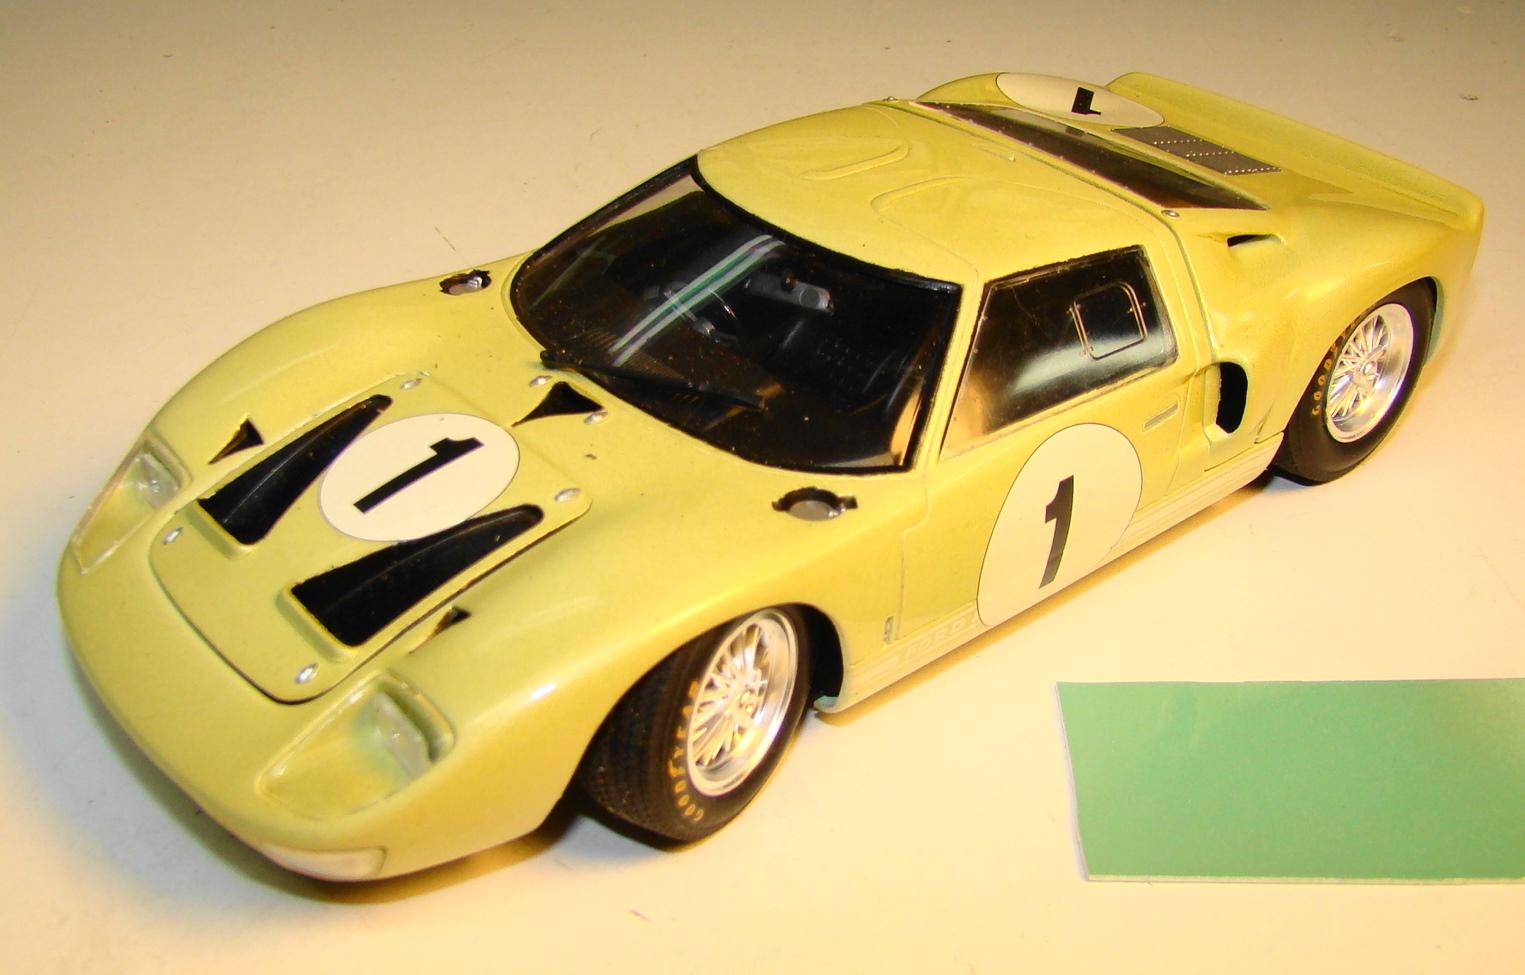
1965 Ford GT40 Roadster
Rich Chernosky replied to Gramps46's topic in WIP: Other Racing: Road Racing, Land Speed Racers
Gary thanks for the post and picture. Think I will go with the TS 60 and just call them different cars. I like the green on the # 14. Moving the stash is the easy part since they are in bins with wheels. Its the 3 workbenches, lathe, paint booth, 2 racetracks, 3000 slot cars (HO) and accumulated tools. The 11 display cases will be a logistical nightmare since they are loaded down with lots of delicate models. I think I have it all figured out but it is still worrisome. Fer sure there will be some casualties. -
1965 Ford GT40 Roadster
Rich Chernosky replied to Gramps46's topic in WIP: Other Racing: Road Racing, Land Speed Racers
Gary..a long time ago...I built this Fujimi kit. At the time I was uncertain of the color so I asked for advice on "that other modeling site" I was told it was Linden Green but no one had a source for the color. So i used my judgement based on what pictures were available at the time. What I came up with was a light gray yellow green and as you can see it comes nowhere close to the sample of Tamiya TS-60 which is a light blue gray green. I happen to like the color of mine and still have the formula of what I mixed. Unfortunately it is buried right now as I am expecting a move shortly. I also have the Mini-exotics trans kit and a donor. I am in a quandry as to which way I should go on my trans kit. Your opine is welcome. To my eye this looks closer to the Jorgen Stendahl trans kit pictured above. ..???
-
Mathias...this is really , really cool. LED lighting is awesome and the paintwork very nice. Yah....I'm a Trekkie
-
Nissan R390 GT1 - 1/24 - Tamiya
Rich Chernosky replied to toled's topic in Other Racing: Road Racing, Salt Flat Racers
Super decal and paint work. Did you clearcoat the decals. What did you use...looks great. -
Fujimi/Testors 1/24 Dino 246GTS Spyder
Rich Chernosky replied to Justin Porter's topic in WIP: Model Cars
That looks great Justin. I have done this myself and know how painstaking it is. PE can be tough to master but you did it.