Rich Chernosky
-
Posts
2,103 -
Joined
-
Last visited
Content Type
Profiles
Forums
Events
Gallery
Everything posted by Rich Chernosky
-
Fujimi 1981 Ayrton Senna Kart
Rich Chernosky replied to IanH's topic in WIP: Other Racing: Road Racing, Land Speed Racers
This is a facinating project and I had no idea Fujimi even made this kit. What scale is it and is the driver figure included. Look forward to seeing it completed. -
Great job...on all of those...makes a nice collection.
-
Nothing wrong with this build. I think it looks great. The wheels really make it. (yah...and I like my Ferrari's too)
-
March 707 Can Am
Rich Chernosky replied to Dave B's topic in WIP: Other Racing: Road Racing, Land Speed Racers
Dave...were you aware of the existence of this model. It is by LS, I believe. This was done many years ago and box stock as reference material didn't exist. So please excuse the inaccuracies. I like the shape of yours much better and of course the detail work. So keep at it and I will look forward to the results.
-
Penske Sunoco Grand Sport Corvette
Rich Chernosky replied to 65slotcar's topic in Other Racing: Road Racing, Salt Flat Racers
Like it a lot -
grand sport corvette roadster
Rich Chernosky replied to 65slotcar's topic in Other Racing: Road Racing, Salt Flat Racers
William...great build. This is inspiration for me to dig out mine and build it. Thanks for posting...its awesome. -
Lancia Beta Montecarlo
Rich Chernosky replied to afx's topic in WIP: Other Racing: Road Racing, Land Speed Racers
JC...the very best of luck with this build. Soooo glad you found one and don't want mine. I will be following this build on both forums since I haven't start mine. Thanks for posting. -
Maserati Tipo 61 Birdcage
Rich Chernosky replied to Gluebomber's topic in Other Racing: Road Racing, Salt Flat Racers
Now that is cool. You did a great job bringing that rare kit to life. -
I very much enjoyed this build. Yours turned out great. You can see mine here:
-
Outstanding...,I know from experience that this kit is one tough decal challenge. You did a great job.
-
Gary...so nice to see you back at the bench...you have lost none of you skills and these models show it. Thanks for sharing. I have learned a great deal.
-
You had a great year Phil. And built some amazing models. I hope this year is just as good if not better for you. . Luv that Camaro BTW.
-
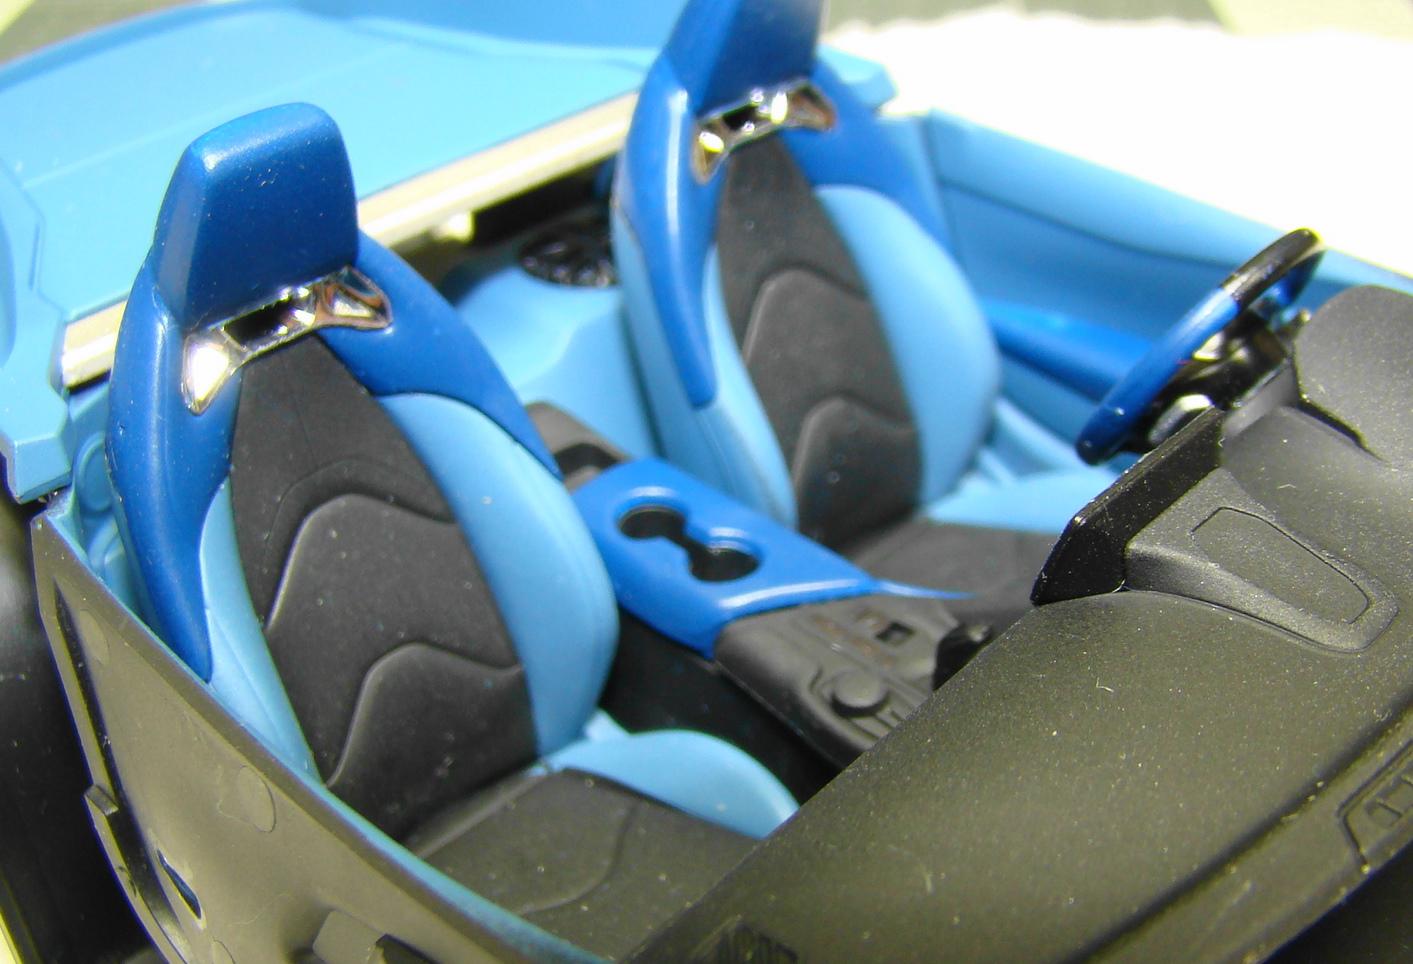
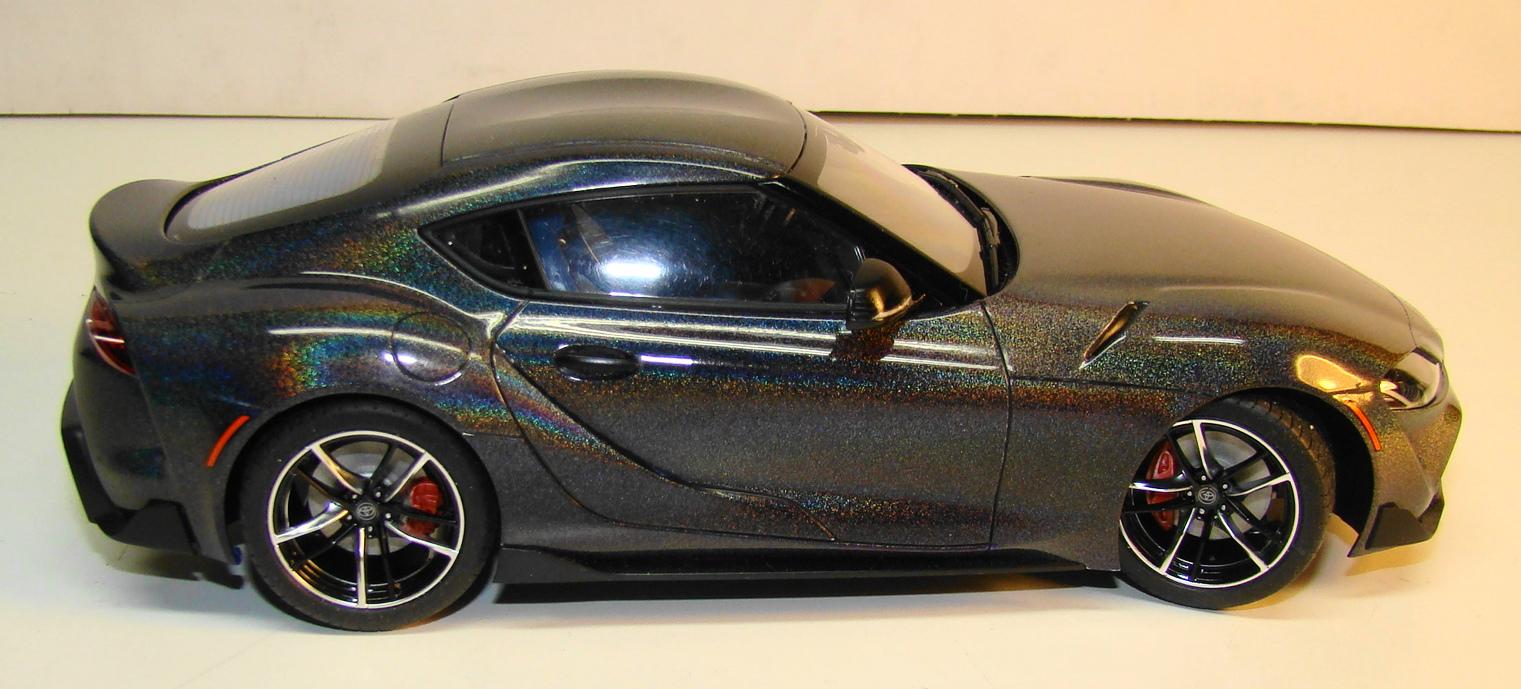
For the last 10 yrs I have had this custom of finishing a project on New Years day. It takes some planning but I manage. This years candidate is Tamiya's Toyota GR Supra in 1/24 scale. Colour chosen was Alclad Holomatic Spectral chrome which was sprayed over Tamiya TS-55 dk blue. Clear coat was Krylon latex clear. Interior was done with Mr Color #70 blue, Mr Color #328 blue and Mr Color #182 flat clear. This kit was a joy to do. The fit and finish of the parts was amazing. I would highly recommend this kit to anyone. See the photo captions for extra details on this build. Thanks for looking. This is one of my favorite interiors. I had a flocking that matched the light blue quite nicely. These seats were in multiple parts and helped create the paint division lines. I don't usually take a picture of the chassis, but Tamiya went to so much trouble to extra detail I thought it was worth seeing. The rear ind alone was 16 pieces Finished car on its wheels. The fit of the glass in particular was awesome. I usually sweat over installing the glass and Tamiya made it easy peazy Quite a bit of detail work went into the rear of this car. The chrome emblem in the kit was a nice touch. The wheels and tires on this kit are something else. The black spokes were a separate insert and fit like a glove. This photo doesn'rt do justice to the headlight treatment. Many pieces just to keep it accurate. This photo was taken back in June while the clear coat cured in the sun. It give the best idea of how chromatic this paint is. Krylon Latex clear takes a couple months to cure before it can be sanded and polished. This was painted several times before I found a clear that would not distort the very thin metallic finish of Alclad. Krylon now makes this finish as Lo-Odor clear.
-
Revell Penske Reynard
Rich Chernosky replied to Gluebomber's topic in Other Racing: Road Racing, Salt Flat Racers
Very Nice....Tamiya TS-36 is my "go to" for this livery. Thanks for sharing. -
Kurt....you did and absolutely stunning job on this. I followed your WIP and all the effort you put into this paid off.
-
Steveracer - Builder of Models :)
Rich Chernosky replied to steveracer's topic in Welcome! Introduce Yourself
Welcome to the forum Steve...there are quite a few of us racing and rally types here. You will enjoy it. -
Thanks Brett...come see it in person sometime. Thanx Glad you liked it , Dann Thank you Thanks for the praise. I thought it suited the car well. I have 100's of cans of paint lying around and never used this one. Topo bad the photos don't show the two tone green fogging on the lower part of the car. This was a paint exercise. Than you, it was.my pleasure. Those kits are still around so I hope you do.
-
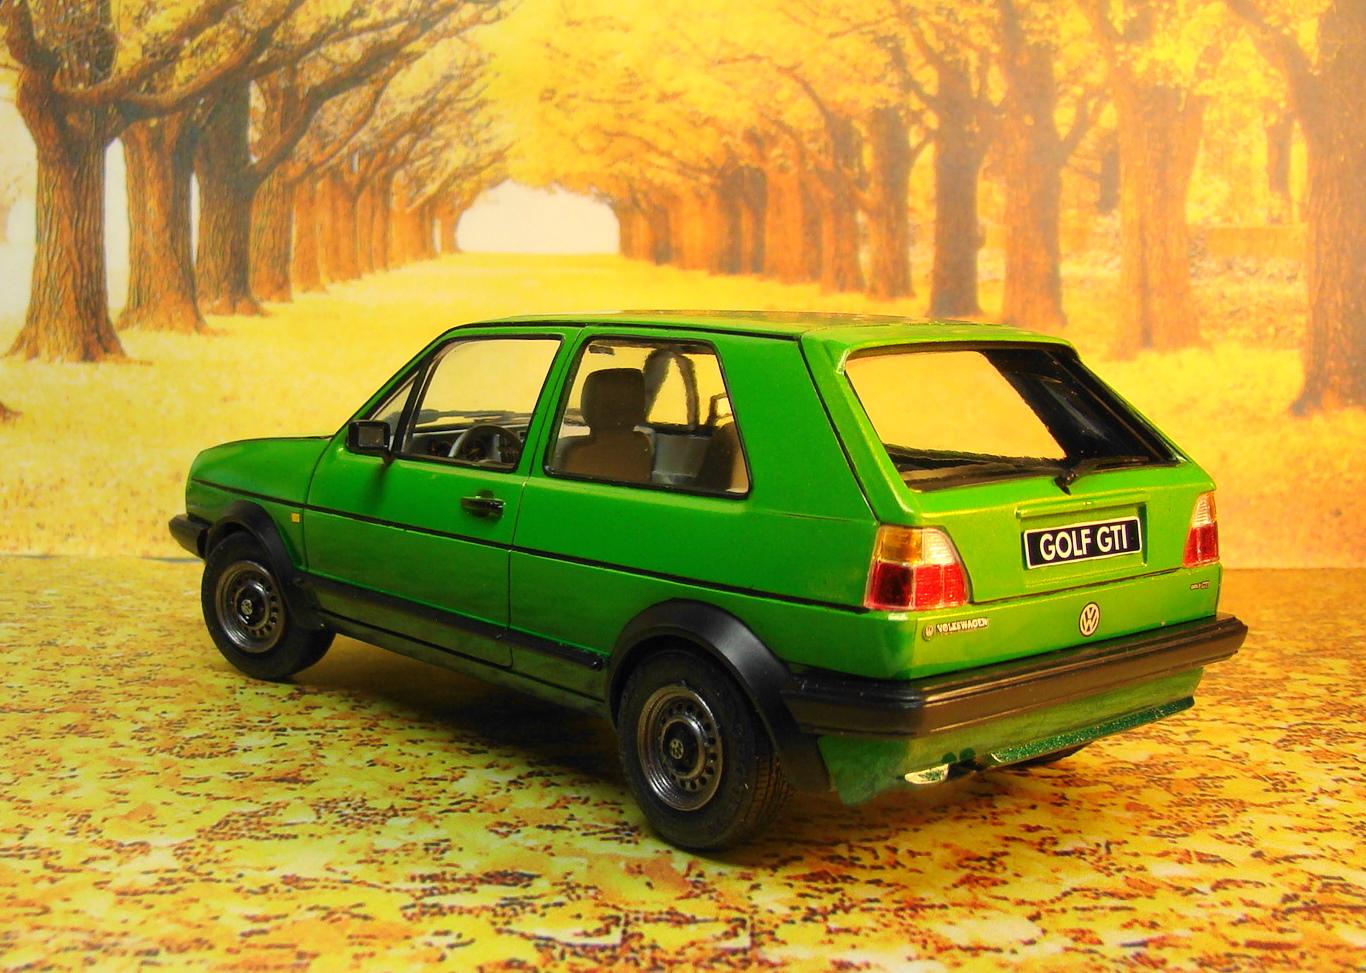
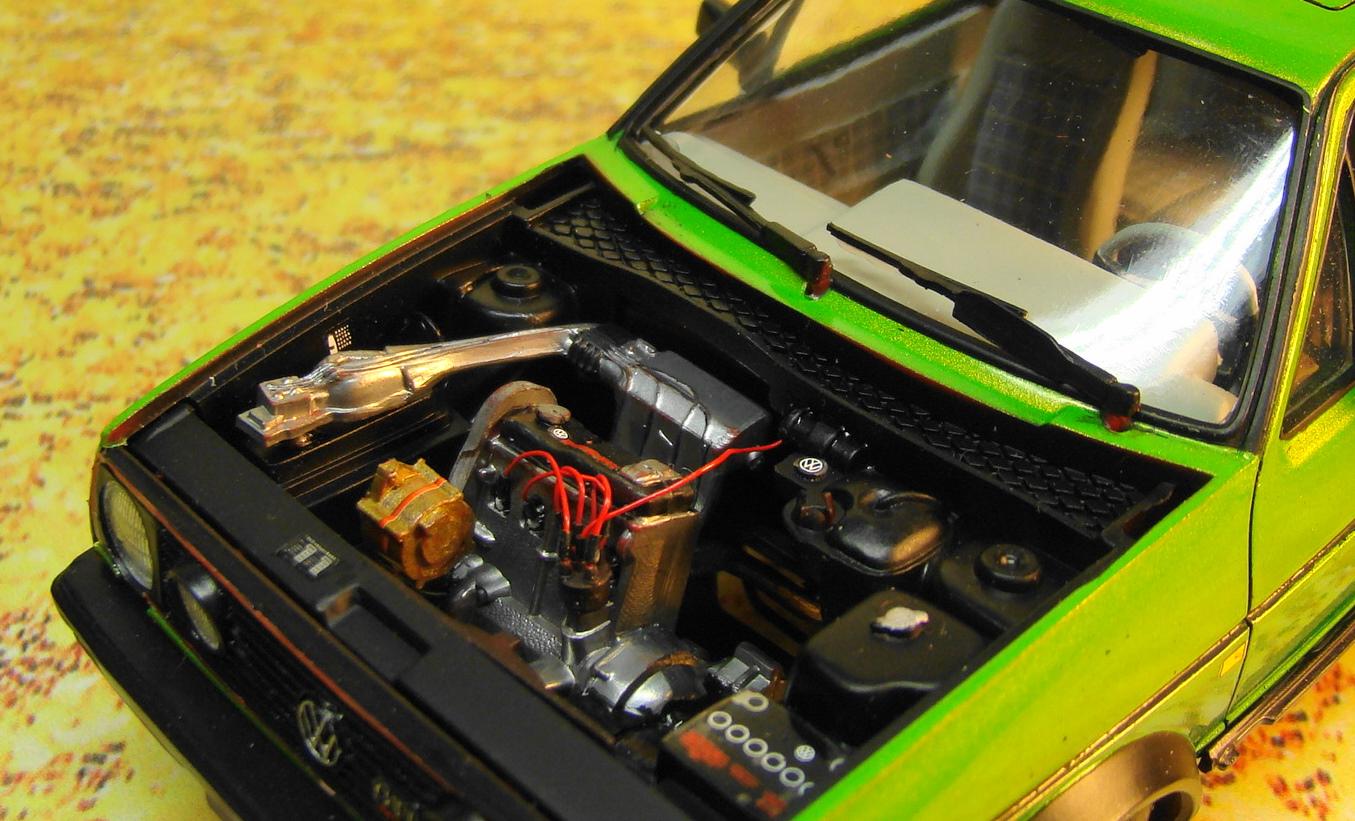
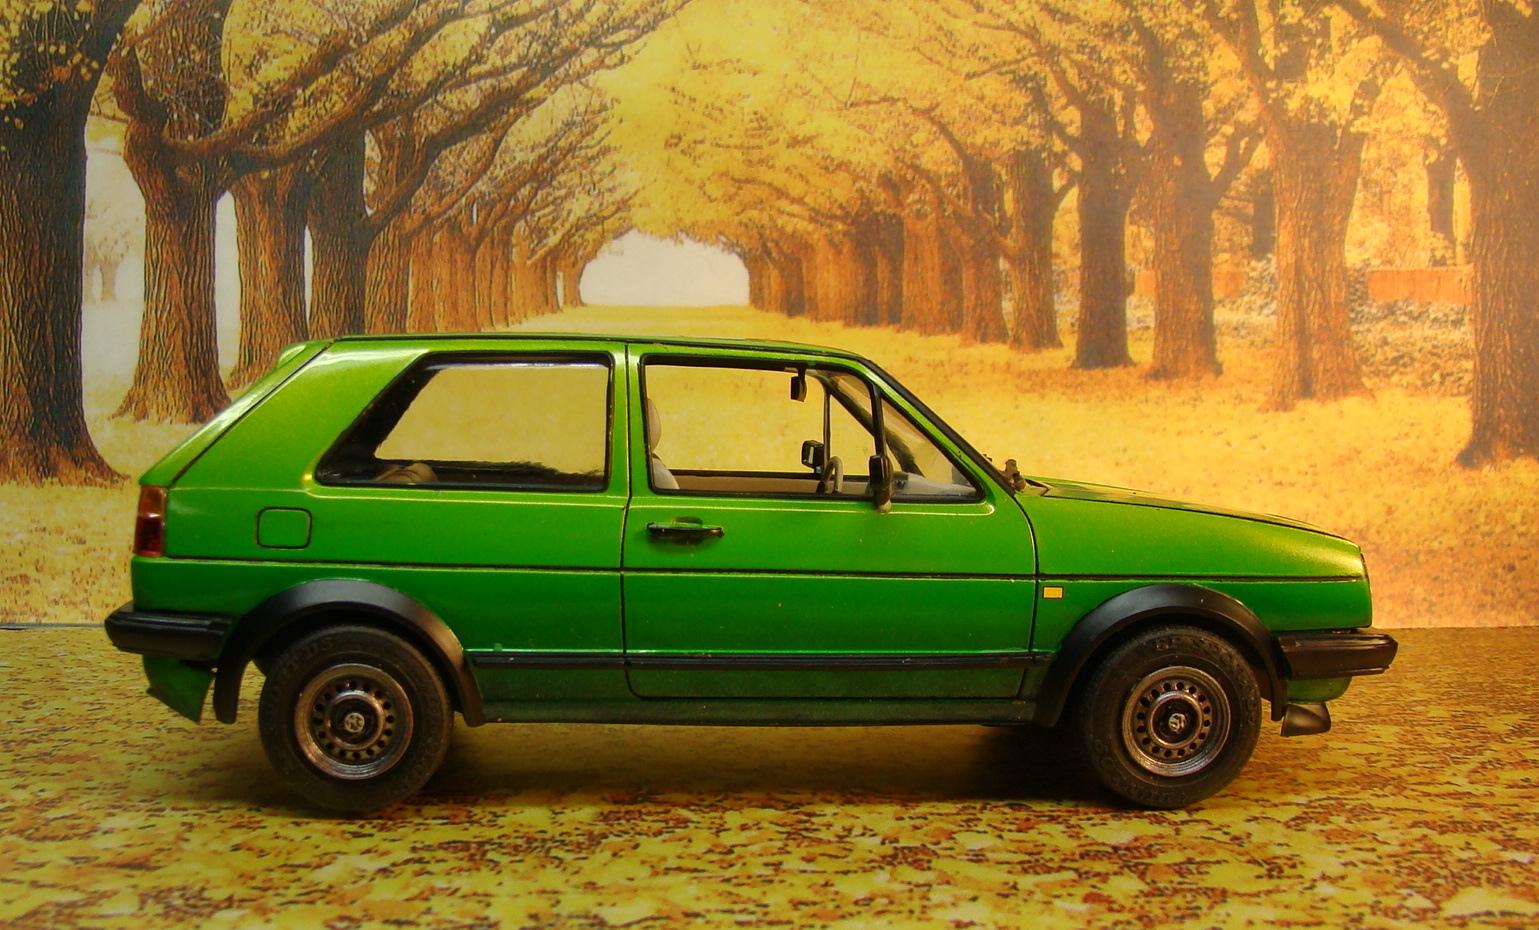
Inspiration to finish a kit comes in many forms. I recently re-did one of my storage areas for all my Revell kits and this one didn't fit. It was already painted some time ago during one of my painting sprees....so I built it. Can't say the kit went together easily. The front and rear bumpers and valances fought me pretty hard. But for the most part it was a satisfying project. Overall colour is Tamiya TS52 Metallic green. The accent along the bottom was airbrushed with a mixture of Tamiya TS43 British green, and TS25 metallic. Interior is done with Mr Color #11 Light Gull Grey and Tamiya XF27 Black green. The biggest modification was making the wheels steer and fabricating the tie rod. Engine has some wring added to it as well. See pictures captions for some additional comments. Thanks for looking. I really liked the seat decal inserts. They laid down nice but were a little shiny. Some flat clear fixed that. Kit was molded in red and that doesn't show on the finished model. But I like to take pics before the interior is installed. I was fooling around with the camera adjustments and took many of this shot. The auto settings proved to be the best...go figure. Rear bumper fitting could have been better. The attachment points were weak. Tail lights were painted on the inside and backed with chrome tape. The red decals aroouind the headlight insert proved to be a real challenge. Those ignition wires and boots were realltiney
-
Pescarolo Judd 01 LMP
Rich Chernosky replied to Rich Chernosky's topic in Other Racing: Road Racing, Salt Flat Racers
Bob....have my Simil'R Ford GT built. The door fit between the front cover will need some serious attention. Fit the body to the chassis first and the rest will go without much problem. The decal sheet is very good BTW and you will have no problems there. Cartograf rules! Thanks for the kind words. -
Pescarolo Judd 01 LMP
Rich Chernosky replied to Rich Chernosky's topic in Other Racing: Road Racing, Salt Flat Racers
Thank you for the compliment....and yes it was. Thank you for the compliment -
Pescarolo Judd 01 LMP
Rich Chernosky replied to Rich Chernosky's topic in Other Racing: Road Racing, Salt Flat Racers
That would be correct. Turns out it wasn't really necessary as the white Cartograf decals covered the blue with no bleed through. But it was probably a case of better safe than sorry. -
1966 Le Mans GT40/ Sotheby’s auction
Rich Chernosky replied to Venom's topic in Other Racing: Road Racing, Salt Flat Racers
Great job on that one Josh. I saw a picture of that car when it was at the auction and you nailed it quite well. -
Tic Tac BMW .
Rich Chernosky replied to Silver Foxx's topic in Other Racing: Road Racing, Salt Flat Racers
Outstanding decal work, Great job Bruce. -
Martini Porsche 936
Rich Chernosky replied to Rich Chernosky's topic in Other Racing: Road Racing, Salt Flat Racers
Thanks JC Thank you Gary, it was a fun project. -
Martini Porsche 936
Rich Chernosky replied to Rich Chernosky's topic in Other Racing: Road Racing, Salt Flat Racers
Dan....no I didn't. The body is removable and it can still be done. I was in too much if a hurry to get it done and forgot about this. Thanks for the compliments. If y ou are ever interested LED bulbs are really cheap...I bought 100 of the 3mm (sizes go as low as 1.8mm) for $6. Three volts DC is all it takes to light them. You just have to be carefull about negative and positive as they only light one way.